Blog by Steve Laug
The next pipe I chose to work on came is another one from the lot of 11 pipes I purchased from a lady in Regina, Saskatchewan. She had found them in a house she bought and wanted to know if I wanted them. We struck a deal, I paid for the pipes and shipping and the box arrived while I was traveling in Europe. In the box were 4 Stanwells, 1 Danmore Bowl, 1 Soren Freehand, 1 Calabash with a Briar Bowl, 1 Nording Freehand, 1 Italian Made Bertenetti, 1 Rhodesian with a banded cracked shank, and 1 Brigham. I have restored the Nording, the snapped Stanwell, the Brigham, the Gourd Calabash with the briar bowl, restemmed and restored the Danmore bowl and a Stanwell Ivarsson design 11 Pot. There are blogs on each restoration available.
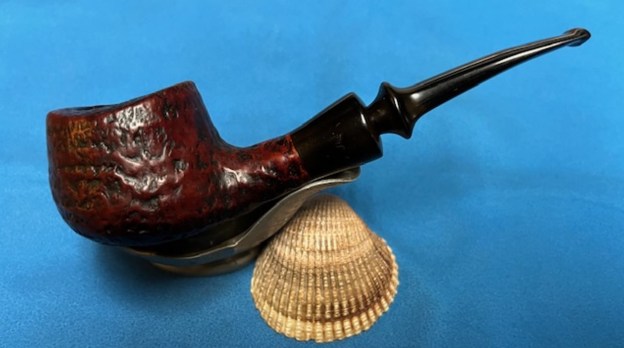
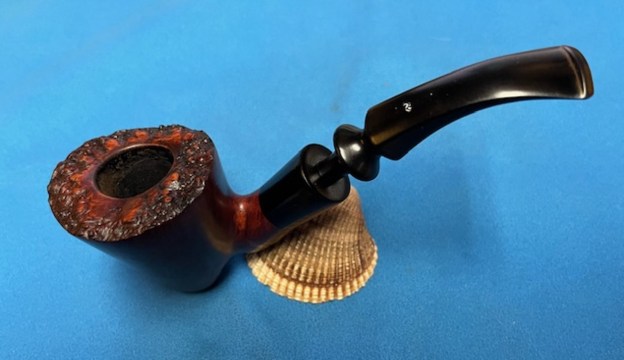
 The next pipe on the table is one of the dirtiest pipes in a box full of very dirty pipes. It is stamped on the underside of the shank and reads Soren [over] Hand Carved [over] Made in Denmark. There is no visible model name or shape number stamped on the pipe. The shank had been snapped through the last line of the stamp but it was faint. There was a thick cake in the bowl, debris in the bottom and on the bowl walls and some remnants of tobacco. The airway was plugged and there was no draught on the pipe. There was a heavy lava overflow on the plateau rim top. It was hard to know the condition of the inner edges of the bowl for sure because of the cake. The outer edge actually looked quite good under the grime. The finish was dirty and dusty and there was glue from the shank repair along the repaired shank. The vulcanite shank extension was filthy and oxidized. The stem looked to be in decent condition underneath the calcification and oxidation. The tooth marks and chatter looked minimal. I took photos of the pipe before I started my cleanup work on it.
 I took a close-up photo of the bowl and the plateau rim top to show the cake in the bowl. The rim top shows some lava on the smooth area around the inner edge of the bowl. The outer edges of the bowl looked good. I took photos of the vulcanite shank extension and the top and underside of the stem surface and button to show its general condition. It looked very good under the spotty oxidation.
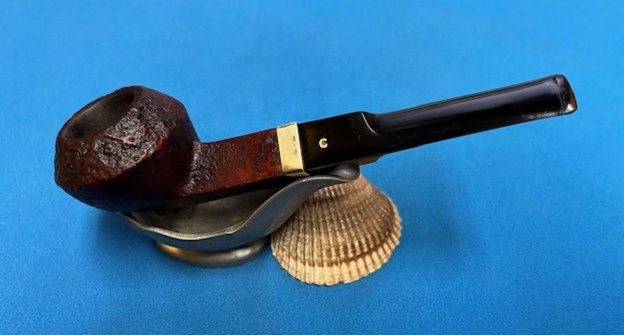
 I took some photos of the repaired crack around the shank. You can see it clearly in the photos below. In spots the glue is higher than the repair and in spots it is lower. I will need to rework the repair surface but the repair itself is very well done.
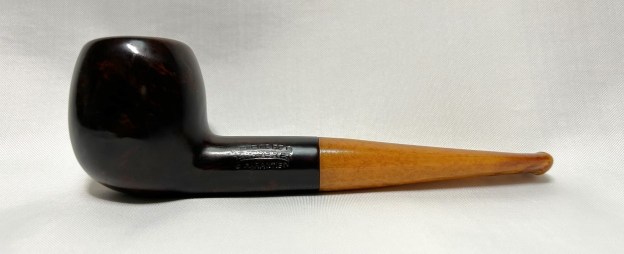
 The stamping on the underside of the shank is faint but readable as noted above. You can barely make out the third line of the stamp on underside of the shank but it is present. I took the stem off the shank and took a photo to give a sense of the proportion of the pipe.
 I needed to refresh my memory on the history and background of the Soren pipes so I went to a previous blog and reread what I had written. https://rebornpipes.com/2016/09/12/repairing-and-rejuvenating-a-soren-danish-freehand/. I quote from that blog post: I looked up the brand on pipephil (http://www.pipephil.eu/logos/en/logo-s10.html) and found that the brand was carved by Søren Refbjerg Rasmussen. Pipes that he made for the European market were mostly stamped “Refbjerg” while those made for the US market were stamped “Soren”. Thus I knew that one I was working on was imported into the US market.
It looked like I was once again working on a pipe made by Soren Refbjerg Rasmussen for the US market as it was stamped Soren. I continued to do reading on another of my go to websites, Pipedia. Here is the link for the article there. https://pipedia.org/wiki/Refbjerg. I quote some of the more pertinent information.
Søren Refbjerg Rasmussen founded a company in 1969, which employed an average of 8 – 12 craftsmen in the 1970’s. The semi-freehands they produced were traded under his prename Søren. Rasmussen himself finished only the very best pipes. So his way of pipemaking closely resembled the ways of Preben Holm, Karl Erik Ottendahl or Erik Nørding. Altogether more than 1,000,000 pipes were sold.
There was also a note from Soren himself regarding the Danbark line of pipes that he made. I think that it is interesting to note that even on these he used the finest Corsican and Grecian briars. I assume that is also true of his other lines as well. I quote the note in full.
“A note from the carver:
I am very proud to introduce my new (!) series of hand-carved Danbark Pipes by Søren. These pipes are crafted from the finest Corsican and Grecian briars. I take a great deal of pride in crafting the Danbark Pipes to be highly functional and so they will provide the smoker with many years of dedicated service. The Danbark Pipes by Søren are available in several different styles and finishes with my personal touch and inspirations. At this time I favor making classic shaped pipes with a slight touch of my own hands and feelings. I do not produce many pipes today but the pipes that I do make available are individually crafted from the finest Corsican and Grecian Briars available to me. I still make free-hand pipes but not as many as I once made. For the past 35 years I have always tried to make good smoking pipes in my workshop located near Copenhagen, Denmark. I have always tried to craft my pipes in such a way as they will be long lasting and best friends with the owners. I take great pride in the shape of my pipes, the drilling of the pipes, and the overall dimensions of the pipes. I enjoy spending my spare time on the very long, rugged coasts of Denmark. I derive much relaxation from being on the coast while angling for Sea Trout with my own hand-tied flies. I find this environment is a great inspiration to me for making pipes. Many times I think to myself, “Inspired by nature, made by me”. — Happy puffing, Søren”
From that I knew that the pipe in my hands came from the 1970s. It bears the Soren signature stamp which also says that it was made for sale in the American pipe market. Armed with that information I turned my attention to restoring the pipe.
I decided to start my work on the pipe by working on the shank repair issues. I filled in the repair area with clear CA glue and pressed some briar dust into the glue. It took a few layers to smooth it out but the touch up on the repair was effective.
 I sanded the repaired area on the shank smooth with 220 grit sandpaper to blend it into the surrounding briar. I also sanded the burn mark on the side of the bowl. I wiped the bowl down with a damp cloth to remove the sanding dust.

 I reamed the bowl with a PipNet pipe reamer using the third cutting head to take the cake back to bare briar. I cleaned up the reaming with a Savinelli Fitsall Pipe Knife. I sanded the walls with a piece of 180 grit sandpaper wrapped around a dowel to smooth them out.
 I used a brass bristle wire brush to knock off the debris in the plateau on the rim top. It took some work but it cleaned up well. I used a folded piece of sandpaper to clean up the inner edge of the rim and to sand the darkening off the smooth area around rim top. I sanded the vulcanite shank extension at the same time to break the oxidation on the surface.
 I scrubbed the exterior of the briar with a tooth brush and undiluted Murphy’s Oil Soap. I rinsed it off with warm water to remove the grime and soap. It looked much better and the dust and debris was gone. I dried it with a cotton towel.
 I touched up the sanded areas on the shank and the bowl spots using a Maple Stain Pen to start the process of blending them into the rest of the bowl. The colour is very close and once I restain the bowl it will work very well.
 I stained the bowl and shank with a light brown stain wash. I applied it to the surface of the briar with a wool dauber. I flamed it with a lighter flame to set it in the grain. I repeated the process until I was satisfied with the coverage.
 I polished the vulcanite shank extension and the briar with micromesh sanding pads – dry sanding it with 1500-12000 git sanding pads. I wanted to make the new stain coat a bit more transparent. I wiped it down with a cloth and some Obsidian Oil.


 I scrubbed out the internals of the pipe with 99% isopropyl alcohol, pipe cleaners and cotton swabs. I cleaned out the airway in the stem as well. I worked on these areas repeatedly until the shank and the airway in all the parts was clean.
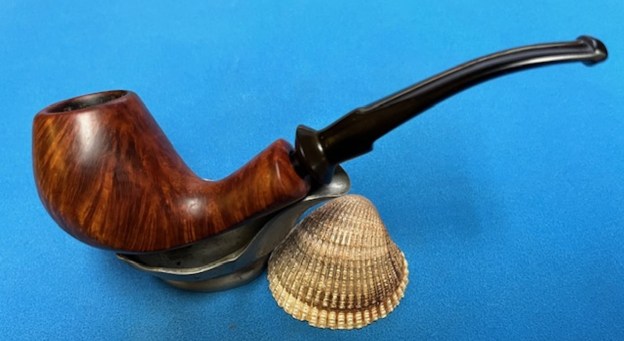
 I worked some Before & After Restoration Balm into the surface of the briar with my fingertips to clean, enliven and protect the briar. I let the balm sit for 15 minutes and then buffed with a cotton cloth to raise the shine. The photos show the bowl at this point in the restoration process.

 With that done, the bowl was finished other than the final buffing. I set it aside and turned my attention to the stem. I wiped it down with some Soft Scrub to remove the oxidation.
 I touched up the “S” stamp on the top of the stem with white acrylic nail polish. Once had dried I sanded out the excess with a worn 1500 micromesh sanding pad.
 I polished the oxidation and tooth chatter on the stem with micromesh sanding pads – wet sanding with 1500-12000 grit sanding pads. I wiped it down after each sanding pad with Obsidian Oil.
 I finished polishing the stem with Before & After Pipe Stem polish (both Fine and Extra Fine) then wiped the stem down with another coat of Obsidian Oil.
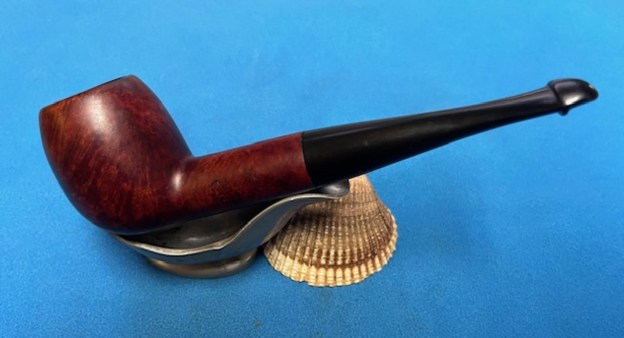
  I polished finished Soren Hand Carved Danish Freehand with Blue Diamond to polish out the remaining small scratches. I gave the bowl and the stem multiple coats of carnauba wax and buffed the pipe with a clean buffing pad to raise the shine. I hand buffed it with a microfiber cloth to deepen the shine. The pipe polished up pretty nicely. The plateau on the rim top and shank end and the smooth Dark and Medium brown contrast finish work very well with the black vulcanite stem. The finished pipe is shown in the photos below. I have worked on several Soren pipes by Soren Refbjerg Rasmussen and several Refbjerg pipes over the years and I have always been impressed by his craftsmanship and ability to work a pipe to follow the grain of the briar. He does great work and is quite innovative in terms of shapes, flow and finishes on his pipes. The Length: 5 ½ inches, Height: 2 ½ inches, Outside diameter of the bowl: 2 inches, Chamber diameter: 7/8 inches. The weight of the pipe is 73 grams/ 2.57 ounces. I will be putting it on the rebornpipes store in the Danish Pipemakers Section if you would like to add it to your rack and carry on the previous pipeman’s legacy. This is an interesting estate to bring back to life.
As always, I encourage your questions and comments as you read the blog. Thanks to each of you who are reading this blog. Remember we are not pipe owners; we are pipe men and women who hold our pipes in trust until they pass on into the trust of those who follow us.