Blog by Dal Stanton
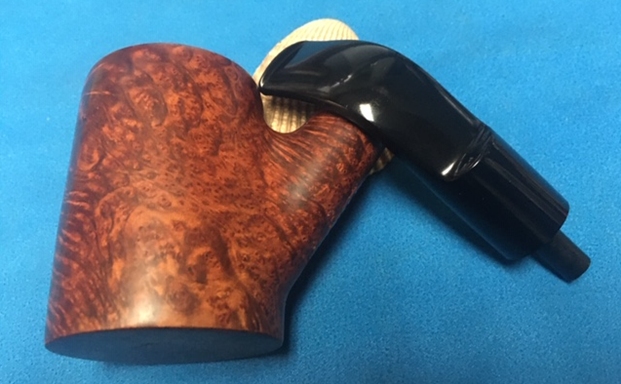
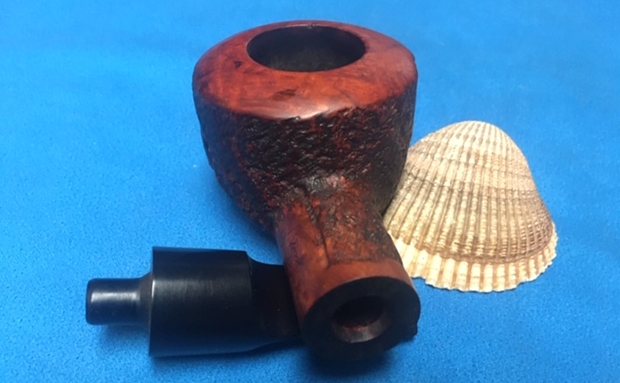
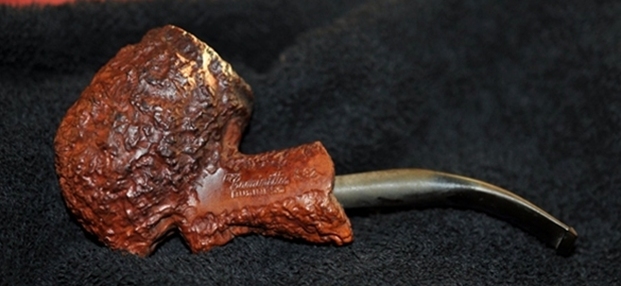
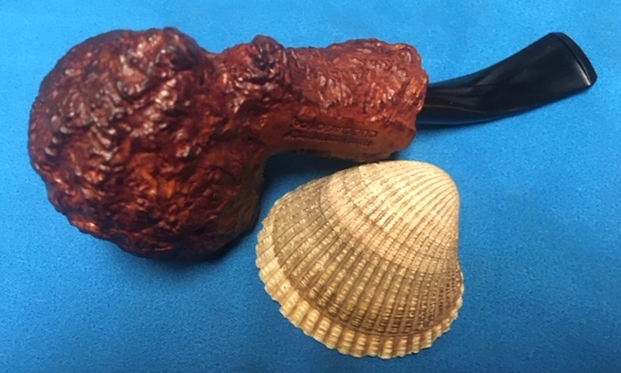
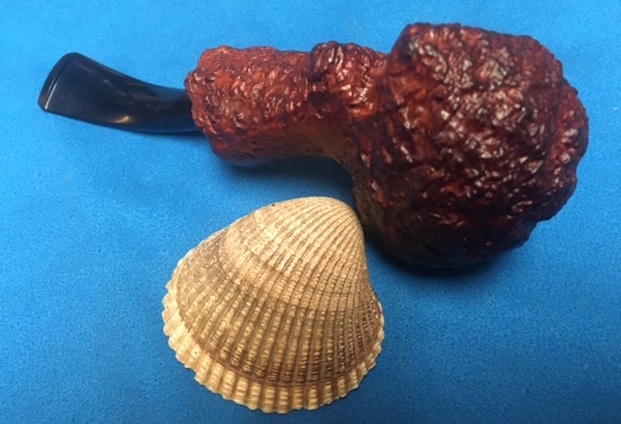
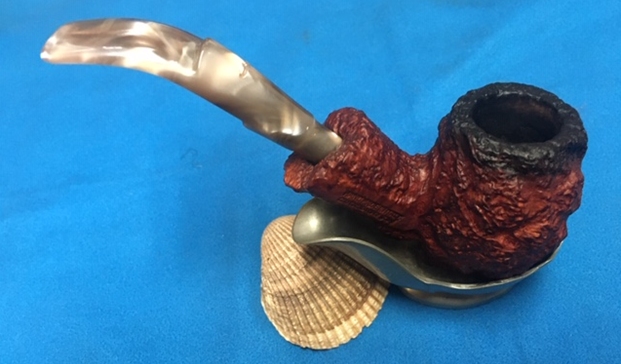
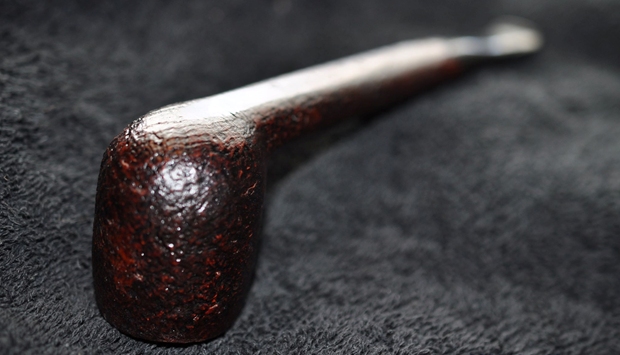
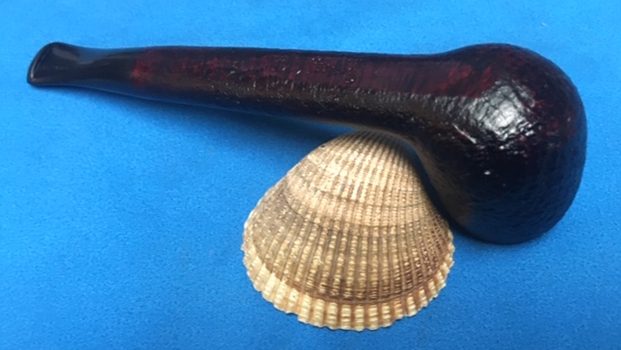
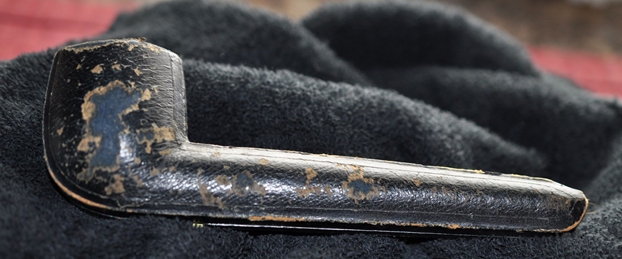
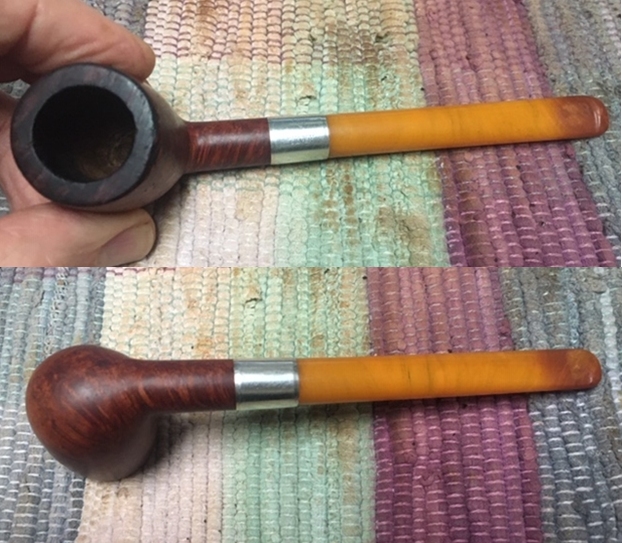
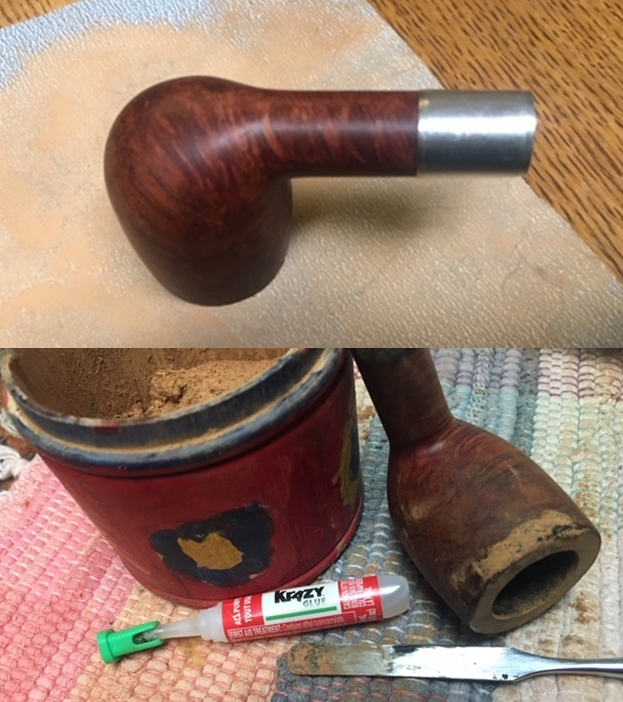
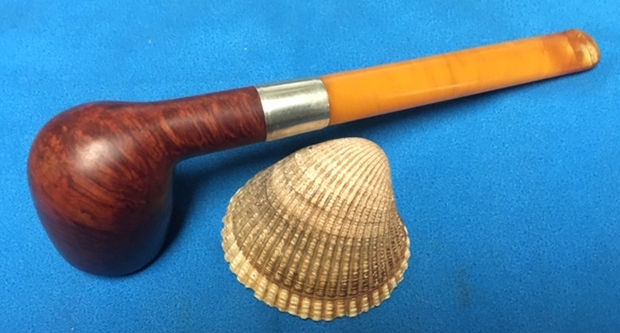
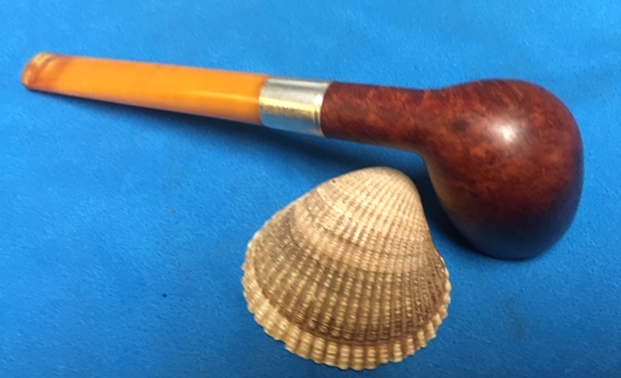
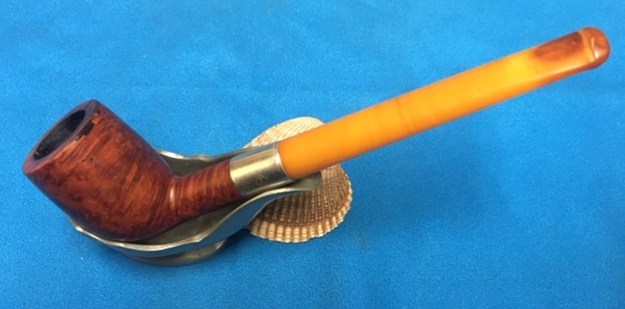
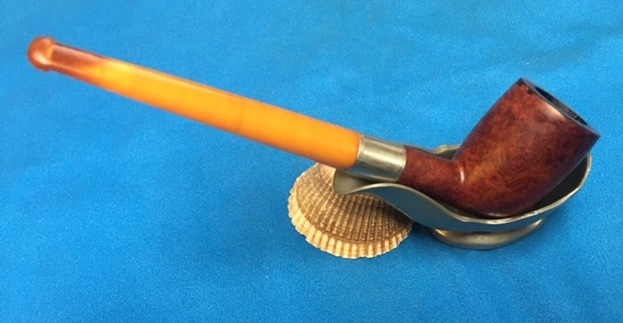
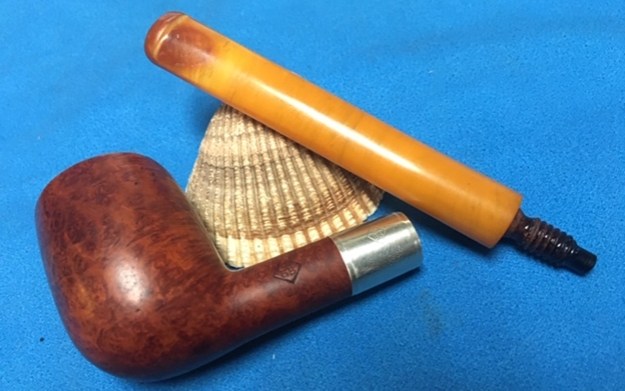
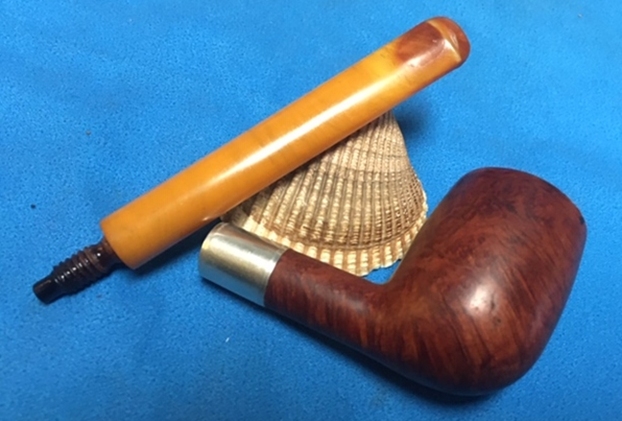
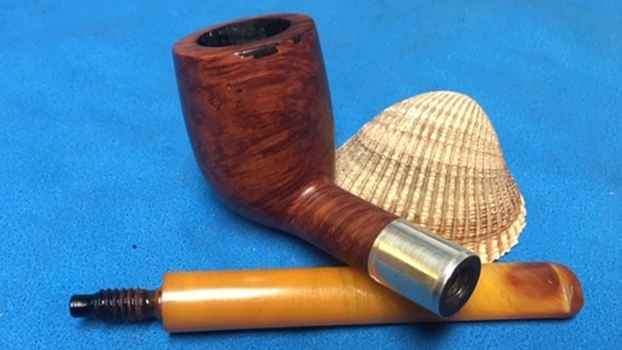
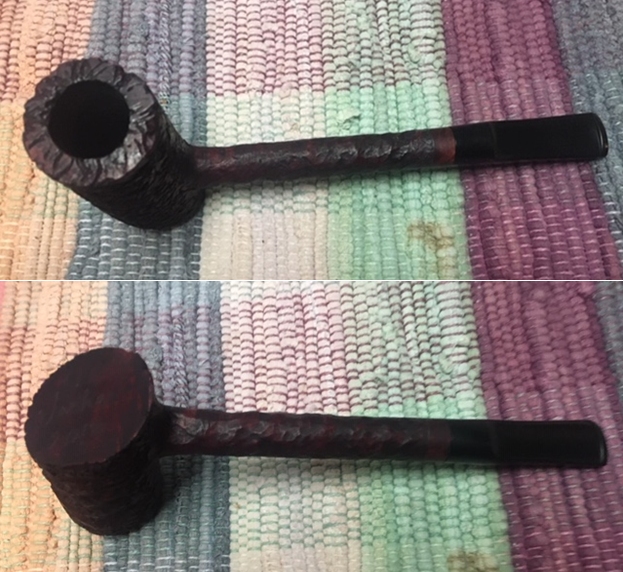
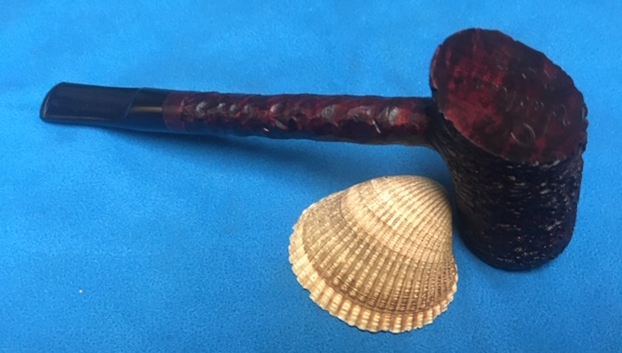
This Kaywoodie “500” is the final of three pipes Joe sent. It belonged to Paw, Joe’s wife’s great grandfather. I’ve enjoyed learning about Paw, or ‘2-Page Sam’, the name given to him by his fellow workers of Brown & Williamson Tobacco, Corp, founded in the 1800s in Winston-Salem, North Carolina. In the restoration of the first of three, a Medico Apollo Brylon (See: Another Legacy Pipe of a Great-Grandfather: Challenges Working with ‘Brylon’ on a Medico Apollo) an article in the B&W Tobacco, Co.’s company magazine, Pipeline, Sam’s 43-year career was showcased and it described how he became known as ‘2-Page Sam’. As a salesman for the tobacco company, Sam’s daily goal was to secure enough orders from clients he would visit, ‘Ma & Pa’ establishments mostly, to reach page two of the order book for the day. This company-wide work ethic, along with how the article captures Sam’s sincere respect for people – his fellow M&W employees and supervisors as well as the normal working-class people he sold to that made his livelihood possible. Joe sent the picture on the left, below, of Sam among fellow employees of B&W. I’m not sure which one is Sam but, my guess is the top, fourth man from the left! The picture on the right is Sam (standing on the right) – capturing a moment in an age long gone. The second of Sam’s pipes that I just restored (See: Bringing to Life a Unique Kaywoodie Natural Burl 33 – Another Legacy Pipe of a Great Grandfather) was a rarer, Kaywoodie ‘Natural Burl’ 33, Apple shape. It turned out very, very well and even included the collaborative help of Bill Feuerbach, Kaywoodie’s – or more correctly, S. M. Frank Co.’s, president, the holding company of Kaywoodie, Medico and Yello Bole. The last of the three is on the worktable now, the Kaywoodie “500” IMPORTED BRIAR US Pat. 2808837 50C. Here are a few pictures to take a closer look.
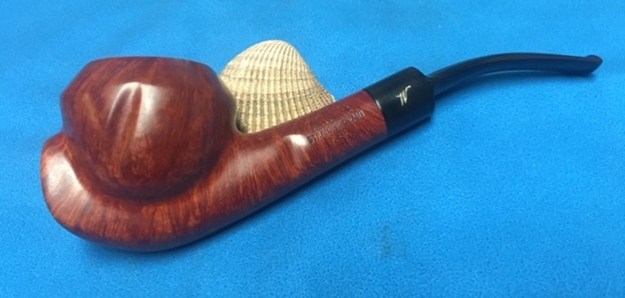
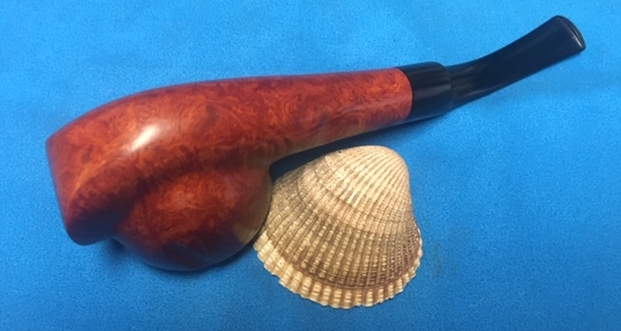
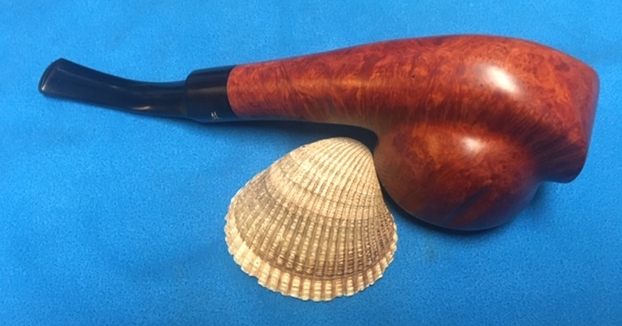
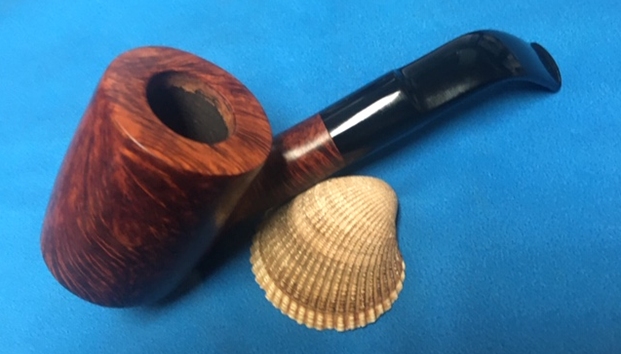
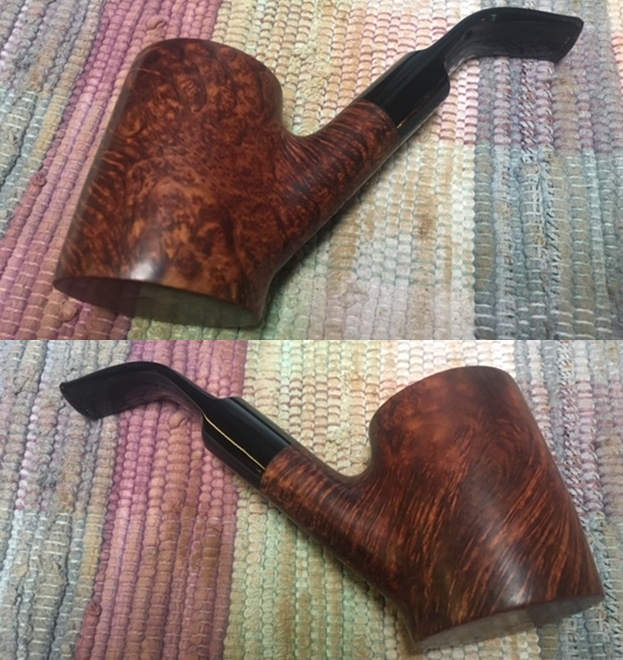
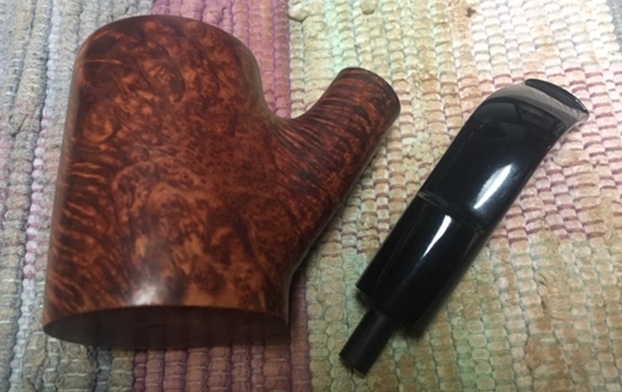
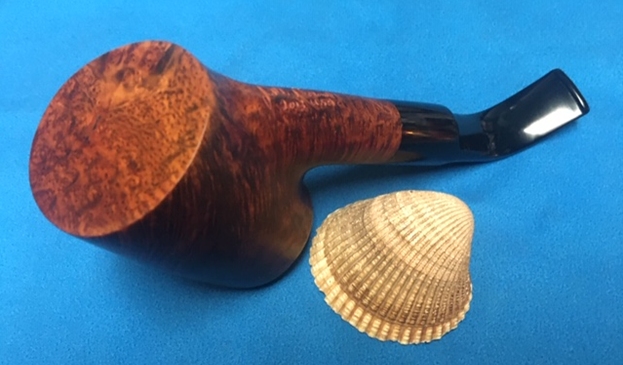
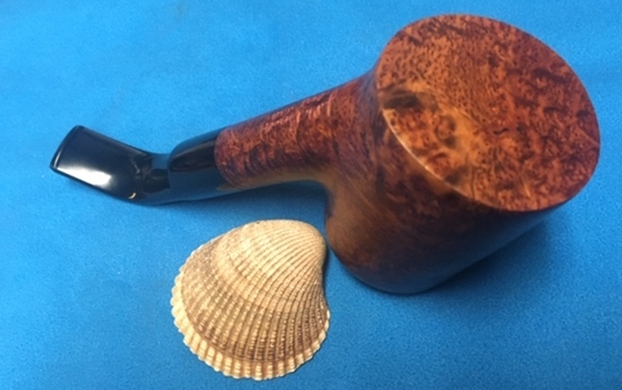
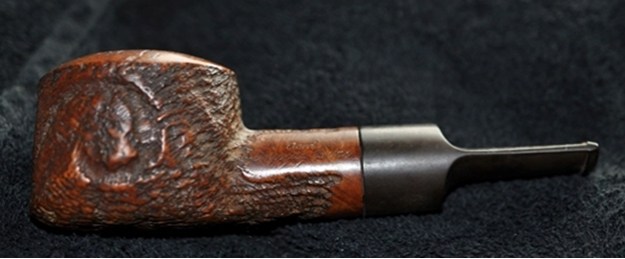
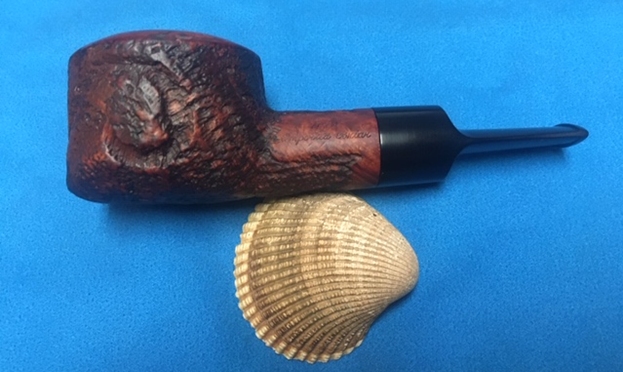
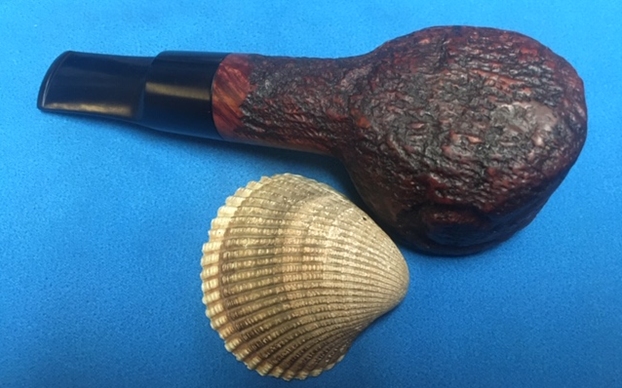
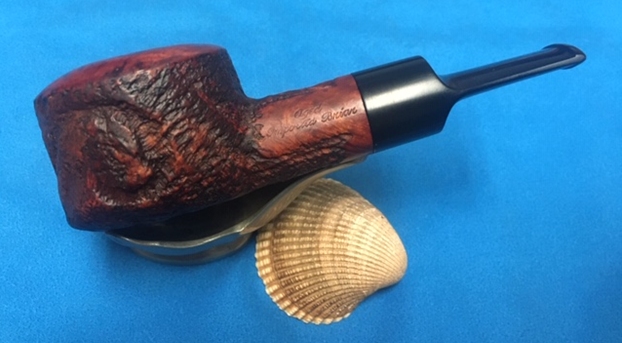
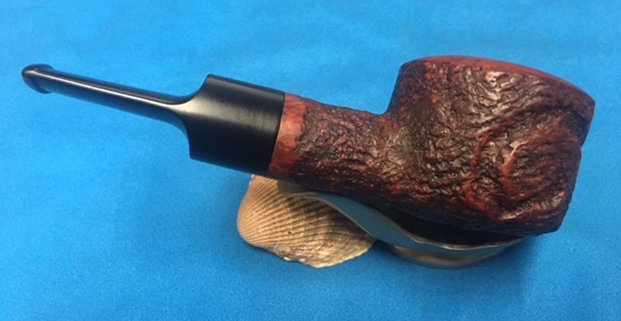
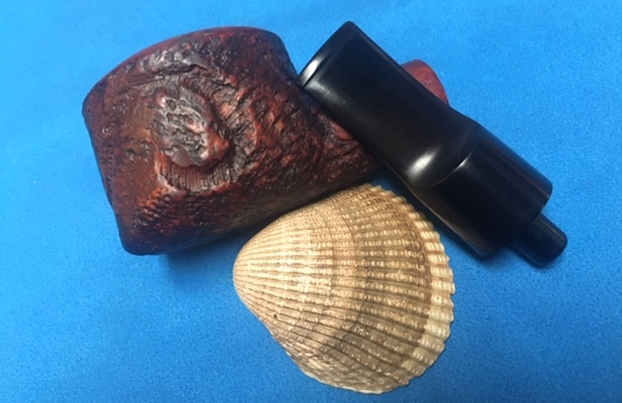
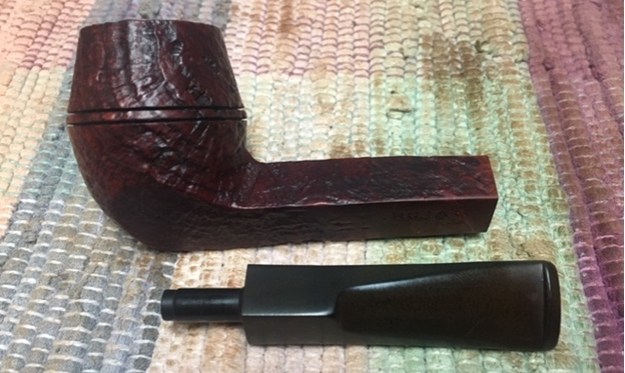
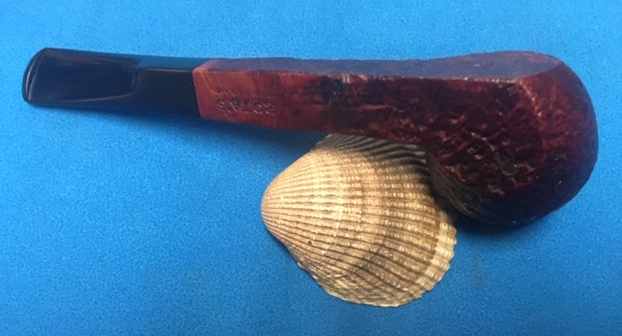
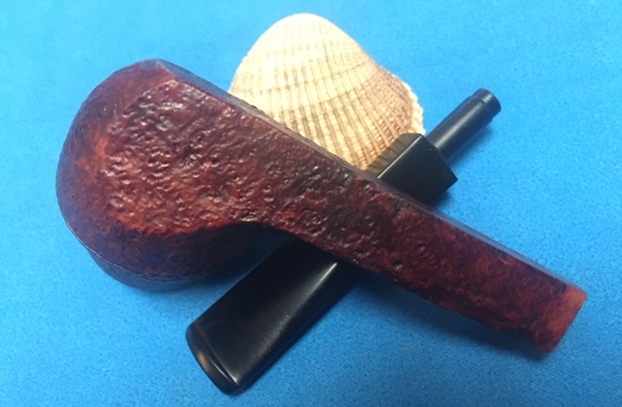
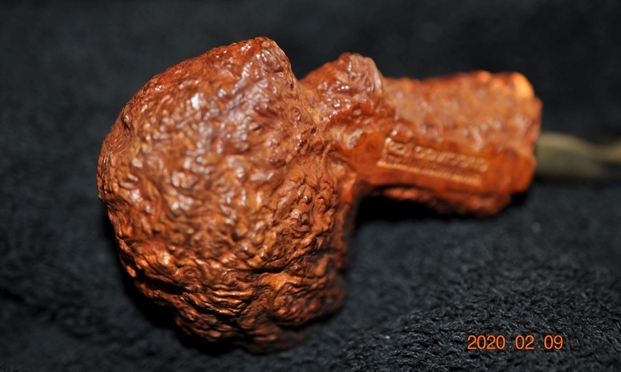
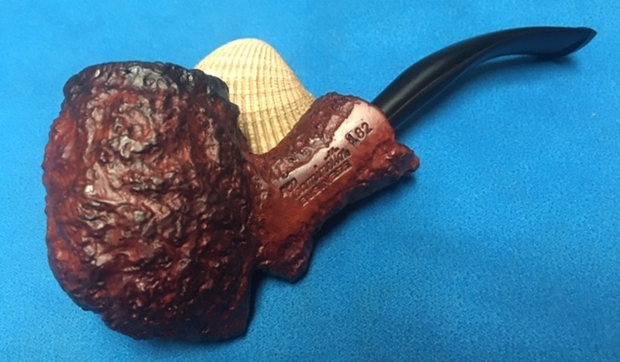
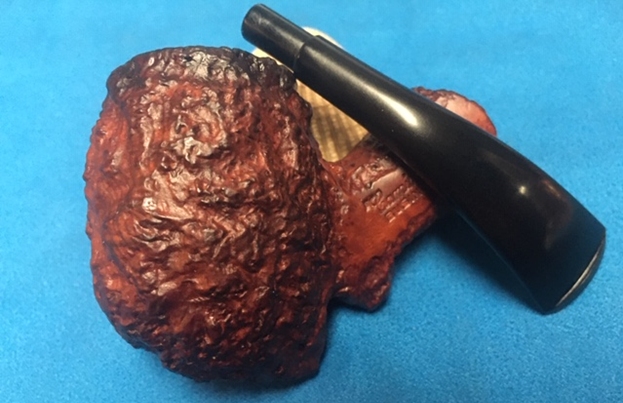
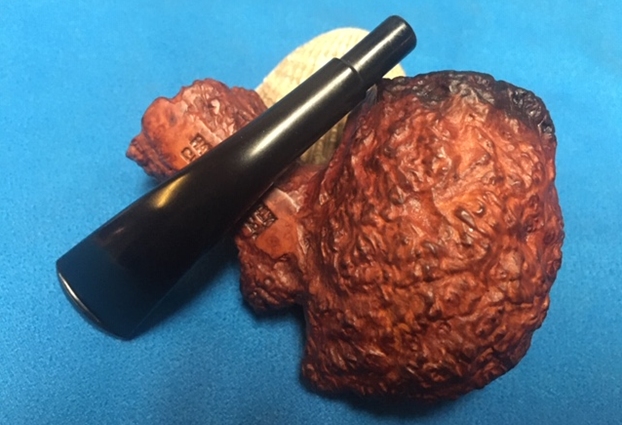
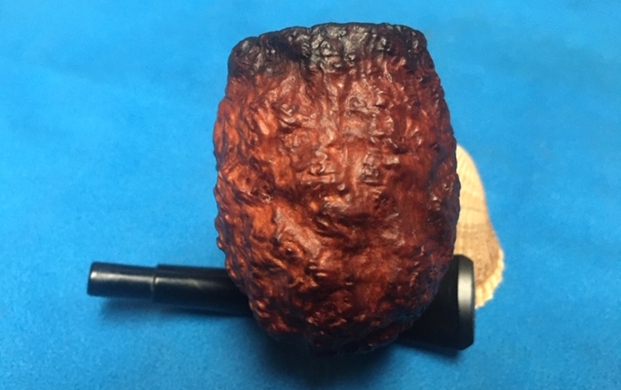
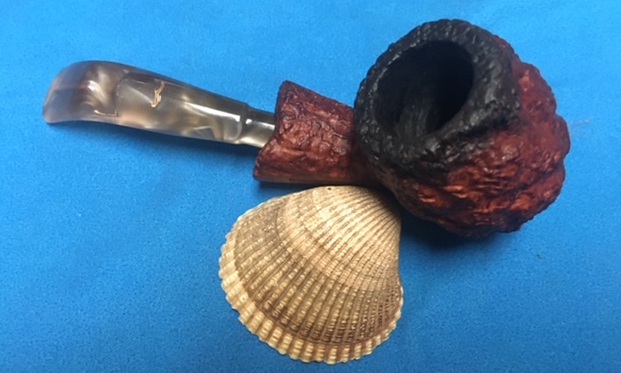
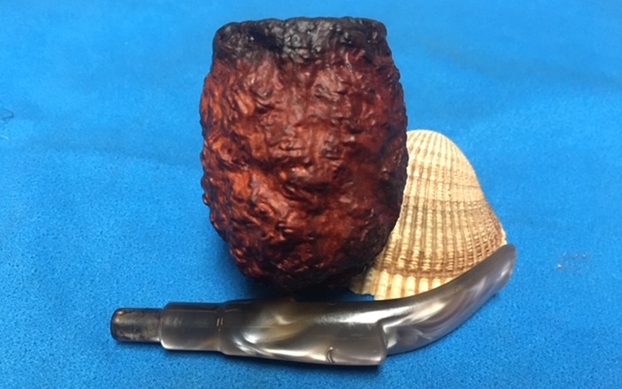
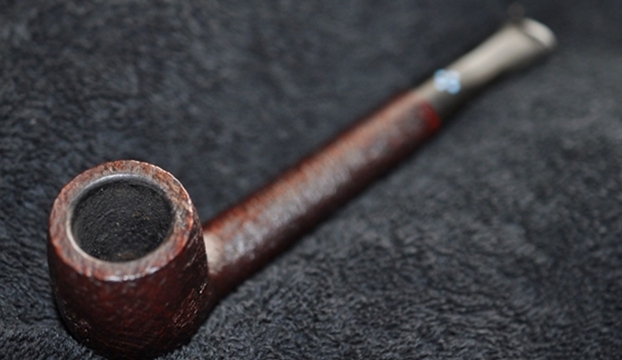
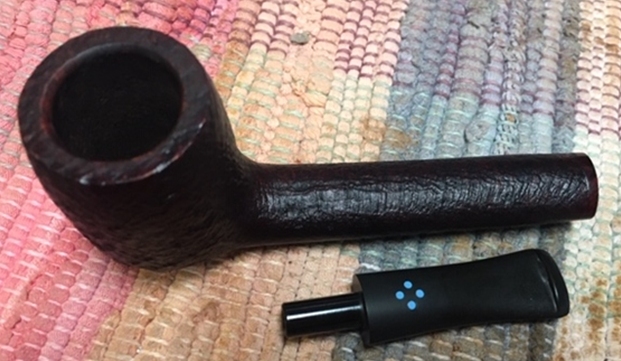
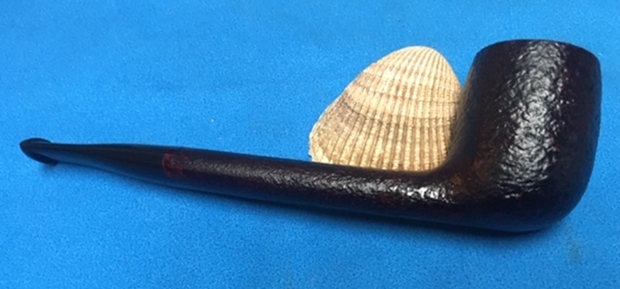
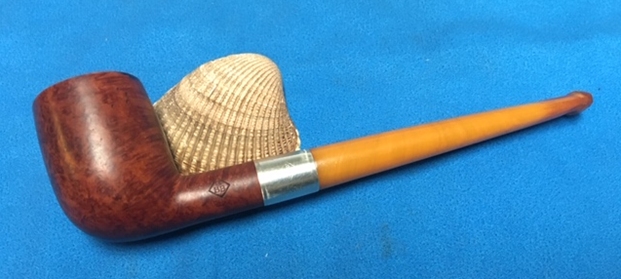
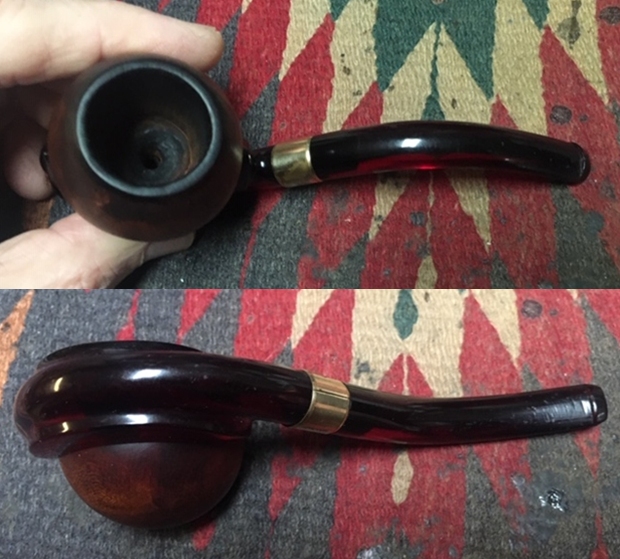
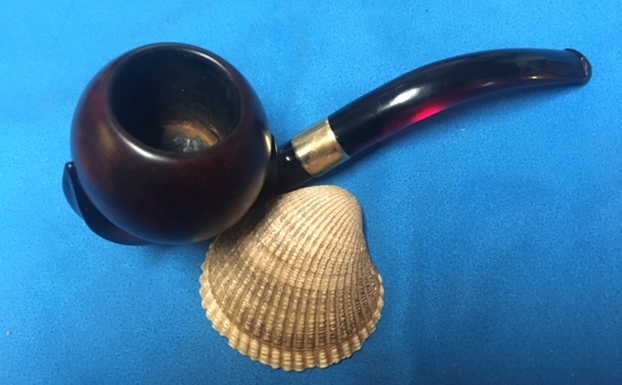
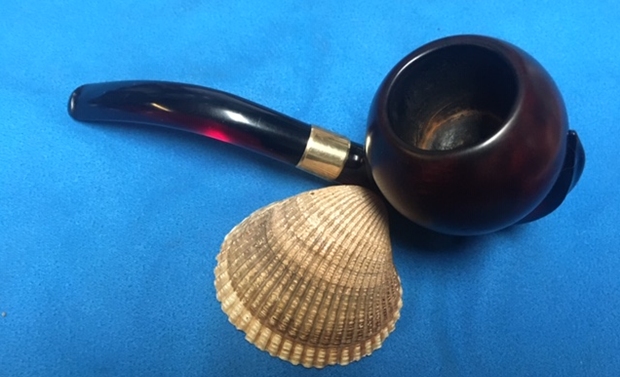
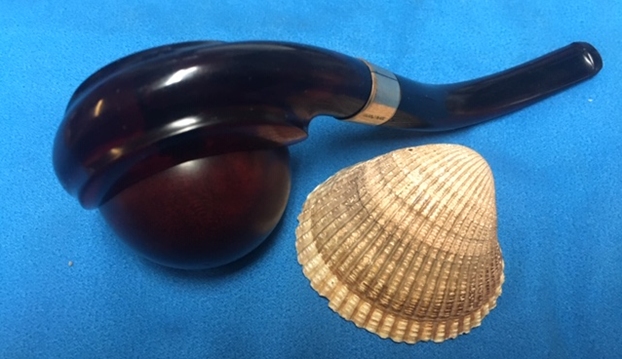
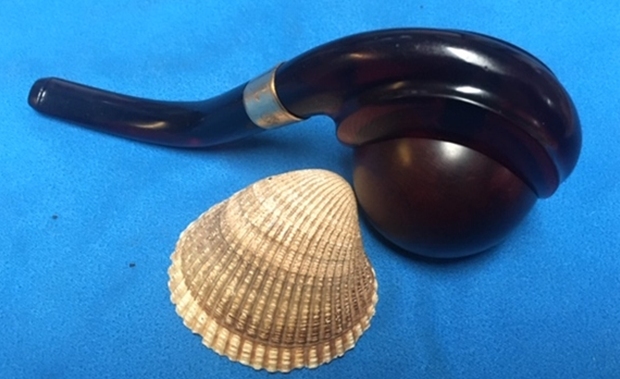
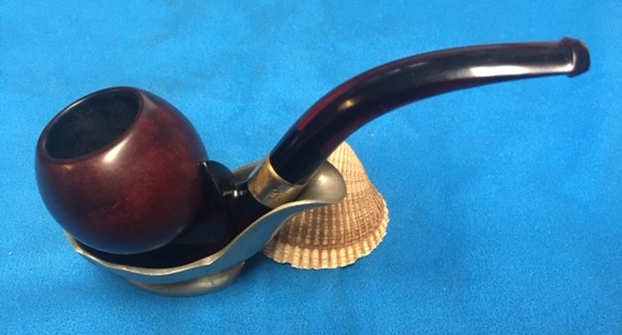
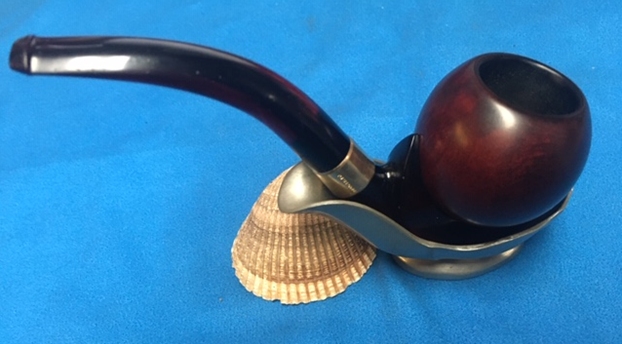

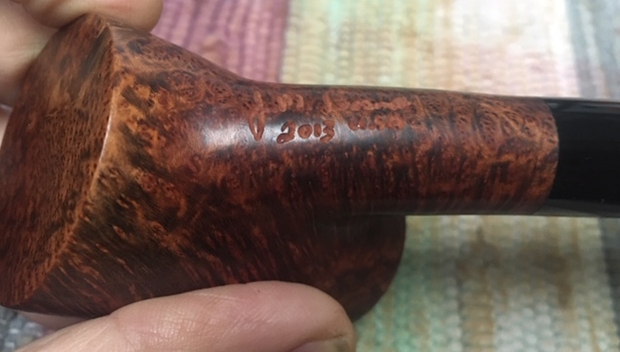
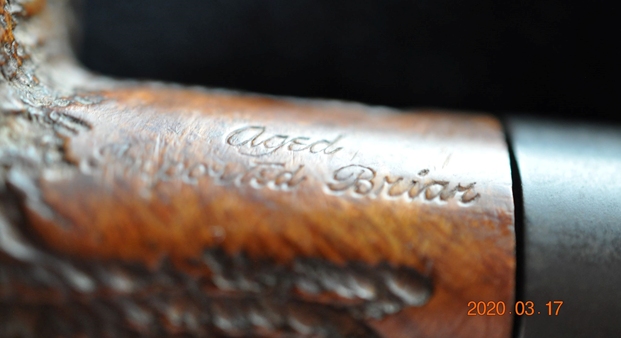
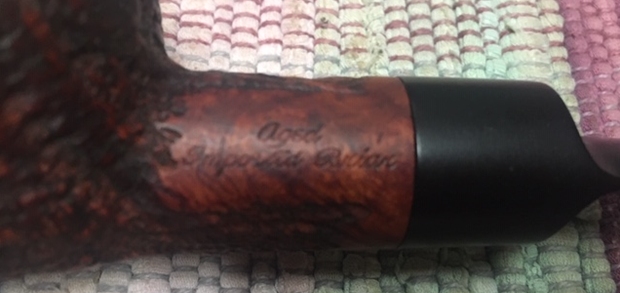
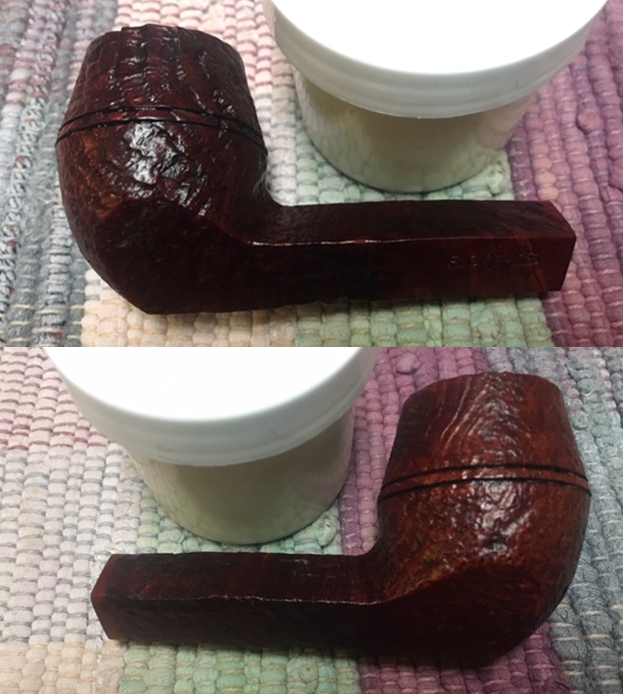
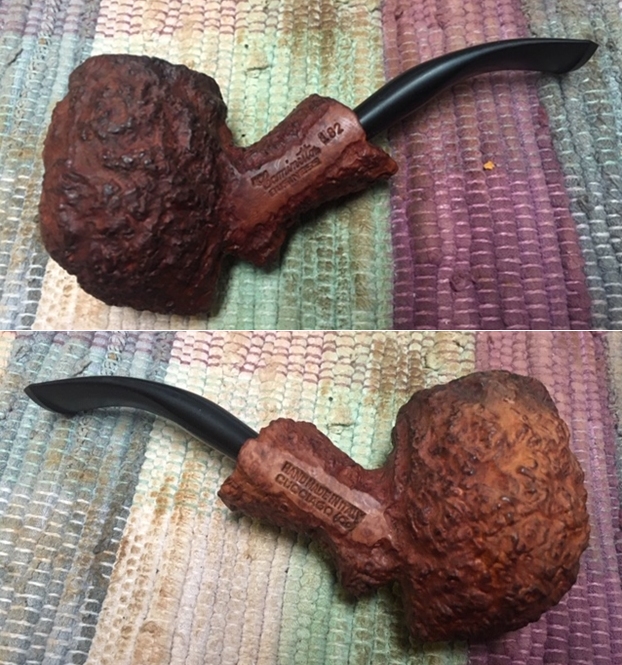
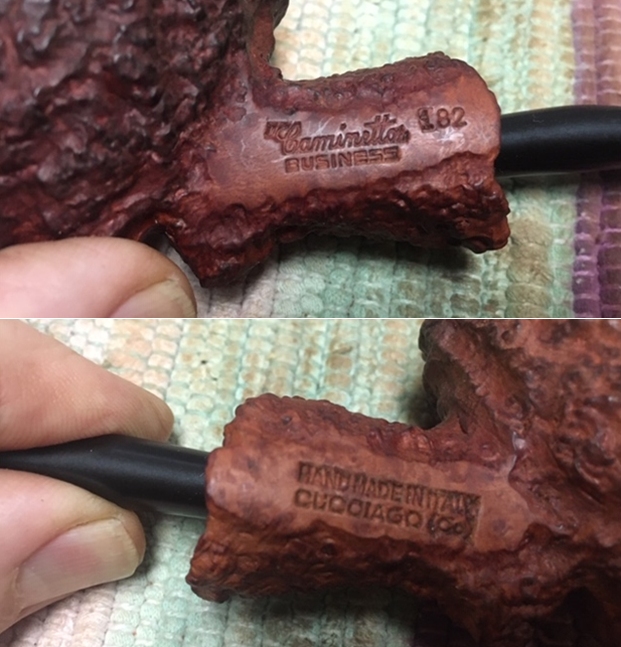
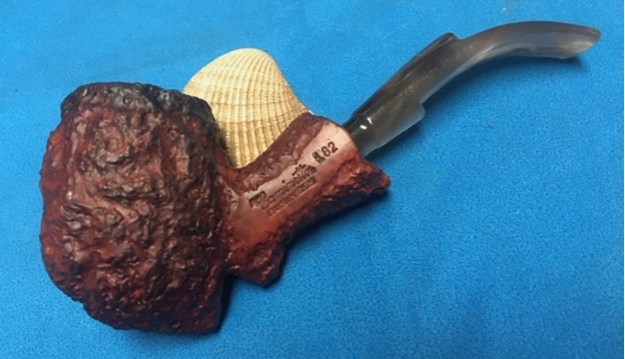
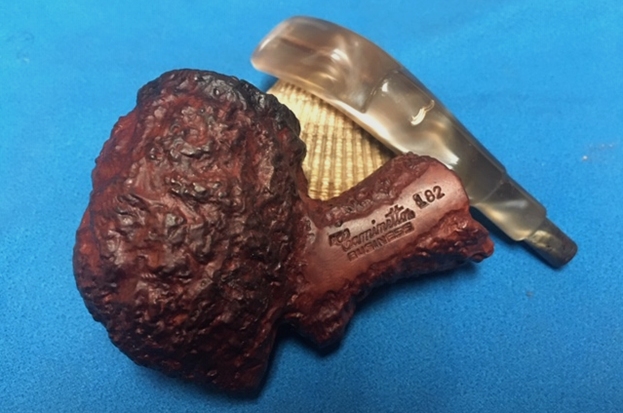
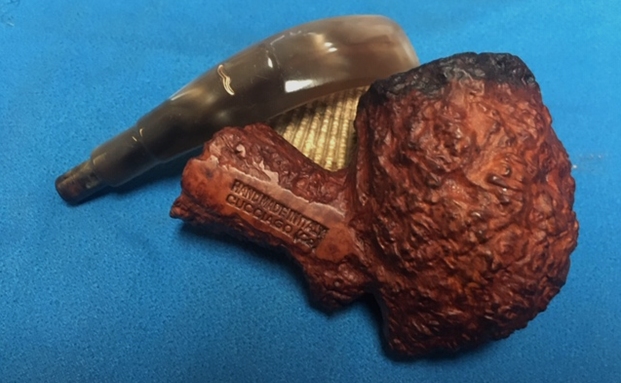
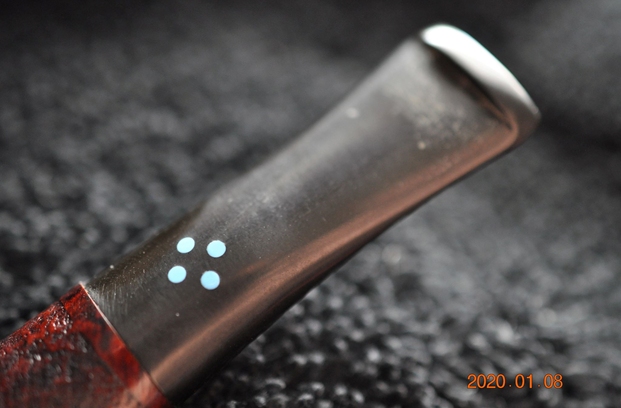
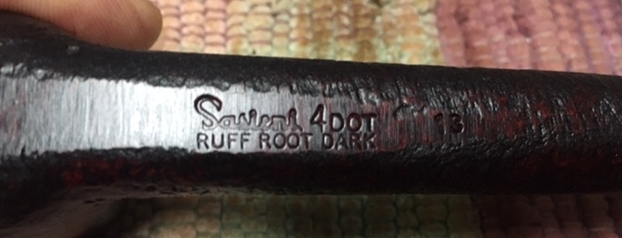
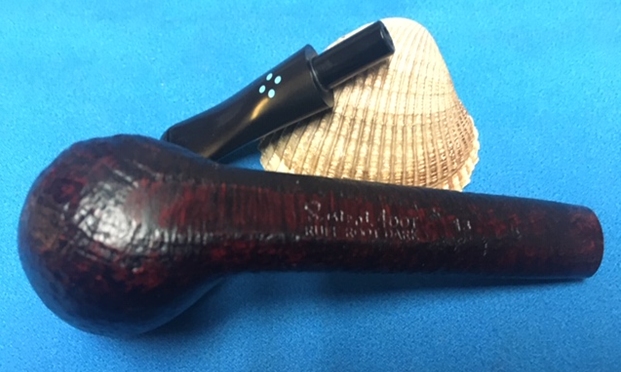
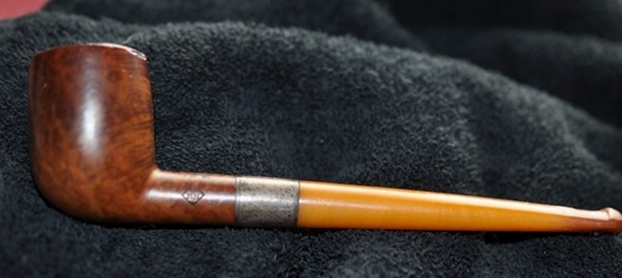
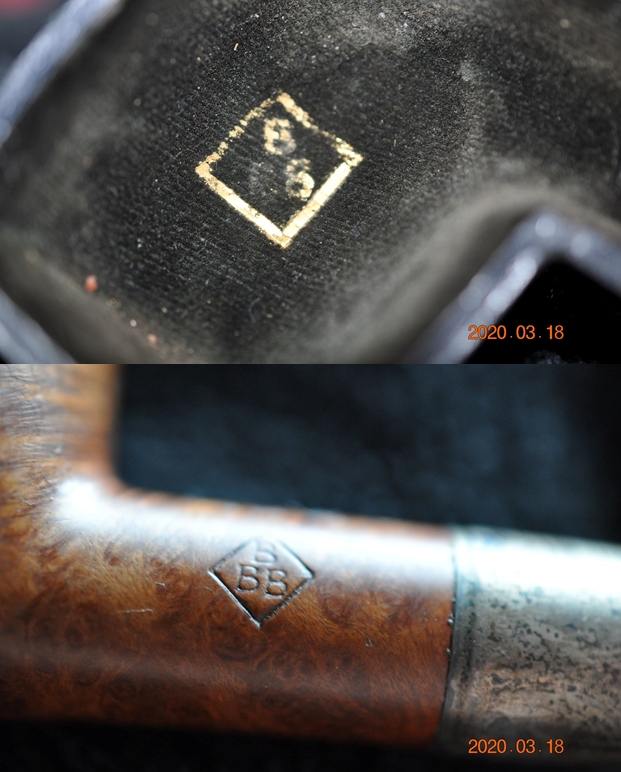
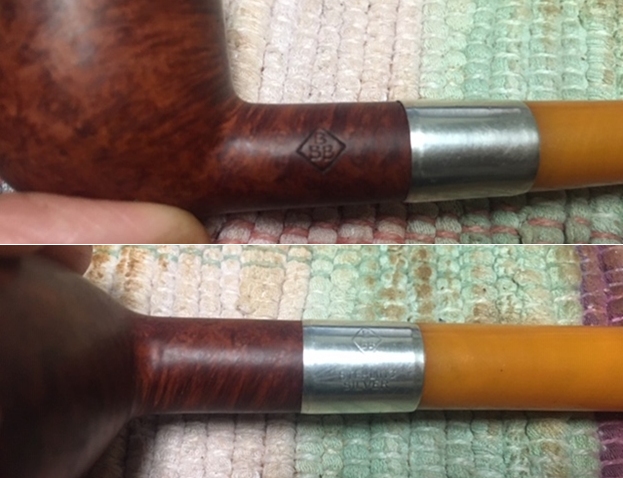
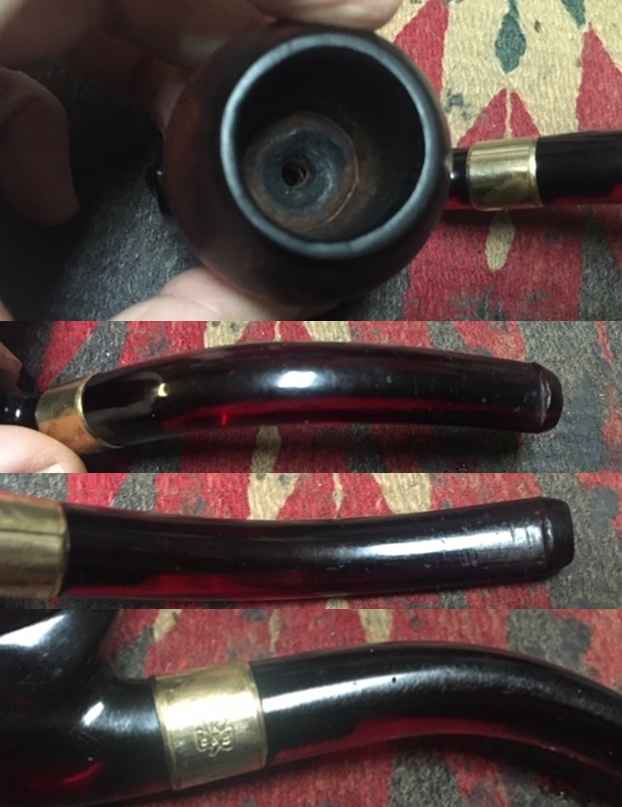
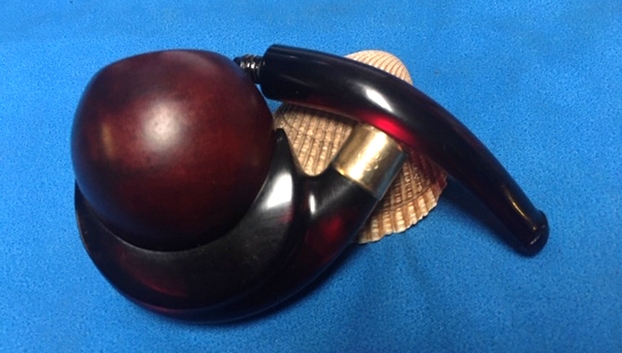
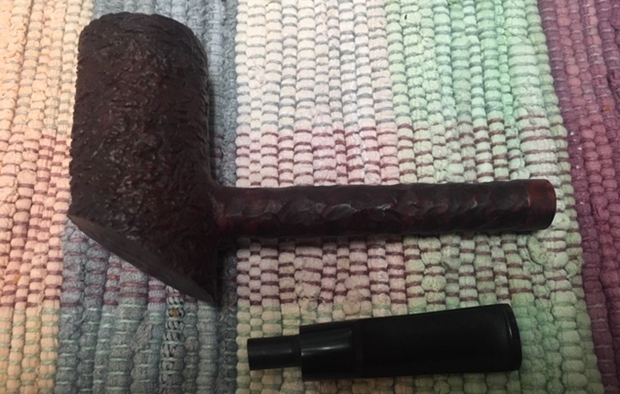
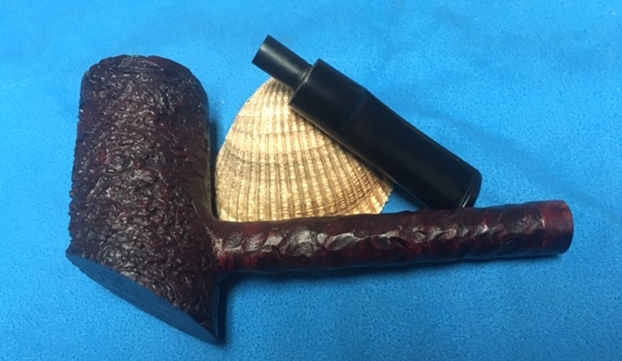
 The nomenclature on both sides of the shank is clear. The left flank is stamped KAYWOODIE [over] “500” [over] IMPORTED BRIAR [over] PAT. 2808837. The right side of the shank is stamped with the Kaywoodie shape number, ‘50C’. The stem holds the classic inlaid Kaywoodie shamrock or clover.
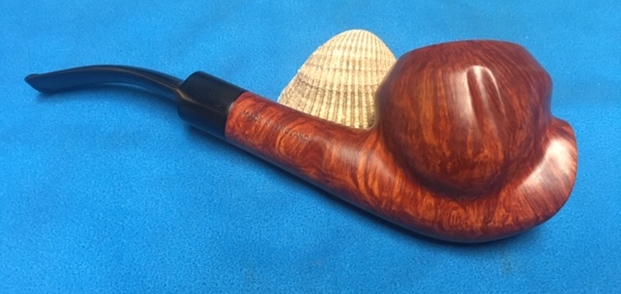
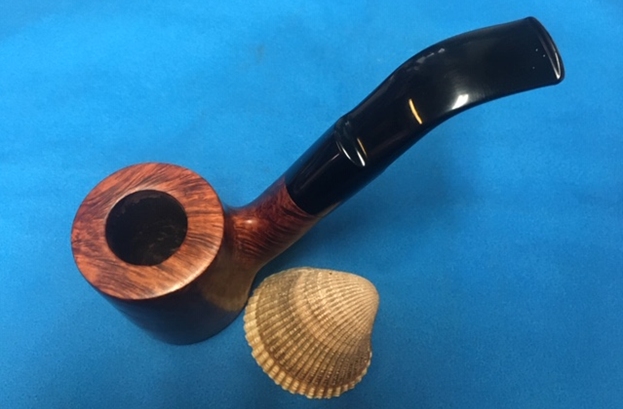
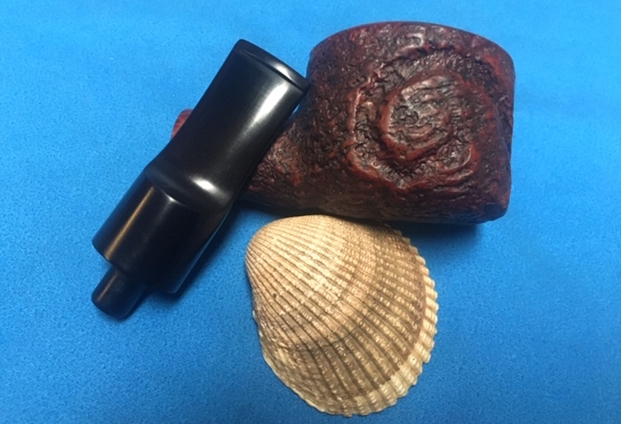
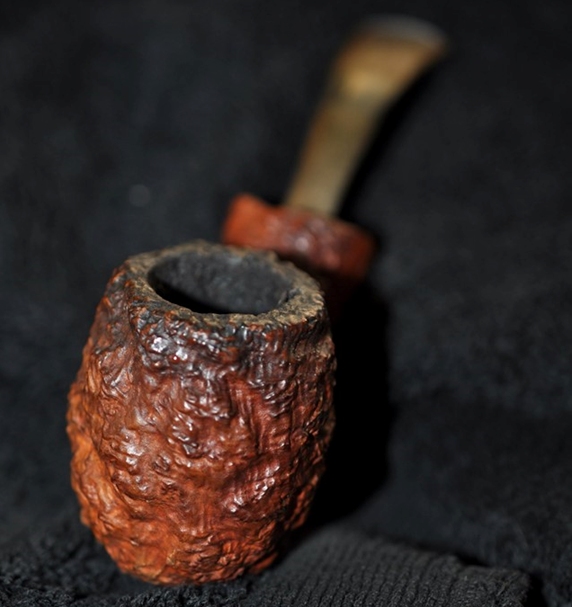
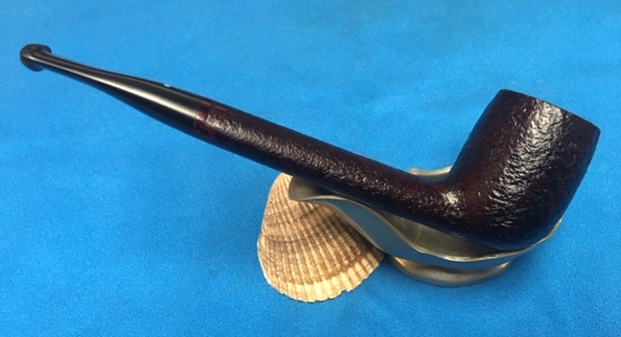
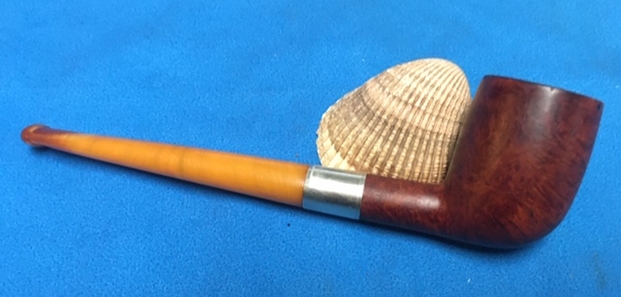
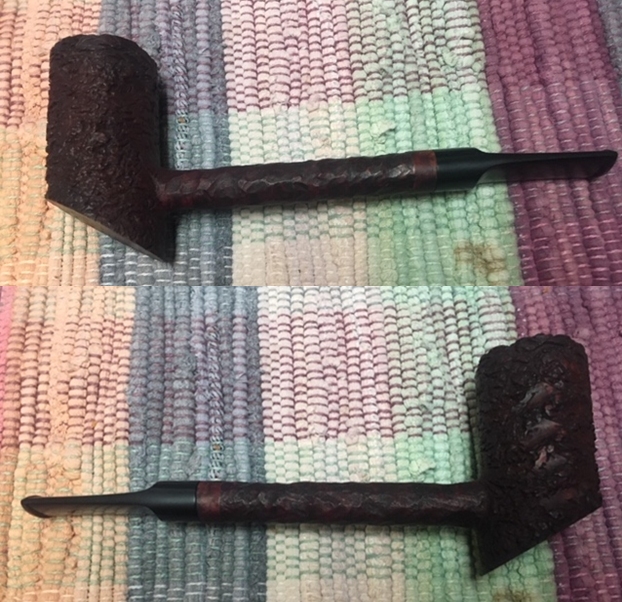
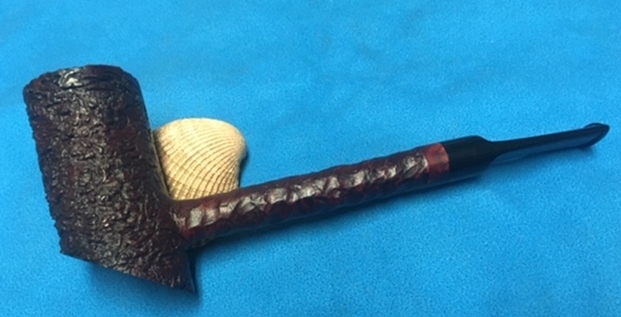
 The first interesting aspect about this Kaywoodie is the shape designation. When I first saw pictures of the pipe that Joe sent, I made the immediate identification of the shape to be a compact Rhodesian. When I looked up the Kaywoodie shape number in the extensive list provided by kwguy originally in the Kaywoodie forum listed also in Pipepedia’s listing, the description surprised me:
| 50C |
Small bulldog, round shank |
1960-1963 |
My main pipe shape ‘go to’ is Bill Burney’s Pipedia’s Pipe Shapes where the debate is described: In deference to Kaywoodie, I’ll call Paw’s pipe a small Round Shank Bulldog. What was also helpful is that the short period that the Round Shank Bulldog was in production is small – 1960 to 63. Pipephil.eu’s comments on Kaywoodie’s
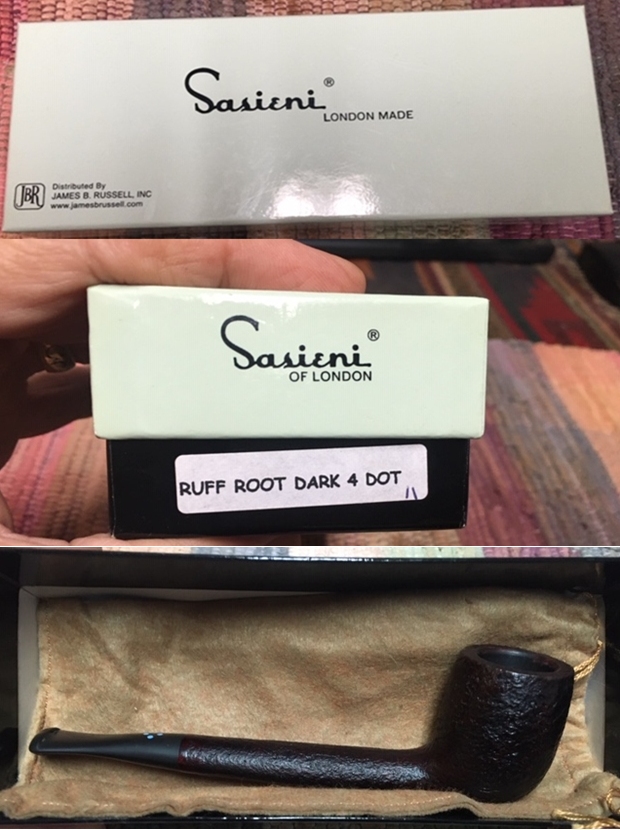
500 and 600 series were that they were cheaper, low-end pipes that ran through the period: 1959 – 1967. It’s probable that Paw’s Kaywoodie “500” Round Shank Bulldog which isolates it as a “500” that was marketed between 60 to 63, cost him $5.95. The 1962 Kaywoodie catalog page that Bill Feuerbach provided to include in the restoration write-up of Paw’s Kaywoodie Natural Burl, also included an ‘All New Kaywoodie “500”’ advertisement. Bill’s explanation of the page below indicated that the cost of the pipe, $5.95, identified it as the 1962 catalog which would have encompassed the 1960 to 1963 timeframe of the round shank Bulldog production.  The Kaywoodie “500” add also touts a “Syncro-Lok Stem” and a “New Miracle Finish” which lasts for years. The “Syncro-Lok Stem” was a component part of the US Pat. 2808837 which is stamped as part of the “500” nomenclature. According to Pipedia’s Kaywoodie article, the 1957 Pat. 2808837 applies specifically to the metal on metal fittings developed by Kaywoodie (Picture below courtesy of Doug Valitchka). It was interesting for me recently to hear Bill Feuerbach, president of S. M. Frank Co., describing the era of Kaywoodie’s metal fitments coming to a close in his January, 2016, interview with Brian Levine on the Pipes Magazine Radio Show. Some reasons discussed were the changing landscape of pipe smokers where ease of cleaning and the fact that today’s pipe smoker, representing a younger generation, is not using the pipe as rigorously as those of earlier generations. The other primal reason that Bill gave were the economics – the company that had manufactured these parts for Kaywoodie no longer was in business and finding a replacement ended up not making economic sense.
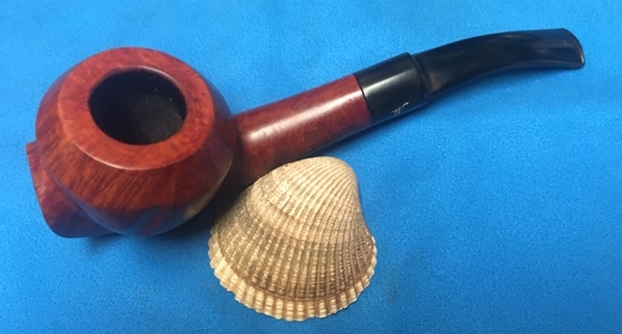
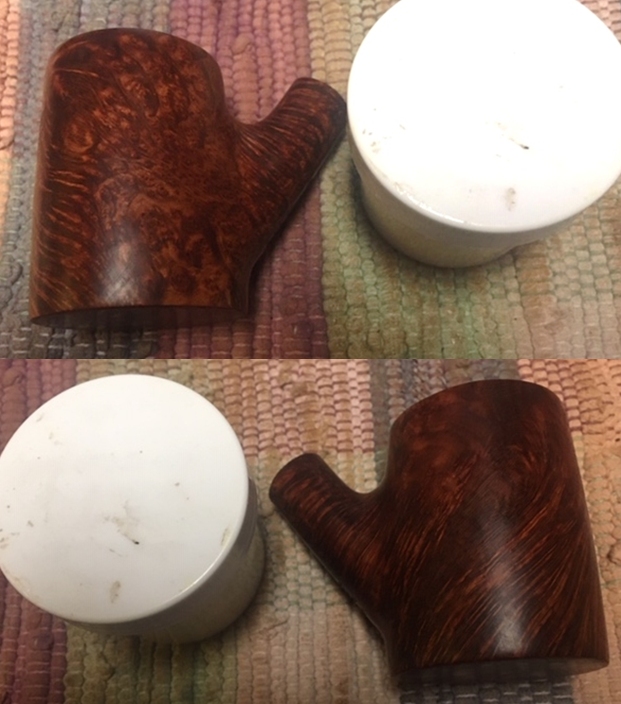
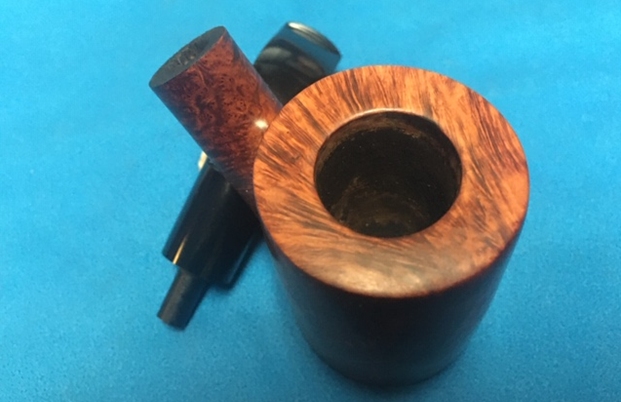
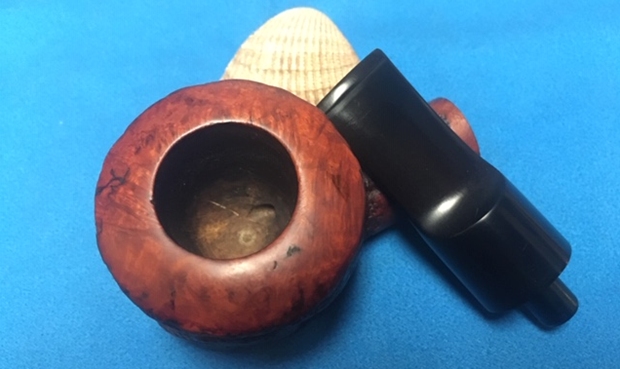
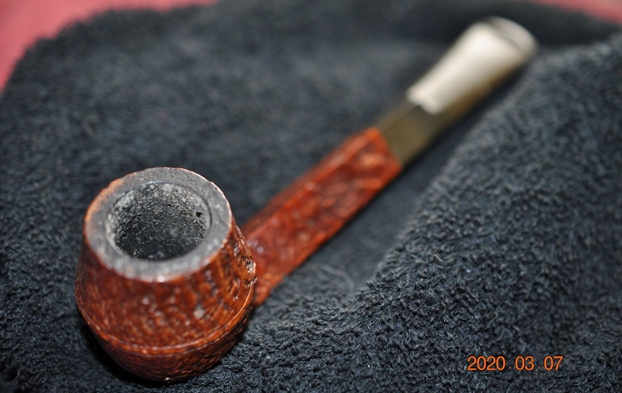
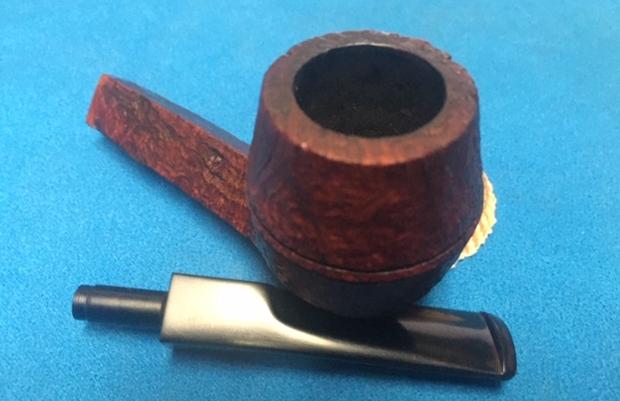
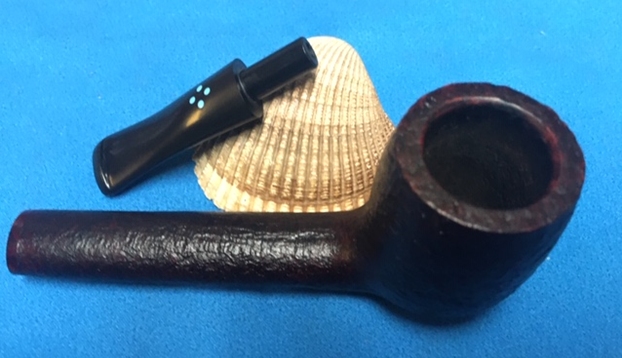
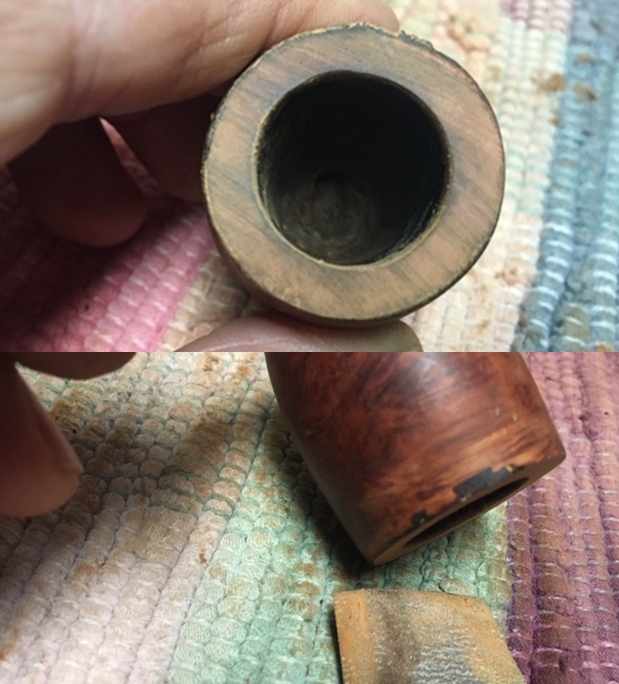
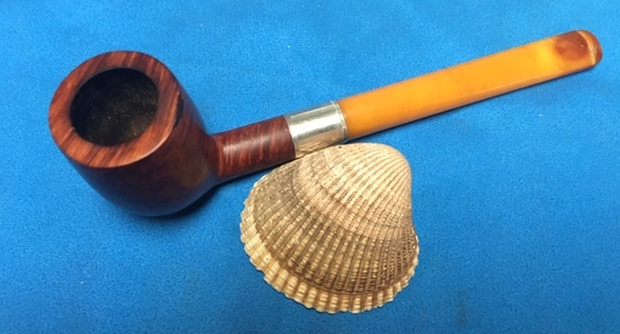
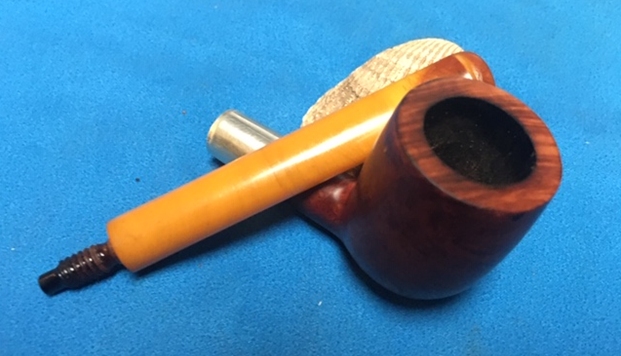
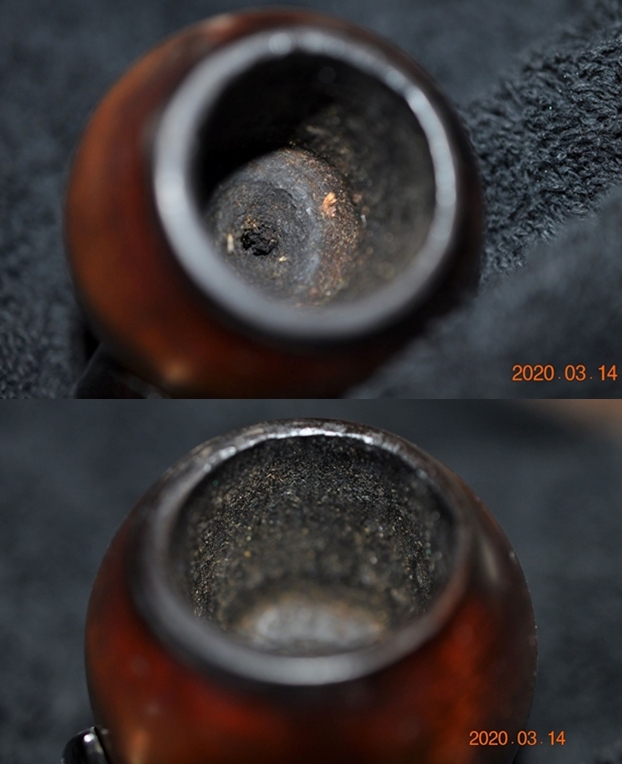
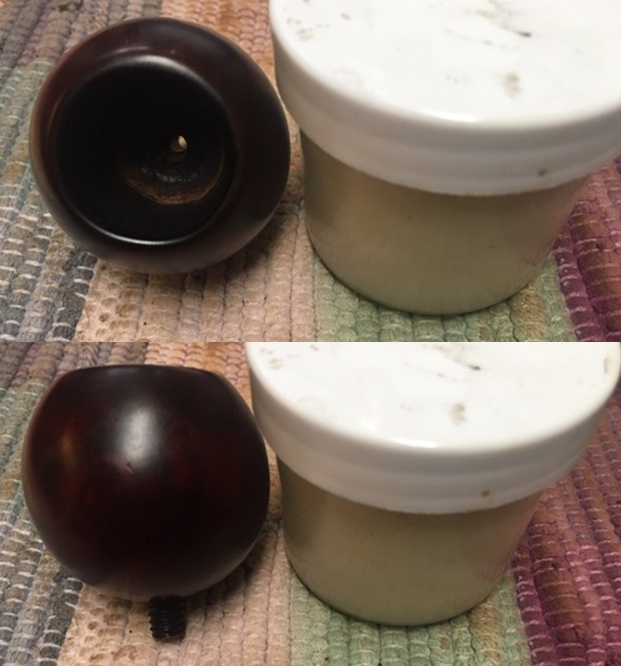
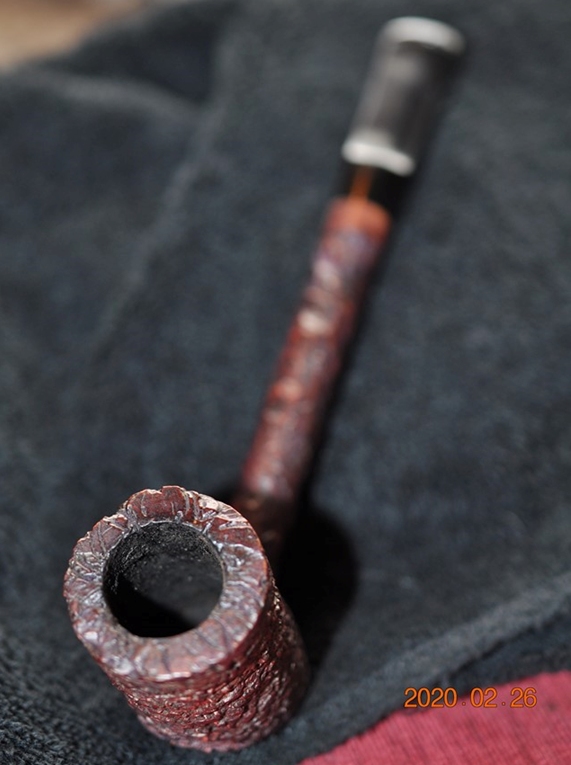
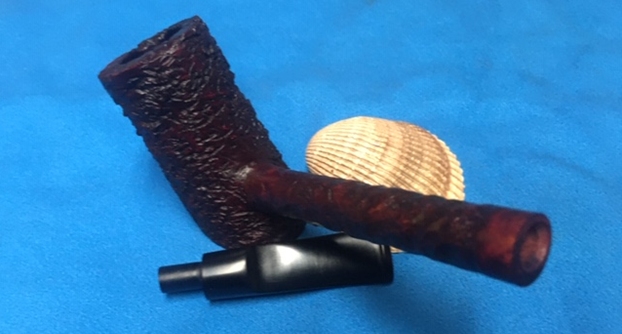
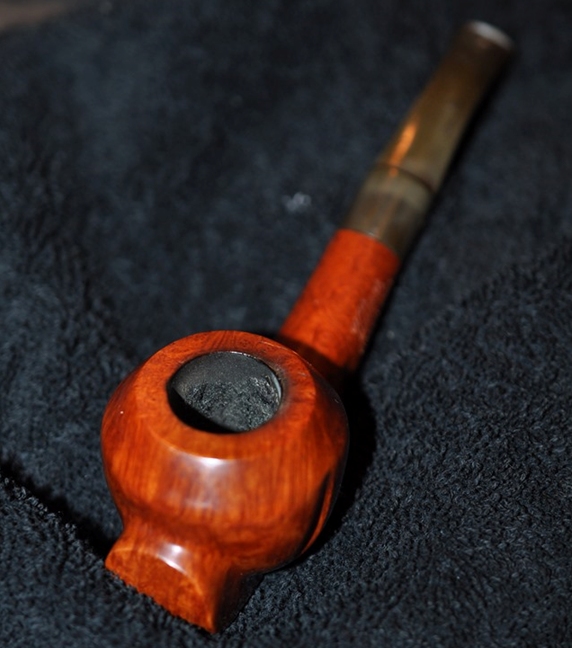
  With a better understanding of the Kaywoodie “500” on my worktable, I now take a closer look at the Bulldog’s issues. The cake in the chamber is not thick in the upper chamber, but tightens toward the floor of the chamber.
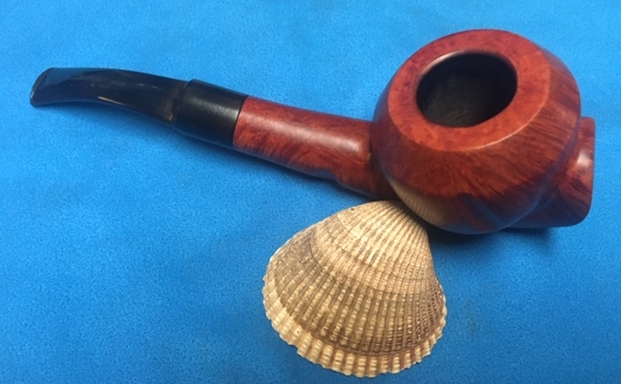
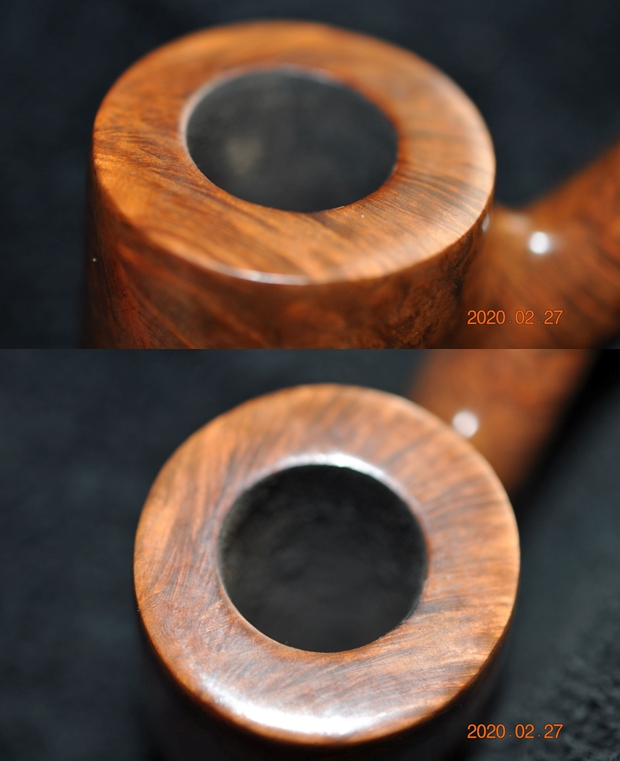
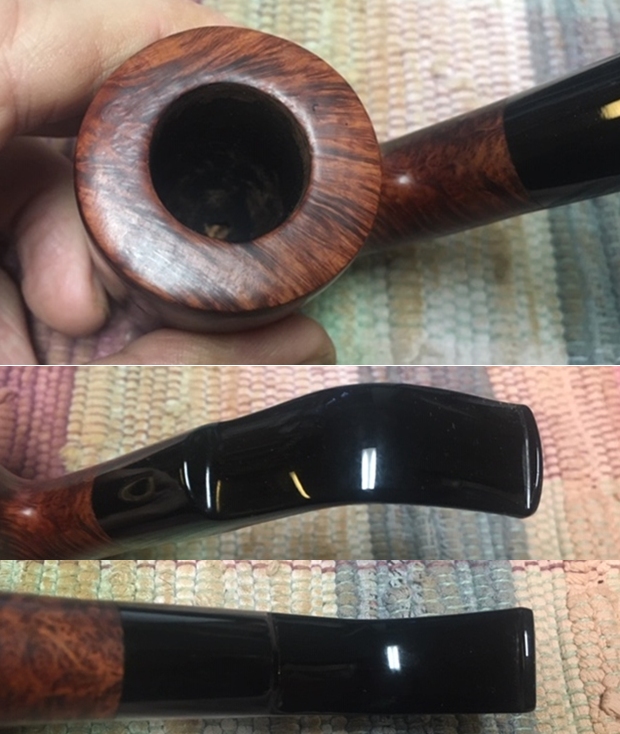
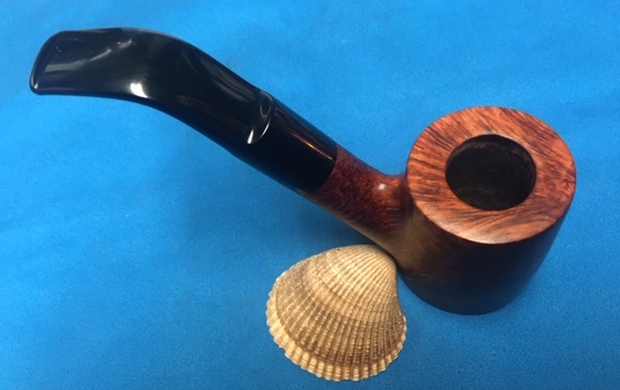
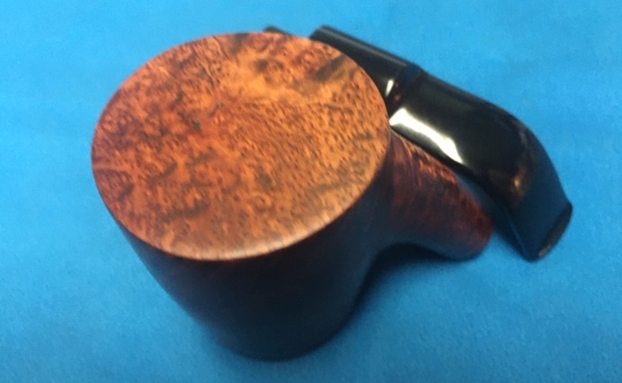
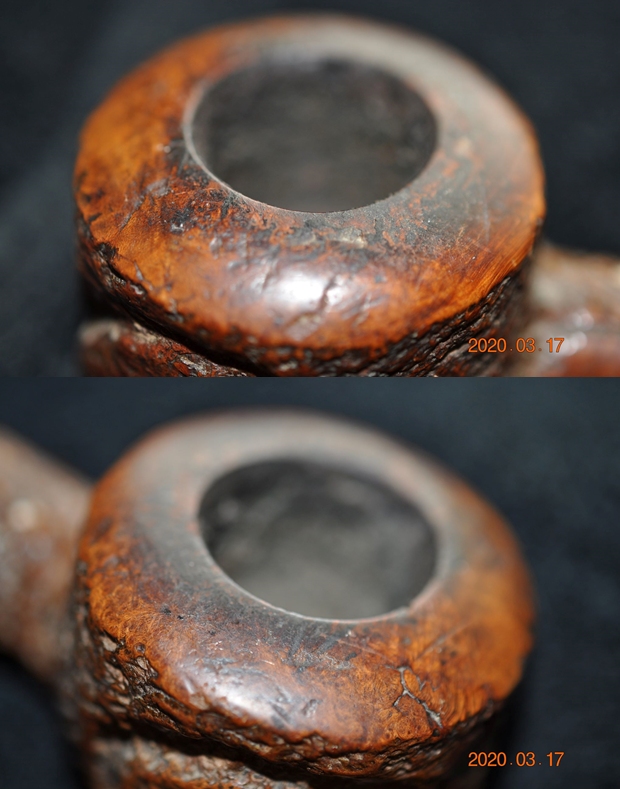
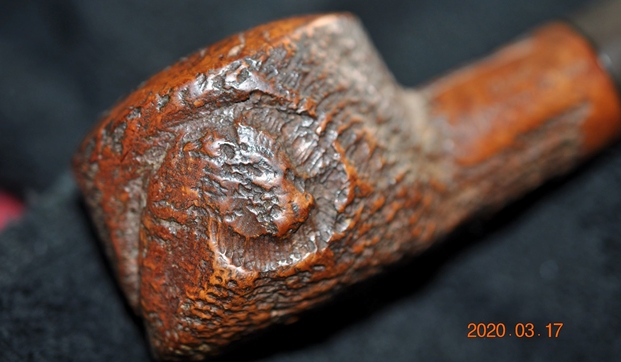
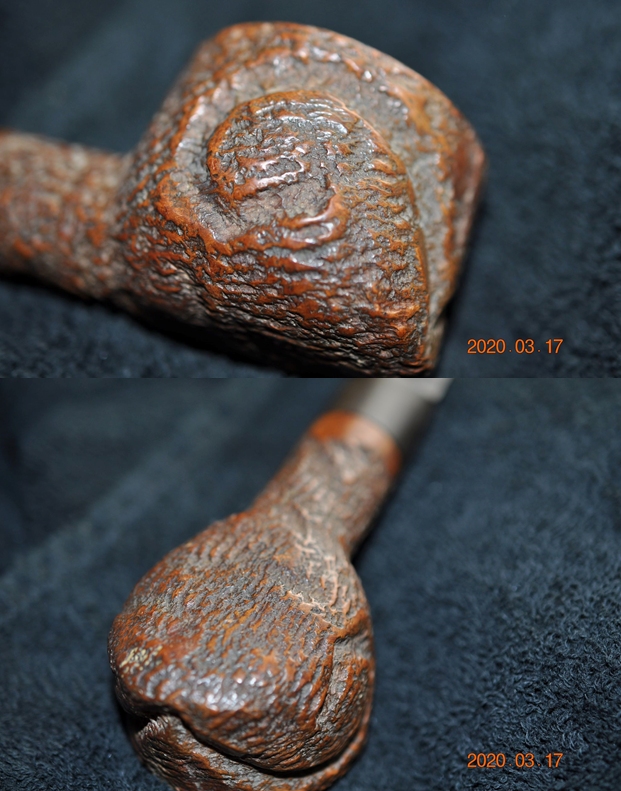
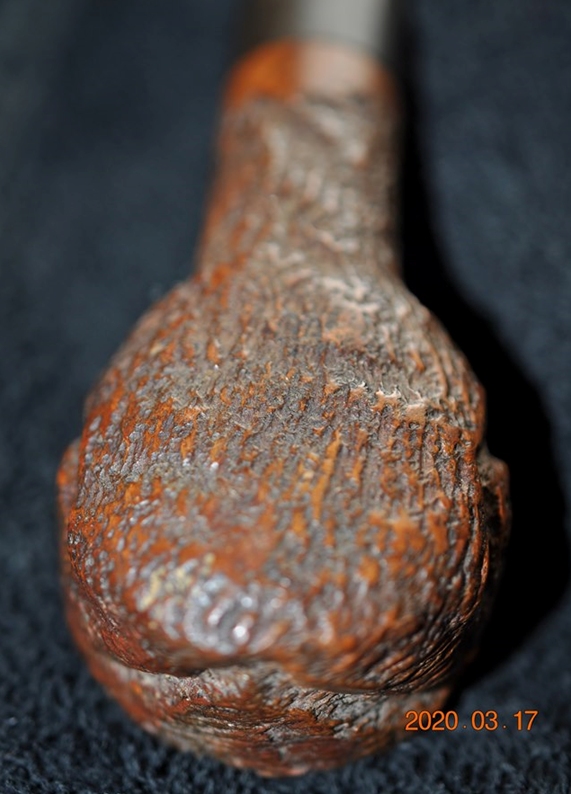
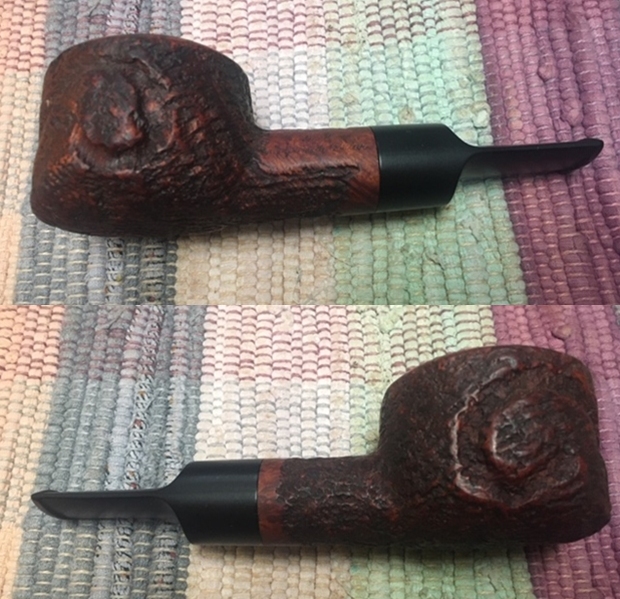
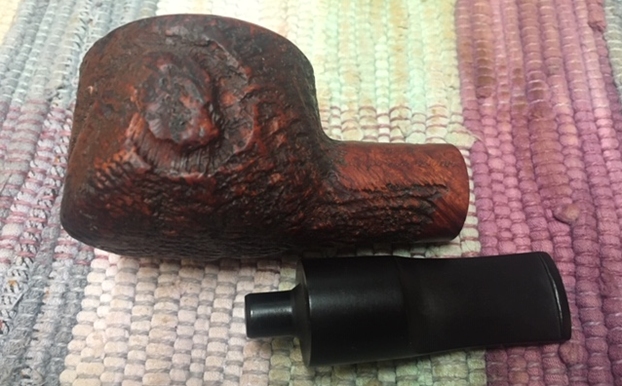
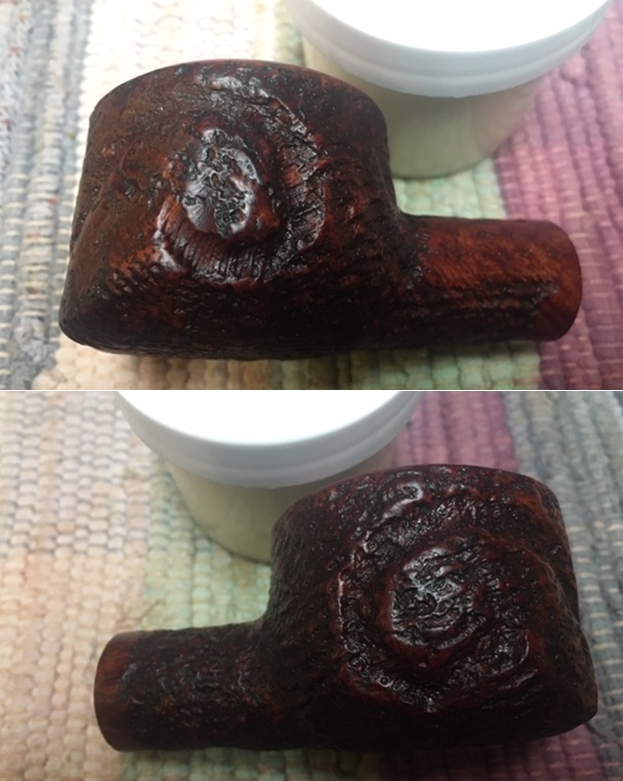
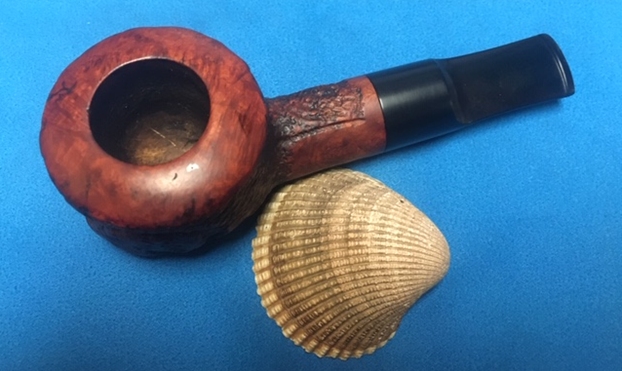
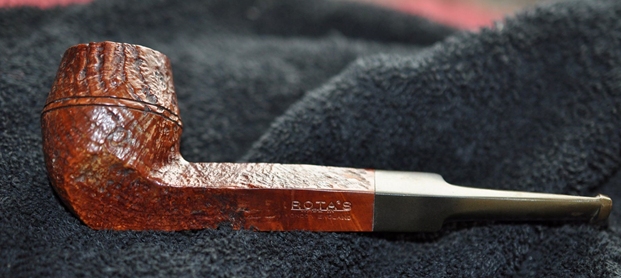
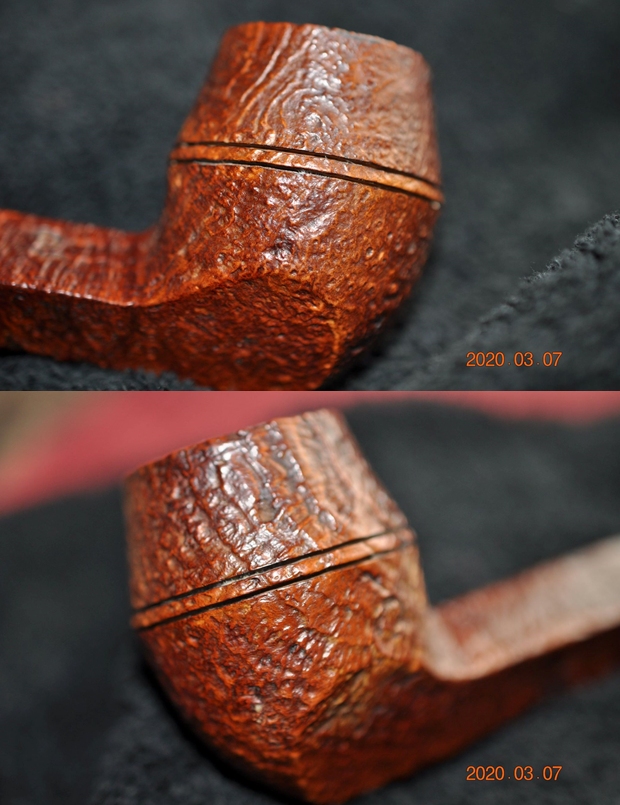
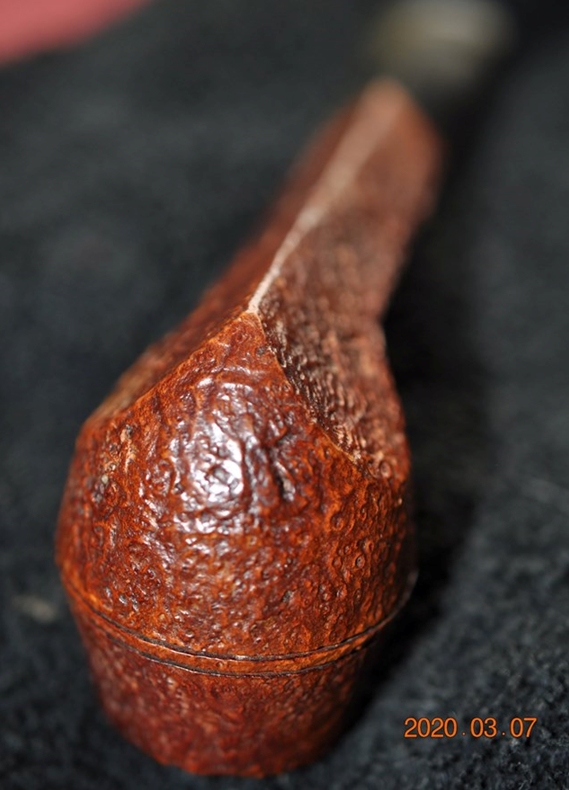
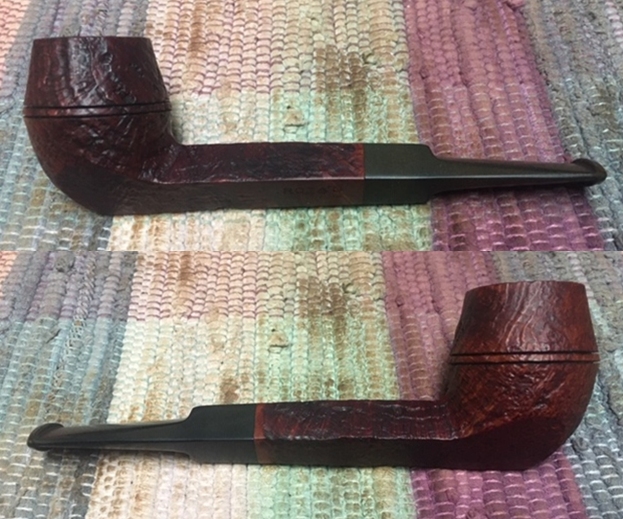
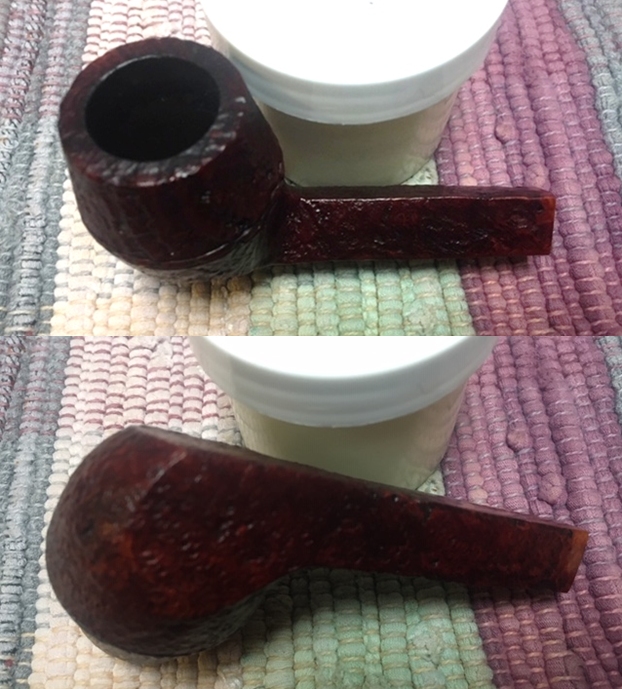
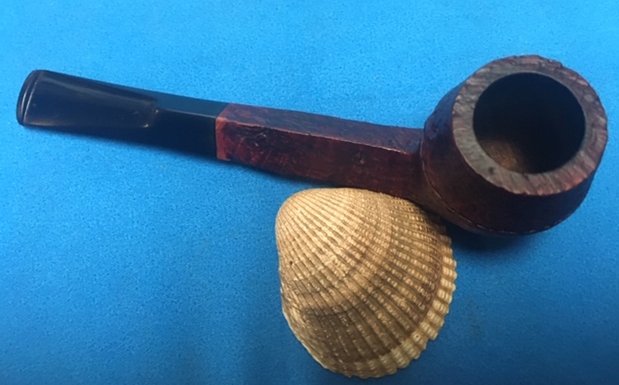
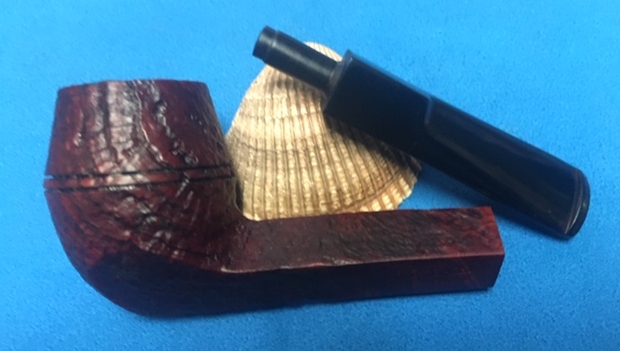
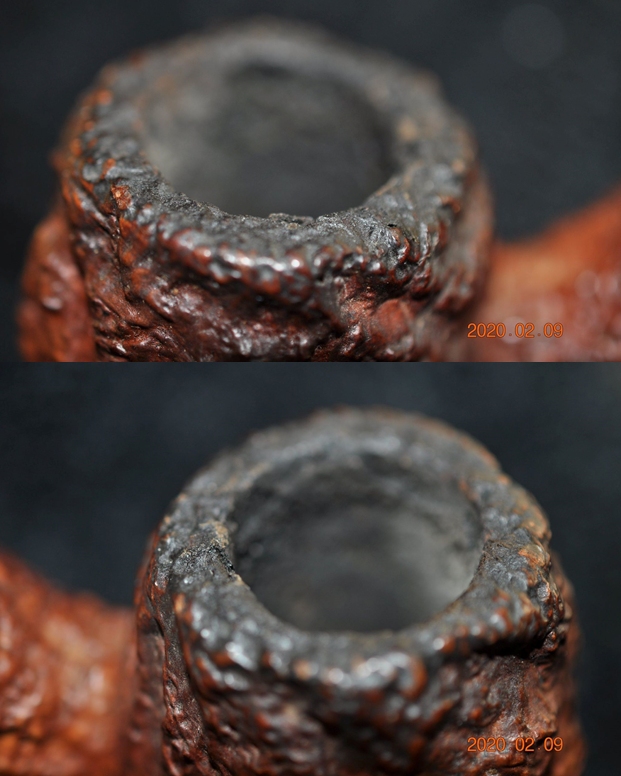
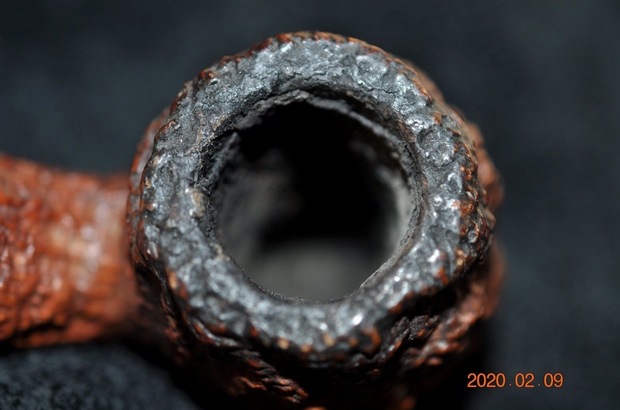
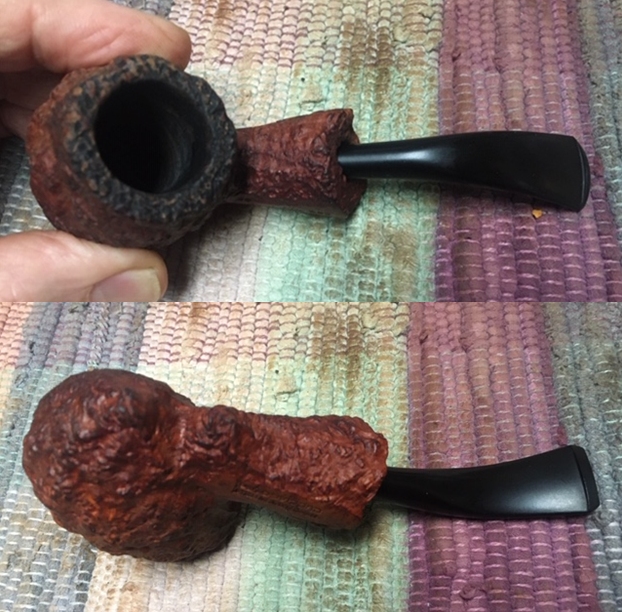
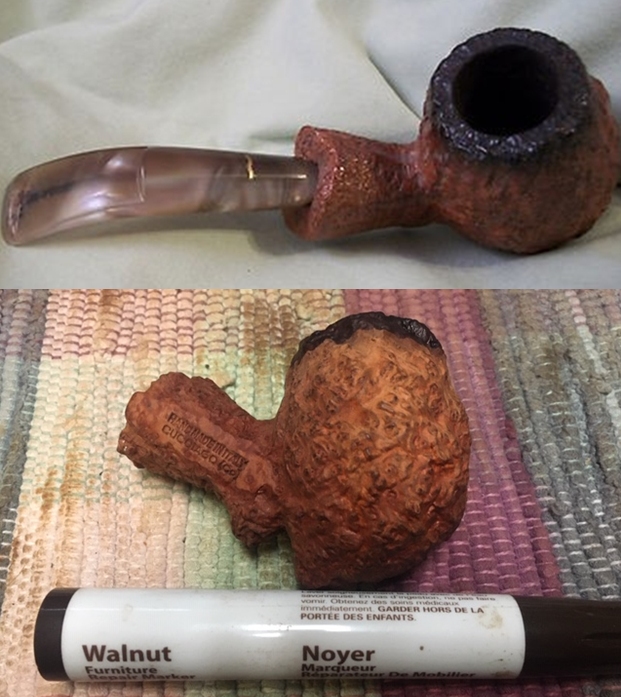
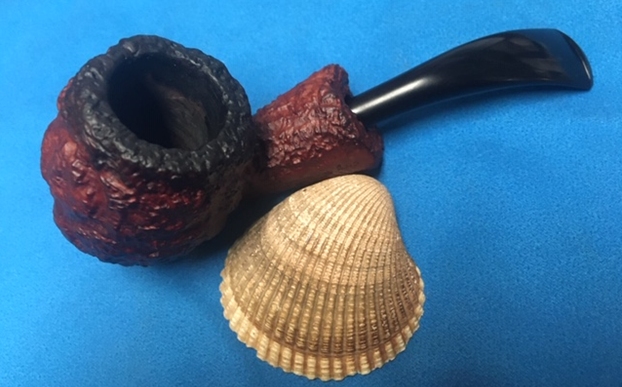
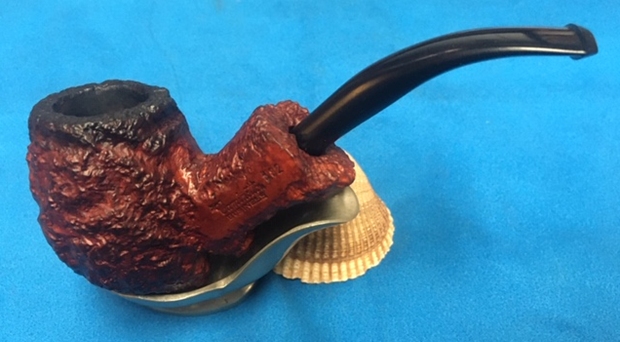
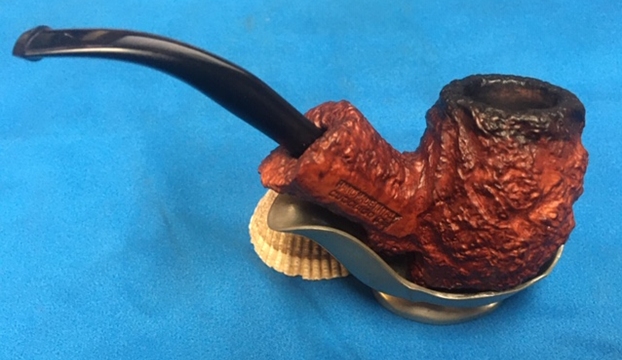
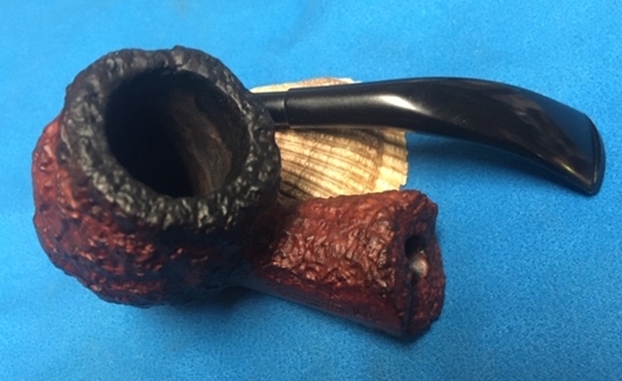
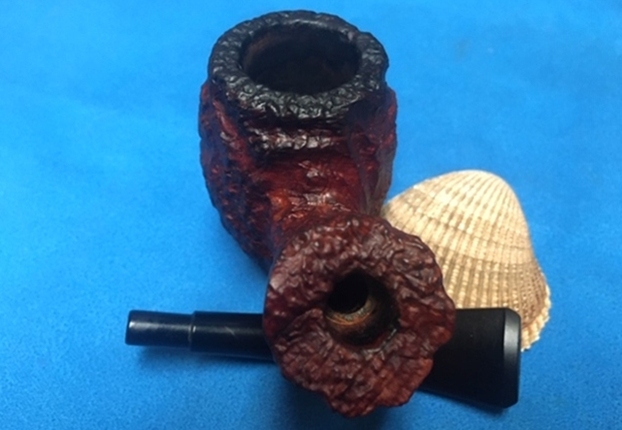
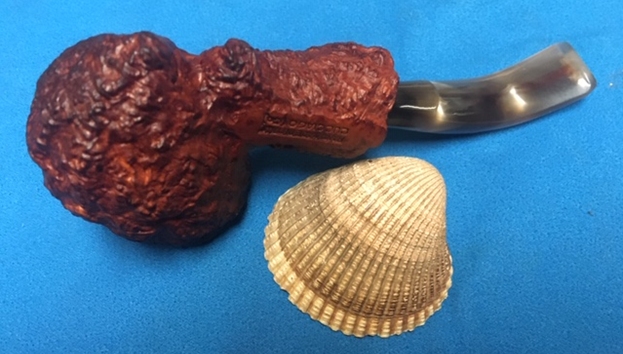
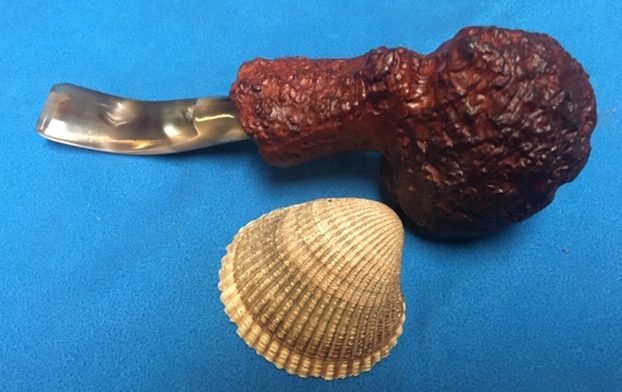
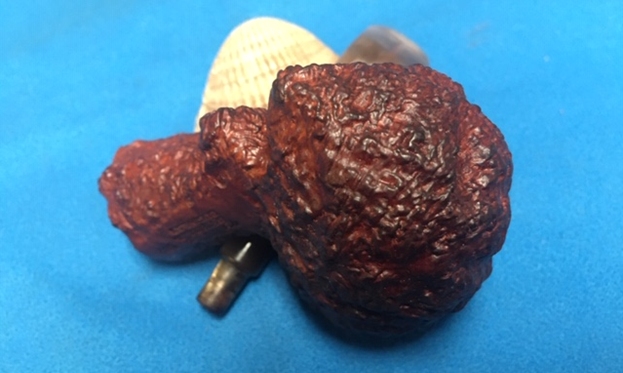
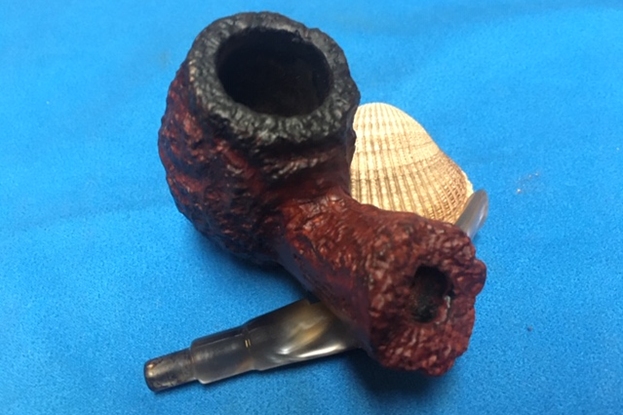
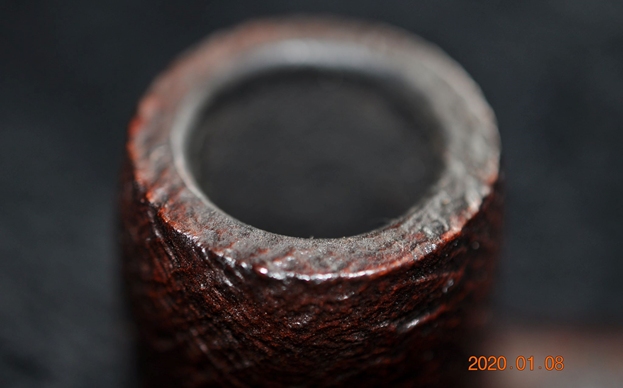
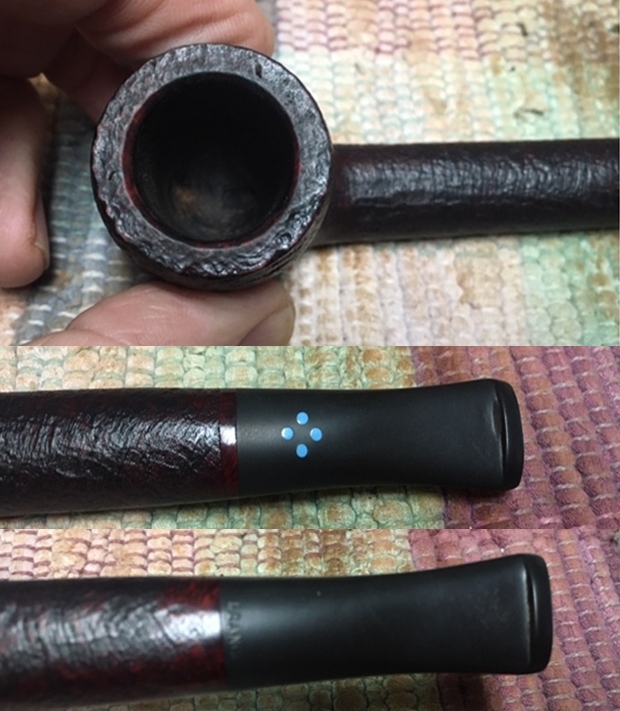
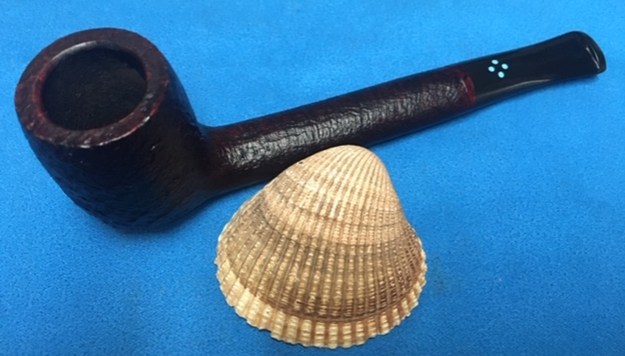
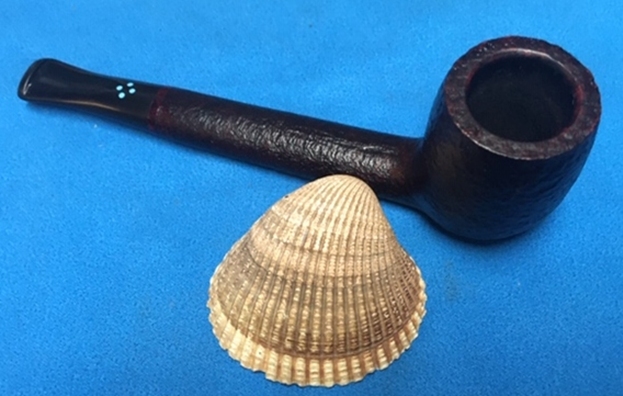
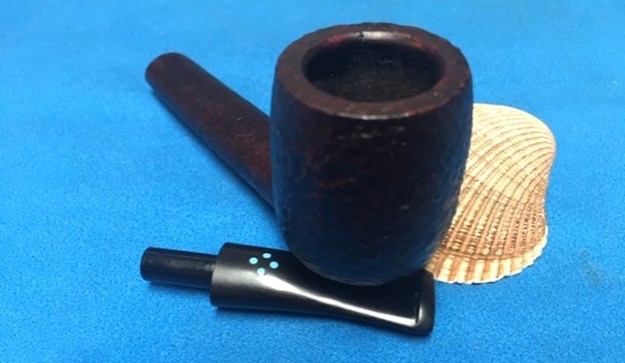
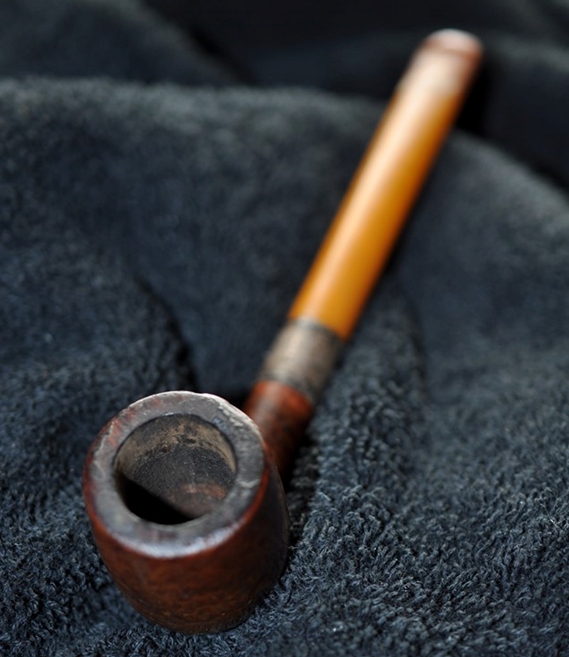
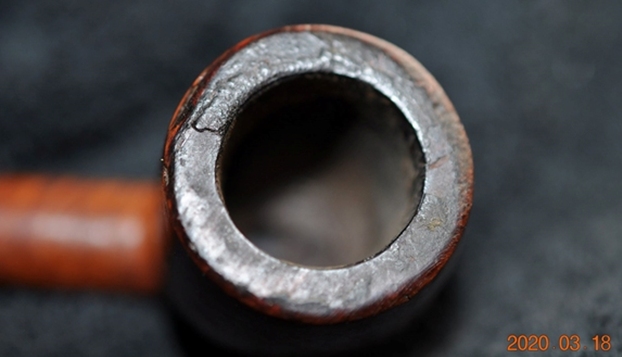
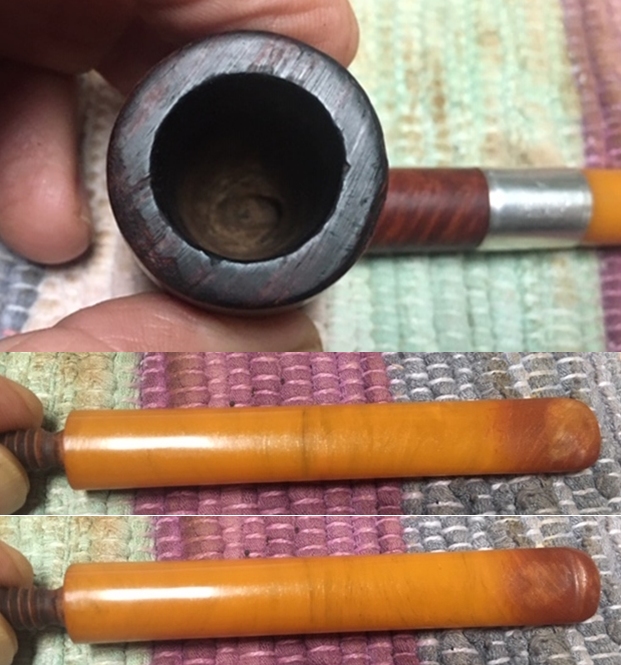
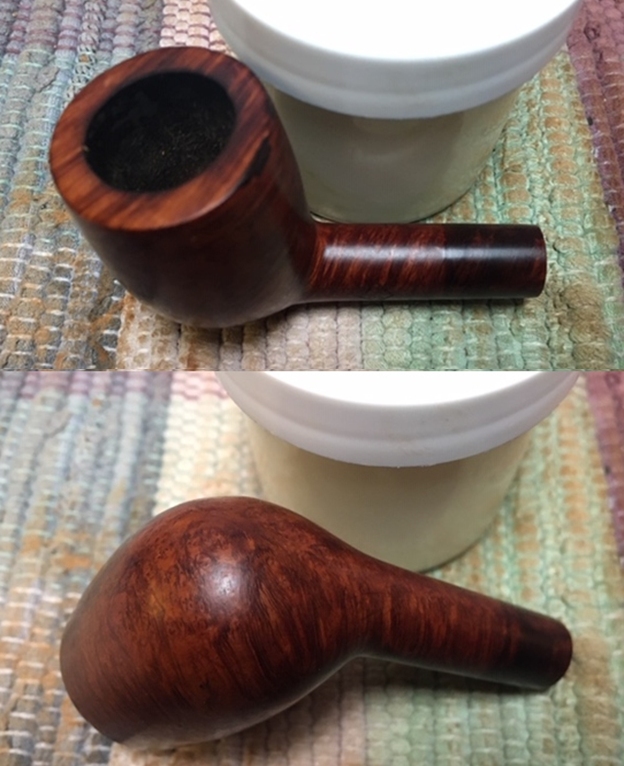
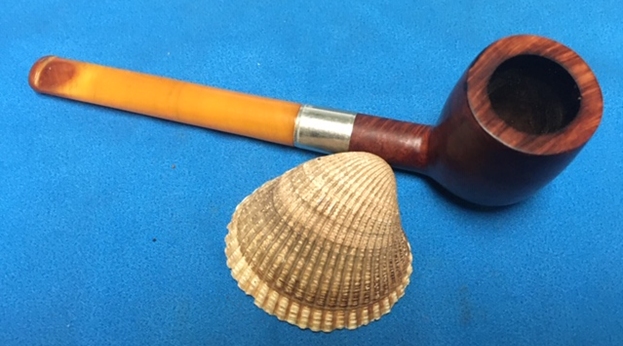
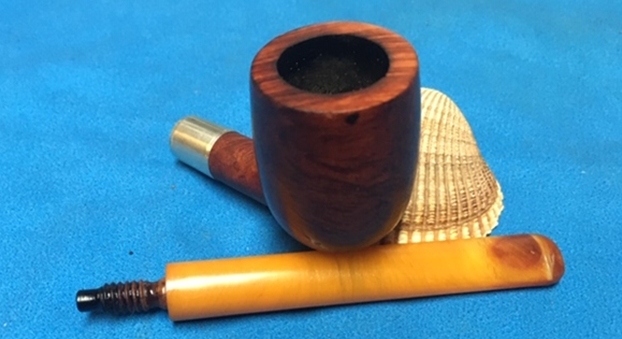
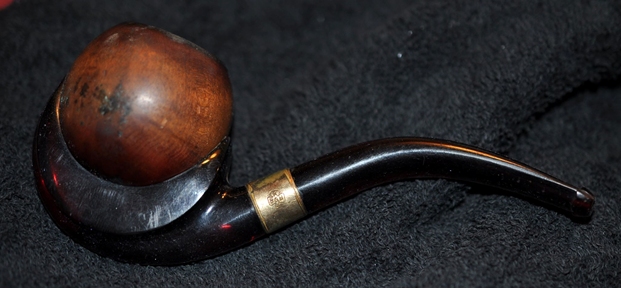
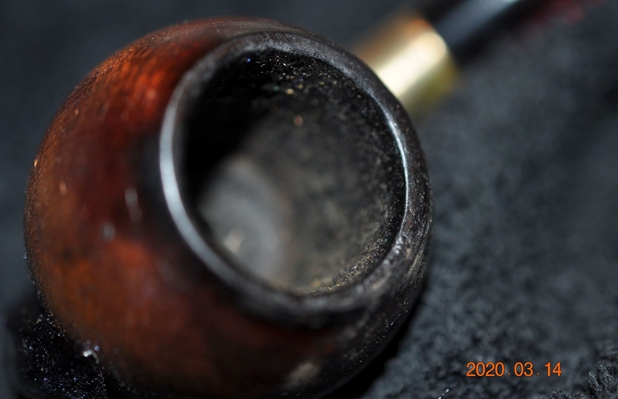
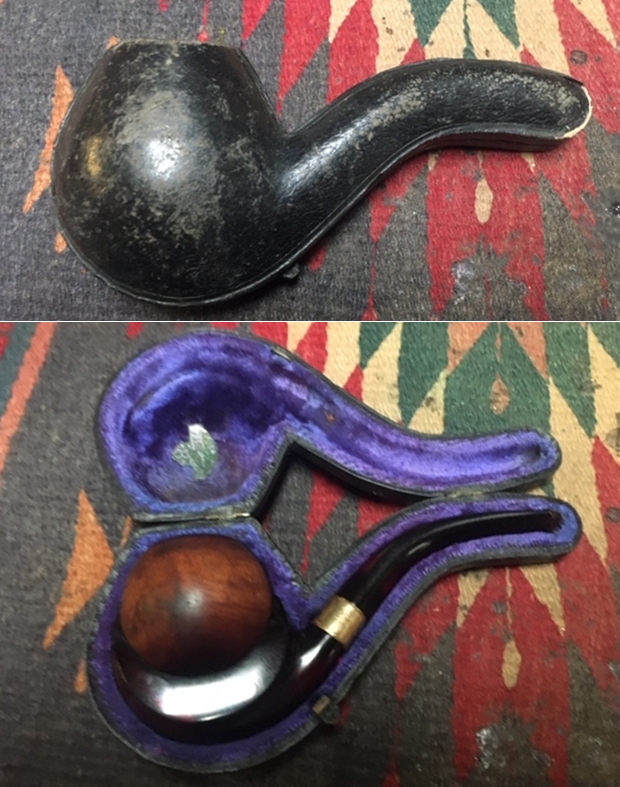
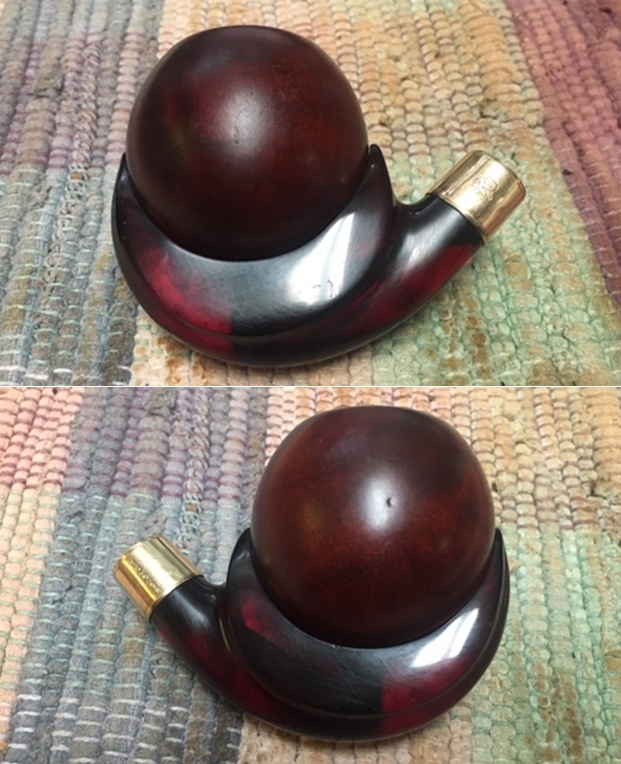
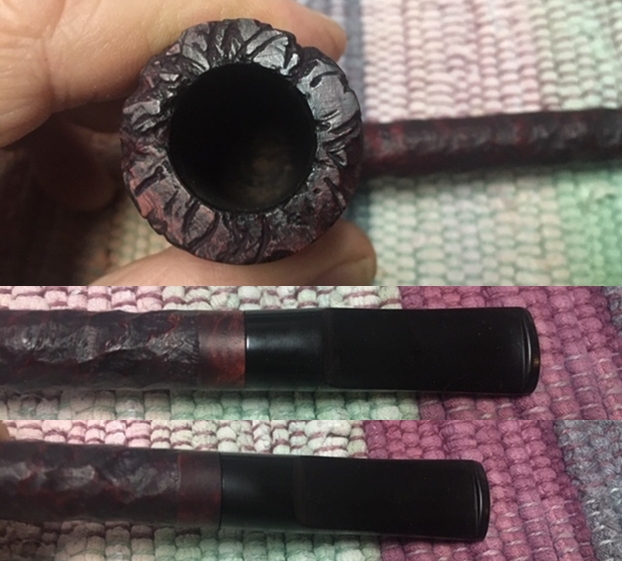
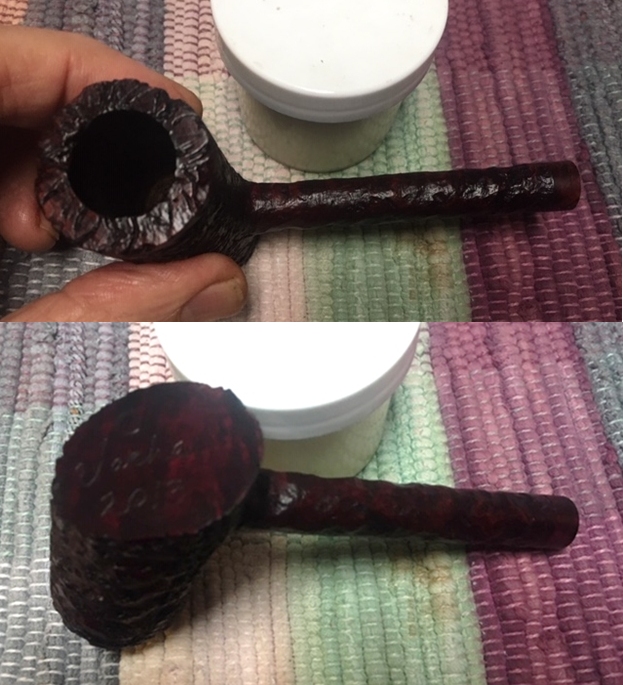
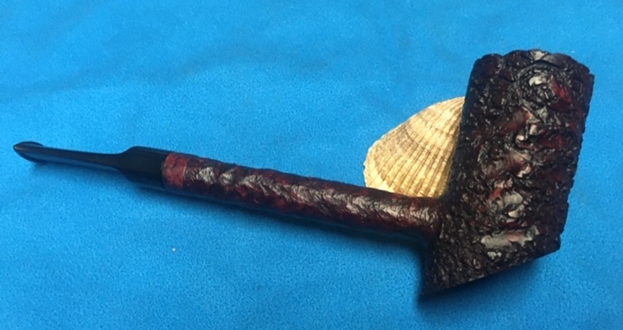
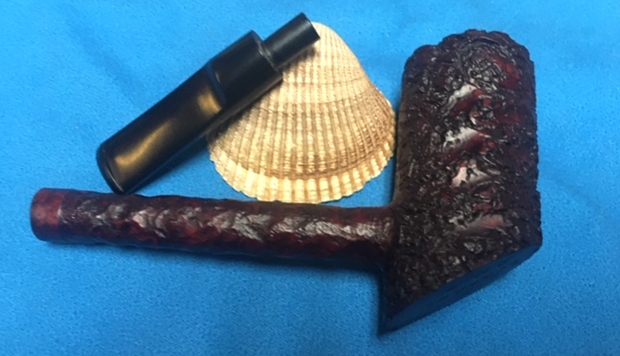
  The rim is classic ‘2-Page Sam’ as it has sustained Sam’s rushed knocking damage on the aft quadrant of the rim – but it’s not severe. As with the other 2 pipes, and with Paw’s Kaywoodie “500” Long Shank Billiard that I restored for Joe last year, this “500”’s rim will also carry these marks in remembrance of Paw.
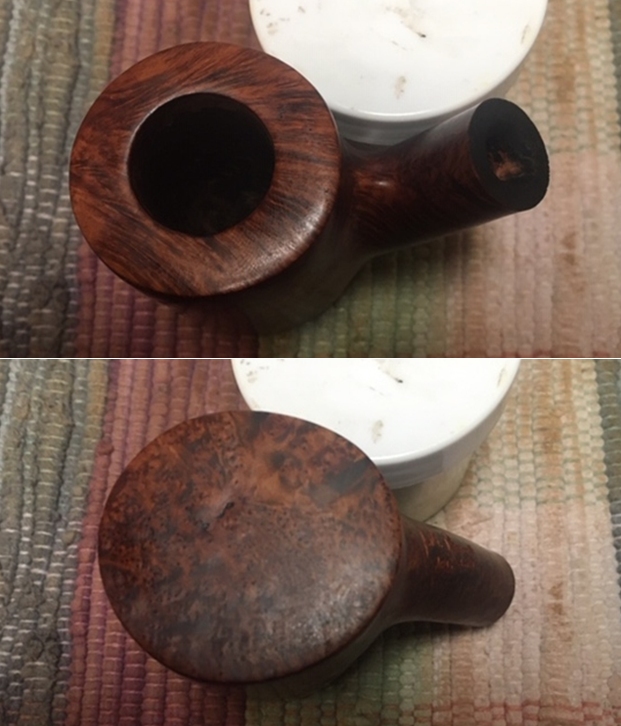
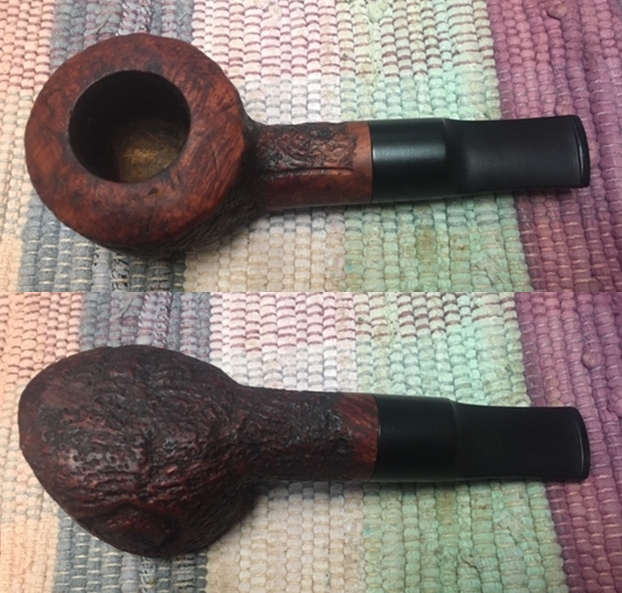
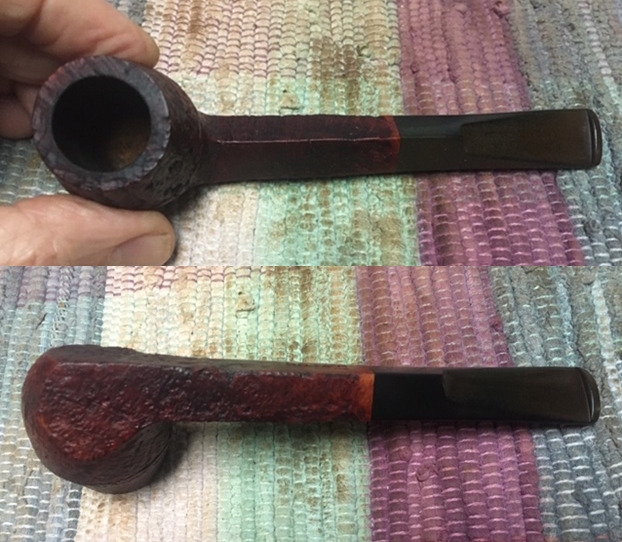
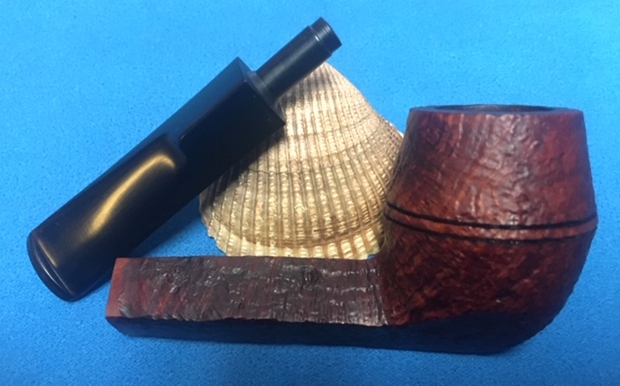
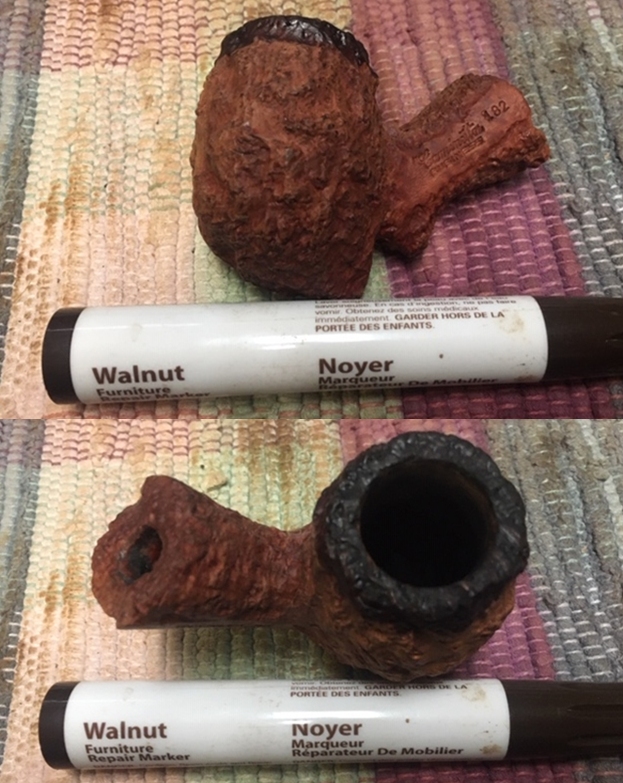
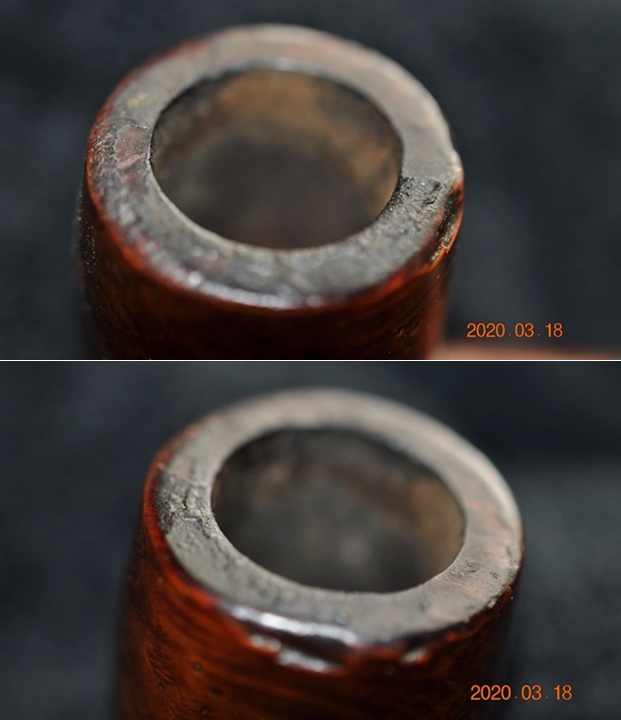
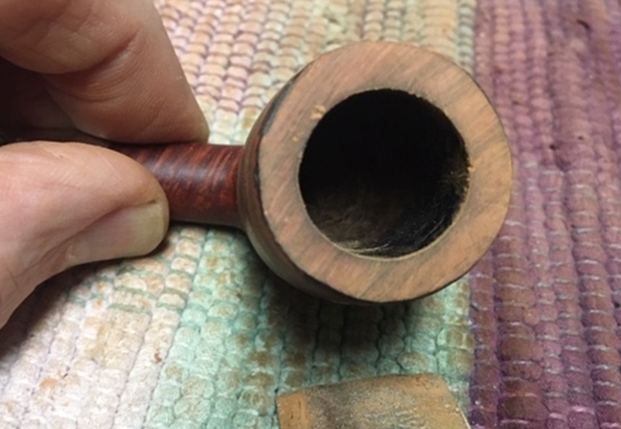
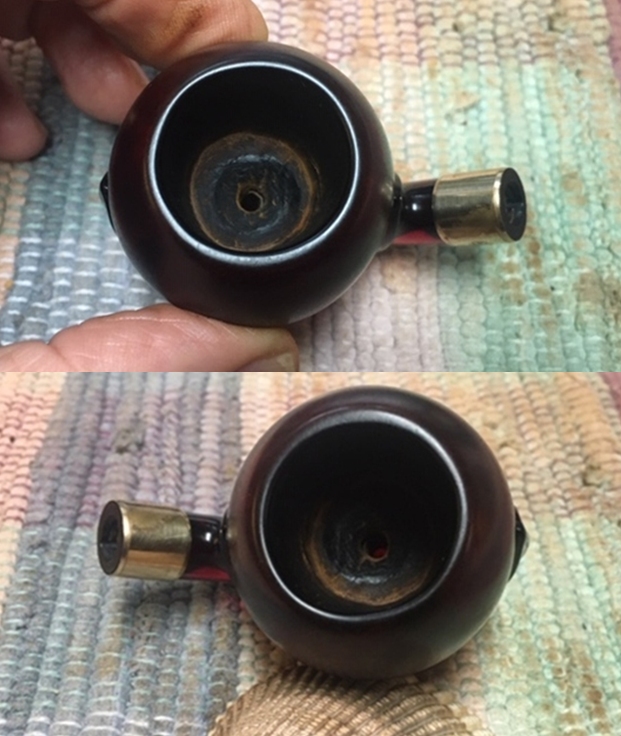
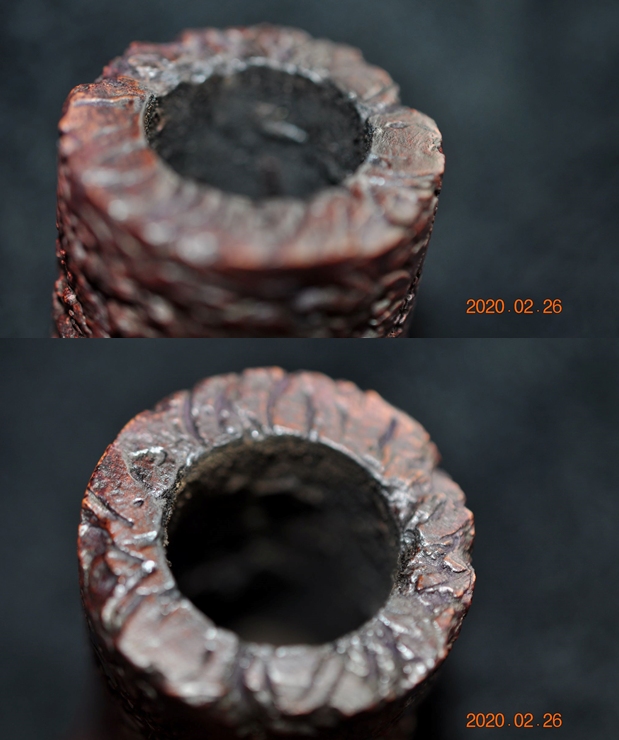
  The internal edge of the rim has a large divot which I will repair. The rest of the rim shows some grime and nicks on the external edge which one would expect.
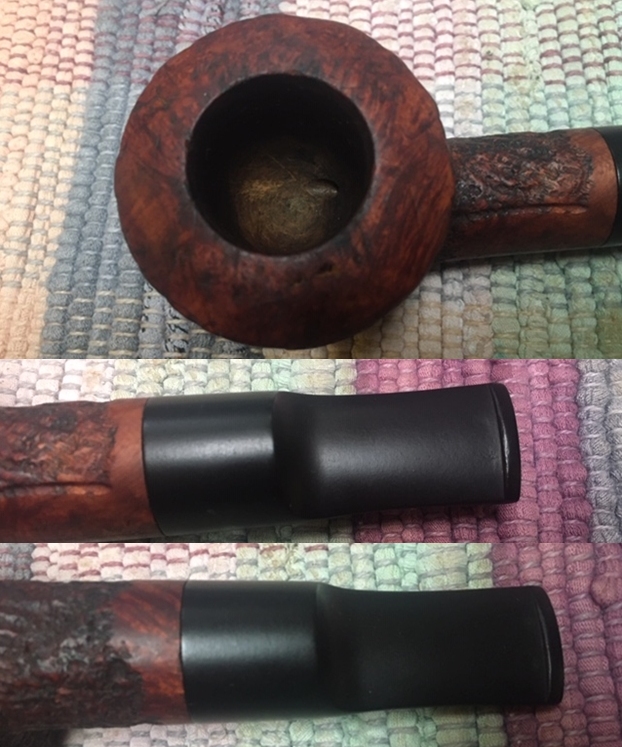
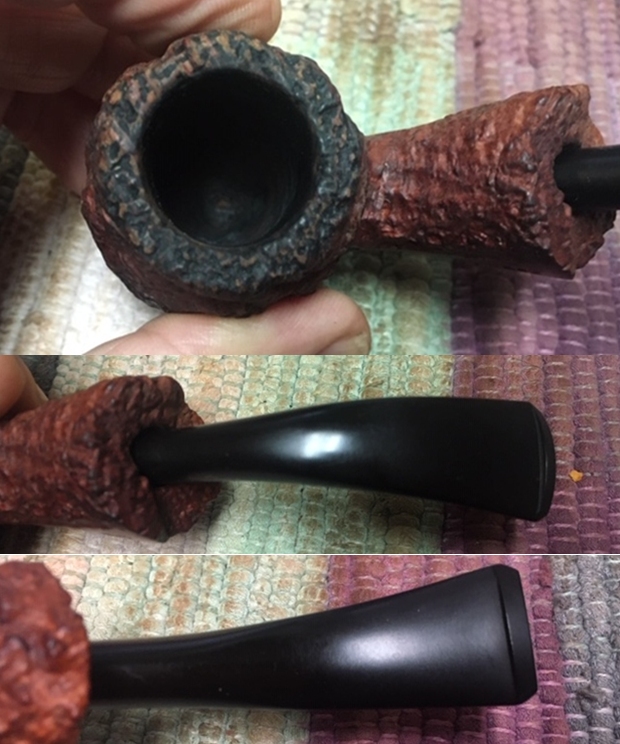
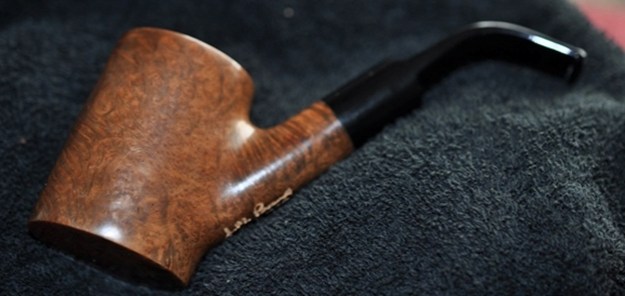
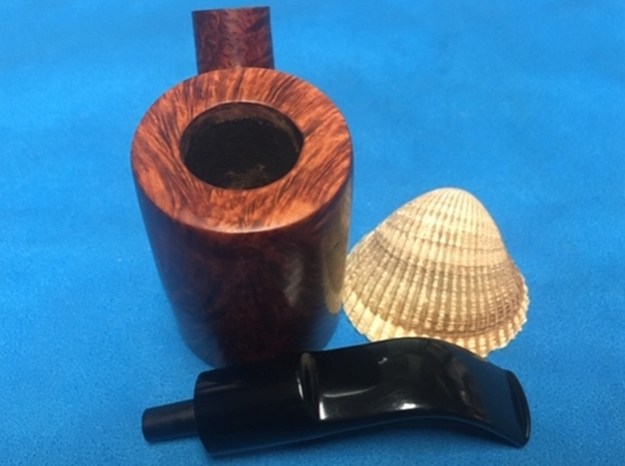
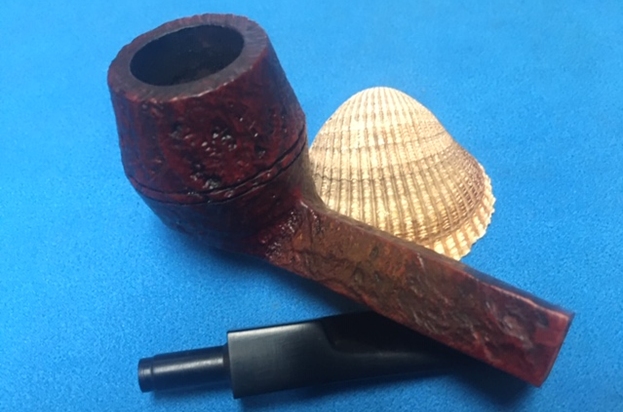
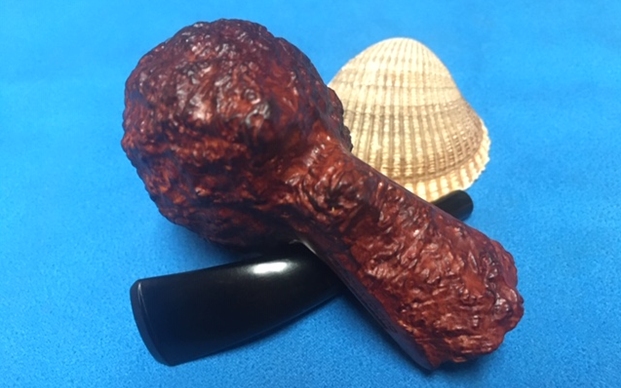
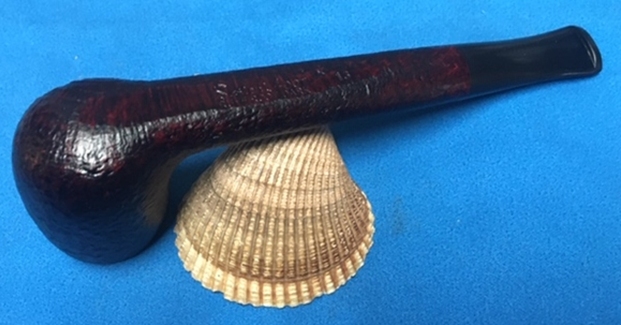
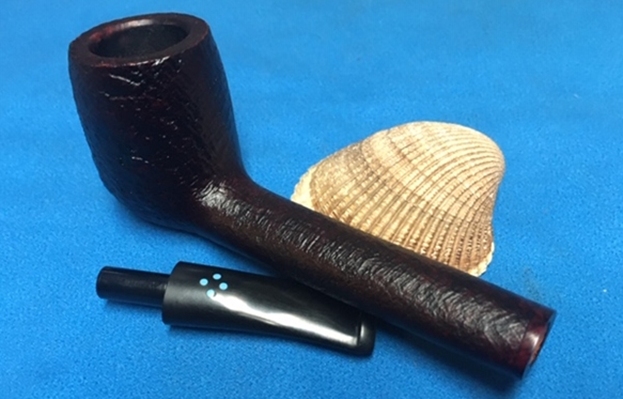
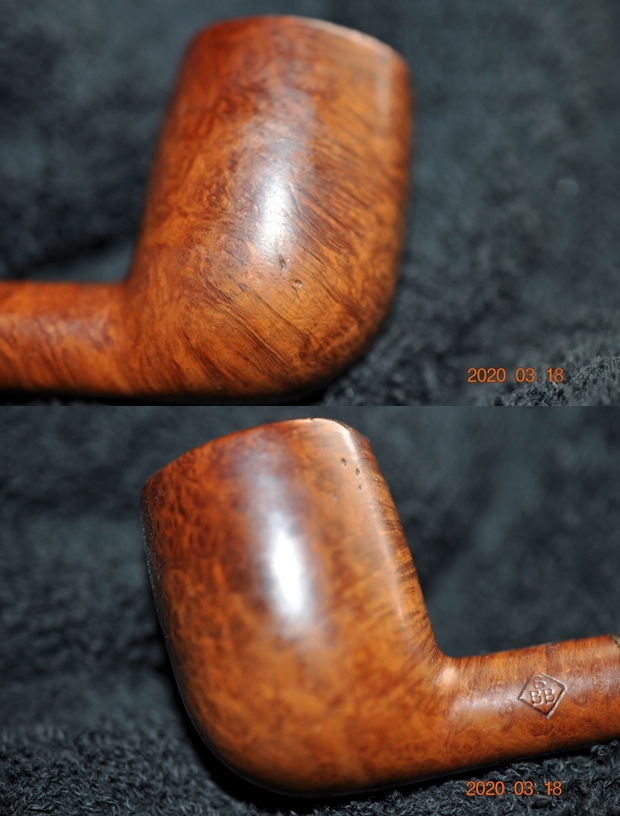
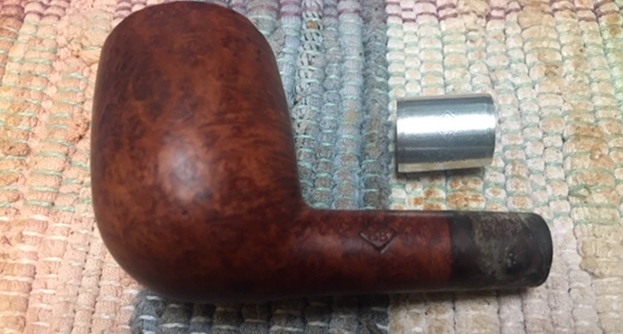
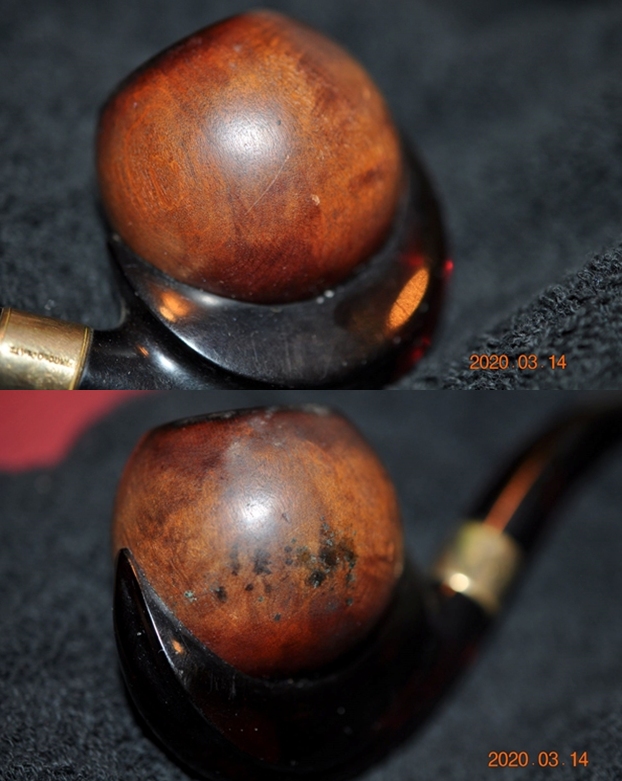
 The finish on the “500” series to me is not preferred. In the Kaywoodie “500” add above it describes the finish as a “New Miracle Finish” which lasts for years. As with the other “500”, to me the acrylic-like finish is not as attractive as a natural briar shine. The ‘candy apple’ shine I will remove in order to reveal better the grain beneath.
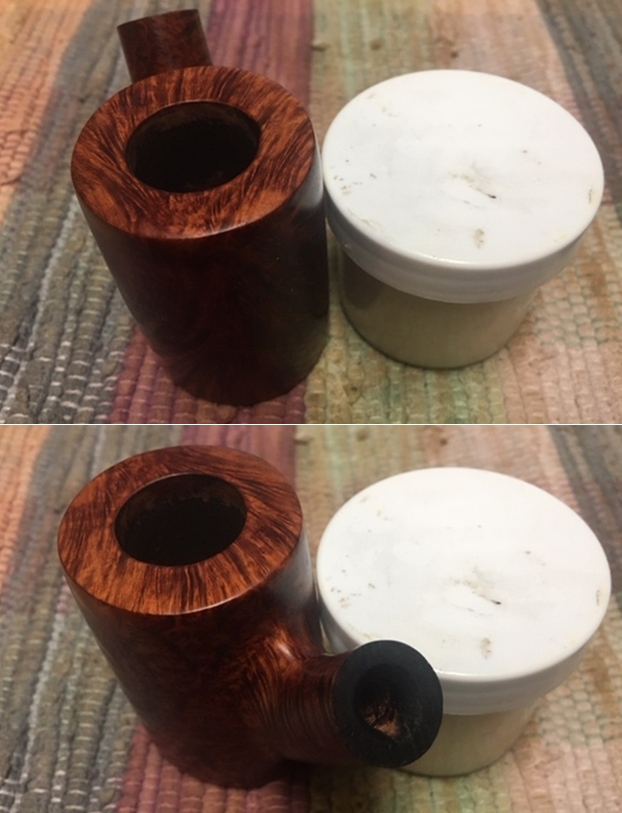
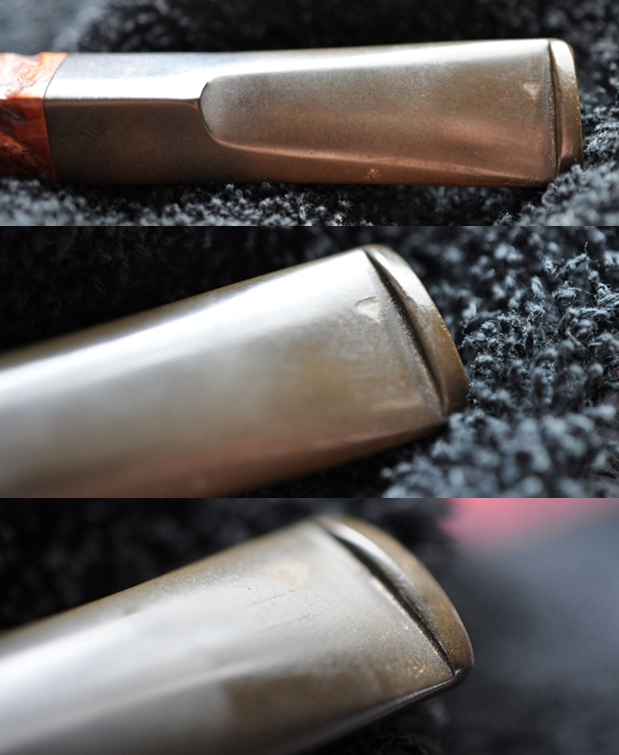
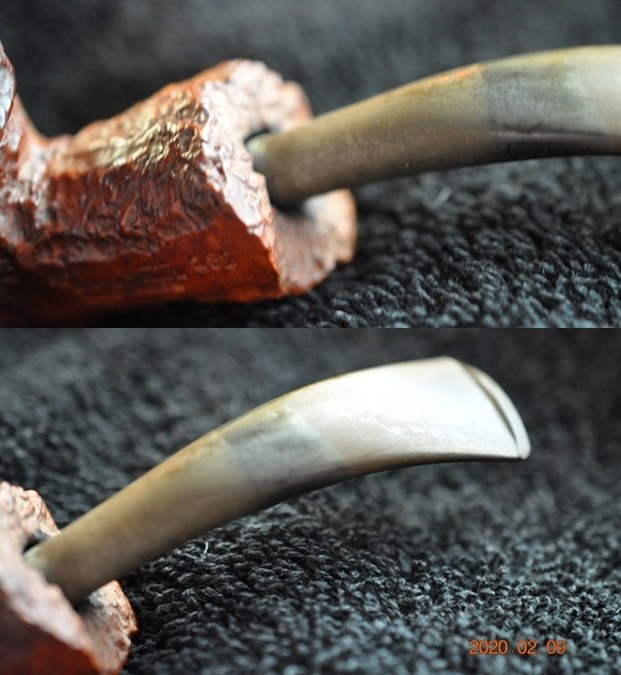
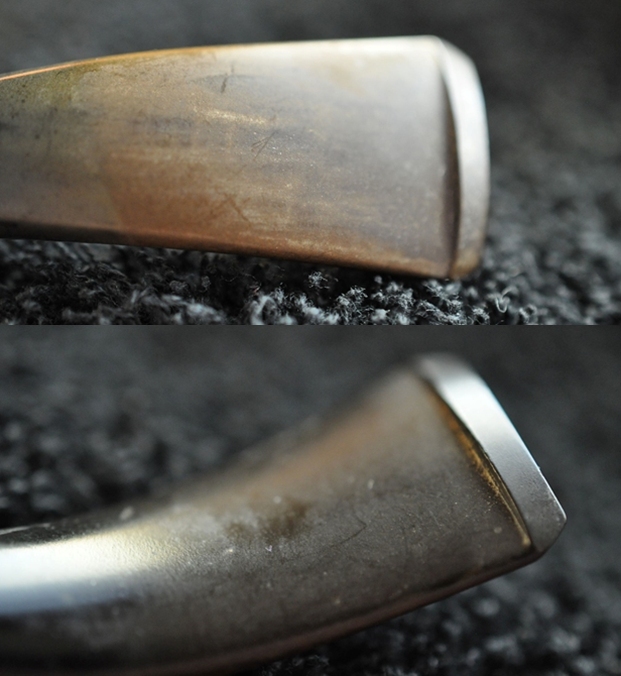
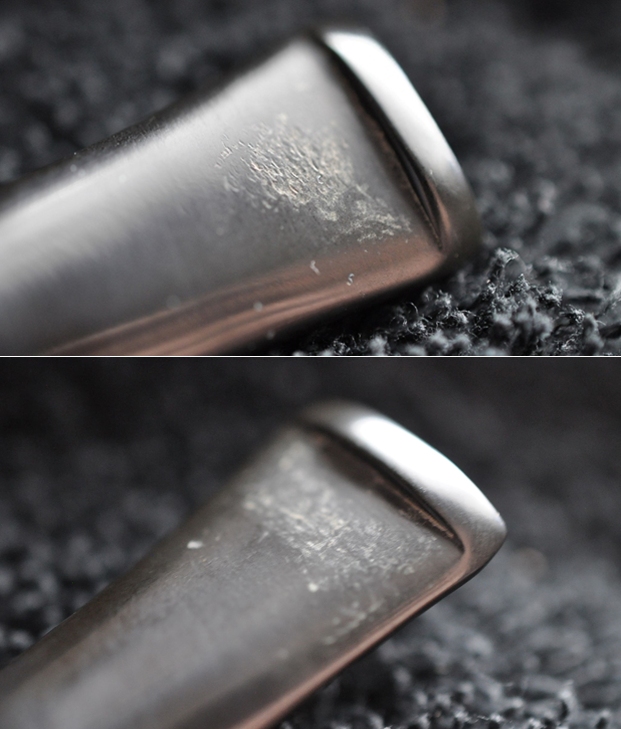
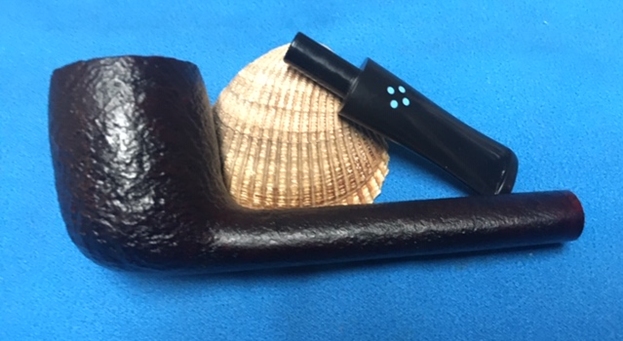
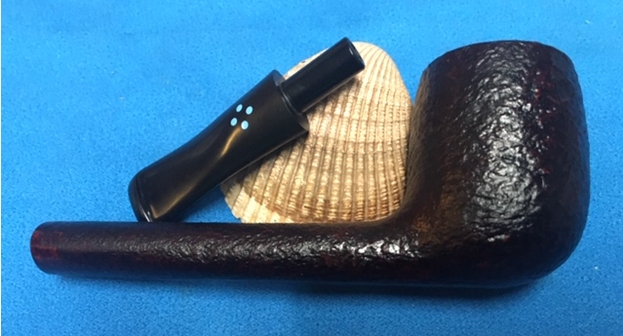
  The stem is thick with deep residual oxidation and the bit is caked with calcium deposits. There is tooth chatter, but the button seems to be in good shape.
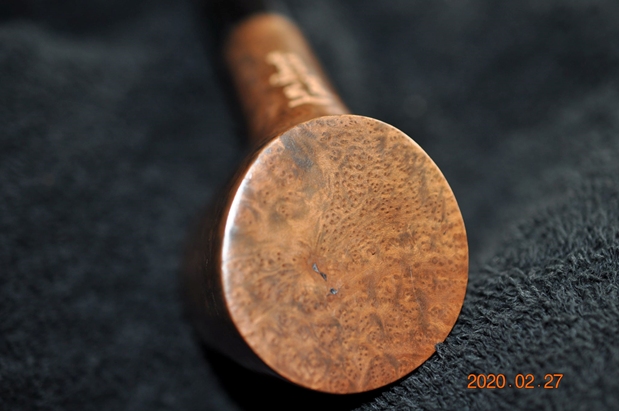
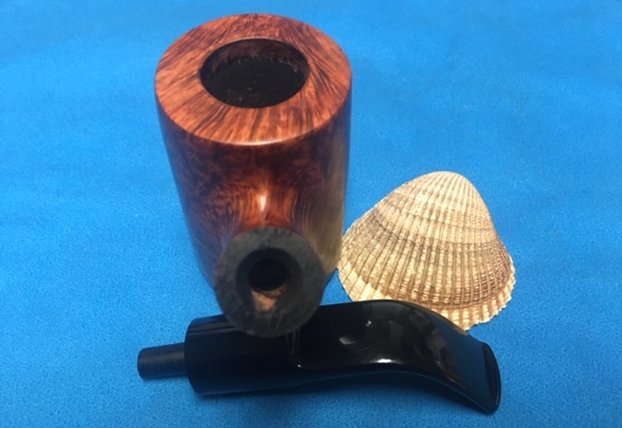
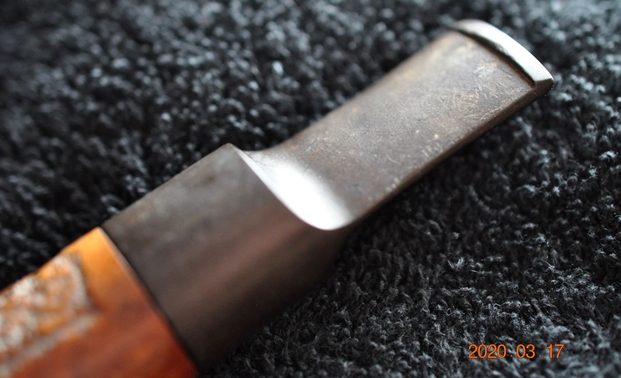
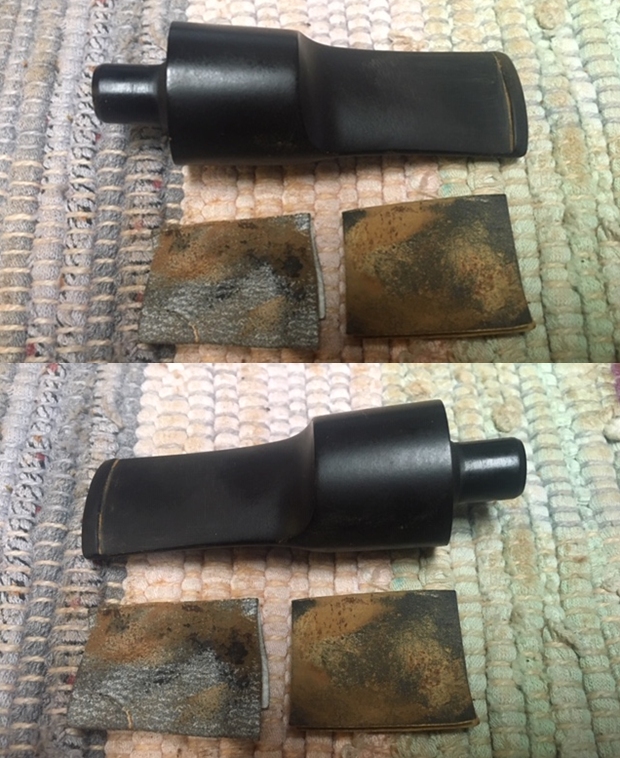
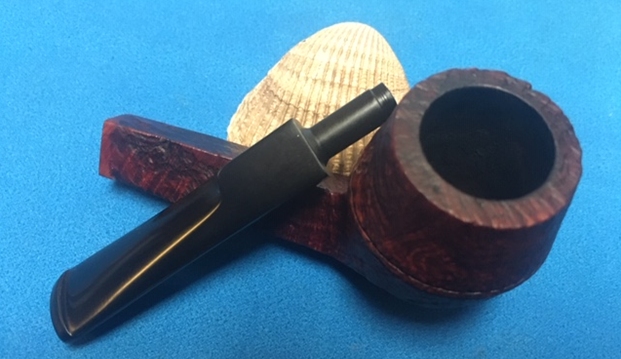
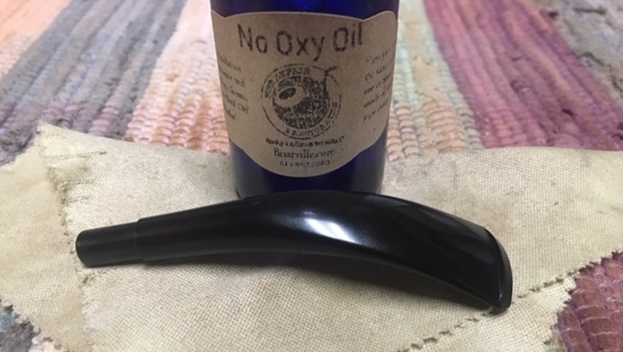
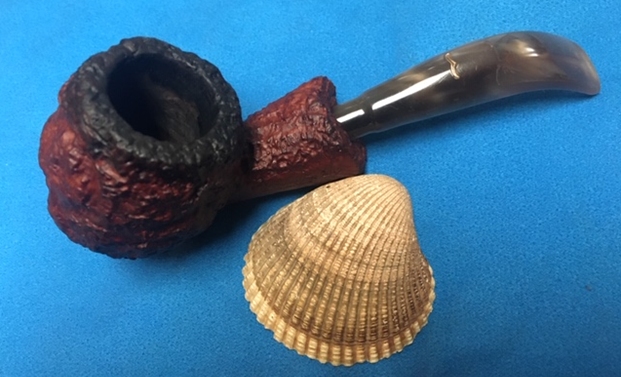
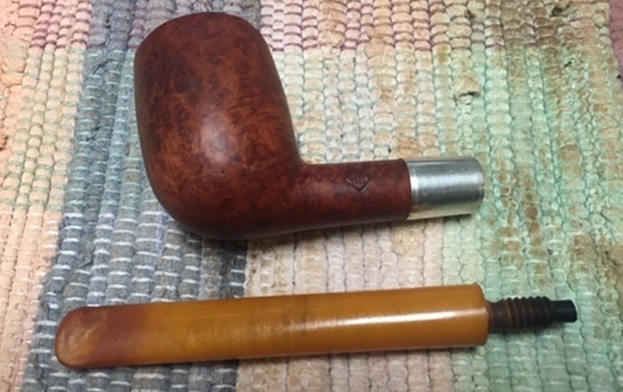
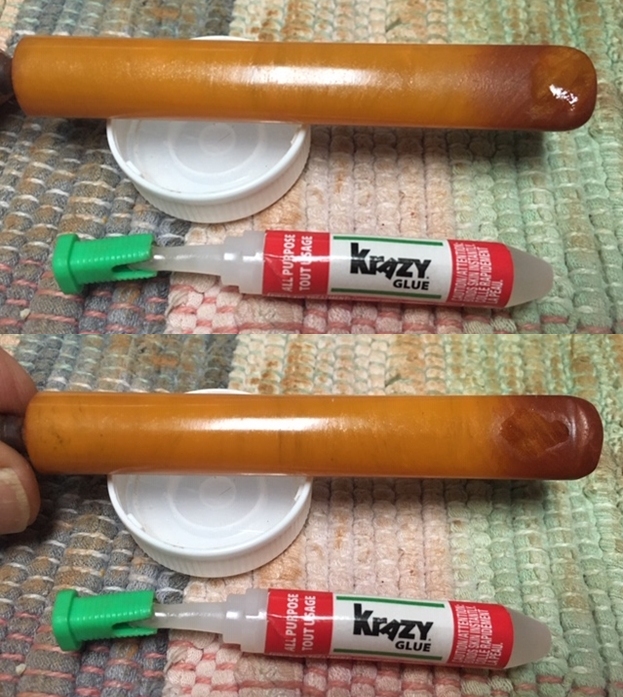
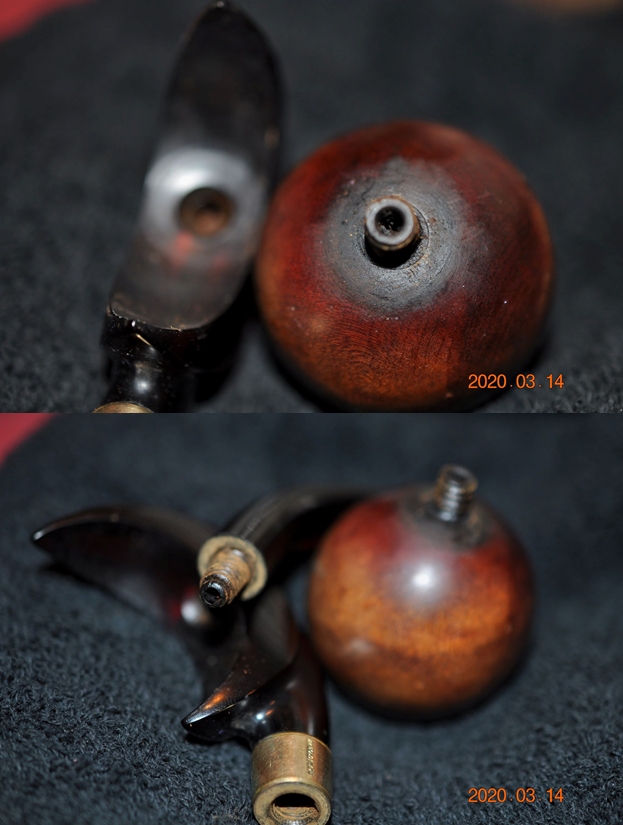
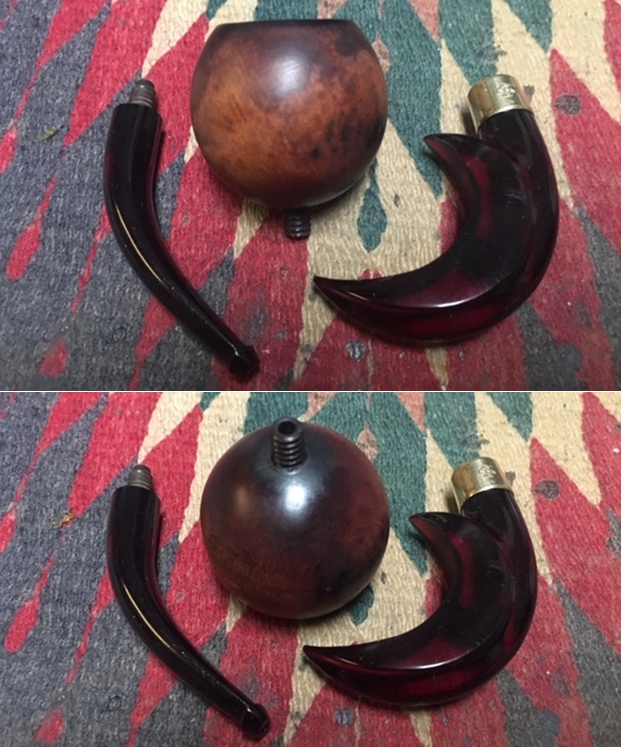
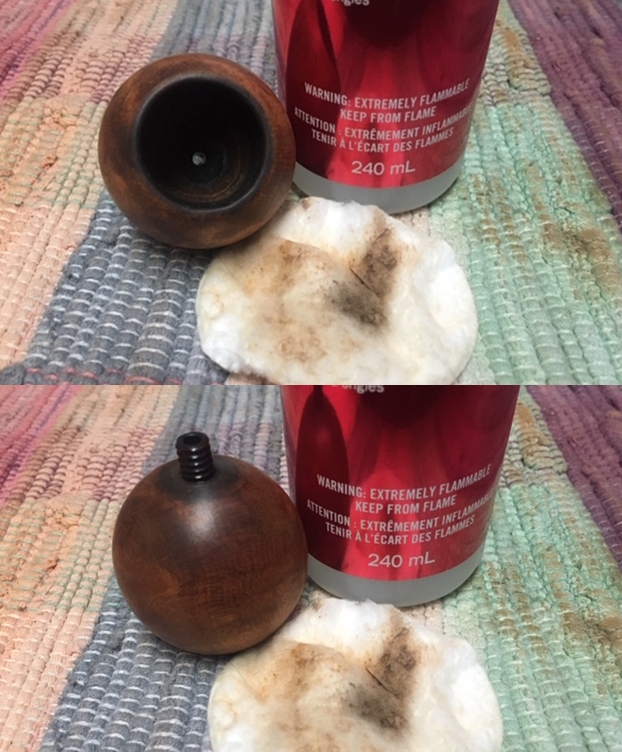
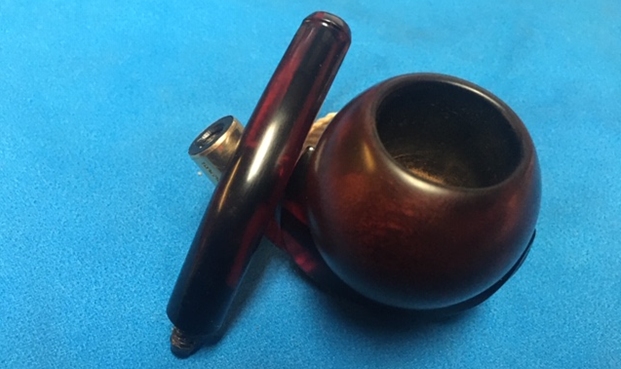
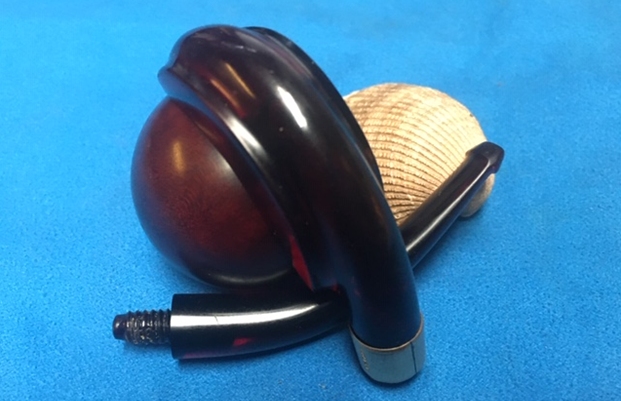
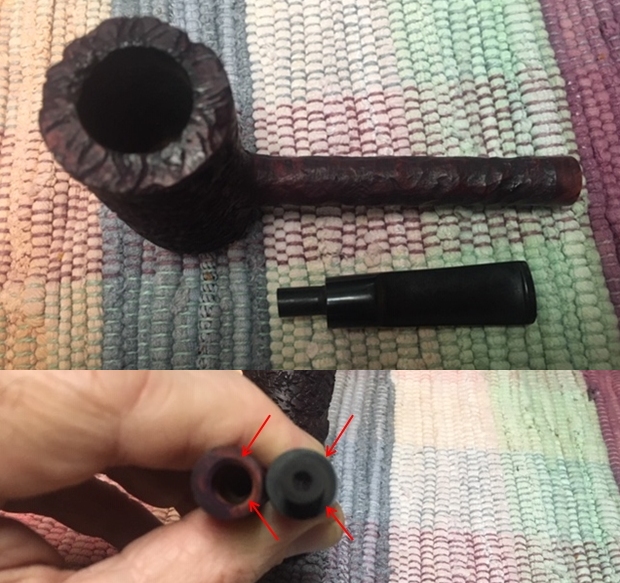
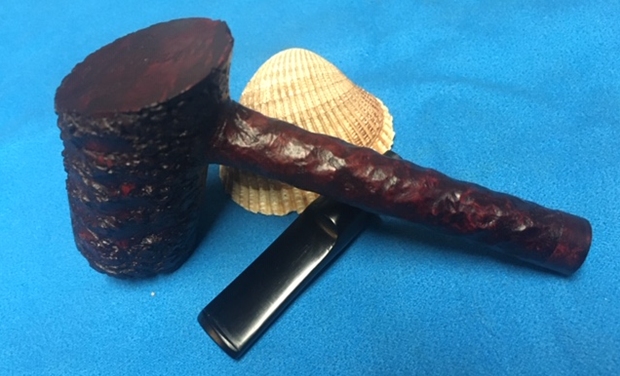
 One last issue is that the Kaywoodie screw in stem is slightly under clocked. This will need a small adjustment and may even correct itself through the cleaning. With the help of my mouse and box of matches, I’m able to show the stem’s orientation.
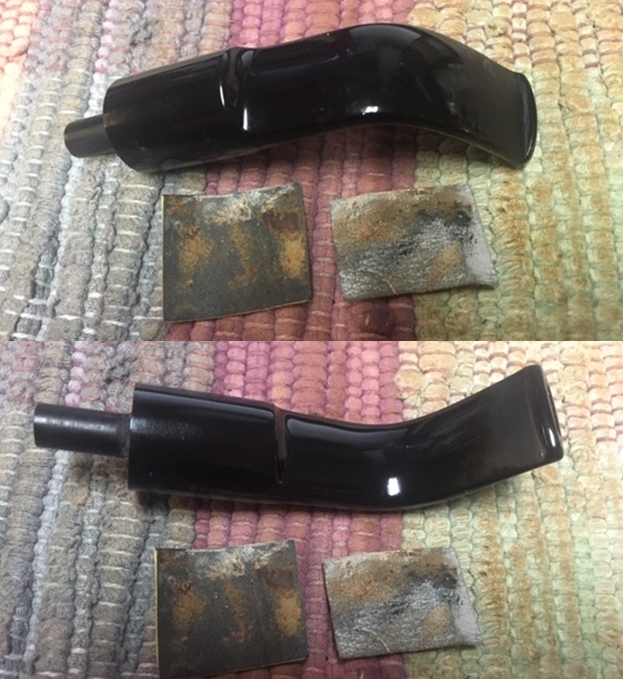
 To begin the restoration of the last of Paw’s pipes, I start by working on the stem. I first clean the internal airway with pipe cleaners wetted with isopropyl 95%. In order to reach through the tight quarters of the 3-hole stinger, a shank brush is used to help clean.
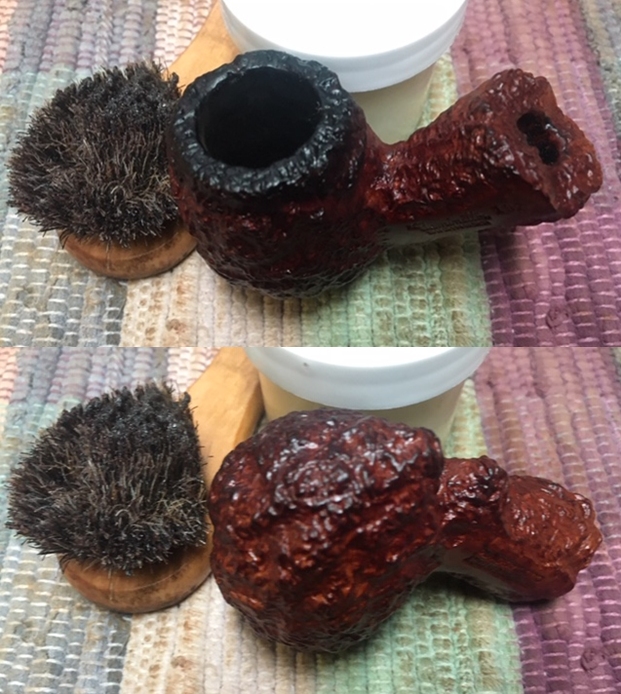
 To get a jump on dealing with the oxidation and calcium deposits, I take the stem to the kitchen sink and use a Soft-Scrub-like product here in Bulgaria called CIT. Using 000 steel wool, I scrub the stem with the CIT cleaner. The results look good, but I’ll probably use 240 sanding on the stem after seeing how the soak with Before & After Deoxidizer goes.
 The Kaywoodie “500” stem then joins other pipes in the queue for a soak in the Deoxidizer.
  After a few hours in the soak, the Kaywoodie’s stem is taken from the Deoxidizer and drained of the excess fluid to save it for future use! After I squeegee the liquid with my fingers, I again use a pipe cleaner wetted with isopropyl 95% to clear the remaining Deoxidizer from the stem’s airway and a cotton pad, wetted with alcohol, is used to wipe away oxidation raised by the soaking process.
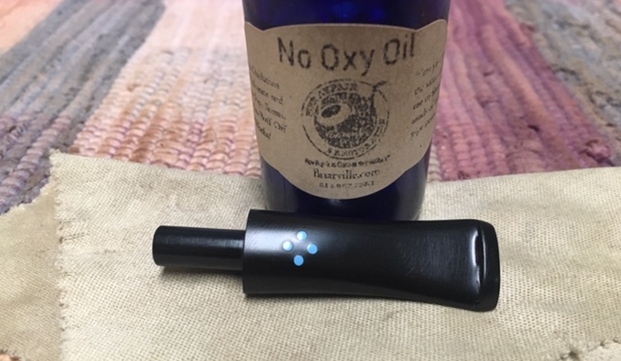
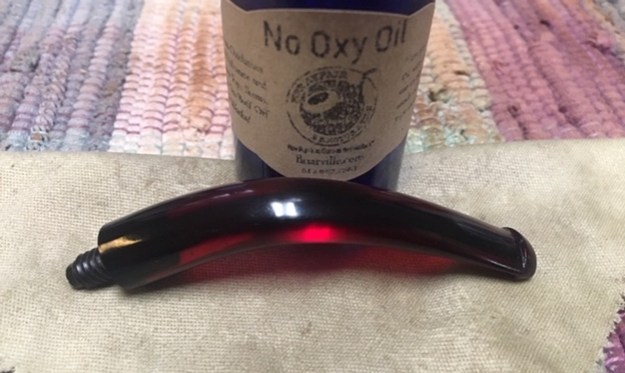
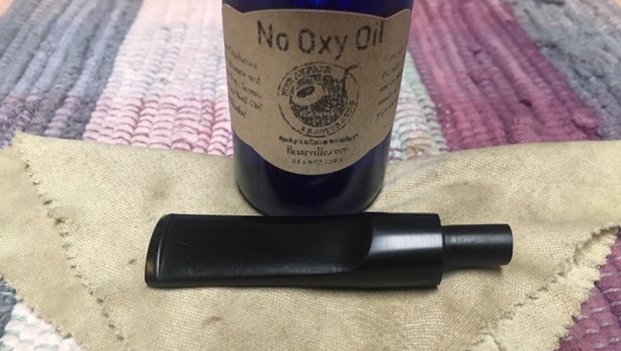
 Then, to condition the vulcanite stem, paraffin oil, a mineral oil, is applied to the stem and set aside to absorb.
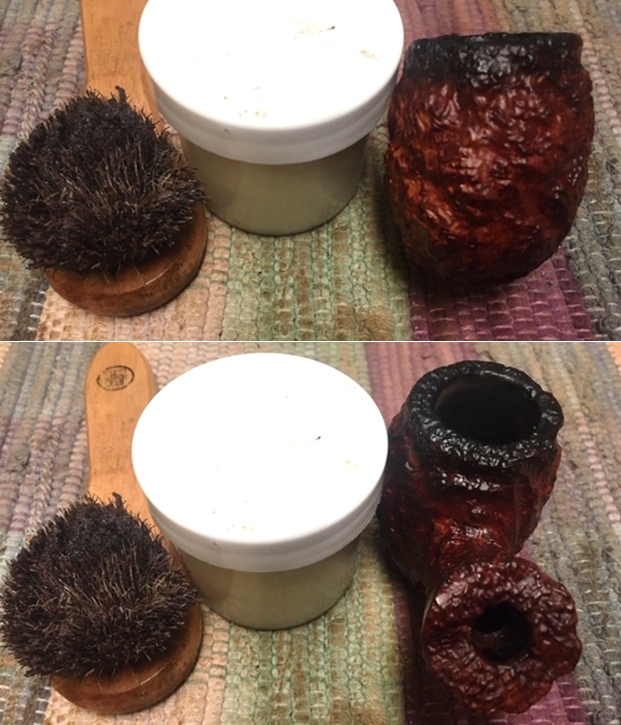
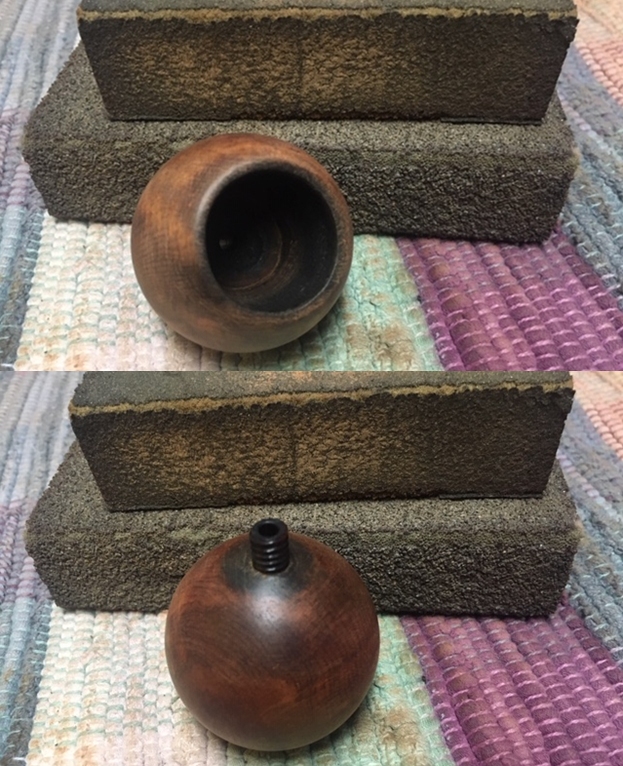
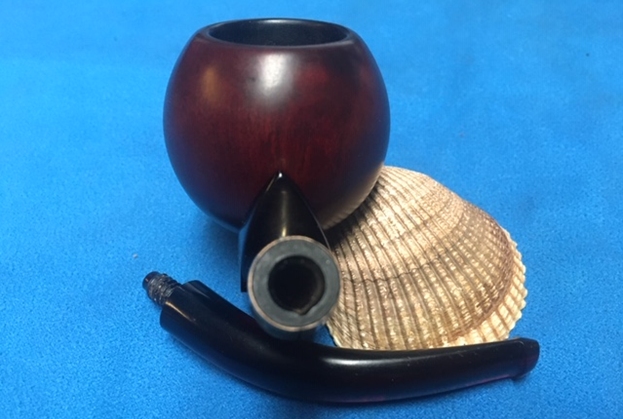
 Turning to the Kaywoodie “500” Bulldog stummel, the chamber has cake that thickens as it moves toward the chamber floor. To remove this cake buildup, the smallest blade of the Pipnet Reaming Kit goes to work on the small chamber. After using only this blade head, the Savinelli Fitsall Tool is employed to further scrape the chamber walls removing more carbon cake buildup. Next, using 240 grade paper wrapped around a Sharpie Pen, the last vestiges of carbon are removed from the chamber wall. After wiping the chamber with a cotton pad wetted with alcohol to clean the carbon dust residue, an inspection reveals a healthy chamber.
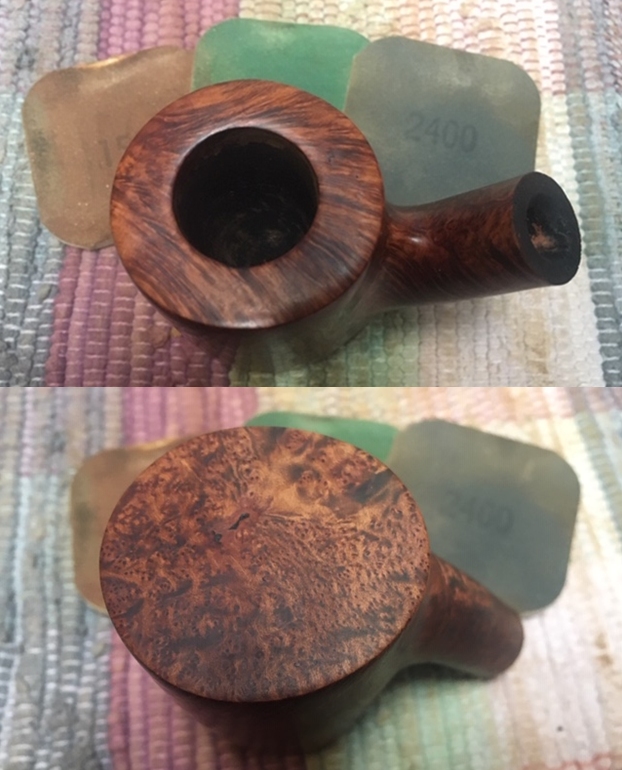
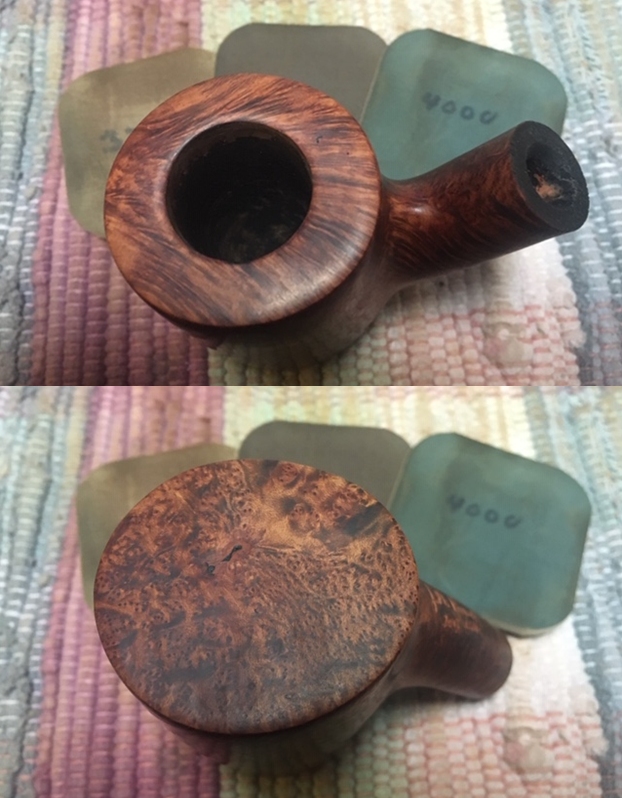
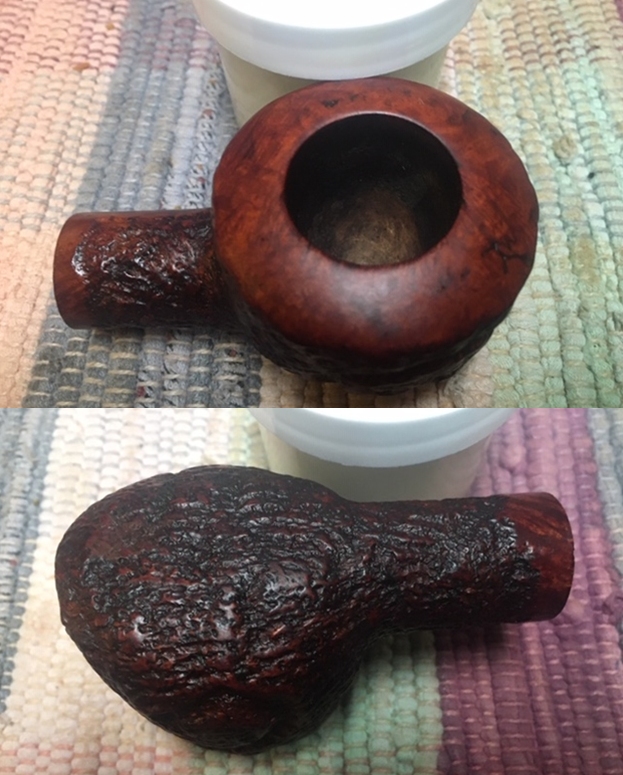
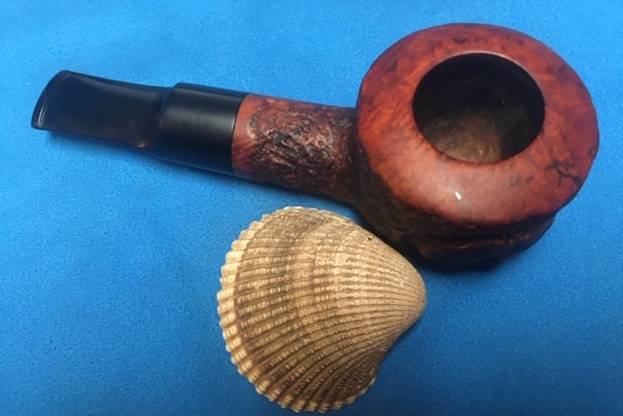
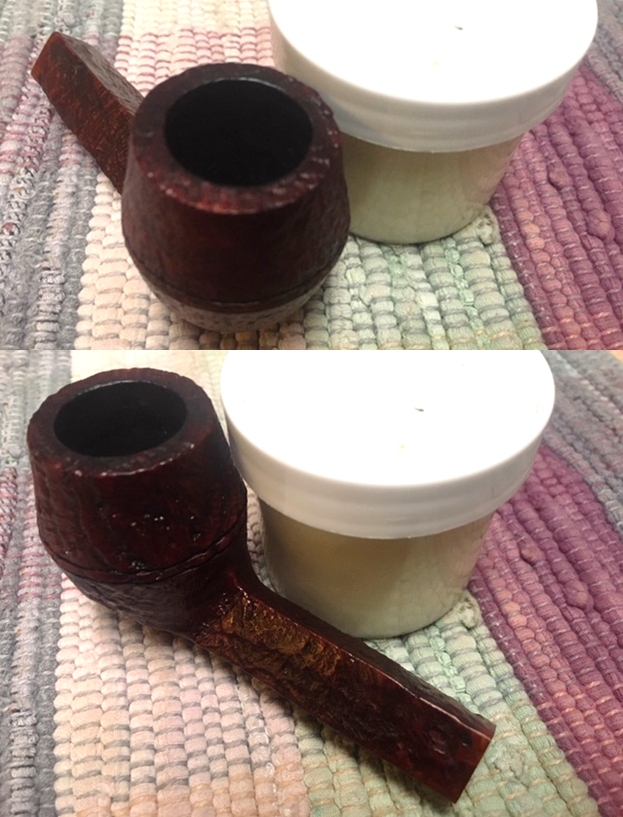
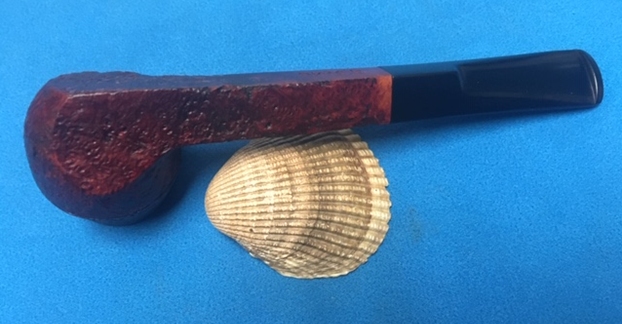
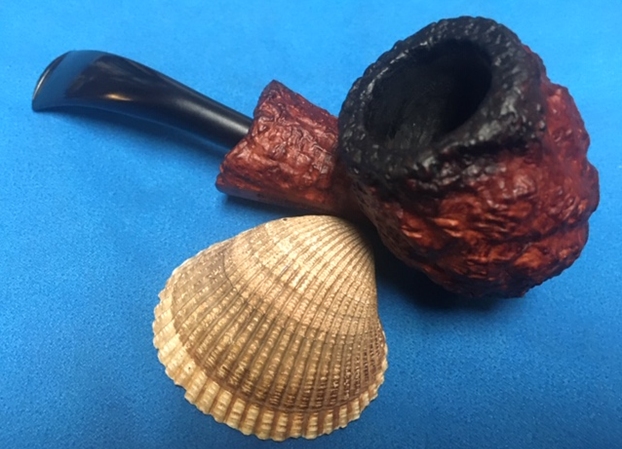
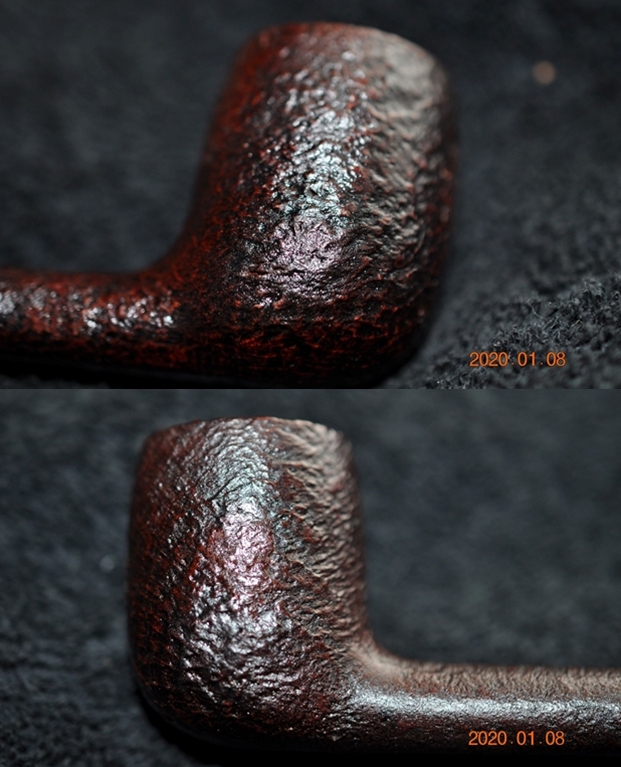
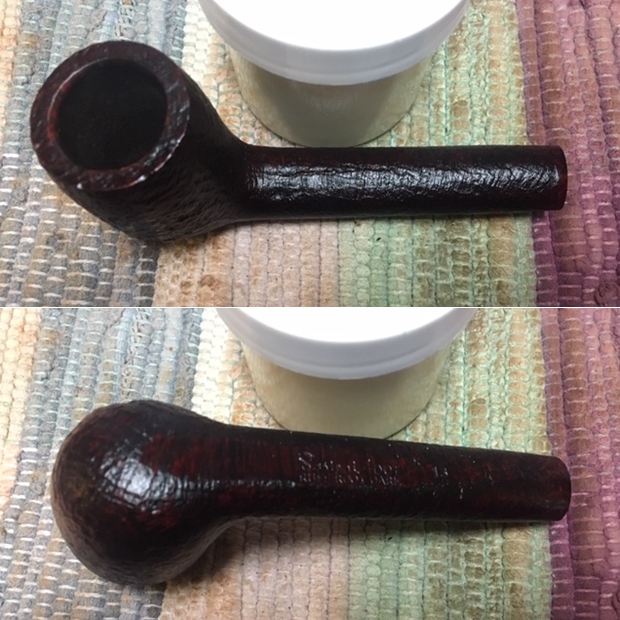
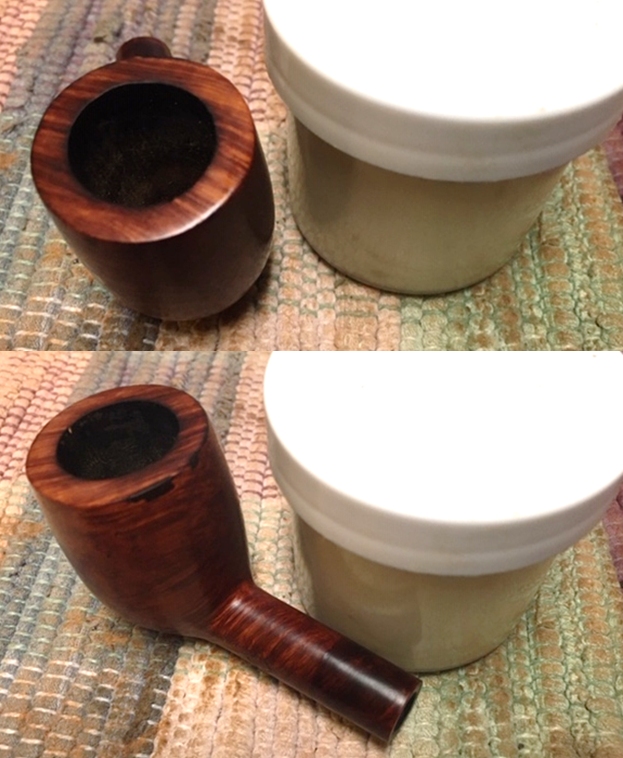
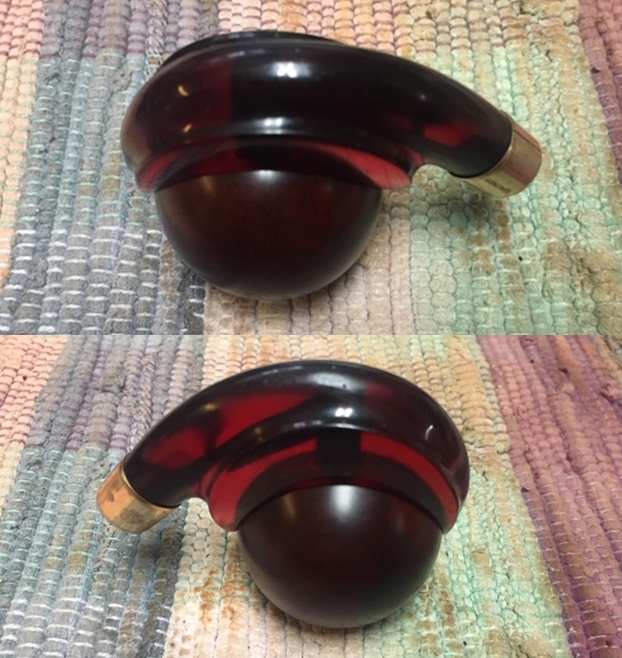
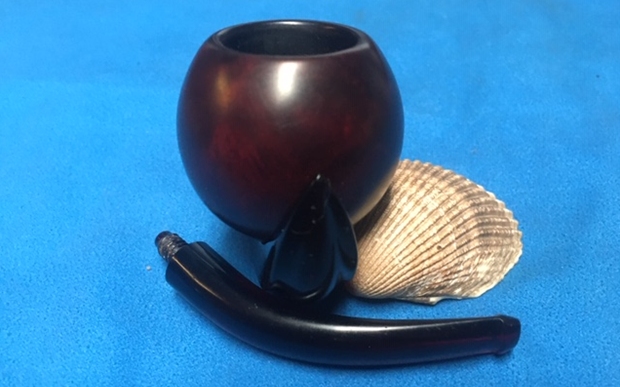
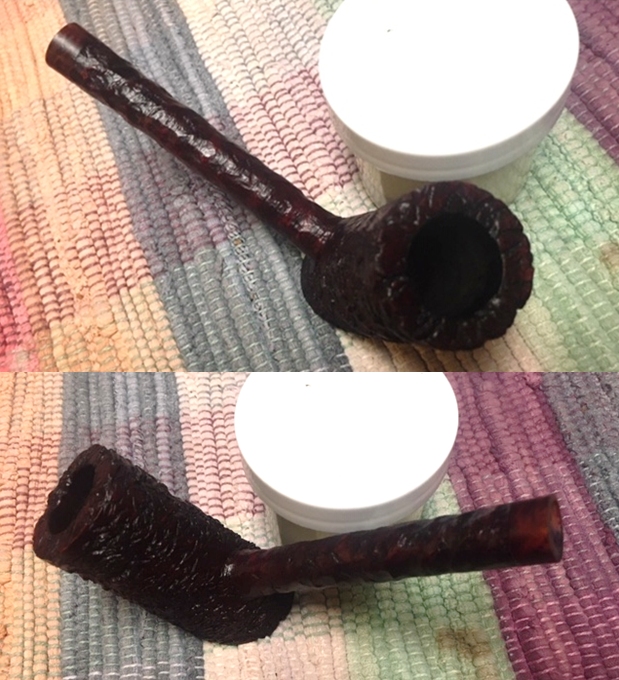
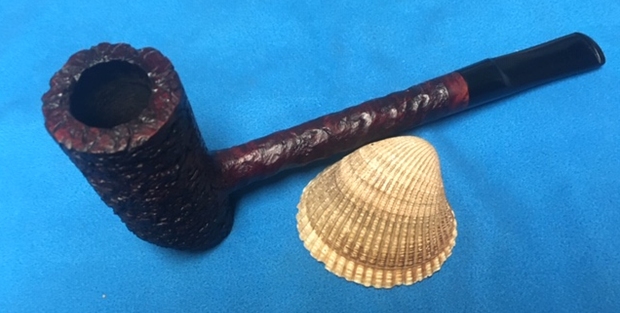
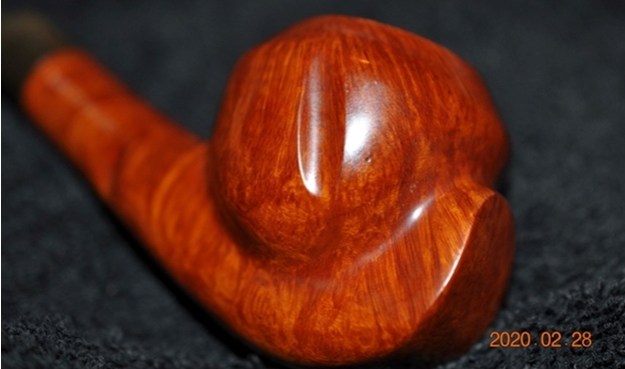
 Transitioning now to the external cleaning, the rim has some darkening from lighting and light lava flow. The stummel has normal grime. The second picture below shows the shininess of the acrylic-like finish. I’m interested to see how the finish holds up through the cleaning.
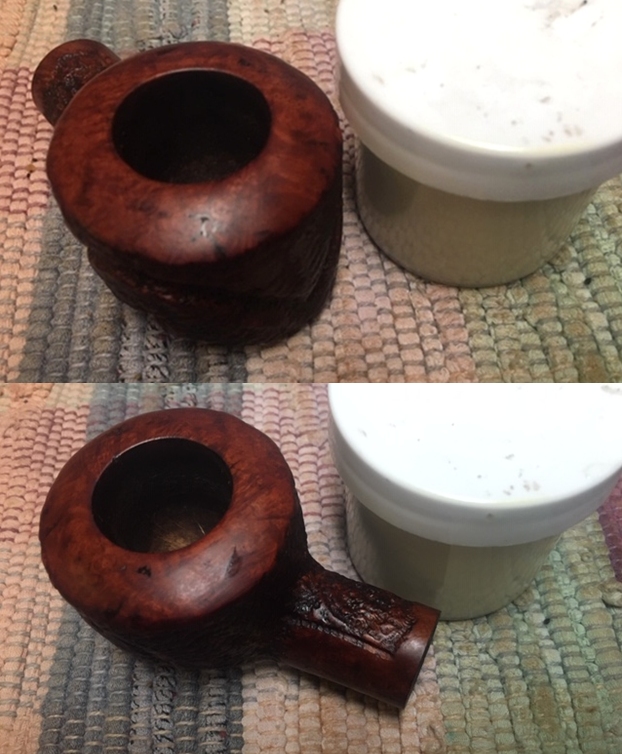
 Undiluted Murphy’s Oil Soap is used on a cotton pad to begin the external cleaning. A brass wired brush is also used to clean the rim. After some cleaning, the stummel is taken to the kitchen sink where with shank brushes and anti-oil liquid dishwashing soap is used to clean the mortise and airway using warm water. After a good scrubbing, the stummel is rinsed thoroughly and after returning to the worktable, I take a picture to show the results of the cleaning.
 Next, returning to cleaning the internals, I use cotton buds with pipe cleaners wetted with isopropyl 95% to do the job. The metal threaded shank insert is small, and this makes it difficult for the cotton buds to exit with their buds! The buds are pulling off the sticks in the close quarters and that makes retrieval difficult. I discover in the end, if I ‘unscrew’ the buds when extracting them, the threads help instead of grabbing the buds. This makes cleaning a bit slower. A small dental spoon is helpful is scraping the mortise walls and excavating old tars and congealed oils. Another helpful technique was folding two bristled pipe cleaners and twisting the ends together. This provides the action of 4 pipe cleaners in the mortise at one time enhancing the cleaning action. In time, the buds are coming out lighter and I transition to cleaning with a kosher salt and alcohol soak.
 The hour is late, and I’ll let the soak go through the night. Kosher salt and isopropyl 95% are used for the soak and this method of cleaning helps to freshen the internals for the new steward. I first fashion a ‘wick’ by pulling and twisting a cotton ball. It is then inserted and guided down the mortise and airway with the aid of a stiff wire.
 The chamber is then filled with kosher salt, which leaves no aftertaste, and placed in an egg carton for stability.
  Using a large eyedropper, the chamber is then filled with isopropyl 95% until surfacing over the salt. After a time, the alcohol is absorbed, and I top the bowl off once more with alcohol and turn out the lights.
 The next morning, I discover that the salt and wick have soiled little which usually is a good indicator that last night’s cleaning was effective.
  After tossing the expended salt in the waste and clearing the salt from the stummel with the use of paper towel and by blowing through the mortise, I use a few more pipe cleaners to complete the internal cleaning.
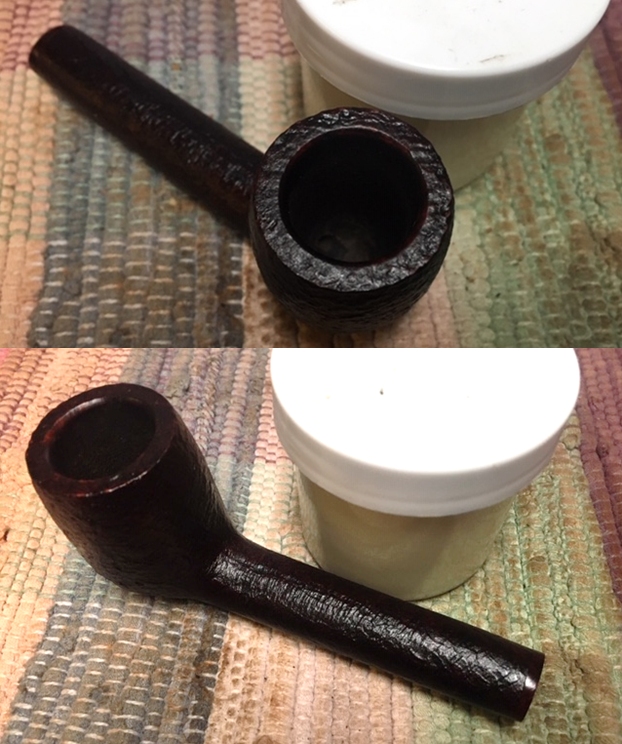
 Next, I take another look at the stummel surface and finish. As with Paw’s Kaywoodie “500” I restored for Joe last year, the candy apple shine of the acrylic-like Kaywoodie finish lingers. My preference is to remove the finish and to get down to the natural briar.
 Another reason for removing the old finish is the fact that it’s already been removed on the rim from Paw’s knocking on the back side of the rim. Raw briar is already exposed here but the wear on the rim edge also shows where the finish is either gone or very thin.
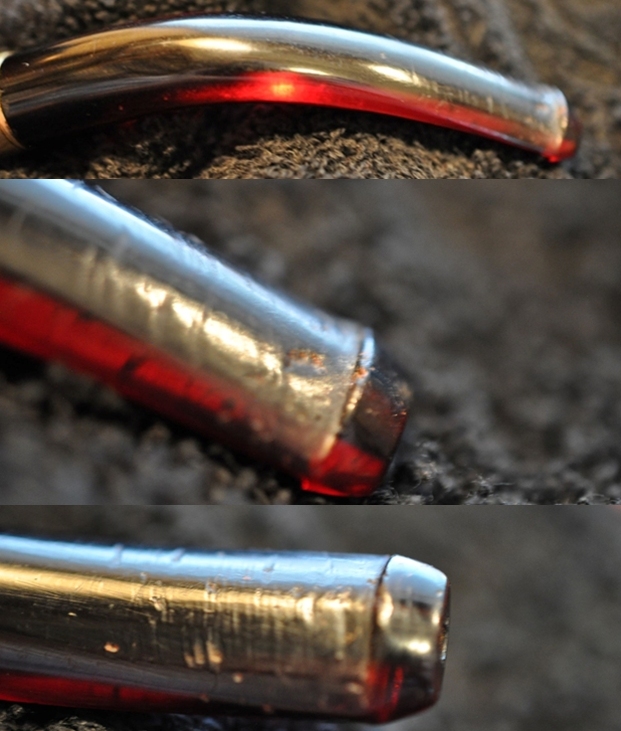
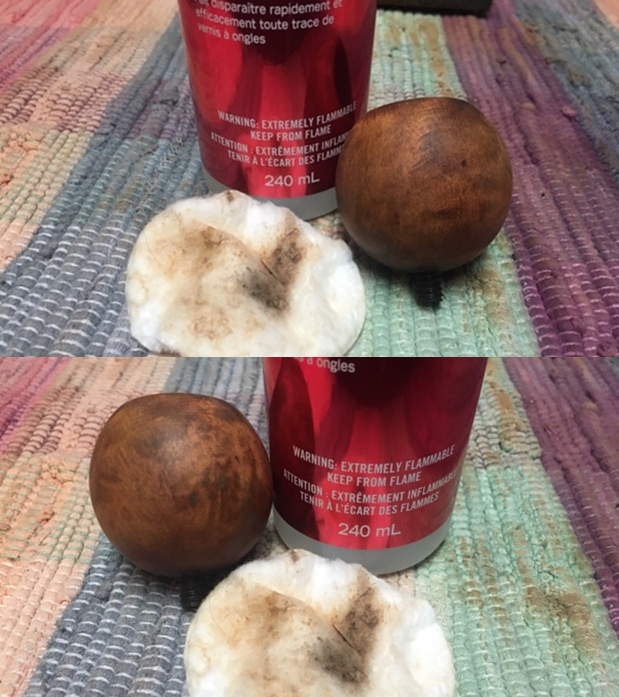
 The most efficient way I found to remove the Kaywoodie “500” finish from my previous experience is with acetone. Starting with cotton pads I incessantly rub the surface with the cotton pads wetted with acetone. From the very beginning, the red dye begins to show on the cotton pads as the acetone breaks down the old finish.
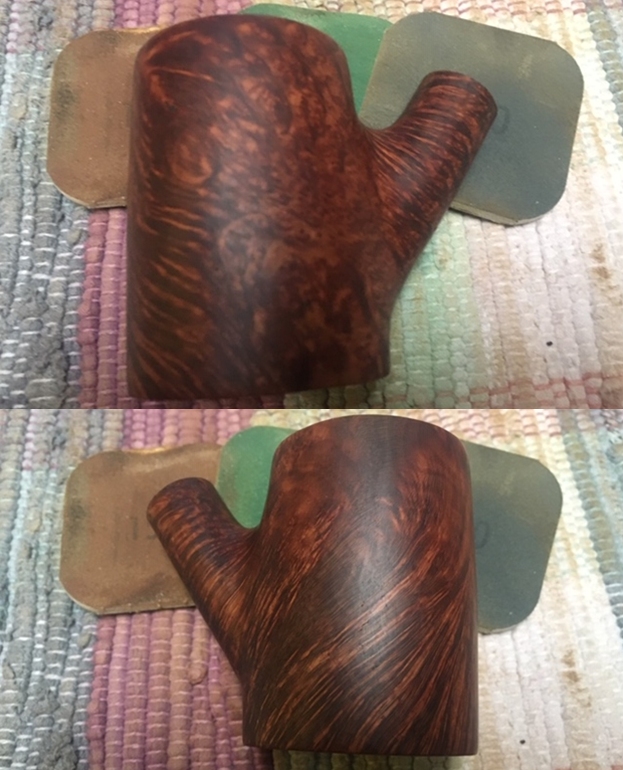
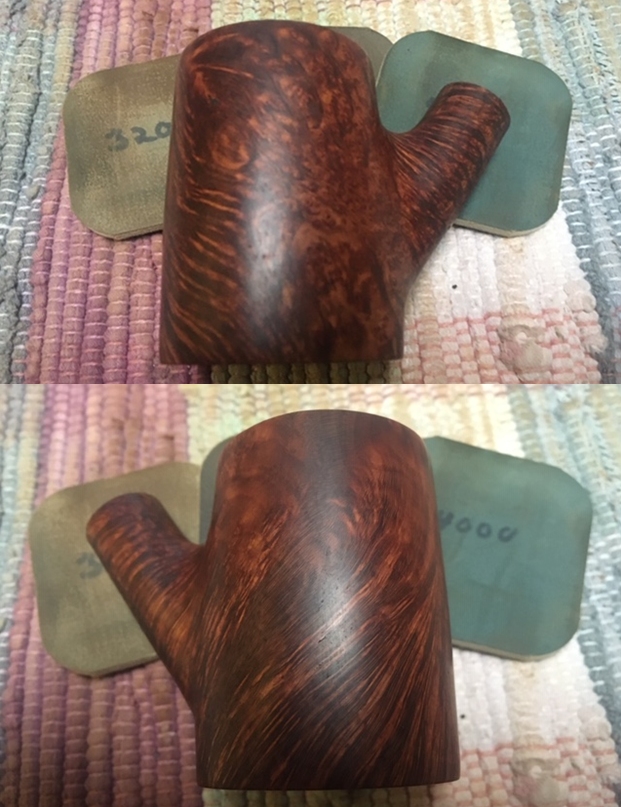
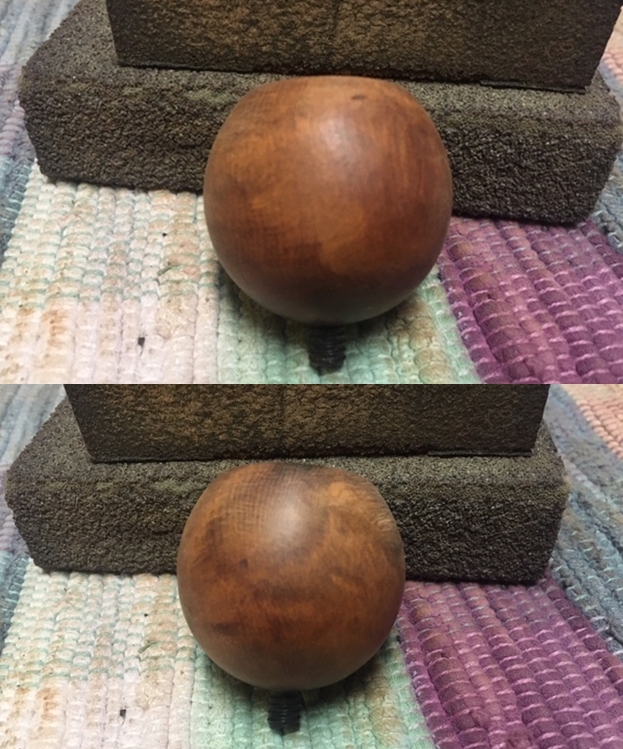
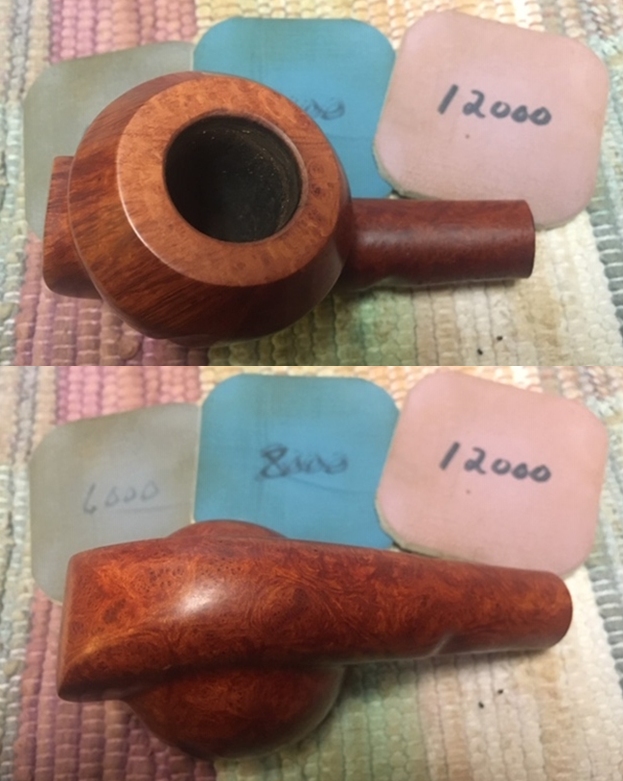
 The next picture shows the progress on the stummel surface. The shiny surface indicates old finish hanging on. Next to it, you can see splotches of dull surface – the goal!
 The progress is slow with the cotton pads, so I transition to utilizing 000 steel wool wetted with acetone. This does the trick as the following pictures show. I’m amazed at the grain that I can now see, and it’s not half bad! Even though I do not prefer the thick acrylic-like finish, the upside of it at this point is that it has successfully protected the stummel’s surface from damage. Most of the nicks and scratches that could be seen before were superficial damage to the finish shell and not to the briar. As I inspect the stummel, I’m seeing a practically pristine surface.
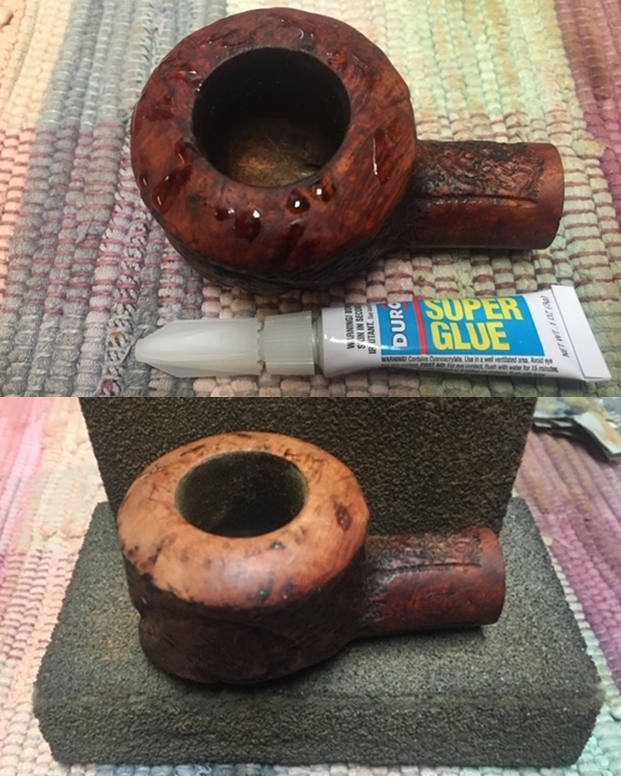
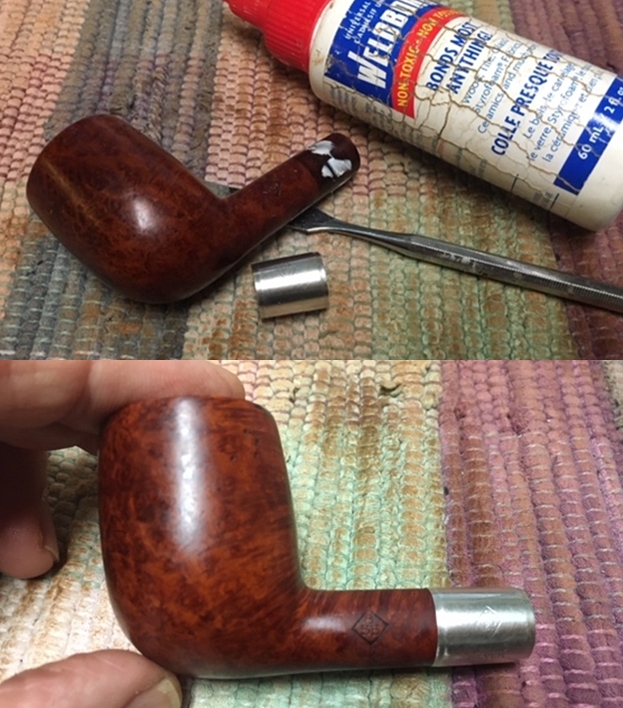
 Before moving further with the stummel’s finishing, the divot on the rim needs attention. It’s located on the internal edge just in front of Paw’s skinned rim backside. It’s small but filling it will provide a better rim presentation.
 I fill the divot by mixing a very small amount of thick CA glue with briar putty. After placing both the briar dust and glue on the mixing palette, I use a toothpick to draw the briar dust into the glue until it reaches the thickness of molasses at which time I apply it to the divot.
 I use an accelerator to quicken the curing time of the patch. I next use both flat and half-round needle files to remove the excess briar putty patch.
 After doing the primary removal with the needle files, 240 grade sanding paper finishes the patch blending at this point.
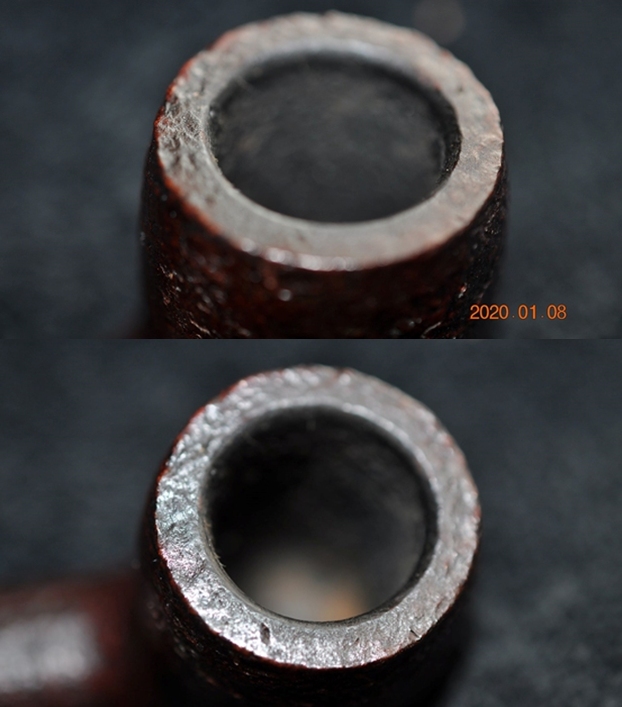
 With the 240 paper in hand, I do a quick internal rim edge sanding. There is a dark ring remaining on most of the internal rim that is cleaned up.
 Taking a close look at the rims condition, there are nicks throughout the external rim’s edge. There are also pits here and there which need cleaning.
 I decide to do a very gentle cosmetic topping of the stummel to clean the rim and give it a fresh definition. Using the chopping board for my topping board, I first place 240 grade paper on it. With the stummel inverted, I give the bowl a few rotations and check.
 Then, after a few more rotations, I’m satisfied. I’m not concerned with Paw’s aft knocking damage – that remains. I’m concerned that the rest of the rim enjoys fresh rim lines. This is especially with a Rhodesian and Bulldog – the twin dome lines that encircle the bowl give these pipes their unique shapes.
  Then, switching to 600 grade paper on the topping board, the stummel goes a few more rotations to smooth things out further.
 Next, I use sanding sponges to further erase minuscule nicks and scratches and to start the process of coaxing out the grain that has been waiting beneath the heavy finish. Starting the sanding with a coarse sponge is followed with a medium then light grade sponge. I avoid the nomenclature except with the final sponge.
 HOLD THE PRESS! – At this point I had moved into the process of applying the full regimen of micromesh pads to the “500” and Steve had published a really good write up on rebornpipes
 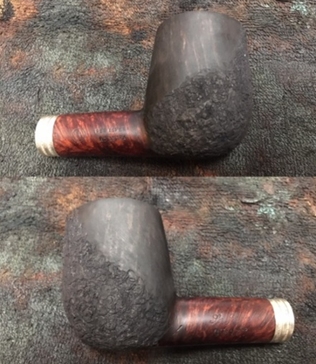 that caught my attention which I was reading as I sanded (See: Operation Rescue – “My Dog Ate my Ser Jacopo L1 Billiard!”). He described the process of applying rustication, a skill that I’ve not had too much experience with, and I was very interested in the processes he described. One of these processes that dovetailed with my current musings about the Kaywoodie “500” on my table was the staining process. Steve described in his write-up using a black undercoat stain followed by a mahogany on the smooth briar parts of his project (See picture). He also described the reasoning and the other micro steps leading into and out of this process. The motif of the Kaywoodie “500” series is obviously red, but the grain underneath is dark to stand out in contrast to the light wood. Last year when I restored Paw’s other Kaywoodie “500” I had used a dark brown undercoat followed by an Oxblood overcoat. This achieved results that emulated very well the “500” red theme. The question in my mind after reading Steve’s write-up was the use of black versus dark brown. I sent Steve an email with that question that resulted in several emails back and forth where Steve responded to more questions raised about how his approach to undercoat staining was different than what I had done and probably, much more effective in creating the affects desired. Without repeating the full email chain, the process difference that I’m trying out with the Kaywoodie “500” from Steve’s input is to move the undercoating process before the micromesh process and to focus more on the undercoat process of removal of the excess dye. So, now you know why the presses are on hold!
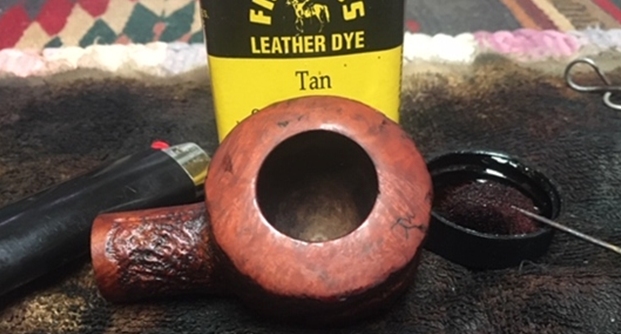
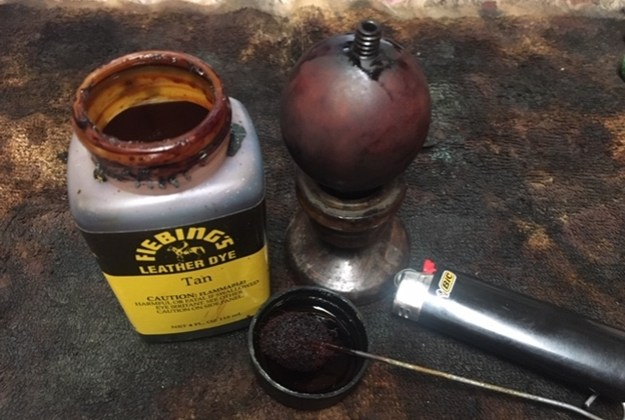
Therefore, I stop the micromesh process mid-stream and plan to insert Steve’s approach to provide an undercoat and see how it goes! Regarding the question of the use of black or dark brown for the undercoat, Steve saw no difference in the two. I understand why now – the point of an undercoat is to darken the grain threads for the most part and in his approach, the undercoat is, in large measure, removed but for these effects. I decide to apply Fiebing’s Dark Brown Leather Dye as the undercoat. I assemble on my desktop the needed components. With spring in full swing here in Sofia, I’m working on my 10th floor Man Cave balcony and enjoying the views while I work. To begin, after wiping the bowl with alcohol to clean it, I warm the stummel with a hot air gun (inside again for a few minutes). This warms the briar with the result of opening the grain to be more receptive to the dye.  Then, back on the Man Cave, I use a folded pipe cleaner to paint the aniline dye onto sections of the briar surface. While still wet, the lit candle ‘flames’ the dye. The flame combusts the alcohol in the dye leaving behind pigmentation in the grain. I cycle around the bowl painting and flaming twice to make sure the coverage is thorough.
  I then put the stummel aside for the initial undercoat to dry. The following pictures show the dense appearance of the flamed surface.
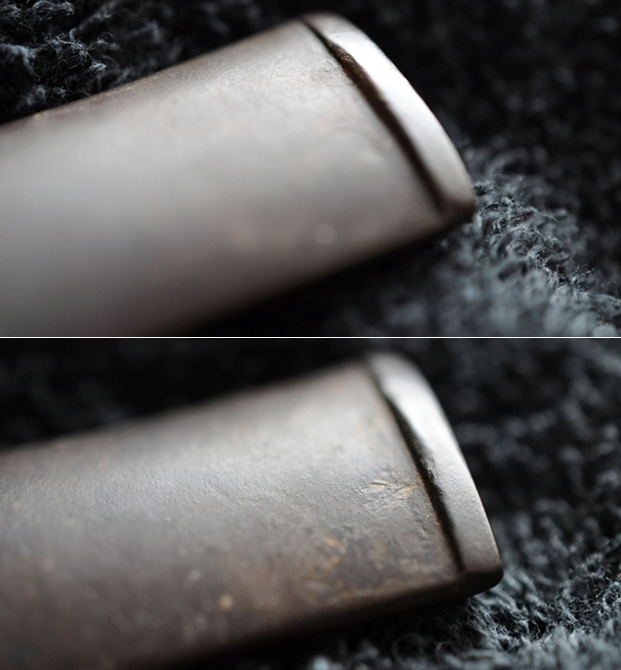
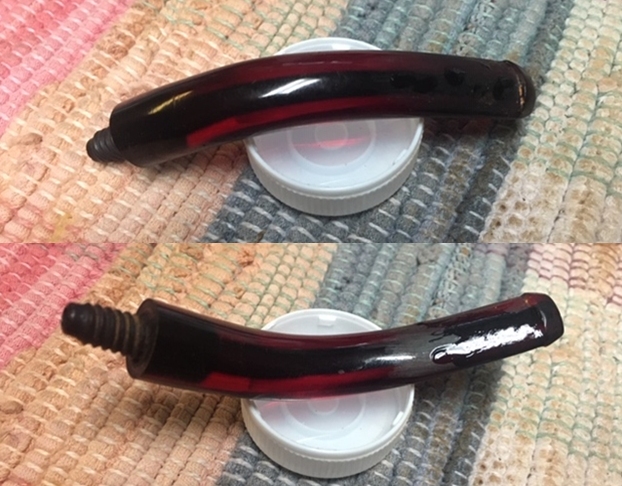
 Turning now to the stem, there is very little chatter on the bit. The lower side pictured in the second picture only has a small button compression that I will address.
 Deep oxidation is still hanging on especially on the shank side of the stem. The lighter exposure of the picture helps to show what I can see with the naked eye.
 To address the lower bit button compression, I use the heating method of expanding the vulcanite, a rubber compound. With the flame of a Bic lighter, the bit is painted and as the vulcanite heats, the dent hopefully reclaims lost territory. The result is good. Only sanding will be necessary.
 The flat needle file is used to freshen the button and 240 grade paper sands the bit, and the minor chatter is erased.
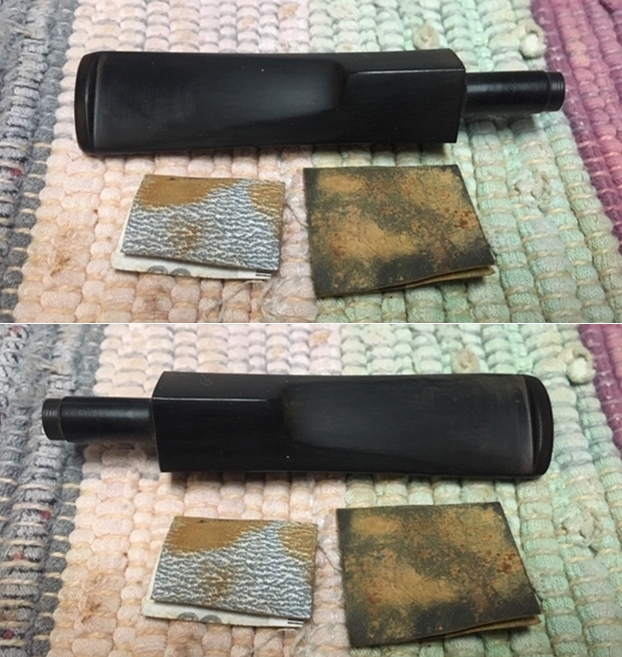
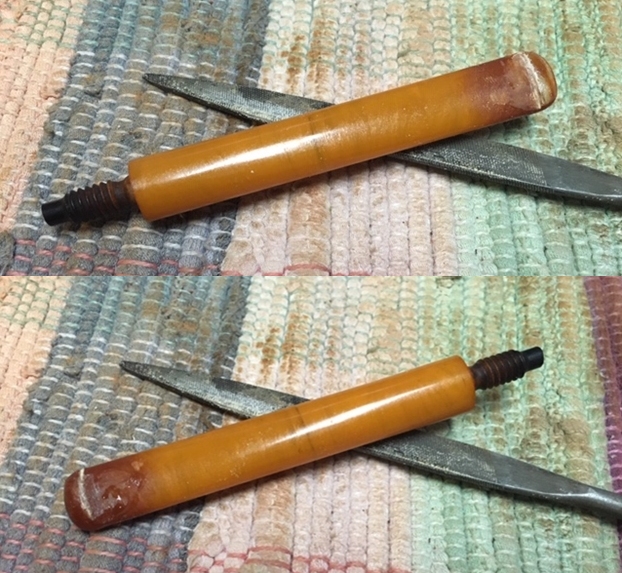
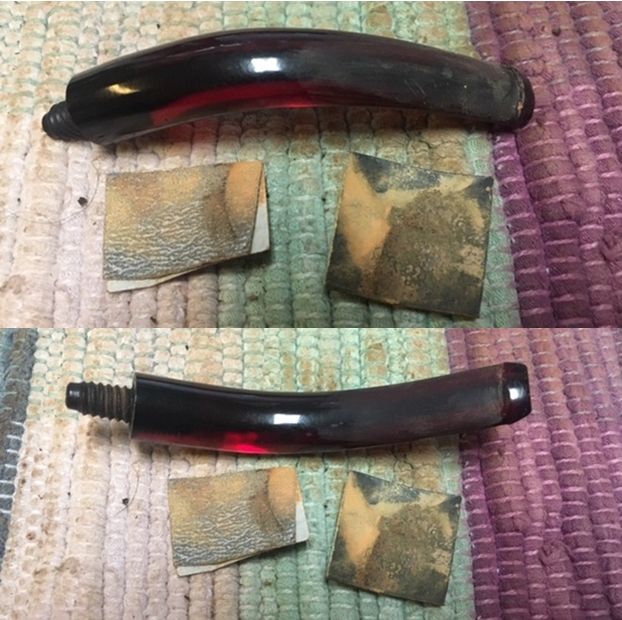
 I expand the 240 sanding to the entire stem to address the latent oxidation. I do not relish the thought of the oxidation emerging during the later polishing stages. I use a plastic disk I fabricated for this purpose that I pinch up against the stem facing to guard against shouldering the edge of the stem. The disk works well to maintain a crisp facing.
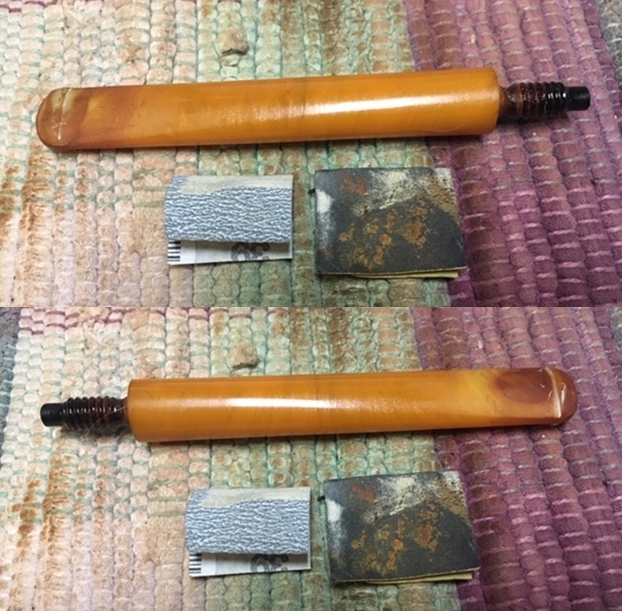
 Next, the entire stem is wet sanded with 600 grade paper followed by an application of 000 grade steel wool. The 3-hole stinger also receives attention from the steel wool.
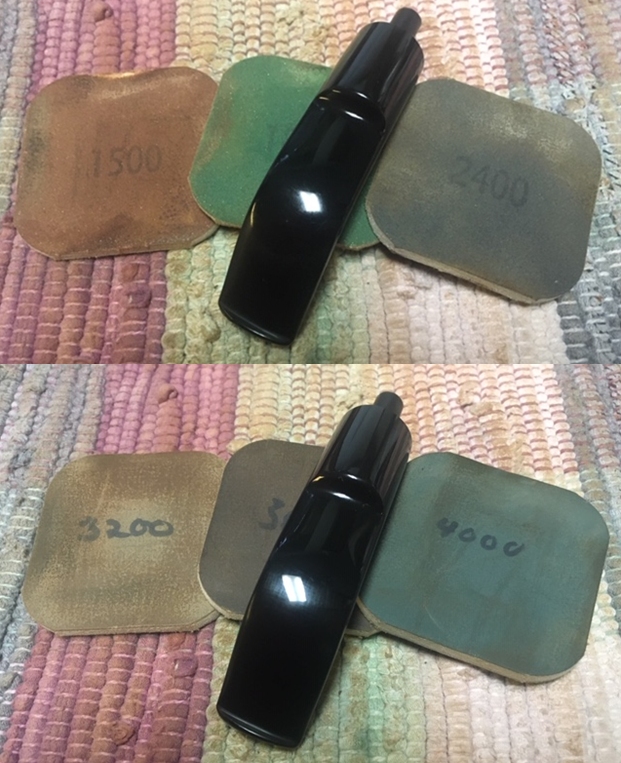
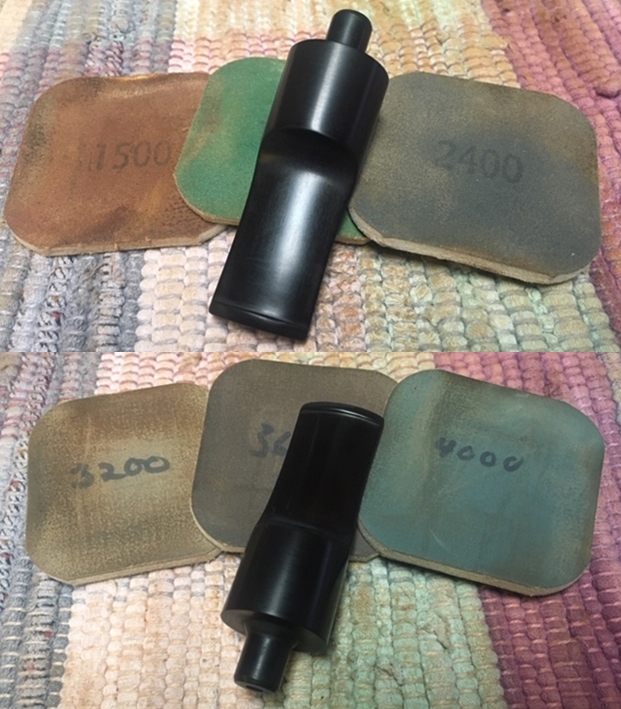
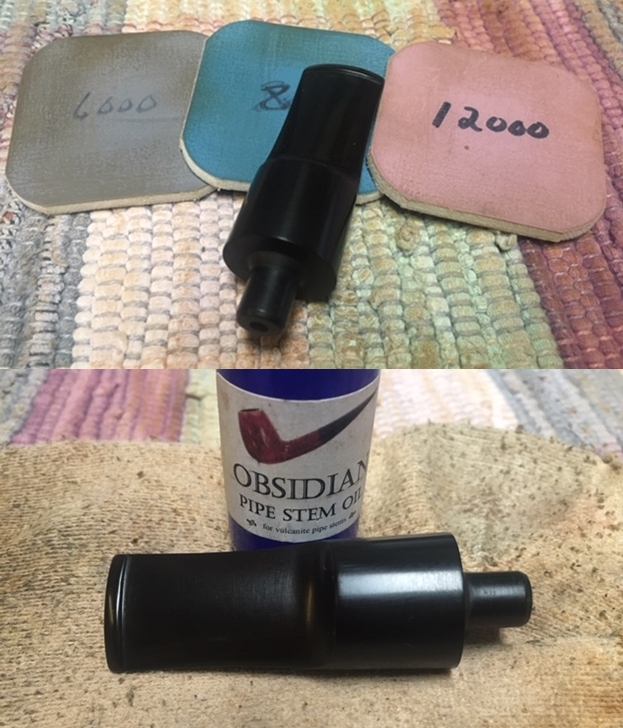
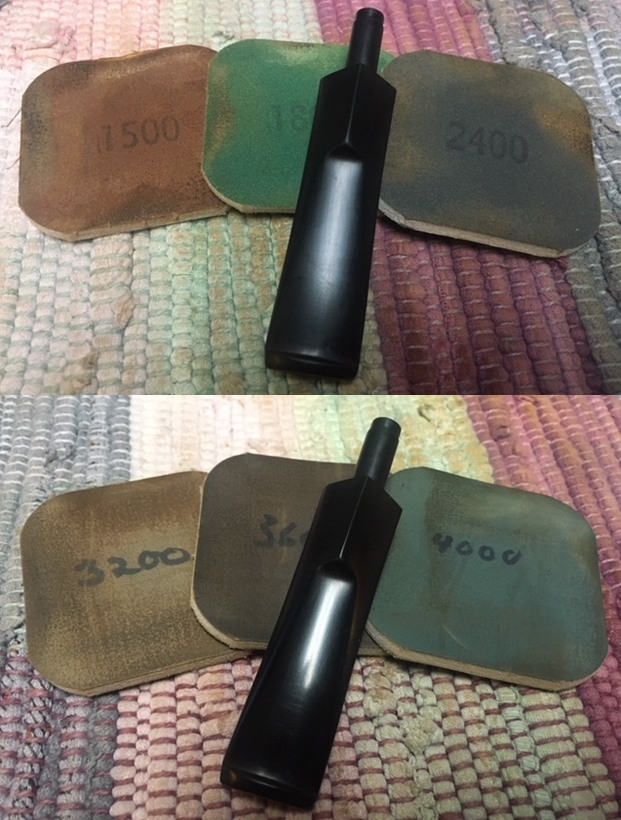
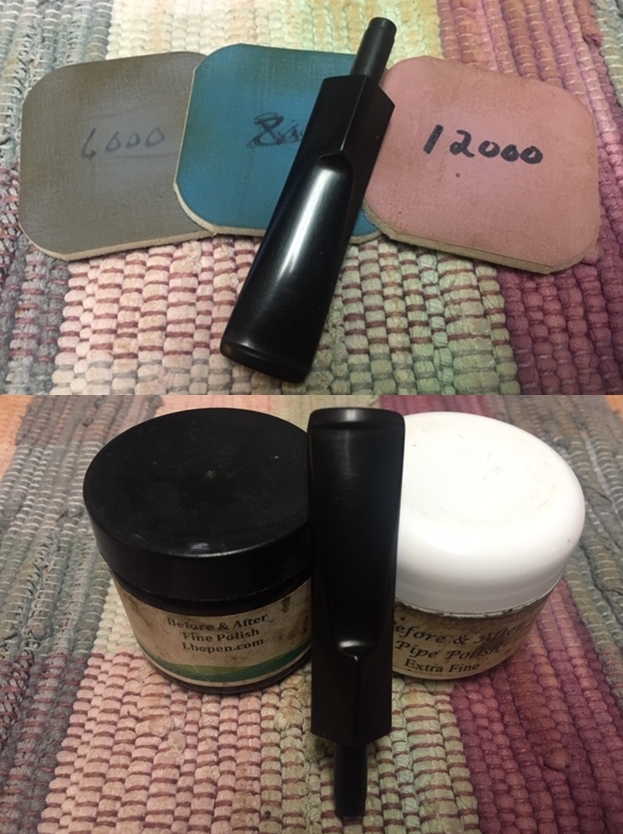
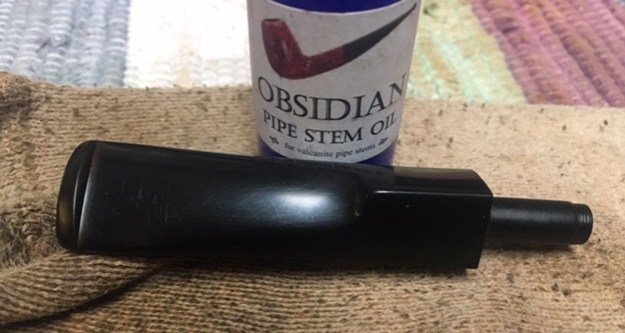
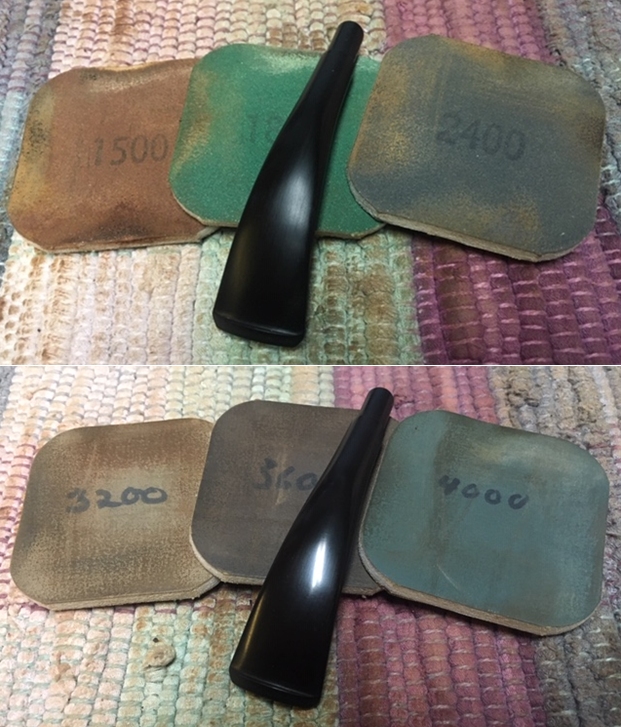
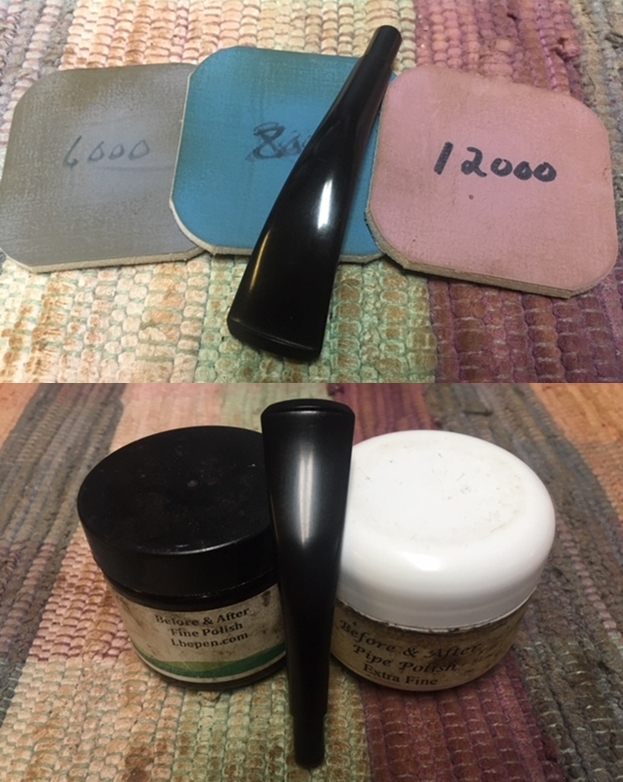
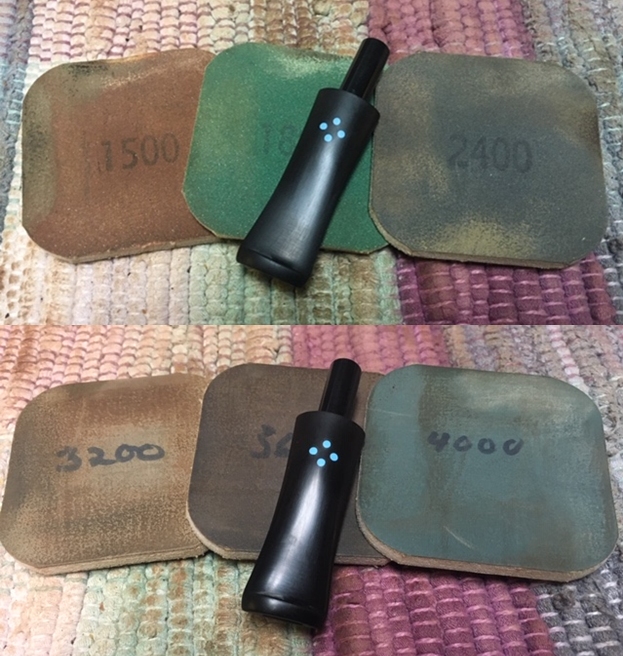
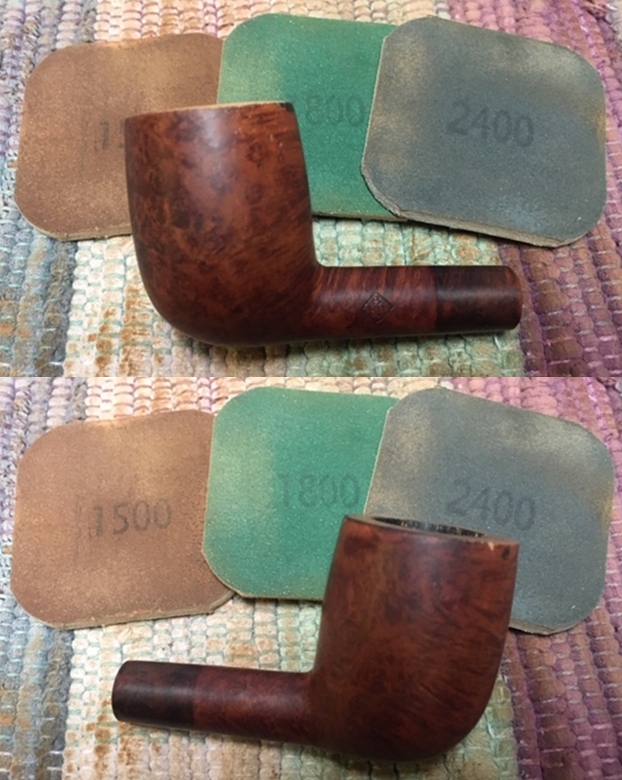
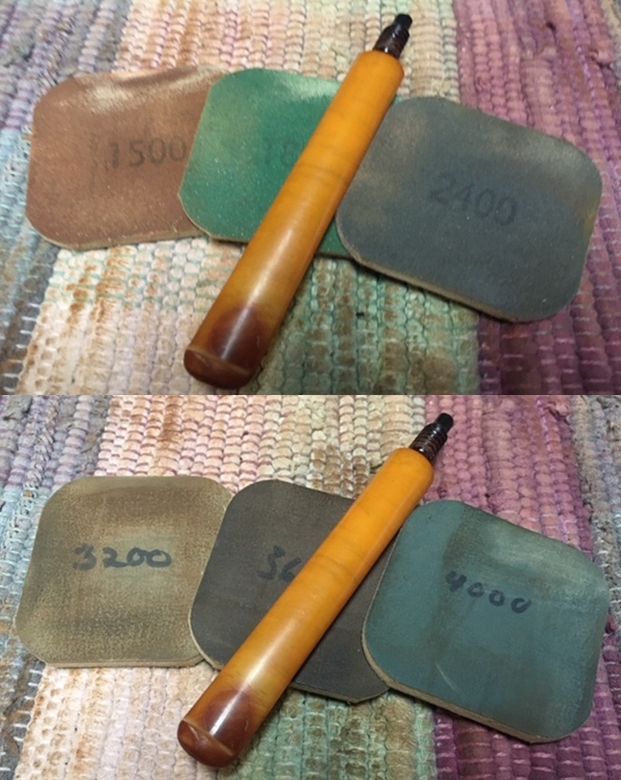
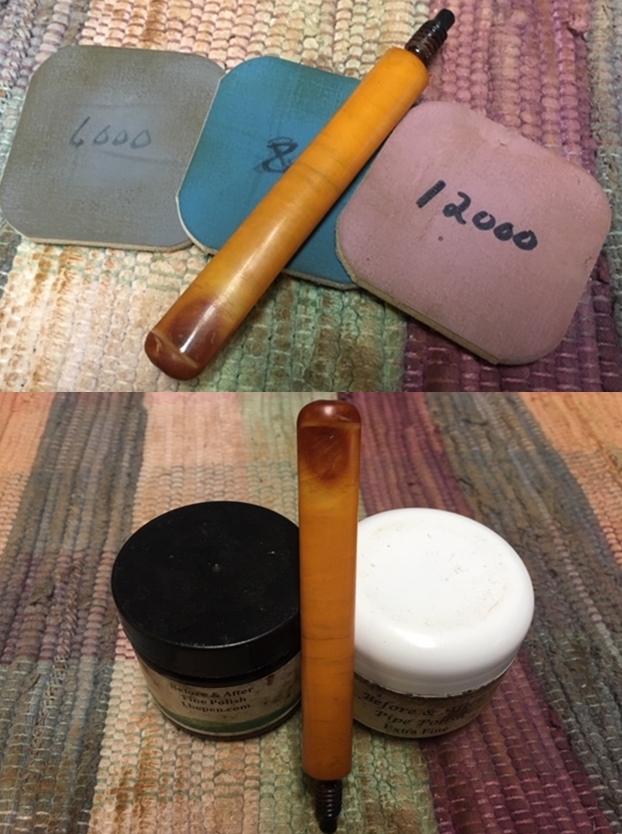
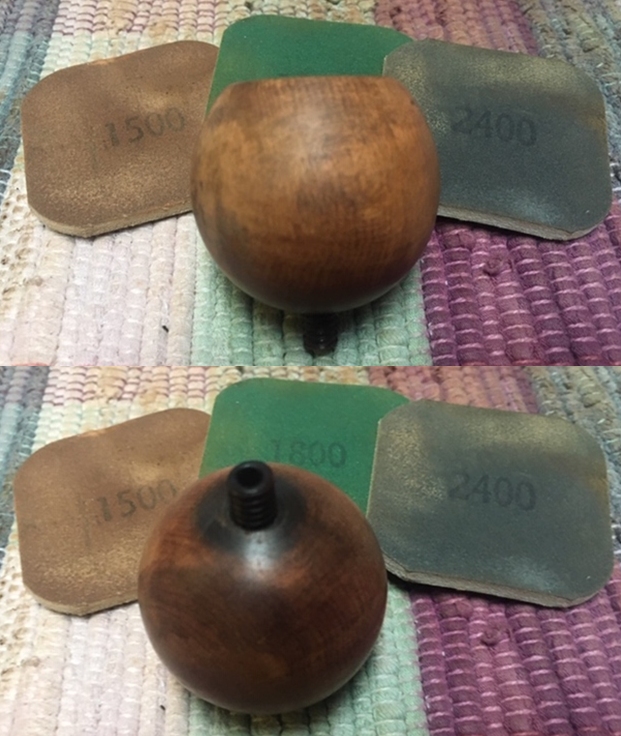
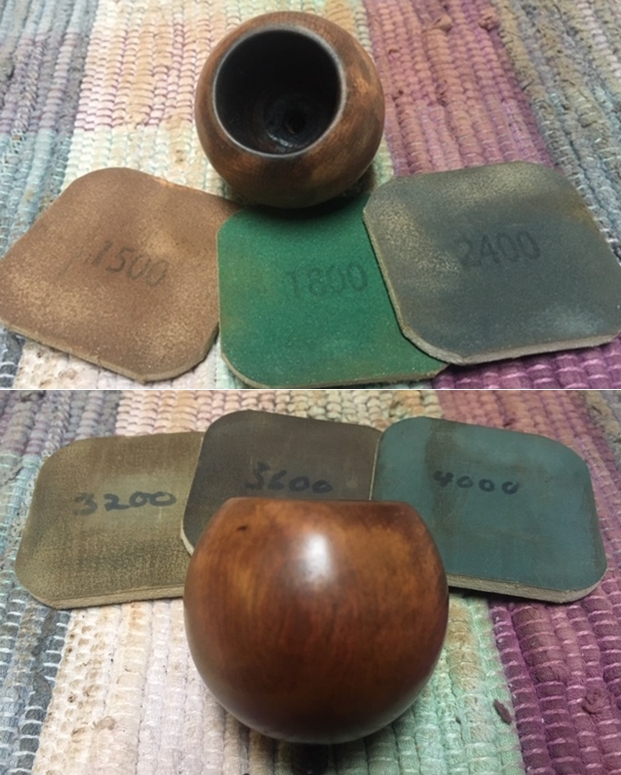
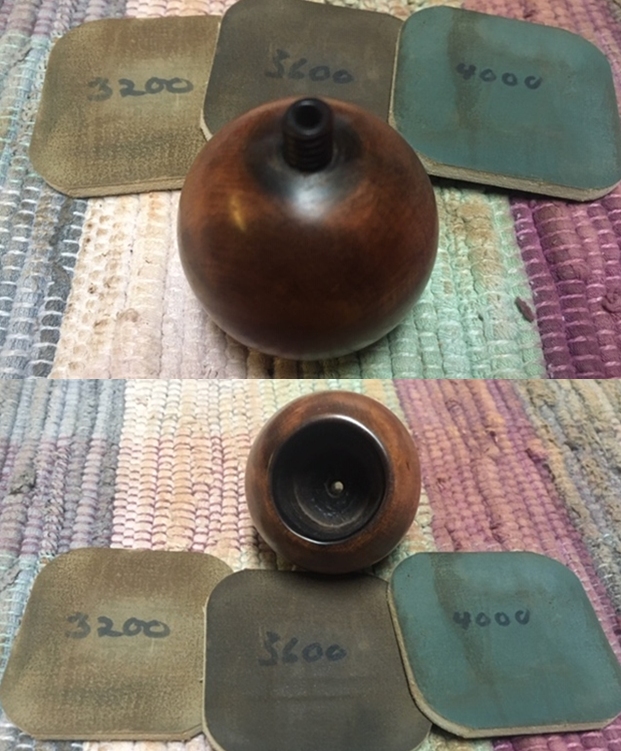
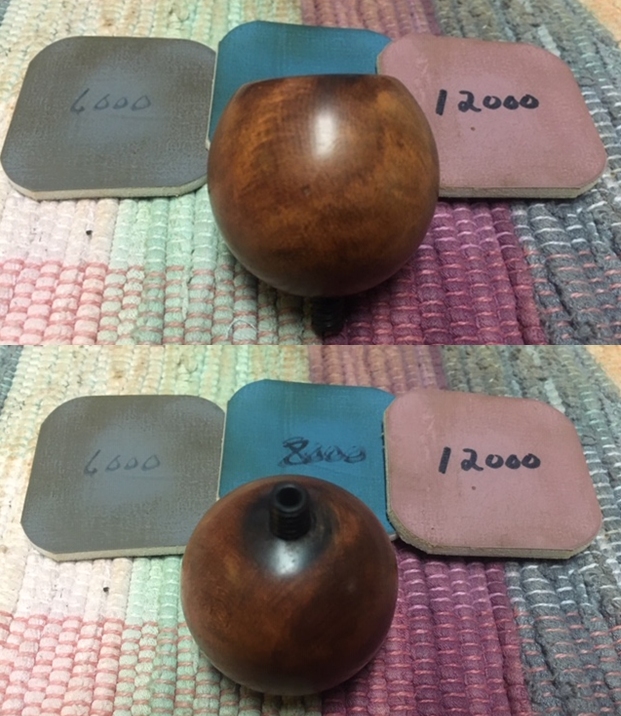
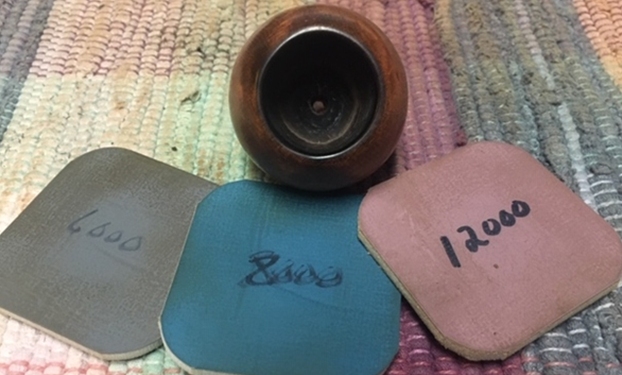
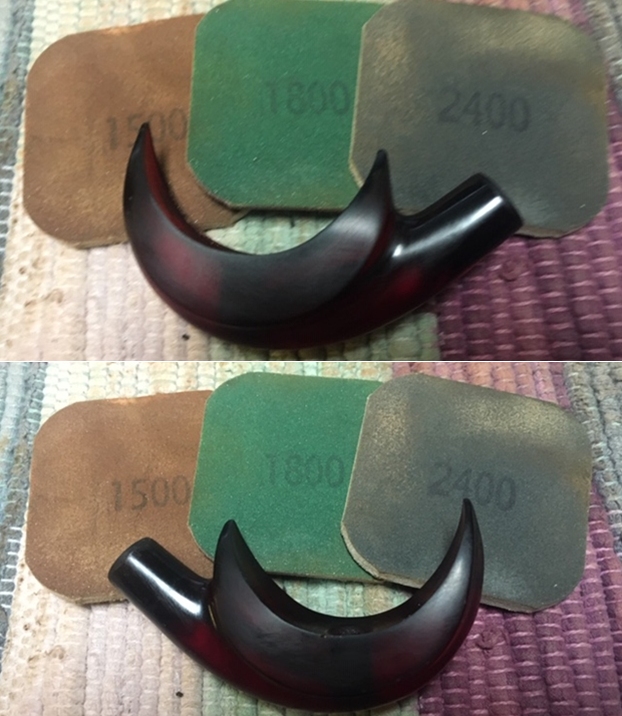
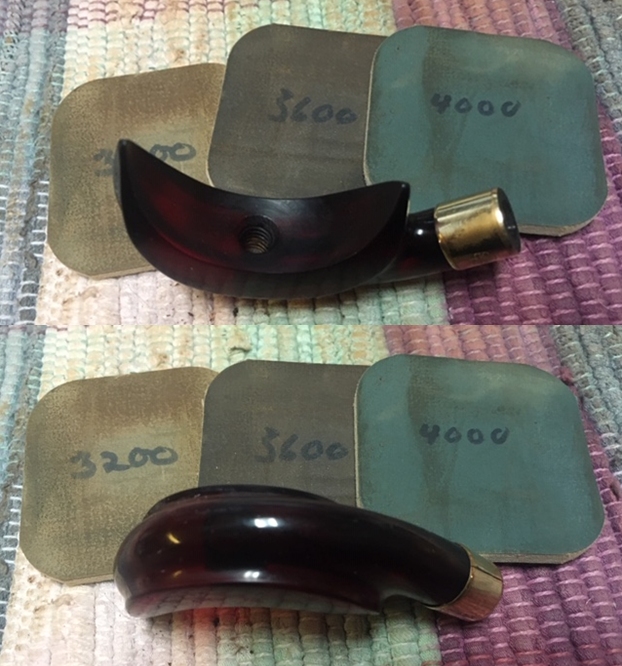
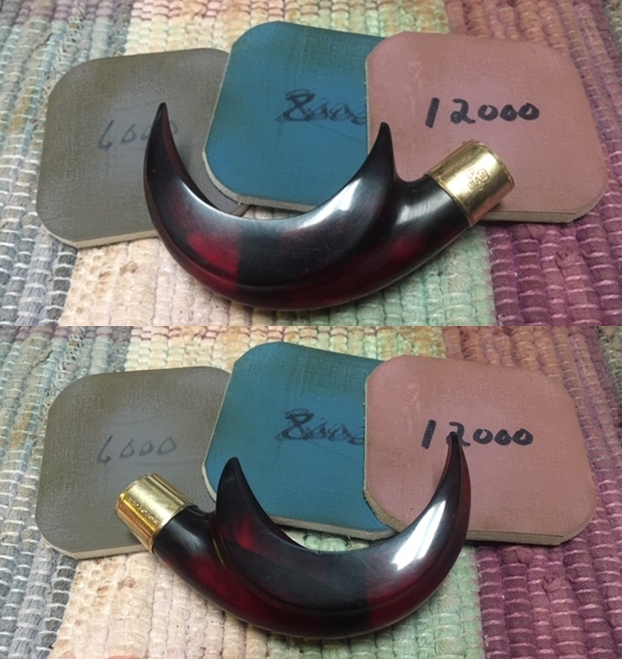
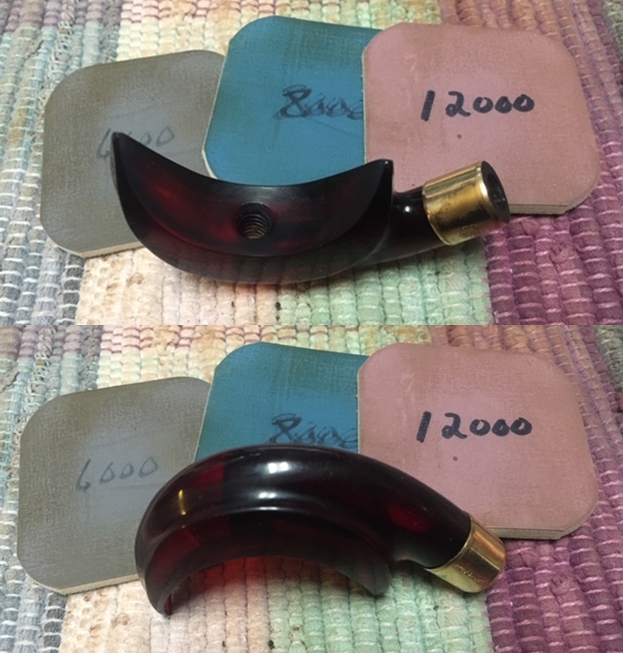
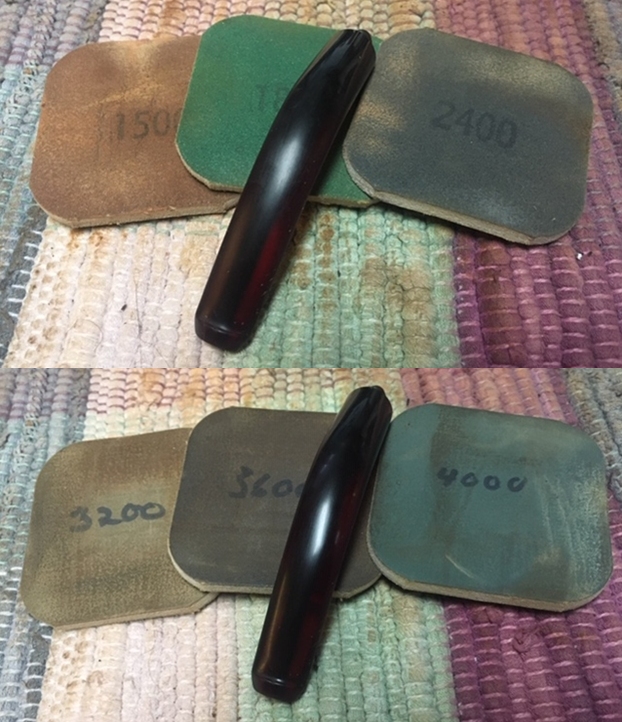
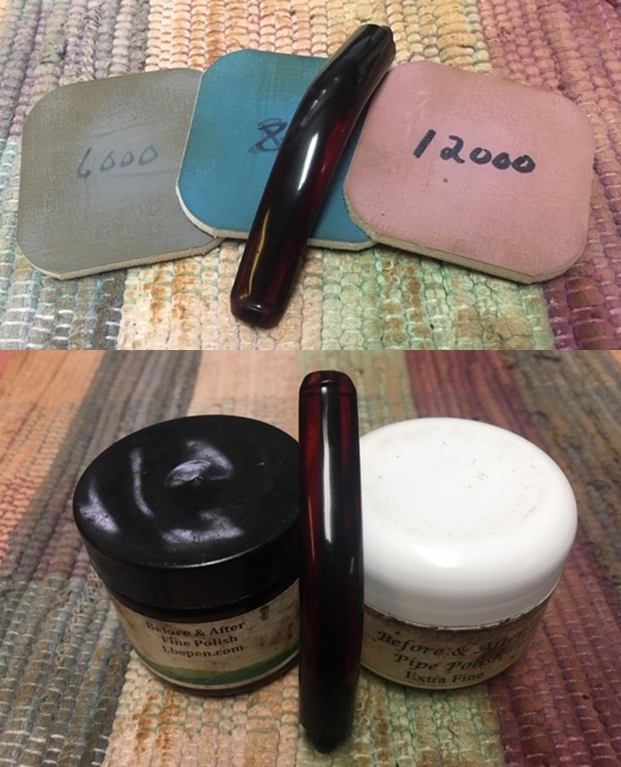
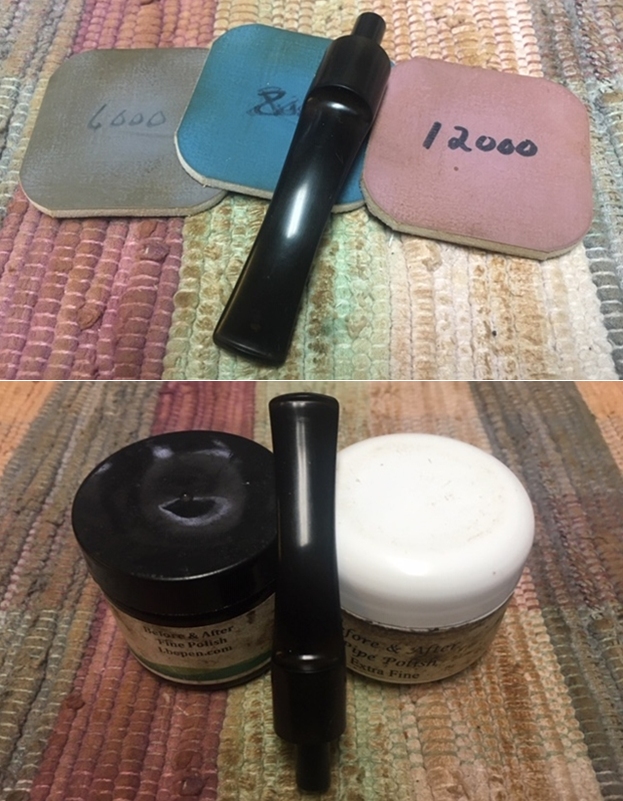
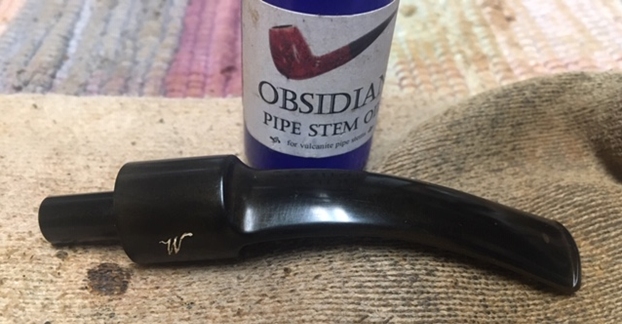
 The stem is now ready for the full regimen of micromesh pads beginning with wet sanding using pads 1500 to 2400 and followed by dry sanding with pads 3200 to 4000 and 6000 to 12000. Between each set of 3 pads, Obsidian oil is applied to condition the stem and to guard against future oxidation setting in. The Kaywoodie “500” stem looks great.
 Turning again to the stummel, per Steve’s description I use 430 grade paper to sand off the dried excess undercoat.
 I combine the sanding with wiping the stummel with a cotton pad wetted with alcohol. This helps to remove the excess and to allow the grain to come through more.
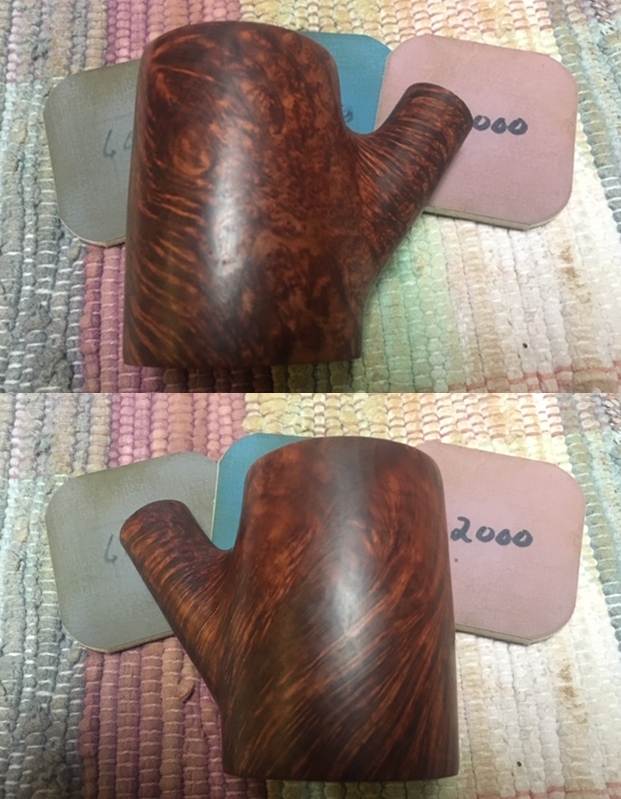
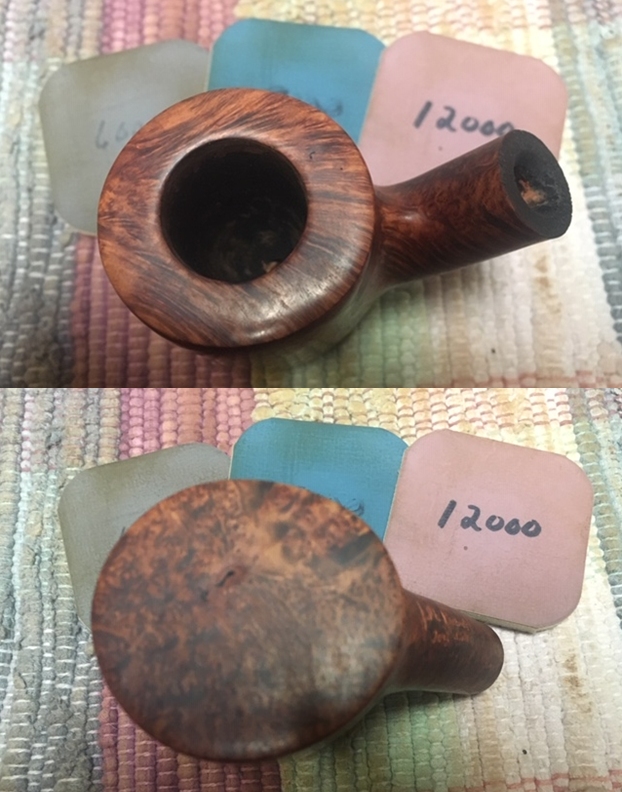
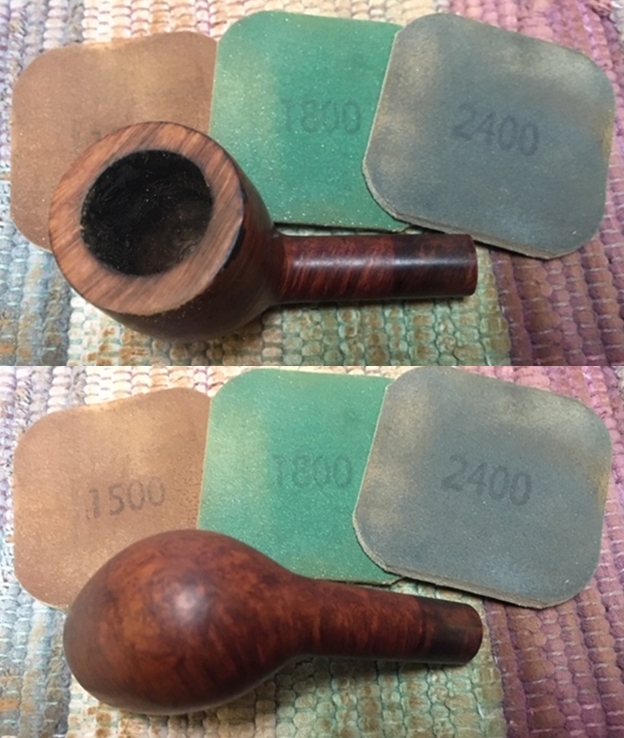
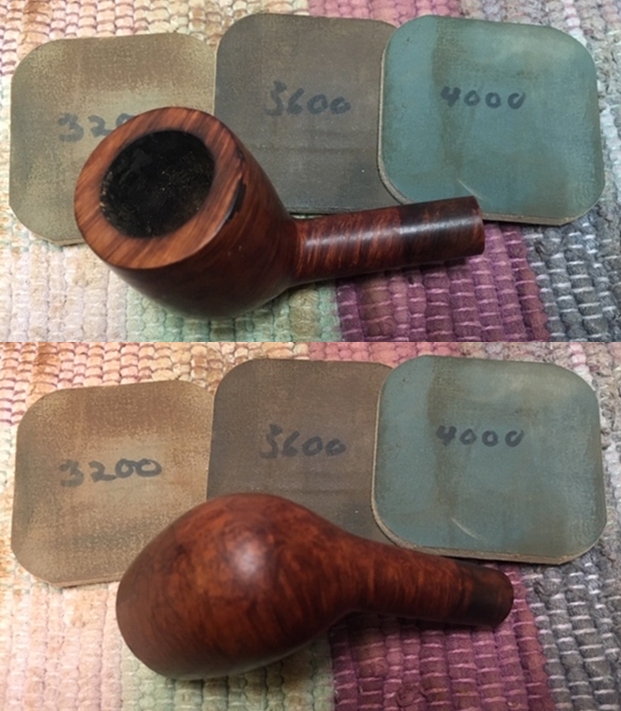
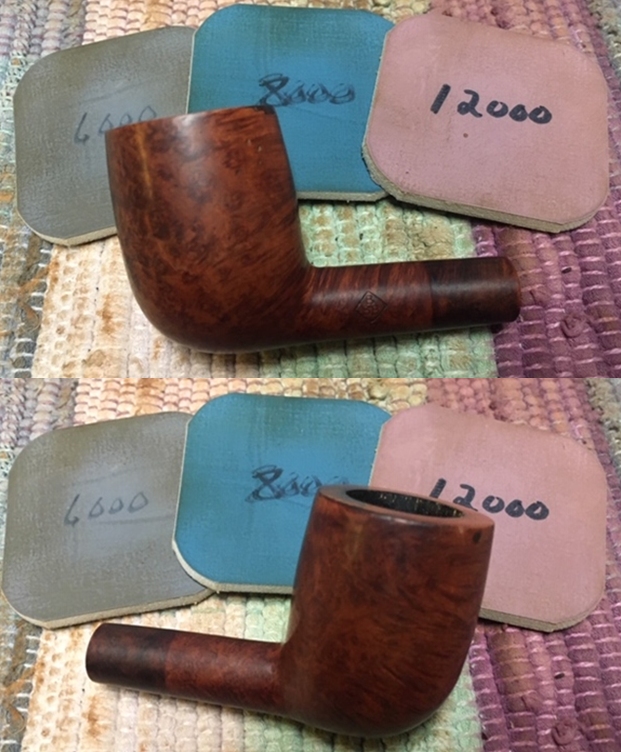
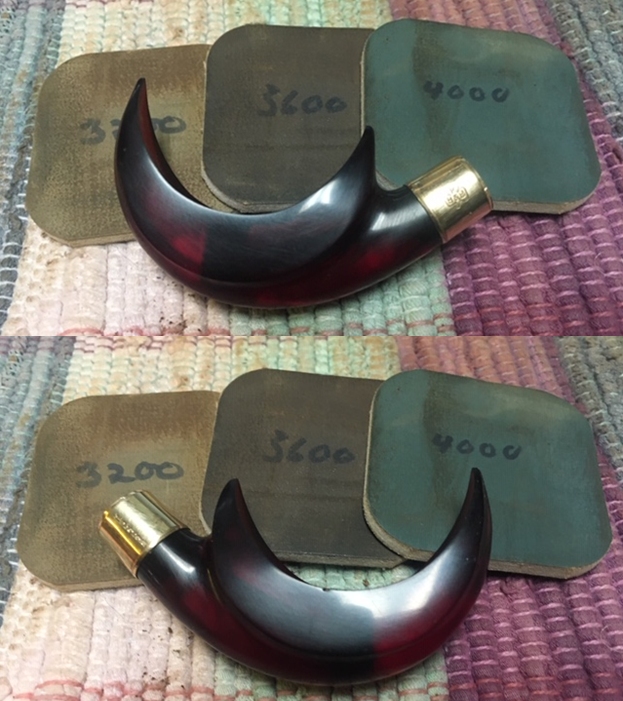
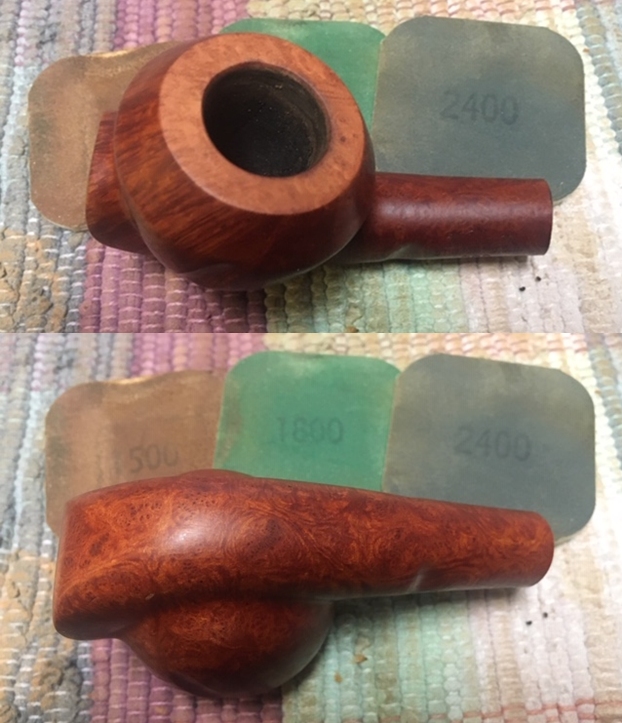
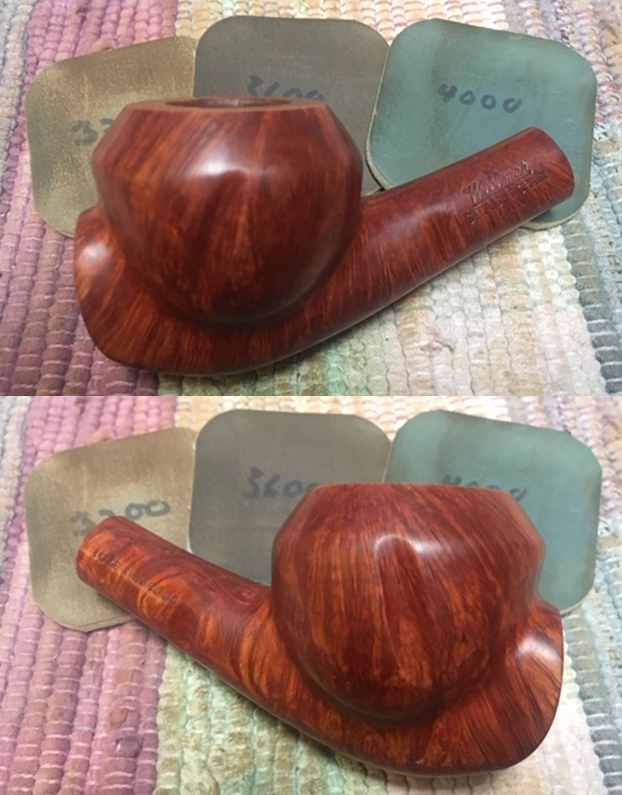
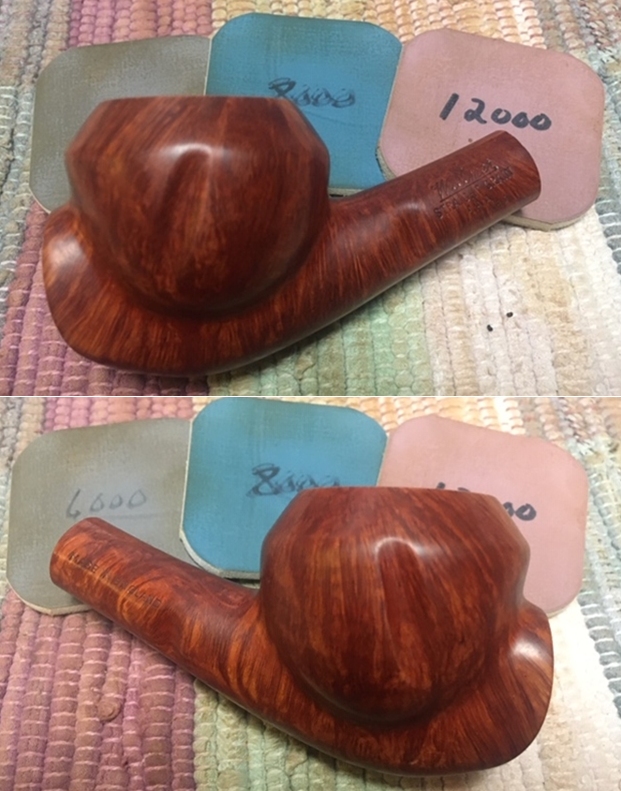
 At this point I transition to applying the full regimen of micromesh pads from 1500 to 12000 in 3 pad increments – 1500 to 2400, 3200 to 4000, and 6000 to 12000. The point of the undercoat is darkening and giving greater definition to the grain. The progression of the micromesh process shows this to be the case.
 Next is the overcoat staining with the new red aniline dye I acquired. I’m hoping to get close to the Kaywoodie “500” red finish hue. I used Fiebing’s Oxblood as the overcoat last time. I approach this overcoat stain as if it were the first coat.
 I begin by heating the stummel with the hot air gun to open the briar’s receptivity to the dye.
 Next, using a folded pipe cleaner, I paint the red dye on the stummel. I discover at the first attempt to flame the dye with the lit candle, that there wasn’t enough alcohol content in it to combust. The application of the dye transitioned into a dye wash – hmm. I paint the dye on to get a thorough coverage. I repeat the process once more to make sure all was covered well with the dye.
  Afterwards, I set the dye aside to dry. I’m a bit concerned at this point that the red dye may not have enough resonance or depth in it. It seems to light or pale at this point.
 I decide to unwrap the finish using Blue Diamond compound and a cotton cloth buffing wheel on the Dremel. The Dremel is set at about 40% full power.
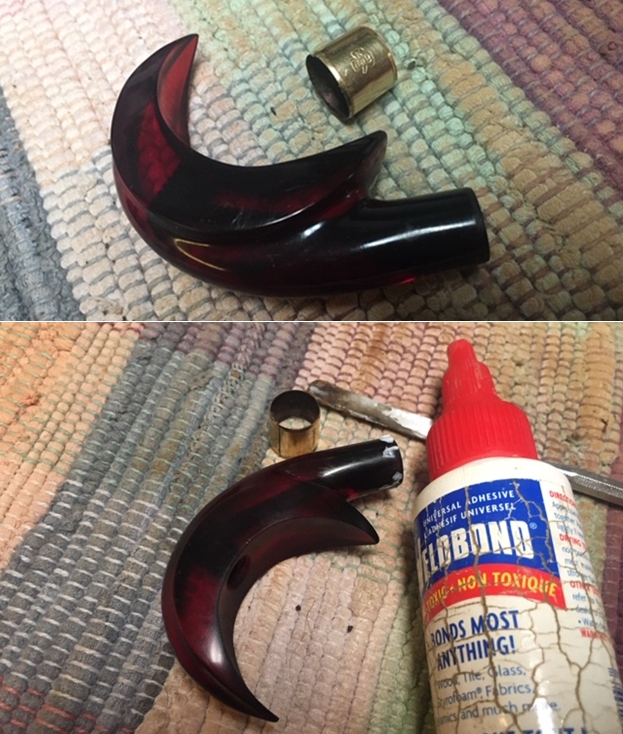
 After removing the dye excess my concerns were confirmed. The new red dye mixture that I used was not ‘grabbed’ by the grain to create much of a red tent over the dark brown undercoating. I take a quick picture on the black cloth I normally use for the finish shots at the end of the restoration to see what the camera might see. The finish looks great – the grain looks great, but the color of the Kaywoodie “500” is falling short of expectations.
  Last time I worked on Paw’s other Kaywoodie “500”, I used an Oxblood over dark brown and it turned out well. I know my processes have changed up somewhat, but I have a foundation of dark brown undercoating that has been brought down to a darkened grain presentation. On top of that, the red dye added something… and now, Fiebing’s aniline Oxblood Leather Dye on top of that. The only thing I do to prepare the surface for the Oxblood is to wipe it well with a cotton pad wetted with alcohol. Interestingly, almost no dye residue came off after the red wash. Now using Fiebing’s Oxblood, I apply the dye, flame it, and set the stummel aside to rest for several hours – overnight. Even at this ‘raw’ state, I can see a marked difference in the dye’s resonance.
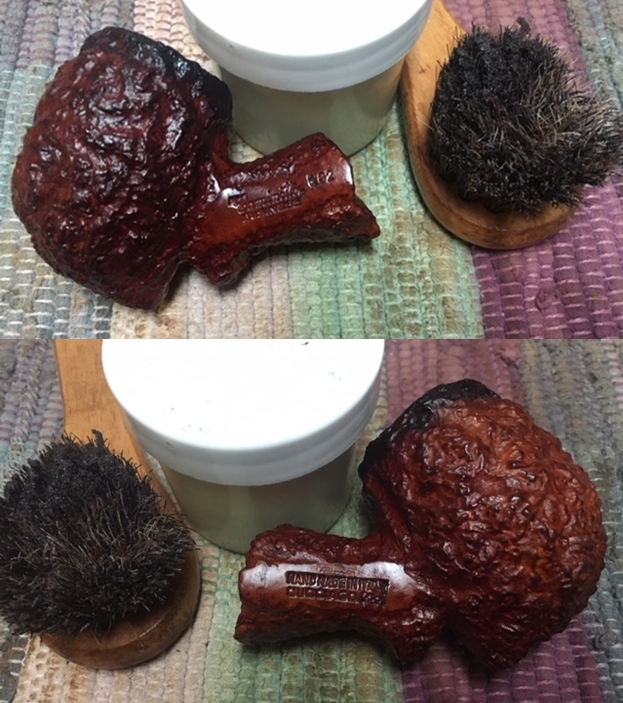
 The next morning, the fire-dyed stummel is ‘unwrapped’ using my normal process, with a felt buffing wheel and Tripoli compound with the Dremel set at the slowest speed. I take a picture midstream to show the contrast between the flamed shell and the unwrapped briar surface. The difference is marked. As the surface is unwrapped, I purge the felt wheel many times during the process by running the felt wheel against the edge of the lapboard I’m working on. This keeps the felt wheel cleaners and more supple. The picture below shows the caking on the wheel that happens as the wheel does the plowing.
 I follow by wiping the stummel with a cotton pad wetted with alcohol. This lightens the finish some but helps to remove excess dye build up and help to blend the finish.
 Next, after changing to a cotton cloth buffing wheel set at about 40% full power and after reuniting stem and stummel, Blue Diamond compound is applied to the entire pipe. Tripoli is a coarser abrasive and Blue Diamond is finer, and less abrasive as the fine sanding is completed. After completion, I use a felt cloth rag to buff/clean the pipe of compound dust in preparation for the application of wax.
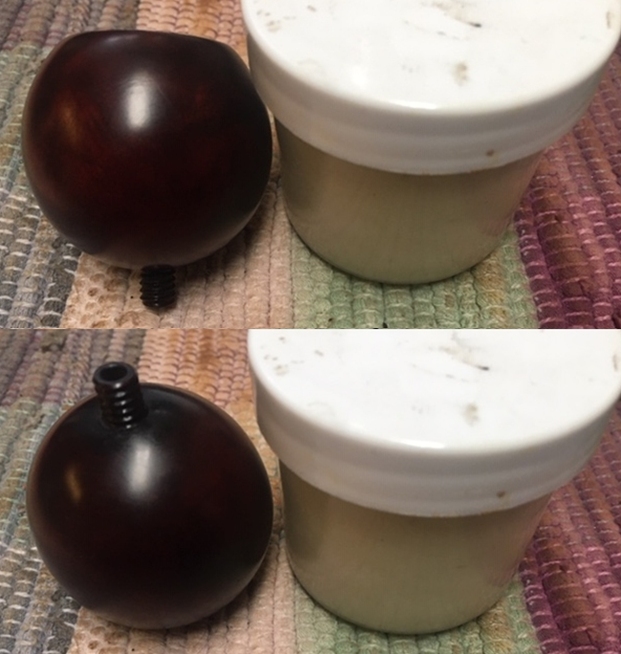
 In the homestretch – after changing the cotton cloth buffing wheel and leaving the speed of the Dremel at 40%, carnauba wax is applied to the entire pipe – stem and stummel. Following this, the pipe is given a rigorous hand buffing with a microfiber cloth to raise the shine.
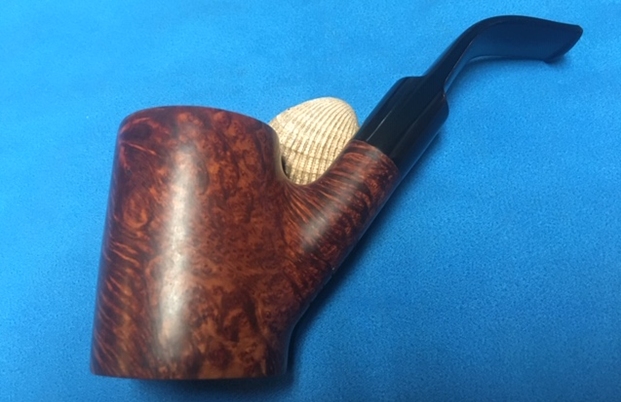
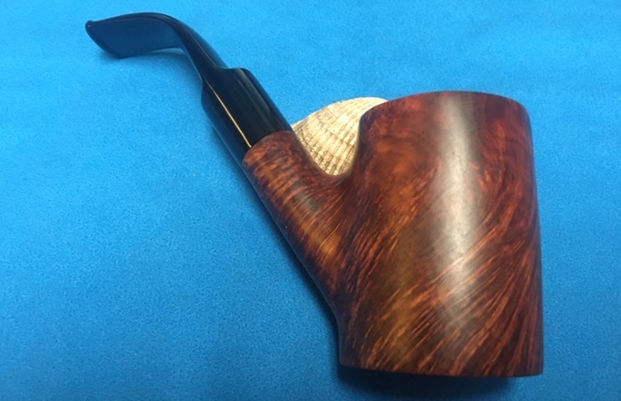
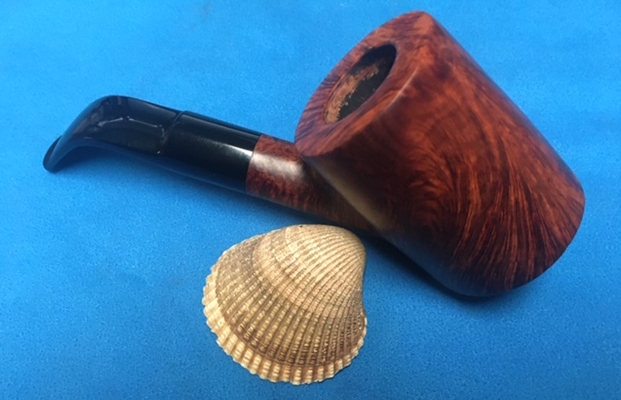
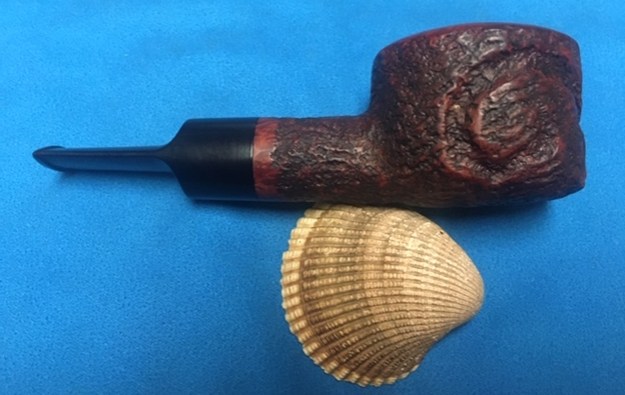
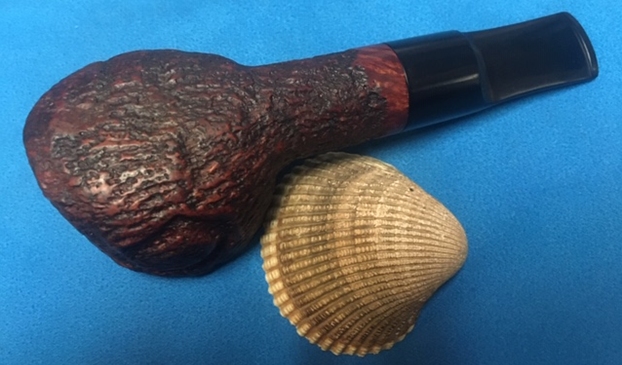
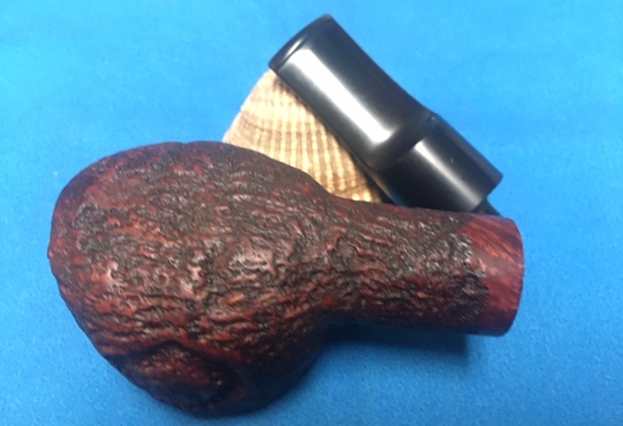
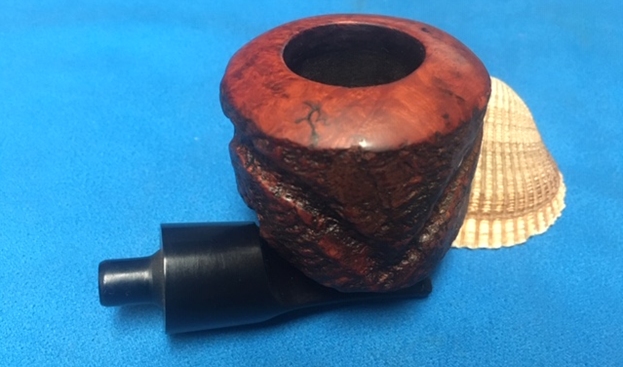
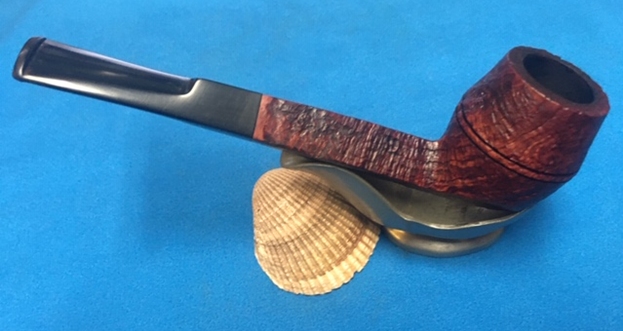
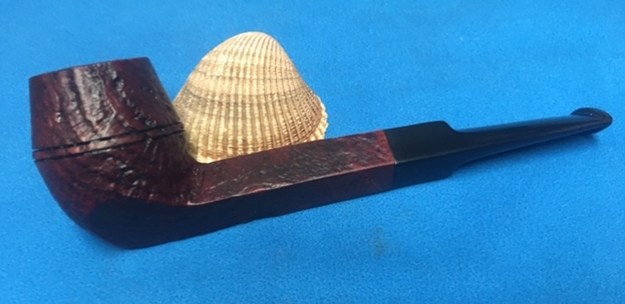
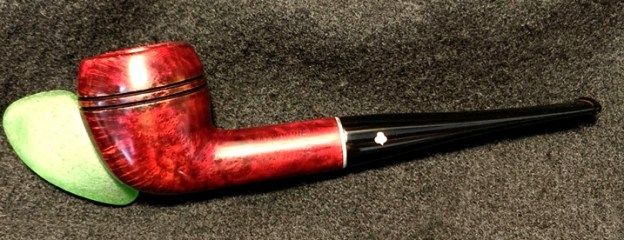
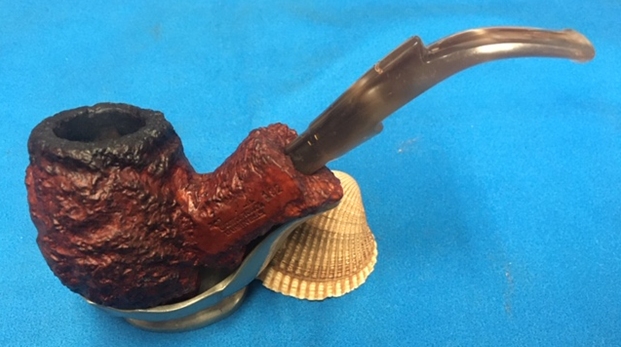
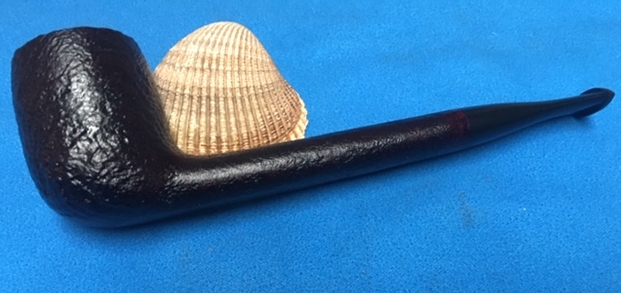
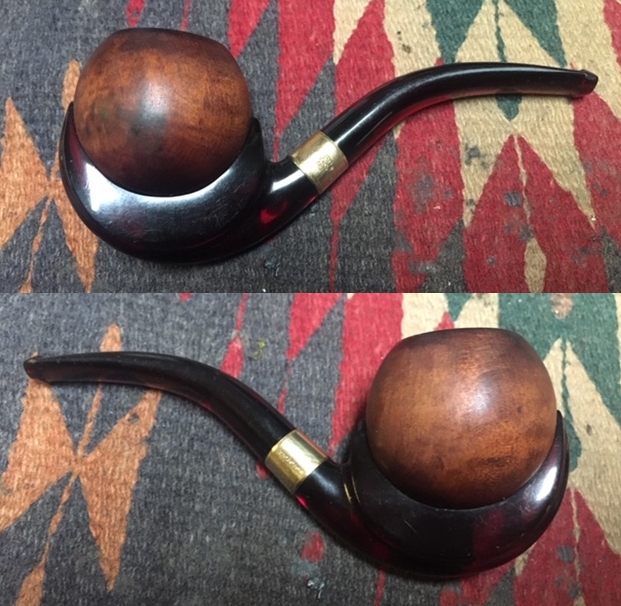
 After some twists and turns trying out new processes and a new dye, I’m pleased with the results. I believe the undercoating advice that Steve provided certainly deepened the signature of the darker grains. Paw’s Kaywoodie “500” 50C Round Shank Bulldog is looking good with a classy, sharp presentation, and I believe the Oxblood works well to bring out the deeper red tones of the Kaywoodie “500” series. Paw’s signature remains on the back side of the rim with the shadow of Paw’s penchant for knocking and a reminder of the man he was as ‘2-Page Sam’. It was a privilege bringing life back to this Kaywoodie “500” for Joe and Hannah and preserving a great grandfather’s legacy to his family. Moreover, Joe’s commissioning of this restoration benefits the Daughters of Bulgaria – women and girls who have been trafficked and sexually exploited. Thanks Joe!, and thanks to all, for joining me!


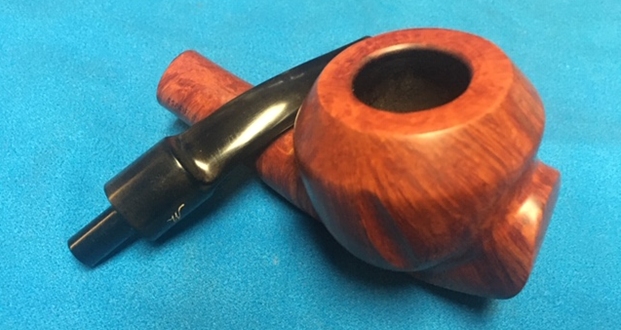
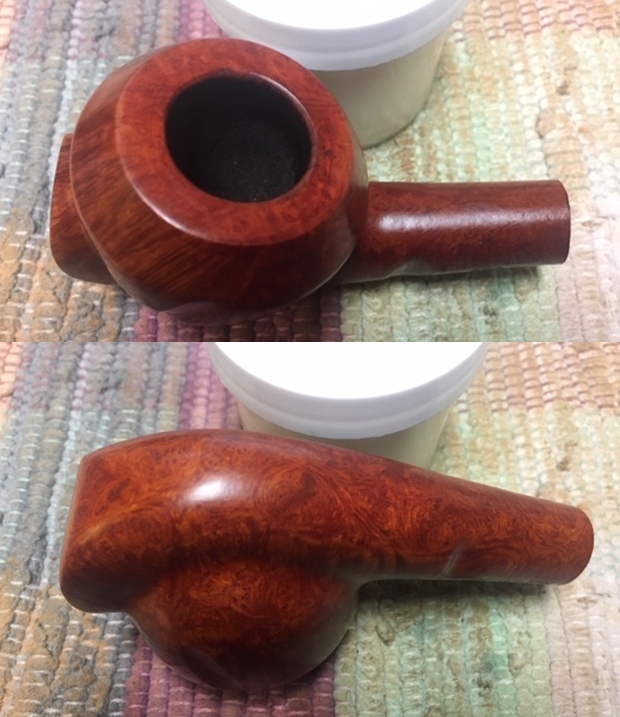
 He took close-up photos of the bowl and rim top from various angles to capture the condition of the rim top and edges of the bowl. There was a little darkening around the inner edge and heavier along the back edge of the bowl. There are some scratches on the top and outer edge of the bowl as well. You can also see the cake in the bowl.
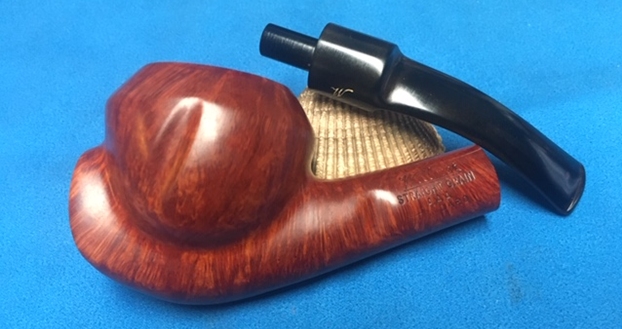
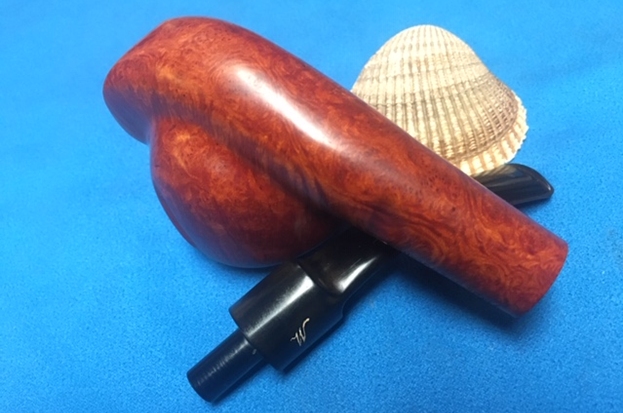
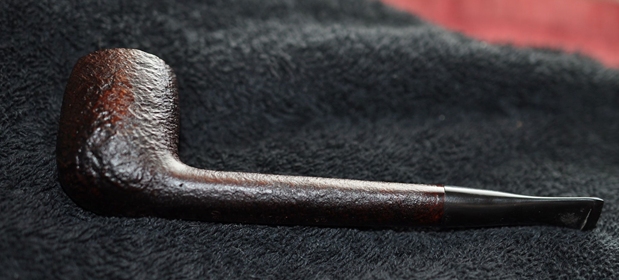
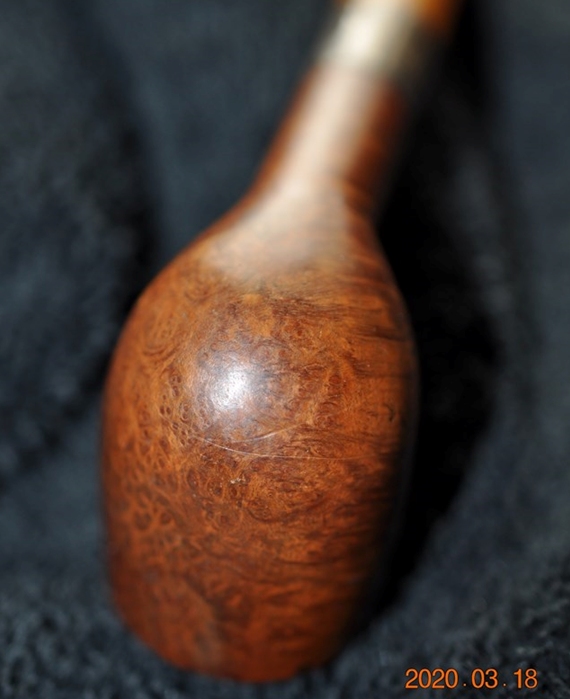
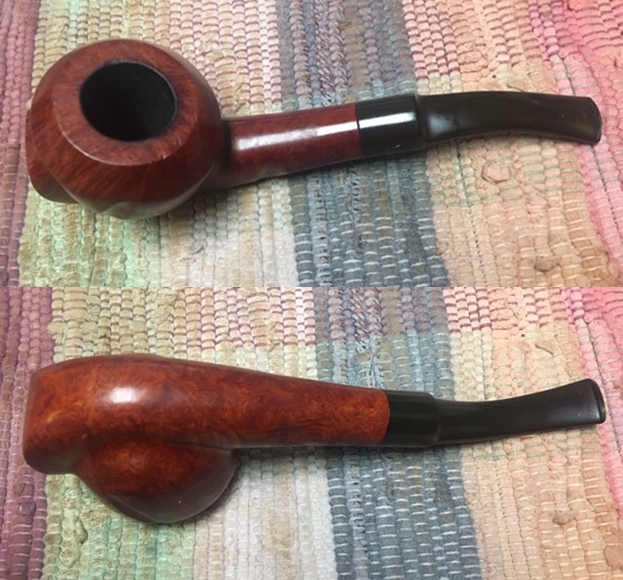
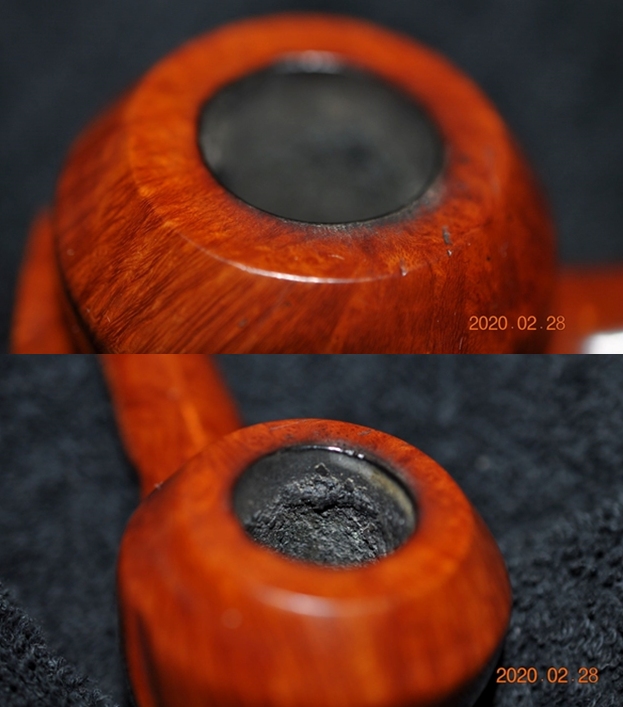 He took photos of the sides and heel of the bowl to show the condition of the finish and the grain around the bowl. The pipe has some stellar grain around the bowl and shank and the carver maximized the lay of the grain with the shape of the pipe.
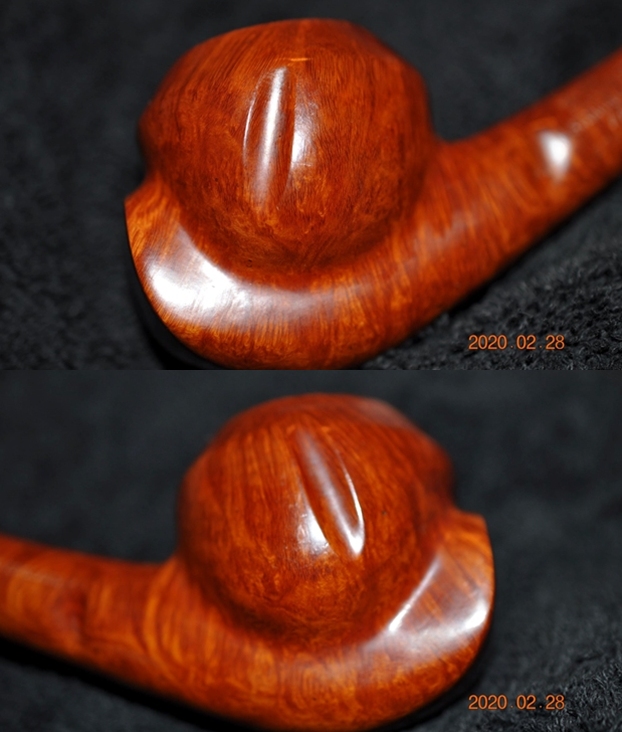
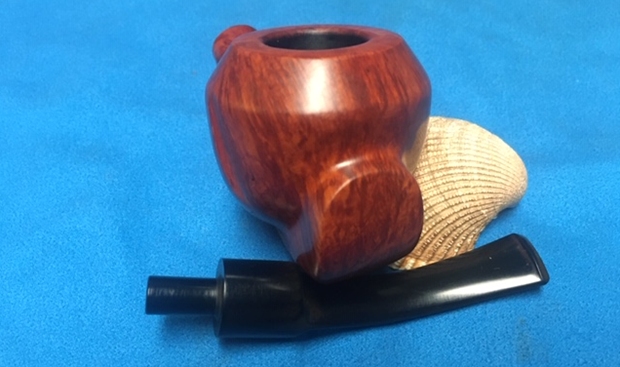
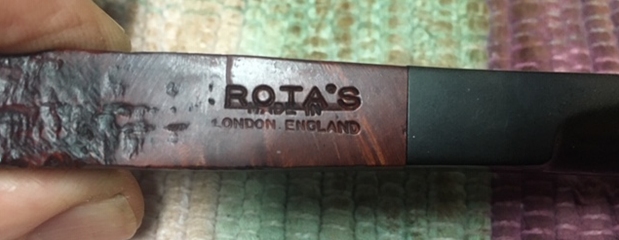
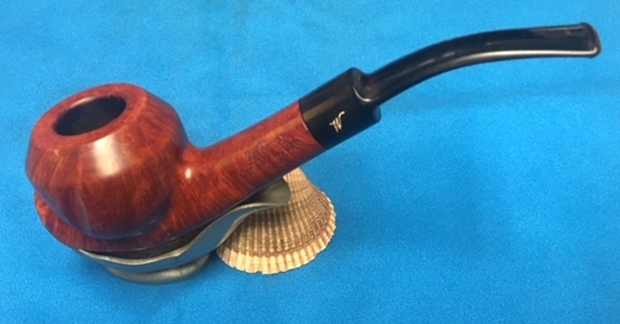
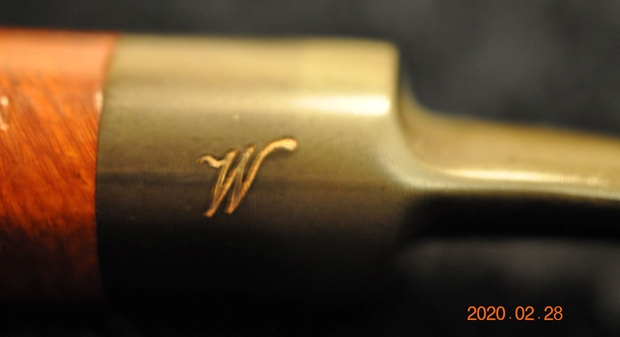
 Jeff took photos of the stamping on the sides of the shank. It reads as noted above and is clear and readable. He also took a photo of the Willmer “W” on the left side of the stem.
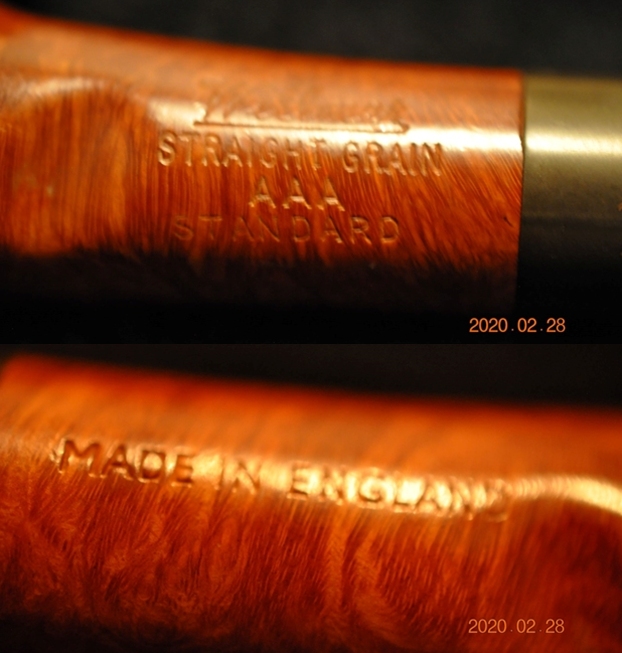
 The next photos show the top and underside of the stem. You can see the light tooth marks right next to the button edge.
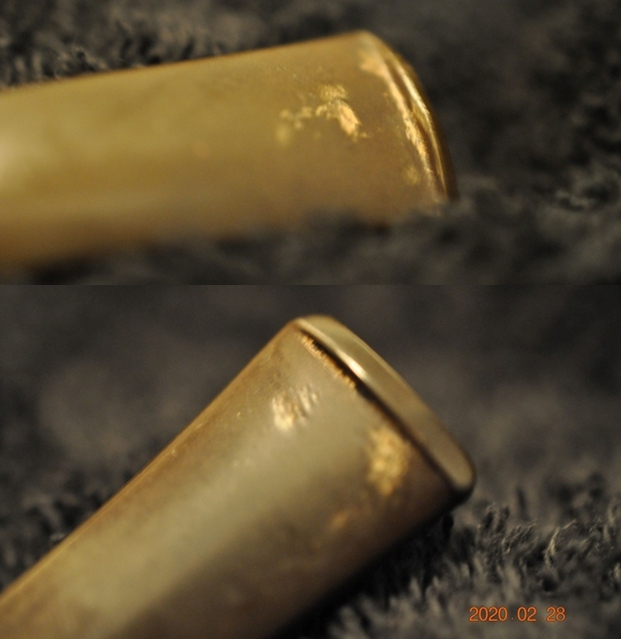 I turned to Pipephil to get a quick review of the Willmer Company as it had been a long time since I had worked on one (http://www.pipephil.eu/logos/en/logo-w3.html). I quote the side bar from the site bellow.
 I turned to Pipedia to get more information on the brand (https://pipedia.org/wiki/Willmer). The first paragraph dispelled of the belief that Willmer had been a carver for Charatan in his own words. I quote a portion of the article to give a sense of the history of the brand.
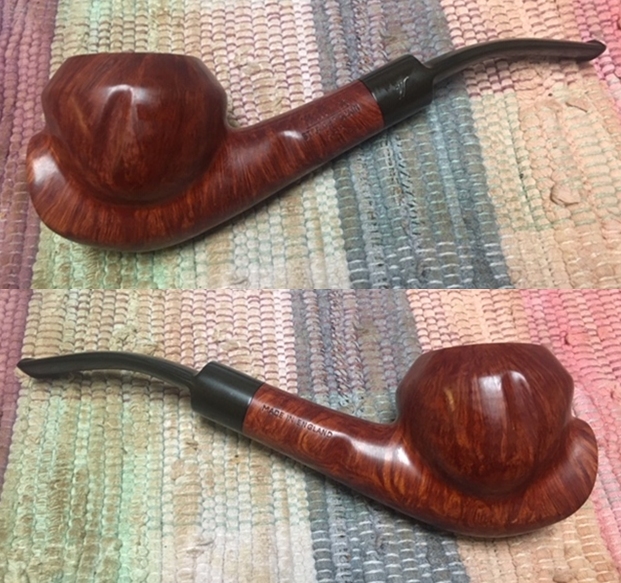
 To show the damage to the inner edge of the rim and the rim top I took a close-up photo. You can see it on the right inner edge and the back edge of the bowl. The vulcanite stem had some tooth marks on both sides and there was some oxidation remaining.
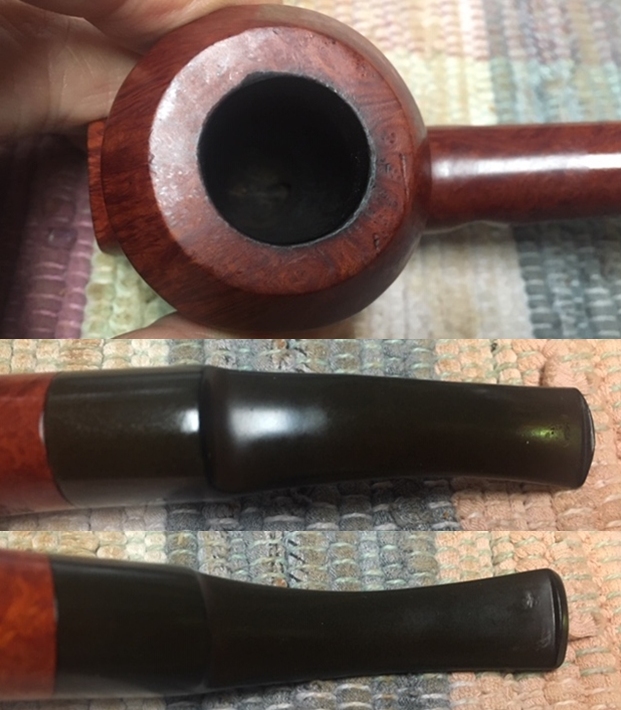 I took a photo of the stamping on both sides of the shank. It clearly read what was noted above. The “W” stem on the left side of the saddle stem is also readable.
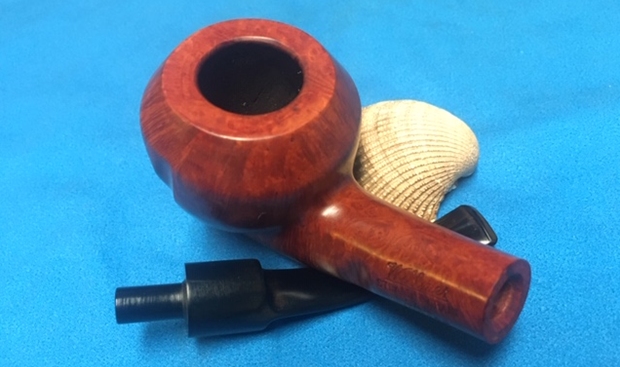
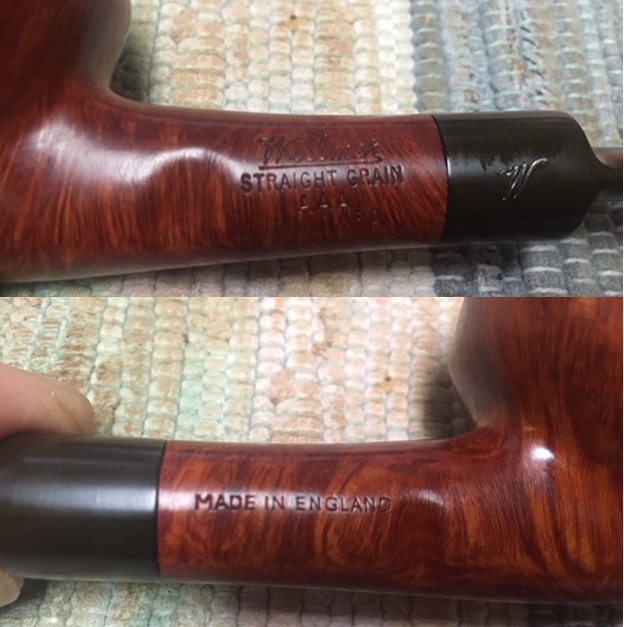 I removed the stem from the bowl and took photos of the parts. It really is a great looking pipe.
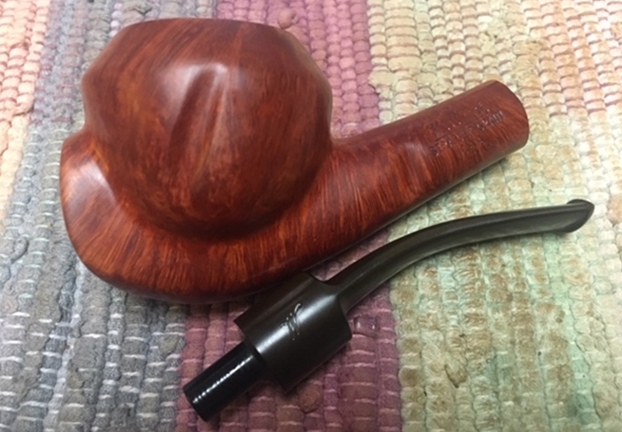 I started my part of the restoration by addressing the damage to the rim top and inner edge of the bowl. I topped the bowl on a topping board with 220 grit sandpaper. I worked over the inside edge of the bowl with a folded piece of 220 grit sandpaper.
 I polished the newly topped rim and the rest of the bowl with 1500-12000 grit micromesh sanding pads. I wiped the bowl down with a damp cloth after each sanding pad to remove the dust and debris.
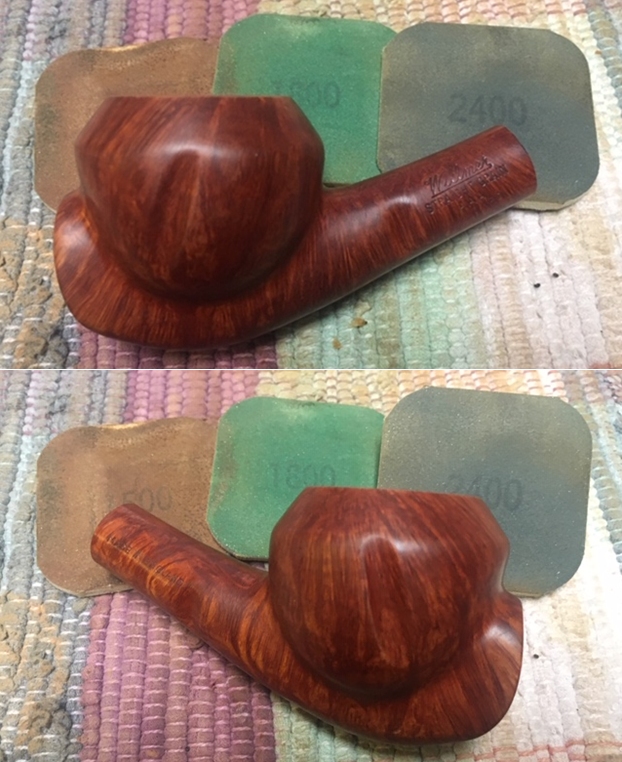

 I stained the rim with a Maple Stain Pen to blend the repaired and polished rim into the rest of the bowl.
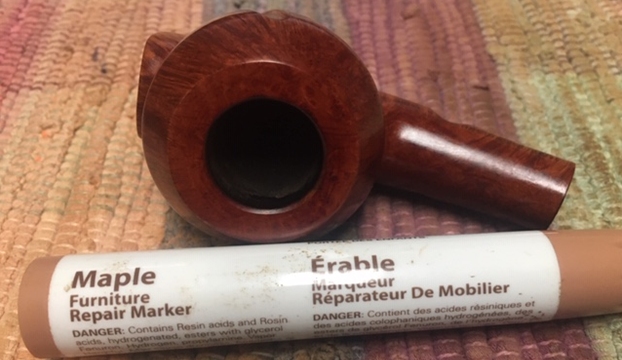 I rubbed the bowl and shank down with Before & After Restoration Balm to deep clean the finish on the bowl and shank. The product works to clean, enliven and protect the briar. I worked it in with my fingertips into finish on the bowl and shank. I let it sit for 10 minutes to let it do its magic. I buffed it with a soft cloth. The briar really began to have a rich shine. I took some photos of the bowl at this point to mark the progress in the restoration.
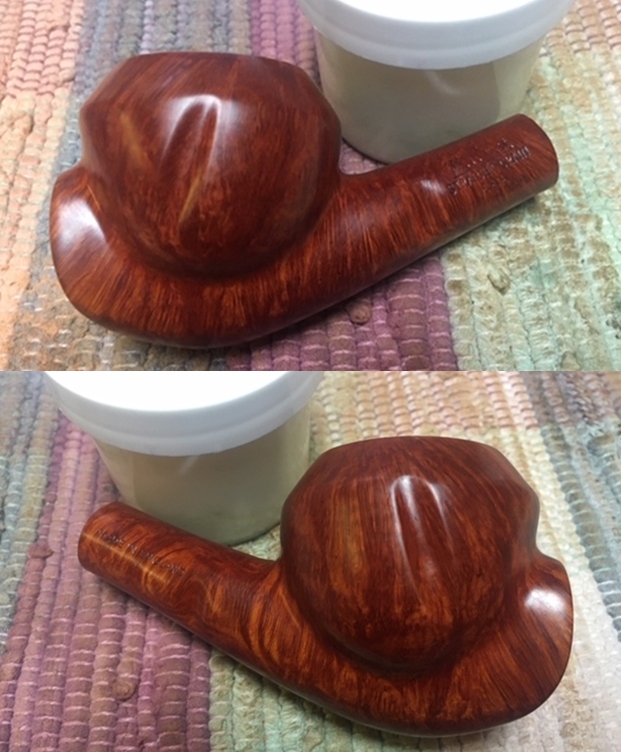
 The bowl was finished so I set it aside and turned my attention to the stem. To address the oxidation and the tooth marks on the stem surface I sanded it with 220 grit sandpaper to blend in the tooth marks and to break up the oxidation. I started the polishing with 400 grit wet dry sandpaper.
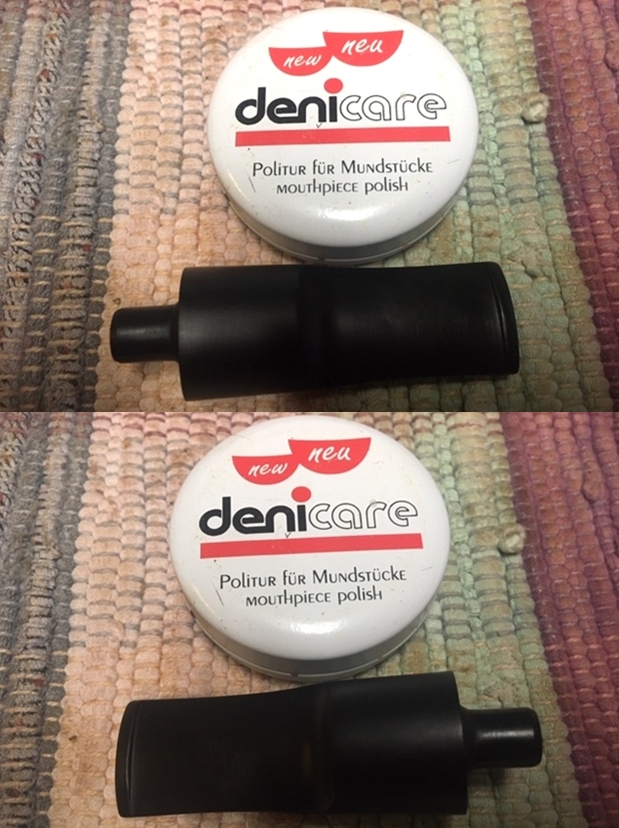
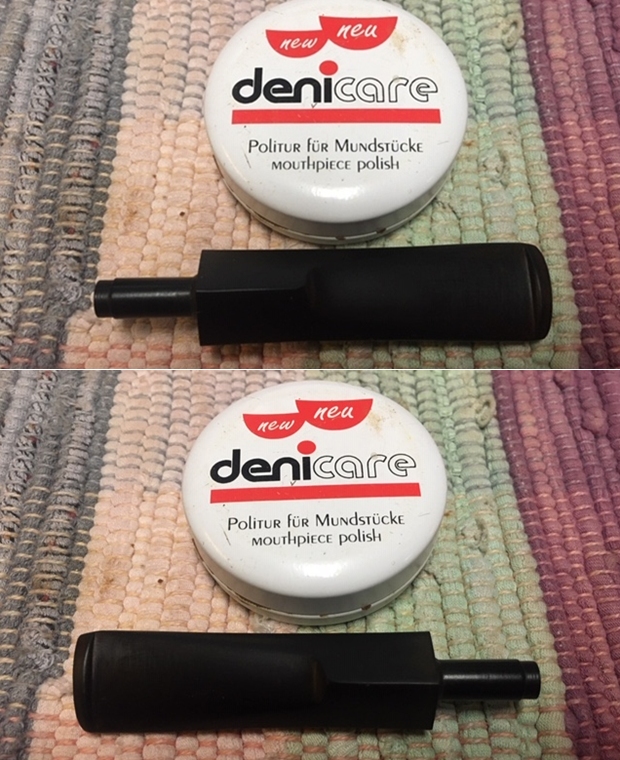
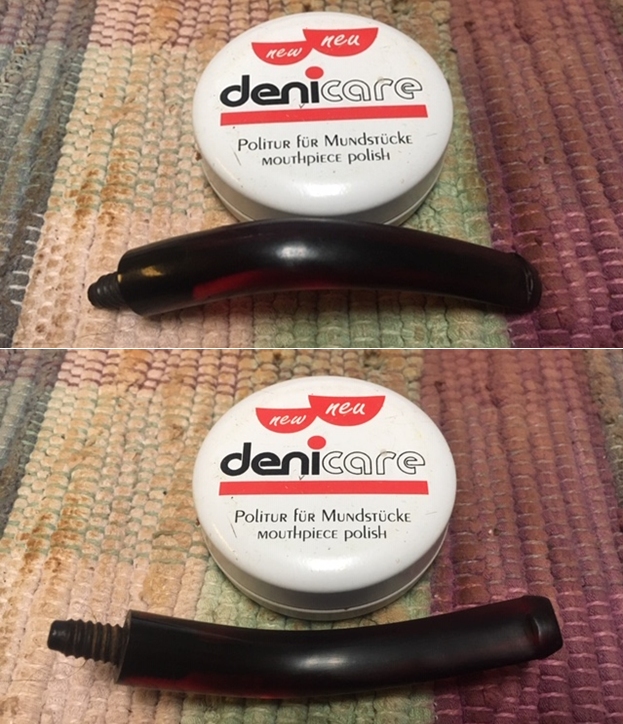
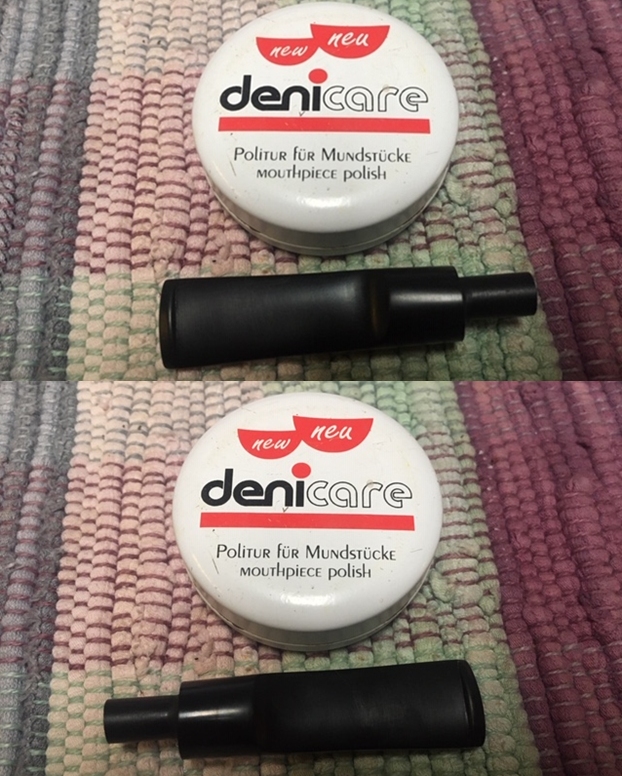
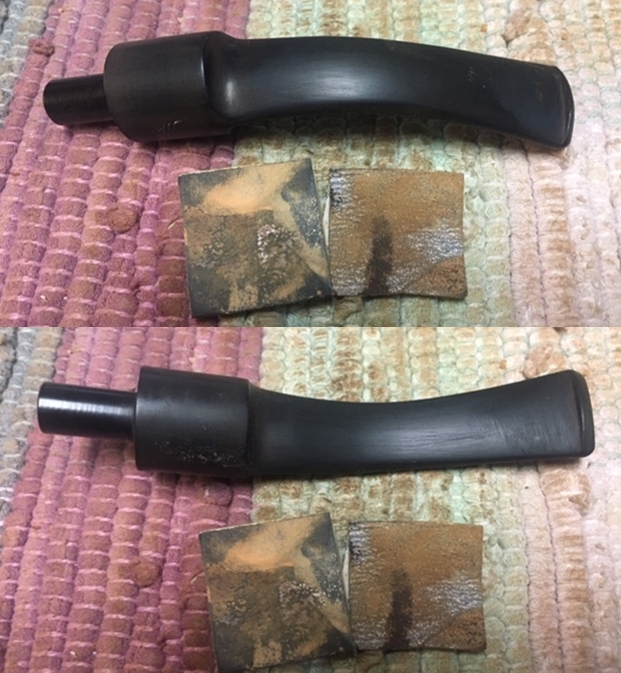 I started polishing the stem with Denicare Mouthpiece Polish – a red gritty paste that feels a lot like Tripoli. I find that it works well to polish out some of the more surface scratches in the vulcanite left behind by the 400 grit wet dry sandpaper. I rub it into the stem surface with my fingertips and buff it off with a cotton pad.
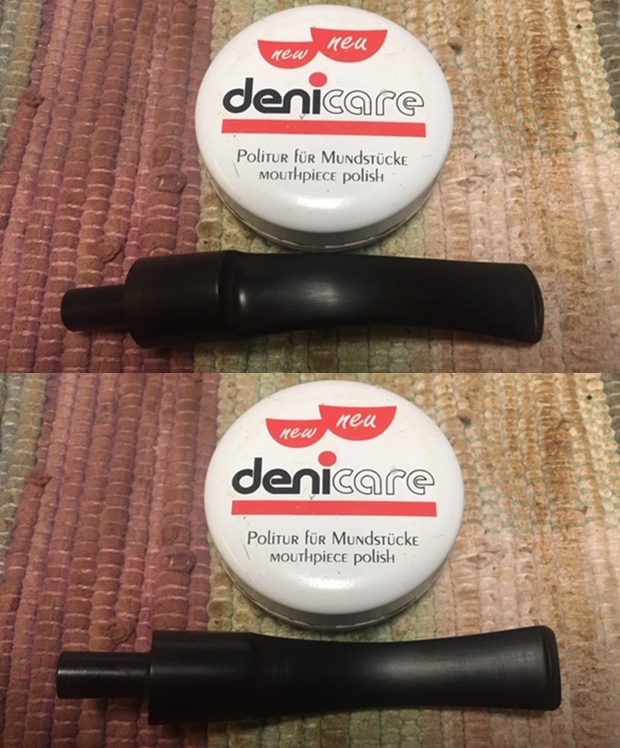 I touched up the “W” stamp on the stem with PaperMate Liquid Paper. I pressed it into the stamp in the vulcanite with a tooth pick. Once it dried I scraped off the excess fill with the tooth pick and with micromesh sanding pads.
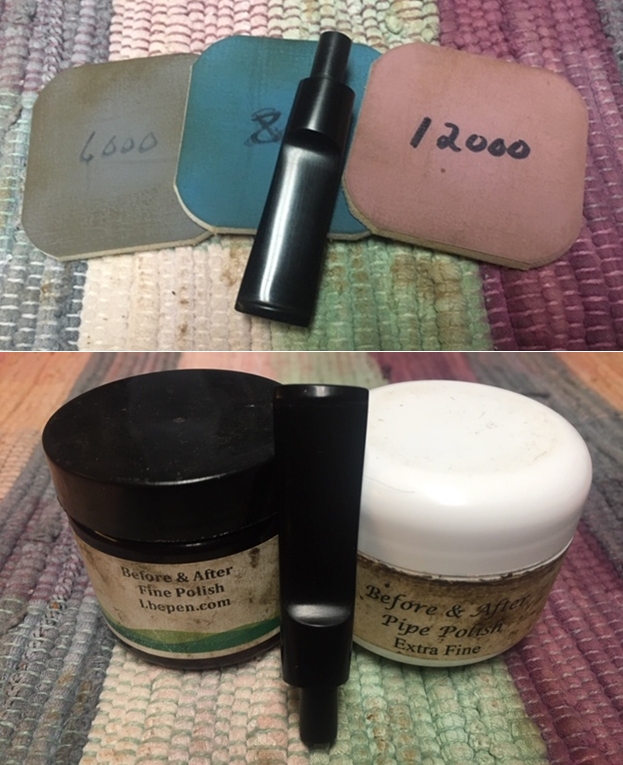
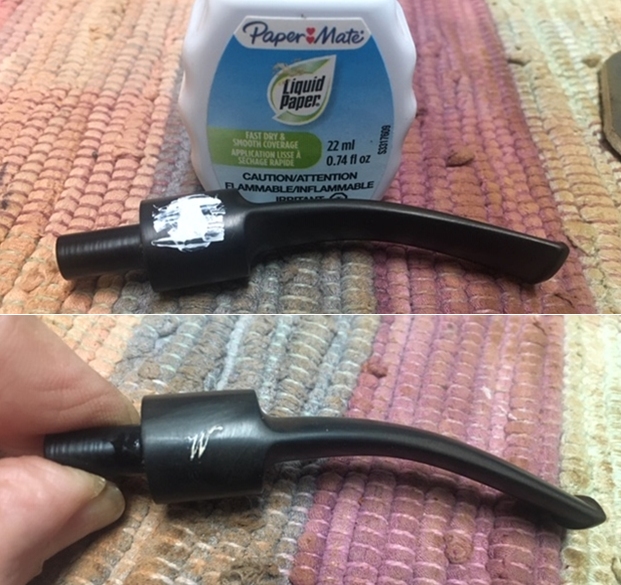 I polished the stem with micromesh sanding pads – dry sanding with 1500-12000 grit sanding pads. I wiped the stem down after each sanding pad with a cloth containing some Obsidian Oil. I finished polishing it with Before & After Pipe Stem Polish – both Fine and Extra Fine and buffed it off with a cotton cloth. I wiped it down with a final coat of Obsidian Oil and set it aside to dry.
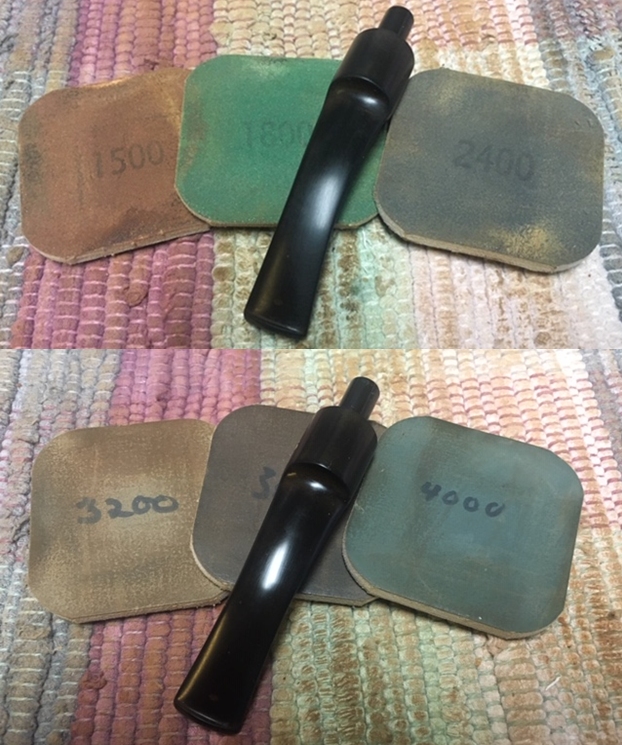
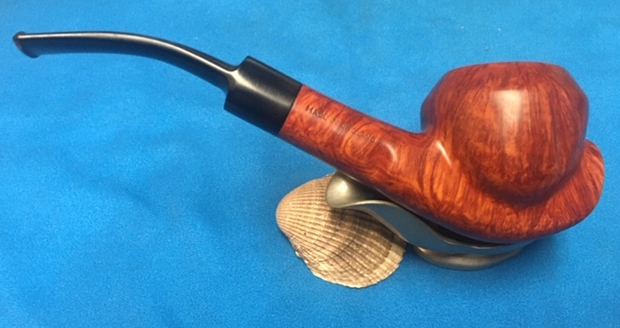
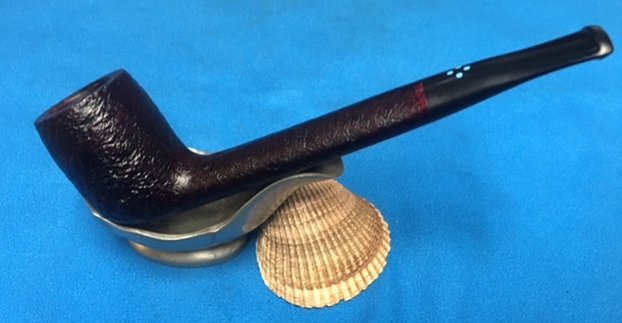
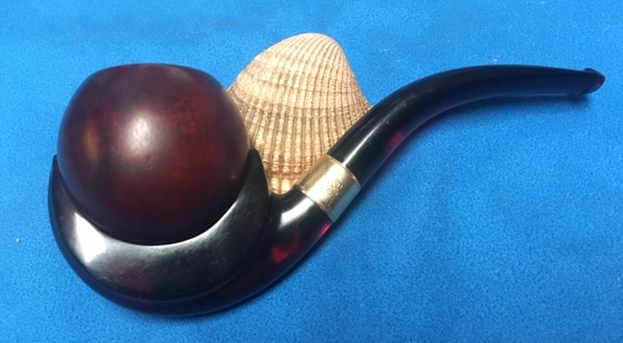
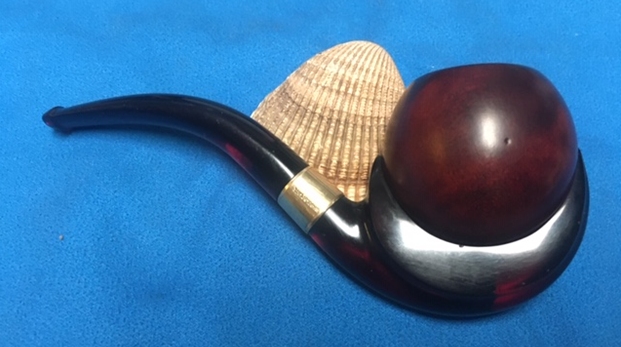
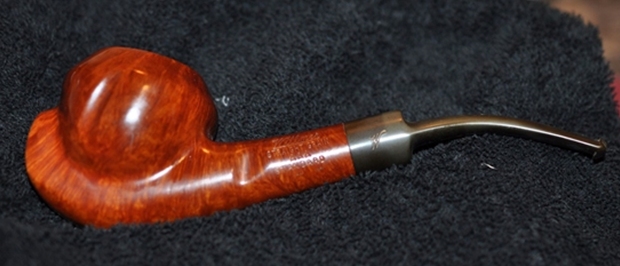
 This is a unique pipe and it is the first one I have worked on like this. It is a beauty. I put the bowl and stem back together again and buffed the bowl and the stem with Blue Diamond on the buffing wheel. I gave the bowl and the stem several coats of carnauba wax. I carefully buffed the entire pipe with a clean buffing pad to raise the shine. I finished buffing with a microfiber cloth to deepen the shine. The finished pipe looks very good. The grain is quite beautiful a mix of straight and flame around the bowl sides and birdseye on the rim top and heel. The pipe feels great in the hand. It has an interesting shape that fits well in either the right or left hand. The finished Willmer Straight Grain AAA Standard is shown in the photos below. The dimensions of the pipe are Length: 6 ½ inches, Height: 2 inches, Outside diameter of the bowl: 2 inches, Chamber diameter: ¾ of an inch. This great looking Willmer Cup and Saucer pipe turned out very well. It should be a great pipe. It will be going on the rebornpipes store shortly if you are interested in adding it to your collection. Thanks for reading this blog and my reflections on the pipe while I worked on it.