Blog by Steve Laug
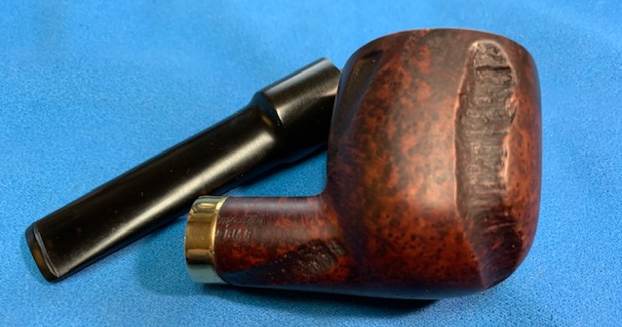
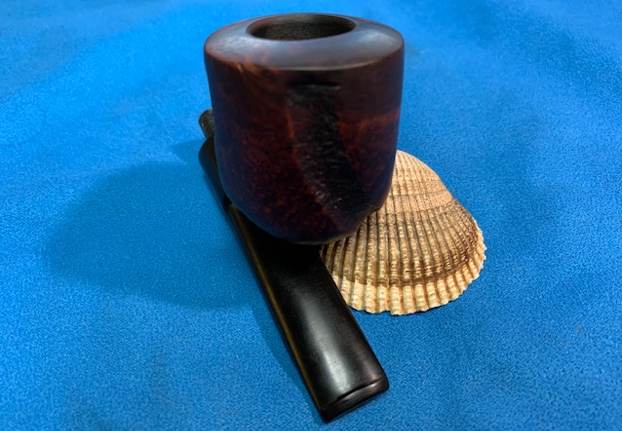
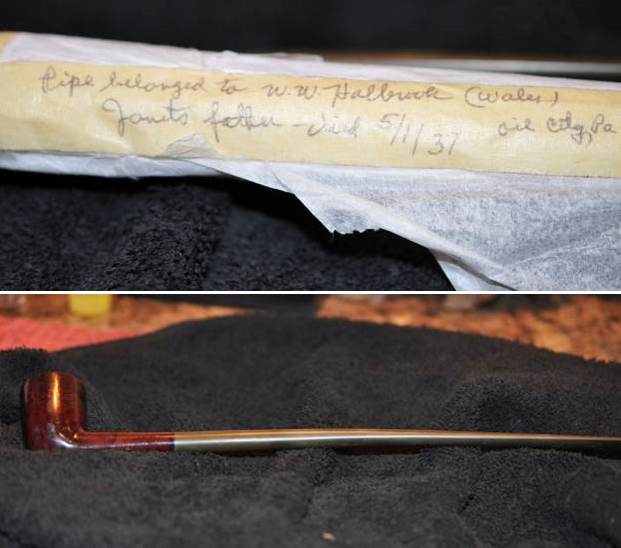
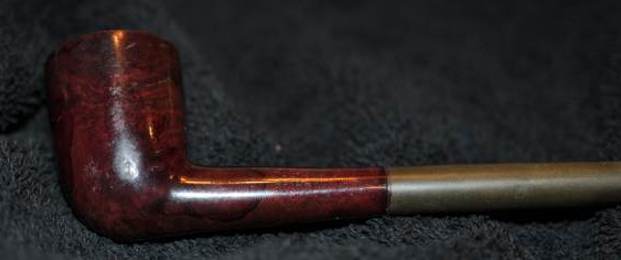
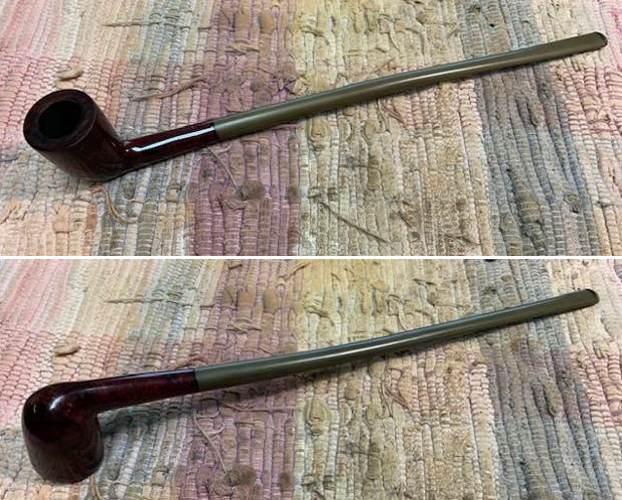
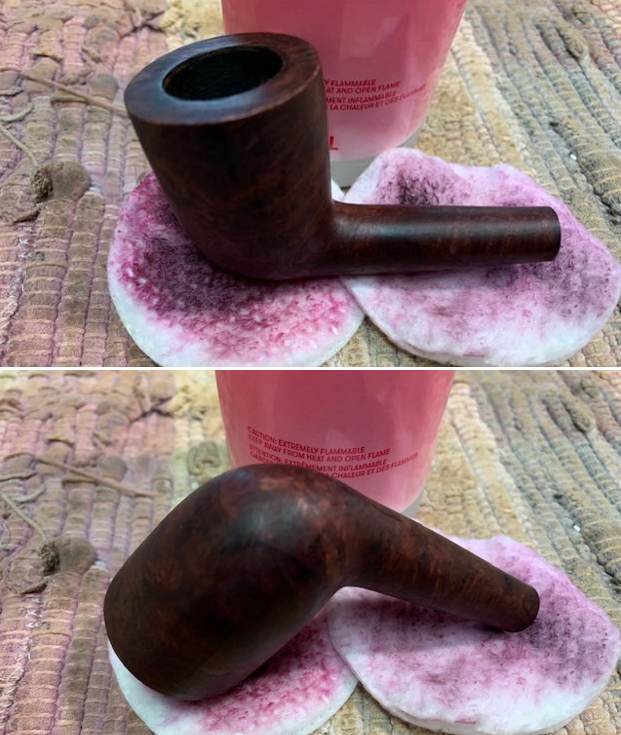
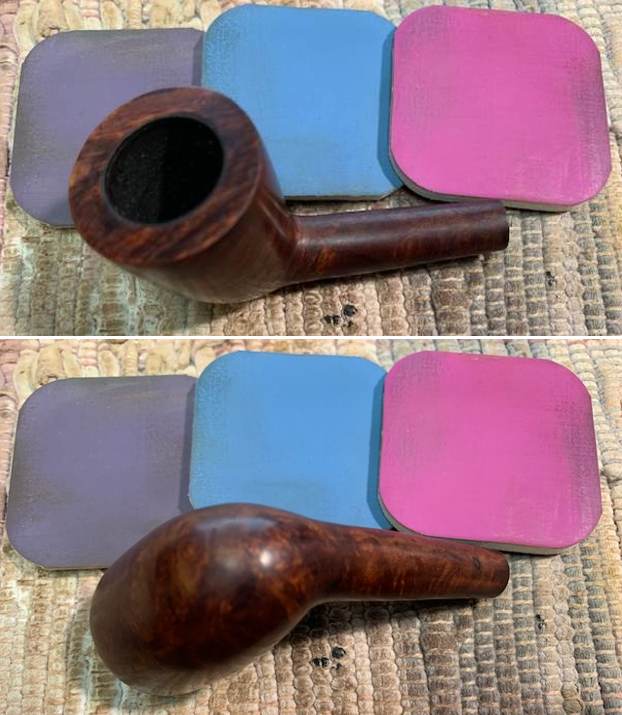
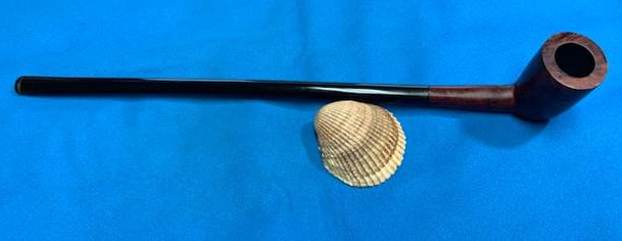
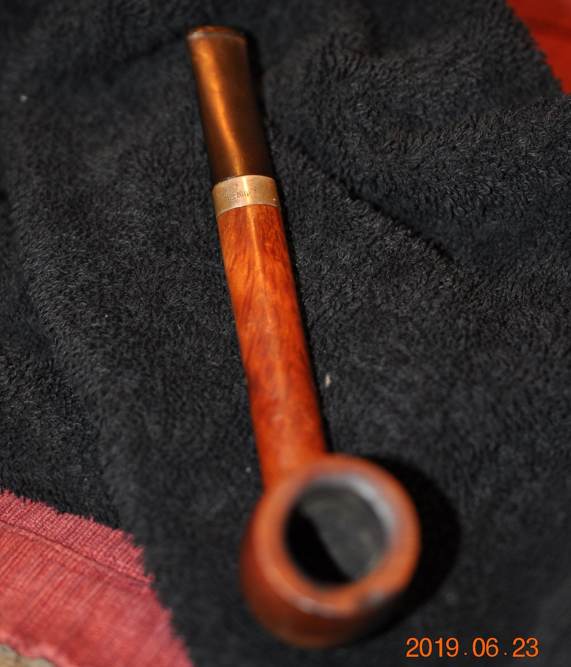
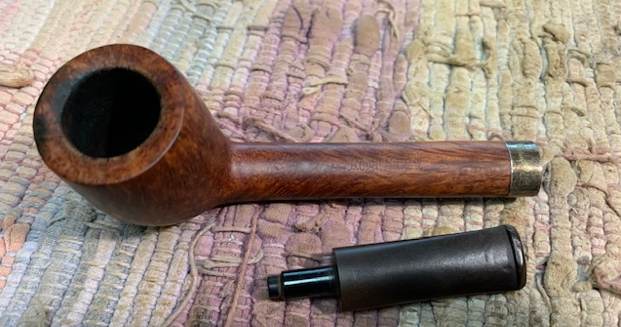
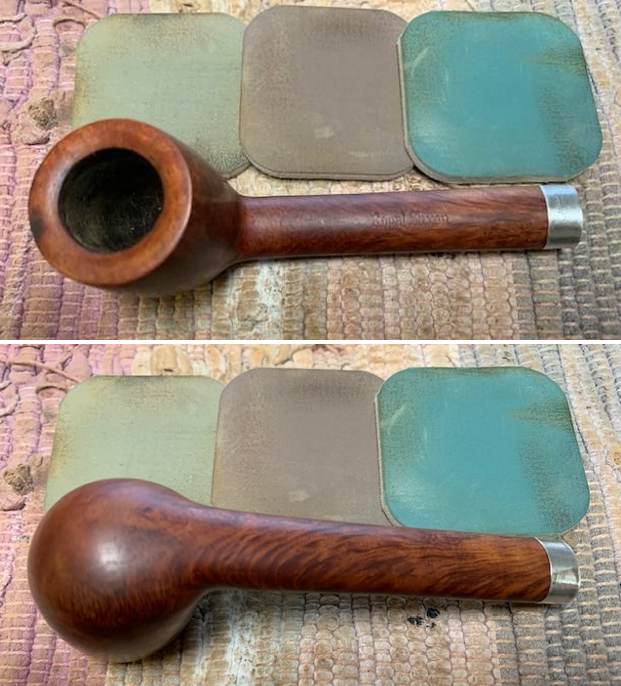
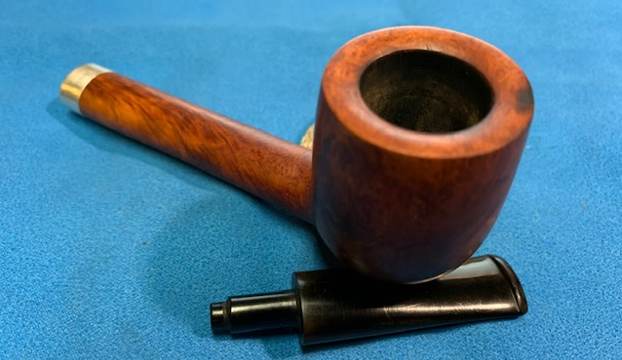
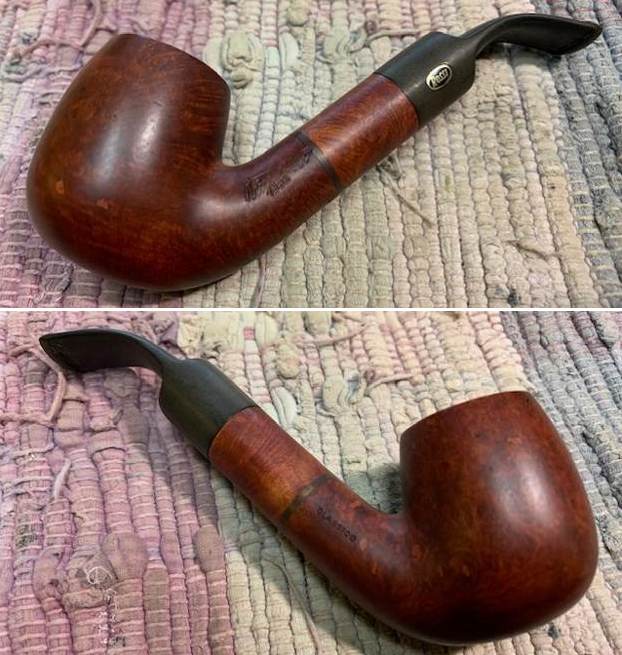
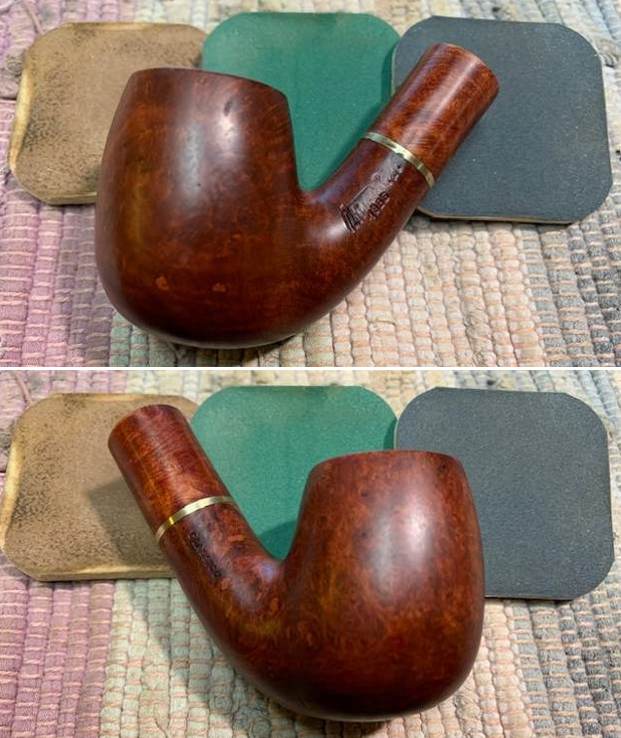
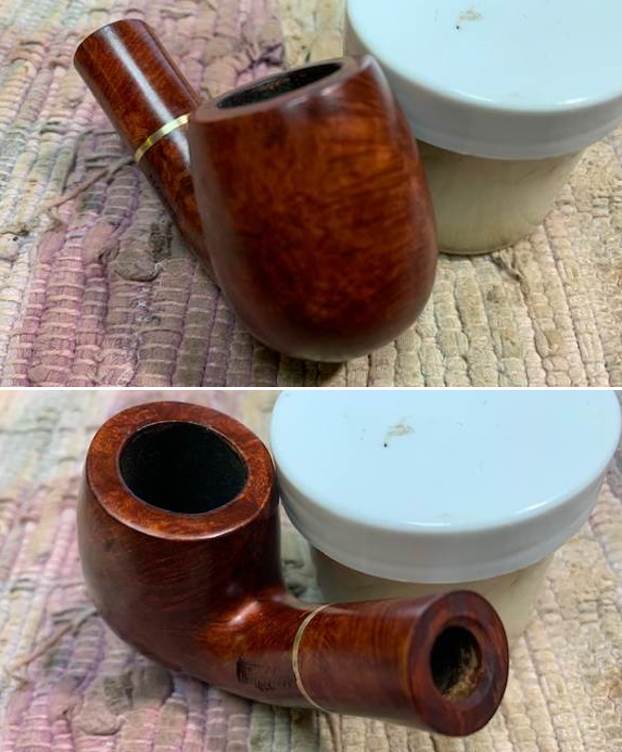
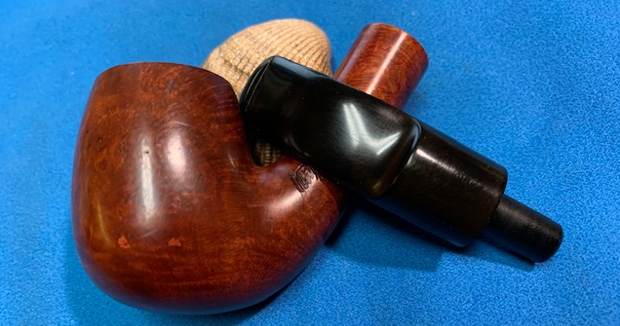
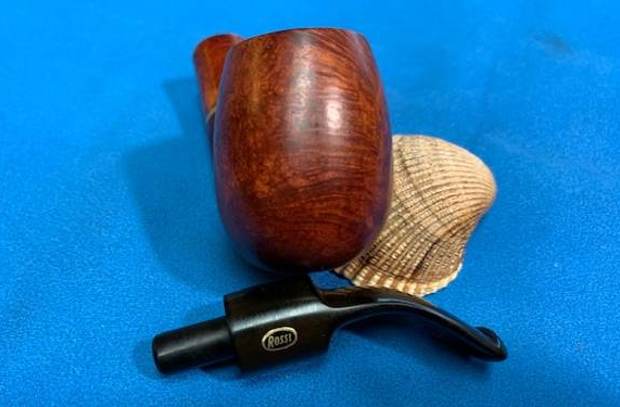
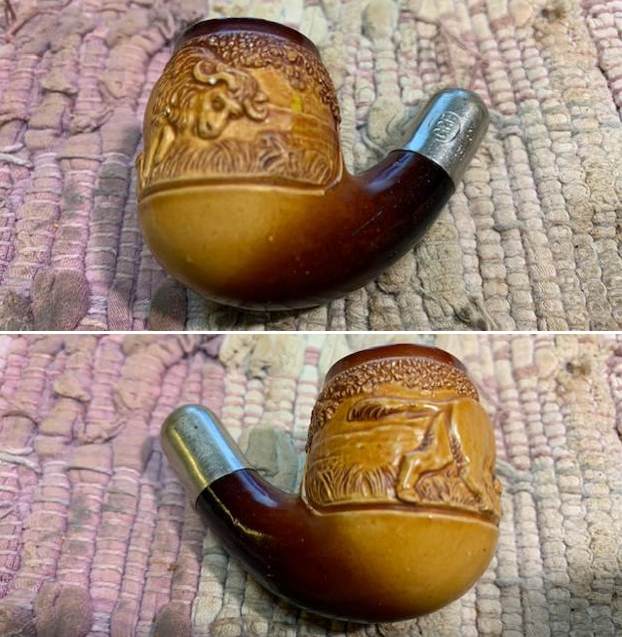
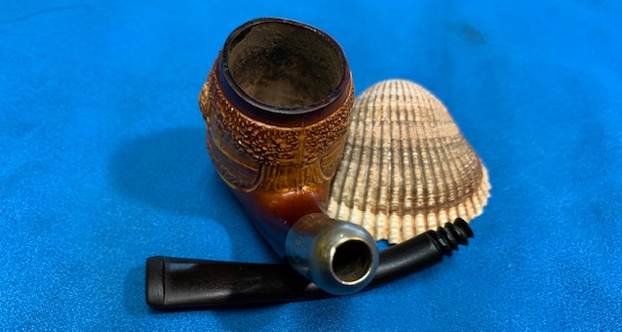
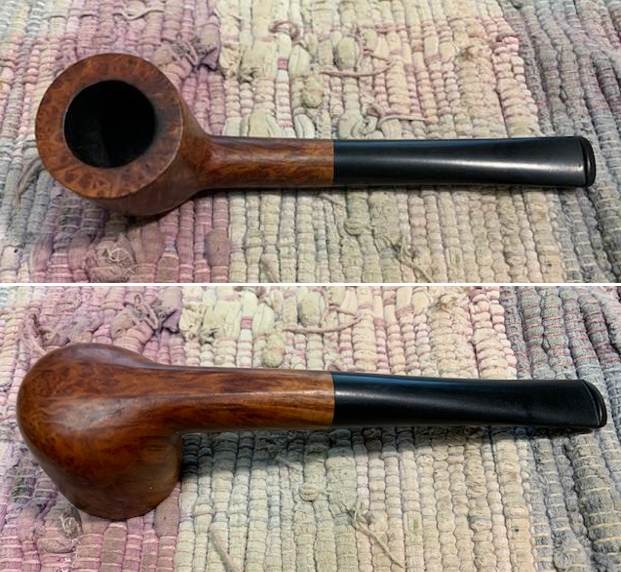
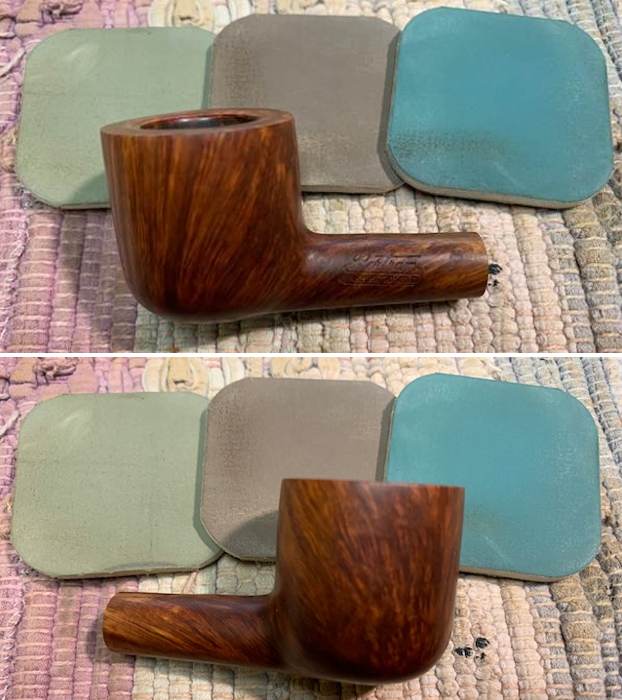
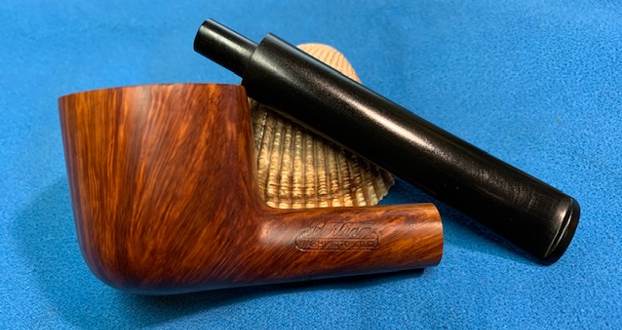
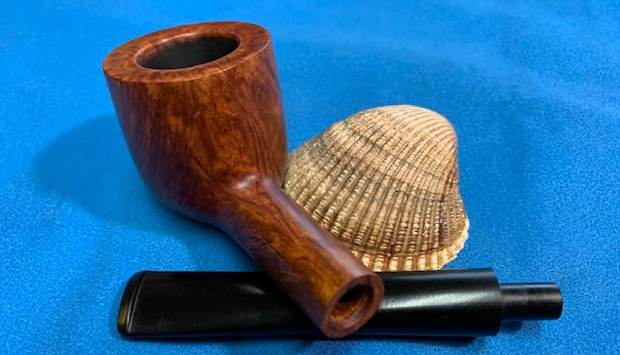
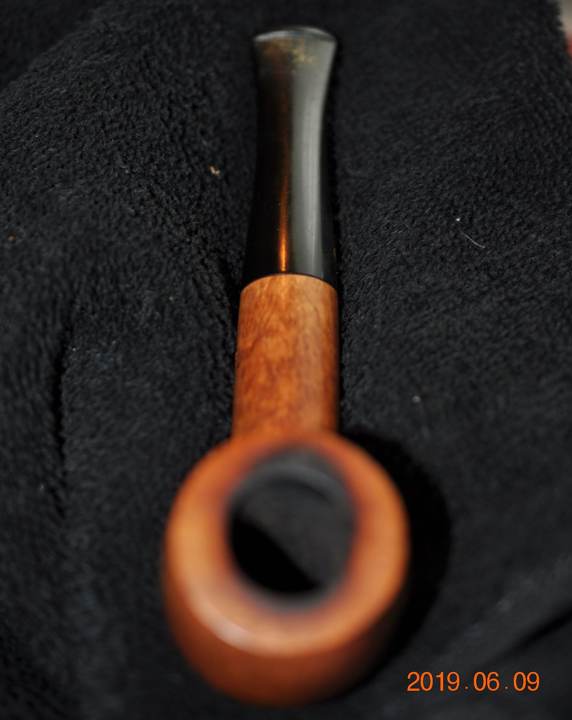
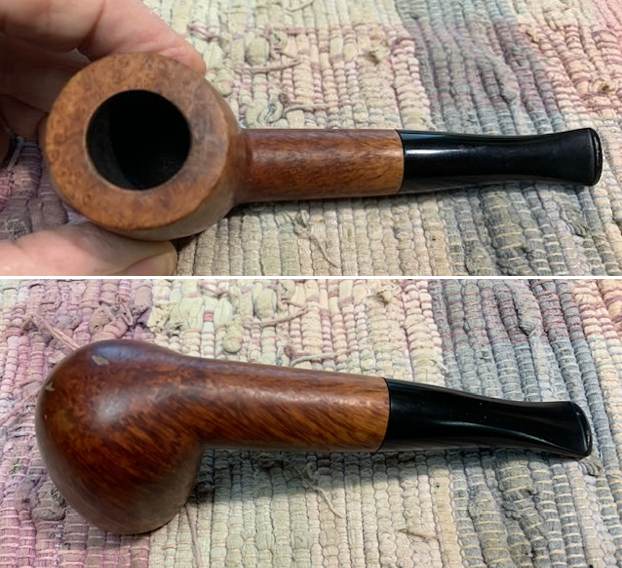
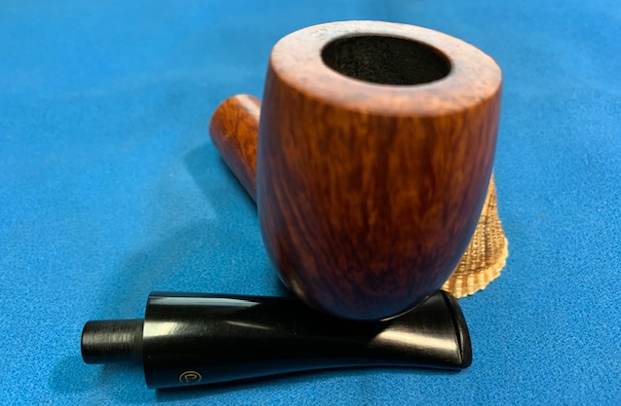
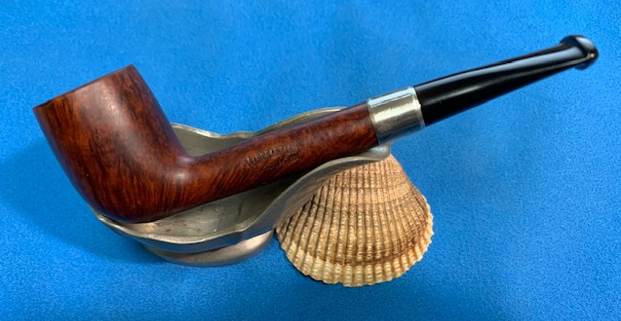
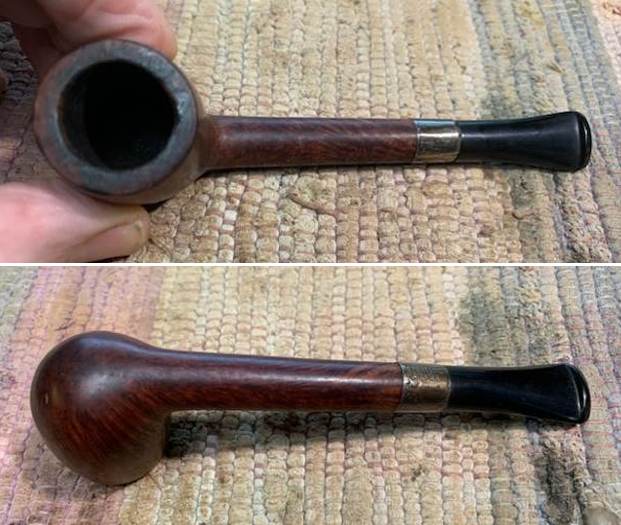
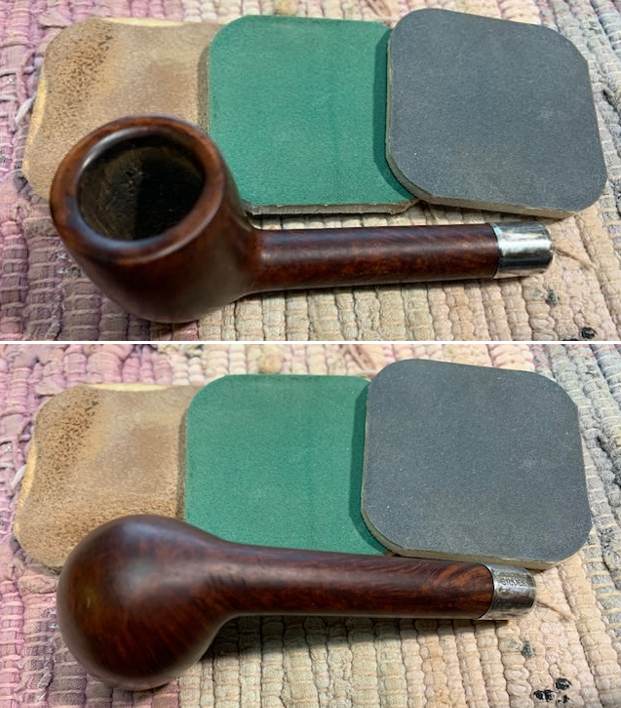
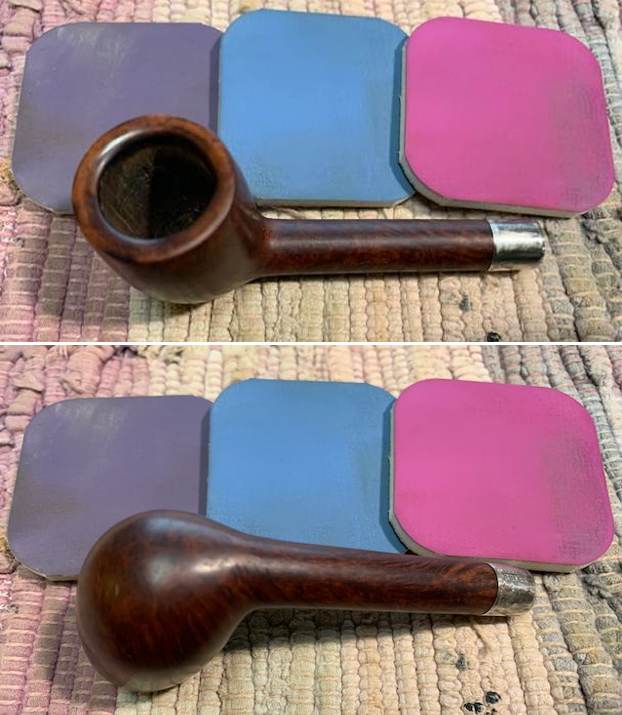
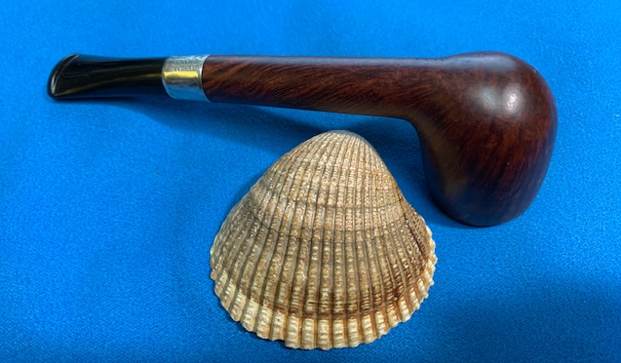
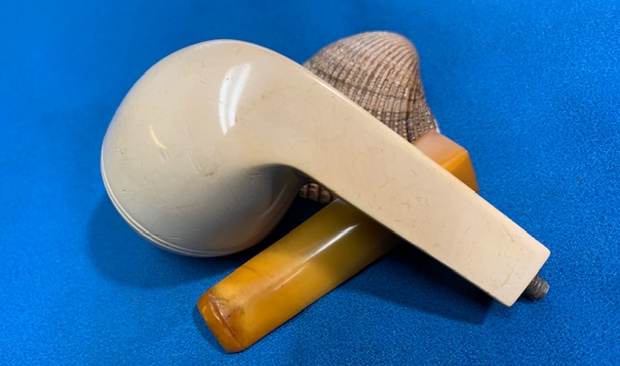
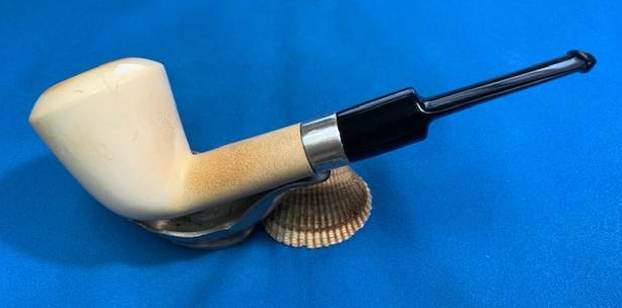
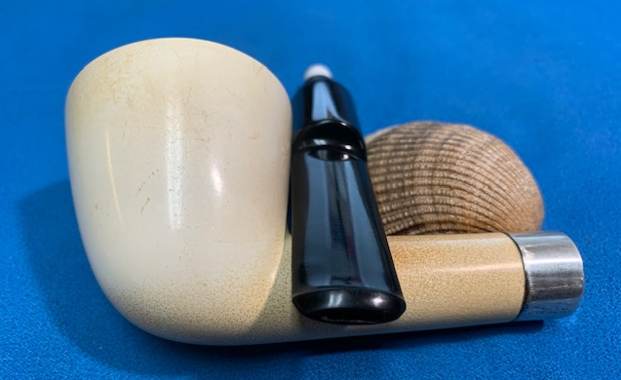
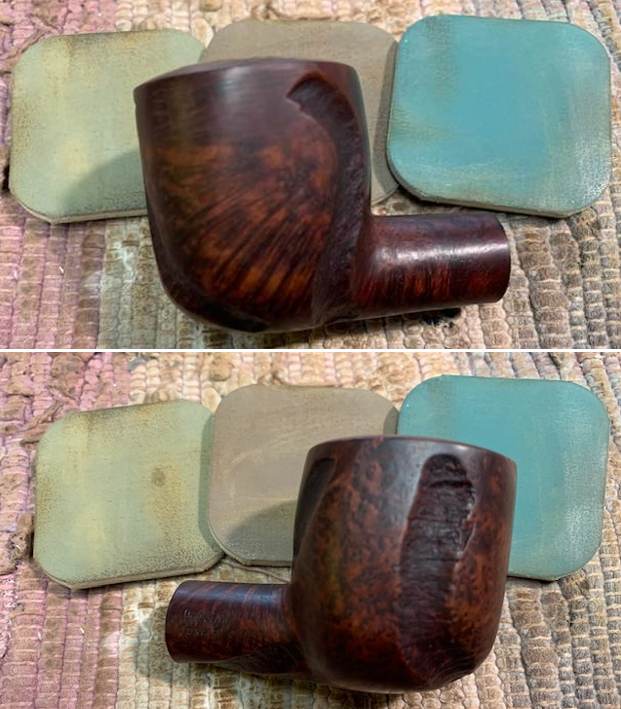
Sometimes when I start working on a pipe there is can be a sense of gloom or expectant trouble. That was the case with this one. I thought it would be a straightforward clean up and restoration. Little did I know what lay ahead for me in this restoration. Time would tell and I would share it here with you my readers. It started as usual. I recognized the brand on this pipe but could not remember any of the details. Jeff picked this pipe up from an antique store in Ogden, Utah, USA back in 2019. It is stamped on the left side of the shank and reads Greenwich House [arched over] Antique and on the right side Imported [over] Briar. It was the Greenwich House tag that grabbed my attention. You know how sometimes a name just sits on the edge of your memory beyond your reach but you still know it? That is what this name did to me. The finish is quite dirty with a cake in the bowl and lava overflow on the rim top. The worm trails on the sides and base reminded me of a Custom-Bilt but a bit more smooth. The crowned rim top was more elegant. The saddle style stem was old vulcanite and other than deep tooth marks it was quite clean, Jeff took some photos of the pipe before he started. 
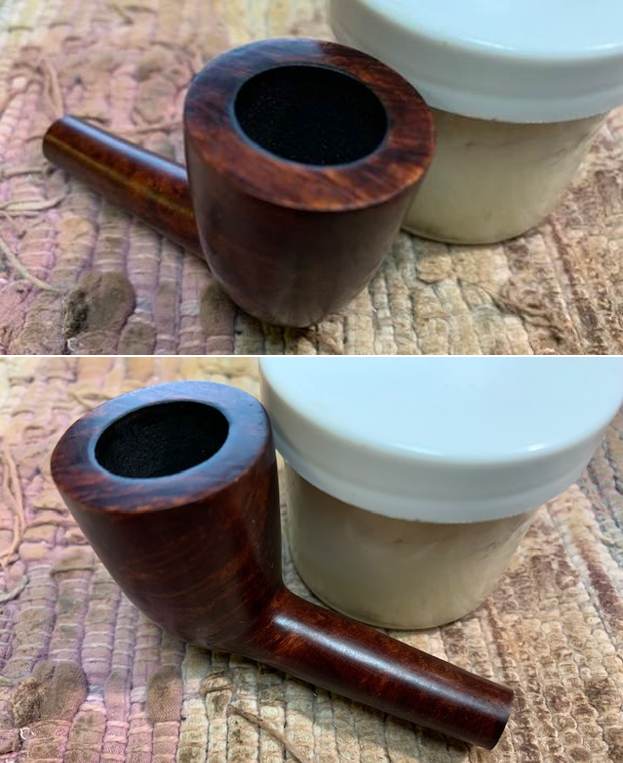
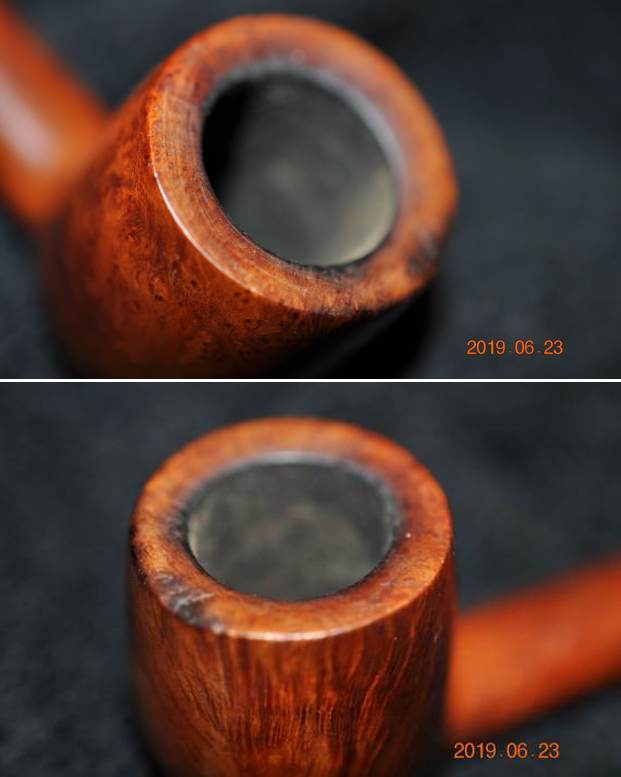
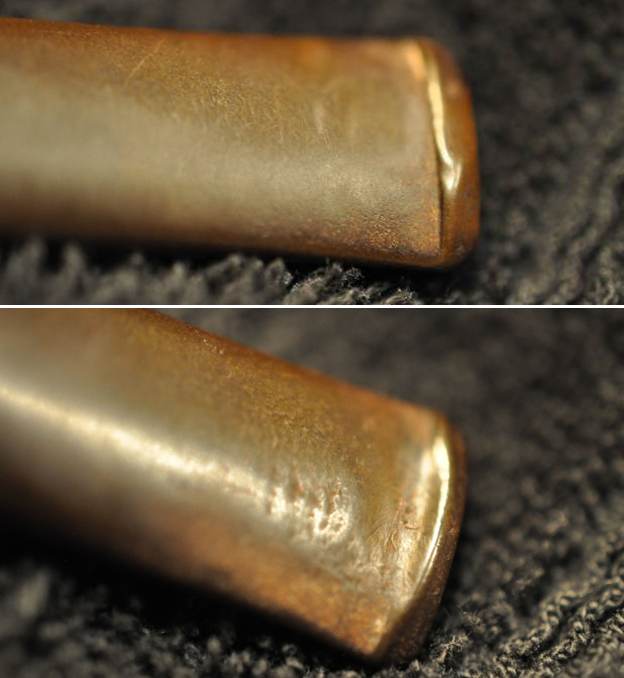
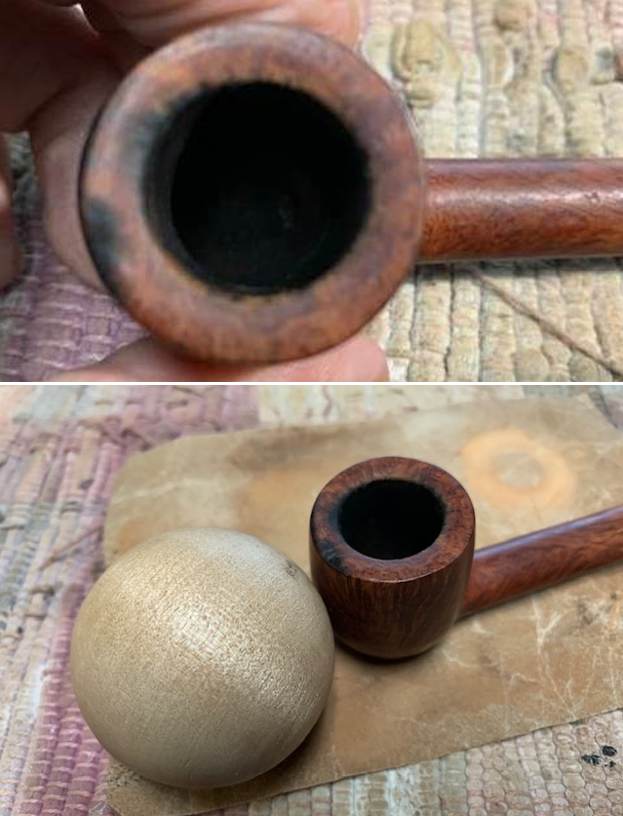
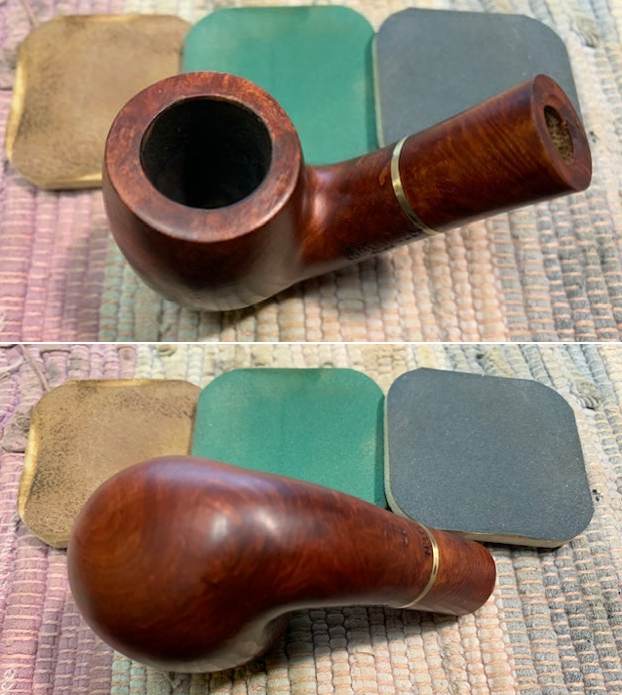
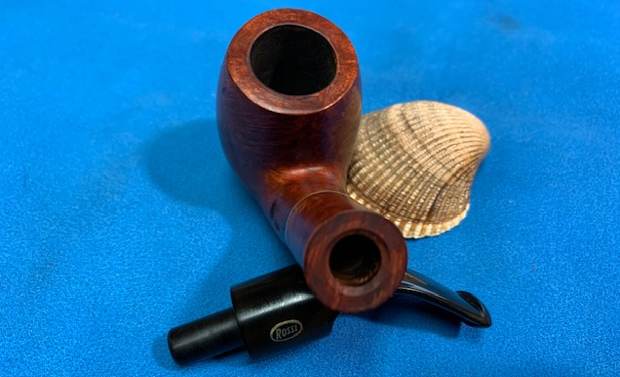
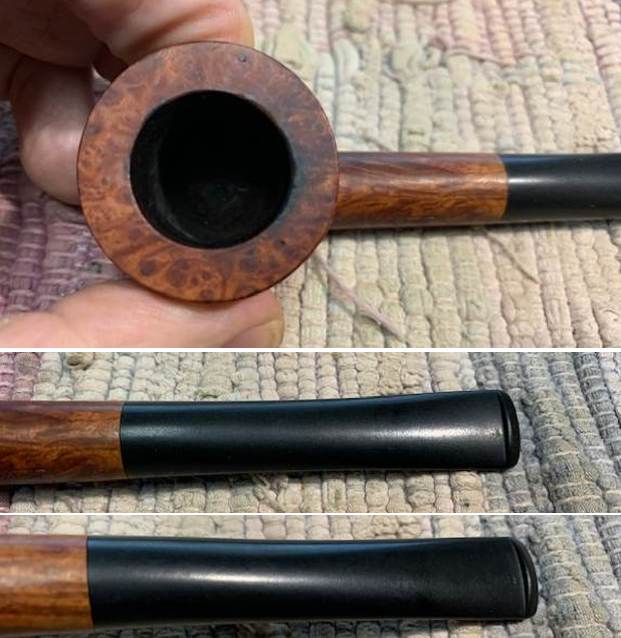
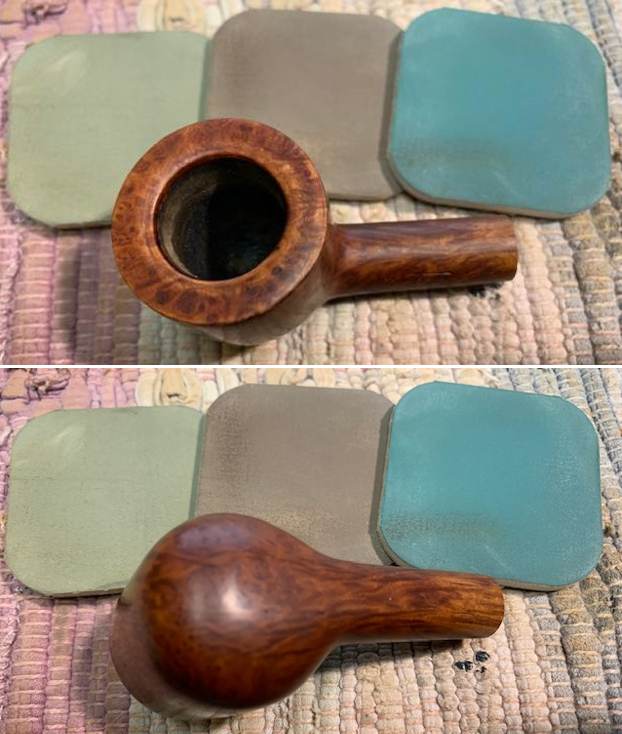
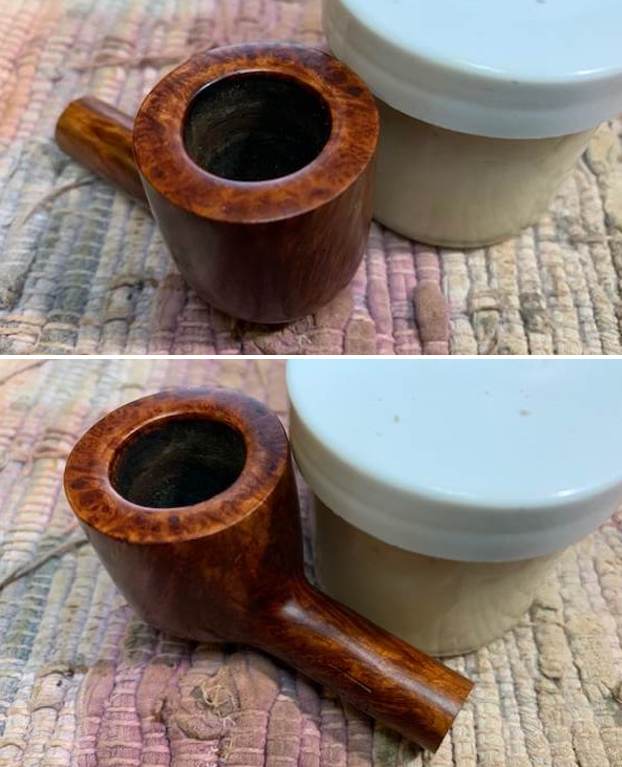
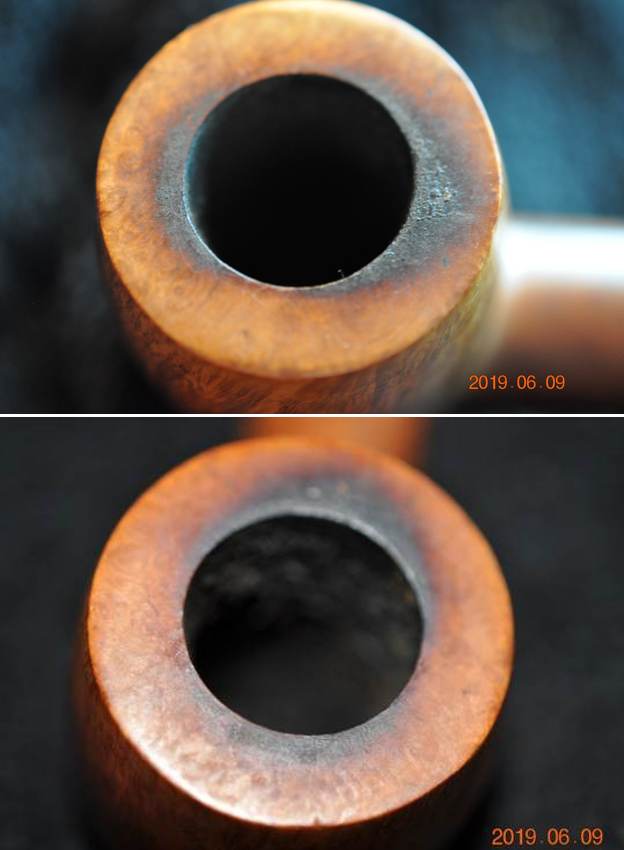
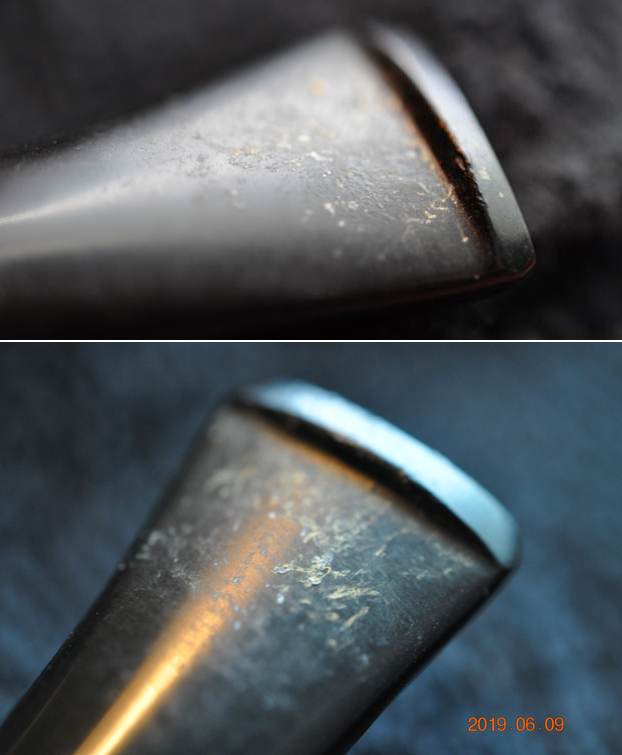
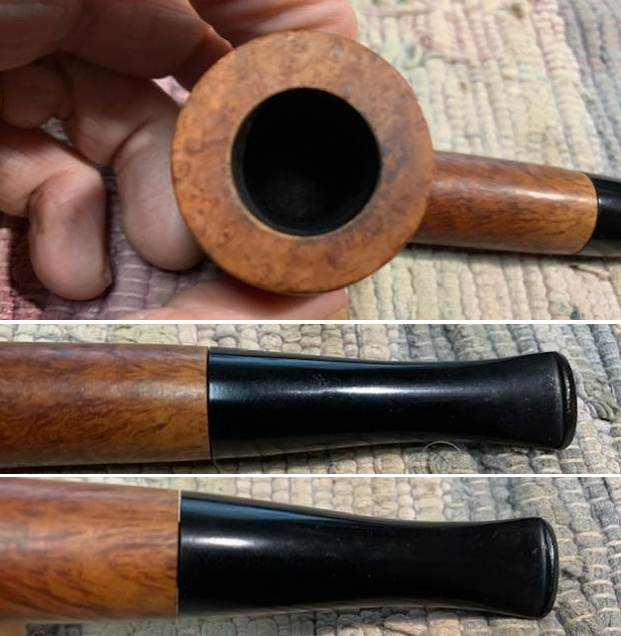
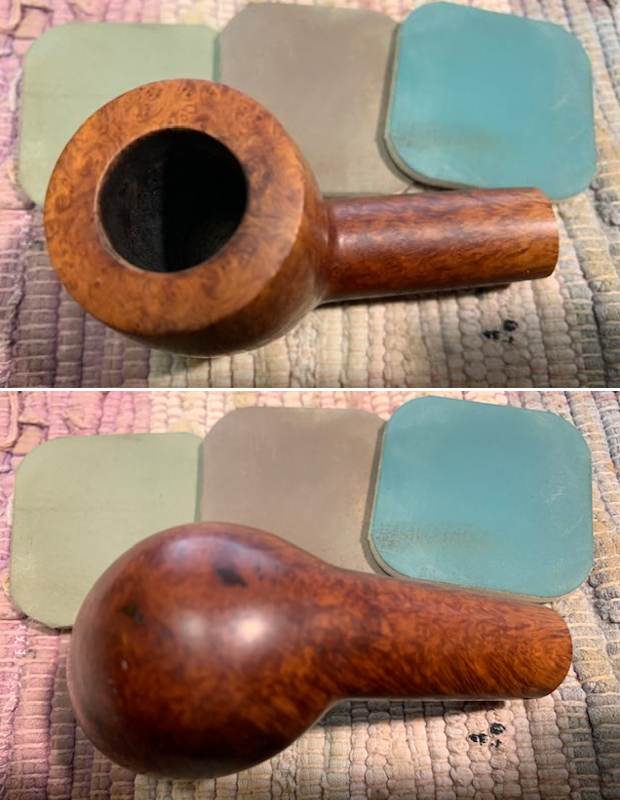
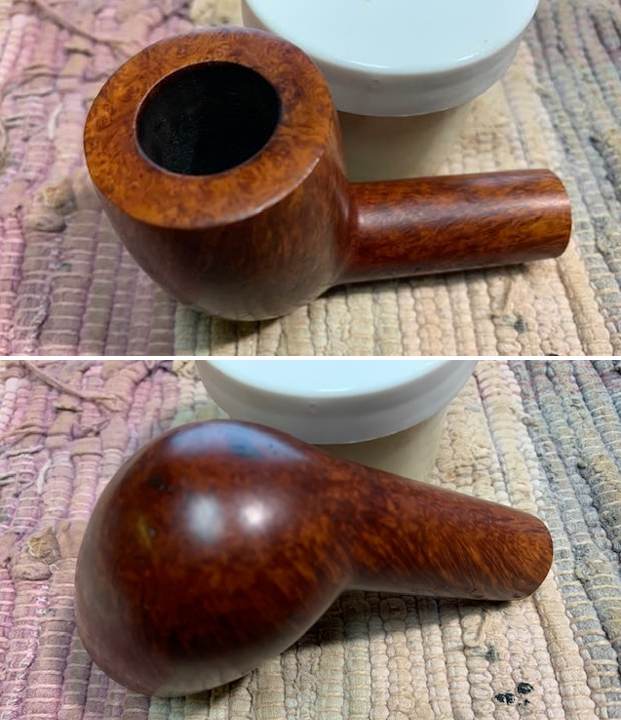
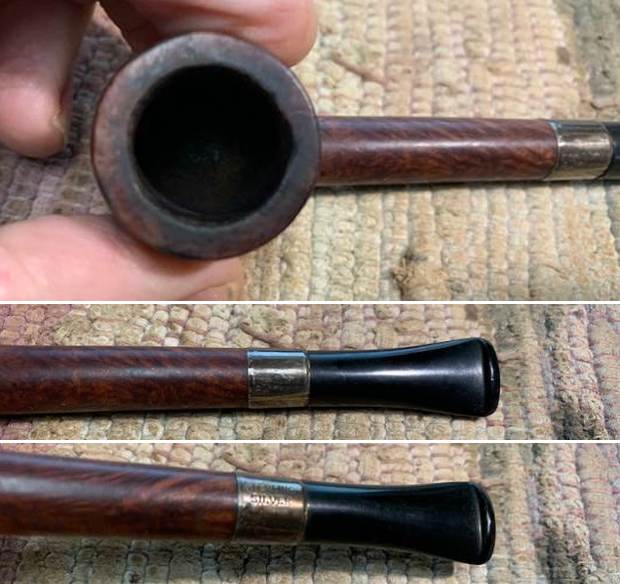
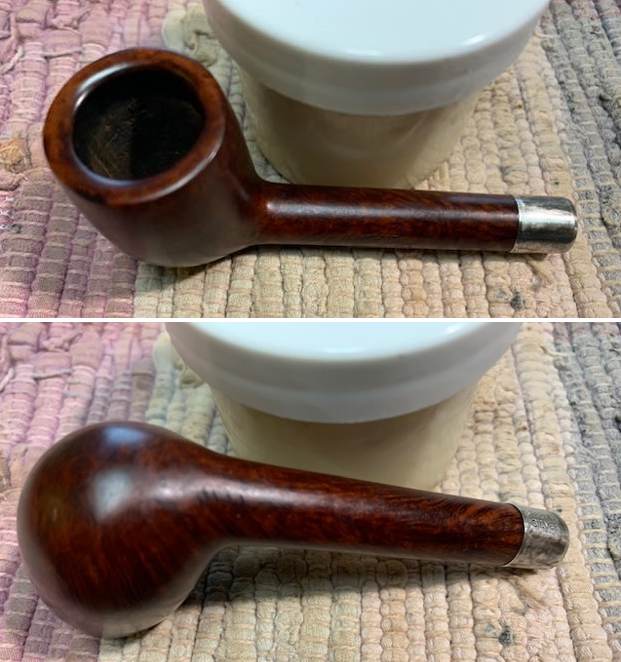
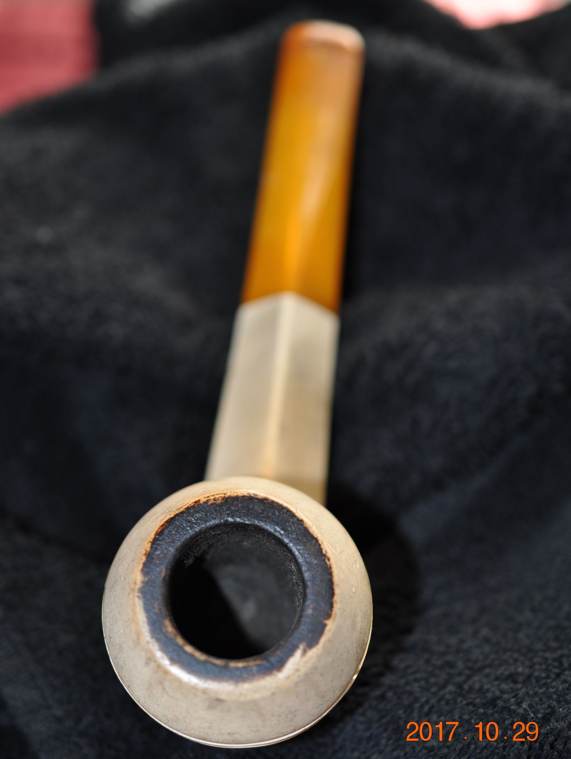
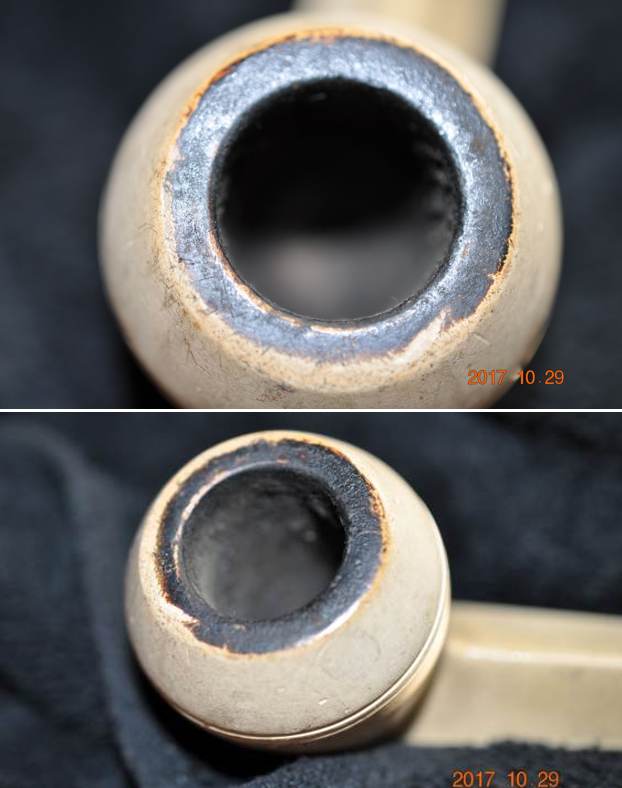
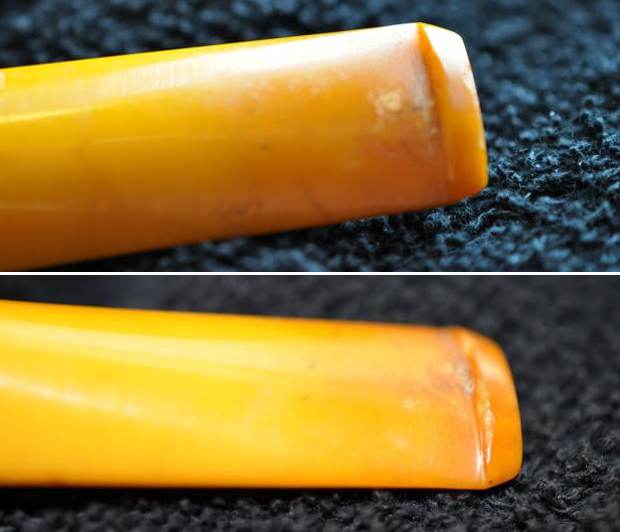
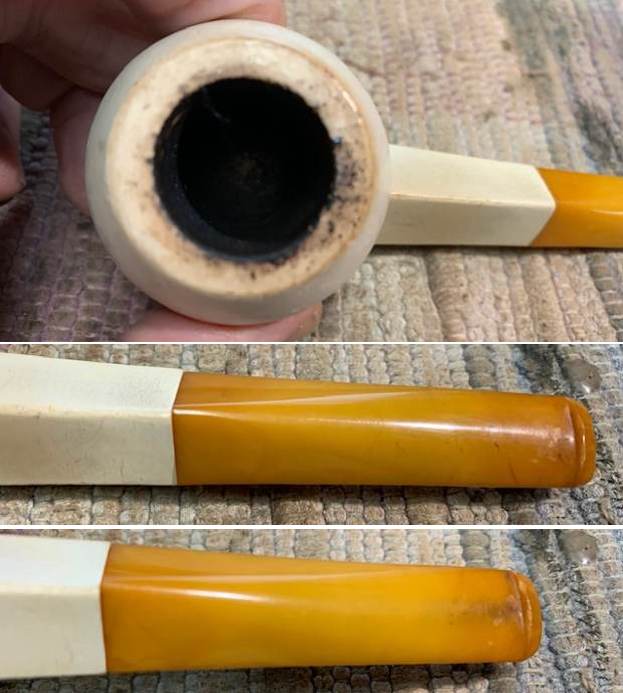
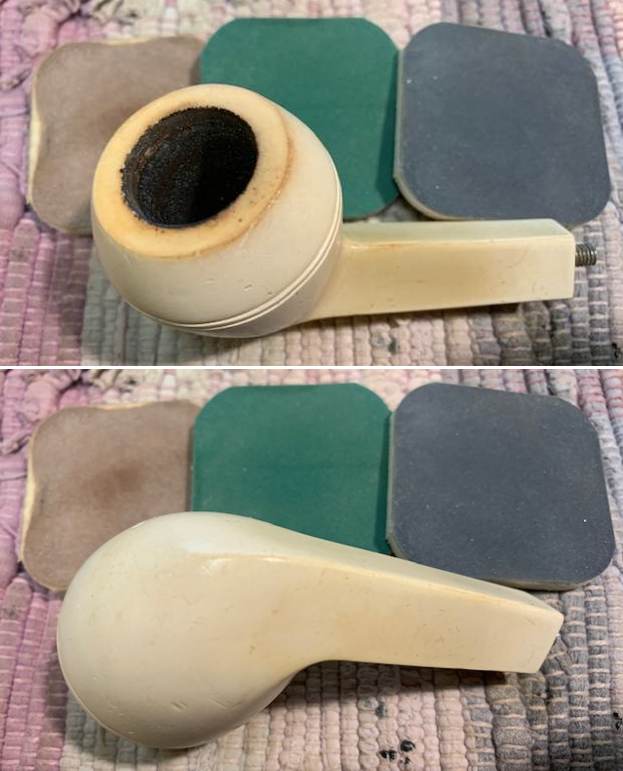
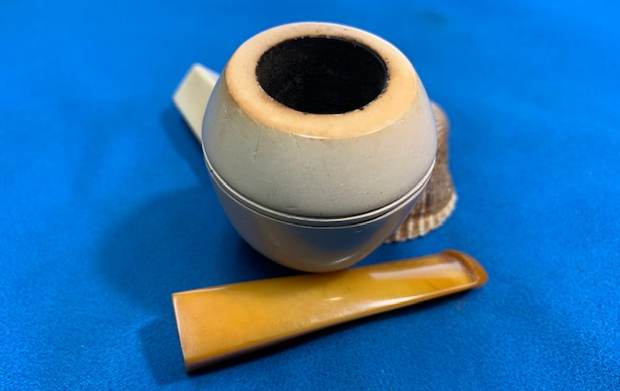
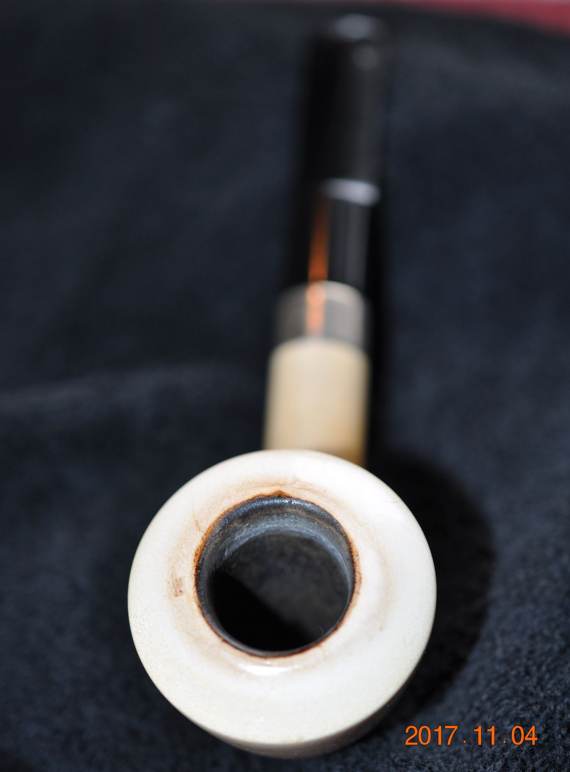
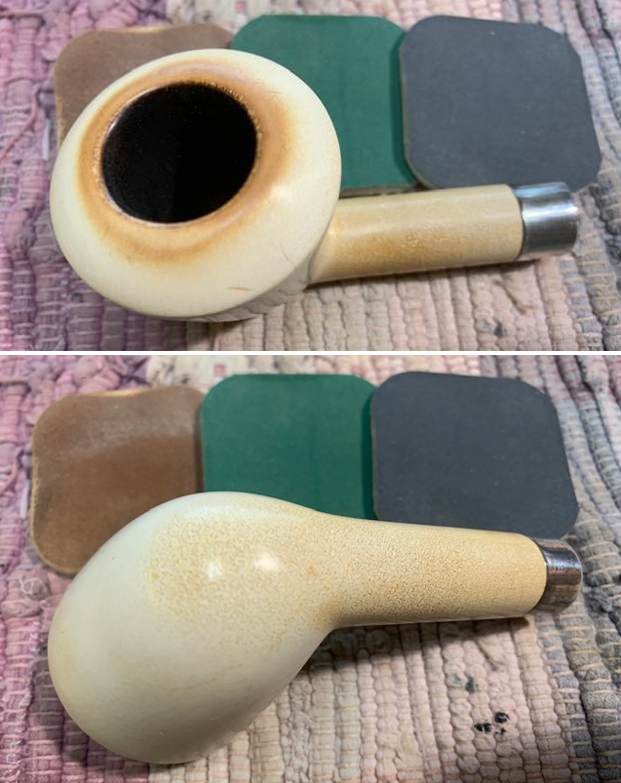
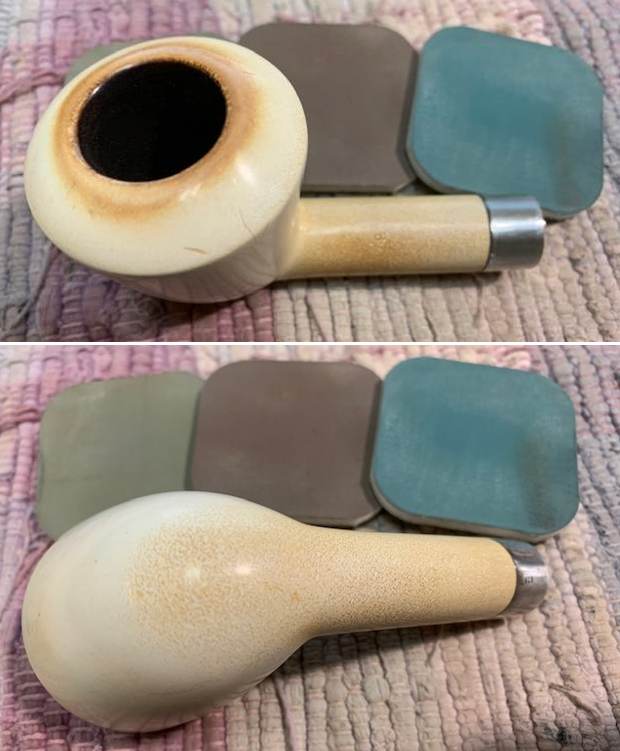
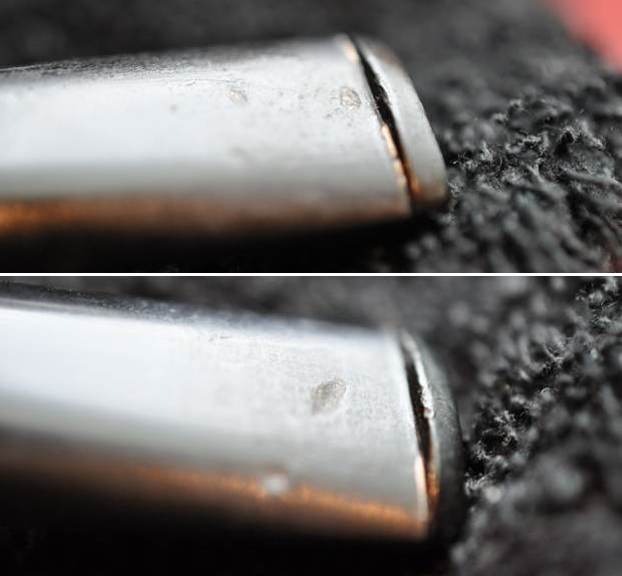
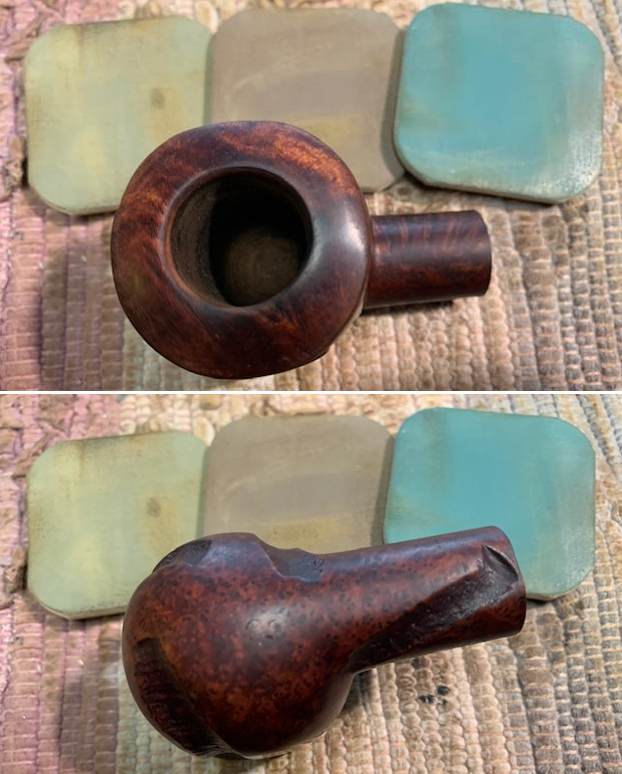
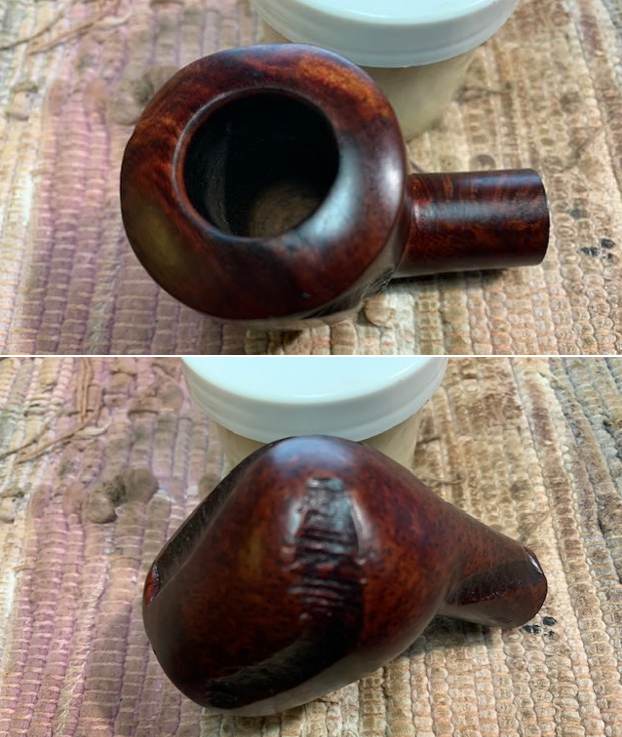
 He took close up photos of the rim top, bowl and stem to give a better picture of what he was seeing as he prepared to clean it up. You can see the cake in the bowl and the lava on the rim top. The inner edge appears to be burned and damaged but it was hard to tell for sure. The stem had some deep tooth marks on both sides just ahead of the button and some light calcification at the sharp edge.
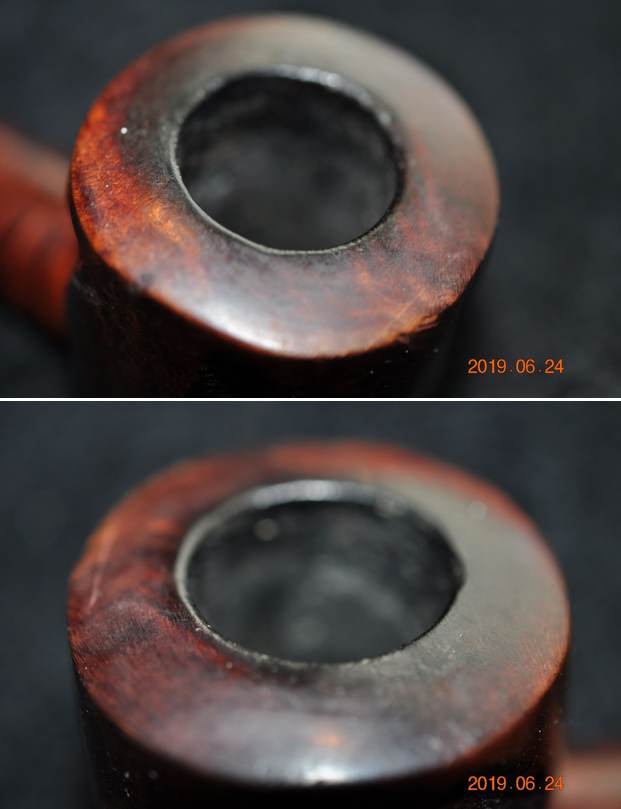
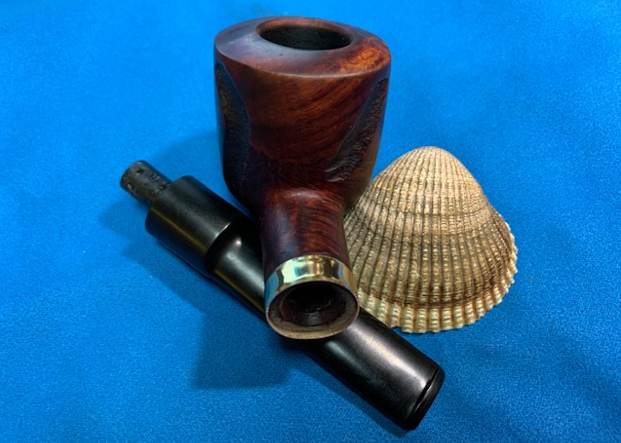
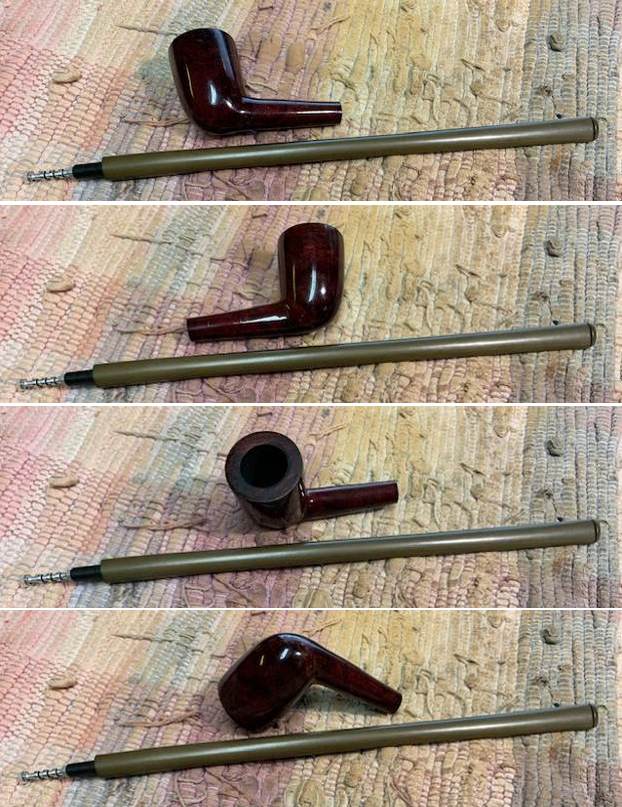
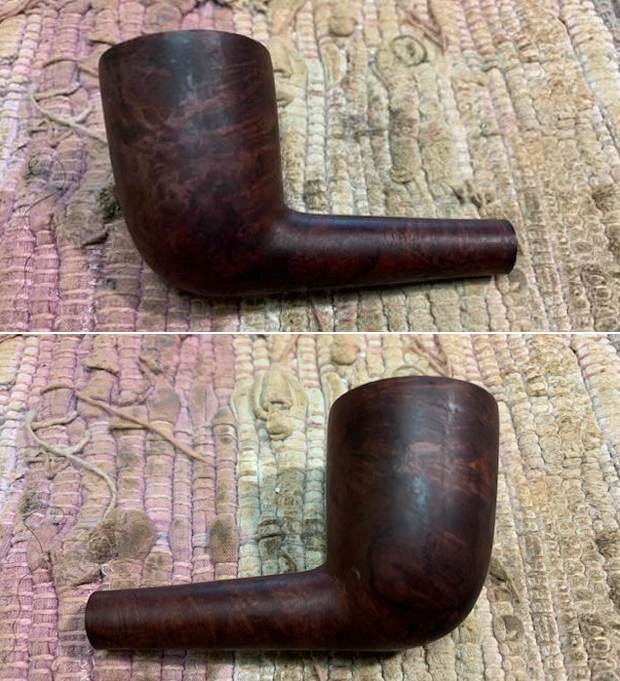
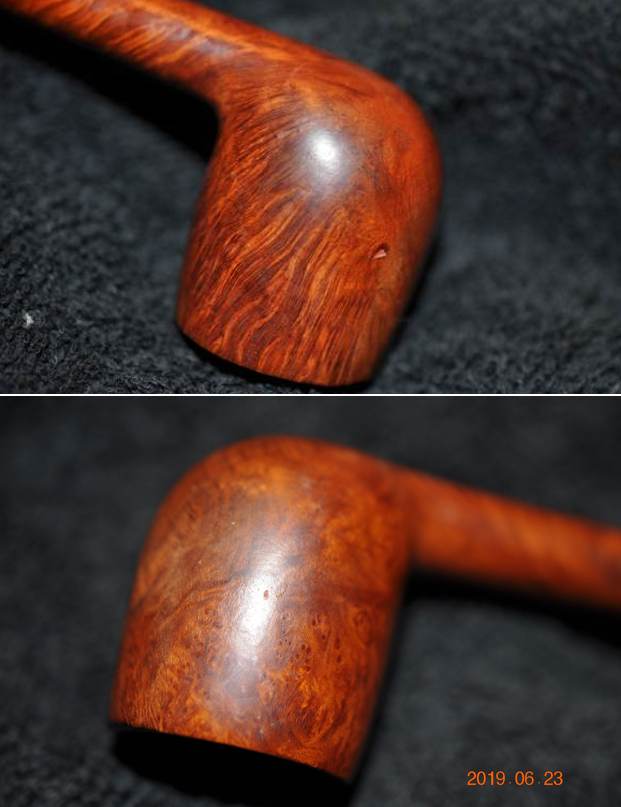
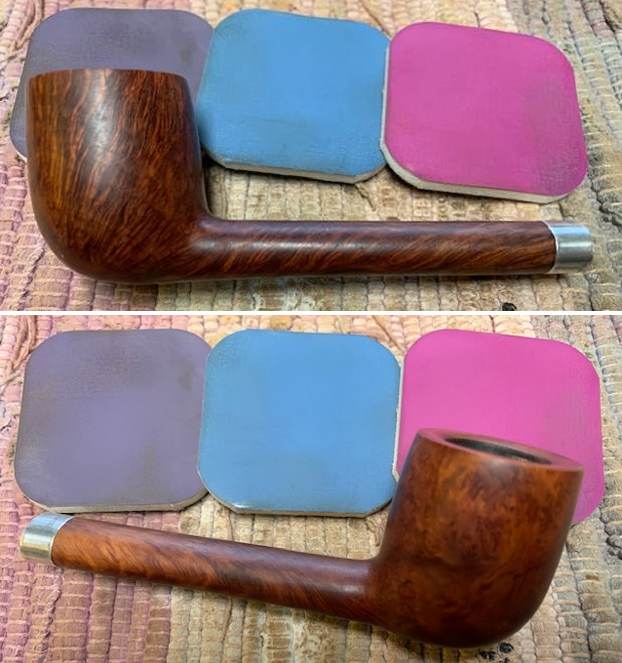
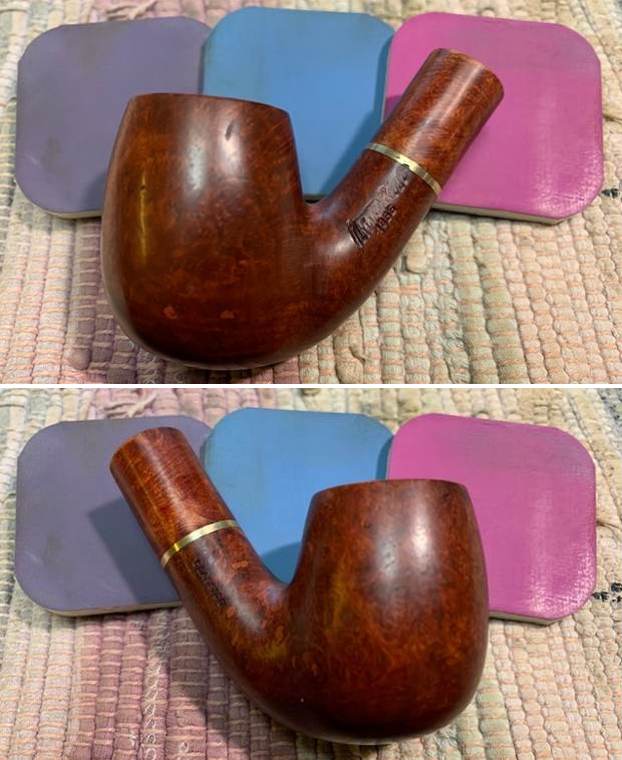
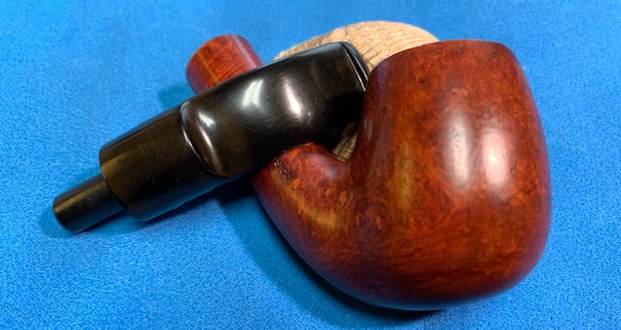
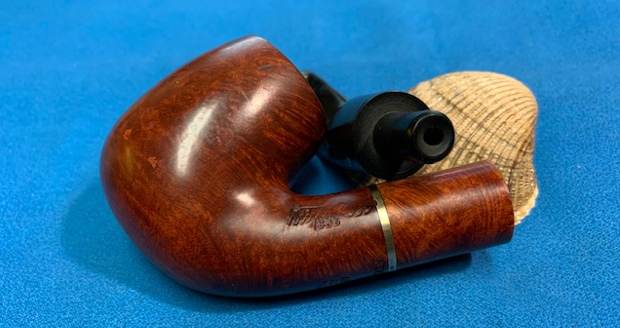
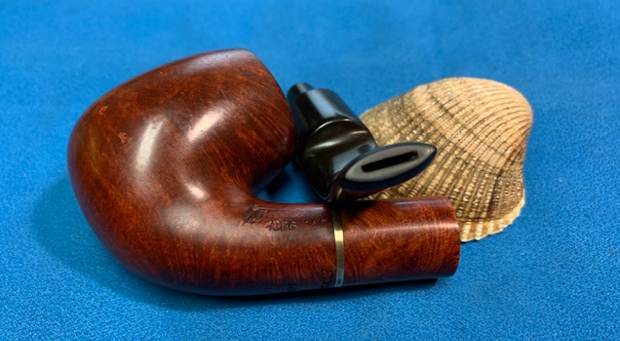
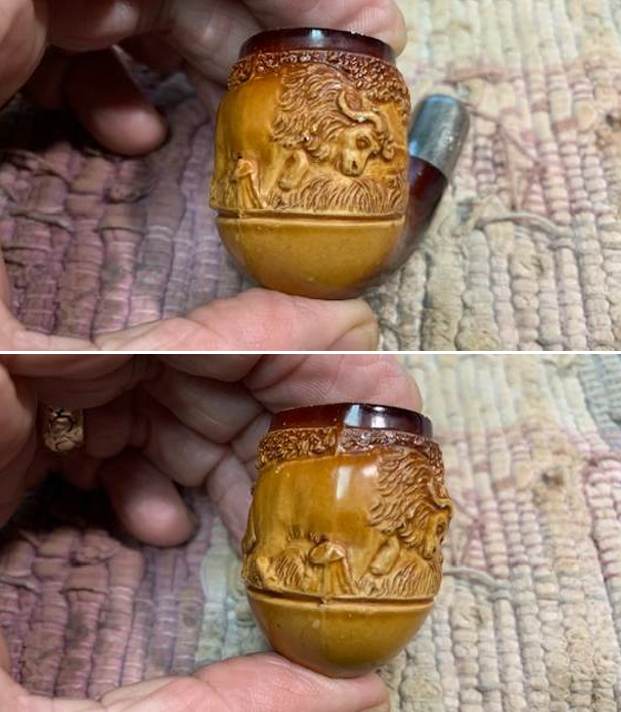
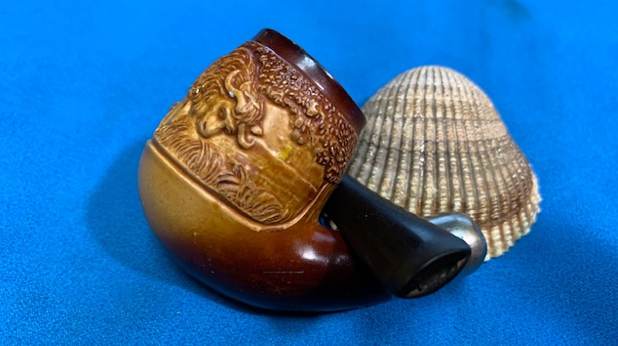
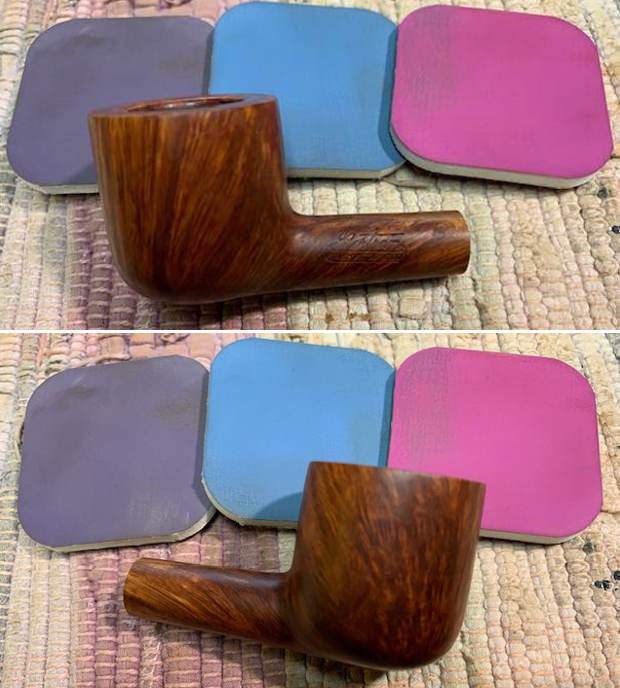
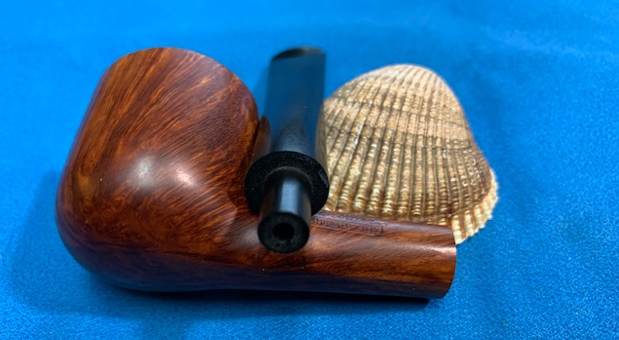
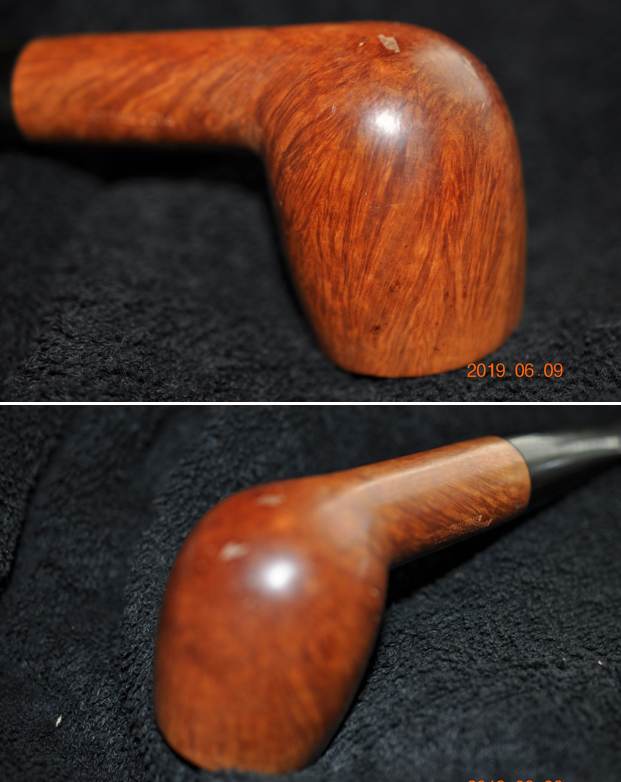
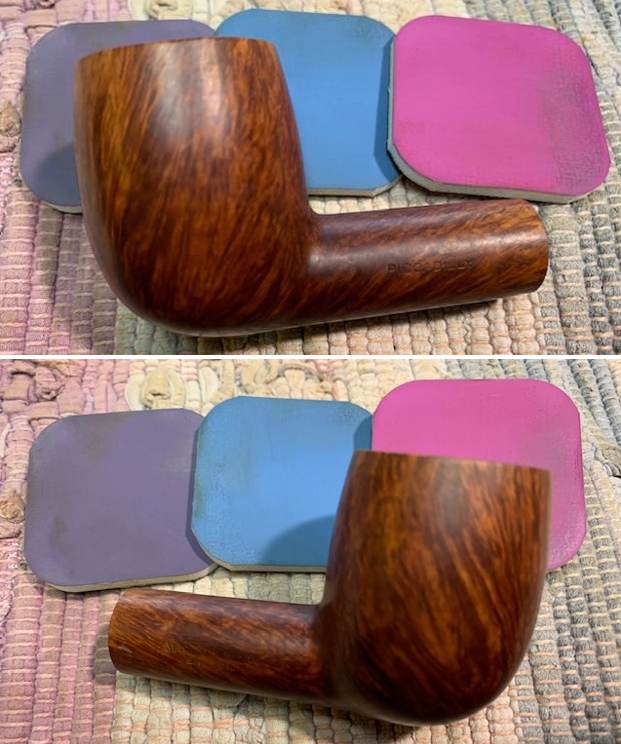
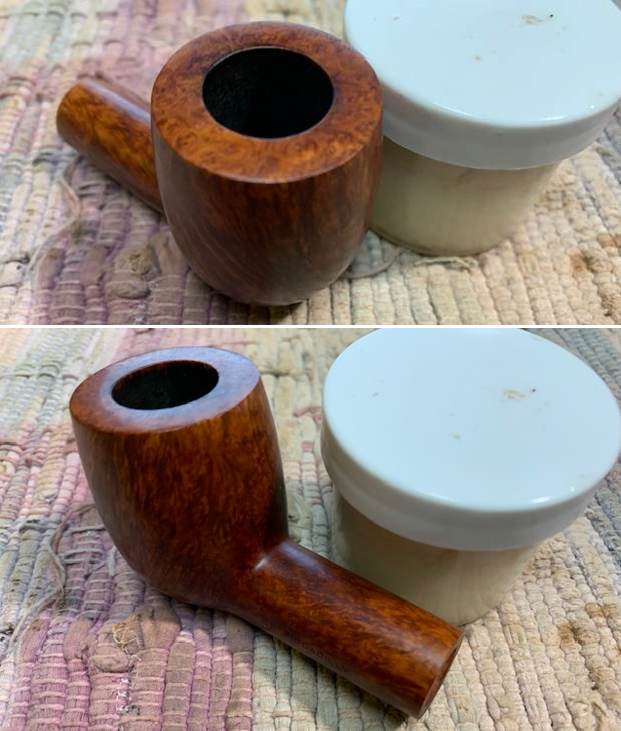
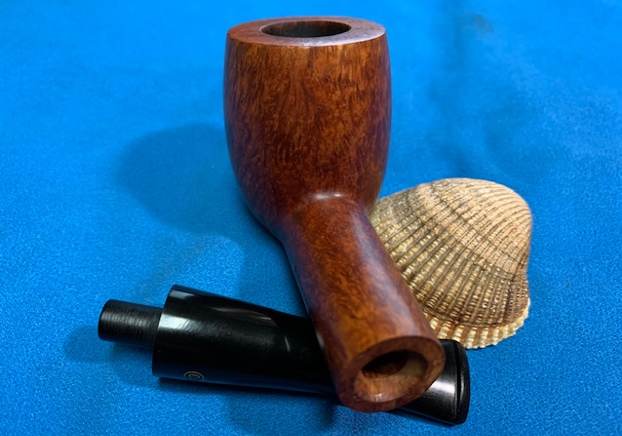
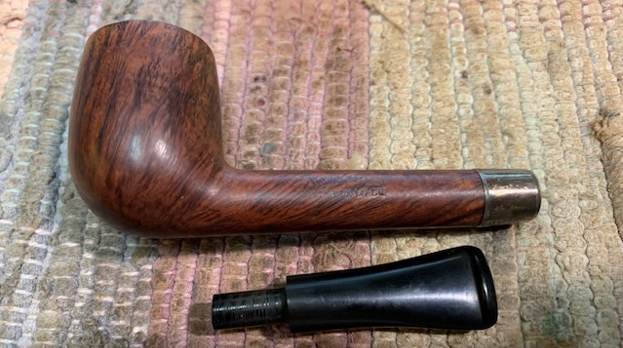
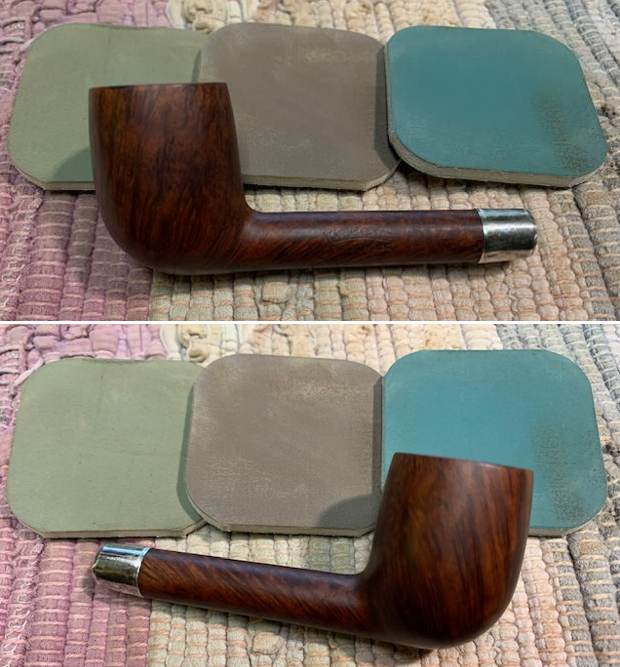
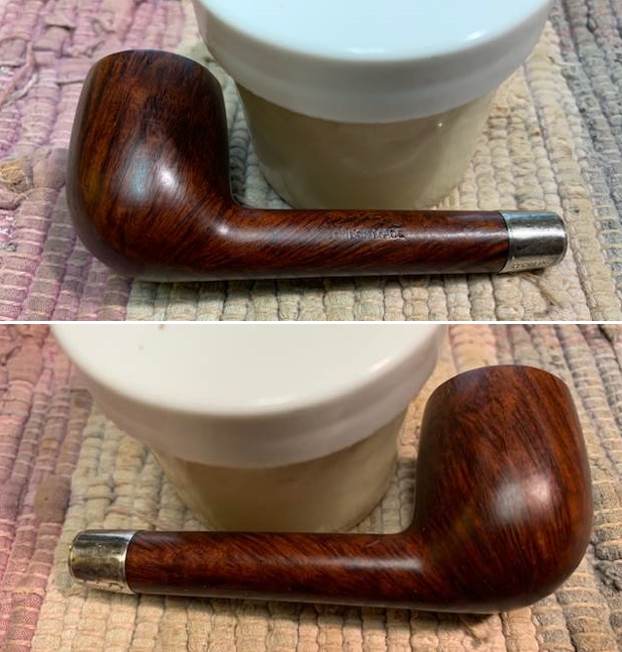
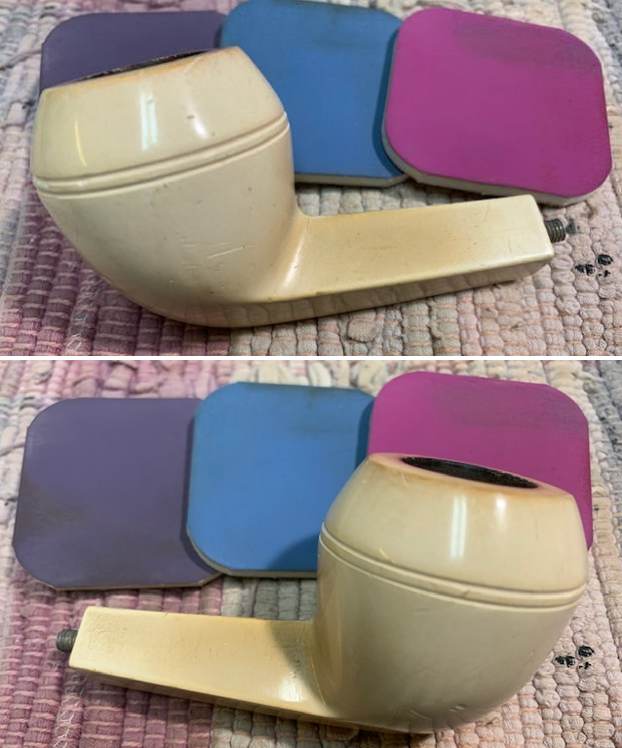
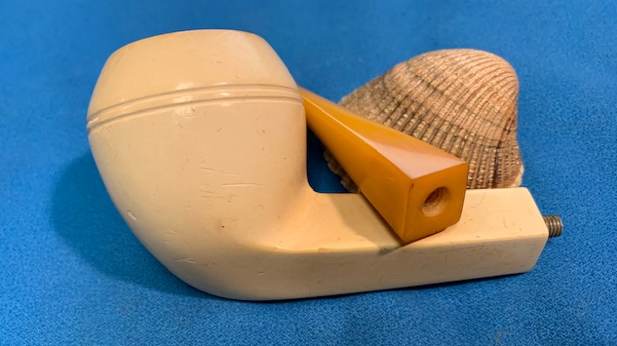
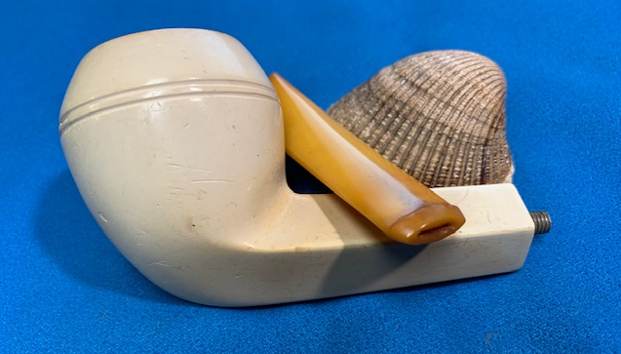
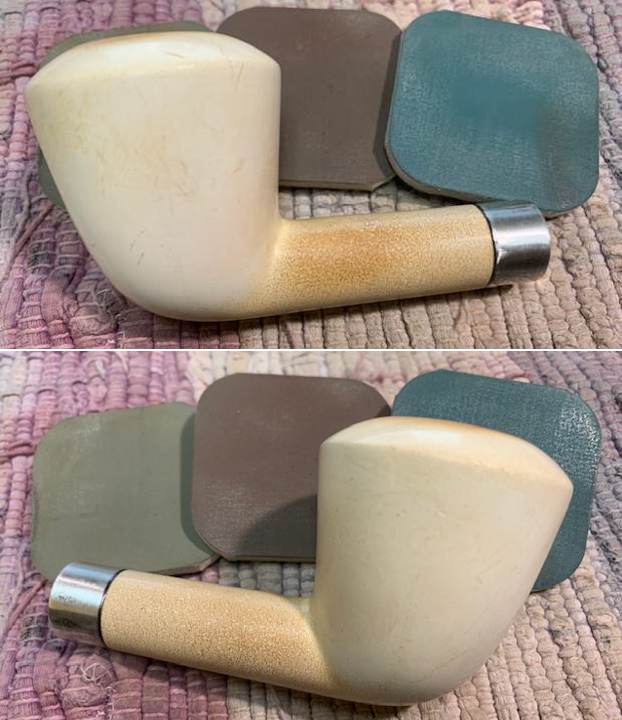
 Jeff took his characteristics photos of the bowl sides and heel to give a clear picture of the grain around the bowl and the style of the worm trails carved into the sides and heel. It is a nice piece of briar.
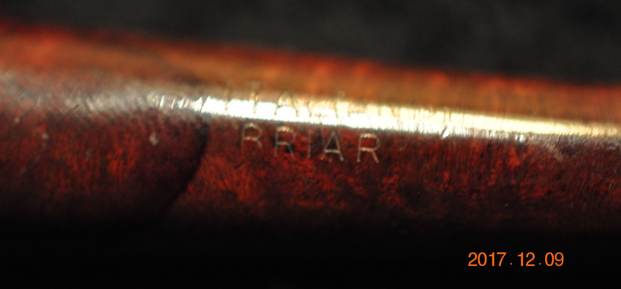
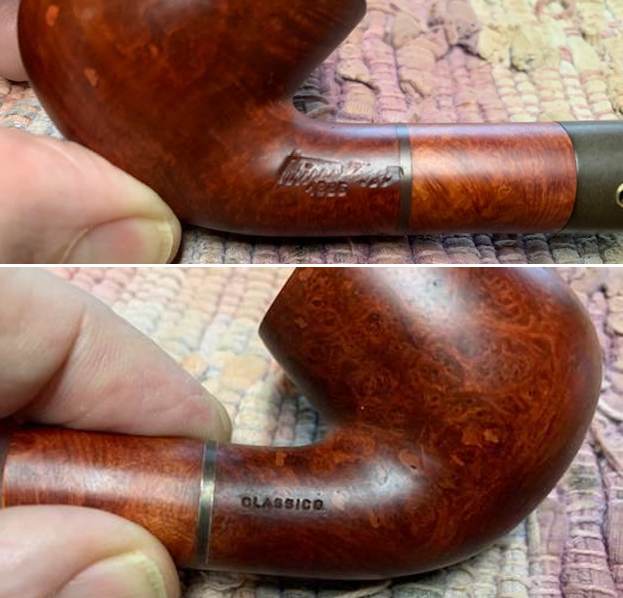
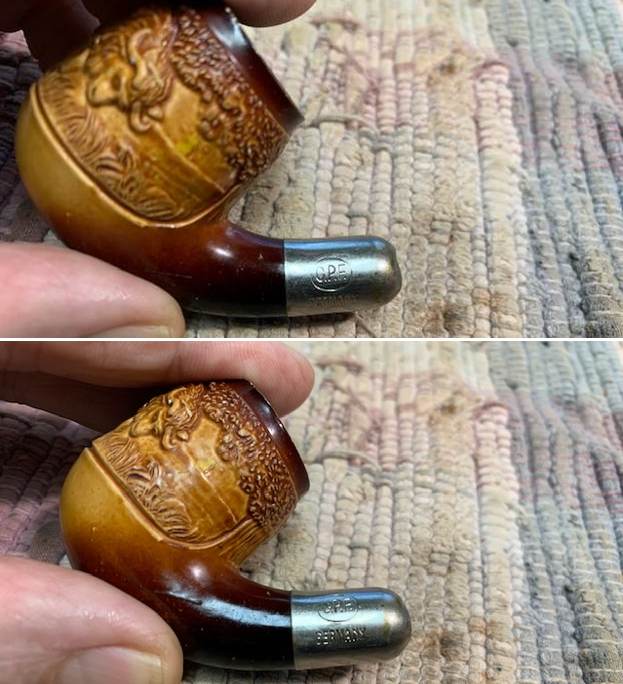
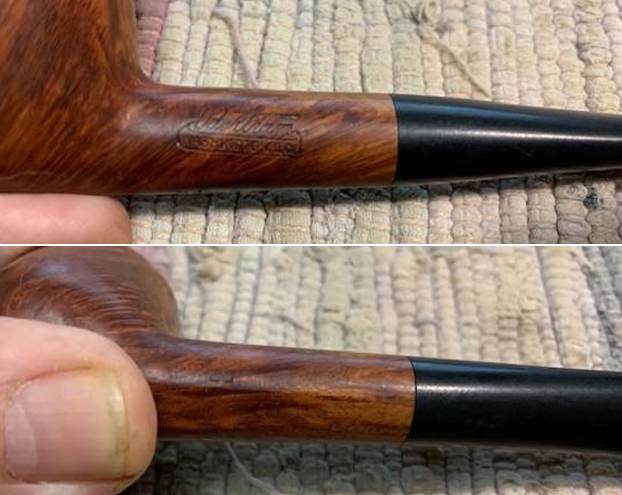
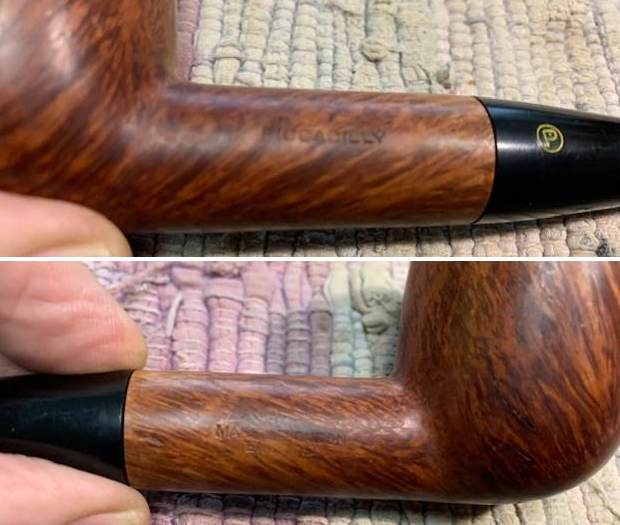
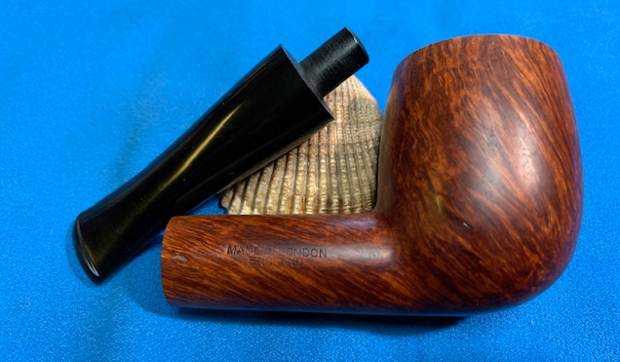
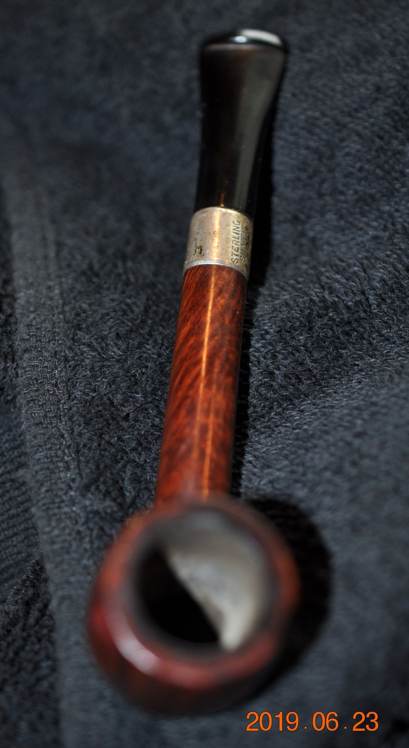
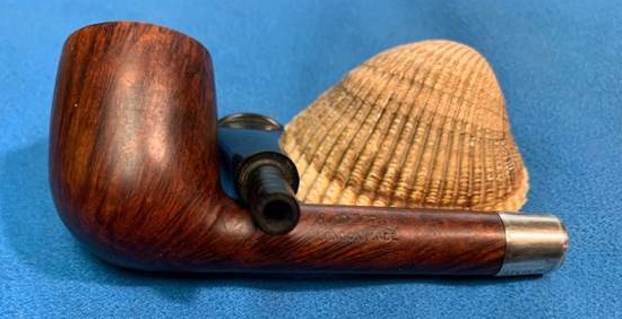
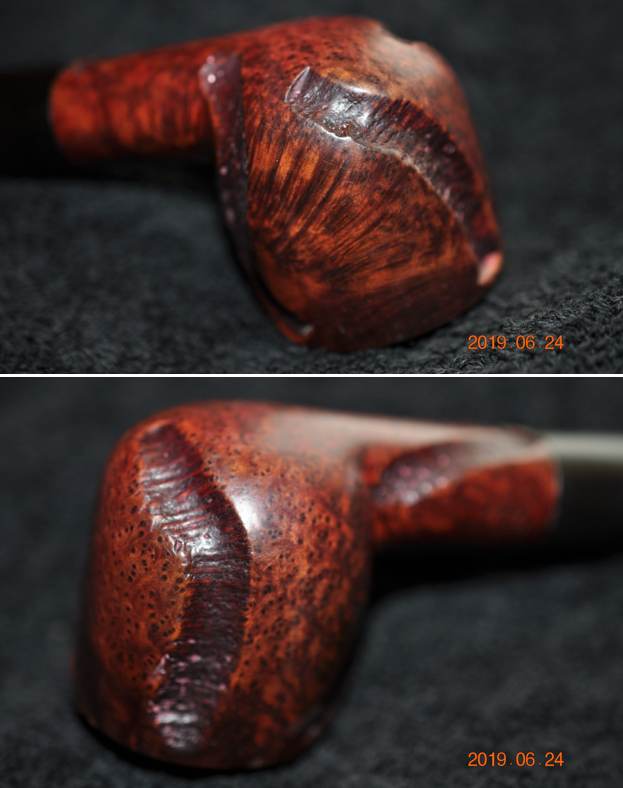 The stamping was readable though a little faint on the left side of the shank. It read Greenwich House arched over Antique on the left. On the right side it was very clear and read Imported [over] Briar.
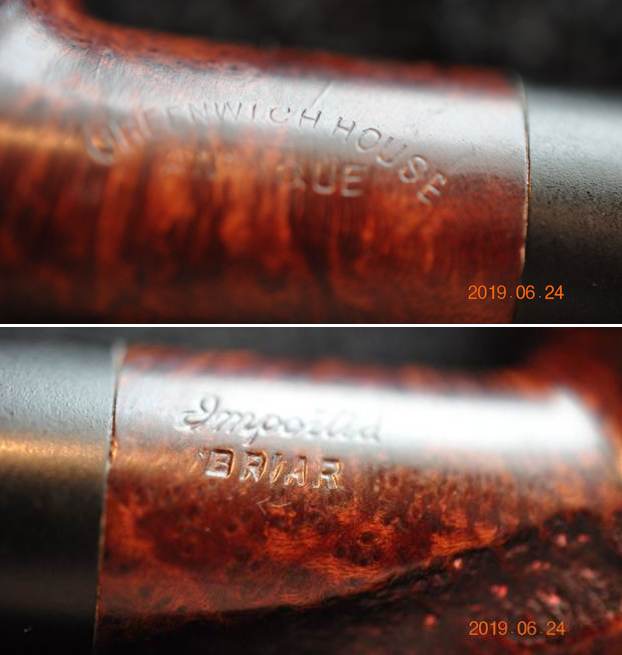 I turned first to my blog on a previous restoration of a Greenwich House pipe. I had worked on one that was stamped Thoro-Kleen, a metal pipe (https://rebornpipes.com/2016/02/24/a-piece-of-art-deco-greenwich-house-thoro-kleen/). I read through that blog and have included a pertinent piece of information on the brand below.
According to Pipedia (https://pipedia.org/wiki/Thoro-Kleen) the Greenwich House Thoro-Kleen was a metal pipe system from the same family as the Roybrooke, Comet, and Original Gridiron pipes, and parts from all are believed to be interchangeable. The pipes were sold by the Greenwich House Corporation, located in 1947 at 939-M 8th Avenue, N.Y. 19, N.Y…
From that I knew it was an American Made pipe that had been carved for or by a company known as Greenwich House Corporation in New York City.
I turned to the listing of American Brands on Pipedia to see if there was a listing for the Greenwich House itself (https://pipedia.org/wiki/American_Pipe_Brands_%26_Makers_G_-_H). I found that there was not an article but the list of makers identified the brand and said that The Antique was made of Aged Algerian Briar. One more piece fell in place. The pipe I was working on was stamped Antique so I now knew the source of the Imported Briar.
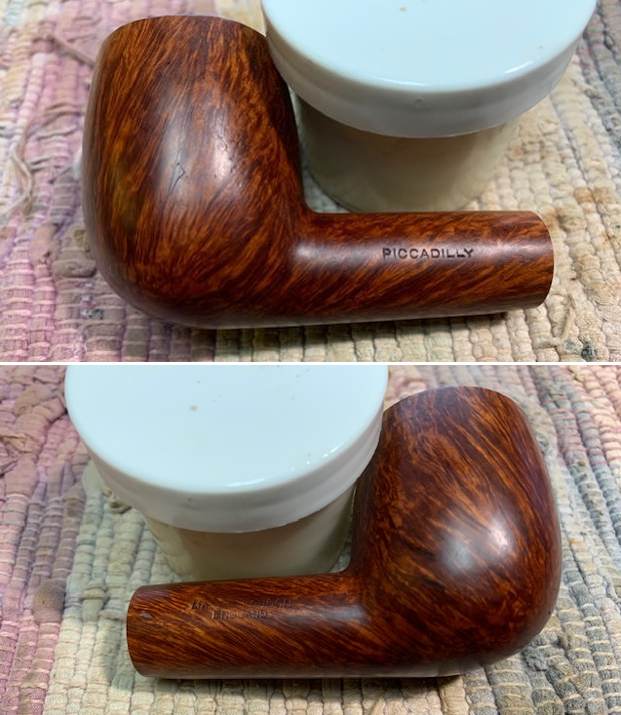
But I still wanted a bit more information so I did a Google search and was taken to pipes made by Greenwich House on smokingpipes.com and other sites. Worthpoint, an auction site had several and also had one stamped Antique (https://www.worthpoint.com/worthopedia/vintage-greenwich-house-carved-1992675965). I have included the description from the sale item below as it is quite descriptive of the pipe in my hands.
Vintage Greenwich House Carved Antique Aged Algerian Tobacco Pipe. Good condition. Measures about 6.25″ long.
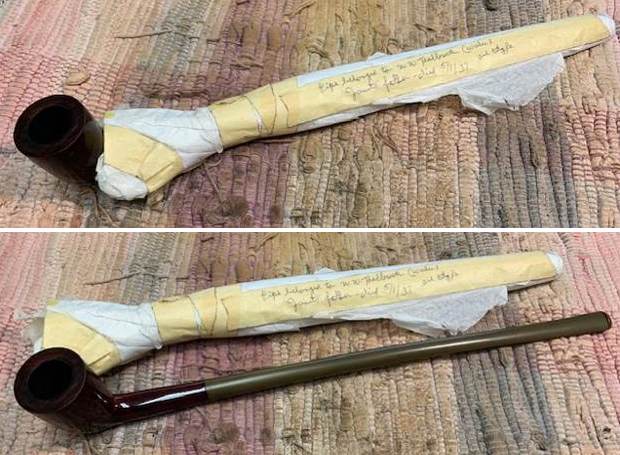
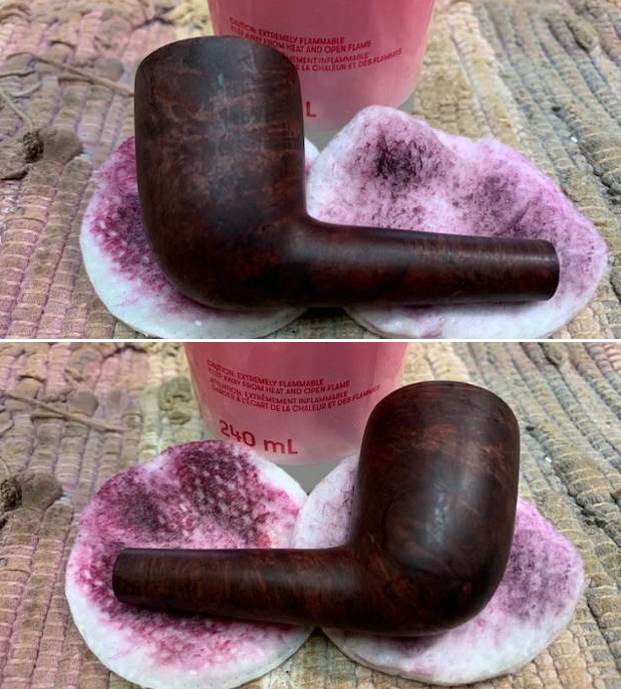
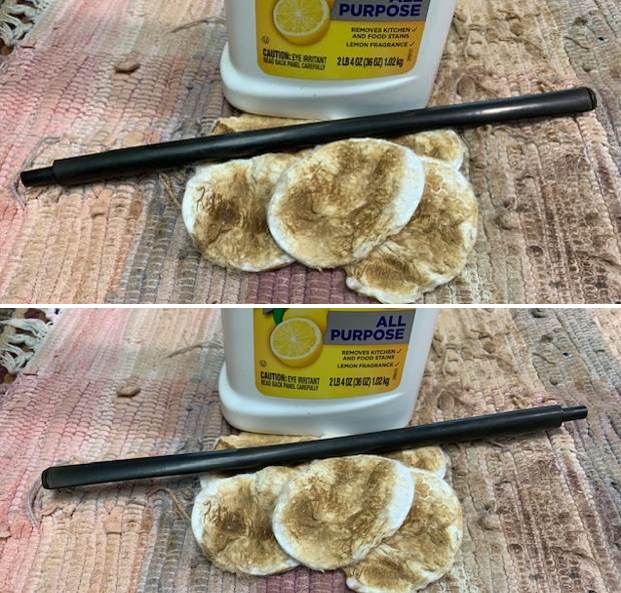
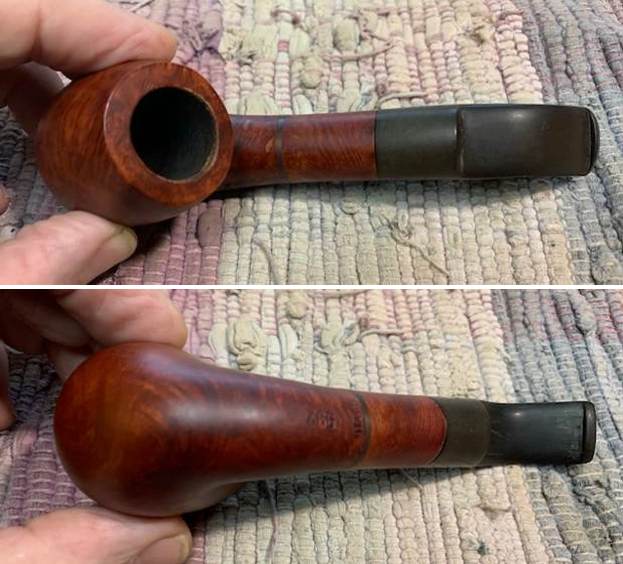
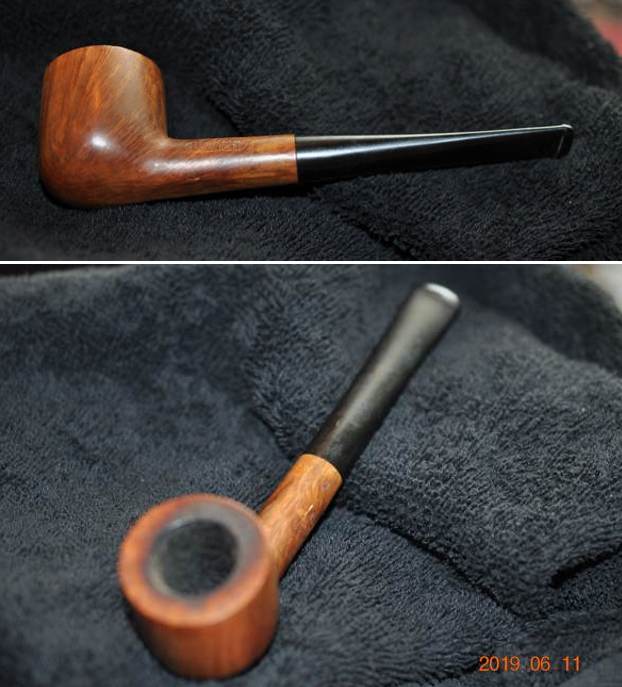
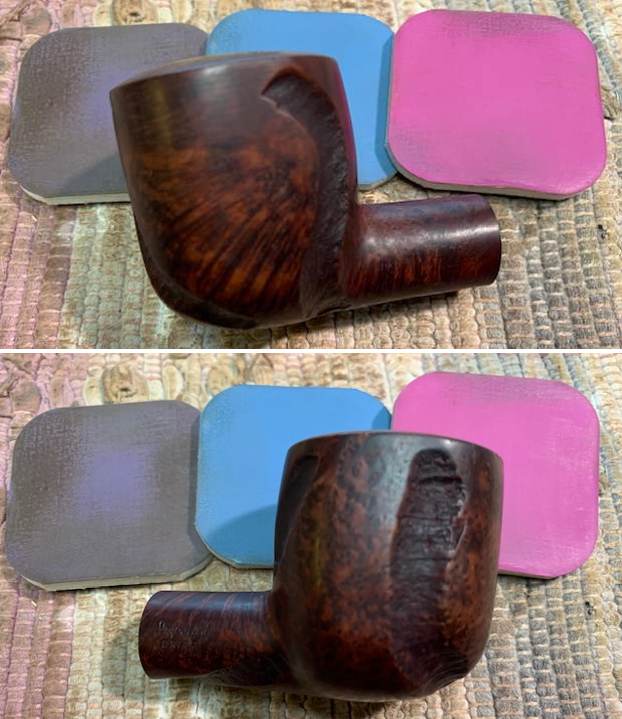
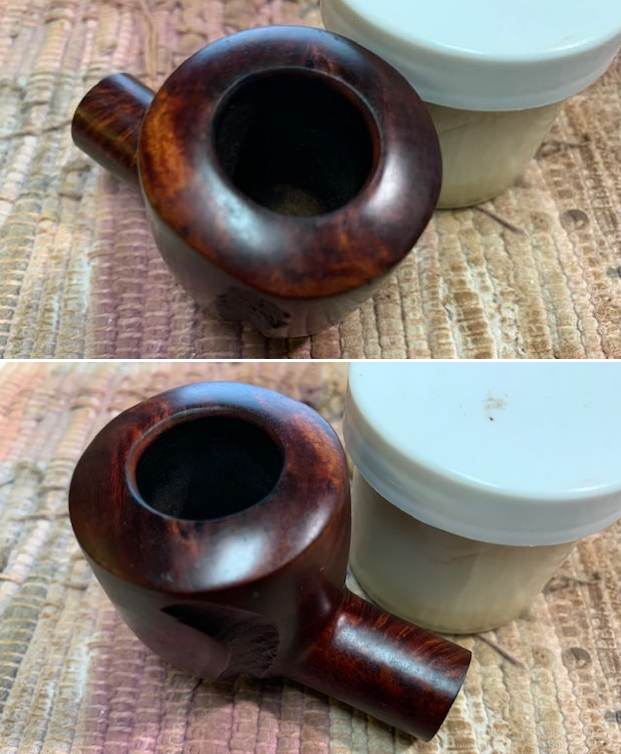
It is similarly stamped as mine and also similarly sized. Now it was time to work on the pipe itself. Jeff had cleaned up this nicely grained Pot with his usual pattern. He reamed the bowl with a PipNet pipe reamer and then cleaned up the inside of the bowl with a Savinelli Fitsall Pipe Knife. He scrubbed the exterior of the bowl and shank with Murphy’s Oil Soap and a tooth brush to remove the grime on the rim top and bowl. He cleaned the internals of the shank and stem with pipe cleaners, cotton swabs and alcohol until the airways were clean and the pipe smelled fresh. The pipe looked much better once the bowl and stem were clean. He scrubbed the stem with Soft Scrub to remove the oxidation and then let it soak in Before & After Pipe Stem Deoxidizer. He rinsed it with warm water when he took out of the soak. Before I started my part of the work I took photos of the pipe.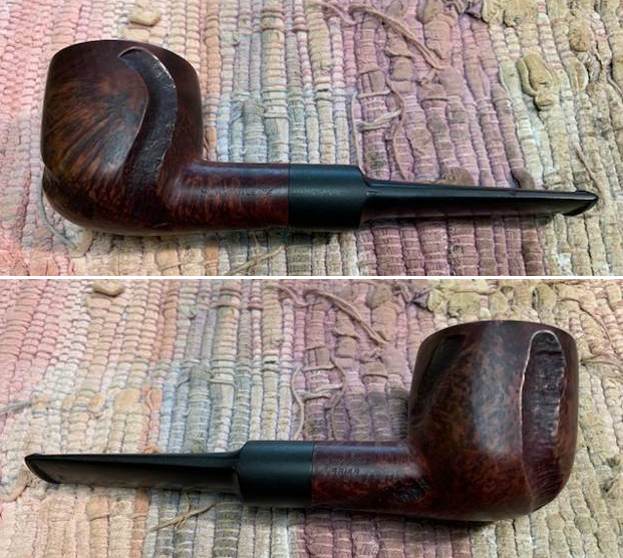
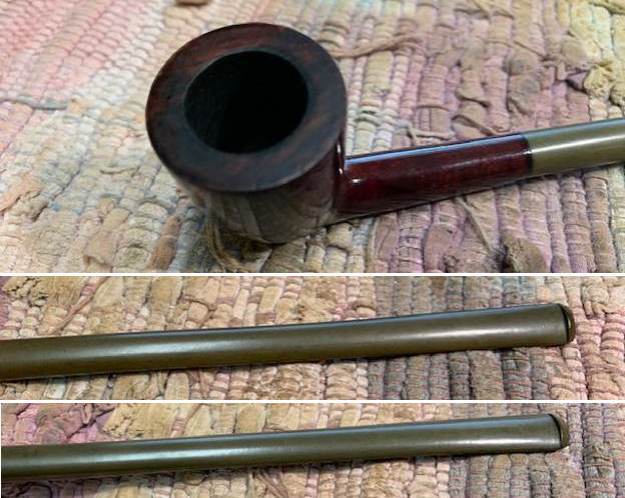
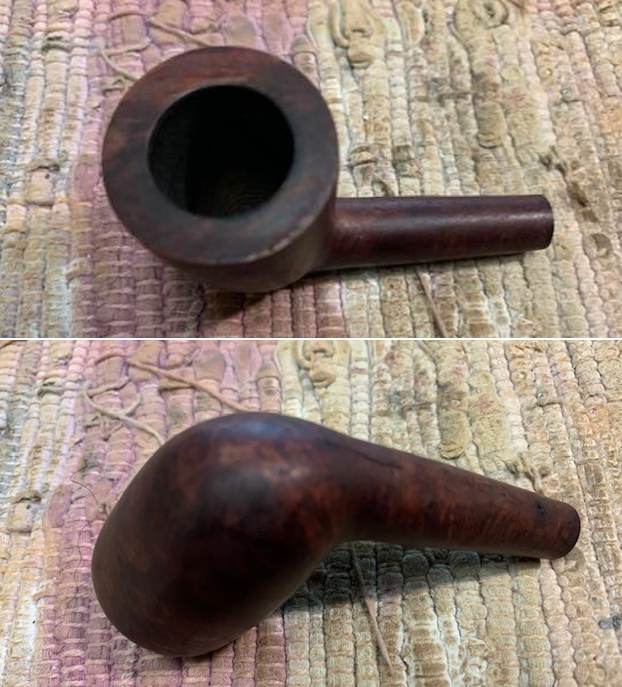
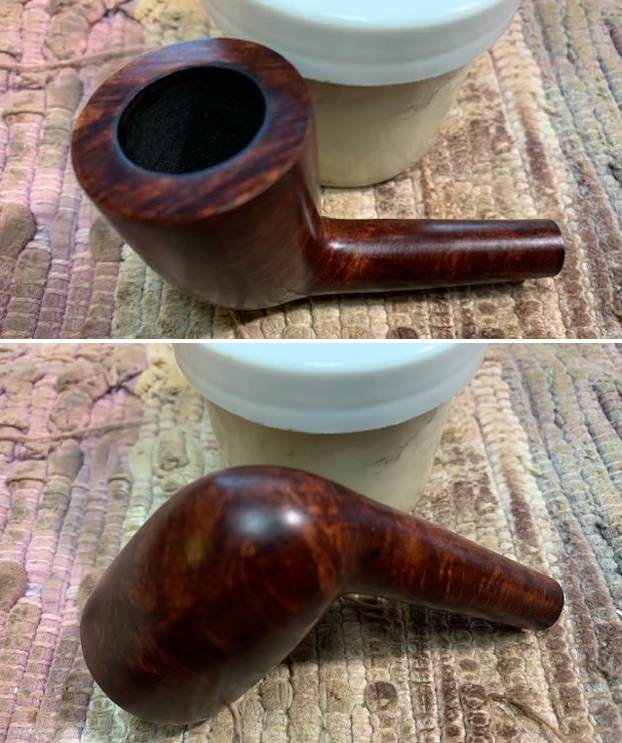
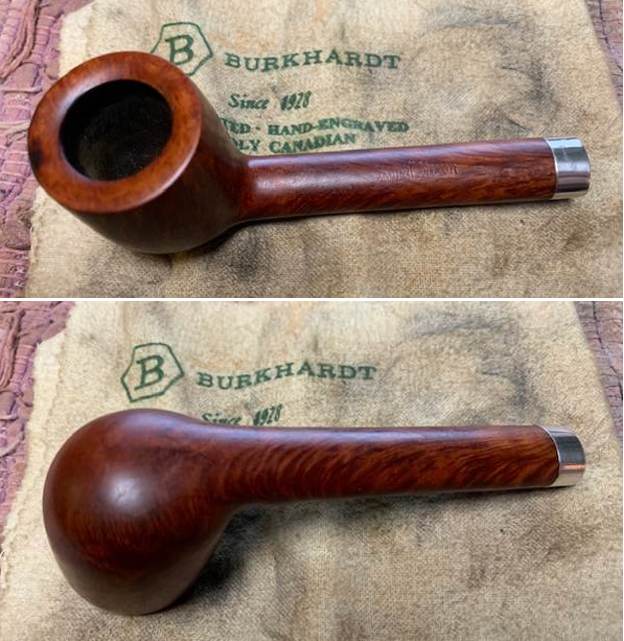
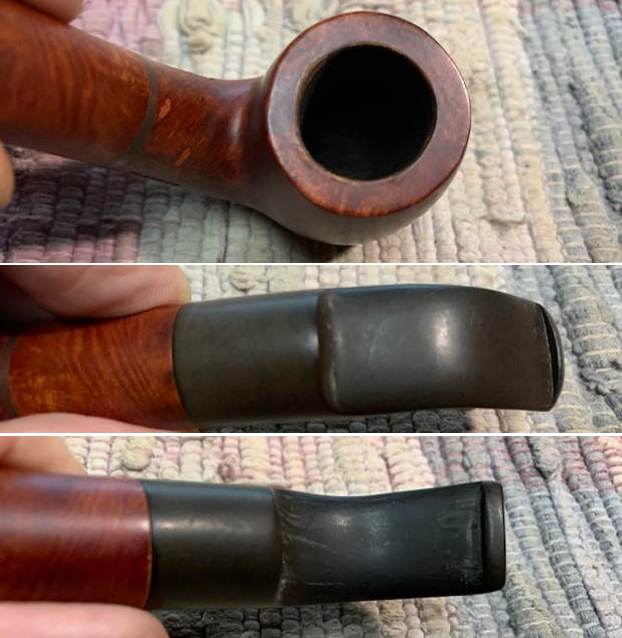
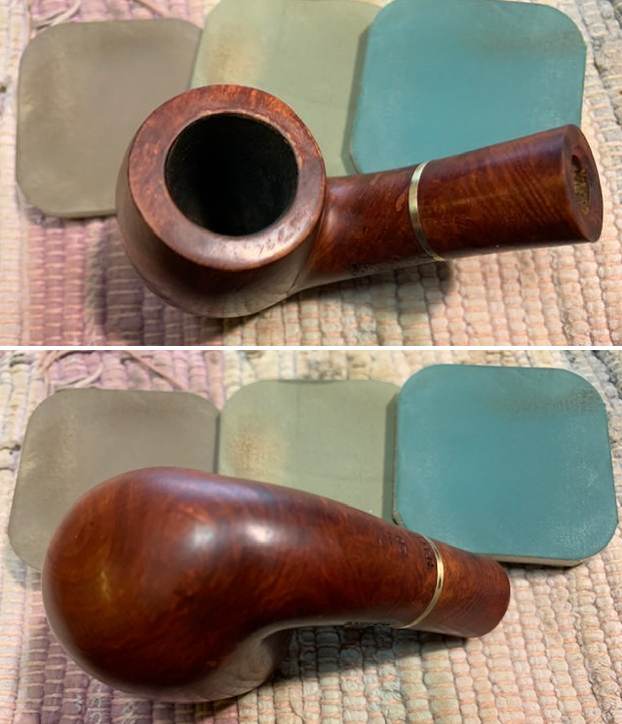
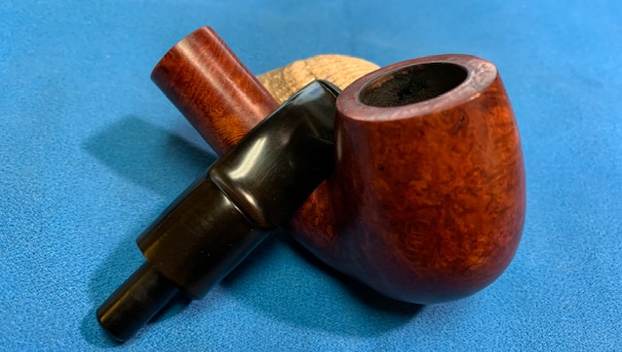
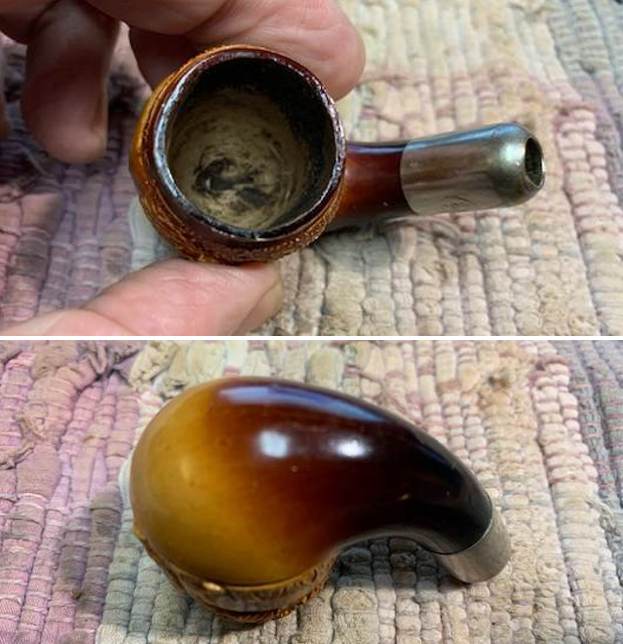
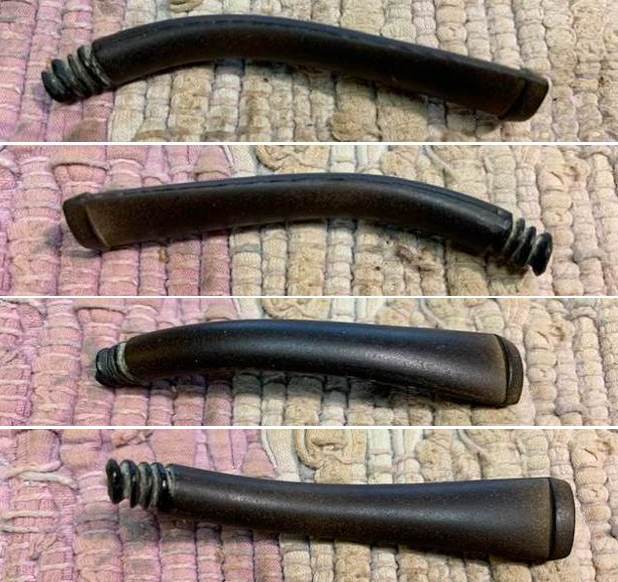
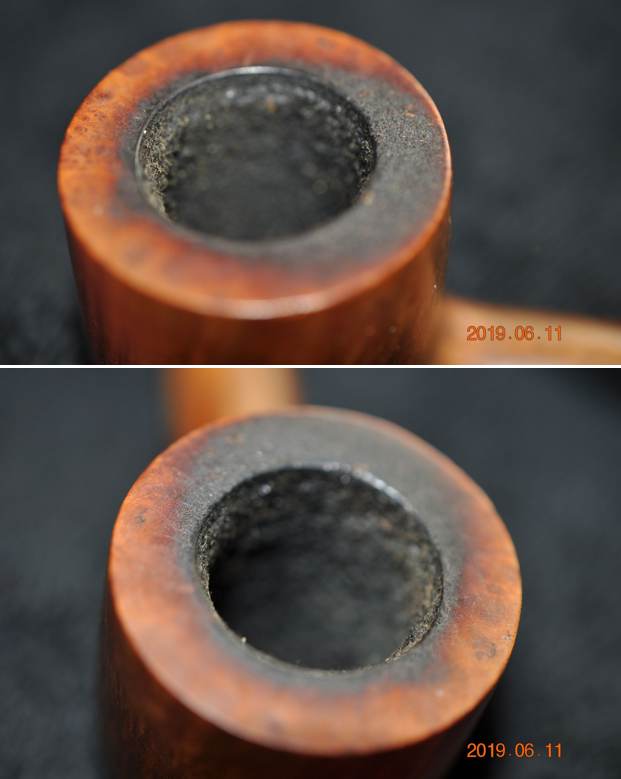
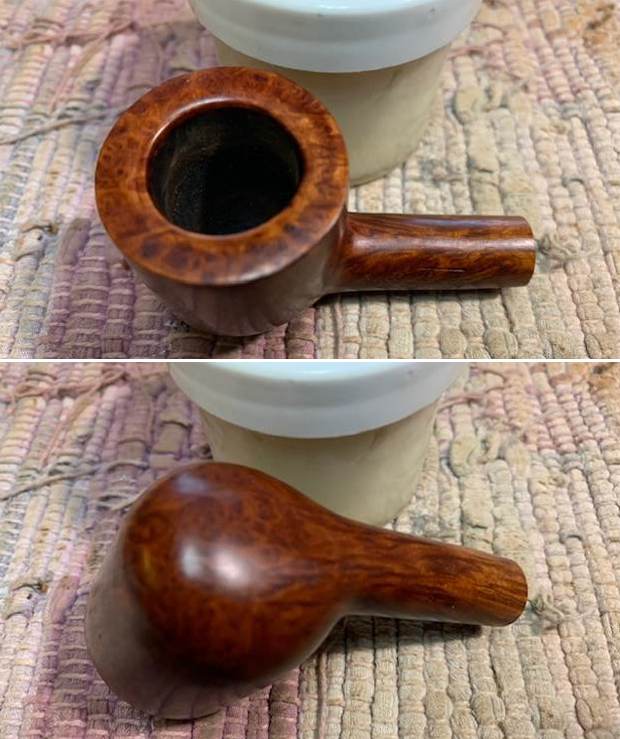
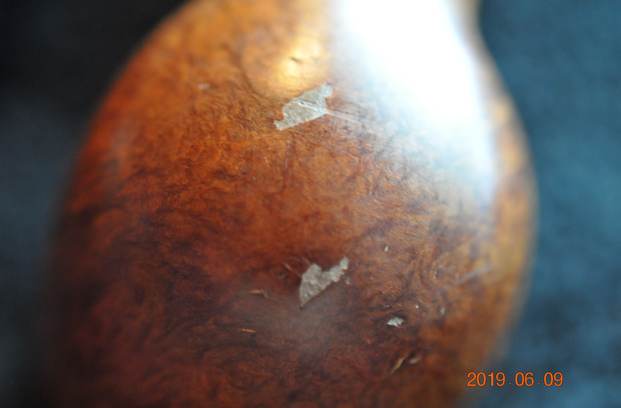
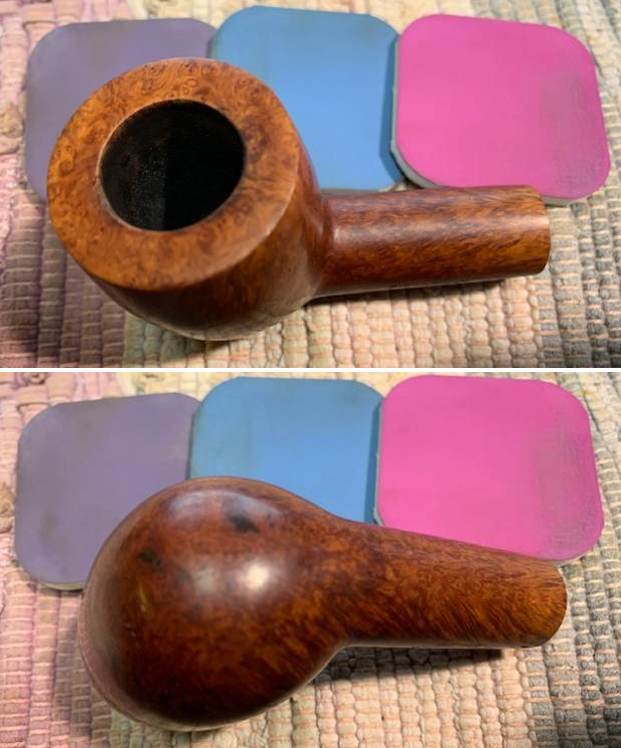
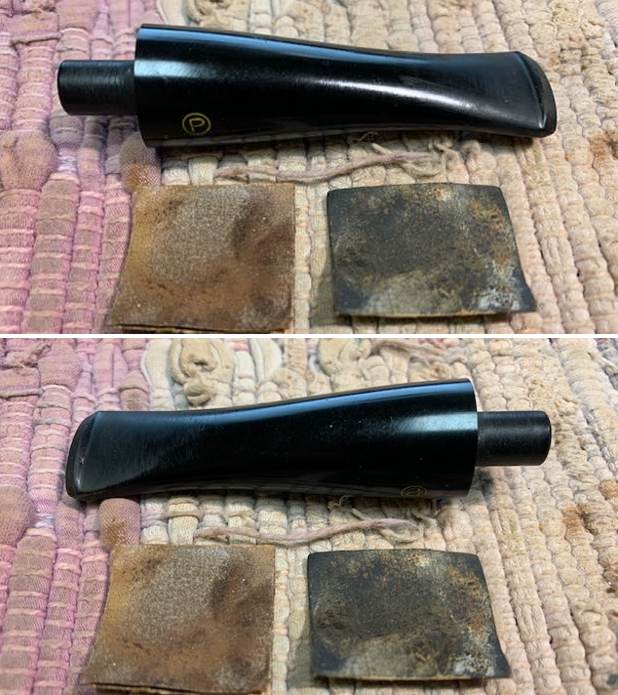
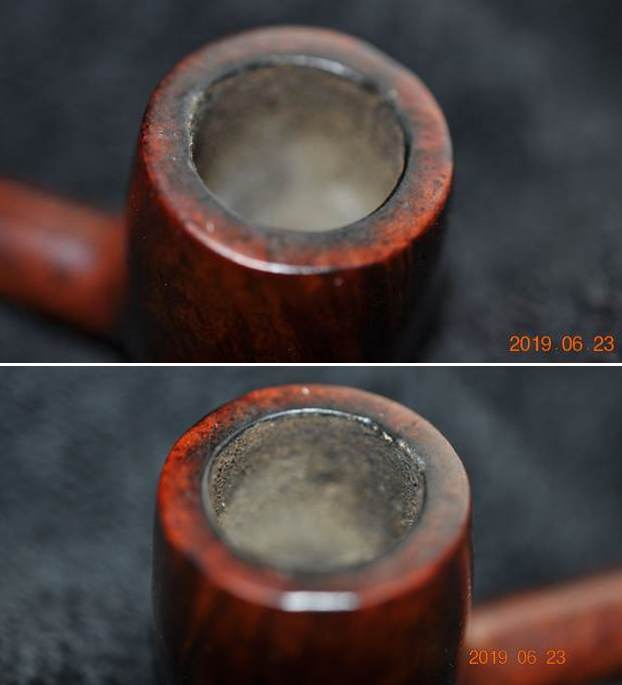
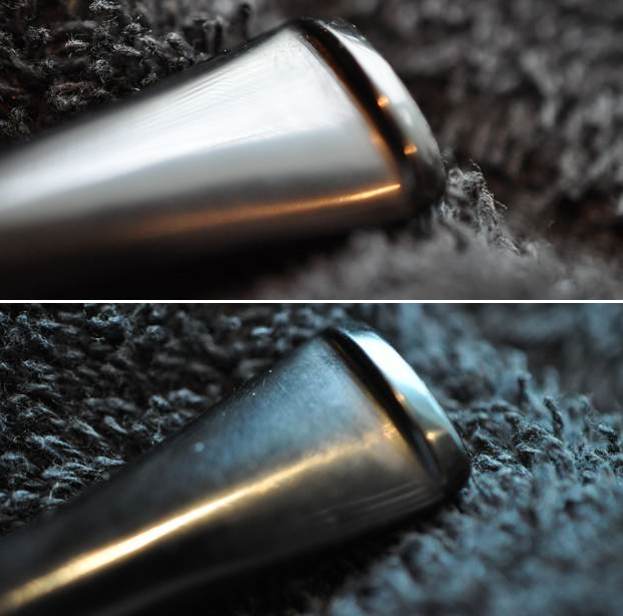
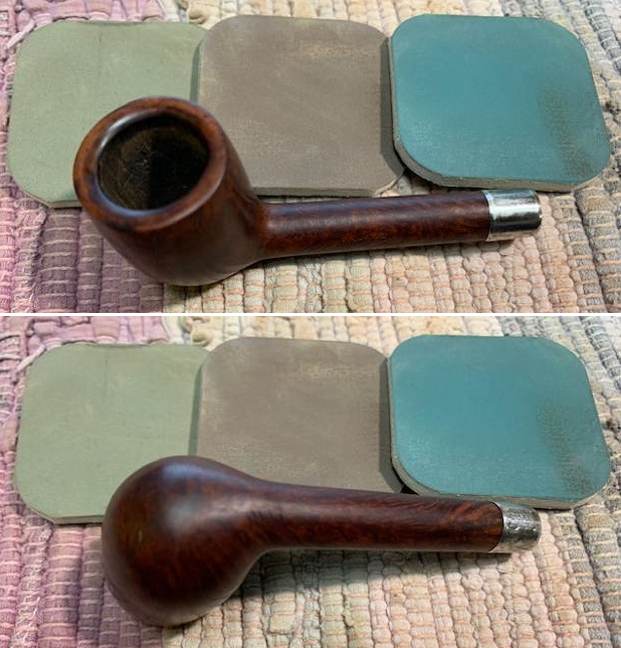
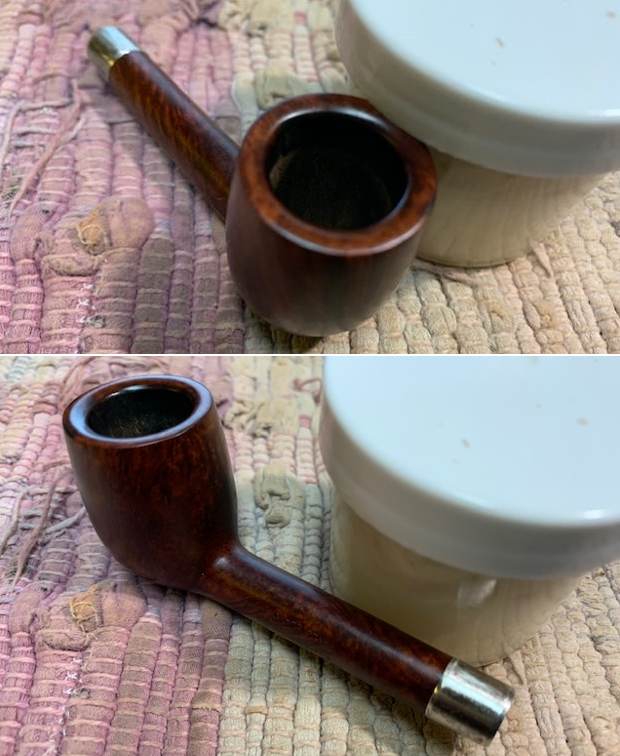
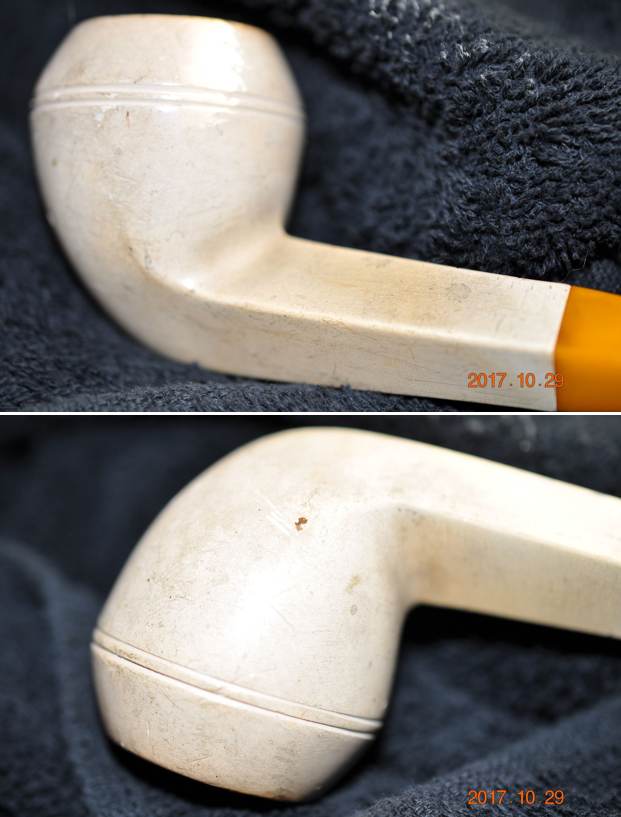
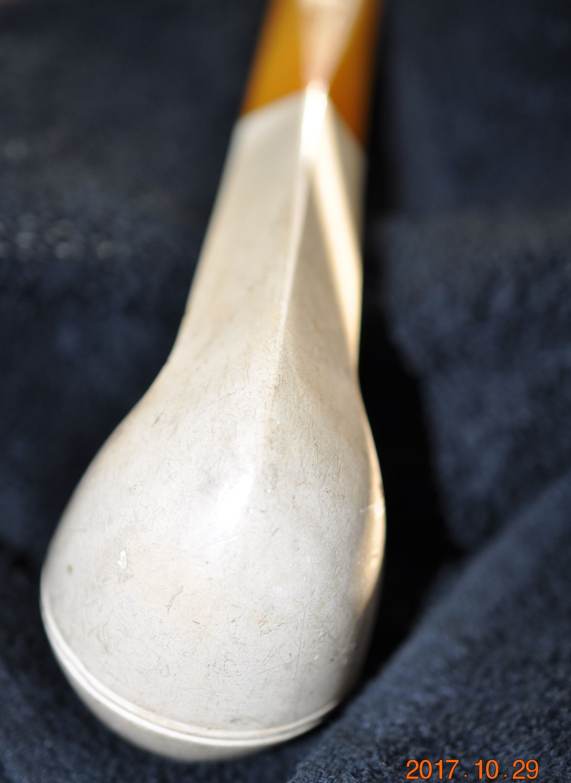
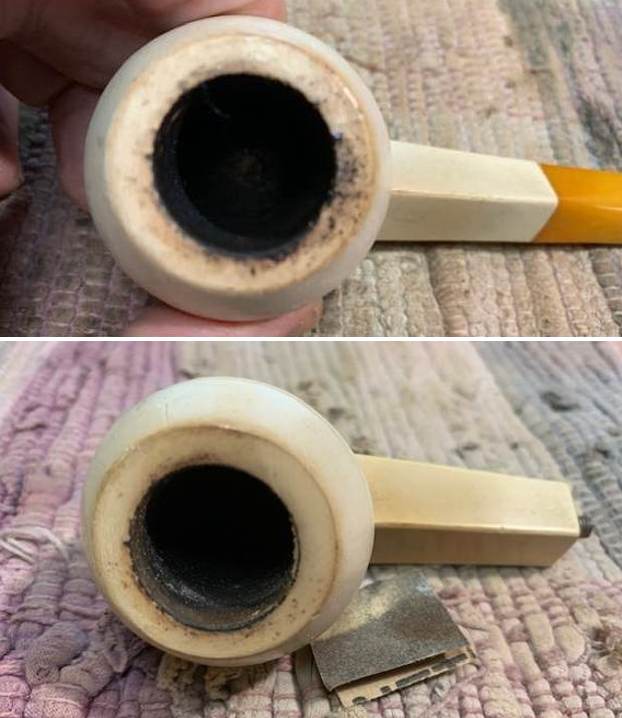
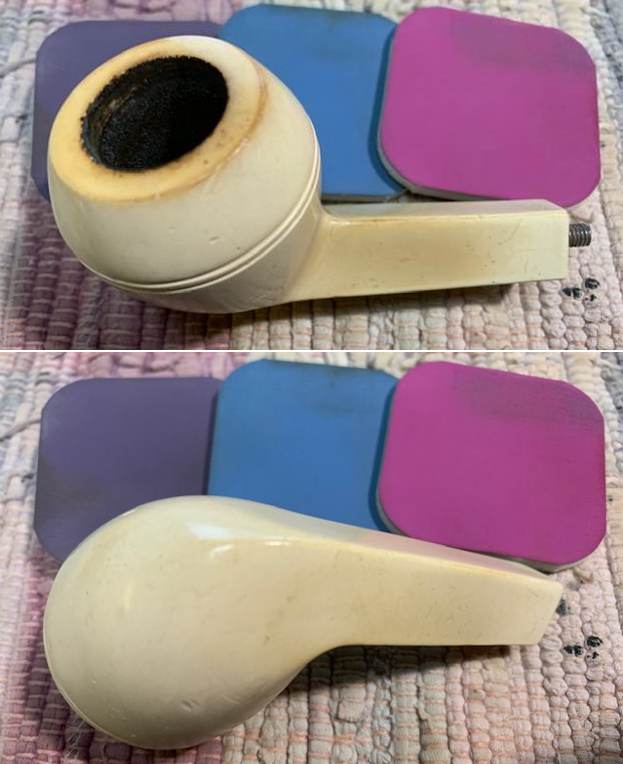
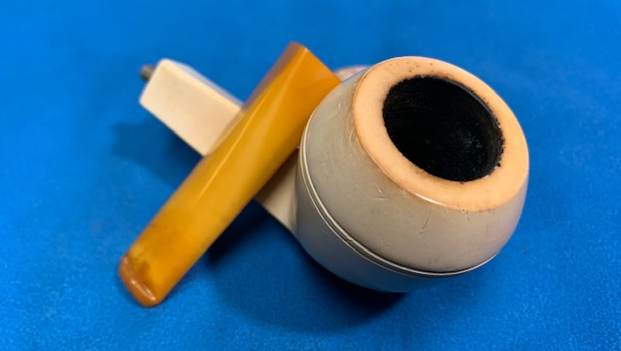
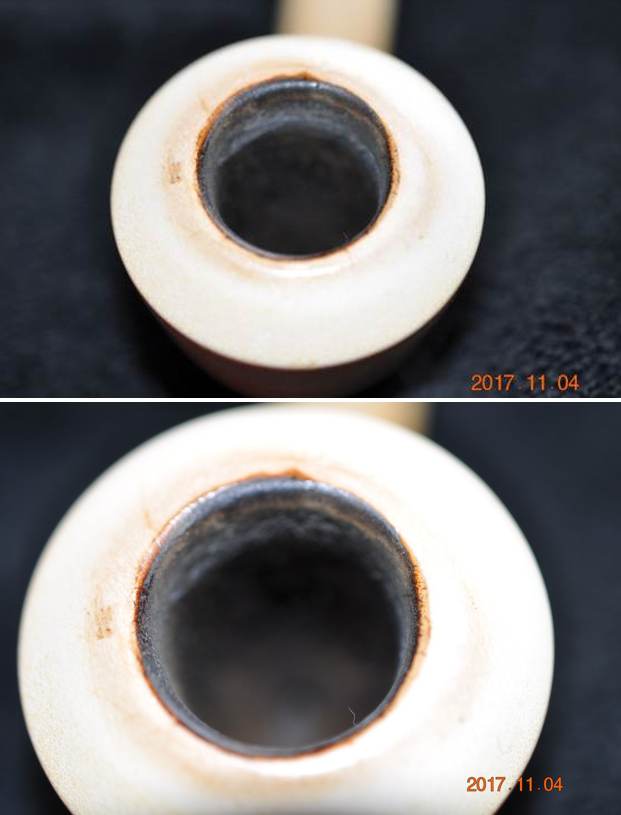
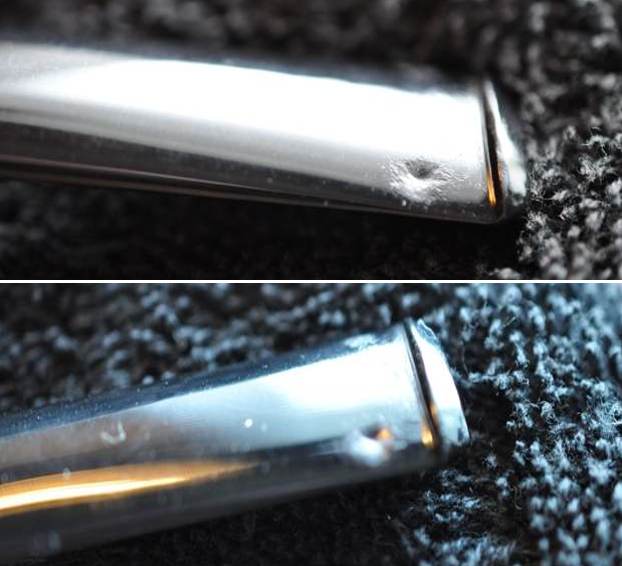
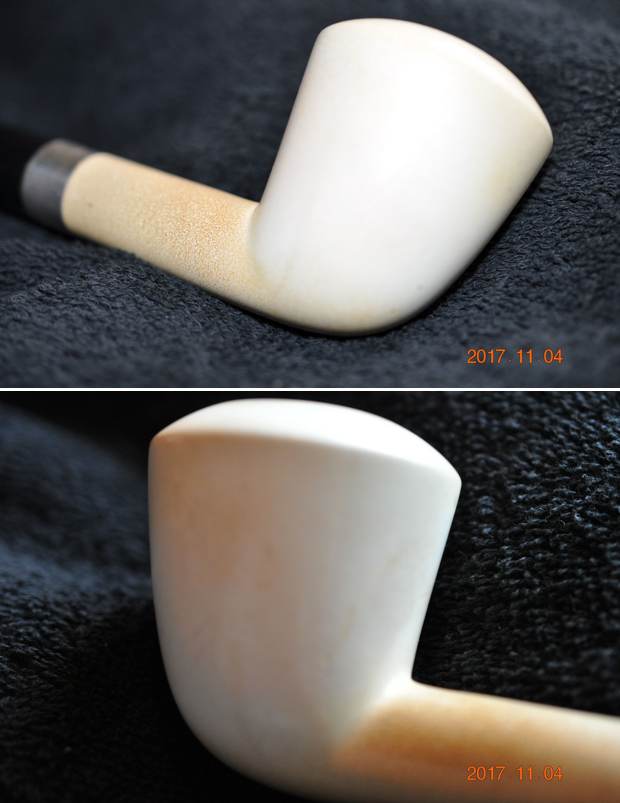
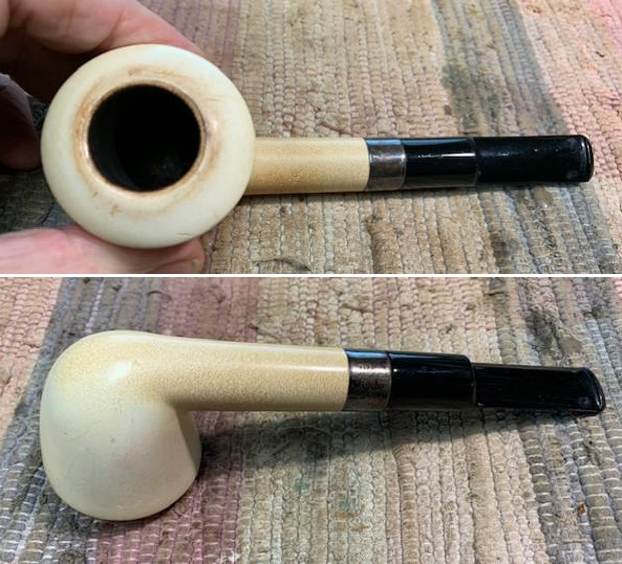
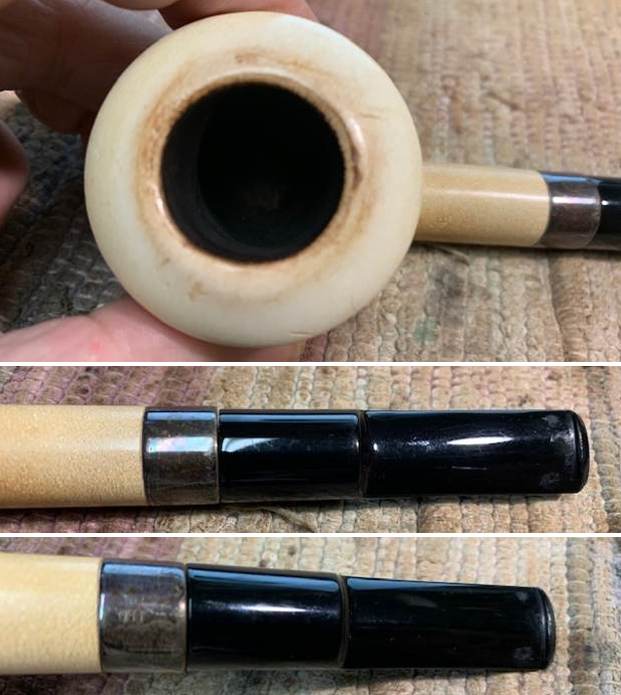
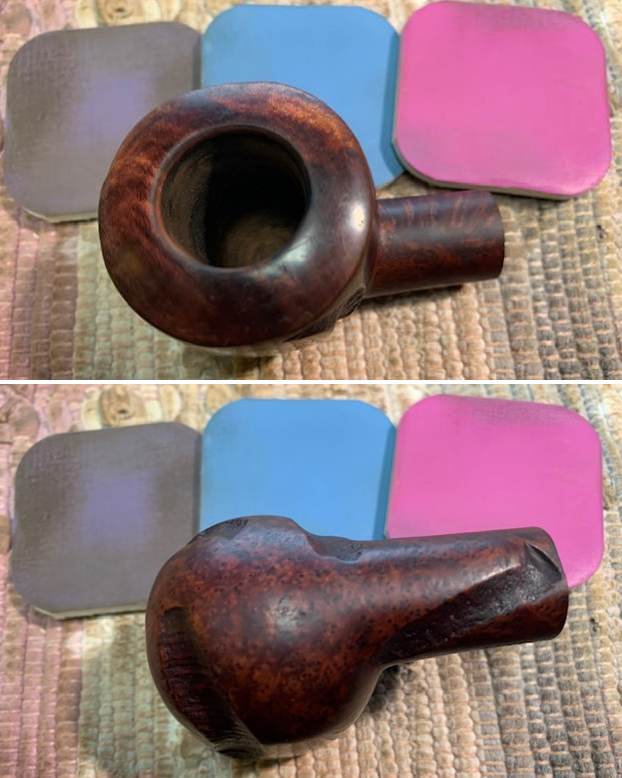
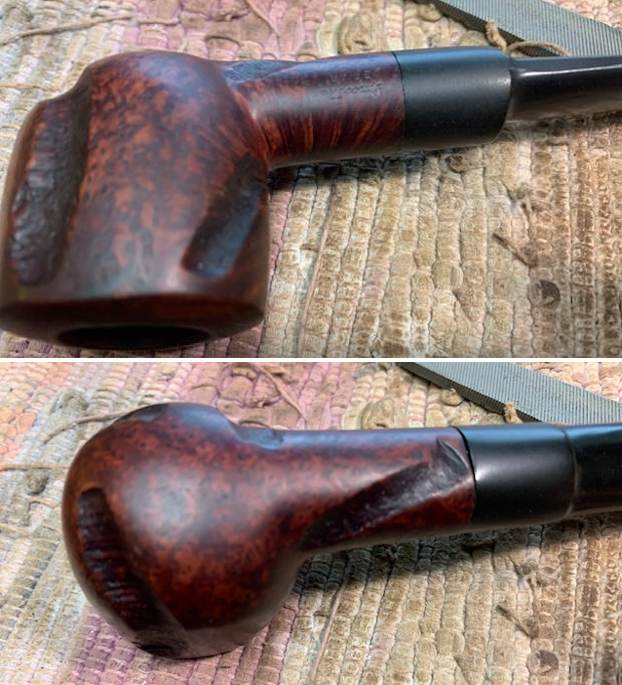
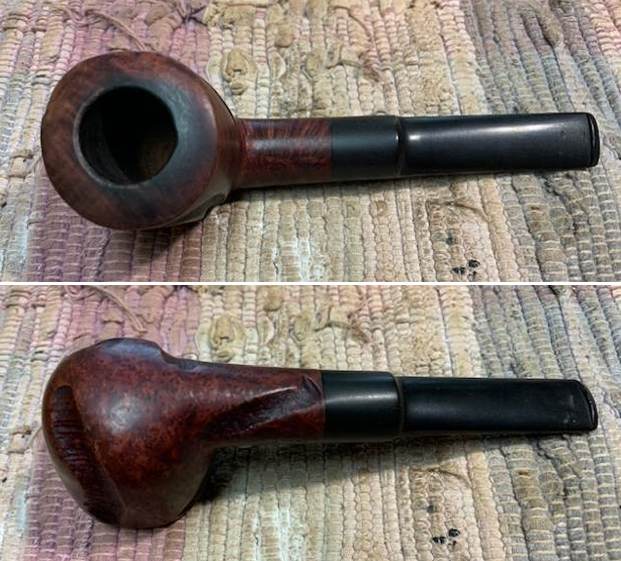 I took close up photos of the bowl and the rim top to show the condition. The photo clearly shows the burn damage to the inner edge and the rim top at the back of the bowl. You can also see the roughening of the rest of the inner edge and rim top. It was going to take some work to bring it back. I also took photos of both sides of the stem to give a sense of the condition of both sides at the button. There is deep tooth marking and damage on both sides ahead of the button.
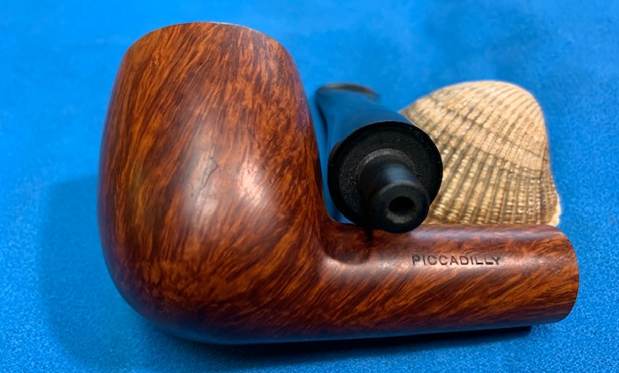
 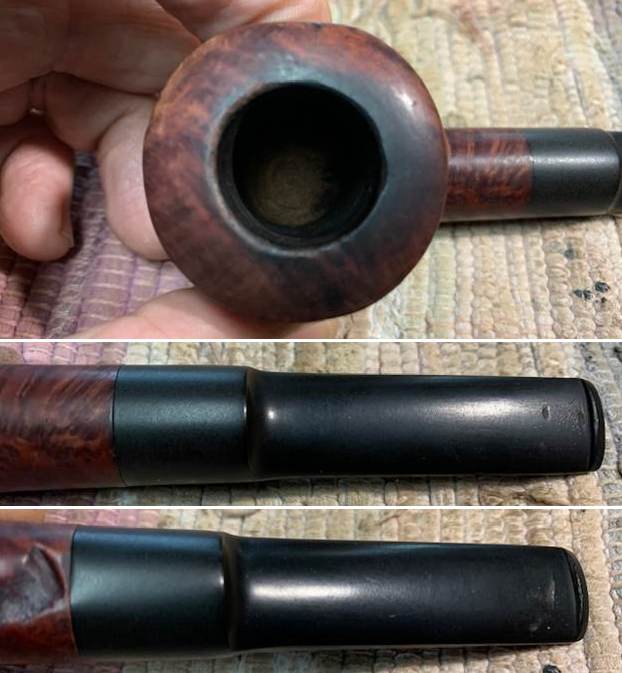 I took a photo of the stamping on the sides of the shank. It was readable but was more faint on the left than the right side. It read as noted above.
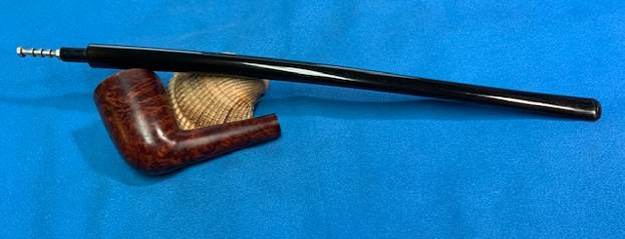
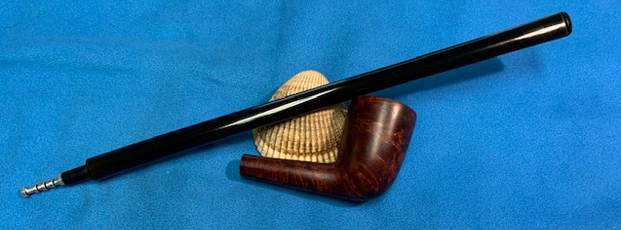
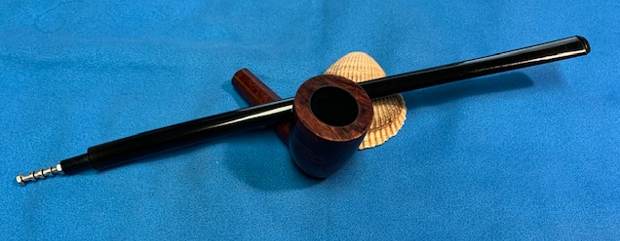
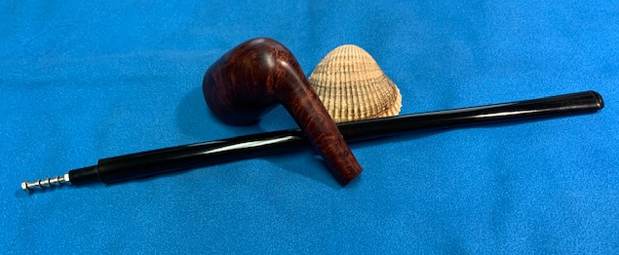
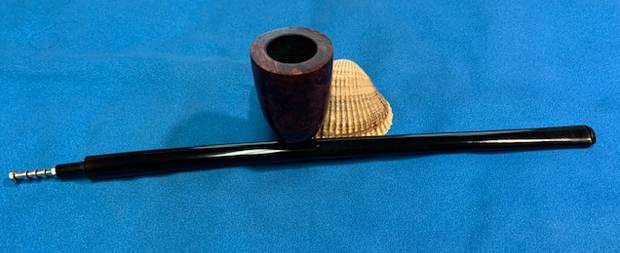
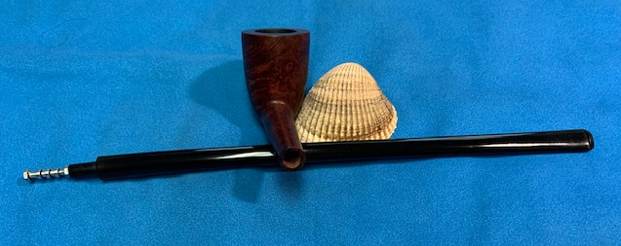
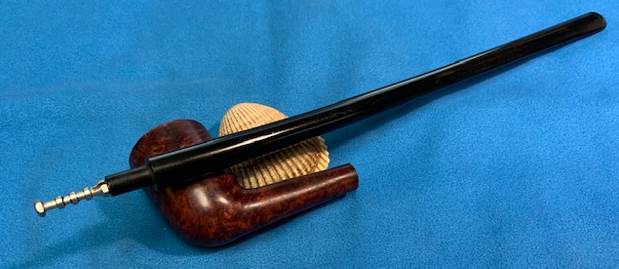
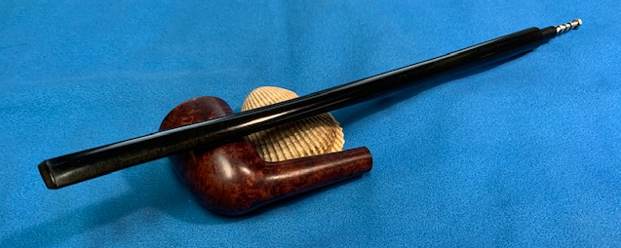
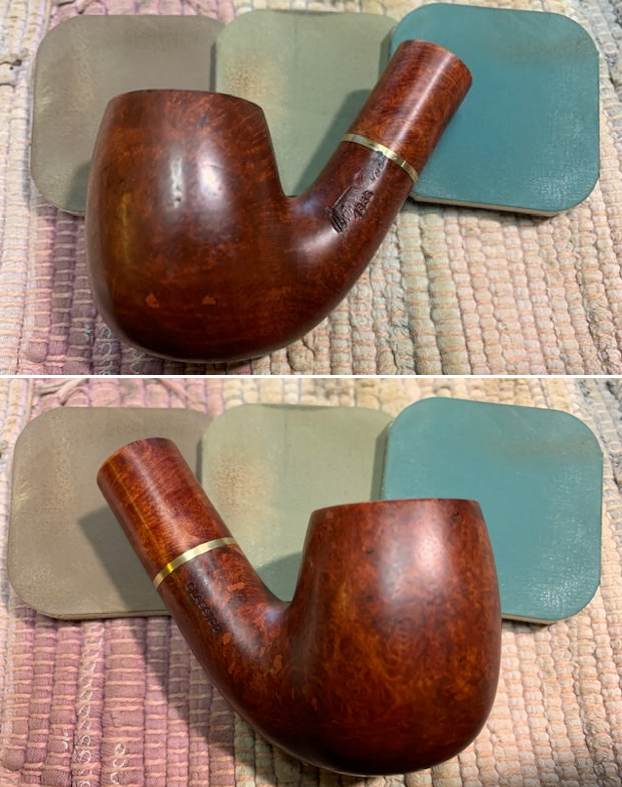
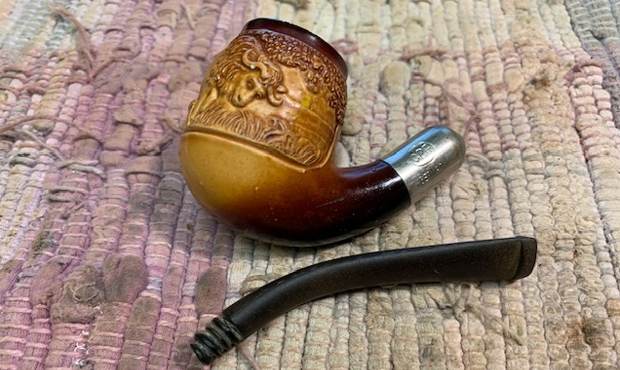
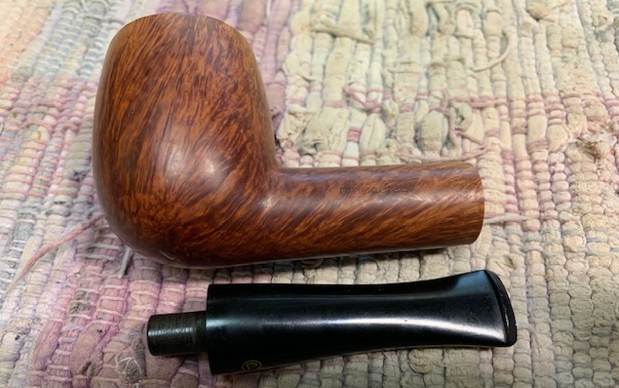
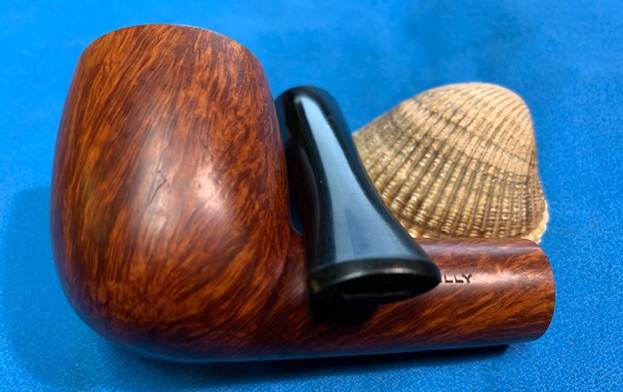
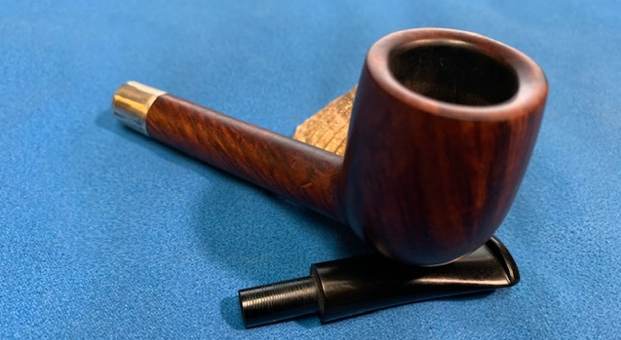
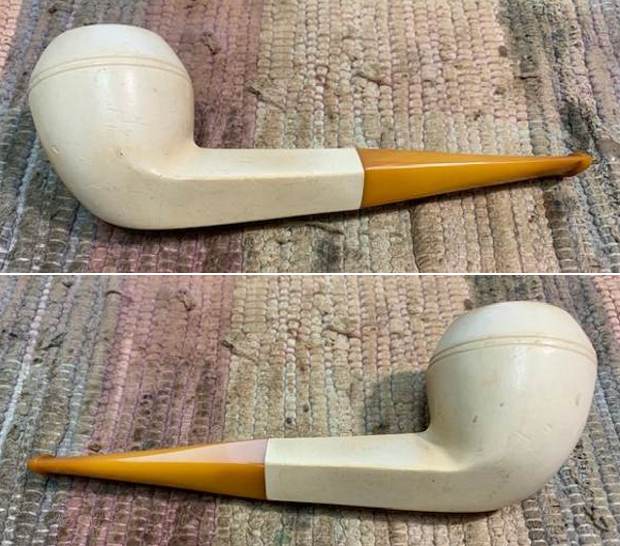
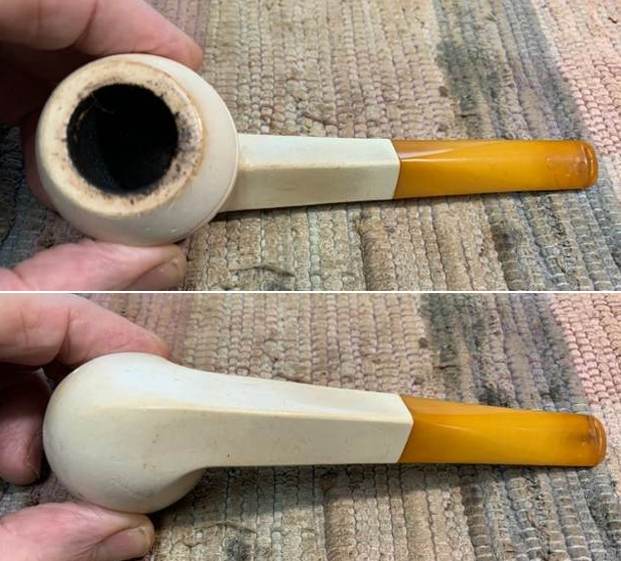
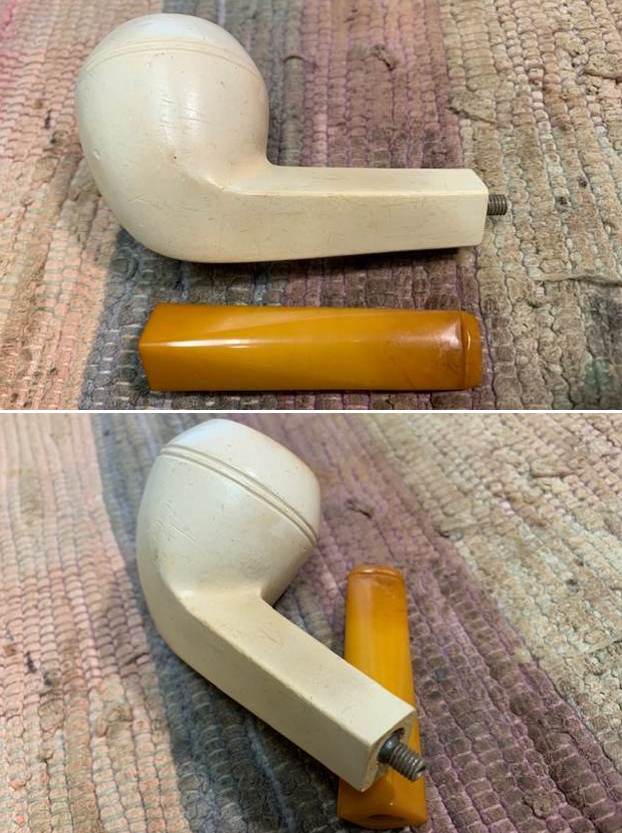
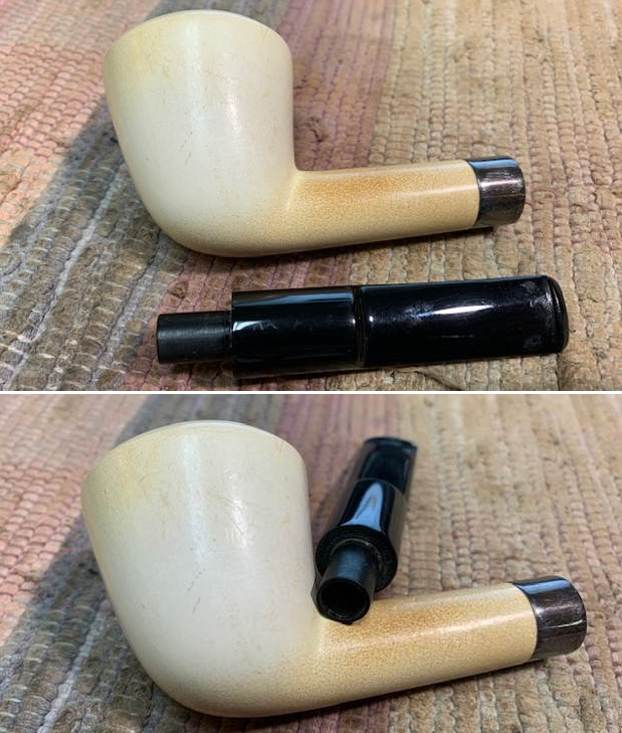
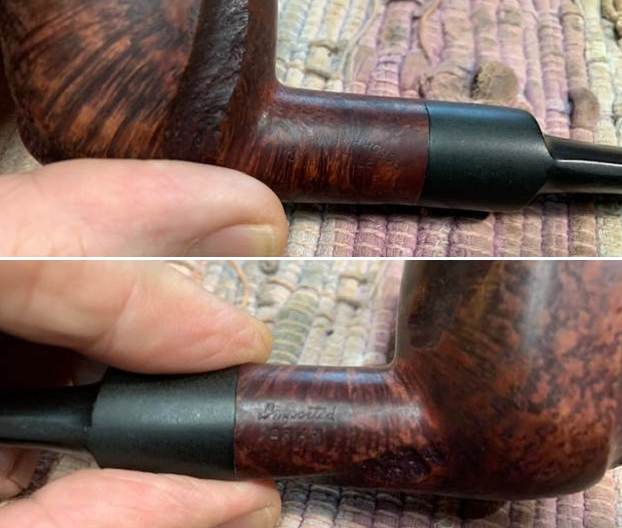 I removed the stem from the shank and saw to my chagrin a stinger. I fiddled with it a bit to see if it was pressure fit or screwed into the tenon. There was no give to it. (This portends what is ahead, keep reading.) I set the stem down with the bowl and took a photo to give a general look at the proportions of this pipe.
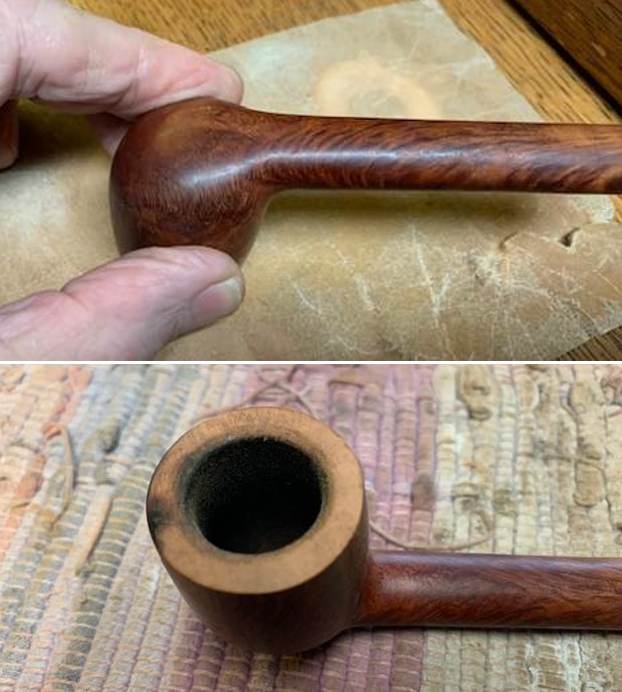
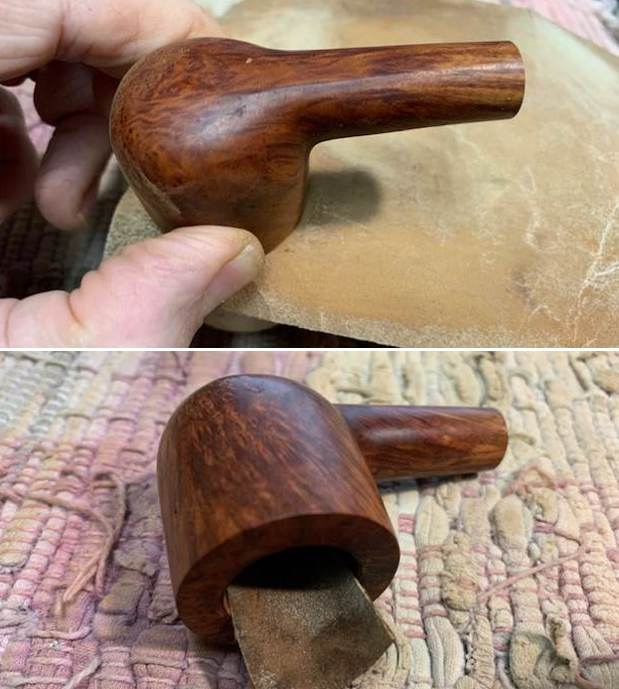
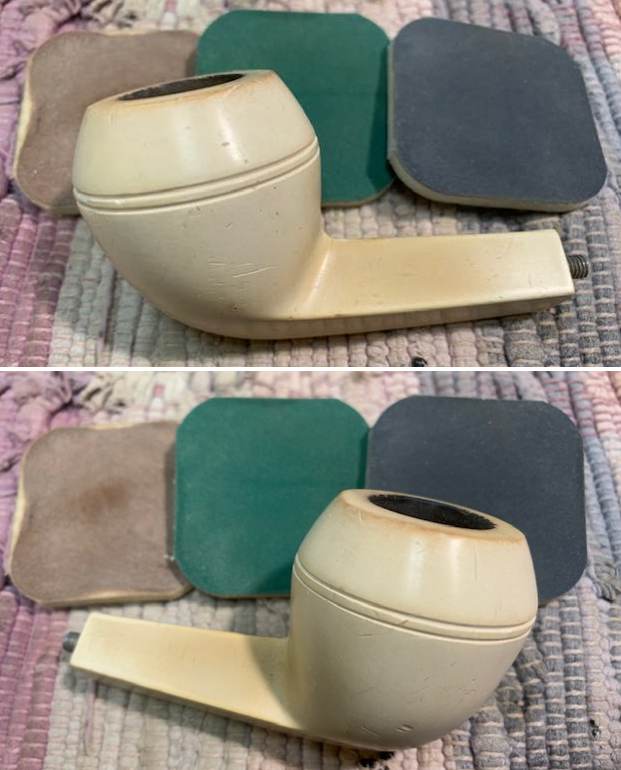
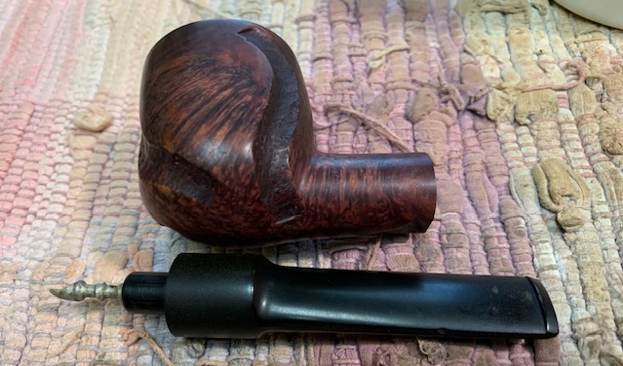 I started work on this one by using a folded piece of 220 grit sandpaper to clean up the inner edge of the bowl and the rim top at the back. I was able to clean and reshape the bowl by slowly working through the process. So far the restoration was going well.
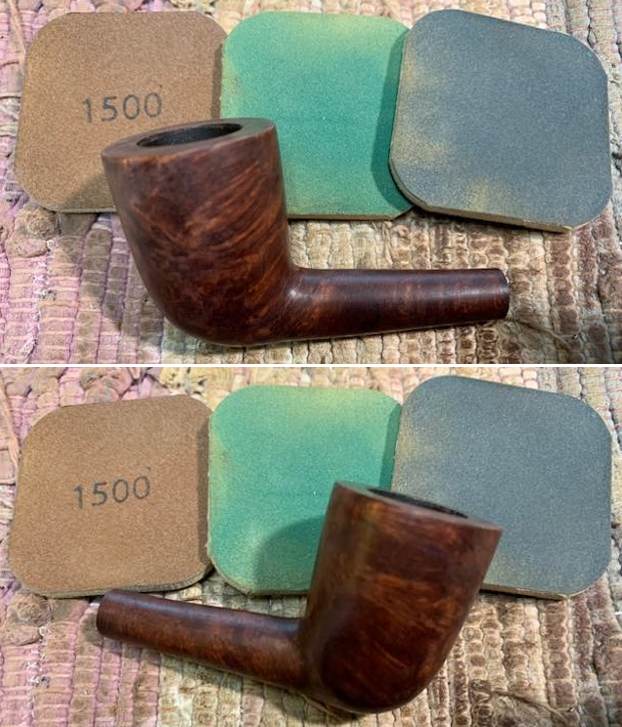
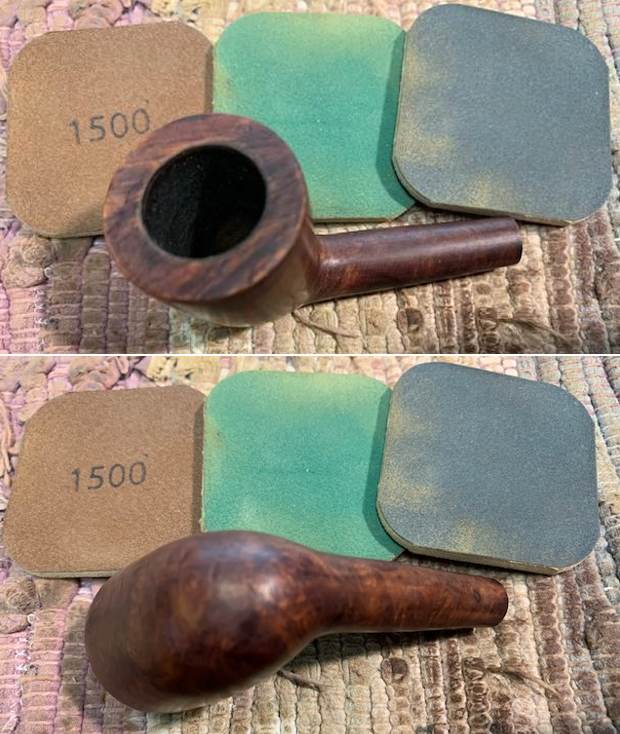
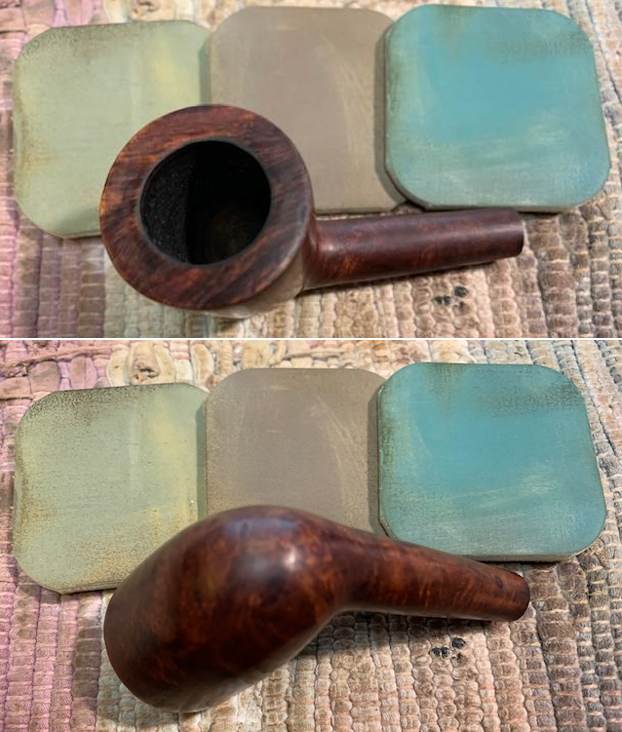
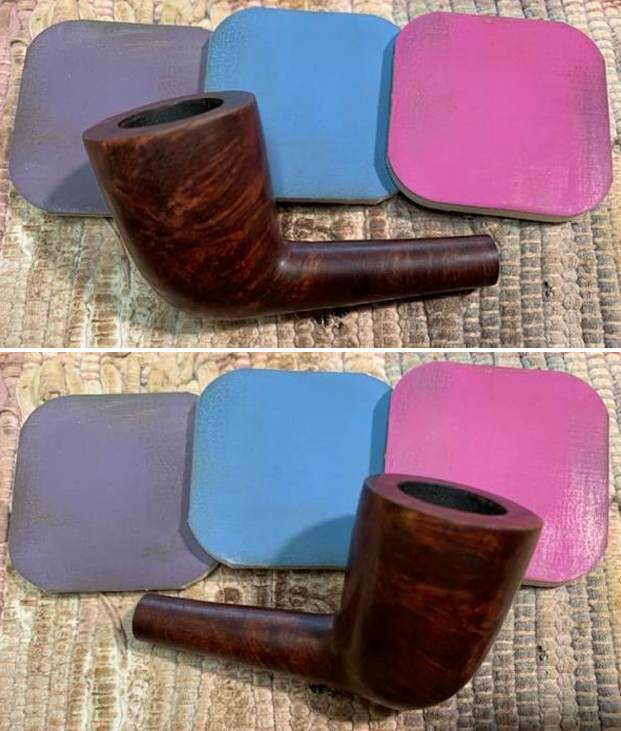
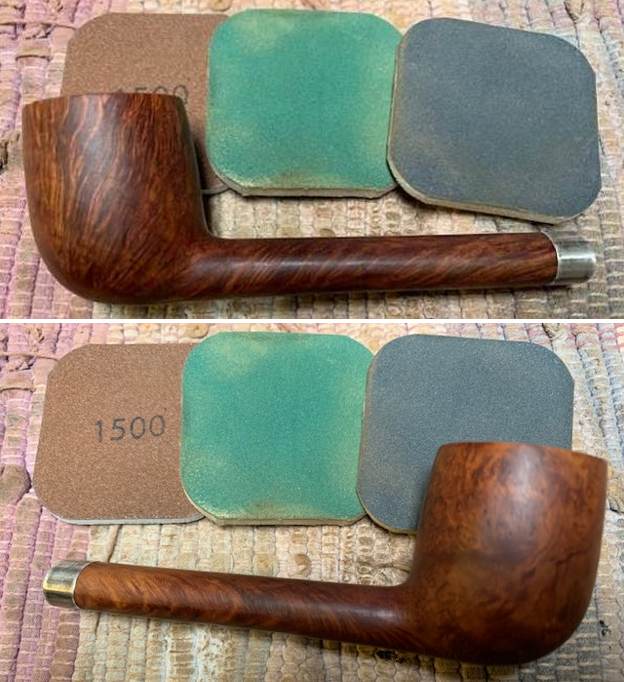
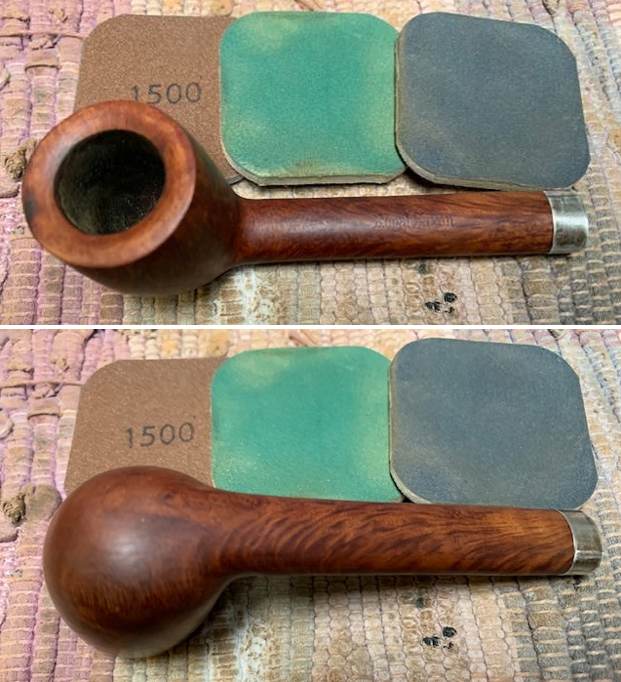
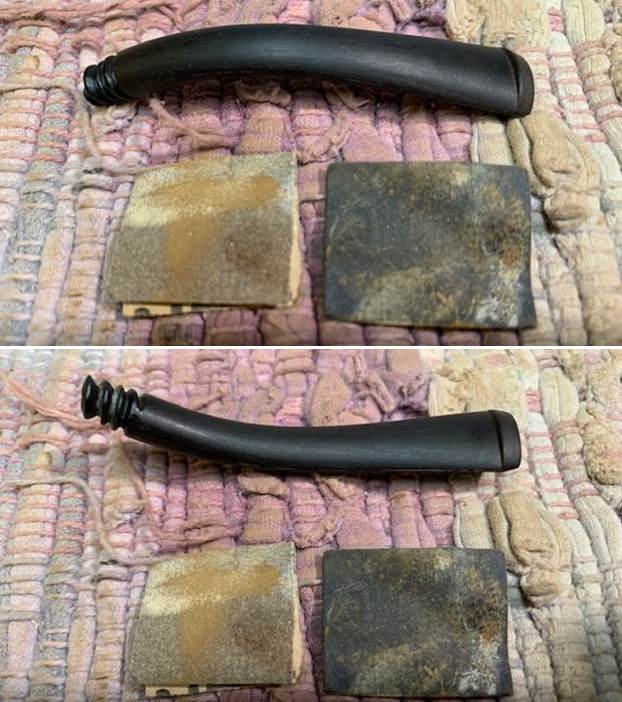
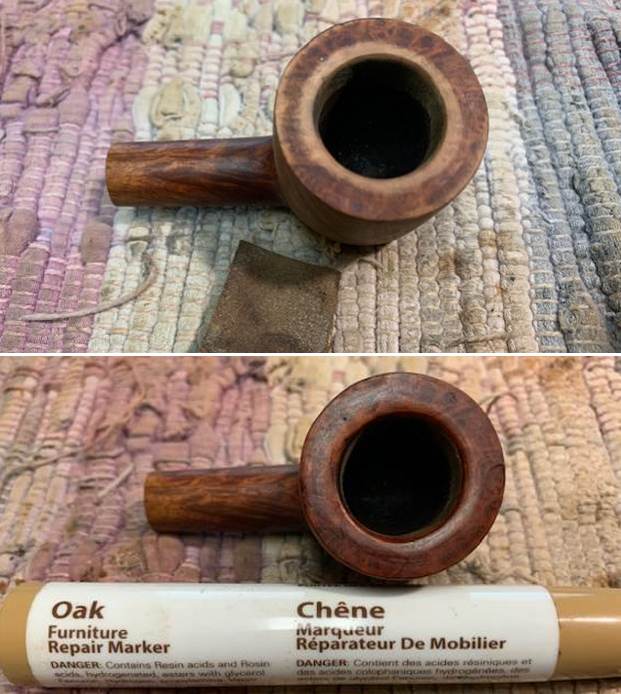
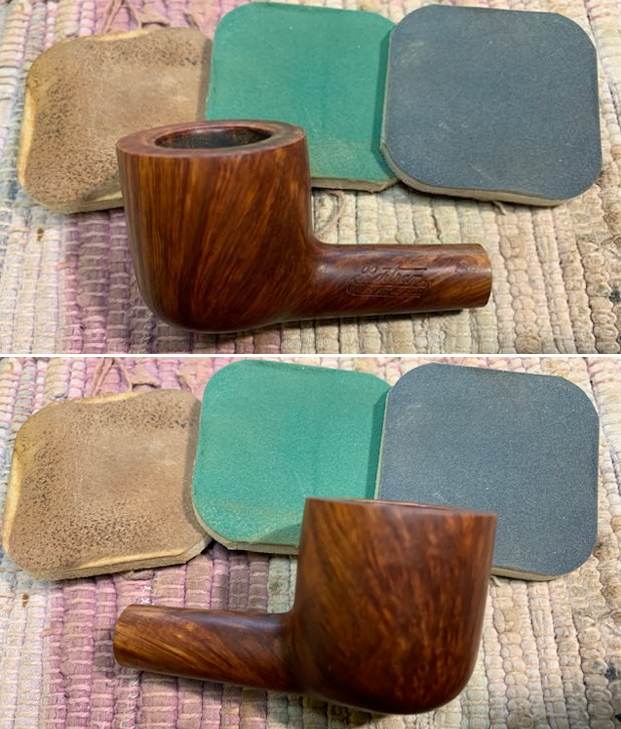
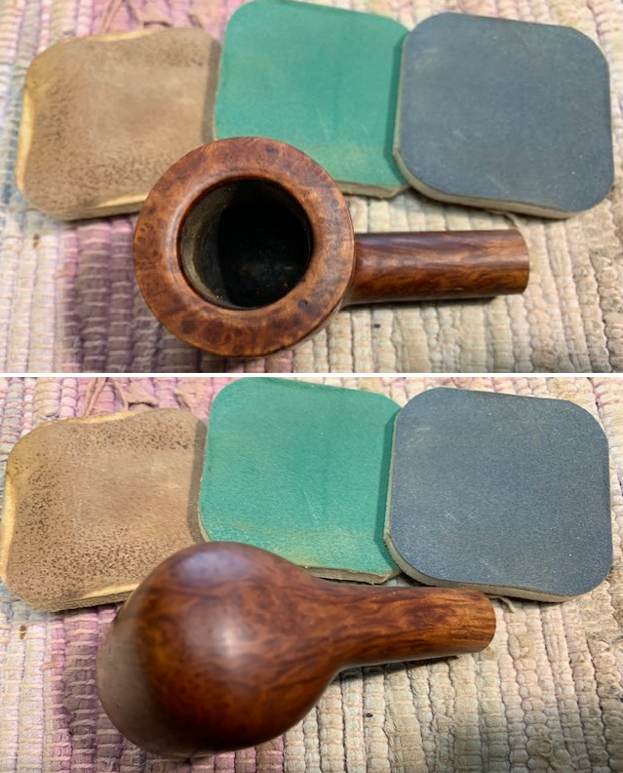
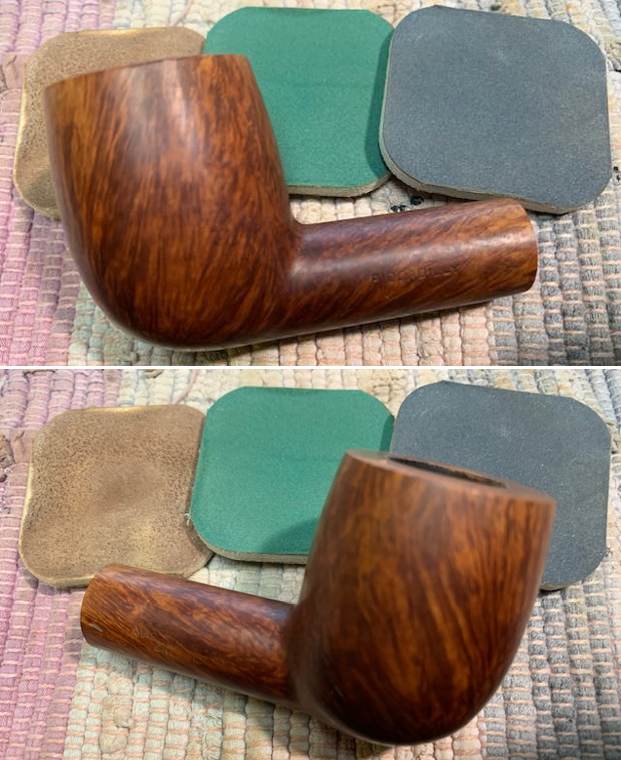
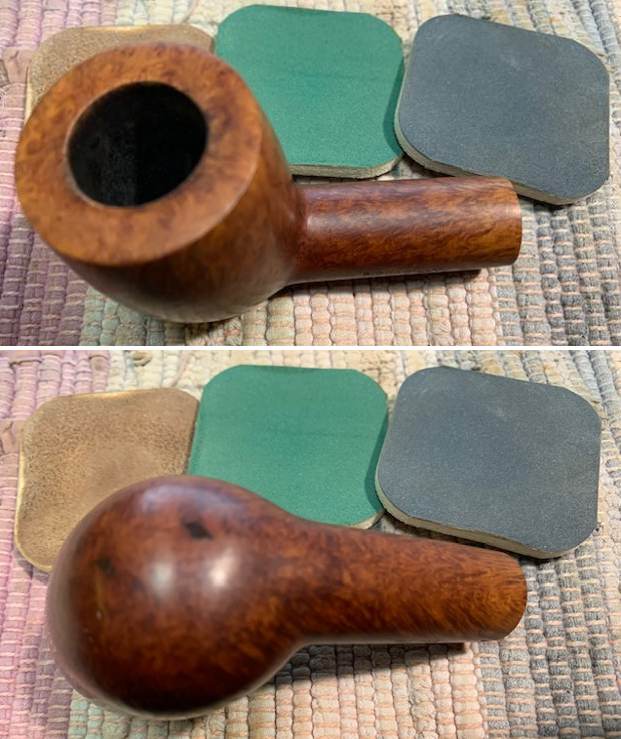
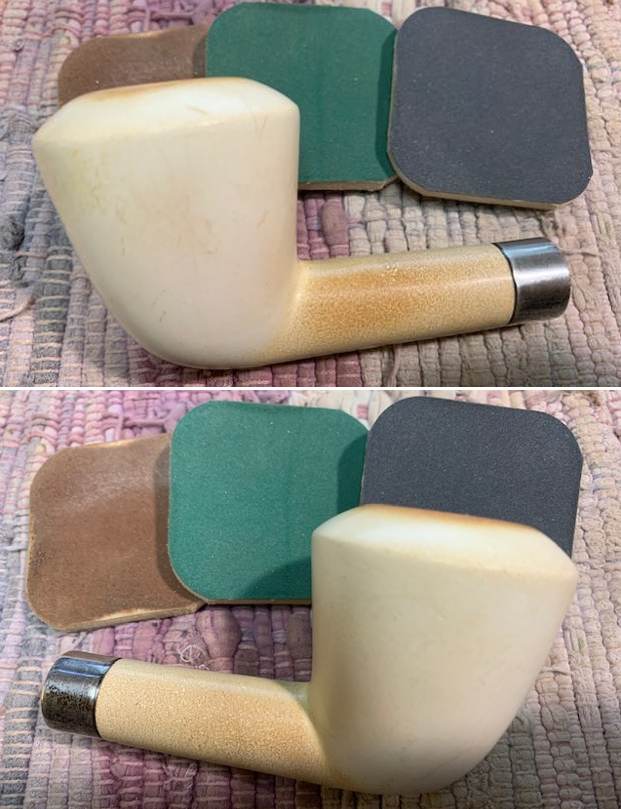
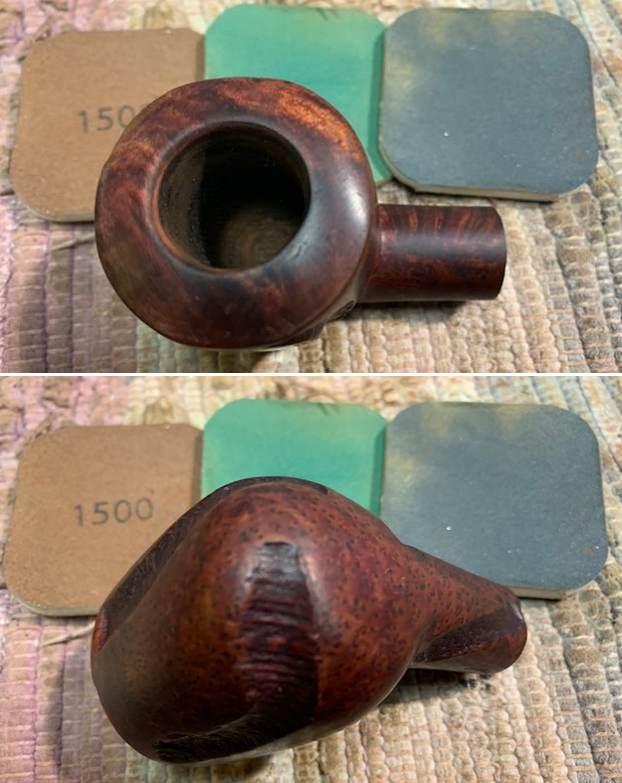
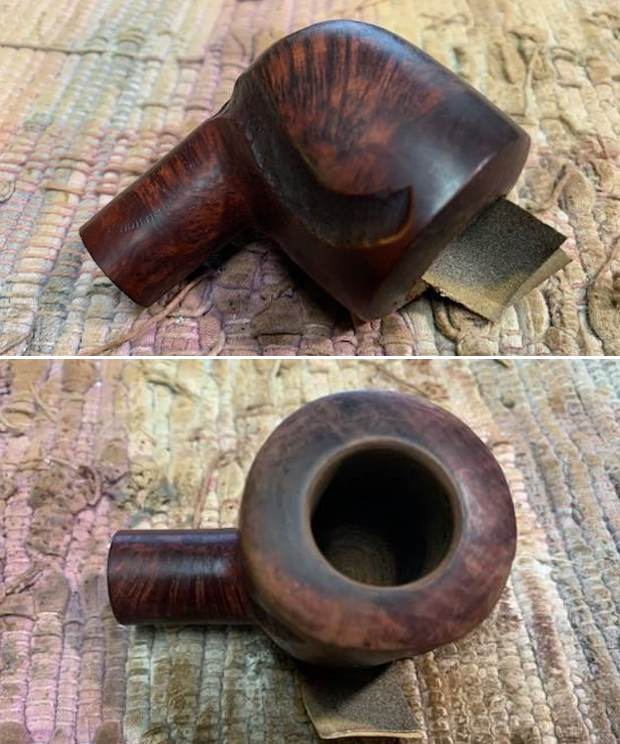 I polished the bowl and rim top with micromesh sanding pads – dry sanding with 1500-12000 grit pads and wiped down the bowl after each sanding pad.
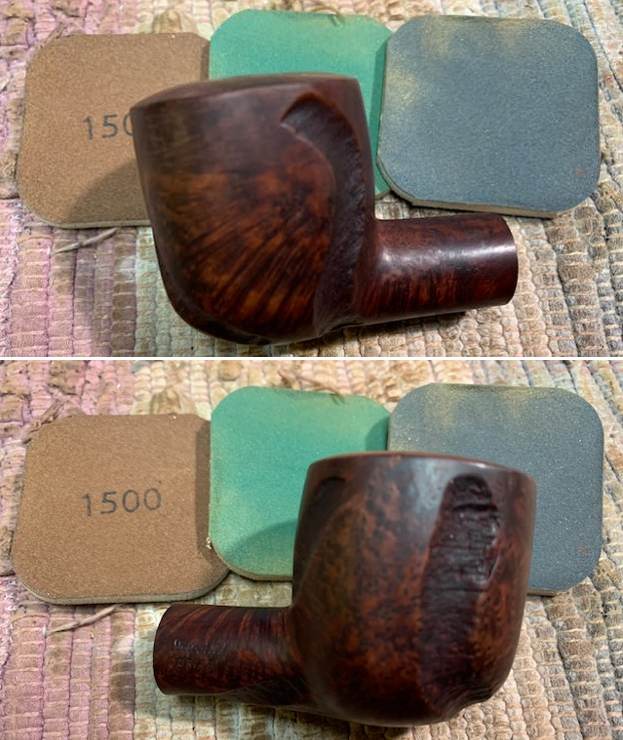
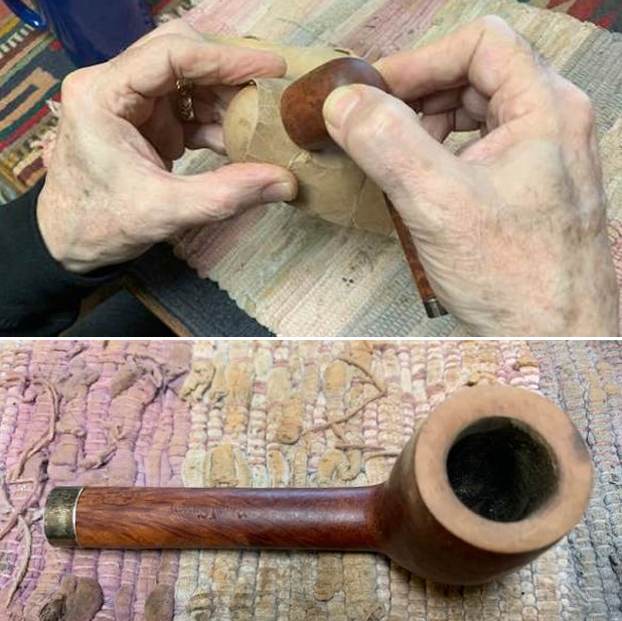
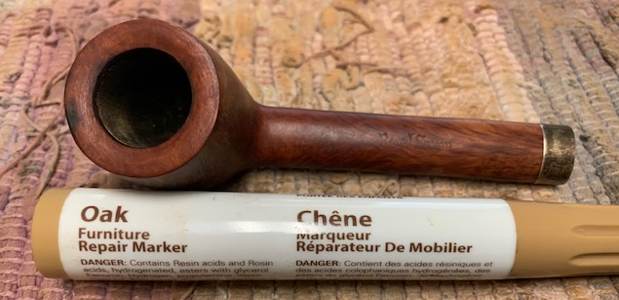
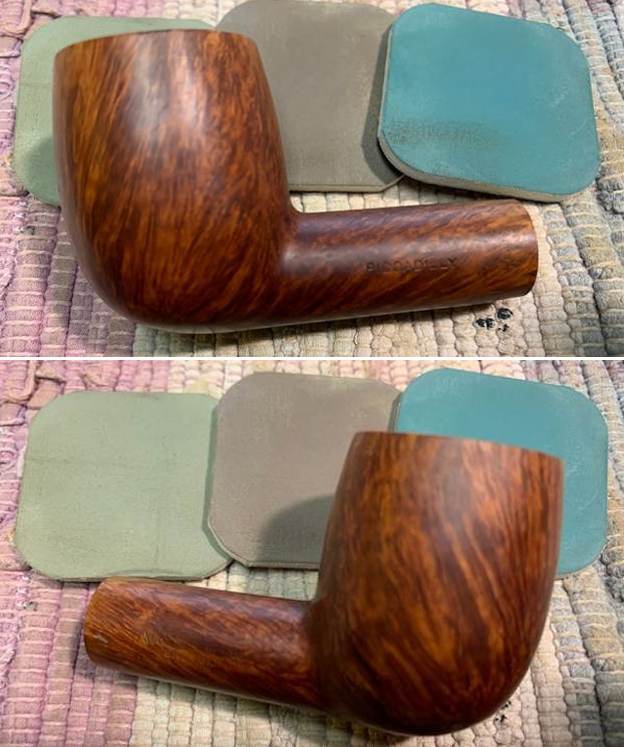
 I rubbed the bowl and shank down with Before & After Restoration Balm. I worked it into the surface of the bowl sides and shank with my fingertips and a horse hair shoe brush to clean, enliven and protect the briar. I let the balm sit for a little while and then buffed with a cotton cloth to raise the shine. The Balm did its magic and the grain stood out.
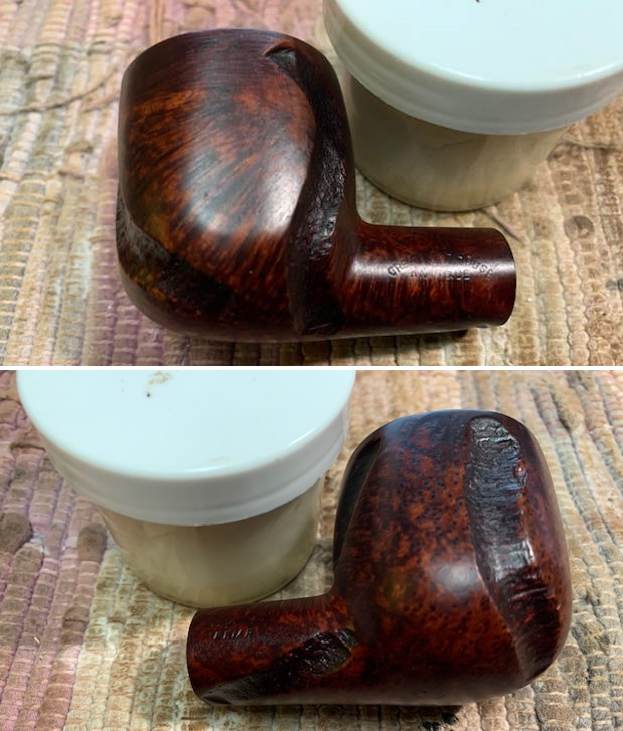
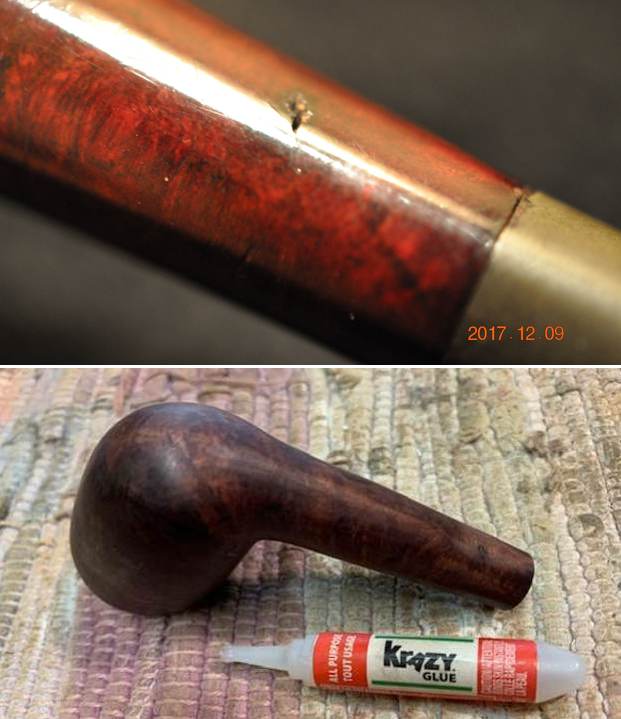
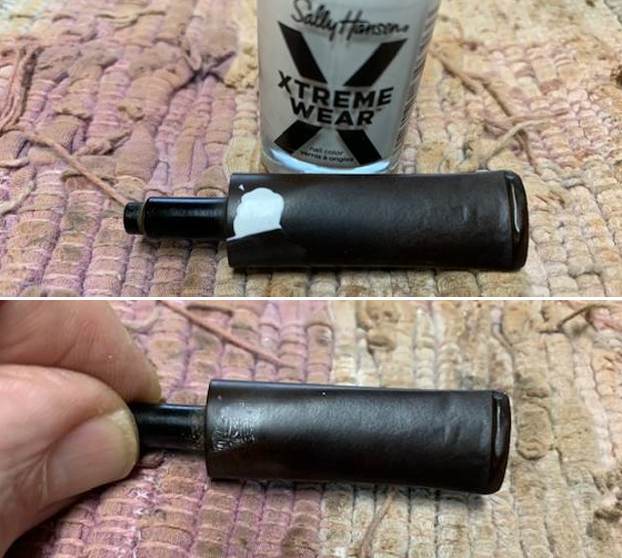
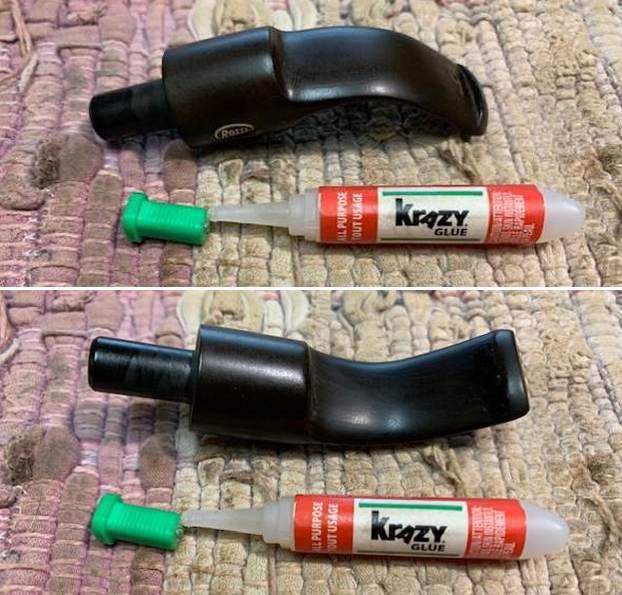
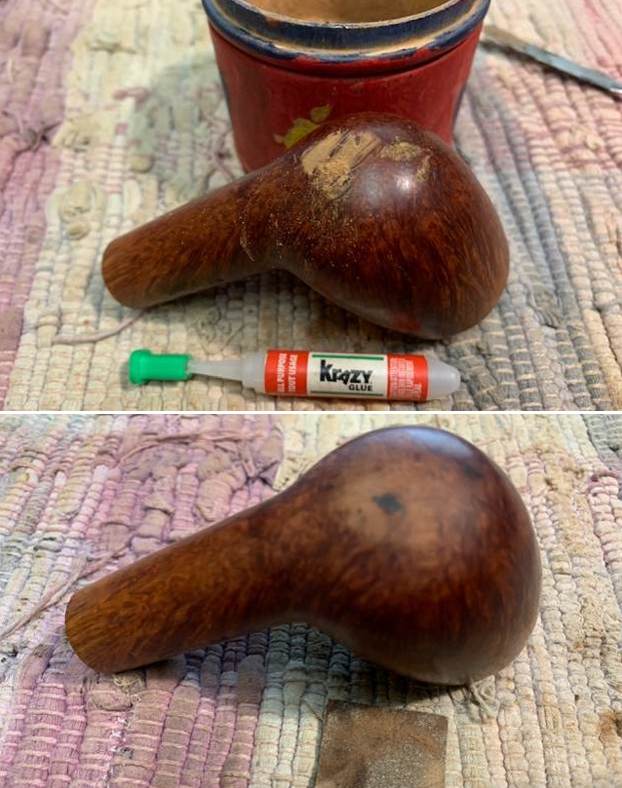
 So far so good! I filled in the deep gouges on the top and underside of the stem and set it aside for the repairs to cure.
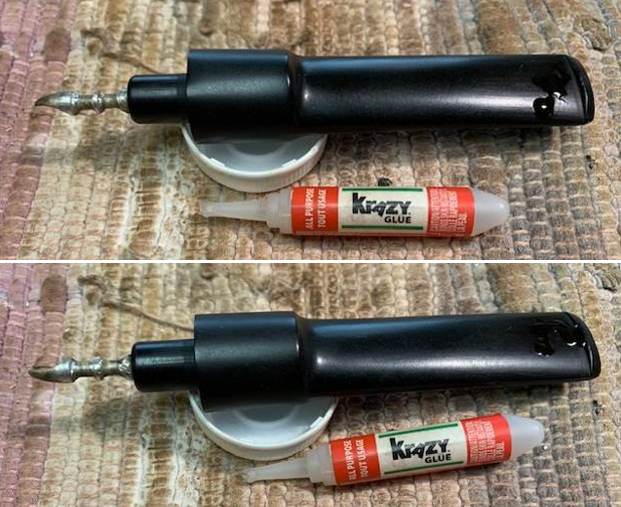 After the repairs cured things took a horrible turn! If you have read this blog for long you know how much I dislike metal stingers. I find that they indeed condense moisture and fill the shank with horrendous muck. Soooo… I decided I would try to remove this one and give the stem a thorough cleaning. I have found that most stingers are either threaded and screwed into the tenon or are pressure fit. Either way a little heat loosens the glue or gunk that hold it tight and it is easily removed.
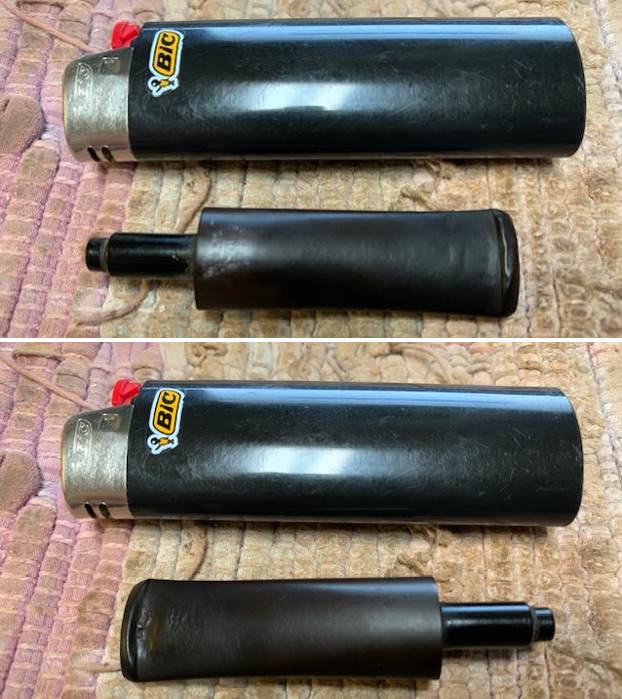
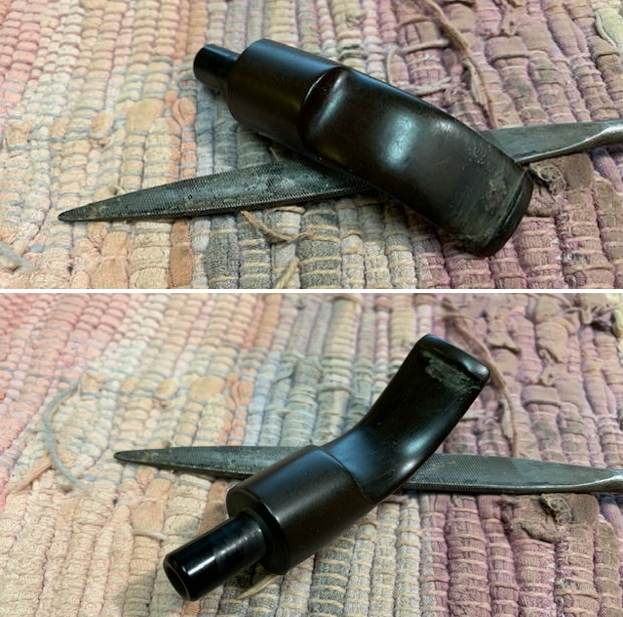
Well… the heat did absolutely nothing with this one. It did not twist or wiggle free. It was solid with or without heat… or cold for that matter. I was frustrated at this point and tried to pull it with pliers and the “wicked” thing snapped off! Now that usually does not matter either. I can easily drill it out with a small bit.
Again not so!! The remaining tube went well beyond the saddle on the stem. I drilled and drilled then filed the edges to smooth it out. At this point I should have just left it. But I DID NOT DO THAT. NO! I tried to pull out the remnant of the tube with a small file. And then a chunk of the tenon cracked off. You can see the offending tube in the tenon stubbornly laughing at me. Arggh… This was becoming much more of a problem. Each step I took to remedy it made it actually worse. Now I would need to cut off the remaining tenon and the drill the stem and make a new tenon for it. OH MY! THIS IS NOT WHAT I WANT TO DO!!
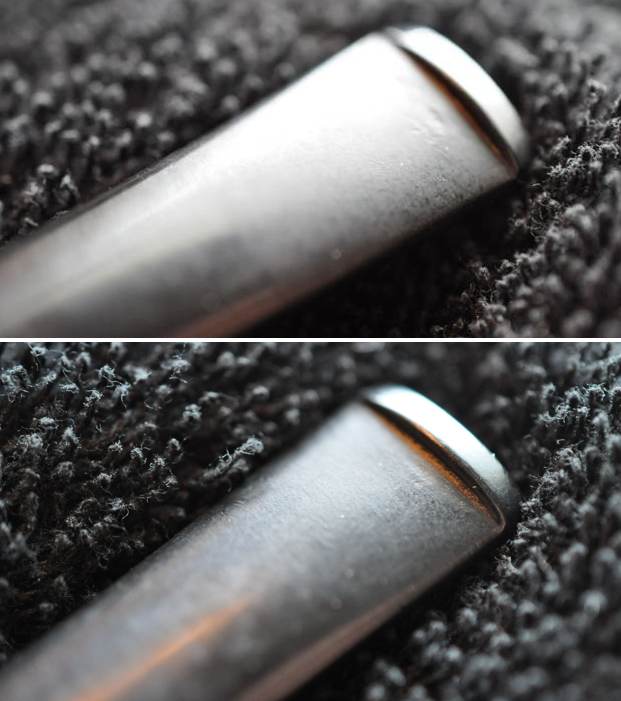
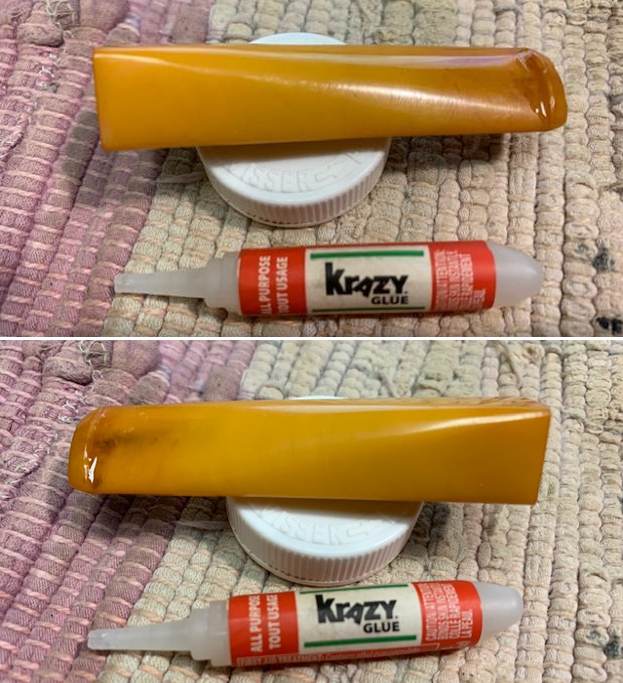
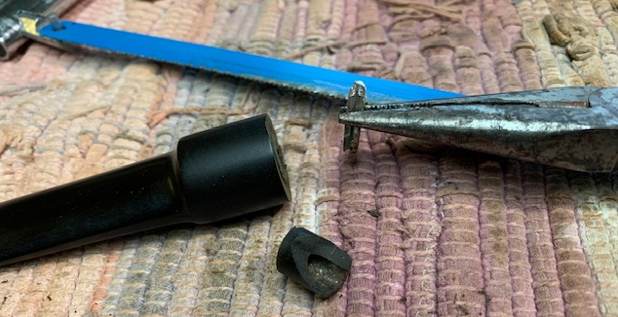
I got out my hacksaw and carefully cut all the way around the broken tenon. I purposely did not cut the tube as I wanted to see how far into the stem it actually went. I pulled it out with a pair of pliers and took a photo of the length of the offending tube once it was free of the airway.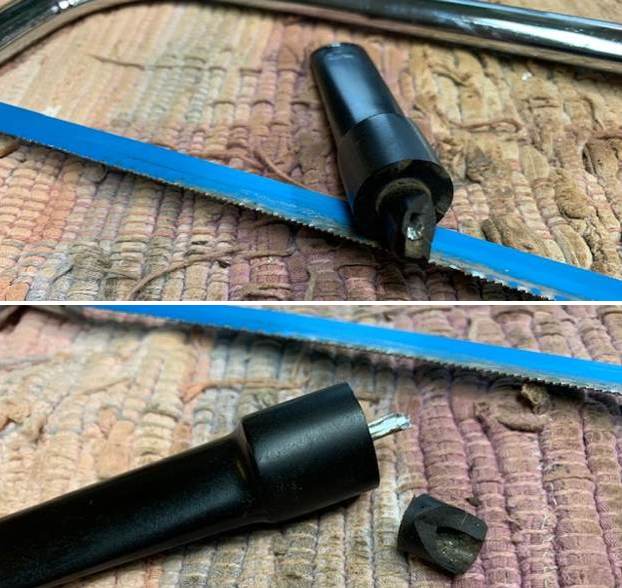
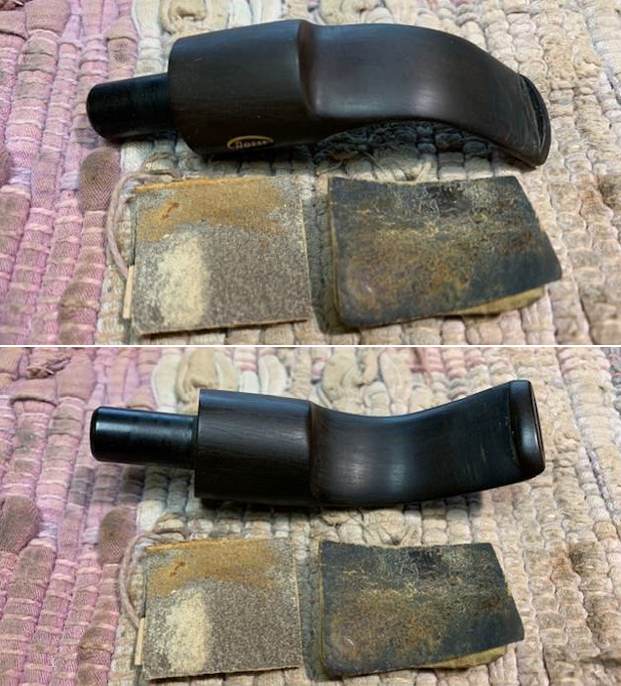
 You might laugh at this point and I invite that. This was a lot of work to go to just to clean out the airway in the stem. But now I could replace the tenon. I went through my tenons and had one that was a close fit to the shank of the pipe. I would need to drill out the stem to take the threaded replacement tenon but I was hoping that this part would proceed without more things going awry.
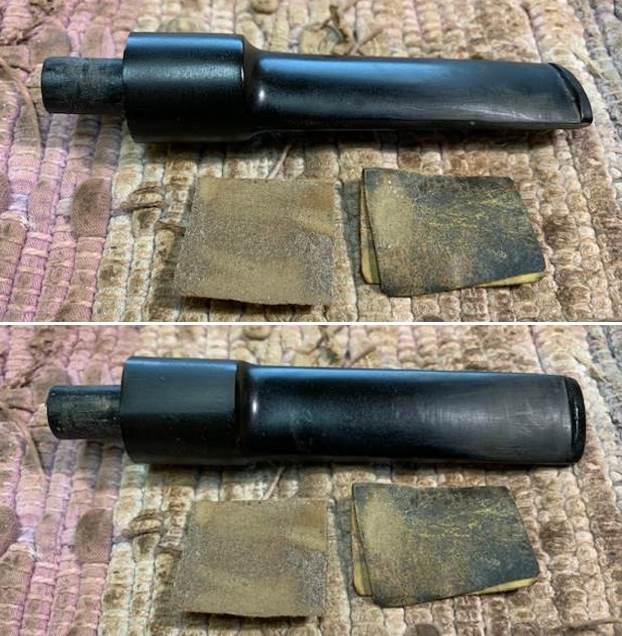
 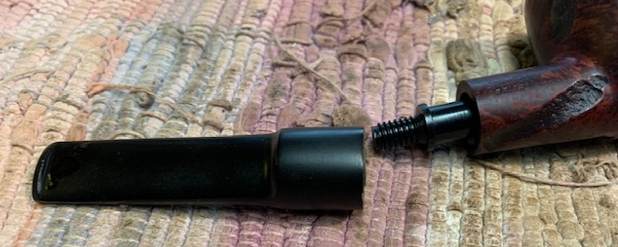 I started drilling with my cordless drill and a bit slightly larger than the airway in the stem. I continued going through various bits up to ¼ inch which was the size I would need to receive the threaded tenon end with some modifications. You will notice the repairs to the deep tooth marks still have not been smoothed out.
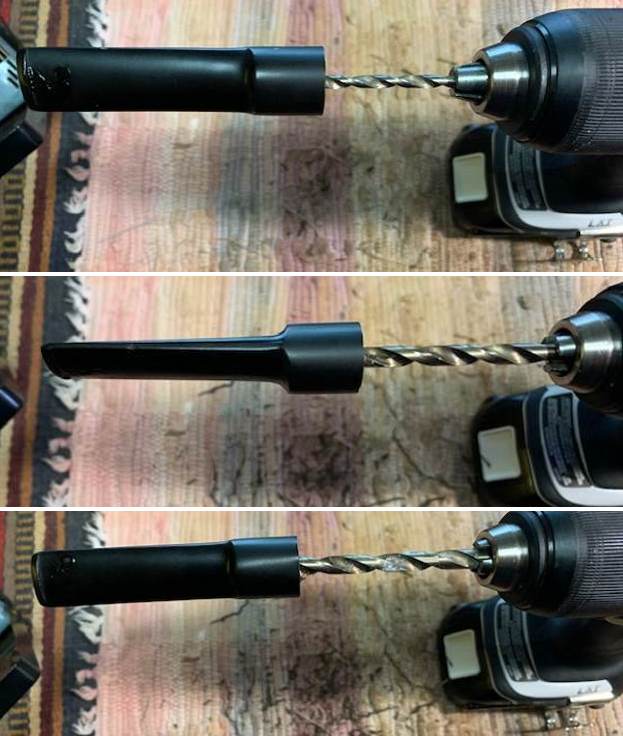 I modified the threaded tenon with a Dremel and sanding drum. I removed the should on the middle of the tenon and reduced the diameter of the threaded portion so that I could glue it in place in the stem. I cleaned up the edge between the thicker portion and the threaded portion with a flat rasp to make the fit smooth when inserted in the stem. I inserted it in the stem and took a photo.
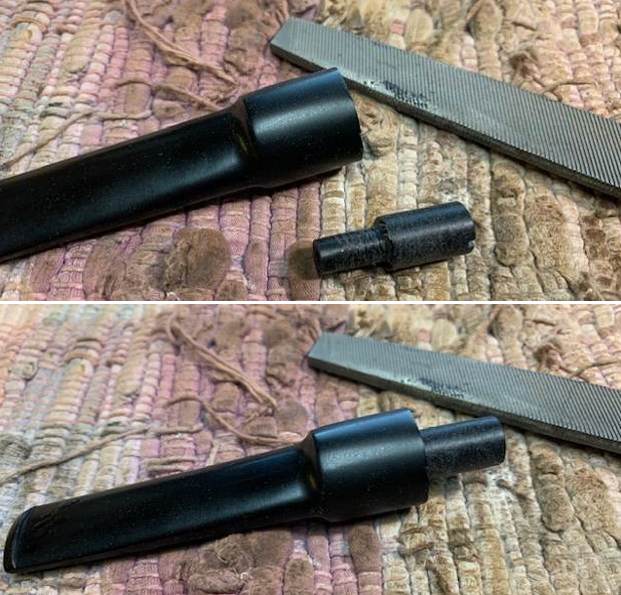 Before gluing the tenon I the stem I put all the parts together to make sure that everything lines up correctly. It looks good so I take photos to show it at this point in the process.
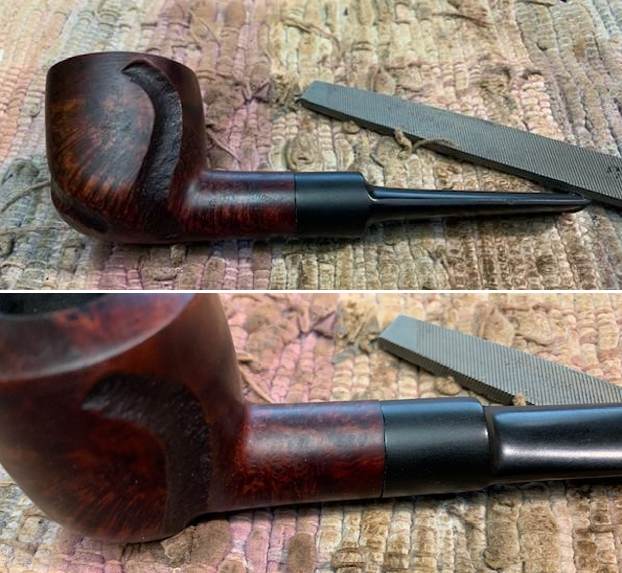
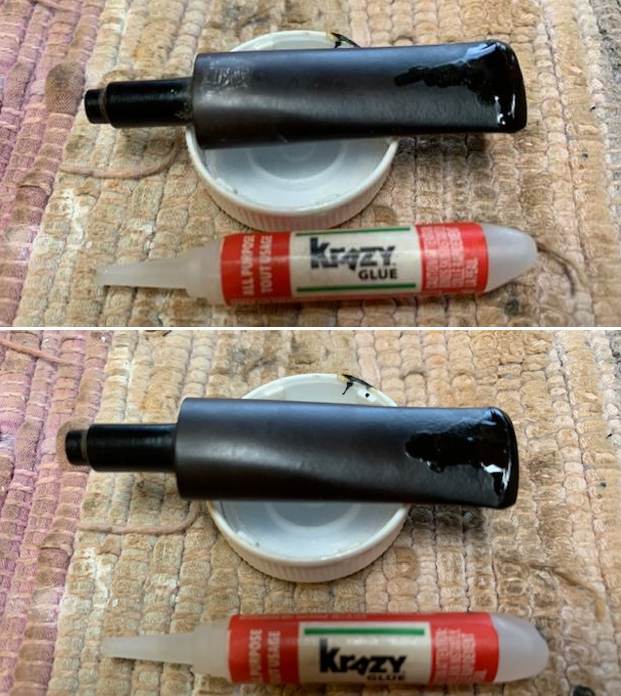
 With the alignment correct I coated the threaded end of the tenon with black super glue and pushed the tenon in place in the stem. I set the stem aside to let the glue cure and went and had a cup of coffee with Irene. I needed to lick my wounds a bit on this whole mess!
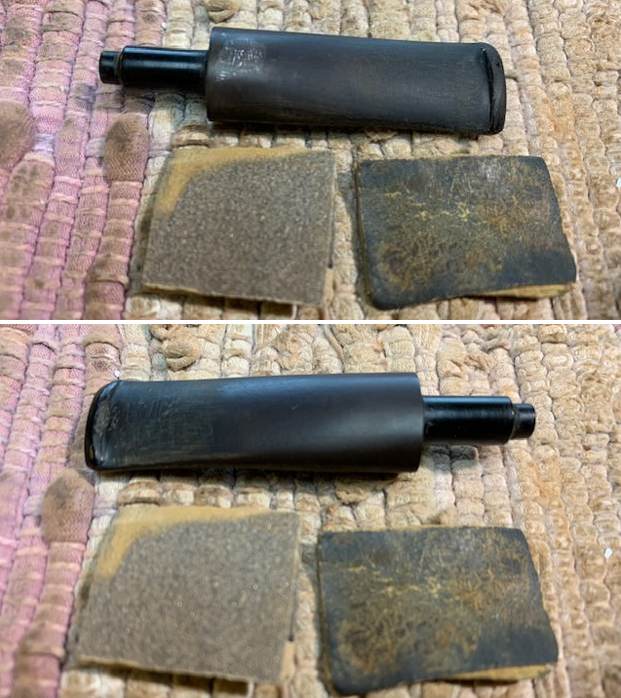
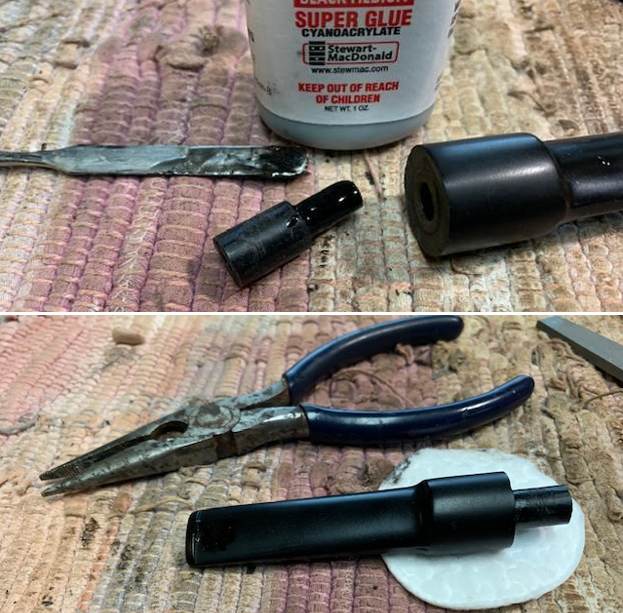 After coffee I went back to the stem to clean up the repairs on the top and underside of the stem. I flattened out the repairs with a flat file to begin to blend them into the surface. I followed that up with 220 grit sandpaper to further blend it in. I started polishing it with 400 grit wet dry sandpaper.
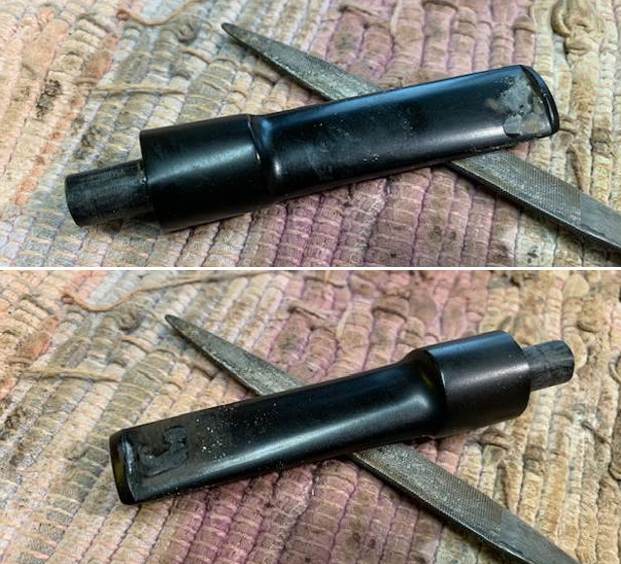
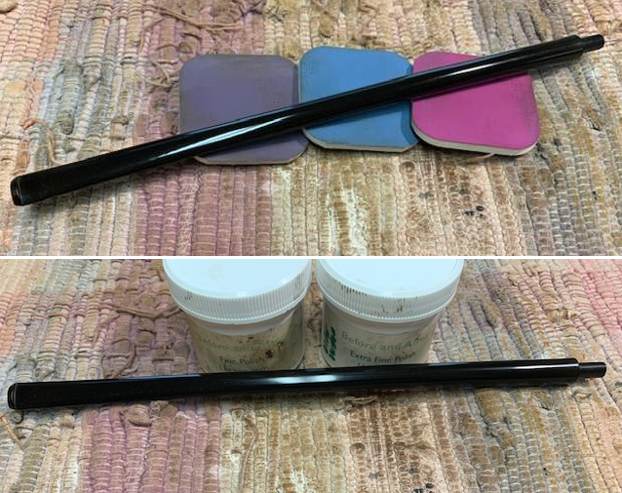
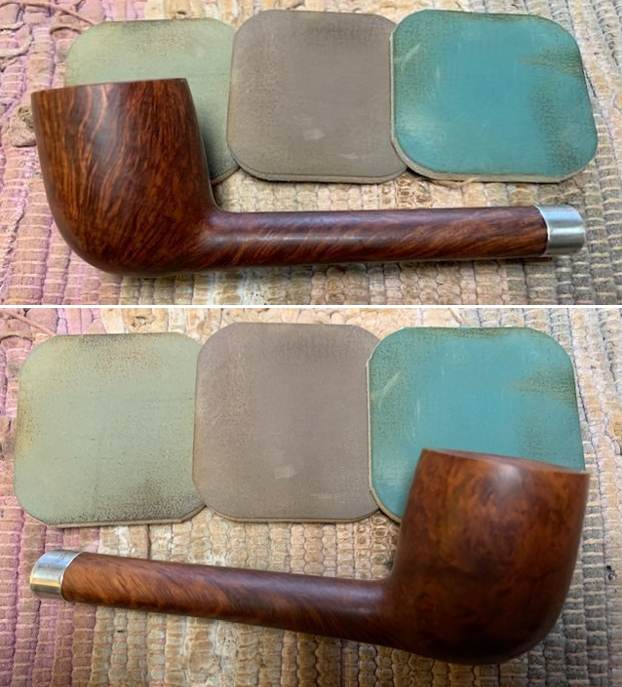
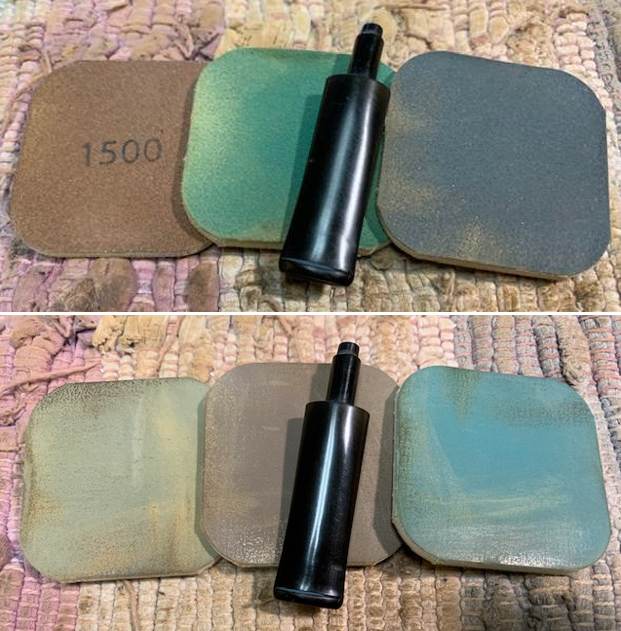
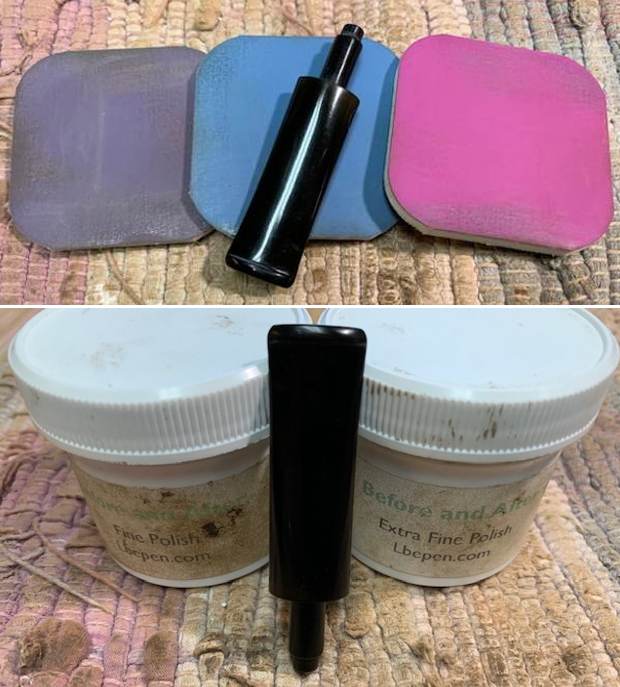
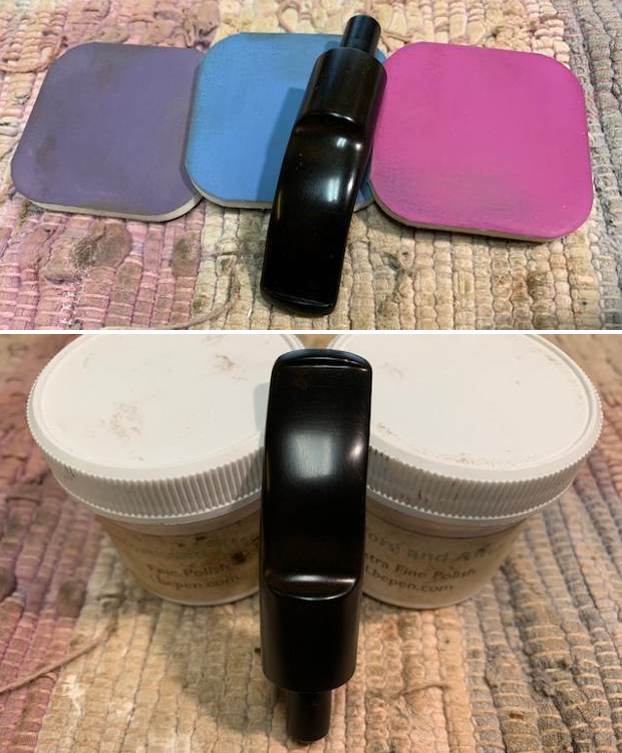
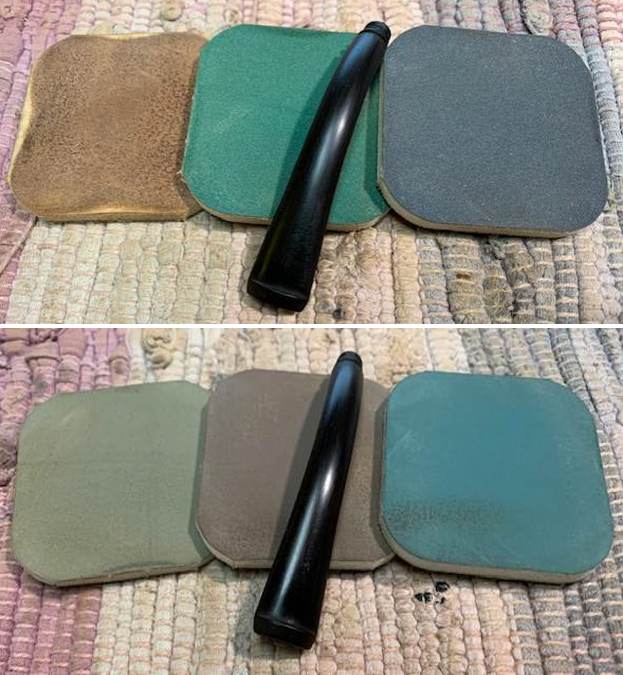
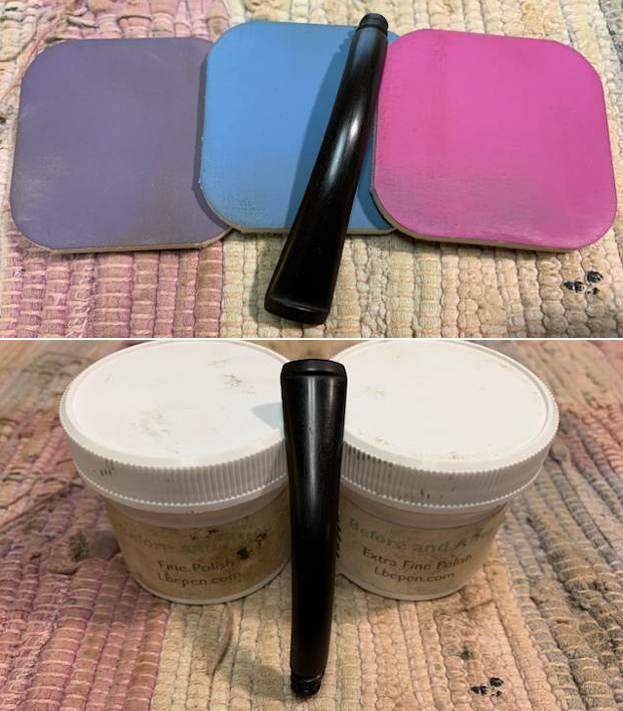
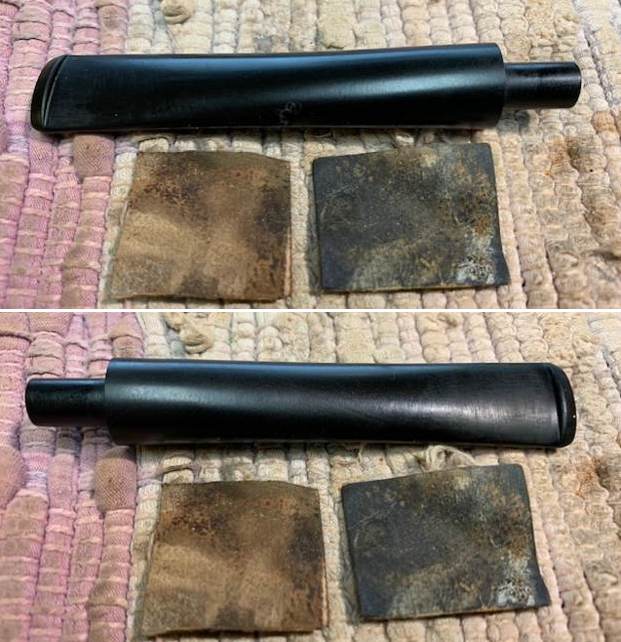
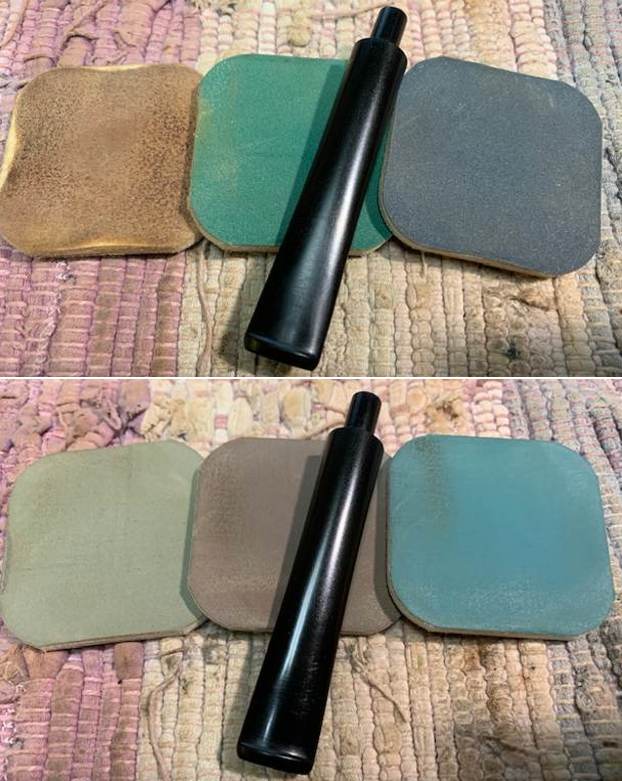
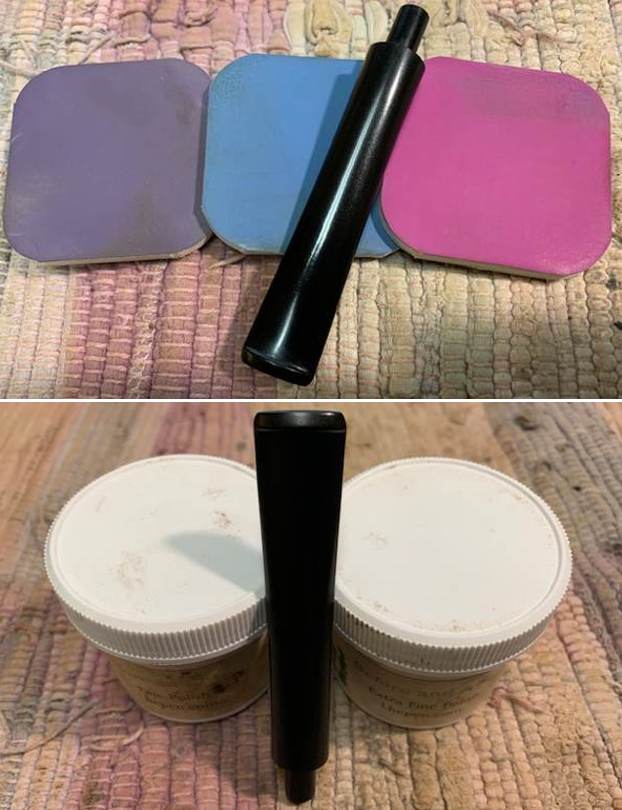
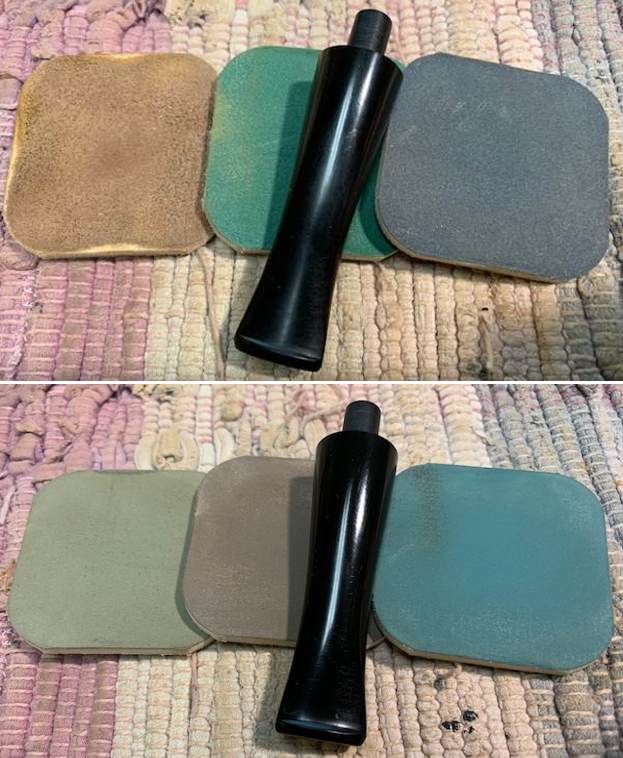
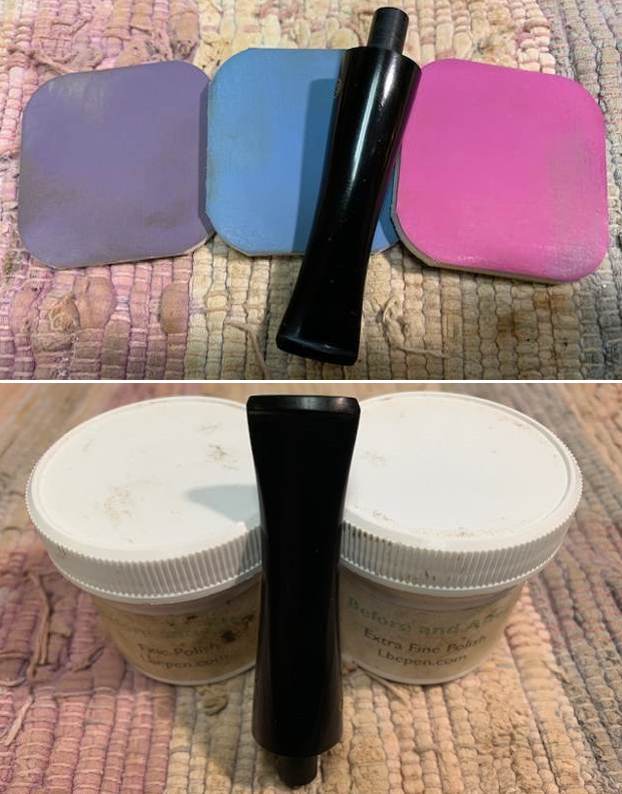
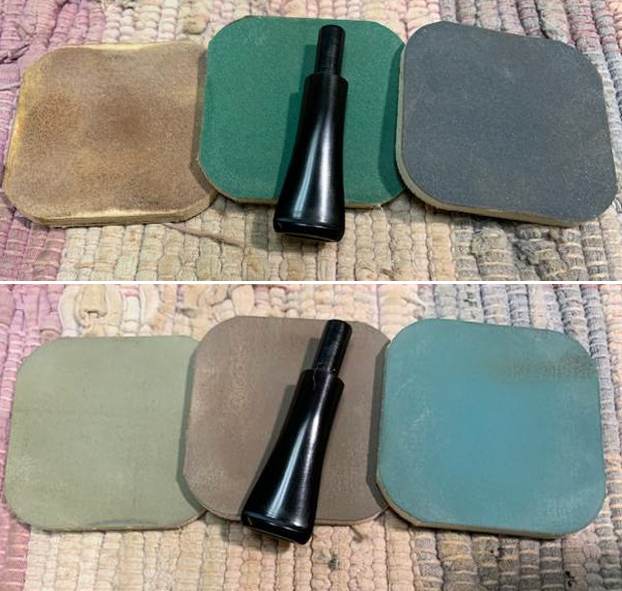
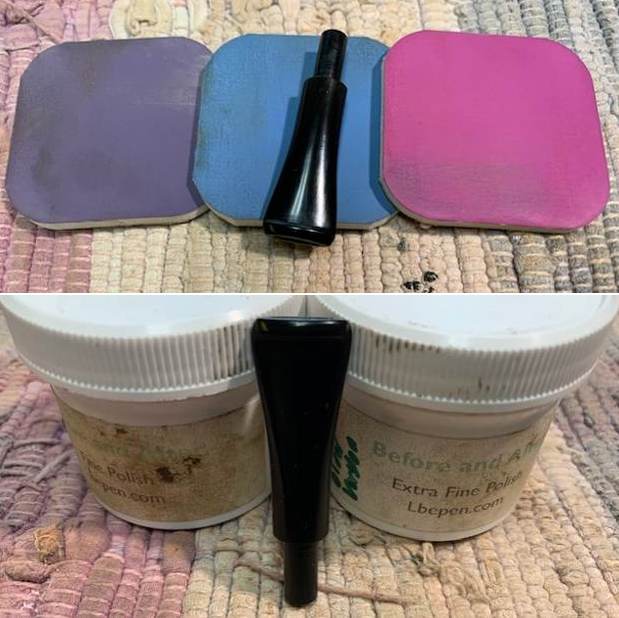
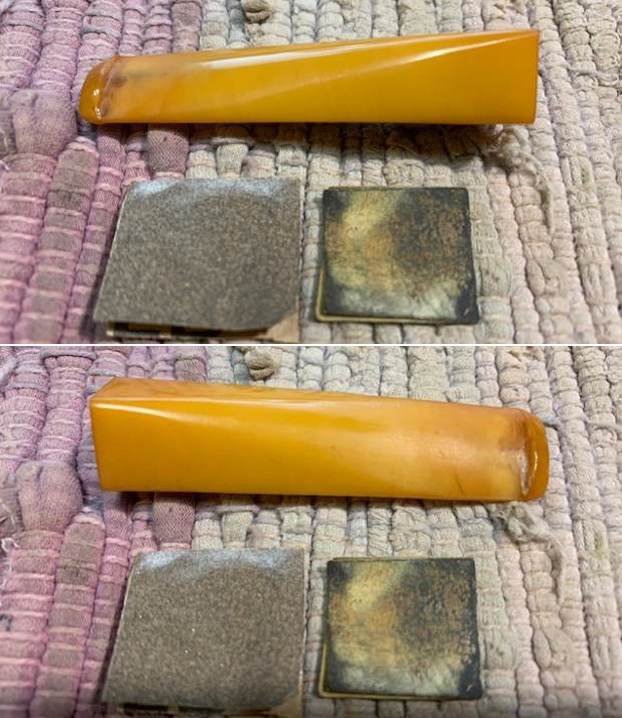
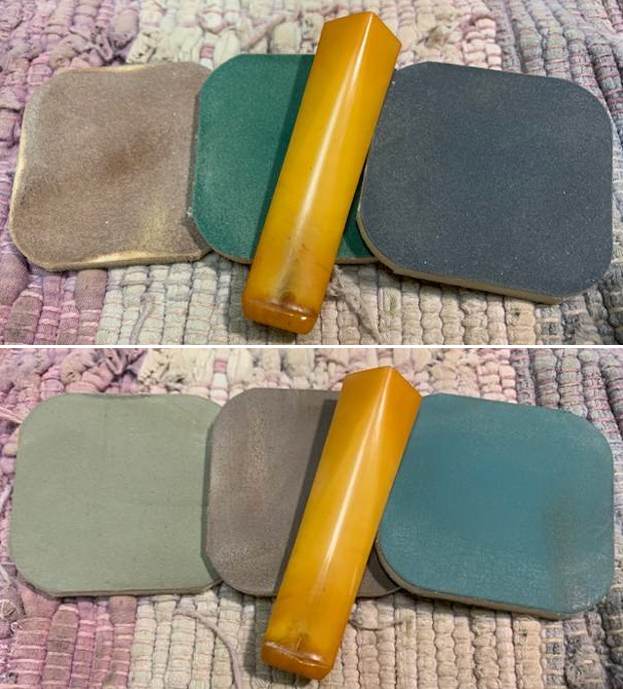
 I polished the stem with micromesh sanding pads – 1500-12000 grit pads. I wiped it down with Obsidian Oil after each sanding pad. I used Before & After Pipe Polish – both Fine and Extra Fine to further polish the stem. I gave it a final coat of Obsidian Oil and set it aside to dry.
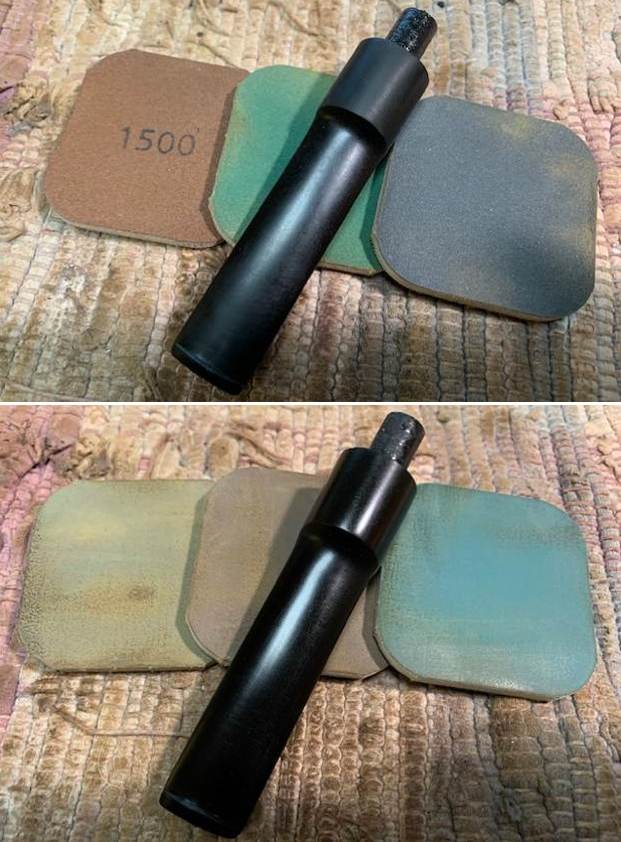
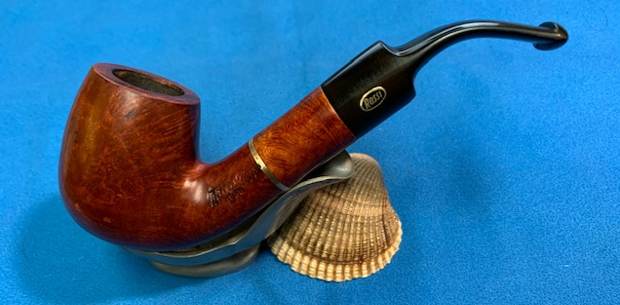
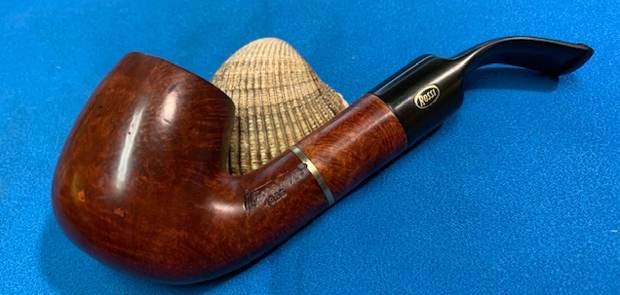
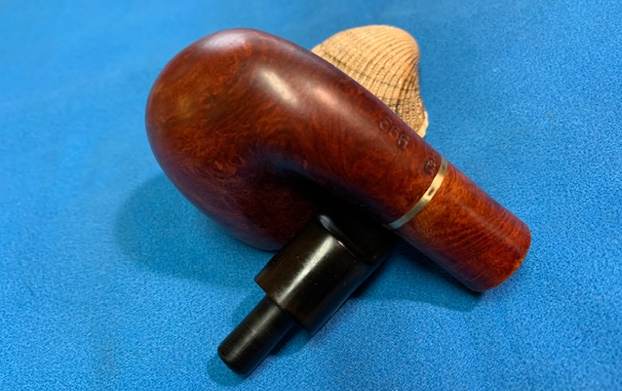
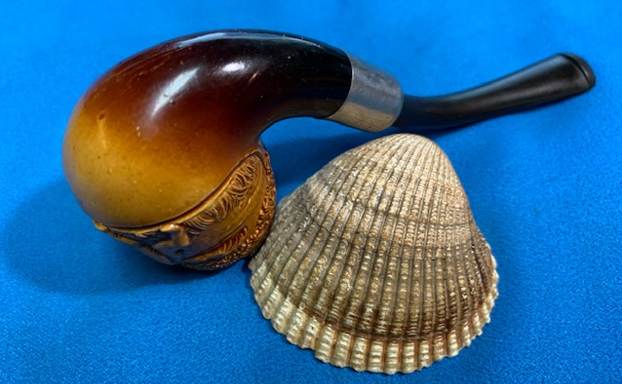
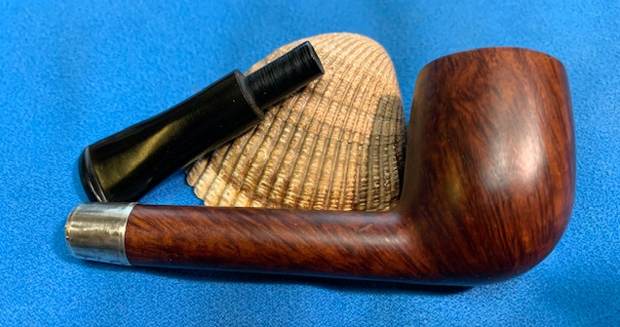
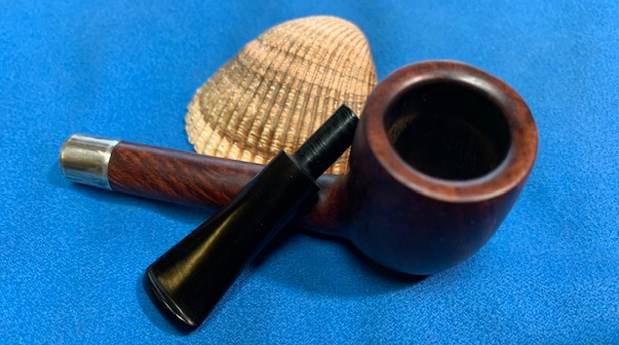
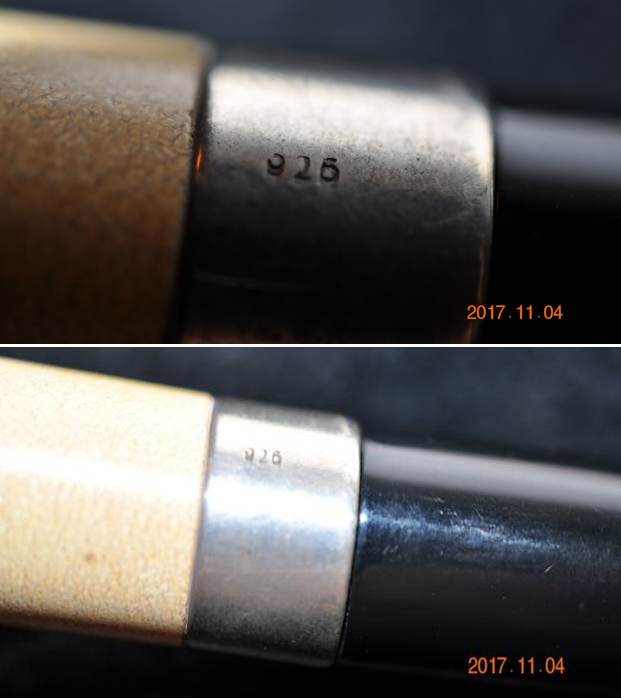
 While I liked the look of the new stem on the shank it felt like it was missing something to me. I really wanted to give it a special touch that would set it apart and make the look spectacular. I went through my band collection and found a perfect 14K Gold band that would do just what I wanted. I took down the end of the shank to enable a snug fit. I heated the band with a lighter and pressed it onto the shank end.
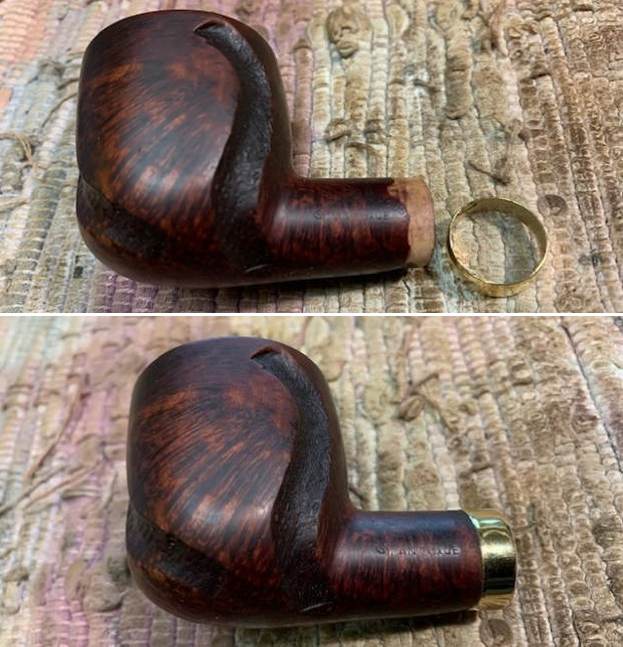

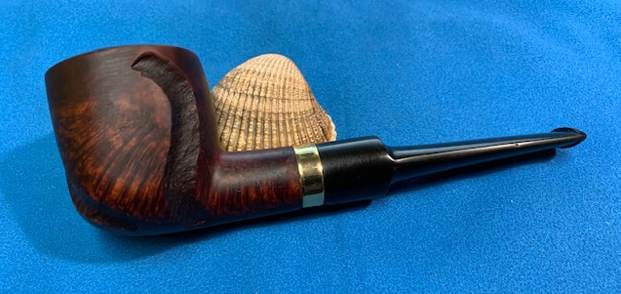
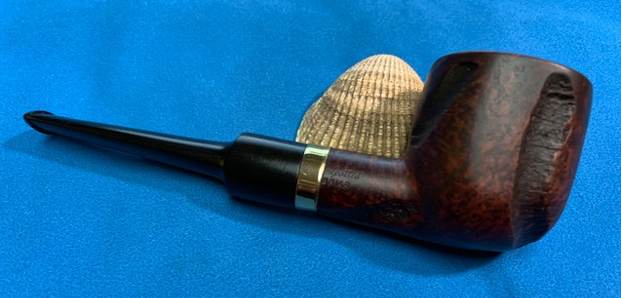
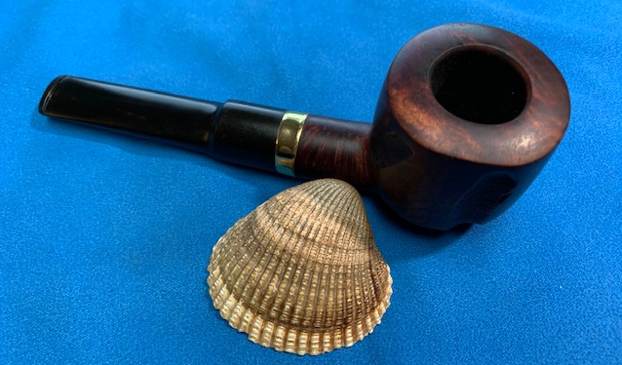
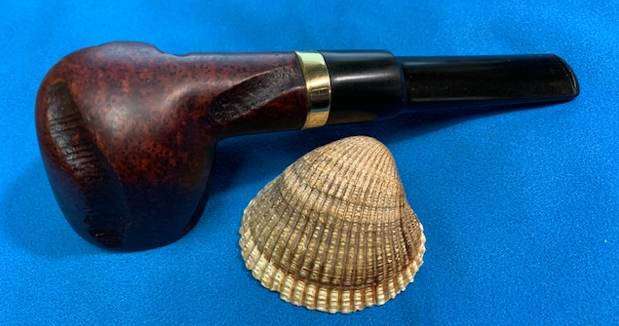
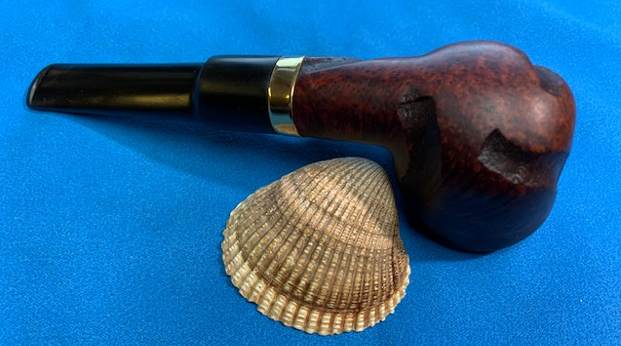
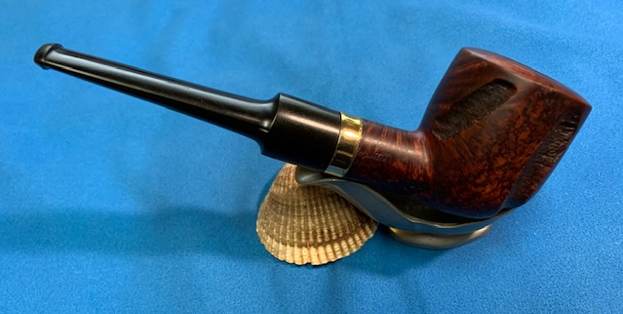
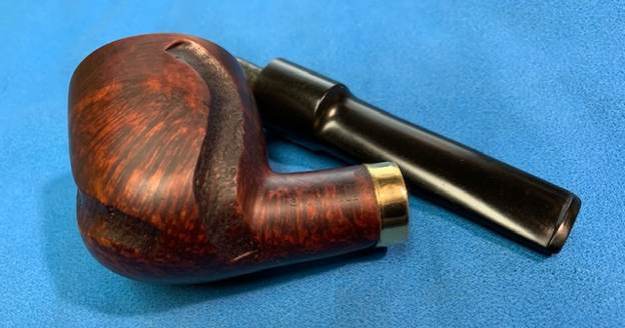
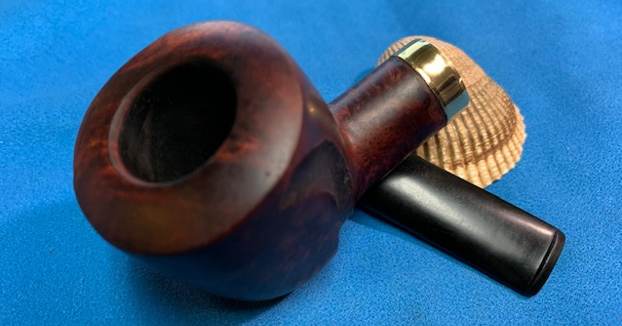
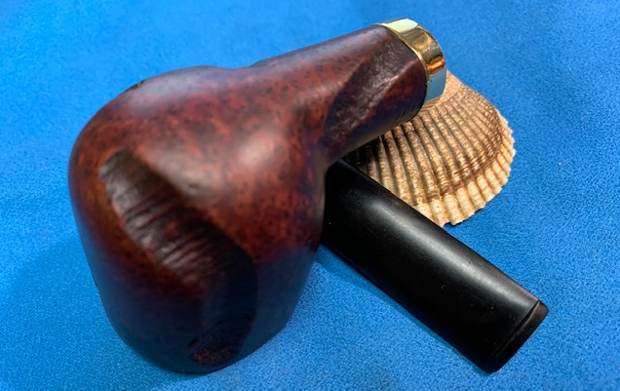
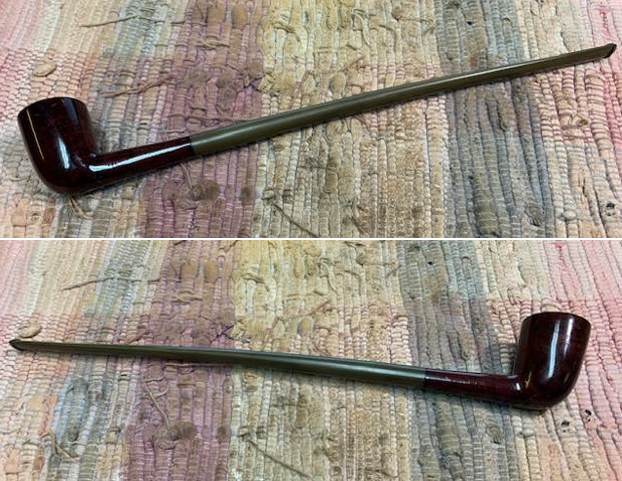
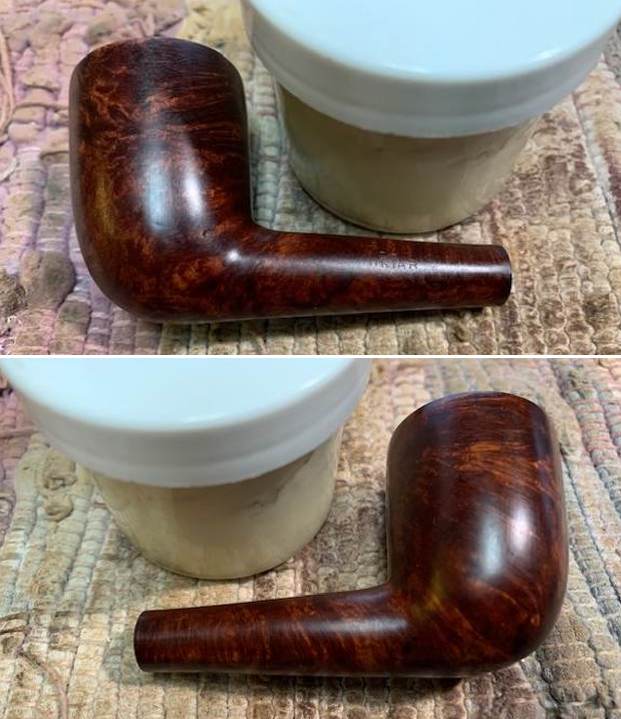
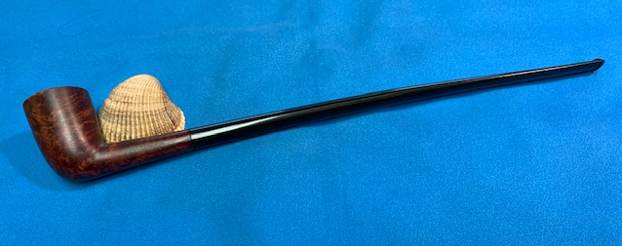
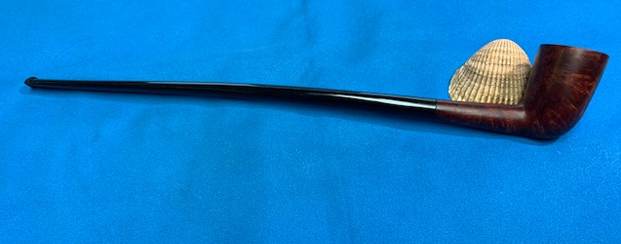
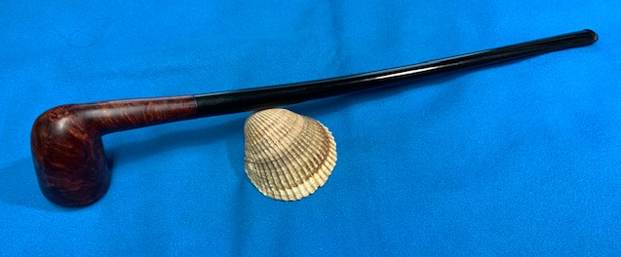
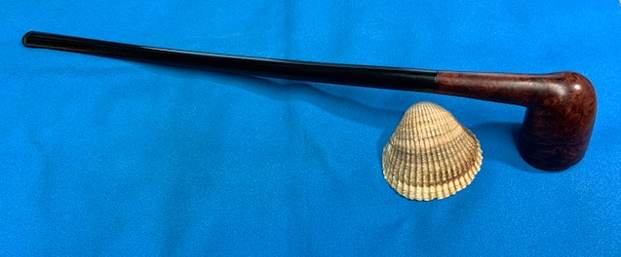
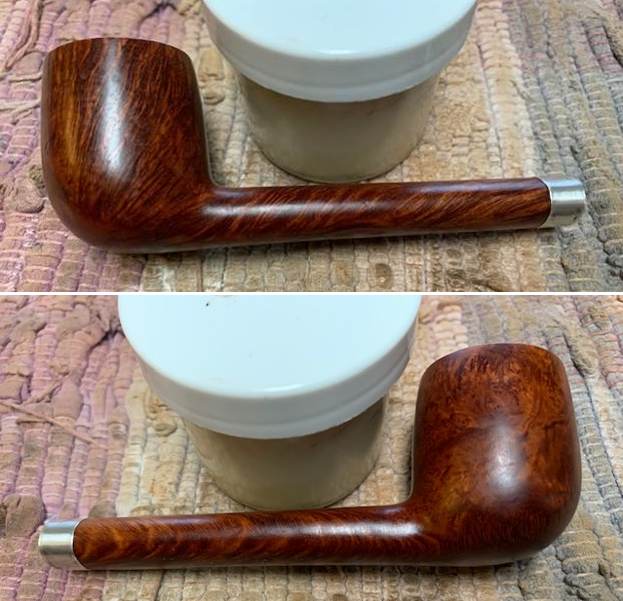
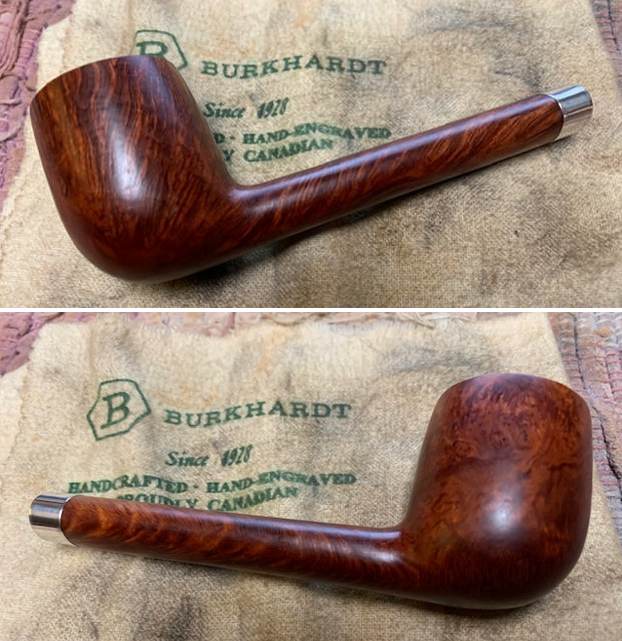
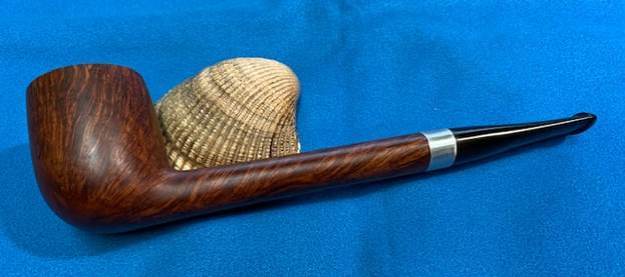
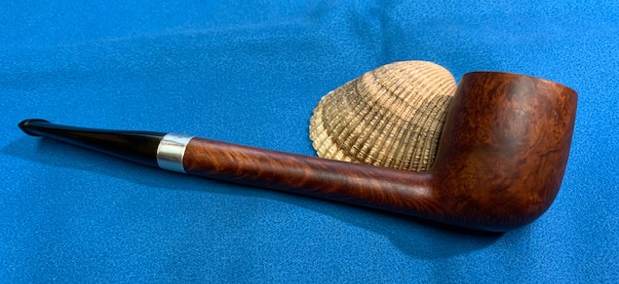
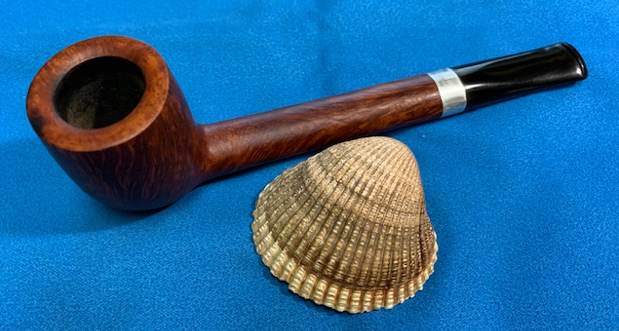
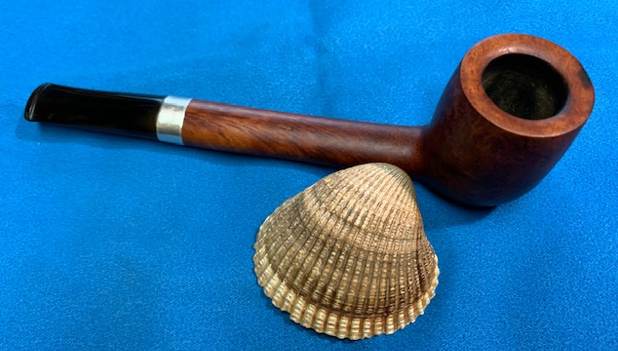
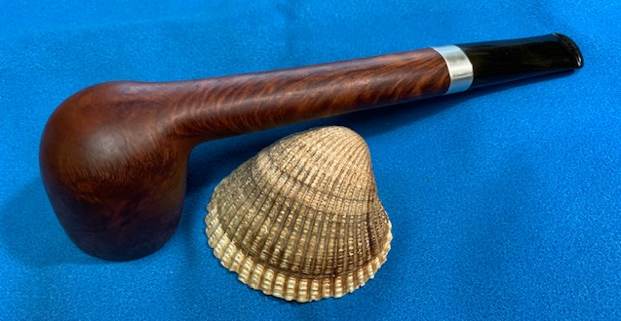
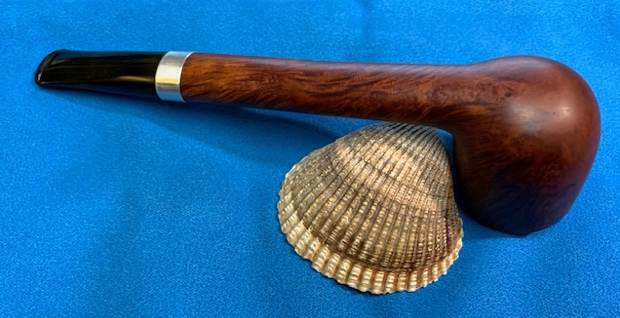
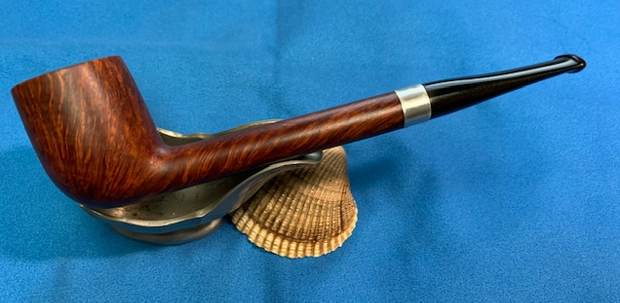
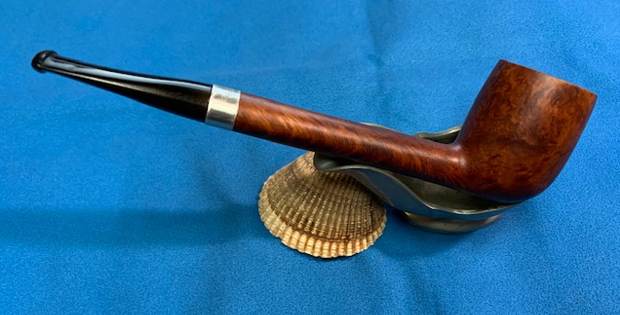
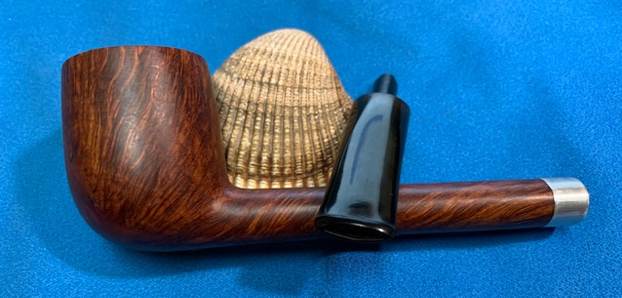
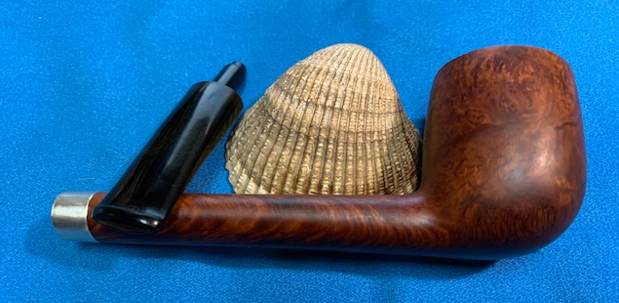
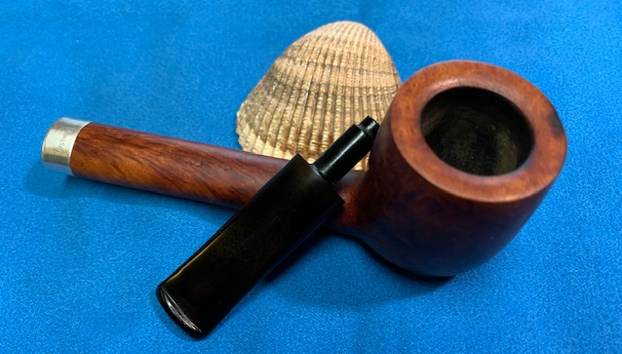
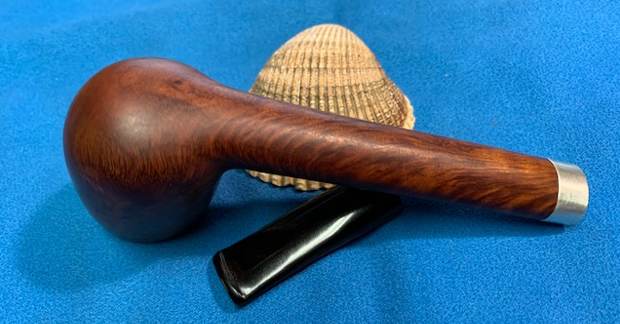
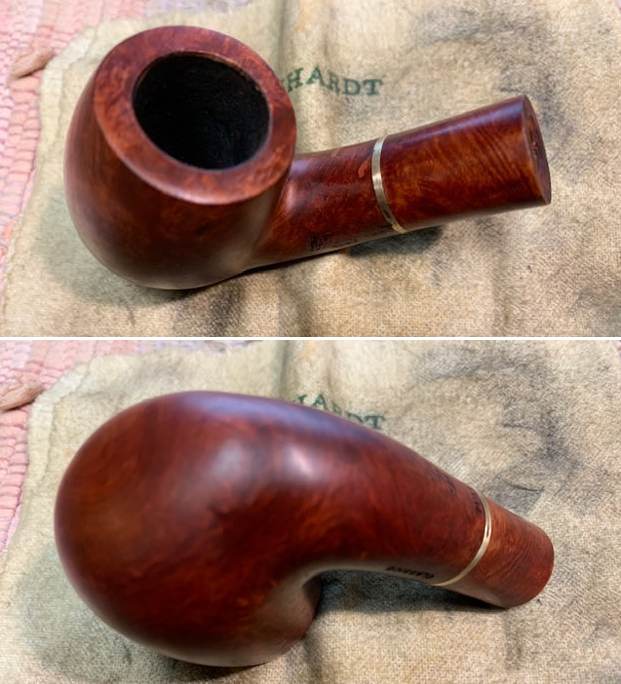
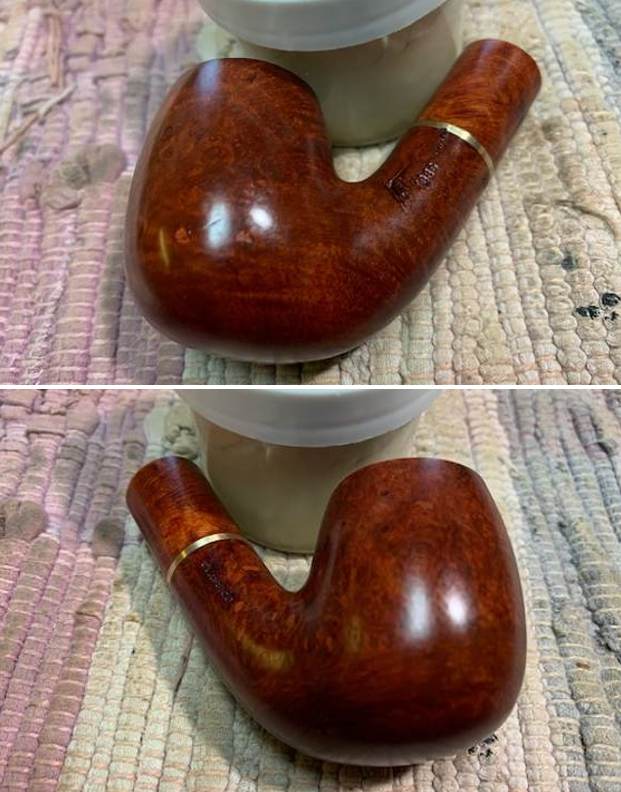
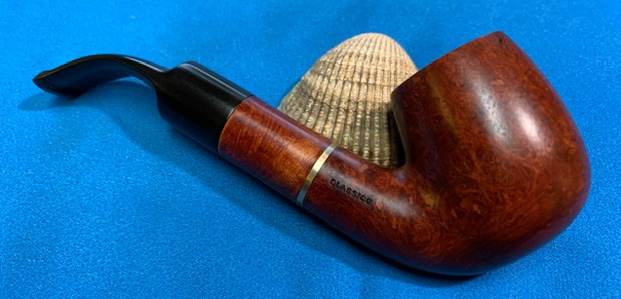
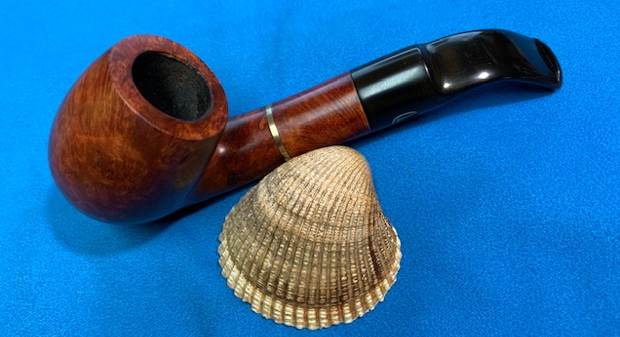
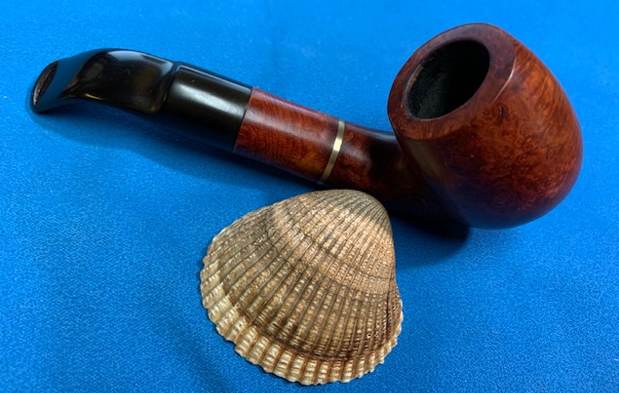
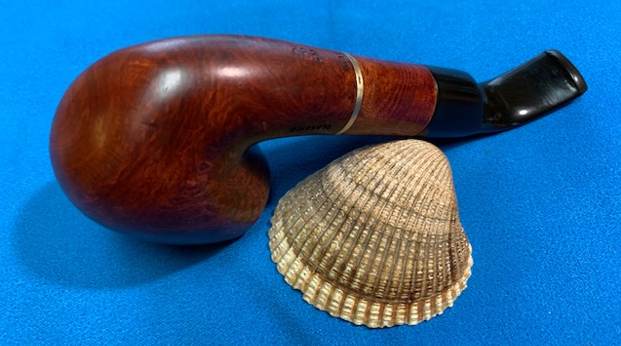
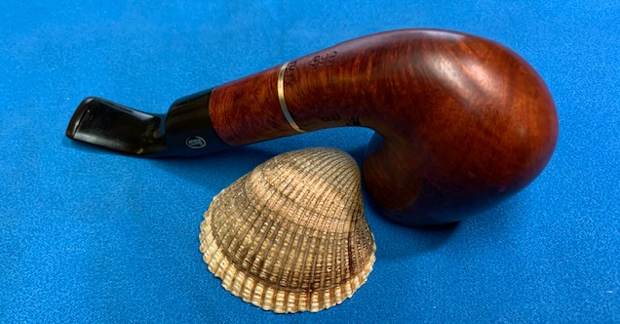
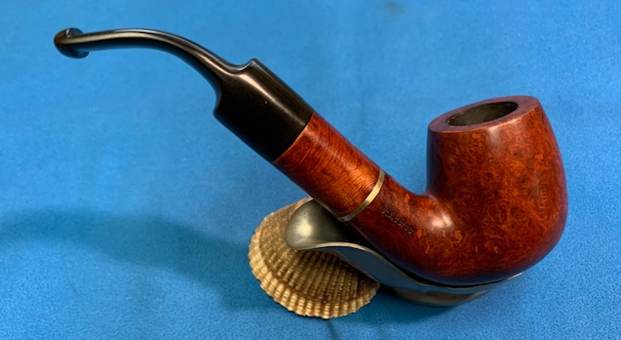
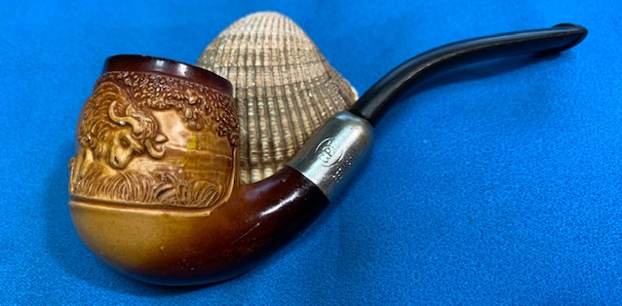
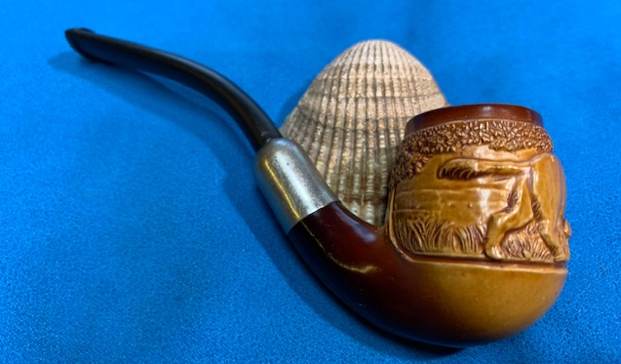
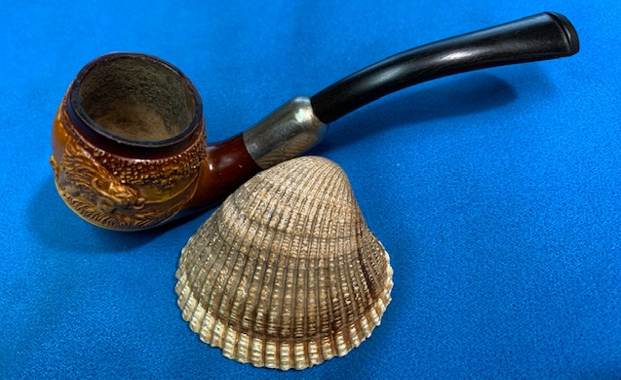
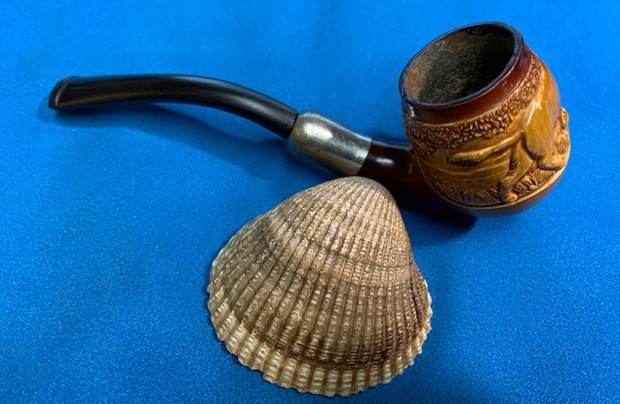
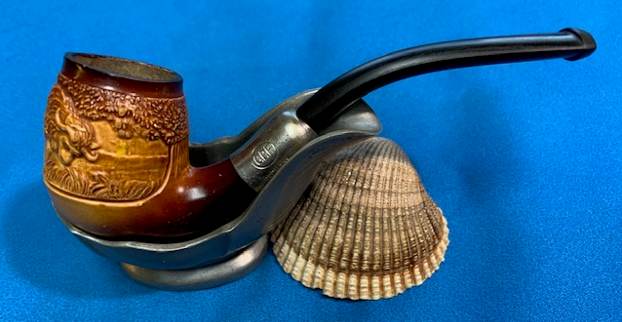
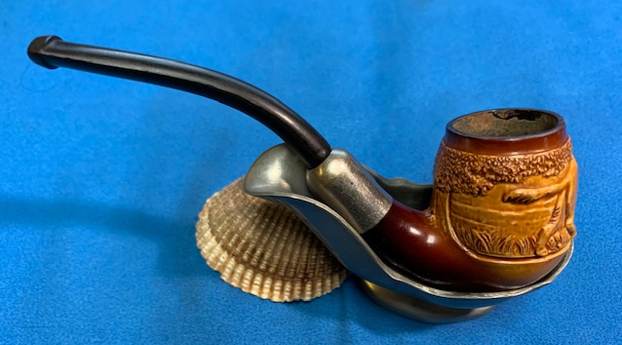
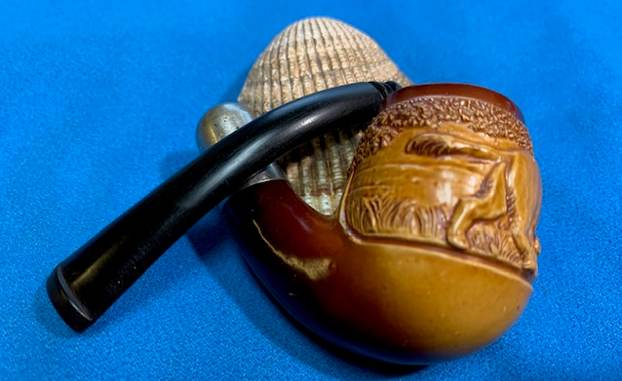
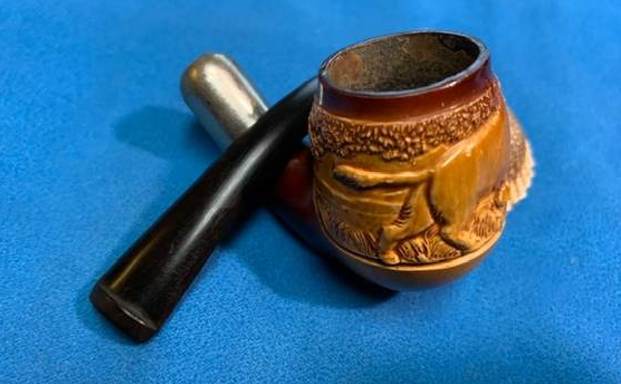
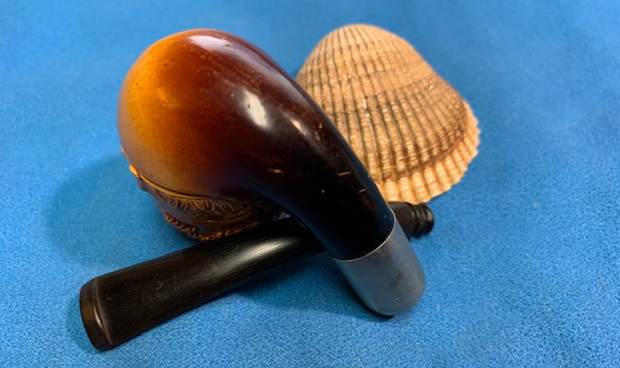
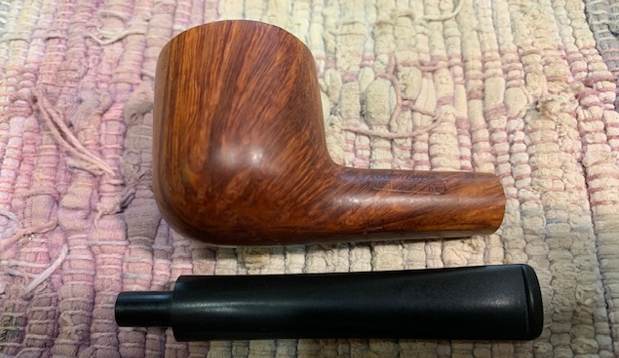
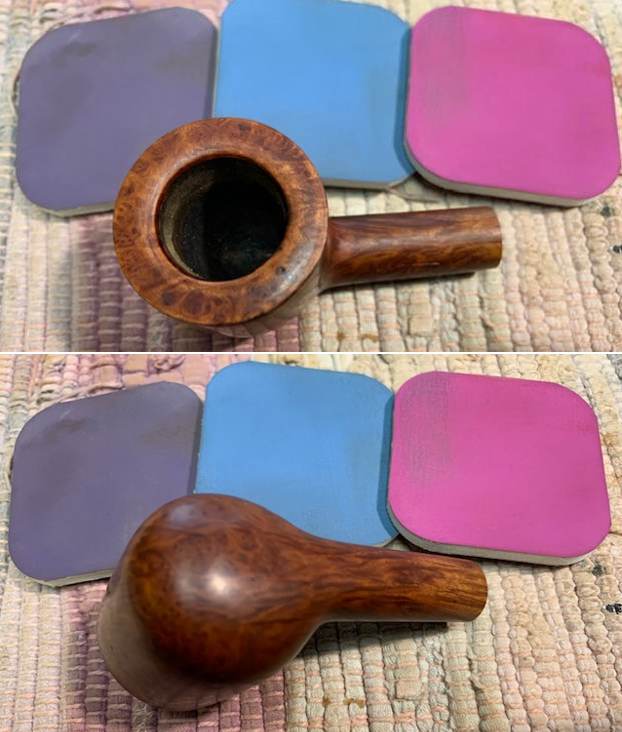
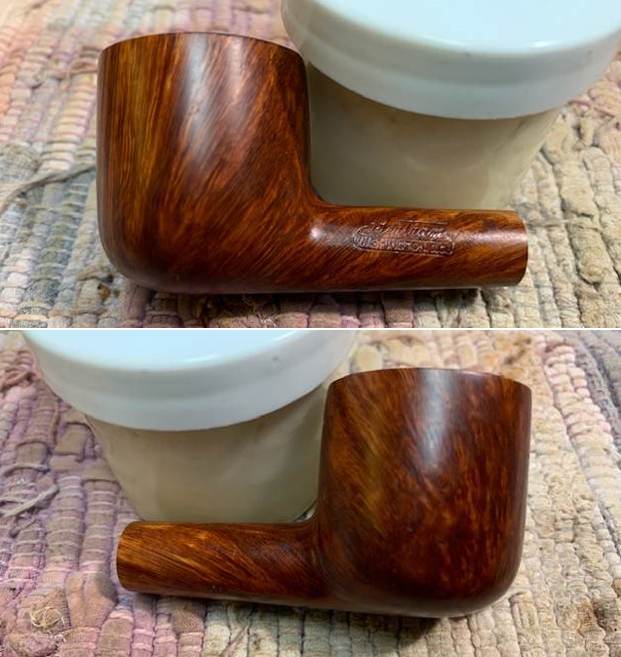
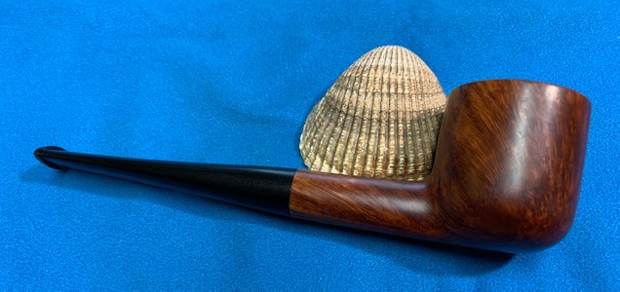
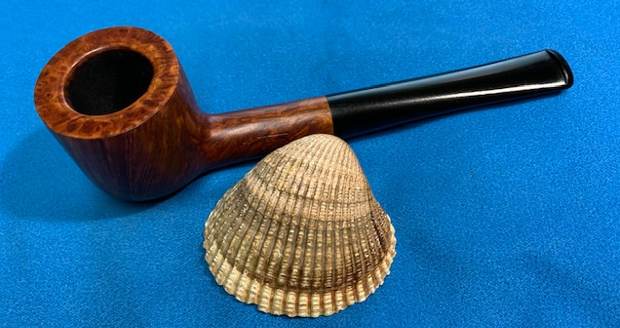
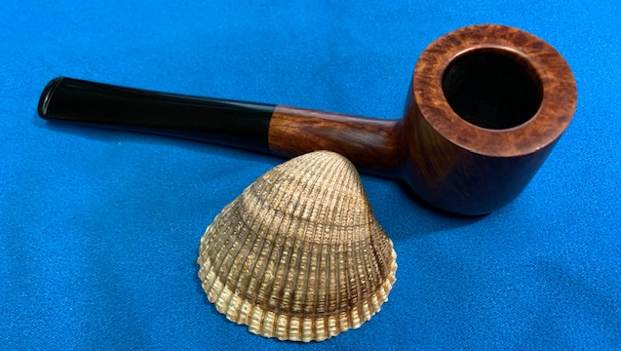
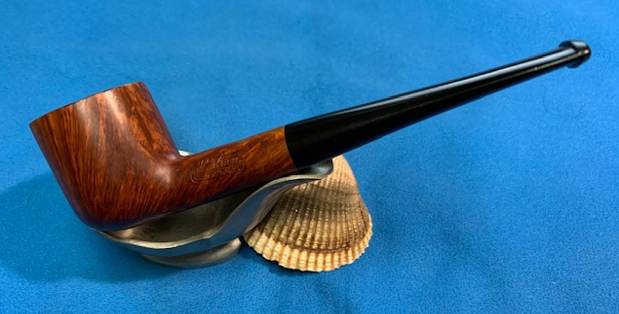
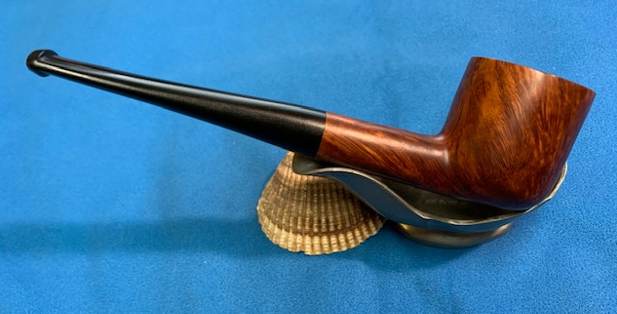
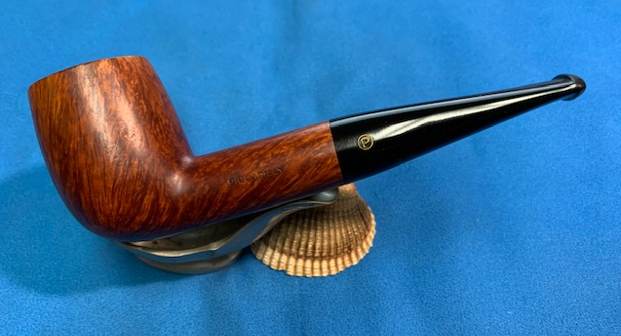
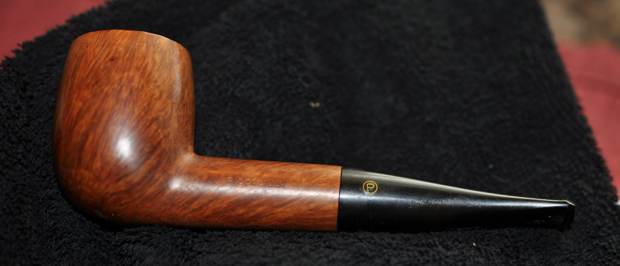
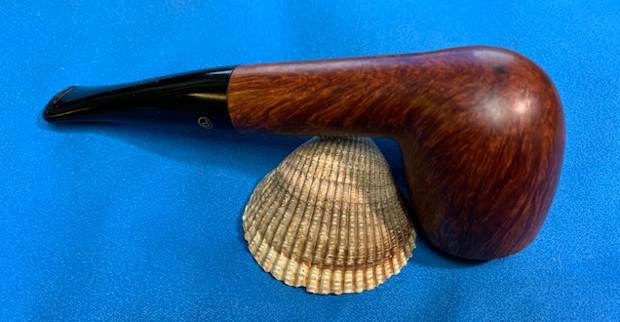
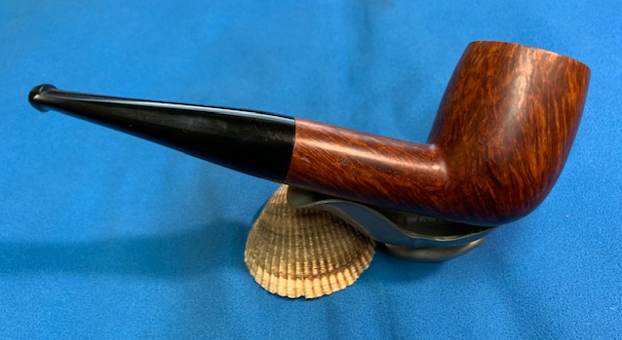
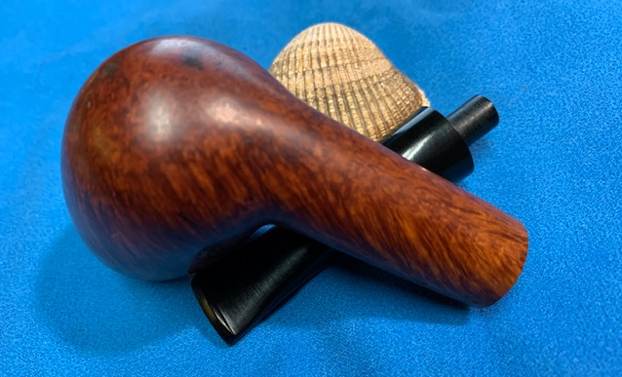
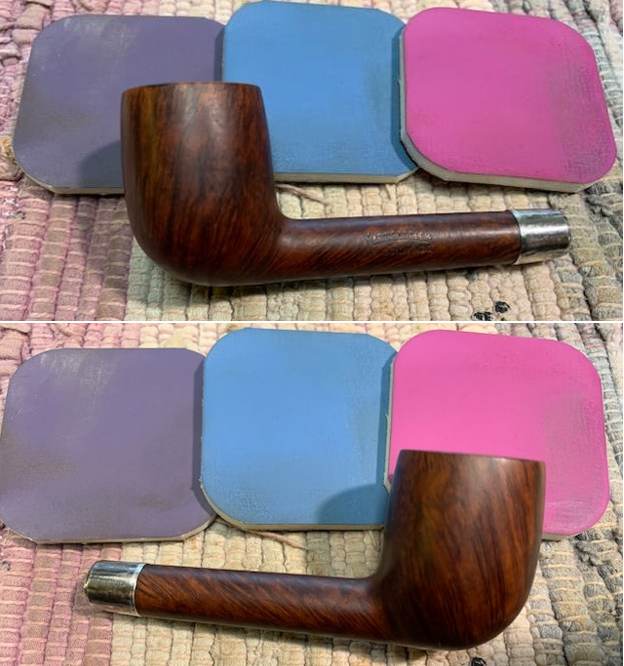
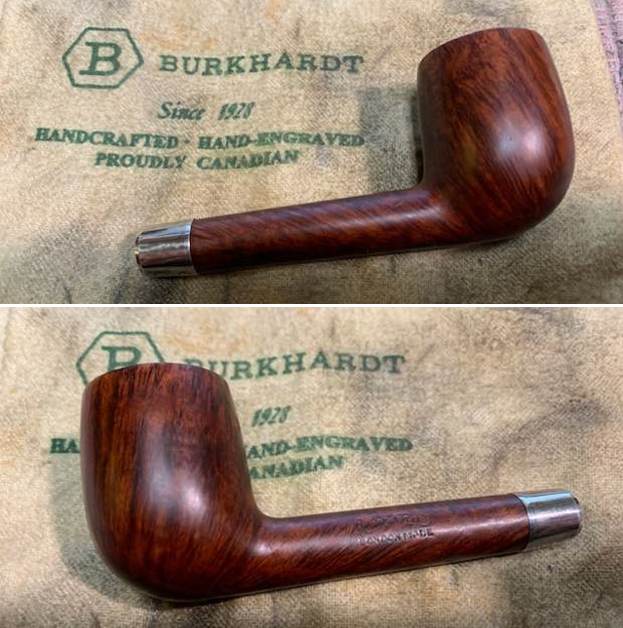
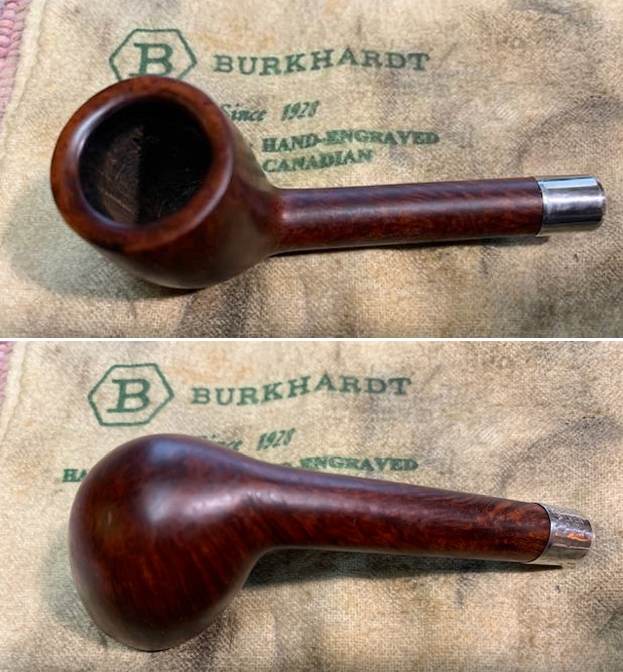
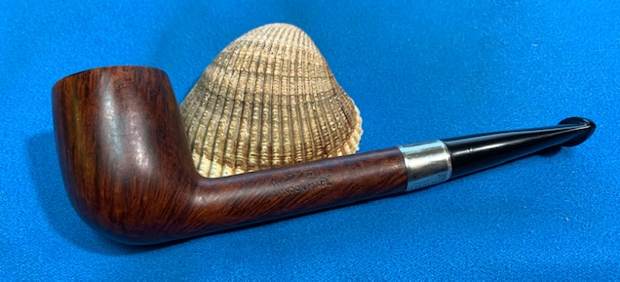
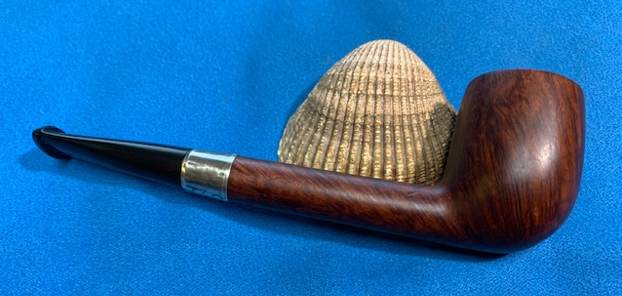
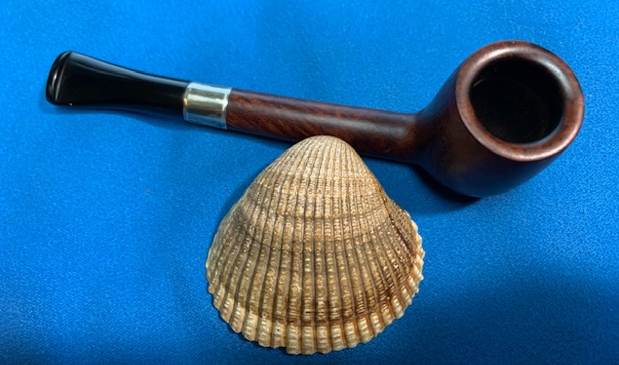
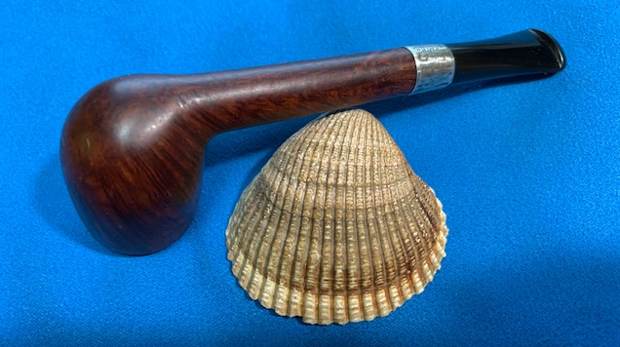
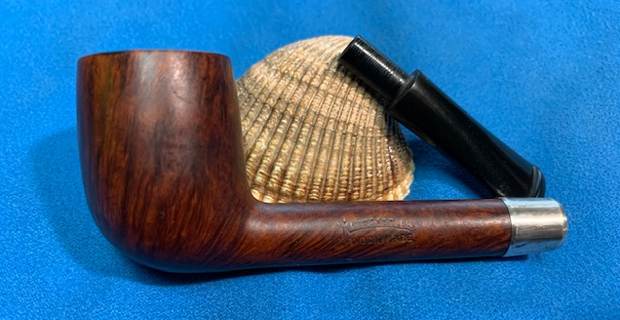
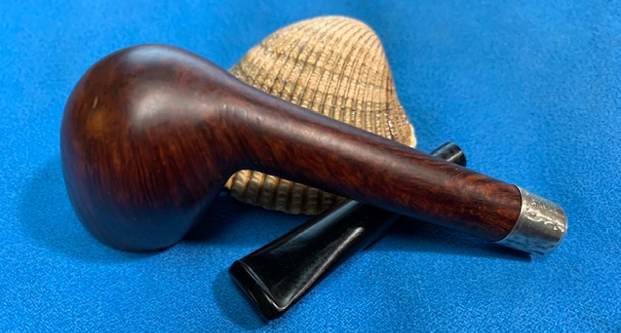
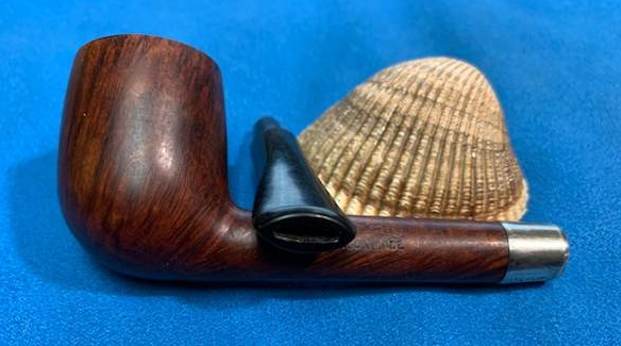
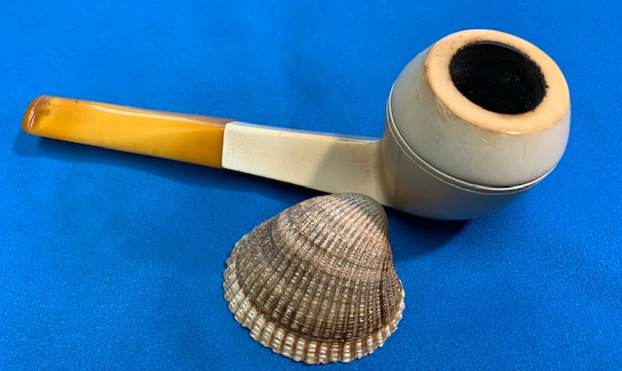
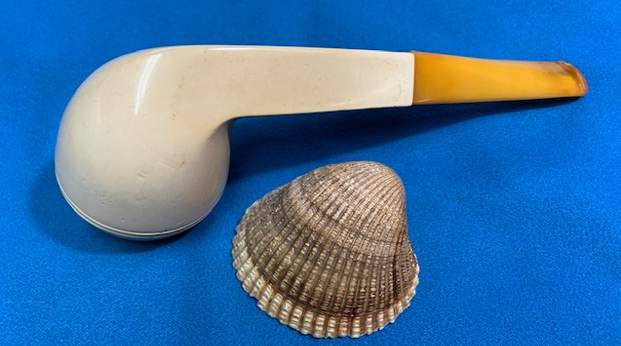
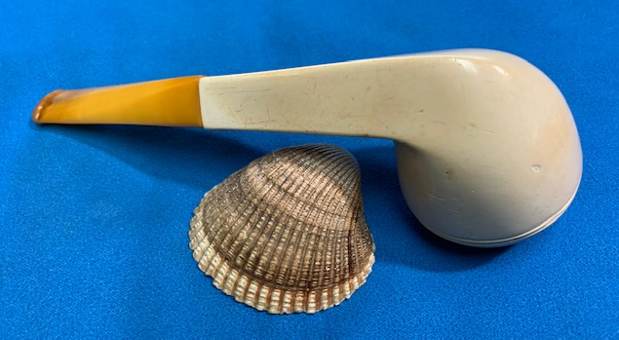
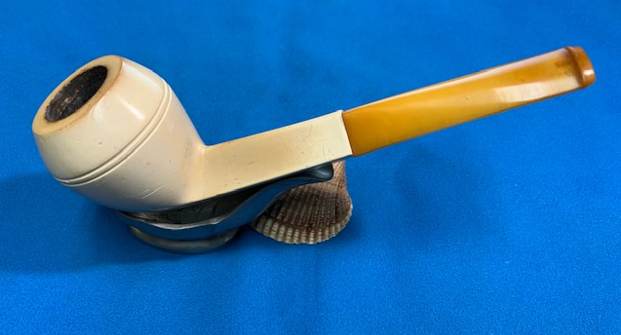
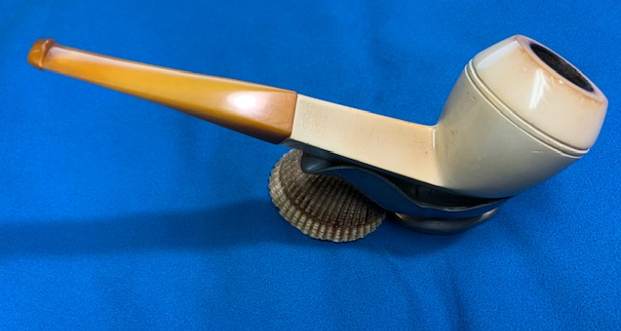
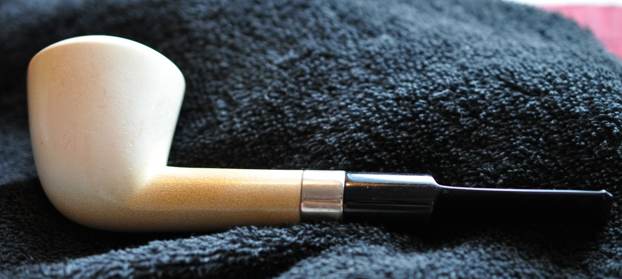
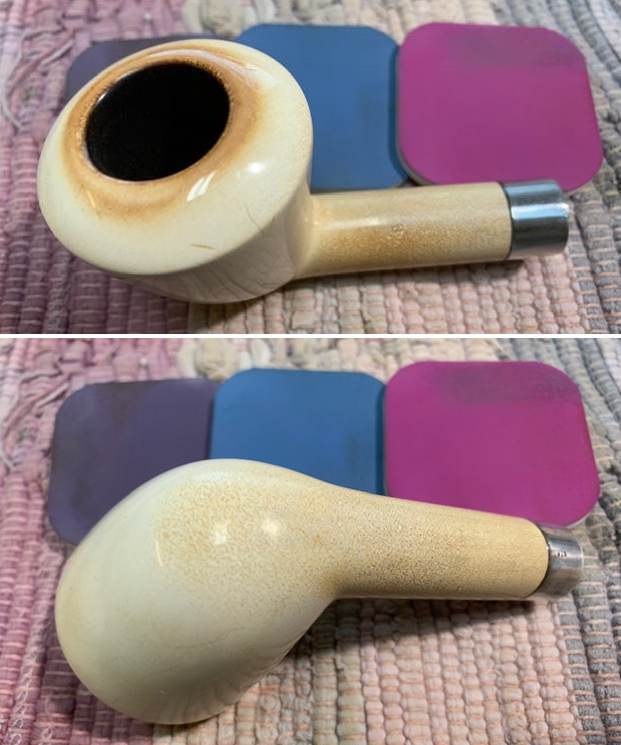
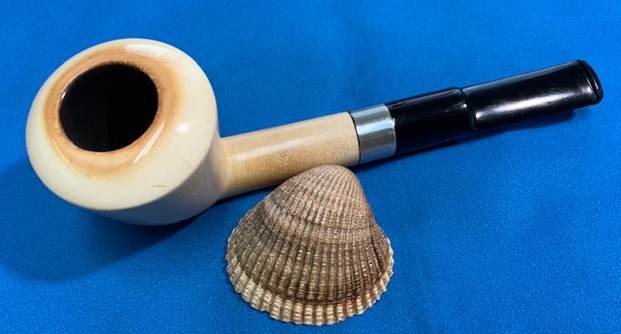
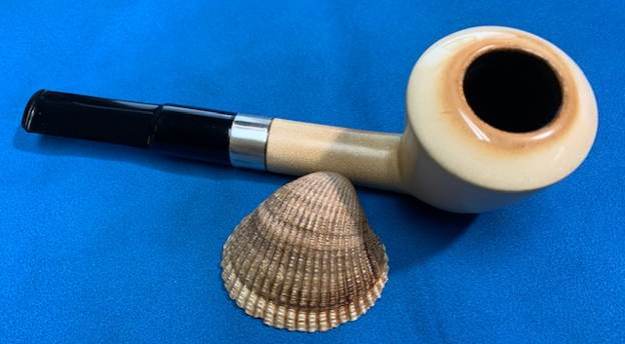
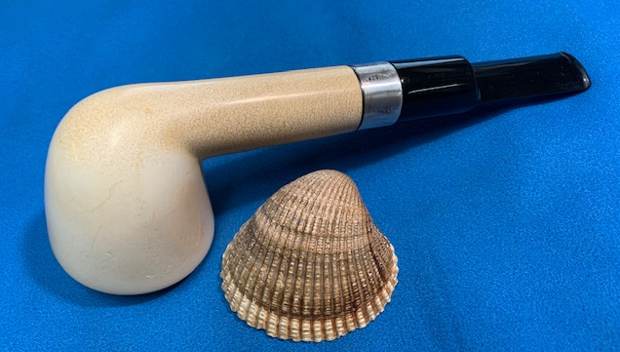
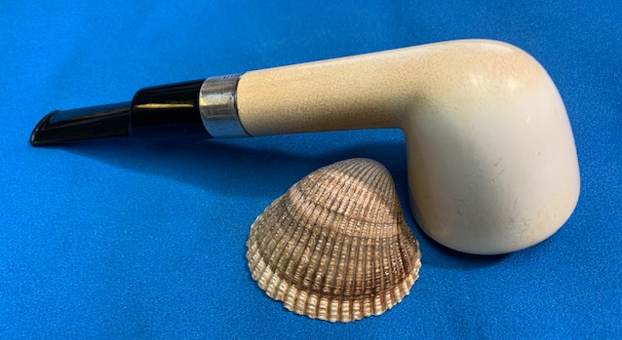
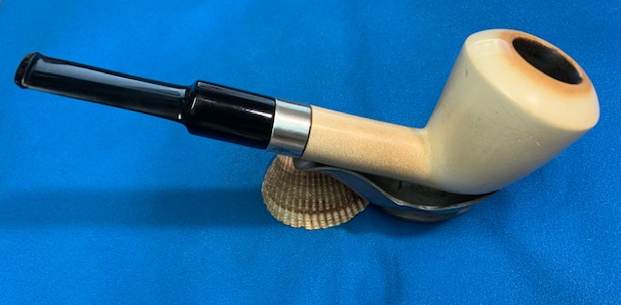
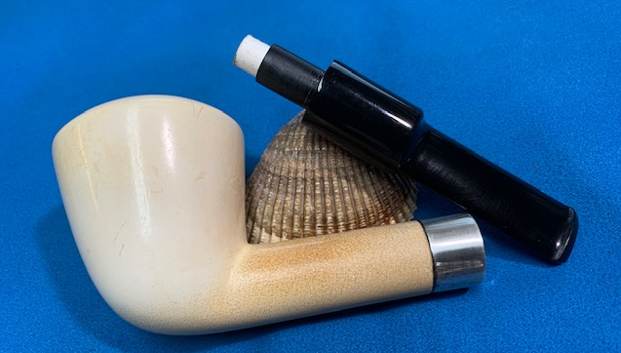
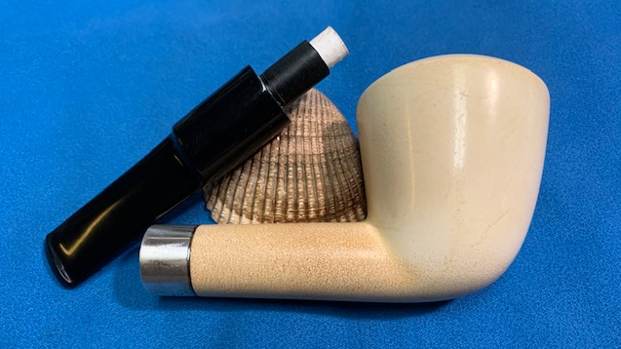
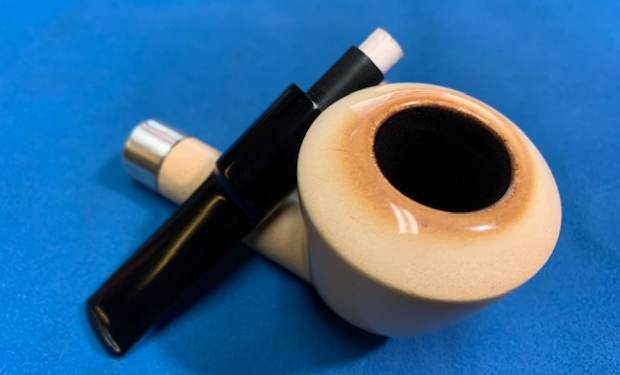
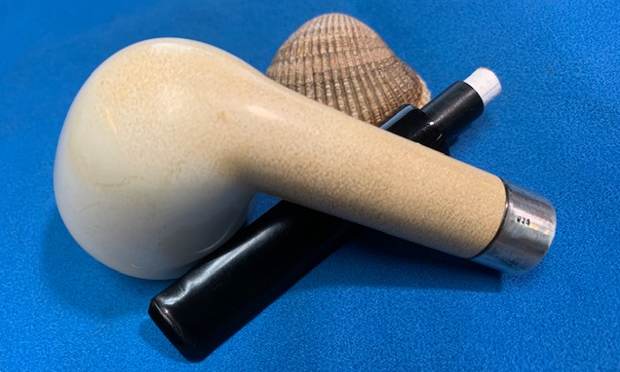
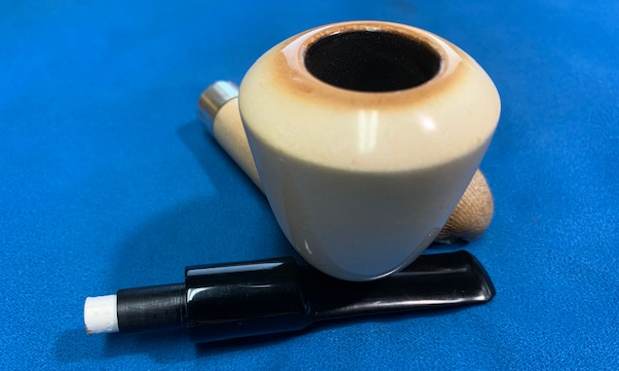
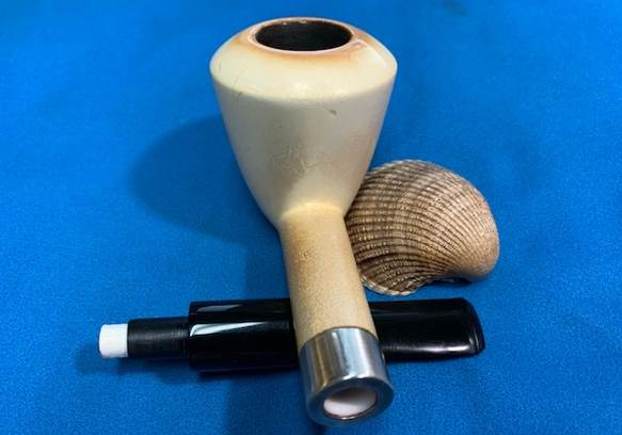
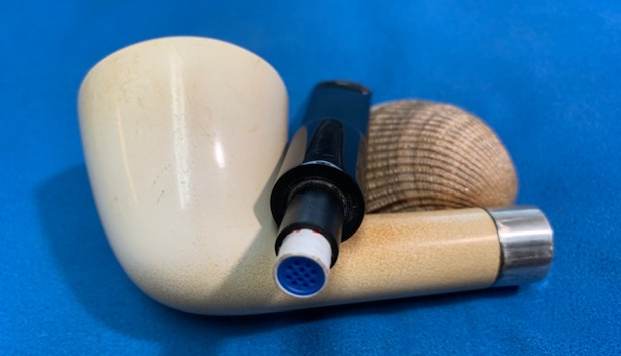
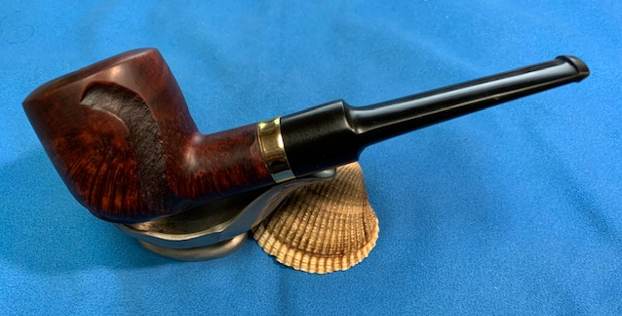
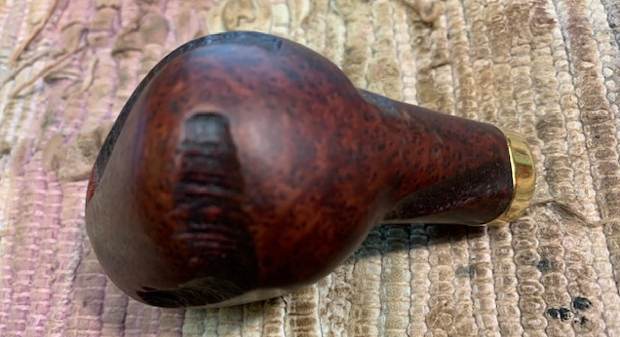 I finally finished this nightmarish restoration of a pipe that should have been quite simple. The Greenwich House Antique Import Briar Crowned Pot with a vulcanite saddle stem is a great looking pipe now that everything came together. The briar around the bowl is clean and really came alive. The rim top looks much better than when I began. The rich brown stains gave the grain a sense of depth with the polishing and waxing. The grain on the smooth portions really popped and the worm trails carving look good as well. I put the vulcanite stem back on the bowl and carefully buffed the pipe with Blue Diamond on the buffing wheel using a light touch on the briar. I gave the bowl and the stem multiple coats of carnauba wax on the buffing wheel. I buffed the pipe with a clean buffing pad to raise the shine. I hand buffed the pipe with a microfiber cloth to deepen the shine.
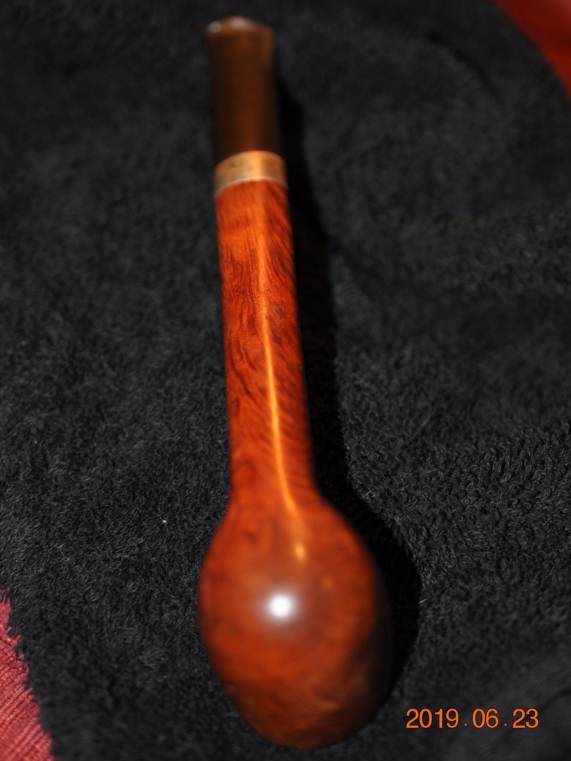
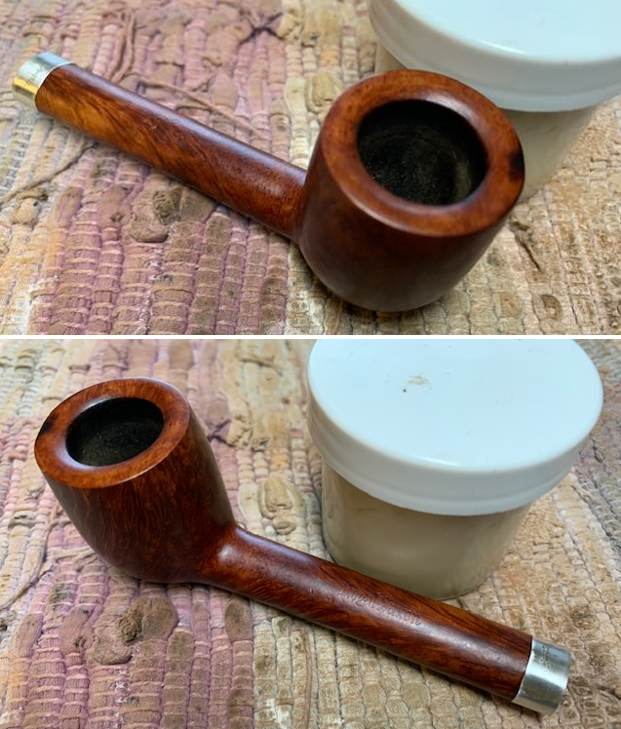
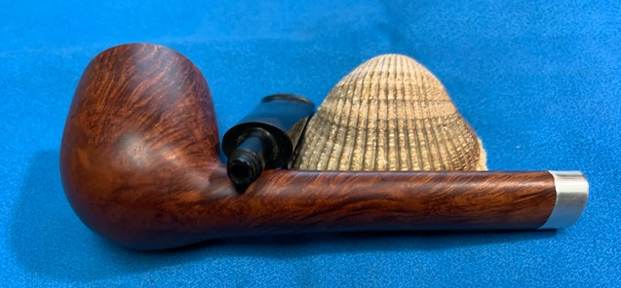
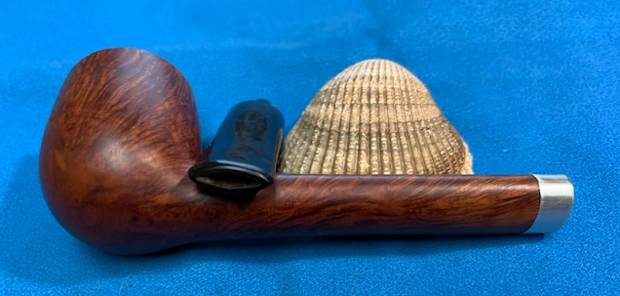
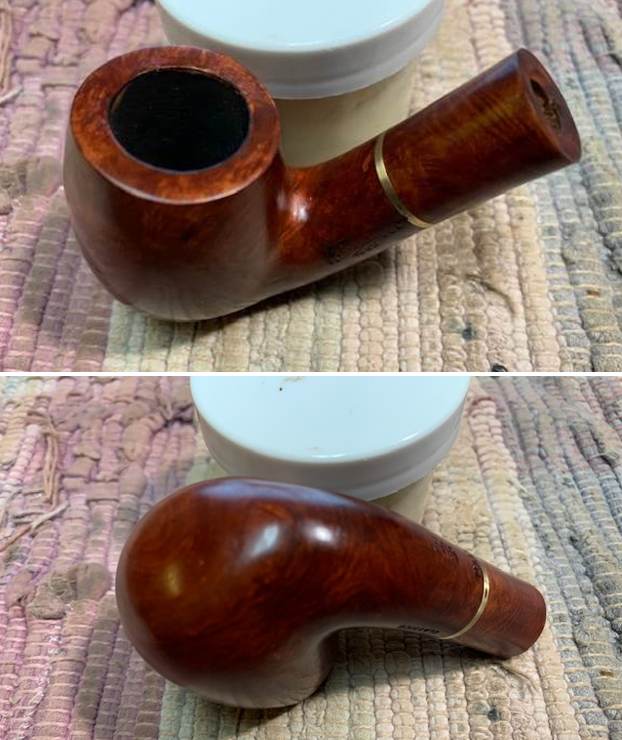
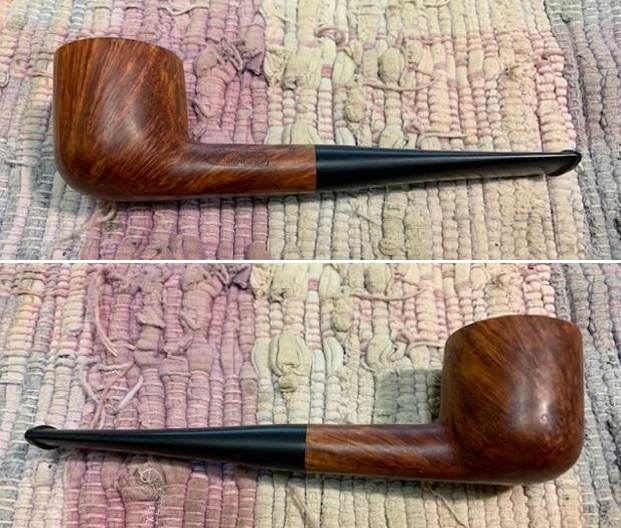
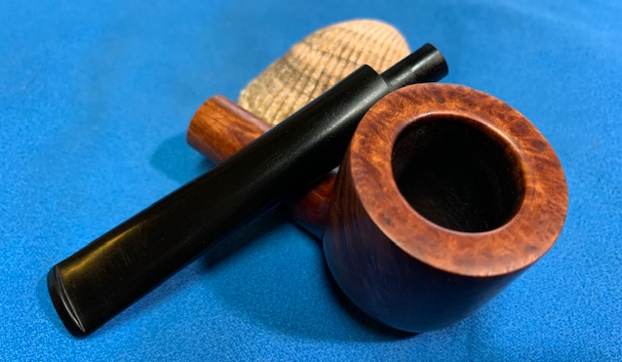
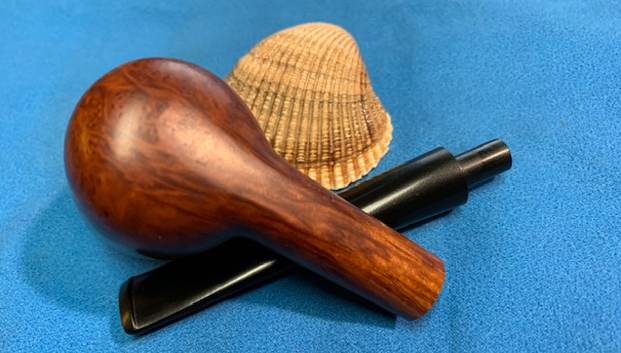
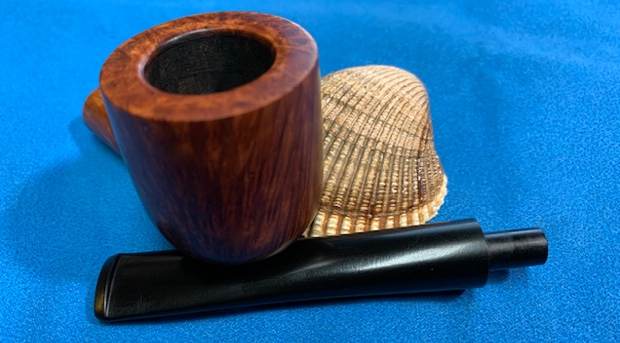
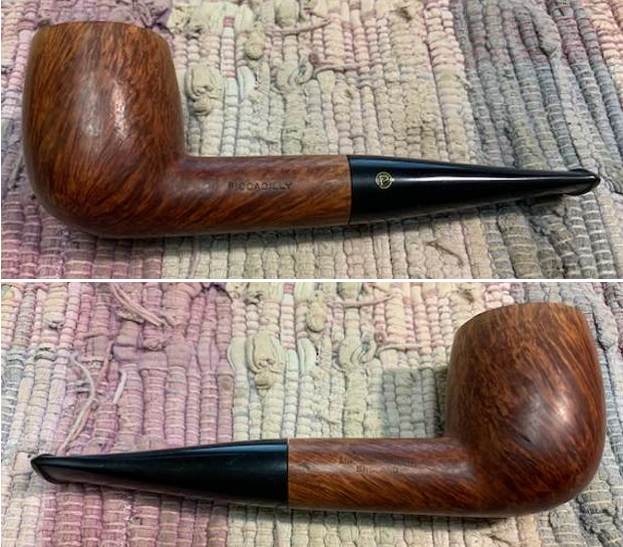
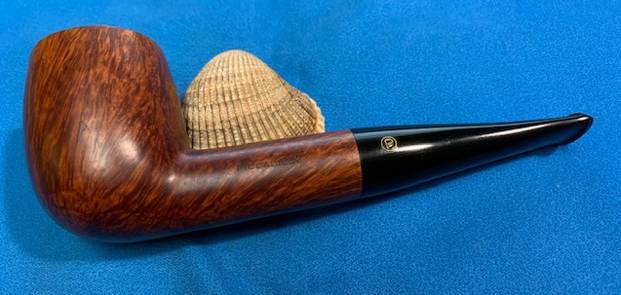
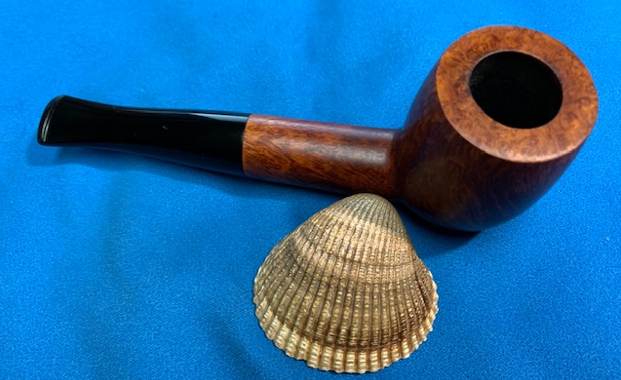
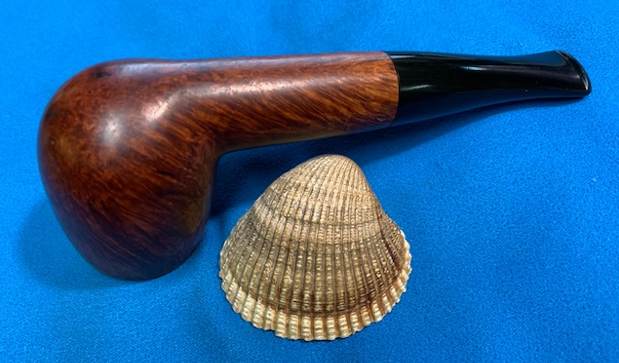
The finished Greenwich House Antique Pot is a beauty and feels great in the hand and looks very good. Give the finished pipe a look in the photos below. The dimensions of the pipe are Length: 5 ¾ inches, Height: 2 inches, Outside diameter of the bowl: 1 ½ inches, Chamber diameter: ¾ of an inch. The weight of pipe is 2.29 ounces/65 grams. It is much more beautiful in person than these photos can capture. I will be putting it on the rebornpipes store soon. Look for it in the American Pipe Makers section. If you would like to add it to your collection let me know. This is another pipe that has the possibility of transporting the pipe man or woman back to a slower paced time in history where you can enjoy a respite. Thanks for walking through the restoration with me.