Blog by Paresh Deshpande
My job involves a lot of transfers and frequent shifting of our household to a completely new place. At times, it is we who move to our work place alone while our families stay back for children’s education or when accommodation is not available or when the new place is in a remote area and fraught with risks. I moved to my present place of work alone. Here, I had a very fine set of colleagues with whom I gelled well. As time went by, these colleagues got transferred and new colleagues joined. However, when the last of my old colleagues got his transfer orders, I wanted to gift him a pipe as he has started to enjoy pipes more than his cigars.
Abha, my wife, had sent me one lot of 40-45 pipes that she had cleaned up and all ready for my part of restoration process. From this lot of the pipes that I had earmarked as for sale/ gifting, he selected a pipe that had come to me as part of my Mumbai Bonanza.
For those readers who have missed out on how I came to purchase this lot, here is the background story….
I was fortunate enough to have heeded the advice of my dear friend and mentor, Steve, and struck a deal with a junk collector from Mumbai. He did not know what he was selling and I did not know what I was buying as we reside in different cities!! The argument that Mr. Steve presented was that if not anything, I shall at least have some spares and this was logical. I struck a deal and here are pictures of the pipes that I received in this lot. 

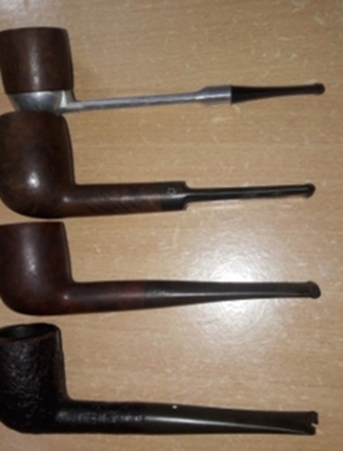 This lot contains some very nice collectible pipes, a few well known brands and some mediocre brands. Overall, with seven Dunhill pipes, a Preben Holm #1 FH, a couple of “Made in England” Pete System pipes, a couple of Charatan’s Belvederes, Custom-Bilt, Stanwell and other assorted pipes, I would say that I had struck a decent deal!! This is indeed my “Mumbai Bonanza”.
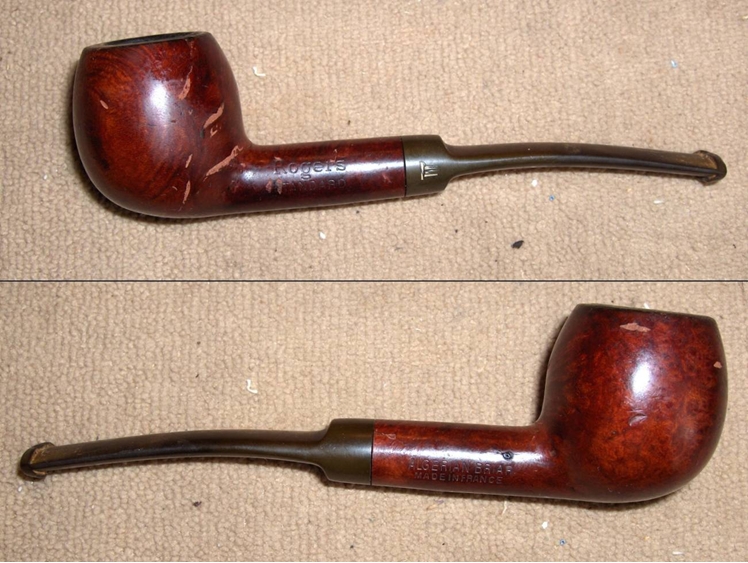
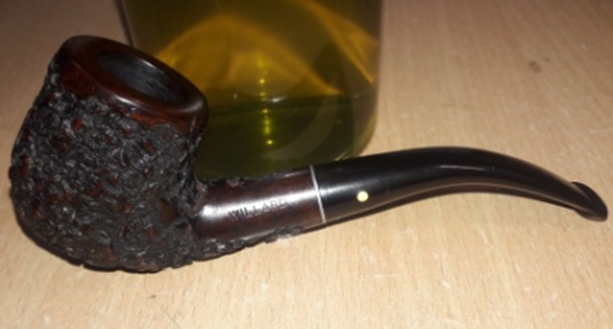
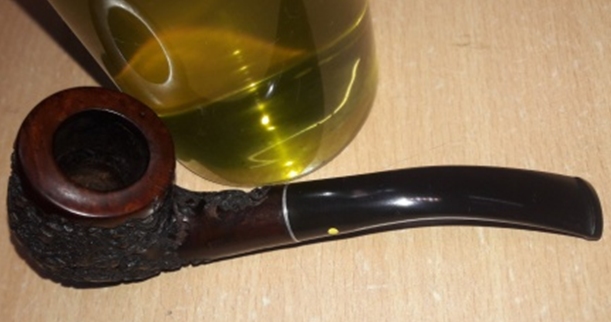
The pipe selected by my colleague and now on my work table from this find (sixteenth pipe being restored) is a bent billiard pipe with flame shaped worm rustications, a poor imitation of worm rustications as seen on Custombilts from the Wally Frank era! It is indicated in yellow arrow in the picture below. It is stamped on the left side of the shank as “WILLARD” in block letter over “IMPORTED BRIAR” again in block letter. The right side of the shank is devoid of any stamping. The stem bears a “Dot” logo in Yellow, embedded on the left side of the stem. 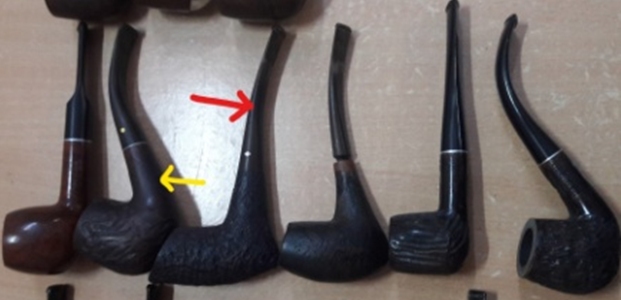
 Now coming to the research of this brand and line/model in specific, I referred to pipedia.org. Though there are no reams of information on this brand or model, the information provided gives a clear perspective of this brand and its aim. Here is the link (https://pipedia.org/wiki/Willard).
“The Willard pipes were made by Sparta Industries in Sparta, N.C from 1963 to 1975 (about 60,000 pipes per week). Some were distributed by the Post and Base Exchanges that serviced the military during the Vietnam War. Others were produced for R. J. Reynolds Tobacco. (preceding content from the “Pipes” website http://www.pipephil.eu/index.html)
Lord Abbott was either a sub-brand or a series produced by Willard —Dgillmor 22:42, 10 May 2012 (CDT)”
From the above information, it is evident that the pipe currently on my work table is from the period 1963-75. With this input on the vintage of this pipe, I move ahead with the restoration of this 42 plus years old pipe!
Initial Visual Inspection
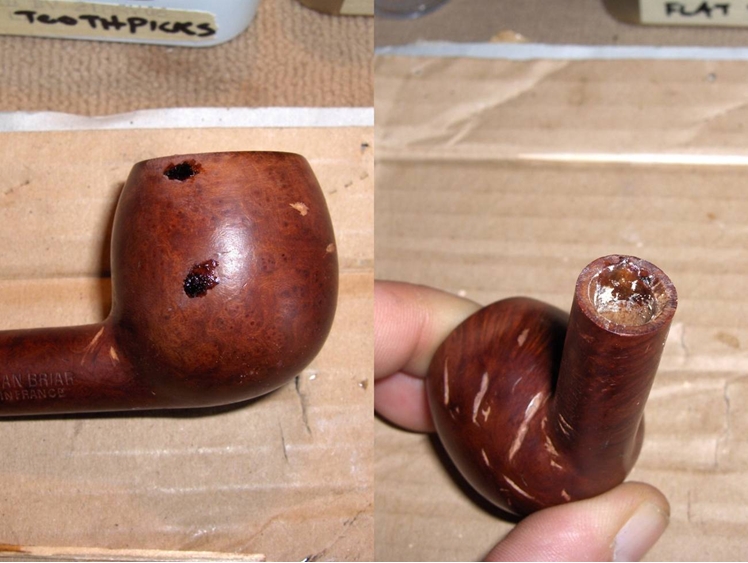
The stummel is covered in dust and dirt giving it a dull appearance. The Custombilt like worm rustications are uneven, without any finesse and filled with dirt and grime. There are a couple of fills that are plainly visible. These will need to be refreshed, if needed. It’s a matter of personal choice; however, I could not help but wonder what it was that attracted my colleague to this pipe in the first place!! I got my answer the next day when he said that he liked the shape and lightness of this pipe. Thus, it was not the grains (which were zero!) or the worm rustication that he was interested in and could be done away with to make it more attractive. With this input from him, I decided to rusticate the stummel as I was not very happy with the appearance of this pipe at this stage.
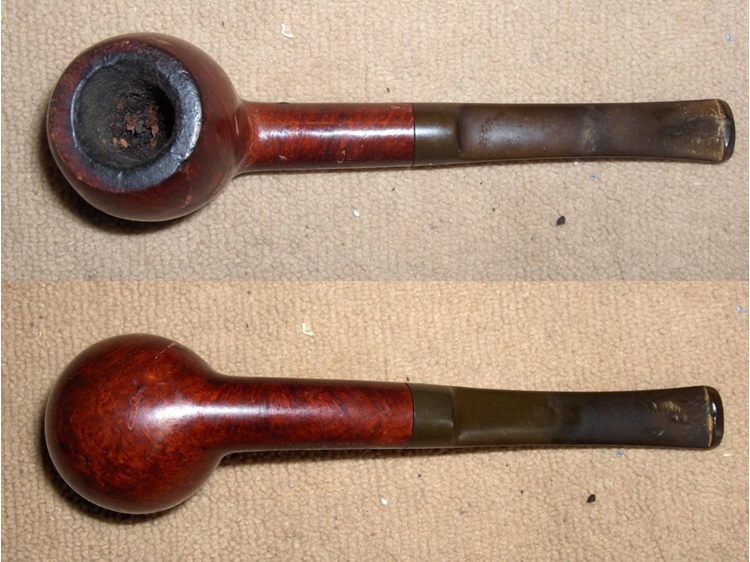
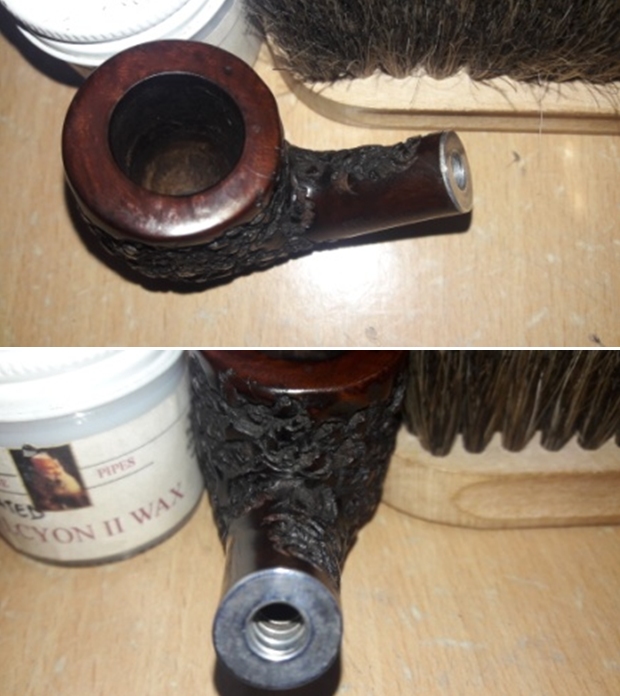
 A thick layer of cake can be seen in the chamber. The smooth rim top surface is covered in dirt, dust and grime with a few dents and dings thrown in for good measures. The condition of the inner walls of the chamber will be known once the cake has been taken down to the bare briar. The inner rim condition appears to be in good condition with no burn/ charred surfaces. Even the outer rim edge appears to be in a decent condition. Only once the stummel has been thoroughly cleaned that I can be sure of my initial appreciation. In spite of the thick cake, the chamber odor is surprisingly not strong, yet I shall be subjecting it to a salt and alcohol treatment to freshen it up for him.
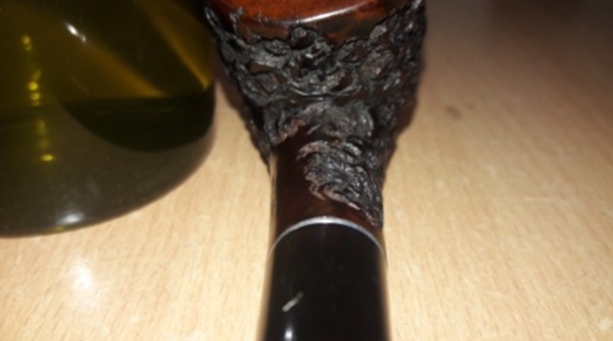
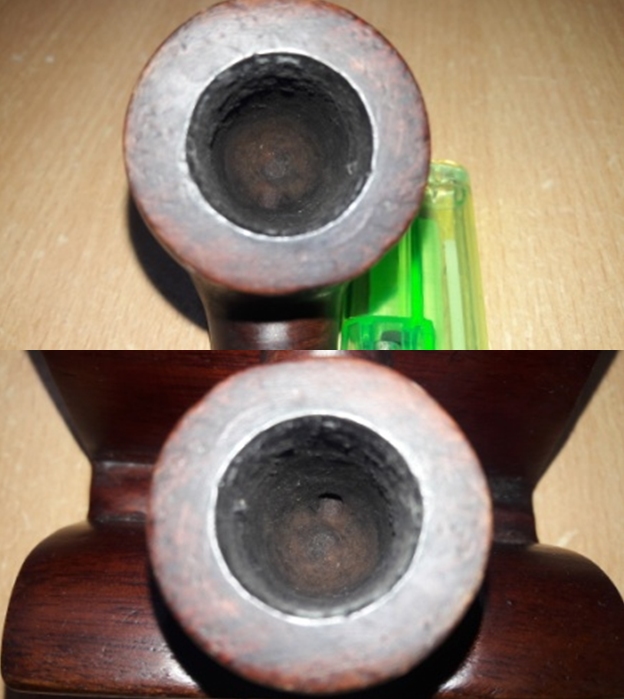 The shank end has a metal band and this metal band extends inside the shank with threads, over which the threaded stinger is seated in to the mortise. Thankfully, the band and threads are all intact. The mortise is blocked with dried gunk, adversely affecting the airflow. The metal band is dull and dirty in appearance.
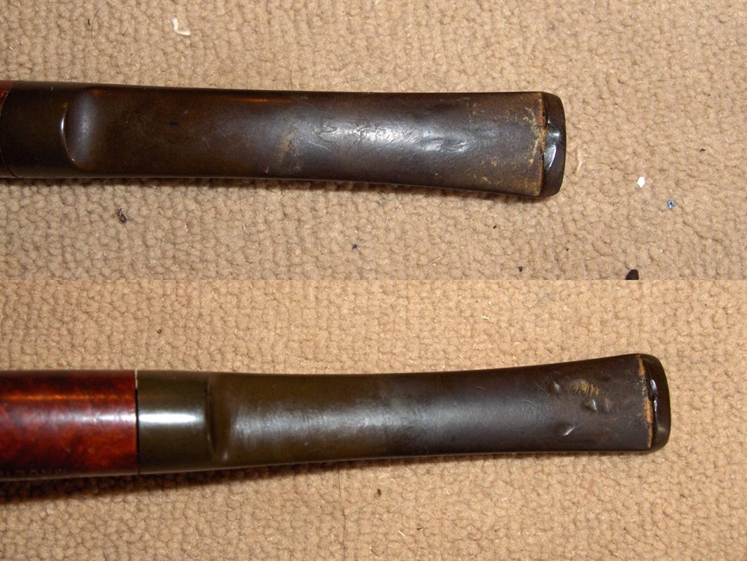
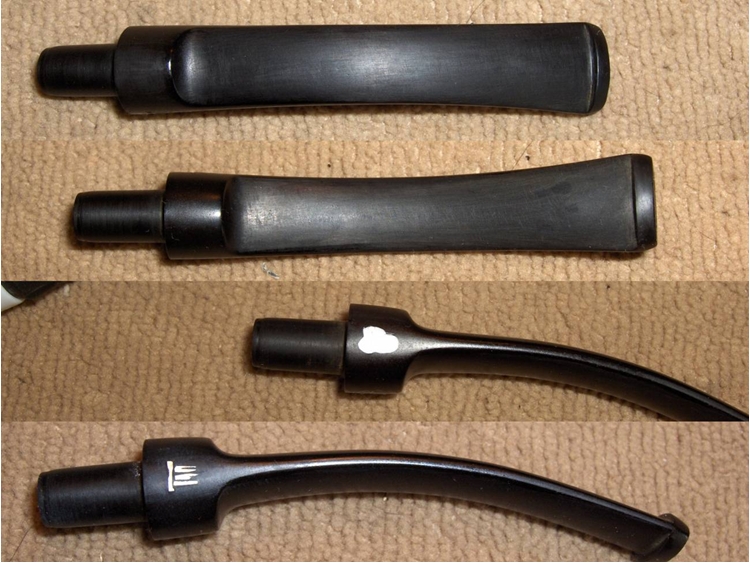
 The vulcanite stem is oxidized and has calcification deposits towards the button end. The lower and upper stem surface is peppered with tooth chatter. The button edges also need to be sharpened. The stinger opening and the horizontal slot is covered in accumulated oils and tars. The alignment of the stem and shank is skewed with the stem being overturned to the right.
 Initial Cleaning By Abha…
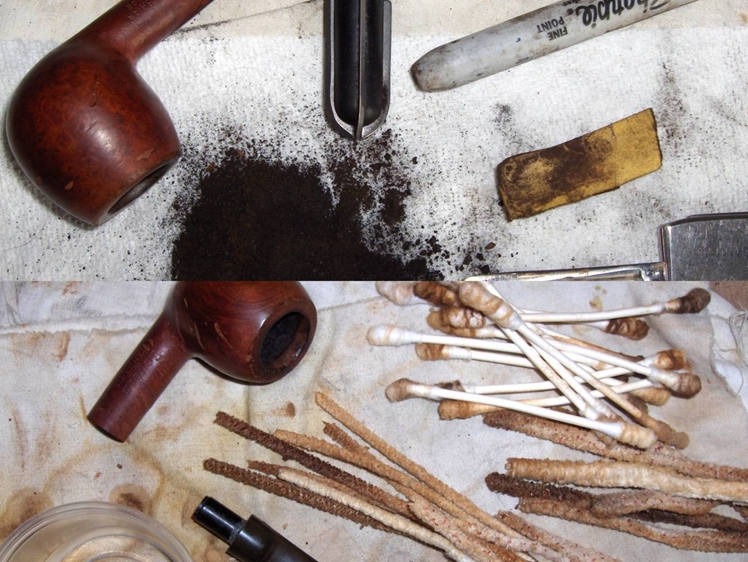
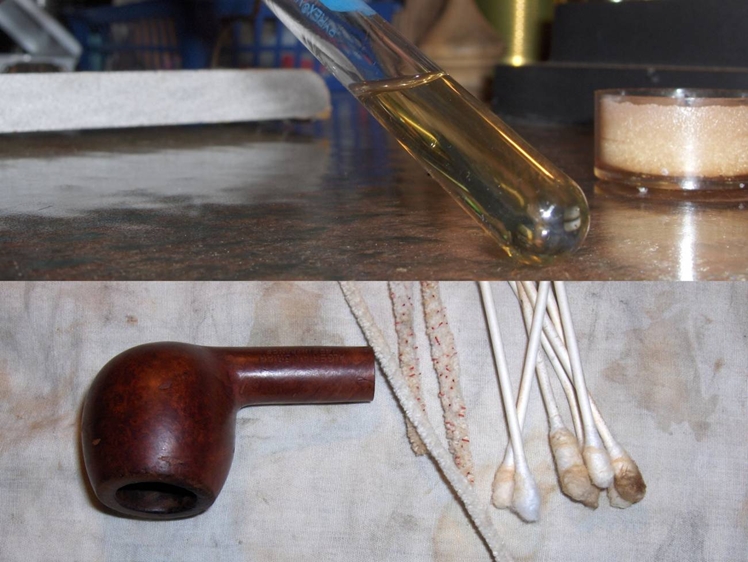
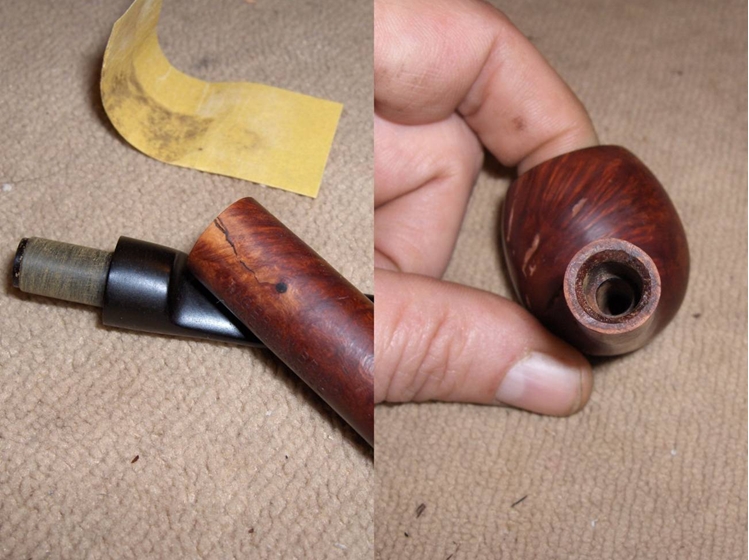
The initial cleaning on this pipe was done by Abha, my wife (she has cleaned up around 40-50 pipes and these have now reached me for further restoration). She reamed out the complete cake and further smoothed out the chamber walls with a folded piece of 220 grit sand paper. She further cleaned out the internals of the shank with pipe cleaners and alcohol and cotton buds. She followed the internal cleaning of the shank with external cleaning of the stummel using Murphy’s Oil soap and hard bristled tooth brush and dried it with paper napkins and cotton cloth. Next she cleaned out the internals of the stem air way and immersed it in “Before and After Deoxidizer” solution (pipe is marked in indigo blue arrow) along with the stem of other pipes in line for restoration. Once the stem had soaked overnight, she cleaned the stem under running warm water and scrubbed the raised oxidation from the stem surface using Scotch Brite pad. She further removed the oxidation by scrubbing the stem with 0000 grade steel wool and applied a little olive oil to rehydrate the stem.
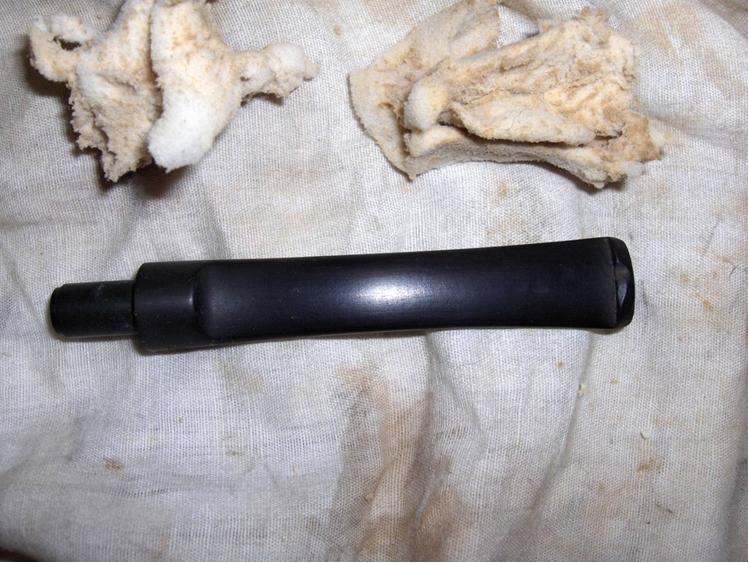
 Once The Pipe Is On My Work Table…
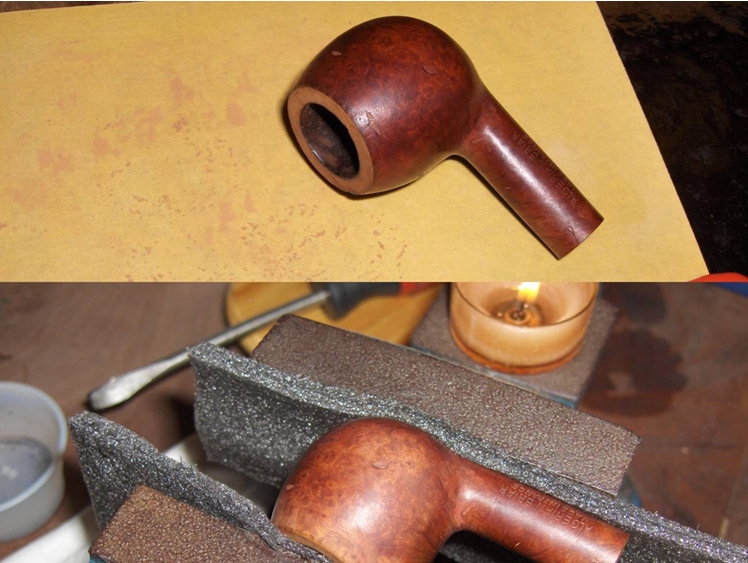
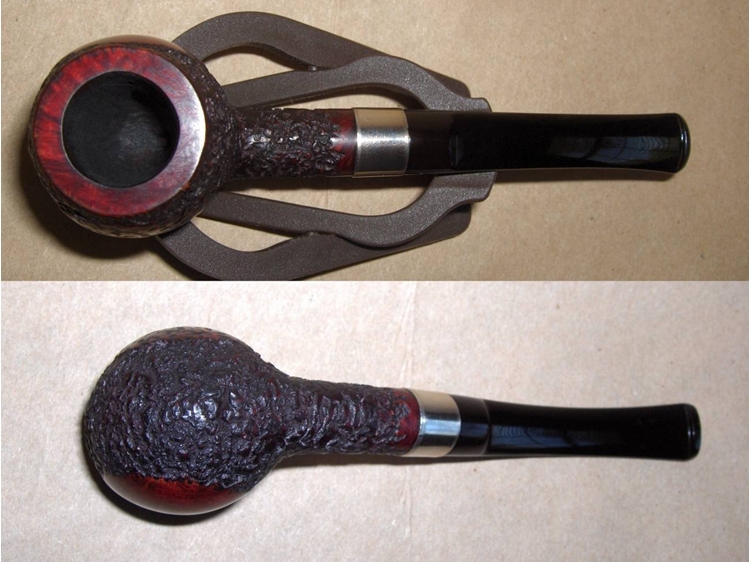
The cleaned up pipe presents a very clear picture of what needs to be done to restore this pipe to a decent and smoke worthy condition. I really cannot thank Abha, my wife, enough for all the help and support that she extends in my pursuance of this hobby. I proceed to carry out my appreciation of the work that needs to be done on this pipe to restore it. The cleaned up pipe, as I received it, is shown below.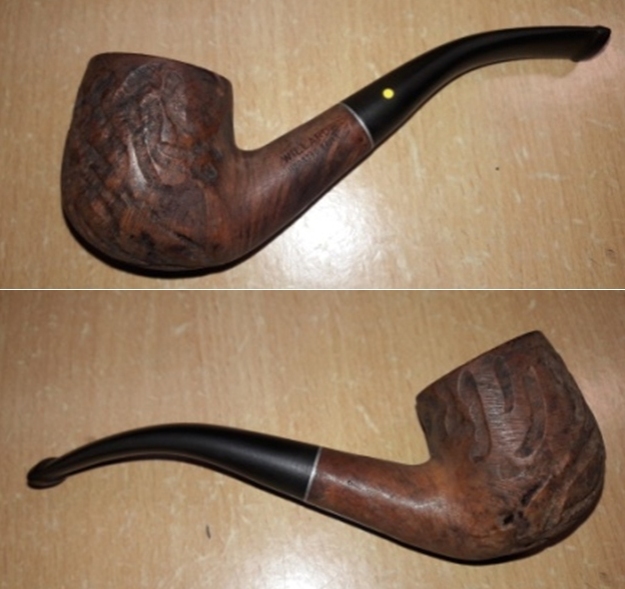
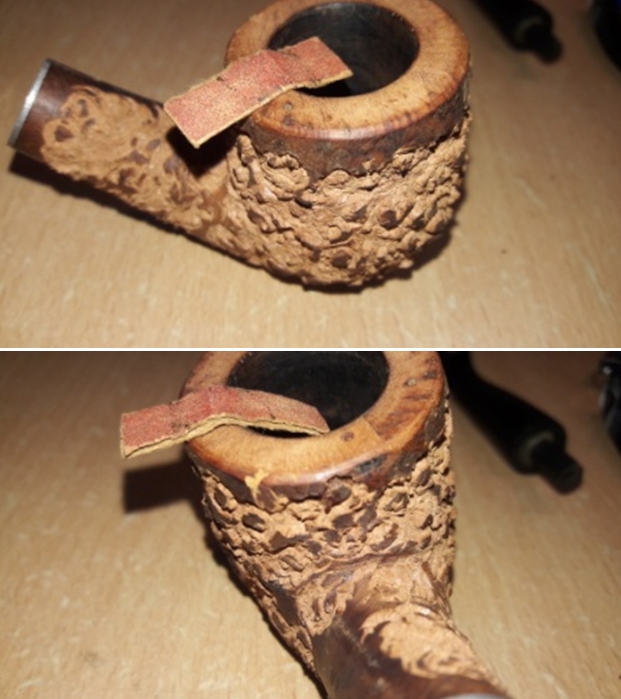
 The chamber walls are without any heat fissures or pits and that’s a big relief. The rim top surface is peppered with dents and dings. The inner rim edge shows slight darkening all round and should be easily addressed with a couple of turns of a piece of 220 grit sand paper along the edge. There are some minute chipped spots on the outer edge. The condition of the chamber is good and will not require much repair work. There are no ghost smells in the chamber.
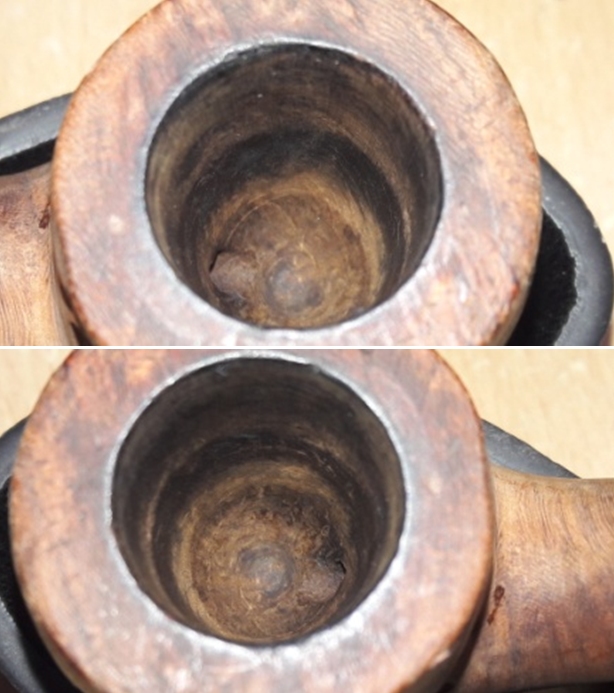
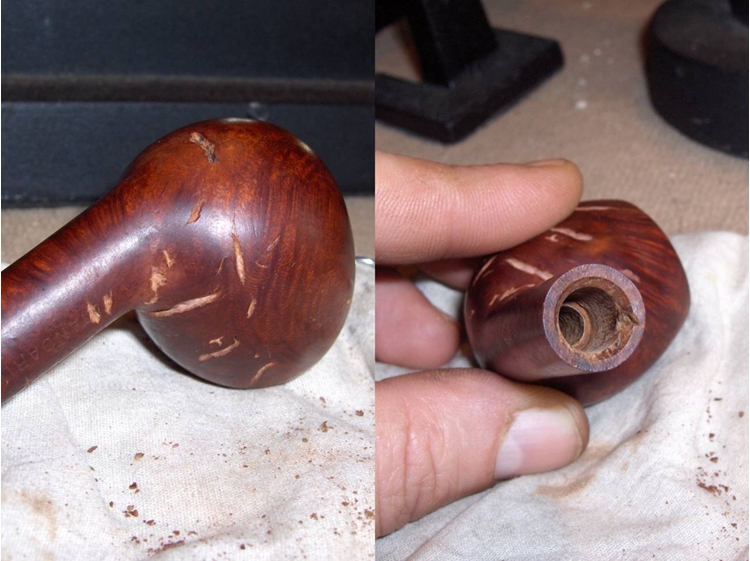
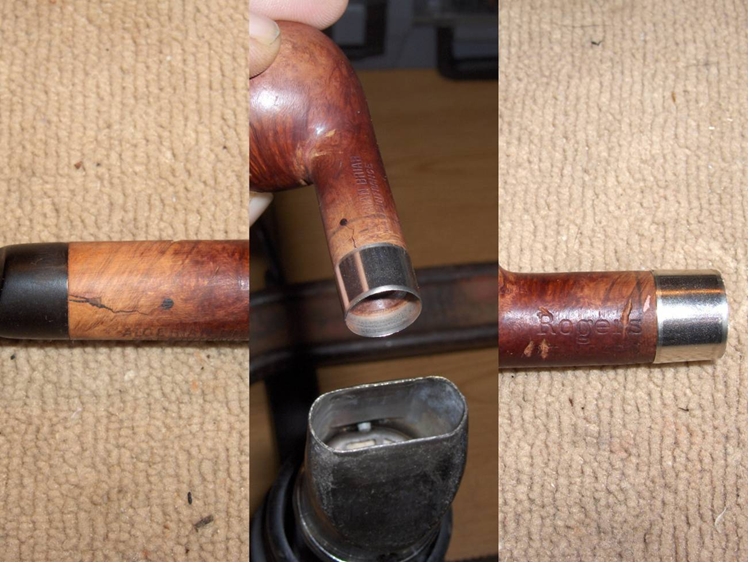
 The stummel surface is nice and clean. The worm rustications, though clean, are still not visually pleasing. There are a large numbers of fill now plainly visible (only larger ones are enclosed in yellow circle). The mortise is clean and air flow is smooth. The metal spacer ring is also clean and intact.

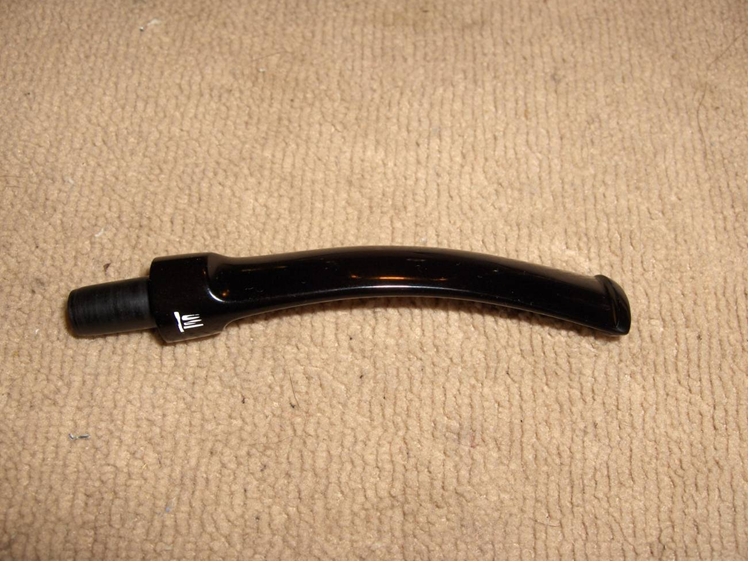
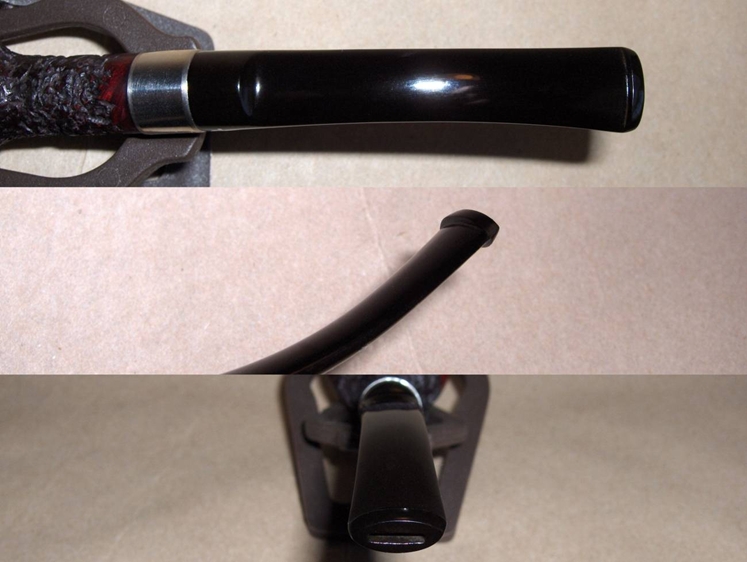
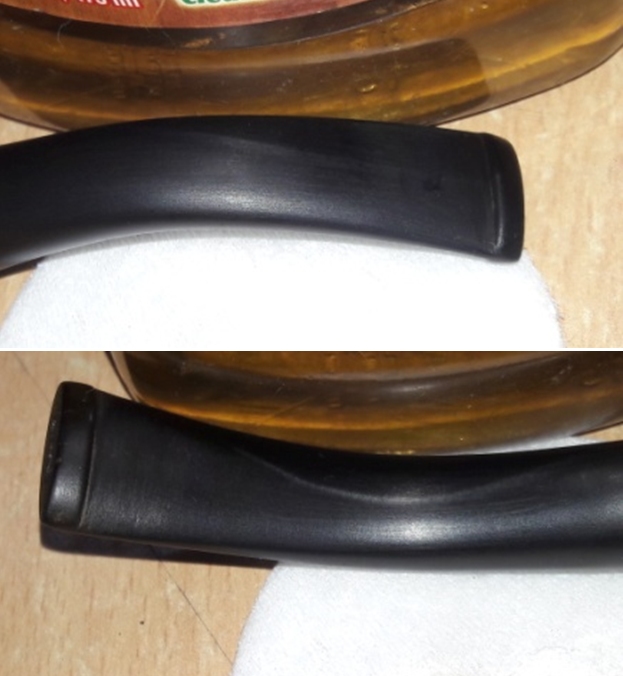
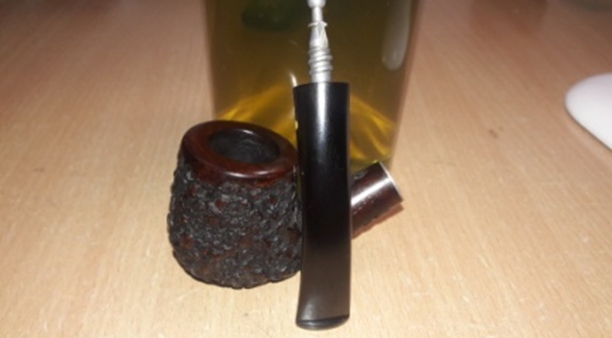
 The vulcanite stem had cleaned up nicely. The upper stem surface has a couple of deep bite marks at the base of the button and also in the bite zone. The lower surface has some minor tooth chatter in the bite zone. The button edges on both the surfaces need to be sharpened. The aluminum stinger is clean.
 The seating of the stem stinger in to the metal threaded mortise is off center. The stem is overturned to the right and will have to be readjusted to perfectly align with the shank and the stummel.
 The Process
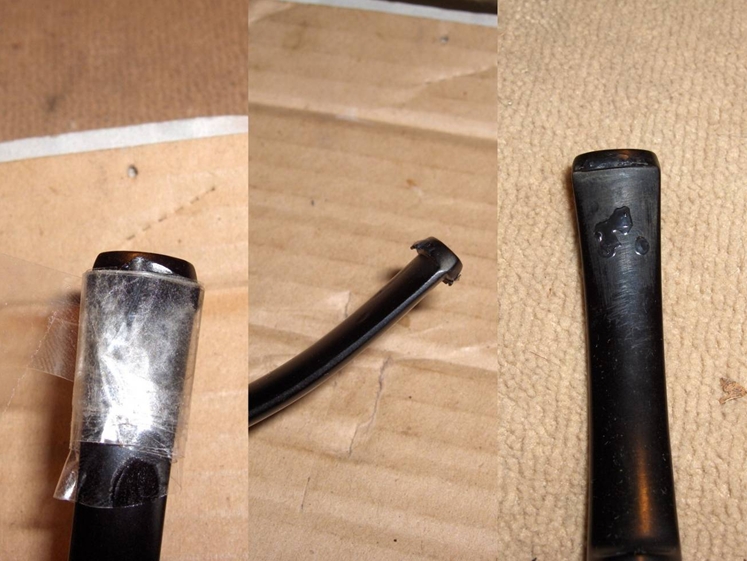
The first issue that I addressed in this project was that of the stem repairs. I painted both surfaces of the stem with the flame of a lighter to raise the tooth chatter and bite marks to the surface. This also helps in loosening minor oxidation from the stem surface. I sand the entire stem surface with a folded piece of a 220 grit sand paper to remove the loosened oxidation. I wiped the stem with a cotton swab and Murphy’s oil soap to further clean the surface. Even though most of the tooth indentations have been eliminated by heating the damaged stem portion, one deep indention is still seen on upper surface in the bite zone and a minor bite mark is seen on the button edge on the lower stem surface.

 I filled the tooth indentation in the button edge on lower and upper stem surface with a mix of activated charcoal and CA superglue and set it aside for the fill to cure.
 With the stem fills set aside for curing, I decided to work the stummel. The other day during a Face Time video call with Steve, we discussed the best way to transform this stummel. The long and short of the discussion was that it was decided to rusticate the stummel. This would help to mask the fills and provide a very tactile feel while smoking. It would also provide me an opportunity to practice rustication. With this decision finalized, I proceed with rusticating this stummel.
Now, this would not be my first attempt at rustication as I had rusticated one a few months back, here is the link to the write up (https://rebornpipes.com/2019/08/02/gifting-my-mentor-and-dear-friend-steve-an-alexander-zavvos-hygrosystem-pipe/).
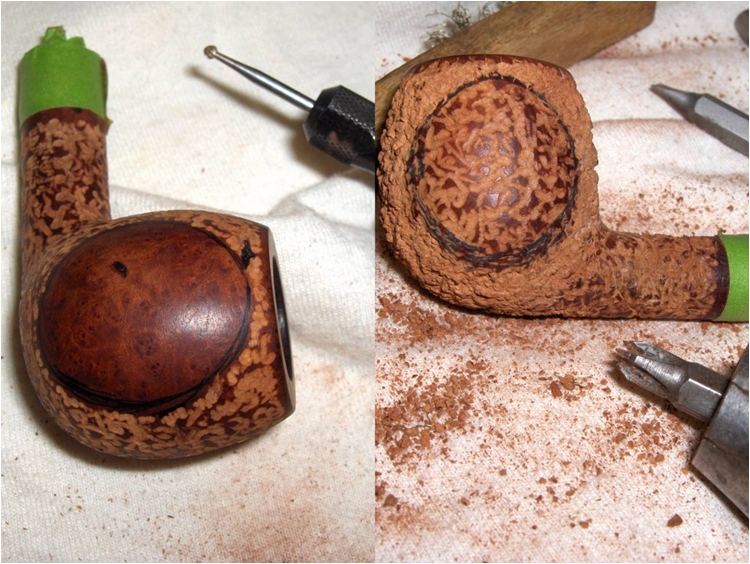
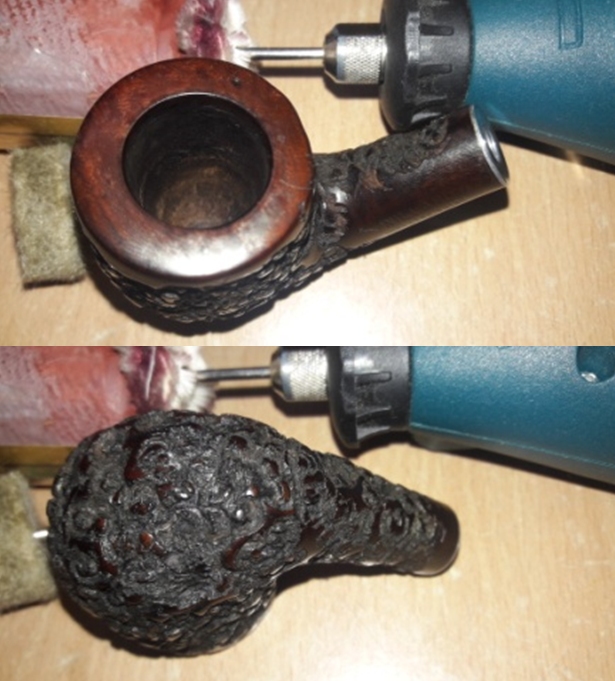
I referred to the above write up and other subject write ups on rebornpipes to understand the mistakes committed and decide on the look/pattern of rustications over the stummel surface. I decided to maintain a smooth ring atop the rustication below the outer edge of the rim and also at the shank end. I used a transparent tape to demarcate the area that I wanted to keep smooth that is the rim top and about quarter of an inch below the rim outer edge and a thin band at the shank end. Similarly, I covered whatever little that remained of the stamping. From my experience, I knew that this is a very essential step as I realized during rusticating that it is very easy to lose track and transgress over the areas and stampings which you wish to preserve.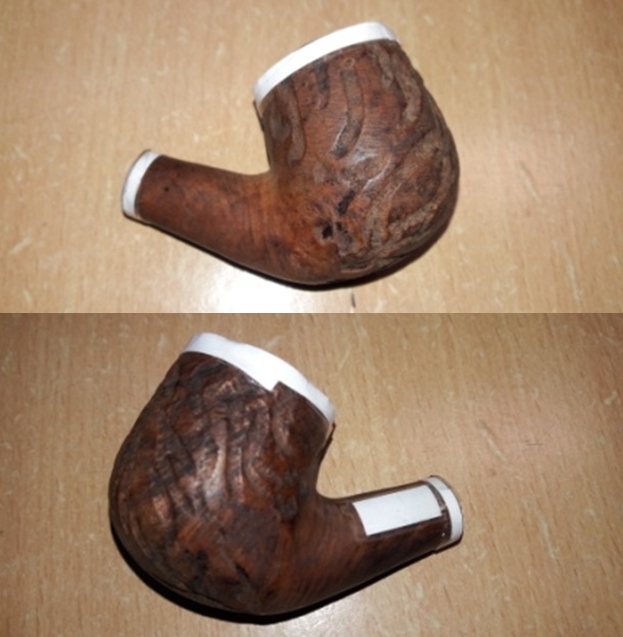 To rusticate, I firmly held the stummel in my left hand and with my right hand and began gouging out the briar. The technique is to firmly press the pointed four prongs of the modified Philips screwdriver in to the surface, rotate and pull out the removed chunk of briar. I worked diligently till I was satisfied with the rustications and the appearance of the stummel. I cleaned the stummel surface with a brass wired brush to clear all the debris from the rustications. I decided to take a break from further rusticating the surface as the process is tiring and painful. This makes me want a better and efficient rusticating tool.
 While giving my right hand a rest from this task, I decided to work on the damage to the rim top and edges. I start by addressing the rim top surface damage. I top the rim on a piece of 220 grit sand paper, checking frequently till I am satisfied that the darkened surface is addressed to a great extent and the rim top surface is nice, smooth and even. The inner and outer edges are still uneven, though much better than before topping, and shall be addressed subsequently.
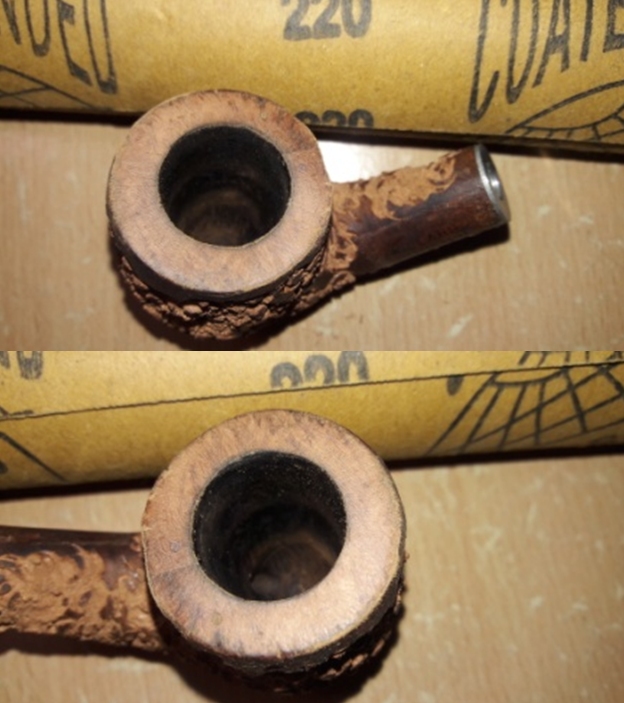 With a folded piece of a 220 grit sand paper pinched between my thumb and forefinger, I create a slight bevel on the inner and outer edges of the rim top surface. This helps to mask and address the minor dents and dings that had remained on the rim edges after topping. I am careful so as not to alter the profile of the stummel by excessive topping or creation of the bevels. I am pretty pleased with the appearance of the rim top and edges at this stage.
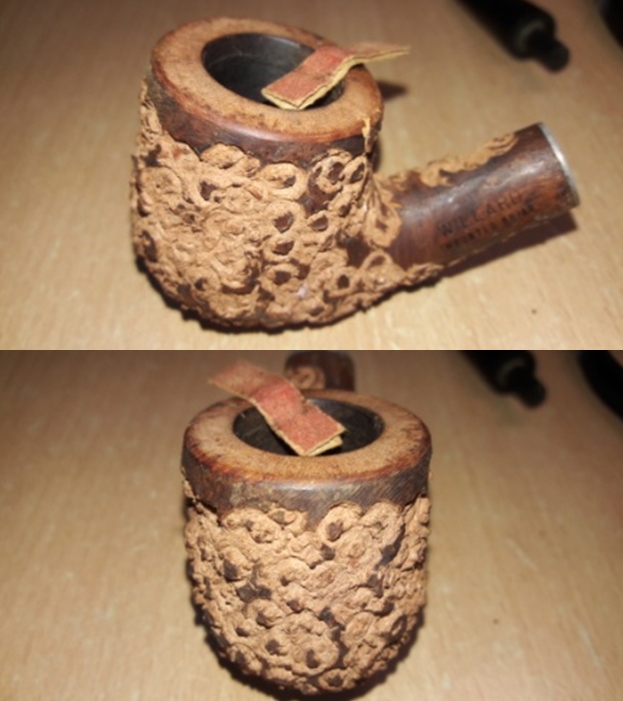
 I cleaned the stummel with pure acetone and cotton swab to remove the old stain completely in preparation for the polishing and subsequently, a new stain. After the cleaning, I set the stummel aside to dry out naturally.
 I turn my attention back to the stem. The fill has cured nicely and with a flat head needle file, I sand the fill to achieve a rough match with the surrounding surface. To achieve a perfect match, I sand the stem with a 220 grit paper, progressively moving through to finish with a 1000 grit sand paper. As expected, a clean and neat looking stem stared back at me. I rub a little Extra Virgin Olive oil into the stem surface to hydrate it and set it aside to be absorbed in to the vulcanite.
 I polish the rim top and the smooth surfaces of the stummel using micromesh pads, wet sanding with 1500 to 12000 grit pads. I am happy with the appearance of the stummel at this point in the restoration. The stummel is now ready for a fresh coat of stain.
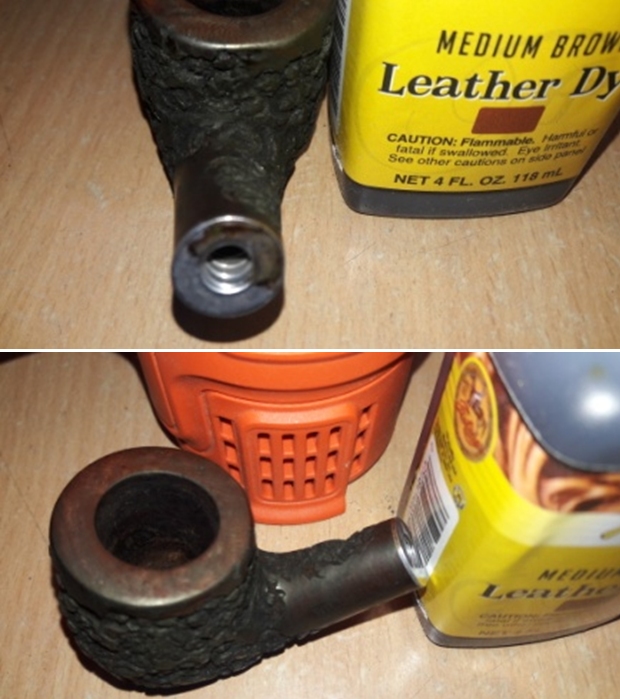
 I heat the stummel surface with my heat gun to open up the pores on the stummel so that the stain is well set. I mix black stain powder with isopropyl alcohol and liberally apply it over the heated surface, flaming it with the flame of a lighter as I went ahead to different self designated zones of the surface. This helps in the setting of the stain in the grain of the briar.
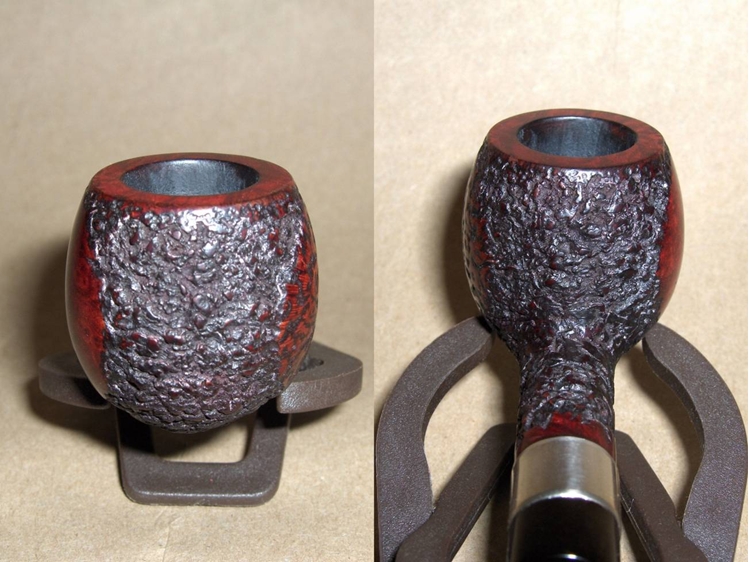
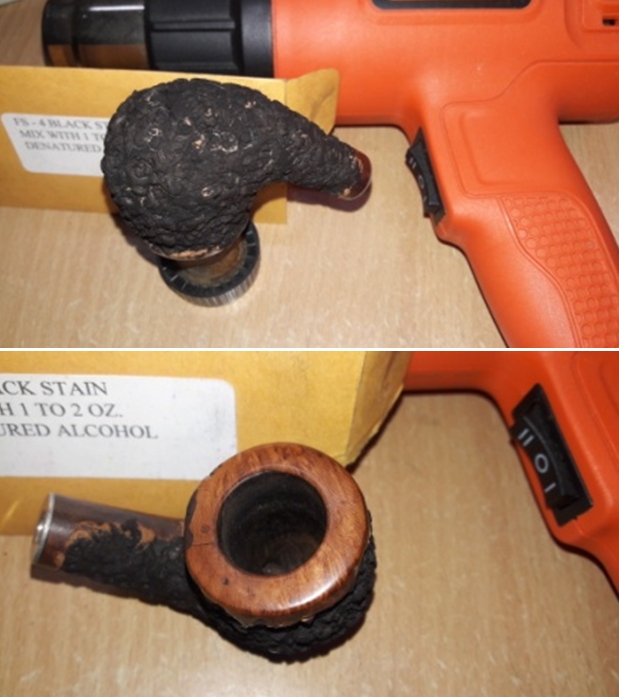 Once the stain has set in well, I again warm the stummel with my heat gun. This helps the stain to be absorbed and set further into the briar. I mount a felt cloth buffing wheel on my rotary tool and gently buff the entire stummel surface to remove the stain crust. I wipe the stummel with a cotton swab and alcohol to remove any excess stain and follow it up sanding the raised rustication with a folded piece of 220 grit sand paper. This is followed up by careful dry sanding of the entire stummel, especially the raised rustications with 1500 to 12000 grit micromesh pads. This not only lightens and highlights the rustications, but will also provide a smooth surface for the next coat of stain. Here is how the stummel appears at this stage.
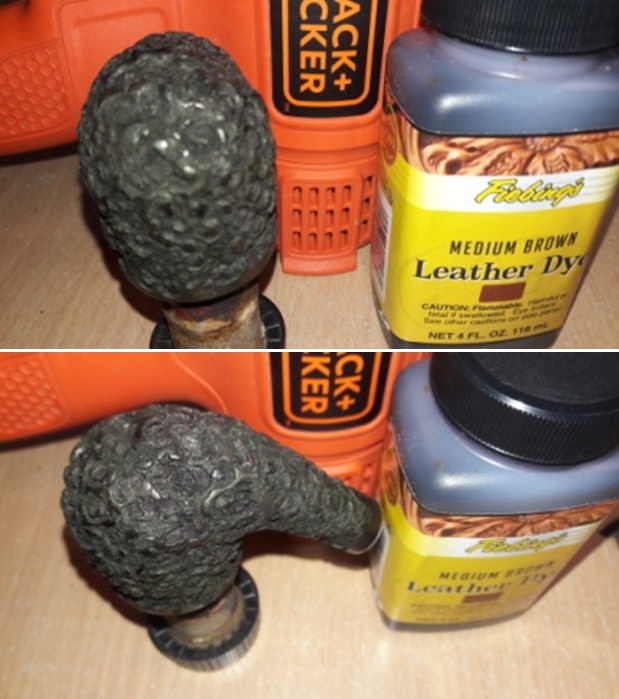
 I buff the stummel with a horse hair shoe brush to remove any sanding dust resulting from the micromesh sanding. I apply a small quantity of “Before and After” restoration balm to rehydrate and rejuvenate the briar and set it aside for some time. Thereafter, I buff and clean the stummel with a microfiber cloth. I apply a second coat of Medium Brown stain over the stummel and the shank extension, going through the same method as described above and set them aside for the stain to set.
 With the stummel set aside for the stain to set, I turned my attention to the stem polishing. Using the micromesh pads, I complete the polishing cycle by wet sanding the surface with 1500 to 12000 grit pads. The stem looks great with the fills nicely matched with the rest of the surface. I rub a little quantity of Extra Virgin Olive oil in to the stem surface and set it aside to be absorbed by the vulcanite.
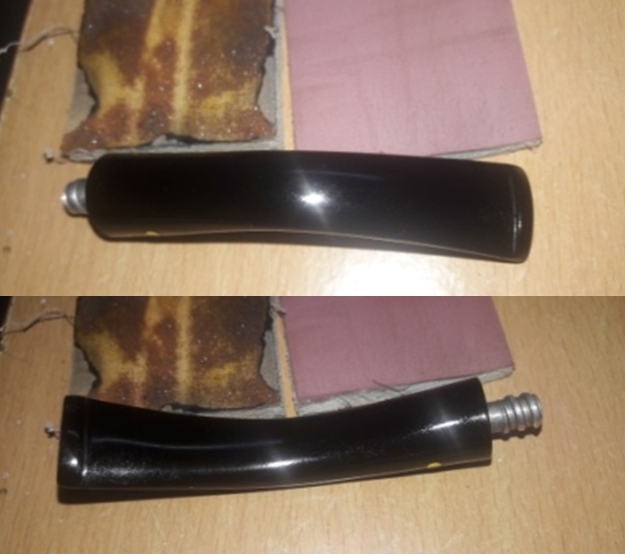 Coming back to the stummel, once the stain is set I wipe it down with a cotton swab and alcohol to remove any excess stain and lighten it from the raised rustications. Mounting a felt cloth buffing wheel on my rotary tool, I go about removing the crust formed by the stain over the raised rustication. The second coat of brown stain has added another layer of texture to the appearance of the stummel.
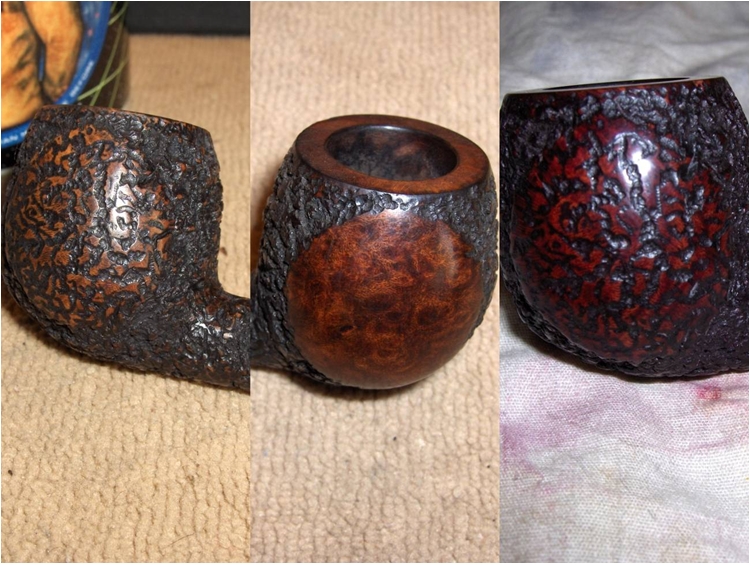
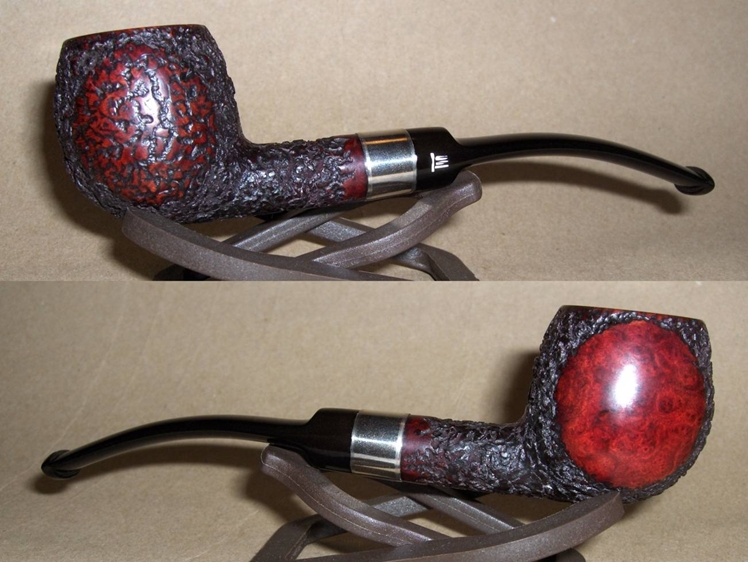
 Next, I rub a small quantity of “Before and After Restoration Balm” in to the briar with my finger tips, work it deep in to the sandblasts and let it rest for a few minutes. The balm almost immediately works its magic and the briar now has a nice vibrant appearance with the beautiful rusticated patterns on full display. I further buff it with a horse hair shoe brush. I rub a small quantity of Halcyon II wax into the surface and immediately wipe it with a microfiber cloth.
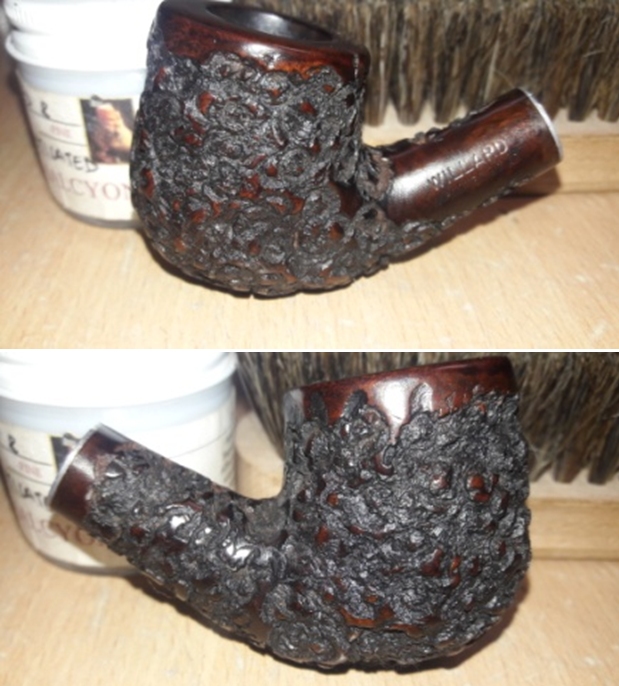
 The only issue that remains unaddressed at this stage is the issue of the overturned stem. With the flame of a lighter, I heat the aluminum stinger to a point where the stem is just about able to rotate on the stinger. I reattach the stem to the shank while the stinger was still warm, and turned it till the alignment was as perfect as I desired and set it aside to cool down.
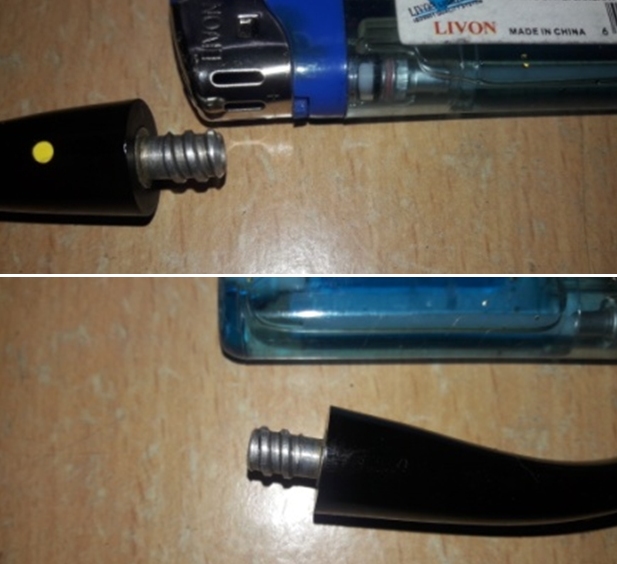 To complete the restoration, I mounted a cotton cloth buffing wheel on to my hand held rotary tool. I set the speed at about half of the full power and applied several coats of carnauba wax. I finished the restoration by giving the entire pipe a rigorous hand buffing using a microfiber cloth to raise the shine further. The finished pipe looks amazingly beautiful and quite a transformation it was. It is now ready for its long second innings with my colleague. I wish that he enjoys his pipe and remembers our association for a long time to come.
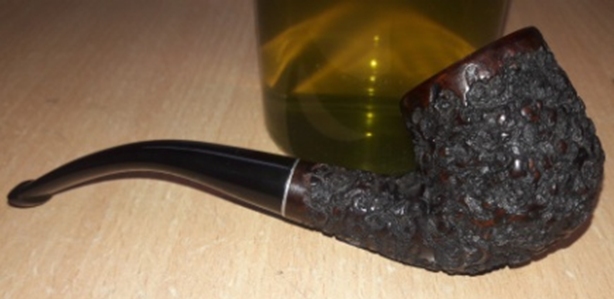


 I wish to thank our esteemed readers for sparing their valuable time to read through and any input or advice is always welcome.