Blog by Dal Stanton
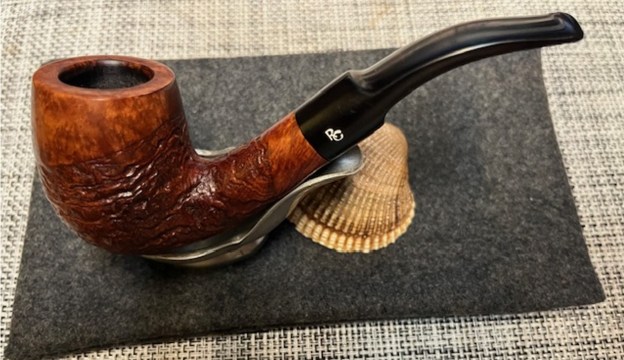
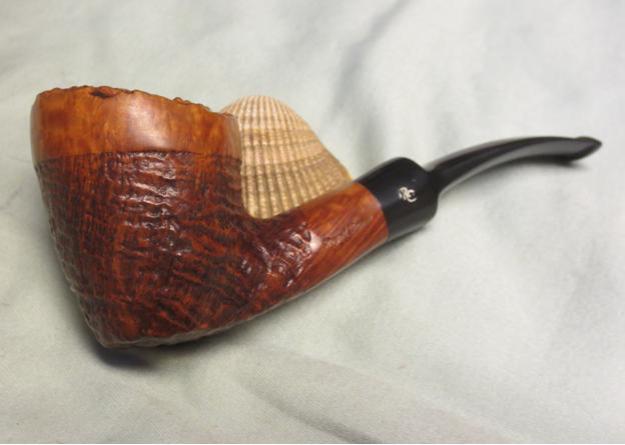
After returning to Golden, Colorado, after nearly 5000 miles of travel over Christmas and New Year, it was good to return to my stationary Pipe Steward work desk! I experimented with a mobile Pipe Steward worktable through the travels and it worked exceptionally well. I am looking forward to traveling again in our R-pod travel trailer and taking my hobby with me. Seeing family in Florida, Nashville, and St. Louis during our travels was wonderful, whipped frosting on the cake! One highlight of our journeys was sharing a bowl with my son-in-law, Niko, in Nashville. I was able to complete the Butz-Choquin Cocarde Geante Plus (see picture below) that Niko had commissioned that was huge enough not to be dwarfed by his larger than normal hands 😊. The BC turned out beautifully and was the first to be restored from a Lot of 16 that was donated anonymously to The Pipe Steward from a pipe man in the Kansas City, Missouri, area who wanted his pipes to benefit the Daughters of Bulgaria – women and girls who have been trafficked and sexually exploited.
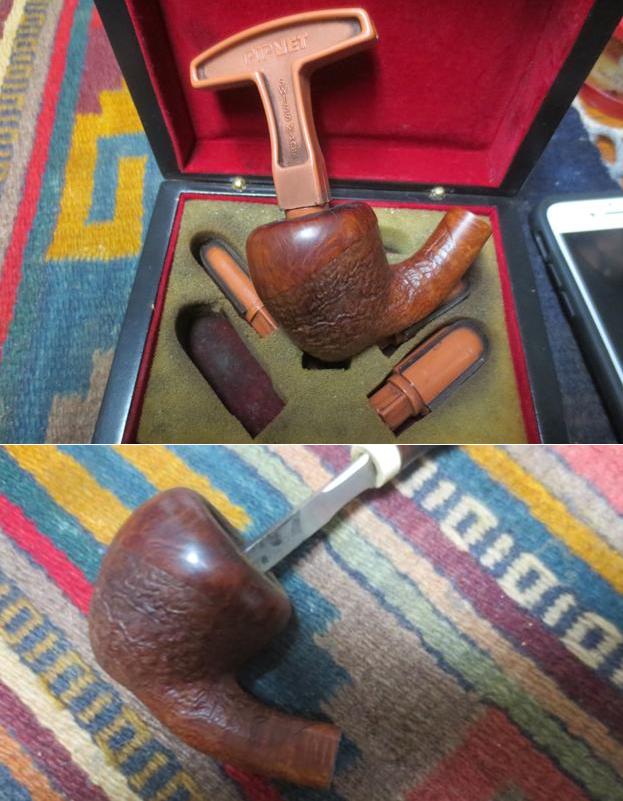
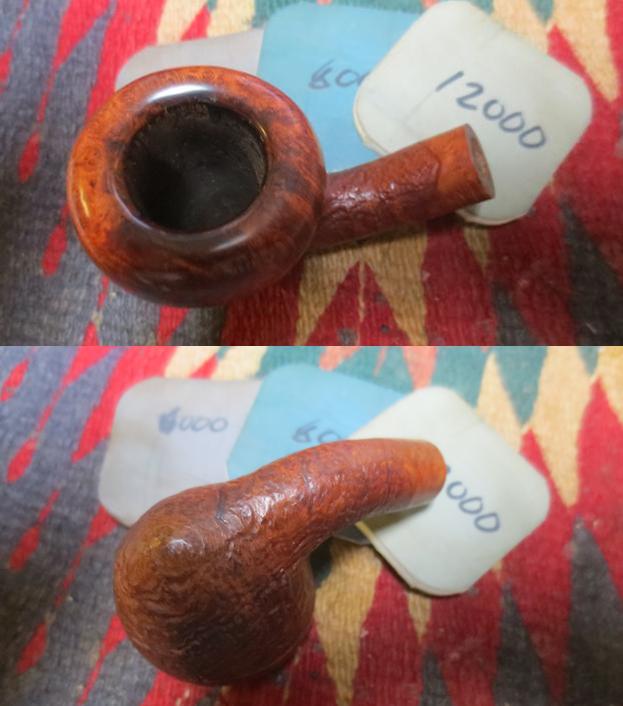
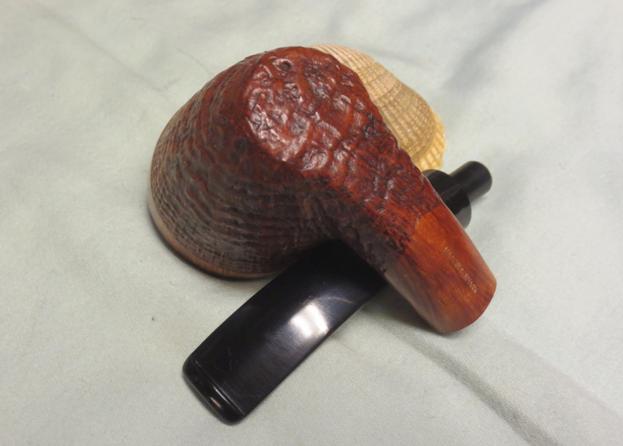
 Niko commissioned the BC Cocarde Geante, but he also found another pipe from the Pipe Steward inventory that he wanted to add to his blossoming collection of pipes. What caught his eye was a stylish Danish Royal Guard 582 Pickaxe with an eye-catching blasted surface to compliment the unique shape. I acquired the Royal Guard Pickaxe in the ‘Lot of 68’ I found on the eBay auction block from a seller in West Hartford, Connecticut. I will be uploading more of the ‘Lot of 68’ to the virtual ‘Help Me Baskets’ in the For “Pipe Dreamers” Only! online collection where pipe men and women can choose and commission a pipe that catches their eye – all benefiting the Daughters of Bulgaria. This picture shows the plethora of quality pipes soon to be added to the online Dreamers collection.
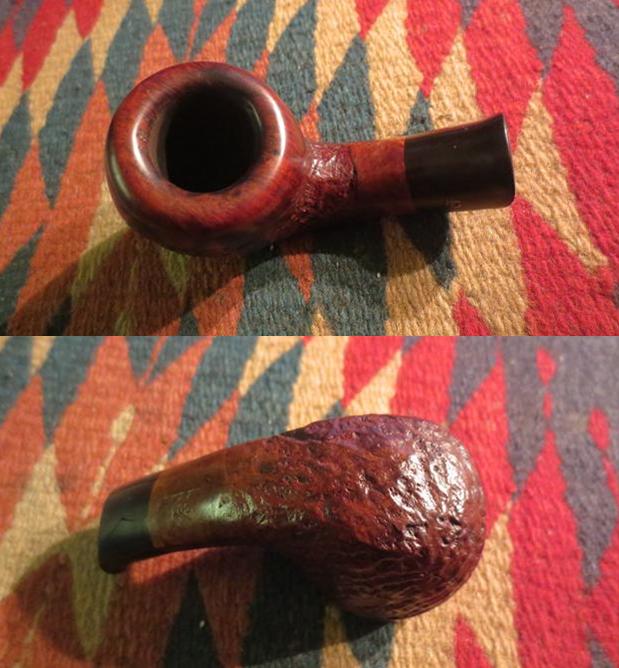
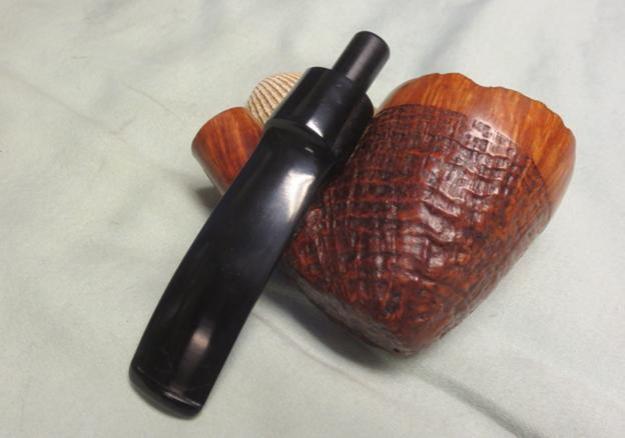
 With the blasted Royal Guard Pickaxe now on the worktable here in Golden, I take a few pictures to take a closer look.
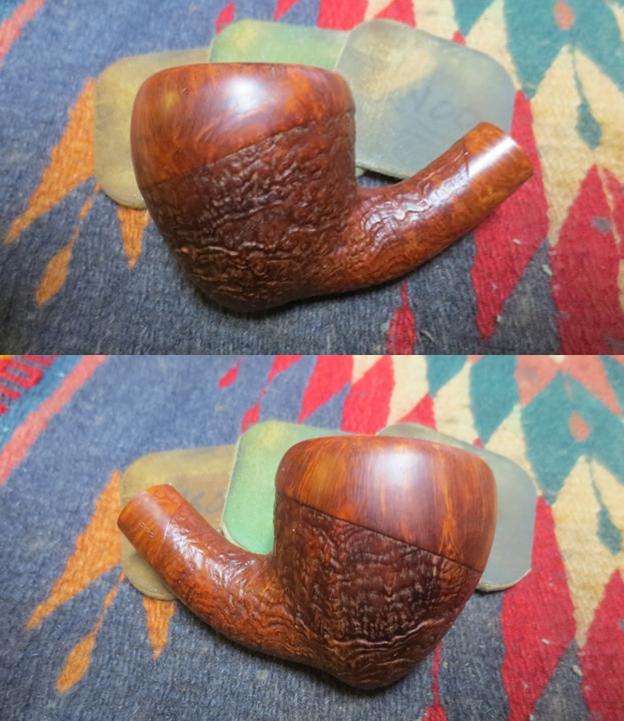
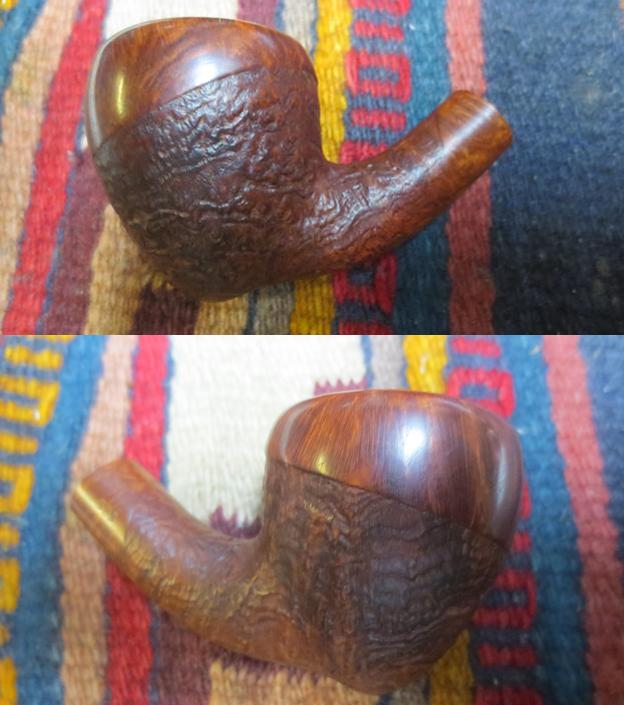
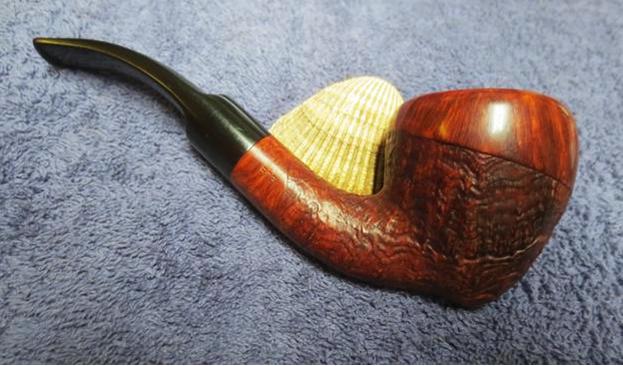
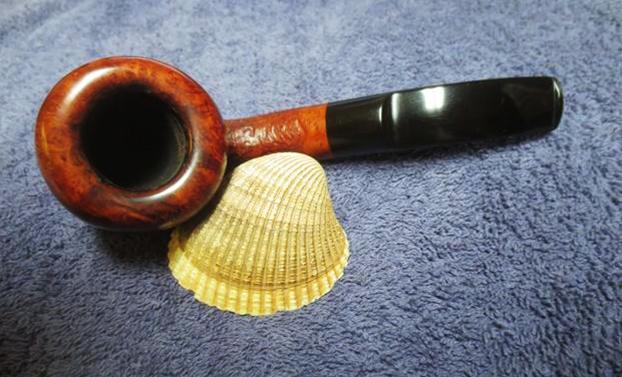
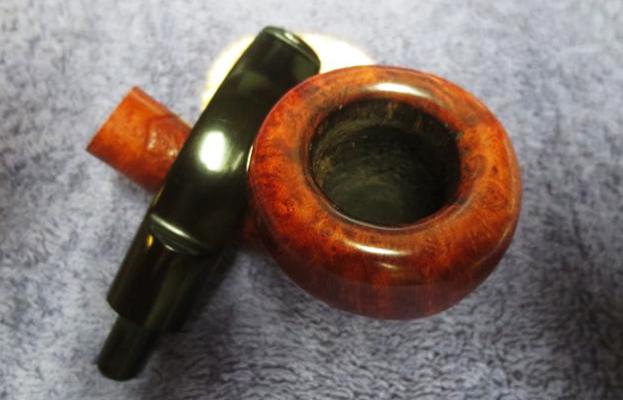
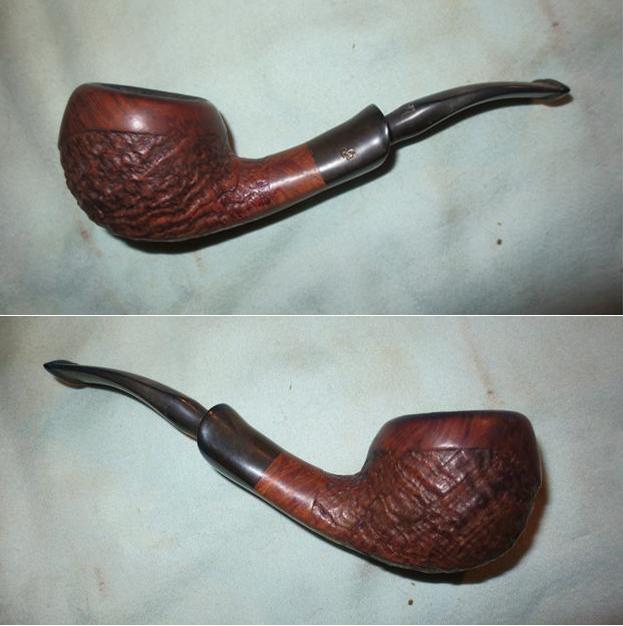
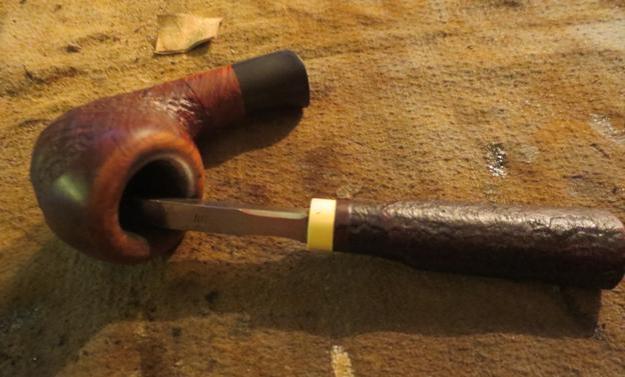
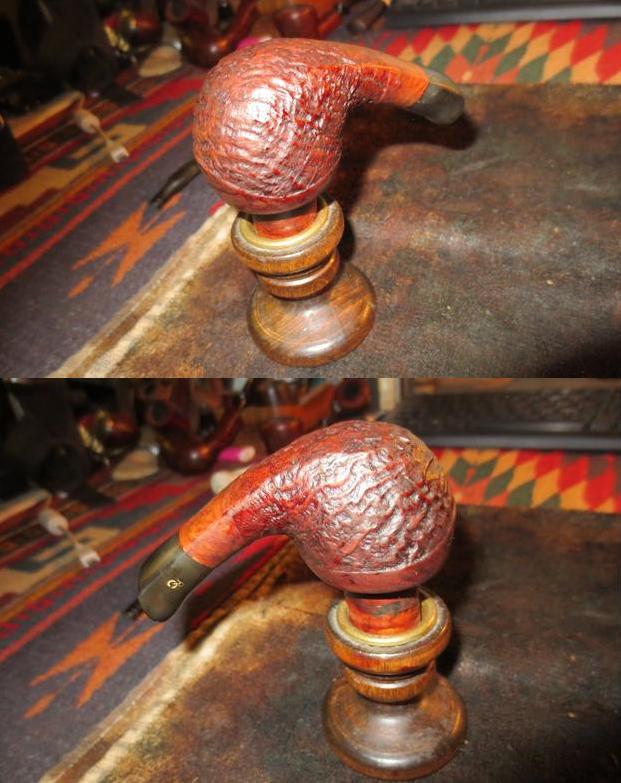
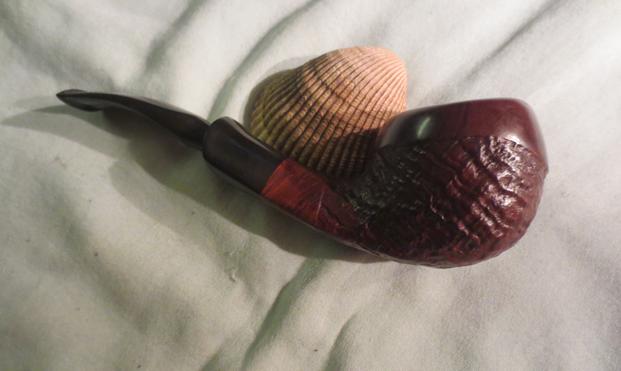
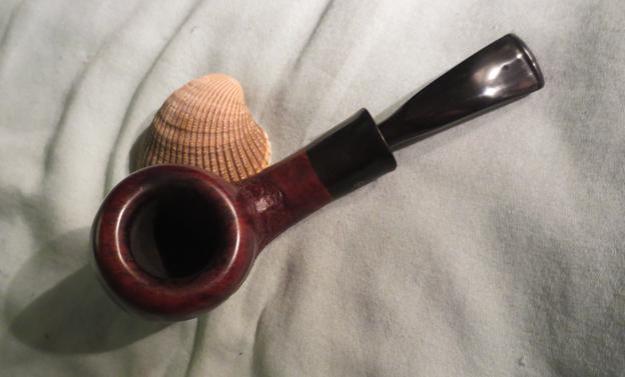
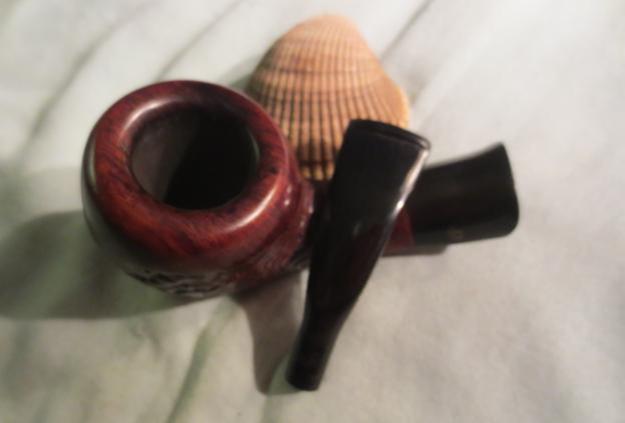
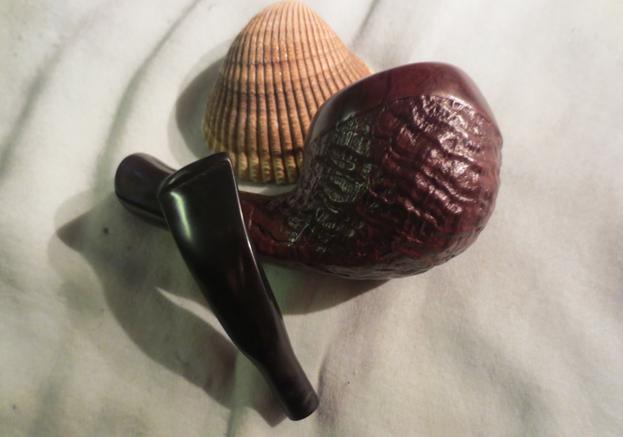
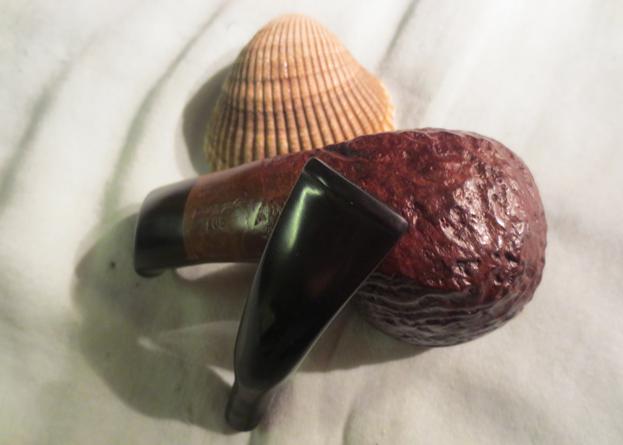
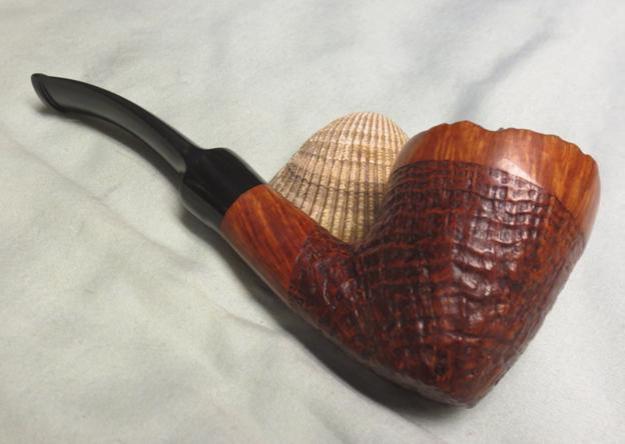

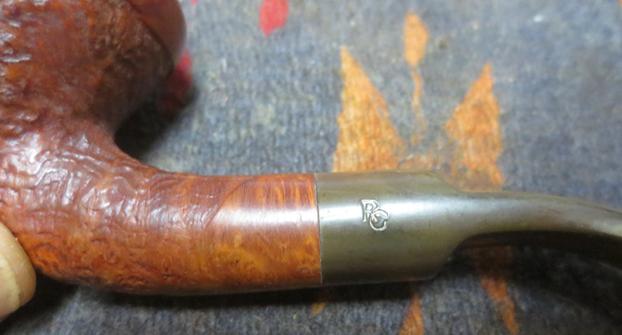
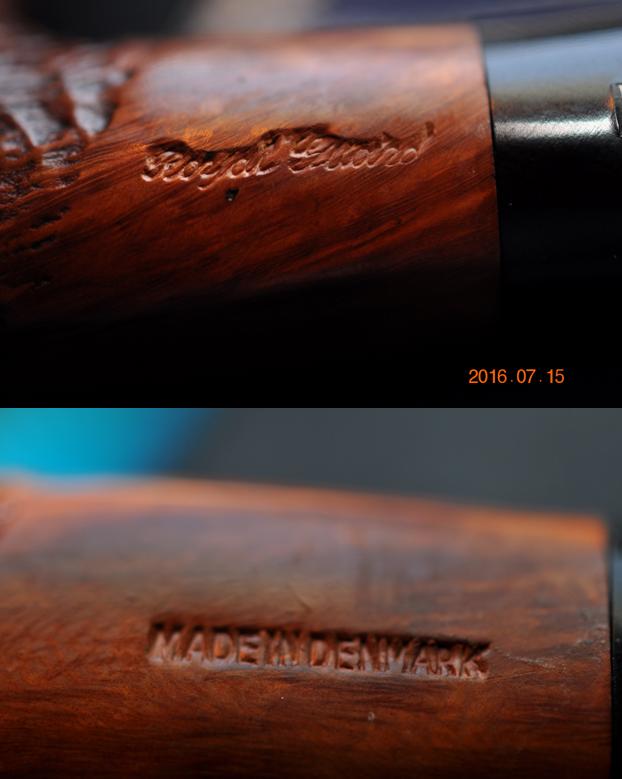
 The nomenclature is crisp and distinct and is in the smooth briar panel on the underside of the shank. Stamped to the far right is the shape number ‘582’. To the right of this is ROYAL GUARD [over] MADE IN DENMARK. The shank cap is stamped with a diagonally over-lapping ‘RG’.
 I have grown in my appreciation of Danish pipes and have enjoyed adding some genuinely nice Danish pipes to my own collection – classic shapes and Freehands. I am not familiar with the ‘Royal Guard’ name and my first effort at discovering more in Pipedia comes up empty. Next, I pull out my prized copy of ‘Who Made that Pipe?’ by Herb Wilczak and Tom Colwell and discover that Royal Guard is a product of the well-known Danish pipe maker, Stanwell.
  My next stop to find information is Pipephil.eu where the Danish Stanwell provenance is confirmed. The panel I clipped below provides some Royal Guard examples and confirmation with the same ‘RG’ stamping.
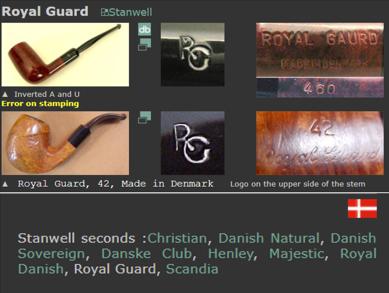 The concise summary of Stanwell provided by Pipephil is helpful (See: Link):
Brand & factory were established in 1942 by Poul Nielsen. The company has been owned since 2000 by Nordisk Tobaks Kompagni A/S. The factory in Borup crafted all Stanwell pipes from 1965 until 2009. From 2010 on the pipes are crafted by Barontini (Italy) exept for the limited editions. Production (2007): 115 000 Pipes/year.
According to this addition of information, with the COM being Denmark, the Royal Guard on my worktable would have been made at the Stanwell Borup factory dating between 1965 and 2009. The feel and look of the pipe lend toward the earlier or mid-date range – early 70s? I return to Pipedia to the Stanwell article looking for additional information about the Royal Guard line. I find nothing helpful. Pipedia has a good article on ‘Stanwell Shape Numbers and Designers’ which I looked at hopeful of finding some correlation. I compared the Stanwell shape number information (See: LINK) and found no correlation with the shape number, 582 and Stanwell shape numbering.
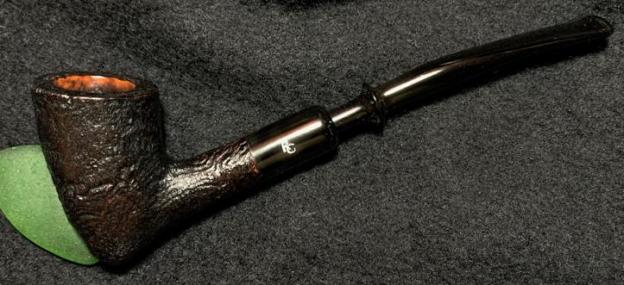
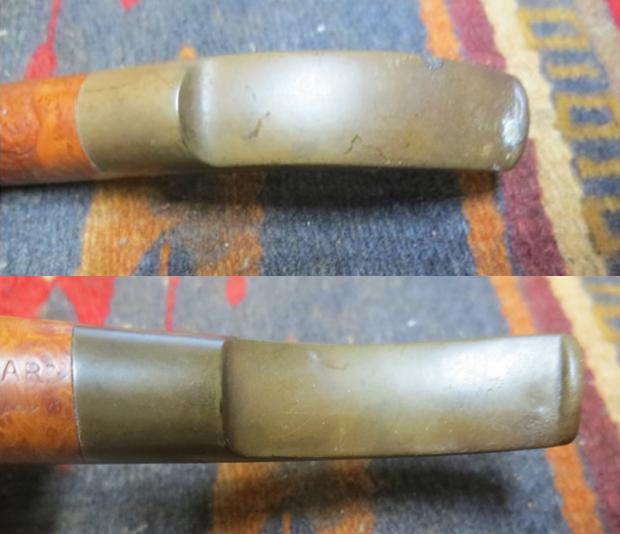
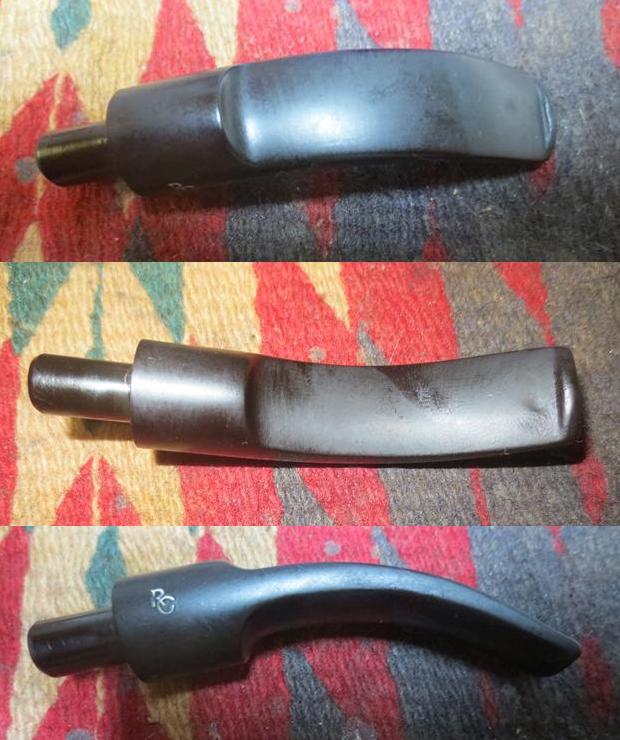
 What I found of interest was that Stanwell did mark some of the ‘Royal Guard’ seconds with the ‘Stanwell’ name. Steve restored an attractive Stanwell Royal Guard Made in Denmark which also enjoyed the classic Stanwell ‘crowned S’ stem stamping. These two pictures come from Steve’s rebornpipes writeup:
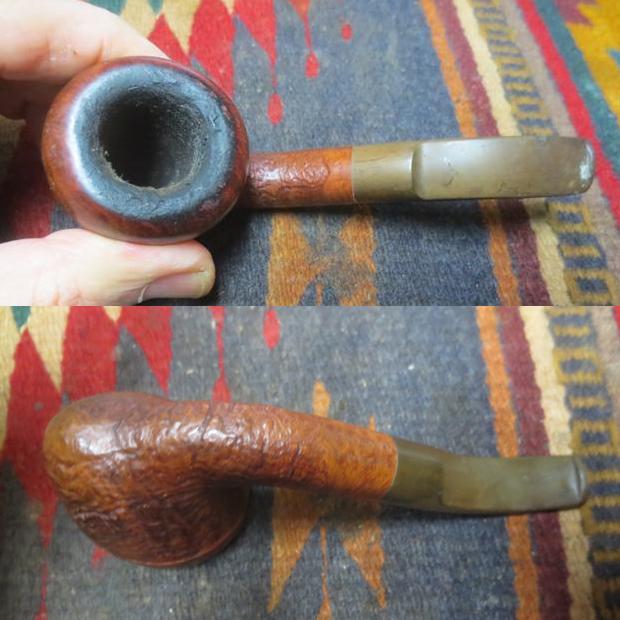
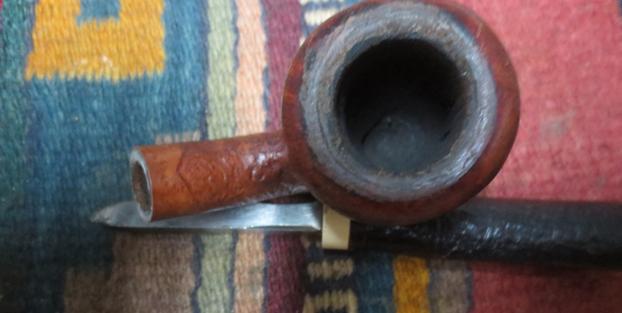
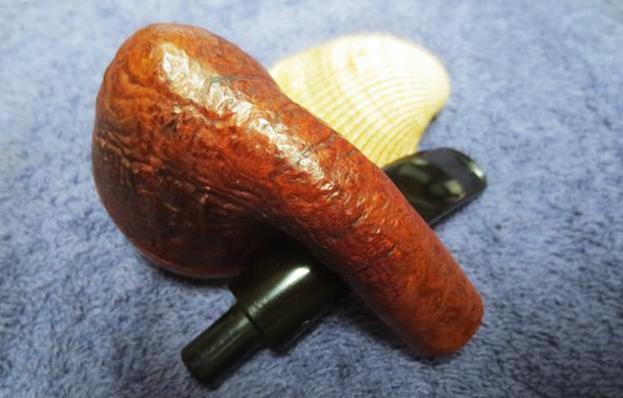
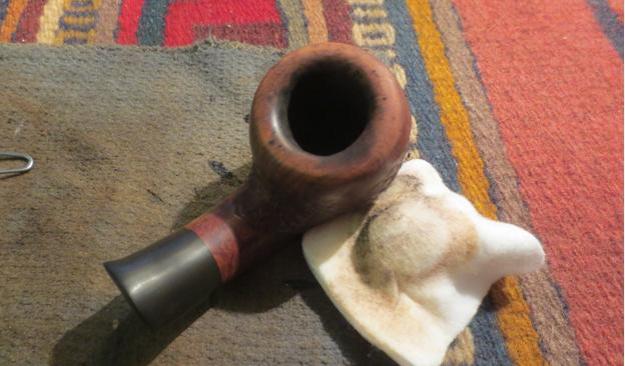
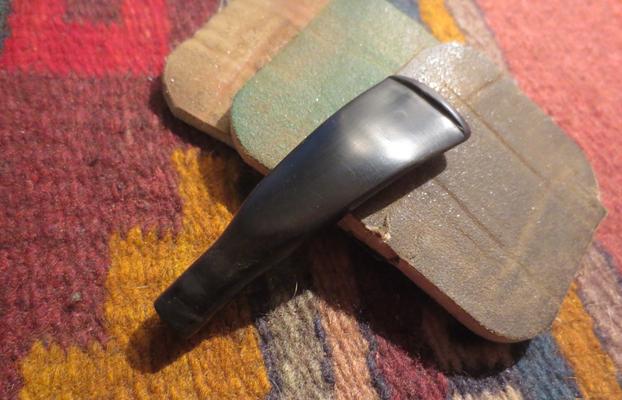
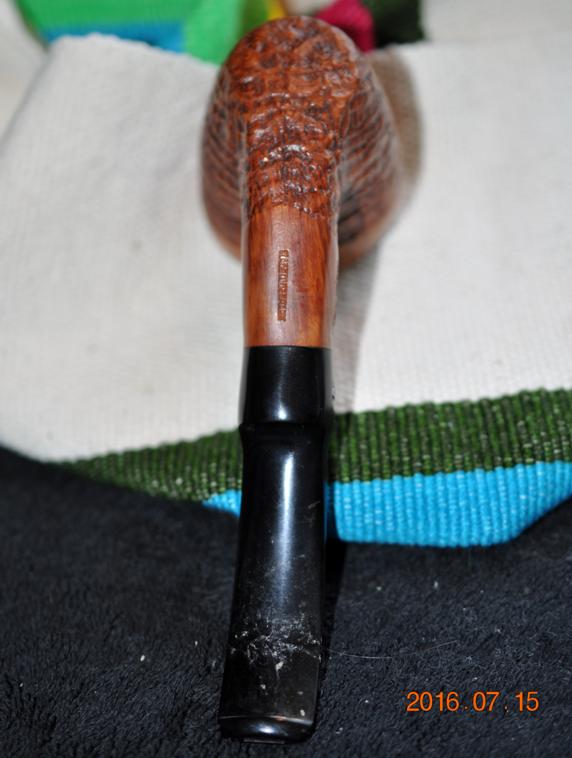
One other anecdotal piece of information I found while doing broad trolling while searching for Royal Guard information on the internet. Several Royal Guard pipes come up in various sites selling pipes. One ad, already sold, on the site Worthpoint (see: LINK), showed a Danish Freehand style like the RG on my worktable with the shape number 564 – 500s like the Pickaxe. It seems that all Royal Guard pipes have shape numbers in the 500s. The RG pipe in the ad also has a very nice, blasted surface and a shank cap – military style fancy stem, and the RG stamping on the shank cap – the same DNA. The seller provided a lot of information about the Stanwell linkage but also provided some information that helps hone in on the dating with a reference to the previous steward of the pipe: “It is from the personal collection of a physician who quit smoking in the early 1970’s. It would make an excellent addition to anyone’s collection.” If the doctor quit in the early 70s, he would have acquired the pipe before this, and it would have been produced earlier yet. It is very probably that the Royal Guard line could date back into the 60s which gives it an earlier Stanwell provenance. With a better understanding and appreciation for the Stanwell Royal Guard 582 Pickaxe on my worktable, I take a closer look at the issues. The narrow conical chamber has some cake that will be removed to give the briar a fresh start. The dark blasted surface shows the grime of some years, but generally in good condition and should clean up well. The stem has minor oxidation, and the bit has tooth chatter or roughness, but not serious. The shank cap, which appears to be a black acrylic, needs cleaning as well. Its appearance is like vulcanite and it appears to have oxidation or dulling on the upper side – the sun-side. I take a picture of this, but showing different phases of black isn’t easy with the iPhone Xs camera!
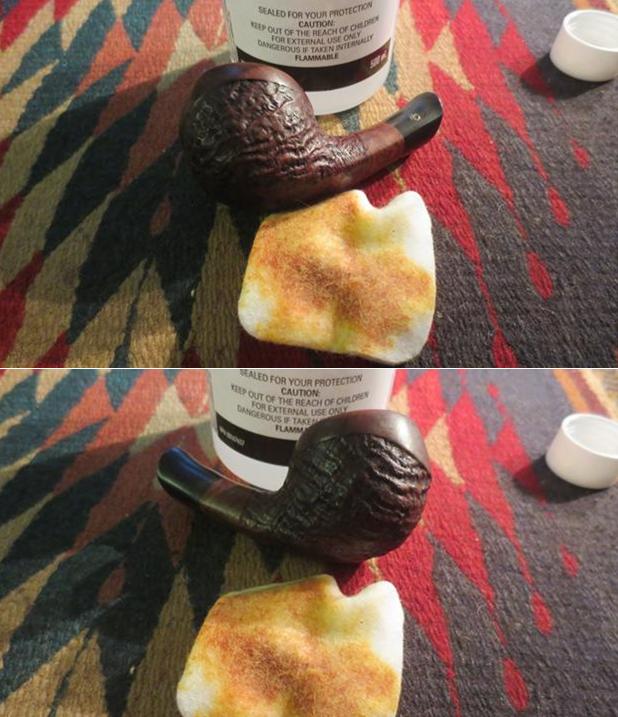
 I start the cleaning by addressing the oxidation in the fancy RG stem, but first the airway is cleaned with a couple pipe cleaners dipped in isopropyl 99%. After this, the Royal Guard fancy stem joins other pipes in the queue for a soak in Mark Hoover’s (www.Lbepen.com) Before & After Deoxidizer.
 After several hours in the soak, the stem is fished out and the Deoxidizer fluid is squeegeed off with my fingers and a pipe cleaner wetted with isopropyl 99% is used to clean the airway of the fluid. A cotton pad wetted with isopropyl 99% is then used to wipe off much of the raised oxidation.
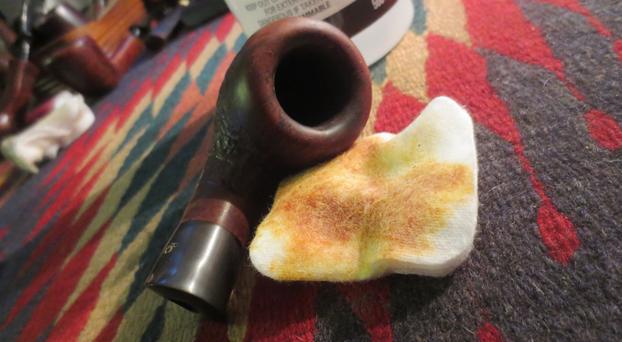
 To encourage the conditioning of the stem, paraffin oil, a mineral oil, is applied to the vulcanite stem and set aside to absorb.
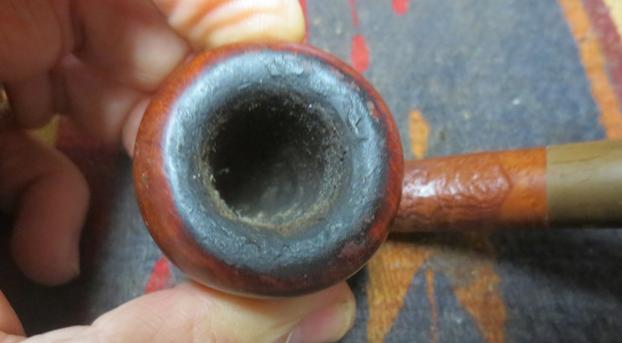
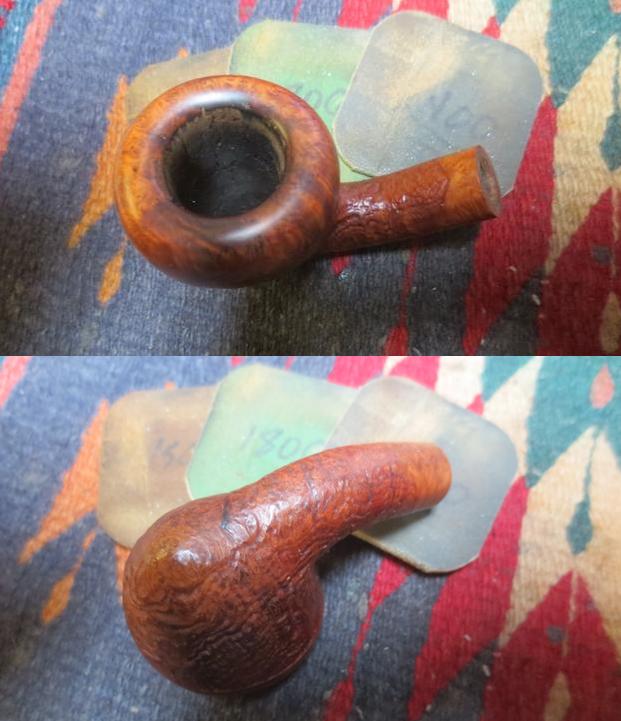
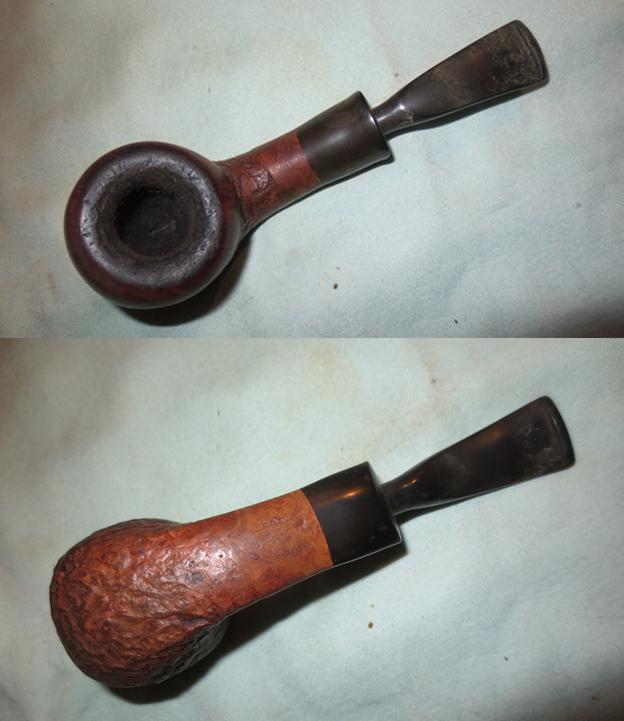
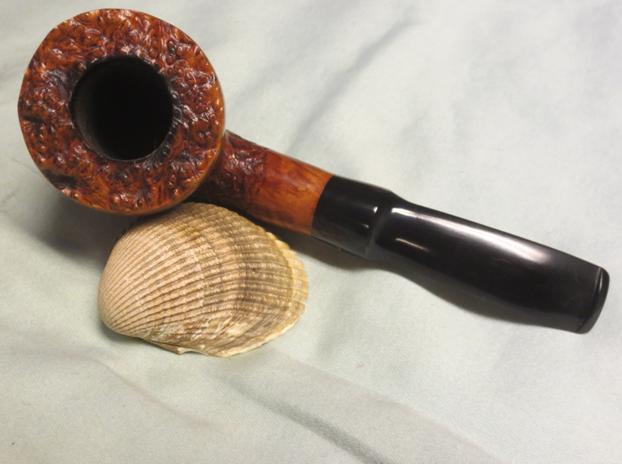
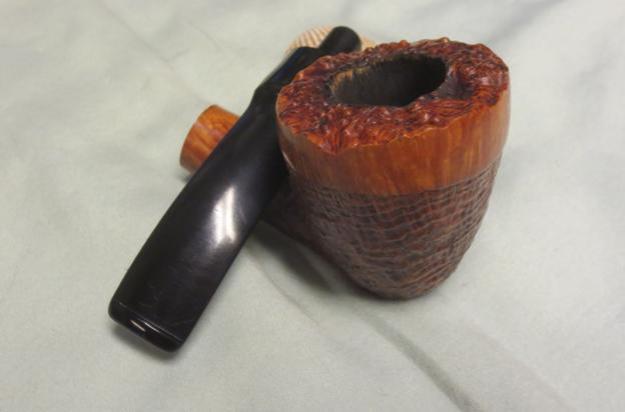
 Turning next to the blasted Pickaxe stummel, I take another close up of the chamber to show its condition. The last bit of baccy the former steward used is an exhibit on the floor of the chamber. The carbon cake buildup is moderate.
  The widest measurement of the chamber at the rim is only 11/16 inches. Neither the Pipnet Reaming Kit nor the Kleen Reem Pipe Tool, which I pull out for tighter chambers, are small enough to reach far into the chamber to ream. I therefore go directly to the Savinelli Fitsall Tool to do the job. It scrapes the chamber walls and can reach down to the floor of the chamber where the cone tightens to the smallest radius.
 When the Fitsall tool has done its work, a piece of 240 sanding paper wrapped around a Sharpie Pen completes the cleaning of the chamber as the walls are sanded.
 After an inspection of the chamber, the briar looks good. There are no heating problems detected. I move on.
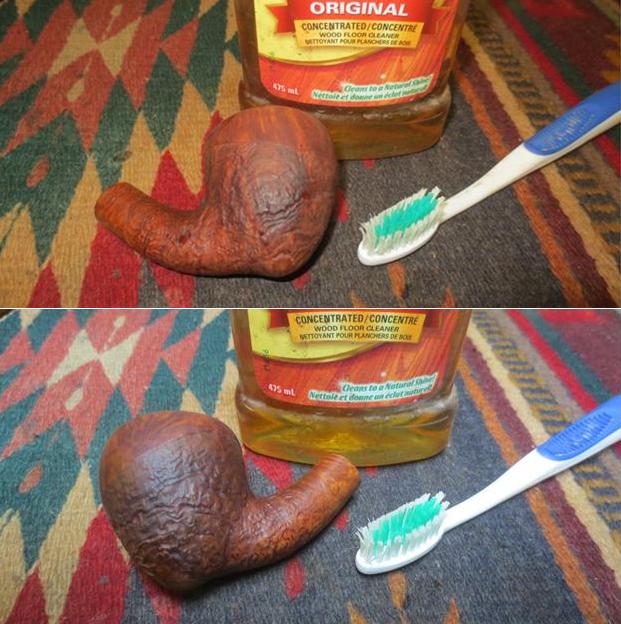
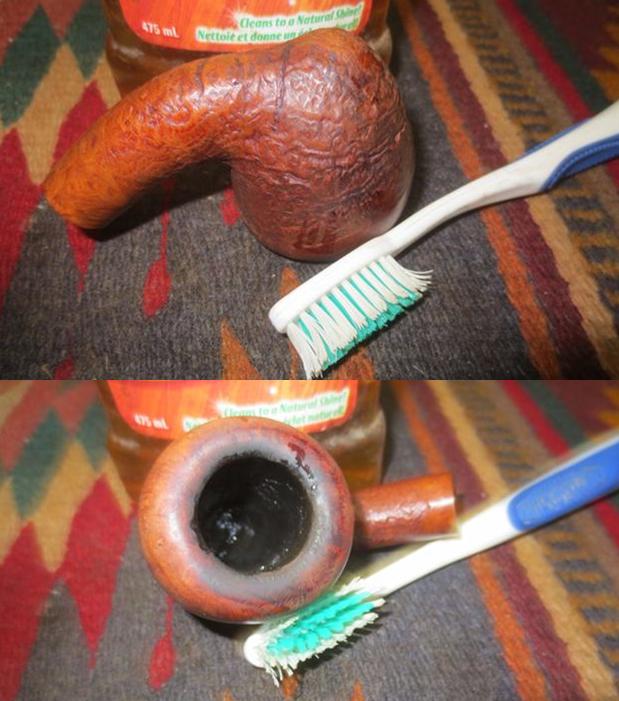
 Next, the external blasted surface is cleaned using undiluted Murphy’s Oil Soap and a cotton pad to scrub. A bristled toothbrush is also used to scrub the rough blasted surface.
  Next, the stummel is transferred to the sink where the cleaning continues using warm water, shank brushes with anti-oil dish washing liquid on the internals. The dishwashing liquid helps break down the oils built up in the mortise. While at the sink, I also use Magic Eraser on the acrylic shank cap – careful not to scrub over the ‘RG’ stamping.
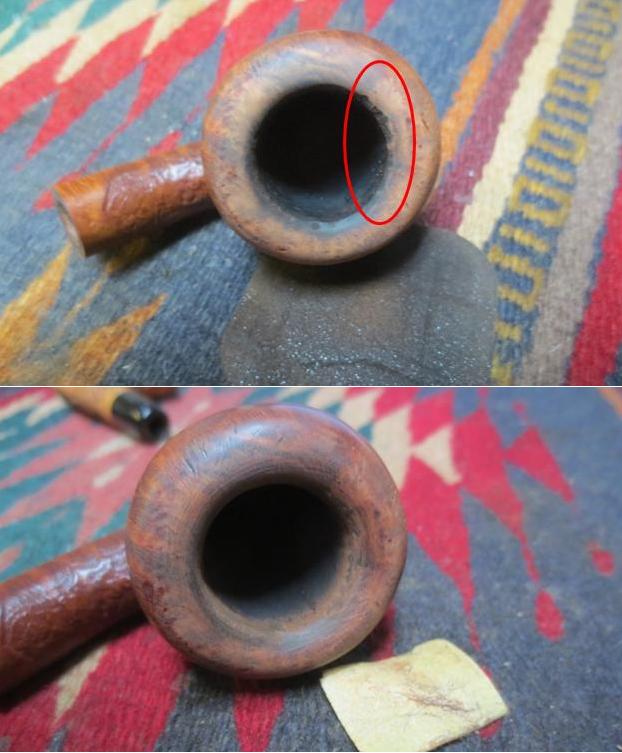
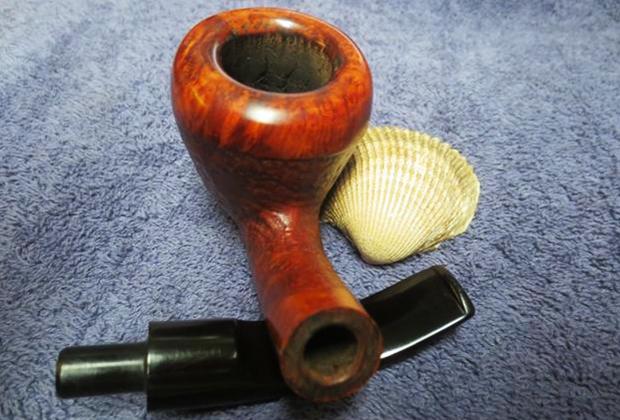
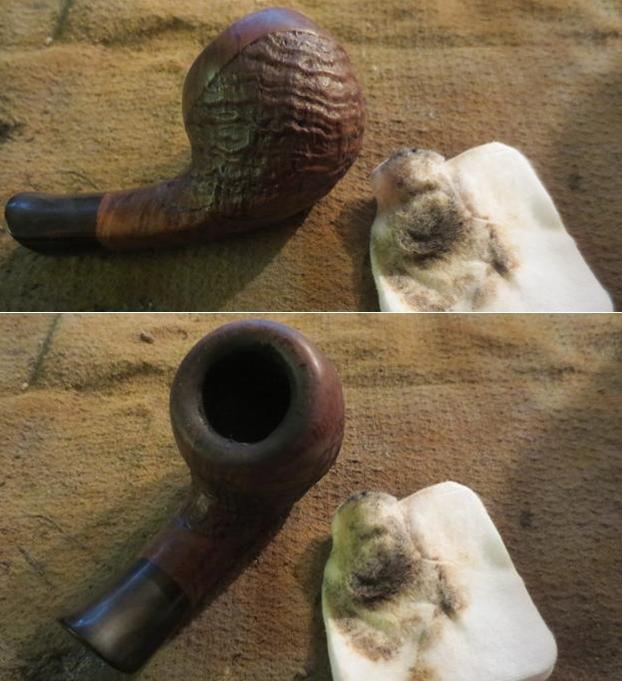
  After a thorough rinsing, the stummel is brought back to the worktable and pictures are taken showing raw spots on the fore and aft rim edge.
 The point of the Pickaxe is also worn, and bare spots are coming through.
 The scrubbing of the shank cap with Magic Eraser did a good job. The cap now is a unified dull after the cleaning which should shine back up through the polishing phase.
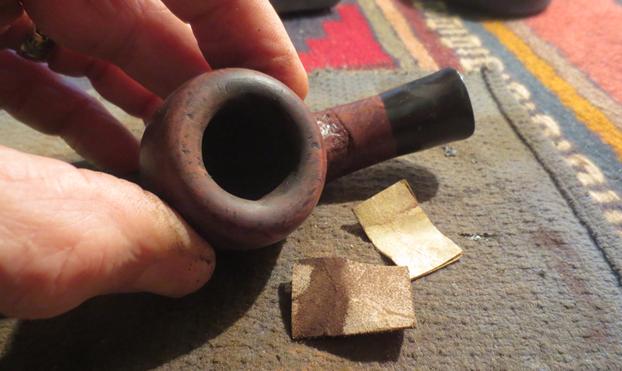
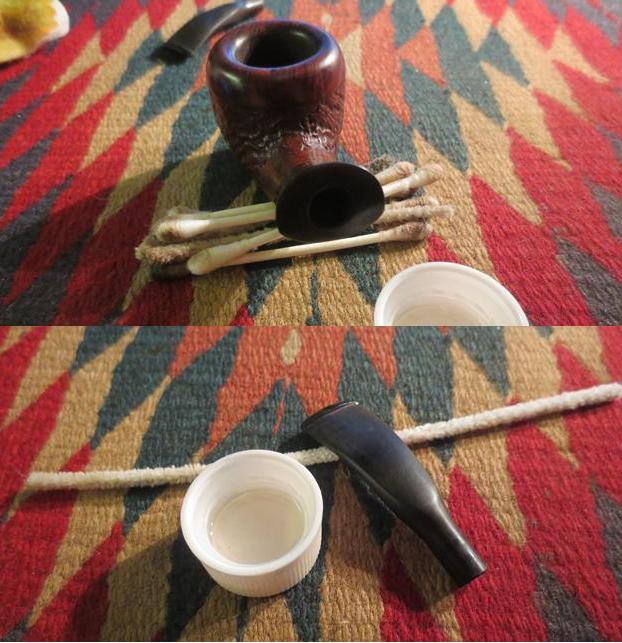
 To complete the cleaning, I return to the internals using cotton buds and pipe cleaners wetted with isopropyl 99%. A small dental spoon also is used to scrape the mortise walls to remove residual gunk. After some effort, the buds and pipe cleaners lighten indicating cleaner internals. Later, I will continue the cleaning of the internals by using a kosher salt and alcohol soak.
 Turning now to the blasted briar surface of the stummel, there were raw or ‘bald’ spots on the rim and heel after the cleaning. The most pronounced place on the front of the rim.
 To remedy these bald spots, I use a mahogany dye stick to refresh the rim edges and the blasted rim surface. The same is done with the heel and a few small spots on the shank. The results look good. The blending between the dye stick and the native stummel hue is good.
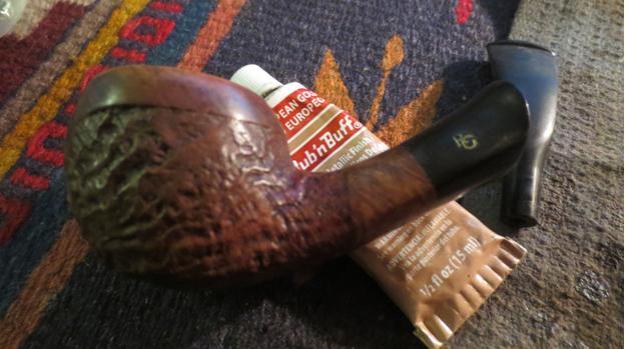
 Next, I treat the blasted stummel with Before & After Restoration Balm. I apply the Balm by placing some on my fingers and working it into the rough blasted landscape. As I’ve described many times before, I notice the colors and textures of materials I use on pipes. The Balm applies initially with a cream-like consistency and then thickens to a waxier texture as it’s worked in. Some Balm is applied also to the acrylic shank cap as well – it will work on it too! After thoroughly covering the stummel landscape, the stummel is put aside for the Balm to be absorbed.
 After about 20 minutes, excess Balm is removed with a microfiber cloth and then buffed up. I have two microfiber cloths of the same color dedicated to, first, wiping off the excess, and then, secondly, to buffing the stummel after cloth number 1 has wiped off the excess. This dedication is helpful when I use cloth #1 on other pipes simply to give them a quick ‘spruce-up’ with Restoration Balm. The next pictures do not do justice to the deepening of the hues of the dark blasted surface I can see with the eye. The blasting on this Stanwell Royal Guard is attractive with deep burgundy flecking and the Restoration Balm brings this fact out more.
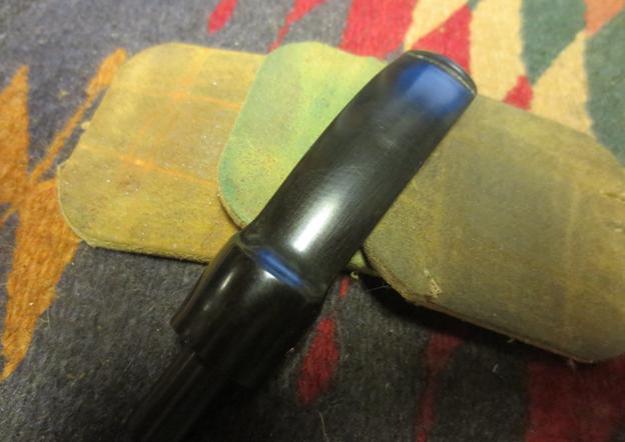
 With the stummel now waiting in the wings, the Royal Guard fancy stem is back on the table. The Before & After Deoxidizer did a good job earlier. Some pictures of the upper and lower bit show almost no tooth chatter but roughness from normal wear.
  To remove the roughness in the bit area and to address any remaining oxidation, the stem is sanded with 240 grade paper below the flare.
 Following the 240 sanding, the entire stem is wet sanded with 600 grade paper and then 0000 grade steel wool is applied.
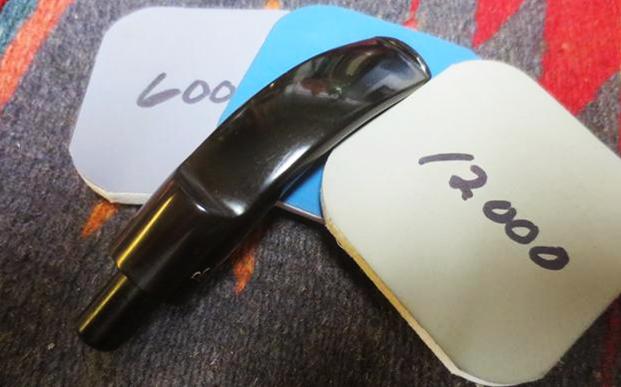
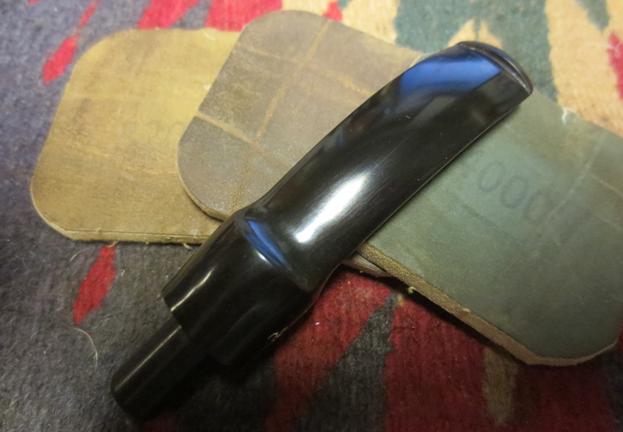
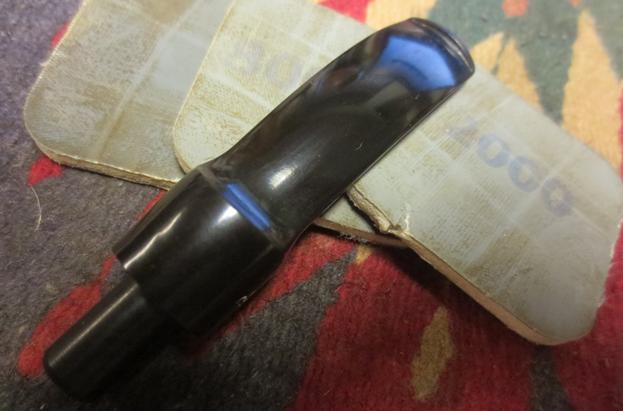
 Next, the full regimen of 9 micromesh pads is applied starting with wet sanding with pads 1500 to 2400. Following this is dry sanding with pads 3200 to 4000 and 6000 to 12000. Between each set of 3 pads, Obsidian Oil is applied to condition the stem as well as to protect against future oxidation when the pipe is put back into service. The gloss comes out nicely through the micromesh sanding.
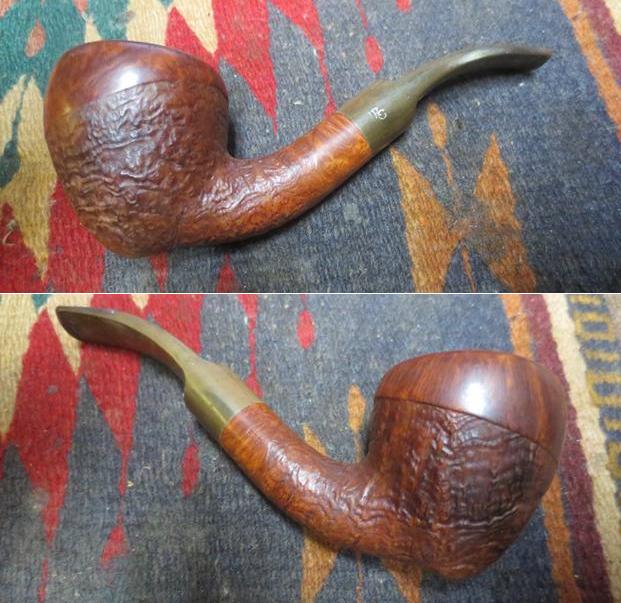
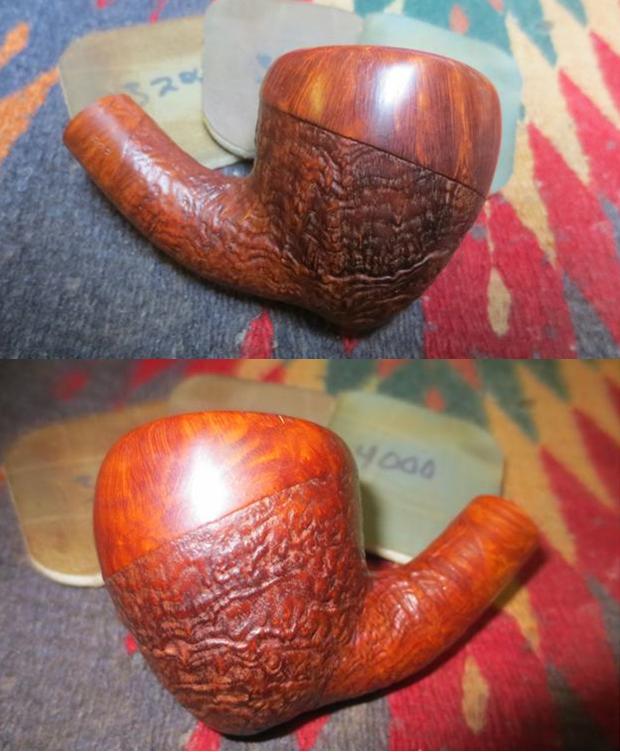
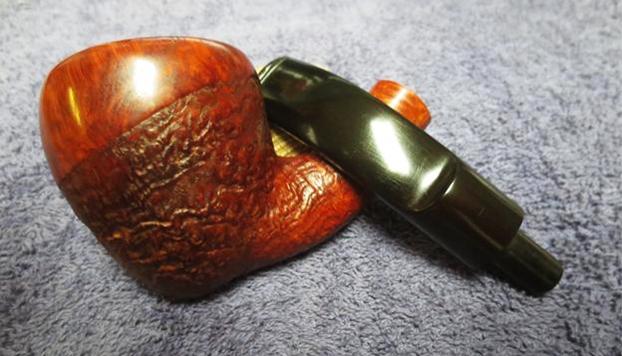
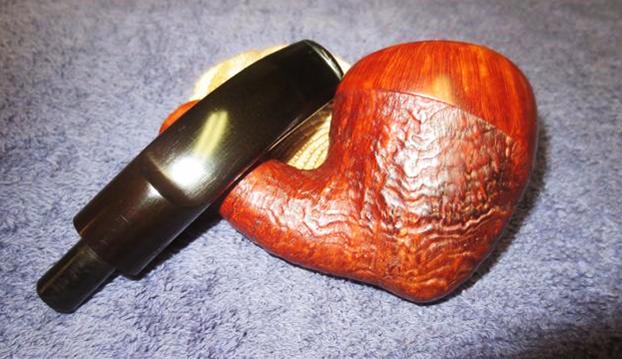
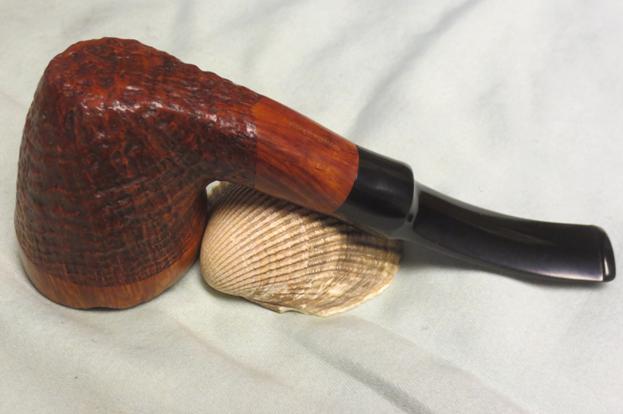
 To get a look at the progress, the Pickaxe stummel and fancy stem are reunited. The progress looks good, but I see a few cosmetic issues that will improve the overall presentation.
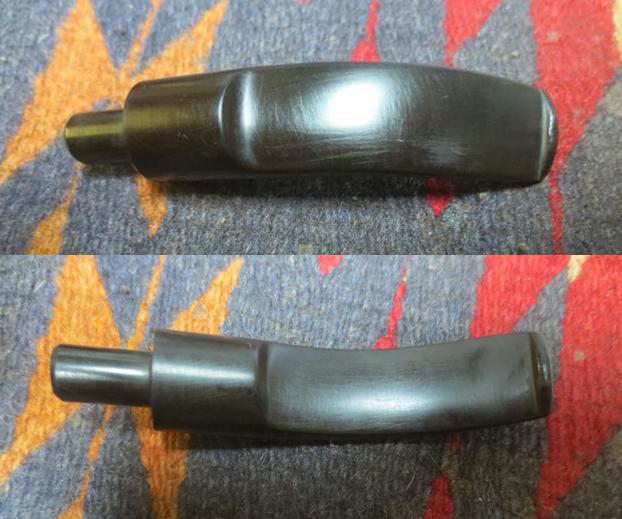
 First, I decide to apply micromesh pads to the shank cap to create a bit more pop in the acrylic. I only use the final 6 micromesh pads, 3200 to 12000 to do the sanding/polishing. I avoid the initial coarser pads because the surface is sufficiently smooth but simply needs some pop that the finer pads will deliver. As hoped, the picture below shows the renewed ‘pop’ after using the pads.
 The second cosmetic application is to sharpen and smooth the inner chamber wall below the rim. I like a smooth briar contrast with the dark blasted surface as a general preference. The smooth briar panel on the underside, holding the nomenclature, looks good contrasted to the rough, dark blasted surface.
  I would like to emulate this contrast on the inner rim chamber wall. This inner upper chamber wall finishing enhances the looks of Danish Freehand pipes with their longer, taller stummel designs. The next two pictures show the forward quadrant and then the rear quadrant of the chamber as it is now. There is some space here that should work well.
  I apply a quick sanding on the upper chamber wall with 240 then 600 to clean it and smooth it further. This is then followed with the full set of micromesh pads 1500 to 12000 to finish the inner chamber wall. I like the way this finishes the rim providing a bit of bump in the classy category!
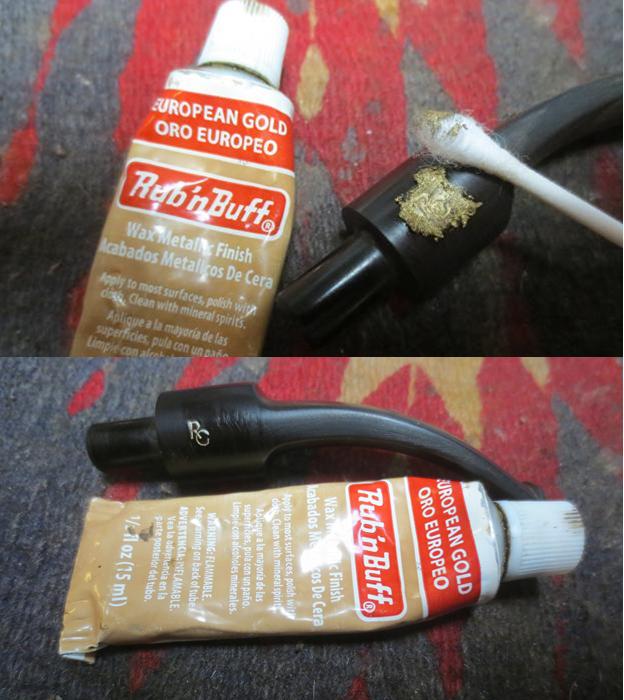
  The last cosmetic upgrade is the RG stamping on the shank cap. The stamping needs refreshing, and white acrylic paint is used to do the job.
 The first step is to place a drop of paint over the stamping and then spread it out with a toothpick.
 A cotton pad then daubs the wet paint to thin it out more over the lettering and this also quickly dries the paint.
 Using a toothpick, the excess paint is removed as the toothpick is scraped over the lettering. The point of the toothpick is also helpful to edge off excess paint close to the stamping. The final ‘RG’ looks good.
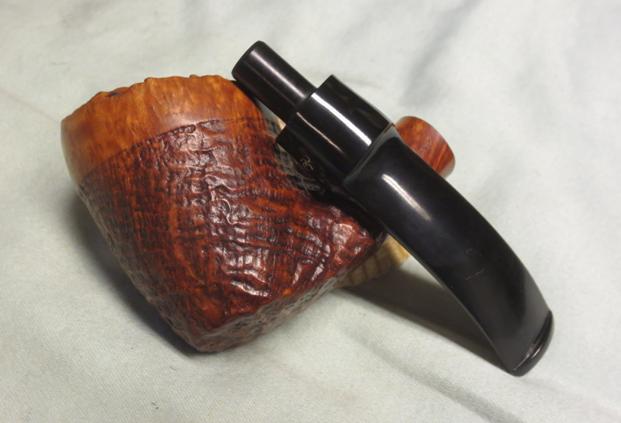
 On the home stretch – with stem and stummel reunited, a cotton cloth buffing wheel is mounted on the rotary tool set at about 40% full power. Blue Diamond compound is applied primarily to the smooth surfaces – the underside of the stummel, inner rim chamber wall, shank cap and fancy stem. I do apply the compound to the blasted stummel but very, very lightly. I do not want to load the rough blasted briar surface with compound making it difficult to remove and clean. The results are good overall. Following the application of the compound, the entire pipe is wiped down with a felt cloth to remove remnant compound residue.
 After the compound, another cotton cloth buffing wheel is mounted, and carnauba wax is applied to stem and stummel. Following the wax, the pipe is given a rigorous hand buffing with a microfiber cloth to raise the shine and to remove excess wax from the surface.
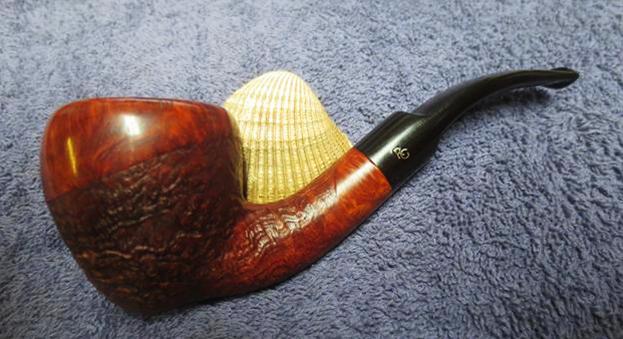
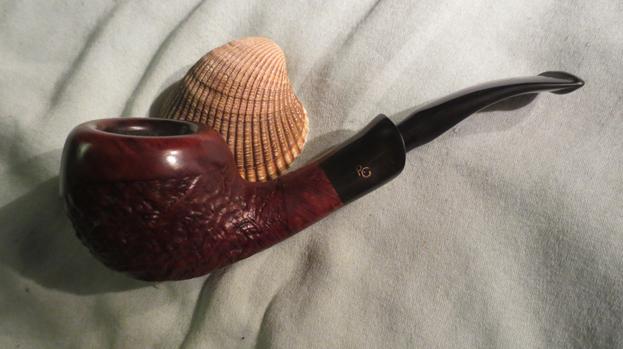
 I am pleased with the way this Danish Stanwell Royal Guard perked up through the restorative process. The dark blasted briar surface draws the eye to the 3-D presentation of grain, and this is augmented by the smooth briar contrast of the inner chamber wall. The Pickaxe shape is sharp and provides a unique tactile hold with the blasted surface. The black acrylic shank cap provides a nice flow transitioning from the conical bowl to the fancy stem. I think Niko will be pleased with this additional pipe of Denmark he commissioned, and he will have the first opportunity to acquire it from The Pipe Steward Store benefiting the Daughters of Bulgaria – women and girls who have been trafficked and sexually exploited. Thanks for joining me!


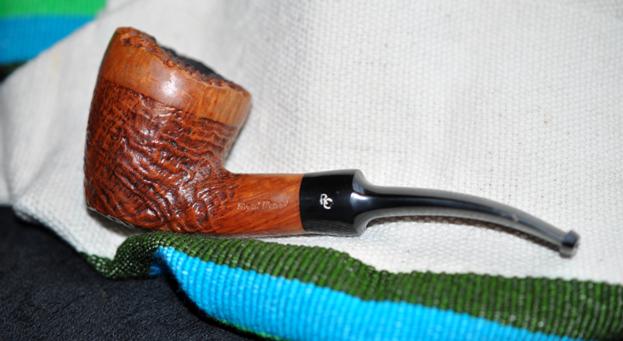
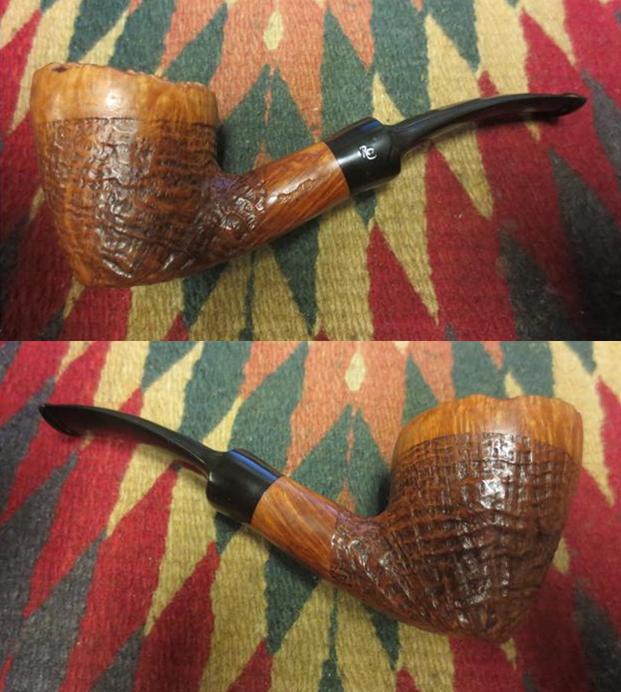
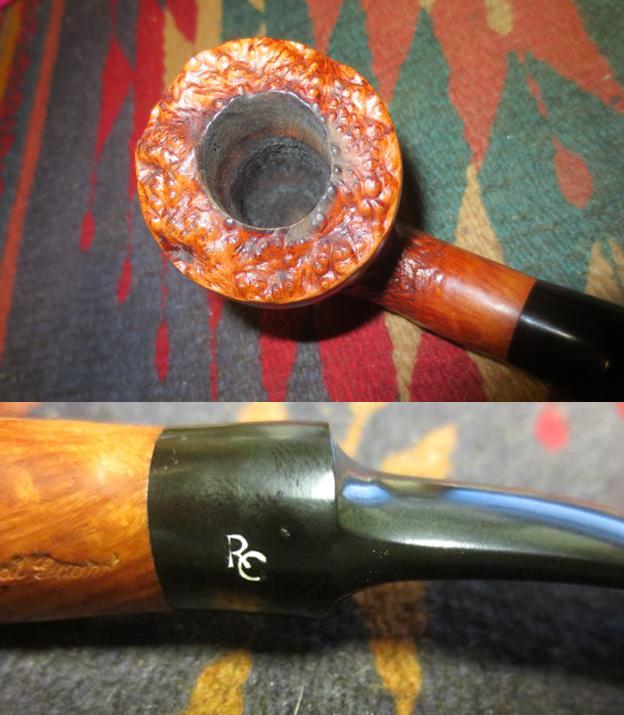
 This is a Royal Guard 535M freehand canted egg – or, at least, that’s what I’m going to call it. I learned from previous research that “Royal Guard” is a Stanwell sub-brand (in this case). I believe there was also a full Stanwell line called Royal Guard too, but that’s a topic for another time. It’s all a bit confusing, but this pipe is definitely of the sub-brand variety. As is typical of Stanwell sub-brands, the quality is immaculate and it’s not at all obvious why this wasn’t a full-blown Stanwell. This canted egg is a very attractive shape and it really makes an impression. It has beautiful, partially-sandblasted briar from the bowl and down the shank to the vulcanite shank extension. It also has a lovely flared push stem. The underside of the shank reads 535M [over] Royal Guard [over] Made in Denmark and, on the stem, the letters RG, indicating the Royal Guard make.
 Both Pipedia and Pipephil list Royal Guard as being a Stanwell sub-brand or second (and not much else), as per the photo below.
 I did some searching for that “535M” shape number, but came up empty. Stanwell does not have a 535 shape number. Sometimes a digit can be added to a shape number, but the Stanwell 35 shape
  does not correspond to this pipe at all. I learned that some of the Stanwell sub-brands used the Stanwell shape numbers and some used their own. Apparently, Royal Guard uses their own. Meanwhile, Pipedia has a good amount of information on the Stanwell brand and its history. I certainly recommend looking it over: https://pipedia.org/wiki/Stanwell.


 The stem was first on my list. I wiped down the outside of the stem with oil soap on some cotton pads. I also took a BIC lighter and ‘painted’ the stem with its flame in order to lift the bite marks and dents. This worked reasonably well, but I would still need to sort out the dents. Then, I cleaned out the insides of the stem with pipe cleaners and isopropyl alcohol.

 Once this process was done, I used some cleanser and cotton pads to wipe down the stem before throwing it in the oxidation remover overnight. The following day, I cleaned all of the de-oxidizing mess and again scrubbed with the cleanser on some cotton pads to remove the leftover oxidation. This worked well.
 I used some nail polish to restore the letters “RG” on the stem. I painted the area carefully and let it fully set before proceeding.
 Before I moved on to the Micromesh pads, I built up the dents on the stem with black, carbon-and-rubber-infused cyanoacrylate adhesive and let them fully cure.
 I sanded the adhesive down with my needle files to meld seamlessly into the stem. I then used all nine Micromesh pads (1,500 through 12,000 grit) to bring out the lovely black lustre on the stem. I also used pipe stem oil in between each pad scrubbing (from 3600 on up).

 I then proceeded to clean out the insides of the shank with cotton swabs, pipe cleaners, and isopropyl alcohol. There was some filth inside this stummel, but it wasn’t too bad. I followed that up by cleaning the insides with some dish soap and tube brushes.
 I decided to de-ghost the pipe, so I thrust cotton balls into the bowl and the shank and saturated them with 99% isopropyl alcohol. I let the stummel sit overnight. This caused any remaining oils, tars and smells to leach out into the cotton. The bowl was nice and clean after this.
 At this point, I turned my attention to the vulcanite shank extension. This, like the stem, needed to be cleaned and deoxidized. However, I did not want to soak the whole shank in the deox fluid. Similarly, I couldn’t risk getting any of the powerful cleanser on the beautiful briar. So, I took some clear hockey tape and carefully, precisely masked the briar with it, as protection. I then proceeded to clean the vulcanite safely with the cleanser. I’m glad I did – boy, was it dirty!
 I then moved on to cleaning the outside of the stummel with oil soap, some cotton pads, and a toothbrush. That removed any latent dirt hidden in the lovely recesses of the sandblast.
 As I mentioned earlier, there were some very minor burn marks on the rim of the stummel that also needed to be addressed. Fortunately, I was able to resolve this by gently sanding the interior rim edge to remove any remnants that remained. This worked perfectly and didn’t affect the pipe at all. Since this was a partial sandblast, I only needed to use the Micromesh pads on the smooth sections near the rim and shank. Of course, I also sanded the vulcanite shank extension and, like the stem, I used pipe stem oil on it.

 A light application of Before & After Restoration Balm brought out the best in the stummel. The balm does wonderful things to the wood and really emphasizes how beautiful this pipe is. I’m going to be sorry to see it go.


 I took the pipe to my bench polisher and gave it a thorough going-over with my buffing compound and carnauba wax. This pipe was a delight from the start and its beauty only increased through the restoration process. This Royal Guard 535M freehand canted egg is elegant, light, and incredibly comfortable to hold. Finally, I am pleased to announce that this pipe is for sale! If you are interested in acquiring it for your collection, please have a look in the ‘Danish’ pipe section of the store here on Steve’s website. You can also email me directly at kenneth@knightsofthepipe.com. The approximate dimensions of the pipe are as follows: length 5½ in. (142 mm); height 2⅛ in. (54 mm); bowl diameter 1½ in. (39 mm); chamber diameter ¾ in. (19 mm). The weight of the pipe is 1⅜ oz. (41 g). I hope you enjoyed reading the story of this restoration as much as I enjoyed restoring it. If you are interested in more of my work, please follow me here on Steve’s website or send me an email. Thank you very much for reading and, as always, I welcome and encourage your comments.