Tag Archives: restaining

A Beatup GBD 9438 Given a New Look


I bid on this one knowing full well that it was going to take a lot of work to get it back to some semblance of beauty and functionality. When I found it on EBay I thought it might be worth the effort but let it sit for awhile and then before the bidding ended I put in my bid. I honestly think I was the only bidder so I got it for a pittance.

When it arrived it was more rough than the EBay pictures intimated. The front edge of the bowl and rim looked like it had been used as a hammer. Not only were there dents and holes on the front of the bowl but the rim was chewed up like it had been hammered out on a piece of concrete. The finish was absolutely gone. The surface of the bowl was permeated with oils and grease from dirty hands and from looked like having been laid on its side in a full ashtray! At least the bowl was still semi-round and there were no burn marks. The other remarkable thing to me was that the stem was virtually unchewed. That surprised me actually given the overall state of the pipe. It was very oxidized and a deep brown colour. ImageImageImageImage

I reamed and cleaned the bowl and shank to remove the grime and tars. It took a lot of pipe cleaners and isopropyl alcohol to clean things up. I dropped the bowl in the alcohol bath and the stem in a bath of Oxyclean for a while and went about other work that I had going. I believe it soaked overnight before I got back to it. When I did I removed it from the bath, dried it off and went to work on the damaged rim and bowl. I used some medium grit emery cloth to reshape the rim. The tricky part here was to keep the angles even on all sides of the bowl. The front edge was heavily damaged and the rim itself was also badly chewed up. After the emery cloth I used 240 grit sandpaper to smooth the scratches out and then 400 and 600 grit wet dry sandpaper to finish the shaping. The series of three photos below show the progression of the shaping. ImageImageImage

Once the top was smooth and the shape retained I wiped the bowl down with an alcohol soaked cloth to remove any dust from the sanding. I also used a dental pick to clean out the rings around the bowl to prepare them for staining. I find that those collect a lot of grit and grime and can almost be smooth due to the buildup. I then stained the bowl with a medium brown aniline stain and flamed it to set the stain. I took it to the buffer and gave it a light buff with Tripoli to remove the excess stain and also give it a slight polish. Then took it back to the work table to work on the stem and to sand the bowl with micromesh to smooth the surface and bring the grain to the front. The pictures below show the stem after the soak in Oxyclean and then light sanding with 400 grit wet dry sand paper to remove the oxidation that was softened. The stem still needed more work to get out some of the stubborn places but it was getting close. ImageImageImage

I used micromesh pads 1500-6000 grit on the bowl and the stem to finish the smoothing and restoration. Once it was done and shining I gave the whole pipe a buff with White Diamond to polish it and then gave it multiple coats of carnauba wax and buffed it with a clean soft flannel buff to polish. ImageImageImageImage

Irwin 943810 by GBD – A Makeover.


I have had this older Irwin 943810 made by GBD for some time now. It is described on the GBD Models website http://www.perardua.net/pipes/GBDlines.html as follows: “The warm dual-tone brown finish deepens with repeated smoking. Finest rum is used in the special process of maturing these fine pipes. Its smooth flavour compliments the natural taste fine tobacco. Catalogue (1976)” With that description my old pipe looked pretty faded and worn.  The warm dual-tone brown finish was pretty much washed out and no longer “warm”. The dark undercoat on the pipe was clearly visible, highlighting the grain but it seemed that previous owners had buffed the pipe hard and the top stain of brown was gone. The bowl was dirty. The stamping is really light and I can just make out the Irwin stamp and the numbers on the side. The stem had some tooth damage in terms of scratching and tooth chatter but at least there were no deep dents. The edge of the button on the top had some minor denting to it. Tonight I decided it was time to give it a makeover.

As an aside, I have never seen the 6 digit stamping on the GBD lines so this one was interesting to me. I have sent out several emails to search out the stamping details but so far no luck. Anyone have any clue as to the meaning of the stamping? Thanks.

I started the makeover by wiping down the bowl with acetone and cleaning off the remnants of the stain and the finish that was pretty well gone. I also wanted to see if wetting the stamping would make it a bit more visible to my eye. It did and afterwards I was able to read the stamping. You can see the scratches and marks on the stem in the last two photos below. Right next to the button and on top of it there are some white spots that show the marks and scratches.

I decided to work on the stem with a medium grit sanding pad to remove the tooth marks and scratches. It also brought up the oxidation that was present but not visible in the photos above. Once I had the rough sanding done I stained the pipe with some oxblood stain. I daubed it on with the cotton/wool dauber that comes with the stain and then flamed it to dry it. In the photos below you can see the stain just after I applied it. I put it on good and heavy as I was wanting a rich coat to this old timer.

I hand buffed the bowl with a soft cotton cloth to remove the excess stain and to give it a quick polish. I decided not to use my buffer as I did not want to further damage the stamping that is already faint on this one. My goal was to enhance the pipe and try to raise the stamping a bit to make it more legible. I was able to do it enough to read it but it is still very faint. The hand buffing takes more work but I find that it does not harm the stamping at all.

The next series of four photos show both the new stain and the work that I was doing on the stem. You can see in the first and the third photos how the whole stem looked at this point in the process. The major scratches have been removed but there are still small scratches and oxidation that needed to be dealt with. In the second and the fourth photos you can see close up shots of the stem and button area. I continued to sand the stem at this point moving on to a fine grit sanding block to remove more of the scratches and the marks in the stem and the button.

I sanded the stem with micromesh pads from 1500 to 12,000 grit and the stem began to take on a shine. I gave it a coating of Obsidian Oil, rubbed it in and let it dry. I finished by giving the pipe several coats of carnauba wax.


Restoration of an old BBB Own Make 622


When I saw this one on EBay it grabbed my attention. I have always loved BBB pipes and found that they are great smokers and often fly under the radar. This one is stamped BBB Own Make on the left side of the shank and Made in London England 622 on the right side of the shank. The stem was an obvious replacement stem from the pictures. The band is a factory original stamped BBB and Sterling Silver. The grain showed promise and the bowl looked to be in good shape under the grime. I would know more once it arrived.


Once it arrived I took time to look it over. The bowl indeed had some great looking grain under the grime. The rim was covered with a thick coat of tar and carbon. The bowl looked to be unmarked by reaming and was still round. The cake on the inside was crumbly and sticky. The entire shank was caked with the sticky grime as was the stem. Definitely a goopy aromatic had been smoked in this old timer. The sterling silver BBB band had dents in it but was unbroken and uncracked. It was definitely an original band as when the stem was removed the shank was not cracked or damaged. The stem was indeed a replacement. It was a standard blank that still had some of the edge marks from the casting on it. It also short in terms of the length of the original pipe as I have found it on pictures on the web and in the catalogues. I was unable to find the 622 with a saddle stem like this one. It did not have the BBB diamond logo or a stamping of BBB on the stem either.

One of the reasons I bid on the pipe was that I had a BBB taper stem in my can of stems that looked like it would be a perfect fit for the pipe. Once I had it out of the box and on my work table I took out the old stem and sanded the tenon a little to make it fit correctly and slid it into place. The diameter of the stem was a perfect match to the shank and the tapered stem fit well with the pot shape. The two looked like they belonged together. Once the fit was smooth and well seated I put the replacement saddle stem into my can of stems to be used one day on a pipe that needed to be restemmed.

I put the bowl into the alcohol bath for about a half hour while I worked on removing the oxidation from the stem. I placed the stem in a bath of Oxyclean and hot water to soak when I took the bowl out of the alcohol bath. The Oxyclean softens the oxidation and makes it easier to work with than the hard unsoftened oxidation. The bowl was a real mess and I wanted to get the grime and remnants of the old finish removed so I could start fresh with the bowl and restain it. When I took the bowl out of the bath it looked like is shown in next three pictures. The finish was gone but for a few grey spots at the bowl shank junction and around the rim. The top of the bowl was seriously covered with goopy tars and black sludge that would take some work to remove. You notice in the first picture that on the right side of the bowl near the front were two fills that needed to be addressed as the putty had shrunken and they were divots.

I reamed the bowl to remove the internal grime and get back to the wood. I find that a soak in the alcohol bath softens the cake making removal much easier. It does not chip or break around the rim. I also cleaned the shank with pipe cleaners, a shank brush and alcohol to clear out the tars. I also used a drill bit that I had turned into the shank to clean out the hardened tars. Once I had it clean I used some emery cloth and turned the bowl top into the cloth to remove the chunks of tar and carbon build up. The next series of three pictures show the pipe during and after using the emery cloth. The last picture shows clearly the extent of the grime and tar build up even after sanding the top of the bowl.

Once the bowl was at the point in the photo above I then reamed the bowl a second time to clean up the remaining build up and then wiped the bowl down with acetone on cotton pads. The next series of five pictures show the pipe after the repeated wipe down with acetone. The briar is clean and ready for some work on the fills and some work to remove some of the damage to the inner side of the rim – you will notice in the last photo in the series.

I picked out the putty fills and wiped the bowl down one last time with acetone before dripping super glue and briar dust into the sandpits. The briar dust and superglue makes a far nicer looking fill in my opinion than the pink putty ever will. Once the glue had dried I sanded it with 240 grit sandpaper to see if there were any dents or dimples in the patch and refilled until the surface was smooth. I sanded repeatedly with the 240 grit until the patch blended into the surface and the glue was off of the surround clean briar.

I then used a piece of sandpaper to bevel the inner edge of the rim into the bowl to lessen the effect of the burned area. I aim for an even bevel all the way around the bowl rim and thus the effect of the burn will disappear with the stain coat. I took the stem out of the Oxyclean bath and wiped it down with a cotton cloth to remove the softened oxidation. I then reinserted it into the pipe to check for a good fit. You can see in the first picture below the beveled rim and the fit of the stem. The stem is almost back to a clean black finish. The oxidation is virtually gone and only needs to be polished and sanded with micromesh pads to bring back the shine. This particular stem also had two deep tooth marks on the top and bottom of the stem near the button. I decided to deal with them after I had finished cleaning and polishing the stem and staining and polishing the bowl.

I gave the pipe a first coat of oxblood stain, flamed it and buffed it off with Tripoli. You can see that it gave a fairly good coverage but was a bit too opaque to my liking. I wanted the grain to be more visible so I washed the pipe down with acetone to remove some of the depth of colour and highlight the grain. In the photos below you can see the pipe after I wiped it down with the acetone and buffed it with White Diamond. It still was not the finish I was looking for so I sanded the bowl with 1500 and 1800 grit micromesh to smooth the surface and then heated the bowl with my heat gun to open the grain of the wood before giving it a second coat of oxblood stain.

The next series of four pictures show the finish that I was looking for. The grain shows through clearly and the bevel and stain on the rim minimize the effect of the burn marks. The stem is also cleaned and polished but the bite marks still remain in the pictures below. After staining and flaming the pipe I buffed it with White Diamond and then waxed it with several coats of carnauba before buffing with a soft clean flannel buff.

At that point last evening I set the pipe aside to be finished today. When I came home from work this evening I used the heat gun to raise the dents in the stem on the top and underside. The first two photos show the effect of the heat gun in raising the dents. Once I have the dents raised as far as I can lift them I used 240 grit sandpaper to level the surface of the stem and I have found that the combination of the heat and the sanding takes care of most dents in the surface of the stem as long as they are just dents and not cut marks. I finished sanding those areas of the stem with micromesh pads from 1500-12,000 grit until the stem had its own inner shine. When I was finished I coated the stem with Obsidian Oil and once dry, buffed it with carnauba wax and a soft flannel buff. To finish off the pipe I gave it several more coats of wax and buffed it by hand with a soft cotton cloth.

A Second Bewlay Olde 49 Bent Billiard Repaired and Rejuvenated.


Here is the mate of the other Bewlay Olde 49 bent billiard that I posted about recently. They had both been sitting in my box of pipes to repair and refurbish for several years now. Yesterday I worked on the first one and restemmed it. This afternoon I decided to work on second one. The finish was exactly like the other one – grime ground into the surface and the wax and shine were gone. The top of the bowl was tarred and caked. The stem had been chewed through. The button was gone and the previous owner had made it into some kind of dental bit but cutting a groove in the stem along the end of the chewed off portion. It was a mess. I decided to cut off the chewed portion of the stem and then rework a button into the smooth surface of this one rather than restem it. I find that often this takes far more time to do this than it would just to cut a new stem for it. Such was the case with this one.

I used my Dremel with the sanding drum on it to cut back the damaged stem. I removed just under ½ inch of the stem. I cut it back until there was plenty of vulcanite over the airway on the top and bottom so that I could work in the new button and open the airway into a nice slot. The next series of pictures show the cut off stem. You can see that there is plenty of stem left for the work of shaping a new button.

The next four pictures show the stem from the end and then from the top and the bottom to give a good idea of what the stem looked like once I had removed the damaged material. I worked on the end of the stem to keep it a straight cut. I would eventually curve the ends of the new button but at this point I wanted to keep a straight edge to work with. You can see from the airway pictured in the first picture that there is plenty of vulcanite above and below the airway for the new button to be cut.

I used a rasp with a flat straight edge to do the initial cutting work on the button. I followed up with the flat needle file to clean up the work after the rasp did the initial work. The first two photos below show the freshly cut button. The first photo is of the underside of the stem. The button is cut to match an existing Bewlay stem that I have here. I also wanted it wide enough that I could taper it on the ends and the front edge after I had cut the slot. The second photo shows the topside of the stem after the initial cut of the new button. You can see from that photo that the left edge of the button has a slight indentation in it that will need to be worked on to make the button have a smooth and flowing shape.

The next series of four pictures show the stem after I have smoothed out the initial cut of the rasp with the needle file in the picture. The edge of the button is becoming distinct and clear. The first picture shows the underside of the stem and the clean flow of the button. The second picture shows the topside of the stem. Notice that the line is at a slight angle in the photo. That will be corrected once the left side of the button has been built up with some super glue. Pictures 3 and 4 show the shape of the button and how it is beginning to take the final shape – the oval or “football” shape that was on the old Bewlay pipes. At this point I had not begun to work on the airway to open it up and make a smooth slot into the stem.

I continued to work on the button and the surface of the stem to smooth out the transition and shape and to give some definition to the edge of the button. I used a variety of sandpapers and emery cloths to do the work. For emery cloth I used medium and fine grit and for sandpaper I used 240 and 280 grit. The next two photos show the look of the stem at this point. The line of the button on the top is now straightened out. The spot on the bottom edge of the button in the first photo is the cleaned up divot or dent in the button.

In the next two photos I wanted show the developing profile of the stem and button. The button is actually beginning to show quite clearly and is distinguishable from the surface of the stem.

Quite a bit more sanding needed to be done to clarify the edges and the cut of the button. In the next two photos you can see the new button very clearly. I also had used some clear super glue to build up the top of the button and fill in the divot. I sanded it smooth once it was dry. In the first picture below you can see that the divot is gone and a black spot is in its place. The second photo shows the ongoing development of the underside of the stem and button.

I then used my needle files to work on the slot and open up the airway from the button end. I used an oval needle file to begin to cut the ends of the slot open. The four pictures below show the development of the slot from the start to the finished shape that I was aiming for. It is a nice open draw and should deliver a good smoke. In the fourth picture you can also see that I have tapered the button back toward the slow so that it is a good smooth transition and is comfortable in the mouth. I used a folded strip of emery cloth and 240 grit sandpaper to sand the inside of the slot and smooth the internals.

At that point I decided to take a break from the stem and work on the bowl finish. I wiped down the bowl and rim with acetone to clean off the existing finish and give me a clear surface to work with. This one also has some interesting grain patterns under the old finish. It is a bit more mixed cross grain and birdseye with no real pattern to the grain like the other Olde 49. But it cleaned up nicely.

I sanded the stem some more with micromesh sanding pads – 1500-12,000 grit to get rid of the file marks and sandpaper marks that were left behind. I wet the stem and sanded them through the various grits. The photos below show the rich blackness of the stem that has come back with all the sanding.

At this point I decided to restain the pipe. I did so with a Dark Brown aniline stain. I flamed it to set the stain and stained it a second time. I took pictures but the batteries on the camera gave out at this point and I was left with no photos of the stained pipe. It was dark like the other Bewlay pipe so I wiped it down with acetone on cotton pads to lighten the colour. The picture below gives a bit of a look at the pads and the dark stain that came off with the wash. The pipe is a little dark. This was the last of my batteries and the only picture that came out at this point in the process.

The next four pictures are of the finished pipe. The stain came out very nicely with the grain coming through very well. I buffed it with White Diamond once I had wiped it down with the acetone. The shine came up well on this one. I also buffed the stem with White Diamond and then gave the pipe several coats of carnauba wax and buffed it with a soft flannel buff.

The last picture is of the two Bewlay Olde 49 pipes together and ready to smoke. In person they are not quite as red as they come out in these photos. The rich older brown stain really matches these two well.

Restemmed an Old Rogers Deluxe for the Second Time


I picked this old timer up on EBay. It is stamped on the left side of the bowl – Rogers De Luxe. The stamping on the silver cap is Sterling in an arc over the letters HC in an oval with the word London in an arc below the oval. The right side of the shank is stamped with London in an arc over a reverse arc of Los Angeles. In the centre of the oval formed by the two arcs are the words PIPE SHOP. There is also a shape number 25 stamped just ahead of that stamping. The stamping makes me wonder who the maker was. The HC on the cap leads me to think it may be a Comoy’s pipe but I am not sure of that. The stem that was in it was badly chewed and cut off. It was very short and not usable. The bowl was in rough shape and all the stain and finish was worn off.  The silver end cap was tarnished and when it arrived it was split on the underside. It had been repaired with some glue and that was a mess. There were some dents in the sides of the bowl but underneath the grime and dents of a beat-up old pipe was some nice grain. Evidently the previous owner had found that it was a good smoker and chomped his way through the stem and enough tobacco to let it build up to thick hard cake. ImageImage

I cleaned and reamed the pipe, cleaned the shank and worked a new stem for it. The stem I chose is an old stock orific button stem. I polished and cleaned the silver. I soaked the bowl in an alcohol bath to remove the grime and remnants of the finish. Once it was dry I restained the pipe with an oxblood aniline stain. I flamed the stain to set it in the grain. I then polished it with Tripoli and White Diamond to give more visibility to the grain. It has been polished and waxed. The stain really highlights the grain on this old beauty.

The stem I chose, while it fits, is still not quite right for the pipe. I am keeping an eye out for a new one that is more proportionally correct. This one is a bit short for the size of the bowl and kind of changes the beauty of the pipe. I know what I am looking for and when I find it I will restem it and it will be as good as new.
Image

ImageImageImage

Today (September 9, 2012), I found the stem I was looking for, though it was not an orifice button the slot and the shape tell me it is an old stock stem. I used my Dremel to rework the taper on the military bit end so that it would fit the shank correctly. I sanded the stem with Fine grit emery cloth to remove the oxidation on the stem. I also sanded out the scratch marks left by the Dremel. I proceeded to sand with 240 grit sandpaper, 400 and 600 grit wet dry sandpaper and water to further remove the scratches. I then used micromesh sanding pads from 1500-12,000 to finish the sanding. When I had finished with that I took it to the buffer and buffed it with White Diamond to deepen the shine. I then wiped the stem down with Obsidian Oil and finally inserted it in the pipe and waxed the pipe and stem with several coats of carnauba wax. I really like this stem better. ImageImageImageImage

New Stem and New Life for a Bewlay Olde 49 Bent Billiard


I have a pair of older Bewlay Billiards, a 160 and a 169, in my work box. Both have chewed and ruined stems so both need restemming. Tonight I took on the smaller of the two pipes. It is stamped Bewlay over Olde 49 over London, England on the left side of the shank. The right side is stamped 169. In pictures 1 -4 below you can see the state of the pipe. Picture 1 shows that the underside of the stem has deep dents and a large chip that has been chewed out of the button and stem. Picture 2 and 3 show the grime and deep dirt ground into the finish of the pipe. Underneath it is some beautiful birdseye. On the front and back of the bowl are great cross grain patterns. Picture 4 shows the top of the bowl. It has a thick coat of tars and oils built up on the edges and the bowl was badly caked. This one took me about 3 hours to rework. ImageImageImageImage

The next photo below shows a possible stem that I had in my box. I fit the tenon to the mortise by hand sanding it to fit. Once it was on the pipe it was a bit too small on one side of the shank. One of the challenges in restemming these older pipes is that the shanks are never truly round. This one was off by quite a bit and left a ridge between the shank and the stem. I had to dig through my stems to find one that gave me room to work with an out of round shank. To do that the stem needs to be a bit bigger than the shank and then must be sanded to fit properly. It is never simple but once it is finished the reward is great in my opinion. With the stem in place the shank and stem look round. Image

I fit the tenon on the new stem and fit the stem to the shank. I needed to sand it to make it fit properly on the right side of the shank. I also lightly sanded the top of the bowl and rim to clean it up. I washed down the whole pipe with acetone (finger nail polish remover) on cotton pads several times to remove the finish and clean up the grit and grime that was embedded in the finish. I bent the stem a little less than the one on the original as the bend made the pipe hang down when it was in the mouth. The new bend on the stem is essentially vertical with the top of the bowl and when it is in the mouth it is level. ImageImageImage

Once it was clean I restained the bowl with dark brown aniline stain that I thinned down with isopropyl alcohol until it was the colour I wanted to use on this one. I flamed it and put on a second coat of the stain. The pictures below show the newly stained pipe. Once it was dry I took it to the buffer and buffed it with Tripoli to remove the surface coat of stain. I looked it over and brought it back to my work table. It was just too dark to show the birdseye and cross grain so I would need to wipe it down to get the effect I was looking for. ImageImageImage

The next four photos show the pipe after I wiped it down with acetone on the cotton pads. You can see the amount of the stain removed from the pipe by the stain on the pads. ImageImageImageImage

I sanded the stem with micromesh pads from 1500-12,000 grit before I took it to the buffer and buffed it with White Diamond to polish and shine the surface of the bowl and the stem. You can see that after the wash and the buff the stain is more translucent and the grain shows through the finish. It actually matches the brown on the other Bewlay pipe that I have to restem. I gave the entirety several coats of carnauba wax and buffed with a soft flannel buff to bring up the sheen. The photos below show the finished pipe – it is ready to load up and smoke. The new stem fits well and it looks good on the pipe. ImageImageImageImage


Restemmed Savinelli Hand Carved Folk Art Bowl


I picked up the three pipes below at an antique mall in Washington. The third one is the one about which I am writing this article. It came with the two stems pictured with it below. Neither of them fit the pipe. I decided to work on a tapered stem for this one. The bowl as badly faded in terms of colouration. One side was darker than the other. The rim was darkened and tarred. What attracted me to this pipe was the interesting folk art carving on the bowl. There was a hand carved vine that was carved around the bowl top with and interesting line on the top and bottom of the design. There was also a sheaf of leaves on the front of the bowl. There were also the initials C. J. I believe carved in the front of the bowl. They were done in an old Germanic style script. The carving was nicely done and very folksy. I decided to pick it up rework it.

Image

The first thing I did to it was to clean and ream the bowl. I wanted to have it clean to work on. I do what I call a field dress when I pick them up in the shops. I generally have a bottle of Isopropyl alcohol and a small reamer and pipe cleaners to get the major grime off. I have added some cotton pads to that kit. I cleaned enough to bring home with less work to do at home. I finished cleaning and reaming it. I scrubbed the top of the bowl with Murphy’s Oil Soap and a tooth brush until the tars and grime were gone. I scrubbed the carvings as well and wiped off the soap. Once it was clean I found a nice taper stem in my can of stems and fit the tenon to the mortise. I then used my Dremel to get the stem diameter to match the shank. When it was as close as I could get it with the Dremel I dropped the bowl in the 99% alcohol bath to soak while I worked on the stem with sandpaper – 240 grit, 400 and 600 grit wet dry and water – to remove the scratches and smooth out the surface and flow of the stem.

When I took the pipe out of the bath I dried it and looked at the shank. I kind of like the look of a nickel band on these chubby pipes so I pressure fit a band on the shank. I then restained the pipe with some medium brown Feibings Shoe Dye (an aniline stain). I flamed it to set the stain and then took it to the buffer to polish the new stain. The carving held a bit of the stain so they are just a shade darker than the rest of the bowl.

I sanded the stem with my micromesh list – 1500 – 6000 grit pads. Once done I buffed the stem (on the pipe) with White Diamond. I gave the whole pipe several coats of  carnauba wax to build a shine and make the grain shine. ImageImageImageImageImage

Chuck’s Gift Pipes Part 2 – an Old Diamond Shank WDC Pot with a Bakelite Stem


The second pipe in the gift from Chuck (desertpipe on Smokers Forums) was an old WDC with a Bakelite or Redmanol Stem. It is a beautiful translucent red stem. The band has gold filigree like scrolling on each of the four sides of the diamond shank band. The bowl was clean but in need of a light reaming. The finish was broken but did not seem to hide any obvious fills in the dark colour. The stem was over turned almost a quarter turn (pictures 1-3 below). The tenon was a bone tenon screw mount into a thread shank (picture 4 below). The stem also had two tooth marks one on the top that was not too deep and one on the underside that was deep (pictures 5-7). The button was missing an edge on the right side. It was almost like a piece of the button had been sliced off and it was a smooth angle (picture 8). The stem had some kind of buildup on it near the shank junction. At first it looked like chips or flake on the surface of the stem but upon inspection it was just buildup. The orific button was central and the curvature of the button face was nicely done. This one showed some promise. I was going to need to figure out how to correct the over turn on the stem. ImageImageImageImageImageImageImageImage

I took the pipe apart and reamed the bowl carefully. It was lightly caked but I wanted to smooth out the surface of the walls to get a clean start to the building of a new cake. I personally prefer removing the old cake so that I can build a good hard cake of my own making rather than live with the ghosts of the old one. The next two pictures show the Pipnet reamer that I prefer using on these old pipes as it is very controllable and easily handled. Image

I used finger nail polish remover (acetone) to remove the finish from the bowl. I wanted to have fresh wood to work on with the new stain and finish. I wiped it down with the cotton pads that are visible in the pictures below. I find that these are perfect for wetting with the acetone and rubbing off the finish. Once I had wiped it down and the finish was gone sanded the bowl down and also topped the bowl just a bit. The edge of the bowl had been rounded quite a bit and the rim was not clean. I sanded it carefully to remove the scratches and the dents as well as to level the edges and give the surface a more crisp sharp edge. I also sanded the inner edge to smooth out some of the out of round portions of the bowl. I was careful in the sanding and the wiping down with acetone to not remove the gold paint that had been put in the stamping of the triangle and WDC logo on the shank. Pictures 1-2 below show the bowl after sanding and wiping down with acetone. Picture 3 shows the top of the bowl and rim after the slight topping and sanding. Picture 4 shows the nice graining on the diamond shank and the “keel” on the underside of the bowl. ImageImageImageImage

Once I had the bowl clean I decided to work on the bite marks on the stem. Picture 1 shows the bite mark on the top of the stem. It was not too deep so I was able to raise it a bit with boiling water and then I sanded out the remaining tooth mark. Picture 2 shows the underside of the stem with the bite mark. It is on the low part of the stem near the button. It is a bit hard to see in the picture but it was significantly deeper than the one on the top of the stem. The heat lifted it a bit and I was able to sand it but it still was present and too much sanding would have changed the curvature of the stem. ImageImage

The button, seen in the first picture below, is missing a portion on the top right (or lower left in picture 1 below). It does not have the graceful curve of the other side but is actually a slice or a flat spot on the button that tapers into the stem with no edge. The second picture shows the first layer of the fill I added with super glue. I wanted to build up the missing portion by layering superglue until it was repaired and then shape it with sandpaper and files. ImageImage

While the superglue patch cured a bit I decided to work on the over turned stem. To correct that overturn I would need to loosen the bone tenon in the stem. In the past I have heated the tenon and then turned the stem like I have done on the metal tenons on Kaywoodie pipes. This one was a totally different fix. In picture 1 below I filled a cup with water and boiled it in the microwave for 3 minutes. Once I removed it from the microwave I placed the stem in the bowl – tenon down in the boiling water. I repeated this until I was able to loosen the tenon. Picture 2 shows the tenon loose and free of the stem. The threading on the portion in the stem is finely threaded. I tried different methods to align the stem. Picture three and four show the tenon screwed into the shank to different levels. I then would twist the stem on until it was tight. No matter how many times I did this and no matter how many turns I could not get it to align properly with the shank. It was always either a ½ turn or a full turn off. I wrapper the tenon with cotton thread and reinserted it to lift the tenon a bit from the stem. The results were categorically them same – overturned or under-turned no matter how many ways I tried it. I was mystified on how to do it so I set it aside and went to bed for the night. ImageImageImageImage

This morning when I got up I had an idea on how to tackle the overturn. In the middle of the night I woke with a thought – what if I turned the stem back and forth a bit and see what happened. I remembered the concept of self adjusting emergency brakes on a car. On one of my old cars I would put the car in reverse and pull the emergency brake on and off until it was adjusted. I adapted that with the stem. I turned it forward and backward a few times and sure enough after a few turns the stem was aligned properly! I could not believe it! I don’t know what I would have done had I not had that flash of memory in the middle of the night. Picture 1 below shows the aligned stem and the sanded smooth bowl ready to be stained. Image

I restained the bowl with an oxblood stain applied with a cotton swab. I was careful about putting too much stain on the gold stamping of the WDC in the Triangle. I wanted to retain that feature. Once the stain was applied I flamed it with a match and then rubbed the surface with a piece of flannel to remove the excess stain and allow the grain to show through. I then took it to the buffer and buffed it with White Diamond to bring back a good shine. I coated it with several coats of carnauba wax and buffed it with a flannel buff to polish it. The four pictures below show the final look of the bowl after the stain and the wax. Picture 3 shows the nice grain on the “keel’ of the pipe. I love the cross grain on this old beauty. Picture 4 shows the polished rim and top after buffing. The edges are now crisp and much more defined than in the original photos of the pipe. ImageImageImageImage

The next pictures show the work I did on the button to build up the worn part. Picture 1 shows the state of the patch after the first layer of super glue. Picture 2 shows the second layer of super glue. The button is starting to come back to the original shape and match the other side. Picture three shows the superglue patch to the deeper tooth mark on the underside of the stem. I had heated and sanded the spot but it did not rise any further so I filled the remaining tooth mark with clear super glue. I have found that the clear superglue works very well on Bakelite and on horn stems. Once sanded and blended in with micromesh it is virtually invisible. Picture 4 shows the stem from an end view. On the right top you can see the damage to the button. You can also see that the super glue is building up the area to match the left top. After this photo I added several more layers of super glue. ImageImageImageImage

The next picture shows the continued build up of the button with the super glue. The first picture shows that the curve of the button is coming back to match the left side of the button. My goal was to build up the button on the right side to a point where it was actually a bit overfilled and slightly larger than the curve on the left and then sand it until it matched. Image

Picture 1 below shows the recut button. I used needle files to cut the edge of the button to a clean sharp edge differentiating it from the smooth curve of the stem. I also sanded the stem and the edge of the button with fine grit emery cloth to make the transition between the button and the stem very clear. Picture 2 below shows the button from the end after I have begun to shape the right edge to match the left edge. The angles and shape are like a North American football. ImageImage

From this point on the shaping progressed to 1500 grit micromesh as I wanted to fine tune the shaping and smooth the transitions and angles of the button. The first picture shows the edge is clean and sharp. The brown spots at the top of the photo are the remnants of sanding dust after using the micromesh pads. Picture 2 shows that the shape is curved and the match of left and right is virtually perfect. ImageImage

The next series of photos show the button after sanding with the 1800 grit micromesh pad. Pictures 1 and 2 show the stem in profile. The button is distinct and clear in the pictures. Picture 1 is of the left side – the unrepaired side of the stem. You can see the sharp edges of the cut between the stem and the button. Picture 2 is the right side in profile – the repaired side. Again the sharp edge of the cut between stem and button are clear. The slope of the button matches the left side as well. The stem repair on this one is done. All that remains is to polish it with the remaining grits of micromesh. Picture 3 shows the stem from the top. You can see the new edge of the button and the nice straight edge from left to right. The surface is smooth and once the remaining sanding is done it will look as good as new. Pictures 4 and 5 show the button from the end. You can see the nice curves of the “football” on each end and the gentle curve to the middle of the button over the orifice airway. ImageImageImageImageImage

I worked on the stem and button with micromesh pads from 1500-12,000 grit and water to shape and polish the button and the stem. One of the beauties of the Redmanol stem is the rich ruby glow to the stem when the light reflects off of it. That glow is hard to capture in photos but it is what I was aiming for in the polishing of this stem. Picture 1 and 2 show the finished button on the pipe stem. It is a perfect match on the left and the right. The super glue patch and build up blended in perfectly and even in hand is not visible. I love the way it blends with this Redmanol/Bakelite stems. ImageImage

The next series of photos (pictures 1-4) show the finished pipe. It has had many coats of carnauba by this point and is back to its original lustre. The oxblood stain brings the deep richness of the bowl back to the surface and it looks like it must have in much better days. Pictures 5 and 6 show one last look at the stem. The button is smooth and the transition between the stem and the button is crisp and clean. The “football” shape of the button is restored and the pipe is ready to smoke. ImageImageImageImageImageImage

Thank you once again Chuck for giving me the opportunity of restoring this pair of old timers to life again. It has been a pleasure and each was a challenge in its own way as I worked to bring them back to life again. I look forward to firing up a bowl in each of them in the course of the weekend ahead.

Resurrecting a Barling “Fossil” – Gan Barber


When I put this Barling away in my ‘Lazarus’ box, I thought that it might be from the Early Transition period, and therefore made from the last of that century old Algerian briar that Barling’s were famous for. I had not looked carefully at the nomenclature obscured beneath the grime. Noting that it was a Barling’s, I stored it away, looking forward to the opportunity to smoke from a piece of classic wood.

When I pulled it out and inspected the markings I was disappointed to find it had all the earmarks of a post transition period pipe.  The Barling was in script, the model number had four digits, and T.V.F was stamped on the shank. Further, the bowl was not particularly well carved and there were several major fills – something you would never find on a Pre-transition family era pipe. Oh well. I decided to proceed with the refurb anyways.

I pulled a beautifully grained twin bore saddle bit Canadian from a drawer of miscellaneous pipes that I randomly smoke. It has no maker’s name, and is simply marked “France” 255. What a great smoker. Dry and sweet, it sang with the sample of Rincon De LA Pipe No. 1 sent to me compliments of 4noggins Tobacco.  So, what’s in a name? You just never know…..

The pipe was in poor condition, having been snapped at the bowl junction where the shank was very thin. Image

The airway was also drilled off center, which may have contributed to the break. Image

Dirt and grime aside, the bowl chamber was not scorched or heavily caked. The stem had some tooth marks, but was more dirty than oxidized. Image

The bowl and shank were placed in my trusty container of 91% Isopropyl alcohol (99% is hard to fine in my neck of the woods) and left to soak for several hours. Meanwhile, the stem went into a bath of Oxy-Clean for 30 minutes, mostly to loosen any residual tars in the airway. Once soaked, pulling several bristle cleaners through the airway was all that was needed to clean out the gunk. After wet scrubbing the exterior with synthetic 0000 wool and Oxy-Clean, the stem was set aside to dry.

Once the bowl was done soaking, I cleaned the small amount of cake from the bowl with my Senior reamer, dipping the bowl in the bath to rinse out the bits and pieces that came free. Next, the exterior surfaces were scrubbed with the synthetic 0000 wool, working wet with clean alcohol.

At this point, with the cleaning finished, the Barling was beginning to come back to life. I set the pipe aside for the evening to let everything dry thoroughly before moving on to the bonding phase. Image

I used my favorite epoxy, JB Kwik to bond the shank back to the bowl. I set the two parts on a clean work surface, aligned as closely as possible, before mixing the epoxy. I applied a thin layer to both surfaces. I pressed the shank and bowl together, taking care to align the fracture, and let as much excess as possible squeeze out to minimize the joint. Hand pressure for three minutes is all that is needed for the initial bond. I then set the bowl down and let it rest for another 7 minutes (approximate). Under ideal temperature, humidity and proportioning, JB Kwik reaches a rubbery stage after 10 minutes.  At this point, I removed the excess epoxy that squeezed from the joint with the tip of a utility knife blade. It peels off like a rubber gasket if you catch it at the right point as it cures. I then used the bit from my Senor reamer to carefully remove any excess epoxy that may have gotten into the airway. Care must be taken to work slowly and with very little pressure, as any leverage against the shank my cause the newly bonded joint to fail. Once the excess epoxy has been removed, I let the stummel cure for at least 6 hours.

With the pipe joined and epoxy cured, it was time to take the bowl and stem to the buffer for an initial polishing with red rouge. After cleaning any residual compound off with alcohol, the bowl was ready for stain. The stem needed some sanding to clean up the faint scouring from the synthetic 0000 wool. The Barling Cross logo was a faint memory, so conserving it was not a concern. 2×2 flex micro-mesh pads, 1500 through 4000, did the trick.

After two wash coats of Feibing’s Medium Brown aniline dye, and spot staining the two rather large fills (sorry, the photos were not usable), I wiped the bowl down vigorously with a micro-fiber cloth and set the stain with a table-top lighter. The micro-fiber cloth works wonders in evening out the coats of dye. Uneven coating or overlap marks blend beautifully when wiped down just after the dye dulls completely.

With the stain applied, the fills touched up, and the stem sanded, all that was left was a gentle once-over with white diamond, followed by three coats of carnauba wax on the bowl. The stem received a white diamond buff, followed by two coats of Briar Works Stem Wax and Sealer. I prefer to protect the stem this way, as my saliva tends to react with straight carnauba, leaving an unsightly white stain. ImageImage

I’ll save the repair of the tooth dents on the stem for a future essay…..

It may be inferior, when compared to the legendary family era Barlings, but it was still fun to resurrect a pipe that could be half a century old. Sandblasted or rusticated pipes are much easier to repair in this manner, as the rough texture tends to hide the repair. The fracture is only evident on the smooth portion of the stem where the nomenclature resides.

Thanks for looking.

-Gan

Chuck’s Gift Pipes Part 1 – a Horn Stemmed Venezia Vogini


Blog by Steve Laug

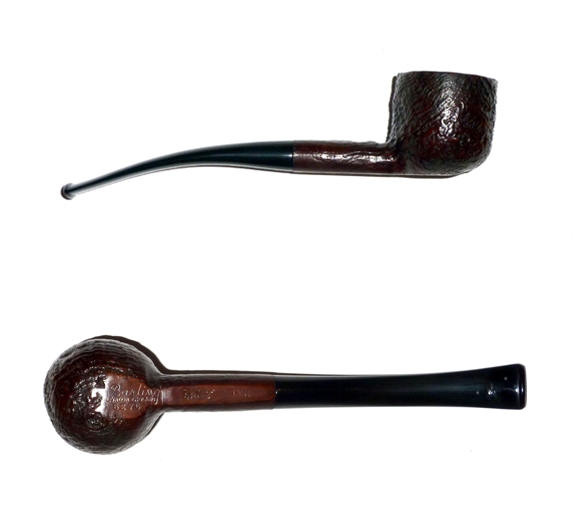
In celebration of his 1500th post on Smokers Forums, Chuck (Desertpipe) sent me an email regarding some packages that he was going to distribute to three folks on the Forums. Two of them came to the Vancouver area and one went to the East Coast of the US. I refurbished the older Barling that is heading east as a surprise to the new owner. (I posted the refurb on that old pipe on the blog https://rebornpipes.wordpress.com/2012/08/05/new-life-for-an-old-barling/ ) Now the wait for the package to come my way north and into my mail box begins.

Chuck posted on SF that he had mailed out the packages. On 08/23/12 I received this email from him regarding the package coming my way. It seems he has chosen two pipes for me to work on. I look forward to seeing them.

Steve,
Back a decade ago, when I first started getting serious about understanding pipes, I discovered the wonderful world of size. I dawned on me that the size of pipes had radically changed over the course of time, related to the quality, cost and strength of tobacco. I put together quite a collection of pipes from many decades, and also a collection of tobaccos from as many sources and time frames as I could.

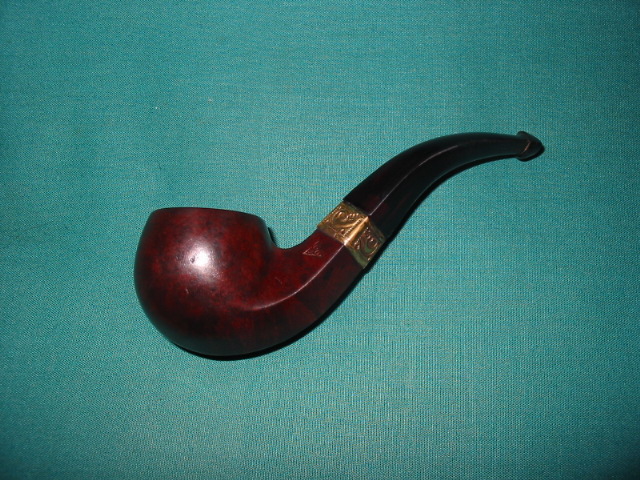
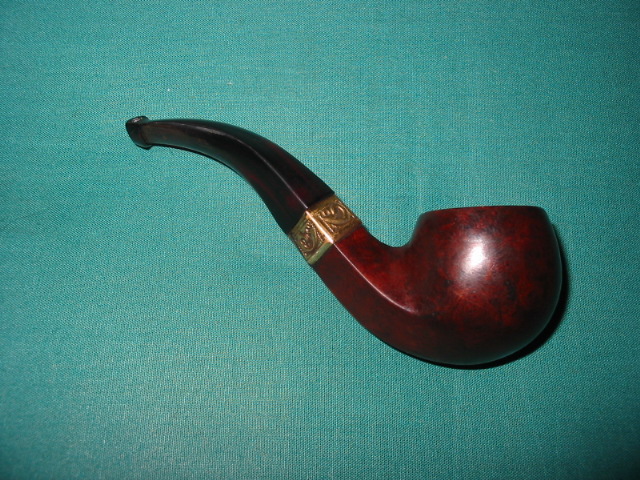
The two pipes coming your way are from this collection. The red stemmed pipe will need your magic touch to return to perfect, and I look forward to your take on the restoration. The other is one of my two favorites of this type. It has all the bells and whistles that make one collect very old examples, and I bet it finds a permanent home in your collection.

Enjoy, my Friend,
Chuck

When I received the above email, my curiosity was piqued and I sent him an email asking about the age of the two pipes and this is his response via a reply email.

My best guess…..The red stem is early Redmanol time frame….puts it 1920’s/30’s? 14k gold filled band has no marks to help out.  The horn bit folder (so far beyond cool as to be in a class by itself) is before that, as far as I have been able to trace, turn of the Century or a bit before?

Now I am even more excited to see what the package contains once it arrives. I have a weak spot for older pipes. The tension of the wait increases!

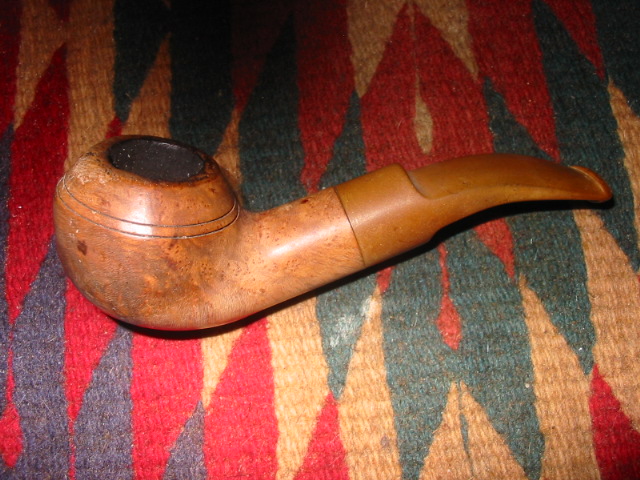
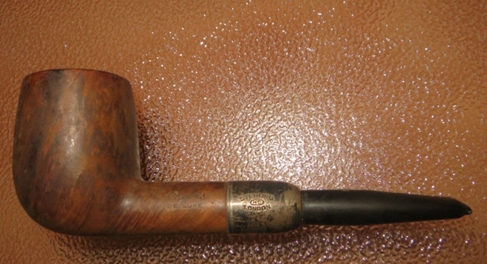
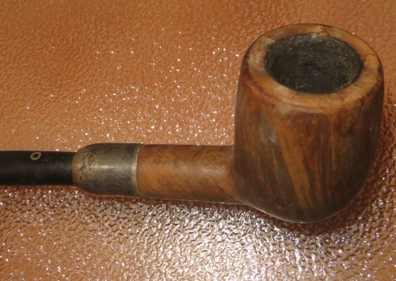
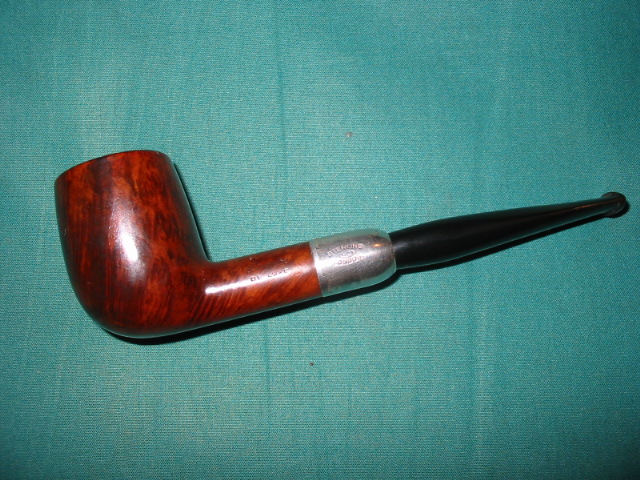
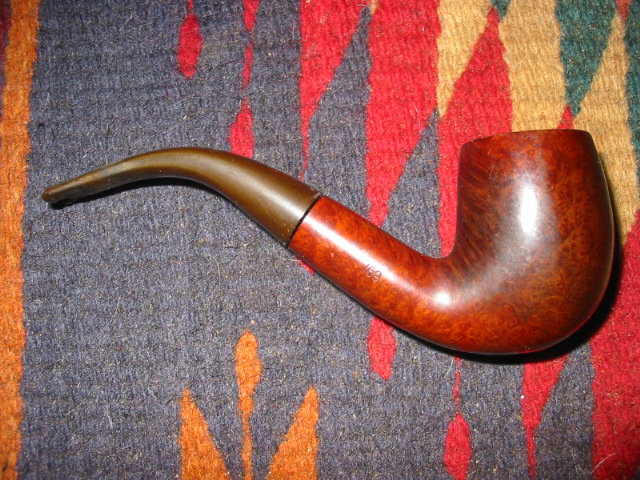
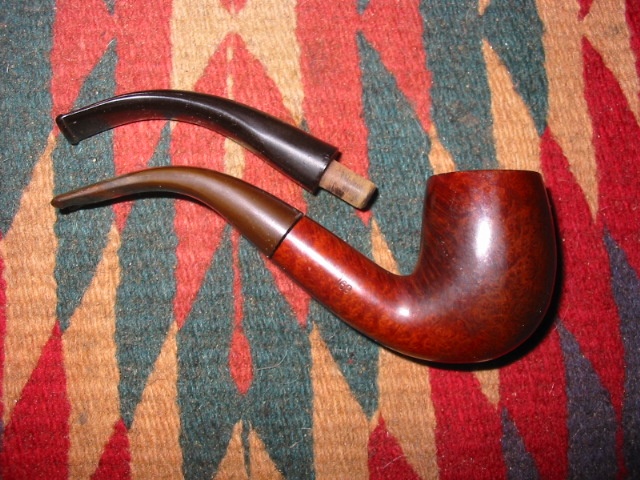
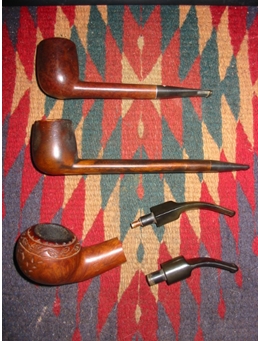
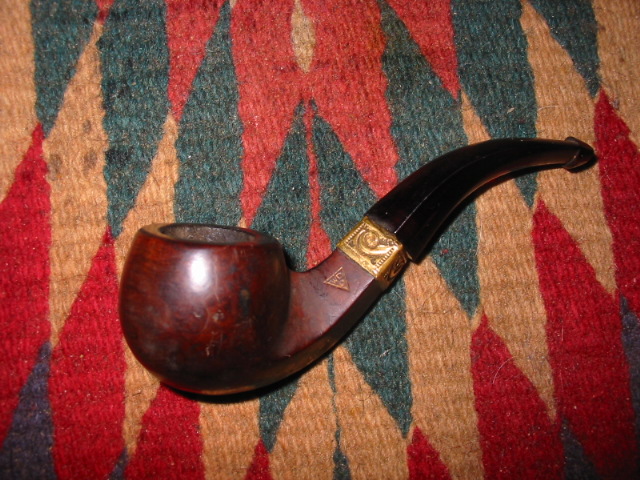
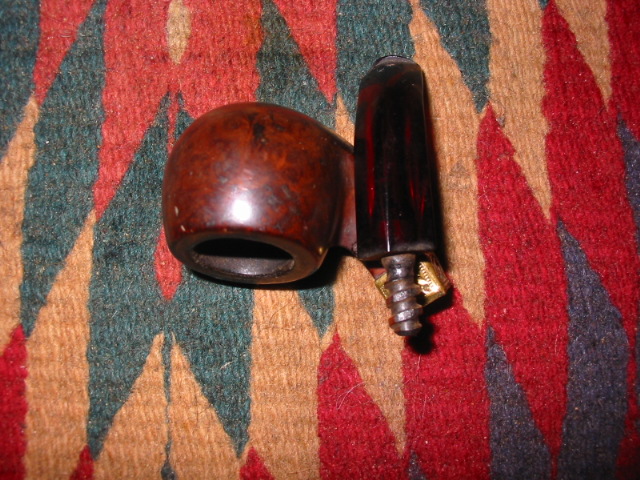
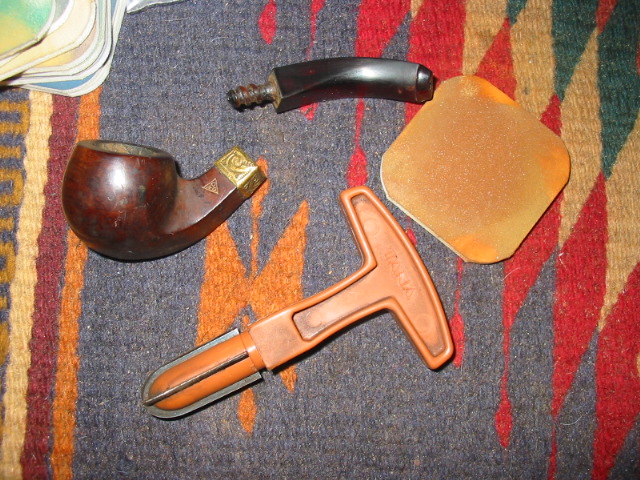
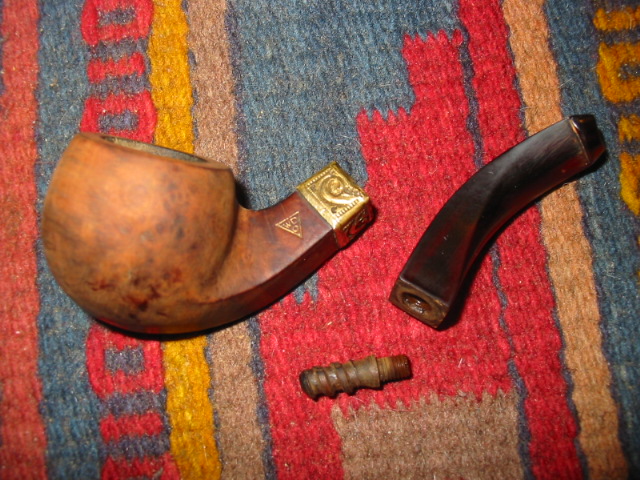
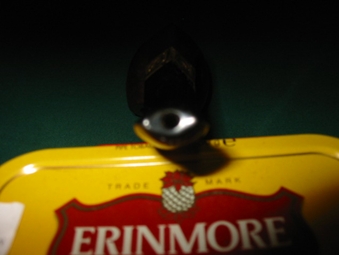
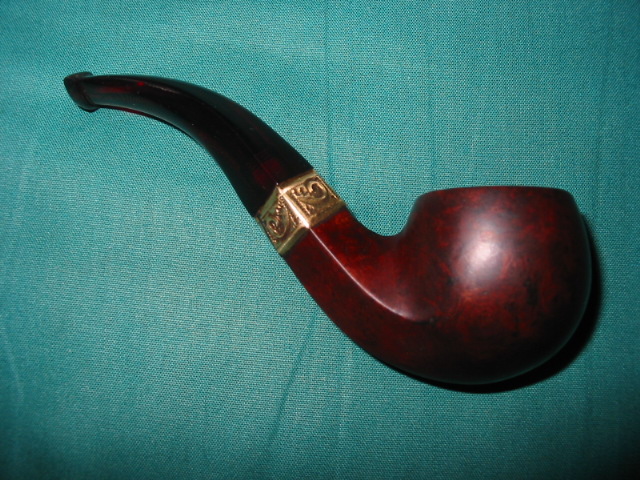
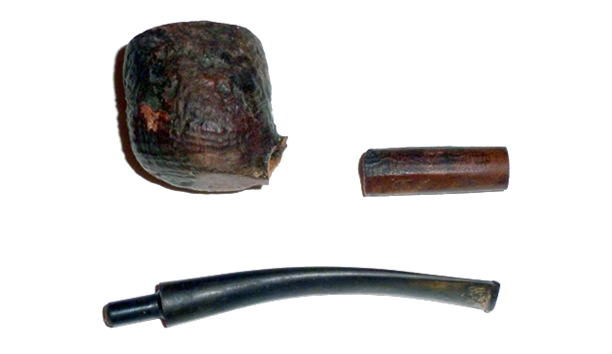
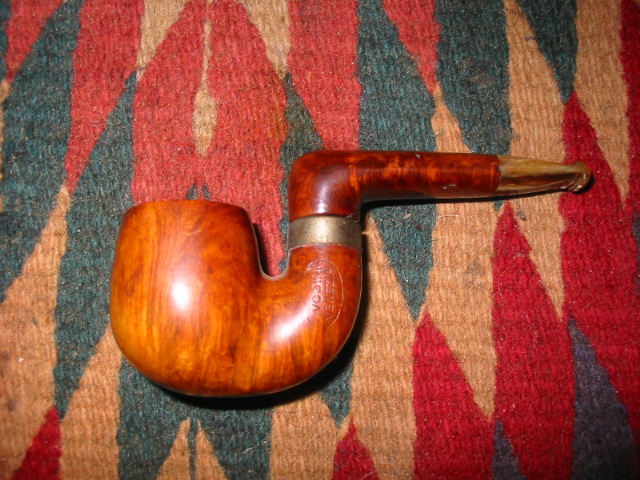
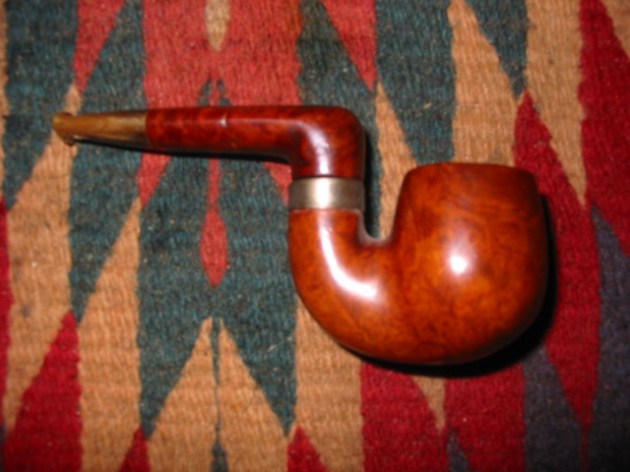
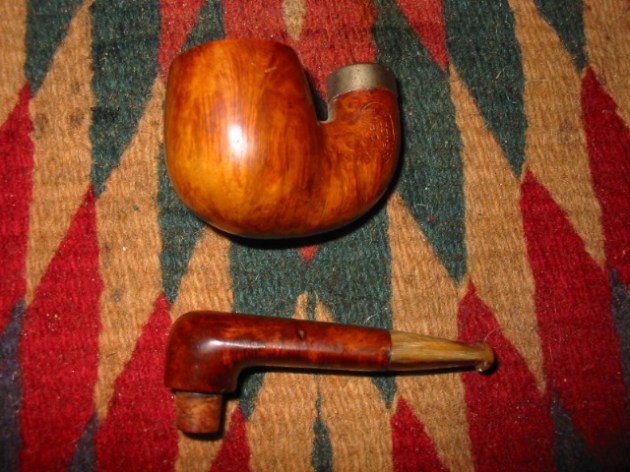
Today, 9/4/2012 Chuck’s gift box arrived. I opened it to find a tin of C&D Opening Night and two nice little old timers. The first is an old WDC bent pot with a Redmanol stem. The other is a folding vest pocket pipe. The shank has a 90 degree bend and the stem is horn. These are going to be great to work on.

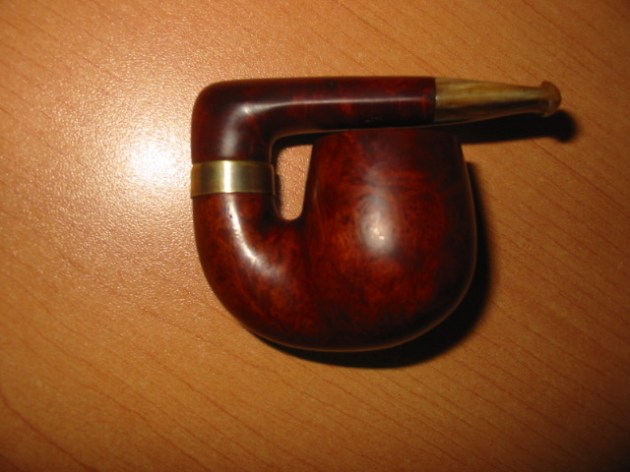
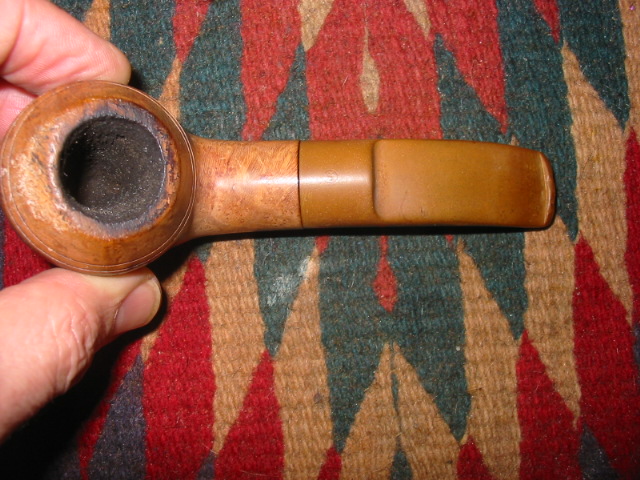
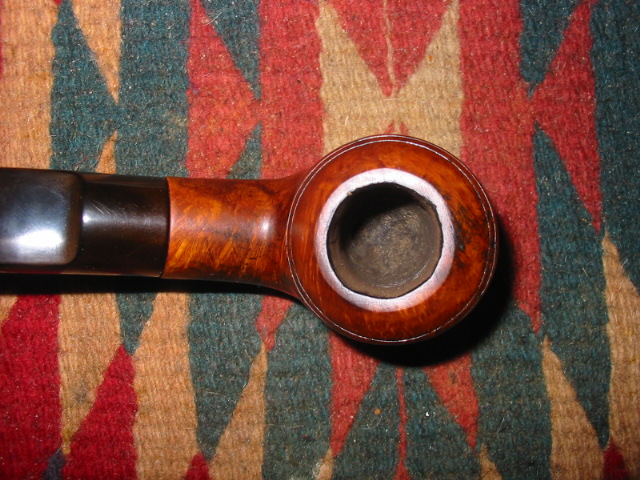
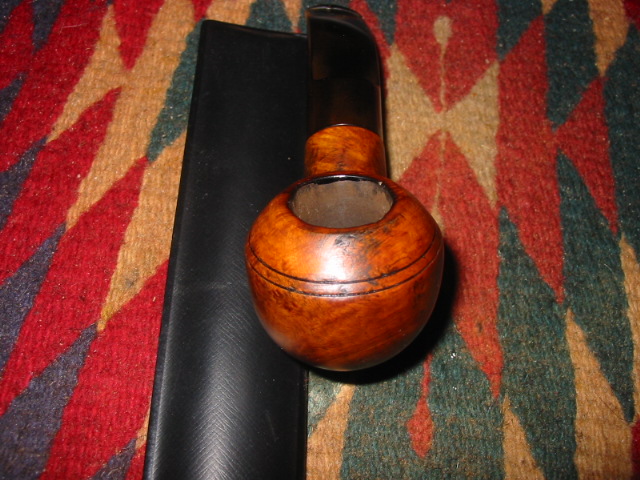
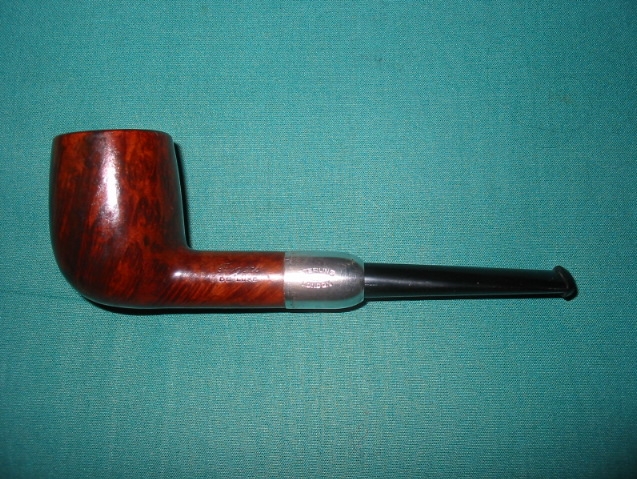
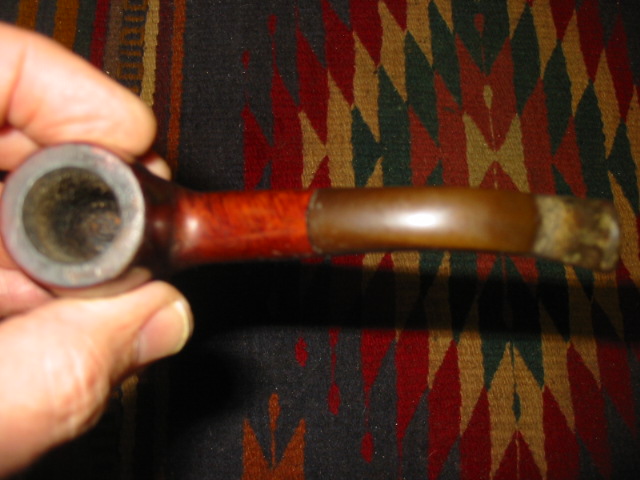
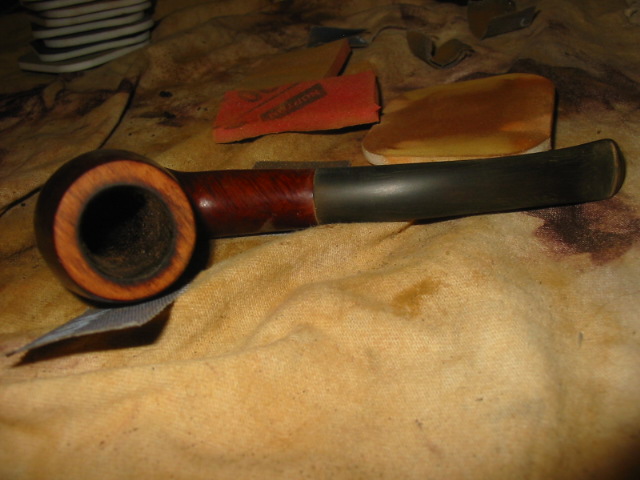
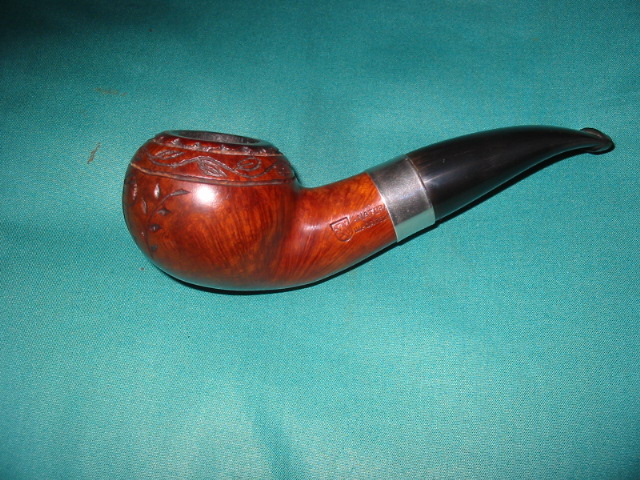
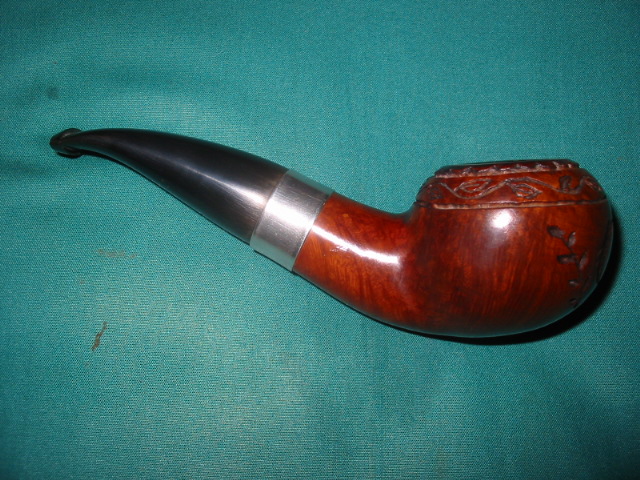
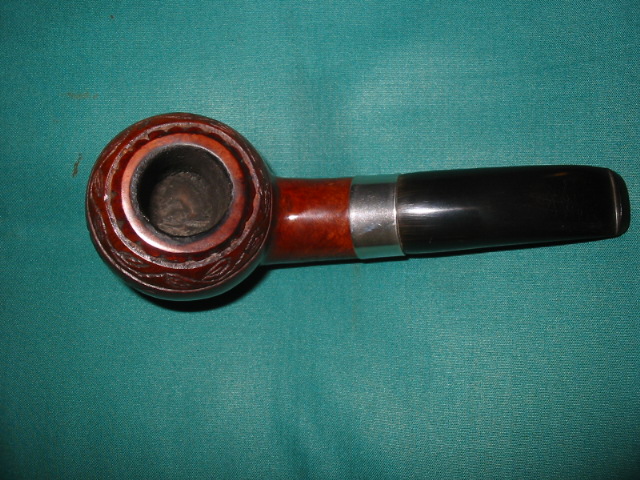
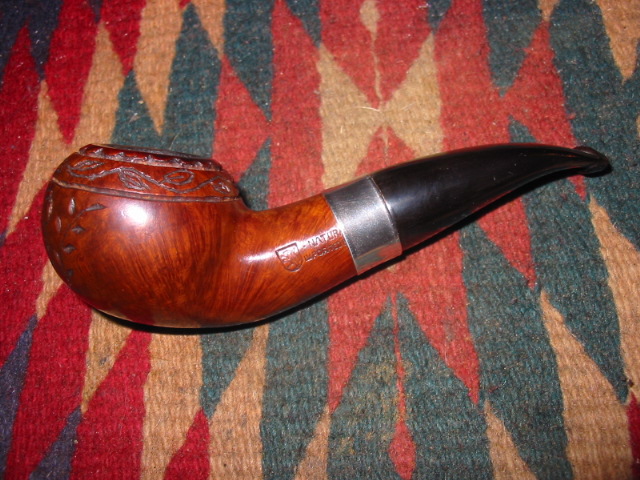
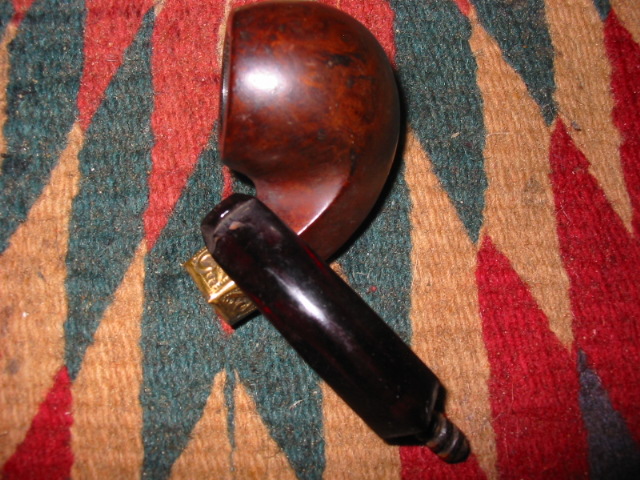
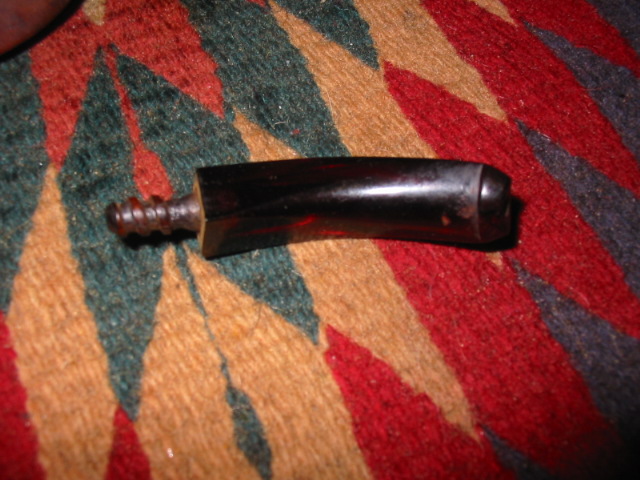
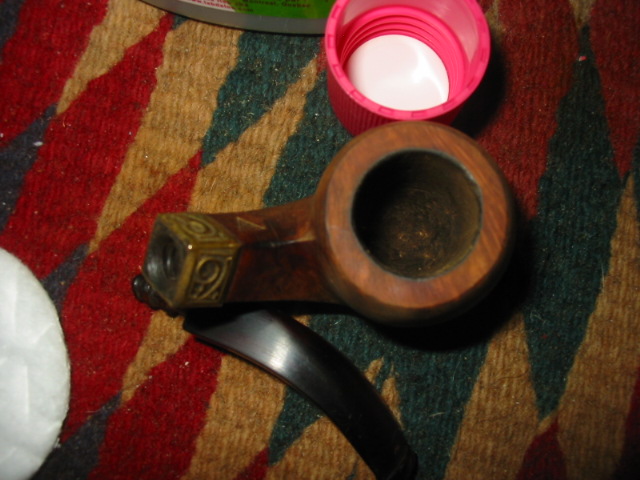
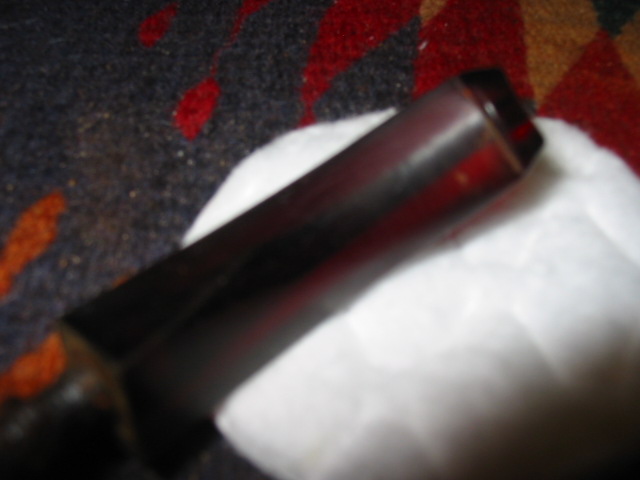
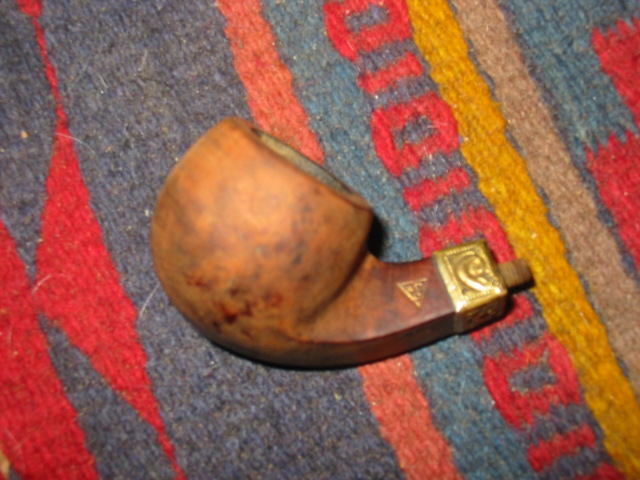
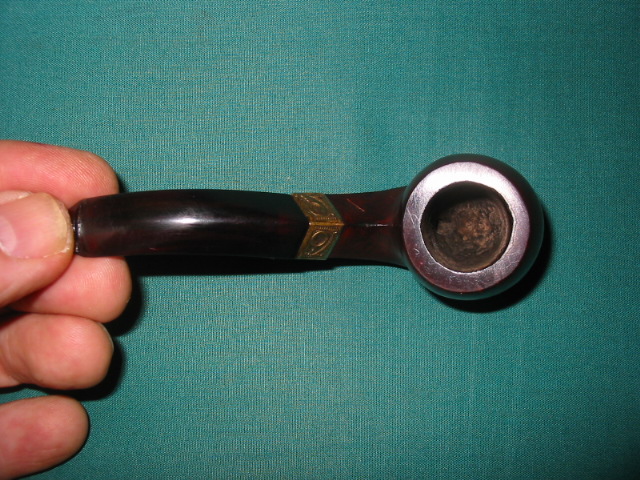
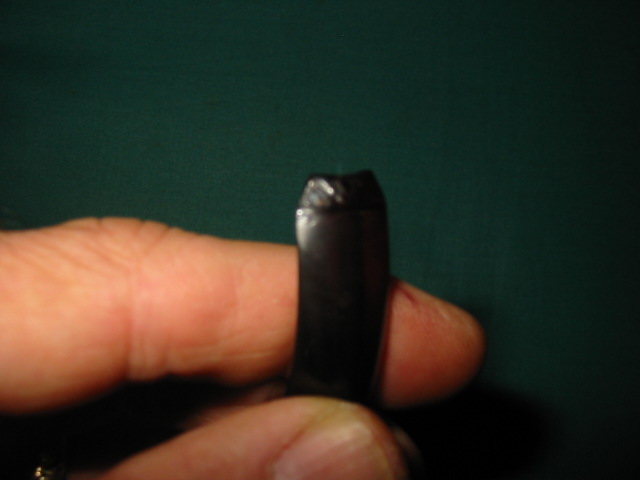
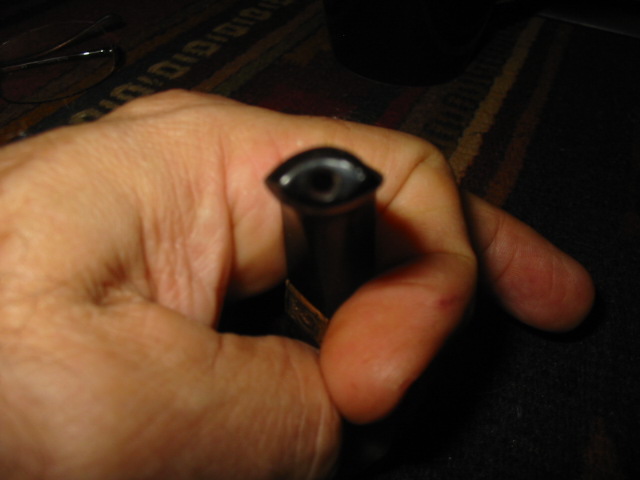
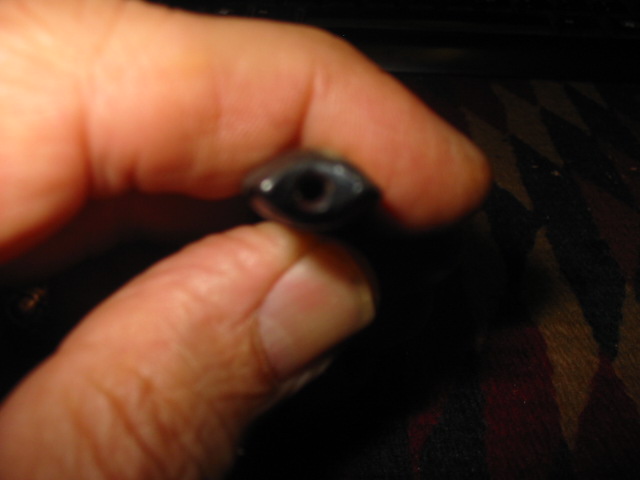
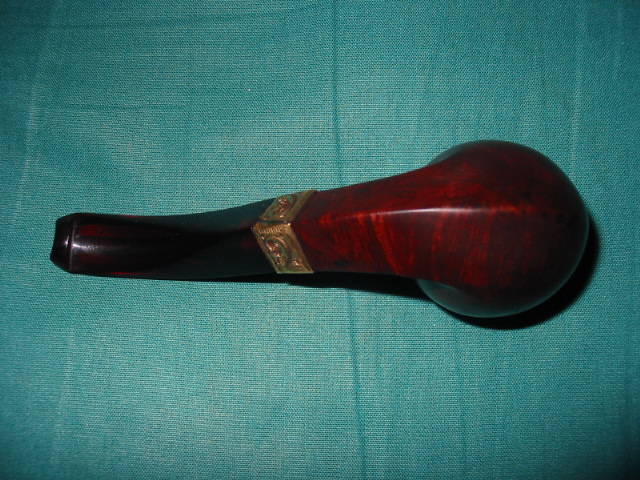
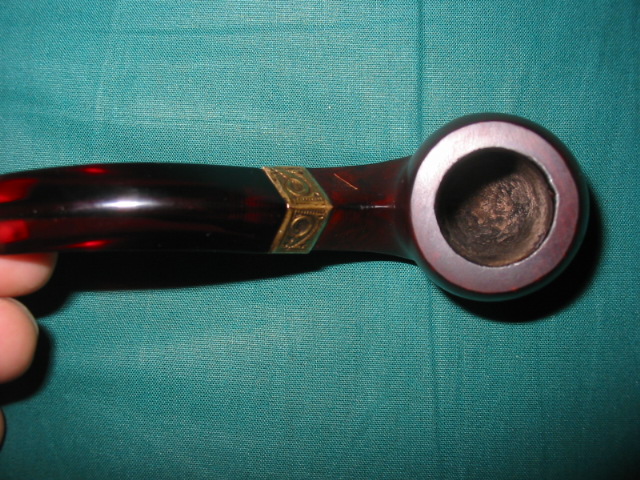
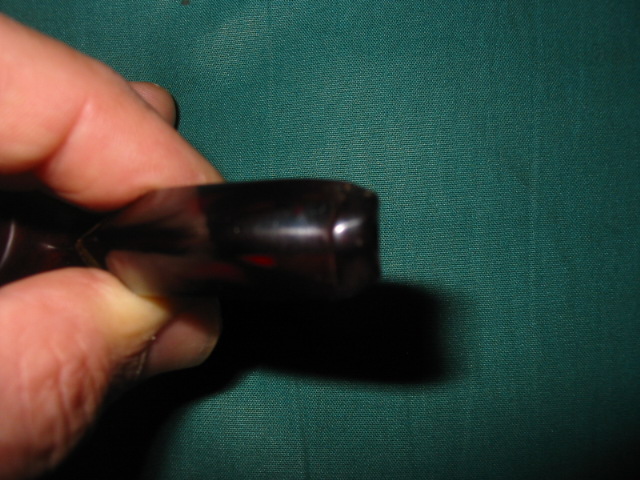
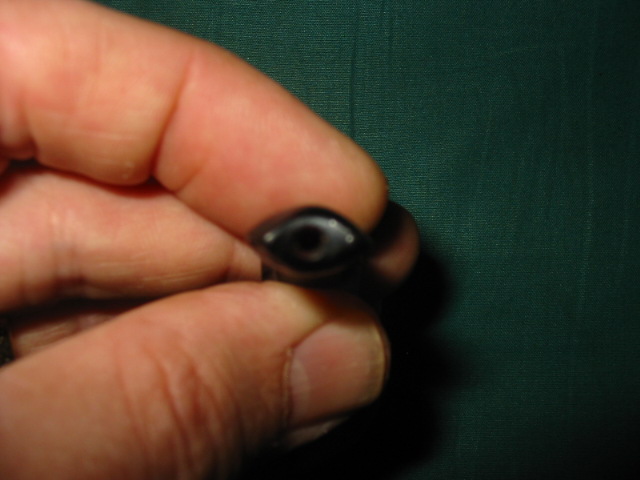
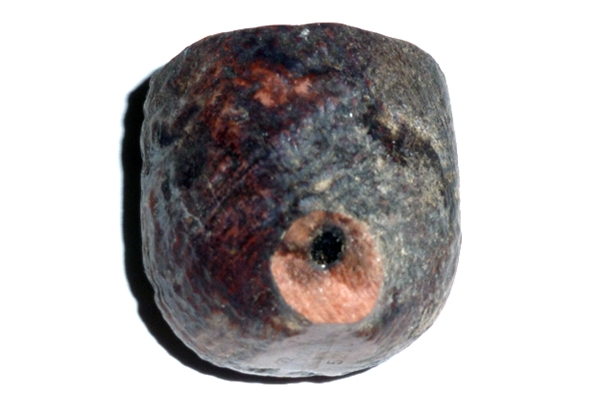
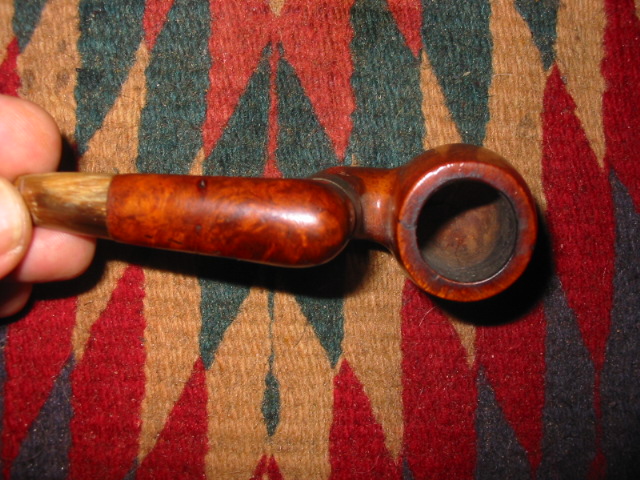
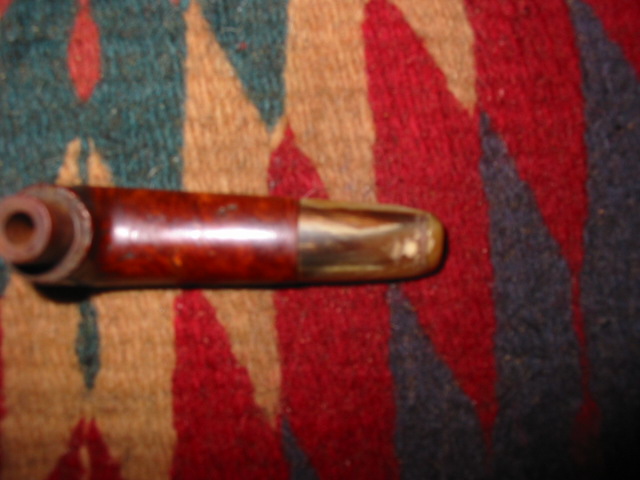
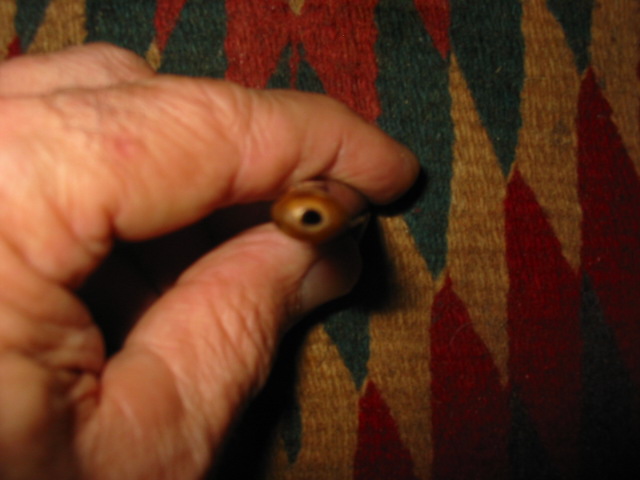
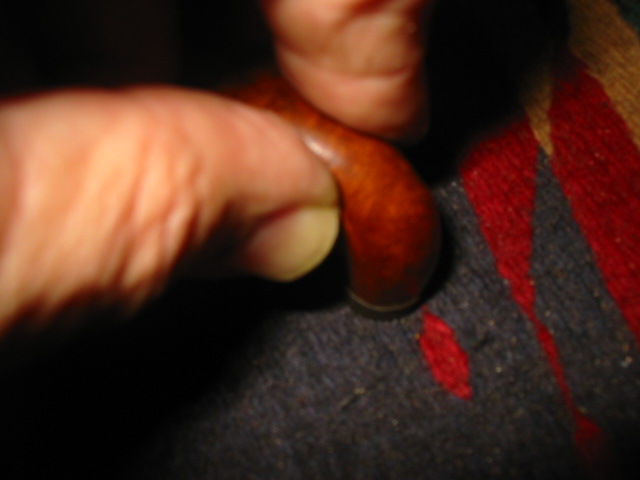
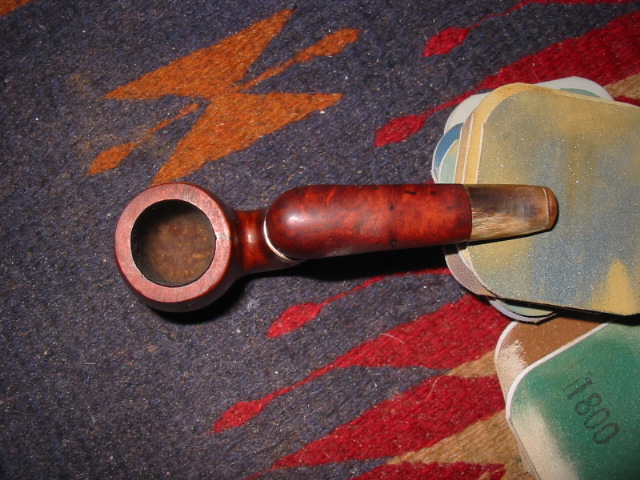
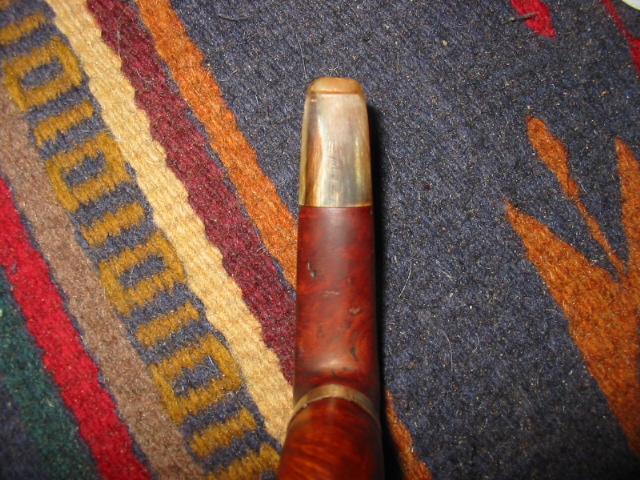
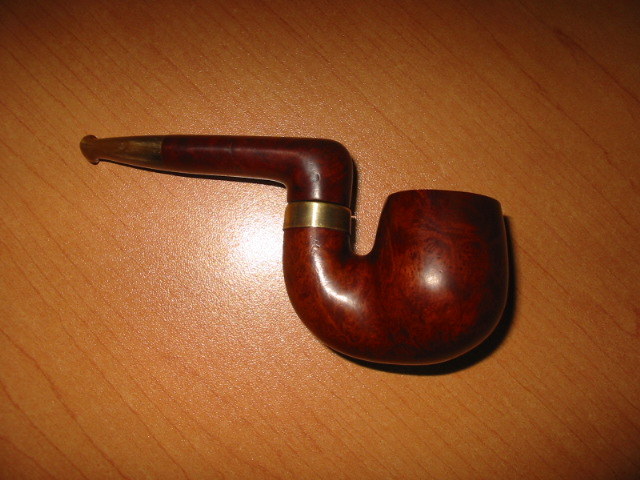
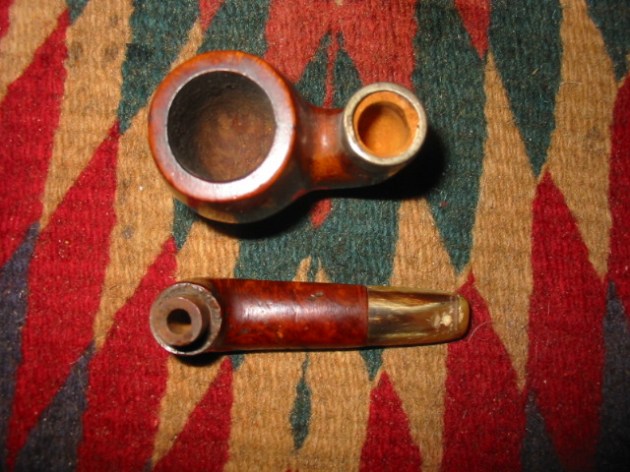
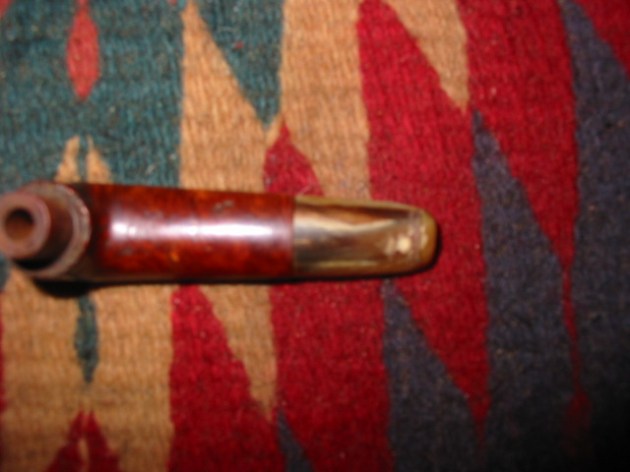
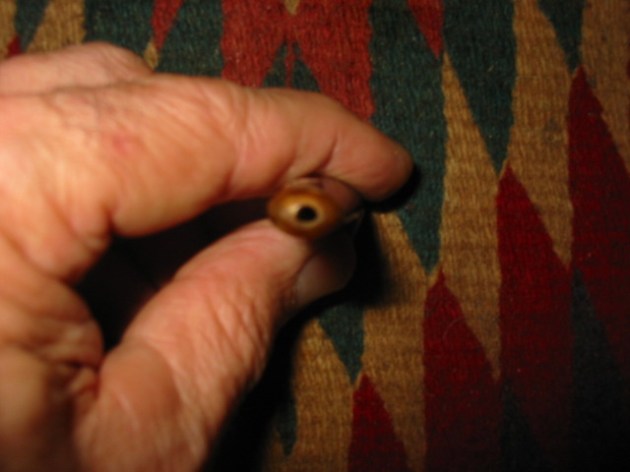
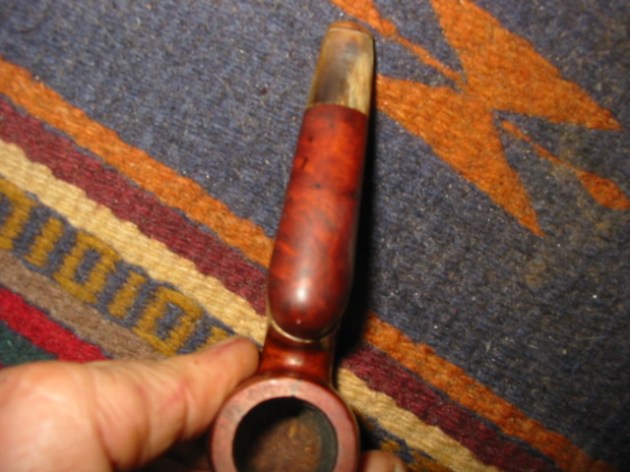
I chose to work on the folding vest pocket pipe first. It is stamped Vogini over Venezia in an oval on the upward bend of the bowl to meet the shank. When it arrived the bowl was clean. There were a few scratches on the rim. There were small dents on the left and right side of the bowl. The band was set crooked with the back side lower than the front making a good seat for the shank impossible. The shank is briar and is a 90 degree bent piece. It is very unusual. There were fills on both the top and the underside of the horizontal part of the shank. The stem is a nice piece of horn that is actually quite tiny. It has tooth chatter on the top and the bottom side of the stem. There are two tooth dents on the underside next to the button. The orifice hole in the button is slightly off centre. This is a great looking old timer that should clean up easily and look amazing!

I have done a bit of research and find that the Venezia brand is definitely Italian and is either a Cavicchi mark or La Rocco but not sure which was an early company. The mark may even go back further into history that I am aware and than Who Made That Pipe reports. If any of you have any ideas on the age and provenance of this pipe let me know by posting a comment. Thank you ahead of time for the information. ImageImageImageImageImageImageImageImageImageImage

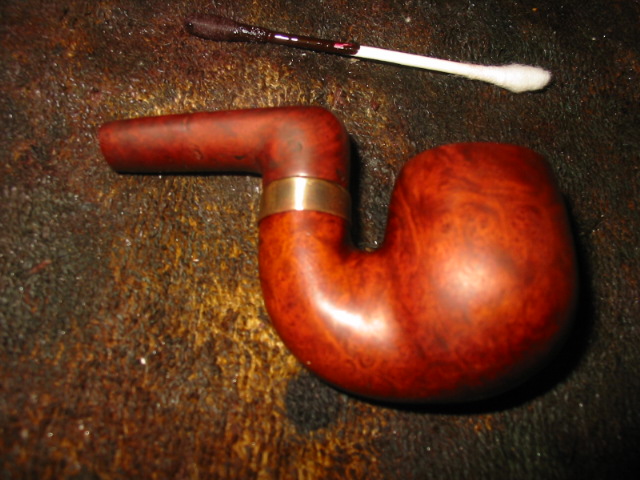
On the evening it arrived I removed the band from the shank and glued, pressure fit it and reset it at a proper angle to seat the shank correctly. I used carpenters glue to reglue the band. I pressed it on and held it until it was set. I then wiped the bowl down with a cotton pad and acetone to clean off the grime and the remaining finish. I also wiped down the band to remove the oxidation that was built up on it. ImageImageImage

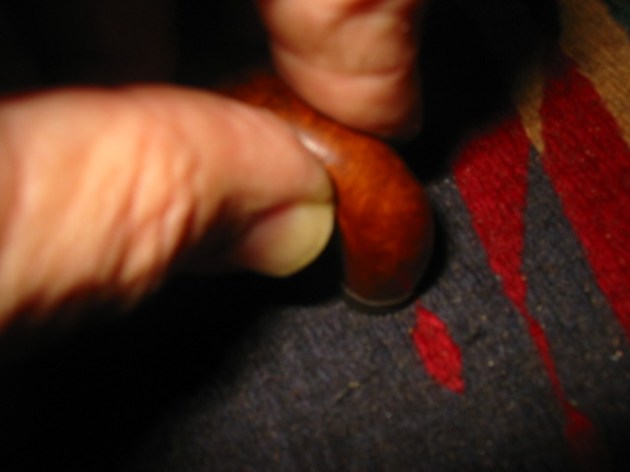
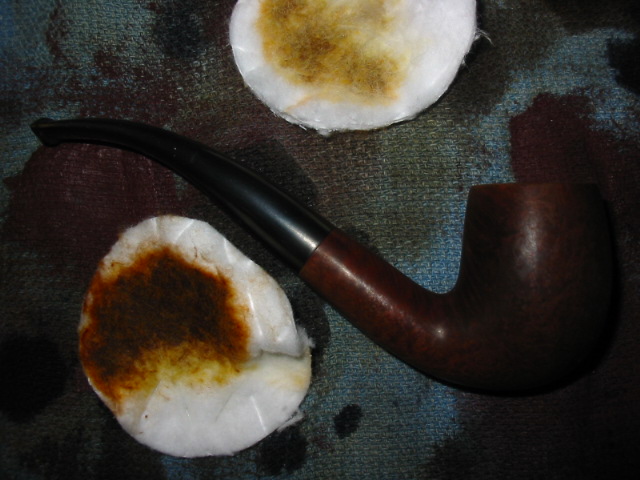
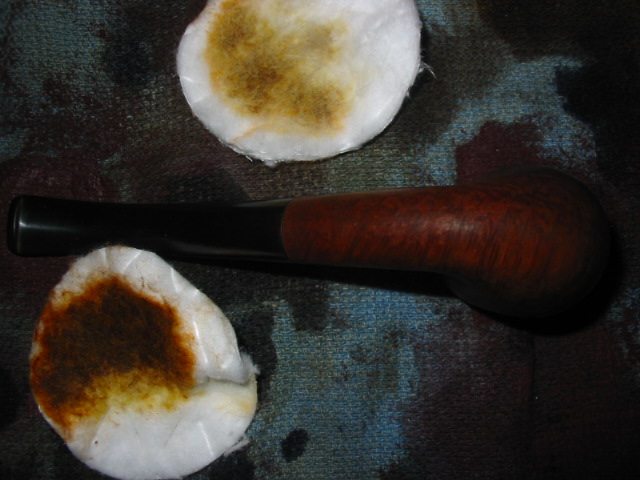
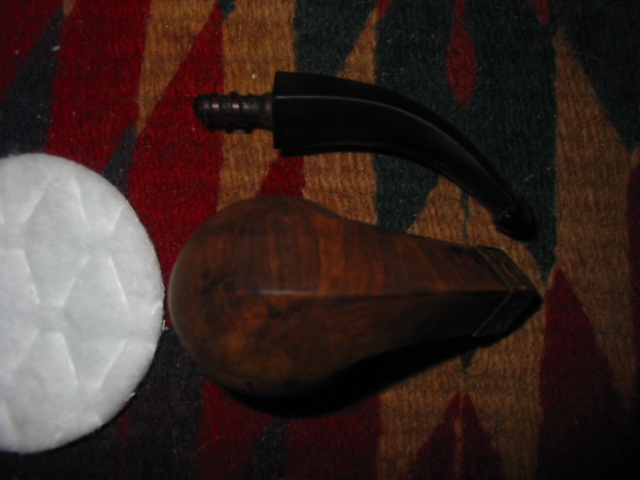
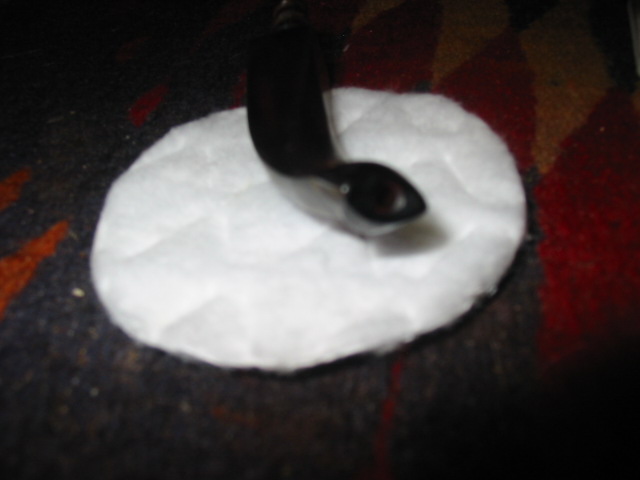
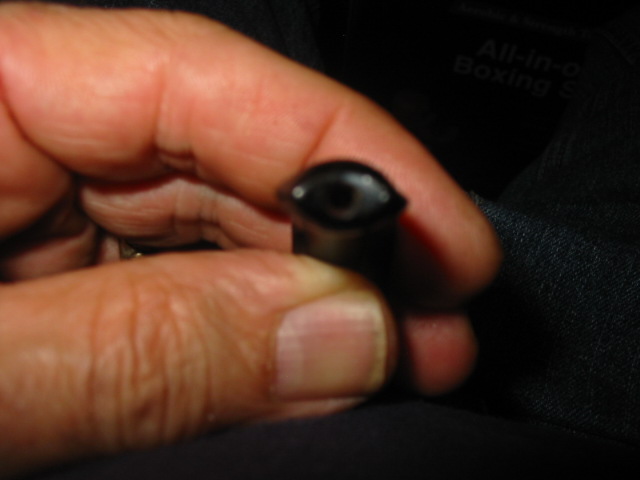
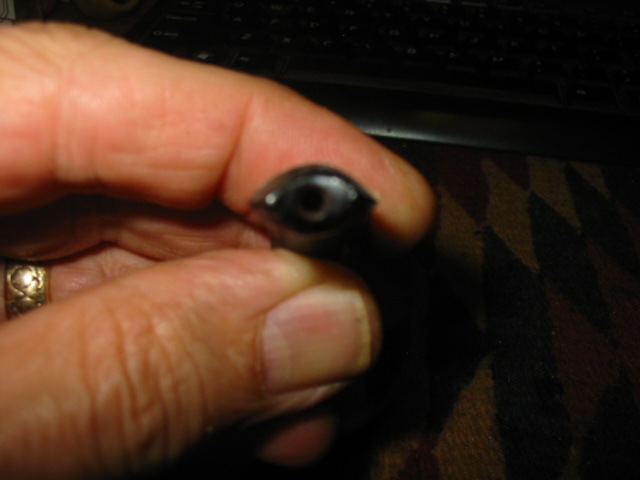
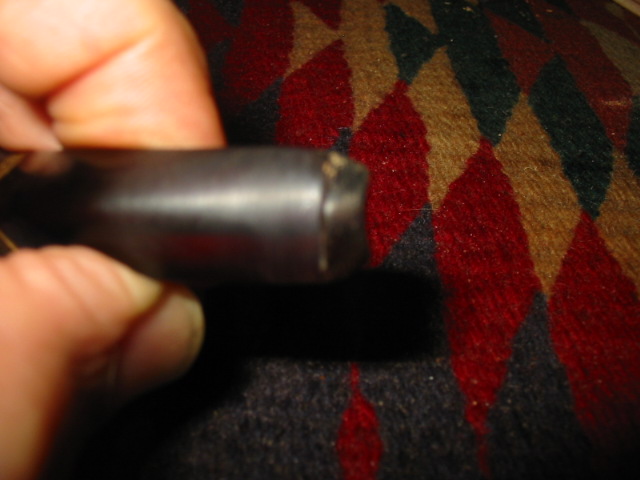
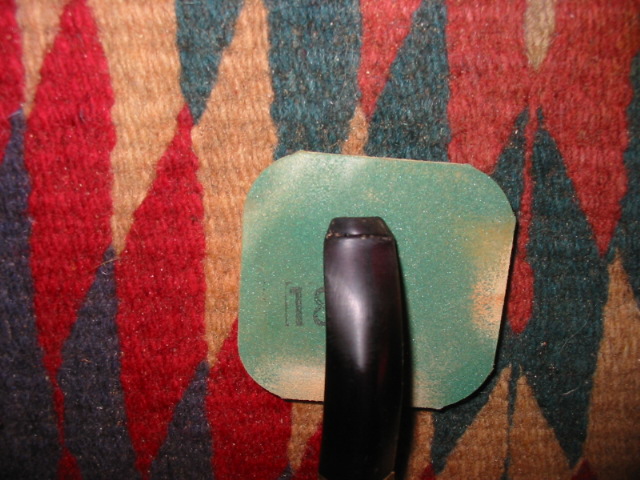
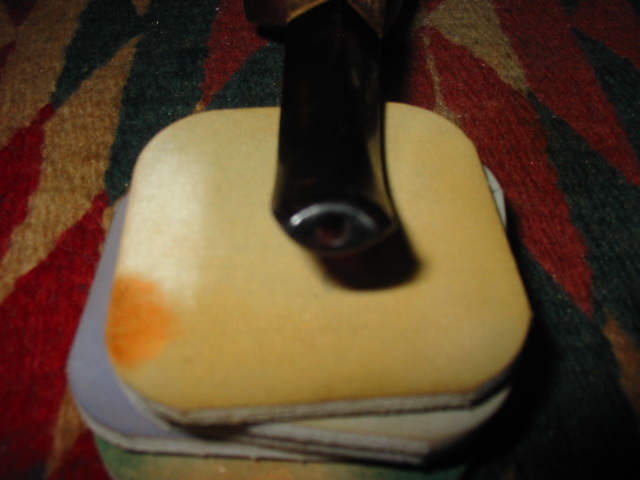
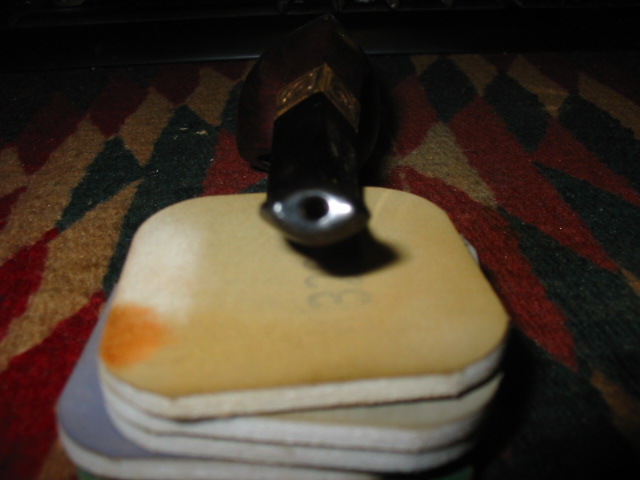
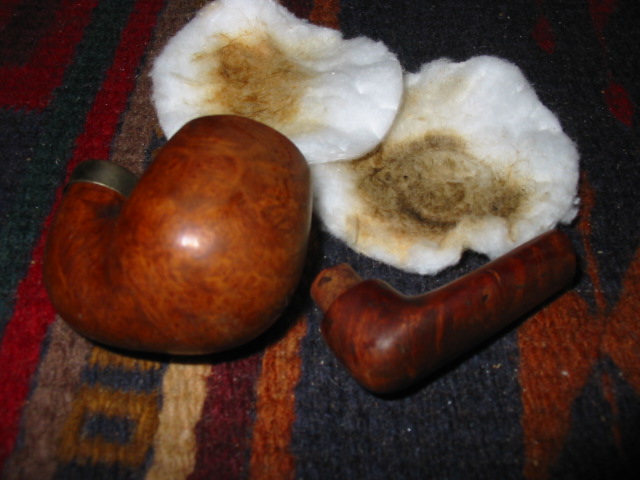
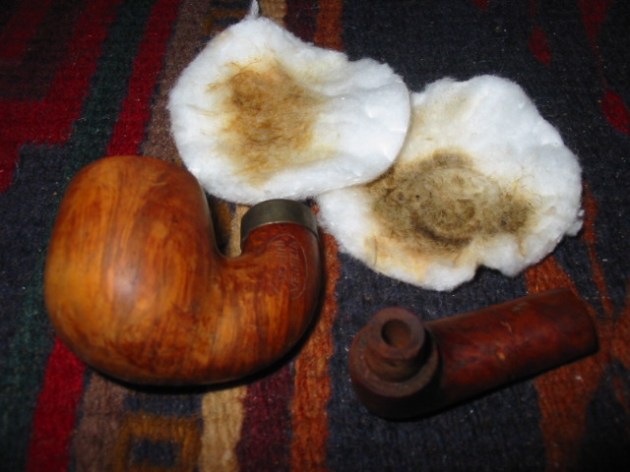
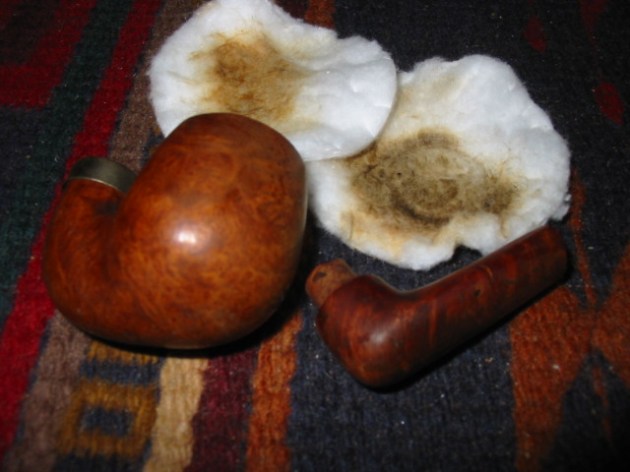
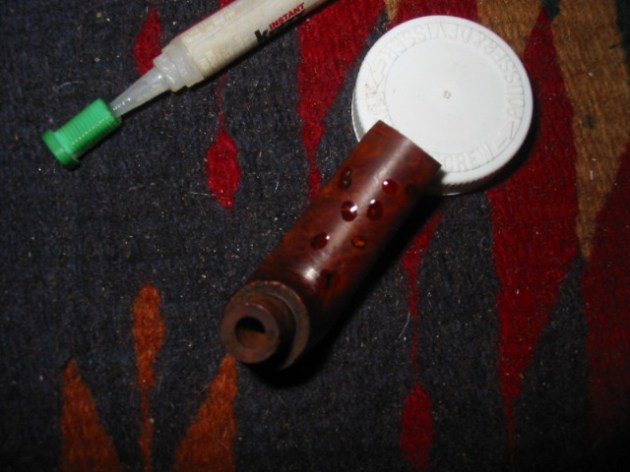
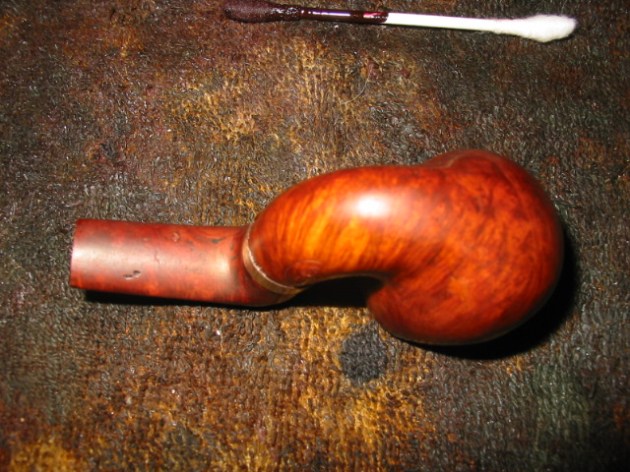
I cleaned off the briar shank and the bowl with some more acetone to remove the finish completely and to clean it so that I could begin to repair the fills in the shank. The first photo below shows the pipe after has been wiped down with acetone completely. I avoid using acetone on horn stems. In pictures 2, 3, and 4 you can clearly see the cotton pads that I use with the acetone to wipe the pipe down. These are circularly pads that I pick up at a local store in the makeup section. They are used to remove makeup but I find them perfect for using with alcohol and acetone wipes. I dampen them with the liquid and then wipe down the surface. The dirty pads in the pictures show the dirt and stain that has been removed from the surface of the pipe. ImageImageImageImage

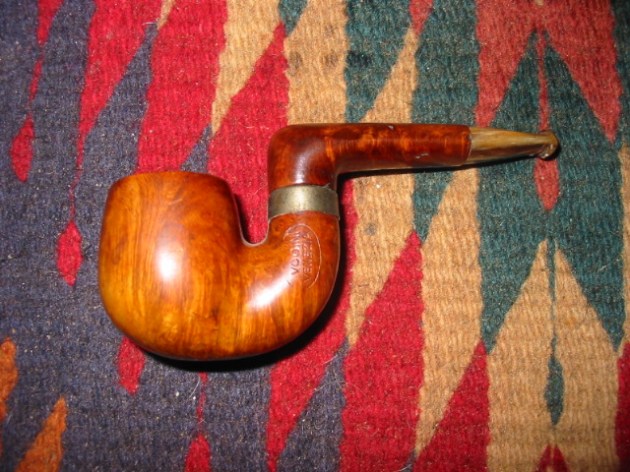
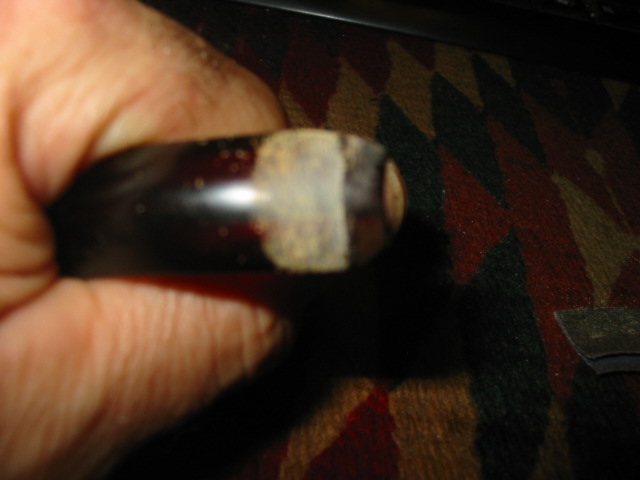
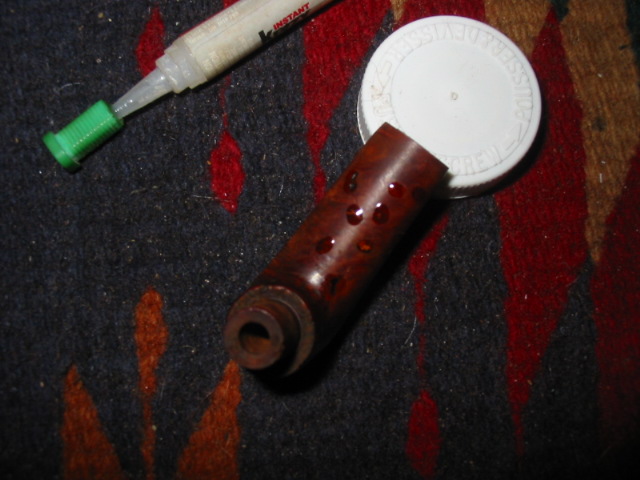
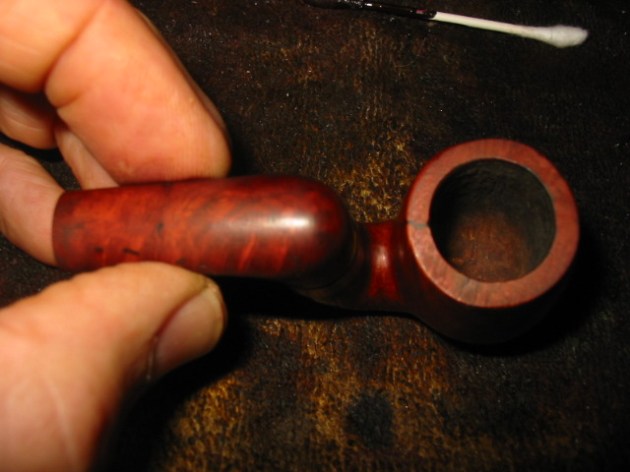
Once the surface is clean, I picked the pink putty fills from the top and underside of the shank piece. I wanted to refill them with briar dust and super glue (pictures 1 and 2 below show the spots that were filled with the combination). ImageImage

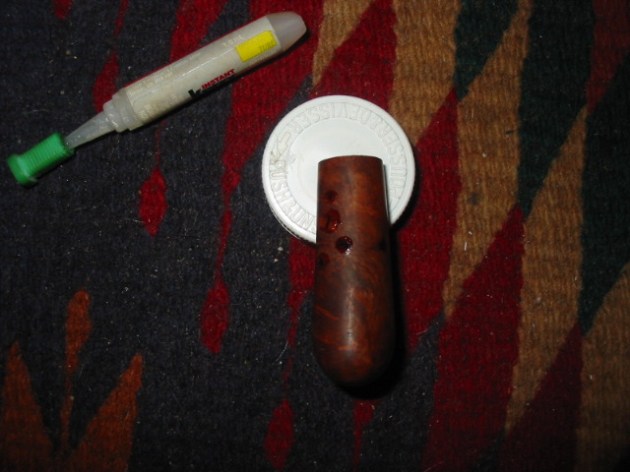
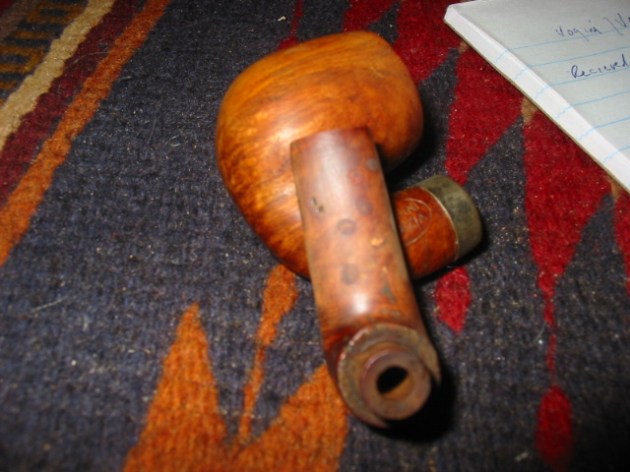
I sanded the filled areas (pictured in the next two photos) until they were smooth dark spots on the surface of the wood using fine and extra fine sanding pads. I continued to sand down the surface of the shank and the bowl until the spots were basically blended into the wood as much as possible. I also sanded the rim and top of the bowl to remove the scratches. The bowl and rim were sanded with micromesh pads 1500-2400 grit. The shank was also sanded with the same grits. Photos 3-4 show that finished look of the spots. Once they were sanded to that point I wiped down the shank piece with a pad and isopropyl alcohol to clean off any remaining dust on the briar. ImageImageImageImage

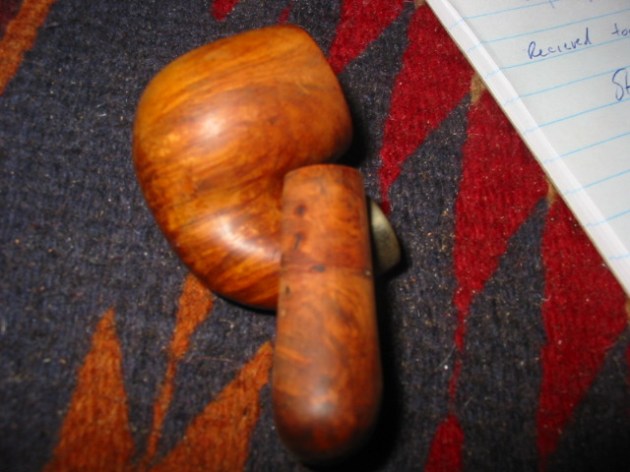
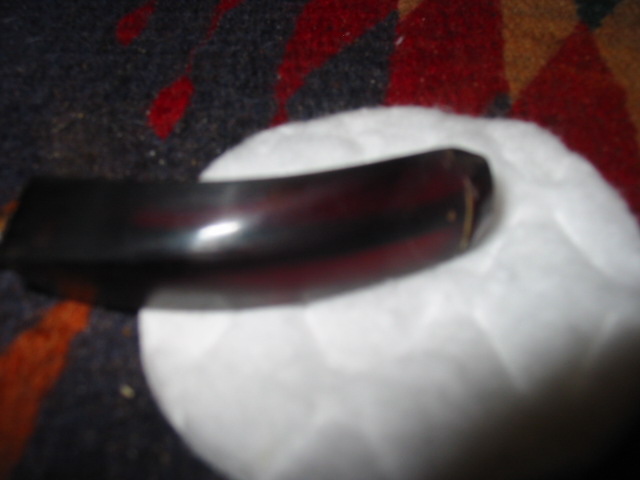
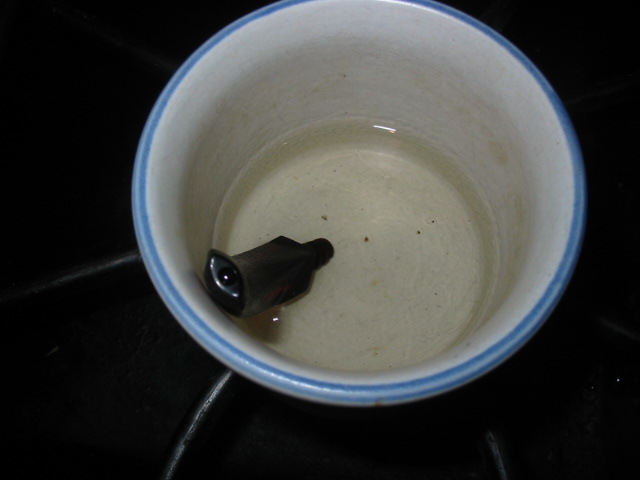
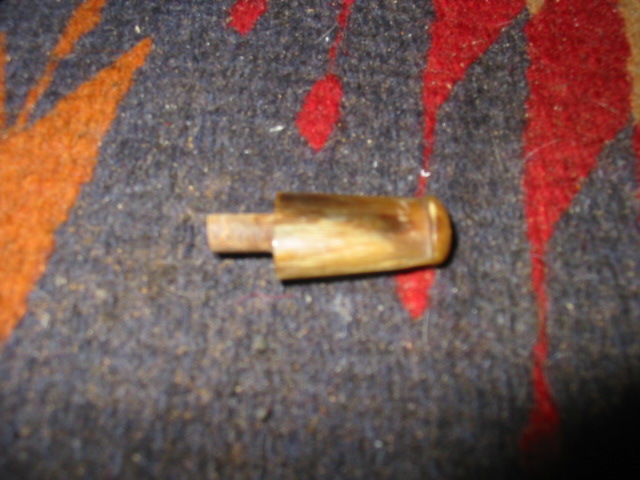
I set the bowl aside and worked on the stem to remove the tooth chatter and the tooth marks on the underside. Horn is such interesting material to work with. I use a fine grit sanding sponge to remove the chatter and tooth marks. It is flexible so it is easy to conform to the curve of the stem. I also had to use emery cloth (fine grit) to remove the remaining marks left by the tooth dents. ImageImage

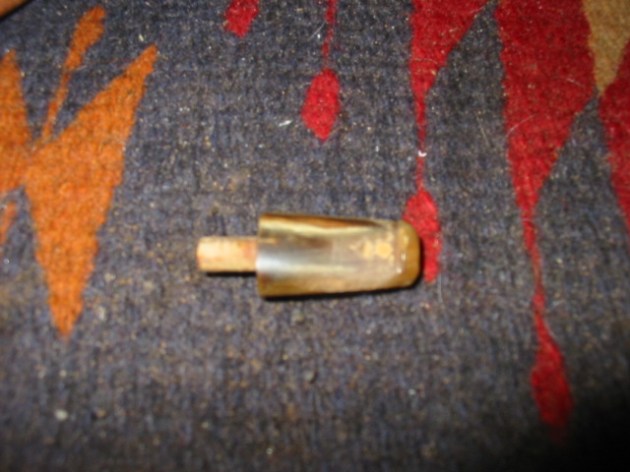
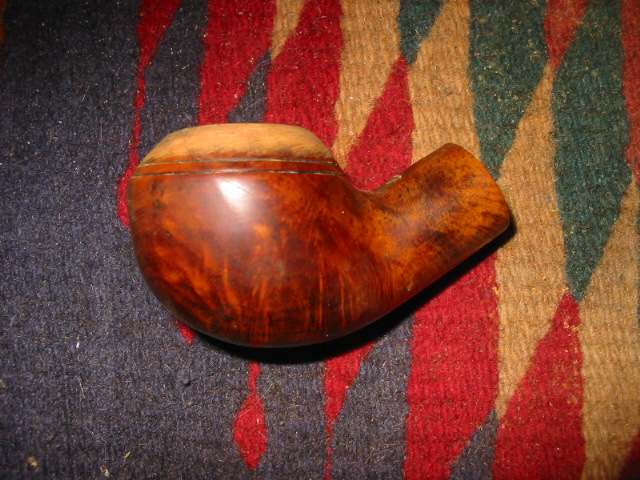
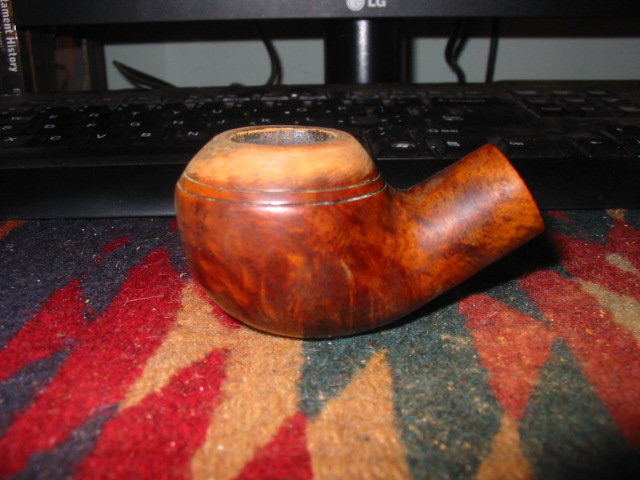
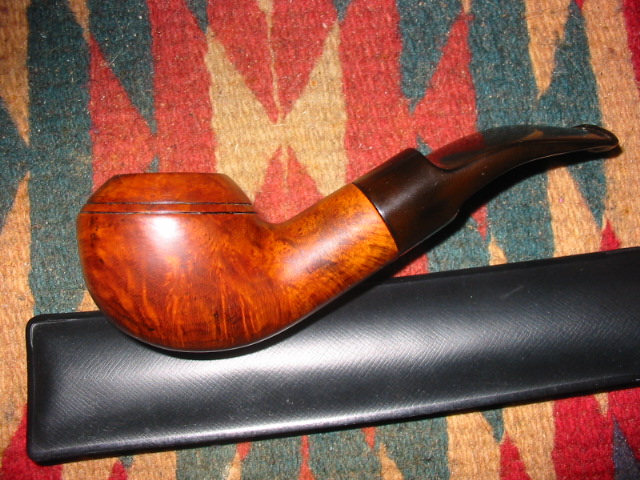
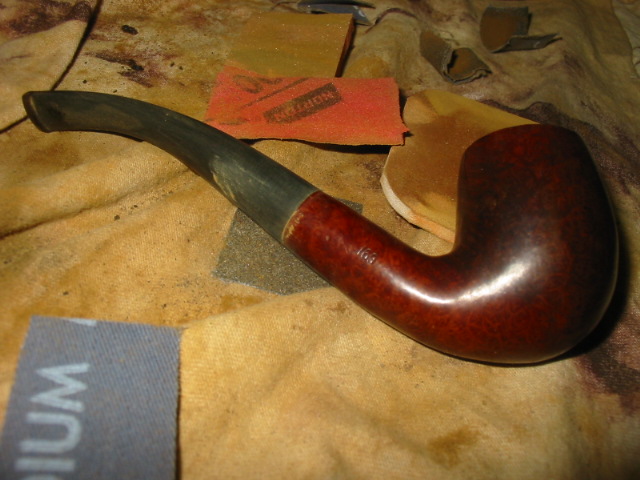
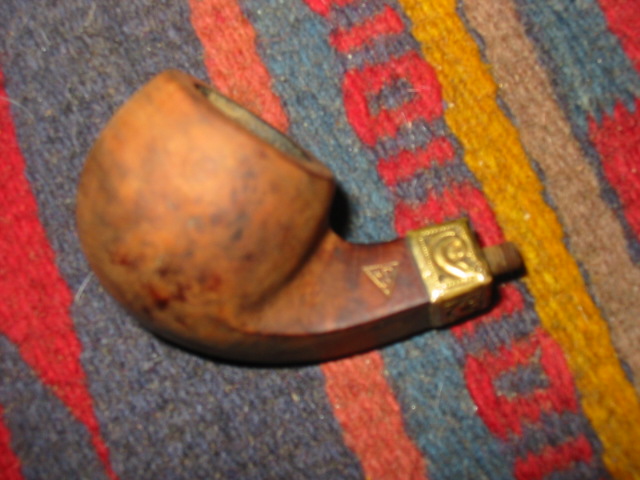
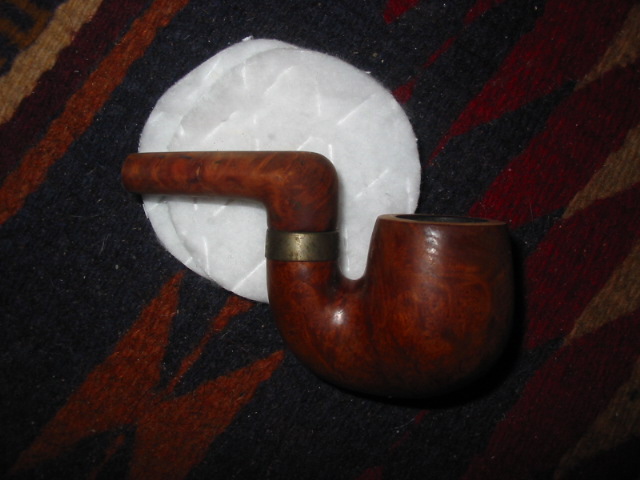
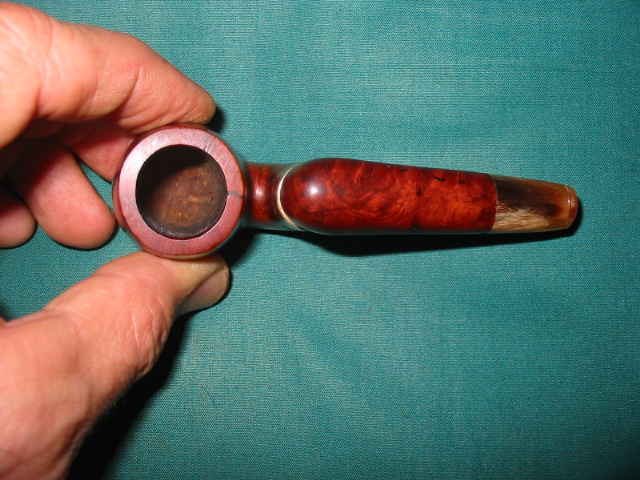
I restained the bowl and the shank with an oxblood aniline stain, flamed it and then buffed it with White Diamond to remove opacity of the stain and polish it. I wanted the bowl and stem to match in colour rather than the original look of the darker shank and lighter bowl. I gave the entirety several coats of carnauba wax and a light buff with a flannel pad on the buffer. ImageImageImageImage

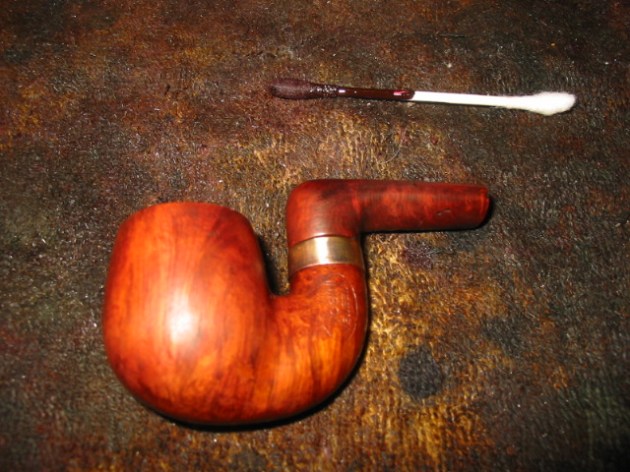
From the above pictures you can see the colour of the shank and bowl are pretty close. I needed to do some work on the fit of the shank to the bowl. The briar tenon on that portion of the shank was loose fitting and could easily have fallen out at this point in the cleaning. I used a thin coat of super glue and sanded it down to make it a snug fit. Once the shank had a good flush fit and was snug to the bowl, I sanded it with micromesh pads 8000 and 12,000 grit to give it a shine. I gave it another coat of carnauba wax and set it aside.

ImageImageImage

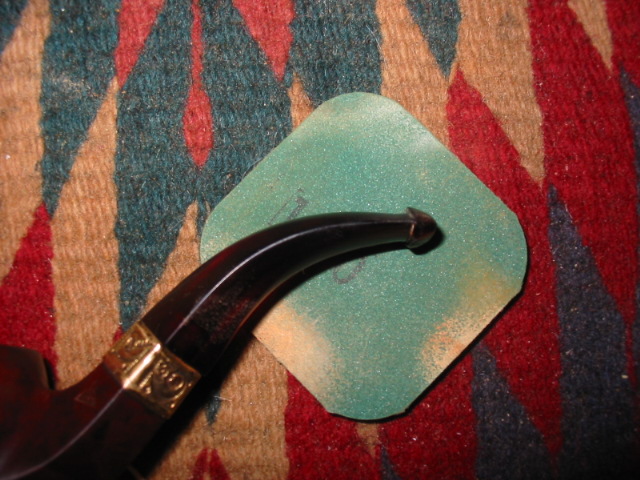
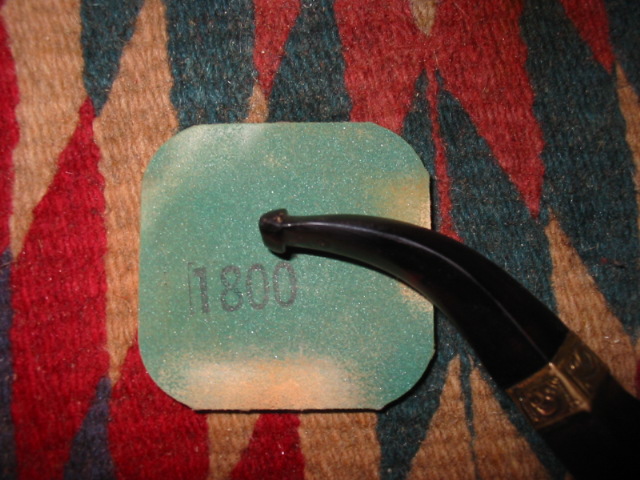
I gave the tenon on the stem a thin coat of super glue as well and sanded it until the fit was snug. The stem had been loose and easily came out of the shank and would twist from side to side. The superglue made it fit perfectly. I continued to sand the surface of the stem with micromesh pads using the 1500 and 1800 grit pads before buffing it with White diamond. I went on to sand it with the pads from 2400-12,000 grit. Each successive sanding brought more of a shine to the stem. Once it was finished I gave it several coats of carnauba wax and buffed the whole pipe on the buffer to raise the shine. Image

Image

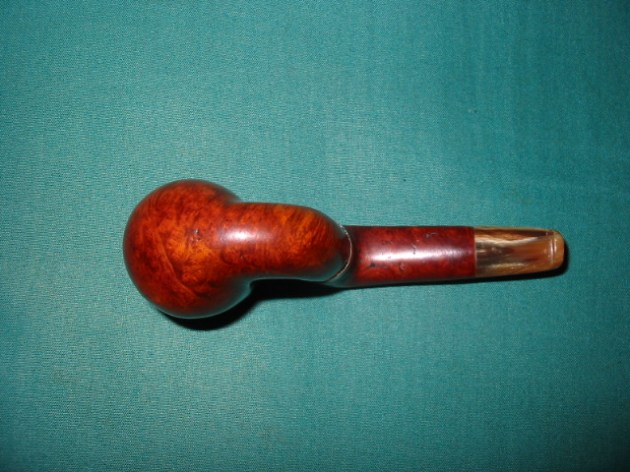
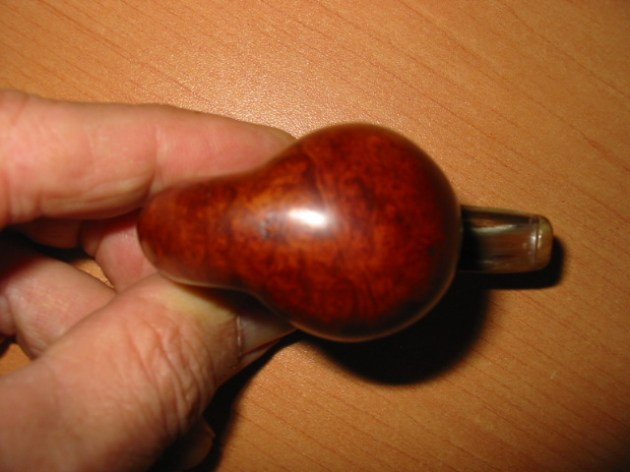
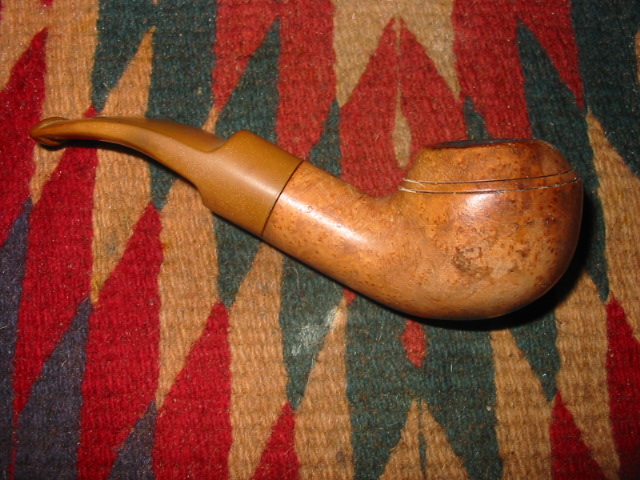
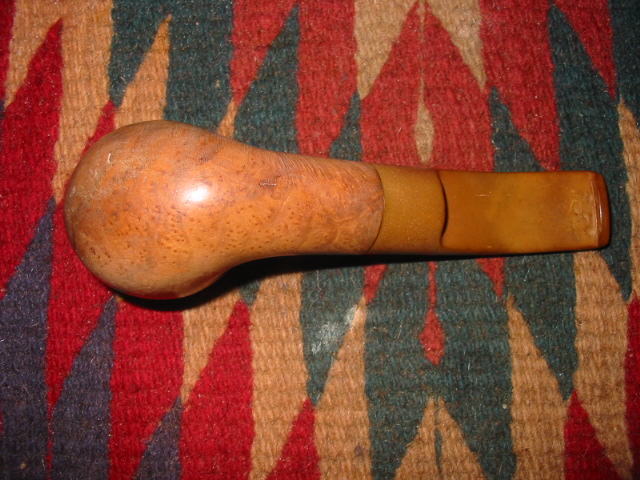
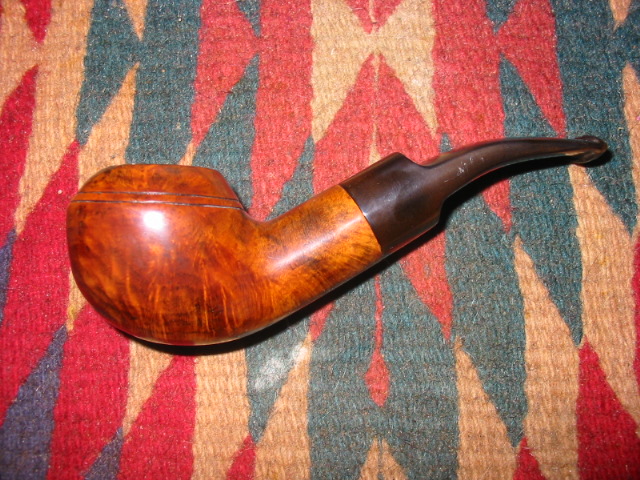
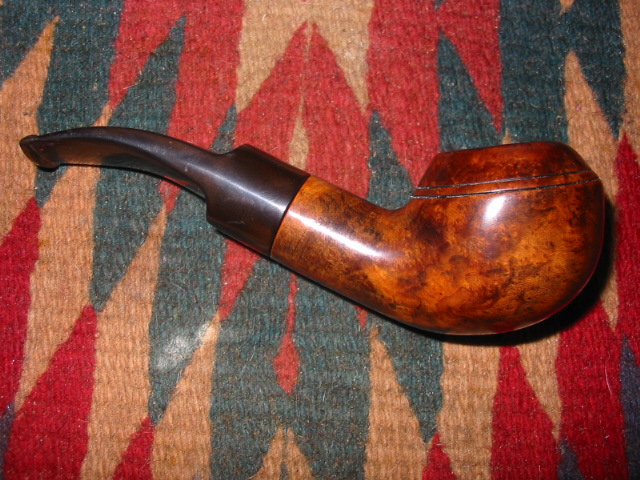
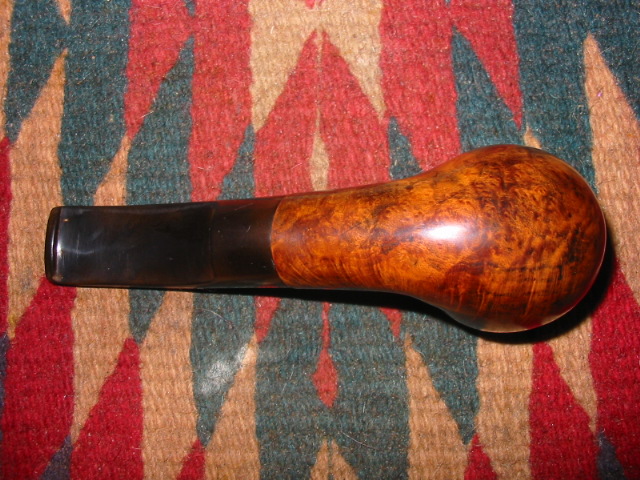
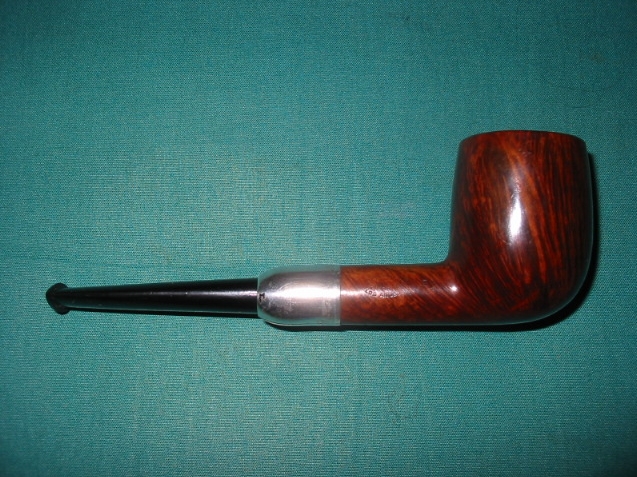
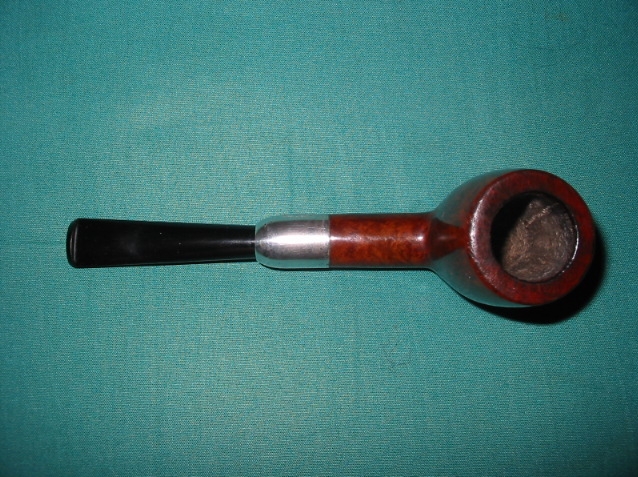
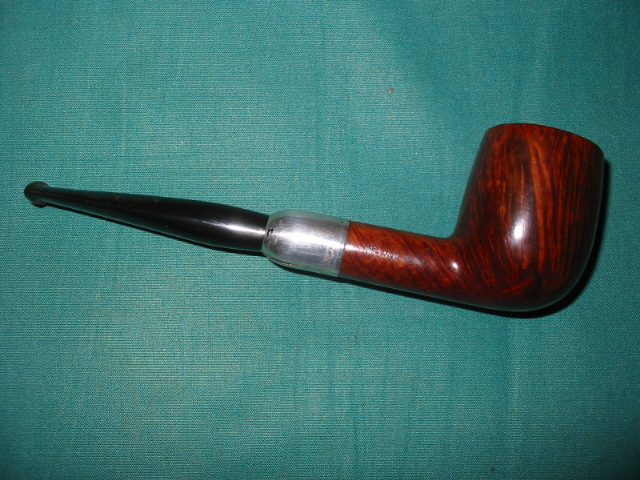
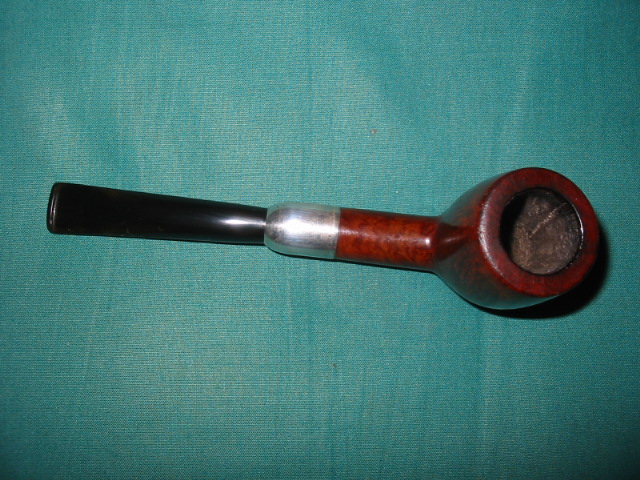
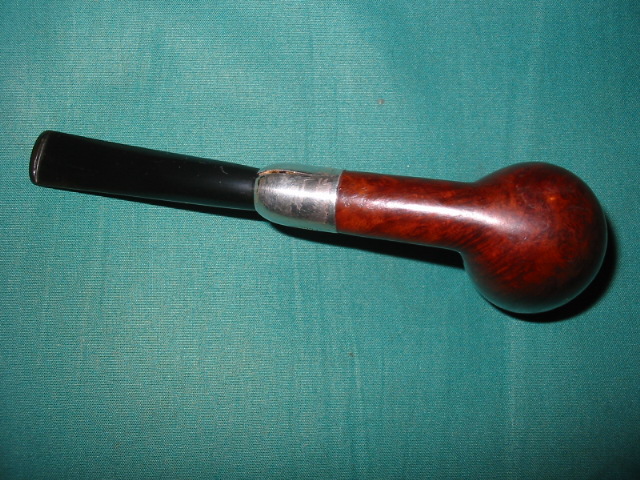
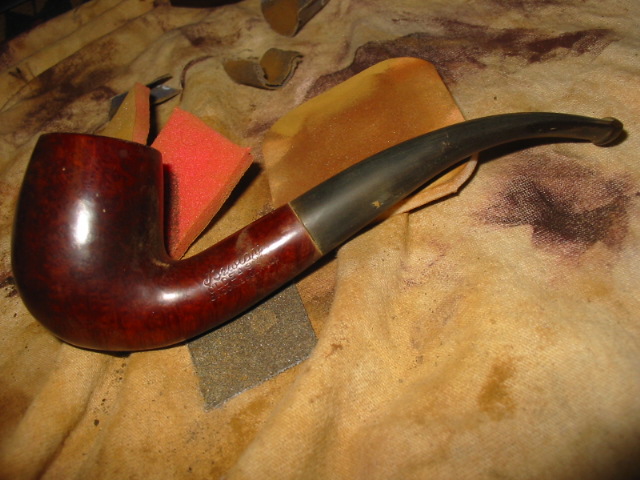
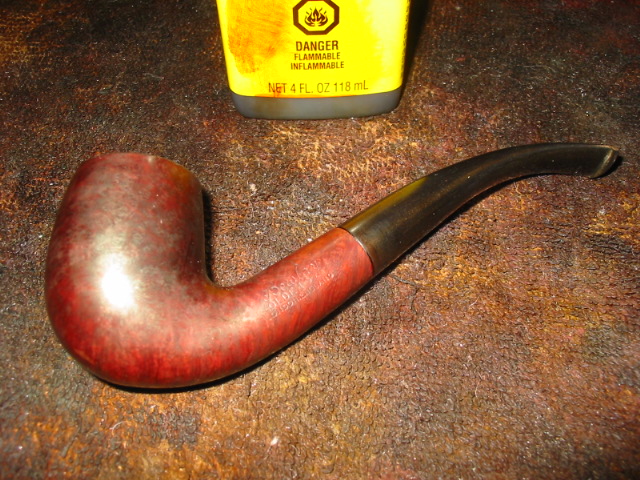
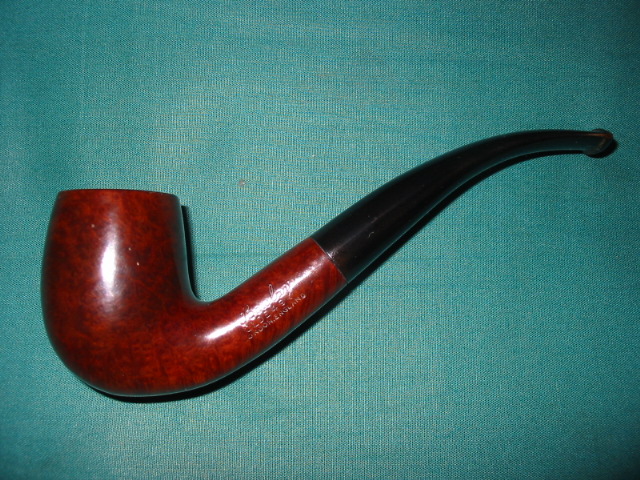
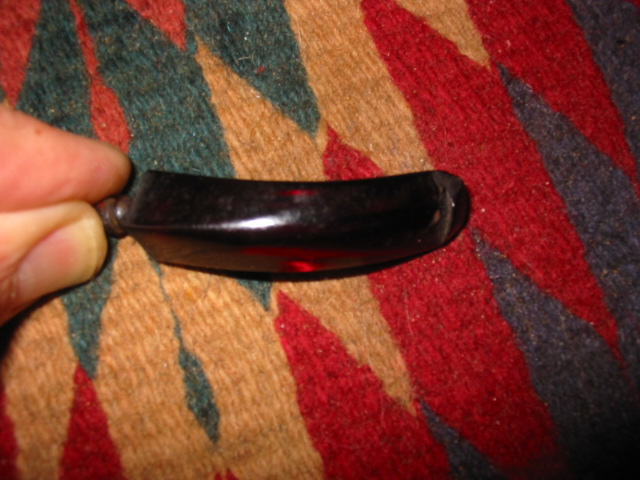
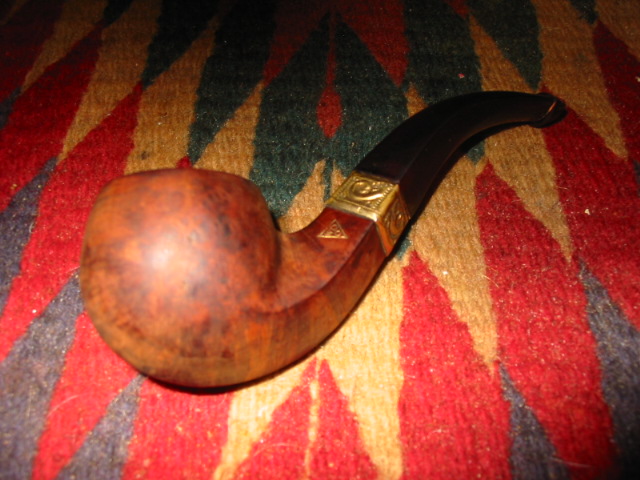
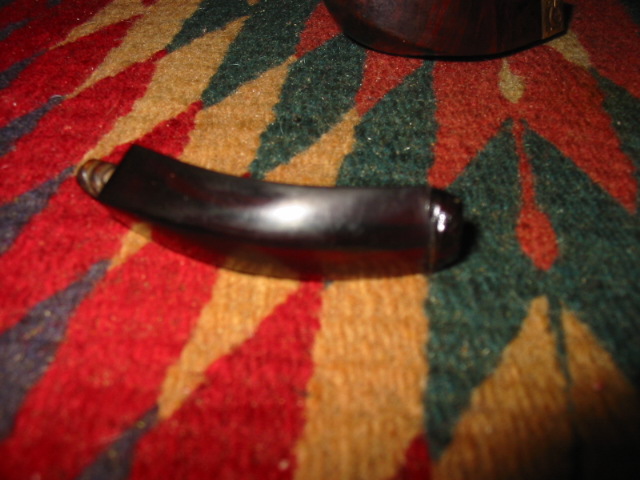
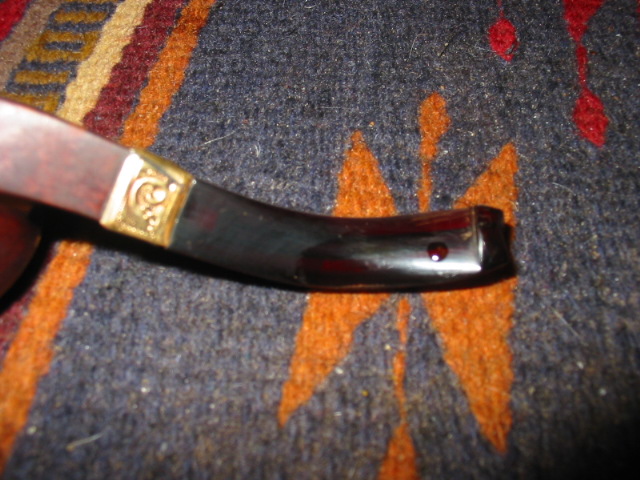
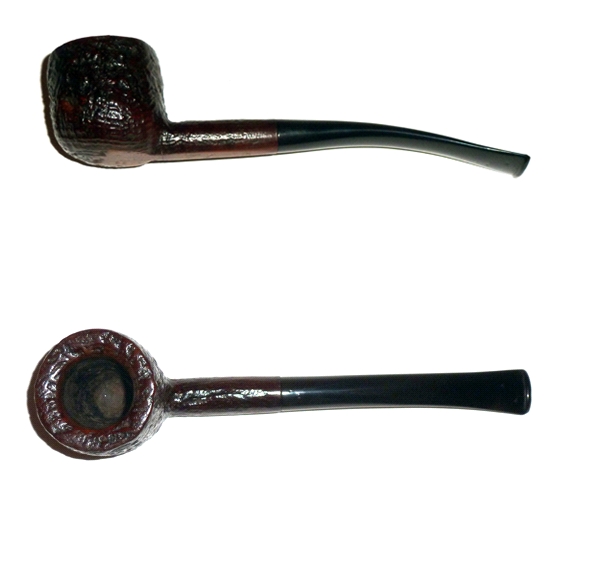
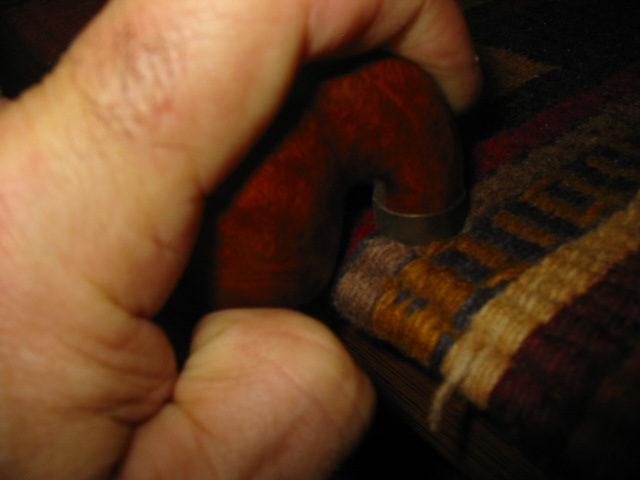
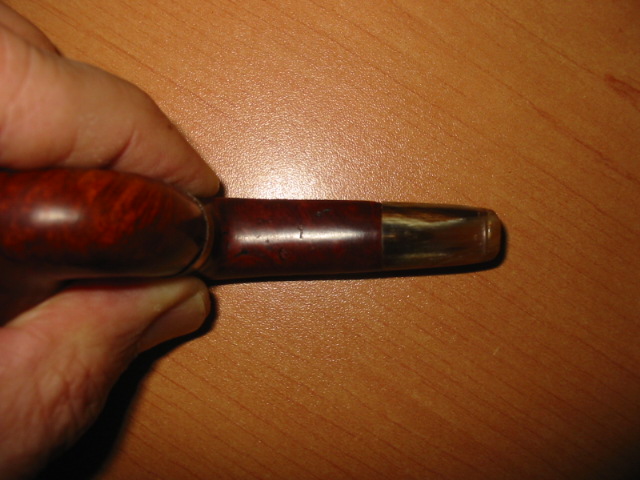
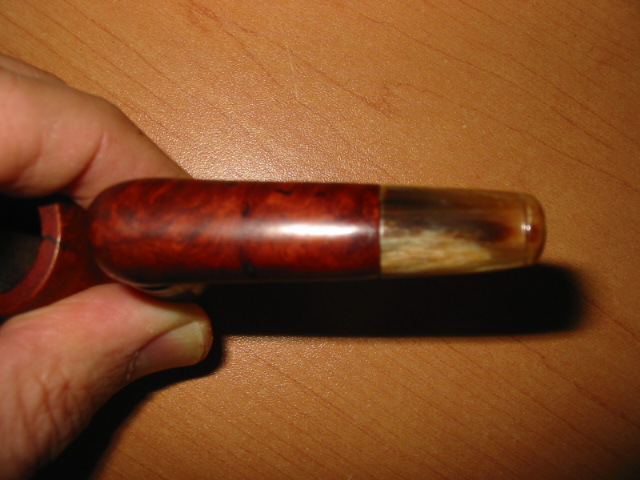
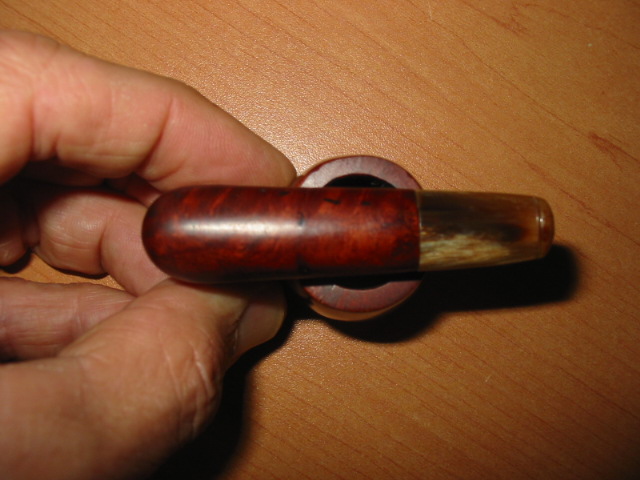
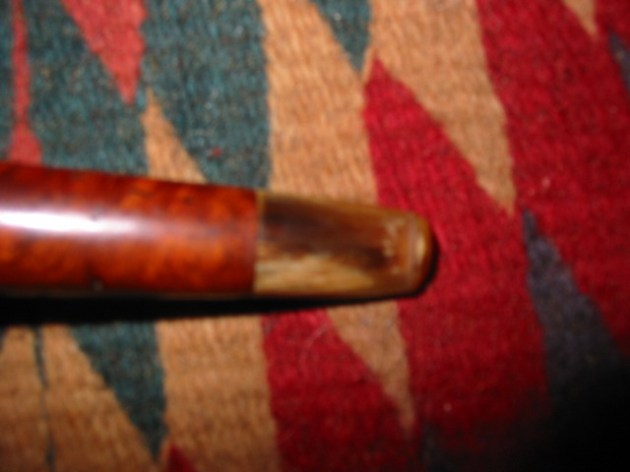
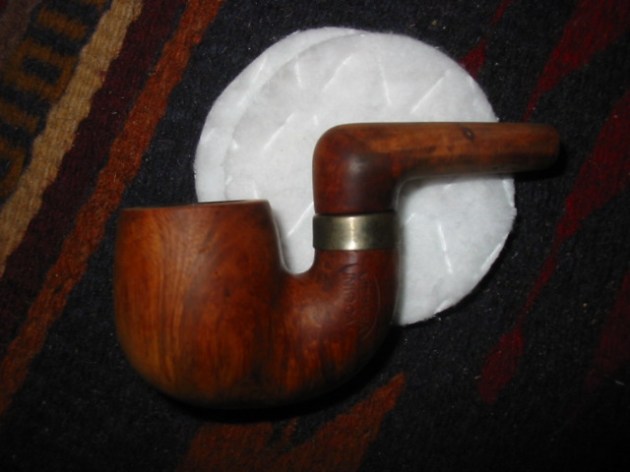
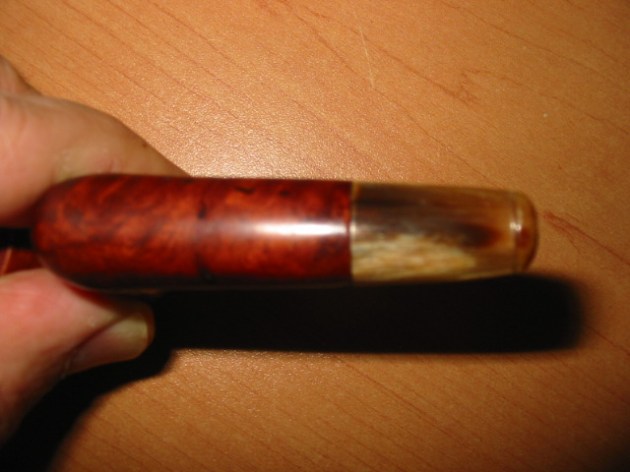
The final pictures were taken this morning (9/5/12) after a quick wipe down with a polishing cloth. The next series of five photos show the pipe with the shank and stem extended and ready to smoke. There are several shots to show the state of the horn stem after the sanding and polish. It has a beautiful natural sheen to it that is amazing and only possible in horn. There is almost a warm glow that seems to come from within the stem. You can see that the super glue patches in the fills and the sandpits are fairly well blended into the shank.  ImageImageImageImageImage

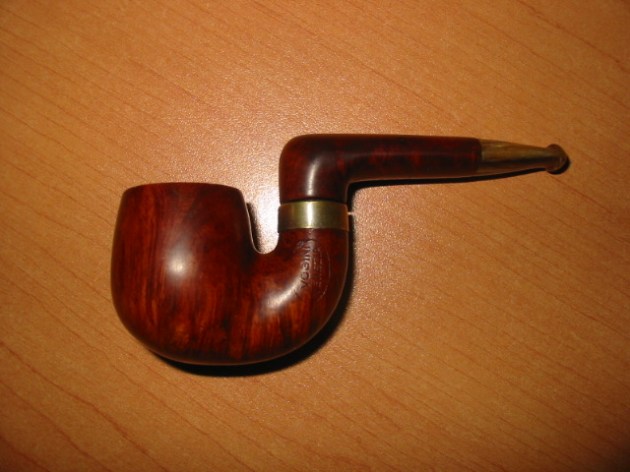
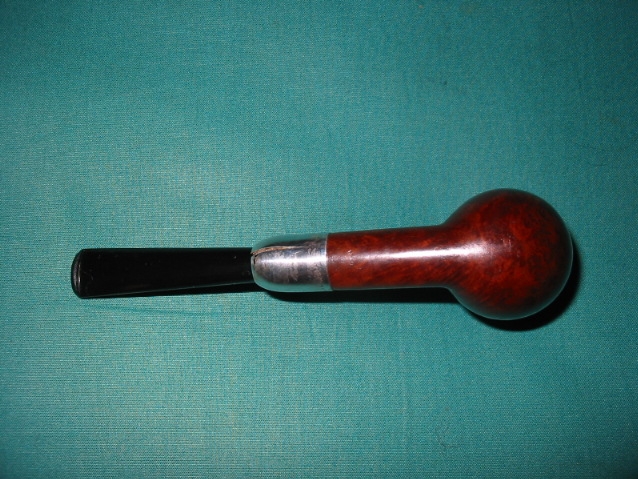
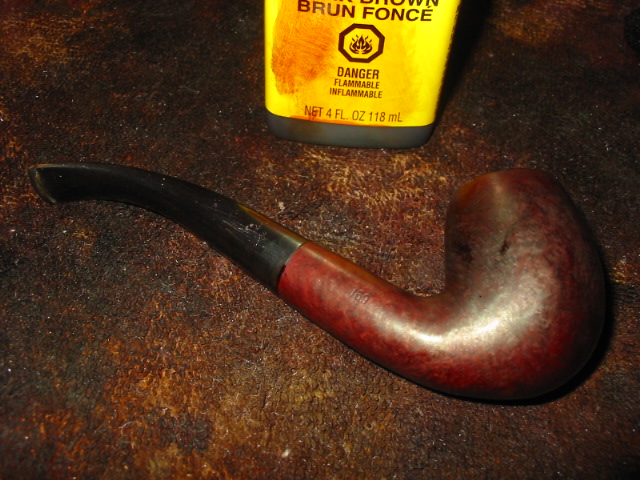
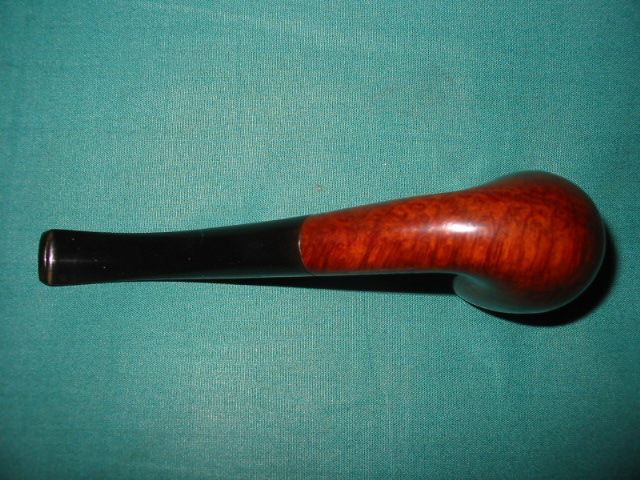
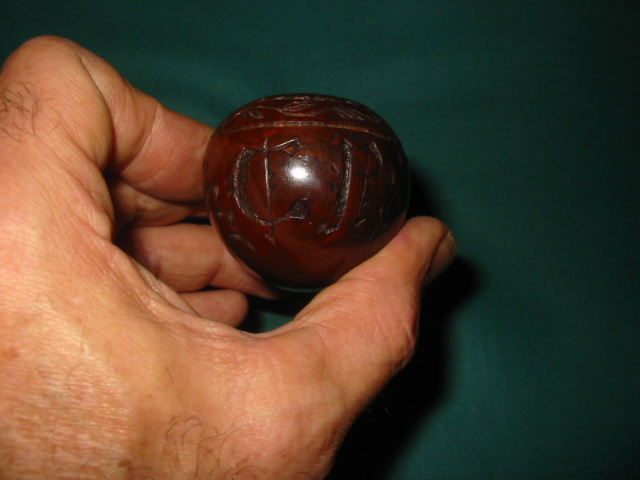
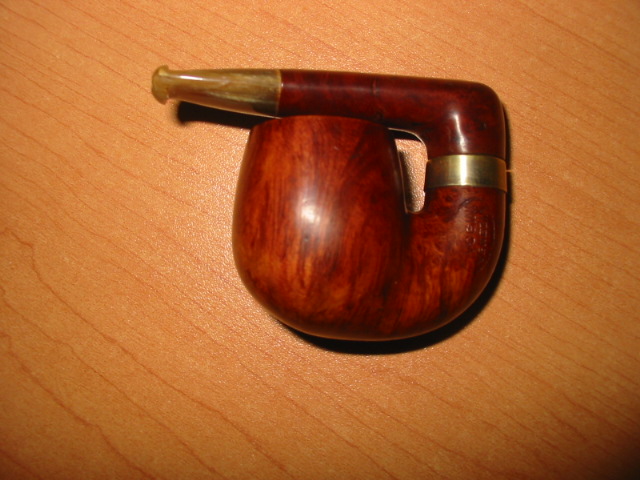
The next series of four photos show the folded pipe ready to be put in the vest pocket and carried with me to the next event where I want to take a small pipe which folds up nicely into a small square and slips into my pocket. The grain on this little pipe is amazing.

I would like to once again thank Chuck for his generous gift of this old timer. I look forward to firing it up and smoking it over the remaining years I am around. I love these unique old timers that add colour and character to my collection. I often wonder what stories they would tell if they could speak. Ah well, I will now add my story to the list of those who have smoked and enjoyed this beauty. ImageImageImageImage