Tag Archives: restaining a bowl and rim

Spotlight: Ladies Pipes, Part 3/7, a Tiny Medico Acorn


Guest Blog by Robert M. Boughton
Member, International Society of Codgers
Member, North American Society of Pipe Collectors
http://www.naspc.org
http://www.roadrunnerpipesnm.biz
http://about.me/boughtonrobert
Photos © the Author

Two old buddies are heading off on their Annual Fishing Trip. For argument’s sake we’ll call them Kevin and Bob.
Bob notices that Kevin is being more grumpy than usual and tries to lighten things up by way of conversation.
Bob: “So Kev, last week was your birthday, happy belated.”
Kevin: (grudgingly) “Thanks.”
Bob: “Say, did, Laura, buy you that Estate Dunhill that you were constantly hinting at?”
Kevin: “Na”
Bob: “Well what did she get you instead?”
Kevin: “SUV.”
Bob: “New or used?”
Kevin: “New of course.”
Bob is extremely puzzled as Kevin is still driving the same beat-up pickup that was already old when Saddam was considered an ally.
Bob: “You know, Kev, you and I have been friends for a long time, and I’m entitled to say that you are an ungrateful sour puss. Laura buys you a New SUV instead of a second hand pipe, and that has you in a bad mood.”
Kevin: “Humph!”
Bob: “Well what kind of an SUV was it anyway?”
Kevin: “Socks, Underwear, Viagra”
— Thanks to mate on smokingpipes.com/forums. (I don’t know, but for some reason this struck me as a good gift idea for the next man who gives a lady grief for enjoying a pipe.)

INTRODUCTION
Steve comments now and then on the pleasure he gets from researching a pipe’s history. I know his motivation is not to tuck away, in his mind and for his own use, the information he gathers. I can’t say for sure what drives Steve, but I suspect he, also, is a natural born reporter – which is to say collector and sharer of information – with an insatiable longing to spread his news to readers as well as to supplement or in some cases create new pipe lore available online. Steve laughed at this when I suggested the notion, but I would say his crowning achievement so far is the definitive and exhaustive research that got to the bottom (which was deep) of the complex origins and Byzantine life of Brewster pipes – a close second to his exposé on the history of the Colossus Pipe Factory (CPF).

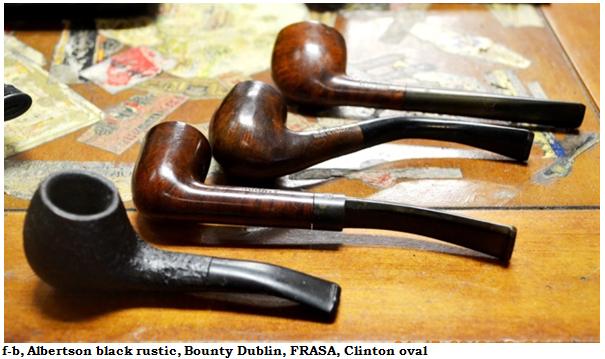
As a former freelance news reporter/photographer and still a spot news enthusiast, not to mention aspiring literary writer and pursuer of other investigative endeavors, I have a knack of my own for probing. When I can’t find any mention whatsoever of a pipe brand, I therefore become somewhat vexed. This was the case in particular with the first two pipes I restored for this series. One was a Frasa (or maybe FRASA as an acronym) French natural bent billiard;. The other was a Clinton natural straight oval that was neither the Israeli Alpha brand type nor the U.S. variety. Forever a dogged reporter at heart and also having a serious case of Obsessive-Compulsive Disorder, however, I intend to stay on these stories and others until I uncover the facts. The truth is out there.

As for Medico, there is much to be found online and in actual bound and printed books on pipes and the long, glorious history of their peaceful enjoyment. Indeed, the latter tools still exist, however tenuous their future. I hope and pray they survive for as long as Mankind occupies this planet, if not beyond. The history of Medico began with S.M Frank & Co.in New York in 1851, giving S.M. Frank the claim to the oldest pipe manufacturer in the U.S. By the time Frank formed Medico Pipes in 1957, it had already consumed eight other pipe makers, some still celebrated and others less remembered: the Manhattan Briar Pipe Co. in 1922; William DeMuth & Co. (WDC) in 1937; The Kaywoodie Co. (later Kaywoodie Pipes Inc.), Yello-Bole, Kaufman Brothers & Bondy (KB&B), the Reisss-Premier Corp. and the New England Briar Pipe Co. in 1955, and the New Jersey Briar Pipes Co. in 1956.

Discussions today about Medico pipes, in person or online forums, can become downright nasty, pitting vehement supporters against rabid critics. Nevertheless, older Medicos certainly possess a certain heightened quality and charm, and the brand’s lines are still made to be inexpensive and durable. As cigarsinternational.com put it, Medicos are “no-nonsense pipes made for the everyman.” That, they no doubt definitely are, at prices ranging from $15.99-$39.99. Medico has made pipes with materials including traditional briar, Brylon (an S.M. Frank synthetic invention of high temperature resin and wood flour) and even a unique bent tall billiard covered with a mysterious material described by Pipephil as either felt, synthetic fur “or a piece of wall-to-wall carpet.” Well, that settles that. To tell the truth, I would love to own one of those, if only for show-and-tell and to be able to call myself a carpet piper, despite the risk of static-electric charges and burns.Lady1
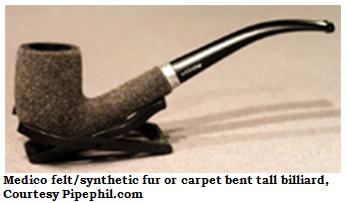
SOME FEMALE SMOKERS AND PIPE MAKERS
I have put out various general calls for help in my local and online pipe communities searching for women who smoke pipes and would be willing to share some of their experiences and preferences, and my friend Liz invited me to become a Friend of her Facebook Ladies of the Briar Group. I still need to pursue that line, but at least have four blogs left to do so.

Since my second ladies pipe blog, I have re-focused my research on areas of interest I had not even considered until some other friends mentioned them. The one was revealed to me by Jennifer, the owner of Stag Tobacconist in Albuquerque where I am a very frequent fixture. The other, suggested to me by another Smoking Forums UK friend, Ed, was a fact that struck me as so obvious I was embarrassed to have overlooked the idea. Both, I believe, will prove of great interest.

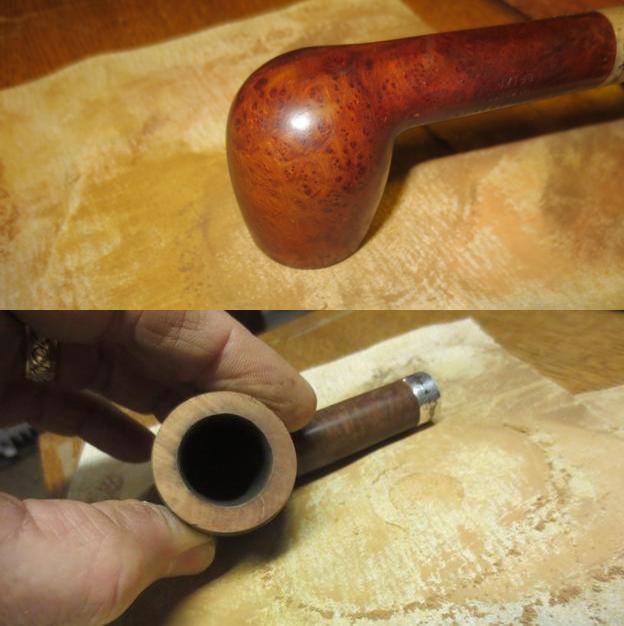
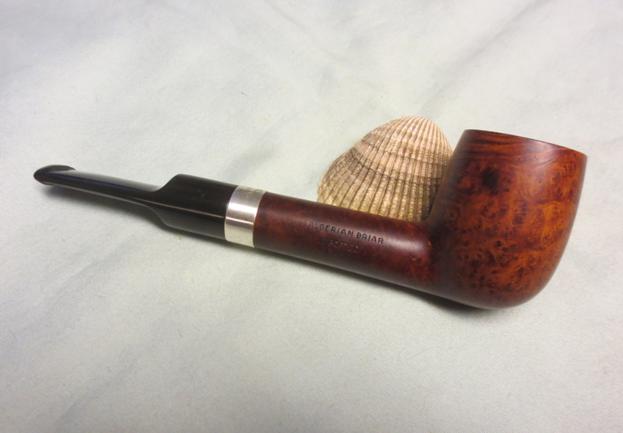
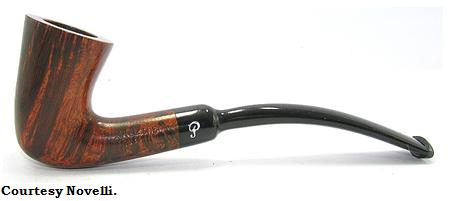
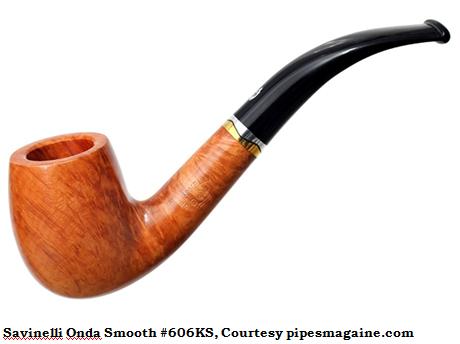
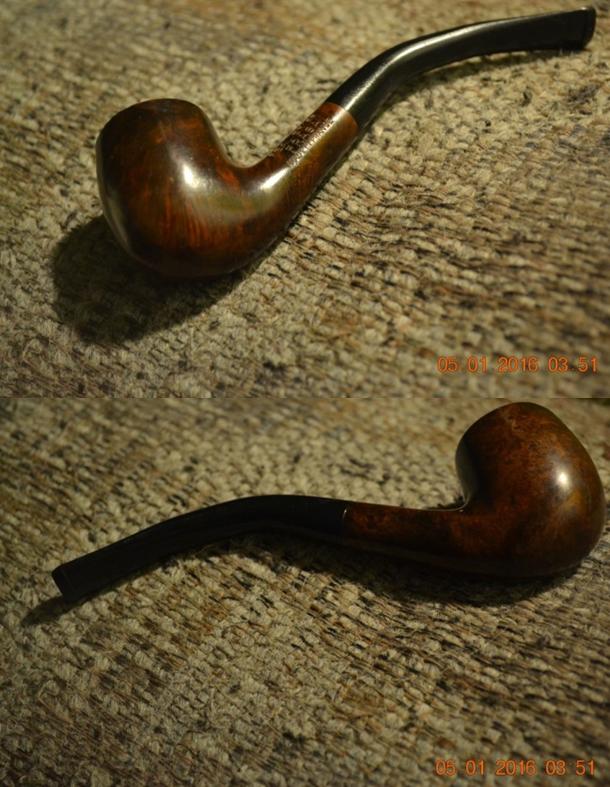
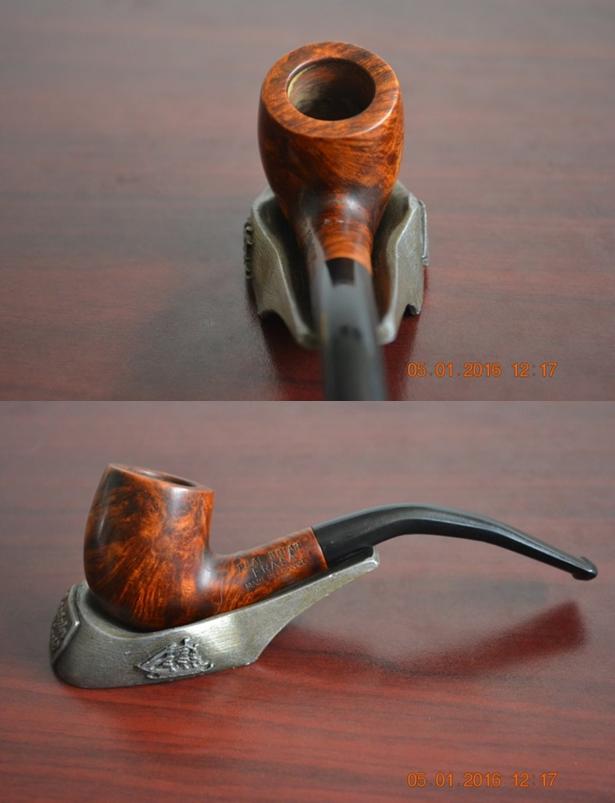
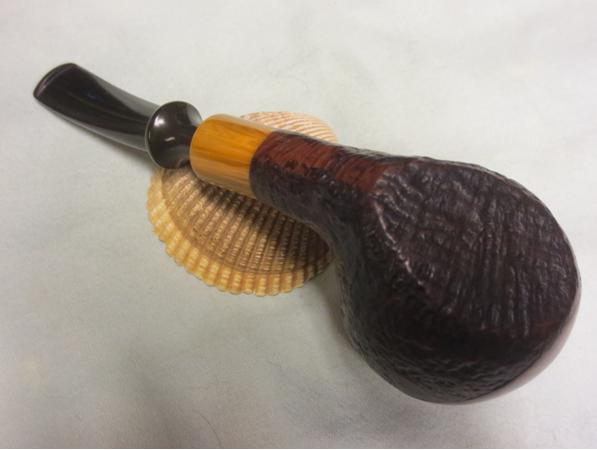
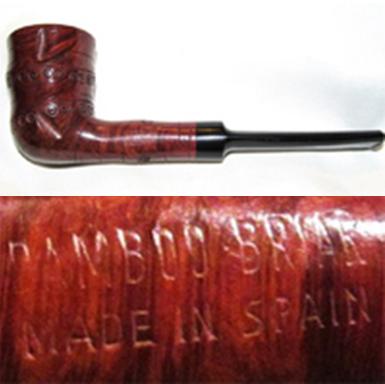
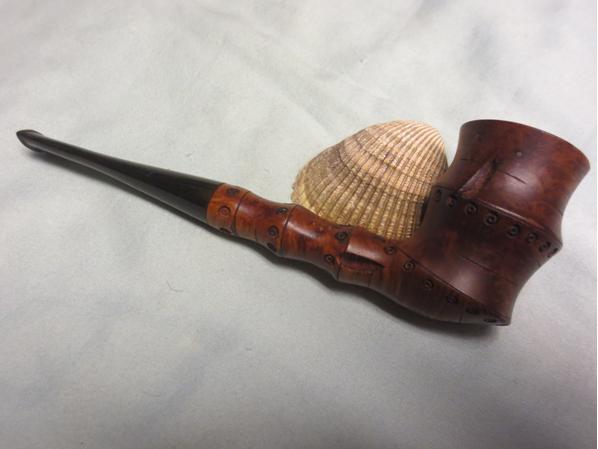
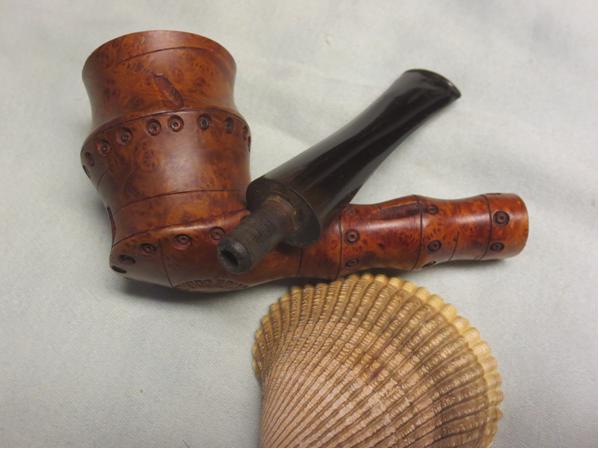
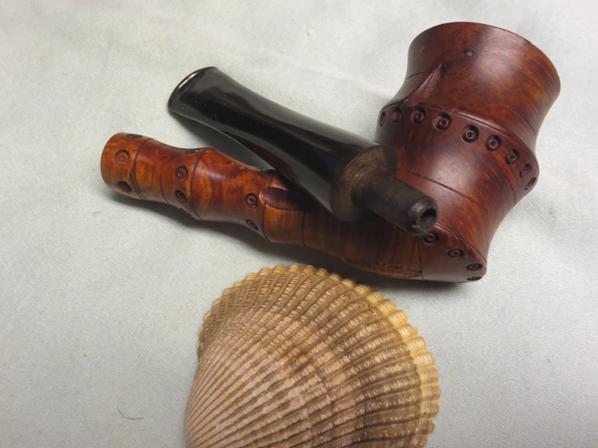
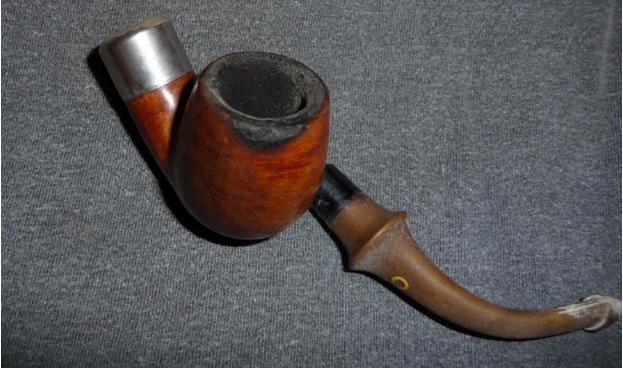
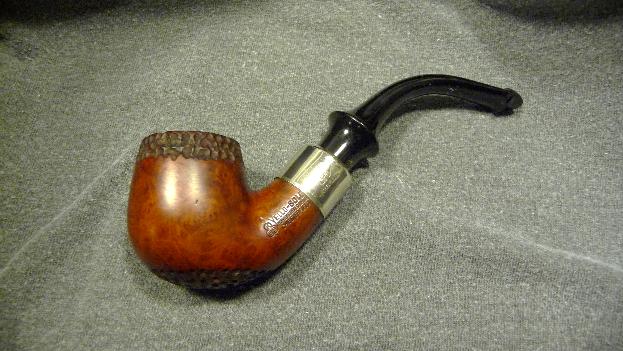
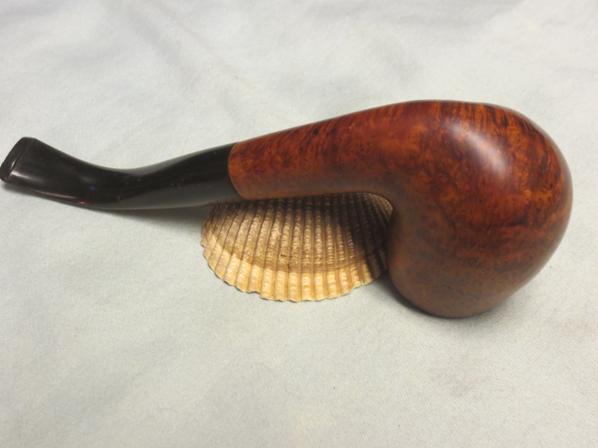
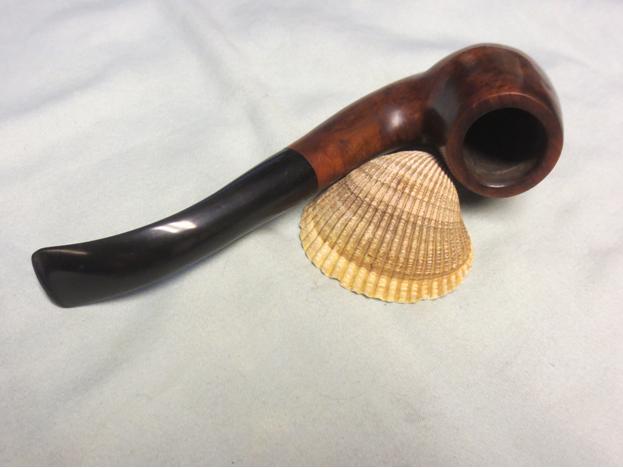
Unknown to me until Jennifer’s revelation, was that Samuel Gawith Fire Dance Flake – a Virginia mix with blackberry, vanilla and brandy flavorings that was a favorite of mine back in my aromatic-heavy days but remains a blend I still enjoy on occasion – was formulated by one of the few female tobacco blenders in the U.S. The light flavorings and Best Brown Virginia used give Fire Dance a nice little bite.Lady2
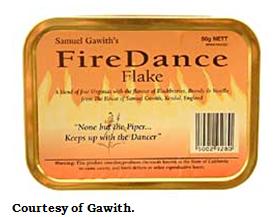
Of more significance is the presence of females – ye gads, what’s the world coming to? – in the business of making pipes. Ed mentioned the following names and provided a few links, worried these were not enough, and I looked up the rest to get samples of their work: Vilma Armellini, one of three daughters of the great Italian pipe maker Mauro Armellini and who regularly assisted her father in making many of his pipes and took over the business upon his death; Anne Julie; Nanna Ivarssen, and two newcomers who have been crafting fine pipes for the past several years, Sabina Santos and Scottie Piersal. Alas, I have been unable to locate a pipe made entirely by Vilma Armellini, but the first photo below shows her father’s work that likely included her help. I will, you can bet, continue looking.Lady3 Lady4 Lady5 Lady6 Lady7
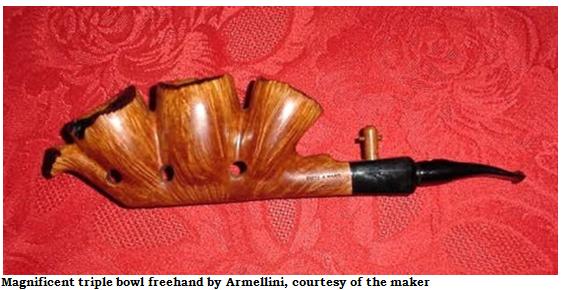
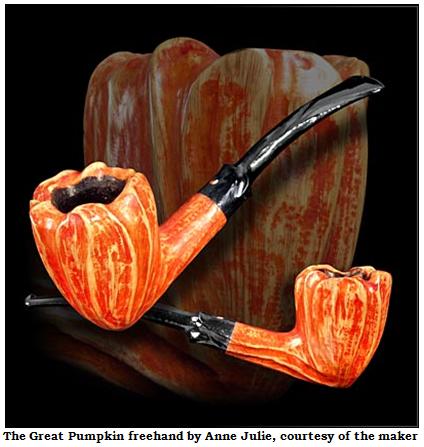
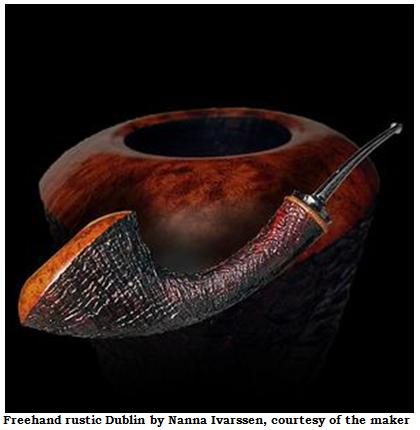
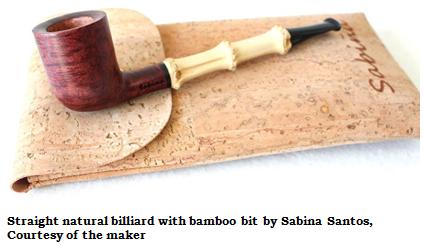
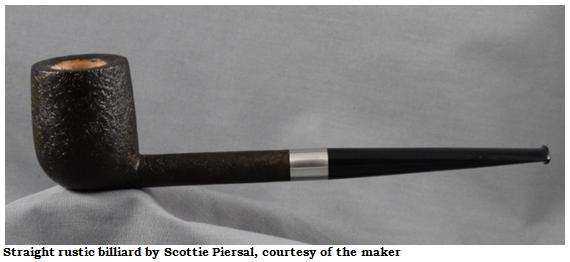
In light of my severe case of P.A.D., I expect to add samples of these brilliant women’s pipe crafting art to my collection as soon as possible.

RESTORATION
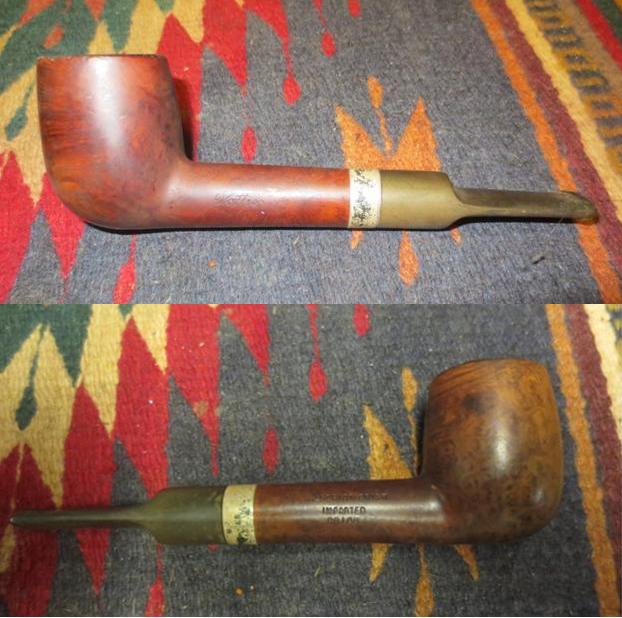
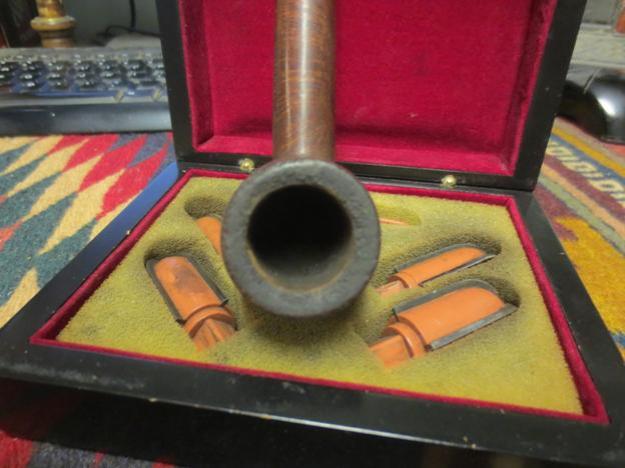
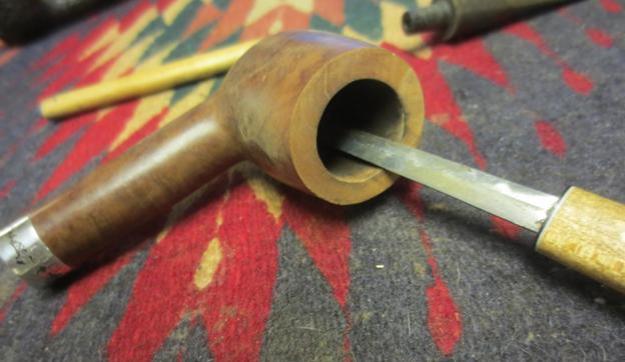
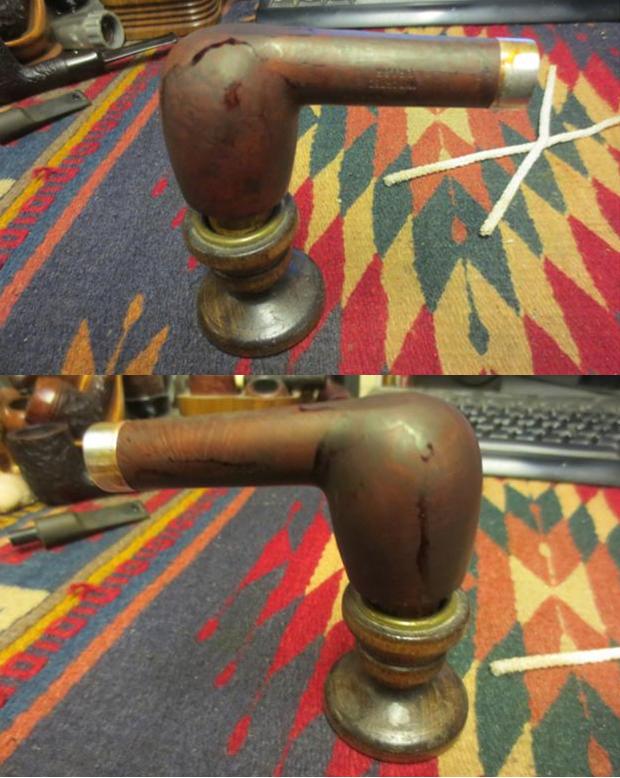
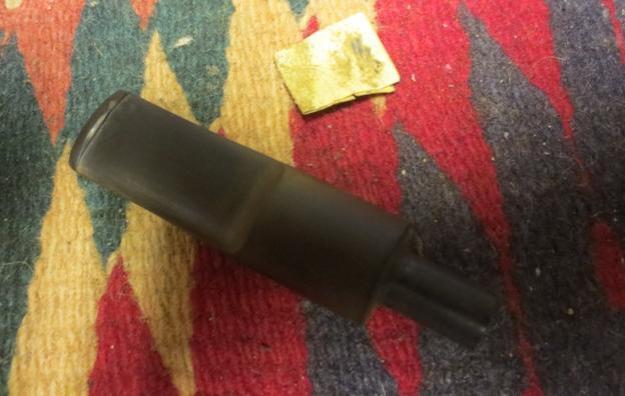
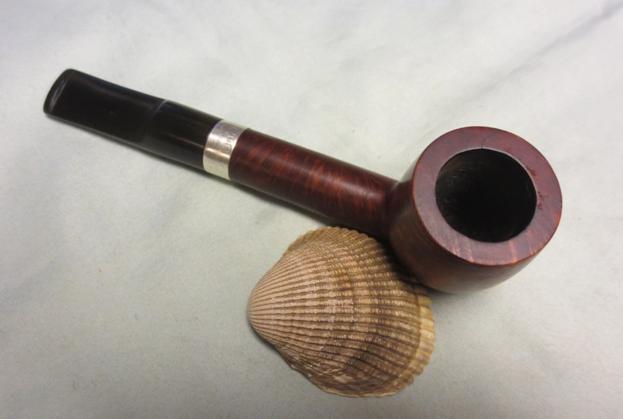
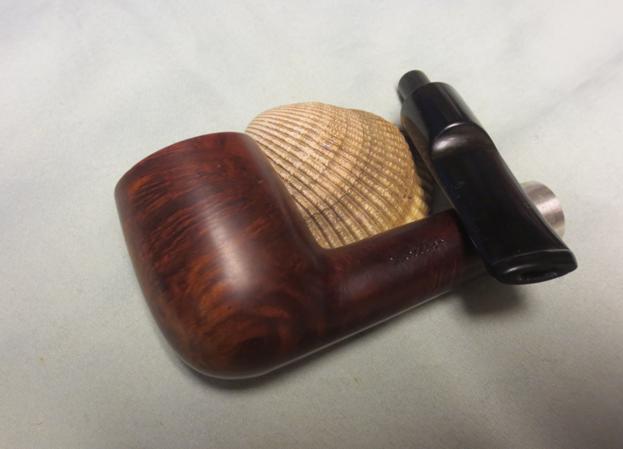
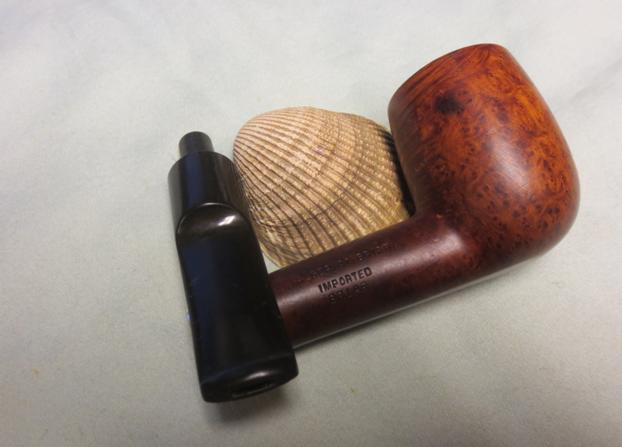
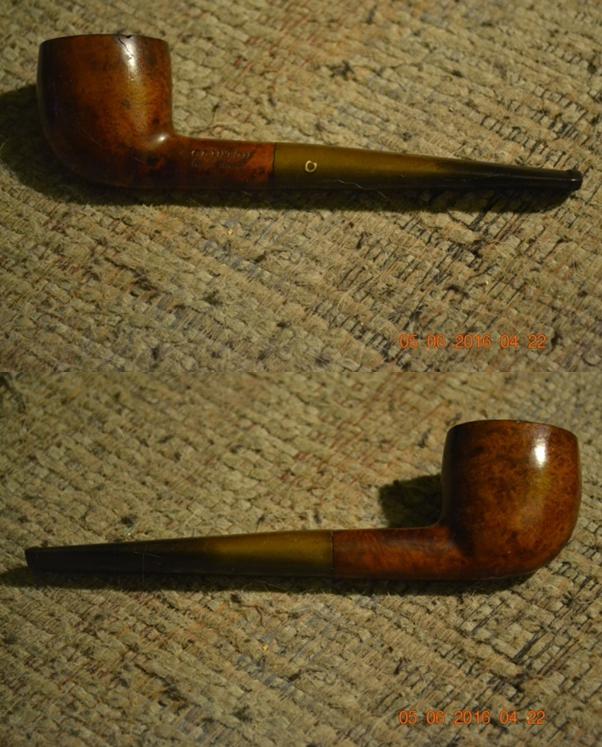
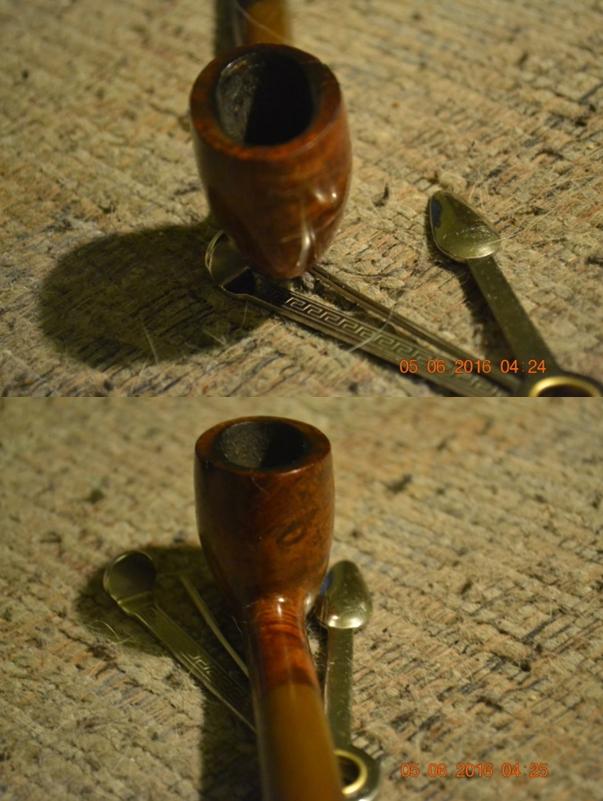
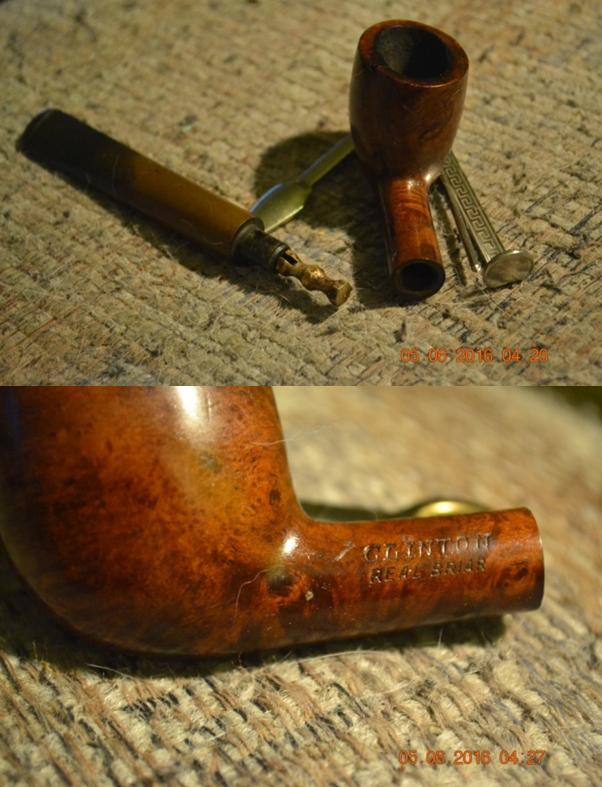
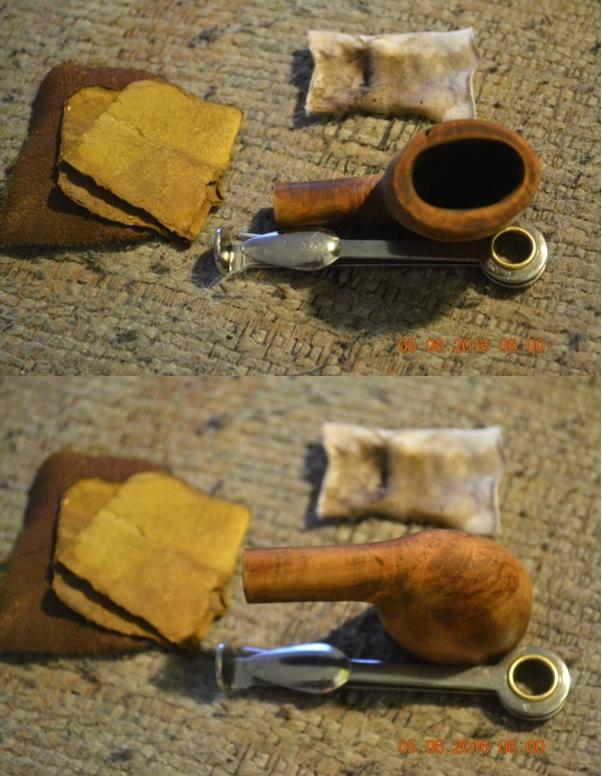
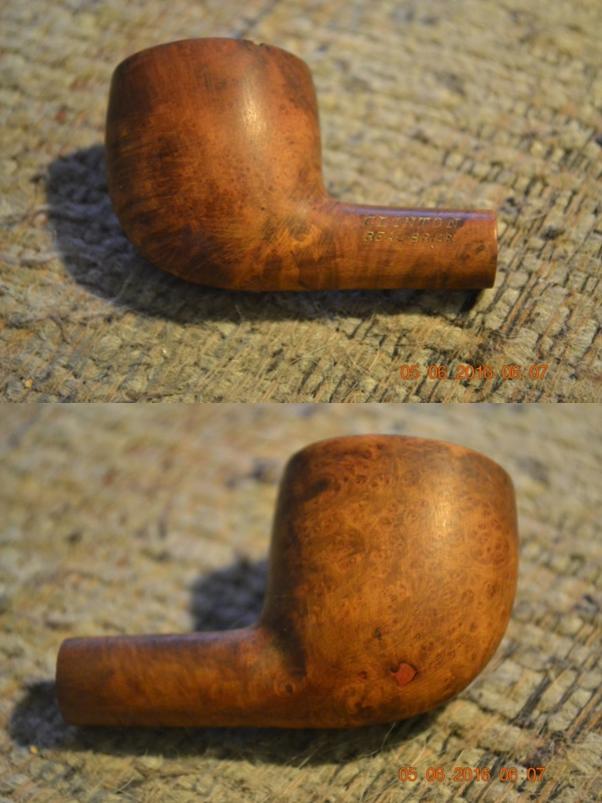
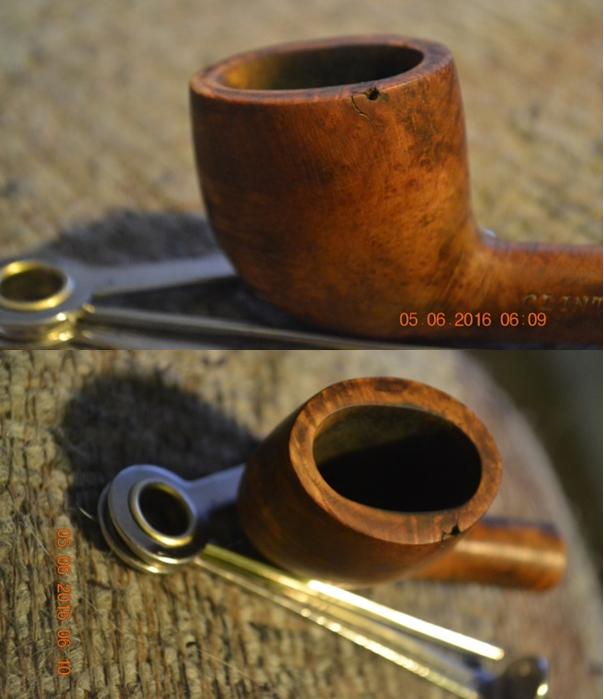
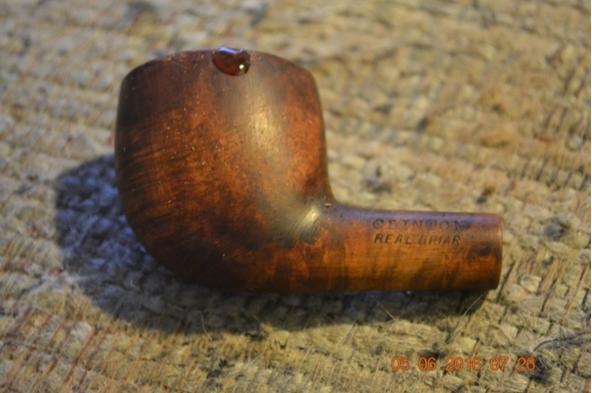
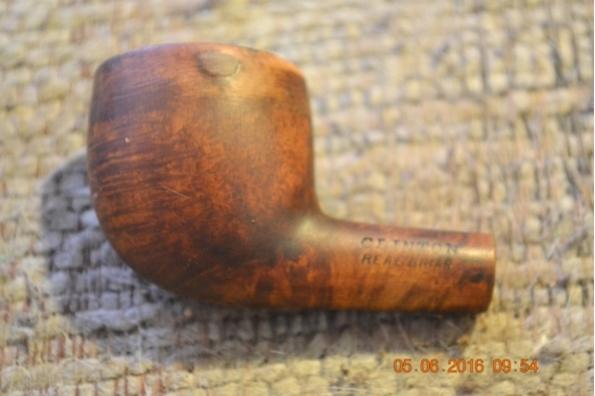
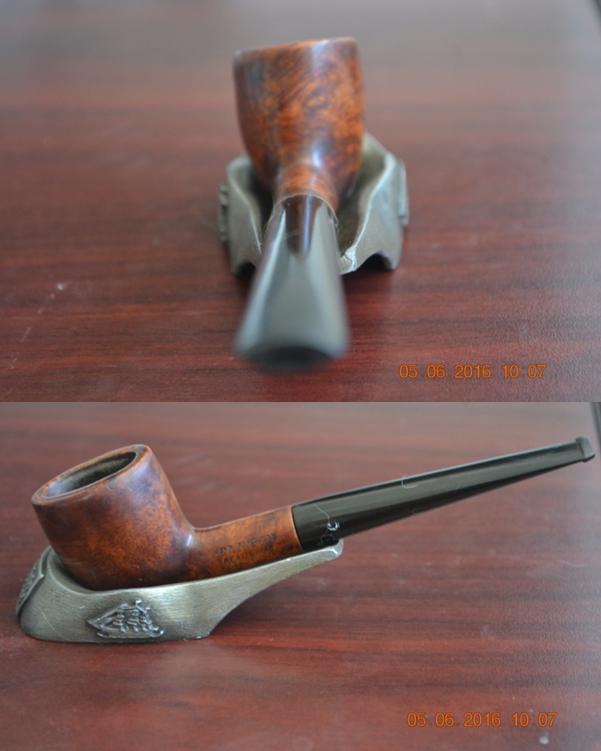
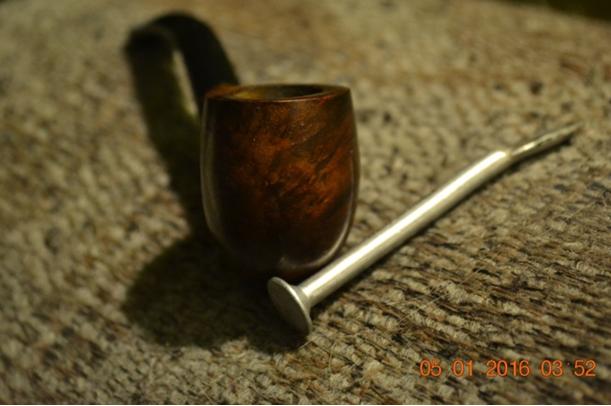
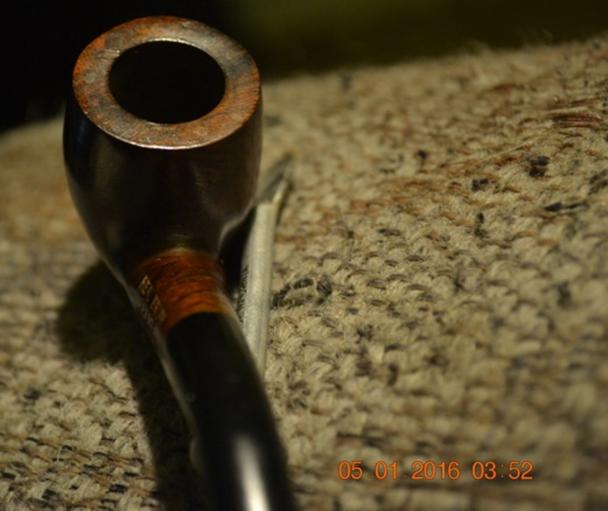
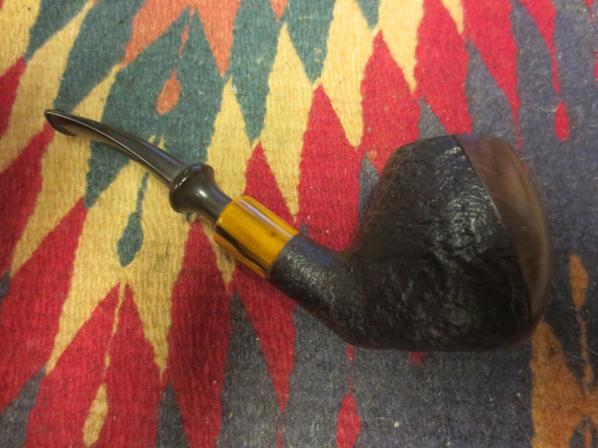
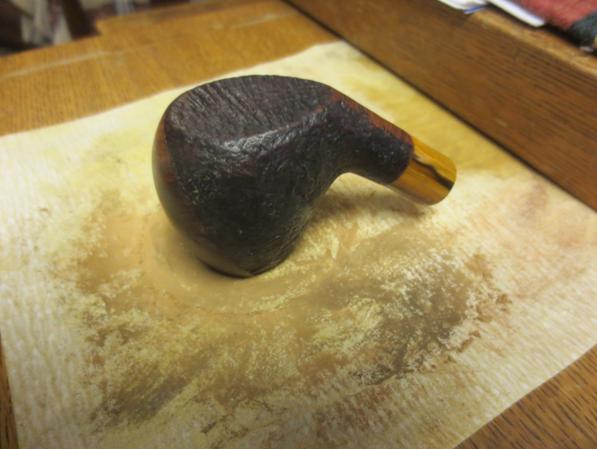
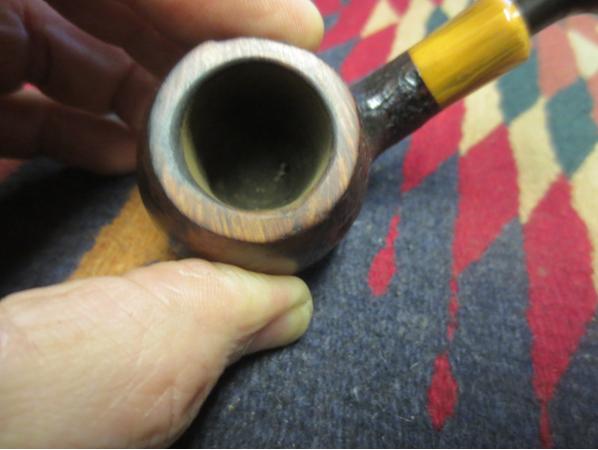
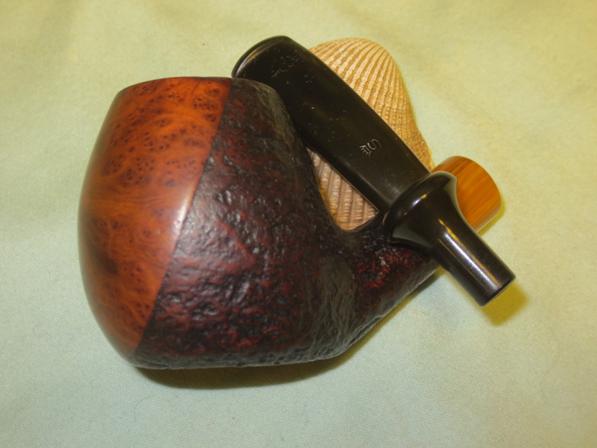
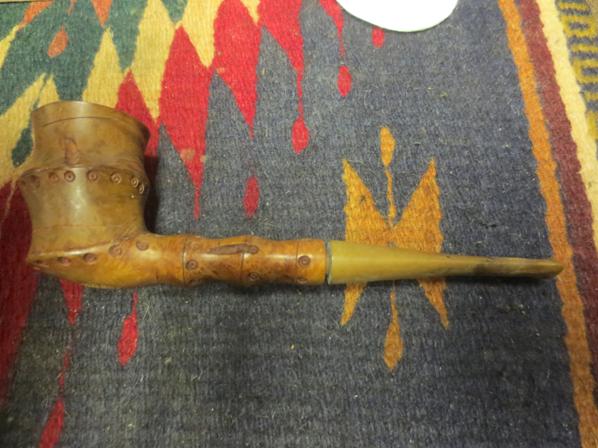
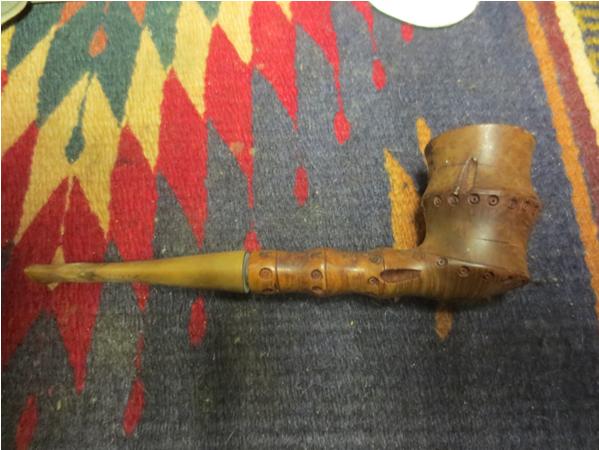
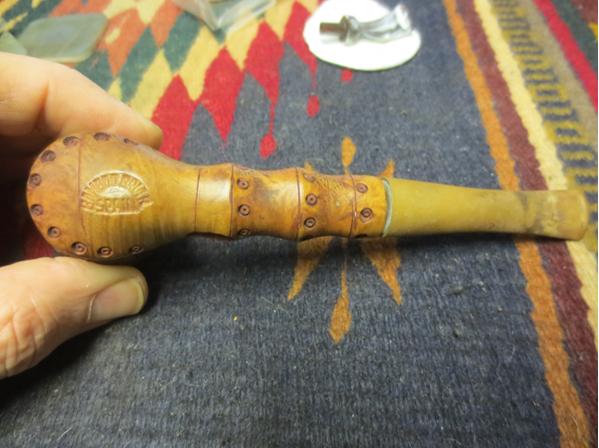
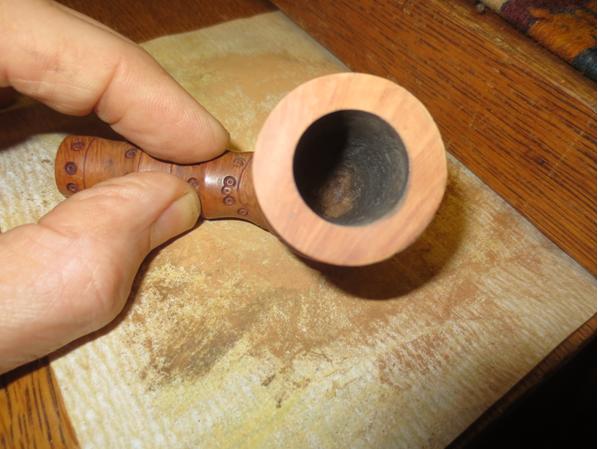
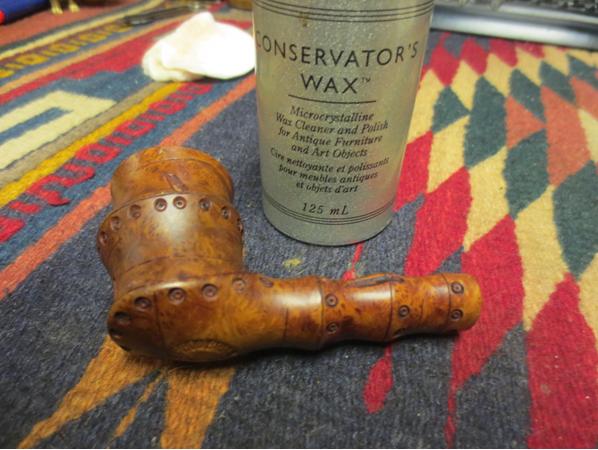
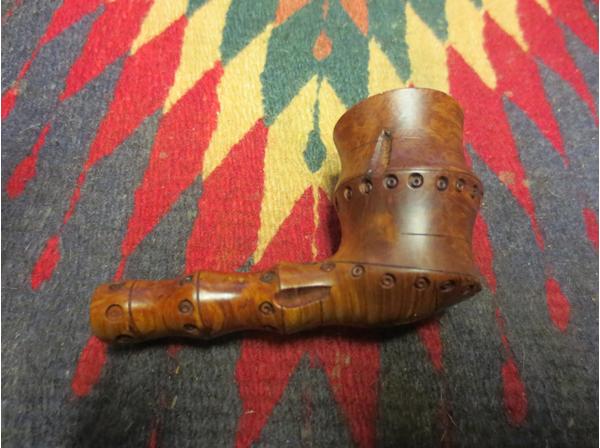
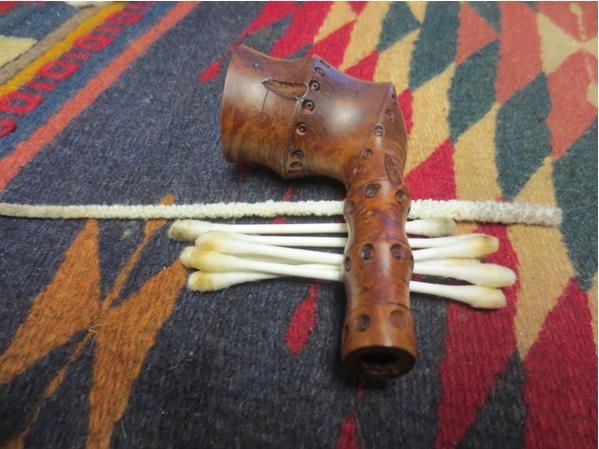
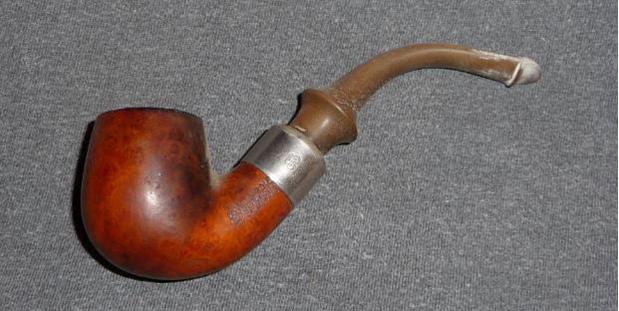
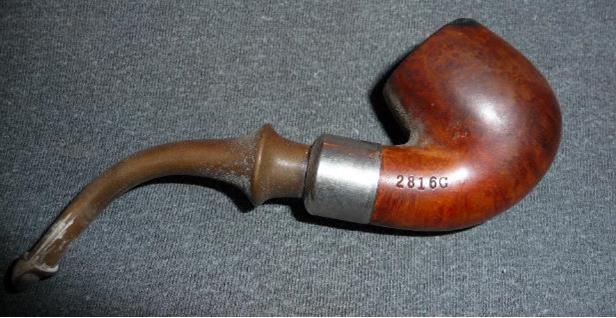
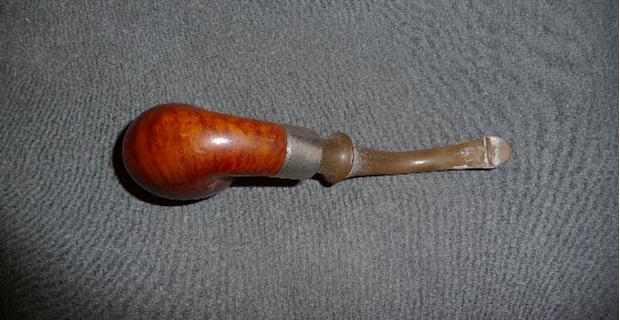
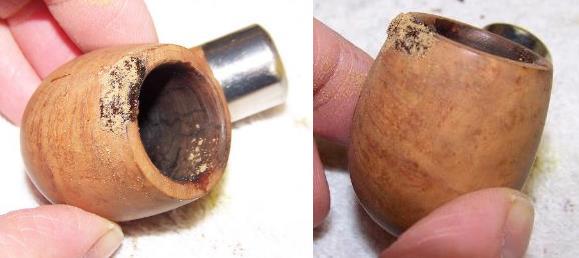
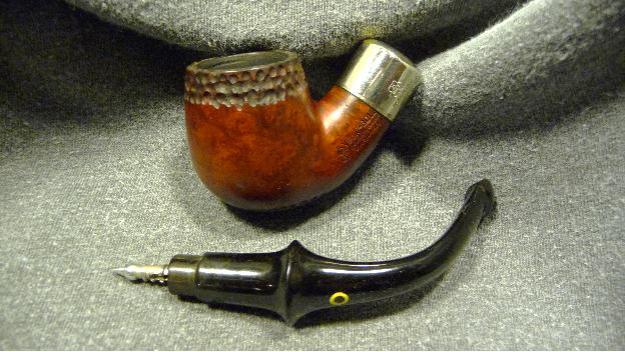
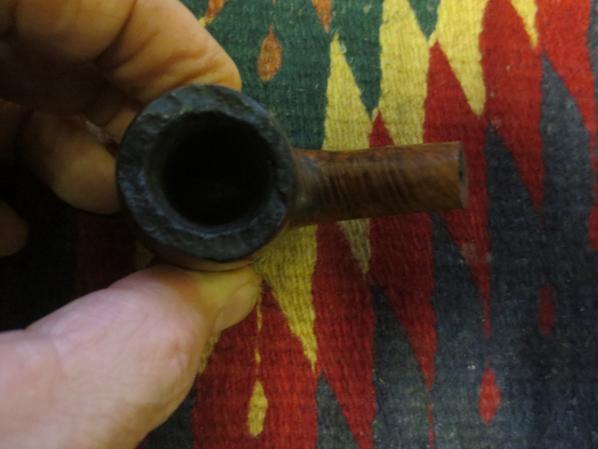
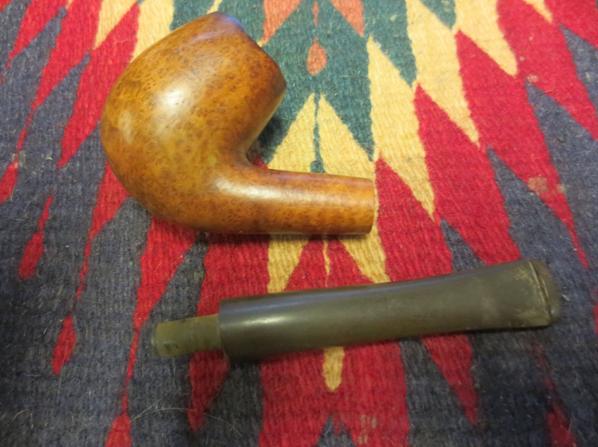
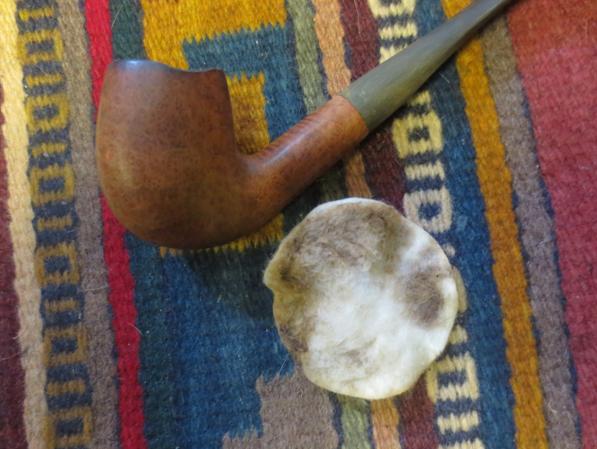
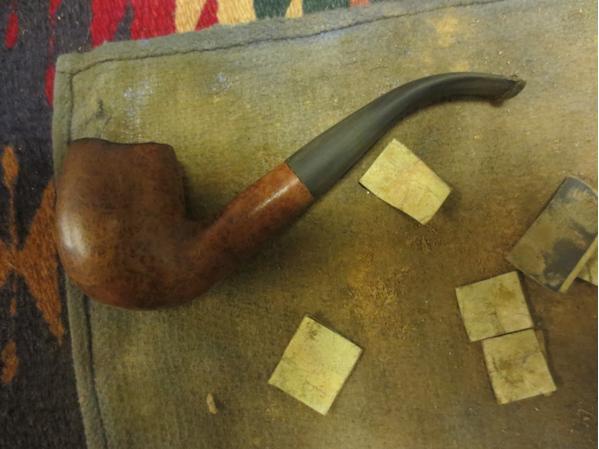
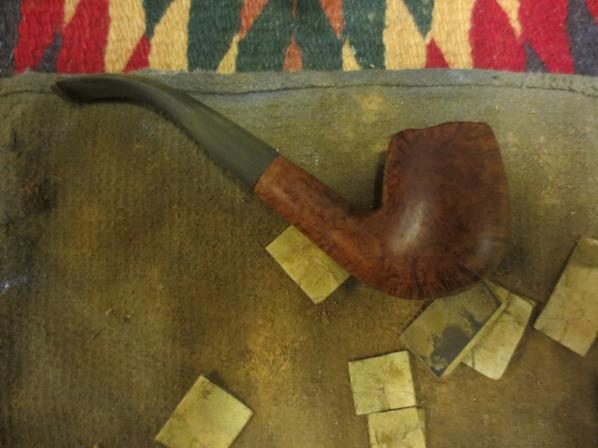
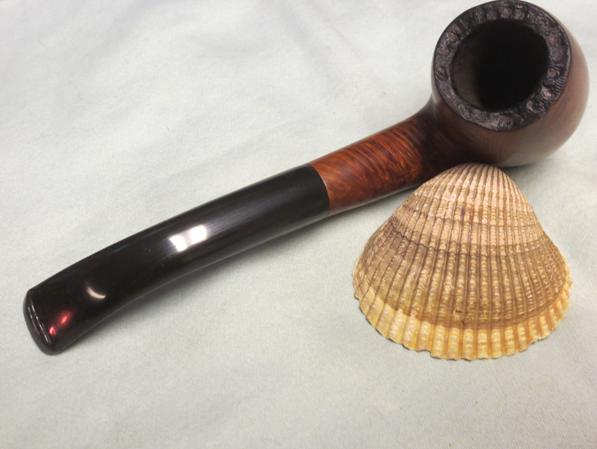
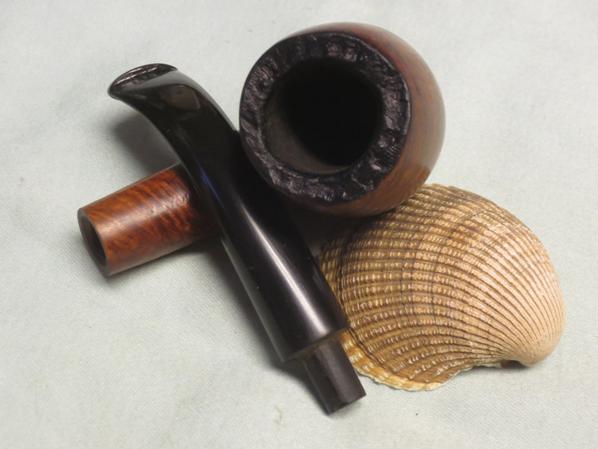
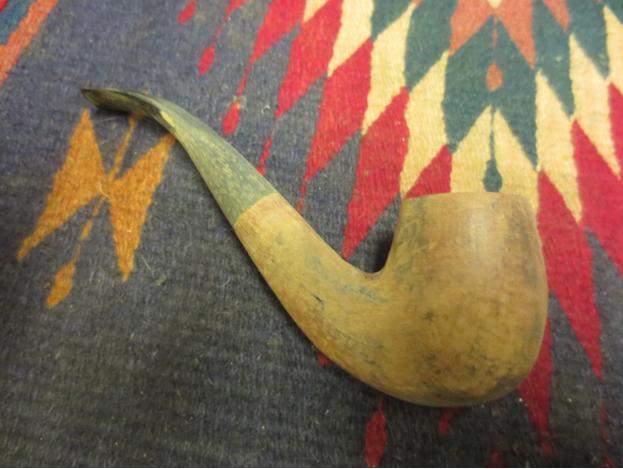
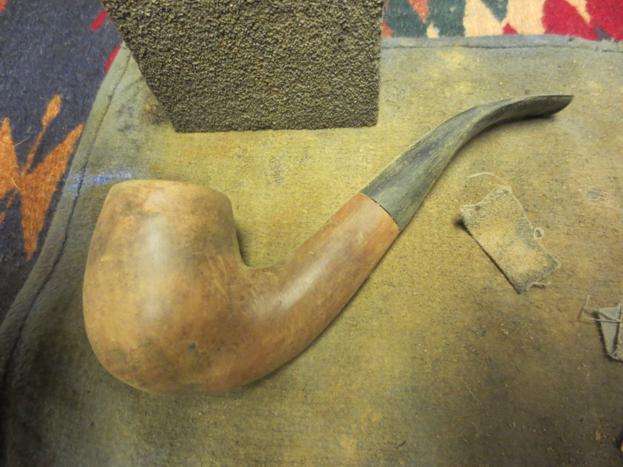
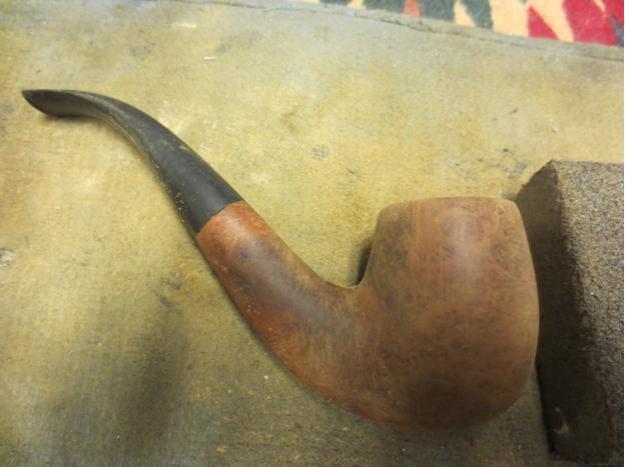
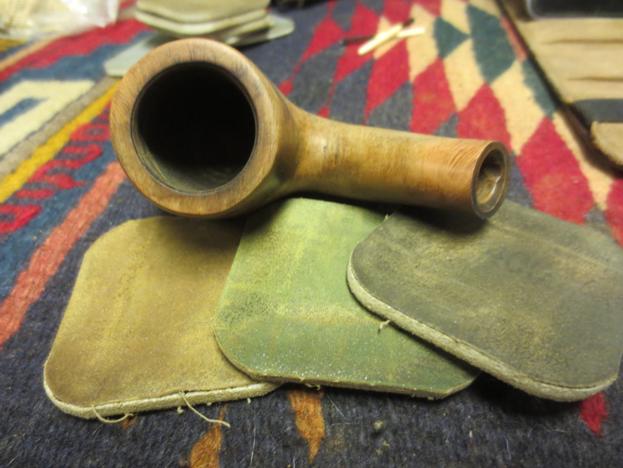
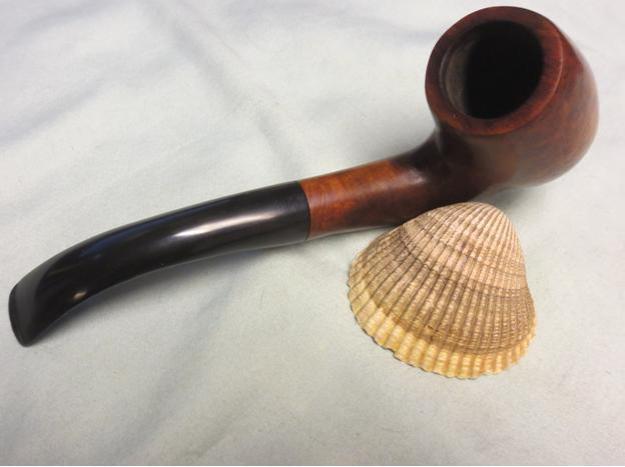
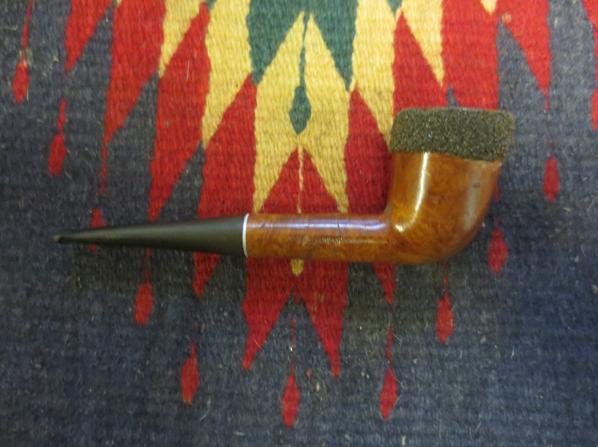
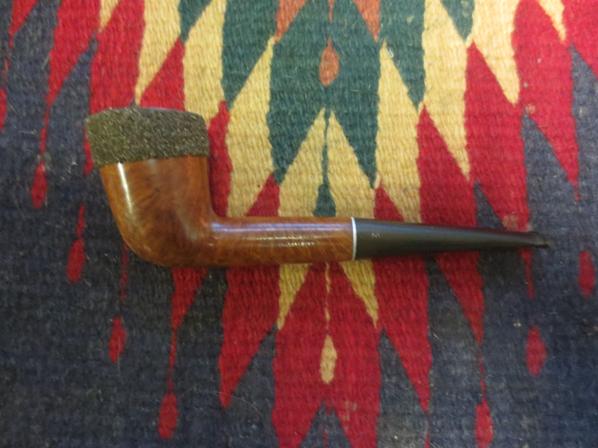
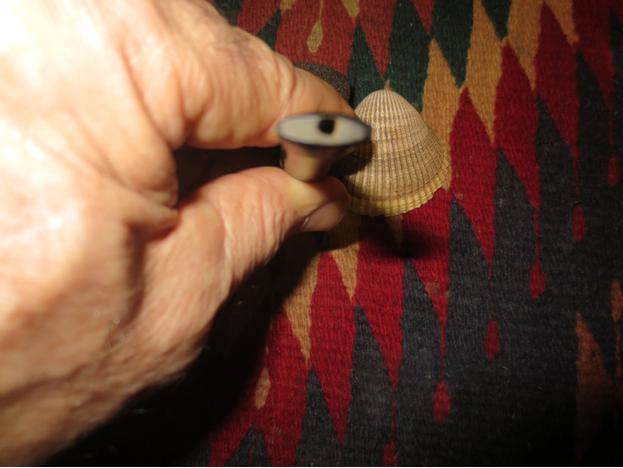
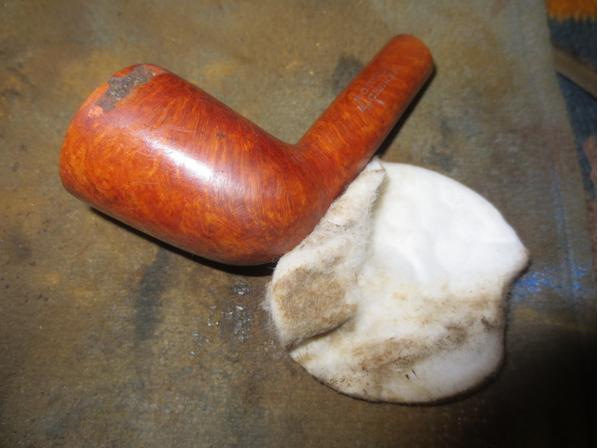
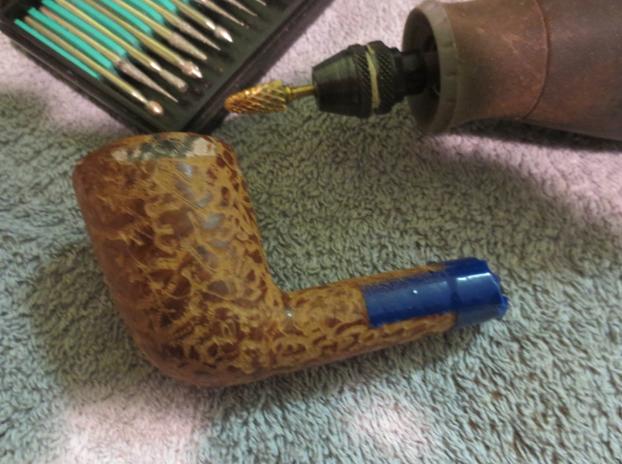
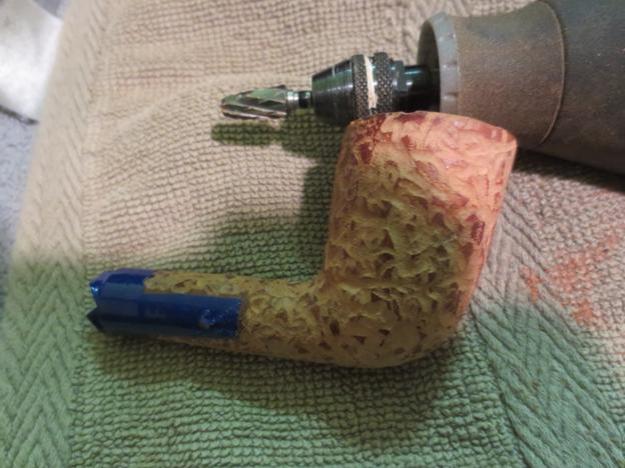
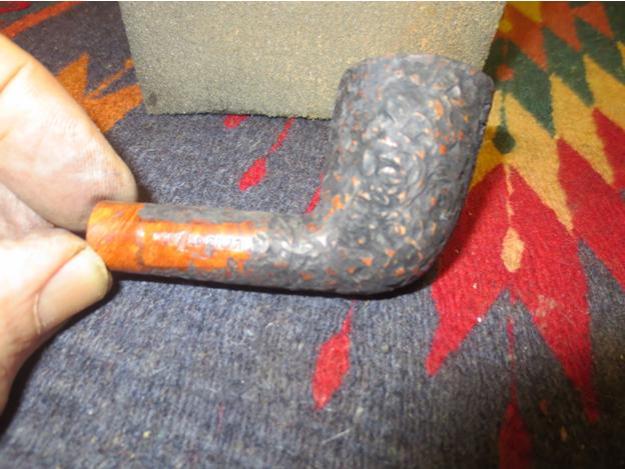
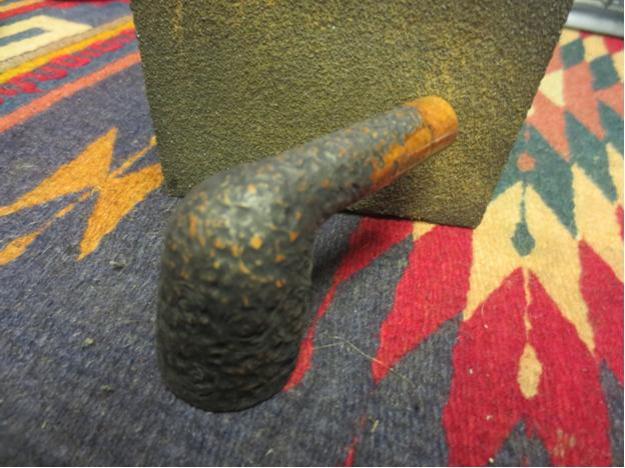
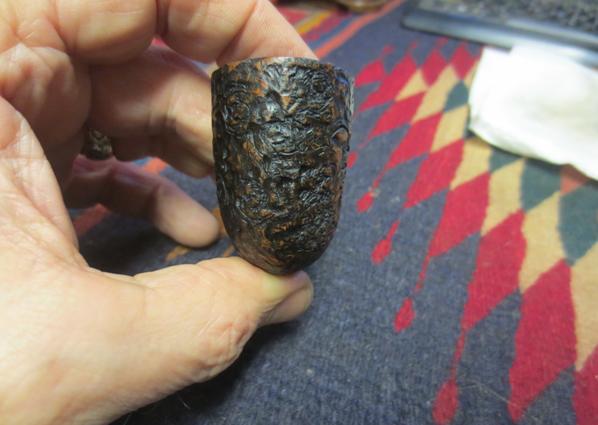
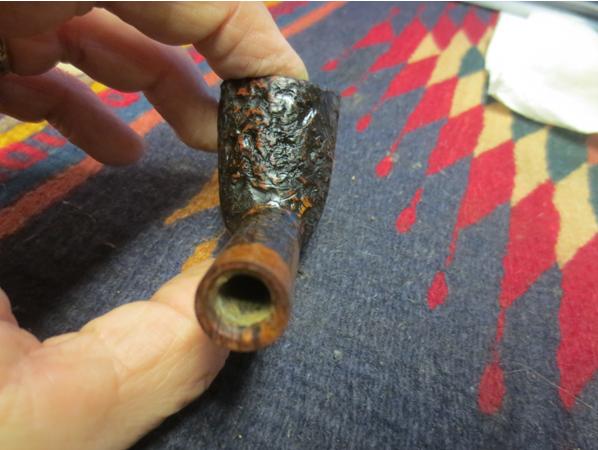
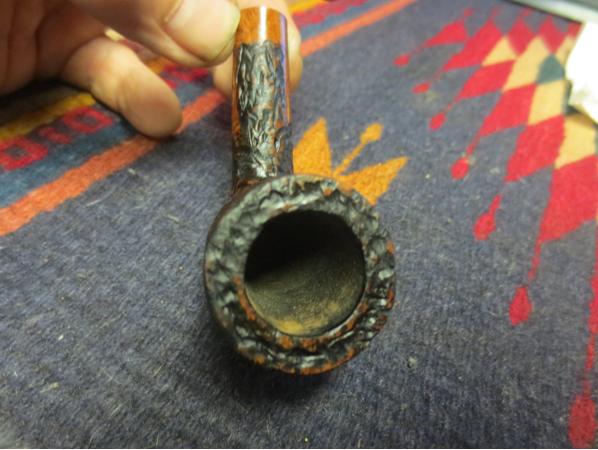
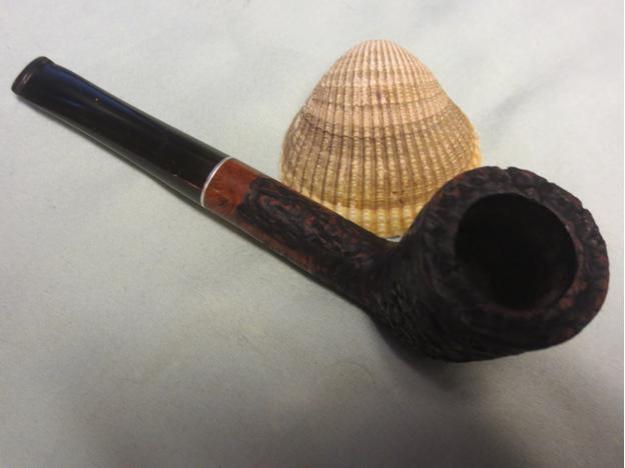
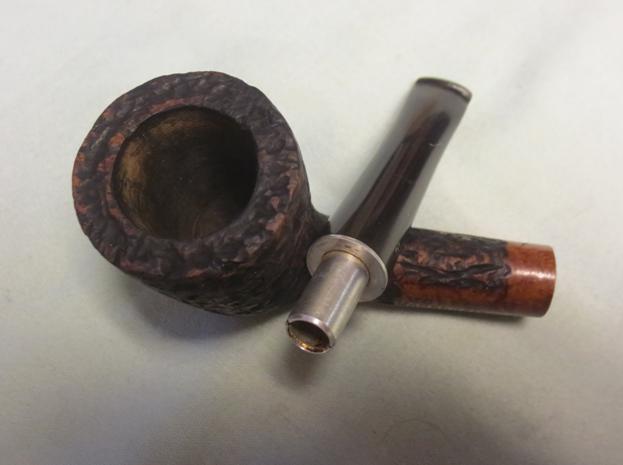
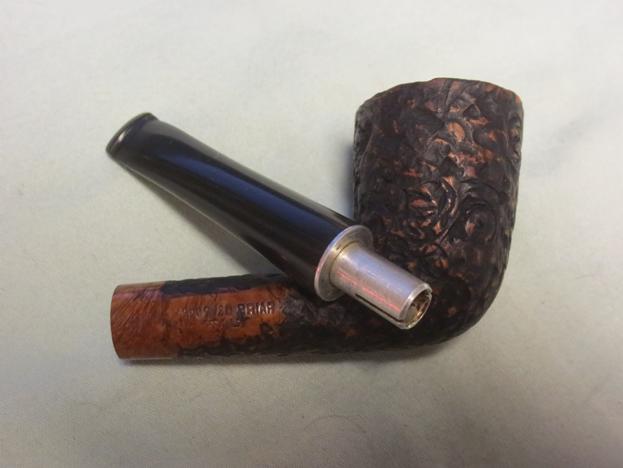
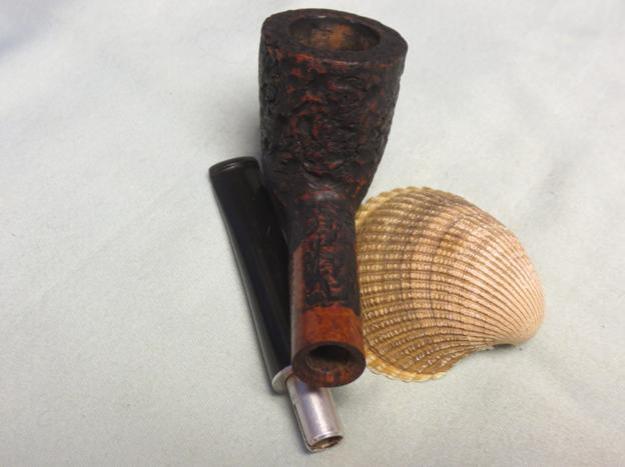
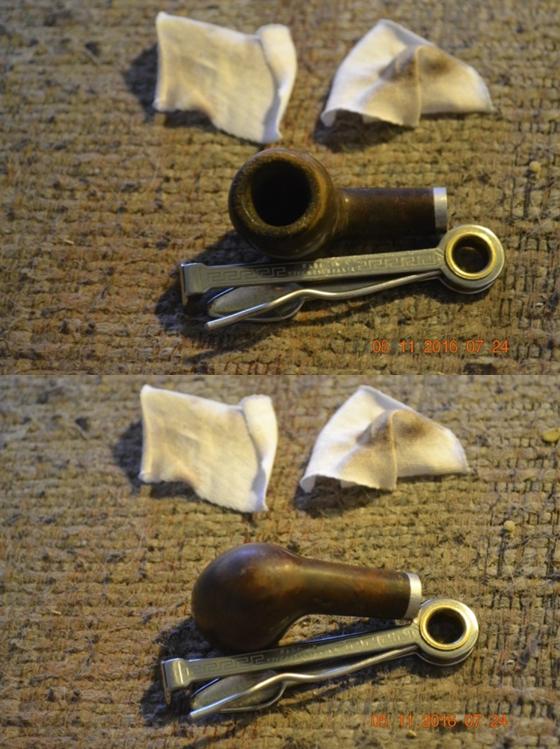
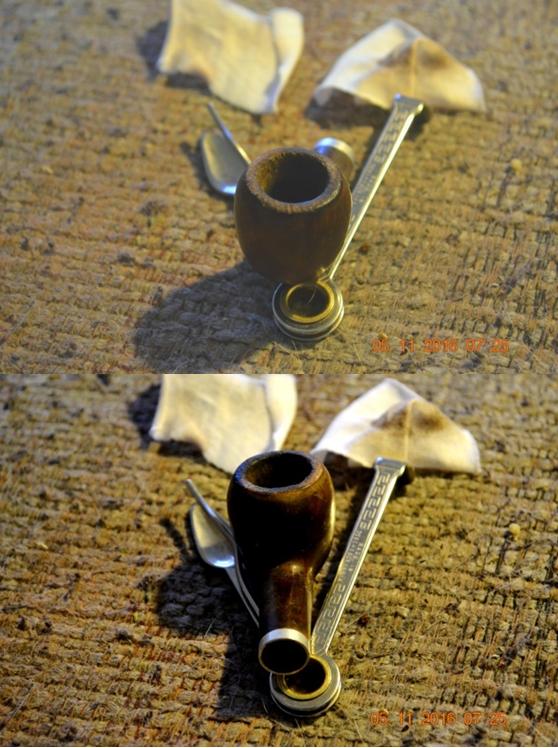
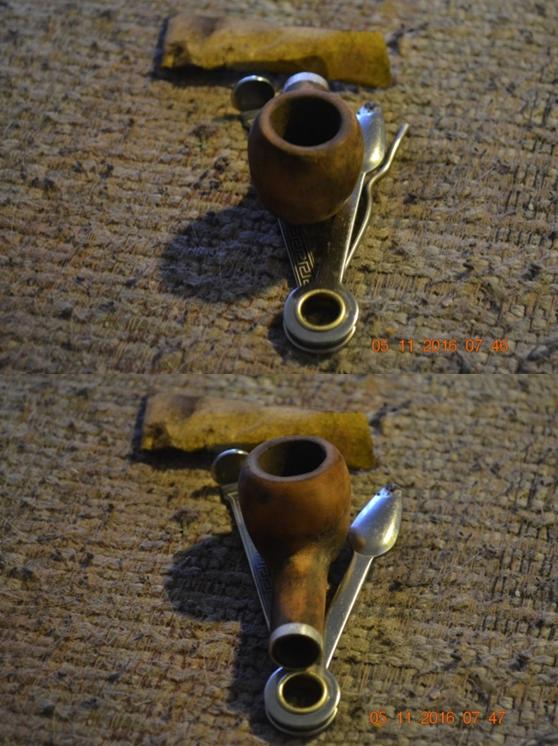
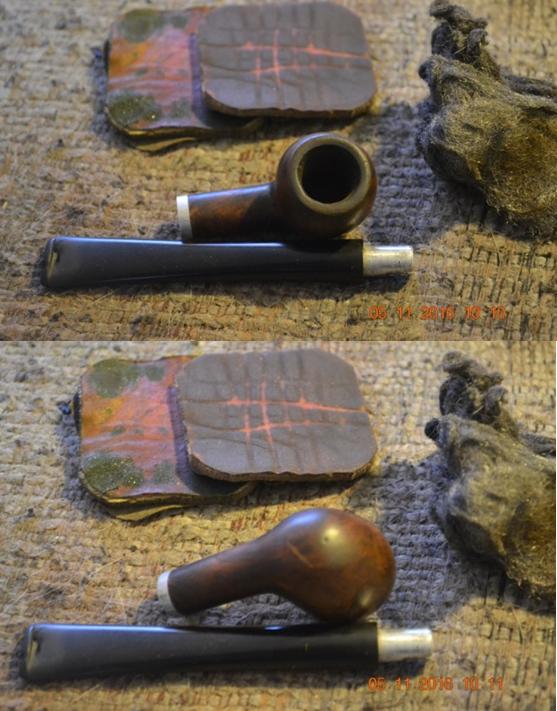
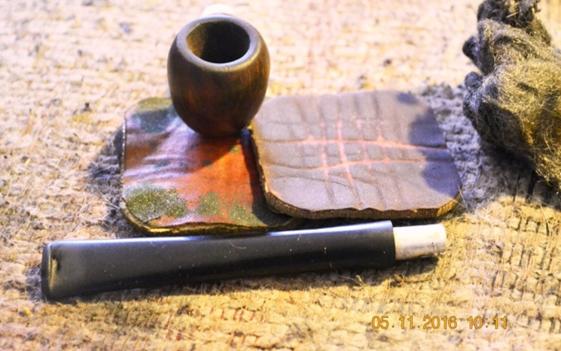
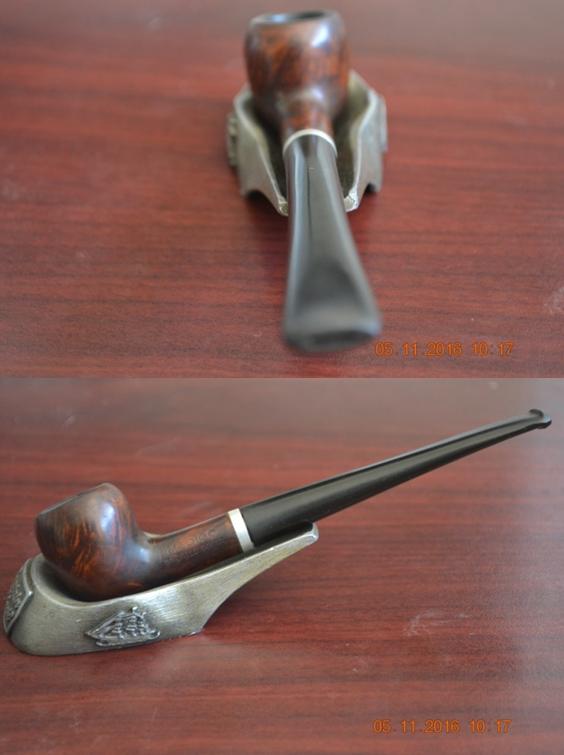
Now, for the drab little Medico Real Briar acorn as I first saw it.Lady8 Lady9 Lady10 Lady11
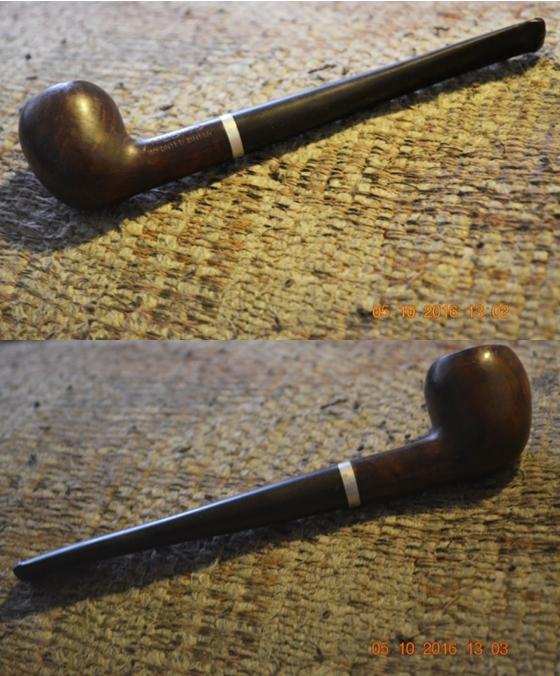
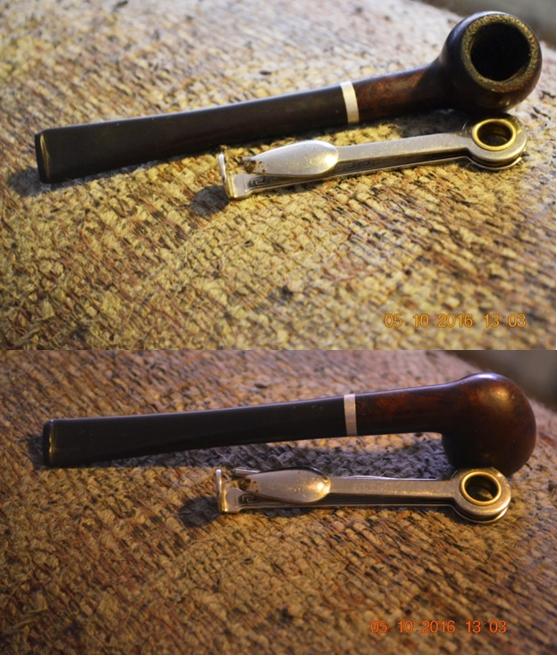
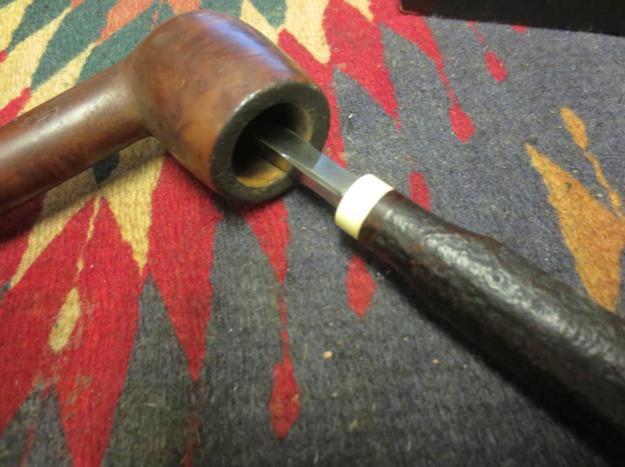
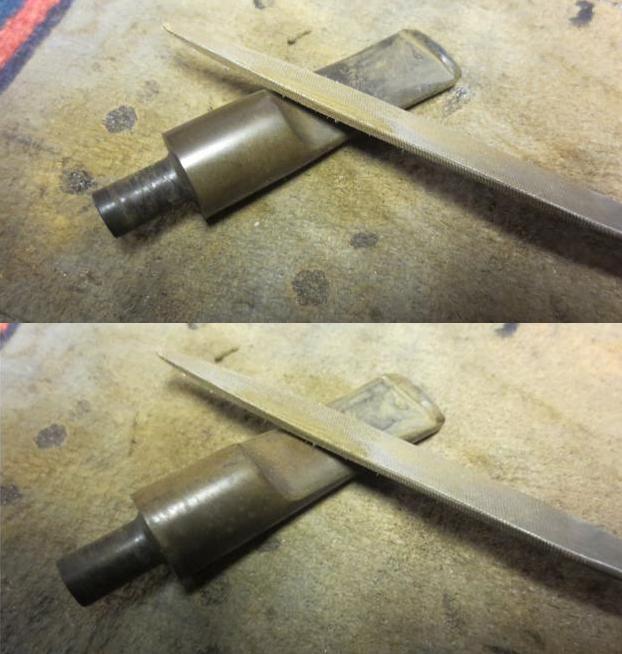
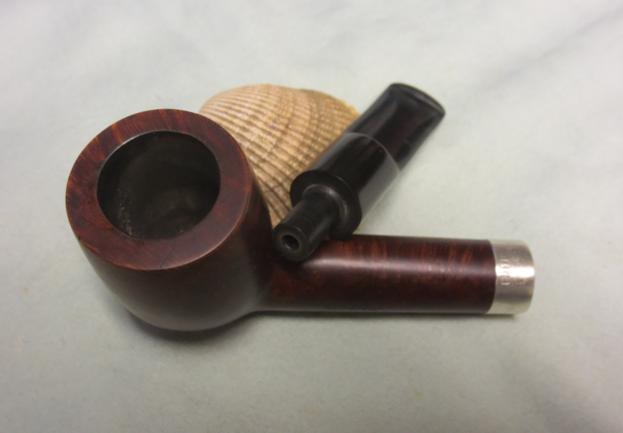
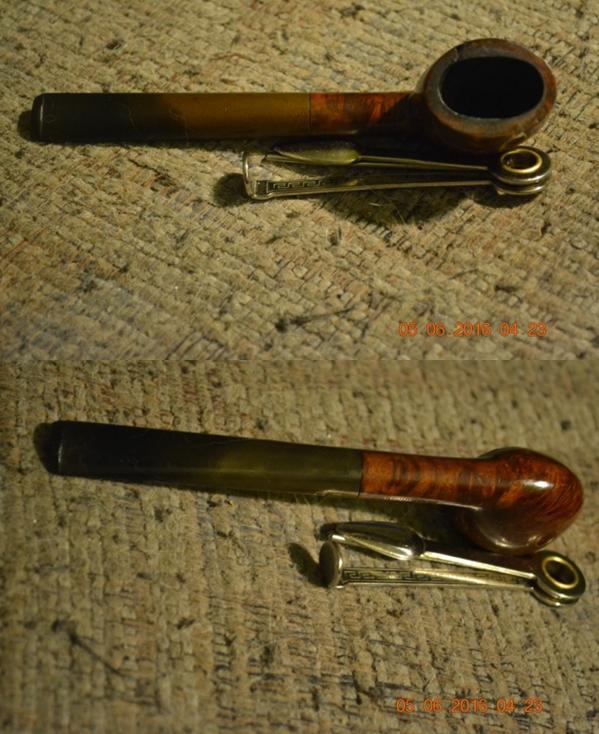
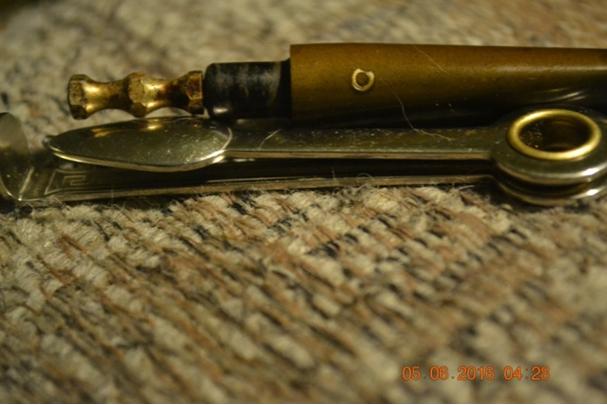
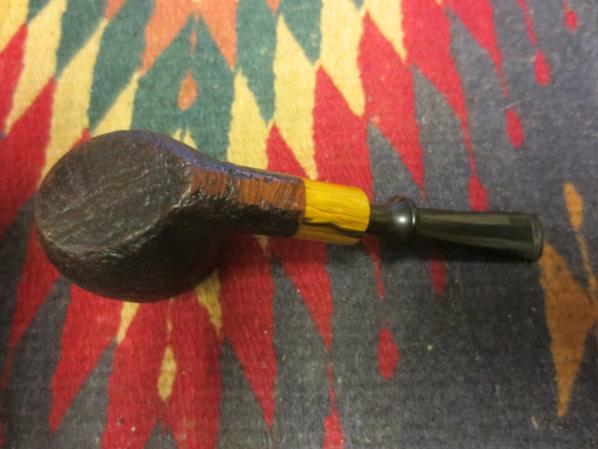
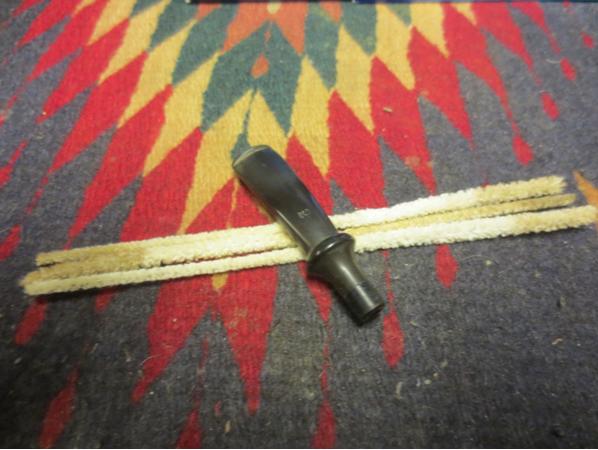
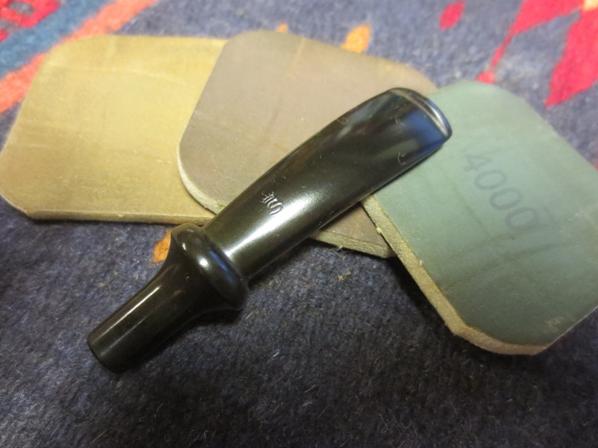
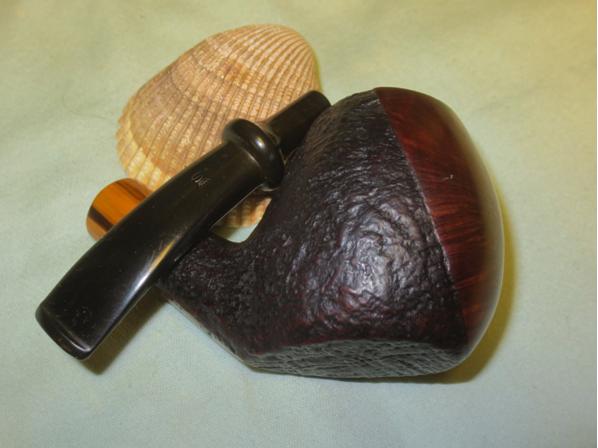
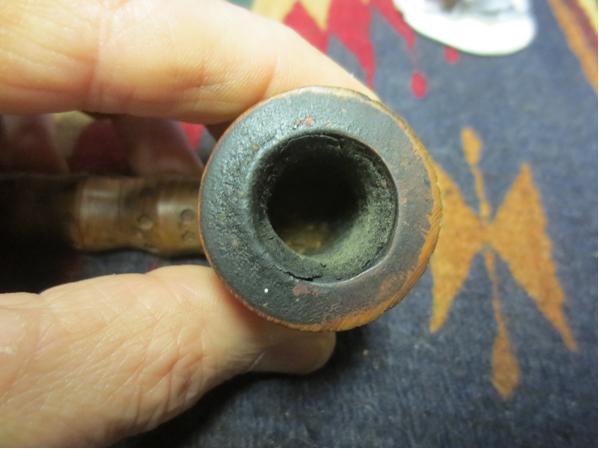
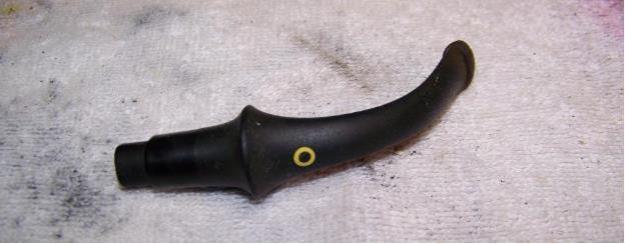
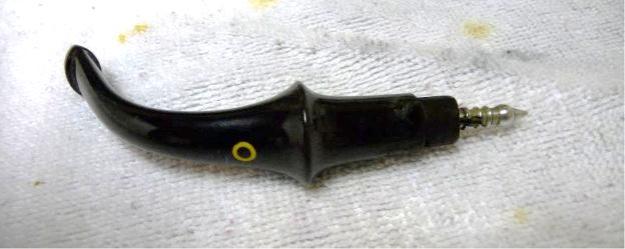
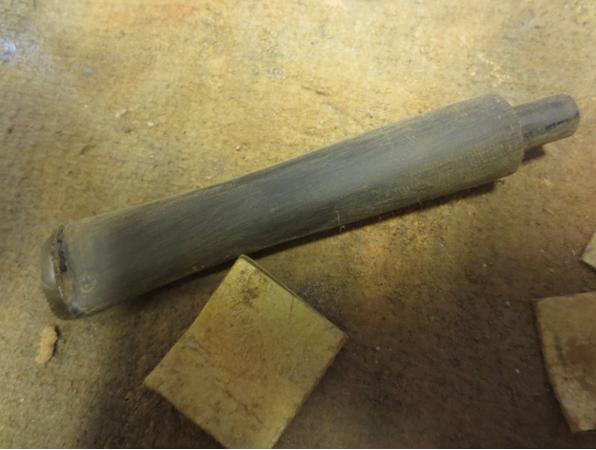
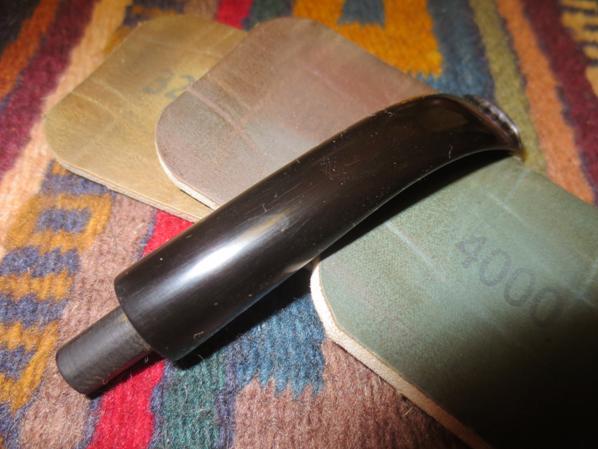
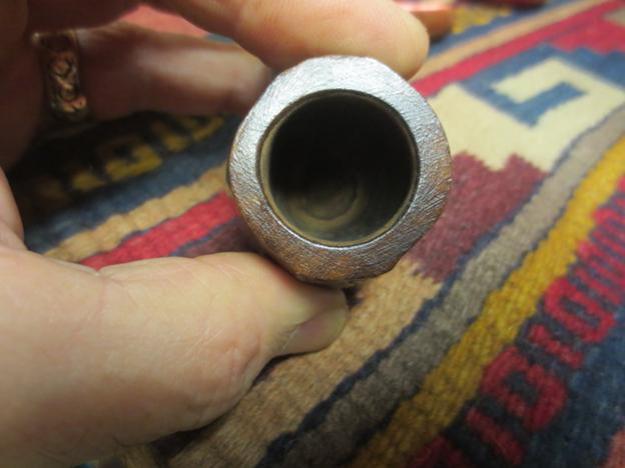
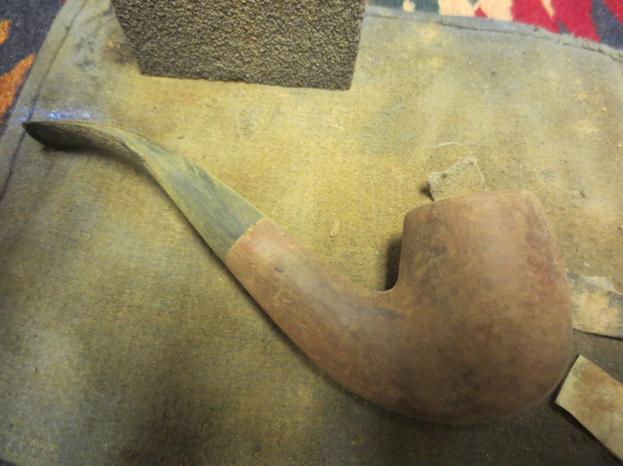
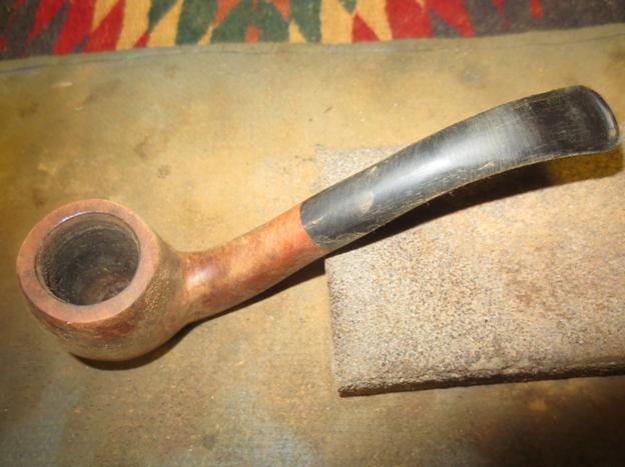
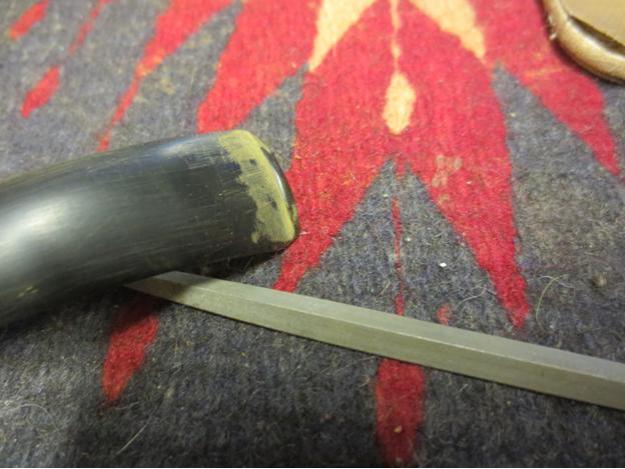
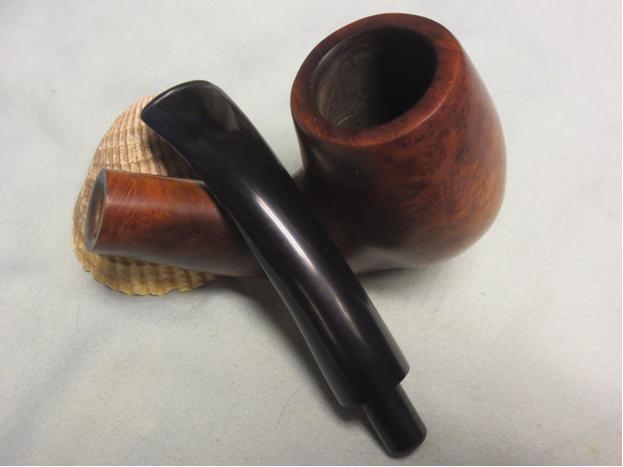
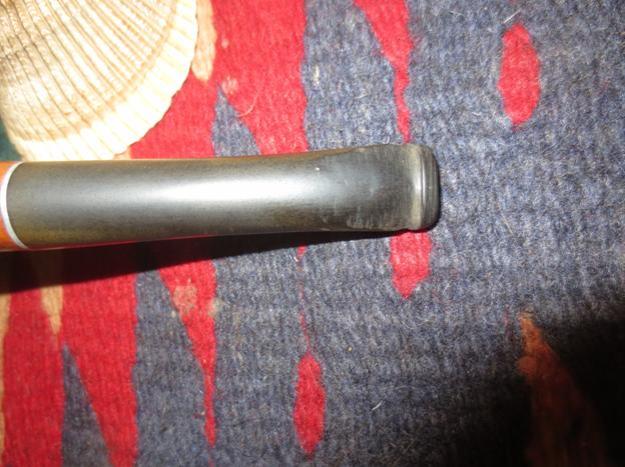
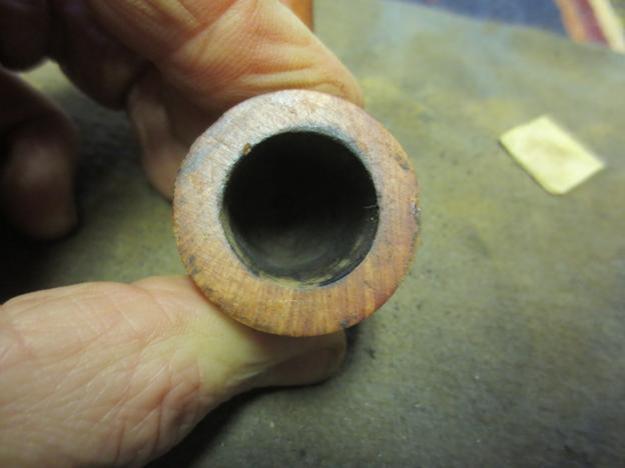
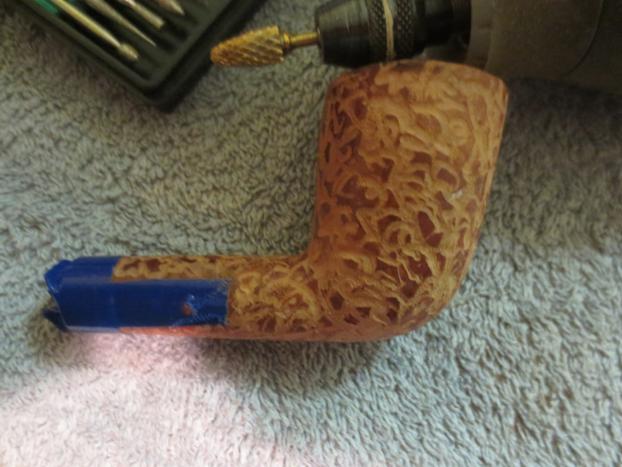
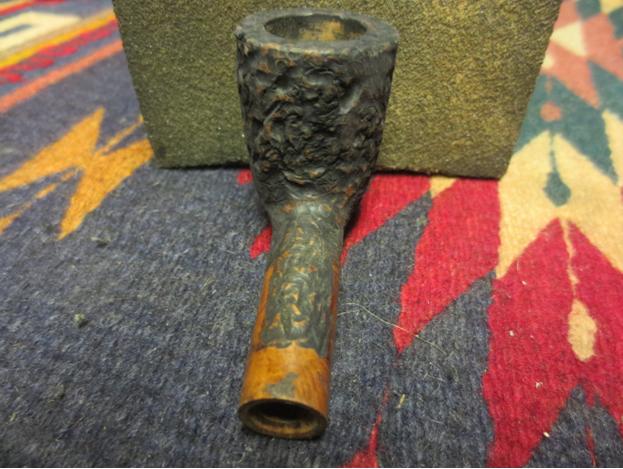
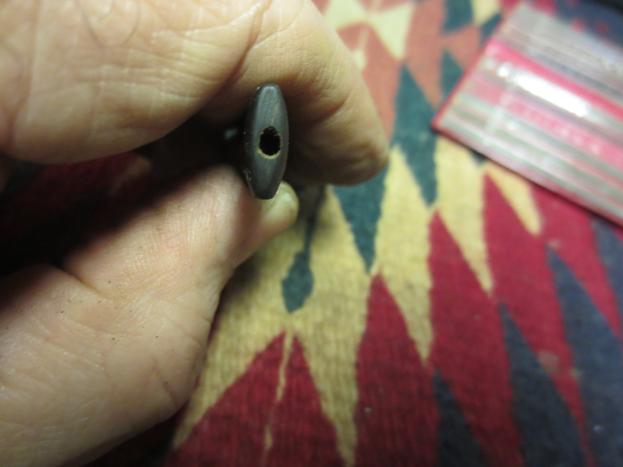
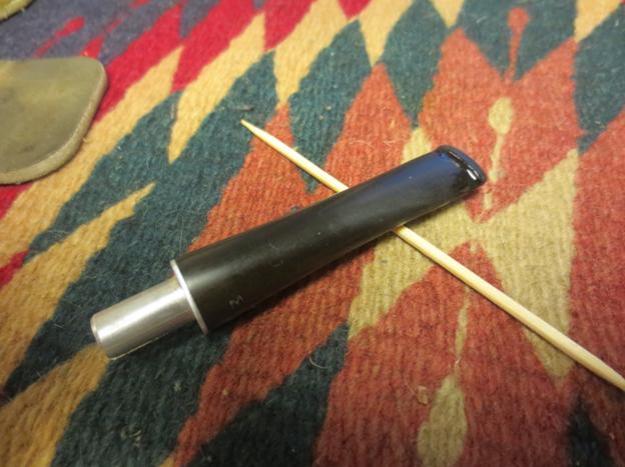
The bit looked like this close up.Lady12
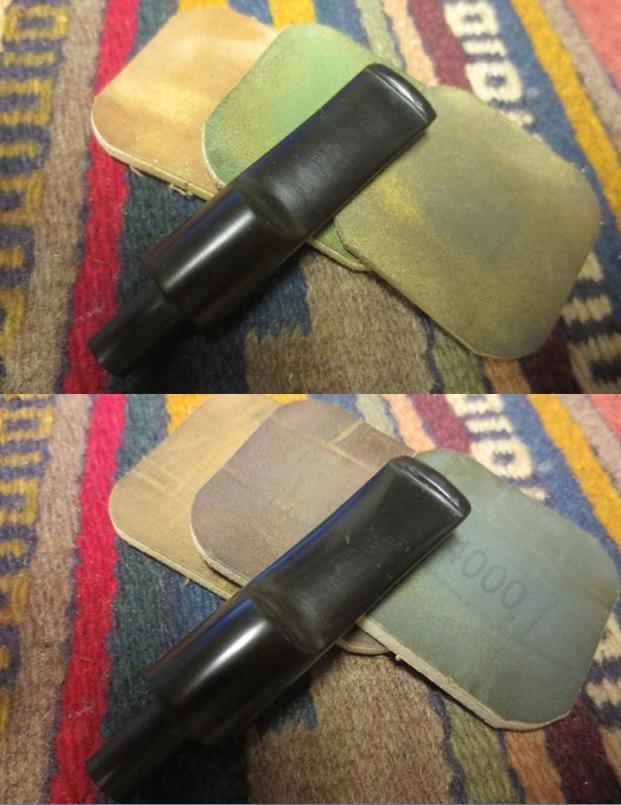
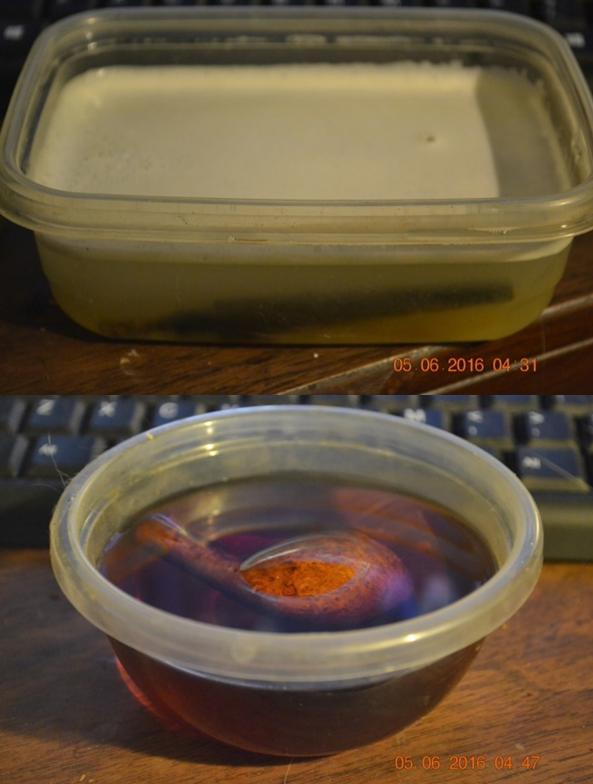
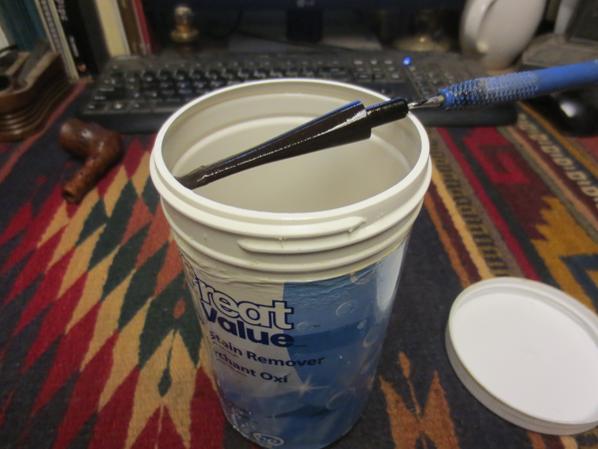
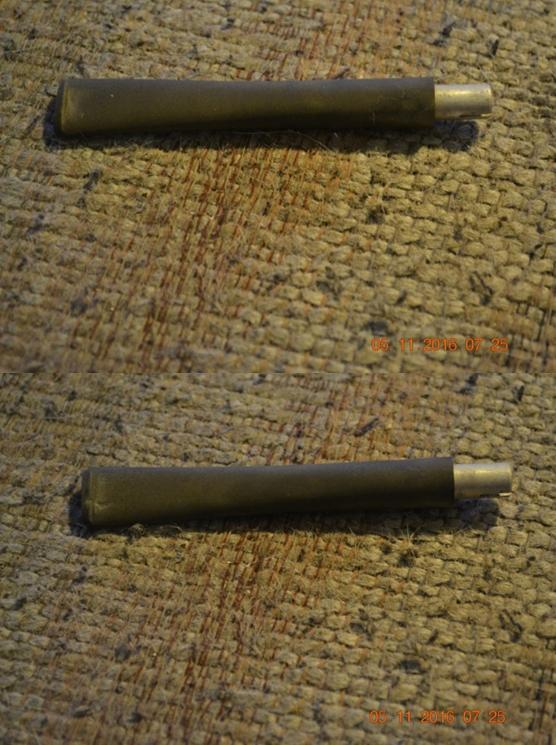
I put it in an OxiClean bath and the stummel in used Everclear (not to drink, but to strip prior pipes).Lady13
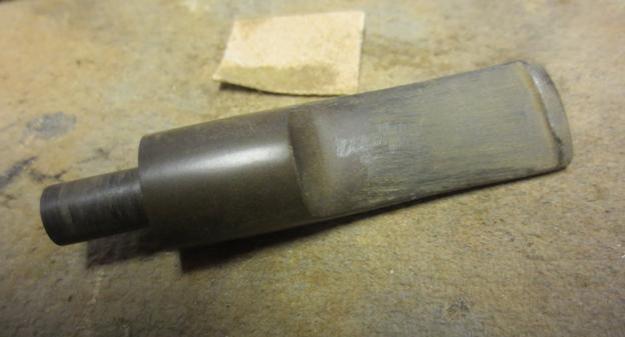
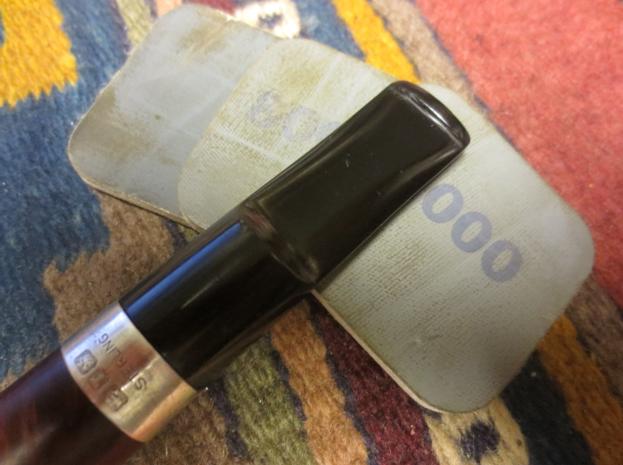
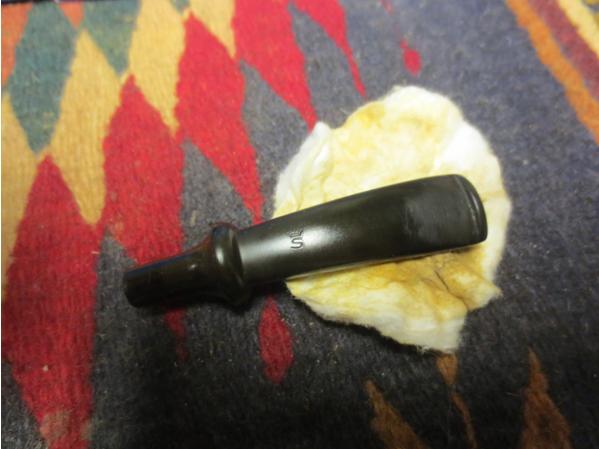
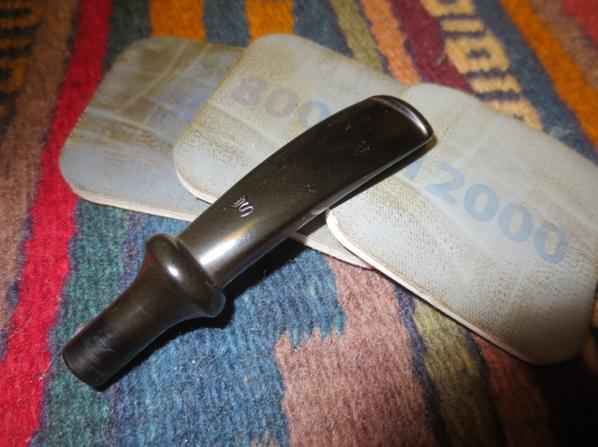
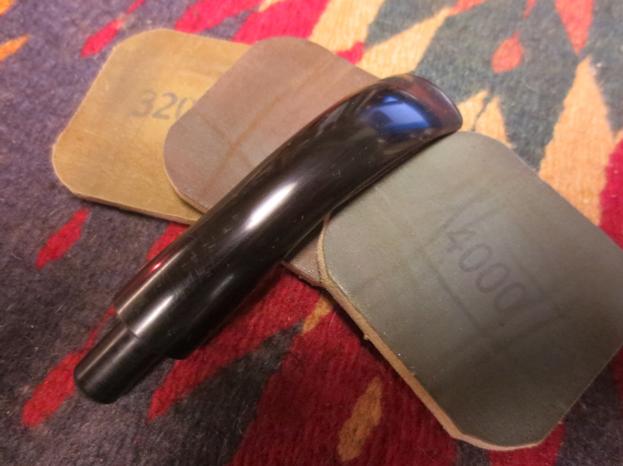
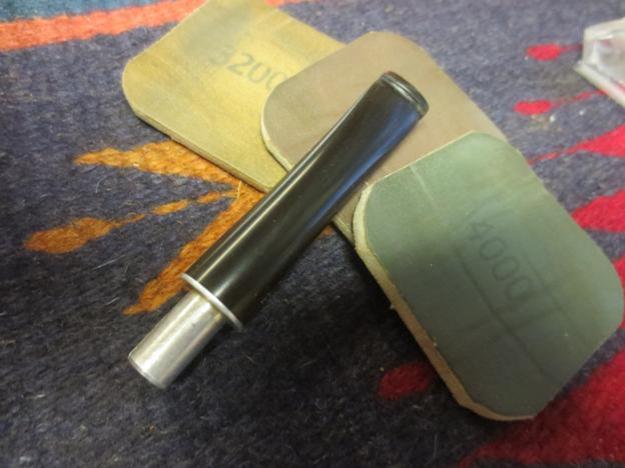
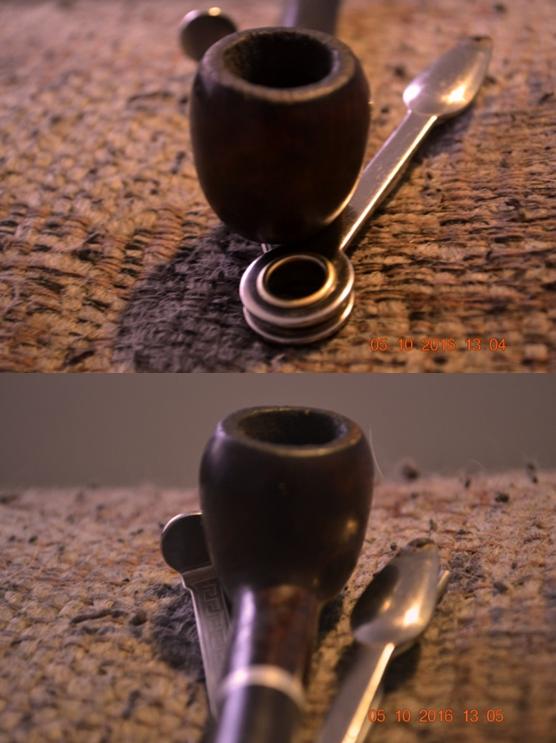
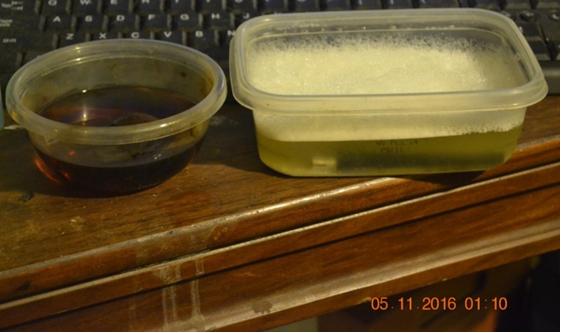
I took the bit out after a half-hour or so and wet micro meshed it. Then I went ahead and buffed it with red and white Tripoli, White Diamond and carnauba.Lady14
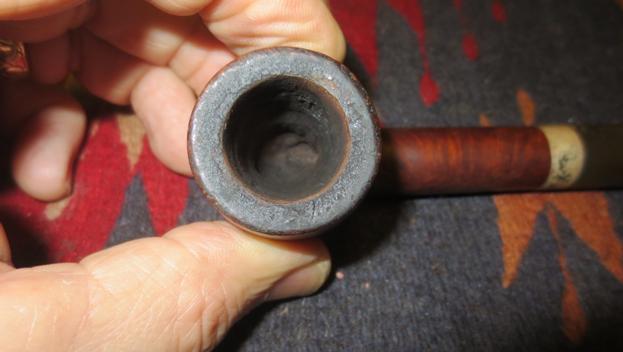
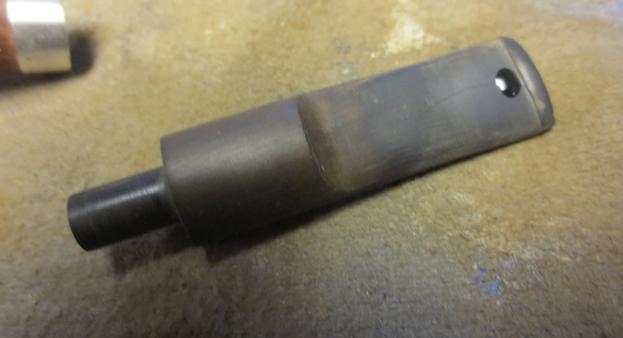
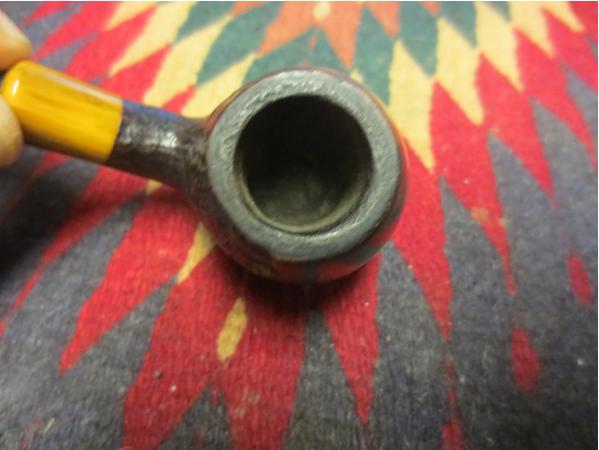
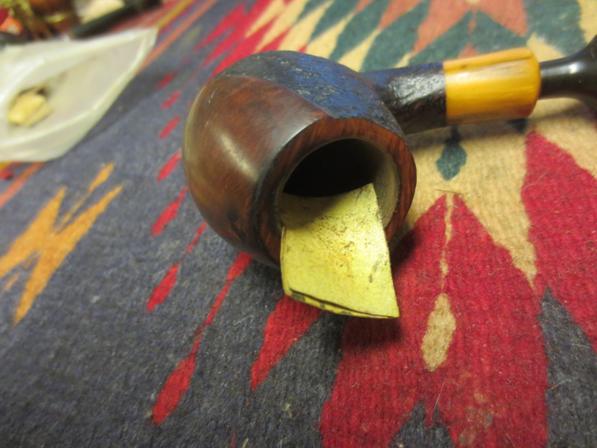
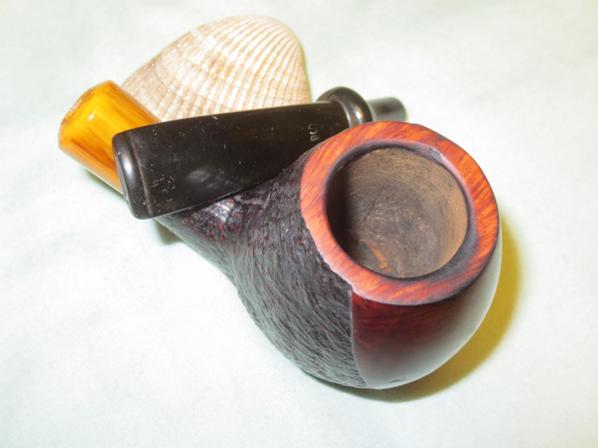
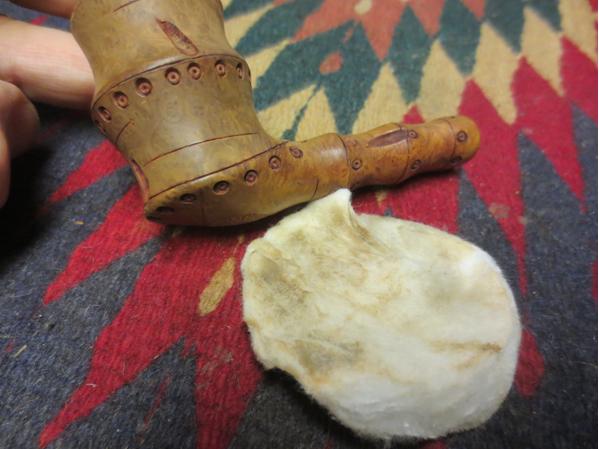
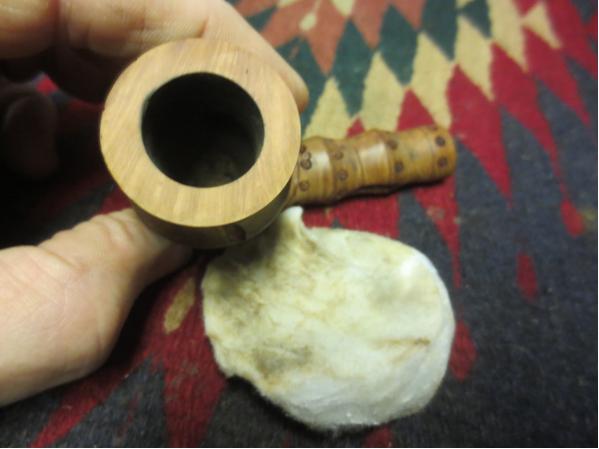
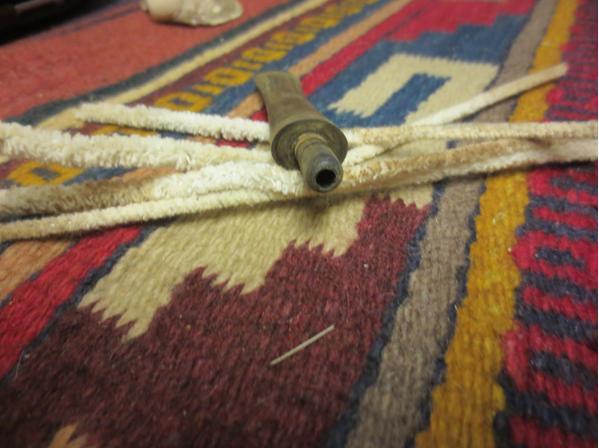
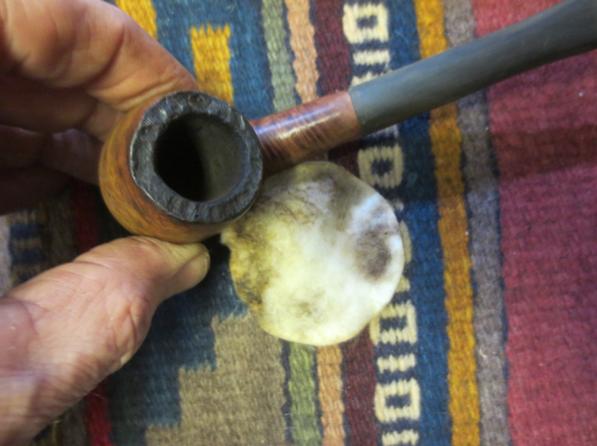
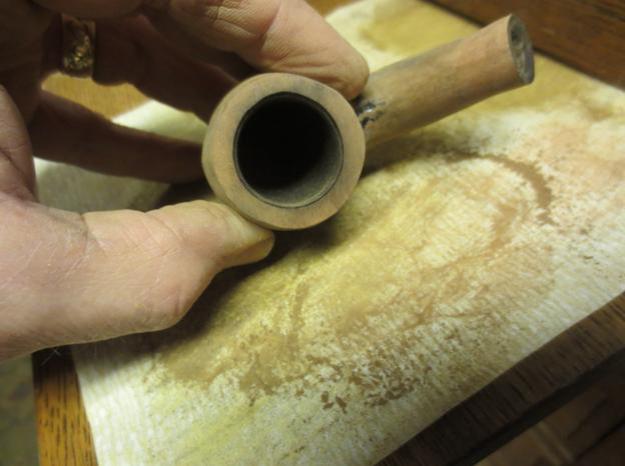
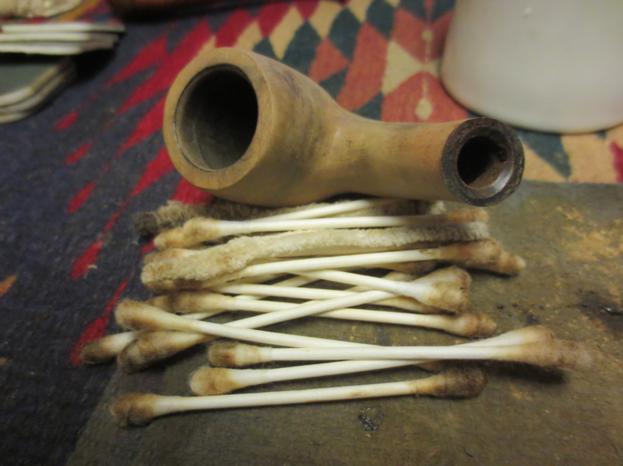
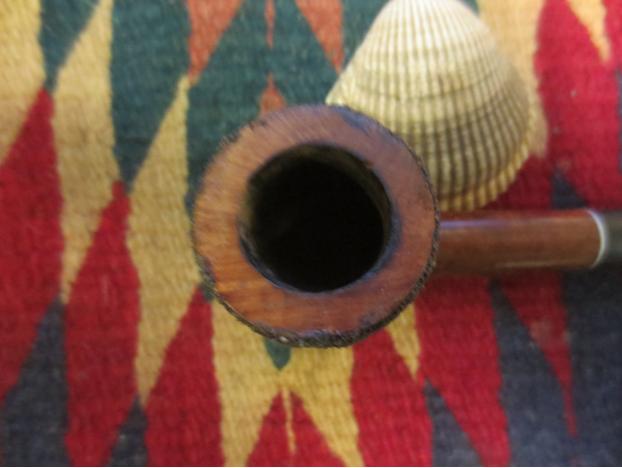
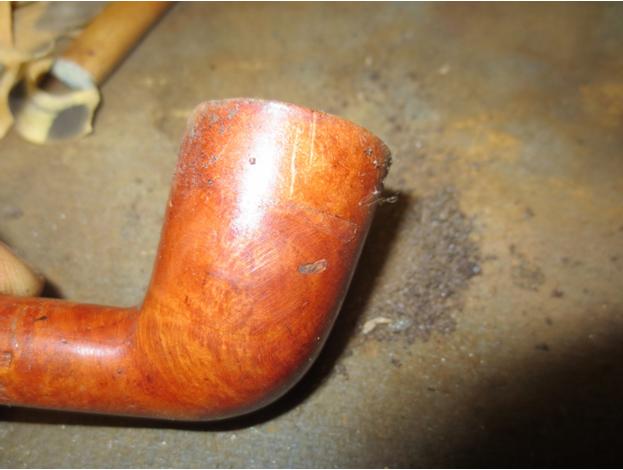
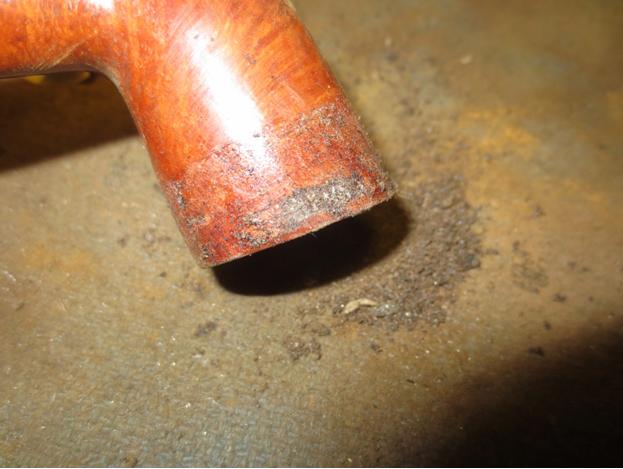
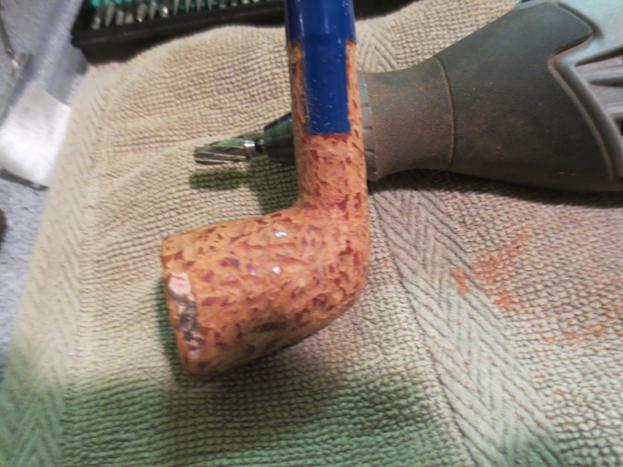
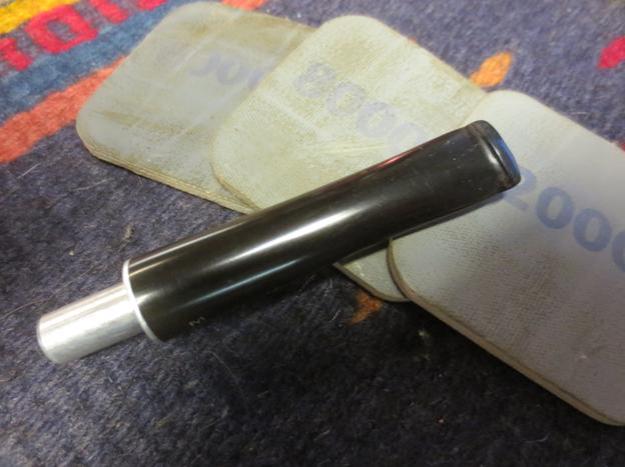
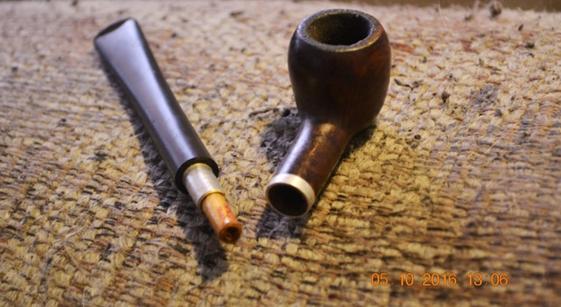
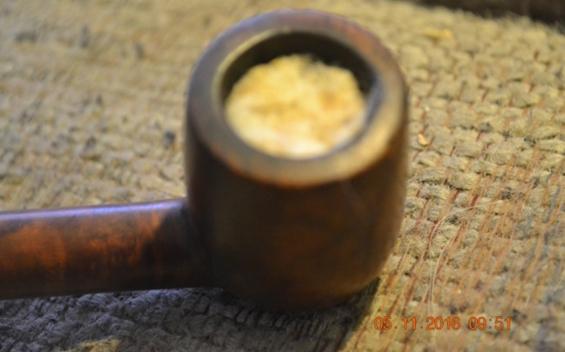
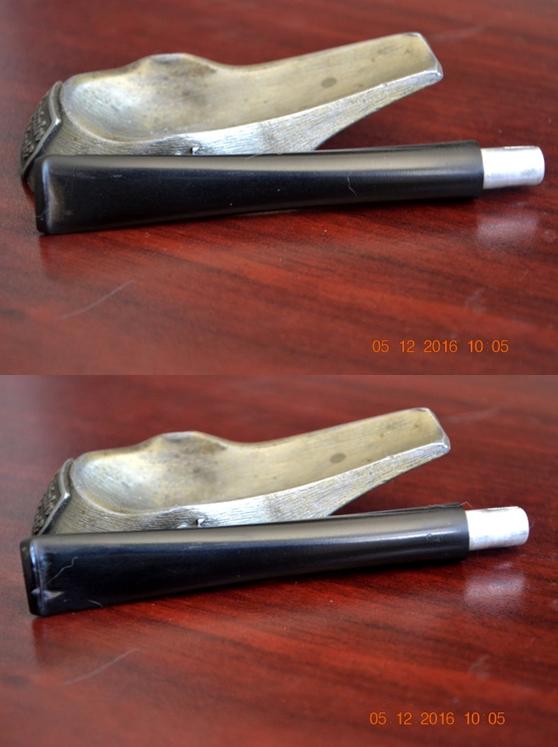
I apologize for the gunk in the last photo. I just noticed it, but I assure you it came off with a wipe, or I wouldn’t have sold it the next day. About an hour after putting the stummel into the Everclear, I removed it and swabbed the chamber with one small soft cotton square and the outside with another.Lady15 Lady16 Lady17
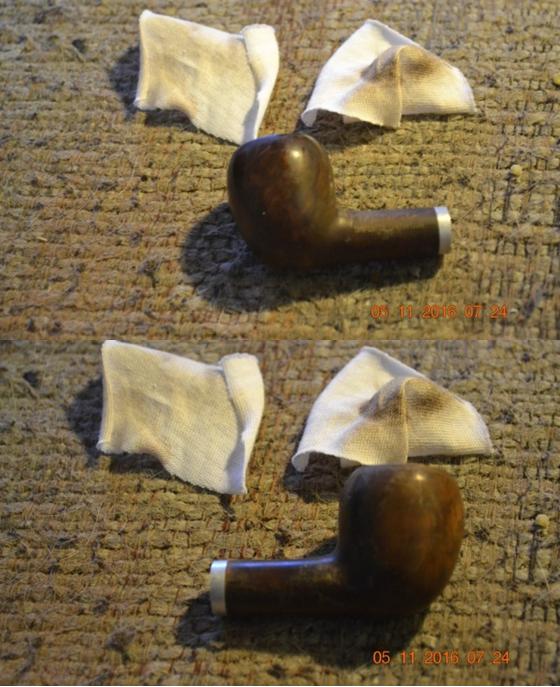
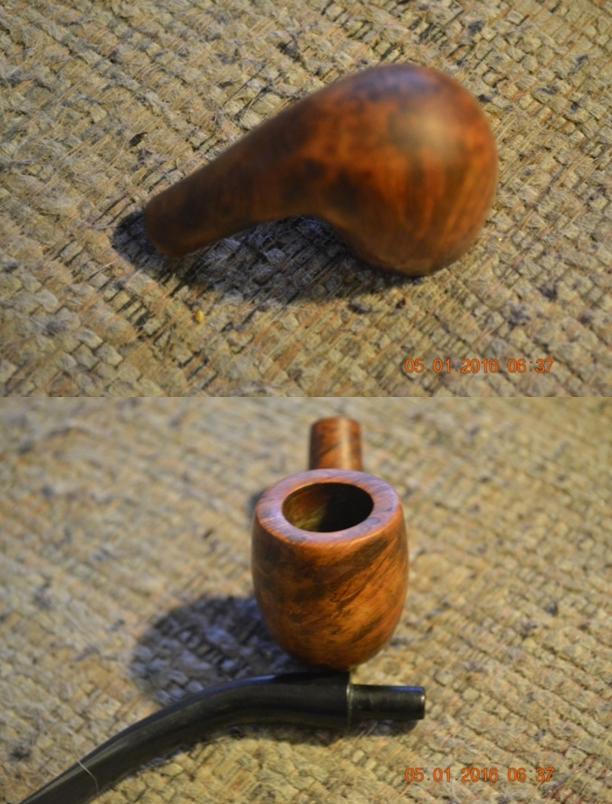
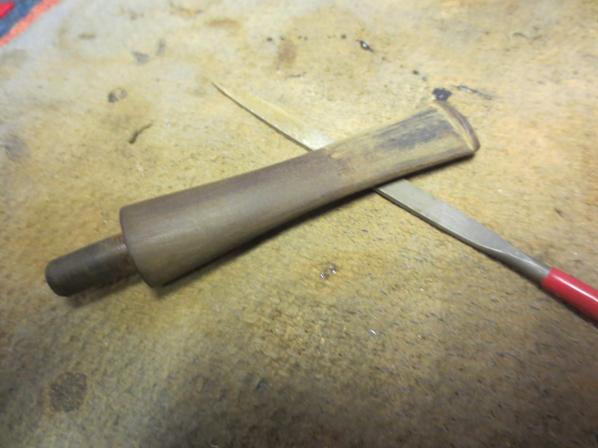
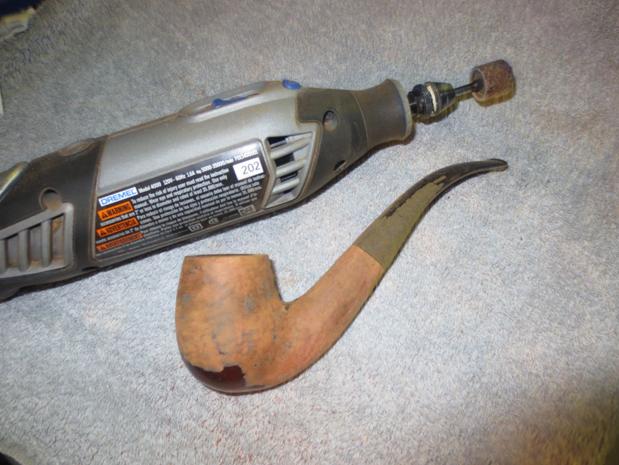
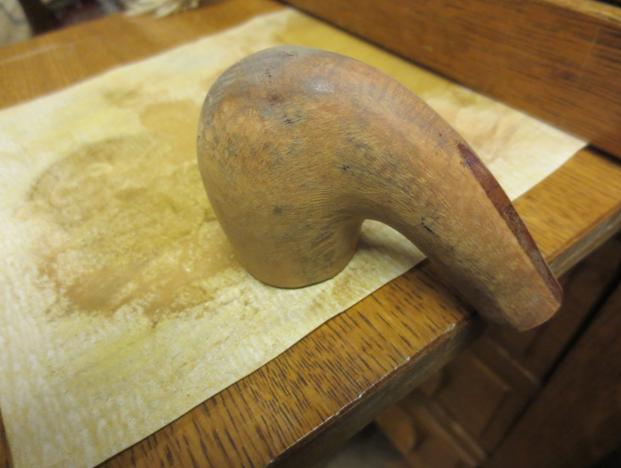
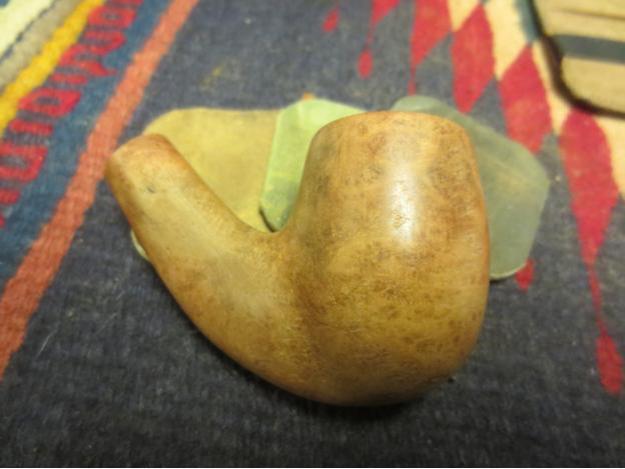
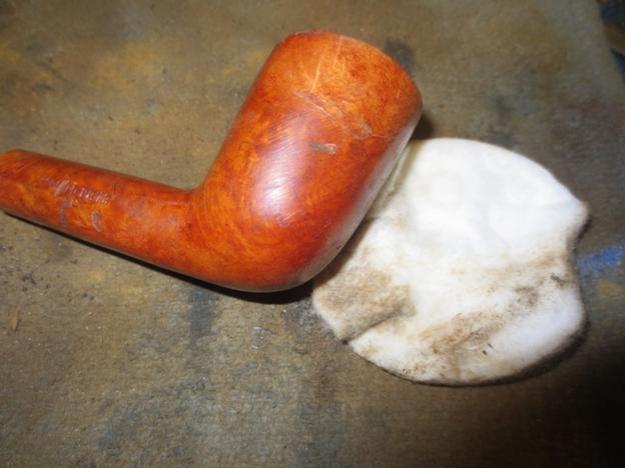
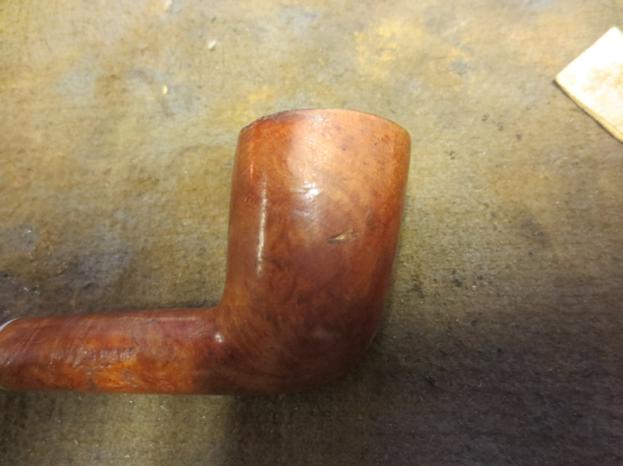
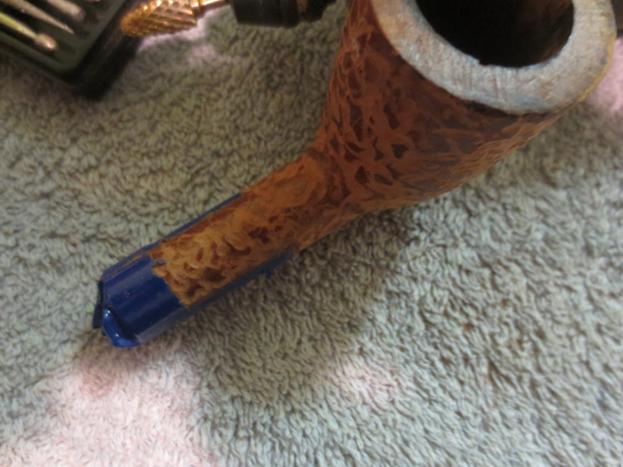
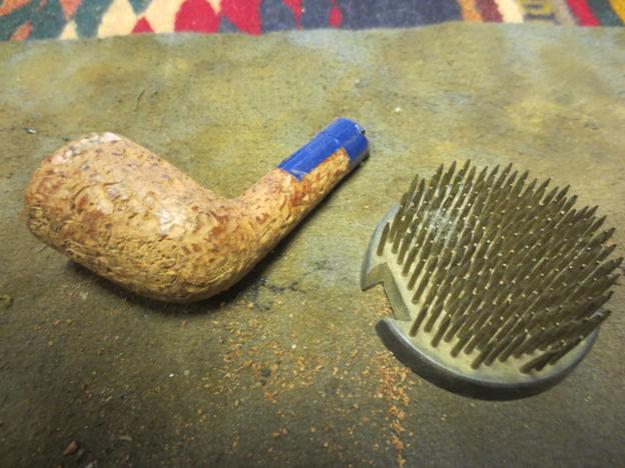
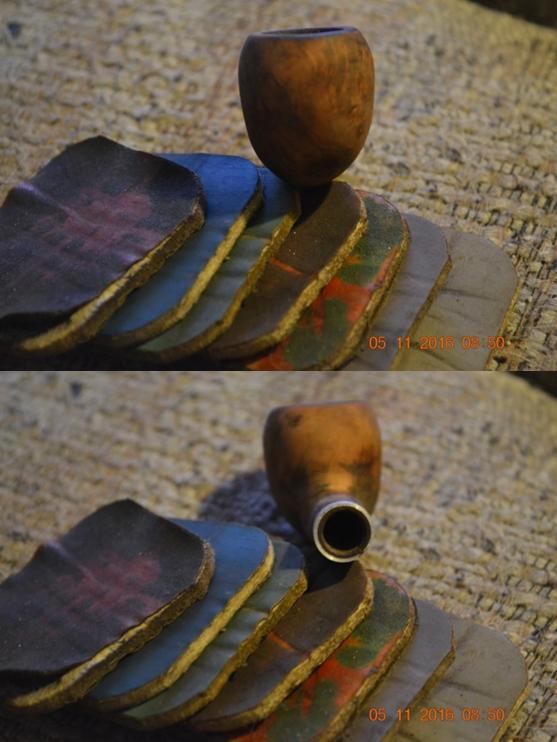
As usual, there was still old stain to remove, but other than uncommon situations such as removing that awful red varnish used on almost all pipes made in China , for example, I prefer not to let the wood soak too long. A little sanding with 220-grit paper in easy, even strokes, for the most part in the same direction, worked off the rest of the drab and dreary cloaking stain on the briar that had left darkness there and nothing more, as Edgar Allen Poe wrote.Lady18 Lady19 Lady20
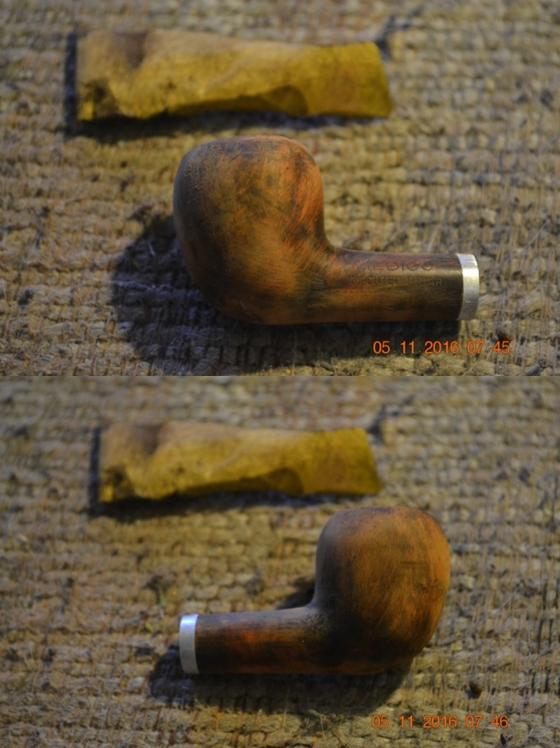
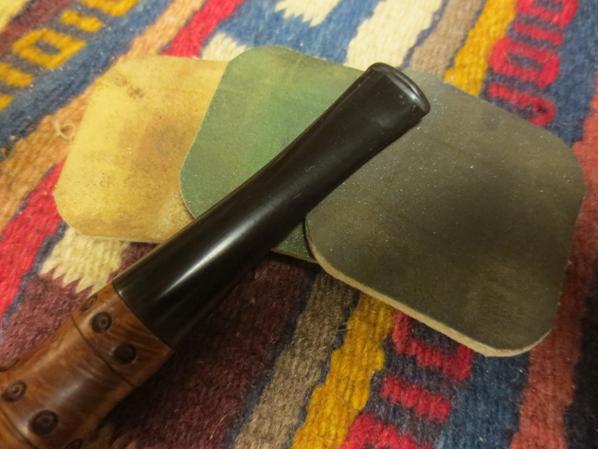
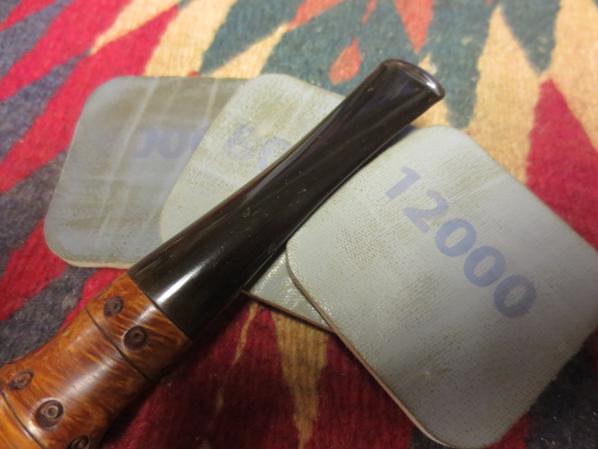
Call me anything other than Ismael, but I always get a distinct rush when the stummel is ready for micro meshing. In an average restoration of this type, with no serious, time-consuming obstacles, micro meshing most of the time is the halfway + 1 point, or the hump of the project. However, with five steps to go before completion of the pleasant task – it was better than the movie, which I had seen 10 times already – I was exactly halfway finished. The point, however obtuse, is that in my mind I was almost to the finish line. Oh, never mind! Alright, then, I proceeded to micro mesh from 1500-12000.Lady21 Lady22 Lady23
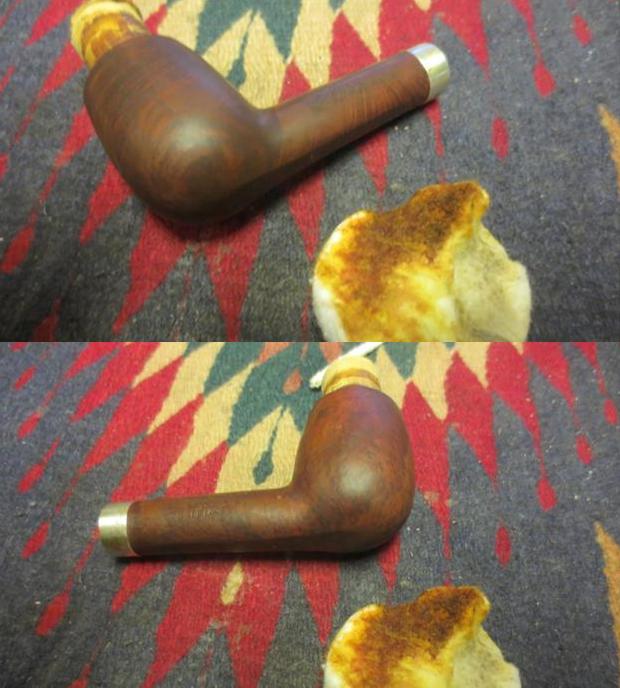
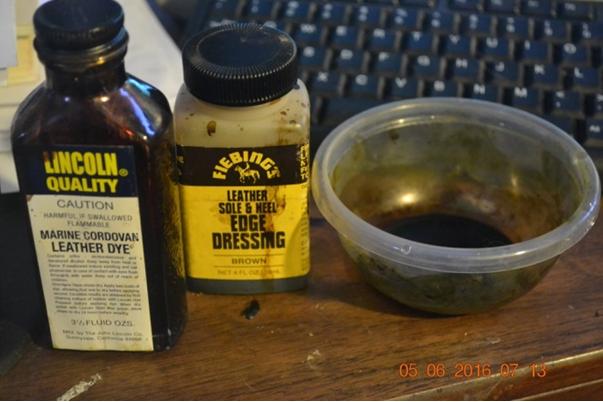
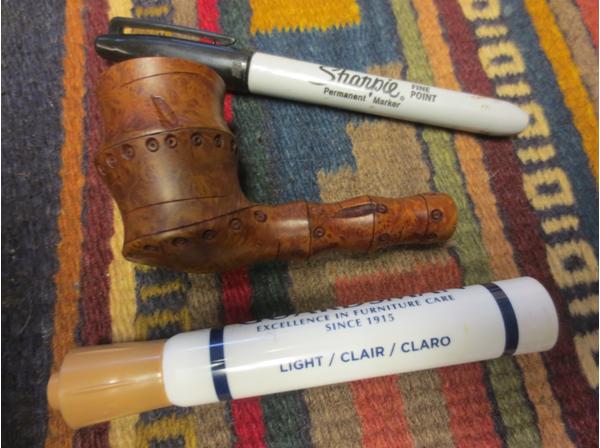
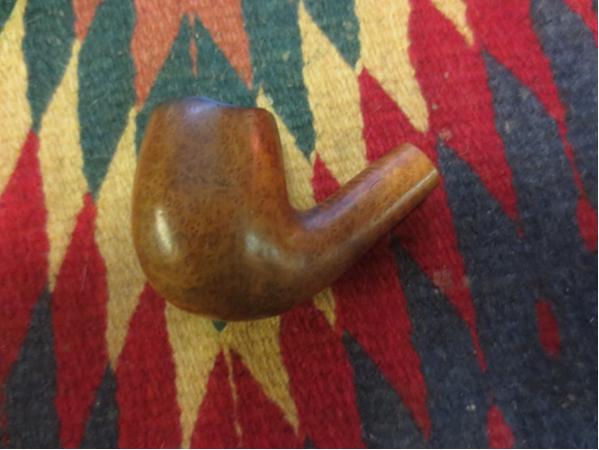
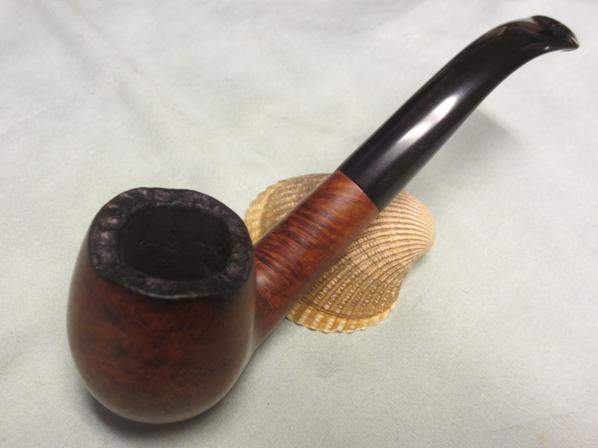
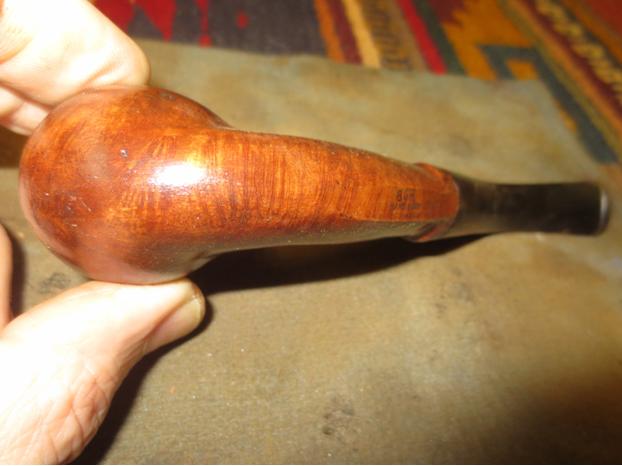
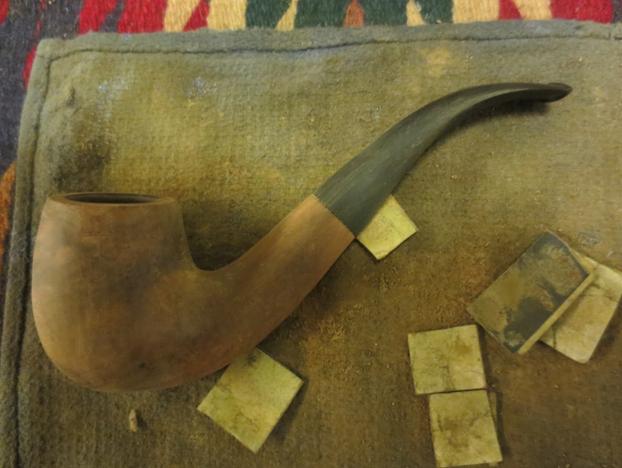
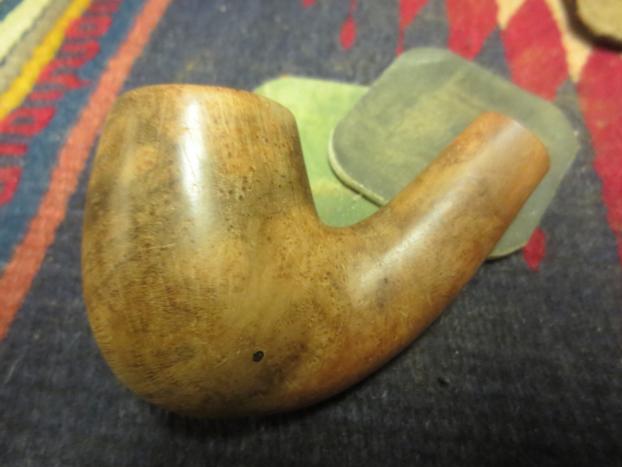
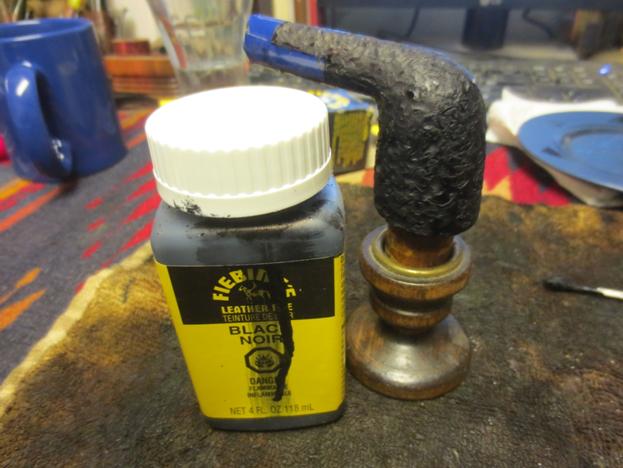
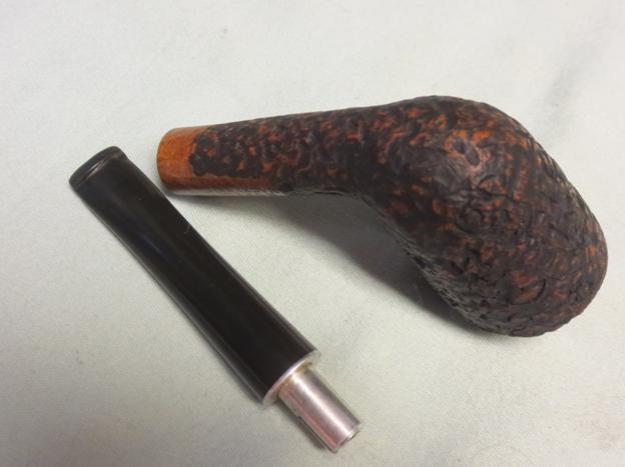
Next up was re-staining the stummel, using Lincoln brown alcohol-based shoe and boot leather dressing.Lady24
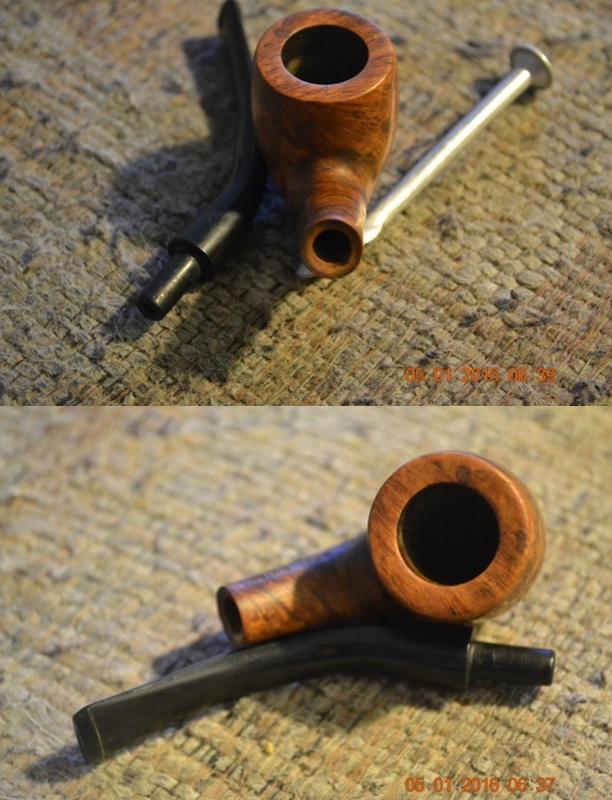
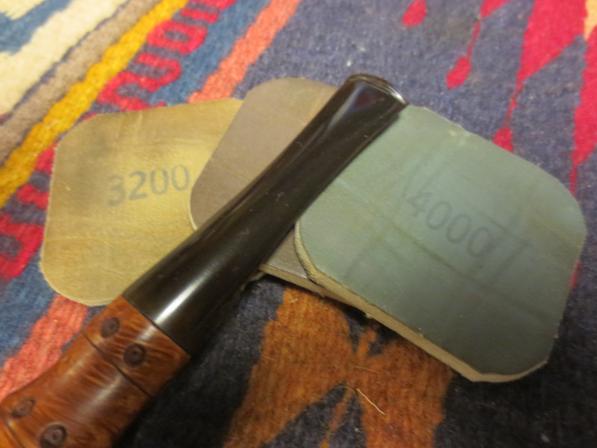
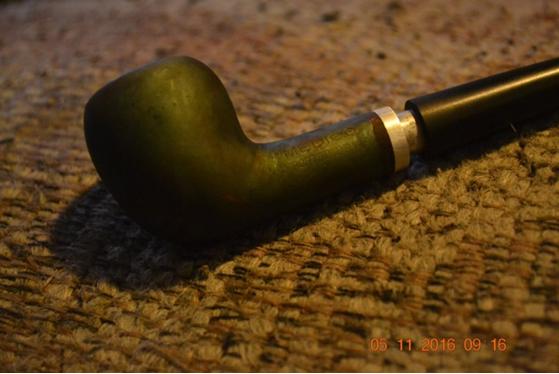
I also enjoy the brief puff of blue fire after holding my Bic or a good kitchen match close to the stain-wet wood, like flaming baked apples served with ice cream. Sort of. But that doesn’t make me a pyro. I prefer to think that life is like a bowl of ice cream, even if it’s served up on fire at times. Consequently, a few minutes after torching the stummel, I started with 2400 and 3200 micro mesh to remove the charred neon green coating. That broke through to dark brown, at which time I switched to super fine four-ought steel wool to take the darkness down a few notches.Lady25 Lady26 Lady27
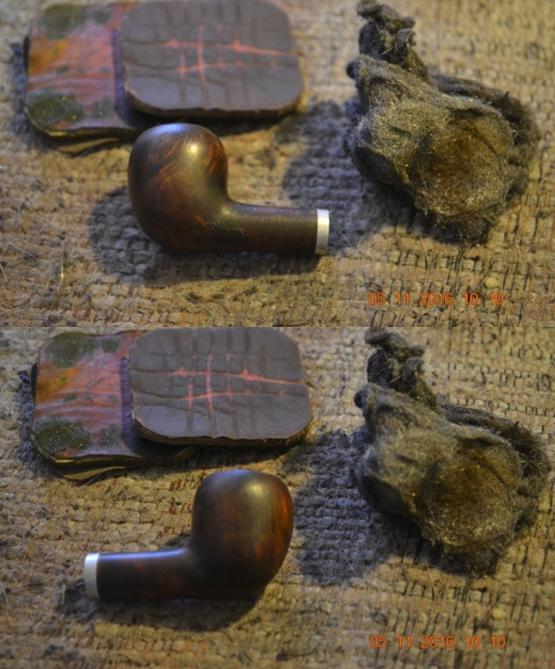
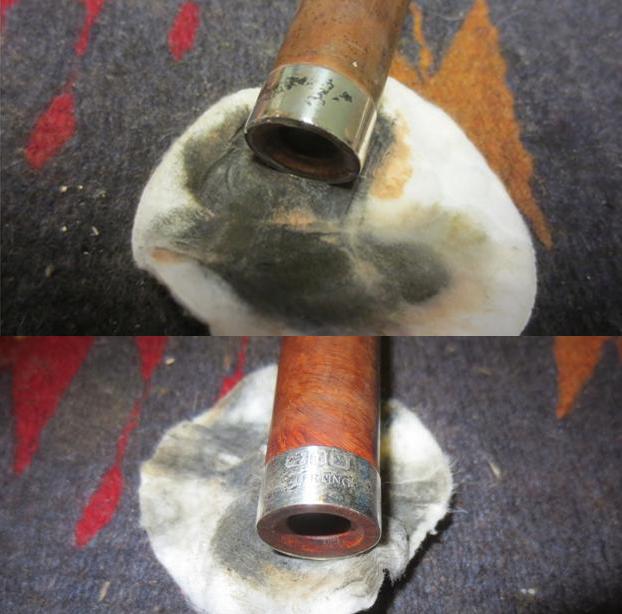
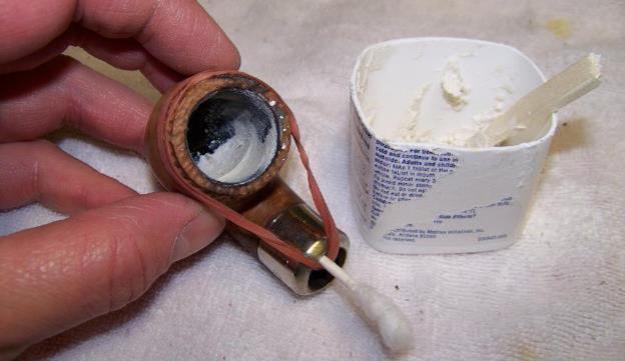
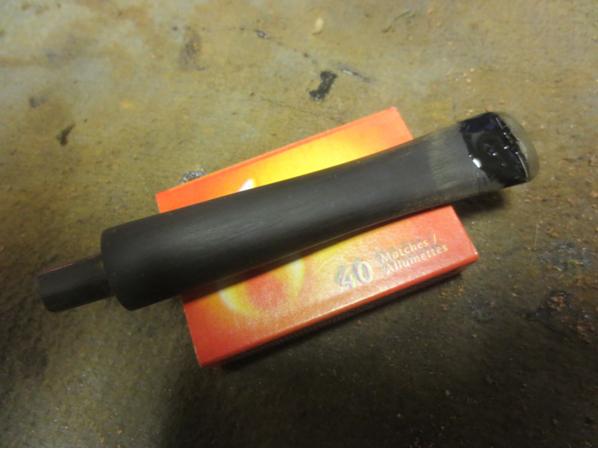
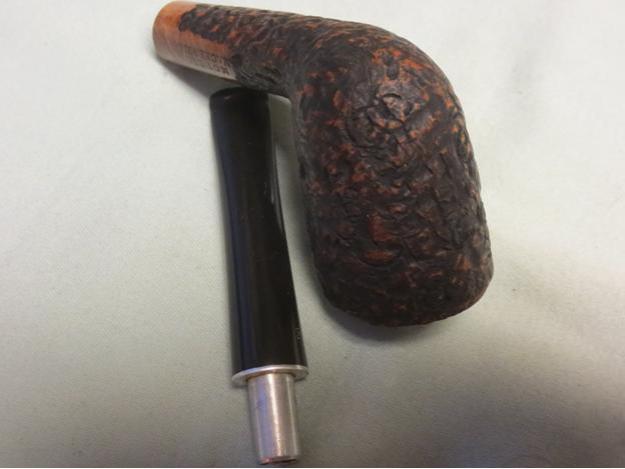
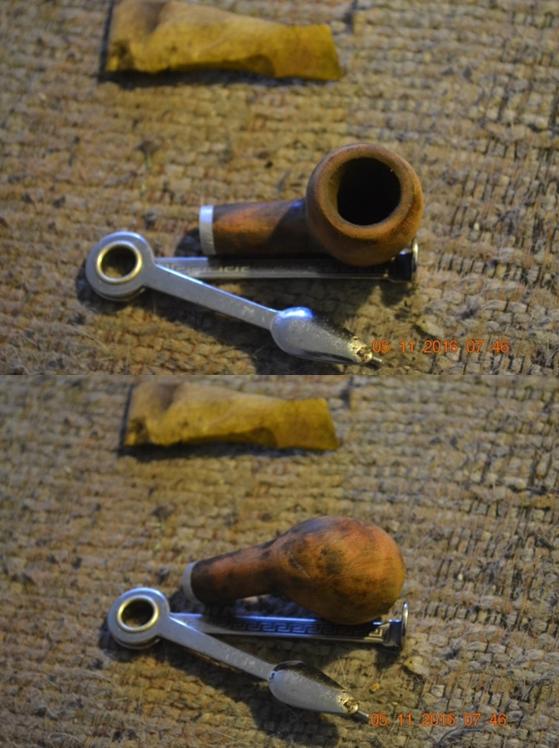
Ready for the second to last step in this somewhat off-the-norm order of events, I retorted the pipe at last.Lady28 Lady29
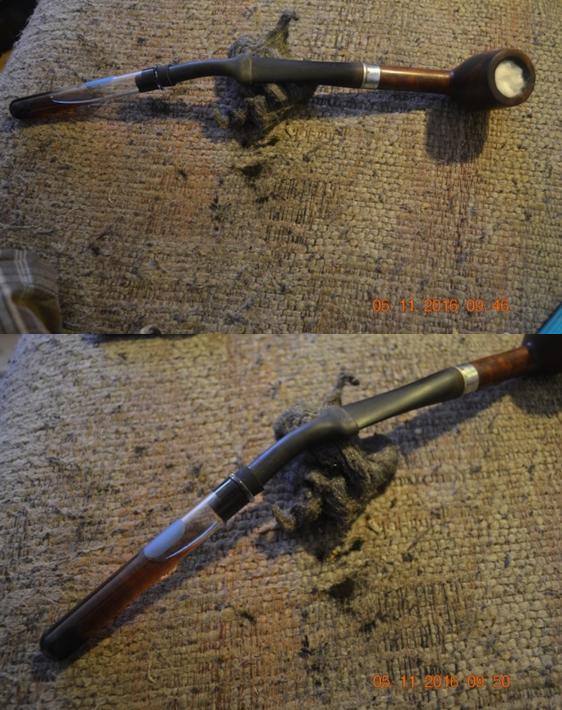
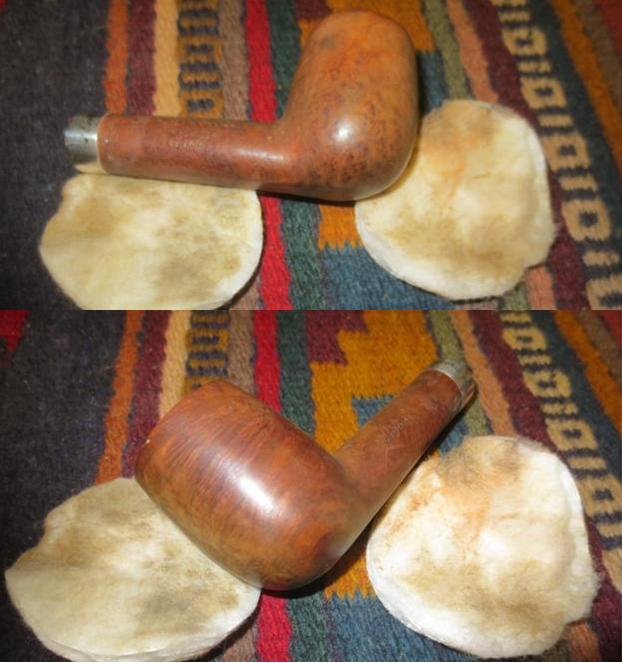
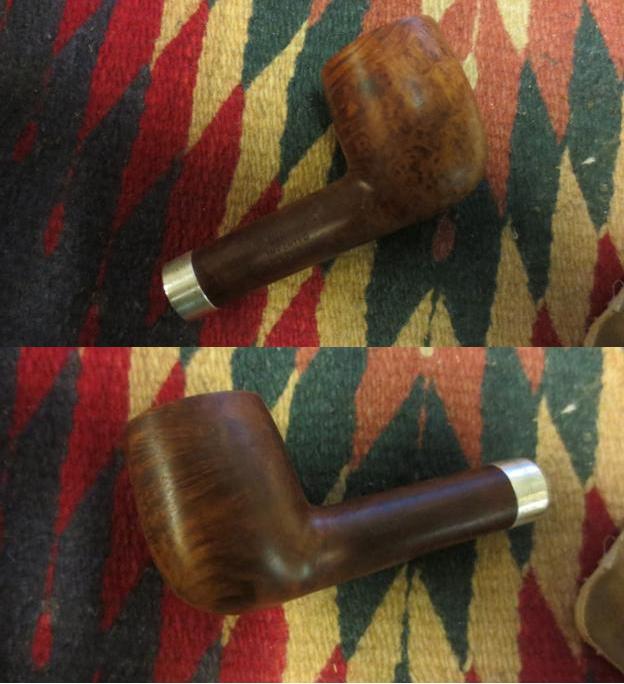
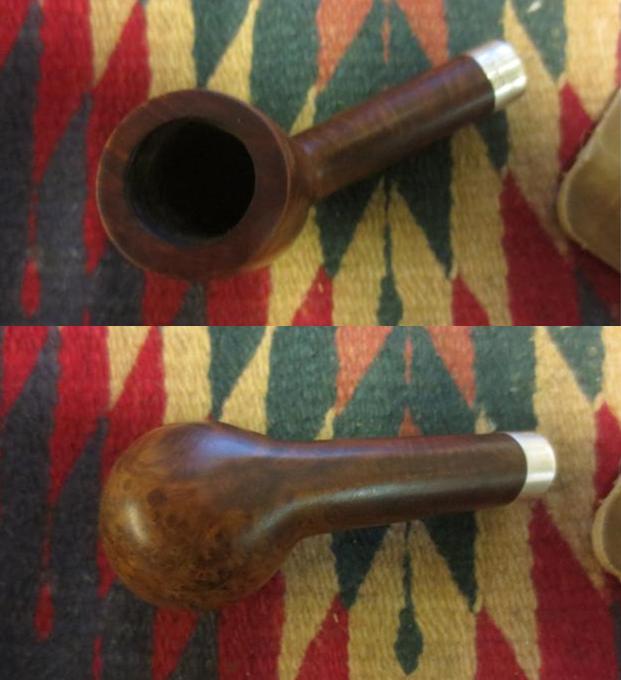
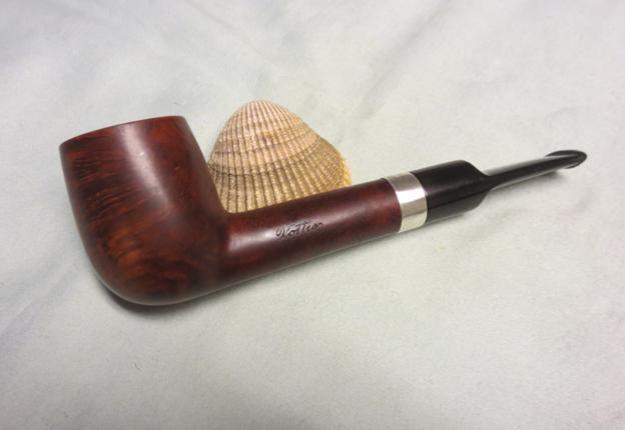
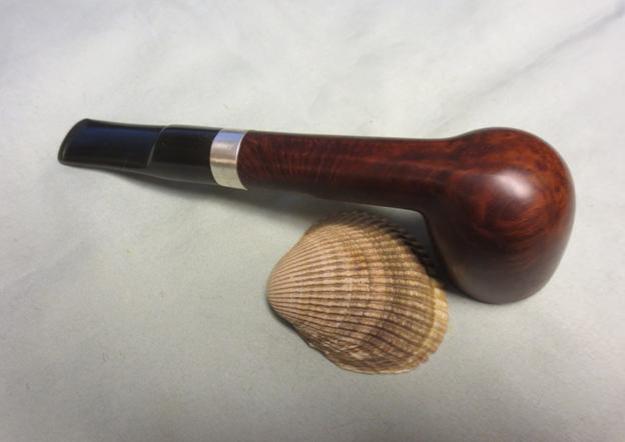
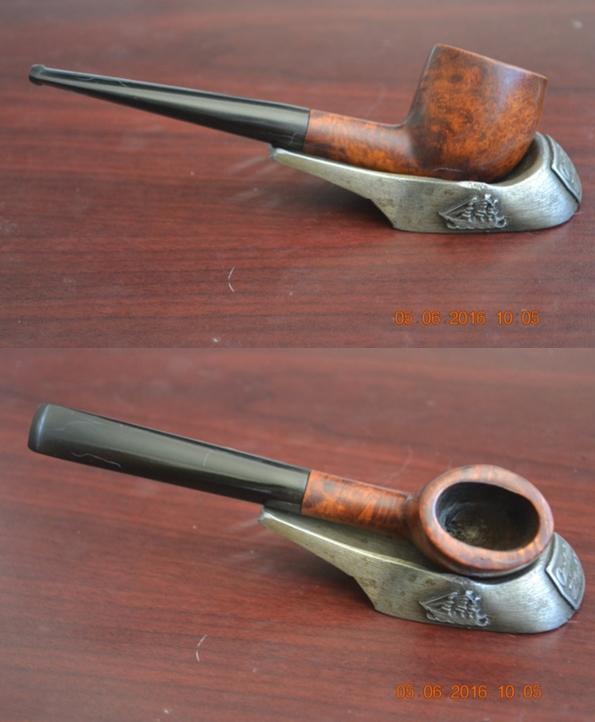
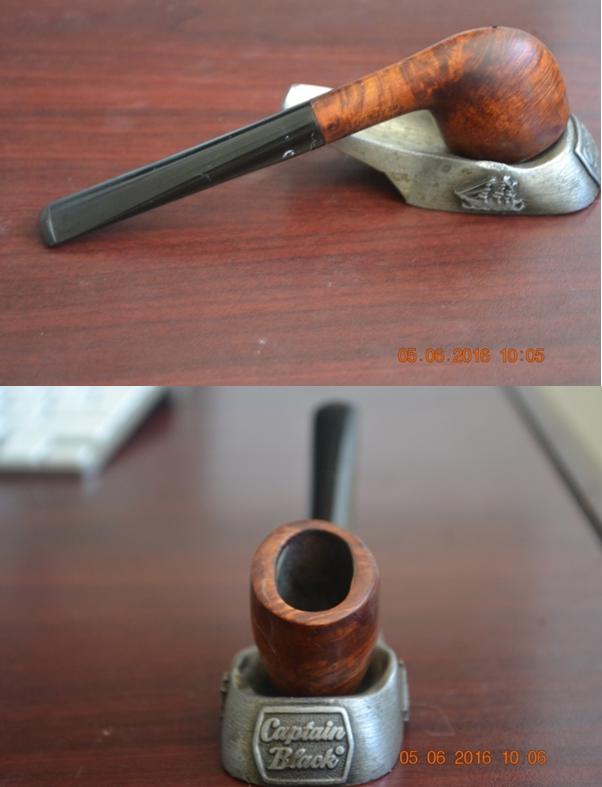
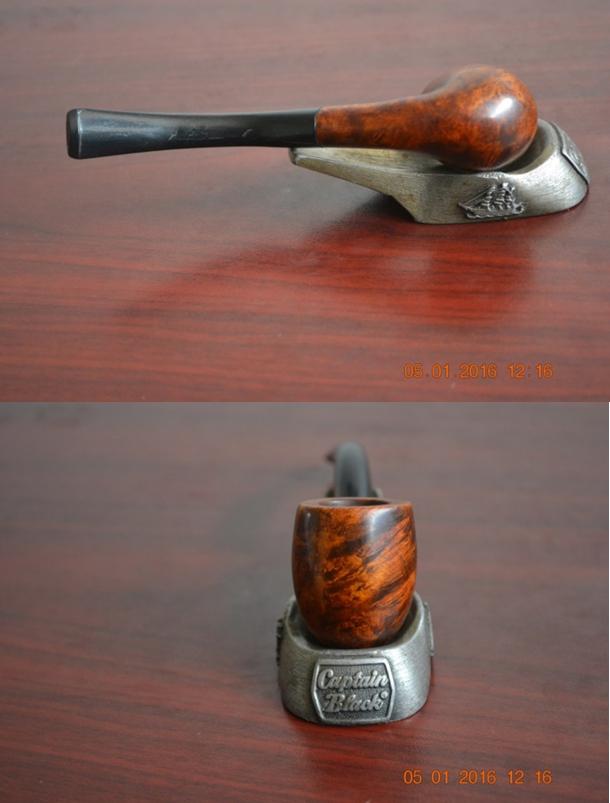
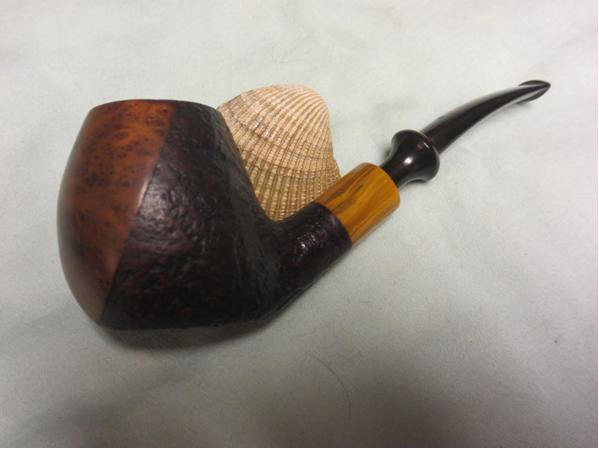
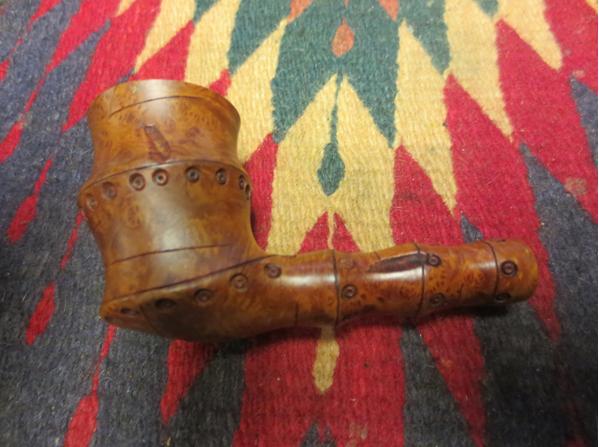
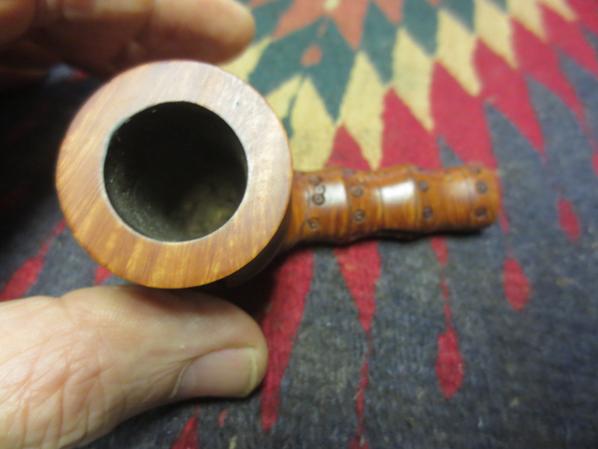
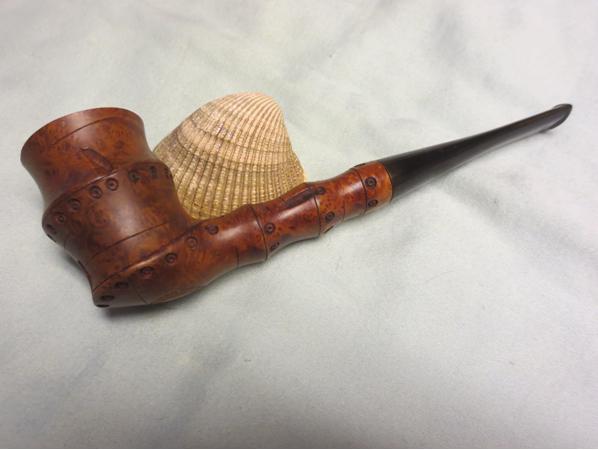
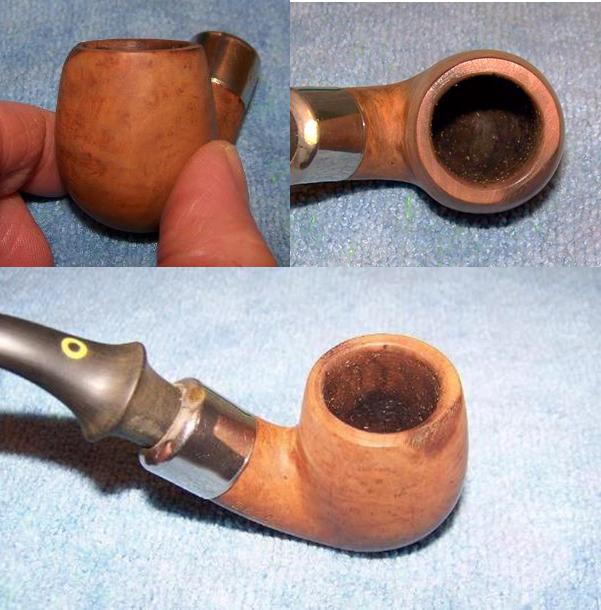
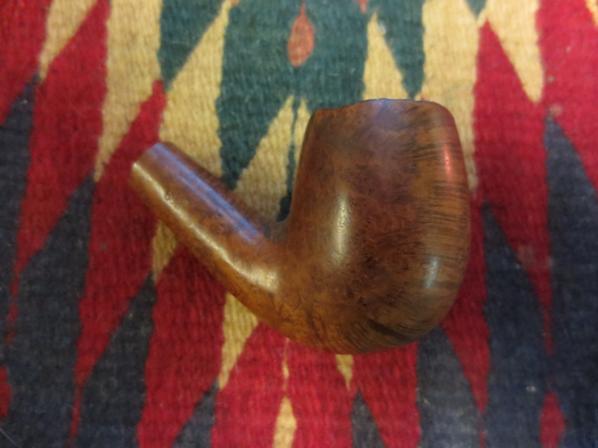
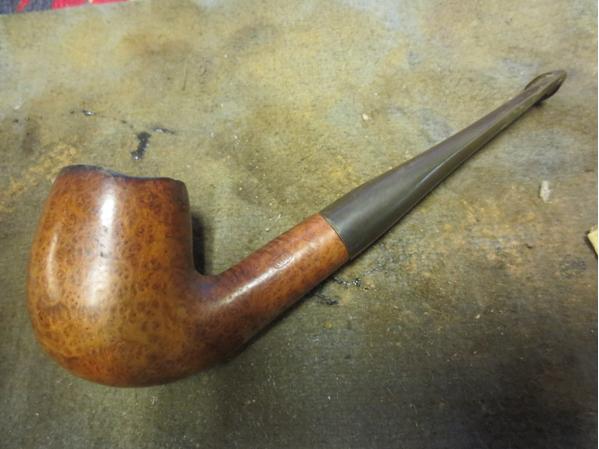
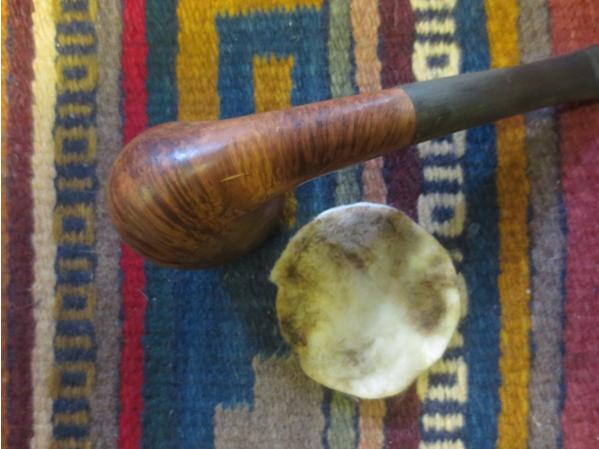
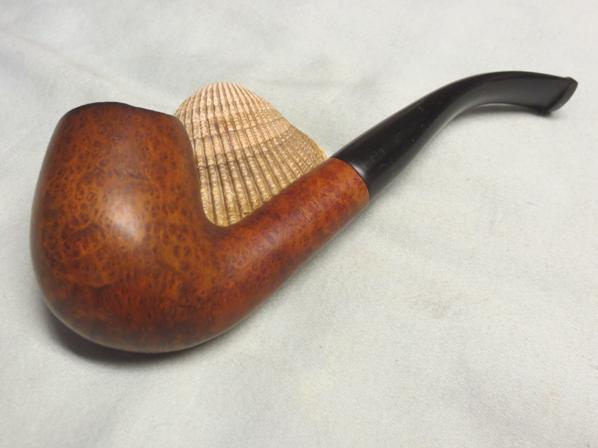
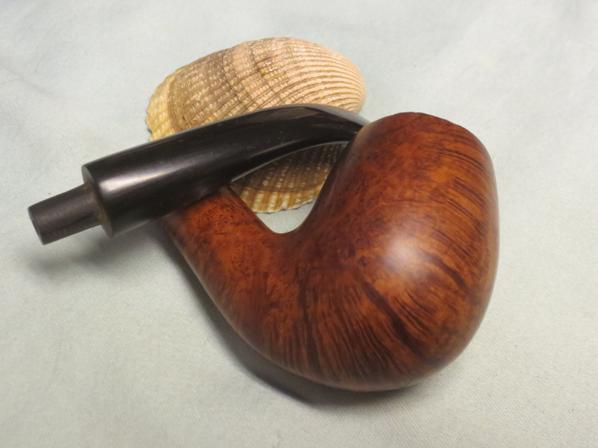
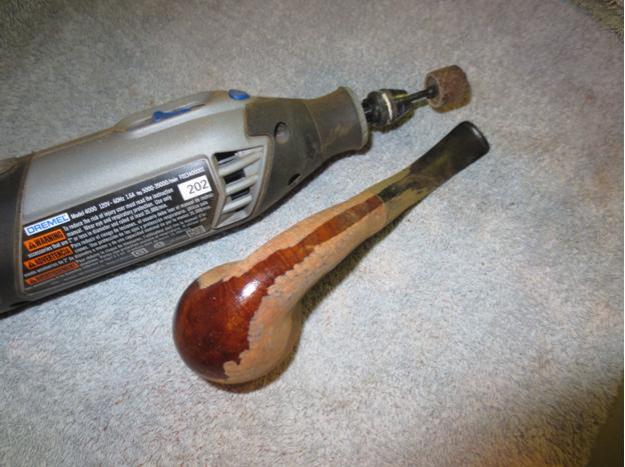
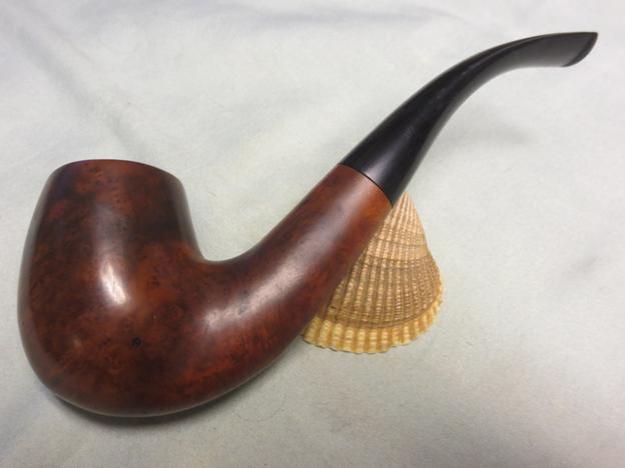
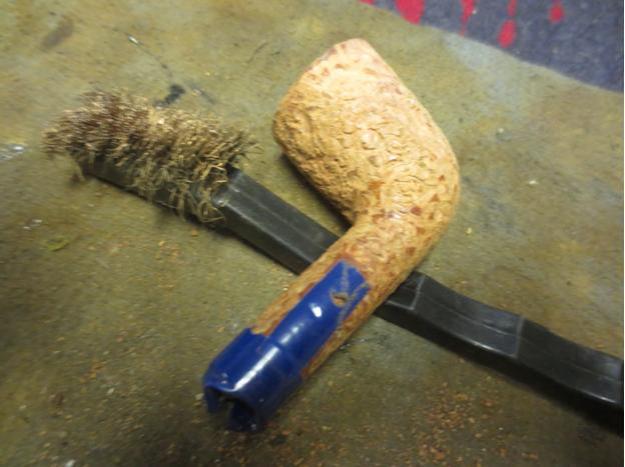
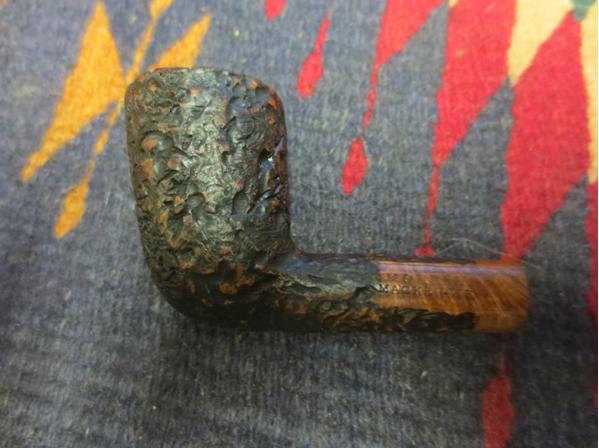
After running a fluffy cleaner through the shank and clearing more last-minute soot from the chamber with a cotton cloth square, I buffed the stummel with white Tripoli, White Diamond and carnauba, using the wheel I keep clean after each to work the compounds further into the briar and keep them from smudging.Lady30 Lady31 Lady32CONCLUSION
So far, by an eerie coincidence if there is such a thing, all three of the pipes I have restored for this ladies pipes series have sold. The Frasa (or FRASA) went to my good friend and fellow pipe club member, Ashley. The Medico Acorn of this installment was snatched up by another woman, Rita, whom I met last night when she saw me smoking a pipe and mentioned that her husband “used to enjoy his pipes all the time” (I took this rather ominous wording as either a sign that the good man is no longer with us or just not with Rita), as well as the fact that she gave up cigarettes by puffing on a pipe of her own with tobacco until she weaned herself off both, and she added that she missed the feeling of the pipe in her mouth. No comment. The third pipe, a Citation Real Briar oval, sold to an 18-year-young man who also approached me because of the fine pipe in my mouth at the time. Ashley reserved hers before it was even restored while the others fell victims to my persuasive sales technique and the fortuitous circumstance that I had my available pipes with me. Still, I didn’t push any of the ladies pipes on anyone. They were all picked out of the box by the happy buyers.
SOURCES
http://pipesmagazine.com/forums/topic/smoke-jokes
https://rebornpipes.com/tag/brewster-pipes/
https://rebornpipes.com/2013/04/14/some-reflection-on-the-historical-background-on-cpf-pipes/
http://www.smfrankcoinc.com/home/?page_id=2
https://pipedia.org/wiki/S.M._Frank
http://www.pipephil.eu/logos/en/logo-medico.html
http://www.smfrankcoinc.com/home/?page_id=143 Medico pipes
http://www.cigarsinternational.com/brands/1552/medico/
http://www.tobaccoreviews.com/blend/1965/samuel-gawith-firedance-flake
http://www.theitalianpipe.com/artisans/armellini.htm
http://www.annejulie.com/pipes.html
https://pipedia.org/wiki/Ivarsson,_Nanna
http://www.sabinapipes.com/
http://mypipeclub.com/forum/index.php?PHPSESSID=18ed18b6fd1b7cfa581ca18da56449f7&topic=805.0 Scottie Piersal

It turned out to be a beauty – a Long Shank Vottis Billiard


Blog by Steve Laug

When I saw this one online there was some residual memory about the brand. I could not put my finger on it but I knew it was an American made pipe. I did not where but I remembered a name – Pat Vottis. It was a pipe on eBay that received little notice. I am not sure anyone bid on it so it became mine. I looked forward to its arrival in Canada when I could see what was under the grime and oxidation. In some of the photos below that I took upon its arrival there is some nice grain peeking through the cloudy finish.Votis1The finish was quite worn and cloudy but the sides of the bowl and shank did not have any gouges or dents. There was a dark, vertical stain on the front of the pipe that went from just below the rim edge to the curve of the bowl bottom. There was also a dark mark on the right side of the bowl toward the back. The rim was a mess. The outer edges had been knocked about to the point that the rim edge was rough to touch. There was a thick lava flow over the flat surface of the rim so it was hard to tell what was going on there. The inner edge of the bowl also looked to be damaged on the back right side. There was a thick cake in the bowl that I removed when I picked it up while visiting my brother in Idaho. That cake still needed more attention as can be seen in the photo below. There was a loose, oxidized silver band on the shank of the pipe that had blackened to the point that I could not read the stamping on the top side. The stem had some tooth marks on both the top and bottom sides that were quite deep and extended almost ½ inch up the stem from the button. The edge of the button was flattened and also had some tooth marks. Oxidation covered the whole stem. Votis2I took a few close-up photos of the rim top and the stamping on the shank of the pipe. From the first photo you can see the rim and the inside of the bowl. The remaining cake was incredibly hard. The stamping on the left side of the shank read, “Vottis” in script. On the right side it read Algerian Briar over Imported Briar. The stamping was sharp and legible.Votis3 Votis4I decided before going further on the restoration of the pipe to do some research on the Vottis brand and see if I could rattle the old memory. Sure enough my original thoughts were correct. The name was Pat Vottis. There was quite a bit of information on the web about him and his pipe making and pipe shop. (NOTE: The next section is quite long so if you do not want to read the history of the brand you can skip ahead to the next photos and the explanation of the refurb.)

The first place I looked was on Pipedia.com. I found there that Vottis ran his workshop in Schenectady, New York. According to Pipedia he worked there from about the end of the 1940’s to the middle of the 1970’s. The article went on to say that he was one of the very first American carvers who made freehands in a moderate Danish style. This information did not help me identify the classic shaped pipe that I have. Mine is anything but a freehand, it is rather a long shank billiard or a long stem Lovat. The one thing that was interesting in the article was that Vottis pipe are well thought of to this day. I also learned that he preferred to use Corsican briar in making his pipes.

Well, that was a good start, but I wanted to know more. So I did some more digging and came across a conversation on pipes.org. The link below takes you to the conversation. The part that I have copied below was posted by Guy Vottis, Pat’s grandson in 2007. If you should want to read the context of the conversation you can follow the link.

http://pipes.org/forums/messages/23/46034.html?1171913269

Guy writes in response to a previous post. Here is the entirety of his post.

This post references Harold Vance Post #4 username hbvance and Jose Manuel Lopes Post #91 in the Archive of 2005 Sept 20 with a Subject Title of Vottis Pipes http://pipes.org/forums/discus~discus/discus~discus/discus/cgi-bin/discus/show.cgi?tpc=23&post=45187#POST451 87

Jose, I am not quite sure where you obtained your information regarding Pat Vottis but it is incorrect and I would like to share a bit of good information for the audience.

Pasquale (Pat) Vottis is my grandfather. He did not die as you have posted on the web in 2005. He actually died this morning at 99 yrs 9 months of age on Feb 18, 2007. He had a passion for the customers and the business.

My grandfather opened his first pipe shop in Albany, NY on South Pearl St. It was in the Bank Building (which took up a whole city block) at the corner of State Street and South Pearl. We also opened a second shop in Albany which was in the Empire State Plaza on the Concourse level. This was to serve all of the State Workers so they could do business at lunch time and not be strapped for time while trying to get down to the South Pearl shop. We still have the Vottis Pipe Shop Sign and the Vottis Pipe Shop Clock that was a landmark for the customers.

Harold Vance’s pipes may very well come from a pipeshop in Santa Monica. We mailed pipes all over the world. My grandfather’s sister actually lived in Santa Monica for many years. We also had a very large tobacco mail order business in which I mixed 1000s of pounds of tobacco and mailed them all around the world as well. We closed the pipe shops in the early 90s due to the numerous break-ins late at night. The locals would throw rocks through the store front windows to steal the hand carved pipes and the meerschaums.

My grandfather hand carved many, many pipes himself. He usually carved the big blocks. My grandfather, my uncle, and my father repaired pipes for everyone even if they had not bought a pipe at our shops. We had a metal lathe in the basement as well as a stove. The machined the tenon portion of the stem with a carbide cutter to match the stem of the bowl for a perfect fit every time. To match the stem or the fit of the customer, we custom bent the stems of the pipes to their satisfaction.

I recall boxes of briar blocks that were rough turned and my uncle, my father, and my grandfather would also hand finish these too. We had a lot of fun in the stores too. Mixing different formulas of tobaccos to see how the public would respond. We had numerous successful formulas. Our approach was to make all natural formulas with no sugars added, no sugar sprays, or flavorings added.

The most popular formula was created by grandfather and was called Black Watch. Some of the other blends were North Woods, Vottis’s Own, Vottis Club, Boulevard 76, No#9. These blends were comprised of burley, yellow cavendish, black cavendish, turkish, latakia, and others of which I do not recall. Ironically, for the namesake, my grandfather has died at a Nursing Home named North Woods just like one of his tobacco blends called North Woods…

That post gave me much more information including the link to Albany, New York. I went on to dig some more and found a newspaper article written by Paul Grondahl a staff writer for the local paper. The article is called “Pipe Shop’s Flame Flicker Out”. The link to the article is: http://alb.merlinone.net/mweb/wmsql.wm.request?oneimage&imageid=5580379. In that article I learned that the shop closed in 1991. I have included the article as it is very well written and gives a flavor of the shop and the proprietor.

PIPE SHOP’S FLAME FLICKERING OUT
Paul Grondahl Staff writer
Section: LIVING, Page: G1
Date: Sunday, October 27, 1991
ALBANY – The soft rattle and hum on the countertop of a battered, black wooden mixing bowl in which dozens of tons of blended pipe tobacco have been hand-kneaded for 50 years is being silenced.

The final clouds of aromatic smoke will waft past the humidor, beyond the wooden Indian perched on a box of cigars in the window and out the door of the Vottis Pipe Shop. After serving three generations of pipe smokers and shipping its custom tobacco blends across the country and to soldiers at war around the world, this South Pearl Street landmark is letting the fire burn out at the end of the month.

A handful of pipe shops still will remain in the Capital District after the Vottis Pipe Shop ceases to exist, but none who would make the bold claim, as Vottis did in 1948, of being “the world’s best-stocked pipe shop.”

No other local shop can boast of the long legacy in the trade, or having a patent on the air-cooled Vottis Rey pipe the way Pat Vottis did. And in no other shop has time essentially stood still for five decades.

It is the final chapter for a tobacconist family and its fiercely loyal customers.

“It was a fun business, and I’ve always said we didn’t have customers, we had only friends,” says Pasquale “Pat” Vottis, 84, of Guilderland. He opened the first Vottis Pipe Shop in 1941 on Erie Boulevard in Schenectady with his brother, Salvatore, before branching off with his own shop in downtown Albany in 1946. The Schenectady location was closed many years ago.

It felt a bit like a wake the other day as pipe aficionados streamed through the shop and placed a final order at the “tobacco bar.” Proprietor Vince Bonafede rang up the sales for Vottis custom blends Black Watch and Boulevard Deluxe on an antique manual National cash register. Customers paid their respects through clenched teeth, between drags on their pipes.

“An old friend is like a good smoke, Vince,” John O. McKenna was saying to Bonafede, with whom everyone is on a first-name basis. “I’m going to miss you, old buddy.”

McKenna, who works on behalf of the homeless in Albany and lobbies for war veterans, has been coming to the shop for a couple of decades, ever since he was a high school student and served as a legislative page who made cigar runs from the Senate floor for his late uncle, Sen. William F. Condon, a Westchester County Republican.

“I have delightful memories of this store, which helped me survive a place called Vietnam,” says McKenna, a non-smoker who frequently buys gifts at the shop. “The aroma of the store is something I’ll never forget. It’s extremely odiferous.”

Memories of his customers are equally pungent for Bonafede, 65, who took over the six- day-a-week business singlehandedly 15 years ago when his father-in-law, Pat Vottis, retired. Bonafede says he hasn’t had a week’s vacation since, and is eager for retirement, even though nostalgia tinges his anticipation of freedom.

“I’m happy that I’m finally going to get to rest and do what I want to do, but I’ll miss all my customers terribly,” Bonafede allows.

On this afternoon, Bonafede was leafing through letters from distraught mail-order customers who had been told the shop was closing.
There was a note from the Rev. Donald Webster, who has been ordering a pound of Vottis’ Boulevard Deluxe… religiously… each month from his home on Peaks Island, Maine, for more than 40 years.

“I wandered into the shop in the little arcade by the Schenectady railroad station in 1948,”
Webster writes. “I really felt bereft at hearing you were closing, and hate to think of going back to drugstore brands.”

Votis5There is a deep connection and intense loyalty between the serious pipe smoker and the choice of custom-blend tobacco that would be difficult to fathom for even, say, the Chivas Regal drinker or Cadillac driver who sticks with the same brand time after time.

The style of pipe and type of tobacco blend one smokes are a sort of talisman, rife with ritual and emotion.

The Vottis Pipe Shop has customers who had the pipe passion passed down from grandfathers. Others developed an allegiance to Black Watch while they were tweedy college-aged poseurs and have smoked nothing else straight through middle age and retirement.

But pipe smoking’s glory days are long past.

Pipe Lovers, “The Magazine for Men Who Love a Pipe,” published in Long Beach, Calif., had its heyday in the late-1940s. It was in that era that Pat Vottis was secretary of the Rip Van Winkle Pipe Club in Albany and club meetings, which regularly drew more than 100 pipe fanatics, were covered in the pages of Pipe Lovers.

Many cities had a pipe club. There was the Mohawk Pipe Club in Schenectady, with whom the Rip Van Winkle members held annual grudge matches. The contest was to see which club member could keep a bowl’s worth of tobacco burning the longest.

In 1949, Mohawk Pipe Club took the title with a 69-minute flame. Vottis tried to hold the honor for his Rip Van Winkle co-horts, but consumed all his tobacco and burned clean through his pipe’s briar bowl.

Gone a long time ago, too, are the Thursday evening pipe-smoking classes led by Vottis at the South Pearl shop, which were all the rage in the 1950s among women dangling dainty, jewel- encrusted pipes.

It was an innocent era, in which pipe smoking was touted as a healthy alternative to cigarettes and Vottis advertised that his Black Watch blend offered “an aroma that is accepted in every home, office or place of gathering.”

But these days, as pipe-lovers and smokers of all stripes are being made to slink with their habit past an anti-smoking phalanx and forced to steal puffs on sidewalks outside their places of work, the customers of the Vottis Pipe Shop reminisce about their golden age.

Garry Lavigne, an Albany attorney, was a Siena College student 30 years ago when he bought his first pound of Black Watch in an effort to give up cigarette smoking and he has been buying a pound of the same blend each week ever since.

“It’s disastrous that this shop is closing,” Lavigne says. “There’s no place else on Earth where I can get this tobacco.”

The Vottis Pipe Shop has always been proud of its most popular and trademark blend, the Scottish-styled Black Watch, of which they’ve sold tons at $9.75 per 12 ounces.

Vottis and Bonafede plan to go to their graves with the recipe. “Everyone tries to copy the Black Watch blend, but we’ll never let the secret out,” Bonafede vows. He says the key is its cool, mellow flavor and lack of an undesirable aftertaste.

The Vottis stamp has always been an all- natural smoke, without the vanilla, chocolate, strawberry or fruity flavorings of commercial blends. The Vottis philosophy is to let nothing get in the way of the flavor of wood and tobacco and smoke.

Vottis blends are homemade and so named, such as Connolly, a loyal customer, or Vin’s Special or Vottis’ Own. The English-styled Page No. 112 was inspired by book-lovers at Union College. North Wood is an outdoorsy, Adirondack blend and Grand Concourse was concocted by Bonafede’s wife, Marge, who ran a shop in the Empire State Plaza concourse for a decade before closing it five years ago.

The longtime Vottis customers are not happy about the prospect of change in their smoking life. They wonder will another tobacconist, besides Bonafede, will come up with novelty items such as the “crazy pipe,” a trombone- looking affair that carries the bowl behind the ear to keep smoke out of the eyes of the smoker? And will a new generation of tobacco merchants rush home after work to a basement workshop the way Bonafede did to make overnight repairs on pipe stems rendered useless by nervous teeth? And will there be other artists in Algerian briar who fashion one-of-a-kind pipes out of gnarled wood the way Bonafede does?

The Vottis Pipe Shop regulars think not, and they’re creating something of a Black Watch buying panic during the final week of business.

George Williams, chairman of Allied Capital Corp. in Washington D.C. and a 40-year customer, wrote to wish Bonafede well in his retirement and to score a five-pound order of Black Watch.

John Mason of Plattsburgh wrote to reminisce about his discovery of the Vottis Pipe Shop in 1941, while he was a student at Union College. He also ordered two pounds of Black Watch.

“I came into this shop with two friends from high school 26 years ago, and I’m the only one still smoking a pipe, and Black Watch, at that,” John Kelley, a CDTA bus driver, says during his final visit to the shop for a pound of Black Watch. “I hate the thought of going to a grocery store or CVS for a packaged blend now.”

Mike DeGulio, who works for the state division of housing, discovered the Vottis Pipe Shop six years ago after moving to Albany from New York City.

“Coming into the shop is a personal thing for me,” DeGulio says. “I shoot the breeze with Vince, I watch him blend my tobacco with his own two hands and he always takes good care of me.”

After one-half century, twilight has descended upon the Vottis Pipe Shop. The floor-to-ceiling lemon wood cabinets Vottis bought from a haberdashery have been sold. The pipe display cases have been mostly picked clean during a going-out-of-business sale, save for a few oddities, including a Calabash “Sherlock Holmes” model, marked down to $31 from $45.

Bonafede, who alternates between pipes and cigars, takes a cutter and neatly slices off the end of a thick Hoja, a hand-rolled Honduran stogey, and steps out onto South Pearl to exhale a cloud of smoky musings.

“It feels strange to be closing after all these years,” he says. “It’s been a good family business, but our children weren’t interested in carrying on and we didn’t want to sell it. The new generation just doesn’t care about the art of smoking a pipe.”

All of that information gave me what I needed to get a feel for Pat Vottis and his pipe shop including his philosophy of tobacco blending. I still did not know much about the pipe I had in my hand other than what I could deduce from the stamping. I knew that the briar was not Corsican but in this case Algerian. I also knew from the IMPORTED BRIAR stamping that the pipe was most probably made after the close of WWII when briar was once again imported into the US. I knew that the pipe was made in Albany, New York in the basement workshop of the Vottis Pipe Shop. I also knew that Pat Vottis in all likelihood carved the pipe sometime between 1946 and 1976 when his son in law Bonafede took over the shop at Pat’s retirement. So I found that while nothing was certain I could extrapolate quite a bit of information about the pipe I had found. Now it was time to get to work on it.

I had “field dressed” the pipe when I was in Idaho so when I got home at my work table I gave it another quick ream with the PipNet reamer and then followed up with the Savinelli Pipe Knife. I wanted to take the cake completely out of the bowl so I could look for burned areas or checking.Votis6Votis7 Votis8The top of bowl was a mess. The inner edges were in decent shape but the outer edge was beat down against something so the edges were rounded over and the distinct shape was compromised. I topped the bowl to clean up the edges and remove that damaged surface of the bowl. Once I removed the lava there was some burn damage to the front edge.Votis9I scrubbed the silver band with cigar ash to clean off the oxidation. Once I had it cleaned I also rotated it to centre the hallmarks on the top of the shank. There were some hallmarks on the band – a lion, an anchor and the letter T in a cartouche. To me the date on the band put it as early as the late 1890s and early 1900s. Since I knew that Vottis was not around at that time it was obvious to me that the band was added at a later date. There did not appear to be any cracks in the shank so that meant that the band was cosmetic.Votis10I removed the finish and the grime on the pipe with acetone on cotton pads. I was able to get most of the dark line of stain off the front of the bowl and also some of the dark spot on the right side of the bowl. Underneath the grime was some really nice grain on the briar.Votis11I did a light scrape of the bowl with a pen knife to take out some of the remaining carbon that stubbornly clung to the walls toward the bottom of the bowl.Votis12I cleaned out the mortise and airway in the shank and also the airway in the stem with alcohol, cotton swabs and pipe cleaners.Votis13The button edges were no longer well defined and had been worn into the surface of the stem. I recut the edges with a needle file. I also used the file to scrape the surface of the stem and remove most of the tooth marks.Votis14I sanded the stem with 220 grit sandpaper to smooth out the file marks and further remove the tooth marks.Votis15There was one small, deep mark on the underside of the stem that I filled with black super glue.Votis16While the stem repair dried I stained the bowl. I applied a dark brown aniline stain and flamed it with a lighter. I gave the bowl a second coat of stain and flamed it again.Votis17I wiped down the bowl with isopropyl alcohol to even out the stain coat and make it more translucent. The grain began to stand out.Votis18I buffed the pipe with Blue Diamond on the wheel to bring out the shine. The rim came out really well and the grain stood out on this old pipe.Votis19 Votis20With the bowl finished I worked again on the stem. I sanded the repair with 220 grit sandpaper to blend it into the surface.Votis21I scrubbed the stem with Meguiar’s Scratch X2.0 and removed much of the oxidation.Votis22I wet sanded the stem with 1500-2400 grit micromesh sanding pads and gave the stem its first coat of Obsidian Oil. I dry sanded with 3200-4000 grit micromesh and gave it another coat of oil. I finished sanding with 6000-12000 grit pads and gave it a final coat of Obsidian Oil.Votis23 Votis24I buffed the pipe on the wheel with Blue Diamond and then gave the bowl and stem multiple coats of carnauba wax. I buffed it with a clean buffing pad to raise the shine and buffed it with a microfibre cloth to deepen the shine. The finished pipe is shown in the photos below. It is a beauty. The dark spot on the right side is kind of a beauty mark in my mind. It is not a burn or damage in that way but rather a spot where the bowl sat against something that permanently darkened that spot. I chose to not hide it because I love the grain on the rest of the bowl. It came out very well to my eye. Thanks for looking.Votis25 Votis26 Votis27 Votis28 Votis29 Votis30 Votis31

Spotlight: Ladies Pipes, Part 2/7, a Clinton Straight Oval


Guest Blog by Robert M. Boughton
Member, International Society of Codgers
Member, North American Society of Pipe Collectors
http://www.naspc.org
http://www.roadrunnerpipesnm.biz
http://about.me/boughtonrobert
Photos © the Author lady1

INTRODUCTION
I came across a more subtle but still rather sexist yet humorous comment concerning the perceived relationship of women to pipe enjoyment, this time in the older ad above for Flying Dutchman tobacco. No longer in production, it was an aromatic blend of Kentucky Burley, Cavendish, Virginia, Oriental Turkish and “Other/Misc.” Sounds pretty good to me. But it makes me flash on an email I received from a friend on Smokers Forums UK. Her name is Liz. She wrote:

“I always wanted to smoke a pipe even when I was a child. I had seen photos of my dad smoking a pipe but he had quit smoking by the time I was born. I started smoking cigarettes in my early teens and the desire to smoke a pipe became stronger once I became an adult and started to do a lot of camping. I thought it would be very nice to sit by the campfire and smoke a pipe.”

Here comes the sad crux of Liz’ response. “But as a woman, I never felt comfortable or confident enough to go in a store and buy one. Finally in 2004 I got the nerve to go in the tobacco shop and buy a pipe. I used the excuse that I was buying it for my brother. [Emphasis added.] …I had no one to teach me anything about smoking the pipe so what I learned I found on the internet.”

I was struck by the eloquent and poignant plight of a woman I have come to think of as supremely confident and self-assured in all matters, albeit that our friendship is based in the ether world. This is a woman I should very much like to meet some day in person. Liz’ reluctance to purchase a tobacco pipe, at a tobacconist, for herself as a woman who had always wanted to partake of the pleasures she rightly imagined she would discover (around a campfire, no less, and as an alternative to the pernicious and addictive additives in cigarettes), plucked a mournful acoustic chord in my heart like listening to Albinoni’s Adagio for guitar alone on a torrential night.

This in turn sparked a connection to the woman in my previous blog of this series, the person who inspired me to tackle the subject in the first place with her soft-spoken, somewhat tentative inquiry to Chuck, at my local tobacconist, asking if he had any ladies pipes. After I read with delight and growing admiration for the fine woman Liz’ responses revealed her to be from the several questions I posed to her as a preliminary breaking of the ice in an ongoing interview process, I played back my mental tape of Chuck’s encounter with the good lady in search of a suitable pipe, and doing so recalled the trepidation in her voice and body language. With some amazement, I realized that she had probably worked herself up for untold years to that moment when at last she was determined to ask for that which she had always wanted!

As a man, I am compelled to declare that this clear and present state of social antipathy toward women who wish only to savor a pipe – and indeed the attitude must be widespread, or else I could not have come in contact with two ladies in hardly a month with the same reluctance to buy something so basic that they fancied obtaining – is intolerable. I mean good Lord, have we come so short a distance from the days when women on their own volition and in the strength of groups protested the double standard of cigarette smoking as chic by men while the practice was viewed as vulgar by females? Alas that science was not what it is today, and many beautiful pioneering civil rights women perished early from the intrinsic impurities and carcinogens of cigarettes. And let’s not forget the infamous bra burning demonstration so popular when I was a youngster (and to my natural titillation, no pun intended). With hope, therefore, these blogs will help to alleviate the barriers.

VARIOUS BRAND LADIES PIPES
I noticed Peterson’s had at least one ladies pipe, and reader/blogger Mark Irwin, who read my previous blog on this subject, urged me to include some of them during the course of the series. Here are several samples of fine ladies pipes, starting with a Peterson I found offered in Italy, per Mark’s suggestion.lady2Paddy of SF let me know that his wife has a sweet collection of Savinelli 606 pipes, at least one for each day of the week, like the following example. BTW, Paddy writes, the missus also has “one Castello of a similar shape which she received as a gift.” Good company, indeed.Lady3 lady4And now, here is the Clinton Real Briar Oval as it came to me.Lady5 lady6 Lady7 Lady8RESTORATION
The Clinton, as well as the FRASA I restored for my first of these seven blogs, has an unusual stinger tenon, heightening my surprise that neither of them seems to have any discernible history, not even as seconds. In addition to the tenon, the Clinton also has a distinctive upside-down C on the bit.Lady9By way of synopsizing the pipe’s chief and obvious problems, the bit was badly discolored, there was a crack on the upper left side of the bowl extending from the rim downward (but not penetrating into the chamber), and the stain was far too dark for my taste, given the apparent decency of the obscured grain. And so I began by soaking the bit in an OxiClean bath and the stummel in some used Everclear I keep on hand for such occasions.Lady10The bit was ready first, about a half-hour later, and I removed it from the soak and rinsed it, then took out the stinger and ran a soft cleaner through the airway. I wiped the stinger clean with a soft cotton gun cleaner square and sanded both sides of the bit’s lip end with 200-grit paper. Then I wet micro-meshed the entire bit from 1500-12000 and had a nice bowl of D&R Two-Timer Gold in my Peterson Killarney Straight Bulldog Dress Pipe. I ordered the beautiful black “ebony” pipe online during a brief overwhelming fixation on these pipes that also landed me a sleek Nat Sherman. Both remain favorites.

That Everclear strip lasted just long enough for my consummate Burley mix to work its way down to a fine ash – or maybe I made it last the proper time, as was my prerogative! Whichever the case may have been, I had a couple more handy cotton cloth squares ready, one to stuff into the chamber with a pinkie and twist so I could clean out any residue there and hold the body in place while I scrubbed the still wet outside of the wood with the other. Look at the scum that would have ended up trapped below the stain I later applied. Some would ask what it would matter. I like to think the devil is in the details.Lady11With considerable difficulty given the tiny chamber diameter (1” in length and 1” deep but a mere 0.5” across), I coaxed a small, limp piece of 150-grit paper inside and somehow worked it up and down enough to make a difference, then switched to 200- and finally 500-grit., finishing with a cotton cloth square with a squirt of purified water to remove the extra char. On the outside, I used 200-grit paper to clear away the stubborn remaining stain and residue from the Everclear soak.Lady12 Lady13 Lady14I micro-meshed from 1500-12000.Lady15 Lady16 Lady17I was ready at last to consider the crack.Lady18It looks pretty nasty, doesn’t it? Again, the consensus was to shave down the rim. Having Executive Power of veto, I opted for a fix I never tried before with a little concerted sanding of the rim with 150-grit paper, it comes down appreciably.Lady19Then I got a wild hair to do the unthinkable. I retrieved my file, an old, wrecked briar stummel I’ve kept for several years knowing I would never dare to try restoring it and some Super Glue, and scrape off enough of the wood to make a nice pile of super fine particles. I’ll tell you right now, the first two attempts at mixing Super Glue with the briar particles and then moving the ultra-fast-drying gloop to the top hole in the Clinton didn’t turn out well. Eventually I conclude the trick is sprinkling some of the fine wood into the gap and then sealing it with a kiss of glue.Lady20I did hasten to scrape some of the excess glue into the hole and remove the rest using the edge of a business card. When it was dry, which was in almost no time at all, I retorted the pipe Before the finishing touches, I sanded it down to smoothness with 200-grit paper and re-micro-meshed.

Afterward, taking the matter under full advisement and consideration, I mulled over Lincoln Marine Cordovan (burgundy) to stain it, which might have been overkill, and a mix with that and two or three times more Feibing’s Brown. I chose the latter, of course. I mixed the two stains in my small Tupperware. Lady21Staining the surface of the Clinton stummel for the most part had a nice effect, not counting the serious accentuation it gave to the small remaining hairline crack beneath the one I sealed on the rim. Therefore, following the same process I so painstakingly learned before, only going straight to the effective method, I prepared more briar shavings and, Super Glue at the ready, set the stummel down left side up and sprinkled the dust over the area where the crack was forming. After using another business card (what else are they good for?) to get the most of the particles, I squeezed a nice precise dot of glue over the spot and spread it out to let it dry in a thin coat.Lady22Of course I was forced to sand down the resulting obnoxious big round shiny bump, and in the process some of the surrounding stained surface, but it was worth it knowing the integrity of the pipe would be sound and none of my pipe aficionado friends with their eagle eyes would spot the former crack. Here is after sanding and before touch staining.Lady23And now for the finished product, after buffing with white Tripoli, White Diamond and carnauba. Red and white Tripoli, White Diamond and carnauba gave this bit a higher than usual shine.Lady24 Lady25 Lady26CONCLUSION
However lighthearted the ad with which I opened this installment of the series was intended to be, women are not here to be led around by the nose in the pursuit of so-called manly pleasures. Granted, no doubt, for the most part the pleasure of partaking of tobacco pipes has always been more the purview of men, but to think that women are incapable of such finer sensibilities of life is sheer sophistry, and shamefully self-deceptive and fallacious reasoning at that.

Furthermore, women need not have masculine qualities to favor the subtle qualities of pipe appreciation. And although most humans are capable of normal synaptic reflexes, the electrical impulses generated do not produce identical stimuli tickling the pleasure centers of the brain and kicking out uniform reactions. On the contrary, the magnificence of the human brain is that everyone’s reaction to a given stimulus is unique.

Why, then, should anyone be deprived of the deeply personal reflections facilitated by the mere puffing of a favorite tobacco in a like pipe? These are propositions that we hold to be self-evident, that all people are created equal. I would no more give up my pipes than my gun. Call me a radical or a revolutionary, but don’t call me a redneck or late for dinner.

SOURCES
https://www.smokingpipes.com/smokingpipesblog/single.cfm/post/top-pipe-picks-for-ladies Ladies pipes

https://www.youtube.com/watch?v=eo7IJY4ZjCU The Ladies of the Youtube Pipe Smoking Community


Spotlight: Ladies Pipes, Part 1/7, a FRASA French Bent Billiard


Guest Blog by Robert M. Boughton
Member, International Society of Codgers
Member, North American Society of Pipe Collectors
http://www.naspc.org
http://www.roadrunnerpipesnm.biz
http://about.me/boughtonrobert
Photos © the Author

LadyA pipe in the mouth makes it clear that there has been no mistake–you are undoubtedly a man.
— Alan Alexander Milne (1892-1956) – English author, playwright, poet essayist and storyteller best known for Winnie the Pooh – from “Smoking as a Fine Art,” in Not That It Matters, 1919, a collection of wide-ranging and manly essays

INTRODUCTION
I admit, my choice of the above quote was calculated, but not to raise the ire of any female smokers I indeed admire and whose attention I hope to draw to this forum and others, with the goal of opening a dialogue between the genders who share at least one common love. Of course, as with all well-meaning attempts at good natured humor mixed with more than a grain of satire, I should not be surprised if this one, in the spirit of political incorrectness, backfires in my face like a good ole boy’s sawed-off shotgun packed with too much rock salt.

But no, I think my message is clear. A.A. Milne was a good man and without doubt one of the most celebrated and creative writers of children’s stories of his time, albeit the product of the languid ease and floating, hypnotic comfort of his youth in the English countryside and predetermined defining crucible at Cambridge’s Exeter College at a time when his contemporaries were such traitors as Guy Burgess and Kim Philby to name but two. Yet Milne chose the right path, whatever unavoidable world-view of woman and their “rightful places” in the homes and gardens and still grander scheme of the universe. Milne escaped the abyss of prison, execution or exile to a dacha on the steppes of Mother Russia – outside of his day-to-day harrowing home life. All in all, notwithstanding the opening and somewhat tasteless quote, Milne turned out a bit alright.

So now, a few words about the earth-shattering day at the Stag Tobacconist in Albuquerque, New Mexico, US of A, deep in the Land of Enchantment. How â propos is that, I ask? Holy Shades of a Midsummer Night’s Dream, Batman! You see, I was sitting in my customary spot with a view of the entire room against the unlikely and therefore ever-present threat of imminent attack by unknown sinister forces, which seem to lurk in every corner of this wannabe city. The place continues to groan and grumble with unnatural growing pains.

I was sitting there in my comfortable cushioned chair in the smoker’s lounge, working on my laptop, when I overheard a woman who had come in looking for a “lady’s pipe.” I wasn’t eavesdropping, I just couldn’t help overhearing, along with the rest of the conversation, although my interest was piqued and my ears pricked. From her demeanor, I guessed it was her first visit to the shop. She was a rather large lady, dressed in a heavy long black coat. I knew right off that I had exactly what she was looking for at my apartment in an assortment of nice smaller pipes that nevertheless were not minis. I knew not to interfere with Chuck Richards, my friend and mentor, who had engaged the good woman

Scanning my mental knowledge of the shop’s inventory, I settled on a few of the no-name Italians and some mini carved meerschaums in the glass case below where Chuck and the lady stood at the end of the service counter, only a few yards from my curious ears and eyes. To my immense surprise, I watched Chuck (whose lips were pulled back in a look of distaste I recognized, whether or not the woman detected it) as he produced with appropriate care the open box of one of the meerschaums. The woman made a definite sound of pleasure that was stifled by Chuck’s masterful discourse on the pros and cons of meerschaum minis. He went on about the quality of the material and their ability to burn any type of tobacco without a lingering taste; their fragility and special precautions needed to use them, and in particular their construction with small push-in tenons that can be difficult to maneuver the vital cleaners through. He demonstrated and then explained how the cleaner would also be inserted into the shank after smoking but that he couldn’t handle the surface of the pipe because of its porous nature that absorbs skin oils and dirt, leading to serious damage.

Choking back a laugh, I thought I could not have discouraged a sale better if I had tried! I happen to know Chuck despises fancy, carved meerschaums for his own collection but would never hesitate to sell one to the right person. And so he moved on to several nice, shiny, natural finish no-names of medium length and bowl size. My excitement was growing. I decided if and only if Chuck proved unsuccessful in matching the female customer with a pipe – a wholly unlikely event – would I scurry out the door after her and offer the prospective customer my card and services.

But of course, Chuck sold her a very nice pipe, albeit twice the size of those I will show in this series. Thus was conceived the idea for this series, which, in my original plans, I envisioned, as usual, in a single blog. After a mere glimpse at the boggling research needed to undertake the endeavor, however, not to mention the difficulty of blogging seven restores in one space, I had the brainstorm of splitting the project into a series.

My friend on the Smokers Forums UK (http://www.smokersforums.co.uk/), who goes by the username “im2for1” there, is a Team Member at the Forums and owner of Ladies of the Briar for women only on Yahoo Groups and Friends of the Ladies of Briar of Facebook. She is also vice president of New Jersey Fellowship of Pipe Smokers on Yahoo and Facebook. With some careful, specific prodding, I hope to elicit some invaluable intelligence from Liz as this series progresses.

Here are some pictures of the seven pipes, which I relegated to a special pile on the big work desk in my office. I automatically segregated them for their unusual small sizes but had no idea that distinction would someday come in handy.Lady1 Lady2Now, for a description of my first foray into a so-called Ladies Pipes, although it could be smoked without shame by a man (if I didn’t already sell it to one of my best customers, known to some readers here as Ashley and going back to my first real restore). This is a FRASA (from the brand mark on the shank), a French piece of work about which I can find no background. Lady3I wonder if the larger capital letters indicate an acronym. It’s a lovely, little, delicately curved, natural, dark red briar billiard.Lady4 Lady5 Lady6 Lady7 Lady8RESTORATION
This was one of the cleanest pipes I’ve ever come across in a lot, but I’ve never seen one yet on which I couldn’t improve. I showed all of the pipes I’m restoring for these blogs to Ashley at one of our weekly pipe meetings a few weeks back, and I had a good idea which one she would like best. I’ve come to know her tastes, having sold her several pipes, not to mention one to her husband, Stephen. Her hand went straight for the FRASA and her eyes sparkled with P.A.D. I knew I had her. I pointed out the clean but slightly rough to the touch chamber, which took a flashlight to determine that it had indeed been lightly smoked. Then there were some minor blemishes on the bowl. I also said I’d like to lighten it up a bit, unless she liked it the way it was.

“Go for it!” she said.

And so I tossed the bit in an OxiClean bath.Lady9Moving to the stummel, I wiped it down with purified water and soft cotton cloth gun cleaners before using 320-grit paper gently and evenly before micro-meshing from 1500-12000.Lady10 Lady11 Lady12Removing the bit from the OxiClean and rinsing it, I wet micro-meshed it to a nice dark shine.Lady13I sanded the small chamber with 200- and 320-grit papers and retorted it just to be thorough, but I didn’t expect to find anything, and I didn’t. Now, that’s a clean pipe!

I finished by buffing the stummel with white Tripoli, White Diamond and carnauba, and the bit the red and white Tripoli, White Diamond and carnauba.Lady14 Lady15CONCLUSION
In the next installment, I plan on getting more to the meat and potatoes issues of relative numbers of women who partake of the magic instrument of divine contemplation – recognizing, of course, the futility of trying to get anywhere near exact numbers. I also hope to have feedback from Liz and others like her who are as active as any men in their smoking communities, with some insights into the kinds of pipes they actually enjoy, whether “ladylike” or more “manly.” Yes, sir (or ma’am), the times, they are a-changin‘.

I’ll leave you with these parting shots of two lady smokers, one real and one – ahem – well, never mind.Lady16 Lady17

An Interesting Multi-Finish Stanwell Buffalo Sitter 606


Blog by Steve Laug

This pipe came to me in the last box of pipes that my brother sent me. It is a Stanwell as can be seen from the shape and finish. From my research I came to understand that it came from the Stanwell Buffalo line. It is stamped on the smooth underside of the shank with the words Stanwell Made in Denmark and the shape number 606. The shape number is very visible and I was unable to locate that number on the internet shape charts.The front of the bowl was smooth and there was an acrylic horn-like material as a shank extension. The bowl had a light cake and looked as if it had been reamed recently. The rim of the pipe was really dirty with lava overflow from the bowl but underneath I could see that it was originally smooth like the front of the bowl and the portion where the stamping was on the underside of the shank. There was some burn damage on the outer and the inner edges of the rim that would need to be addressed. The pipe was a mix of medium and dark brown stains and the finish had a light sand blast on the surface of the sides, back and bottom of the bowl and the top and sides of the shank. The finish was dirty with lots of grime in the grain of the blast. The stem is a military style stick bit. The stem was in good shape with only one tooth mark on the underside toward the right side of the pipe. The fit in the shank was snug. The stamping on the stem showed the Stanwell Crown and S and it was faint but visible.Buff1 Buff2 Buff3 Buff4I took a close up photo of the rim to show the state of things when I started. You can see the buildup on the surface and the burn damage on the front inner edge of the rim.Buff5I cleaned up the reaming with the Savinelli Pipe Knife and then cleaned out the internals of the bowl, shank, mortise and airway in the stem. I used pipe cleaners, cotton swabs and alcohol to remove all of the oils.Buff6 Buff7I scrubbed the stem with Meguiar’s Scratch X2.0 plastic polish to remove the oxidation. I sanded the tooth marks on the underside of the stem with 220 grit sandpaper until the stem was smooth.Buff8 Buff9I lightly topped the bowl on the topping board. I wanted to remove the damaged surface and clean up rim edges. I also wanted to expose the burn marks so that I could address them.Buff10I sanded the rim top with 1500-2400 grit micromesh sanding pads to smooth out the scratching. I then stained it with a medium brown stain pen to match the smooth portions of the pipe. You can see the burn damage on the inside edge of the front of the bowl.Buff11I folded a piece of sandpaper and worked on beveling the inside edge all the way around the bowl to minimize the damaged area on the right front edge. While the damage is still visible it is much more subtle than it was before the beveling.Buff12 Buff13I set the bowl aside and worked on the stem. I sanded it with 220 grit sandpaper to clean up some of the oxidation and then worked on it with micromesh sanding pads. I wet sanded the stem with 1500-2400 grit sanding pads and then rubbed the stem down with Obsidian Oil. I dry sanded with 3200-4000 grit pads and gave it another coat of oil. I finished sanding with 6000-12000 grit pads and gave it a final coat of oil. I set it aside to dry.Buff14 Buff15 Buff16I buffed the pipe with Blue Diamond (lightly on the bowl except for the smooth areas and the rim top and more concentrated on the stem). I gave the stem several coats of carnauba wax and buffed with a clean buffing pad. I hand waxed the bowl with Conservator’s Wax. I hand buffed the bowl with a shoe brush. I finished buffing the pipe with a microfiber cloth. The finished pipe is shown in the photos below. I am still debating rusticating the rim to match the bowl and stain it darker to blend with the sandblast but not sure… time will tell. Thanks for looking.Buff17 Buff18 Buff19 Buff20 Buff21 Buff22 Buff23

Introduced to a Bamboo Briar of Spain Oval Shank Billiard


Blog by Steve Laug

I don’t know why but I keep taking out some unique pipes from the box my brother Jeff sent me. He has an uncanny ability to find the unusual and interesting pipes for me to restore. This one is one I had never heard of before. I have seen other bamboo rusticated pipes but not one that had the stamping that this one does. It is stamped on the underside of the bowl with the words BAMBOO BRIAR in an arch over the word Spain. The carver did a marvelous job of replicating the look of bamboo in the briar. The nodules, lines and grooves that he/she put in the briar really look like bamboo. To give it even more of an interesting look they left the briar natural to highlight the subdued grain of the briar coming through the smooth areas of the bamboo and the carved nicks in the surface. It is really beautiful.

When I took it out of the box the bowl had a thick cake of carbon built up in the bowl. The rim was thickly caked as well with lava. The outer edges of the bowl had some nicks in it and there was a small burn mark on the front right inner edge of the bowl. The stem did not fully seat in the mortise because of the tars and oils there. The exposed portion of the tenon and the stem were badly oxidized. There was some light tooth chatter on the stem but overall it was in decent shape underneath the oxidation.Bamboo2 Bamboo3 Bamboo4 Bamboo5I took some close up photos of the rim and the bottom of the bowl. The picture of the rim shows the thickness of the cake and the state of the top of the rim. This old pipe was pretty clogged up with cake and tars. The picture of the bottom of the bowl shows the stamping. It reads Bamboo Briar over Spain.Bamboo6 Bamboo7Bamboo1I removed the stem and dropped in a jar of Oxyclean to soak the heavy oxidation for several hours. Before working on the bowl I did a little research on the brand and found that on my go to site, Logos and Stampings, or pipephil there was a notation. Here is the link: http://www.pipephil.eu/logos/en/logo-b1.html#bamboobriar.

On that site the pipe is described as follows: The bamboo like decorative carving was typical of Valencia’s manufacturers since the early 20th century. However it’s difficult to say who exactly the maker was.

With that information in hand I went to work on the bowl. I reamed it with a PipNet pipe reamer beginning with the smallest cutting head and working up to one that was the same diameter as the bowl. I removed the cake and took it back to bare wood. I finished the reaming and cleaned up the bowl walls with the Savinelli Pipe Knife.Bamboo8 Bamboo9 Bamboo10The outer edge of the rim was rough and the top had some nicks in the briar that made topping the bowl necessary. I topped it to remove the damaged areas of the rim using a topping board and 220 grit sandpaper.Bamboo11 Bamboo12I scrubbed the exterior of the bowl with acetone (fingernail polish remover) on cotton pads to clean up the dirt and oils from the natural finish of the briar.Bamboo13 Bamboo14 Bamboo15 Bamboo16I sanded the topped rim with 1500-2400 grit micromesh sanding pads and then used a light brown stain pen to stain it to match the patina on the bowl. I used a black Sharpie pen to touch the “root nodules” of the simulated bamboo. Bamboo17I hand applied some Conservators Wax to the bowl and once it dried hand buffed it with a shoe brush.Bamboo18I took photos of the pipe after buffing it. The colour of the rim and the patina that came out on the bowl with the wax gives it an aged bamboo look that I really like.Bamboo19 Bamboo20 Bamboo21 Bamboo22I cleaned out the shank with alcohol, cotton swabs and pipe cleaners to remove the tars and oils. I was quite surprised by how little came out of the shank with the cleaning. I expected it to be far worse.Bamboo23The stem had been soaking in Oxyclean for about four hours so it was time to work on that. I set the bowl aside and removed the stem from the Oxy soak. The soak had softened and removed much of the oxidation from the surface. It had also brought the deeper oxidation to the surface.Bamboo24I rubbed the stem down to remove the softened oxidation and then used needle files to clean up and define the edges of the button.Bamboo25I used pipe cleaners and alcohol to clean out the inside of the stem and again was surprised by the lack of real oils and tars.Bamboo26I sanded the stem with 220 grit sandpaper to smooth out the file marks and to remove the oxidation on the surface. I wet sanded the stem with 1500-2400 grit micromesh sanding pads and gave it a coat of Obsidian Oil. I dry sanded with 3200-4000 grit pads and gave it another coat of oil. I finished sanding it with 6000-12000 grit pads. I gave it a final coat of Obsidian Oil and let it dry.Bamboo27 Bamboo28 Bamboo29I buffed the stem on the buffer with Blue Diamond and then gave the pipe multiple coats of carnauba wax. I used a light touch on the bowl and shank so as not to clog up the nodules or grooves in the bamboo carving with too much wax. I raised the shine with a clean flannel buff on the buffer and then gave it a hand buff with a microfibre cloth. The finished pipe is shown in the photos below. I really like the way the patina of the briar and the carvings on the bowl and shank give the pipe a look of aged bamboo. The unknown Spanish carver did a great job on this one in my opinion. Now I have to decide whether to keep this one or not. It is so unique that I think it deserves a place in my collection. Thanks for looking.Bamboo30 Bamboo31 Bamboo32 Bamboo33 Bamboo34 Bamboo35 Bamboo36 Bamboo37

A Challenging Yello-Bole Chesterfield


Blog by Aaron Henson

Although this is a standalone write up, it is also part 2 of an adventure I started with the rustication of a bent billiard about a month ago.

I found this Yello-Bole Chesterfield at a local flea market in town. It was part of a large estate collection, most of which were unsmoked uniquely carved pipes. My eye, however, was immediately attracted to the Peterson-like shape with military bit and P-lip stem and I was surprised to see that it was a Yello-Bole. The pipe was a bit grimy and oxidized with burn marks but after some talking we agreed on a price and I took it home.Chesterfield1The stampings on the bowl were very clear and deep, some of the nicest I have seen on an estate pipe that is as well used as this one. The left side shank read YELLO-BOLE over HONEY CURED BRIAR over CHESTERFIELD with the KBB inside the clover leaf on the left. The band was stamped with KB&B inside the clover leaf over NICKEL PLATED. The right side shank was stamped with shape number 2816C. The stem had the Yello-Bole yellow circle inset in the top and SOLID RUBBER stamped deep into the underside of the stem.

A quick search online and I was able to use the markings to date the pipe to the 1933-1936 time manufacturing period.

The briar was in great shape with beautiful bird’s eye pattern. The pipe was dusty and grimy and after wiping down with an alcohol soaked cotton pad I continued with my assessment. The rim was coated with a heavy crust of tar and there was a deep burn mark on the outside of the rim (major issue number 1). The bowl did not have a large amount of cake so I had to assume that the previous owner had reamed out at some point. And perhaps it had been over reamed, because the air hole entered the bowl about 2/3 the way down the chamber wall. This would lead to a mouth full of hot ash when you were half way through the bowl (major issue number 2). There were some minor bumps and scratches in the surface of the bowl but nothing that could not be buffed out.Chesterfield2 Chesterfield3The stem was in great shape. It was heavily oxidized with some minor tooth chatter but the airway was clear and the stinger was intact and in great condition.Chesterfield4I set the stem to soak in a Oxiclean solution and turned to the stummel. First I reamed the chamber back to bare wood. Next, I tried to clean the rim with Oxiclean on a wet green pad but the tar was just too stubborn so I resorted to a topping board and lightly sand away the tar build up. This is where I made my first mistake: I scuffed off a bit of the nickel plating when topping the bowl (I still don’t have a fix for this!). I have thought about taking the ring off and having it re-plated but several attempts to remove the ring with heat have not been successful.

To address the burn mark on the rim I used a worn piece of 220 grit sand paper I removed the burned wood trying not to remove any of the sound briar under the burn. I was surprised to see how deep the burn went and was at a bit of a loss on how to address it. As you can see below, a significant amount of wood as damaged.Chesterfield5I figured I had two options: 1) replace the burned material with glue/briar dust or 2) sand the rest of the rim to match and change the shape of the pipe. In either case I was going to need to refinish the briar so I wiped it down with acetone to remove as much of the finish as I could while I decided what I was going to do.

Looking into the chamber again, I listed out my options for addressing the air way issue. Again I came up with two options; 1) fill in the bottom 1/3 of the bowl with pipe mud, or 2) drill a new airway that comes out at the bottom of the chamber. I didn’t like either option. The first would have been a very large fill and volume change for the pipe and the second was fraught with potential problems – chiefly aligning the drill bit to come out at just the right point in the bottom of the bowl

So I figured it was time for some consultation. I outlined the issue in an email and included some picture and sent them off to Steve – our worthy “Professor of Pipe-ology” and blog host.

While I waited for Steve’s response I cleaned the inside of the shank and with alcohol soaked cotton swabs and pipe cleaners until then came out as clean as they went in. I also took the stem from the Oxiclean bath and removed the loose oxidation with a magic eraser. I cleaned the internals of the stem then polished it with micromesh pads 1500 – 12000. I used mineral oil every three pads to freshen the vulcanite and give the pads some traction. There was only one minor tooth mark that didn’t raise with heat and I filled it with a dab of black super glue and sanded it smooth with the 1500 mirco-mesh pad.Chesterfield6 Chesterfield7Steve responded with the recommendation of building up the burn spot with super glue and briar dust confirmed that I had the right idea. I was hoping that he had another trick up his sleeve because I knew that the repair would have to be covered up with either a very dark stain or rusticated. I applied three separate layers of clear super glue and briar dust to build up the rim then carefully sanded the repair to blend it into the shape of the rim. Chesterfield8 Chesterfield9I came across and older post where Kirk Fitzgerald rusticated a Peterson that looked very similar to my Chesterfield. Taking some note, I decided to try a similar type rustication. I lightly mark a ½” band around the top of the bowl with a pencil and corresponding area on the bottom of the bowl to balance the appearance. Using the 1/8” carving tool on a Dremel I added a dimpled texture in offset rows. I was glad I had tried using this tool on the previous project because the carving tool did have a tendency to skip on the harder grain. Chesterfield10The final texture hid the repair and was not so extensive as to hide the grain. I sanded the outside of the bowl with micro mesh pads 1500 – 3600 to smooth out the scratches.

Instead of drilling a new airway, which posed the risk of additional misalignment, Steve recommended using a needle file to elongate the opening so it extended to the bottom of the bowl. The excess space could then be filled with plaster creating a new airway. This proved to be tedious work. Below are two rough cross-section of the pipe. On the left is the airway as it was and on the right is the revised airway (in theory).Chesterfield11Filing was a slow process and it took some effort to keep the elongated hole from drifting off course. I went slow and checked the progress often. Once the hole was about where I thought it should be I used the stick of a cotton swab as the place holder for the new airway. It was the rolled paper type stick that could be bent to match the curve of the bowl. Holding stick in place with a rubber band around the rim I mixed a batch of thick plaster and pushed it into the elongated hole with my finger. When plaster came out the top of the hole I removed the excess from inside the bowl and set it aside to dry for 24 hours. Chesterfield12In my first attempt at this repair, I did not have plaster so I used pipe mud (a slurry of cigar ash and water). This did not work at all. It is great for filling in the bottom of a bowl but it was too loose to stand on its own as a fill/patch. I removed the pipe mud and started over with the plaster.

The next evening, I used 100 grit sand paper wrapped around a ¼” dowel to remove the excess plaster and smooth out the repair. I carefully twisted the swab stick and it came free without damage to the patch. The next time I do this I will coat the stick with wax before securing it in place. The wax should help the stick pull free without bonding to the plaster.

It was time to finish the bowl. I chose to use straight Fiebing’s dark brown stain on the rusticated areas and then wiped it down with alcohol pad. Chesterfield13Next I applied straight light brown to the rest of the bowl. After setting the color with heat I wiped the entire bowl with an alcohol pad to blend the colors. Happy with the results I took the pipe to the buffing station. I buffed the stem and stummel separately so I could get to all the area a little more easily. I started with white buffing compound then finished with multiple coats of carnauba wax.

With the outside of the pipe complete I wanted to cover up the plaster patch inside the bowl so I applied a bowl coating. Using my finger I spread a thin coat of maple syrup evenly over the inside of the bowl then poured in the contents of a dietary charcoal capsule. I put my palm over the top of the pipe and shook the pipe so the charcoal powder covered the inside of the bowl. I set the pipe aside to dry for 5 days before emptying out the loose powder.

I want to say “Thank you” to Steve for his advice on this one… and thank you for reading.Chesterfield14 Chesterfield15 Chesterfield16 Chesterfield17 Chesterfield18

Restemming a GBD International London Made – 508 Bent Billiard


Blog by Steve Laug

Quite a while ago now my brother Jeff picked up a handful of pipes from an antique shop in Montana. There were quite a few GBD pipes in the lot. One of them was this GBD International bent billiard. It came with a gnawed off stem that was irreparable. The bowl was caked and dirty and the rusticated/plateau top was filled with grime to the point that it was almost smooth. The bowl looked good under the grime and the finish looked salvageable. The pipe was stamped GBD in an oval over International over London Made on the left side of the shank. On the right side it was stamped with London England over the shape number 508. I failed to take photos of the bowl before I cleaned it up as I was on a roll with about four bowls going at the same time. Here is what it looked like after I had wiped it down with alcohol. I scrubbed the plateau top with a brass bristle brush and some Murphy’s Oil Soap. I rinsed it down with cool water and dried it off. It is in very good shape. I had reamed the bowl with a PipNet reamer and cleaned out the shank and the bowl. GBD1 GBD2 GBD3 GBD4I went through my stem can and had several potential stems there. I chose one that was slightly larger in diameter than the shank. I had to shorten the tenon as it was too long to sit correctly in the shank.GBD5 GBD6With the tenon shortened the stem fit nicely in the mortise. The diameter was close and I would adjust it to fit.GBD7The stem was a used one that I recycled and it had one deep bit mark on the top side near the button. I sanded it smooth and cleaned it before I filled it in with black super glue. Once the glue cured I sanded the repair with 220 grit sandpaper to smooth it out.GBD8 GBD9I used the Dremel and sanding drum to reduce the diameter of the stem. I sanded it with 220 grit sandpaper until the transition was smooth. I wiped down the bowl with acetone on cotton pads to clean off the remaining grime before restaining the rim with a Black Sharpie.GBD10 GBD11 GBD12 GBD13I heated the stem over a heat gun until it was pliable and bent it to the proper angle. I set the bend with cold water. I sanded the stem with 220 grit sandpaper to remove the scratches left behind by the Dremel and smooth out the flow of the stem.GBD14 GBD15I sanded the stem with micromesh sanding pads – wet sanding with 1500-2400 grit pads. I rubbed the stem down with Obsidian Oil and then dry sanded it with 3200-4000 grit pads. I gave it another coat of oil and then finished sanding it with 6000-12000 grit pads. I gave it a final coat of oil and let it dry.GBD16 GBD17 GBD18I buffed the bowl and stem with Blue Diamond on the buffing wheel and then gave the pipe multiple coats of carnauba wax. I buffed it with a clean buffing pad and then hand buffed it with a microfibre cloth. The finished pipe is shown in the photos below. The grain on this pipe is spectacular – great birdseye on the sides and cross grain on the front, back and bottom. The plateau or rustication on the rim that I stained black gives it a unique look. I think it is a beauty! Thanks for looking.GBD19 GBD20 GBD21 GBD22 GBD23 GBD24 GBD25 GBD26 GBD27

A Ruined Stanwell Handmade 80R Bent Billiard – another ugly duckling


Blog by Steve Laug

Out of the three pipes from the “hackster” – the cut off Rhodesian, the coffee grounds Dublin and this Stanwell 80R Bent Billiard I have to say that the work he did on this one was by far the worst abomination. This pipe is stamped Stanwell Hand Made 80R Made in Denmark on the underside of the shank. It was a sandblast brown contrast bent billiard that would have been beautiful when it was made. The “hackster” decided to improve upon the finish and believe it or not he desecrated the pipe. He used a Dremel or sander to remove the majority of the sandblast finish leaving a dab of it on the back of the bowl at the joint of the shank and the bowl and a dab on the front side about 1 inch long from the rim. In removing the blast he completely ruined the shank leaving a thick band near the stem and the two thick sandblasted dabs. He sanded off the blast on the shank leaving it looking anemic and awful. He ruined the shape of the bowl and left it totally out of round on the outside. He also over reamed the bowl with what looked like a Dremel and sanding drum and took the bottom of the bowl almost ¼ inch below the entrance of the airway.

He did not leave the stem safe either he reshaped the button by removing the majority of the sharp edge. Then to add insult to injury he left the stamping intact on the bottom of the shank giving credit to Stanwell for the ruination of this fine briar pipe. It went from handmade to hand ruined. Over the entire bowl and slopping onto the stem was a thick coat of shellac. Runs and drips had hardened. The file and Dremel marks were held in perpetuity under a thick coat of shellac. That is where I started with this abomination. The question was could I do anything to redeem this mess.blast1 Blast2 blast3 blast4I took some photos of the stem and the left over sandblast sections. There is also a photo of the rim shows the out of round condition of the outer edge of the rim.blast5 blast6 blast7 blast8 blast9I sanded off the remaining sandblast sections on the bowl and shank and rounded the bowl with a Dremel and sanding drum. I used the Dremel to reshape the shank and the bowl and shank. The damage done to the shank made it necessary to shape the stem into an oval instead of a round.blast10 blast11 blast12 blast13With the rough shaping work done there was a lot of fine tuning to be done to the shape of the bowl. I topped the bowl with a topping board and 220 grit sandpaper to remove the deep saw and file marks and to flatten the surface. I sanded the areas on the bowl where I left the shellac and existing finish until they were smooth as well. I left the band on the bottom of the shank where the faint stampings that the “hackster” had left behind remained. I had still not decided whether to remove them as the pipe was certainly not a Stanwell any longer and when I was finished reclaiming it the pipe would be two times removed from the pipe that came out of the Stanwell factory.blast14 blast15I hand sanded the bowl and shank with 220 grit sandpaper to further shape it. I sanded the stem as well to remove the damage that had been done to it and also to reshape it to the oval shank.blast16 blast17 blast18 blast19I worked on the outer edge of the rim and shaped the bowl with 220 grit sandpaper. Fortunately, the inner beveled rim was undamaged. The bottom of the bowl was a mess that I would need to fill with pipe mud to restore the depth of the bowl to the bottom of entry of the airway into the bowl.blast20I sanded the bowl and shank with a coarse grit sanding block to smooth out more of the curves. The larger surface of the block ensures and evenness to the contours of the bowl and shank.blast21 blast22 blast23 blast24I used the heat gun to bend the end of the stem to the angle that would have originally been present when the pipe left Denmark. I sanded the stem and bowl further with sandpaper and gradually the pipe was taking shape. The swan was beginning to appear. During the sanding process I found that there were several flaws in the briar and at least one fill. During the course of the sanding these may well disappear. Overall this is a nice piece of briar with enough meat on it that I can still end up with a nice pipe.blast25I cleaned out the shank and the airway to the bowl and in the stem with alcohol, pipe cleaners and cotton swabs. It was amazingly dirty for a pipe that had been “refurbished”. The “hackster” had left the inside absolutely filthy while destroying the outside of the bowl and stem.blast26 blast27I continued to sand the bowl and stem with a coarse grit sanding block to remove the remaining scratches left behind by the Dremel and sanding drum. Gradually the swan was beginning to emerge. I was getting excited about what this one was going to look like when it was finished. There was some nice grain emerging as I sanded.blast28 blast29 blast30 blast31I sanded the bowl with micromesh sanding pads to further remove the scratches. I wet sanded the bowl with 1500-2400 grit pads and sanded until the grain began to shine.blast32 blast33 blast34I dry sanded with 3200-12000 grit pads and then rubbed on a coat of Danish Oil Cherry stain. I gave the bowl several coats of the finish and then set it on a cork stand to dry over night.blast35 blast36I cleaned up the sharp edge of the button with needle files to redefine it as the shape was blurred into the body of the stem. I shaped the button with 220 grit sandpaper at the same time to give it definition.blast37 blast38I sanded the file marks out with 220 grit sandpaper to blend the edge of the cut into the surface of the stem. I wet sanded the stem with 1500-2400 grit micromesh sanding pads and then gave the stem a coat of Obsidian Oil. I dry sanded with 3200-4000 grit pads and gave it another coat of oil. I finished by sanding with 6000-12000 grit pads and giving it a final coat of oil. I set the stem and pipe aside for the night.blast39 blast40 blast41In the morning I buffed the bowl and stem with Blue Diamond on the wheel to bring out the shine and then gave the pipe several coats of carnauba wax. I buffed it with a clean buffing pad and then by hand with a microfibre cloth. The finished pipe is shown in the photos below. To me it looks far better than the mess I started with but what is your verdict? Did a swan emerge? The pipe certainly has some nice grain and the flaws are small in comparison to the overall look of the pipe. Thanks for looking.blast42 blast43 blast44 blast45 blast46 blast47 blast48 blast49

The Transformation of a Second Ugly Duckling – Can it be done a second time?


Blog by Steve Laug

This afternoon I took on the second ugly duckling from the eBay “hackster” who had ruined the pipe that I transformed into a swan earlier. This one is stamped Morell over Mackenzie on the left side of the shank and Imported Briar over Italy on the right side. The Morell was a filter pipe so it was made to accommodate a Medico style paper filter. The pipe was a mess. Picture with me what it looked like. It had been painted with a band of coffee grounds (?) around the rim going down the sides of the bowl about a ¼ inch. The rim had been roughly sawn off and the tooth marks of either the file or saw were still present. The shank had damage that was ignored. The entire pipe had then been coated with a thick, runny coat of shellac that had rippled over the surface and given the pipe an obscene shininess that highlighted the atrocities that had been done to it. The stem was original but the “hackster’s” hand had not missed it either. It was cut off and a poorly cut button was carved into the stem. No care of thought was taken to account for the angles of the stem to the button and nothing had been done to open a slot in the end of the button. If you cannot picture it in your mind’s eye here are some photos.Dublin1 Dublin2 Dublin3 Dublin4I took some close up photos of the rim and stem. The rim photo is a little out of focus but you can see what I was talking about above. It was a mess. The issues with the stem are pretty self evident.Dublin5 Dublin6 Dublin7 Dublin8I scraped the coffee grounds off of the bowl edge with a sharp pen knife. In doing so I found a large pink/white fill on the left side of the bowl across the top just below the rim edge. In the next two photos you can see the coffee grounds on the cloth I put on the work table to collect them when I scraped them off. The bowl was pretty full of fills all the way around.Dublin9 Dublin10I scrubbed off the shellac with acetone on cotton pads until I had removed all the thick, runny coat that covered the bowl.Dublin11 Dublin12I took a close up photo of the fill area on the left side to give you an idea of the size of it. It was large and ugly. The other side of the bowl also had several and one larger one mid bowl.Dublin13 Dublin14I took a photo of the rim to show the detail of the file or saw marks.Dublin15With fills this large and a pipe this ugly something had to be done with it or it would end up looking worse than it did when I started. The ugly duckling would just be a duck of another colour. There would not be any swan emerging unless I took some drastic measures. I taped off the stamping on the bowl and a band around the shank stem union with some electrical tape to protect it during the rustication and the staining. I used a series of burrs on the Dremel to cut a random rustication pattern on the sides of the bowl. Different burrs gave a different effect so follow the photos until the end of the rustication to get a full idea of how each burr worked.Dublin16 Dublin17 Dublin18 Dublin19 Dublin20 Dublin21 Dublin22 Dublin23When I finished with a series of five different burrs I then used the rustication tool that was gifted to me and tore up the finish even more. I wanted to cut some deep gouges in the briar to give it heavy rustication.Dublin24I followed that up with a flower frog (see picture below) to further rusticated the finish.Dublin25Once finished with the serious weapons I used a brass bristle brush to knock of the loose particles of briar and smooth things out a bit.Dublin26My next step in the transformation process was to stain the bowl. I chose an aniline black stain to go into the grooves of the rustication because of the large fills. The black stain would penetrate even the white stain in the grooves I cut into it. I applied the stain and flamed it to set it in the briar.Dublin27 Dublin28When the stain dried I removed the tape from the smooth areas. I sanded the high points on the rustication with a sanding block to remove the black from those areas. I wanted to have a contrast that blended well with the smooth areas. I chose on this bowl to also rusticate the rim because of the amount of damage that the “hackster” had done to that area of the pipe. With the sanding done you can see the contrast beginning to show.Dublin29 Dublin30 Dublin31 Dublin32After I sanded the bowl and rim I rubbed it down with a light coat of olive oil to enliven the briar. I let is absorb into the wood before I hand buffed the pipe with a shoe brush.Dublin33 Dublin34 Dublin35 Dublin36 Dublin37With the bowl finished it was time to tackle the damage done to the stem. It had been clipped off and then sloppily tapered to the hand cut new button. I worked on the taper with a flat file and a sandpaper until the transition on both sides of the stem matched. I also cleaned up the button as it was wider on the top than the bottom. I also shaped the button so that it was uniform. The button was pinched and there was an indentation on both sides of the stem in front of the button. I sanded the sides of the stem to remove that indentation.Dublin38The end of the stem was left with a raw air hole. I used needle files to clean up the shape of the button from the end and also to cut and shape a slot.Dublin39 Dublin40The photo above shows the general shape of the slot. I still needed to flatten the face of the button and to clean up the slot but you get the idea. I also used some tiny spots of superglue to fill in the areas on the left side of the stem near the button where the “hackster” had cut back too much material. Once it dried I sanded it with 220 grit sandpaper to smooth it out and blend it into the surface of the stem.Dublin41With the reshaping and tapering done to the stem I went on to use my usual array of micromesh sanding pads. I wet sanded with 1500-2400 grit pads and gave it a coat of Obsidian Oil. I dry sanded with 3200-4000 grit pads, another coat of oil and then finished with 6000-12000grit pads. I gave it a final coat of oil and let it dry.Dublin42 Dublin43 Dublin44I buffed the bowl and stem with Blue Diamond – making sure to use a light hand on the bowl. Then I gave the stem several coats of carnauba wax. I gave the bowl a coat of Halcyon II wax and hand buffed the bowl with the shoe brush. I gave the entire pipe a final buff with a microfibre cloth. I think the ugly duckling once again became a swan. What do you think? I may well have to make a new stem for it one day. Dublin45 Dublin46 Dublin47 Dublin48 Dublin49 Dublin50 Dublin51 Dublin52 Dublin53