Guest Blog by Robert M. Boughton
Member, International Society of Codgers
Member, North American Society of Pipe Collectors
http://www.naspc.org
http://www.roadrunnerpipes21.biz under construction
http://about.me/boughtonrobert
Photos © the Author except as noted
NOTE: ALL BUT ONE TITLE OF RAYMOND CHANDLER’S NOVELS ARE INCLUDED WITHIN THE TEXT OF THIS BLOG, THE MISSING ONE BEING IN NO WAY VIABLE WITHOUT BECOMING RIDICULOUS. I HAVE ALSO ADDED CERTAIN LESS OBVIOUS REFERENCES FROM THE GREAT NOVEL. I WANT TO BE THE FIRST TO POINT OUT THAT THIS SINCERE HOMAGE IS NEVERTHELESS WANTING. AS PARTIAL COMPENSATION, I OFFER THE PIPE THAT IS THE SUBJECT OF THE RESTORATION – FREE, NO GIMMICKS OR POSTAGE – TO THE FIRST READER WHO IDENTIFIES THE MOST TITLES AND OTHER ASSOCIATIONS. IN ORDER NOT TO MAKE THE TASK TOO EASY, I WILL LET THE READERS SOLVE THE MYSTERY OF THE SPECIAL CONNECTIONS. ONE HINT – THE 1940S SLANG USED IS A DEAD END. POST ANSWERS IN THE COMMENTS SECTION. GOOD LUCK!
From thirty feet away she looked like a lot of class. From ten feet away she looked like something made up to be seen from thirty feet away.
— Raymond Thornton Chandler (1888-1959), British-American writer of poems, essays, literary reviews, screenplays and hard-boiled detective tales, through his great character Philip Marlowe in “The High Window,” 1942
I was wearing my powder blue boxers. I was unkempt, dirty, unshaven and sober, and I couldn’t care less who knew any of it. The sun was a big dark orange rooster mute with nothing left to crow about other than another shot at a life filled with danger, which reminded me I had not slept going on five days. The freshness of the Sandia foothills was fooling no one who has blown the kind of time I have in this high desert burg, even if that steady, sandy ascent into the mountains was too formless to see yet.
The temperature during the longer shifts of light than dark grew hotter with each twenty-four-hour trudge that dragged on that miserable stretch, late July into August. The dog days neared their end with no such luck appearing on the horizon for the solar blaze. The sultriness outside was the kind that had nothing to do with dryness or humidity. The oppressiveness that hung over the entire overblown town was all about the barometer. At night the blood red color of the fourth planet from the sun, and the fact that it was closer to our little world than it had been in eleven years, only made the air outside seem hotter.
The weather fat-heads kept predicting rain but I hadn’t seen any since the part of the year I liked best, what the locals called the monsoon season with the kind of cock-eyed, soppy buzz that got under my skin, right after the mere sound of a Christmas carol. Last I heard, a monsoon was driven by large bodies of surrounding water. The whole forsaken state was landlocked. While I’m on the subject of things I dislike, I might as well mention I’m not a big fan of opera – excuse me, the opera. I’ve had to scratch under the collar through my share of these shows and would be none the poorer if I never sat through another. Carmen was okay, come to think of it. At least you could say that little tease got what she had coming.
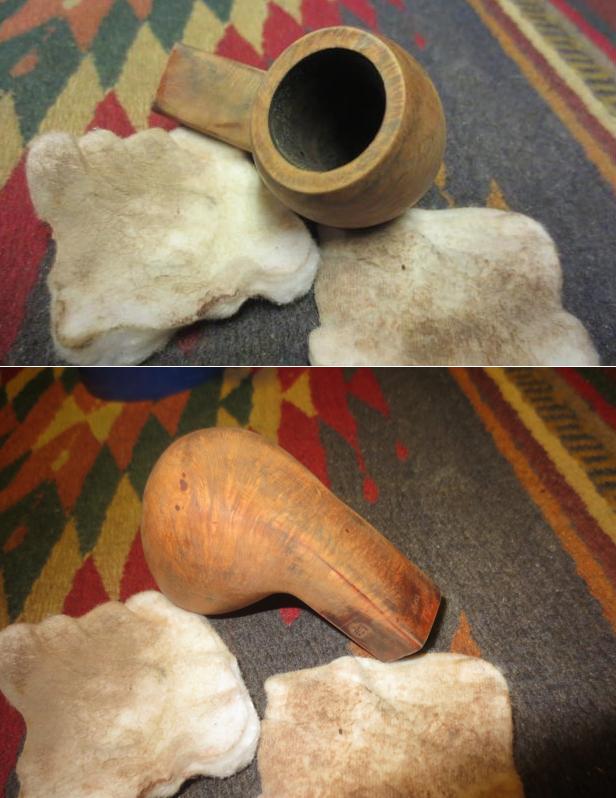
The torridness was part of the reason I didn’t bother to put on one of my suits. All of them were the same straight cut, most black or gray but a few with some color to them, like a rumor about me that was going around. Not that any of those stories played a part in my trouble sleeping The other excuse for not making myself more decent was that every one of my flannel uniforms was at Owen’s, my tailor, being taken in because of the weight that was sapped out of me. I was everything the well-dressed pipe restorer who lived alone ought to be. I was waiting on an eight thousand dollar check to clear the bank, and until that happened I wasn’t going anywhere.
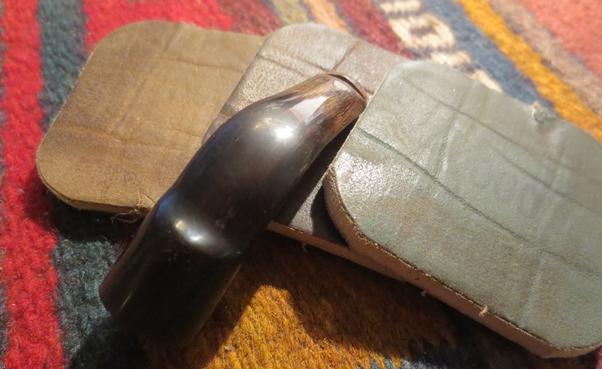
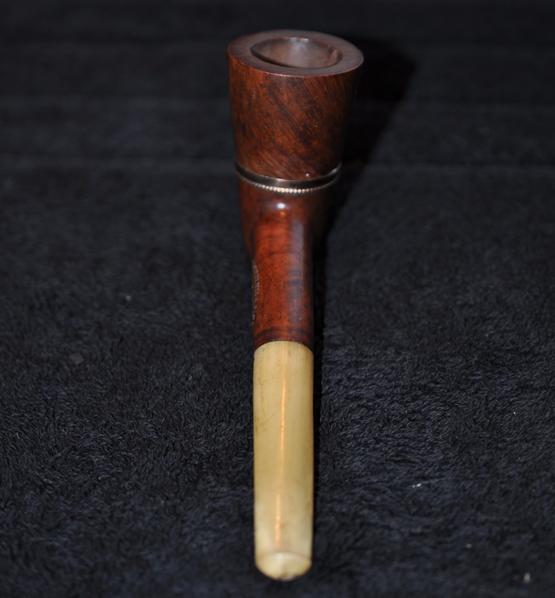
The case I was working was a tough nut to crack. Sometimes a gig was all aces, but this was bad news that made a big part of me not even want to cool down. My biz was to fix the brodie, only in this case the charge sheet of senseless brutalities was full with counts. I’ve never hung it up unless the pipe was done for, as in ready to stoke the fireplace or campfire. Briar is a stern wood, though, and I had to take a shot. In the crowd she came from, the little sister looked plenty ritzy. Away from the crowd made her more into something any group would give a wide berth.
Some creep did a real number on this one. She still had a swell figure and I could tell she was a dish back in the day, but that was long ago and far away, as the kid from Hoboken crooned. In my book, a nice body is the important thing anyway. Whatever genius plugged this dame had to be whacky or a twit. As I saw it, the heartless S.O.B. deserved the hotsquat. I’m not one to lash out unless I’m threatened to my face, but if I had nabbed him, he wouldn’t have known I had a beef until I put the kibosh on him. Not that I had any idea to dog the numbskull. It’s not like I had a Geiger counter tuned to a man’s sweat, and murder is about as simple as common sense is common. Besides, by then he was long gone.
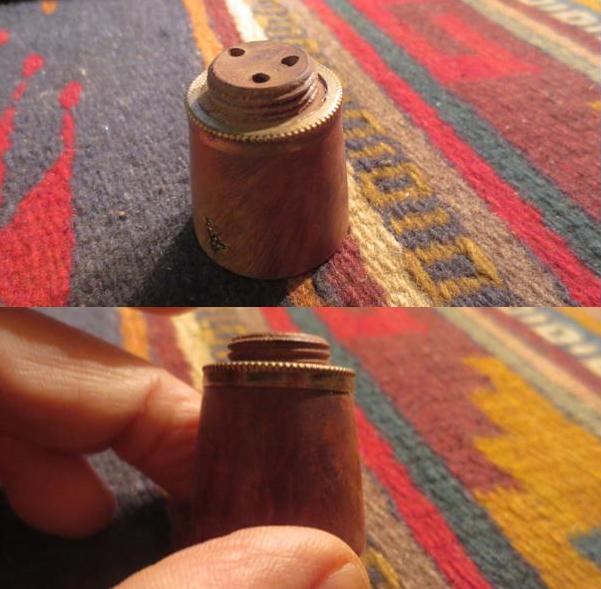
I picked the broad up for a five spot, but not for anything sappy, just to save her from the meat wagon. I kept her wrapped up like I found her and got her safe and sound to my office on Agnes Avenue. That’s also my cave, which makes it my castle. My heater is the only insurance policy I carry.


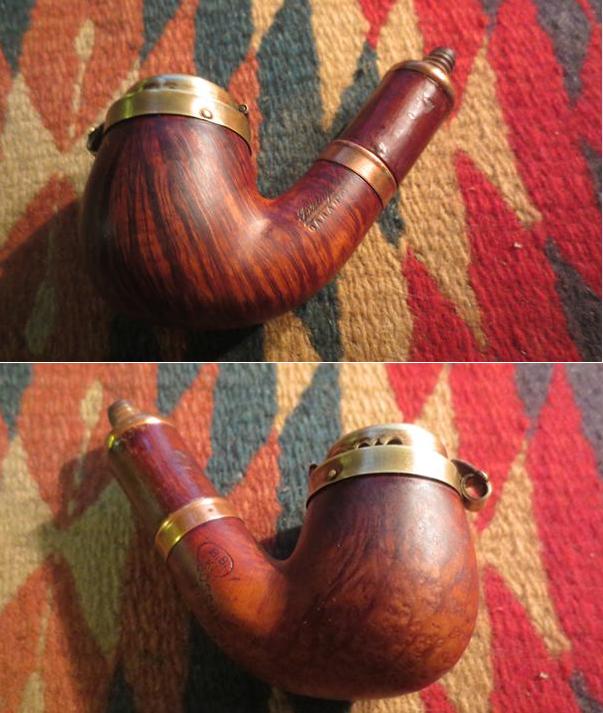
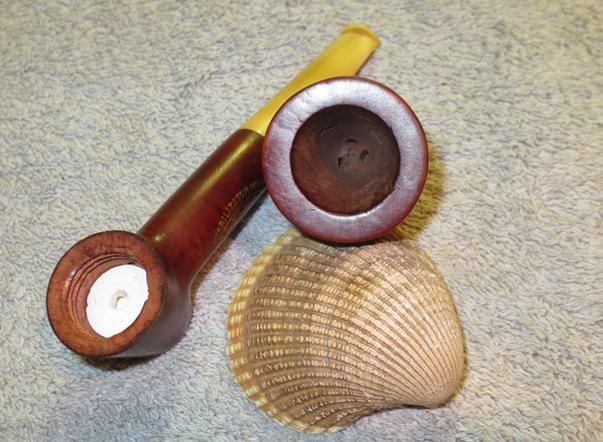
 I’ll give you the dope, straight up. She was worked over pretty good if that word can be used in this scenario. Her kisser and most of the rest looked like a body that was dragged along a stretch of old road strewn with potholes and broken liquor bottles. Maybe she took a dive from the high window, but that would have spelled farewell my lovely for this client. Then there was the forehead that looked to have been pistol-whipped.
 This little gal, no big surprise, had a bad dose of amnesia. The little bit of I.D. I found on her was all but eroded by years of grime on top of all the pushing around. All of my local pipe gumshoes were sure they recognized her as Alpha, an Israeli, on account of a distinctive birthmark forming a curious A. I’d known a couple of the type, and something about this A didn’t jibe.
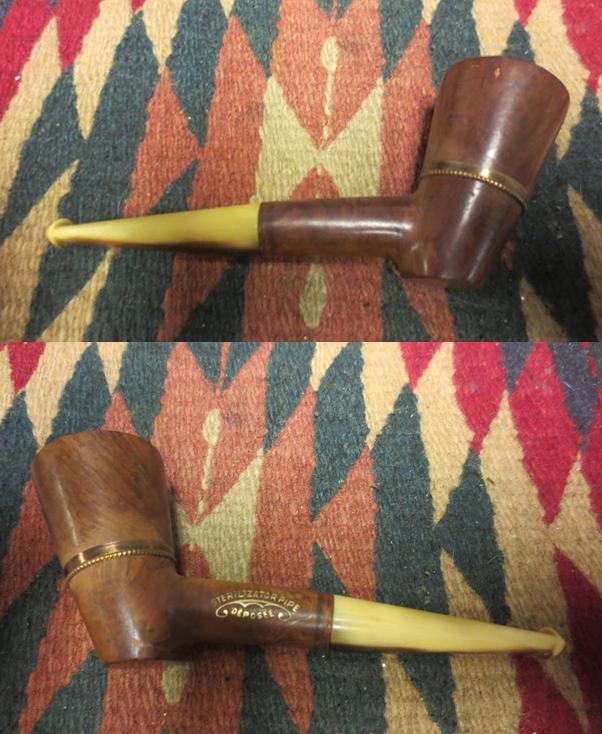
I brought my friend Steve Laug, a fellow pipe investigator north-northwest of here in Canada, up to speed with my progress. Laug was the best P.I. in the biz and had profiled more pipes than I had ever dreamed of in my humble philosophy, to crib from one okay yarn spinner. I don’t buy a word of the stories that some fellow named Marlowe wrote any play credited to another Brit. Anyway, Laug also had more skill patching up the abused and maimed than anyone else I knew.
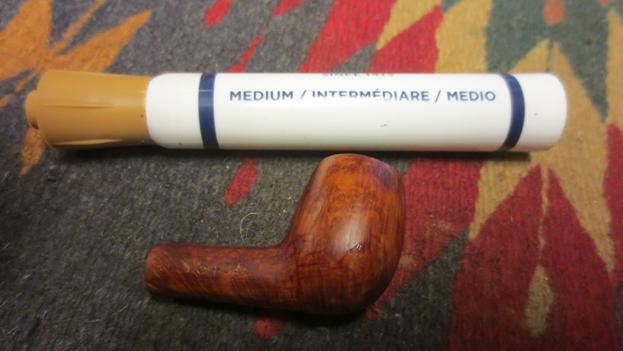
He was the one who spotted the resemblance of my victim to one of the classic models from the Dr. Grabow stable, the 42 number. Laug shot me the profile he did on one going by the name of Westbrook about a year before. One mugshot in particular that Laug snapped of the Westbrook gal after he started cleaning her up showed the unmistakable genetic marker of my girl. So they were related, but how? That was for me to uncover.

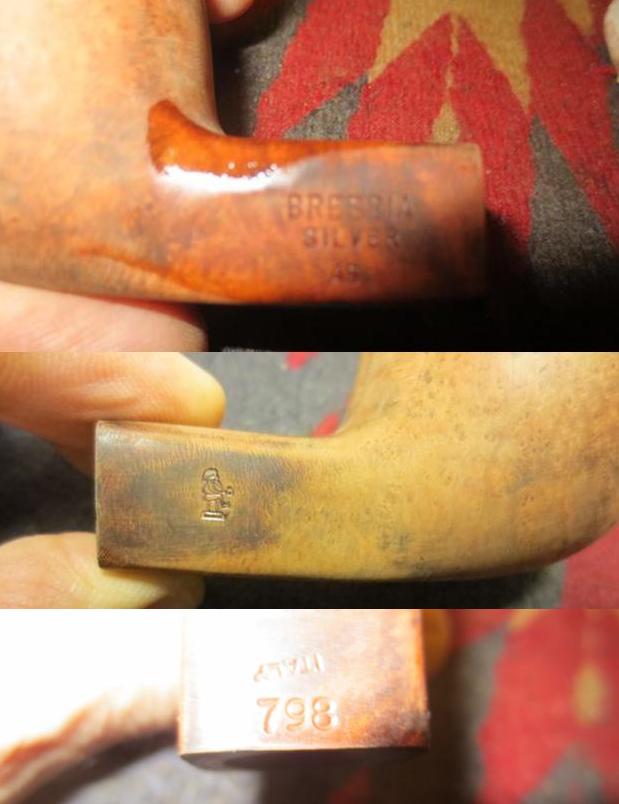
Courtesy of S. Laug, P.I.
No man could miss the hot curves on Laug’s Westbrook knockout compared to those of my Jane Doe, even after someone put the screws to her. I followed Laug’s tip to another lead that took me to a real treasure trove, including a group shot of Doc Grabow’s X Series Continental Line, class of ’81. Letting my eyes move over the lines and curves of these gorgeous creatures clued me into why the doc rated them X, if you get my drift. Oh, so many beauties in this world, and so little time. Still not being able to put a name to my little darling was driving me bat nuts, so I gritted my teeth and went to the archives, as I like to call the place. It’s a reputable joint run by a Frenchman known on the streets as Pipephil. First I inquired about Alpha and was introduced to a couple of sweet numbers that showed two styles of that outfit’s A, both about as similar as Laurel and Hardy.
 Roaming still deeper into the organized labyrinths of Pipephil’s place, I came across an A type that was a virtual twin of my Jane Doe, belonging to a swell called Douwe Egbert, a Dane no less. That was when I got my big break and hit the jackpot with a connection to another part of the same clan, a blue blood great Dane from the house of Elbert Gubbels & Sons of the Royal Dutch Pipe Family. They went belly up a few years back, but not before conceiving a certain new acquaintance of mine, even if they adopted her out and didn’t give her their own name, as if it was too good for her. All that digging paid off. Amphora was her name, and a beautiful one at that, from the Greek for a double-handled thingy used back in ancient times to hold wines and oils and whatnot. I looked at the facial big boned structure on Amphora and got it right off.
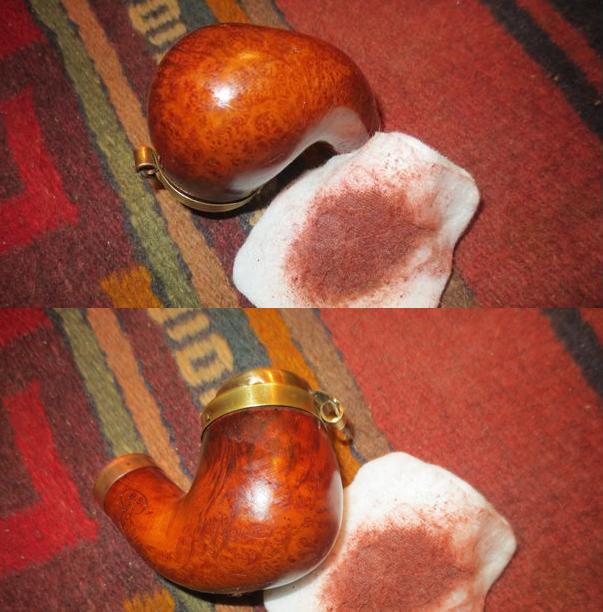
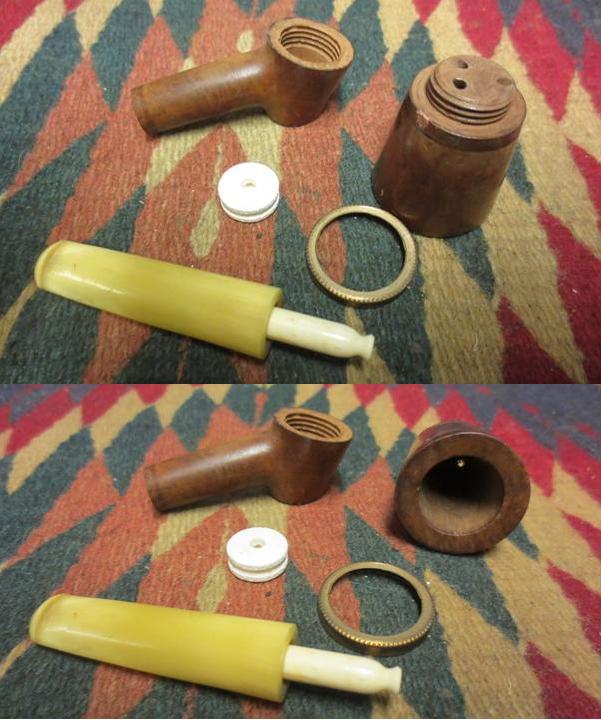
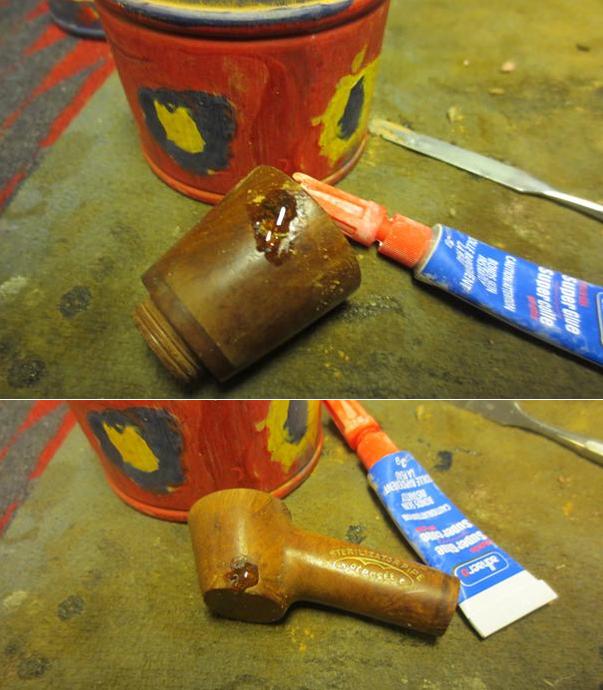
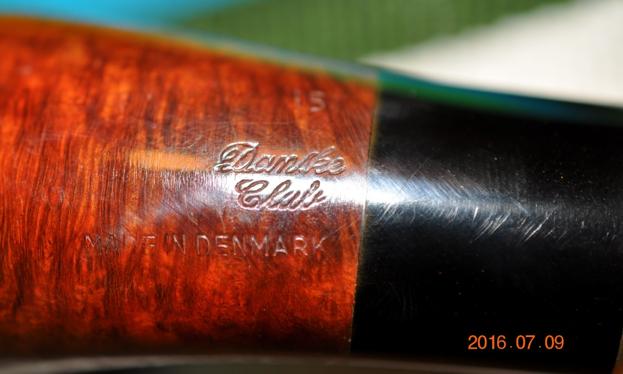
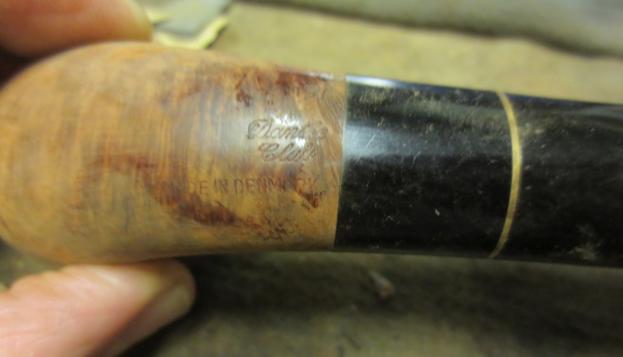
 Relieved to have put a name to my innocent friend, I started saying it out loud, over and over, as I began the tasks of cleansing, mending and restoring Amphora to health. It was a dirty job, as some guys liked to put it in those days, but that was my specialty. After the initial wipe with soft cotton cloth strips soaked with purified water, I made the first definite visual confirmation. The words were legible only because I knew what I was looking for from a gander at one very crisp tattoo on the left hip of one of Pipephil’s collection.
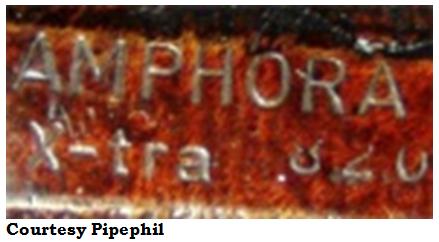
 I never could get my Amphora’s number, maybe because she was too classy to let a man of my position become so familiar.
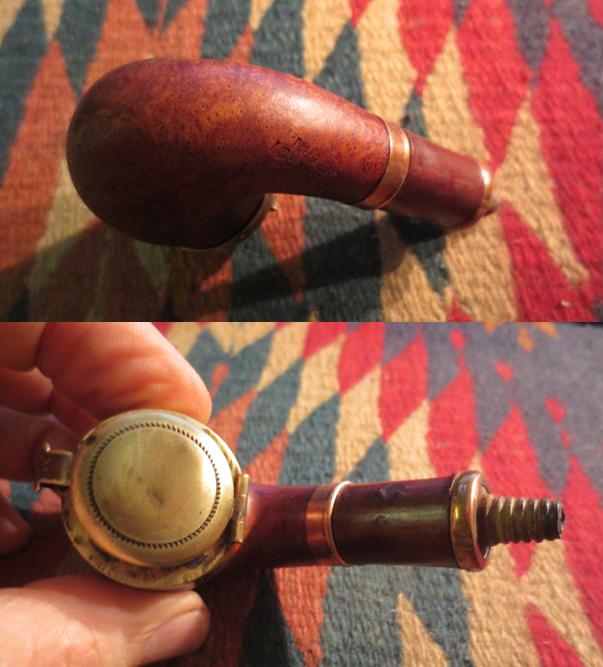
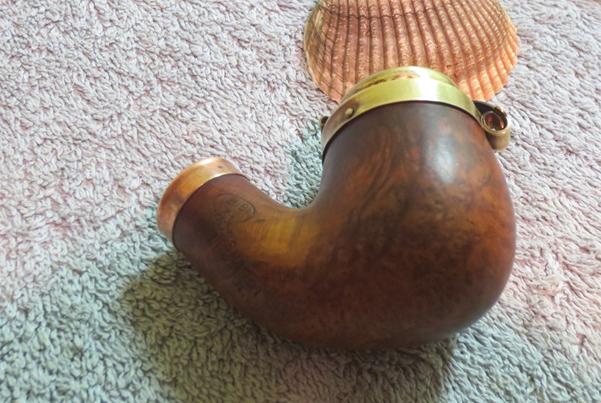
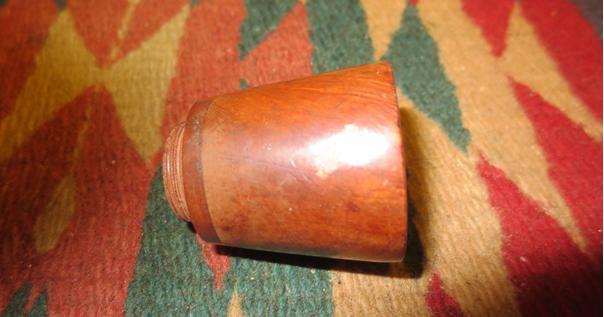
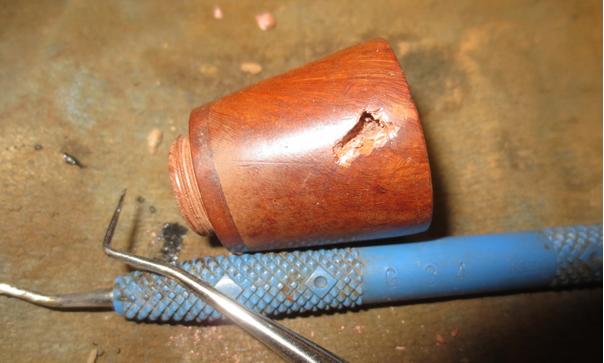
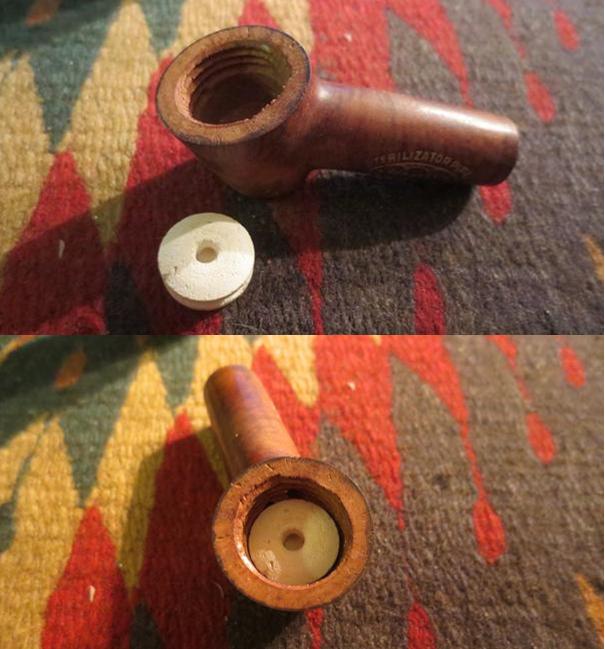
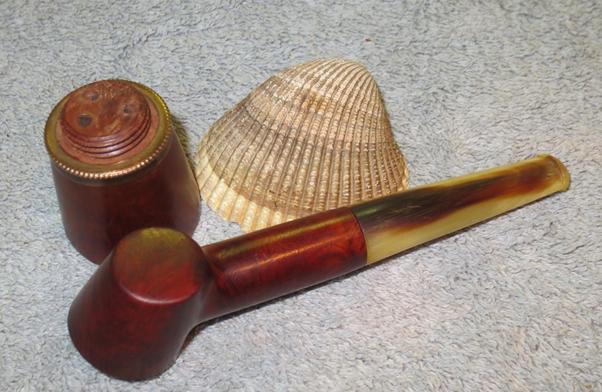
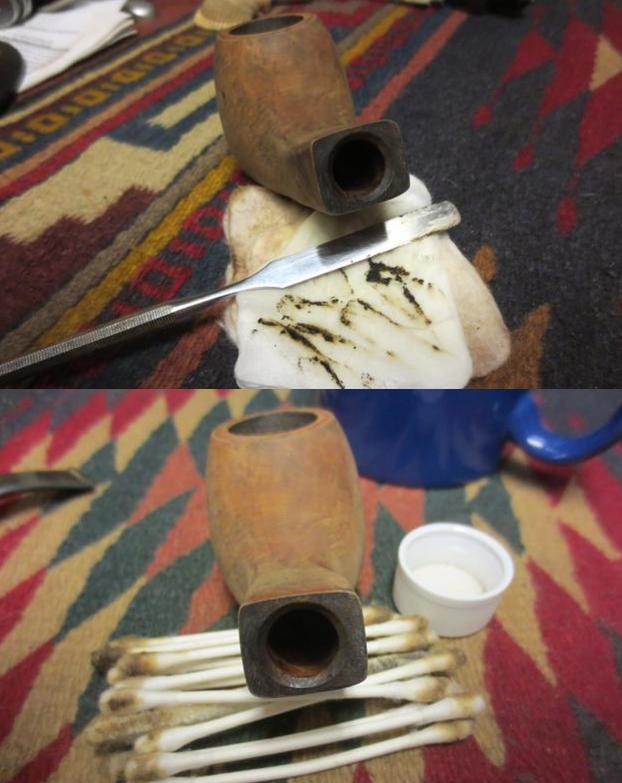
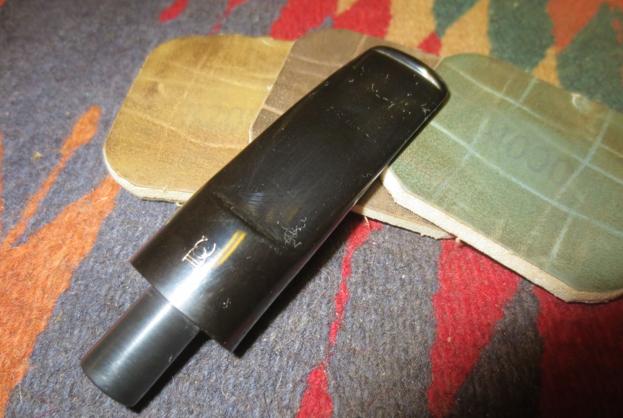
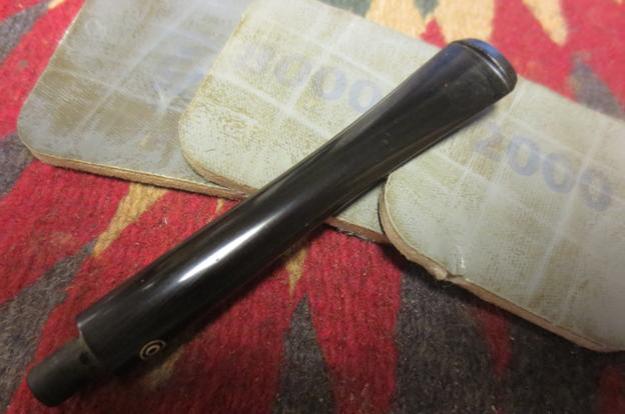
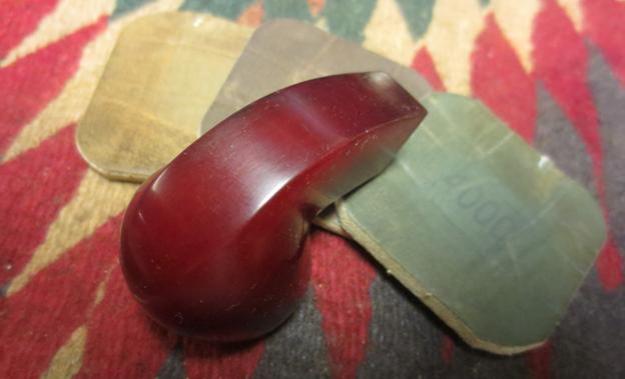
All I can say about the next step, when I finished washing her body and went to work on that wrecked forehead, is that I was glad she was still out cold. I had to get rough, see. There was nothing plastic about the surgery I had to perform, but it was cosmetic, alright. The job started out gritty and got worse, about as low as I ever go, with 80 paper followed by 150 to clear away the char alone. I’ve seen my share of bad burns, but this was as close to a crispy critter where the victim was still alive as I hope I ever see.
The harsh part was what followed. I had no choice but to put a file to her scalp, behind the forehead that was caved in, to fix the mess the best I could. After that part I took a deep breath and let it out, like a tea kettle giving off steam right before it hits full boil. I stepped back to look over my handiwork so far. The job wasn’t perfect, but that kind of work is above my paygrade.
I did most of the mop-up of that scene of the unfolding drama with what seemed like endless paperwork. Let’s face it, this job runs on paperwork. Fine tuning with the full scale of micro mesh was a pleasure. Maybe I took a liberty at that point, but I could not control the impulse. Besides, I told myself, Amphora might very well awaken from her ordeal of the long goodbye, which she was lucky to survive. and not even notice the patchwork I did. That last part was if Lady Luck shined on me, but who was I kidding? I don’t place my faith in luck and never met a dame, not the type I liked to be seen with in public anyway, who didn’t know the instant a single strand of hair went amiss. The best I could hope for was that she would keep quiet about it.
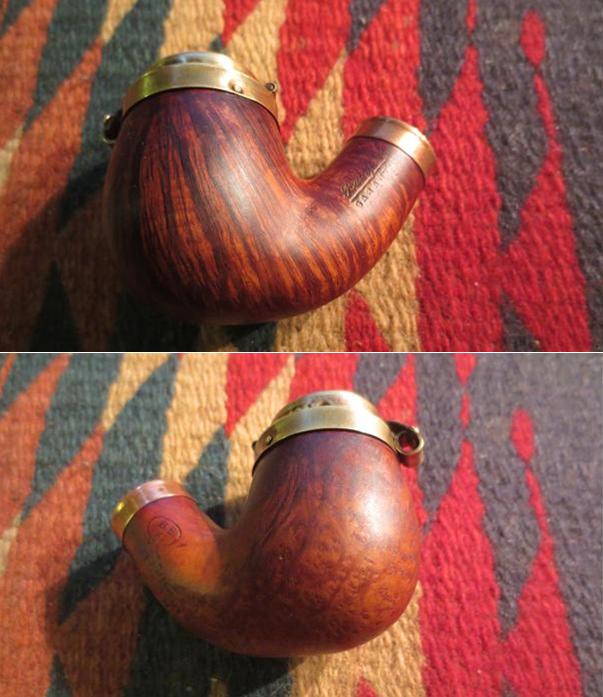
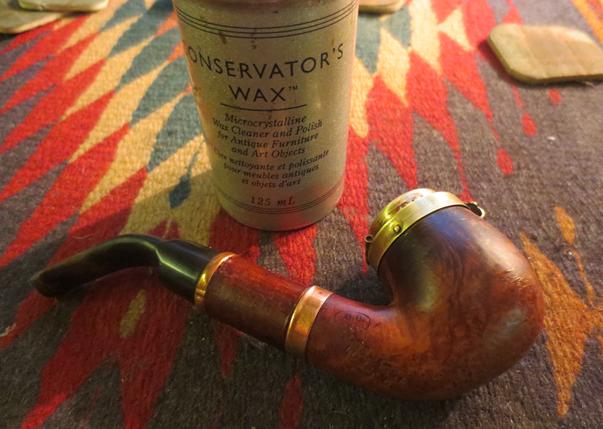
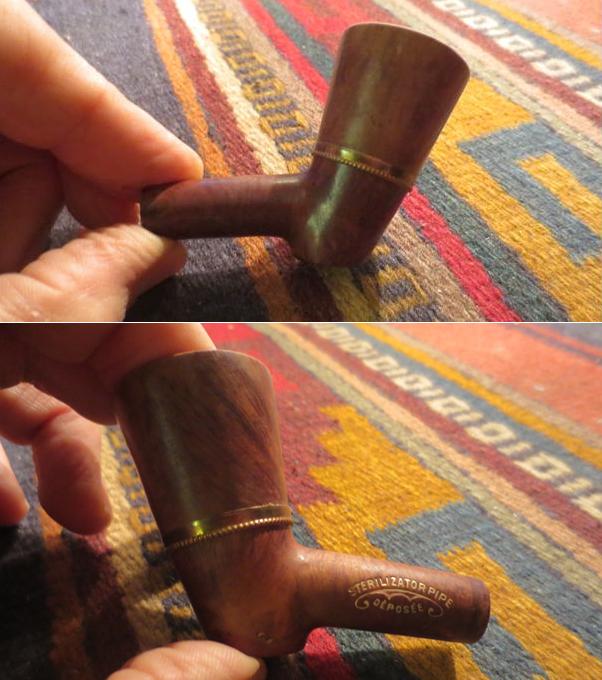
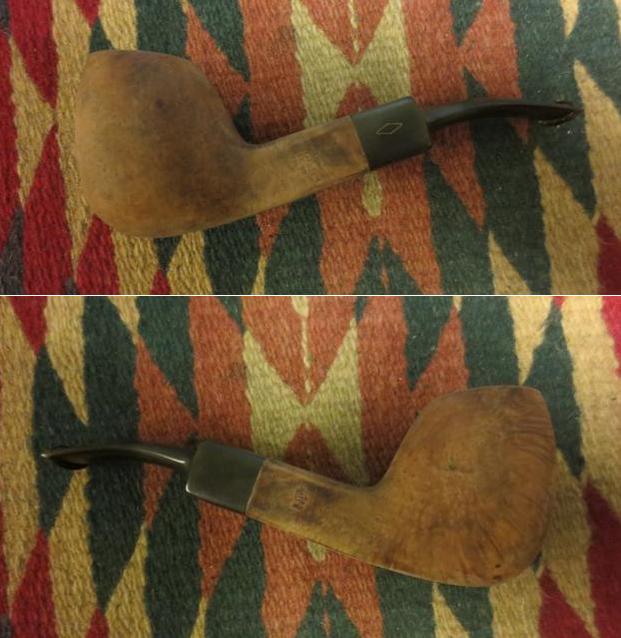
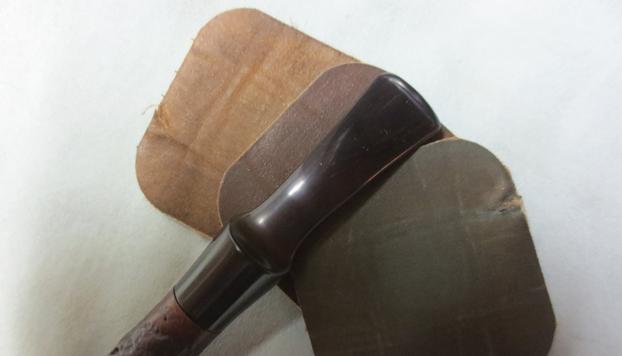
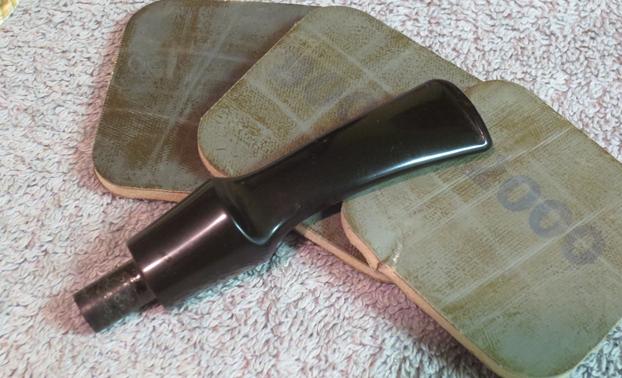
To give Amphora a healthy tone more like her old self, at least as I imagined she once was, I gave her a thick coat of high fashion skin colorizer called Lincoln, a burgundy color that I knew I could lighten to a more natural auburn. I applied some heat to fix the solution so it wouldn’t run and with a patience that was anything but natural to my usual personality used a three-stage, six-pad micro mesh conditioner process. I finished that part with a light rub of four-ought steel wool.


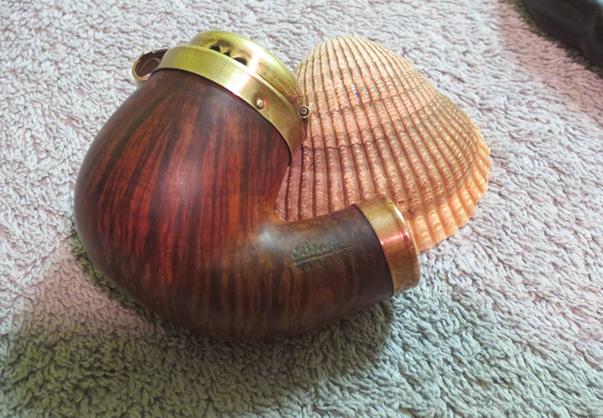
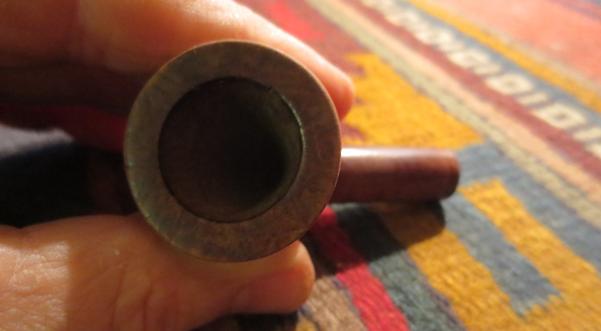
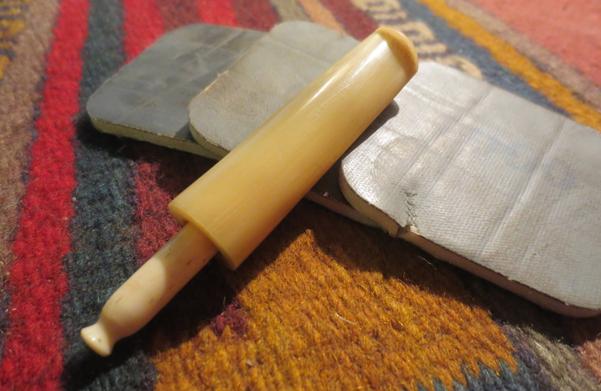
 I saved the most slender part of Amphora for the last. There were scratches along both sides, but no evident mayhem.
 This called for more paperwork, forms 180, 220 and 320 to start.
 I followed up with form 400 and the full treatment of micro mesh conditioner.
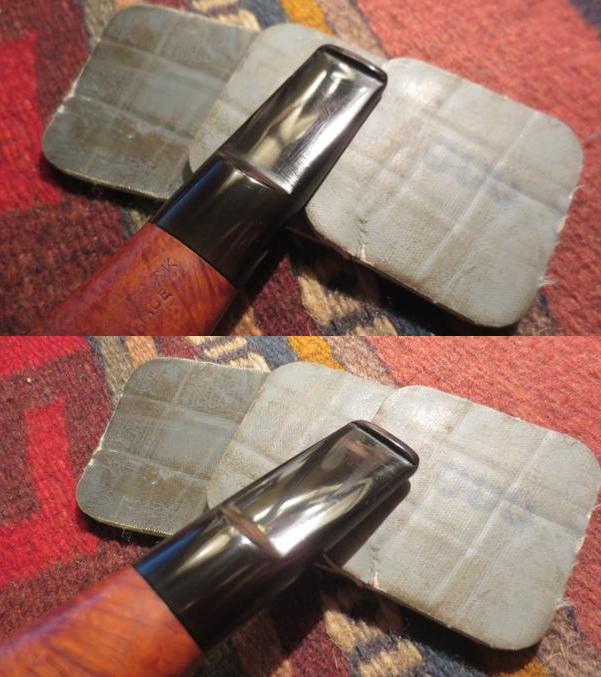
 The conditioner was old, and I could see it was out of date. I checked my mail and found the new supply was in the box. There’s a saying in billiards that the cue is only as good as the player, but a cue that’s an inch off from warping is plain bad news. I would never carry a heater with a barrel that’s off, or one that’s not nice and tight all over. I don’t even care for the 1911 .45 that’s designed that way for tactical reasons. I had a playback, you could call it, to other times in my career when I re-stocked my supplies.
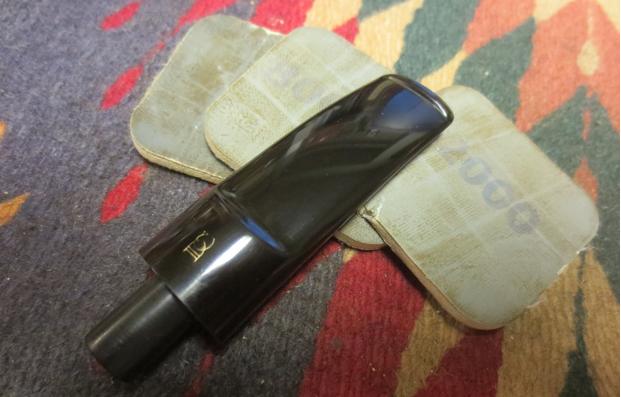
Repeating the full process with the new pads, I found that even an old dog can learn a new trick, in this case to keep your heater clean and well-oiled, if you get my meaning. Amphora was waking up and starting to squawk. My only retort was that medicine never tastes good, and I gave it to her.
 She was lucky her insides were cleaner than she had been outside, and I only had to give her the one dose.
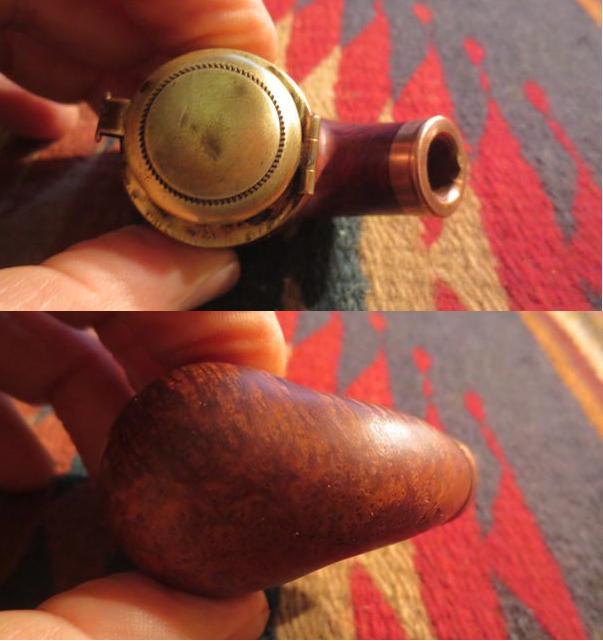
While Amphora was still coming around, I found the makeup any lady of quality won’t leave home without putting on, just the usual compounds and waxes, and buffed her up.


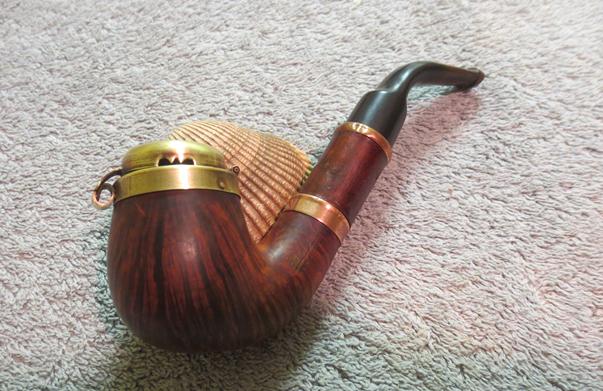
 My insomnia and other personal stresses had made me ready to go for the big sleep, but I was over all that and was just about to take a seat on the new recliner I bought for my new digs in a more genteel part of town, and relax with a long, full-bodied, folksy Ukrainian tiger I came across at one of those new places a man can now find such pleasures. I even sat down with the broad in my hands, feeling her fearful symmetry that only the Master Craftsman Himself could dare frame, and was about to light her fire for a quickie before taking a nice long snooze.
That was when Amphora woke up and started to yap.
SOURCES
http://www.gutenberg.ca/ebooks/chandlerr-bigsleep/chandlerr-bigsleep-00-h.html
http://www.cultureify.com/1940s-slang-lingo-phrases/
http://graphics.latimes.com/finding-marlowe/
http://www.dailymail.co.uk/news/article-2836745/How-two-Hollywood-s-famous-detectives-Sam-Spade-Philip-Marlowe-named-inspired-black-private-eye.html
https://1fa1282d-a-62cb3a1a-s-sites.googlegroups.com/site/seanspipes/home/dr-grabow-shape-charts/1981SpartaShapeChart-continental.jpg?attachauth=ANoY7crnrqZwyaoMF6HNKflSv6JrH2Q7_rP-H_6Xxq1Sa06aylrImgtGNsFeVu_T_bqhD5Y6hzREmZd4gNHMqg8hnJsZvY1OOZ_YEhyY89J1hl6hxkkPDpByhf4a8lRCcpVWOhT8jl0dm1h8VzGTZsmNyXP2hkyYUh2qNPjvWbTB_Oe2ICpBIQvJIeuZRyXhXwUU9mg0Y7kKKFJRTa_wNVG6RMzhB5mZ1mQfDOblMM0GZrGp11FRY1RsH3x40zSzsxnvXA6ipj8iBYH4SPiuD8GaKDySNG2Fcw%3D%3D&attredirects=0
https://rebornpipes.com/2015/08/29/restoring-a-dr-grabow-westbrook-42/
https://sites.google.com/site/seanspipes/home/dr-grabow-shape-charts
https://pipedia.org/wiki/Shalom_Pipe_Factory
https://pipedia.org/wiki/Alpha
http://www.pipephil.eu/logos/en/logo-d7.html
http://www.pipephil.eu/logos/en/logo-a5.html#amphora
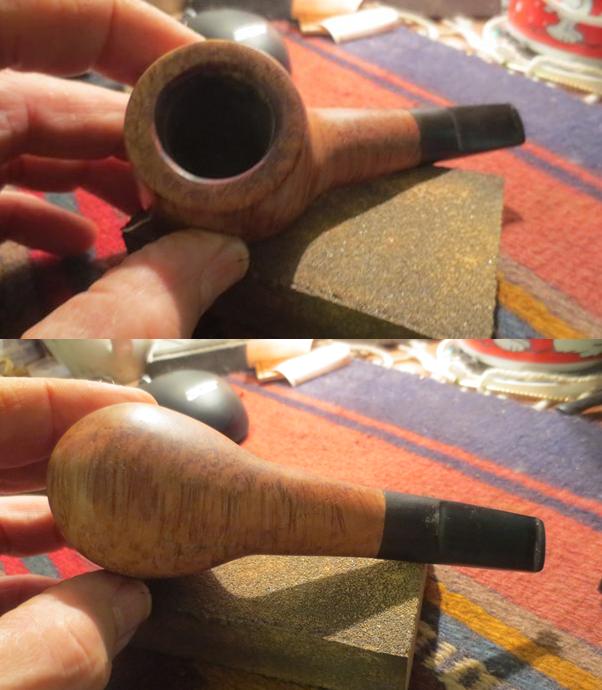
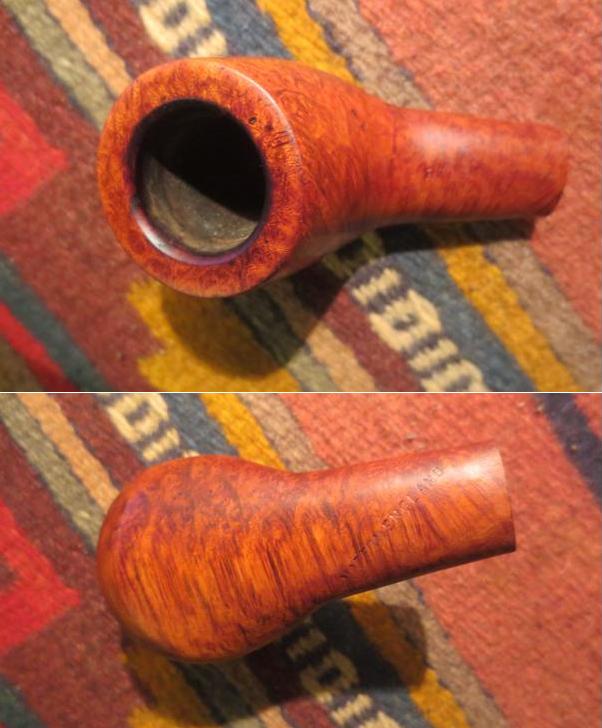
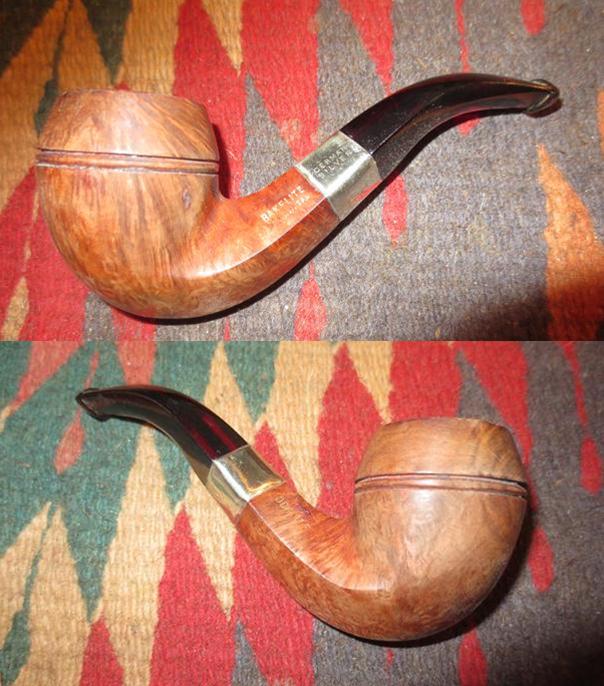
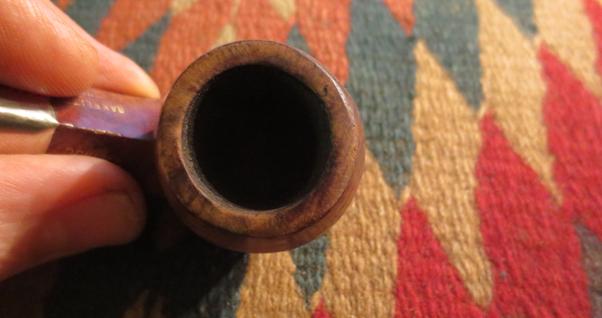
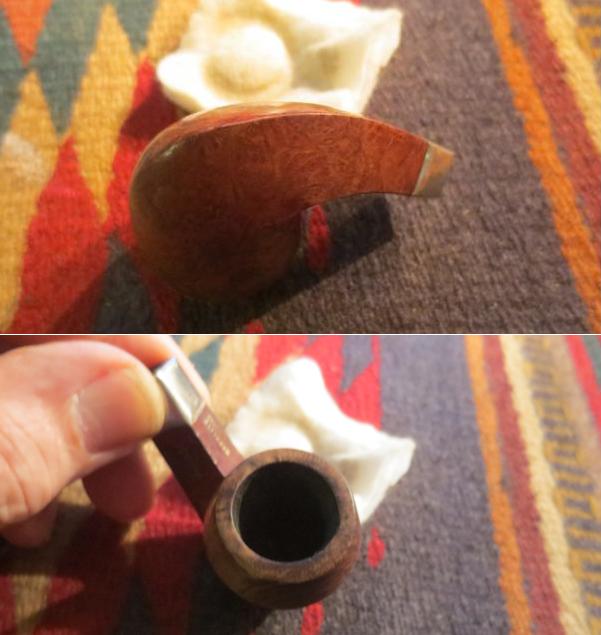
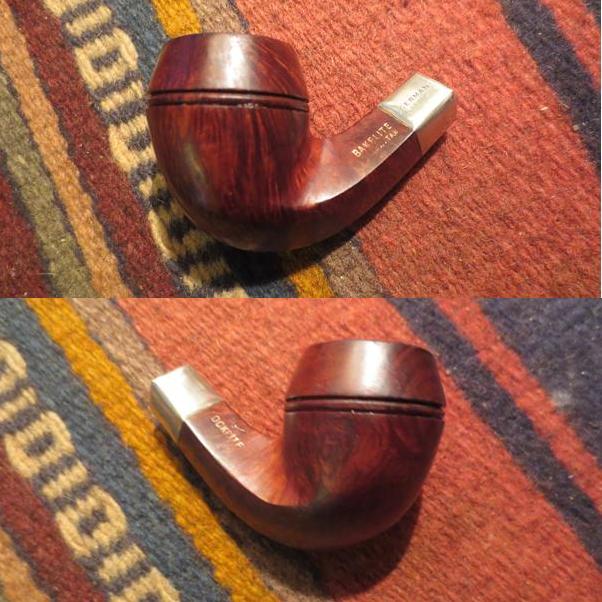
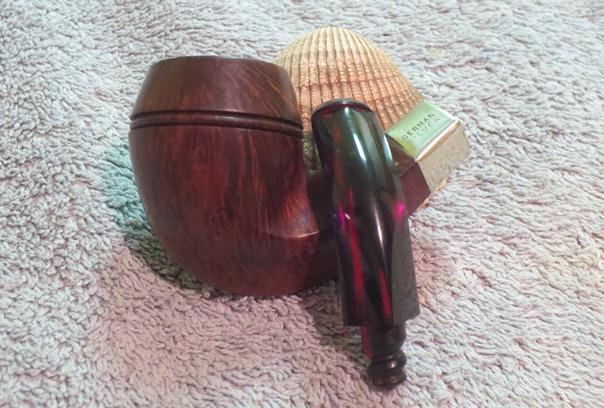
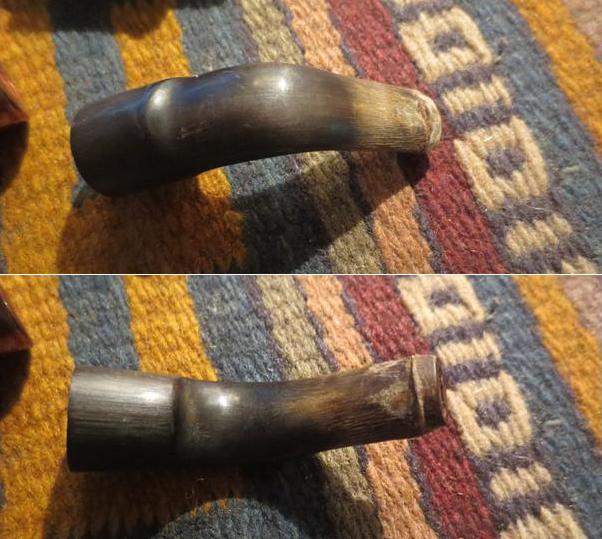
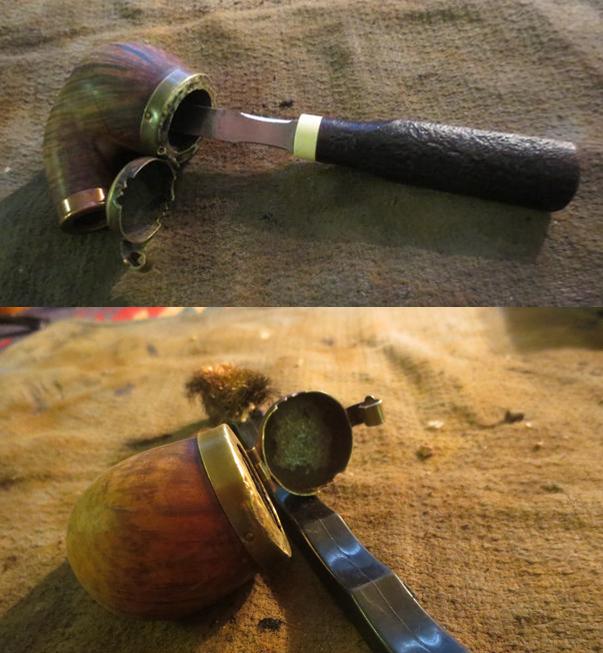
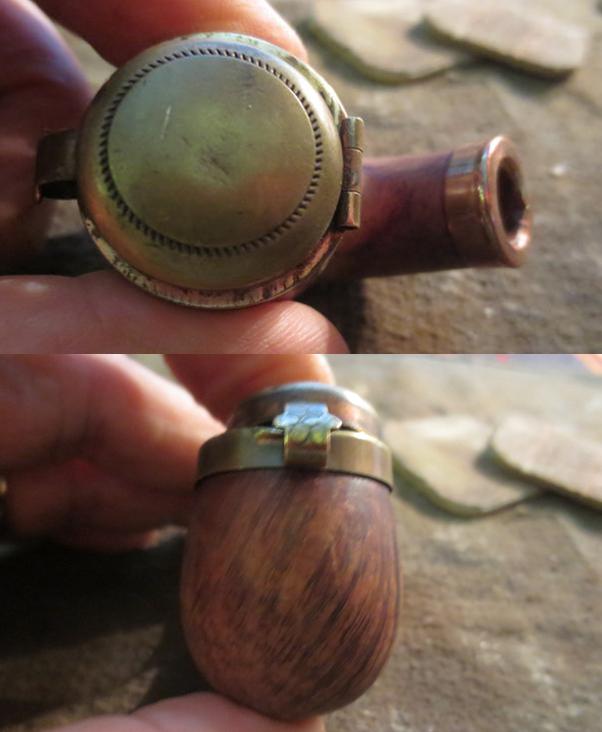
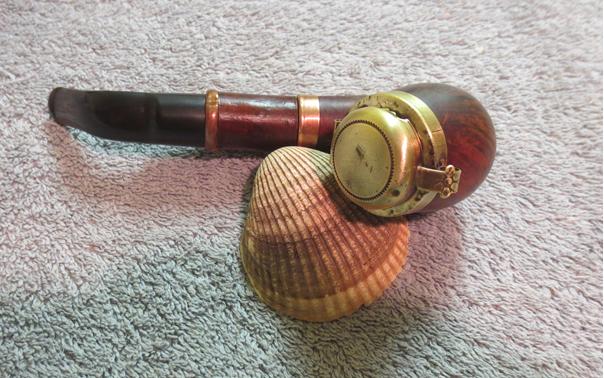
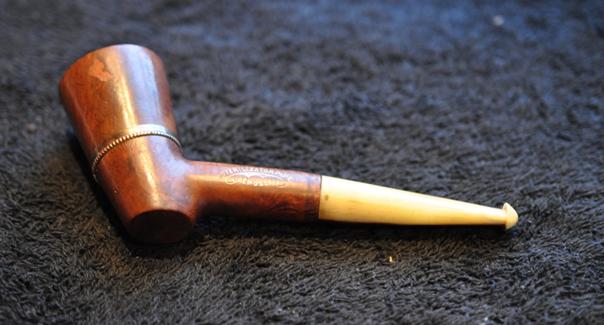
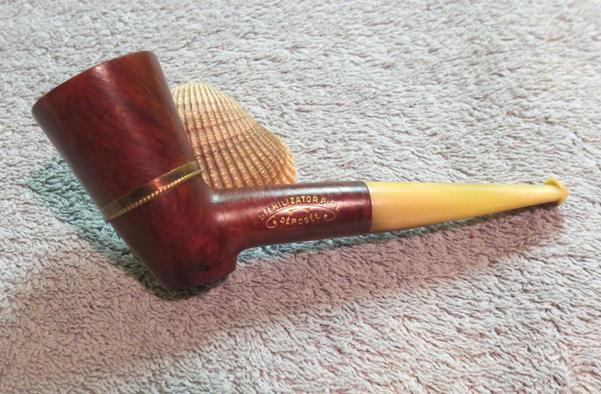
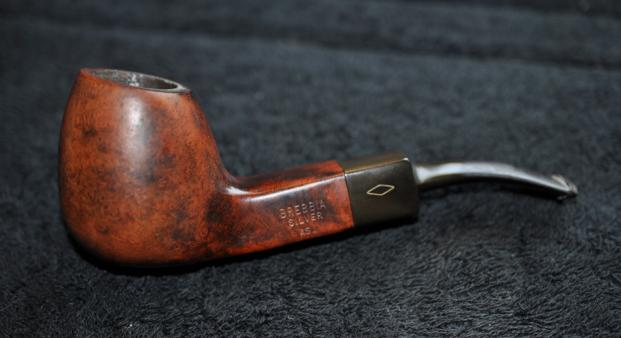
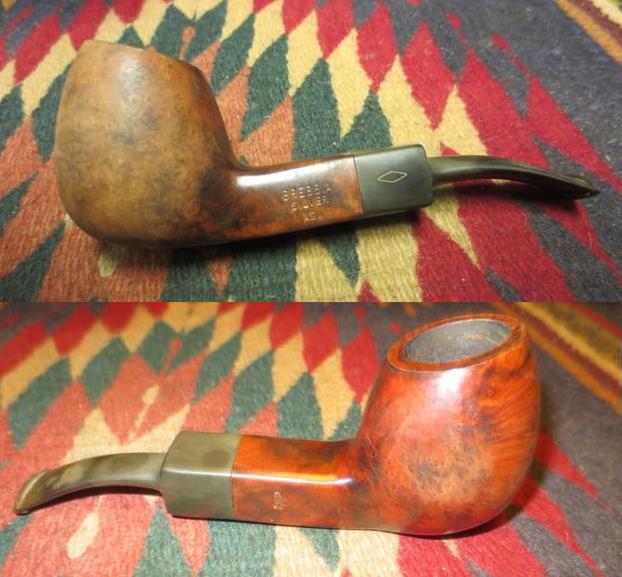
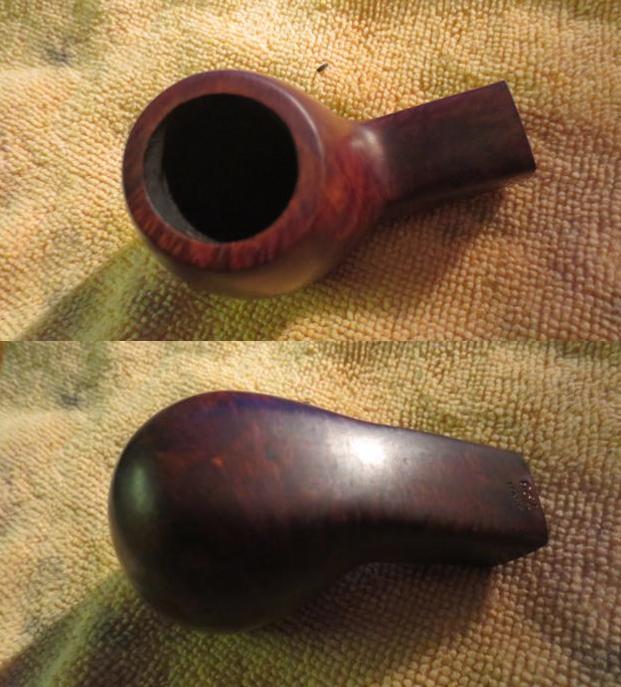
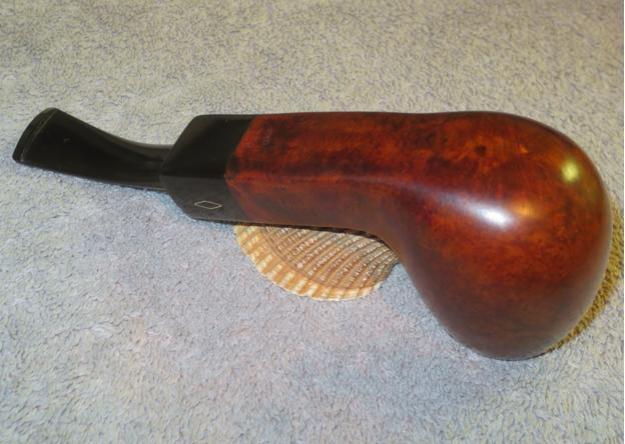
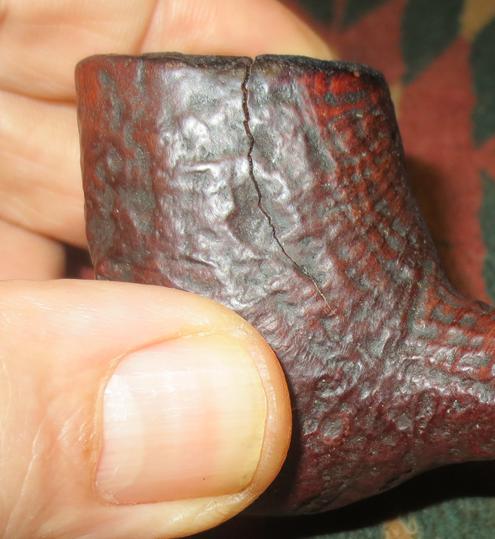
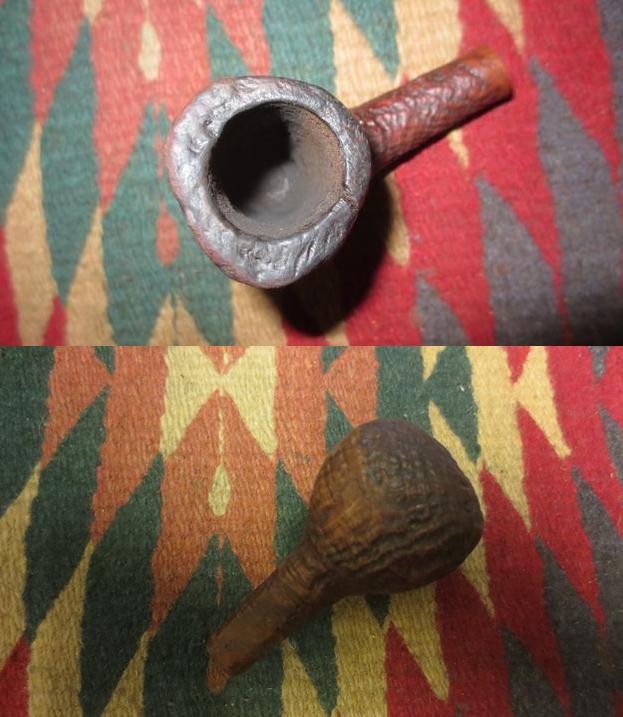
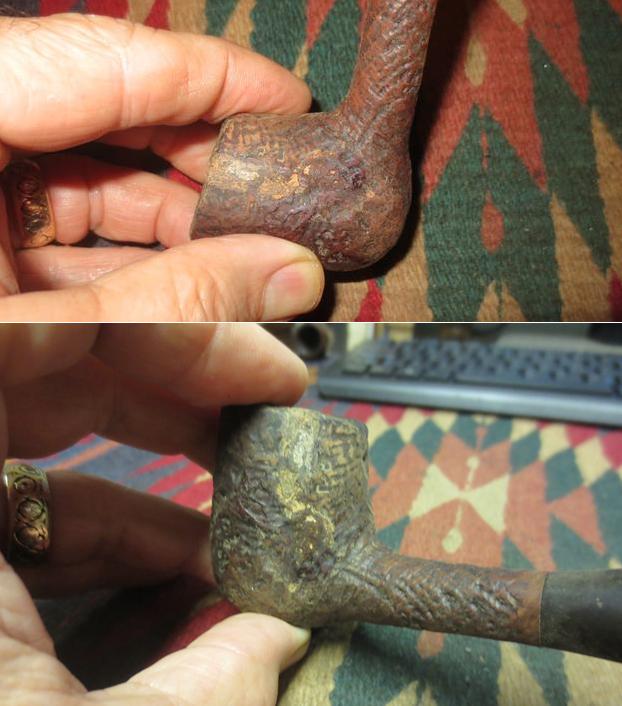
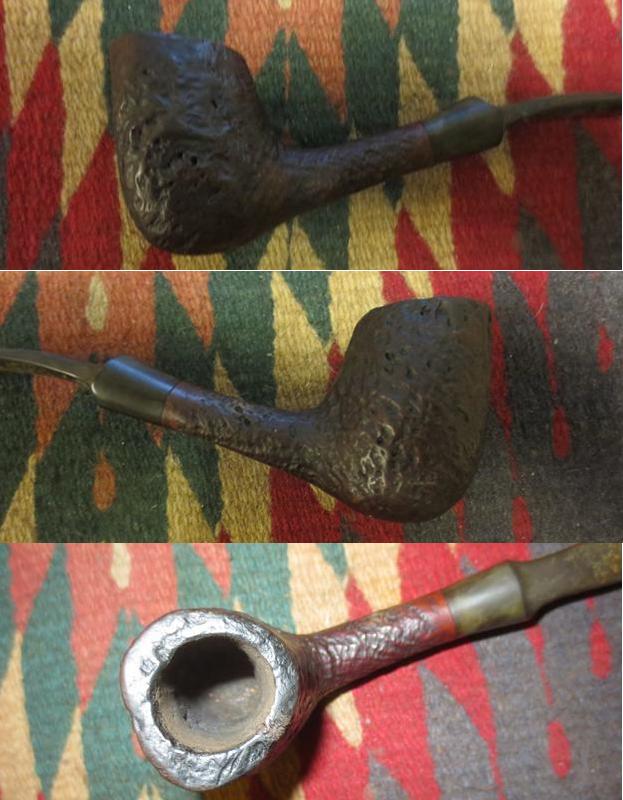
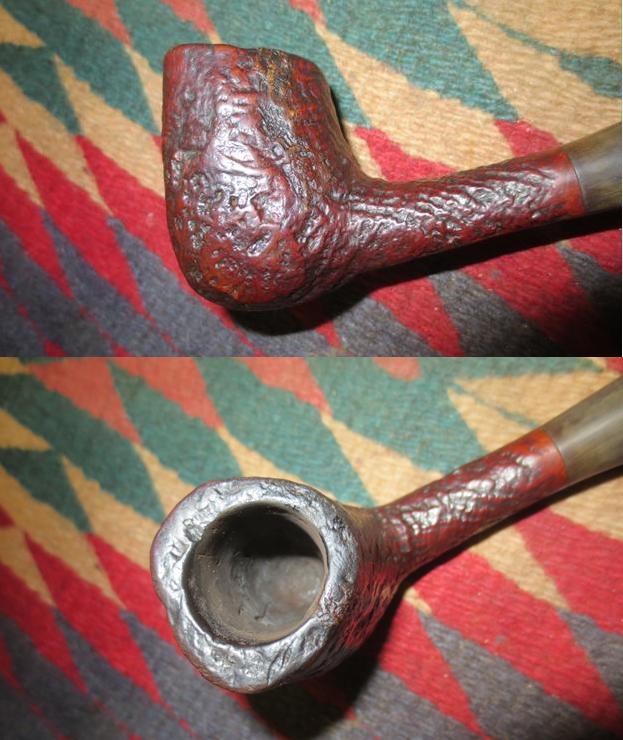
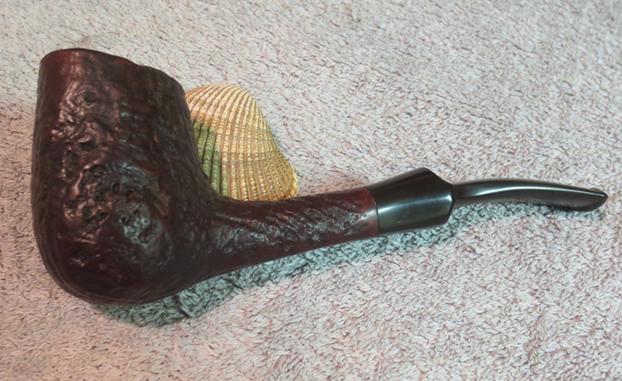
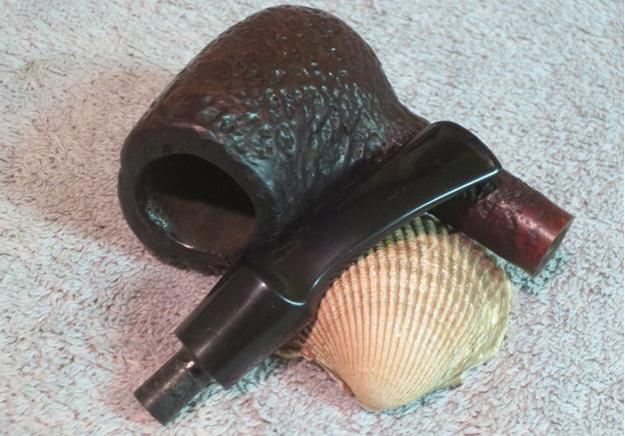
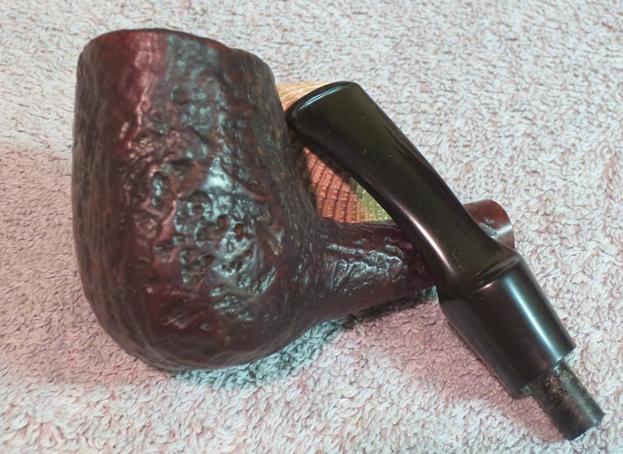
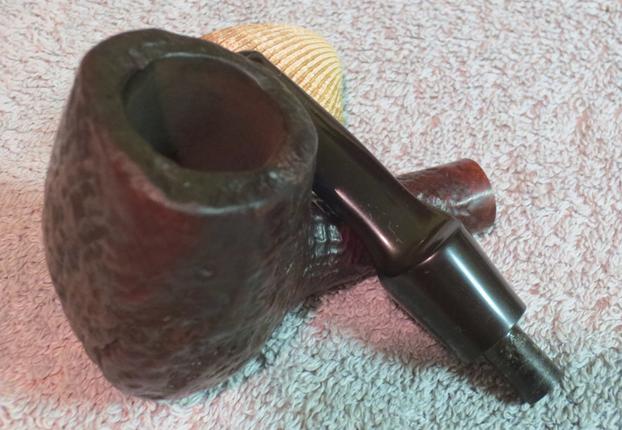
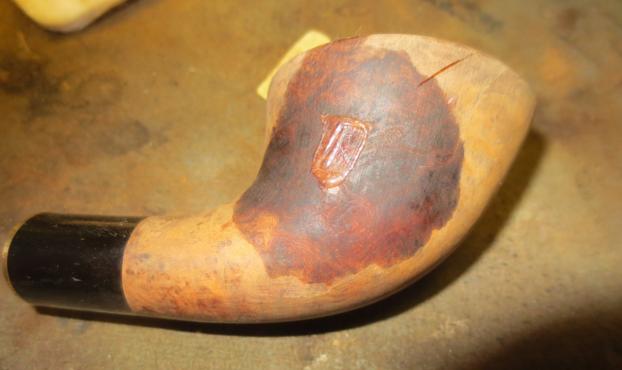
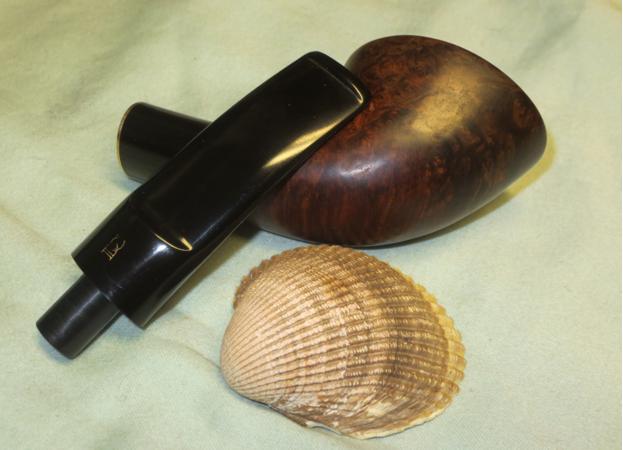
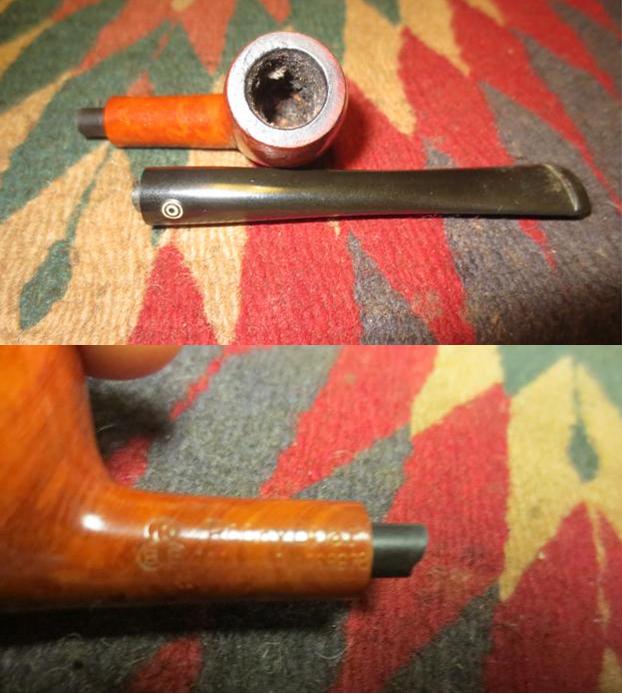
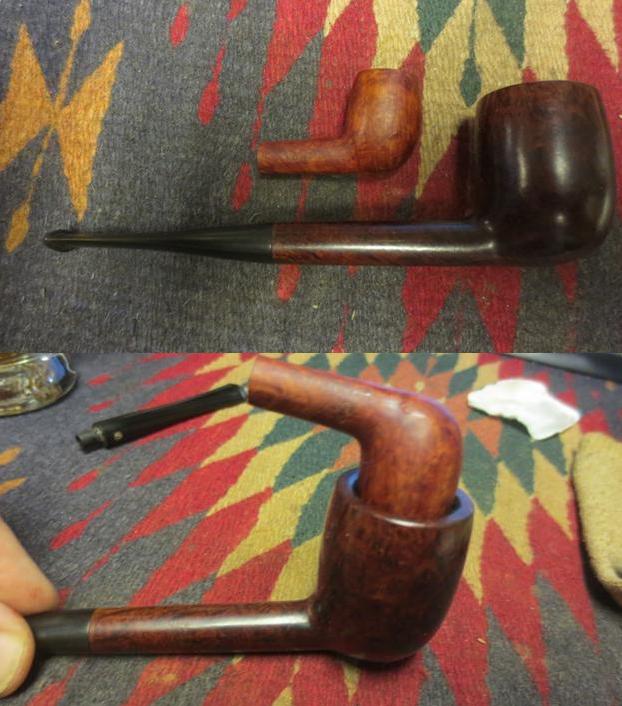
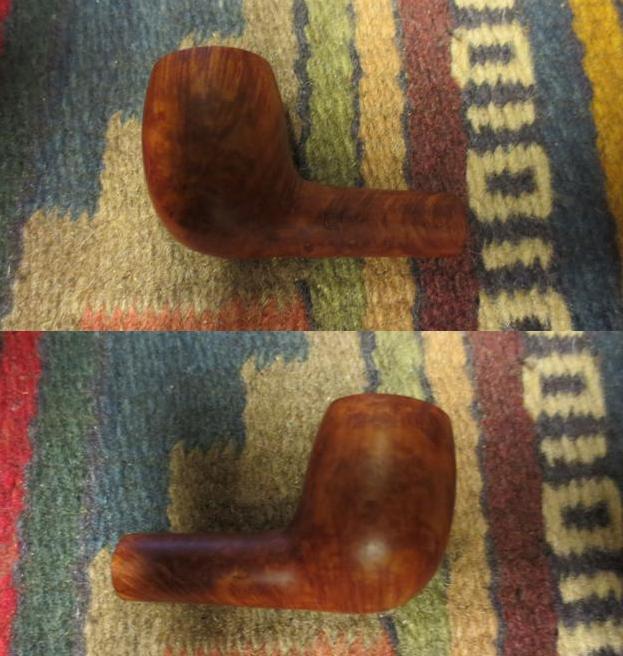
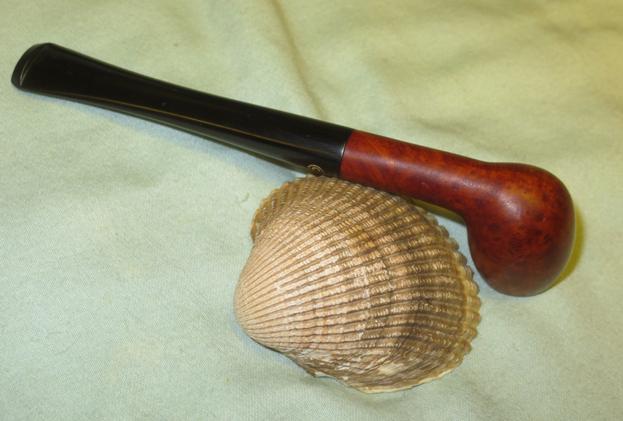
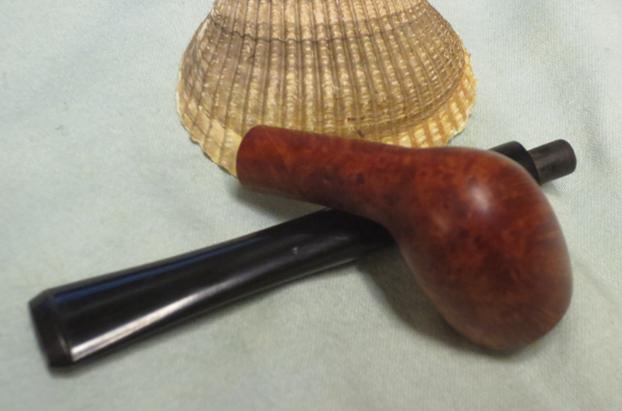
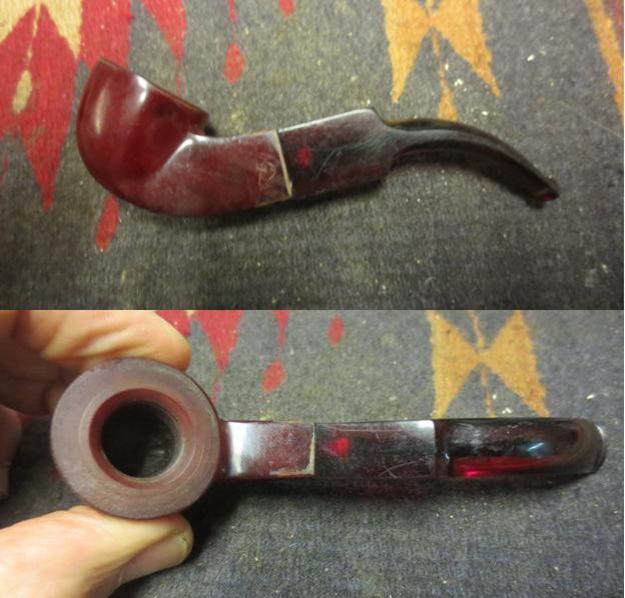
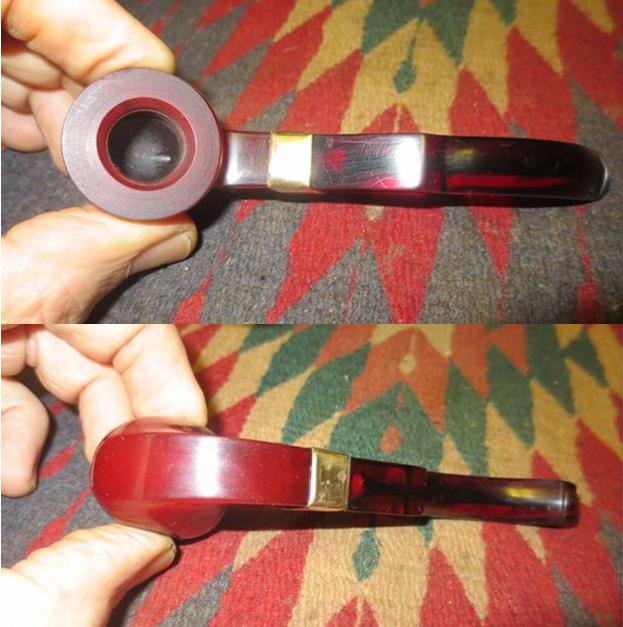
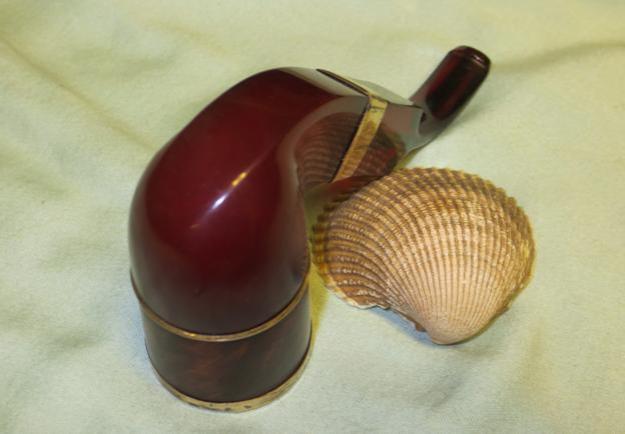
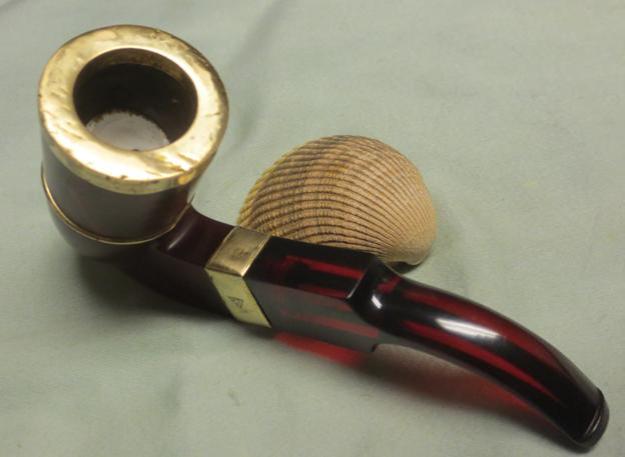
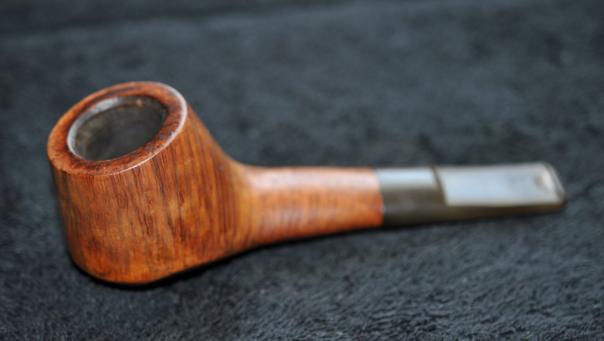 The stem was lightly oxidized and there was a deep and large tooth mark on the top side near the button. I have learned that there is usually a match to that on the underside of the stem. The canted volcano shape is very nice. In the photo below it appears that there were some small pin prick fills on the back side of the bowl just above the shank.
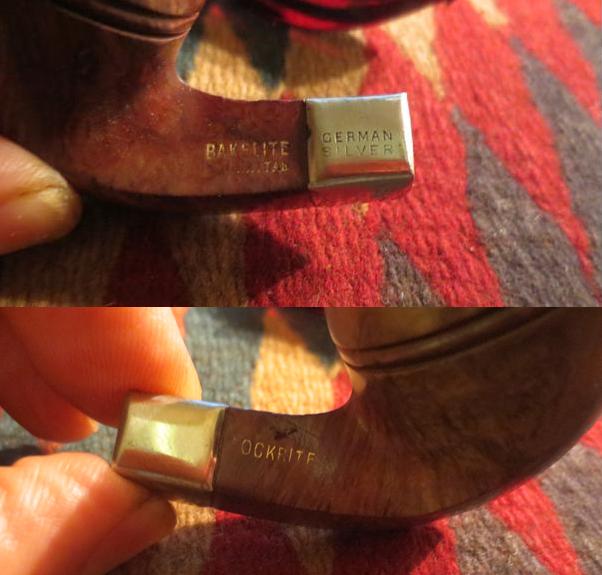
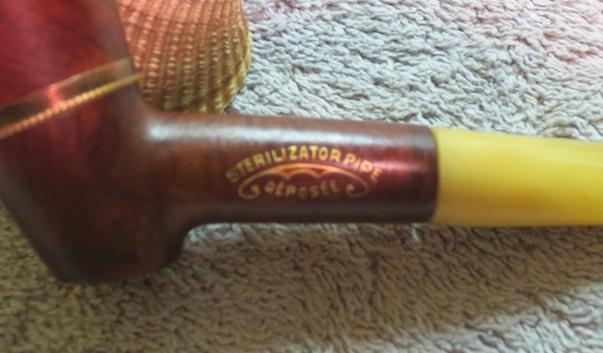
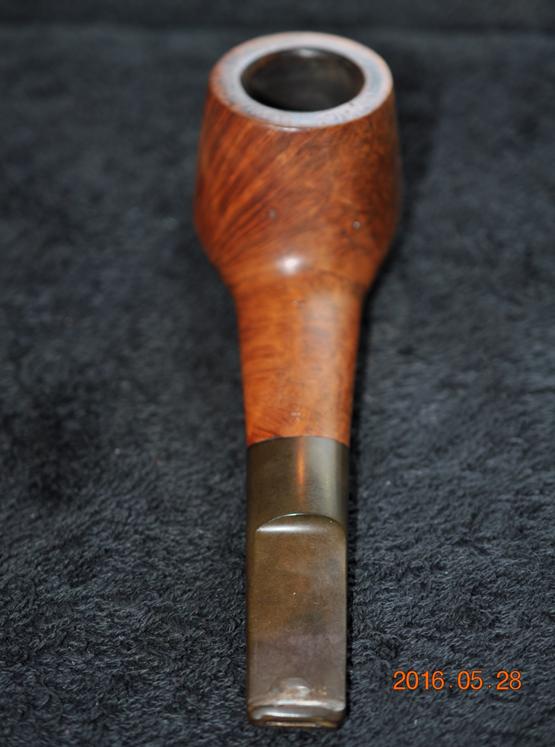 From what I can find online the pipe is made by Comoy’s. They made the Hyde Park brand and it appears they also made the Regent’s Park brand – both which are Comoy’s seconds and are named after London Parks. I found this Comoy’s Shape Chart on-line which shows the pipe as a Modern 625. I have circled it in red – it is shown on the bottom of the right column, last pipe.
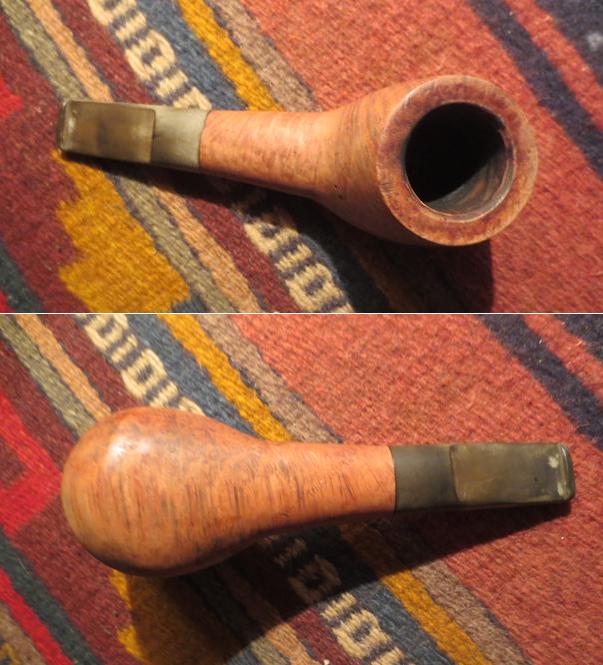
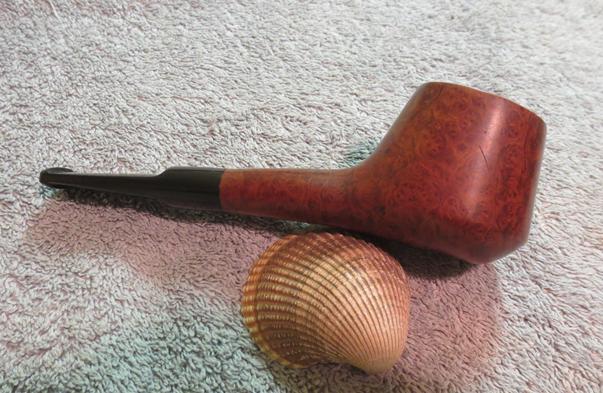
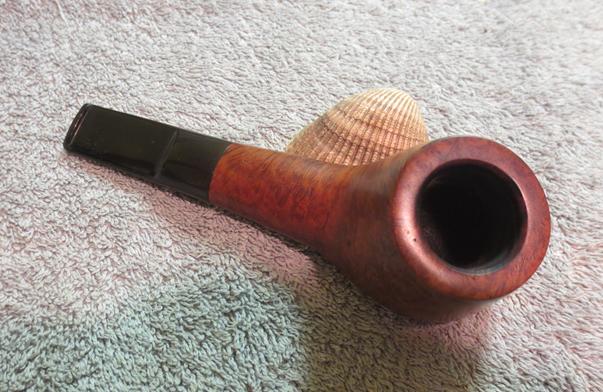
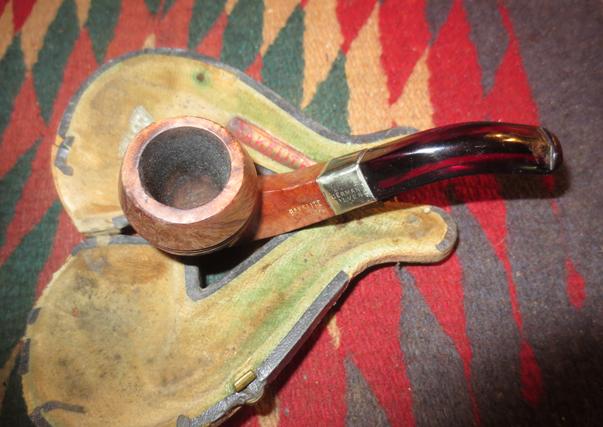
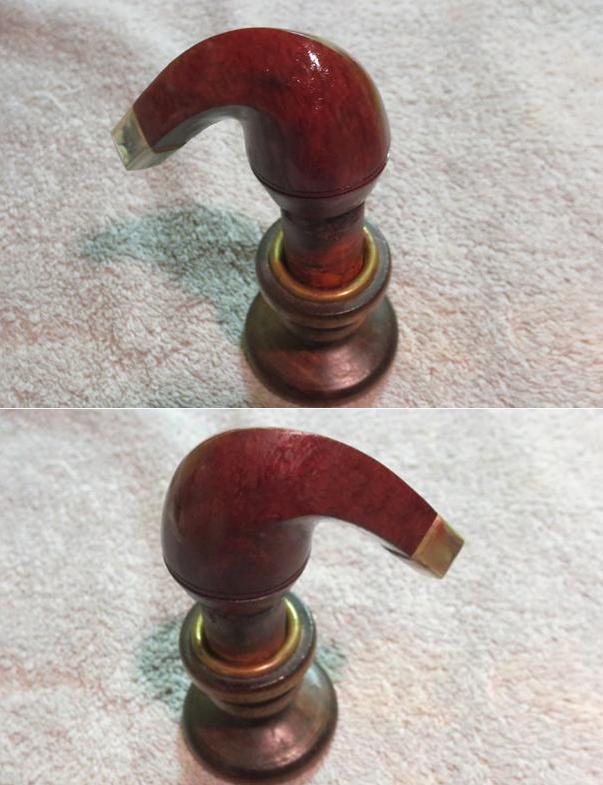
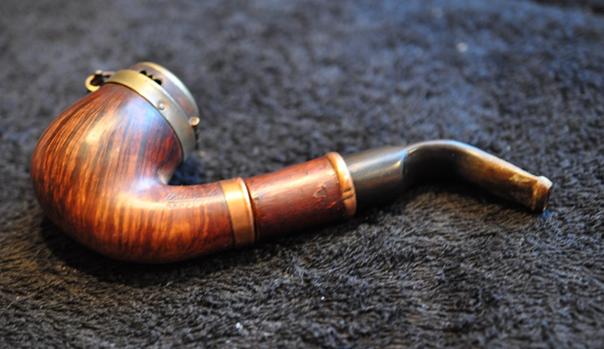
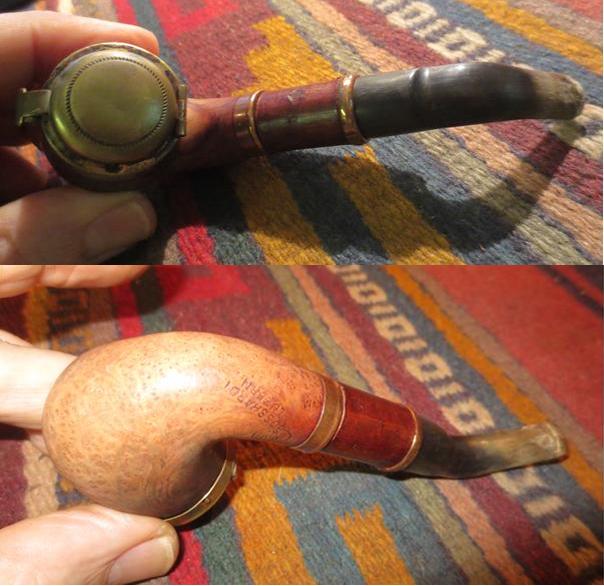
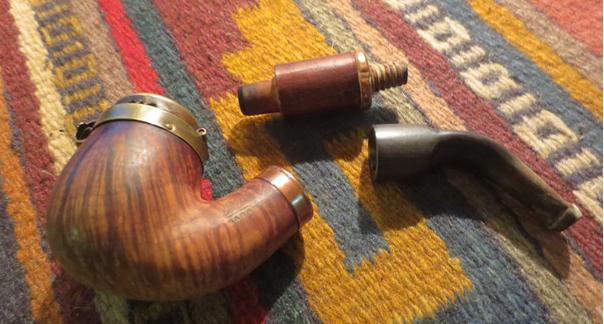
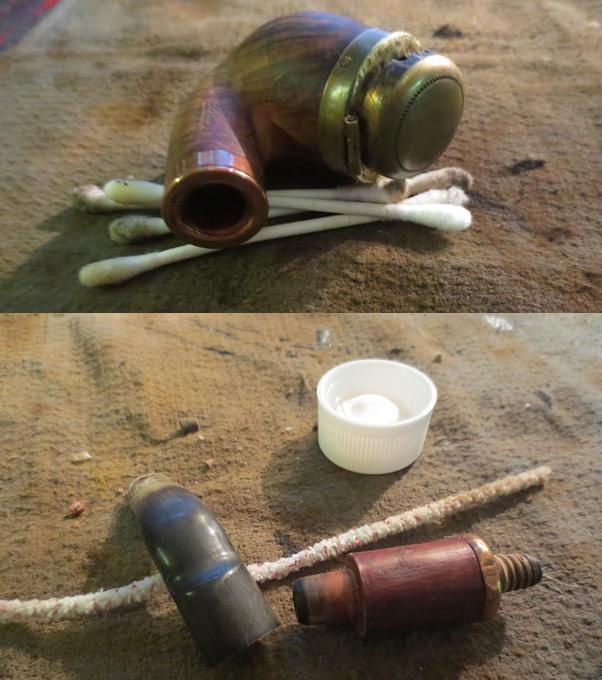
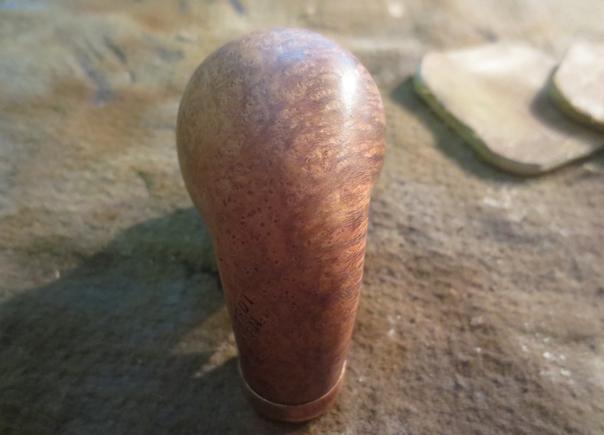
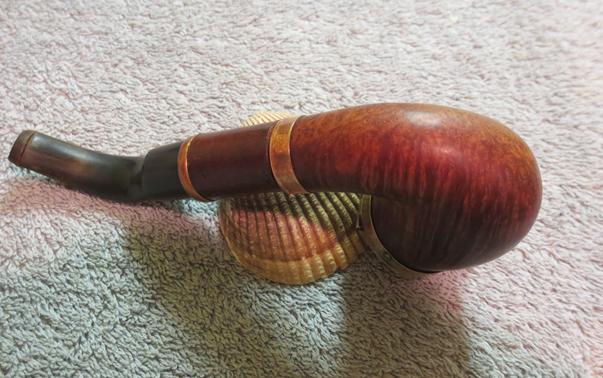
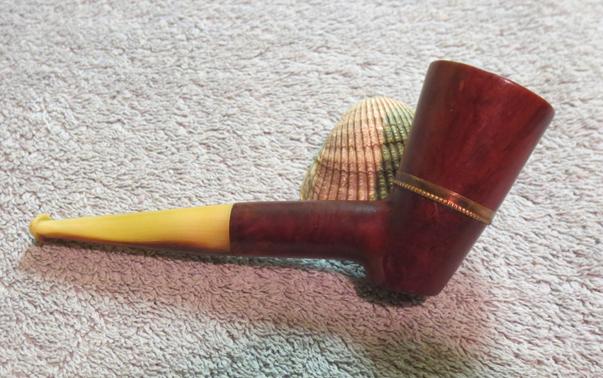
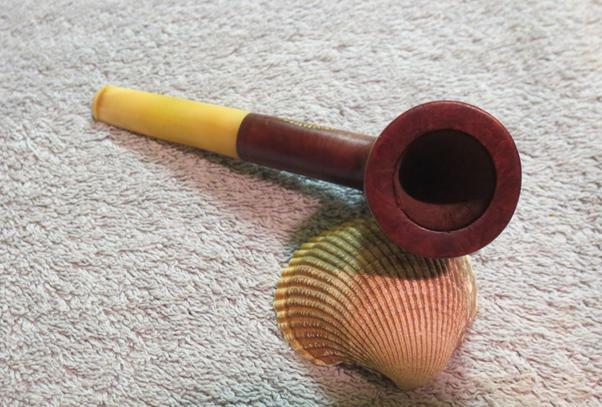
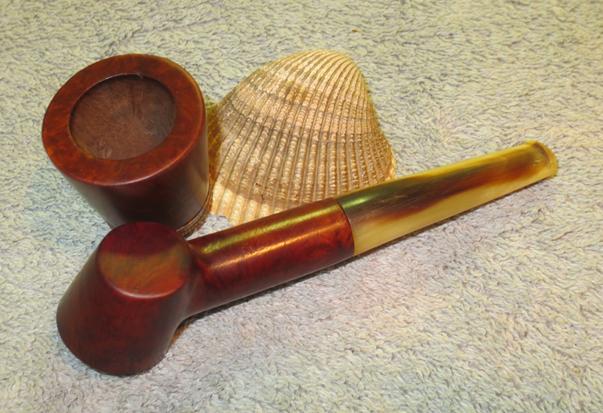
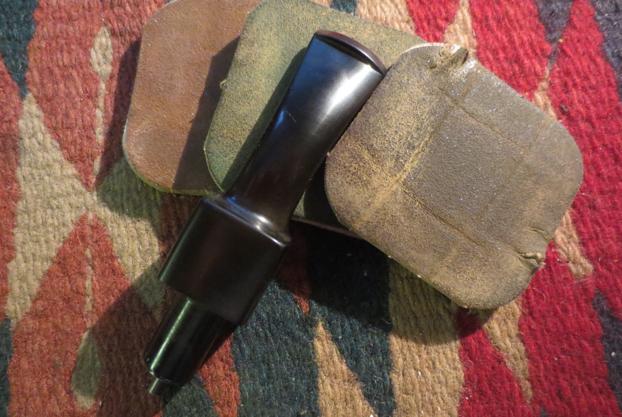
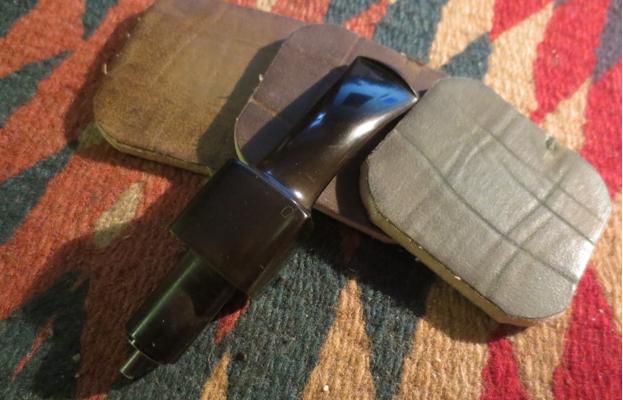
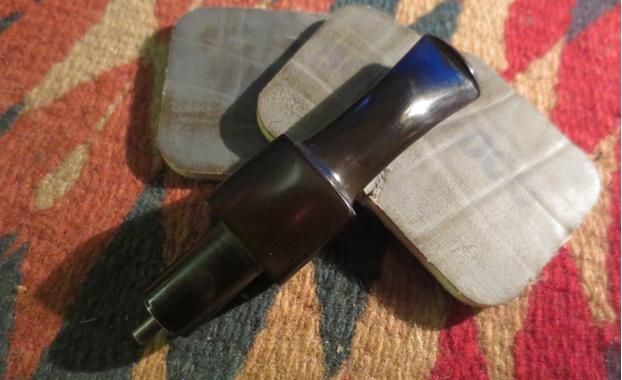
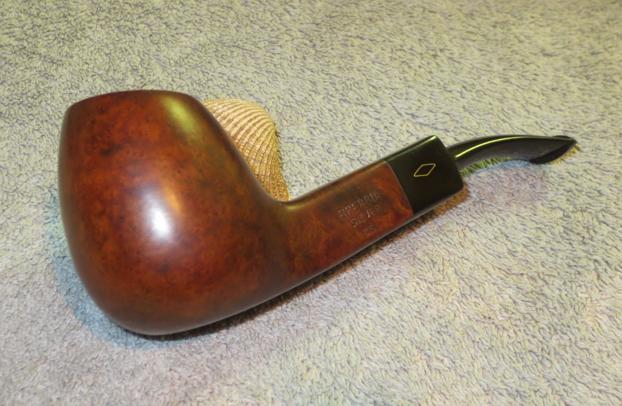
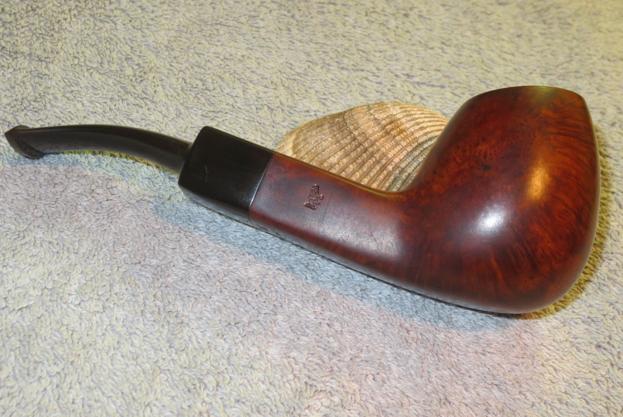
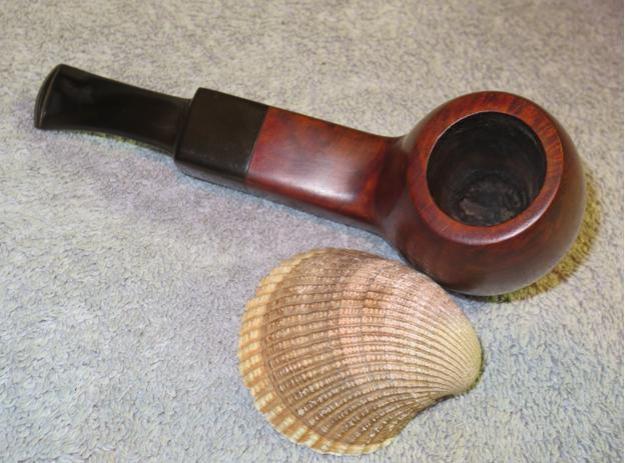
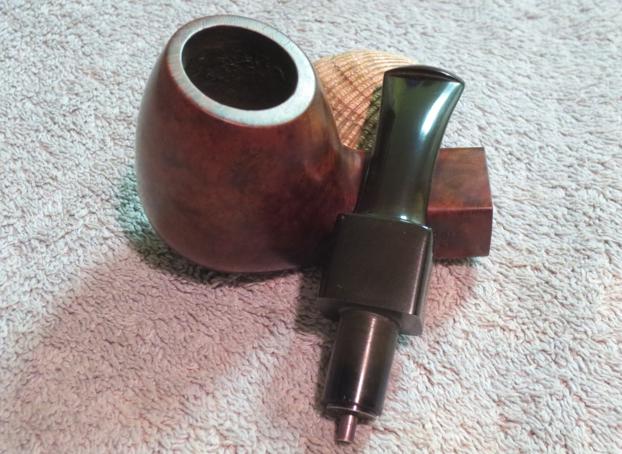
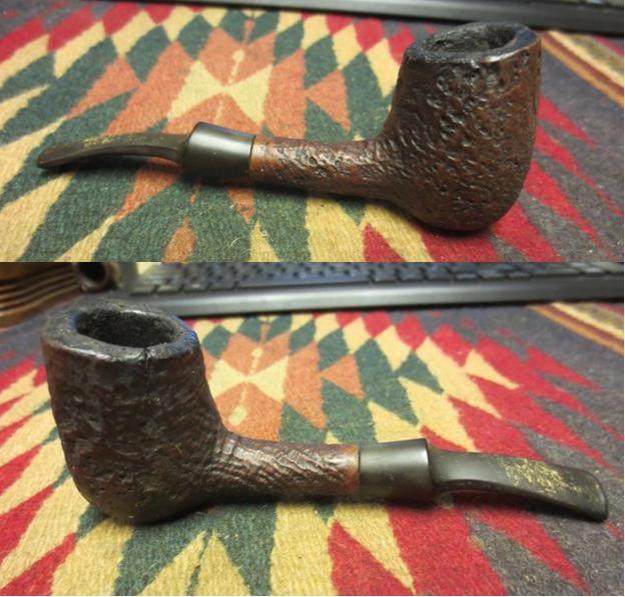
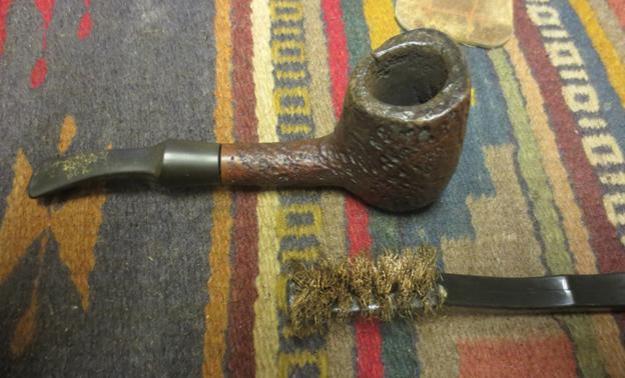
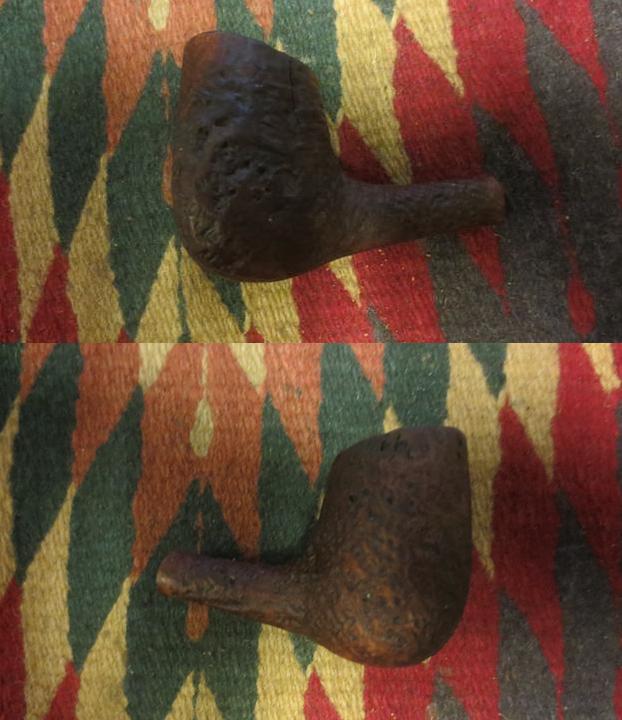
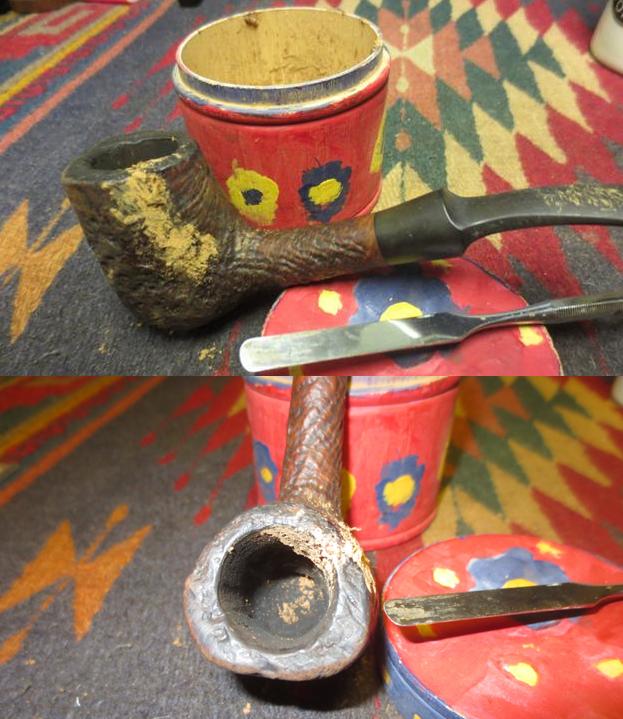
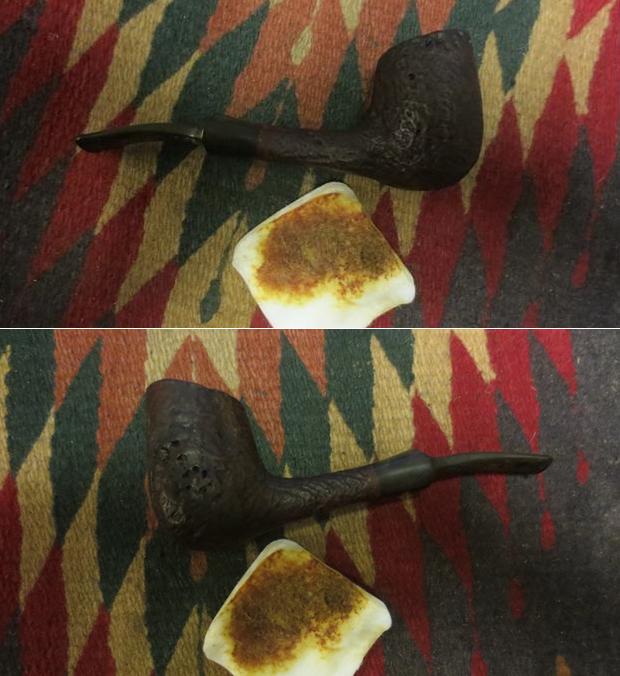
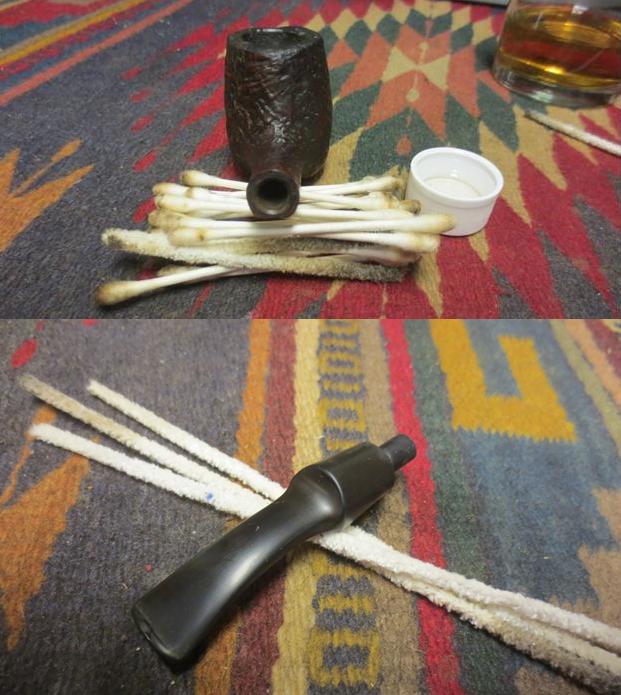
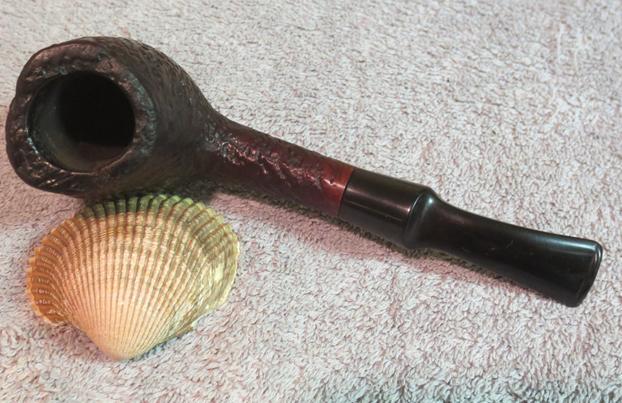
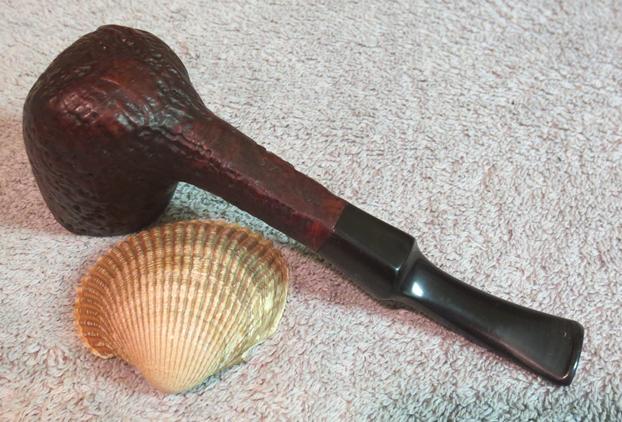
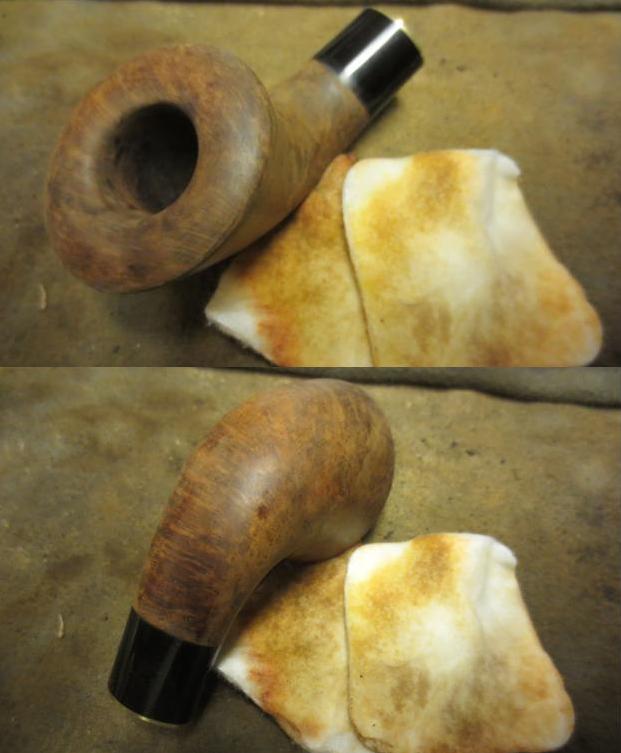
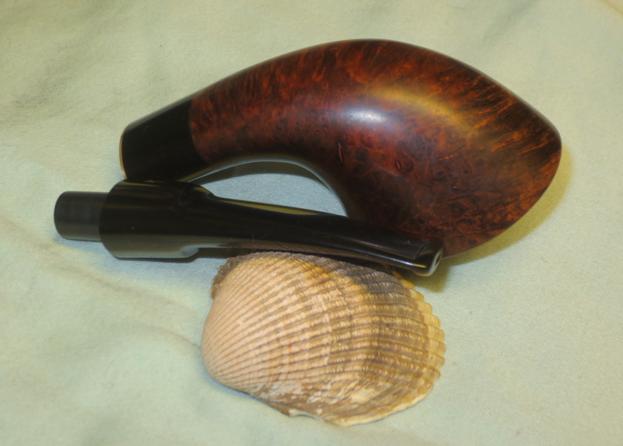
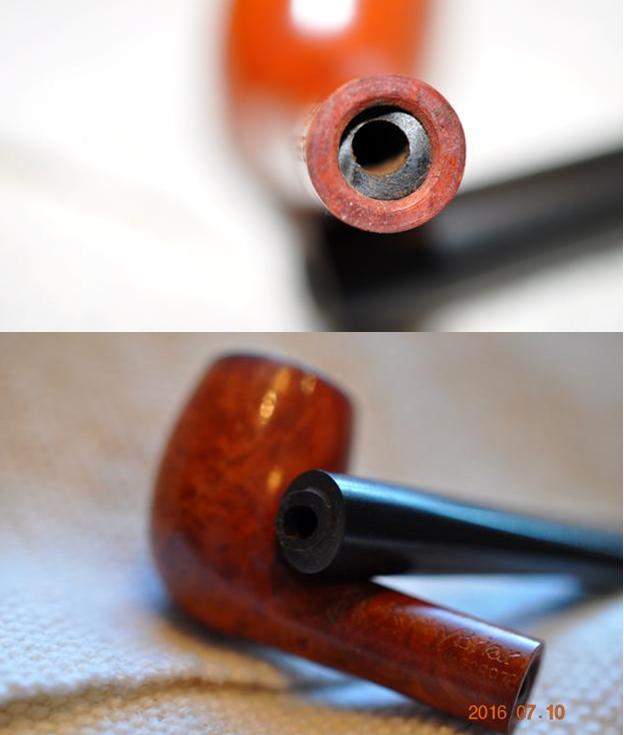
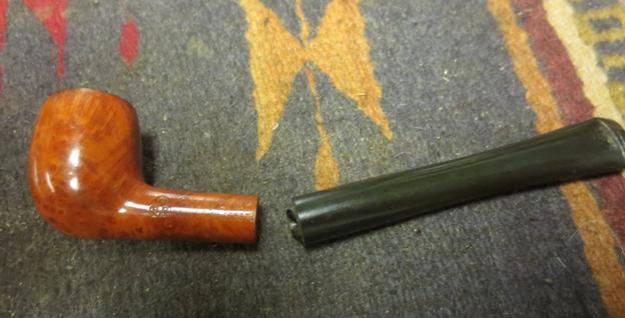
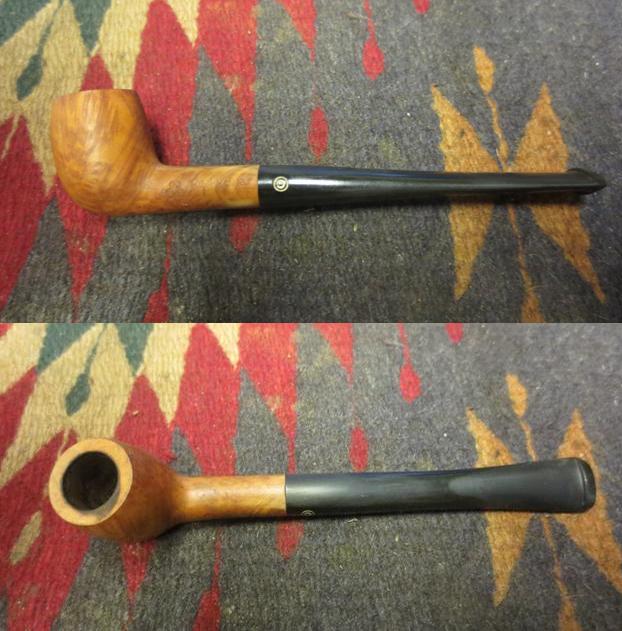
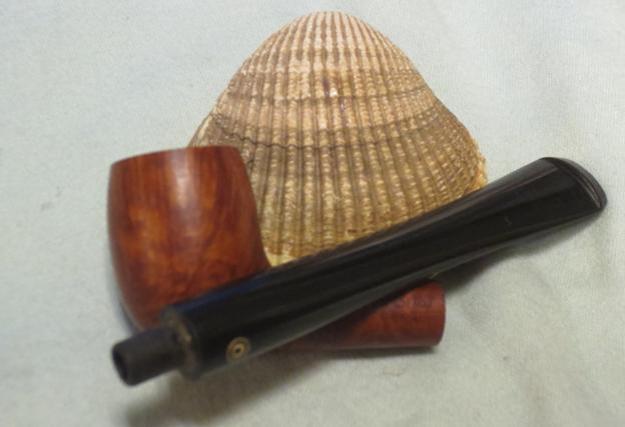
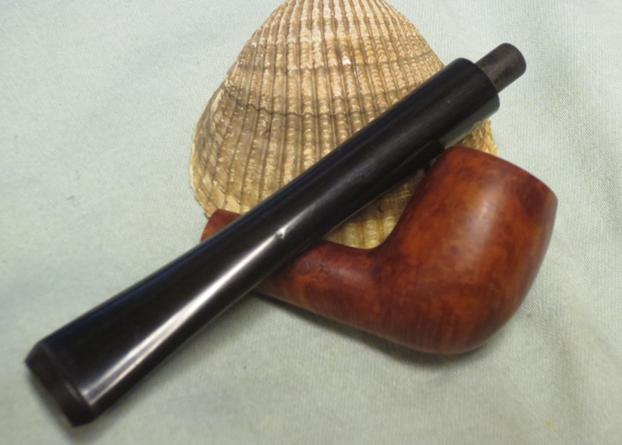
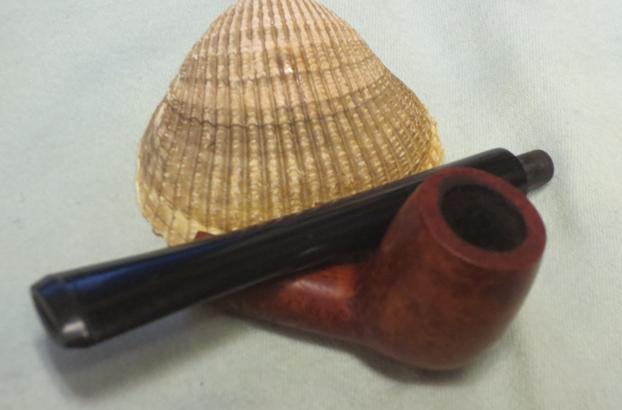
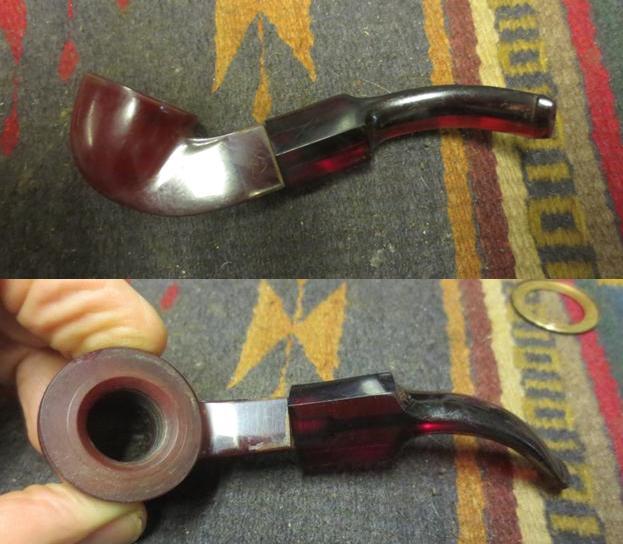
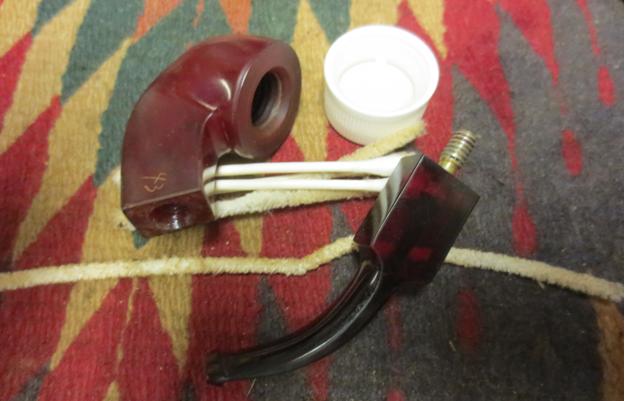
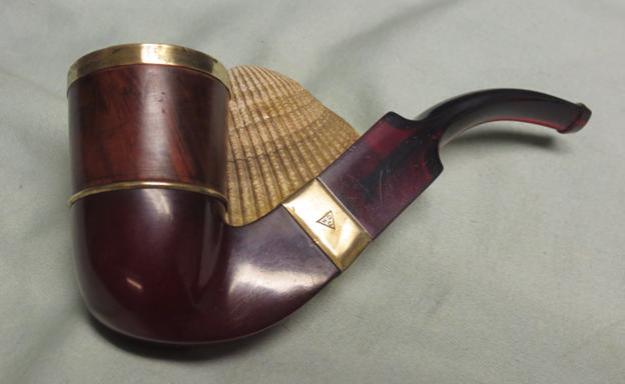
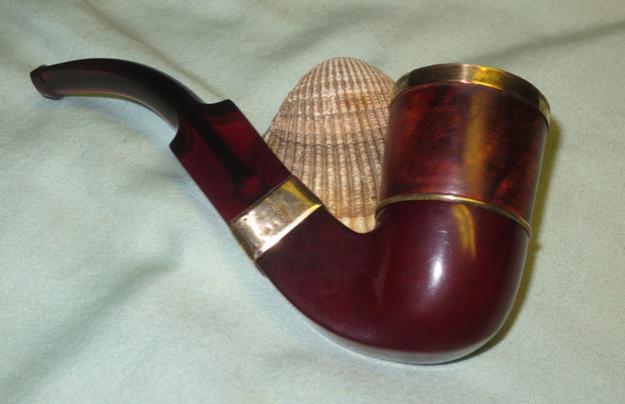
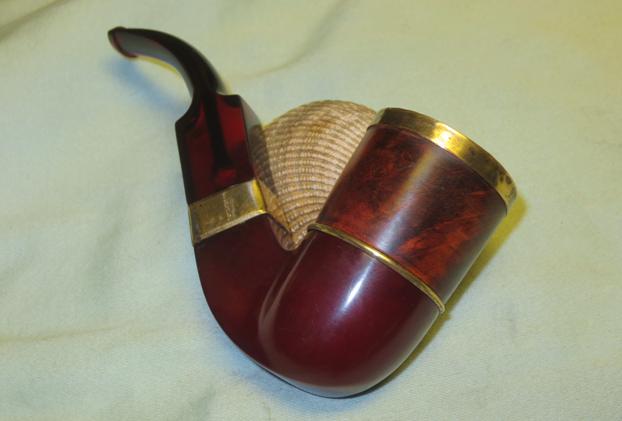
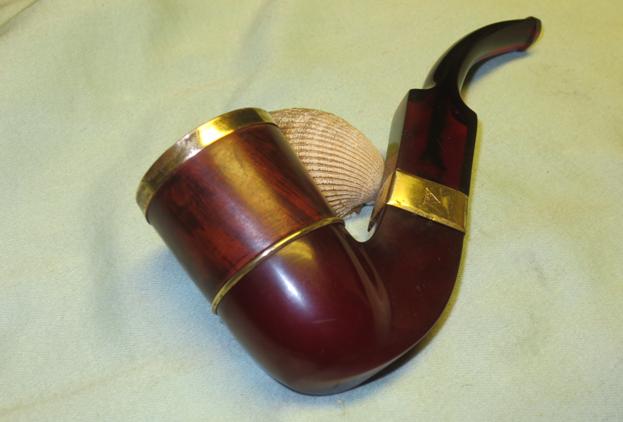
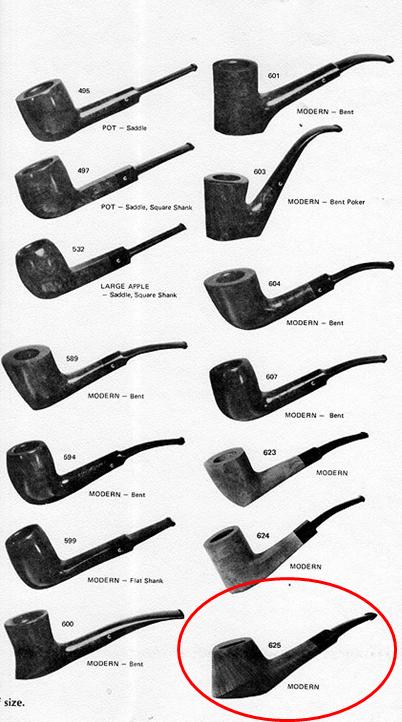 As usual now, my brother did a stellar job cleaning up the pipe before he sent it to me. He reamed it and scrubbed the exterior with Murphy’s Oil Soap so the finish was very clean. He cleaned out the internals as well. The pipe was ready for me to work on the finish and stem repairs when I received it. The next four photos show what the pipe looked like when it arrived to my work table.
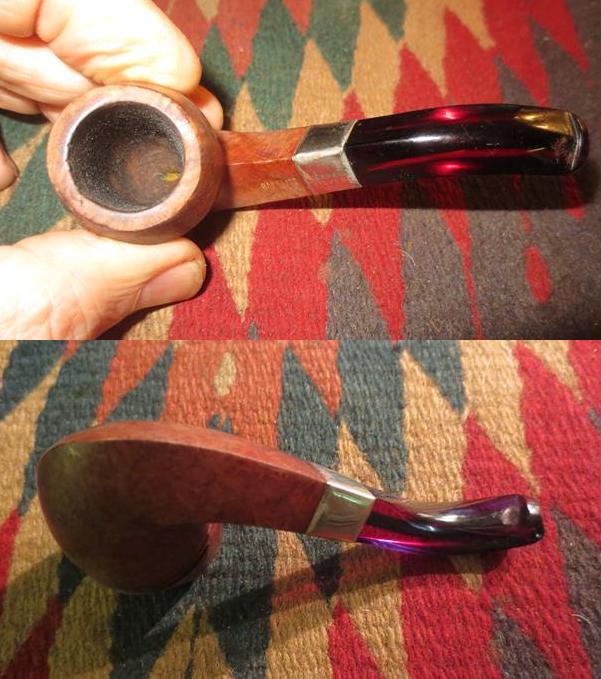
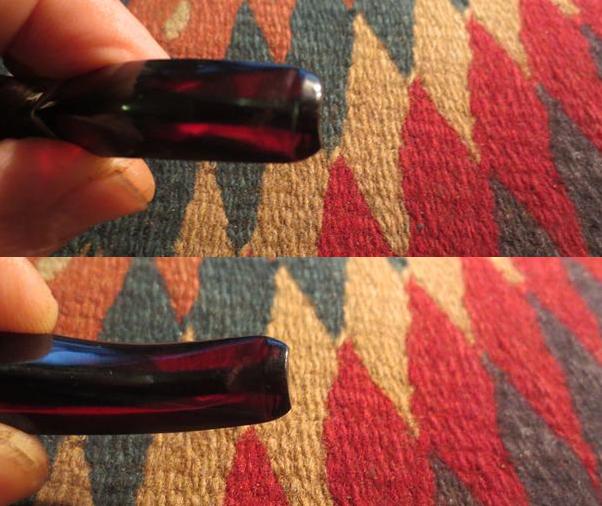
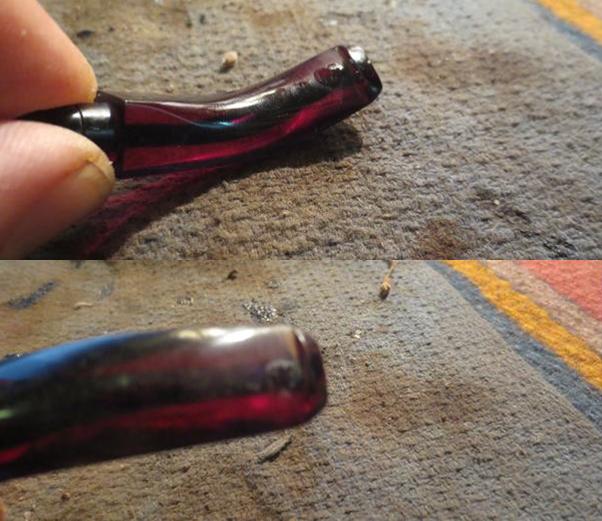
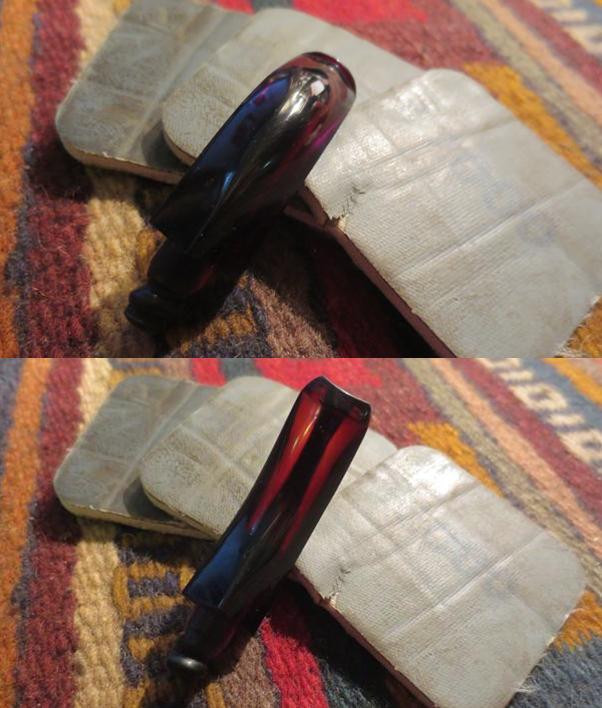
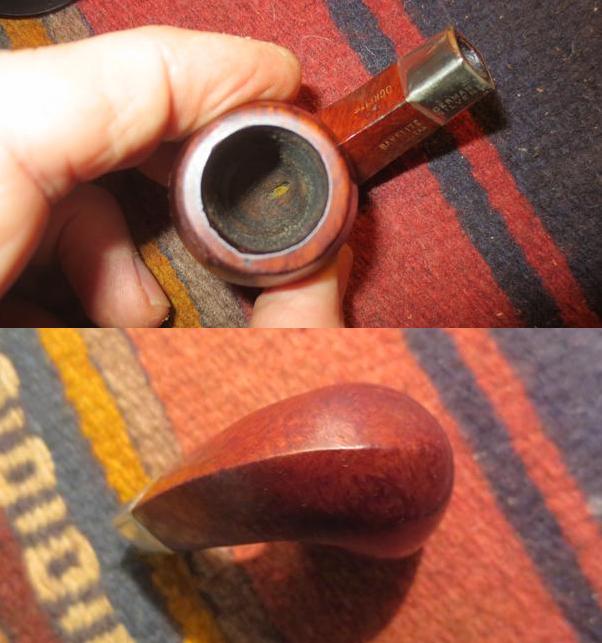
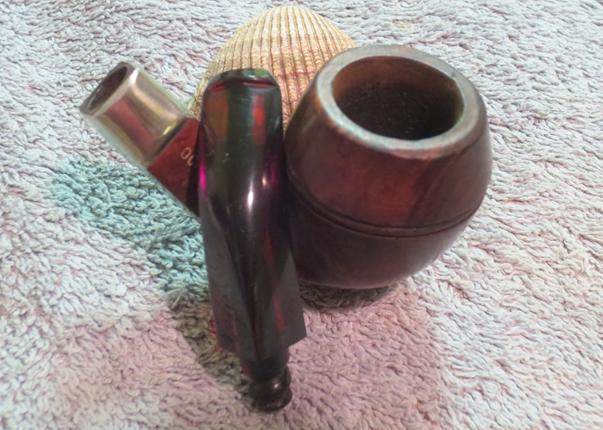
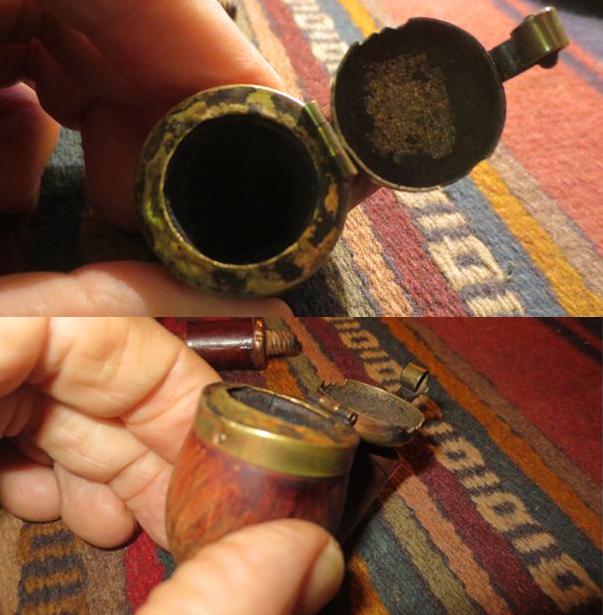
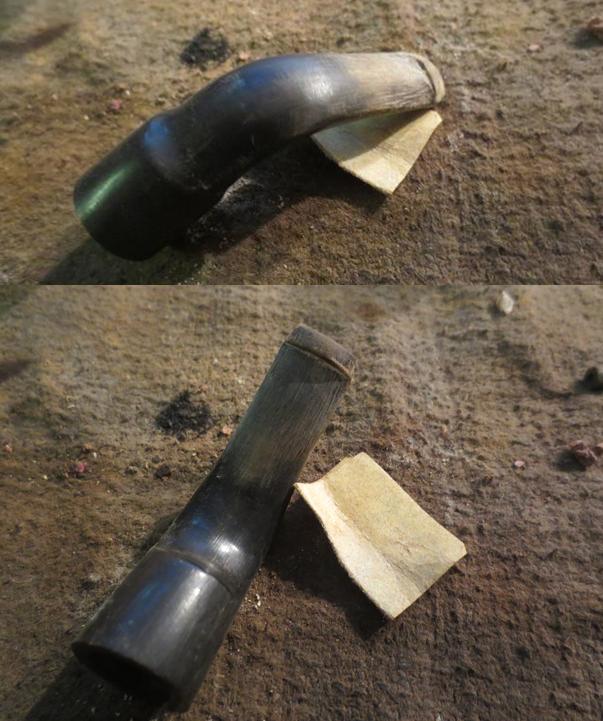
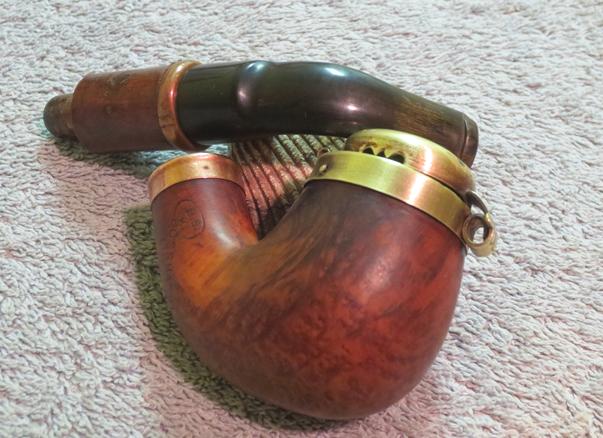
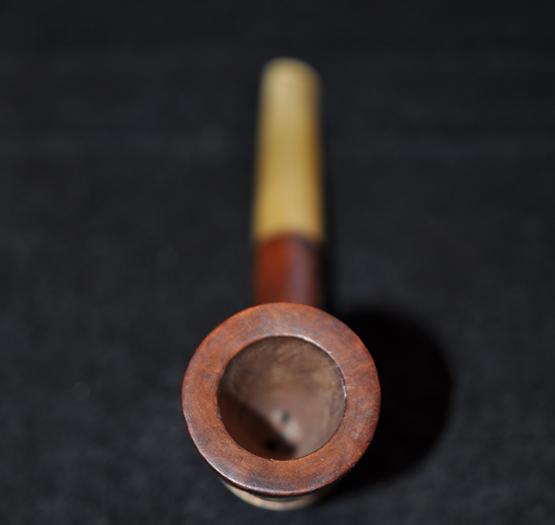
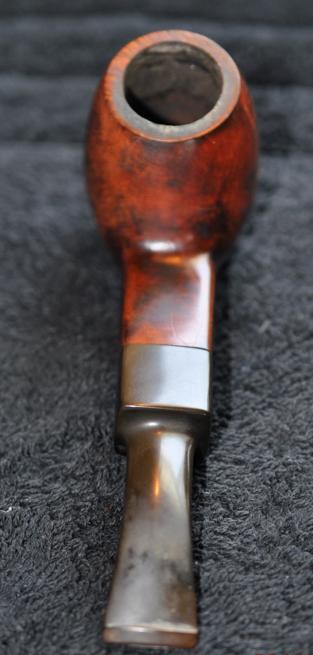
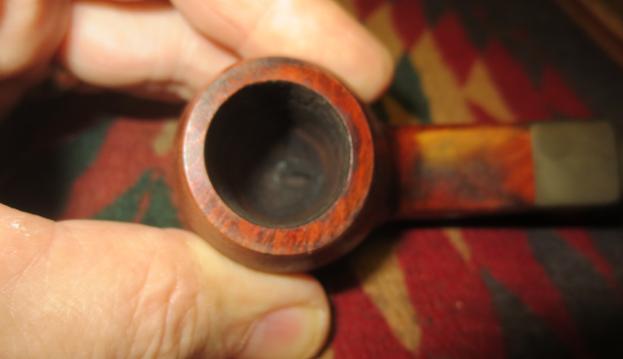
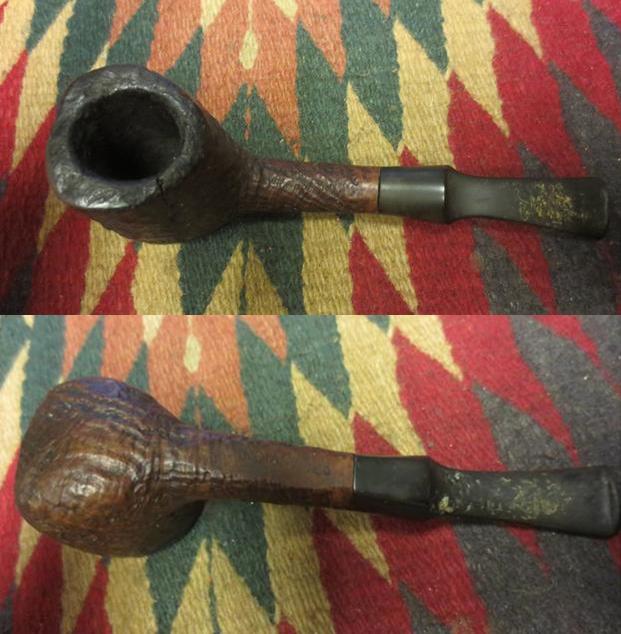
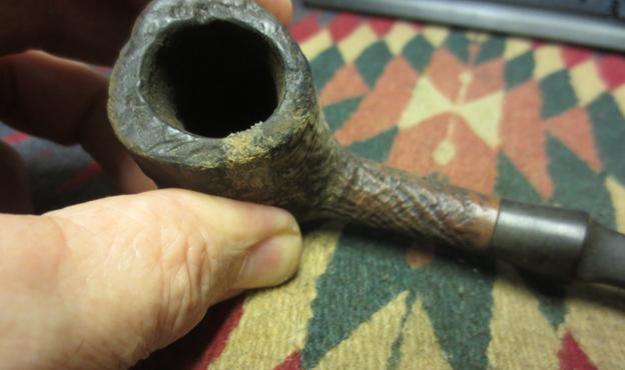
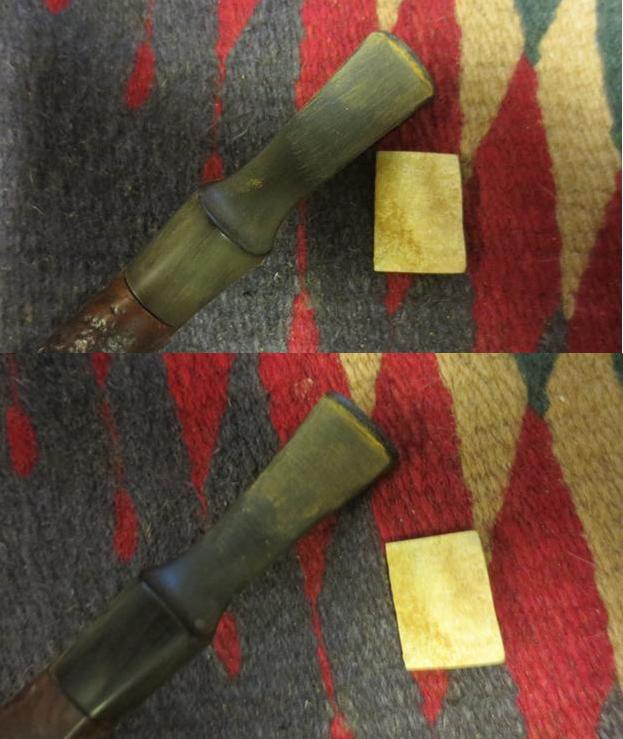
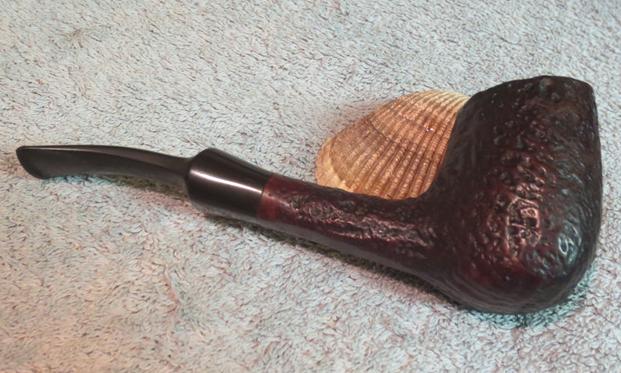
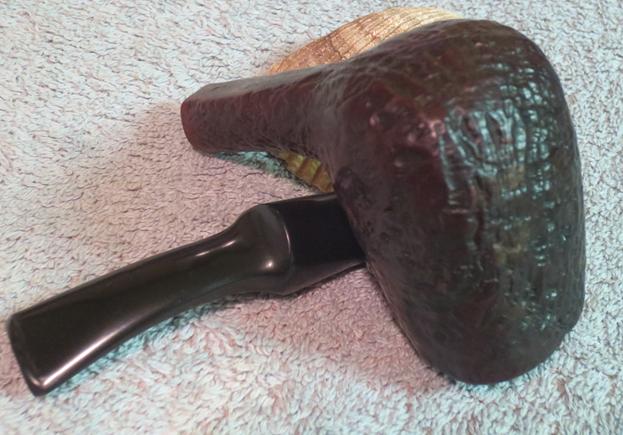
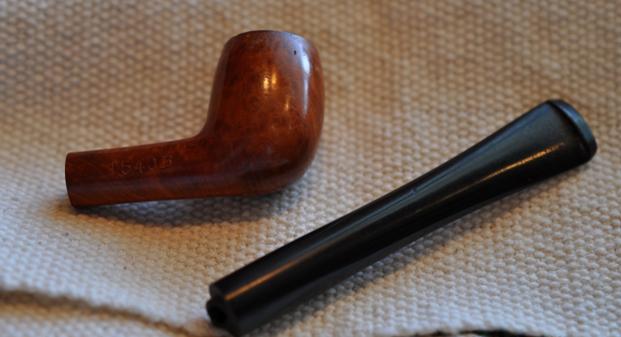
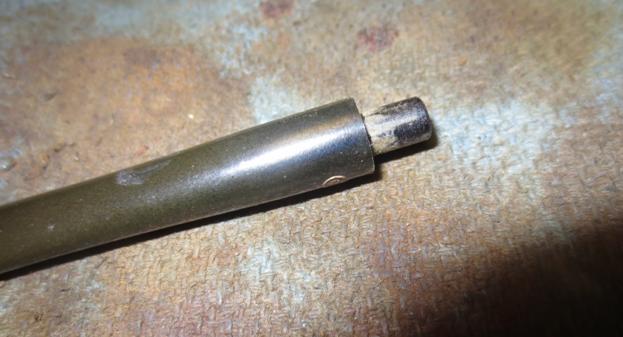
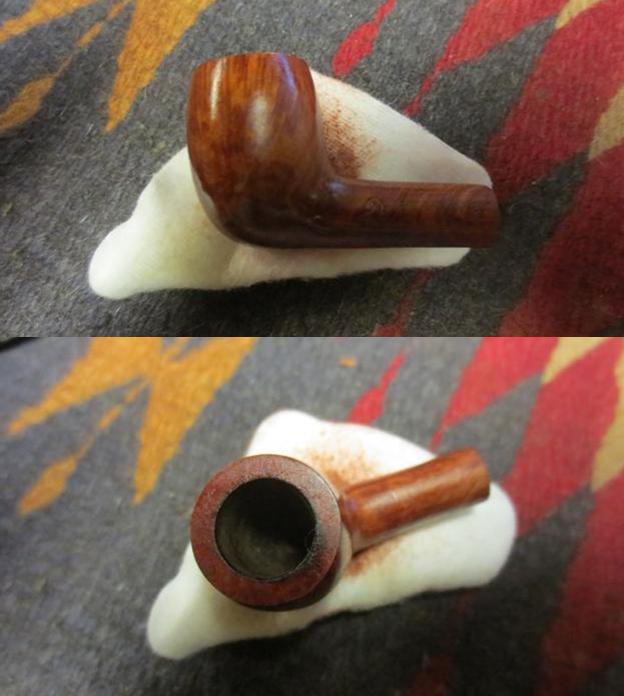
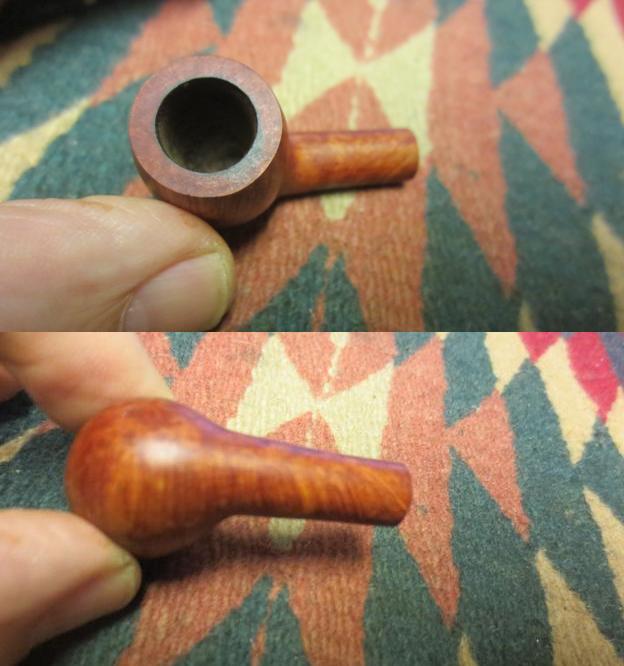
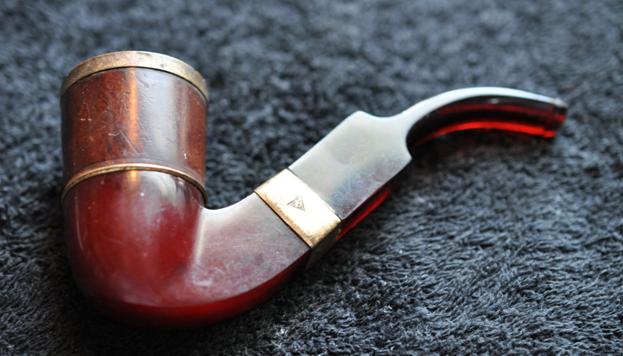
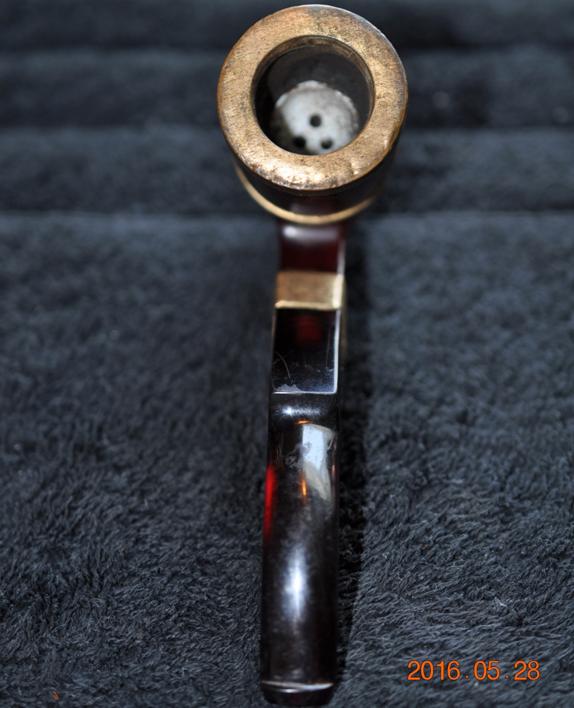
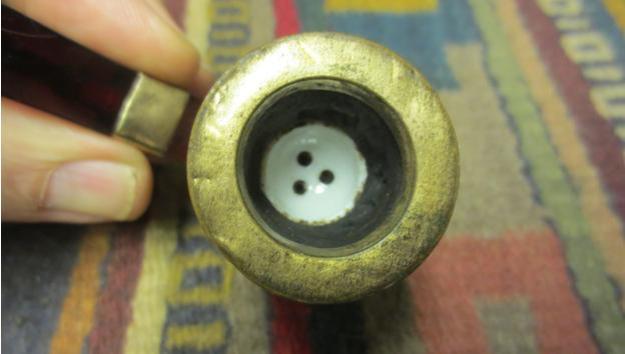
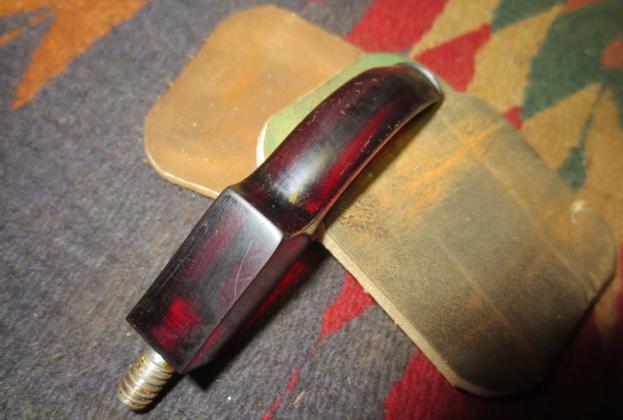
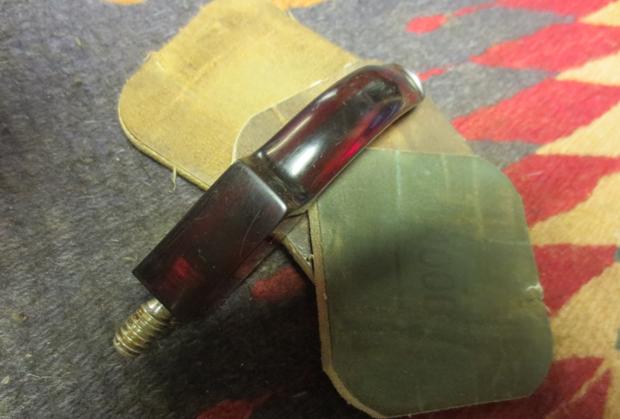
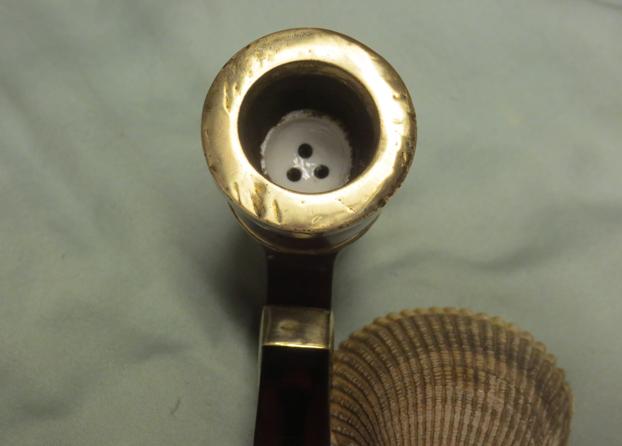
 I took a close up photo of the rim to show the slight damage – almost cut marks on the top of the rim surface. The inner and outer edge of the rim is fairly undamaged though so it will not take much to clean up this rim. I also took close up photos of the stem to show the large bite/tooth marks on the top and bottom sides near the button.
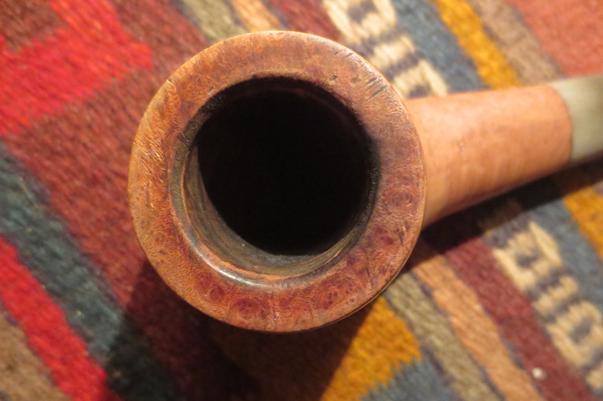
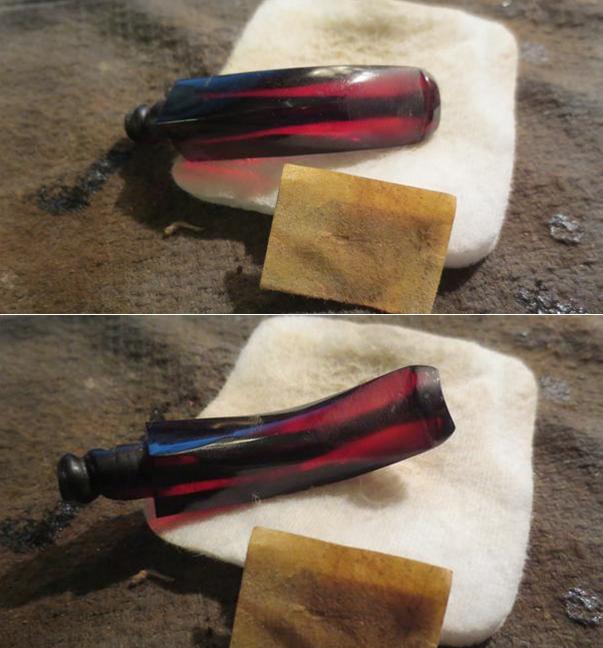
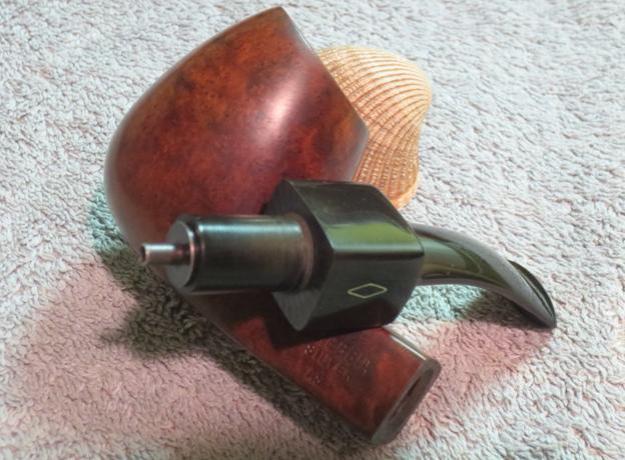
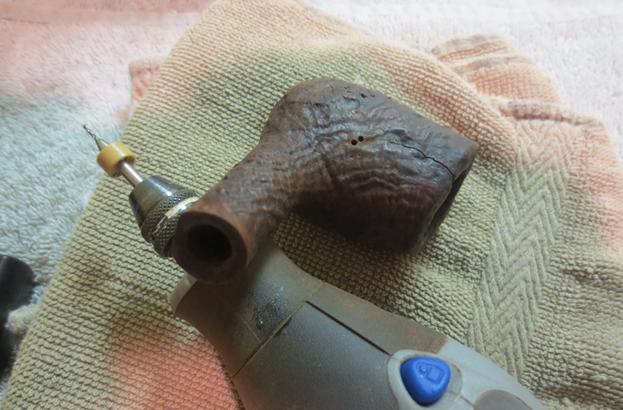
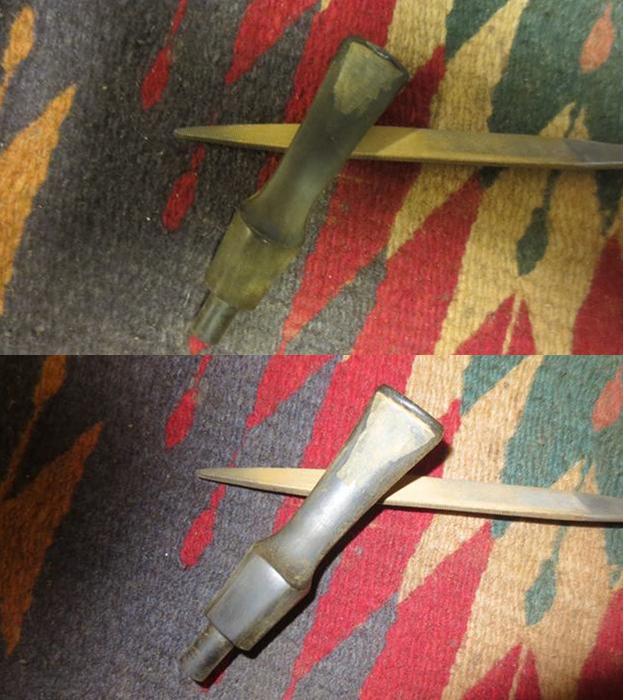
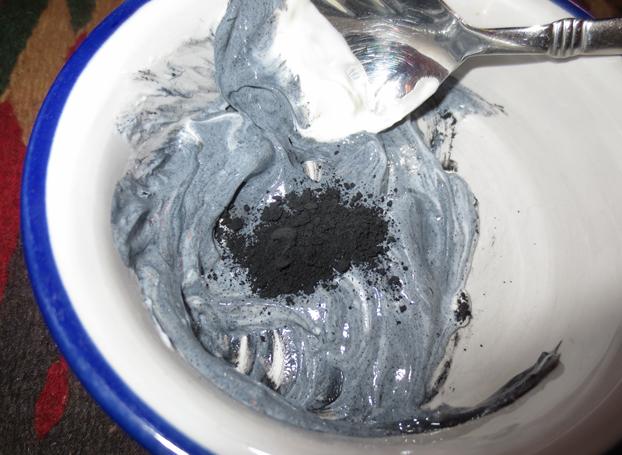
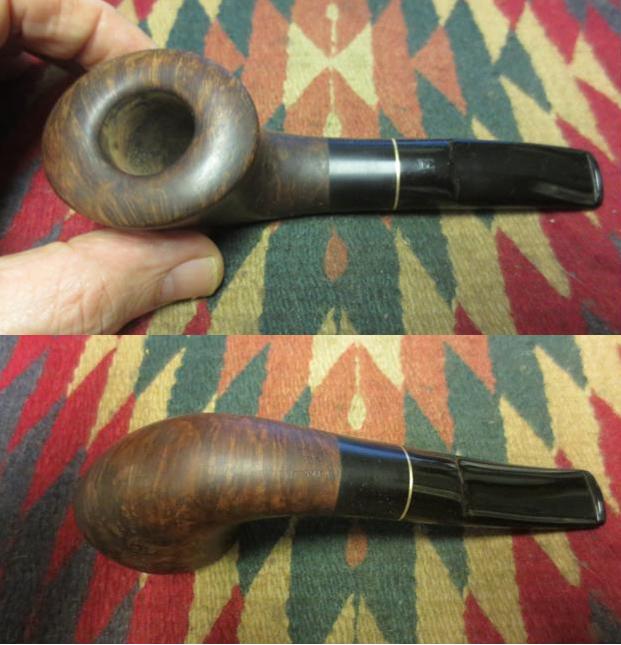
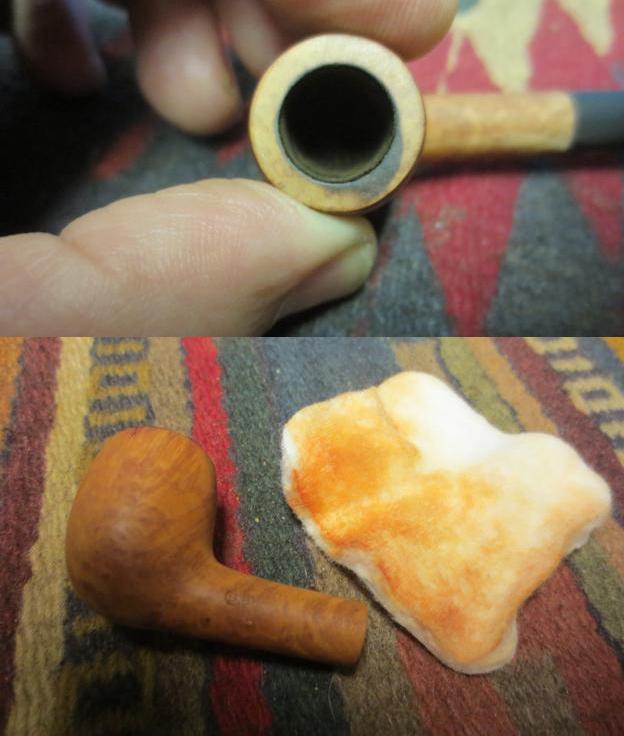
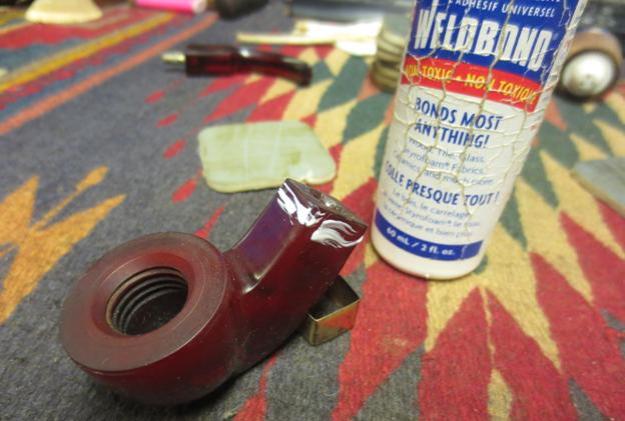
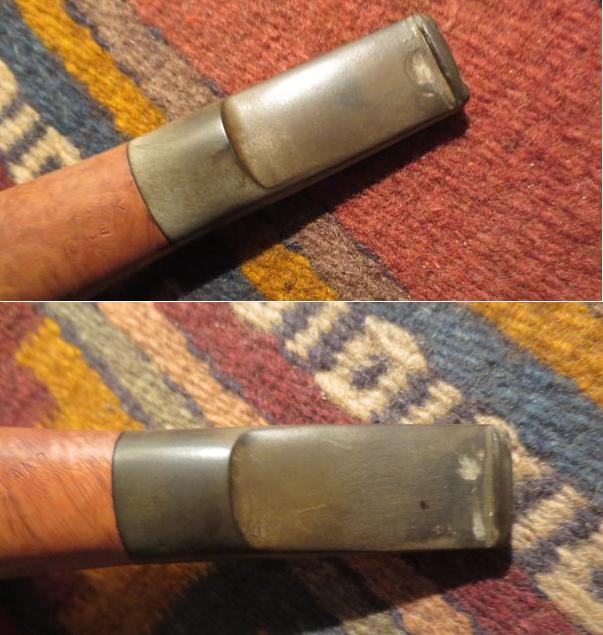 I cleaned up the tooth marks with sandpaper, a dental pick and alcohol. I filled in the deep dents with black super glue and let it cure. I forgot to take photos of the repairs before I sanded them out. Once the glue had cured I sanded both sides of the stem with 220 grit sandpaper to smooth out the repair to match the surface of the rest of the stem.
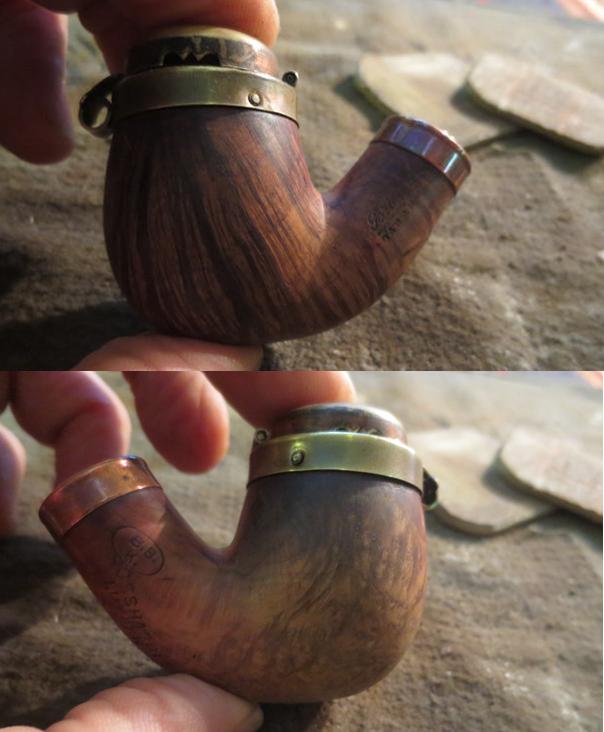
 I also filled the pin holes in the back side of the bowl with clear super glue and briar dust. Again I forgot to take a photo of the glue and dust mixture. Once it dried I sanded the bowl with 220 grit sandpaper and blended the repairs into the surface of the briar. The surface was smooth to touch .
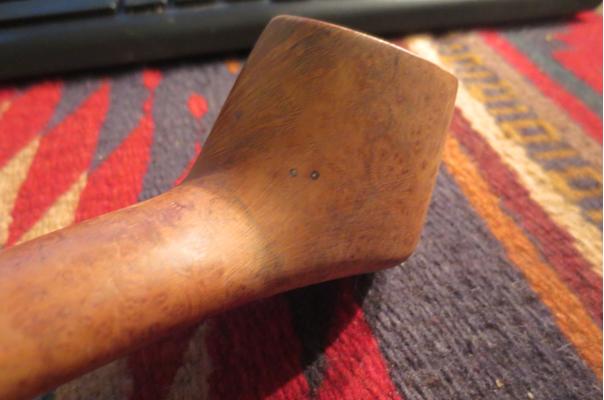 I sanded the slash marks on the rim with 220 grit sandpaper to minimize them. It did not take too much sanding to remove them. I also sanded the inner beveled edge of the rim to clean it up and remove the darkening.
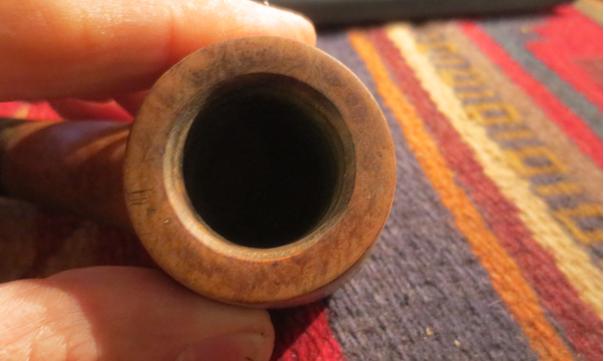 I sanded the bowl and rim with a medium and a fine grit sanding block. I worked to remove the scratching left behind by the 220 grit sandpaper. I carefully avoided the areas on the shank that held the already faint stamping.
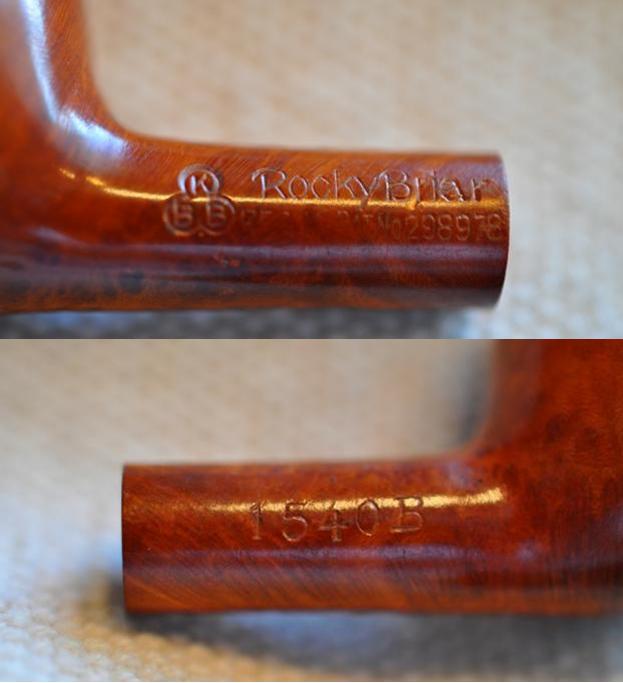
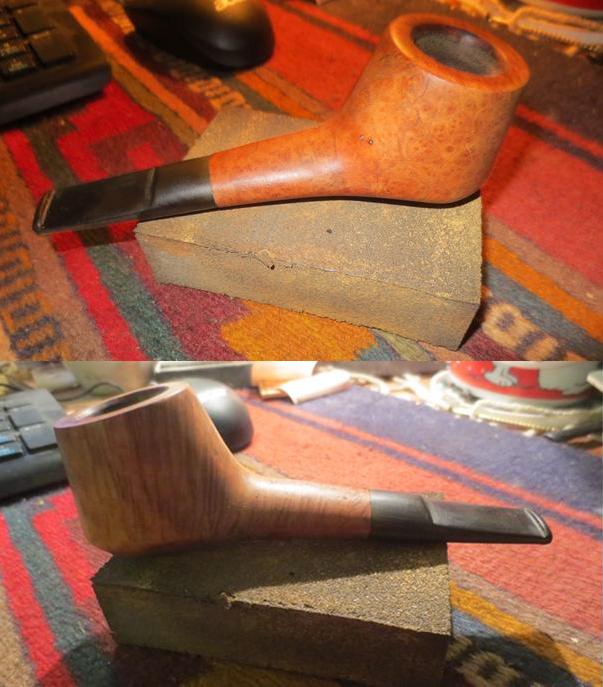
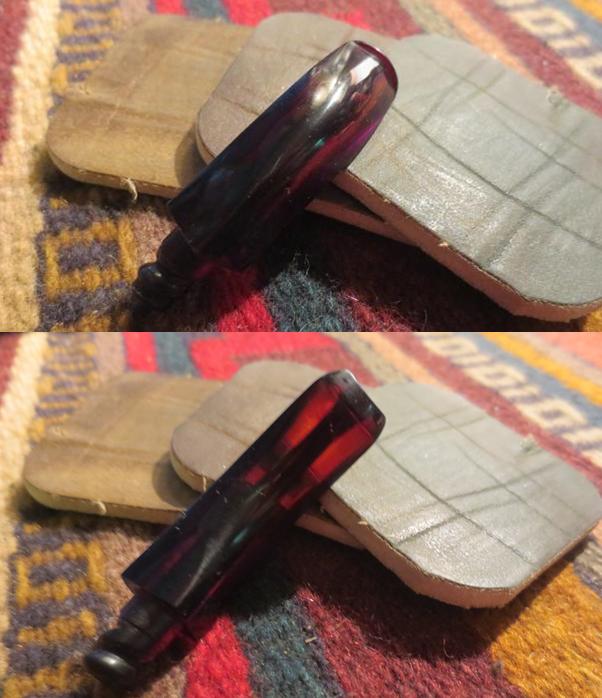
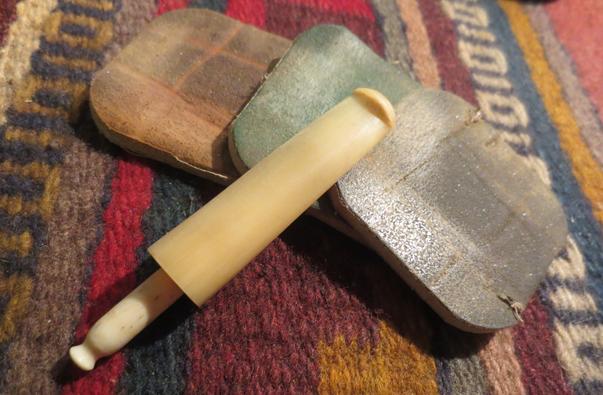
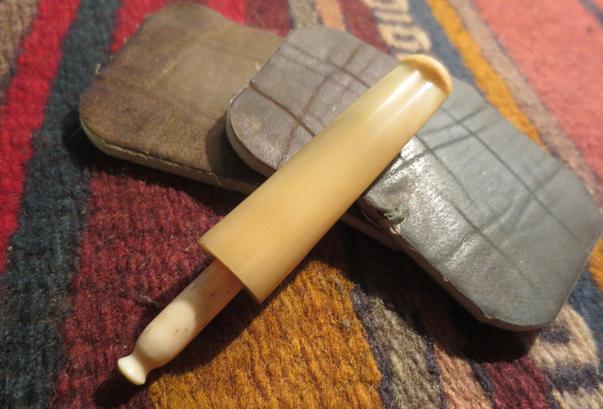
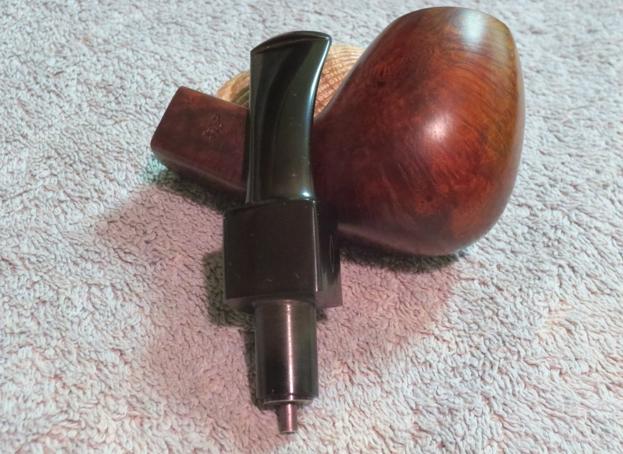
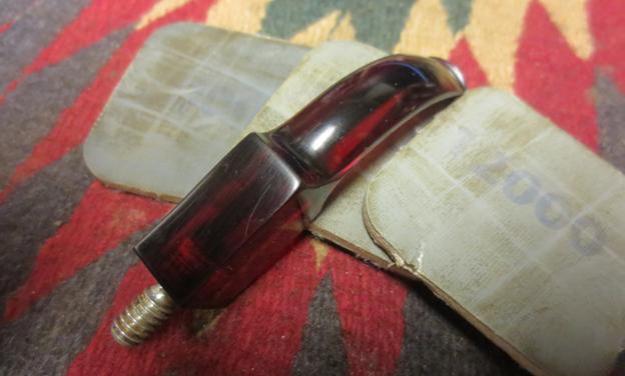
 I sanded the stem with the sanding block as well.
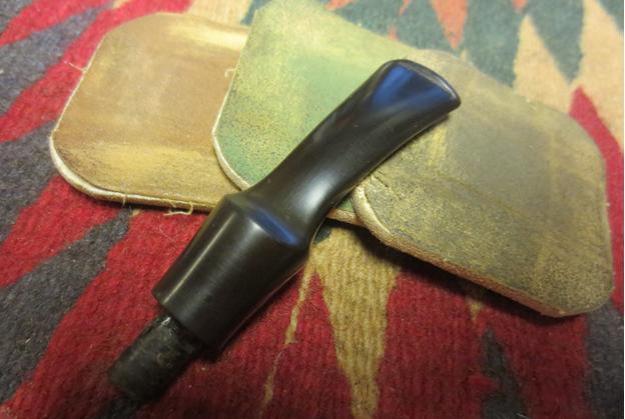
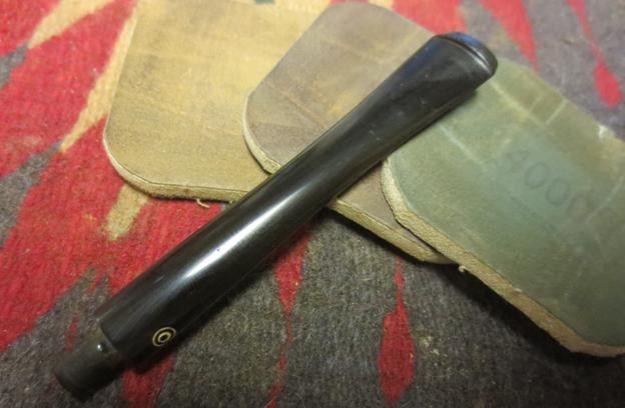
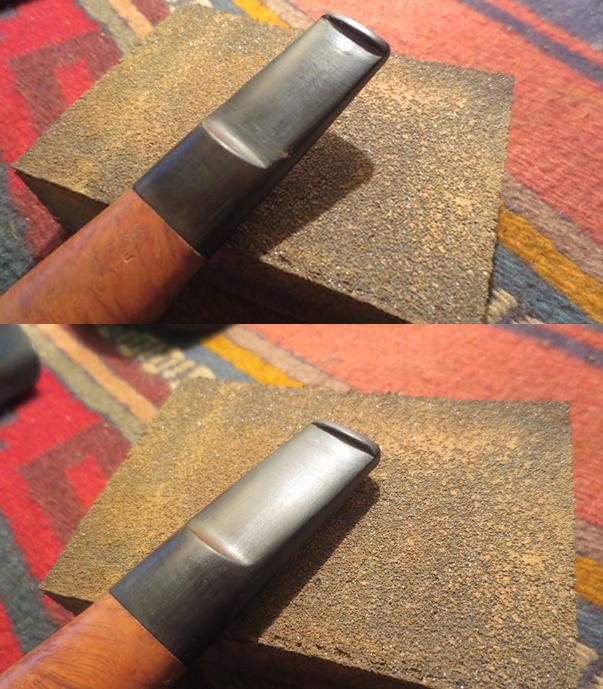 I wet sanded the stem with 1500-2400 grit micromesh sanding pads and rubbed it down with Obsidian Oil. I dry sanded it with 3200-4000 grit pads and gave it another coat of oil. I finished sanding it with 6000-12000 grit pads, gave it a final coat of Obsidian Oil and set it aside to dry.
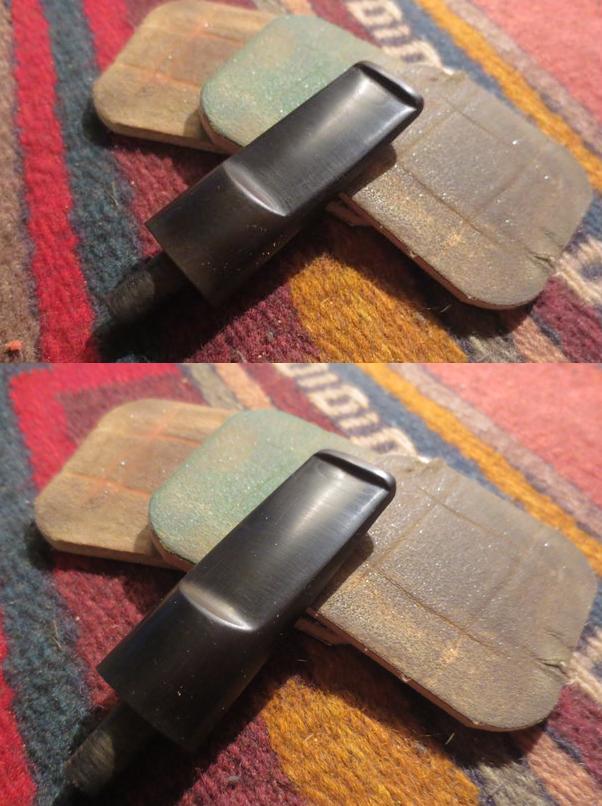 There were some scratches on the top of the stem. I would need to work on them some more at this point.
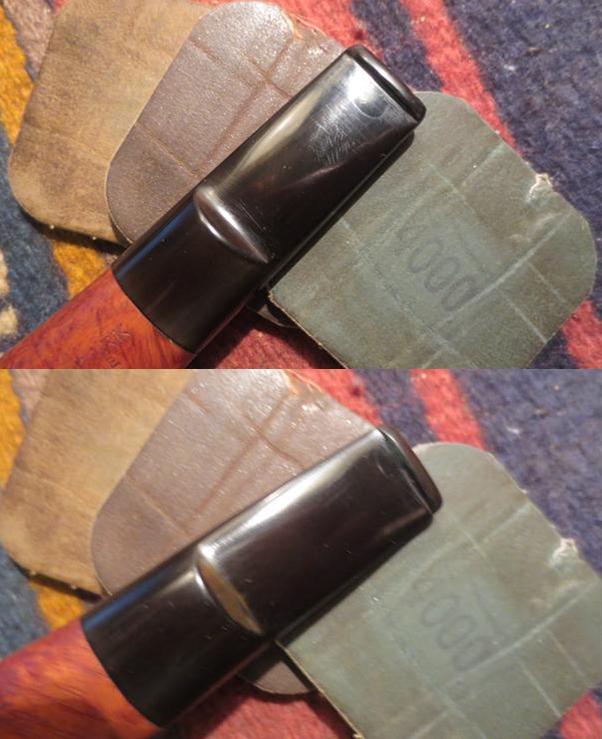
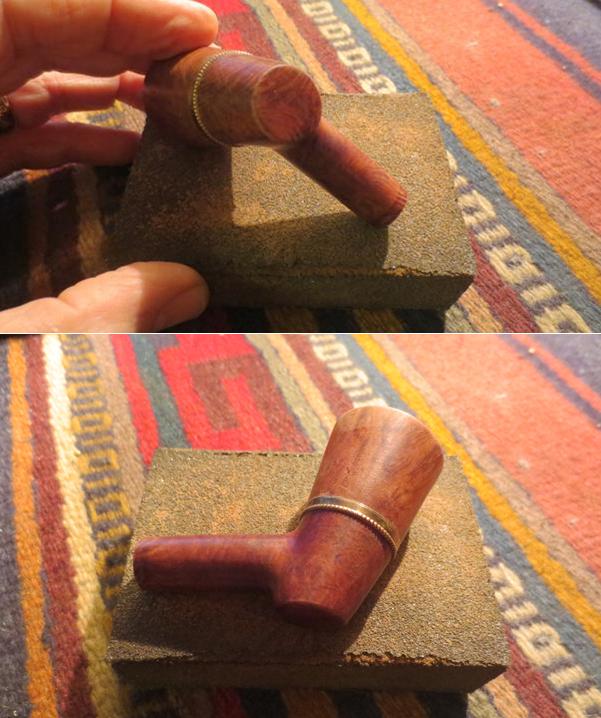
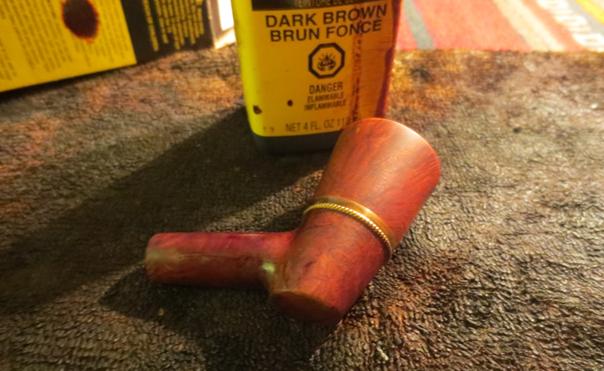
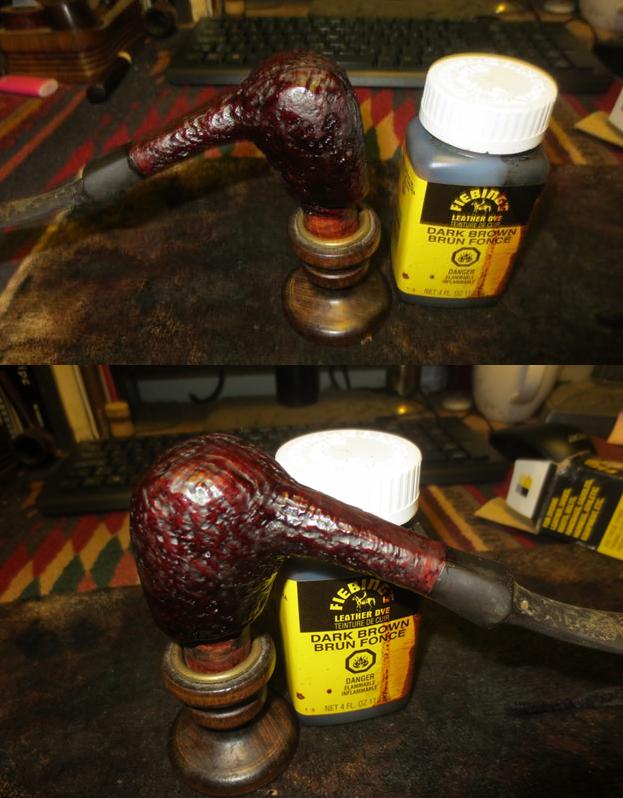
 Once I buffed the stem with Blue Diamond the scratches would be blended into the stem surface. I gave the bowl a coat of Danish Oil and Cherry Stain to highlight the red of the briar. I set it aside to dry for about twenty minutes.
 I wiped the bowl off with a soft cloth and hand buffed it lightly to get a clear picture of the finish and the grain on the bowl.
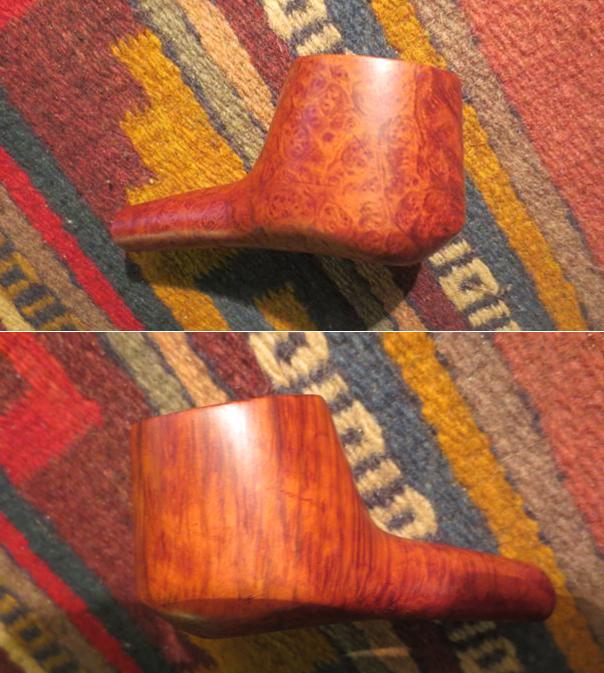
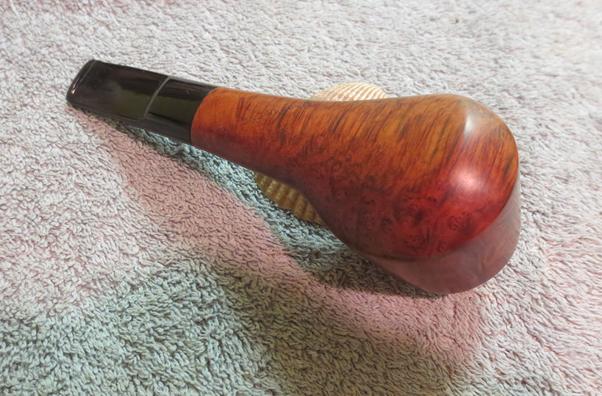
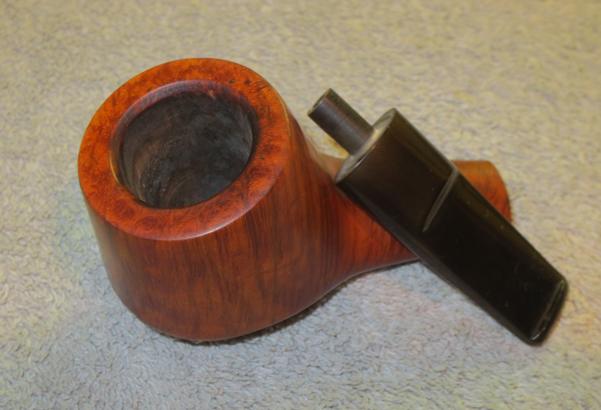
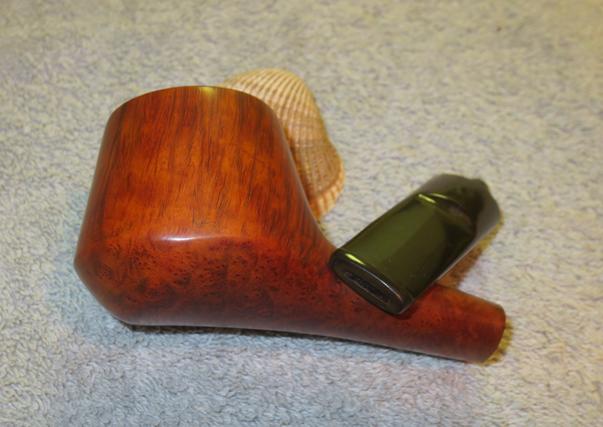
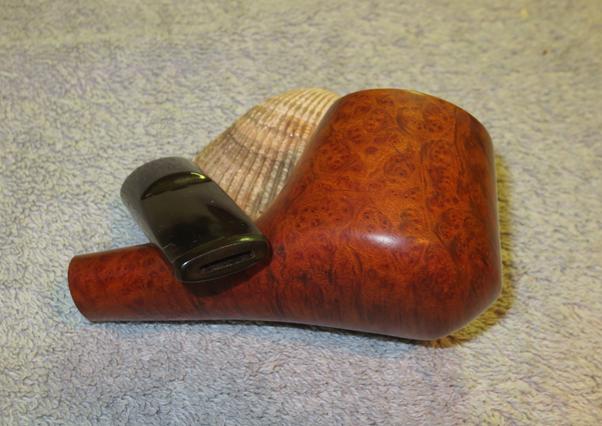
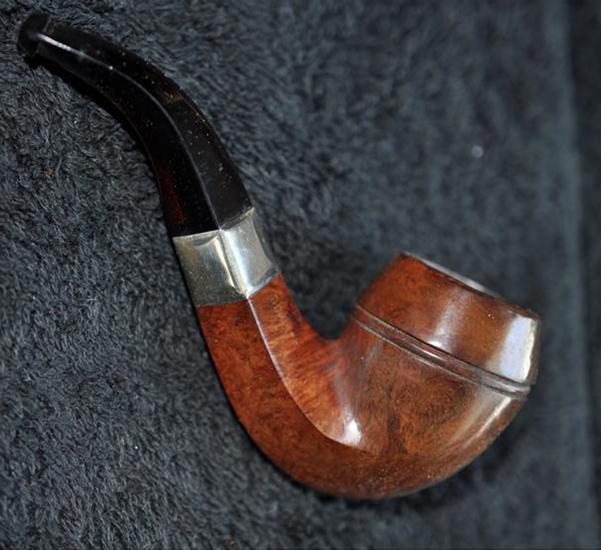
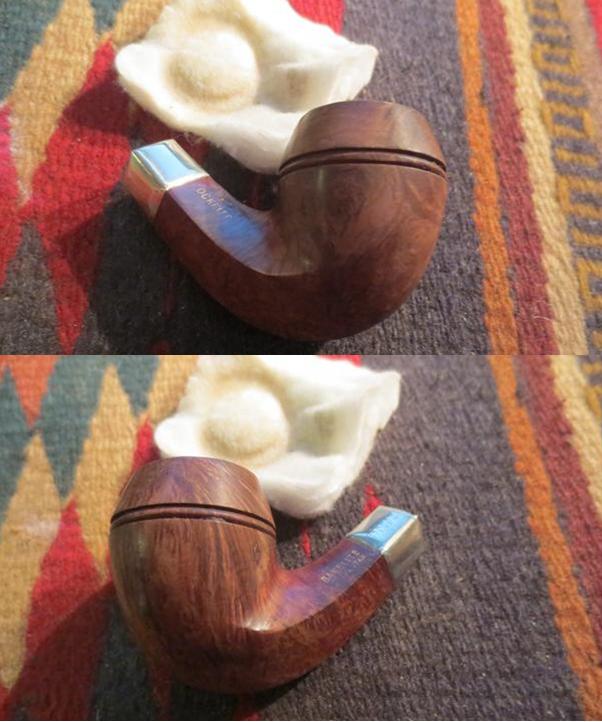
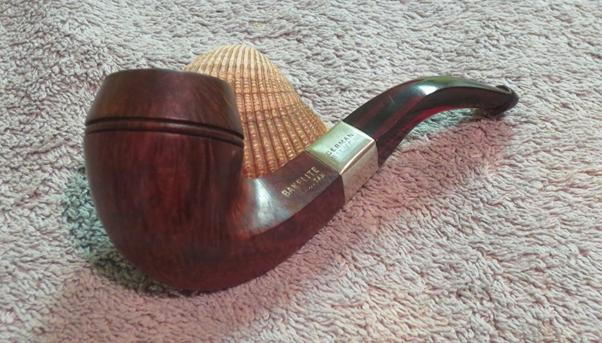
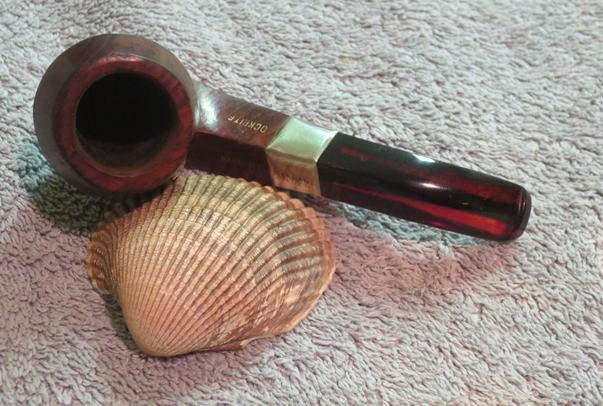
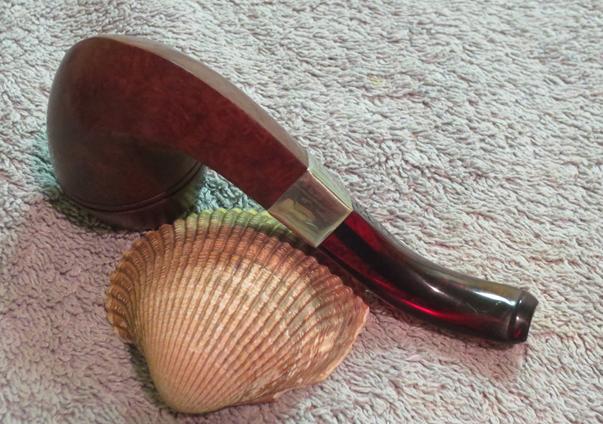
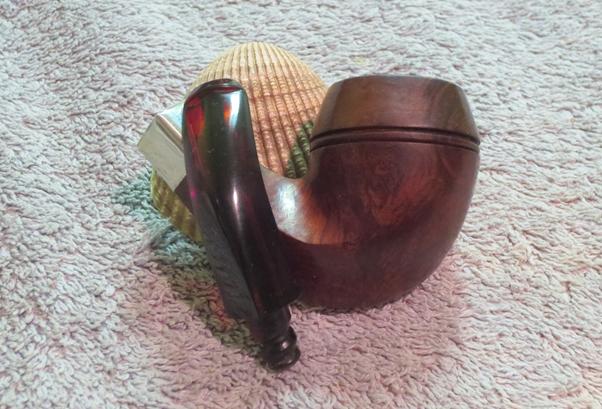
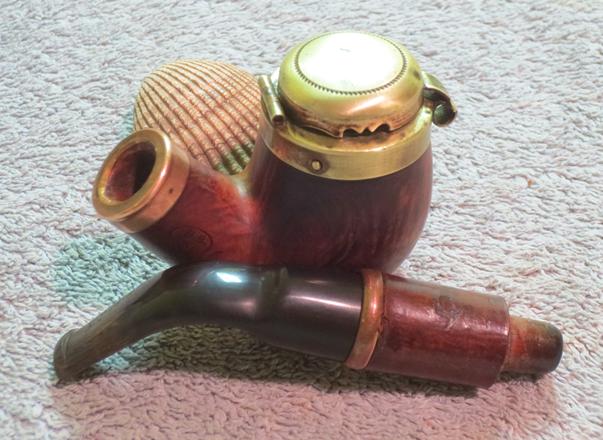
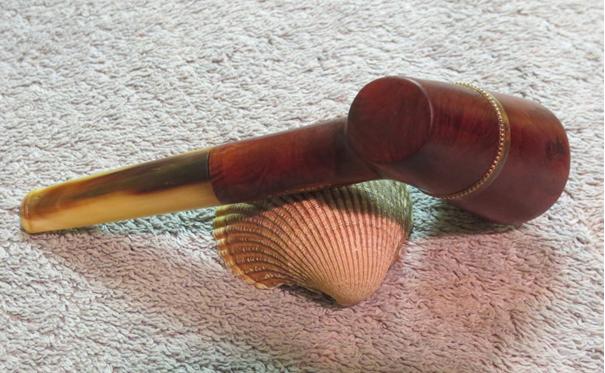
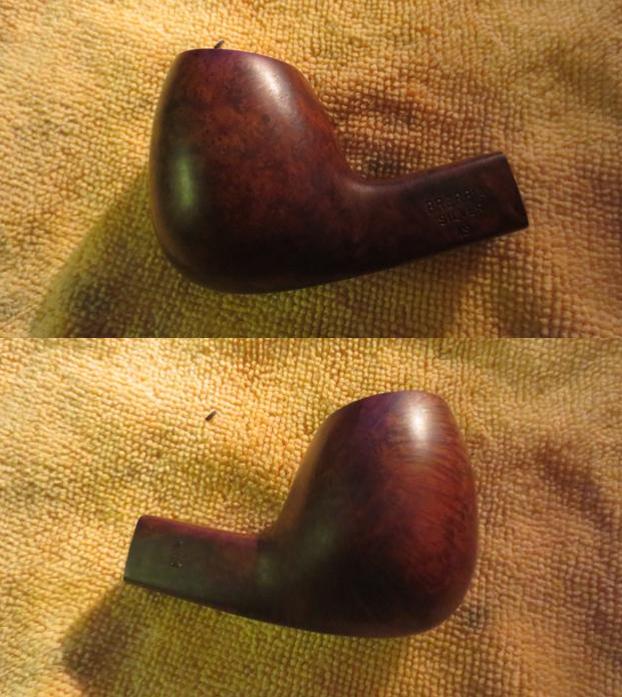
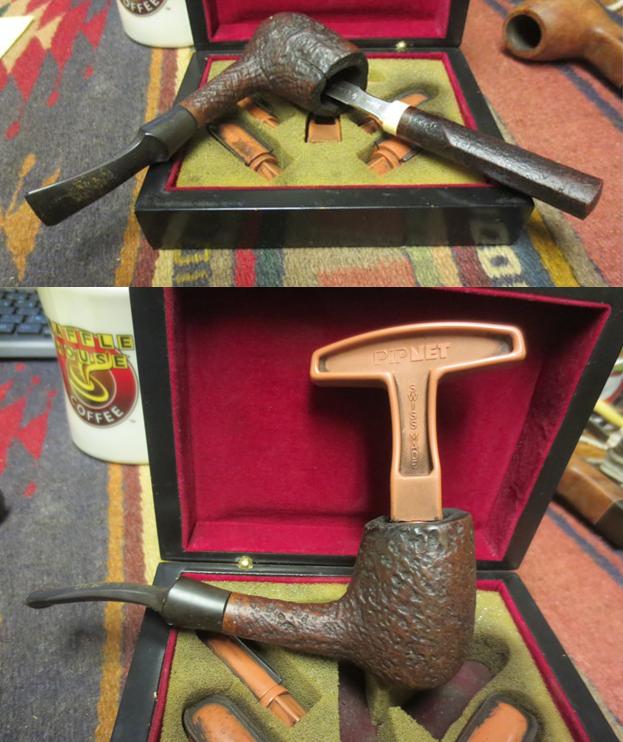
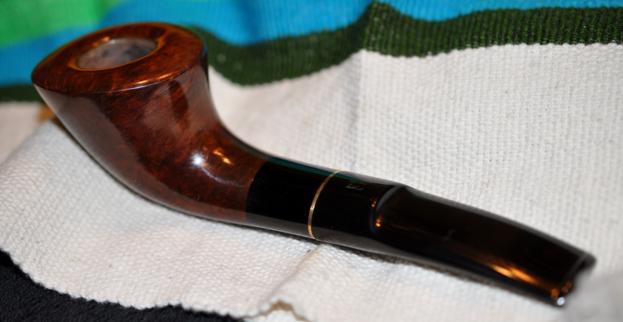
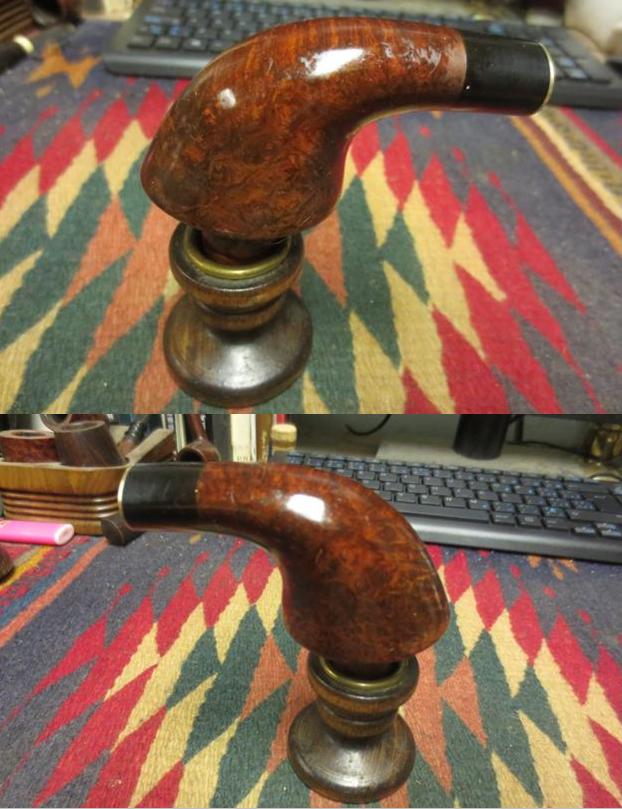
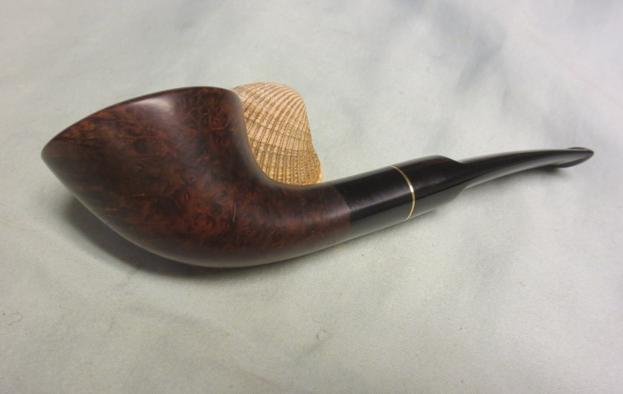
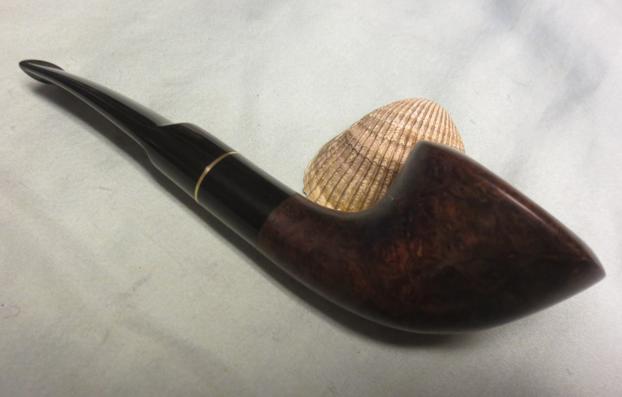
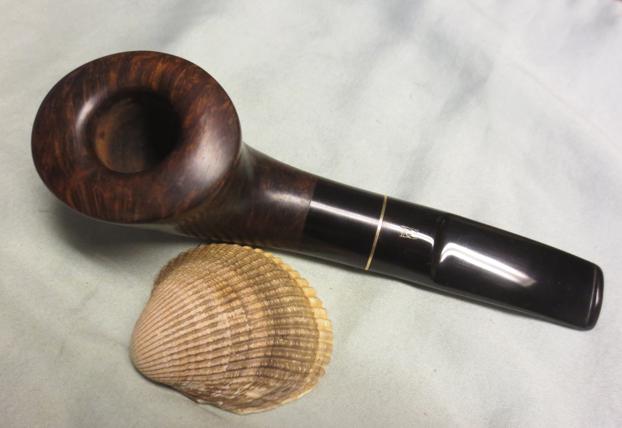
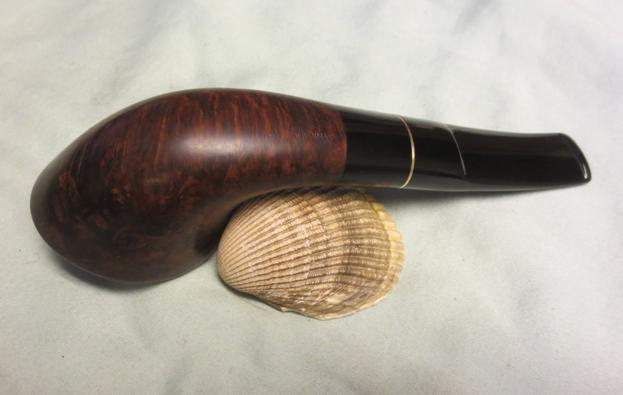
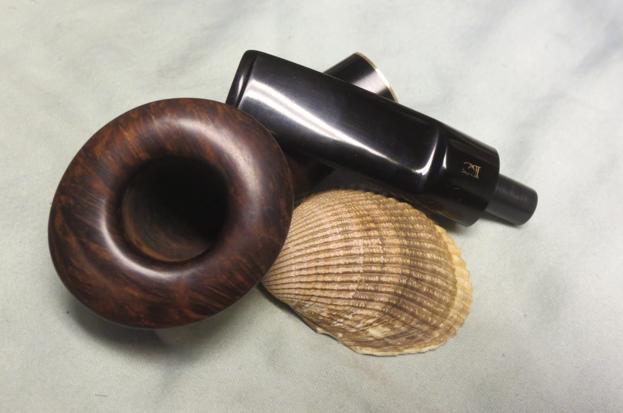
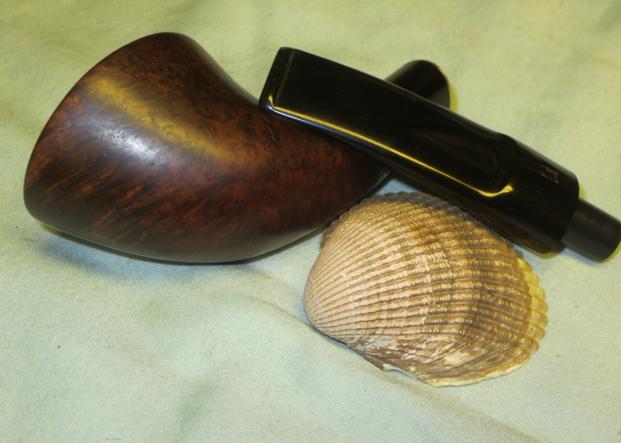
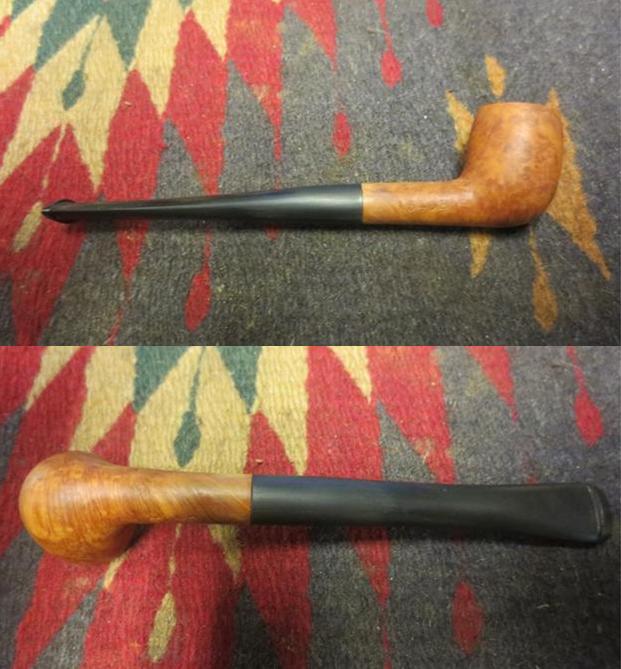
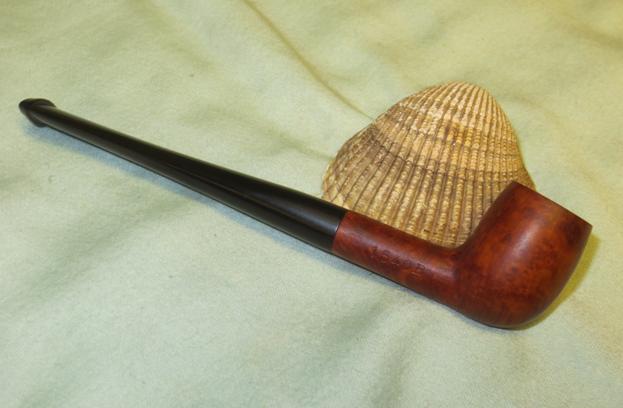
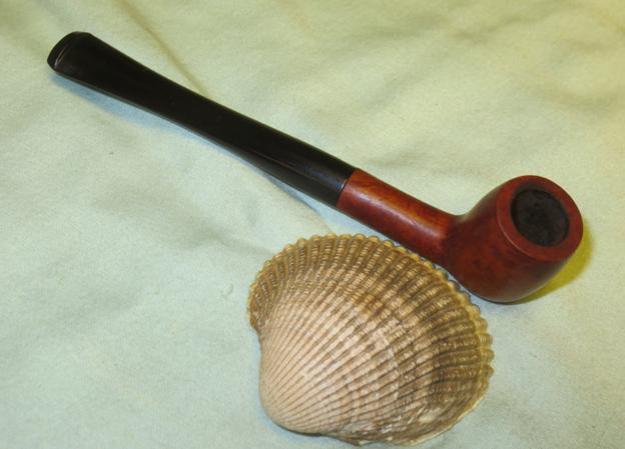
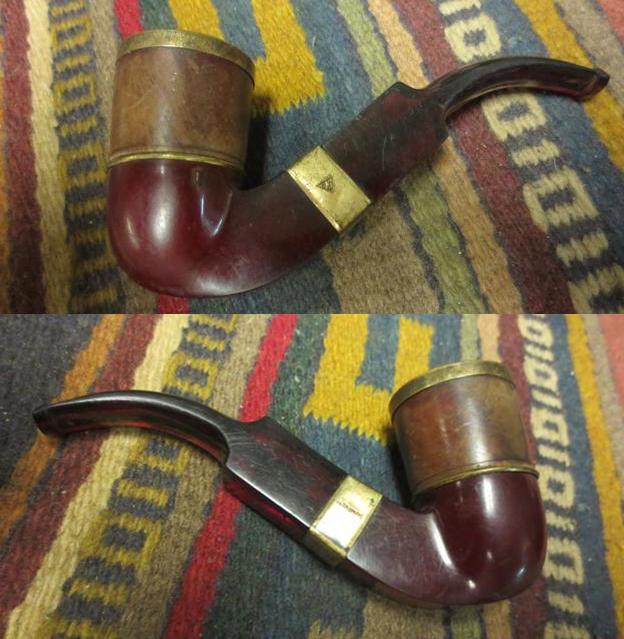
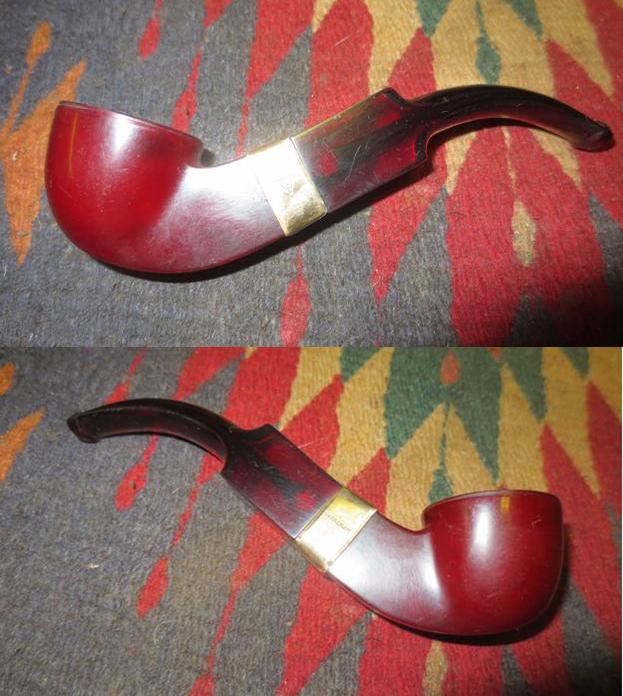
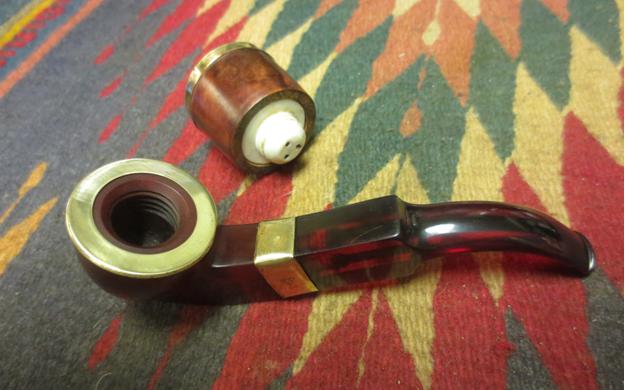
 I polished the bowl and stem with Blue Diamond on the buffing wheel. I buffed out the scratches in the stem and the briar. I gave the bowl and stem multiple coats of carnauba wax to protect it. I buffed it with a clean buffing wheel to raise the shine. I hand buffed the pipe with a microfibre cloth to deepen the shine. The finished pipe is shown in the photos below.
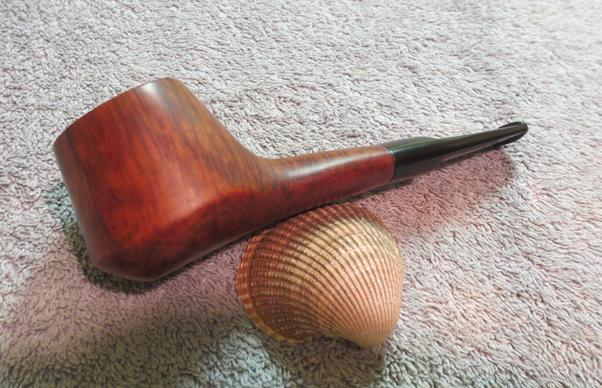


