Tag Archives: repairing tooth marks

Cleaning Up a Brigham One Dot Acorn 778


Blog by Steve Laug

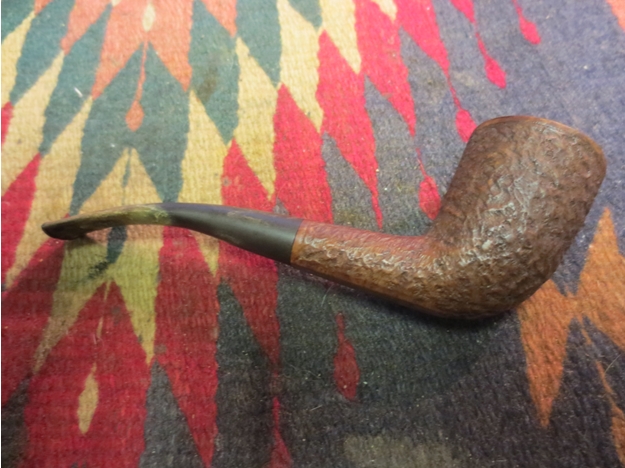
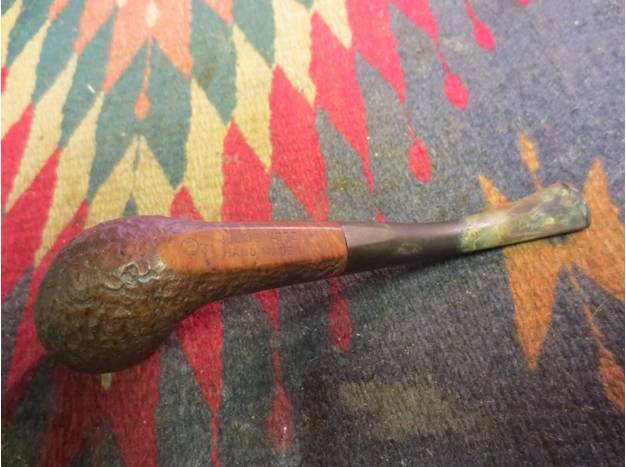
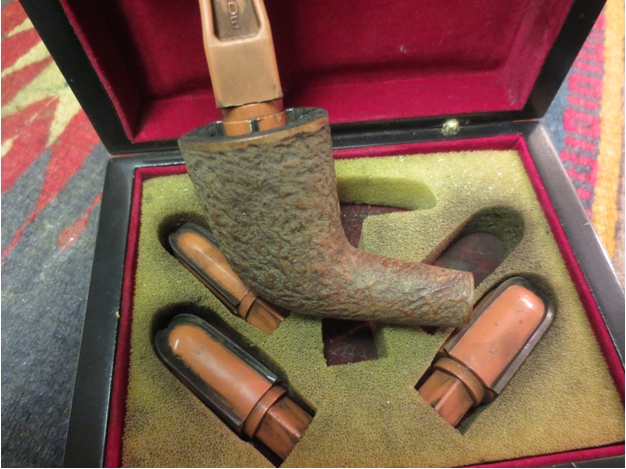
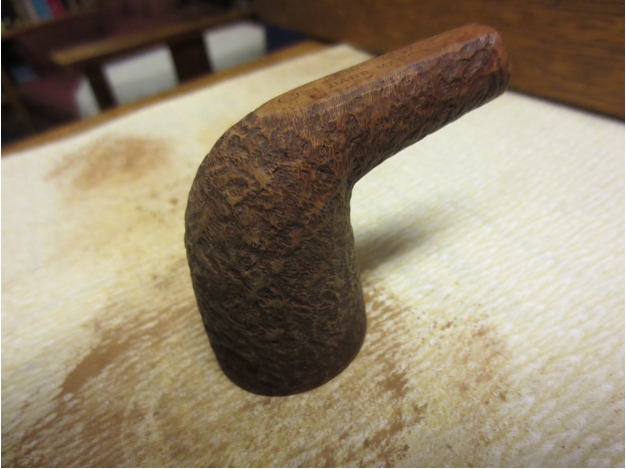
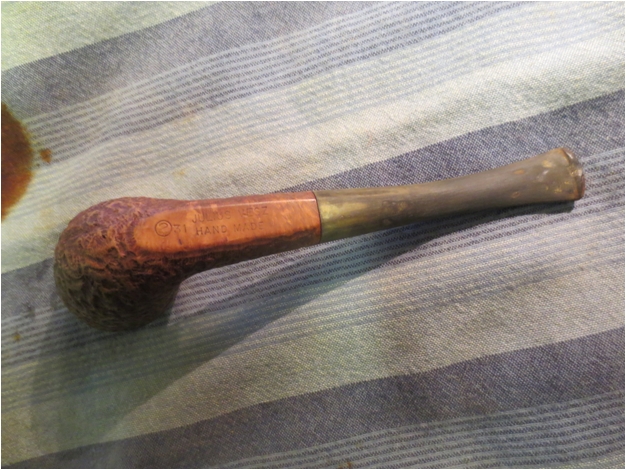
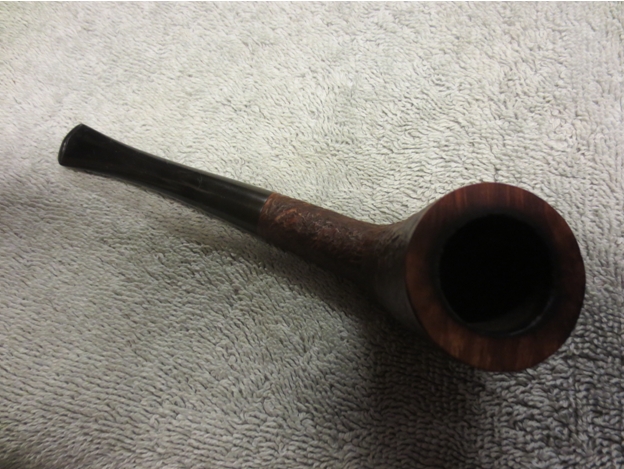
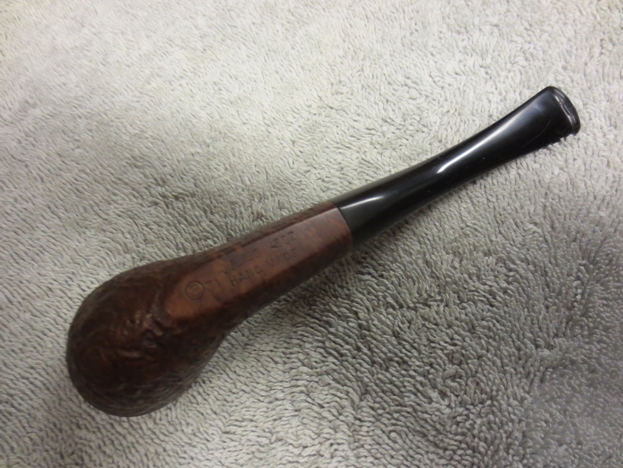
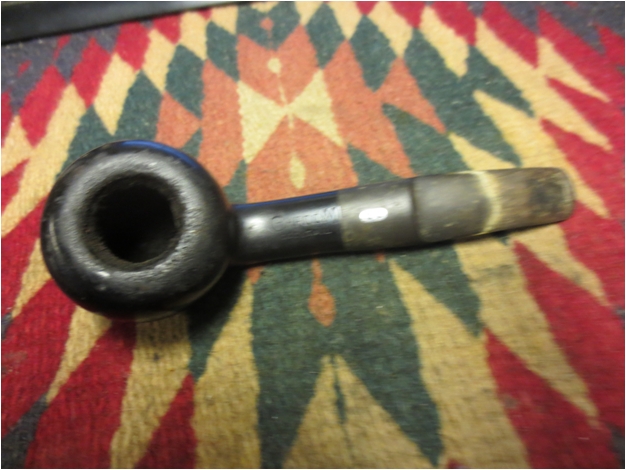
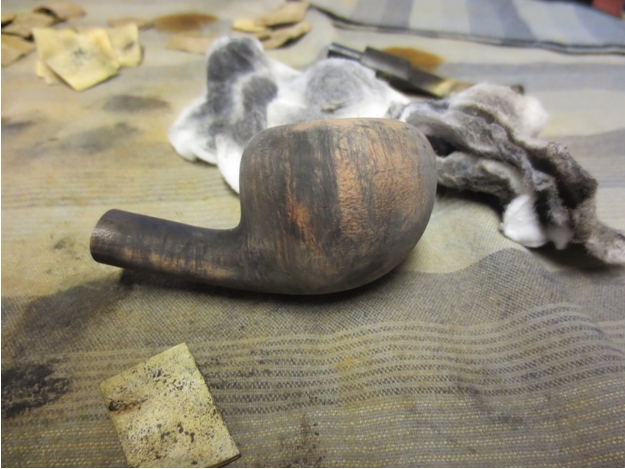
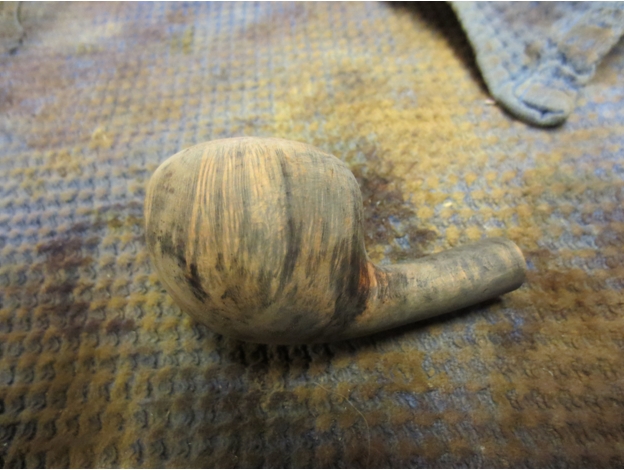
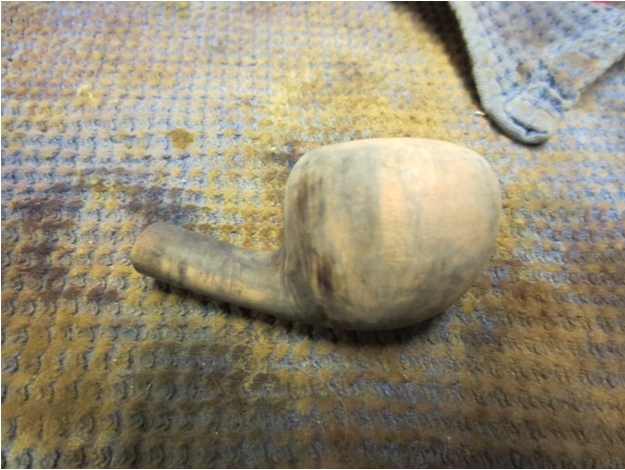
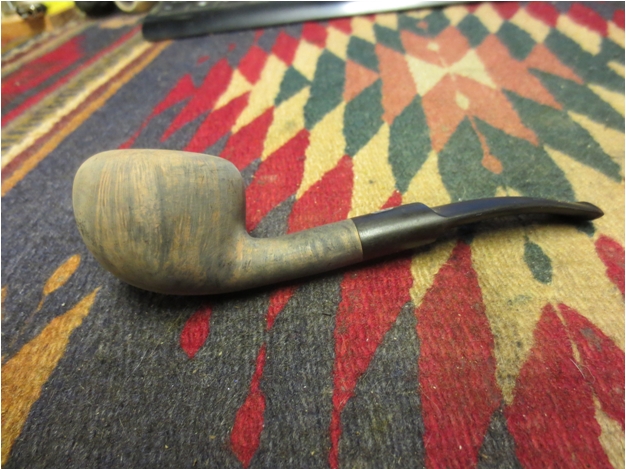
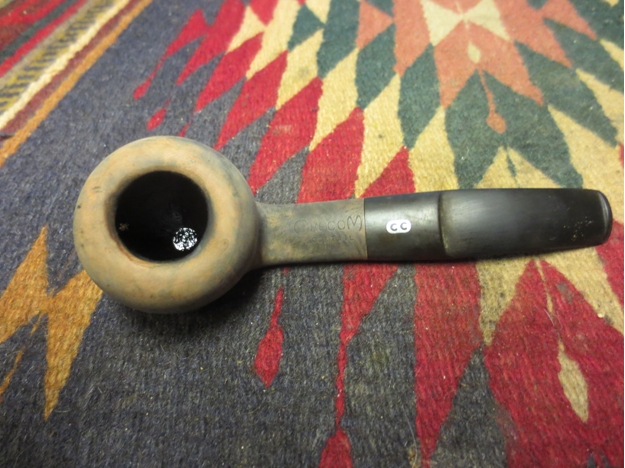
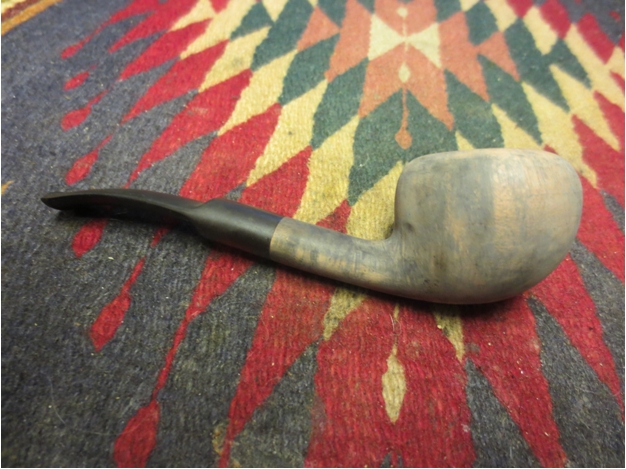
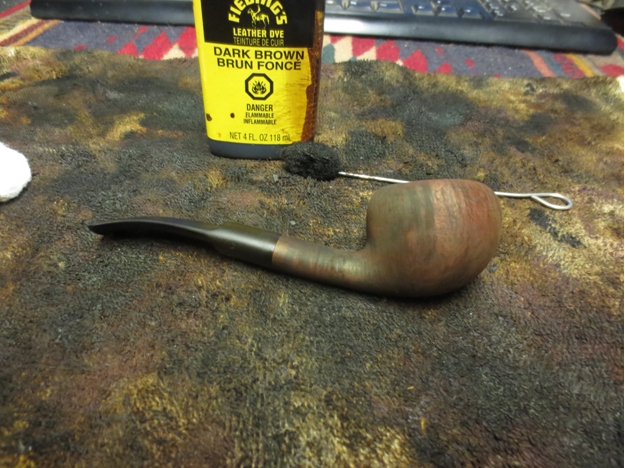
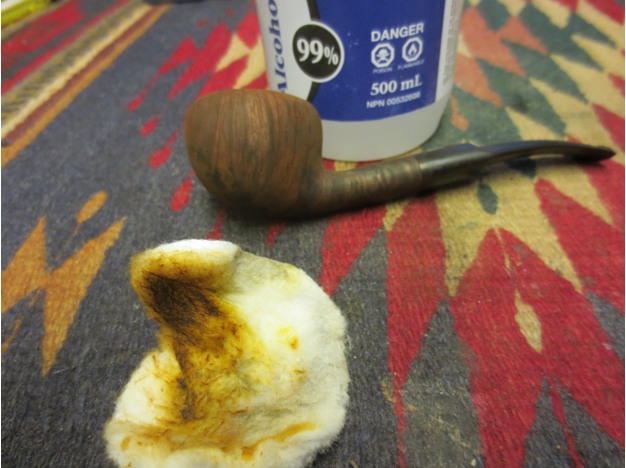
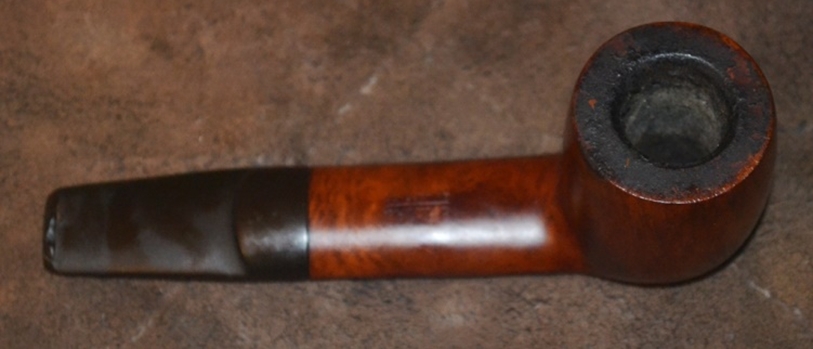
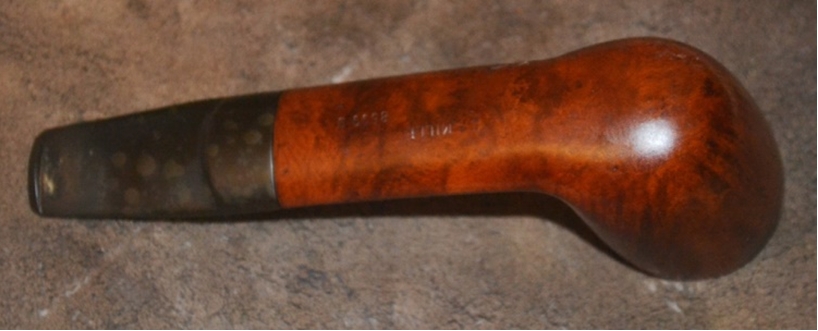
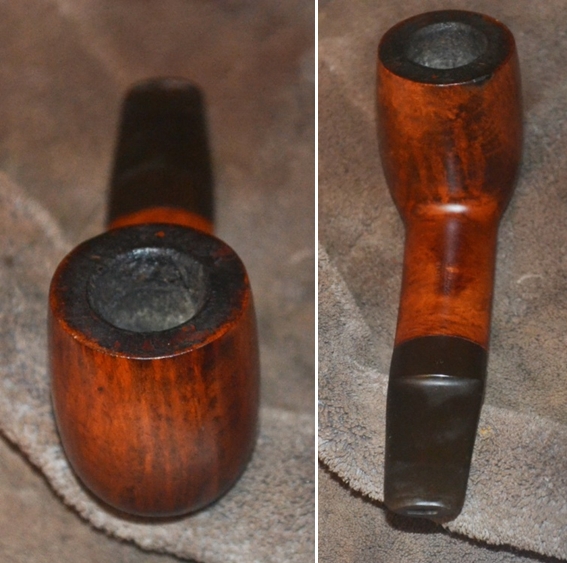
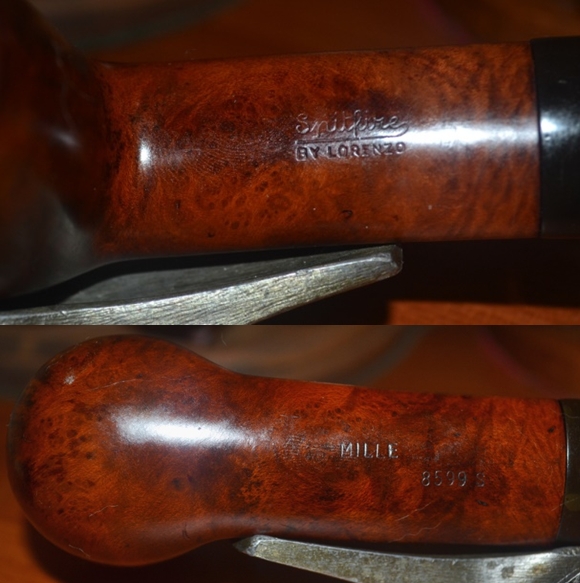
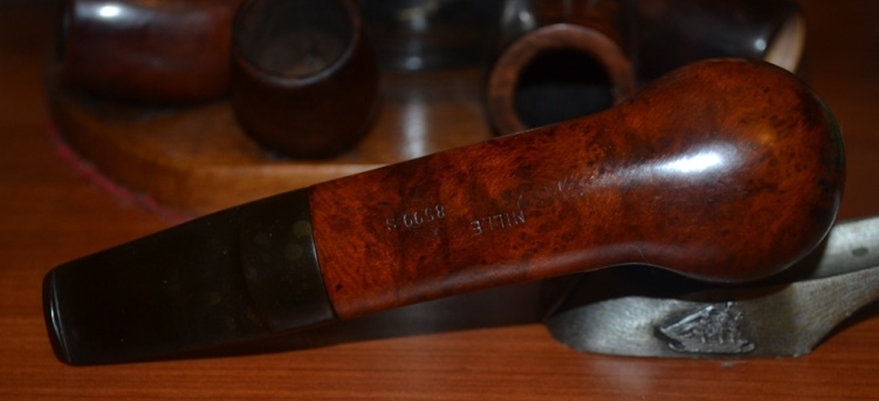
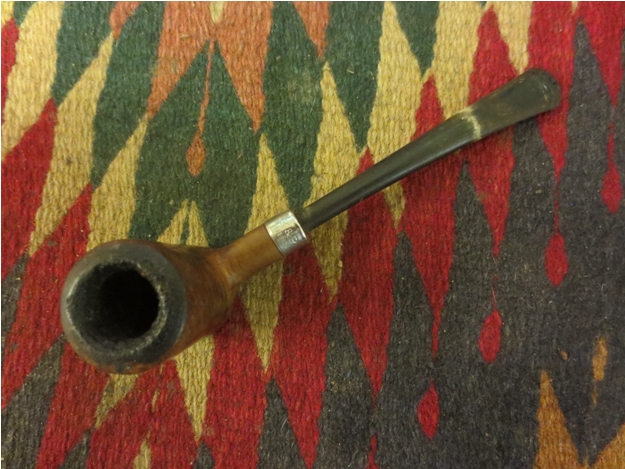
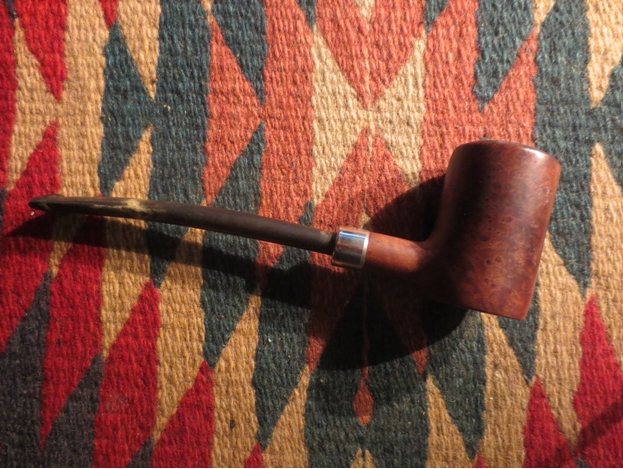
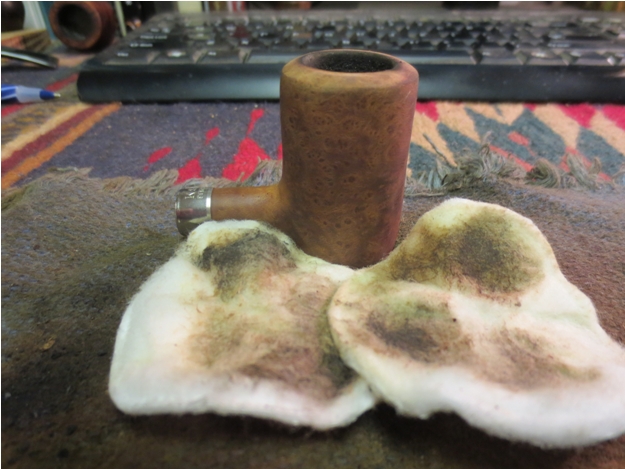
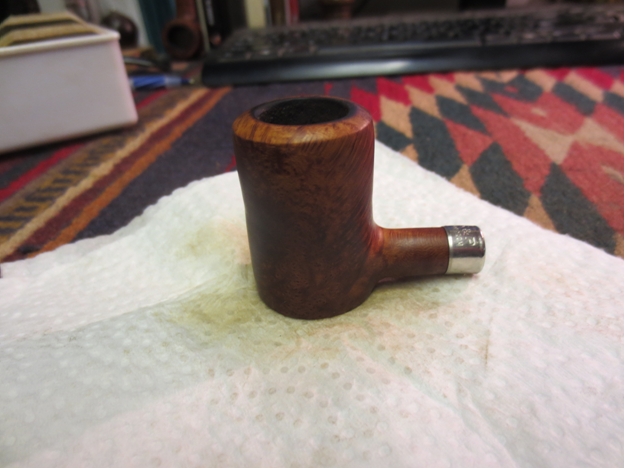
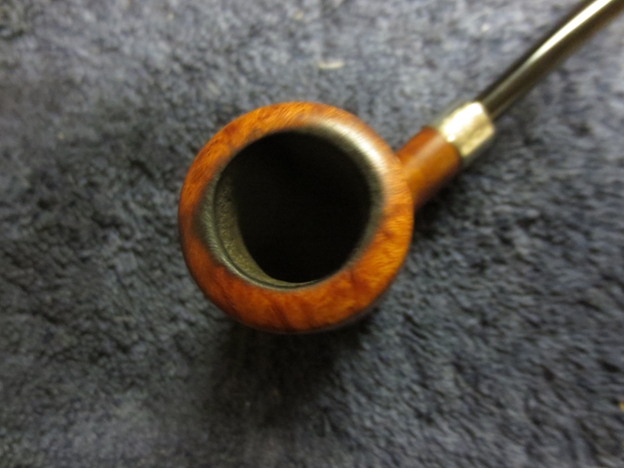
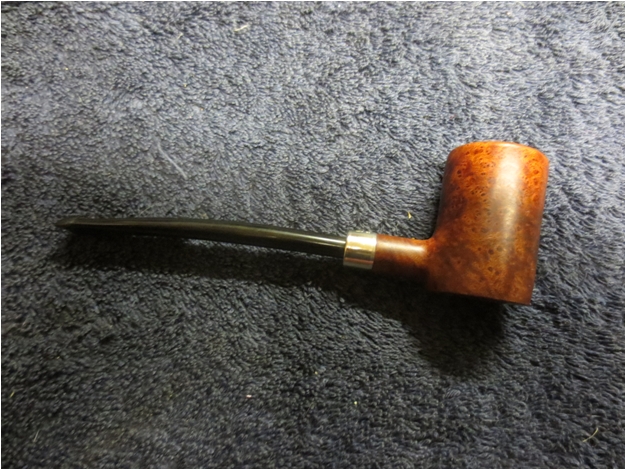
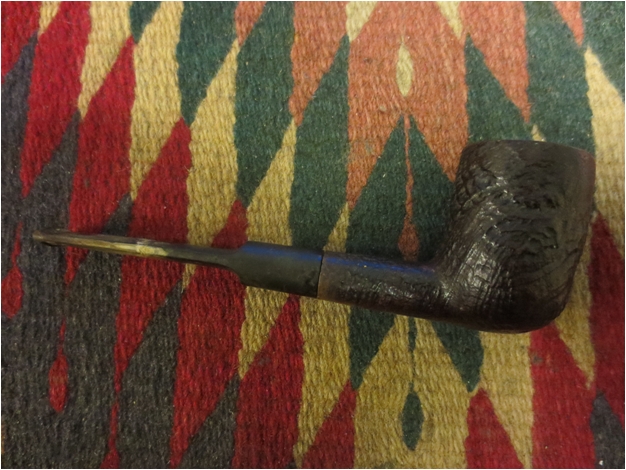
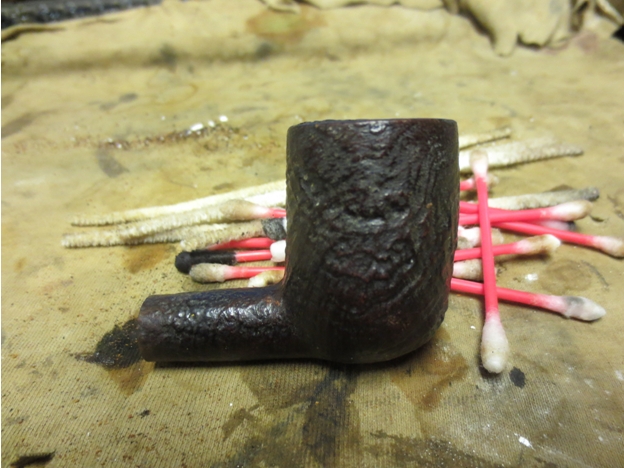
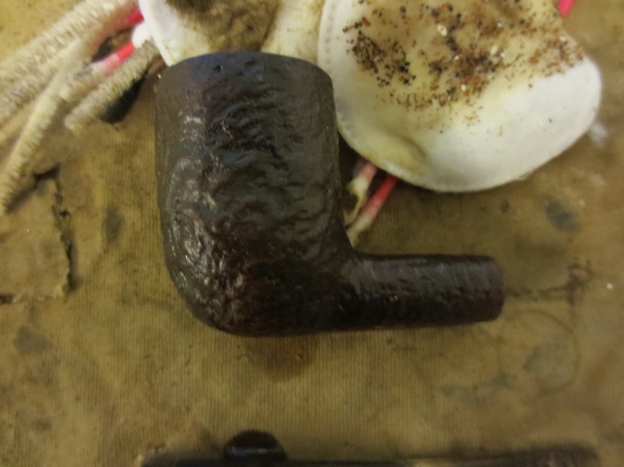
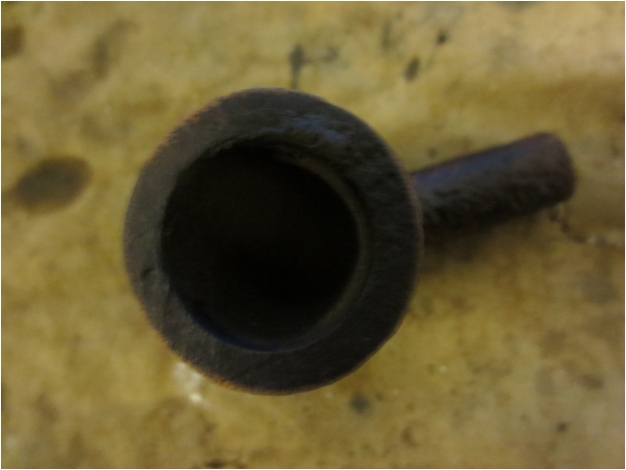
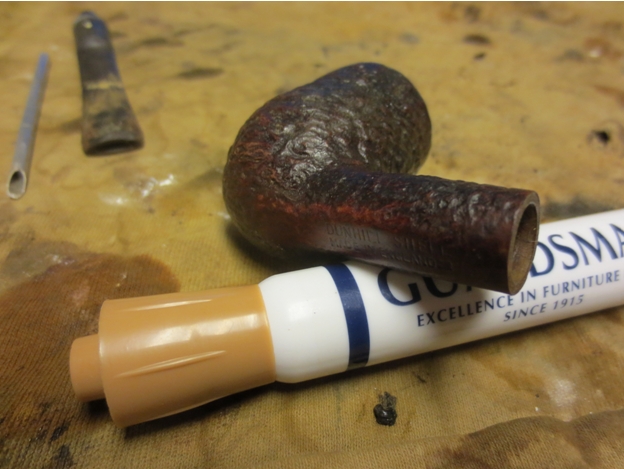
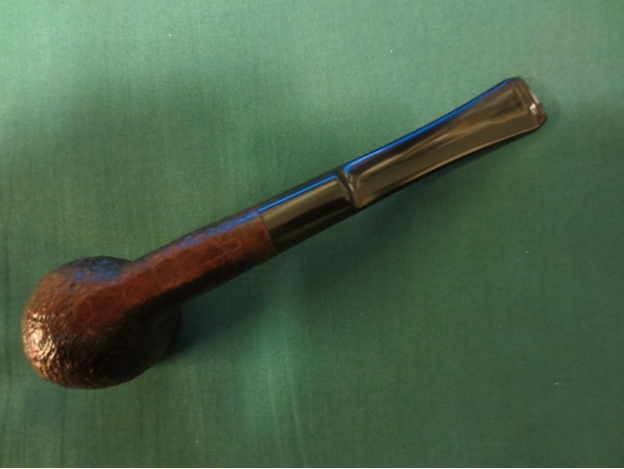
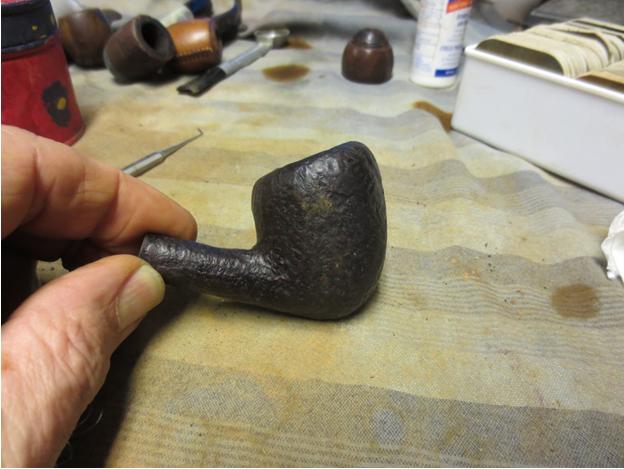
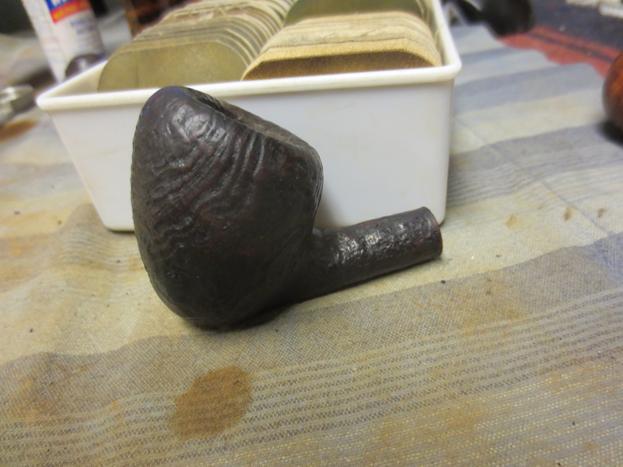
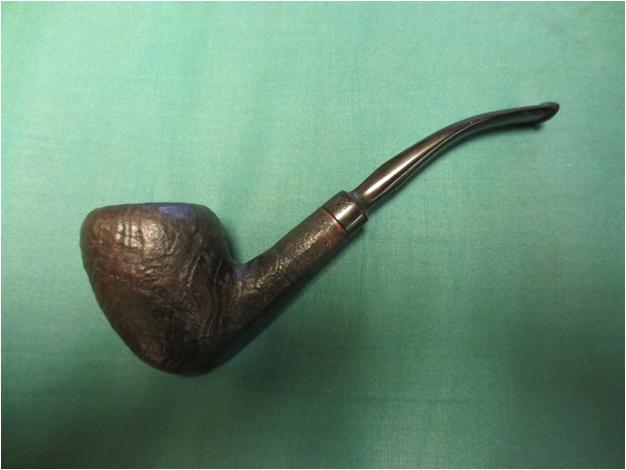
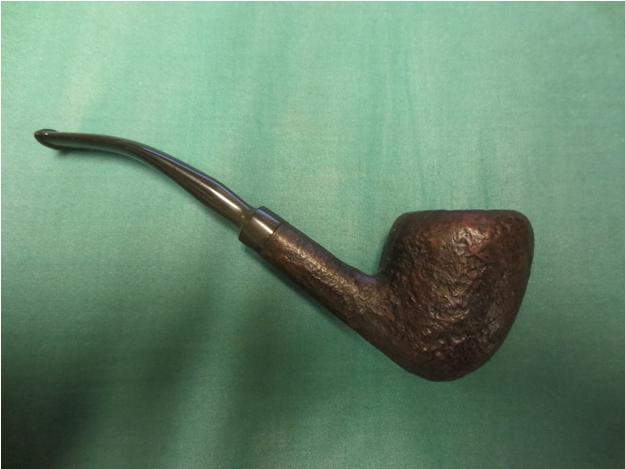
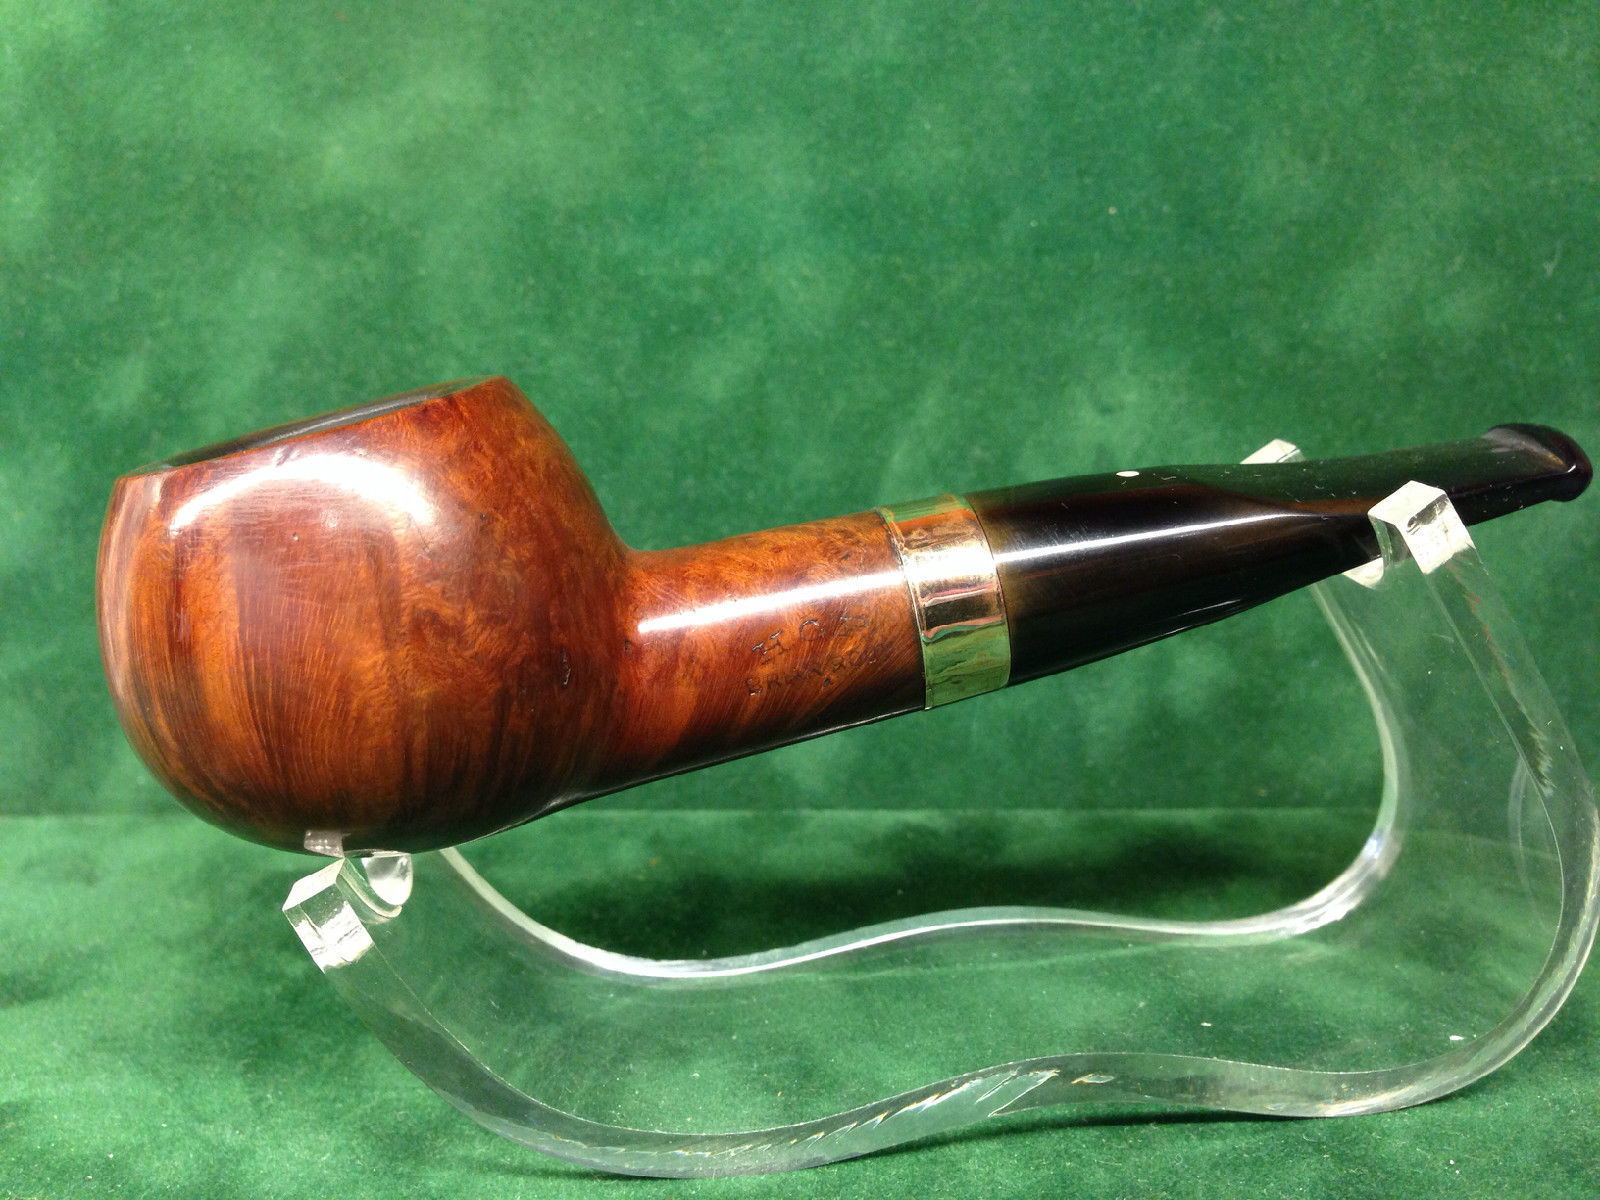
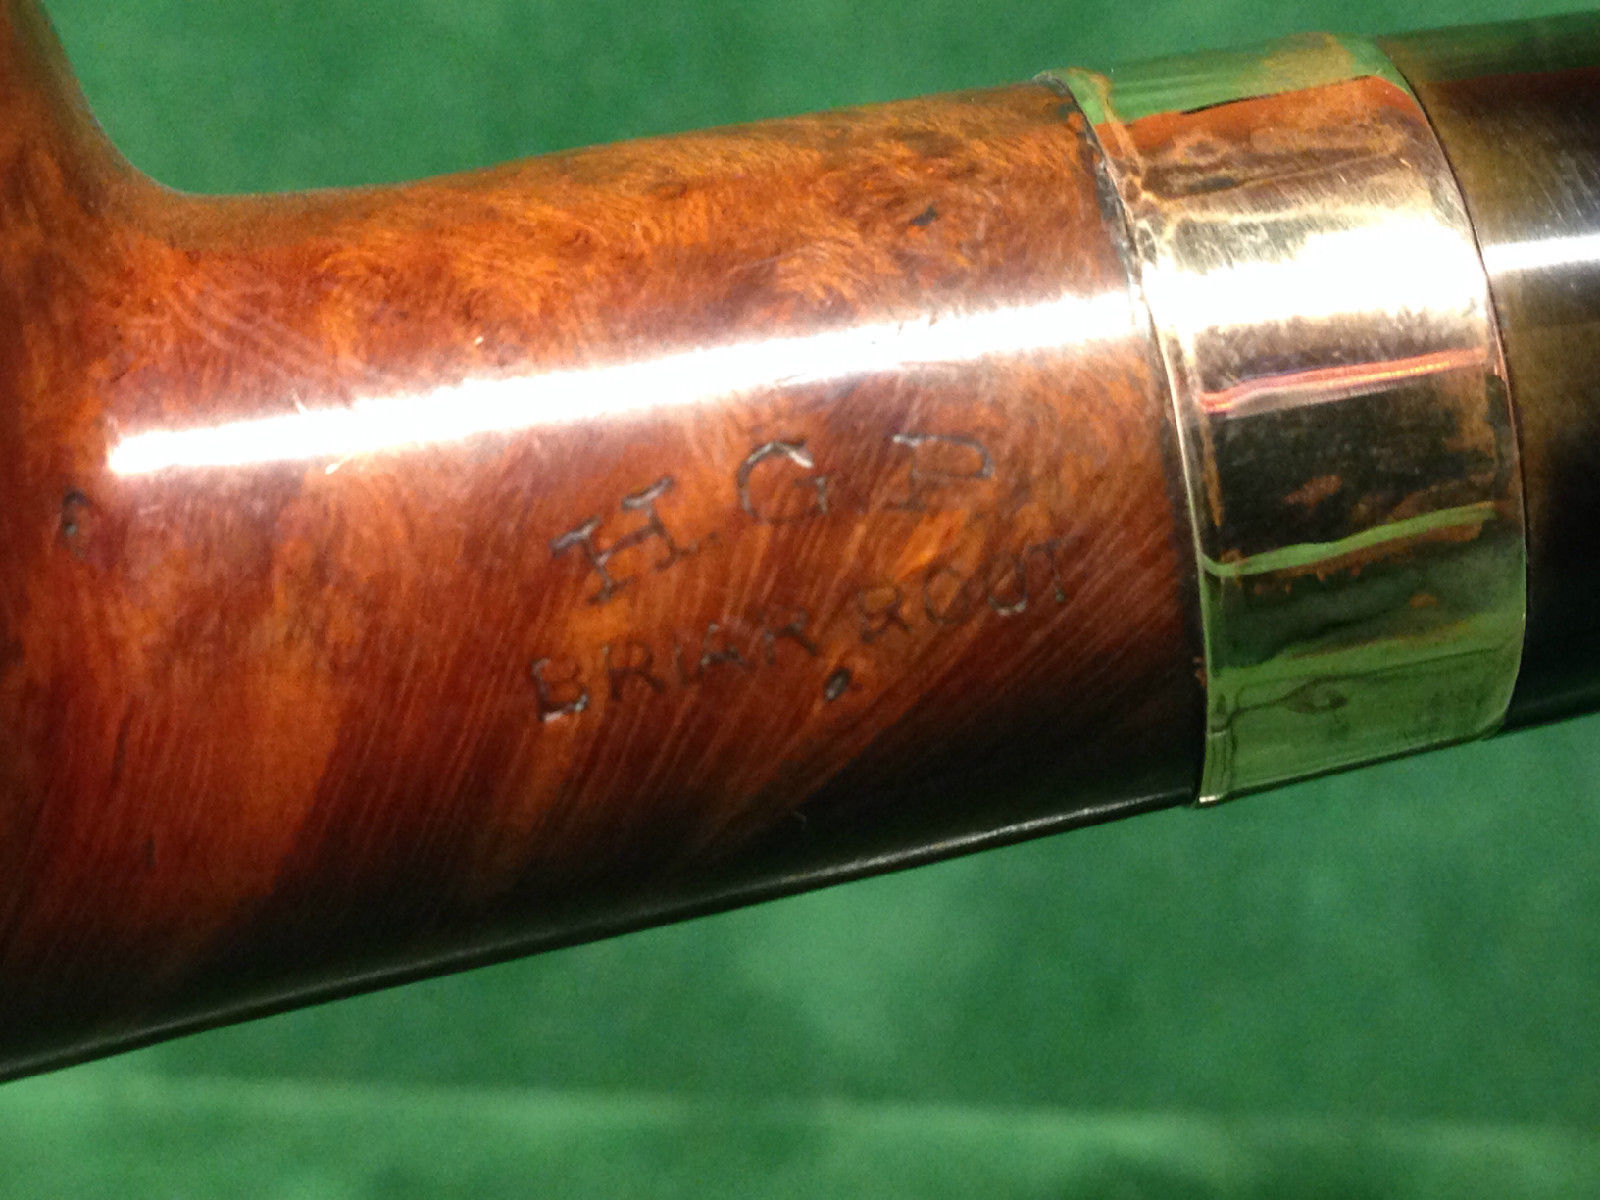
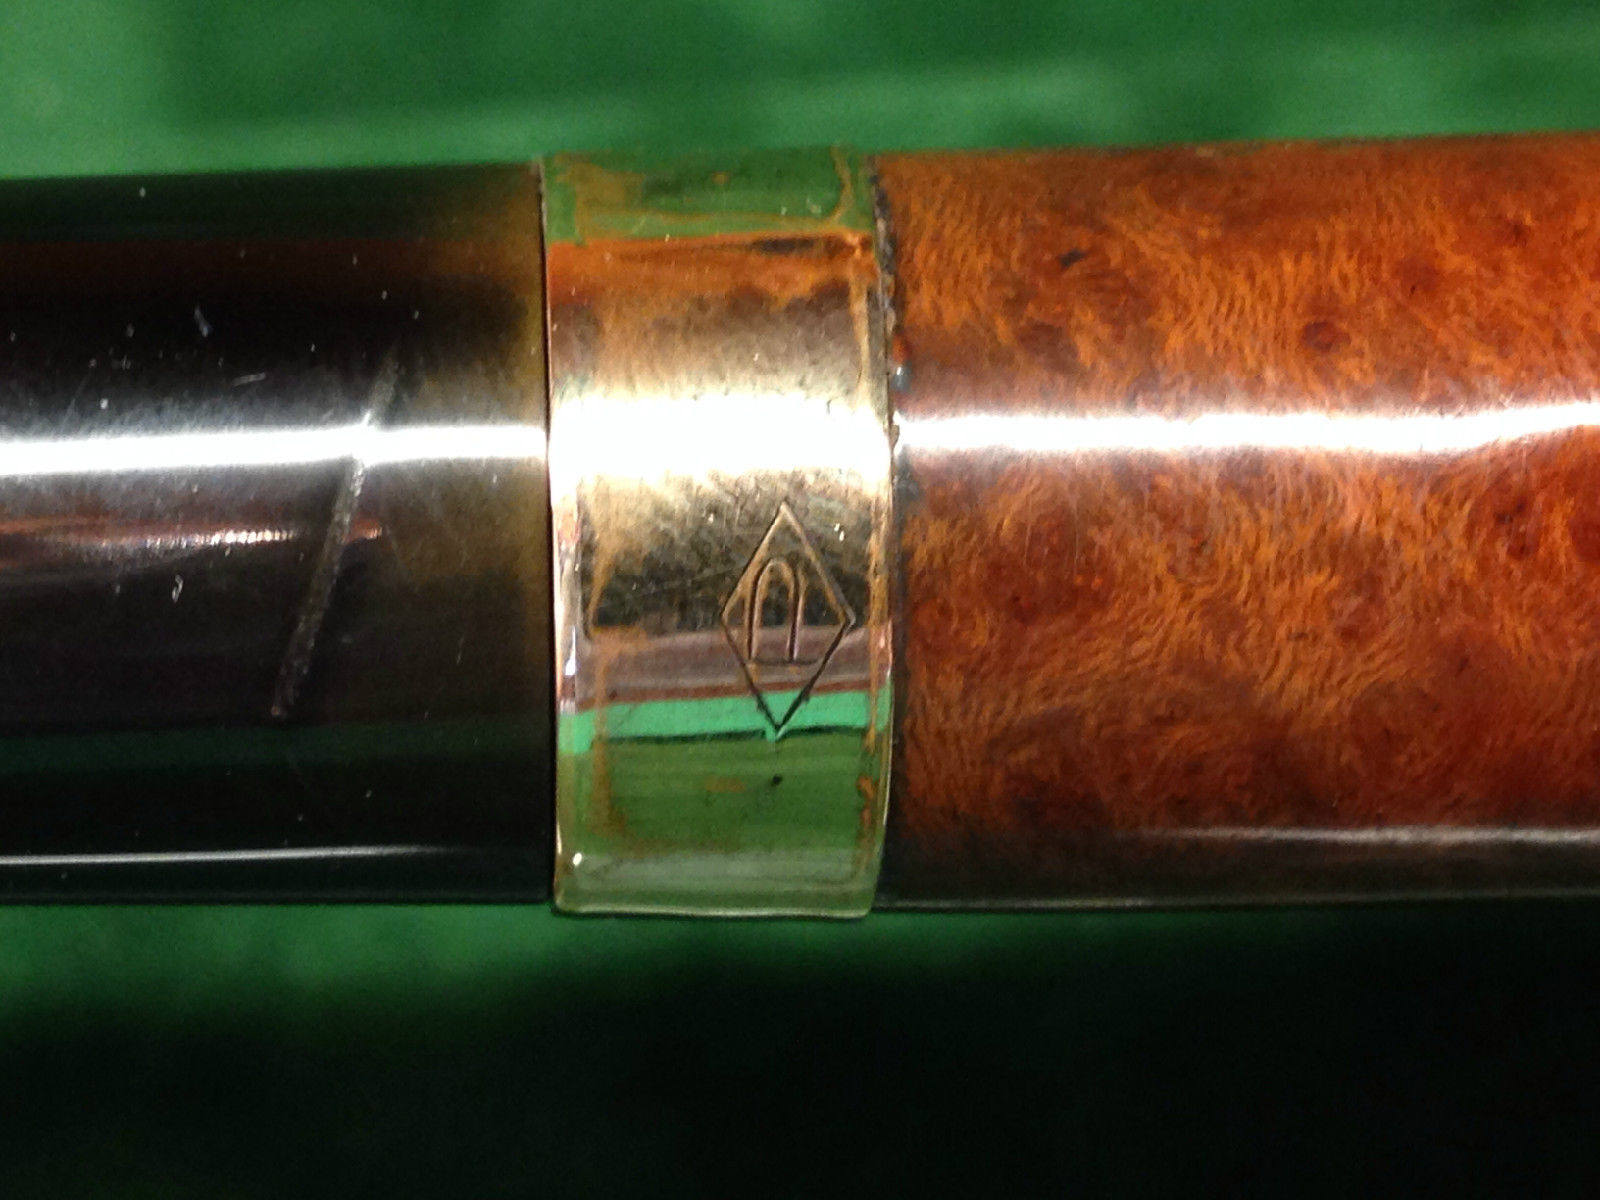
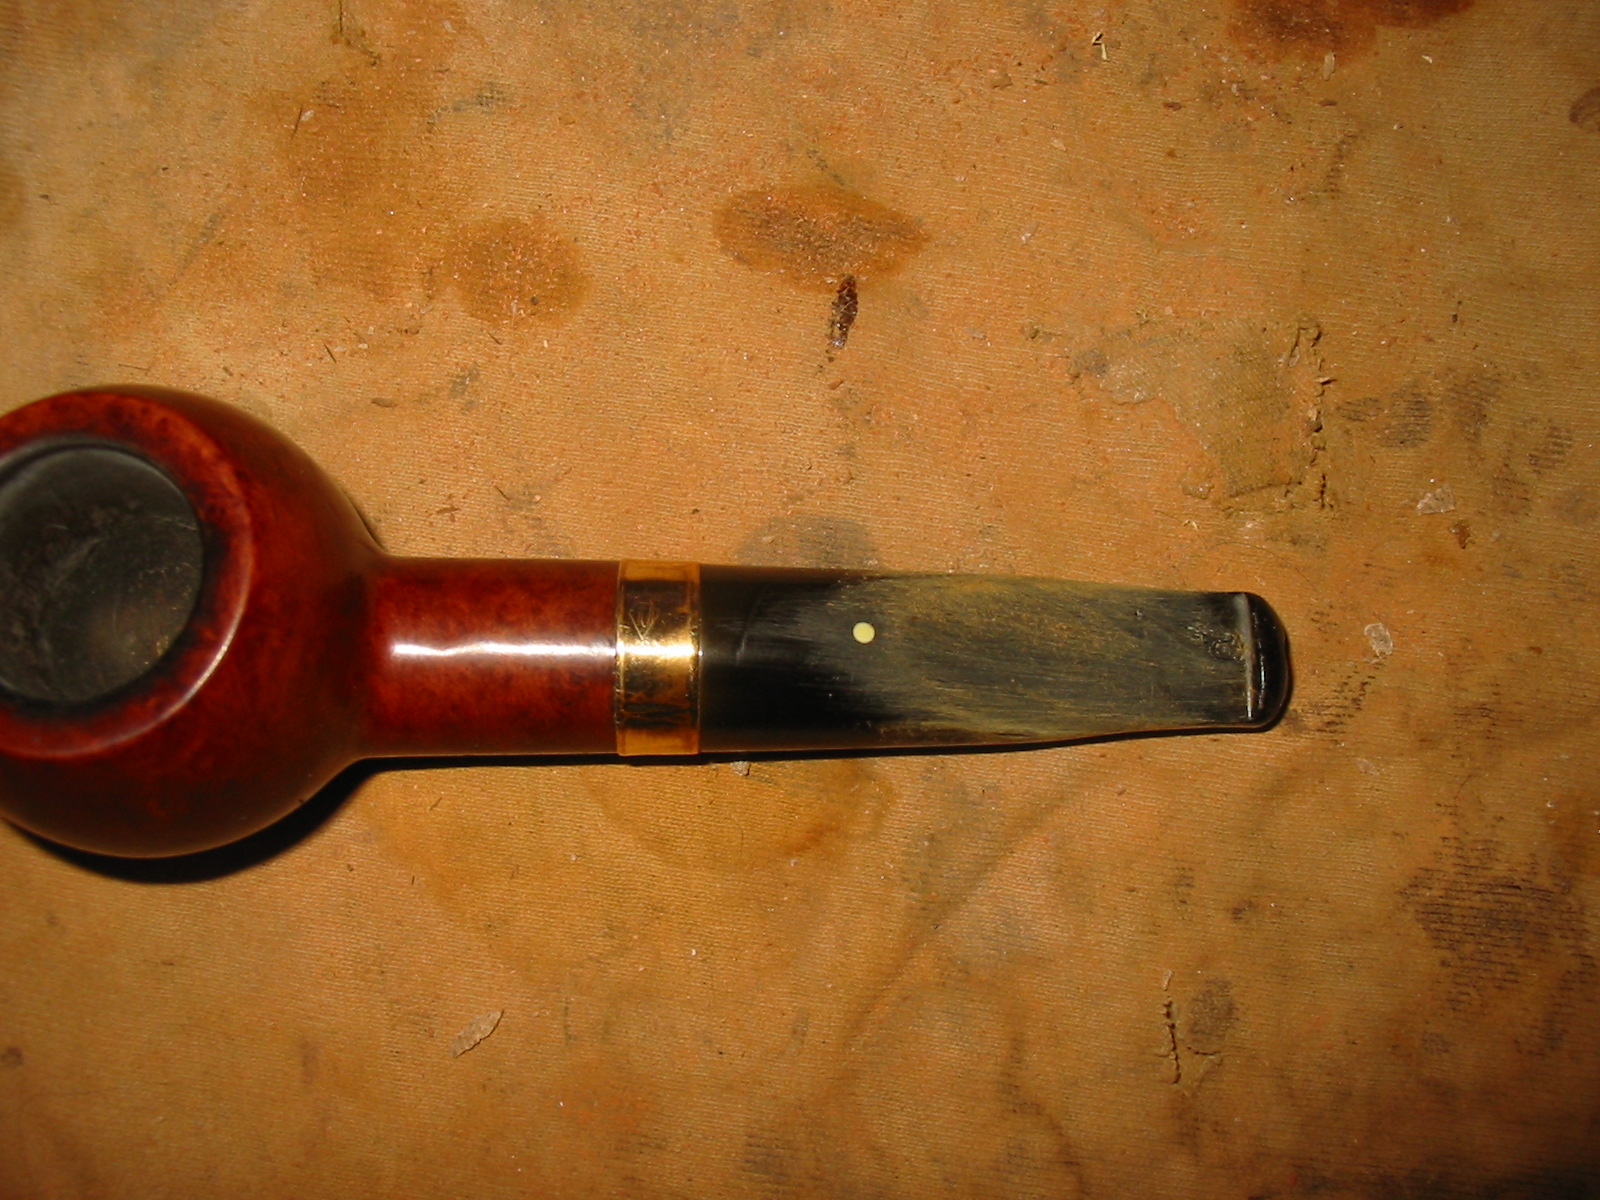
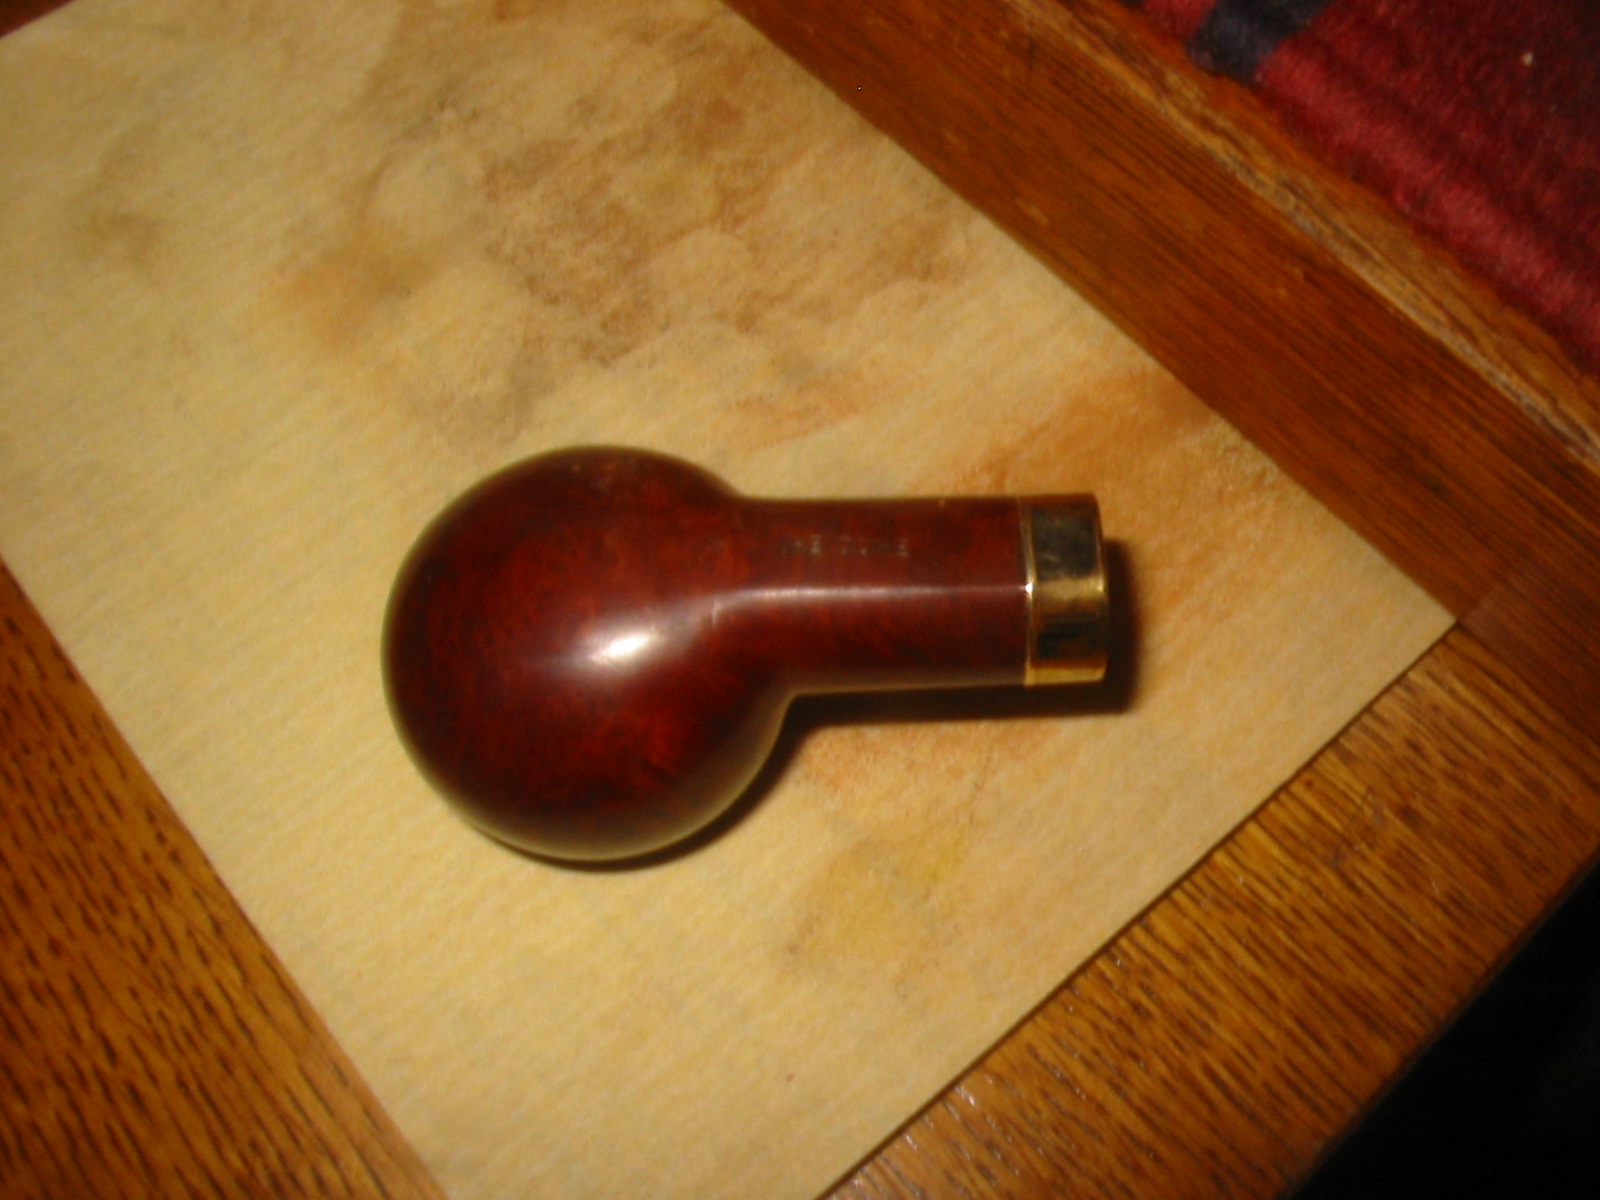
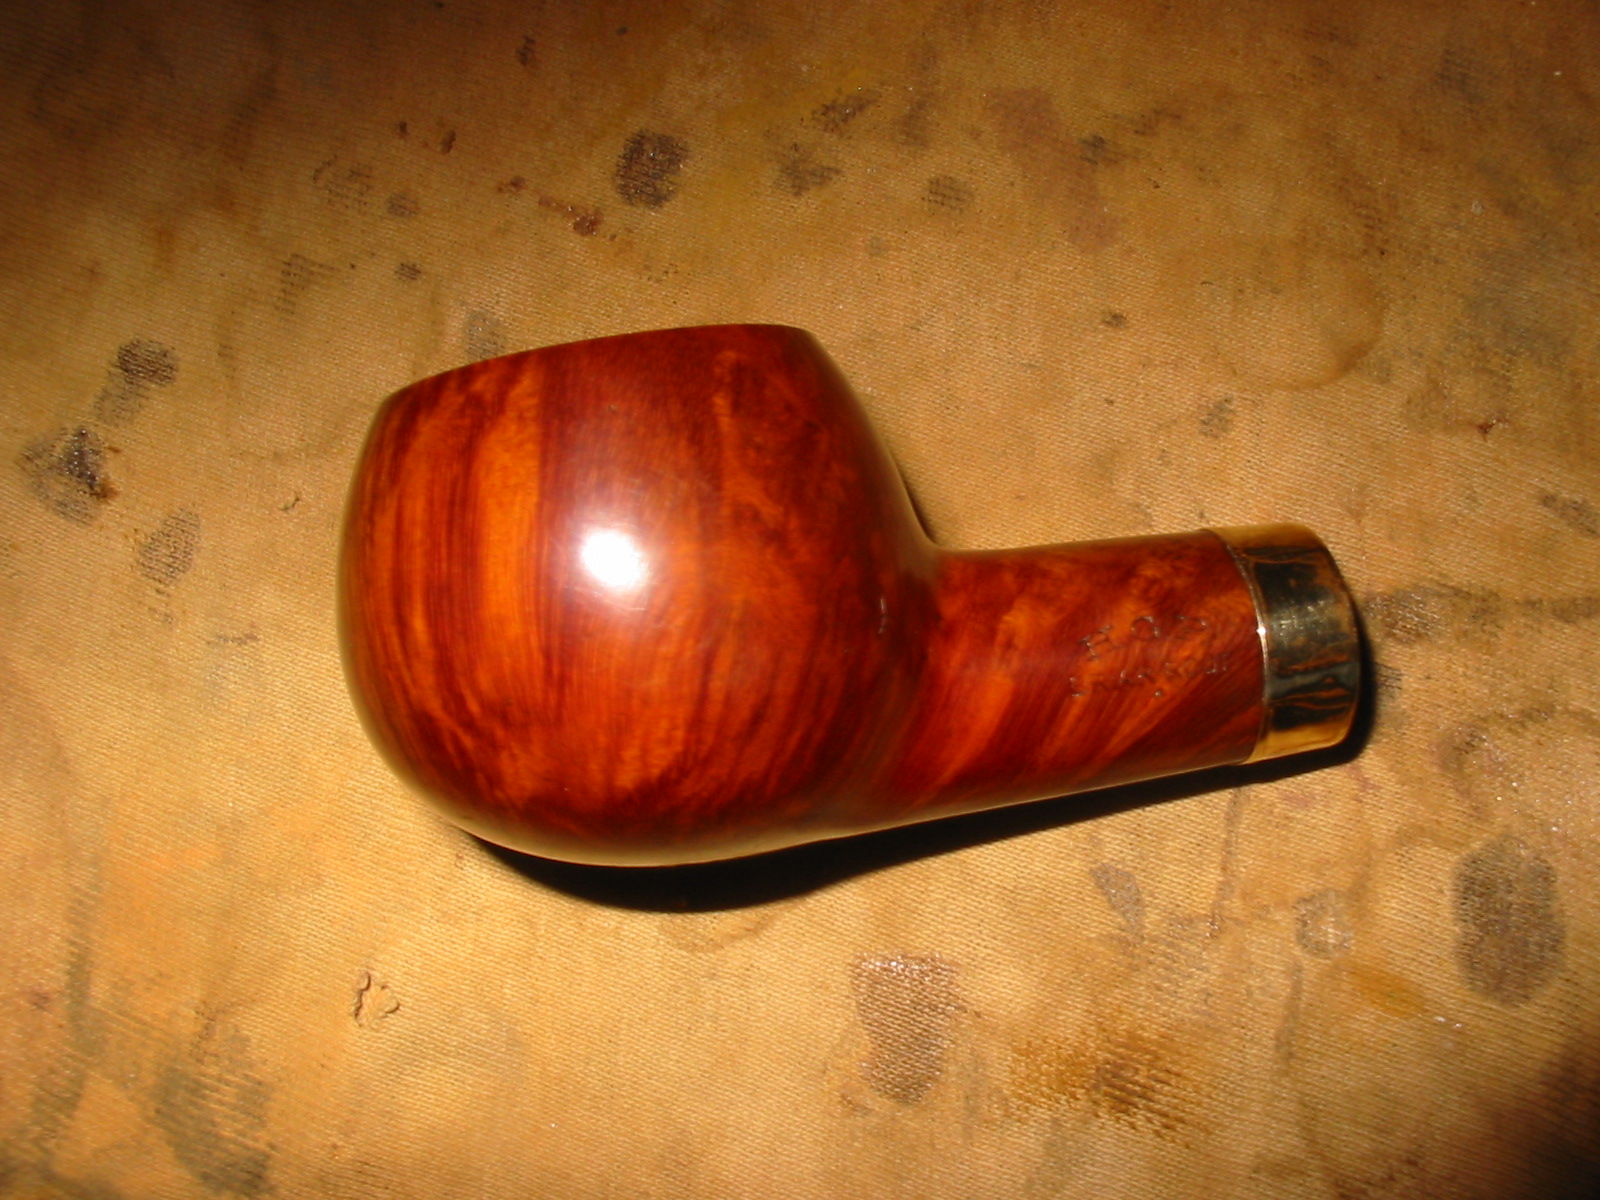
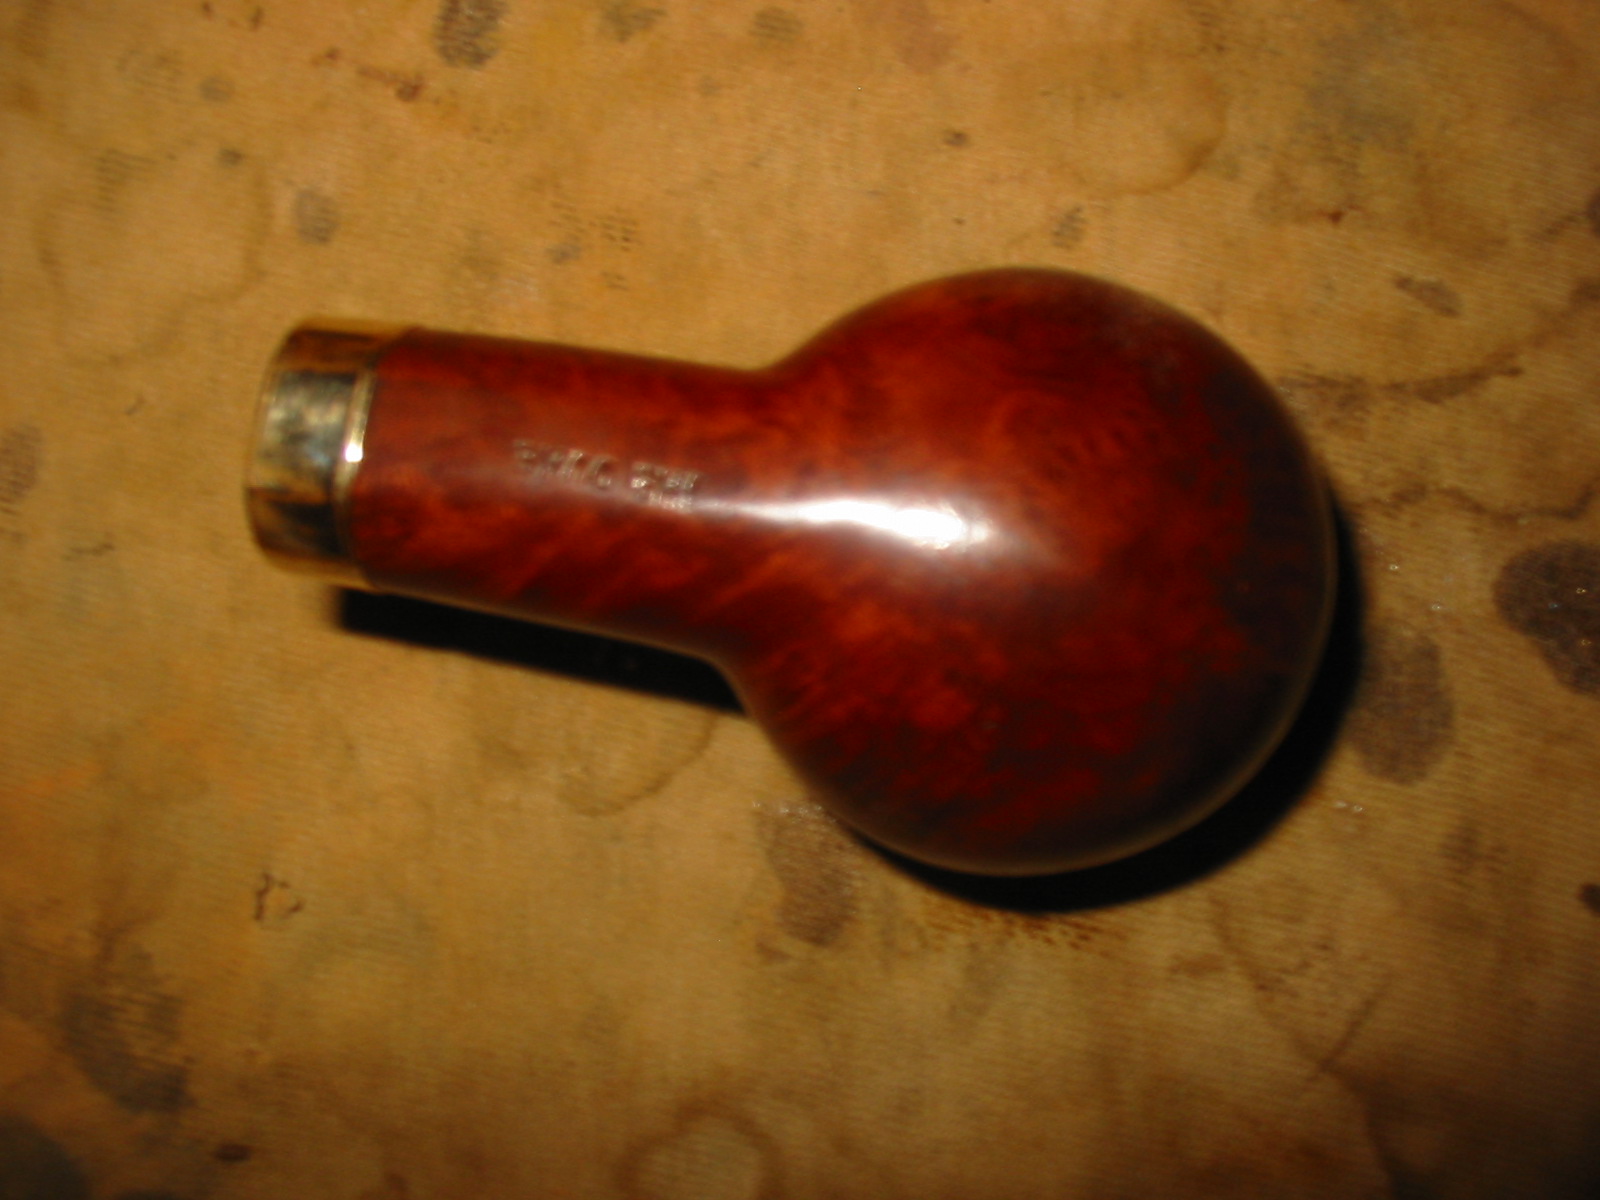
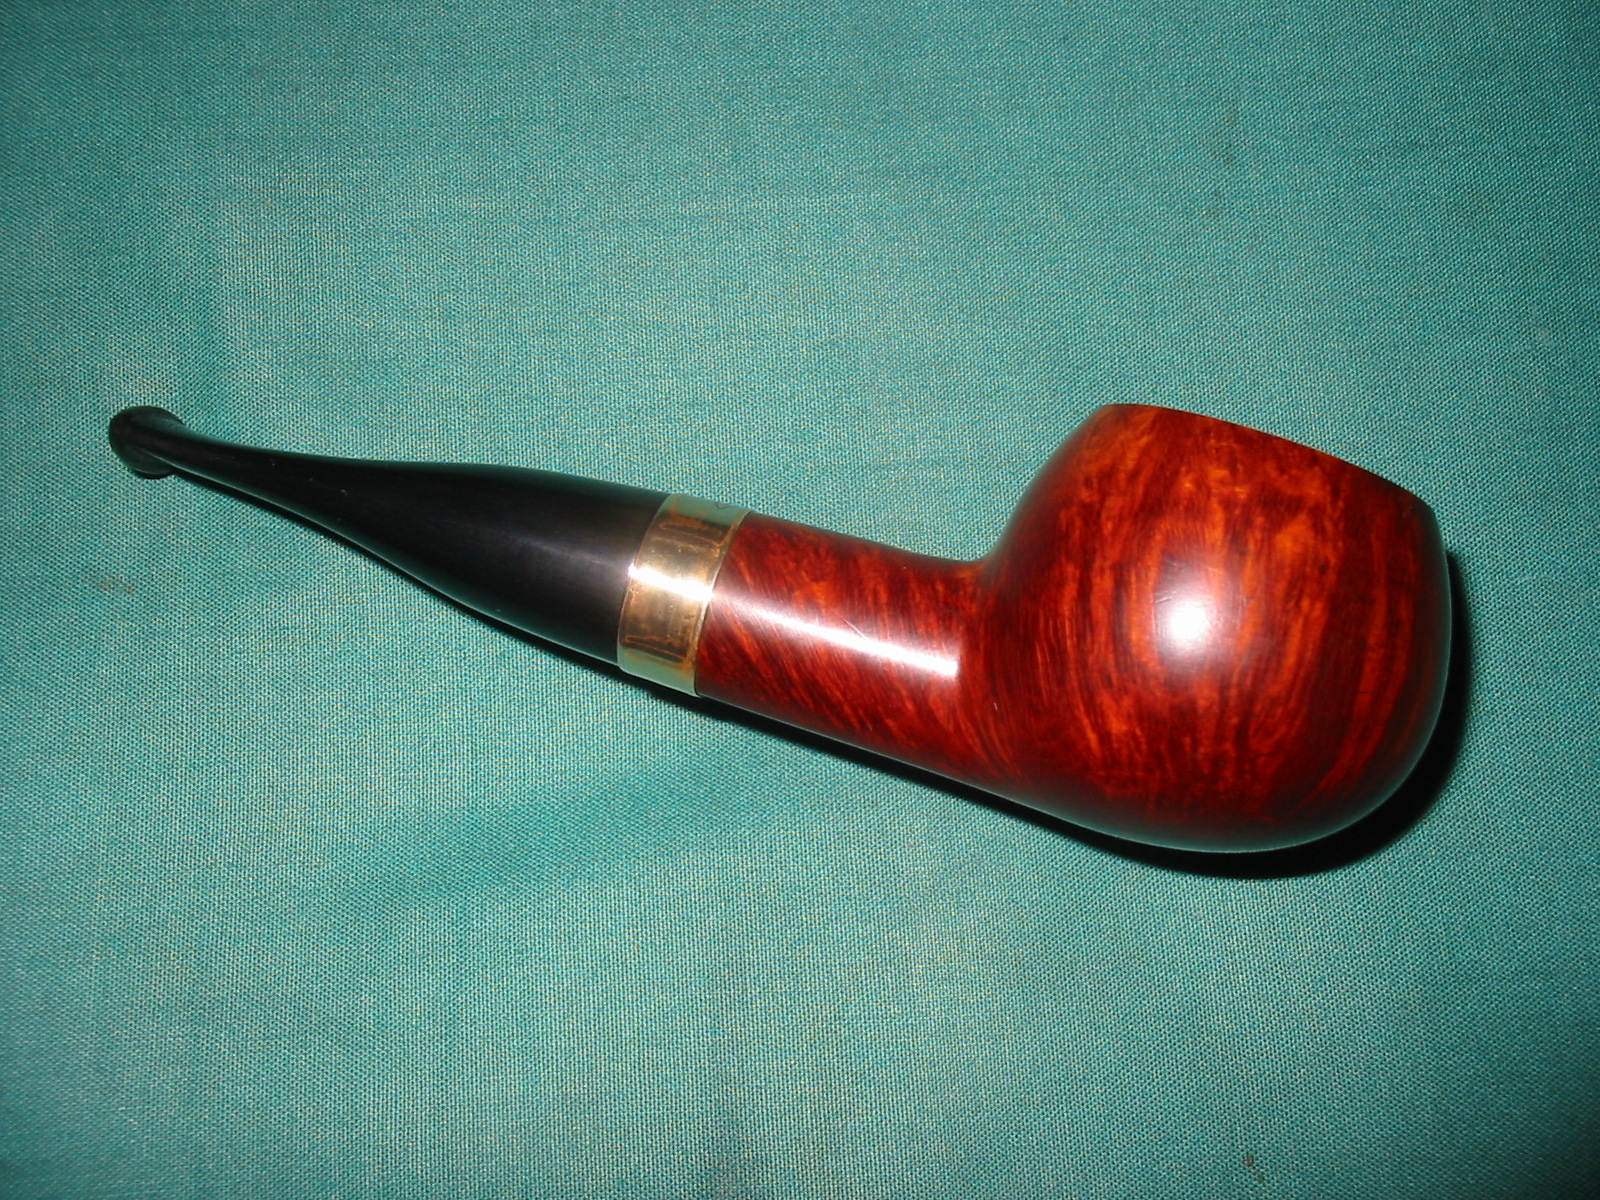
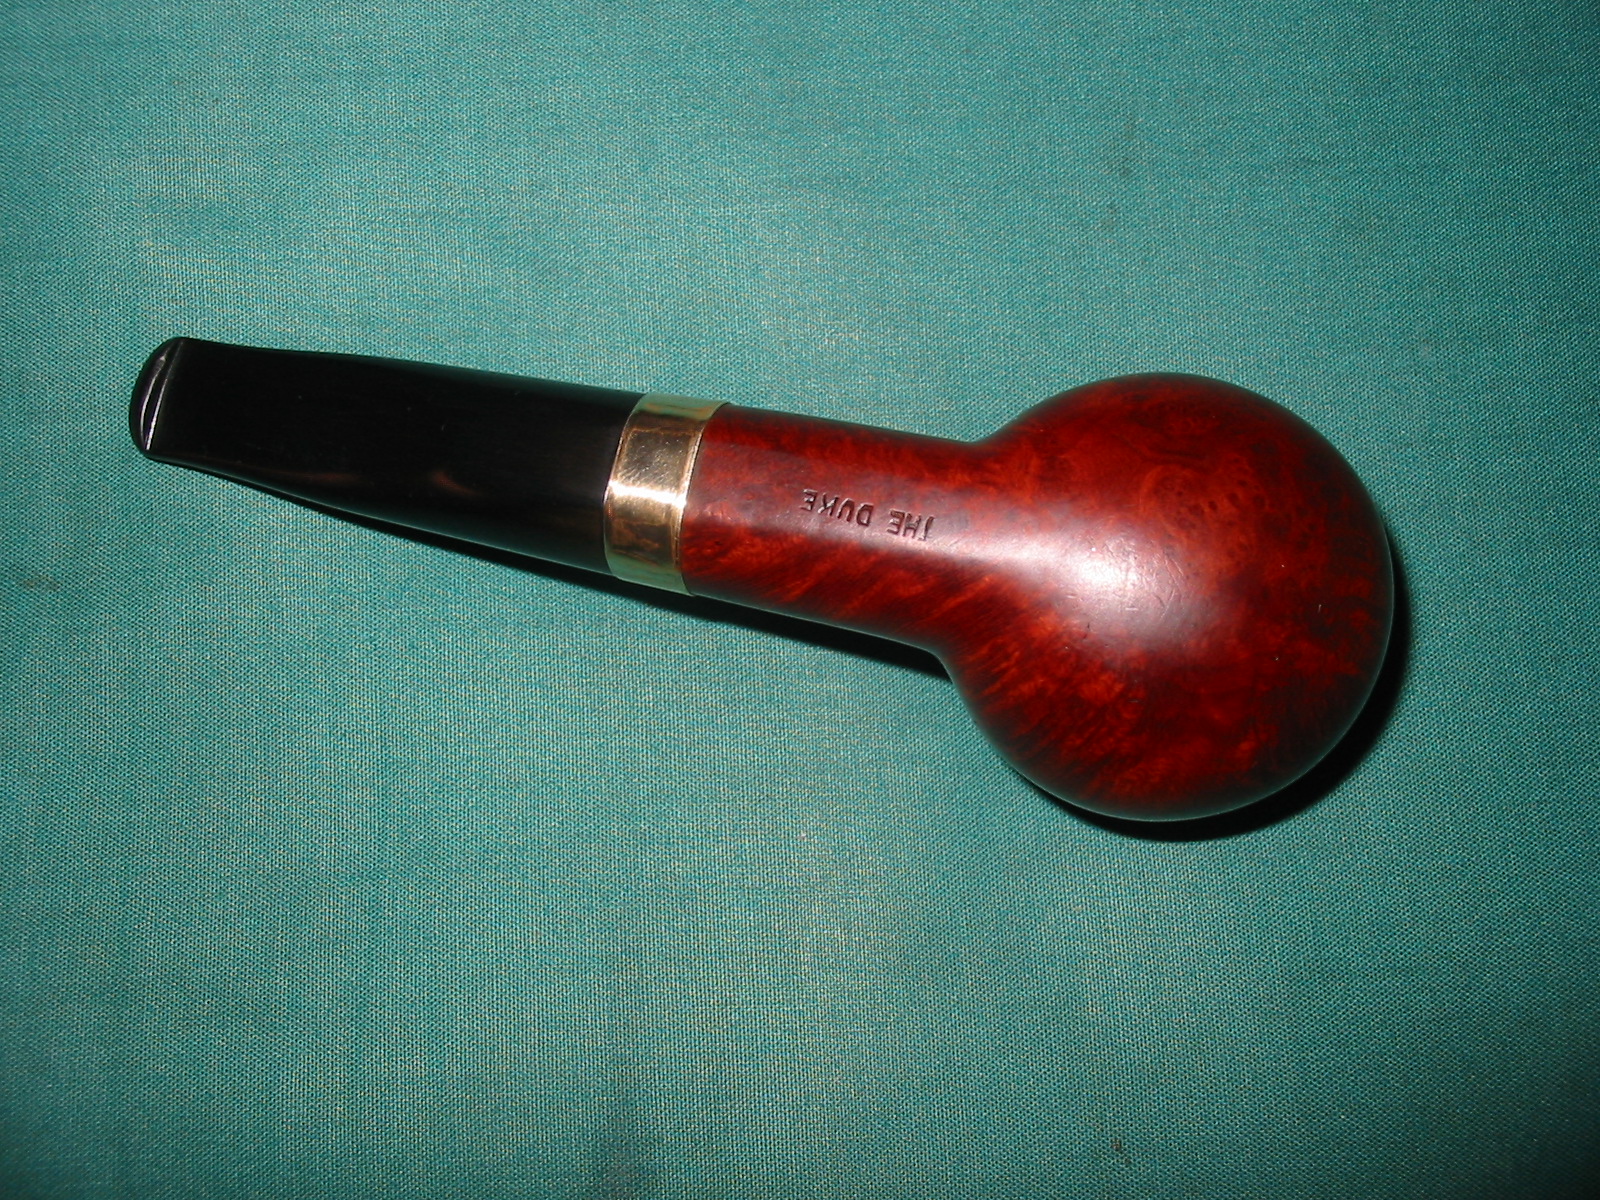
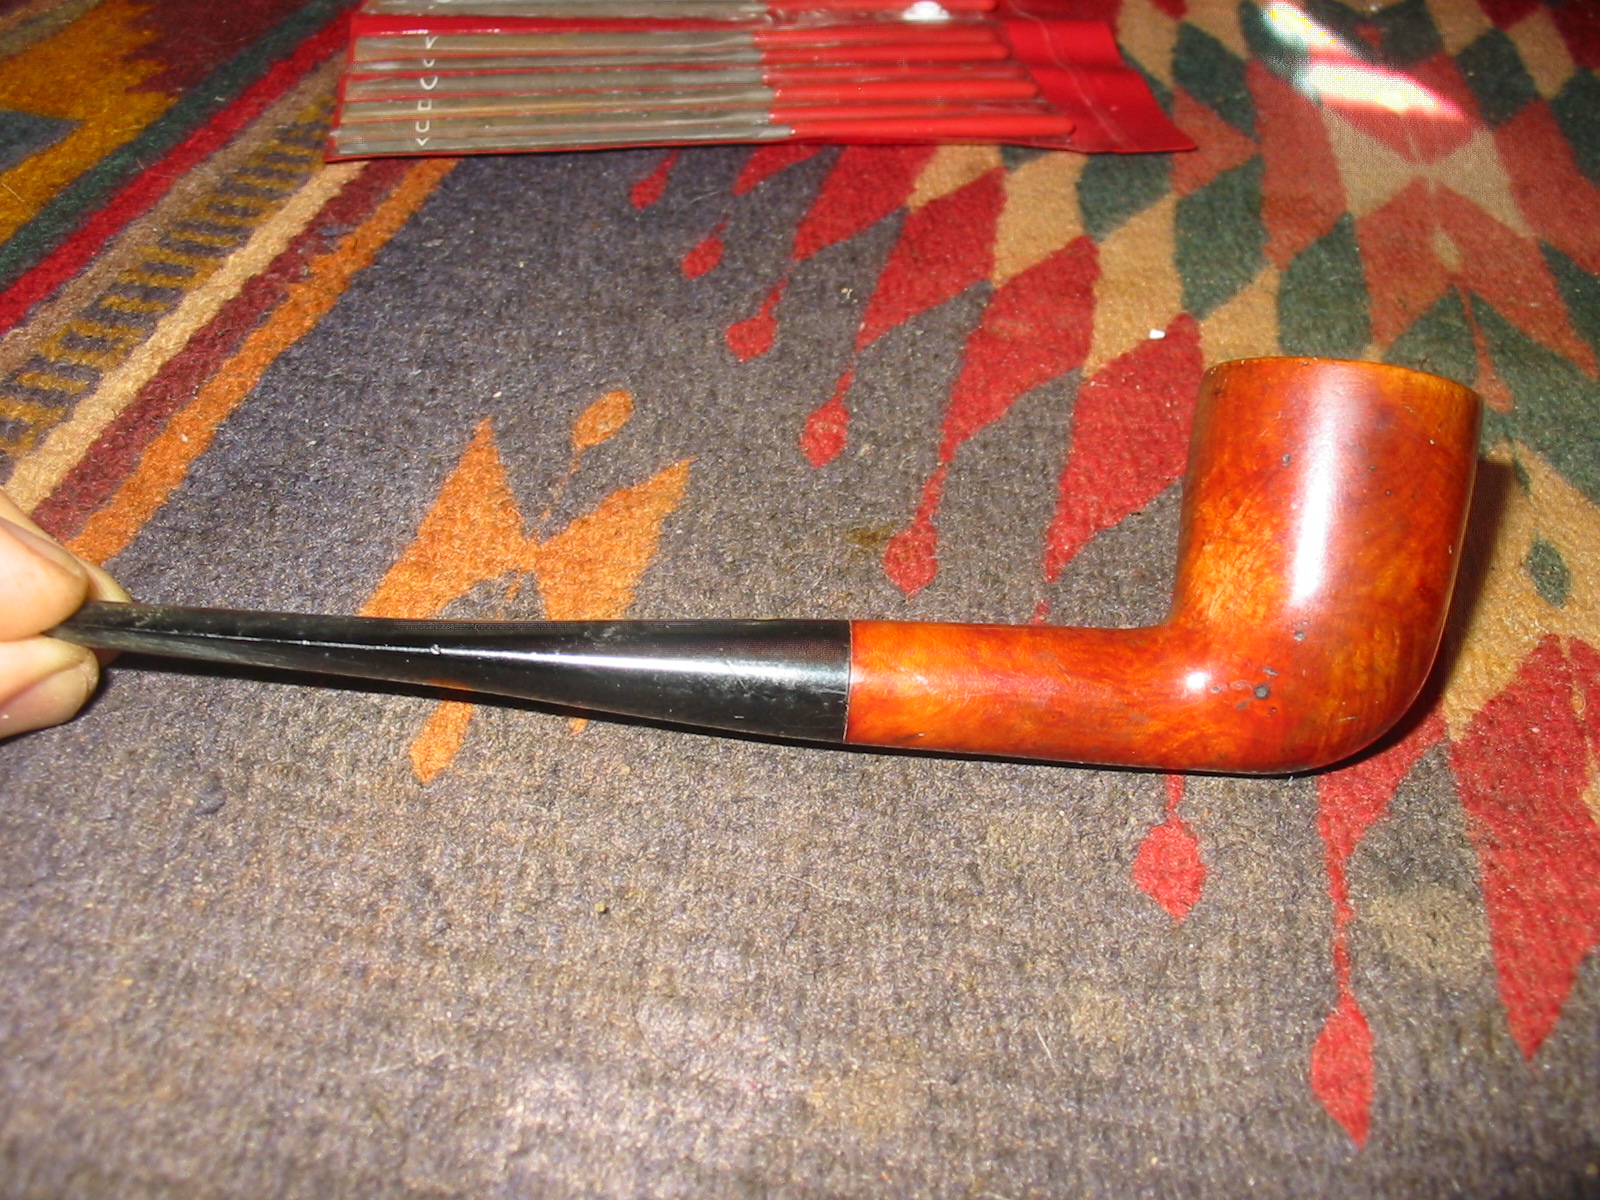
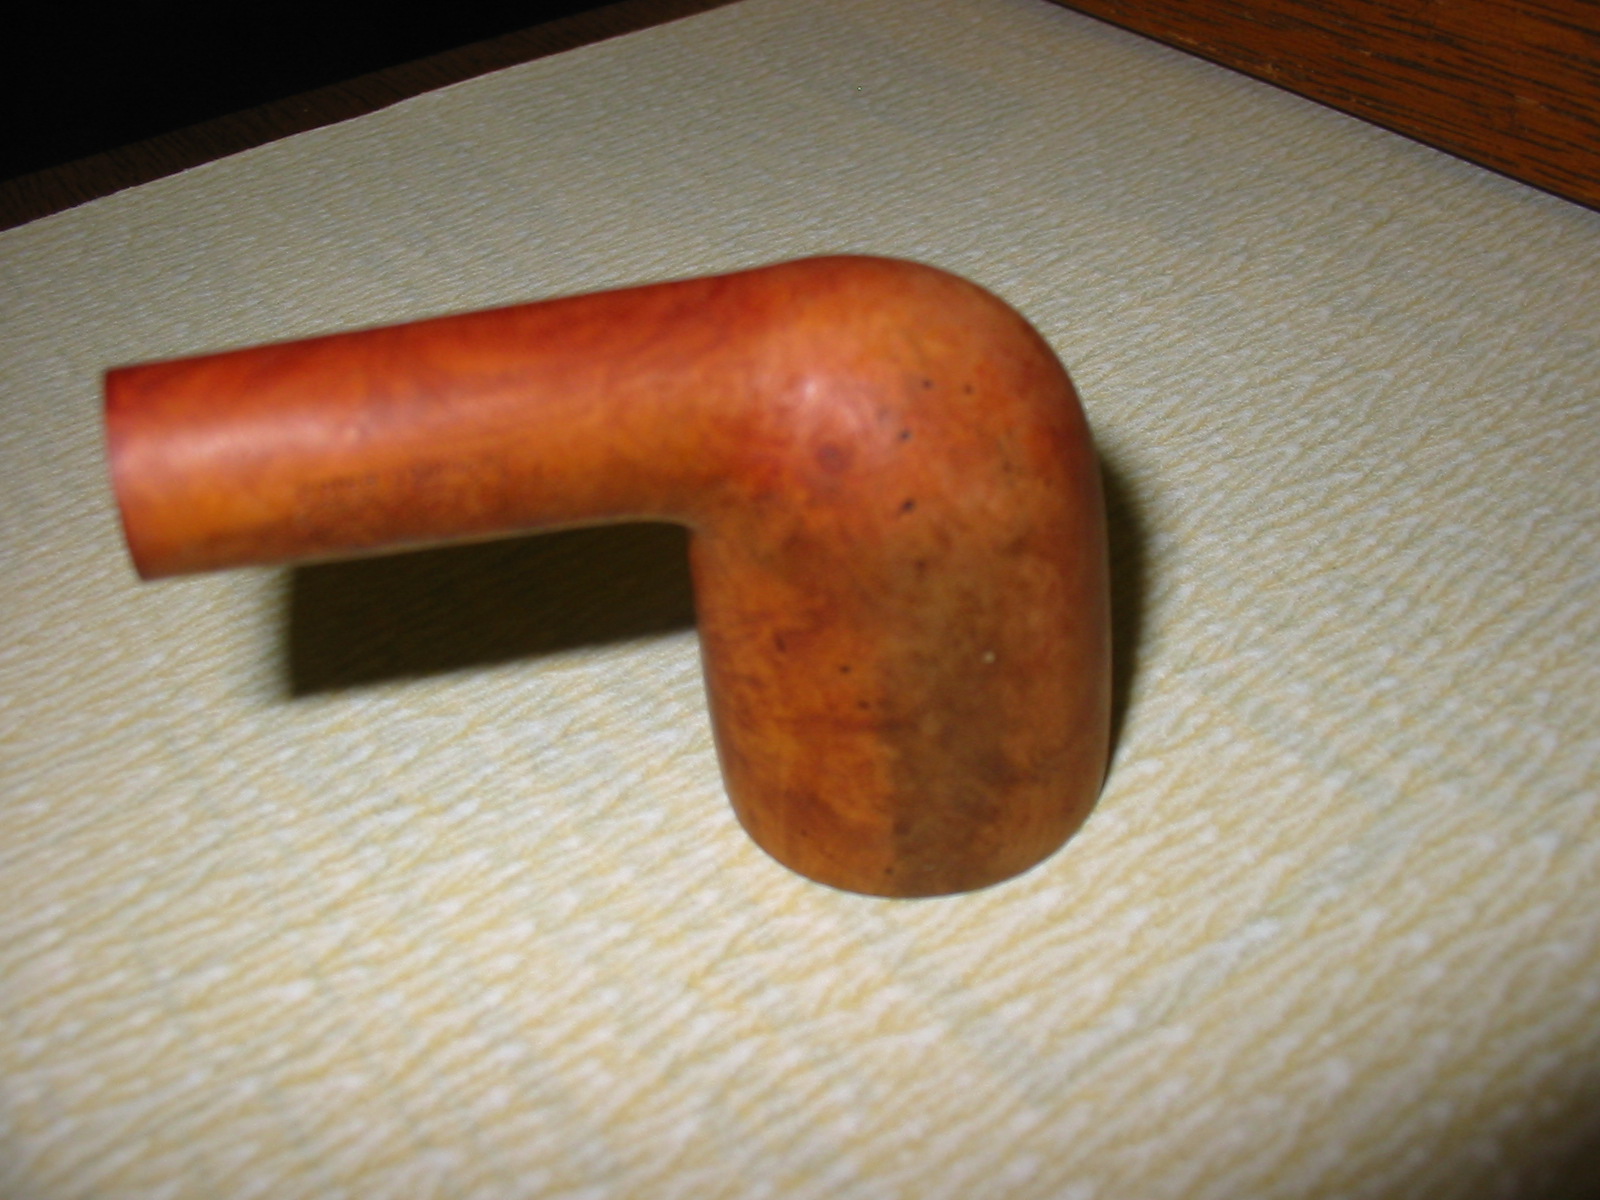
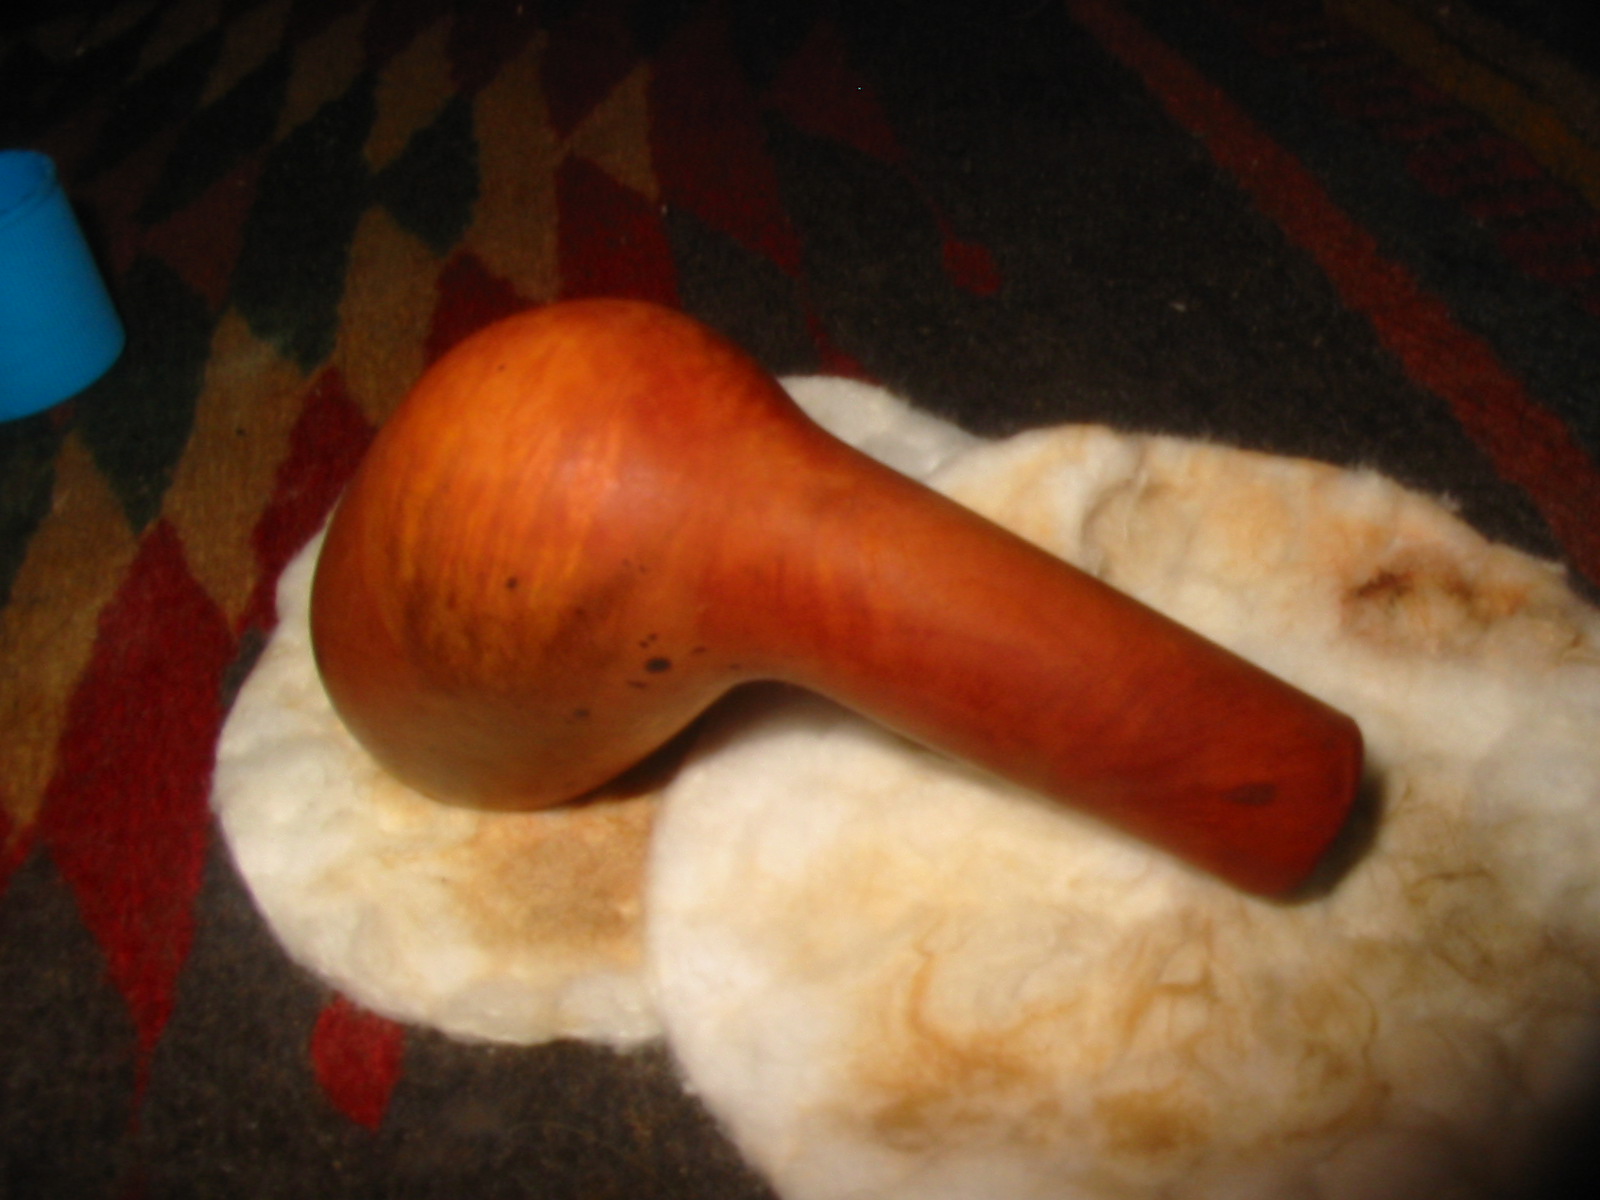
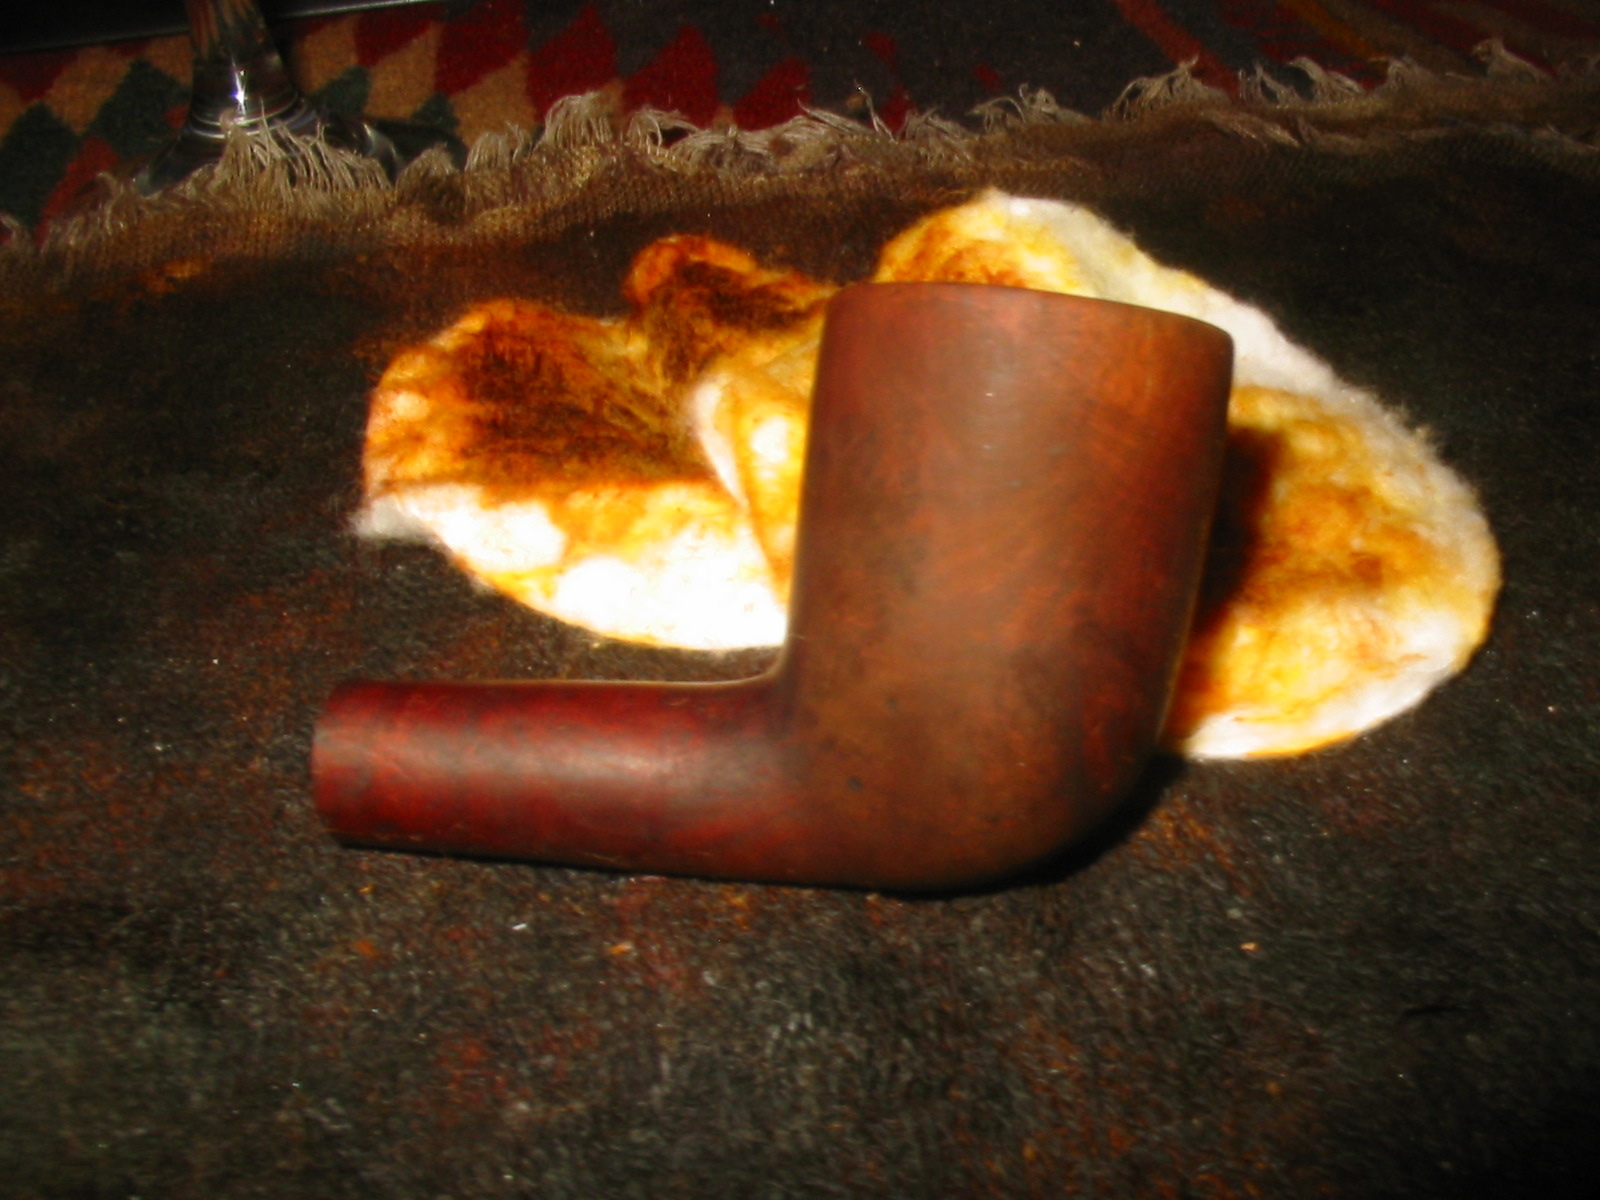
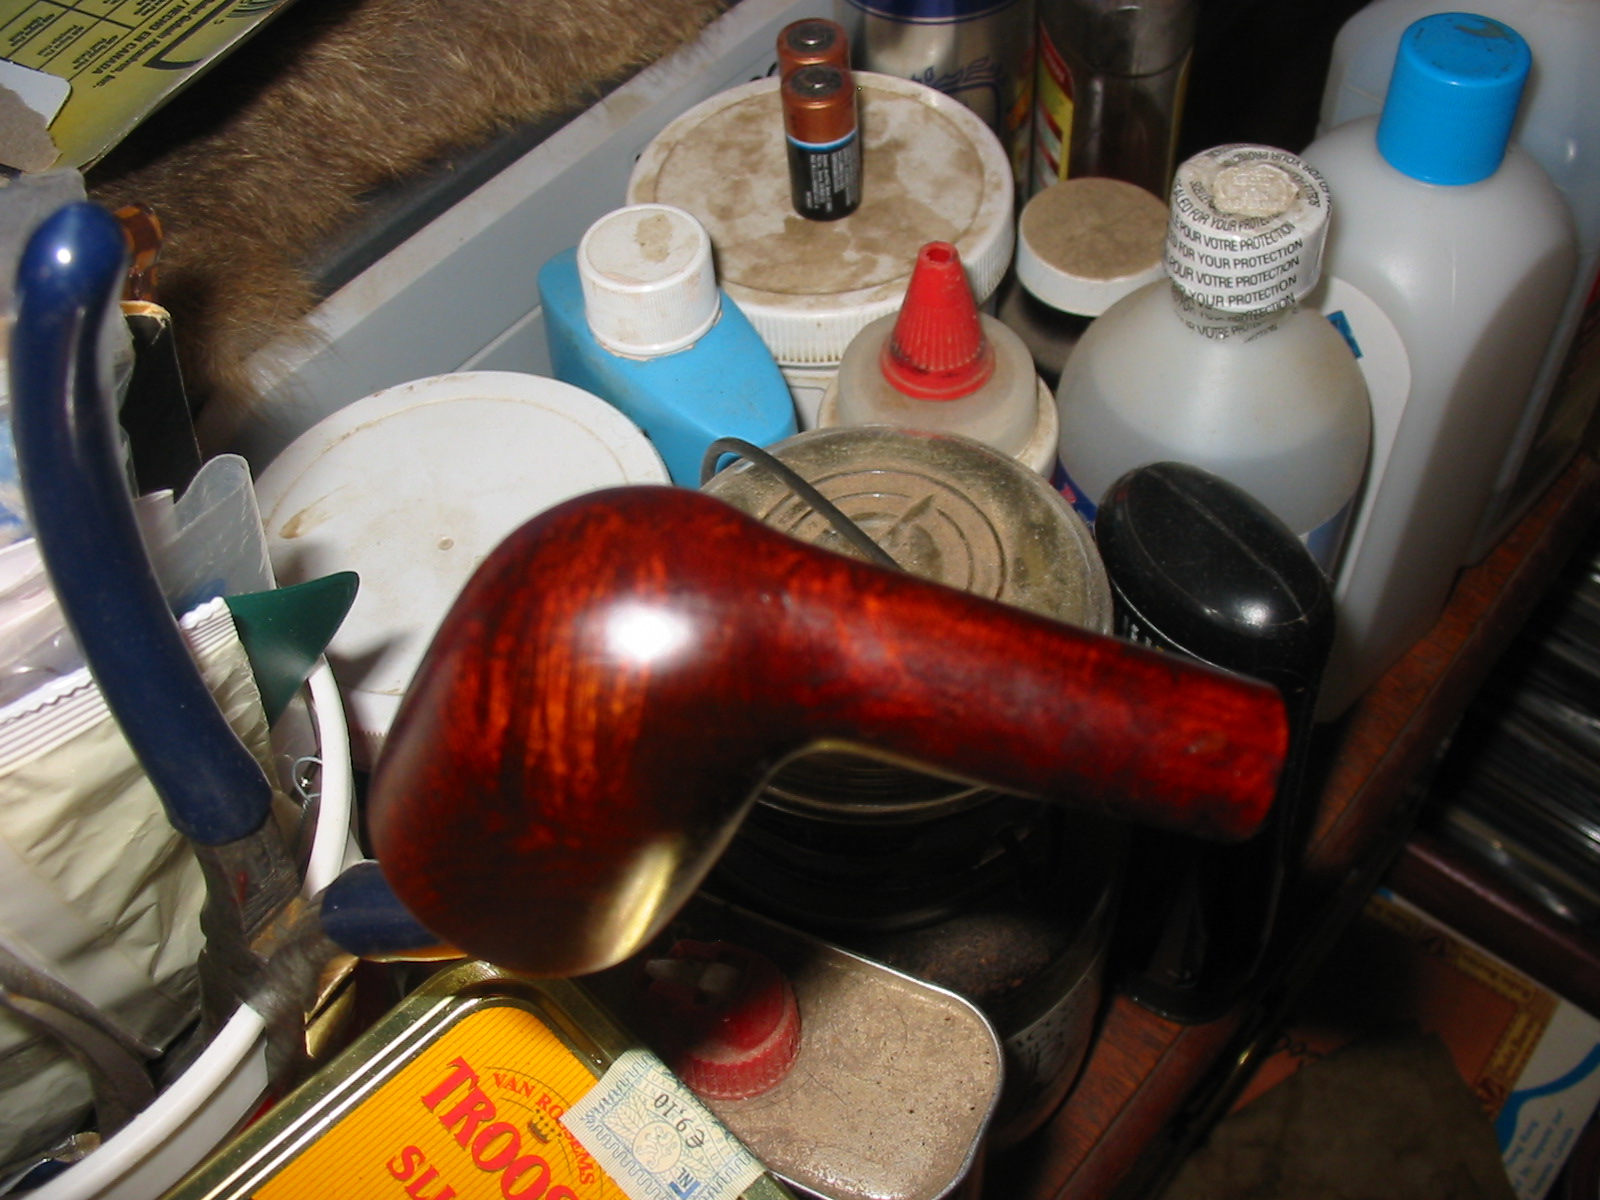
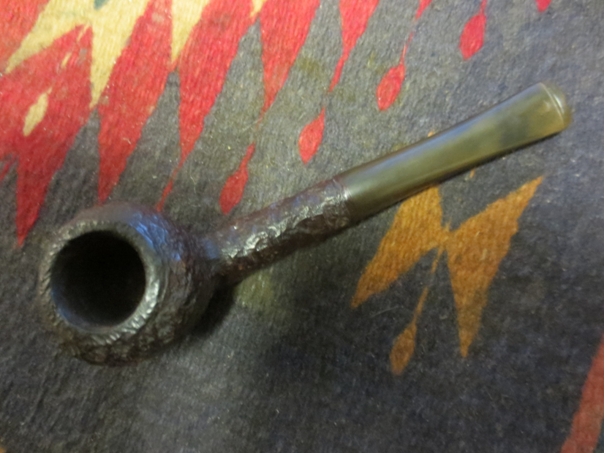
One of the last pipes I picked up on my recent Alberta trip and the last pipe in my current pile of pipes to refurbish is a little Brigham Canada Acorn or Strawberry shaped rusticated pipe. The shape of the pipe is what caught my attention. And when I had it in hand the size was also a relevant feature. It is a very light weight pipe (don’t have a scale) and it is diminutive in size. The dimensions are: length – 5.5 inches, height – 1.5 inches, bore – .75 inches. The bowl is conical in shape ending well below the entry of the airway into the back wall. Overall the pipe was in decent shape and would be fairly easy to clean up. The finish was dirty and the bowl had a thin cake in it. The stem was oxidized and the inside of the shank was dirty. The stem was oxidized and had one tooth mark on the top surface near the button. On the underside of the stem near the button was a lot of tooth chatter. The stamping on the underside of the shank in a smooth area reads 778 which is the shape and that is followed by Made in Canada and then Brigham in script.Brig1

Brig2

Brig3

Brig4 
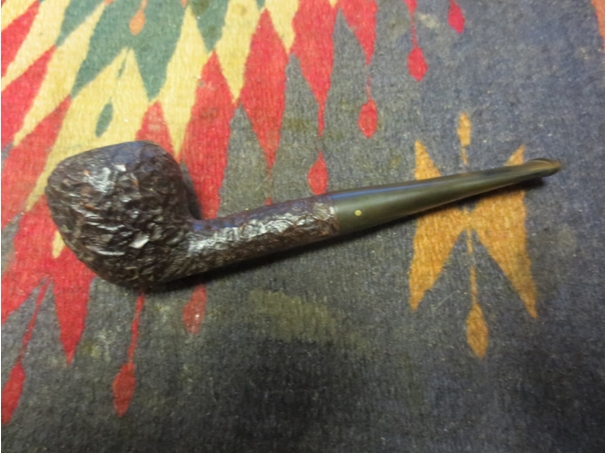
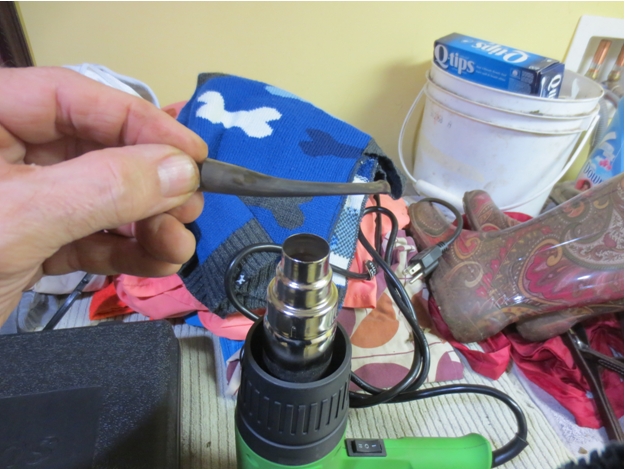
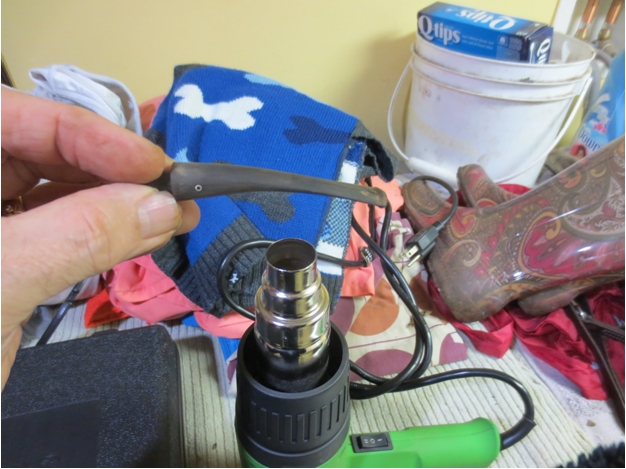
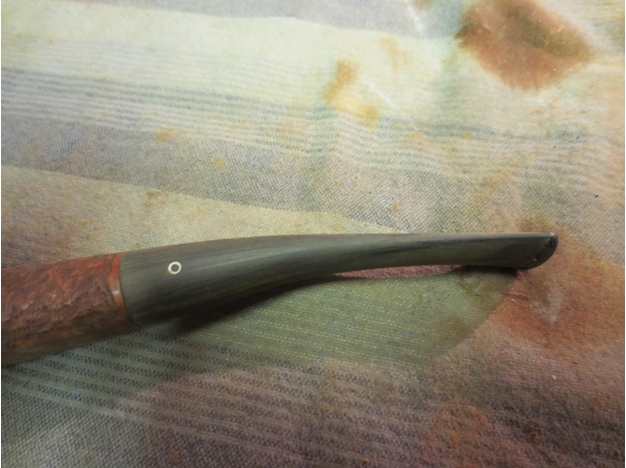
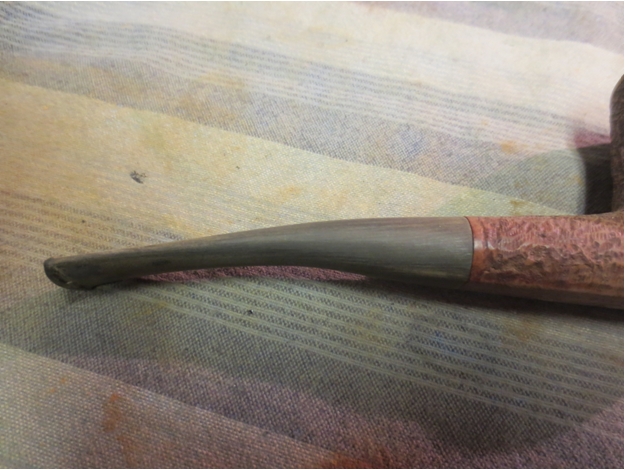
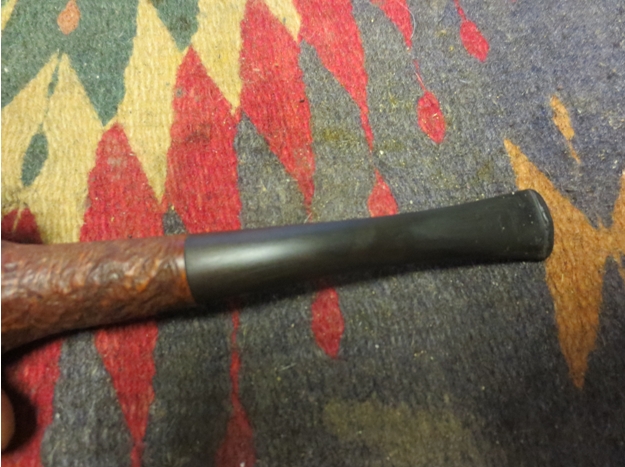
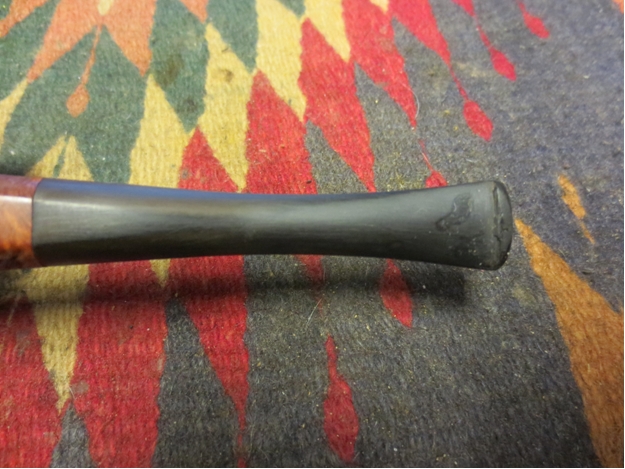
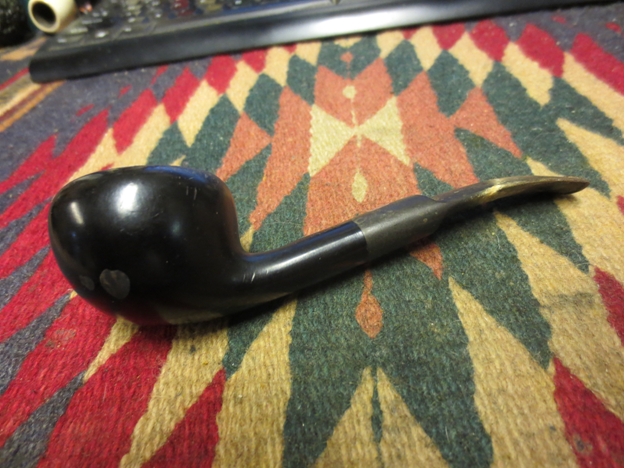
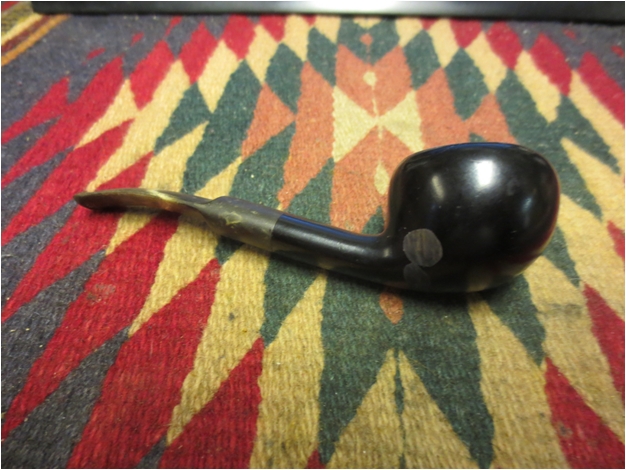
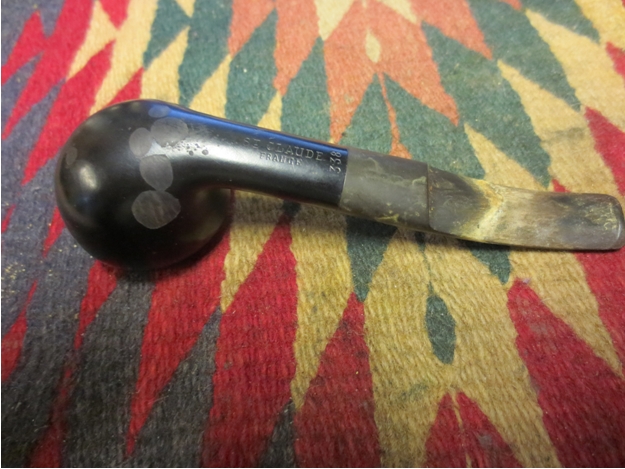
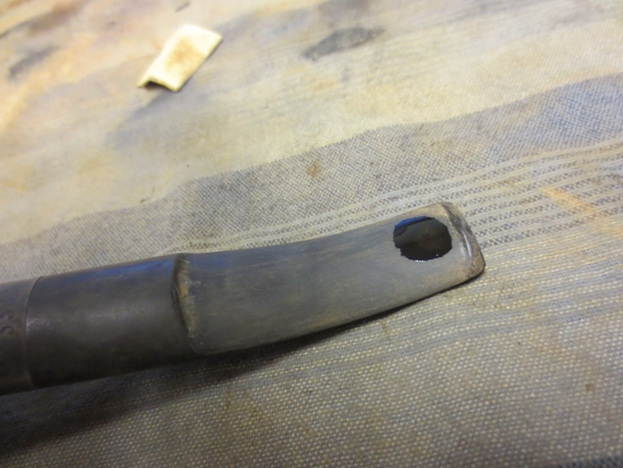
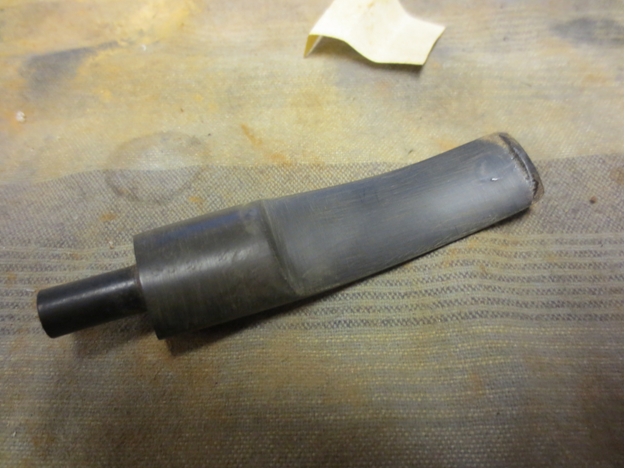
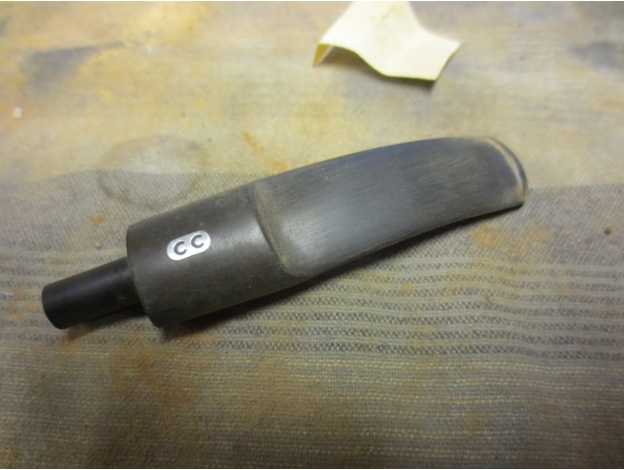
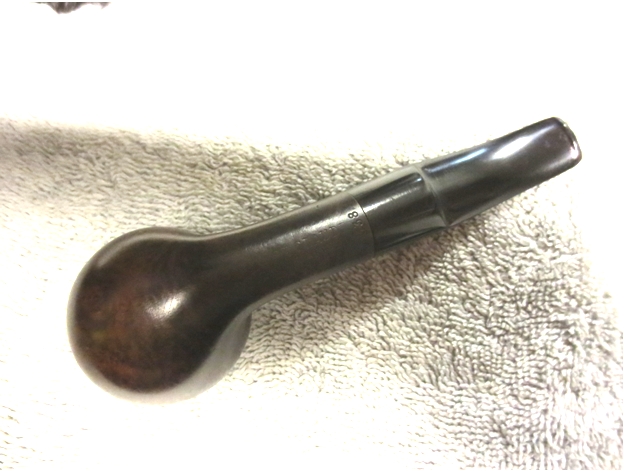
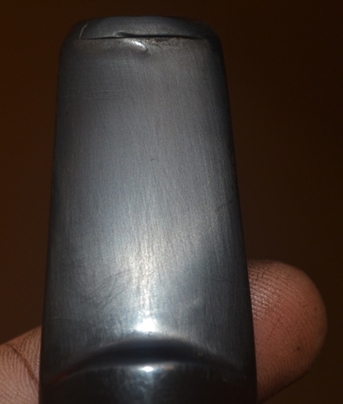
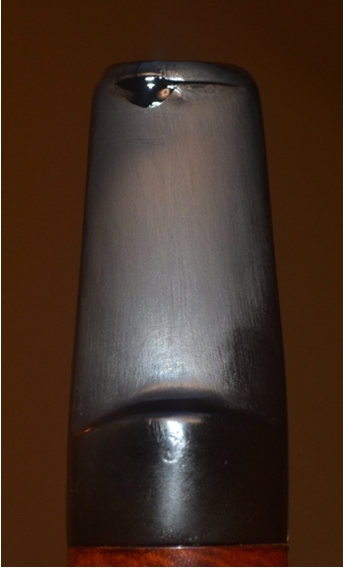
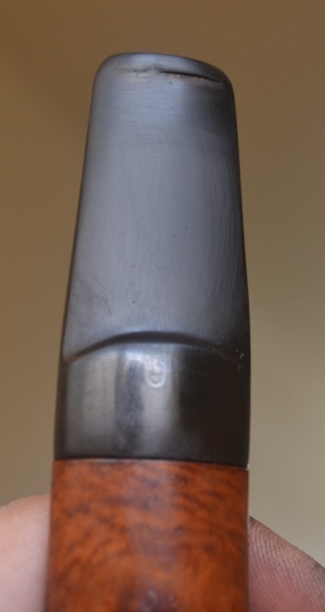
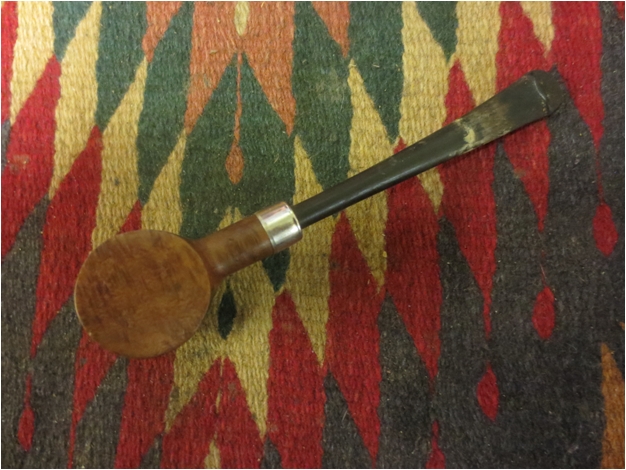
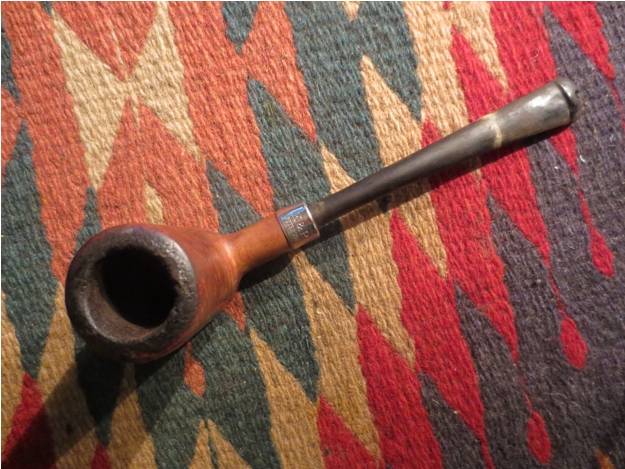
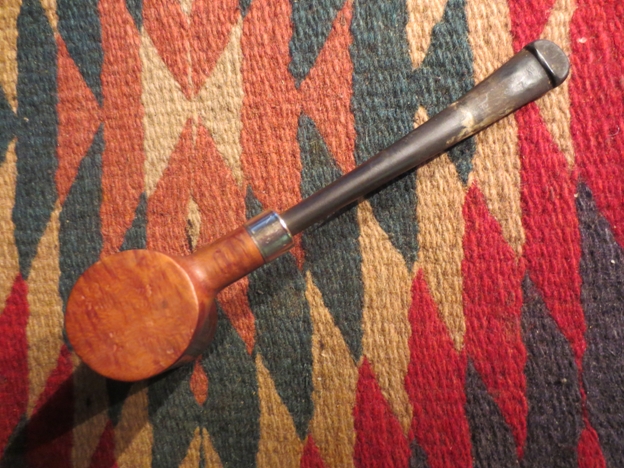
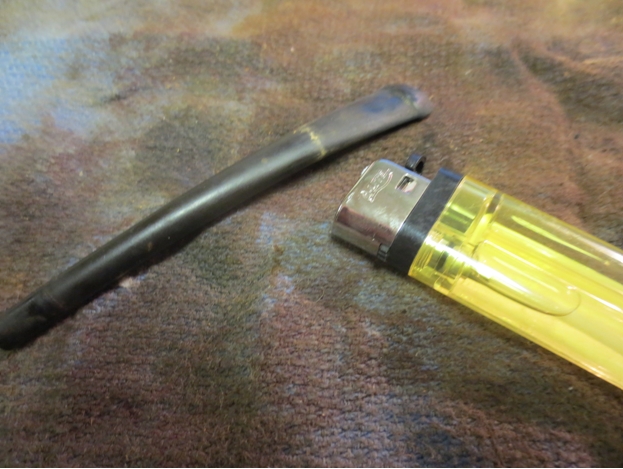
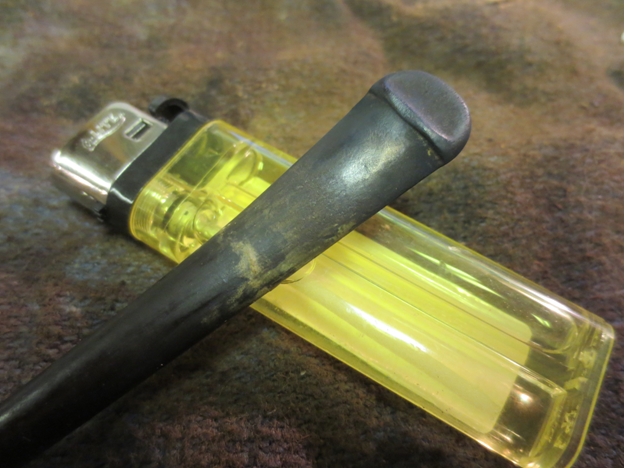
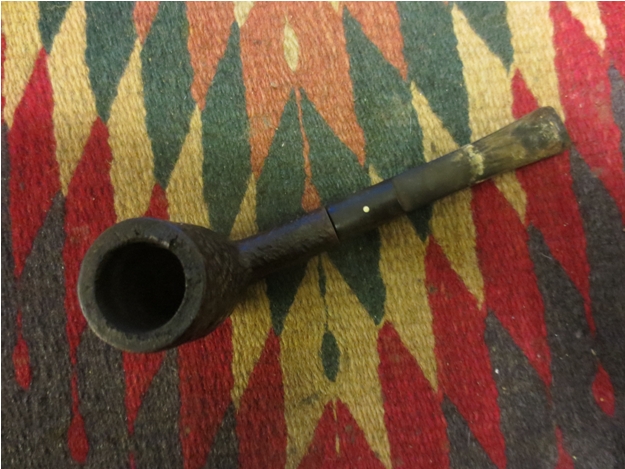
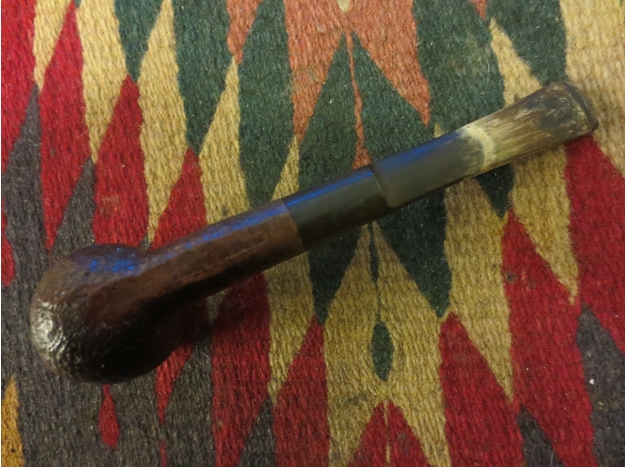
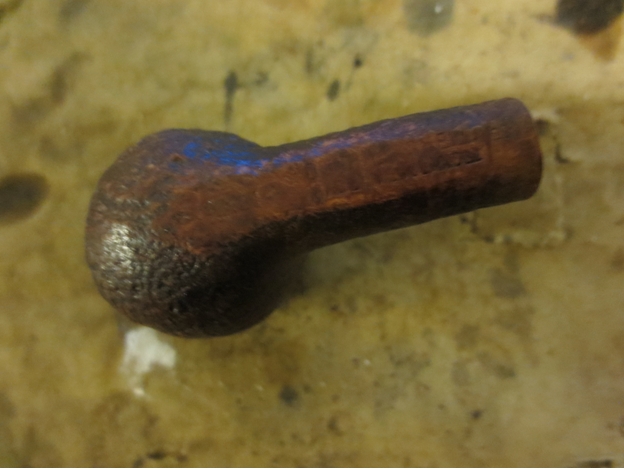
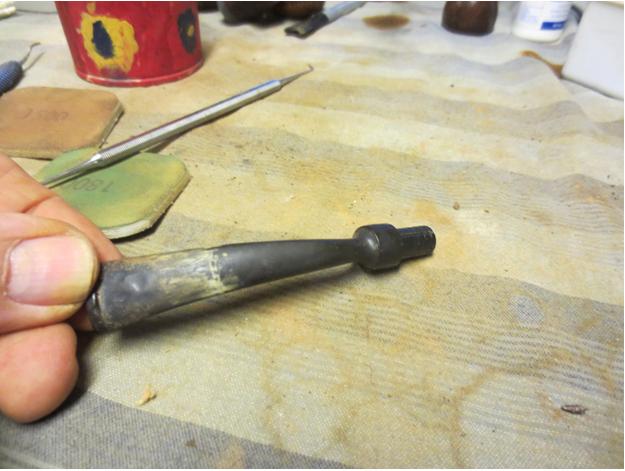
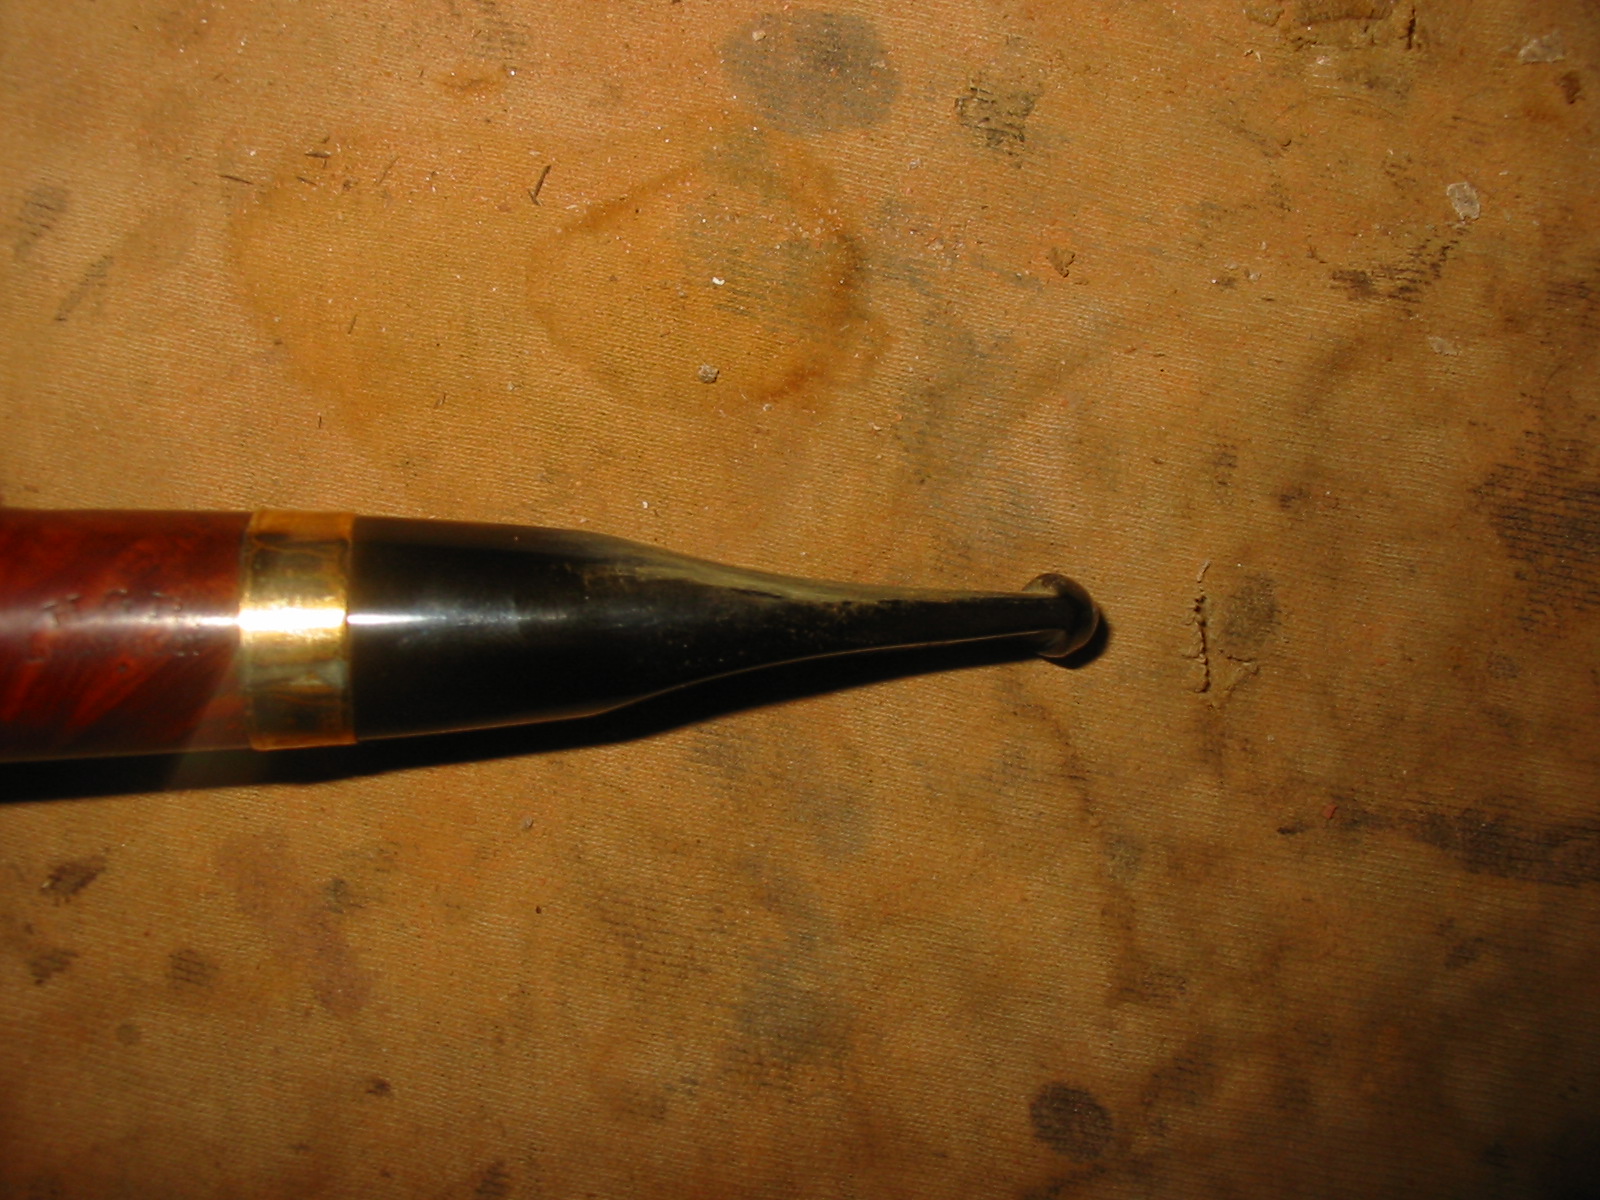
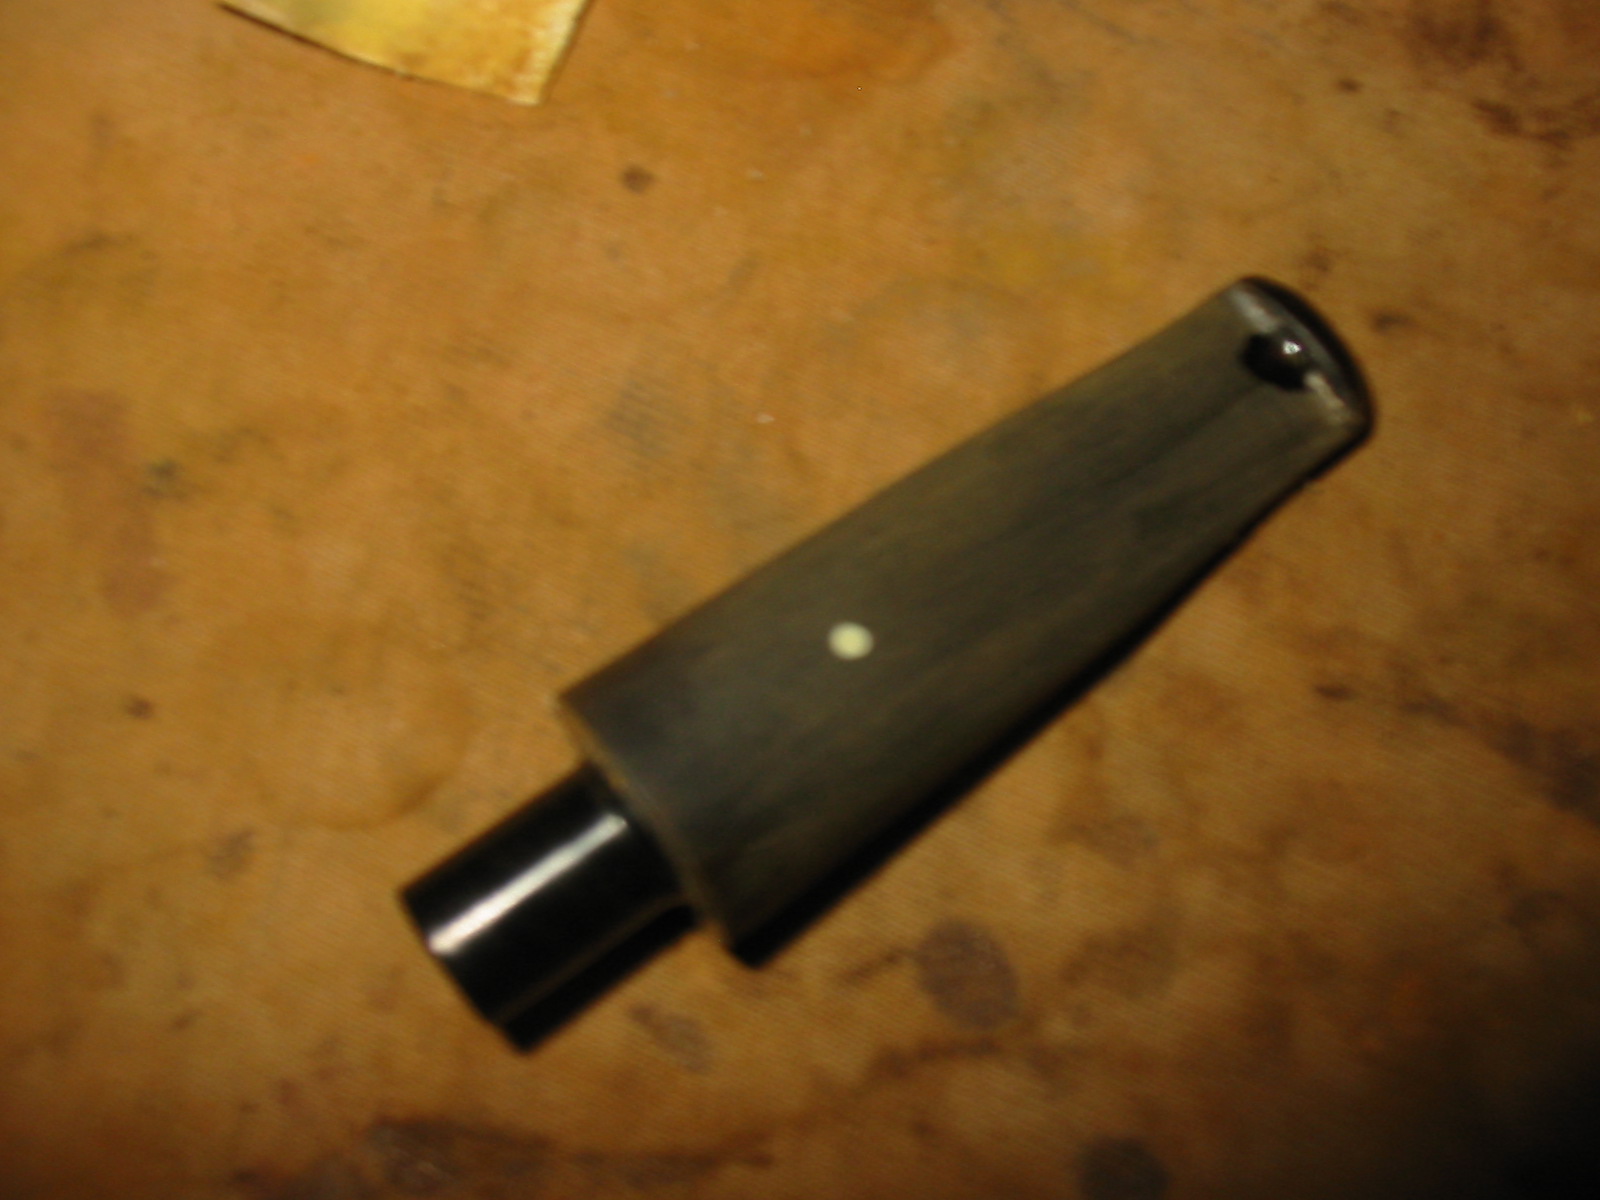
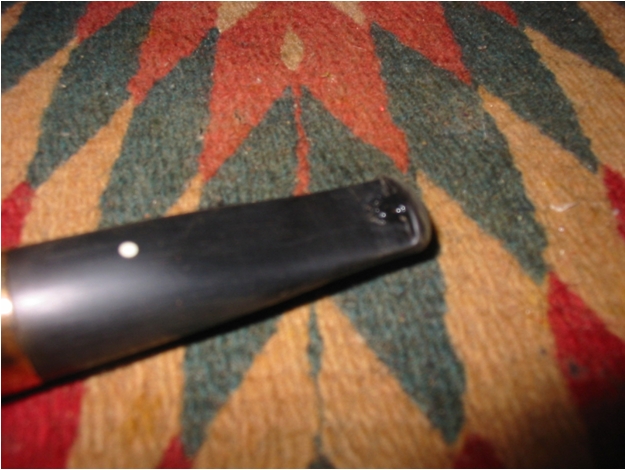
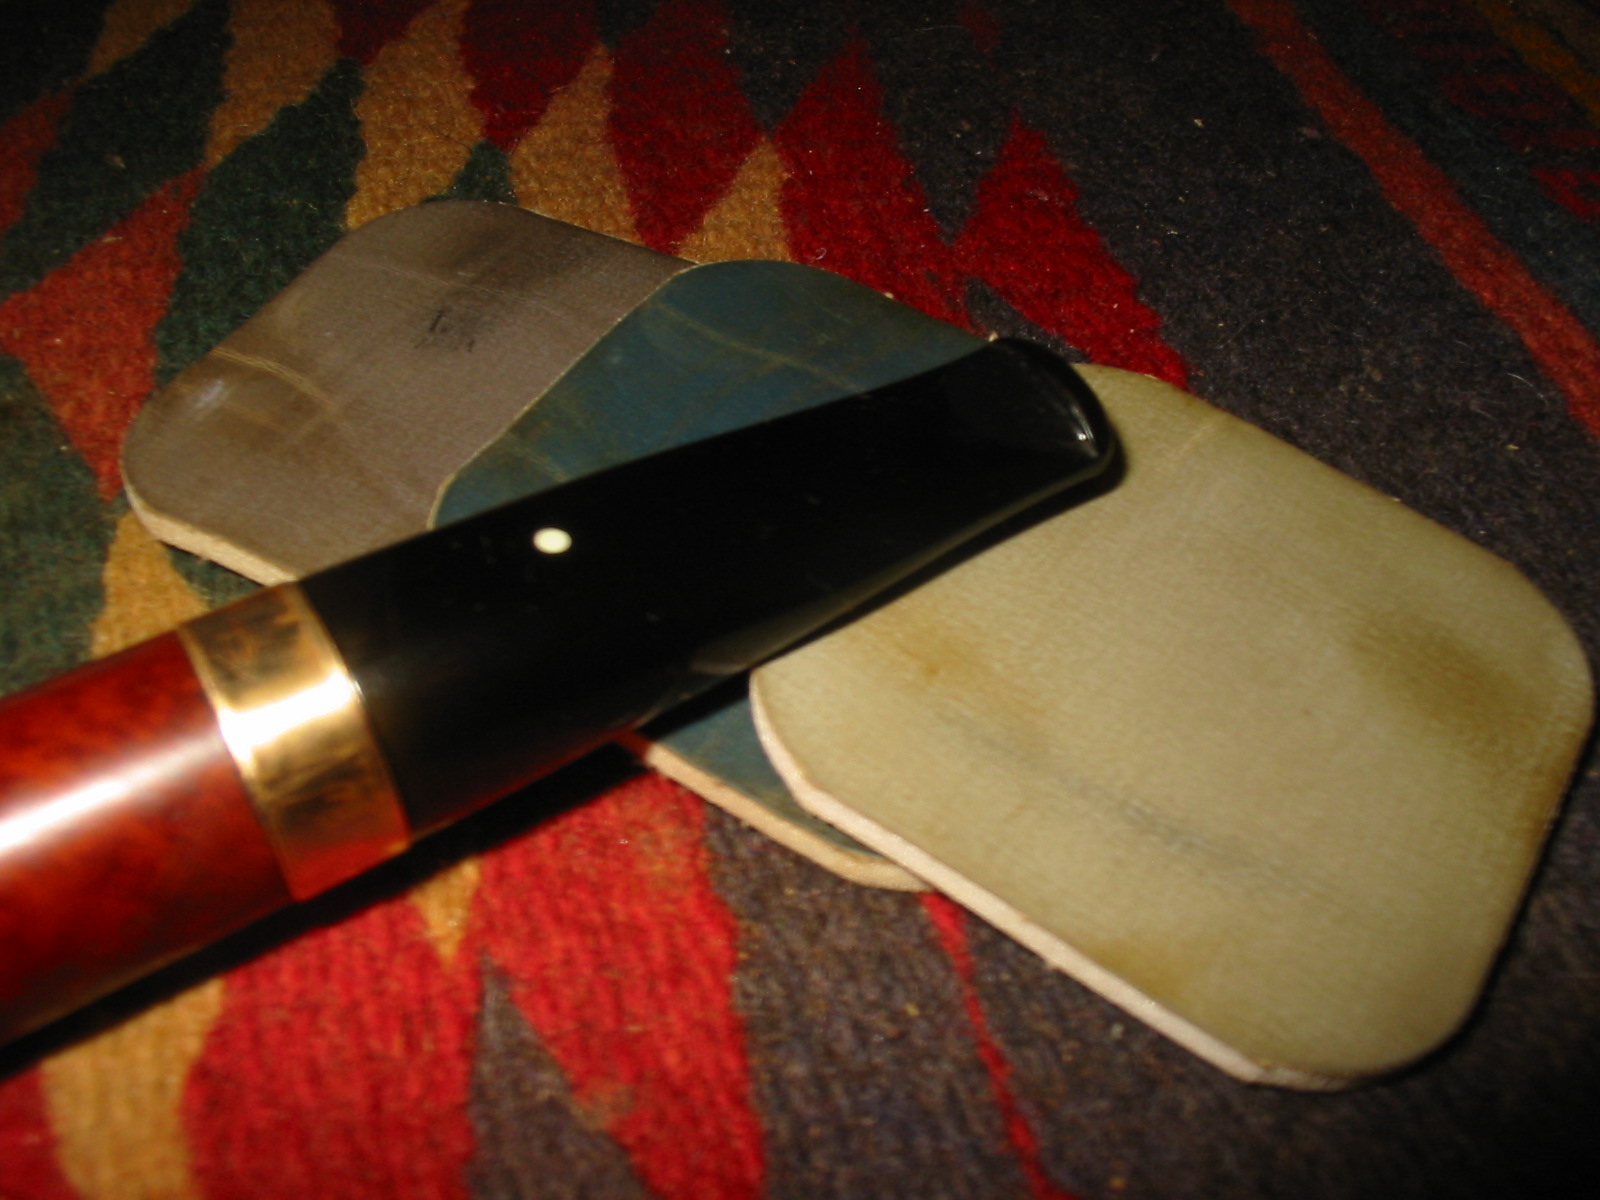
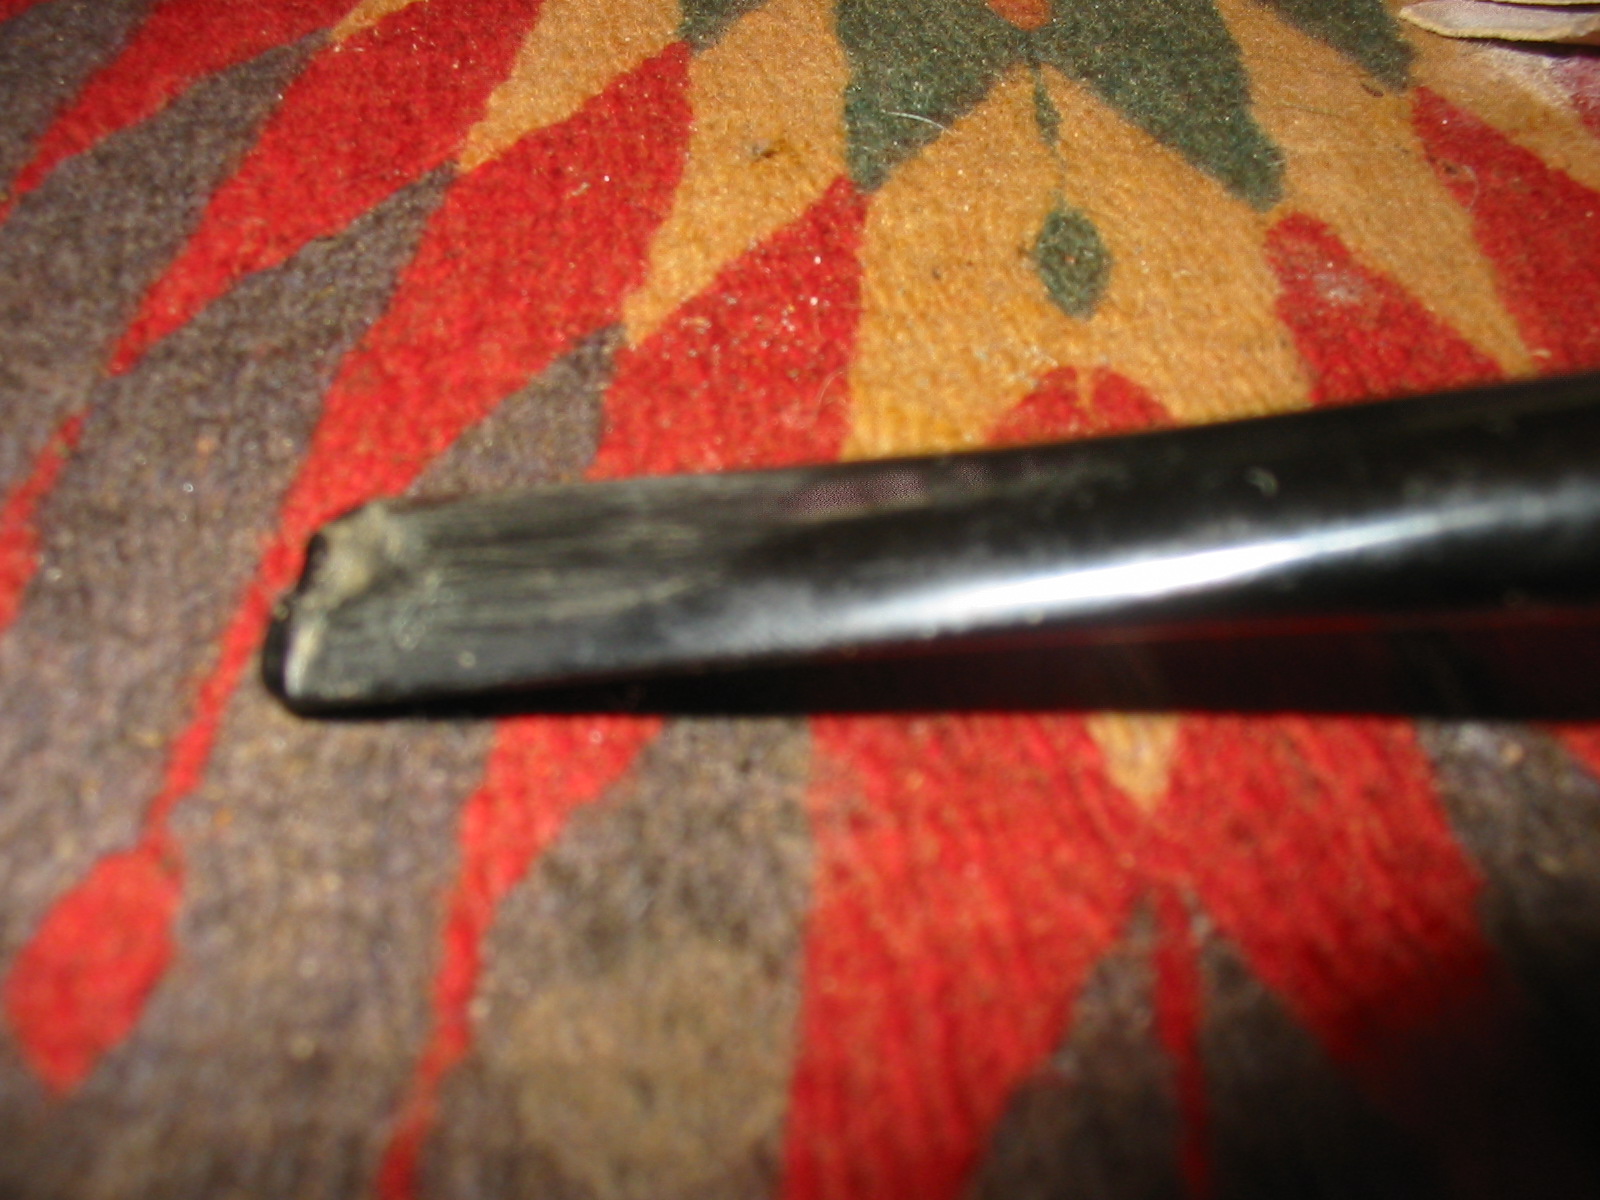
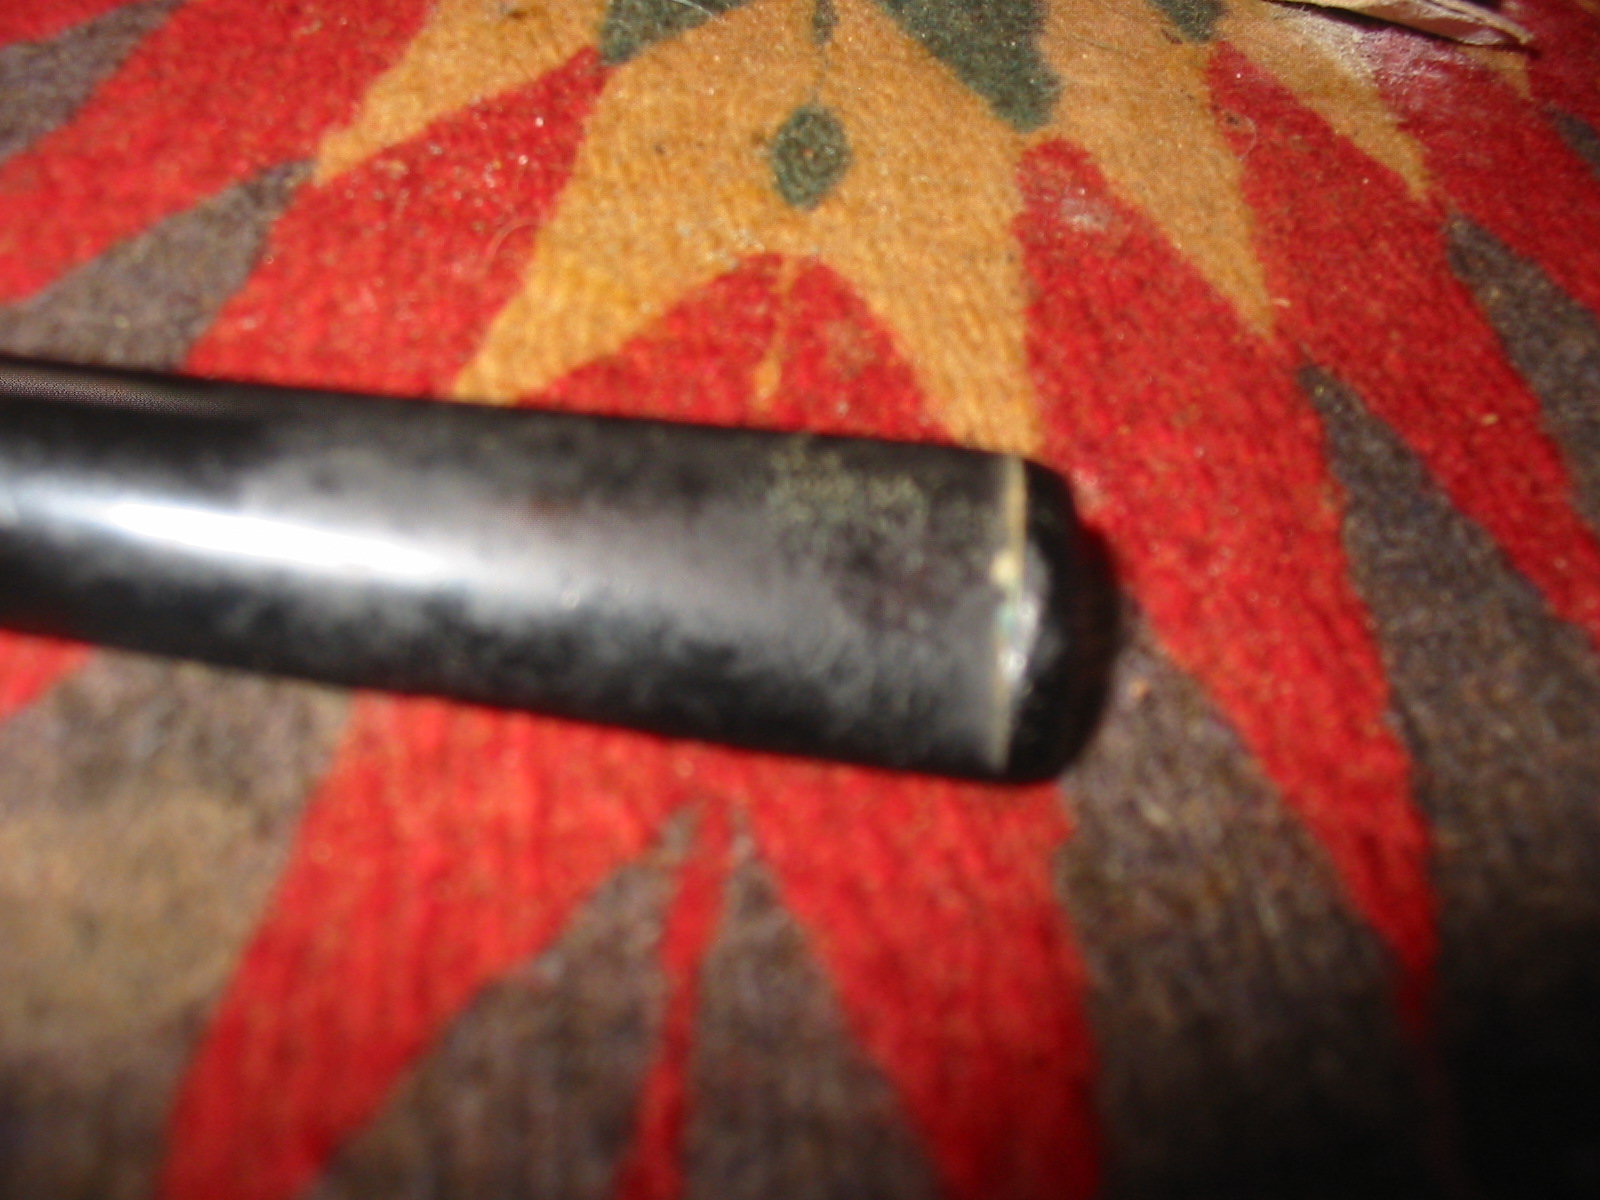
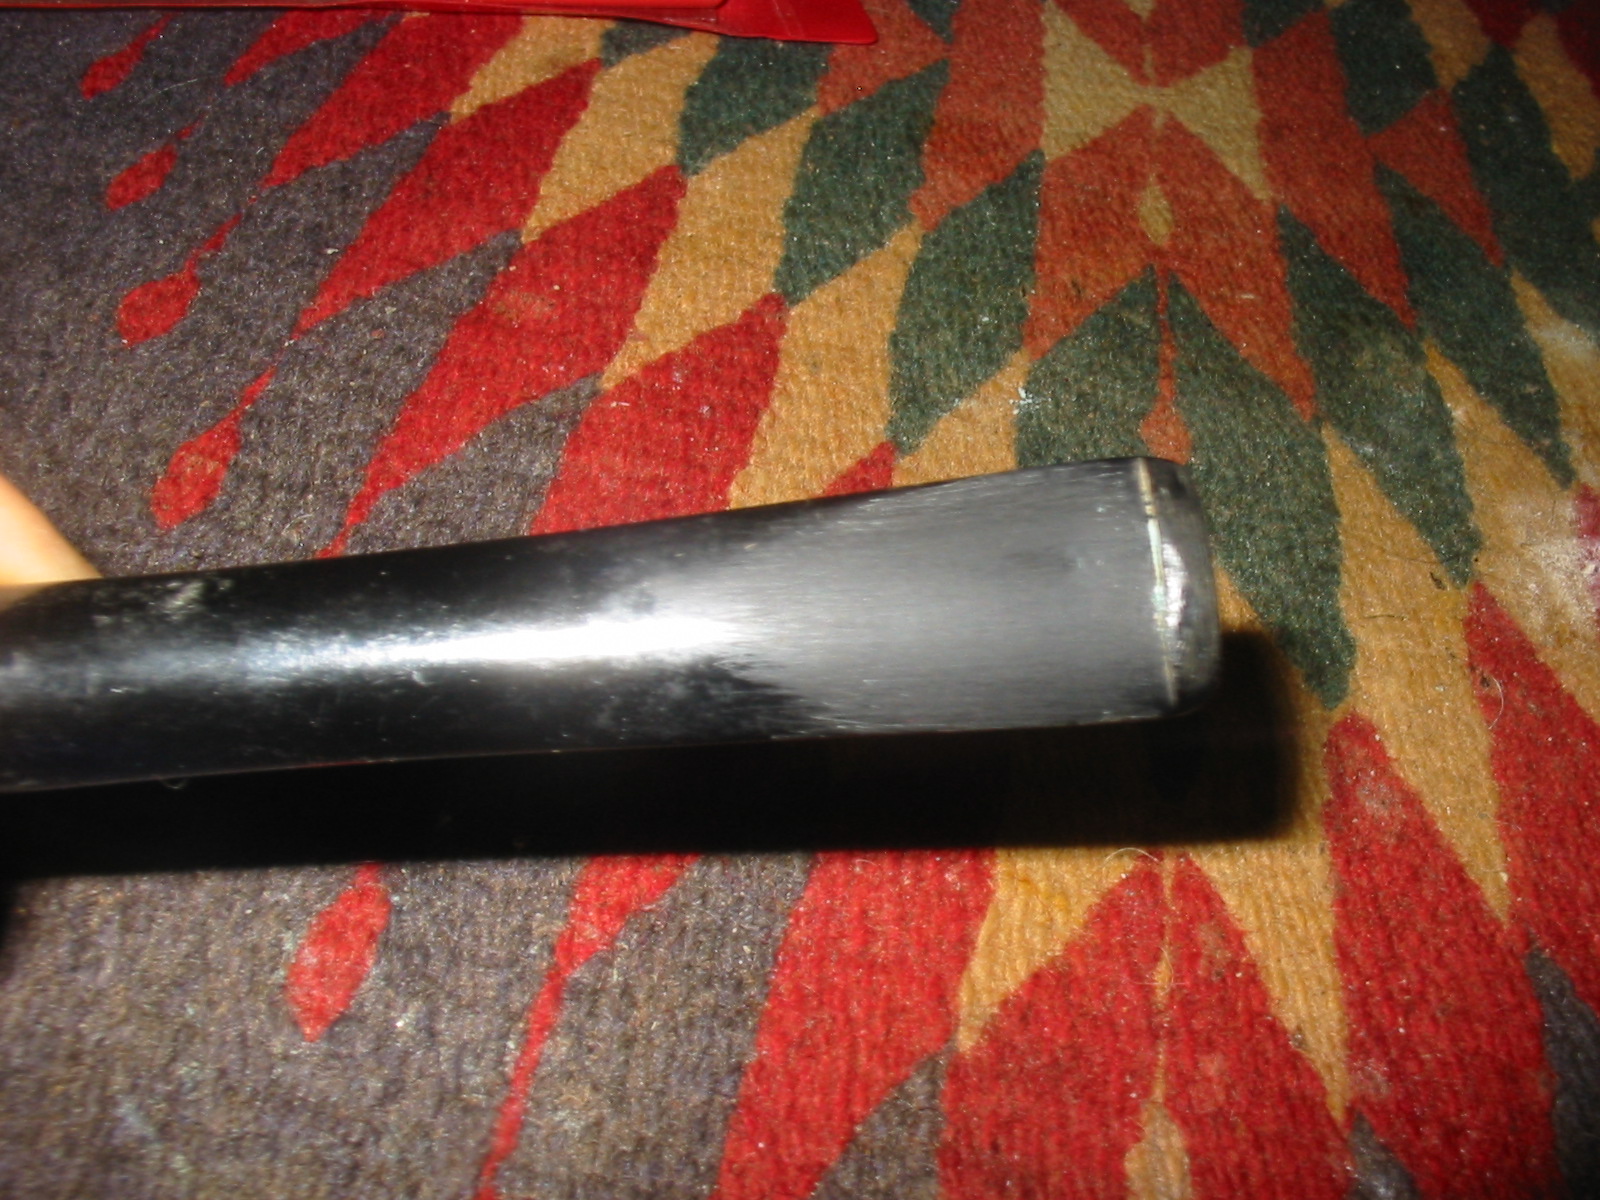
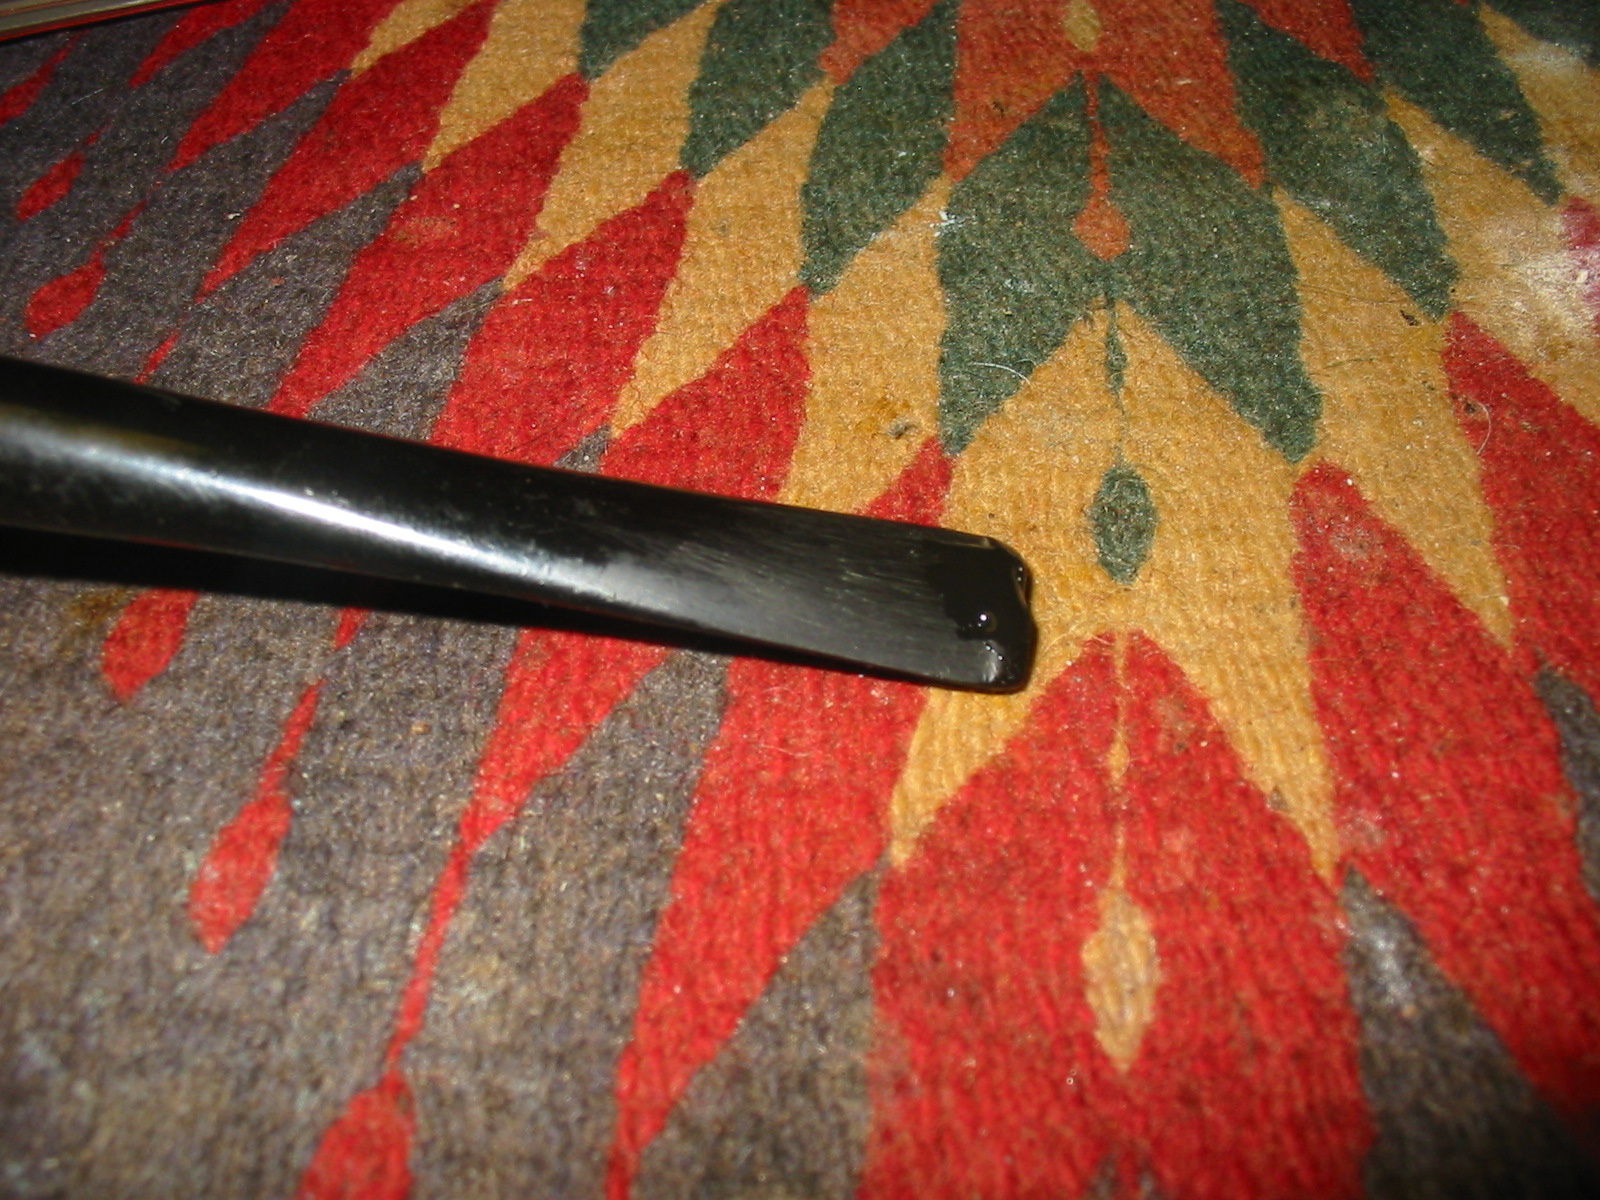
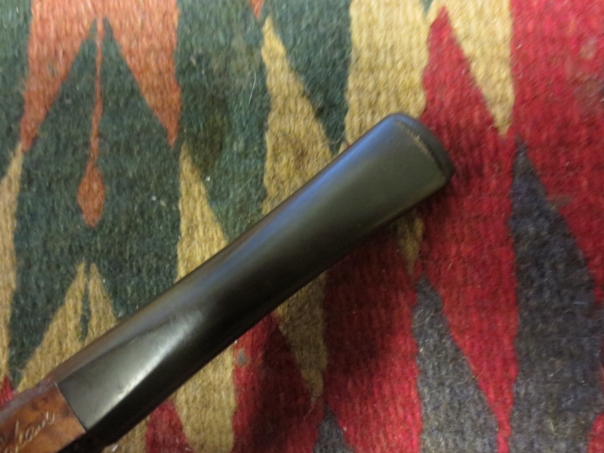
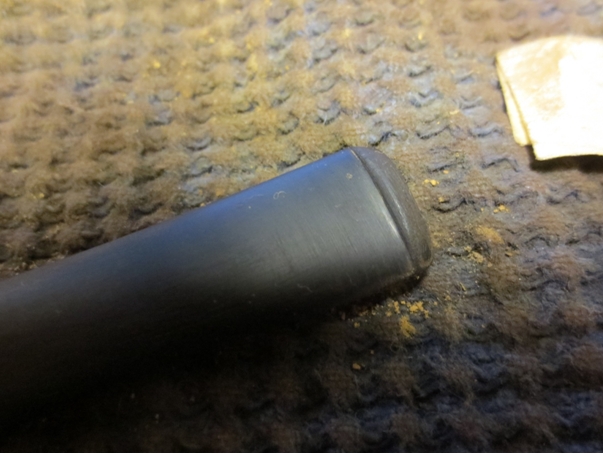
The next two photos show the tooth marks and tooth chatter on the stem. The tooth dent on the top of the stem near the button was quite deep and would need to be raised with heat and then probably repaired with superglue.Brig5

Brig6
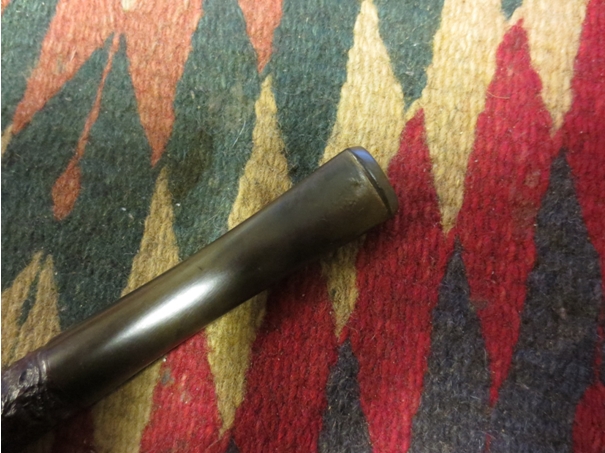
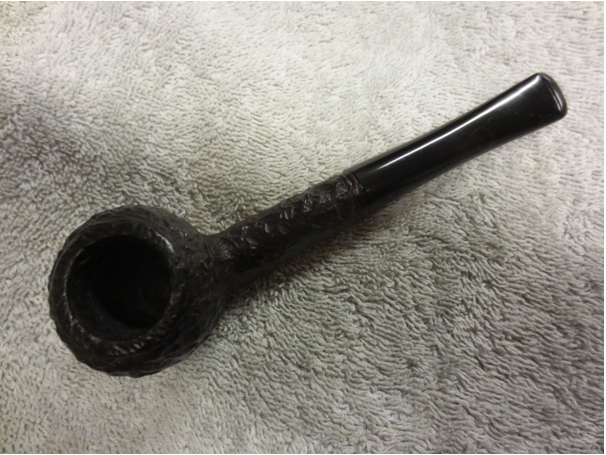
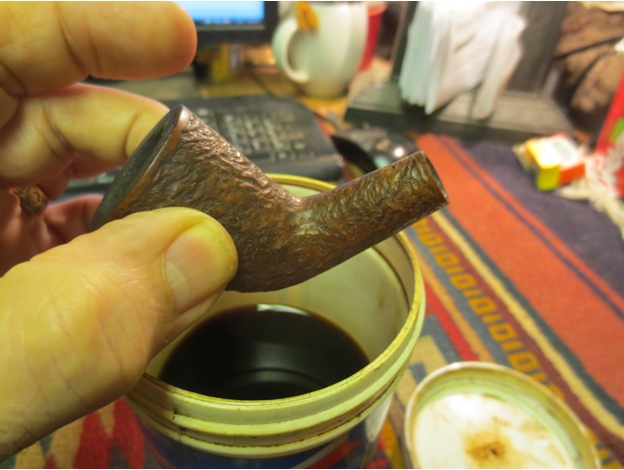
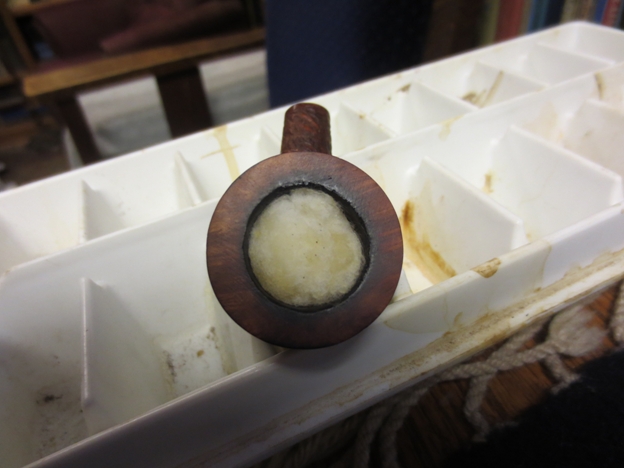
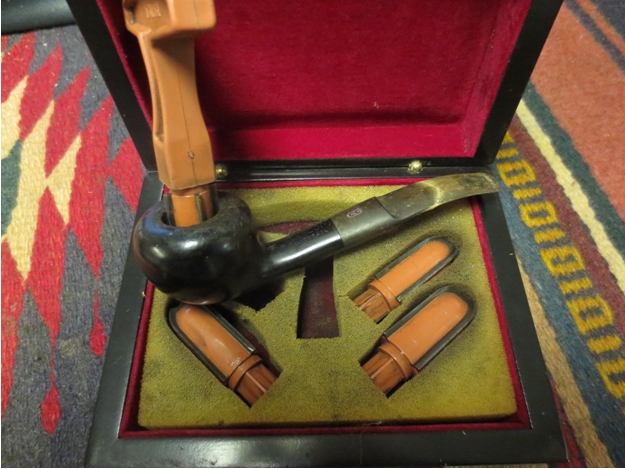
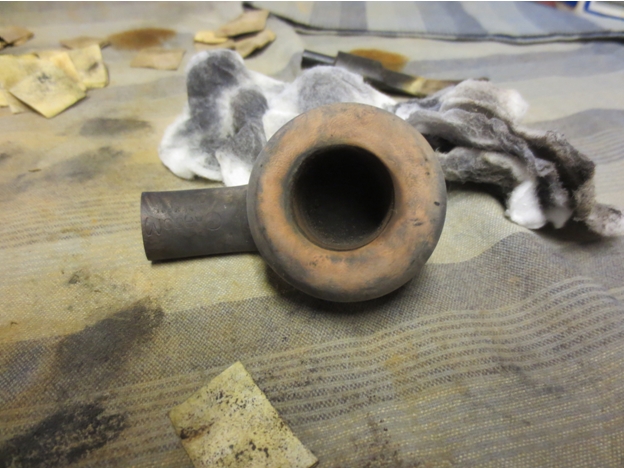
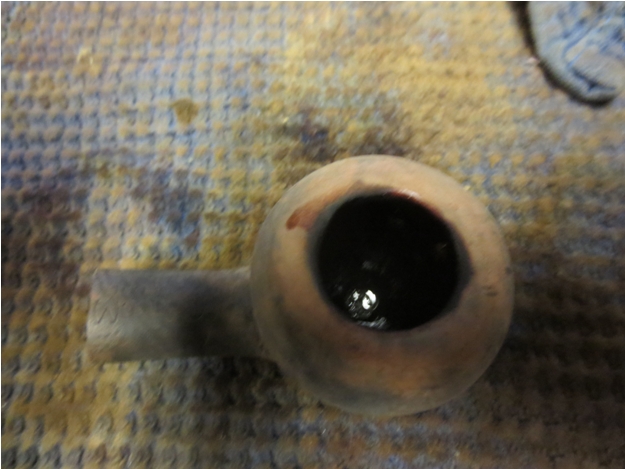
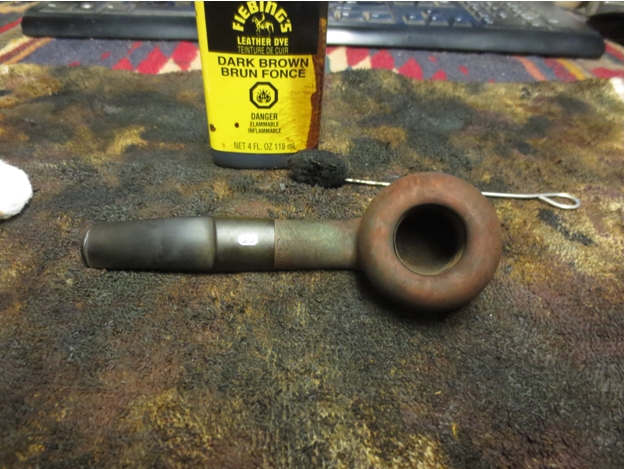
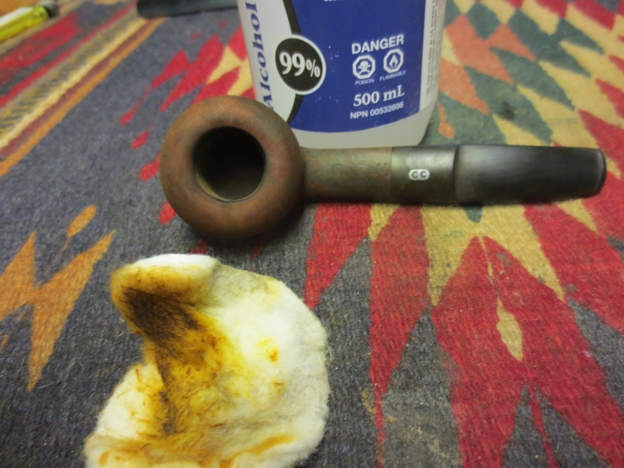
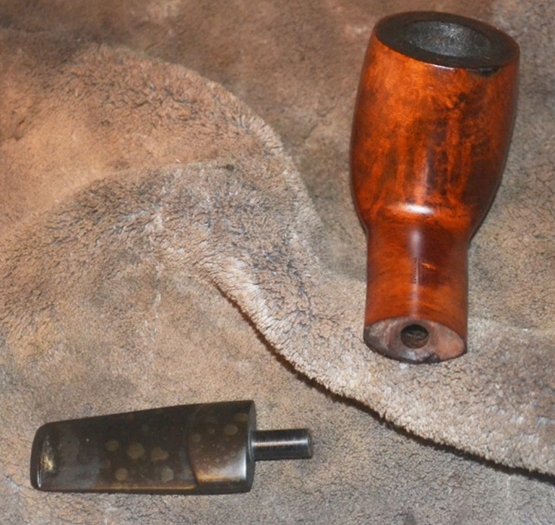
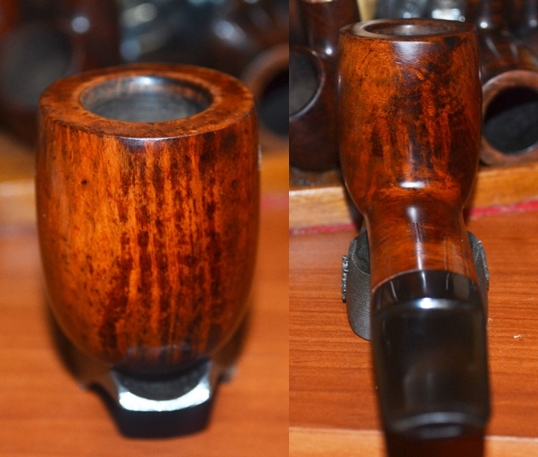
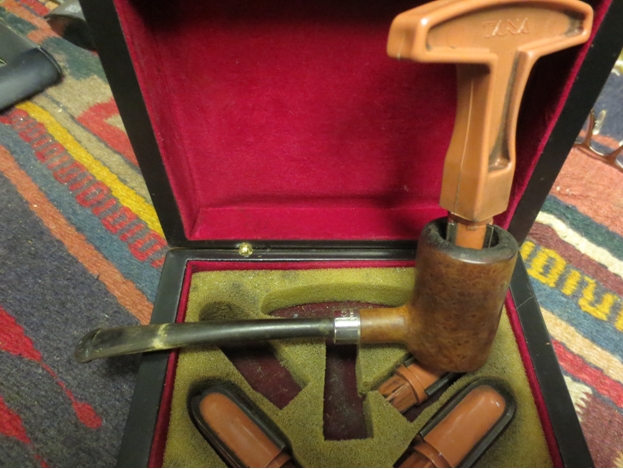
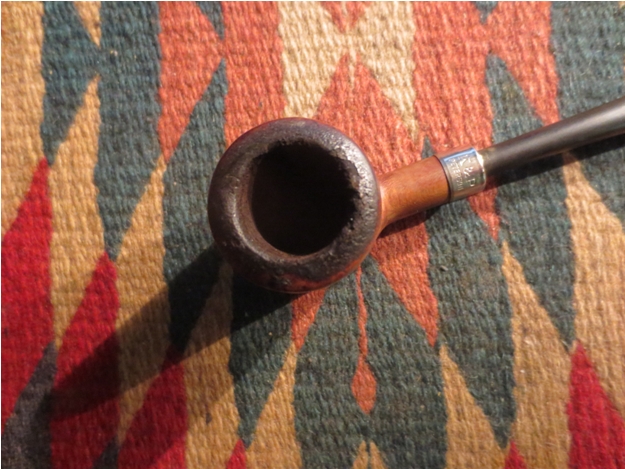
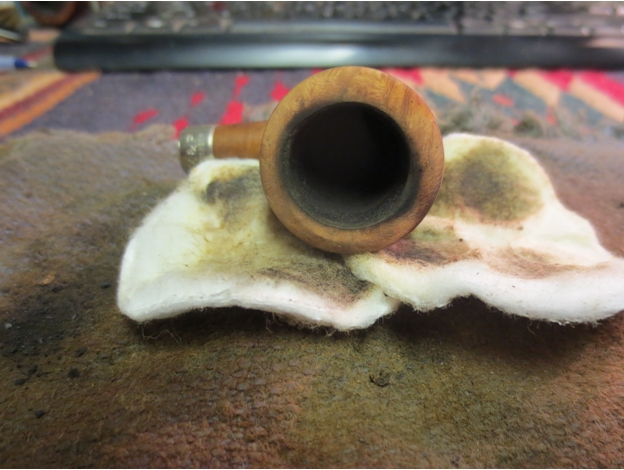
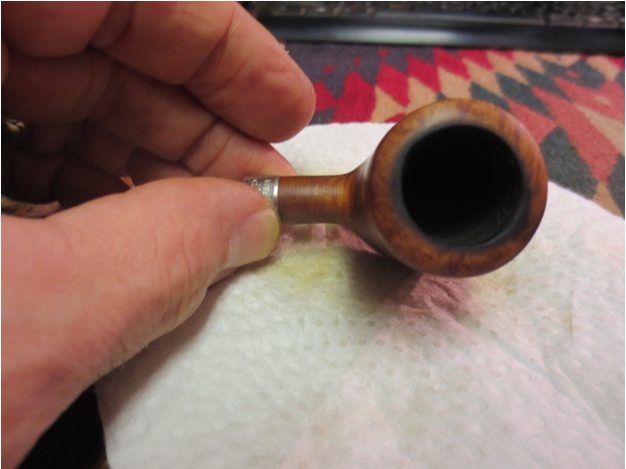
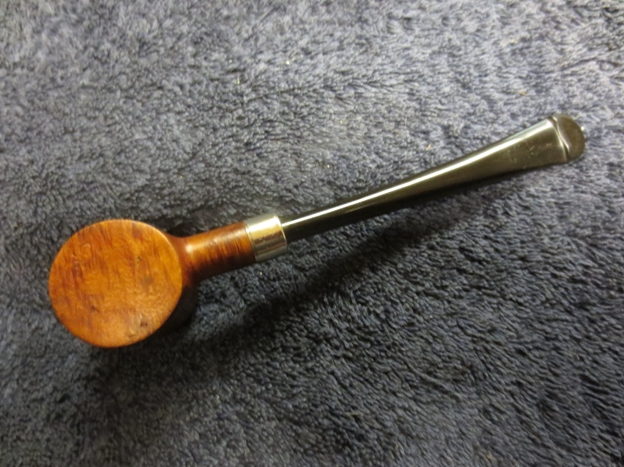
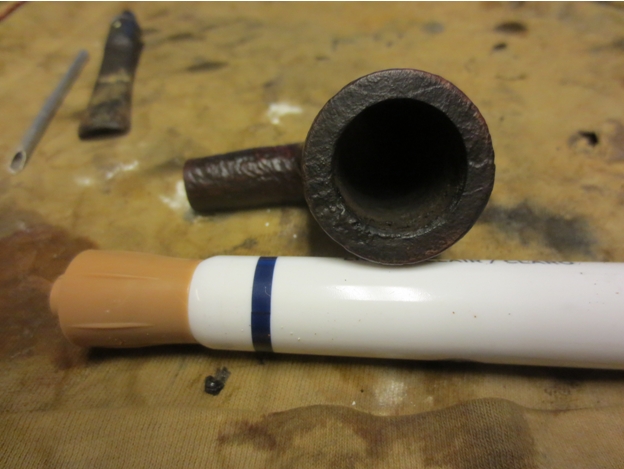
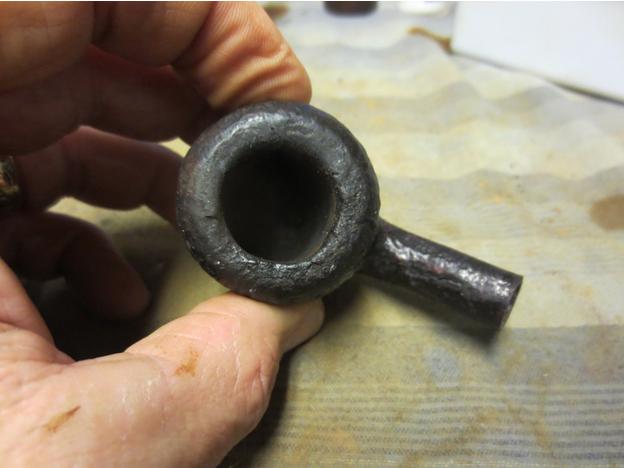
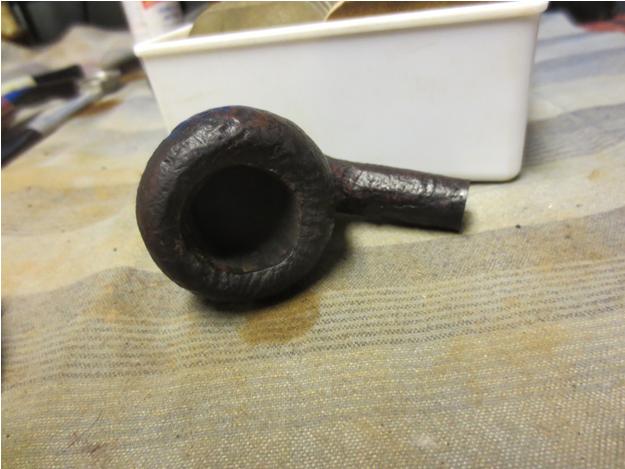
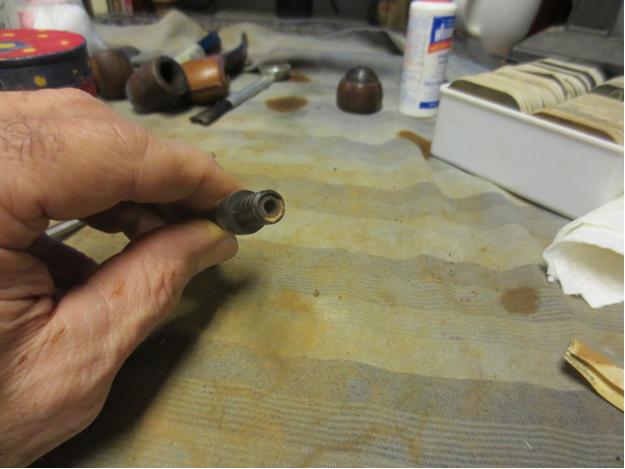
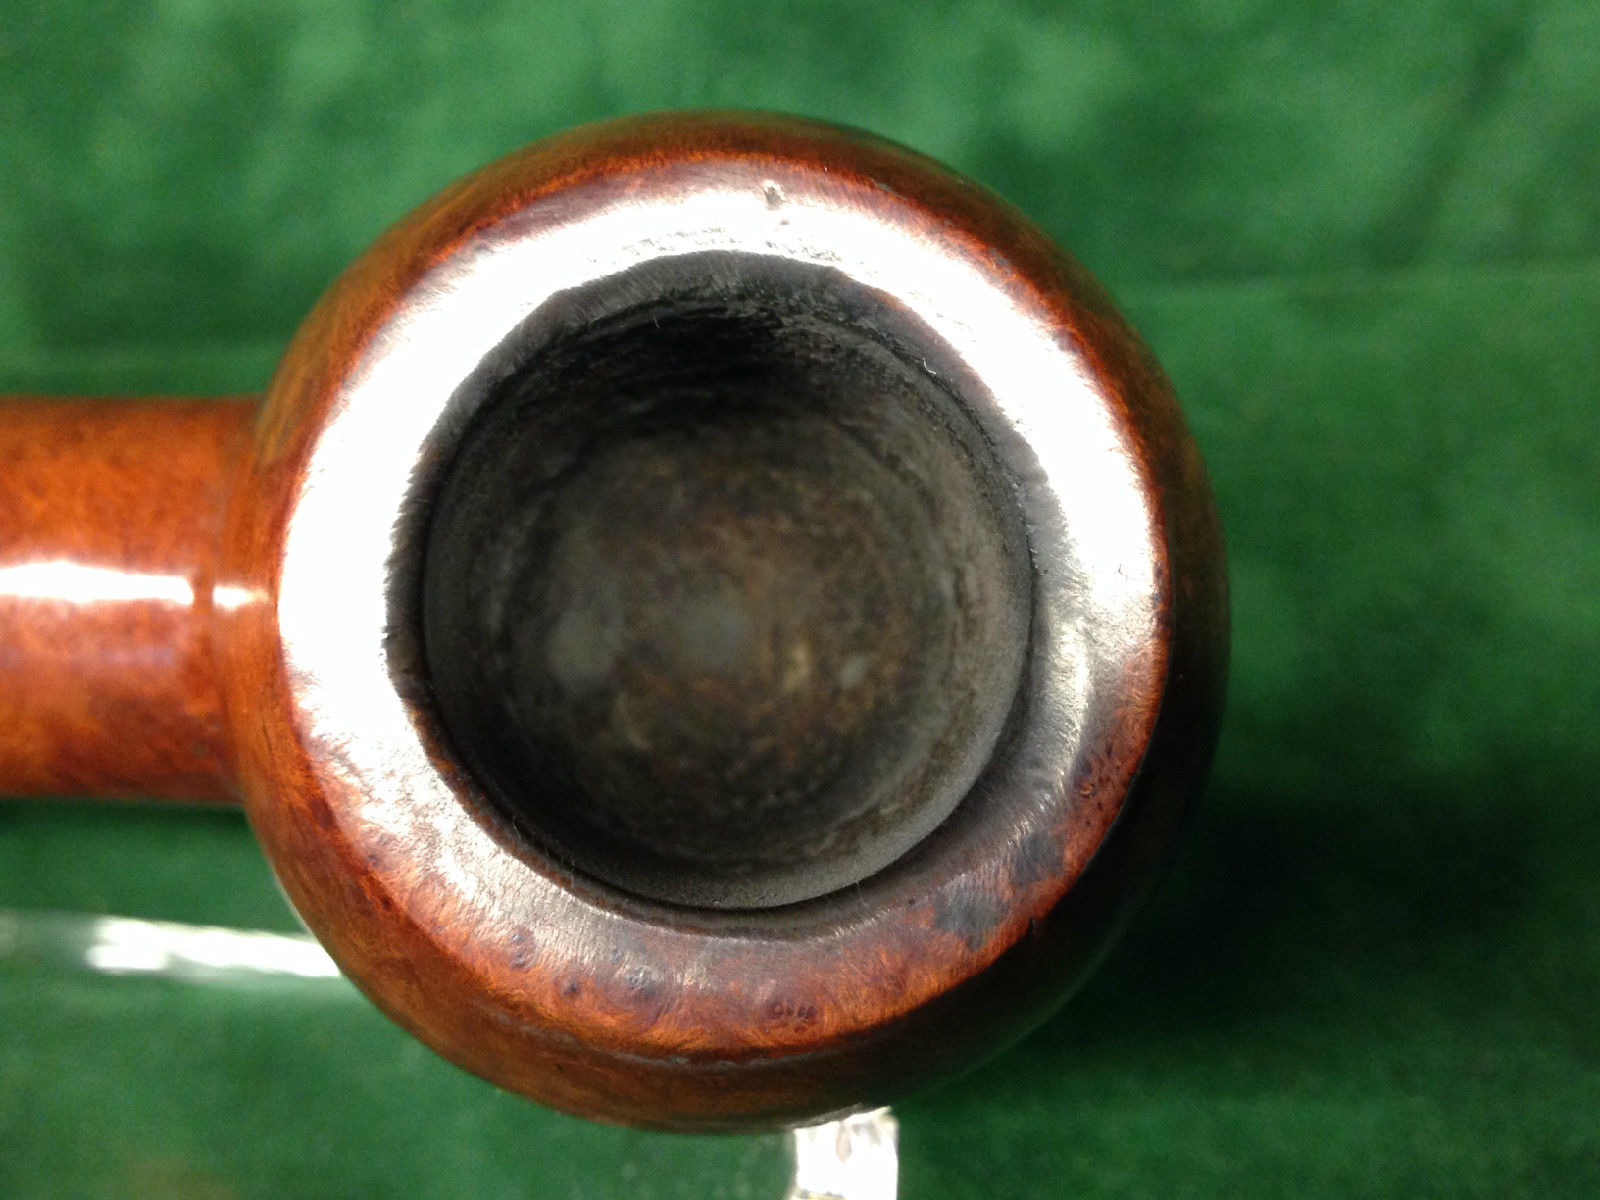
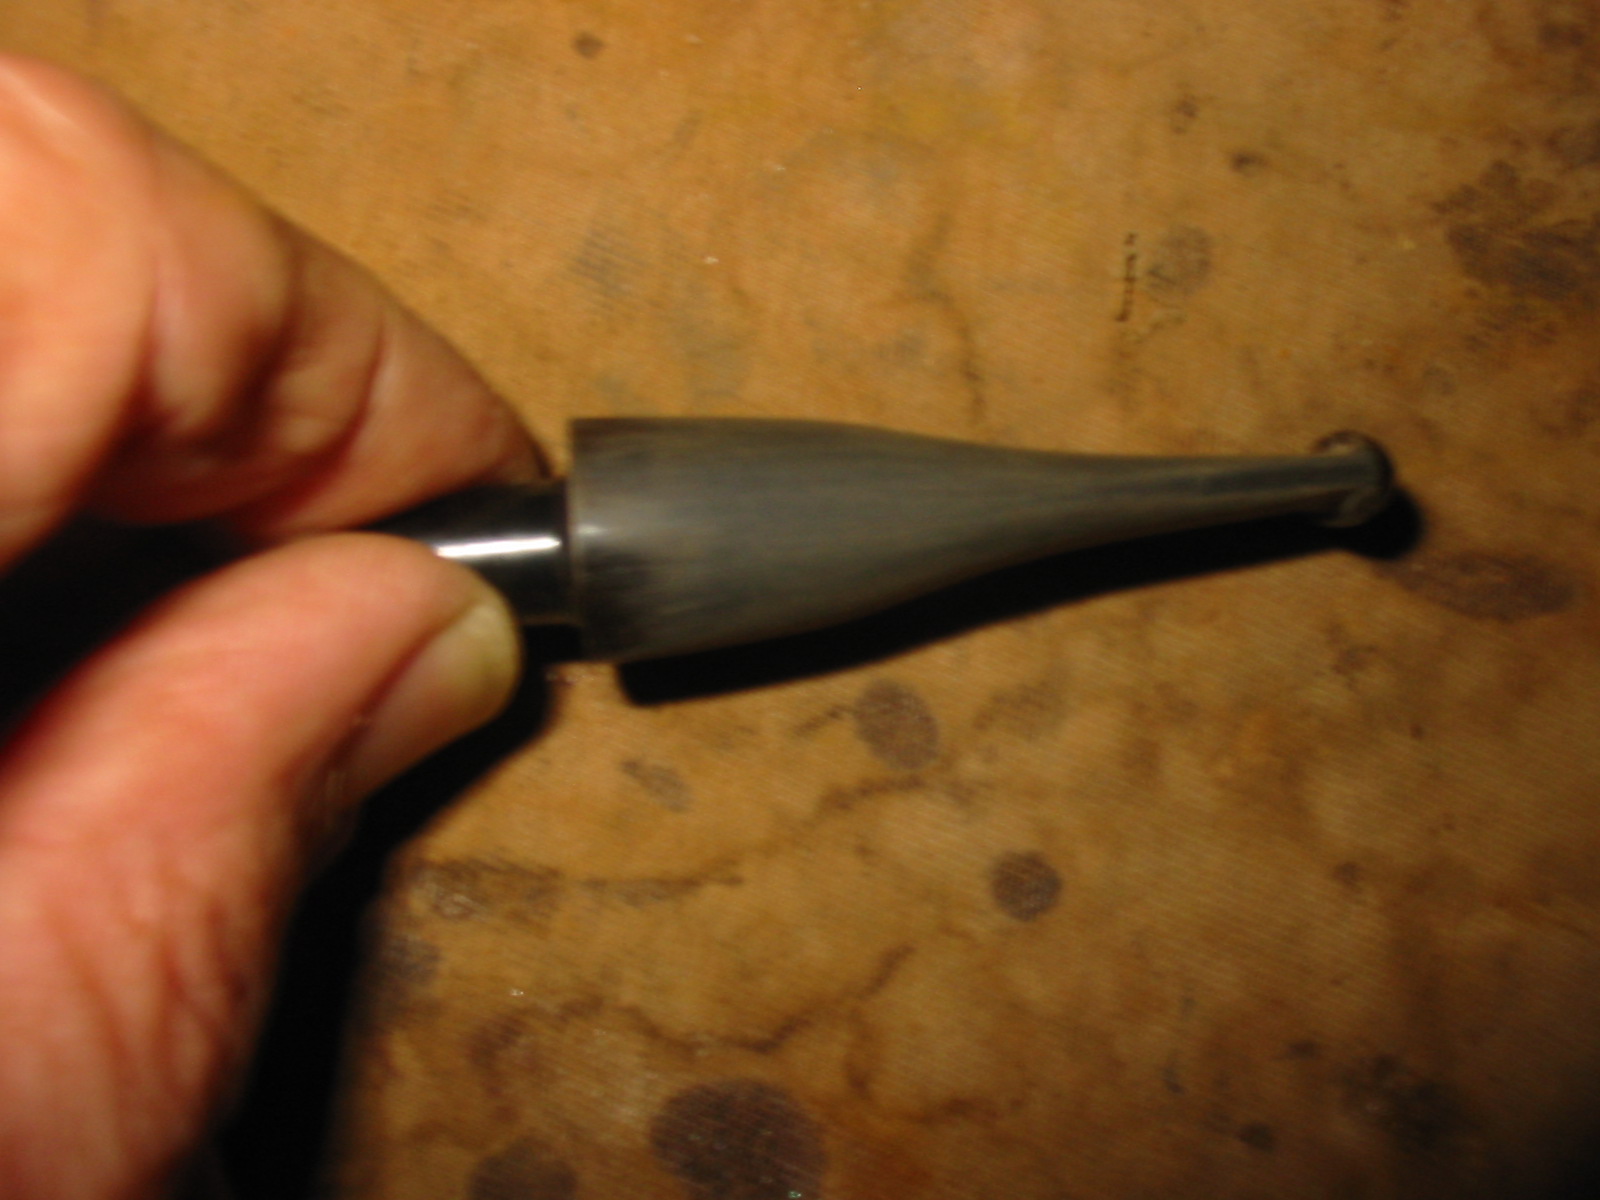
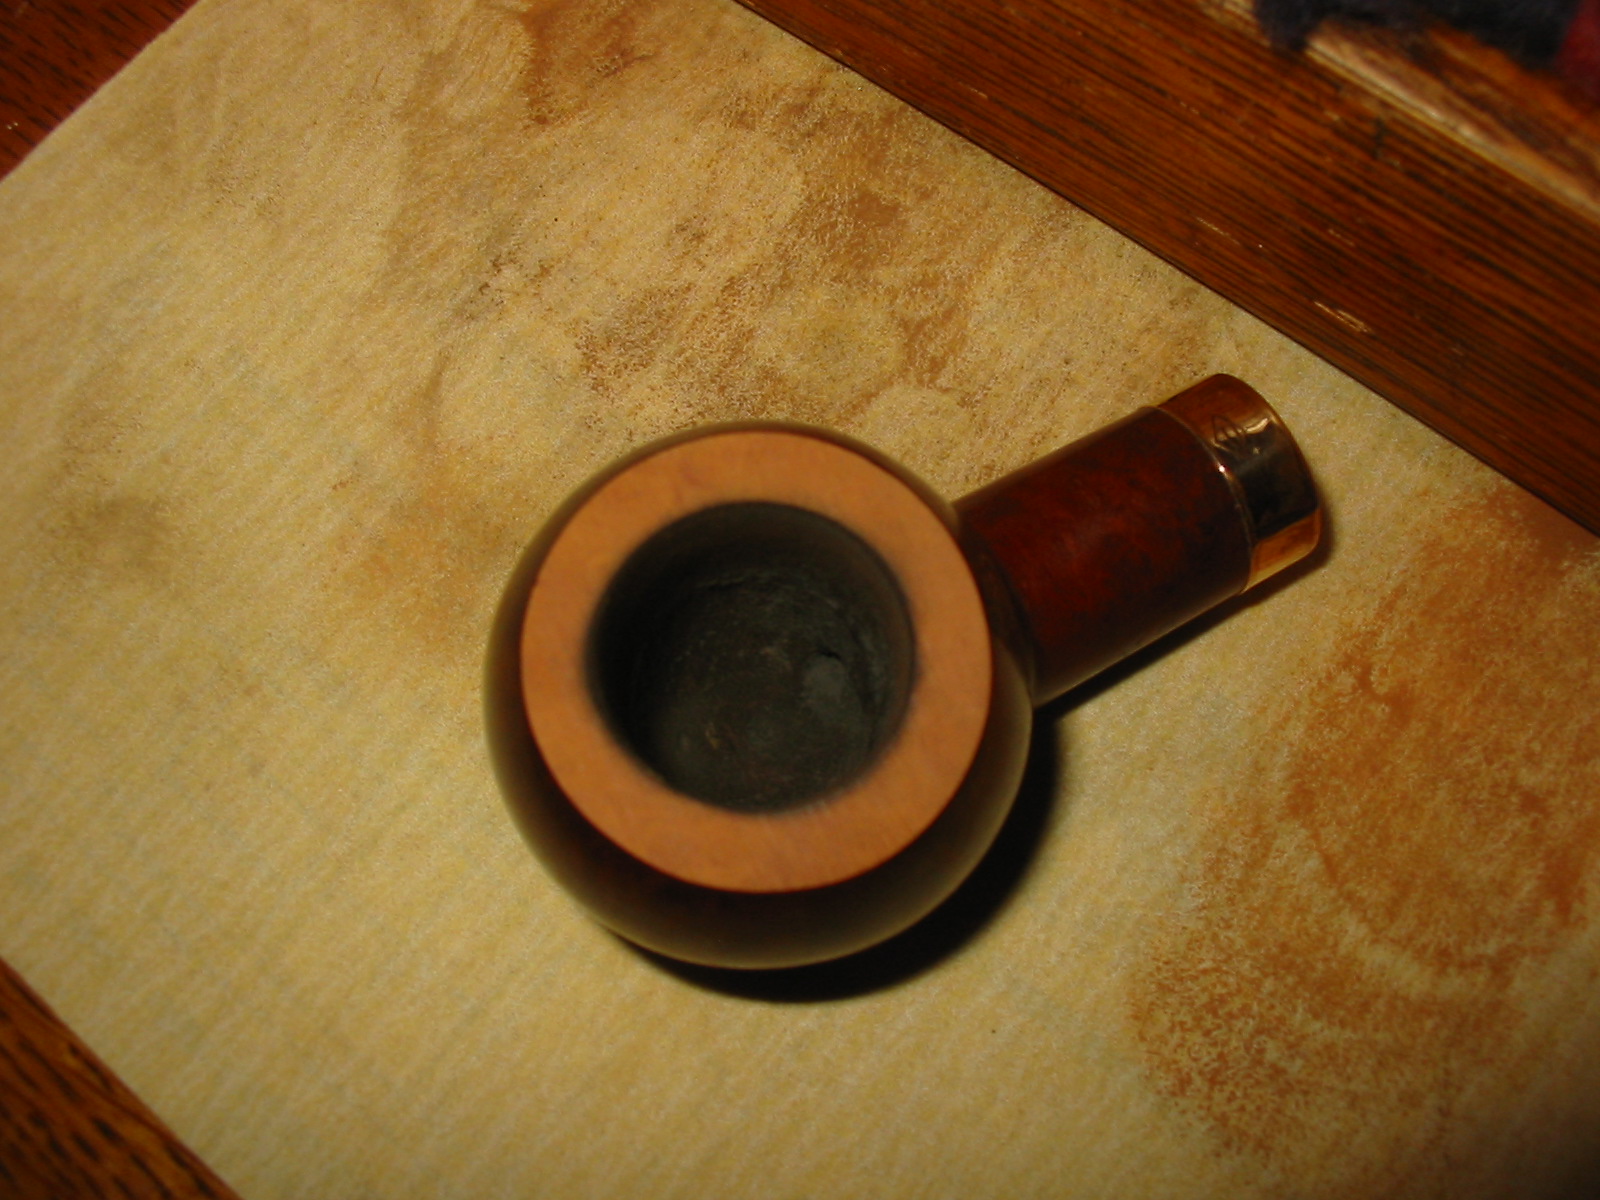
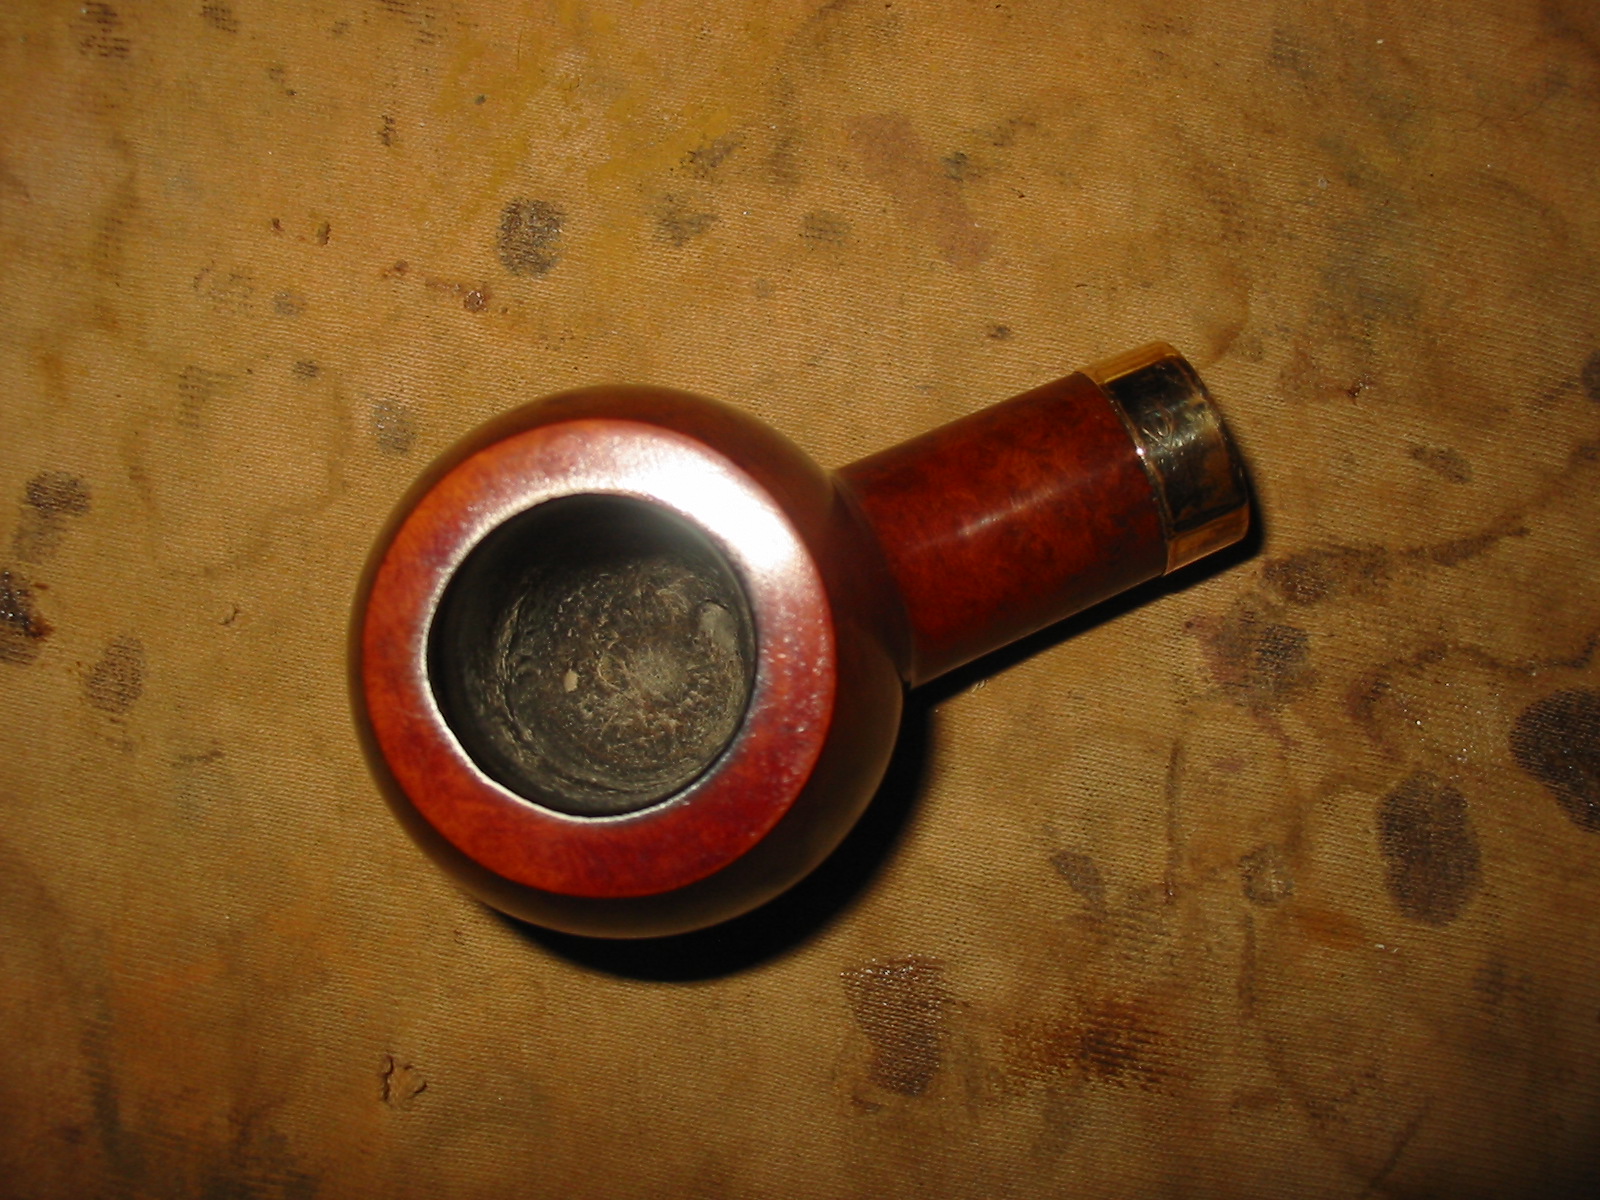
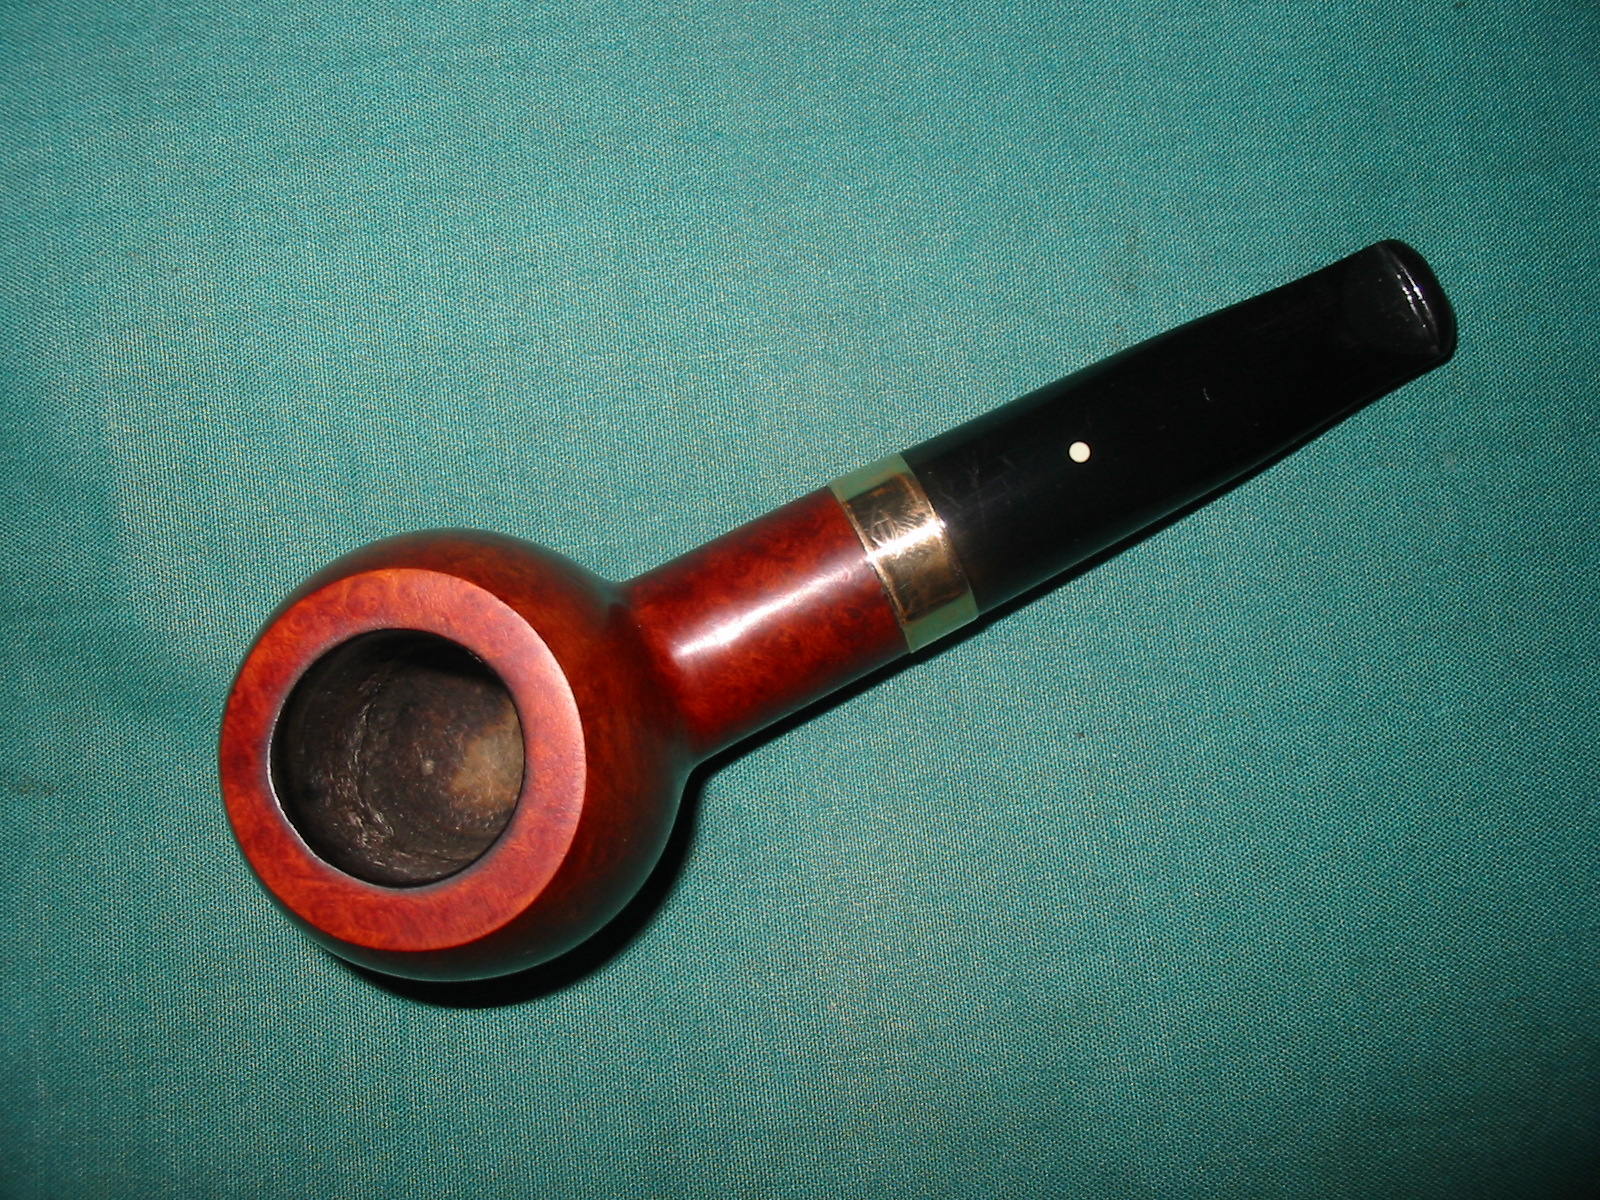
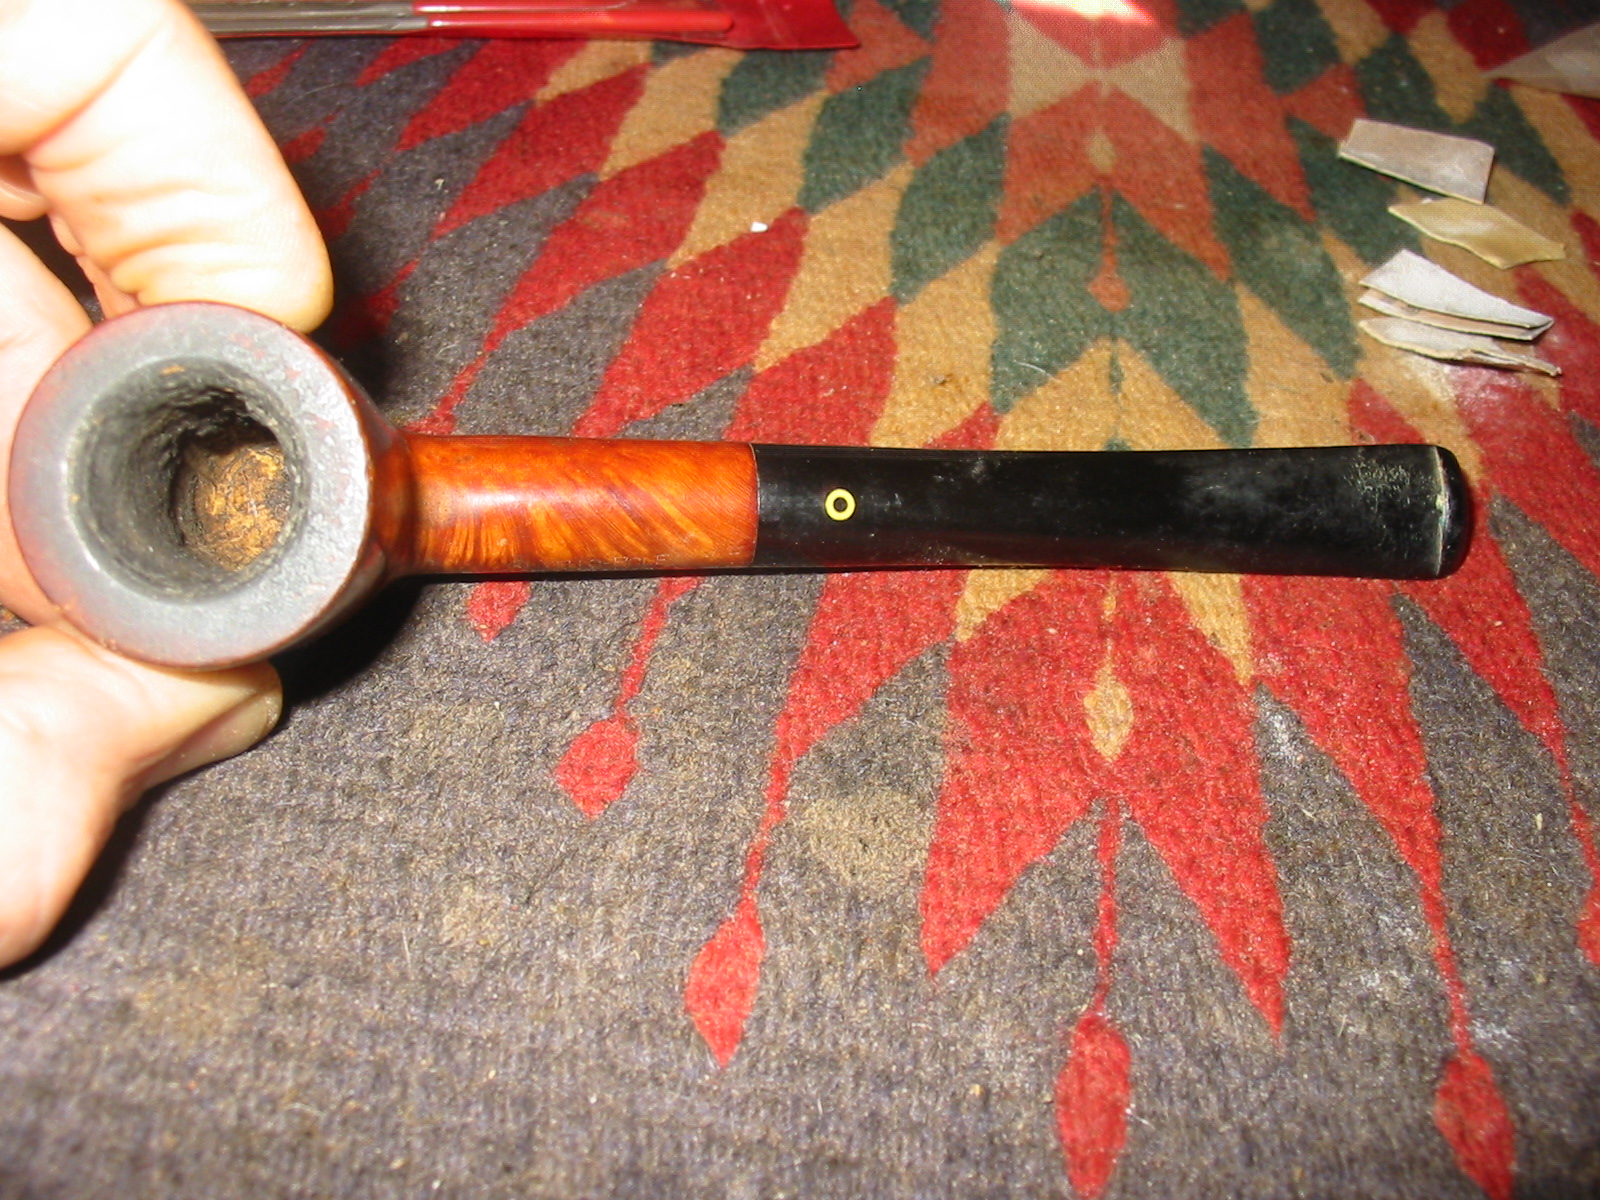
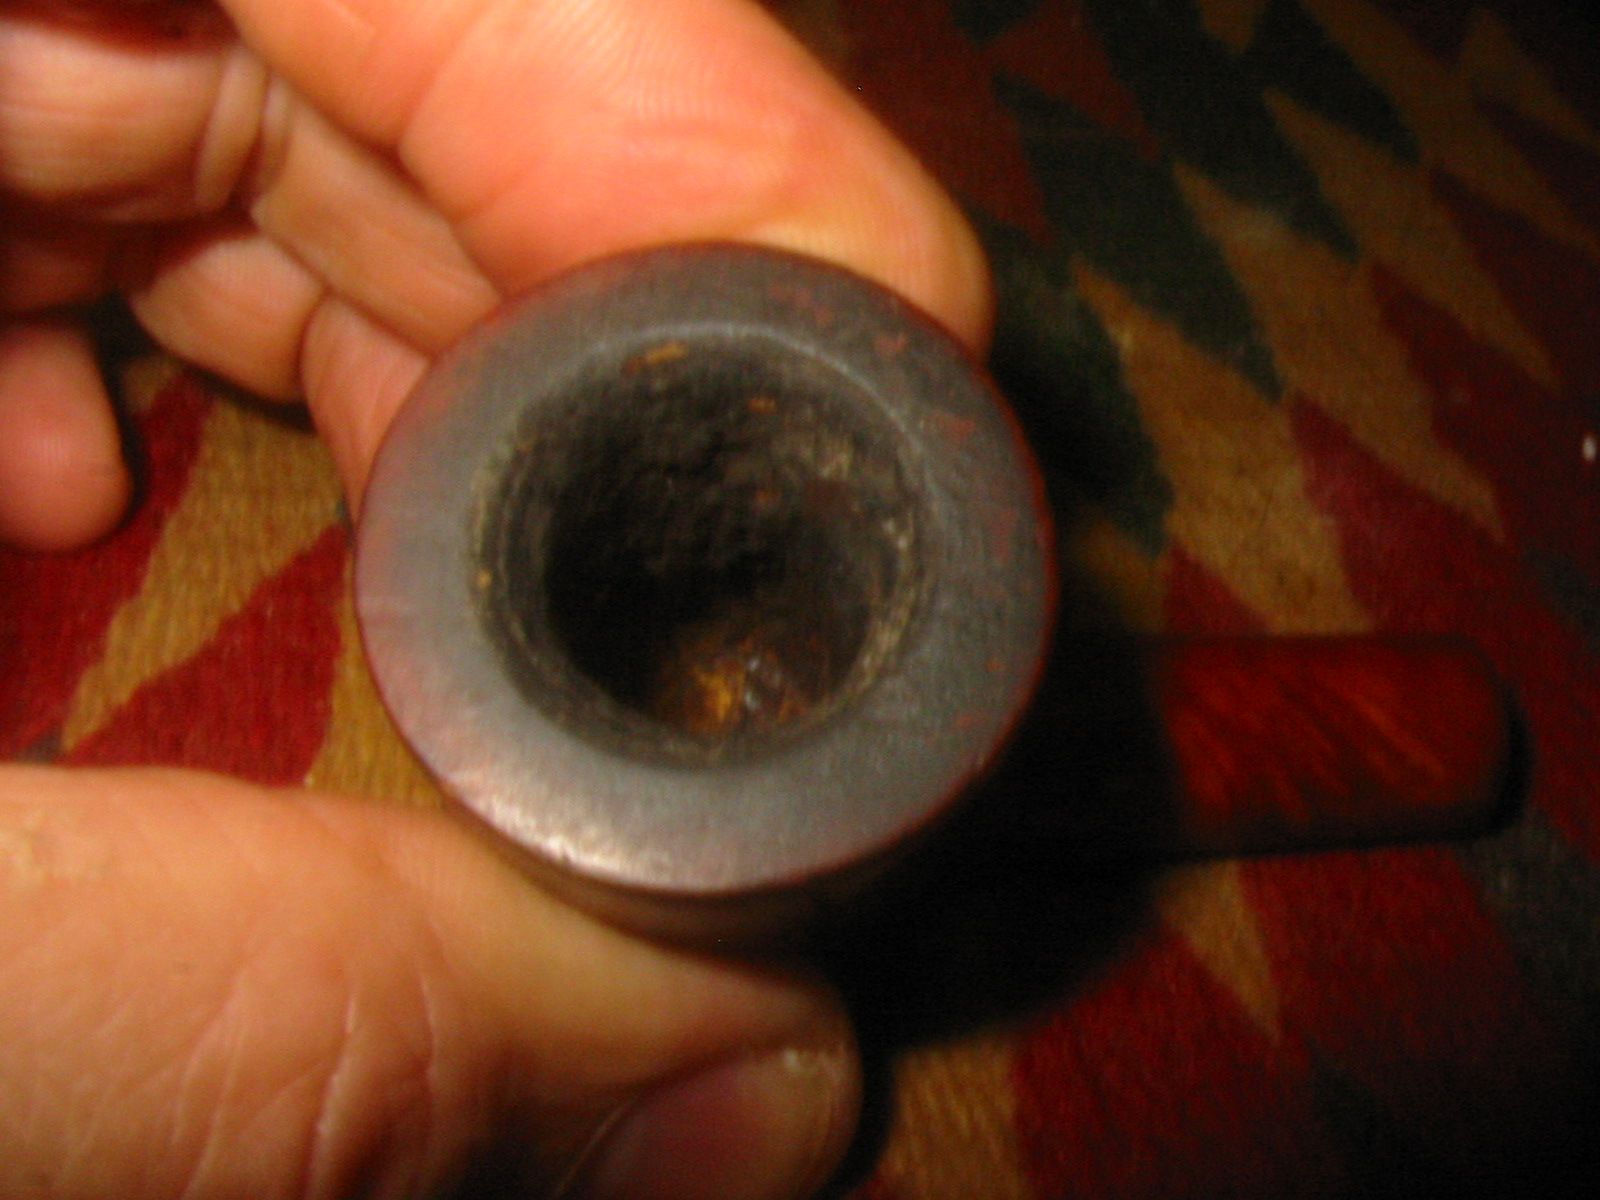
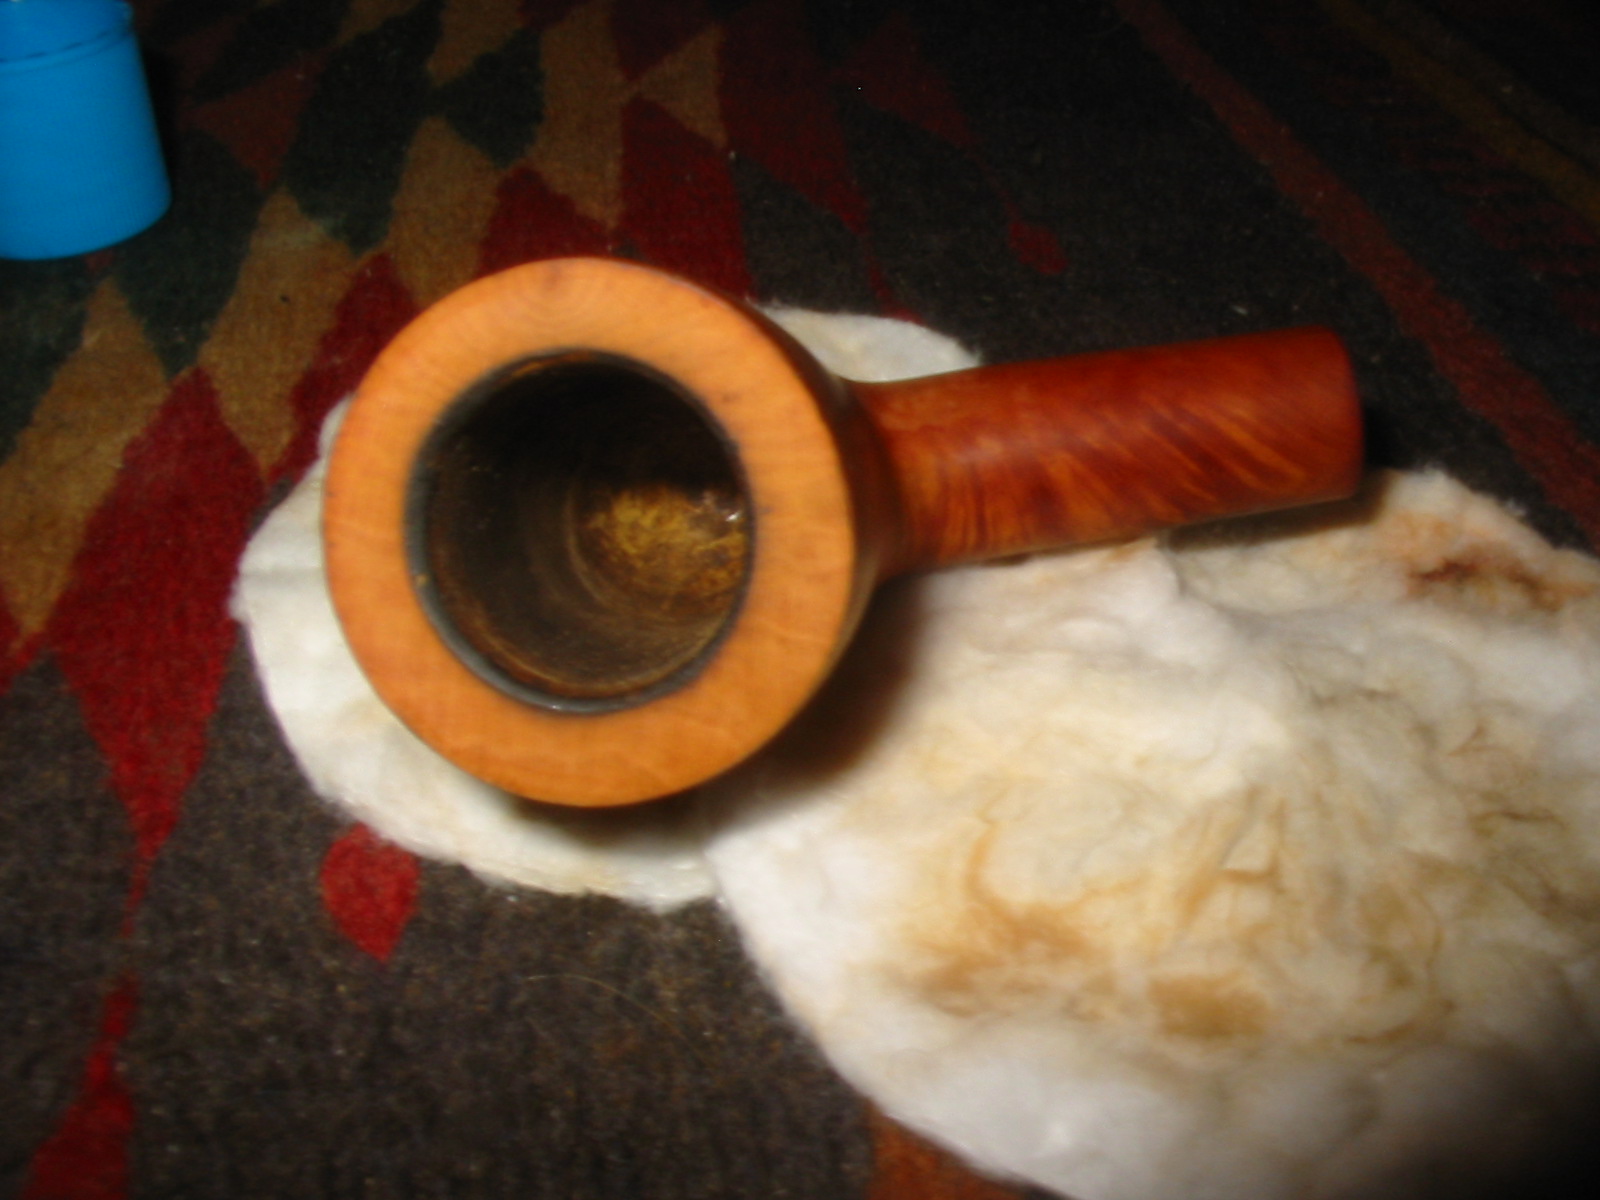
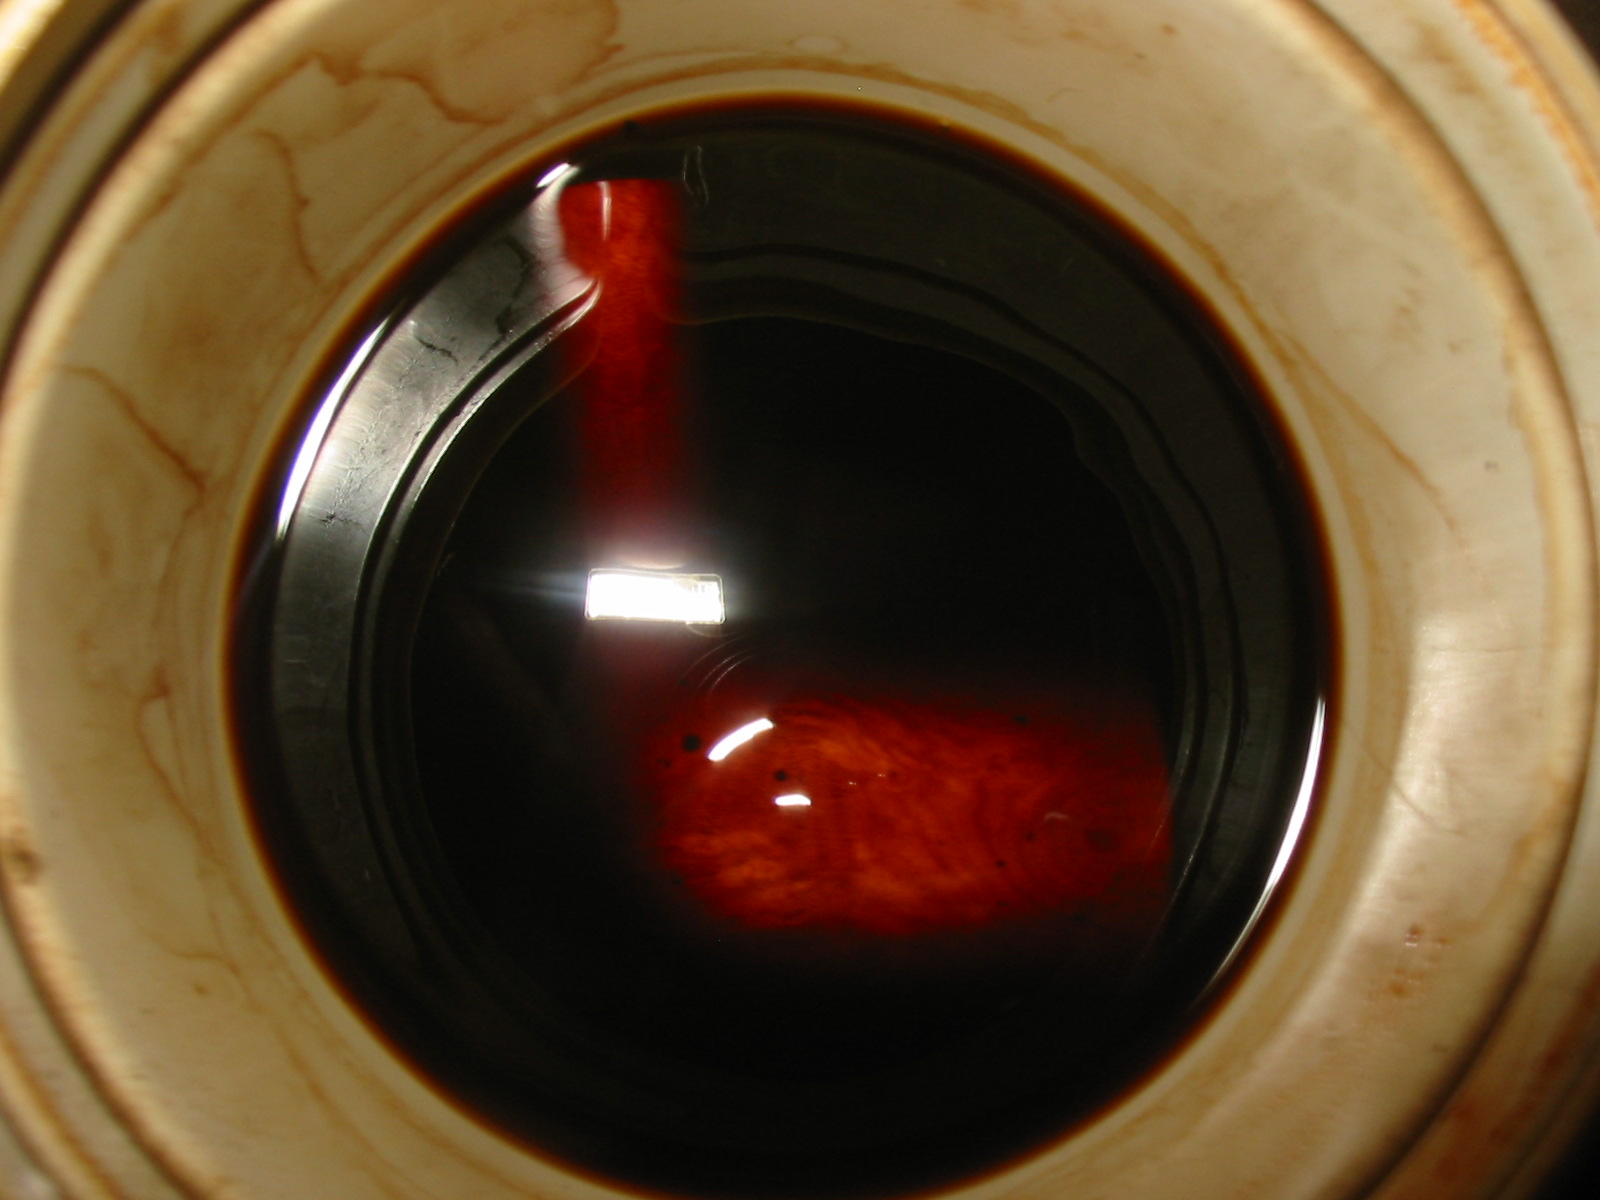
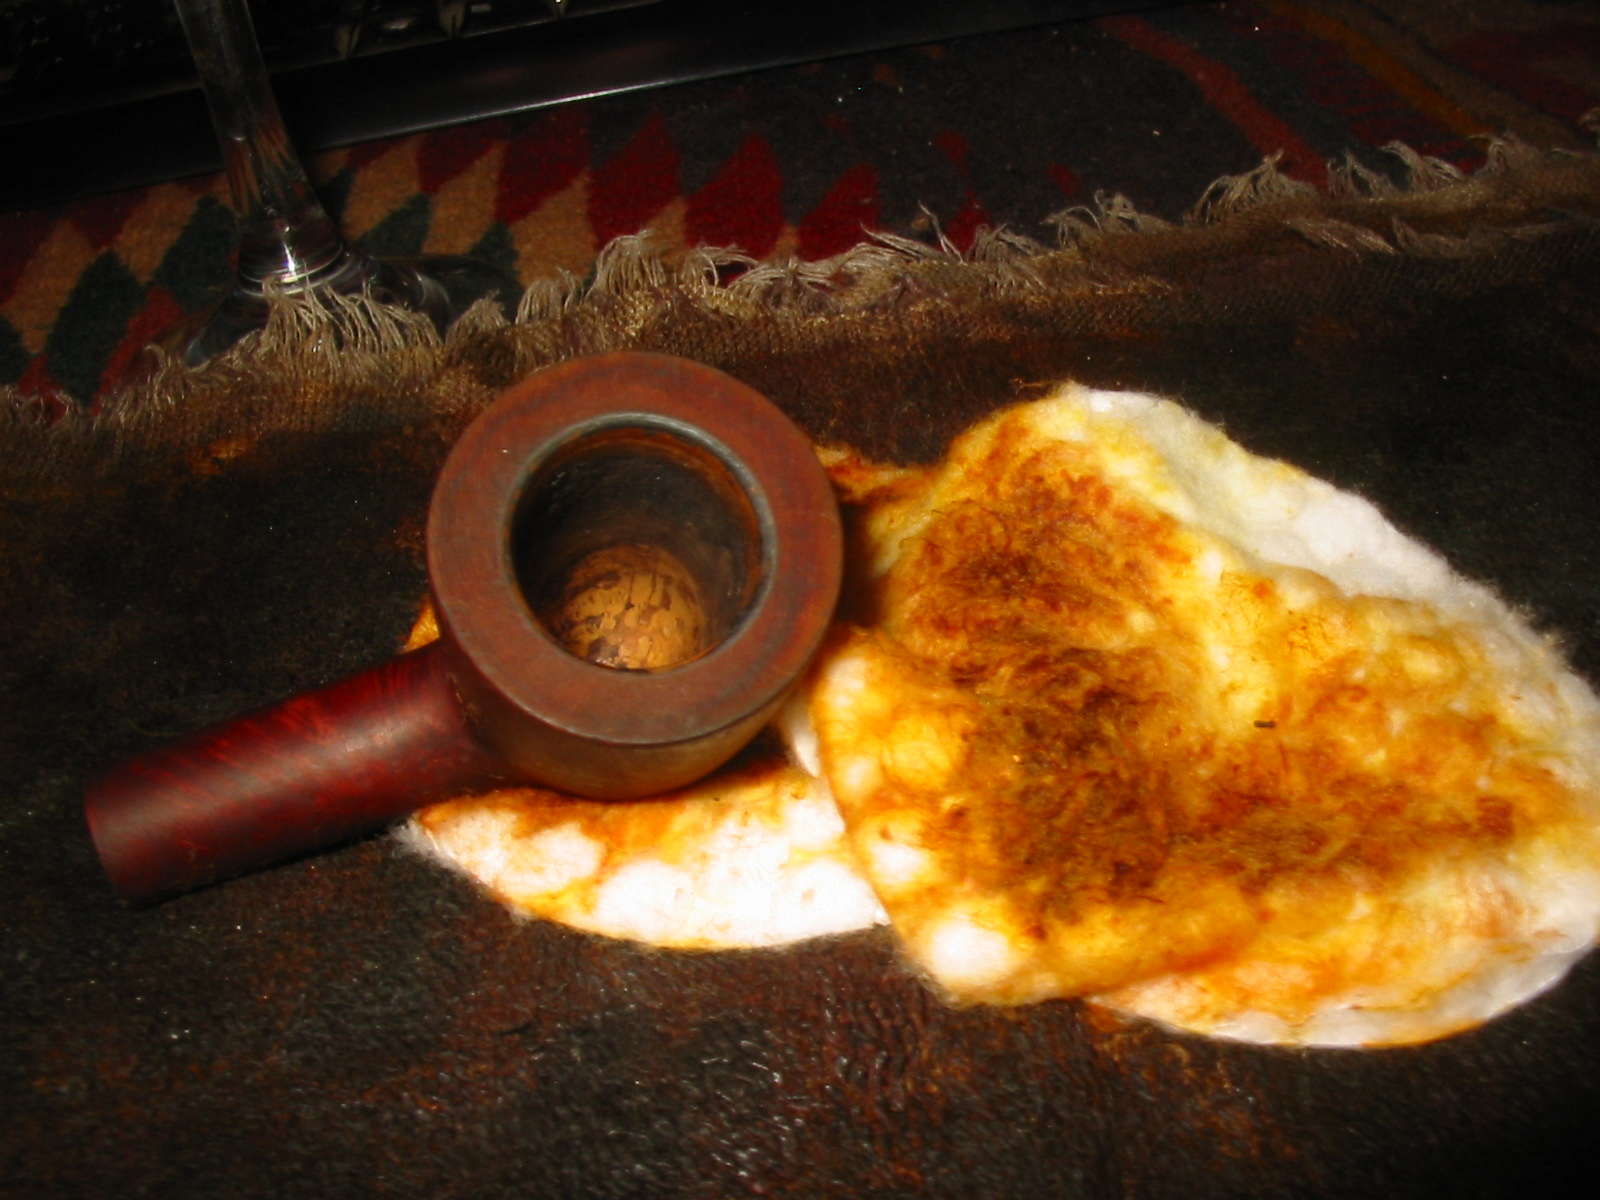
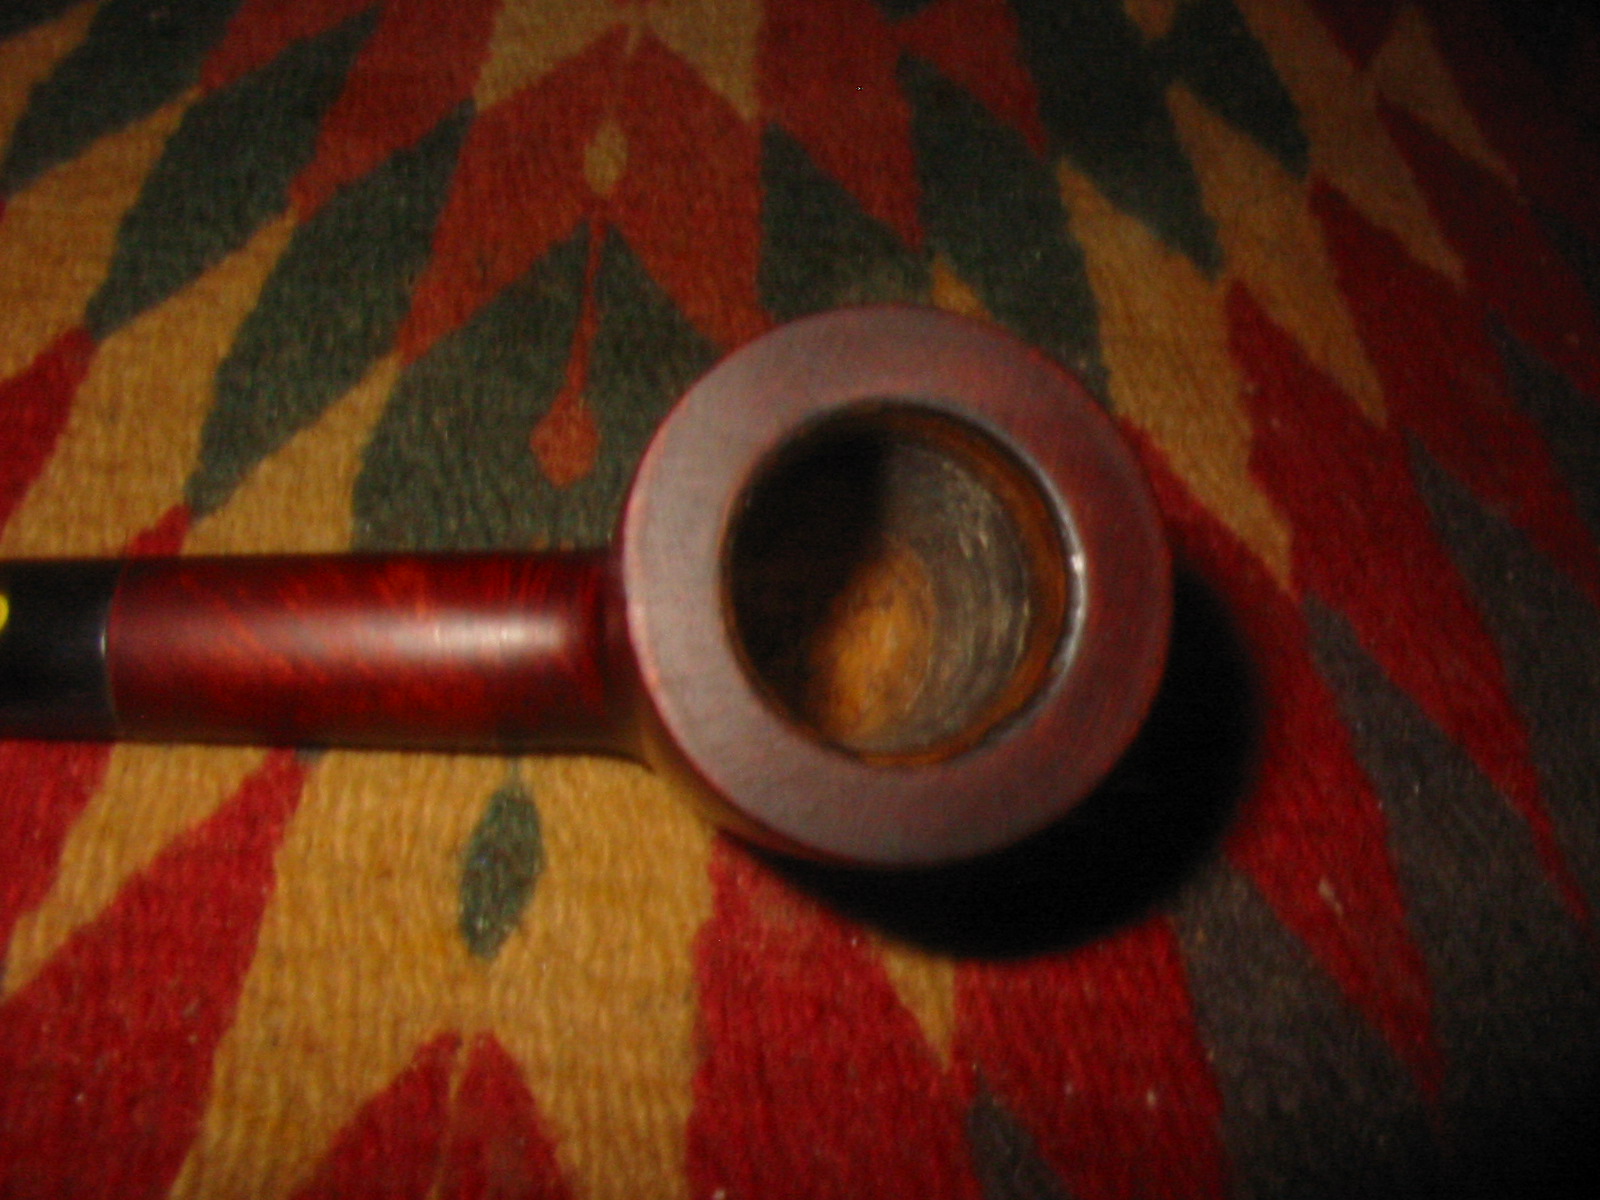
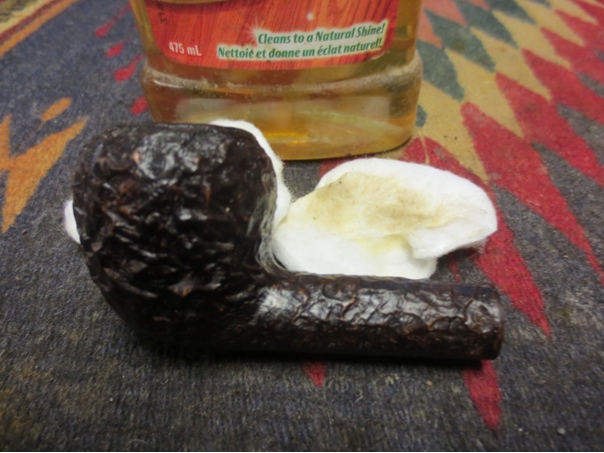
The aluminum Brigham tenon system was in great shape and showed no wear or tear on it. In the past I have taken apart these older Brigham pipes with the aluminum tenon and found it pitted and sometimes even eaten away. The filter surprised me in that when I pulled it out it was actually quite clean. The bowl was very clean and the rim was also clean.Brig7 
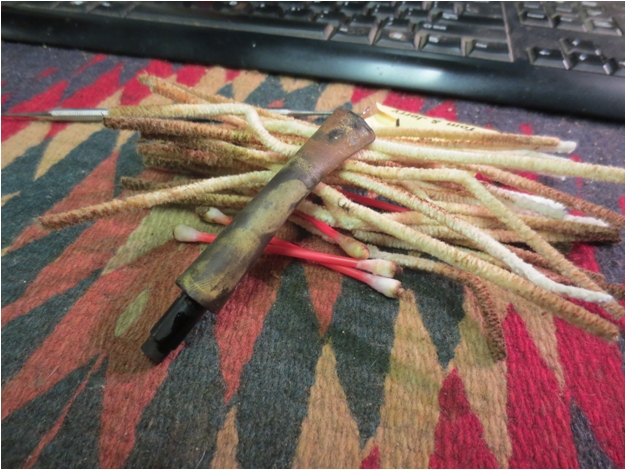
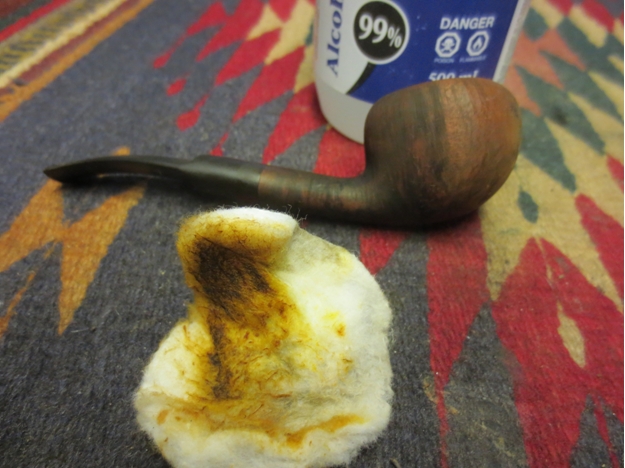
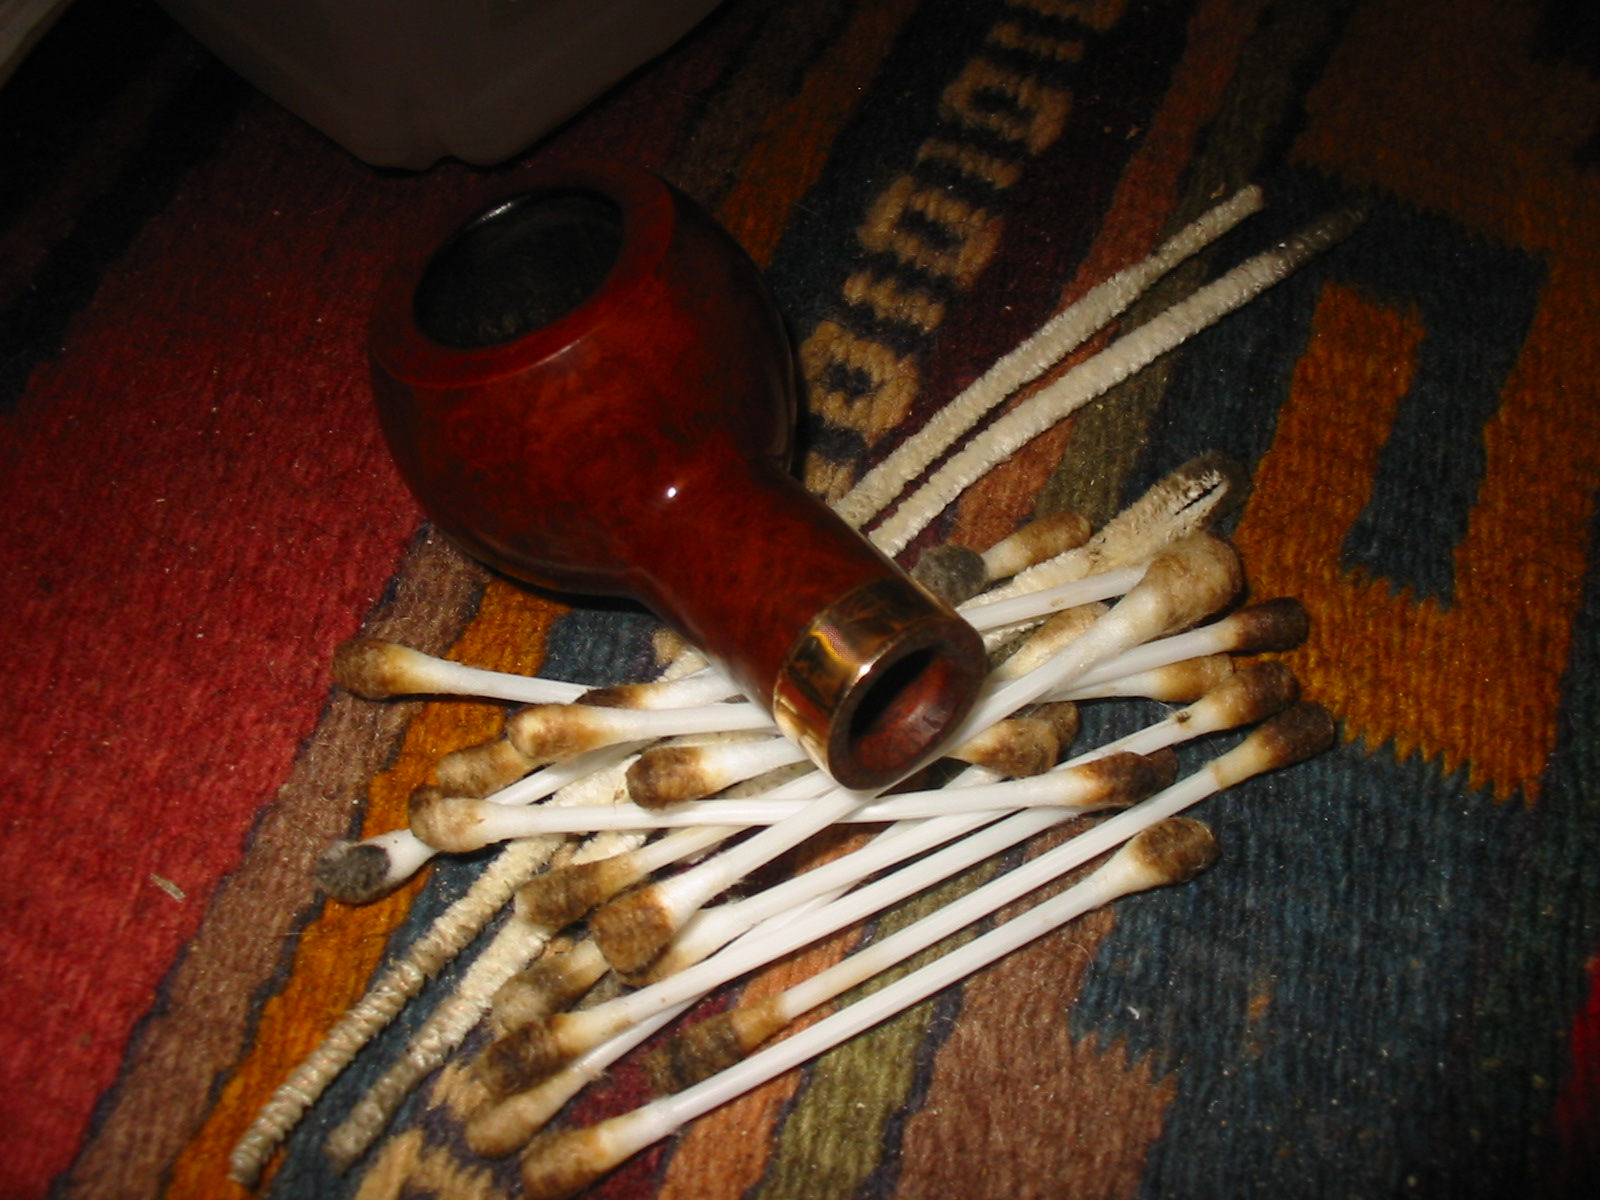
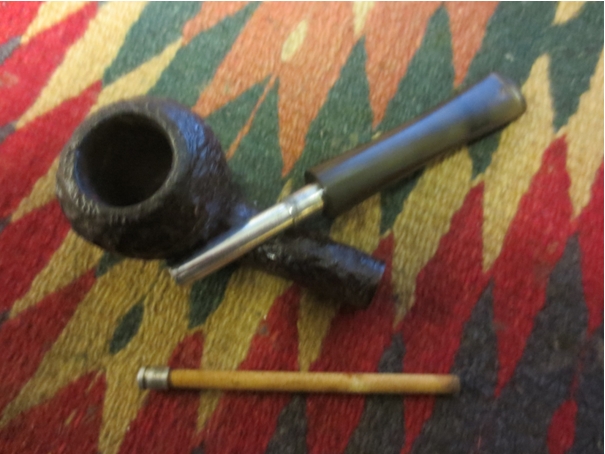
I cleaned out the aluminum tenon and the mortise area with isopropyl alcohol (99%) and cotton swabs and pipe cleaners. I ran them through the shank and stem until they came out clean.Brig8
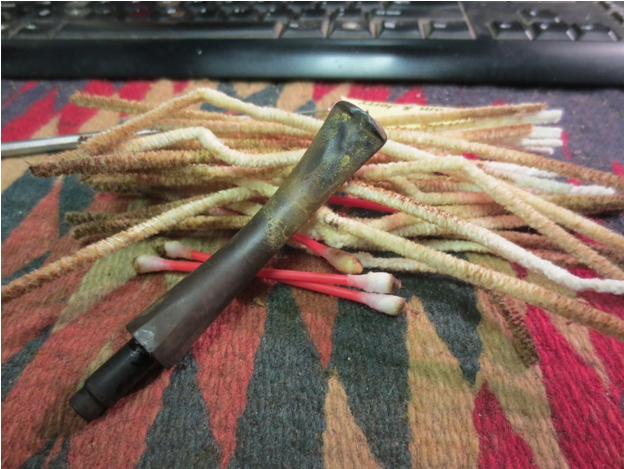
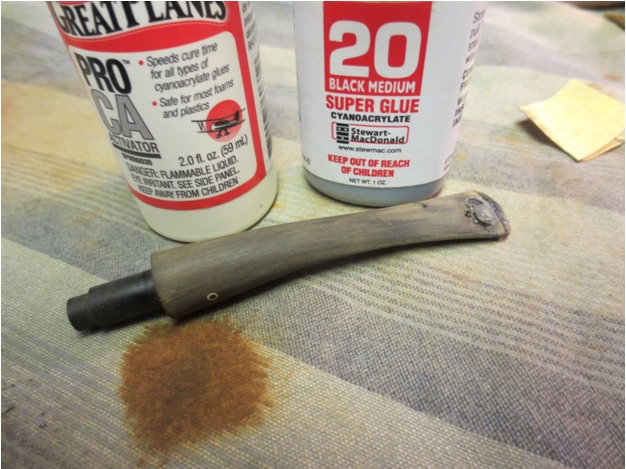
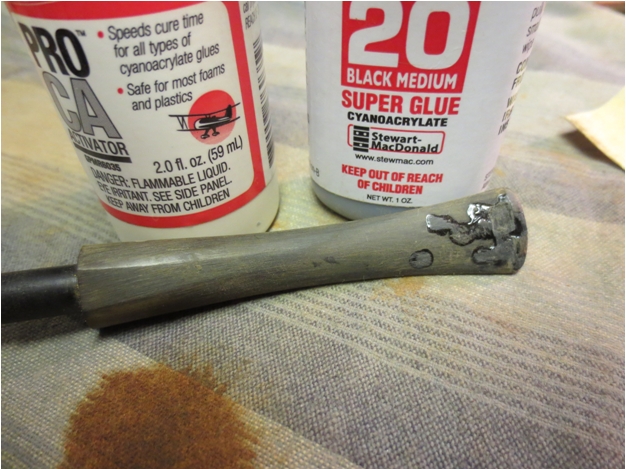
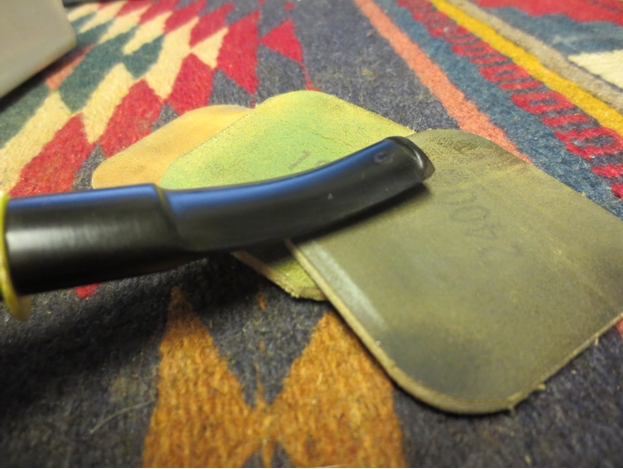
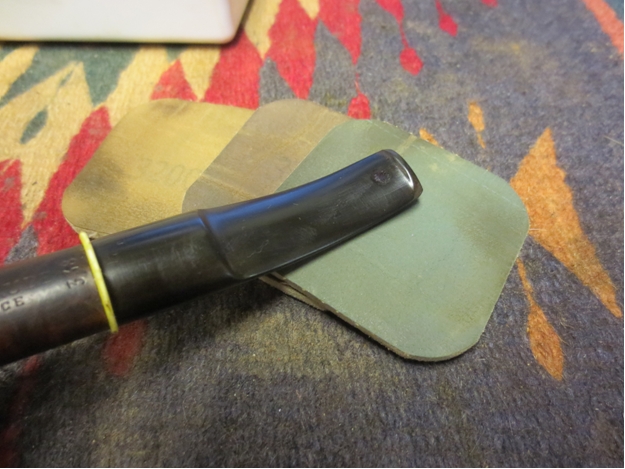
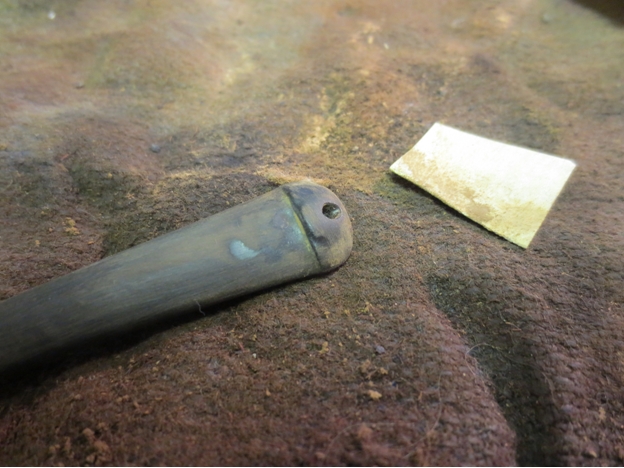
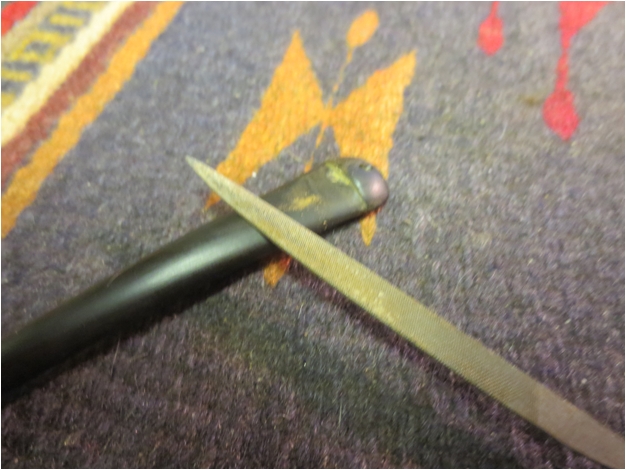
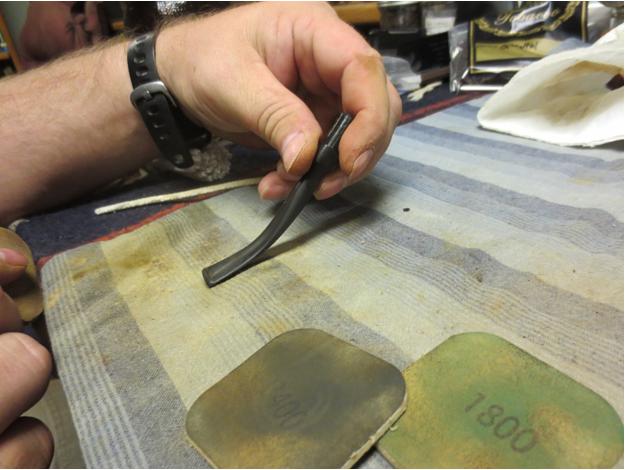
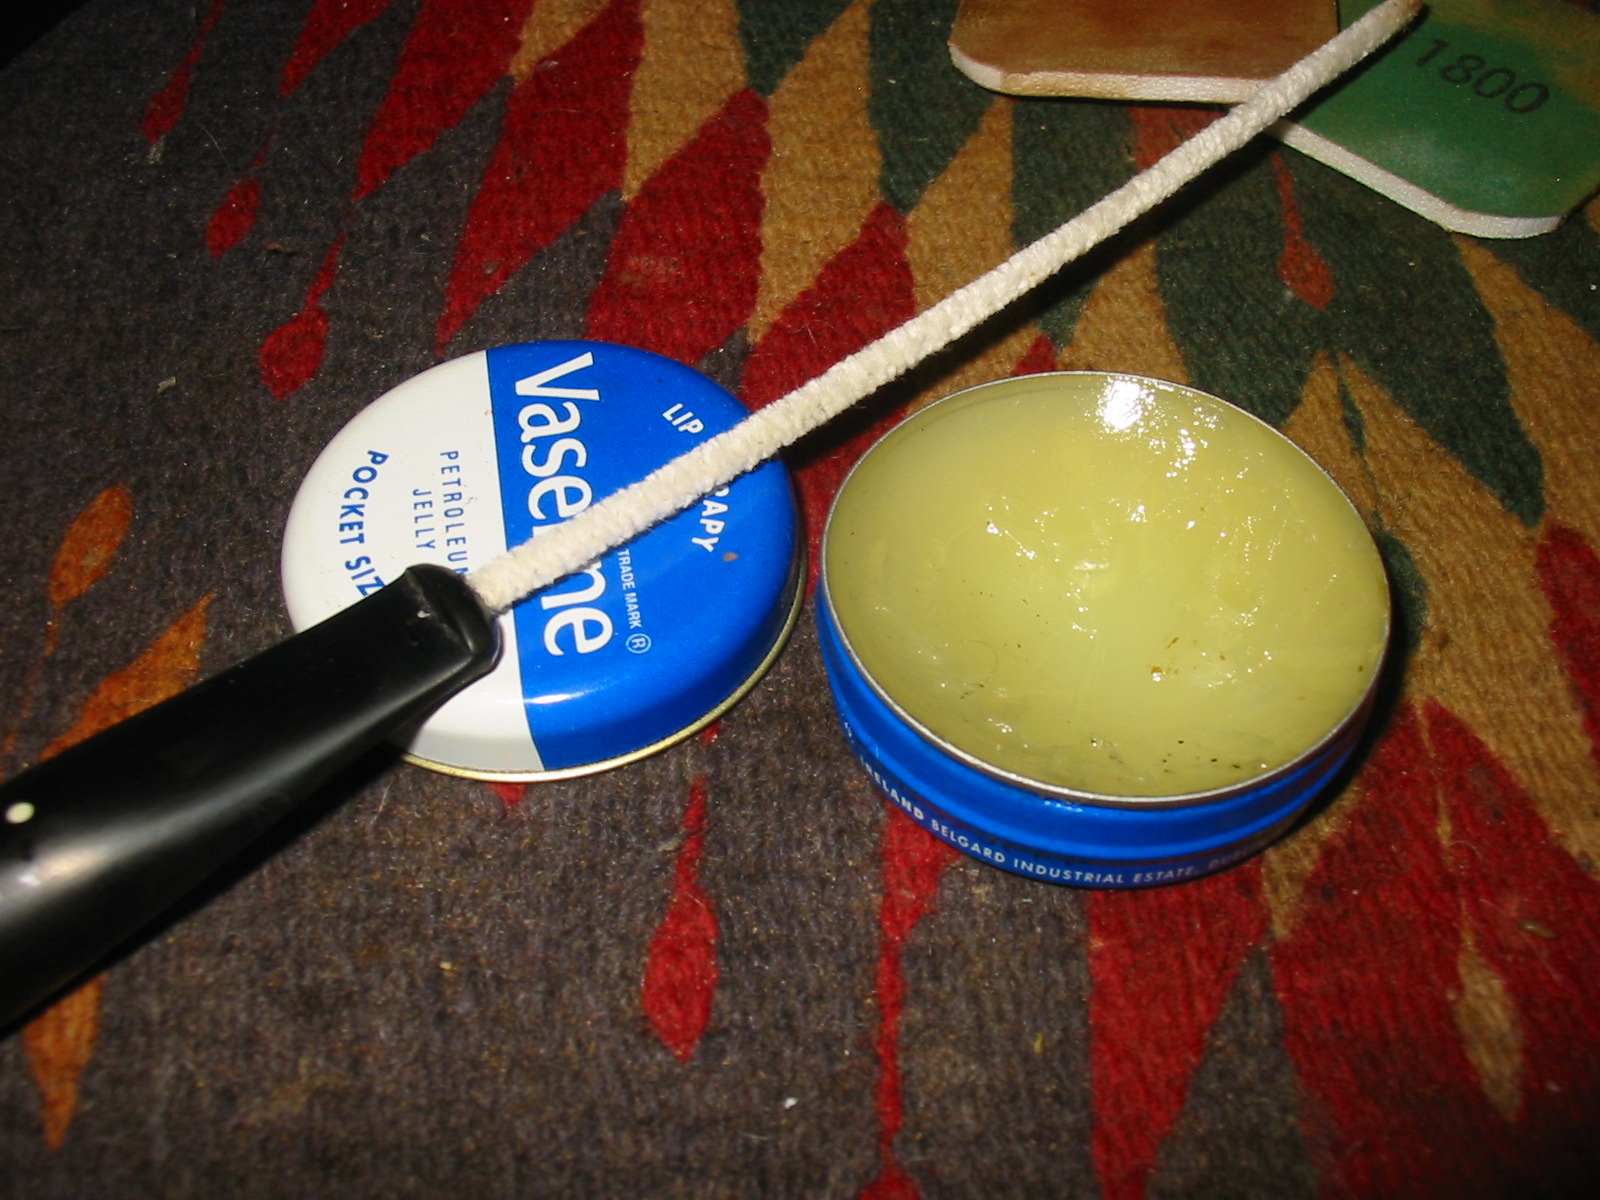
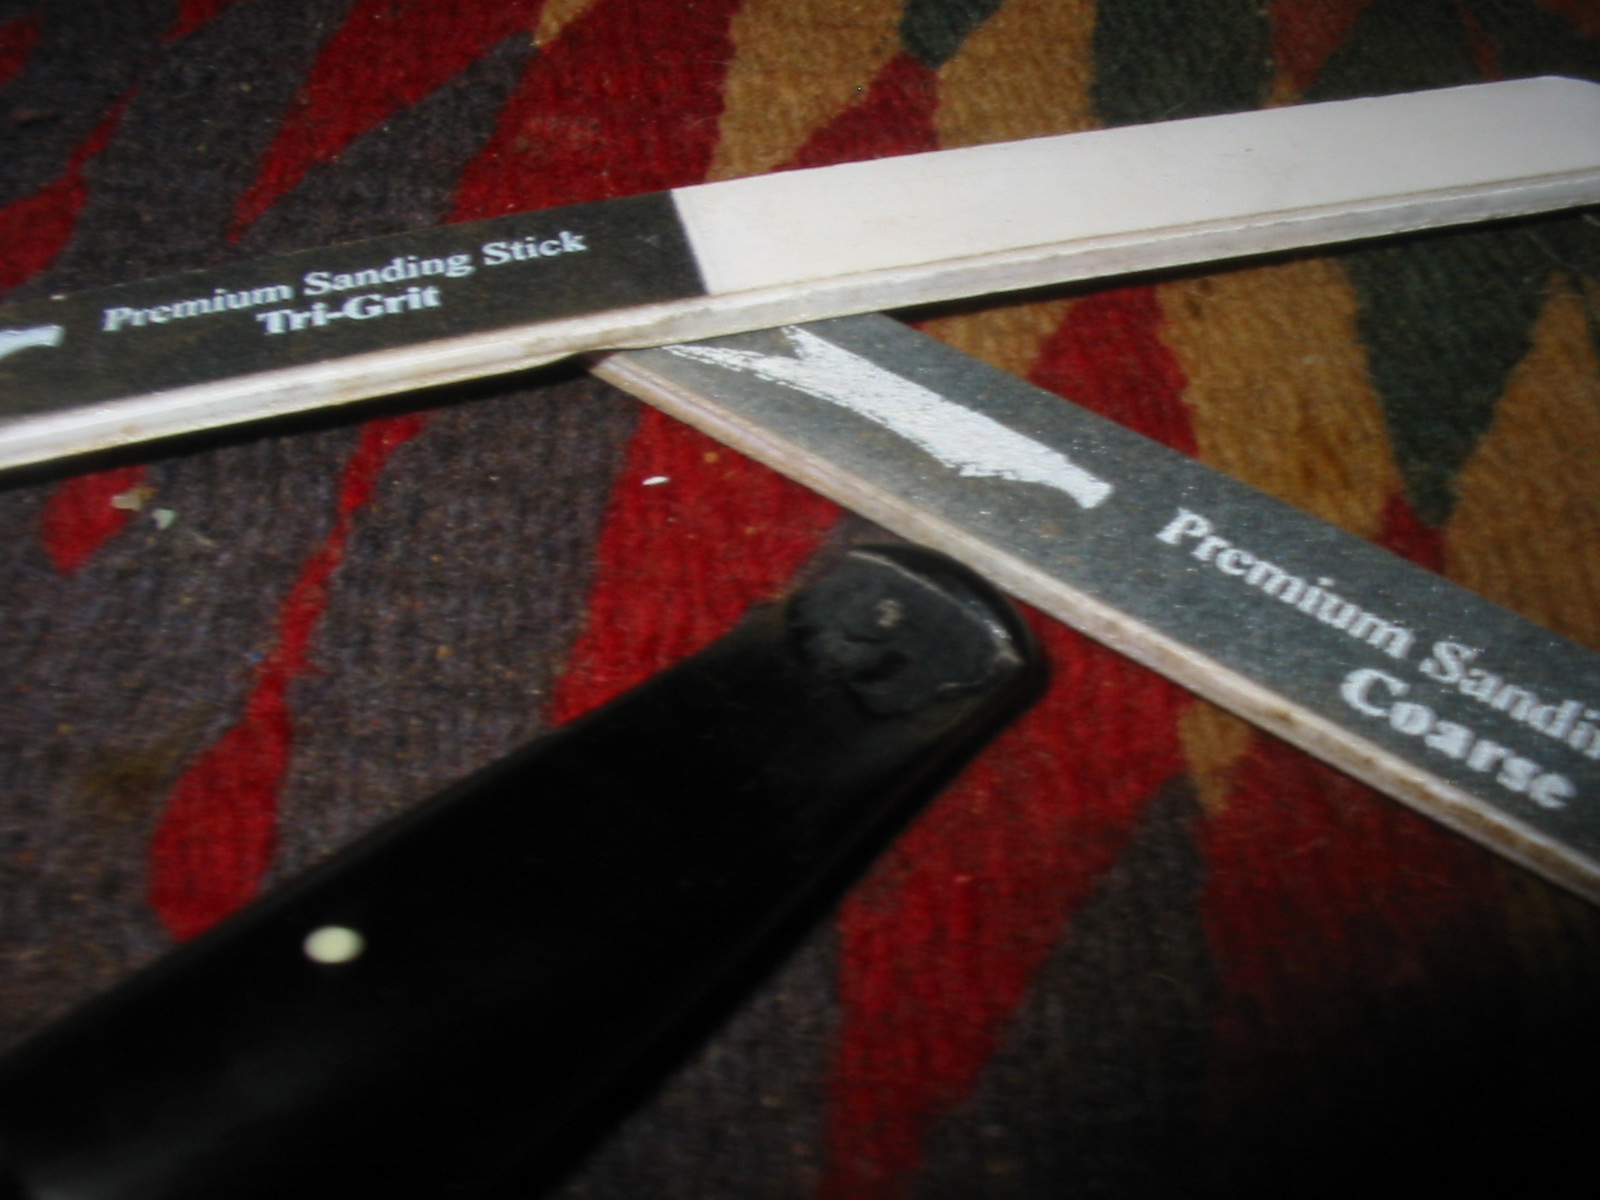
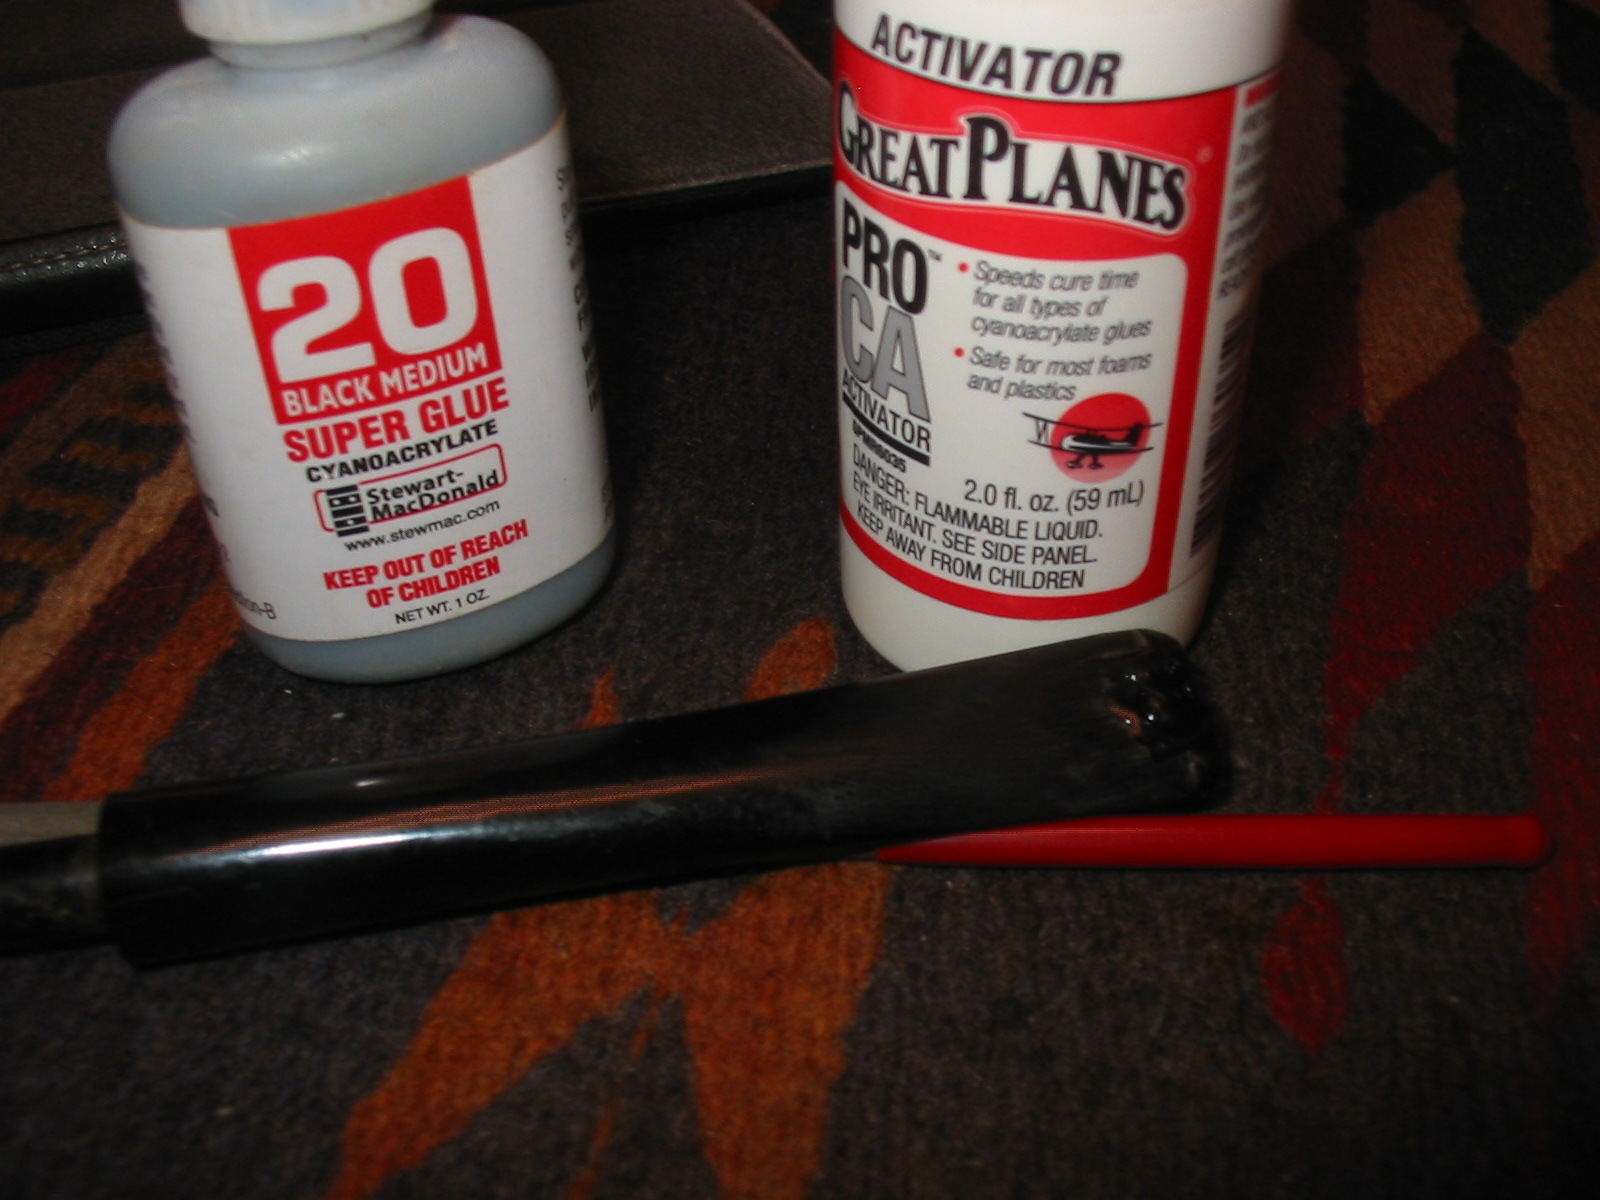
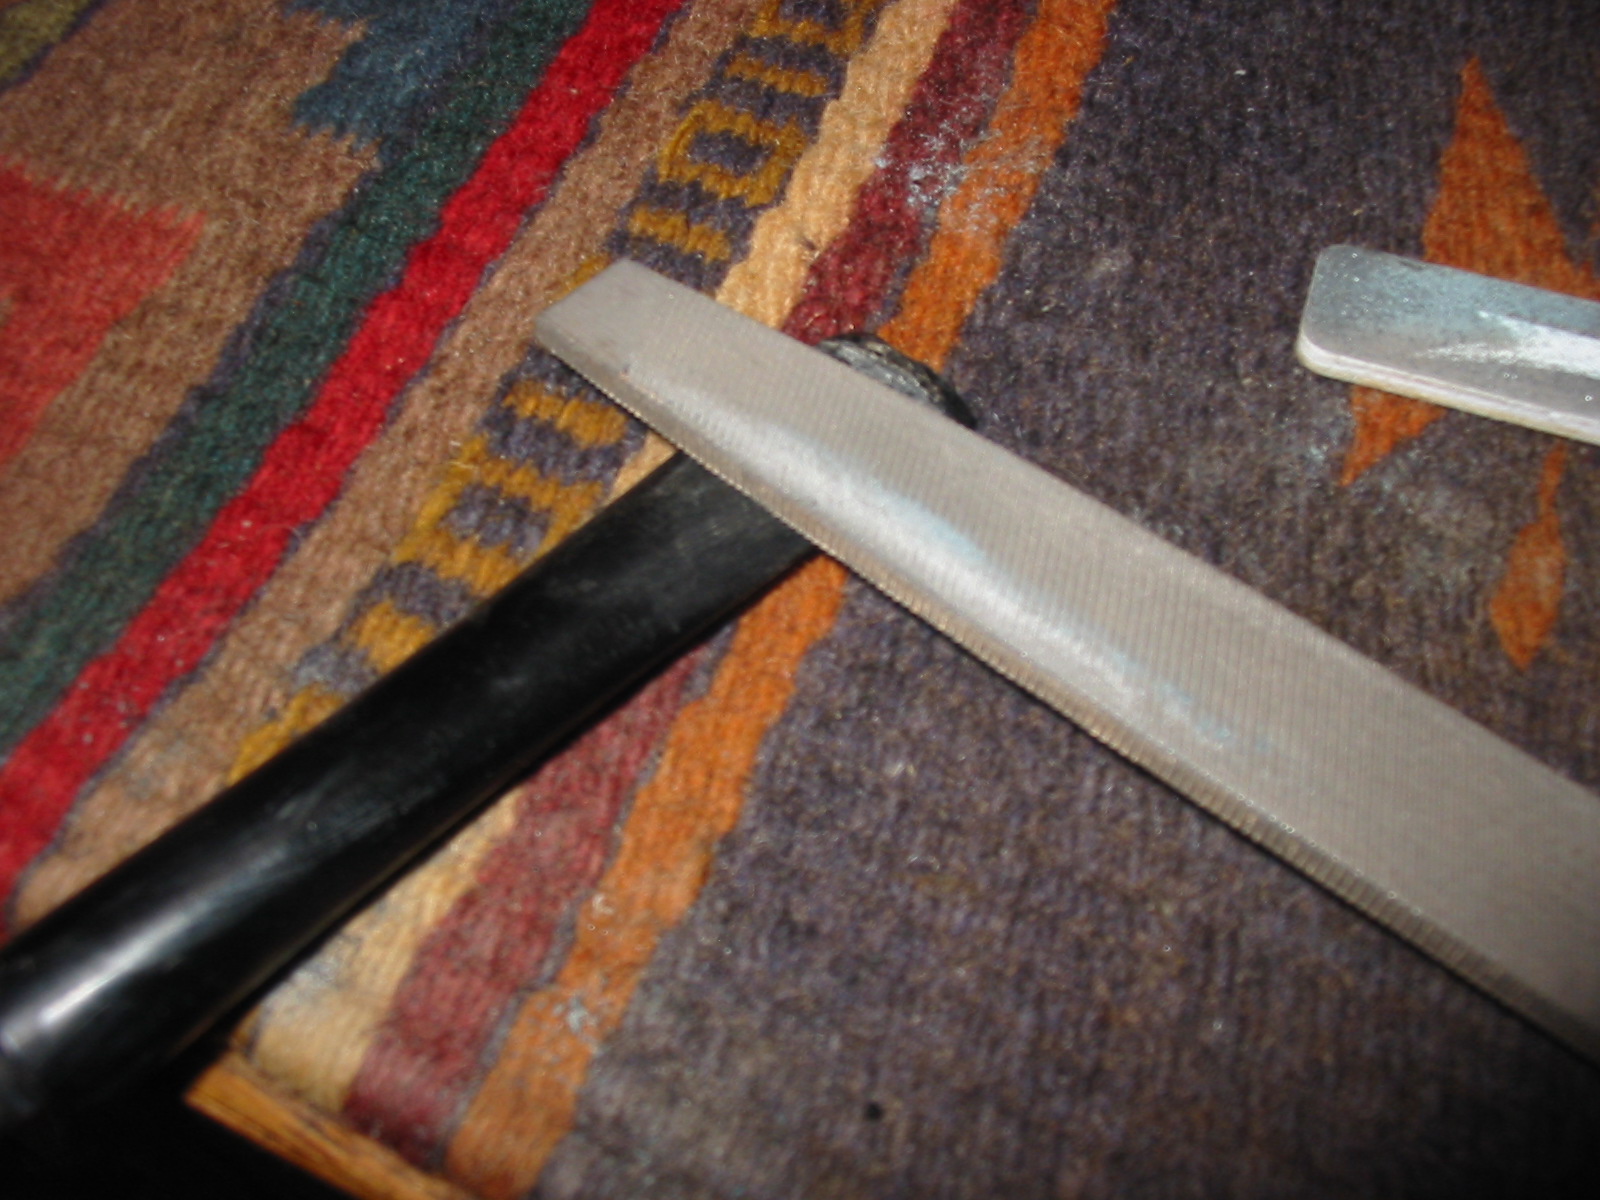
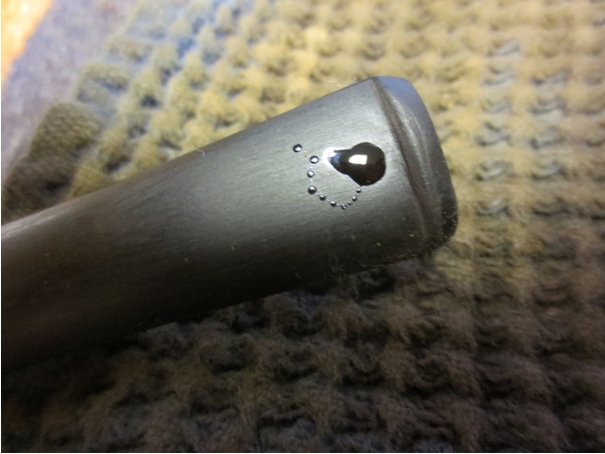
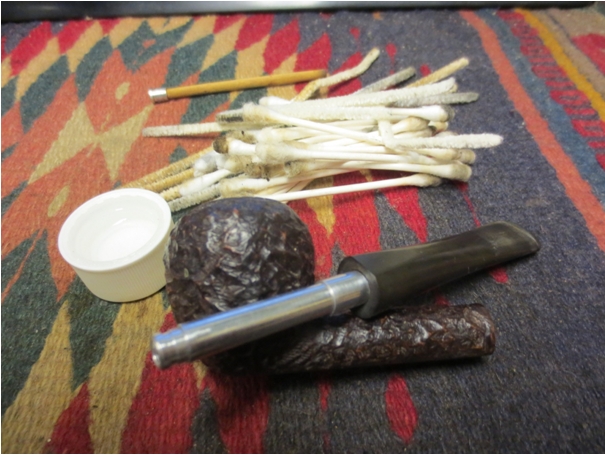
I sanded the stem with 220 grit sandpaper, medium and fine grit sanding sponges and then cleaned the surface with alcohol on a cotton pad. I scratched out the surface with a dental pick to remove any loose vulcanite or grit on the surface. I put several drops of clear superglue in the tooth dent and let it dry until it was hard.Brig9

Brig10
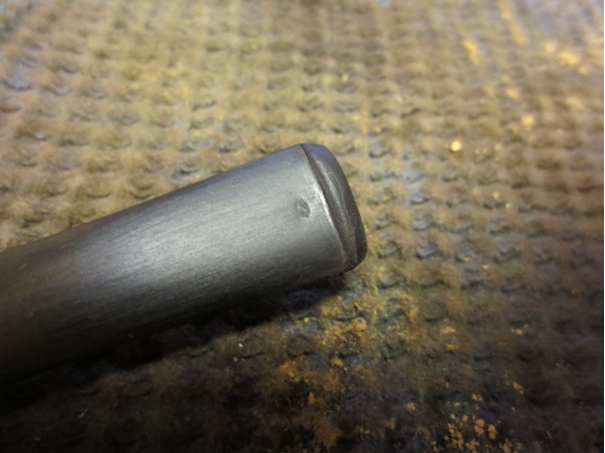
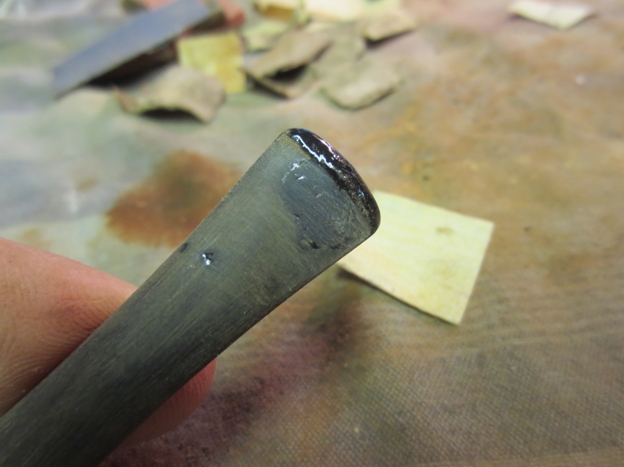
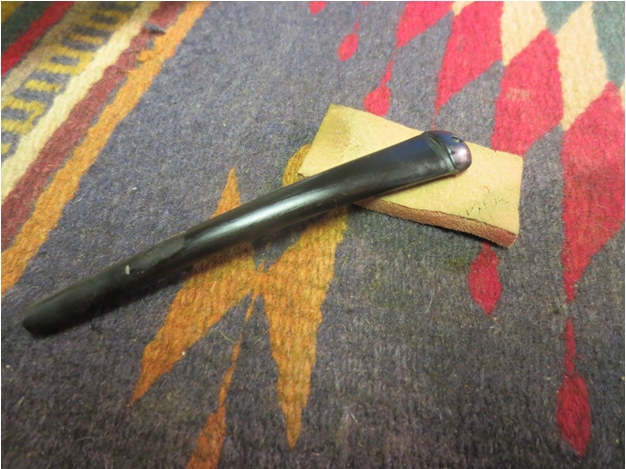
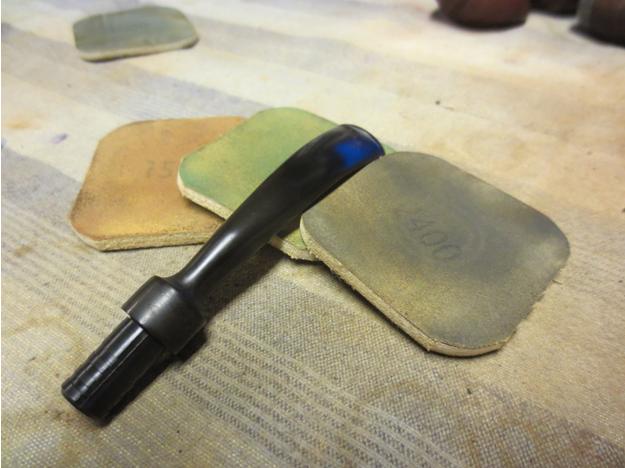
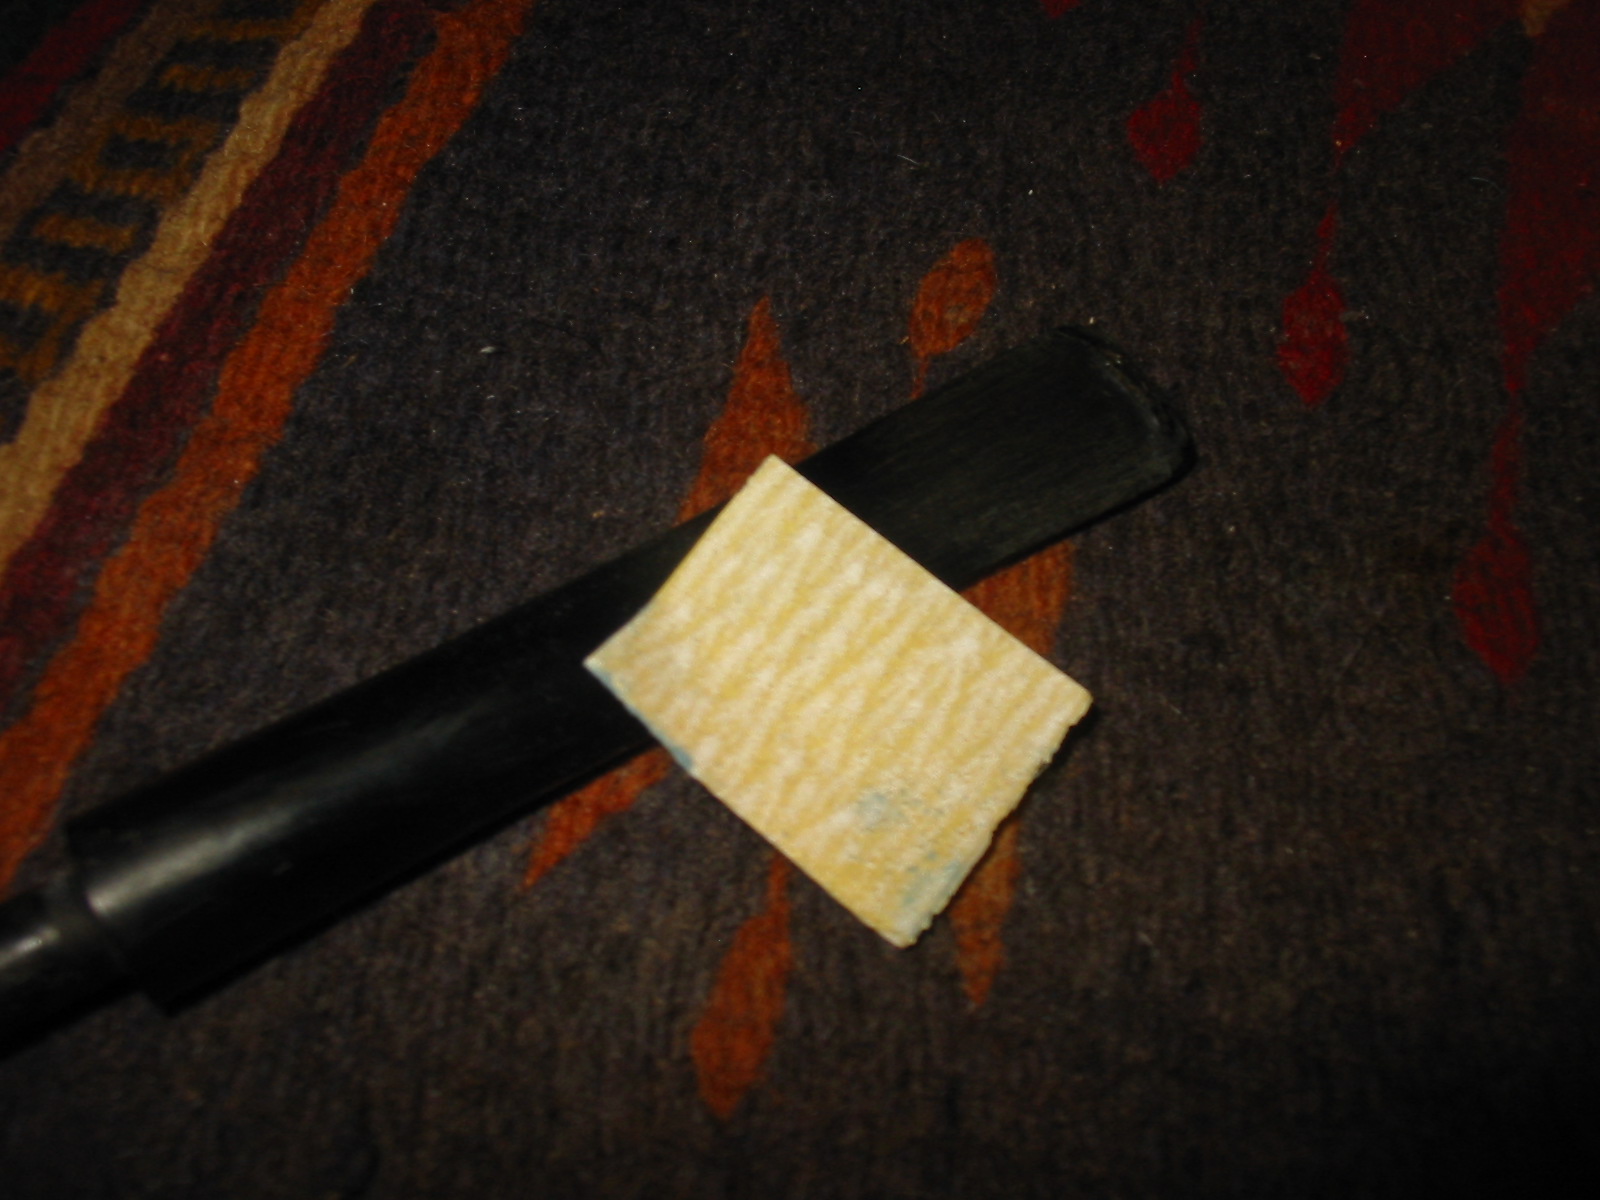
Once it hardened and cured for about an hour I sanded it with 220 grit sandpaper to blend it into the surface of the stem. I wanted the surface to be smooth and the super glue bump to be smoothed into the surface. I also sanded it with a medium and fine grit sanding sponge to remove the scratches in the surface.Brig11

Brig12 
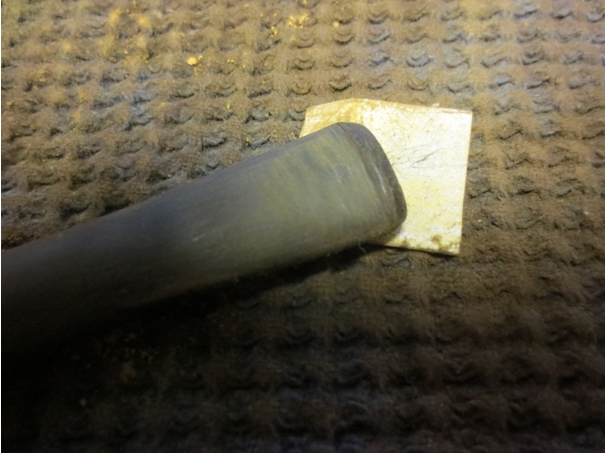
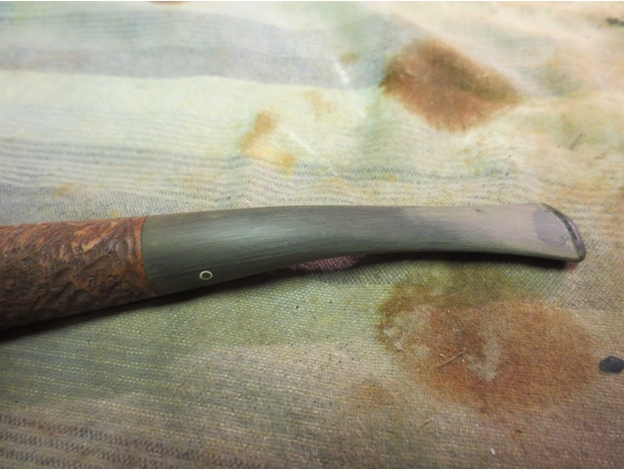
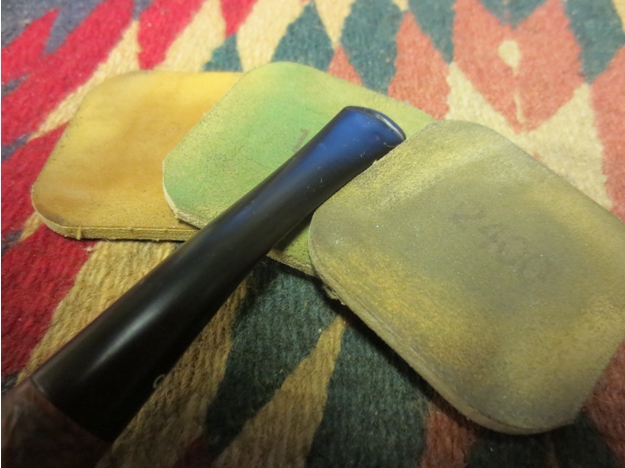
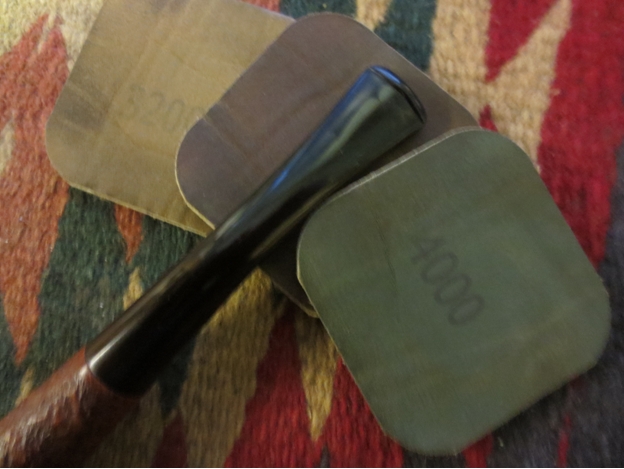
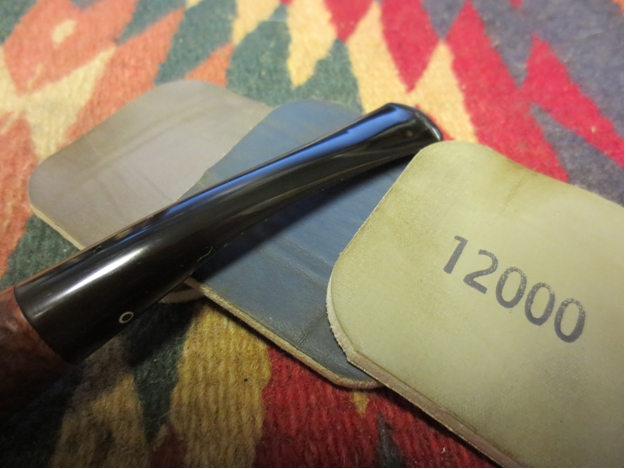
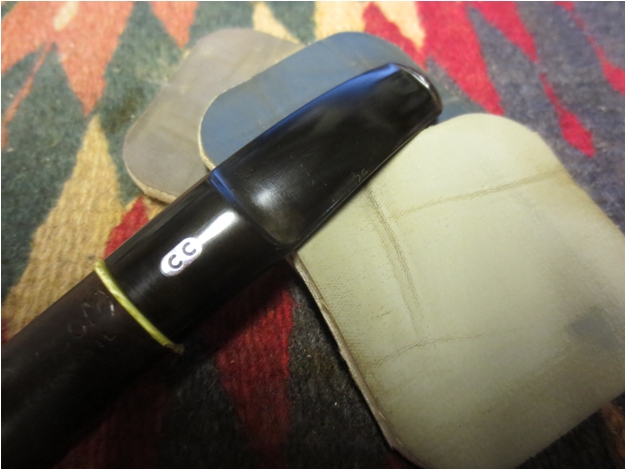
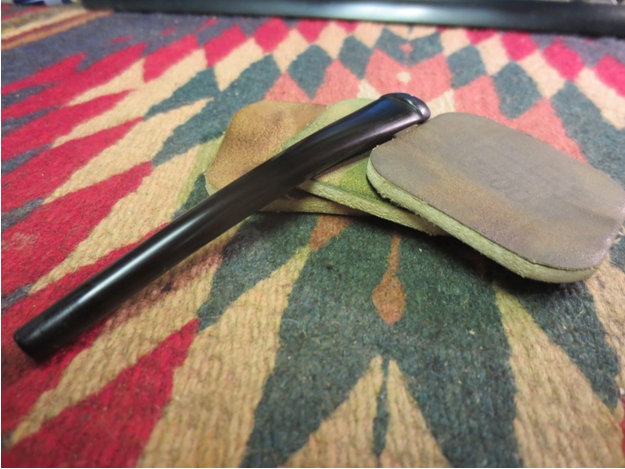
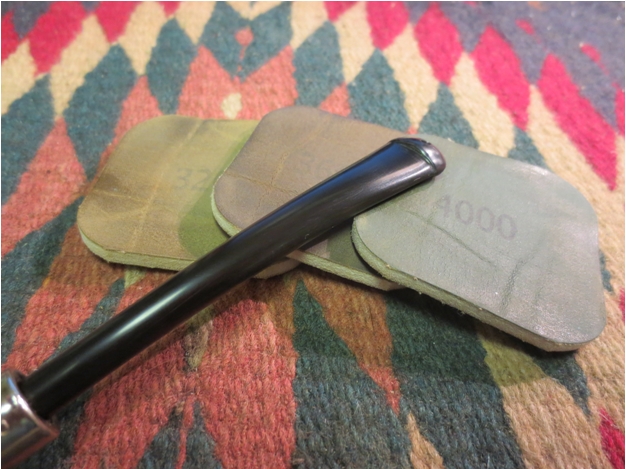
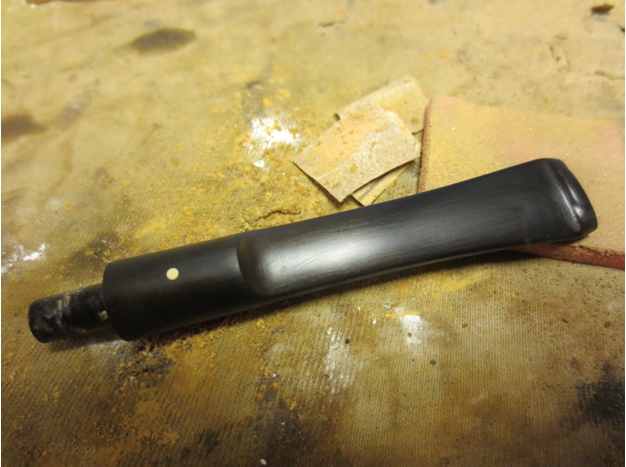
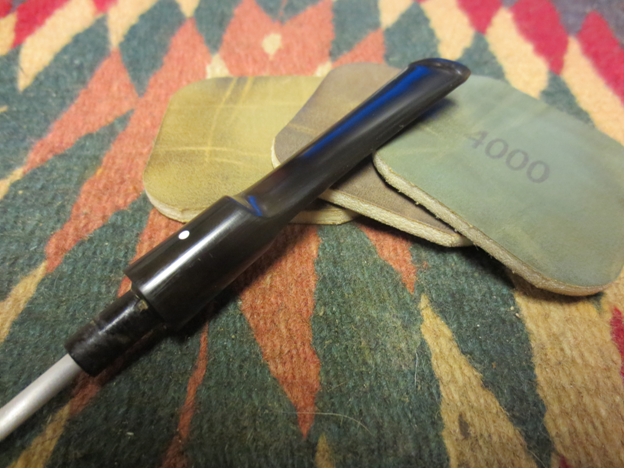
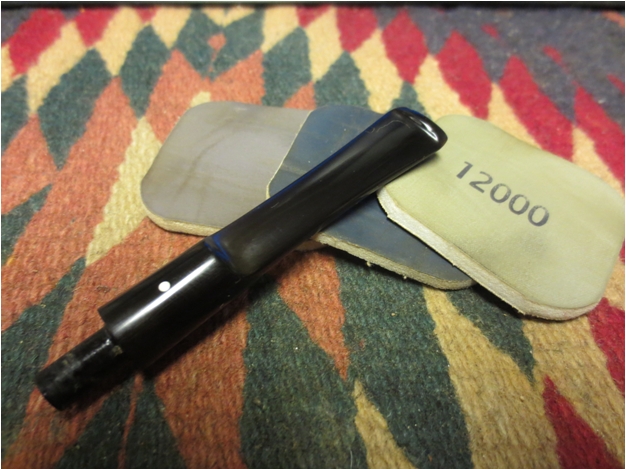
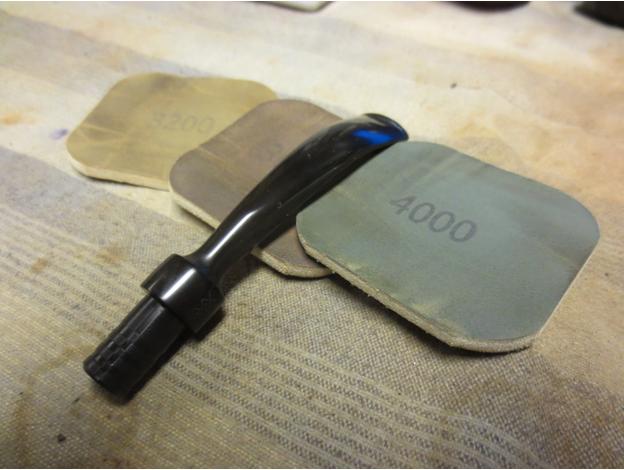
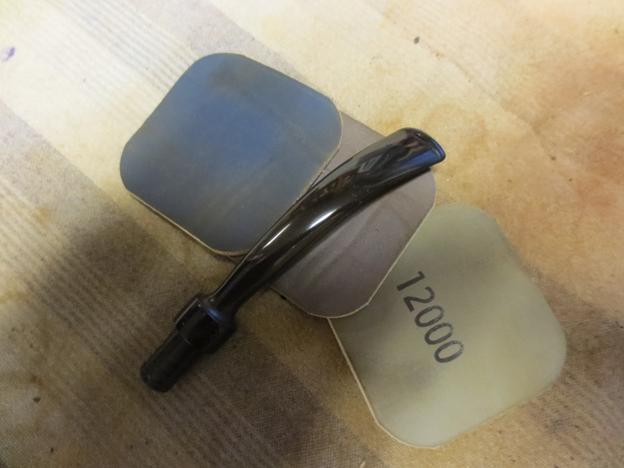
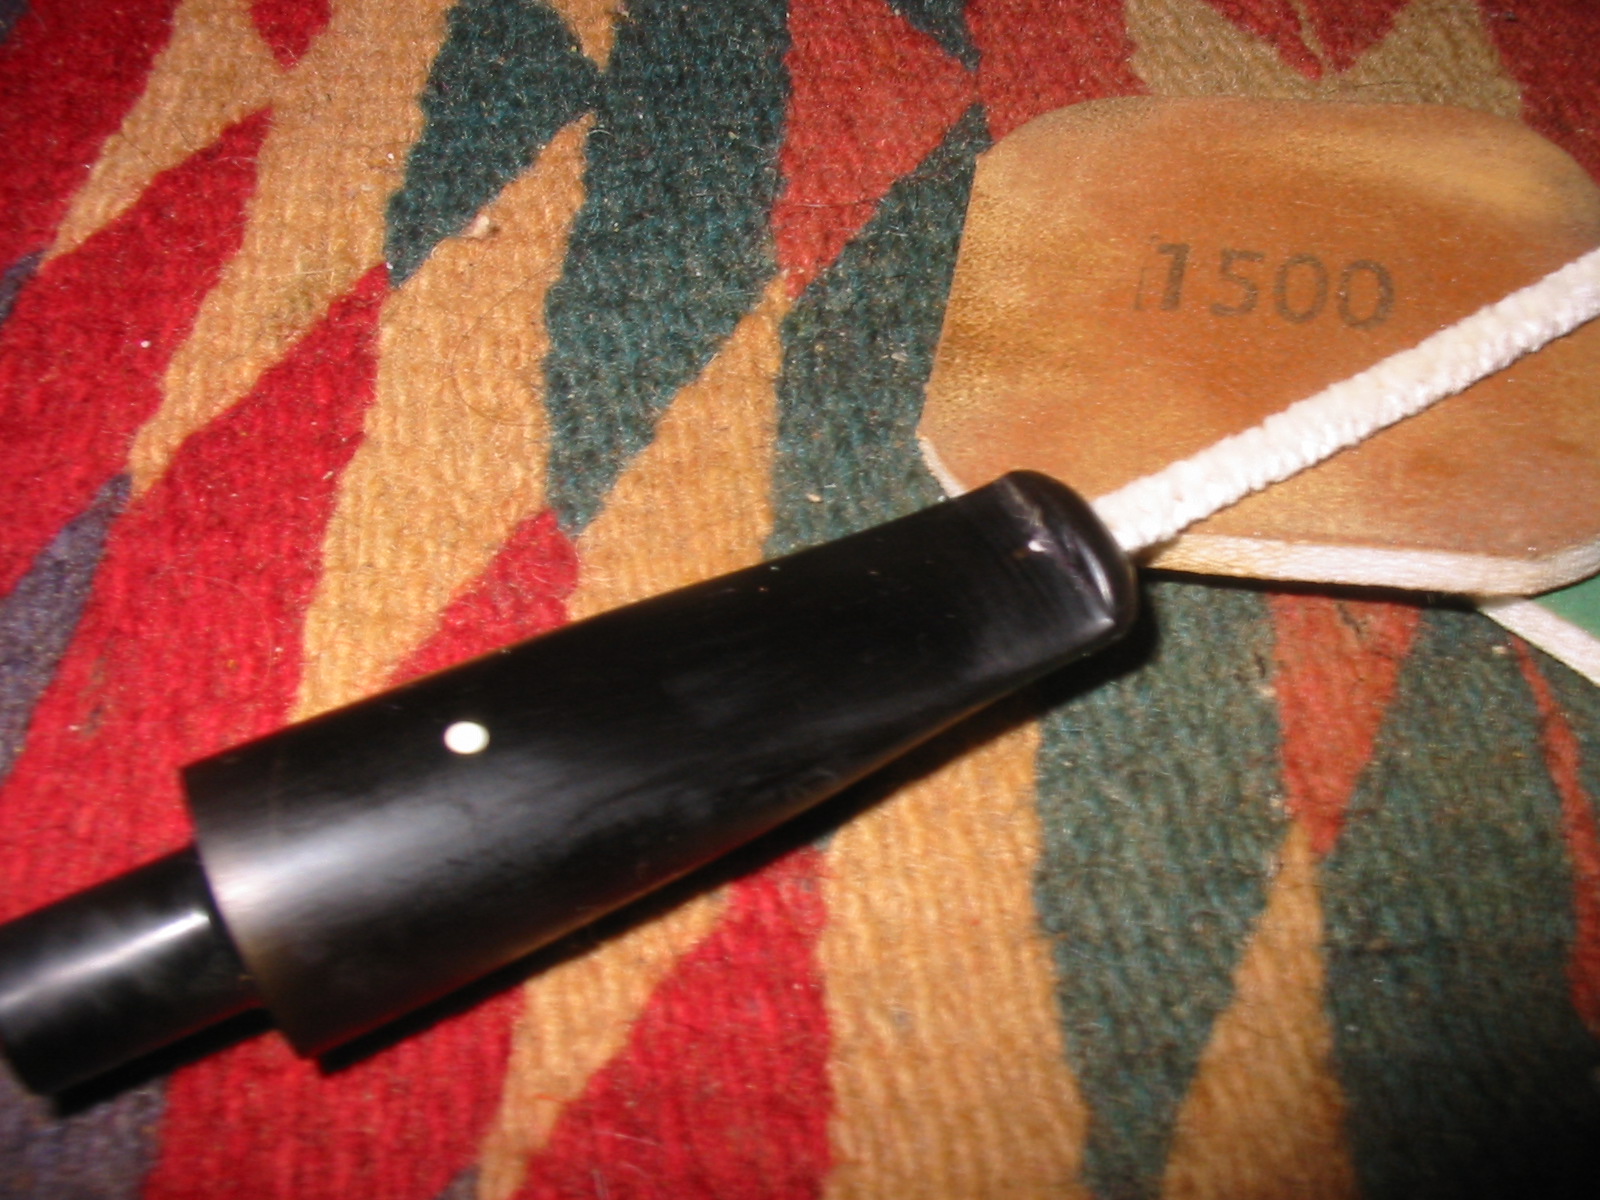
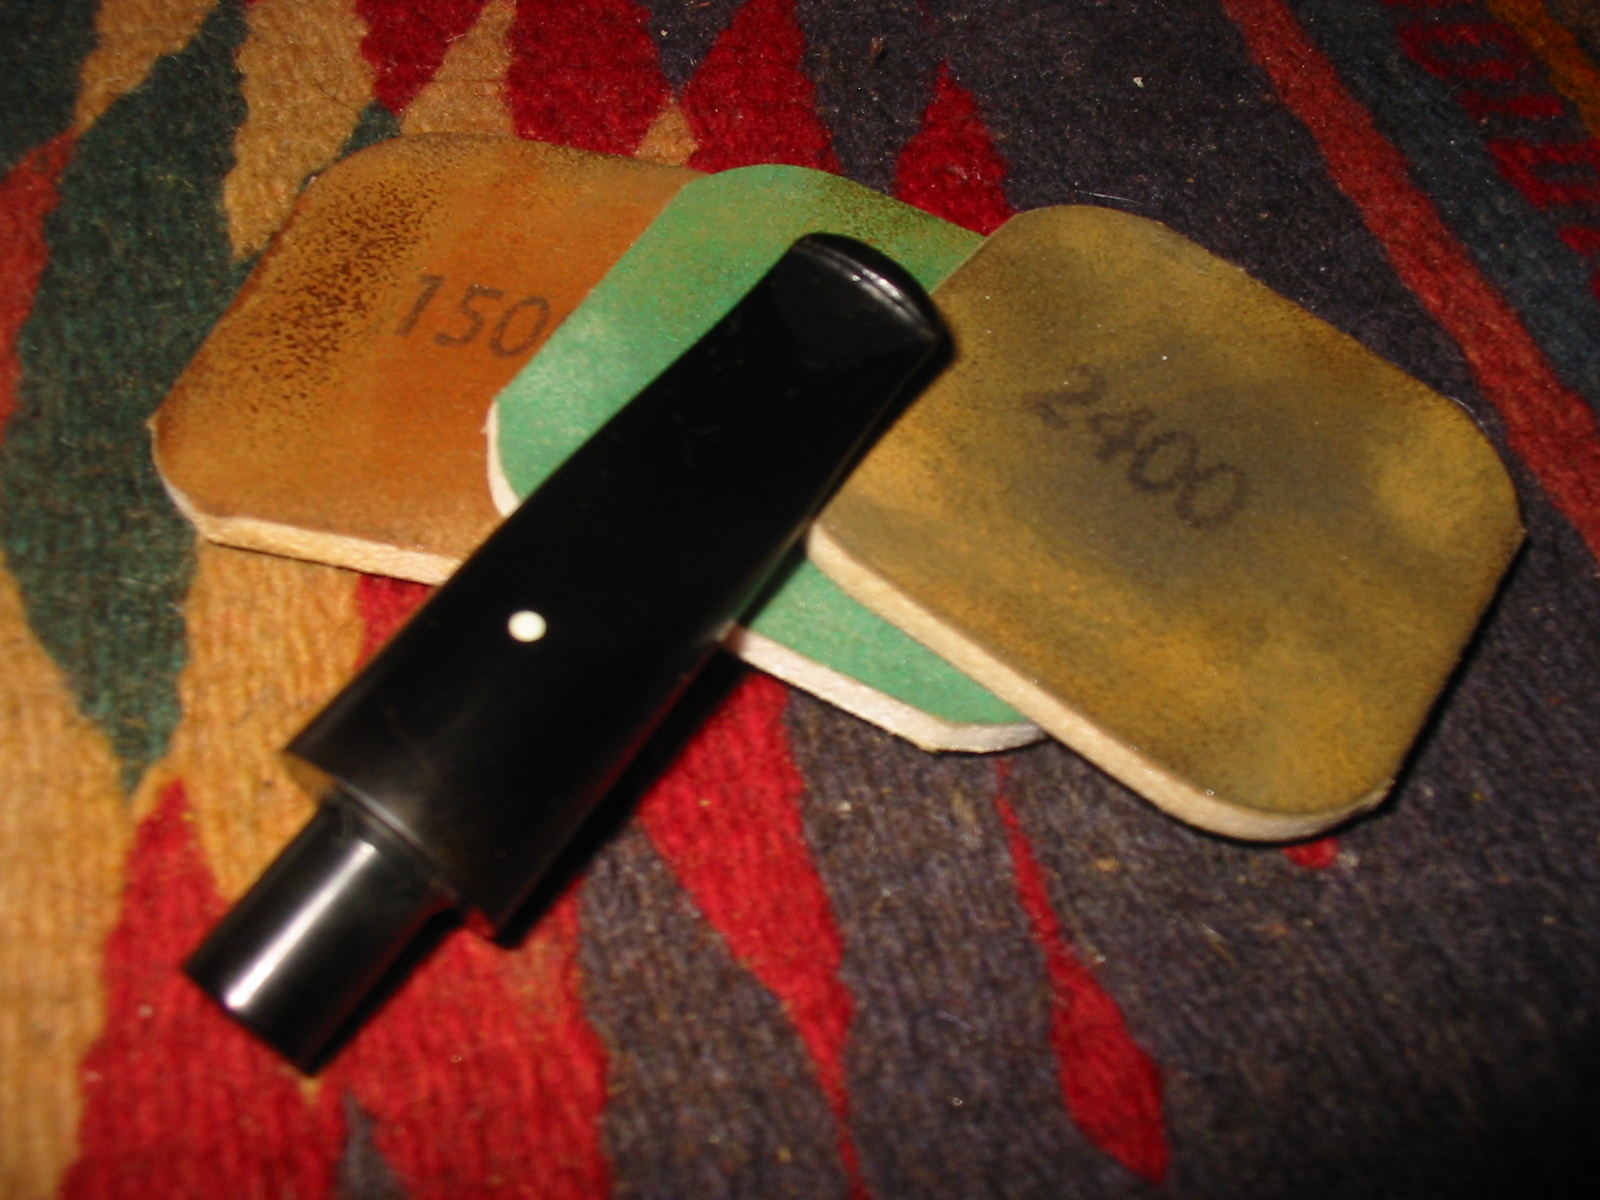
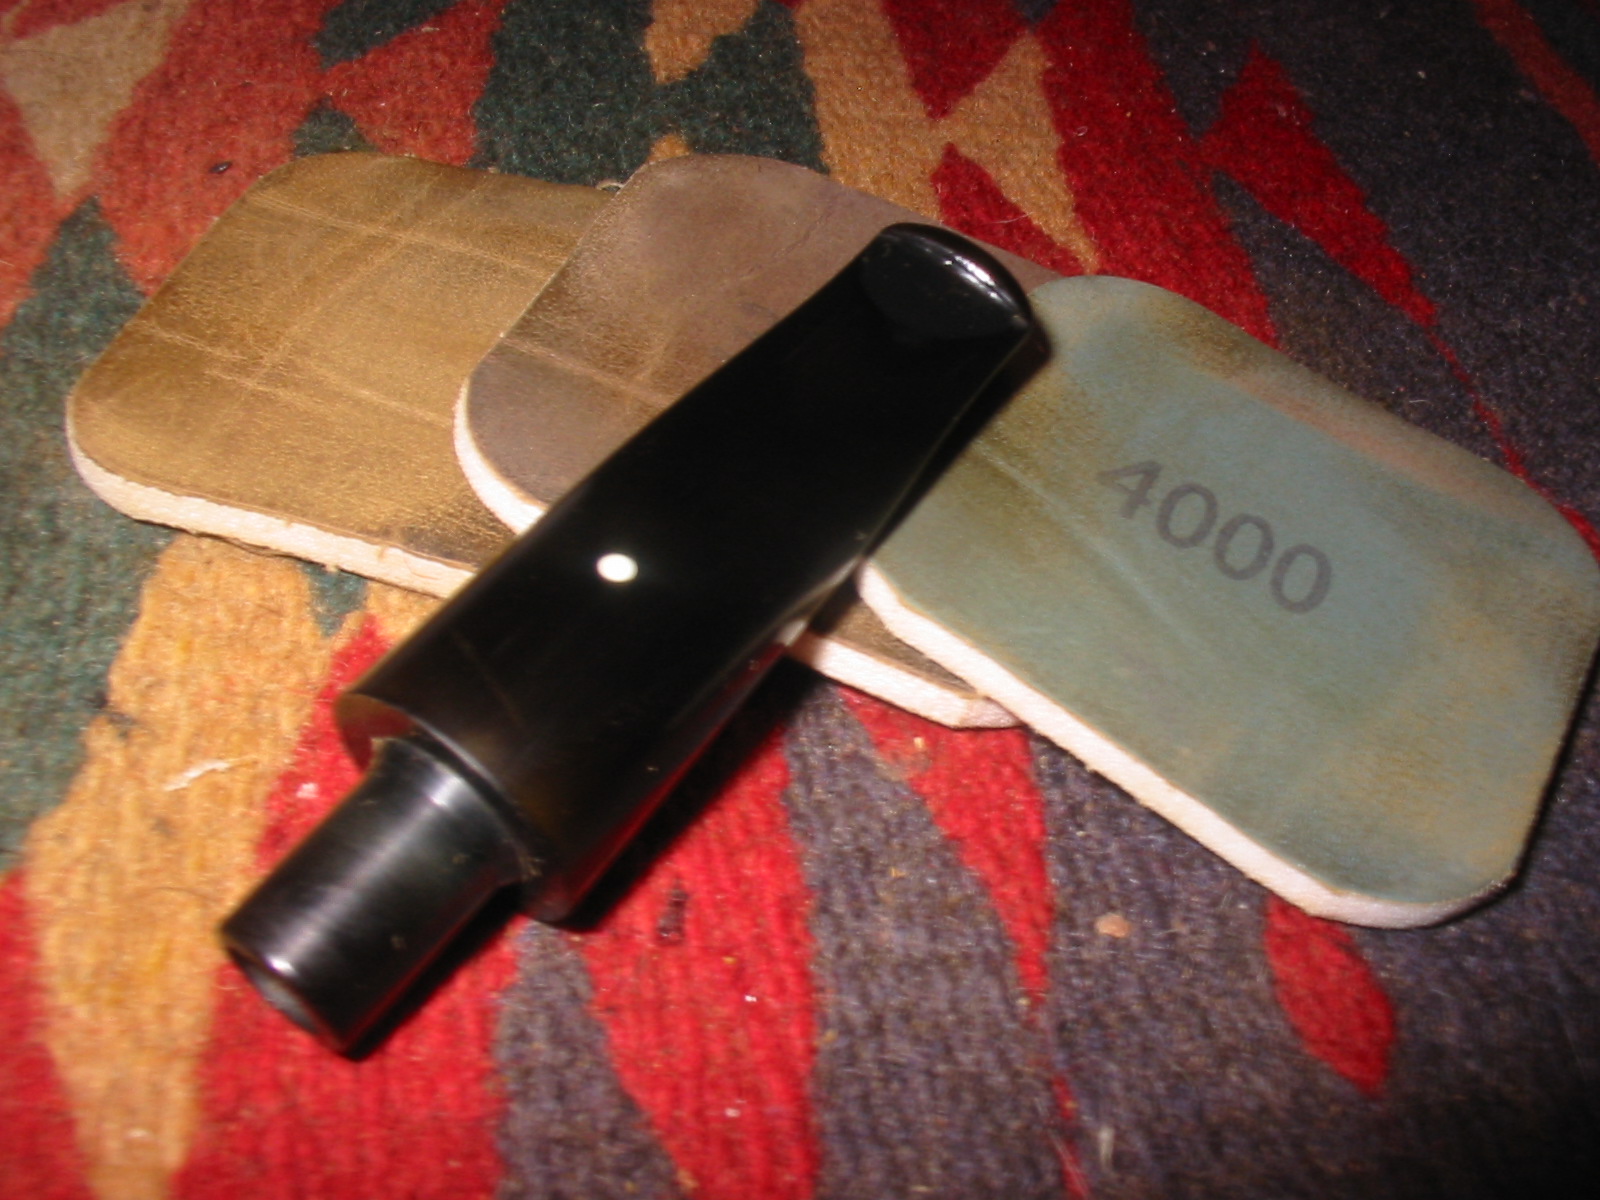
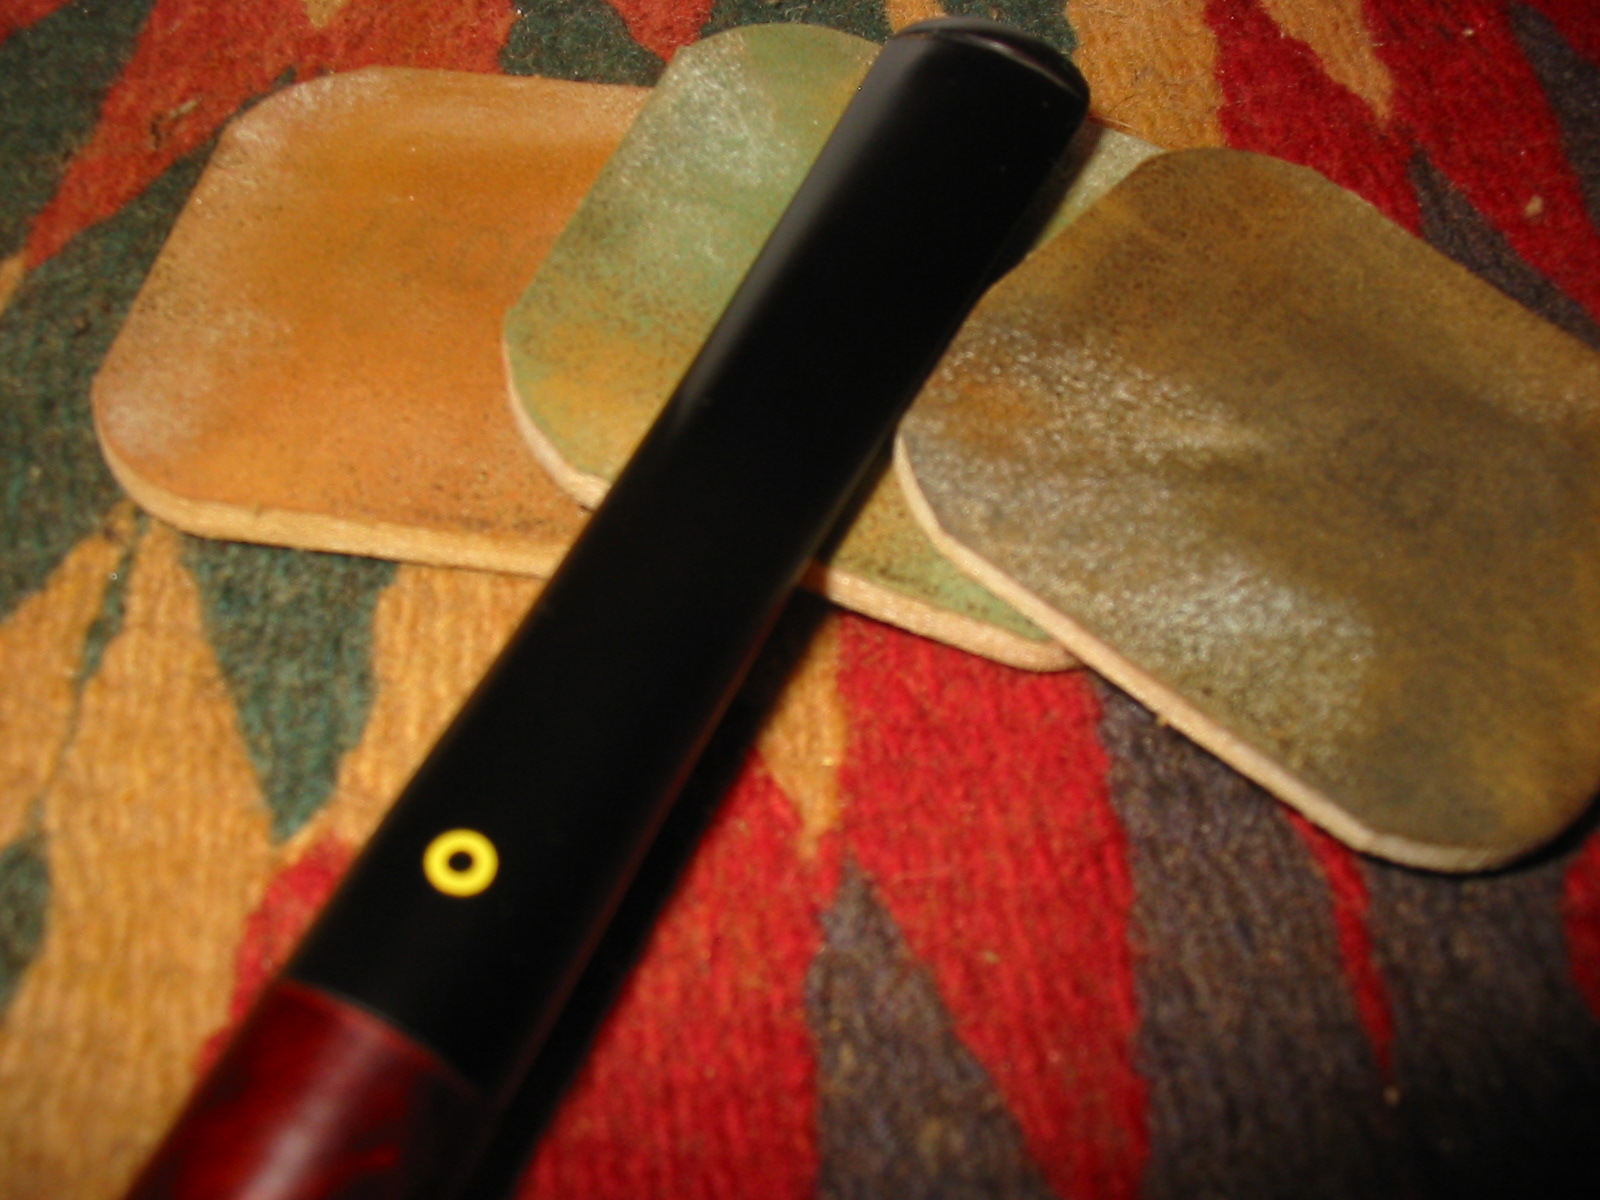
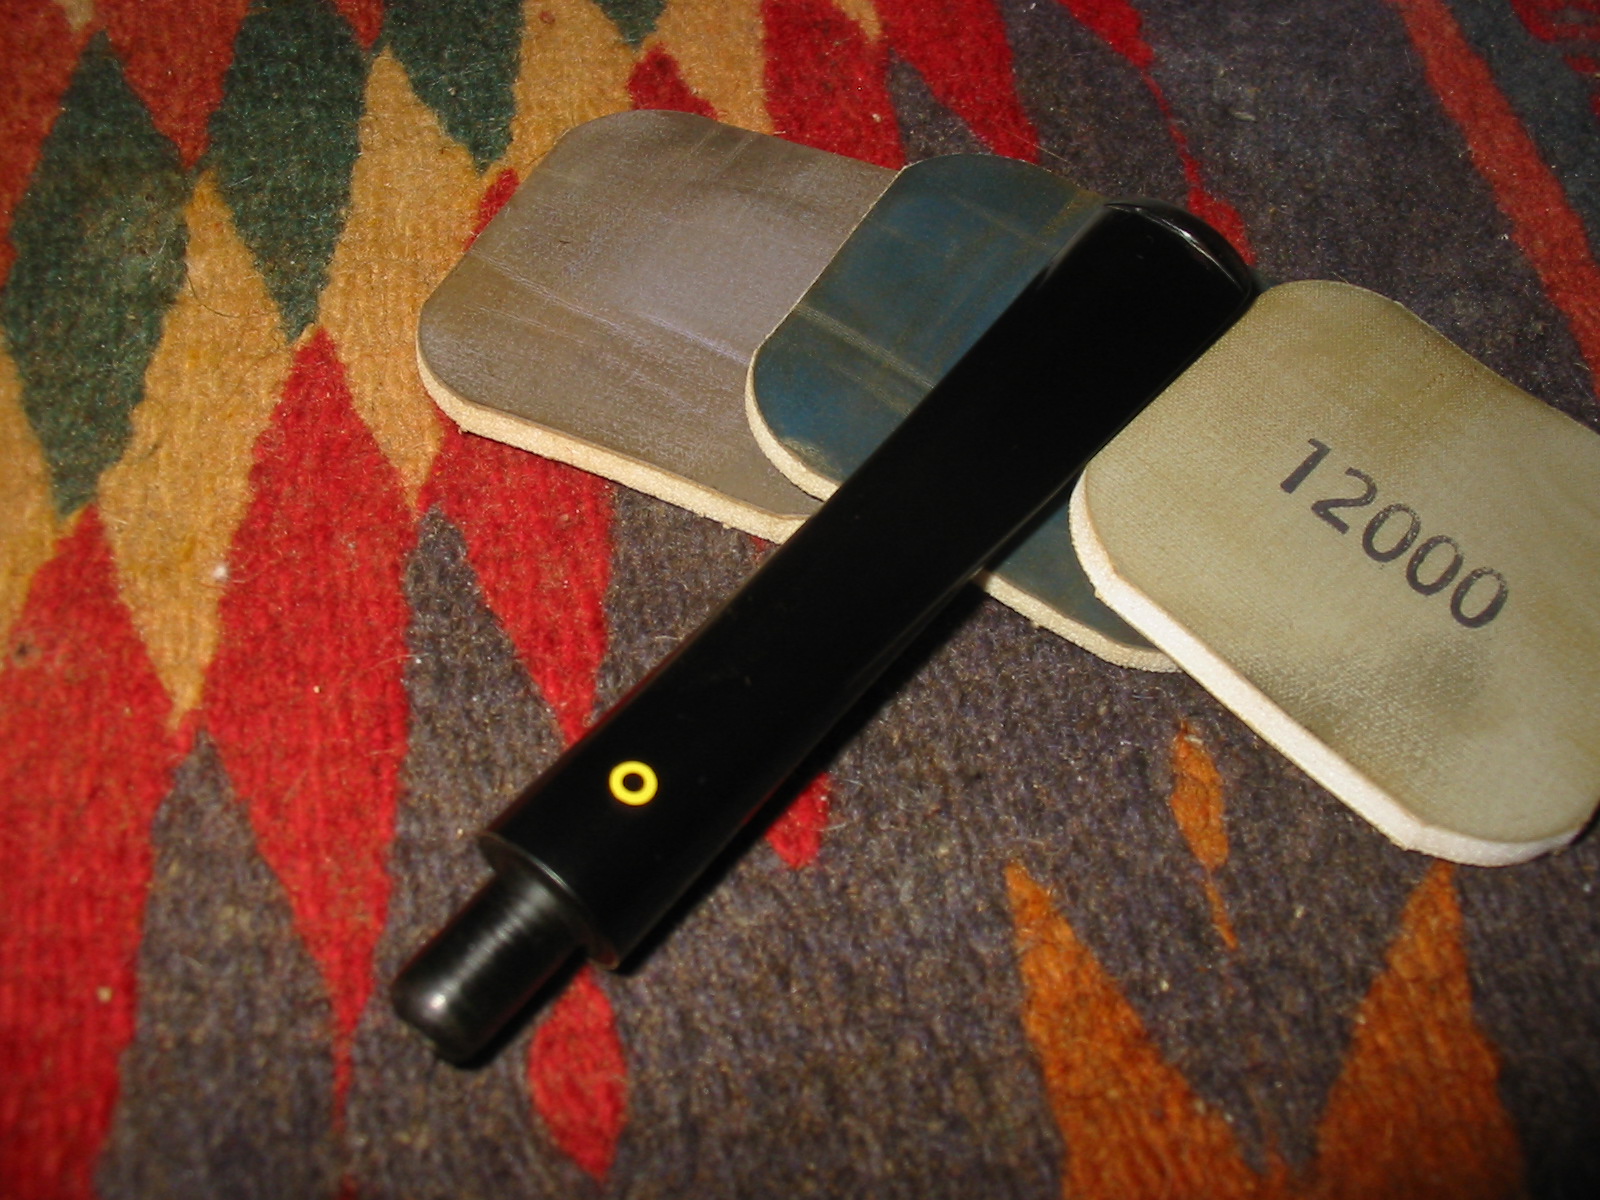
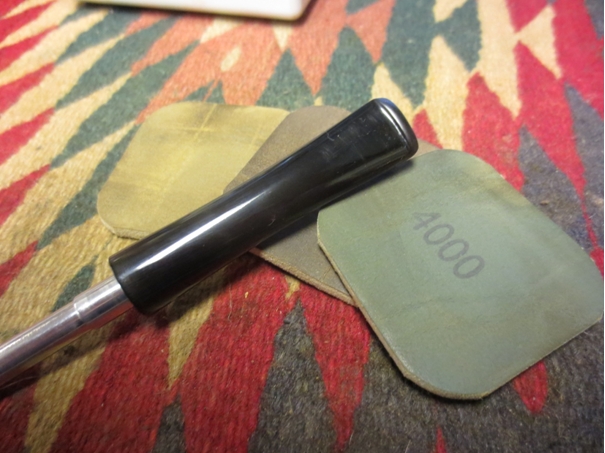
I sanded the stem with micromesh sanding pads – wet sanding with 1500-2400 grit pads and dry sanding with 3200-12,000 grit pads. In between each set of three pads I rubbed the stem down with Obsidian Oil and let it soak into the vulcanite. I had to repeat the process several times to remove the oxidation near the shank. I buffed it with White Diamond and then gave it a coat of carnauba wax.Brig13

Brig14

Brig15 
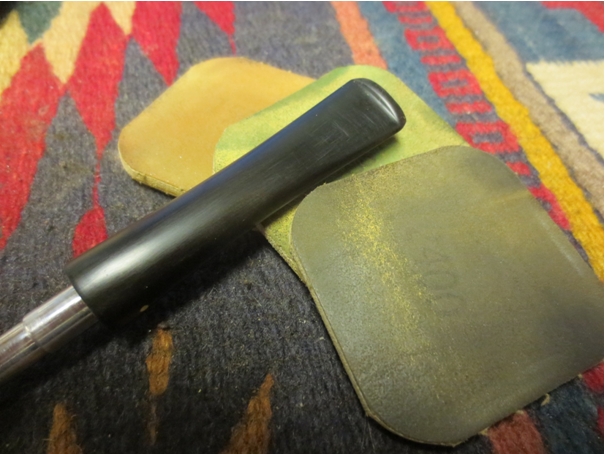
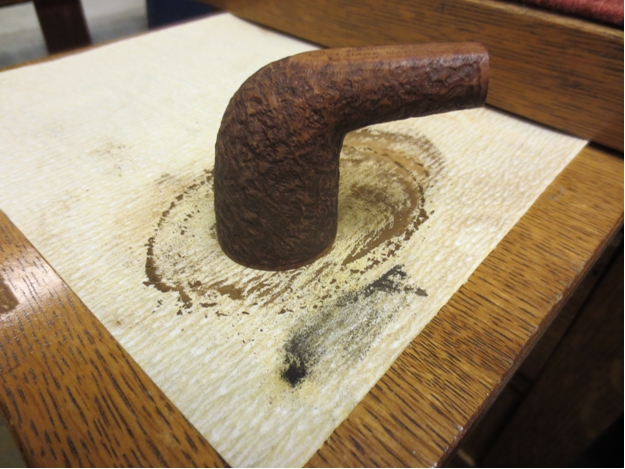
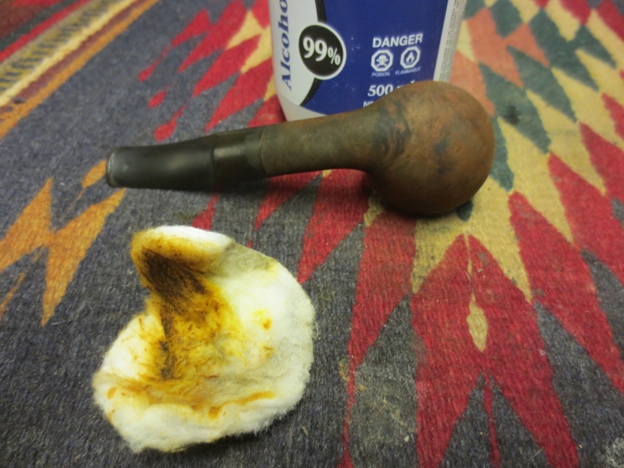
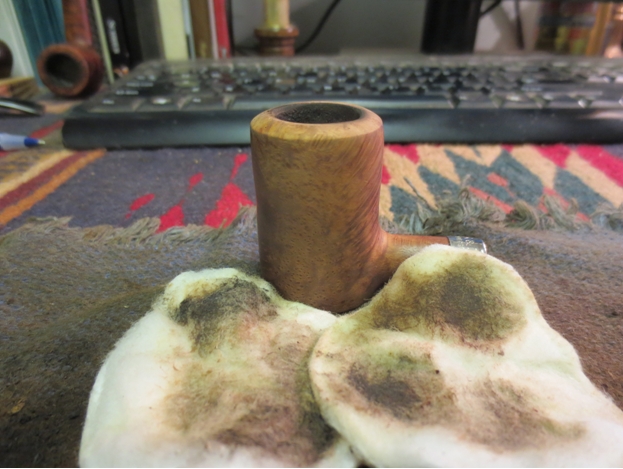
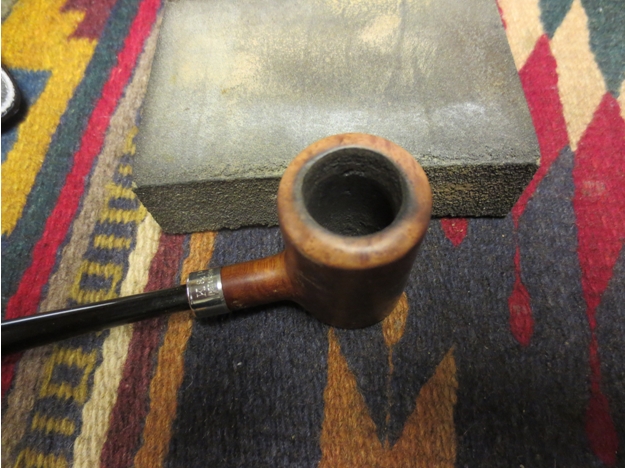
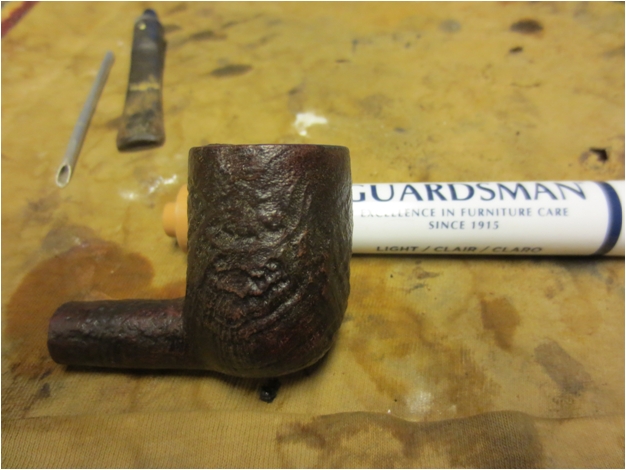
I set the stem aside and scrubbed the bowl with Murphy’s Oil Soap. I used a soft bristle tooth brush to scrub it and then rinsed it off with running water. I kept a thumb in the bowl to keep the water from getting into the inside of the pipe. I dried it off with a cotton towel.Brig16

Brig17 
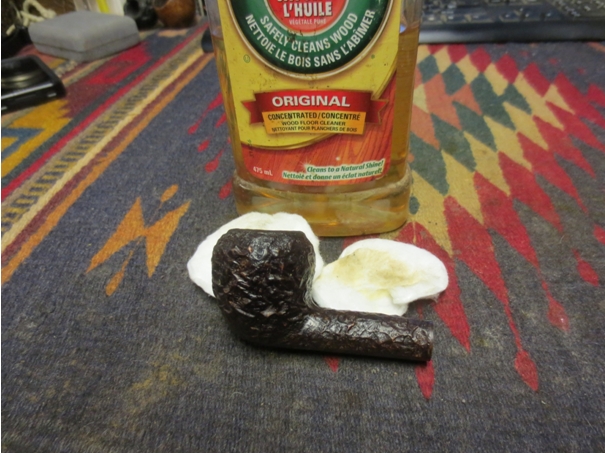
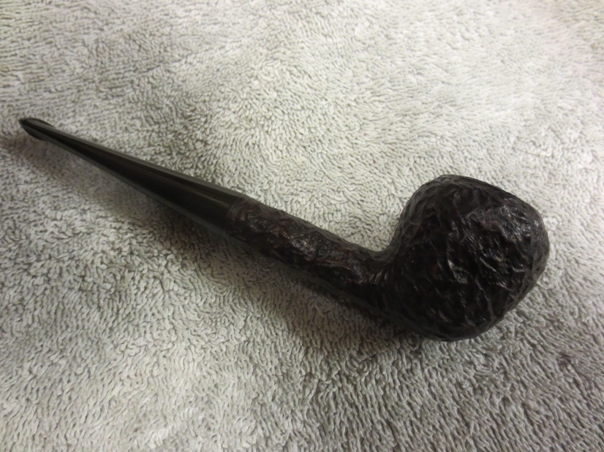
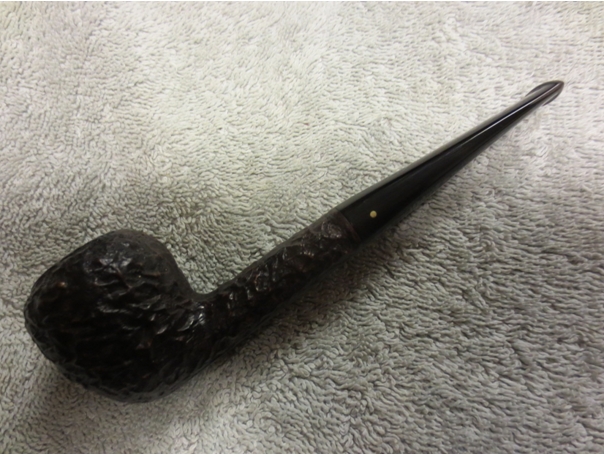
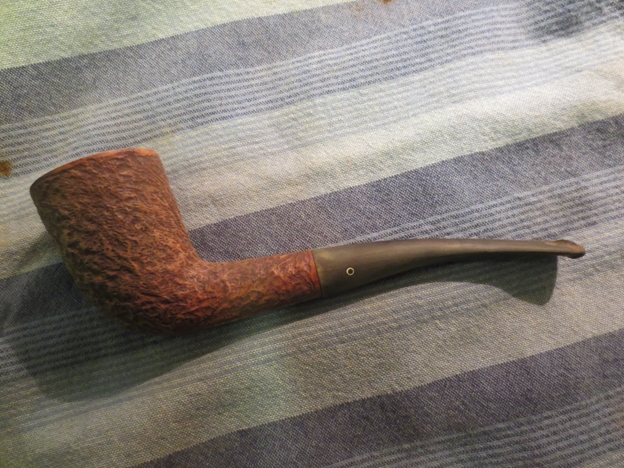
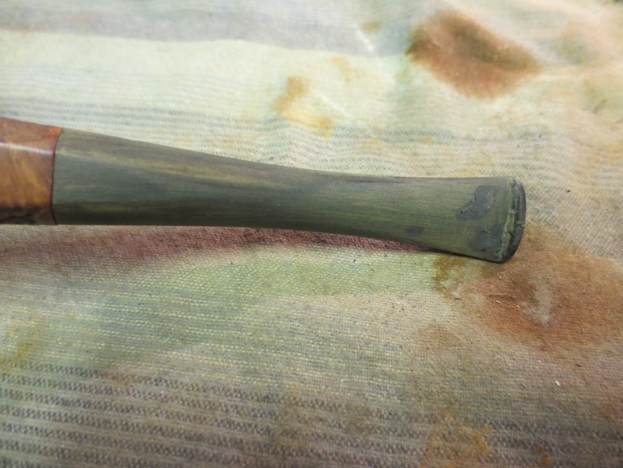
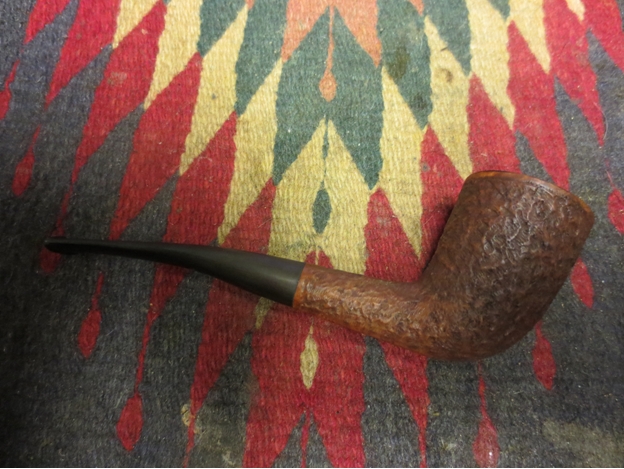
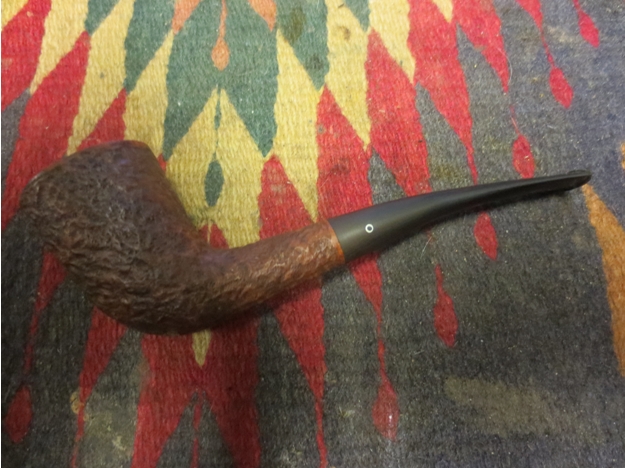
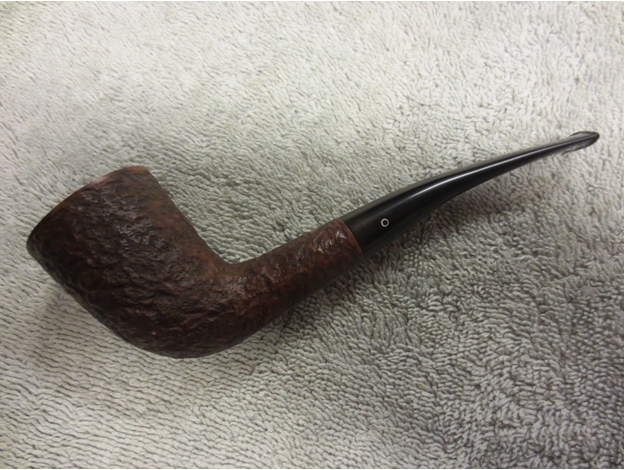
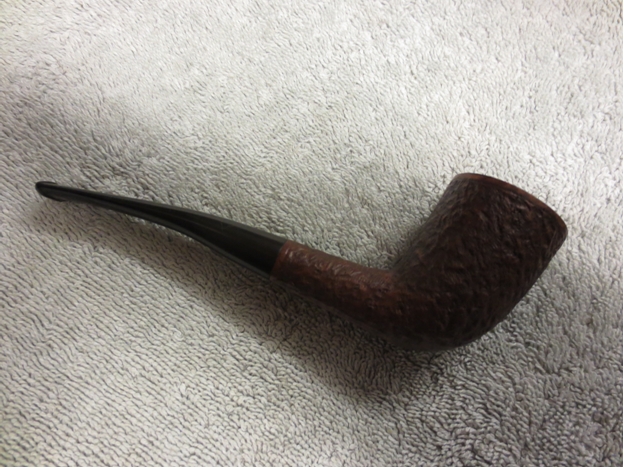
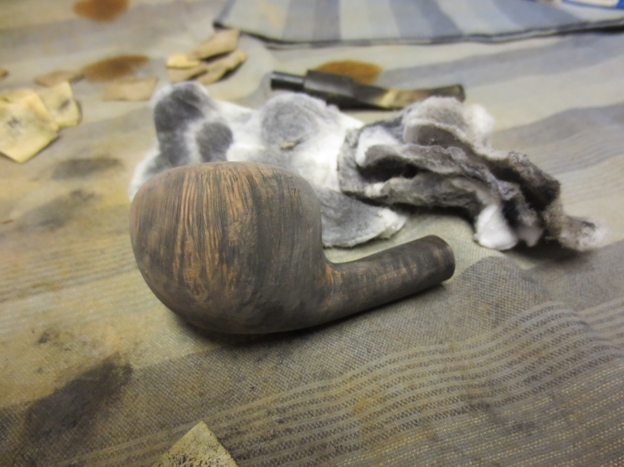
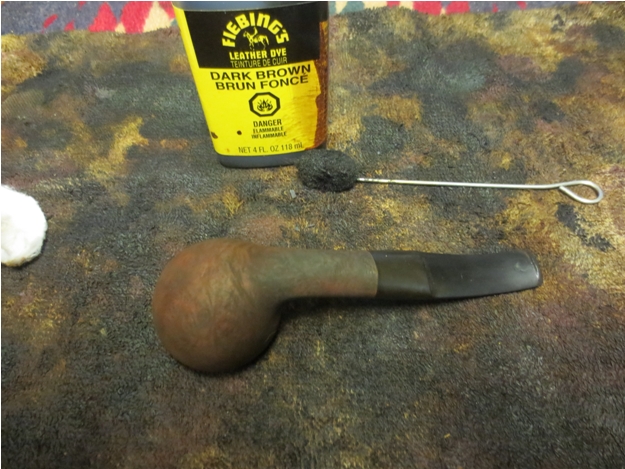
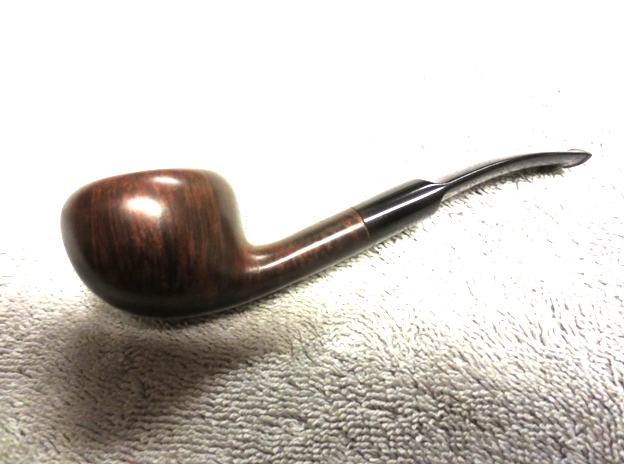
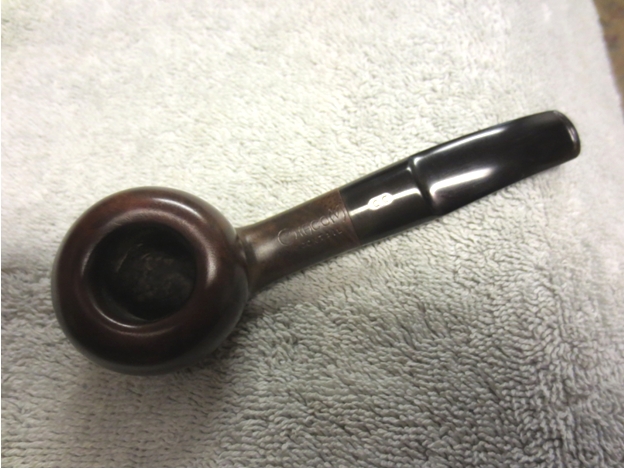
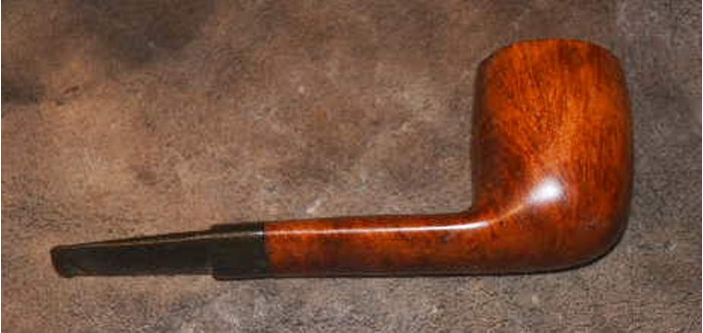
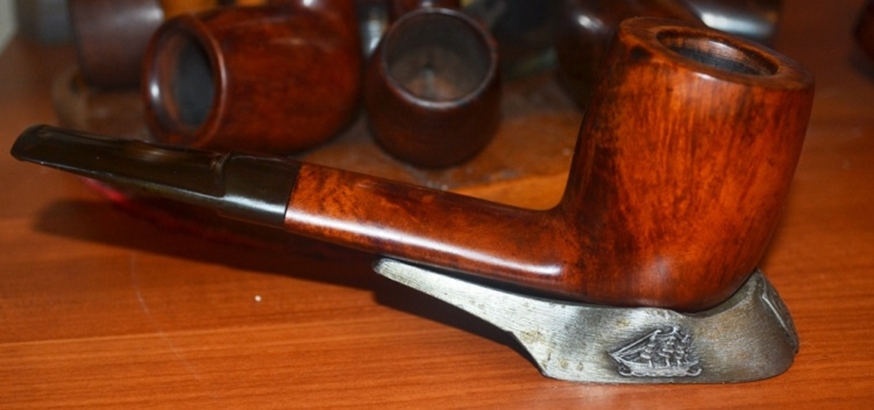
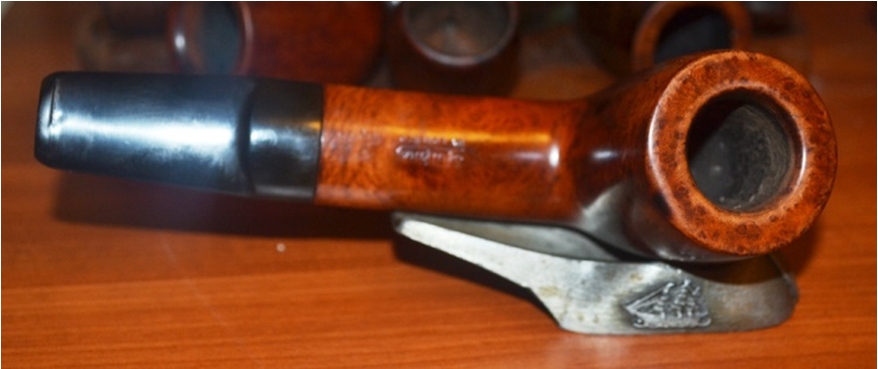
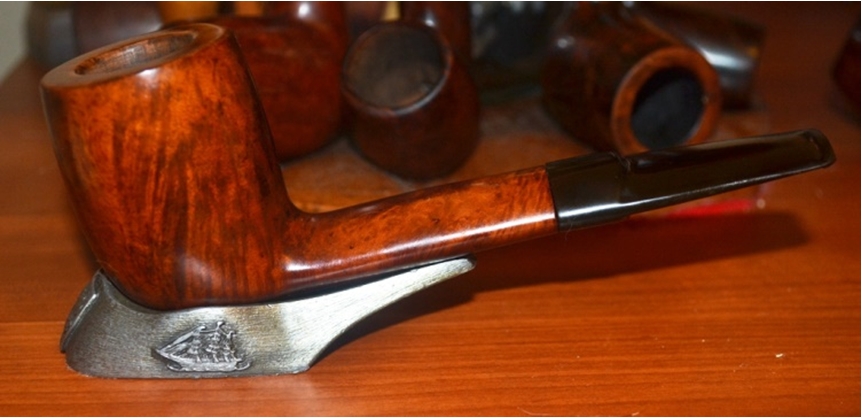
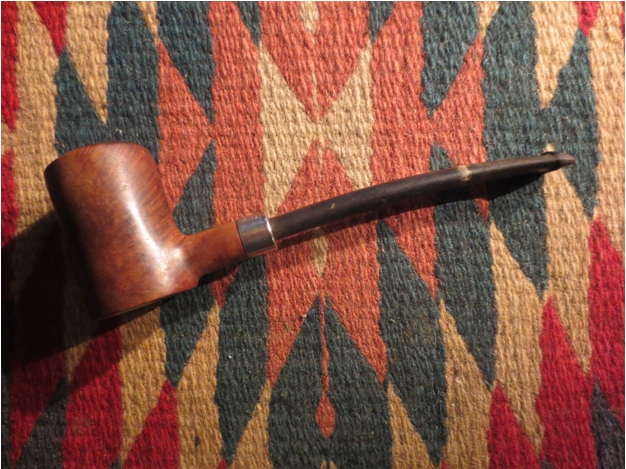
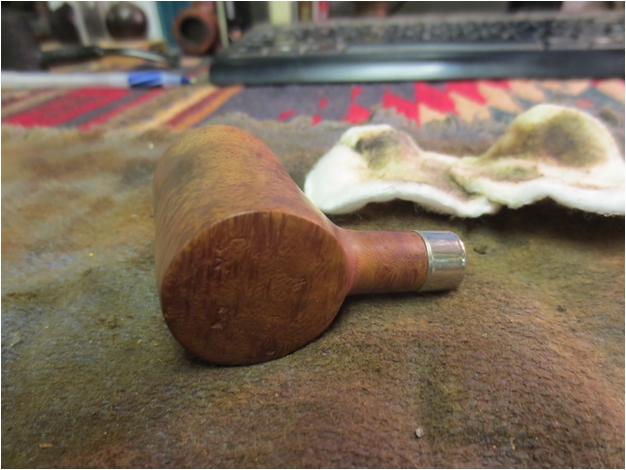
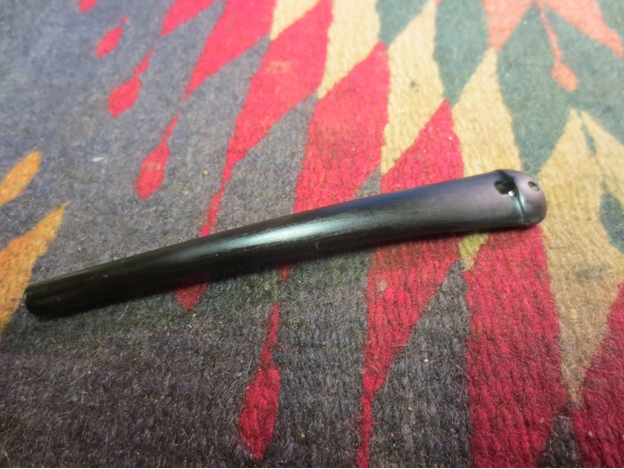
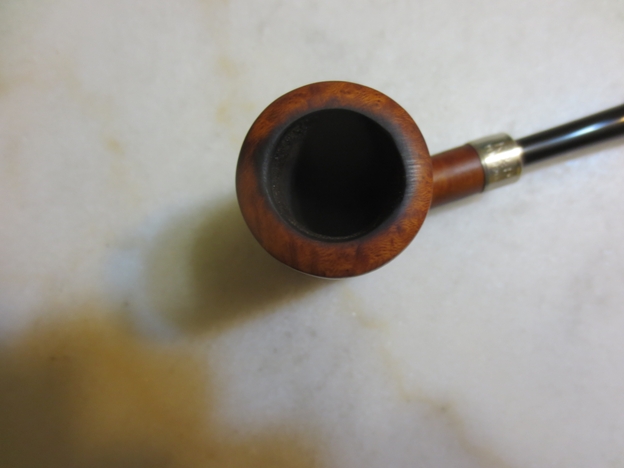
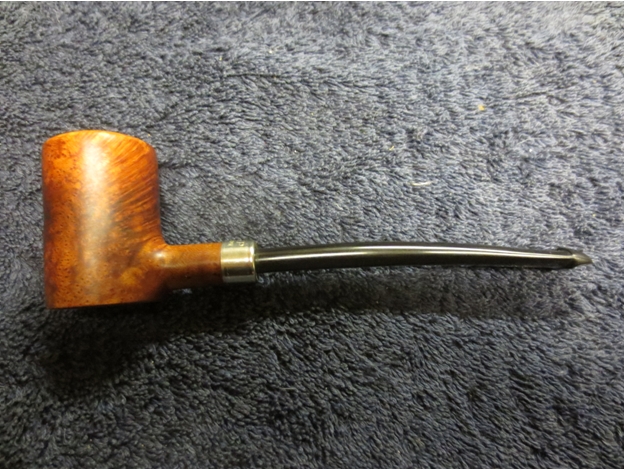
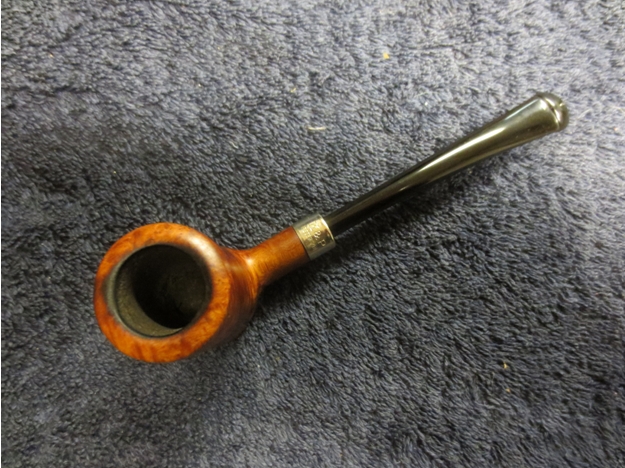
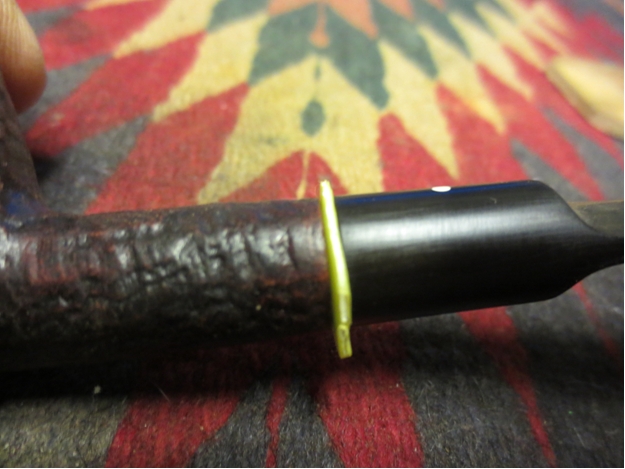
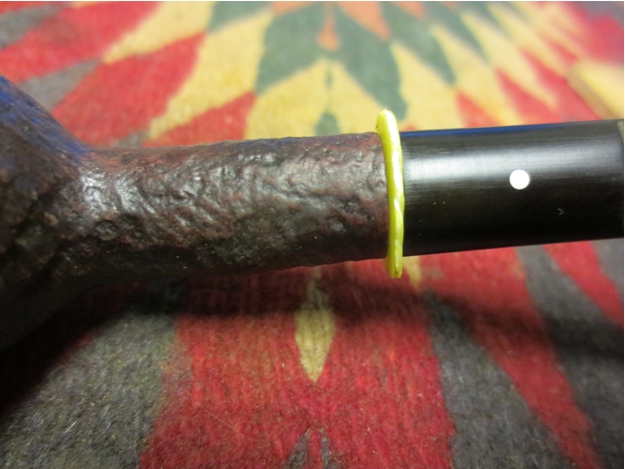
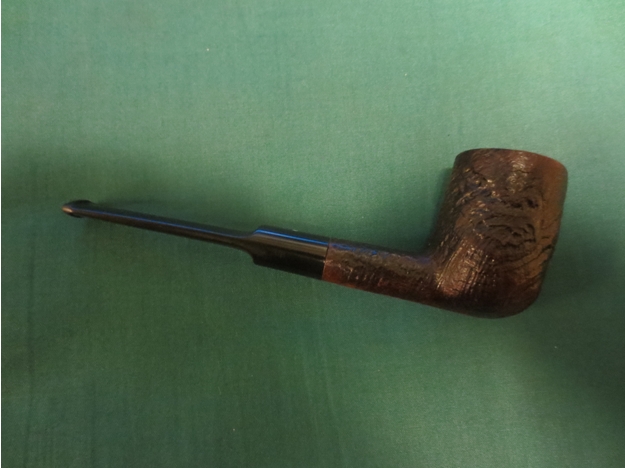
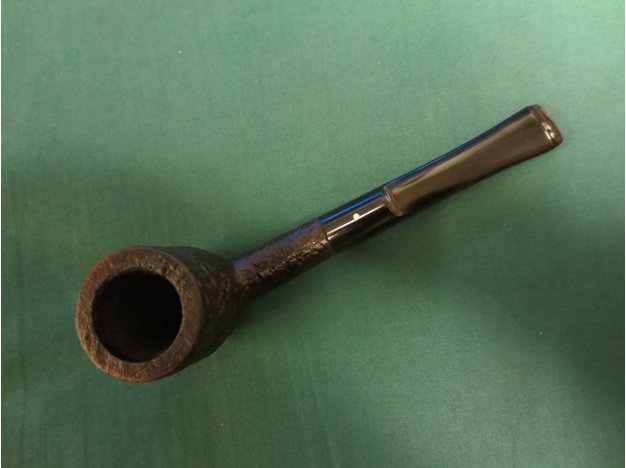
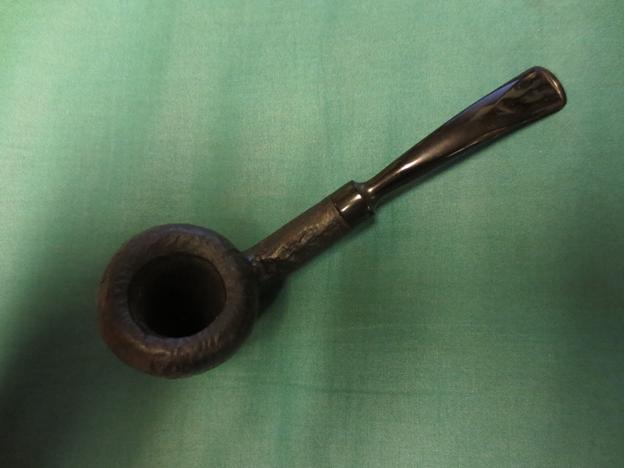
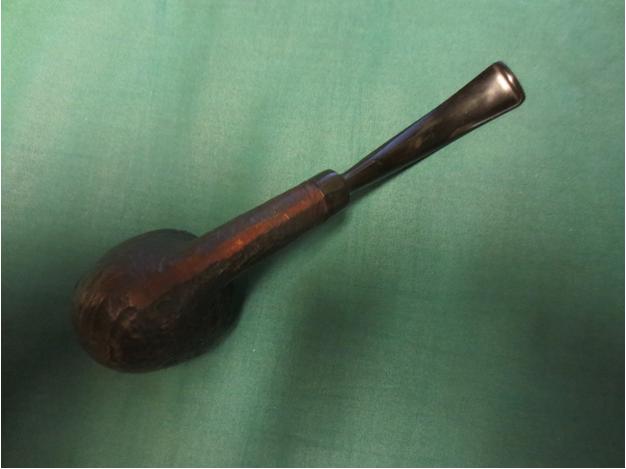
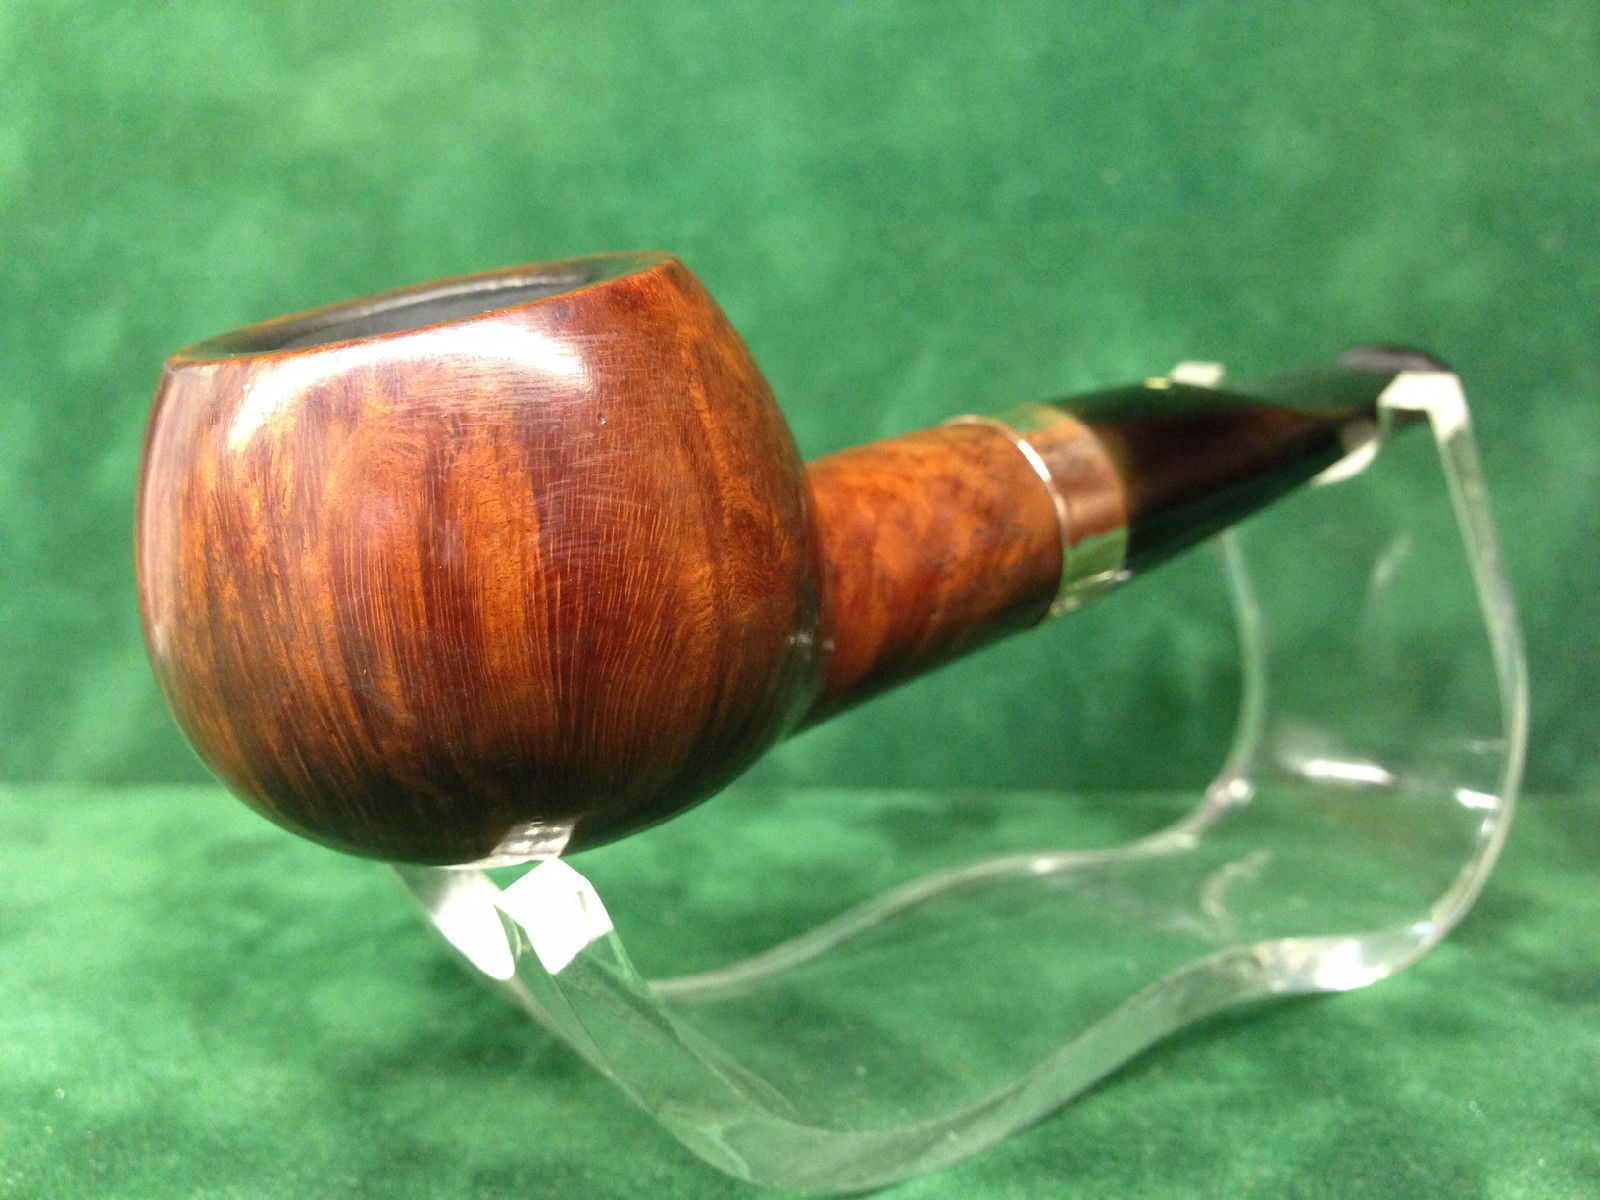
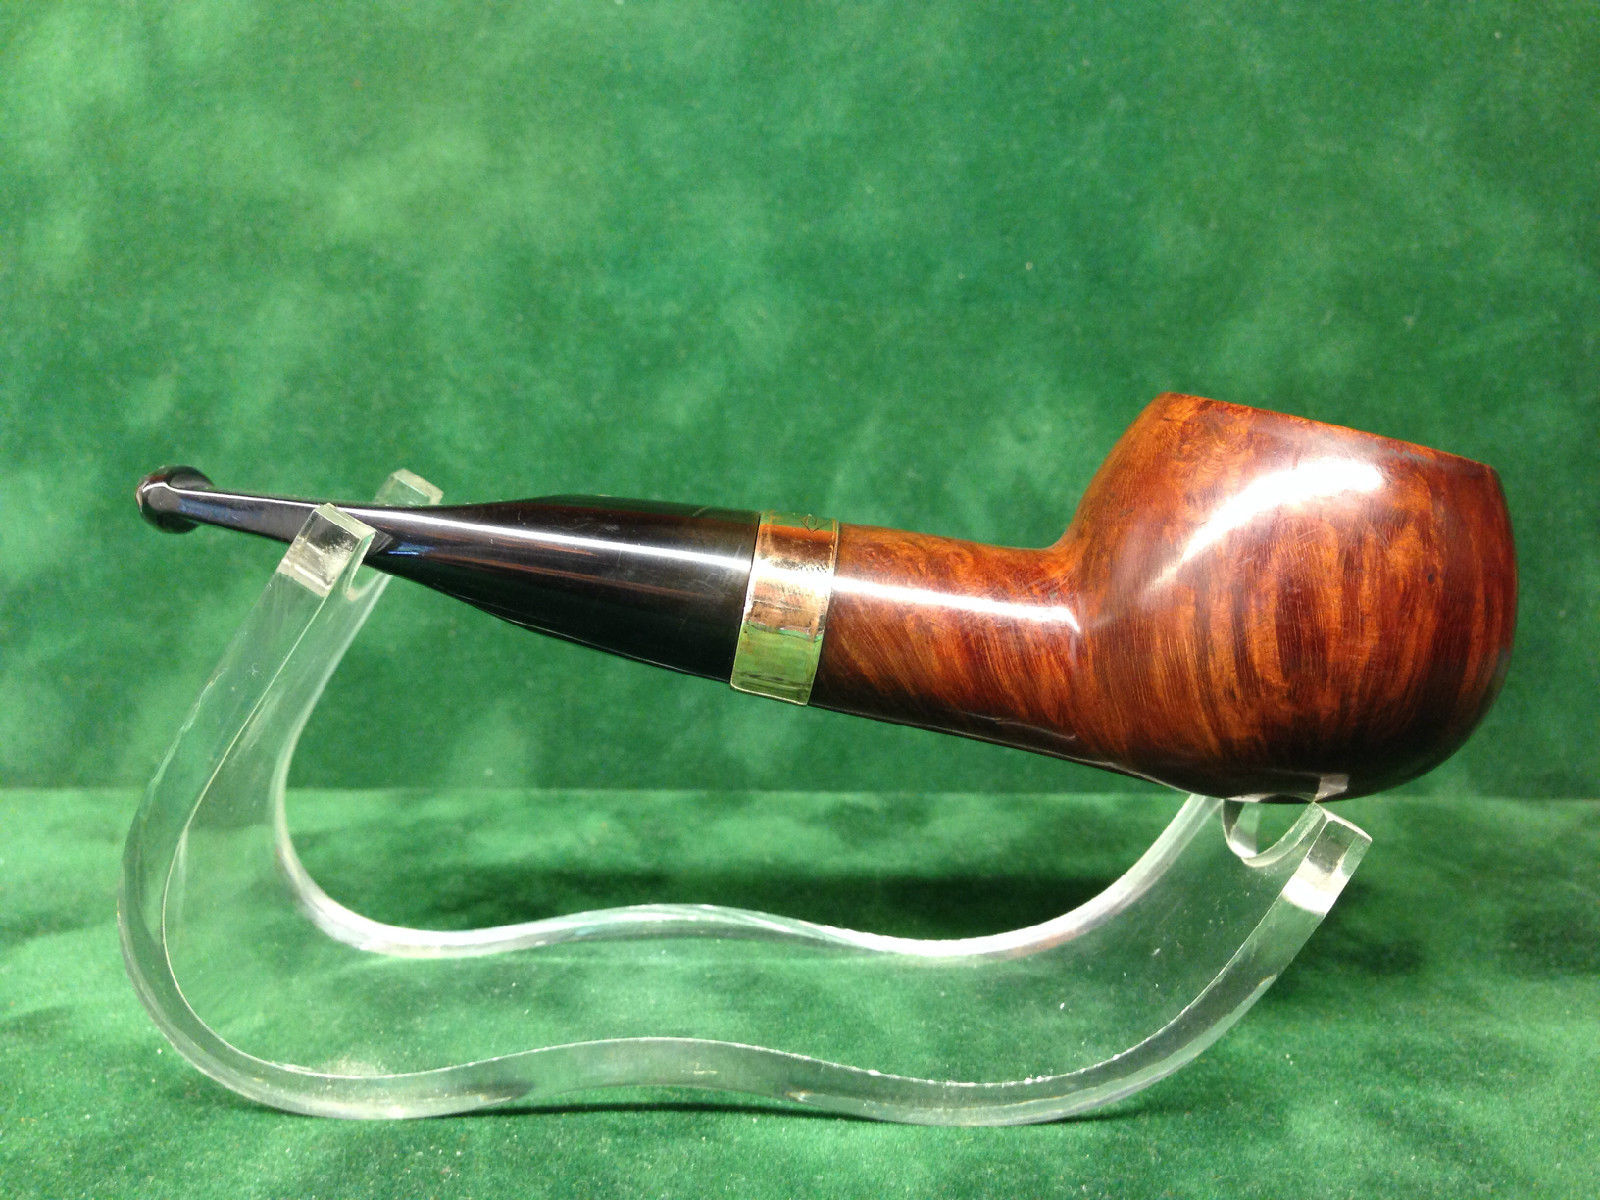
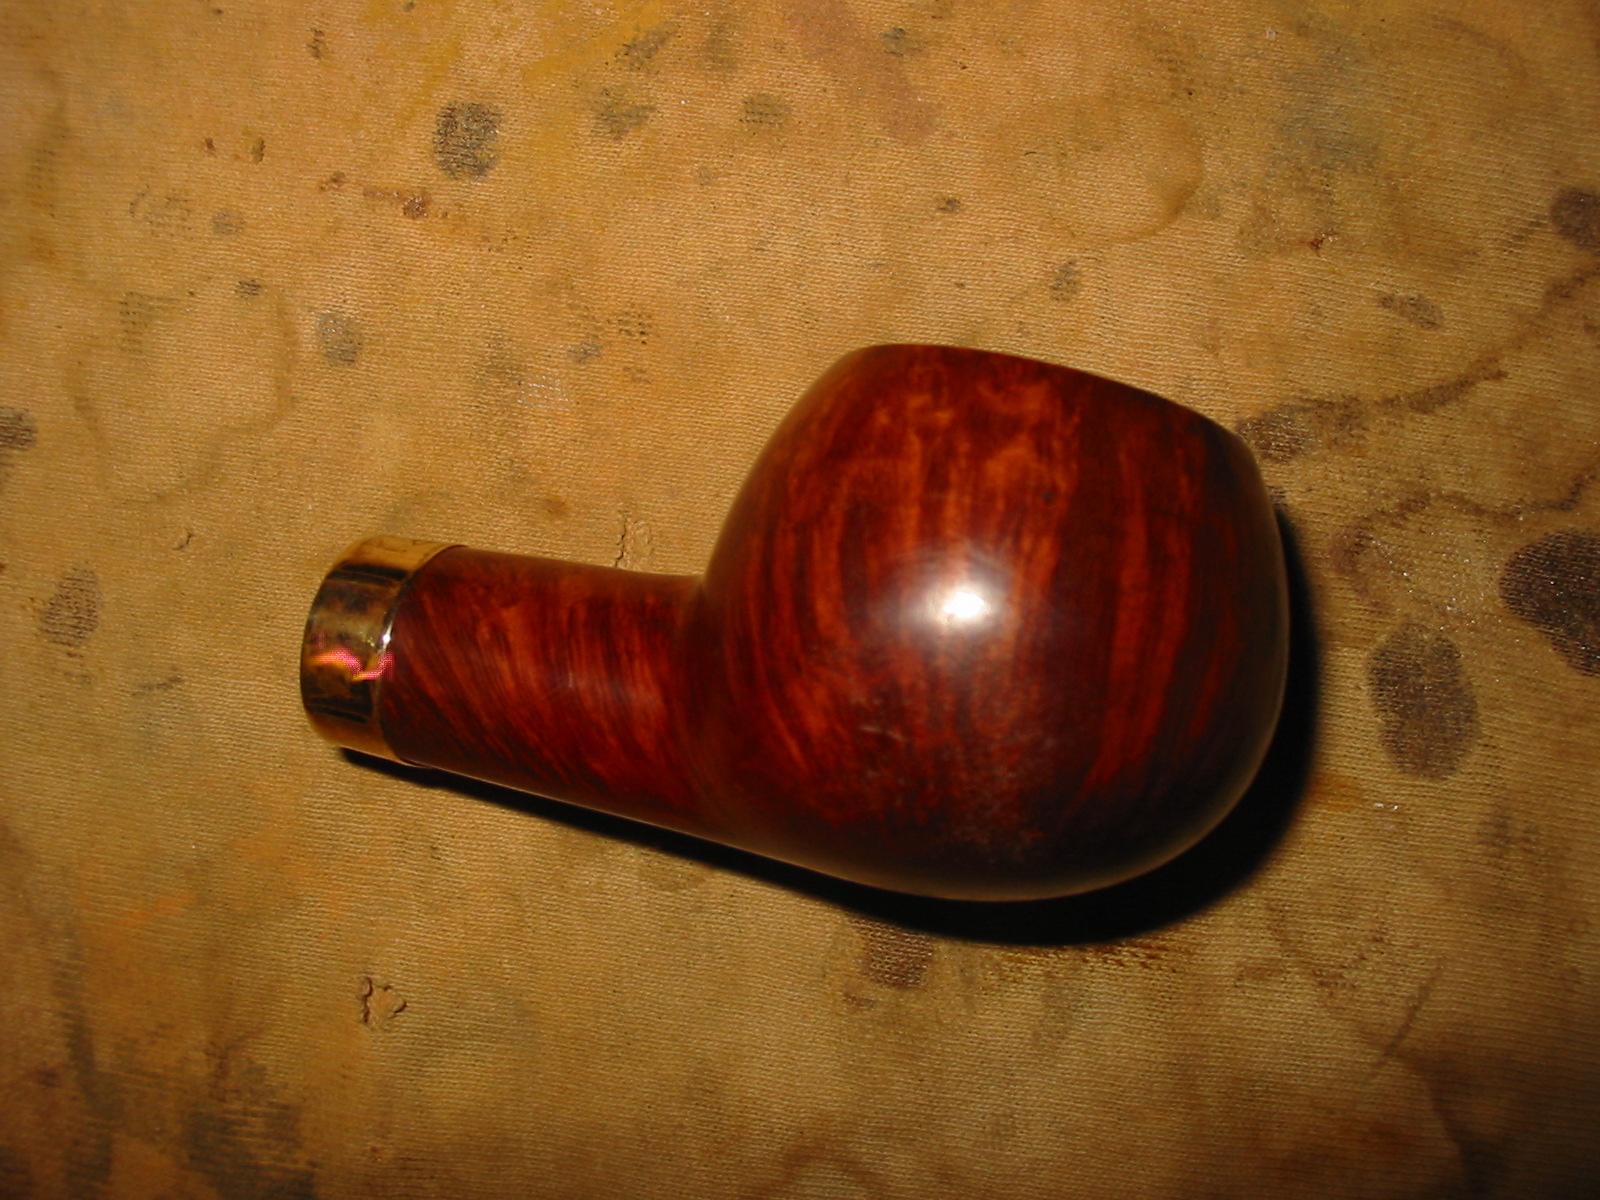
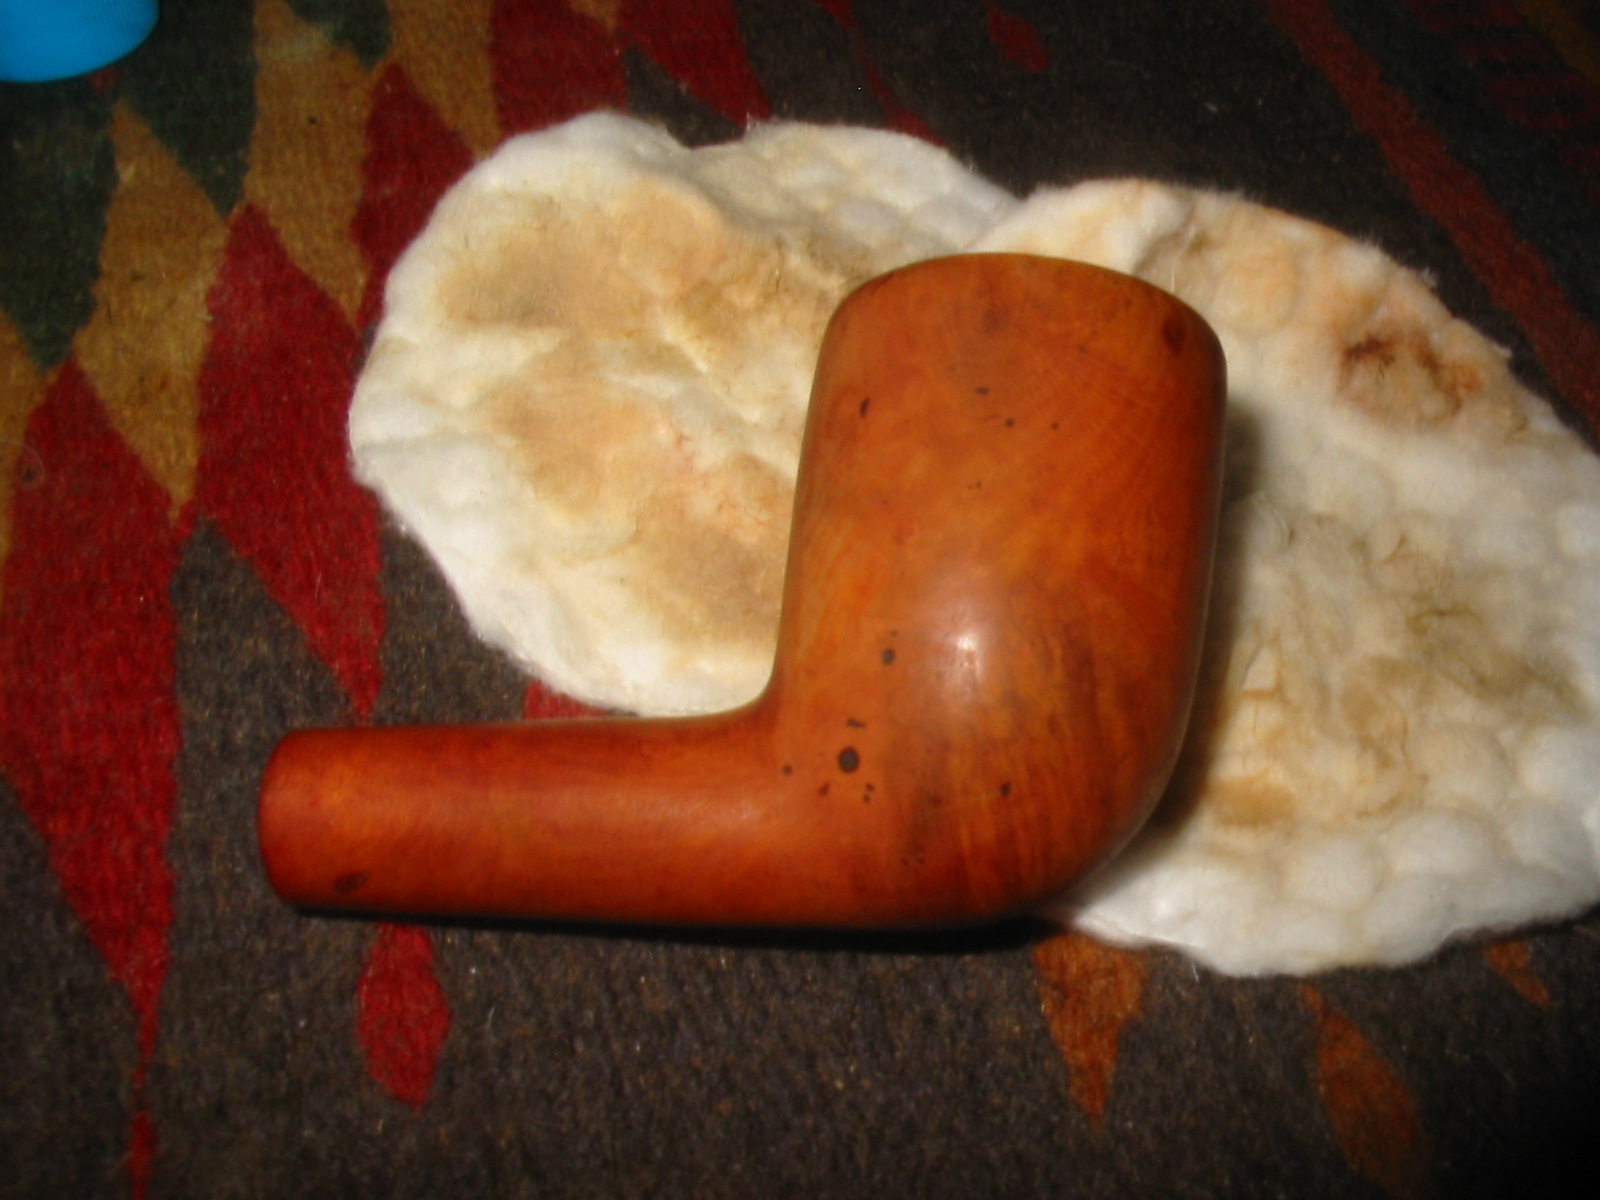
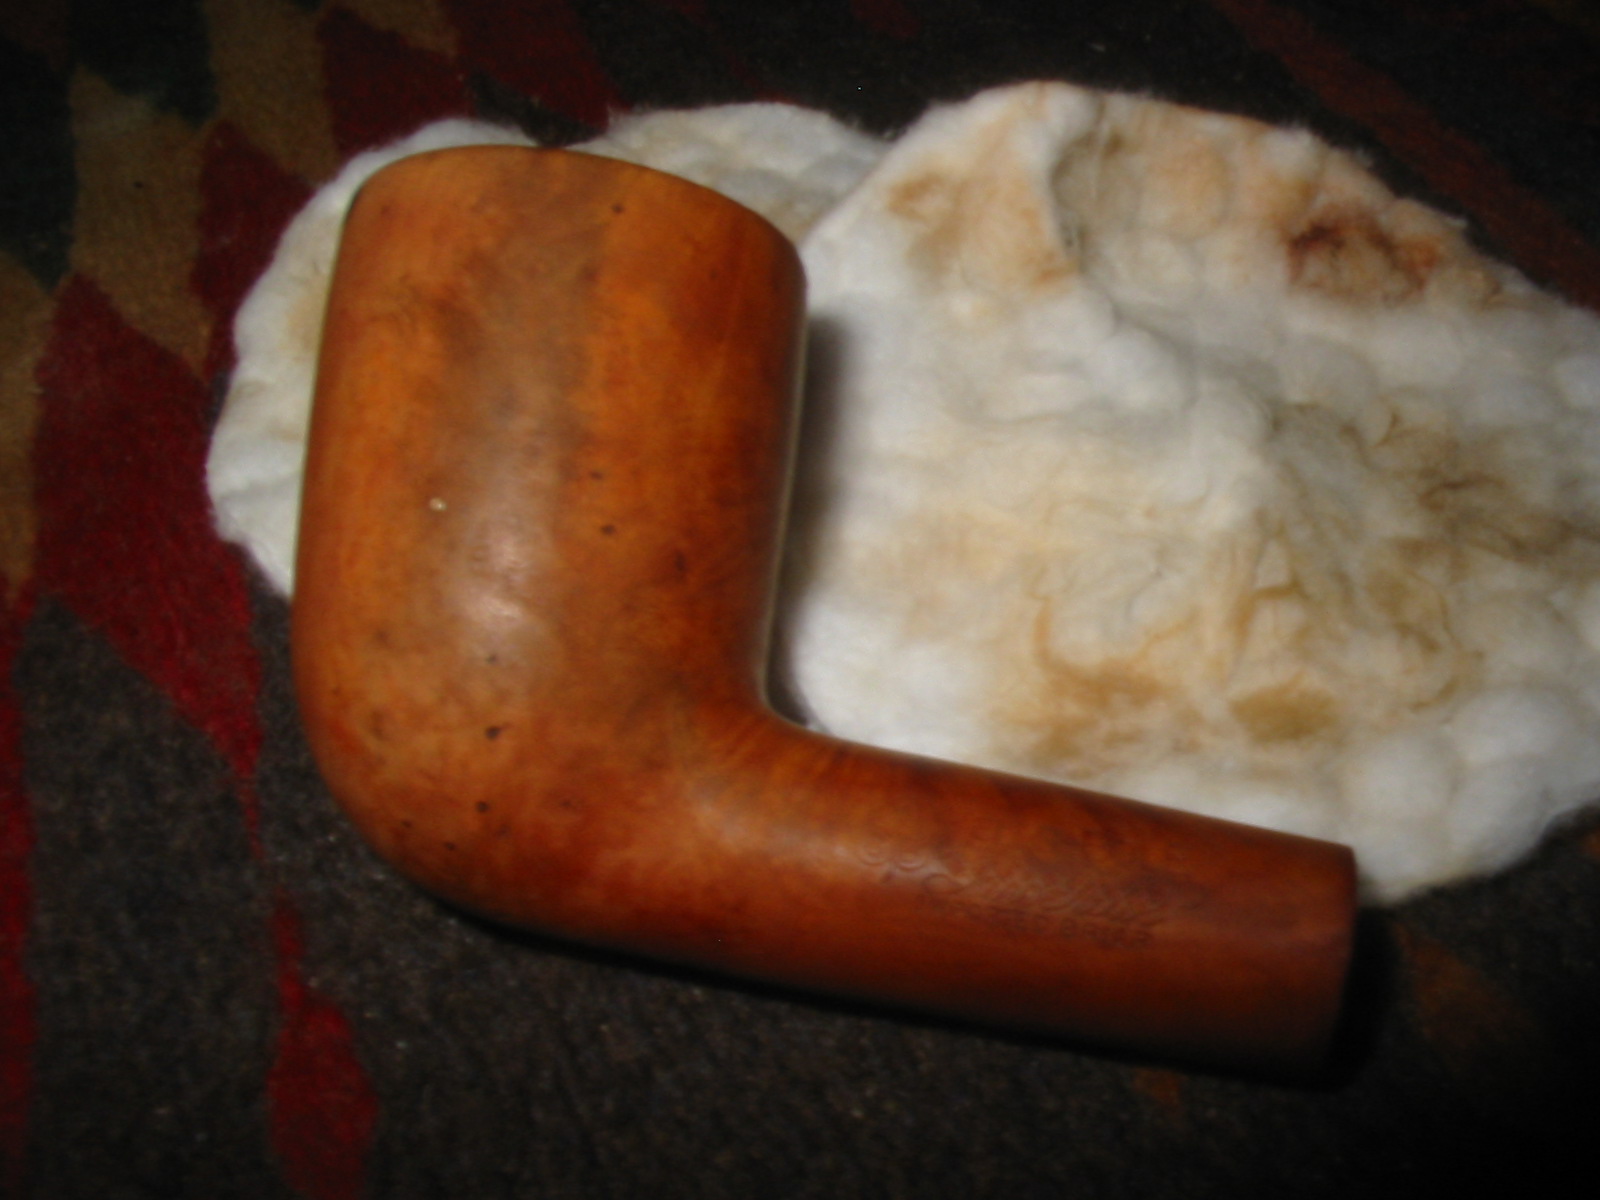
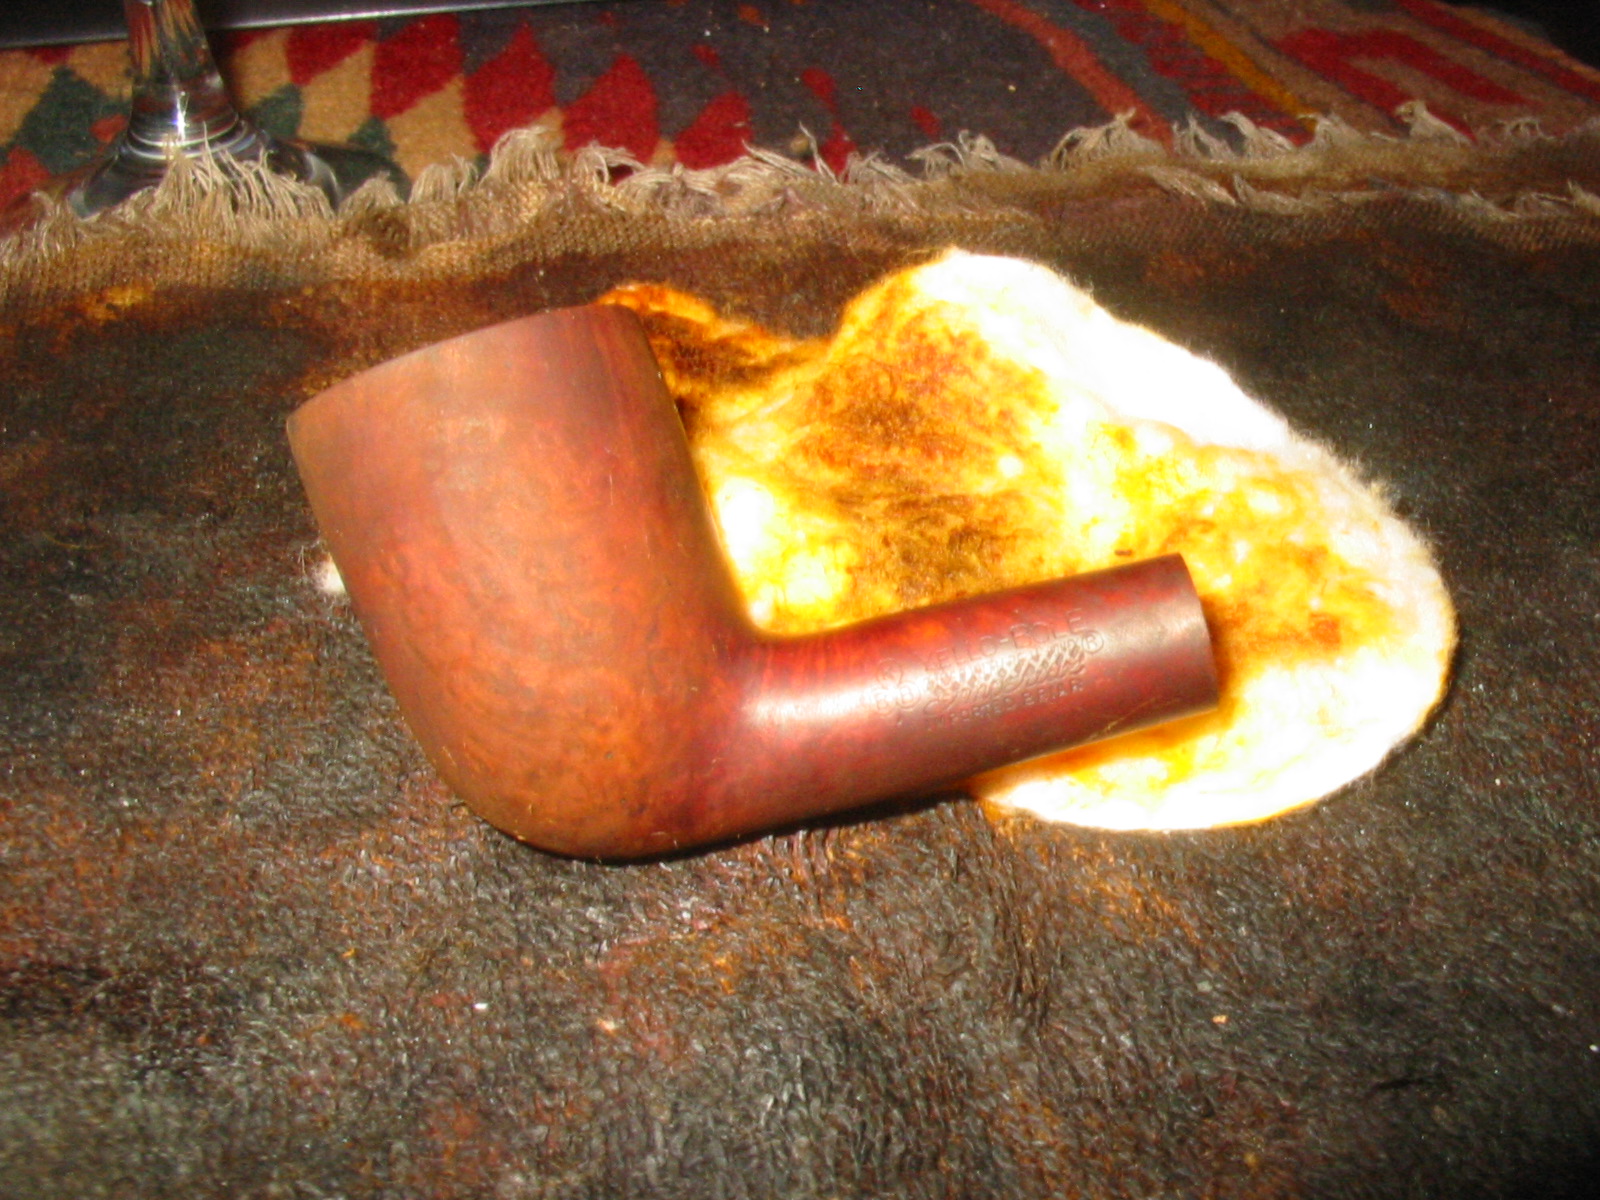
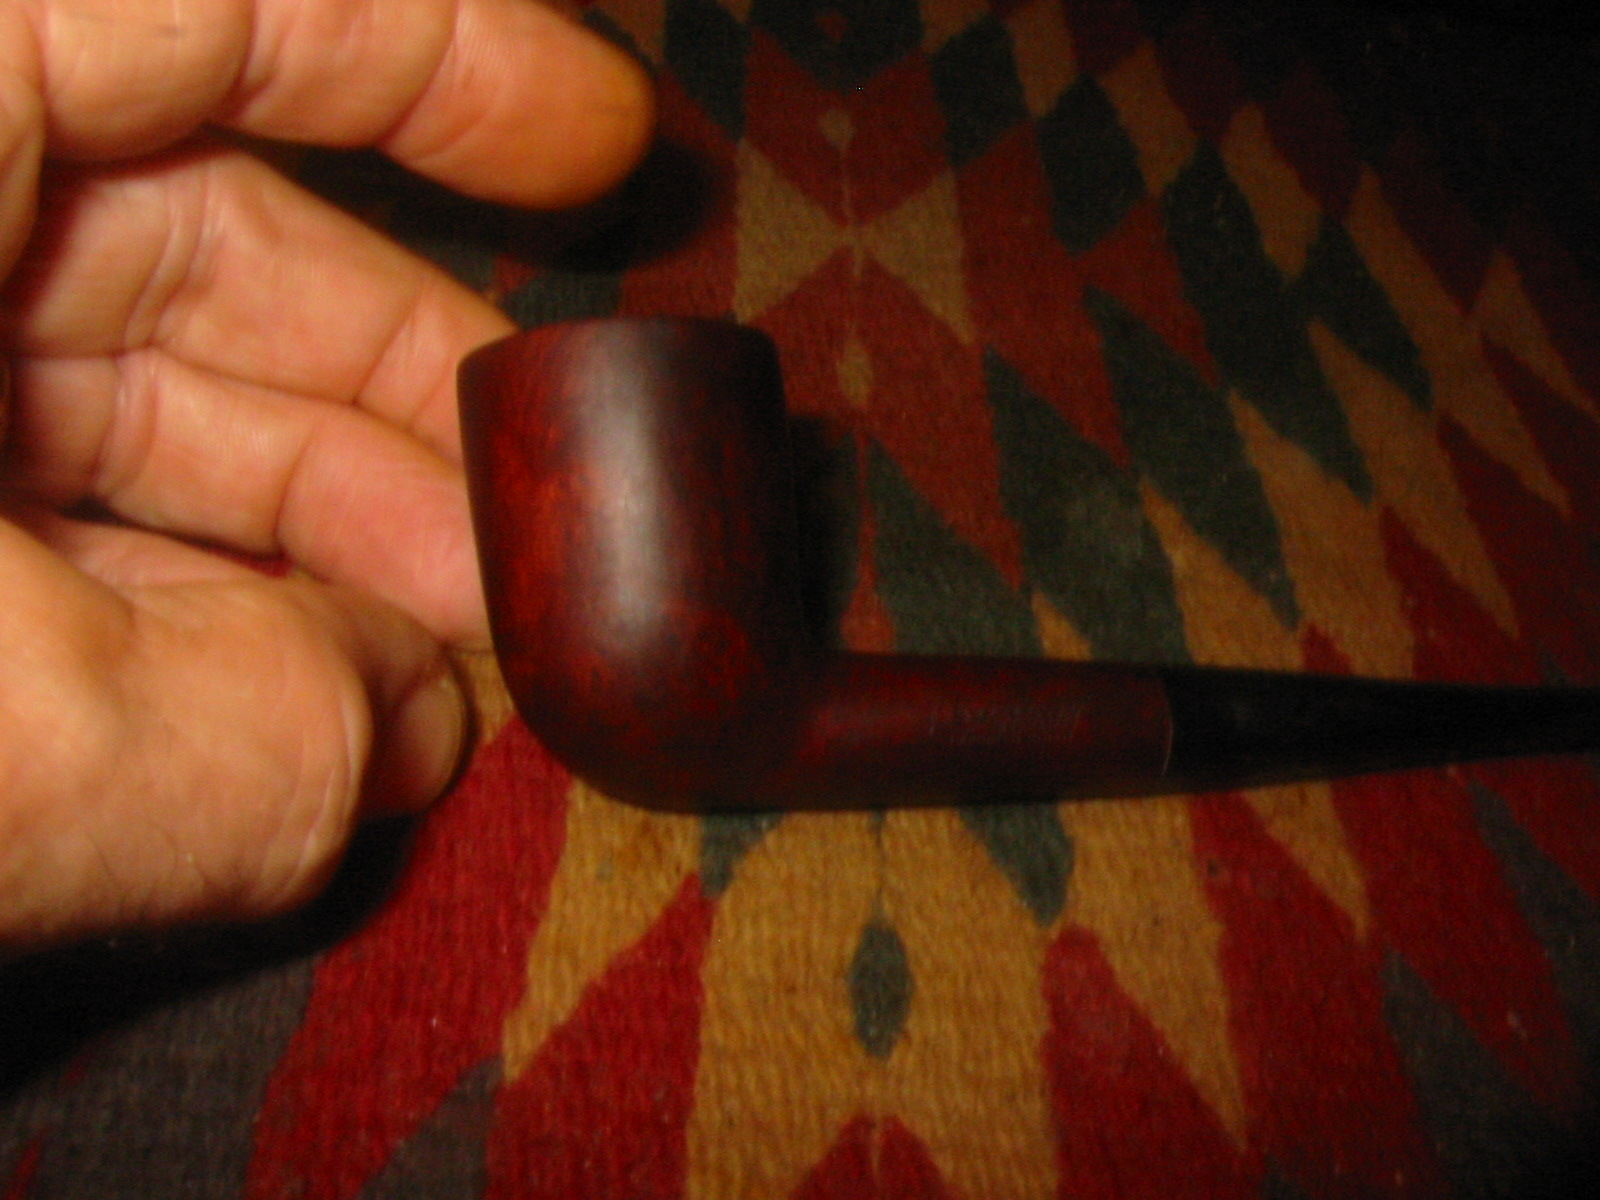
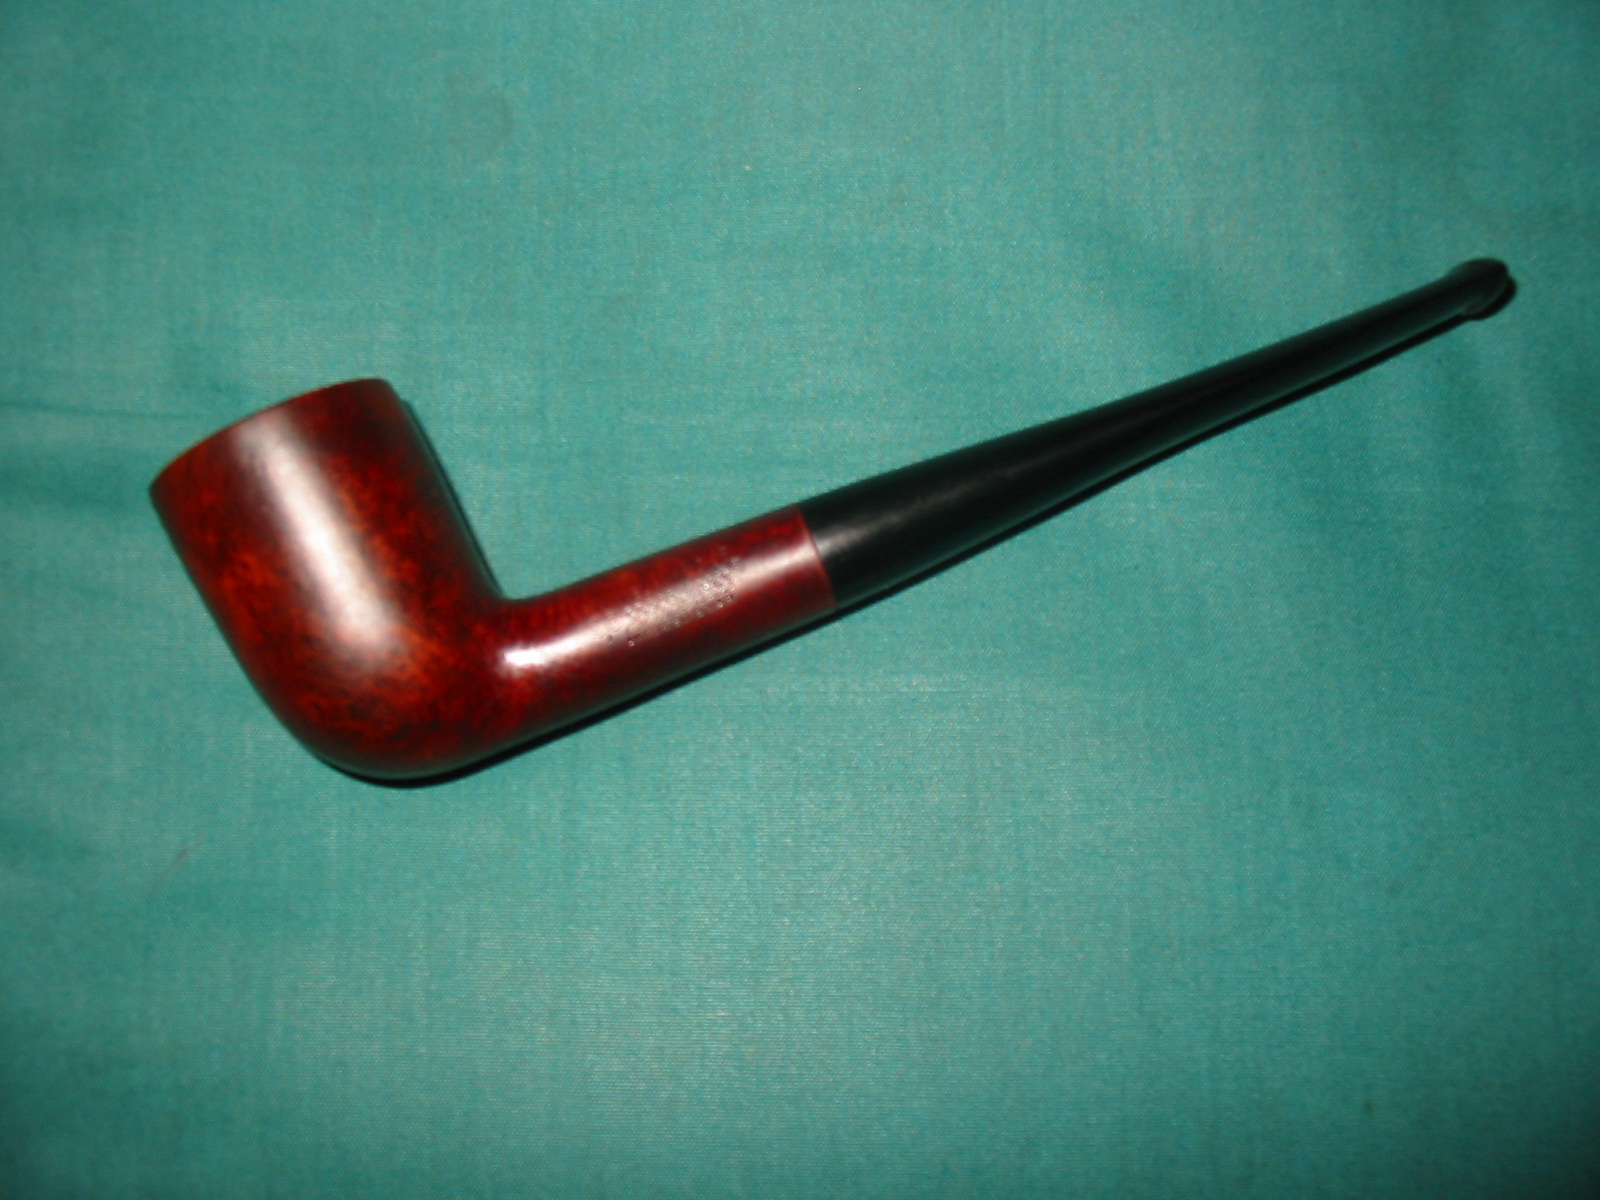
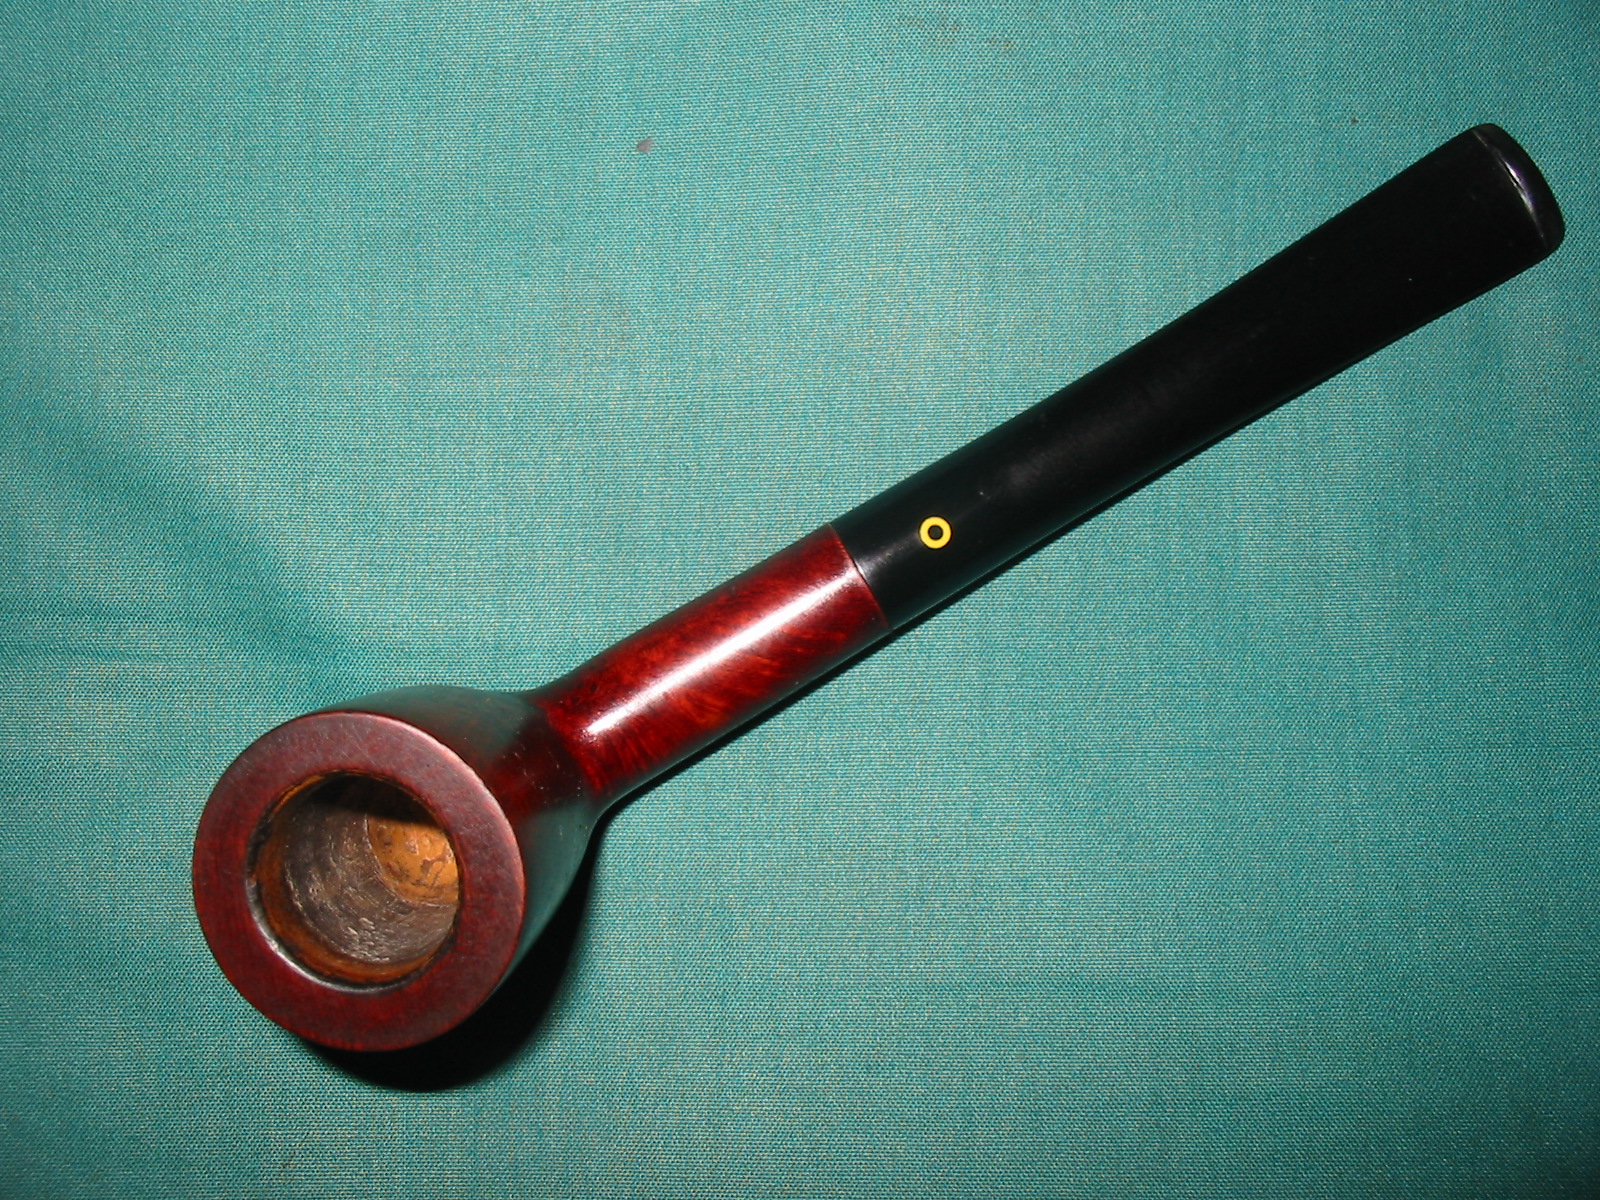
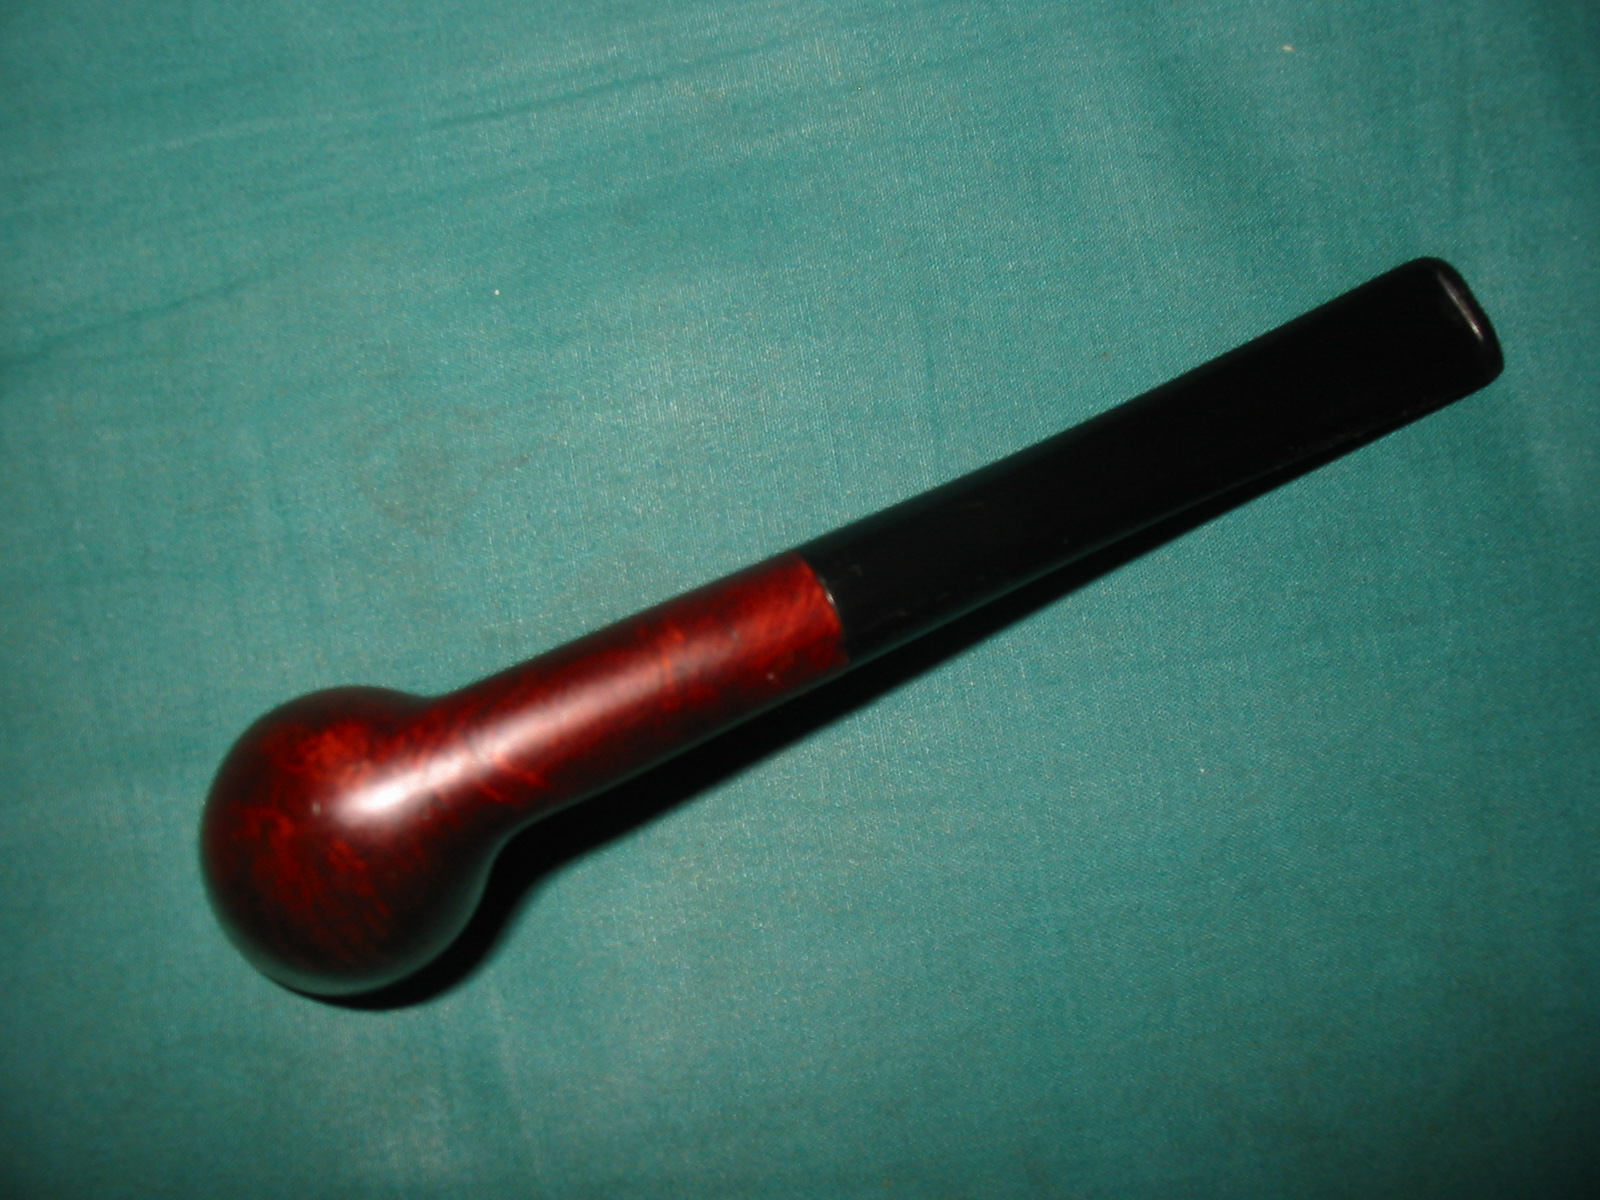
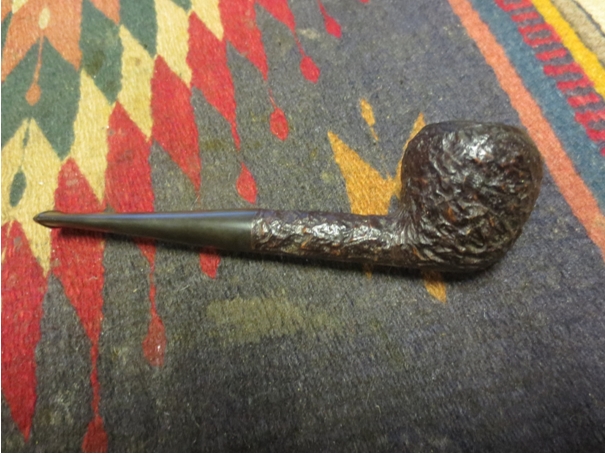
I rubbed down the bowl with Halcyon II wax and buffed it with a shoe brush to raise the shine and even out the wax. I put the maple filter back in the tenon and then put the stem on the bowl. I buffed the bowl lightly with carnauba wax and then with a soft flannel buff. The finished pipe is shown in the photos below. It is cleaned and ready to smoke. I love the older Brigham pipes like this one and find that they smoke very well. They deliver a cool dry smoke and the Brigham filter system works well to cool the smoke and not hamper the draw or the flavour. Sometime later this week I will load a bowl of Virginia and enjoy the first smoke in this old timer.Brig18

Brig19

Brig20

Brig21

Rode Hard Put Away Wet – A Tired Julius Vesz shape 31 Zulu/Canted Dublin


Blog by Steve Laug

When I walked by the display case in the antique mall and saw the classic Vesz finish and the O logo on the stem I knew I was looking at one of Julius’ pipes. It was in very rough shape. The stem was covered on the topside and underside from the button forward for about an inch with a lot of dents and bite marks. On the topside there was a bite through – not large, more of a pinhole sized hole. There was also a lot of calcified buildup on the stem. The stem was over bent and the flat bottom of the bowl and shank did not rest on the desk top when laid down. The stem arch kept it from happening. The button and crease had were also worn. The rest of the stem was oxidized. The bowl finish was dirty and worn with white paint spots on the bowl. The stem was very tight and hard to remove but when I did remove it the tars on the end of the tenon were thick. The inside of the stem was so filled that the airway was virtually clogged. The slot on the end of the stem was plugged but for a hole the size of a pencil lead.Vesz1 Vesz2 The rim was damaged and worn from tapping it out on hard surfaces. There were large dents and worn areas. The inner edge was blackened and on first glance looked to have burned damage. It was hard to tell for sure but it also looked to be slightly out of round due to the damage to the inside edge. The bowl was heavily caked with a concrete like carbon build up. I tried to ream it and found it too hard to cut as it stood. The inside of the shank had heavy carbon and tar buildup.Vesz3 The pipe is stamped on the flattened bottom of the shank. Toward the front of the bowl it is stamped Circle 3 which denotes the price point of the pipes. Julius stamped them 1-6 to denote the price. That is followed by the shape number – in this case 31. The final stamping is Julius Vesz over Hand Made.Vesz4 To soften the concrete like cake so that I could ream it more easily without damaging the briar I put the bowl into an alcohol bath to soak for a while. I also wanted to remove the grime from the rustication on the bowl and the soak would facilitate that.Vesz5 While the bowl soaked I worked on the stem. I cleaned the inside of the stem with cotton swabs, pipe cleaners and isopropyl alcohol. I also sanded the calcification with 180 grit sandpaper and 220 grit sandpaper to remove the build up from the surface of the stem. The tooth marks are very evident in the photos below.Vesz6 Vesz7 I took the bowl out of the alcohol bath to ream it and found that indeed the alcohol had softened the cake enough to make reaming a very easy task. I reamed it with a PipNet reamer starting with the smallest cutting head and working up to the size of the diameter of the bowl.Vesz8 I topped the bowl and removed the damaged surface of the rim. I set up a topping board and used 220 grit sandpaper to gently and carefully remove the damage. I sanded the bowl in a circular pattern on the board as I find that doing so does not leave as deep scratches in the finish. Once I had removed the damage I could see the state of the inner edge of the rim. It had some darkening but it was still solid. There were no deep burned areas that needed to be removed.Vesz9 Vesz10 Vesz11 I set up a heat gun and heated the bent stem to reduce the bend to a point where the pipe would sit up right on the flat bottom of the shank and bowl. I also heated the tooth dents to raise them as much as possible before I sanded them.Vesz12 Vesz13 Once the stem was heated and flexible I inserted it in the shank and pressed down on the bend to adjust the bend to allow the bowl to sit without falling over. The tooth marks did lift quite a bit and are visible in the last two photos of the foursome below.Vesz14 Vesz15 Vesz16 I sanded the stem with 220 grit sandpaper and then with medium and fine grit sanding sponges to clean up the dents as much as possible. The surface needed to be cleaned and prepped for the work of filling the dents with black super glue. I washed down the dents with alcohol to remove the sanding dust. I filled the holes and built up the dents in the button lip with black super glue until they were overfilled, then sprayed them with the accelerator to harden the glue. I sanded the fills with 180 grit sandpaper and then with 220 grit sandpaper to begin the process of smoothing them and blending them into the surface of the vulcanite.Vesz17 Vesz18 I continued to sand with the 220 grit sandpaper to shape the crease and the button as well as the surface of the patches until they were at the same level as the surface of the stem.Vesz19 Vesz20 I sanded the stem after that with a medium and a fine grit sanding sponge to further blend it into the stem surface. It took a lot of sanding to blend it into the surrounding vulcanite.Vesz21 Vesz22Vesz23 Vesz24 I rubbed down the stem with Obsidian Oil to make the scratches and trouble areas very visible. I also rubbed down the bowl with olive oil and wiped it off and set it aside overnight to let the oil be absorbed into the wood. In the morning I took the following set of two photos to show the state of the pipe when I began to do the finishing work on it. Vesz25 Vesz26 I sanded the stem with fine grit sanding sponges to clean it up further and remove the deeper scratches. I then sanded it with micromesh sanding pads – wet sanding with 1500-2400 grit pads and dry sanding with 3200-12,000 grit pads. I rubbed it down with Obsidian Oil between each set of three pads. I finished the stem work by buffing the stem with White Diamond on the wheel to finish the polish. I gave it several coats of carnauba wax and buffed it with a soft flannel buff to raise the shine.Vesz27 Vesz28 Vesz29 Vesz30 Vesz31 The bowl had a heavy ghosting of aromatics – it was overwhelming and no matter how many times I cleaned it the smell remained. I filled the bowl with cotton balls, pressed them down and then filled the bowl with isopropyl alcohol with an ear syringe until the cotton was soaked. I set the pipe bowl in an old ice-cube tray that holds it upright and let the alcohol and cotton do their work to pull out the oils from the briar and sweeten it. I have moved more and more toward using cotton instead of coarse salt. It seems to work just as well and is less of a mess in the clean up stage.Vesz32 I let the pipe sit with the alcohol and cotton balls for about three hours. The photo below shows the oils that were drawn out of the bowl. The cotton turned a yellow-brown and was almost dry.Vesz33 I took the cotton balls out of the bowl and cleaned the shank and bowl with pipe cleaners. I put the stem back in place on the pipe and gave the pipe a hand polish with some Halcyon II Wax. I hand buffed it with a shoe brush to raise the shine. The finished pipe is shown below. The look and feel of the pipe is far better than when I started. The repairs to the stem and button worked well and blended in nicely to the stem. The topping of the bowl removed the damaged portion and the blackening of the inner edge of the rim is merely a character trait. This is one that will stay in my collection. It smells sweet and is ready to smoke.Vesz34 Vesz35 Vesz36 Vesz37

Stripping a Chacom Cocktail Pipe and giving it a new look


Blog by Steve Laug

My son-in-law and I dropped off his wife and two of my other daughters at the shopping mall and made our way to the pipe hunting turf. He found a nice Peterson Dunmore and I picked up this little Chacom. I love the shape of the bowl. It is an oval shanked pipe with stamping on both the top and the underside. On top it is stamped Chacom over Cocktail and on the underside it is stamped St. Claude over France and 338 next to the stem shank junction. The bowl was caked and quite dirty. The top of the rim while undamaged by dents or chips was thickly covered with tars and oils. The finish was shot – the black paint, kind of shiny dress black, was peeling and large spots on the finish were missing. The stem was dirty, oxidize, and covered with a calcification for the first inch of the stem. There was tooth chatter on the top and bottom of the stem and on the underside it had some tooth dents that would need to be addressed.Chacom 1 Chacom 2 Chacom 3 Chacom 4 I reamed back the cake to the bare briar with a PipNet pipe reamer. I used both the first and second sized cutting heads to ream the cake back. This time it was not hard but rather it crumbled when the blades of the reamer touched them.Chacom 5 I put the bowl in an alcohol bath overnight and let it soak. In the morning I took it from the bath and found that the finish was unphased by the soak. I had run out of acetone for removing the finish but I borrowed some fingernail polish remover from my daughter. It was a peach flavoured wash with added vitamin E. I figured that neither the pipe nor I would mine the smell of fresh peaches as I scrubbed down the finish. The peach aroma made the acetone removal of the painted finish not only quick and easy but made it smell like peach cobbler! Wow. I used a lot of cotton pads soaked in the acetone to remove the paint and clean up the finish. I sanded the bowl with 220 grit sandpaper but did not sand the shank as I did not want to damage the stamping on the top and the bottom. I went over the sanded bowl with a medium and fine grit sanding sponge.Chacom 6 Chacom 7 Chacom 8 Chacom 9 I dropped the bowl into an alcohol bath to soak out the deep stain and remove some more of the paint that held on fast. While it soaked I worked on the stem. I sanded it with 220 grit sandpaper to remove the calcification and oxidation and then wiped it down with alcohol. I was able to remove the tooth chatter from the top side but the bottom side still had a deep tooth mark. I sanded it and opened up the edges of the mark. I wiped it down with alcohol and then filled it in with black superglue and sprayed it with accelerator.Chacom 10 I sanded the patch with 180 and 220 grit sandpaper and then with the sanding sponges to blend it into the surface of the stem.Chacom 11 Chacom 12 I removed the bowl from the alcohol bath after it had soaked for about an hour. I dried it off with a soft rag and took the following four photos to give a clear idea of where it stood at this point in the process of removing the finish. The peach flavoured acetone and the isopropyl alcohol had done their magic and the paint was gone!Chacom 13 Chacom 14 Chacom 15 Chacom 16 I let the bowl dry and continued to work on the oxidation on the stem. I sanded the bowl lightly with a medium and fine grit sanding sponge and then wiped it down with a cotton pad and alcohol to remove the dust. I put the stem back on the bowl and took the pictures below to show the progress toward the new look of this old dress pipe.Chacom 17 Chacom 18 Chacom 19 I used a folded piece of 220 grit sandpaper to rework the inner edge of the rim. It had originally had a slight bevel toward the bowl and I wanted to clean that up and redefine it. Once that was completed I wiped the bowl down a final time with the alcohol and prepared it for staining. I decided to use a dark brown aniline stain to work with the black highlights on the grain. I applied the stain, flamed it and reapplied and flamed it again.Chacom 20 Chacom 21 Chacom 22 Chacom 23When the stain dried I wiped it down with isopropyl alcohol on a cotton pad to remove some of the opacity of the colour and to try to make it more transparent. The next four photos show the pipe after the wipe down.Chacom 24 Chacom 25 Chacom 26 Chacom 27I took the pipe to the buffer and buffed it with White Diamond, being careful to avoid buffing the stamping on the shank. I am careful not to damage that in the process of the restoration. Once buffed the stamping really shows up again. Now it was time to work on the stem some more and get rid of the oxidation and scratches. I use a plastic spacer between the shank and the stem to protect the shank and to allow me to sand the stem without rounding the shoulders. I sanded with 220 grit sandpaper, medium and fine grit sandpaper and then used micromesh sanding pads. I wet sanded with 1500-2400 grit pads and dry sanded with 3200-12,000 grit pads. I rubbed it down with Obsidian Oil between each set of three pads.Chacom 28The tooth repair on the underside of the stem is smooth and even. However, when I sprayed it with the accelerator it left a white centre to the patch. I have not had that happen before but it is all the way through the patch. I will live with it for now, but one day may pick it out and redo it to remove that aspect of the patch.Chacom 29 Chacom 30 Chacom 31 Chacom 32I continued to sand the stem as the photos highlighted areas that still showed oxidation. Once I had that removed I buffed the stem with White Diamond and gave it multiple coats of carnauba wax. I wiped the bowl down once again with isopropyl alcohol on a cotton pad to further lighten the brown stain and highlight the contrast with the remaining black stain in the grain. I buffed it with White Diamond and then gave it several coats of carnauba. I buffed the entire pipe with a soft flannel buff to give it a shine and set it aside for an inaugural smoke – either later today or early this week. The finished pipe is shown below.Chacom 33 Chacom 34 Chacom 35 Chacom 36

A Spitfire by Lorenzo Mille Billiard – My First Dabble with Black Super Glue – Robert M. Boughton


Guest Blog by Robert M. Boughton
Member, North American Society of Pipe Collectors
http://www.roadrunnerpipes.com
http://about.me/boughtonrobert
Photos © the Author

“There is nothing insignificant in the world. It all depends on the point of view.”
—Johann Wolfgang von Goethe (1749-1832), German author, playwright and poet
Robert head INTRODUCTION
Perspective is the key to everything, from the incredible diversity of the daily activities to the personal, often unique worldviews of everyone on the planet. Take, by way of an extraterrestrial example, the Sombrero Galaxy shown above, an edge-on spiral 50,000 light years from one side to the other (half the size of our own) and 28 million light years from Earth. Discovered hidden within the constellation Virgo in 1781 and named by French astronomer Charles Messier because of his point of view at the time, the Sombrero seen head-on would have a much different appearance. In other words, looks can be deceiving.

And so I present the initial side view (somehow I neglected to photograph the left side) of the Spitfire by Lorenzo Mille – which, compared to Starbuck’s Venti, meaning 20, translates in the same Italian to 1000 – that lives up to its name in terms of its huge size, and lasts far longer than any of the aforementioned coffee chain’s drinks.Robert1 The massive, gorgeous billiard (measuring 5-3/4″ x 2″ in length and height with an outer rim diameter of 1-3/8″ and chamber dimensions of 7/8″ x 1-7/8″), as seen in this photo side angle as I received it in a pipe lot I bought online, is nothing less than gigantic all around. Even the relatively flat shank leading into the stem is an inch across. But, as will be shown in the next part of this blog, from other angles the pipe, which at least on my screen is the actual size, had its share of problems.

RESTORATION
Here it was from those other views.Robert2 Robert3 Robert4 Robert5 The blackened rim and badly caked chamber were easy enough to fix. I started on the chamber with my reamer and took out the majority of the carbon buildup, then switched to 150-grit paper followed by 400 before finishing with 800. The rim came clean with super fine steel wool before 1500 micromesh, then 2400, 3600 and at last 8000. So far, that is the finest grade of micromesh I have used, and it worked well.

Most of the stem cleaned up with 1500 micromesh and some 400-grit paper on the lip followed by 1500 again, and then 2400 to smooth it out.Robert6 Still, the tooth marks remained, and since my recent order of Black Hyper Bond, a.k.a. Super Glue, had arrived, I was presented with my first opportunity to try it on a stem. The hard part proved to be not squirting out too much.Robert7 A couple of hours later, long after I had prepared the nice hunk of briar for buffing, I returned to the stem and tried 2400 micromesh to remove the dried glue bump. After that, I finished it with 3600. Robert8 As I noted, this was my first time filling in a hole, so the result is not perfect, but I think it looked much better than before.

Every inch of the wood, to my continuing amazement, was as pristine and unblemished as the first side angle shows. This is the only pipe I have ever restored that had not even a single scratch on it, except for the rim, which ended up fine as I described. This was also one of the few times (all of the others on meerschaum restorations) where I only needed to buff the rim to make it shine again with its natural color, not needing to re-stain it.

This brings me, with rather unusual speed, to the final buffing, which I accomplished using my standard methods: red and white Tripoli followed by White Diamond on the stem, and white Tripoli, White Diamond and carnauba on the fine, already lustrous wood just for the sake of it.Robert9 Robert10 Robert11 Robert12 Robert13 Robert14 CONCLUSION
I was a little giddy trying out the Black Hyper Bond to repair the bite mark in the stem, and as I wrote before, the result is not as well done as I hope to achieve in the future and returning to some of my previous restores that some of you with excellent memories may recall needed similar work. But from my perspective, it’s a good start – better than government work at least, as the saying goes.

Grazzie Mille for your time and patience!

A Reborn Peterson Tankard


Blog by Steve Laug

I have looked for one of these little Peterson Tankards for a long time. I have always liked the delicate simplicity of the pipe. The bowl is a round tankard and the pencil shank with the silver Peterson collar looks elegant. The rim is rounded and crowned. The stem has a gentle bend that allows the pipe to sit plat on the base. It is stamped on its base Peterson Tankard, Made in the Republic of Ireland. The pipe is pictured in the photo below, the third pipe down. It was one of the five I found on my recent pipe hunt.IMG_2049The Tankard was in worn but decent shape. The finish was dirty and there was darkening around the bowl middle from the hands of the previous owner. The rim had a thick buildup of tars and oils that had hardened. There were burn marks around the inner edge of the rim at the back of the pipe and the right front. The burn on the front of the bowl was more extensive that then one on the back inner rim. The bowl had a thick cake in it and the shank was dirty. The stamping was readable but faint. The stem had tooth marks on the top and bottom sides of the stem near the crease on the P-lip. It was badly oxidized and there was a heavy calcification around the stem about an inch in from the button. The silver ferrule was clean and would shine up easily.IMG_2123 IMG_2124 IMG_2125 IMG_2126I reamed the bowl with a PipNet reamer to remove the cake back to bare wood. I scrubbed down the exterior with Murphy’s Oil Soap on a cotton cloth and wiped it off to clean the briar.IMG_2128 IMG_2260 IMG_2261 IMG_2262 IMG_2263The next photo shows the reamed bowl and the caked rim top. It was very thick so it would take some work with sandpapers and oil soap to remove the tars. I scrubbed it with the soap and then with alcohol to remove as much of the tars as possible. I then sanded it with 220 grit sandpaper and a medium grit sanding sponge. I wiped it down with acetone once I had finished sanding it. The extent of the rim damage can be seen in the second photo.IMG_2264 IMG_2265I wiped down the finish with acetone on cotton pads to completely remove the wax and the finish from the outside of the bowl.IMG_2266 IMG_2267 IMG_2268I set the bowl aside to work on the stem. I used a Bic style lighter to “paint” the surface of the stem and lift the tooth marks. Doing this I was able to remove many of the tooth dents and lessen the depth of the remaining ones.IMG_2269 IMG_2270 IMG_2271I sanded the stem with 220 grit sandpaper to remove the rest of the dents and the oxidation and calcification. I reshaped the button and the crease to sharpen them. There was one tooth mark that I could not minimize further without damaging the thickness of the stem at the crease. I used a clear super glue to fill that spot. Once the glue had dried I sanded it and then used a needle file to reshape the crease and smooth things out. I sanded the repair with 220 grit sandpaper and then with medium and fine grit sanding sponges until I had blended it into the surface of the vulcanite.IMG_2272 IMG_2273 IMG_2274 IMG_2275 IMG_2276I sanded the stem with my usual array of micromesh sanding pads to polish and finish it. I wet sanded with 1500-2400 grit sanding pads and dry sanded with 3200-12,000 grit pads. I wiped it down with Obsidian Oil between each set of three grits. Once I finished with the micromesh pads I buffed the stem with White Diamond and then gave it several coats of carnauba wax to protect it and give it a deep shine.IMG_2281 IMG_2282 IMG_2283I decided to leave the finish natural and not stain it. I rubbed it down with a light coat of olive oil to enhance the redness of the briar.IMG_2277 IMG_2278 IMG_2279 IMG_2280I took a close up photo of the rim to see if the scratches were still visible. At the back side of the rim there were still some scratches that I needed to work on more to remove. I also wanted to see if I could also remove some more of the rim damage from the burn marks.IMG_2288I sanded the rim with a medium and a fine grit sanding sponge to work on the scratches and the burn marks. Working on the surface with the sanding sponge I was able to remove the scratches and some more of the burn marks from the surface.IMG_2289 IMG_2294I sanded the bowl with the same fine grit sanding sponge and then buffed it with White Diamond. I took special care around the stamping to make sure that I did not damage the light stamping. I gave it multiple coats of carnauba wax and lightly buffed it to a shine with a soft flannel buffing pad. The finished pipe is shown below. The birdseye grain on the sides and the cross grain on the ends both work really well. It is a beautiful pipe and I think it will be a great smoking pipe as well. It should provide many more years of service and certainly live beyond my lifetime to be passed on to a new generation of pipemen.IMG_2290 IMG_2291 IMG_2292 IMG_2293

Restoring a Dunhill Shell Billiard 42121


Blog by Steve Laug

Of all my finds on my recent pipe hunt this little Group 4 Dunhill Shell is one of the favourites. It has a great sandblast that really had some nice craggy grain. The finish was in good shape. The rim was dirty and had a slight build up of oils and tars. The bowl was caked with a thick cake. The stem was oxidized and also had a calcium buildup for the first inch of the stem. The stem had an inner tube inside that was slightly bent that kept the stem from seating correctly in the shank. There were several shallow bite marks on the top and bottom sides of the stem near the button. Internally the stem and shank were surprisingly clean.IMG_2201 IMG_2202 IMG_2203It is stamped on the underside of the shank with 42121 Dunhill Shell over Made In England and next to the D of England was an underlined and superscript 20 next to that was an underlined 23. Using John Loring’s Dunhill Briar Pipe book the dating is 1980 as seen by the underlined 20 slightly elevated and following the D. The underlined 23 indicate that it was sold in 1983, due to the one year guarantee.IMG_2204The next photo shows the buildup on the rim that needed to be dealt with in a cleanup and restoration of the pipe.IMG_2205I cleaned out the shank and the stem with pipe cleaners, cotton swabs and 99% isopropyl alcohol until the cotton swabs and pipe cleaners came out clean.IMG_2206 IMG_2207I scrubbed down the bowl with undiluted Murphy’s Oil Soap on cotton pads and then rinsed it off with running water. I dried it with a cotton towel.IMG_2208IMG_2209IMG_2210IMG_2211IMG_2212I scrubbed the rim with a soft bristle brass tire brush to clean off the tars and oils and open up the sandblast on the rim. I scrubbed it with a soft cotton pad and alcohol to remove the pieces left behind by the wire brush.IMG_2213I touched up the finish around the edges of the bowl rim and the end of the shank. I also touched up spots on the sides of the bowl and the bottom of the shank. I used the Guardsman Stain pens that Greg sent me to do the touch up work. I chose to use the lightest stain pen as it matched the colour of the bowl precisely. When I use these pens I always start with the lightest stain and work toward the darkest until I get a match.IMG_2214 IMG_2215 IMG_2216 IMG_2217I sanded the stem with 220 grit sandpaper and then with medium and fine grit sanding sponges to remove the oxidation and the calcium deposits. I “painted” the tooth marks with the flame of a Bic lighter to lift them closer to the surface and then sanded what remained with 220 grit sandpaper and the sanding sponges.IMG_2218Taking a cue from Al Jones I made a plastic washer to put between the shank and the stem to make the sanding of the saddle simpler. I could sand right up to the edge without damaging the end of the stem and rounding the edges.IMG_2219 IMG_2220 IMG_2221I sanded the stem with my usual array of micromesh sanding pads – wet sanding with 1500-2400 grit pads and dry sanding with 3200-12,000 grit pads. Between each set of three pads I rubbed down the stem with Obsidian Oil before moving on to the next set of three. When I had finished with the 12,000 grit pad I took the pipe to the buffer and buffed the stem with White Diamond.IMG_2222 IMG_2223 IMG_2224I lightly buffed the bowl and the stem once again with the White Diamond and then used Halcyon II wax on the bowl and carnauba on the stem. I hand buffed the pipe with a shoe brush and raised the shine. The finished pipe is shown below. I am looking forward to loading an aged bowl of McClellands 5100 and having the inaugural smoke in this beauty.IMG_2225IMG_2226IMG_2227IMG_2228

John’s First Restoration – A Danish Sovereign Peewit #30


When John and I got home from our pipe hunt we spent the evening and the next morning working on the pipes he had found. We figured that the best way for him to learn how to refurbish pipes was to work on this lot together. That way he would learn as he worked with me on the pipes and we could discuss any issues that might arise during the process of the cleanups. He was intrigued with the idea and liked working with his hands so it seemed like this might be a part of the pipe smoking hobby that he could use to unwind and clear his thoughts from the heavy work of his day to day work as a Presbyterian minister. For his first pipe to refurbish he chose to restore a Danish Sovereign Peewit Shape #30. It is shown in the picture below and is the second pipe in the first row at the top. Walking through the entire process with him on this pipe and one of the others that he did taught him everything from removing the cake, cleaning the finish on a bowl and restaining it to cleaning and polishing a stem to the point that it shone. IMG_2050 Once again I forgot to take photos of the pipe before we started but remembered after I had reamed it with a PipNet reamer. The bowl was badly caked and the rim had a thick buildup of tars and oils. The briar had a nice blast on it and the stain was worn in quite a few spots. The stem was odd on this particular pipe. The tenon had a sleeve on it that added diameter. It appeared that somewhere along the way the shank had been redrilled larger than the original tenon so the sleeve was a necessity. The bowl was drilled way off centre to the right so the airway entered the bowl on the right side of the bottom of the bowl. The bowl itself was round but the pipe itself was way out of round with far more briar on the right side than the left. Danish1 Danish2 Danish3John scrubbed the bowl with a tooth-brush and Murphy’s Oil Soap to remove the grime and the old finish. He used a dental pick to remove the remainder of the buildup on the top of the rim. He rinsed it under running water to remove the soap and grime and dried it with a soft cloth. He used a dark brown stain pen (thanks Greg) to match the stain on the bowl in those areas on the shank and rim where the stain had worn off. He buffed the bowl with White Diamond and then gave it several coats of carnauba wax and hand buffed it with a shoe brush. Danish4 Danish5 Danish6The stem needed a lot of attention. There were some tooth dents in the surface of the stem on the top and bottom side. We set up the heat gun and heated the vulcanite to lift the dents. We also adjusted the bend in the stem while we were at it with the heat gun.Danish7 Danish8 The next photo of the end of the tenon shows the sleeve that had been added to the tenon to increase the diameter. Danish9John sanded the stem with 220 grit sandpaper to remove the calcification and the oxidation. He also used that to sand out the remnants of the tooth marks after we heated the stem. He then sanded the stem with a medium and fine grit sanding sponge to remove the scratch marks left behind by the sandpaper. Once finished he moved on to sand with micromesh sanding pads – wet sanding with 1500-2400 grit pads and dry sanding with 3200-12,000 grit pads. I had him rub the stem down with Obsidian Oil between each set of three pads. He buffed the stem with White Diamond and then we waxed it with some Renaissance Wax (he will not have access to a buffer at home so I was trying work as much as possible without one).Danish10 Danish11 Danish12 Danish13I had John give the pipe another coat of Renaissance Wax and buff it with a shoe brush to raise the shine. The finished pipe is shown below in all of its new sheen. I think John will enjoy smoking this one. I know when I refurbished my first pipe it seemed to smoke exceptionally well. I think it is the time spent bringing it back to life that makes this happen. Great job on this one John, it is a refurbished pipe to be proud of. Be sure to let us know how it smokes when you fire it up.Danish14 Danish15 Danish16 Danish17

Restoration of a Barclay Rex HGP Briar Root Labelled “THE DUKE”


I read a post by dmcmtk on Pipe Smokers Unlimited Forum regarding a pipe he picked up that was a Barclay Rex with a white spot on the stem. He had written to the store and received a response that the pipe was made for them by Dunhill. I had no idea that Dunhill had made pipes for the NY shop so I began to hunt down some of these pipes looking for the tell-tale white dot on the stem. I found some on Ebay under the Barclay Rex shop store there and one stood out to me and seemed to call my name. The write-up on the ad read:

“This is a HGP Stubby Briar Root estate pipe that has been carefully restored on-site.The stem is in excellent condition and has very little visible wear; there are a few nicks on the bowl. This pipe was made by hand for Barclay Rex and likely dates to before 1960. The letters HGP actually stand for the craftsman’s initials.”

The story and the shape intrigued me and it had the white spot on the stem. I was hooked. It had a buy it now price so I went for it. I contacted the store and paid the bill and the pipe was mine. I was not too concerned about the condition as I would work on it anyway. The ad said that it had been carefully restored on-site so I would see what that meant when it arrived. The photos below were on Ebay and give a good idea of why the shape caught my attention. $_57 $_58 $_59 $_60 $_61 $_62 $_63 $_64 $_65 $_66 I wrote to Barclay-Rex to find out a little background information on this pipe and the stamping it showed in the pictures. I received this email response:

Dear Steve,
This was made by a pipe maker who worked for Barclay Rex for a time in the mid-20th century. His initials were HGP and he would stamp his pipes as such. We are unsure why the maker decided to place a white dot on his stem, but we have come across one or two more of his with the same combination. Unfortunately, his full name has been forgotten with time.
– barclayrex1910

When the pipe arrived it was in good shape. The stamping indeed was HGP over Briar Root on the left side of the shank and The Duke on the bottom of the shank. Part of the shank and bottom of the bowl was flattened so that it was a sitter. I took it apart to examine it more closely. It was anything but cleaned and restored. The stem was rough – there was oxidation next to the band that went quite deep. There was a gouge on the right side of the stem that was quite deep. The top and the bottom of the stem from the taper to the button had obviously been modified to make a more pronounced taper. The file marks were still evident in the vulcanite. The width of the button end of the stem had also been modified and was narrower than originally designed as the sides of the stem also showed file marks. The button itself had a orific opening but someone had modified it into a poorly shaped slot. The stem had deep tooth marks on the surface of top and bottom near the button. There was a bite through on the top side next to the button. The angle of the taper was very abrupt and sharp with distinct cut marks. The tenon was fit for a filter by the appearance of it and the inside was very tarry. A filter would not have fit with all of the buildup in the stem. The bowl was another story. It was out of round with burn marks on the inner edge that needed some work. It had been reamed so that was not an issue. Then inside of the shank was filthy. The tars and oils were thick against the end of the mortise.

I decided to work on the stem first. I wanted to address the taper of the stem and cleanup the file marks and gouge in the top portion. I sanded the stem with 220 grit sandpaper to remove the scratches and reshape the taper. This took quite a bit of sanding to reshape the angles and edges of the stem. There was a slight hip on both sides of the stem that needed to be sanded out to get a smooth flow to the lines of the sides. The next series of photos show the progress in reshaping and repairing the stem. I worked on the taper first to remove the sharp angles of the sides and top of the taper and work on a flow to the profile of the stem. IMG_8158 IMG_8159 I sanded the gouge on the top right side of the stem until it disappeared and also worked on the transition from the flattened top and bottom of the taper and the round end next to the shank. The wet spot on the first photo next to the button highlights the spot where the small hole in the top of the taper was. At this point the taper is smooth and the transition is beginning to look right. The profile shot below shows the work that has been done. IMG_8163 IMG_8164 I continued to sand and smooth out the taper to give it a look similar to a Peterson tapered stem. The first photo shows the taper after all of the shaping. I rubbed some Vaseline on a pipe cleaner and inserted it in the orific slot in the button so that I could patch the hole in the top side of the stem. The second photo below shows the size and placement of the hole. IMG_8178 IMG_8180 I used black super glue for the repair and sprayed it with the accelerator to harden it more quickly. I found that the accelerator allows me to sand more quickly but curing actually takes longer. I sanded it with sanding sticks to smooth it out and then build it up several more times to give more thickness to the stem at the button. I reshaped the sharp inner edge of the button with a needle file. Superglue patch IMG_8181 After sanding with the sticks I sanded the patched area with 220 grit sandpaper and then with medium and fine grit sanding sponges to smooth out the scratches and blend in the superglue patch with the rest of the stem surface. IMG_8182 I finished sanding the stem with micromesh sanding pads – wet sanding with 1500-3200 grit pads and dry sanding with 3600-12,000 grit pads. I rubbed the stem down with Obsidian Oil between each three grit sequence of pads and let it sit until absorbed before continuing with the next set of three pads. When I finished sanding with the last three grits of micromesh I rubbed it down with a final coat of Obsidian Oil and when dry put the back on the pipe and gave it a buff with White Diamond. IMG_8187 IMG_8188 IMG_8189 I set the stem aside and turned my attention to the bowl. I decided to top the bowl to even out the rim as most of the inner rim damage did not go too deeply into the bowl. Topping it would smooth out the rim and allow me to correct the damage that made it out of round. I set up the topping board with the 220 grit sandpaper and sanded the top until the rim was smooth and the burn damage was minimized. I sanded the inner edge with a folded piece of 220 grit sandpaper to further mask the damage to the inner rim. IMG_8161 IMG_8162 I sanded the topped bowl with medium and fine grit sanding sponges and then with 1500-4000 grit micromesh sanding pads. I cleaned out the sanding dust from the bowl with a damp cloth and wiped down the top of the bowl with an alcohol wipe to prepare it for restaining. I decided against restaining the whole bowl and to just stain the rim. Thanks to Greg I have a set of staining pens that make this kind of thing quite easy. I started with the lightest stain pen and then used the medium stain pen to match the colour of the bowl. I buffed it with White Diamond and then gave the bowl and rim a quick buff with carnauba wax. After the buffing I sanded the band with the micromesh sanding pads and then polished it with a polishing cloth. The finished bowl is shown in the photos below. IMG_8167 IMG_8168 IMG_8169 IMG_8171 IMG_8172 The next photo shows what I did next, though in retrospective I probably should have done this first, I did not. I cleaned out the inside of the shank with isopropyl alcohol, cotton swabs and pipe cleaners to remove the tarry buildup in the mortise and airway of the pipe. IMG_8175 Once I finished cleaning out the inside of the pipe I gave it a quick buff with White Diamond and then gave it multiple coats of carnauba wax, buffing with a soft flannel buff between coats. The finished pipe is shown below. The restoration and refurbishment are complete and now it can be honestly said that it has been “restored”. The amount of work it took to bring this pipe back to a finished look was far more than I expected when I bid on it. I honestly was surprised at how dirty and unfinished it was when it arrived. Now I have a pipe that I can be proud of and enjoy smoking. The look and feel in the hand is exactly what I like and I look forward to firing up the first bowl in it very soon. IMG_8192 IMG_8193 IMG_8194 IMG_8196

Restoring an older KBB Yello-Bole Imperial Dublin


Blog by Steve Laug

This is the last of the pipes I picked up when I was down in Washington State with my wife for 38th Anniversary. It is an older KBB (no ampersand between the two B’s). It had no shape numbers on the right side of the shank, but on the left side it had the KBB in the cloverleaf/club and next to it was stamped Yello-Bole over Imperial over Imported Briar. The Imperial stamping had been over-stamped with a cross hatch pattern. The bowl was in decent shape. The finish had dark soiling and oils on both sides of the bowl. There were also some dark spots on the sides of the bowl. There was a heavy coat of varnish over the bowl except for the worn spots where the oils and darkening was. The rim was heavily caked with tars and oils. The bowl was caked from the top half way down the bowl, though the yellow honey coating was still visible on the bottom half of the bowl. There were some burn marks along the outer edge and top of the rim.

Again since Yello-Bole is one of my favourite older US brands I did some more reading online to see if I could narrow down when this one was made. I have come to understand that these older Yello-Boles are great smoking pipes and underrated. I turned to one of my go to sources of information on all things KBB and Kaywoodie – the Kaywoodie forum http://kaywoodie.myfreeforum.org/ftopic13-0-asc-0.php. There I found a very helpful article by Dave Whitney that helped narrow down the date. The pipe I have has the shovel drinkless mechanism, the KBB-in-a-clover logo on the left side of the shank and the yellow circle on the stem. From what I can ascertain from Dave’s information it seems to have been produced between the years of 1938-42. I am fairly certain that it did not come from the later period of 1945-50 (World War II) since it did not have the aluminum stem ring and the aluminum drinkless mechanism which came out during those years.

The photos below show the pipe as it was when I found it in the antique shop. IMG_7924 IMG_7926 IMG_7923 IMG_7927 The stem is made of nylon rather than vulcanite. It has the yellow circle inset in the top near the shank of the pipe. The button area was chewed and dented. There was a shallow dent on top of the stem and deeper ones on the underside of the stem next to the button. The button had been chewed down and had deep dents on the underside while the slot had been dented in so that it was not longer straight. IMG_7920 IMG_7922 I sanded the stem down and was able to remove the dents on the topside. The underside tooth mark was too deep to sand or even heat and raise. IMG_7929 I sanded it with 220 grit sandpaper to clean up the chatter further up the stem and then picked the area clean around the large dent with a dental pick. I wiped the stem down with alcohol to clean off the dust and then filled it with black super glue that I purchased from Stewmac online. I filled it the first time and sprayed it with an accelerator. Once it dried it had shrunken and left a divot in the stem surface. I refilled it with the glue and then sprayed it again with the accelerator. I set it aside overnight to cure and worked on the bowl. IMG_7928 IMG_7942 The bowl and rim were caked with an uneven cake so I reamed it with a PipNet pipe reamer to take it back to the briar. The cake was soft and once I removed it from the middle portion of the bowl I could see the yellow coating on the bottom half and partway down from the rim. The only portion that was darkened was in the centre of the bowl. IMG_7930 IMG_7931 I set up my topping board to remove the hard tars on the rim and also the burn damage. Fortunately the burn damage did not go too deep but merely sat on the surface under the tar coat. IMG_7932 I wiped down the bowl with acetone on cotton pads to remove the finish and as much of the dark staining on the side of the bowl as possible. The dark spots were deep in the finish of briar so I was not sure I would be able to remove them. IMG_7937 IMG_7934 IMG_7936 IMG_7939 Even after wiping down the bowl repeatedly the dark stains on the sides remained, lighter though still present. The dark spots appeared to be ink stains and they too remained. I decided to let the bowl soak in an alcohol bath overnight and address it again in the morning. IMG_7941 The next morning I removed the bowl from the alcohol bath and found that it had done its magic. The stains were gone and the ink stains were significantly lighter. I cleaned out the shank with cotton swabs, pipe cleaners and alcohol. I kept cleaning until the pipe cleaners and swabs came out clean. IMG_7946 I stained the bowl with Fiebings Dark Brown aniline stain. I applied the stain and then flamed and repeated the process until the coverage was even. IMG_7947 IMG_7948 I wiped it down with alcohol on cotton pads to remove some of the opaque colour of the stain and to make the grain more visible. IMG_7949 IMG_7950 IMG_7951 I buffed the bowl with White Diamond. The next three photos show the bowl at this point in the process. IMG_7953 IMG_7954 IMG_7957 Once I had finished the work on the bowl to this point I decided to work on the stem. I used a coarse grit sanding stick to cut the sharp edge of the button. While it worked relatively well I could see that the hardened super glue needed something with more teeth to cut into the repair. I used a file to take off the overfill on the repair and then followed that with the sanding stick and 220 grit sandpaper. IMG_7963 IMG_7964
IMG_7965 I sanded the stem further with the 220 grit sandpaper and then with medium and fine grit sanding sponges to remove the scratches in the surface. I wet sanded with 1500-2400 grit micromesh sanding pads and dry sanded with 3200-12,000 grit pads. Between each grit of micromesh I wiped the stem down with olive oil. I have found that the olive oil allows the micromesh sanding pads to really cut into the surface of the nylon stem. I cleaned up the stinger with alcohol and cotton pads and then 0000 steel wool. IMG_7972 IMG_7979 IMG_7983 I gave the bowl a coat of walnut stain and boiled linseed oil to bring out a shine. I wanted the pipe to have a similar shine to what it originally had when it left the factory but did not want to use a varnish coat. I wiped it on the bowl with a cotton pad and then set it aside to air dry. IMG_7975 Once the finish had dried I buffed the pipe with White Diamond and then gave it several coats of carnauba wax and buffed to a shine with a soft flannel buff. I hand waxed the stem with Paragon Wax as I find that the nylon stems are hard to buff. Without a light touch the wheel can do irreparable damage to the nylon stem. The heat generated by the buffer will actually cause the stem to melt. The final photos below show the finished pipe cleaned, polished and ready to enter into the next years of its life. I think that this one will outlive me if properly cared for by the next pipeman after me. IMG_7986 IMG_7987 IMG_8003 IMG_8008

Working by Candle Light- Raising Tooth Dents


Blog by Greg Wolford

Browsing my Twitter feed this morning I noticed a conversation between Steve (@rebornpipes) and Peter Jones (@edpipeclub) about raising tooth marks on a stem with different methods of heat application. The methods discussed were using a soldering iron or a heat gun; Peter had access to the former but not the latter. I tweeted him that a candle flame is also a good option and Steve suggested I post a blog about that. So, without further introduction, here we go!

I use a heat gun if the dents are very deep, or I’m bending a stem, in the shop. But since I’ve been doing more restoration work in the kitchen, upstairs, I have found a candle to be a simple and effective tool for smaller, more shallow dents. A Bic-style lighter will also work for this method but I find myself with a “hot thumb” too often for my tastes using that!

Although about any candle would likely do, I prefer to use a tea candle, such as this:20140801-132659-48419405.jpg
They are inexpensive and small, which makes them easy to work with. And since my wife uses them for her potpourri-type pot, I almost always have them on hand.

20140801-132809-48489530.jpg
What I do is light the candle and hold the stem about 2″ above the flame, maybe a little more. It’s fairly important to keep the stem moving so as to not burn the stem; if the stem is acrylic or nylon keeping moving and higher above the heat is all the more important as, in my experience, ties materials will burn or catch fire with less “notice” and faster than vulcanite. Often with vulcanite you’ll smell an almost burnt-rubber smell before any damage is really done, and this is a sure sign you need to cool the stem; I keep a Tupperware type container of cold water beside me as I do any of this kind of work, no matter what me heat source.

A Video Demo of the Process

After a couple of minutes you’ll notice that the dents are raising up, the heat decompressing the material the stem is made of. Depending on the depth and size of the dent, it can take anywhere from one “pass” to three or more to get the dent as decompressed as possible. If the dent is too large/deep a fill will be required to get it completely level again.

I hope this extra “weapon” in your restoration arsenal is helpful to you; this method may not always be the best way to go but often will be more than sufficient and quick to set up and break down.