Blog by Steve Laug
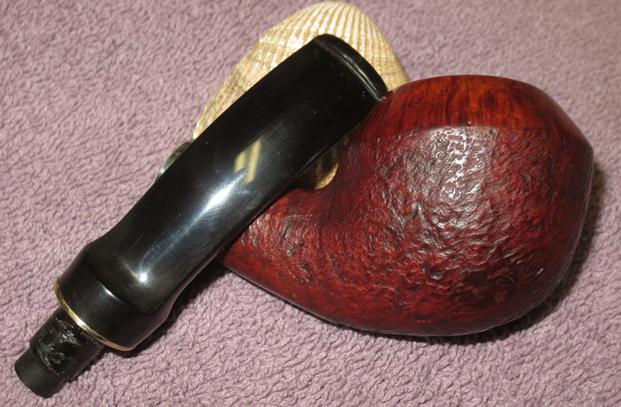
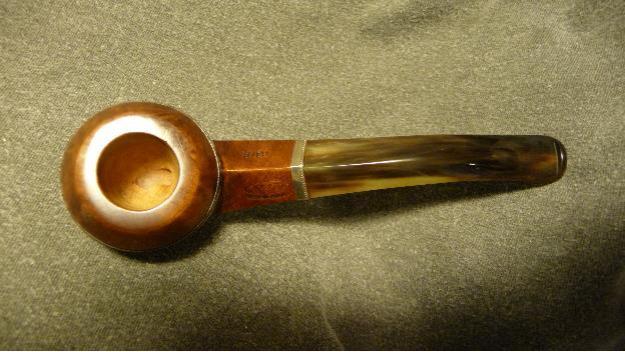
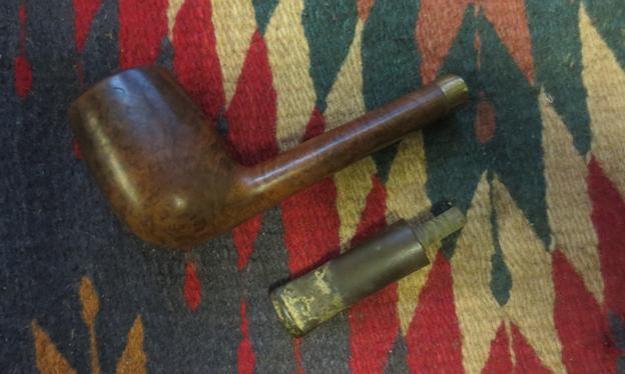
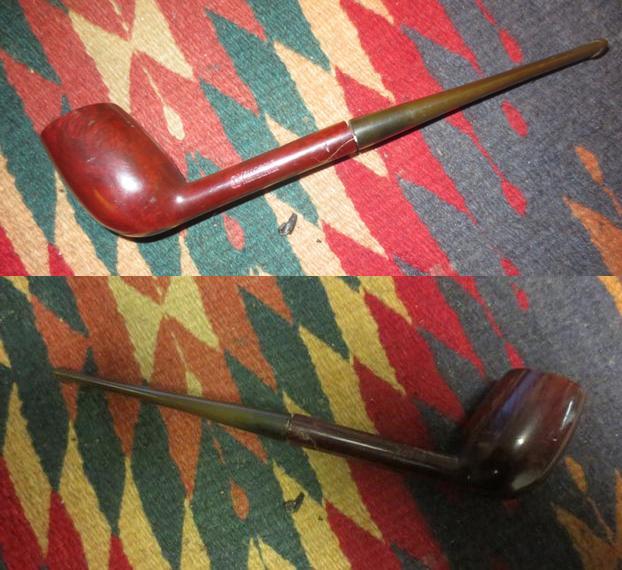
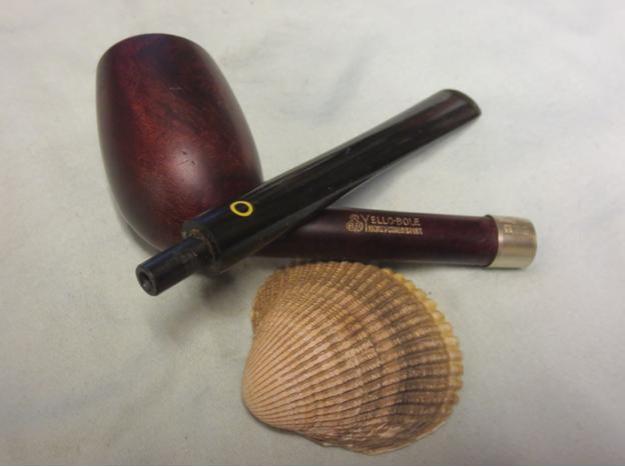
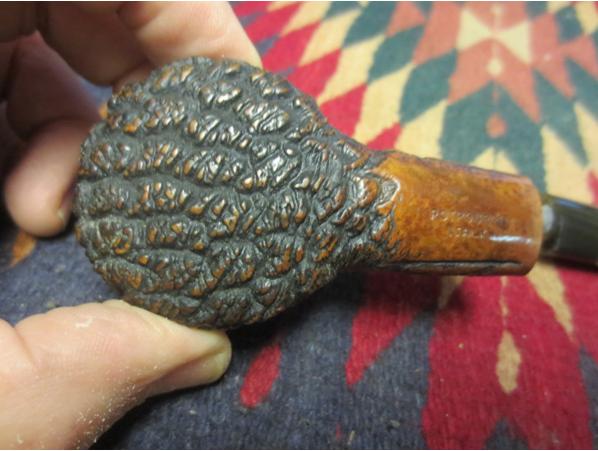
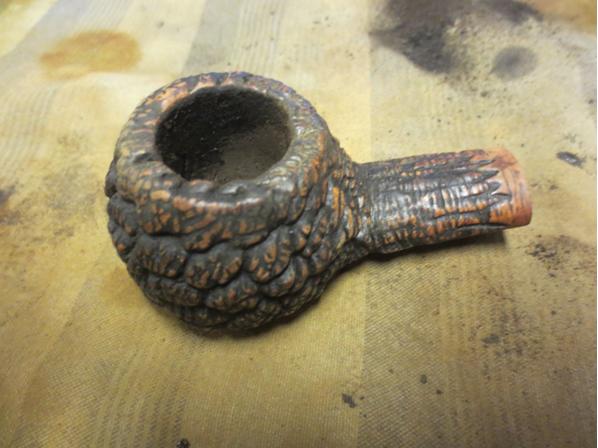
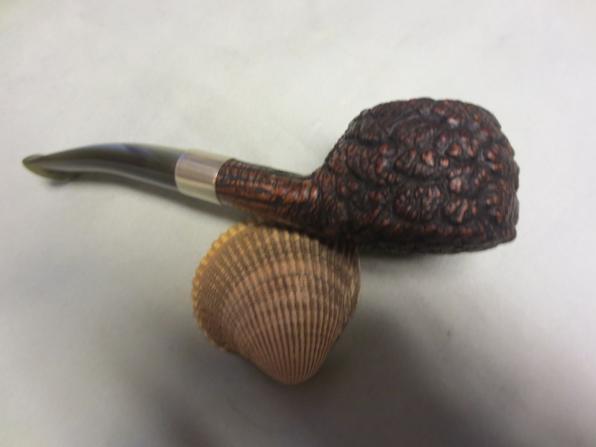
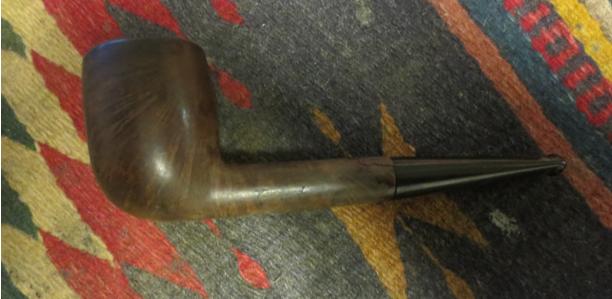
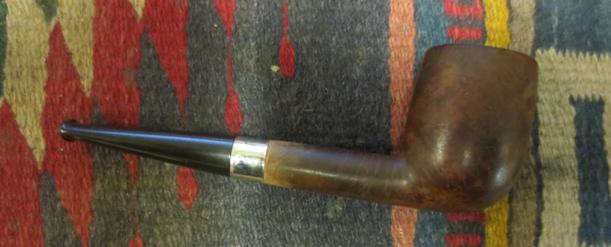
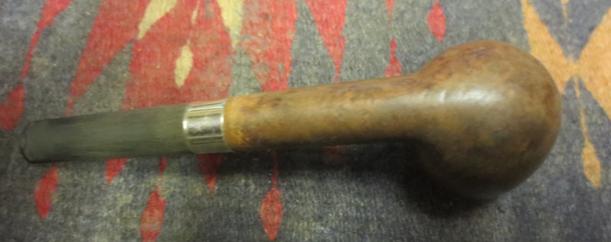
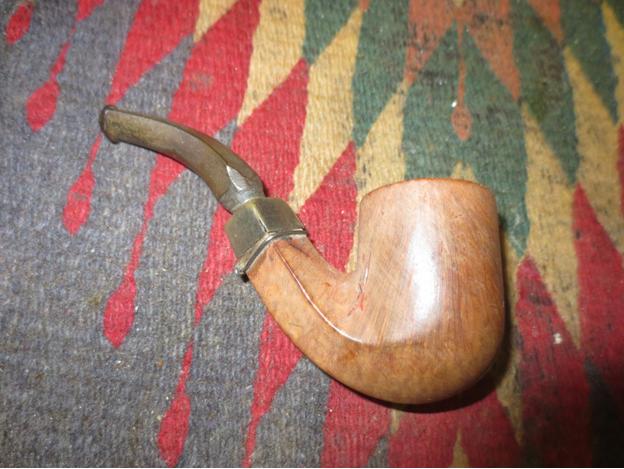
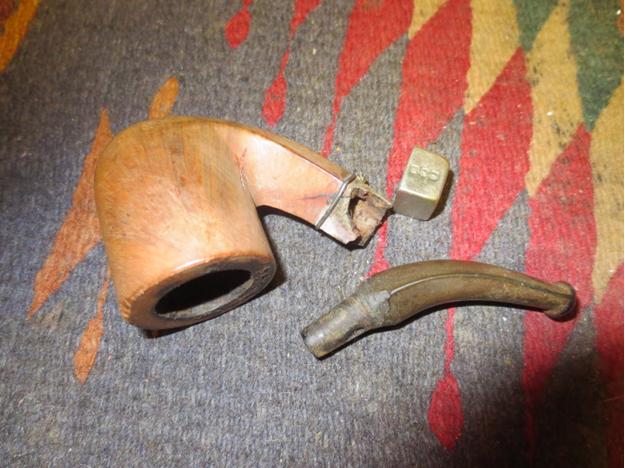
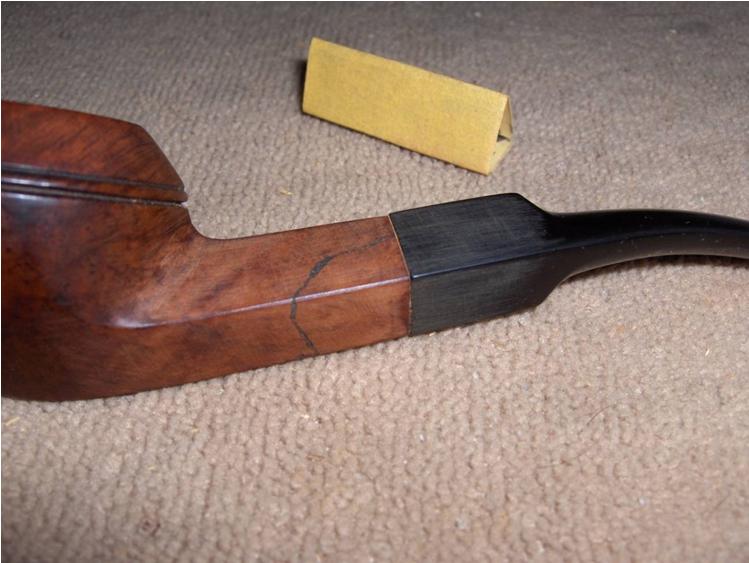
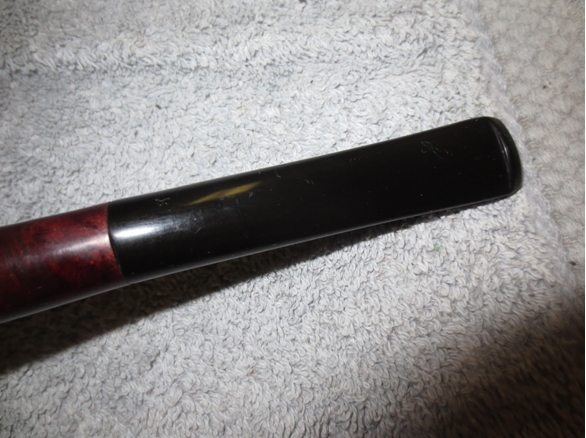
I am working on the second pipe I chose to work on in the lot of nine pipes I am restoring for the pipe smoker who dropped by a box of pipes that badly needed attention. This one was stamped Radford Ravel and had a mixed finish of smooth top and sandblasted shank and bottom part of the bowl. It is a Rhodesian and the cap is smooth and the rest is sandblast. It was finished in a dark brown stain. The finish was very dirty and there were quite a few sandpits and nicks in the smooth portion of the bowl cap. The shank was crack on the lower right side  and extended from the shank end up the shank about a ¼ inch. The stem was a replacement and had a brass washer on the tenon and glued against the shank. When the new stem was made the maker put a space on the tenon to add colour to the stem. I figure that the new stem is what cracked the shank. When I received the pipe the stem did not fit tightly. There were tooth marks, tooth chatter and a lot of oxidation on the stem. There was also a bead of glue around the washer on the tenon.
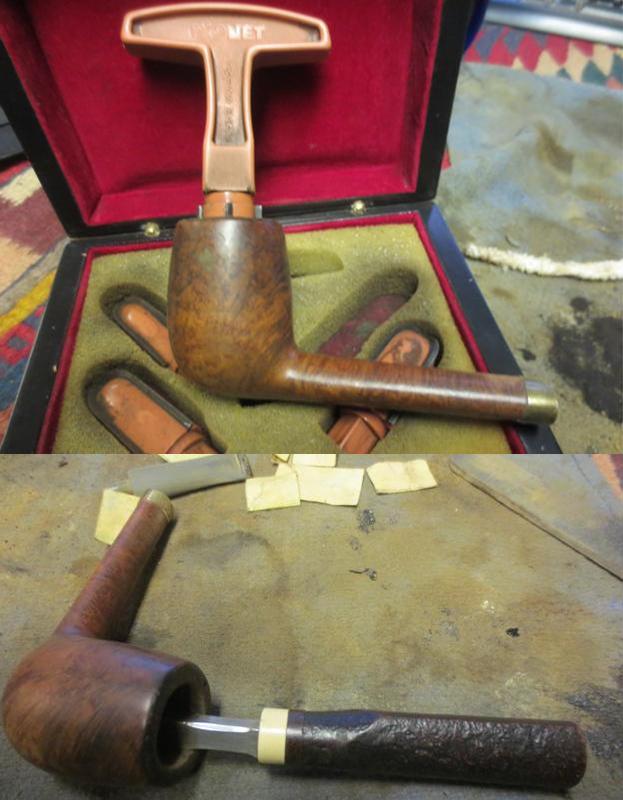
There was something about the brand on the pipe that rang a bell for me. I have a tin of their Sunday’s Fantasy Tobacco in my cellar and I wondered if they might have made pipes as well.
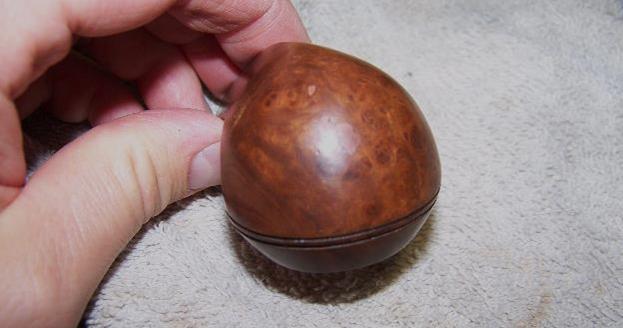
I did a bit of digging and found the picture on the left that showed some of the tobaccos made by the company and also a great figurine with the name Thomas Radford mild premium pipe tobacco on the base. On Pipedia I found that Radford’s Private Label Pipes were crafted by Chacom for the Pöschl Tabak GmbH & Co. in Germany. This information was from “Pipes, Artisans and Trademarks”, by José Manuel Lopes. The pipes were mass produced with ebonite and acrylic stems and were introduced by Butz-Choquin, Chacom, and Nording. On the stem there is generally an embossed logo that was a stylized R. The pipes were made to use 9mm filters and are moderately priced and very attractive. The following three links were the sources I used for this information.
https://pipedia.org/wiki/Radford%27s
http://www.poeschl-tobacco.com/en/products/
http://www.pipephil.eu/logos/en/logo-r1.html
I also looked on another website and got a little more information on the brand. The Radford’s pipe appears in 6 models in 3 variations 1x time a year in autumn. The so called Radford’s Depot contains a minimum of 1 dozen pipes of the actual running collection. Connected to the depot is a listing of the depot holder in Radford’s News.
This particular brand RADFORD’S SERIE RAVEL was a series of 6 elegant models within Radford’s Collection. They are made from good briar wood, sandblast, black/brown with a polished head’s border in dark-red shade. Very nice rich-in-contrast ring at the shaft’s finish. Mouthpiece from Acryl for 9 mm filter. http://cigar.supersmokers.biz/radfords/
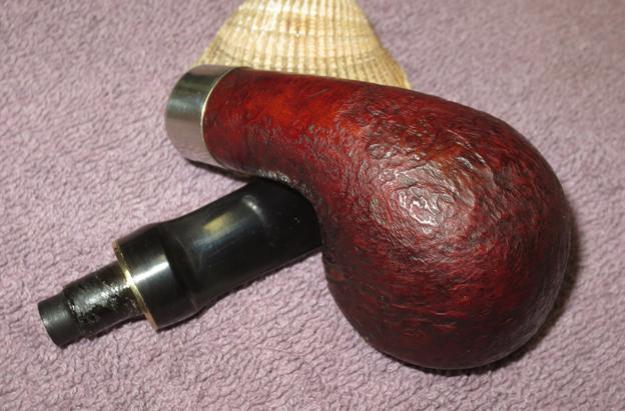
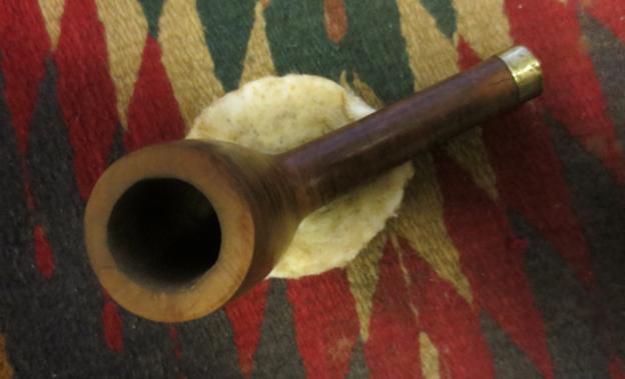
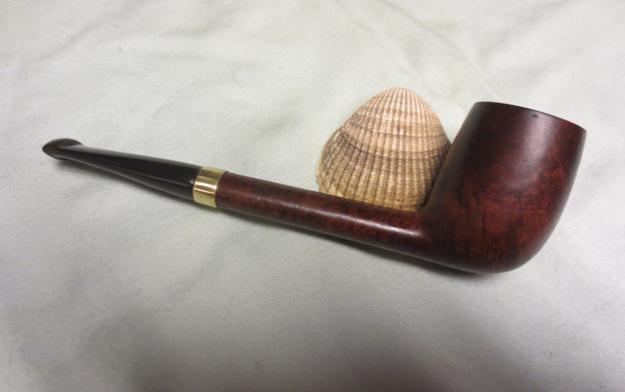
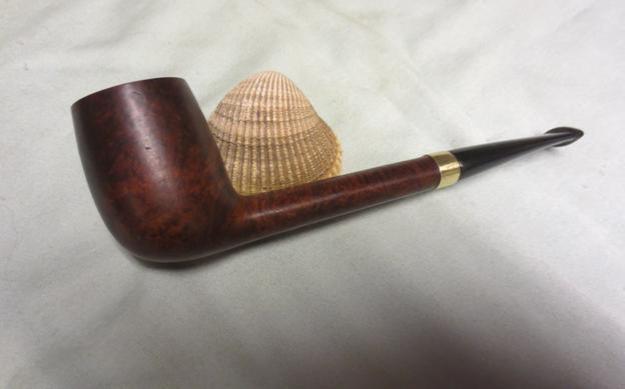
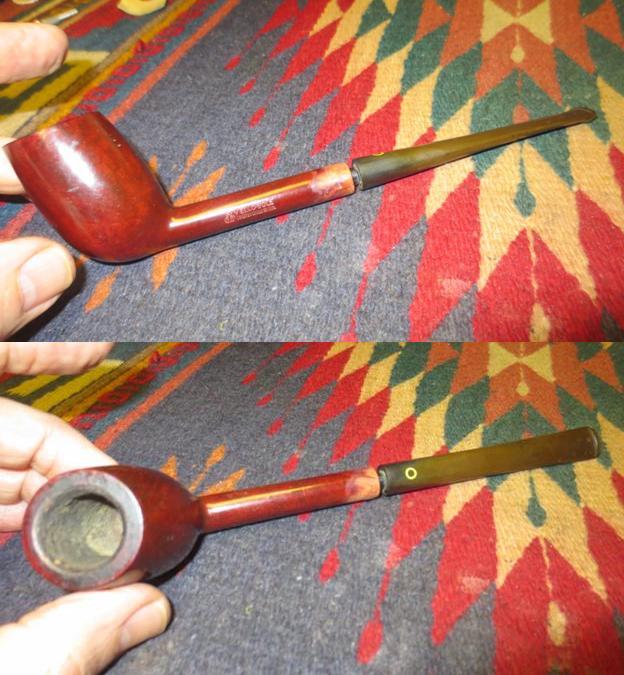
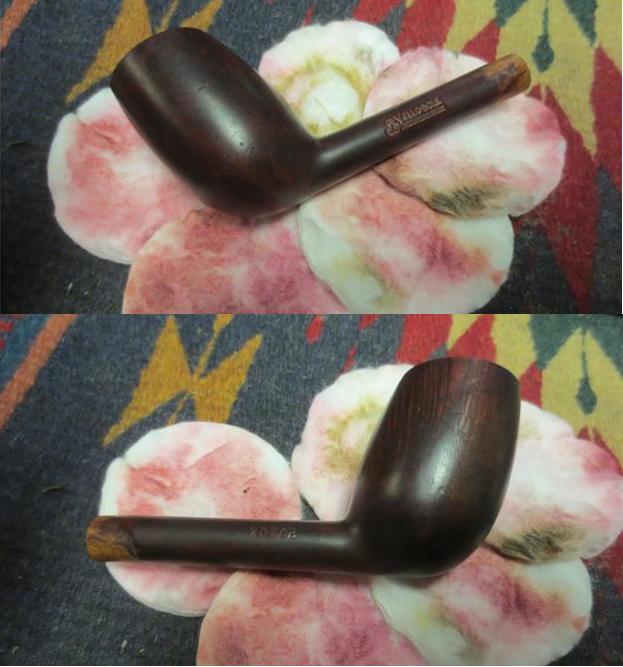
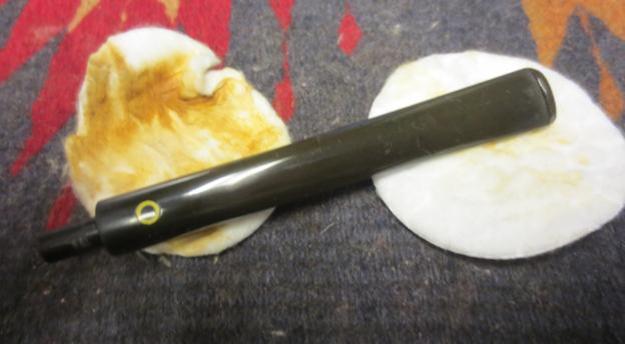
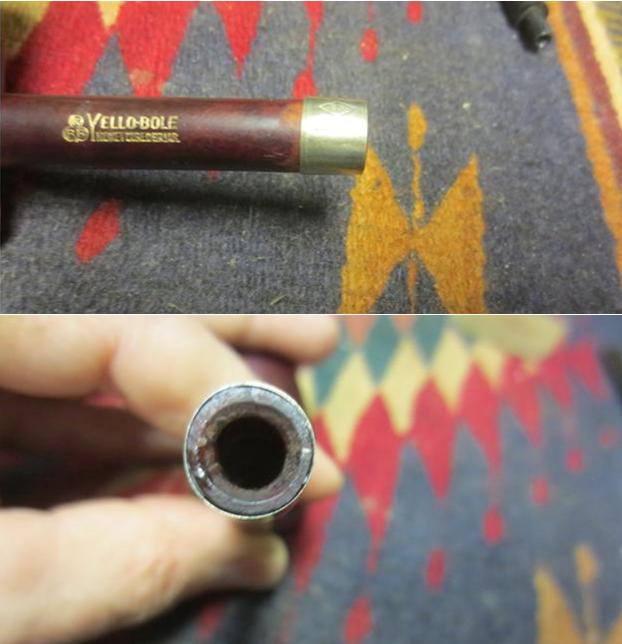
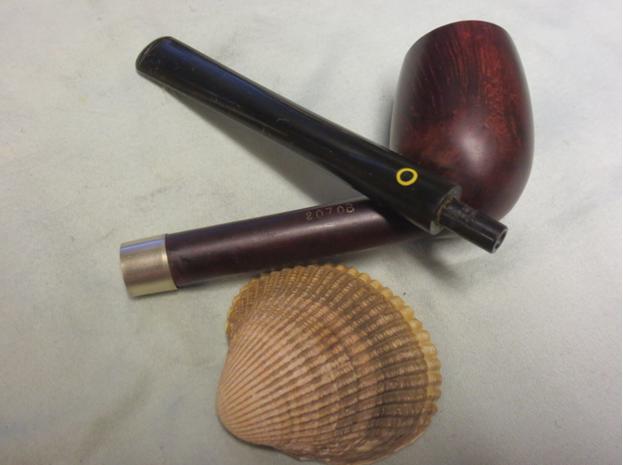
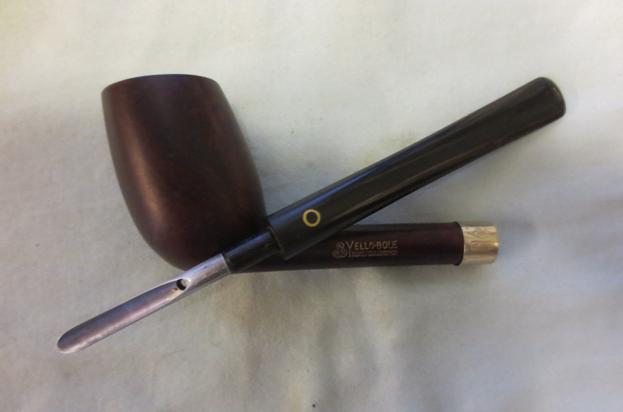
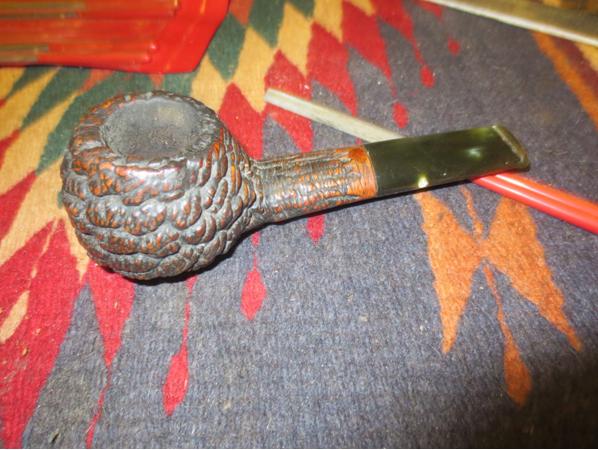
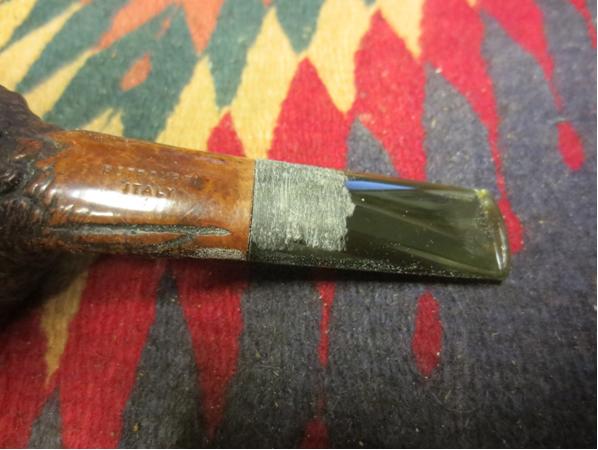
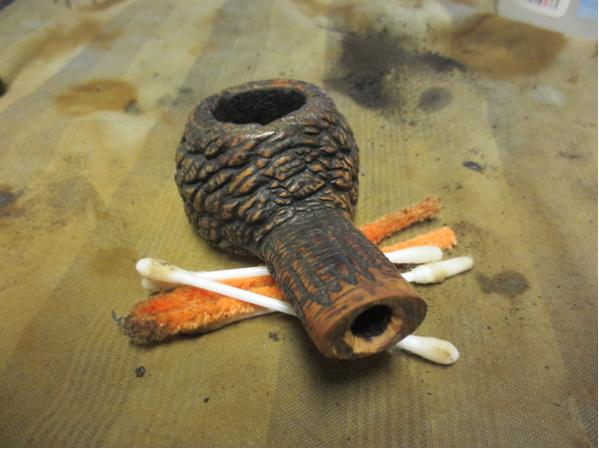
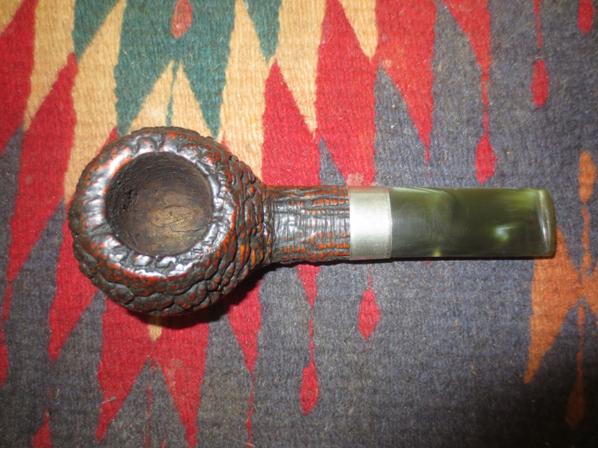
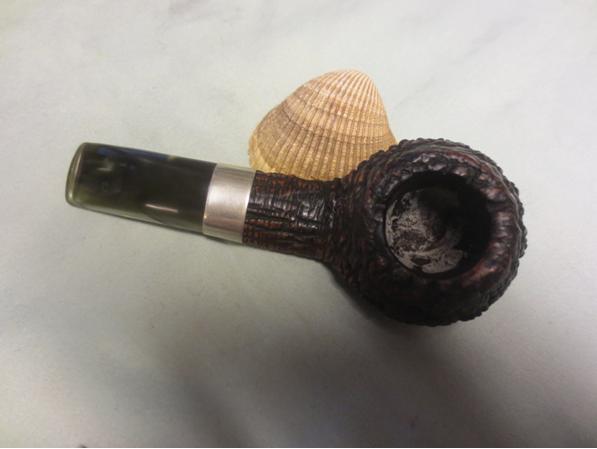
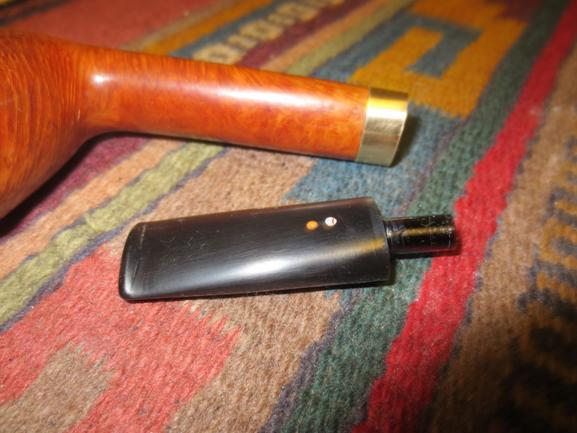
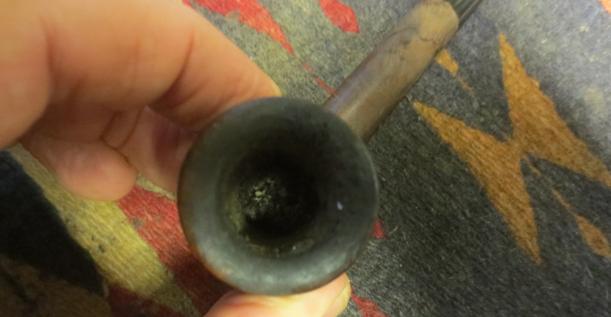
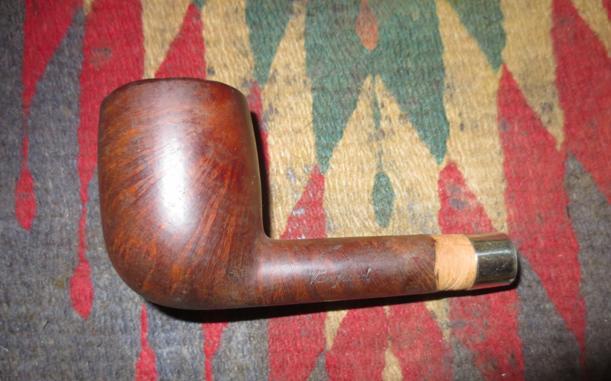
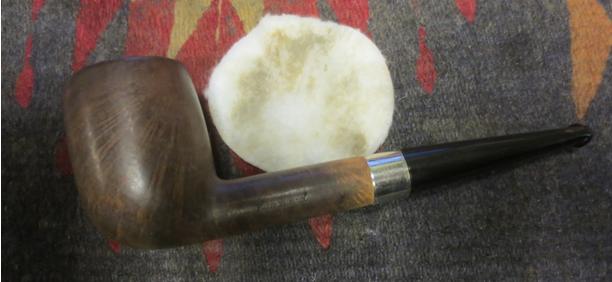
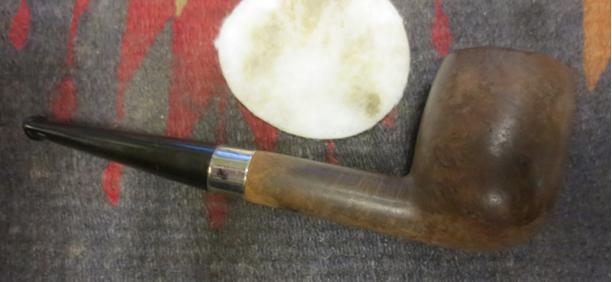
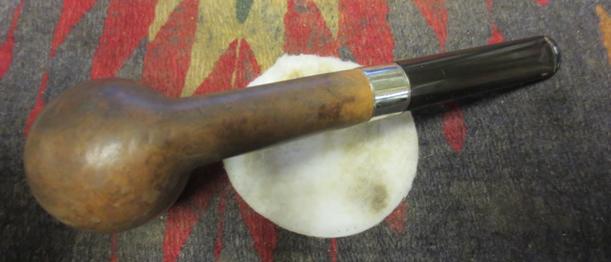
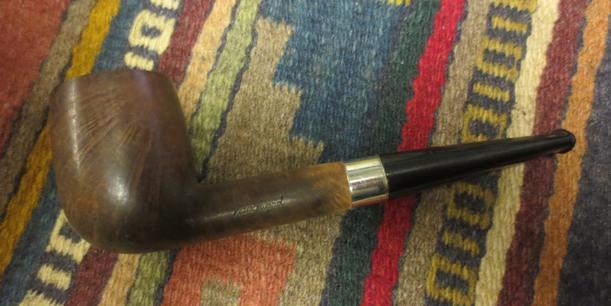
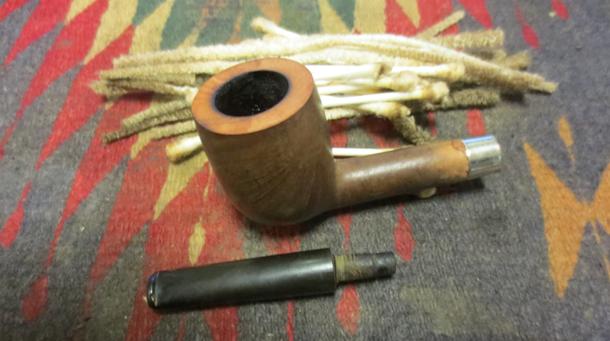
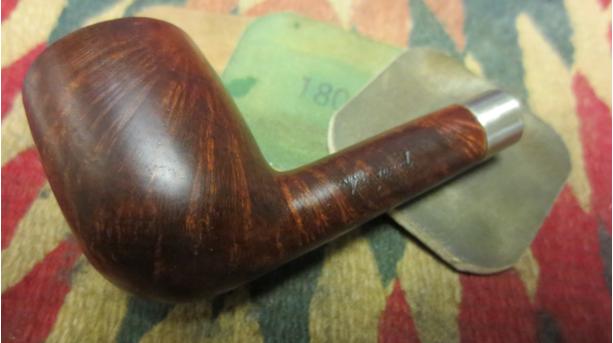
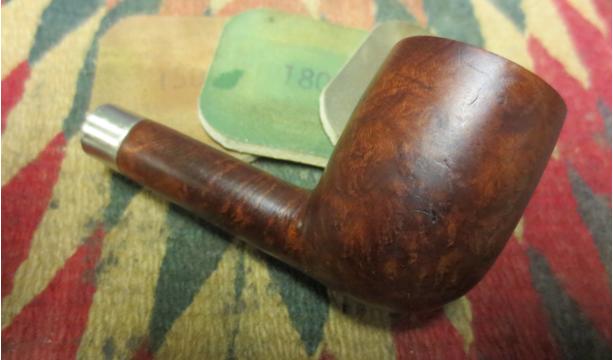
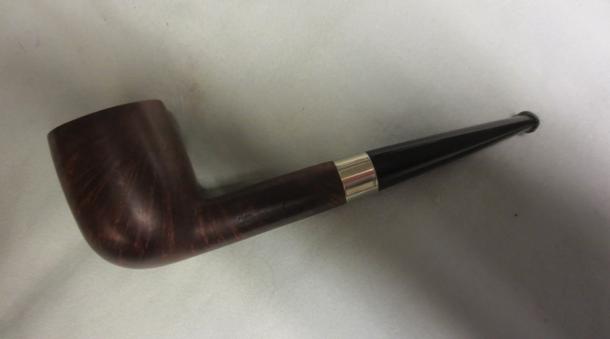
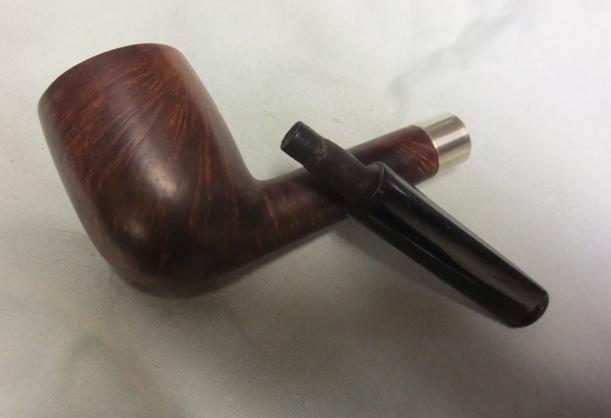
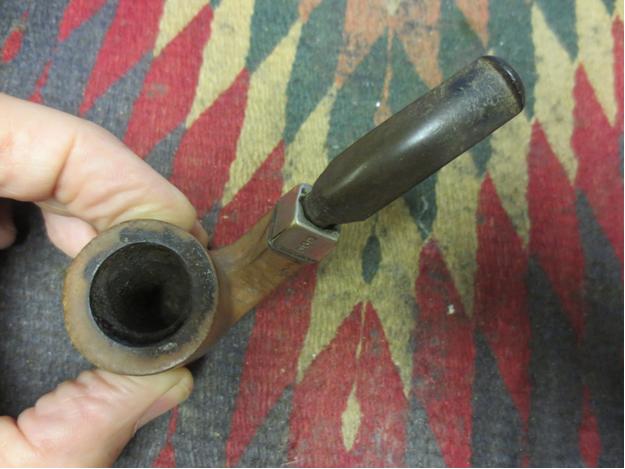
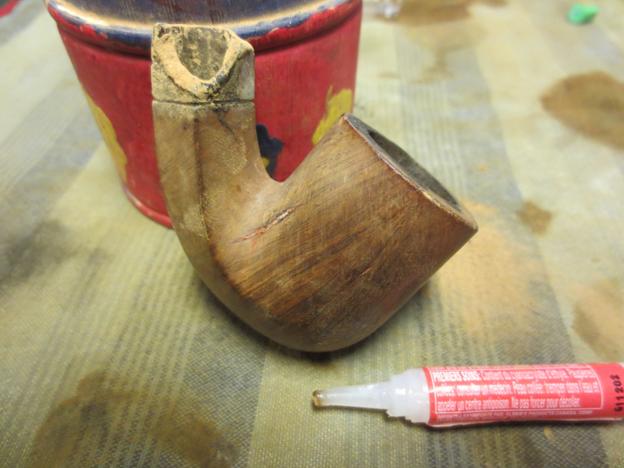
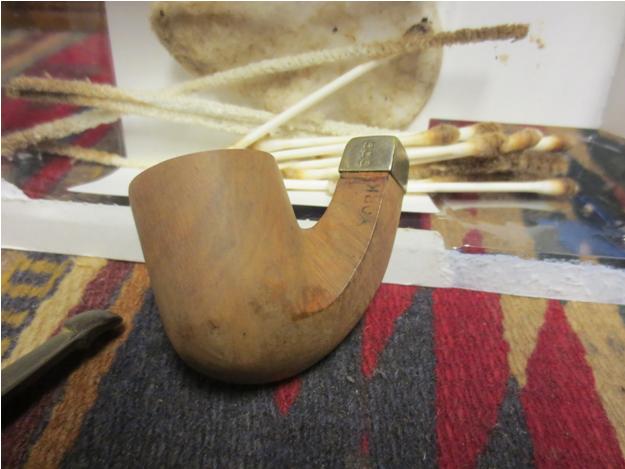
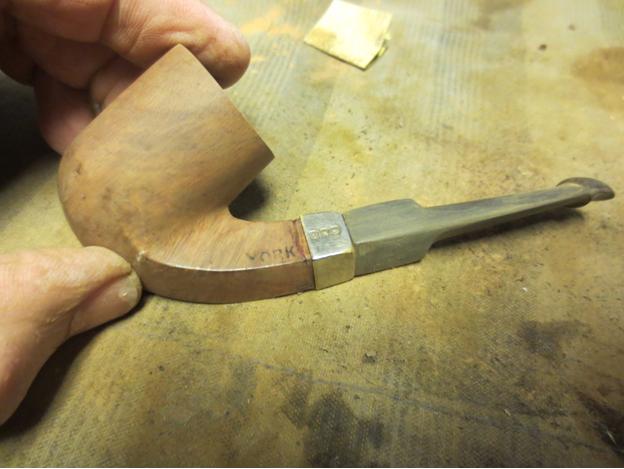
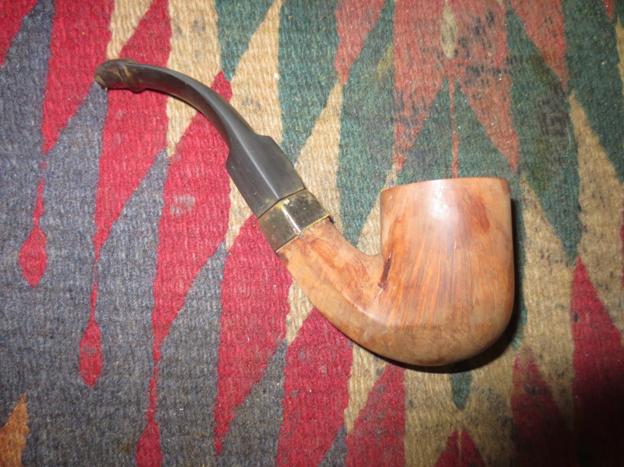
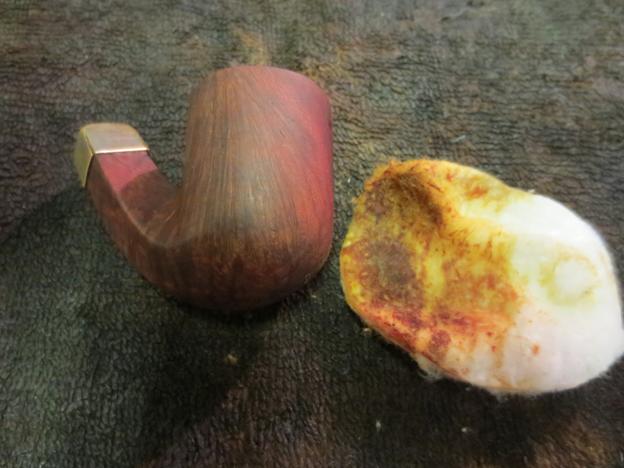
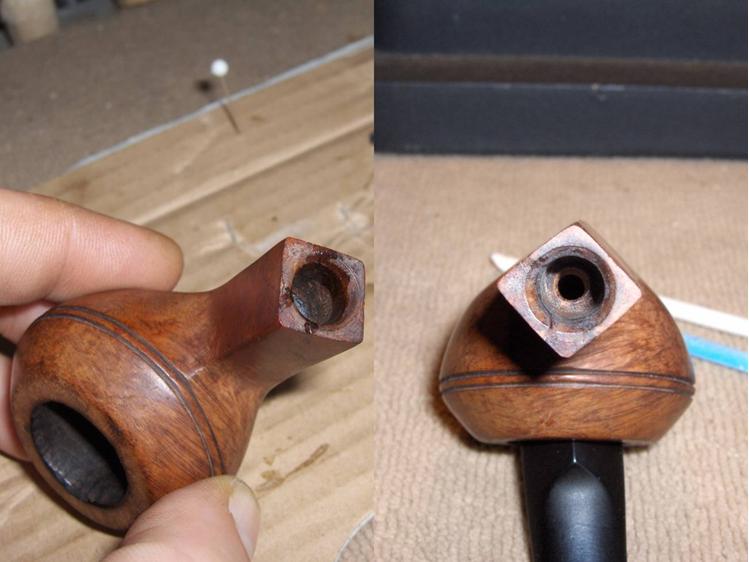
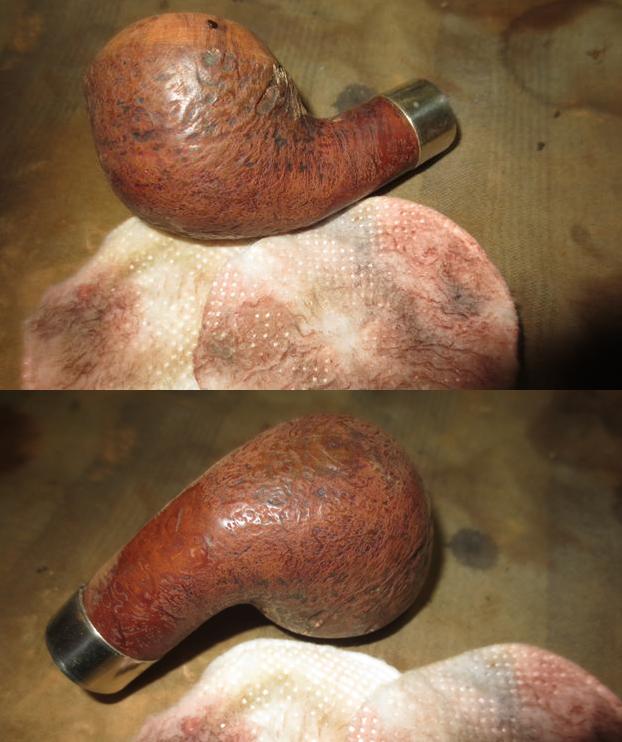
With all of this information I now knew that the pipe was originally made for a 9mm filter. The mortise was drilled deep in the shank to contain the 9mm filter. The replacement stem was a regular push stem without a filter tenon. I took some photos of the pipe before I started working on it. The finish was in really rough shape. You can see the glue and sticky material on the stem near the shank band.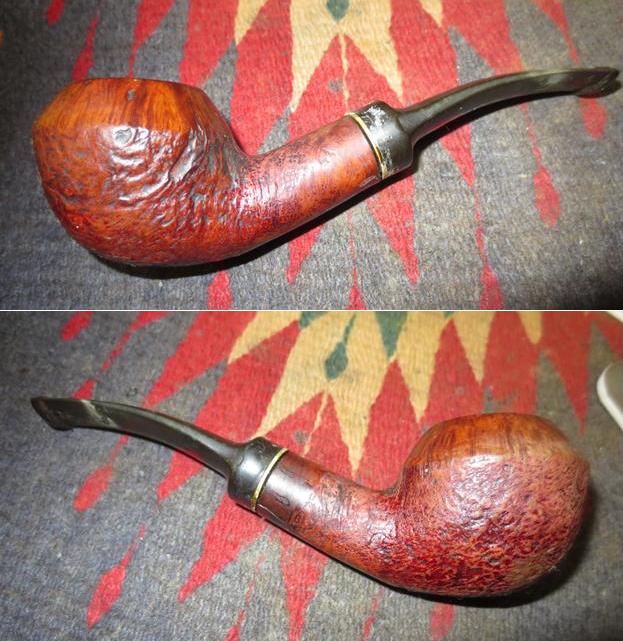
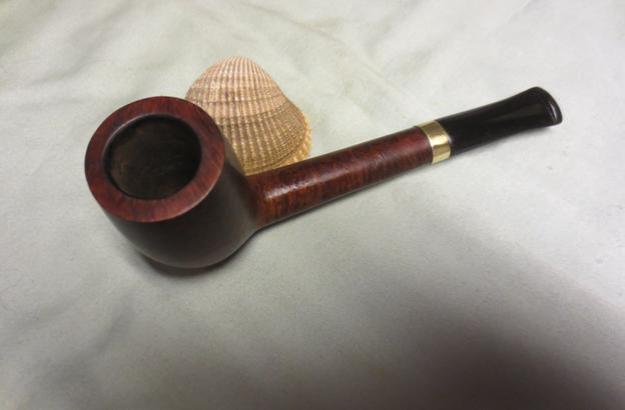
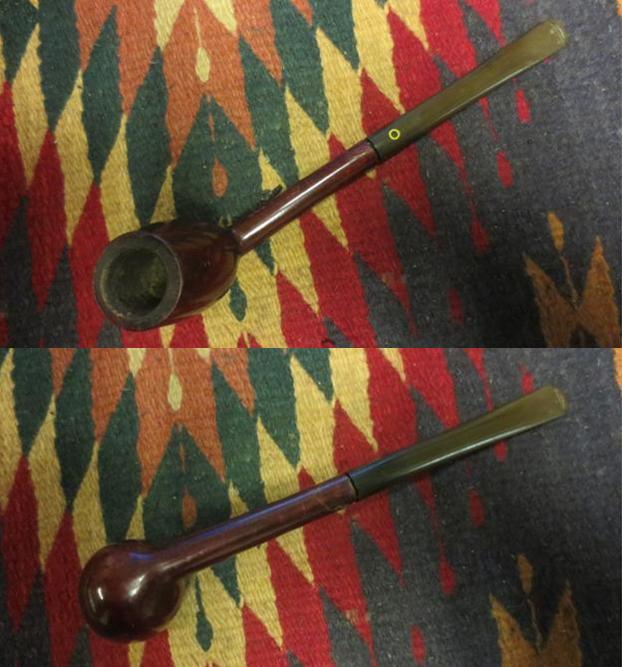
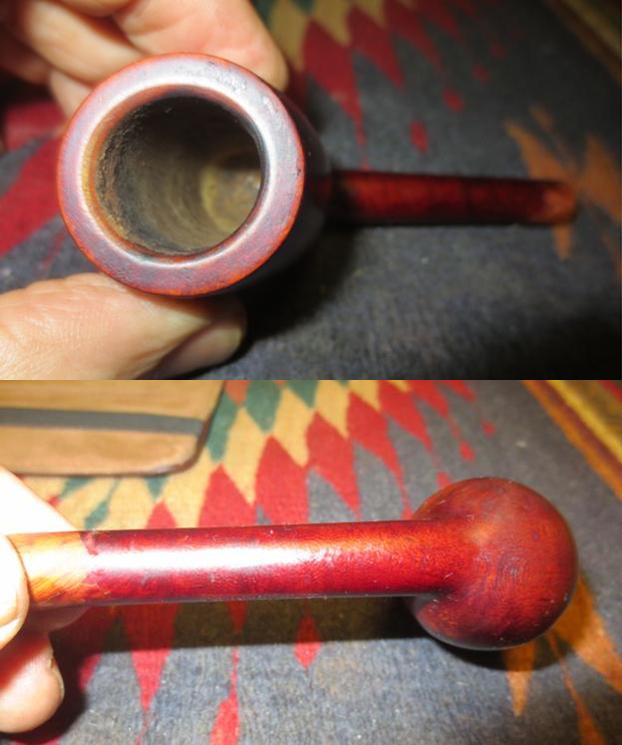
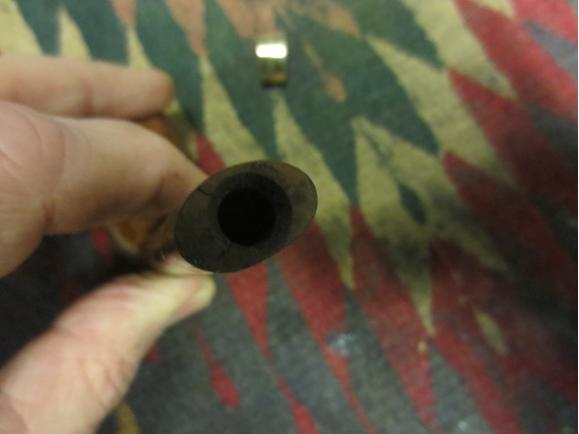
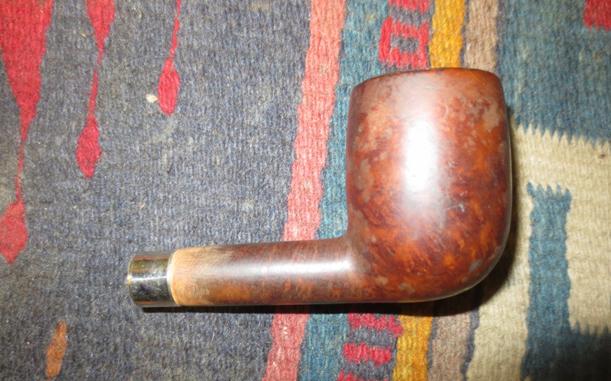
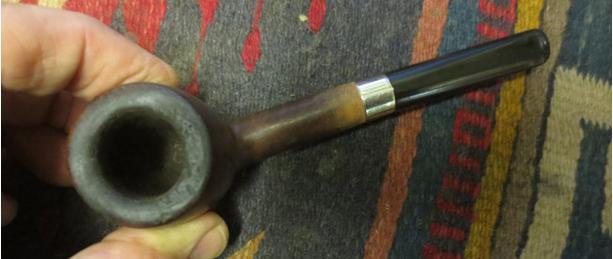
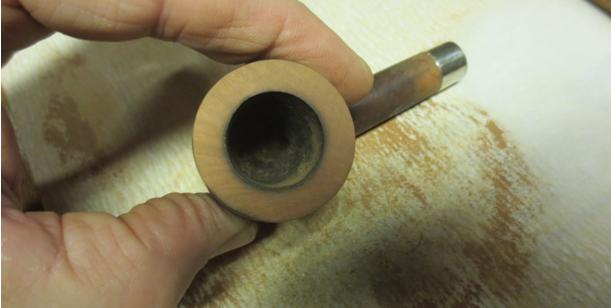
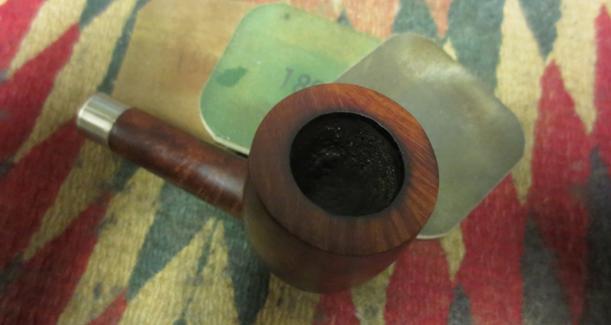
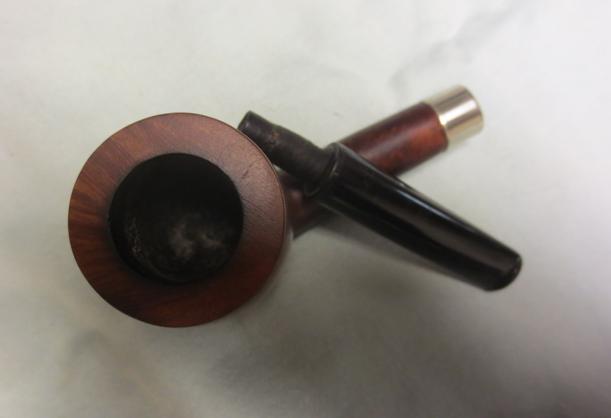
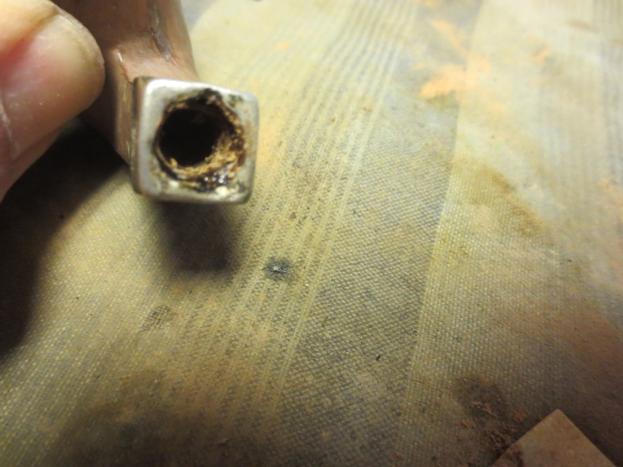
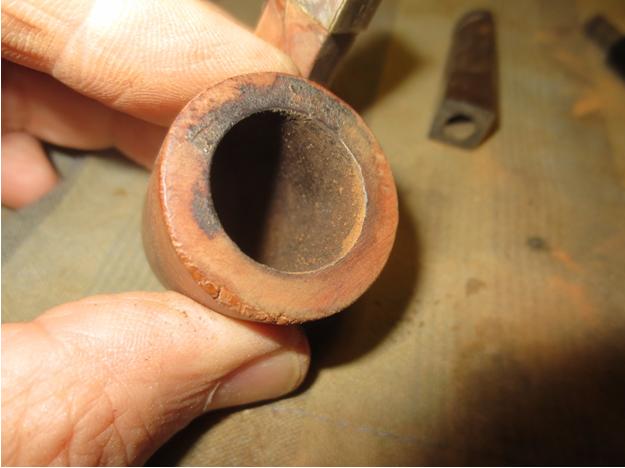
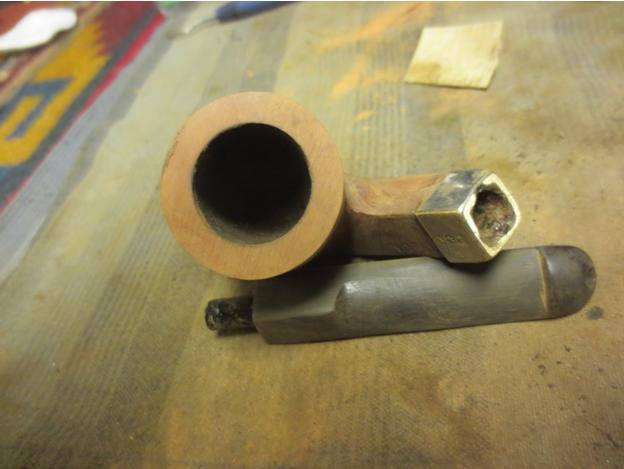
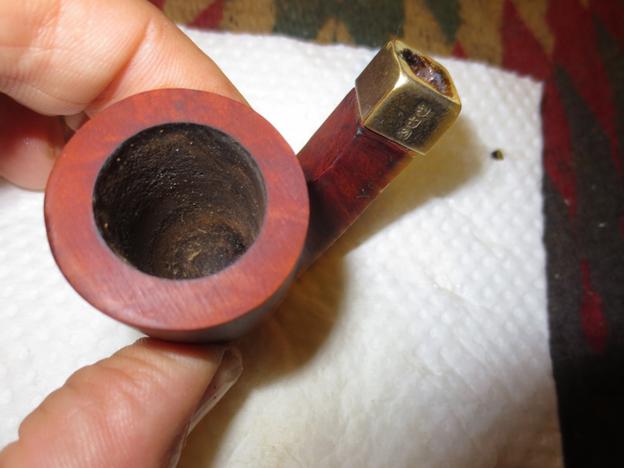
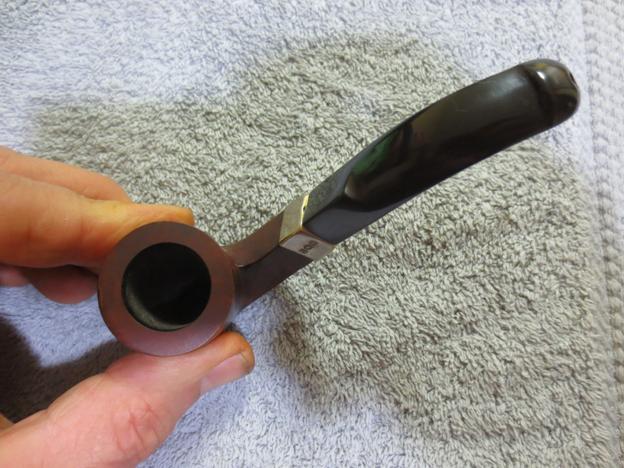
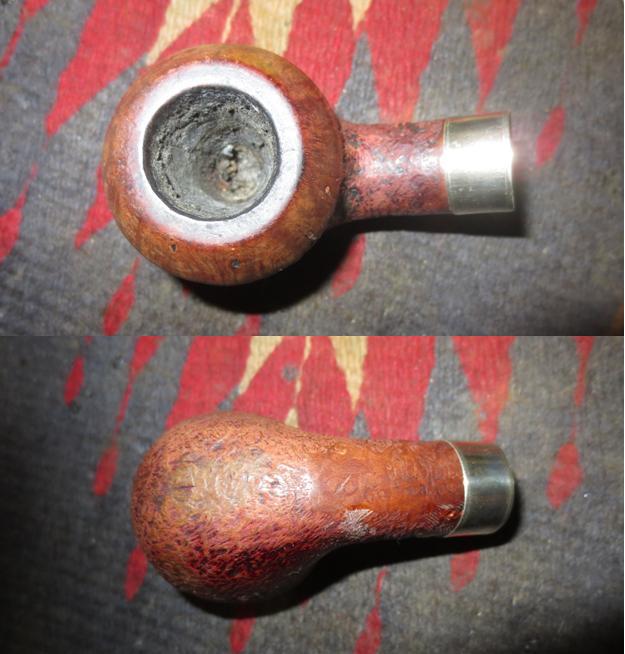
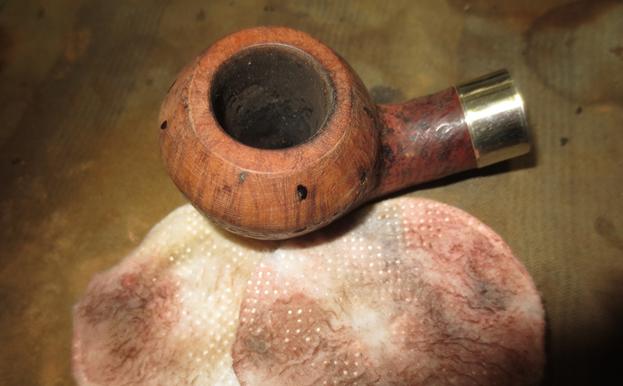
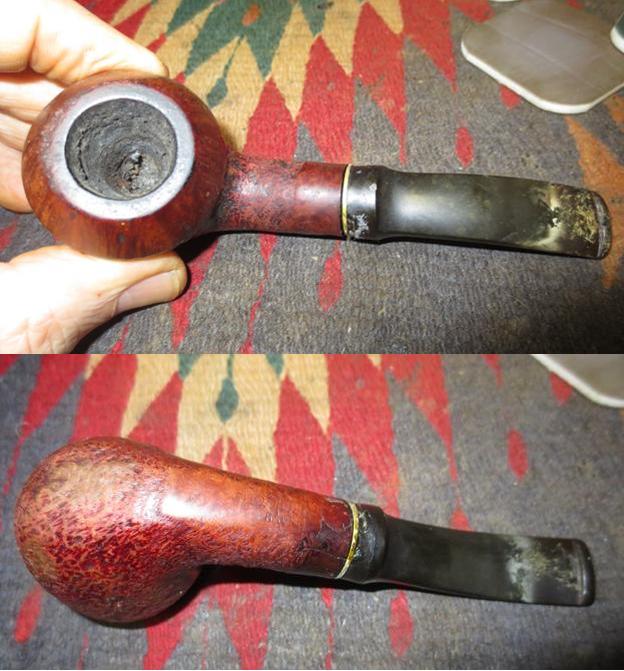 I took a photo of the inside of the shank to show the thick tars that had built up on the walls of the shank. The space in the mortise between the end of the tenon and the extra depth for the end of the original filters was filled with tar and oils. It was thick and sticky.
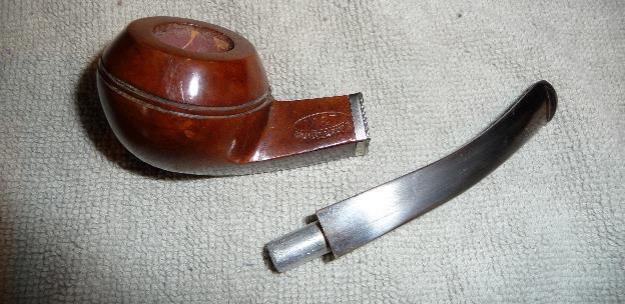
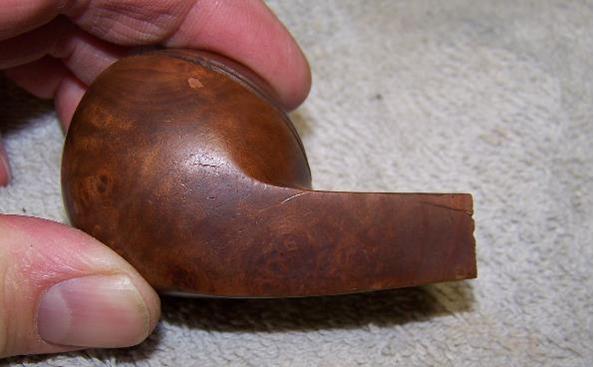
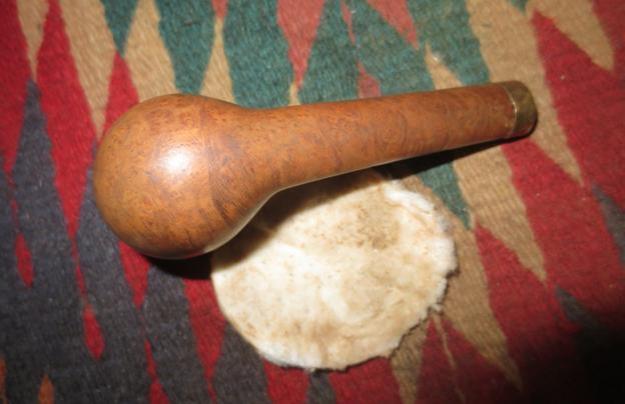
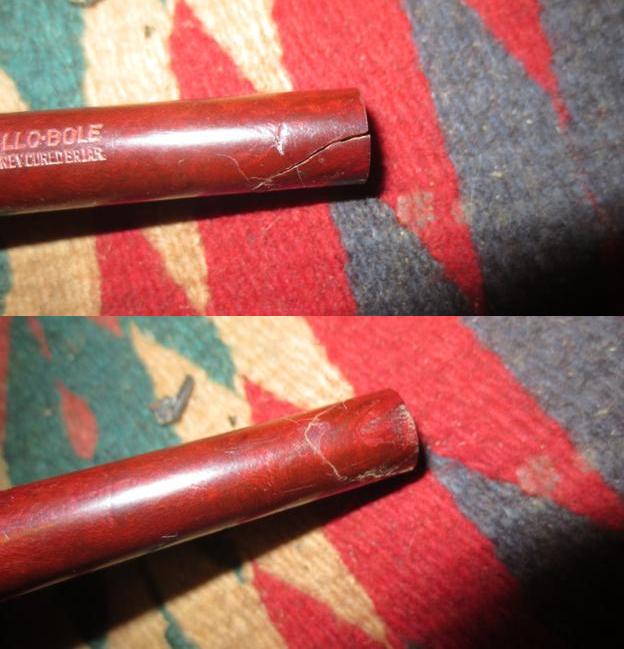
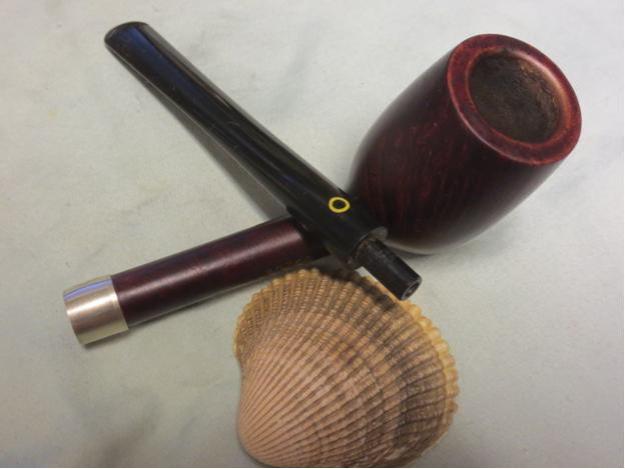
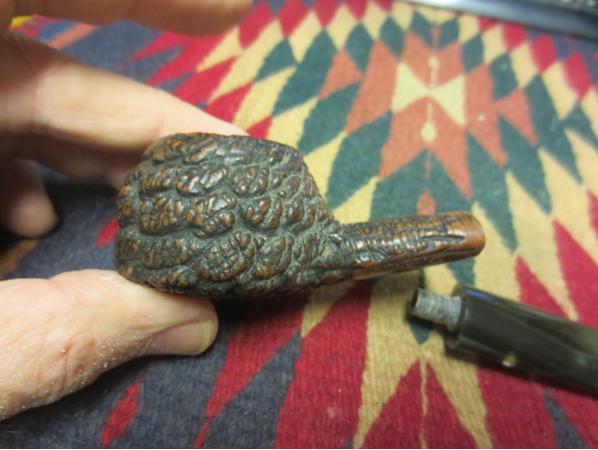
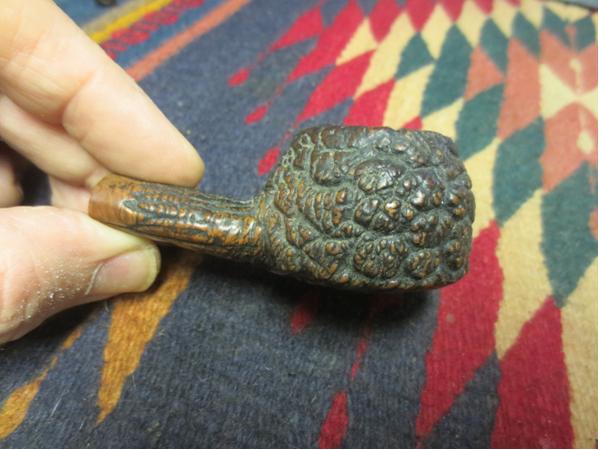
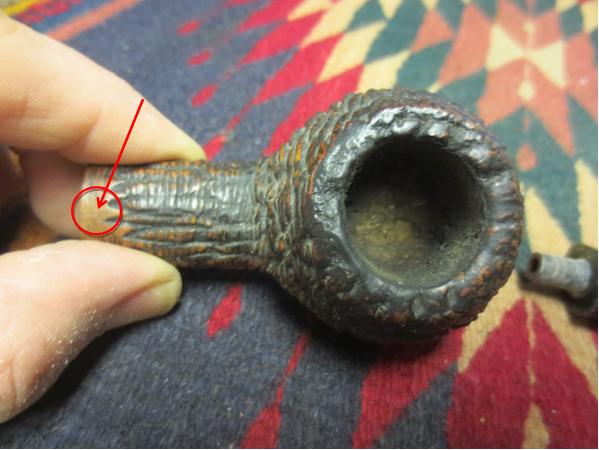
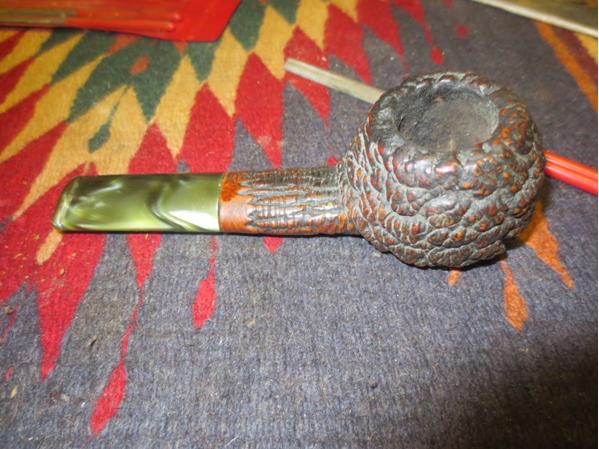
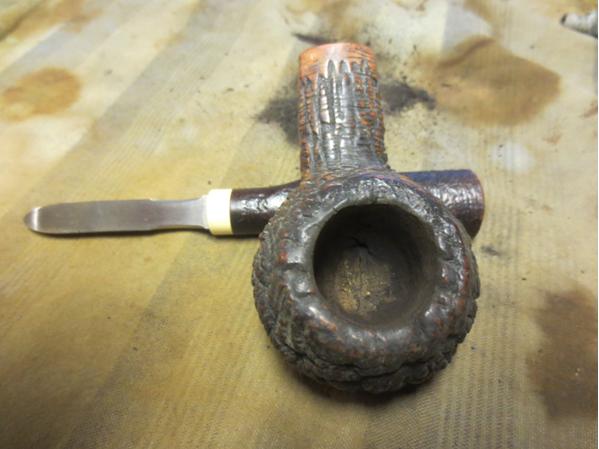
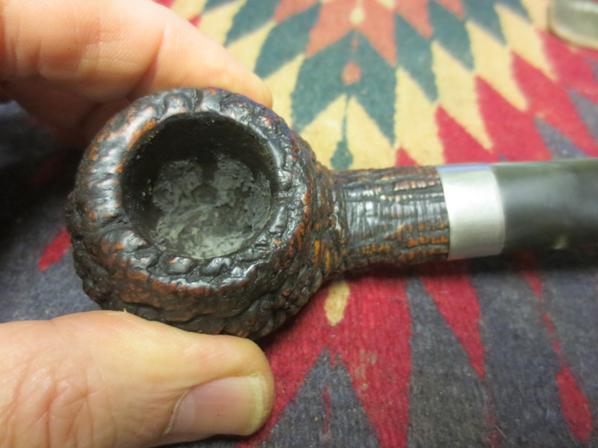
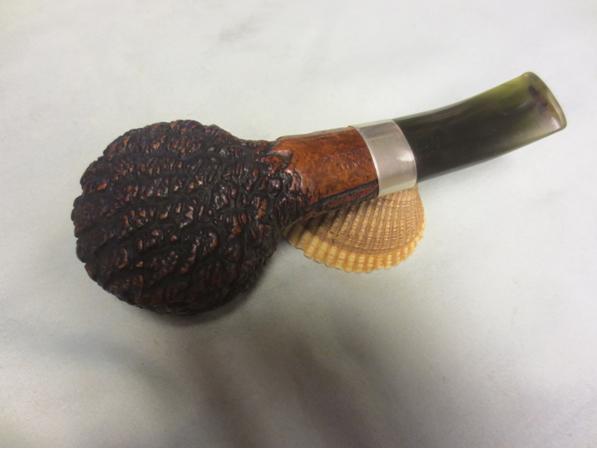
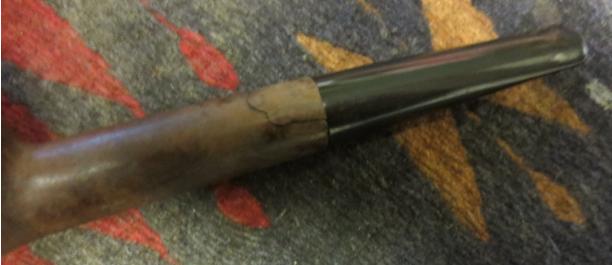
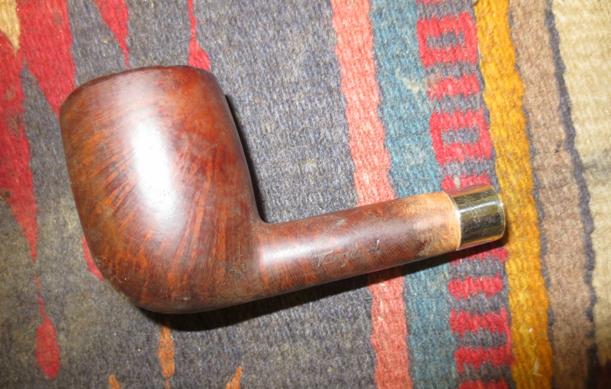
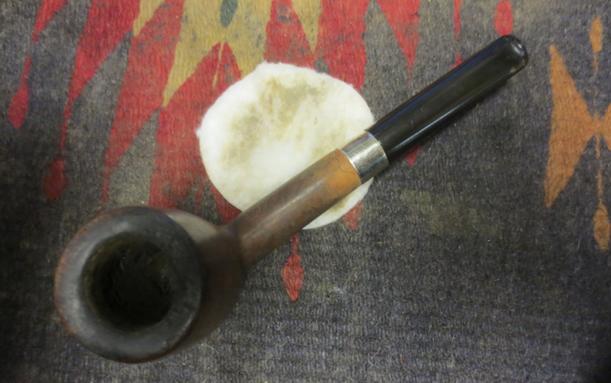
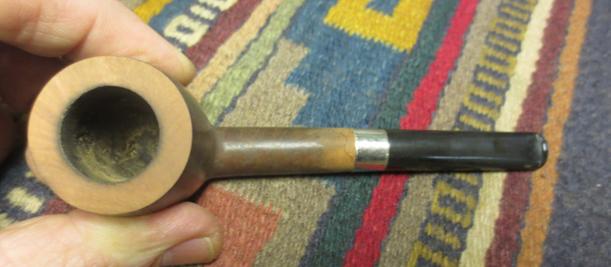
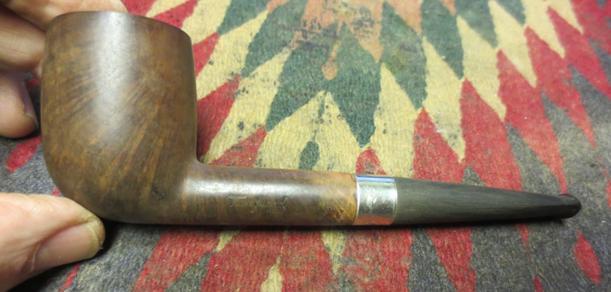
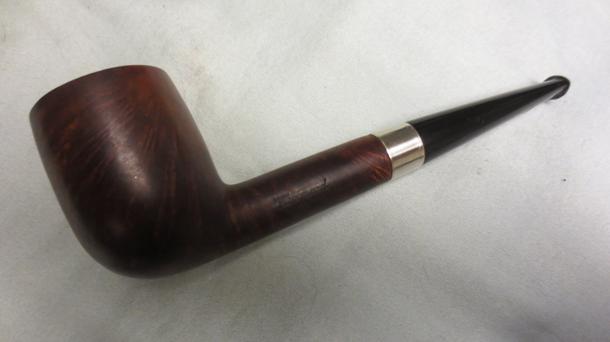
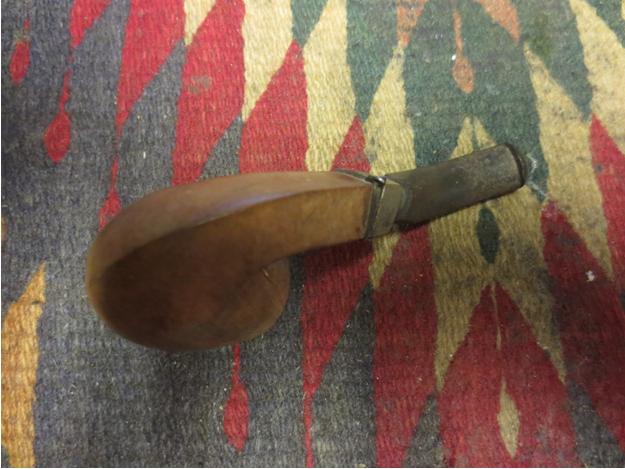
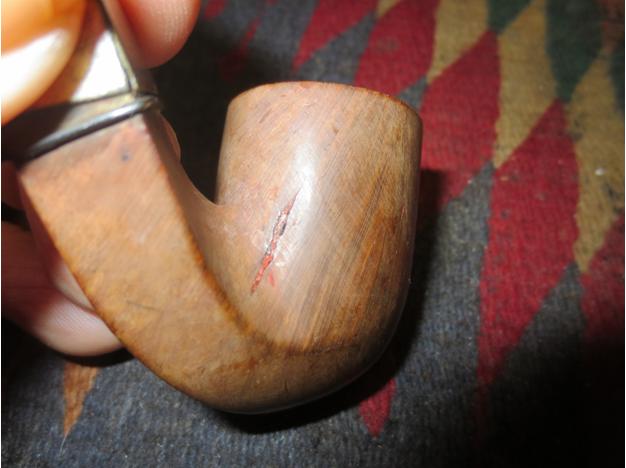
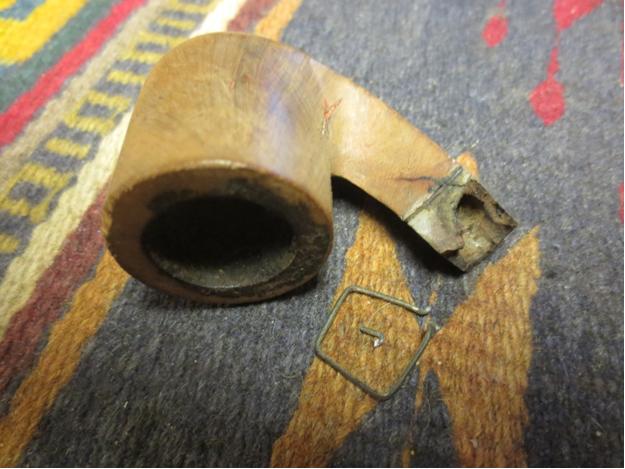
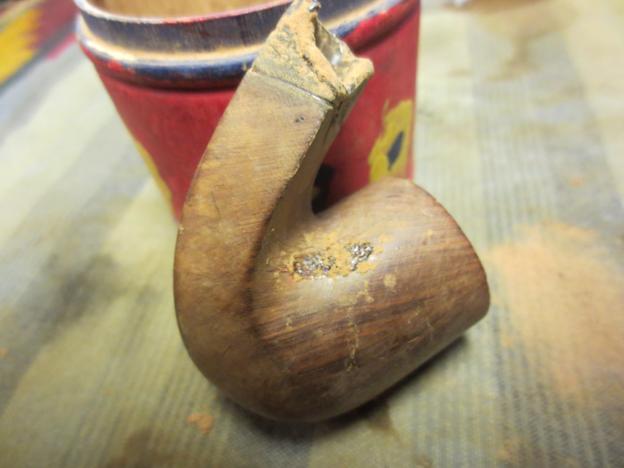
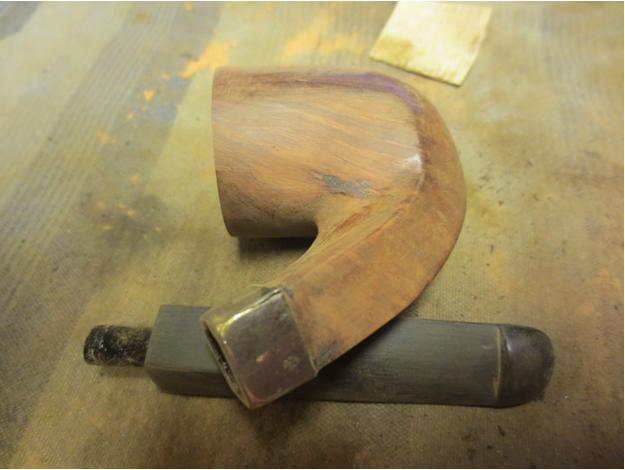
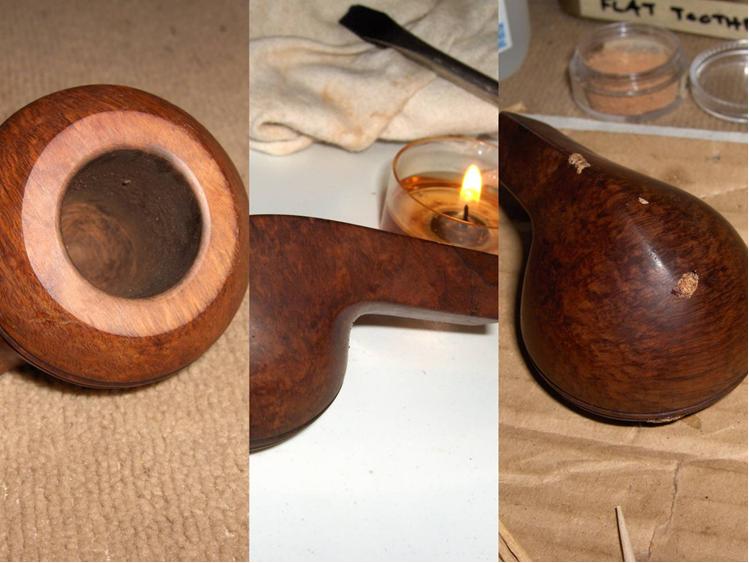
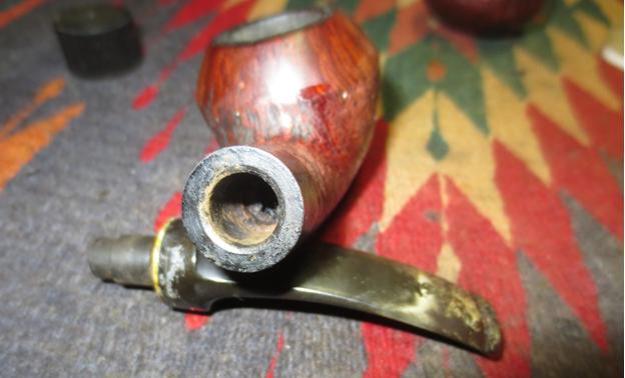 I took a close up photo of the bowl to show the thick cake that lined the walls of the tapered bowl. The photo also shows the damage to the front of the bowl where the pipe had been tapped out against a hard surface. The second photo below shows the crack on the right underside of the shank. It appeared to me from the smooth area and the look of the stain that someone had tried to glue the crack and do a repair but it was not done well.
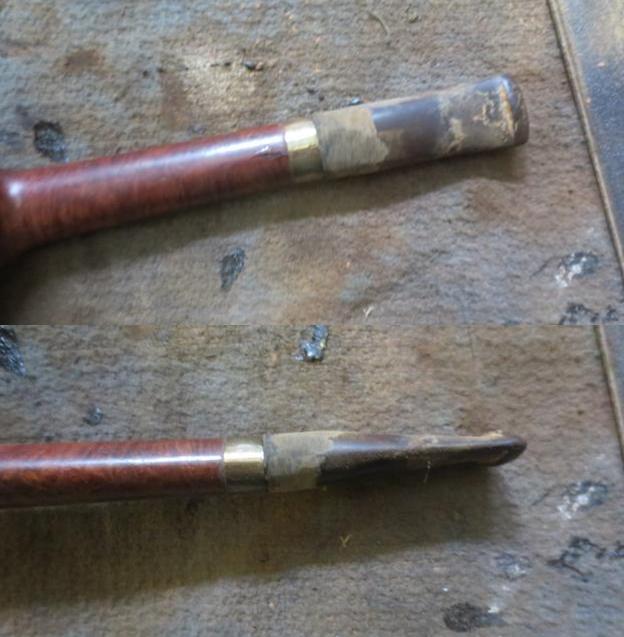
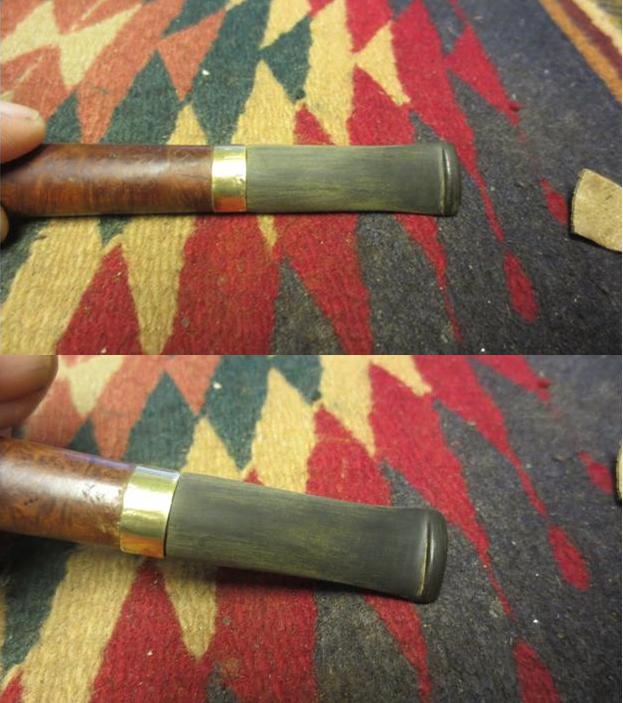
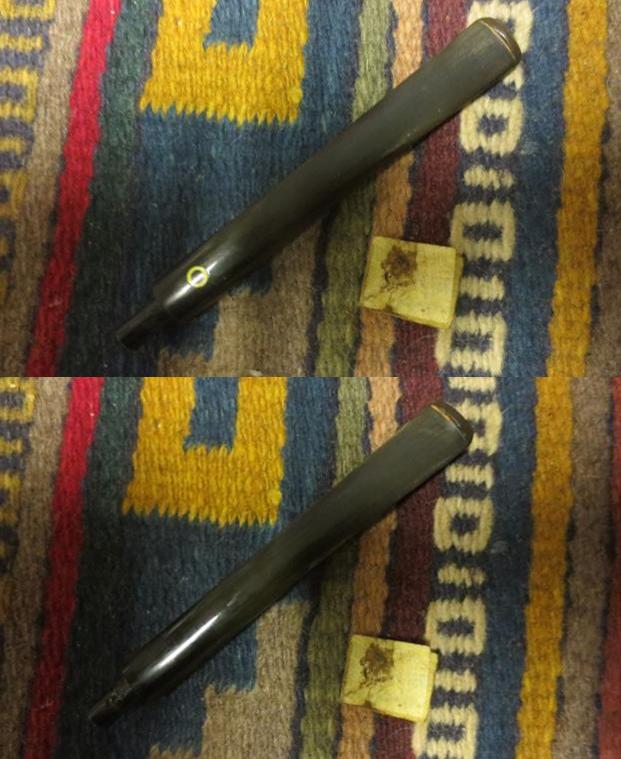
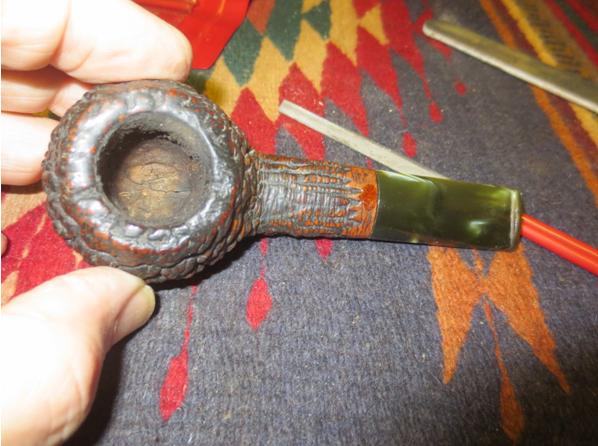
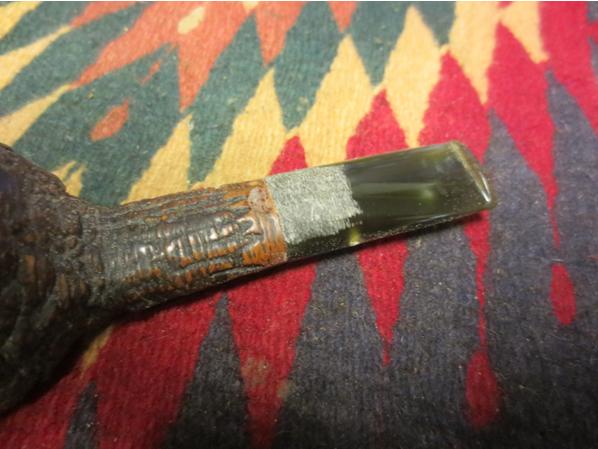
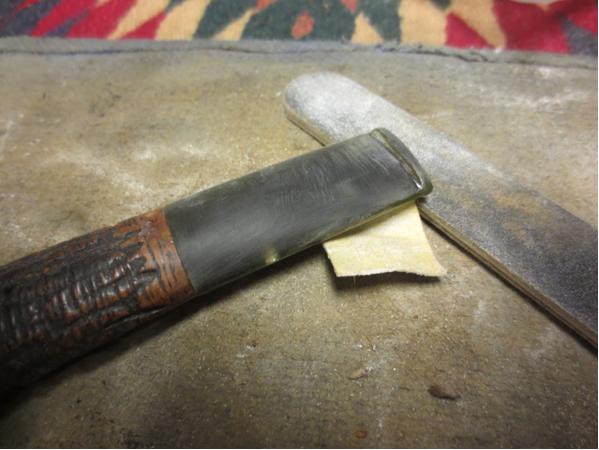
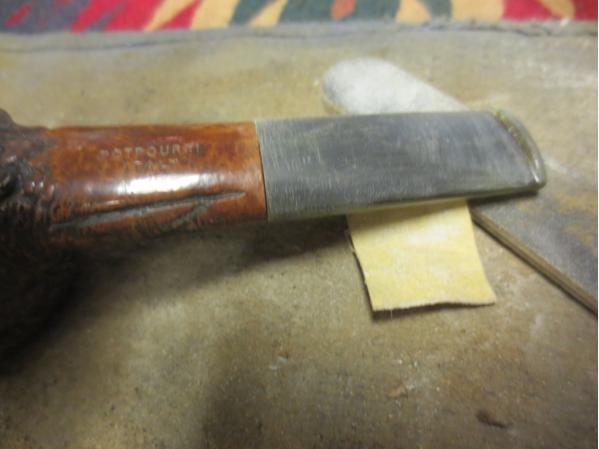
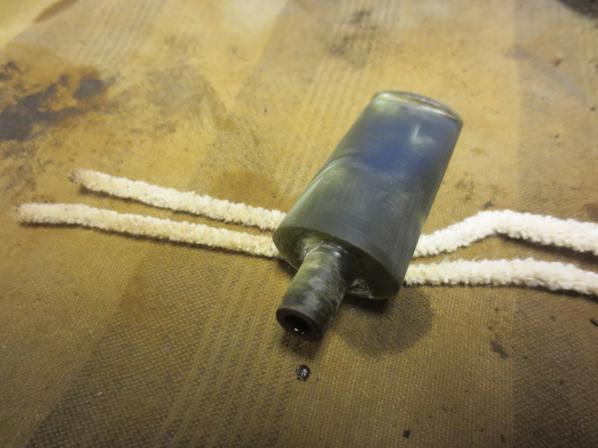
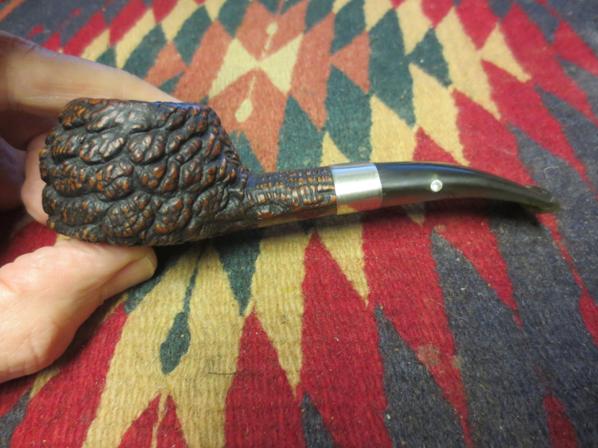
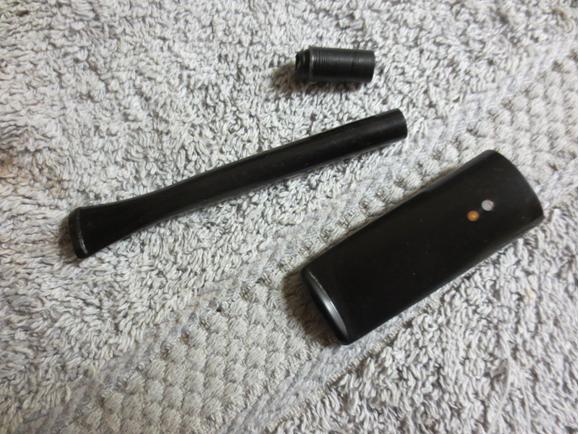
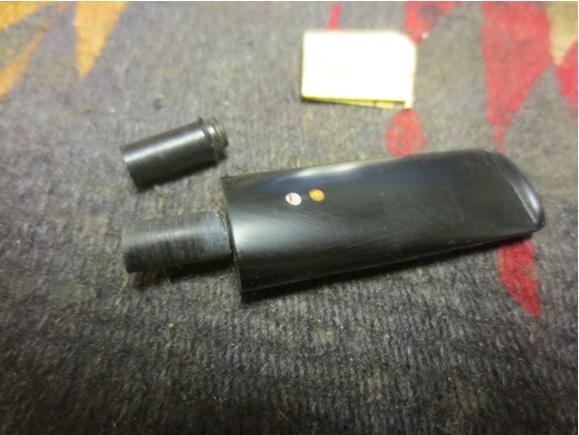
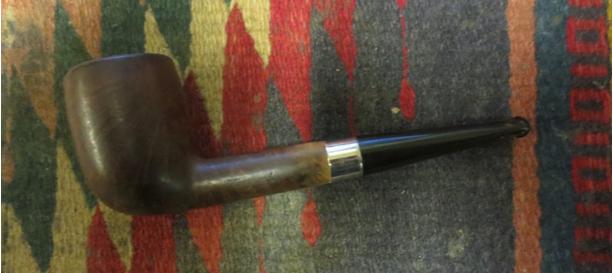
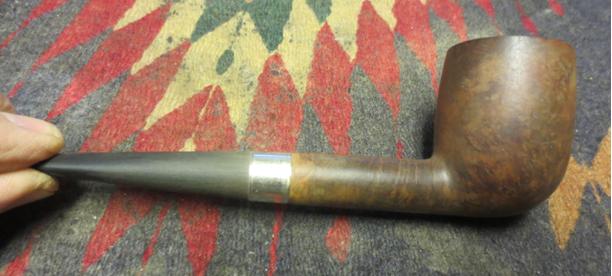
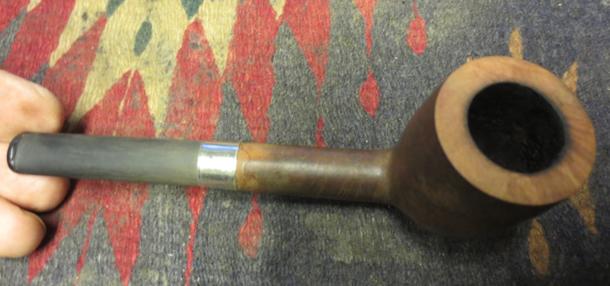
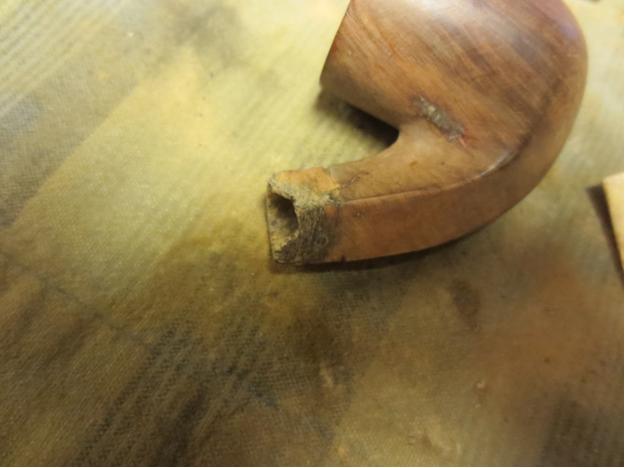
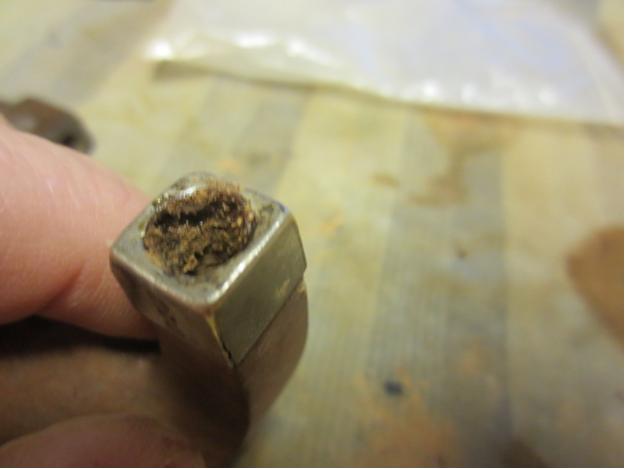
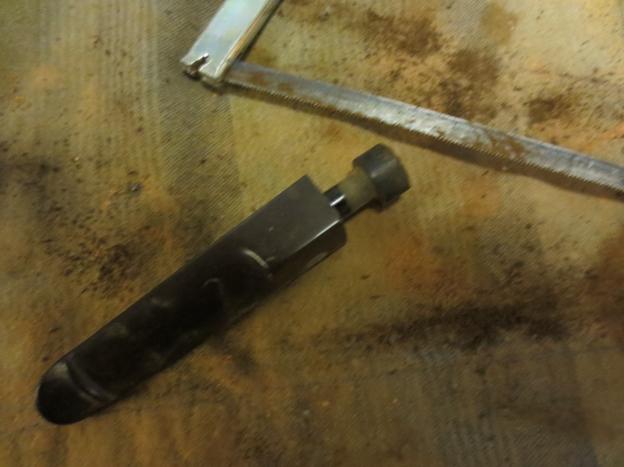
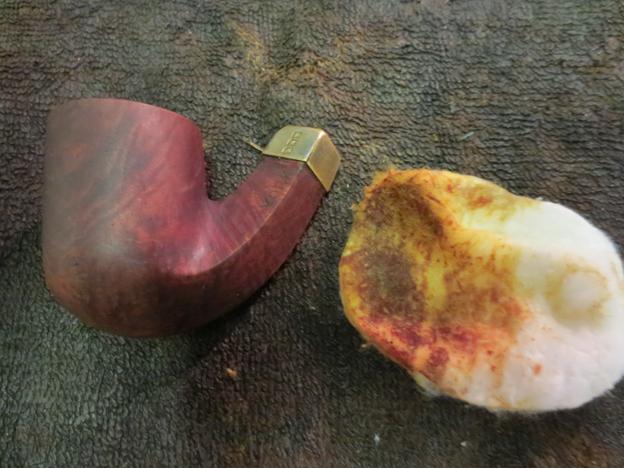
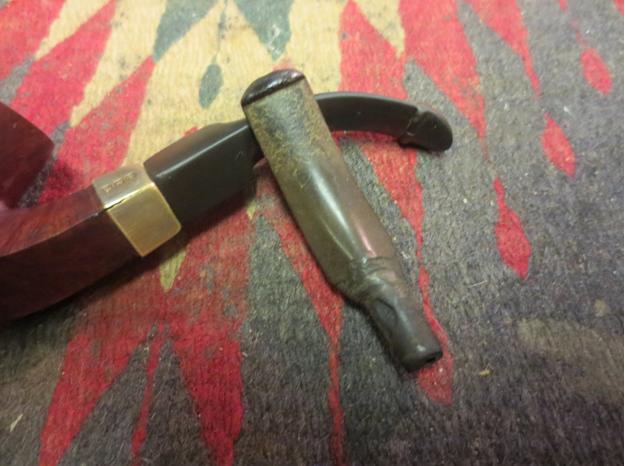
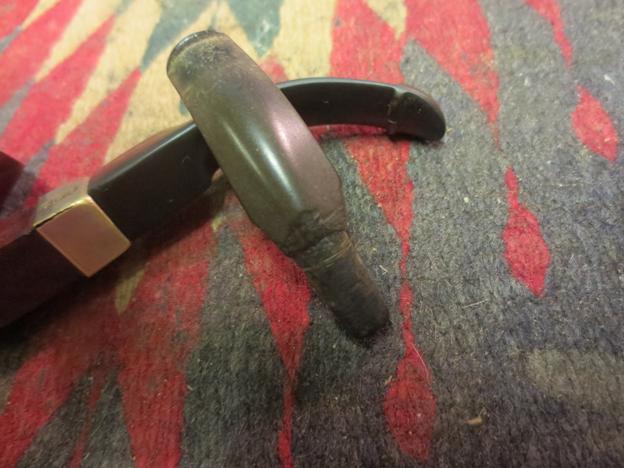
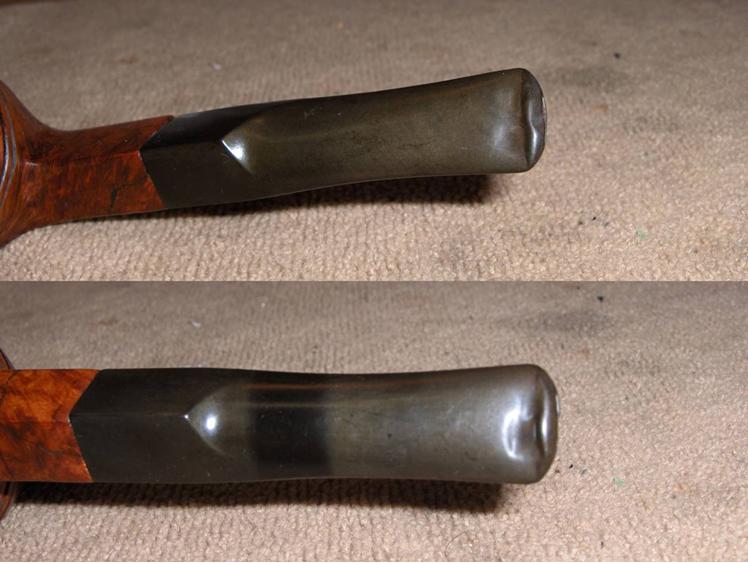
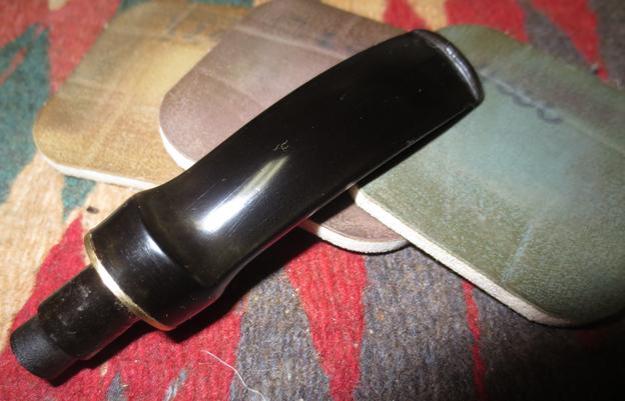
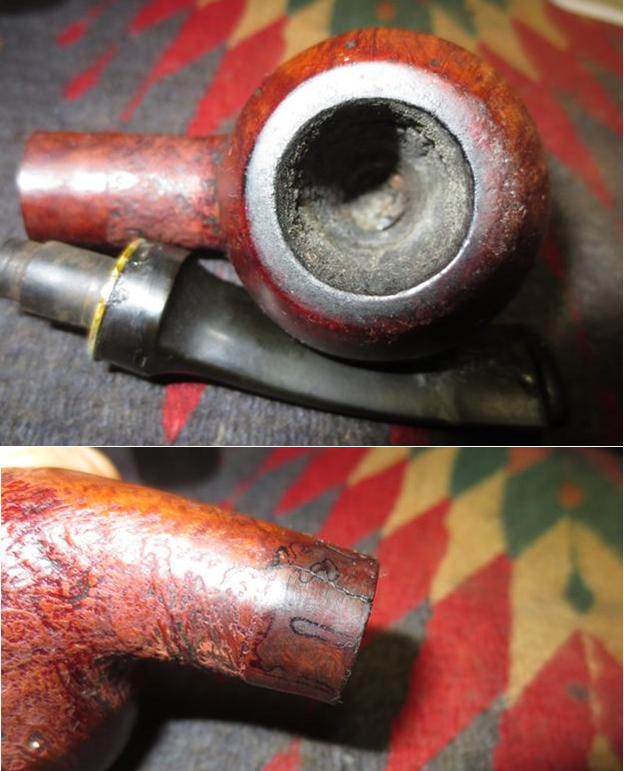 The next two photos show the damage to the stem. The calcium build up on the button end of the stem, the oxidation and glue that is globbed on the stem to hold the washer in place on the tenon and the deep tooth marks on both sides near the button show in the photos.
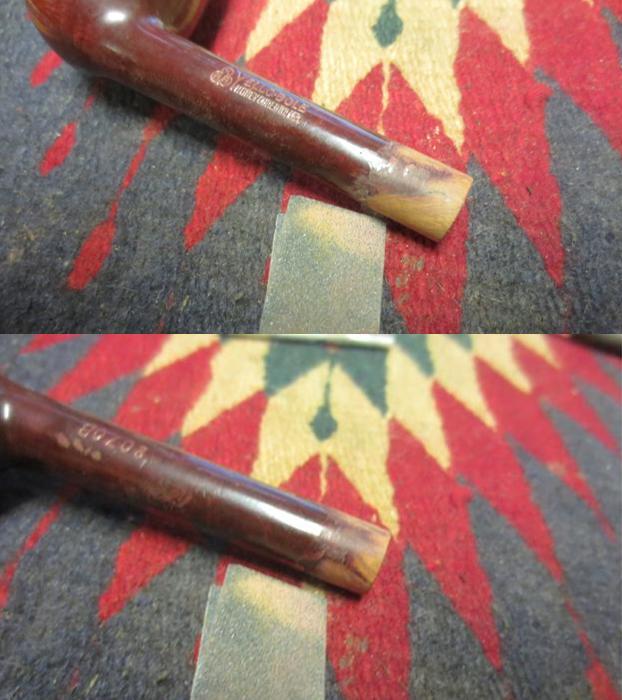
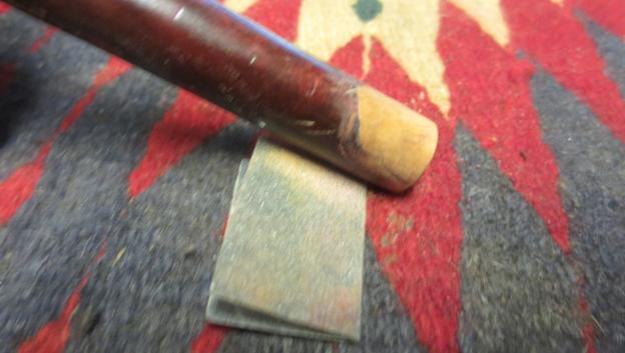
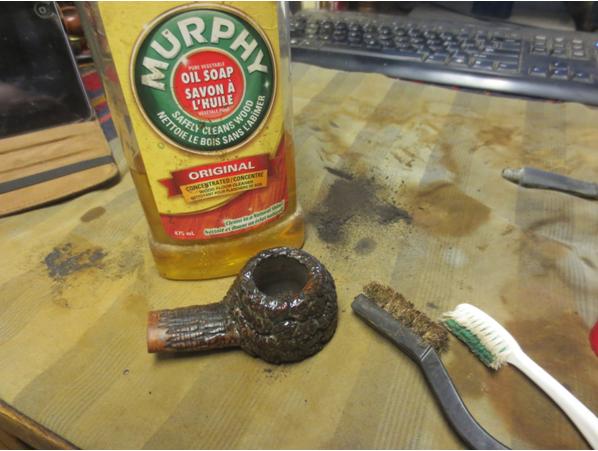
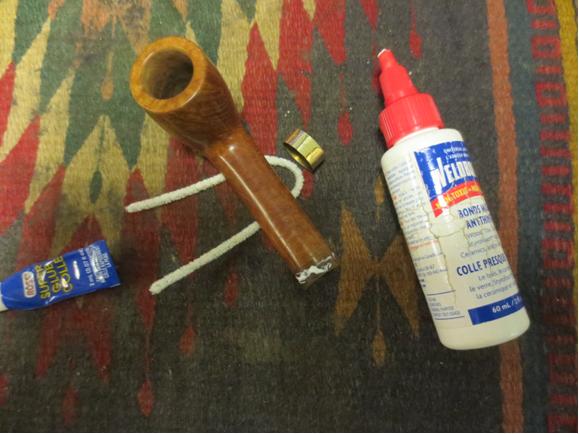
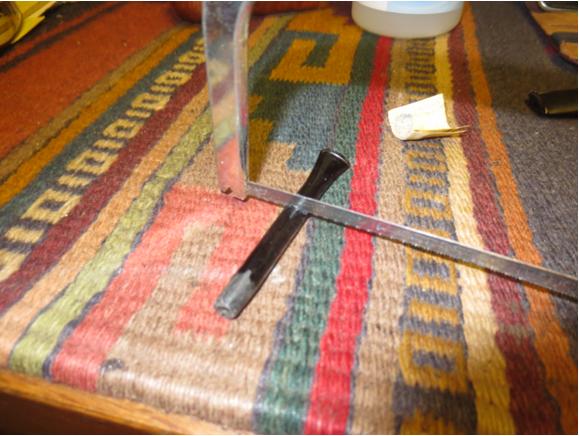
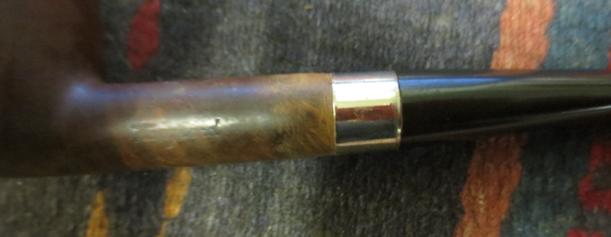
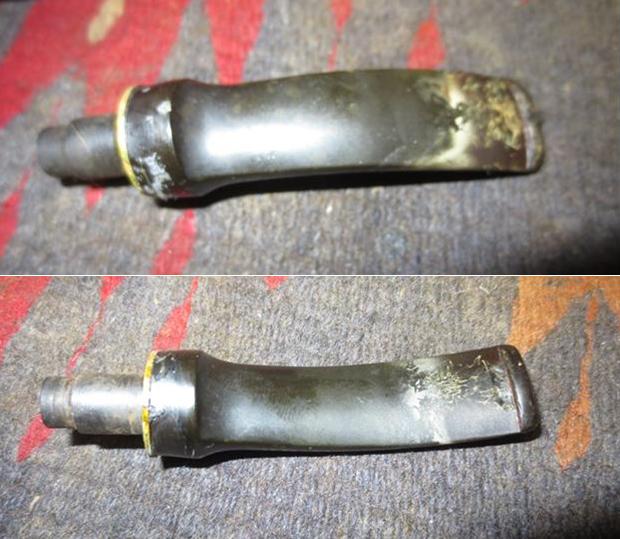 I scrubbed down the surface of the bowl with acetone on cotton pads to remove the damaged finish and the grime and oils in the grooves and crevices of the sandblast. I wanted the surface clean so that I could drill a hole to stop the crack before binding it together with glue and a nickel band on the shank. I drilled two pin holes at the end of the shank with a microdrill bit on a Dremel. The first one was slightly short of the end of the crack so I had to drill a second one.
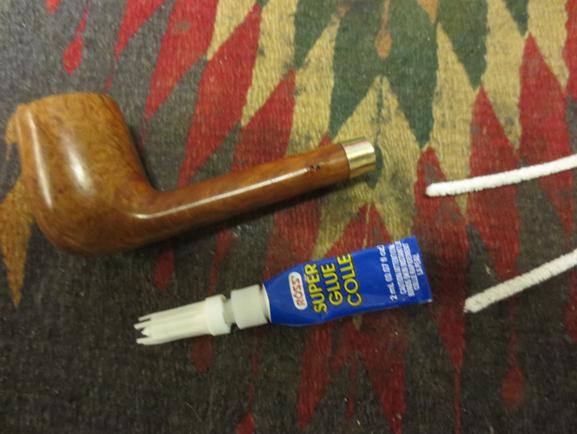
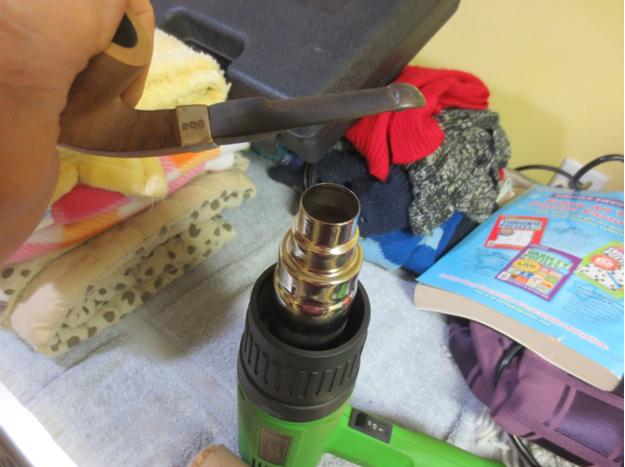
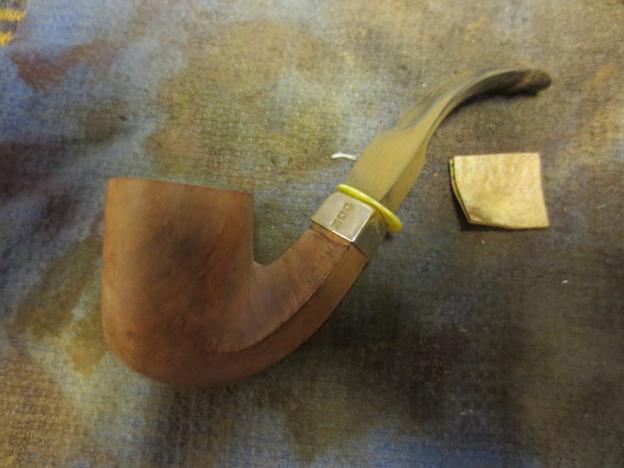
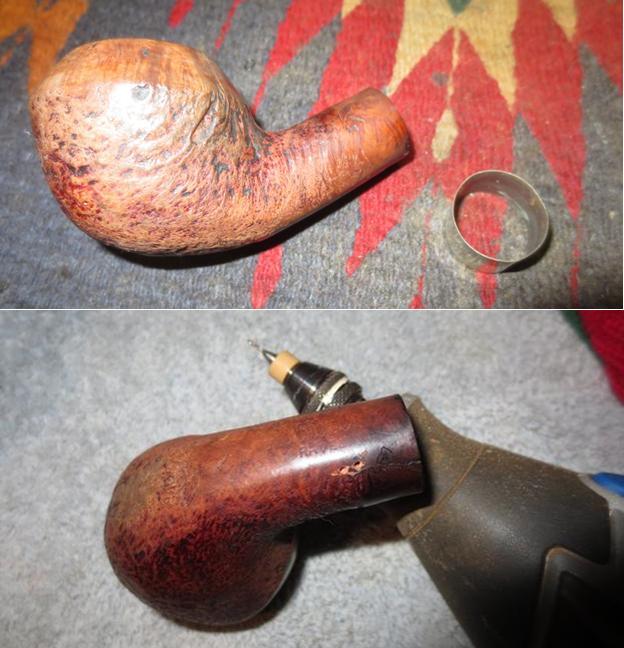 I heated the band to make the fit easier on the shank. I painted the shank end with some slow drying super glue and pressed the band in place against the topping board.
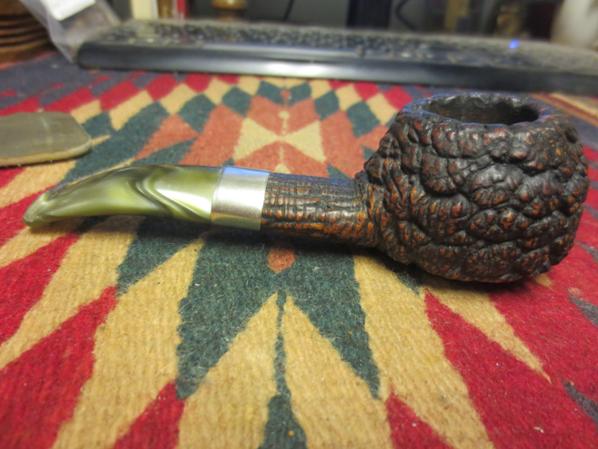
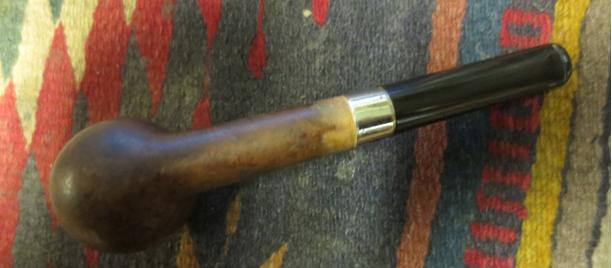
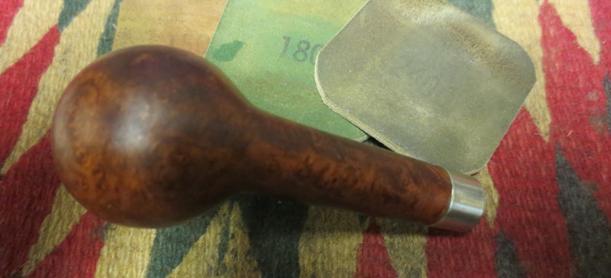
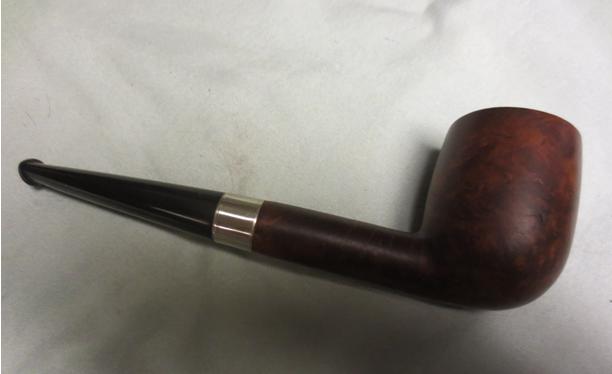
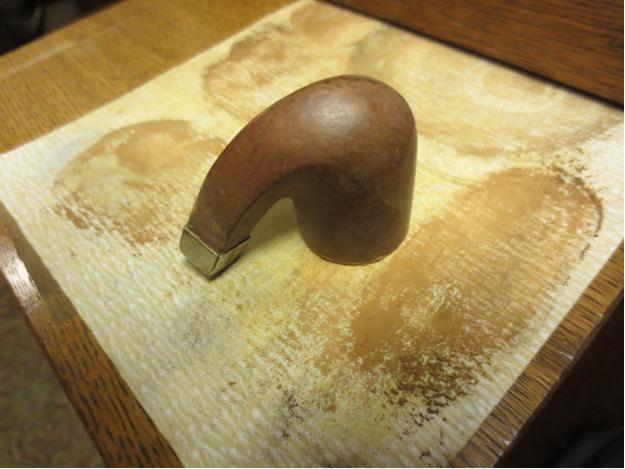
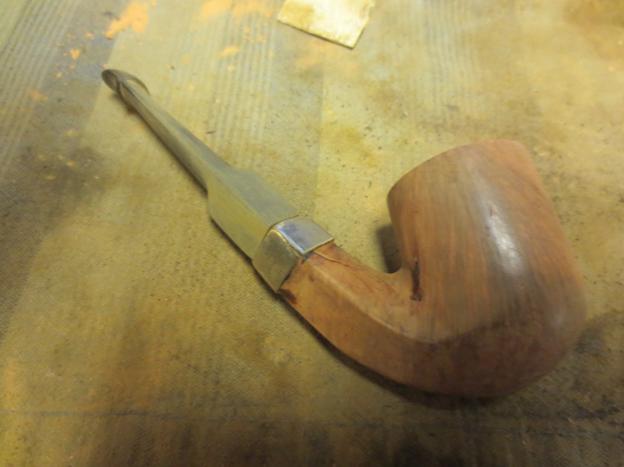
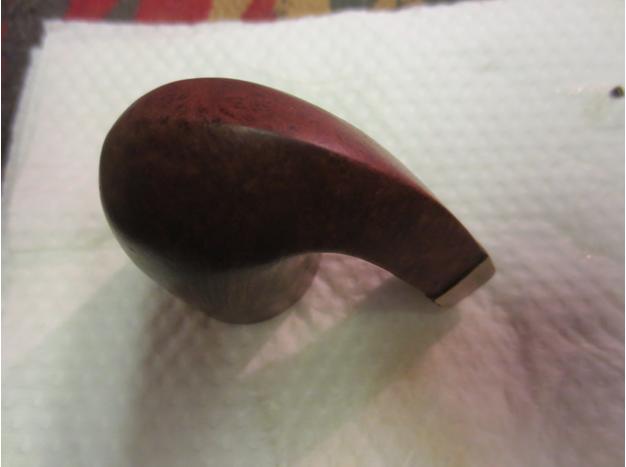
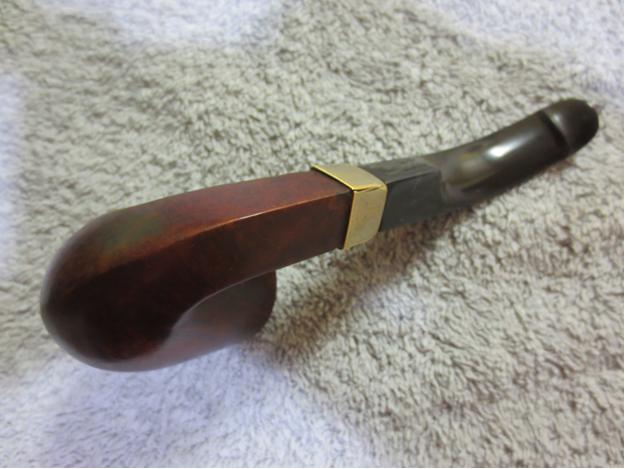
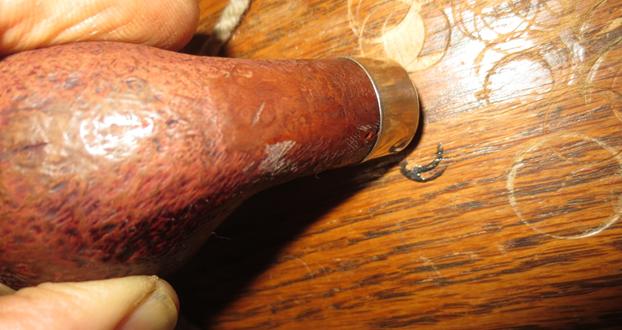 I scrubbed the bowl with alcohol on a cotton pad to remove that last of the dust. I took pictures of the bowl with the new bling addition.
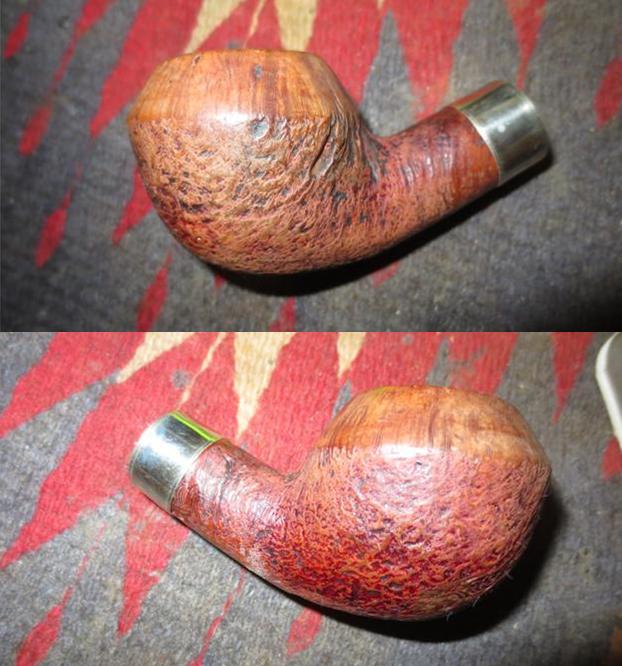
 I reamed the bowl with the PipNet reamer to take back the cake to the bare walls of the bowl. I finished the reaming using a Savinelli Fitsall Pipe Knife to scrape the inside of the bowl smooth. I rolled some 180 grit sandpaper around the end of my finger and sanded the walls of the bowl smooth.
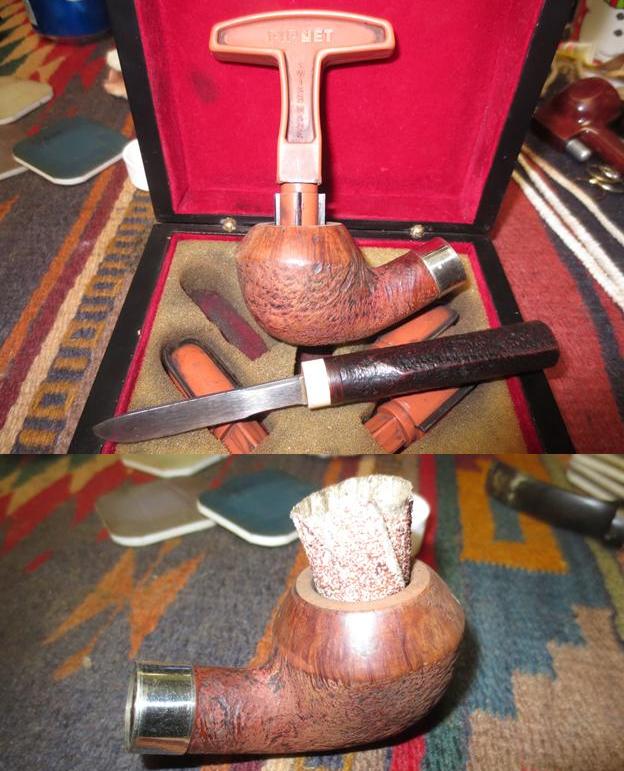 To remove the damage to the top of the bowl and to clean up the rough front edge of the bowl cap I lightly topped it on a topping board with 220 grit sandpaper.
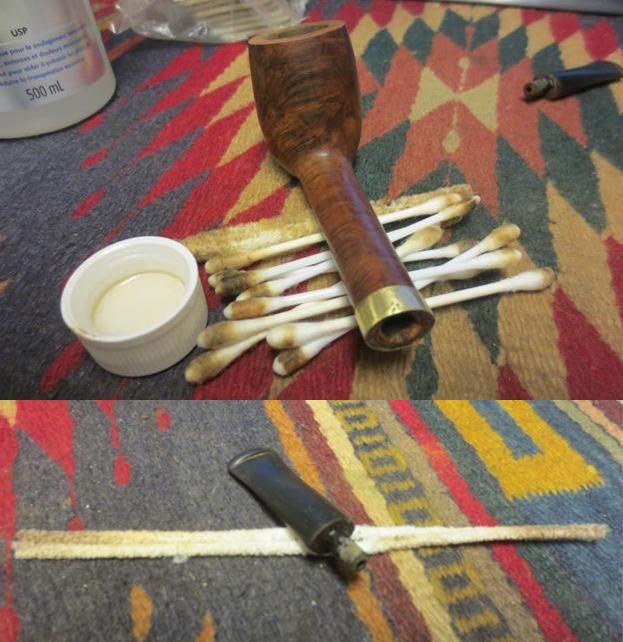
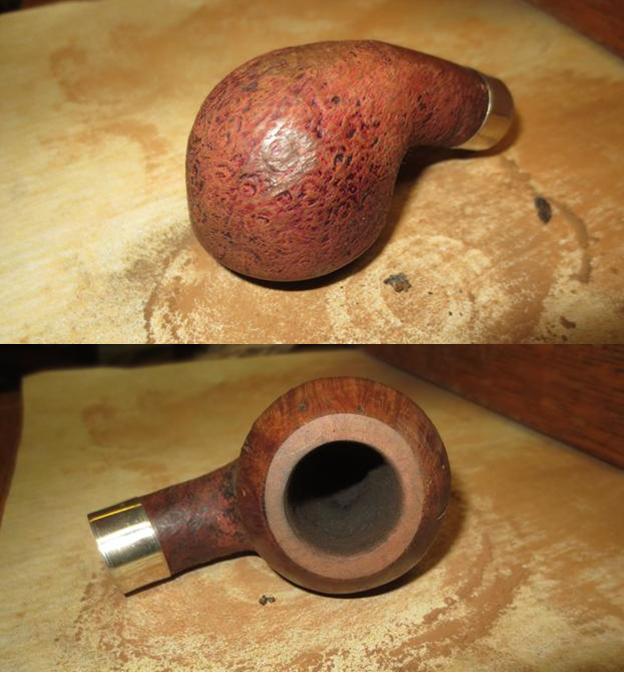 With the bowl exterior cleaned and the damaged rim top repaired I worked on the inside of the mortise and the airway from the mortise end into the bowl. I used the drill bit that is in the handle of the KleenReem pipe reamer to ream out the airway into the bowl. I turned the bit into the bowl using the knurled end to press it through. I cleaned off the drill bit and used the dental spatula to scrape the walls of the mortise all the way to the end where the airway entered the bowl. The amount of grit and oils that came out with the scraping was phenomenal.
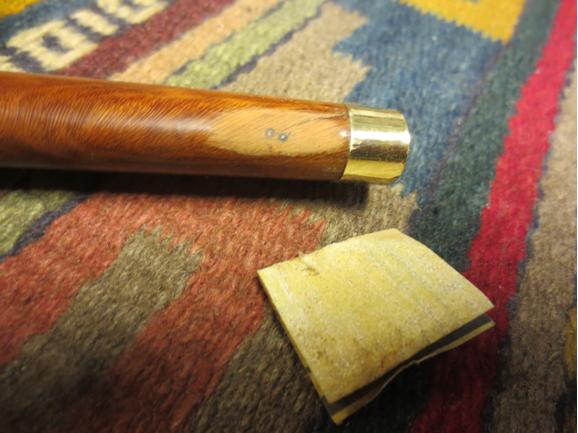
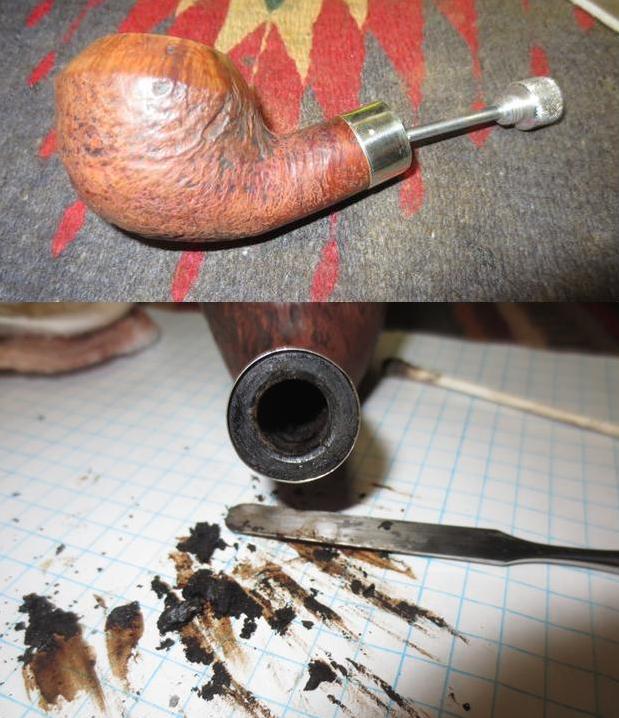 I wiped the bowl cap down with alcohol and filled in the sandpits around the outer walls of the cap with clear super glue.
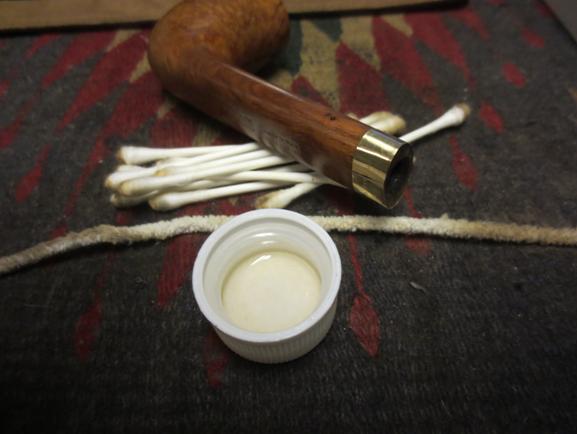
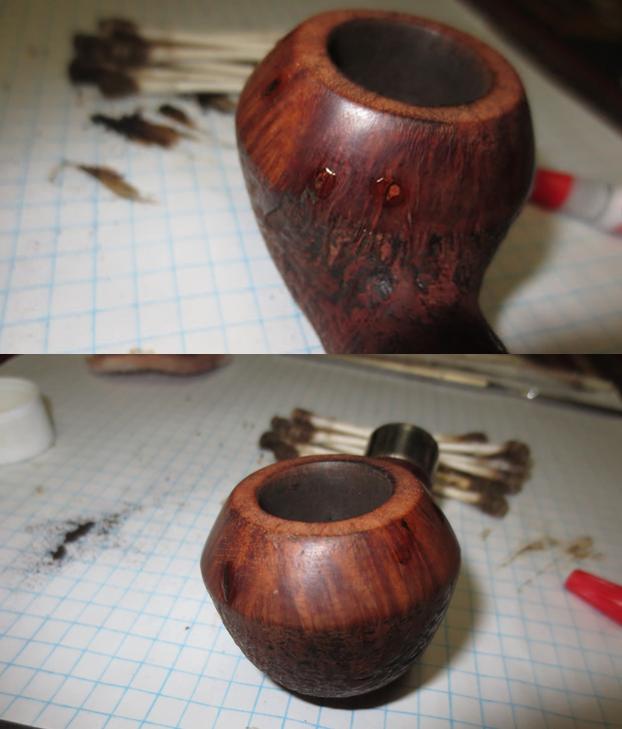 I cleaned out the shank and mortise once again with alcohol, cotton swabs and pipe cleaners until I had removed all of the loose debris left in the shank.
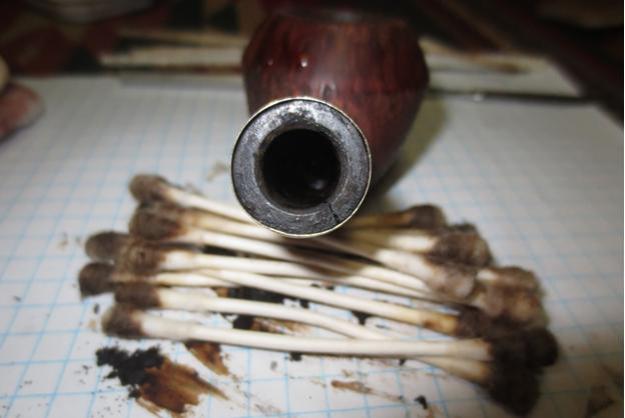 I sanded the repaired patches on the cap with 220 grit sandpaper until the repairs were blended into the surface of the briar. I used a black Sharpie Pen to darken the spots and then wiped the bowl and cap down with alcohol to blend in the black.
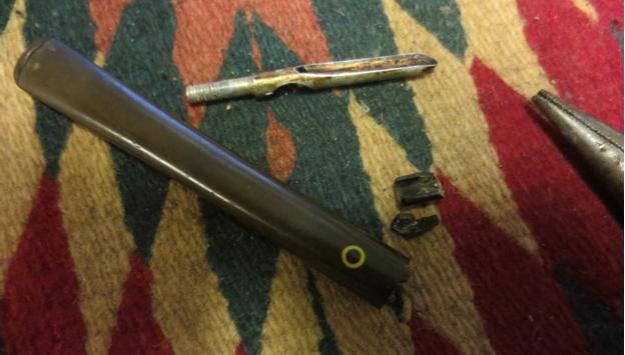
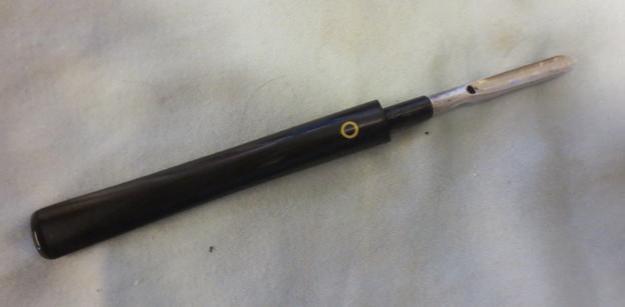
 I scraped the area around the washer and the tenon with a sharp knife and funneled the end of the tenon to facilitate better airflow in the stem. I cleaned out the airway in the stem with pipe cleaners, alcohol and cotton swabs.
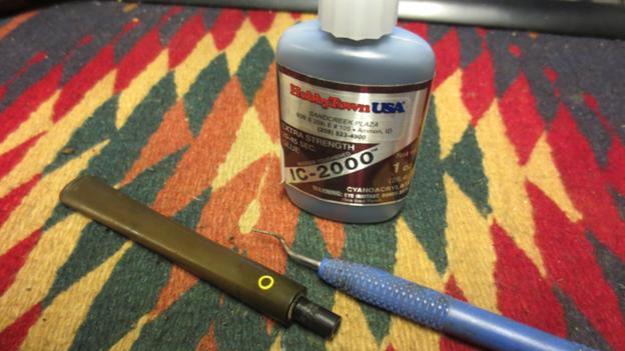
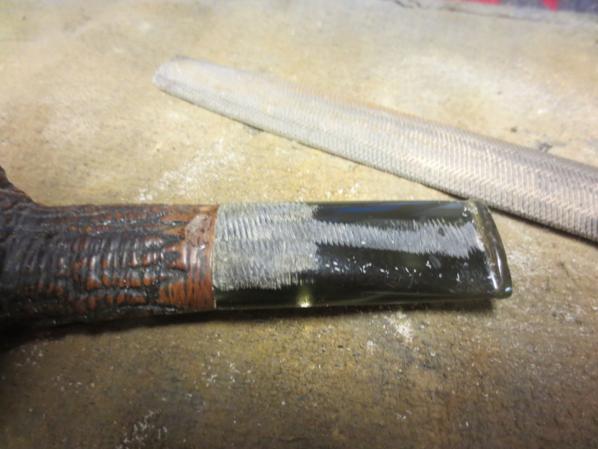
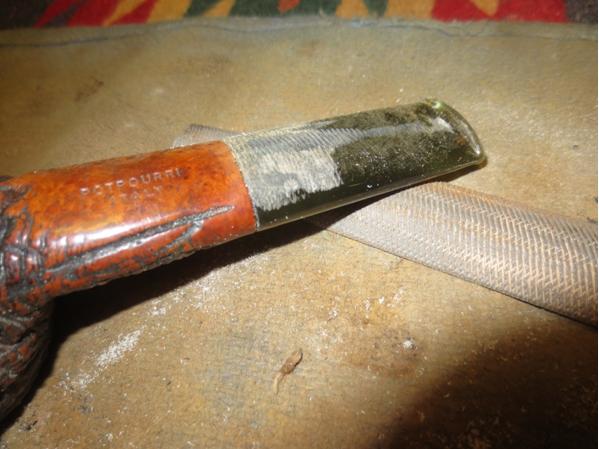
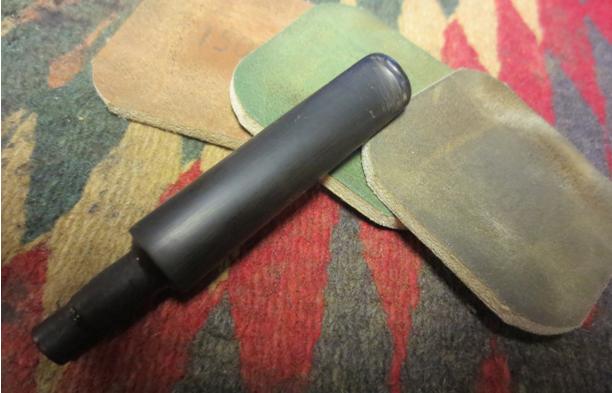
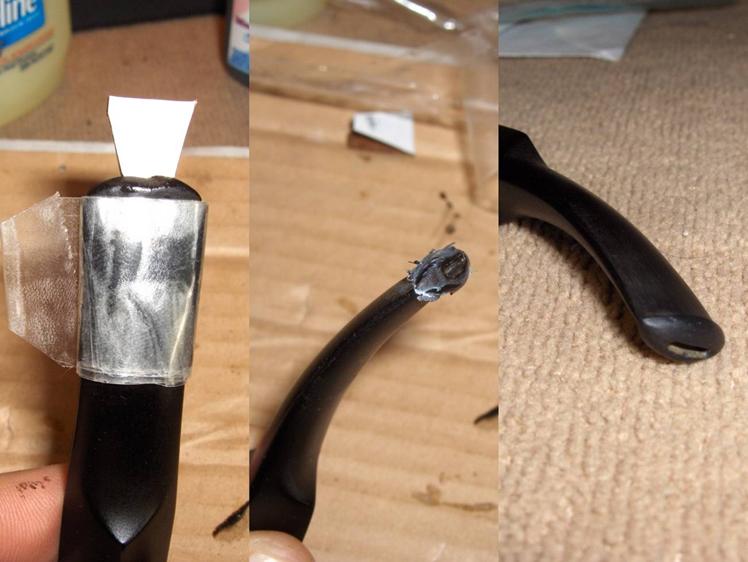
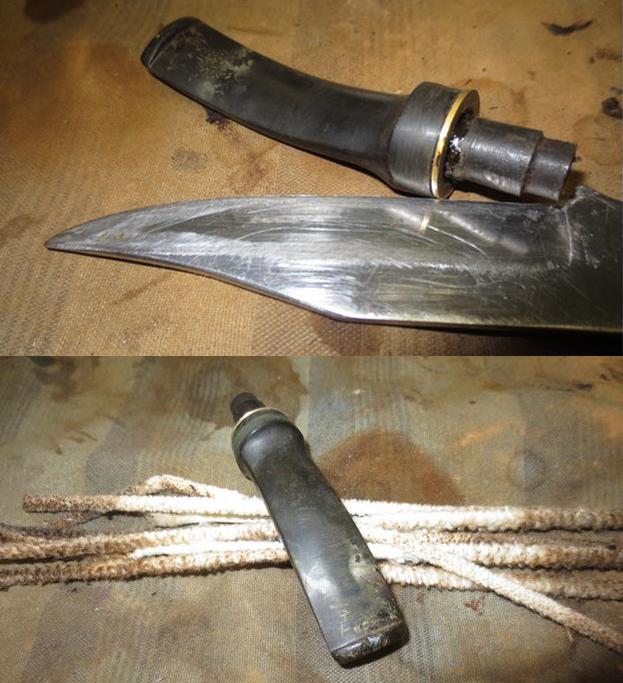 I sanded the stem with 220 grit sandpaper to clean up the stem surface and wiped the tooth marks down with alcohol. I filled in the tooth marks with black super glue and set the stem aside to let the glue cure.
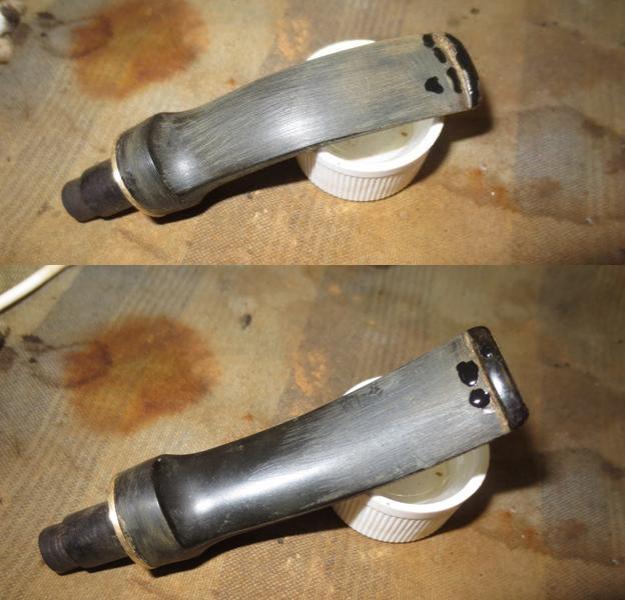 I stuffed a cotton ball into the bowl and rolled a cotton pad into the shank. I set the pipe in an ice cube tray and used an ear syringe to fill the bowl with alcohol and let it sit during the day. I left it sitting all day while I worked on the slot in the stem. At the end of the day the cotton had yellowed the cotton and the alcohol had pulled out tar and oil from the bowl walls.
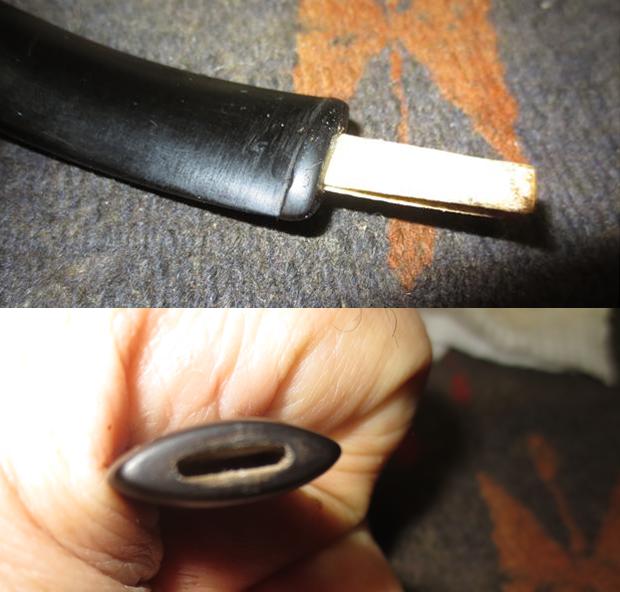
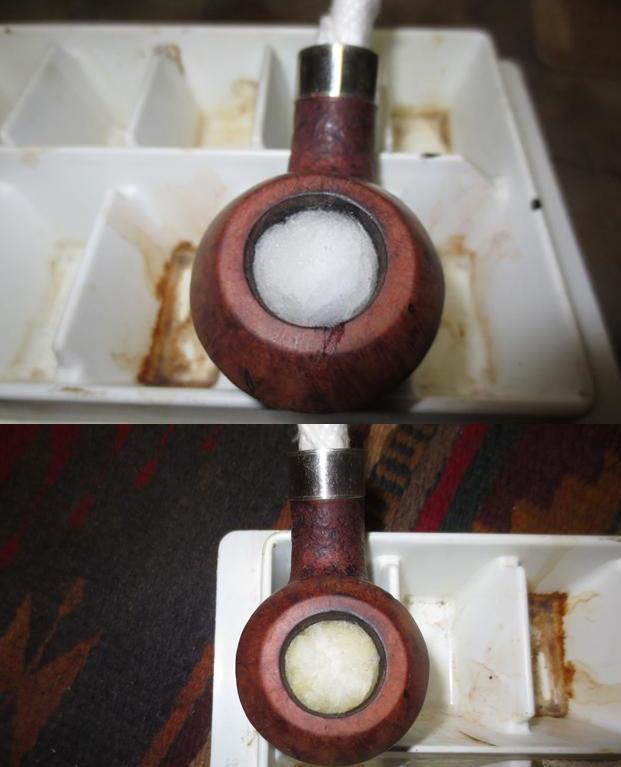 I used needle files to open up the slot in the button. I used a flat, flattened oval and regular oval file to open the slot. I folded a piece of sandpaper and sanded out the inside of the newly opened slot. After sanding it the slot was open enough to easily take a pipe cleaner.
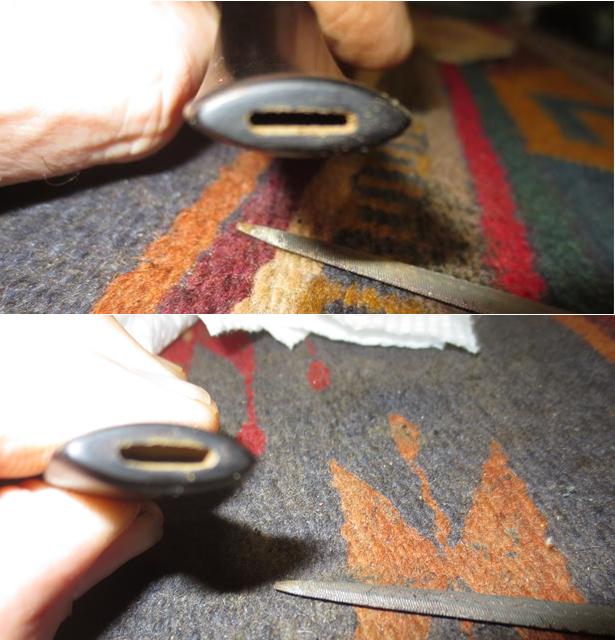
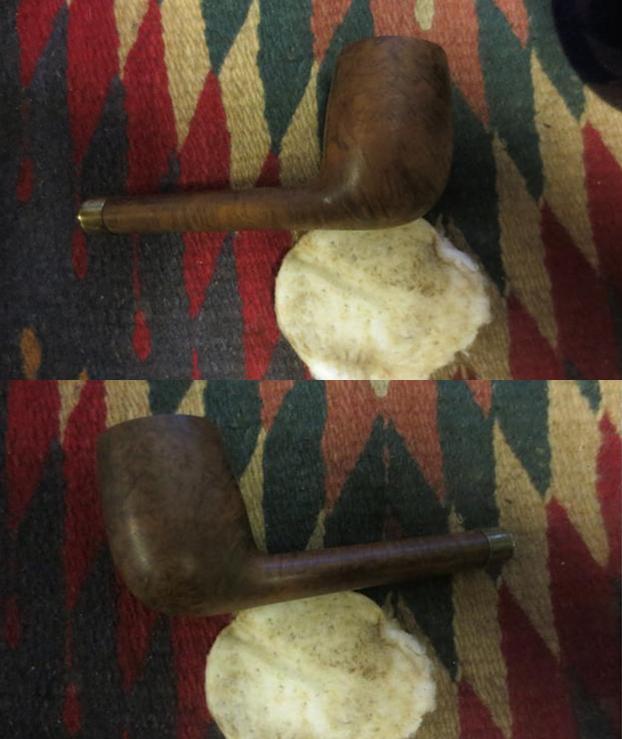
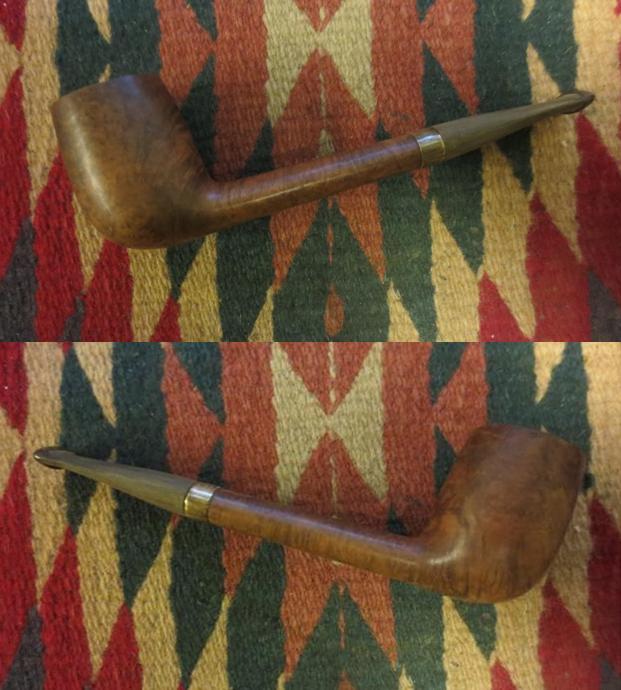
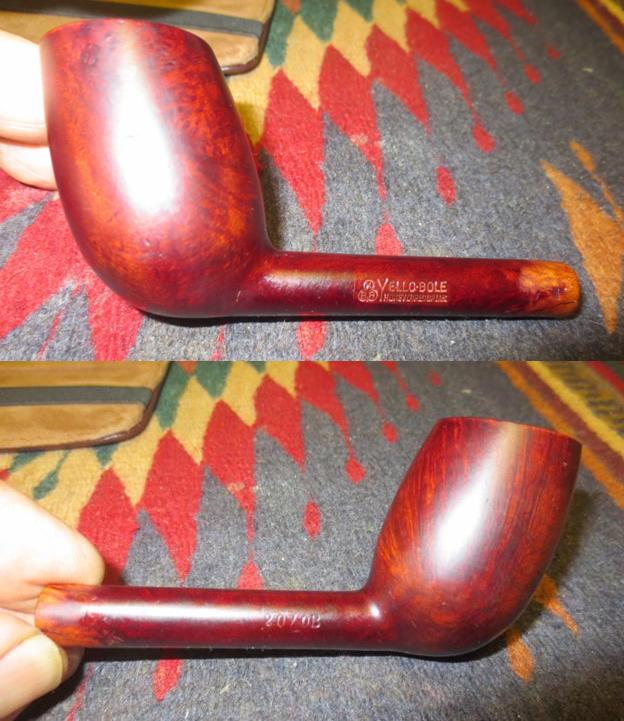
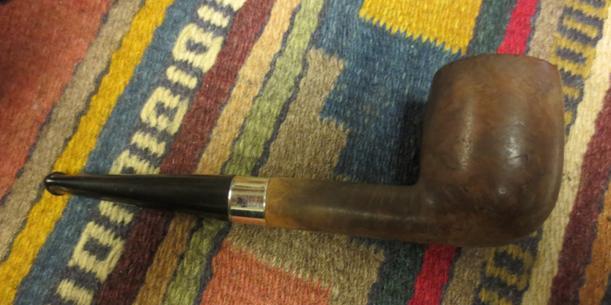
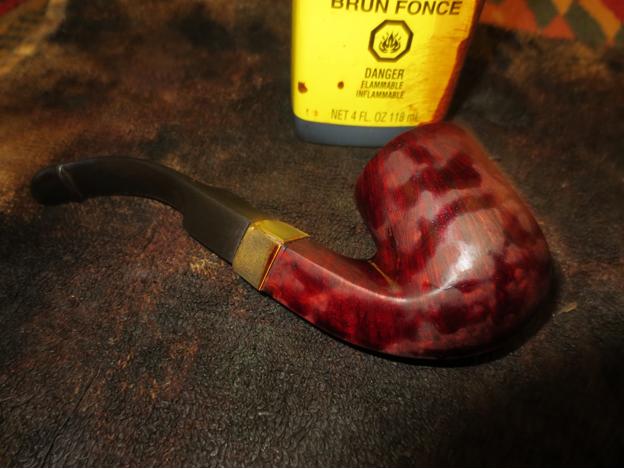
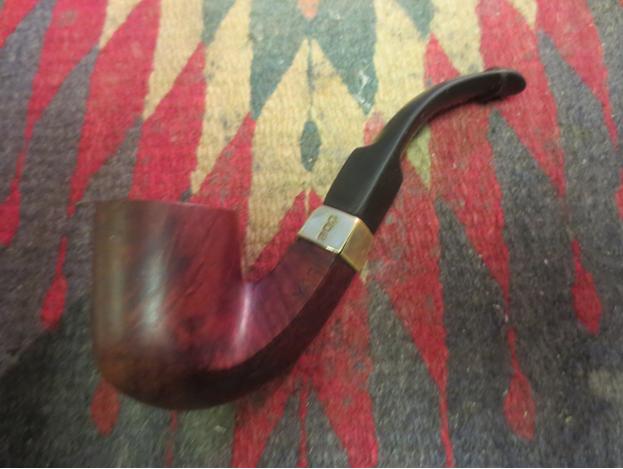
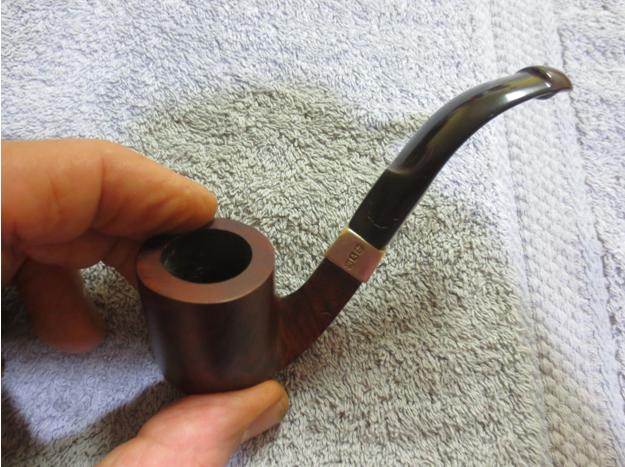
 By this time the alcohol/cotton ball soak in the bowl was finished. I pulled the cotton balls out of the bowl and the pad out of the shank and threw them away. I cleaned out the shank and airway once again with cotton swabs and pipe cleaners. Once it was clean I stained the bowl with dark brown aniline stain cut 50/50 with alcohol. I flamed the stain to set it in the grain. I repeated the process until the coverage was what I was looking for.
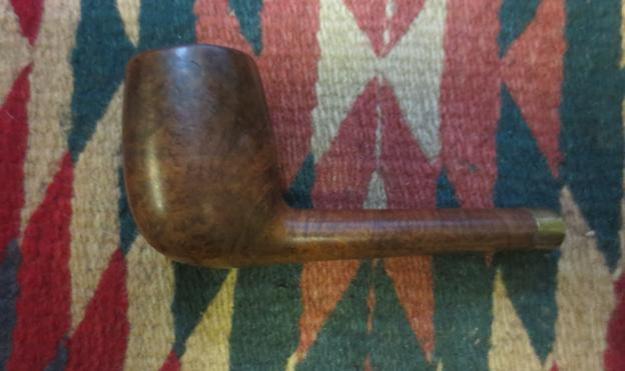
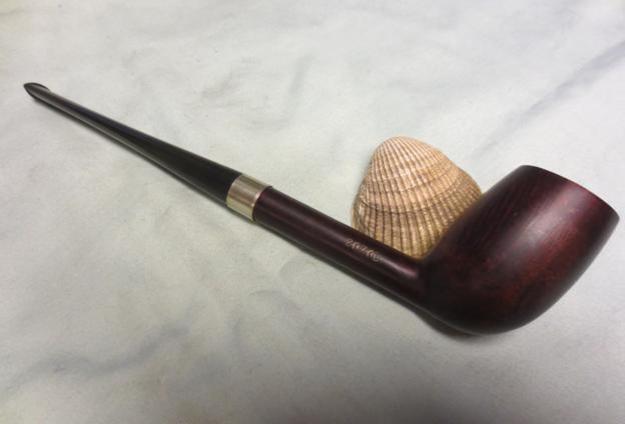
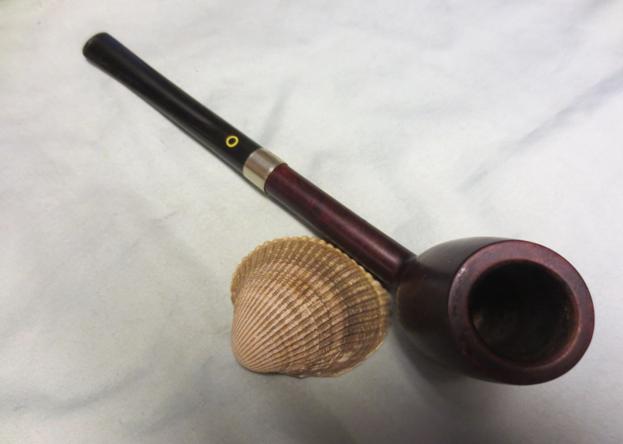
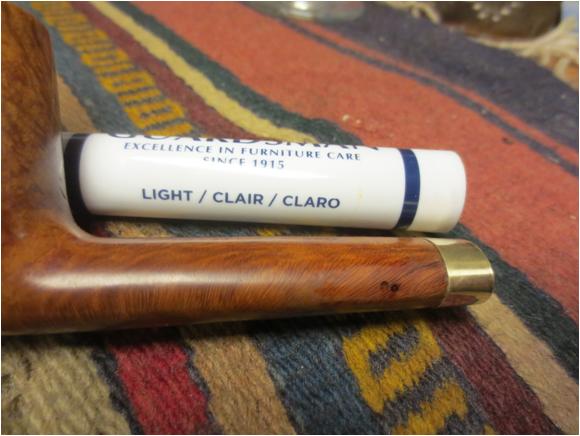
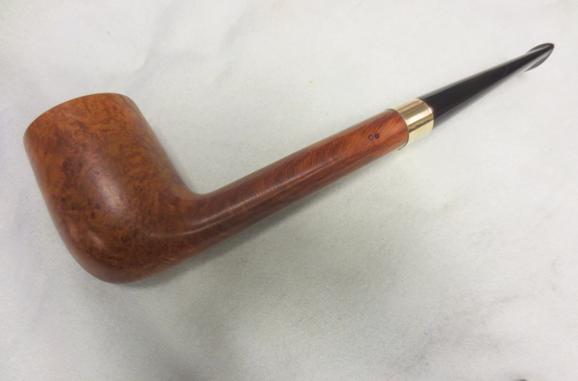
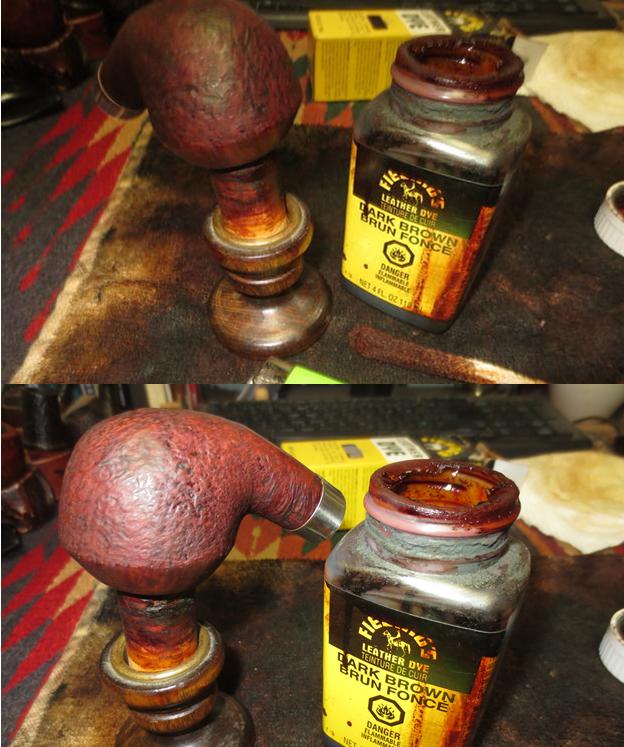 I rubbed bowl down with olive oil on a cloth and hand buffed the bowl with a rough cotton cloth. I took some photos of the new look of this old Radford Ravel pipe. The bowl is starting to look really good and shows some promise.
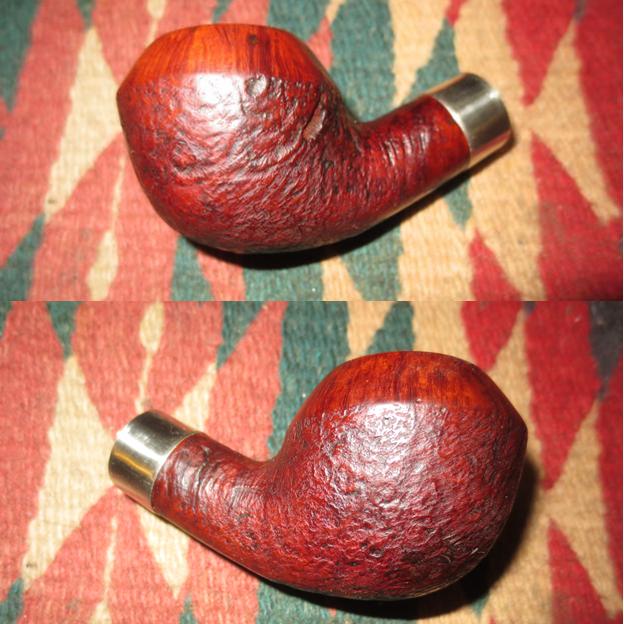
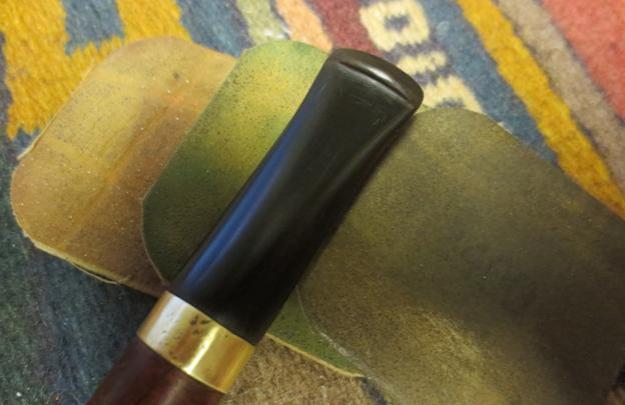
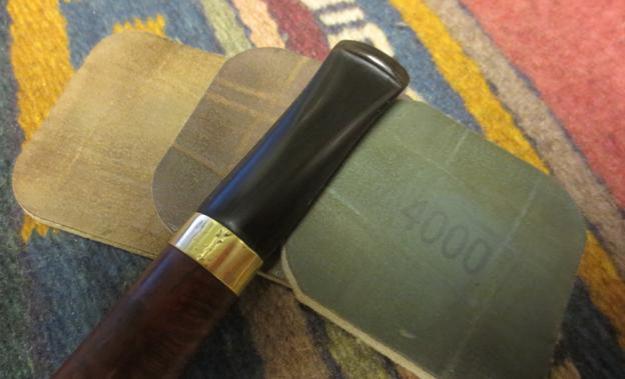
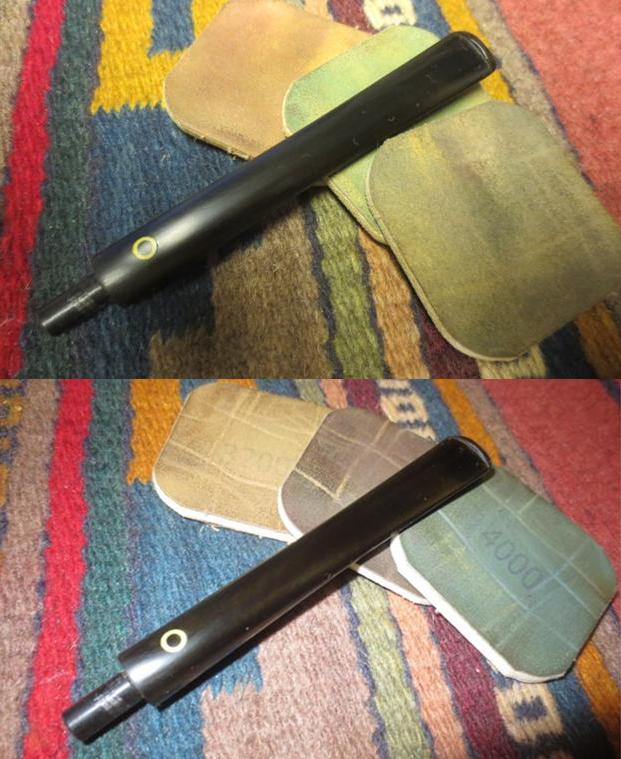
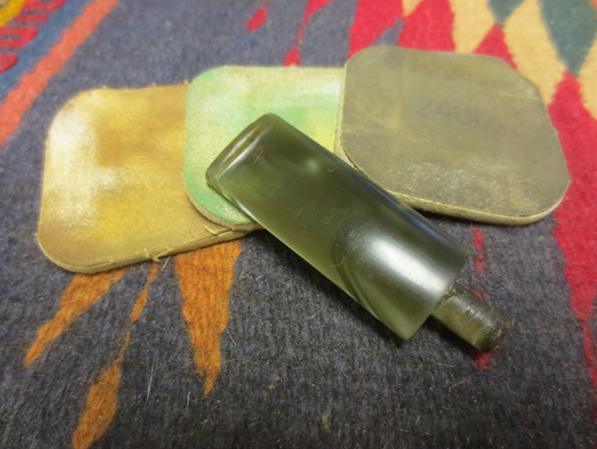
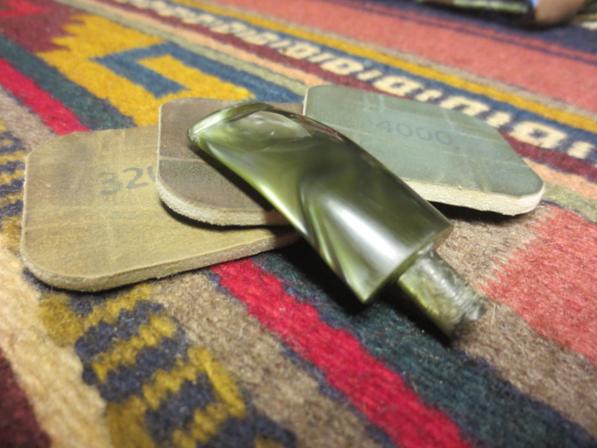
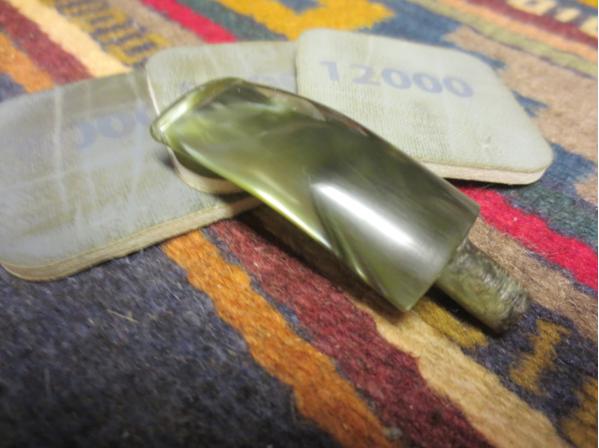
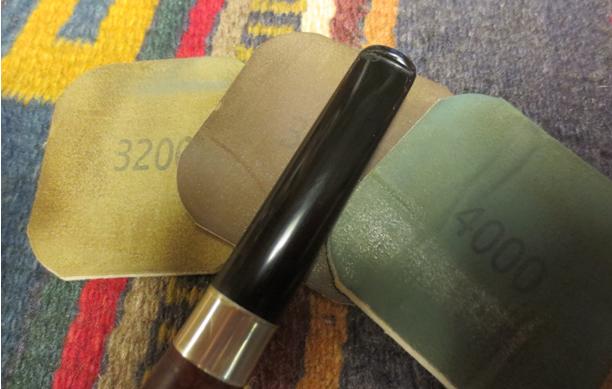
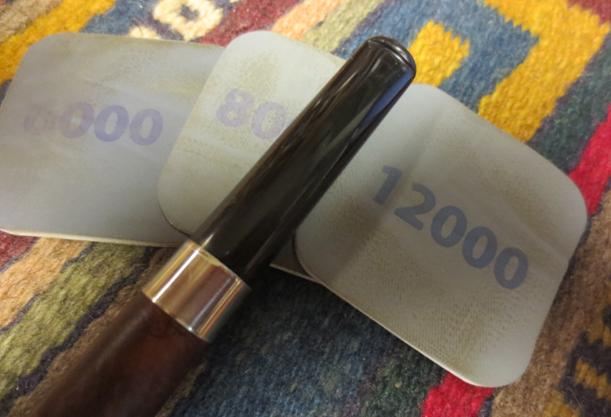
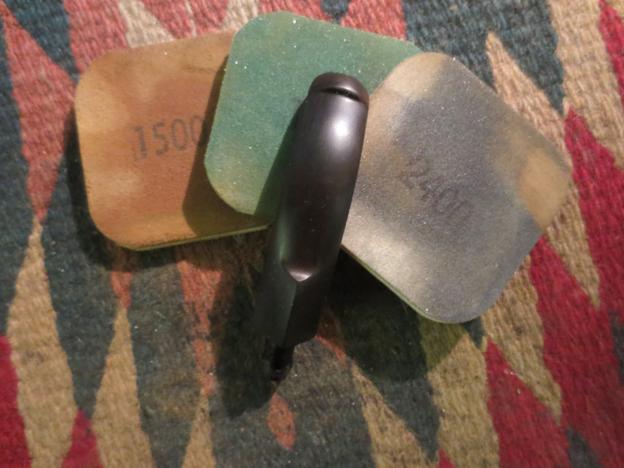
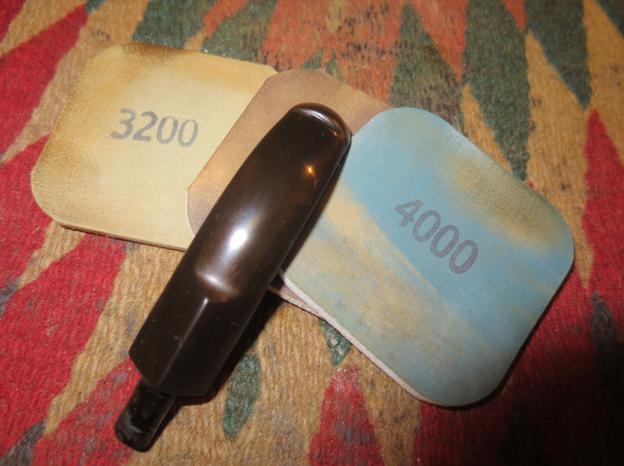
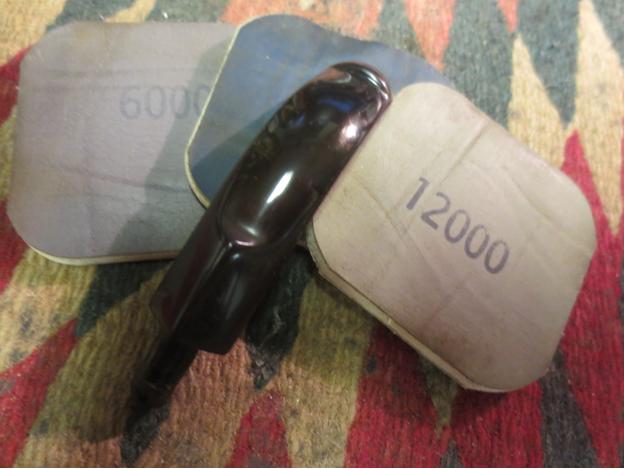
 I polished the stem with micromesh sanding pads to remove the scratches and raise a shine on the vulcanite. I removed the brass washer on the stem and polished it with sandpaper. I reglued it onto the tenon with super glue. I wet sanded the stem with 1500-2400 grit pads and rubbed it down with Obsidian Oil. There were still scratches and also some oxidation. I repeated the sanding with those pads and then moved on to dry sanding with 3200-12000 grit pads. I rubbed it down with the oil after each set of three pads. After the final pad I gave it a final coat of the oil and set it aside to dry.
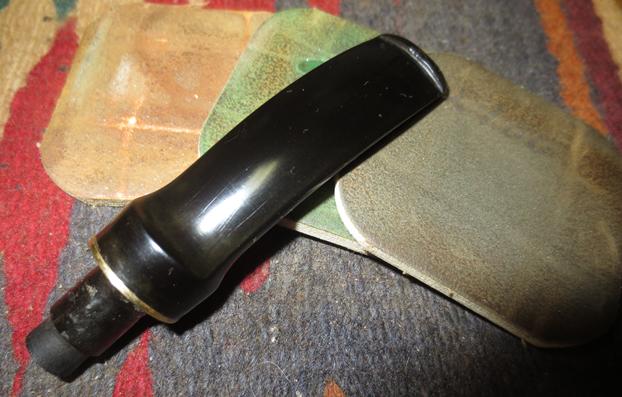
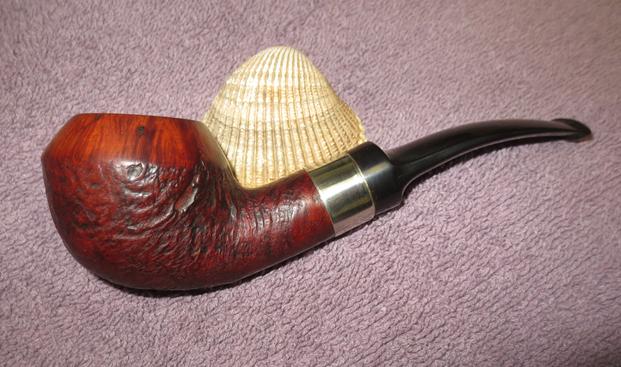
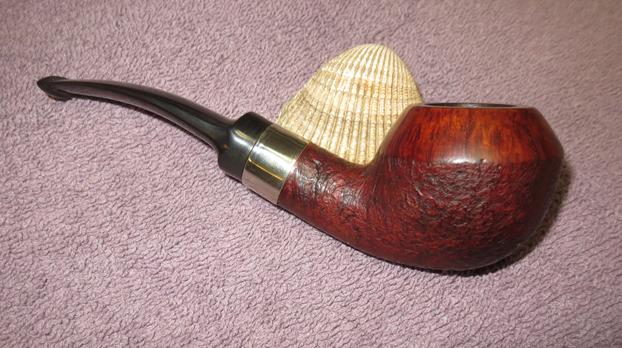
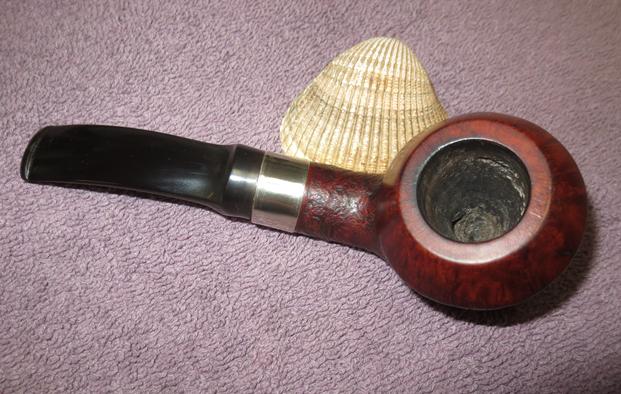
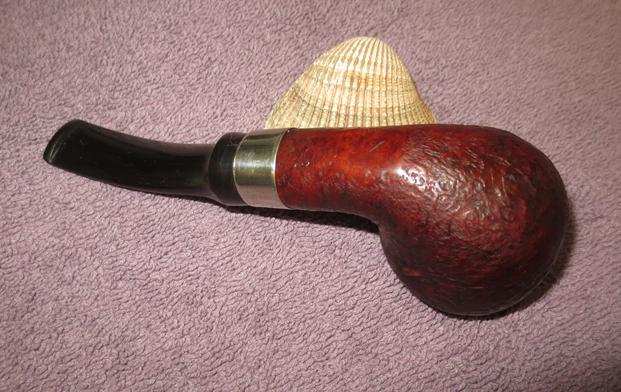
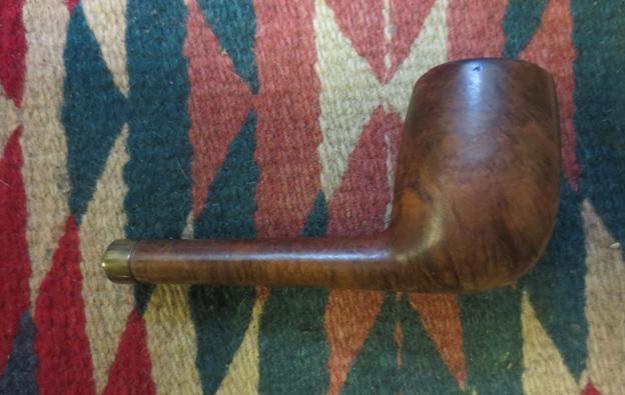
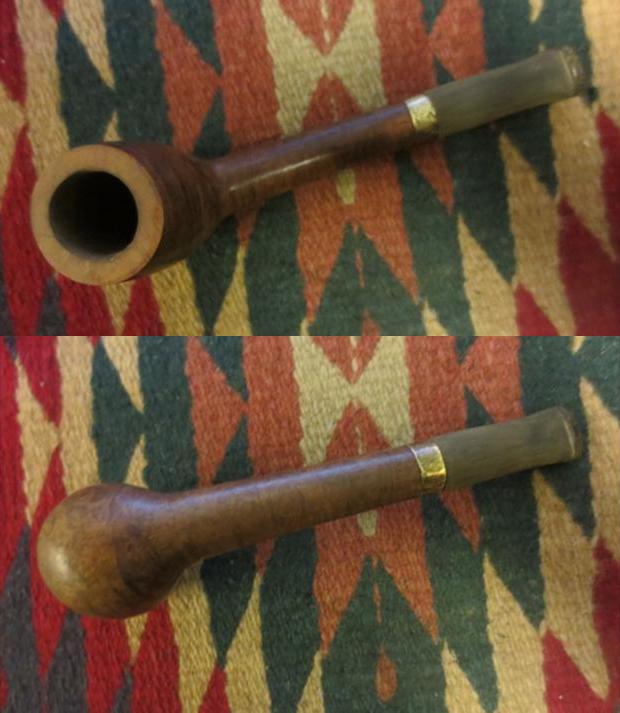
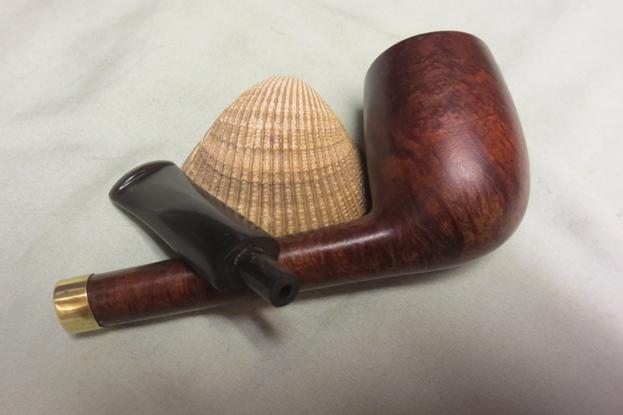
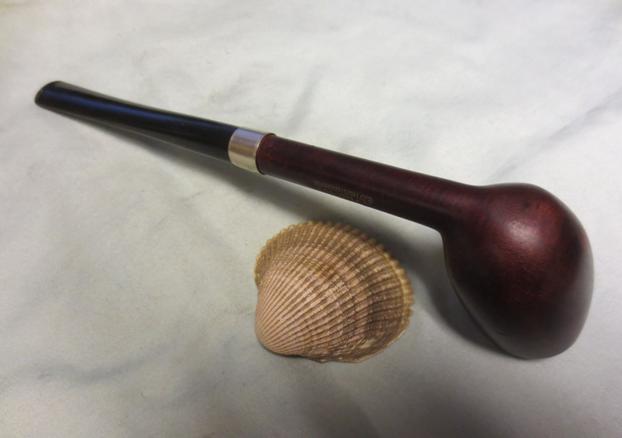
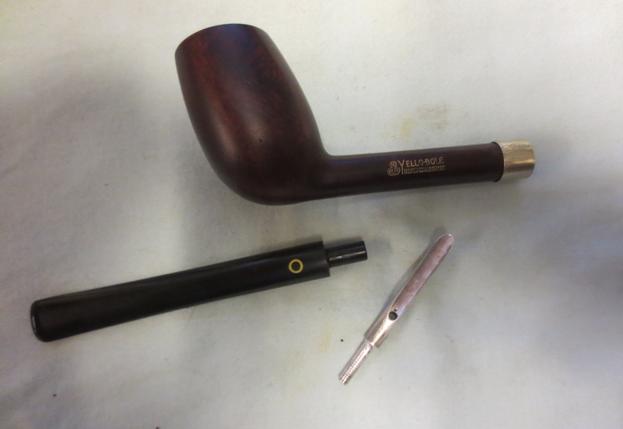
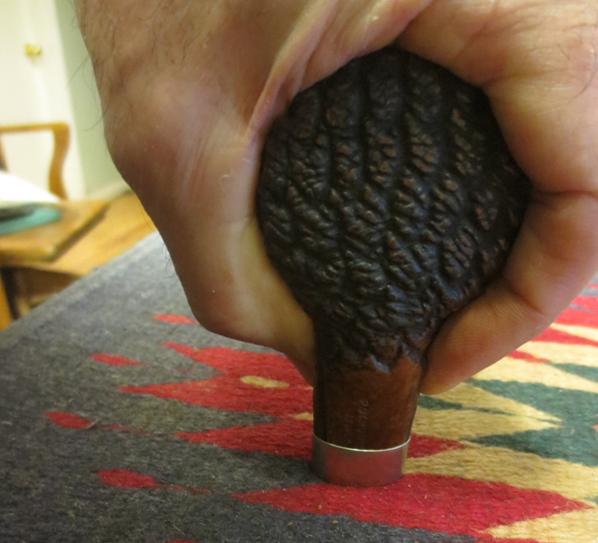
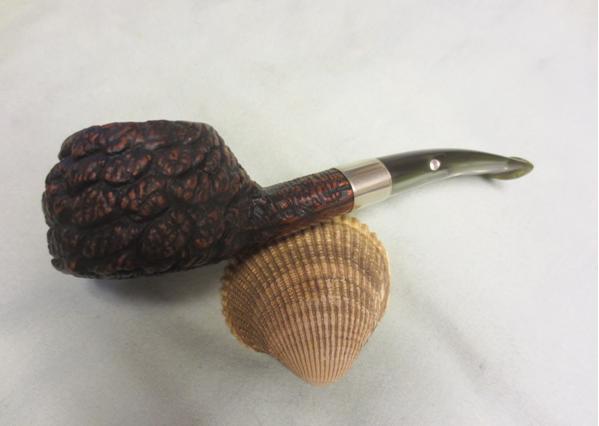
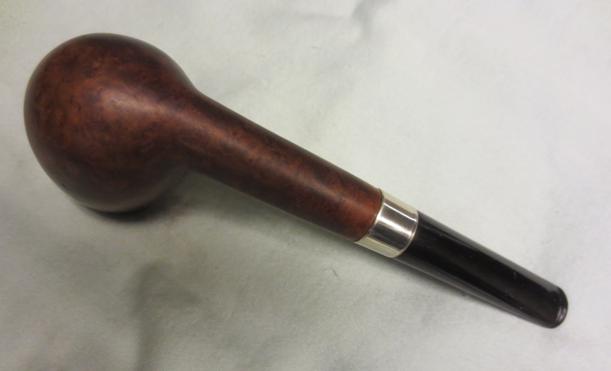
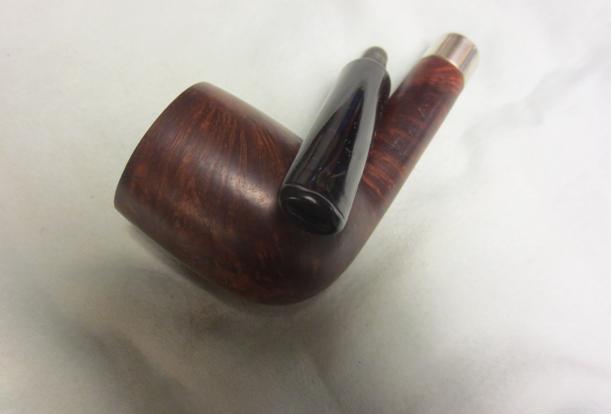
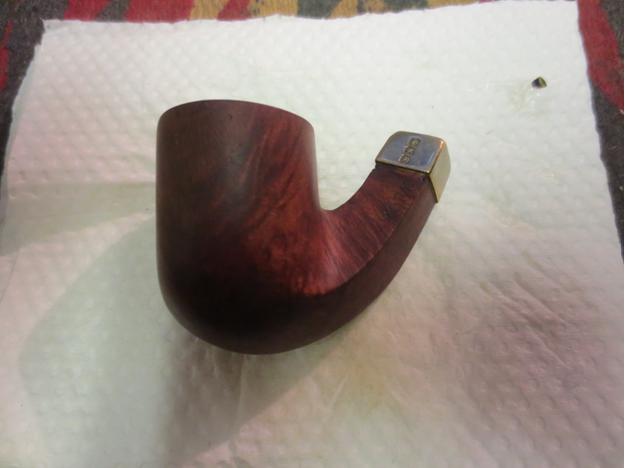
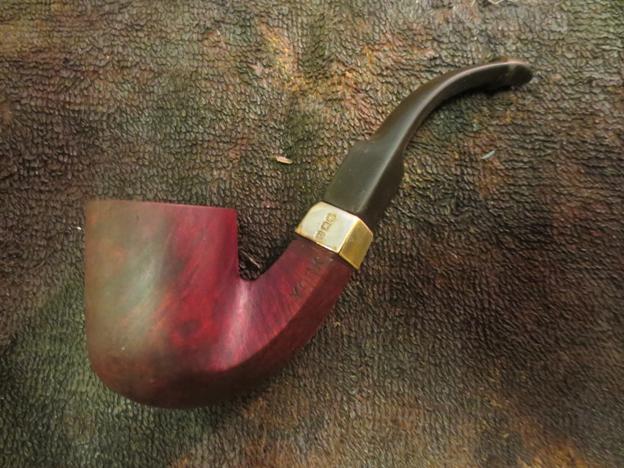
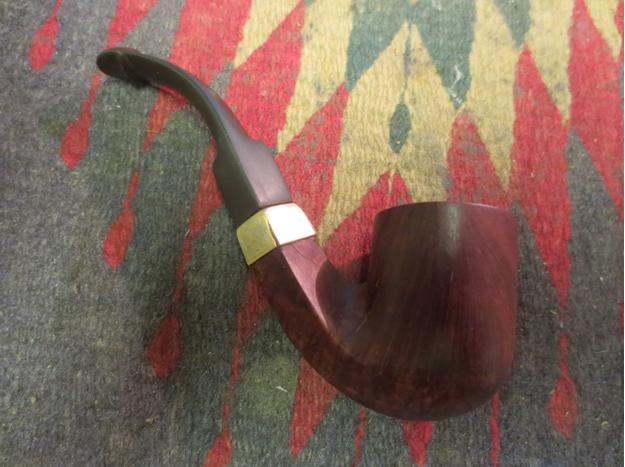
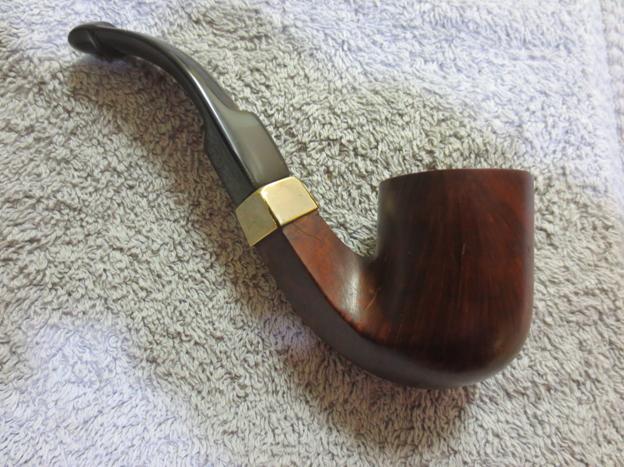
 I buffed the stem with Red Tripoli to try to remove the remaining oxidation and then buffed the entire pipe and stem with Blue Diamond polish on the buffing wheel. I polished the metal band with a jeweler’s polishing cloth. I gave the stem and bowl multiple coats of carnauba wax and buffed the pipe with a clean buffing pad to raise a shine. I hand buffed it with a microfibre cloth to deepen the shine on the briar. The finished pipe is shown in the photos below. It has come a long way from the way it looked when I received it to work on. I really like the looks and the shape of the pipe. I have now finished two of pipes that the pipe smoker dropped off for me to restore before he left on holiday. I look forward to seeing what he thinks of his pipes.