Tag Archives: removing oxidation

New Life for a Jeantet Neuilly ¾ Bent Apple


Blog by Steve Laug

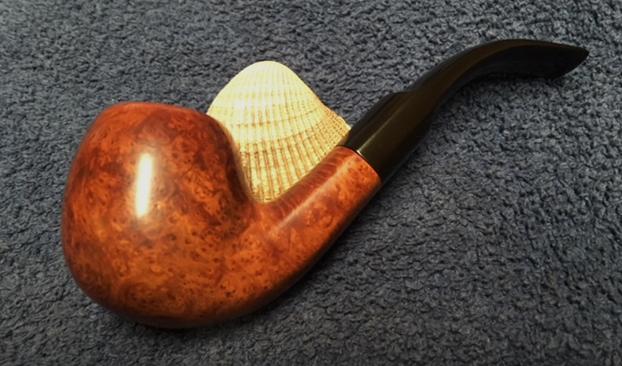
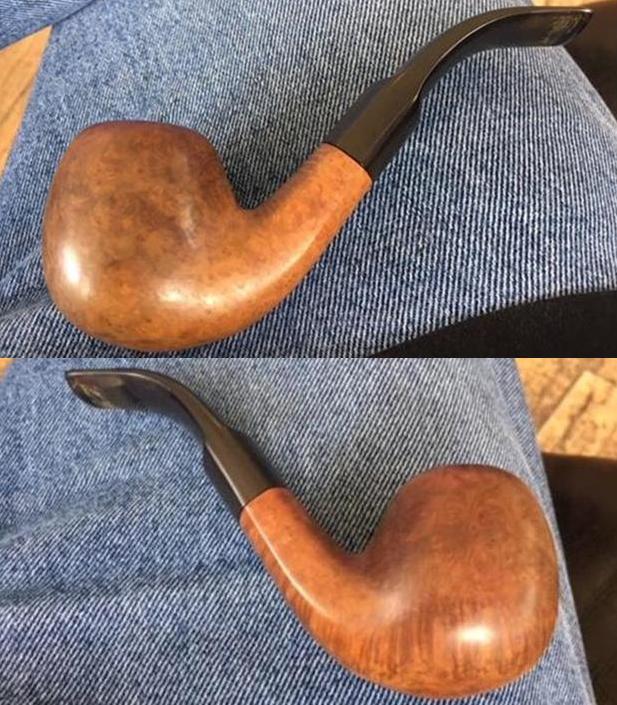
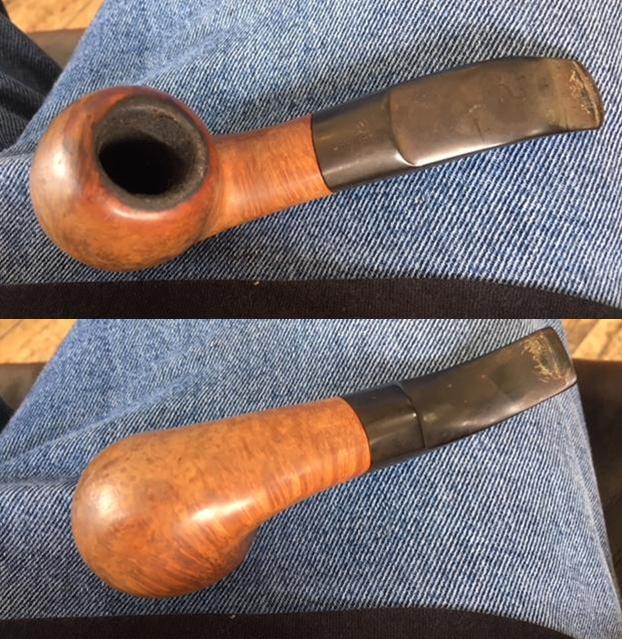
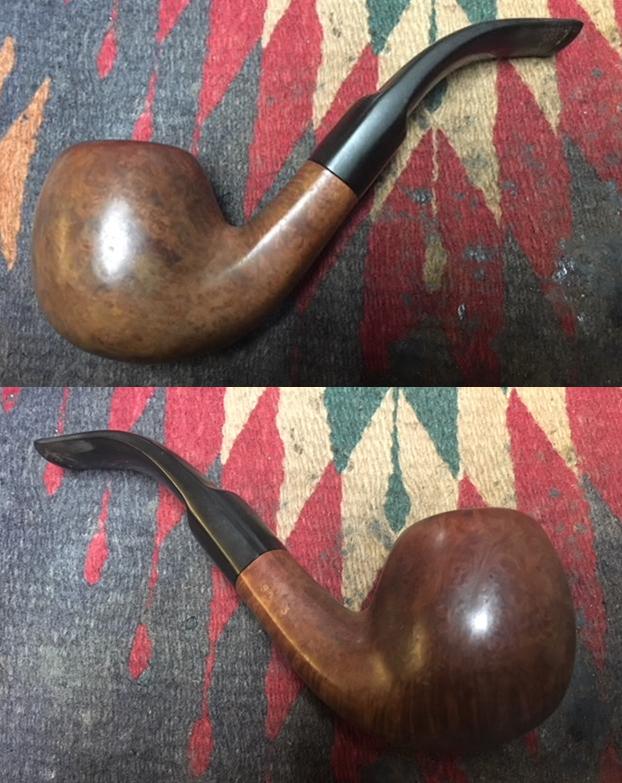
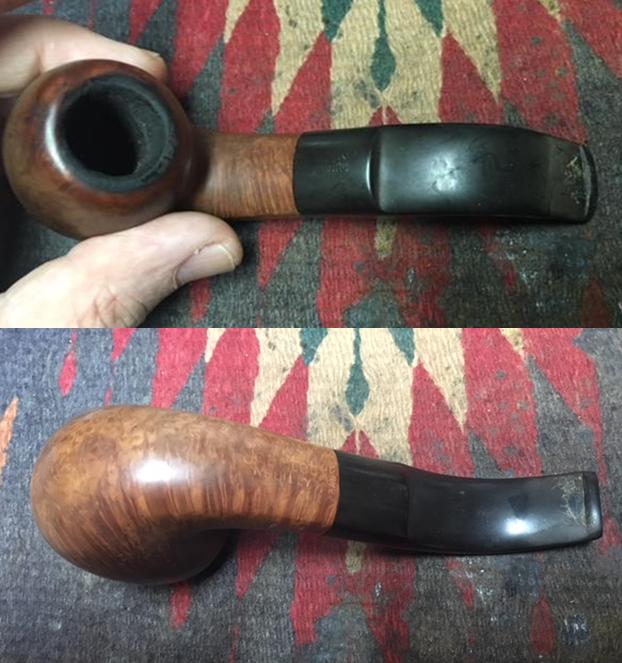
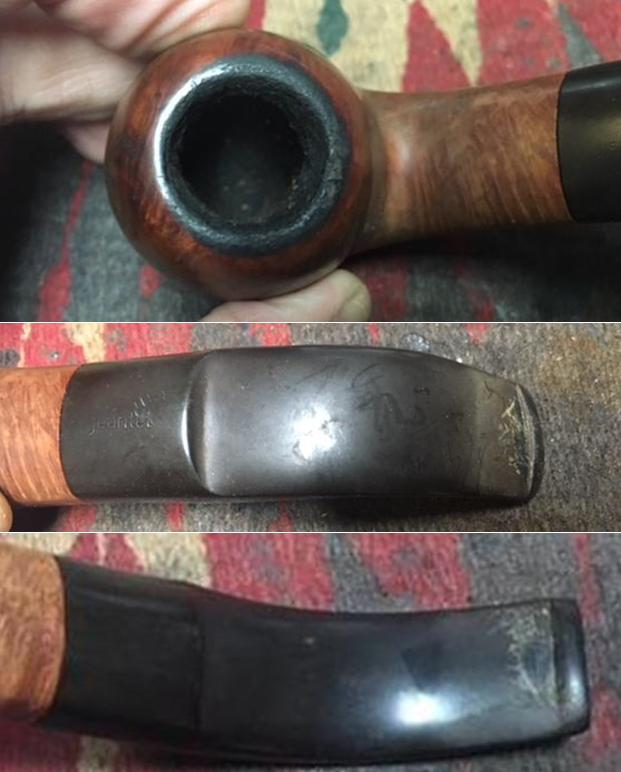
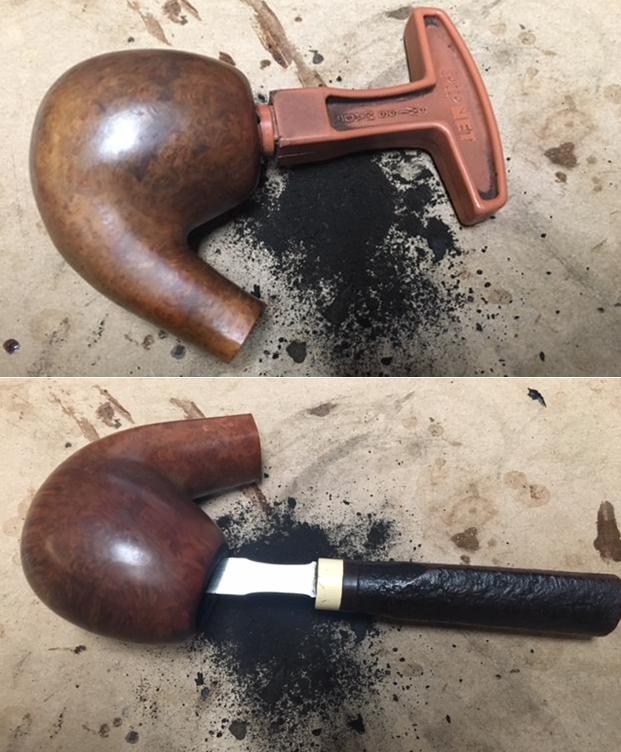
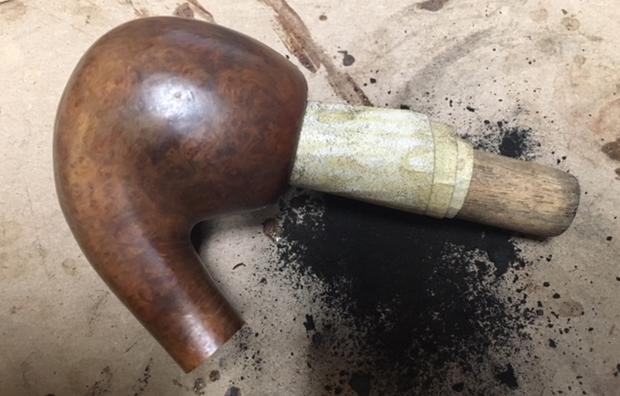
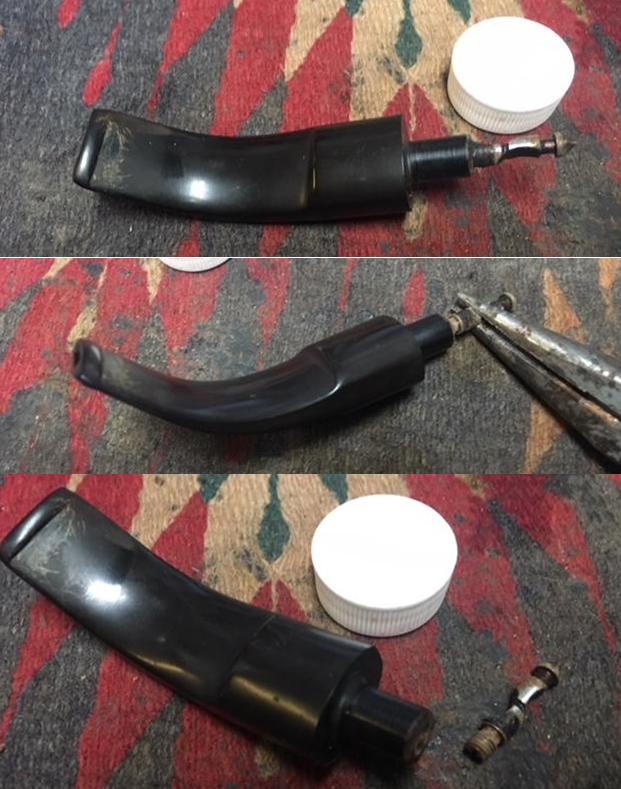
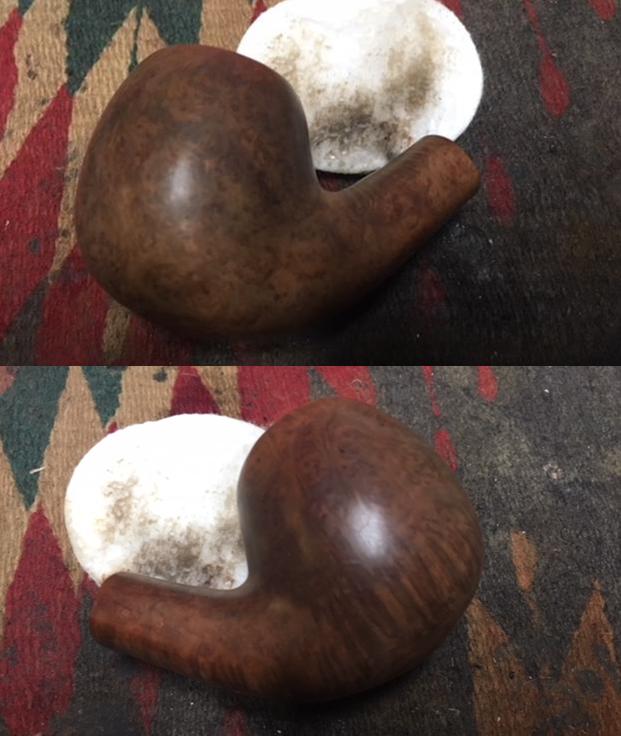
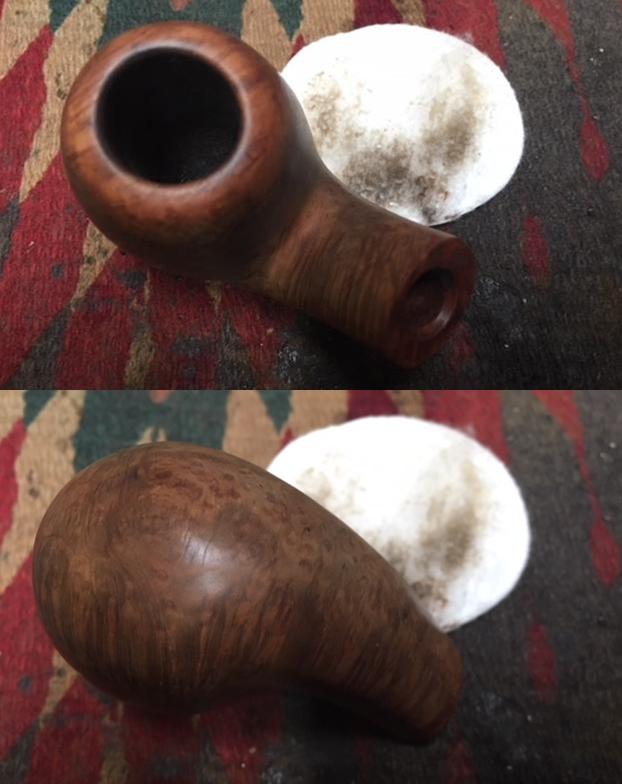
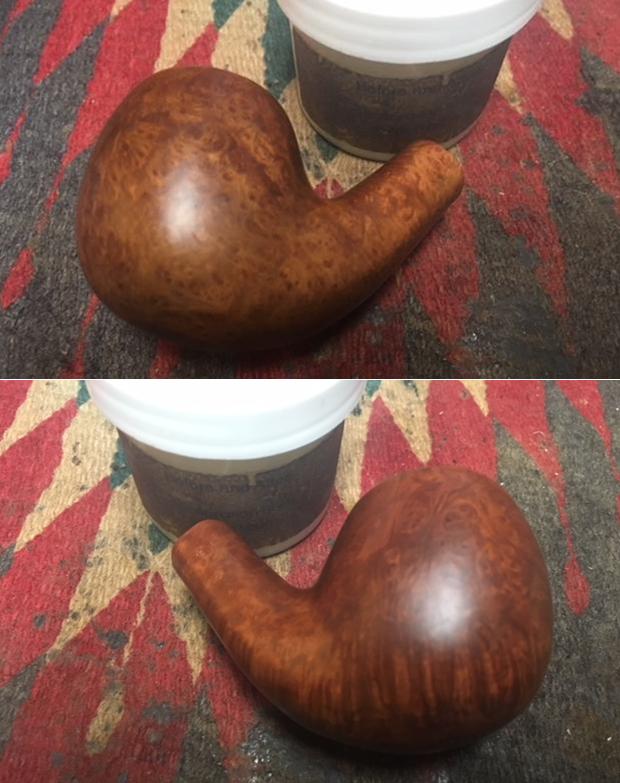
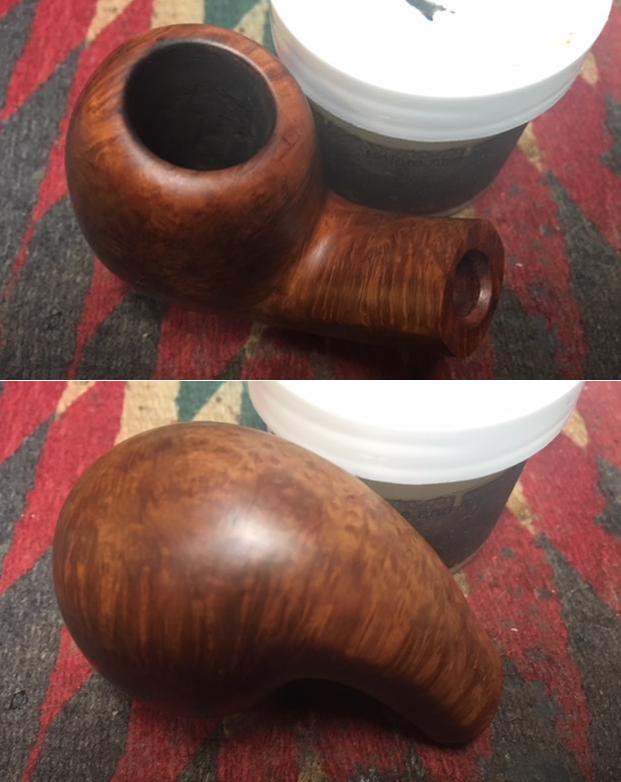
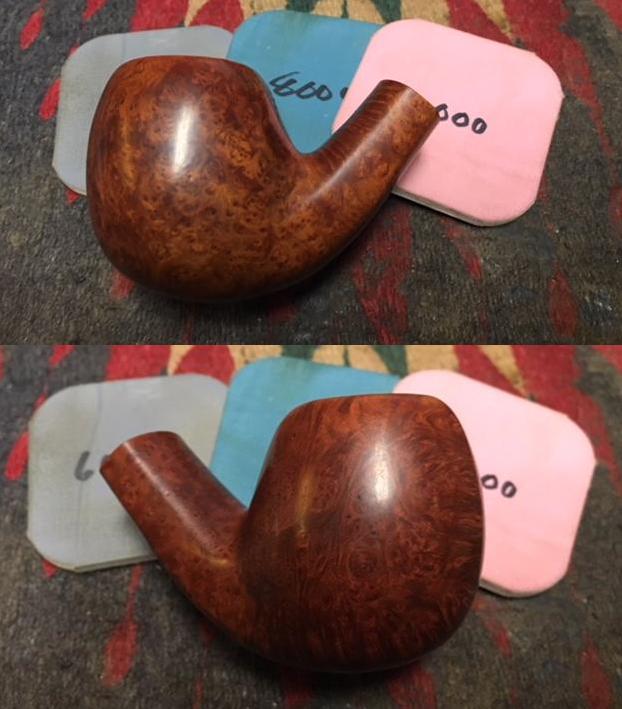
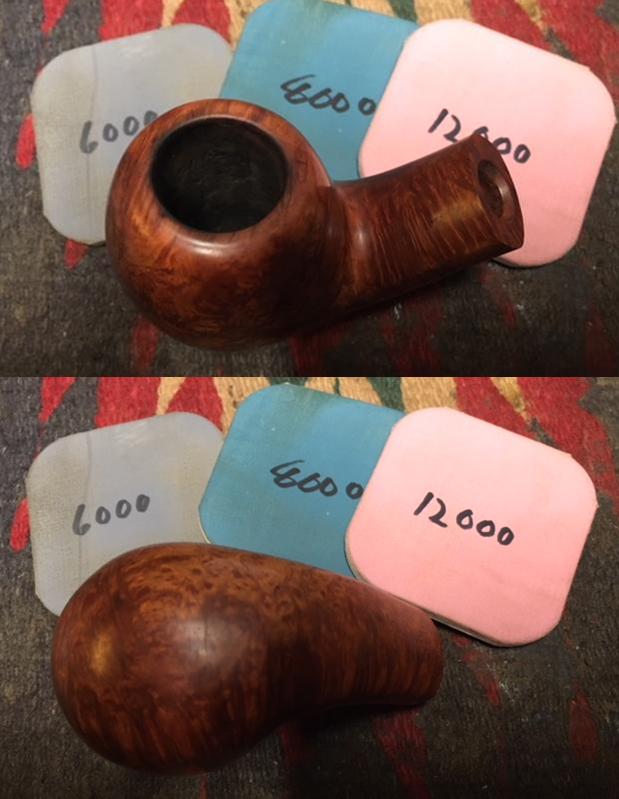
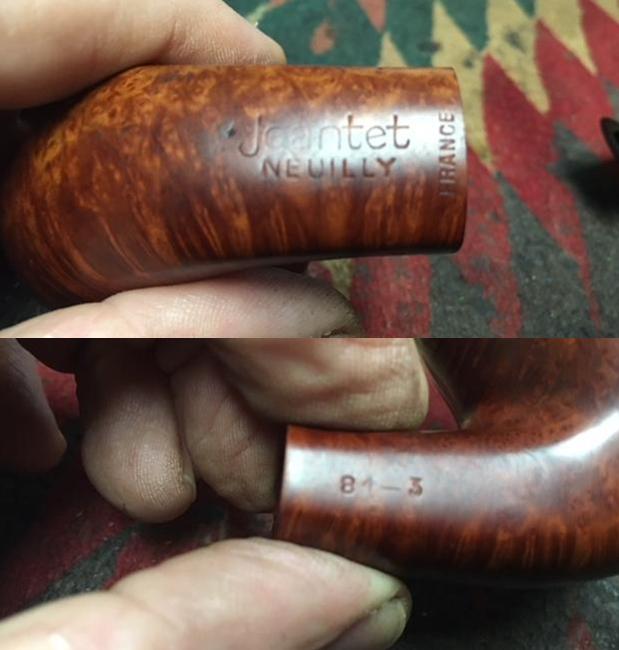
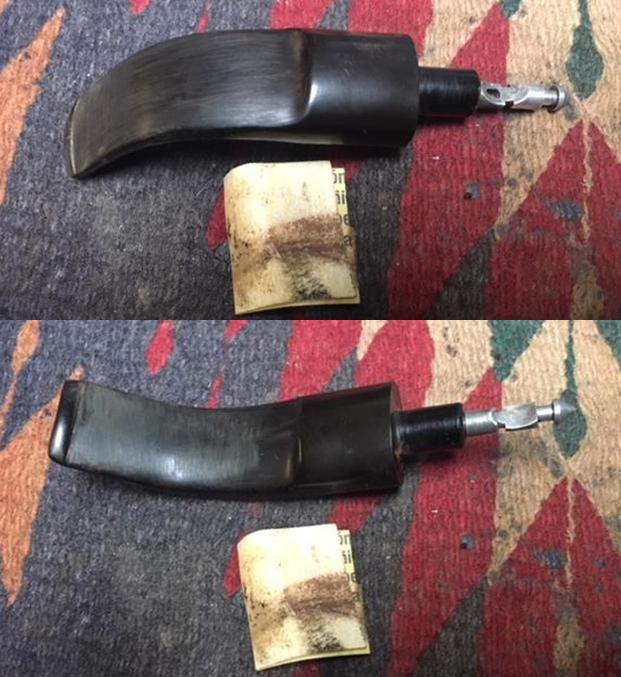
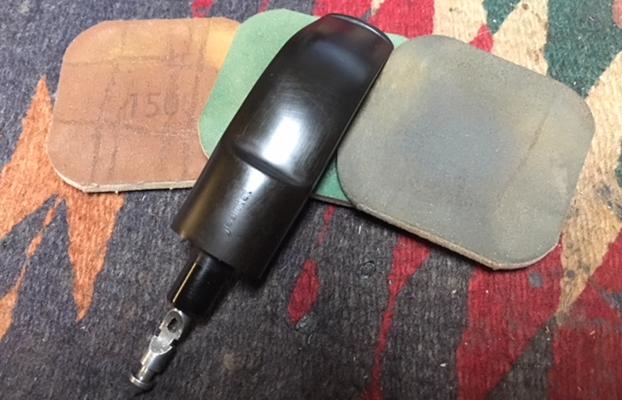
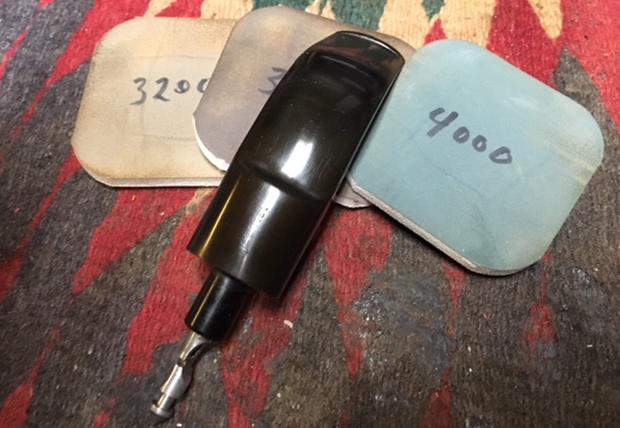
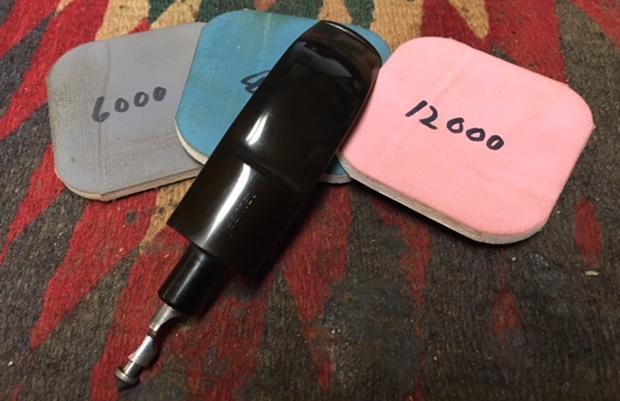
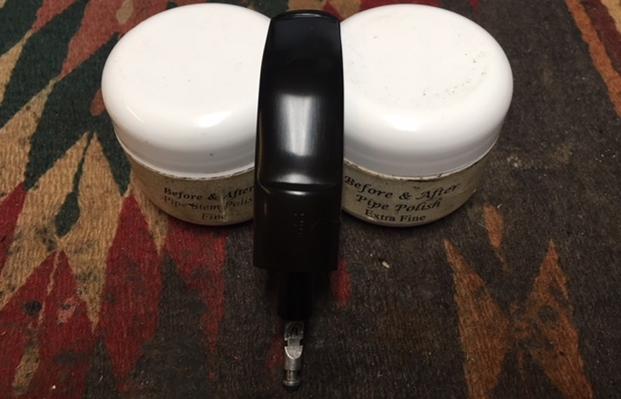
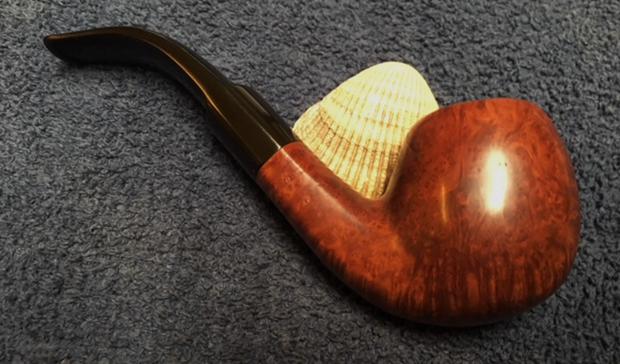
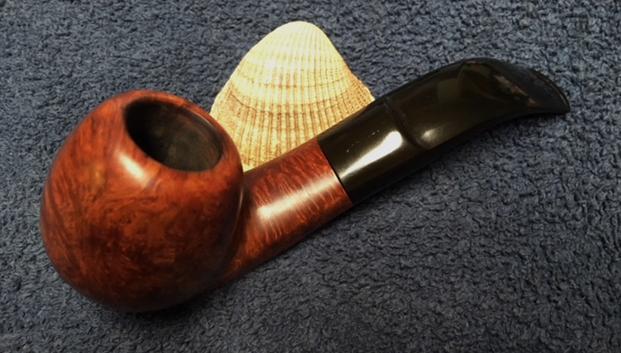
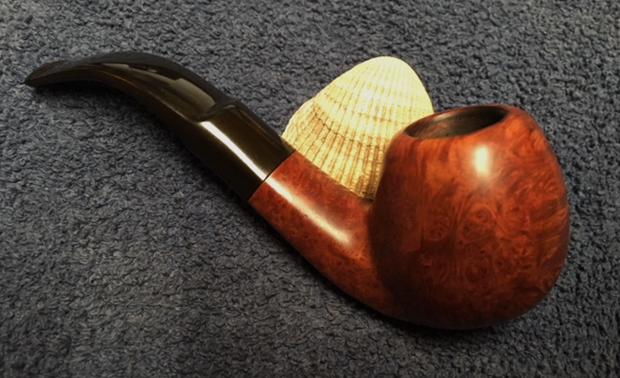
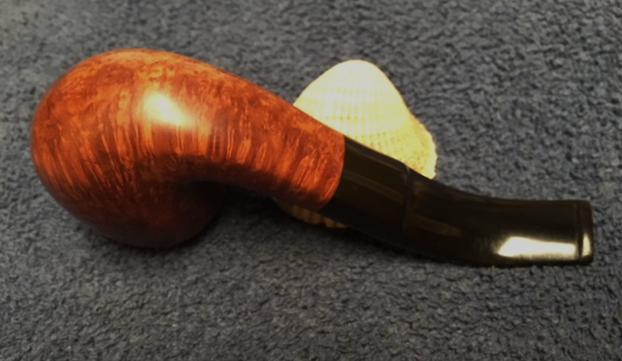
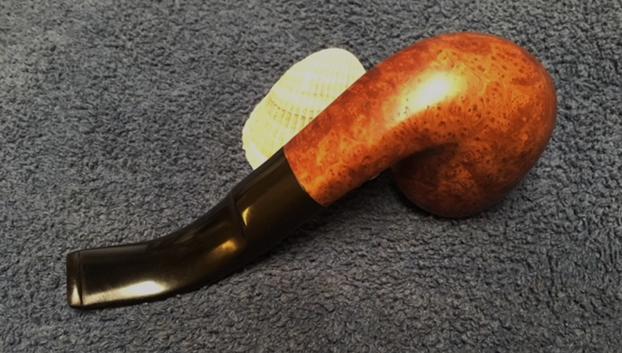
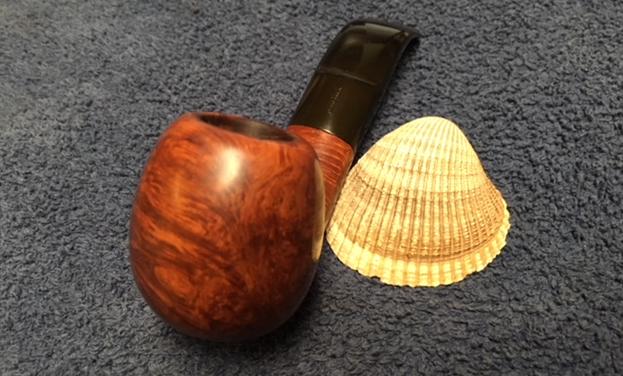
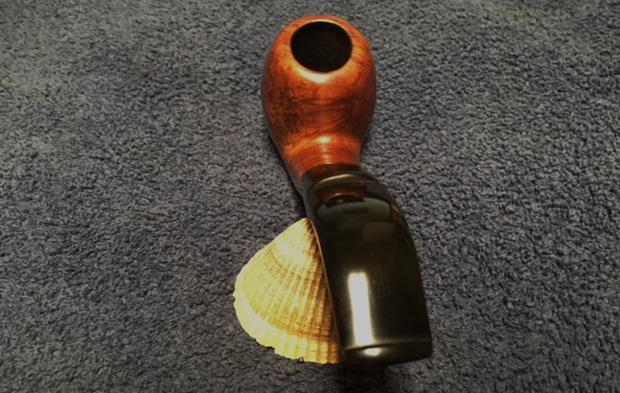
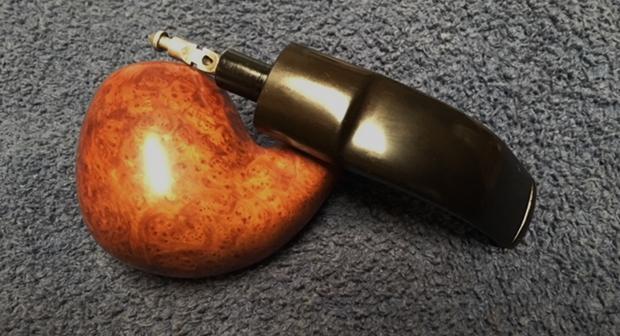
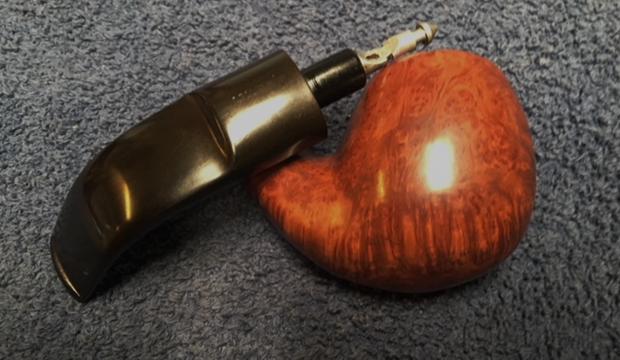
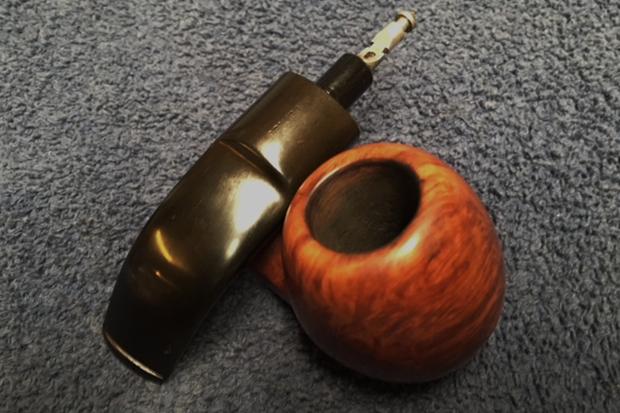
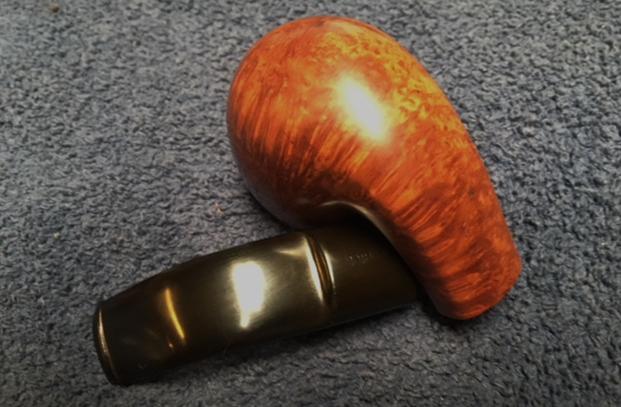
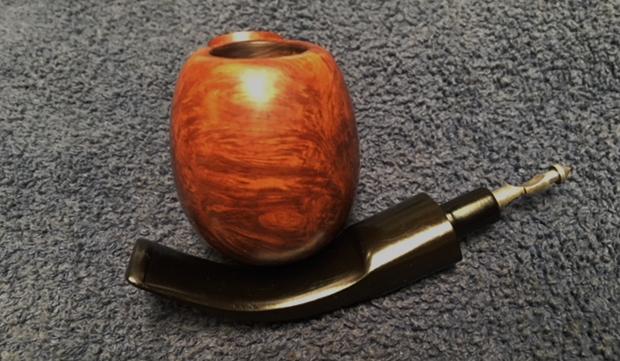
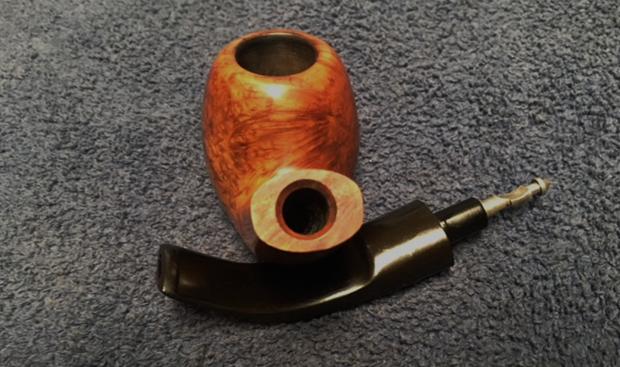
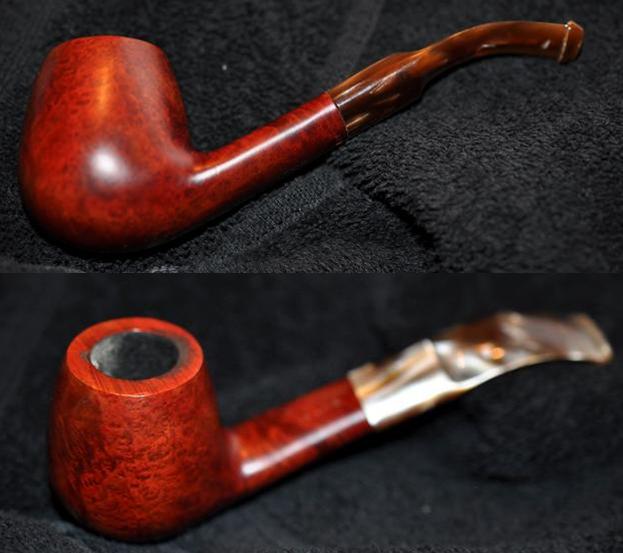
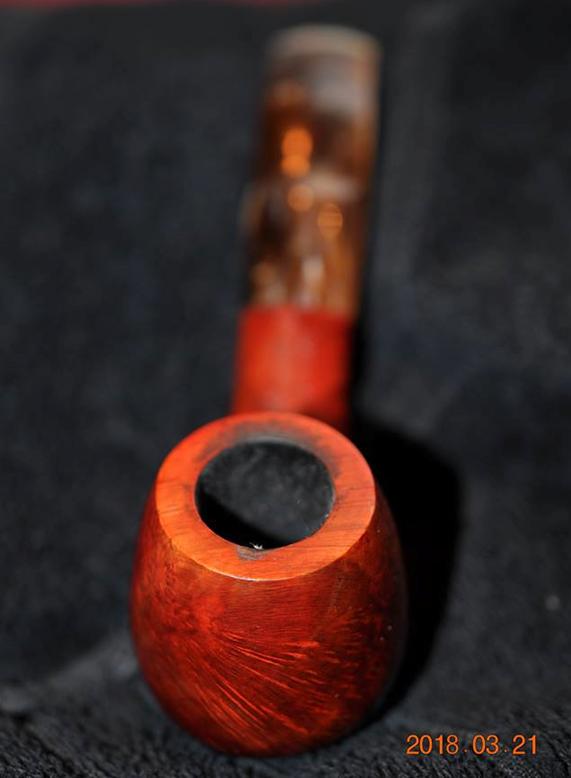
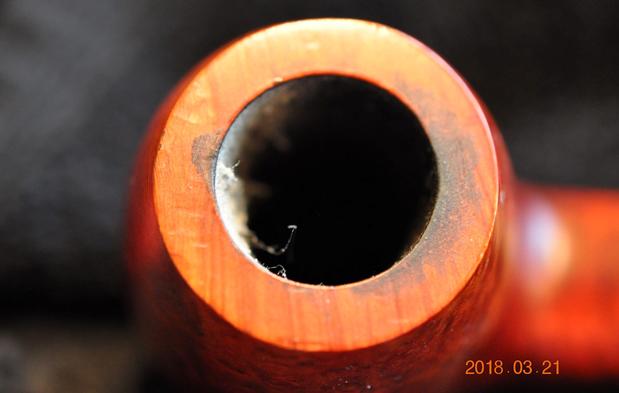
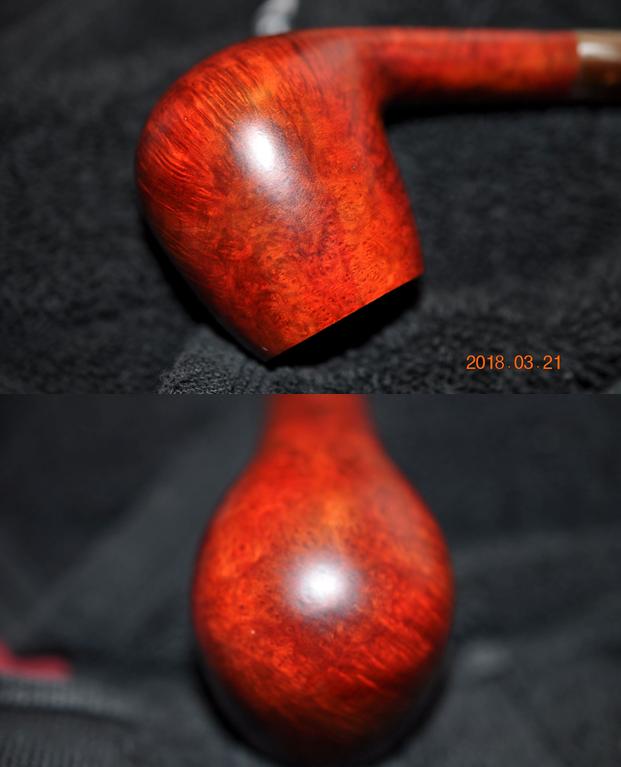
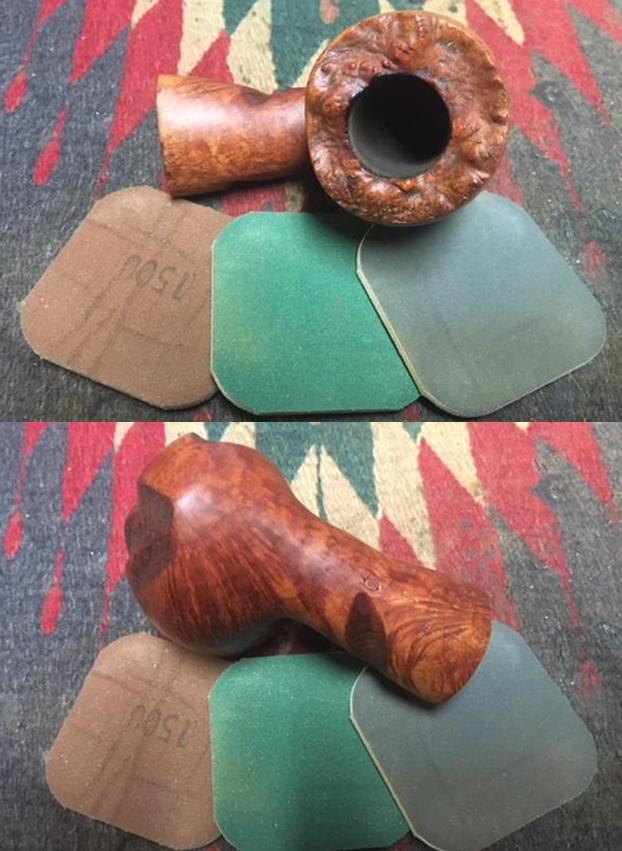
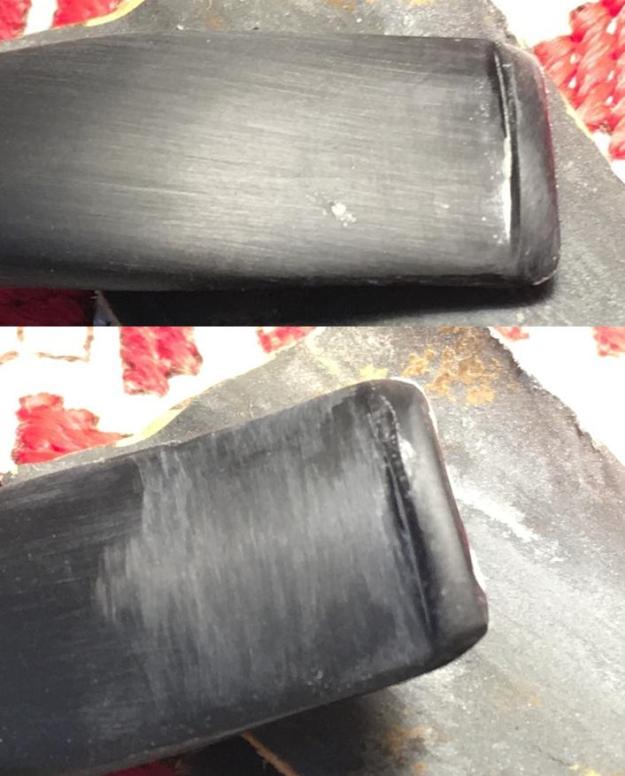
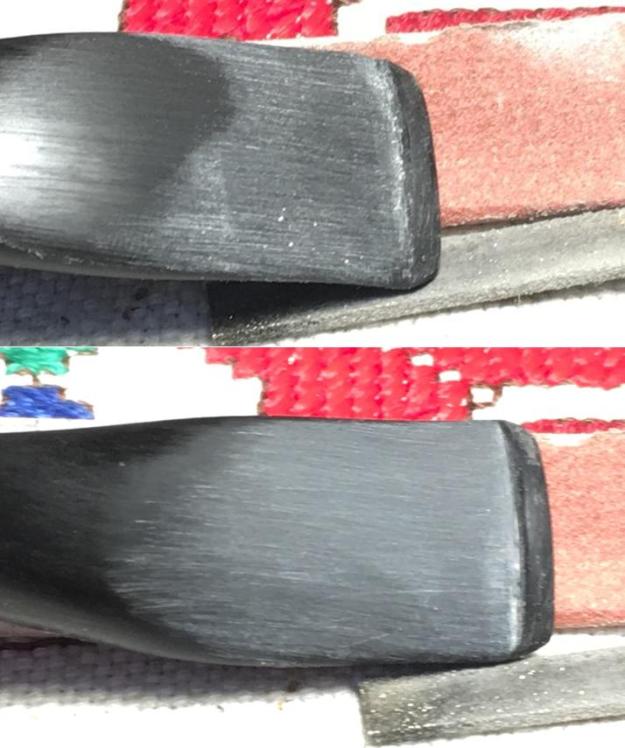
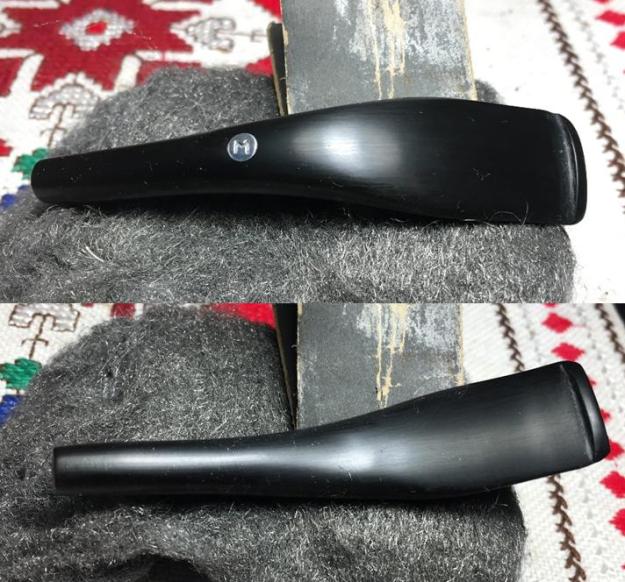
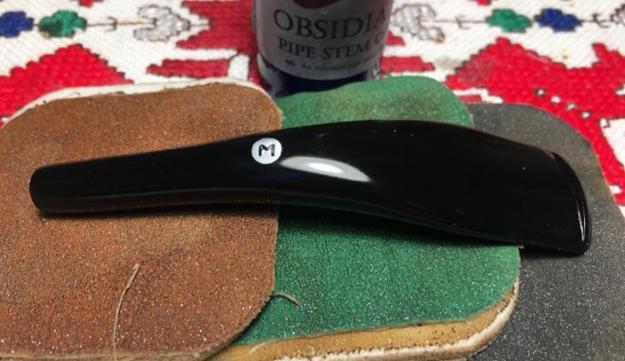
The next pipe on the work table is a pipe I picked up recently at St. Vincent de Paul thrift shop. I caught the bus to meet my daughter for lunch and while I waited for her to get off work I walked over to the nearby shop. I went through the display cupboards and found an interesting looking pipe. It was a ¾ bent pipe with a rounded edge rectangular shank pipe. It was priced pretty high for a used pipe but I struck a deal with the clerk and got it for a reasonable price. I took the pipe over to the coffee shop where my daughter works and took some photos. I took the pipe home and finally got around to working on it today. I took some photos of the pipe before I started to clean it up. It is stamped on the underside of the shank Jeantet over Neuilly and next to the shank/stem junction it is stamped France. It is also stamped on the right side of the shank with the numbers 81-3 It is a three-quarter bent apple-shaped pipe with a natural finish. The finish was dirty and stained from the grime of long handling without cleaning. The rim top had an overflow of lava from the thick cake in the bowl. It was dirty and hard to tell if the finish was nicked or damaged under the grime. The outer edge of the bowl is rounded over to the sides of the bowl. The stem was black vulcanite and had tooth chatter and some calcification on the top and underside near the button. It was stamped JEANTET on the top of the saddle stem. I took a closeup photo of the rim top to show the lava overflow from the thick cake in the bowl. The rounded outer edge of the rim carried down into the bowl. The inner and outer edges of the bowl look very good underneath the lava overflow. There is a thick cake in the bowl. The stem was in good condition. There was some tooth chatter and scratches on the top and underside near the button. There was some light oxidation on the top and underside of the stem. I reamed the bowl with a PipNet Pipe reamer to remove the majority of the cake in the bowl. I cleaned up the remnants of cake with a Savinelli Fitsall Pipe Knife. To finish the cleanup of the bowl I wrapped 220 grit sandpaper around a piece of dowel and sanded the walls of the bowl. I used a dental spatula to scrape the buildup of tars on oils on the walls of the mortise. I scrubbed the mortise and the airway in the shank with alcohol, cotton swabs and pipe cleaners. I took some photos of the pipe to show the condition at this point in the process.Before I could clean out the airway in the stem I needed to remove the caked and dirty stinger apparatus in the tenon. I used a pair of needle nose pliers to twist the stinger out of the tenon. I took a chance that it was threaded and it was not long before I had it free of the tenon.I cleaned up the aluminum tenon with 000 steel wool. I cleaned out the inside of the stinger and the airway in the stem with pipe cleaners, cotton swabs and alcohol.I scrubbed the top of the rim and the exterior of the bowl with isopropyl alcohol and cotton pads to remove the buildup of lava and grime on the bowl. I rubbed down the briar with Before & After Restoration Balm. I worked it into the smooth surface of the briar with my fingertips to clean, enliven and protect it. I let the balm sit for a little while and then buffed the bowl with a cotton cloth to raise the shine. The following photos show the bowl at this point in the restoration process. The grain is really starting to stand out. I polished the briar bowl and shank with micromesh sanding pads – wet sanding with 1500-2400 grit pads and dry sanding with 3200-12000 grit pads. I wiped the rim off after each sanding pad to remove the dust. The pipe really shone once it was polished. I took a photo of the stamping on the underside of the shank. It read Jeantet over Neuilly. Along the shank/stem junction it was stamped France. On the right side of the shank it read 81-3.I set the bowl aside and turned my attention to the stem. I used a folded piece of 220 grit sandpaper to sand out the tooth chatter and marks on both sides of the stem just ahead of the button. They were not deep so it did not take too much to remove them.The Jeantet stamp on the top of the stem is quite worn. There is not enough to recolour with white paint but enough that in the right light it is readable. I polished the stem with micromesh sanding pads – wet sanding with 1500-2400 grit pads and dry sanding with 3200-12000 grit pads. I wiped the stem down after each pad with Obsidian Oil to remove the sanding dust on the vulcanite. I finished polishing it with Before & After Pipe Stem Polish – both Fine and Extra Fine. When I finished with that I wiped it down with a final coat of Obsidian Oil and set it aside to dry. I polished stem and bowl with Blue Diamond to polish out the remaining small scratches. I gave the bowl and the stem multiple coats of carnauba wax. I buffed the pipe with a clean buffing pad to raise the shine. I hand buffed it with a microfiber cloth to deepen the shine. The pipe polished up pretty nicely. The natural oil finish works well when polished to really highlight the variety of grains around the bowl and shank. It has birdseye on the sides of the bowl and cross grain on the front (toward the right) and back of the bowl and on the shank both top and bottom. The polished black vulcanite stem works together with the beautiful grain in the briar to give the pipe a rich look. The finished pipe is shown in the photos below. The pipe is ready for a new home. The shape, finish and flow of the pipe and stem are very well done. The dimensions are Length: 5 1/2 inches, Height: 2 inches, Outside diameter of the bowl: 1 1/4 inches, Chamber diameter: 3/4 inches. I will be listing this one on the rebornpipes store shortly. Thanks for walking through the restoration with me as I worked over this beautiful little Jeantet Neuilly. 

Recommissioning a Sand Blasted Canadian – Made in London England


Blog by Dal Stanton

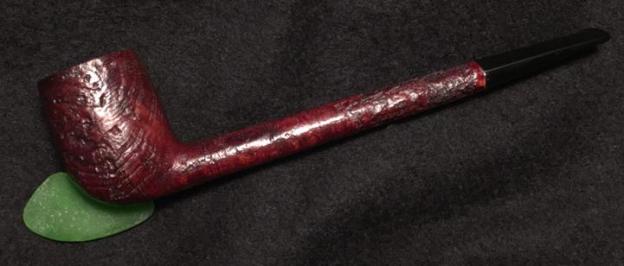
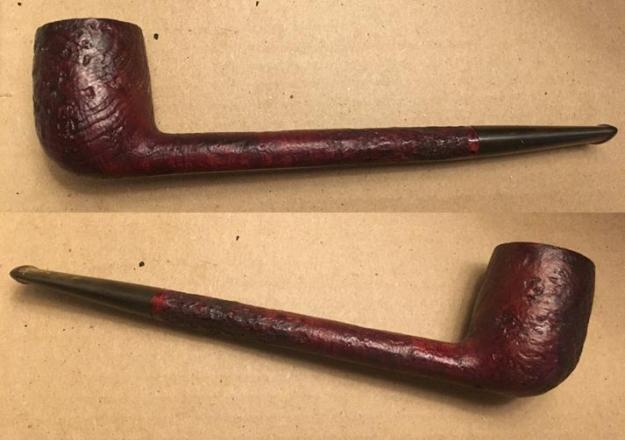
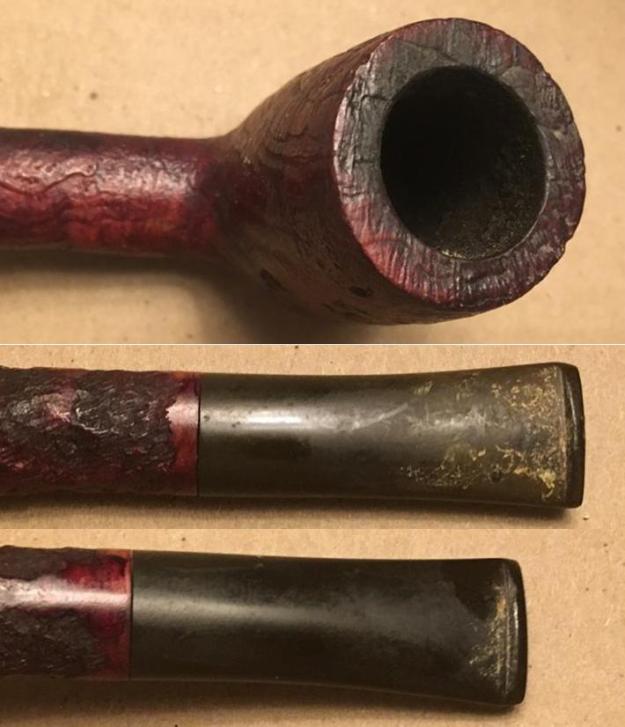
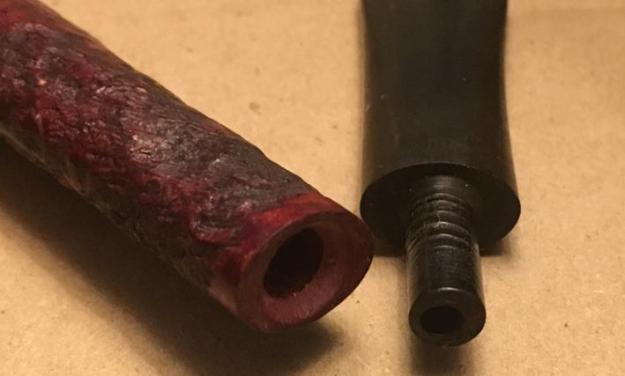
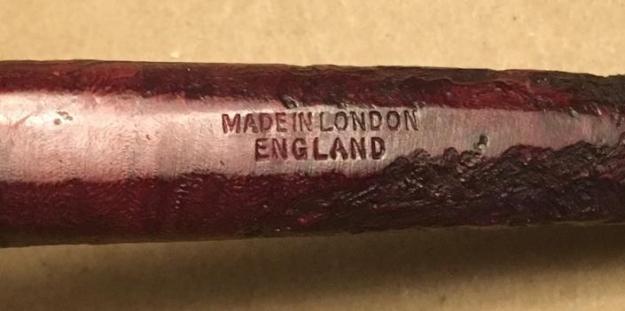
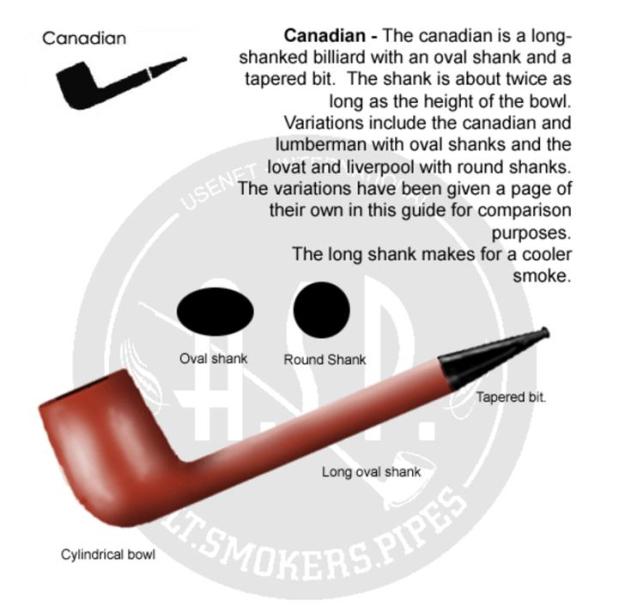
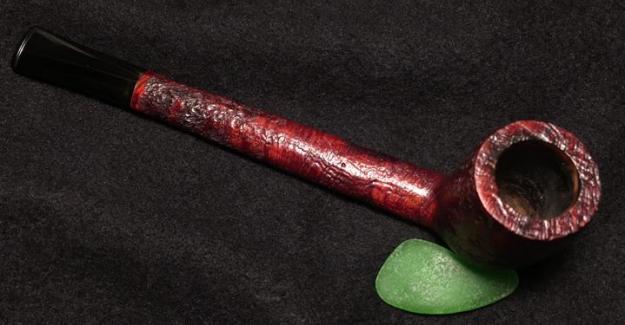
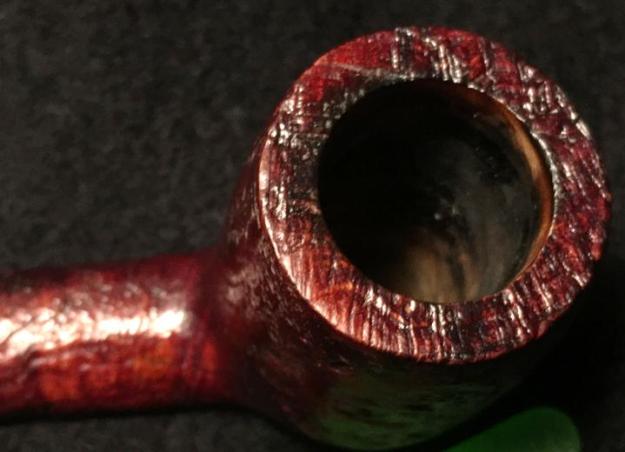
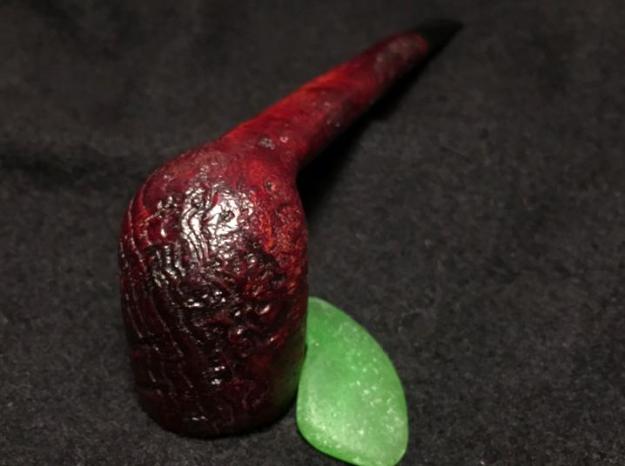
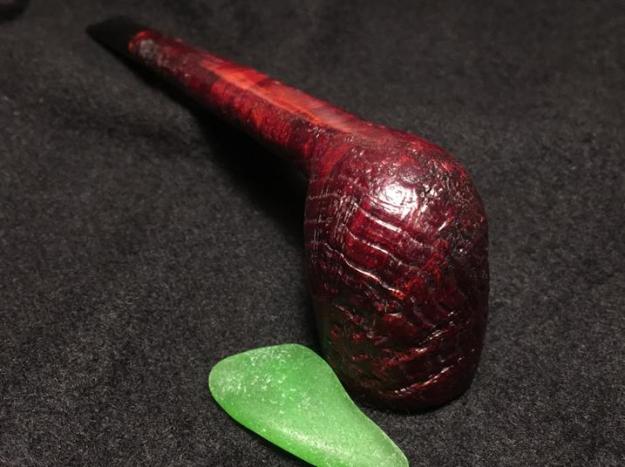
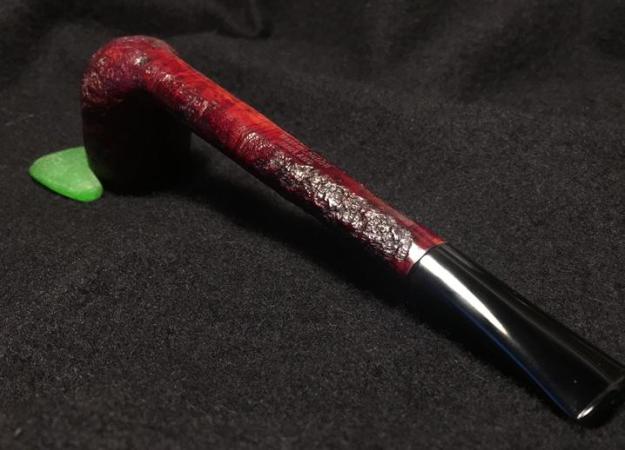
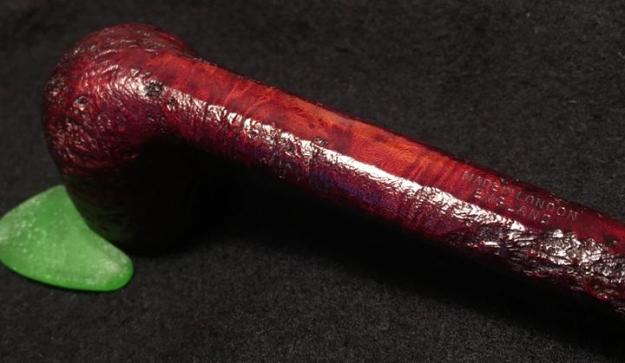
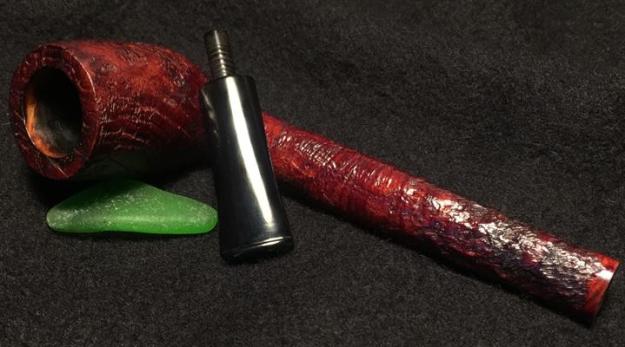
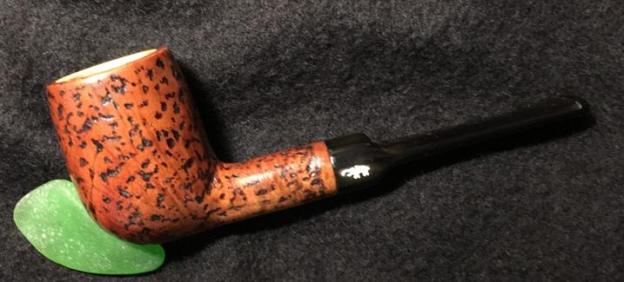
The Lot of 66 that I acquired last year continues to yield pipes to my worktable that are very collectible.  Robert fares from the US state of North Carolina and he has seen many of my online posts on Facebook Groups – The Gentlemen’s Pipe Smoking Society and The Elite Pipes & Tobacco Groups. This is the fellowship and camaraderie I have discovered in these groups among other pipe men and women which many find to be very rewarding.  With the internet being world-wide, the fellowship and relationships cross geopolitical borders and often the ‘Fellowship of the Pipe’ breaks down walls that are created because we live in a broken world.  I’ve commissioned pipes from “For ‘Pipe Dreamers’ Only!” that have gone all over the world and it’s been enjoyable to correspond with those who have received pipes from my worktable.  Robert saw an eye-catching Canadian and commissioned it and this unbranded, Made in London England is now on the worktable.  Here are the pictures Robert saw. Unfortunately, this Canadian has no identifying nomenclature other than MADE IN LONDON [over] ENGLAND.  Yet, the ‘flavor’ of the pipe has a quality classic feel to it.  The blasted surface is eye catching showing very distinctive grain in 3-D. This is not a poorly crafted pipe.Along with the attractive blasted finish, another reason this Canadian got Robert’s attention was the size: Length: 7 inches, Height: 1 3/4 inches, Bowl width 1 3/16, Chamber width: 3/4 inches, Chamber depth: 1 9/16 inches.  It’s a long Canadian of 7 inches which is what everyone wants in this shape family.  Working on a Canadian, I always find helpful Bill Burney’s Shapes Guide Pipedia article to understand the differences among the Canadian cousins.  The oval shank and tapered bit identify the Made in London England as a straight up Canadian.Looking at his condition, the chamber has a light layer of cake but the rim along with the entire external surface look great – but a good cleaning will refresh the blasted surface.  The stem has some oxidation and tooth chatter to address.  For all that I see, this restoration should be straight forward.

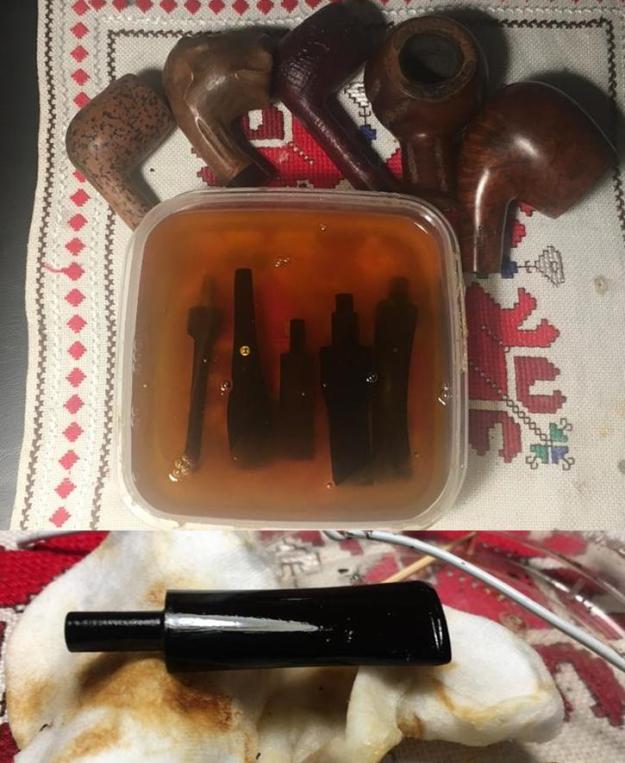
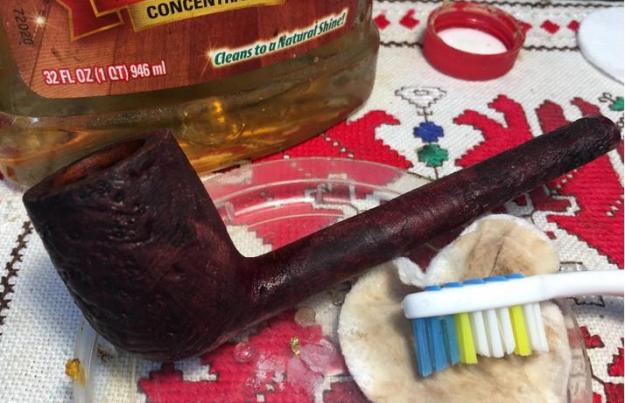
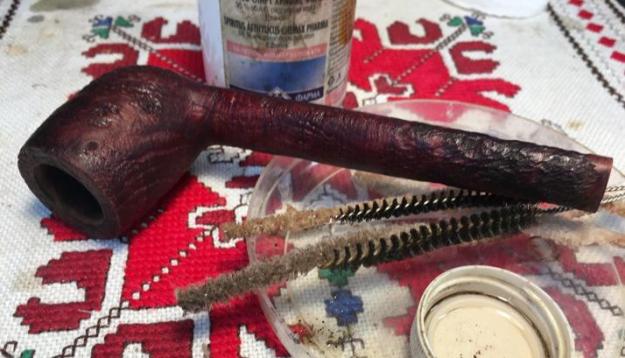
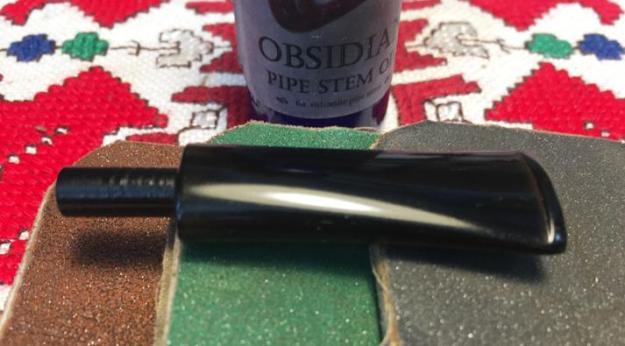
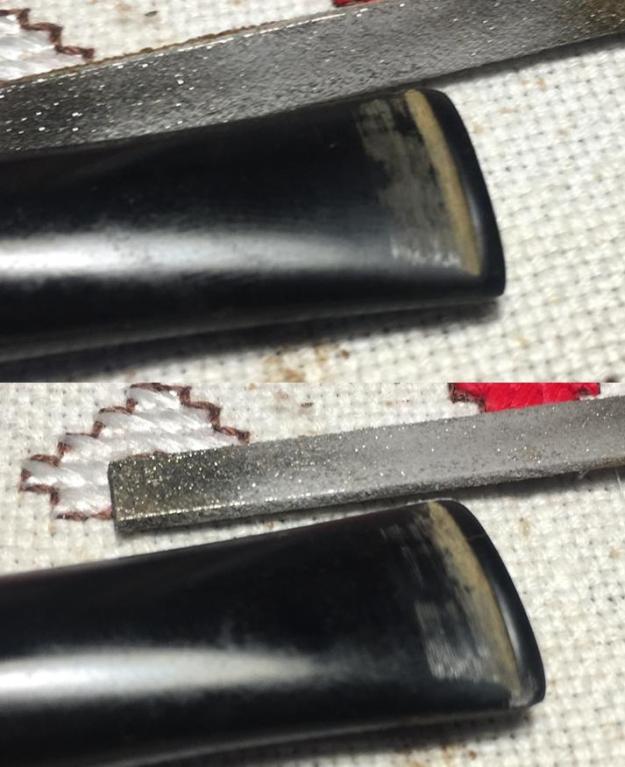
I begin by adding the Canadian tapered stem to a soak of Before & After Deoxidizer with other pipes’ stems that are in queue for restoration.  Before doing so, I use a pipe cleaner dipped in isopropyl 95% to clean the airway of the stem not only to clean the stem but also to keep the Deoxidizer from being contaminated. After soaking for some hours, I drain off the Canadian stem and wipe off the raised oxidation using a cotton pad wetted with light paraffin oil – Bulgaria’s version of mineral oil.  The Deoxidizer does a good job of raising the oxidation.After cleaning the stem of the Deoxidizer, I still detect some deep oxidation.  To deal with this I sand the stem first with 240 grit paper, also sanding out tooth chatter on the bit and button.  I follow by wet sanding with 600 grit paper to erase the 240 grit scratches.  I believe the oxidation has been removed.I put the stem aside for now and pick up the long, lanky Canadian stummel and begin by removing the light cake in the chamber.  I put down paper towel to help in cleaning. Using the Pipnet Reaming Kit, starting with the smallest blade head and moving to the larger using 2 of the 4 blades available in the Kit.  I follow this by using the Savinelli Fitsall Pipe Tool to scrape the chamber wall and to reach down into the chamber getting the harder to reach angles.  Finally, to bring out fresh briar in the chamber, I complete the reaming by sanding the chamber wall with 240 grit paper wrapped around a Sharpie Pen which gives some leverage.  To clean the carbon dust left behind I wet cotton pads with isopropyl 95% and wipe the chamber.  With a clean chamber, I’m able to inspect its condition and I see no crack or heat fissures.  It looks good! Next, I turn to the external blasted briar surface and clean using undiluted Murphy’s Oil Soap and cotton pads.  I also use a bristled tooth brush to scrub the textured surface.  There isn’t a lot of grime.  The pictures show the progress. Turning now to the internals of the Canadian stummel, my main arsenal are shank brushes to reach through the long shank.  I dip the shank brushes as well as pipe cleaners and cotton buds into isopropyl 95% to clean the airway.  It doesn’t take too long.With the stummel clean, I now continue work on the stem.  I begin by wet sanding using micromesh pads 1500 to 2400, following with dry sanding using pads 3200 to 4000 and then 6000 to 12000.  Between each set of 3 pads I apply a nice coat of Obsidian Oil to revitalize the vulcanite stem.  In the interest of full disclosure, after the completion of the first set of 3 micromesh pads, I detected oxidation at both upper and lower right-angle mergers of the stem and button.  I backtracked and used a flat needle file to sharpen the button lips – upper and lower and removed the residual oxidation.  I’m sparing you of the pictures that repeated the 240, 600 grit papers, 0000 steel wool and repeat of pads 1500 to 2400.  On we go! Turning back to the Canadian stummel, next I apply Before & After Restoration Balm to the blasted briar surface to recondition and revitalize it.  I like the Restoration Balm because it takes the briar where it is and deepens it – the change is subtle but noticeable.  I’m anxious to see what the Restoration Balm does with a blasted surface.  Most of my experience using it has been with smooth briar.  I squeeze some Balm on my finger and work it into the briar surface.  I make sure to work the balm into the nooks and crannies of the textured blasted surface.  With the amount of briar real estate of this Canadian it takes 3 ‘squeezes’ of Balm to cover the surface adequately.  After applying the Balm, I let the stummel rest for 10 minutes allowing the Balm to do whatever it does!  I take a picture before application, during the 10-minute rest and after.  You be the judge! After rejoining the Canadian stem and stummel, I mount a cotton cloth buffing wheel on the Dremel, set the speed at 40% of full power and apply Blue Diamond compound to both stem and stummel.  Since I live in an apartment on the 10th floor of a former Communist blok apartment building and have limited space, one of the advantages I’ve discovered by using a Dremel as my main workhorse tool for buffing and drilling is that the buffing wheels are very small – about an inch in diameter. This allows me to surgically apply compounds and wax.  This is especially helpful for a blasted or rustified surfaces like I’m working on now.  I’m able to pivot the buffing wheels orientation to move along with the grain and not against it.  This helps in spreading wax without it getting bogged up on the rougher surface.  After completing the application of Blue Diamond compound, I buff the pipe well with a felt cloth to remove the compound dust before waxing. Next, I mount another cotton cloth buffing wheel onto the Dremel, maintain 40% full power speed, and I apply several coats of carnauba wax to the blasted Canadian briar surface and vulcanite stem.  I finish the restoration by giving the pipe a hearty hand buffing using a microfiber cloth.

The grain on this blasted Canadian Made in London England is exceptional.  Though it has no branding, I’m guessing it was produced in a factory producing other classic English pipes like GBD or BBB.  This pipe demonstrates the classic long lines of a Canadian and therefore it is most definitely a keeper and will be a great addition to one’s collection.  Robert commissioned this Canadian from For ‘Pipe Dreamers’ Only! and will have first opportunity to acquire it in The Pipe Steward Store.  This Canadian benefits our work here in Bulgaria with the Daughters of Bulgaria – helping women and girls who have been trafficked and sexually exploited.  Thanks for joining me!

Kathy’s Dad’s Pipes – Restoring a Barontini De Luxe Brandy


Blog by Steve Laug

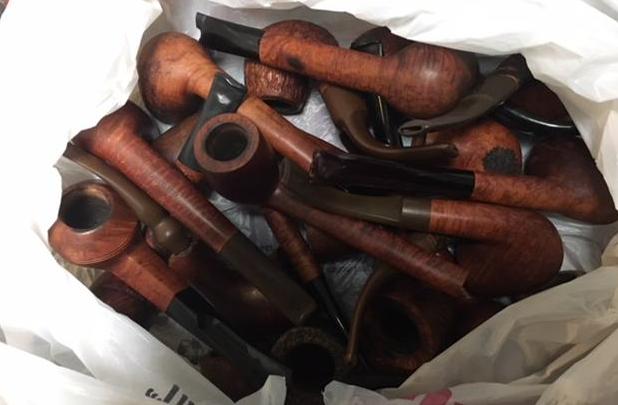
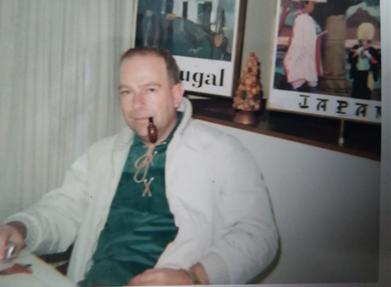
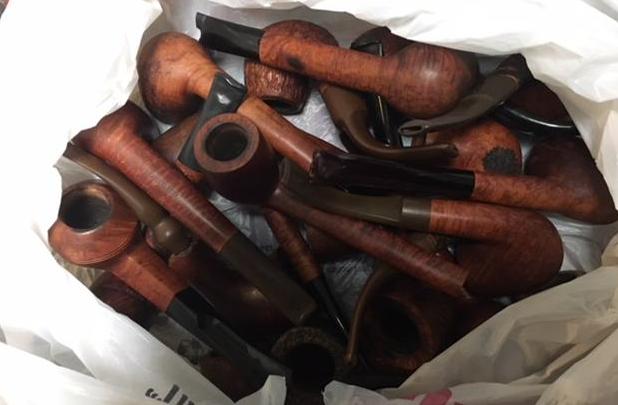
The next pipe on the work table is also from George Koch’s estate. It is a Barontini De Luxe Brandy shaped pipe with a quarter bend. The pipe was one of many that came to my brother and me in several shipments of pipes from George’s daughter Kathy. When Jeff got each box the pipes were well wrapped and packed. Jeff unwrapped them and took the following photo to give an idea of the volume of the pipes that we purchased. The Barontini came in mixed in a box of pipes much like the one below.In each of the previous blogs that I have written on the restoration of George’s pipes I have told his story. To me it is important to keep the story attached to the pipes that came from his collection. Each pipe I work on I remind myself of the man and in the work give a remembrance to the pipeman who owned these pipes. Having held a large number of his pipes in my hand and having a pretty good feel for the shapes, colour and stems that he liked, I can almost imagine George picking out each pipe in his collection at the Malaga shop in Michigan. I am including Kathy’s brief bio of her father and a photo of her Dad enjoying his “Malagas”. Here is George’s bio written by his daughter.

Dad was born in 1926 and lived almost all his life in Springfield, Illinois. He was the youngest son of German immigrants and started grade school knowing no English. His father was a coal miner who died when Dad was about seven and his sixteen year old brother quit school to go to work to support the family. There was not much money, but that doesn’t ruin a good childhood, and dad had a good one, working many odd jobs, as a newspaper carrier, at a dairy, and at the newspaper printing press among others.

He learned to fly even before he got his automobile driver’s license and carried his love of flying with him through life, recertifying his license in retirement and getting his instrumental license in his seventies and flying until he was grounded by the FAA in his early eighties due to their strict health requirements. (He was never happy with them about that.) He was in the Army Air Corps during World War II, trained to be a bomber, but the war ended before he was sent overseas. He ended service with them as a photographer and then earned his engineering degree from University of Illinois. He worked for Allis Chalmers manufacturing in Springfield until the early sixties, when he took a job at Massey Ferguson in Detroit, Michigan.

We lived in Livonia, and that’s where his love for Malaga pipes began. After a few years he returned to Allis Chalmers and we moved back to Springfield. I remember that when we went back to Michigan to visit friends, Dad had to go to the Malaga store and acquire a few new pipes. Many a year I wrote to Malaga and they picked out a pipe for me to purchase that I could give Dad for a Christmas or birthday present. He was always pleased. His favorites were the straight stemmed medium sized bowl pipes, but he liked them all. 

He had some other pipes, but the Malagas were his favorites. I remember him smoking them sitting in his easy chair after work, with feet up on the ledge by the fire burning in the fireplace.  Growing up it was my job to clean them and he liked the inner bowl and stem coated with Watkins vanilla, leaving a little of that liquid in the bowl to soak in when I put them back on the rack. Dad quit smoking later in life and so they’ve sat on the racks for many years unattended, a part of his area by his easy chair and fireplace. Dad passed when he was 89 years old and it finally is time for the pipes to move on. I’m very happy they are being restored by you and your brother and hope they find homes who enjoy them as much as Dad did. Thank-you for your care and interest. — Kathy, the oldest daughter

Each blog I have posted I thank Kathy for providing this beautiful tribute to her Dad. Jeff and I appreciate your trust in allowing us to clean and restore these pipes. We are also trusting that those of you who are reading this might carry on the legacy of her Dad’s pipes as they will be added to the rebornpipes store once they are finished.

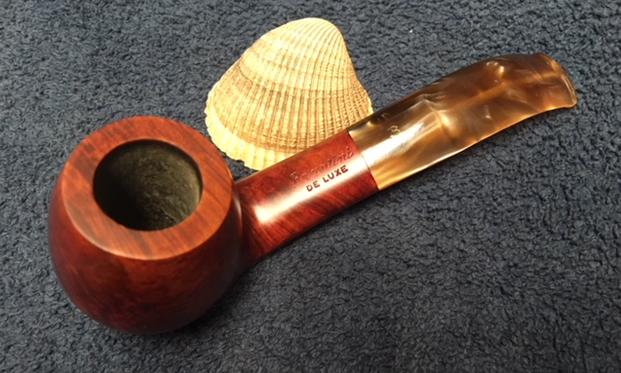
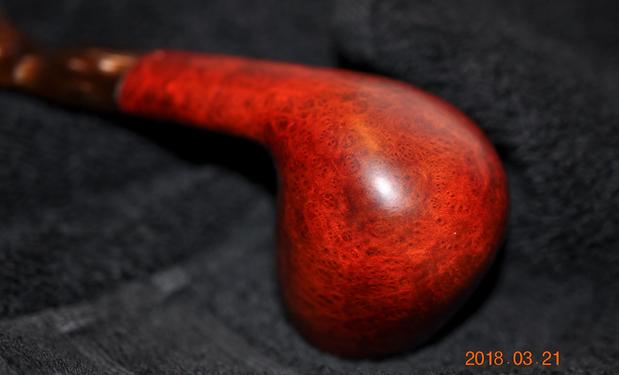
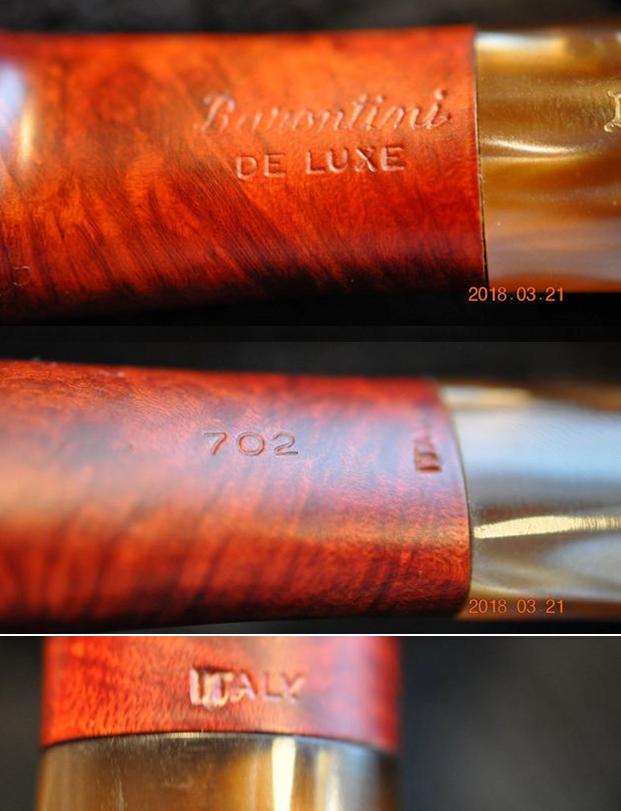
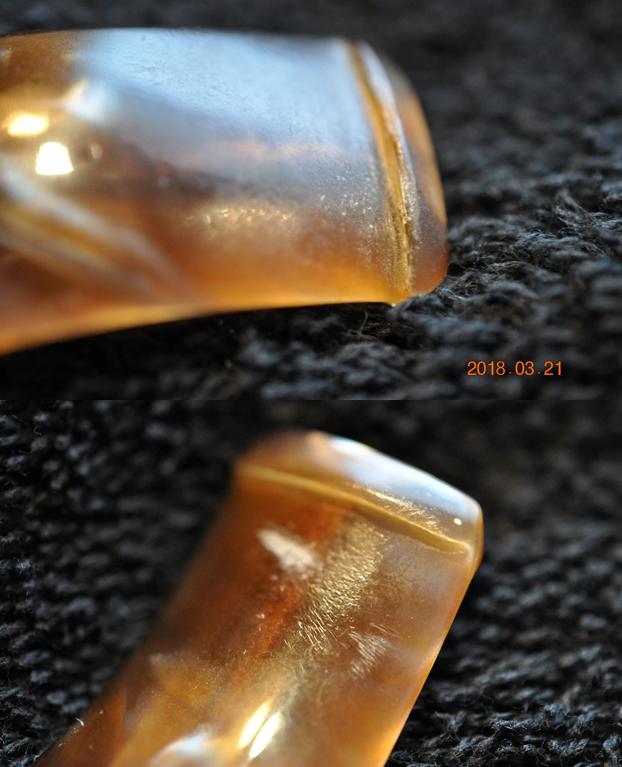
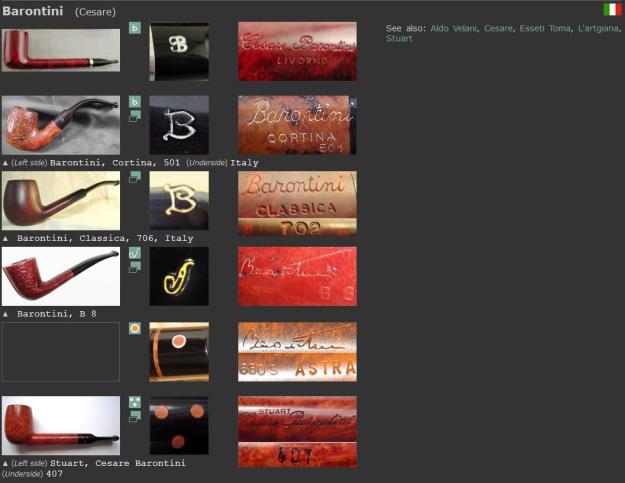
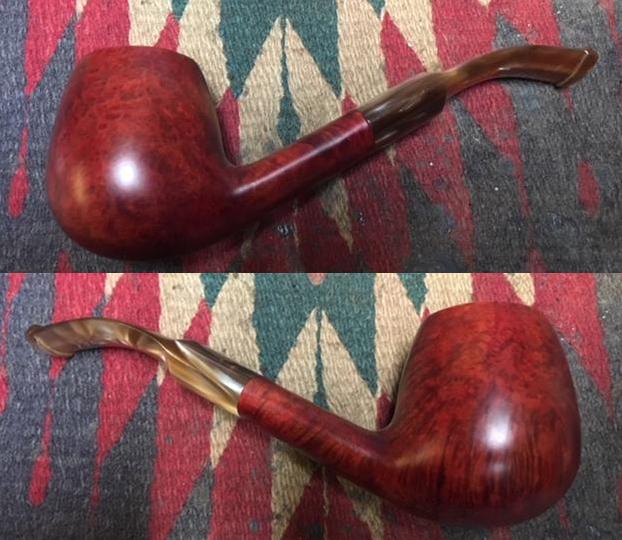
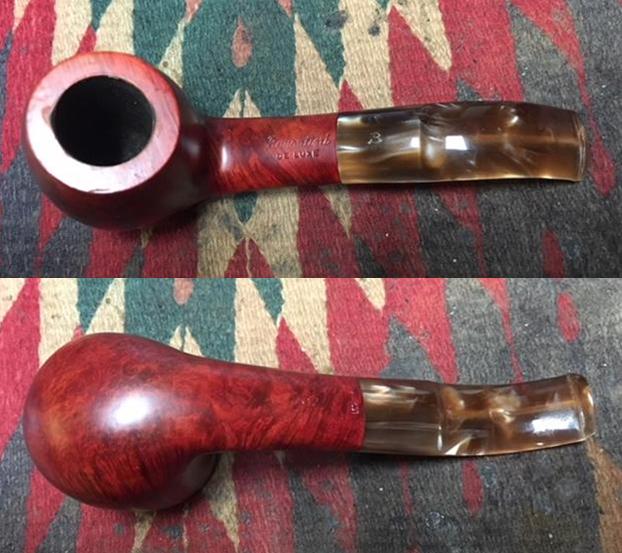
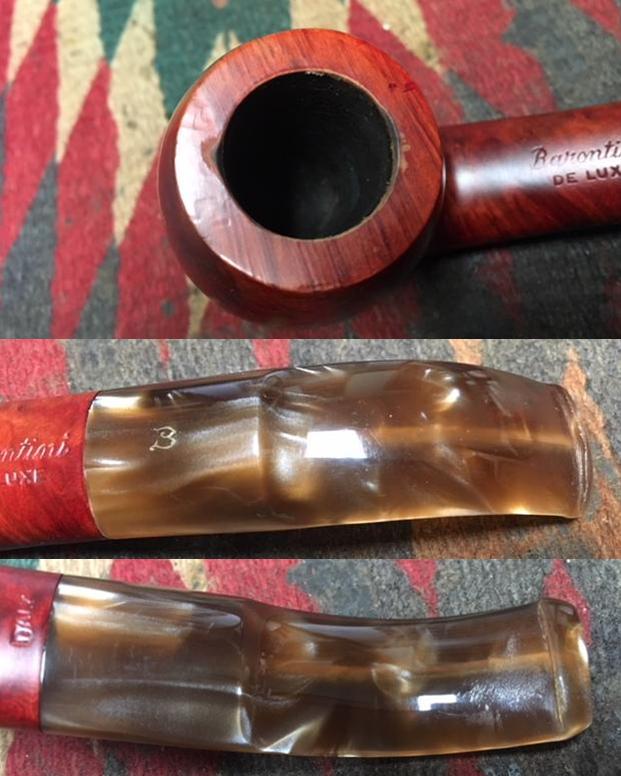
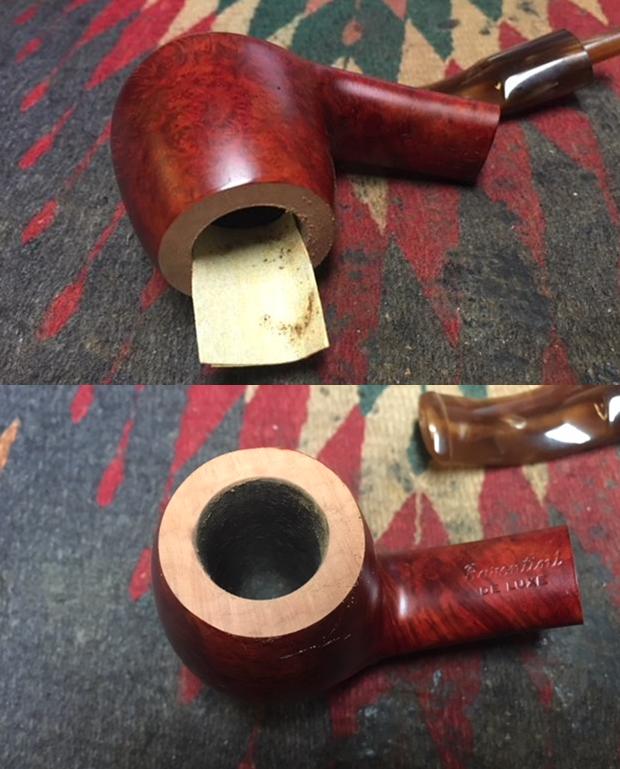
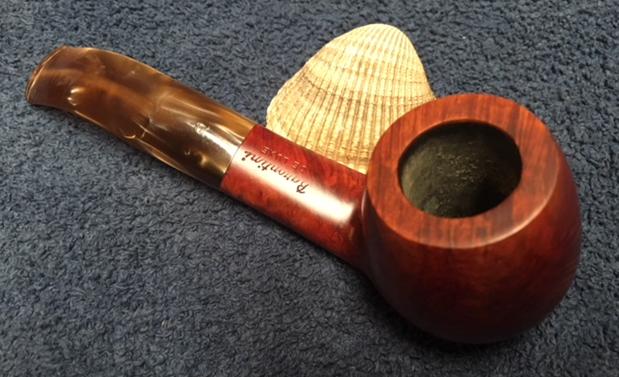
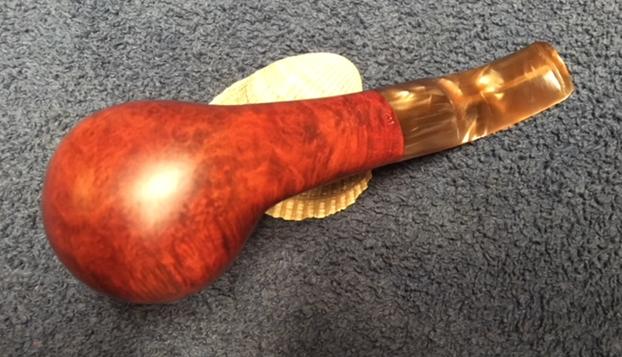
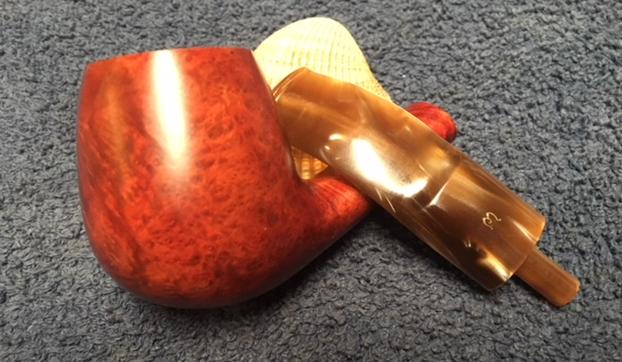
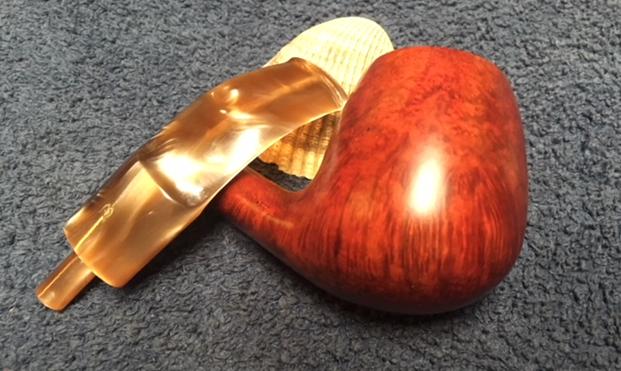
The next the pipe is a nicely shaped Barontini Brandy with an acrylic stem. It has beautiful grain all around the bowl – straight, flame and birdseye that is highlighted by the rich reddish brown stain. The top of the bowl is had some burn marks and some damage. The stamping on the top side of the shank read Barontini over De Luxe. On the underside it has the shape number 702 and Italy at the shank/stem junction. The gold and brown, swirled, pearlized Lucite stem had light tooth dents and chatter on the top and the underside of the stem. The interior of the pipe was caked and had cobwebs. Jeff took these photos before he started the cleanup work on the pipe. Jeff took a close up photo of the bowl and rim to show the condition of the pipe before he started his cleanup work. The rim top had some light lava overflow and some darkening. There appeared to be some rim damage on the inner edge toward the front of the bowl. You can see the wear on the rim top, the cake and remnants of tobacco in the bowl. It also looks like there are some cobwebs in the bowl. The pipe is dirty but in good condition.  He also took photos of the sides and bottom of the bowl and shank from the side to show the grain on this pipe. The finish is very dirty but this is a beautiful pipe. Jeff took some photos to capture the stamping on the top and underside of the shank. The first photo shows the top side of the shank with the stamping Barontini De Luxe and the second shows the shape number 702 on the underside. The third photo shows the ITALY stamping on the underside near the stem. There is also a B stamped on the acrylic stem.The next two photos show the stem surface. There are tooth marks and chatter on both sides near the button. There is also some wear on the sharp edge of the button.I looked up some information on the brand on the Pipephil website to get a quick overview of the history (http://www.pipephil.eu/logos/en/logo-b2.html). I did a screen capture of the listing for the brand. The fascinating thing that I learned in this quick overview was the connection to the entire Barontini family and to other companies like Aldo Velani. It is interesting to see the breadth of the brand in the following screen capture. The  pipe I am working on it stamped like the third photo down – the Classica and the B on the stem is identical to that pipe’s stamping.Pipedia gives further history of the brand (https://pipedia.org/wiki/Barontini,_Ilio) under the listing for Ilio Barontini. I quote that article in full as it has the connection to the De Luxe pipe that I am working on.

Cesare Barontini, who was in charge of the Barontini company since 1955, helped his cousin Ilio Barontini to establish a pipe production of his own.

Ilio started to produce machine-made series pipes of the lower to the middle price categories. Fatly 80% of the pipes went to foreign countries, the bulk being produced for various private label brands. Some of the own lines like “de Luxe”, “Etna” or “Vesuvio” gained a certain popularity. Citation: “Next to excellent craftsmanship Ilio Barontini pipes offer a wood quality, that is almost unrivalled in this price category!”.

The pipes being around still there were some unconfirmed utterances that Ilio Barontini brand has been absorbed by Cesare Barontini or even Savinelli. Who knows?

Now I had some idea of the maker of this Barontini. It appears to be one of the machine made Barontinis in the De Luxe line. Fueled by that information it was time to get working on the pipe itself and see what I had to do with it.

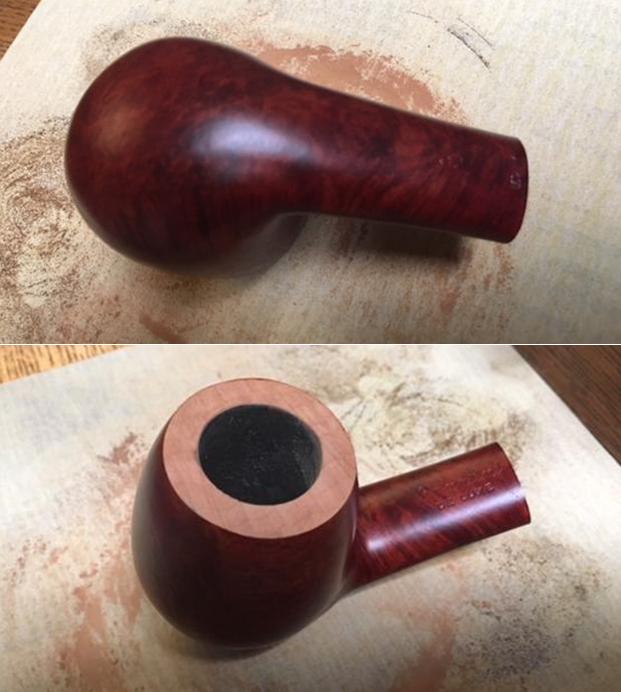
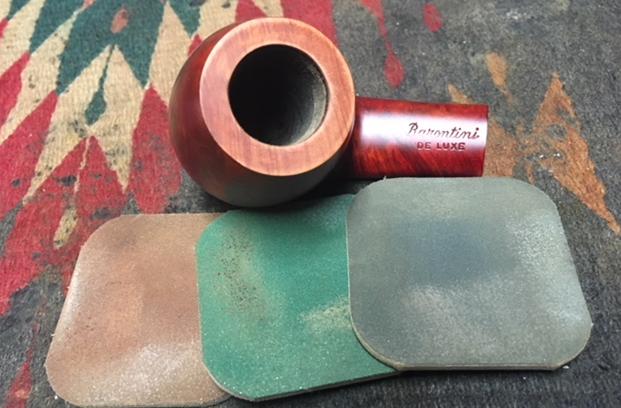
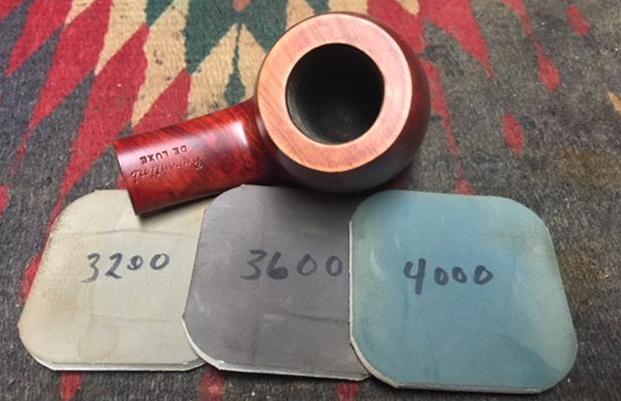
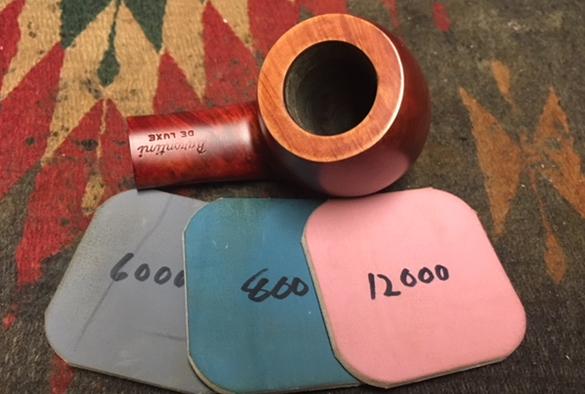
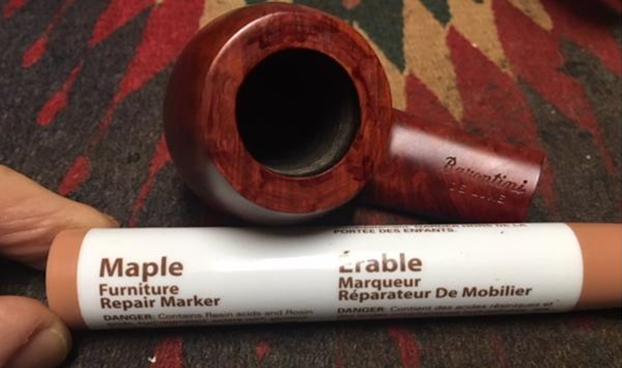
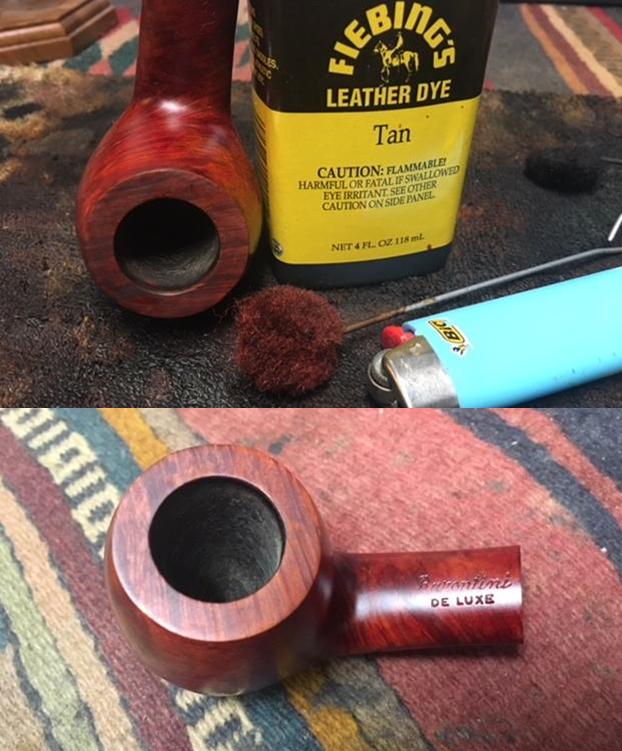
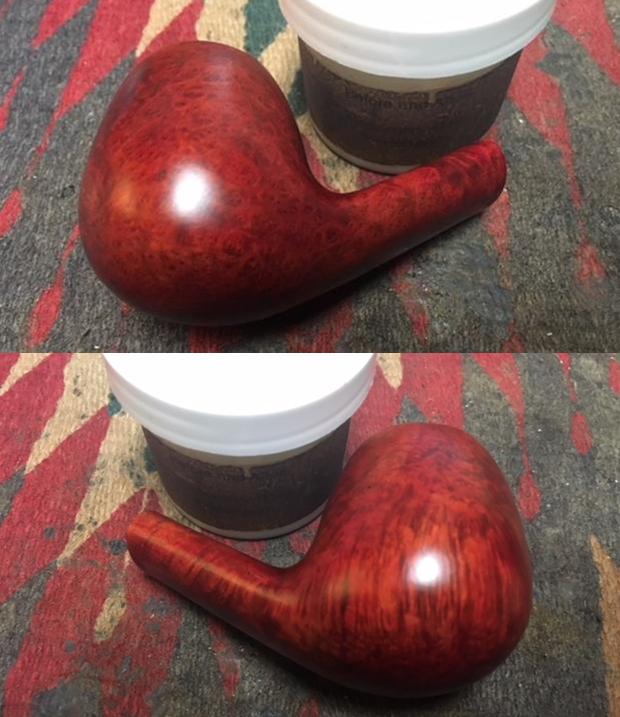
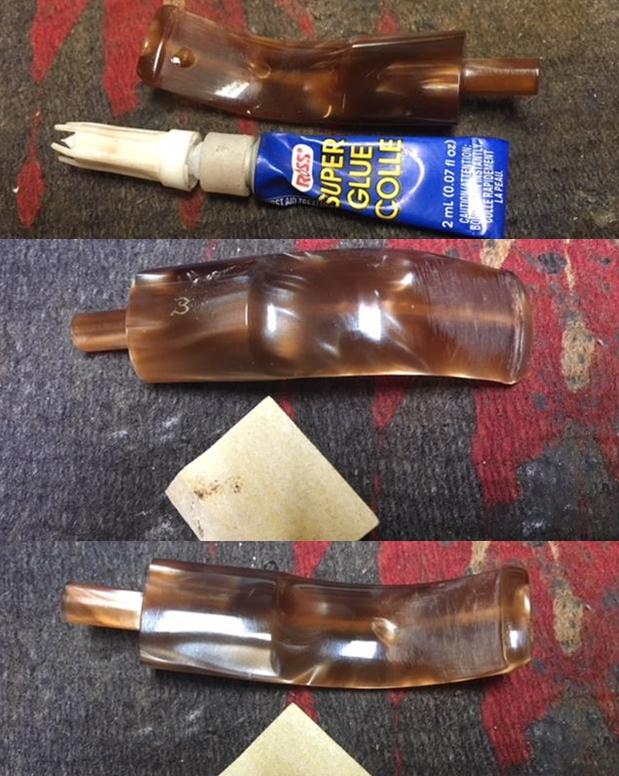
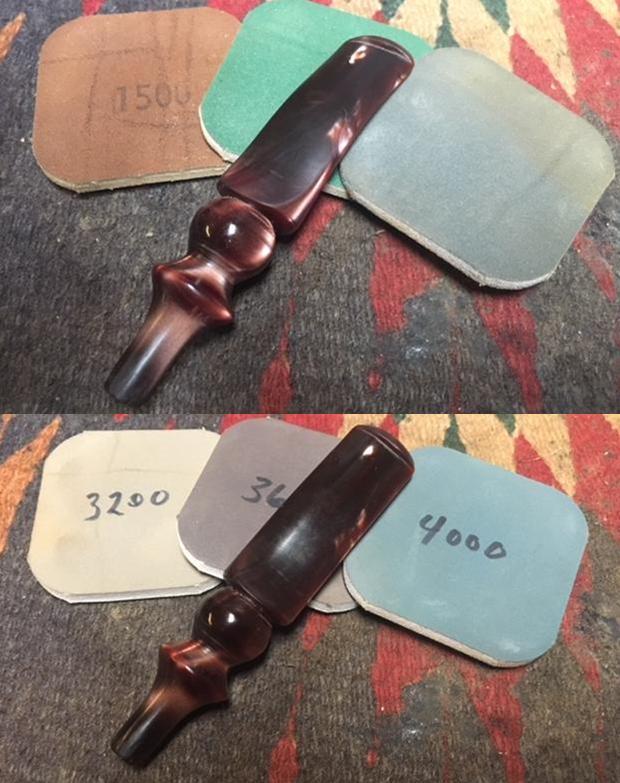
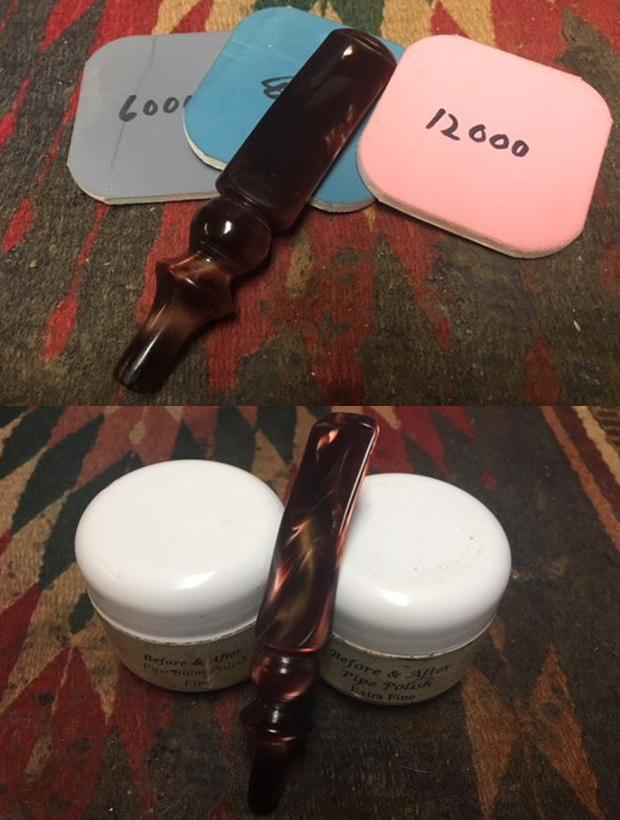
Jeff had reamed the bowl with a PipNet pipe reamer and followed up with a Savinelli Fitsall pipe knife to remove the cake. He scrubbed out the mortise and the airway in the shank and the stem with alcohol, cotton swabs and pipe cleaners. He scrubbed the exterior of the bowl, rim, shank and stem with a tooth brush and Murphy’s Oil Soap to remove the oils and tars on the rim and the grime on the finish of the bowl. He rinsed it under running water. He dried it off with a soft cloth. The rim was thoroughly cleaned and the damaged areas were obvious. Without the grime the finish looked really good. The Lucite stem would need to be worked on but I really like the profile it cast. I took photos of the pipe to show its condition before I started my work on it.   I took close up photos of the bowl and rim top as well as the stem. You can see the condition of the rim top and bowl in the first photo. Jeff was able to remove all of the tar and oils but you can now see the damaged areas on the surface clearly. There are damaged spots on the front inner edge and the back inner edge. There are also some deep dents and nicks in the flat surface of the rim. The acrylic/Lucite stem had tooth chatter and some light tooth marks on the top and underside of the stem just ahead of the button. There was one deeper tooth mark on the underside near the button.I decided to address the damage to the rim top first. I topped the bowl on a topping board using 220 grit sandpaper. I removed the damaged surface of the rim and made it smooth once again.I used a folded piece of 220 grit sandpaper to smooth out the inner edge of the rim. The rim top is looking far better at this point.I polished the rim top with micromesh sanding pads – wet sanding with 1500-2400 grit pads and dry sanding with 3200-12000 grit pads. I wiped the rim off after each sanding pad to remove the dust. The rim really shone once it was polished. Once it was polished the rim was ready to be stained. I started by using stain pens. I used a Maple stain pen to match the colour of the bowl. It was the closest I could get to matching the bowl. Once it cured it was streaked and not quite a match. The first photo below shows the rim after the stain pen.I carefully wiped the rim down with some isopropyl alcohol to smooth out the stain. Once it was smooth I restained it with some Fiebing’s aniline stain. I used a tan coloured stain and flamed it once I had stained the rim. I repeated staining and flaming until the coverage on the rim matched the bowl sides. The second photo below shows the look of the rim after this staining. I rubbed down the briar with Before & After Restoration Balm. I worked it into the smooth surface of the briar with my fingertips to clean, enliven and protect it. I let the balm sit for a little wall and then buffed with a cotton cloth to raise the shine. The following photos show the bowl at this point in the restoration process. The rim matches well but still needs to be polished and buffed to raise a shine on it. There were some tooth marks and chatter on the top and more chatter and a deeper tooth mark on the underside of the acrylic stem at the button. I cleaned off the surface of the stem with alcohol and filled in the deep tooth mark with clear super glue. Once it cured, I sanded both sides smooth with 220 grit sandpaper to blend the tooth chatter and the repair into the surface of the stem. It did not take too much sanding to remove the marks and smooth out the stem surface. When it was sanded it was smooth and the marks were gone. I polished the acrylic stem with micromesh sanding pads – wet sanding with 1500-2400 grit sanding pads and dry sanding it with 3200-12000 grit sanding pads. I wiped it down after each sanding pad with a damp cloth. I the polished stem and bowl with Blue Diamond to polish out the remaining small scratches and raise the shine. I gave the bowl and the stem several coats of carnauba wax and buffed the pipe with a clean buffing pad to raise the shine. I hand buffed it with a microfiber cloth to deepen the shine. The pipe polished up pretty nicely. This turned out to be a beautiful pipe in terms of shape and finish. This is the thirteenth pipe that I am restoring from Kathy’s Dad’s collection. I am looking forward once again to hearing what Kathy thinks once she sees the finished pipe on the blog. The finished pipe is shown in the photos below. The dimensions are Length: 6 inches, Height: 2 inches, Outside diameter of the bowl: 1 3/8 inches, Chamber diameter: ¾ of an inch. Thanks for walking through the restoration with me as I worked over this Barontini Brandy from George’s estate. More will follow in a variety of brands, shapes and sizes. I will be adding it to the rebornpipes store shortly so if you are interested in adding it to your collection and carrying on the trust from her father send me an email or a message on Facebook. Thanks for looking.

Kathy’s Dad’s Pipes – Restoring a Lovely Genod Santa Mauro Bent Billiard


Blog by Steve Laug

Some of you will remember the box of pipes that I received from George Koch’s estate from his daughter Kathy. There are many pipes to go through but with this blog I worked on another of the pipes from the estate. It has been a while since I have worked on them so I thought a reminder was in order about the estate. In the fall of 2017 I received a contact email on rebornpipes from Kathy asking if I would be interested in purchasing her late Father, George Koch’s estate pipes. He was a pipeman who had many “Malaga” and other brands of pipes and she was tasked with moving them out as she cleaned up the estate. We emailed back and forth and I had my brother Jeff follow up with her as he also lives in the US and would make it simpler to carry out this transaction. The long and short of it is that we purchased her Dad’s pipes – all of them (I am not even sure of the numbers at this point as they came in three installments). There are some beautiful pipes in that lot. Their condition varied from pristine to gnawed and damaged stems that will need to be replaced. These were some well used and obviously well-loved pipes. Cleaning and restoring them would be a tribute to this pipeman. I have told the story of George Koch in previous blogs about these pipes but I think it is important to keep the story attached to the pipes that came from his collection. It gives a remembrance to the man as I work on his pipes. I can almost imagine George picking out each pipe in his collection (both Malaga and otherwise) at the Malaga shop in Michigan. Kathy graciously wrote a brief bio of her father and sent it along with a photo of her Dad enjoying his “Malagas”. Here is George’s bio written by his daughter.

Dad was born in 1926 and lived almost all his life in Springfield, Illinois. He was the youngest son of German immigrants and started grade school knowing no English. His father was a coal miner who died when Dad was about seven and his sixteen year old brother quit school to go to work to support the family. There was not much money, but that doesn’t ruin a good childhood, and dad had a good one, working many odd jobs, as a newspaper carrier, at a dairy, and at the newspaper printing press among others.

He learned to fly even before he got his automobile driver’s license and carried his love of flying with him through life, recertifying his license in retirement and getting his instrumental license in his seventies and flying until he was grounded by the FAA in his early eighties due to their strict health requirements. (He was never happy with them about that.) He was in the Army Air Corps during World War II, trained to be a bomber, but the war ended before he was sent overseas. He ended service with them as a photographer and then earned his engineering degree from University of Illinois. He worked for Allis Chalmers manufacturing in Springfield until the early sixties, when he took a job at Massey Ferguson in Detroit, Michigan.

We lived in Livonia, and that’s where his love for Malaga pipes began. After a few years he returned to Allis Chalmers and we moved back to Springfield. I remember that when we went back to Michigan to visit friends, Dad had to go to the Malaga store and acquire a few new pipes. Many a year I wrote to Malaga and they picked out a pipe for me to purchase that I could give Dad for a Christmas or birthday present. He was always pleased. His favorites were the straight stemmed medium sized bowl pipes, but he liked them all. 

He had some other pipes, but the Malagas were his favorites. I remember him smoking them sitting in his easy chair after work, with feet up on the ledge by the fire burning in the fireplace.  Growing up it was my job to clean them and he liked the inner bowl and stem coated with Watkins vanilla, leaving a little of that liquid in the bowl to soak in when I put them back on the rack. Dad quit smoking later in life and so they’ve sat on the racks for many years unattended, a part of his area by his easy chair and fireplace. Dad passed when he was 89 years old and it finally is time for the pipes to move on. I’m very happy they are being restored by you and your brother and hope they find homes who enjoy them as much as Dad did. Thank-you for your care and interest. — Kathy, the oldest daughter

Kathy, once again I thank you for providing this beautiful tribute to your Dad. We will appreciate your trust in allowing us to clean and restore these pipes. I am also trusting that those of you who are reading this might carry on the legacy of her Dad’s pipes as they will be added to the rebornpipes store once they are finished.

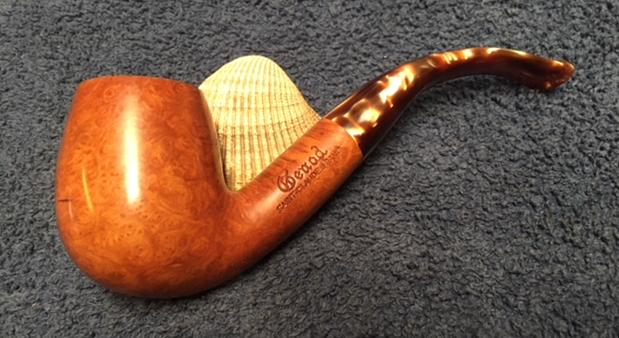
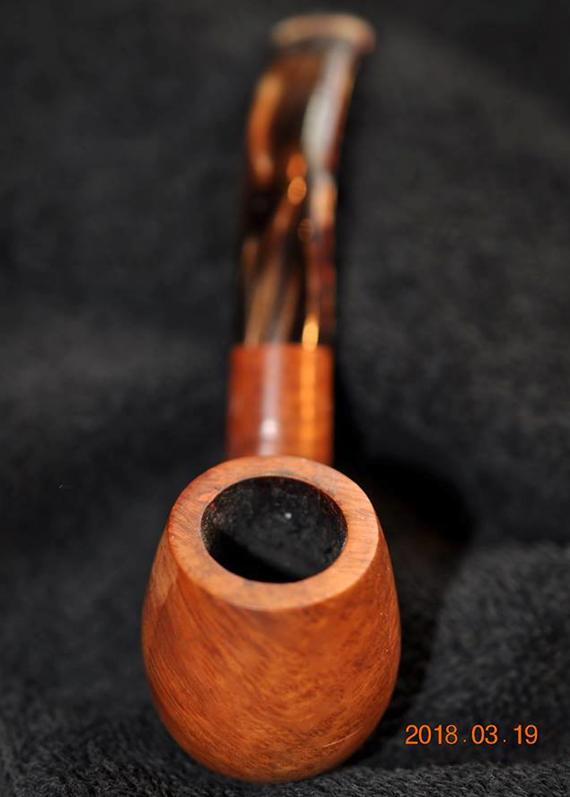
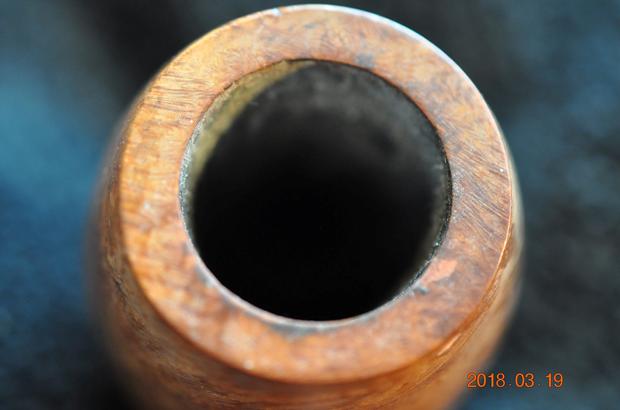
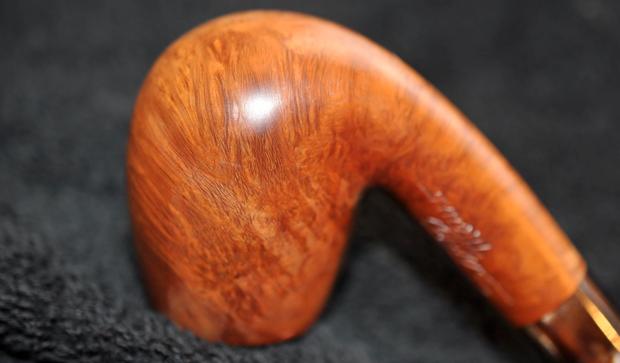
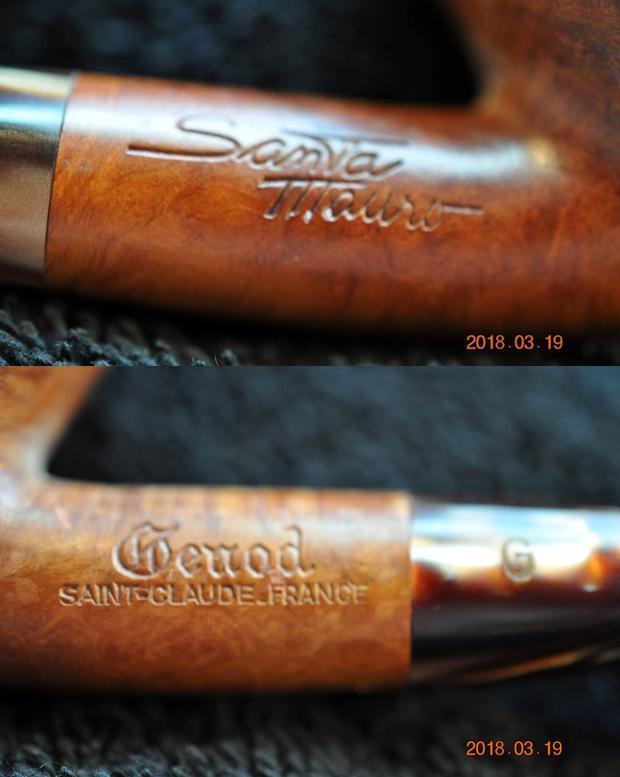
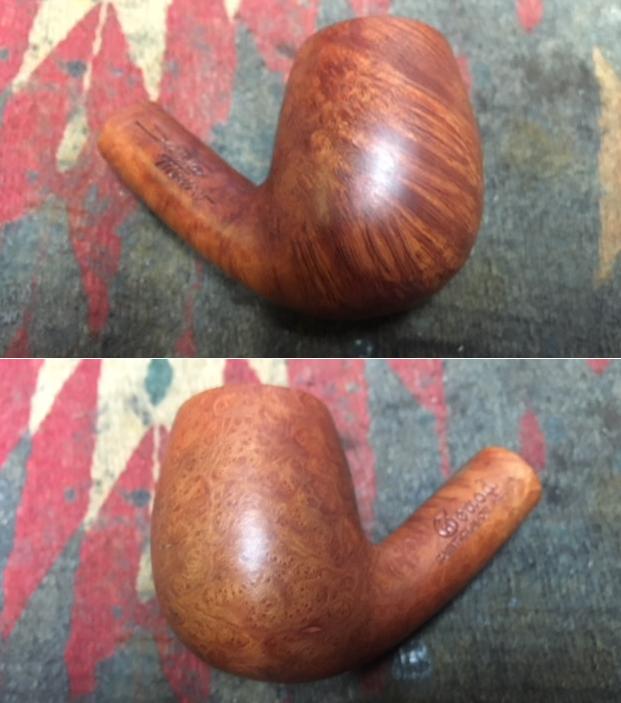
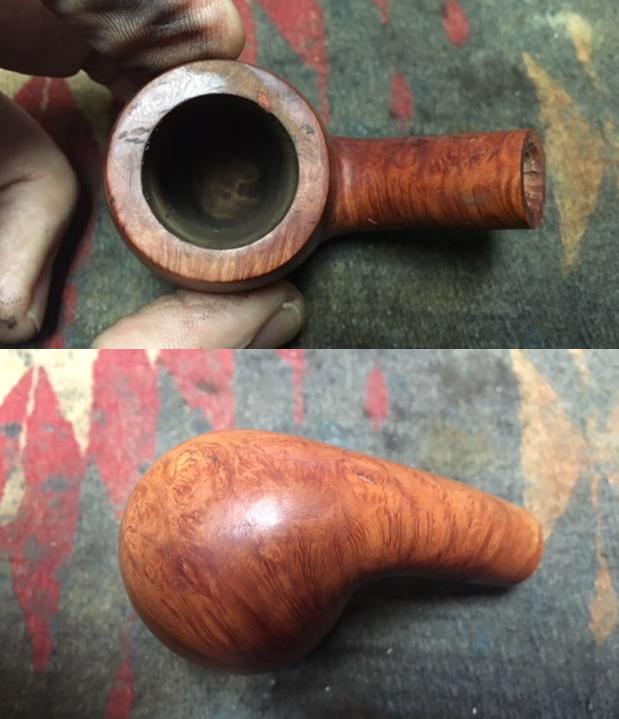
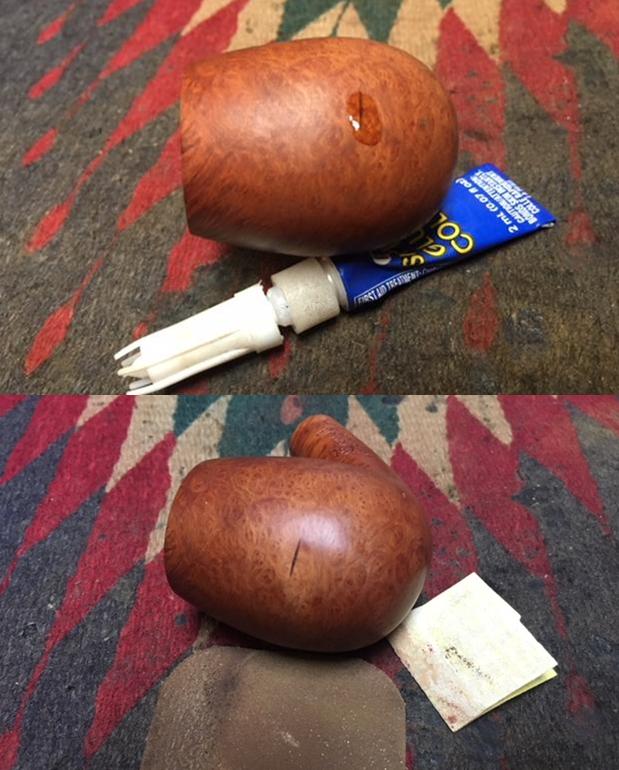
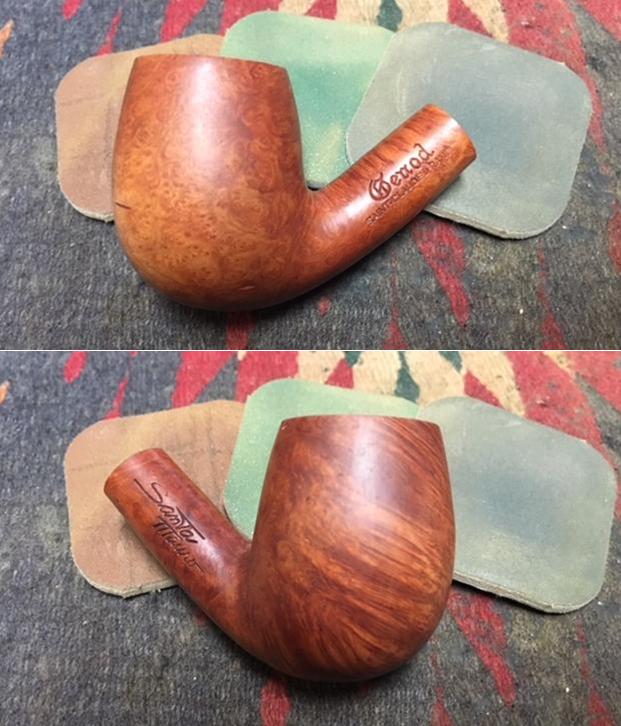
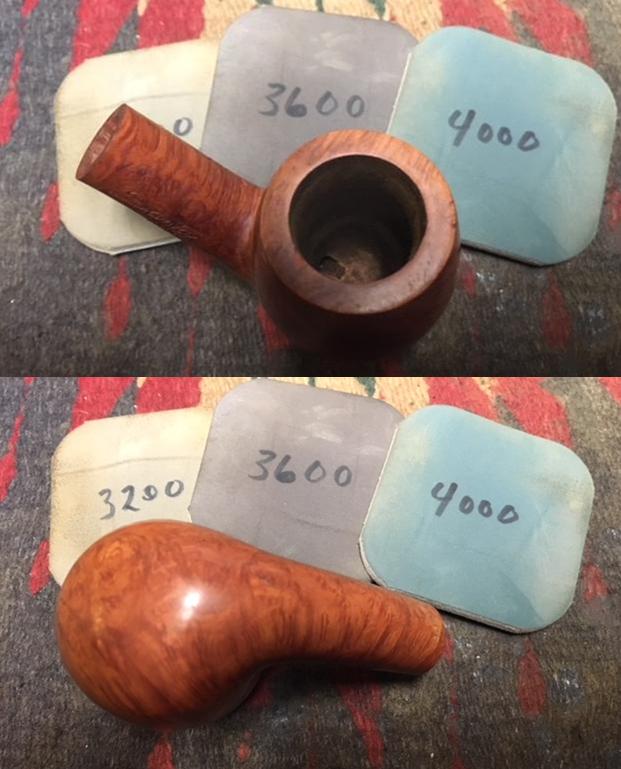
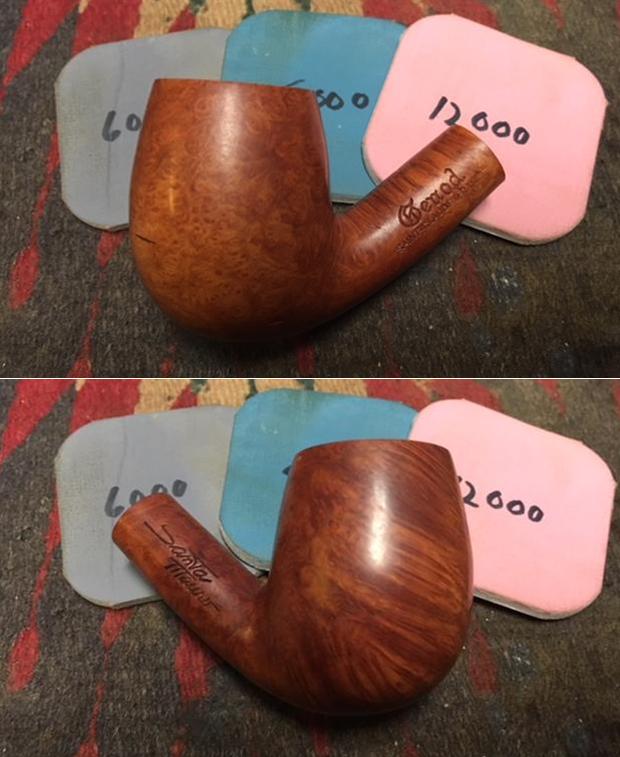
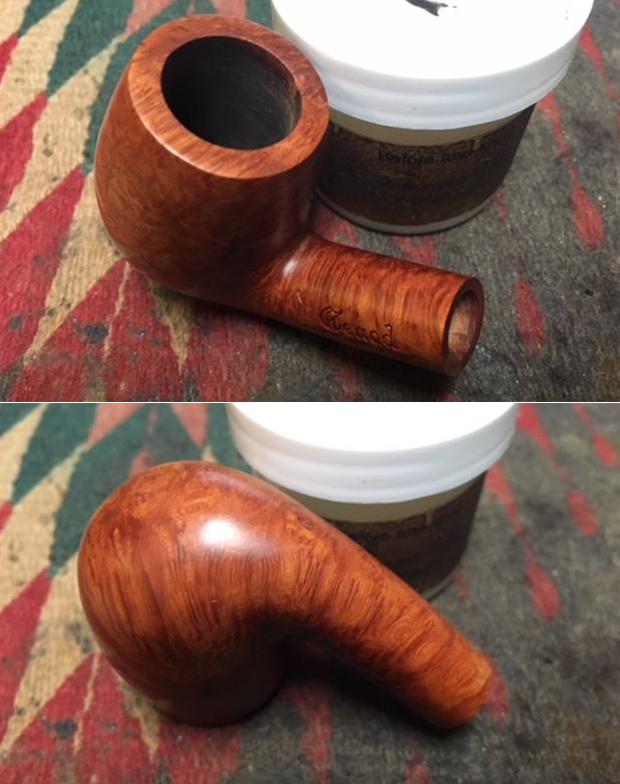
The next the pipe that I chose to work on is not a “Malaga” but a well-made Genod Bent Billiard with an acrylic stem. It has beautiful grain all around the bowl – straight, flame and birdseye. The top of the bowl is in good condition with nice grain. It has a small fill on the outer edge of the right side of the rim top. The stamping on the left side of the shank read GENOD over St. Claude, France. On the left side it reads Santa Mauro. On the underside of the shank it is stamped 909 or 606 and it is hard to tell which is right side up. The brown, swirled, pearlized Lucite stem had light tooth dents and chatter on the top and the underside of the stem. The interior of the pipe was dirty. I think that George had not smoked this one much. Jeff took these photos before he started the cleanup work on the pipe. Jeff took a close up photo of the bowl and rim to show the condition of the pipe before he started to work his magic on it. The exterior of the bowl and shank were dirty. You can see the wear on the rim top, the light lava on the surface and the cake and remnants of tobacco in the bowl. There also appears to be a small fill on the rim top on the right side. The pipe is dirty but in good condition.  He took a photo of the side of the bowl and shank from the side to show the grain on this pipe. The left side was covered in beautiful birdseye. It is a beautiful pipe. Jeff took some photos to capture the stamping on the right and left side of the shank. The first photo shows the right side of the shank with the stamping Santa Mauro and the second shows the Genod brand name over Saint-Claude, France. There is also a G stamped on the acrylic stem.The next two photos show the stem surface. There are tooth marks and chatter on both sides near the button. On the second photo below shows the tooth chatter and some faint marks.Jeff cleaned this one up before he sent it my way. He is really good at the cleanup work. He had reamed the bowl with a PipNet pipe reamer and followed up with a Savinelli Fitsall pipe knife to remove the cake. He scrubbed out the mortise and the airway in the shank and the stem with alcohol, cotton swabs and pipe cleaners. He scrubbed the exterior of the bowl, rim, shank and stem with a tooth brush and Murphy’s Oil Soap to remove the oils and tars on the bowl, plateau rim and shank. He rinsed it under running water. He dried it off with a soft cloth. The rim was thoroughly cleaned and the finish looked good. Without the grime the finish looked really good. The Lucite stem would need to be worked on but I really like the thin profile it cast. I took photos of the pipe to show its condition before I started my work on it.   I took close up photos of the bowl and rim top as well as the stem. You can see the condition of the rim top and bowl in the first photo. The top was in excellent condition and Jeff was able to remove all of the tar and oils. There was one small fill on the right topside of the bowl. He had scrubbed the bowl with a tooth brush and Murphy’s Oil Soap and it looked really good. The acrylic/Lucite stem had tooth chatter and some light tooth marks on the top and underside of the stem just ahead of the button.I looked up some information on the brand on the Pipephil website to get a quick overview of the history (http://www.pipephil.eu/logos/en/logo-g2.html). I did a screen capture of the listing for the brand. There was also a link to a well written historical timeline of the brand. You can read it at this link (http://www.pipephil.eu/logos/en/infos/genod-en.html).Pipedia gives further history of the brand (https://pipedia.org/wiki/Genod). The information is helpful and gives a sense of the history of the brand in St. Claude region of France. With the background information in hand I turned to the restoration of the pipe.

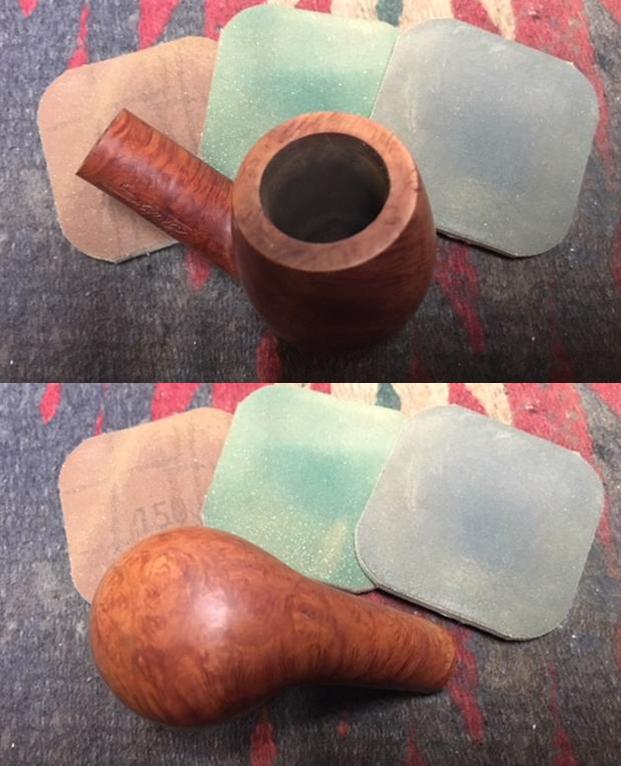
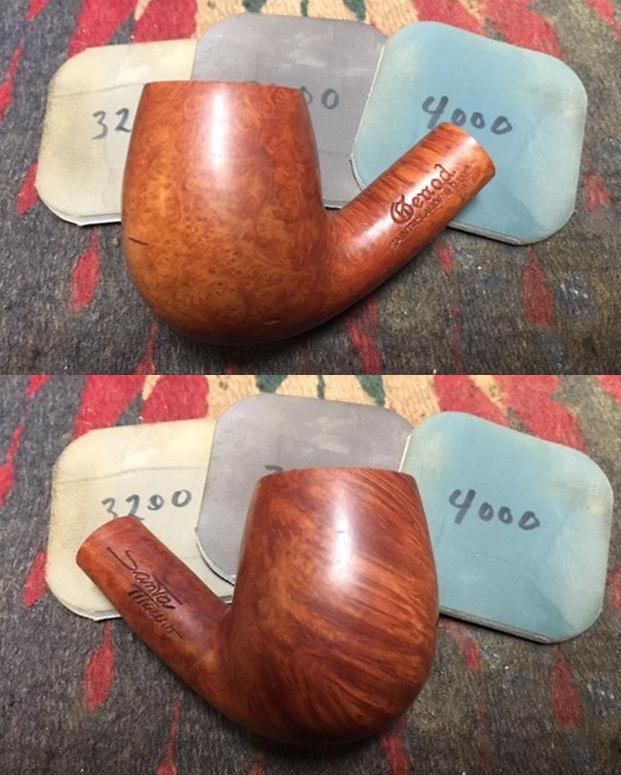
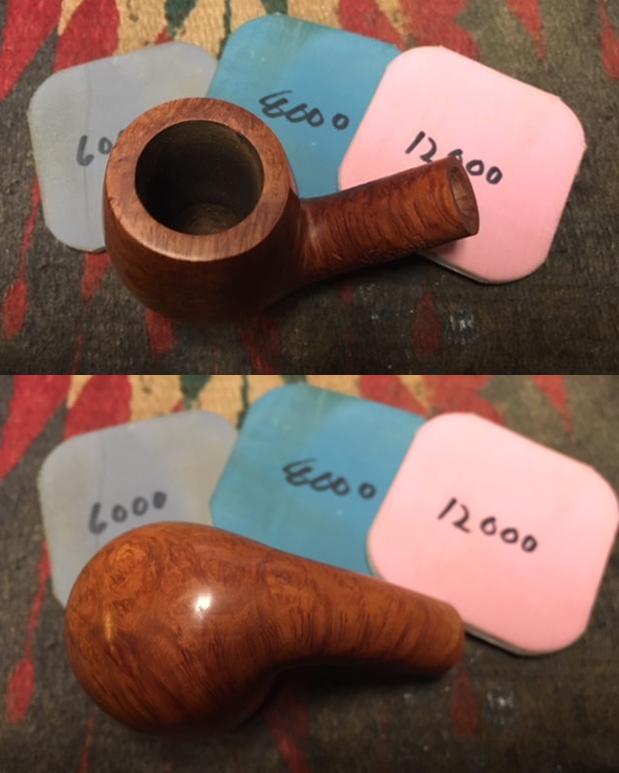
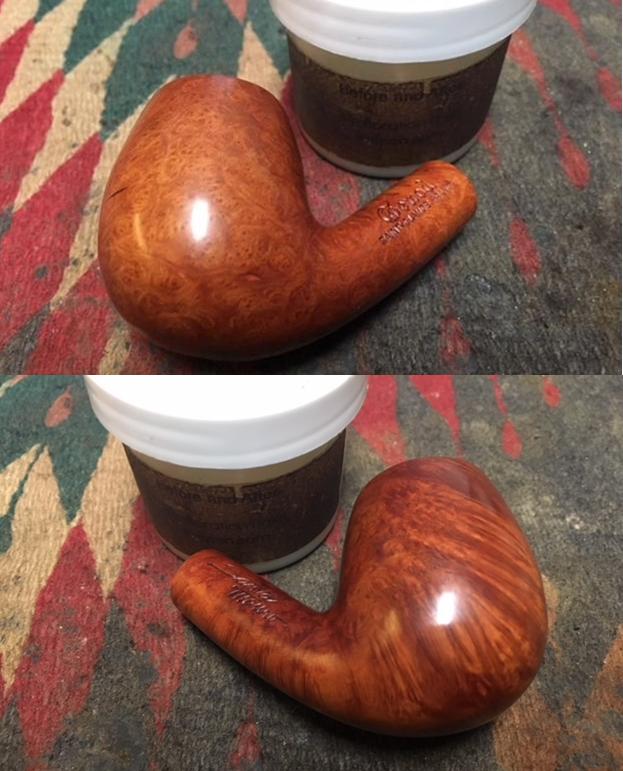
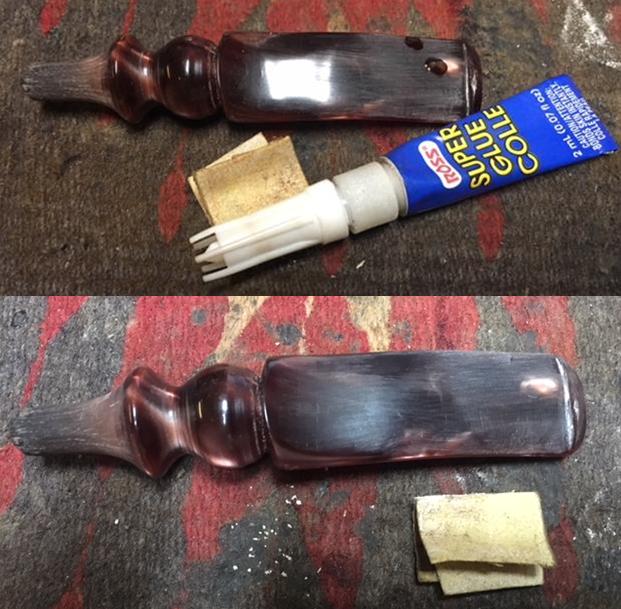
I removed the stem from the shank and there was a small stinger in the tenon. It was pressure fit and I was able to wiggle it free. I have found that these stingers really constrict the draught of the pipe. I ran some pipe cleaners and alcohol through the airway in the stem to remove any grime that was behind the stinger. I wrapped some 220 grit sandpaper around a piece of dowel to sand out the walls of the bowl. I ran pipe cleaners through the airway and a qtip through the mortise and the pipe was clean. I wiped off the dust from the bowl surface and took some photos of the pipe at this point in the process (but evidently not off my fingers as the photos show). The finish is decent. There was some wear around the right side of the top of the rim and there was a knife mark on the left of the bowl toward the front. I repaired the knife cut in the left front of the bowl with clear super glue. I pressed it into the cut mark. Once it cured I sanded it smooth with 220 grit sandpaper and smoothed it out with 1500 grit sandpaper.I polished the briar with micromesh sanding pads. I wet sanded the briar with 1500-2400 grit pads and wiped the bowl down with a damp cloth after each pad. I dry sanded it with 3200-12000 grit pads and repeated the wipe down to leave the briar clean. I rubbed down the briar with Before & After Restoration Balm. I worked it into the smooth surface of the briar with my fingertips to clean, enliven and protect it. I let the balm sit for a little wall and then buffed with a cotton cloth to raise the shine. The following photos show the bowl at this point in the restoration process. There were some tooth marks and chatter on the top and more chatter and a deeper tooth mark on the underside of the acrylic stem at the button. I cleaned off the surface of the stem with alcohol and filled in the deep tooth mark with clear super glue. Once it cured, I sanded both sides smooth with 220 grit sandpaper to blend the tooth chatter and the repair into the surface of the stem. It did not take too much sanding to remove the marks and smooth out the stem surface. When it was sanded it was smooth and the marks were gone. I polished the acrylic stem with micromesh sanding pads – wet sanding with 1500-2400 grit sanding pads and dry sanding it with 3200-12000 grit sanding pads. I wiped it down after each sanding pad with a damp cloth. I the polished stem and bowl with Blue Diamond to polish out the remaining small scratches and raise the shine. I gave the bowl and the stem several coats of carnauba wax and buffed the pipe with a clean buffing pad to raise the shine. I hand buffed it with a microfiber cloth to deepen the shine. The pipe polished up pretty nicely. This turned out to be a beautiful pipe in terms of shape and finish. This is the twelfth pipe that I am restoring from Kathy’s Dad’s collection. I am looking forward once again to hearing what Kathy thinks once she sees the finished pipe on the blog. The finished pipe is shown in the photos below. The dimensions are Length: 5 1/2 inches, Height: 2 inches, Outside diameter of the bowl: 1 1/4 inches, Chamber diameter: ¾ of an inch. Thanks for walking through the restoration with me as I worked over this Genod from George’s estate. More will follow in a variety of brands, shapes and sizes. I will be adding it to the rebornpipes store shortly so if you are interested in adding it to your collection and carrying on the trust from her father send me an email or a message on Facebook. Thanks for looking. 

Refreshing an Italian Gasparini M.G.M. Rock Briar 1912 with an Unexpected Encounter


Blog by Dal Stanton

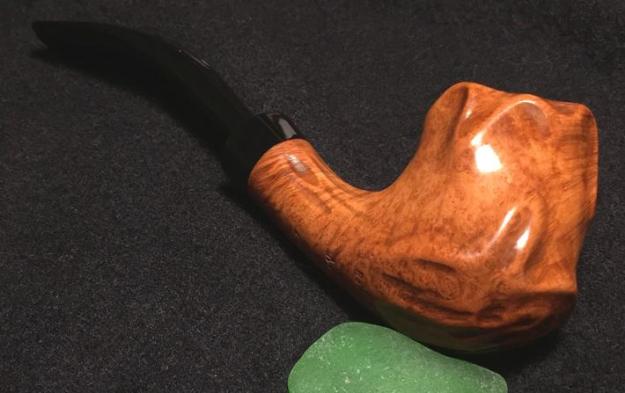
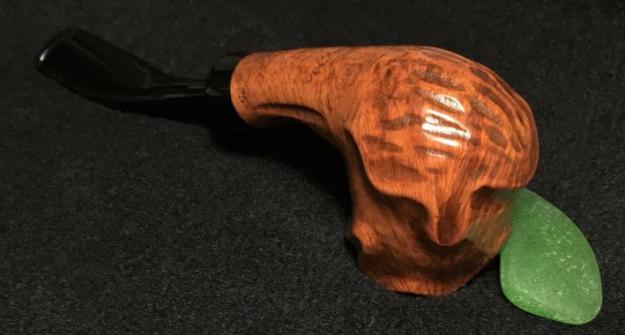
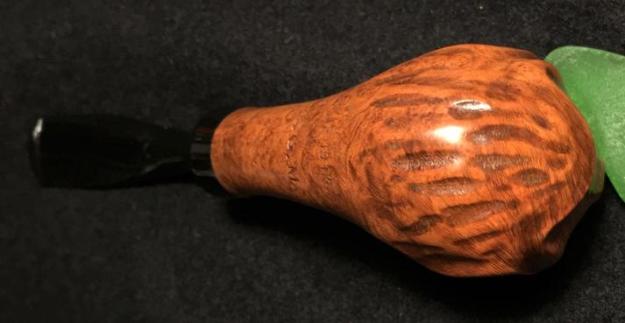
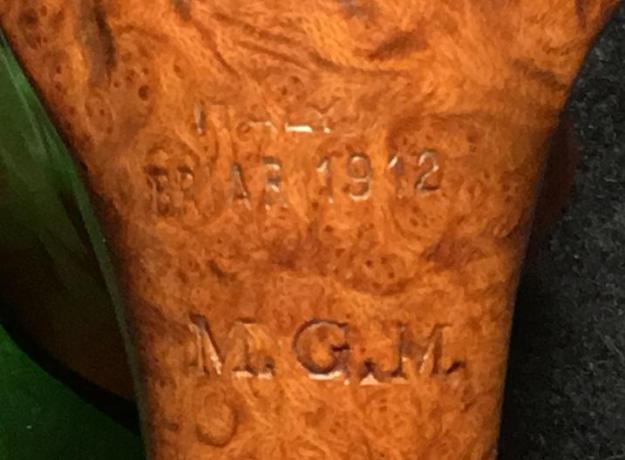
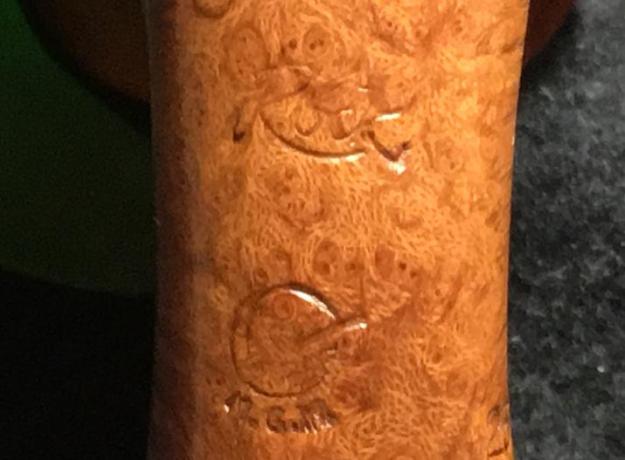
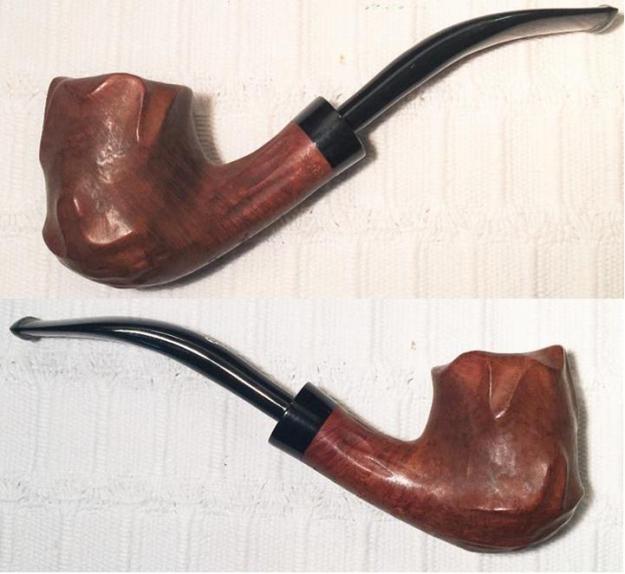
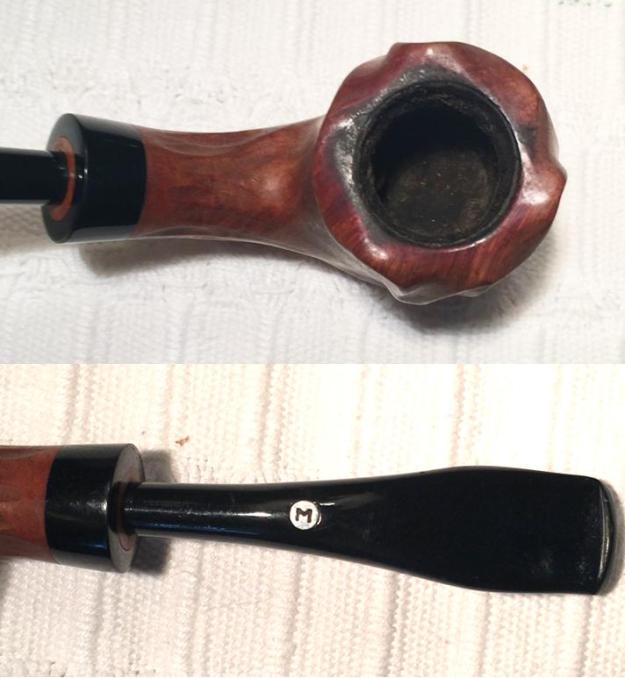
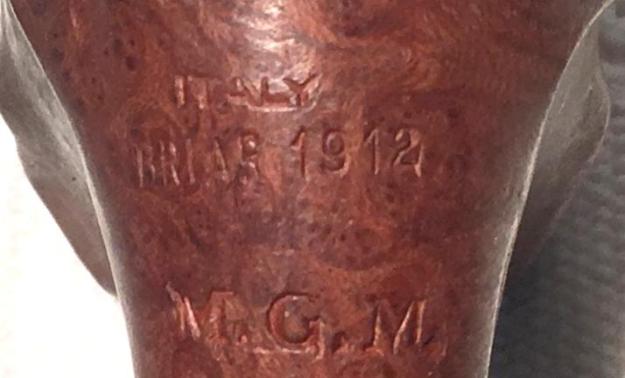
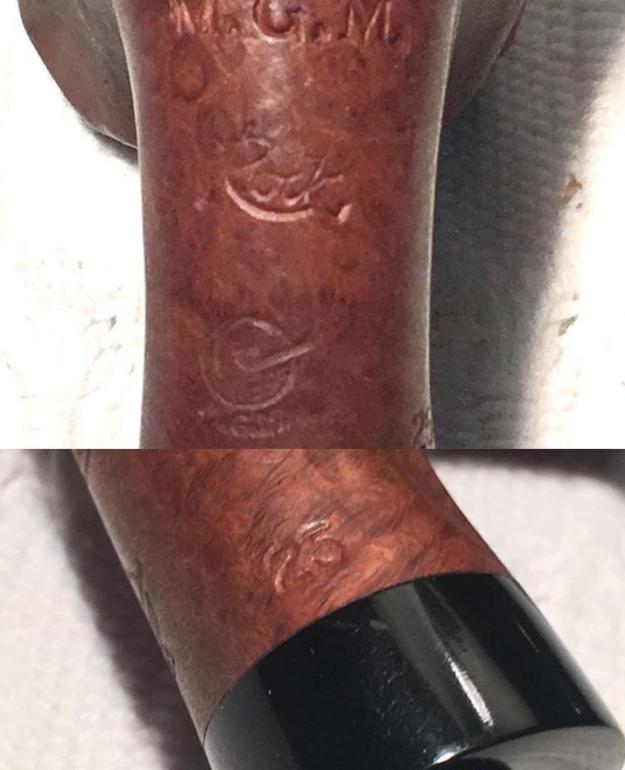
Idian lives in Indonesia and sent me an email after trolling through The Pipe Steward electronic “Help me!” basket which I call, “For ‘Pipe Dreamers’ Only!” He inquired about commissioning two pipes, a Peterson and the Italian, Gasparini M.G.M. Rock Briar 1912.  He settled on the Gasparini and assured me that he was a patient man as I put his commissioned pipe in the queue behind quite a few other commissioned pipes.  I found this pipe along with 65 others in a Lot of 66 which has provided several pipes for my work table which have benefited our work with the Daughters of Bulgaria, helping women and girls who have been trafficked and sexually exploited.  This M.G.M. Rock Briar stood out to Idian and it also stood out to me not only because it’s a unique Freehand shape but also because the shank is chocked full of nomenclature information that I’ve looked forward to researching.  Here are the pictures that Idian saw. The heel of the shank is stamped with ITALY [over] BRIAR 1912 [over] M.G.M. [over] Rock in cursive script.  Below this is a stamp – a pipe partially ensconced in a circle with M.G.M. repeated under the circle. To the right of this, hugging the briar’s edge transitioning to the vulcanite ferrule is the number 25, which I’m assuming is a shape number.  The pictures above show the rondel with the pressed M for Mario, the patriarch of the Gasparini family. Much of Pipedia’s article about the Gasparini name came from the current Gasparini website, http://www.mgasparini.it/en/.  When reading the information, one gets the impression of the enterprise having deep family roots which continue today.  From the Pipedia article:
In 1938 Mario Gasparini, with his wife Ida, took his first steps into the world of the pipe. Today his daughter, Marisa Gasparini, sits at his desk; since 1977 Marisa and her husband, and now her daughter, carry on the tradition of her family. At the beginning of 1950’s, the building, that still today hosts the production department, was enlarged. In 1971 the offices and the warehouse were moved from Milan (where they were situated for marketing purposes) to Luvinate.

During those years the skilled workers and our direct partners have always followed the history of the Gasparini factory, becoming very fond of it and devoting themselves, with care and love, to the making of each pipe, with the personal fantasy and skills of the artist. We would like to take this opportunity to thank those artisans who, with their creativity, gave, and continue to give, life to the Gasparini Pipe factory.

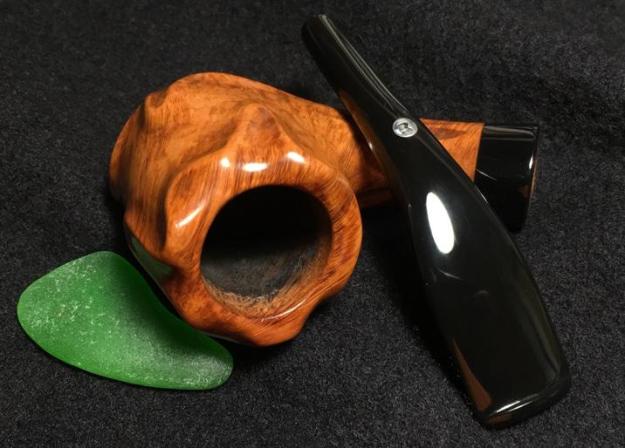
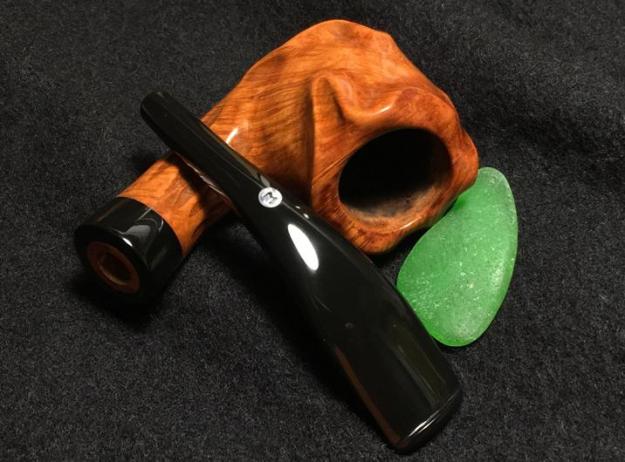
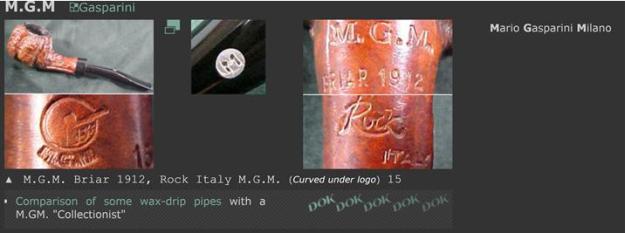
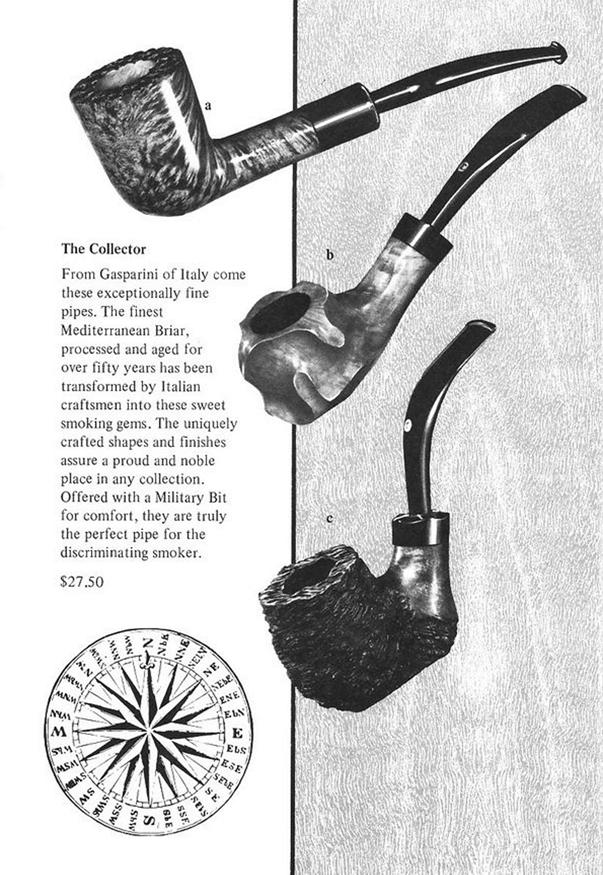
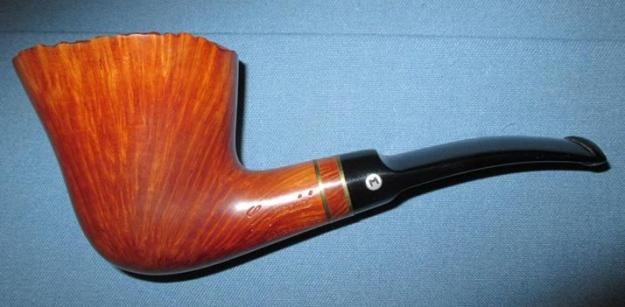
The article also describes the Gasparini series, M.G.M. coming on-line in 1965 as a classical line with the initials standing for the founder’s name – Mario Gasparini Milano.  Pressing the research, the Pipephil.eu site offered more information.Of interest in the Pipephil information was the reference connecting the M.G.M. “Collectionist” series (marked by the circle/pipe stamp) with a comparison to ‘wax-drip pipes’.  I looked at that link and got a clue of what might be the considered shape of the M.G.M. Rock on my work desk: stummels fashioned to look like the ends of used candles.  Here is a clipping of three ‘high-end’ examples of this interesting shape:With these examples before me, I take another look at the M.G.M. Rock Collector on the table and it I believe that its possible it was fashioned in the ‘wax-drip’ manner with the ripples of melted wax shaped on the rim flowing down.Pipedia’s article included an older Gasparini brochure (courtesy of Doug Valitchka) – unfortunately no dating was given for the brochure, showing three pipes in the ‘Collector’ series.  The middle example is obviously the same shape style and stem as the pipe on my work table but with a squatter bowl – very much reminiscent of a ‘wax drip’ shape.  My guess is that the brochure is from the 60’s because it’s black and white and I would imagine that the stated pricing at that time would not be for a corner drug store pipe!  Unfortunately, this was the only page shown – I would love to have read the description for the ‘b.’ pipe!One more question dogged me in my research of the M.G.M. Rock – ‘Briar 1912’.  Briar 1912 was stamped on several examples I saw of Gasparini pipes on Pipedia and Pipephil.eu.  What did it refer to?  As I’ve done before with much success, I decide to go to the front door of the Gasparini house and knock and introduce myself.  On the ‘Contact’ page of the Gasparini website I find contact information and send an email with the 1912 question as well as a few other questions to confirm the shape number and dating.  We’ll see if they respond!  The description in the brochure gives a clue that I didn’t recognize until later – it states that the briar had been aged over 50 years!  If one does the math, if 1912 is when the aging process began – plus 50 years, lands us in the year 1962 – the decade the M.G.M. series was introduced and perhaps the ‘Collector’ series as well. It was only after discovering an August 2013 thread in Pipes Magazine Forum (LINK) concerning Gasparini pipes that I tied the 1912 with the aging of the briar – I know, I’m slow!  This clip from Doc Watson speaks very positively of the Gasparini named pipes:
I have a few Gasparini pipes. They are real sleepers IMO and are seldom talked about by collectors but believe me there are some magnificent Gasparini pipes out there. Here’s a photo of one that came from the late Jack Ehrmantrout (owner of Pipe Collectors International PCI) collection. It was one of his favorites that he never smoked. Some are stamped 1912 briar, which is indeed some old root. As most pipe companies/makers they make different lines, some higher grades than others but IMO if you find one you like, go for it. (Note from me: IMO = in my opinion)I love ‘Sherlocking’ the provenance of pipes not only to learn about the names of historic lines, but to more fully appreciate the value of what I’m handling and seeking to restore.  The picture above, along with several examples in the Pipedia article courtesy of Doug Valitchka, give me a good idea of the natural briar hue Gasparini used and I will shoot for this with the M.G.M. Rock on my table.
Well, my cup runs over!  I received a reply from M. Gasparini Pipes in Luvinate, Italy, but not from a desk employee.  Marissa Gasparini (picture from previously cited Pipedia article) responded to my questions, the daughter of Mario Gasparini, the founder of the Gasparini Pipe house in 1948.  She assumed control of the Gasparini Pipe interests in 1977 and I assume she continues in that role today.  I was honored that she wrote to me.  Here is her letter, switching to my native tongue and responding to my questions:
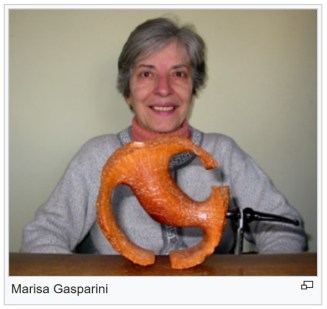
Dear Dal,
1) the 1912 is the year in which was born the briar that we used for making that serie of pipes so particular.
2) The circle with pipe in it was used only for some special  fancy serie like the Rock.
3) We begin to produce thise serie in the 1960 and finish in the 1965, and now we have left only few pieces, and you are lucky to have one.
4) The number 25 is the number of the shape and the pipe was waxed.
We hope  that our informations are o.k. for you and we thank you  and remain at your complete disposal,
with best regards,
Marisa Gasparini

Wow!  I love restoring pipes!  With Marisa’s letter as confirmation, the briar root aging process used for this M.G.M. Rock began in 1912, 106 years ago.  The Collector stamp was only used for special, fancy lines, which applies to this Rock.  This M.G.M. Rock was produced between 1960 and 1965 – which gives it an age ranging from 58 to 53 years.  The shape number perhaps points to the wax candle shape that I was guessing might be the case or the shape may simply be a freehand Rock.  She also said that I was ‘lucky’ to have one of these special collector series in my possession – I would call it blessed.  I responded to her gracious letter and ventured another question – to ask about the significance of the third letter, ‘M’ in M.G.M. moniker?  The first two letters are clear – the initials of her father.  The third letter, ‘M’ stands for Milano.  I asked her the significance of ‘Milano’?

A few hours later her reply arrived.  The M.G.M. – Milano was where the Gasparini family lived and produced their pipes 45 years ago – a special place in their memories.

This is a nice-looking pipe and I’m happy to call this a “Refresh” on the title of the blog. With a very quick cursory look at the chamber, stummel and stem I see no challenging issues.  There is a light cake in the chamber, the rim has minor discoloration from grime and oils, and the stummel surface appears to be in good shape.  The surface of the stummel has darkened and has become tired and needs some cleaning and spiffing up a bit.  The Military stem shows no perceptible oxidation and only minor scratches – no tooth chatter.  Maybe an easy restoration!

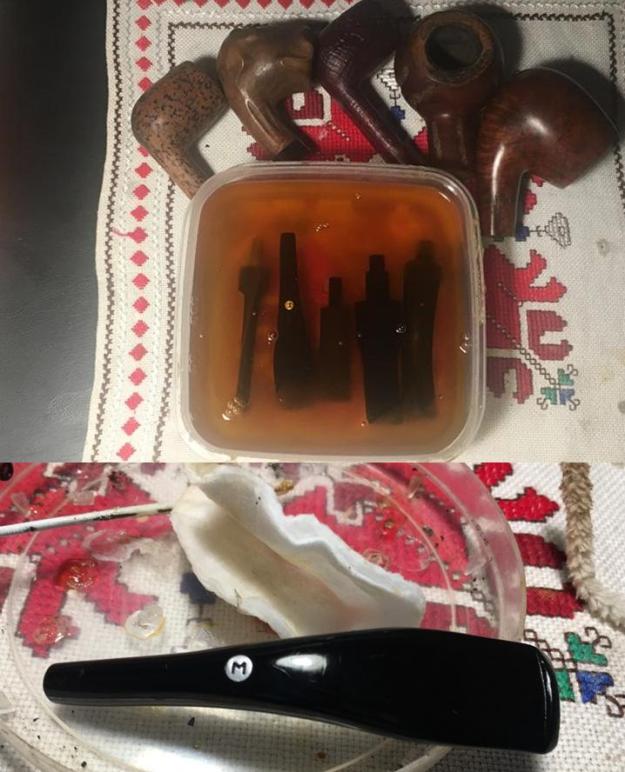
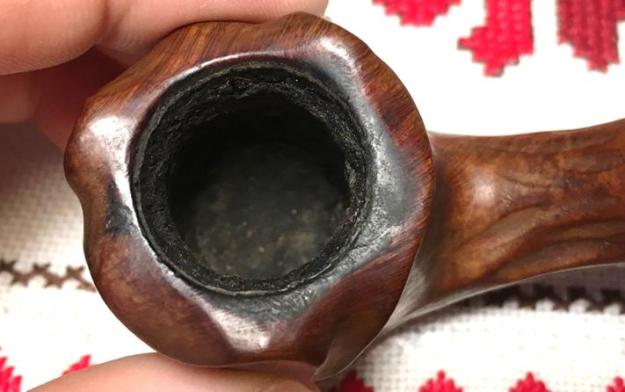
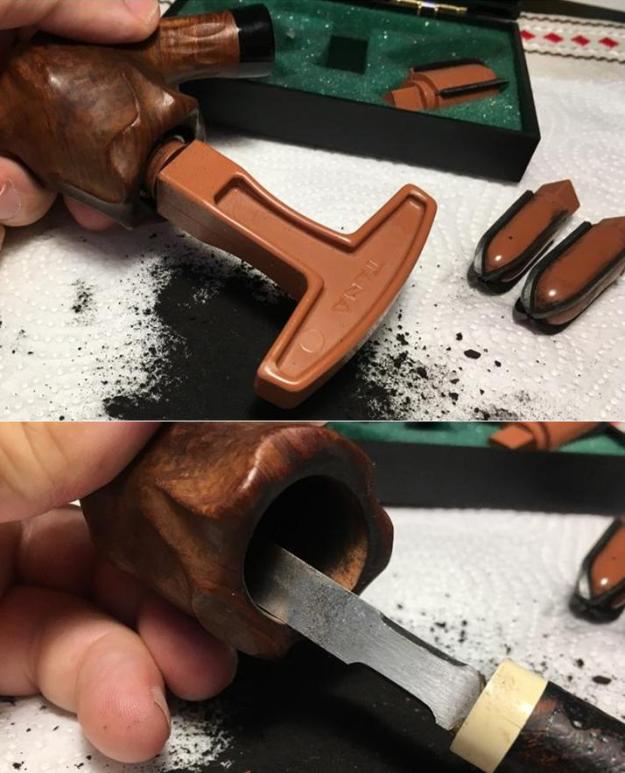
I begin the restoration by placing the stem in a soak of Before & After Deoxidizer along with other stems of pipes in queue for restoration.  Even though I see no oxidation, I’ll give it a soak to make sure.  Before putting the stem in the soak, I run a pipe cleaner dipped in isopropyl 95% through the airway to clean it first.  After soaking for several hours, I fish the stem out, drain it and wipe it down with a cotton pad wetted with mineral oil (light paraffin oil here in Bulgaria).  As I thought, very little oxidation was raised during the soak.Looking now to the M.G.M. Rock stummel, I begin by reaming the chamber to remove the moderate collection of carbon cake to provide a fresh start for the 106 year aged briar.  After putting down paper towel for easier clean-up, from smaller to larger, I use 3 of the 4 blade heads available to me in the Pipnet Reaming Kit.  After this, I employ the Savinelli Fitsall Pipe Tool to fine tune the reaming by reaching the more difficult angles at the floor of the chamber and by scraping the walls.  Finally, I wrap a piece of 240 grit paper around a Sharpie Pen and sand the chamber walls.  I then wipe the chamber with a cotton pad wetted with isopropyl 95% to clean the carbon dust left behind.  An inspection reveals a healthy chamber with no cracks or heat fissures.   The pictures show the process. Now, turning to the external surface cleaning, I use undiluted Murphy’s Oil Soap with cotton pads and a bristled tooth brush to reach into the rolls of the briar shaping.  I also use a brass wire brush on the small plateau to loosen the scorching around parts of the internal lip.  Following this, I gently scrape the scorching with a Winchester pocket knife edge to remove more of the damaged briar.  The cleaning and brushing made good progress. Preferring to work on a cleaned pipe, I now switch to the internals of the stummel by cleaning the mortise and airway with pipe cleaners and cotton buds dipped in isopropyl 95%. I also utilize different sized dental spatulas and scoops to excavate tars and oils by scraping the mortise walls and digging around the draft hole drilling deeper in the mortise.  I have learned over time that it shortens the clean up by excavating what you can and following with the cotton buds.  Last time I was in the US, I went to the US 1 Flea Market in Stuart, Florida, looking for pipes, of course.  I found a shop in the Flea Market that had absolutely everything and found an assortment pack of about 8 different dental tool accessories – sharp, flat and scooped.  These tools are very helpful in different phases of the pipe restoration process.  A good investment!  After excavating and swabbing, the internals are clean.  I move on!Back to the Military stem – it is in good shape with respect to the oxidation, but it has scratches and roughness around the bit that one expects to find through normal use.  The button also has compression marks to address. I first wet sand using 600 grade paper to find out if a mid-range grit is invasive enough to address the issues I see.  It does well, but it uncovers small tooth dents that I didn’t see before as well as the button being a bit compressed. I backtrack and use a flat needle file to give the button refreshed definition.  I then use 240 grit paper only in the bit area to remove the tooth dent and work on the button.To erase the 240 grit scratches, I again sand using 600 grit paper followed by sand/buffing the entire stem with 0000 grade steel wool.  I think the Military stem is looking pretty good.Pressing forward with the stem sanding, I wet sand using micromesh pads 1500 to 2400 followed by dry sanding with pad 3200 to 4000 then pads 6000 to 12000.  After each set of 3 pads, I apply a rich coat of Obsidian Oil which rejuvenates the vulcanite.  The stem’s looking great – I love the pop! I’ve been thinking as I’ve been working how I should approach the sanding/finishing of the ‘Wax Drip’ Rock shape?  As the tired finish is now, the pipe to me is one dimensional.  The darkened finish is uniformly non-expressive.  I look at it and I see the beautiful, unique shape, but I don’t see the beauty of 106-year-old briar grain standing on center stage of this presentation.  The great thing about micromesh pads is that they are flexible and hug the surface which I believe will aid me in adding some depth and contrast of shades in the briar’s presentation.  While sanding with the micromesh pads, there will be natural and unavoidable changes in the pressure and impact of the pads because of the contouring of the Wax Drip Rock shaped briar.  High points will naturally be lighter and lower points will be darker, providing (at least theoretically at this point!) contrast and shading through the briar landscape.  Ok, that’s the theory and the plan.  Time to march!  Using pads 1500 to 2400, I wet sand the stummel and vulcanite ferrule.  Following this, I dry sand using pads 3200 to 4000 then 6000 to 12000.  The pictures show the progress and I like what I see – theory becoming reality. Next, I mount the Dremel with a cotton cloth buffing wheel set at 40% full power and I apply Tripoli compound to the briar surface.  I’m able to reach more directly into the carved areas of the briar with this more abrasive compound.  After the Tripoli compound, I change to another cotton cloth buffing wheel, maintain the same speed and apply Blue Diamond compound to both stummel and military stem.  To remove compound dust from the pipe, I buff the pipe with a felt cloth. Before applying carnauba wax to the stummel, I apply Before & After Restoration Balm. I like using the Restoration Balm because it deepens and enriches the natural briar hues.  After squeezing some Balm on my finger, I apply it to the briar with my fingers working the Balm into the surface – making sure I work it into the carved areas.  As I work the Balm into the briar, it begins with a light oil consistency but thickens during the application to a wax-like ointment – the picture below shows this stage.  After letting the Balm settle for about 10 minutes, I wipe/buff off the Balm with a clean cloth. The final stage is to apply carnauba wax to the stem and stummel.  I mount another cotton cloth wheel to the Dremel, maintain the same 40% of full power, and apply a few coats of carnauba wax.  When I complete the waxing cycles, I give the pipe a rigorous hand buffing with a microfiber cloth to raise the shine even more.
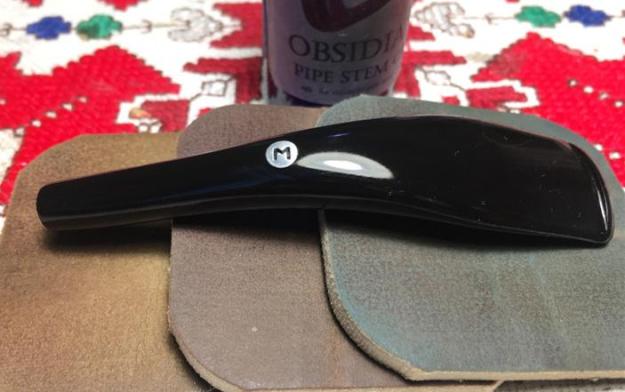
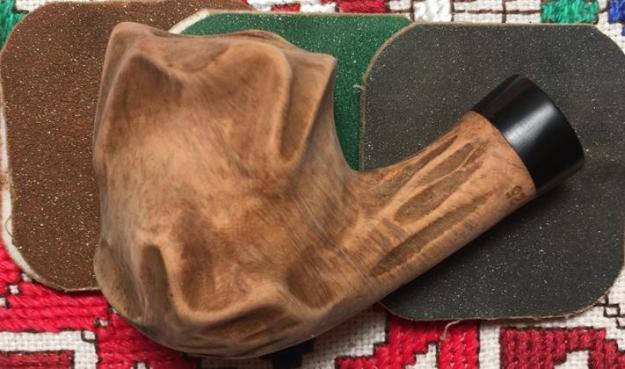
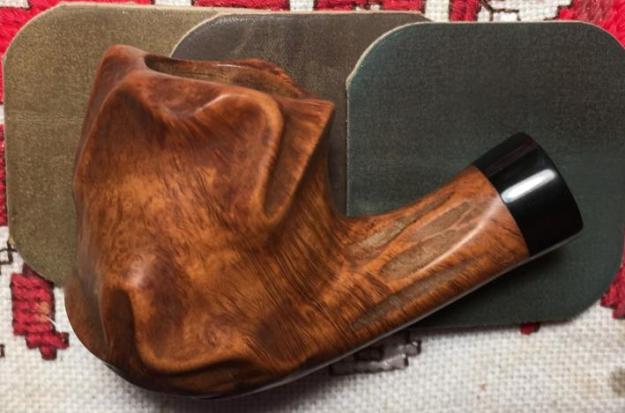
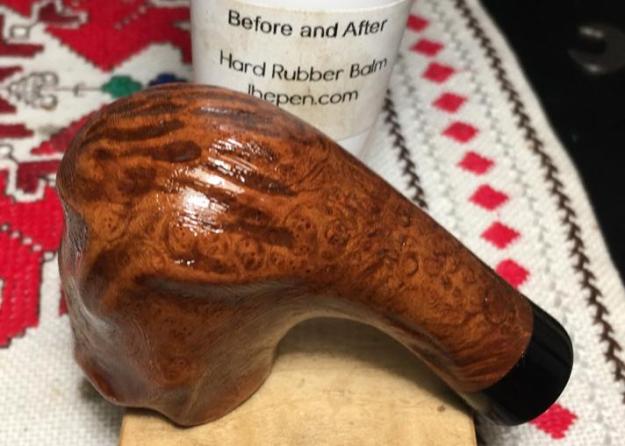
Restoring this Gasparini M.G.M. Rock exceeded my expectations in important ways. The pipe was beautiful before I started.  Now, it’s a show stopper as the 106-year aged briar has retaken center stage and the Freehand shape with the dips, curves and swirls are a stellar supporting cast.  I can easily see the Wax Drip shape, but it could also be petals on a flower.  The Military style stem looks classy but unassuming as it joins the vulcanite ferrule with a contrasting ring of briar between ferrule and stem.  Another exceeded expectation was to understand better the Gasparini name and the value of family. My appreciation brimmed for Marisa Gasparini as she took the time to answer my questions – this was an honor.  This simple act revealed her pride in the Mario Gasparini heritage and her willingness to answer questions shows her concern for each pipe bearing the Gasparini name.

Idian commissioned this pipe with the understanding that the final valuing of the pipe would be after I researched and restored the pipe and published the write-up.  Then, as is the understanding for all the pipes that are commissioned, the commissioner of the pipe has the first opportunity to acquire the pipe in The Pipe Steward Store with the value determined.  If the price is not agreeable, he may pass, and I leave the pipe in the store for another steward to eventually add to his collection.  However, for this restoration, for this Gasparini M.G.M. Rock, the value for me is ‘priceless’.  I’ve invited him to join my collection and start pulling his own weight in the rotation – my first Gasparini, we’re happy.  I’m thankful to Idian for his understanding after letting him know – he was a bit disappointed but happy that the M.G.M. Rock was restored and continued in good hands.  Thanks for joining me!
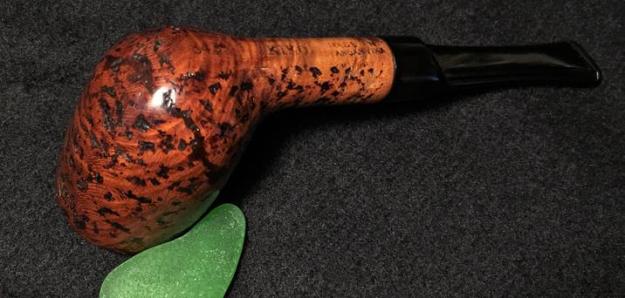
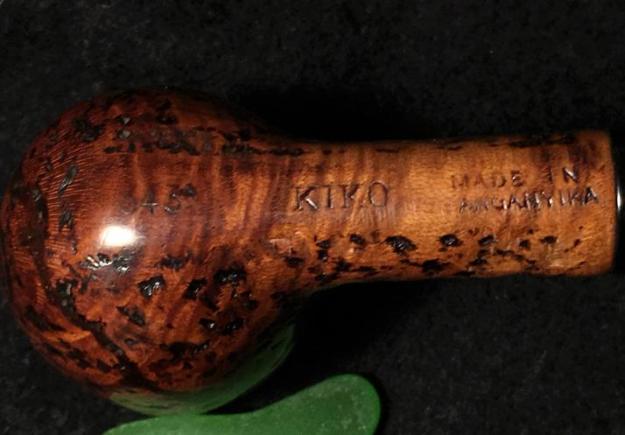
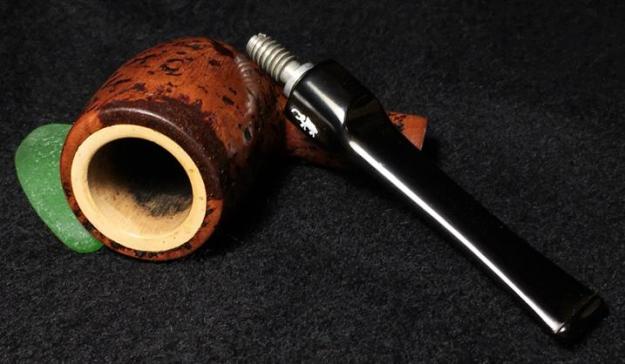
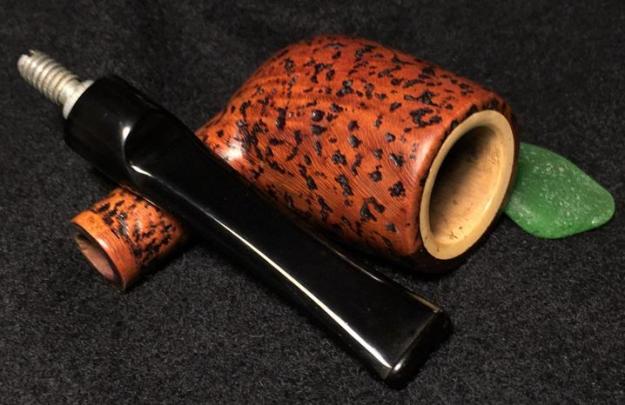
Giving new life to a Kiko 343 Made in Tanganiyka Meer-lined Billiard


Blog by Dal Stanton

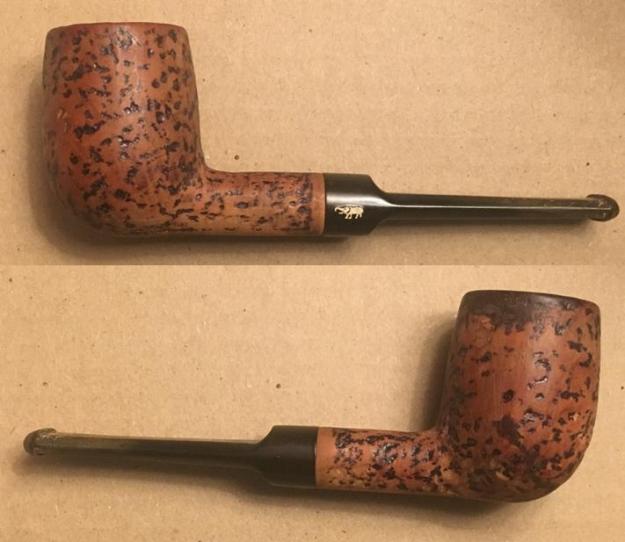
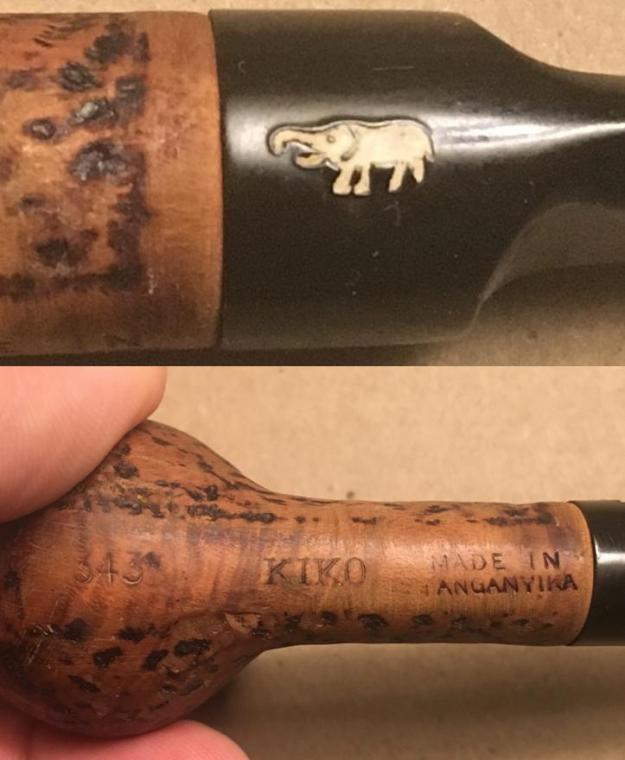
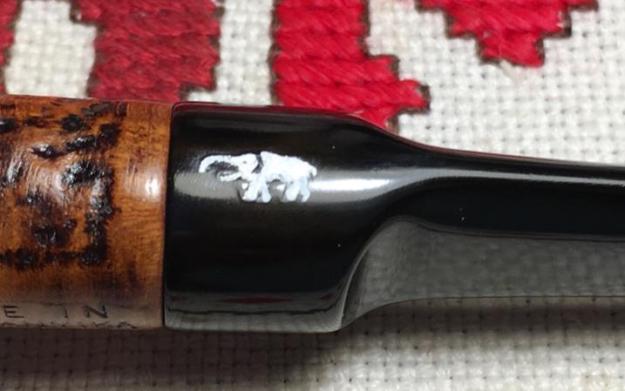
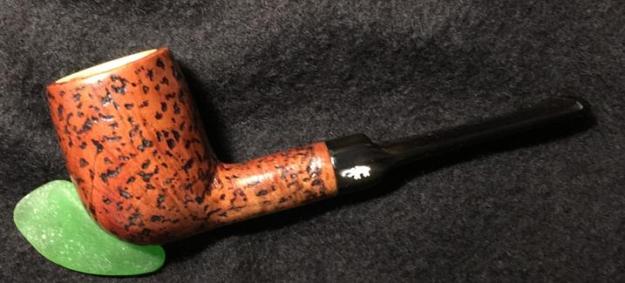
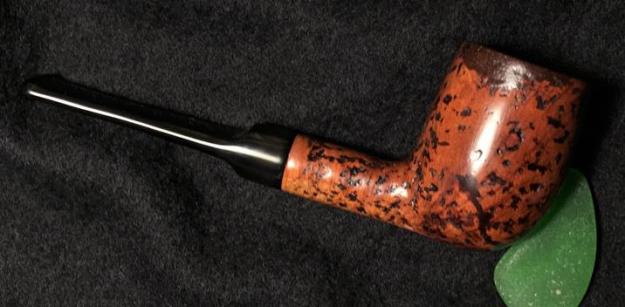
I acquired this interesting Kiko 343 Meer-lined Billiard in a Lot of 66 which has provided many stewards with newly restored pipes.  Aaron saw this uniquely rustified pipe in the “For ‘Pipe Dreamers’ Only!” page on The Pipe Steward site and commissioned it to add to his collection AND this pipe will benefit the Daughters of Bulgaria, our work here in Bulgaria helping women and girls who have been sexually exploited.  Here are the pictures that got Aaron’s attention. I’ve looked forward to working on this pipe because of its country of origin – Made in Tanganyika.  The pipe design itself gives hints of its African origin with a rustification that has a safari motif on a classic Billiard and the stem stamp of an elephant is very cool!  The briar surface also reminds me of cork – a surface that combines smooth and texture which I think is unique.  I assume the shape number 343, stamped on the lower shank, points to the Kiko’s Billiard shape.Dating the minimal age of this pipe is made easy by the fact that Tanganyika is no longer a country.  According to the Wikipedia article, in 1922 the Tanganyika Territory was taken by the British as their share of German East Africa under the League of Nations Mandate.  After WW 2, Tanganyika became a United Nations Trust Territory yet remained part of the British Common Wealth.  Claiming independence from the crown, Tanganyika adopted a new constitution in 1962 that abolished the monarchy and became present day Tanzania.  The picture to the left shows the location of Tanganyika – marked #11. This puts the date of this Kiko at no later than 1962 which gives a bit of vintage as it carries its former Commonwealth history to the present.

I posted some pictures of the Kiko during the restoration on the Facebook group, The Gentlemen’s Pipe Smoking Society, and fellow member, Jonny Mullis commented on the Kiko name that they were wonderful pipes with the animal stamping.  He also said that they were becoming quite collectible and affordable.  That was all good news to me!

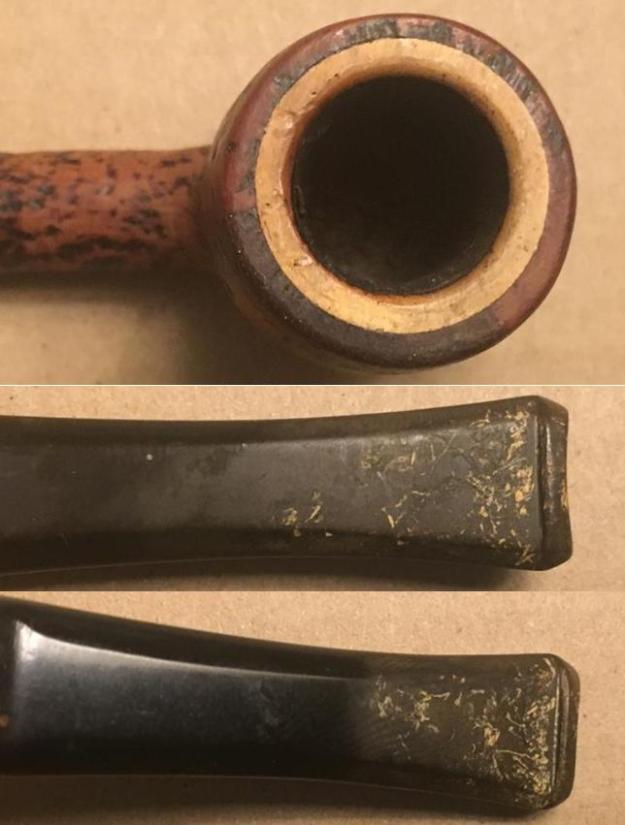
The Kiko seems generally to be in good condition but carries with it some fills that I’ll need to take a closer look. The Meer-lined bowl looks solid, but I will be able to see better after cleaning it.  The rim has a fill or composite material that occupies about a quarter of the rim.  Structurally, the rim looks good and should clean up well.  The saddle stem has some oxidation and tooth chatter on the bit which needs addressing.

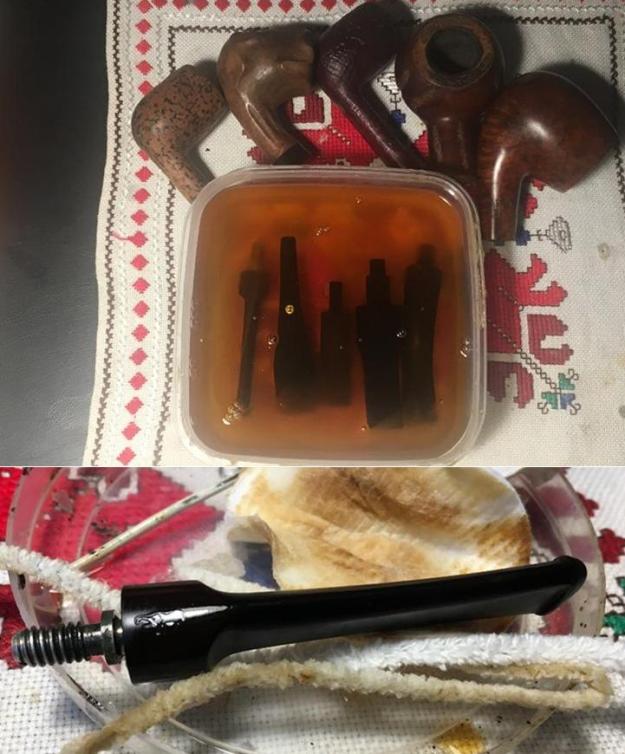
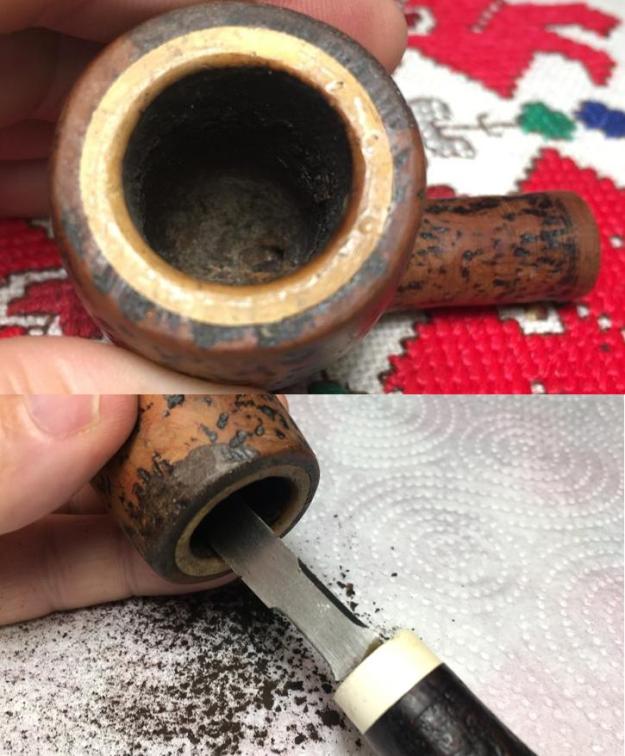
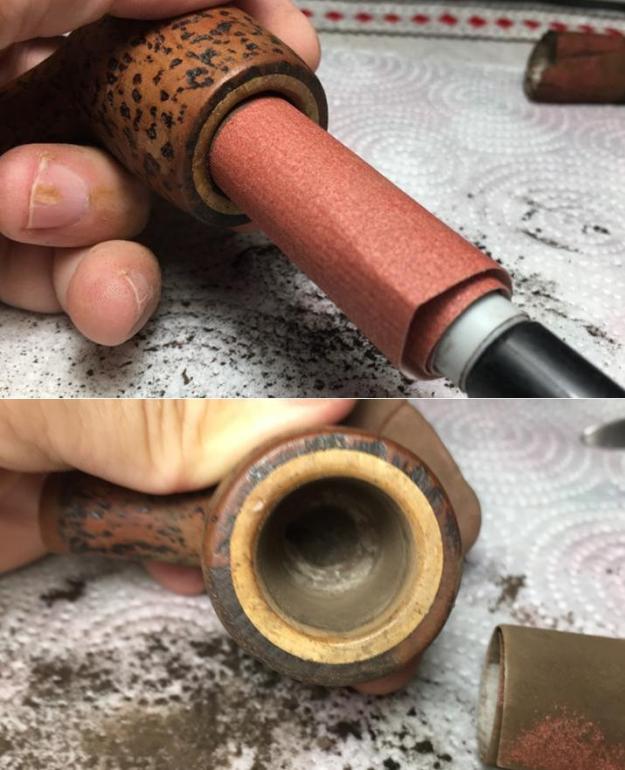
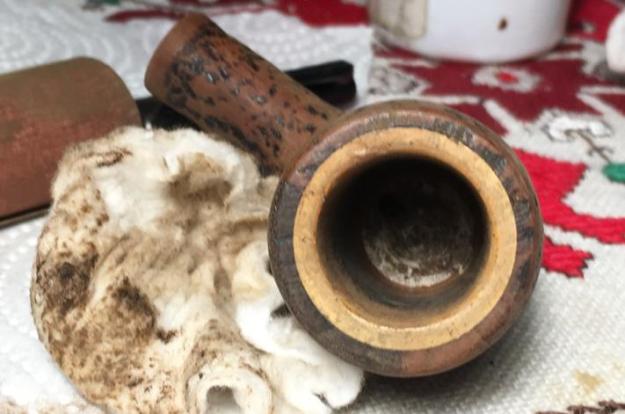
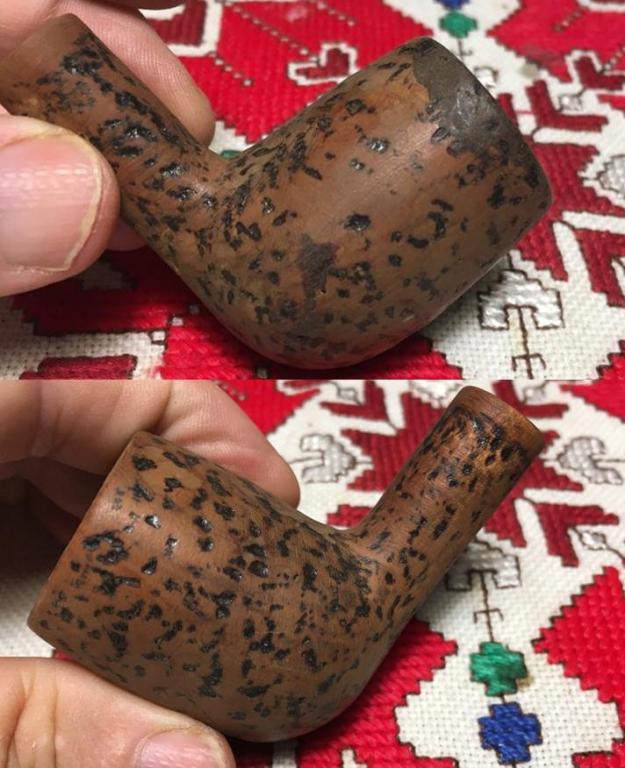
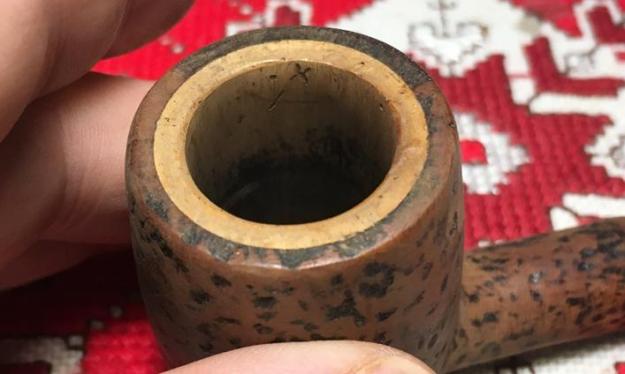
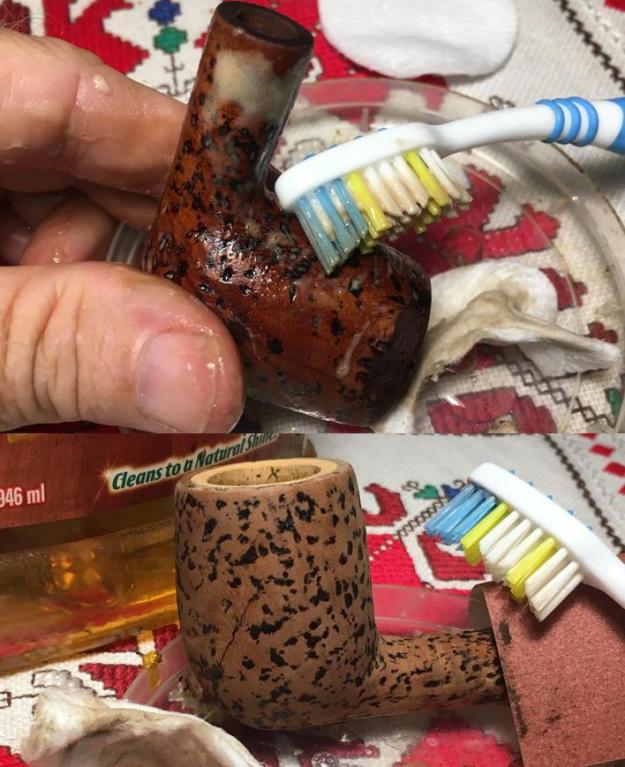
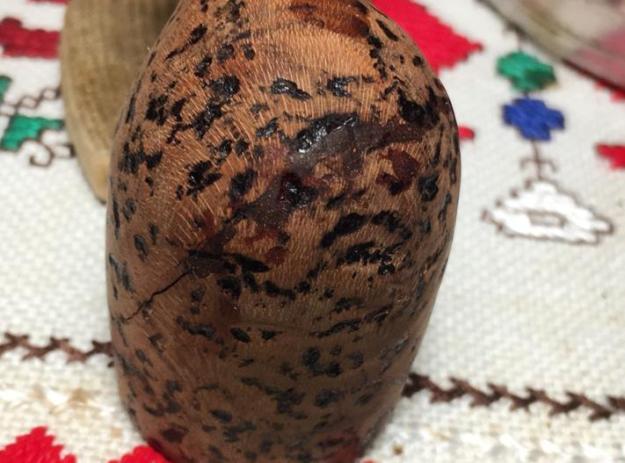
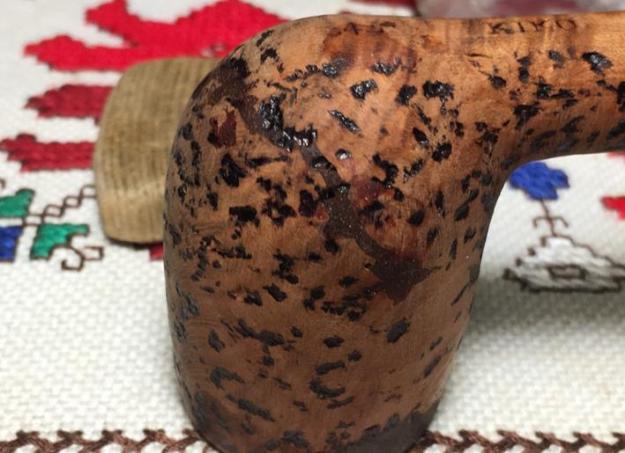
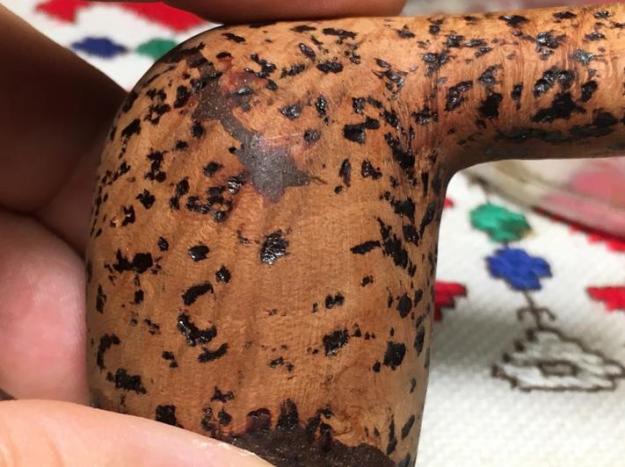
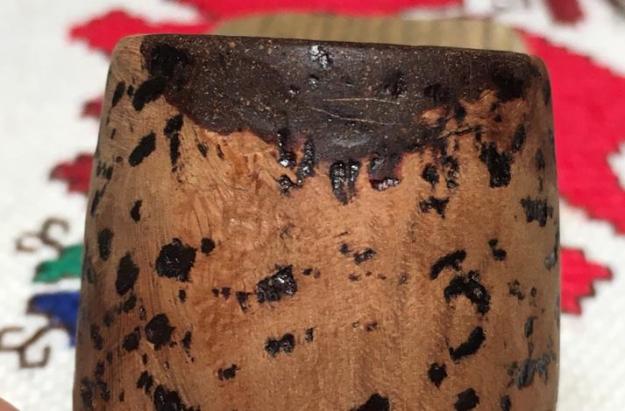
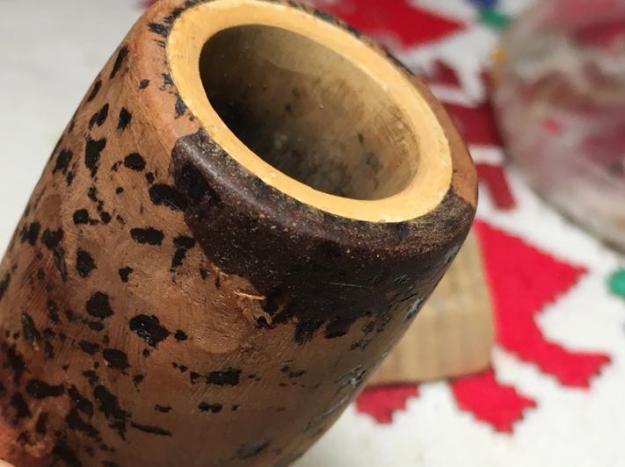
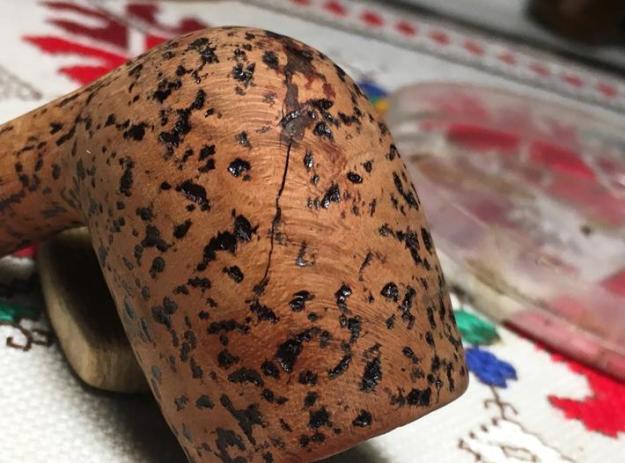
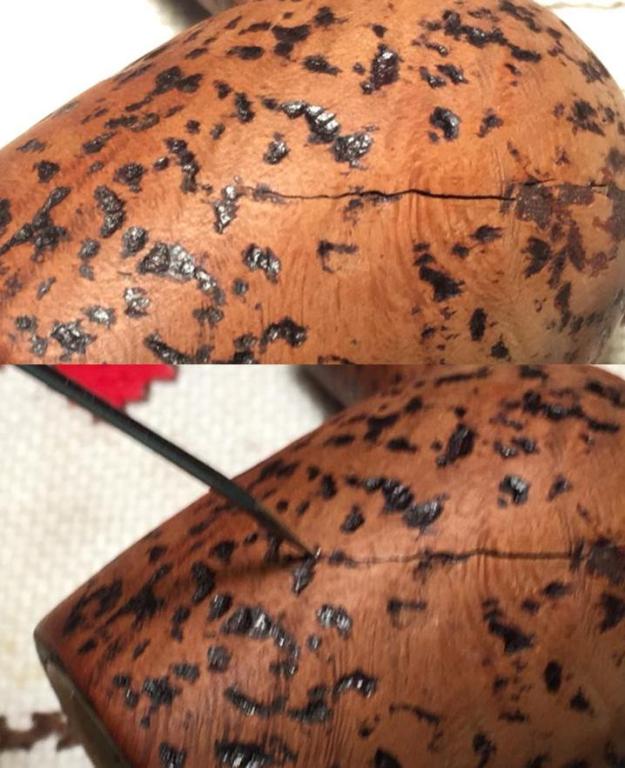
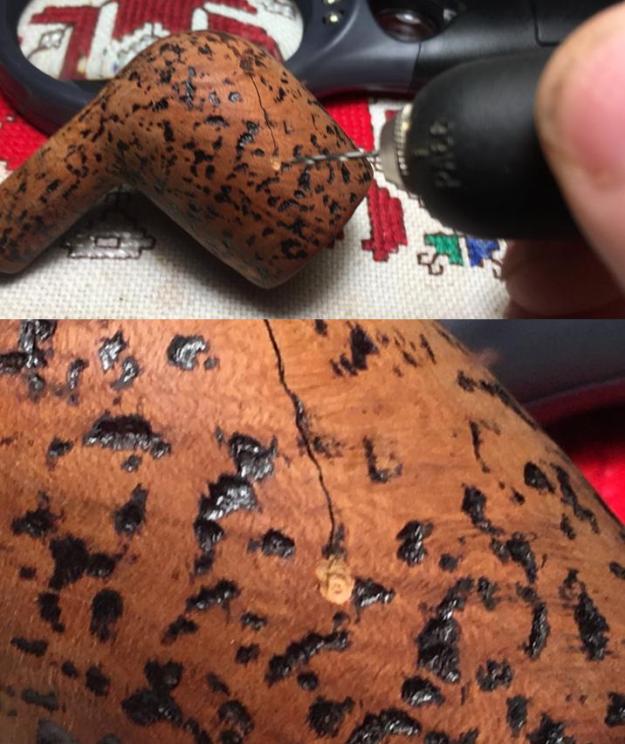
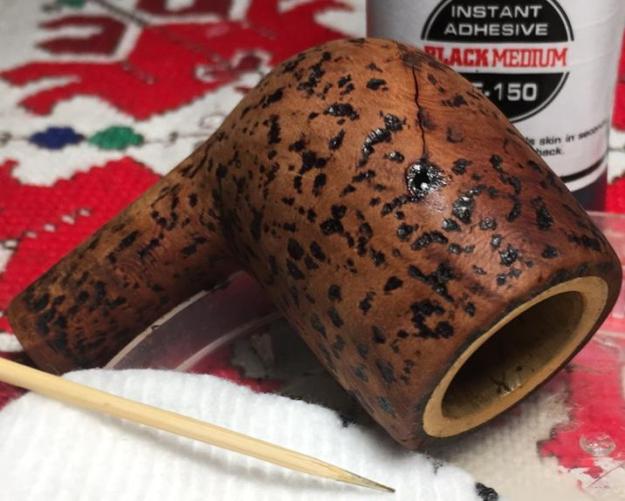
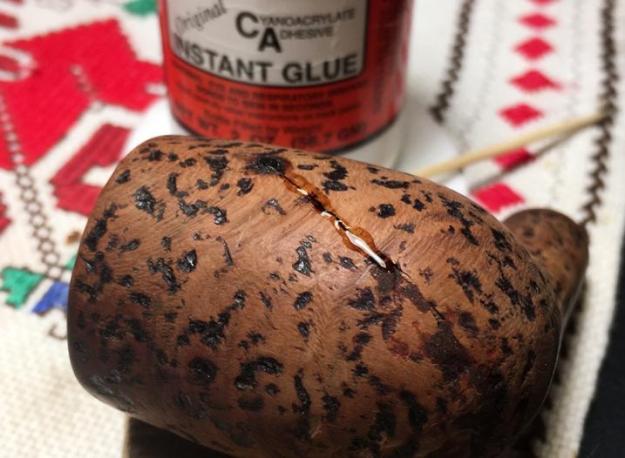
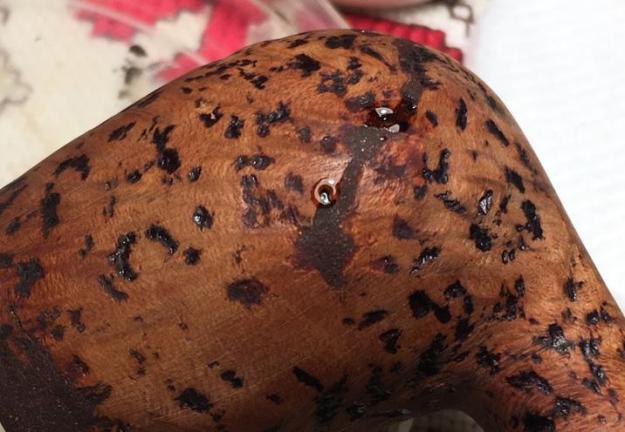
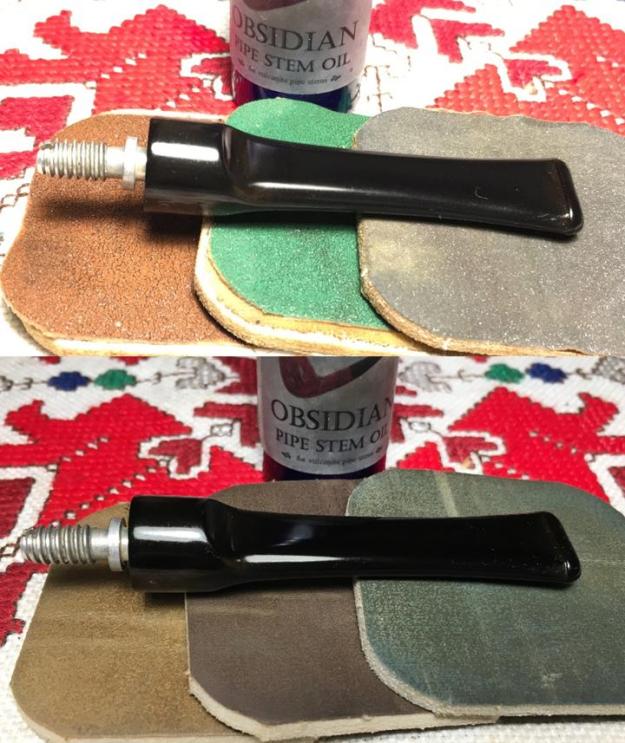
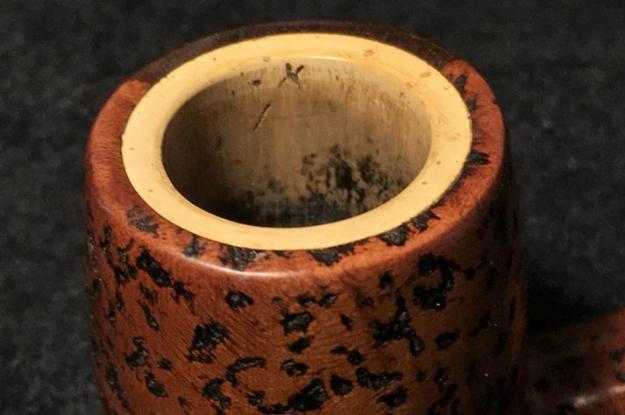
I begin the Kiko of Tanganyika’s restoration by cleaning the airway of the stem with pipe cleaners dipped in isopropyl.  After this, I add it to a soak of Before & After Deoxidizer with several other pipe’s and their stems in the queue for restoration.  I leave the stem in the soak overnight and after fishing it out of the Deoxidizer, I wipe the fluid off with cotton pads wetted with light paraffin oil.  The raised oxidation also is removed as I wipe.  Unfortunately, the paint used for the elephant stamping did not hold.  I should have covered it!  I will need to retouch the stem stamp later.  To be on the safe side, I also use 600 grade sanding paper and wet sand the stem to remove any residual oxidation.  After this, I remember reading a Charles Lemon’s blog on Dad’s Pipes (LINK) about practices he has learned over the years, and one of them was utilizing Tripoli compound and a buffing wheel to remove oxidation.  I decide to try it out.  To do this, I mount a new, clean felt buffing wheel on the Dremel, set at the slowest speed and apply Tripoli over the stem.  It seems to work well as I’m able to concentrate on areas of oxidation – especially around the button and the curve of the saddle that are more difficult to reach.  The pictures show the deoxidation process. Turning now to the Meerschaum lined stummel, I take a picture of the chamber showing the minor cake that has collected on the Meer surface.  Unlike briar pipes, Meerschaum needs no protective cake.  Therefore, the goal in cleaning is to reveal the Meerschaum surface.  To remove the carbon, I begin by gently using the Savinelli Fitsall Tool to scrape the chamber wall.  When the crunchy texture stops as I gently scrape, lets me know that the carbon is removed.  I then follow by sanding with 240 grade paper wrapped around a Sharpie Pen.  I sand it until it is totally smooth in the chamber.  There is still darker Meer in the chamber, but to remove more simply for aesthetics is not necessary. I then wipe the chamber with a cotton pad wetted with isopropyl 95% to remove the Meerschaum dust left behind.  The Meer lining is in good shape – no cracks or crevices in the chamber – though there are some age scratches here and there. The pictures show the progress. Moving to the external surface, I use undiluted Murphy’s Soap with cotton pads to clean.  I also utilize a bristled tooth brush to work the rustification divots.  To freshen the Meer rim top, I use a piece of 240 grit paper to lightly sand and clean the Meer surface.  This enhances the appearance with the contrast between the Meer and the briar rim. I take some pictures of the cleaning process and this is when I discover a problem.  I detect a crack running from the left side of the bowl downward until it disappears when it intersects with the fill that wraps around the heel and up the right side.  The fill looks like a briar dust/CA glue patch material which I use regularly.  The same patch material quarters the rim.  These pictures show the patch material. To address the crack, my first step is to determine the integrity of the old patch material.  I will try to remove the patch material to see what is underneath.  If I can do this, then I can assess the nature of the repair needed.  The crack that is exposed appears to me to be a fresher progression of crack ‘creep’ – that has grown beyond the original patch.  This repair is straight forward by drilling a counter hole at the end of the crack to stop the creep and applying additional patch material. To test the integrity of the patch material I try to remove it by dissolving it with acetone and cotton pads.  The acetone doesn’t make a dent. These patches are solid.  I work the acetone over the rim and it has no effect on the patch material.  I’m not sure what the patch material is, but it’s not going anywhere soon!  At this point, I will repair the exposed crack and shore up some gaps I detect in the old patch material.  The rustic, craggy look is what makes this Kiko stand out and after working on the patches, I’ll seek to blend this rustic look with the finishing process.  To start, to aid me in drilling a hole at the end of the crack to arrest the crack creep, I use a magnifying glass to identify the end and using a sharp dental probe to press a guide hole.  The guide hole helps when drilling.  I mount a 1mm drill into the Dremel and drill – but not too much!  Going through the Meer lining would not be a happy situation.  The black highlighted rustification patterns, make it much easier to blend the repair. To do this, using a toothpick to run a drop off the end, I spot drop Black CA glue into the counter hole and let it cure. After filling the offset hole, using a toothpick in the same way, I run a line of clear, thin CA glue down the crack.  I use the thin CA glue because it penetrates the crevice of the crack for a solid fill.  After the CA glue cures, I spot drop clear CA glue in a few other places where there were gaps around the old patch work. With the CA glue patches curing, I turn to the stem.  Using micromesh pads 1500 to 2400, I wet sand the stem.  Following this, I dry sand using pads 3200 to 4000 and 6000 to 12000.  After each set of three pads, I apply Obsidian Oil to the stem to revitalize the vulcanite. I love the freshly polished vulcanite pop! With the crack patch cured, I start sanding out the excess CA glue using 240 grade paper followed by 600 grade. To bring out the natural briar shine and hue, I run the stummel through the full battery of 9 micromesh pads from 1500 to 12000.  Before I apply any dye color to the stummel to mask and blend the patches, I want to have an idea of the presentation of the briar.As expected, the briar darkened through the micromesh cycles.  There is still a lightened area around the sanded patch areas which I will blend.  I also want to blend the patches more.After applying several different dye sticks and fan blending with a cotton pad wetted with a bit of alcohol, I tried to darken the lower part of the stummel to provide more blending.  I succeeded to a degree, but not enough that would mask the patch areas.  To do that, I would need to stain the entire stummel darker and that would lose the ‘cork’ or safari appearance of this Kiko Billiard made in Tanganyika. That, I’m not willing to do.  His trademark is rough and rustic!  So, with a little embarrassment, I remember that I have not cleaned the internals of the stummel.  After some pipe cleaners and cotton buds dipped in isopropyl 95%, I now have a clear conscience.Reconnecting stem and stummel, I mount a cotton cloth buffing wheel on the Dremel, set the speed at the lowest speed, I apply Blue Diamond compound to both stem and stummel. After completing an application of the compound, I buff the pipe with a felt cloth to clean off the compound dust in preparation for the application of wax.  Before I apply the wax, I have one more project to complete.  The white elephant stamping’s paint disintegrated in the Deoxidation soak and I need to repair this very cool stamping.  Using white acrylic paint, I dab it over the elephant imprint and dab it with a cotton pad to thin it and allow it to dry more evenly.Well…, in the interest of full disclosure, none of the usual methods worked – paint, wipe while wet – paint, let dry fully, scrape off lightly….  At the end of the day, and some hours of experimentation using a paint brush, needles and toothpicks, I finally arrived at an acceptable result for me.  With a picture of the original on my computer screen to compare, I used a toothpick to ‘sculpt’ the acrylic paint onto the Elephant canvas bit by bit.  Then, before the paint dried, I scrape the unwanted portion from the canvas to shape the image.  This was not a straight forward, slam dunk process!  After many starts and restarts working with a magnifying glass to paint, I came to a place where I am satisfied.  I’m not an artist in anyone’s conversations, but through trial and error, the Kiko Elephant mosaic – it’s no longer a stamping, is not perfect, but looks pretty good.  With the Elephant again standing guard on the Kiko’s stem, I mount the Dremel with a cotton cloth buffing wheel, increase the speed to about 40% and apply a few coats of carnauba wax to the stummel and stem.  After applying the wax, I give the pipe a good hand buffing with a clean microfiber cloth to raise the shine on the unique ‘cork’ rustified stummel and stem.

The rustification on this pipe is unique.  It pulls one toward the African roots of Tanganyika, now Tanzania.  The texture reminds me of cork which by the very nature of the material is not perfect.  This Kiko wears his imperfections well – the fills, evident on the stummel surface, belong and mark the difficulties this pipe has had along the way, but now ready to go again.  The grain nuanced as a backdrop to the rustification, has subtle patterns that remind one of tiger fur.  The Meerschaum lining looks great and will provide the Kiko’s next steward the ability to enjoy a bowl of his favorite blend, and immediately reload for another smoke without the need of resting the pipe.  Aaron commissioned this Kiko from the “For ‘Pipe Dreamers’ Only!” page and now he will have the first opportunity to acquire it in The Pipe Steward Store and what is really good, this benefits our work, the Daughters of Bulgaria – helping women and girls who have been trafficked and sexually exploited.  Thanks for joining me!

Ben Wade’s in the House, Part 2


Blog by Joe Gibson

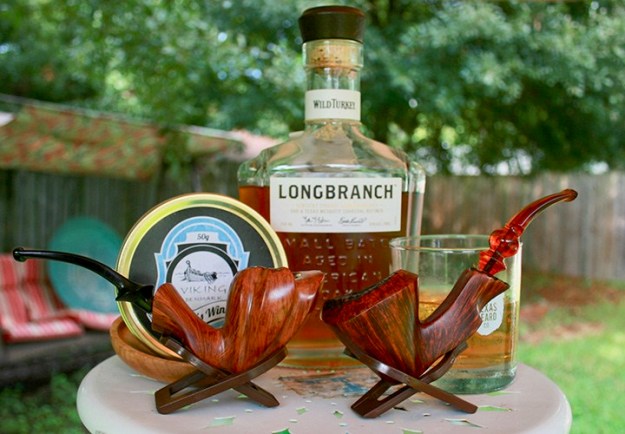
Finished Pipes, ready for an afternoon smoke. The tobacco is last tin of out of production Viking Odin’s Wind.

Which Stem for Which Pipe?

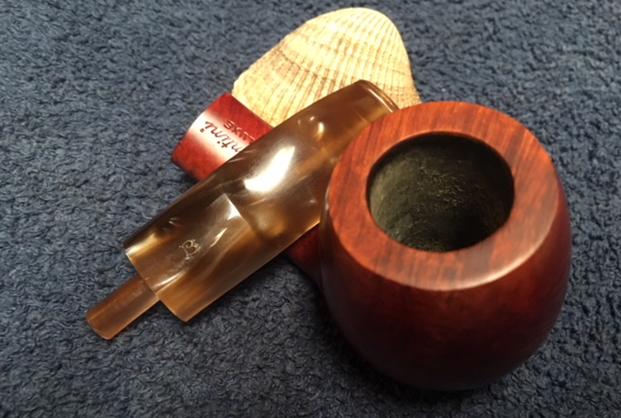
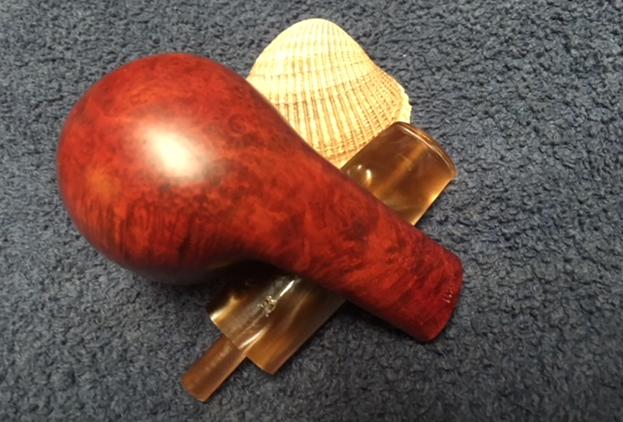
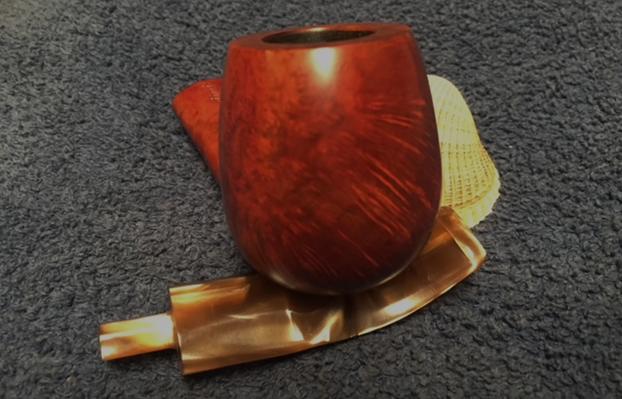
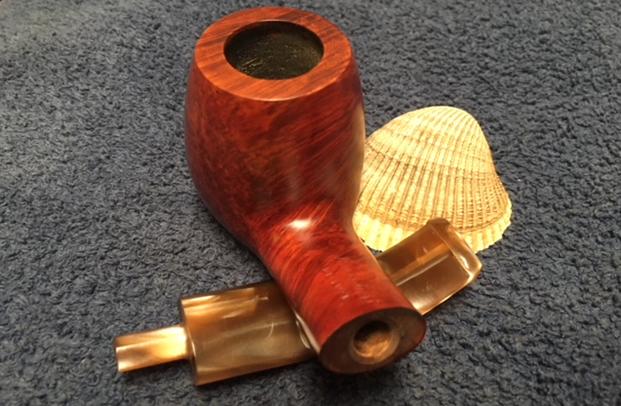
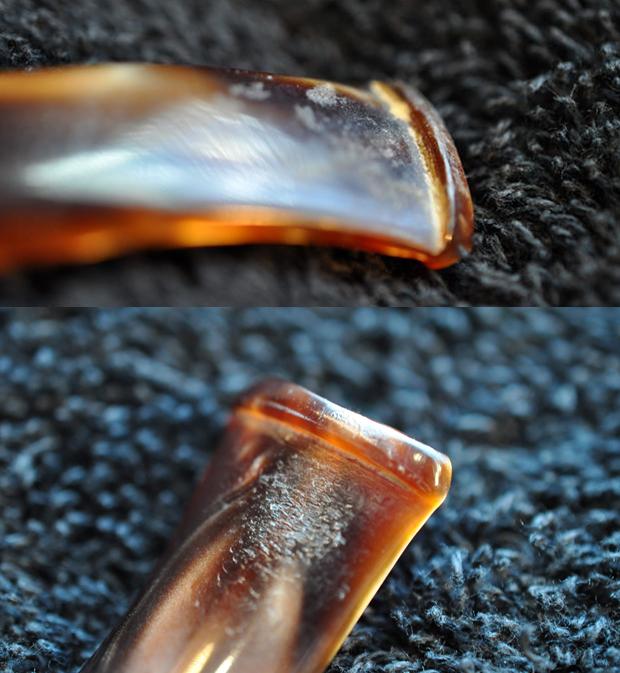
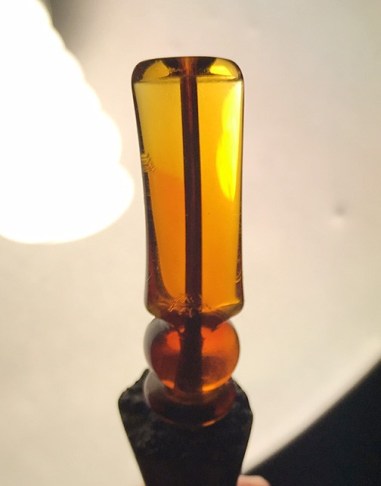
When the Ben Wades arrived, the Martinique came with a beautiful, amber colored but transparent acrylic stem. There was a minor amount of tooth chatter near the bit, but nothing I felt the need to repair. The airway, on the other hand, was black from being smoked. The stem was tight in the mortise and didn’t readily pull out.

The Royal Grain, as I mentioned in the previous post, still had a vulcanite tenon stuck in the mortise. I decided to work on the Martinique stem first and deal with finding a stem for the Royal Grain later.

Cleaning the Perspex Stem

The Perspex stem before cleaning.

The first problem was separating the stem from bowl without breaking anything. Since I planned on soaking the bowl in alcohol, I dipped the pipe and stem in the jar and let it set for a minute or two. The stem then came off the pipe easily and I rinsed it off in clean water.

With oxidized vulcanite stems, I do an Oxyclean soak to bring the oxidation to the surface. I’ve never tried an Oxyclean bath on acrylic or Perspex stems. With those, I usually just wipe the outside down with alcohol and do the inside with pipe cleaners dipped in alcohol. The one thing you never want to do is soak the stems in alcohol. It could possibly cause “crazing” or cracks in the airway. Some

people even report stems breaking after soaking in alcohol.

Tip #1: The shank brush tool is great for cleaning tobacco residue from the bit. I find it does the job faster than just pipe cleaners.

I was hoping dipping regular, tapered pipe cleaners in alcohol would remove the discoloration from the airway and sterilize it. And it did, to an extent. After 10 pipe cleaners the airway was a little cleaner, but I could still see the old tobacco stain. I probably would have gone to my bristle pipe cleaners, but I didn’t The solution for this situation? I switched to a shank brush pipe tool. It’s ideal for cleaning the shank and  the tenon and airway of a pipe stem. I dip it in alcohol and run it through the stem until it comes out fairly clean. I follow that with pipe cleaners dipped in water.

The Royal Grain Stem Replacement. Maybe?

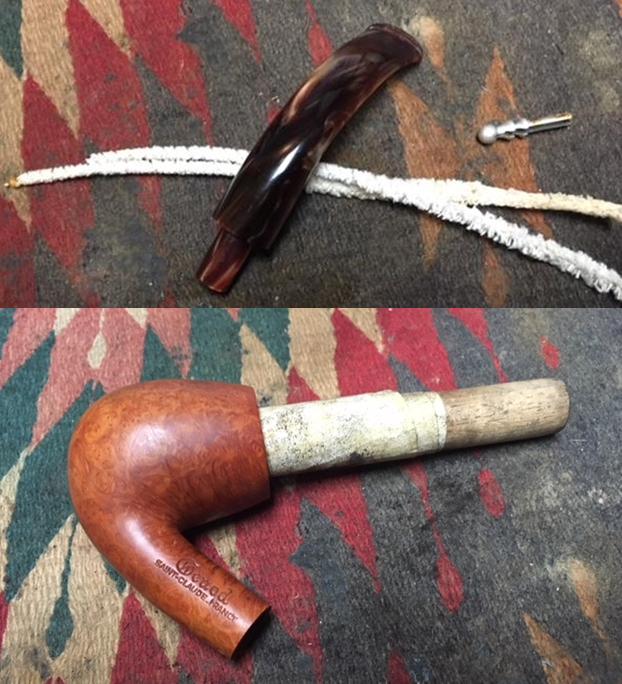
Initially I planned to have a stem made for the Royal Grain. Then I remembered the Preben Holm stem I had sitting in my desk. It’s a mismatched stem from a Søren freehand I bought in early August. I easily removed the broken tenon by inserted a drill bit into the airway by hand and twisting and pulling it out.

Tip #2: When buying pipes in “junktique” shops and malls, check the stems for stamps or logos. It will help you identify the pipes and may also tell you if the stem is the correct one for the pipe. I use mismatch stems as a point in talking the seller into lowering the price.

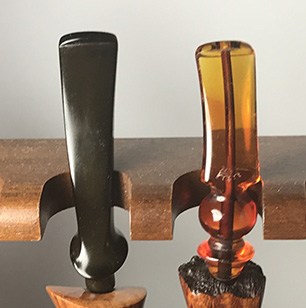
Black Vulcanite Preben Holm stem and a Perspex Ben Wade

Stems are usually made to fit the pipe it’s going with and I have never found one stem to perfectly fit a pipe other than the one it’s made for.

The Preben Holm stem fitted the Royal Grain. Maybe a tighter fit than I like, but it a fit and I can always work on the mortise or tenon to make it better. On top of that, a friend from one of the pipe forums, had a Ben Wade stem he is sending me. One way or the other I have a stem for the Royal Grain. Or, did I?


But Which Stem for Which Pipe?

So, there I was. Sitting with two clean and polished pipe bowls and two stems. I picked up the Perspex stem and inserted it back into the Martinique. And, the bowl almost slipped off the stem. The logo on the Perspex is the Ben Wade logo. This should fit.

I’m guessing that the fit was so tight at the start because both the mortise and the tenon was so dirty. Once the cleaning removed the residue, it became loose.

Just on a lark, I decided to try the Perspex stem on the Royal Grain and it slid into place easily and looked like it was made for it. I also liked the way the amber color matches to the darker finish of the Royal Grain.

I then inserted the vulcanite Preben Holm stem into the Martinique. It is a snug fit but not a tight fit. May not be the original stem, but it is close enough.

Part 1: Ben Wades in the House

© J. Gibson Creative Services. September 5, 2018

Restoring a Beautiful Sandblast Fellini of Italy Sitter


Blog by Steve Laug

The next pipe on the table was one that my brother Jeff picked up from a seller in Texas. We have picked up quite a few pipes from him. It was in a box with the freehand pipes that I have been working my way through. Even though it is not properly a freehand I had put it in the box – go figure. It is more of a Billiard shape with a flat bottom making it a sitter. It has a slight bend in the shank and stem and the pipe is balanced to stand on its own. It has a sandblast finish to the bowl that reveals some swirling grain patterns. It is stamped on the left side of the shank in a smooth panel with the word FELLINI. It is also stamped at the stem shank junction ITALY. The pipe was very dirty when it arrived from the seller. There was dirt and grime in sandblast finish on the bowl. There was a thick cake in the bowl and an overflow of lava on the rim top. The inner and out edges of the bowl appeared to be undamaged under the grime. There were a few sand pits/fill areas that needed attention and the finish was spotty – dark and medium brown randomly around the bowl and shank. The stem was a striated tan and cream acrylic and has some tooth chatter on both sides near the button. The tenon had come loose from the stem and was stuck in the shank. Because of that the fit of the stem to the shank was off.  Jeff took photos of the pipe before he started his cleanup up work. Jeff took photos of the rim top and bowl. You can see the thick coat of lava and grime on the rim and the thick cake in the bowl. This was a dirty pipe. There is even the fuzz of dust all around the bowl from sitting unused for a long time.The next photos show the finish on the bowl from various angles. Though it is dirty it is an interesting looking sandblast. He took a close up photo of the stamping on the left side of the shank. You can see that it is sharp and readable. You can see the gap between the stem and shank end in the photo.The stem was actually in great condition. The tooth chatter was light and there were no deep tooth marks in the surface of the acrylic.Jeff had scrubbed the exterior of the bowl with Murphy’s Oil soap and removed the dust and grime that had accumulated there. The finish looked very good once it had been scrubbed. He lightly reamed the bowl with a PipNet reamer and cleaned it up with a Savinelli Fitsall Pipe Knife. He cleaned the interior of the mortise and the airway in the shank and the stem with alcohol, cotton swabs and pipe cleaners. The pipe came to me clean and ready to do the restoration. I took some photos of the pipe to show the condition at this point in the process. I took some photos of the rim top and sides of the bowl where there were sandpits or fills that needed attention. I have circled the damaged areas in red in the second and third photo below. Both of them will need to be repaired and restained. There is some darkening to the surface of the rim and some spottiness to the finish that a restain will take care of. I also took close up photos of the stem to show its condition. It was in good condition other than the loose tenon in the stem. I took the stem off the shank and you can see the tenon stuck in the shank. It has obviously been this way for a while as there is staining from tobacco on the end that sits in the stem. I used a pair of pliers to wiggle the tenon free from the shank so I could reglue it in the stem later.Once again I turned to the internet to see if I could find out any information on the brand. There was a lot of information on the Italian Film Director Frederico Fellini but very little other than pipes for sale on eBay that bore the name. Pipedia did not even mention the brand so that was unhelpful. I turned to the Pipephil site and found a listing for the brand. I have included a screen capture from that site (http://www.pipephil.eu/logos/en/logo-f1.html). You can see from the screen capture that even that information was very slim. Ah well, it will remain a mystery that hopefully one of you reading this can unravel for us.I started my restoration of the pipe armed with the little bit of information that I could find on the brand. I decided to reglue the tenon in the stem.  I used a needle file to roughen the surface of the Delrin/nylon tenon. I wanted to make it rough enough for the glue to have something to bite on when I glued. I coated the roughened end of the tenon with clear superglue gel and pressed it into the drilled hole in the stem. I wiped away the excess glue on the face of the stem. With that done I set the stem aside to let the glue cure.I turned to repairing the damaged fills or sandpits on the bowl sides (front and rear). I put a drop of clear super glue in the pit and filled it in with briar dust using a dental spatula. When the repair had dried (fairly quickly as it is warm here) I used a brass bristle wire brush to remove the excess repair. I find that the brush follows the pattern of the sandblast. I touched up the repaired fills with an Oak stain pen. I used it to stain the area around the new fill and deep in the crevices of the fill. I intended staining the pipe again in full but this would allow me to at least do a bit of the cosmetic work before the full stain. (Before I did that I put the stem on the shank to check the fit – it was flawless!)You might notice in the above photos that the briar has a definite red tint to it and the light oak stain had turned a red/brown colour. I decided to go with that and highlight the colour of the briar. I have a bottle of Fiebing’s Tan Stain that really is a light Cordovan colour so I used that to stain the briar. I heated the briar and applied the stain with a dauber. I flamed it with a lighter to set it in the wood and repeated the process.I wiped the bowl down with isopropyl alcohol on cotton pads to make the stain more transparent. I took photos of the bowl to show it. I rubbed the bowl down with Before & After Restoration Balm to deep clean the briar bowl and the rim top as well as the briar shank. The product works to clean, enliven and protect the briar. I hand rubbed it with my fingers, working it into the exterior of the pipe. I worked it into the blast with a horsehair shoe brush. After it had been sitting for a little while I buffed it with a soft cloth to polish it. The pipe really began to have a rich shine. I took some photos of the bowl at this point to mark the progress in the restoration. It dawned on me that Jeff may not have been able to get the shank cleaned with the tenon stuck in the mortise so I went back and quickly cleaned the mortise and the airway in the shank and stem with pipe cleaners, cotton swabs and alcohol. I was right he had not been able to get to the debris behind the stuck tenon.I polished the stem with micromesh sanding pads – wet sanding with 1500-2400 grit pads and dry sanding with 3200-12000 grit pads. I wiped the stem down after each pad with a damp cloth to remove the sanding dust on the acrylic. When I finished polishing and wiping it down I set it aside to dry. I polished stem and bowl with Blue Diamond to polish out the remaining small scratches. I gave the bowl multiple coats of Conservator’s Wax and the stem multiple coats of carnauba wax and buffed the pipe with a clean buffing pad to raise the shine. I hand buffed it with a microfiber cloth to deepen the shine. The pipe polished up pretty nicely. The contrasting brown stain on the sandblast and the polished, variegated swirls and striations of the acrylic stem worked together to give the pipe a unique look. The finished pipe is shown in the photos below. This is one of those interesting Italian Made pipes about which little information can be found. The shape, finish and flow of the pipe and stem are very well done. The dimensions are Length: 5 1/2 inches, Height: 2 inches, Outside diameter of the bowl: 1 3/8 inches, Chamber diameter: 3/4 inches. This one will be added to the rebornpipes store soon. If you are interested in adding it to your collection send me an email to slaug@uniserve.com or send me a message on Facebook. Thanks for walking through the restoration with me as I worked over this nice little Italian Made sitter.
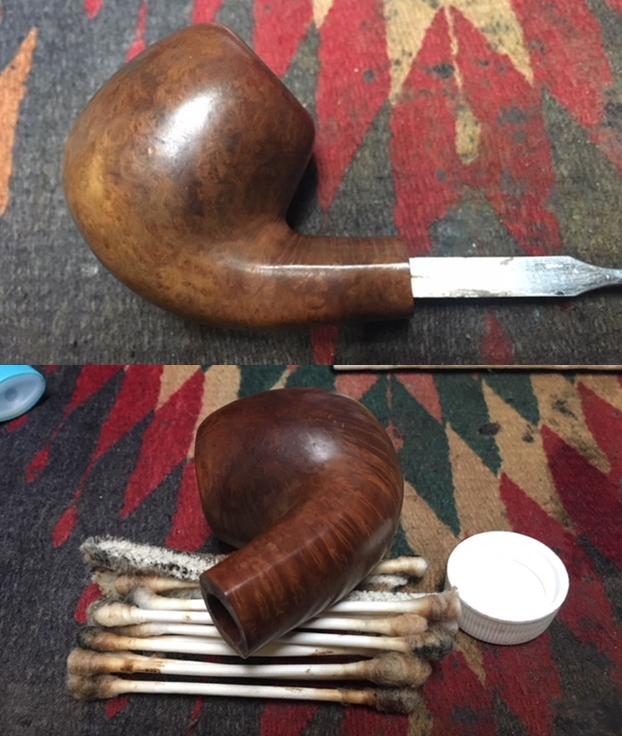
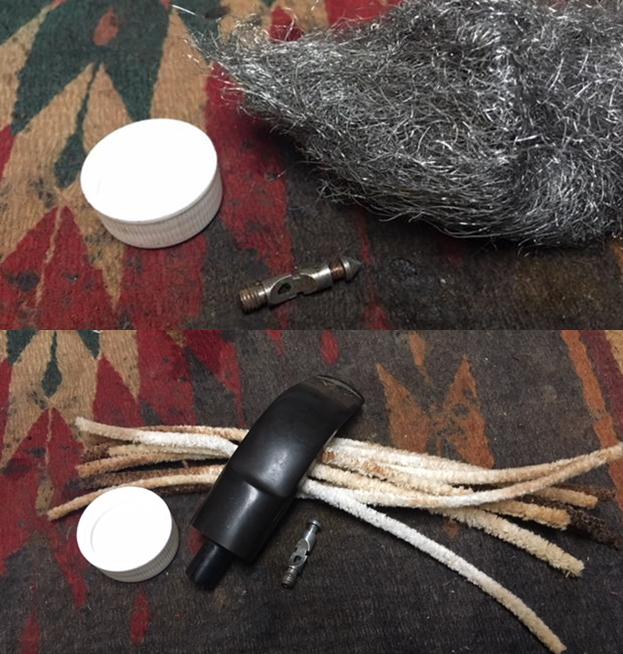
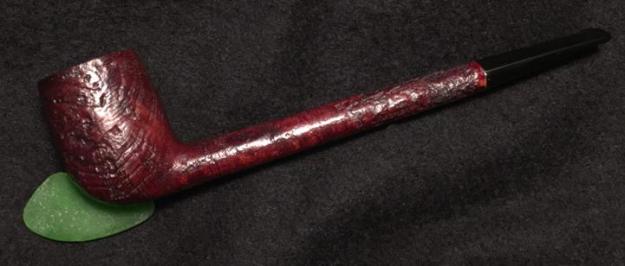
Crafting a New Stem for a Cortina Factory Denmark 22 Freehand Stack


Blog by Steve Laug

The next pipe on the table was one that my brother Jeff picked up on an eBay auction from a seller in Franklin Tennessee almost two years ago. I know it seems like a long time ago and I suppose it is but I have boxes of pipes to refurbish here and this one came up today! It was in a box with the freehand pipes that I have been working my way through. It is an interestingly shaped sandblast pipe that is a stack. When I first looked at it I did not see any stamping on the shank. As I examined it today I found stamping on the thin band of smooth briar between the horn shank extension and the bowl. It stamped around the band and reads CORTINA FACTORY DENMARK with the shape number 22. The pipe looked pretty good when he got it from the seller. There was dirt and grime in sandblast finish on the bowl. The horn shank extension was oxidized and tired looking. There was a metal mortise inset in the horn to protect it from splitting. There was a light cake in the bowl and the inner and out edges of the bowl were in good shape. The contrast brown finish on the pipe was in excellent condition. I am not sure if the stem on the pipe was the original as the tenon was very long and the fit in the shank was snug but not deep. It was lightly oxidized but in decent condition. I think a stem with a shorter tenon and snug fit to the shank would work well. I would also see if I could shape one to follow the shape of the horn extension. I would have to see what I could find in the can of stems. Jeff took photos of the pipe before he started his cleanup up work. Jeff took photos of the stamping on the pipe. The first photo shows the shape number 22 on the smooth band. The second shows the CORTINA stamp on the smooth band. The third and fourth photos show the stamping Denmark Factory. The next photo shows the shank end – a mottled horn with the metal mortise insert. The stem is in place but you can see that the diameter of the tenon is smaller in diameter than the insert. The second photo below shows the striations in the horn shank extension. The stem was dented and worn. I wanted to replace it with a different stem than the replacement that came in it so I was not too concerned with the stem condition.Jeff had scrubbed the exterior of the bowl with Murphy’s Oil soap and removed the dust and grime that had accumulated there. The finish looked very good once it had been scrubbed. He lightly reamed the bowl with a PipNet reamer and cleaned it up with a Savinelli Fitsall Pipe Knife. He cleaned the interior of the mortise and the airway in the shank and the stem with alcohol, cotton swabs and pipe cleaners. The pipe came to me clean and ready to do the restoration and restemming. I took some photos of the bowl to show the condition at this point in the process. I took some photos of the horn shank extension. At first I thought it was acrylic but as I worked on it I was sure that it was real horn. It was a unique and pretty piece of polished horn. It need to be polished but it was unsplit and in good condition.As has become my practice when working on restoring pipes I did some research on the Cortina Factory Denmark brand name. Pipedia noted the brand but had no information to give in terms of the company or a time frame. I also looked on Pipephil’s site and found a listing for the brand. I have included a screen capture from that site (http://www.pipephil.eu/logos/en/logo-c7.html). The first pipe in the photo shows the Cortina brand and stamp that is the same as on the pipe I am working on. The second one is attached to the Georg Jensen brand and the stamping is actually very similar. It makes me wonder if the Cortina was not a line of pipes made by Georg Jensen. I have no proof of that other than the connection shown in the screen capture below.I started my restoration of the pipe armed with the little bit of information that I could find on the brand. I polished the horn shank extension with micromesh sanding pads – wet sanding with 1500-2400 grit pads and dry sanding with 3200-12000 grit pads. I wiped the bowl down with a damp cloth after each sanding pad to remove the sanding dust. Once I had finished with the last pad I wiped it down with Obsidian Oil to enliven the horn and preserve it. I turned from the horn shank extension to work on the sandblast briar of the bowl. I rubbed the bowl down with Before & After Restoration Balm to deep clean the briar bowl and the rim top as well as the briar shank. The product works to clean, enliven and protect the briar. I hand rubbed it with my fingers, working it into the exterior of the pipe. I worked it into the blast with a horsehair shoe brush. After it had been sitting for a little while I buffed it with a soft cloth to polish it. The pipe really began to have a rich shine. I took some photos of the bowl at this point to mark the progress in the restoration. I had a stem in my can of stems that had turned portions that as the shape of the shank extension on the pipe. Once the stem is cleaned up I will point out the shapes more clearly. I sanded the stem with 220 grit sandpaper to shape the tenon to fit in the mortise. I sanded the oxidation to remove it from the rest of the stem. I took a photo of the new stem next to the one that had come with the bowl. You can see the variation in the shape of the stem. The top one has a very long tenon that fit into the shank up to the spot where the oxidation begins. It is longer than the new stem and the shape is not quite right. On the new stem I have boxed in the shapes in red that parallel the shape of the shank extension.I polished the stem with micromesh sanding pads – wet sanding with 1500-2400 grit pads and dry sanding with 3200-12000 grit pads. I wiped the stem down after each pad with a damp cloth to remove the sanding dust on the acrylic. I polished the stem with Before & After Pipe Stem Polish – both Fine and Extra Fine and I set it aside to dry. I polished stem and bowl with Blue Diamond to polish out the remaining small scratches. I gave the bowl multiple coats of Conservator’s Wax and the stem multiple coats of carnauba wax and buffed the pipe with a clean buffing pad to raise the shine. I hand buffed it with a microfiber cloth to deepen the shine. The pipe polished up pretty nicely. The contrasting brown stain on the sandblast, the variegated swirls in the horn shank extension and the polished vulcanite stem worked together to give the pipe a unique look. The finished pipe is shown in the photos below. This is one of those interesting unknown Danish Pipes that I think could possibly lead back to Georg Jensen but we will probably never know for sure. The shape, finish and flow of the pipe and stem are very well done. The dimensions are Length: 6 1/2 inches, Height: 2 1/4 inches, Outside diameter of the bowl: 1 1/4 inches, Chamber diameter: 3/4 inches. This one will be added to the rebornpipes store soon. If you are interested in adding it to your collection send me an email to slaug@uniserve.com or send me a message on Facebook. Thanks for walking through the restoration with me as I worked over this piece of Danish pipe making history.
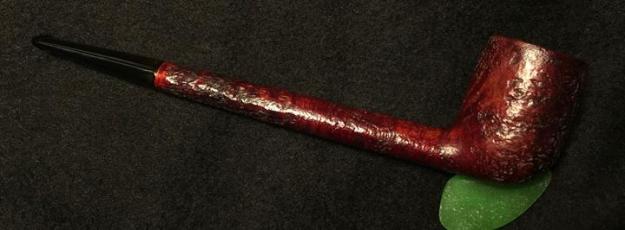
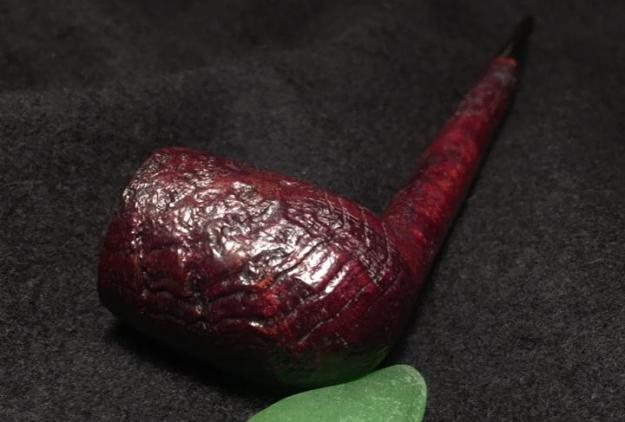
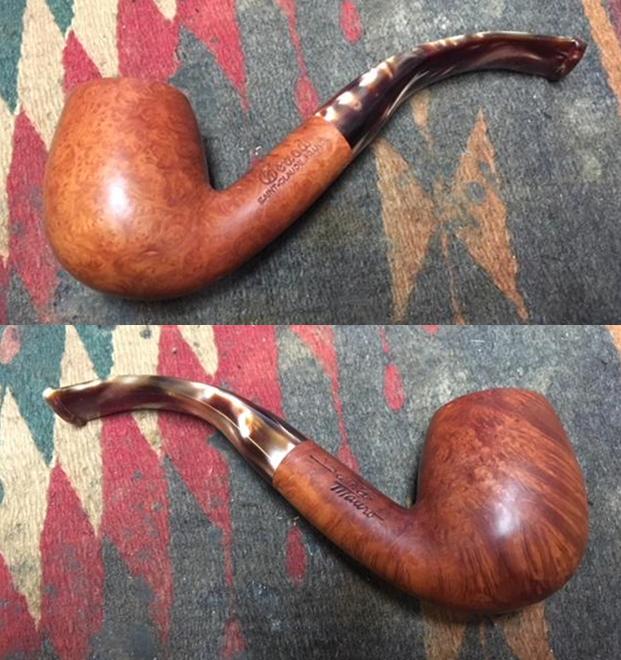
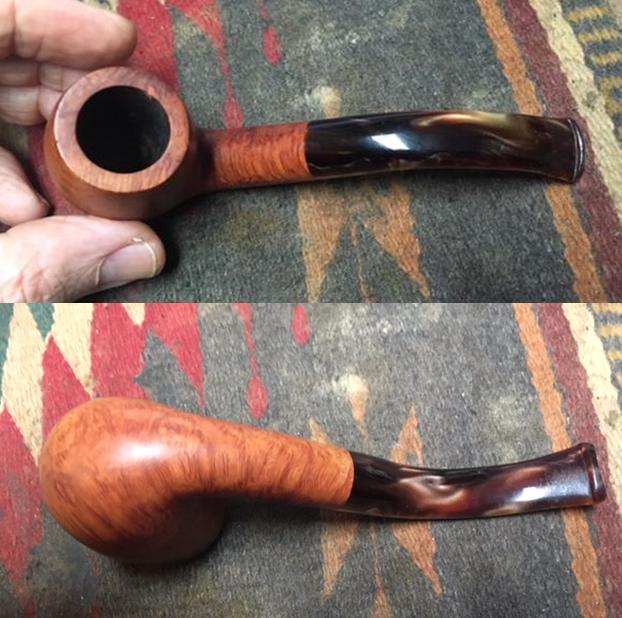
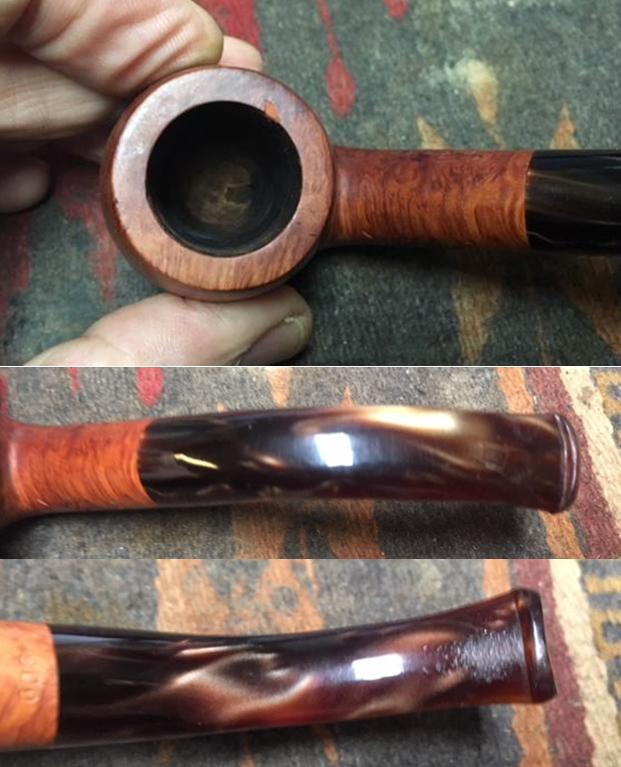
New Life for an Unusual Freehand pipe – a Granhill Signature 1 50


Blog by Steve Laug

I have been working my way through some freehand pipes that my brother Jeff picked up recently. There are some amazing freehand pipes among them. The one on the work table now is another Granhill Freehand. I have already restored a beautiful large freehand Granhill earlier this summer (https://rebornpipes.com/2018/06/09/another-large-and-unique-freehand-pipe-a-granhill-signature-1-100/). It was a Granhill Signature 1 100 where this new one is a Granhill Signature 1 50. The pipe looked pretty good when he got it. There was dirt and grime in the plateau on the rim top. The edges were clean and undamaged. The bowl had a pretty thick cake inside. The finish on the pipe was an oil finish on natural briar. There were some carved trails up the sides of the bowl and the shank that had been lightly sandblasted and had an interesting texture. The stem was a replacement stem of cast vulcanite. It was oxidized but in decent condition. The acrylic stem on the other Granhill made me want to put the same kind of stem on this one as well. We would have to see. Jeff took photos of the pipe before he started his cleanup up work. Jeff took photos of the rim top to show the grime and dirt in the crevices of the rim top. There was also some darkening around the inner edge of the rim top and some lava build up that was overflowing onto the inner edge.He also took a photo of the stamping on the shank. The stamping is very clear and readable.The stem was in decent condition. The surface of the vulcanite was pitted and oxidized. There was some light tooth chatter on both sides of the stem near the thin button.Jeff had cleaned the rim top and removed the debris in the plateau. He had scrubbed the exterior with Murphy’s Oil soap and removed the dust and grime that had accumulated there. The oil finish disappeared and there was natural unfinished briar and once it was scrubbed it was clean and unstained briar. He lightly reamed the bowl with a PipNet reamer and cleaned it up with a Savinelli Fitsall Pipe Knife. He cleaned the interior of the mortise and the airway in the shank and the stem with alcohol, cotton swabs and pipe cleaners. The pipe came to me clean and ready to do some light touch ups and polishing. The stem was cleaned but had tooth chatter on the top and underside near the button and on the surface of the button itself. I took close up photos of the rim top to show the condition of the plateau. It was very clean and there was no damage to the inner or outer edge of the rim. Jeff had been able to remove all of the tars and oils and lava coat on the edge of the bowl. The photos of the stem to give a clear picture of what it looked like before I cleaned it up. They also show the smooth shank end on this particular pipe. There was a slight bit of plateau on the top of the shank end in the second photo.In my earlier blog on the other Granhill I had done research on Pipedia to find information. I found two potential makers of the brand though they separated the name into two parts Gran Hill. The first possible maker was Michael V. Kabik with some of them stamped Made in Denmark. The spelling of the name was noted to come in other versions: Granhill, Gran-Hill. The second possibility comes from Lopes book where he states that the brand also was used by a Fargo Tobacconist, Lonnie Fay, who made freehands bearing this stamp in the 1970s. To me the similarity of the pipe to other Kabik pipes that I have worked on made me go with him as the maker of this pipe as well.

I went back to Pipedia and spent time reading about Michael Kabik (https://pipedia.org/wiki/Kabik). Here is a summary of what I found.

Michael Victor Kabik or Michael J. Kabik, now retired artisan and pipe repairman, was born in Annapolis, Maryland in 1950. As a student he was fascinated by science, but finally turned to the arts. In the early 1970s he started working as an artisan and designer for Hollyday Pipes Ltd., and when the company closed he set up in his own right.

Kabik writes as follows:

…In the 1960s, I had helped Jay build Jay’s Smoke Shop and was his first employee. Since that time, he had set up one of the very first freehand pipe-making operations in the U.S. along with his partner, Chuck Holiday, called CHP-X Pipes. The staff consisted of four full-timers actually making the pipes and perhaps another four in sales and office work. Chuck, who did the actual design and carving, had long since had serious disagreements with Jay and split. Chuck’s replacement from the staff was quitting, and Jay was in a bind. Jay offered me the job, and I gladly accepted. The fellow quitting was supposed to train me for two months but left after two weeks, leaving me with an awesome responsibility. I felt as though the future employment of all these people depended on me as the designer and cutter…and it did.

…Sadly, CHP-X closed its doors two years after my arrival, due primarily to distribution, sales force problems, and other issues to which I was not privy…In love with a medium that satisfied my creative impulses while, pretty much, paying the bills, I bought up the essential equipment and produced pipes on my own. I did this from a farm house my wife and I rented in Phoenix, Maryland. I produced pipes under the name KANE, Gran Hill and others I can’t remember as well as a private label line for a store in, I believe, South Dakota.

…In 1973, I was approached by Mel Baker, the owner of a chain in Virginia Beach called Tobak Ltd. Mel was interested in producing a freehand pipe line and was alerted to my product by Al Saxon, one of his managers and a former CHP-X employee. Mel wanted to relocate me to Virginia Beach, give me carte blanche, and recreate the CHP-X studio with, of course, a new name for the product. I’m sure my answer came very quickly.

…We decided on the name Sven-Lar. Why? Well, when I bought out CHP-X, I also got a small drawer full of metal stamps that were created for private-label work. The Sven-Lar name was conceived but never realized. Aside from having the stamp already made, there were other reasons we chose Sven-Lar. First, we were making a line of pipes in the Danish freehand tradition and also, sadly, we knew the difficulty American pipe makers had breaking the foreign market mystique barrier. The latter certainly played a big part in the demise of CHP-X.

After rereading the previous blog I was pretty certain that the pipe I was working on was another one made by Kabik. I turned my attention to restoring the pipe. I started with the clean bowl, I rubbed the bowl down with Before & After Restoration Balm to deep clean the briar bowl and the rim top as well as the briar shank. The product works to clean, enliven and protect the briar. I hand rubbed it with my fingers, working it into the exterior of the pipe. I worked it into the plateau top with a horsehair shoe brush. I wiped it off and buffed it with a soft cloth to polish it. The pipe really began to have a rich shine. I took some photos of the bowl at this point to mark the progress in the restoration. I wrapped a piece of dowel with 220 grit sandpaper and sanded out the inside of the bowl to smooth the walls. I removed all of the remaining cake on the walls of the bowl.I set the bowl aside and turned my attention to the stem. I looked over the replacement stem and decided to not use it. I went through my stem collection and found a nice brown swirled acrylic stem that I thought would look good with the pipe bowl.  It was very similar to the stem on the other Granhill I worked on so I decided to use it instead. I took photos of the two stems side by side for comparison.I sanded the tenon end with a Dremel and sanding drum and smoothed it out with 220 grit sandpaper to adjust the tenon to the same diameter as the tenon on the replacement stem. It did not take too much work to adjust the fit to the shank.I sanded out the tooth marks out of both sides of the stem with 220 grit sandpaper. I worked over the surface with sandpaper to remove the tooth chatter, marks and to smooth out the surface. There were tooth deeper tooth marks on the top side of the stem that I would need to fill in and work on. I filled in the dents with clear super glue. Once the glue cured I sanded them smooth with 220 grit sandpaper to blend them into the surface of the acrylic. I polished the stem with micromesh sanding pads – wet sanding with 1500-2400 grit pads and dry sanding with 3200-12000 grit pads. I wiped the stem down after each pad with a damp cloth to remove the sanding dust on the acrylic. I polished the stem with Before & After Pipe Stem Polish – both Fine and Extra Fine and I set it aside to dry. I polished the briar with micromesh sanding pads – wet sanding with 1500-2400 grit pads and dry sanding with 3200-12000 grit pads. I wiped the bowl down with a damp cloth after each sanding pad to remove the sanding dust. Once I had finished with the last pad I wiped it down with a light coat of olive oil to collect the dust and to give some depth to the finish. I polished stem and bowl with Blue Diamond to polish out the remaining small scratches. I gave the bowl and the stem multiple coats of carnauba wax and buffed the pipe with a clean buffing pad to raise the shine. I hand buffed it with a microfiber cloth to deepen the shine. The pipe polished up pretty nicely. The plateau on the rim top and the smooth natural oiled finish work very well with the swirled brown acrylic stem. The finished pipe is shown in the photos below. While I have worked on other Michael Kabik pipes (a CHIP-X) this is the second Granhill pipe of his that I have restored. It is well crafted and is very similar to the CHIP-X that I worked on in the past. The shape, finish and flow of the pipe and stem are very well done. The dimensions are Length: 6 1/2 inches, Height: 2 1/4 inches, Outside diameter of the bowl: 1 3/4 inches, Chamber diameter: 3/4 inches. This one will be added to the rebornpipes store soon. If you are interested in adding it to your collection send me an email to slaug@uniserve.com or send me a message on Facebook. Thanks for walking through the restoration with me as I worked over this Granhill freehand.