Tag Archives: polishing Bakelite

Restoring the first of 11 pipes sent for restoration – an old Triangle WDC Bakelite Bent Bulldog


by Steve Laug

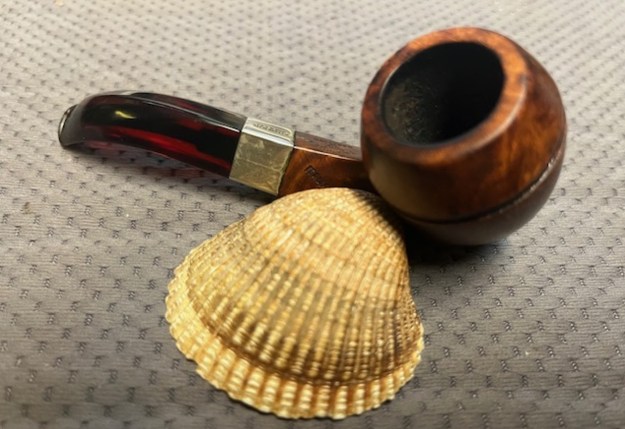
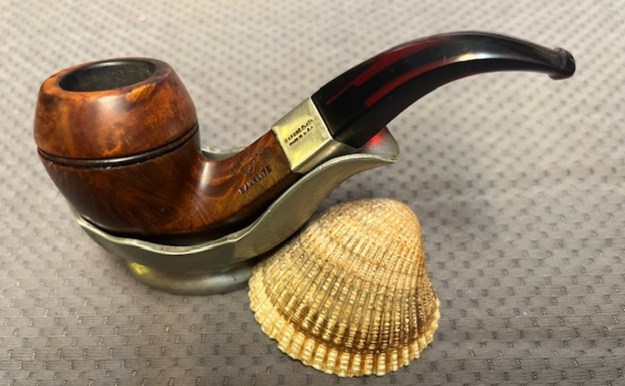
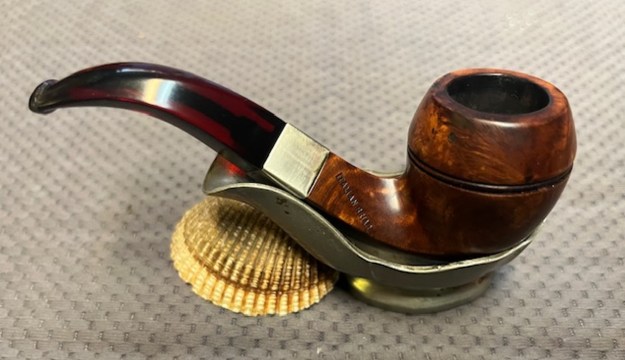
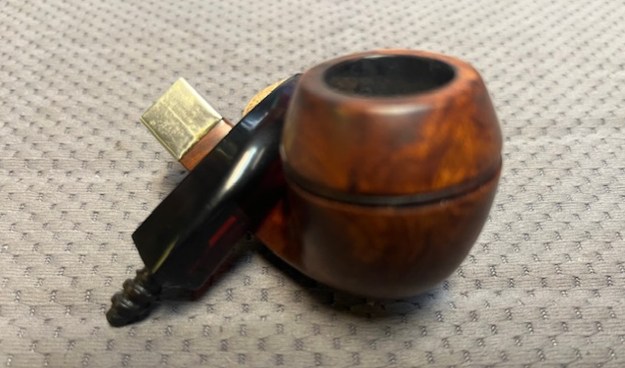
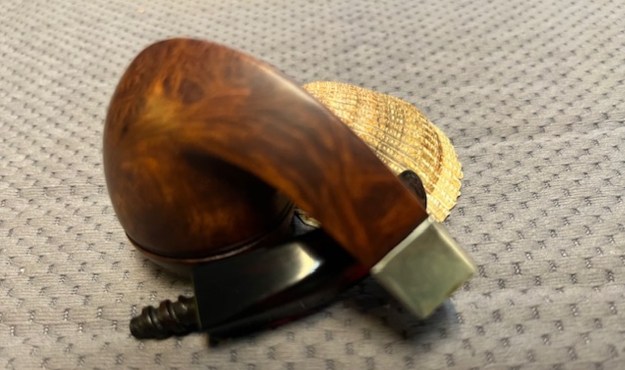
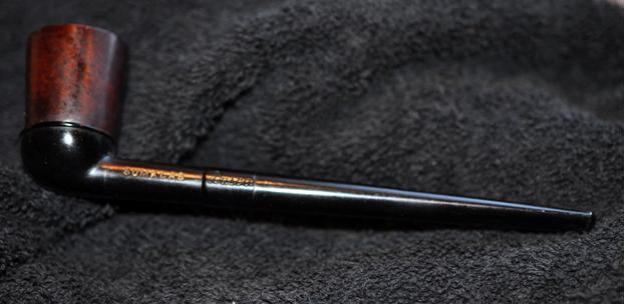
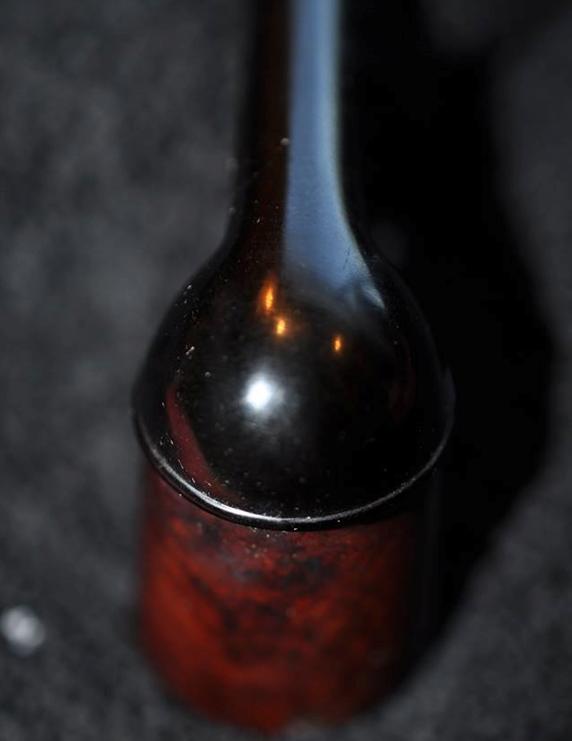
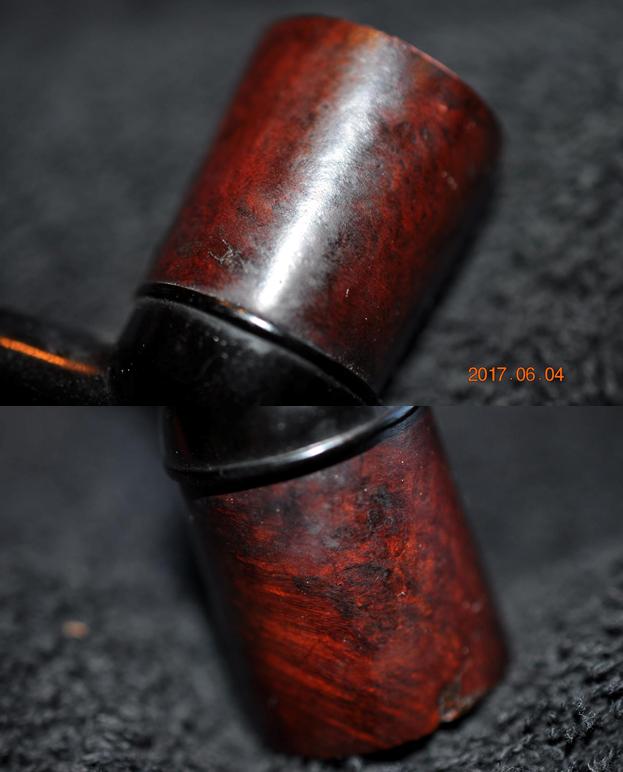
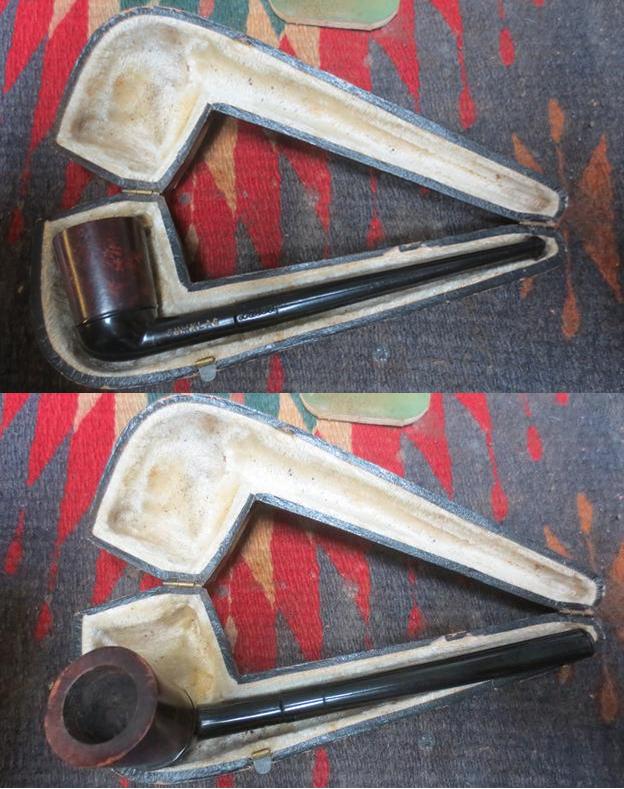
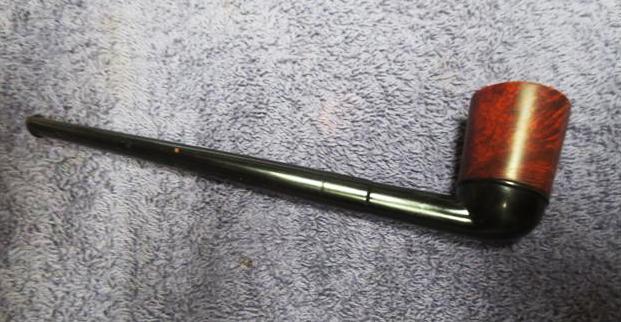
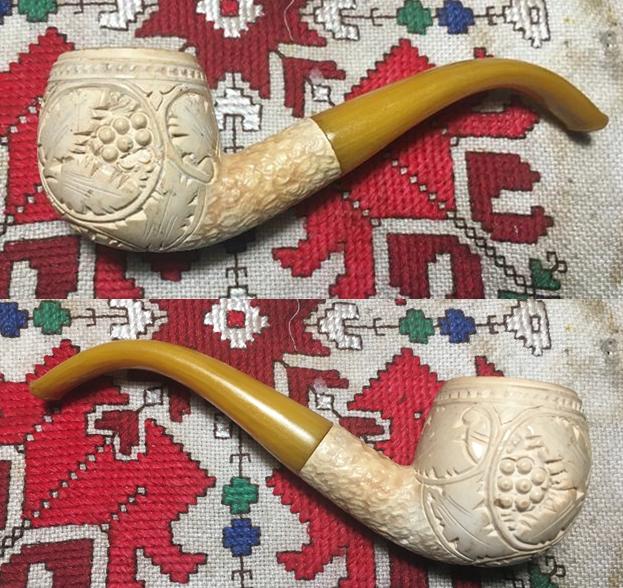
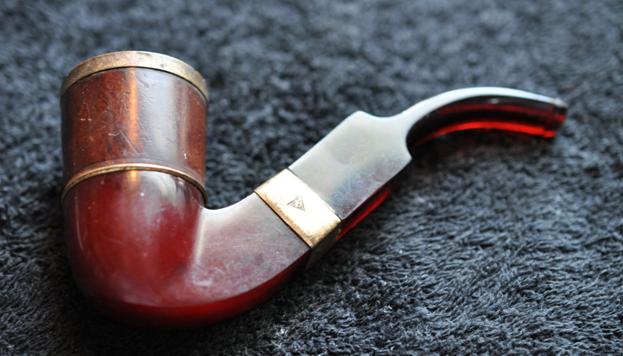
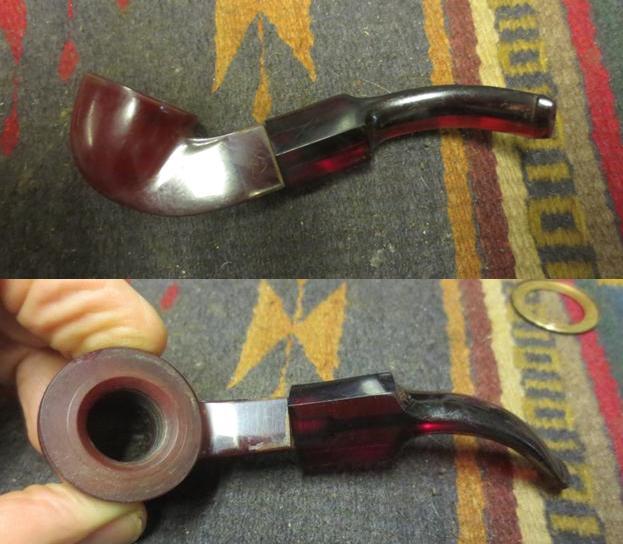
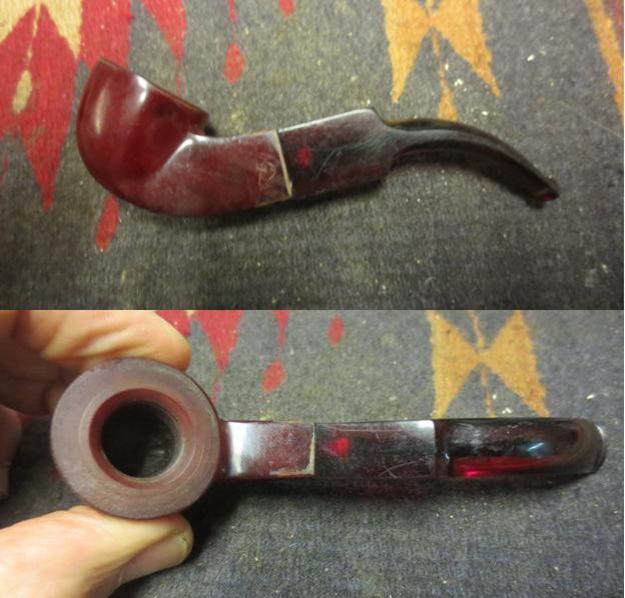
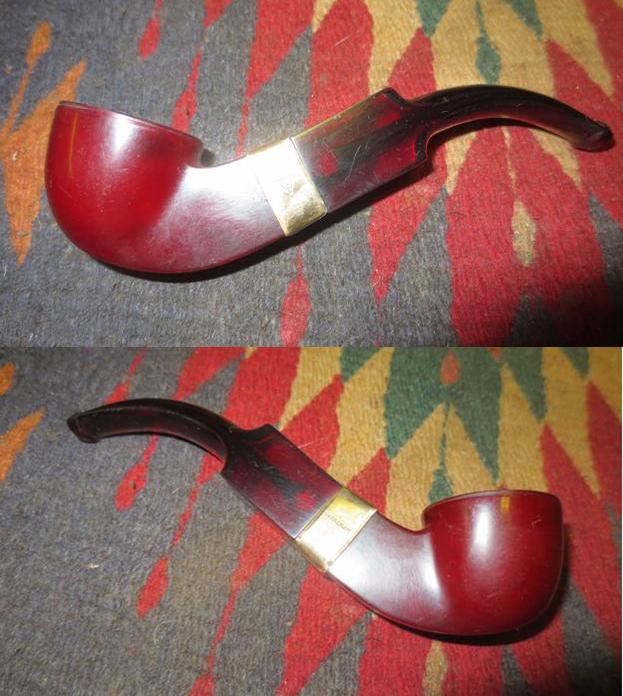
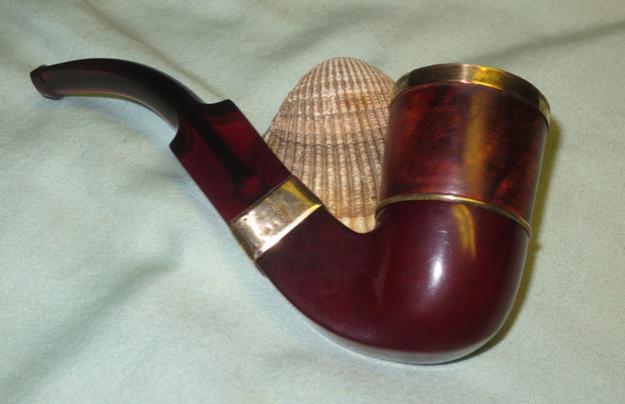
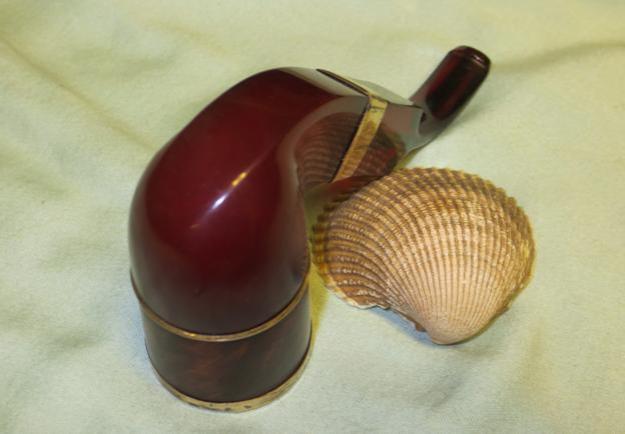
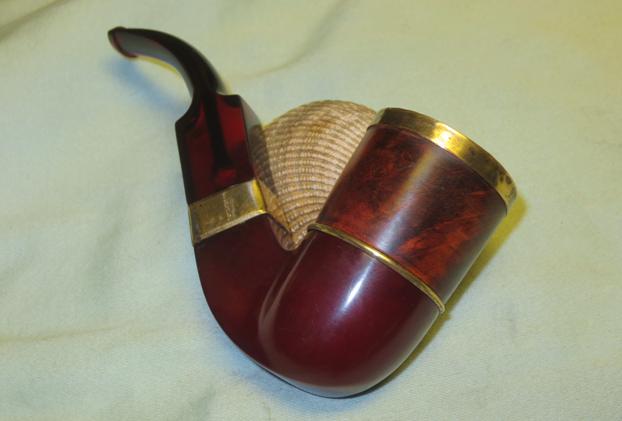
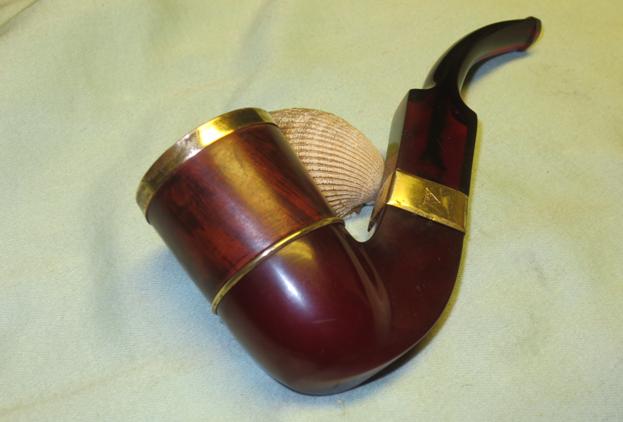
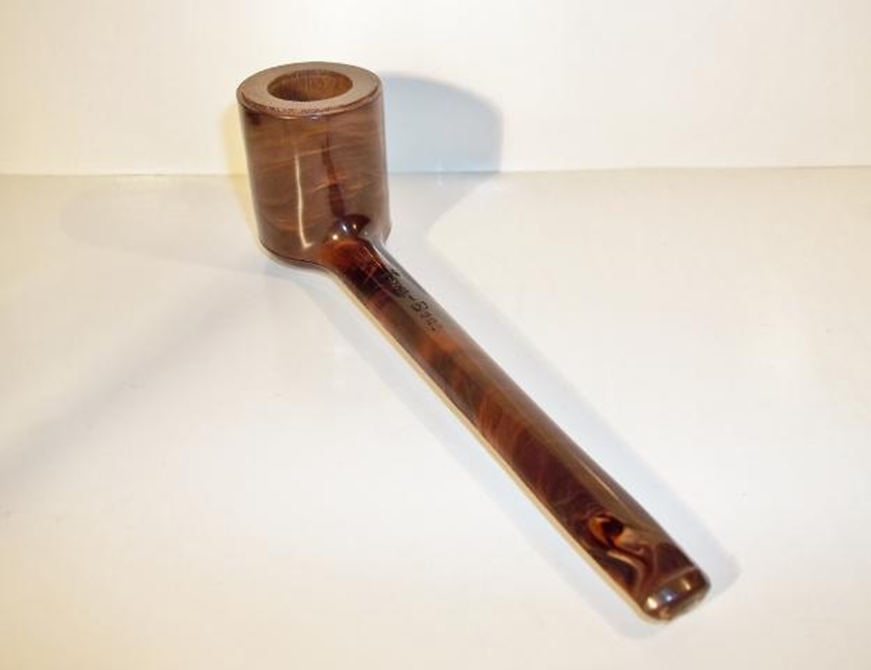
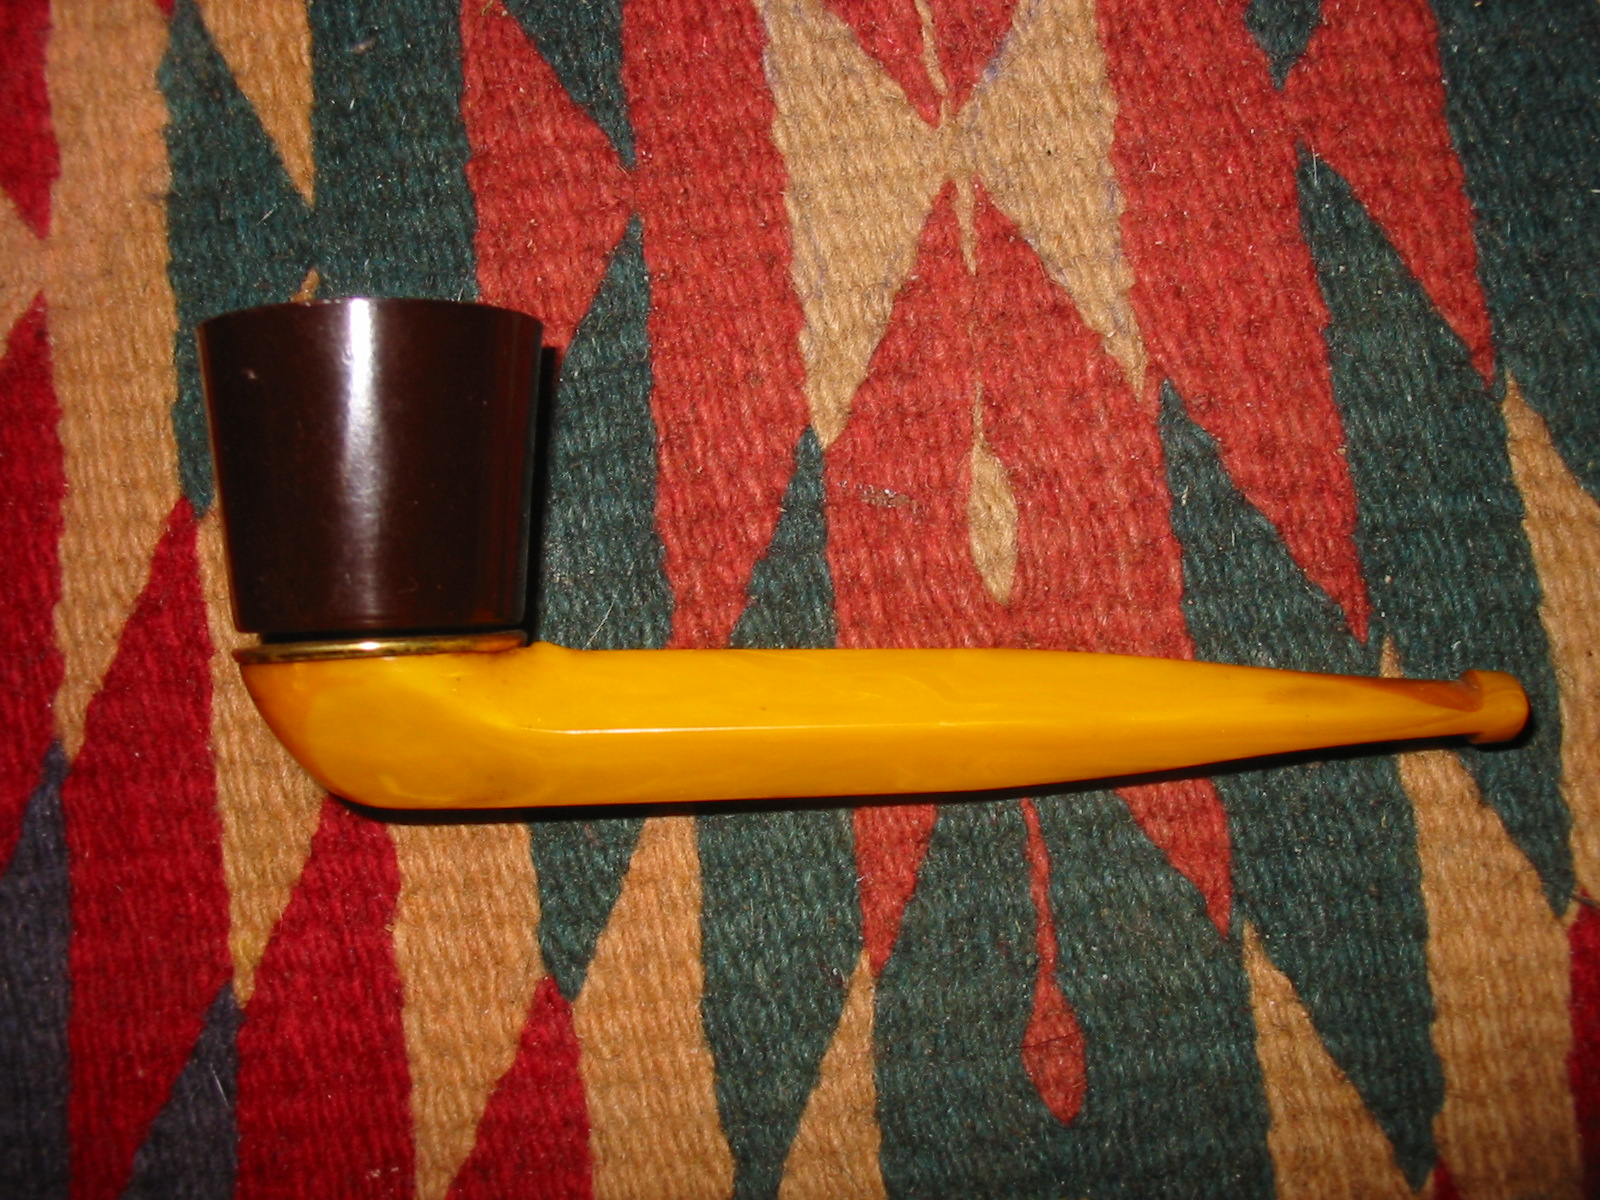
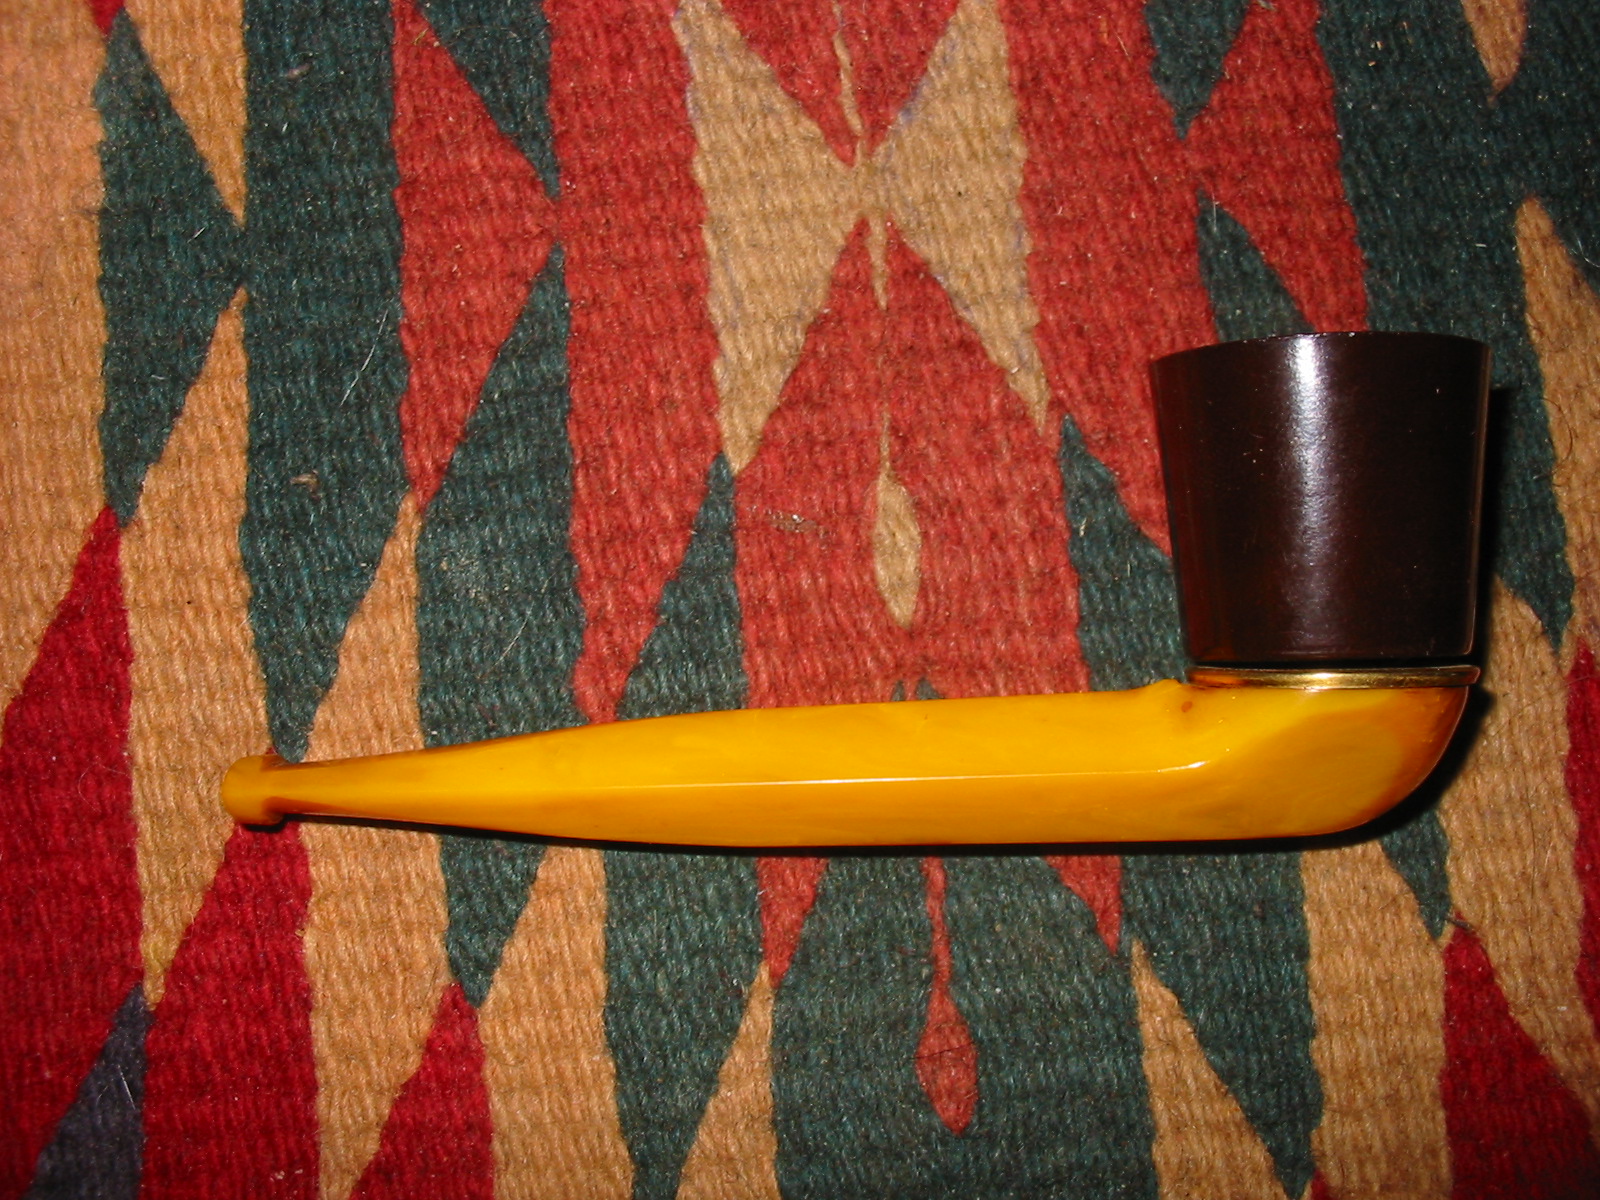
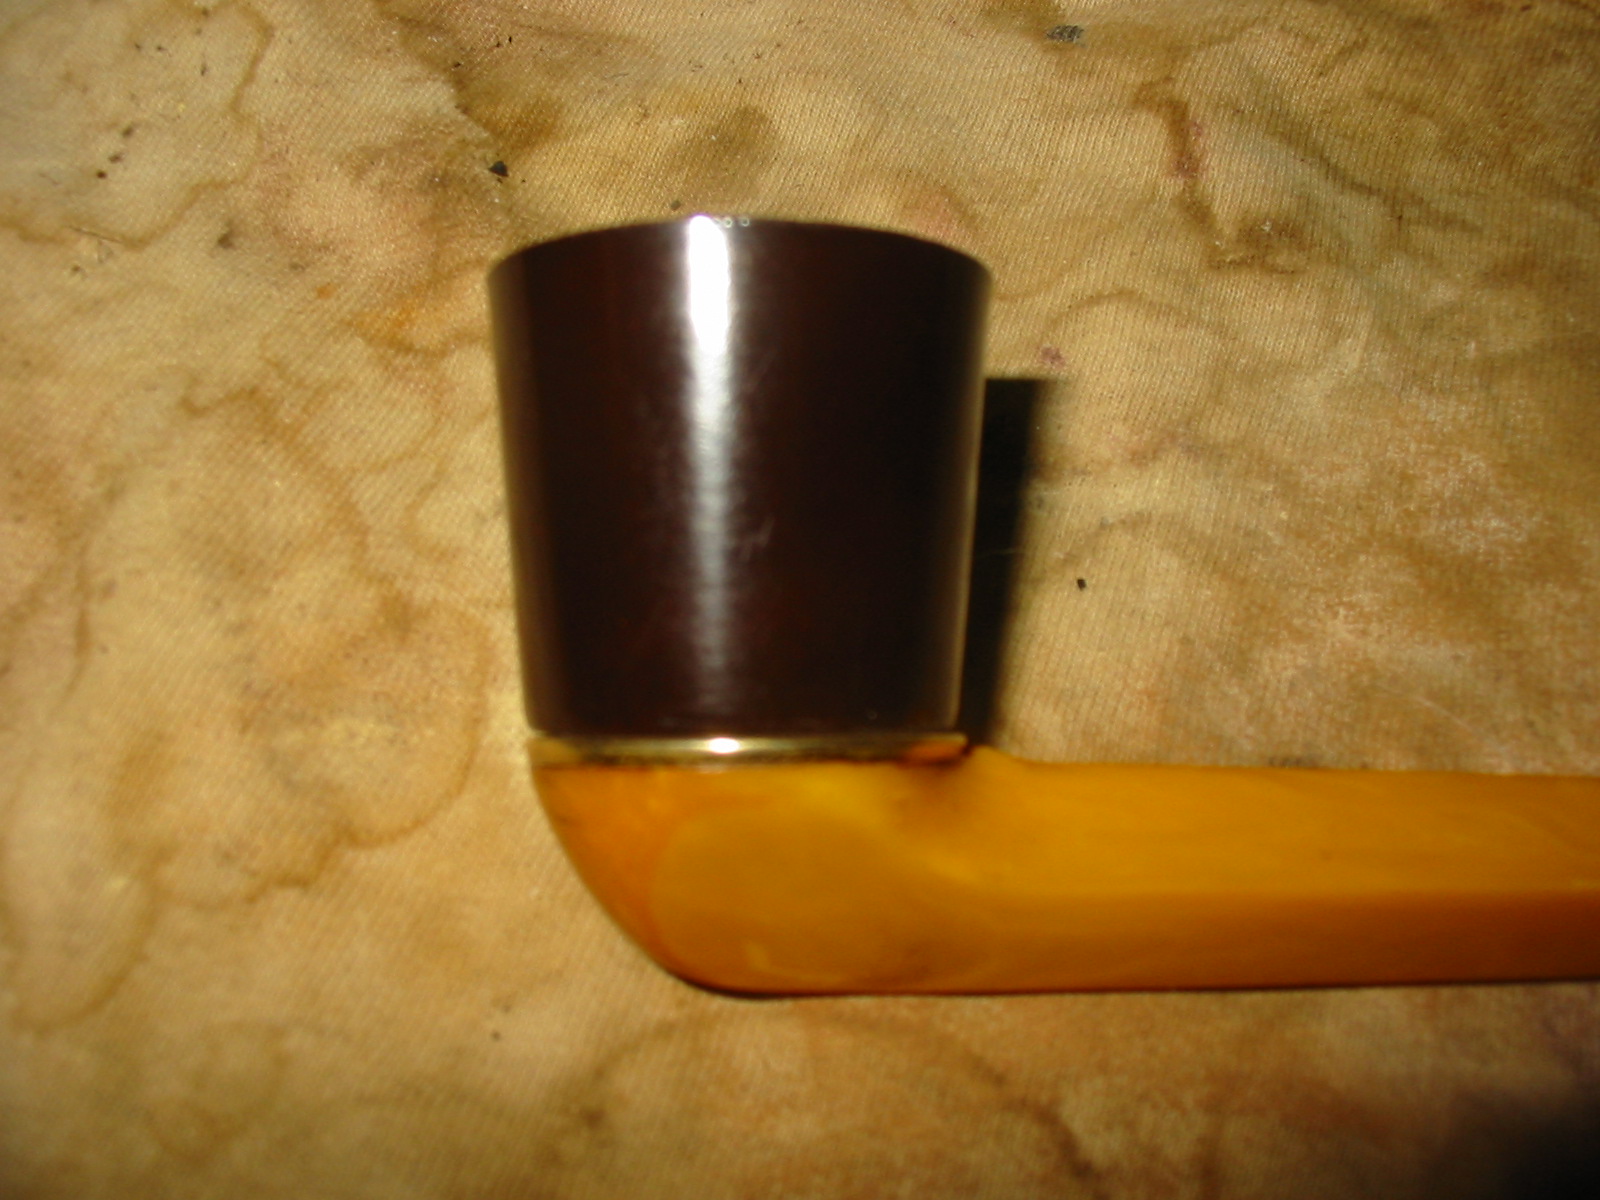
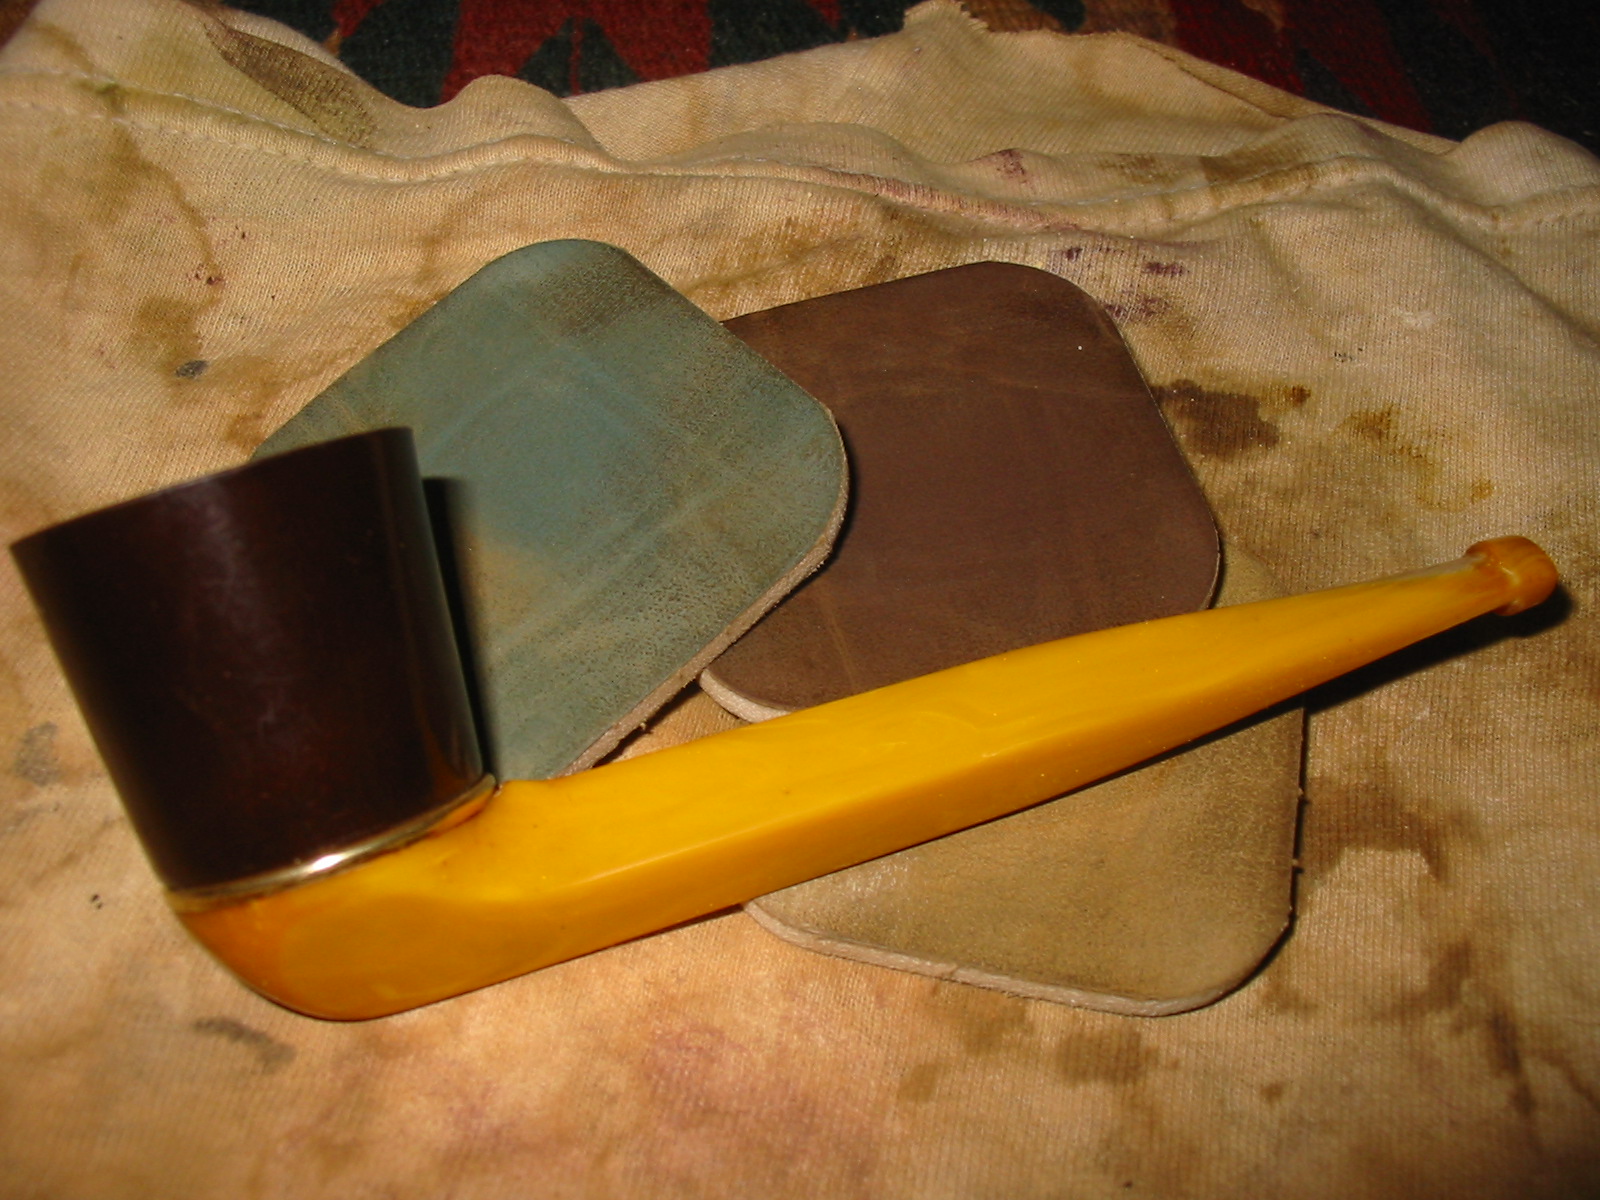
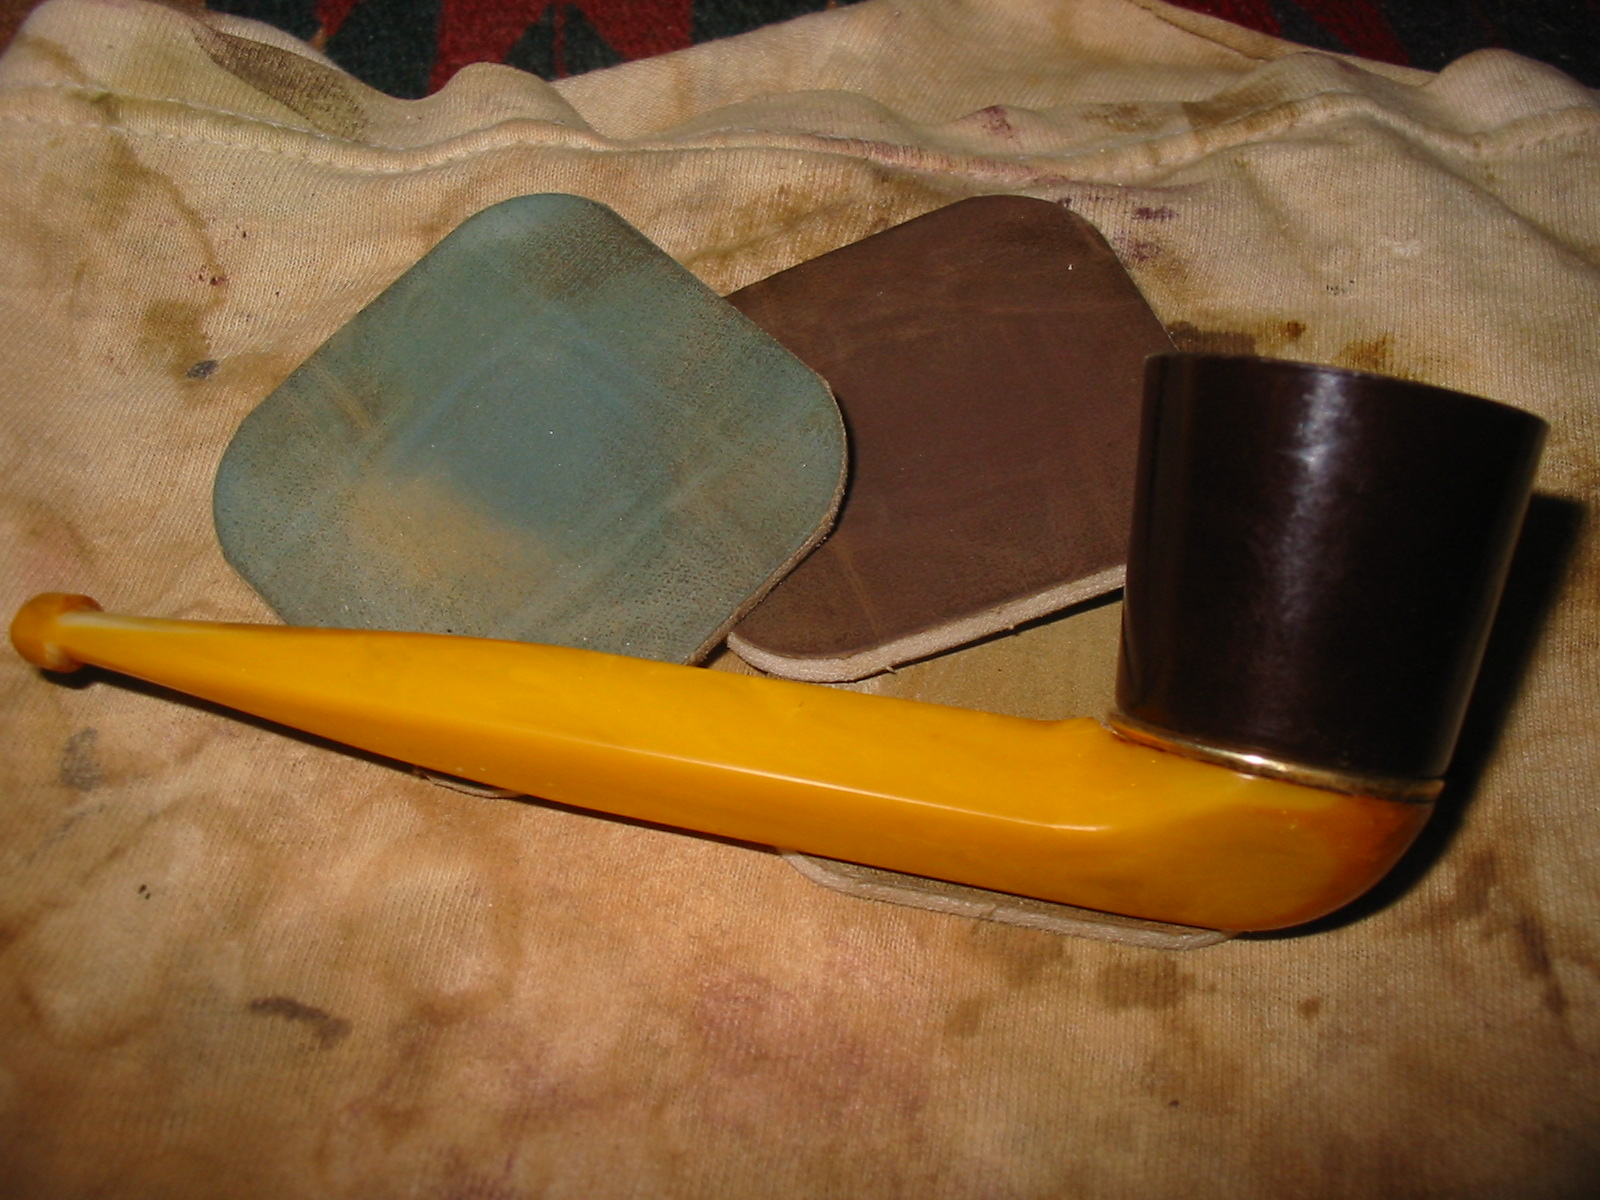
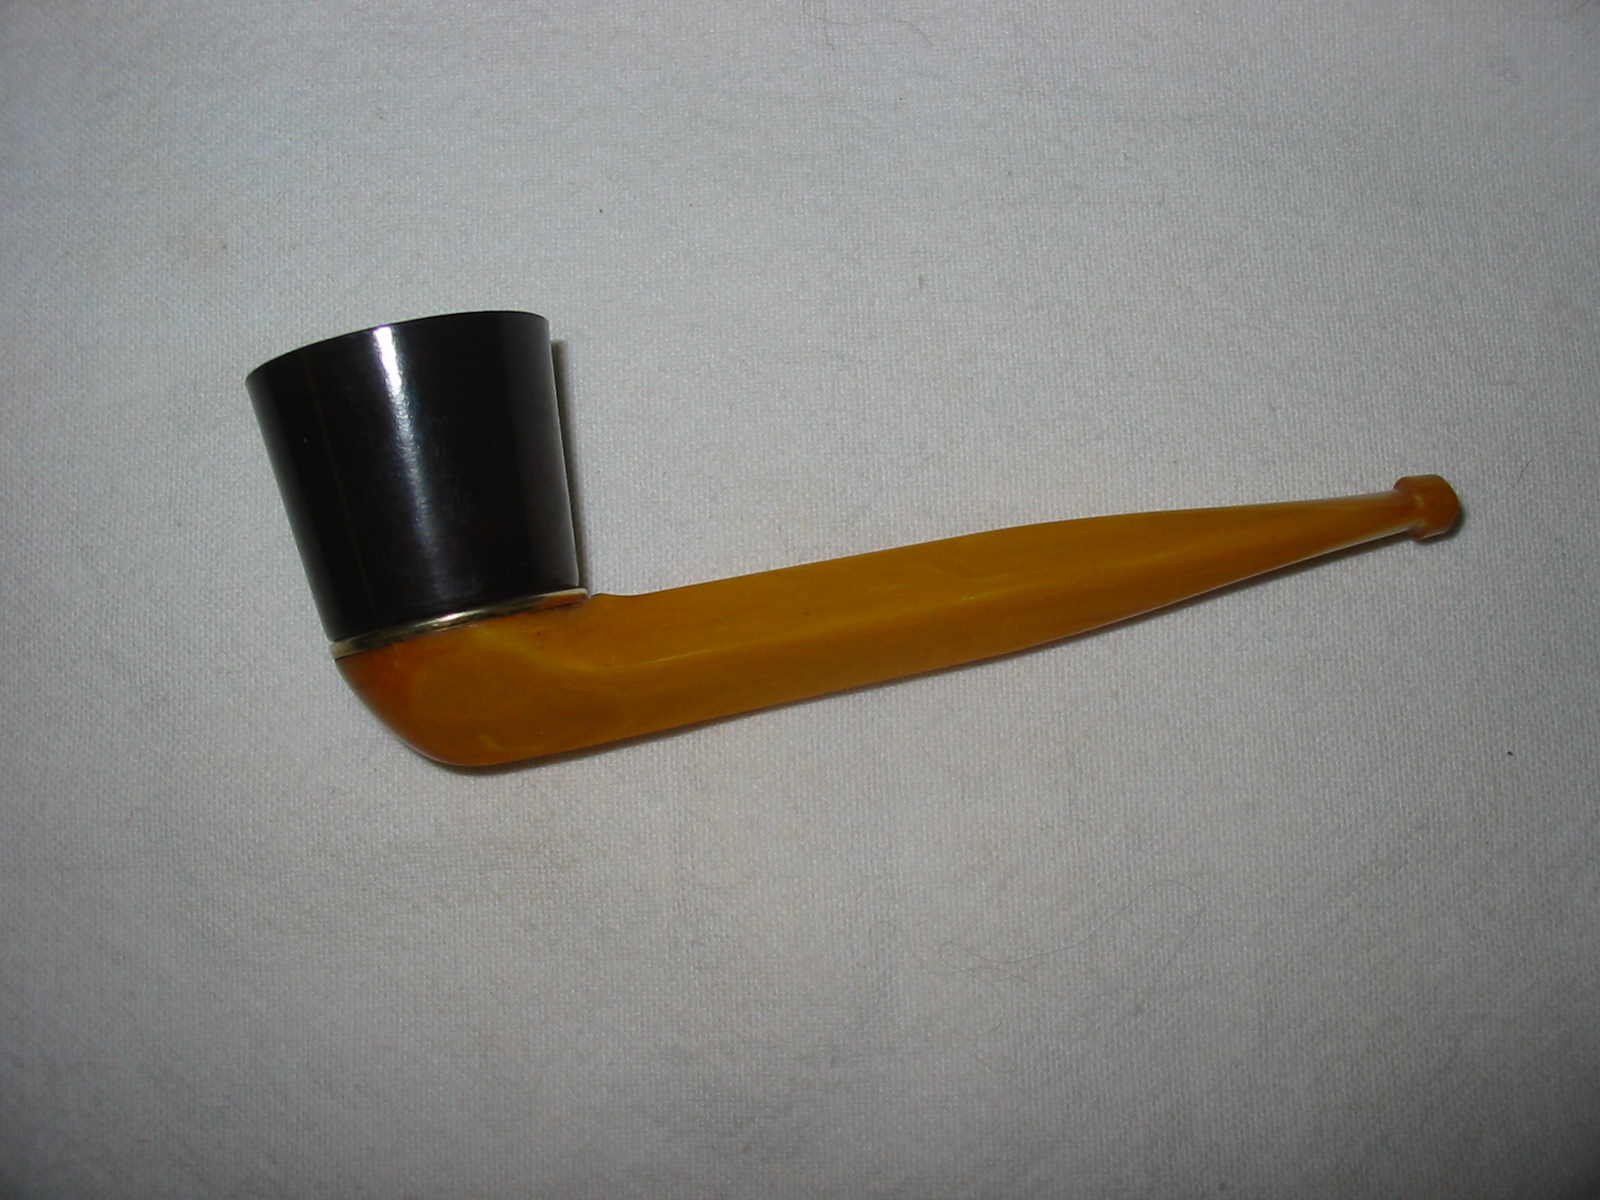
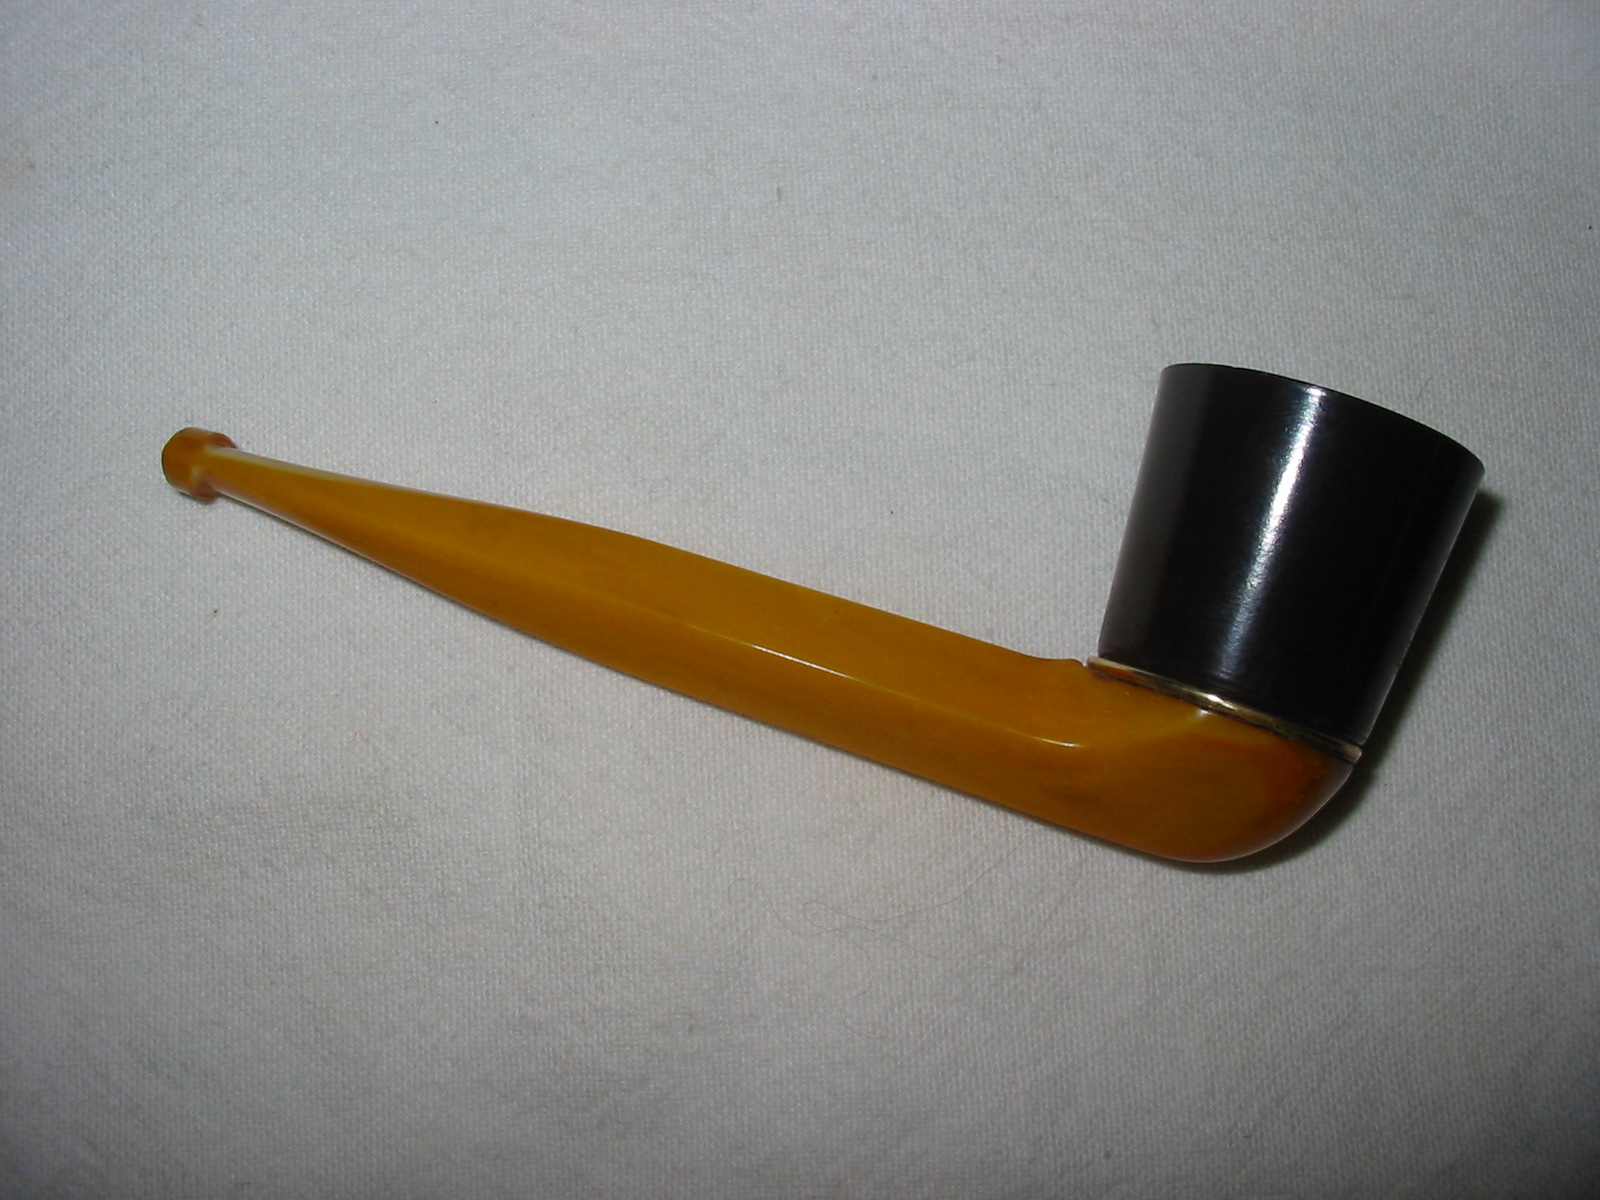
A while back I was asked by a customer and friend, Jack to take on some projects for him. I have worked on a few pipes for him over the years so we seem to have a standing agreement that I will clean up his pipes. This time he sent a batch containing 11 pipes – six Bertrams, an Arlington, a GBD, an old WDC Triangle Bakelite and one marked Texaco. All of them were in various conditions and would need different types of work. I took a photo of the pipes before I started working on them.
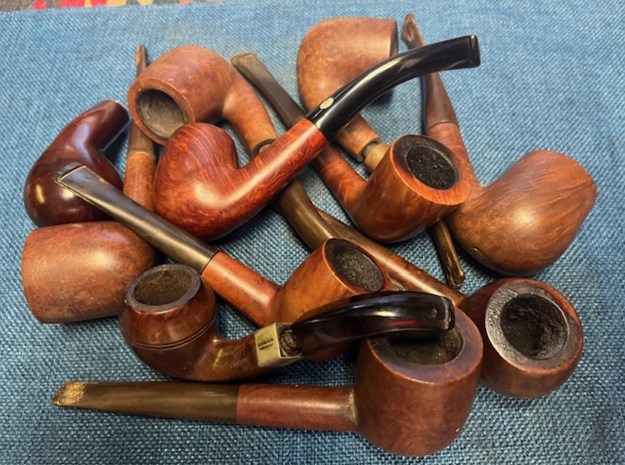
I chose to work on the older Triangle WDC Bakelite Bent Bulldog first. This richly stained Bent Bulldog is a beautiful pipe. It is clearly stamped on the left side of the shank and reads Triangle [arched over] WDC in a triangle [over] BAKELITE. On the right side it is stamped at angle along the shank and reads Italian Briar. There is a diamond shaped silver coloured band on the shank end that is stamped and reads Oxford Plate [over] Made in U.S.A. It is oxidized but in good condition. The grain around the bowl is highlighted by the stain and really stands out. It has a rich darker, reddish brown finish that is on the bowl and shank. It was filthy with dust and debris ground into the sides of the bowl. The rim top has a heavy lava overflow on the top and edges coming from a thick cake in the bowl. The tapered Bakelite stem had a bone tenon that screwed into the shank. It had some deep tooth marks and chatter on both sides ahead of the button. I took photos of the pipe before I started working on it. It really is a beauty. 
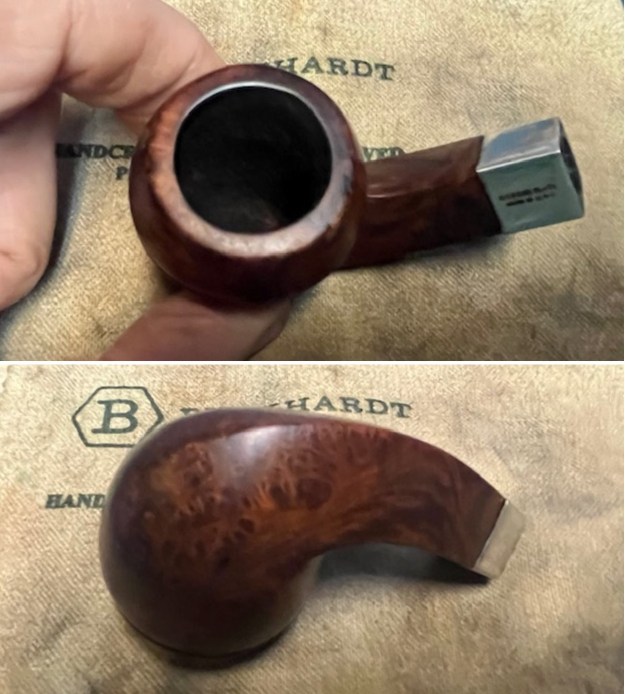
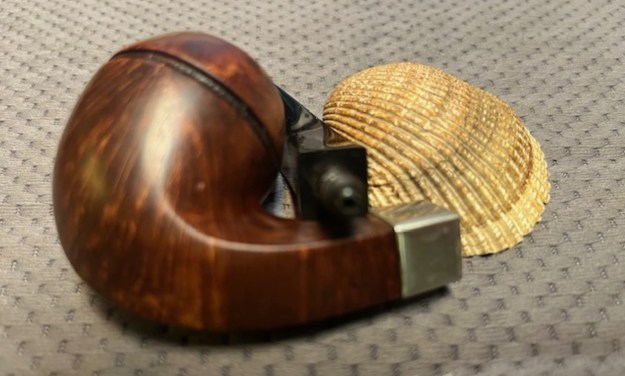
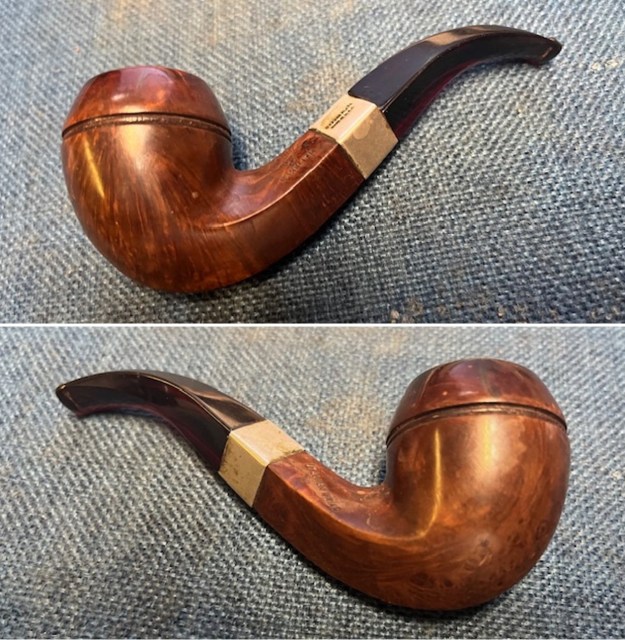
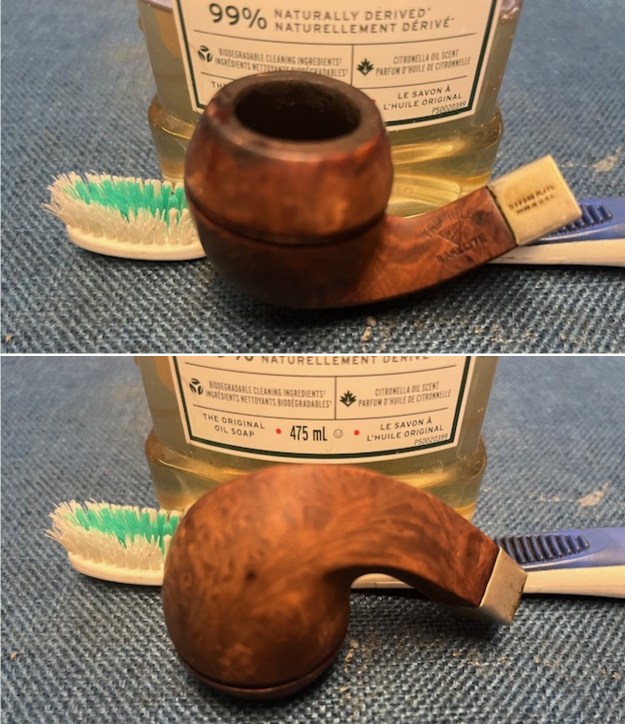
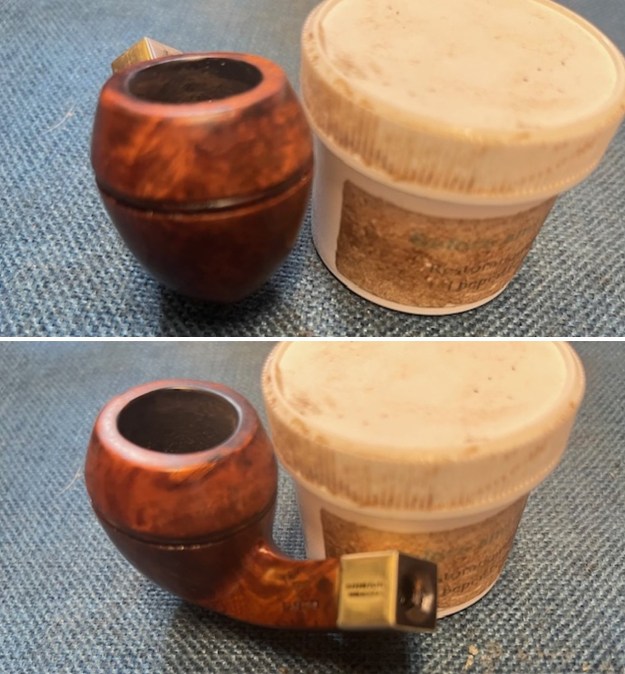
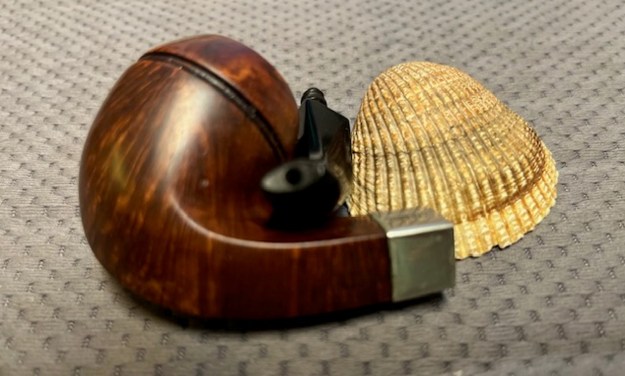
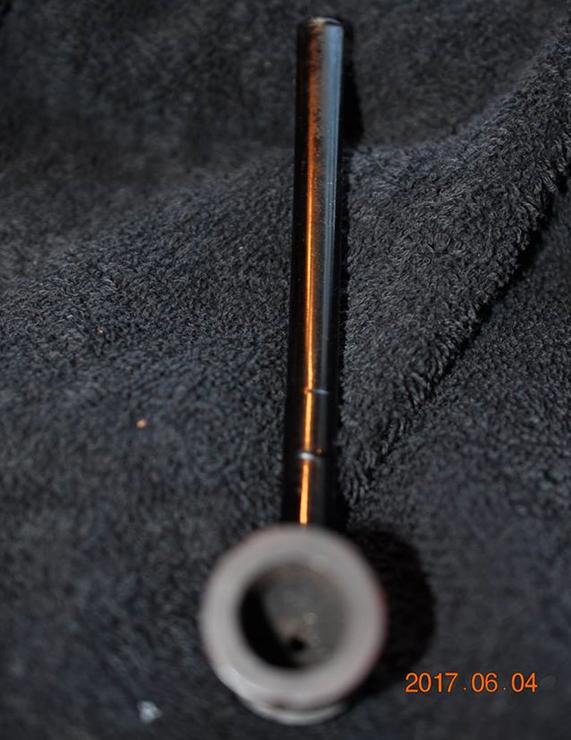
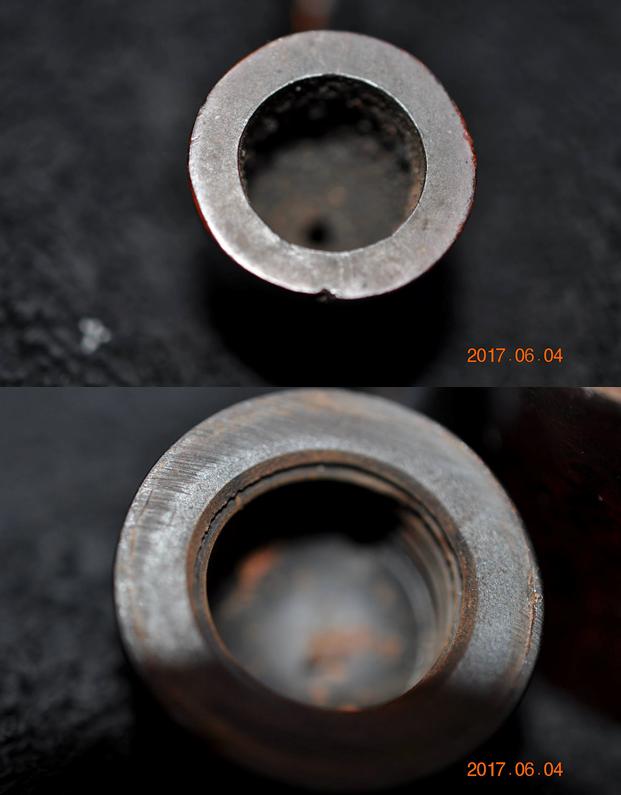
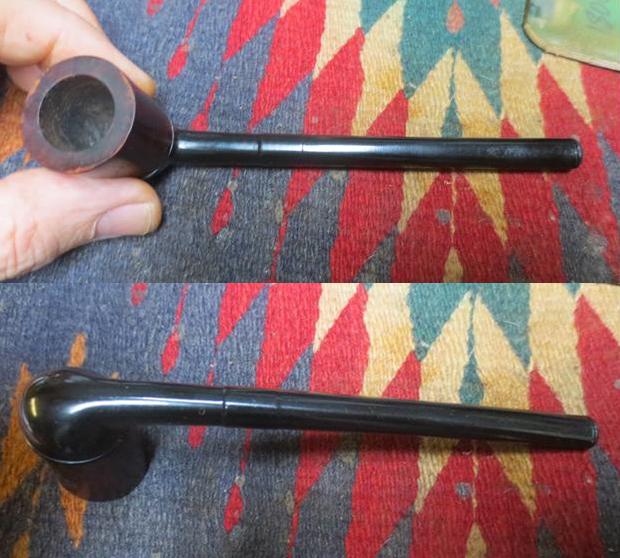
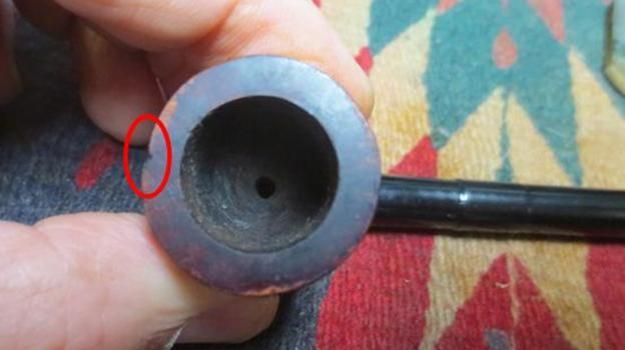
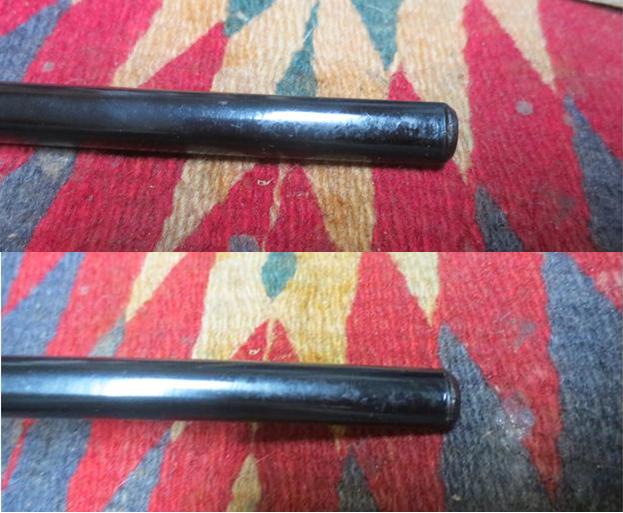
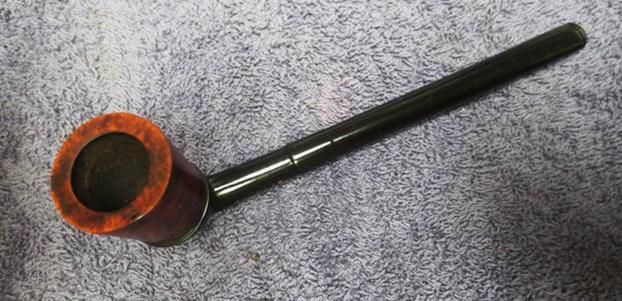
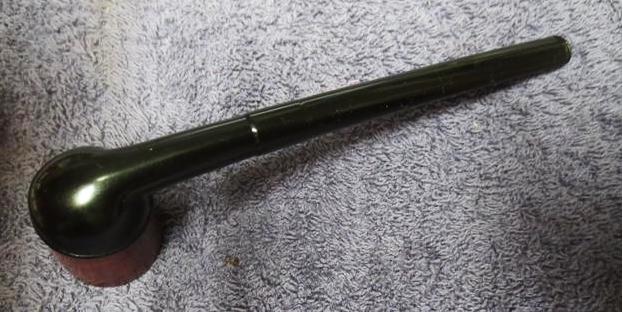
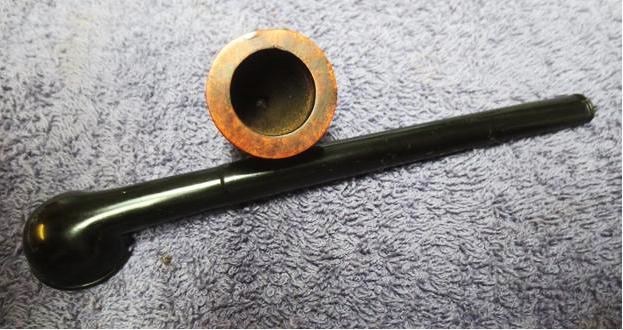
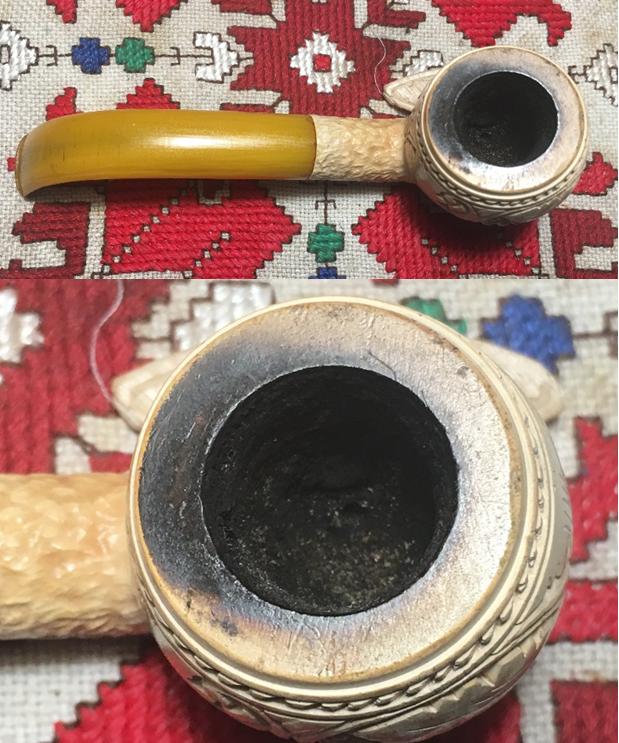
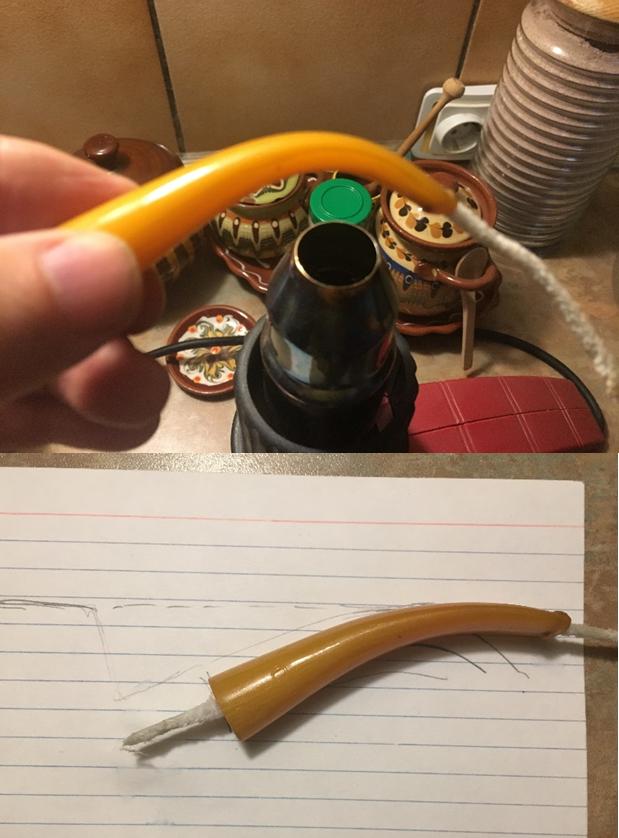
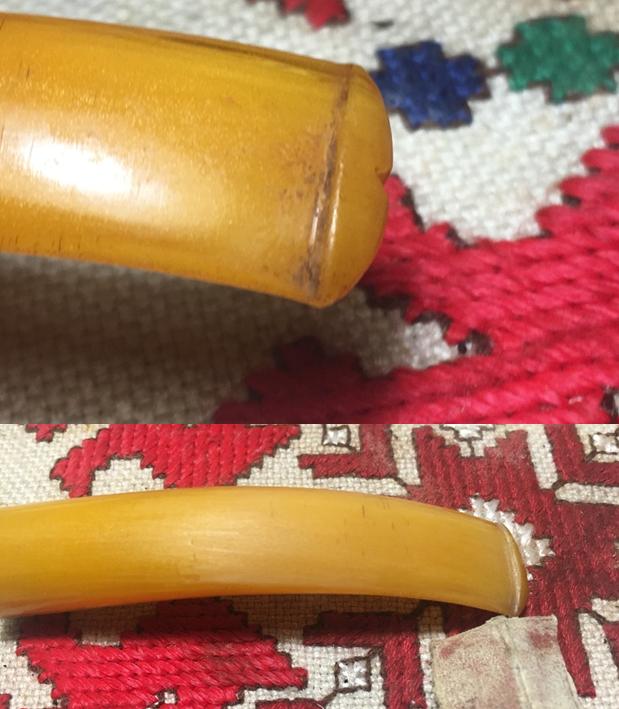
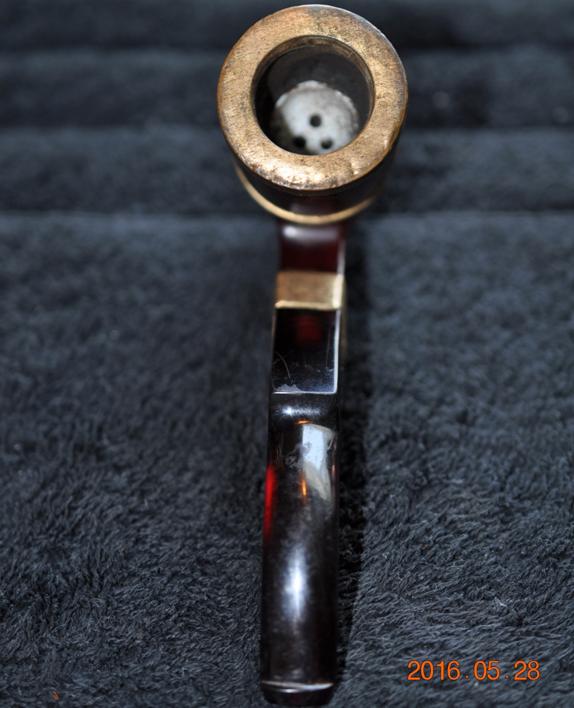
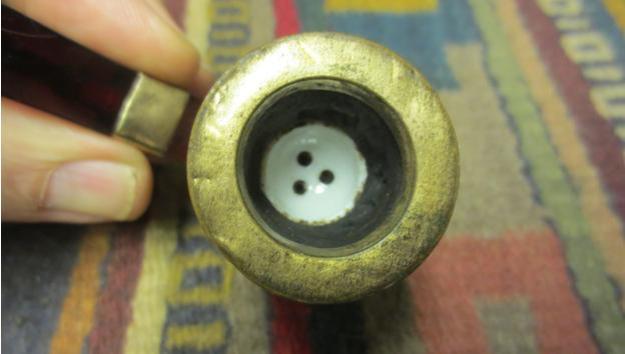
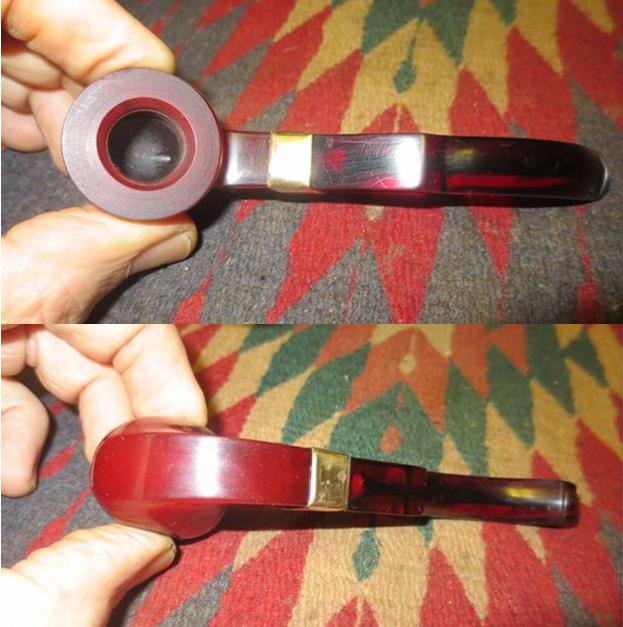
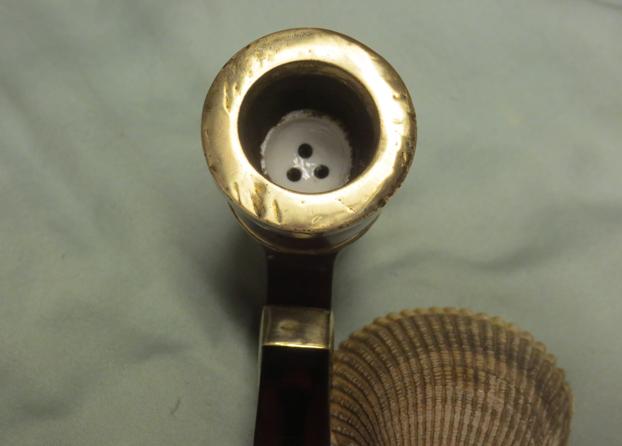
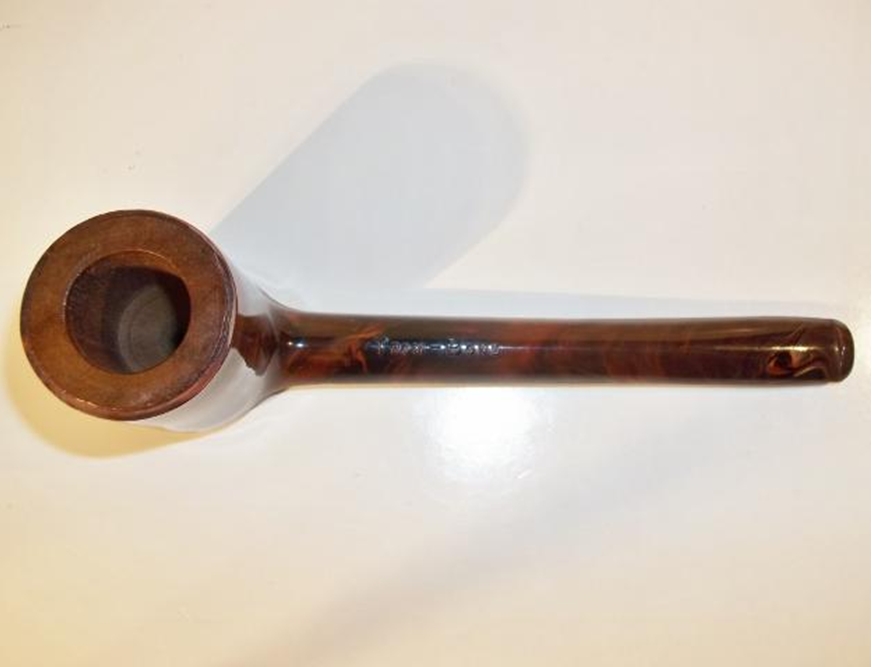
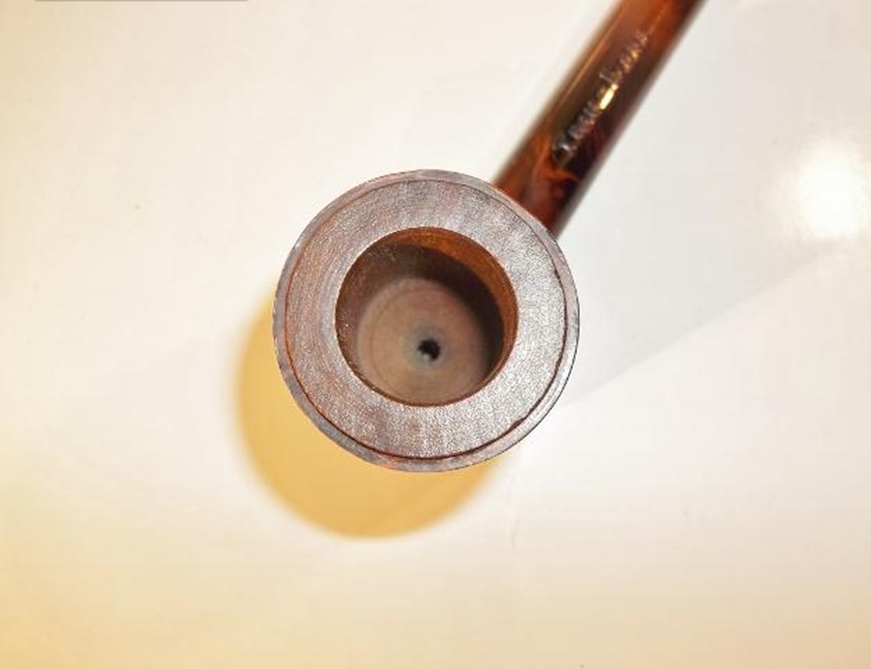
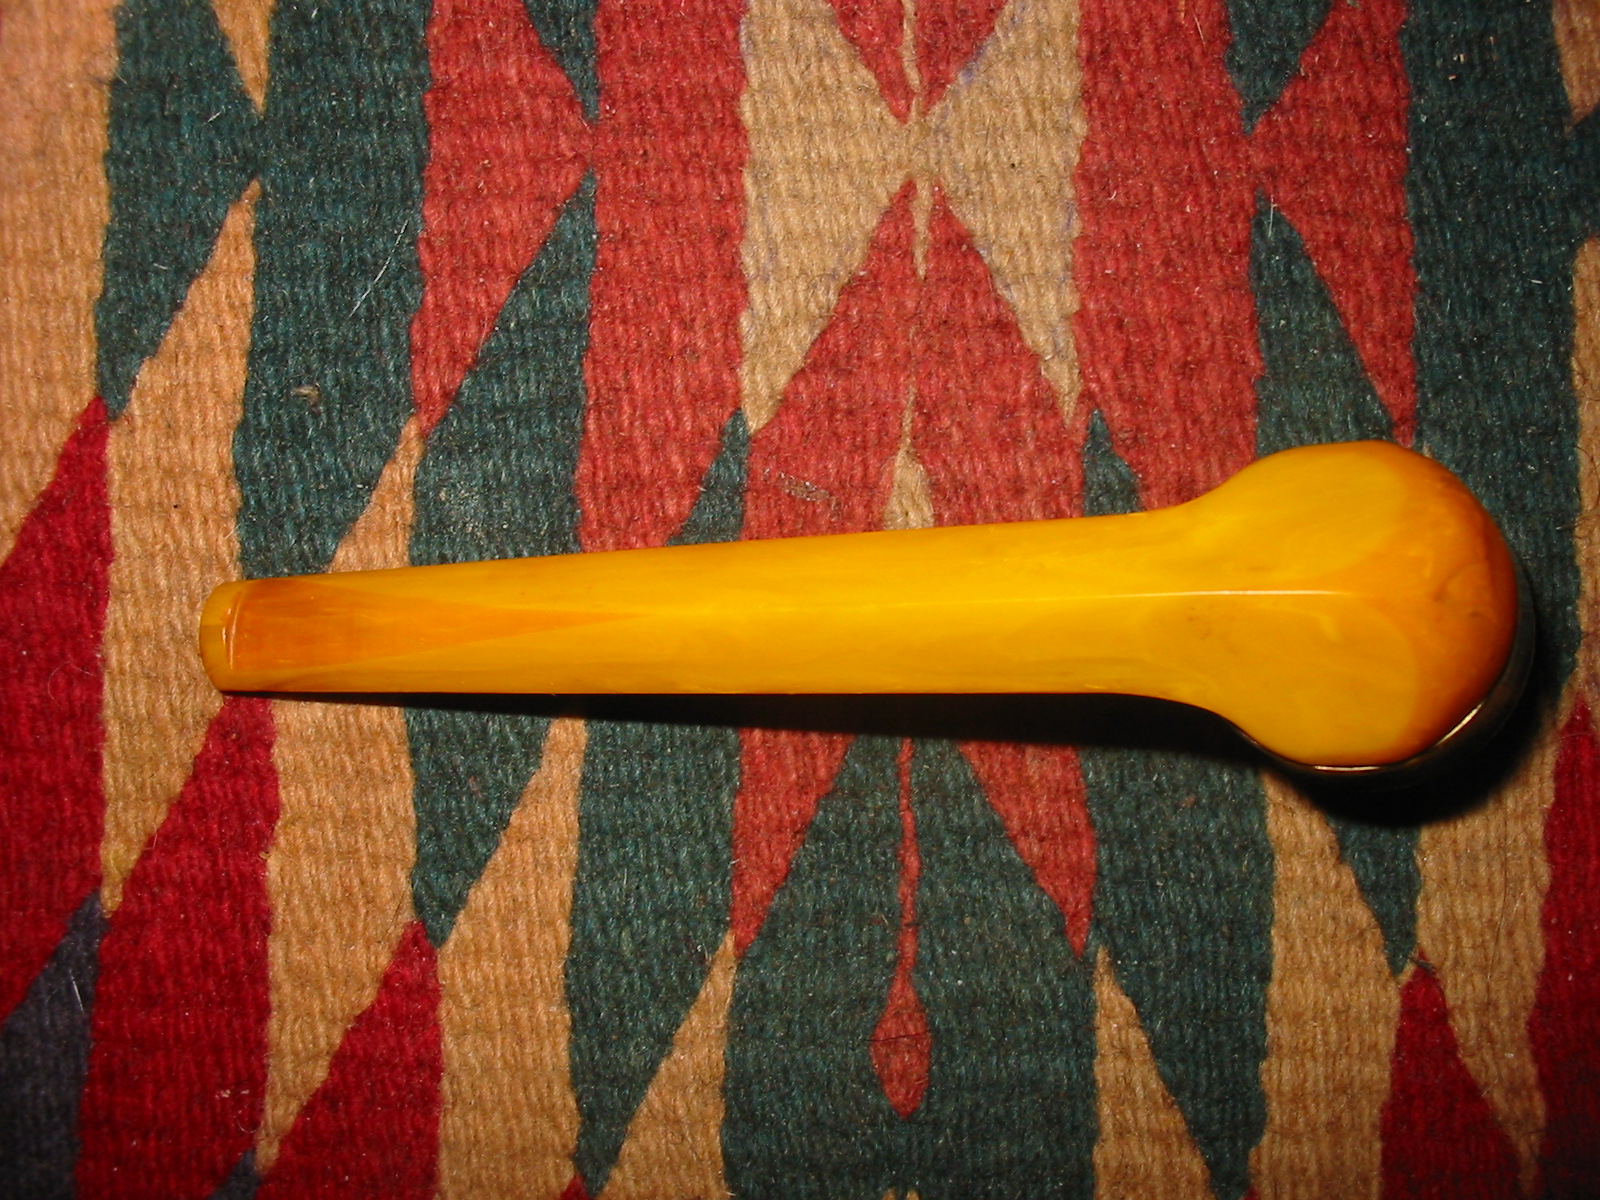
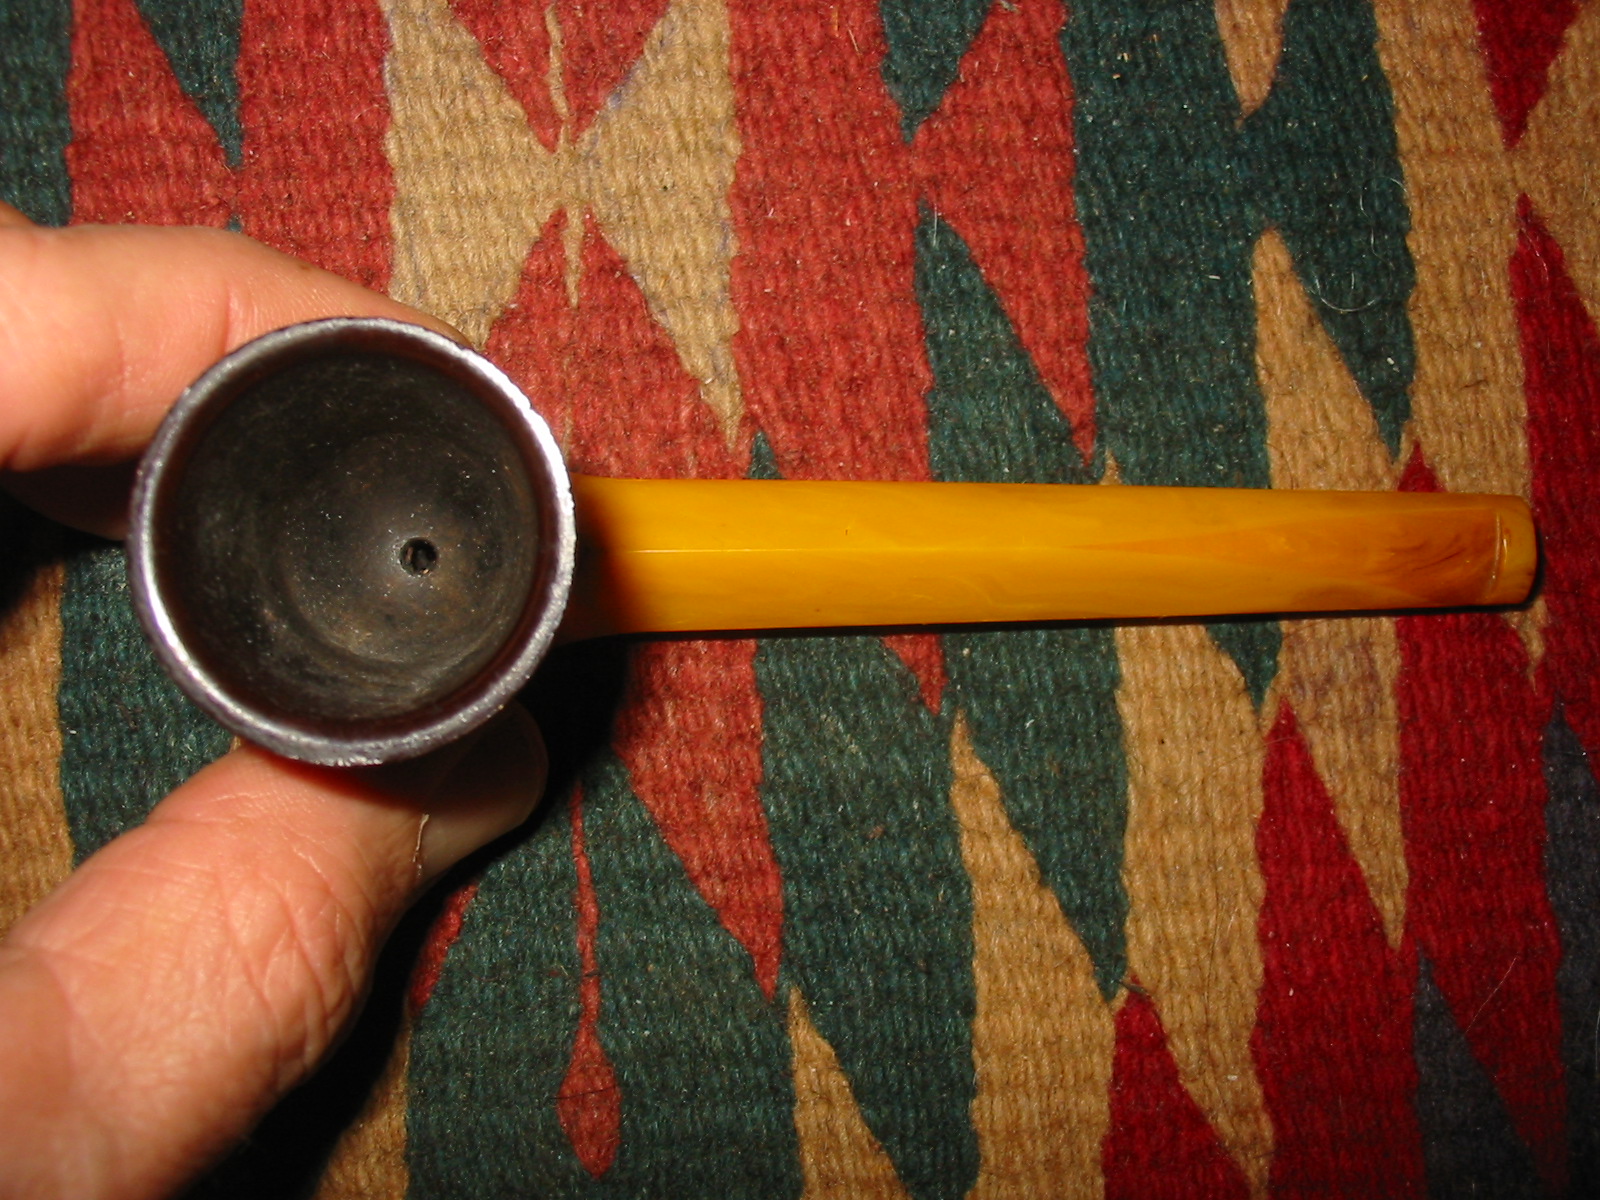
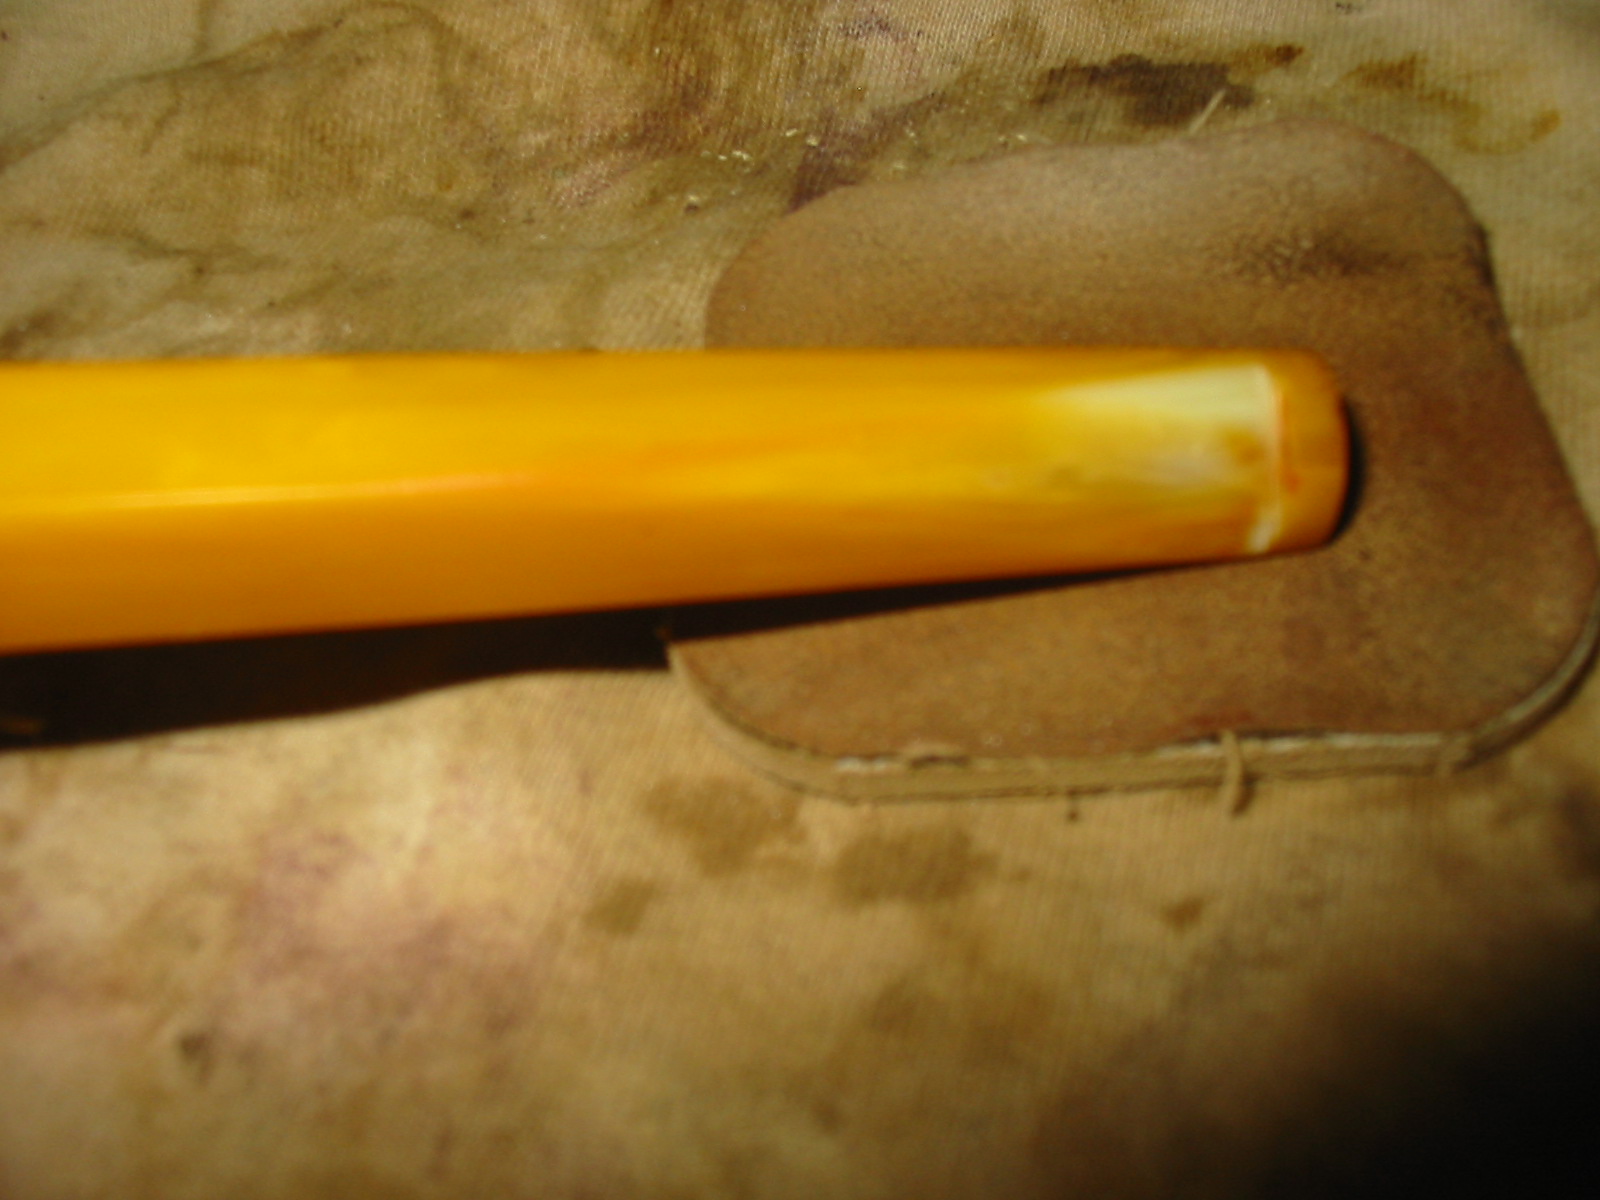
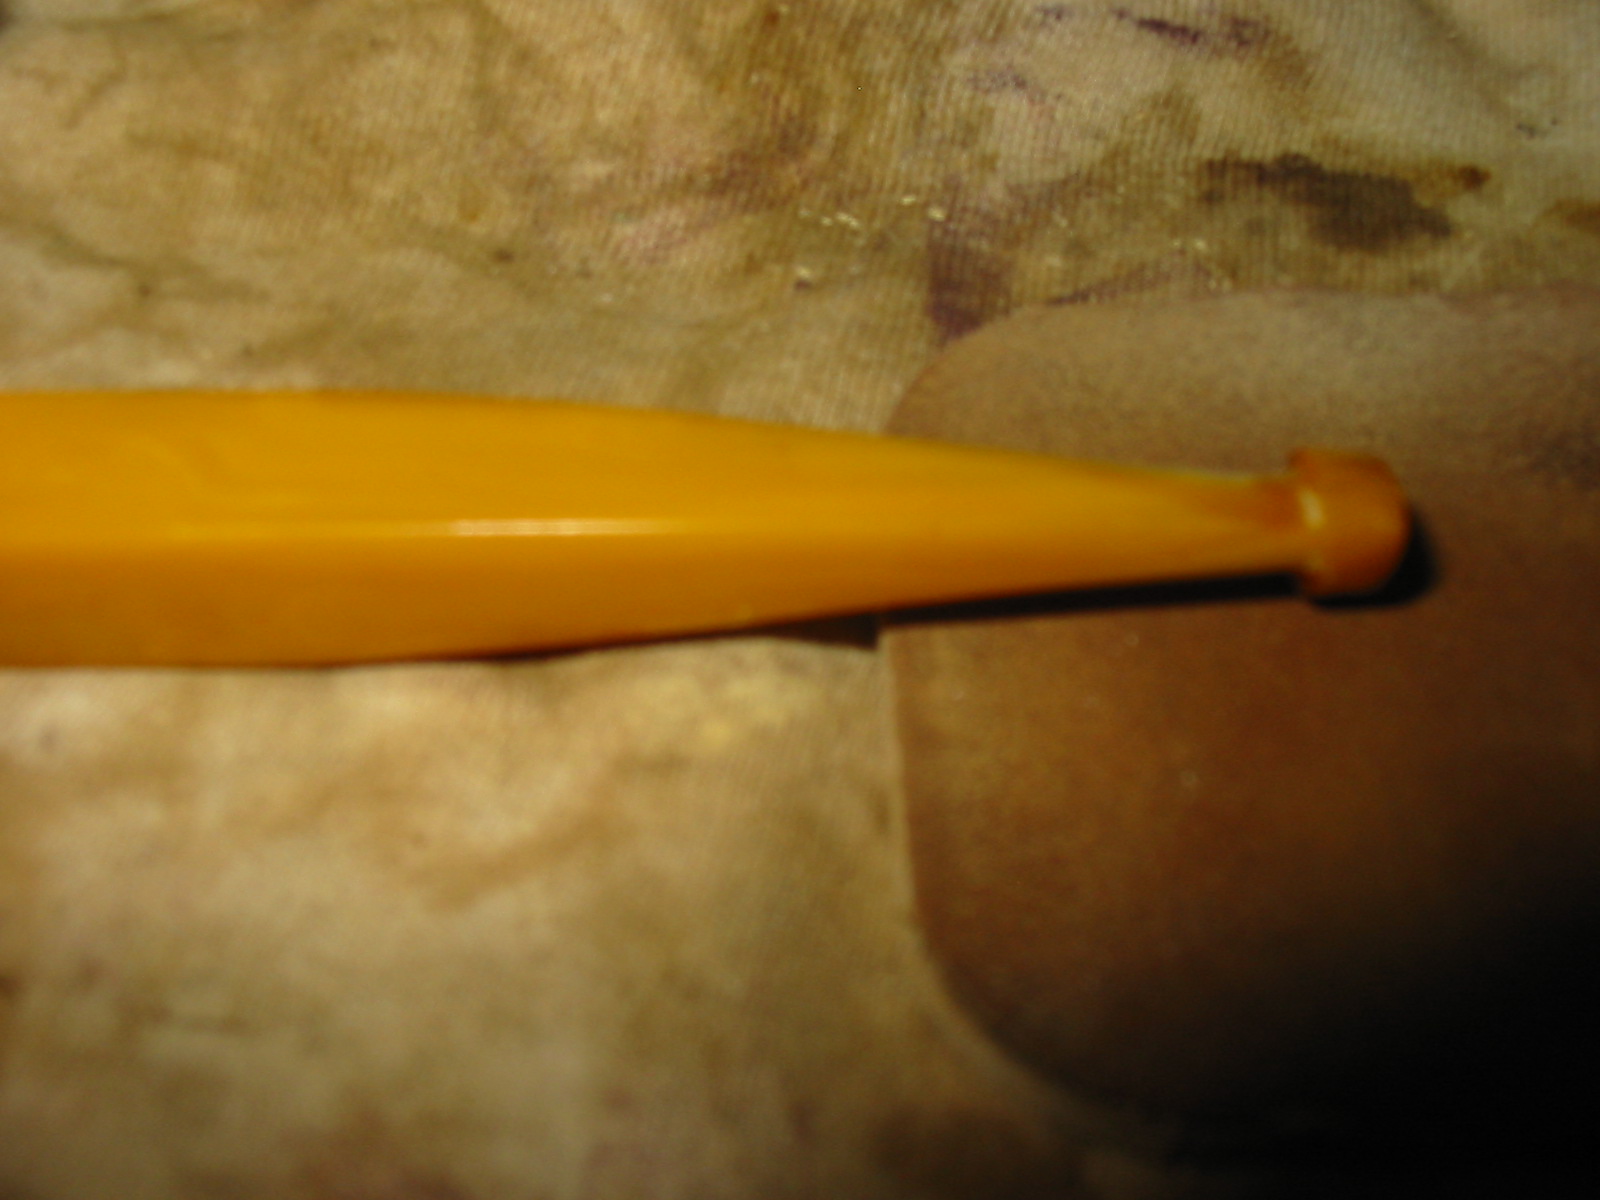
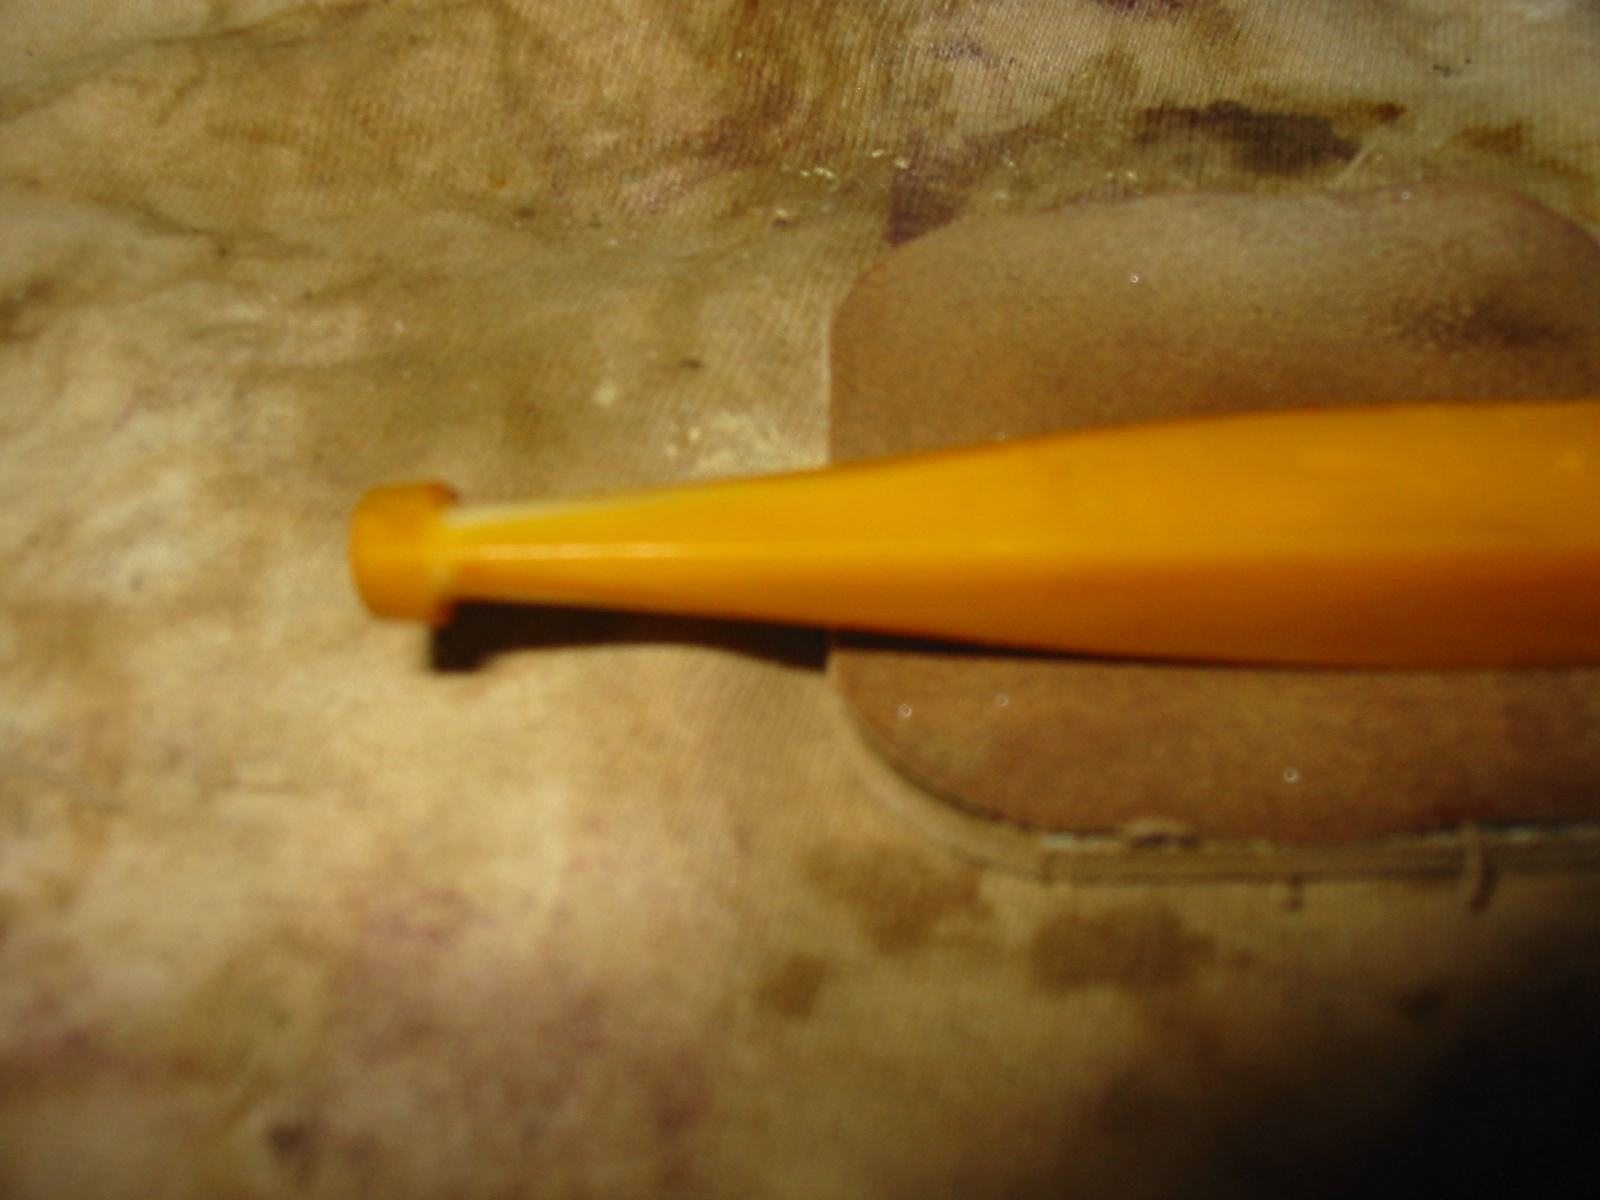
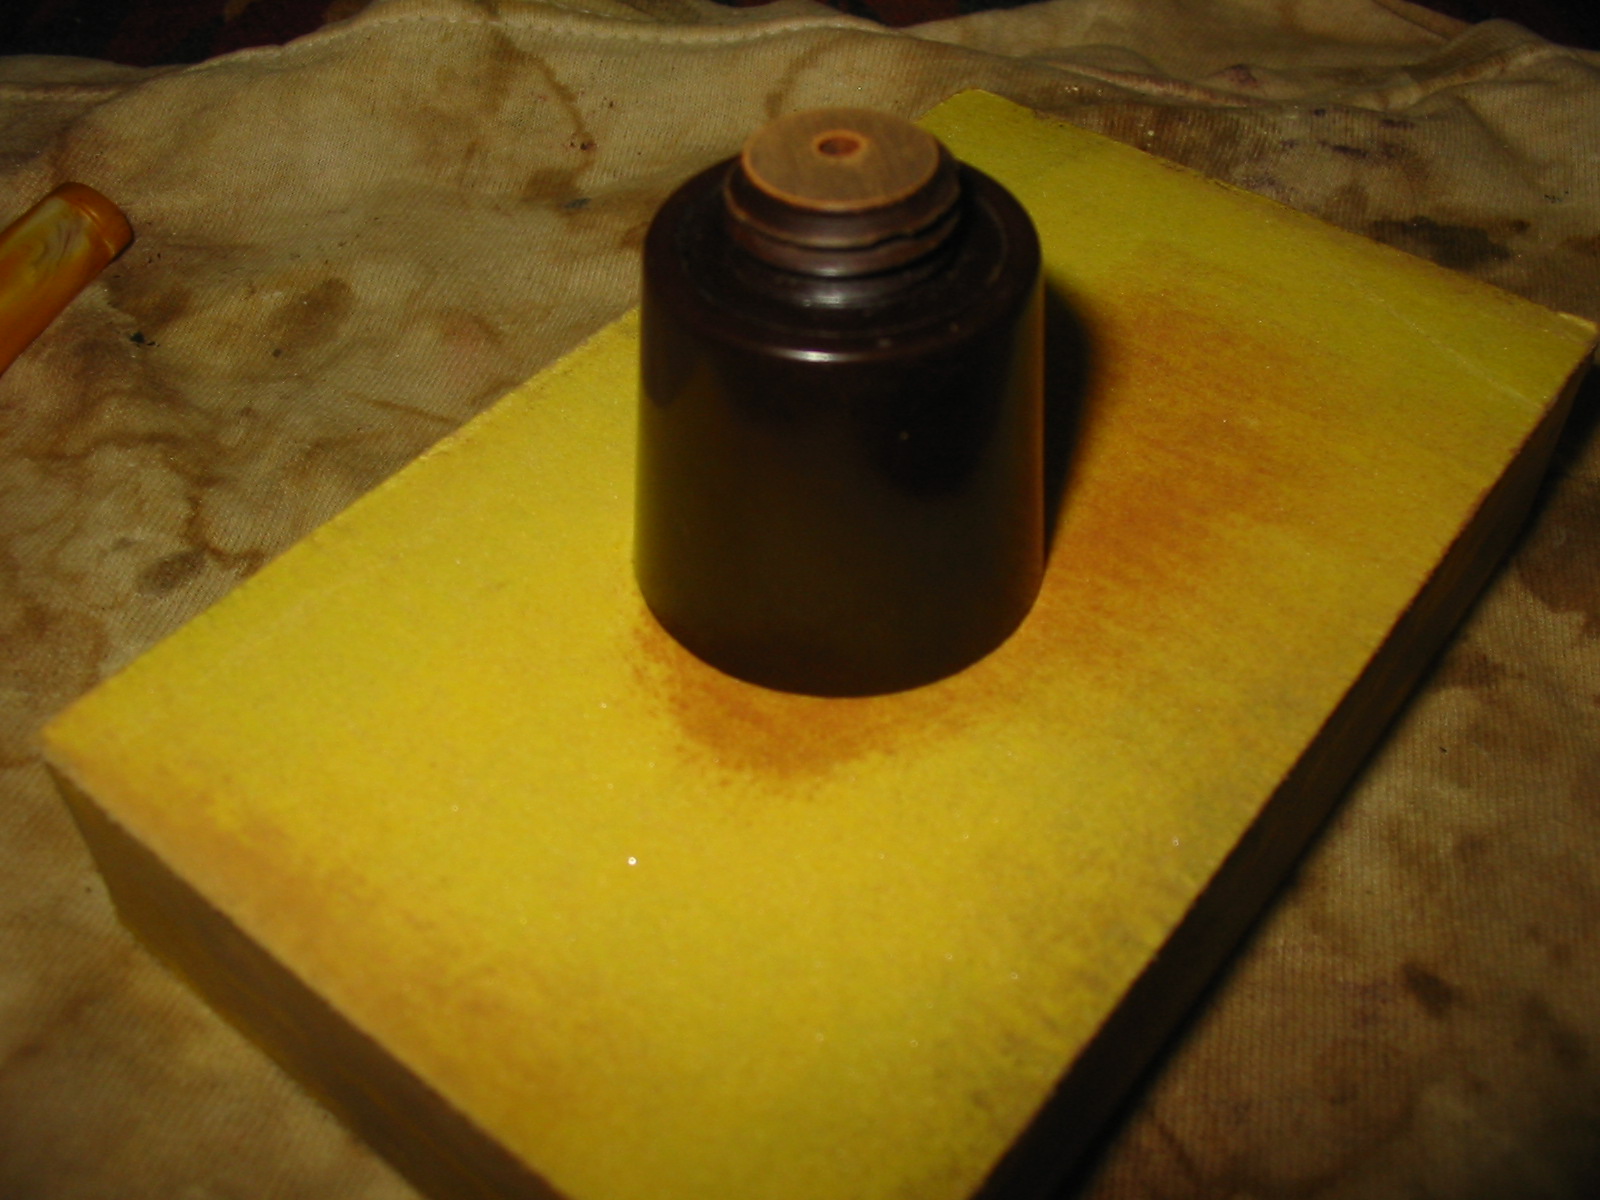
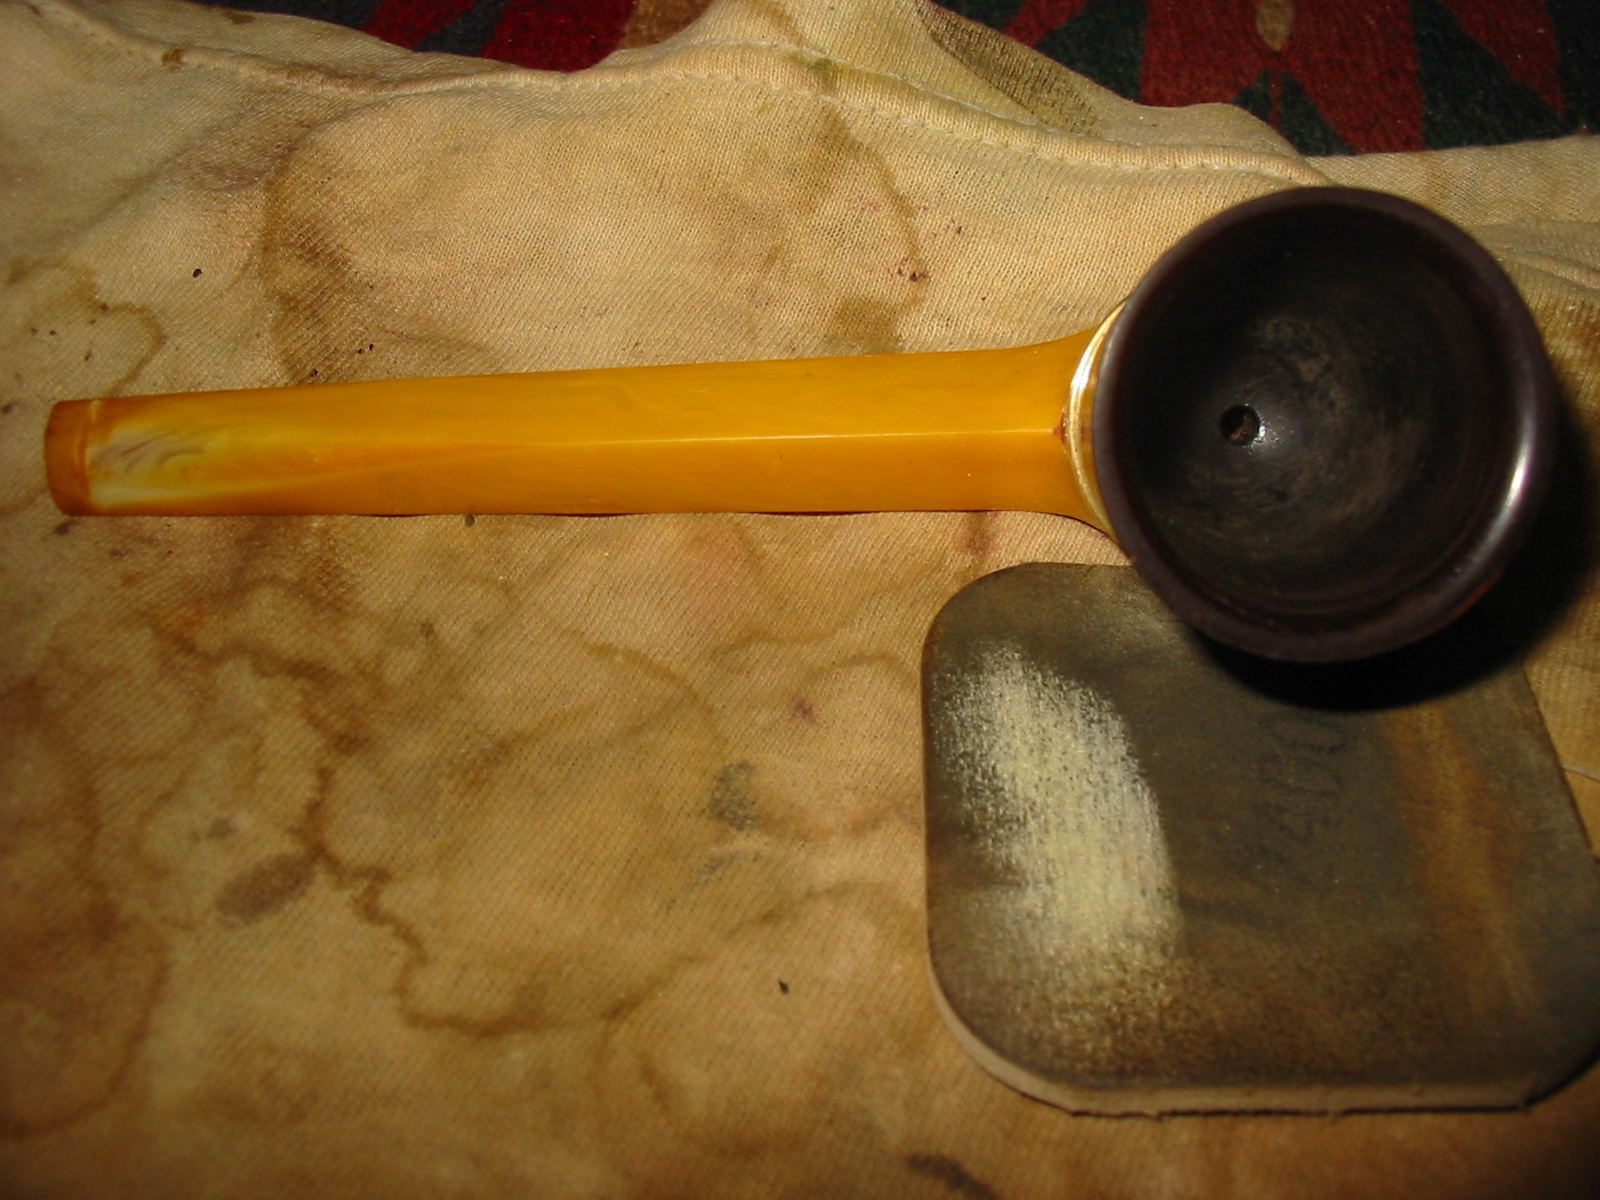
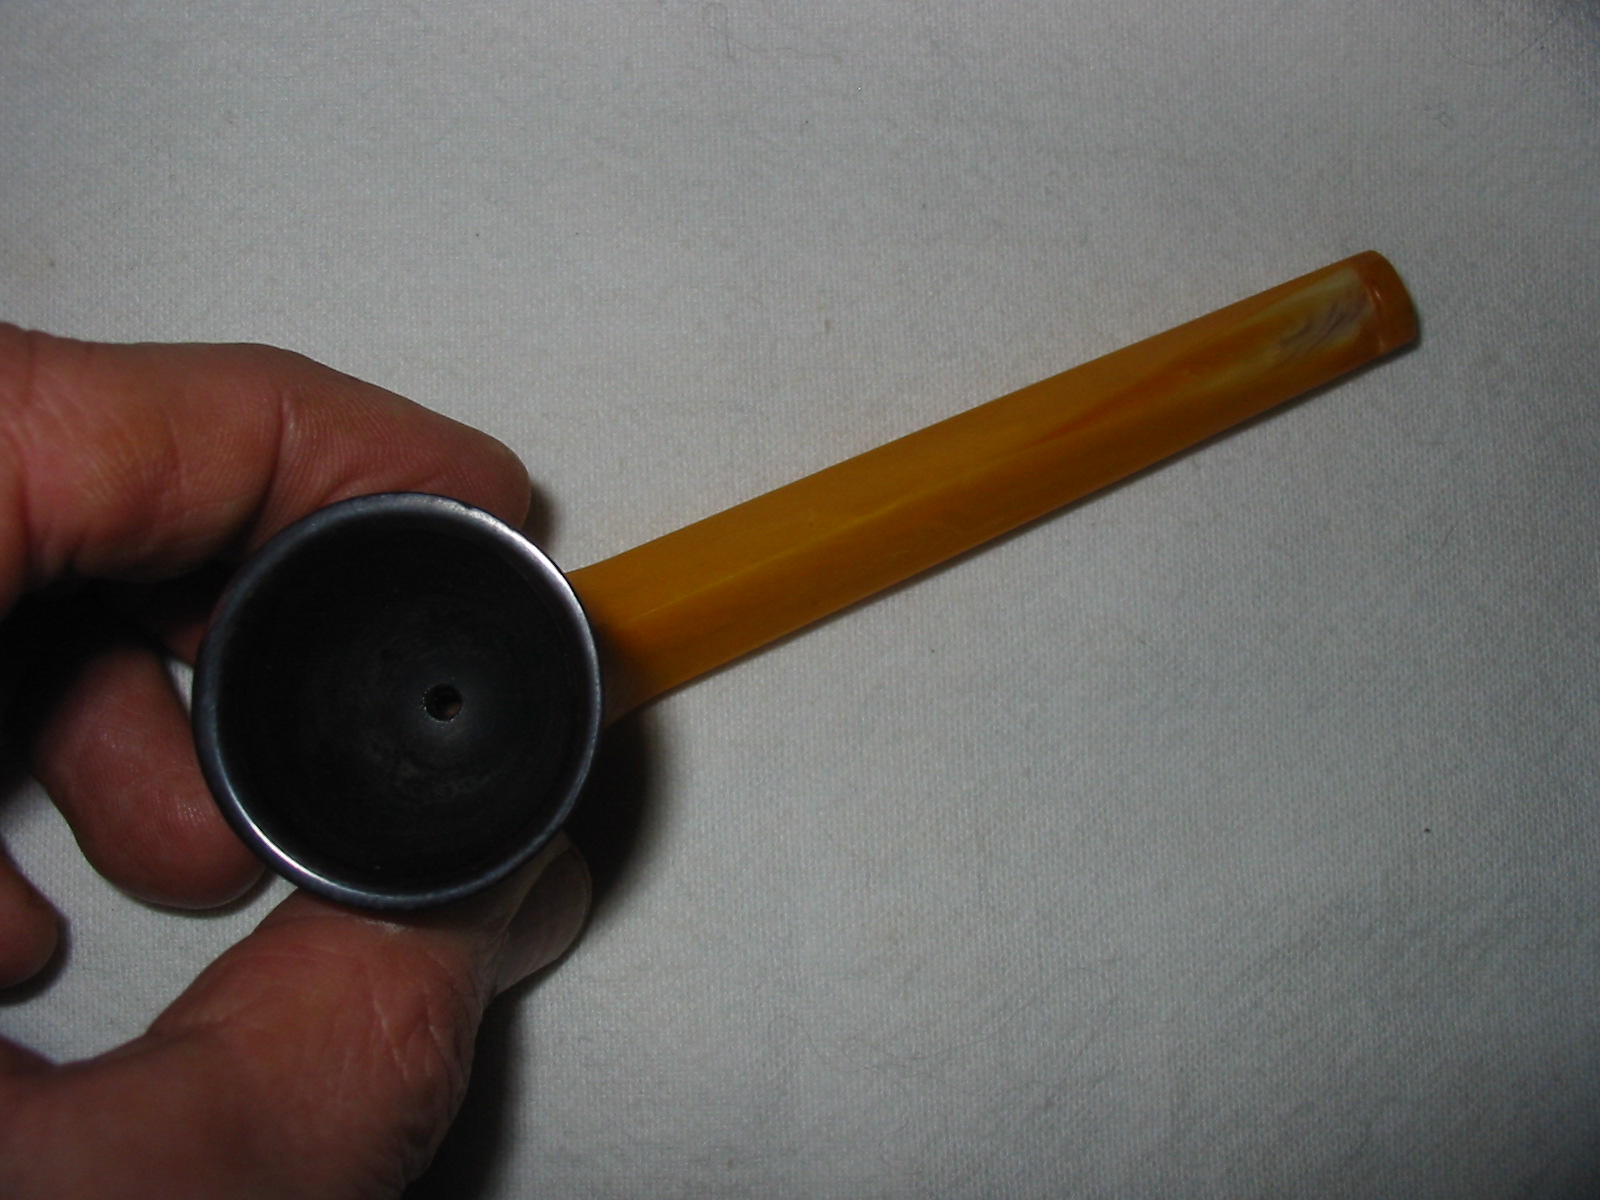
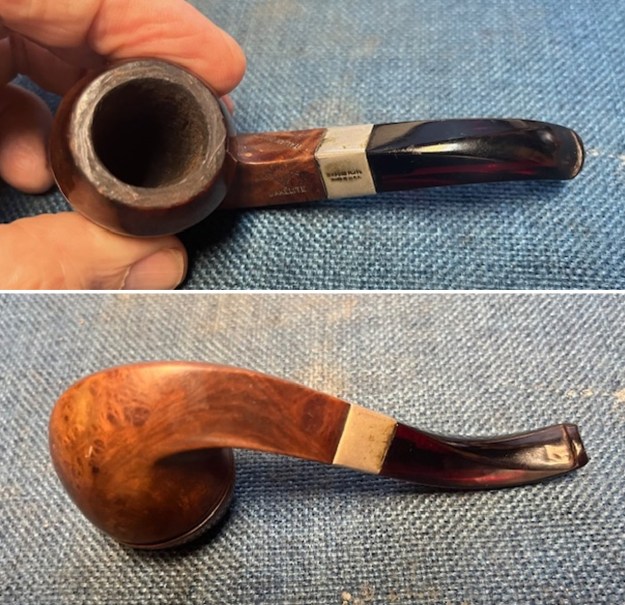
I took photos of the rim top and the stem to show the condition. You can see the thick cake in the bowl and overflow of lava on the rim top. The photos of the stem show the tooth marks and damage in the Bakelite on the top and underside ahead of the button.
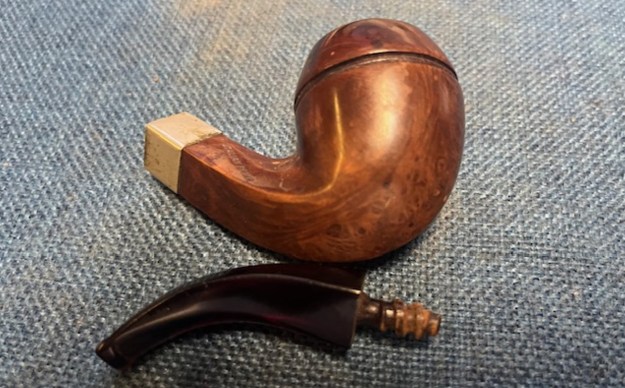
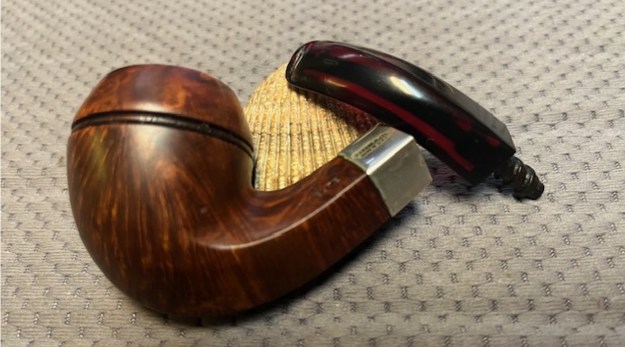
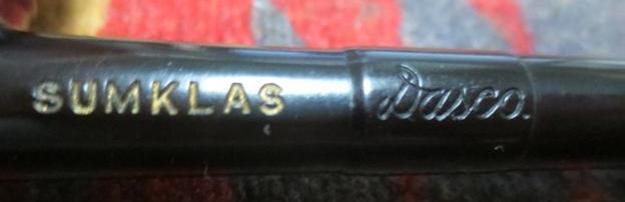
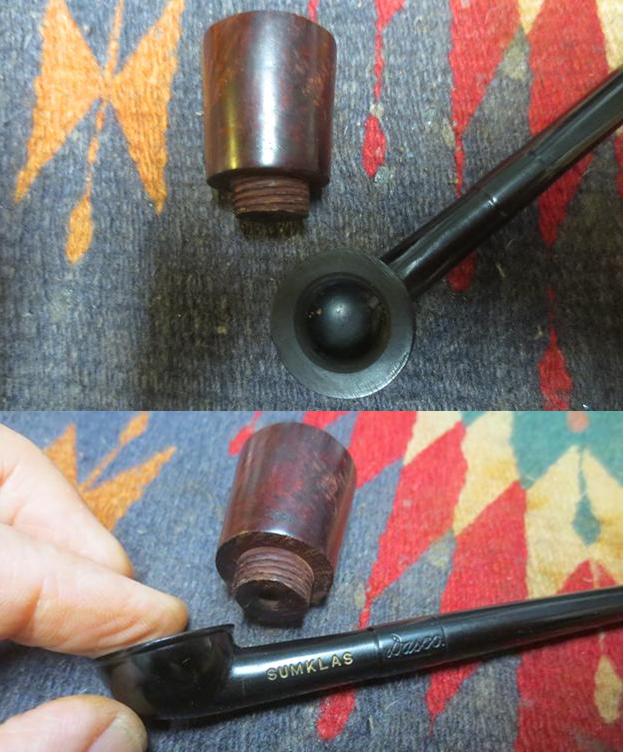
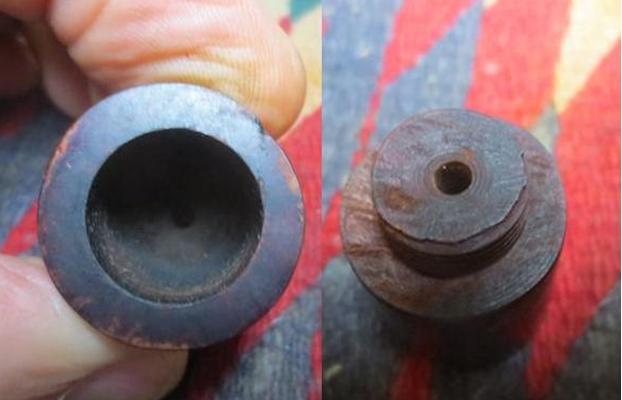
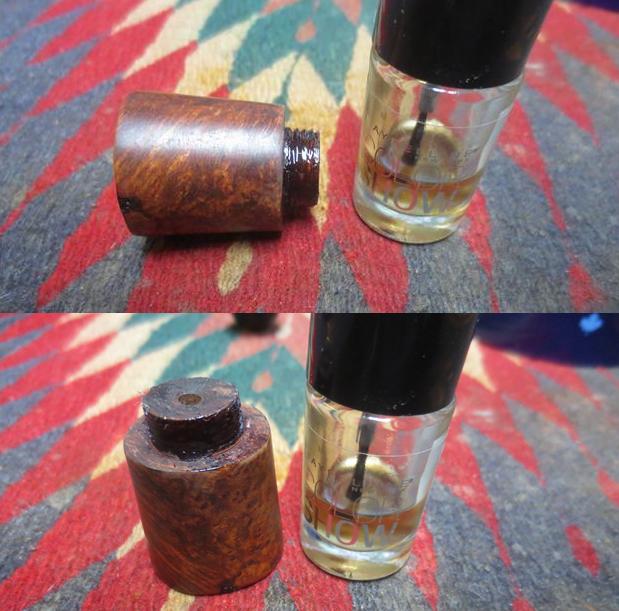
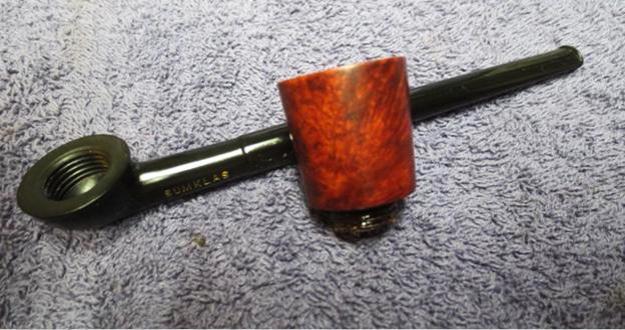
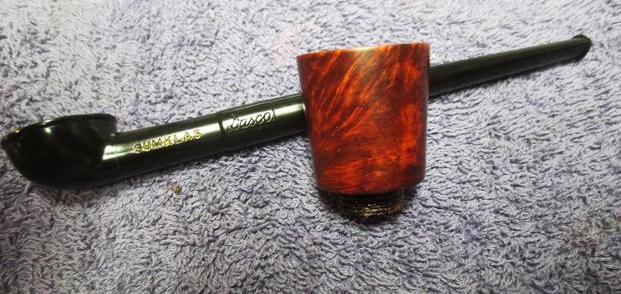
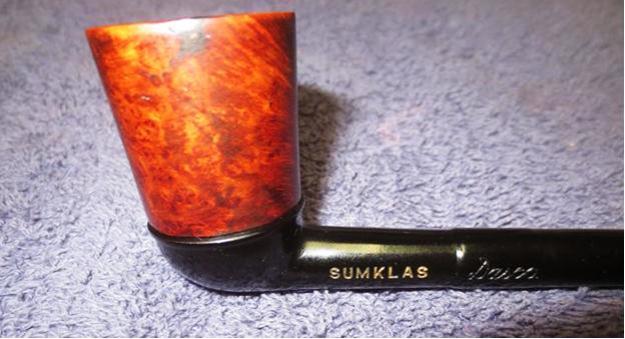
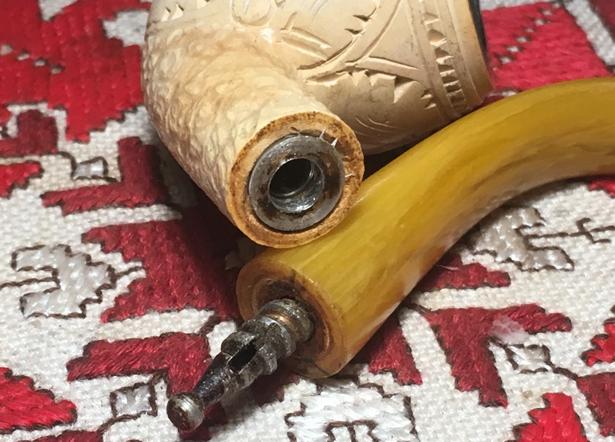
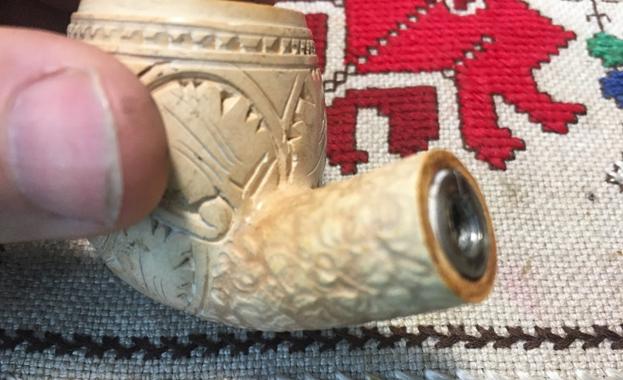
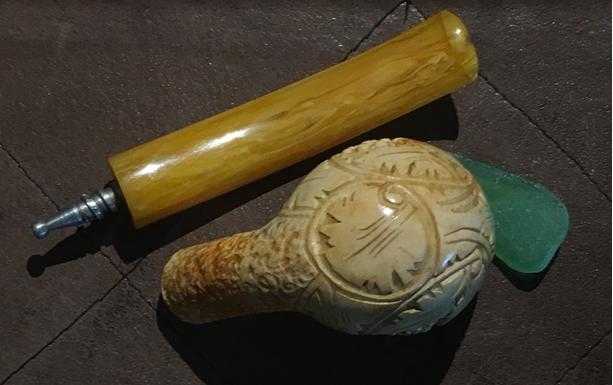
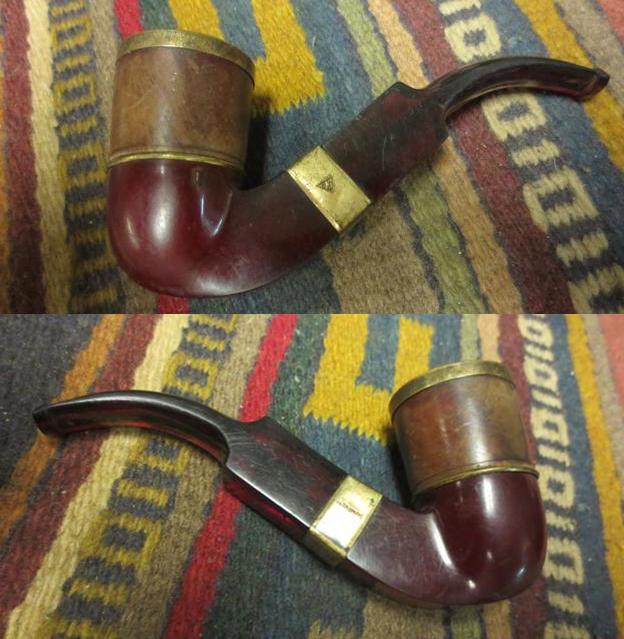
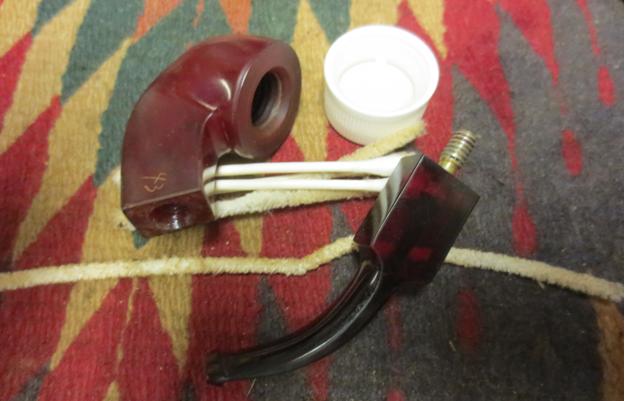
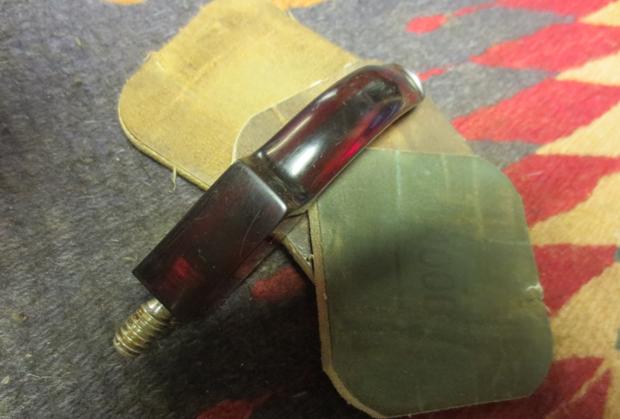
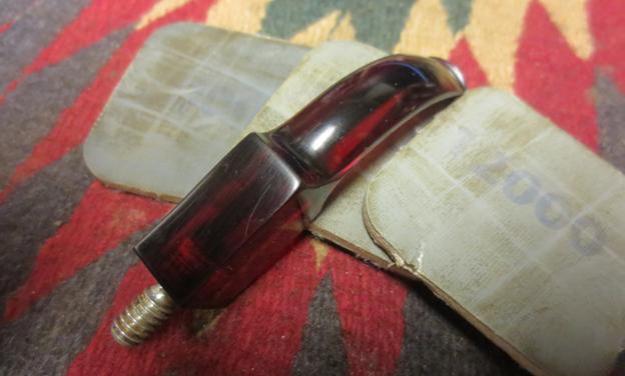
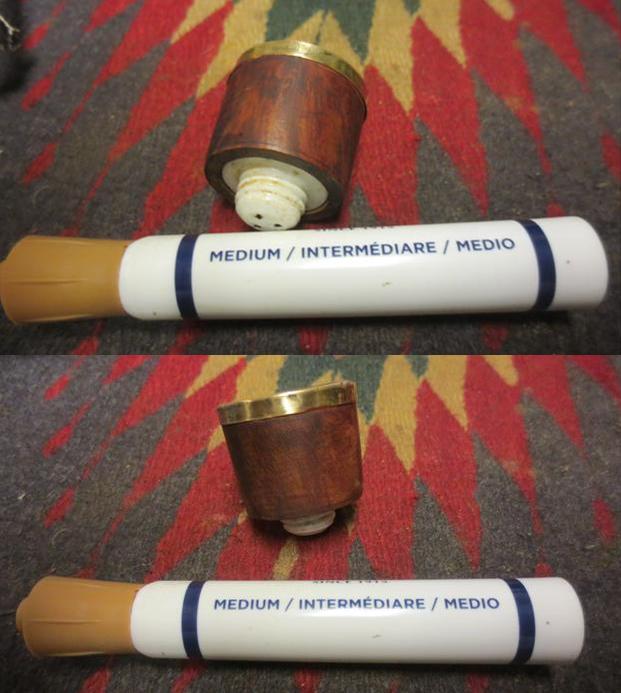
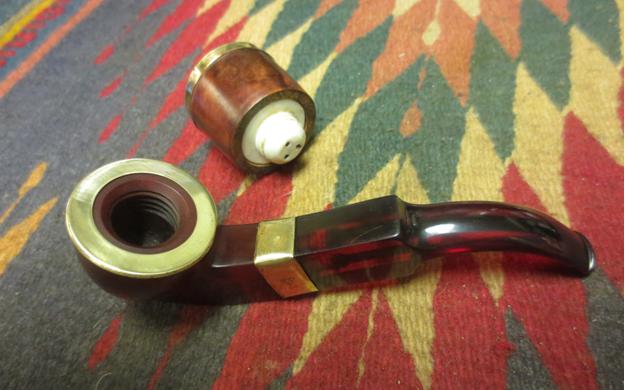
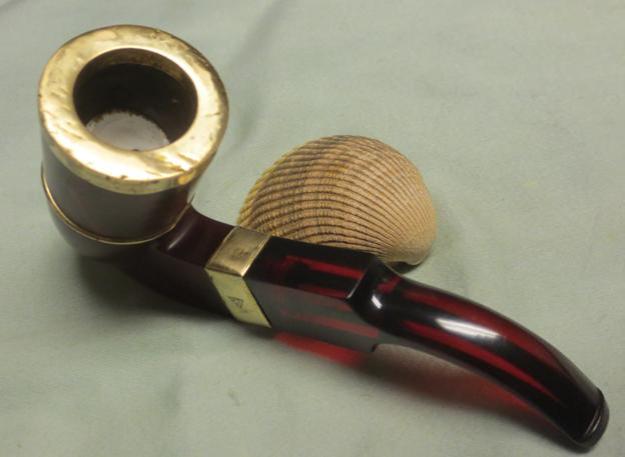
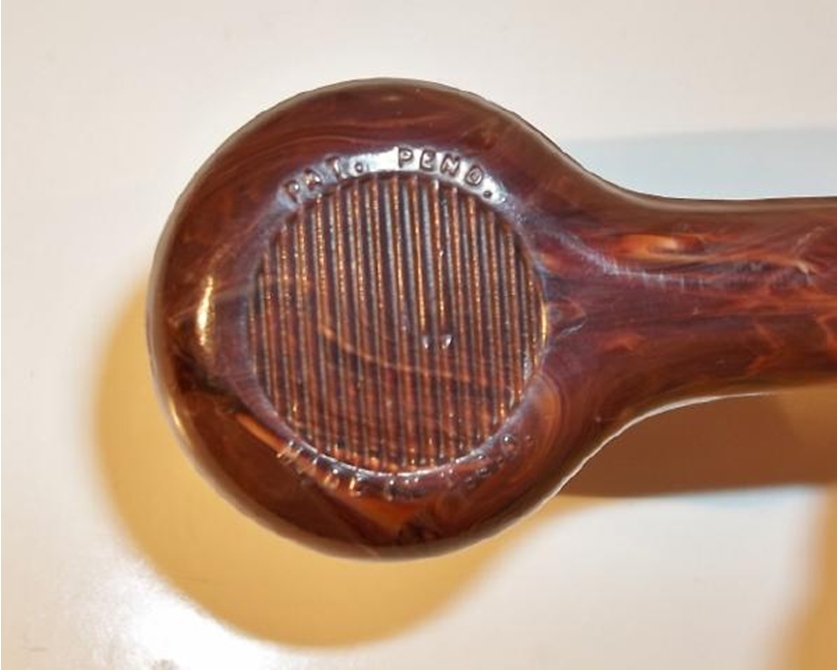
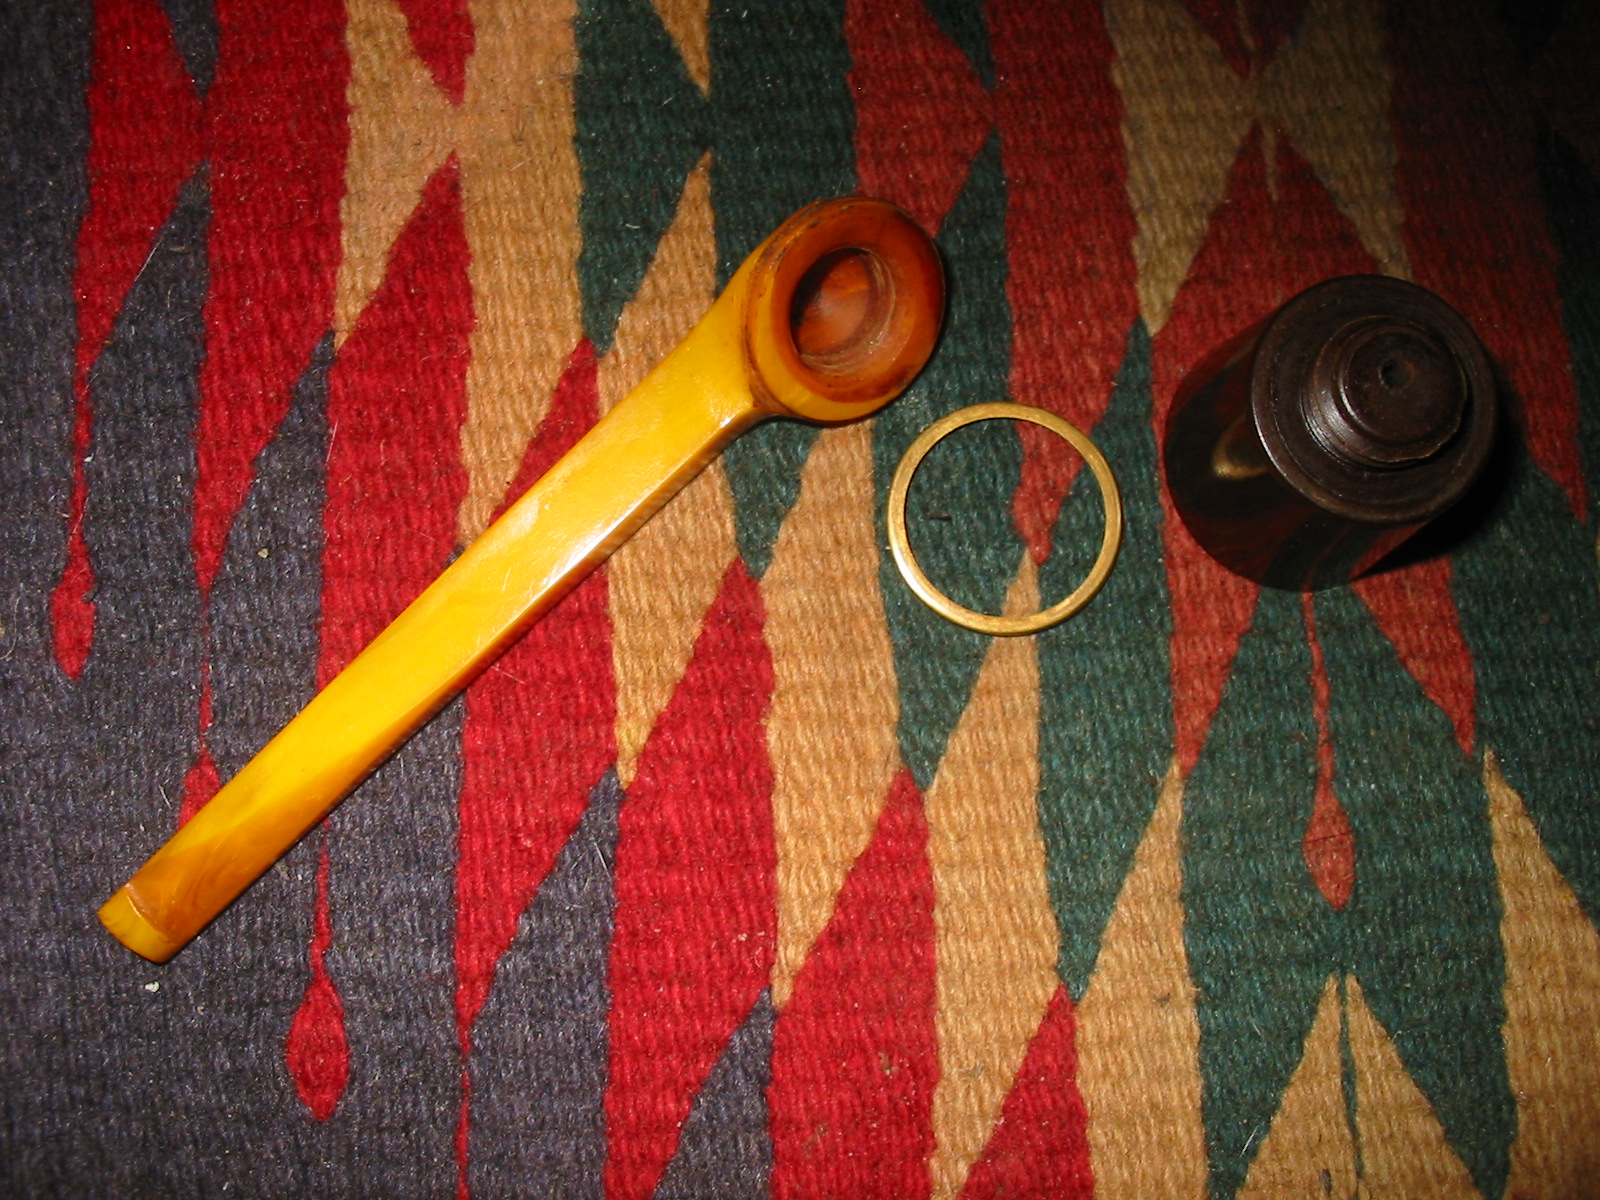
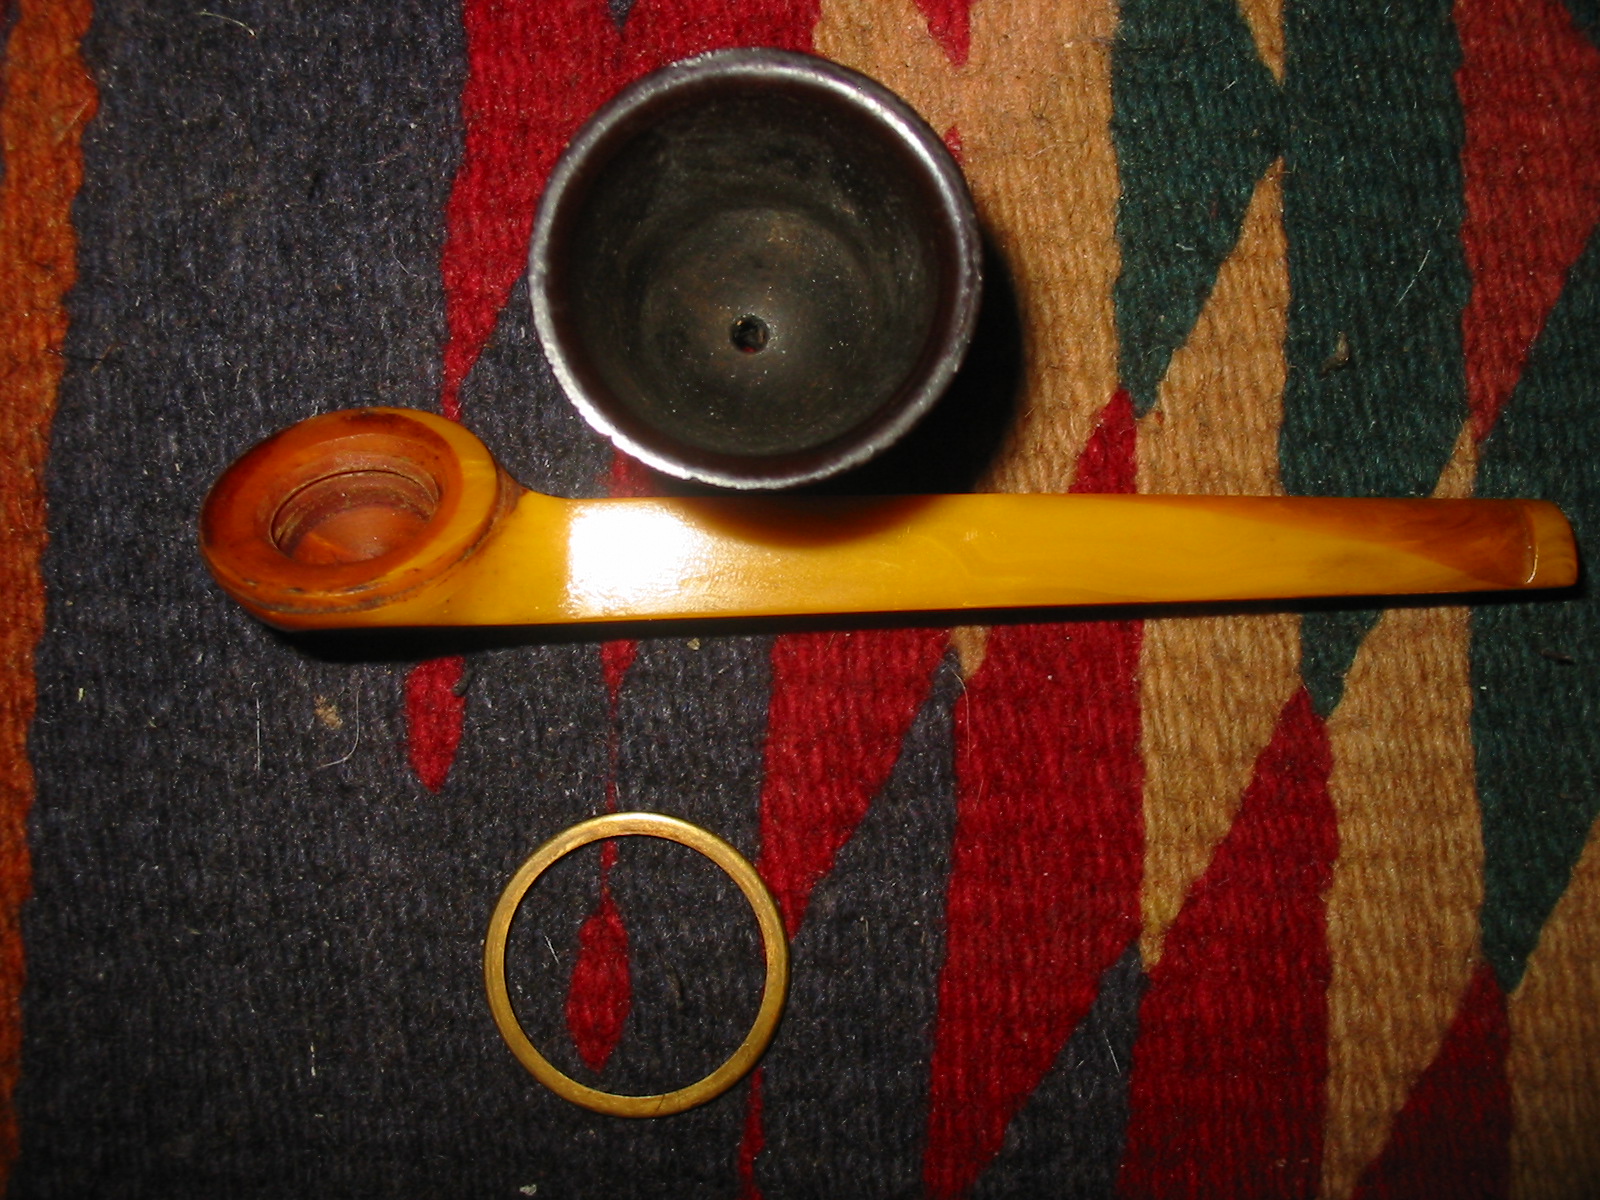
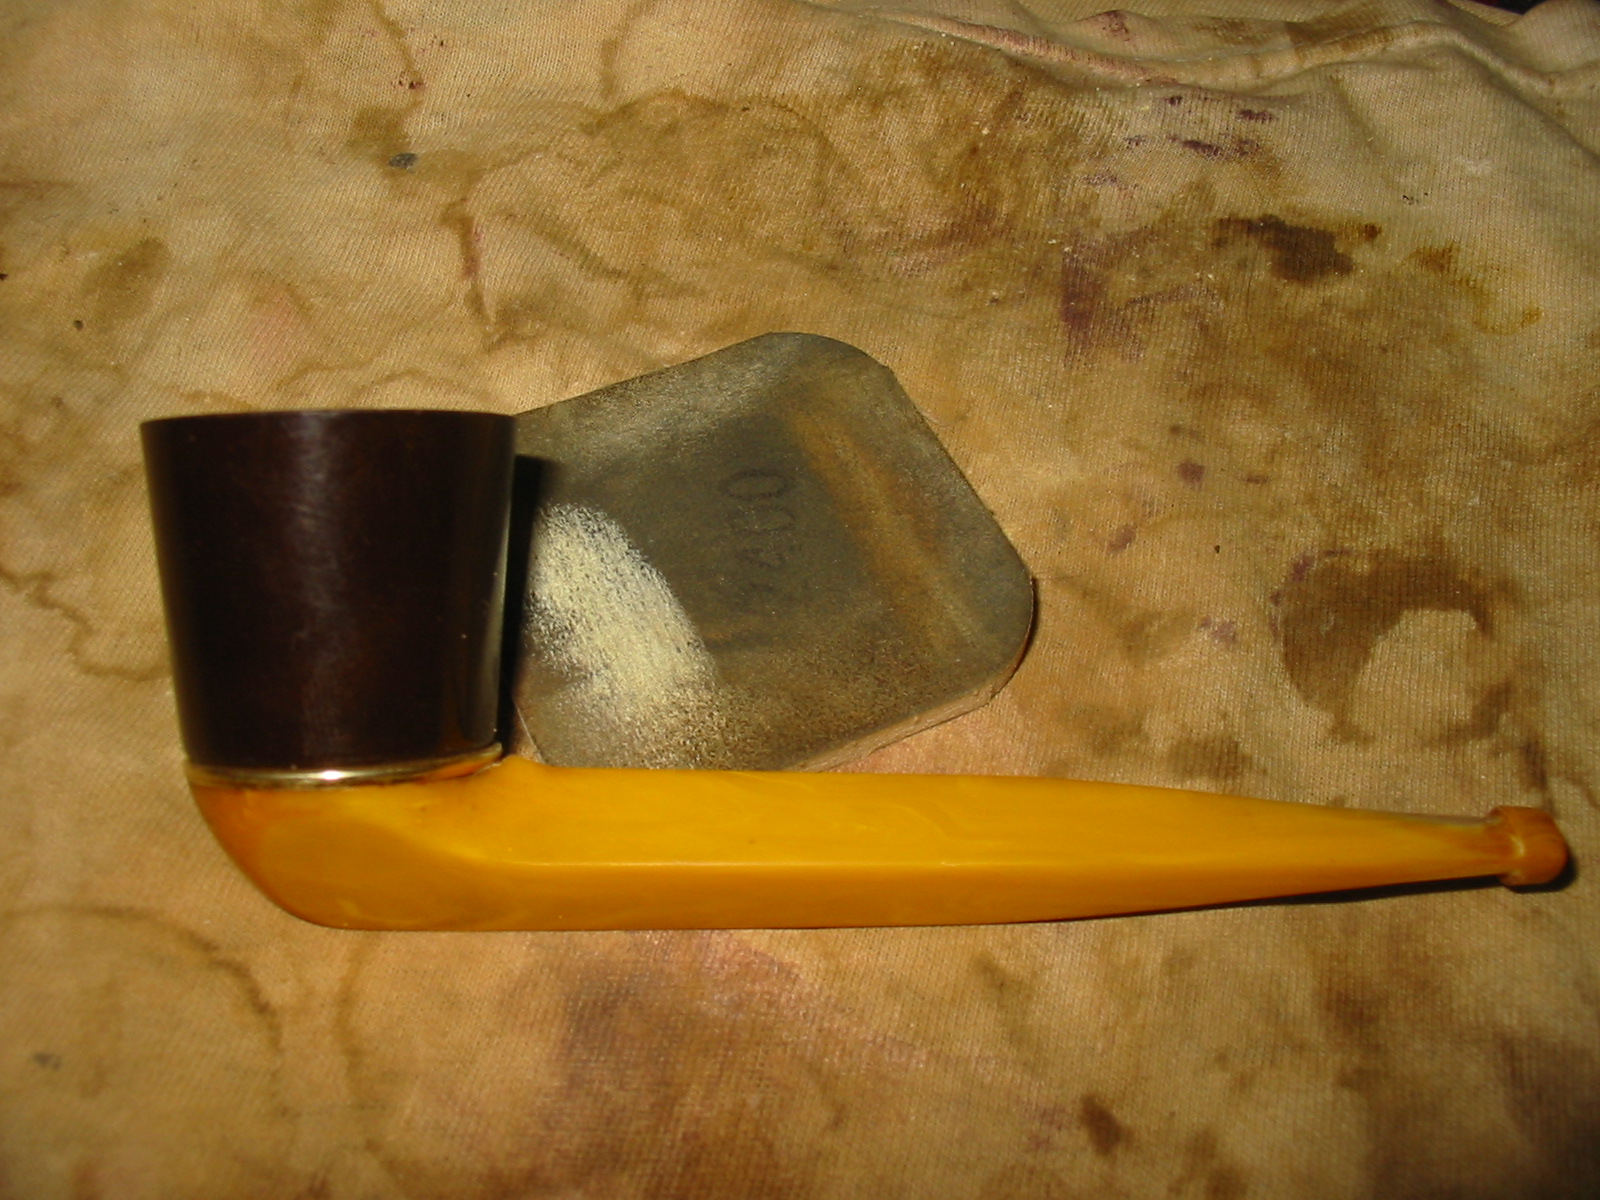
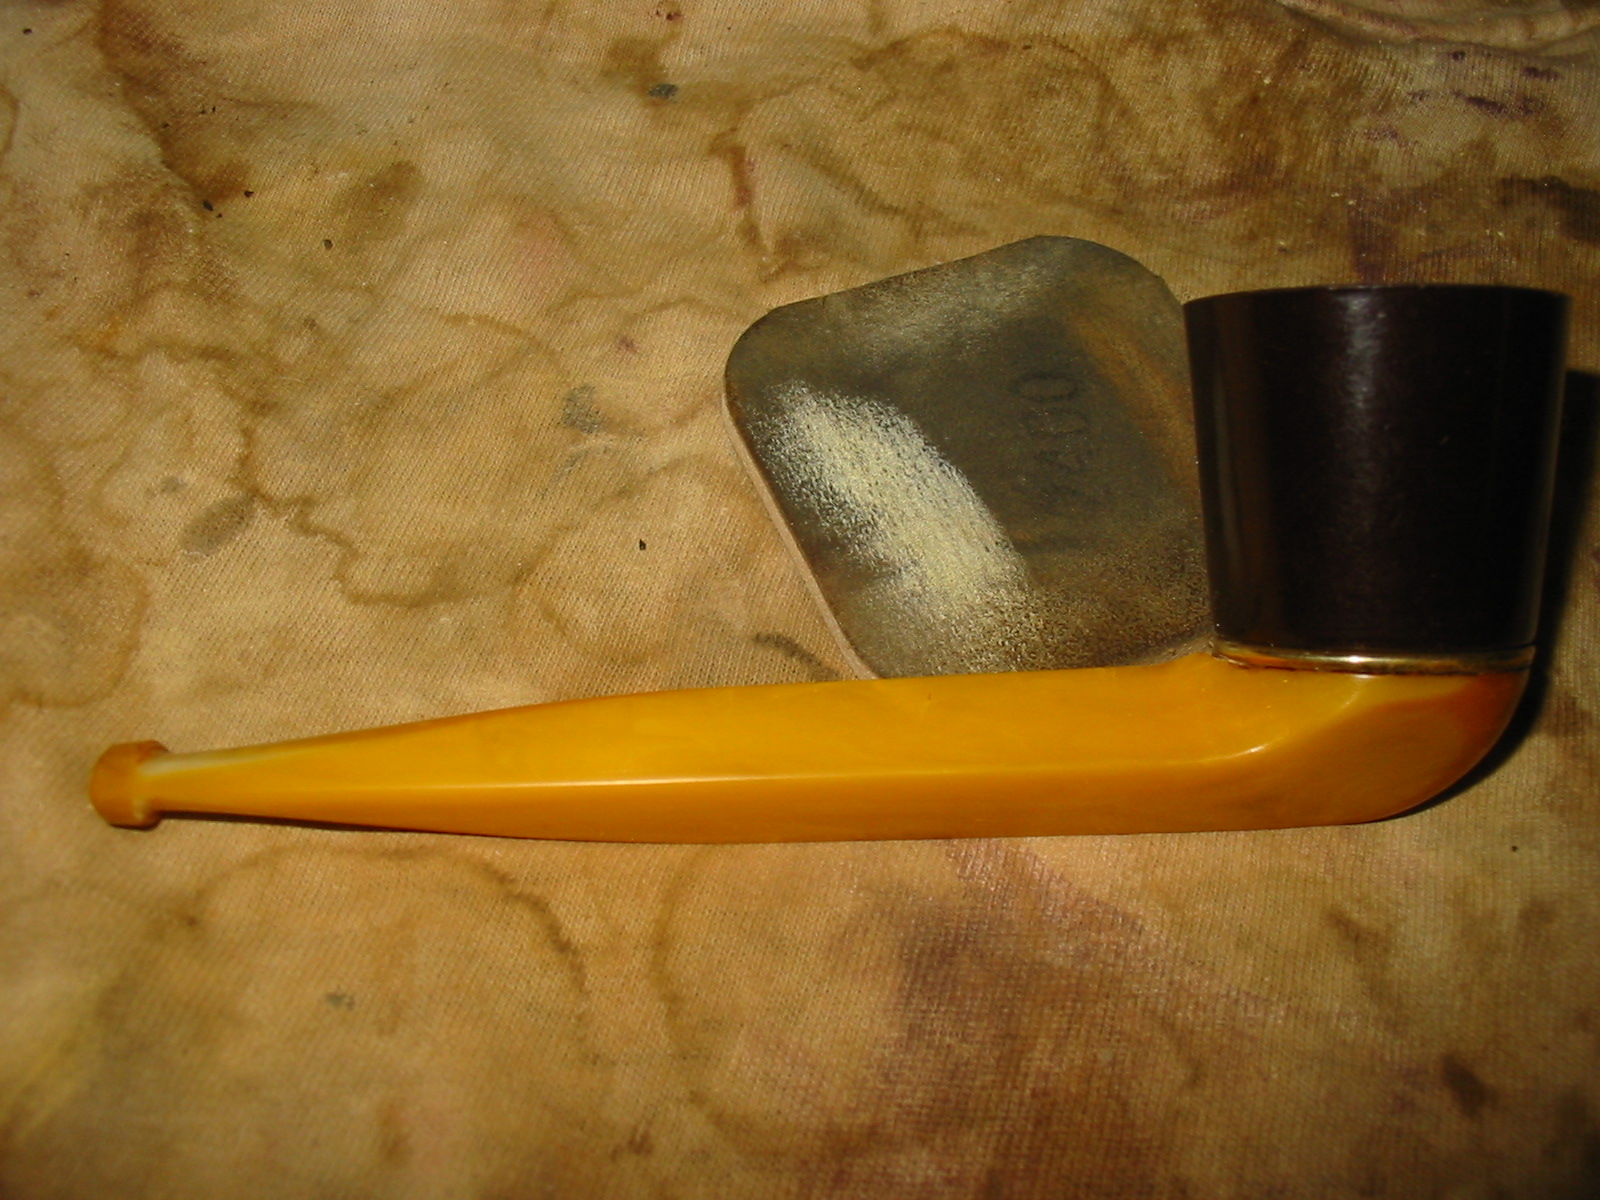
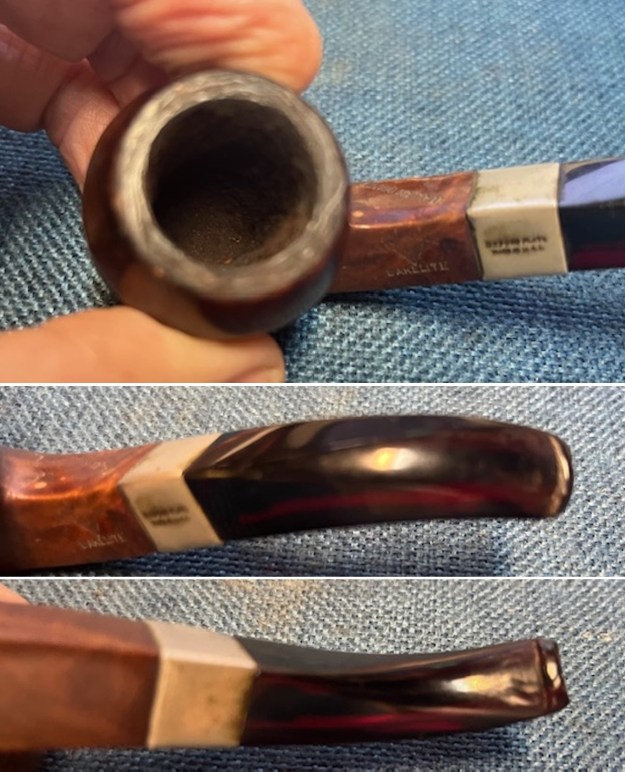
I took photos of the stamping on the sides of the diamond shank to capture it. It was clear and readable as noted above. I tried to capture some of the stamping on the oxidized band as well. It is a little blurry but it is clear and readable under the oxidation. I removed the stem from the shank and took a photo of the parts. 
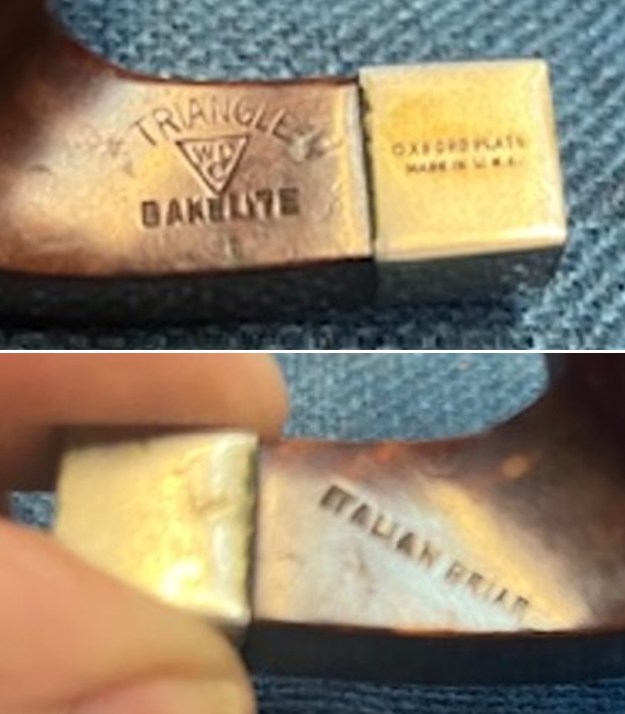
Before working on the pipe, I followed my usual procedure of looking for history on both the brand and the Triangle Bakelite line. I have included a quick history of the brand from Pipedia that is interesting and is helpful (https://pipedia.org/wiki/William_Demuth_Company).

William Demuth. (Wilhelm C. Demuth, 1835-1911), a native of Germany, entered the United States at the age of 16 as a penniless immigrant. After a series of odd jobs, he found work as a clerk in the import business of a tobacco tradesman in New York City. In 1862 William established his own company. The William Demuth Company specialized in pipes, smoker’s requisites, cigar-store figures, canes and other carved objects.

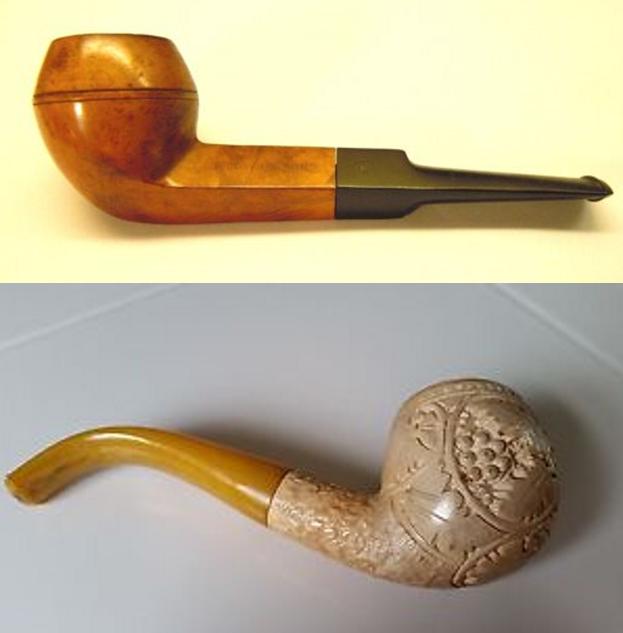
The Demuth Company is probably well known for the famous trademark, WDC in an inverted equilateral triangle. William commissioned the figurative meerschaum Presidential series, 29 precision-carved likenesses of John Adams, the second president of the United States (1797-1801) to Herbert Hoover, the 30th president (1929-1933), and “Columbus Landing in America,” a 32-inch-long centennial meerschaum masterpiece that took two years to complete and was exhibited at the World’s Columbian Exposition in Chicago in 1893…

…In 1897 Ferdinand Feuerbach joined the Demuth company and by 1903 had become the production manager. Feuerbach is credited with developing Demuth’s popular Royal Demuth and Hesson Guard Milano pipelines. He left in 1919, when Sam Frank Sr. needed an experienced pipe man to run his pipe factory, located at 168 Southern Blvd., in the Bronx. Feuerbach and Frank had been close friends since Frank started his own business in 1900 and was closely associated with the sales staff of WDC, selling their line of pipes…

In early 1937, the City of New York notified S.M. Frank & Co. of their intent to take by eminent domain, part of the land on which the companies pipe factory was located. This was being done to widen two of the adjacent streets. As a result of this, Frank entered into negotiations to purchase the Wm. Demuth Co.’s pipe factory in the Richmond Hill section of Queens. It was agreed upon that Demuth would become a subsidiary of S.M. Frank and all pipe production of the two companies would be moved to DeMuth factory. New Corporate offices were located at 133 Fifth Avenue, NYC.

Demuth pipes continued to be made at the Richmond Hill plant till December 31. 1972. Then the Wm. Demuth Company met its official end as a subsidiary company by liquidation. Demuth’s mainstay pipe, the Wellington continued to be offered in the S.M. Frank catalog until 1976. In the mid-80’s, the Wellington even made a brief return as a direct to the consumer offer.

There was nothing specific on the Triangle Bakelite Line in the above article. I did a further Google search and found a link to an advertisement on the WDC Triangle Bakelite pipe that is quite interesting (https://farm1.static.flickr.com/198/460550444_b0cd63fa8f_o.jpg). I have included a copy of the file below.The above advertisement reads as follows:

WDC Triangle Pipes are as good as they are beautiful. They combine the WDC standard of goodness in the bowl, and the lasting beauty of a Triangle Bakelite bit.

There is no substance known to science more suitable for pipe stems, cigar and cigarette holders than Triangle Bakelite. It possesses all the advantages of natural amber but none of the failings.

It has the beautiful coloring of amber – brilliant, rich and translucent – but excels in that it is tougher and more durable than amber. It has neither taste nor odor and is non-flammable.

The bowls of the WDC Triangle Pipes are genuine French briar, specially Demuth seasoned and guaranteed against cracking or burning through.

Me who want something distinctive in a pipe will find a wide variety of select shapes of WDC Triangle Pipe, at the better grade shops, at $1.00 and up. Also a wide selection of cigar holders at 50c and up, and cigarette holders at 35c and up, in many beautiful shapes.

That tells a lot about the manufacture and marketing of WDC pipes. They were viewed as spectacular and unique. They were chosen by discriminating smokers and enjoyed with durability and flavor. Now it was time to work on this pipe.

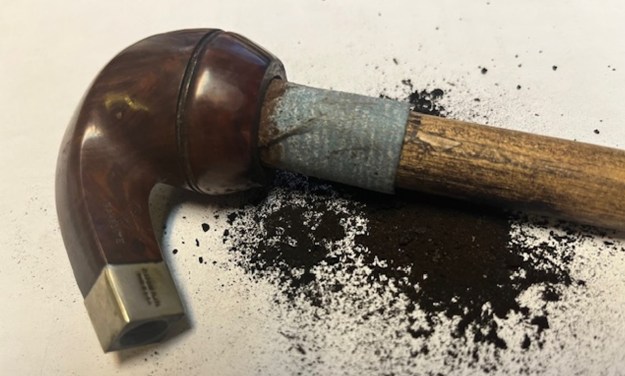
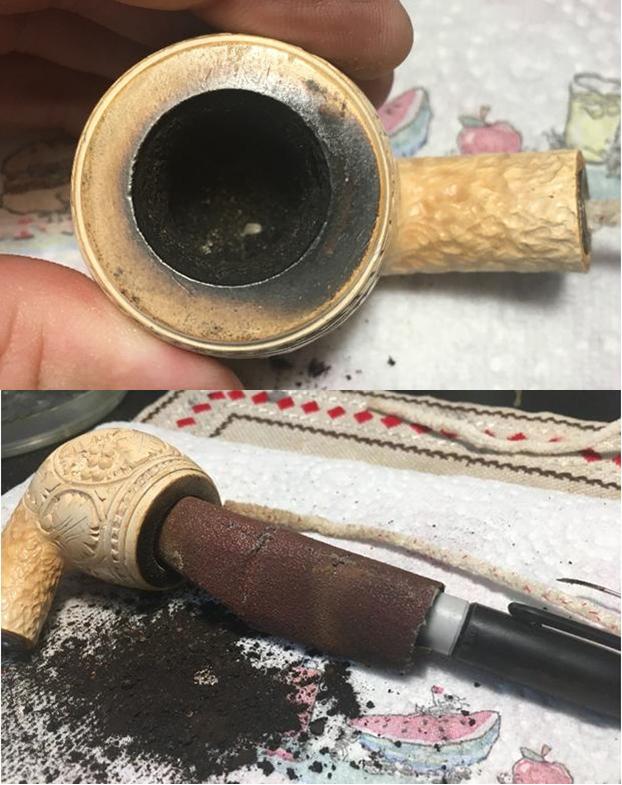
I started my work on the pipe by reaming the bowl with a PipNet reamer. I used the first cutting head and took the cake back to bare briar. I cleaned up the reaming with a Savinelli Fitsall Pipe Knife and removed all the remnants of the cake. I scraped the rim top with the flat edge of the blade at the same time and removed most of the thick lava build up. I sanded the walls of the bowl with a piece of dowel wrapped in 220 grit sandpaper. The walls look very good at his point in the process. 
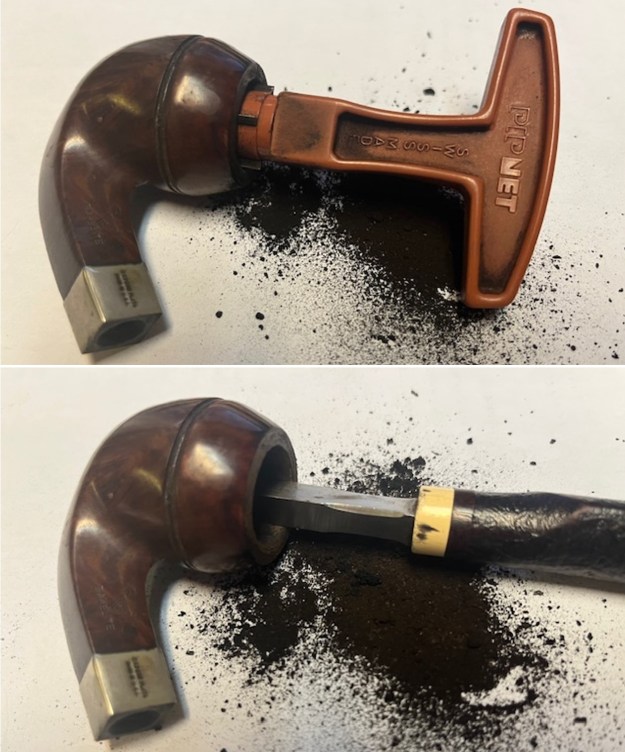
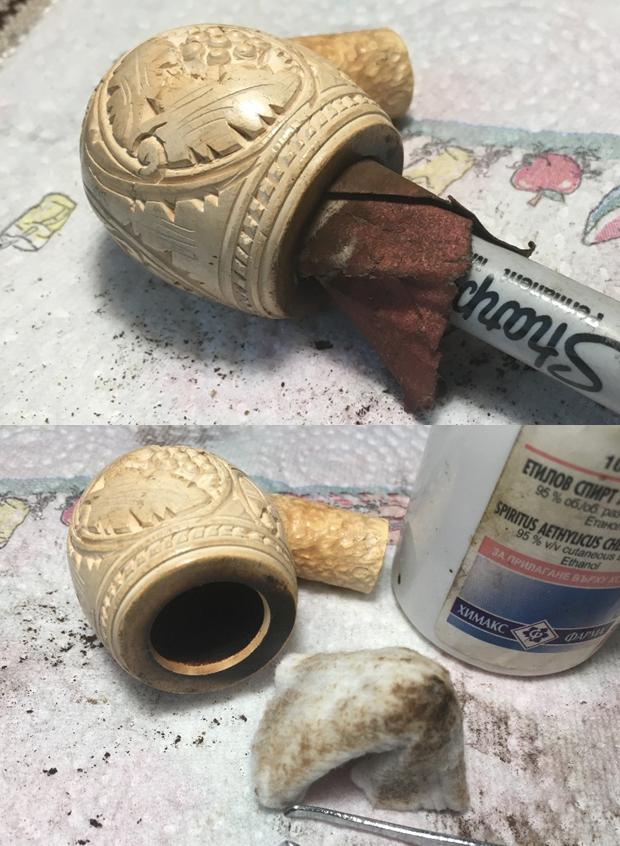
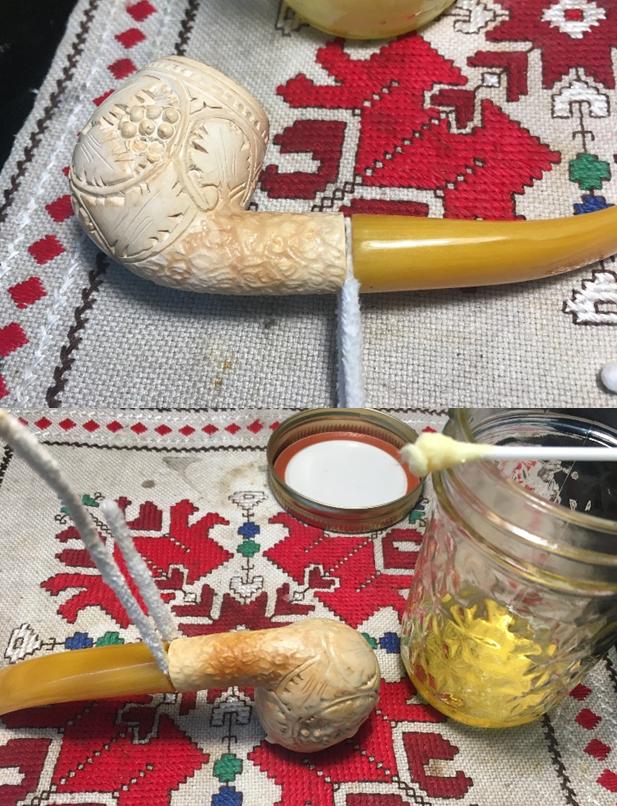
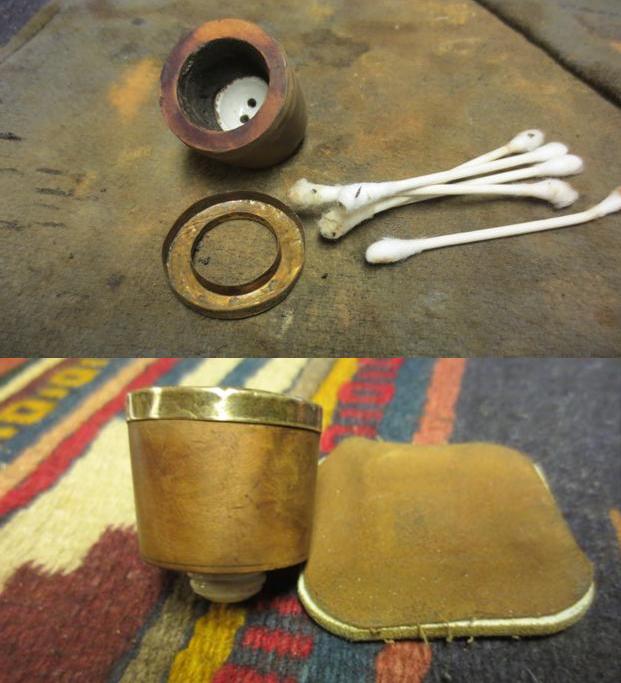
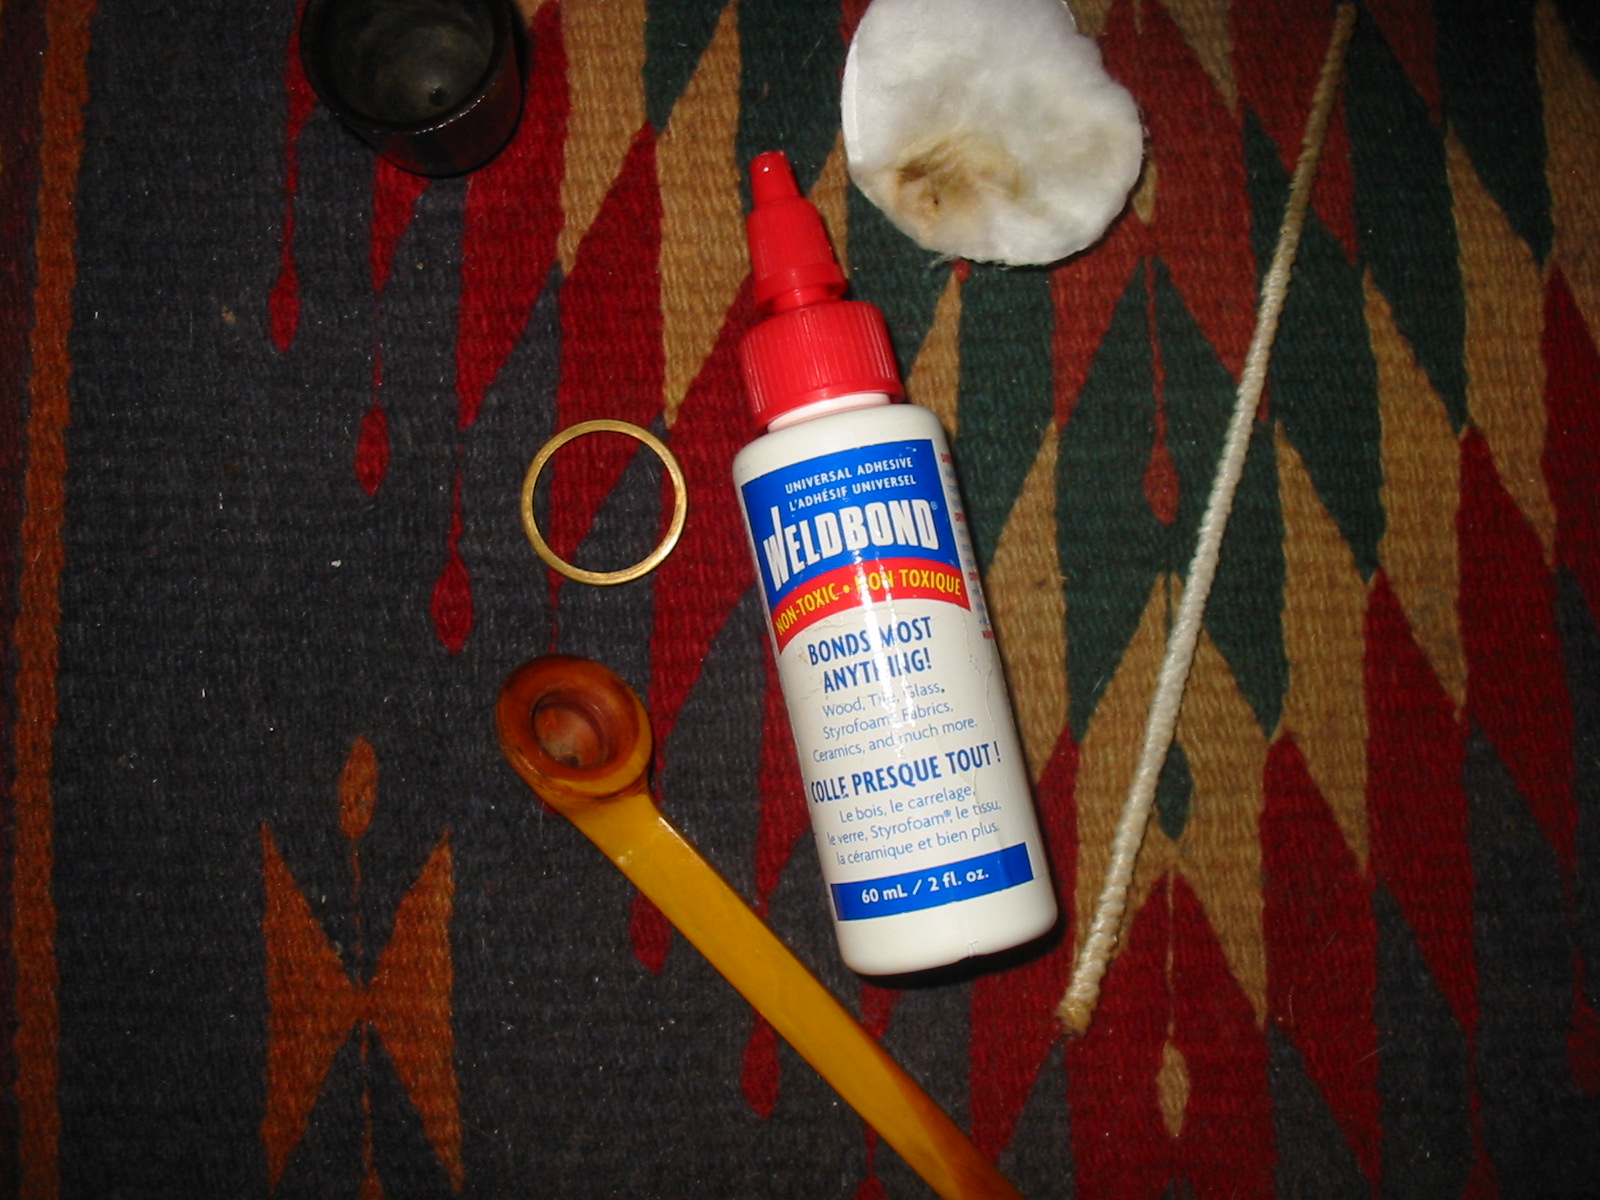
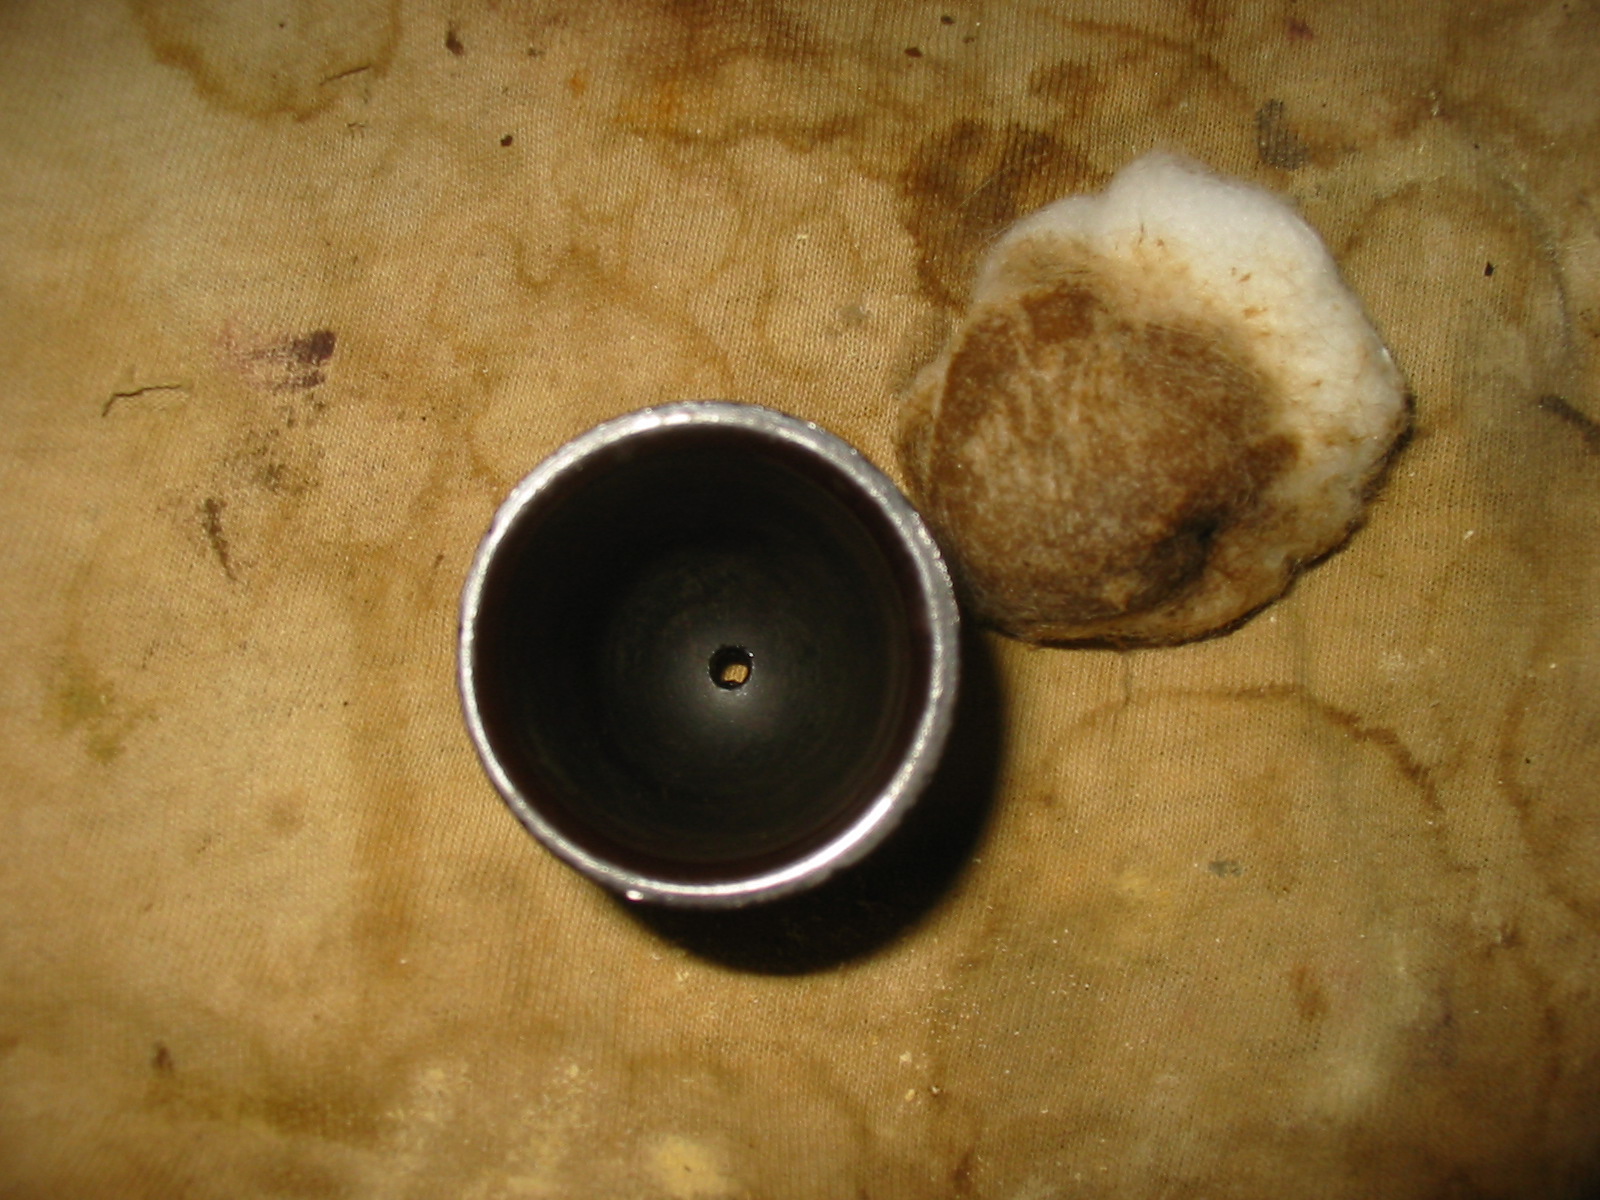
I cleaned out the shank, the airway and the mortise with alcohol, cotton swabs, hard bristle and soft bristle pipe cleaners. It was a very dirty pipe which just meant that it had really been enjoyed by the previous pipe man. I cleaned the bone tenon and the inside of the airway in the stem with alcohol, cotton swabs and pipe cleaners in the same way as I did the shank. It also was very dirty.
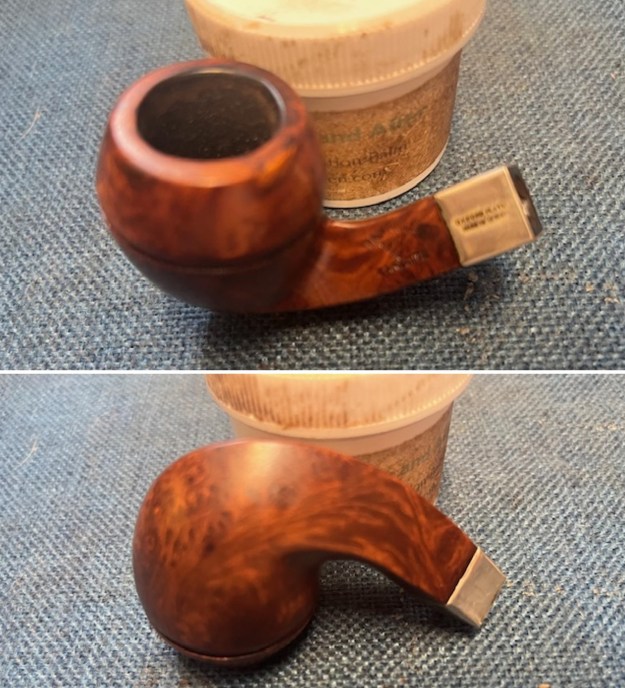
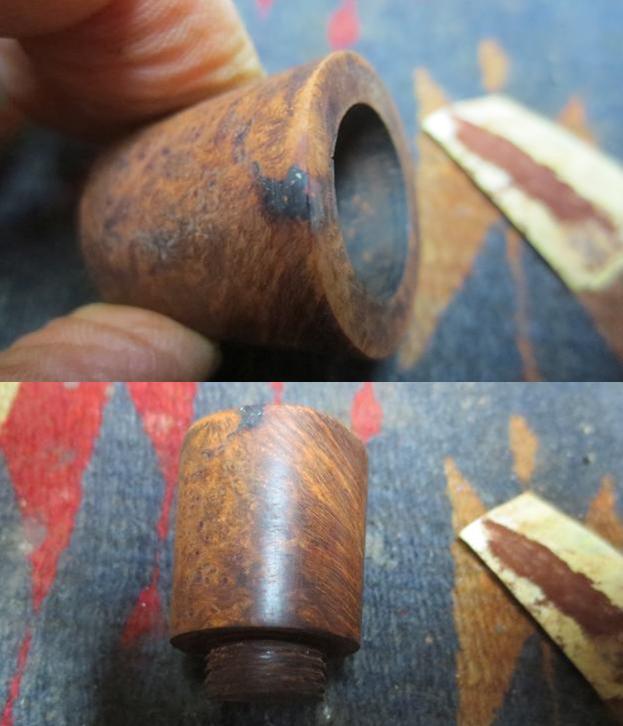
I scrubbed the exterior of the bowl and shank with a tooth brush and undiluted Murphy’s Oil Soap. I scrubbed the lava on the rim top and overflow on the outside of the bowl with the soap. I rinsed  the briar with warm water to remove the grime and debris of the scrubbing. It looked significantly better after the scrubbing. The damage on the bowl front and rim top is very clear. 
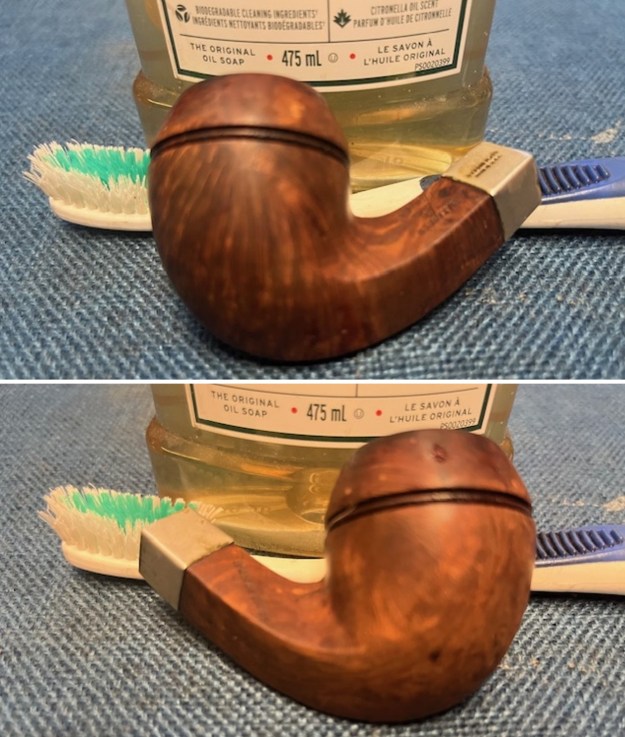
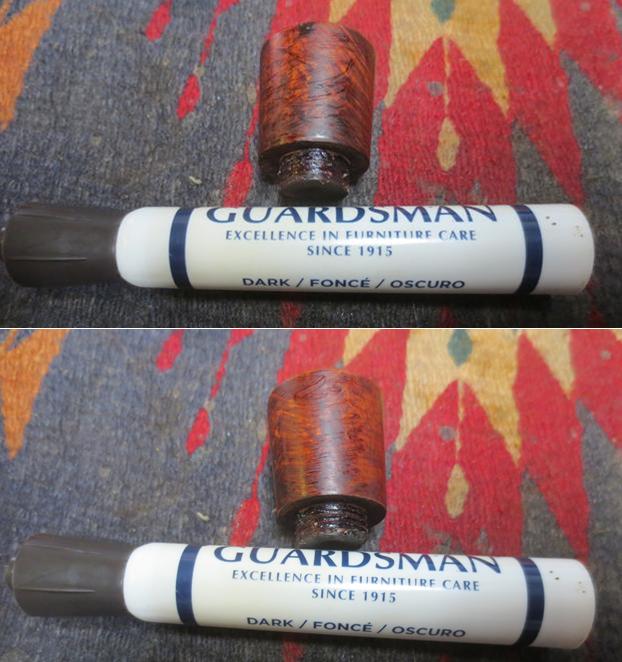
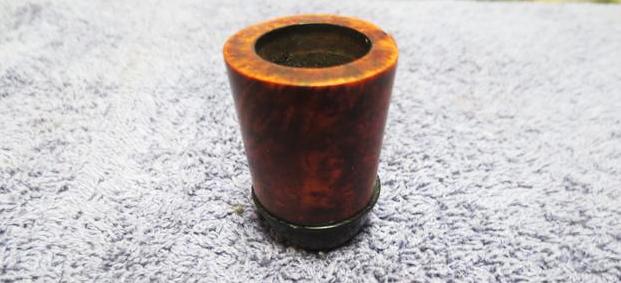
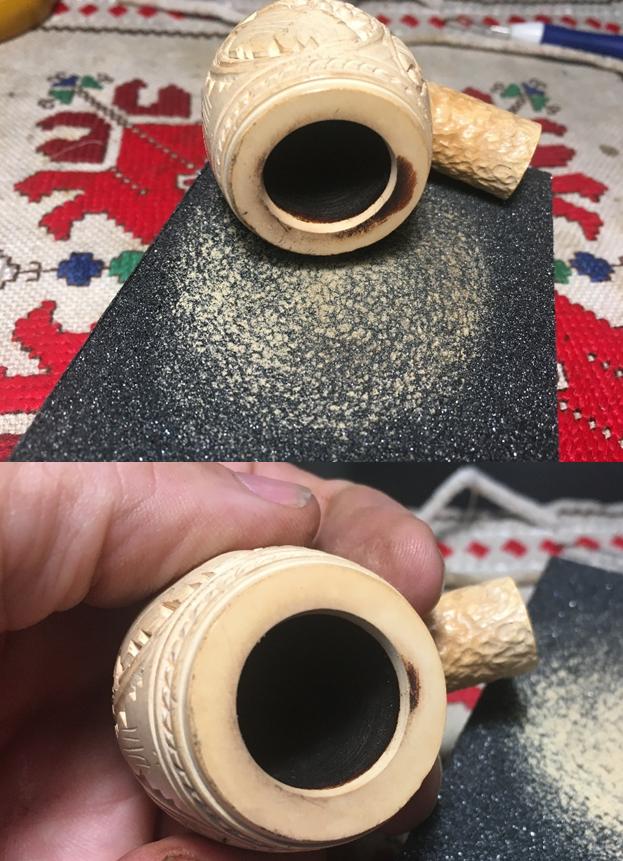
The darkening on the rim top and the outside of the bull cap would need to be dealt with. I cleaned up the inner edge with a piece of sandpaper. I sanded the top of the rim and the sides of the cap with the piece of 220 grit sandpaper and was able to remove much of the darkening.
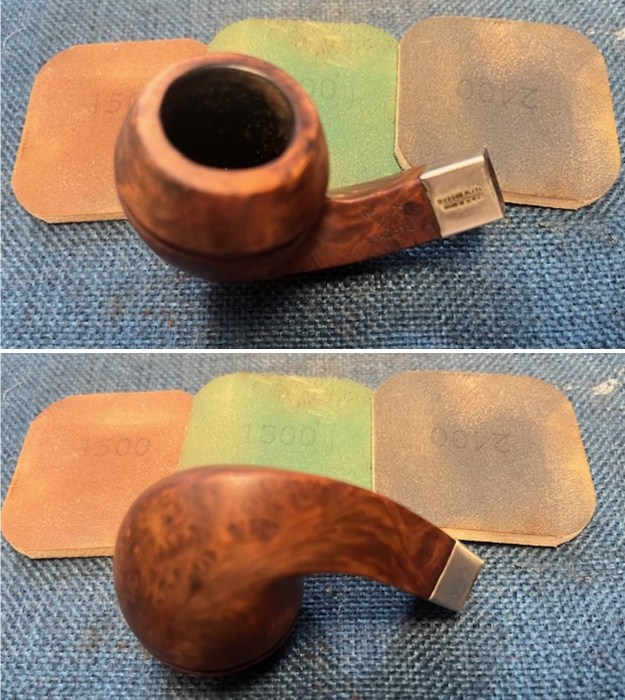
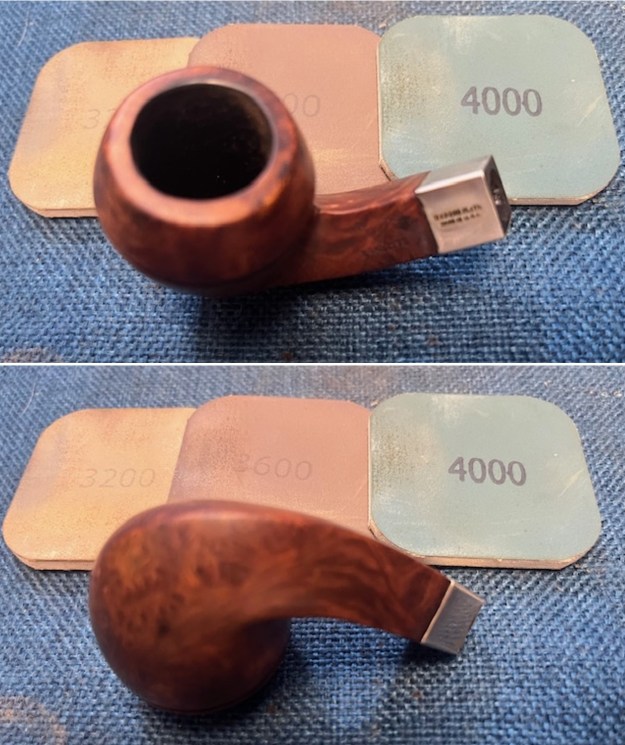
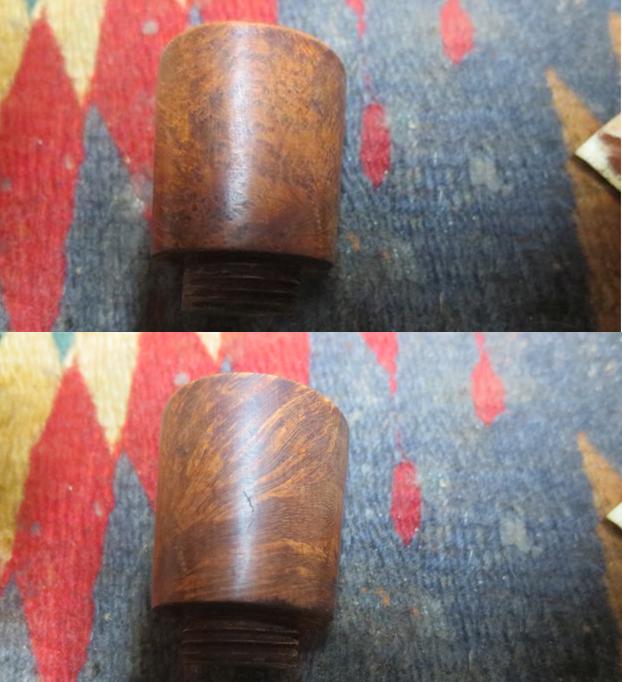
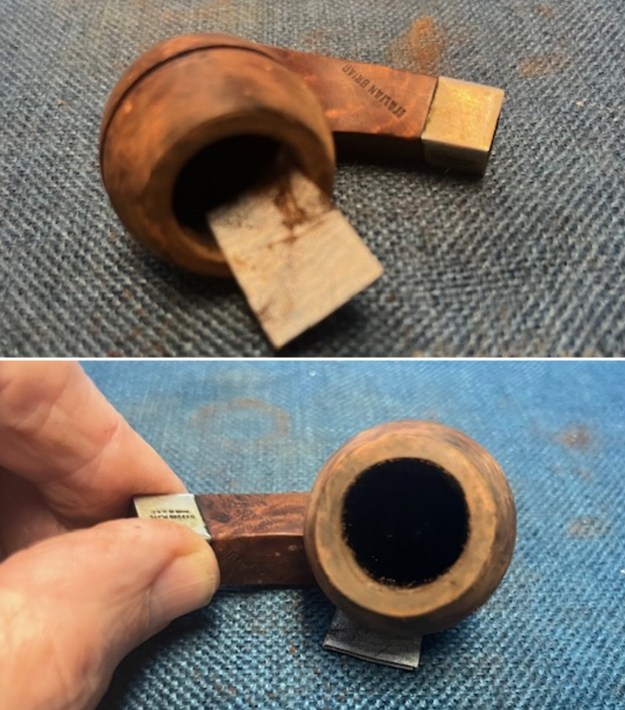
I finished that and moved on to it with 320-3500 grit sanding pads to finish minimizing the burn damage and reshape the rim top and the top half of the bowl. The briar began to take on a rich shine and the burn damage was by and large gone. The photos tell the story. 
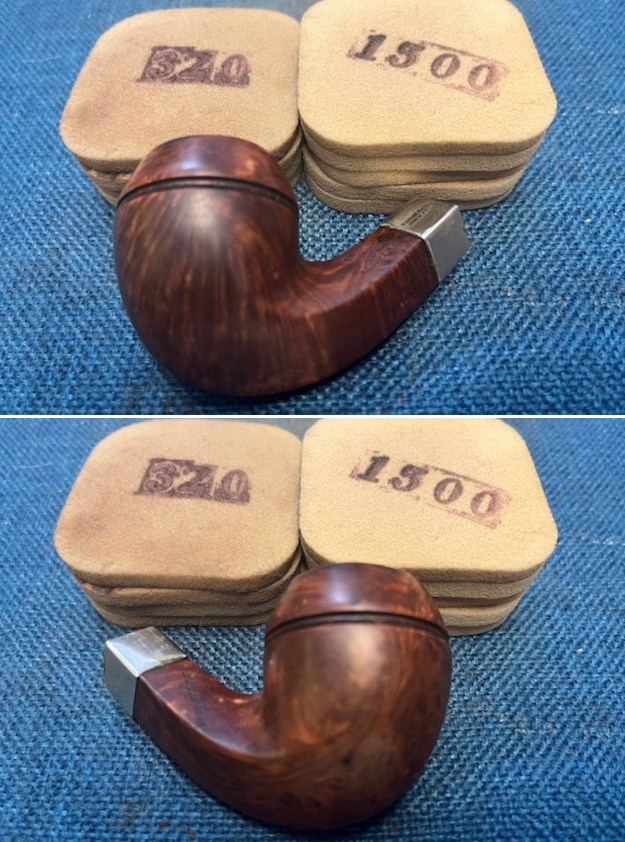
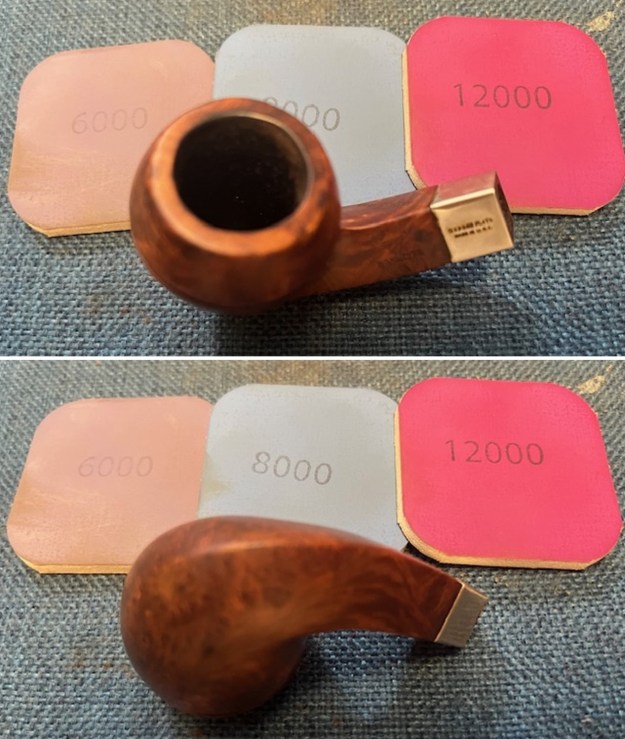
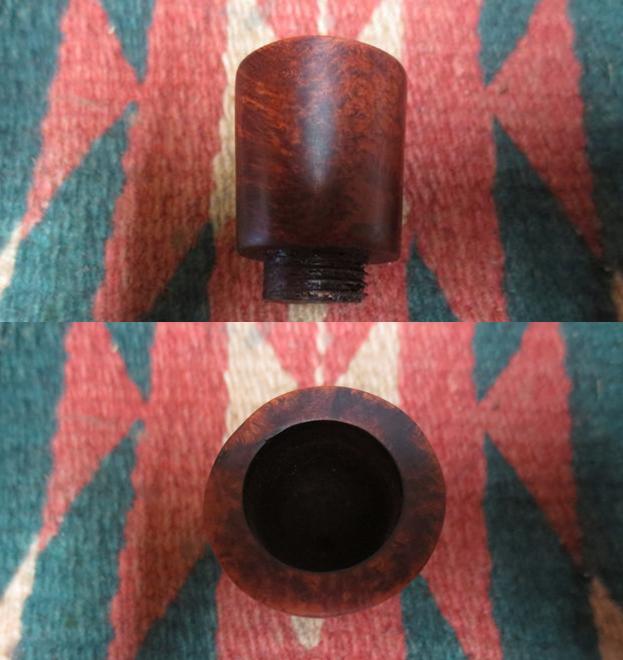
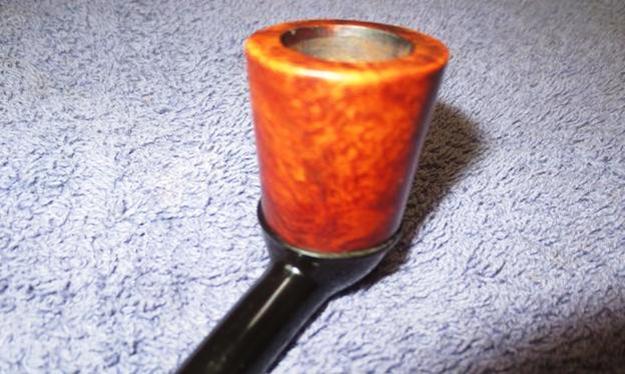
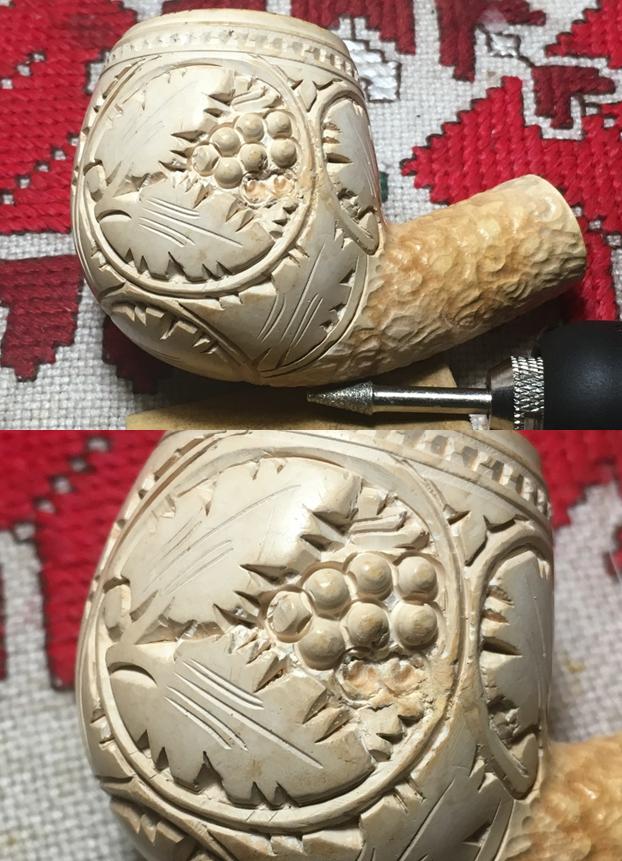
I polished the smooth rim top with micromesh sanding pads – dry sanding it with 1200-15000 grit pads. I wiped the bowl down with a damp cloth after each sanding pad. The grain started to rise to the surface as I polished it. The rusticated portions looked very good as well. 
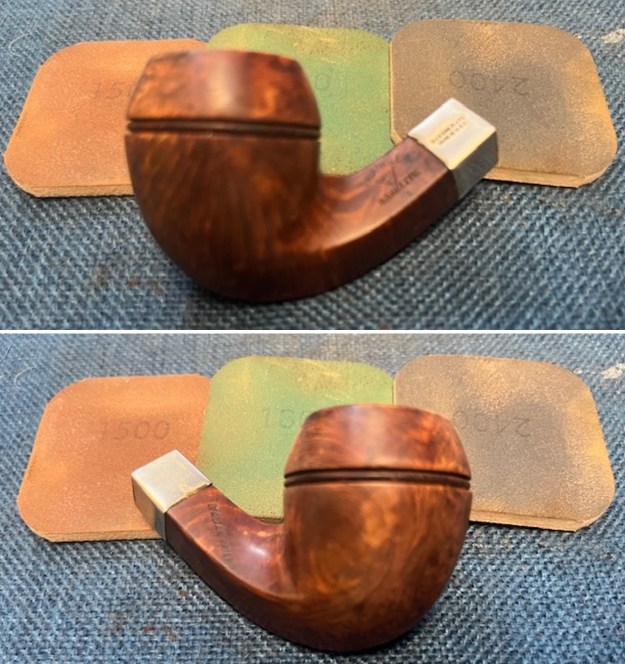
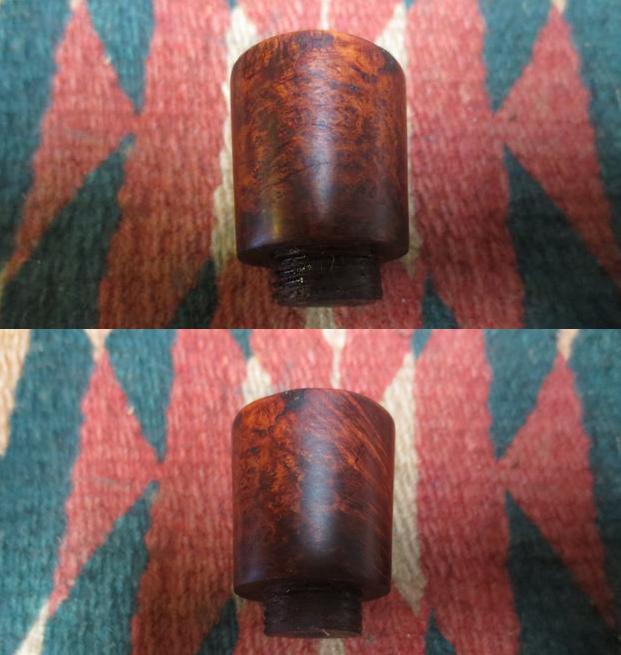
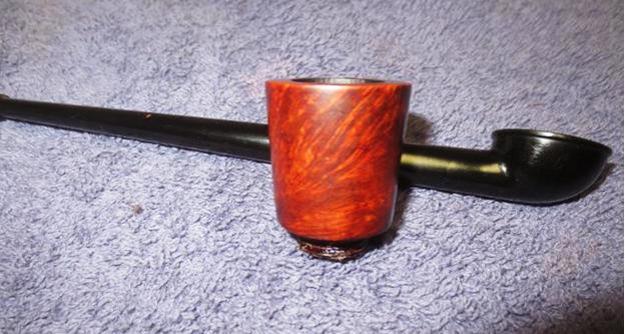
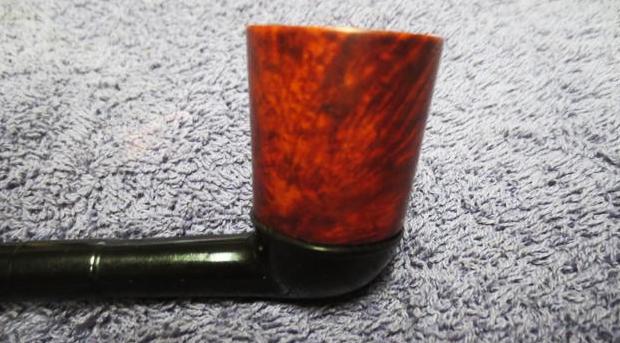
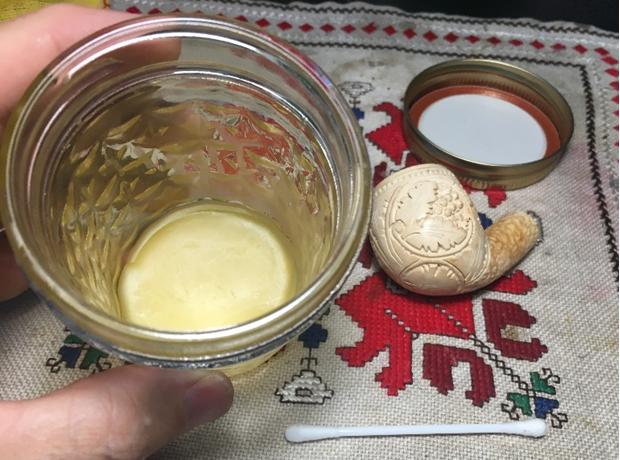
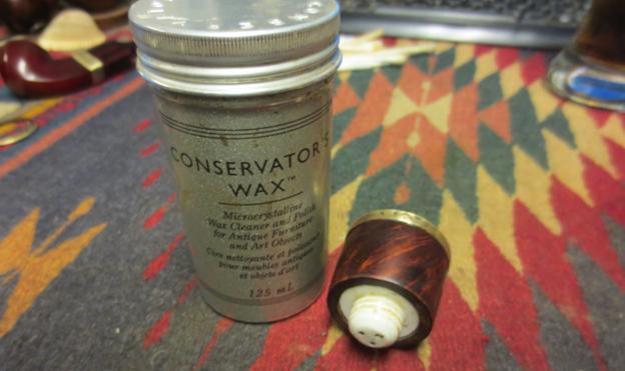
I rubbed the bowl and shank down with Before & After Restoration Balm to deep clean the finish on the bowl and shank. The product works to clean, enliven and protect the briar. I worked it in with my fingers to get it into the briar. I used a horsehair shoe brush to work it into the twin lines around the bull cap. I let it sit for 10 minutes then I wiped it off and buffed it with a soft cloth. The briar really began to have a rich shine. I took some photos of the bowl at this point to mark the progress in the restoration. It is a beautiful bowl. 
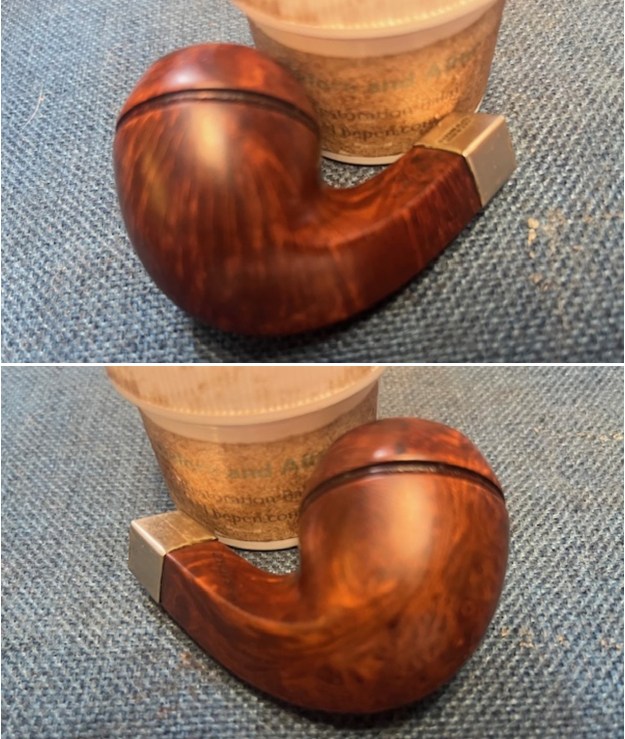
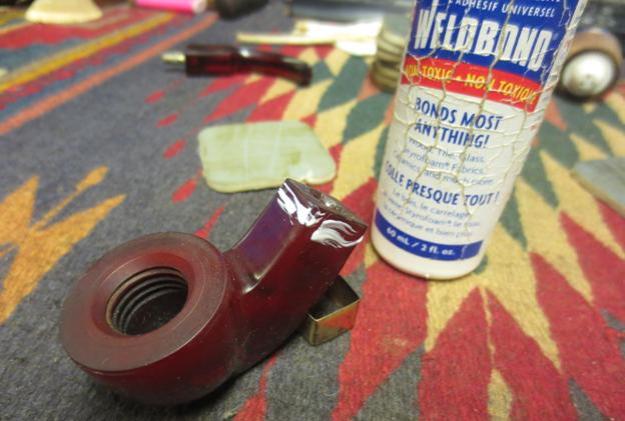
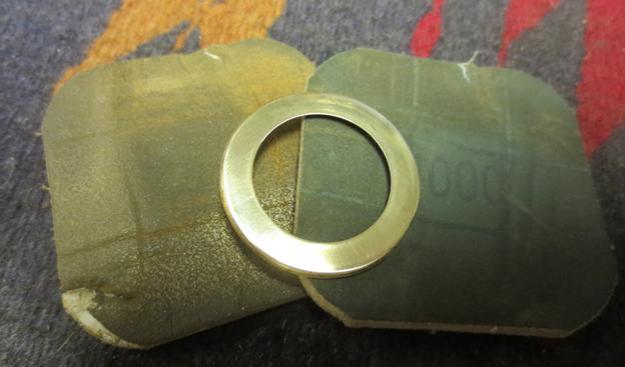
I polished the plated band with a jeweller’s cloth to protect the band from oxidizing and discolouring. 
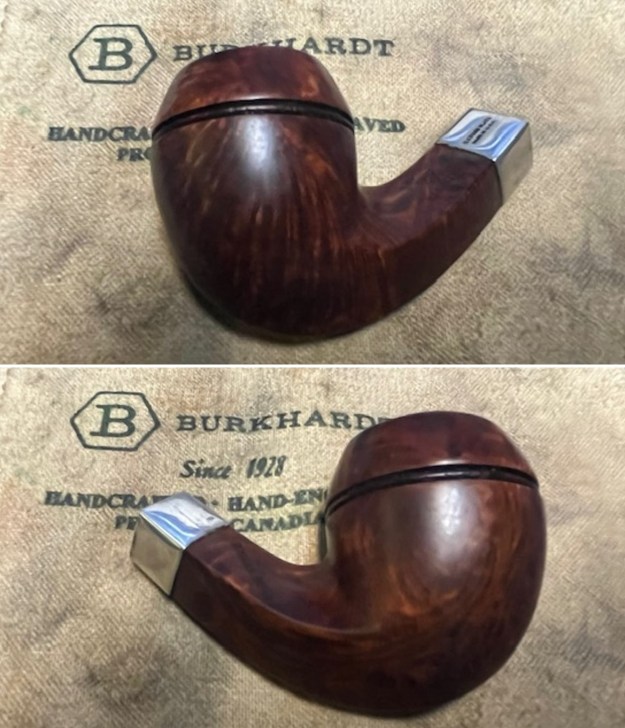
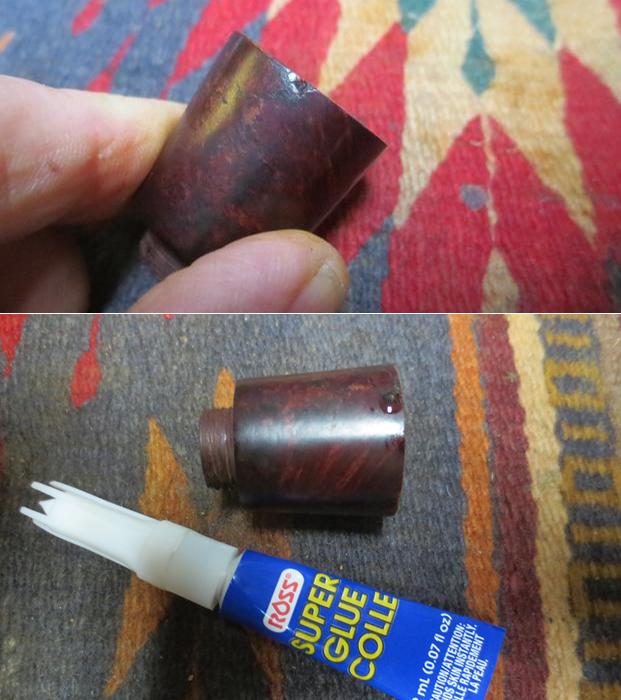
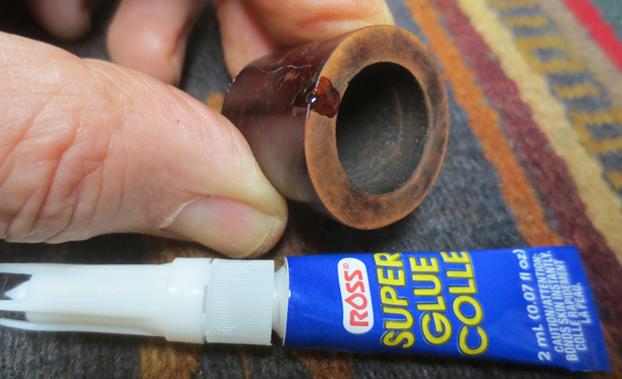
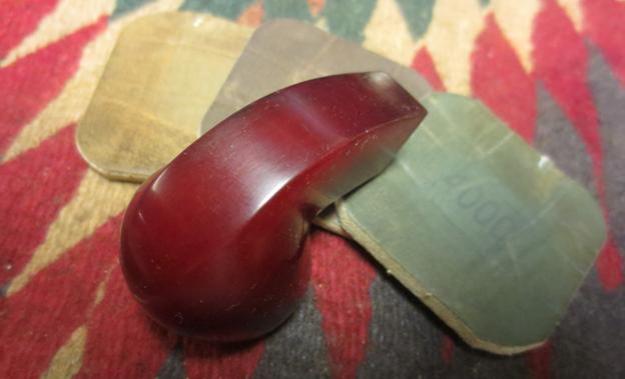
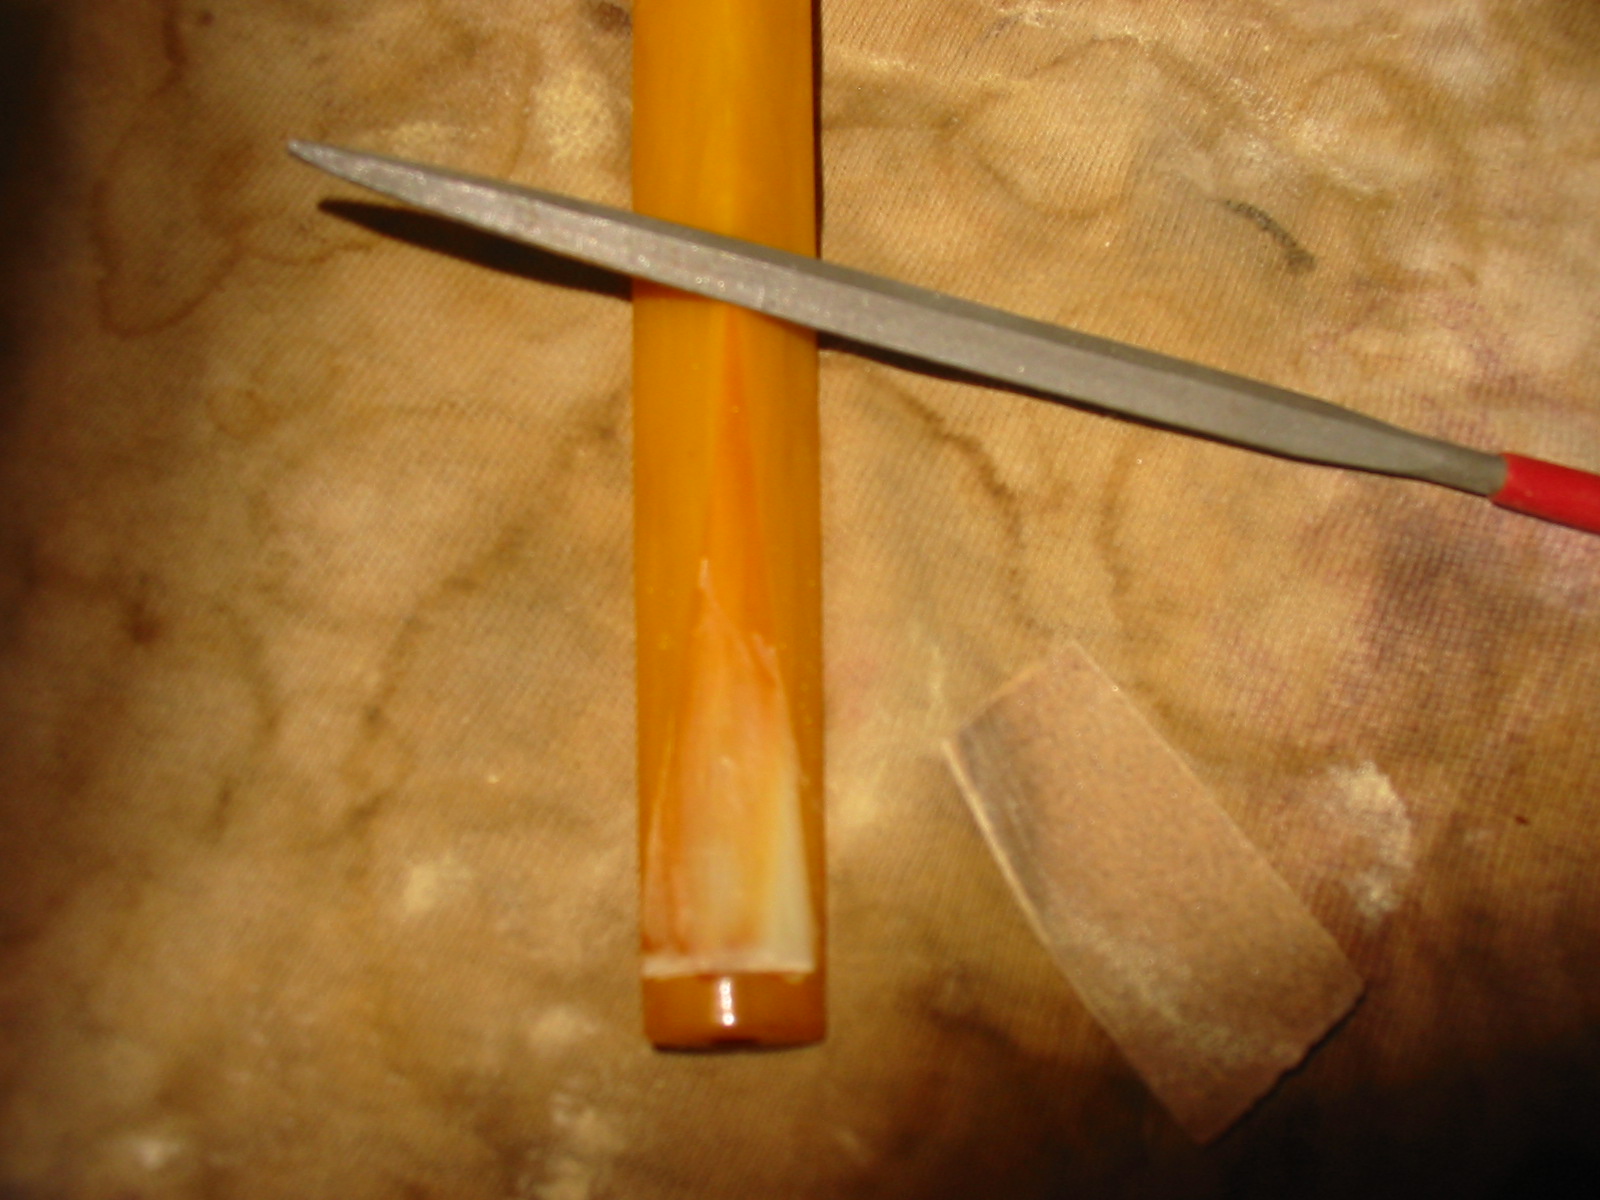
I turned my attention to the stem. I filled in the deep tooth marks in the Bakelite with clear CA glue. After it cured I flattened the repairs with a small flat file. I sanded the repairs further to flatten out the tooth chatter with a folded piece of 220 grit sandpaper. Progress was happening! 
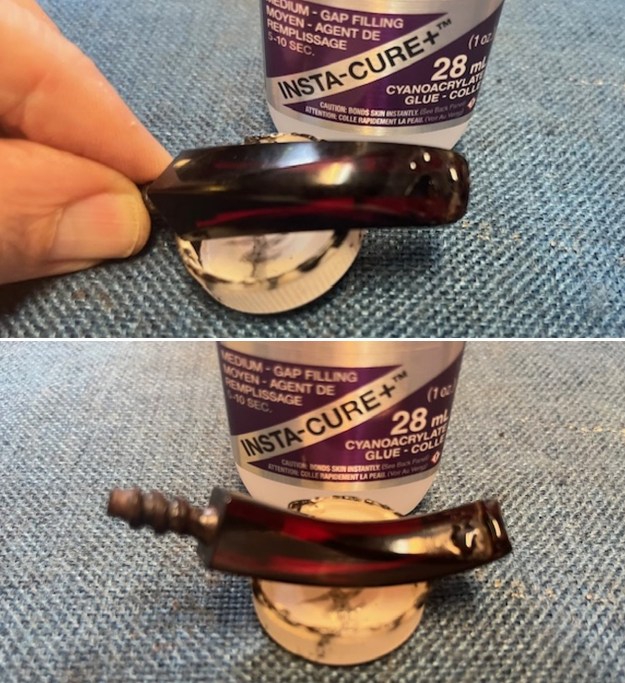
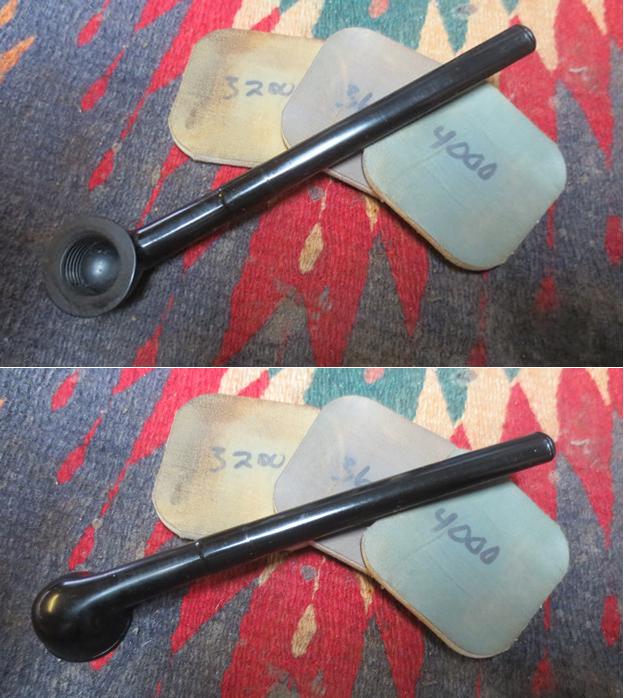
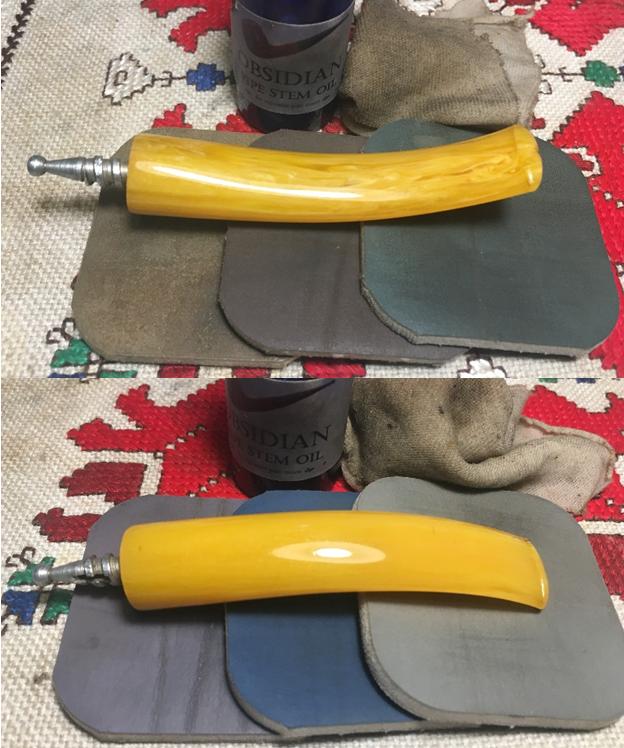
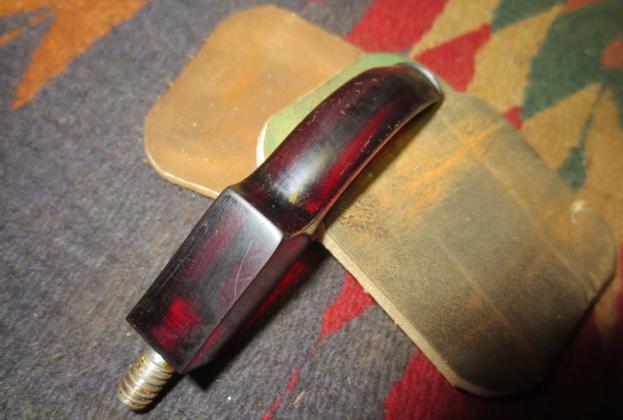
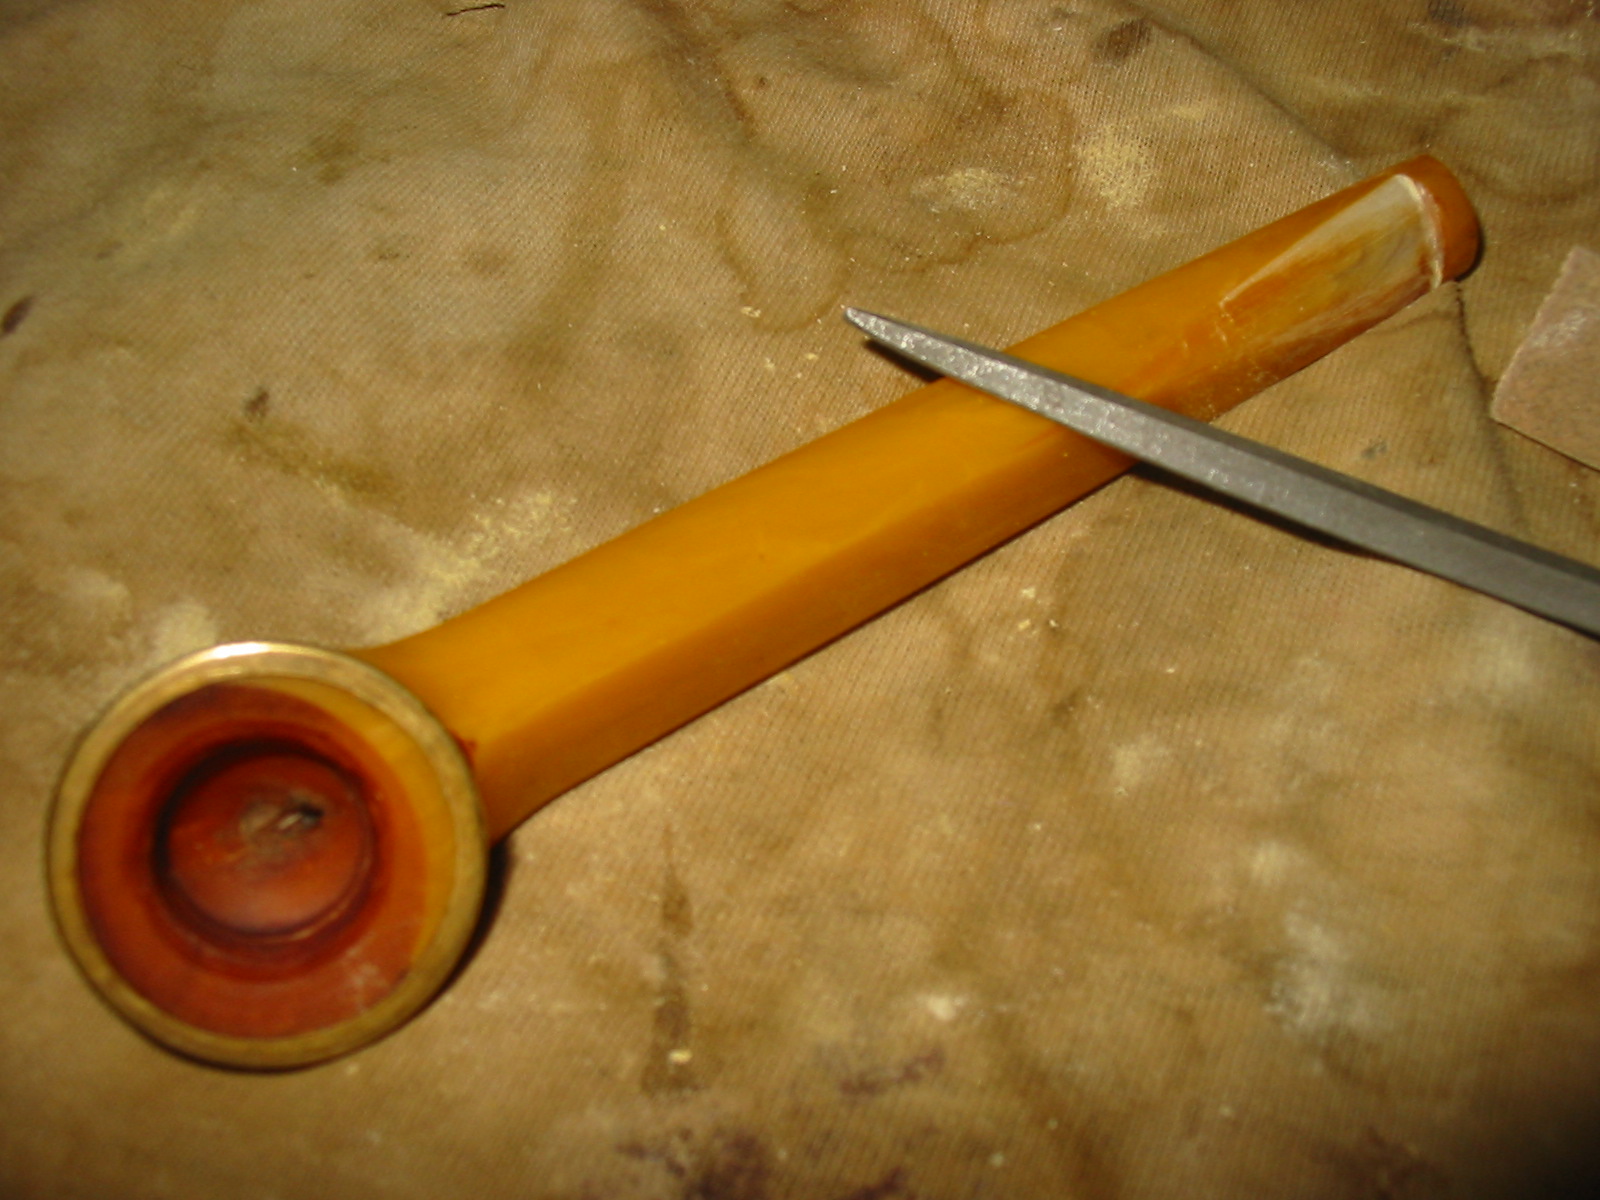
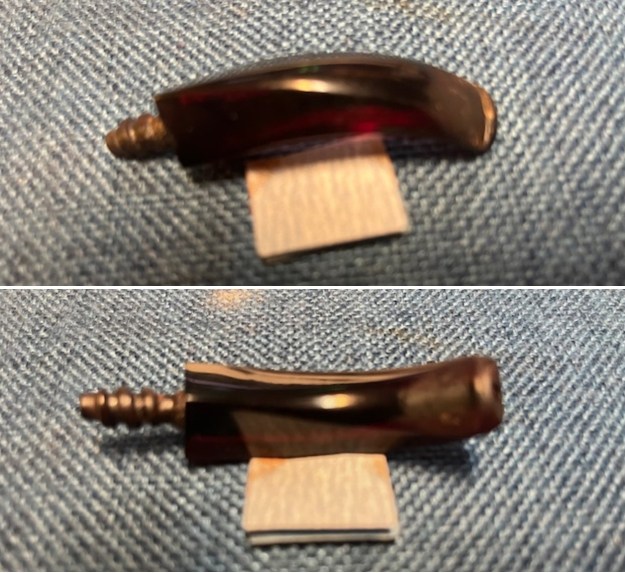
I sanded the surface of the vulcanite with the 2 inch sanding pads – 320-3500 grit pads to remove the remaining oxidation. I dry sanded the surface until I have removed all of the oxidation and the stem started to really shine.
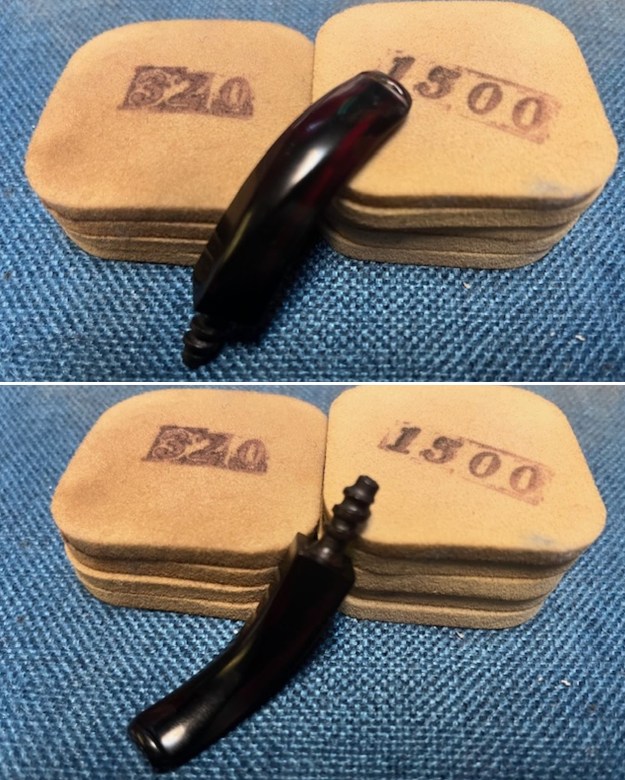
I polished the stem with micromesh sanding pads – dry sanding with 1500-12000 grit pads. I wiped the stem down after each sanding pad with Obsidian Oil. I polished the stem with Before & After Pipe Stem Polish – both Fine and Extra Fine. I gave it a coat of Obsidian Pipe Stem Oil. It works to protect the stem from oxidizing. I set it aside to dry. 
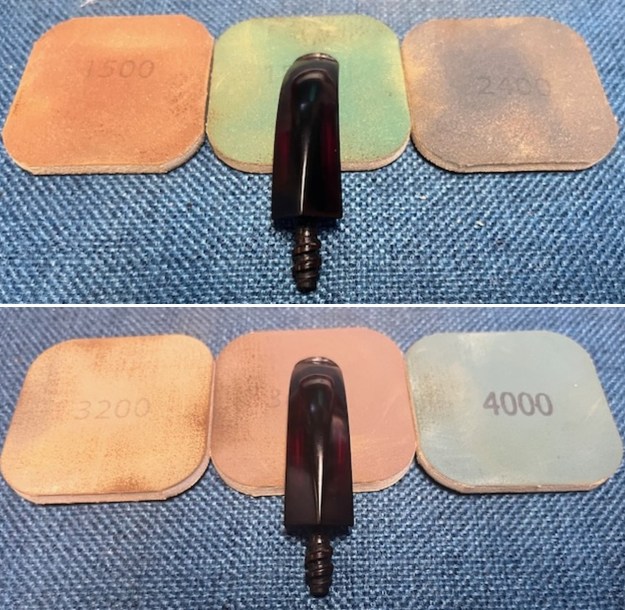
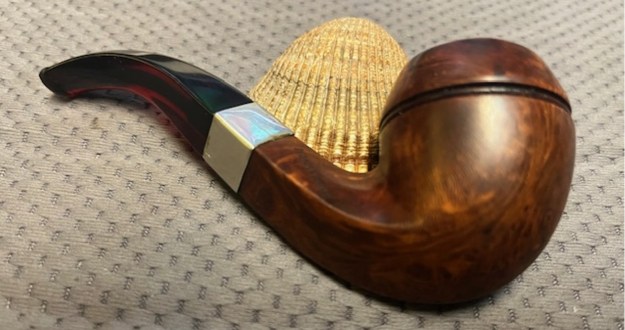
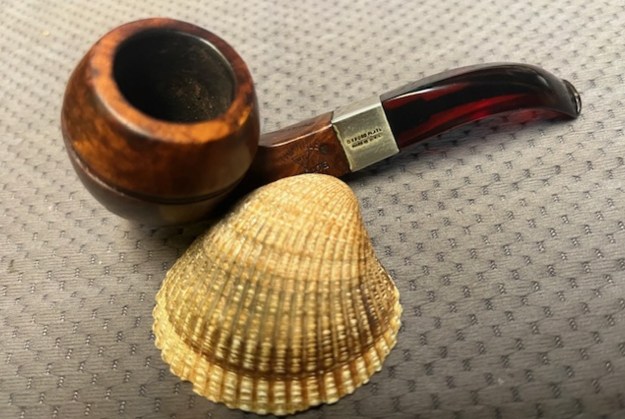
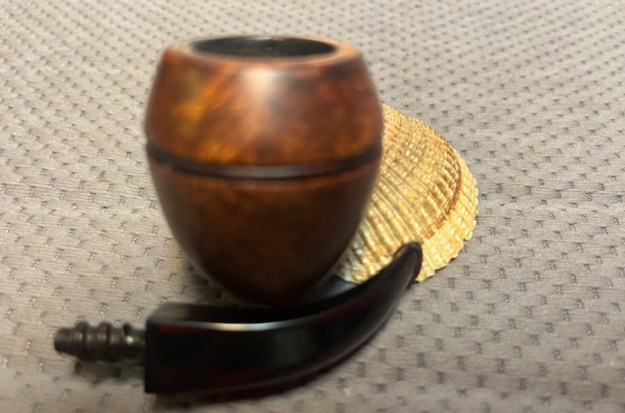
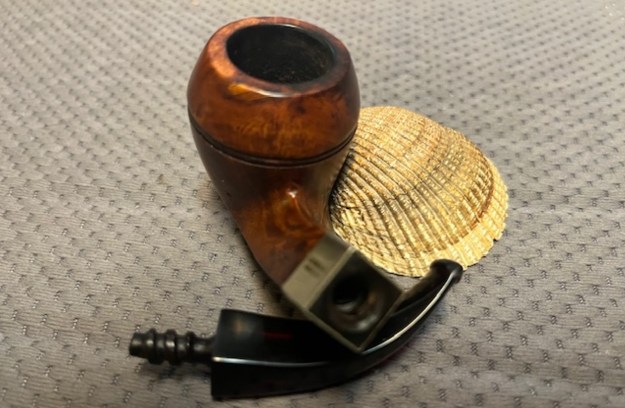
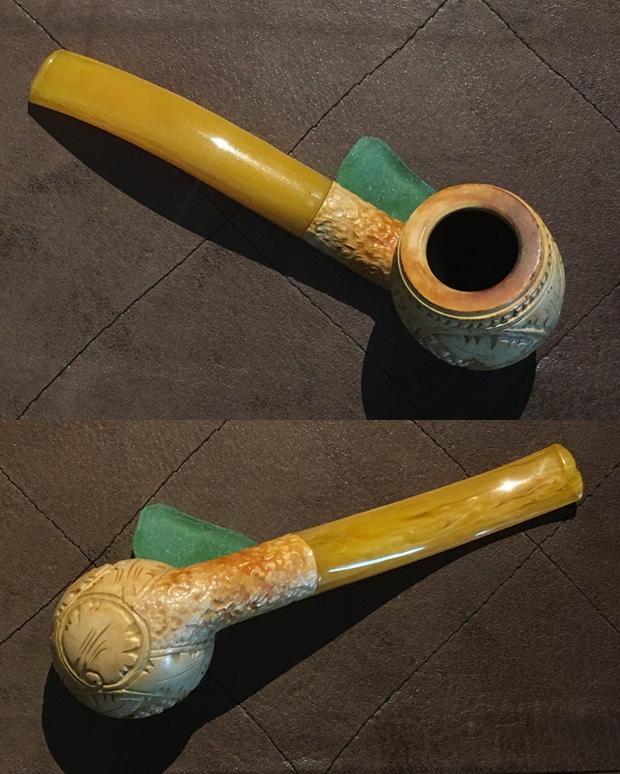
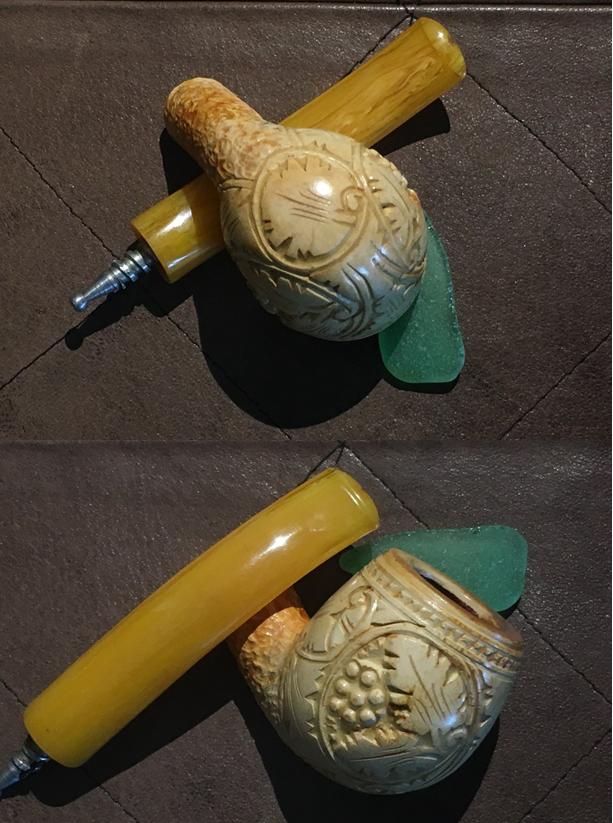
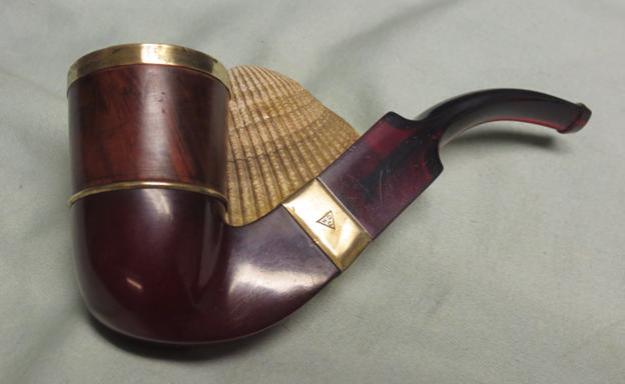
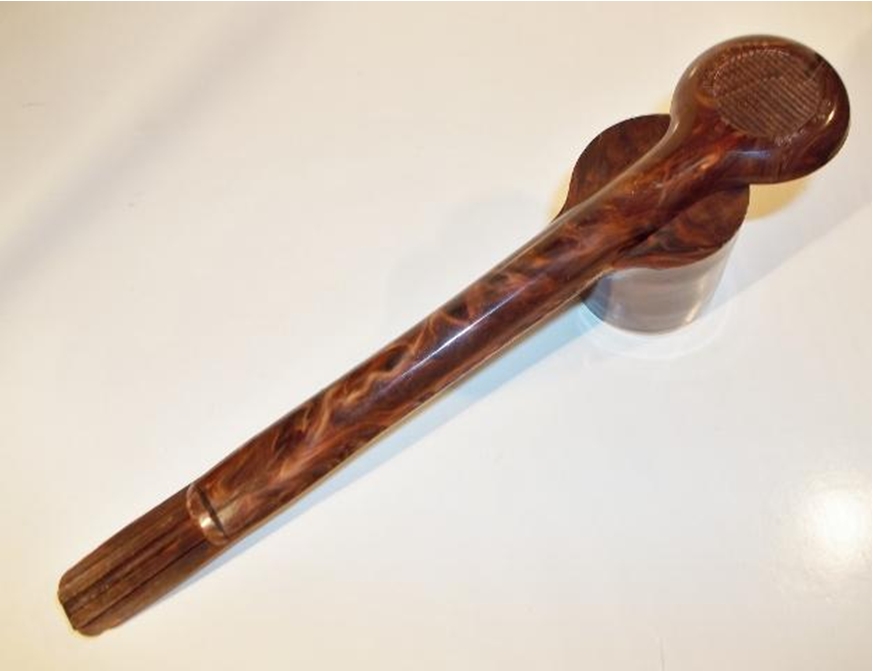
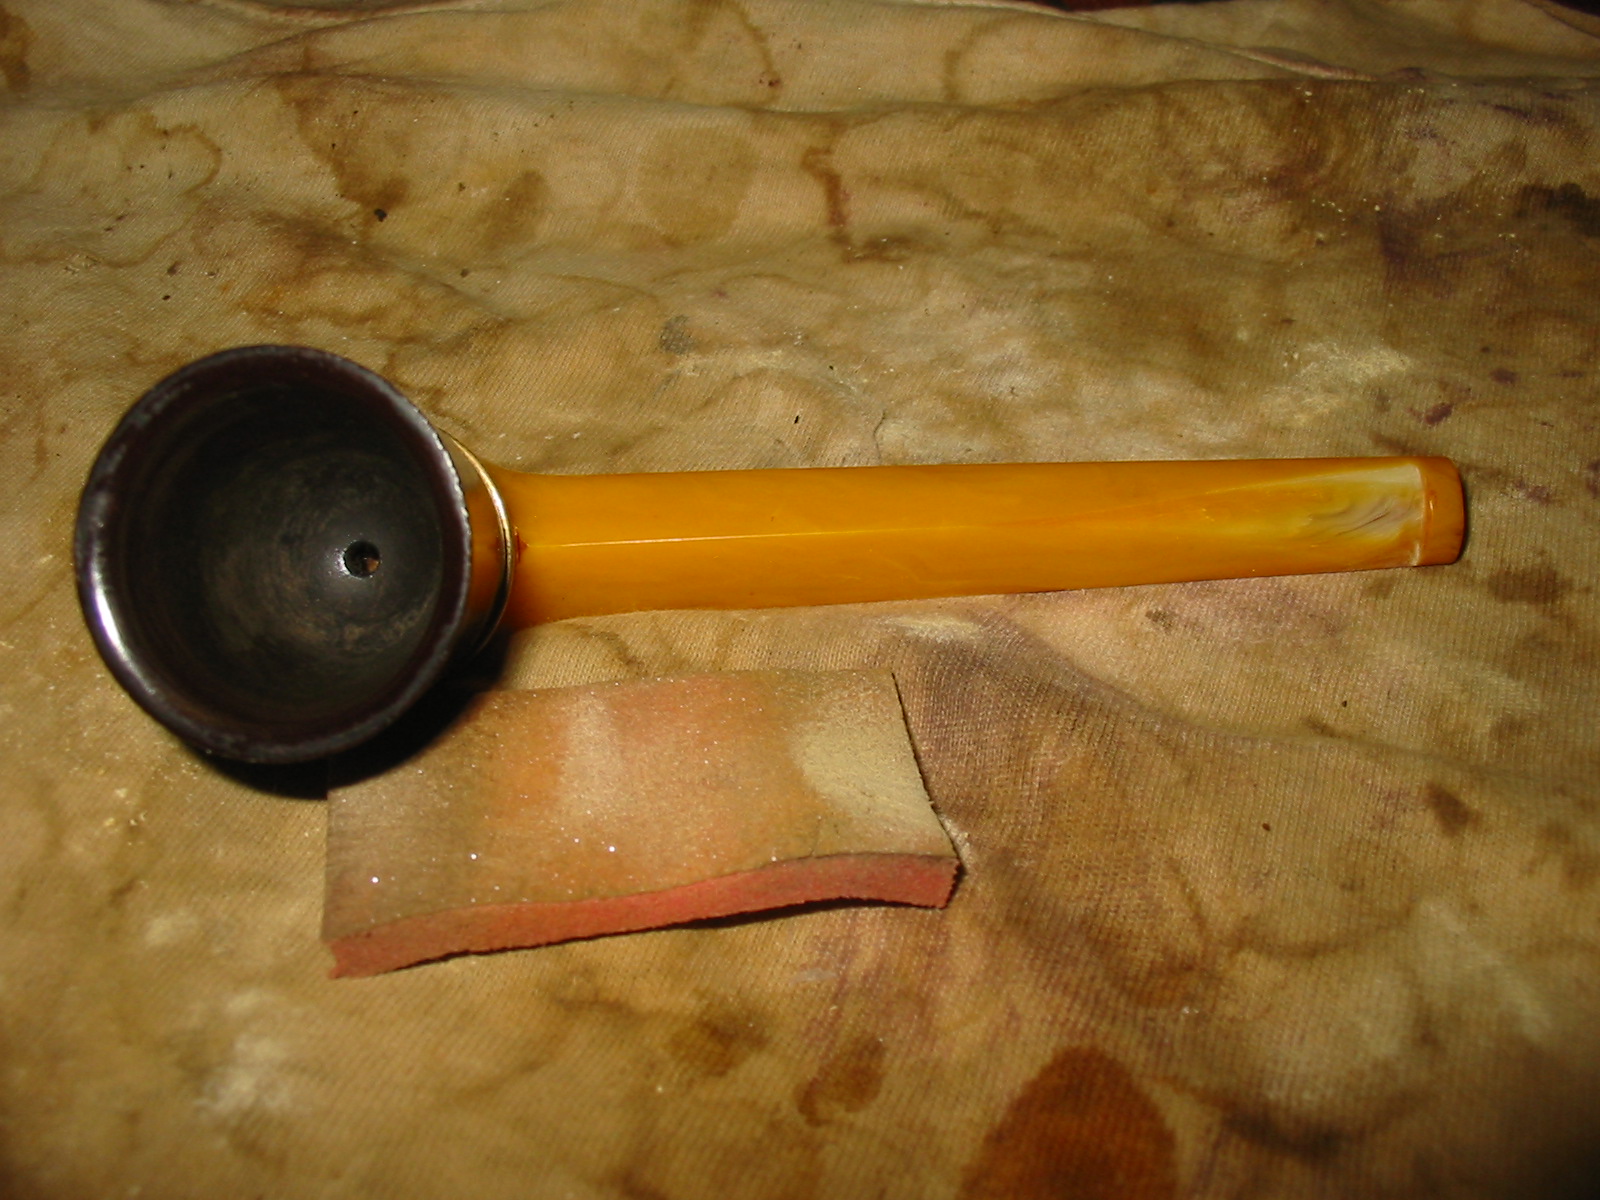
The final steps in my process involves using the buffer. I buffed the bowl and stem with Blue Diamond to polish out the light scratches in the briar and the vulcanite. I gave the bowl and the stem multiple coats of carnauba wax. I have found that I can get a deeper shine if I follow up the wax buff with a buff with a clean buffing pad. It works to raise the shine and then I hand buff with a microfiber cloth to deepen the shine. It is always fun for me to see what the polished bowl looks like with the polished stem. It really is a nice pipe. The smooth, nicely grained bowl sides and the rusticated blaze on the left bowl side looks great with the vulcanite stem. The Triangle WDC Bakelite taper stem Bent Bulldog feels great in my hand. It is a well-balanced pipe. Have a look at it with the photos below.  The dimensions are Length: 4 ½ inches, Height: 2 inches, Outside diameter of the bowl: 1 inch, Chamber diameter: ¾ of an inch. The weight of the pipe is 1.16 ounces/32 grams. It is a beautiful pipe that I will send to Jack after I finish working on the other 10 pipes. I look forward to hear what he thinks of this old beauty. It should be a great smoking pipe.

As always, I encourage your questions and comments as you read the blog. Thanks to each of you who are reading this blog. Remember we are not pipe owners; we are pipe men and women who hold our pipes in trust until they pass on into the trust of those who follow us.
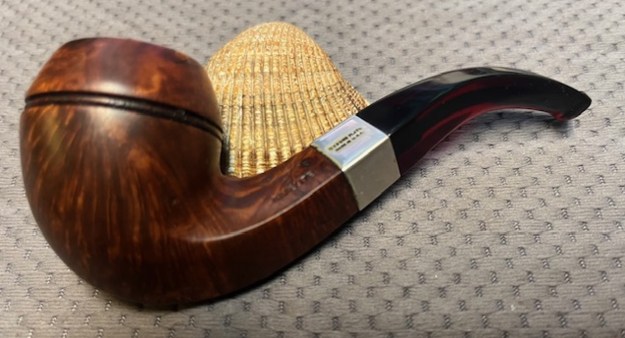
Restoring an odd Daseo/Dasco Bakelite Pipe with a Removable Bowl


Blog by Steve Laug

When I took this old case out of the box my brother Jeff sent me I could not remember what was inside. Looking at it I was kind of thinking that it might hold an older meerschaum billiard or an old amber stemmed briar billiard. I just could not remember what was in the old case when it arrived. I wrote Jeff and asked him to send me the pictures of the old pipe before he cleaned it up. He also was surprised I think when he opened the case as we have worked on so many pipes I am sure he had forgotten what was in this case. I present the case as it looked when he started working on the old pipe that it contained. What do you think could be inside? Don’t want to guess? That’s okay move onto the photos that follow once he opened the case. It certainly was not what I expected. Okay, no more suspense. Here is what we saw when he opened the case. I suppose your response was similar to ours. “What is that?” we exclaimed in surprise. Inside the old case was no older meerschaum or briar. There was no amber stem. There was only an odd looking pipe with a Bakelite base, shank and stem as a single unit with a screw on briar bowl. It was odd looking and strangely delicate. It was very light weight and different.It was stamped on the left side of the shank with the words SUMKLAS in gold filigree. On what would be a band if it was separated from the shank was also stamped Dasco or Daseo in script. There were no other markings on the pipe. I was unfamiliar with the brand whether it was a SUMKLAS or a Dasco/Daseo pipe. I could find no information on the brand in any of my usual online or book resources. I found a link on the Smoking Metal site to a Daseo  http://www.smokingmetal.co.uk/pipe.php?page=513. It is a three part Bakelite Bent pipe that is made of the same black Bakelite as the one I am working on. It has a similar threaded base on the bowl and a poorly rounded outer edge of the bowl as well. So I am not sure if the pipe is a Daseo or a Dasco. I have included a photo of the stamping on the pipe below. Have a look and see what you think. The script name and the curl at the top of the lower case c or e make either option possible. The pipe remains a bit of a mystery unless one of you who are reading this blog can shed any light on it. Jeff took the pipe out of the case and took photos of it to show what it looked like from a variety of angles. The finish on the briar was badly worn with a lot scratches and nicks in the surface of the wood. The rim top had some lava and there was a cake in the bowl. There was one large nick on the front of the bowl at the outer edge of the rim. The stem and base were dirty and scratched but no real issues. There was light tooth chatter at the button on both sides of the stem. Jeff took a close up photo of the rim top and bowl to show the condition. In the photo the nick out of the rim edge can be seen on the front of the bowl. The light cake in the bowl and the lava on the rim is also visible in the first photo. He unscrewed the bowl from the base and took a photo of the base to show what it looked like inside. The threads were in great shape and the base was dirty with oils, tars and dust. The bottom side of the base unit looked very good – a bit of polishing would shine it up. The next photos show the condition of the briar bowl. Note the nicks and scratches as well as the peeling finish on the bowl. There is some nice grain peeking through the old finish.I kept both of the follow photos of the threads on the bottom of the bowl to show the wear and tear on the briar threads. It appears that the bowl had been overturned several times and one side the threads were almost worn smooth.Jeff did a great job of cleaning this old-timer. He reamed the bowl and scrubbed the bowl and base unit with Murphy’s Oil Soap and a tooth brush. He rinsed it under running water. The internals were cleaned out with cotton swabs, pipe cleaners and alcohol. The inside of the base was scrubbed out with alcohol and cotton swabs. When it arrived here in Vancouver I had forgotten what was in the old case. When I opened it I was surprised a second time. I took photos of the pipe before I started working on it give an idea of what needed to be repaired and restored. When I took it out of the case and looked at it the pipe reminded me a lot of an older Swedish pipe that I had restored. That particular pipe was a Bromma Dollar that I restored. The link to the blog is https://rebornpipes.com/…/cleaning-up-a-swedish-bromma…/ I have included a photo of the Bromma here for comparison. It also has a base/stem single unit with a briar screw on bowl. The Dasco/Daseo is older I think and it is certainly more elegantly proportioned than the Bromma but you can see the similarities between the two pipes. I took a close up photo of the rim top and bowl to show the nick toward the front of the bowl as I am holding it in my hand. I have circled it in red to highlight it for you.The stem had tooth chatter on both the top and underside near the button. The button was the older style rounded cap with an orific opening in the end. Overall the stem and base unit were in excellent condition.I took the bowl off the base and took some photos of the parts of the pipe. It is a pretty straight forward design with no systems or sumps. Just a screw on briar bowl and a Bakelite base unit.I took photos of the bowl top and bottom – it is in decent condition. The bottom of the bowl has some nicks in the edge of the threads.I repaired the nick/missing chunk of briar on the side of the bowl (front/side) with clear superglue. I cleaned out the area with a cotton swab and alcohol and then dried it off. I filled it in with clear superglue in layers to build it up even with the rim top surface and the bowl side surface. I sanded the repair with 220 grit sandpaper to smooth it out even with the top of the bowl and the side. I wanted it to be unidentifiable once the bowl was stained. I sanded off the rest of the finish while I was at it. There were bubbles and crackling in the finish. Once the old damaged finish was removed there was some interesting cross grain and birdseye grain around the bowl. Before staining the bowl I “painted” the thread on the bottom of the bowl with clear fingernail polish to build them up for a better fit on the base. Without the added thickness to the threads the bowl overturned and no longer aligned with the edges of the base.I cleaned up the excess fingernail polish on the base of the bowl bottom with a cotton swab and acetone. Then it was time to stain the bowl. I decided to keep things simple and stain the bowl with a Guardsman Dark Brown stain pen. It is simple, mess free but it is also transparent and will allow the grain to show through when buffed. I covered the bowl with the stain pen and repeated until the coverage was what I wanted.I put the bowl on the end of my finger and buffed it with Blue Diamond on the buffing wheel to spread out the stain and even the coverage on the bowl. It gave the bowl a nice medium brown colour and allowed the grain to shine through. I buffed it with several coats of carnauba wax and buffed it with a clean buffing pad to raise the shine. I set the finished bowl aside and worked on the base/stem unit. I polished it with micromesh sanding pads – wet sanding with 1500-2400 grit pads and dry sanding with 3200-12000 grit pads. I wiped the base/stem unit down after each pad with some Obsidian Oil. I have used it on Bakelite before and like how it worked. I gave it a final coat of the oil after the last pad and set it aside to dry. I screwed the stem back on the base and the alignment was perfect now. The repaired area was on the left side of the pipe rather than the front. It blended in pretty well. I buffed the whole pipe carefully with carnauba wax and a clean buffing pad to raise the shine. I hand buffed the pipe with a microfibre cloth to deepen the shine. The finished pipe is shown in the photos that follow. It is a nice light weight pipe that has a unique look and potentially a bit of history. Some of the information on similar pipes dated it in the mid to late 1920s. There is no way of knowing for sure but the orific button and the gold lettering on the shank would fit that time period. It is unique that is for sure. Thanks for looking.


Jen’s Trove No. 3 – Meerschaum Hand Carved Vineyard Bent Billiard


Blog by Dal Stanton

This is the third pipe I’m restoring for Jen, a colleague working here in Bulgaria.  She handpicked, with great care and deliberation, several pipes from my ‘Help me!’ basket (and boxes) that she desires to present as gifts to the men folk in her family when she returns to the US this summer.  What makes it better, each pipe Jen culls as a gift benefits the Daughters of Bulgaria, our work here with women and girls who have been trafficked and sexually exploited.  Thank you, Jen!  The Meerschaum now before me caught her eye very quickly as she trolled through the many hopeful pipes!  I remember acquiring this pipe from eBay last year after communicating a few times with the seller from North Carolina about bundling a few pipes she had on the auction block.  One of those was an attractive French made, Pickwick Arms Bulldog along with the Meer.  This is what I saw, first the Bulldog, still awaiting his turn in the ‘Help me!’ basket and the hand carved Meerschaum.The last restoration I did on a Meerschaum was my first (LINK), when I was challenged with the rebuild of the Bakelite stem using a somewhat experimental method – mixing powdered furniture dye and CA glue to rebuild the stem and most of the button.  Since it was experimental, Steve encouraged me to put it to the test before putting it in The Pipe Steward Store.  I did, the patch has held true, and the beautiful Meerschaum continues as a regular friend in my rotation.  So, the patch works!  And a picture of that eye-catching Meerschaum restoration.With Jen’s Meerschaum on my worktable, I take several pictures to fill in the gaps. The scorch on the rim shows the former steward probably used a lighter over the back to light his tobacco.  The carbon cake buildup in the fire chamber is moderately thick – for a Meerschaum no cake is needed or desired unlike briar pipes.  Meers are popular for this reason – they do not need to be broken in nor do they need to be rested between use.  Smoke a bowl, reload it and he’s ready to go!  I’ll remove the cake bringing it down to the Meer surface.  When I first saw this Meer on eBay, something wasn’t right.  It didn’t take long to determine what was not resonating.  The bend of the Bakelite stem is too much for my taste.  I will see if I can straighten it out a bit – better symmetry!  While there’s no way to tell how old this Meerschaum is, I note that the pipe is fitted with an orific stem – the airway in the button is rounded rather than a horizontal slot.  These stems were mainly used before and during the 1920s when they gradually were replaced by the horizontal slot style. The vineyard carving is very attractive and a classic Vineyard design.  However, I see some damage to a grape cluster ensconced in the rounded fresco on the left side of the stummel.  I take a close-up picture to show this.  The missing grapes aren’t very noticeable – the damage blends quite well as part of the fresco, but I will try to mask it a bit more by doing a bit of Meer sculpting myself. The other potential challenge is the metal tenon/mortise system.  This shows that this pipe has some age as most new Meerschaum pipes I see now in my trips to Istanbul’s markets, are the acrylic push/pull systems.  For the sake of ease of future cleaning, I may go in that direction, but I need to look more closely.  One last thing I see that is good news – there is a bit of the coveted patina developing around the scalloped shank and climbing toward the back of the bowl.  This is good.  This brief description from Meerschaum.com that I’ve previously cited is helpful:

Meerschaum is a very rare mineral, a kind of hard white clay. Light and porous structure of the pipe keeps the smoke cool and soft. The pipe itself is a natural filter which absorbs the nicotine. Because of this peculiarity, meerschaum pipes slowly change their colors to different tones of gold and dark brown. This adds an esthetic enjoyment to its great smoking pleasure. The longer a pipe is smoked the more valuable it becomes due to the color change. Today many old and rare meerschaums have found a permanent place in museums and private collections.I first start with the metal screw in tenon.  I want to see if I can easily remove it and clean it before I try to remove the more difficult mortise receptor.  Carefully, I heat the tenon with a lit candle and counter clock the tenon with needle-nose pliers.  I wrap the tenon with a cloth to protect it from metal on metal scratches.  With little trouble, the heating of the tenon loosens the grip and it easily unscrews holding the tenon/stinger stationary with the pliers and rotating the stem.  Examining the tenon, I can see daylight through it but the slot is very small and clogged with gunk.  I’m not sure it’s possible to run a pipe cleaner through it.  I drop it in alcohol to soak it a bit and then clean it. I dig gunk out of the slot using a dental probe and run a bristled pipe cleaner in it to clean the internal.  The pipe cleaner will go through the slot but not without a good deal of coaxing.  I use a brass brush on the stinger with alcohol and then shine it us with 0000 steel wool.  Since it cleaned up well and a pipe cleaner will pass through it, I will leave well enough alone and use the stinger system. I now turn to removing the carbon cake in the fire chamber.  I insert a pipe cleaner through the draft hole because it was covered by debris.  I discover that the drilling of the draft hole is a bit off center, but this should not be any trouble.  I use the Savinelli Pipe Knife to scrape the carbon buildup off the chamber walls.  It does a great job getting down to the smooth Meerschaum surface.  I follow the reaming by sanding the chamber walls with coarse 120 grade paper wrapped around a Sharpie Pen and then with 240 grit paper.  To remove the carbon dust left behind I clean the chamber out with a cotton pad wetted with isopropyl 95%.  The surface in the fire chamber looks great – I can see no problems.  The pictures show the progress. Turning now to the rim.  The backside of the rim is scorched from flame being pulled over it in lighting.  I first use the spittle test to see if I can make a dent by rubbing my own spittle over the surface with my finger.  No progress.  I then use a cotton pad wetted with isopropyl 95% but with results close to spittle.  I then use a medium grade sanding sponge and lightly (very lightly) top the stummel to break up the carbon.  This did the trick.  There is a bit of the carbon scorching left on the inner lip of the rim.  I role a piece of 240 grip paper to cut an internal rim bevel to remove the last of the scorch stain from the Meer.  I like the inner bevel on the rim and I’m pleased with the progress.  The pictures show the progress from the original state. I like working on a clean pipe so I turn now to the internals of the stummel.  I use cotton swabs dipped in isopropyl 95% and pipe cleaners to do the work.  After a bit of effort, also digging and scraping with a spaded dental tool, the cotton swabs and pipe cleaners start emerging clean.  Just a word here that I’ve heard from others, never clean the internals of a Meerschaum using an alcohol/salt soak.  This will have adverse effects on the Meer.  I finish up by shining up the metal mortise receptor with 0000 steel wool. The picture shows the cleaning.With the internals of the stummel clean, I now clean the external Meerschaum surface.  I use undiluted Murphy’s Oil Soap with cotton pads and a bristled tooth brush.  I use the brush to clean the sculpted carving lines of the vineyard frescoes. I then rinse the stummel with cool tap water using the bristled brush as I rinse.  Wow!  I didn’t expect cleaning the surface would result in the patina of this Meer Vineyard to pop! The honey brown patina around the shank is more distinct now.  The picture shows the results.With the stummel cleaned, I take a closer look at the damaged cluster of grapes.  The Meer took a hit somewhere along the line.  I think that all I want to do is to smooth out the inside of the damaged grapes.  The round external shaping of the grapes remain and I want to keep them intact.  I know I need to be very careful. I mount a pointed shaping instrument on the Dremel.  I will use the Dremel carefully to remove the rough area and blend it more.  Ok, I’m not a Meer carving master!  What I did was use the Dremel tool to hone out the center of the grapes, then I use a 470 grade piece of sanding paper and ‘feather’ the edges around the damage.  The sand paper has the effect of smoothing the edges around the damage and blending the trauma.  I decide ‘less is more’ and leave it and not fiddle with it too much.  I don’t want to make things worse!  The pictures show my Meer sculpting debut. Now I turn to the Bakelite stem and clean the internals first using different sizes of long, wired bristle brushes.  This set of brushes has come in very handy to ‘plow’ the airway when pipe cleaners won’t break through – usually when stems are clogged up and have more severe bends.  I begin by deploying the long-bristled brushes dipped in alcohol to do the heavy lifting.  Then I follow with pipe cleaners.  After they are coming out clean, I reattach the screw-in stinger and reattach the stem to the stummel to see where things are.  The pictures show the progress. I mentioned earlier that I believed the stem was over bent.  The stem’s bend should flare out and be close to parallel with the plane of the rim.  I will heat the stem up and bring it closer to this ideal.  To keep the airway integrity, I insert a pipe cleaner through the stem.  To help achieve the right angle, I make a sketch on a lined index card to help as a template.  I also notice that the bit is over-clocked just a bit.  I’ll try to straighten that as well.  Since the hour is late, and my workstation is adjacent to where my wife has turned in for the night, I take my heat gun to the kitchen and set up on the counter.  I insert a pipe cleaner through the airway which also serves as a handle to help manipulate the stem as it heats.  With the heat gun on, I rotate the stem over the heat focusing on the bend area.  After a short time, the Bakelite becomes supple and gradually I begin to straighten it while I rotate.  I find too, that pulling on the two ends of the pipe cleaner helps facilitate this.  After reaching where I think I need to be with the bend, I hold the stem under cool tap water to set the bend.  The first time I did this, and compared to the template, I decided I needed a bit less bend.  I repeated the process, cooled with tap water and compared with my make-shift template.  I reassemble the Meer Vineyard and it’s looking good!  I’m happy with the new look of the stem.  The pictures show the process. I want to complete work with the Bakelite stem. There is some very light tooth chatter around the upper bit area and there are ‘stretch marks’ along the area where the tight bend had been previously. Using 240 grit paper, I work on the ‘stretch marks’ on the upper side as well as the teeth chatter.  I follow the 240 by wet sanding with 600 grit sanding paper and then with 0000 steel wool.  At this point I wet sand using micromesh pads 1500 to 2400 then I follow with dry sanding with pads 3200 to 4000 and 6000 to 12000.  After each set of three micromesh pads I apply Obsidian Oil to the Bakelite stem to revitalize it – and now that I am writing that this is what I’ve done, I’m not at all sure if Obsidian Oil has the same effect on Bakelite as Vulcanite!  Creature of habit.  Following the micromesh cycles, I mount the Dremel with a cotton cloth buffing wheel and apply Blue Diamond compound to the Bakelite stem for a very fine abrasive polishing.  I complete the stem work by applying carnauba wax with a cotton cloth wheel mounted on the Dremel set and speed 2, one notch up from the slowest speed.  The pictures show the stem progress. Turning now to the stummel, unlike briar pipes, Meerschaum does not use carnauba wax to finalize the finish.  The practice of using bees’ wax to shine the Meer is the standard practice.  I went back to a post from Charles Lemon at Dad’s Pipes that I filed to use as my guide (See: Quick Clean-up of a Tulip Meerschaum Sitter).  I mentioned before how Meerschaum pipes change color as they are smoked and this patina increases the value of the pipe.  Not only does bees’ wax shine the Meer but it also enhances the growth of the patina as one smokes the pipe and the tobacco oils are absorbed. I reattach the stem to the stummel, but place a pipe cleaner between the stem and shank to tighten against – creating a gap so that I don’t get wax on the stem and the stem acts as my handle.  From the last time I did this, I had congealed bees’ wax that I had melted in a mason jar.  I use the hot air gun and reheat the wax until it liquifies, and then I warm the stummel with the air gun.  Using a cotton swab, I paint the stummel with the liquified bees’ wax and am careful to work it into all the nooks and crannies of the vineyard frescos carved into the Meerschaum.  After this is completed I put the stummel down on a cloth for it to dry.  I must say, this time was much easier than the last time when it was in the middle of the Bulgarian winter and the wax cooled and congealed before I could apply it!  I use a clean cloth to remove gently the excess wax then I buff up the shine using a micromesh cloth. The pictures show the bees’ wax application.

I’m pleased with the bees’ wax application.  The Meerschaum absorbed and colored in ways that I wasn’t expecting.  The rim absorbed a great deal and the patina looks great around the stummel.  This Meerschaum hand carved Vineyard has a bit of wear and tear character, with some missing grapes, but he’s ready to go.  With time, his patina will only deepen and increase the attractiveness of this classic Meerschaum carving.  I’m glad that this Meer will be put back in service with one of Jen’s family members.  Her gift benefits the Daughters of Bulgaria, our work with women and girls who have been trafficked and sexually exploited.  For more information, check out my blog, The Pipe Steward.  Thanks for joining me!


A WDC Bakelite/Briar Pipe like none I have seen before


Blog by Steve Laug

When my brother sent me this pipe I have to say I was surprised and enamored with it. I have cleaned up a lot of WDC pipes over the years and have come to really like them. There is something about them that always gets my attention. The workmanship is generally well done. The materials used are good quality. The briar always tends to have some flaws and is never perfect. But there is something about the brand that I like. Well this pipe is an oddity to me. It is a shape that is similar to some of the CPF pipes I have cleaned up and the combination of briar, brass and Bakelite it really nicely done. The first difference is that this one has a flat rectangular shank and saddle stem. The Bakelite base is rounded and flows into the flattened shank and stem. The stem is also Bakelite or Redmanol as the case may be. It is a rich reddish colour that is translucent and the light really plays with. The second difference is that in a lot of this style pipe the threaded connector and bottom of the bowl is metal. On this one it is white porcelain. When the bowl is removed the threaded connector is also porcelain – a single porcelain unit from the cupped bottom of the bowl to the connector. Those two differences intrigued me.WDC1There is a brass spacer between the base and the briar bowl and at some time in its life the spacer had been reversed and the sharper edges scarred the bowl. The Bakelite is actually notched to receive the sharp turned down edges of the spacer. The bowl had lots of dents and scars – character marks that I wish could talk and tell the story of the travels of this old pipe. The brass rim had long since come loose and was easily removed but for some reason never disappeared as it clung to the rim of the pipe. In the next photo you can see the rim top and the porcelain bottom of the bowl… it almost looks like the old milk glass that my grandmother collected.WDC2After looking at the two pictures above that came from my brother I was looking forward to seeing the pipe in person. When it arrived and I finally took it out to work on it was all that I had expected. The stem was over clocked so that would need to be addressed but I lined things up and took the next set of photos to show what the pipe looked like after my brother did an amazing job cleaning it. (It is great to have him work with me – it really speeds up the process on the restoration. He reams and cleans the pipes and does the dirty work of reaming and removing the debris of the years.) I looked it over to see if there were identifying marks. What I thought was brass may all be what is stamped on the right side of the band – 14K Gold Plated. The left side of the band bears the inverted WDC triangle logo.WDC3 WDC4I took a close up photo of the rim top to show the dents, scratches and scars on the surface. The photo also shows the porcelain cup in the bottom of the bowl. It has three round air holes for directing the smoke into the bottom chamber and into the stem.WDC5I dismantled the pipe to show the many parts that went into its construction. The photo below shows the broken down pipe.WDC6The next photos show the over clocked stem. (I had removed the loose band at this point in the process.) Once the base was screwed onto the stem it was grossly overturned. The metal tenon was set in the stem so it would need to be heated to be able to repair this.WDC7I heated the metal tenon with a lighter and once the glue softened I was able to align the stem and shank very easily. Underneath the band the number 43 had been scratched into the Bakelite shank. I am not sure if that is the shape number or if it is the “autograph” of the assembler of the pipe. Either way it is something that remained hidden for many years. WDC8I set the base aside and worked on the bowl. I removed the rim cap and cleaned off the glue that remained behind on the top of the bowl. It was rough and I was thinking that it was reason that the cap was no longer smooth. I scrubbed out the glue residue in the inside of the rim cap as well with alcohol and cotton swabs. I used a flat blade screw driver to smooth out the interior flat surface of the cap. I wiped down the bowl with acetone to remove the remnants of the finish and then glued the rim cap back in place with an all-purpose glue. I polish the rim with some micromesh and metal polish. I decided to leave some of the dents and dings as to me it gave the pipe character.WDC9 WDC10I cleaned the surface of the Bakelite base and sanded the whole base with micromesh sanding pads from 1500-12000 grit. I rubbed the base down with Obsidian Oil several times throughout the process to give the micromesh some bite as I polished the base. WDC11WDC12I gave the internals a quick clean with alcohol and cotton swabs to remove any of the sanding dust that might have found its way into the bowl base and shank. I also cleaned the airway in the stem at the same time with alcohol and pipe cleaners.WDC13I roughened the area on the base that would be underneath the band to give the glue something to bind to. I used an all-purpose glue and applied it sparingly to the shank. I had previously polished the band with metal polish to remove any tarnish and give it a shine. I pressed it in place and laid the base aside for the glue to set.WDC14I cleaned the inside of the space plate with alcohol and cotton swabs to remove the debris of the years. The spacer appeared not to have been glued in place so I left it that way. I polished it with micromesh sanding pads 1500-4000 grit until it gleamed. I laid it aside until I was ready to put the pipe back together.WDC15I turned my attention to the stem. There were some light tooth marks on the underside of the stem near the button. I sanded these out with 220 grit sandpaper. I wet sanded the stem with 1500-2400 grit micromesh sanding pads. I wiped the stem down with a damp cotton pad and dry sanded it with 3200-12000 grit pads. I gave the stem a final wipe down with the damp pad.WDC16 WDC17 WDC18With the stem finished and the glued band dried I put the base and stem back together. I would still need to buff the entirety with Blue Diamond on the buffing wheel.WDC19WDC20I used a medium brown stain pen to stain the bowl. I heated the briar and then applied the stain with the pen. I repeated the staining until the coverage was smooth and even.WDC21I gave the bowl several coats of Conservator’s Wax and hand buffed it to raise the shine with a microfibre cloth.WDC22WDC23With all the parts finished I took a final photo of the bowl and the base before putting it back together.WDC24I buffed the completed pipe with Blue Diamond to polish out some of the scratches in the base and the stem. I was not able to remove all of them so I left a few behind to tell the story. I gave the pipe several coats of carnauba wax and buffed it with a clean buffing pad. I hand buffed it with a microfibre cloth. The finished pipe is shown in the photos below. I am really pleased with the finished pipe and how it looks. Thanks for looking.WDC25 WDC26 WDC27 Wdc28 WDC29 WDC30 WDC31 WDC32


Restoring an odd Trom-bone Pipe


Blog by Troy Wilburn

I got this off eBay because it was an American made pipe and it was a poker. It came unsmoked. It gets its name from the unique way you slide the pipe apart to clean it. I thought it would be an interesting addition to my poker collection.

I don’t know much about the pipe other than that they were made in California. This seems to be one of those “let’s build a better mousetrap” ideas when there is nothing wrong with the old mousetrap. Like I always say, some things are rare for a reason.

The pipe is a Bakelite type of plastic with a briar insert. I don’t know if I will smoke it or not as I am not sure how the plastic can take the heat coming from the bottom of the bowl.

So here is the pipe in all of her weird glory after I did a little buffing. Trombone1

Trombone2

Trombone3

Trombone4

Trombone5

Trombone6

Trombone7

Trombone8

Trombone9

Trombone10

Trombone11

Trombone12 I really didn’t think that this pipe would be that air tight and that it would have a lot of leaks. It doesn’t though. I can cap the bowl with my hand and blow and not hear or feel any air leaks.

A Piece of Tobacciana History – a Bakelite Bowl on a Bakelite Base


This is a new one to me. I have never seen this combination of parts. I have refurbished quite a few of the screw on bowls on Bakelite bases with either metal or vulcanite stems. I even recently completed a Bakelite base with a Bakelite stem on it. But never have I seen a Bakelite bowl. This one is solid Bakelite with no lining whatsoever. The bowl is like a cup. This one was another Chuck Richards gift. I think he takes delight in these surprises. And a surprise it truly is. There is not a single identifying stamp on the pipe so it is a mystery as to its manufacture. It is very unique. The brass ring between the bowl and base was loose and slide around as the pipe was moved. The bowl was lightly coated with tar. The rim had some dings in it and the base/stem unit was not even at the button. Each side of the angle coming down to the button was off and there were tooth marks in the stem. The inside cup of the base was dirty and the inside of the shank and stem unit was also dirty with tars. The end of the button and orific “o” opening was very clean and unstained which is a bonus. Once I get it cleaned up I intend to load a bowl and see what it is like to smoke. The first series of four photos show the pipe as it was when it arrived to my worktable.
IMG_0727

IMG_0728

IMG_0729

IMG_0730
I took it to the work table this morning and took it apart. I cleaned all the parts of the pipe with Everclear and a soft pipe cleaner. I scrubbed out the cup in the Bakelite base with Everclear on a cotton pad. There was darkening to the Bakelite that I could not remove but the slight build up disappeared. I cleaned up the brass ring and then reglued it to the base. I used a white glue to anchor this to the base. The next series of three photos shows that process.
IMG_0731

IMG_0732

IMG_0733
I sanded out the interior of the bowl with 320 grit sandpaper, wiped it down with Everclear on a cotton pad and then sanded it again with a fine grit sanding sponge. I sanded down the rim of the bowl with the sanding sponge to remove the slight nicks in the edge of the bowl and clean up the rough edges. I followed up with a 1500 grit micromesh sanding pad. The picture below shows the cleaned bowl.
IMG_0736
I reshaped the stem and button area with needle files to repair the angles and remove the tooth marks. I sanded the newly shaped area with 240 and 320 grit sandpaper to remove the file scratches. I followed up with micromesh sanding pads 1500-12,000 grit to progressively polish and shine the stem and base. I sanded the entire base with the micromesh sanding pads. There were many small surface scratches in the surface that the micromesh took care of. The next series of eight photos show the reshaping of the button area from the use of the files through the sanding with 1500 grit micromesh sanding pads.
IMG_0734

IMG_0735

IMG_0737

IMG_0738

IMG_0739

IMG_0740

IMG_0741

IMG_0742
The bowl did not seat well on the base. It seemed to sit at a bit of an angle and did not fit into the bottom of the cup. I sanded down the bottom of the bowl insert to remove a small portion of the material to reduce the depth of the threaded portion of the bowl. I also sanded the thread carefully to remove the nicks and chips to the surface. I used micromesh to sand the threads as I wanted to merely clean them up not damage or reduce them. Once this was completed the bowl threaded on more easily and also was seated well on the base. The next series of three photos show the reseating of the bowl.
IMG_0743

IMG_0744

IMG_0745
At this point in the process I sanded the entire pipe with micromesh sanding pads. I used all the grits from 1500-12,000 to polish the Bakelite and give it back its luster. This took quite a bit of time as I was trying to remove all of the minute scratches in the base and on roughness on the outer edges of the bowl. The seven photos below show the progress shine developing through the sanding with the micromesh sanding pads.
IMG_0746

IMG_0747

IMG_0748

IMG_0749

IMG_0750

IMG_0751

IMG_0752
When I had finished with the sanding and the bowl and base had a shine to them I hand buffed it with carnauba wax, applying several coats and buffing it with a soft cotton cloth. My only frustration with the finished pipe is that the area around the button that I changed and sanded is a bit lighter than the yellow/amberlike colour of the rest of the base. It shined up nicely but is lighter. Ah well, it is better than it was and it is certainly more comfortable than when I began. The final series of four photos show the finished pipe. Now it is time to load it and fire it up. The experience is about to begin.
IMG_0753

IMG_0754

IMG_0755

IMG_0756