Blog by Steve Laug
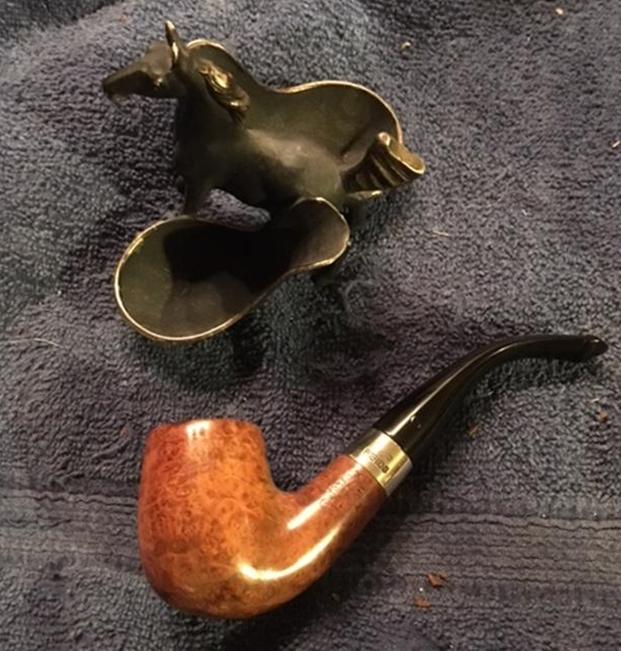
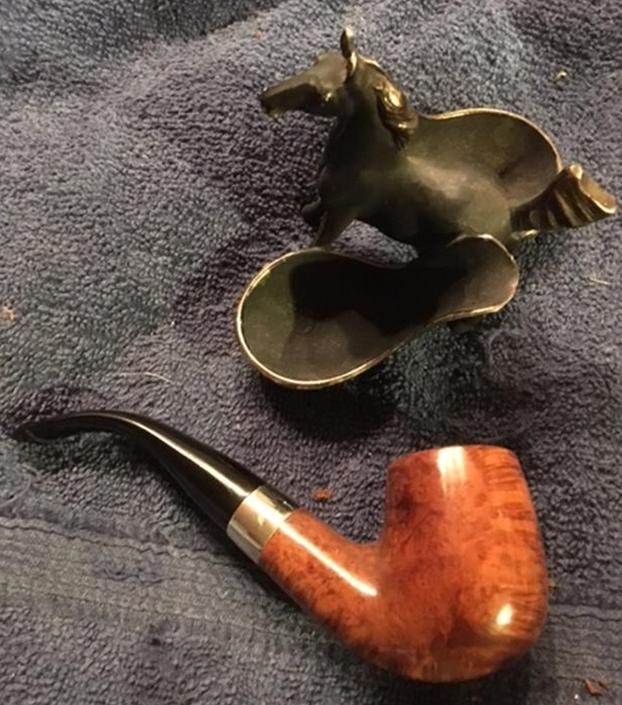
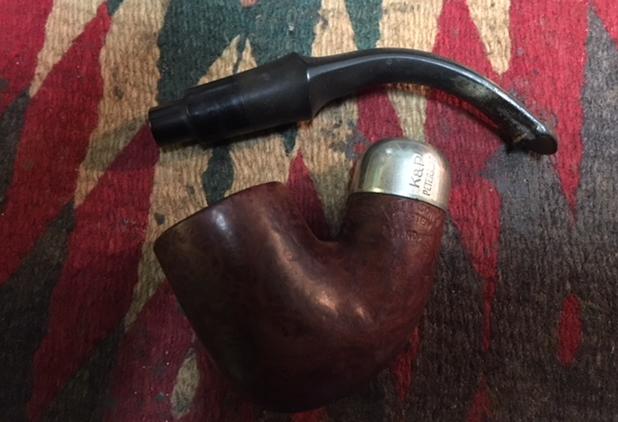
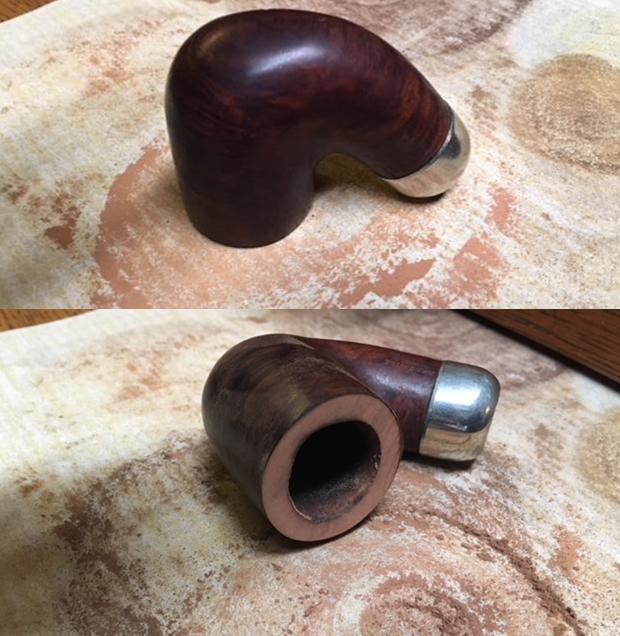
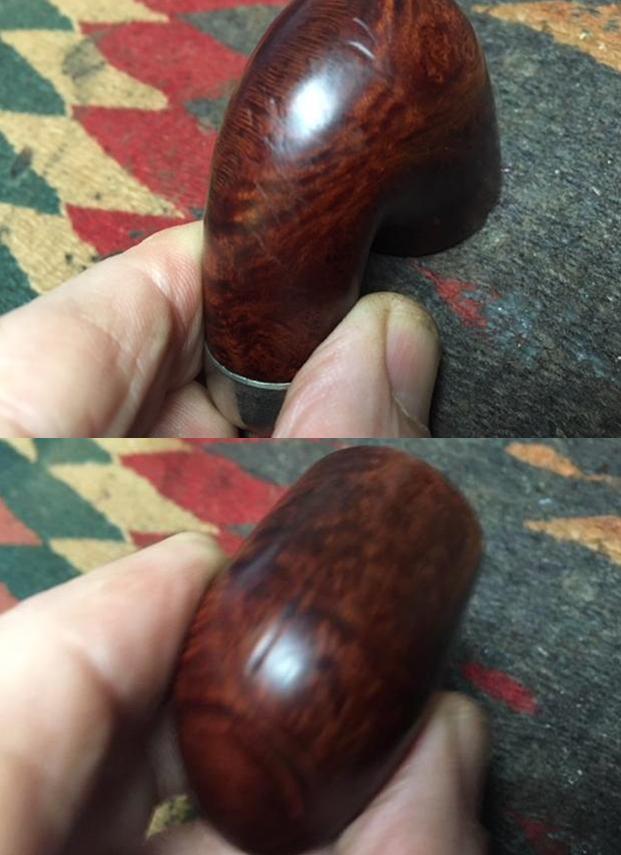
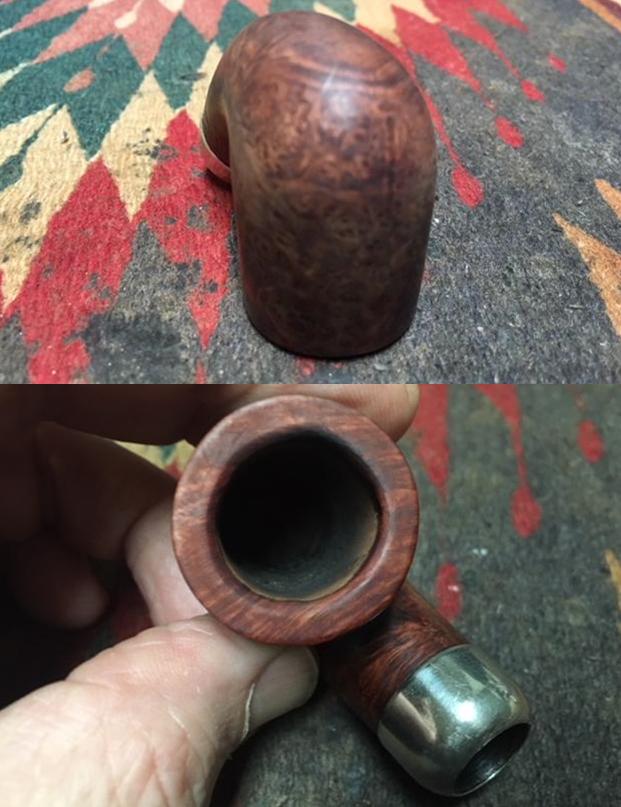
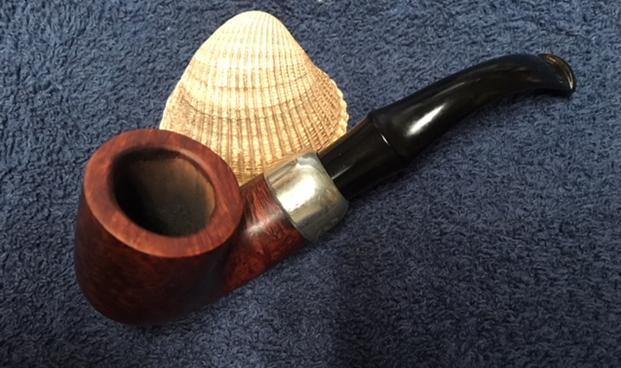
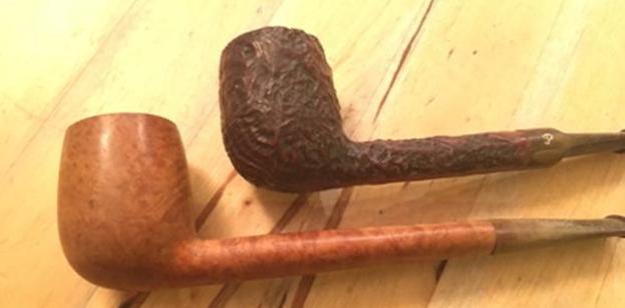
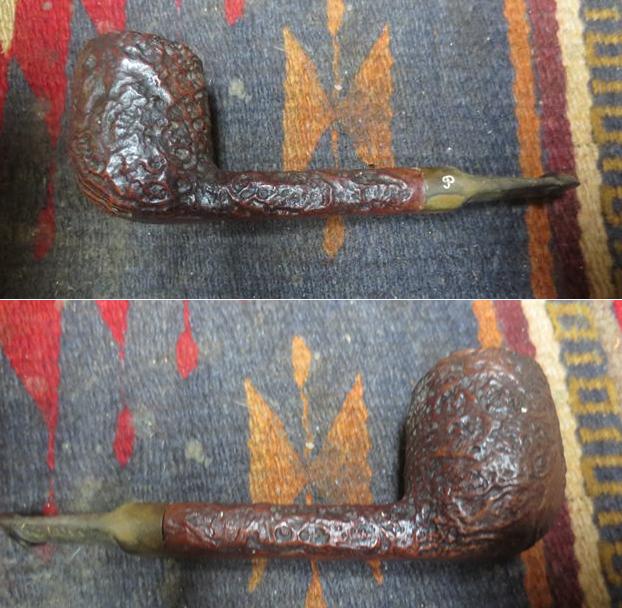
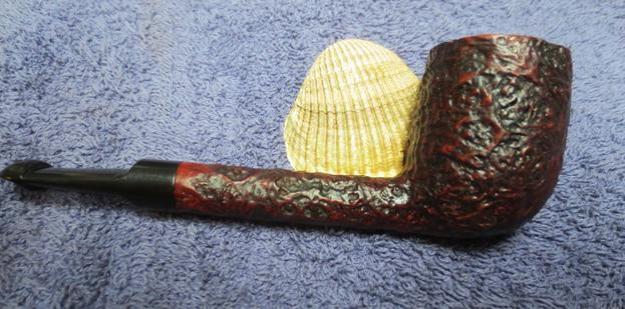
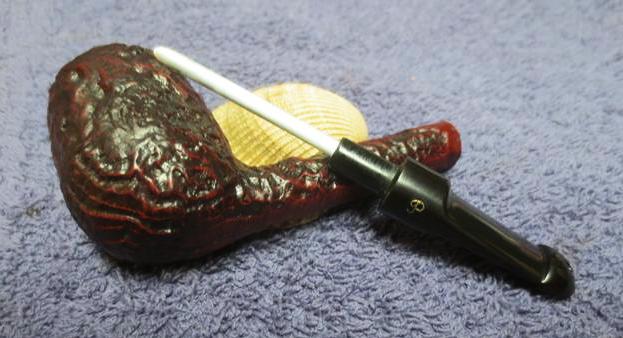
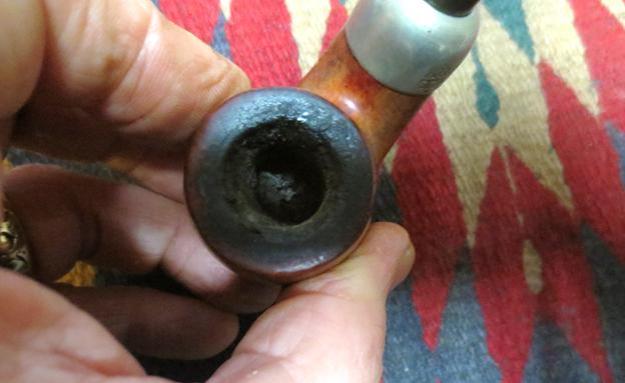
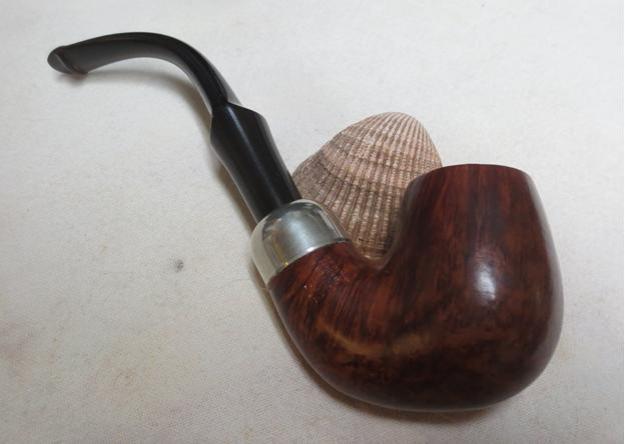
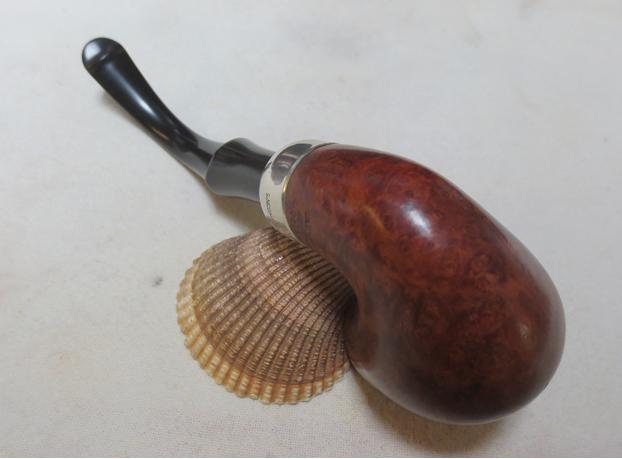
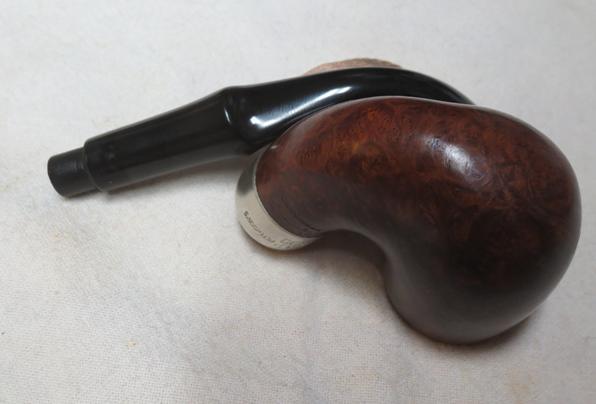
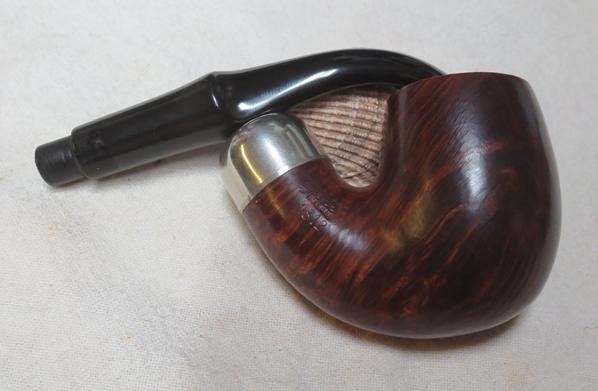
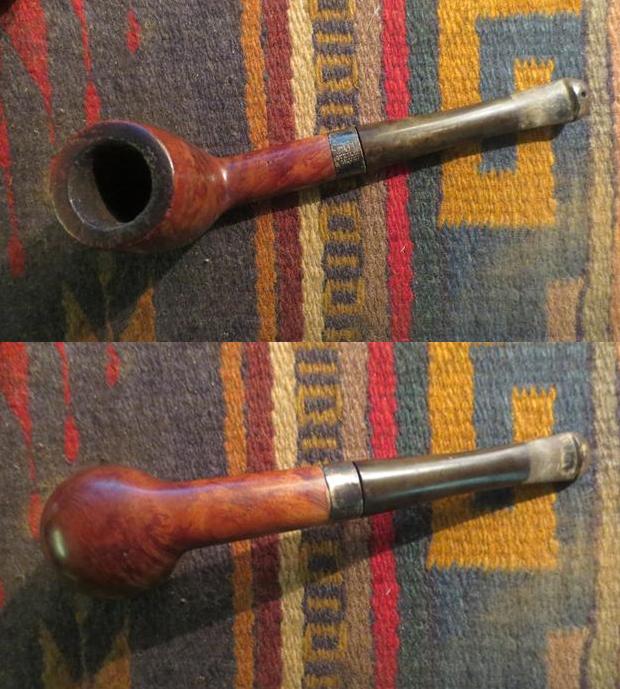
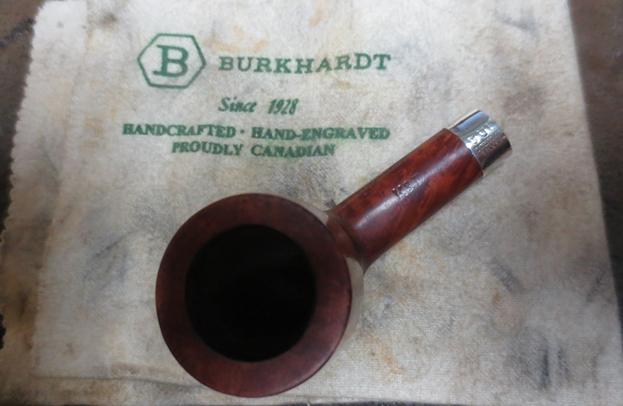
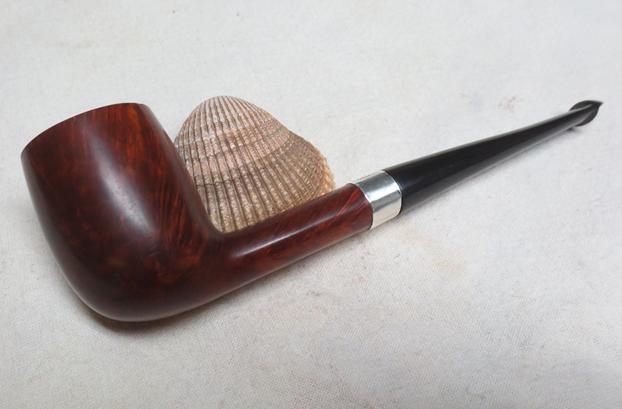
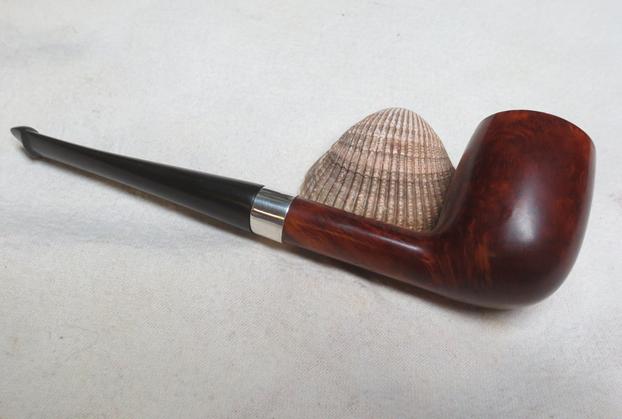
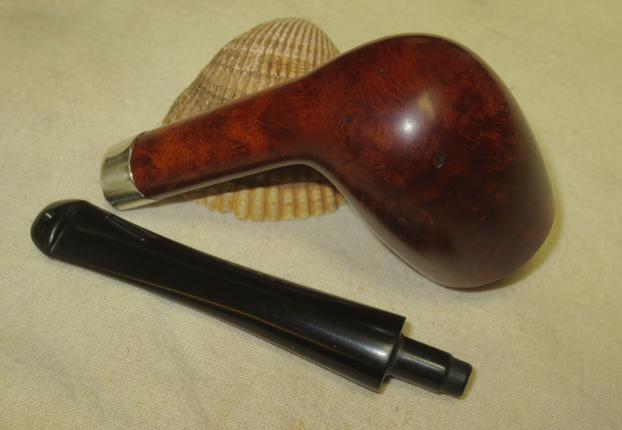
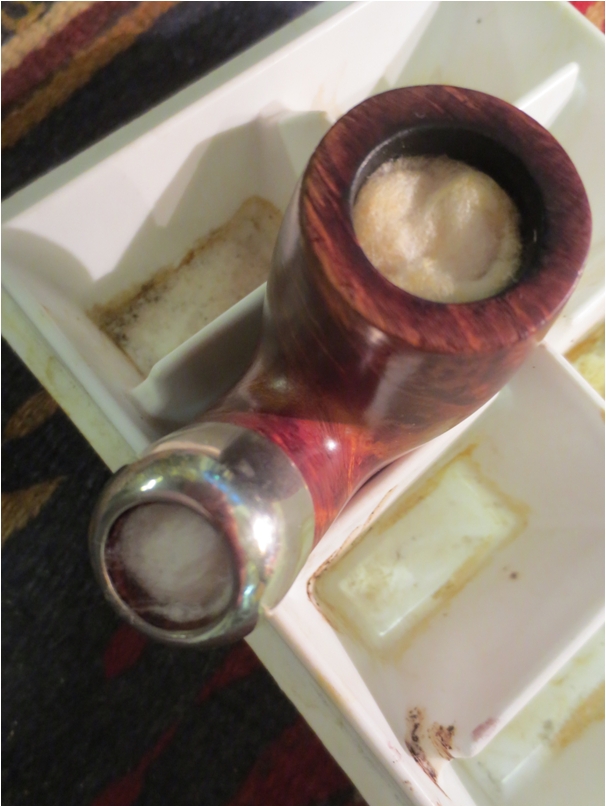
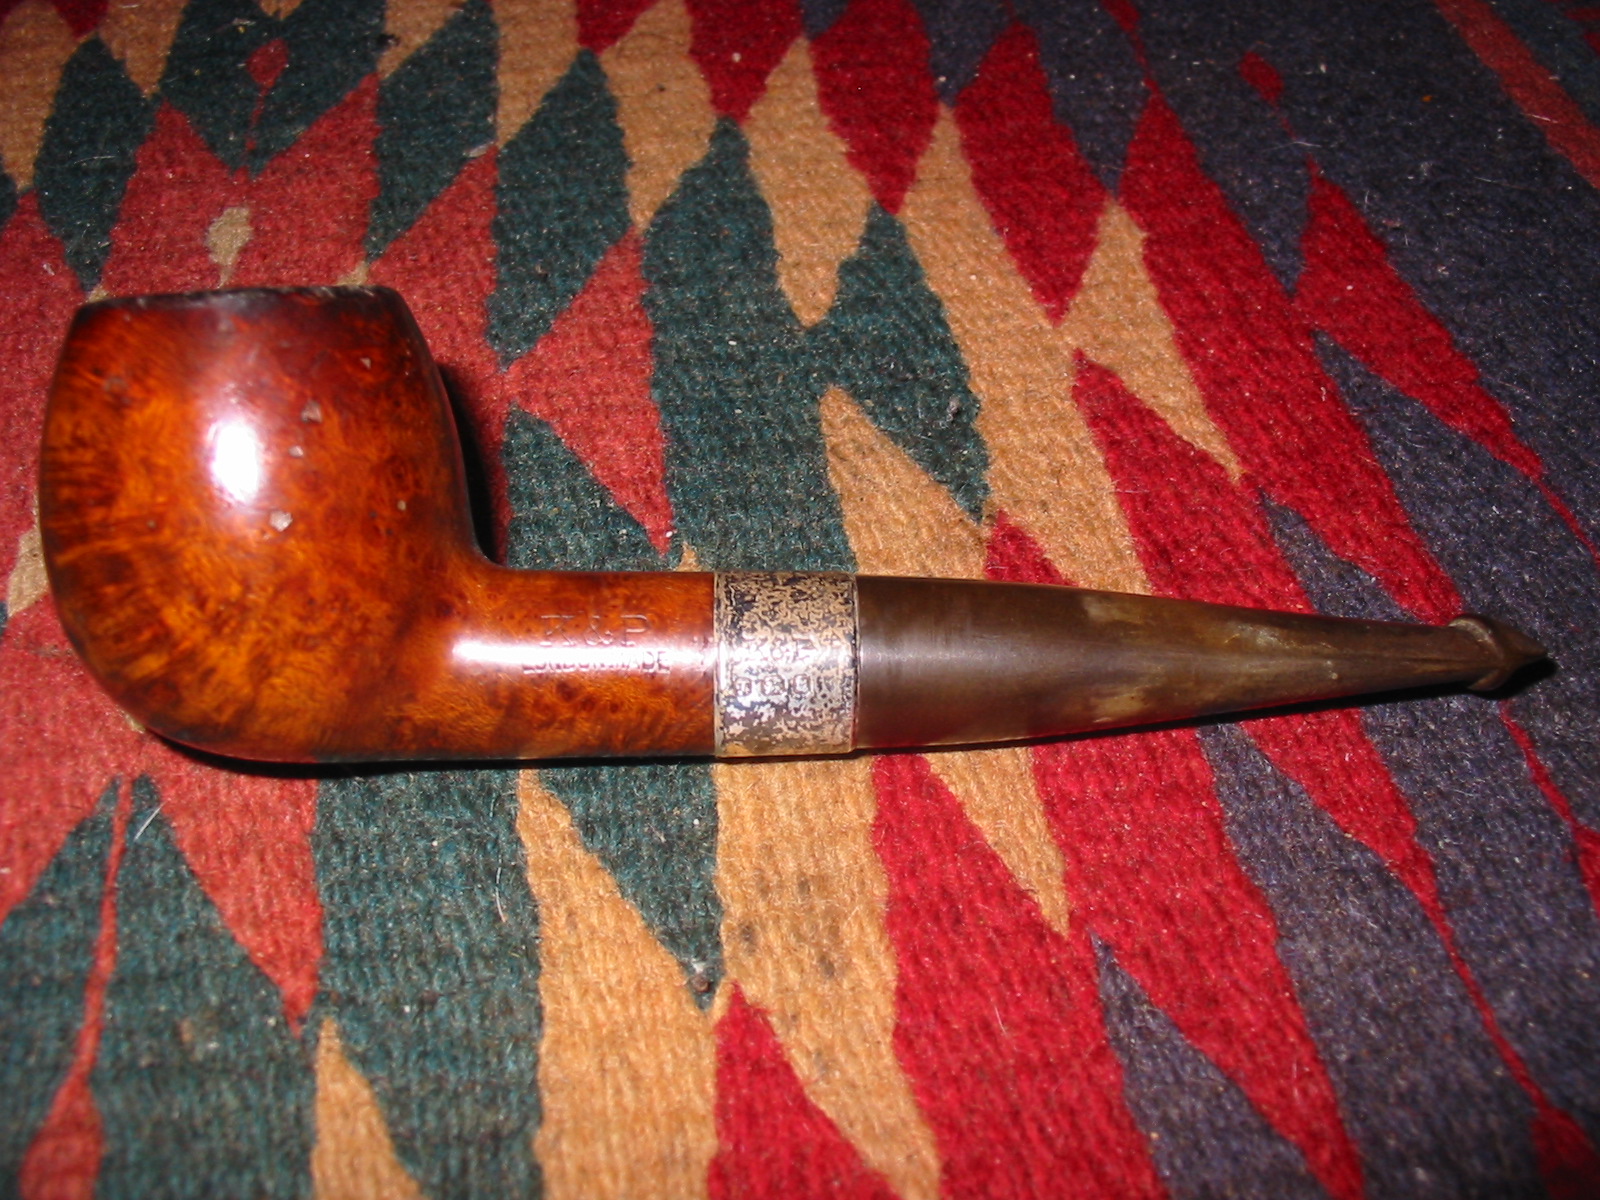
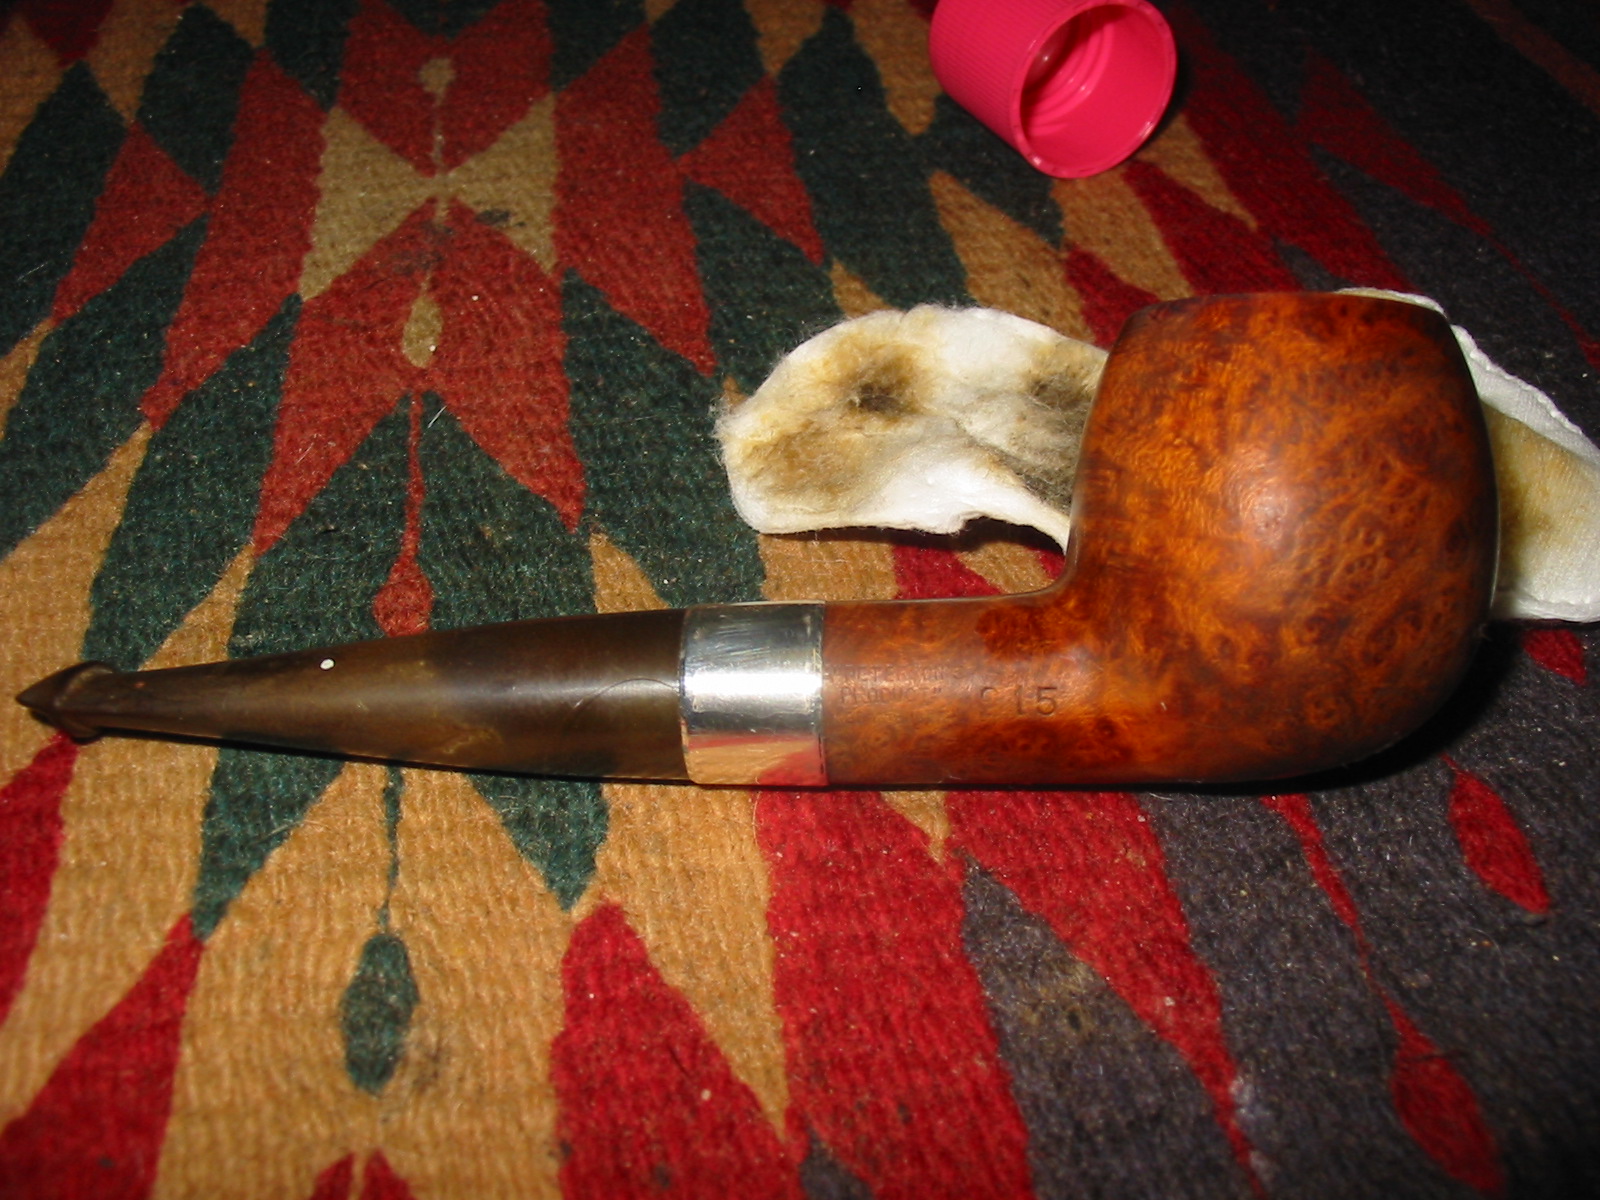
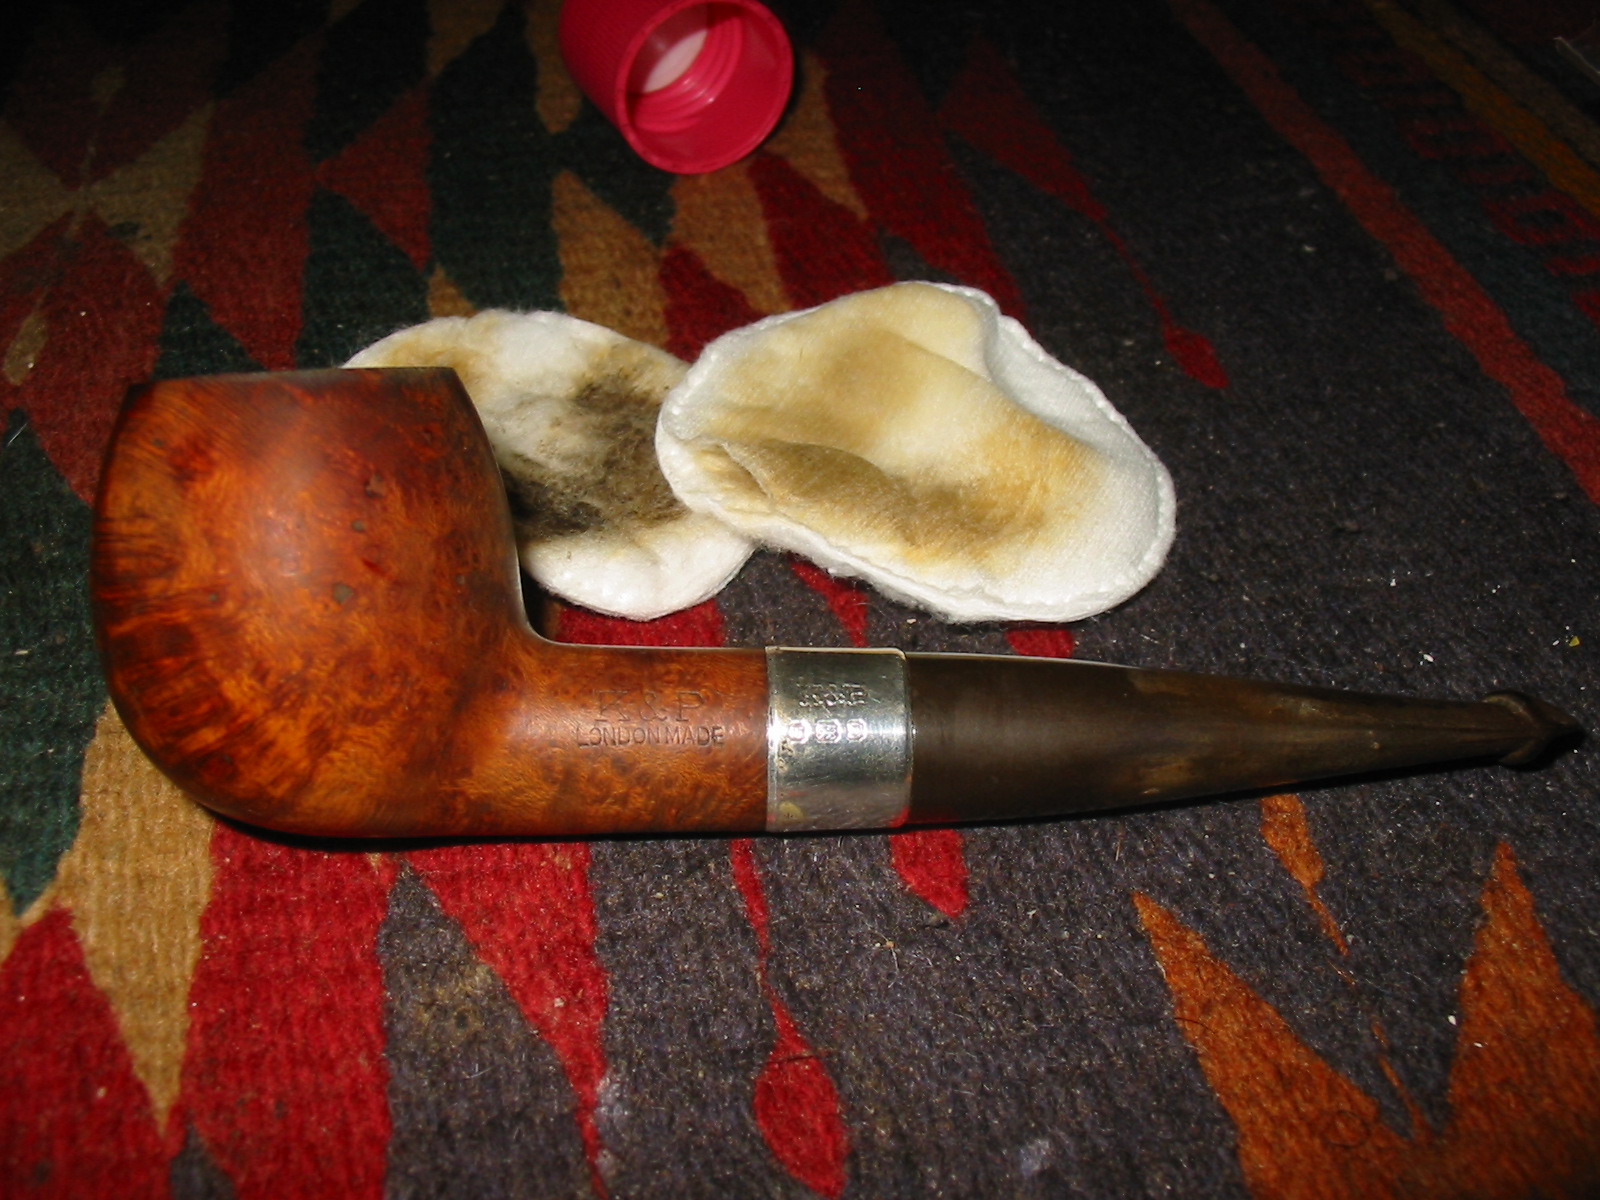
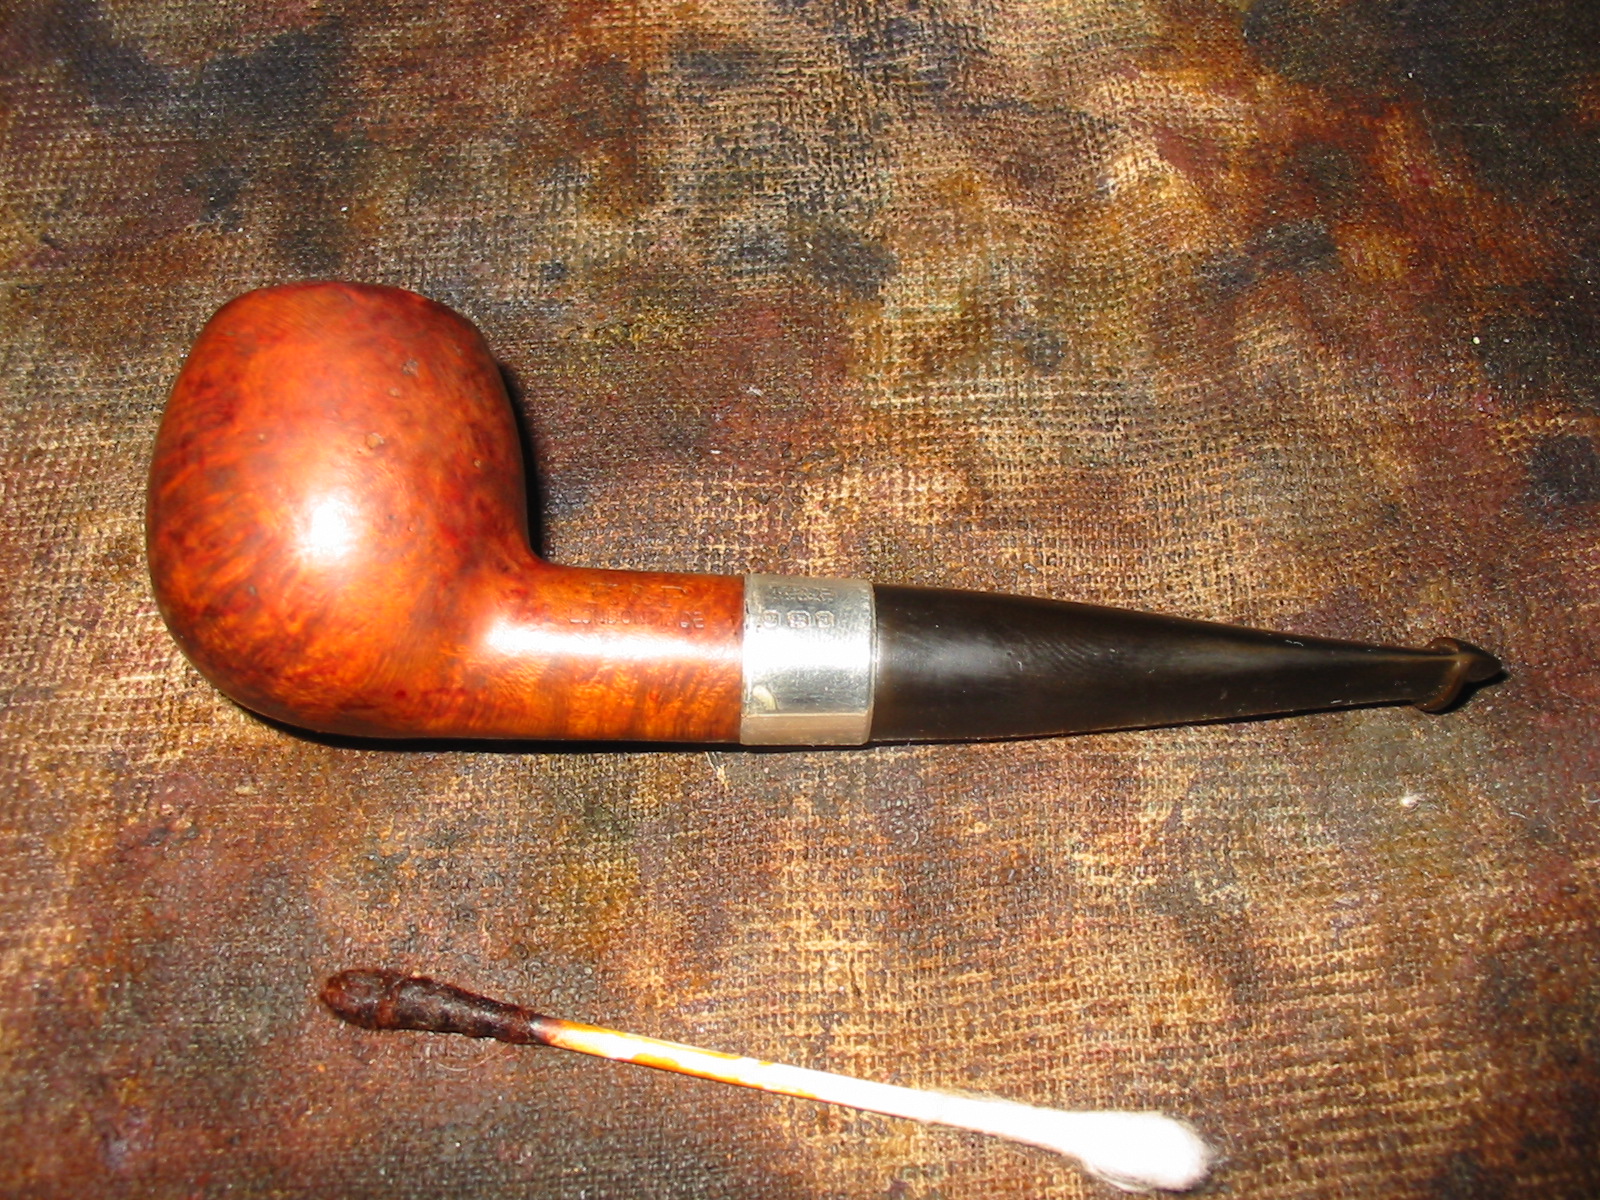
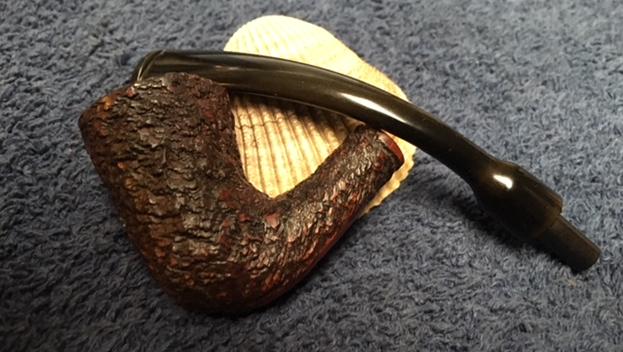
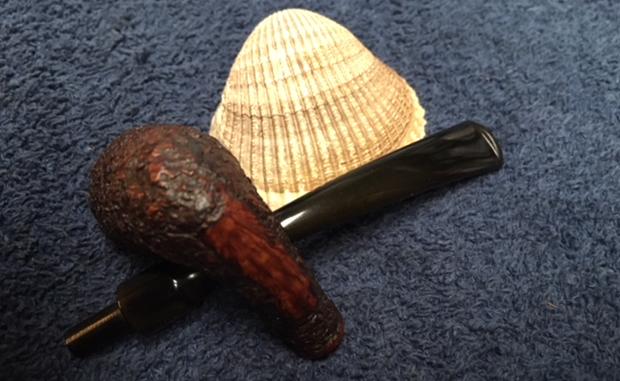
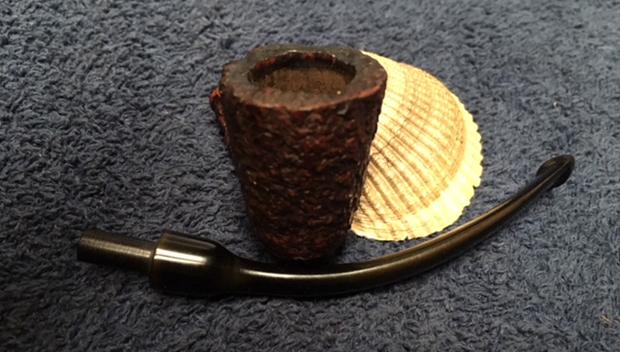
I have completed the repair of four of the pipes of the seven left to Paresh by his Grandfather. It is an interesting assortment of older pipes that come from the period of 1937-1950s. I am really enjoying not only working on them but doing some research on them as well. His Grandfather worked for the Indian Railroad and was a pipeman. Paresh is also a pipeman and only recently learned that his Grandfather smoked a pipe. The fifth pipe is a petite Peterson’s Calabash pipe with a delicate stem and a rusticated finish around the bowl and rim. It is petite but not small in terms of length – 5 inches long and 1 ½ inches tall. I took the following photos of the pipe before I stated to work on it. It was in excellent condition, very clean with just a thin bit of lava and tar on the top of the rim. The inner and outer edge of the bowl was in excellent condition. I took some photos below show the pipe as it arrived. 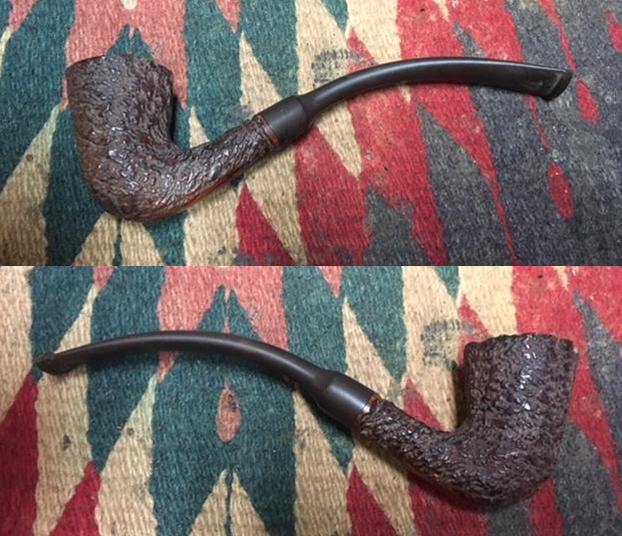
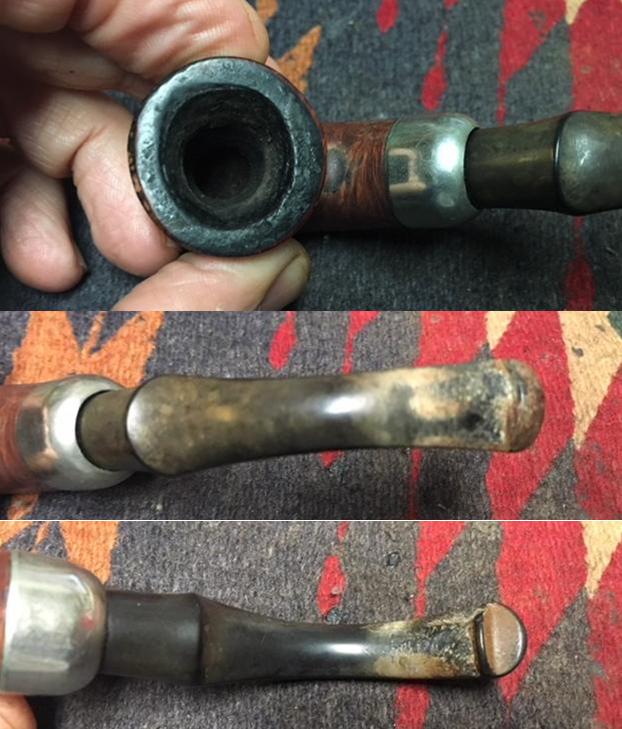
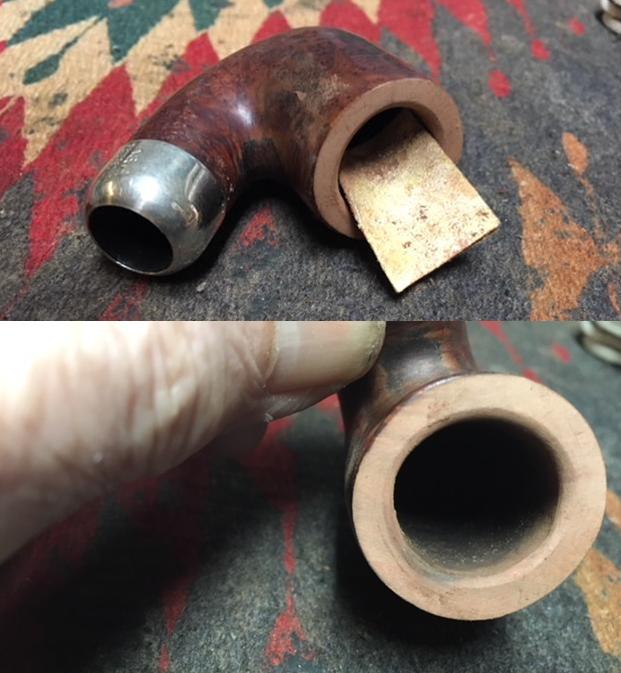
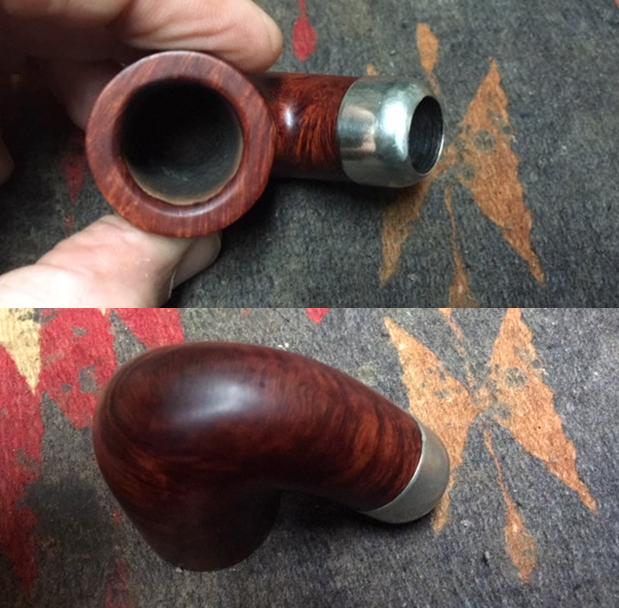
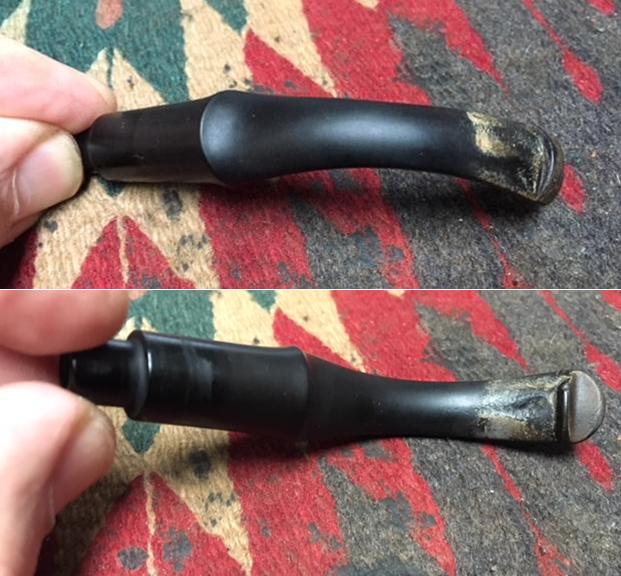
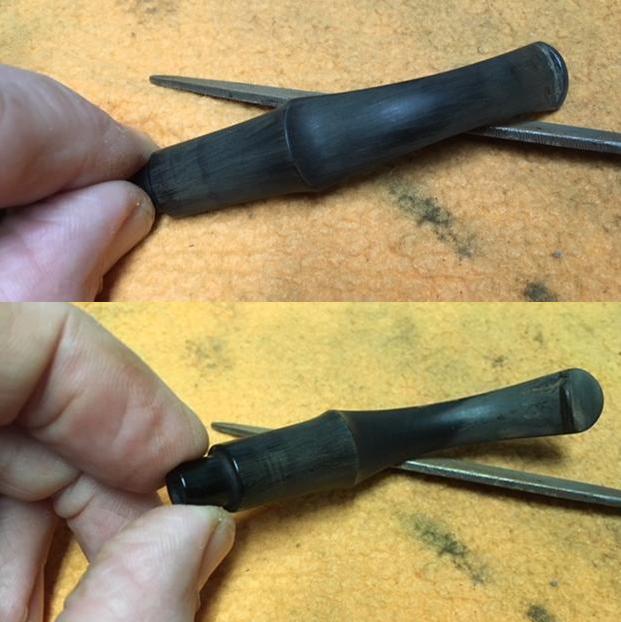
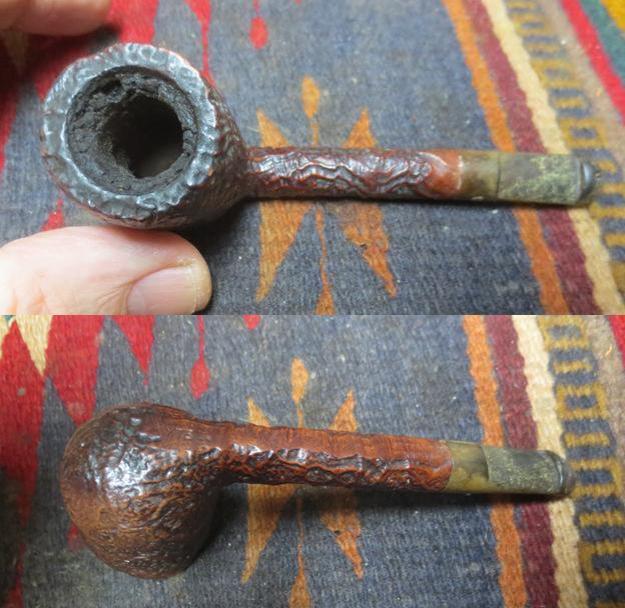
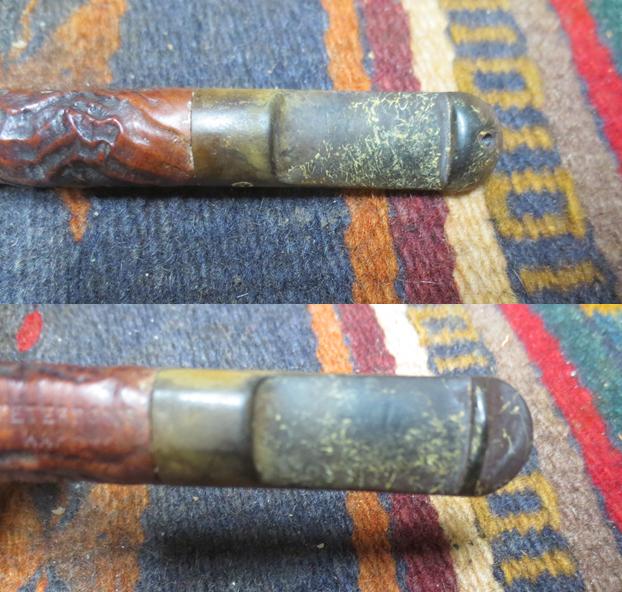
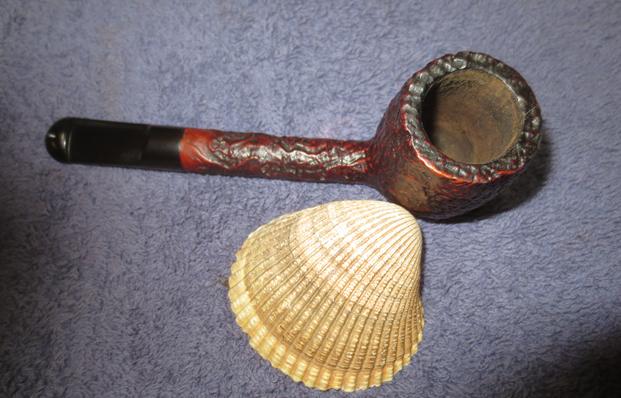
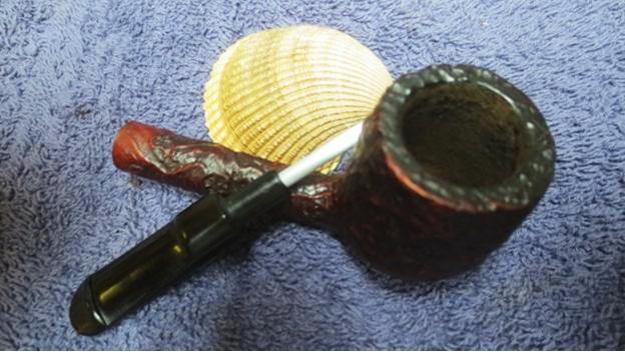
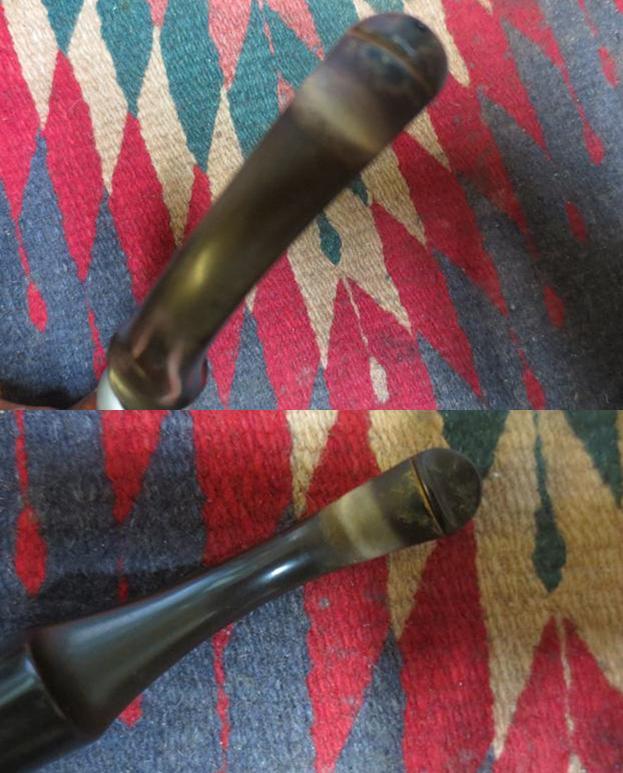
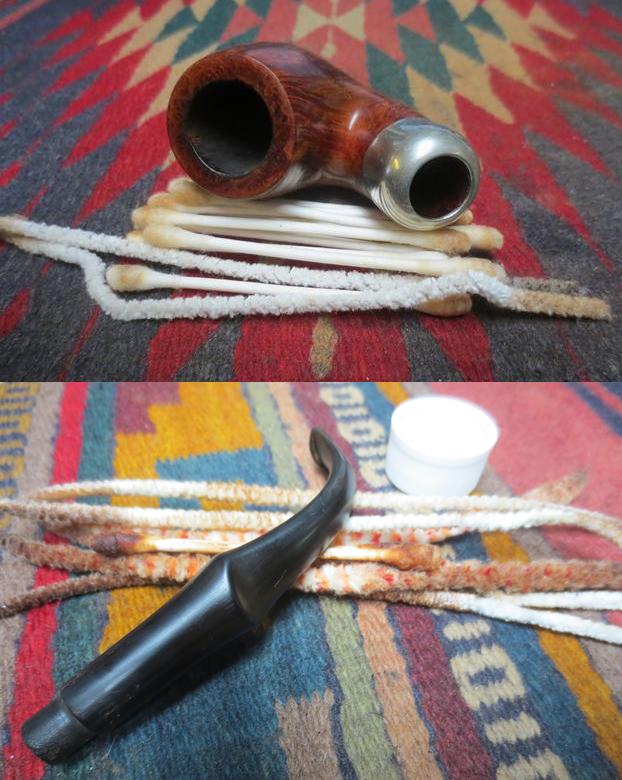
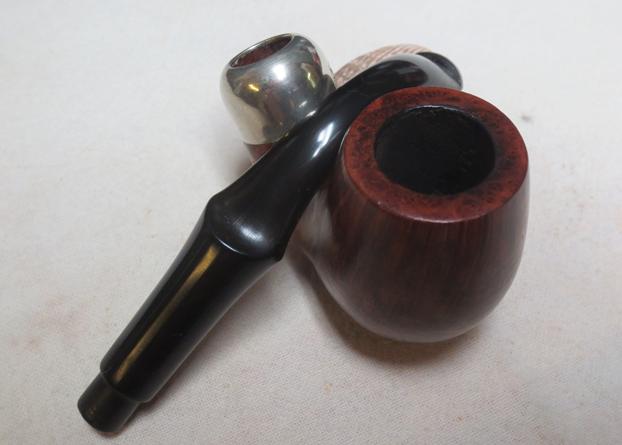
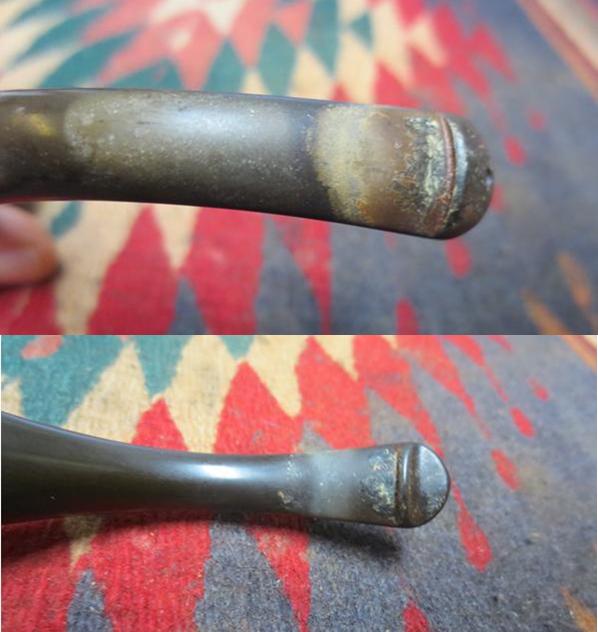
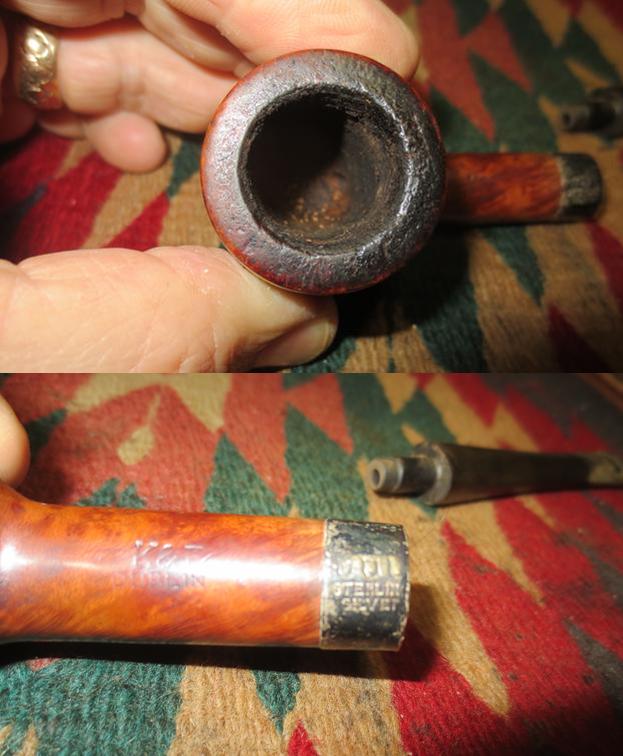
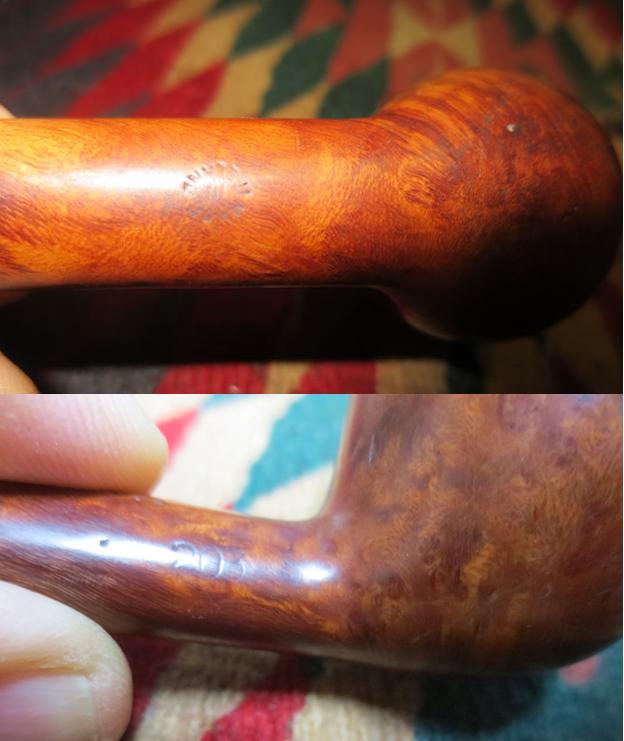
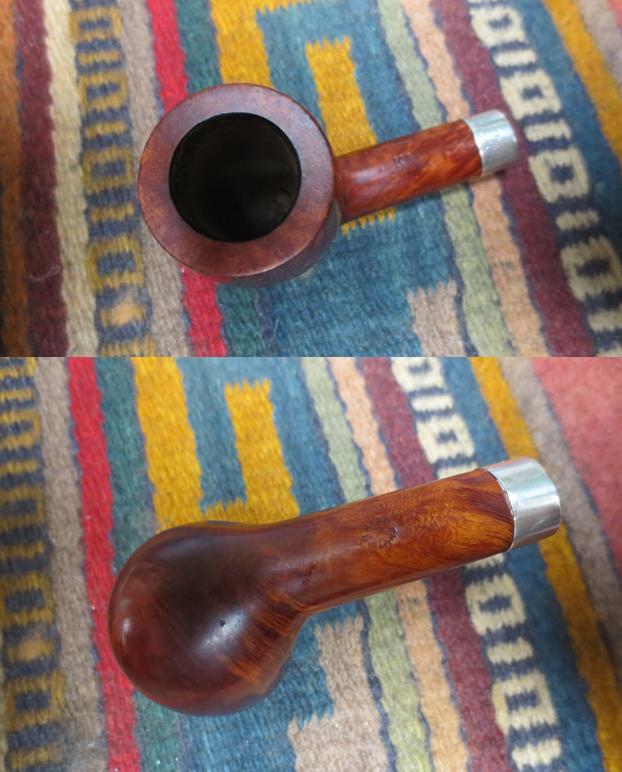
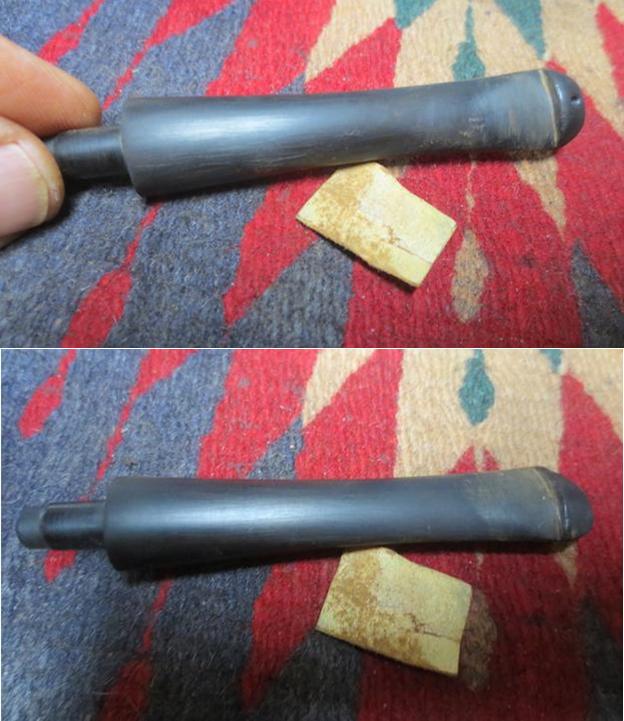
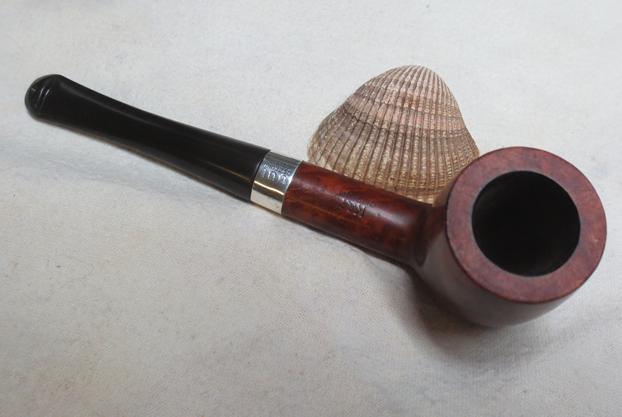
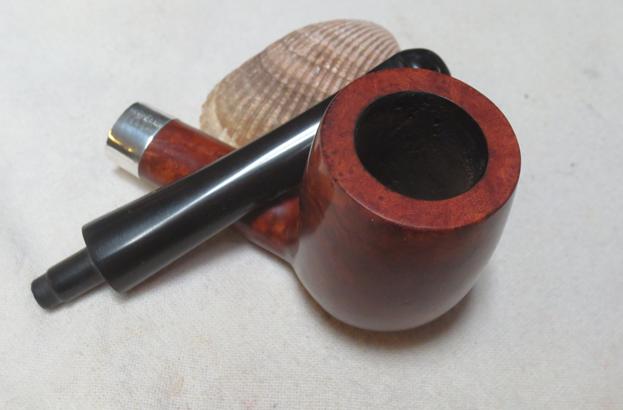
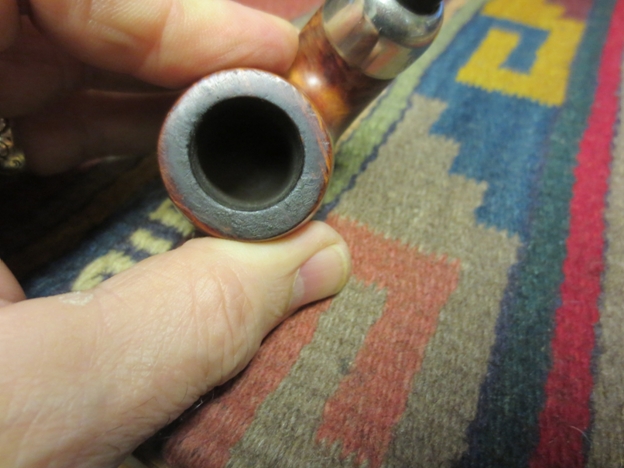
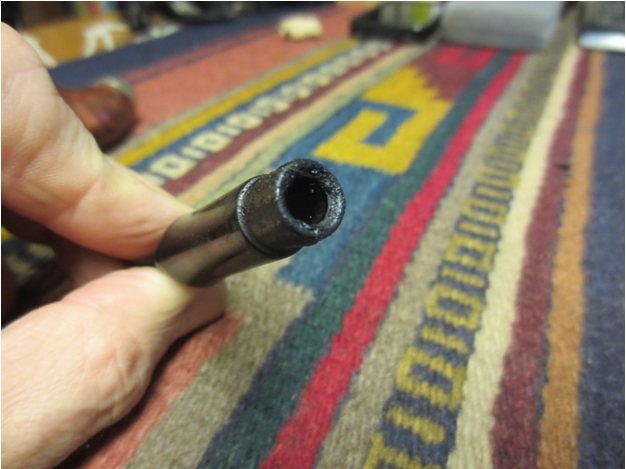
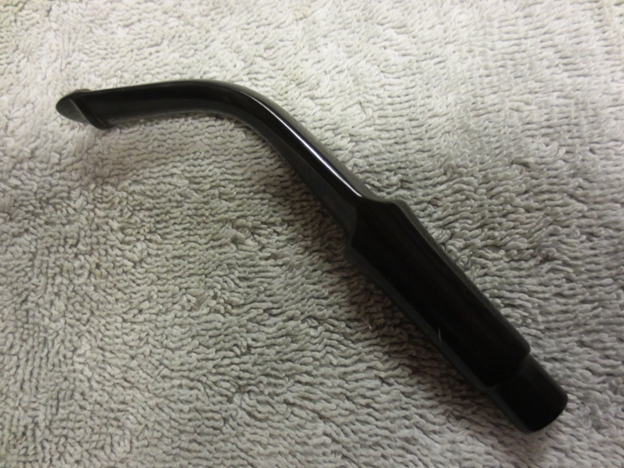
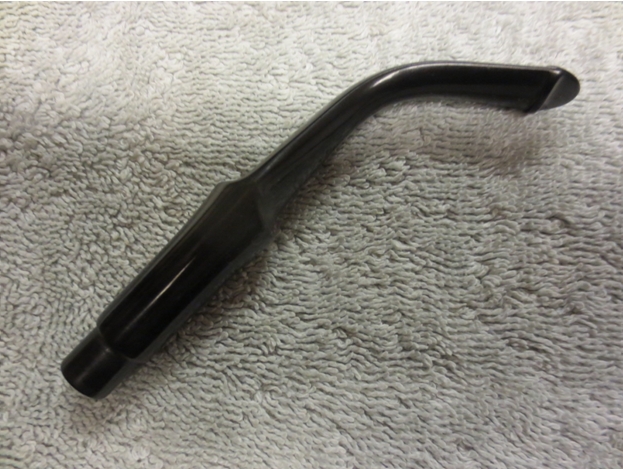
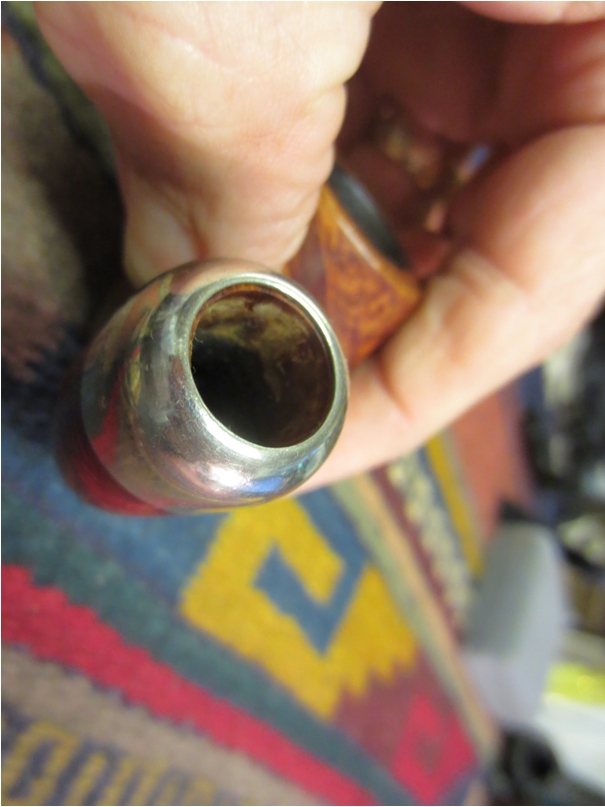
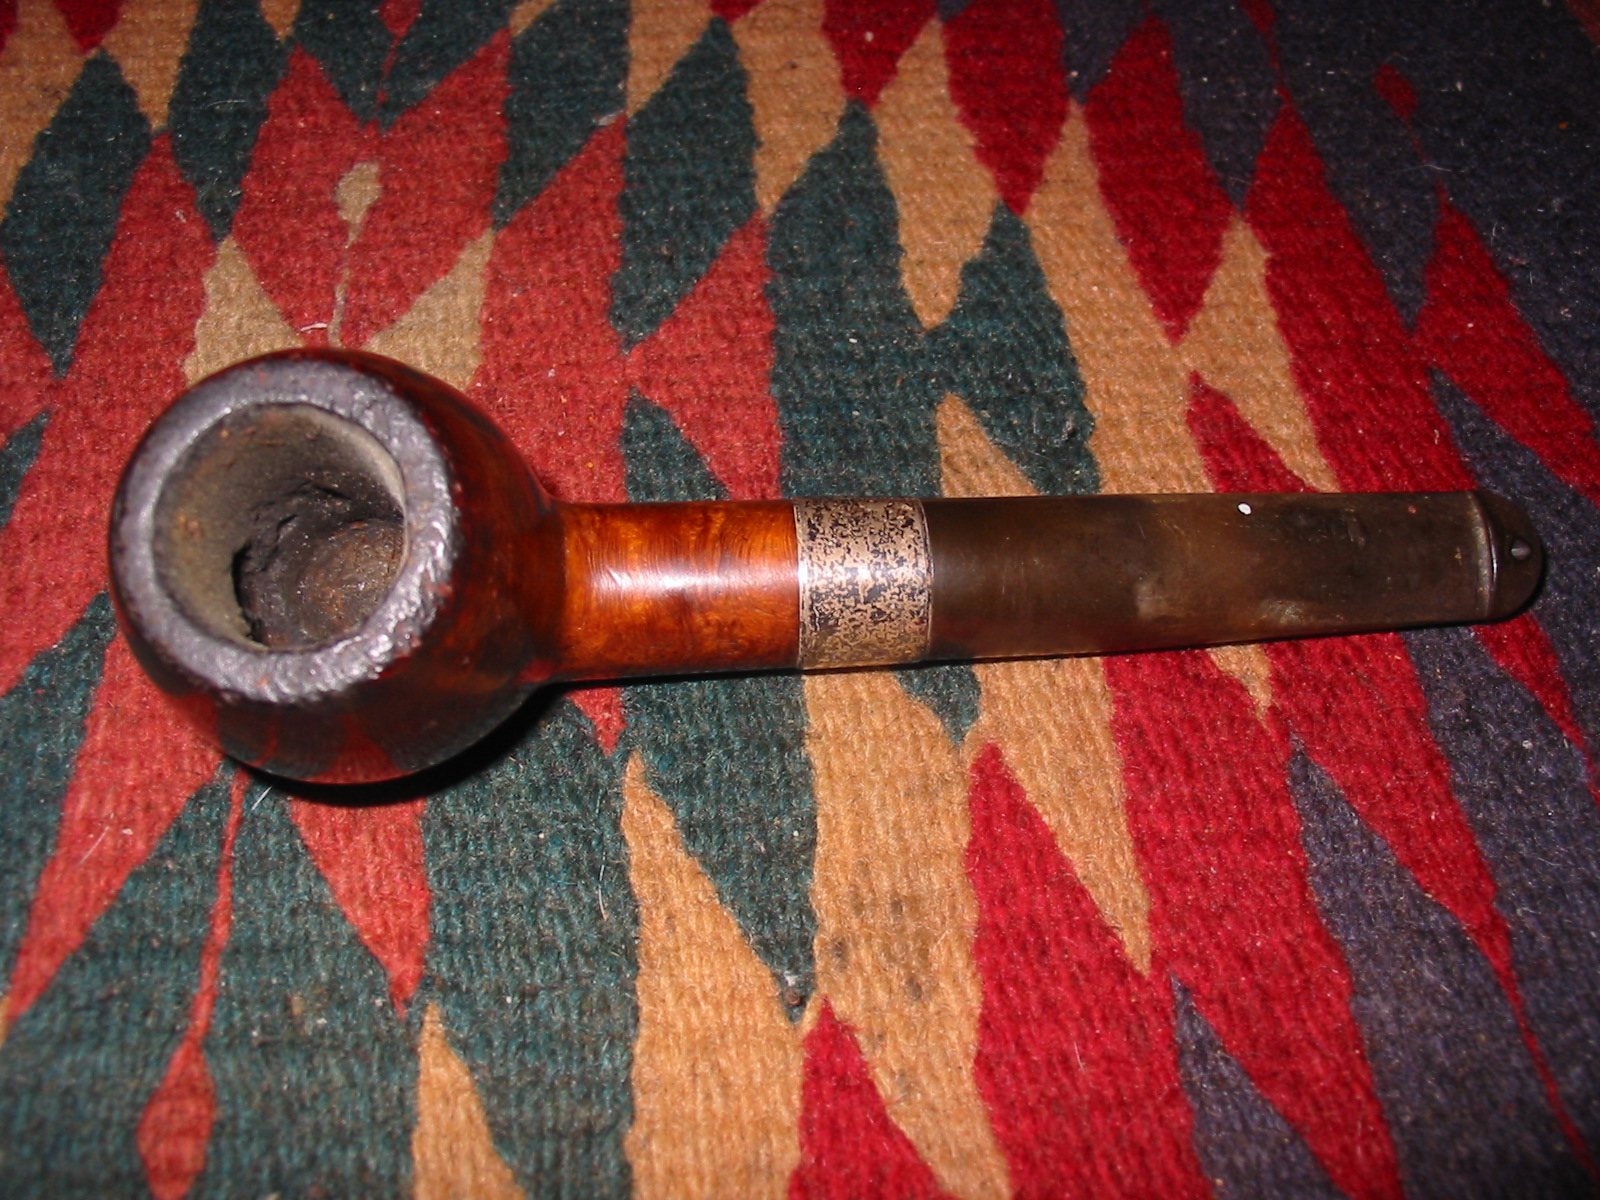
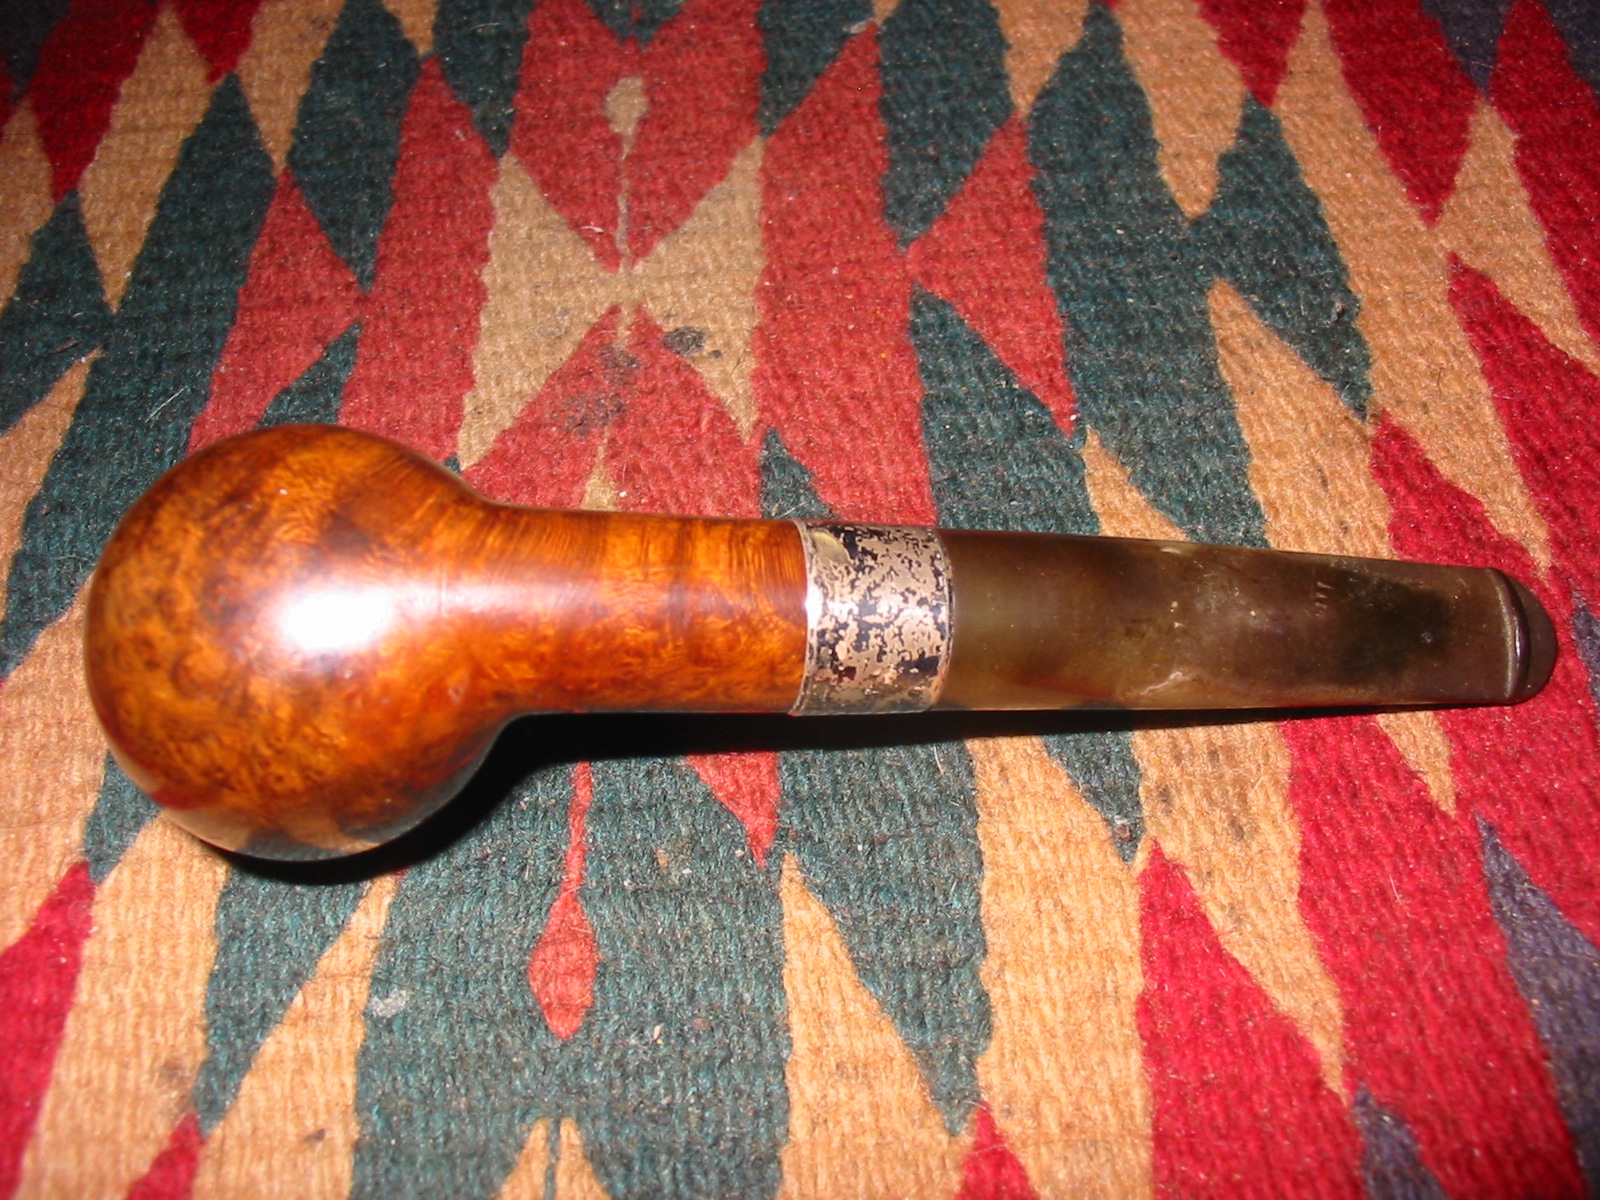
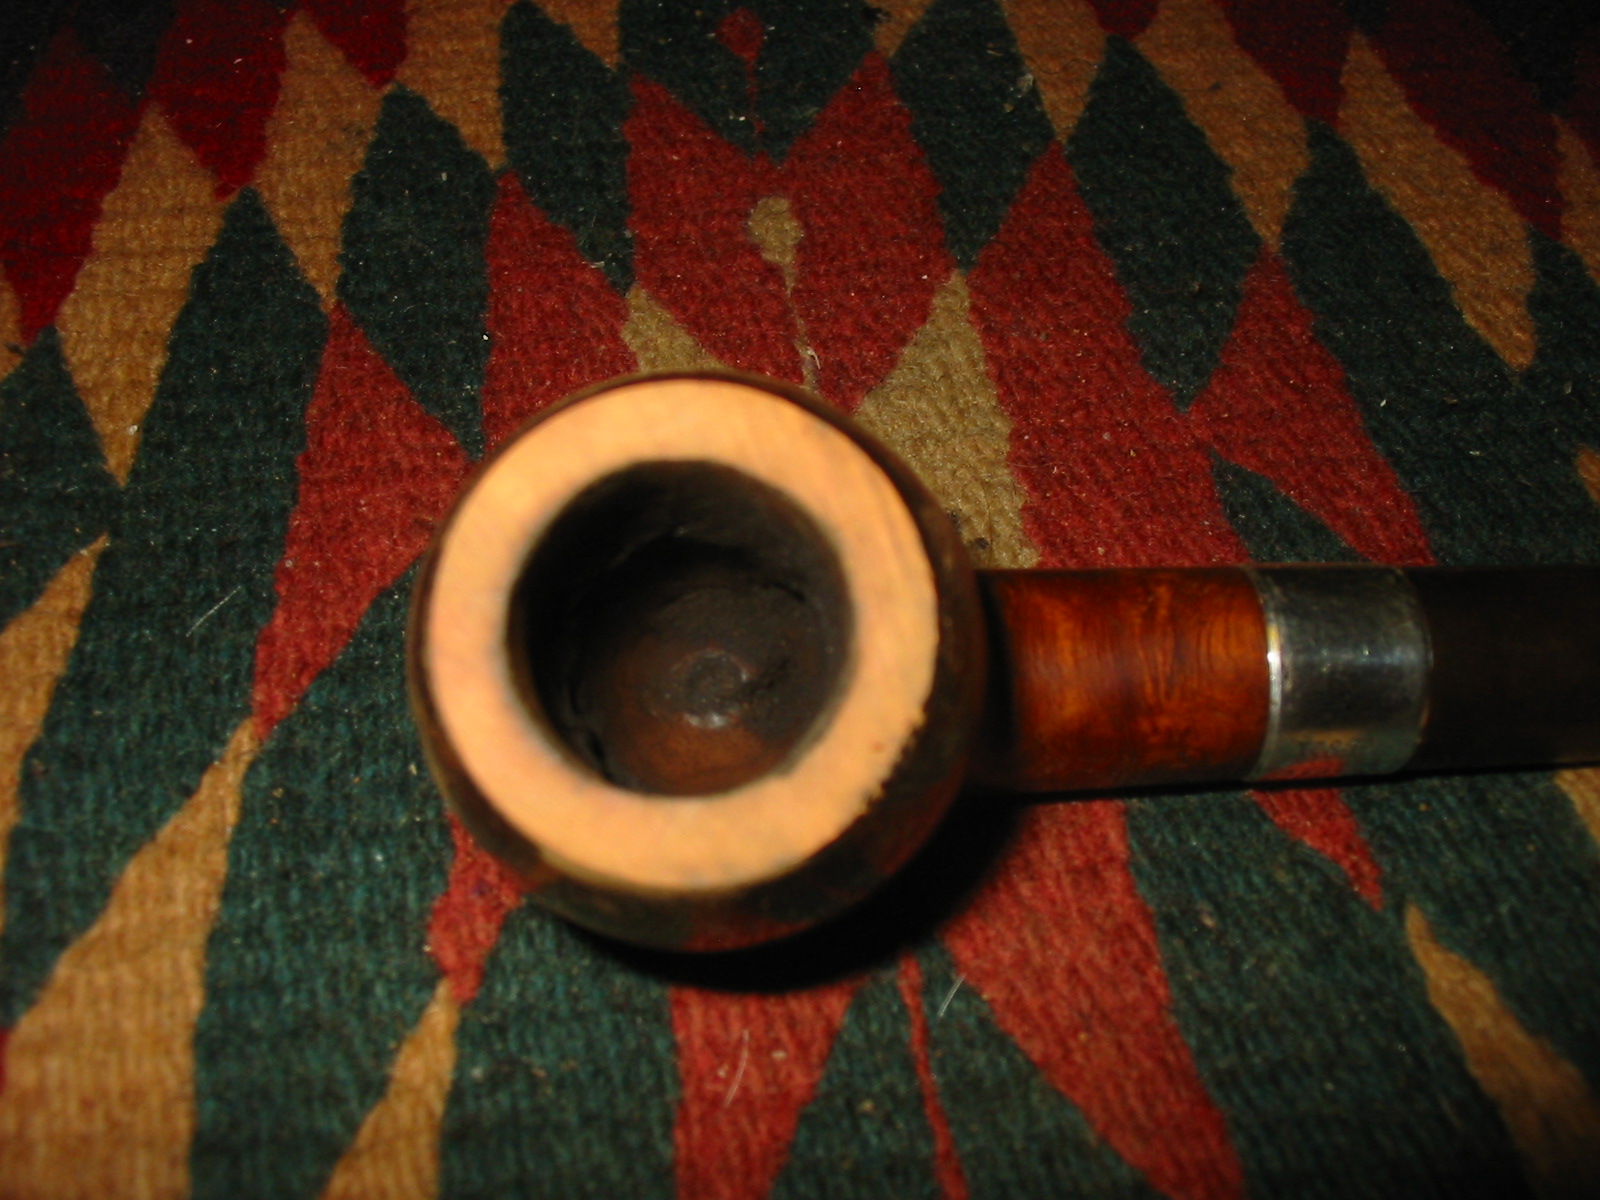
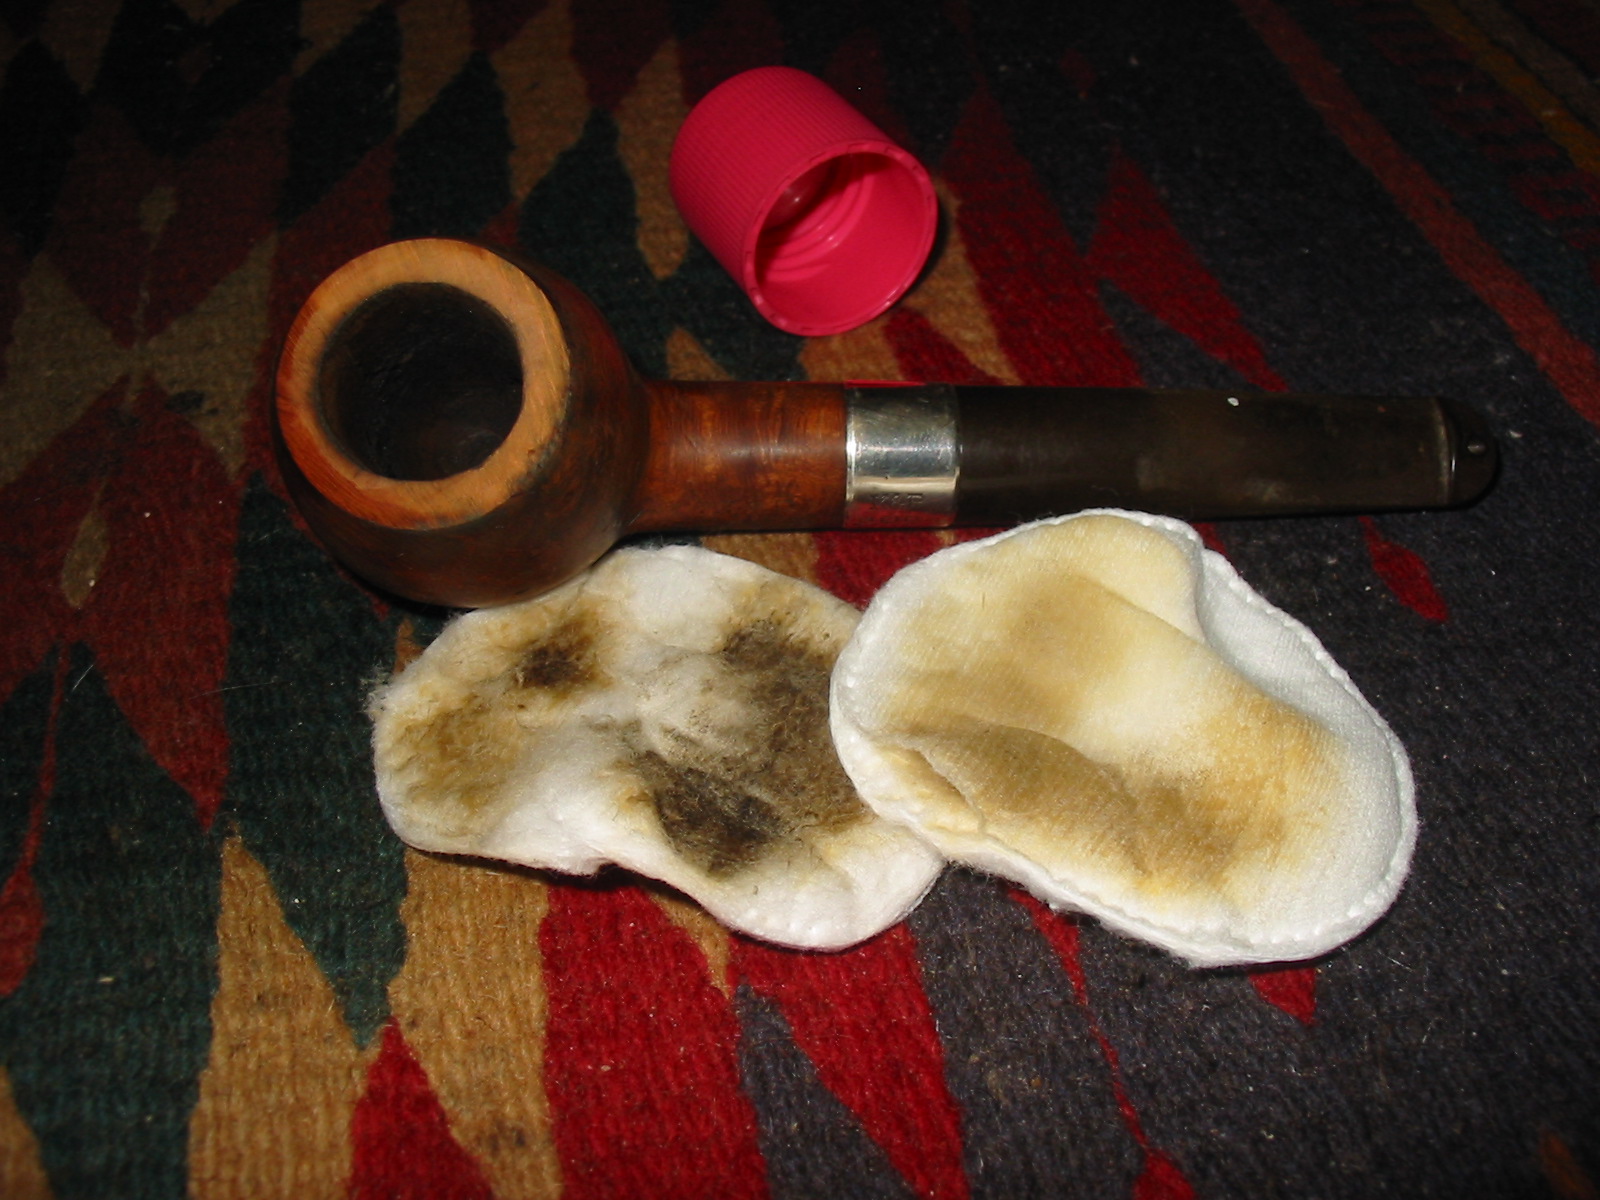
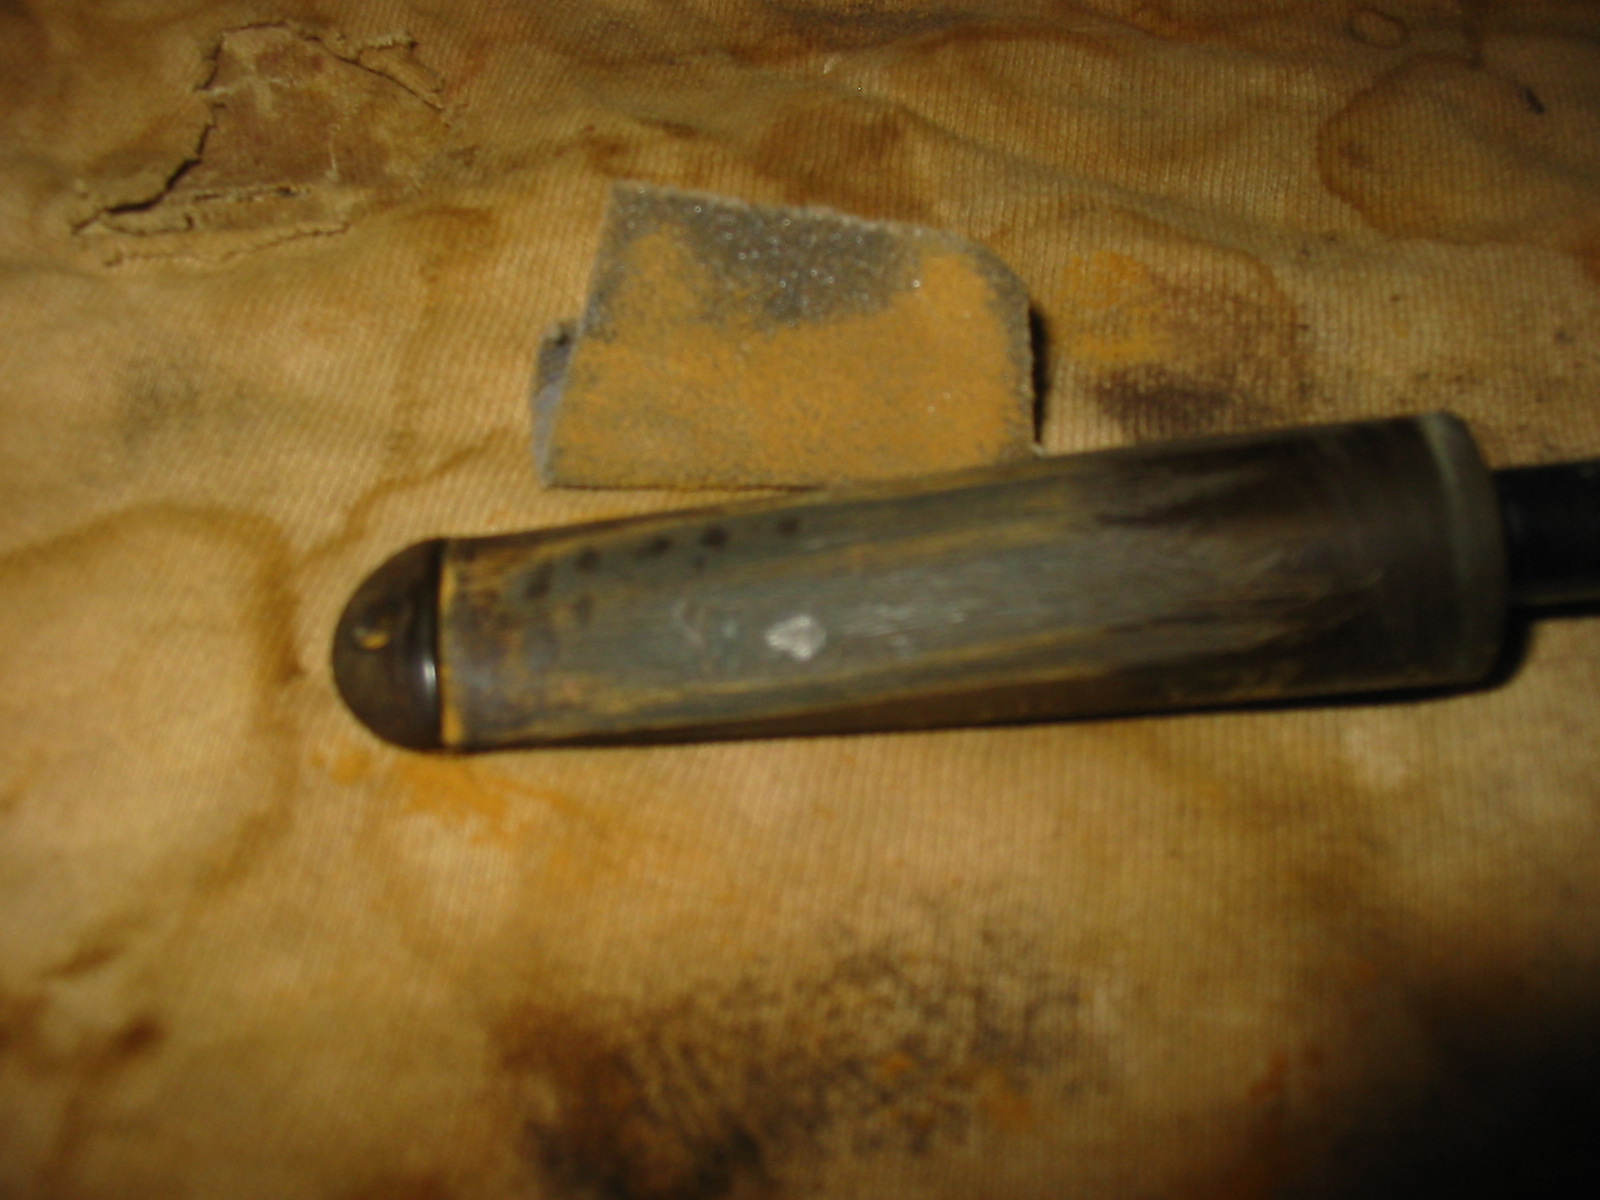
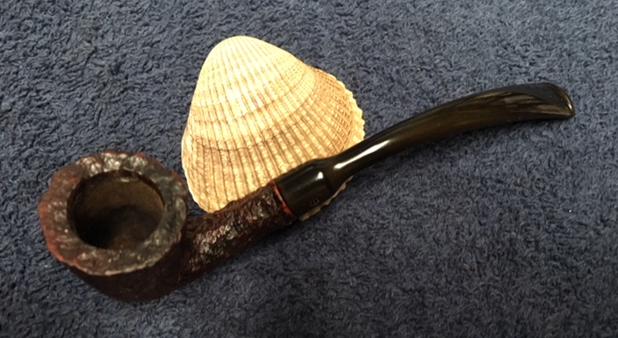
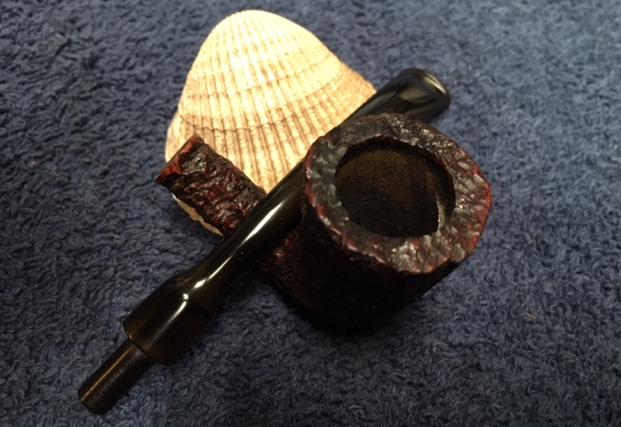
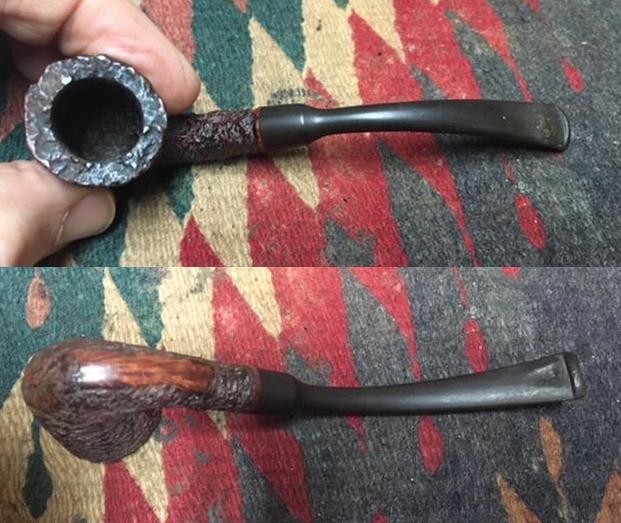 The rim top was clean and the bowl reamed. Abha had once again done a great job cleaning the finish and the interior of the pipe. She had scrubbed it with Murphy’s Oil Soap and removed all of the debris and dust from the deep crevices of the rustication. There was some darkening to the rim top but it was undamaged. The inner and outer edge of the bowl looks pretty good. The bowl was very clean and smooth on the inside. I also took a close up photos of both sides of the stem. You can see that there is light tooth chatter on the top and underside of the stem just in front of the button. There is a deep grove from teeth on the underside of the stem and a small split and divot in the button on the underside as well. The surface of the stem is lightly oxidized. The stylized P on the left side of the saddle stem is faint but readable.
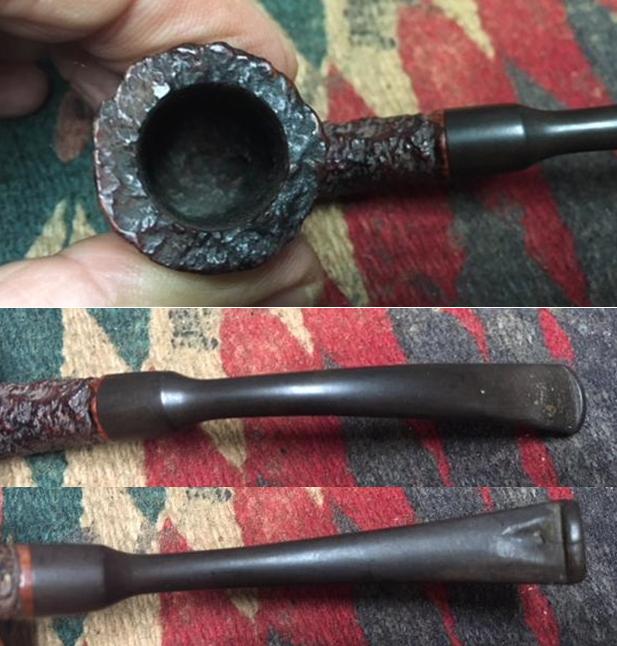 I wanted to know more about the shape and to help pin down the date of the pipe for Paresh so I sent an email to my go to Peterson’s guy Mark Irwin and asked him about identifying the shape and some history. He wrote back quite quickly and gave me the following information.
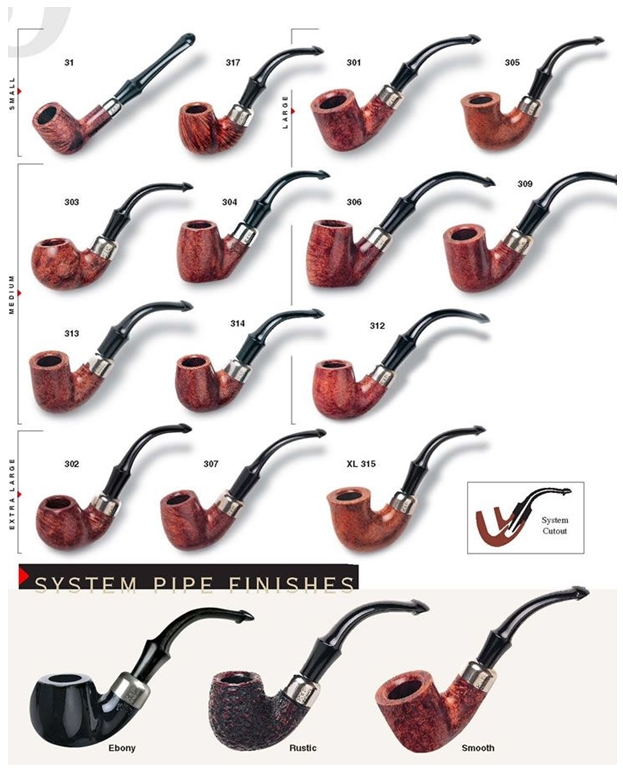
It’s called a calabash (no shape #, just the name), called a “lady pipe” by Europeans, introduced in 1945 as part of a quartet of “Speciality Shapes” that included the Belgique and Calabash (“lady pipes”) and the Tankard and Barrel. Often thought of by Pete Freaks as “flake pipes.” Couldn’t see any stampings on it, but 1945 seems too early for a rustic finish in this shape. Not impossible, but unlikely. Been in continuous production since ’45.
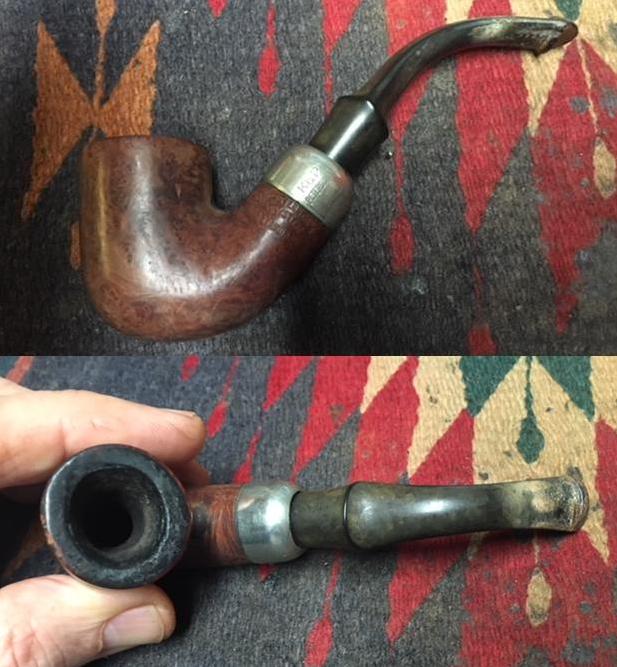
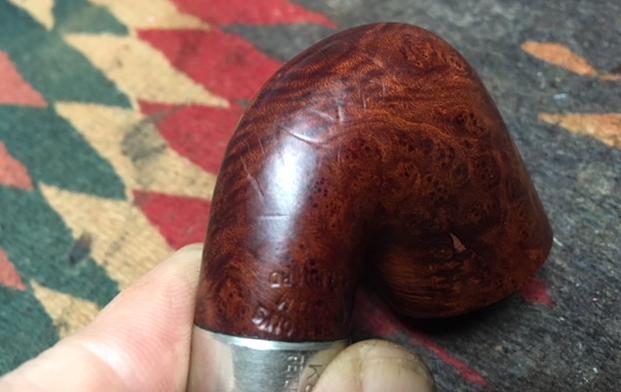
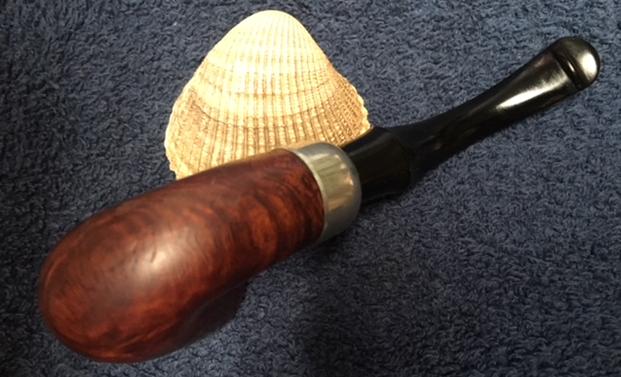
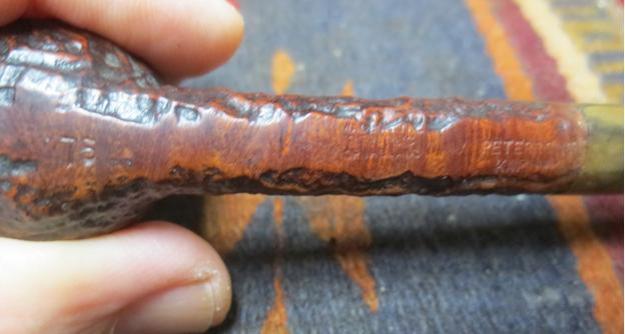
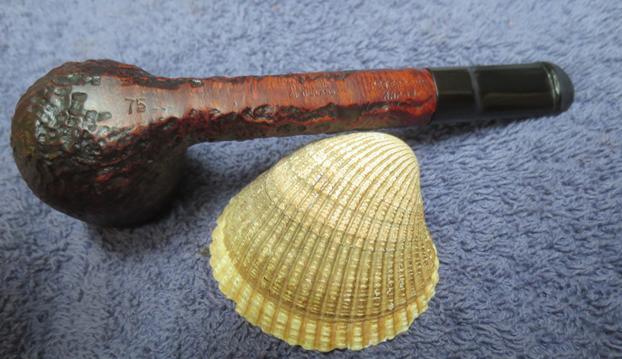
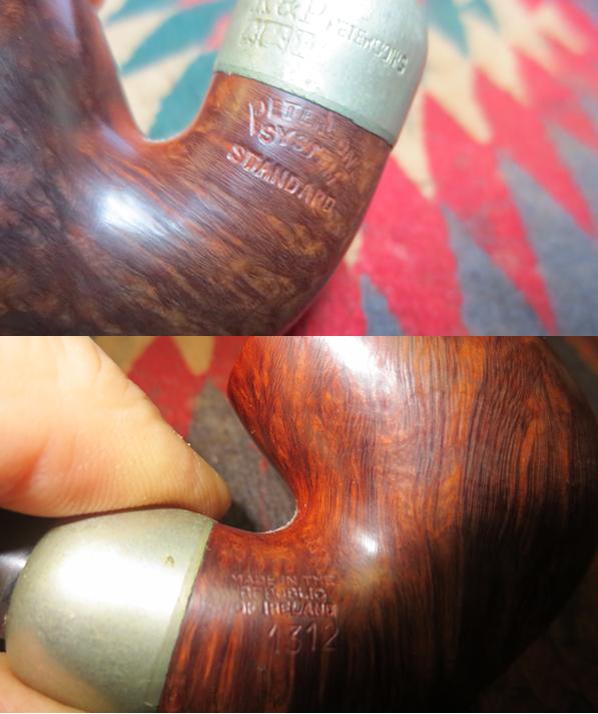
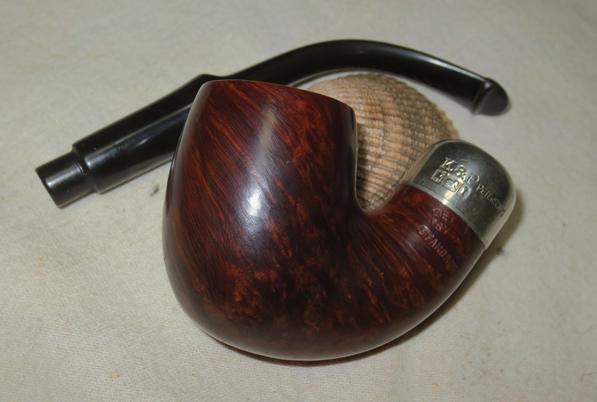
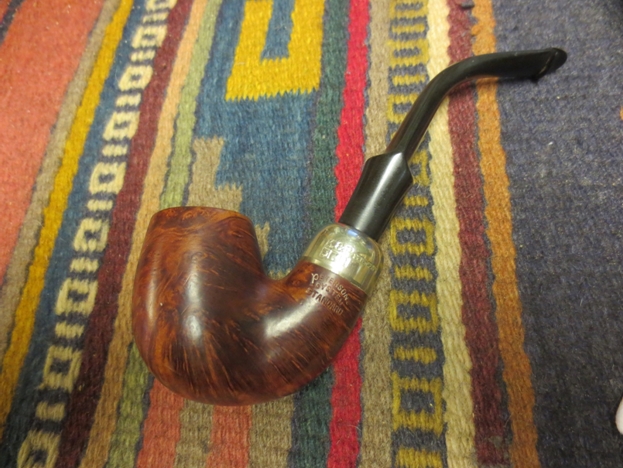
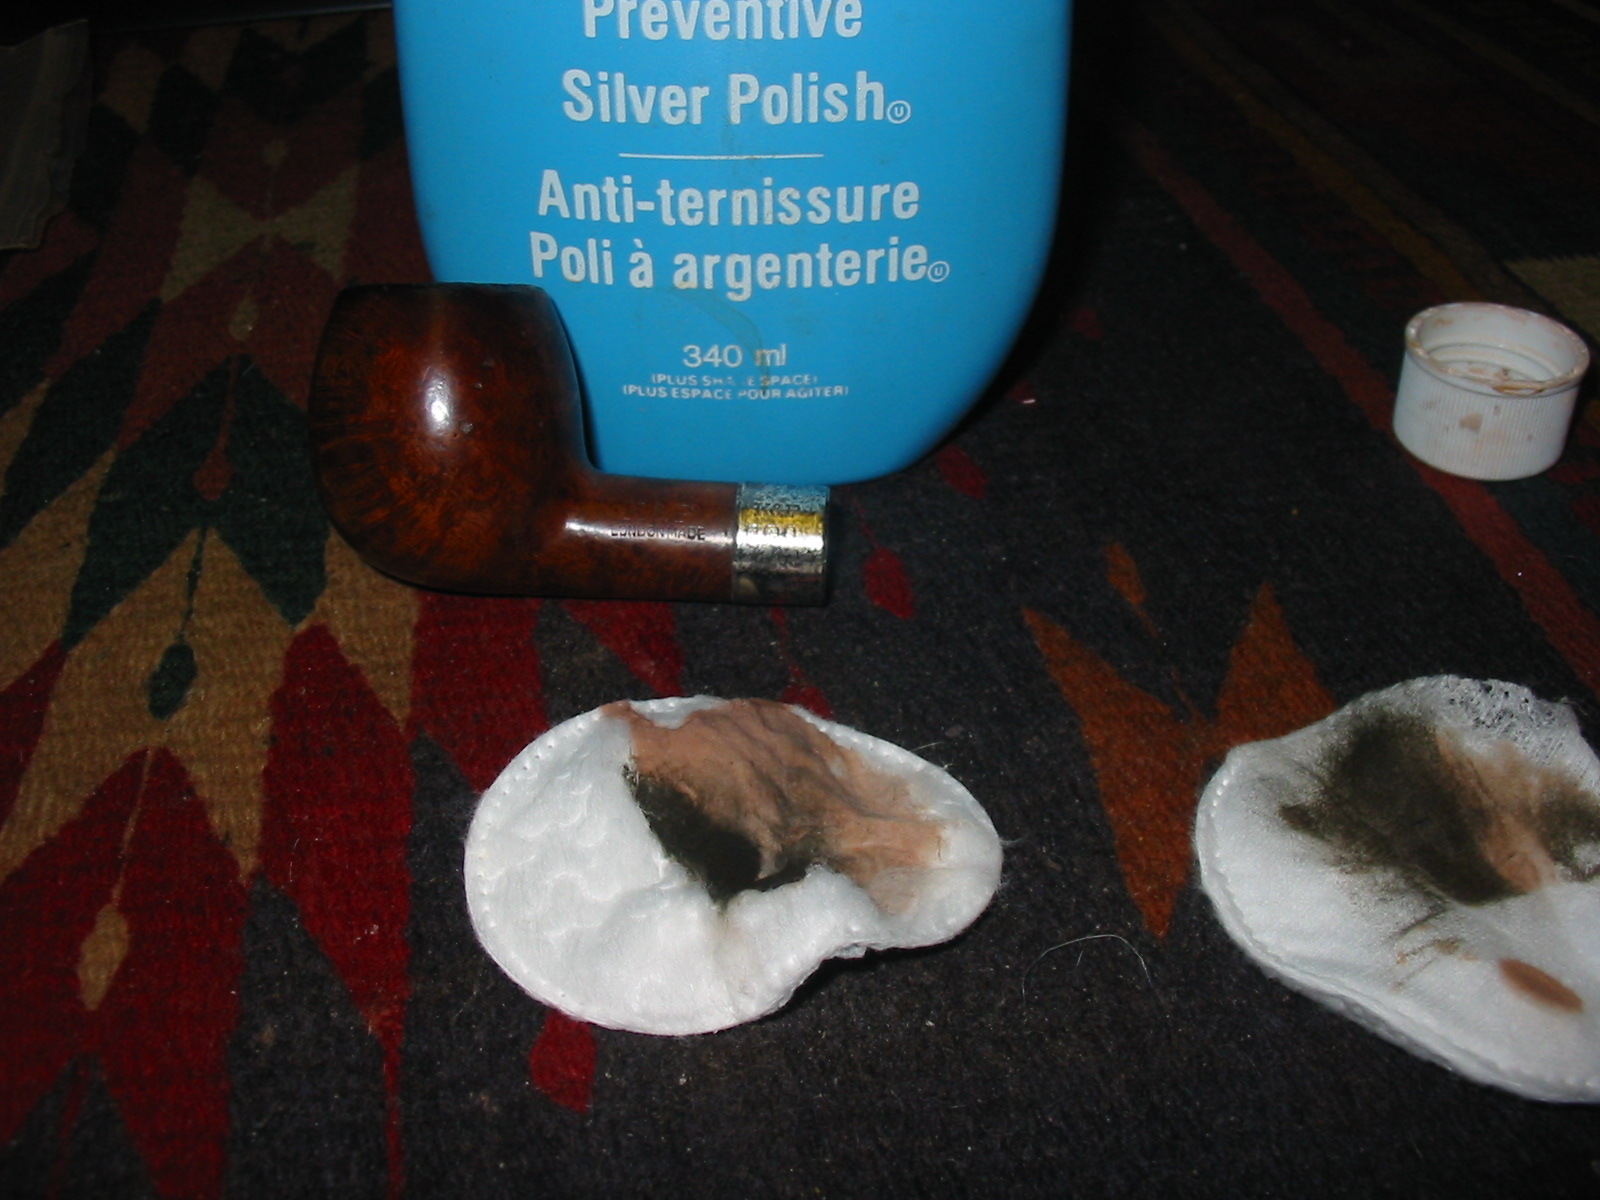
I sent that information to Paresh who was also doing a bit of research on the pipe. He went to http://thepetersonpipeproject.blogspot.ca/ and came across this piece of information that confirmed my suspicions and potentially filled in the “not impossible” comment Mark wrote above. The pipe in question has the definite P with a forked tail on the smooth patch on the underside of the shank.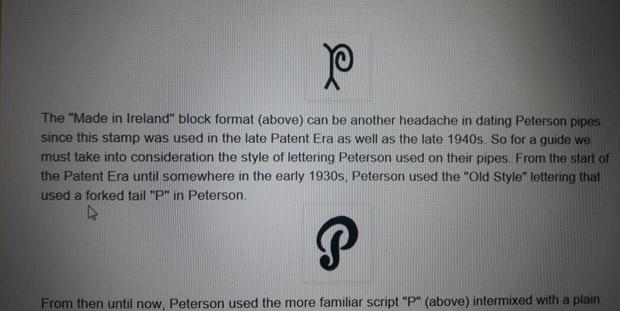 The stamping is faint and worn but it is there under a light and with a lens. The rest of the stamping reads Made in the Republic of Ireland and next to that is the Peterson’s stamp. Looking up that part of the stamp on Pipedia’s section on Peterson pipes I found that The Republic Era was 1950 – 1989. I was narrowing down the time period for this pipe. About the same time I received another email from Mark saying that he had looked through the 1945 and 1950 catalogues he had and as far as he could tell the rusticated finish was not offered during that time period. He suggested that the pipe was from the late 50s to early 60s.
With that I reread Paresh’s biographical write up on his Grandfather once again. There Paresh stated that his Grandfather had revisited England between 1959 and 1960 so I am pretty certain that we have a pipe that he picked up on this second trip. It is interesting that the forked P as Paresh found states it is a 30s era pipe but the Republic of Ireland stamp put it later after 1950. I am including his bio now as part of the background information on this little pipe. The way the tooth mark sits on the underside of the stem I can almost imagine him sitting at home or in his office contemplating something deeply and rubbing the stem against his teeth. Over time it wore the almost trough like mark in the underside of the stem. Here is Paresh’s tribute.
Respected Sir,
Now that the first batch of my Grandfather’s pipes has reached you, I would like to share my memories of him with you, the aim being to provide you with an insight to his personality, the era in which he lived, and a brief history associated with the pipes that I have inherited from him.
My Grandfather, Ananta (named after an exotic seasonal white flower having lovely fragrance), was born in a small coastal town of Konkan region of Maharashtra, India, in 1918. These were very turbulent times when India’s freedom struggle against British rule was gathering momentum and the atmosphere was charged with “Quit India Movement”. Having completed his graduation from Bombay, he joined Railways in 1937. This also marked the beginning of his journey into the world of pipe smoking!!!!!
Having seen his potential, in 1945, he was sponsored by the Government to visit England, for gaining further experience and expertise in his profession. This was a period when India’s Independence was round the corner and efforts were being made to train Indians for various administrative appointments in future Independent India. He returned back to India after a year, in 1946 and with him came some pipes that he had purchased in England. I believe a few of his Petes, Barlings, Charatans and GBDs are from this visit.
In 1947, when the British finally left India for good, my Grandfather was gifted pipes by his British peers, subordinates and Superior Officers as a parting gift. He stayed in touch with a few of them over all these years, even visiting them in 1959-60. Some of his later era Charatans and Barlings and Petes are from this trip. He quit smoking in early 1970s (before I was even born!!!!) and his pipes were packed up. There were a number of pipes which were used as TINDER for lighting fires (CAN’T BELIEVE IT…… I have not overcome my grief of this loss till date!!!!!) due to ignorance!!!!!!
My Grandfather was a very strict disciplinarian and temperamental (I did not know this as he was neither when dealing with me as I am the youngest of all his grandchildren!!!!!! He was always the most understanding and loving person in my life). I later learned that in his office, he was not to be disturbed when his pipe was lit, as he would be in his thinking/ contemplating mode while it was just the opposite as he lit his pipe in the evening while at home, when he would be at his relaxed best!!!!.
The interesting part is that neither of us knew that we each smoked a pipe until after his demise in Jan 2018!!!! In our culture, to this day, smoking or alcohol consumption is socially never talked about (mute acceptance!!!). It was during his last rites that absent mindedly I lighted my pipe and looking into the flickering flames of his funeral pyre, remembered and recollected all the wonderful memories and talks that we had shared. No one said a word to me about my lighting up a pipe!!!!!! Immediately thereafter, I rejoined my duty station. A few days later, my wife, Abha, received a box from my Uncle with a note that said “Grandfather would have loved Paresh to have these”. This box contained a collection of his fountain pens and 8-10 of his pipes (since then as my folks are winding up his belongings, I have received 2-3 packets and a large number of pipes, some in decent condition and some in unspeakable state). Abha immediately messaged me with pictures of these pipes and pens. I had been collecting and restoring (no major repairs, though) fountain pens since long and immediately recognized some of them as highly collectibles, however, pipes were a totally different ball game! I was inexperienced with no knowledge/ information regarding various brands/ pipe makers, shapes and materials. I knew nothing about the value of these pipes, nothing about pipe restorations, nothing about caring for them; I mean zero knowledge about collecting pipes. I smoked some real cheap Chinese pipes which were readily and unfortunately, the only ones, available in India and some inexpensive pipes from eBay India!!!!! Also regular pipe cleaning, pipe rotation, pipe cleaners and such things were unknown to me.
Thus, to know more about the REAL pipes, I embarked upon the journey of exploring finer nuances of pipe brands/ makers, their history and watching “How to videos” on packing a pipe, cleaning, repairing and caring for ones pipes. I found it extremely interesting and satisfying. It was while meandering through this confusing quagmire of pipe world that I came across rebornpipes.com website and eventually established contact with you, Mr Steve, who has since been my mentor, guide and GURU, making this journey a wonderful and satisfying experience.
Sir, there is one more thing that I need to thank you for and that is when you asked me to write a brief about my grandfather and his pipes, I realized how little I knew about him, in fact, knew nothing, as I was not even aware that he was a “pipeman” as no one in my family ever spoke about it being taboo subject and since he had quit a long time before I was even born!!!! This led me to ask the elders in my family, questions on the subject and came to know the above details. I cannot thank you enough for prodding me to get to know my grandfather and his pipes a lot better. Sir, these pipes of his, with your help and guidance, will remain with me forever in mint condition……
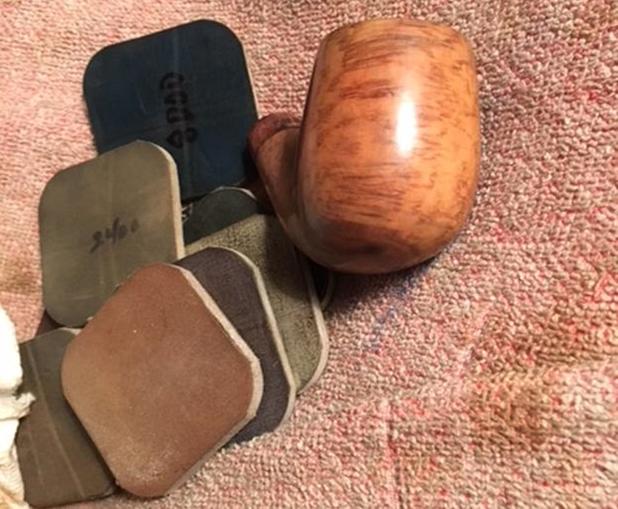
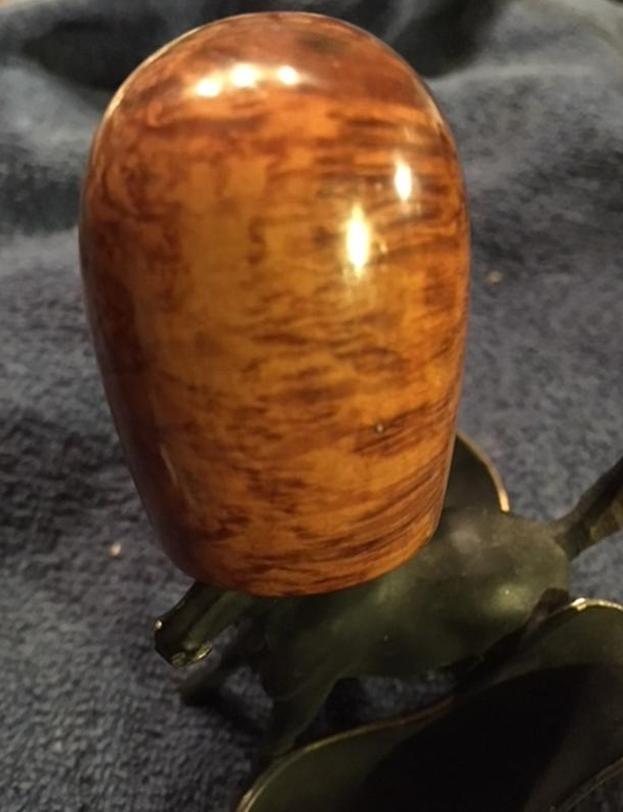
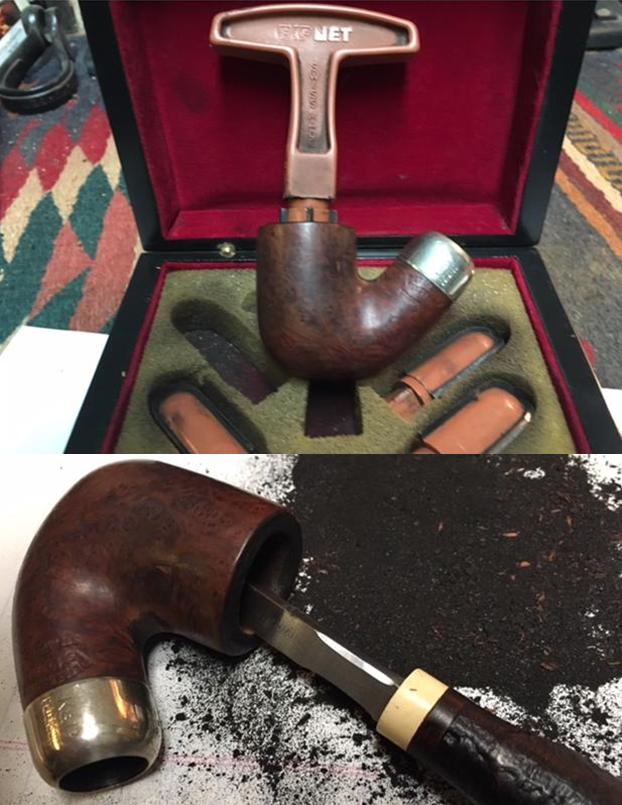
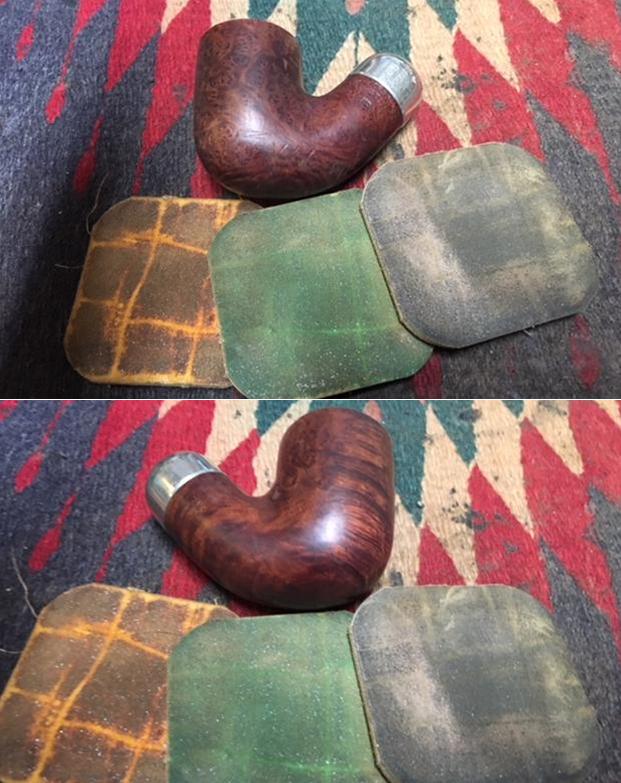
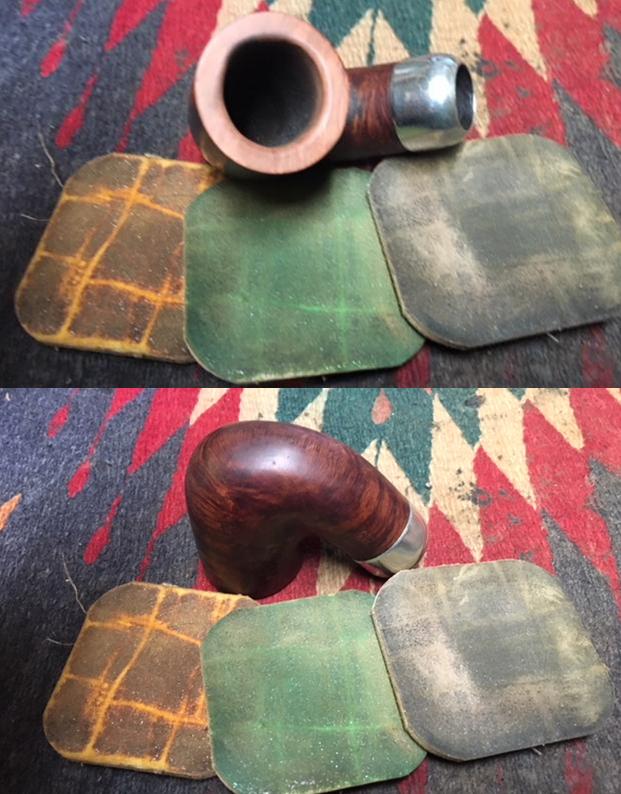
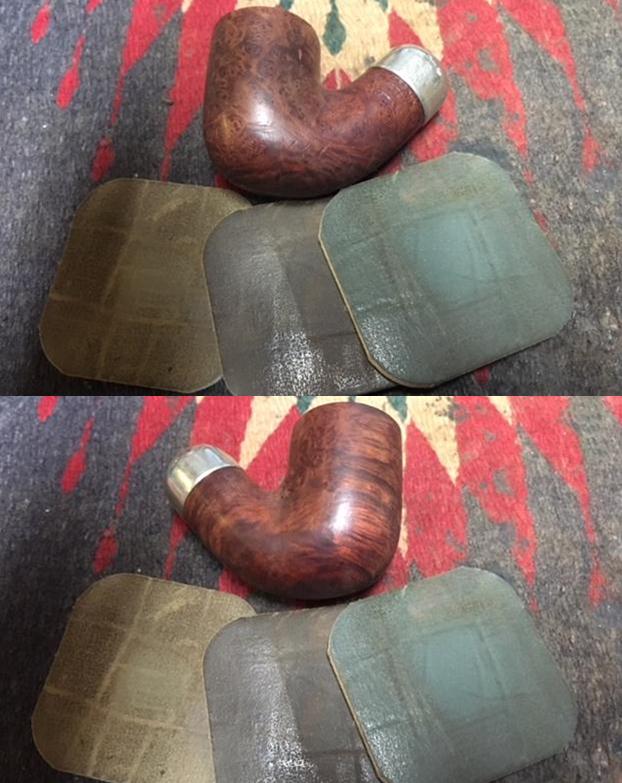
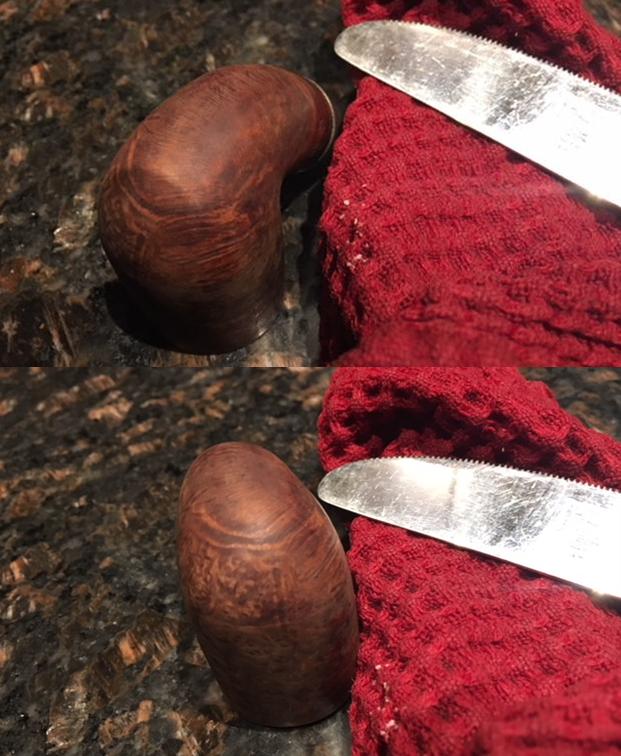
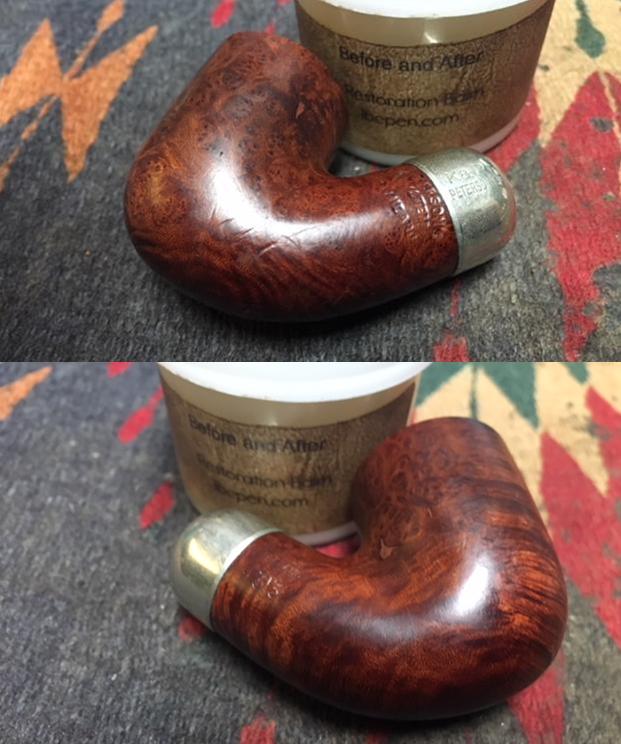
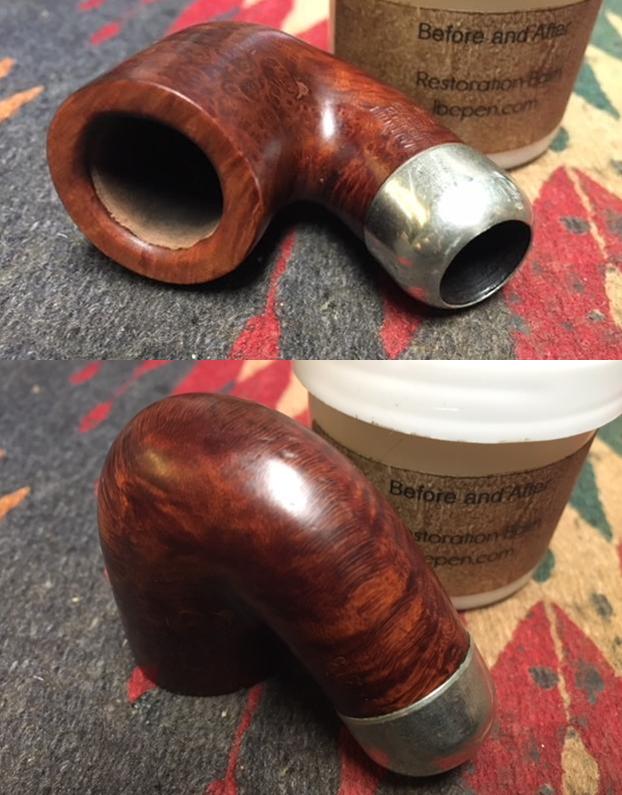
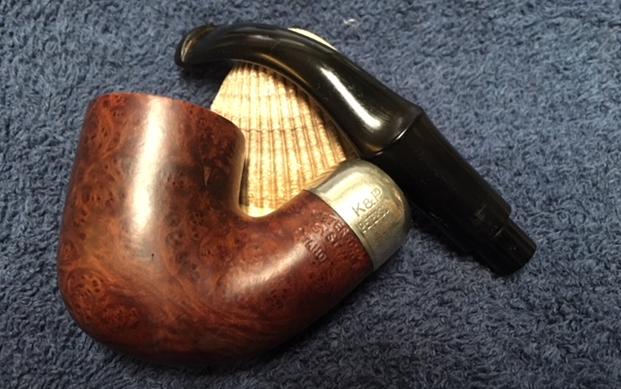
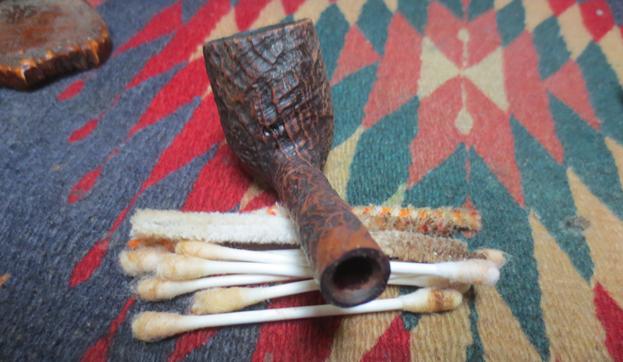
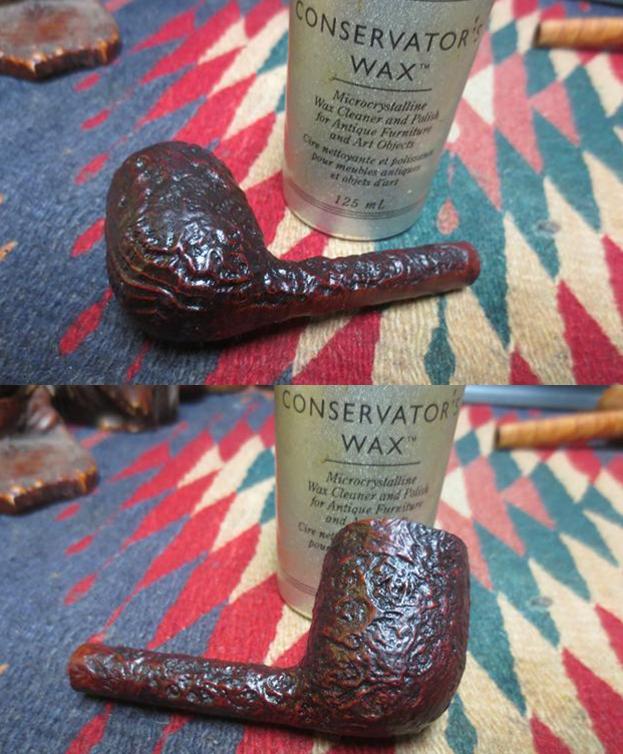
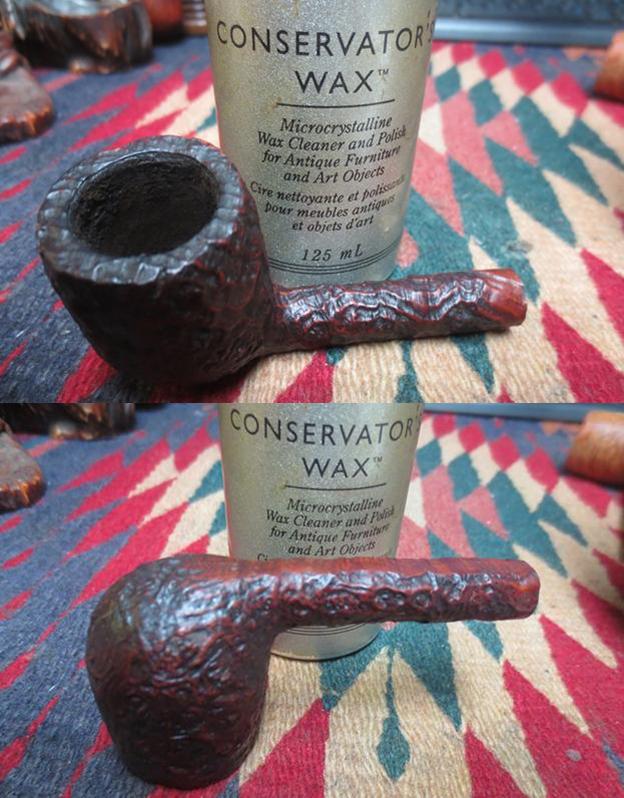
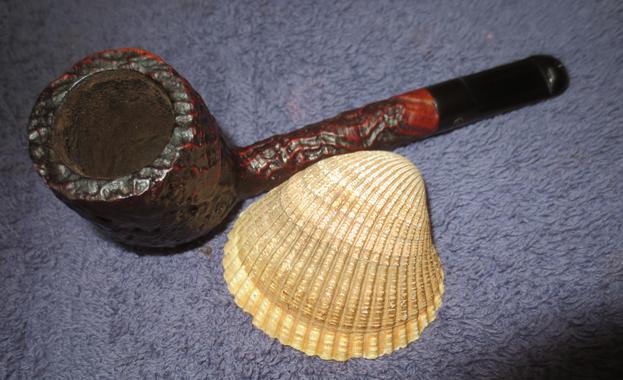
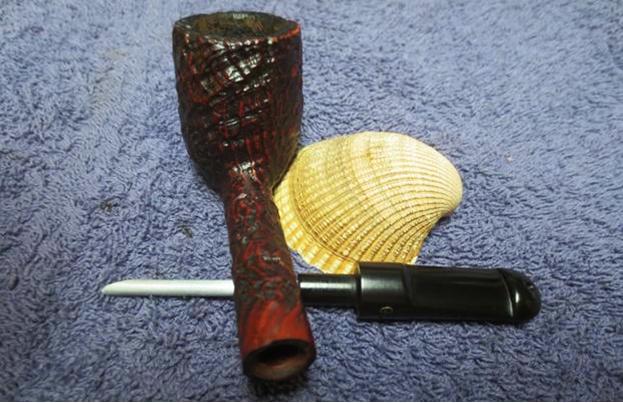
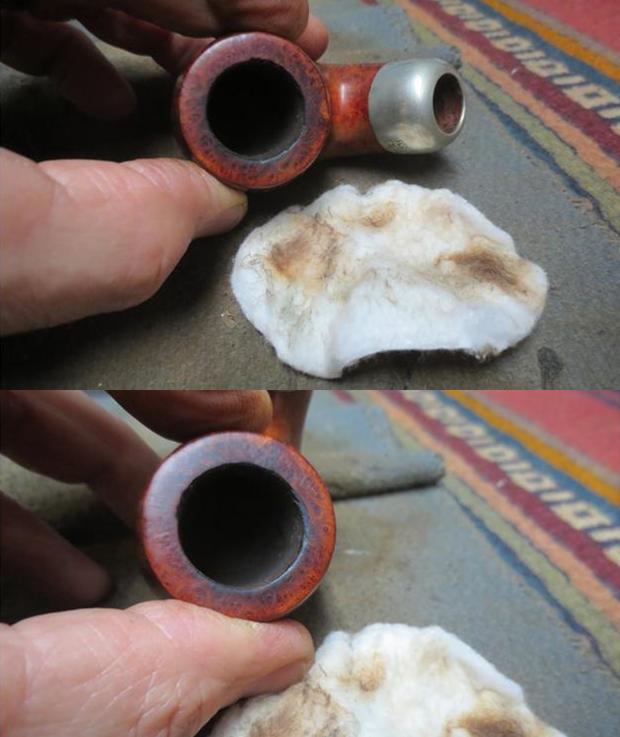
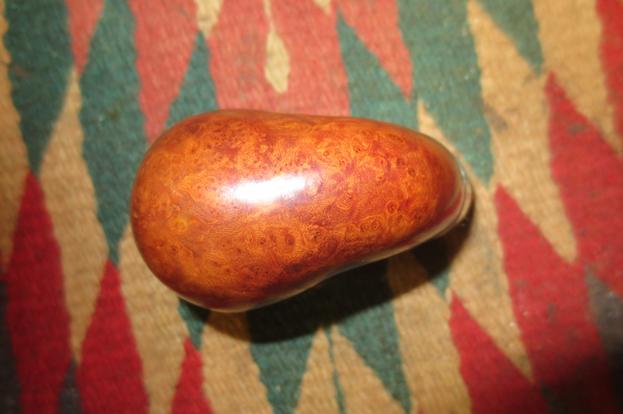
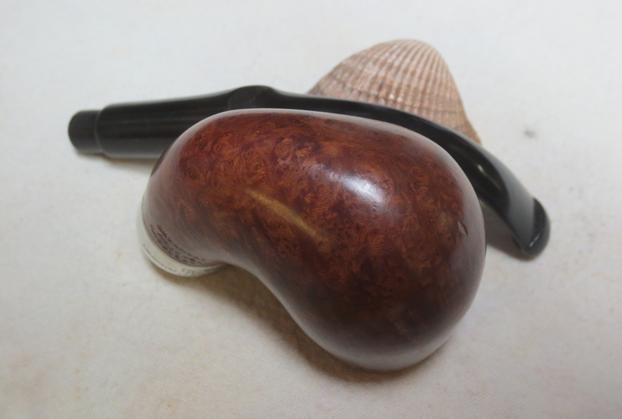
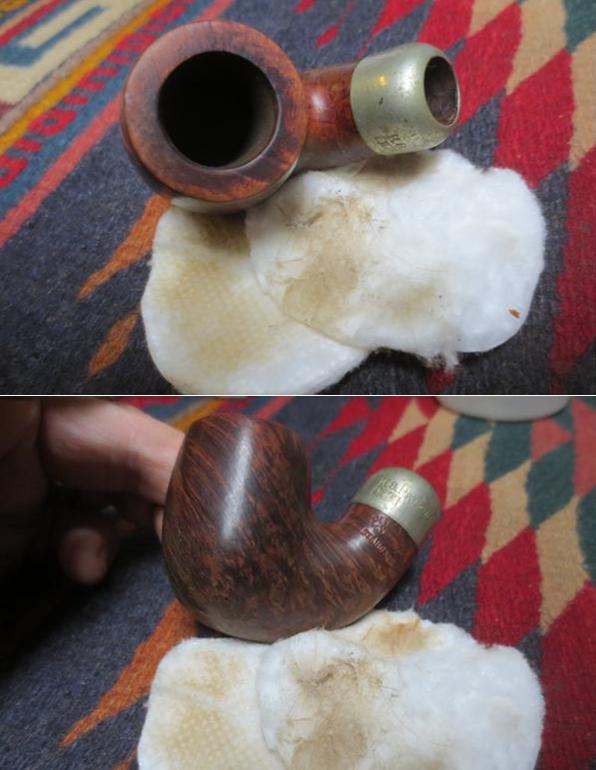
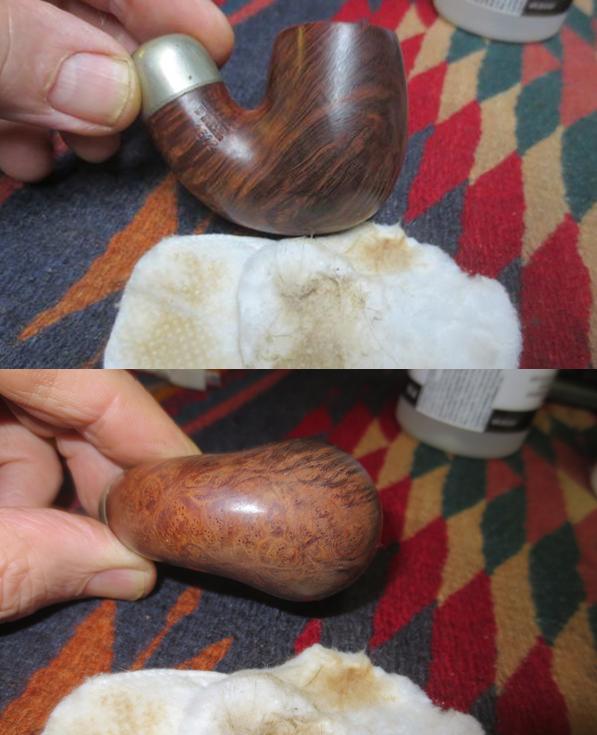
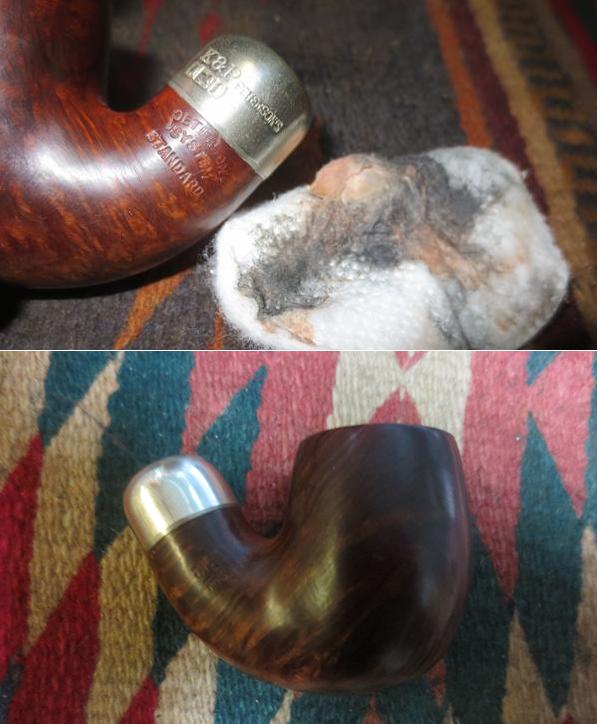
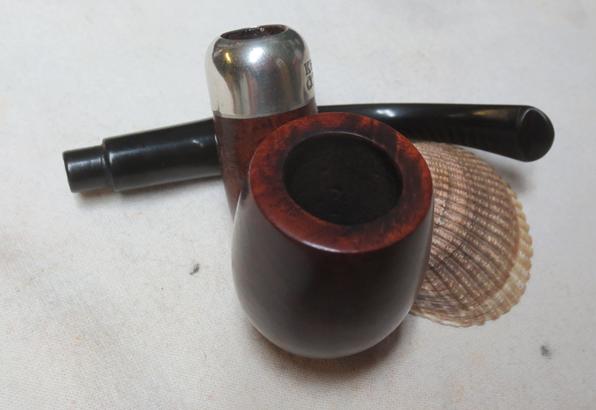
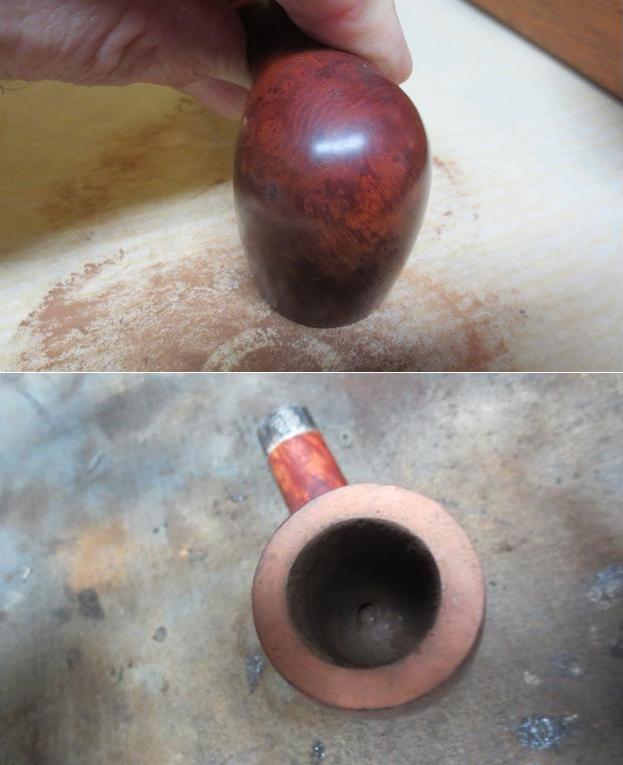
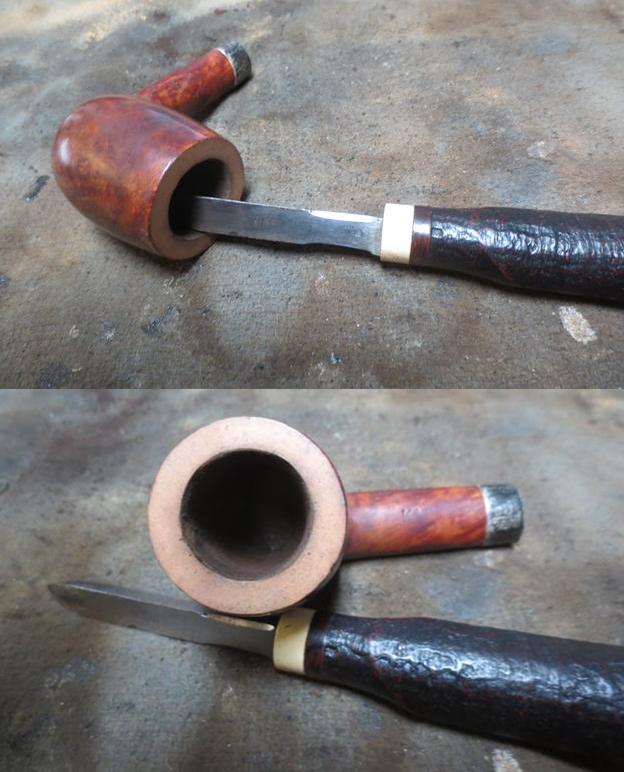
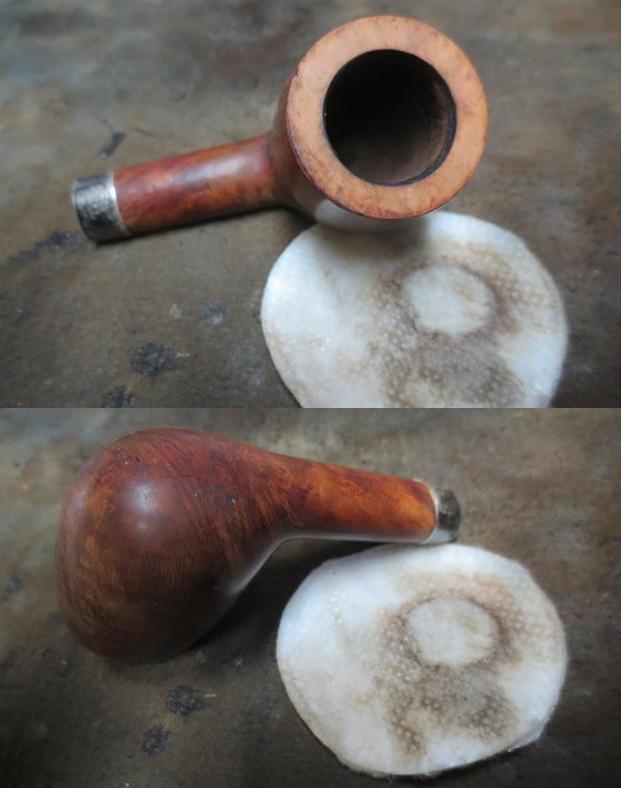
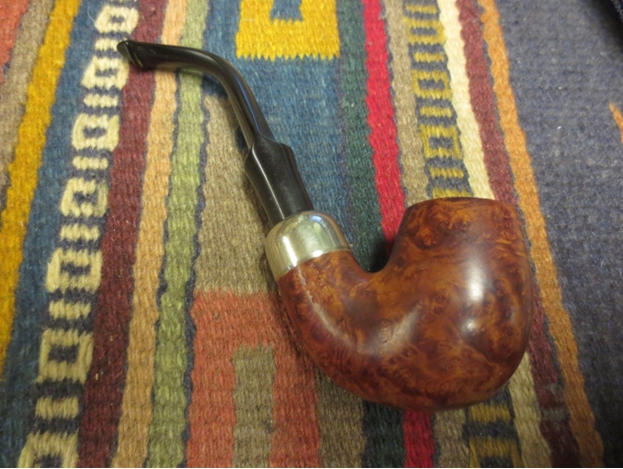
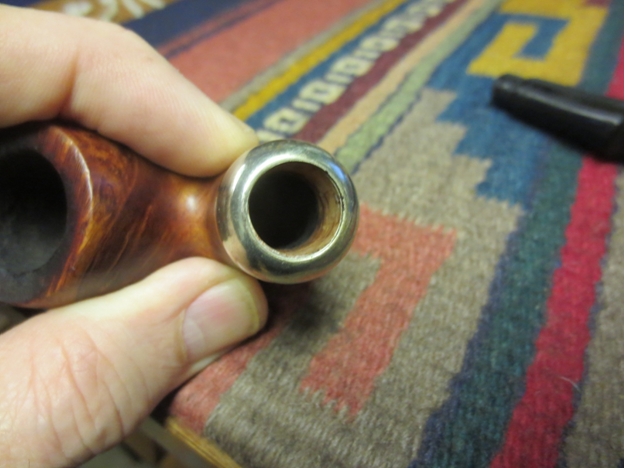
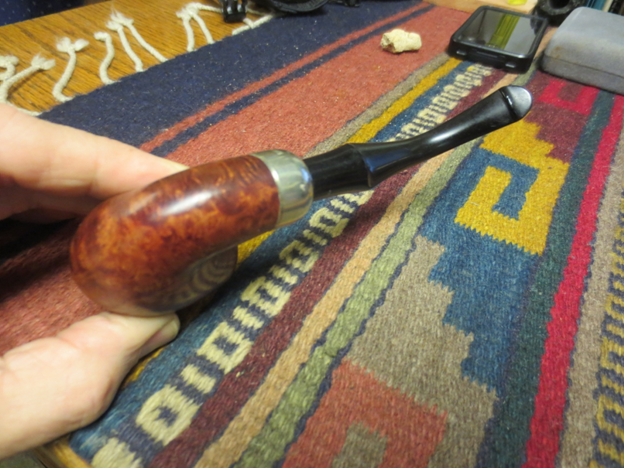
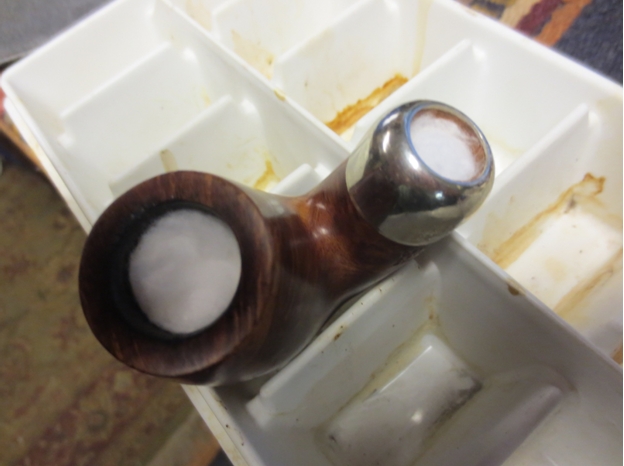
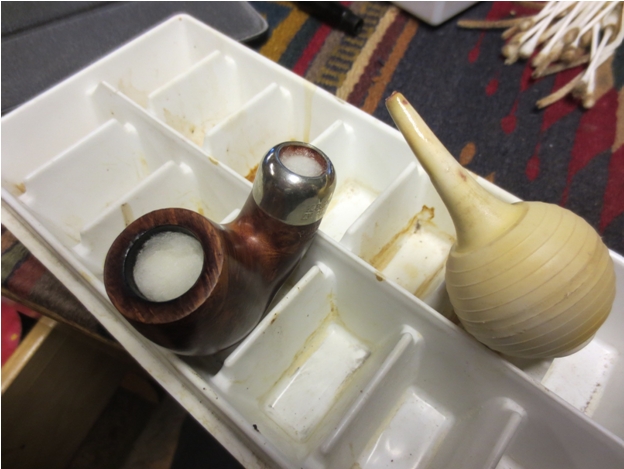
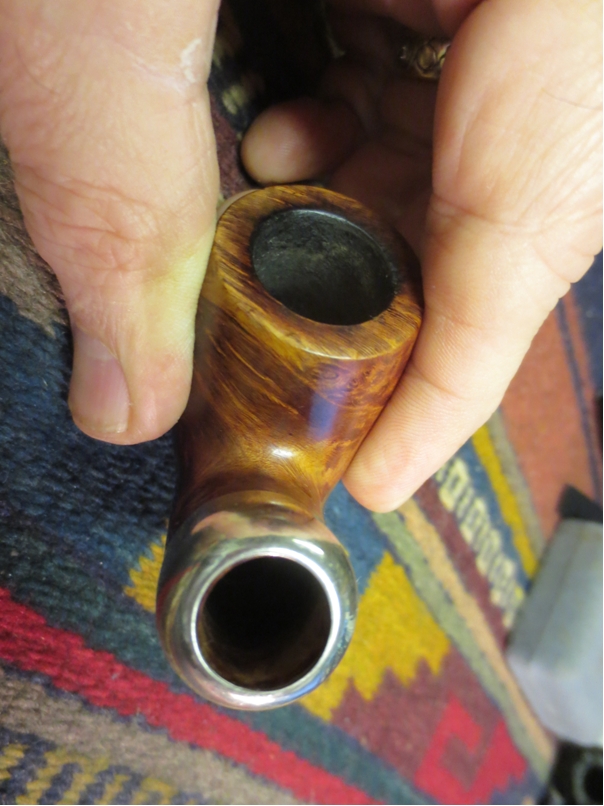
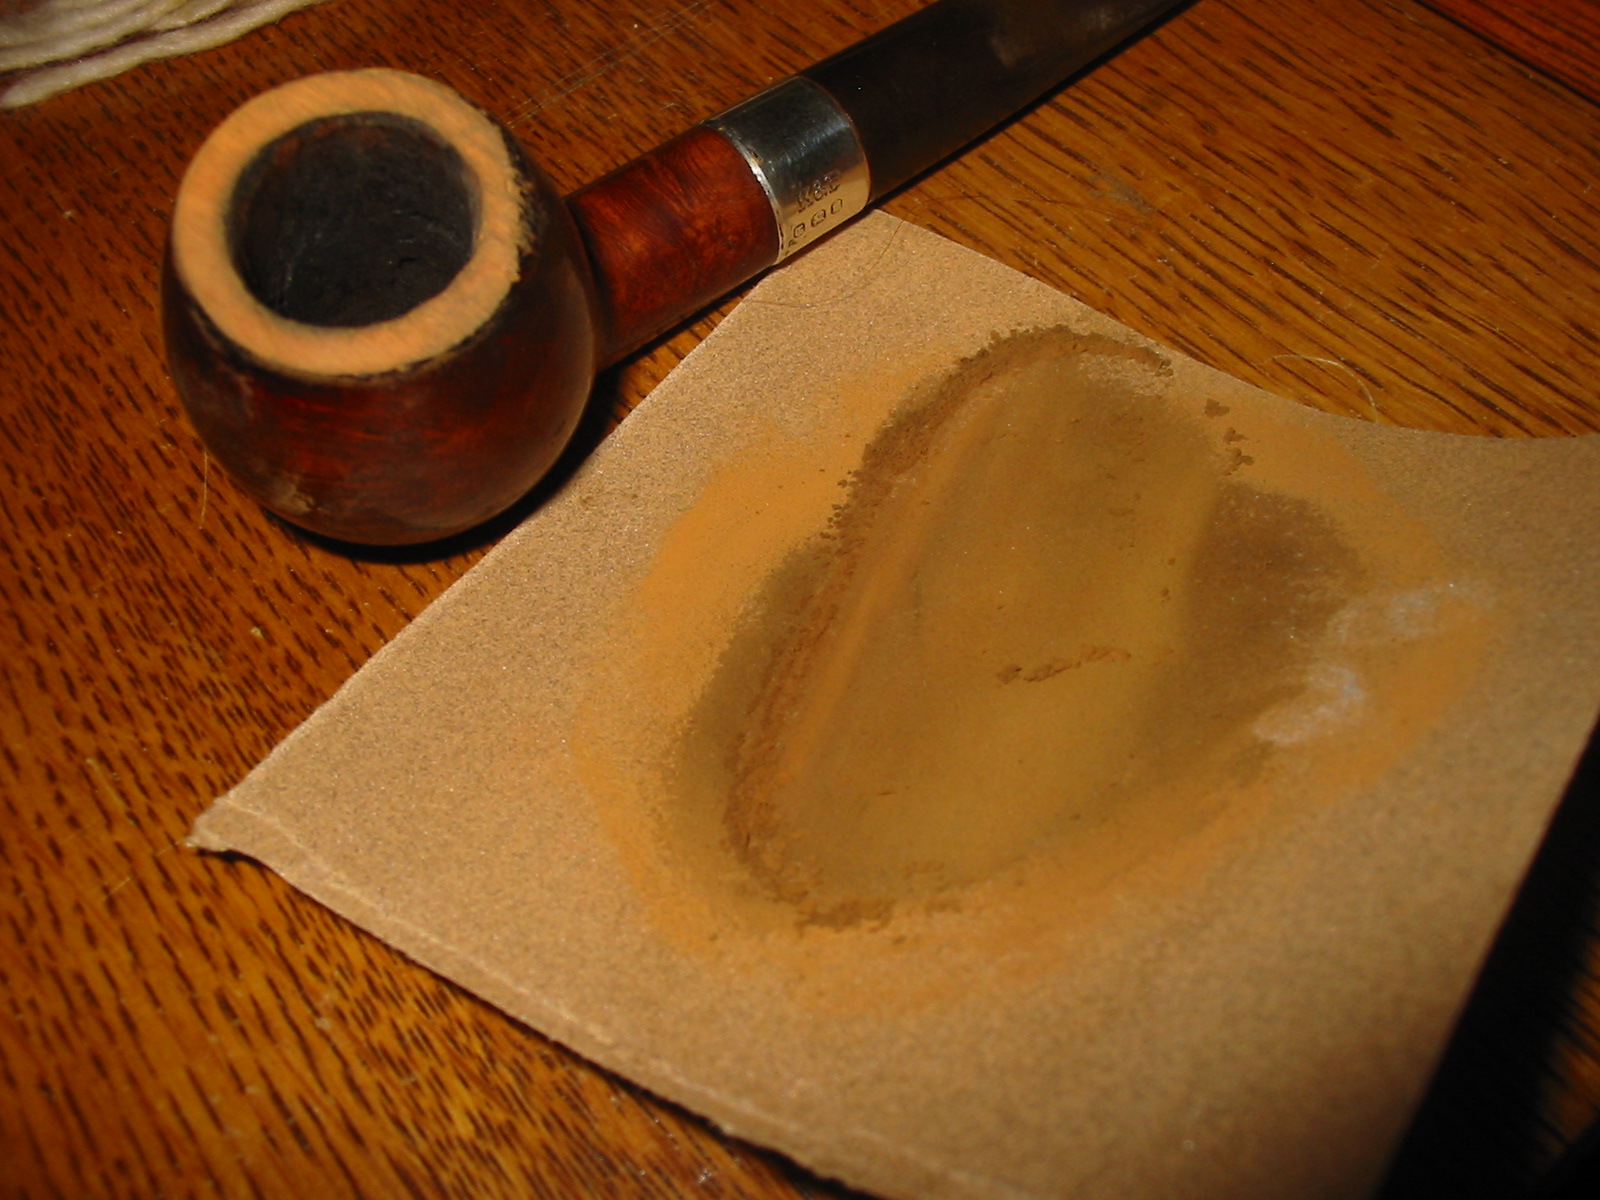
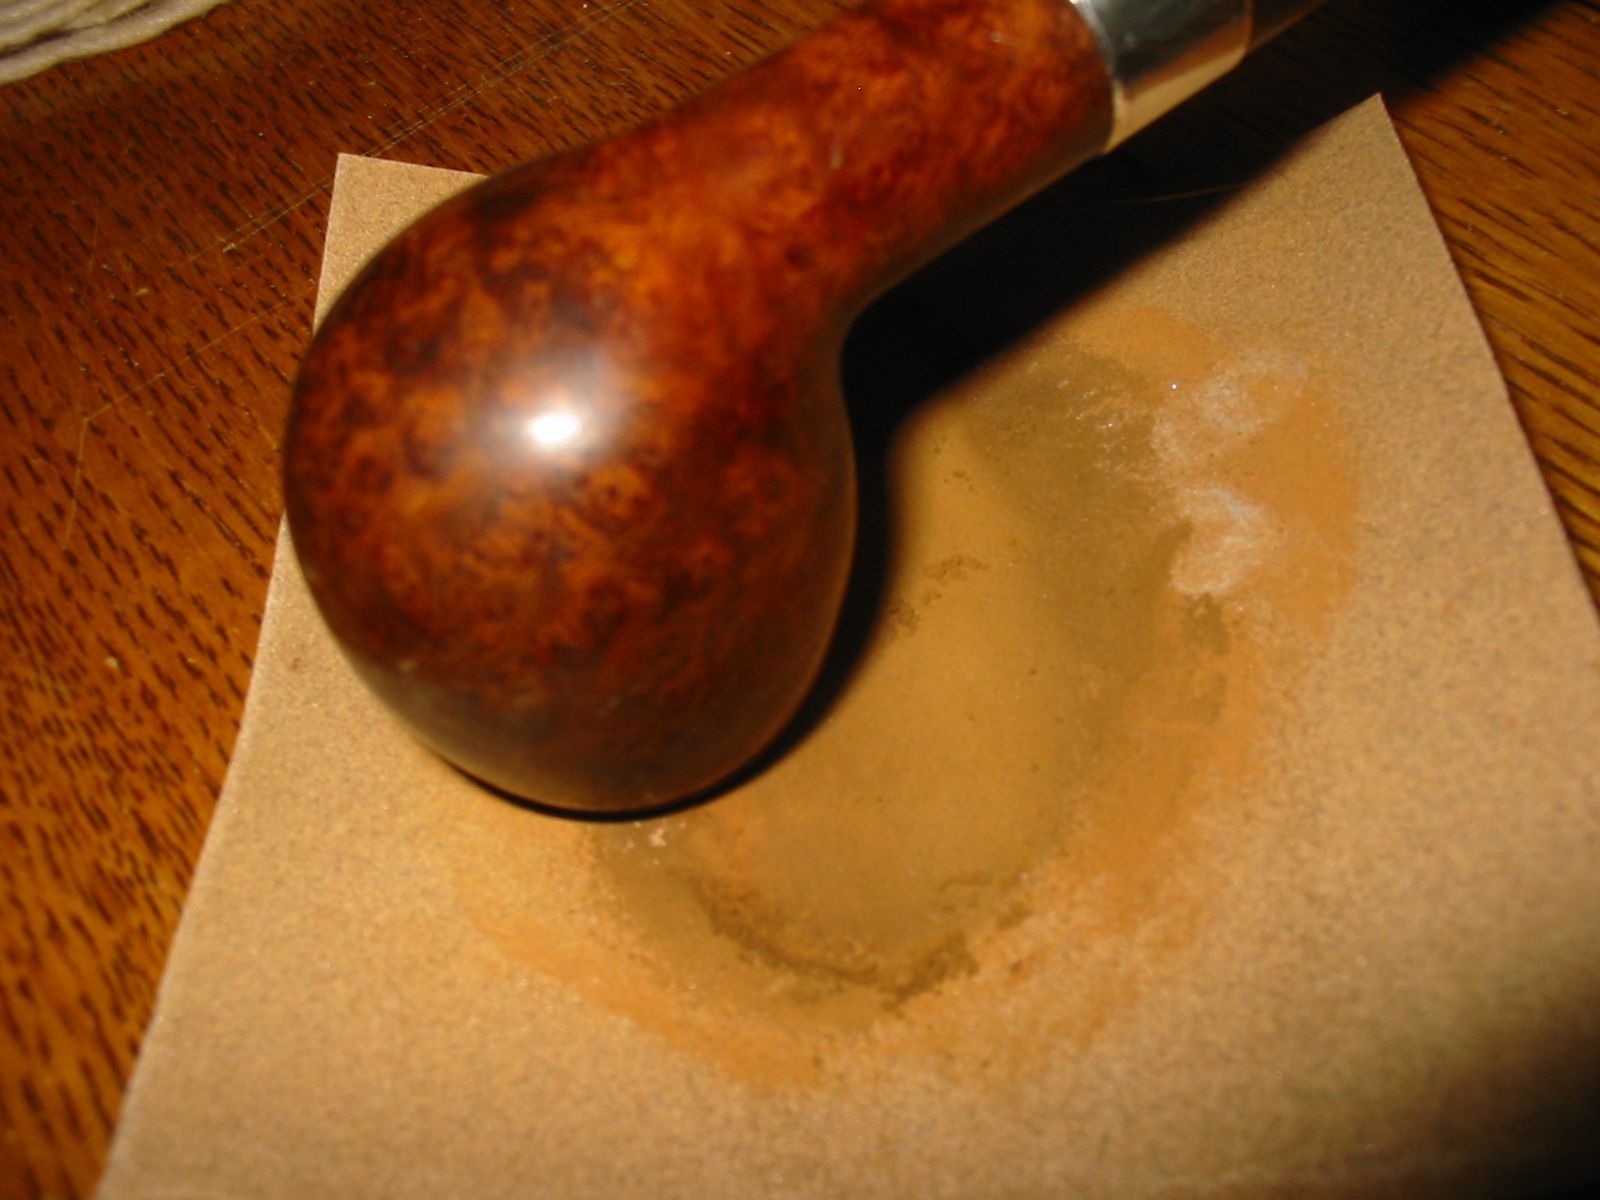
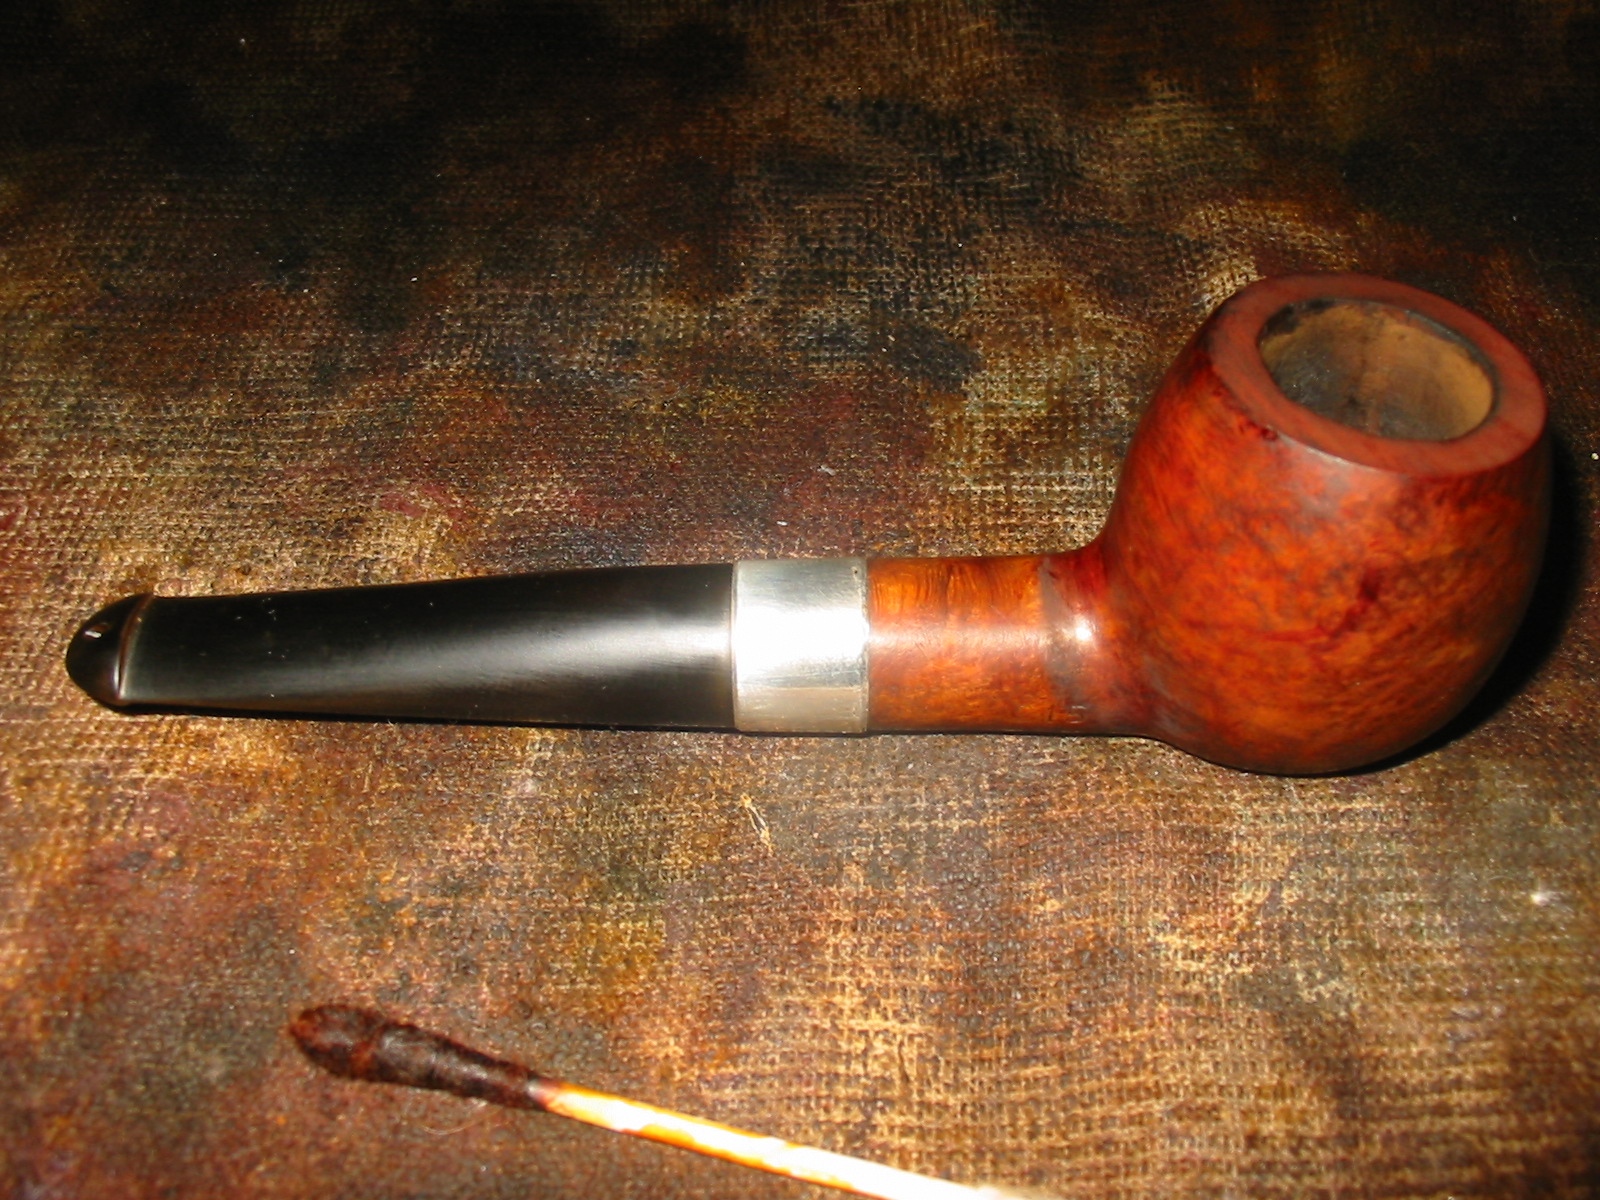
I began my work on the pipe by cleaning up the reaming with a Savinelli Fitsall Pipe Knife to remove the remnants of cake left behind. You can see from the photo that there was very little cake to remove. When I examined the walls of the pipe they looked really good.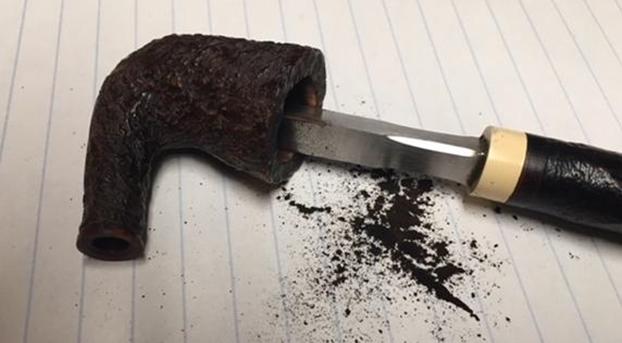 I worked Before & After Restoration Balm deep into the rusticated finish on the bowl and shank to clean, enliven and protect it. I worked it into the finish with my fingertips and with a horsehair shoe brush. I set it aside for a few minutes to let the balm work. I wiped it off and buffed it with a soft cloth to polish it. The rusticated briar really began to have a deep shine and show the variety of colours in the contrasting brown stains. I took a photo of the bowl at this point to mark the progress in the restoration. This is going to be one of those fine, delicate beauties that Peterson made that really grab my attention.
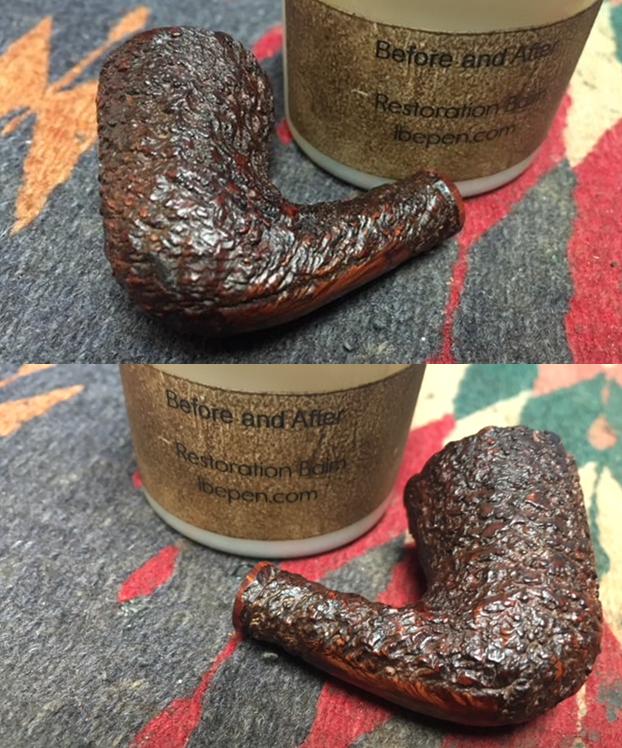
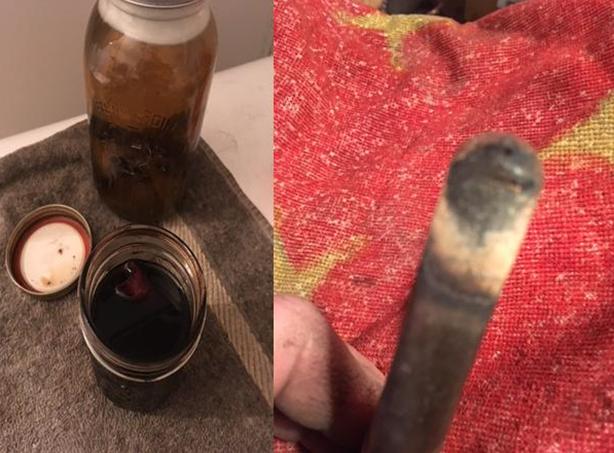
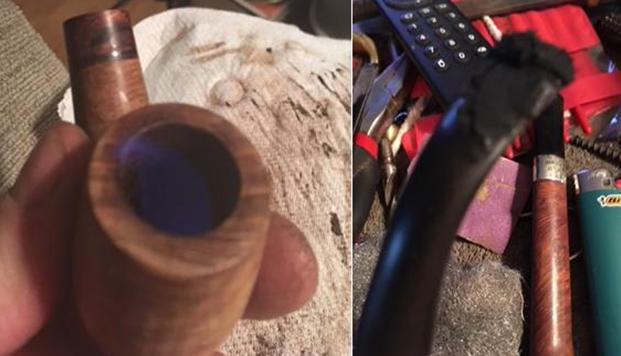
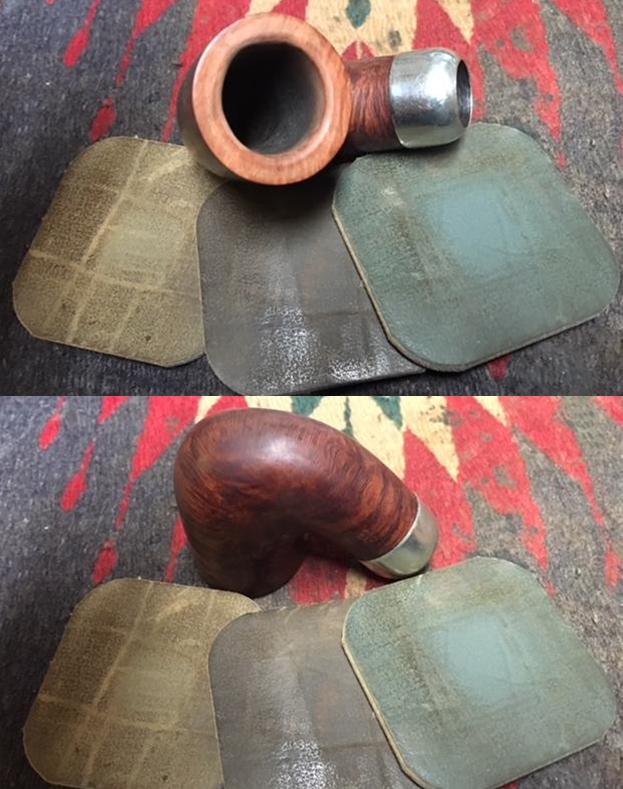
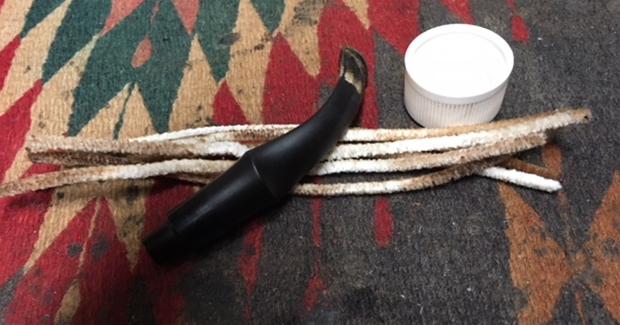
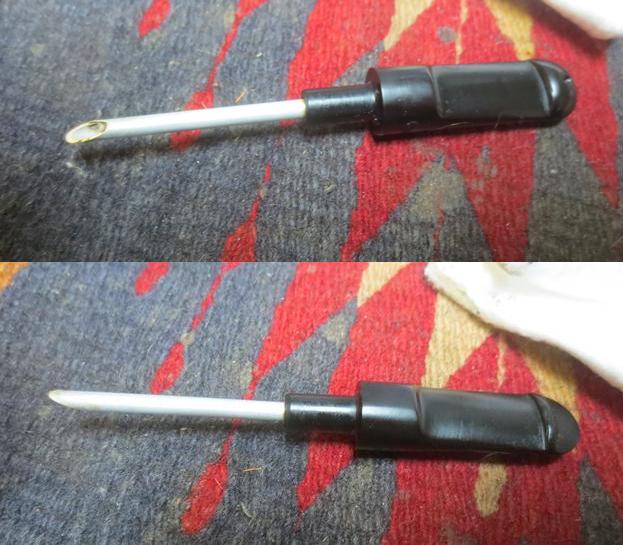
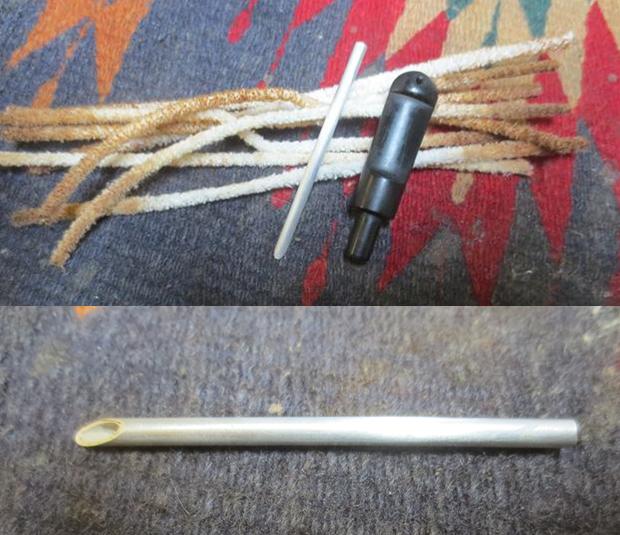
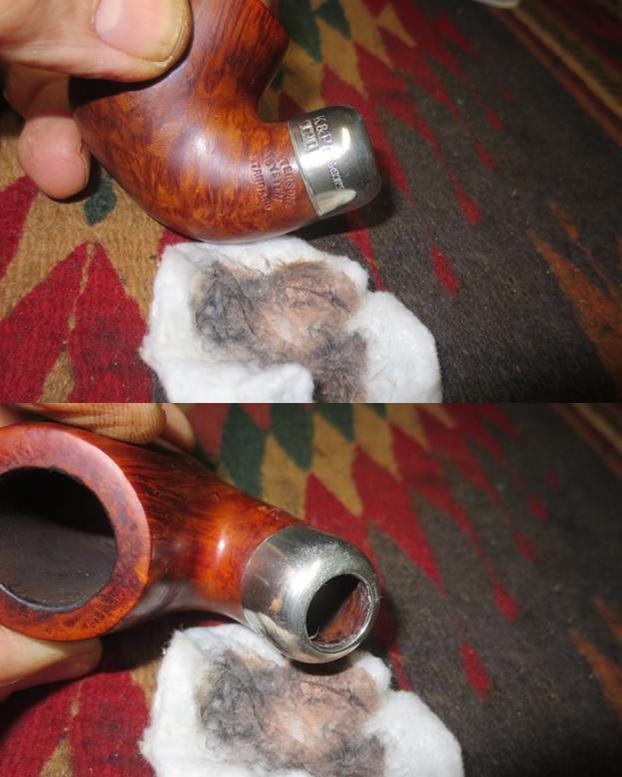
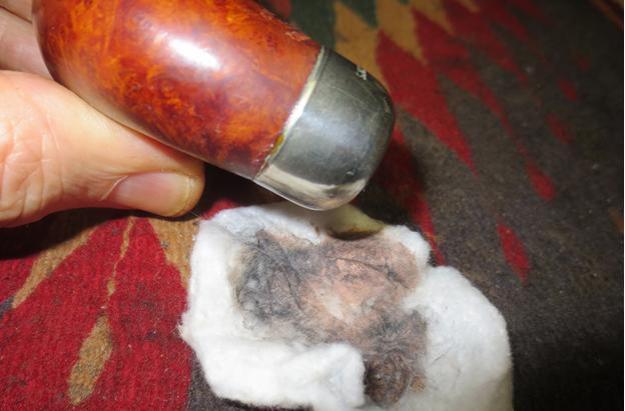
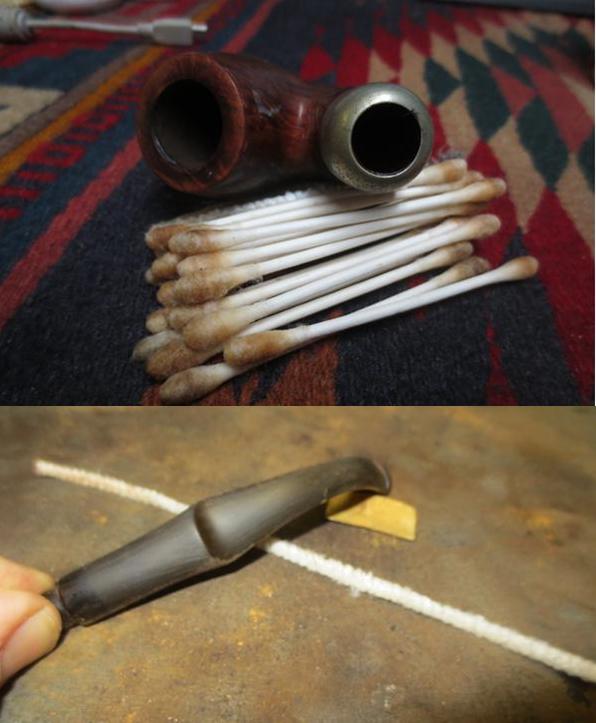
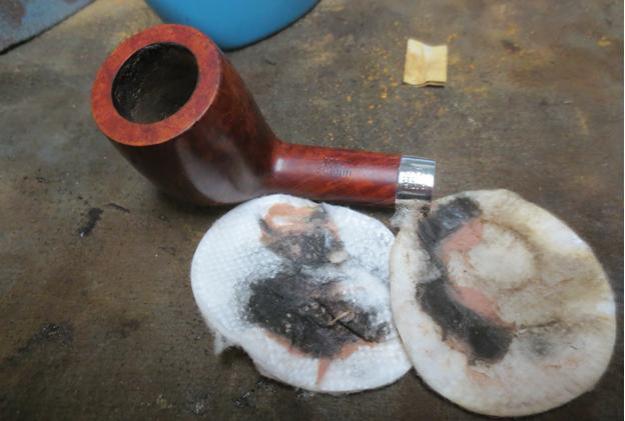
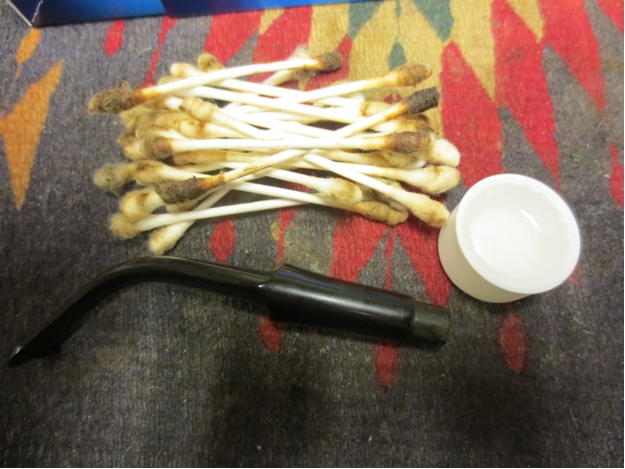
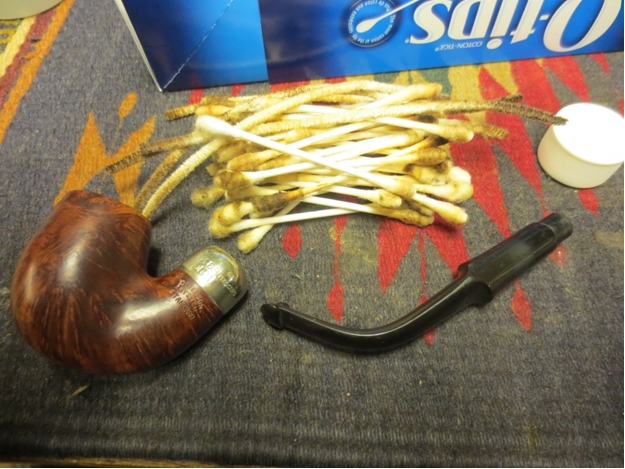
 I cleaned out the internals of the mortise and shank with pipe cleaners, cotton swabs and alcohol. The early pipe cleaners came out dirty with tar and oil. Later ones came out with the reddish brown stain from when the bowl was dip stained. The pipe is clean now and ready for a new bowl of tobacco to be run through it.
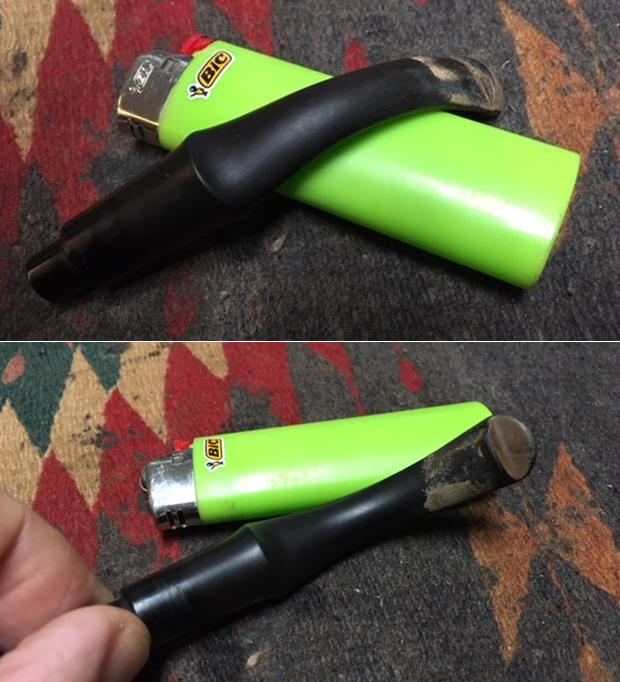
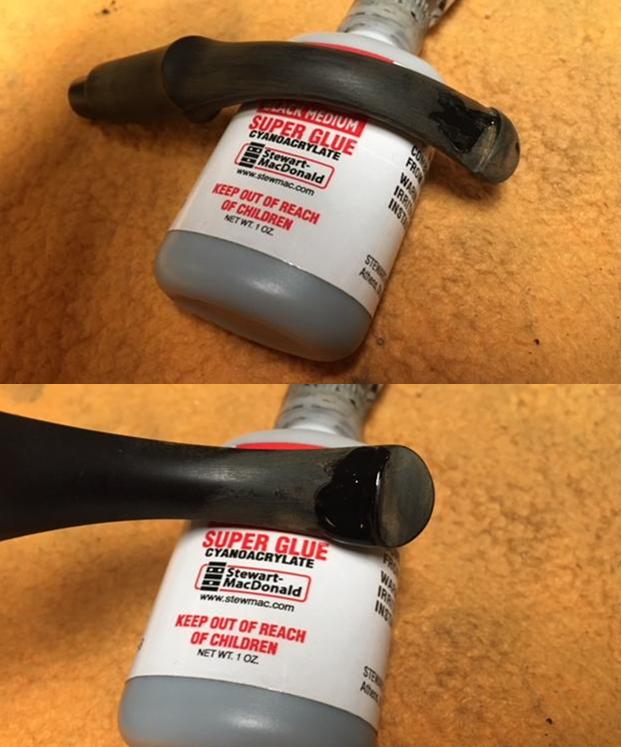
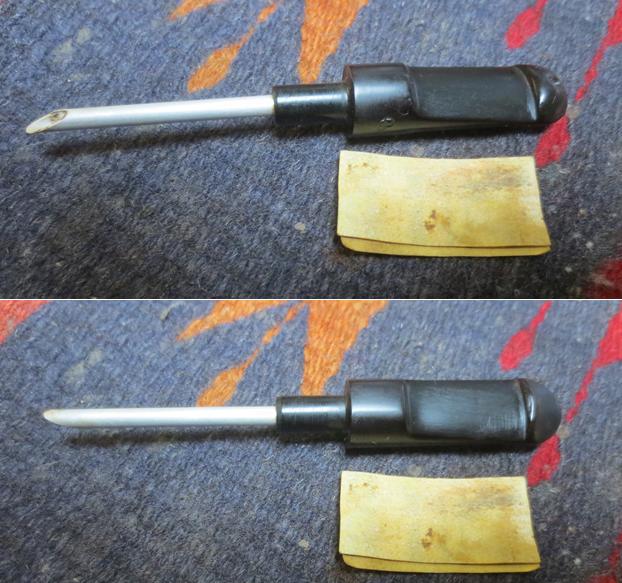
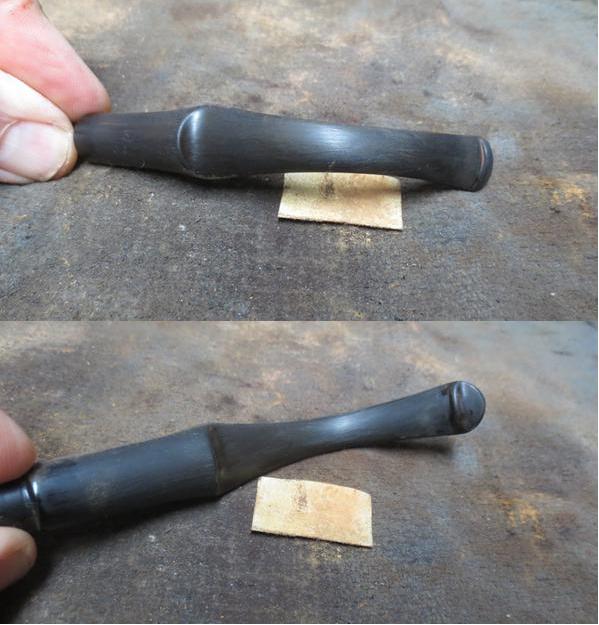
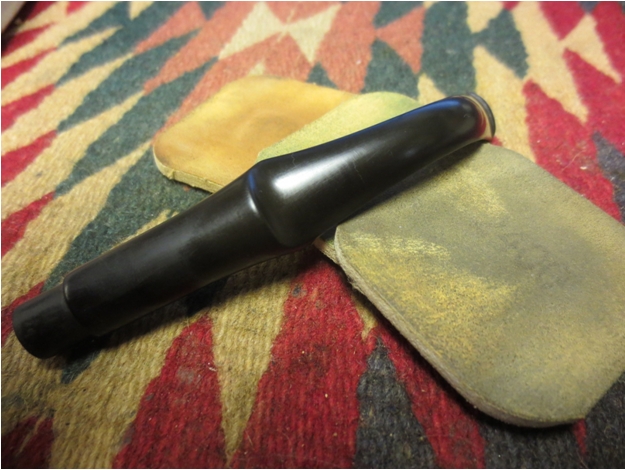
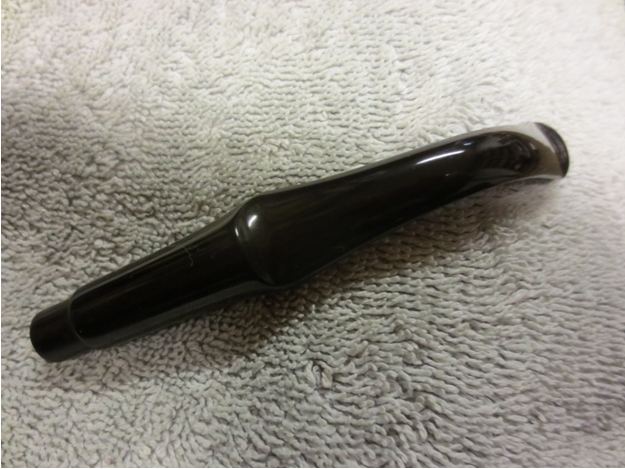
 I set the bowl aside and began the work on the stem. I cleaned up the inside of the button and the surface. I opened the crack slightly and filled it in with clear super glue. I pressed together and held it tightly until the repair dried and the crack was sealed. I cleaned out the surface of the tooth groove with alcohol and cotton swabs and then filled it in with black super glue. It would take several coats but I layered it in and let it cure between coats.
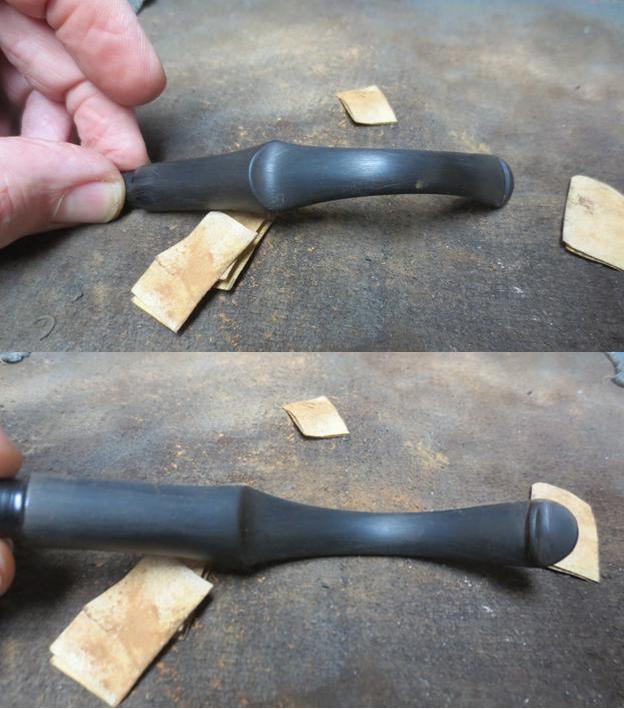
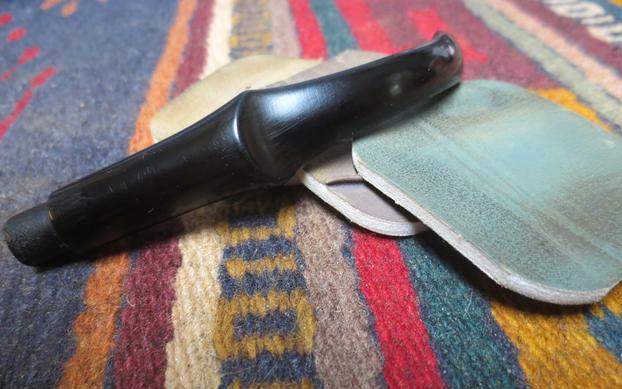
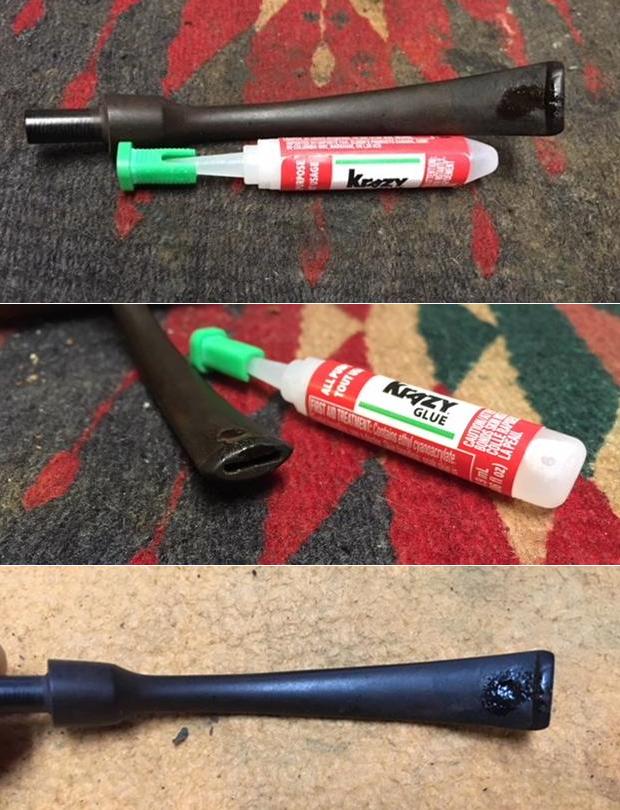 Once the repair on the underside had cured I sanded it smooth with 220 grit sandpaper to blend it into the surface of the rest of the stem. I also sanded out the tooth chatter and pitting on both sides of the stem at the same time.
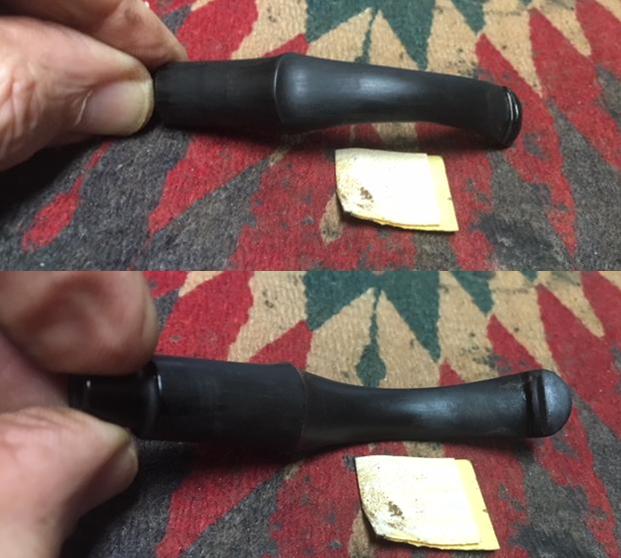
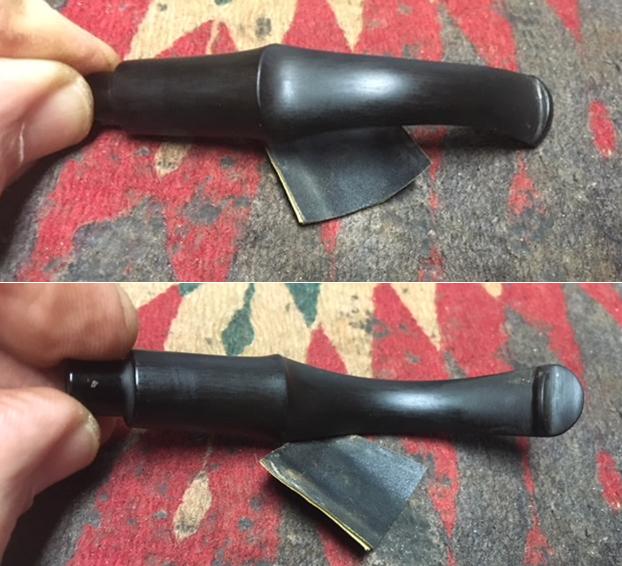
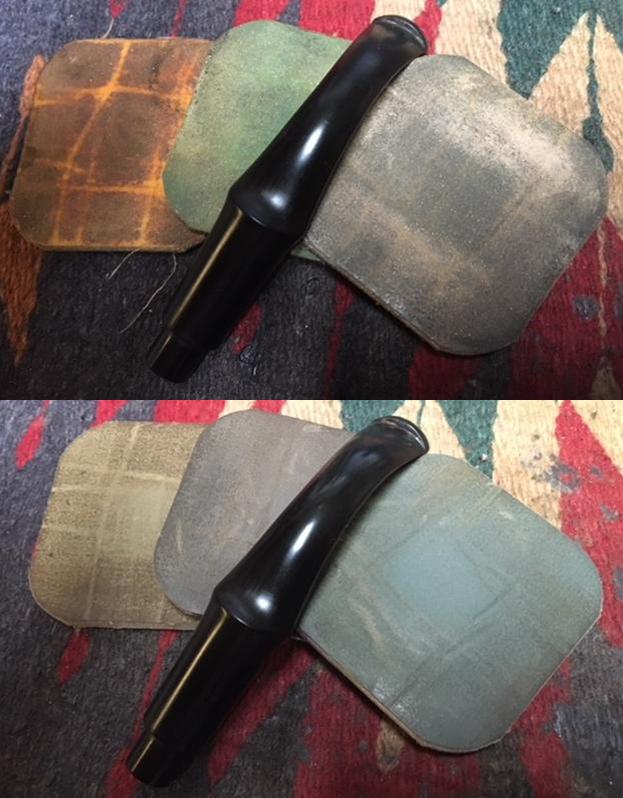
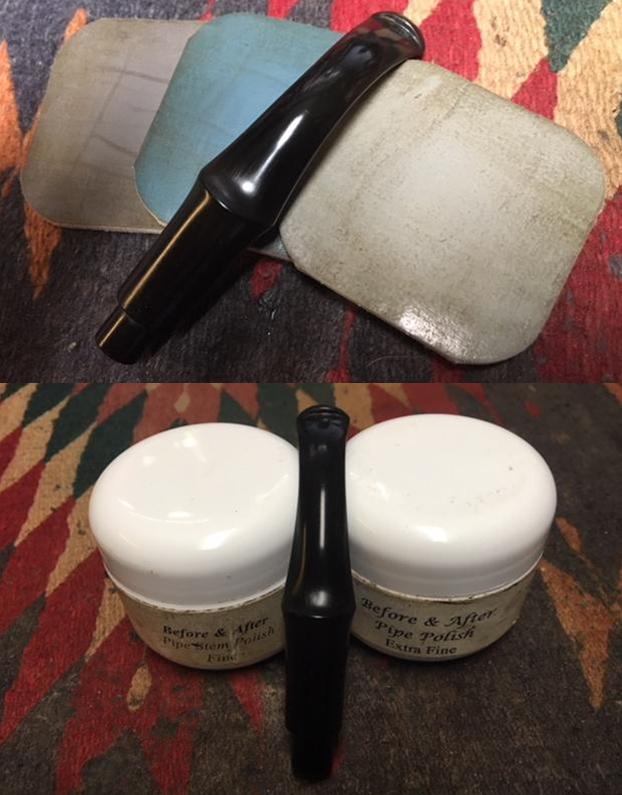
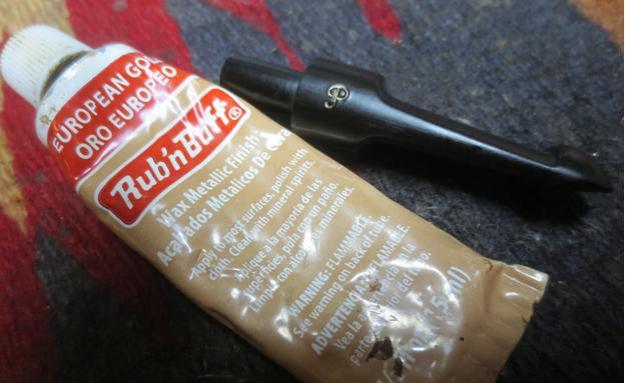
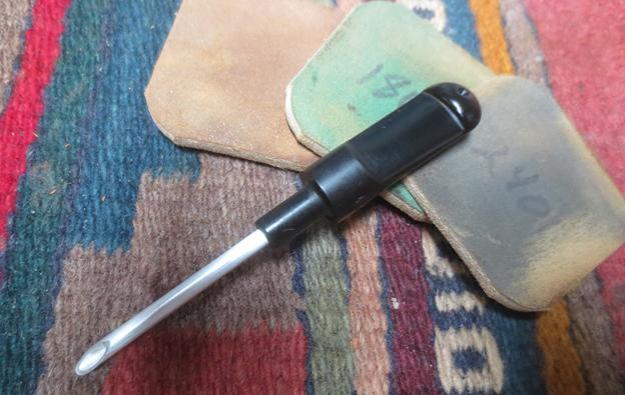
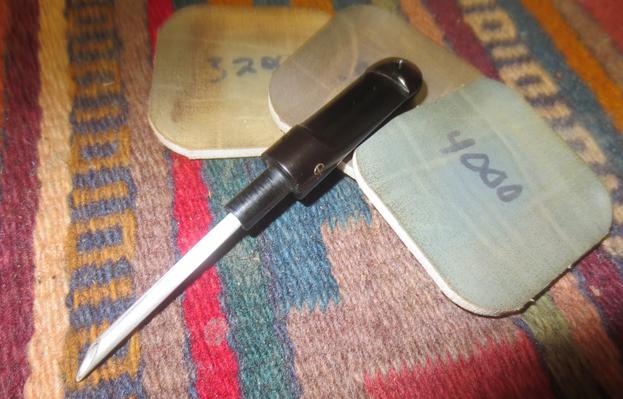
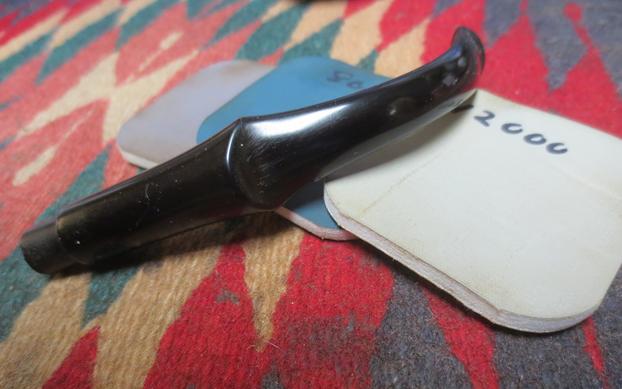
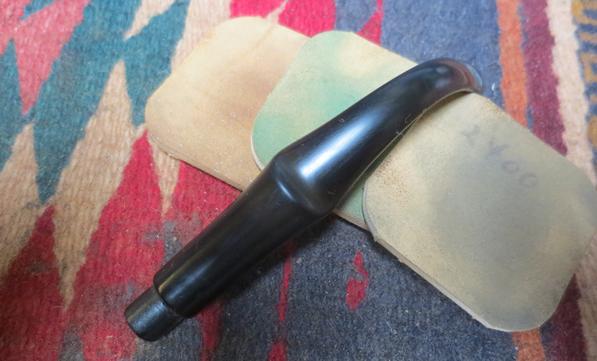
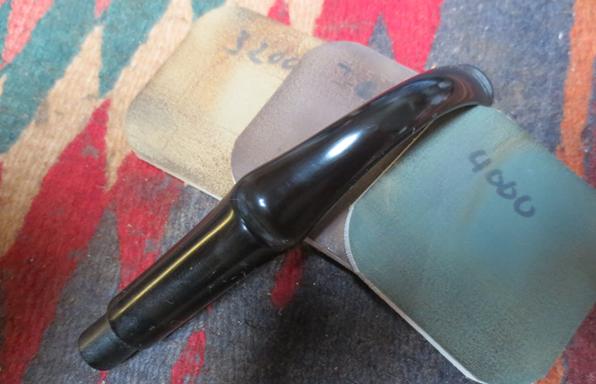
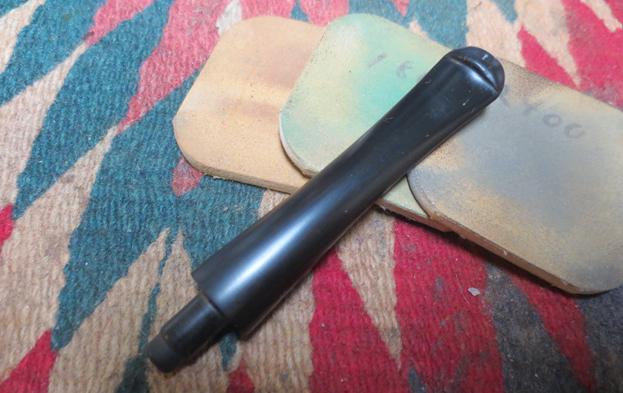
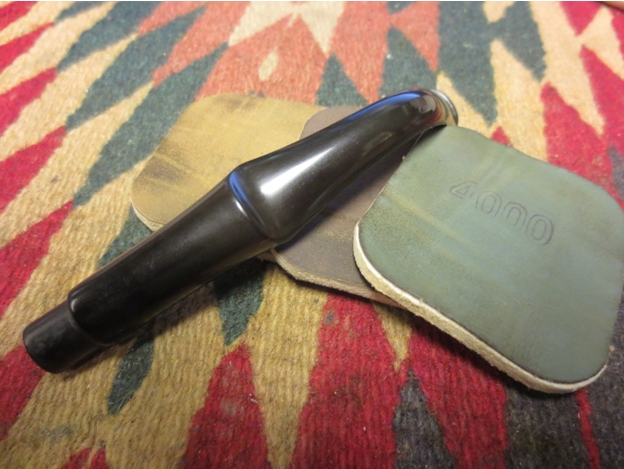
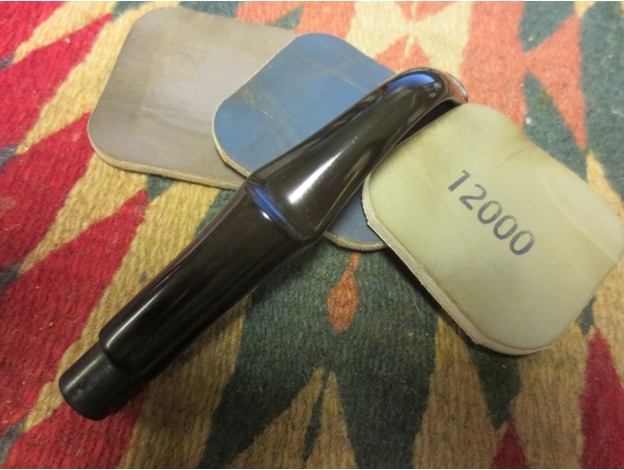
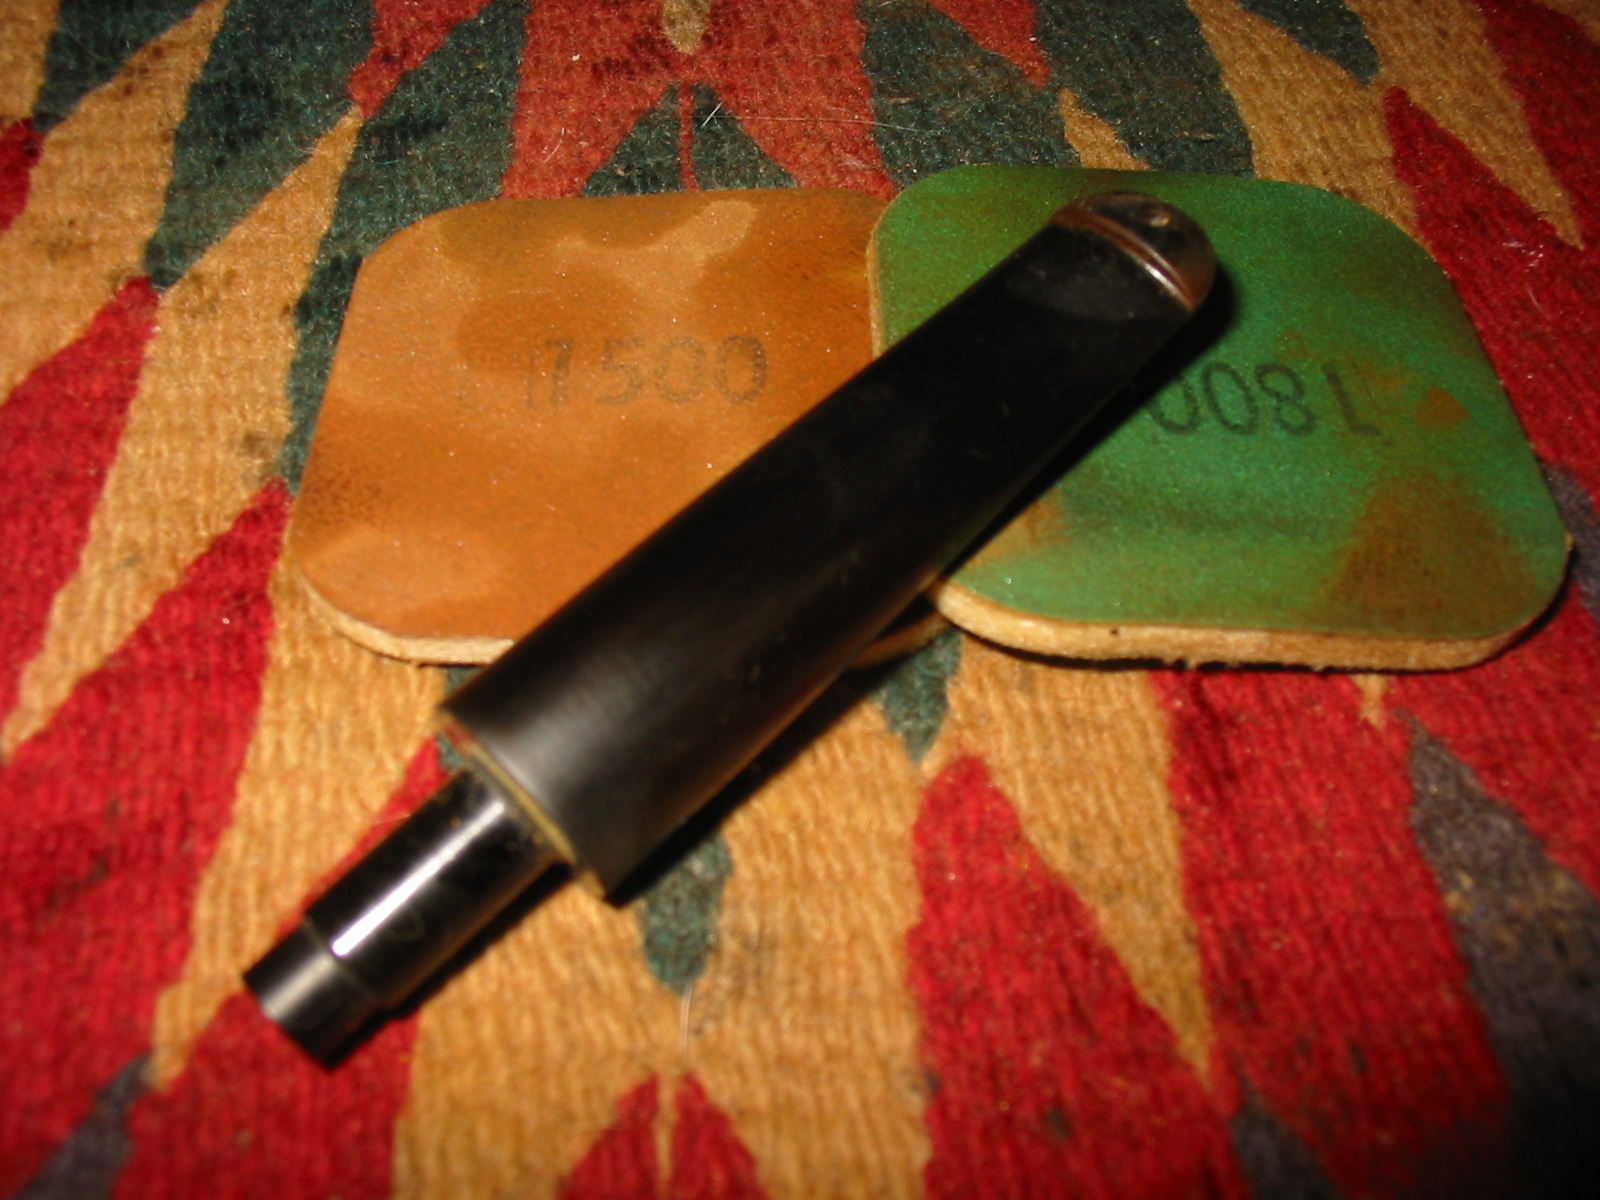
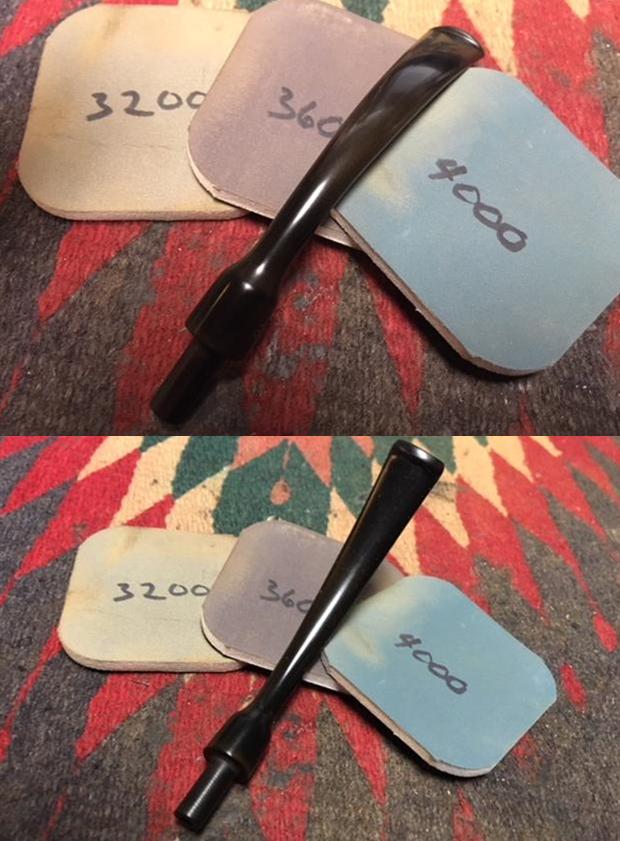
 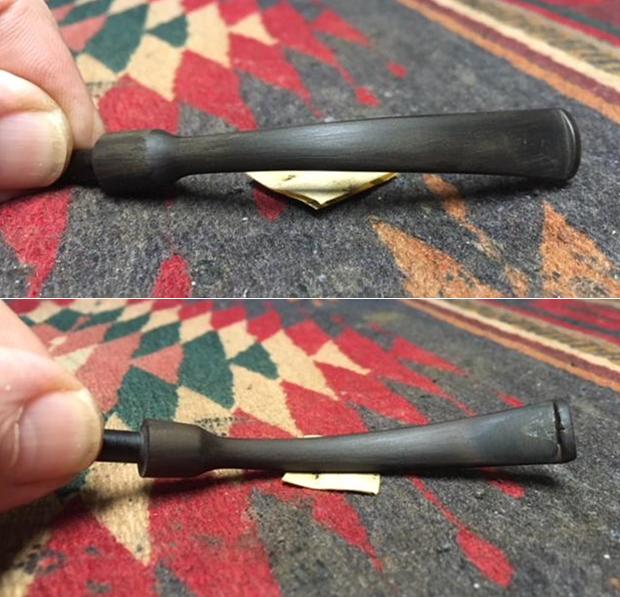 I added some black super glue to touch up the air bubble spots on the repair and the button and set it aside to dry. Once it had dried I smooth it out with 220 grit sandpaper and blended it into the surface of the vulcanite. I polished the stem with micromesh sanding pads – wet sanding with 1500-2400 grit sanding pads and dry sanding with 3200-12000 grit pads. I wiped the stem down with Obsidian Oil after each sanding pad and set it aside to dry.
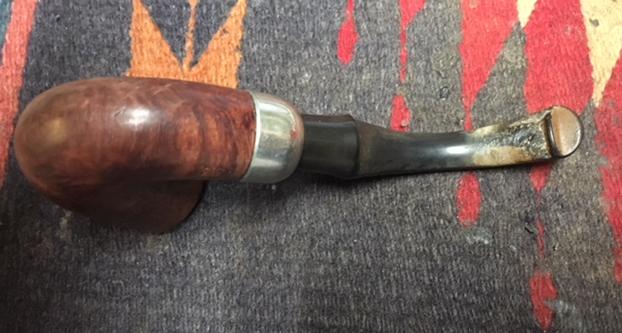
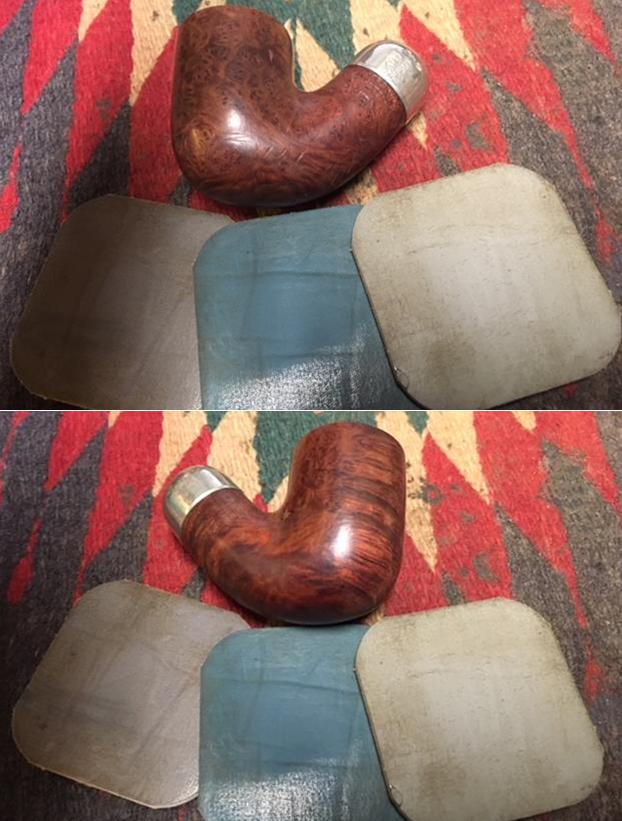
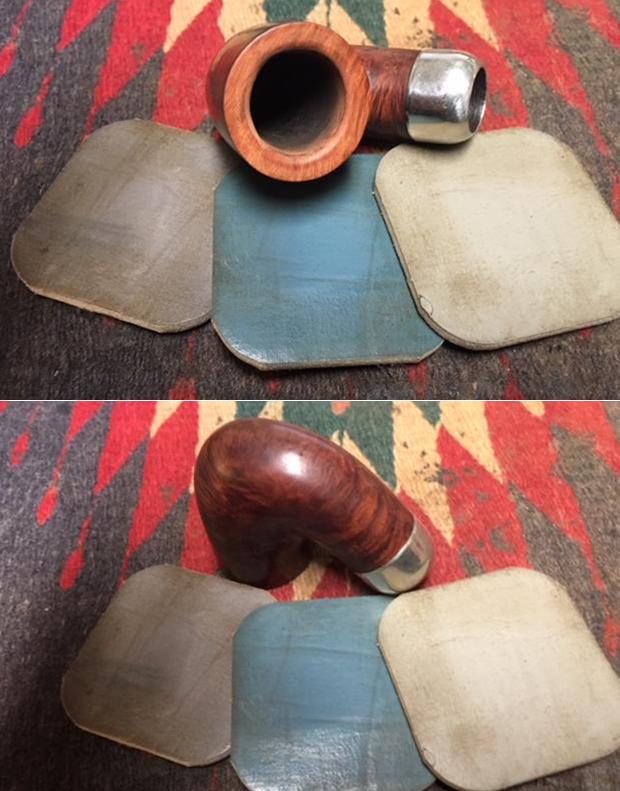
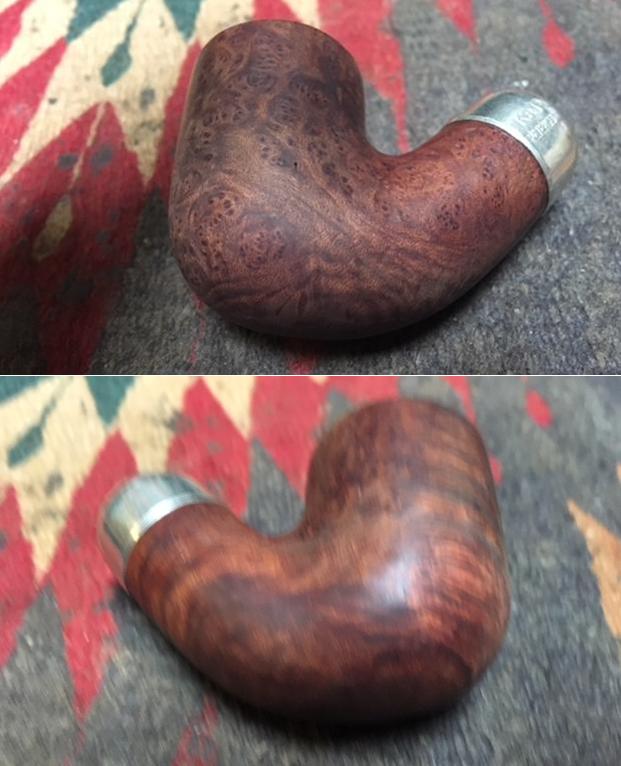
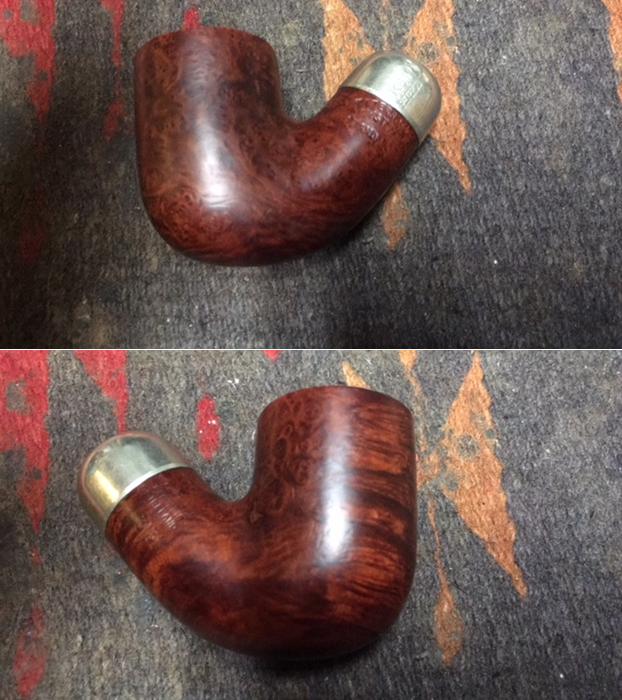
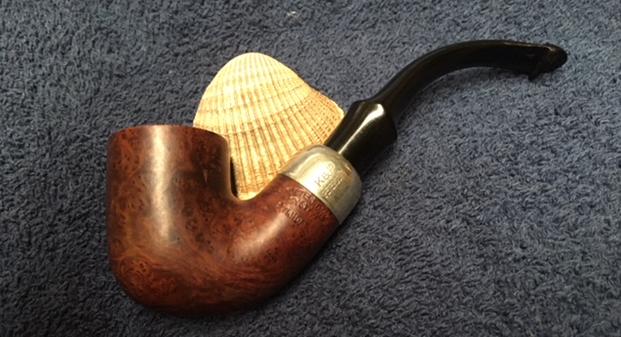
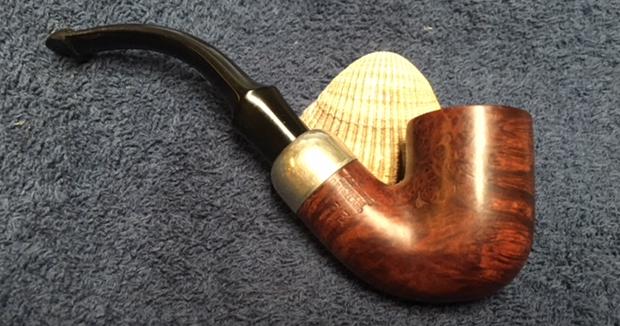
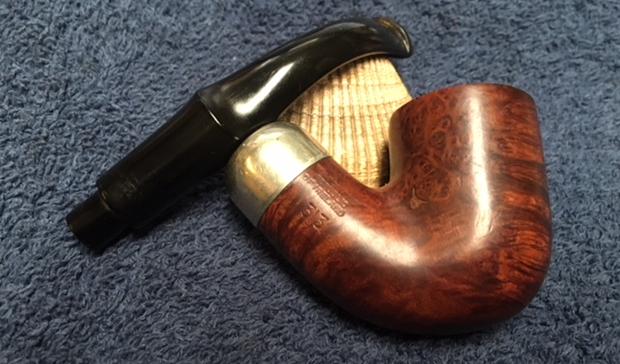
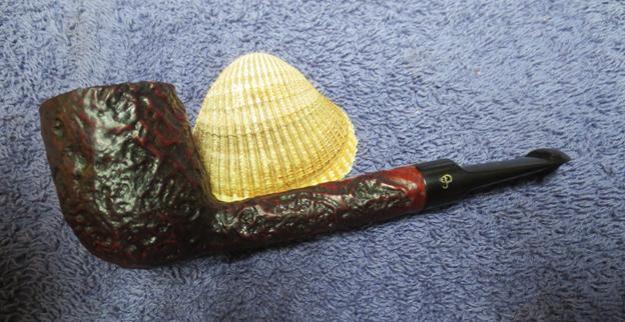
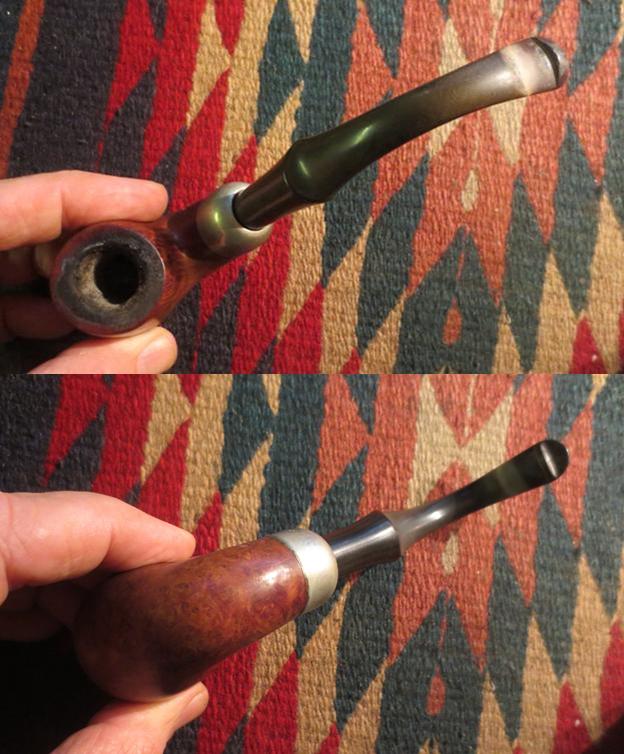
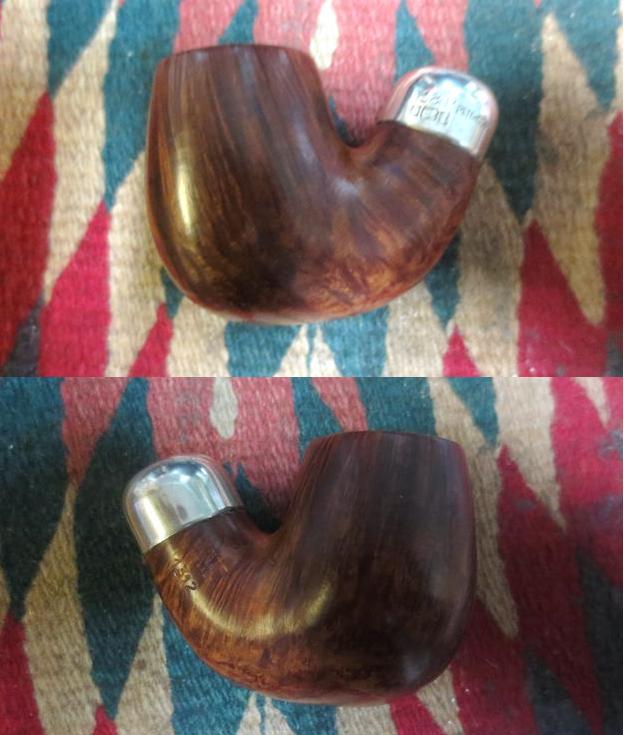
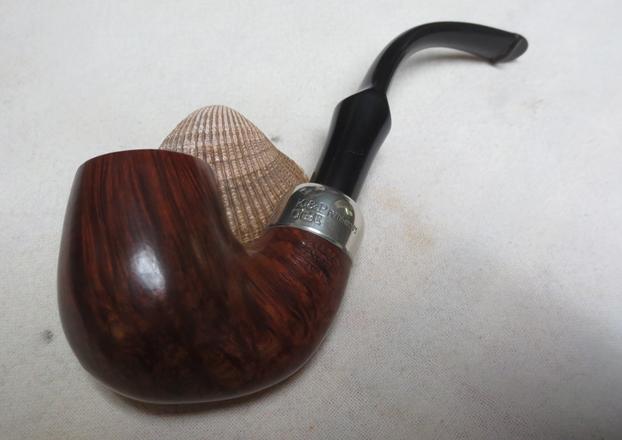
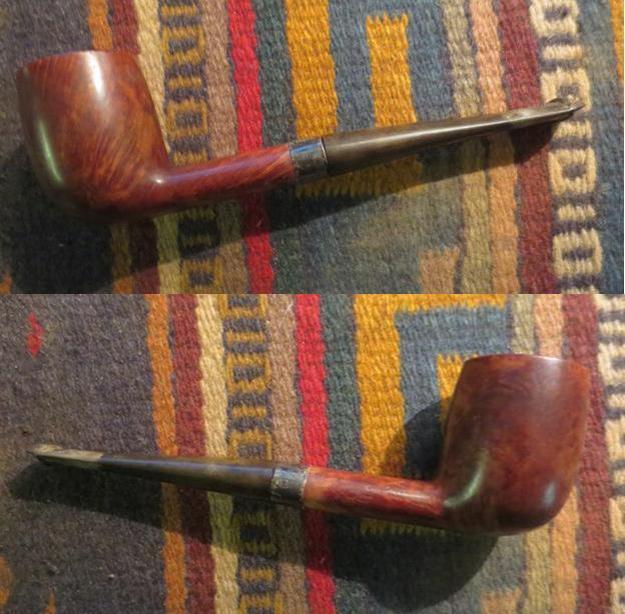
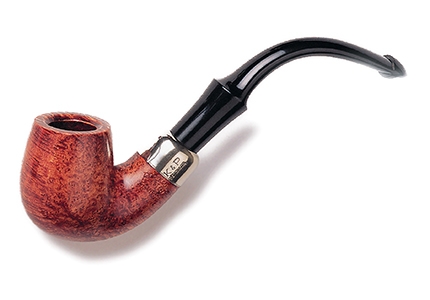
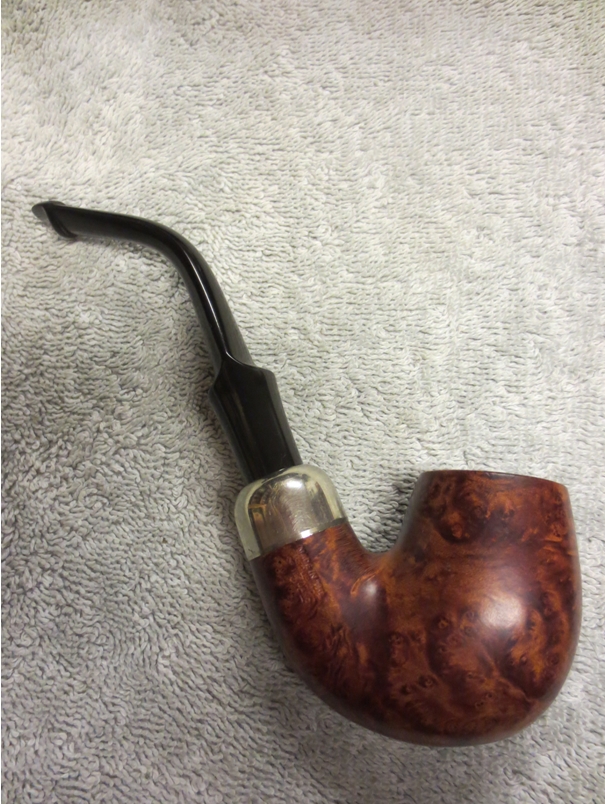
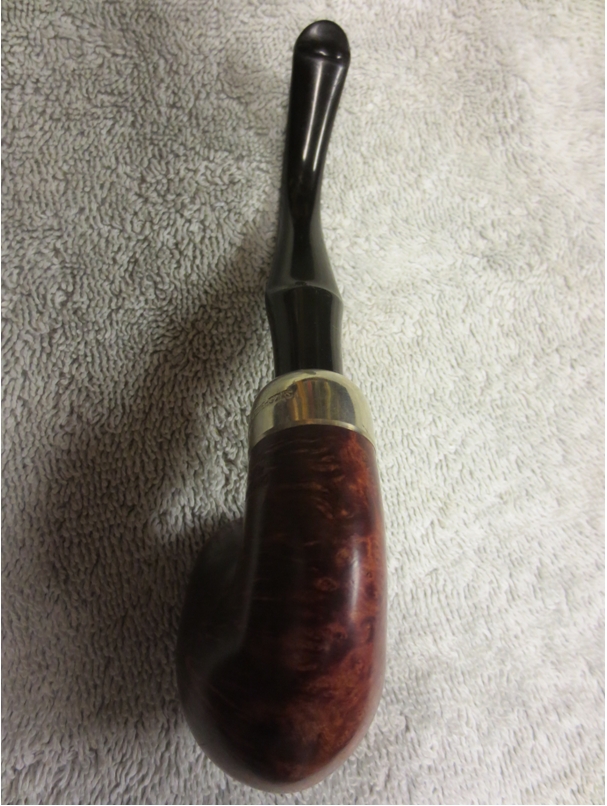
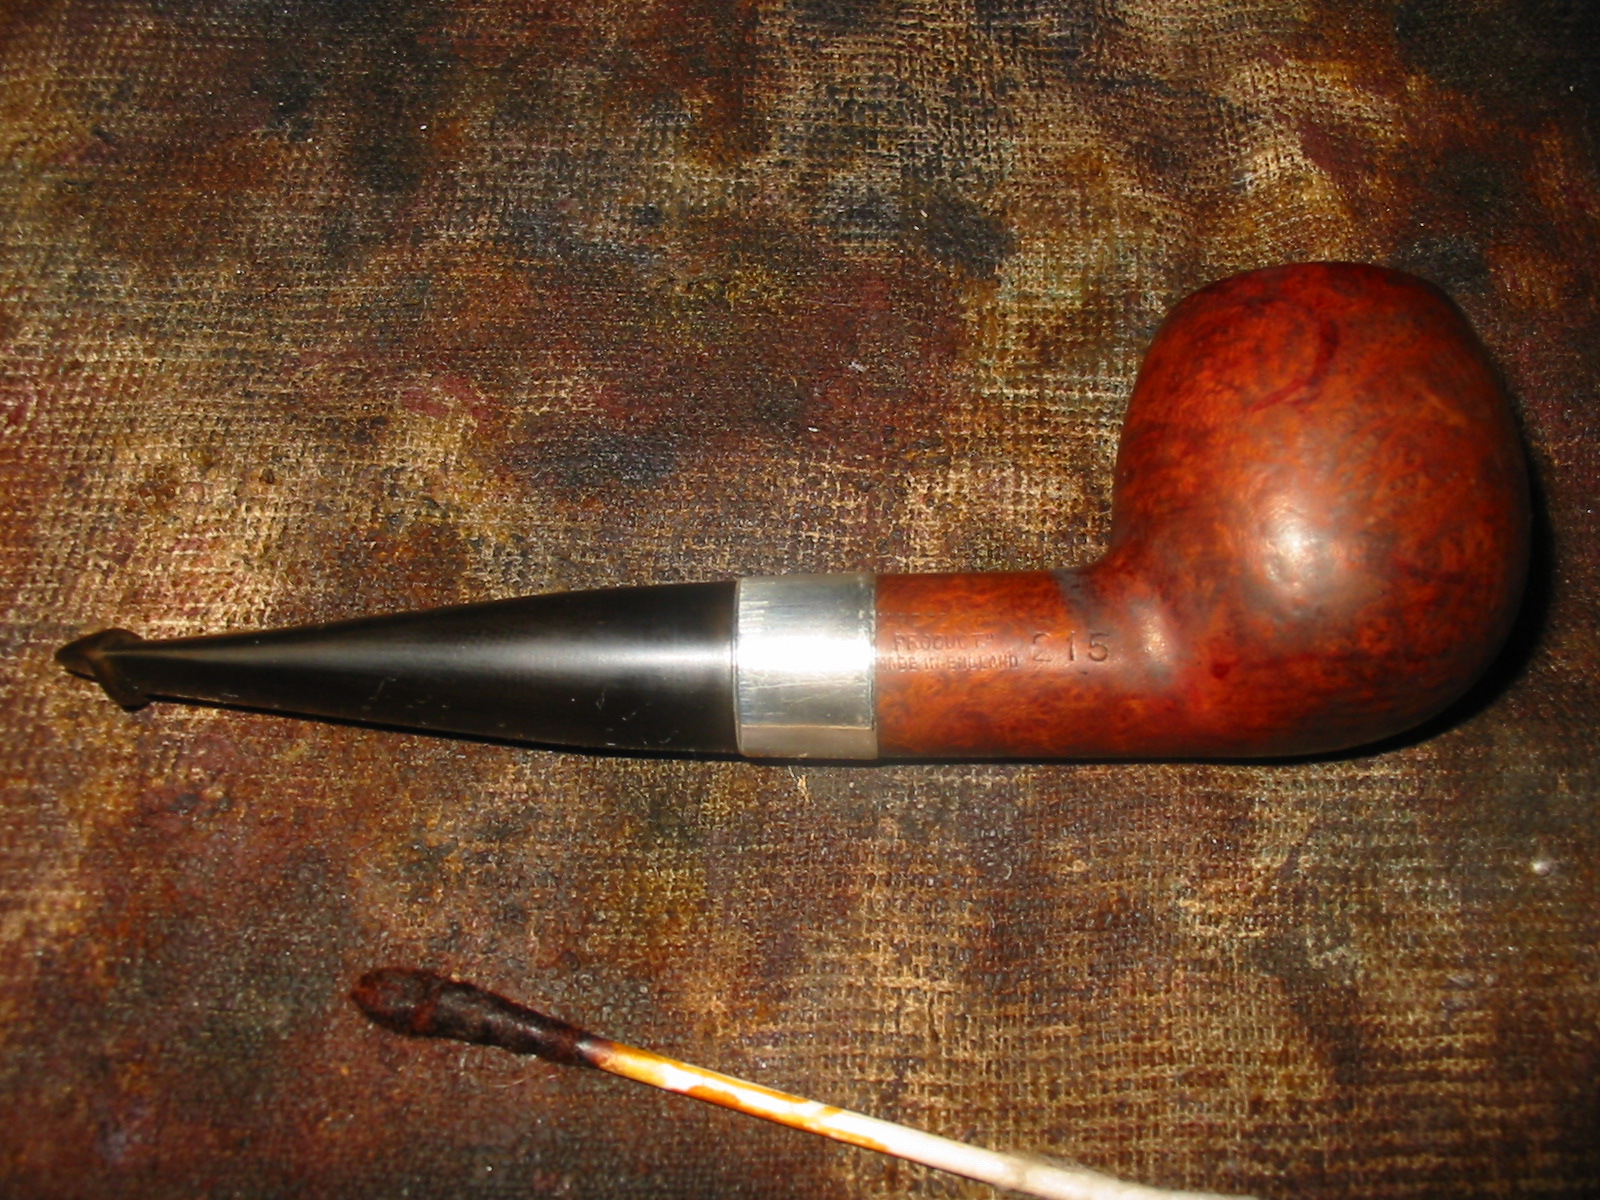
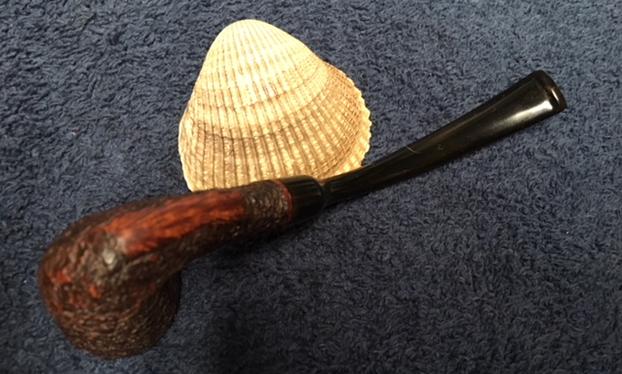
 With the stem polished I put it back on the pipe and lightly buffed the bowl and stem with Blue Diamond. I gave the bowl multiple coats of Conservator’s Wax and the stem several coats of carnauba wax. I buffed the pipe with a clean buffing pad to raise the shine and hand buffed it with a microfiber cloth to deepen the shine. The pipe polished up pretty nicely. The finished pipe is shown in the photos below. I have two more of Paresh’s Grandfather’s pipes to finish and then I will pack them up and send the whole lot across the sea to India where he can carry on the legacy. I know that he is looking forward to having them in hand and enjoying a bowl of his favourite tobacco in memory of his Grandfather. Thanks for walking through the restoration with me as I worked this pipe over.
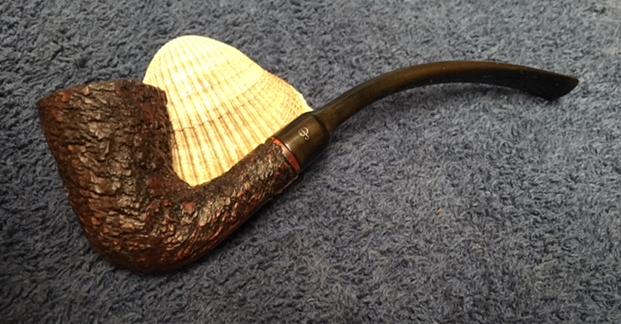


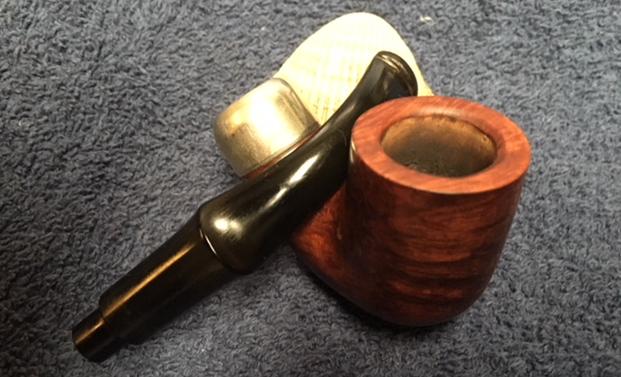
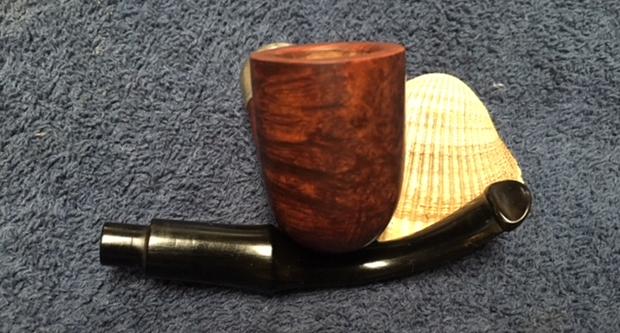
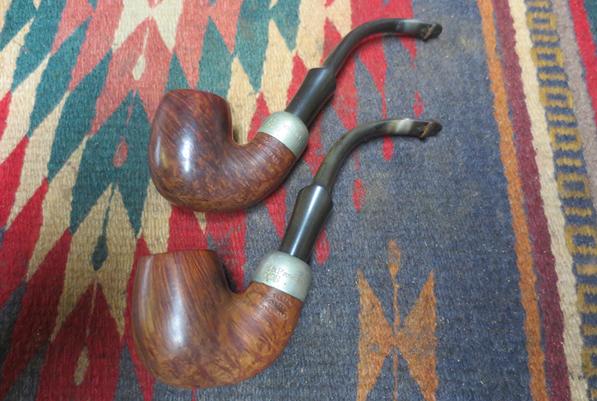
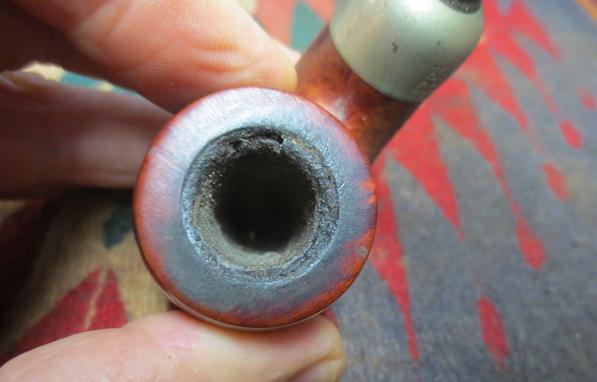
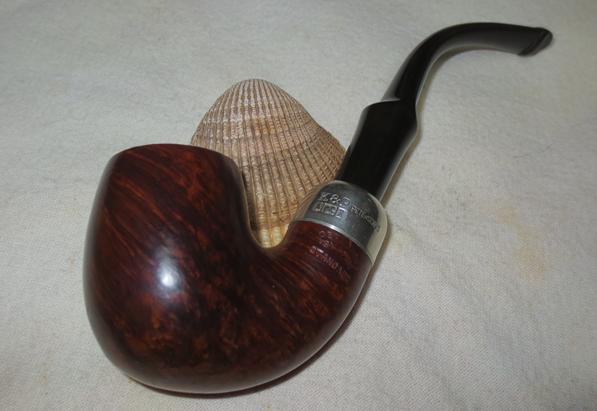
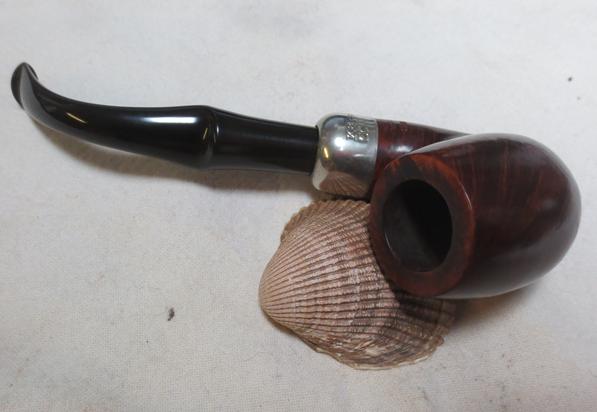
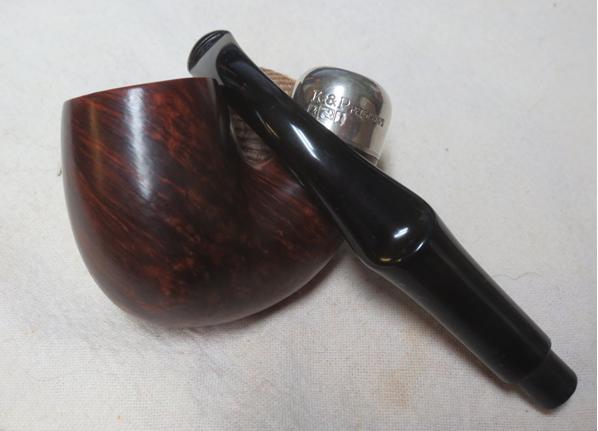
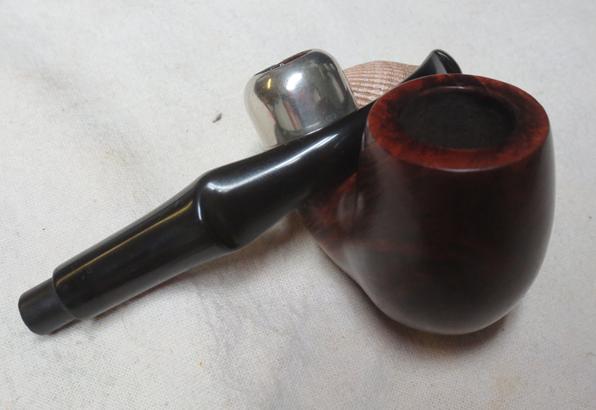
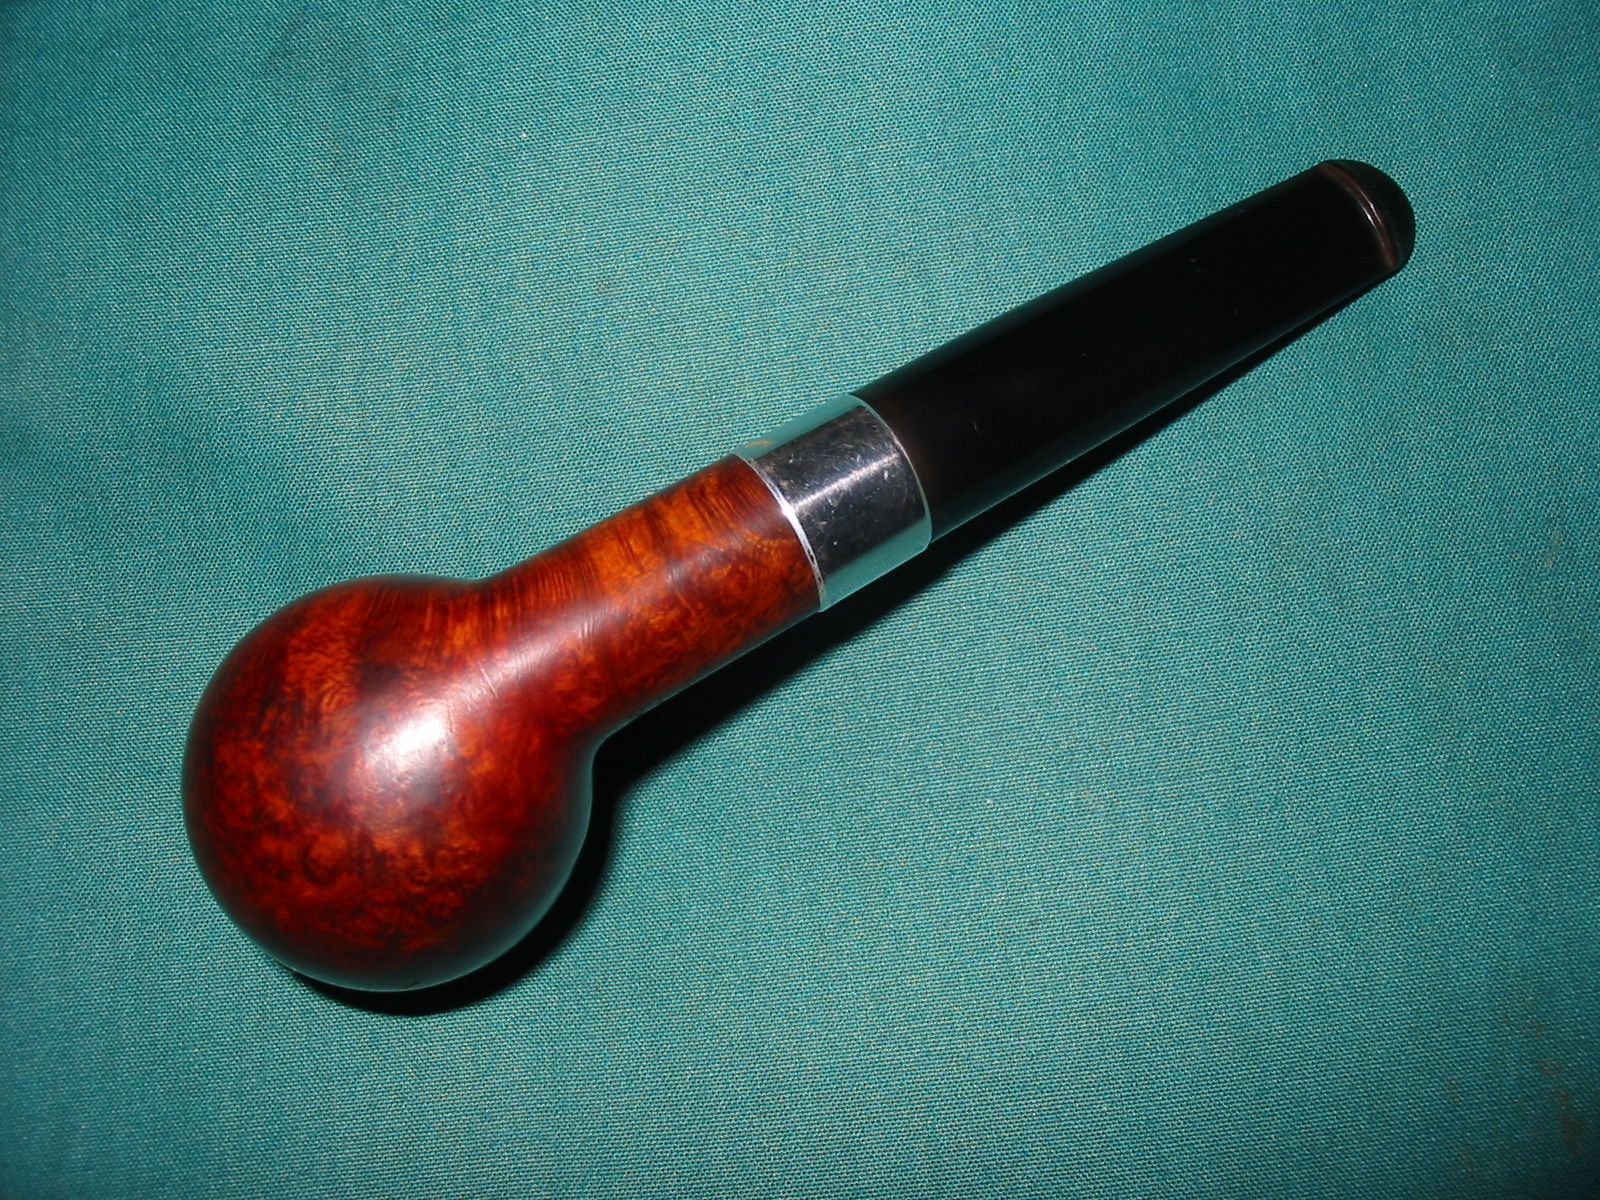
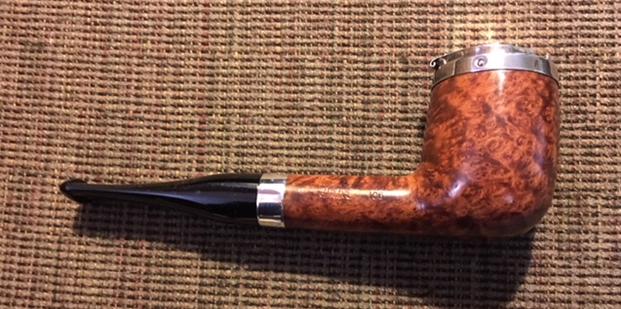
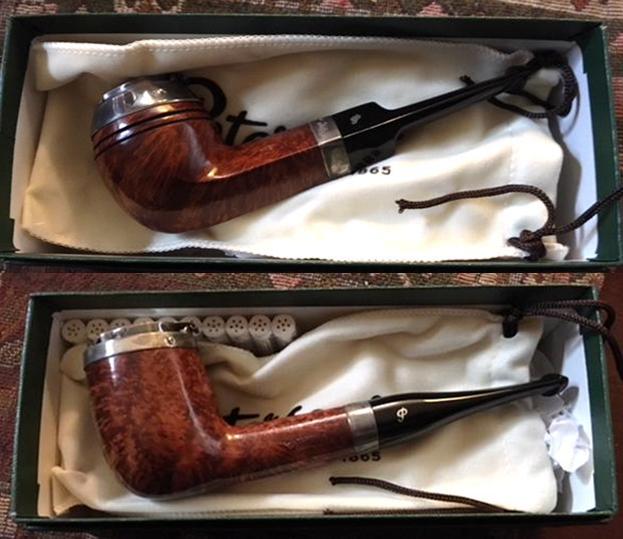 I took each pipe out of the box and took pictures of it to show its general condition. The Bulldog was first. You can see the finish is flawless with some nice grain around the bowl. The silver cap and band are tarnished but undamaged. Both have hallmark stamps on them so I should be able to identify the year of manufacture of the pipe. The silver P on the left side of the saddle stem is also tarnished but undamaged. When I opened the cap the bowl inside was polished and smooth. It was indeed unused. The stem was flawless and there was no oxidation or discolouration to be detected. There were no marks on the stem also showing that it was unused. The airway in the shank and the stem were clean and polished. It is stamped on the left side of the shank Peterson’s with the old forked P arched over Dublin. On the right side it has the shape number 150 and reads Made in the Republic of Ireland. The pipe is a beauty and the silver will really stand out once it is polished and cleaned.
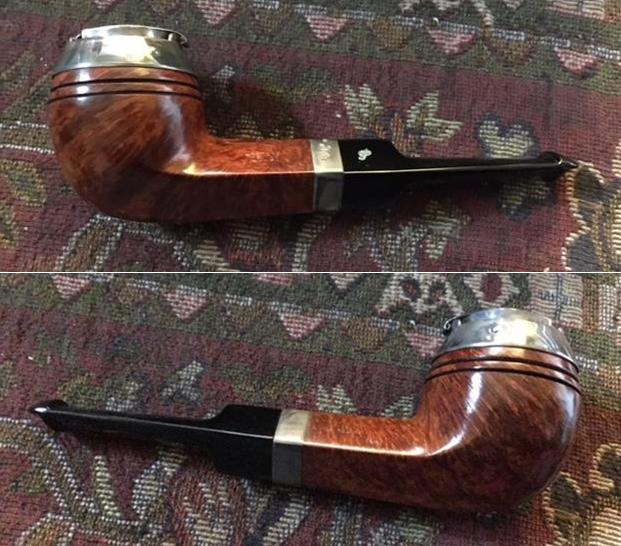
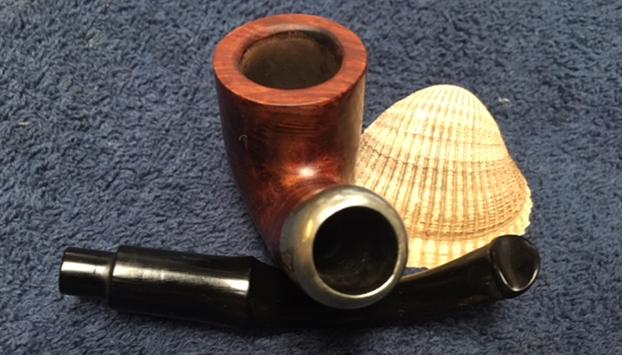
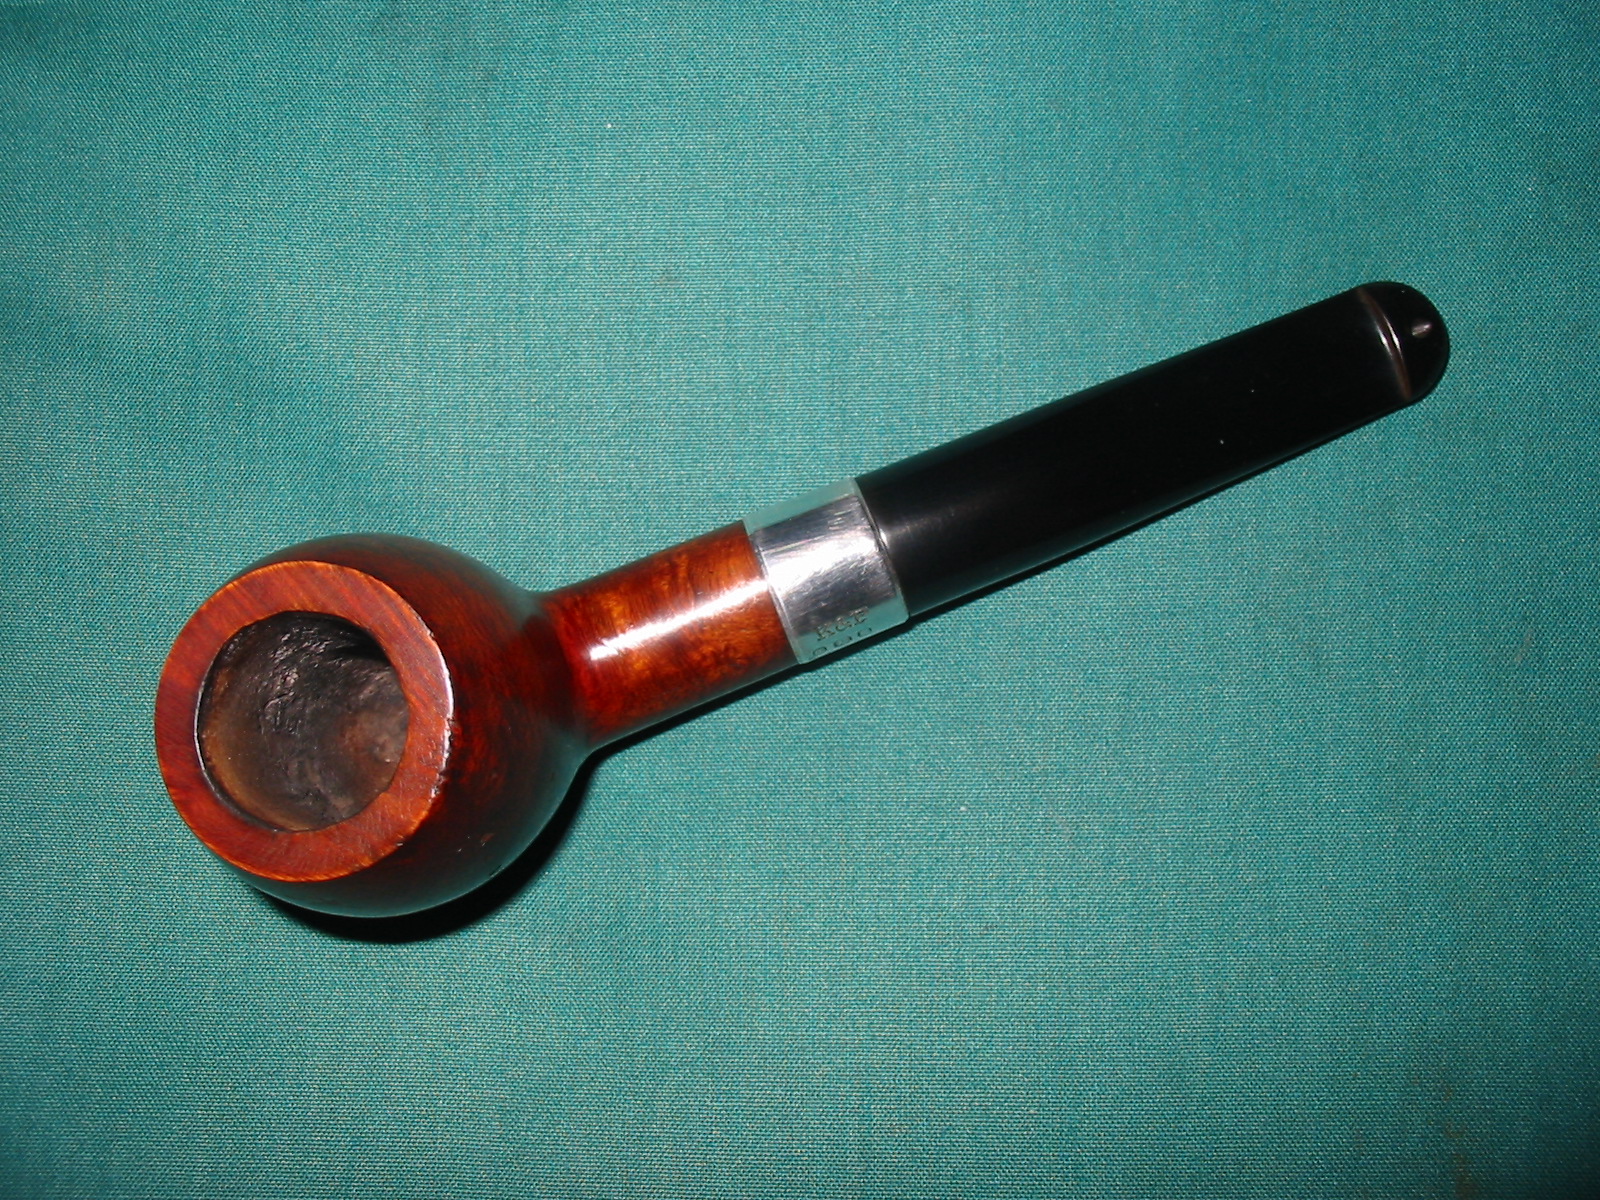
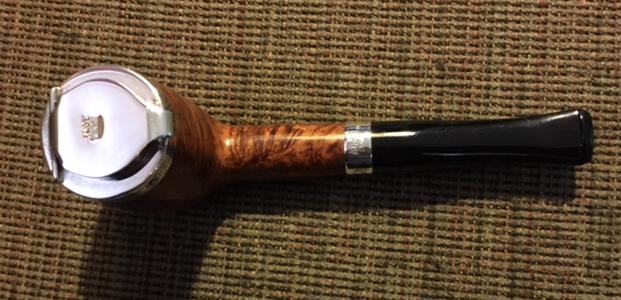
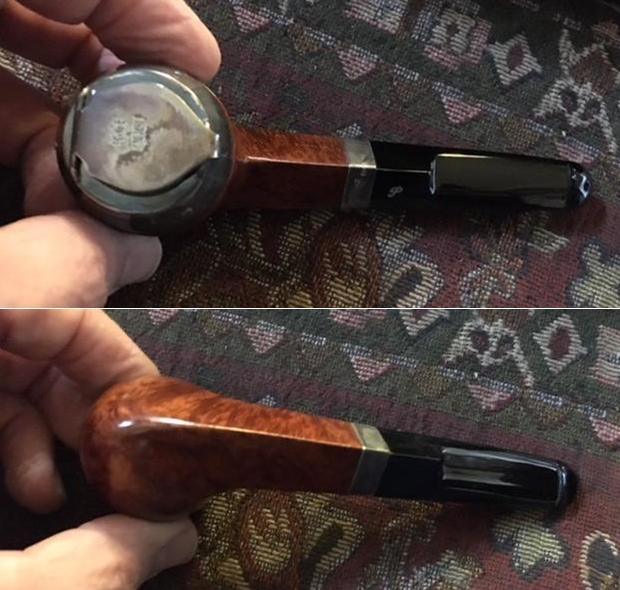 I took some close up photos of the rim cap and the stem to show the condition. You can see the tarnish on the rim cap and the deep shine on the stem. The cap also bore hallmarks that I would be better able to read when I had cleaned up the silver. The band also bore hallmarks that would be readable as well.
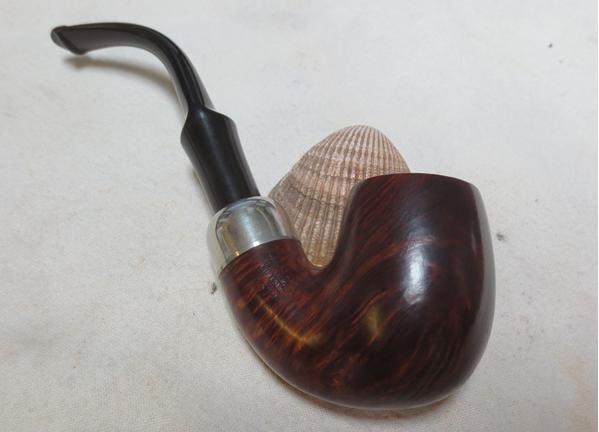
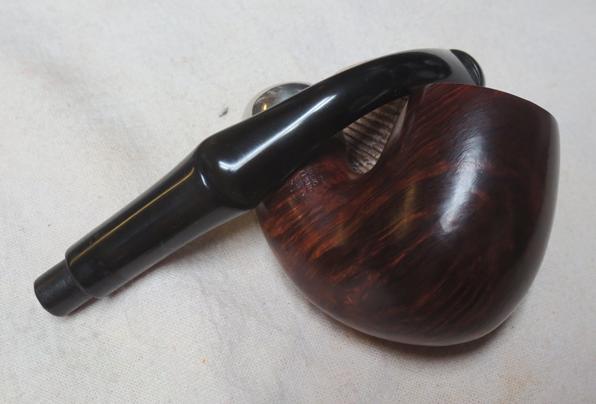
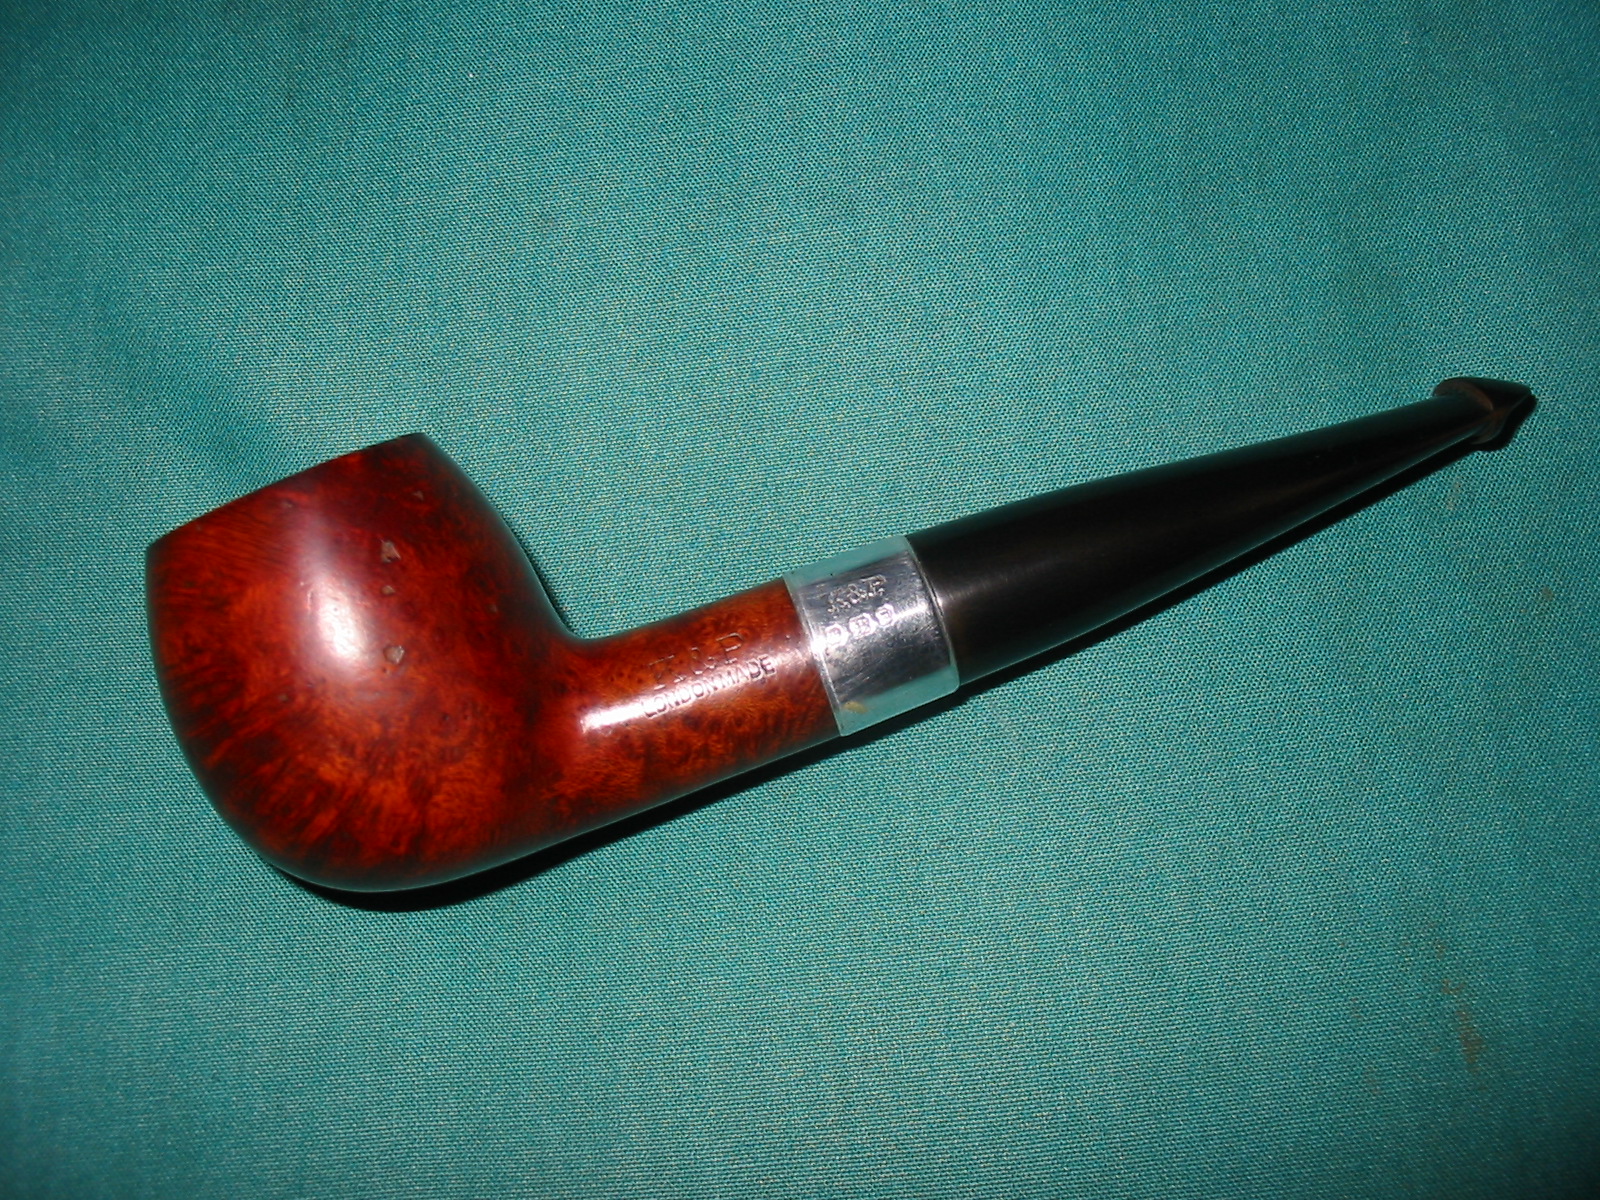
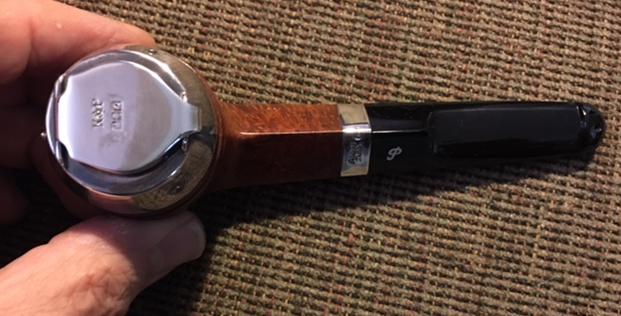
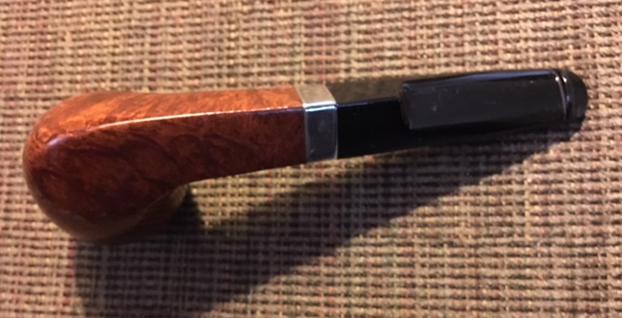
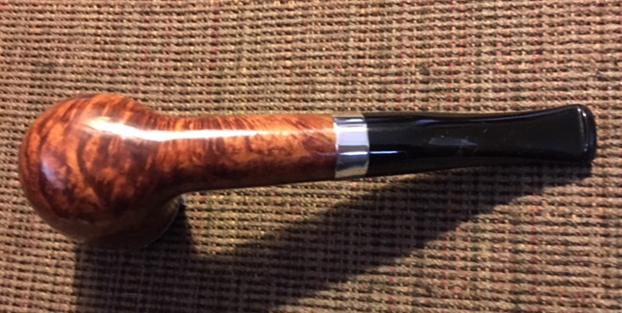
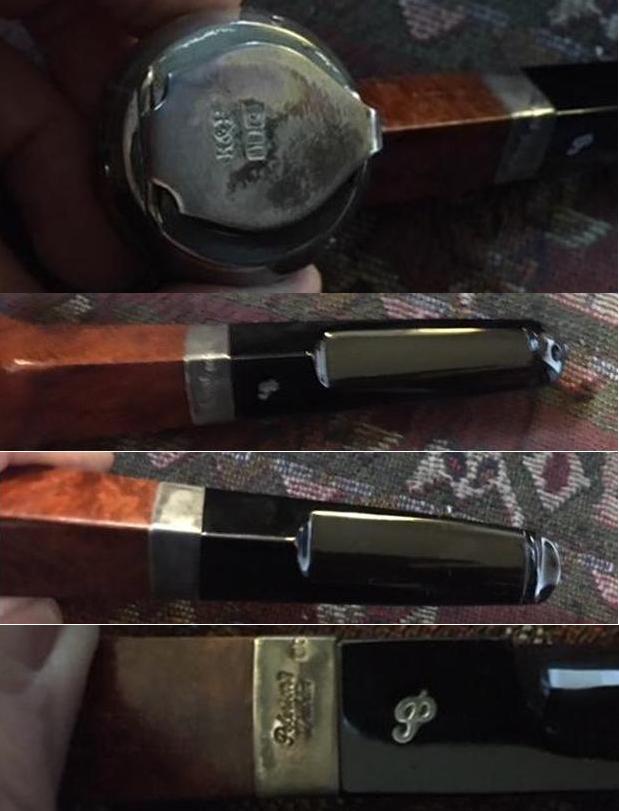 The Billiard was second. You can see the finish is flawless with some nice grain around the bowl. The silver cap and band are tarnished but undamaged. Both have hallmark stamps on them so I should be able to identify the year of manufacture of the pipe. The silver P on the left side of the tapered fishtail stem is also tarnished but undamaged. When I opened the cap the bowl inside was polished and smooth. It was unused as well. The stem was flawless and there was no oxidation or discolouration to be detected. There were no marks on the stem also showing that it was unused. The airway in the shank and the stem were clean and polished. It is stamped on the left side of the shank Peterson’s with the old forked P arched over Dublin. On the right side it has the shape number 106 and reads Made in the Republic of Ireland. This pipe is a beauty as well and the silver will really stand out once it is polished and cleaned.
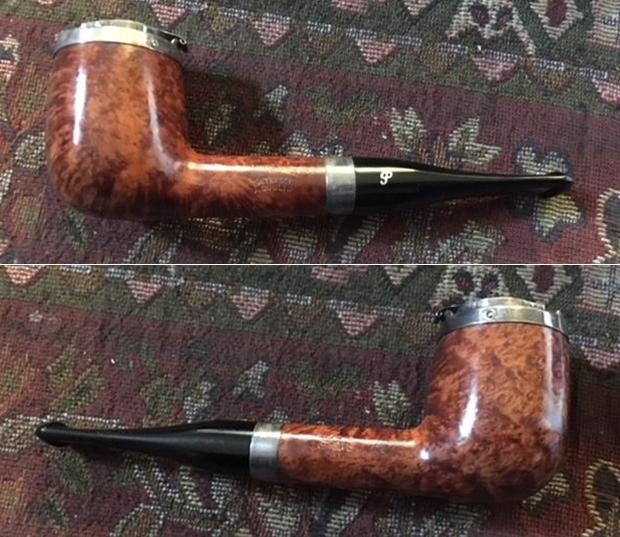
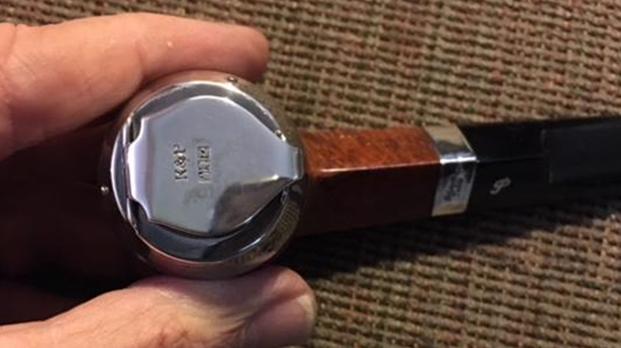
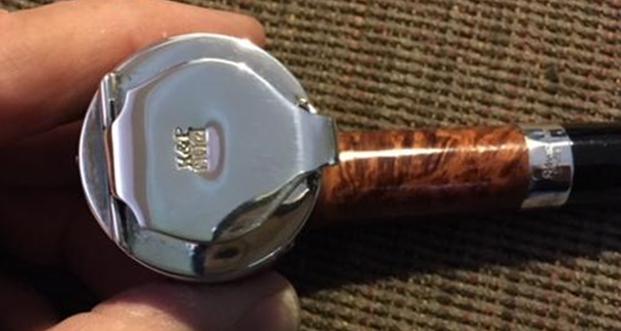
 I took some close up photos of the rim cap and the stem on the billiard to show the condition. You can see the tarnish on the rim cap and the deep shine on the stem. The cap also bore hallmarks that I would be better able to read when I had cleaned up the silver. The band also bore hallmarks that would be readable as well.
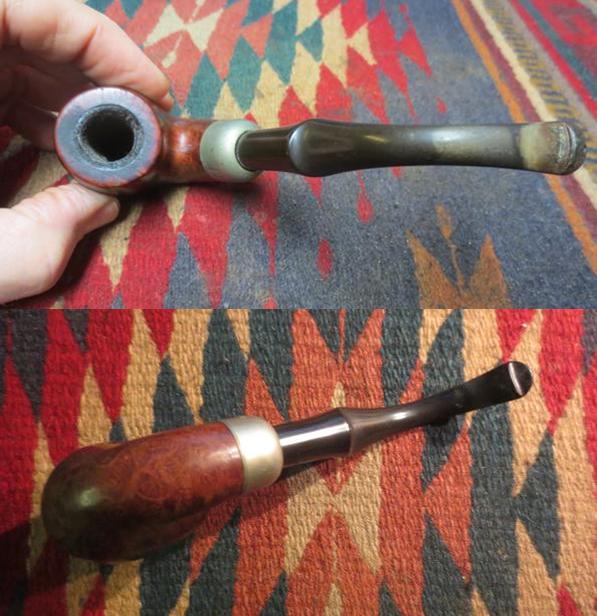
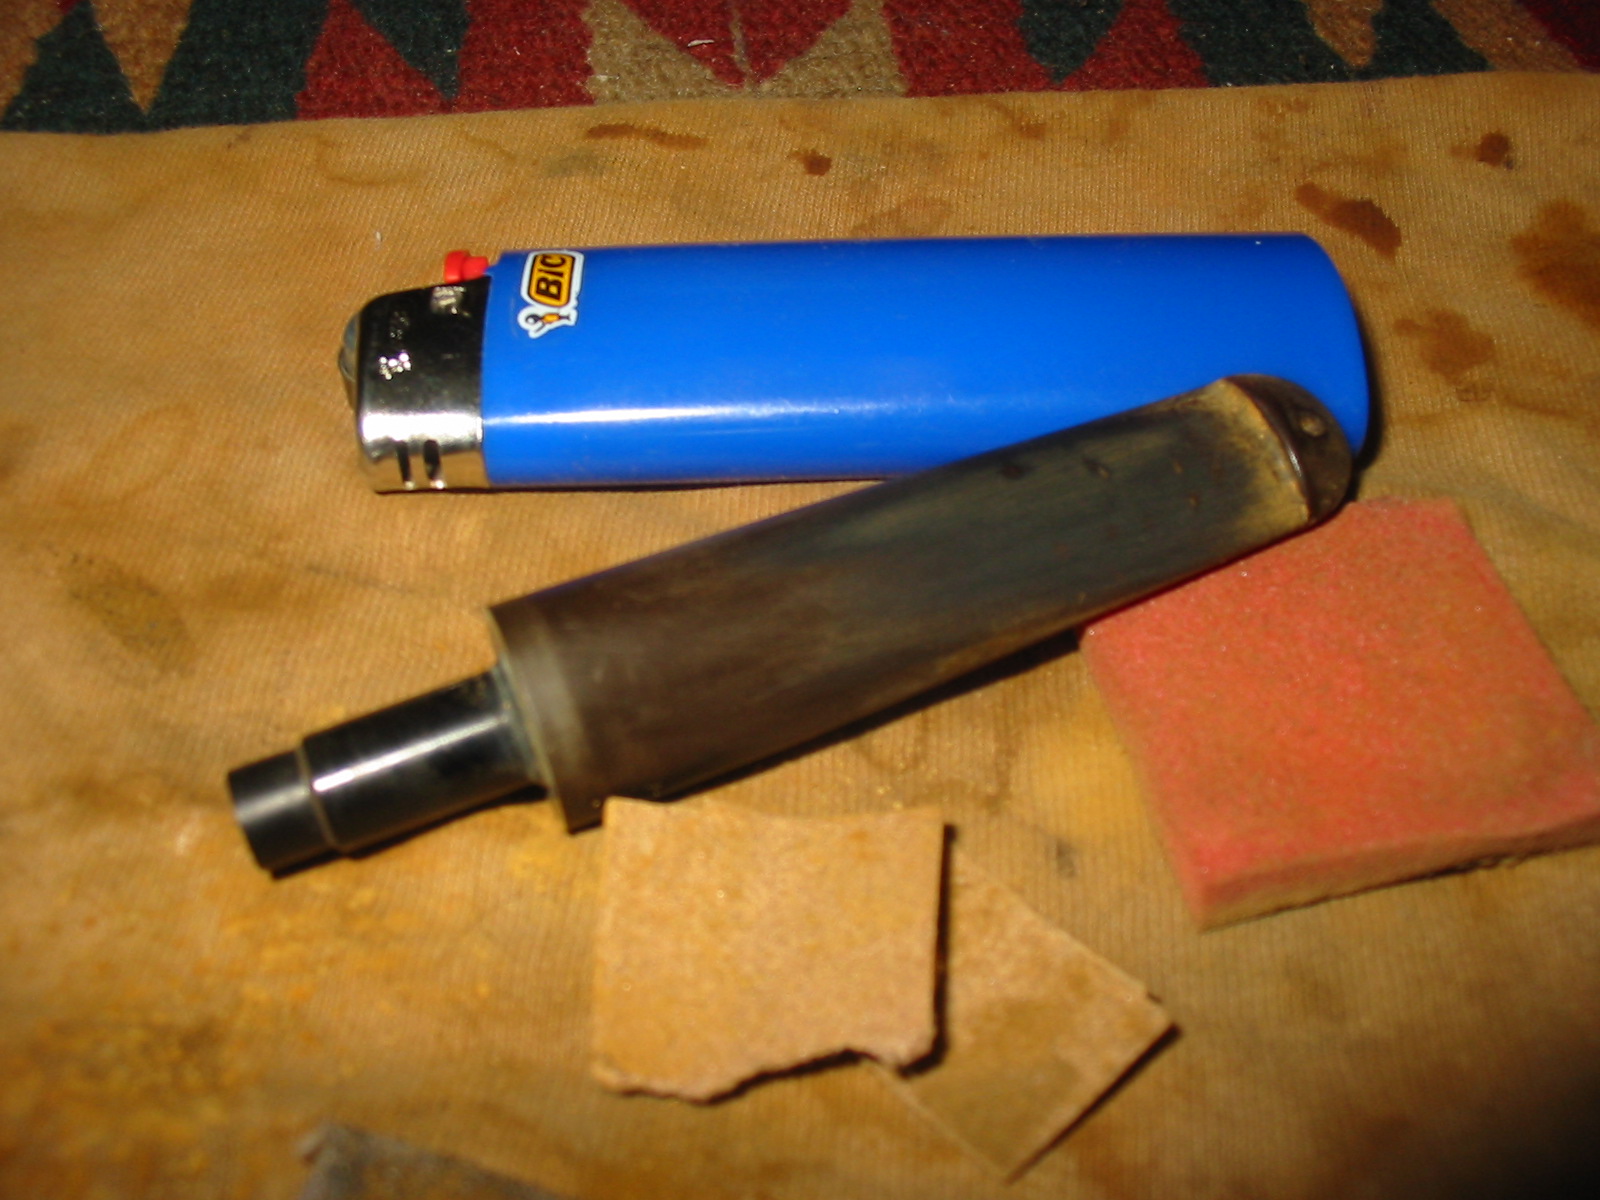
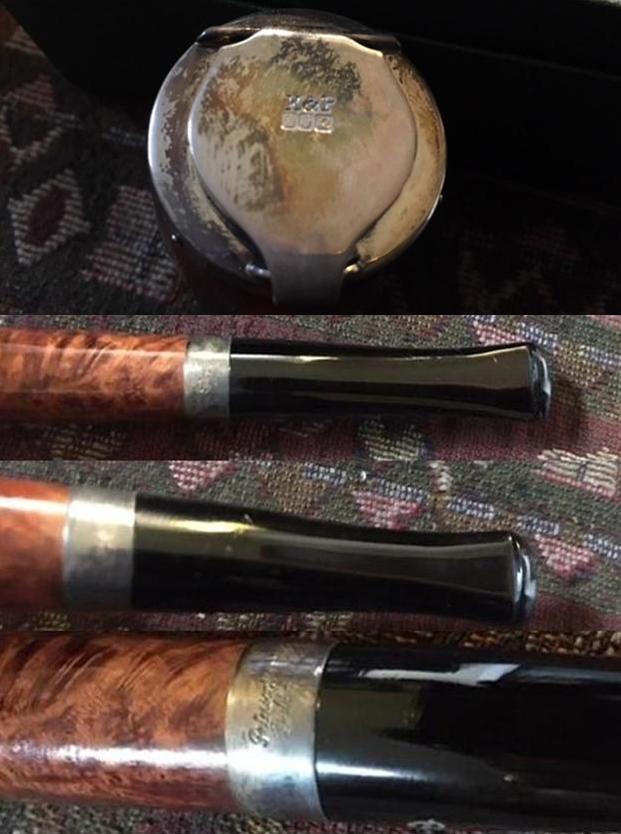 The Billiard came with an adapter in the tenon that was removable allowing the pipe to be smoked with or without the 9MM Absorba Filters. The pictures below show the adaptor in and out of the tenon.
 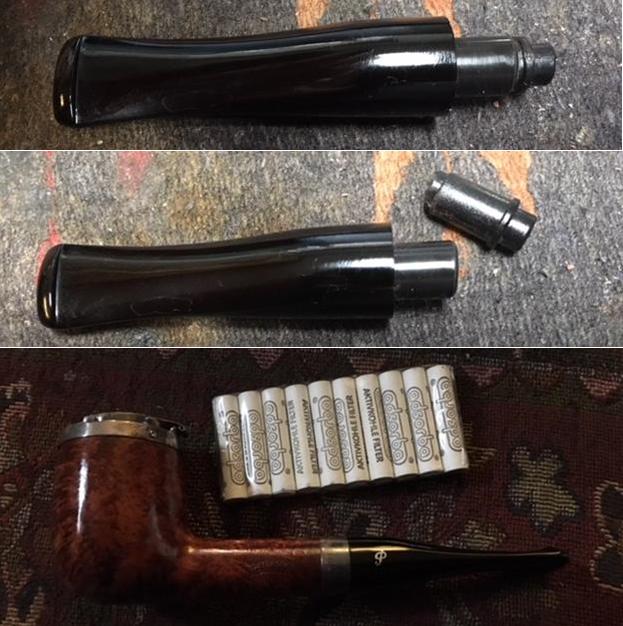 I polished the silver on both pipes with a jeweler’s polishing cloth that removes tarnish and protects silver. I worked over the bands and caps on both pipes as well as the silver P on the stems.
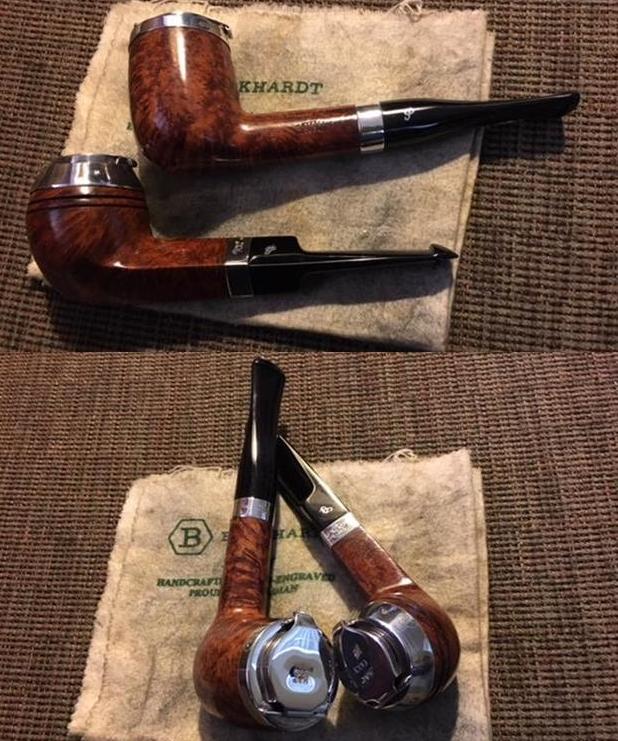 I did some hunting for information on the pipes in a Peterson’s Catalogue I have on rebornpipes (https://rebornpipes.com/2015/05/15/a-beautiful-peterson-of-dublin-pipe-catalogue/). I have copied several pages from the catalogue for use here. The first page shows the Silver Cap series. The two pipes in this blog are Natural Finished pipes – shape number 150 and number 106. I have circled both of them in the picture below.
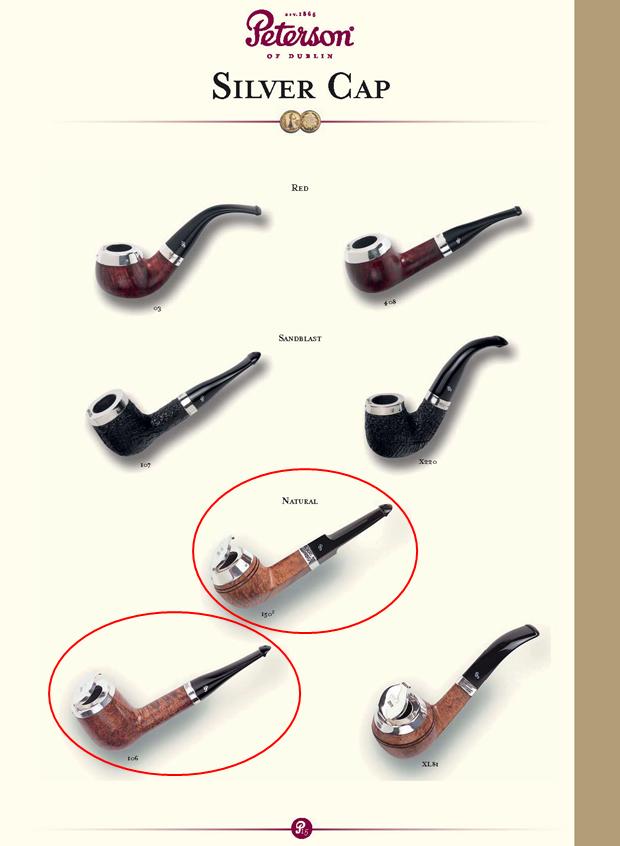 The second page I have included is a hallmark chart below that helps date the pipes. Both pipes have the standard Peterson’s Hallmarks. On both pipes each hallmark is the same. The first mark is the Hibernia which identifies the country of origin as Ireland. The second mark is the Crowned Harp mark is the fineness mark which denotes the quality of the silver as 925. The third mark is the date mark which in this case is the cursive Q identifying the year of manufacture as 2000.
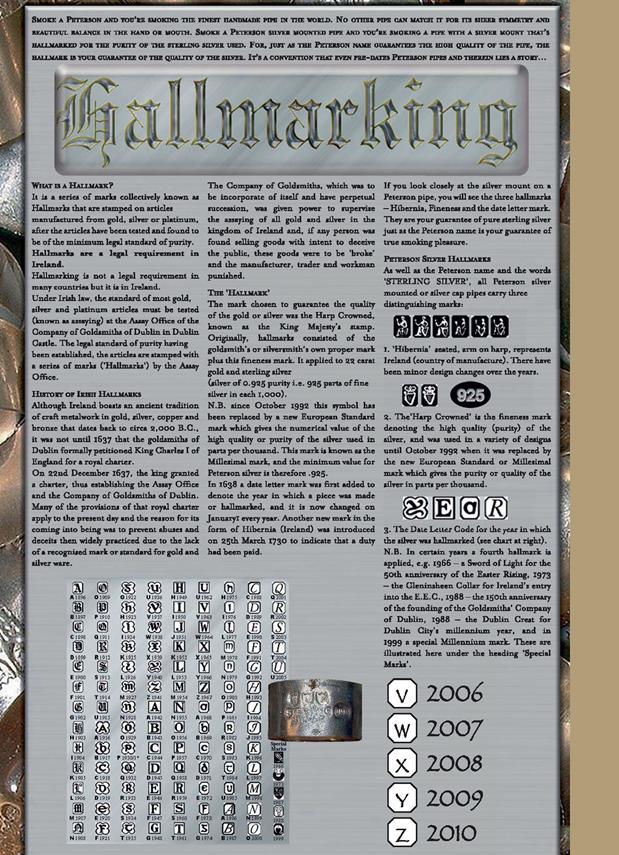 Here are photos of the finished pipes. The first is the Dublin Silver Cap 150 Bulldog. The first picture shows the box end with the shape number and the pipe shop price of the pipe new. The dimensions of the pipe are: Length: 5 1/2 inches, Height: 2 inches (including the cap) Diameter of the Bowl: 1 ¼ inches, Diameter of the Chamber: 3/4 inches. This is a beautiful pipe and will be going on the rebornpipes store. If you are interested in adding it to your collection have a look there.
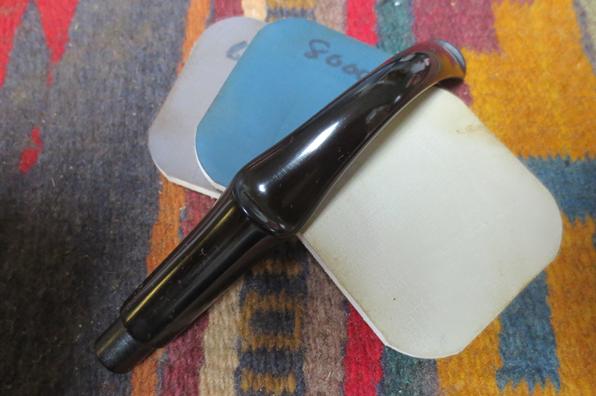
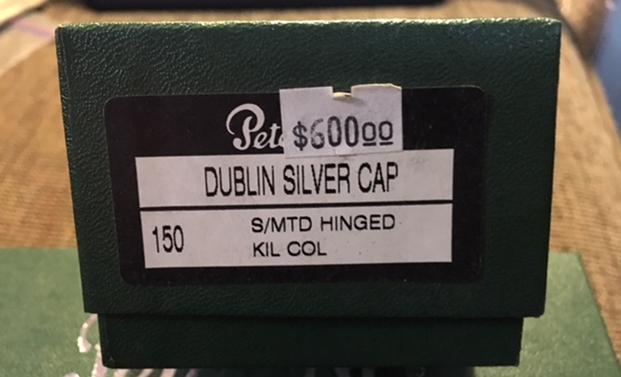

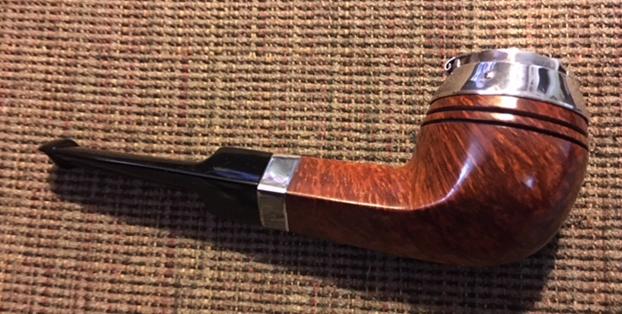
 The second pipe is the Dublin Silver Cap 106 Billiard. The first picture shows the box end with the shape number and the pipe shop price of the pipe new. The dimensions of the pipe are: Length: 6 inches, Height: 2 1/8 inches (including the cap) Diameter of the Bowl: 1 1/2 inches, Diameter of the Chamber: 3/4 inches. This is another beautiful pipe and it will also be going on the rebornpipes store. If you are interested in adding it to your collection have a look there.
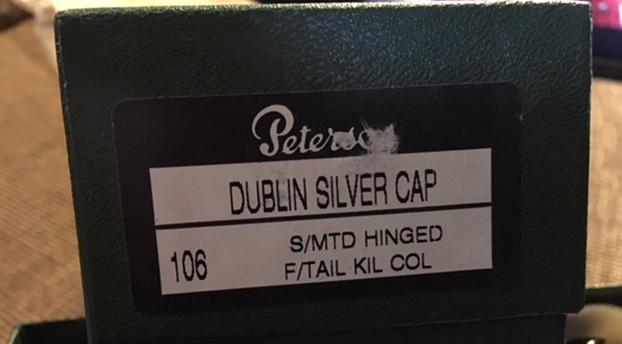

 Both of these are beautiful pipes and will be worthy additions to a Peterson’s Collector’s rack. They have stunning grain and polished silver. The combination looks really good with the black of the stem and silver inset P on the left side of the stems. They are new old stock (NOS) and have never been smoked or even handled much since 2000. If you would like to add one of both to your collection let me know via email to slaug@uniserve.com or send me a message on Facebook. Thanks for looking.