by Steve Laug
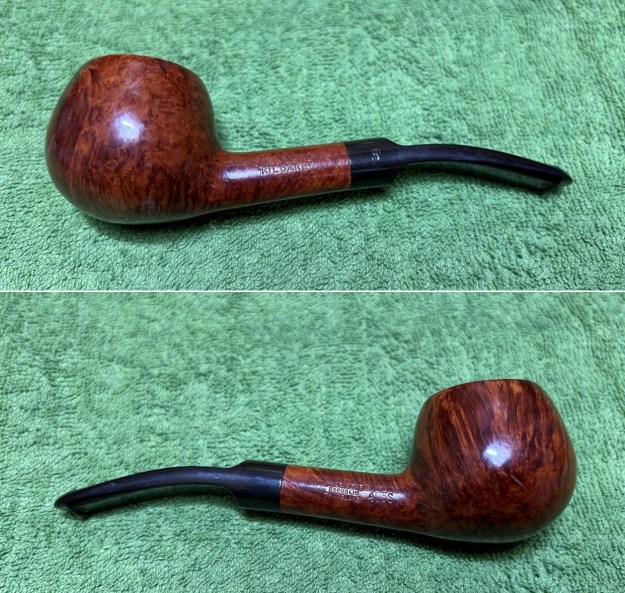
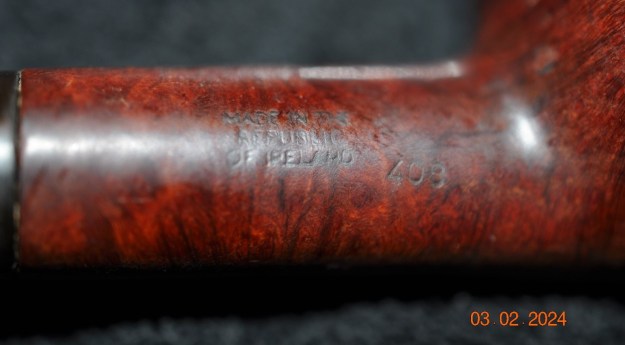
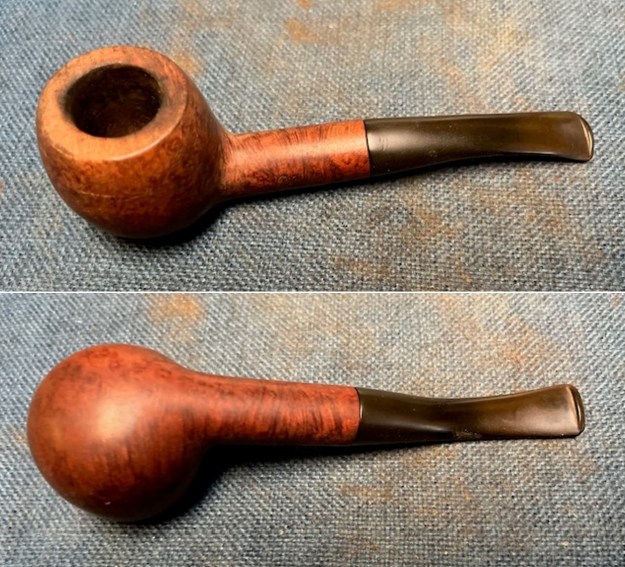
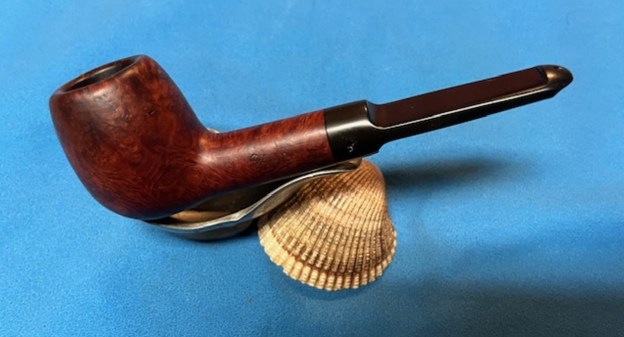
This is another pipe we picked up from a seller in Macon, Georgia, USA on 03/08/2025. It was a classic Peterson’s Apple shaped pipe. It was stamped Peterson’s [arched over] Dublin [over] Kildare. Mid shank on the right side it was stamped 408. It was truly a wreck of a pipe at the worst and at the best it was someone’s favourite. It was very dirty and was covered with tars and oils all around what must have been a natural coloured pipe when it started. The bowl had a thick cake that overflowed in lava onto the rim edge and top of the bowl. The inner edge of the bowl appears to have been poorly, if not infrequently reamed with a sharp knife. It was notched and damaged all the way around and was even visible with the lava coat. The stem was a vulcanite fishtail one that was very dirty, discoloured and there were deep tooth marks on both sides ahead of the button. The fit of the stem to the shank showed that the internals of the shank were as dirty as the externals of the pipe. All in all, it was truly a mess that I was unsure would clean up well. Jeff took photos of the pipe so I could have a sense of what it looked like before he started his work on it.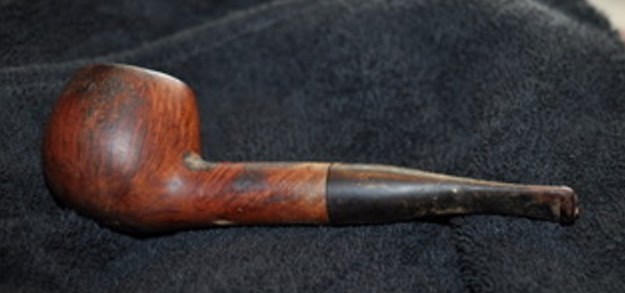
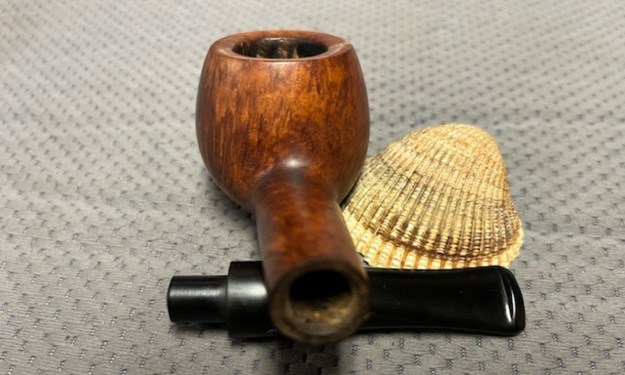
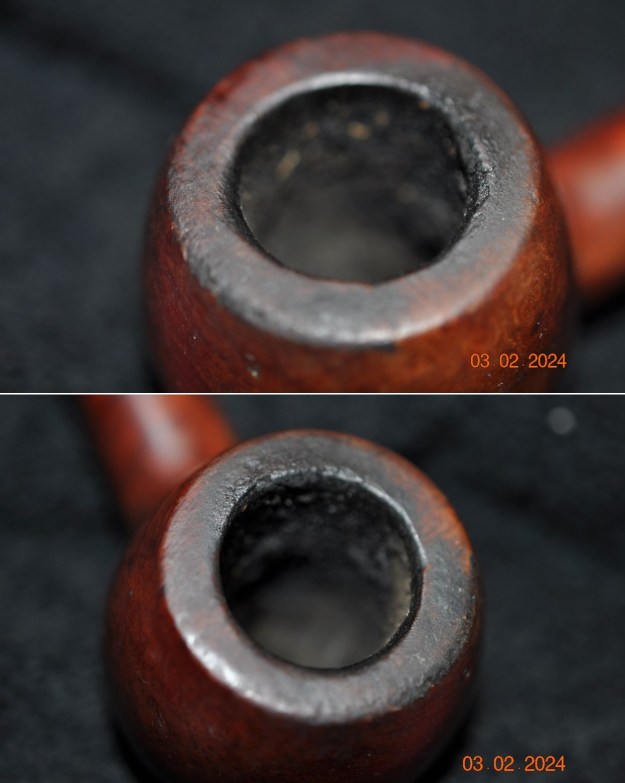
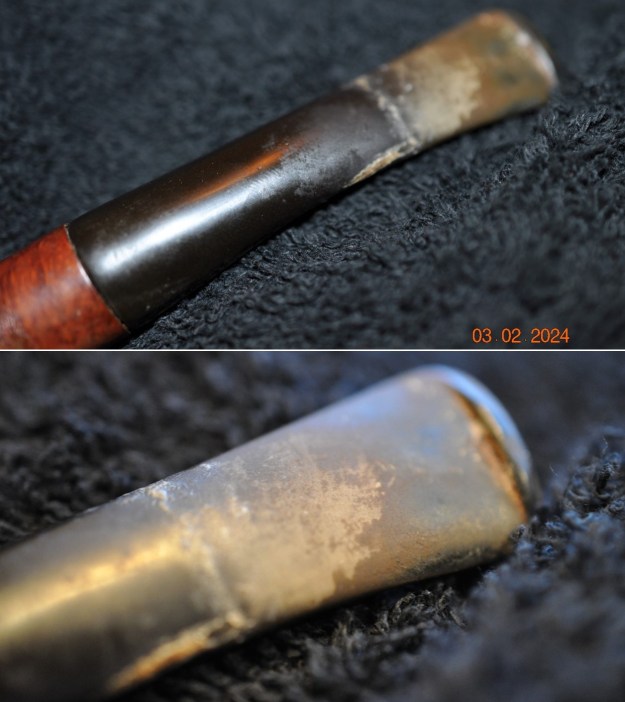
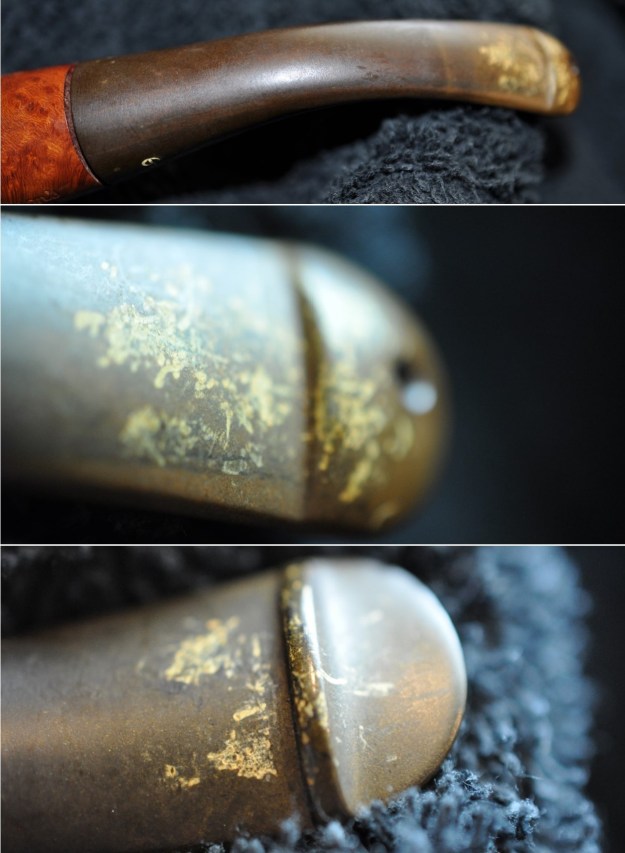
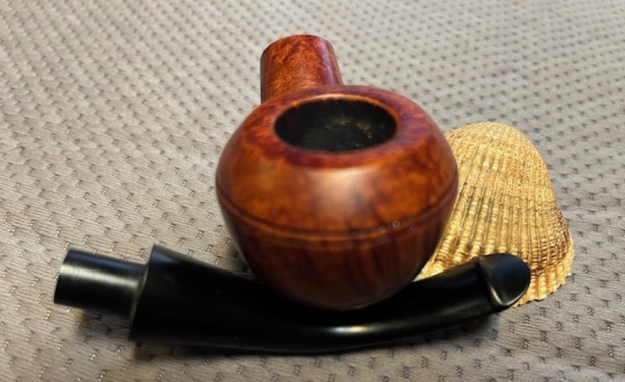
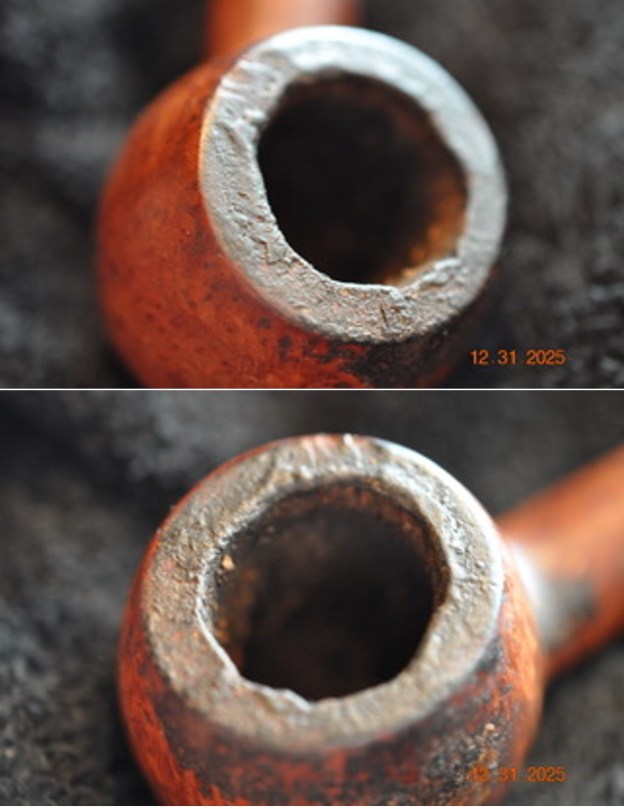
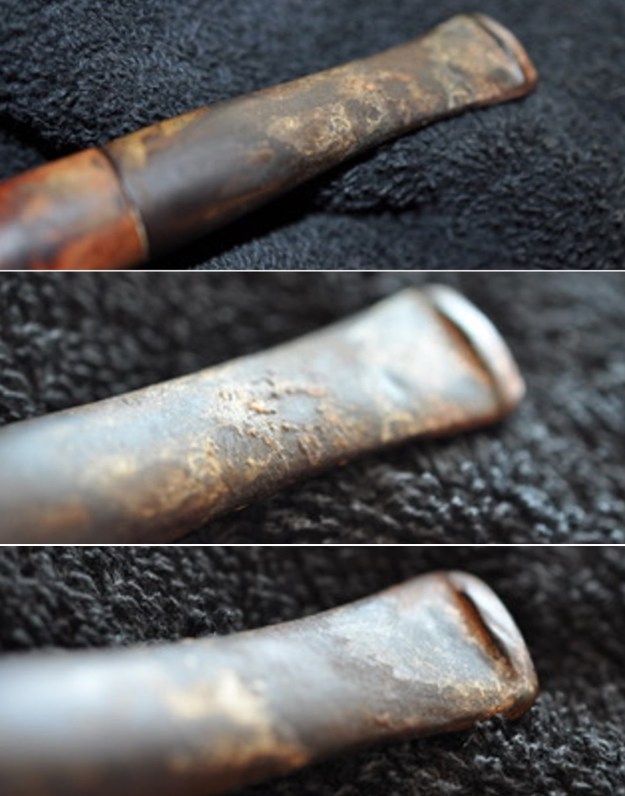
 Jeff took photos of the stem and the bowl and rim to give a sense of the horrible condition of the pipe. You can see the thick cake in bowl and the lava overflow on the edges and rim top of the bowl. The damage on the inner edge of the rim is visible even under the lava. The stem surface is very dirty and you can see the tooth marks and damage. This will be a challenge!
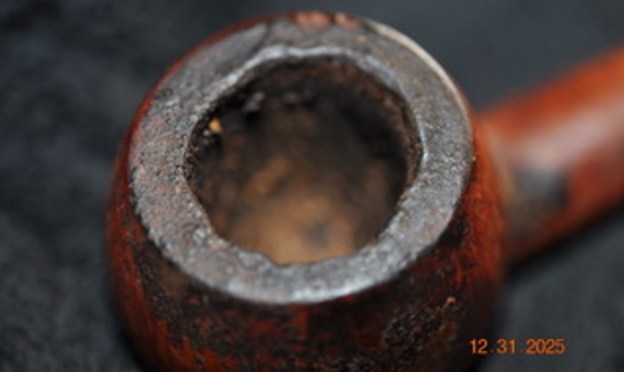
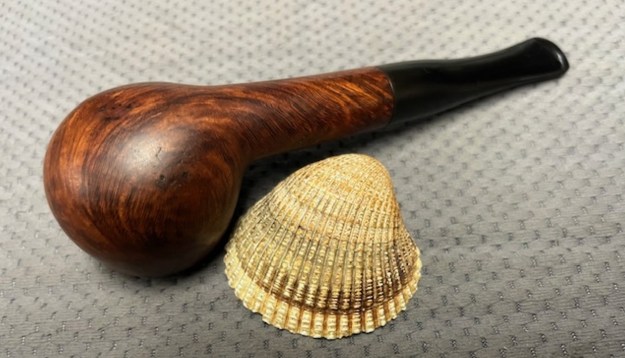
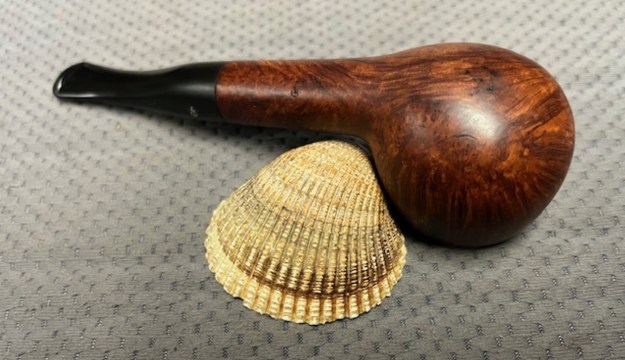
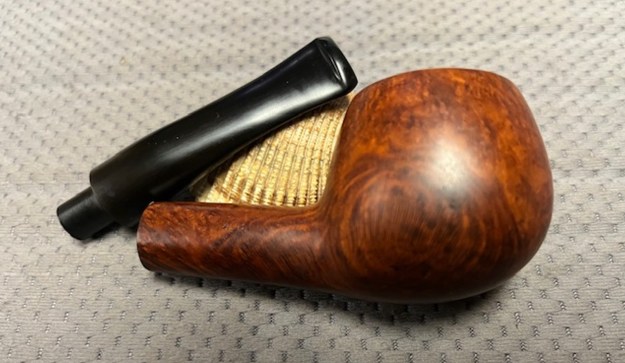
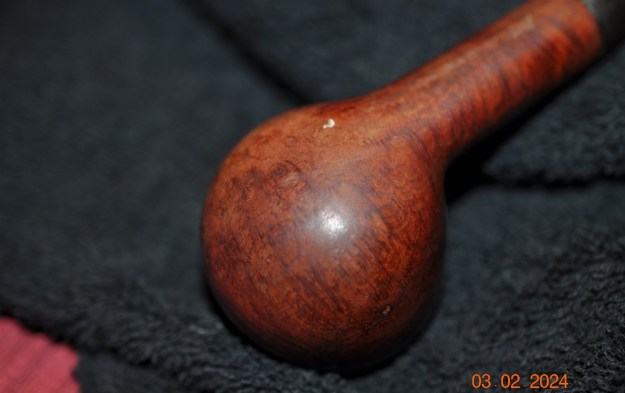
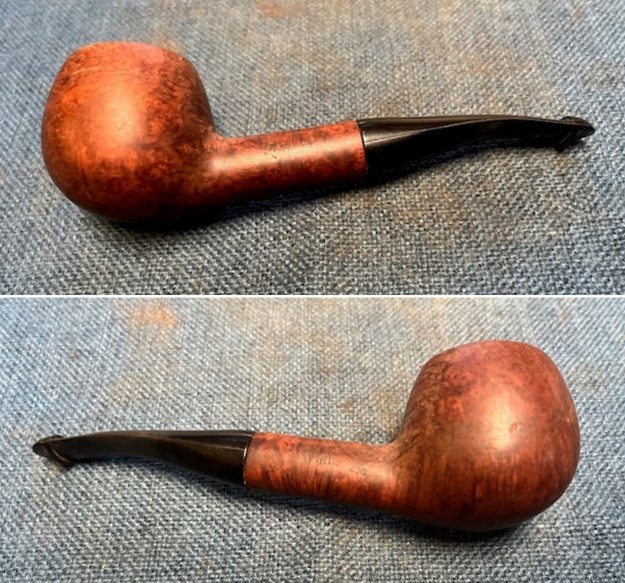
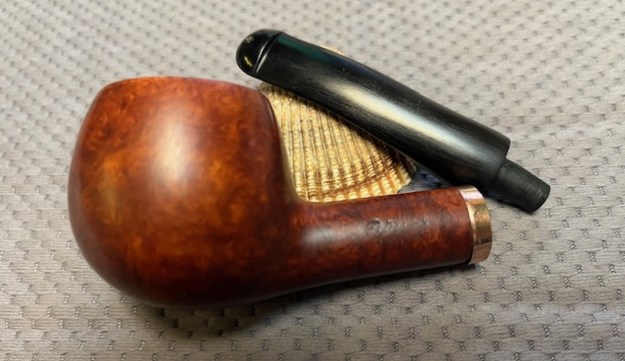
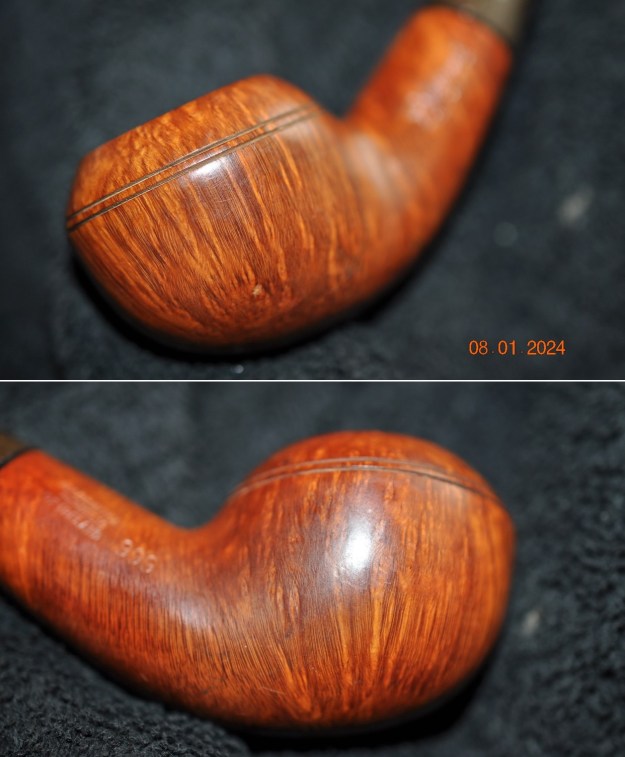
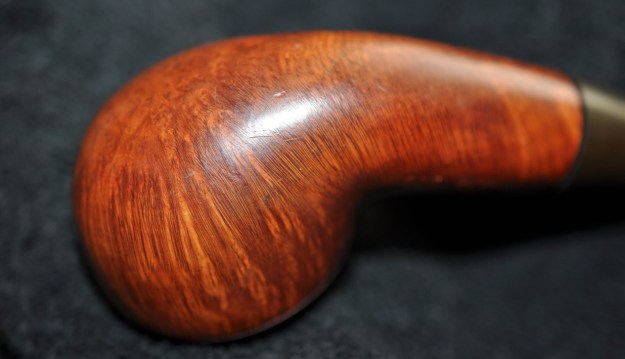
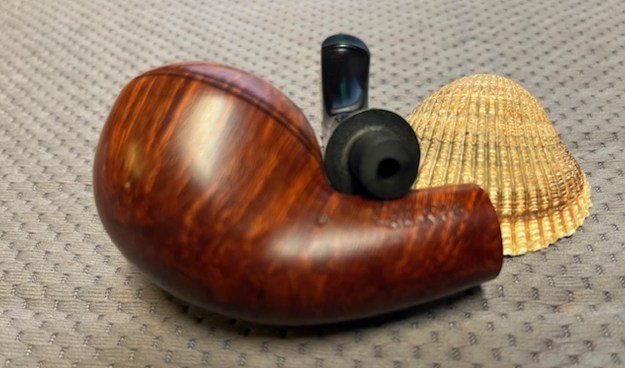
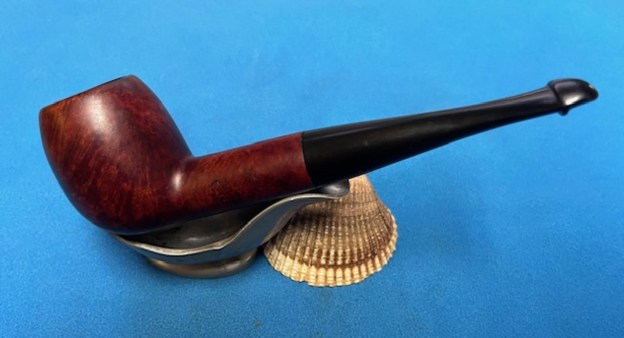
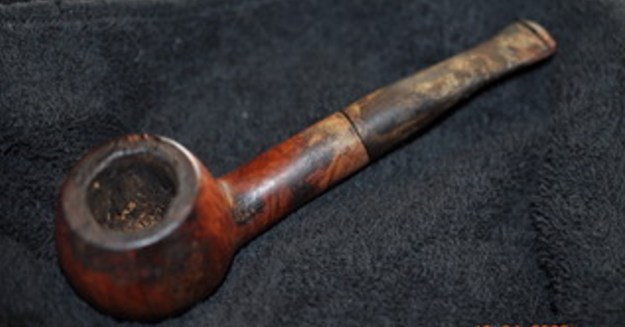
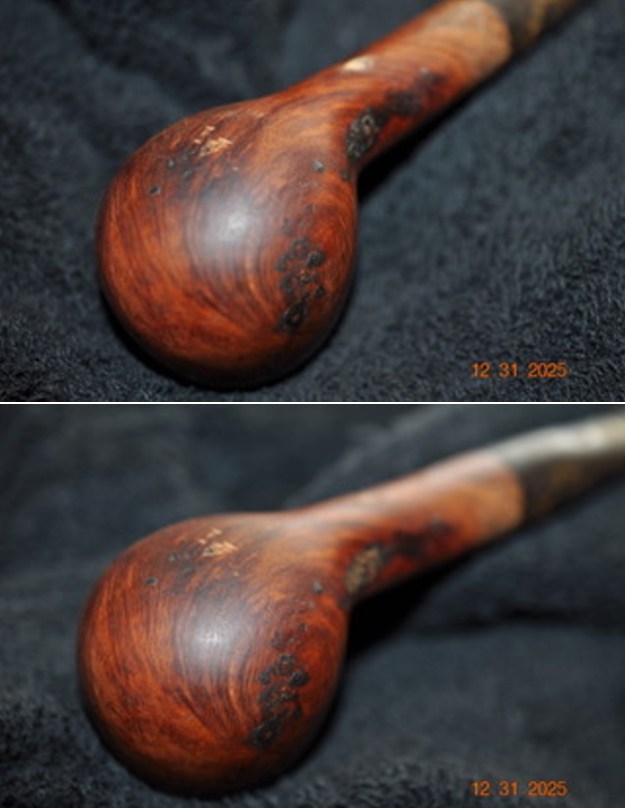
 He also took photos of the sides of the bowl and the heel to show the beautiful grain that could not be totally hidden by the heave filth on the bowl sides. You can see the oils and debris ground into the finish and built up on the surface of the bowl and shank.
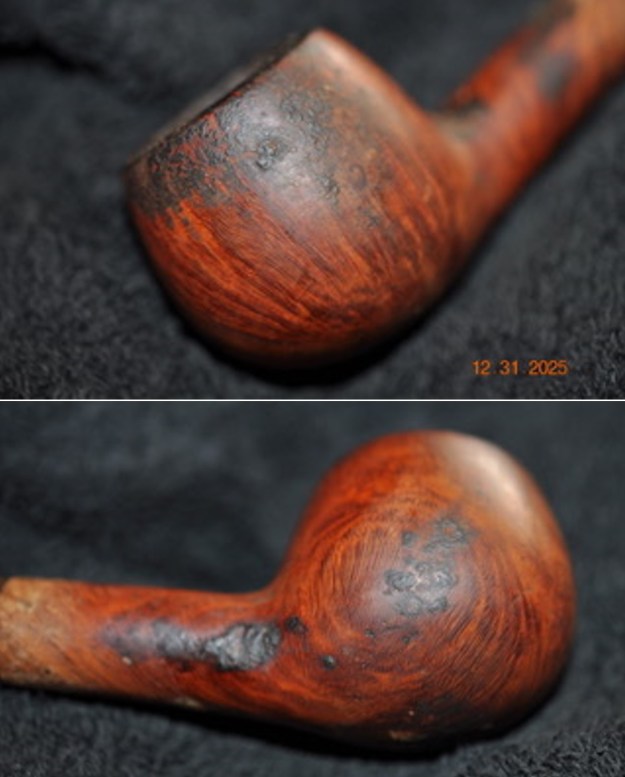
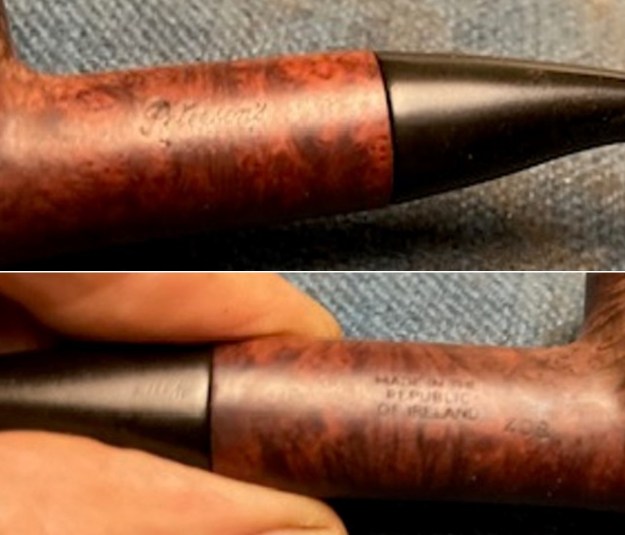
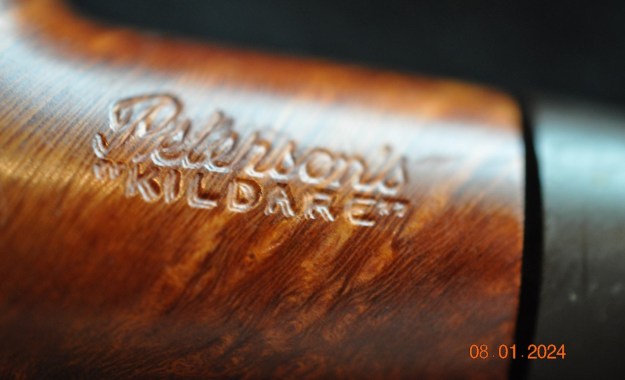
 He took a photo of the stamping on the left side of the shank. It is faint but still is readable as noted above.
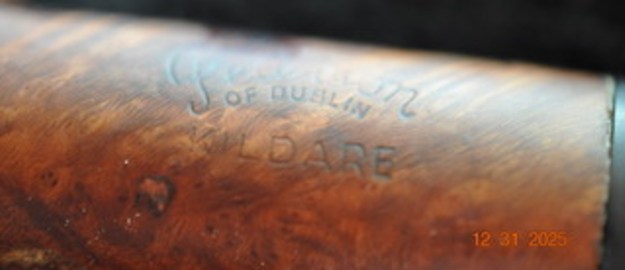 I reread Pipedia’s article on Peterson pipes. It is a great read in terms of the history of the brand (https://pipedia.org/wiki/Peterson). I am quoting nothing specifically from that article but recommend you take time to read it.
I turned to “The Peterson Pipe” by Mark Irwin and Gary Malmberg to get some background on the Peterson’s Kildare Line. It has become my go to any time I want information on Peterson’s lines. Page 314 had the following information on the Kildare Line.
Kildare (1965-) First issue of line with matte-finish in Classic Range shapes, P-Lip and fishtail mouthpiece. Second issue C.1979 as Kildare Patch, with rusticated patches on pipe surface. Third issue 2010, matte-brown, P-Lip or fishtail mouthpiece, no band. Fourth issue 2011-, burgundy sandblast finish, nickel army mount, fishtail mouthpiece, exclusive to smokingpipes.com.
The information given above identifies the pipe as a First Issue of the line with a matte-finish. It would have been issued between 1965 and 1979. This line was issued in a brown finish with either a P-lip or a fishtail mouthpiece. This means that the pipe is an older issue Kildare. The 408 shape number is attached to a ¼ bent Apple.
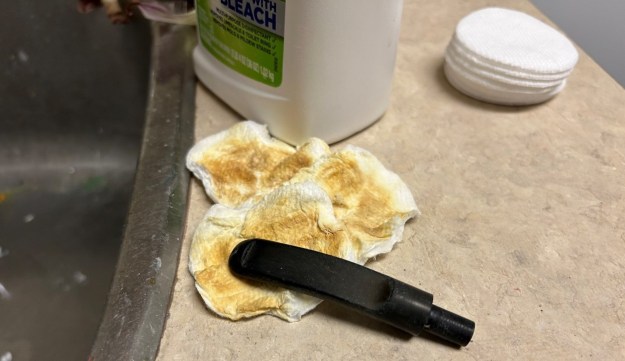
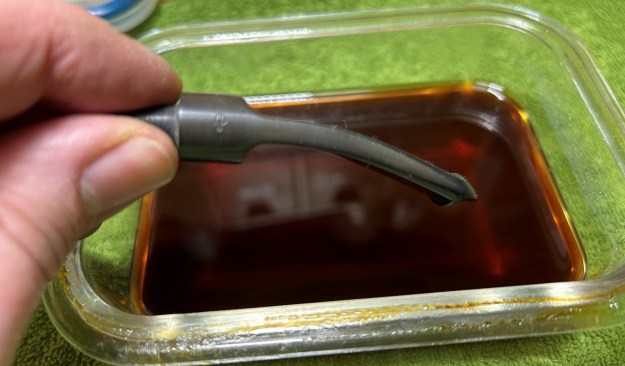
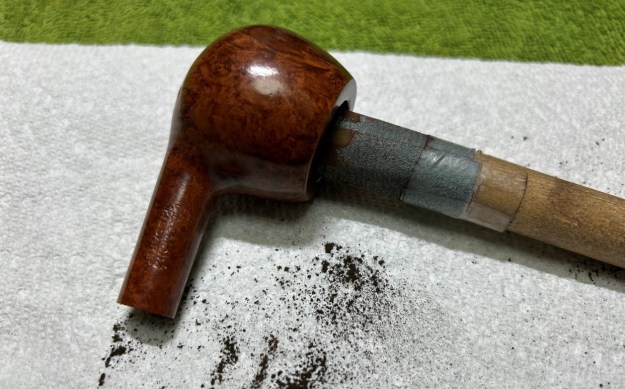
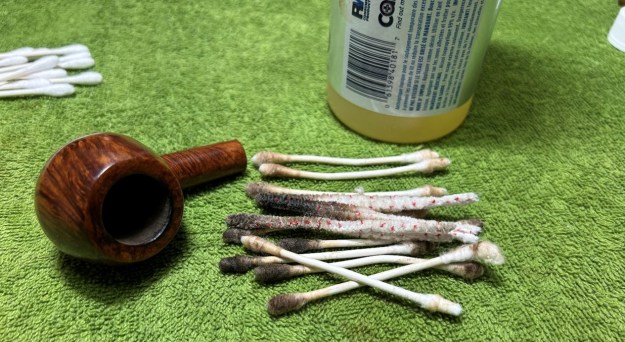
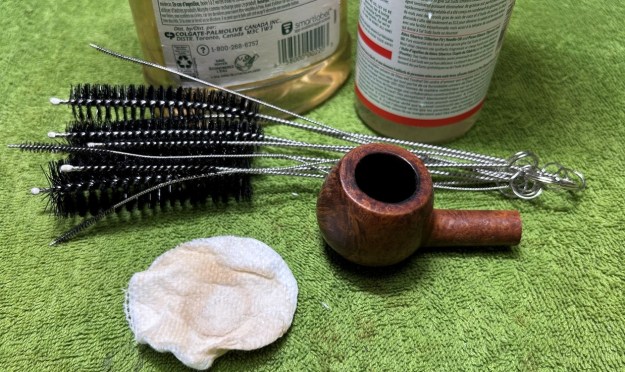
Now it was my turn to work on the pipe. Jeff had done an amazing cleanup of the pipe. It was such a wreck that I wondered what it would look like after his work. He reamed the heavy cake with a PipNet reamer and cleaned up that with a Savinelli Fitsall Pipe Knife. He scrubbed the internals of the bowl and stem with alcohol, cotton swabs, shank brushes and pipe cleaners. He scrubbed the externals with undiluted Murphy’s Oil Soap and rinsed the bowl off with running water. The scratches in the briar stood out once clean. There were some on the heel of the bowl. The rim top was clean but badly damaged on the inner edge. He scrubbed the dirty stem with Soft Scrub and then soaked it in Briarville’s Pipe Stem Deoxidizer. Once it had soaked he rinsed it off with warm water to remove the residual solution. He dried it off and rubbed it down to remove any oxidation that was still on the stem. Overall the pipe looked better but would be a challenge to bring back to life.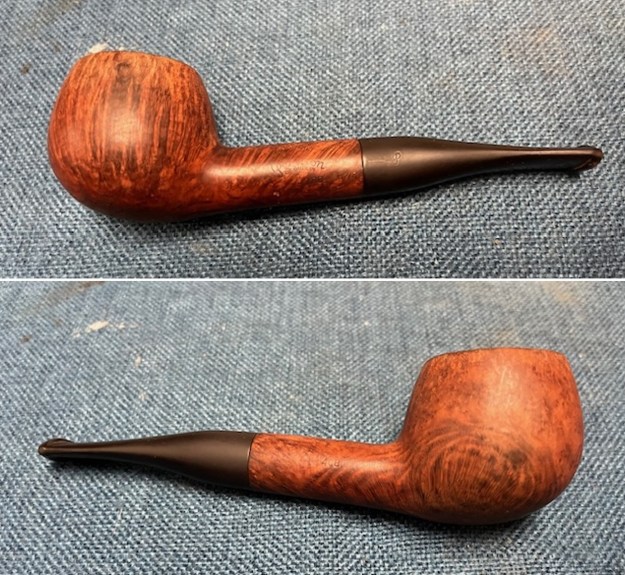
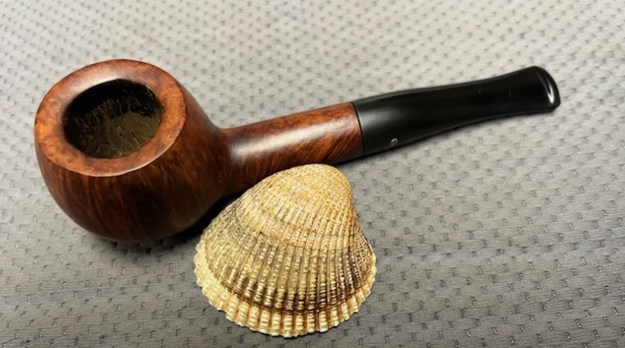
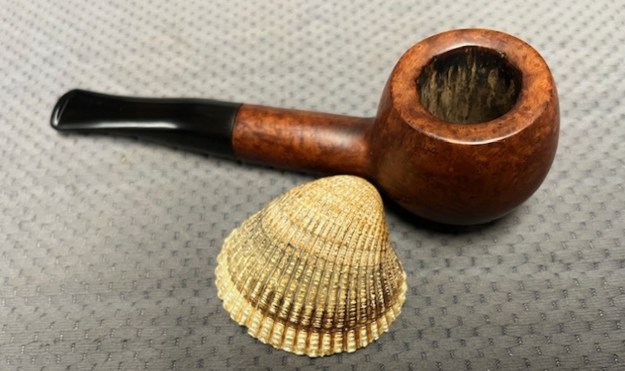
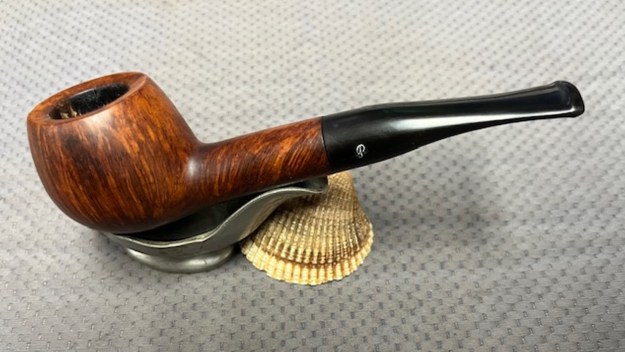
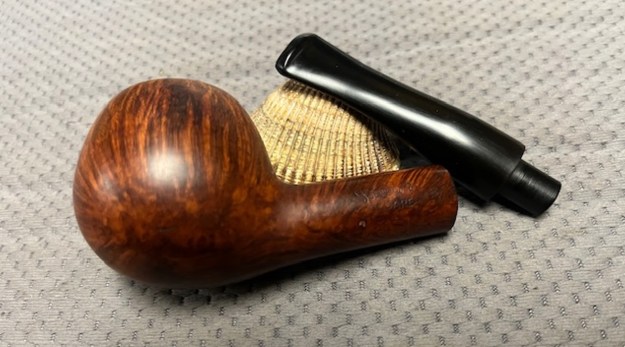
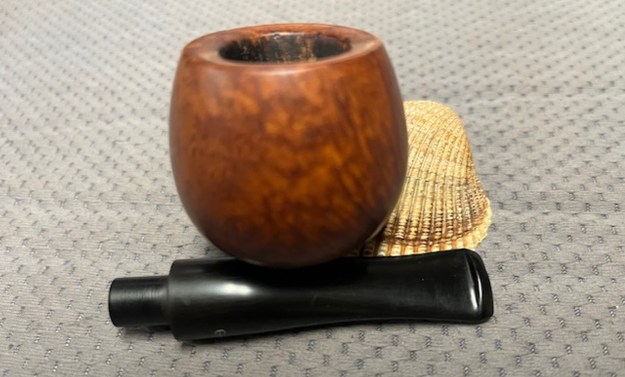
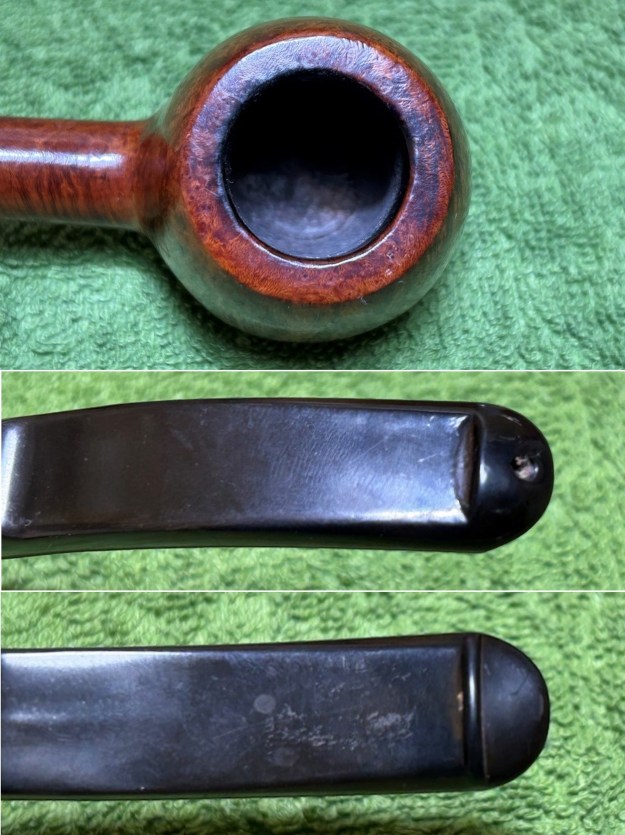
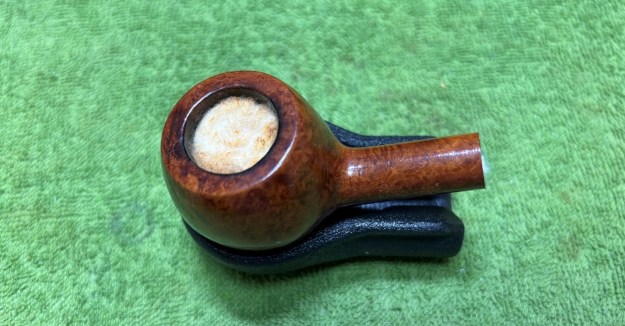
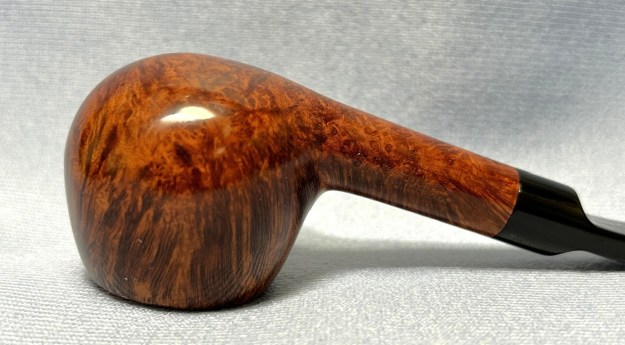
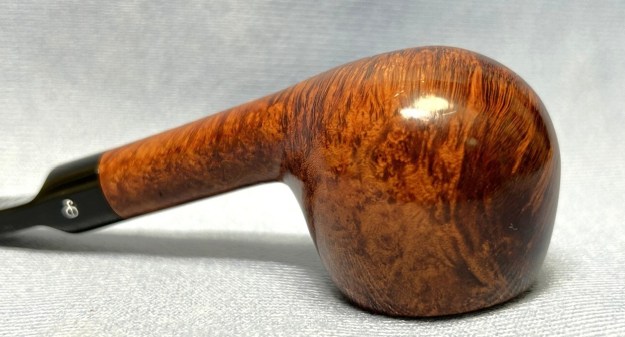
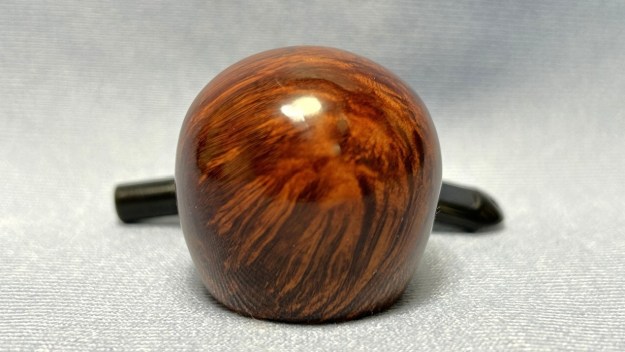
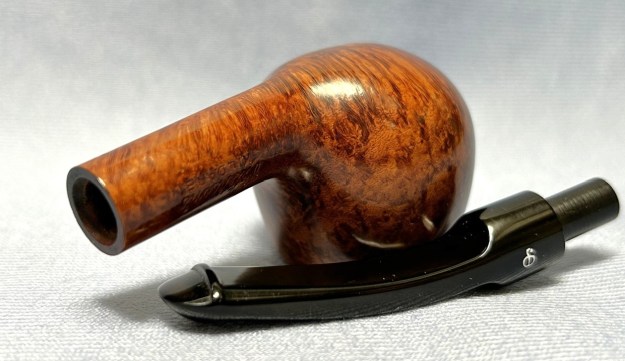
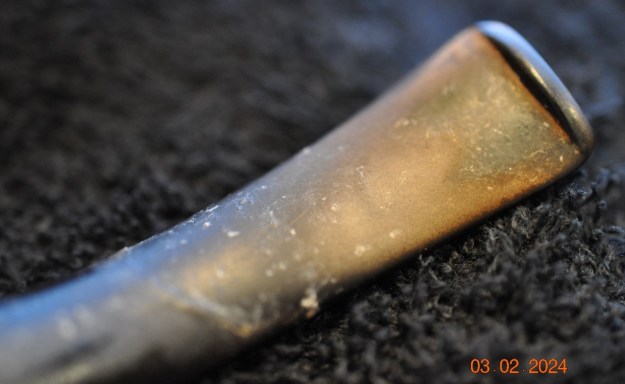
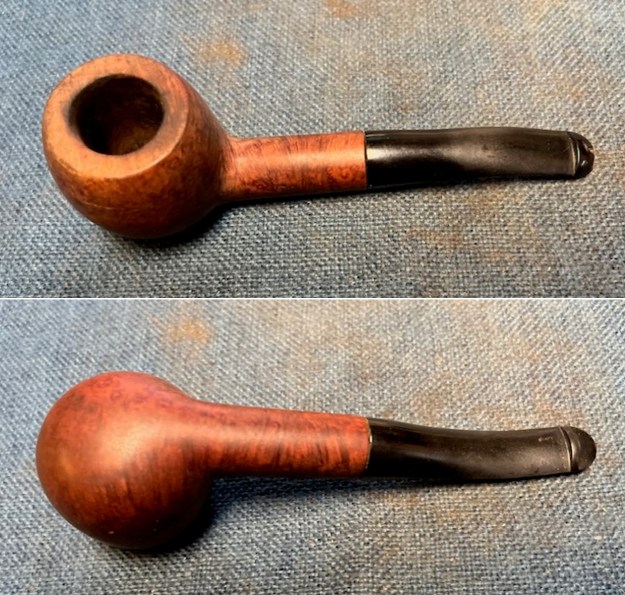
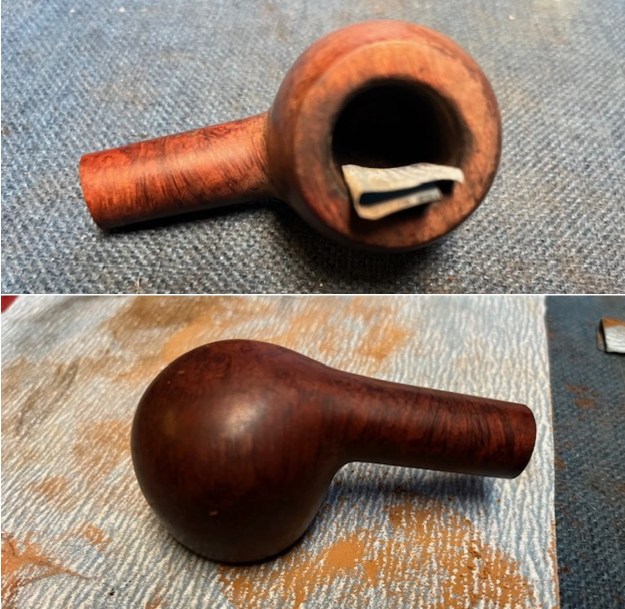
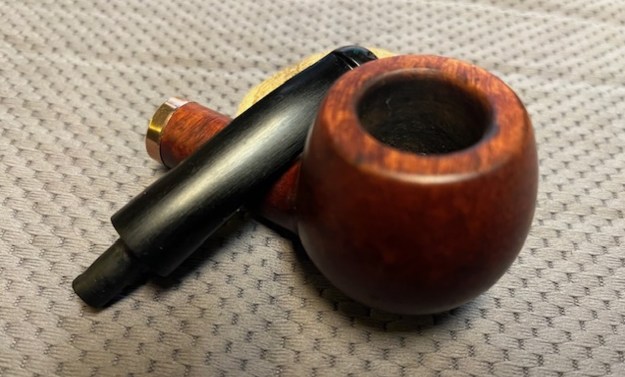
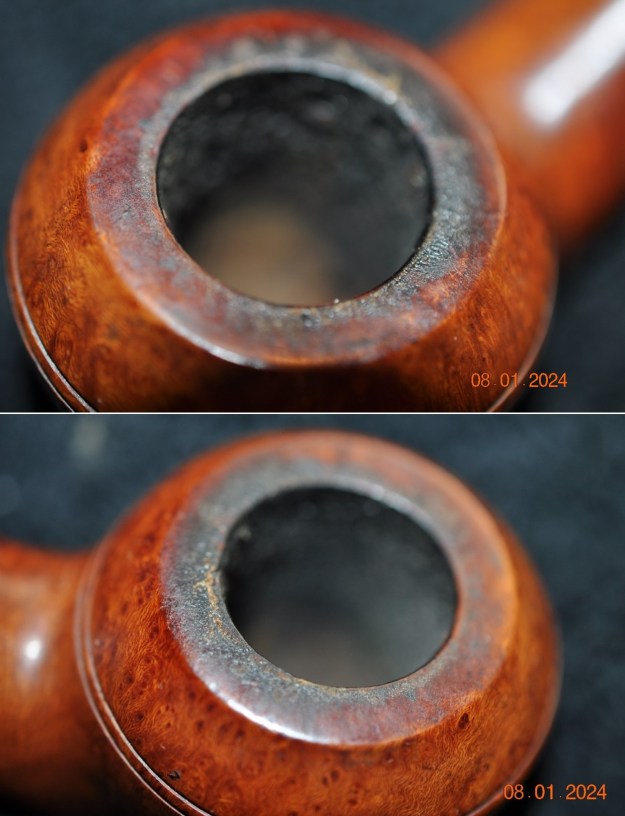
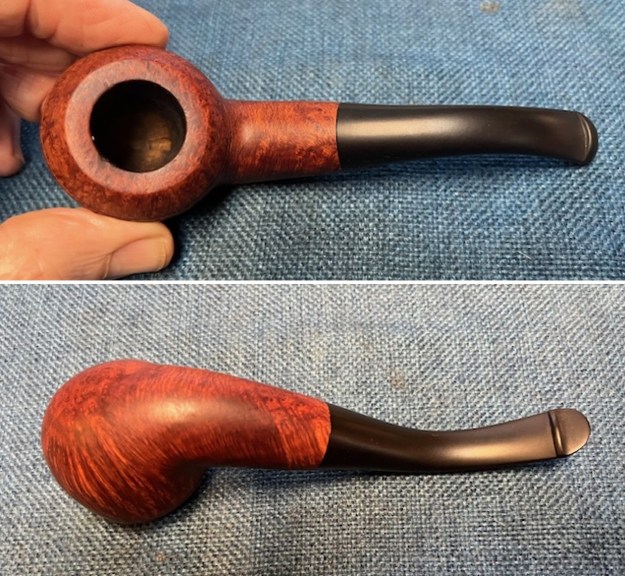
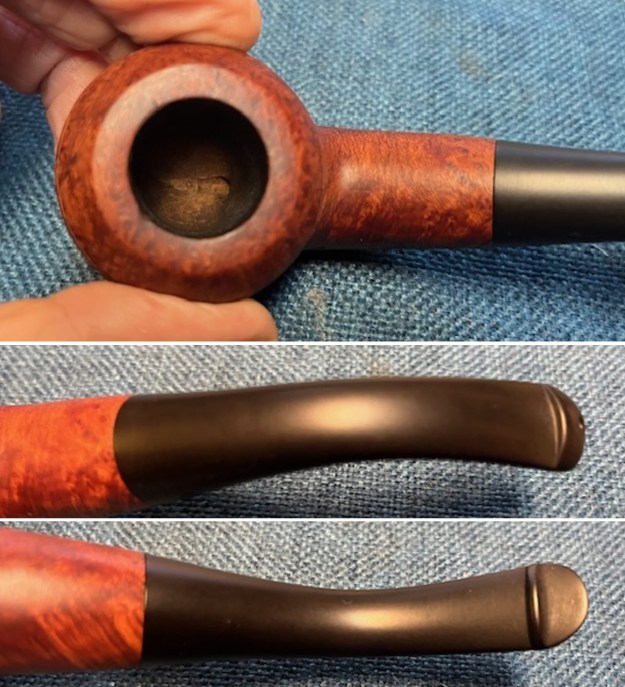
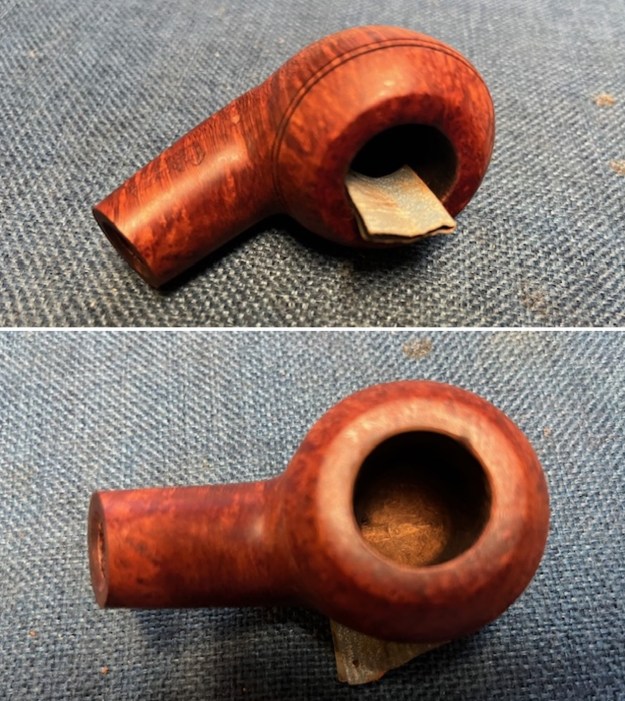
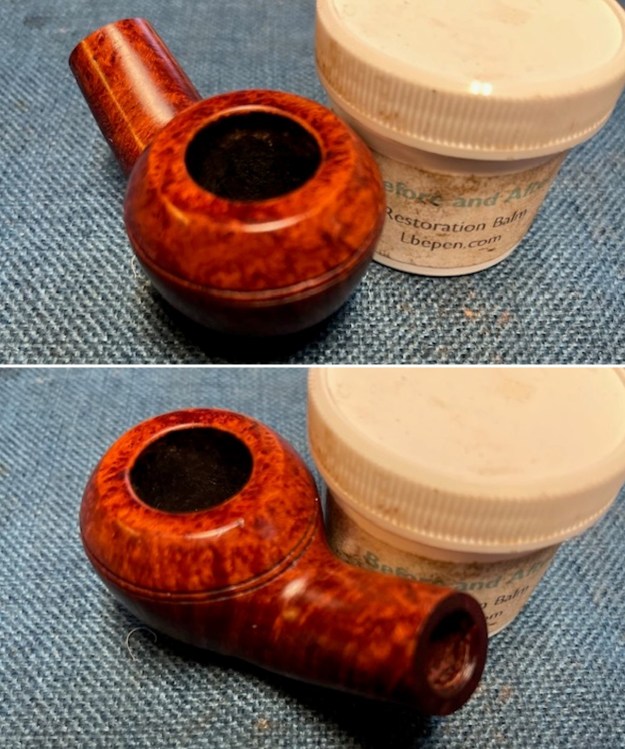
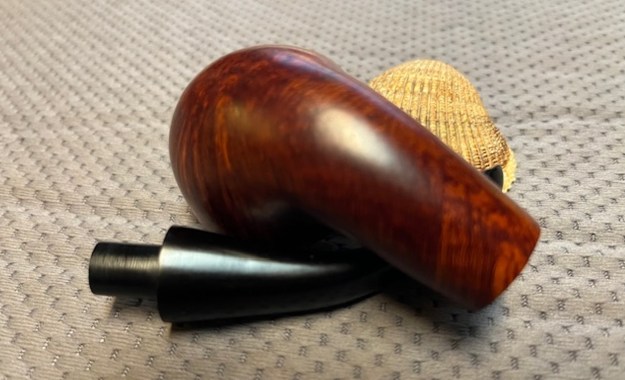
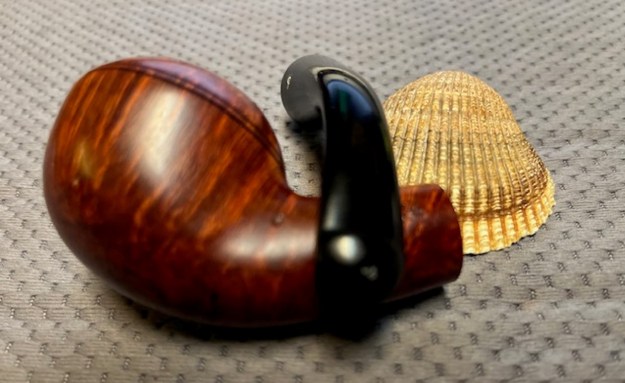
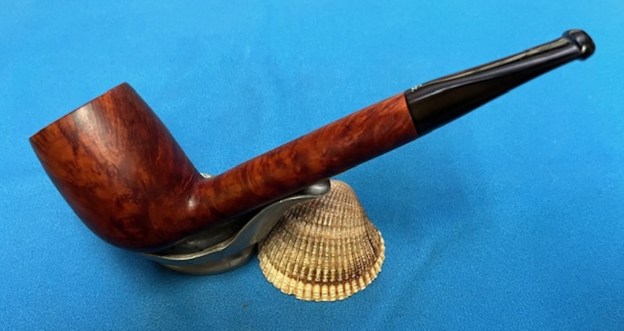
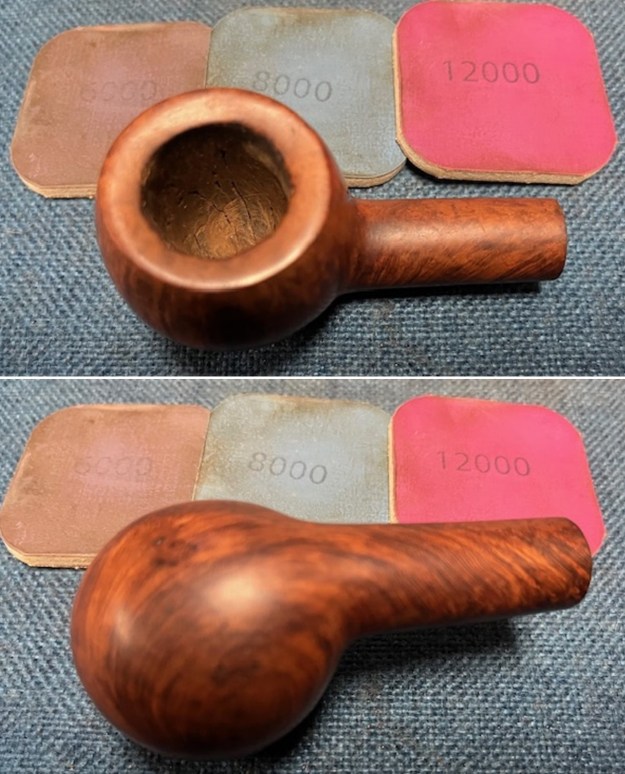
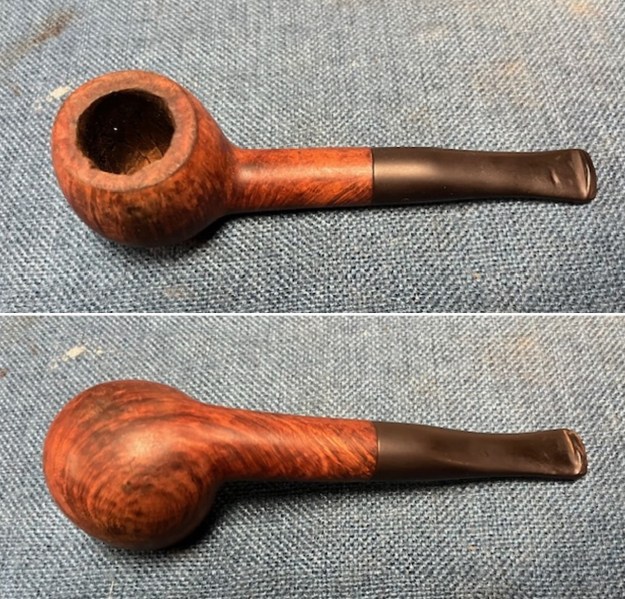 I took a photo of the rim top to show the condition. You can see the clean bowl. The bowl is in excellent condition and the rim top shows the heavy damage on the inner edge of the bowl. The stem came out looking quite good and the tooth marks and chatter were visible on the surface ahead of the button.
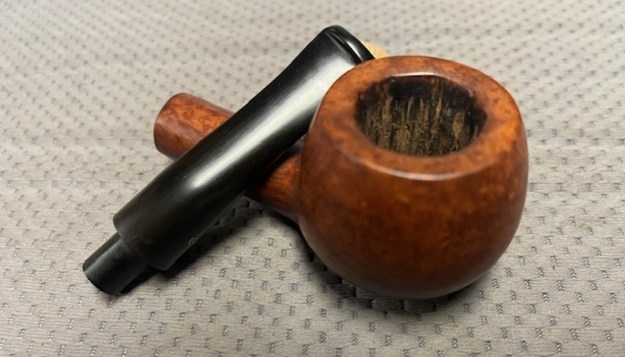
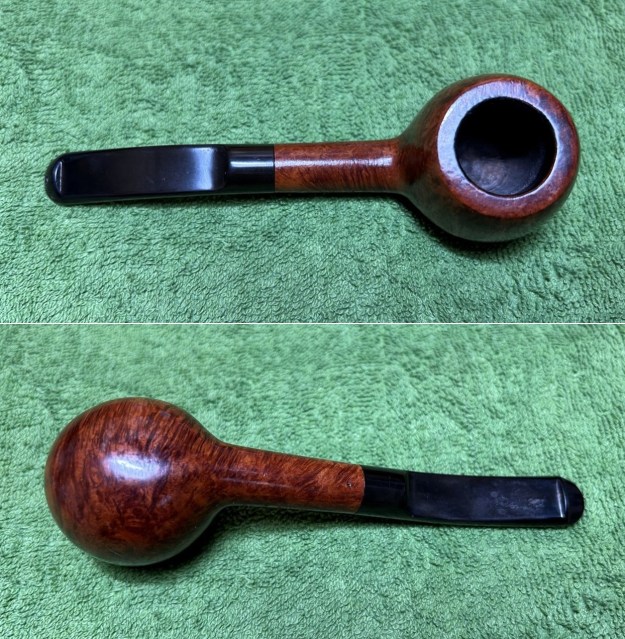
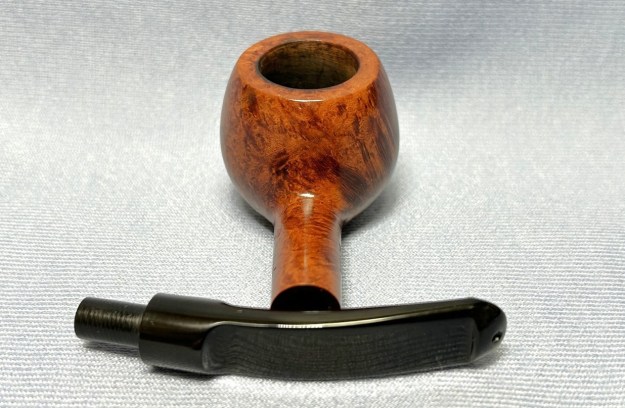
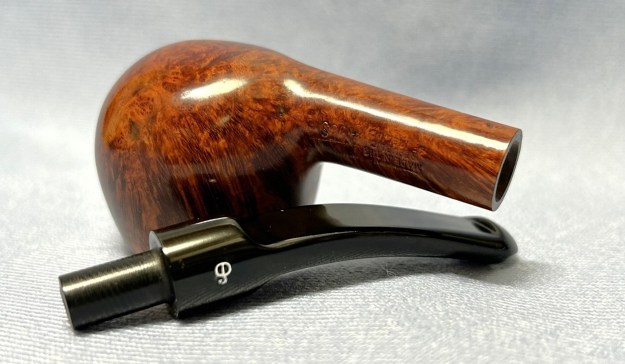
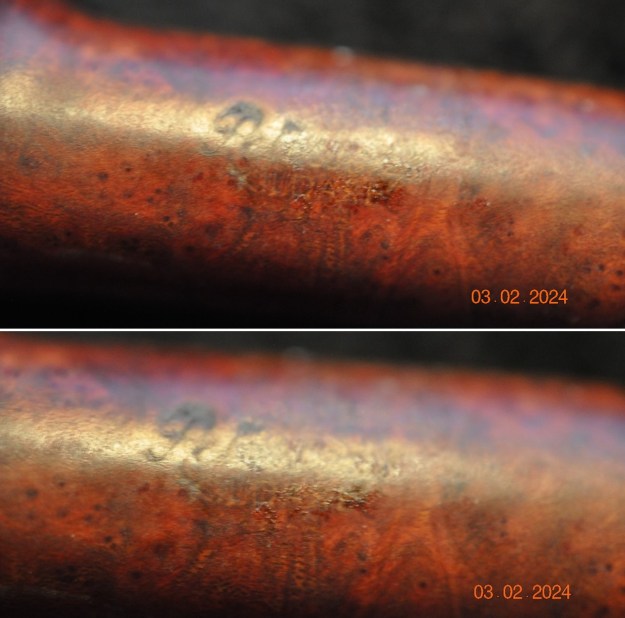
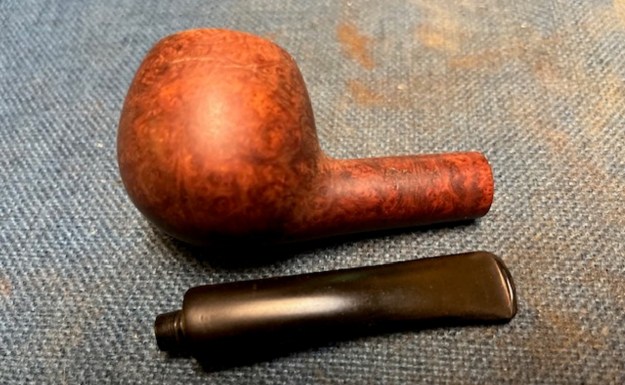
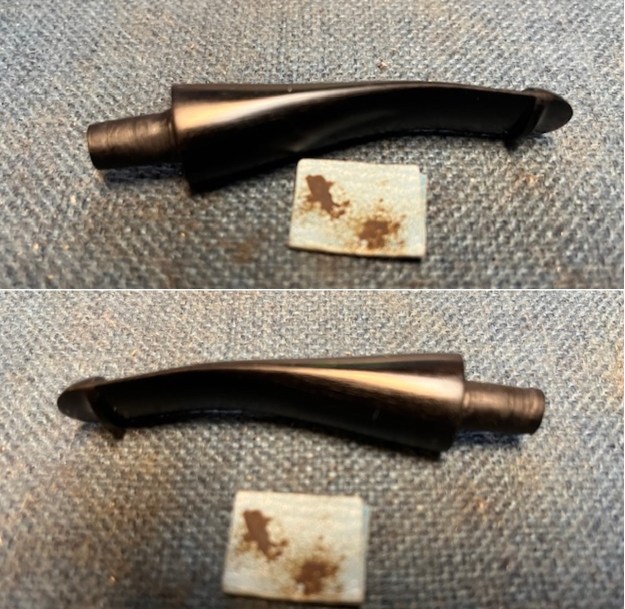
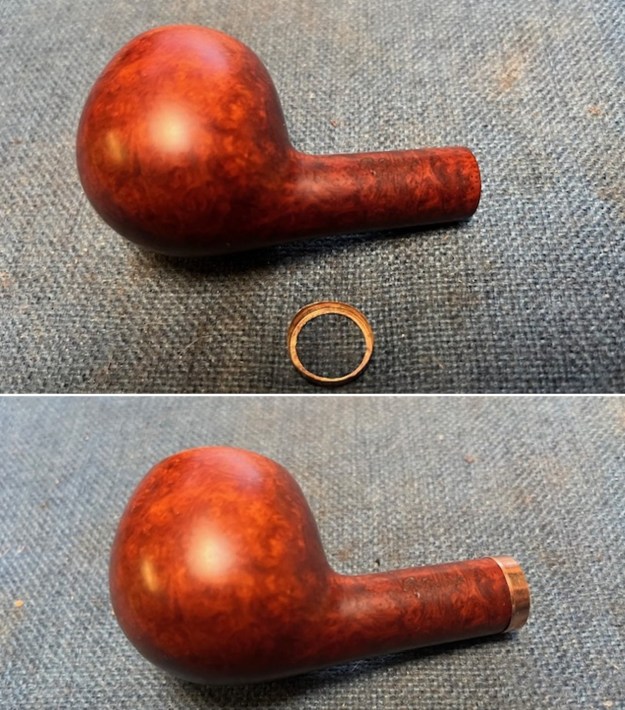
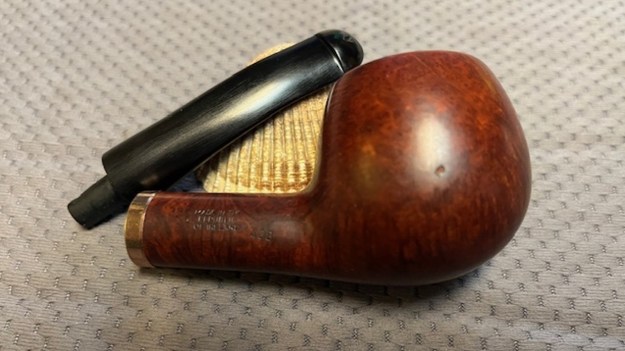
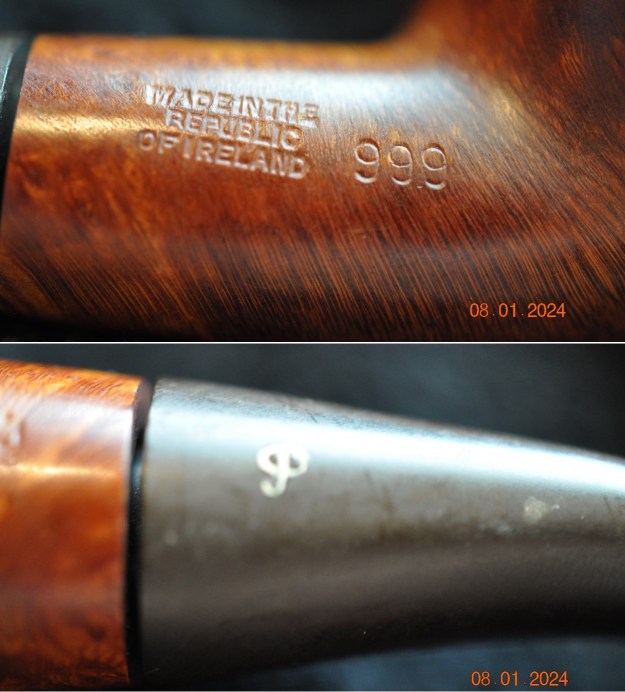
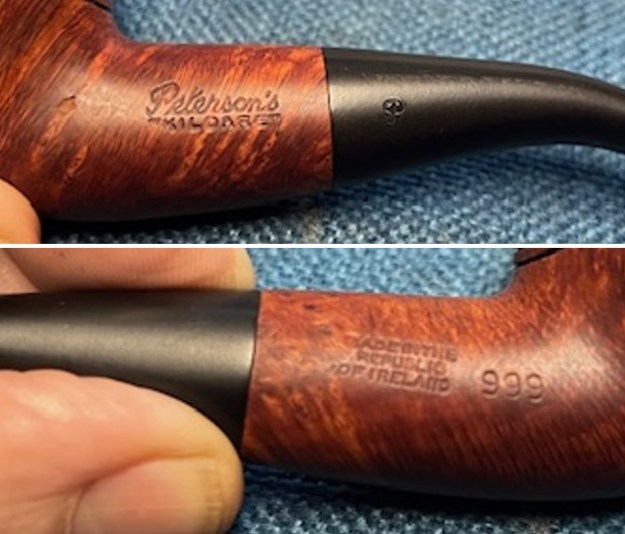
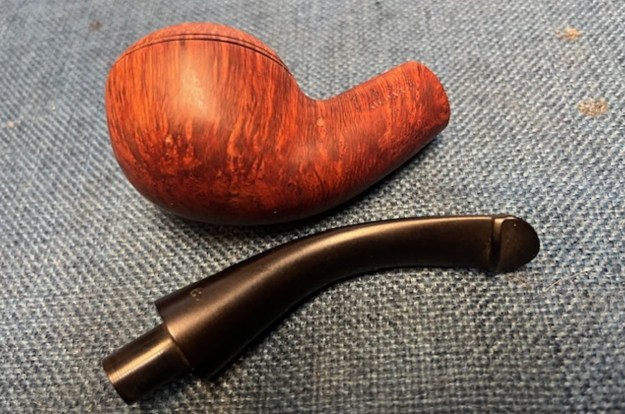
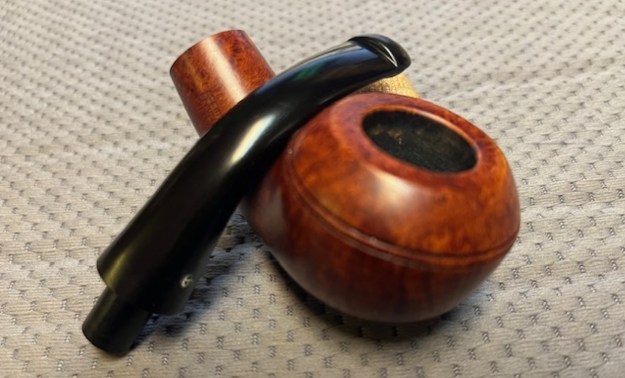
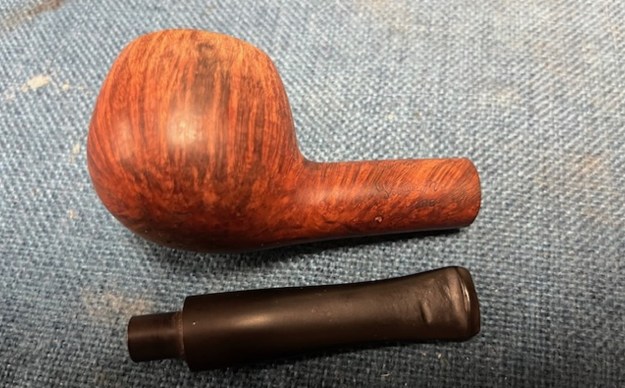
 I took photos of the sides of the shank to show the stamping. The photo clearly shows the faint stamping though it is actually more readable in person. The stem is also faintly stamped with a Peterson’s P logo. I removed the stem from the shank and took a photo of the pipe parts to show what I was working with. It really does have some beautiful grain on the bowl and shank.
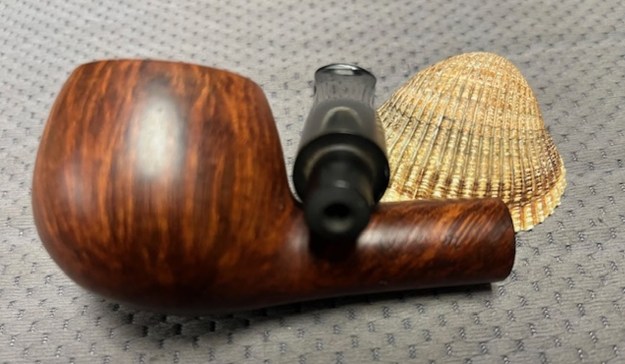
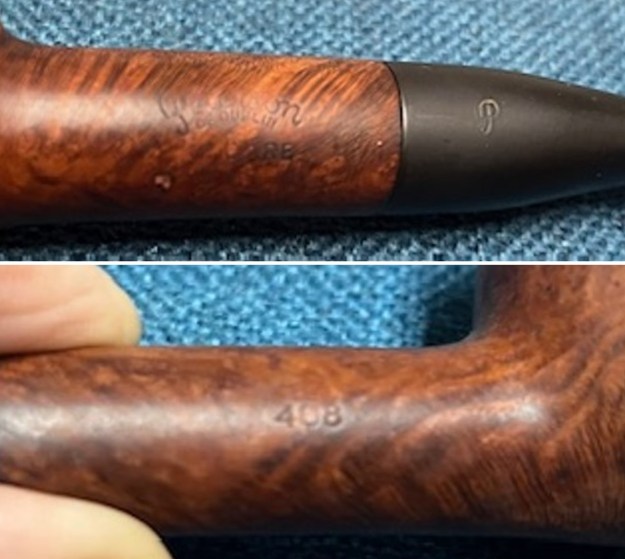
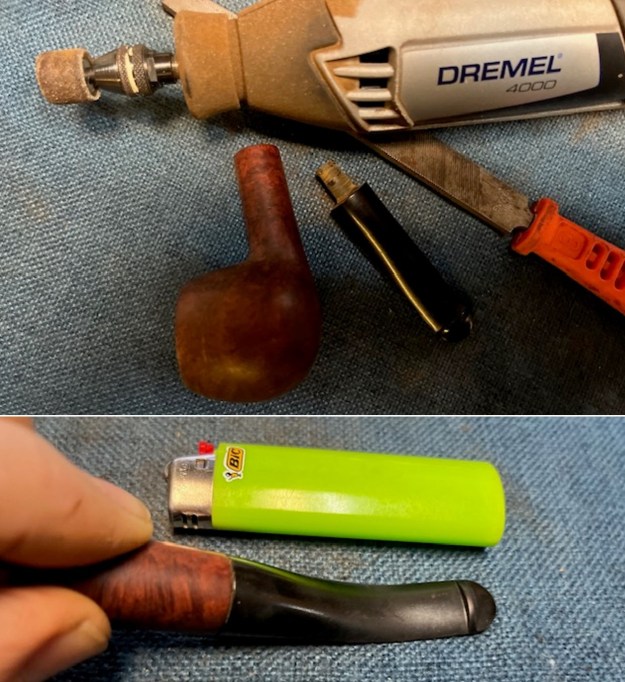
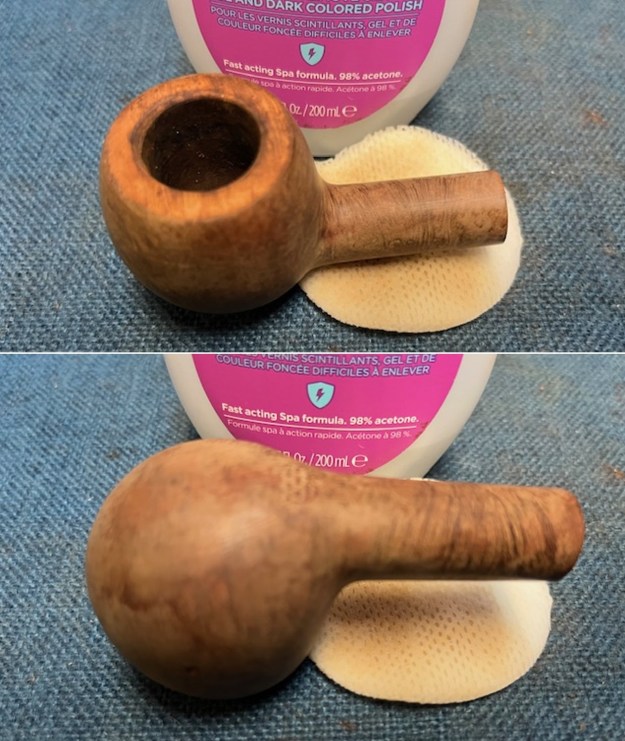
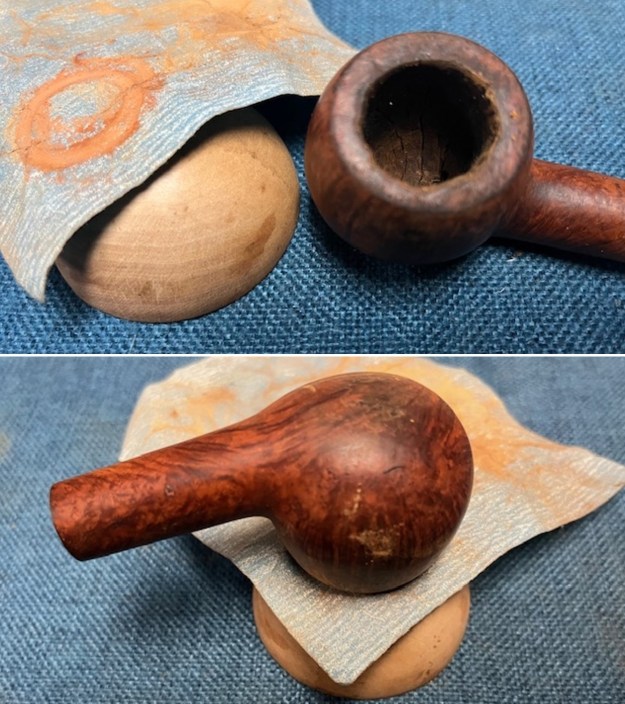
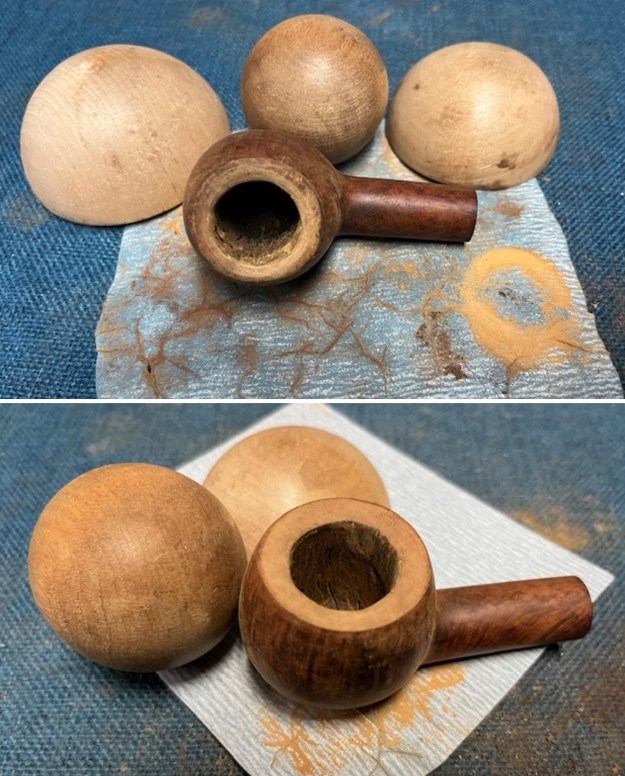
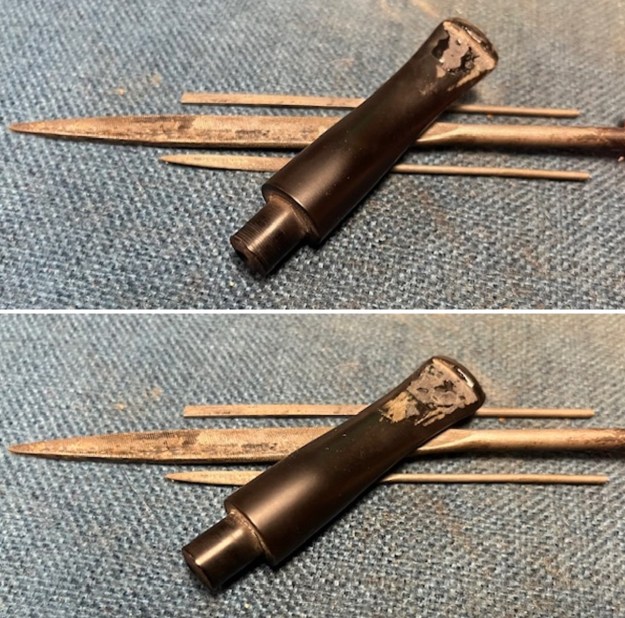
 It was time to work on the pipe. I started by trying to clean up the inner edge bevel with a folded piece of 220 grit sandpaper. It was too far gone for that to work. I changed course to use various wooden spheres I have here along with 220 grit sandpaper to try to rescue the rim edge and bevel. Once finished it definitely looked better.
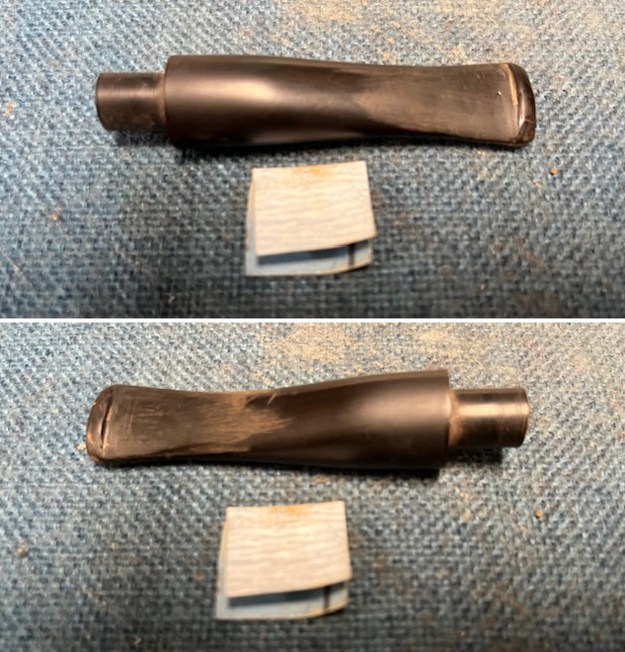
 I filled in the deep road rash on the heel of the bowl with clear CA glue, working it into the deep pits with a tooth pick. Once it cured I used a folded piece of 220 grit sandpaper to smooth it out and blend it in.
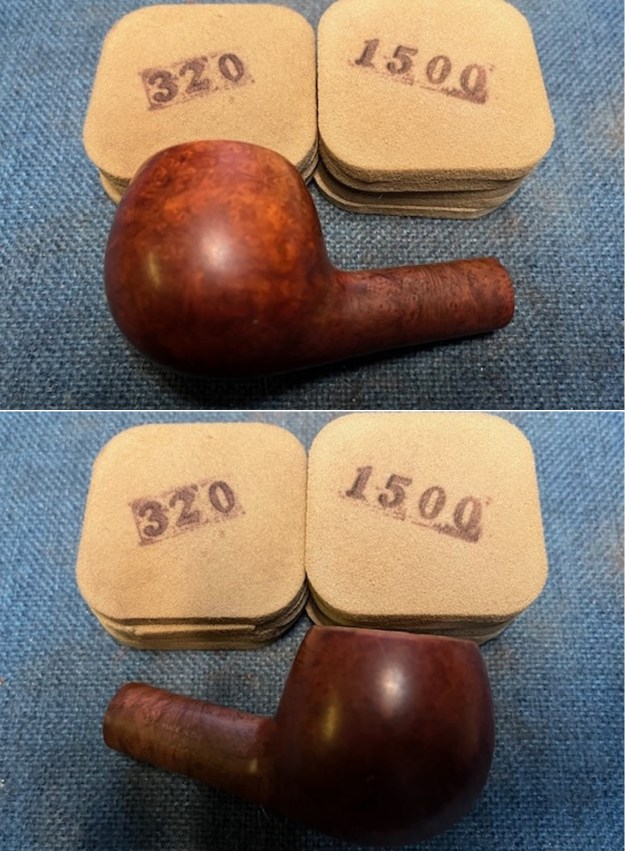
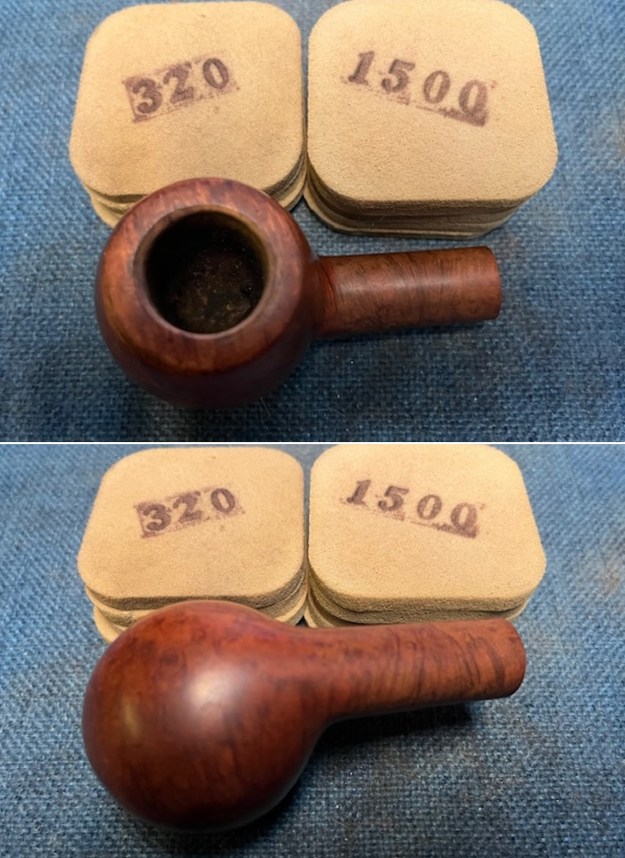
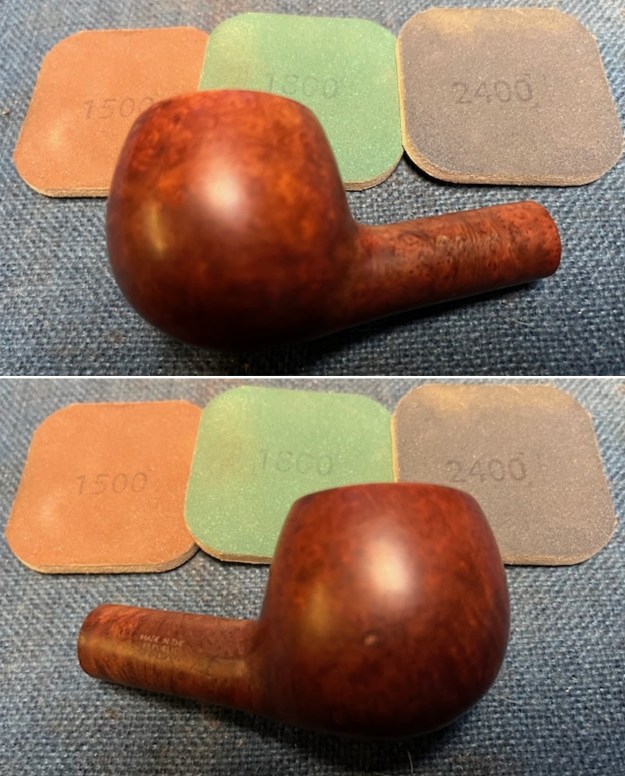
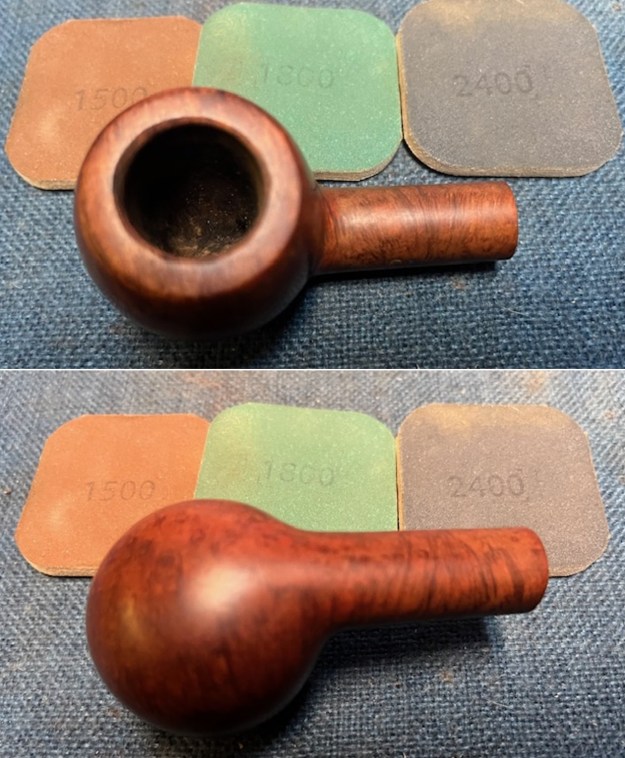
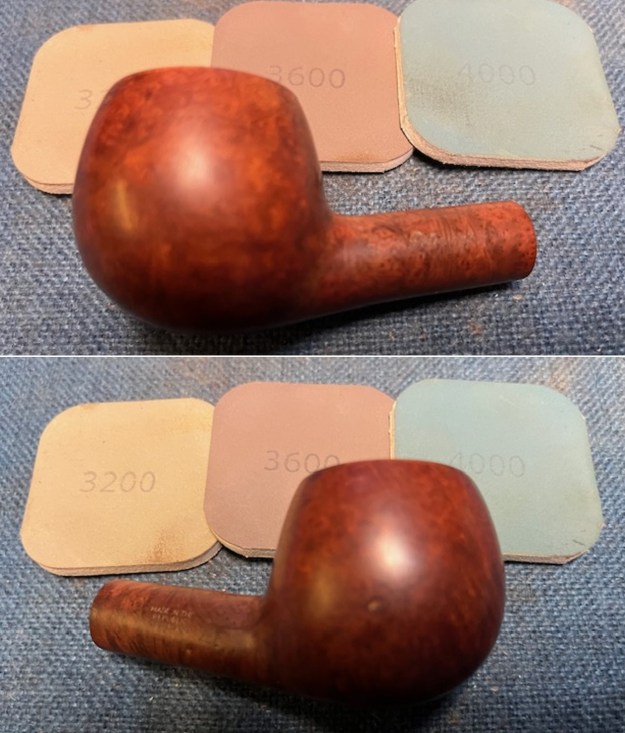
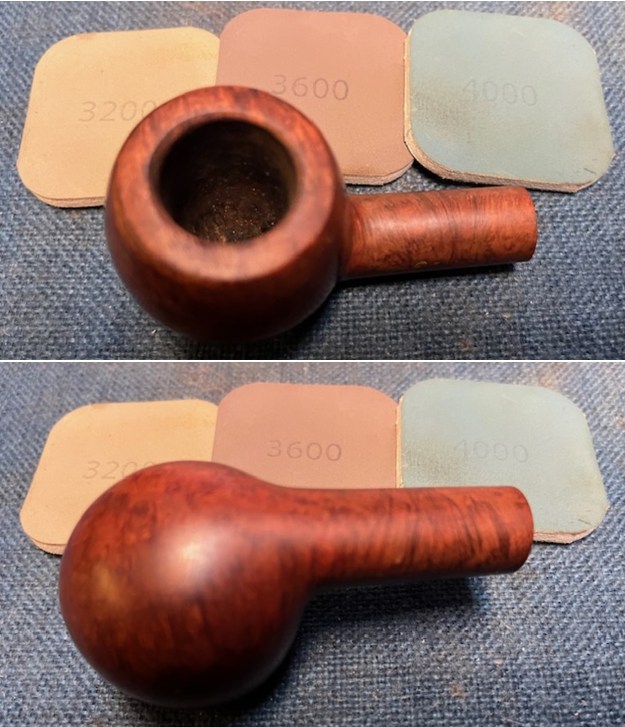
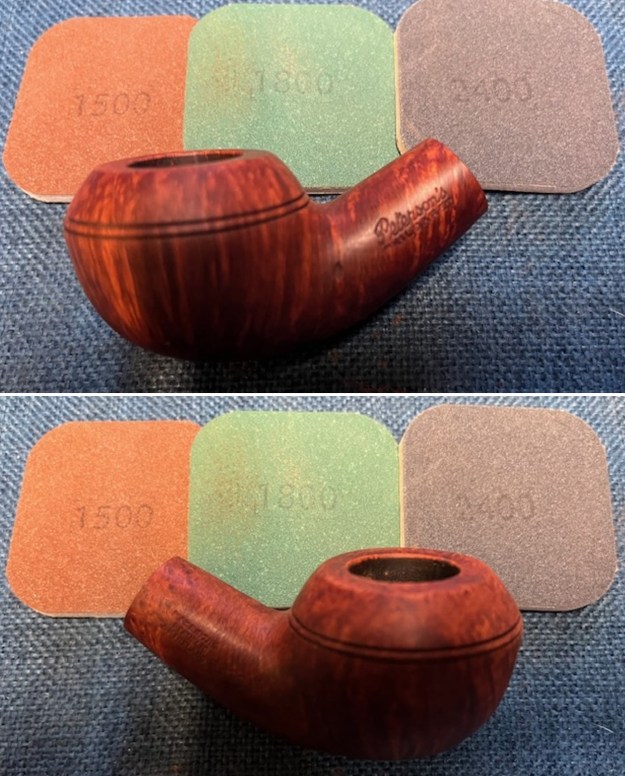
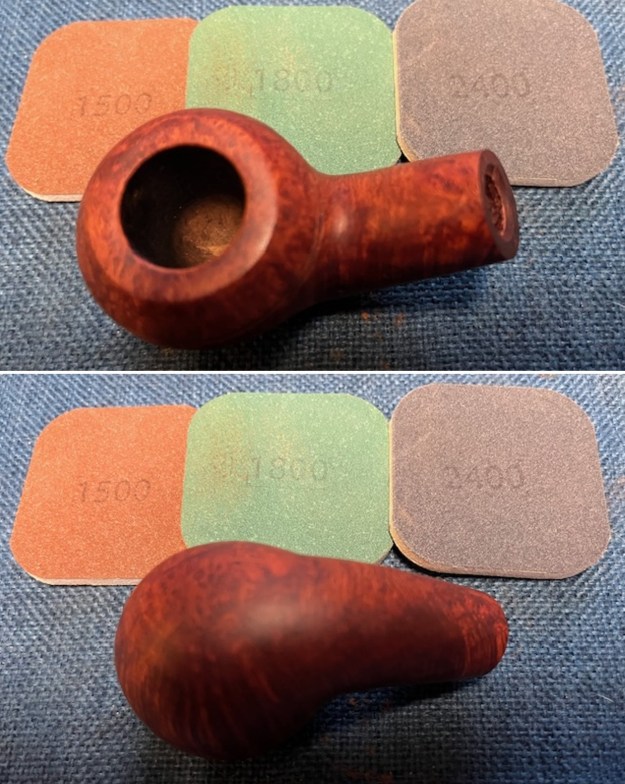
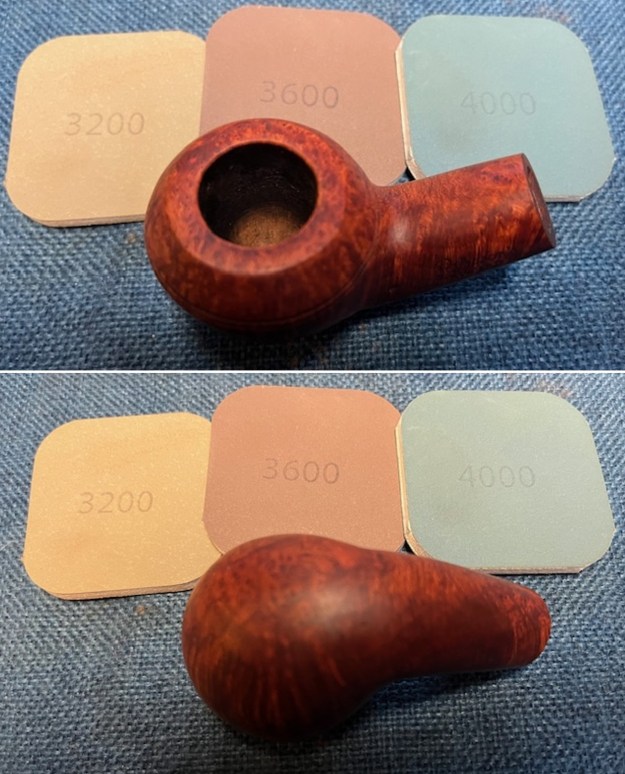
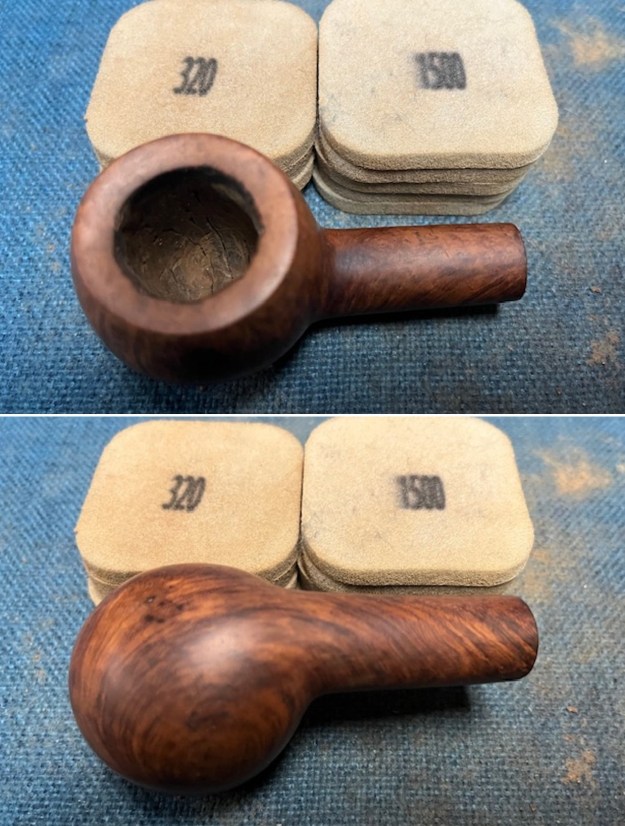
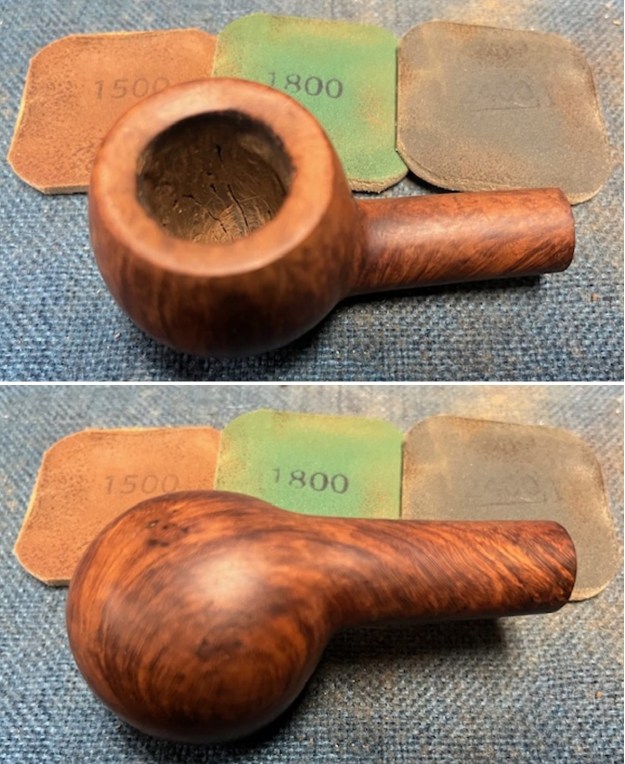
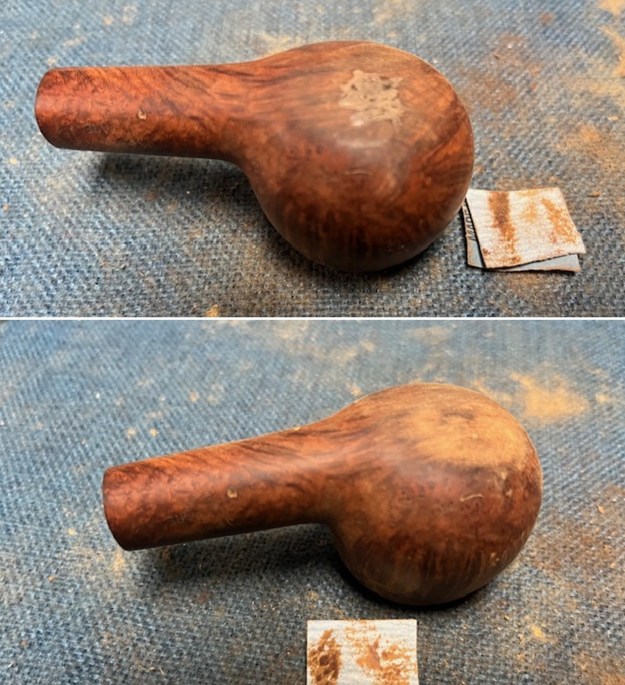 I sanded the bowl with 320-3500 grit sanding pads to remove the scratching and marks on the bowl surface and top and underside of the shank. I wiped it down after each pad with a damp cloth and by the end the bowl really began to show some promise. I carefully avoided the stamping on the shank sides.
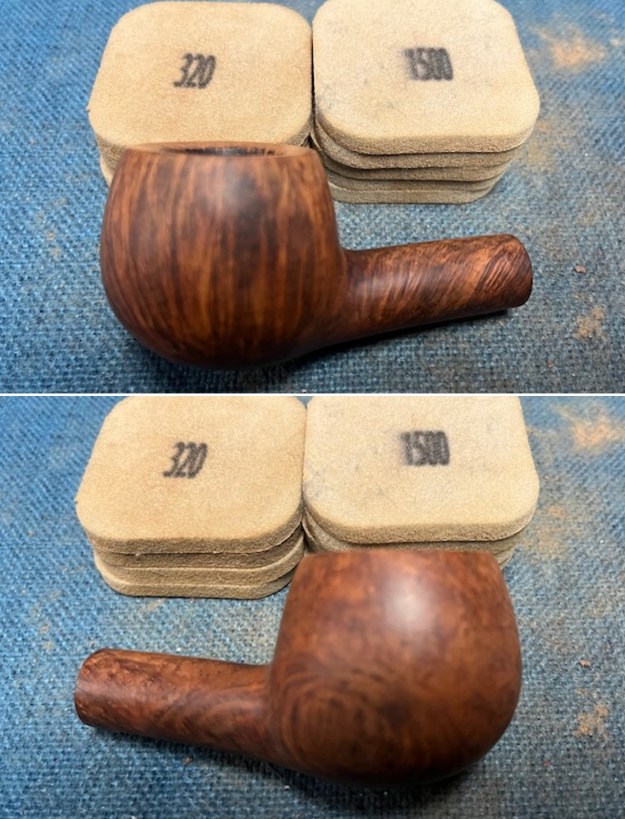
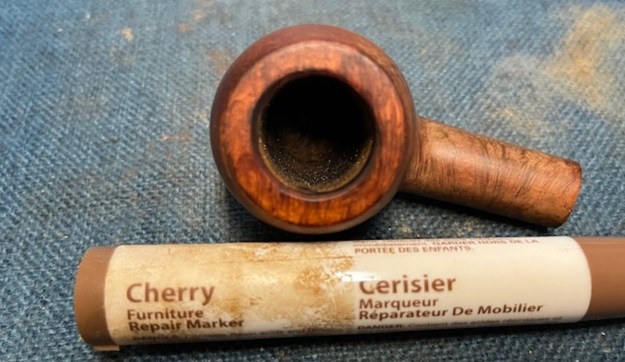
 I used a Cherry stain pen to restain the inner edge and rim top to match the rest of the briar before I started sanding it. Once it had been sanded the match should be perfect.
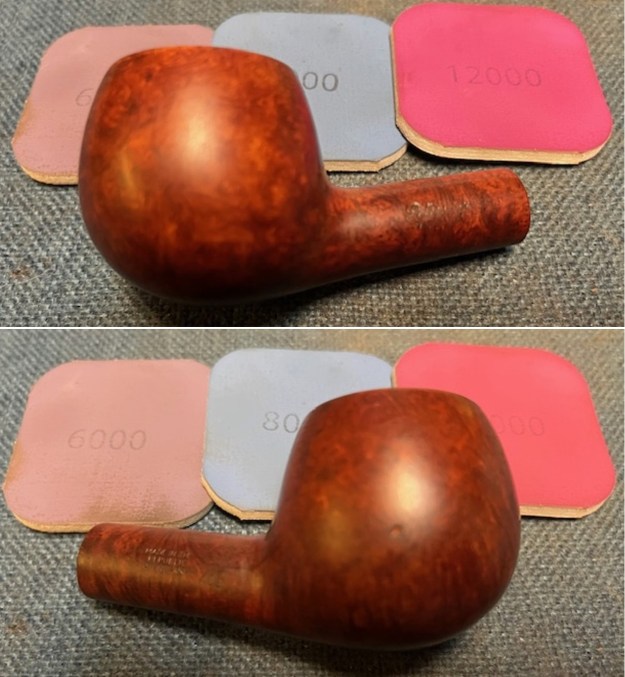
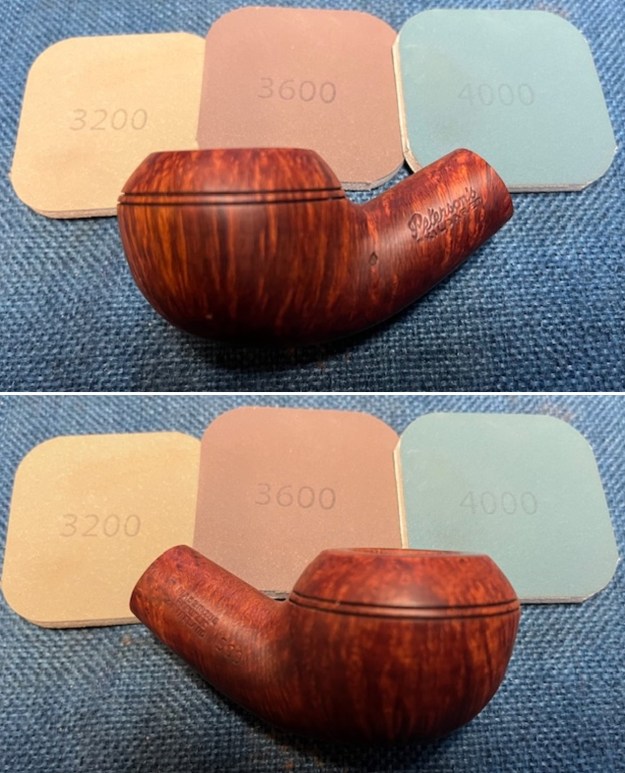
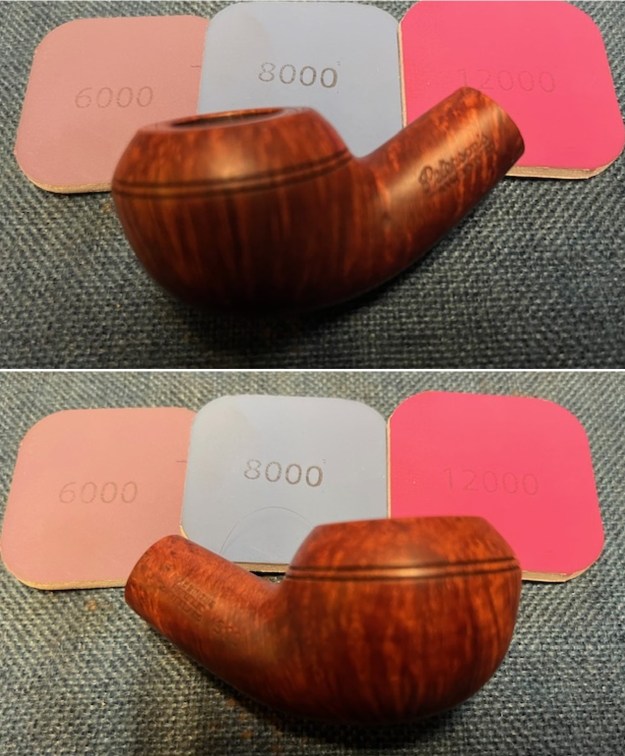
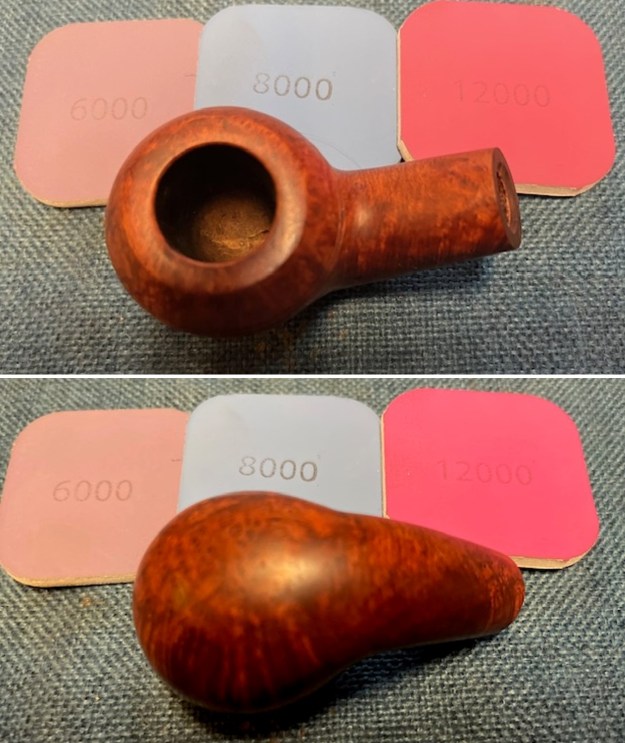
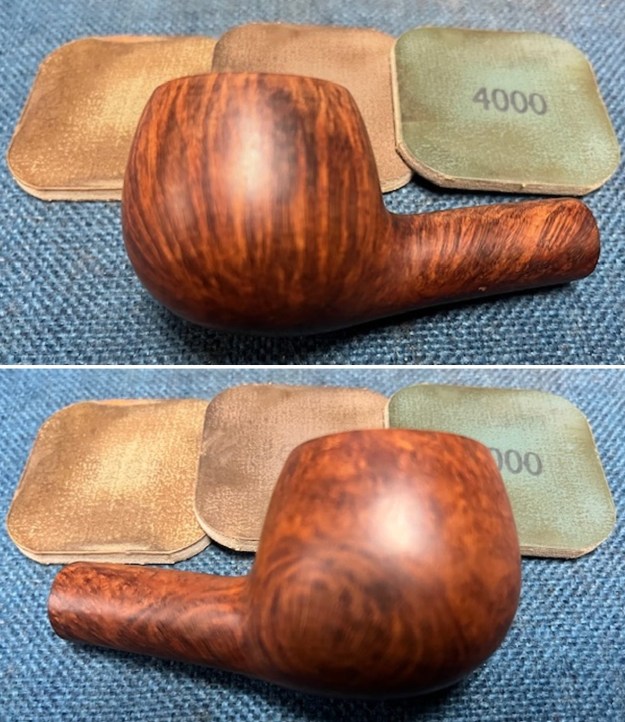
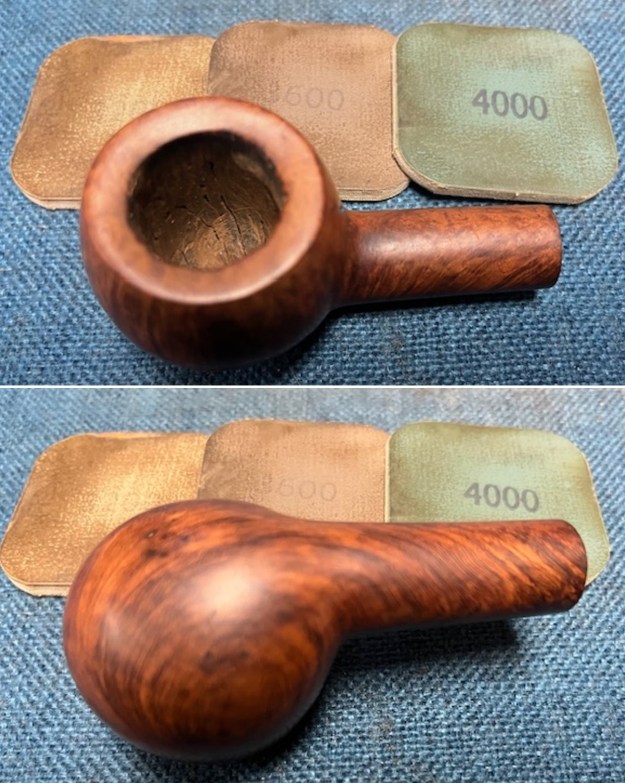
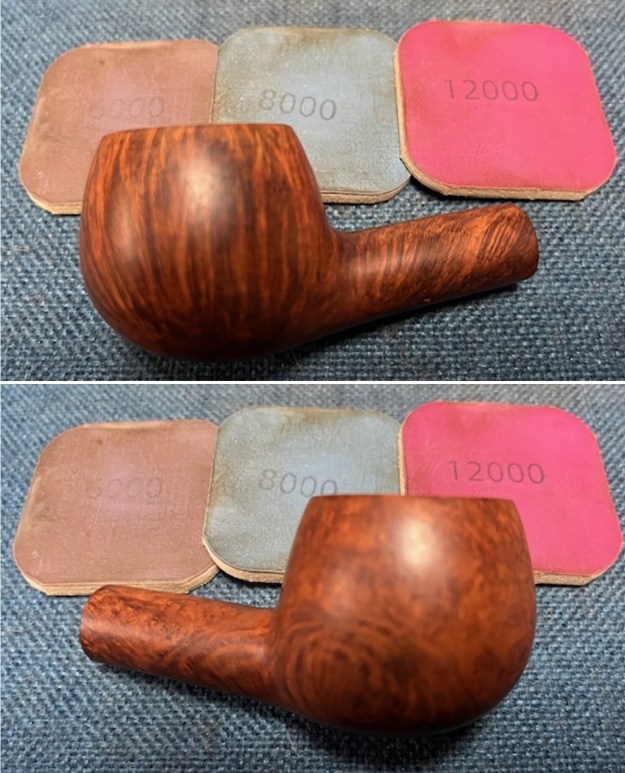
 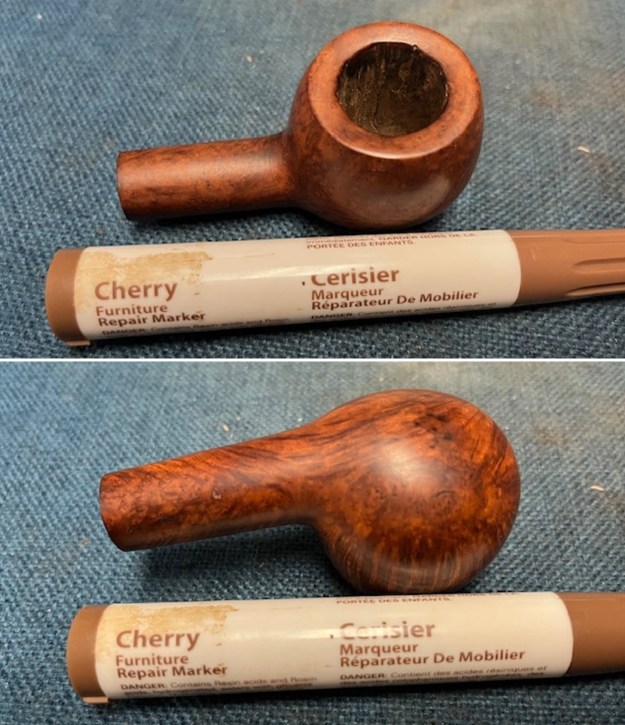 I polished the briar with micromesh sanding pads. I dry sanded it with 1500-12000 grit sanding pads and wiped the bowl down after each pad with a damp cloth. By the final pads the briar really had a shine.
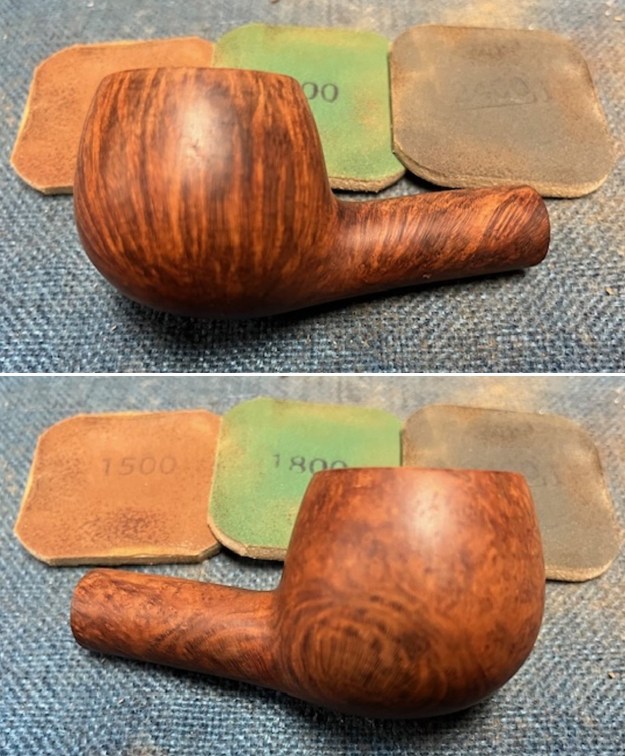
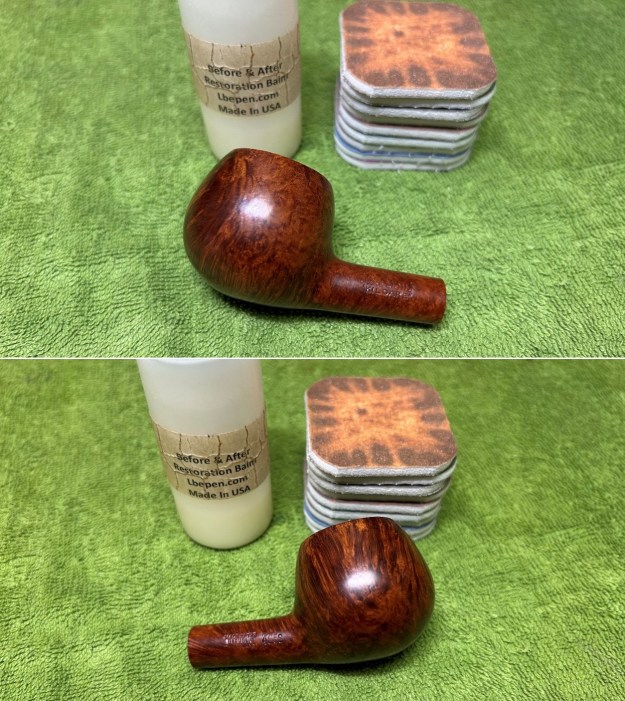
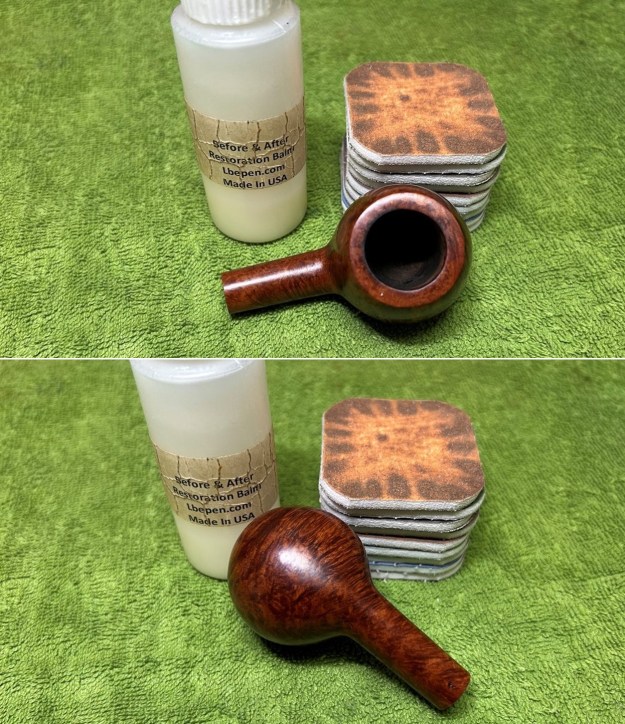
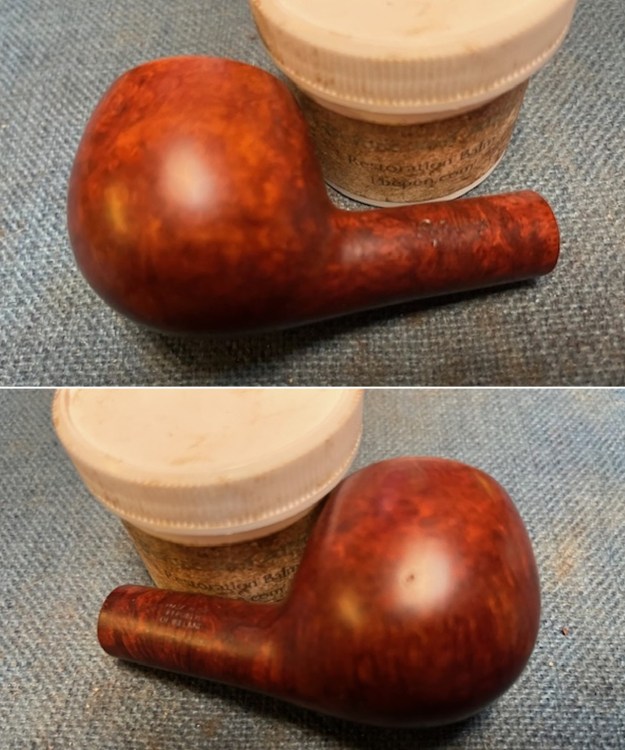
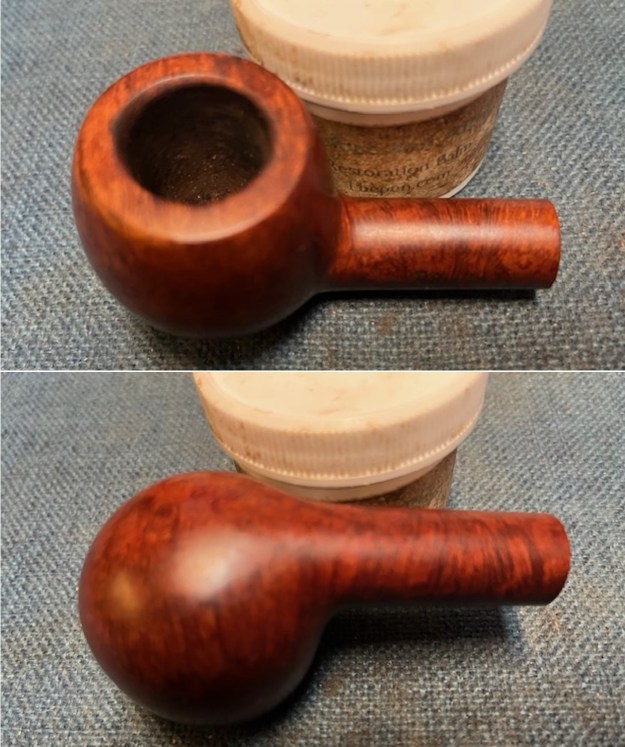
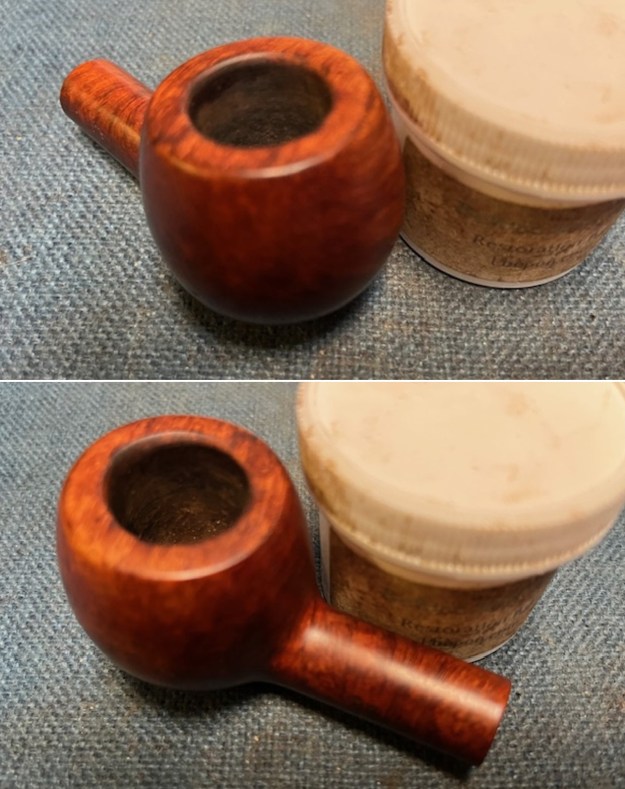
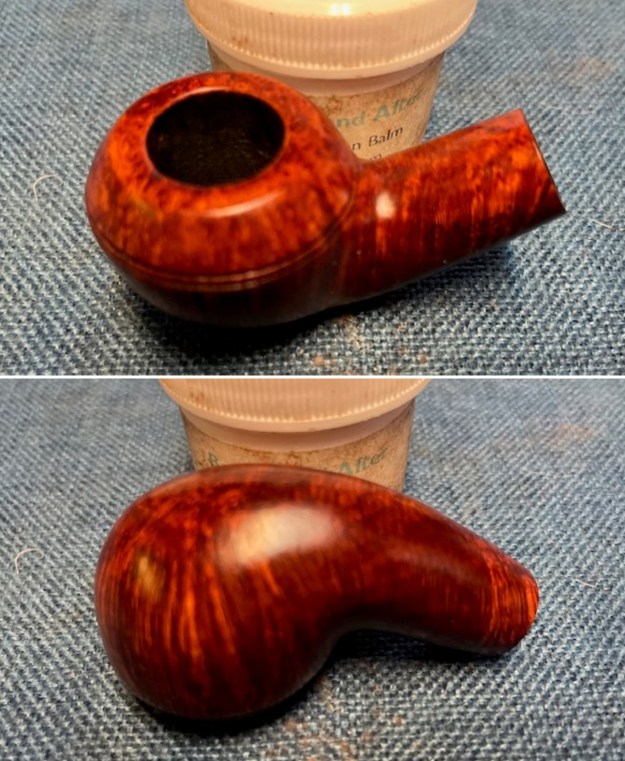
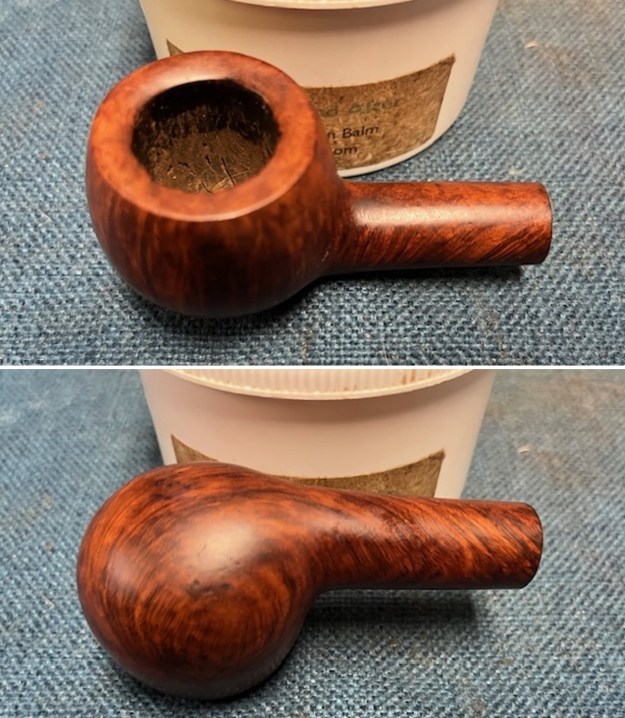
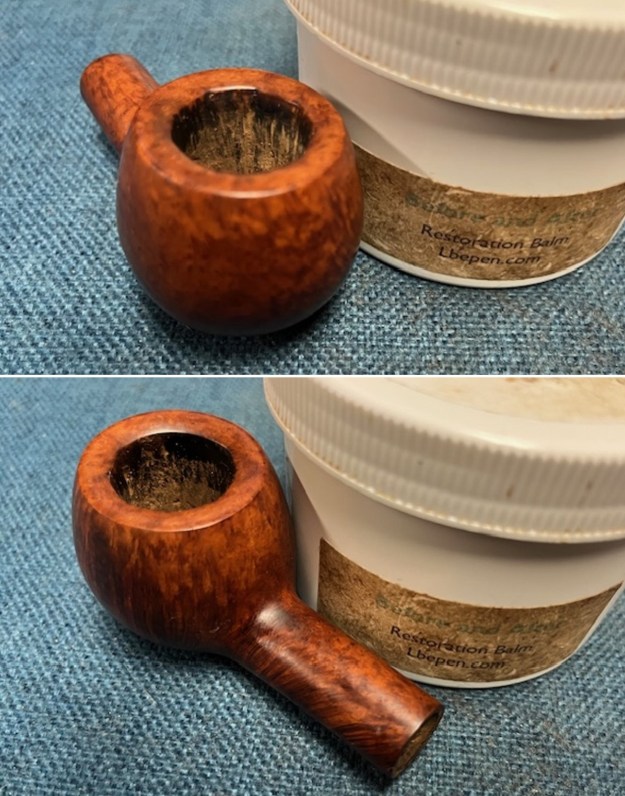
 I rubbed the briar down with Before & After Restoration Balm. I worked it into the briar with my fingertips to work it into the finish. The product works to clean, enliven and preserve the briar. I let it sit for 10 minutes then I buffed it with a cotton cloth to deepen the shine. The briar really comes alive with the balm.
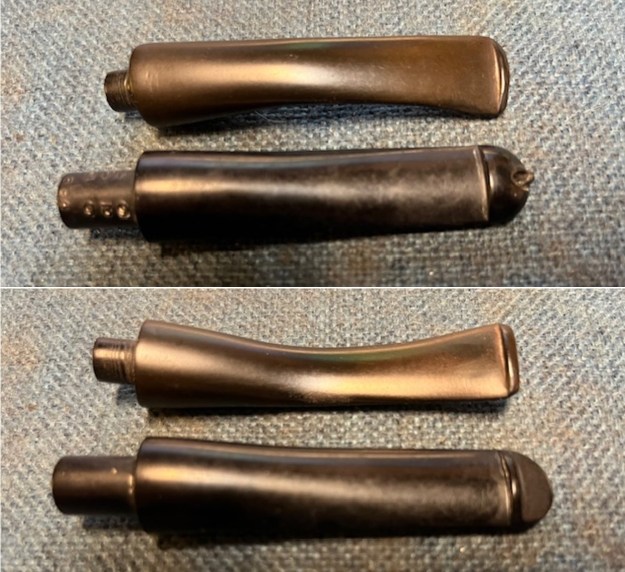
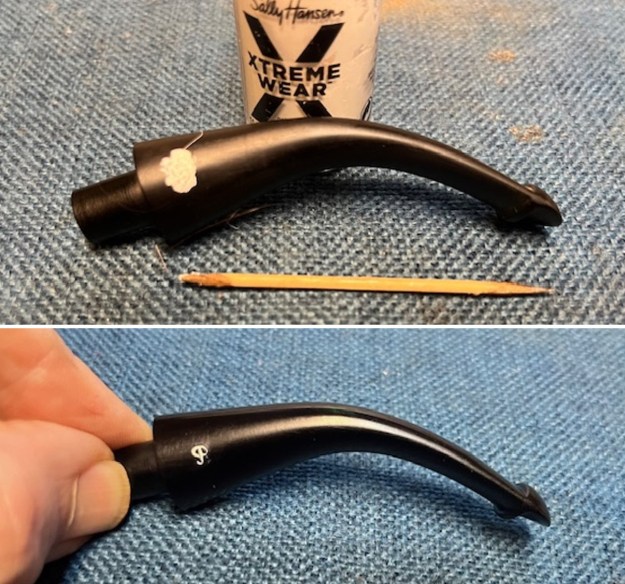
 I set the bowl aside and worked on the tooth marks on the stem. I “painted” them with the flame of a lighter to lift them. They came up a bit and I filled in what remained with the extra strength rubberized Black CA glue. Once the repairs cured I flattened them out and redefined the button edge with small flat files. I sanded them smooth with a folded piece of 220 grit sandpaper.
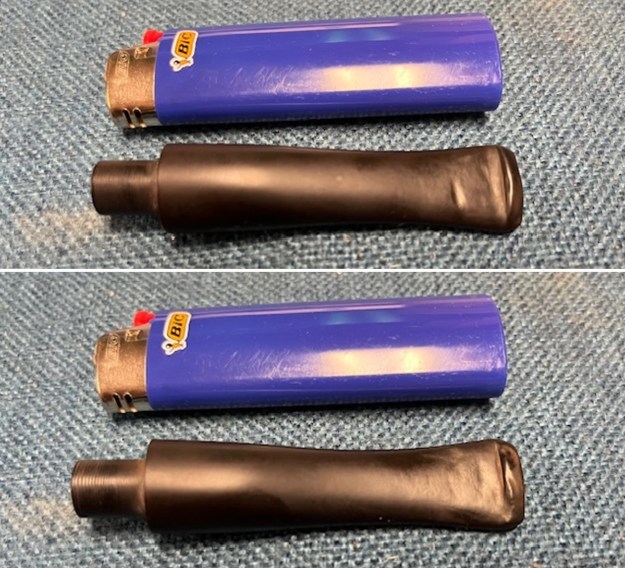
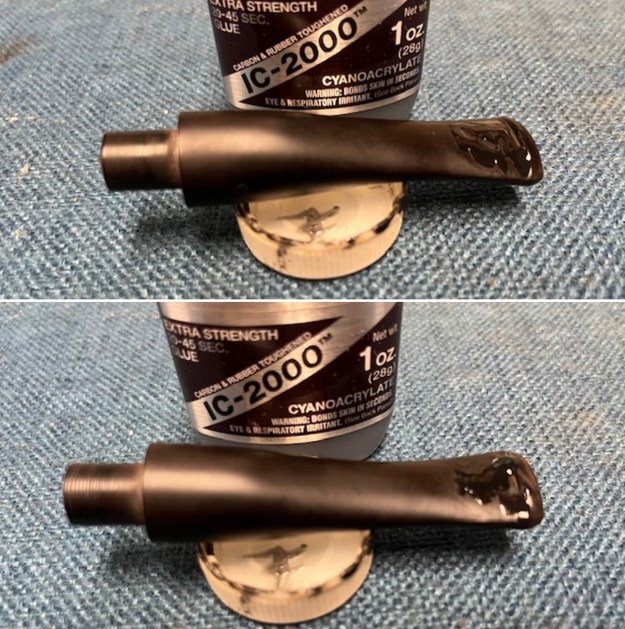
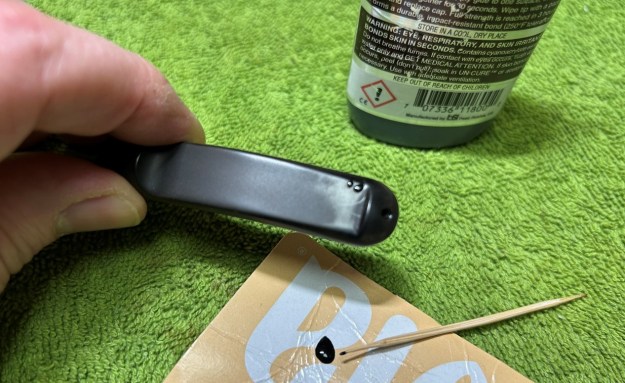
 I touched up the P stamp on the left side of the taper stem with some white acrylic fingernail polish. Once it cured I scraped off the excess and worked over the surface with a 400 grit sanding pad to clean up the stamping. It is clear and readable.
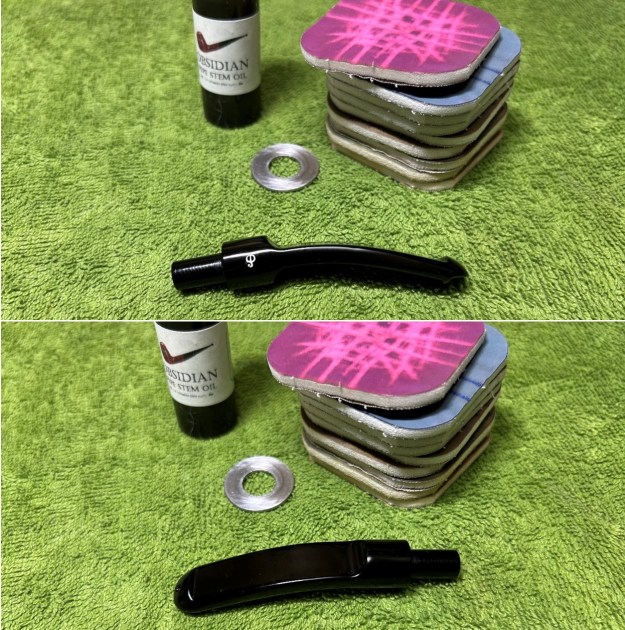
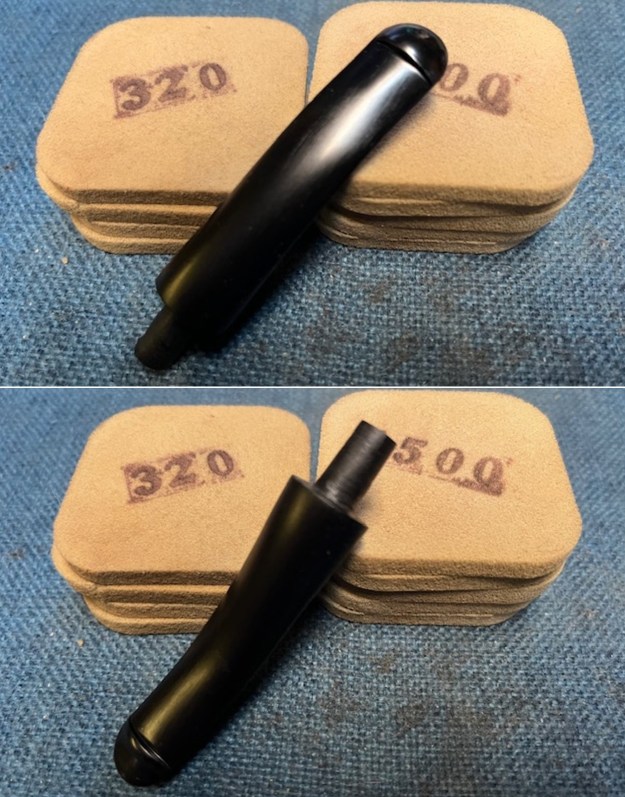
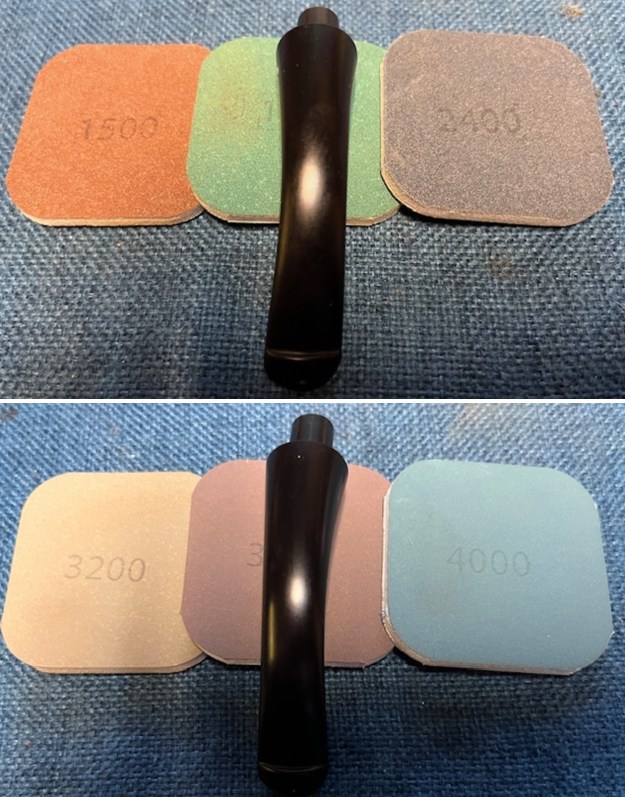
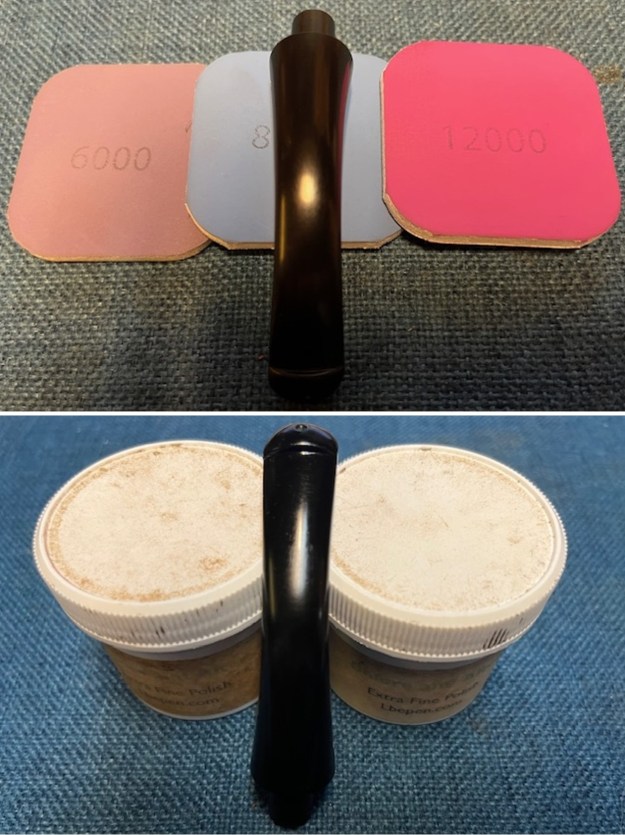
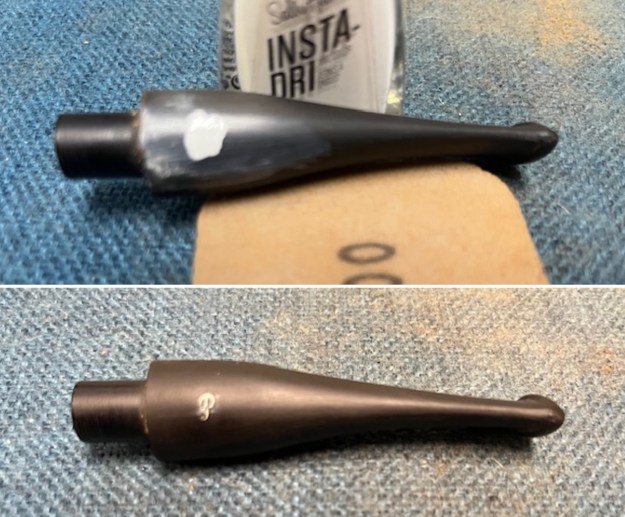 I sanded the stem and tenon with 320-3500 grit sanding pads. Each successive pad brought smoother shape and definition to the stem. I wiped it down with an Obsidian Oil cloth after each sanding pad and by the end it was starting to look very good.
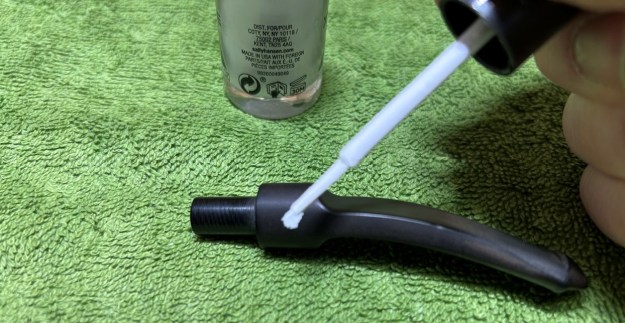
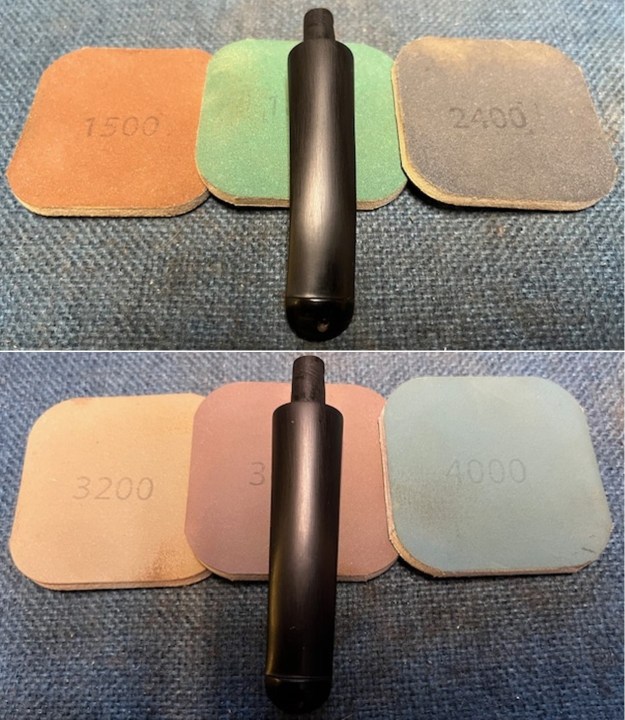
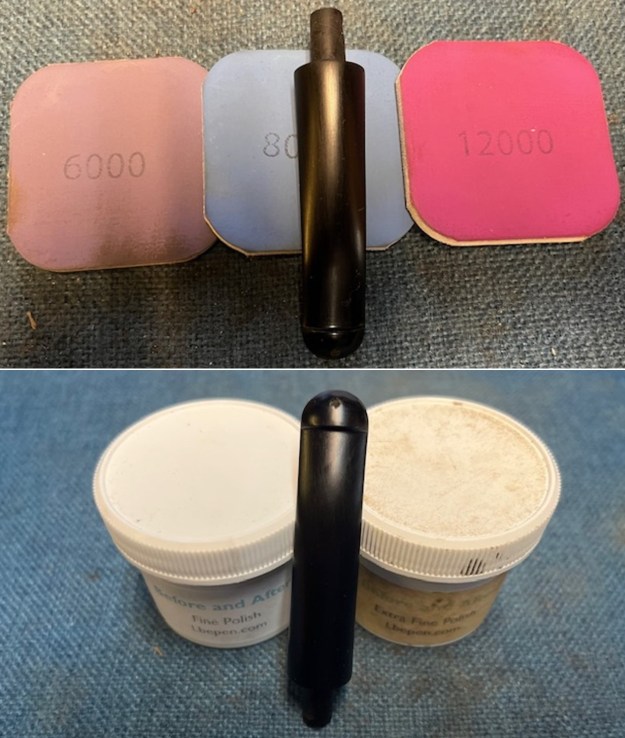
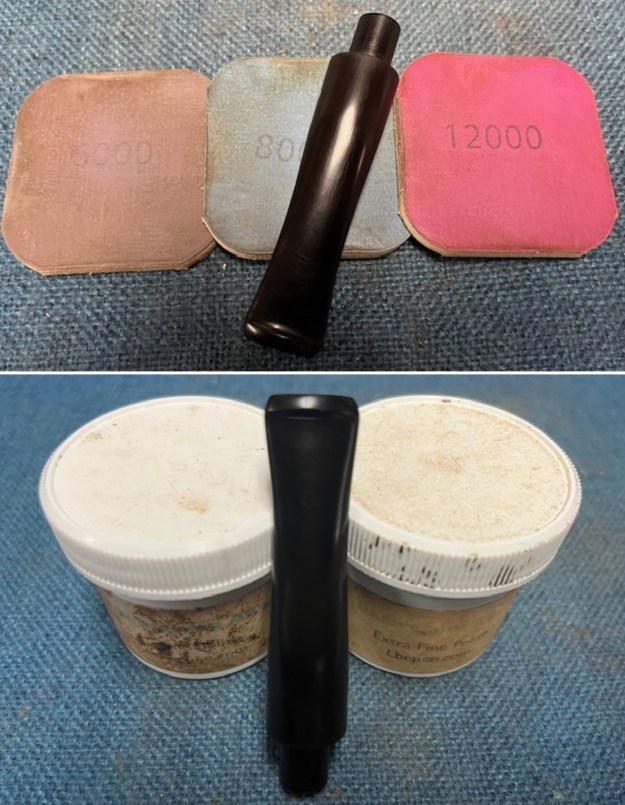
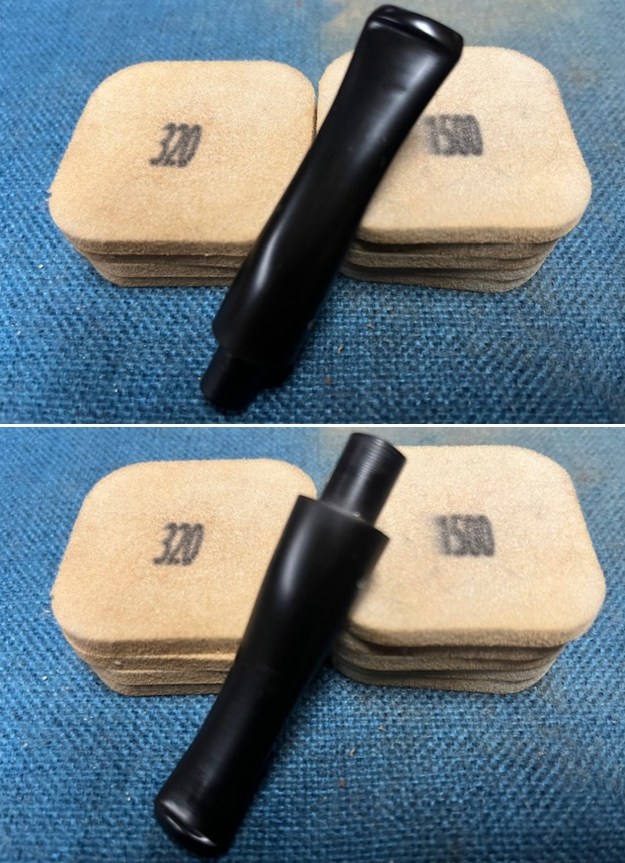 I polished the stem with micromesh sanding pads – 1500-12000 grit pads. I wiped them down with Obsidian Oil after each sanding pad. I used Before & After Pipe Polish – both Fine and Extra Fine to further polish the stem. I gave it another coat of Obsidian Oil and set aside for the product to absorb into the vulcanite.
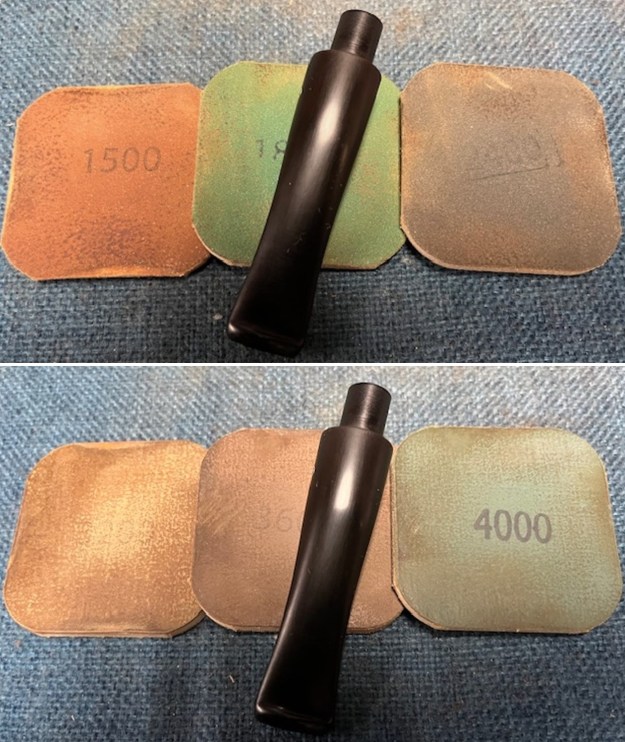
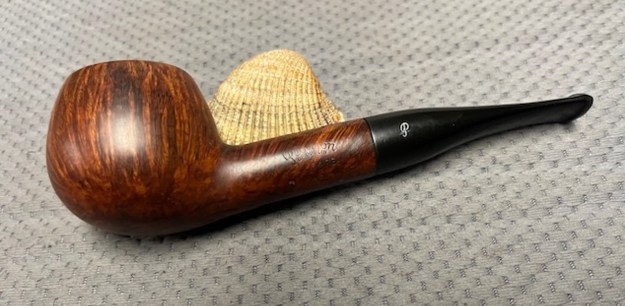
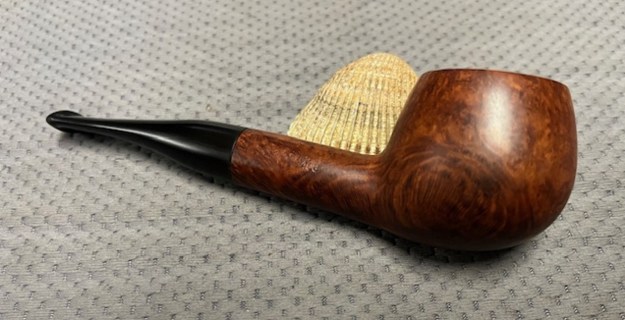
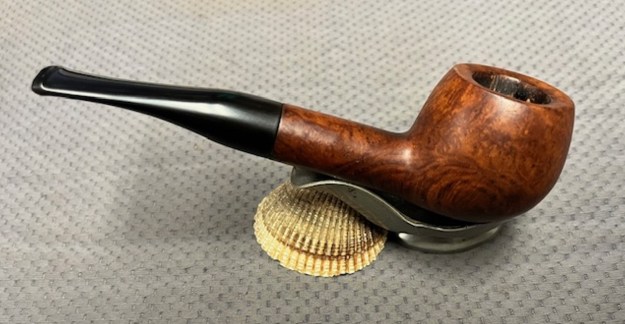
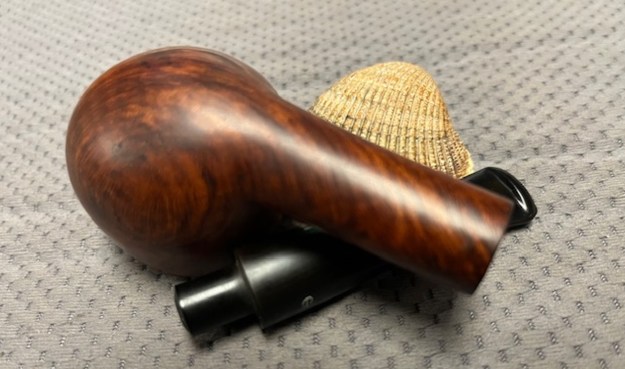
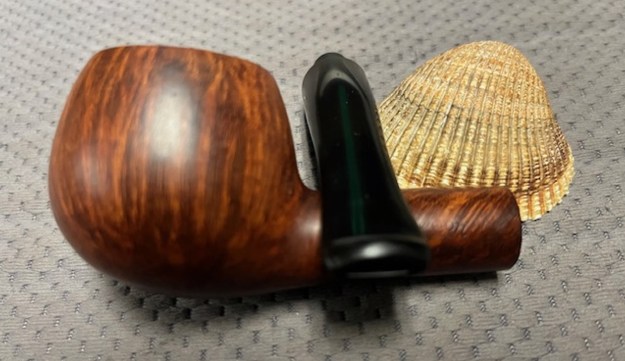
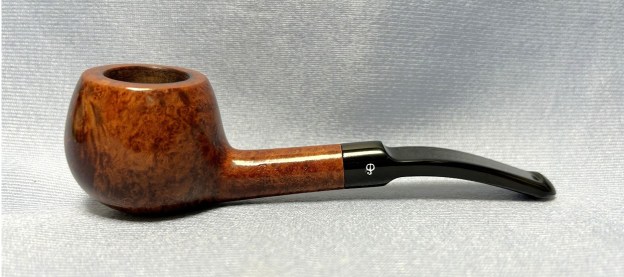
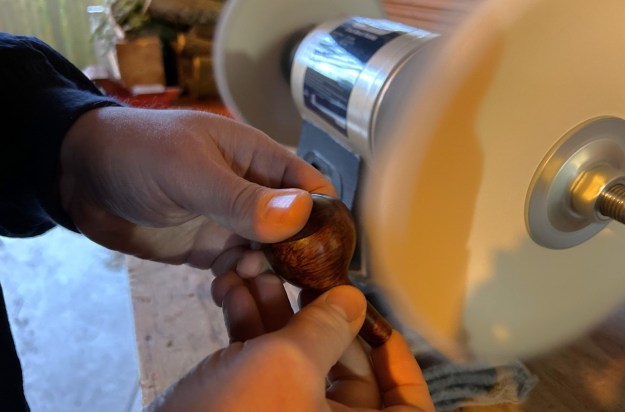
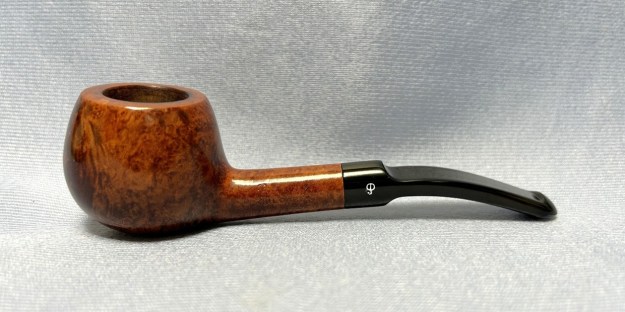
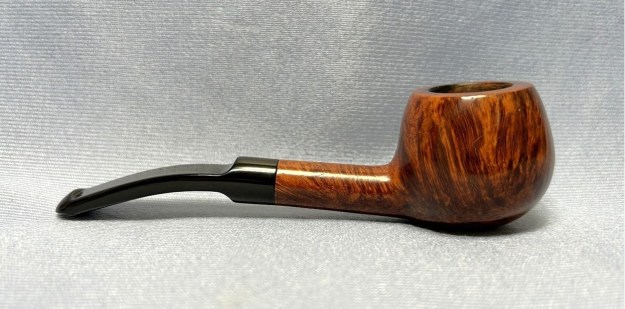
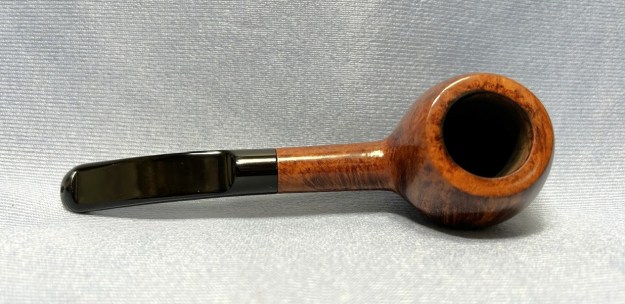
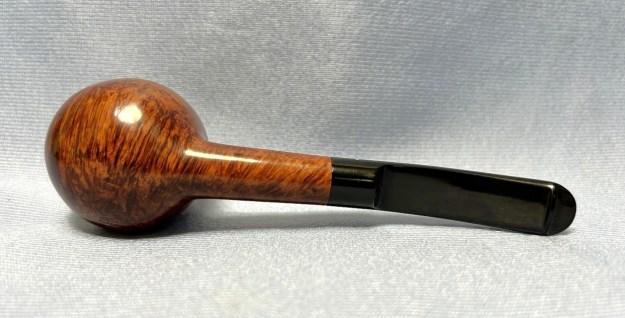
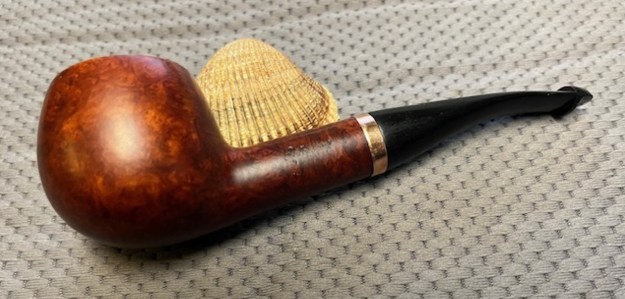
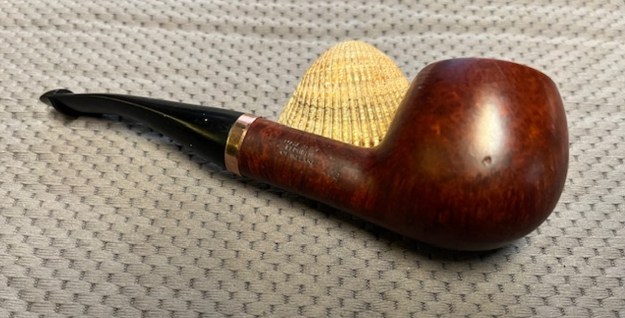
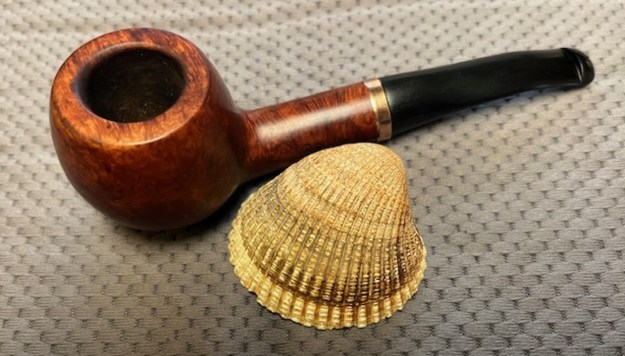
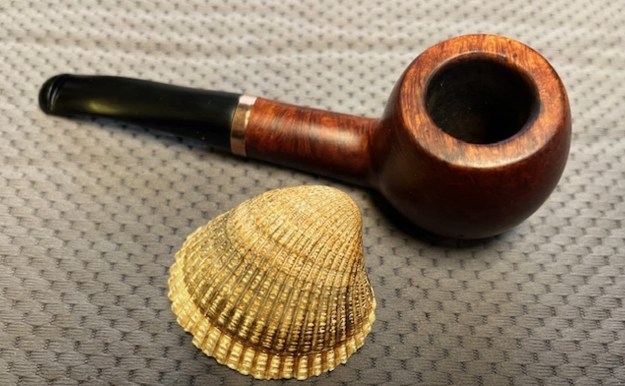
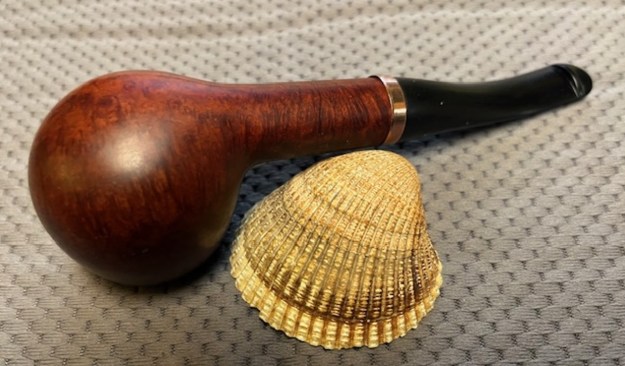
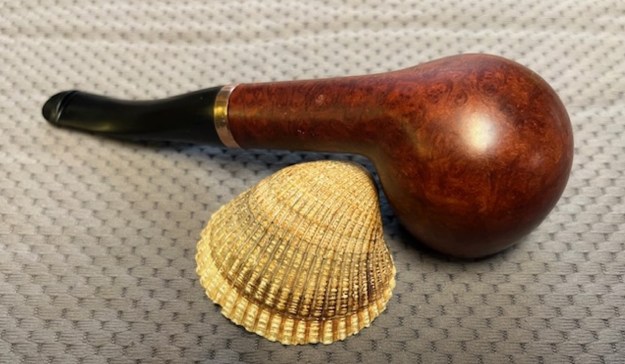
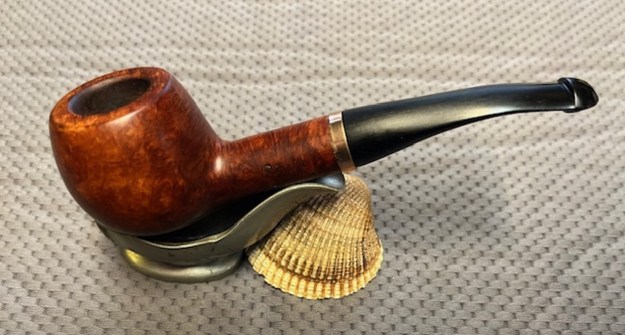
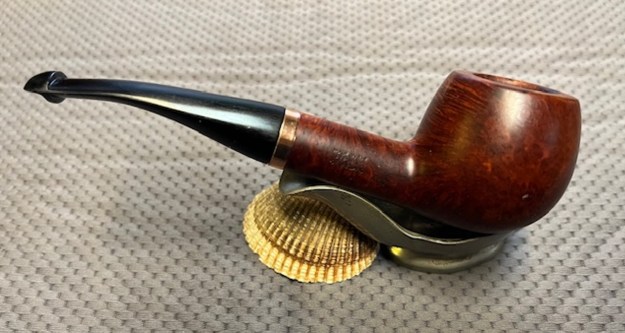
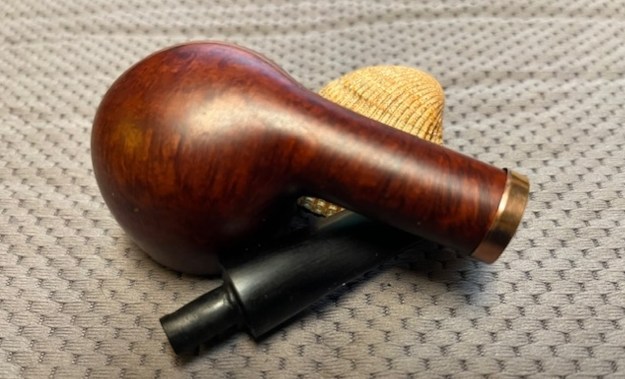
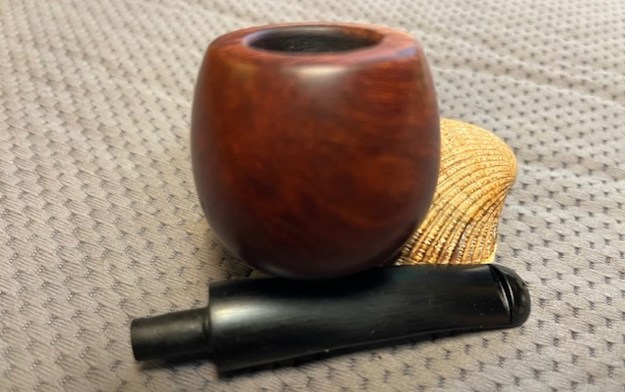
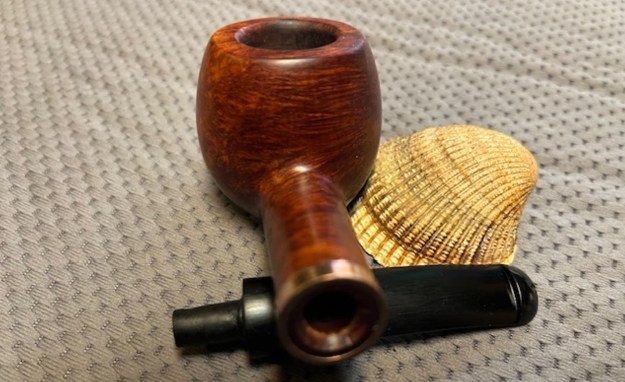
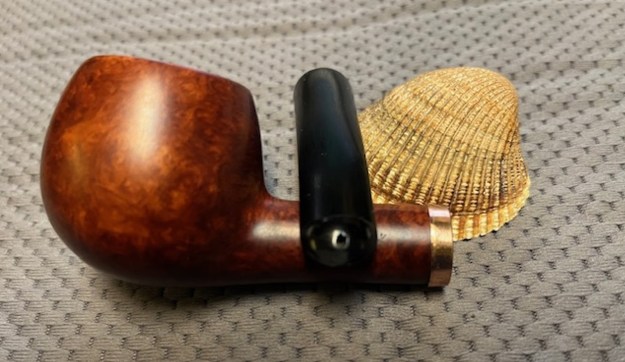
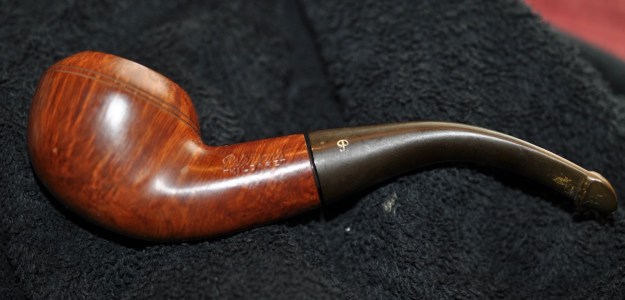
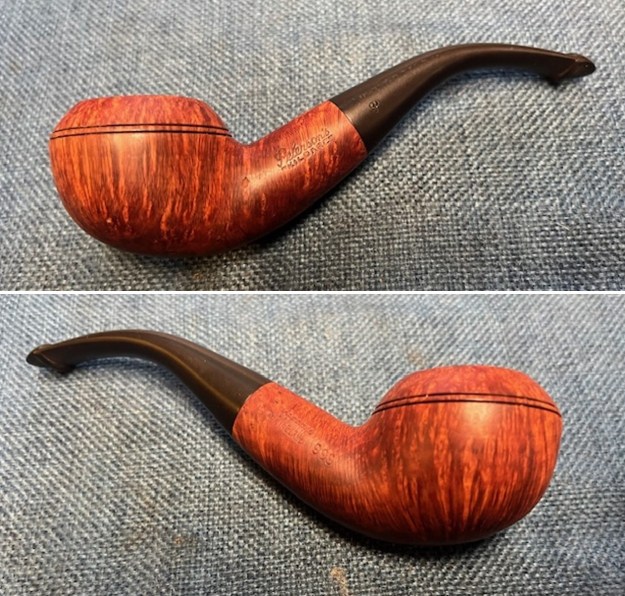
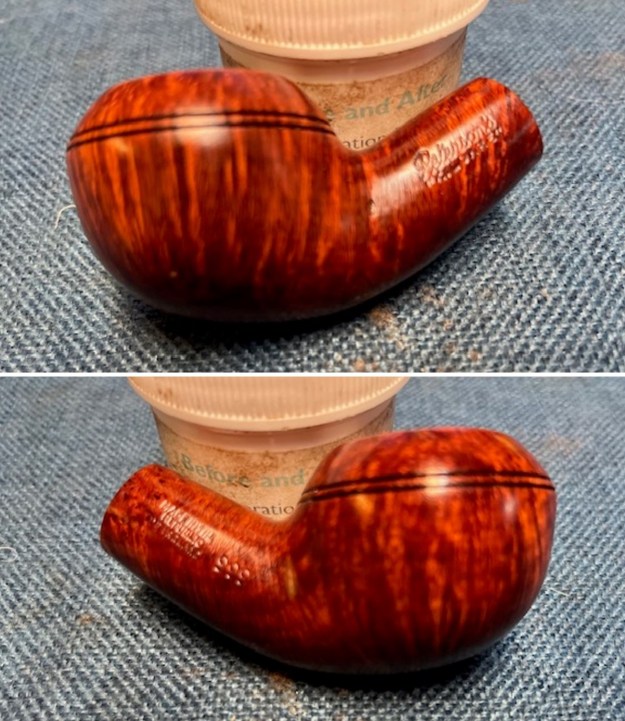
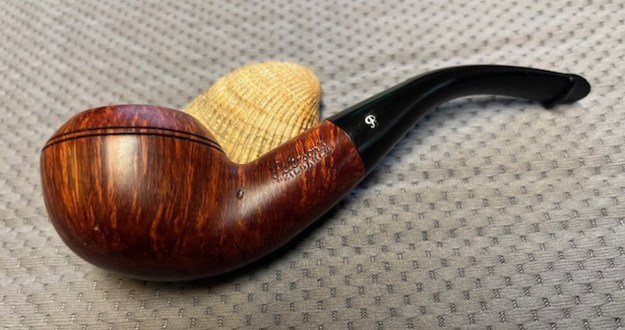
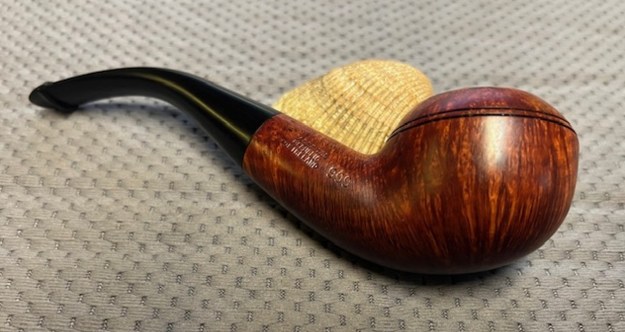
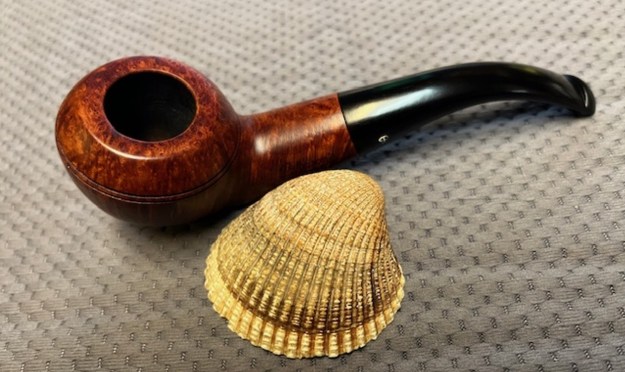
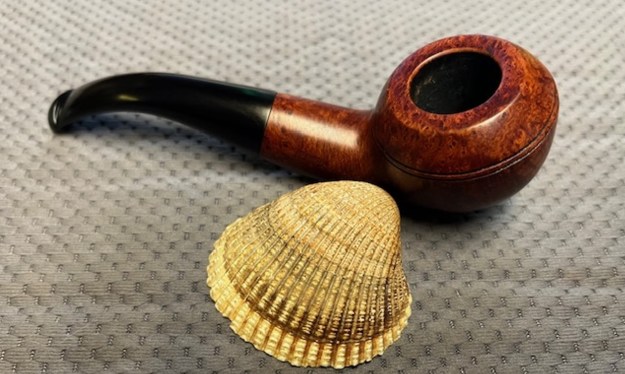
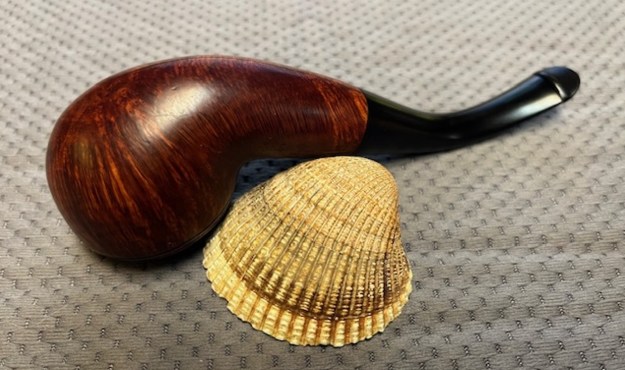
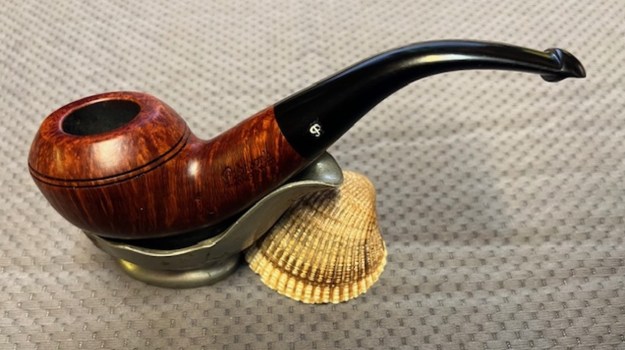
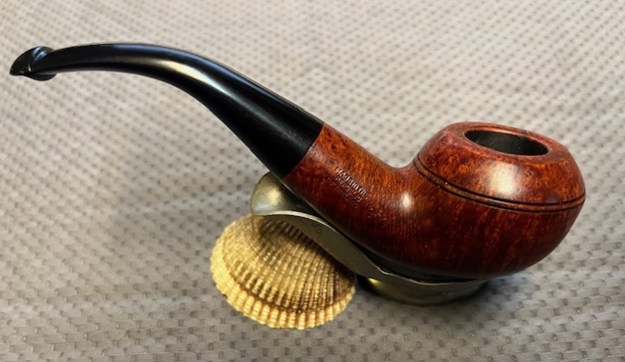
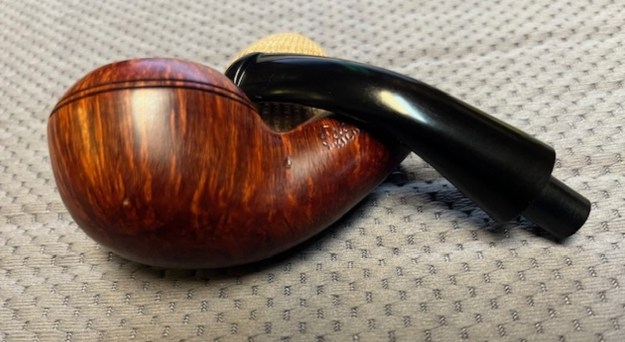
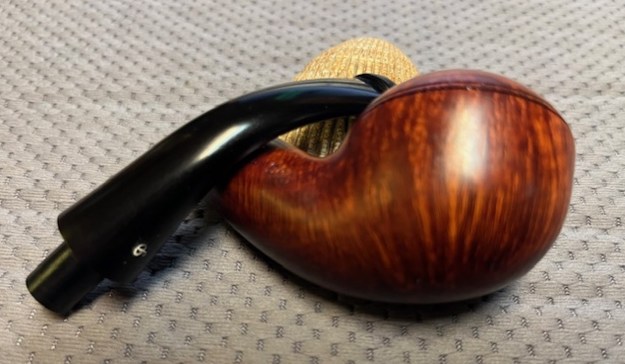
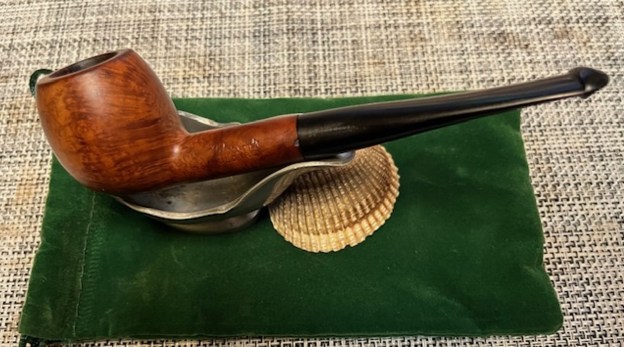
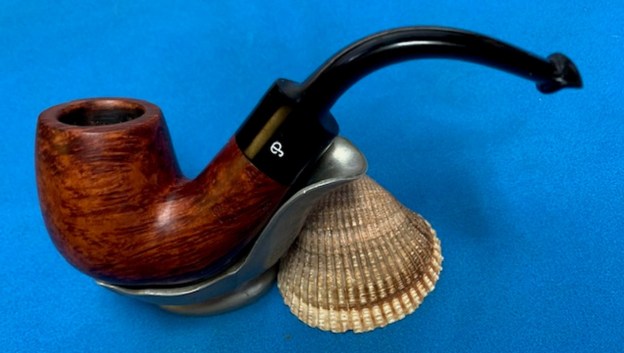
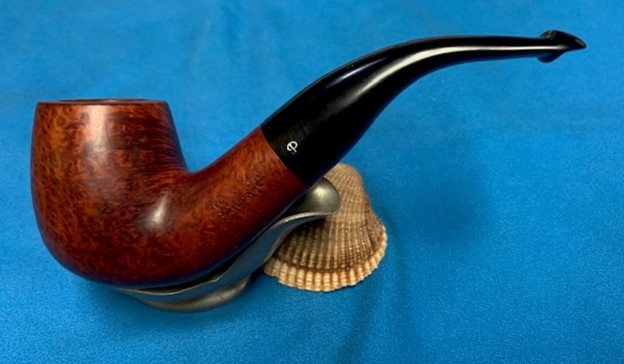
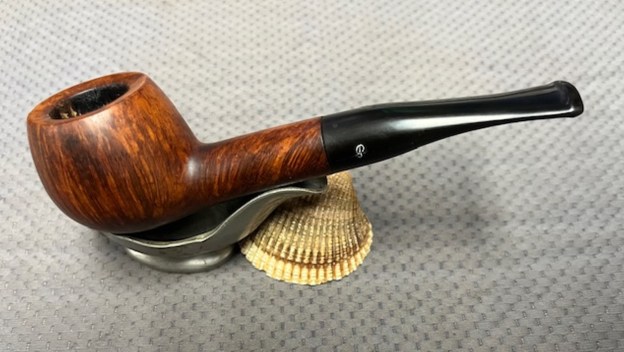
 It was great to finish this older (1965-79) Republic Era Peterson’s 408 Apple. It was a question if it could be reborn but I think it looks good. I put the bowl and the stem together and buffed it with Blue Diamond on the buffing wheel. I gave the bowl and the stem multiple coats of carnauba wax. I buffed the pipe with a clean buffing pad to raise the shine. I hand buffed the pipe with a microfiber cloth to deepen the shine. It is fun to see what the polished bowl looks like with deep sandblast all around it. Added to that the polished black vulcanite stem was beautiful. This Peterson’s Kildare 408 Apple is great looking and the pipe feels great in my hand. It is light and well balanced. Have a look at it with the photos below. The dimensions are Length: 5 ¾ inches, Height: 1 ¾ inches, Outside diameter of the bowl: 1 ¼ inches, Chamber diameter: 7/8 of an inch. The weight of the pipe is 58 grams/2.05 ounces. It is a beautiful pipe and one that will soon be on the rebornpipes store in the Irish Pipe Makers Section. If you want to add it to your collection let me know. Thanks for walking through the restoration with me as I worked over this pipe. Thanks to each of you who are reading this blog.