by Steve Laug
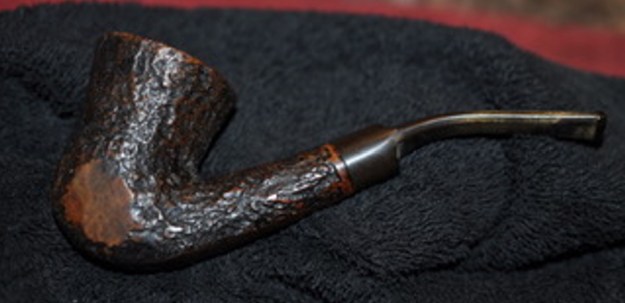
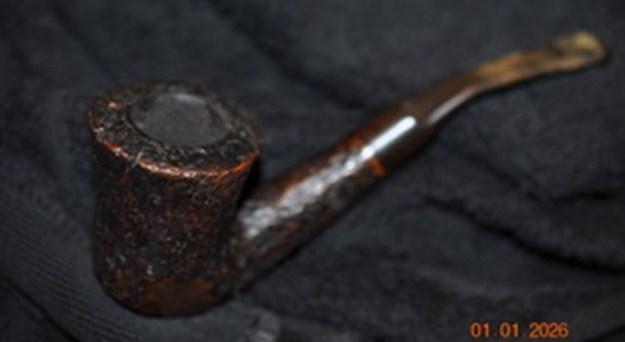
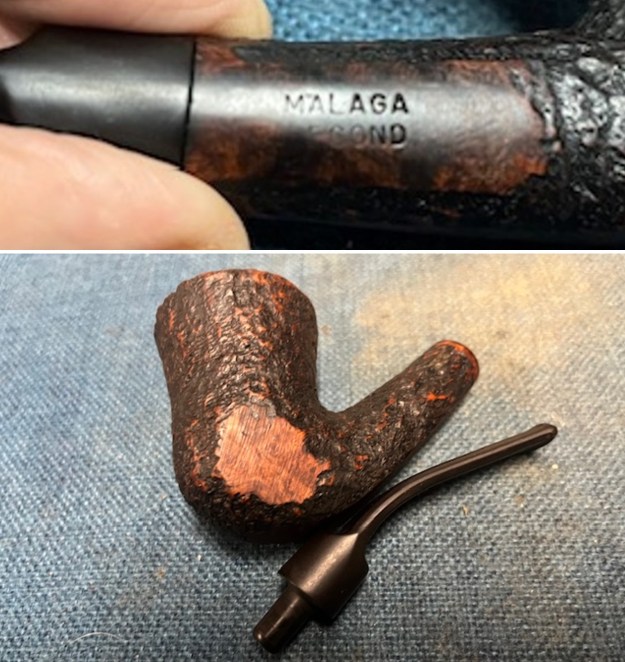
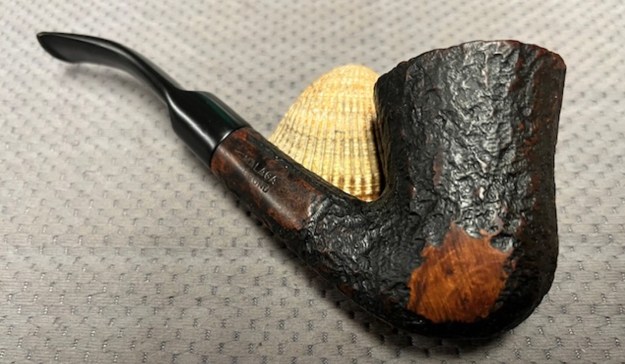
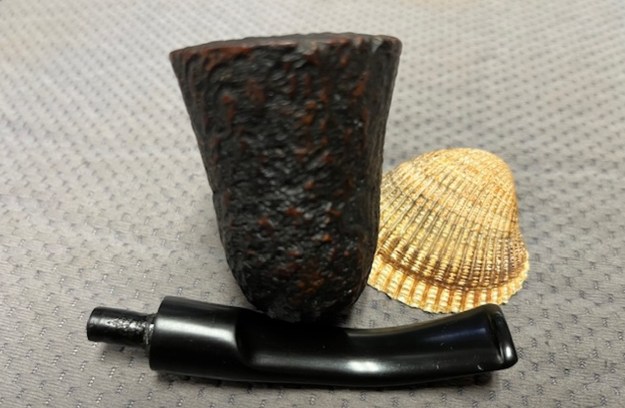
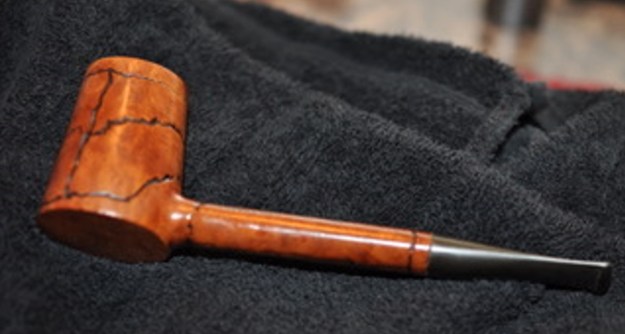
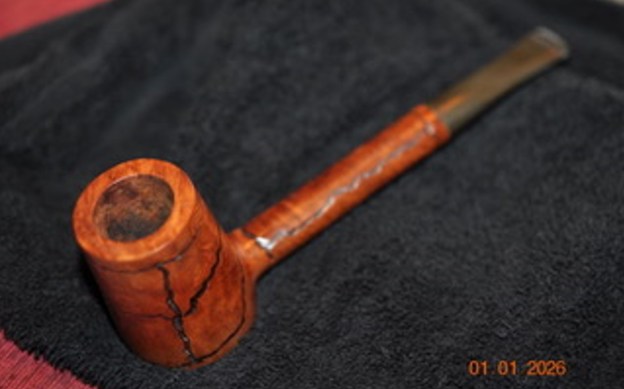
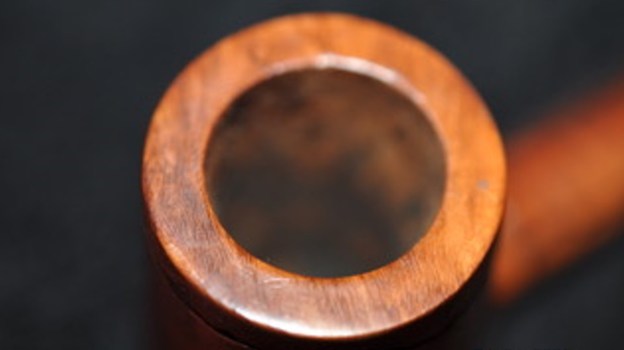
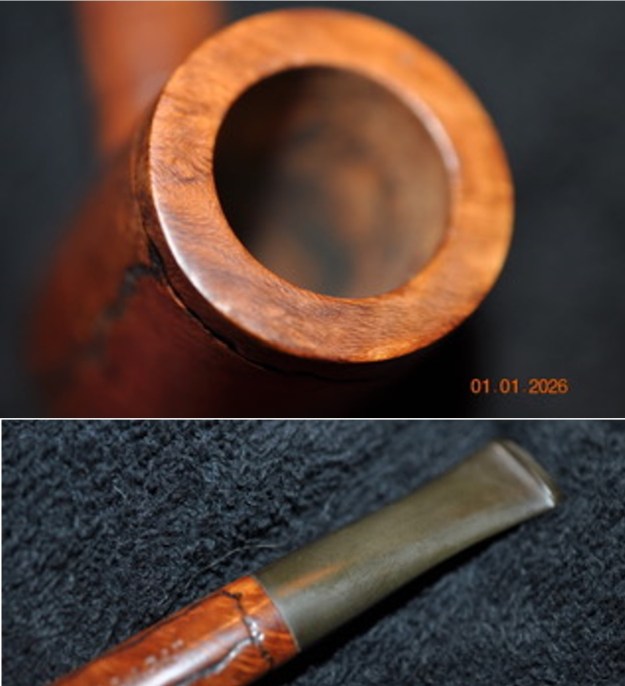
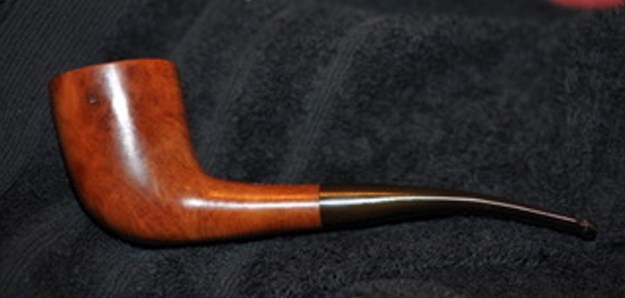
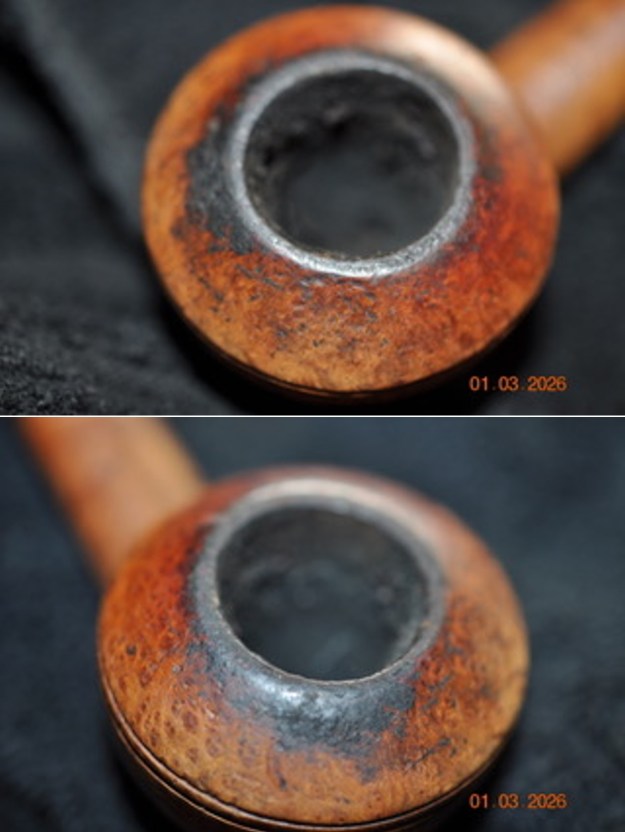
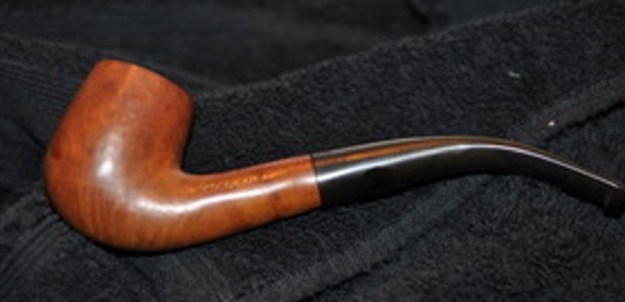
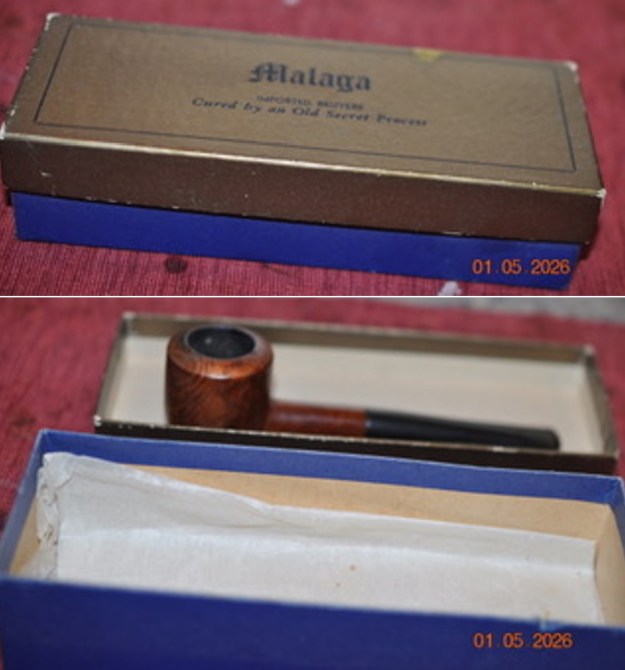
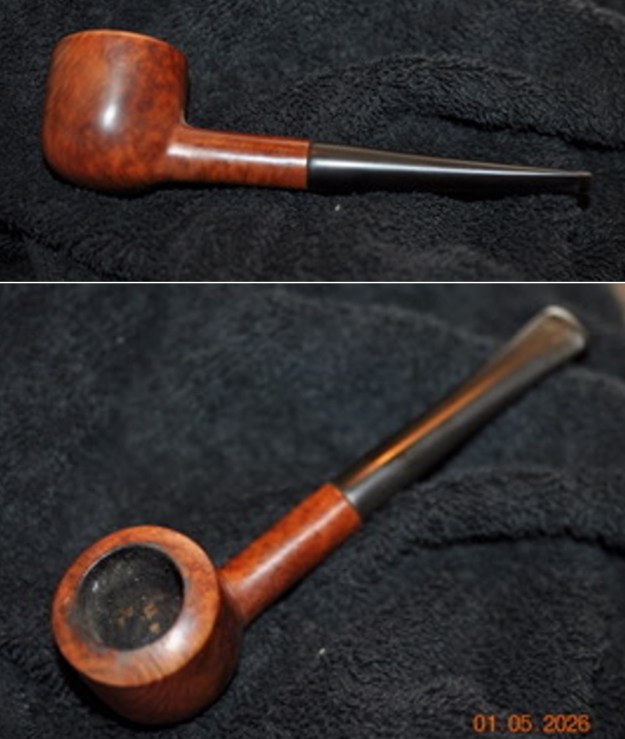
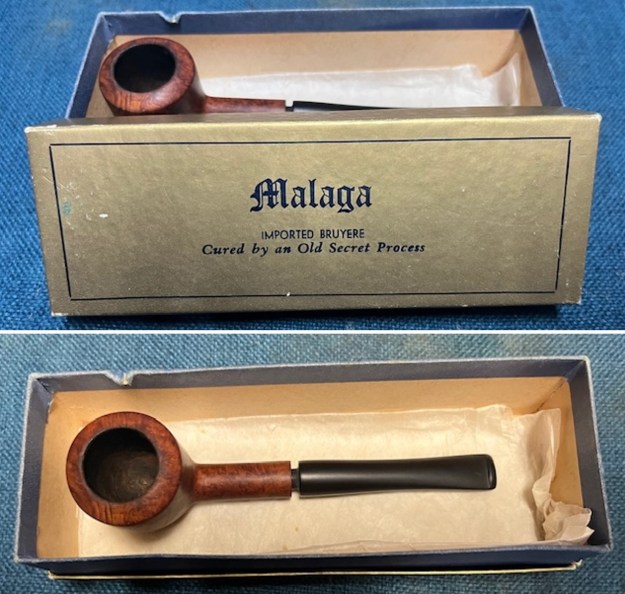
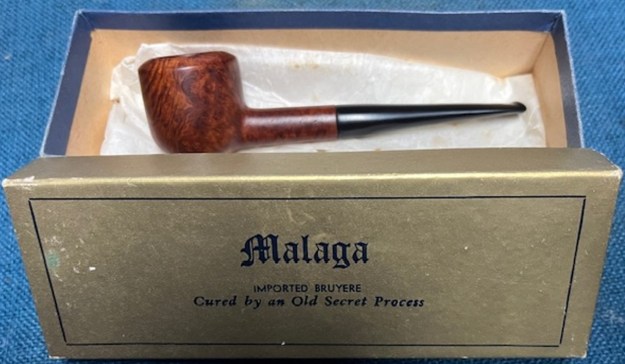
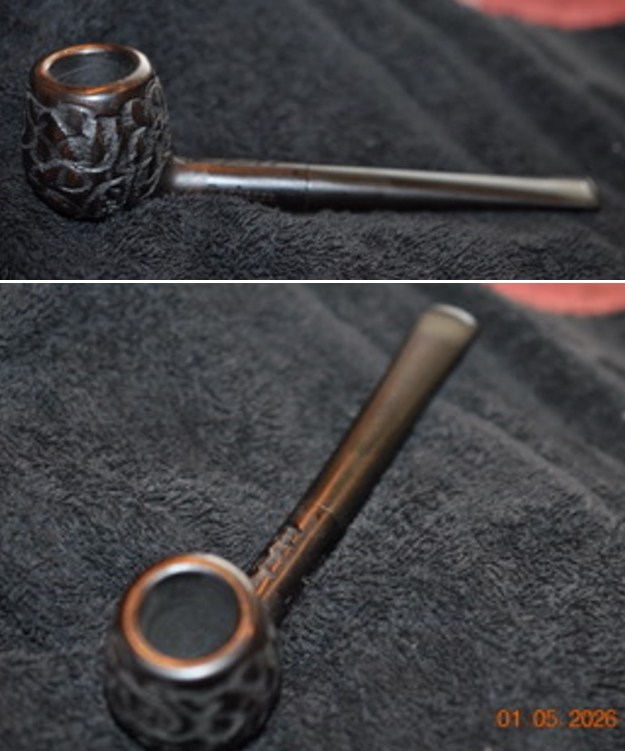
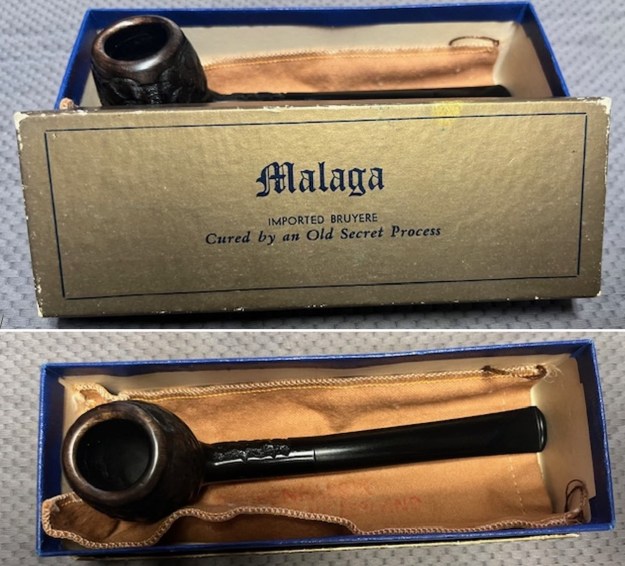
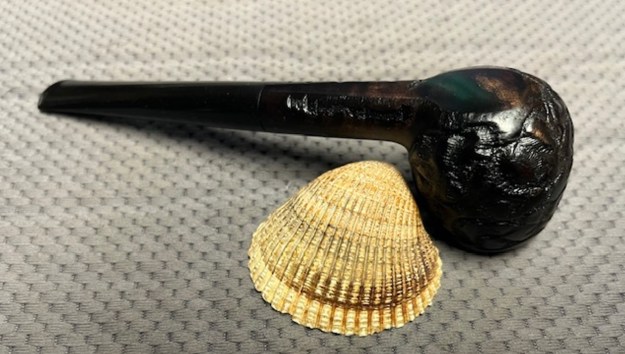
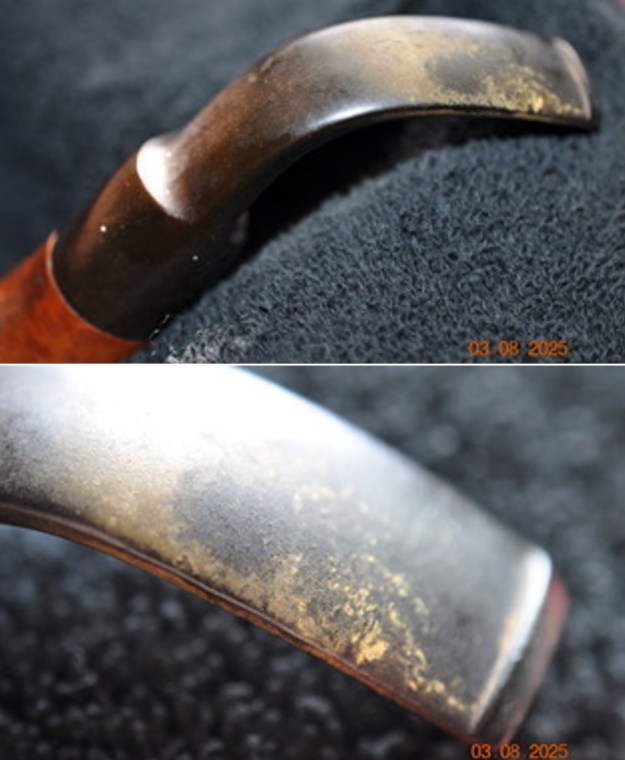
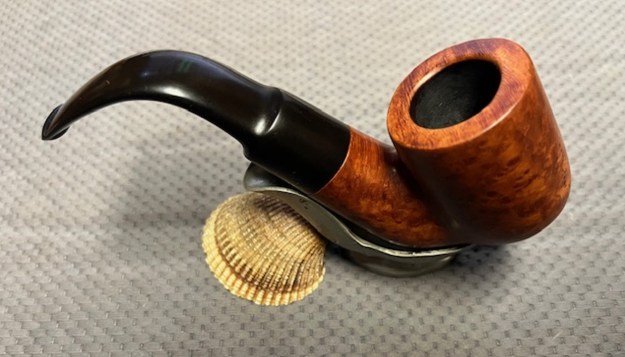
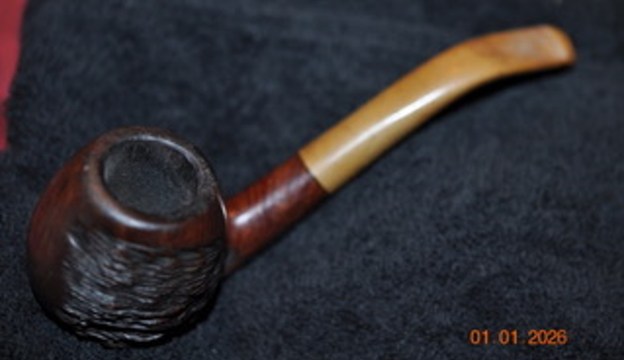
In a recent box of pipes I received from Jeff were several Malaga Pipes to work on. The one on the table now is an interesting Malaga I would call a Brandy Sitter. It has a rope like rustication pattern on the left side of the bowl and the rest is smooth with a flat bottom. We purchased it on 03/20/25 off eBay from a seller in Howell, Michigan, USA. The grain on the smooth portions of this pipe is also quite nice. The rustication on the left side of the bowl is another pattern of rustication that I have never seen before on the Malaga pipes that I have worked on. The pipe was obviously another favourite of the previous pipeman. It is stamped on the left side of the shank and read “MALAGA” and on the right side of the shank it was stamped Custom Carved. The finish was dirty and worn. There were tars and oils ground into the surface of the briar. The bowl had a thick cake that flowed over the top of the rim top with some thick lava. It was hard to clearly assess the damage to the inner edge. The condition of the rim edge and top would become clear in the cleaning process. The vulcanite taper stem was oxidized, calcified and there was chatter and tooth marks on the top and the underside of the stem ahead of the button. Jeff took photos of the pipes before he started his clean up work.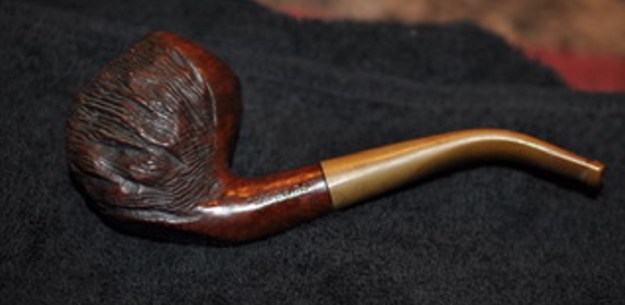
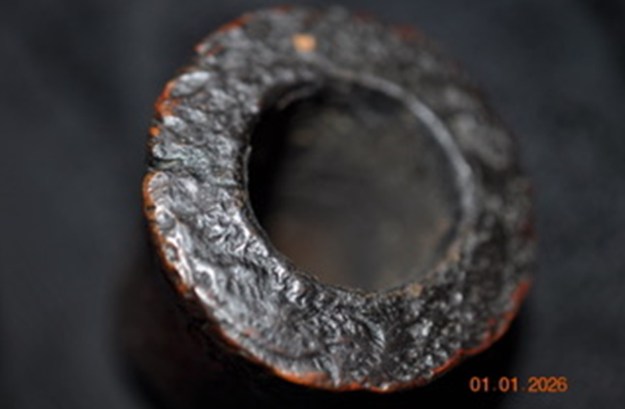
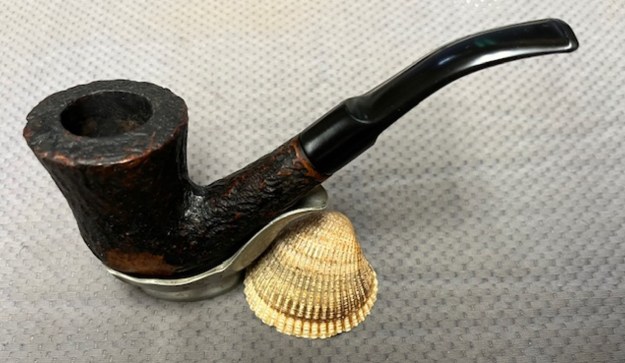
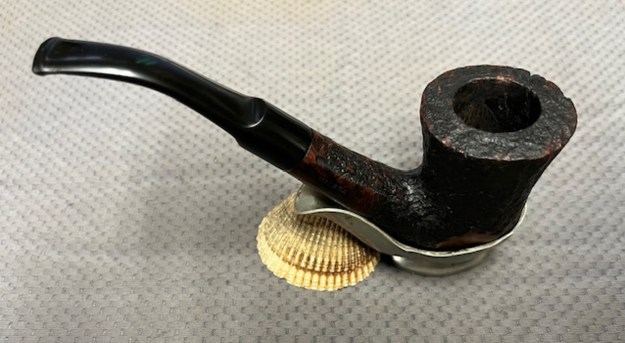
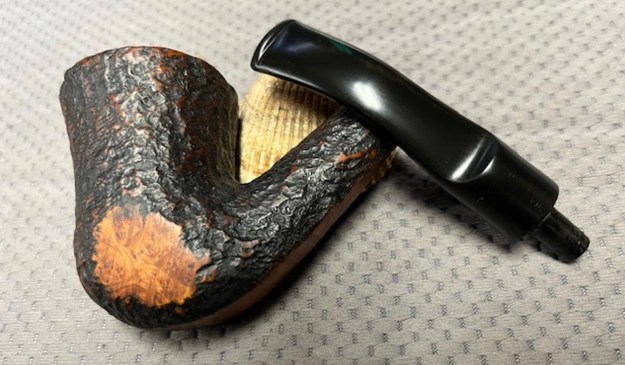
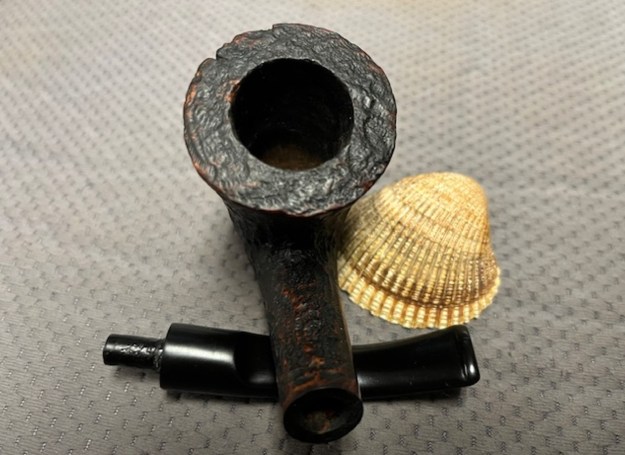
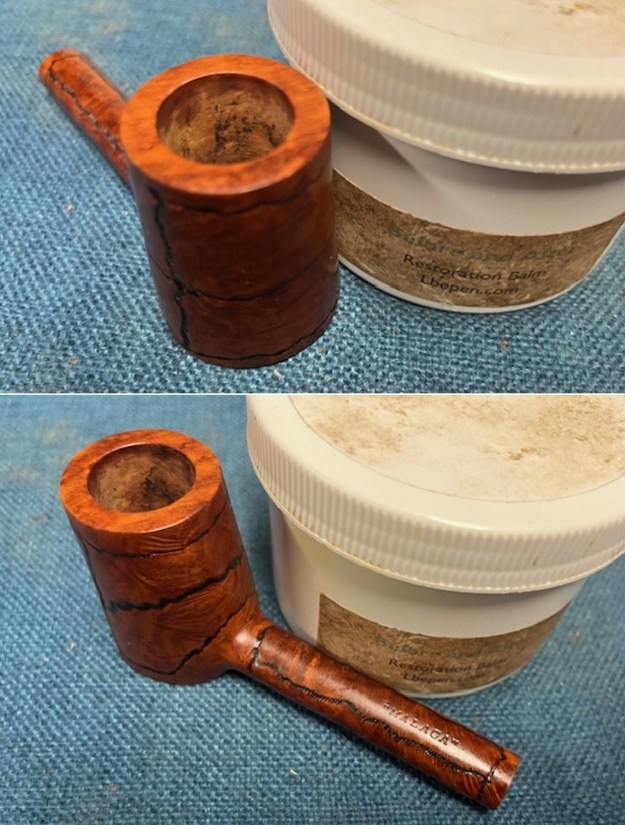
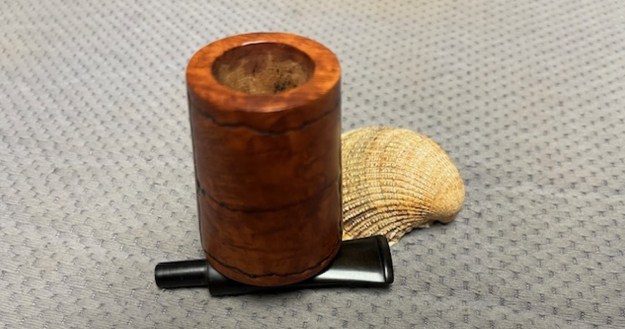
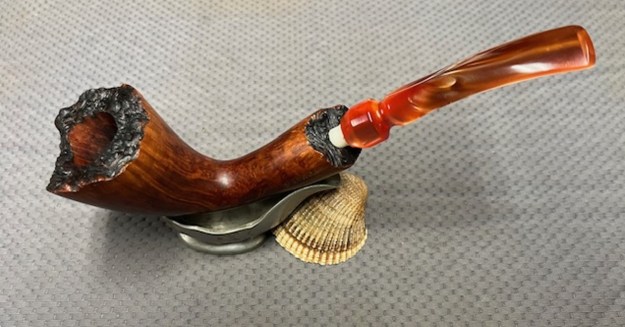
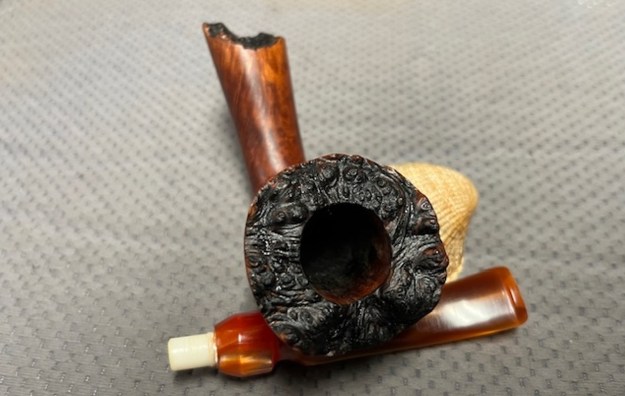
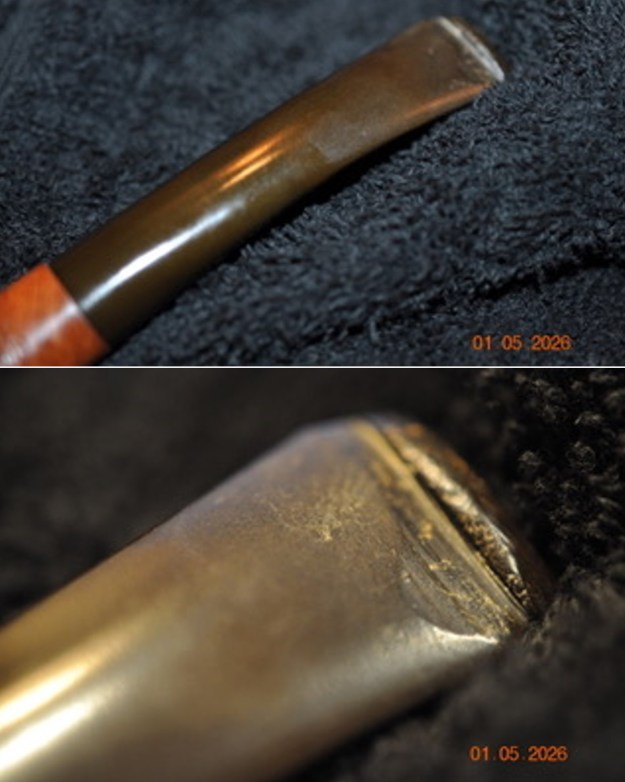
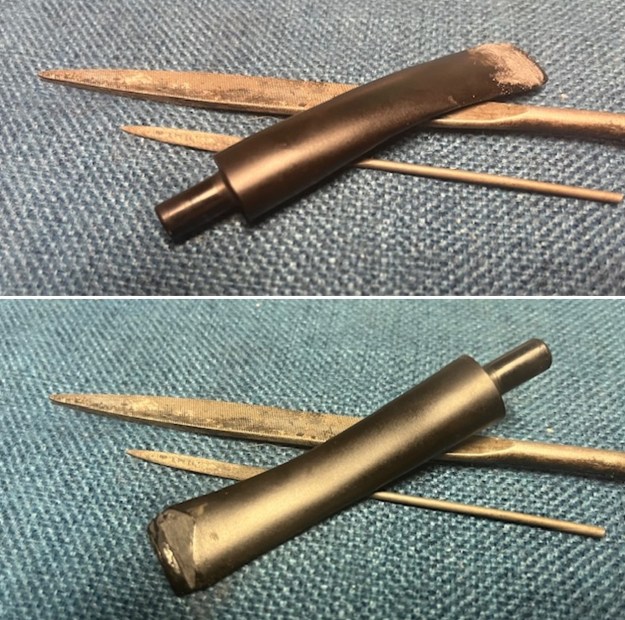
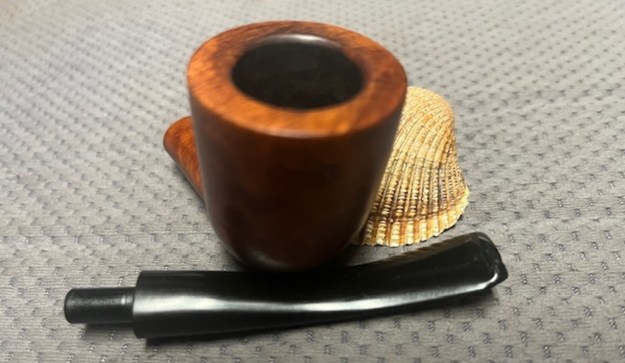
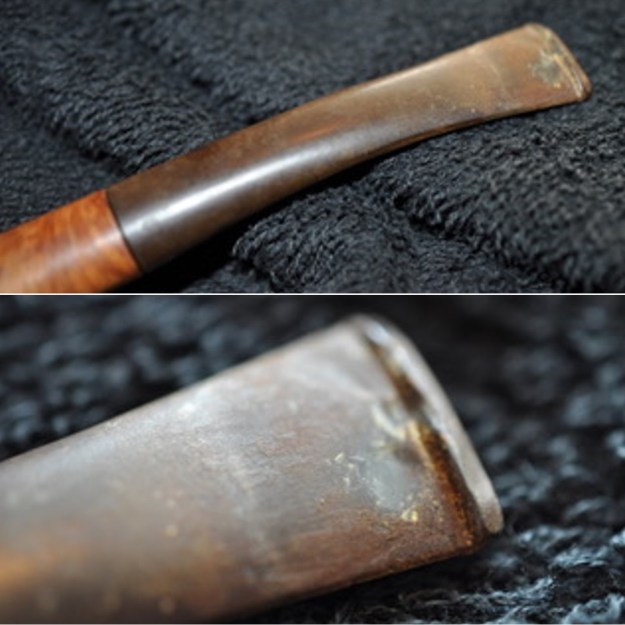
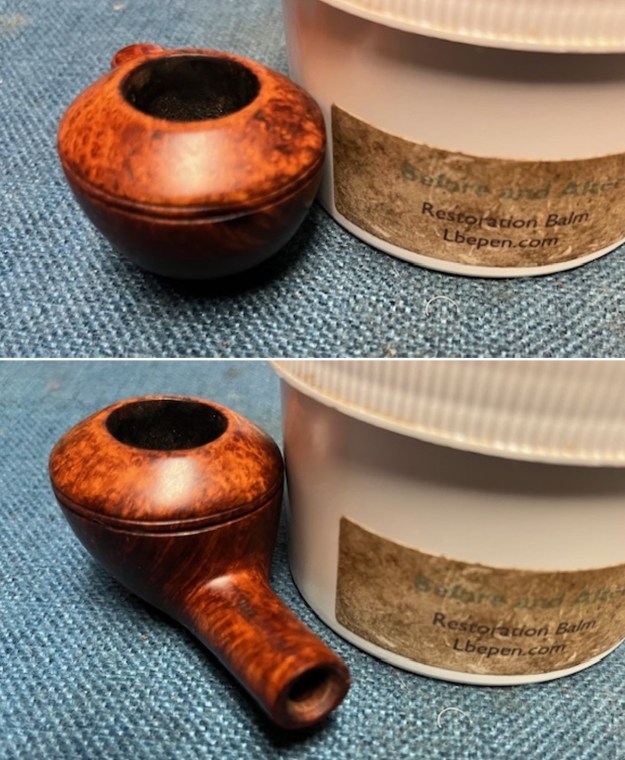
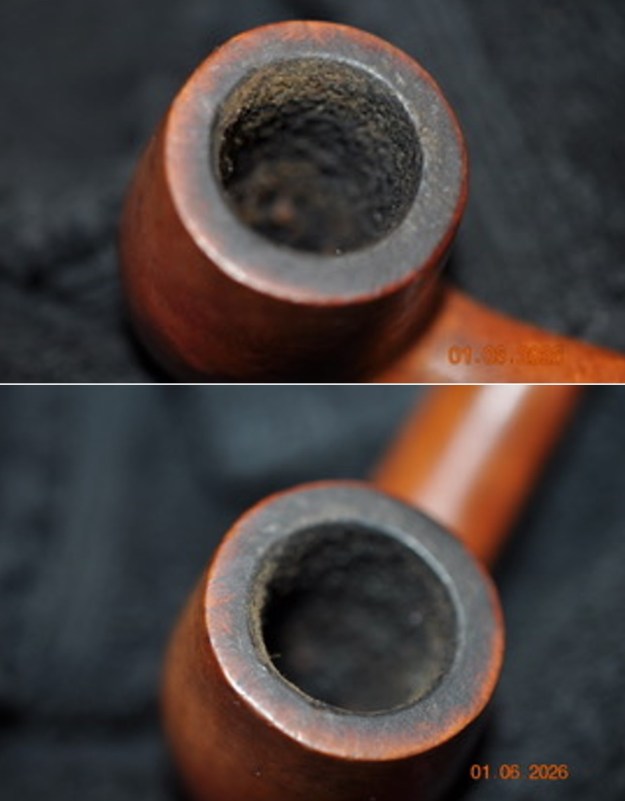
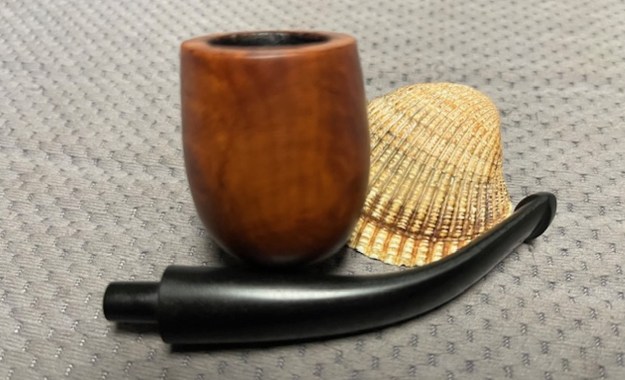
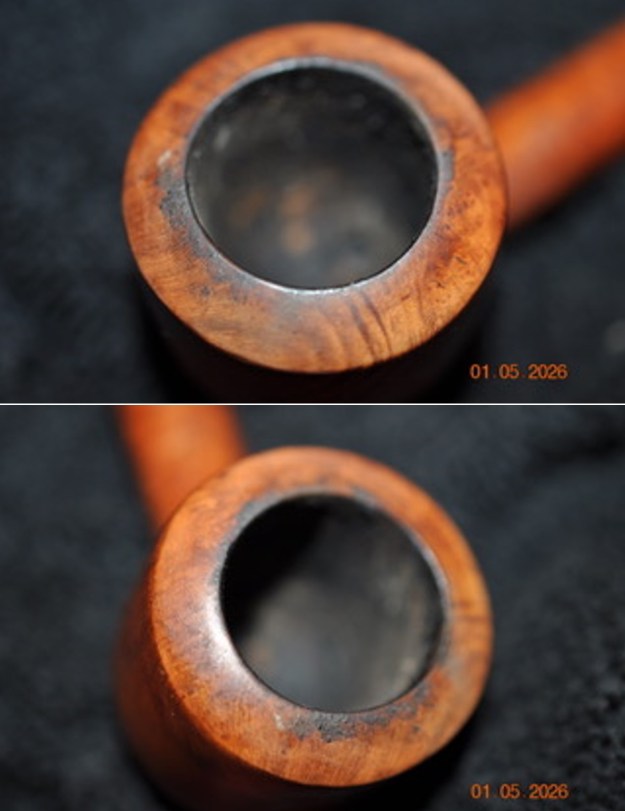
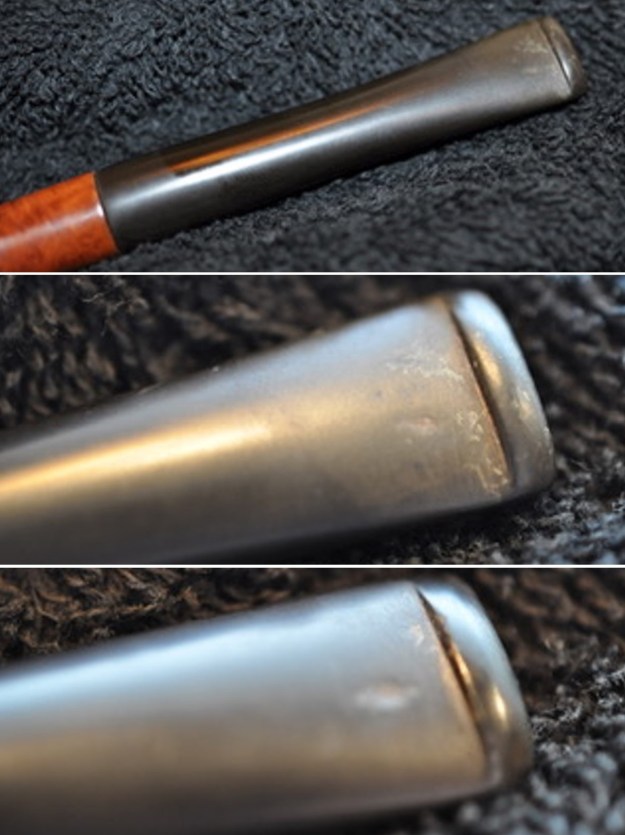
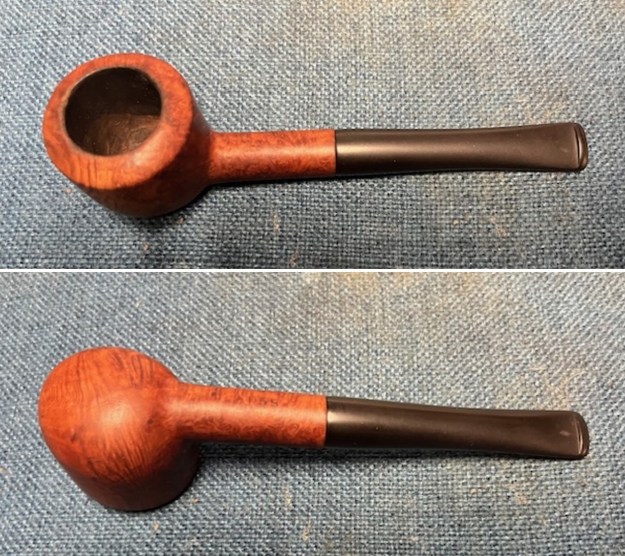
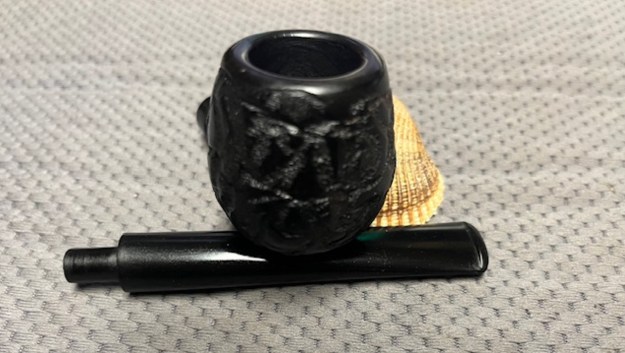
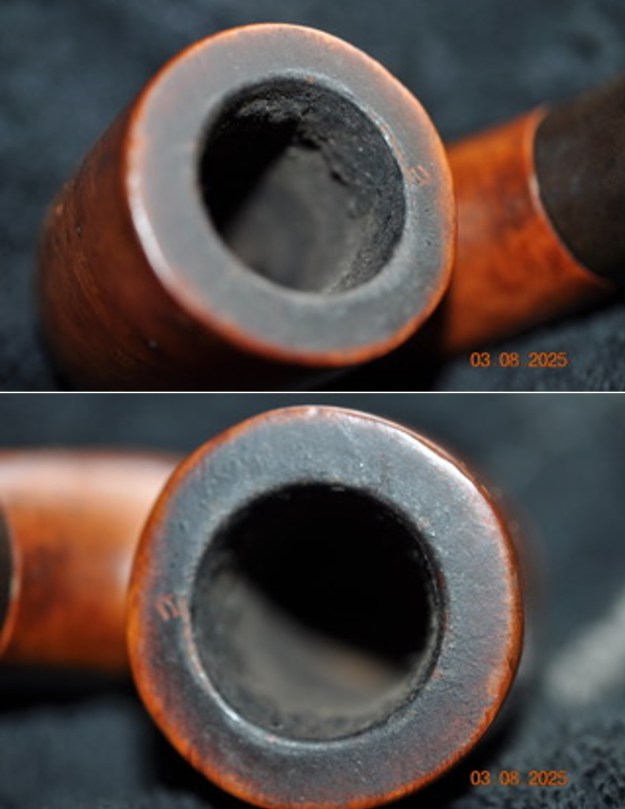
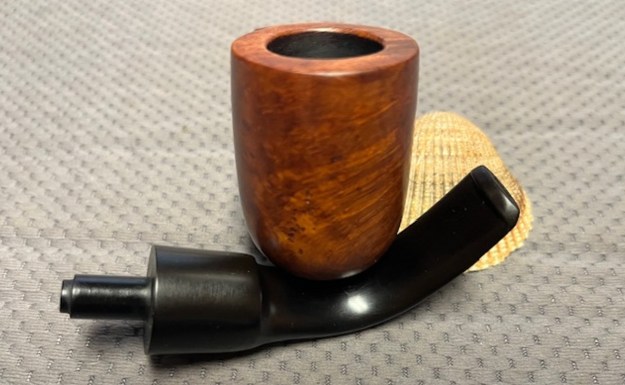
 Jeff took photos of the rim and bowl to show the cake and lava on the rim top and edges. The pipe was a dirty one but still a beauty. The vulcanite taper stem is very oxidized and had tooth marks and chatter on the top and underside of the stem ahead of the button.
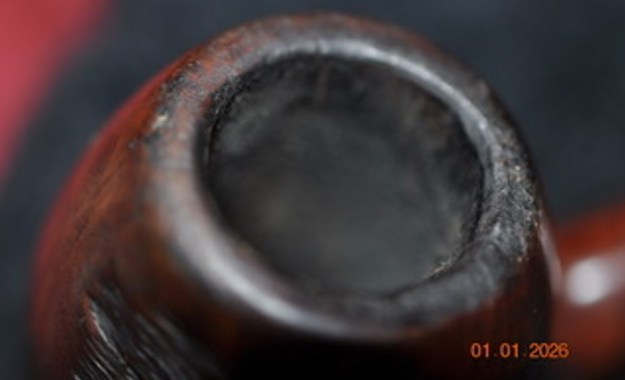
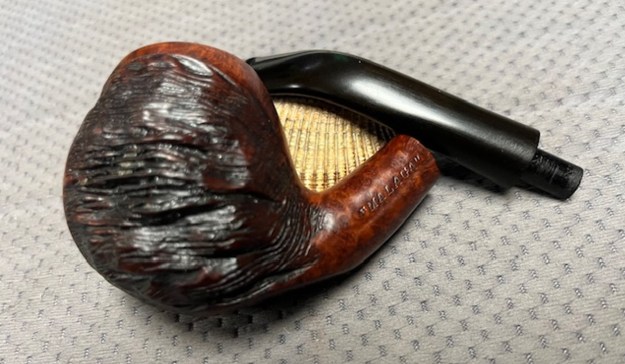
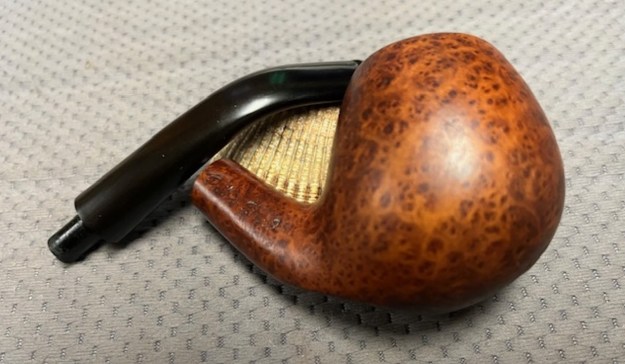
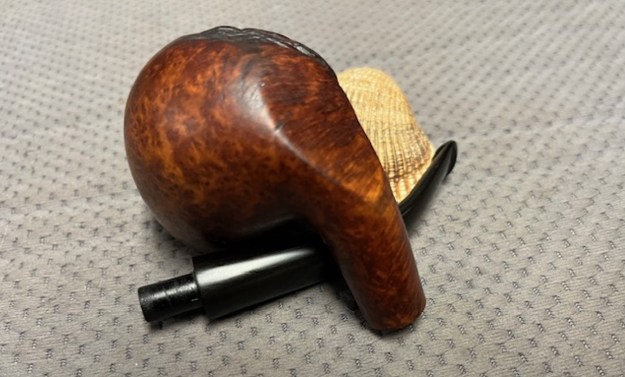
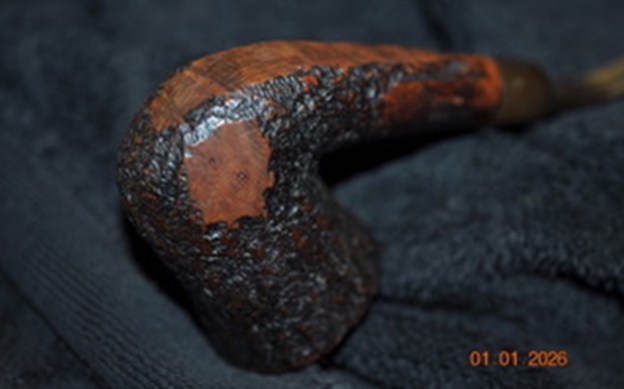
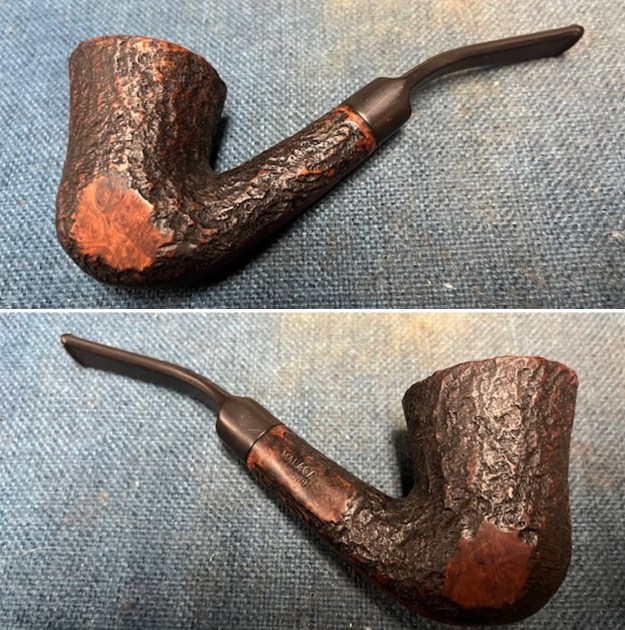
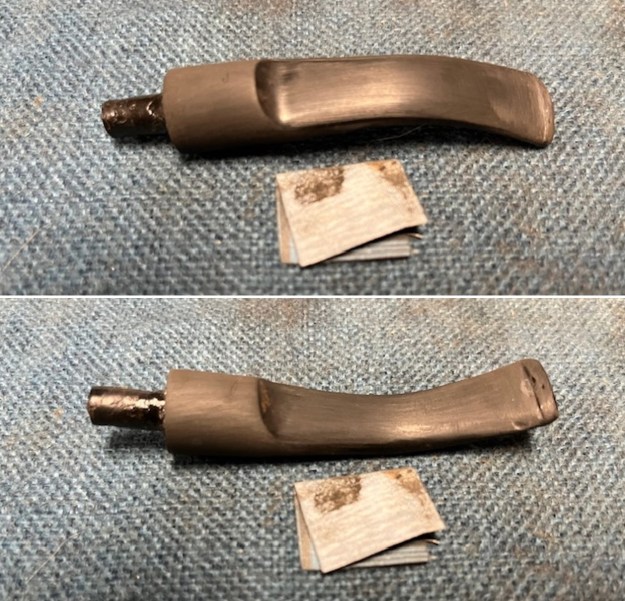
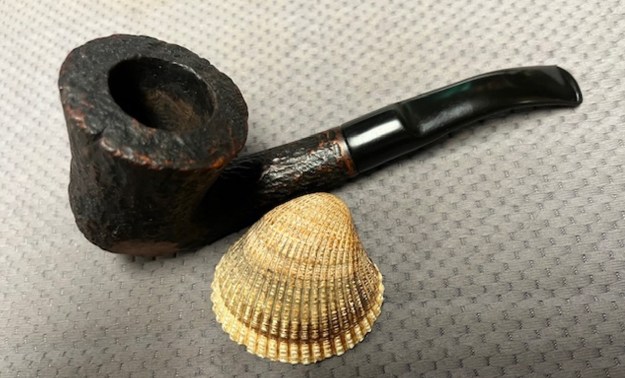
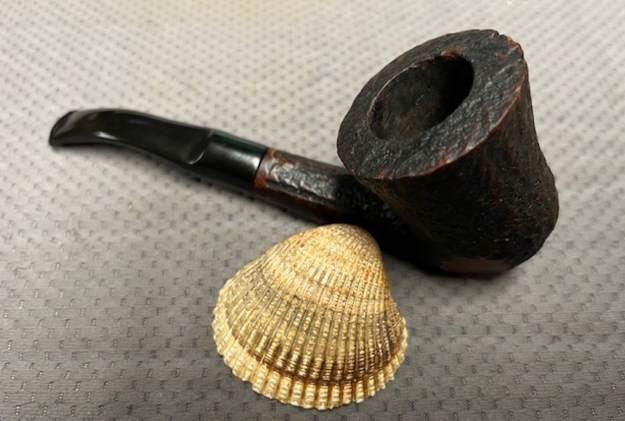
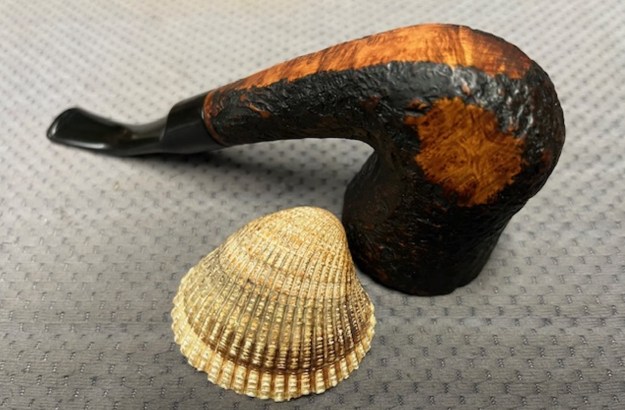
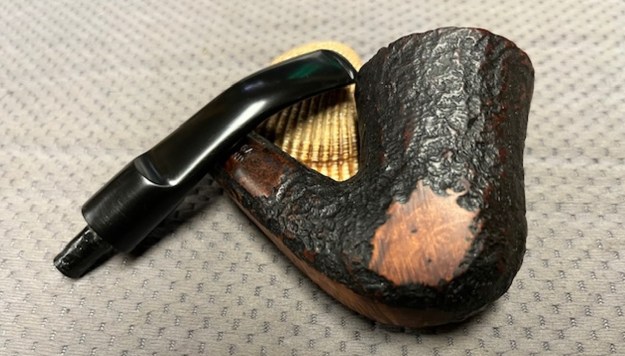
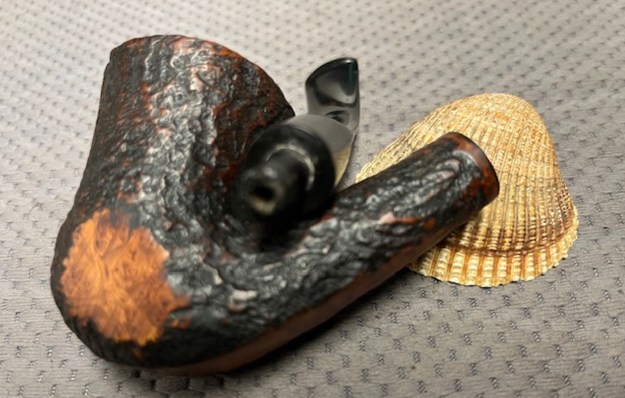
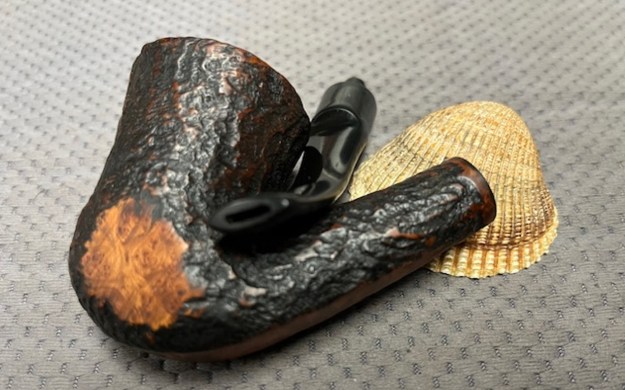
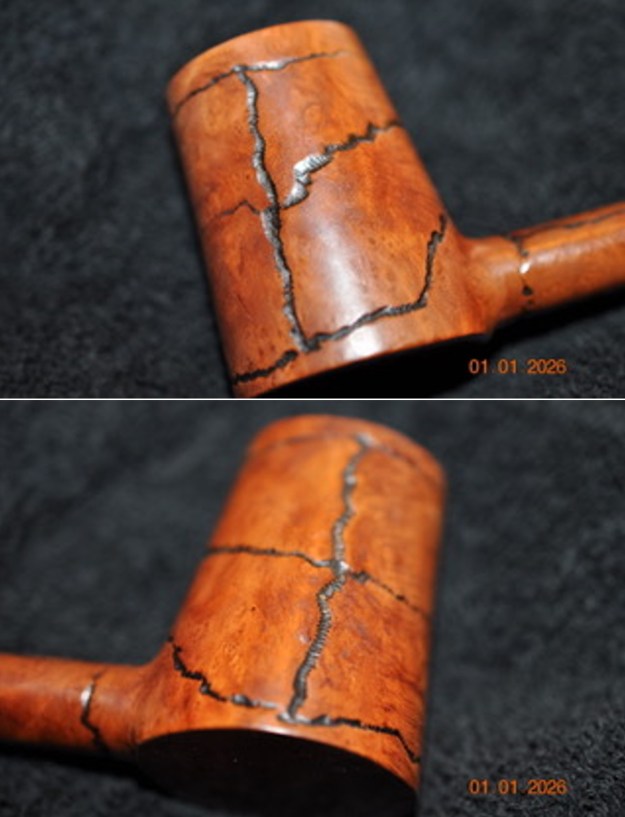
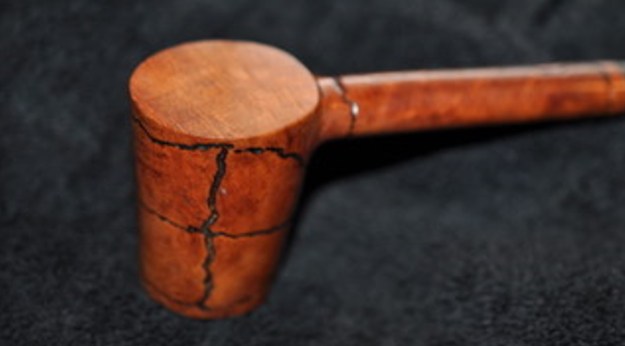
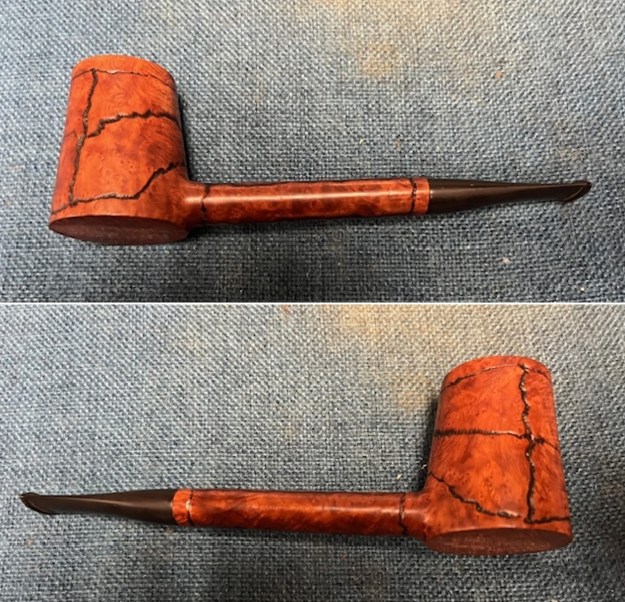
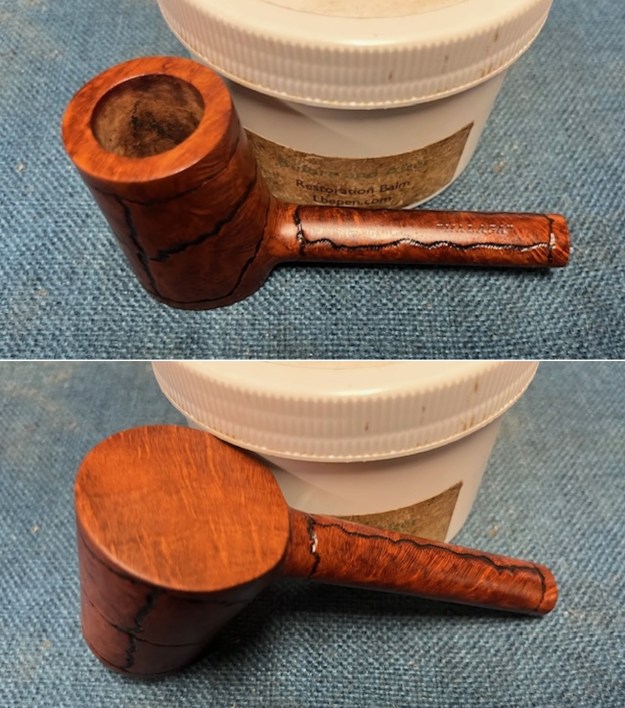
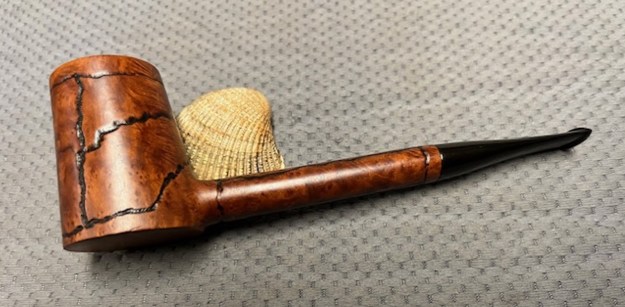
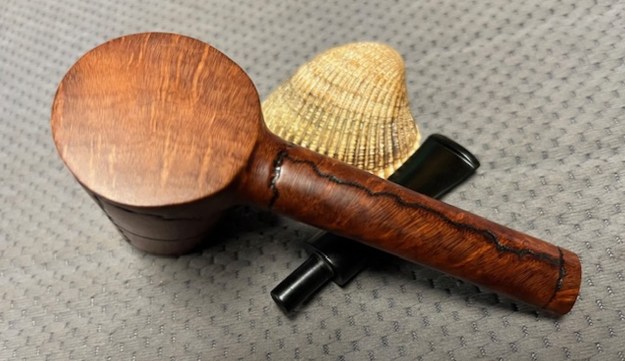
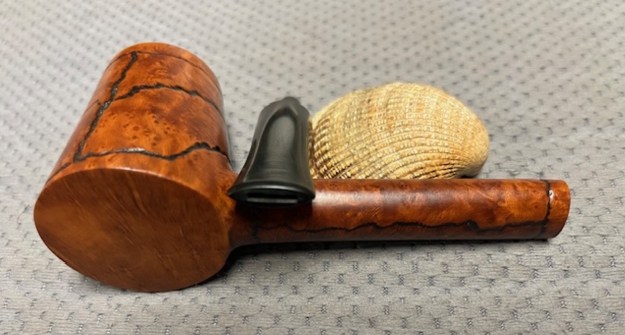
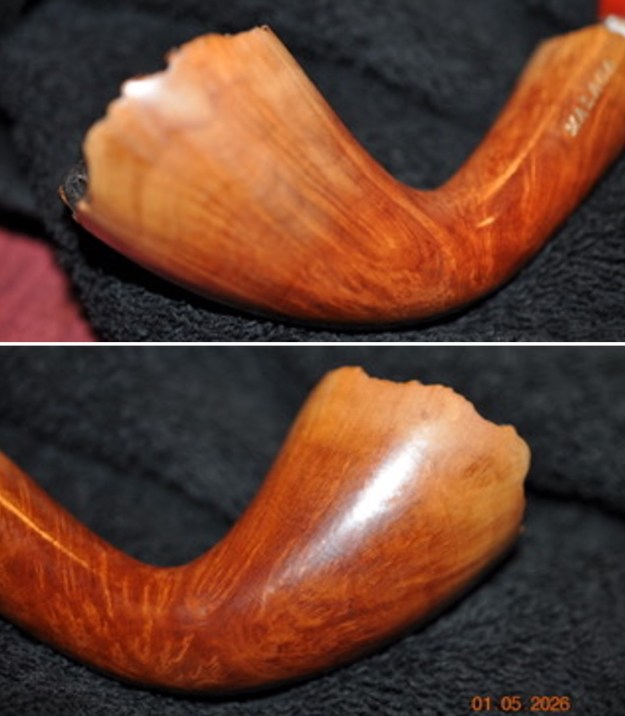
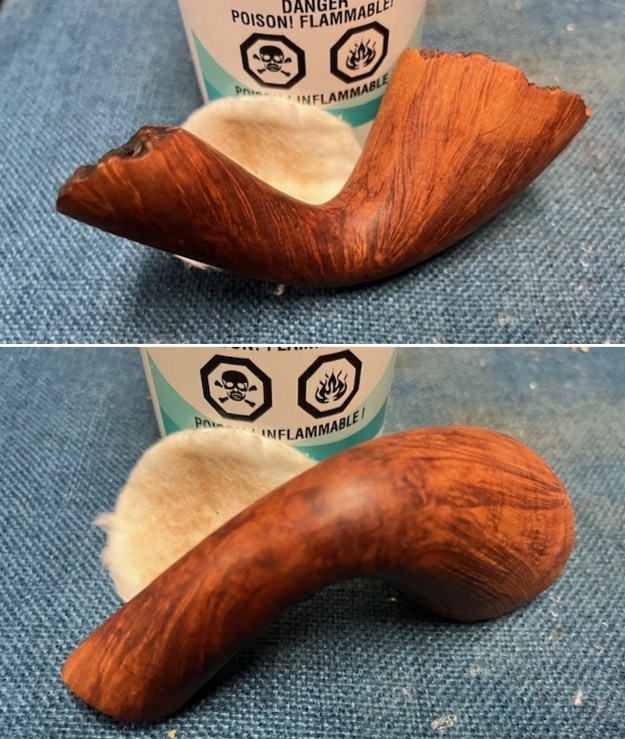
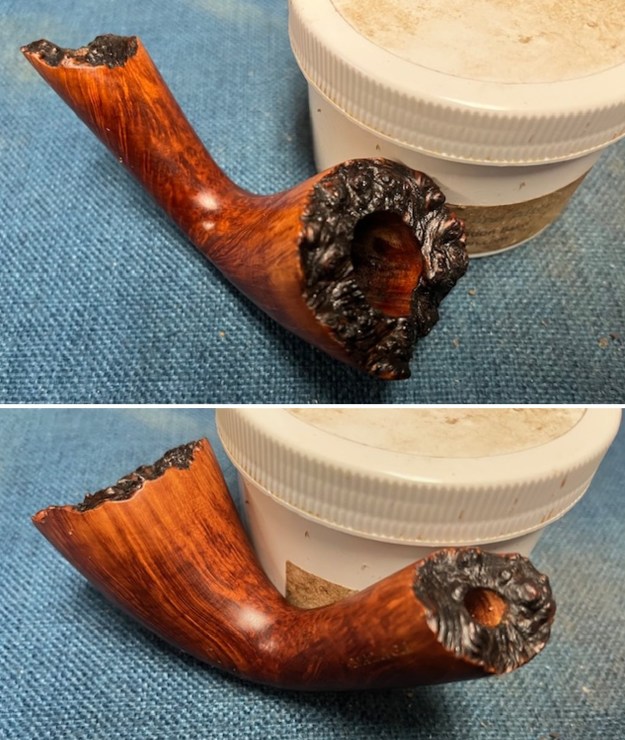
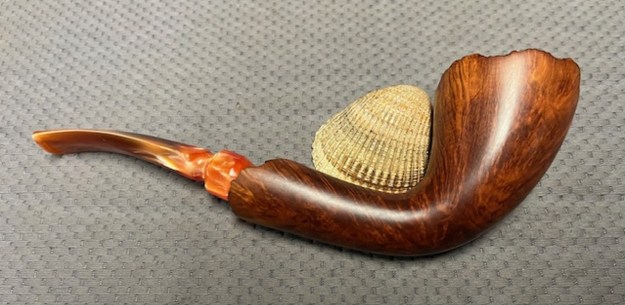
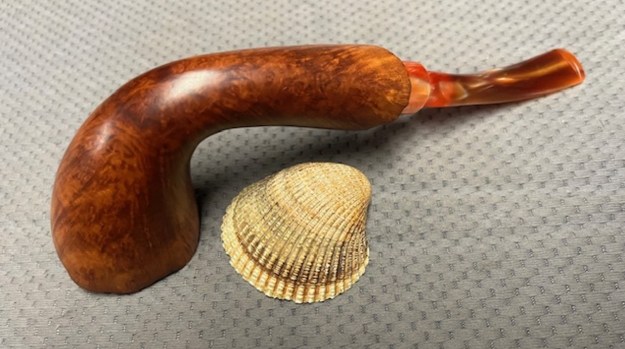
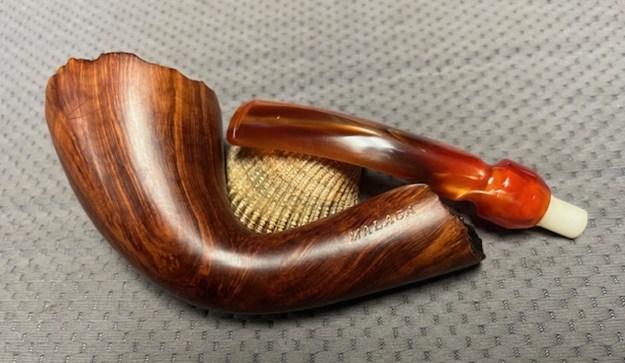
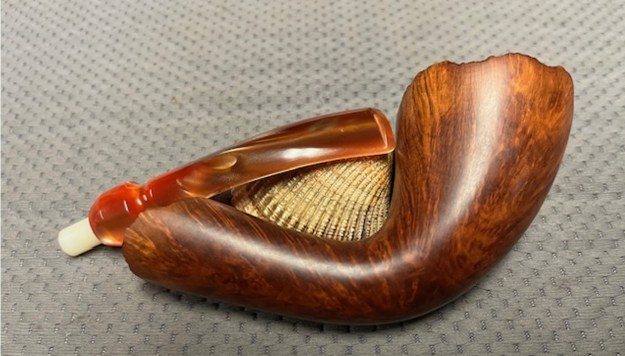
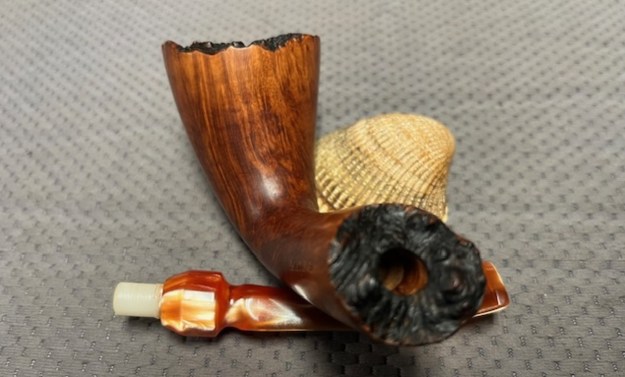
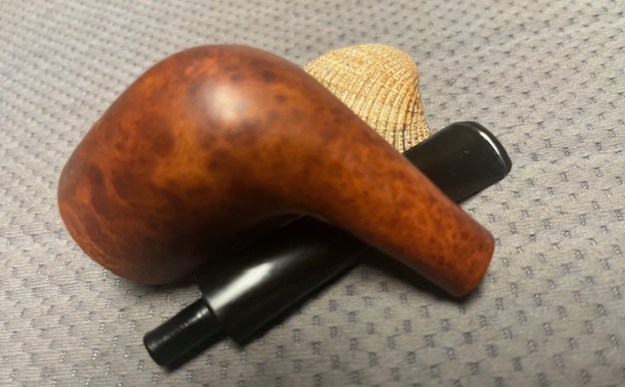
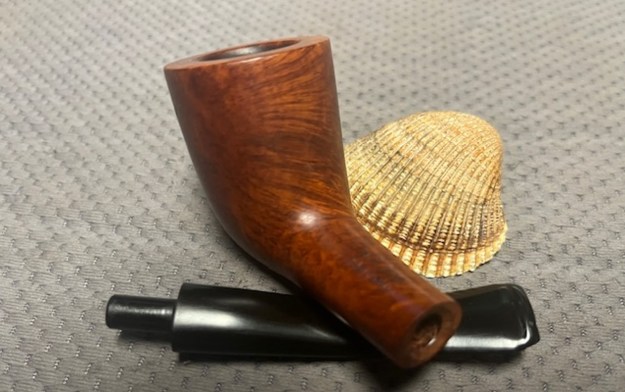
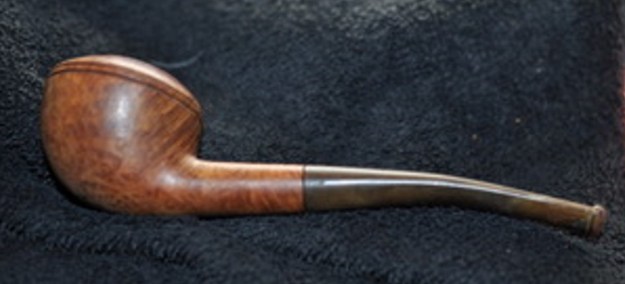
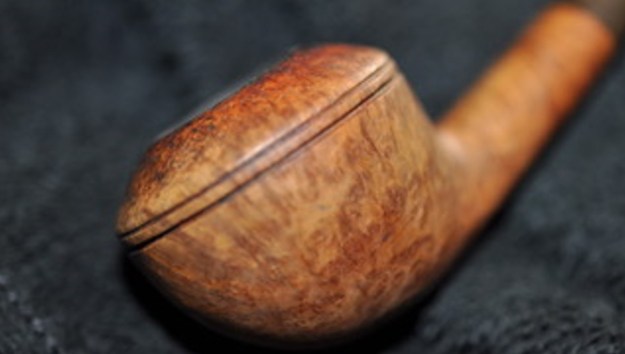
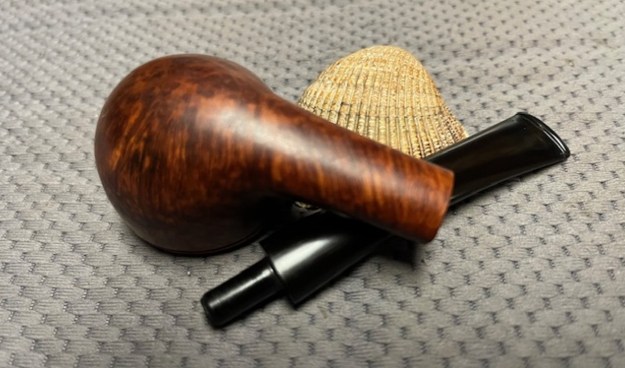
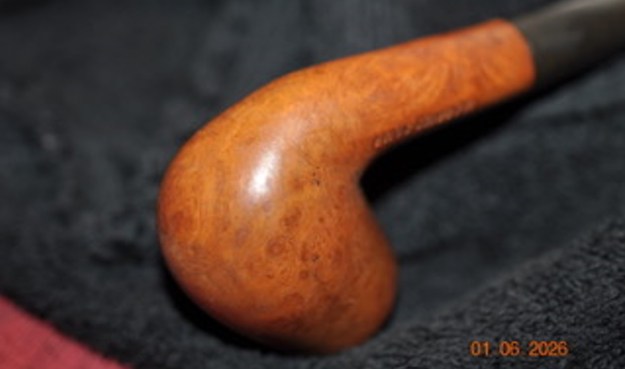
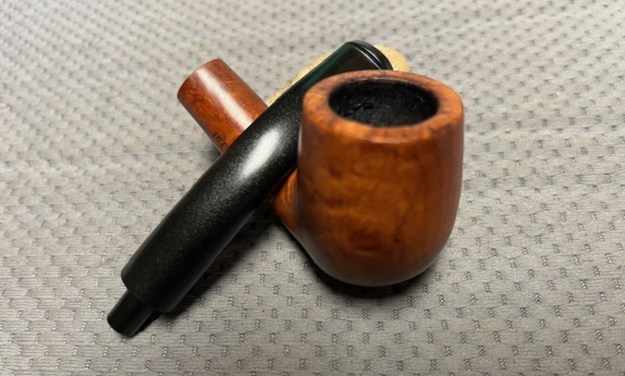
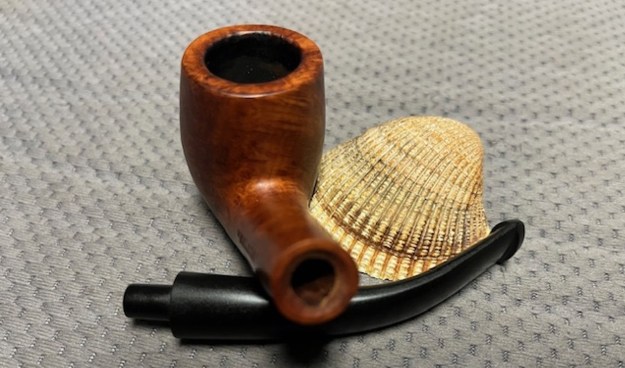
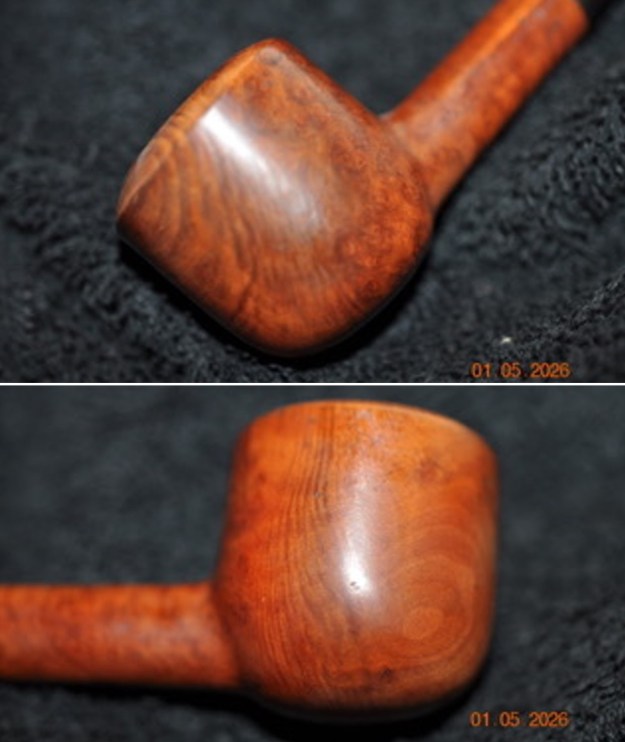
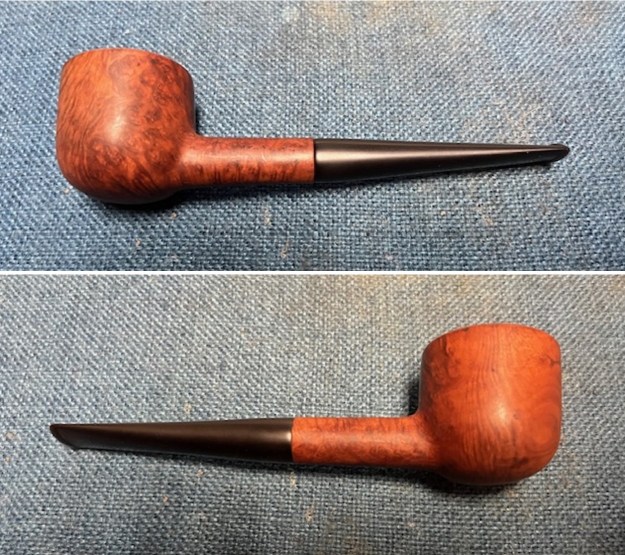
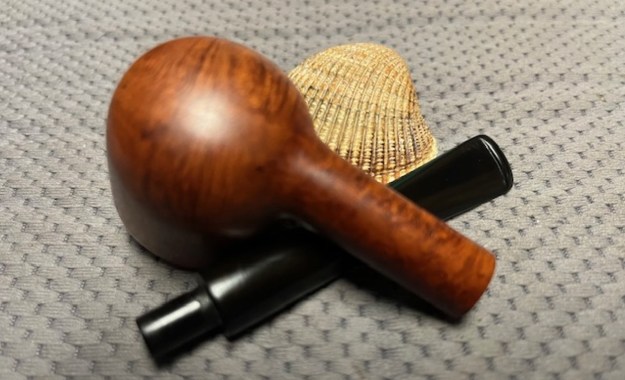
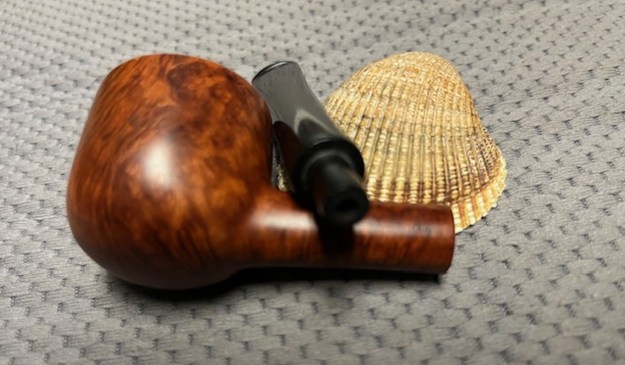
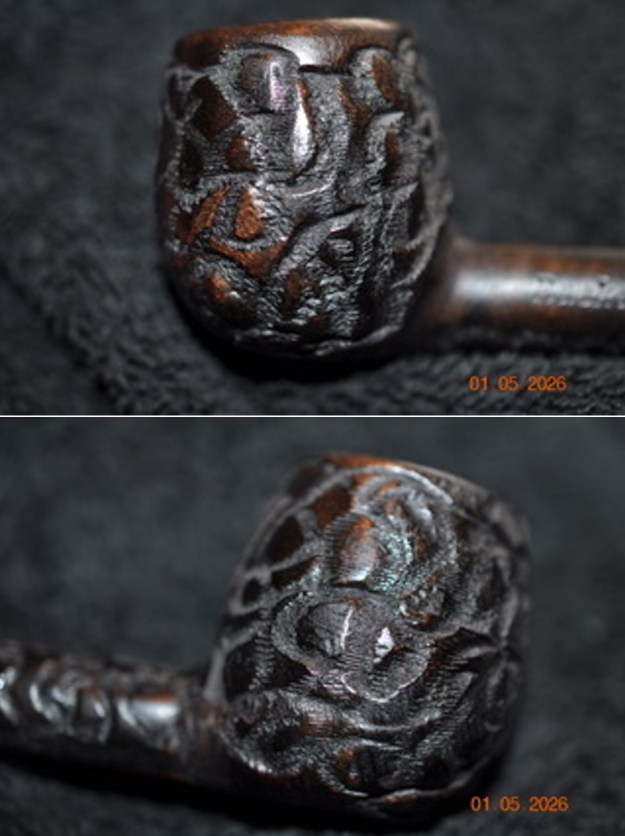
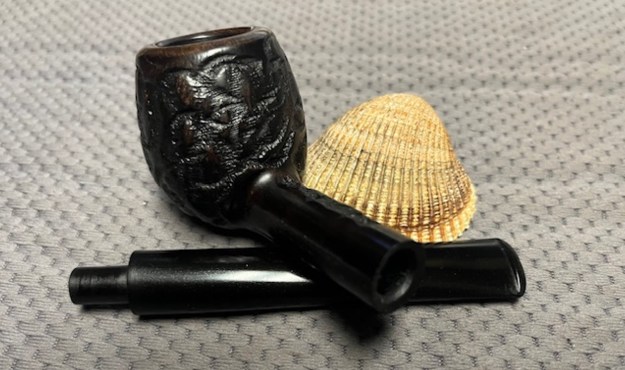
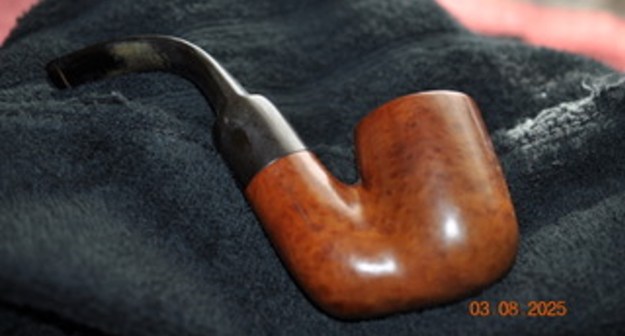
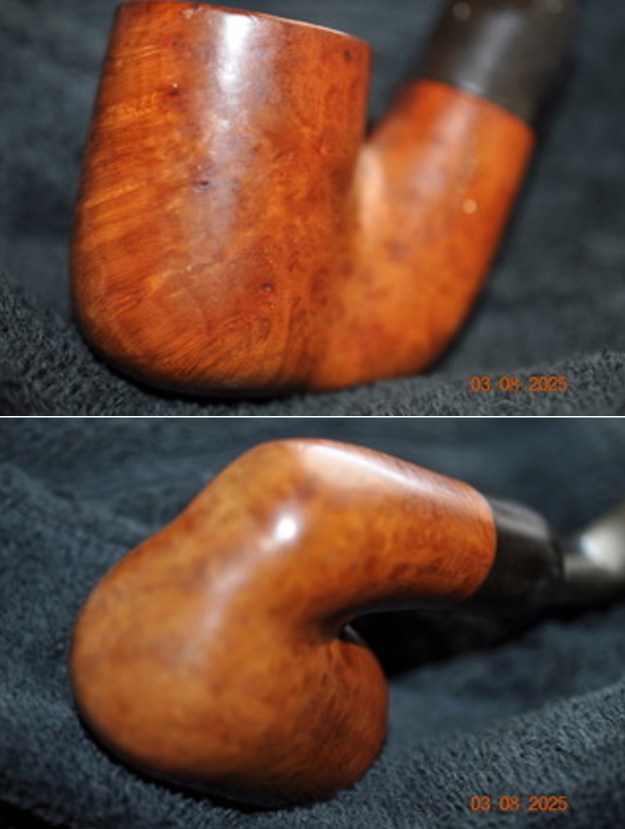
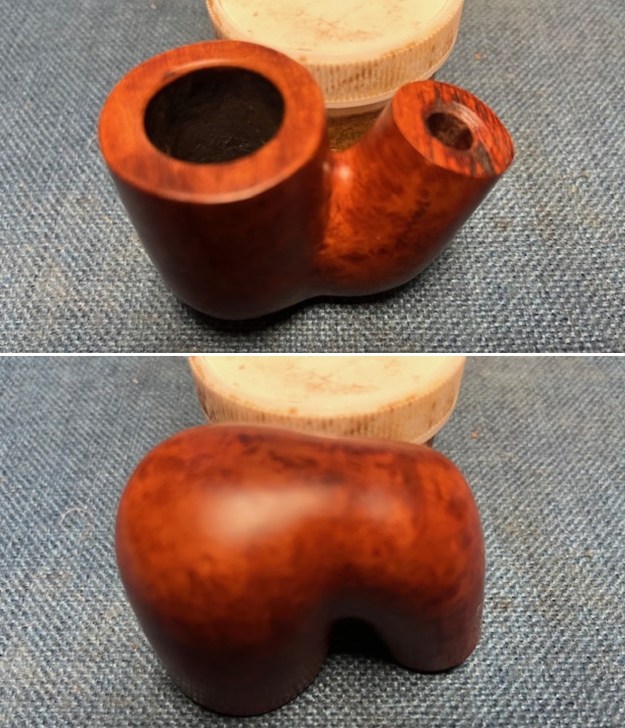
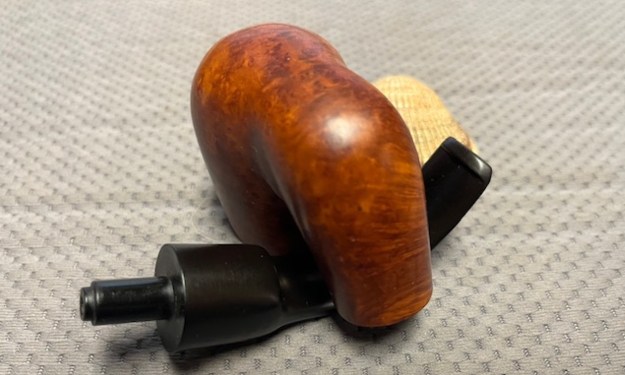
 The photos of the sides and heel of the bowl show the interesting rope like rustication and the birdseye smooth grain on the left side. The briar is quite nice all around the pipe. The oil curing/finish makes the grain really stand out on the bowl and shank. The heel is flattened.
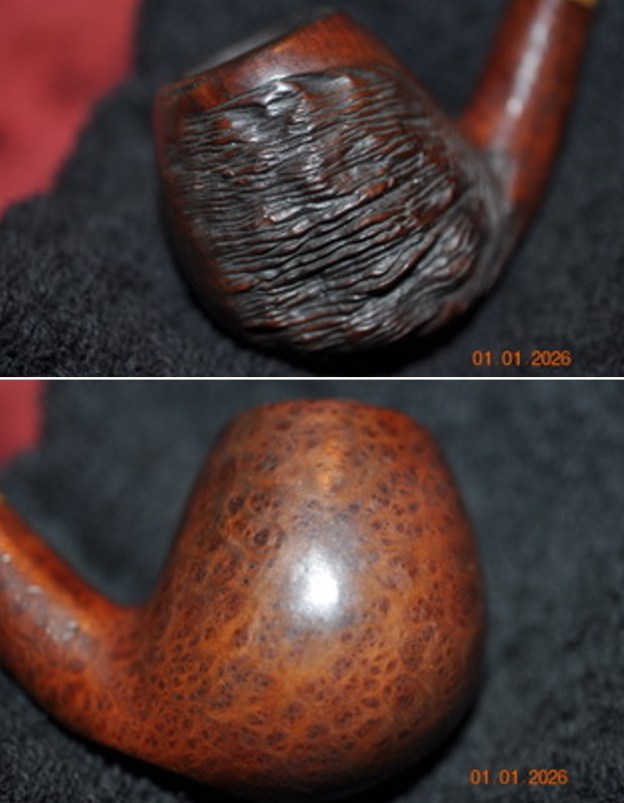
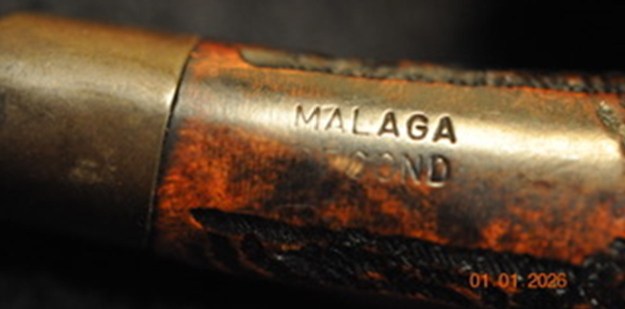
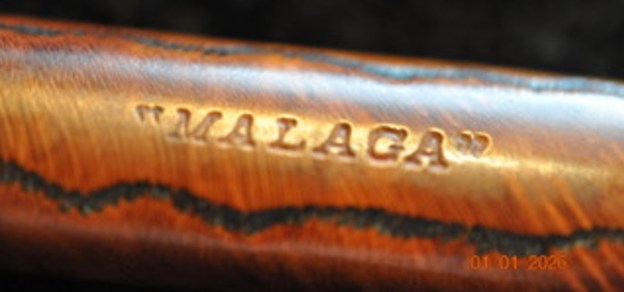
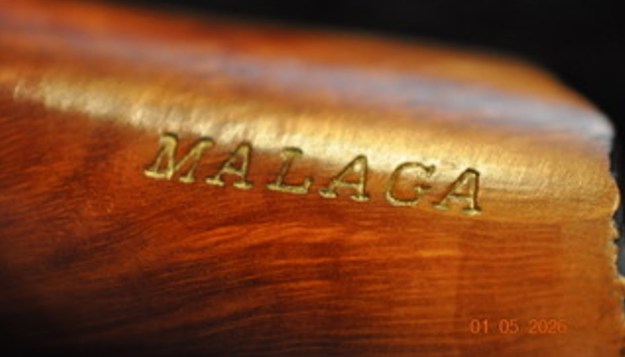
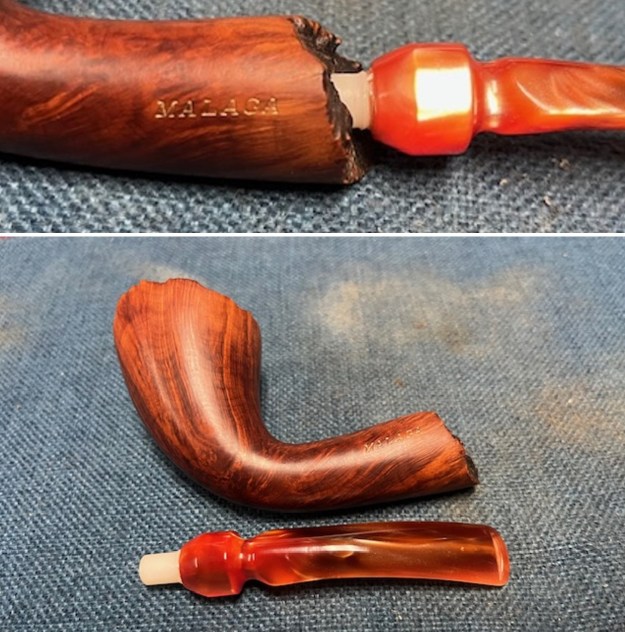
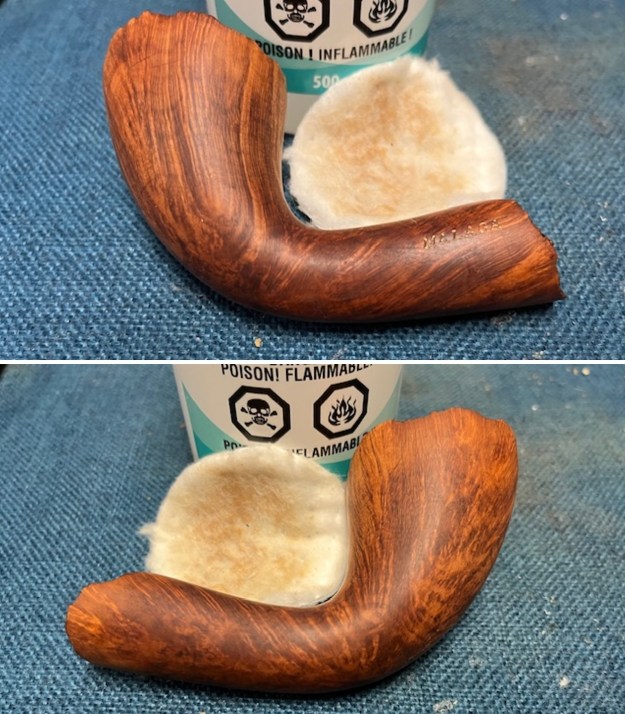
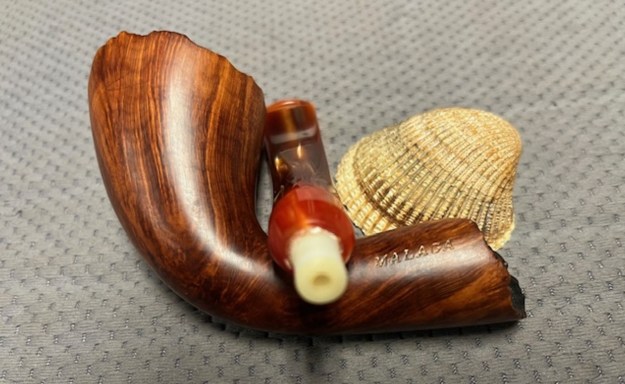
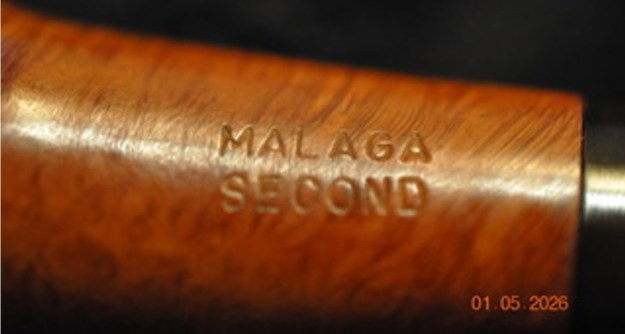
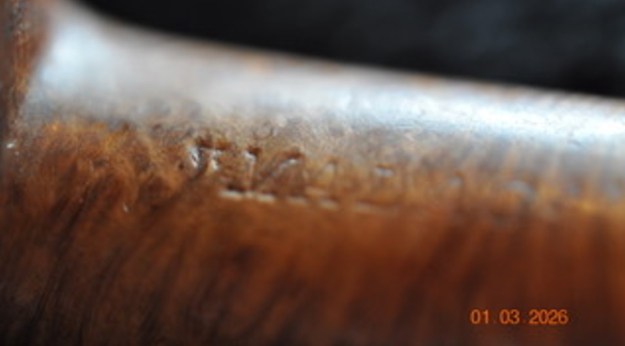
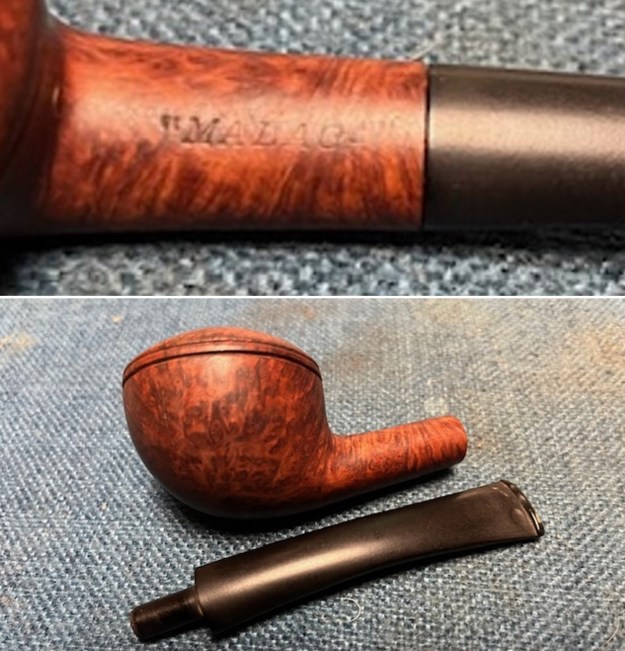
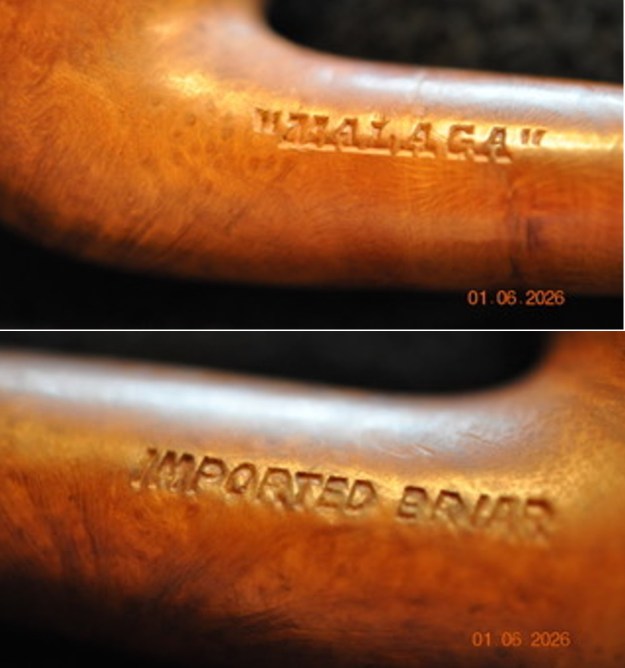
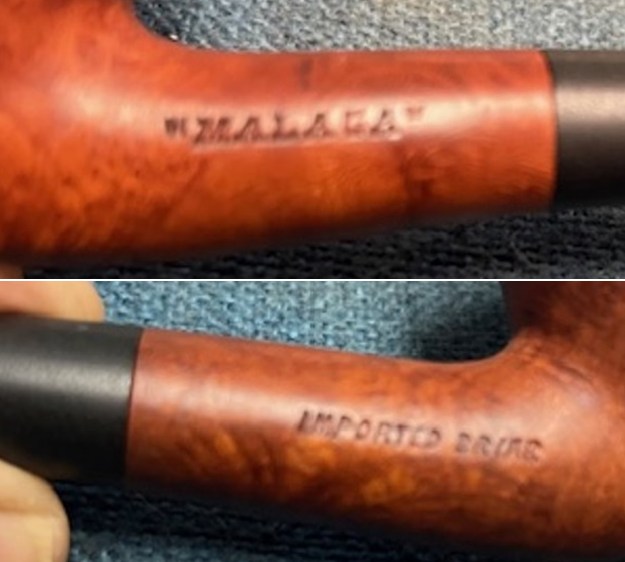
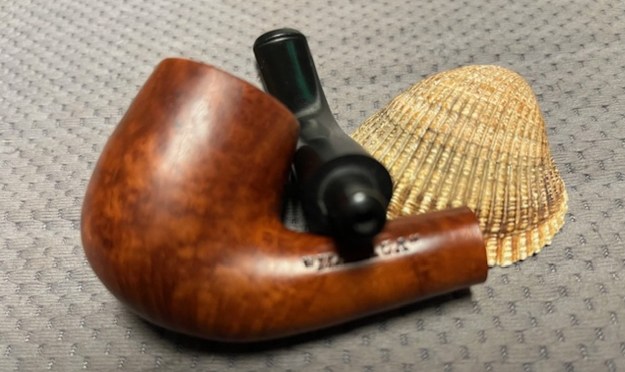
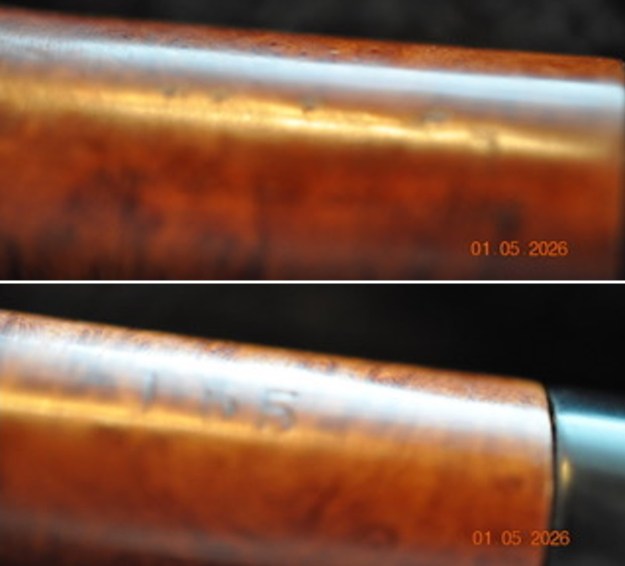
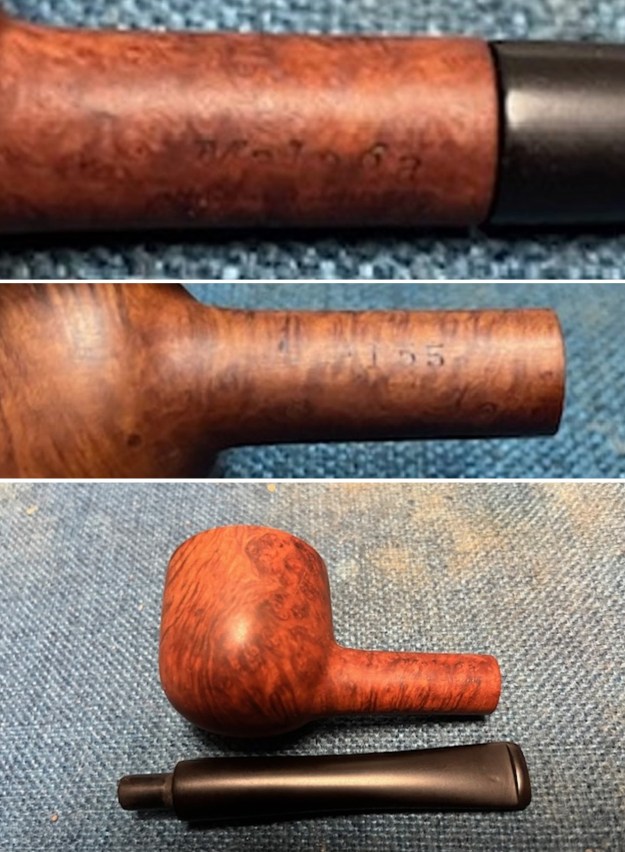
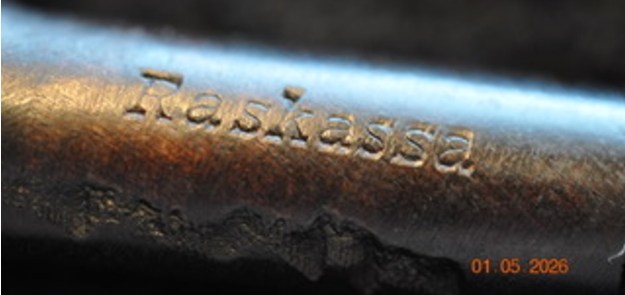
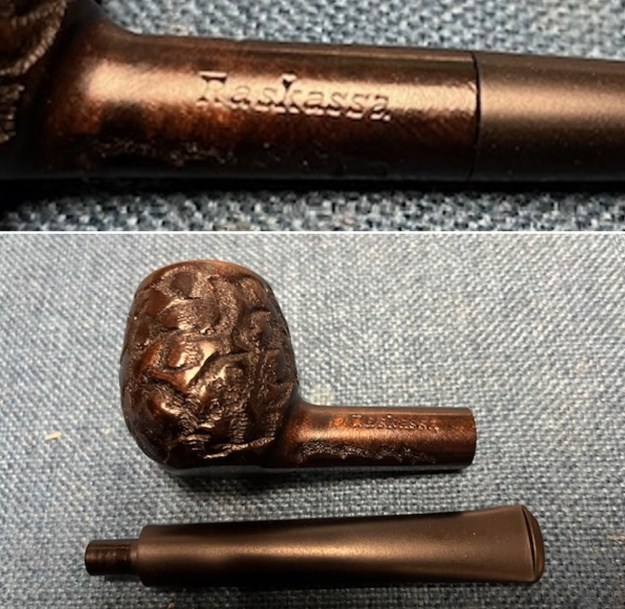
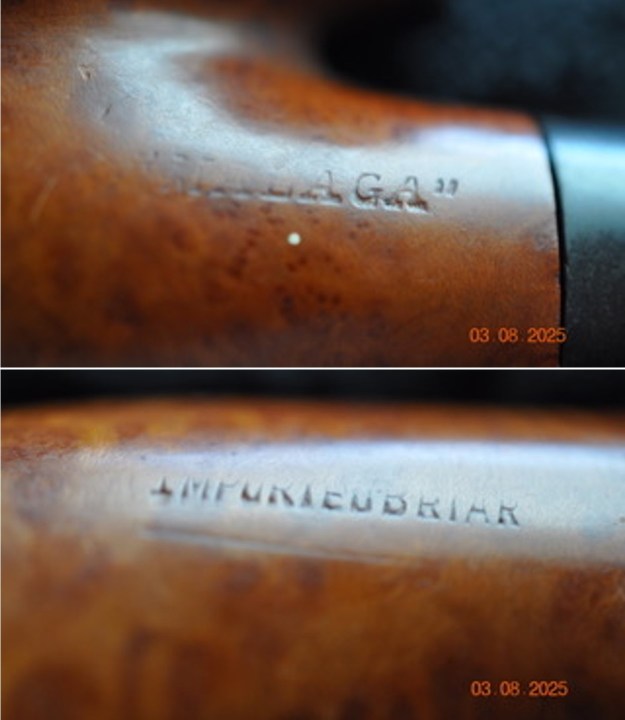
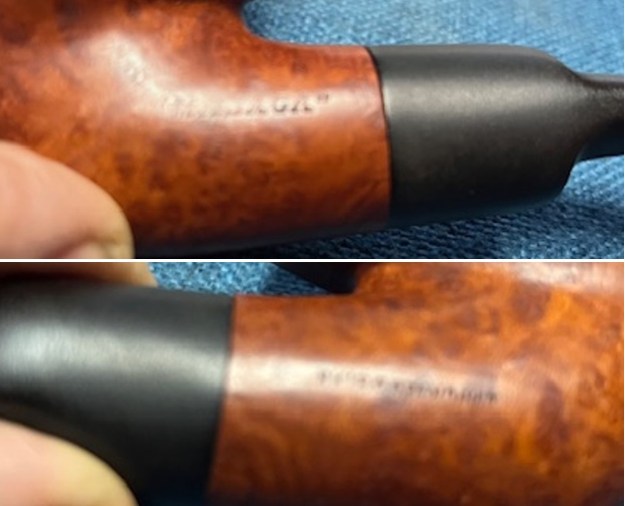
 Jeff took a photo of the stamping on the left side of the shank. It read “MALAGA” and is clear as noted above. Jeff did captured the stamping on the right side reading Custom Carved.
 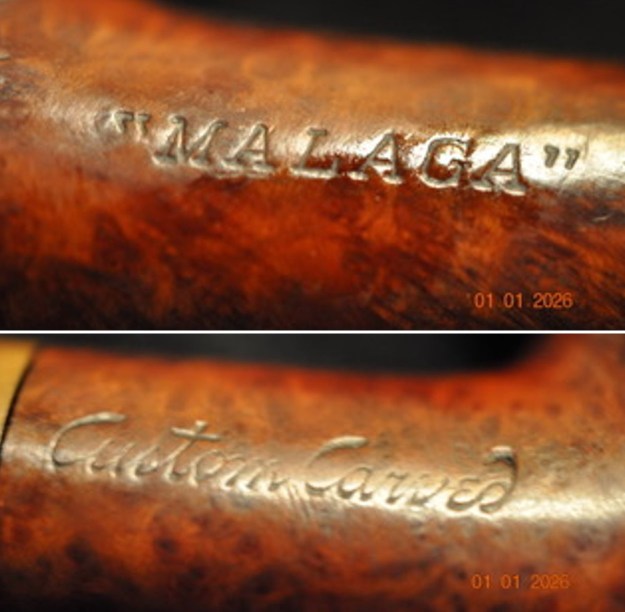 For those of you who are unfamiliar with the brand, I am also including the link to a blog that I wrote that gives some of the history of the Malaga brand and the Malaga Pipe Shop in Royal Oak, Michigan in the USA. Here is the link – https://rebornpipes.com/2013/02/09/george-khoubesser-and-malaga-pipes/. That blog also includes links to a catalogue and the history of the pipemaker George Khoubesser. If you are interested to learn more then I invite you to follow the link to get a feel for the brand and the pipemaker.
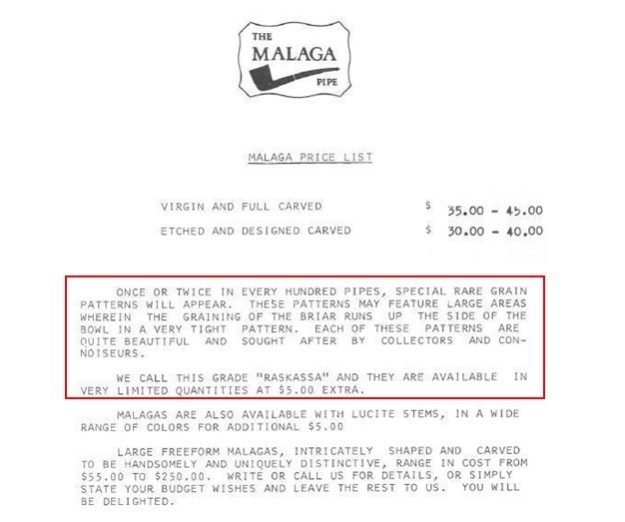
I am also am including a link to some printed material on the Malaga brand that came to me from the daughter of George Koch (we purchased George’s pipes from his daughter) to help identify the particular stamping on the pipe. The link takes you to the entire collection of materials that were sent to me (https://rebornpipes.com/2019/02/27/malaga-pipes-catalogue-of-pipes-and-tobaccos/).
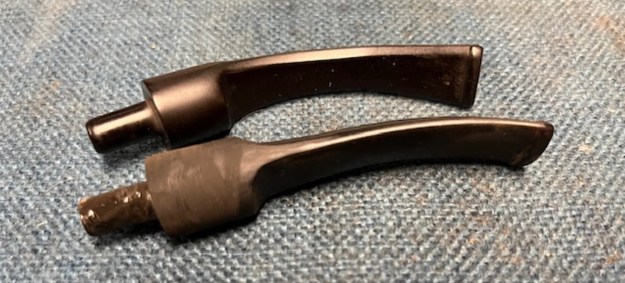
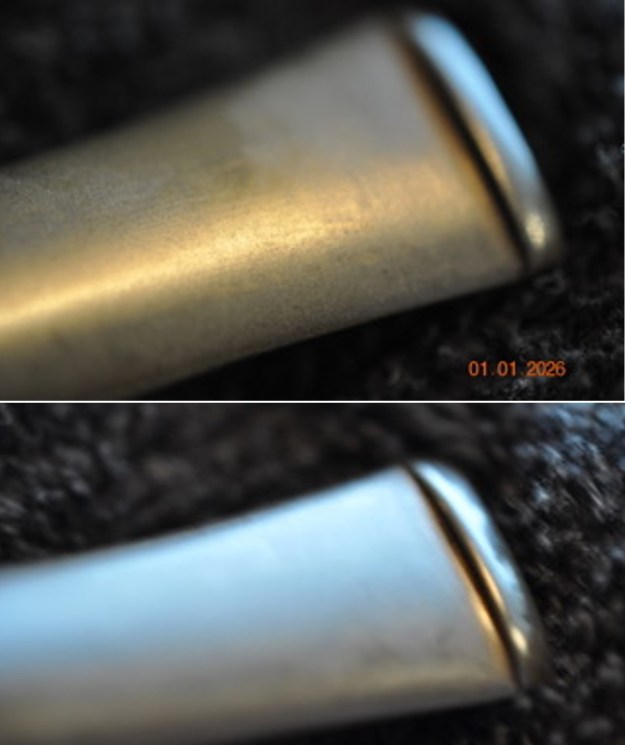
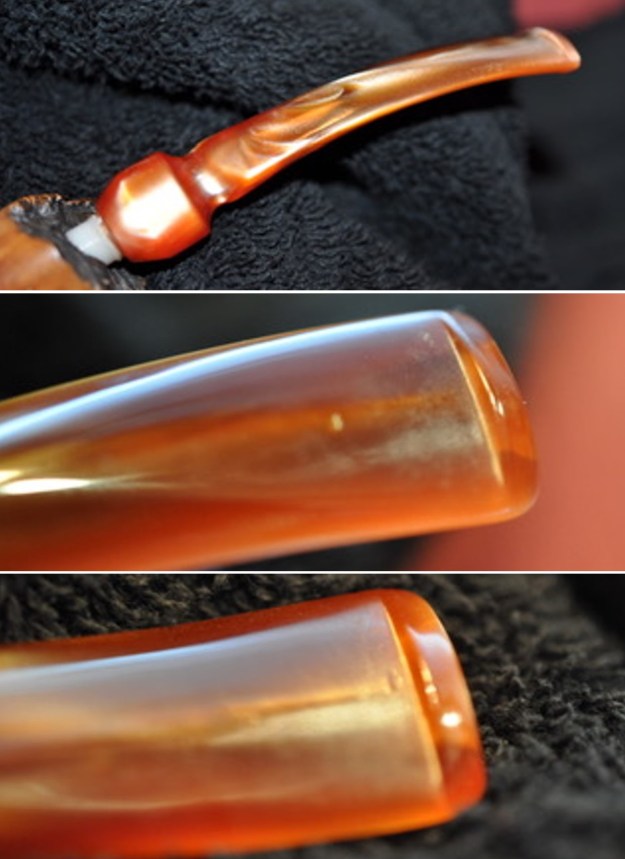
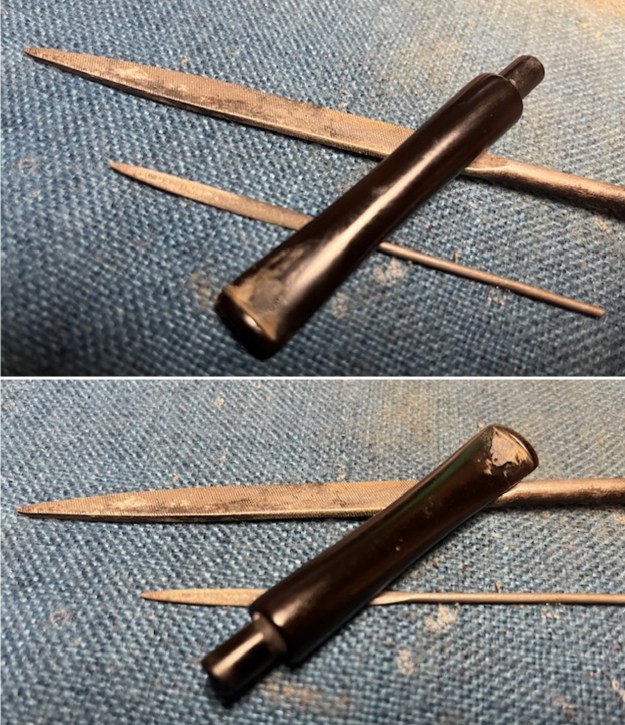
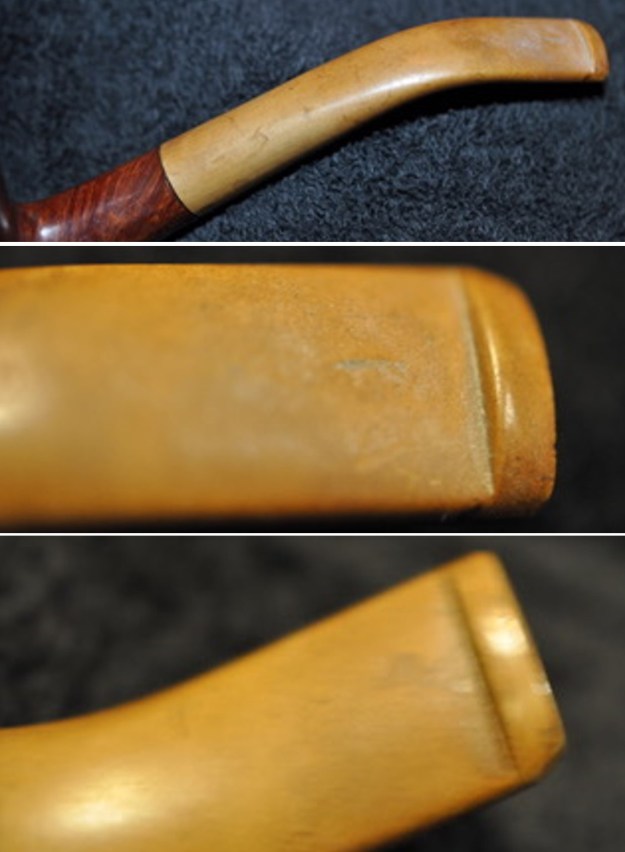
Jeff had cleaned up the pipe using his usual procedure. He reamed the pipe with a PipNet pipe reamer and removed the rest of it with a Savinelli Fitsall Pipe Knife. He scrubbed the bowl with undiluted Murphy’s Oil Soap with a tooth brush. He rinsed it under running warm water to remove the soap and grime from around the bowl sides. It looked better, even the darkened rim top and edges were improved. He cleaned out the inside of the shank and the airway in the stem with alcohol, cotton swabs and pipe cleaners. The stem looked much better and the light tooth marks on both sides were still visible and would need a little work. I took photos of the pipe once I received it.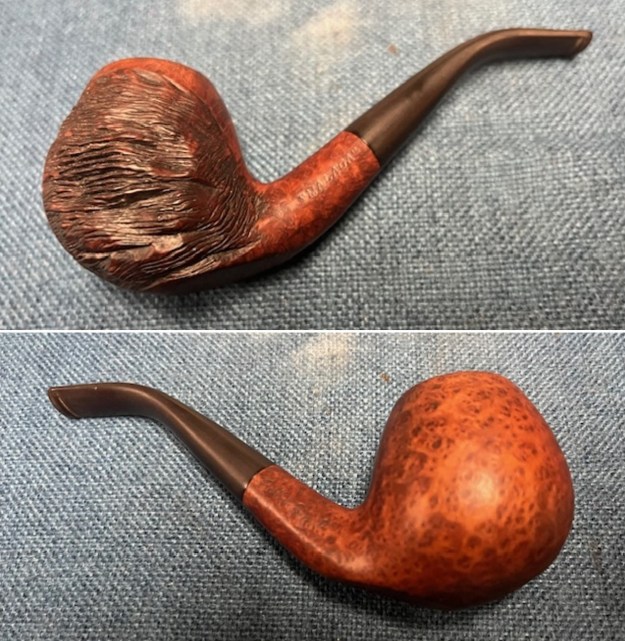
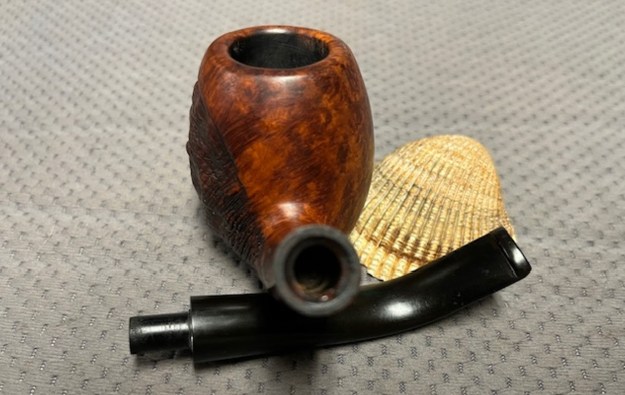
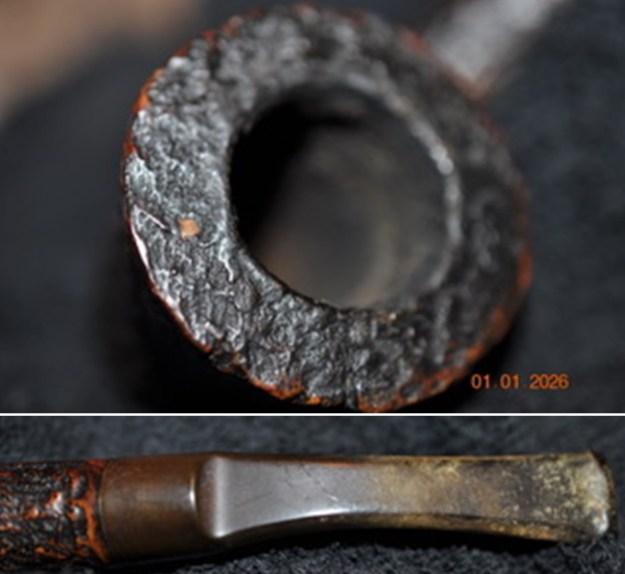
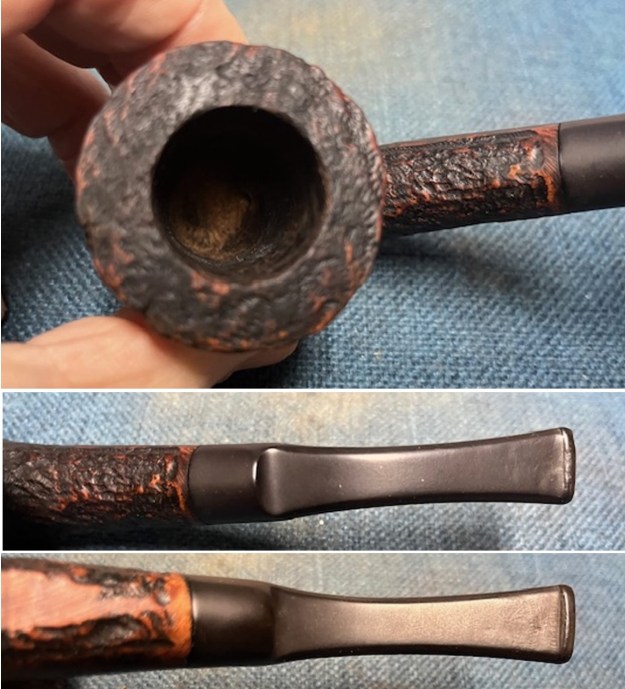
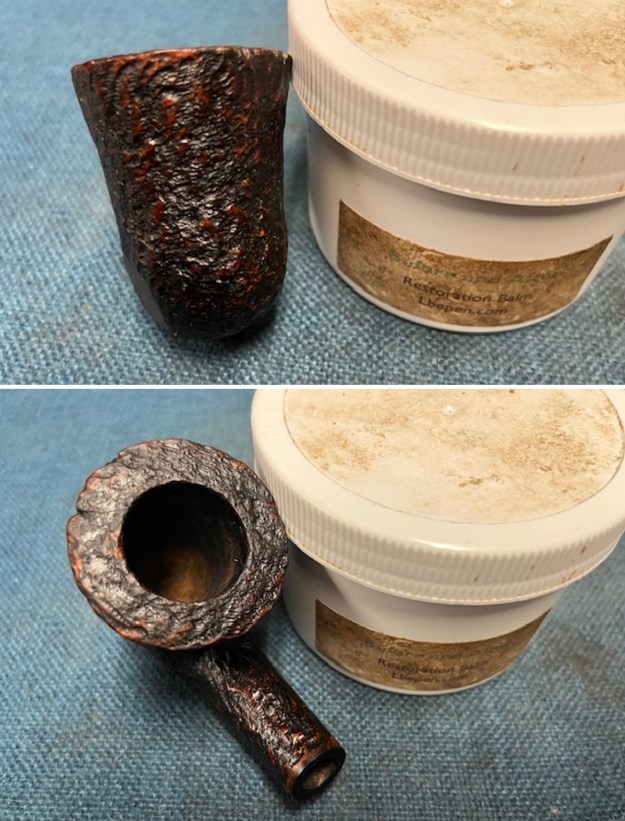
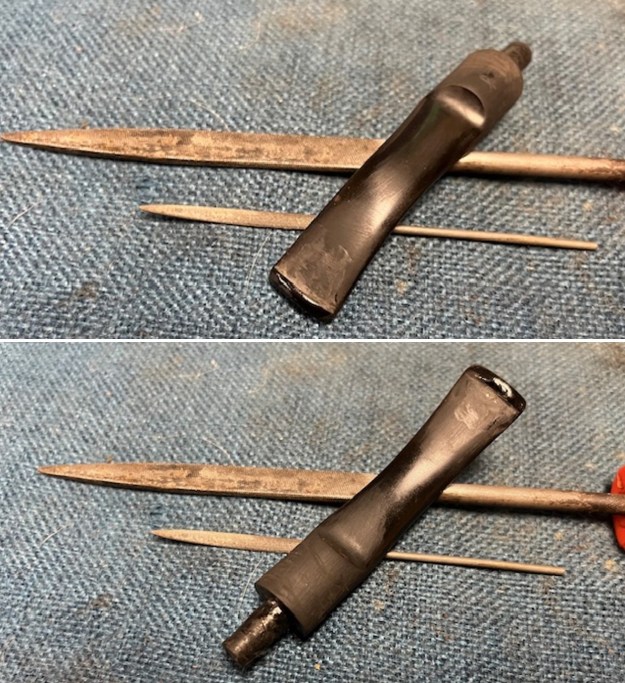
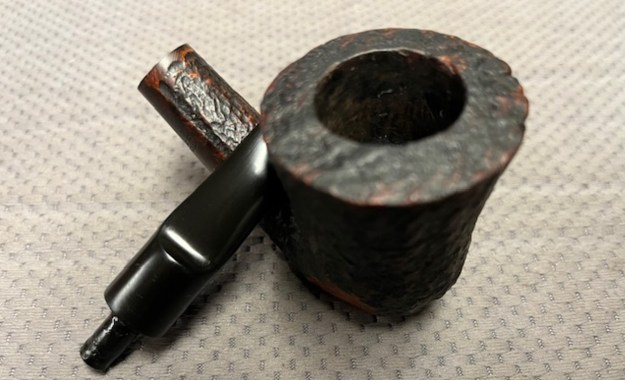
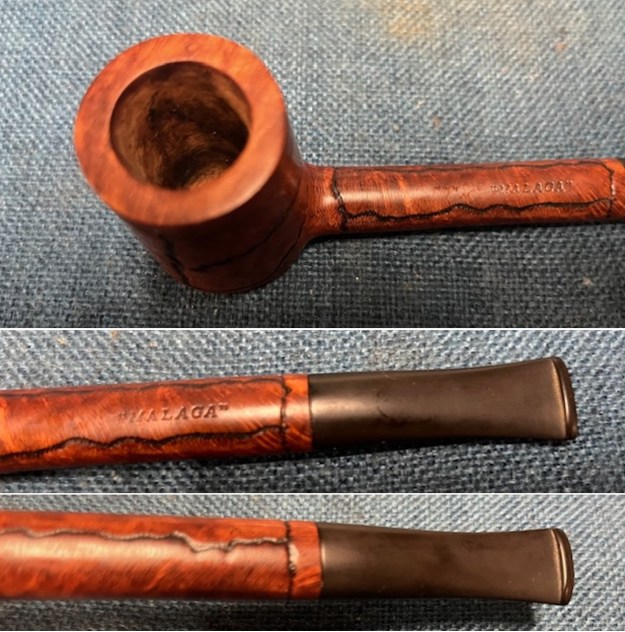
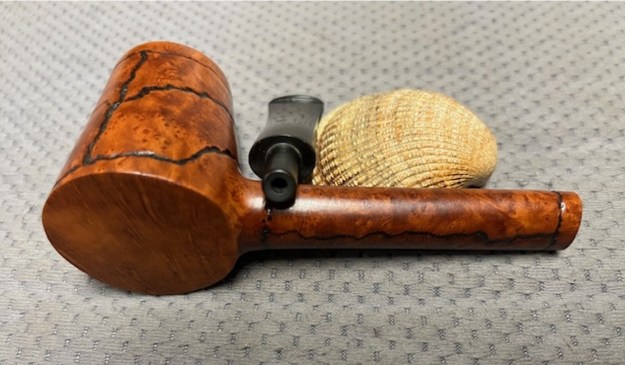
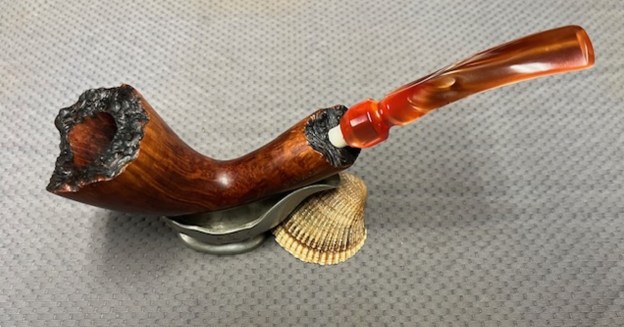
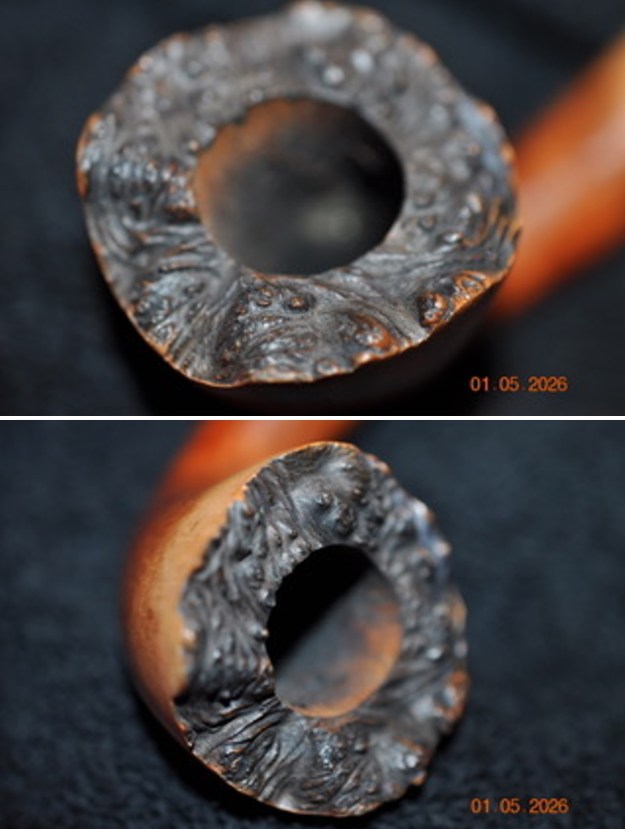
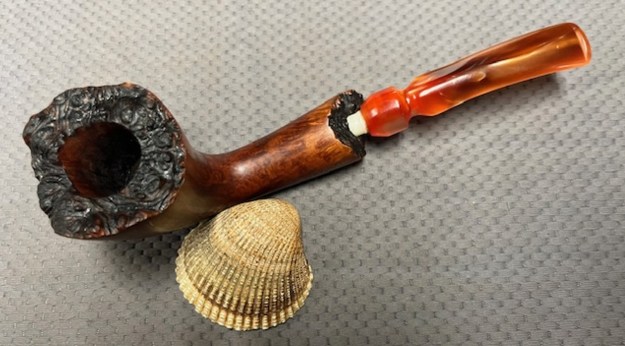
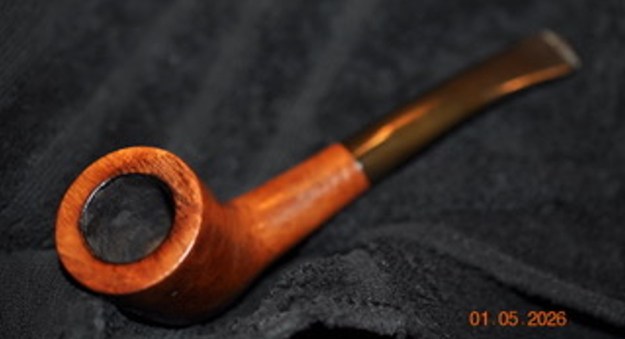
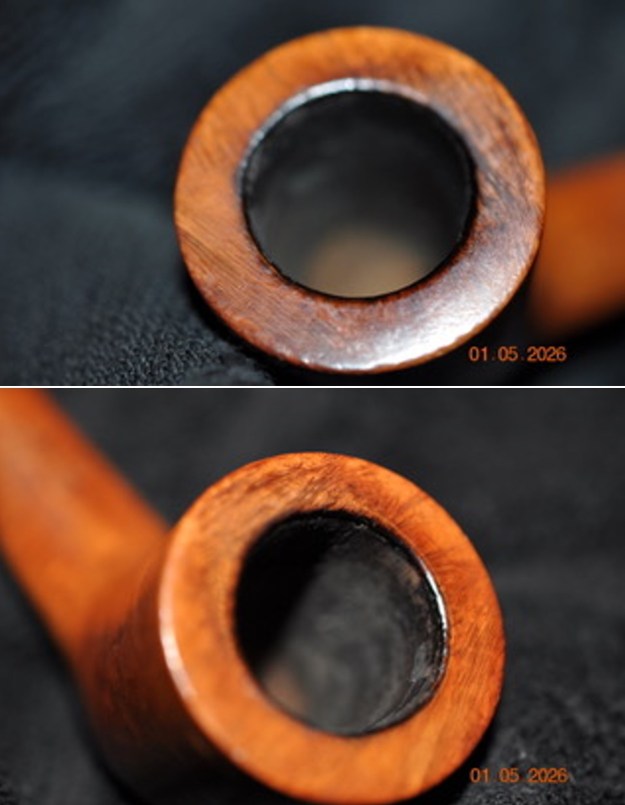
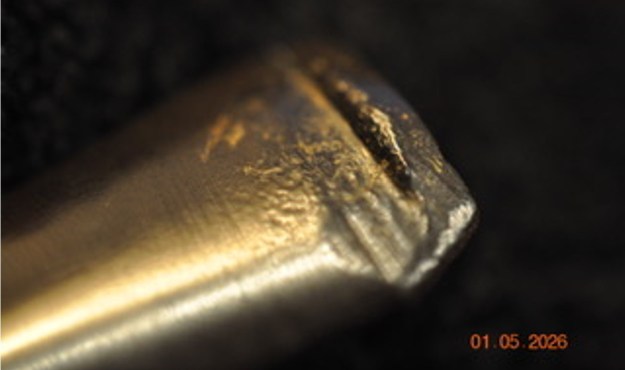
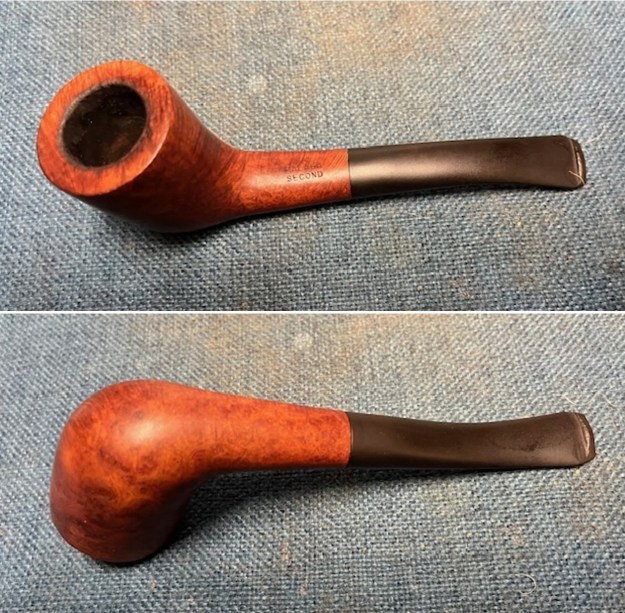
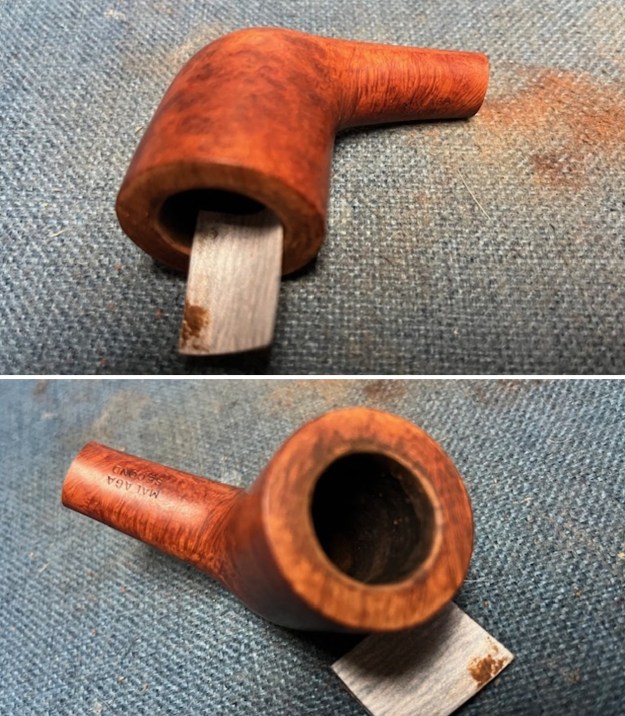
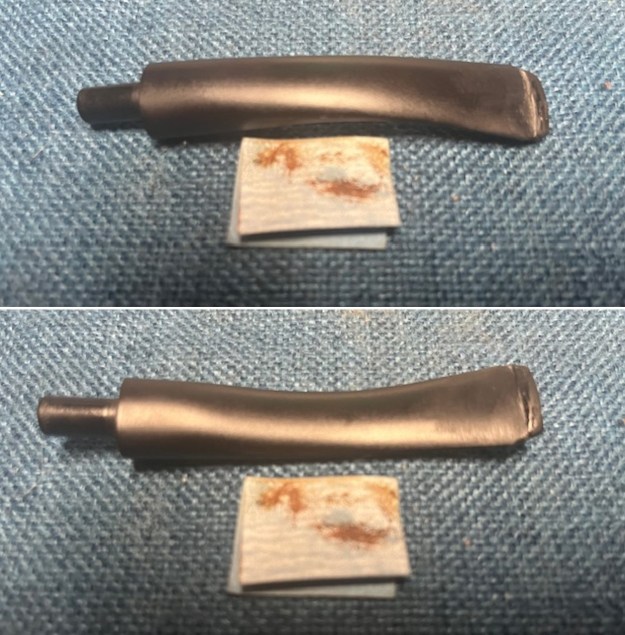
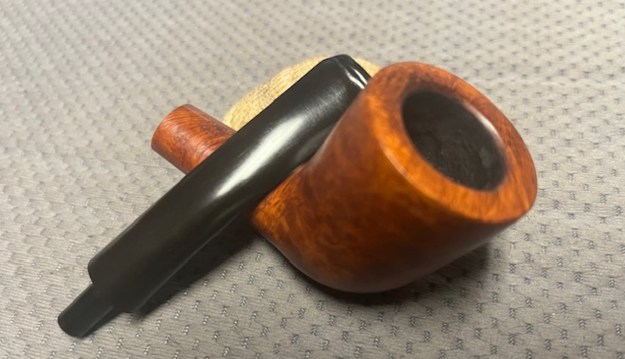
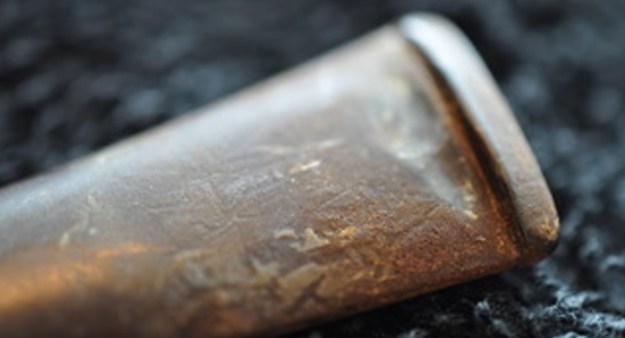
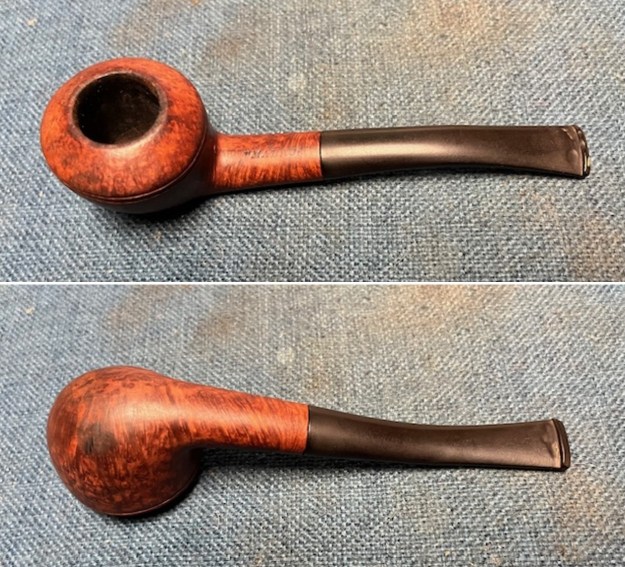
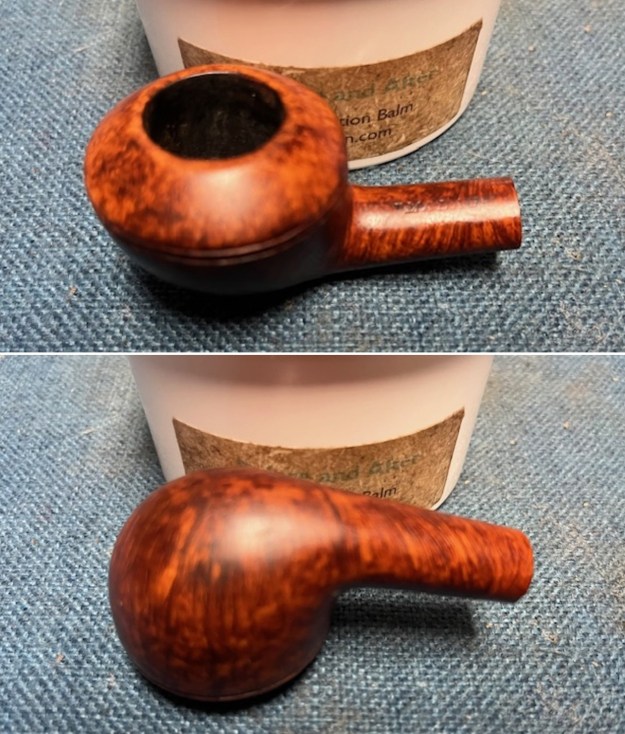
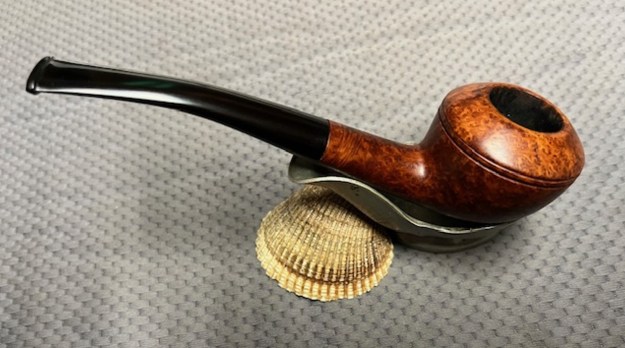
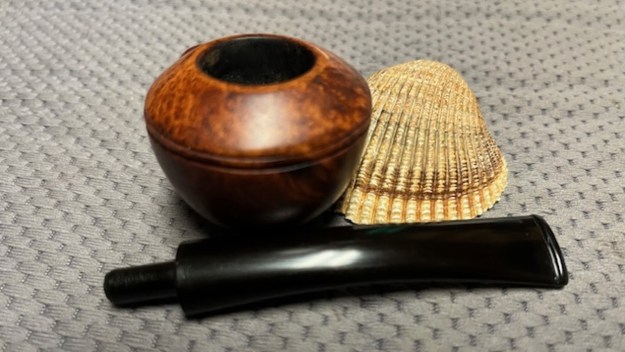
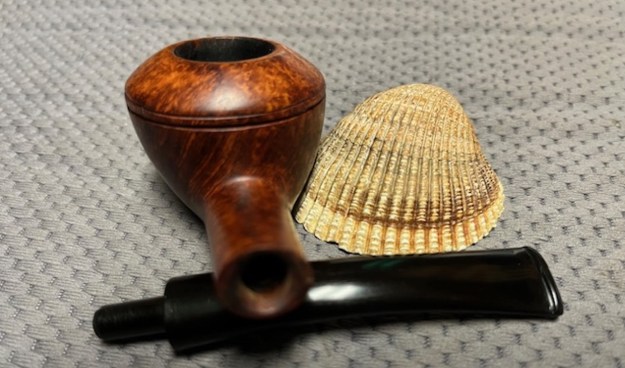
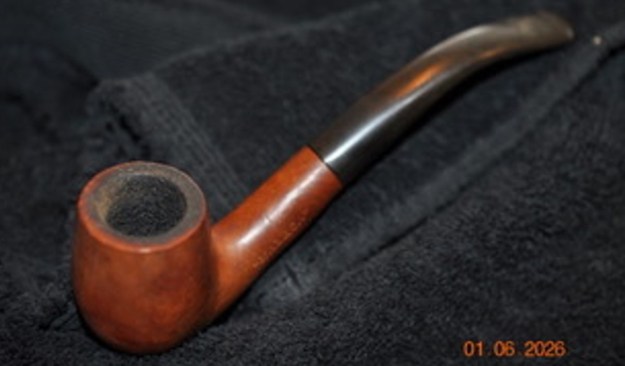
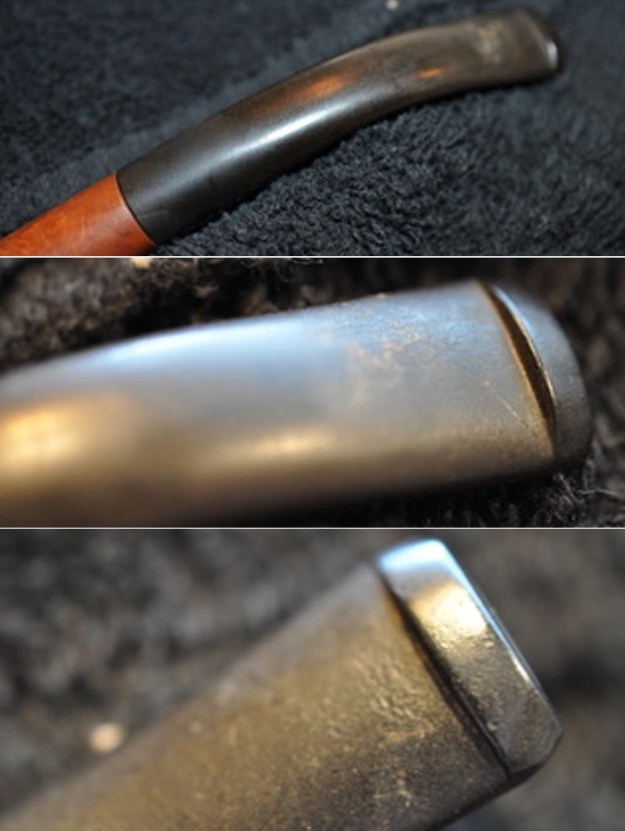
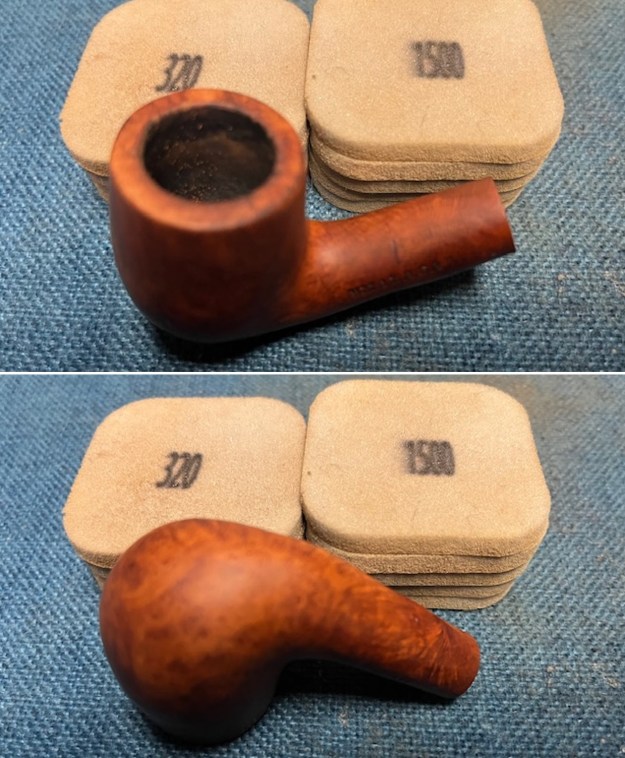
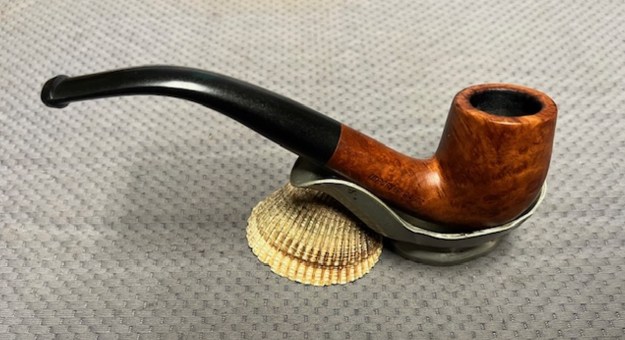
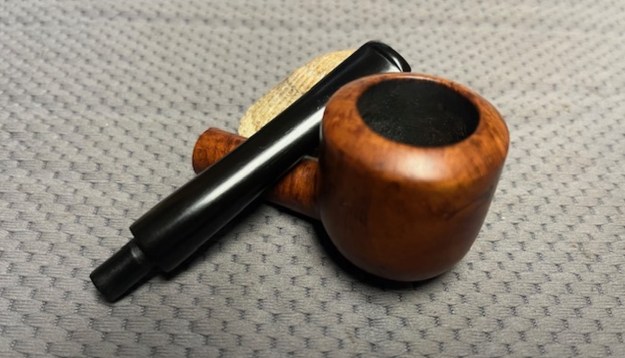
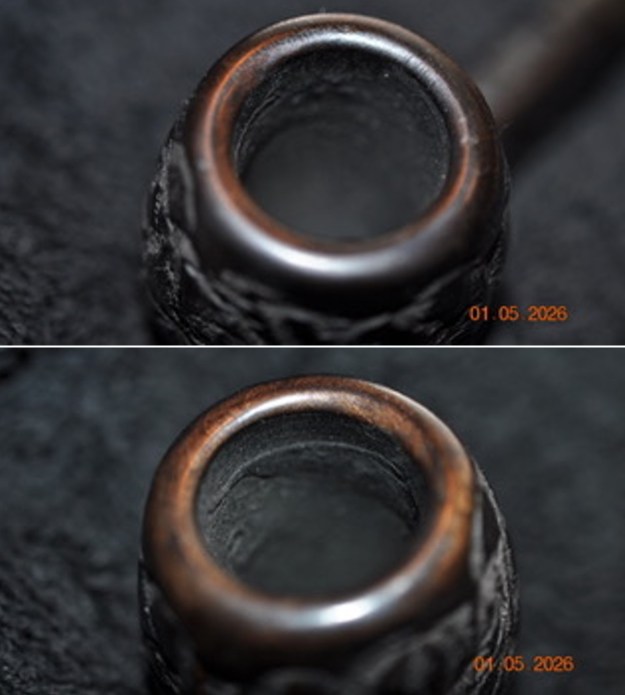
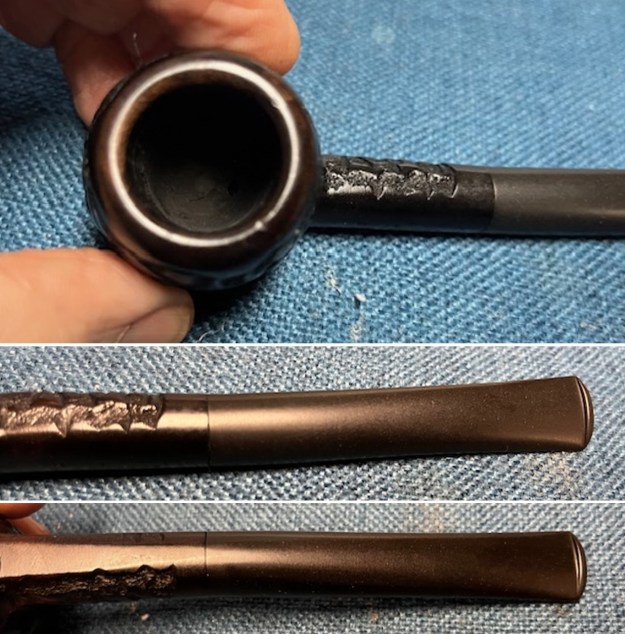
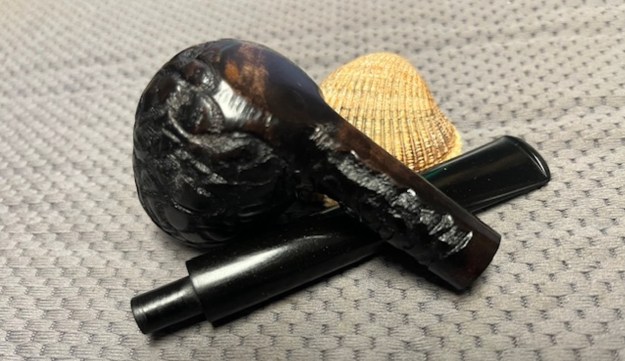
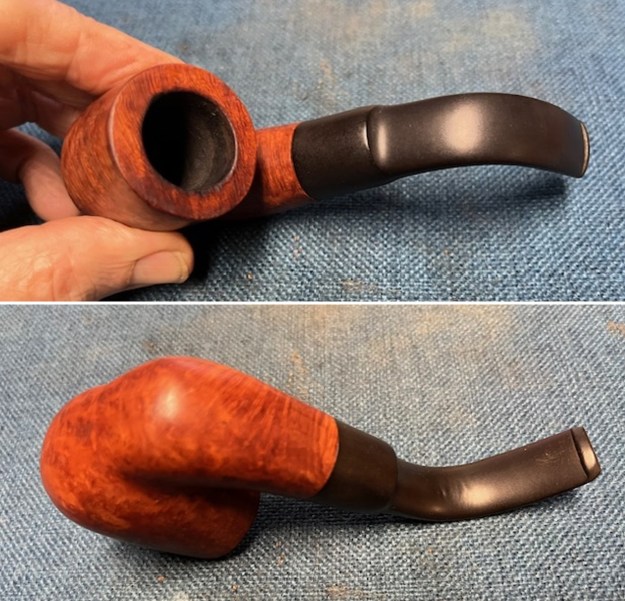
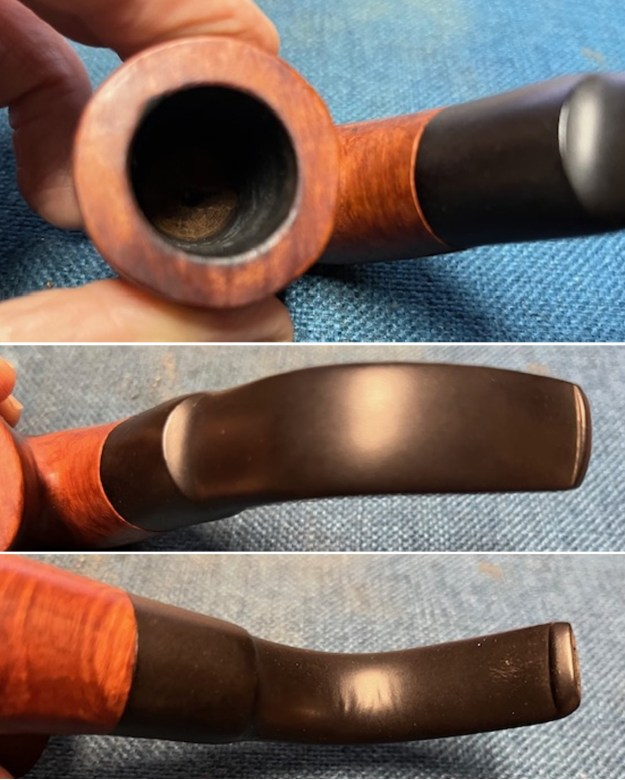
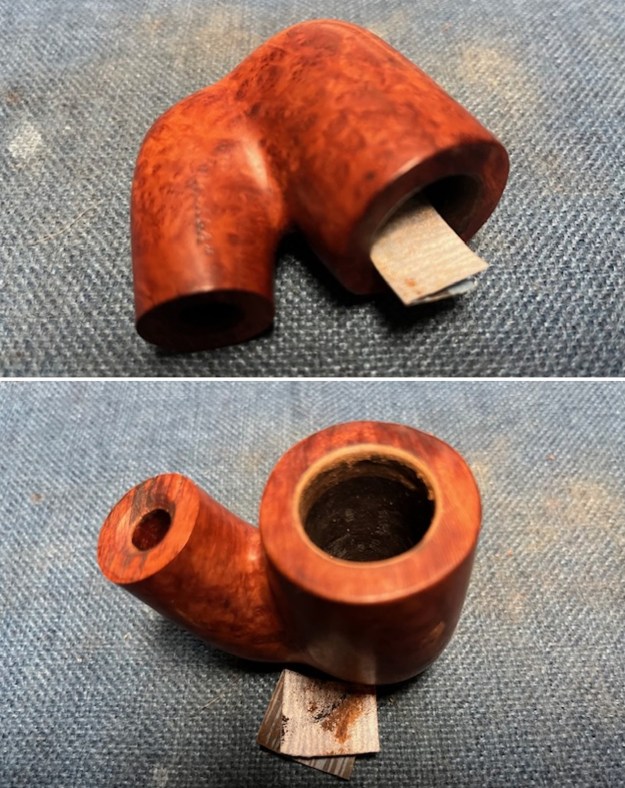
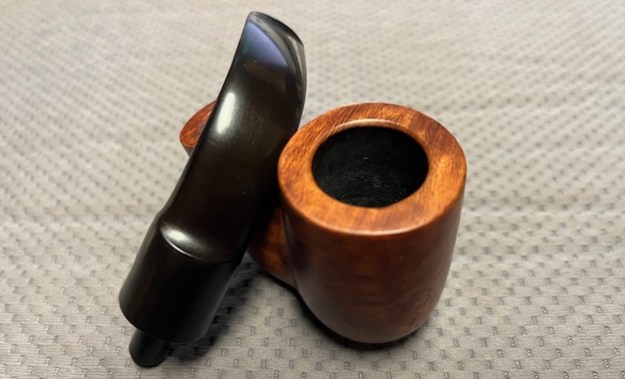
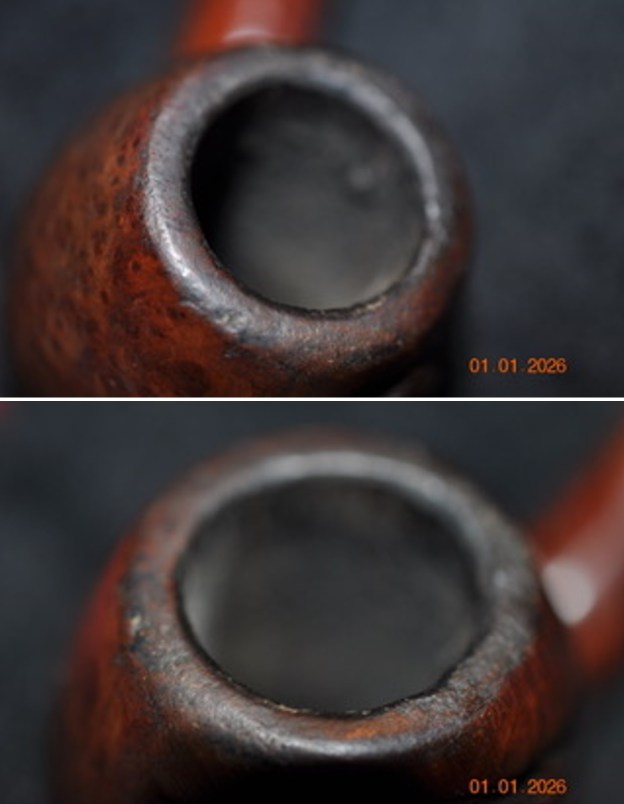
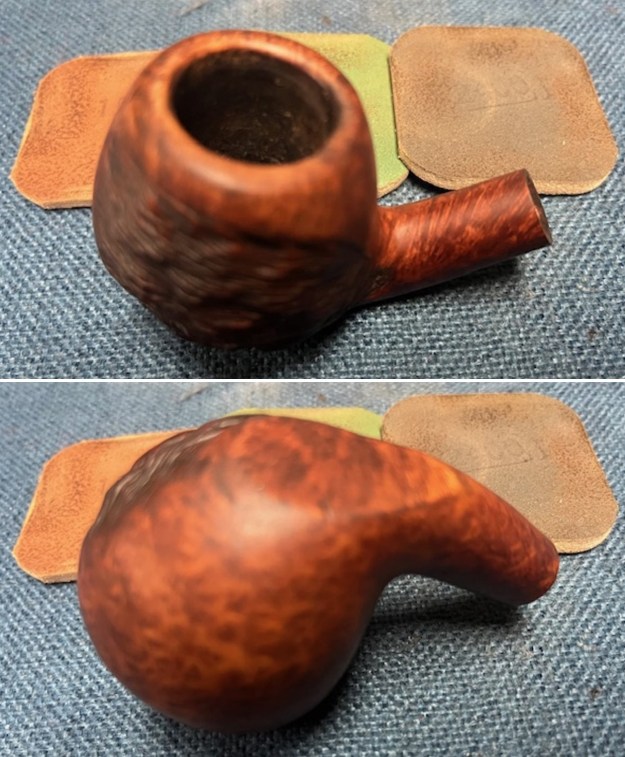
 I took a photo of the rim top and the stem to show their condition. Jeff was able to clean up the cake and the lava overflow that was shown in the rim and bowl photos above. The rim top was better than when it started. There was some darkening around the bowl edges and top. The stem looked better, though there were light tooth marks and chatter on both sides ahead of the button.
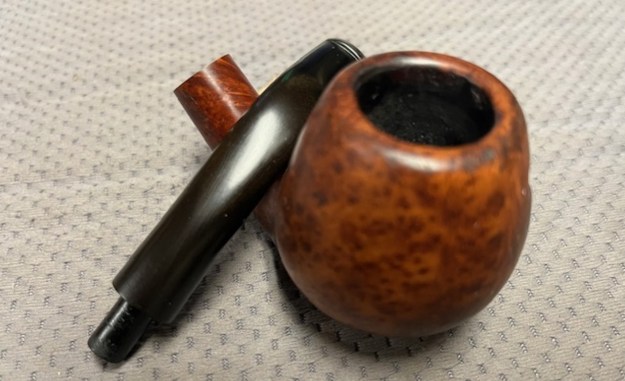
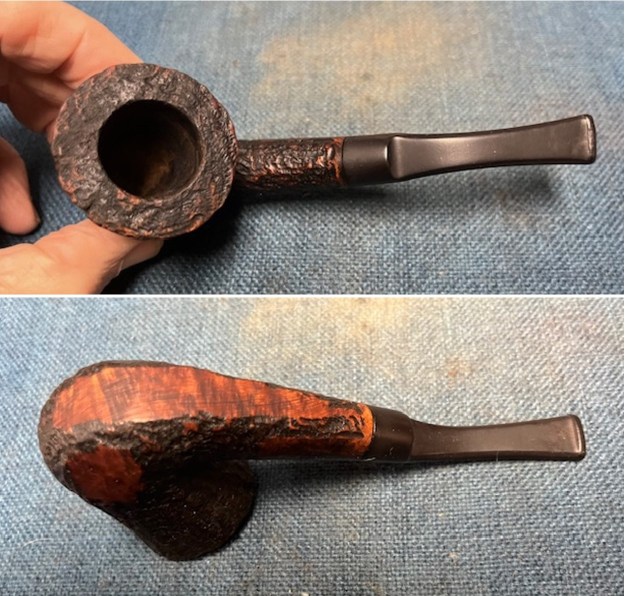
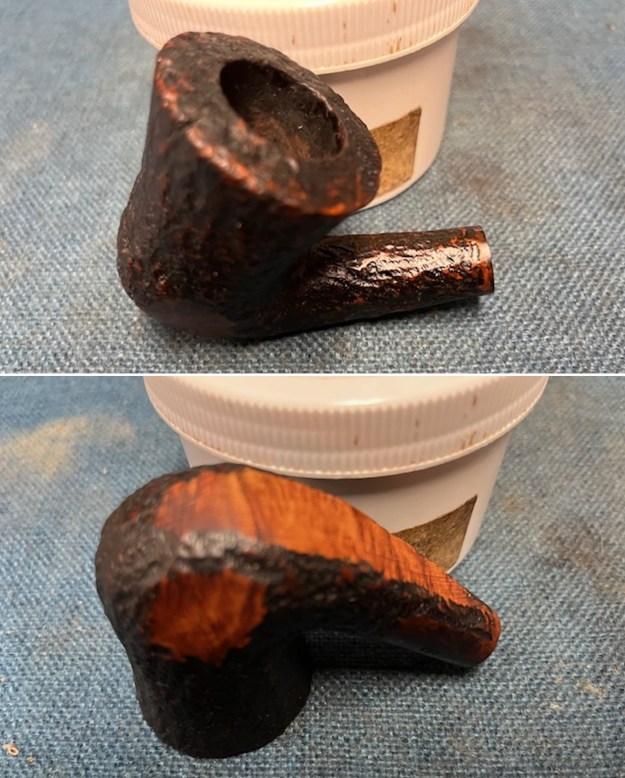
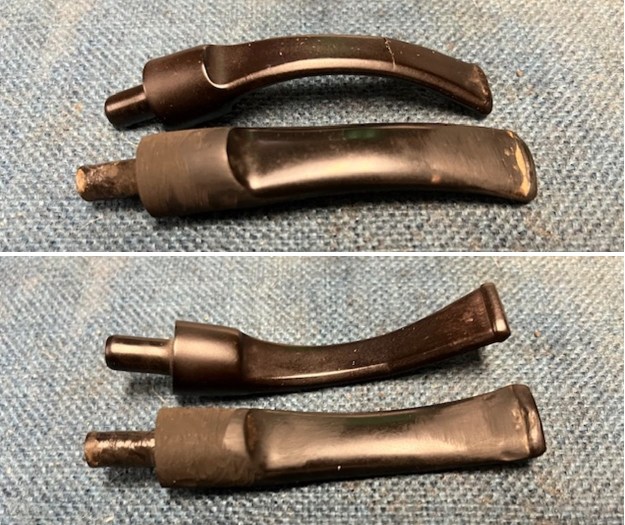
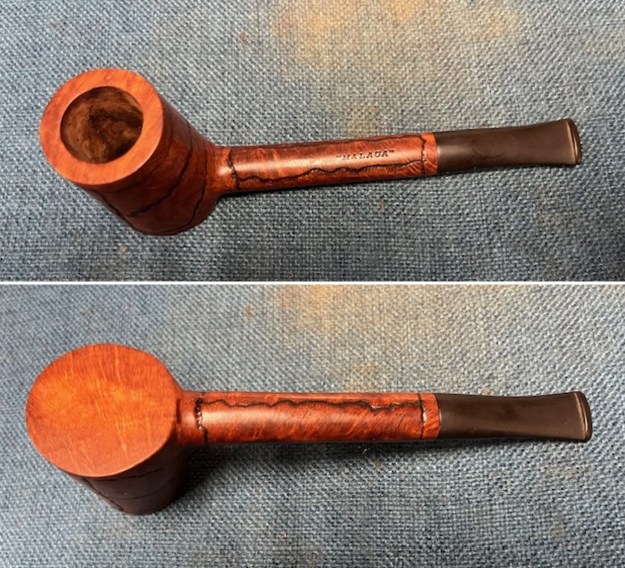
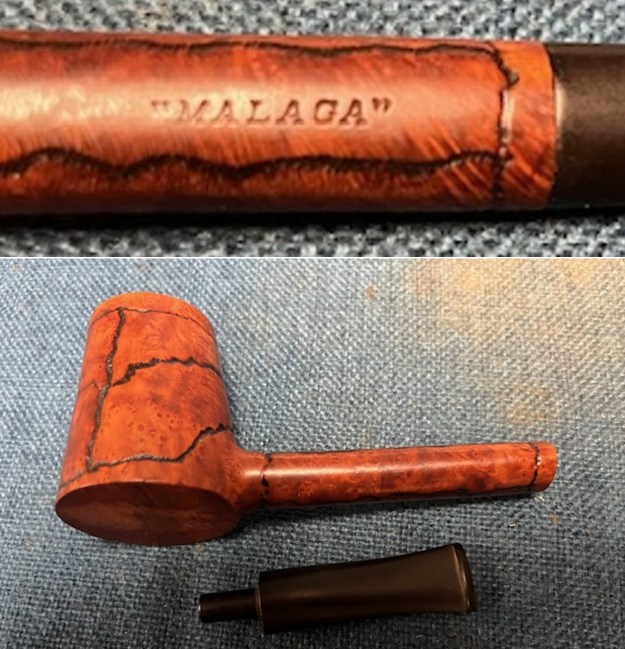
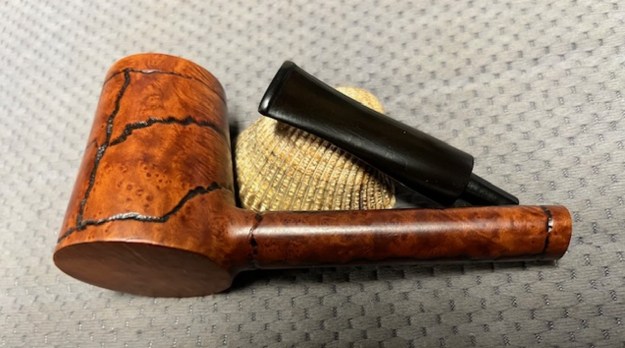
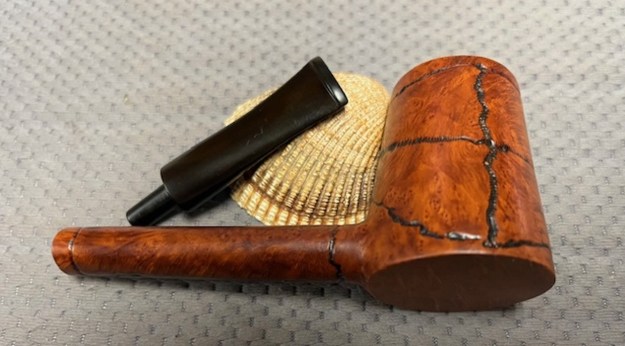
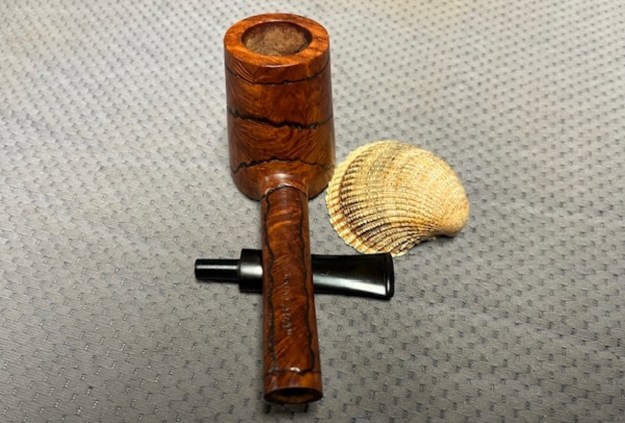
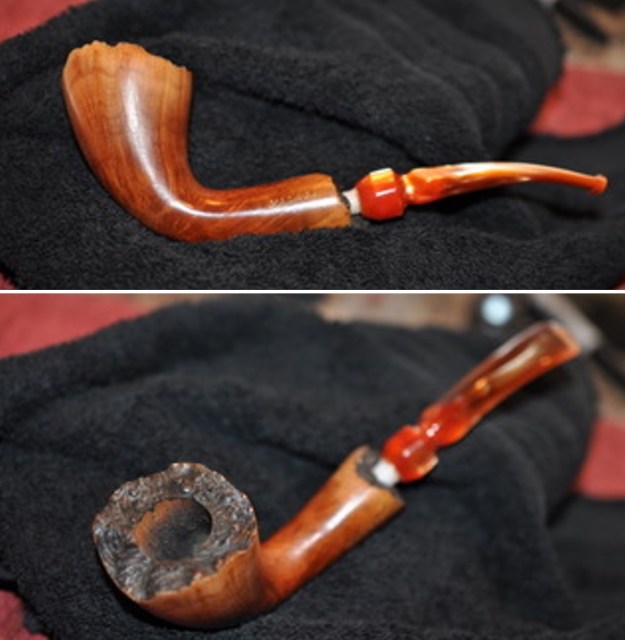
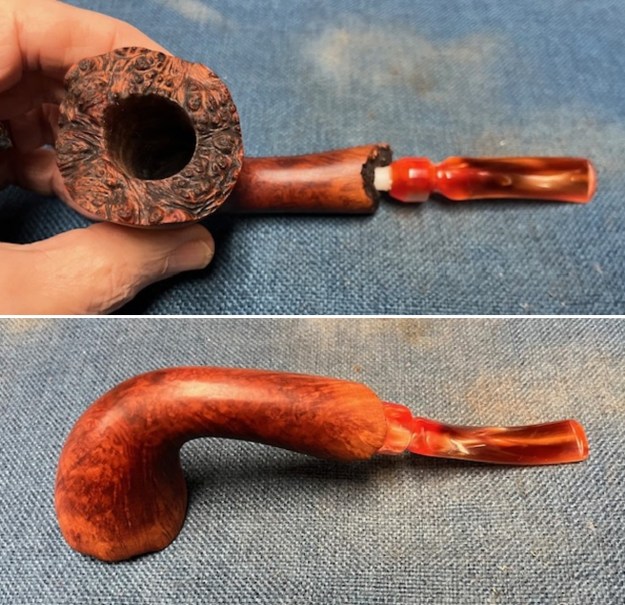
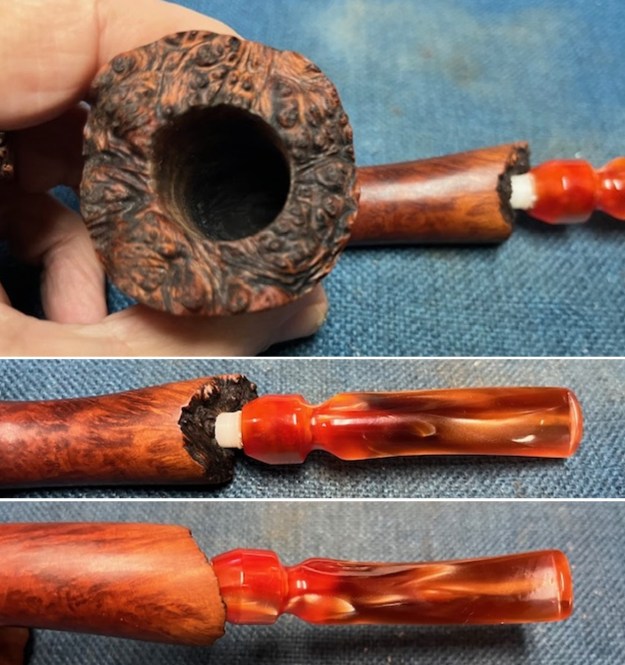
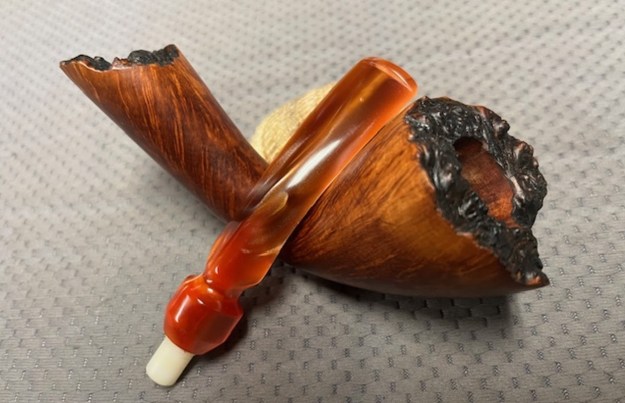
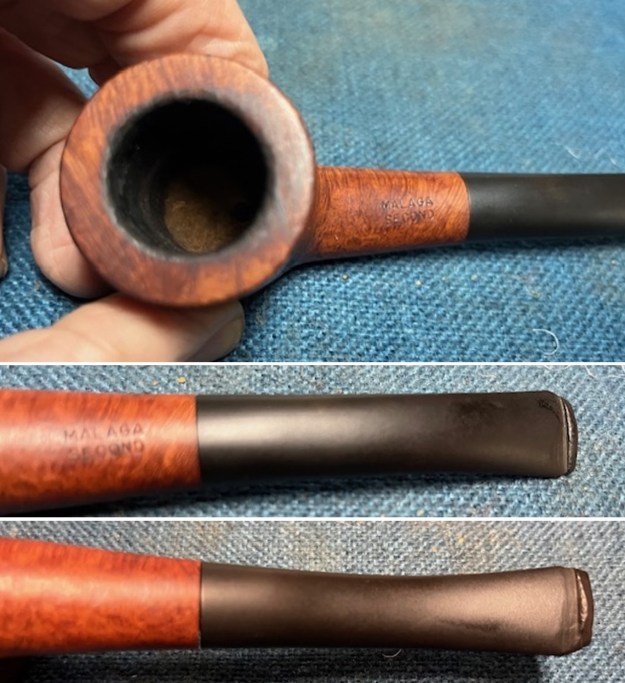
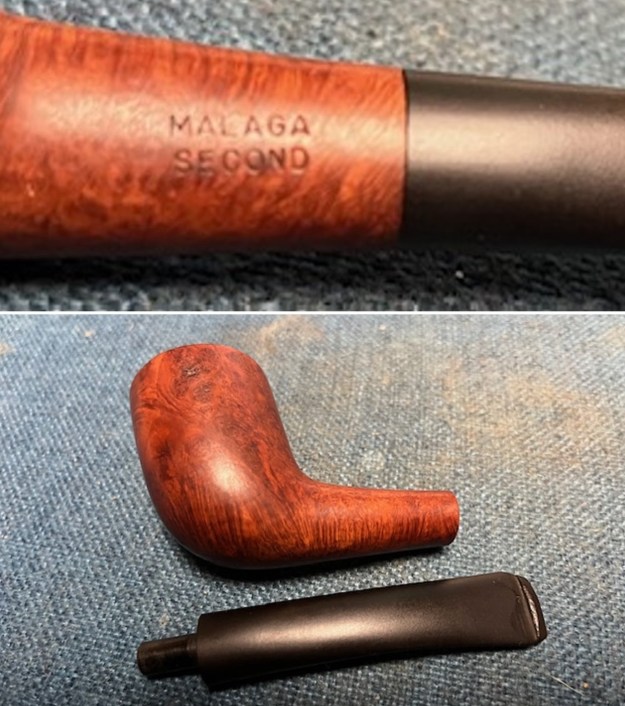
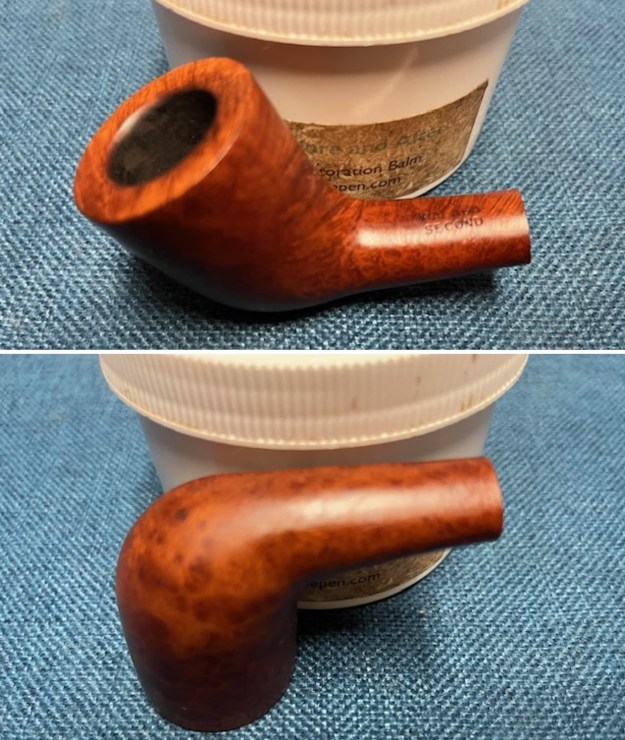
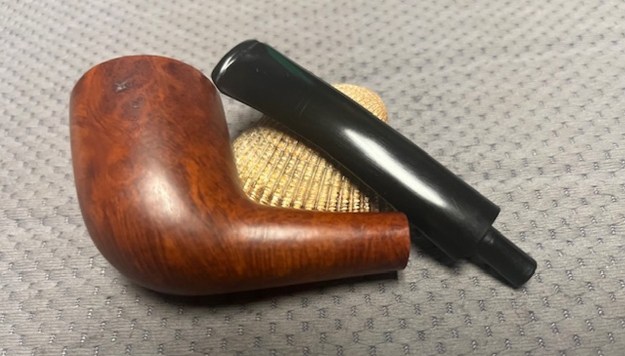
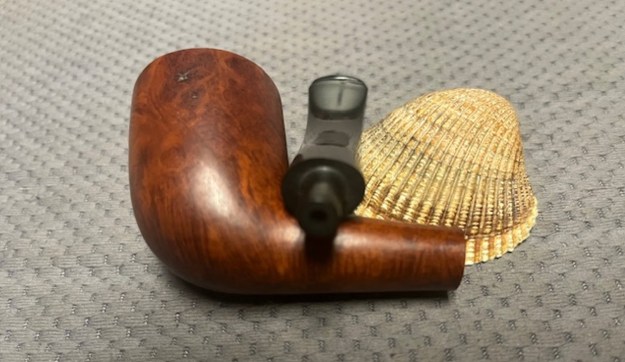
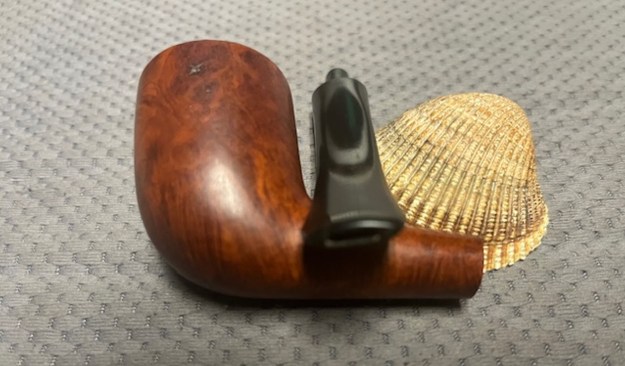
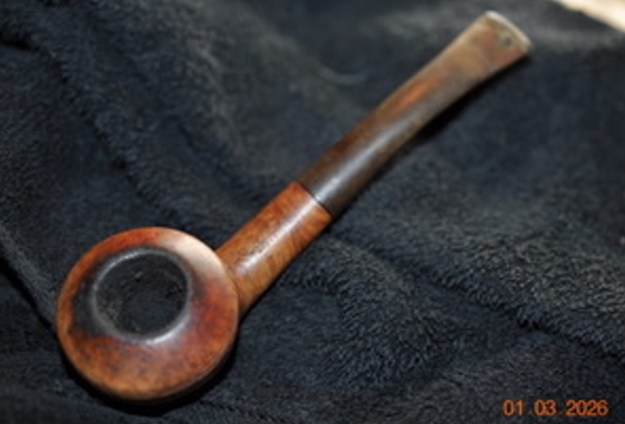
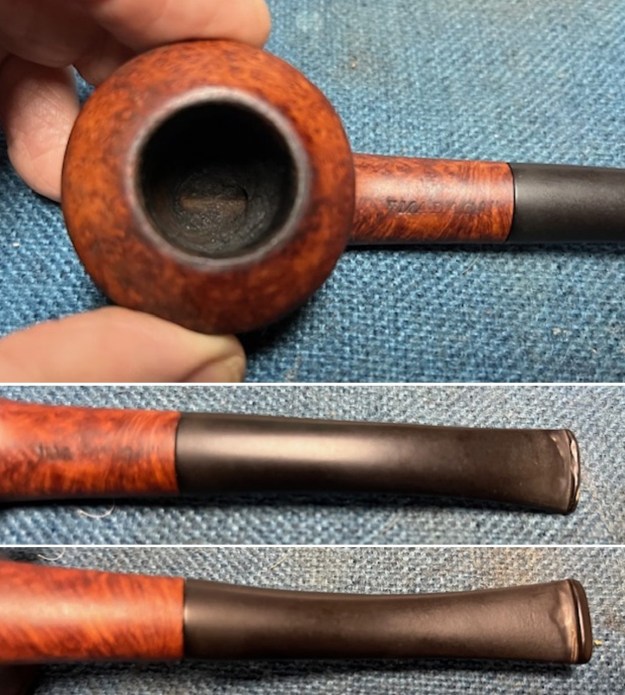
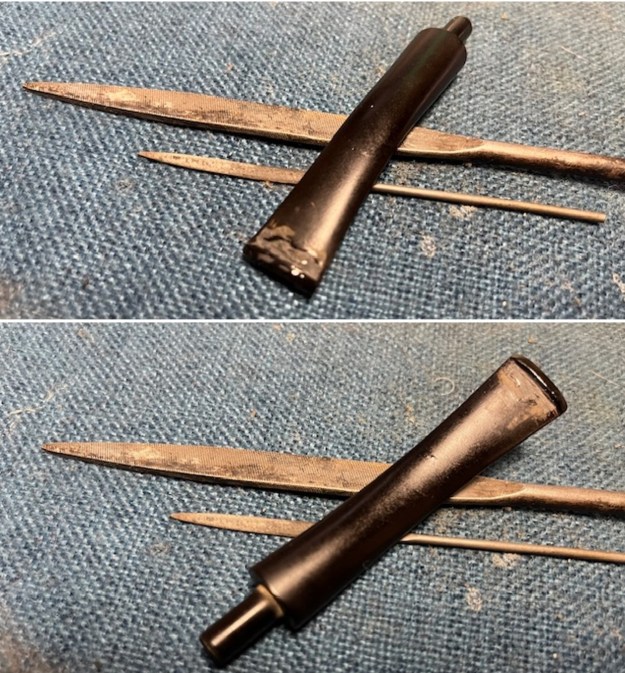
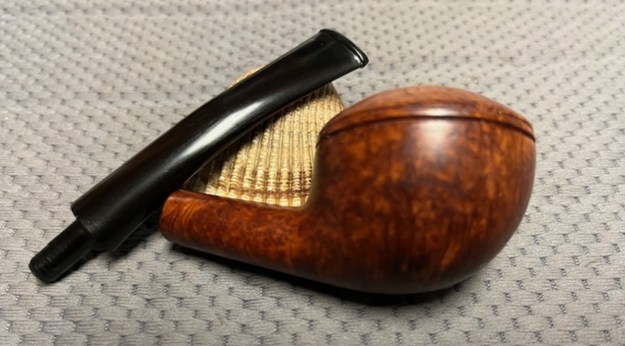
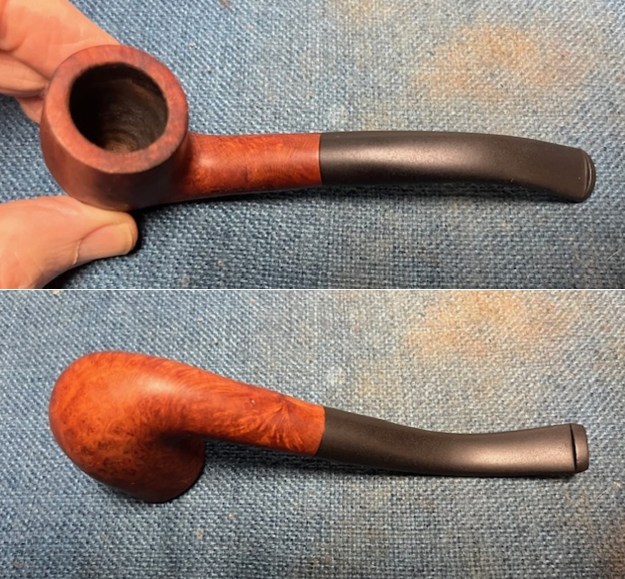
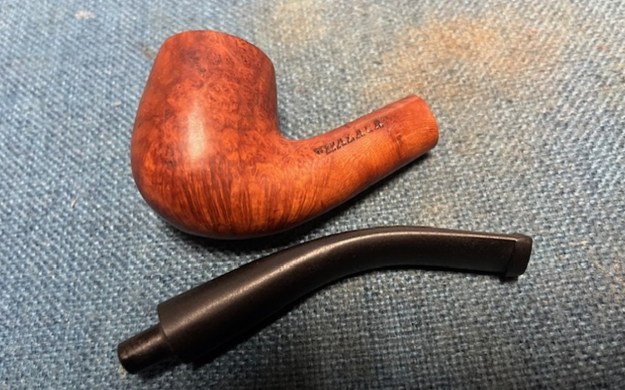
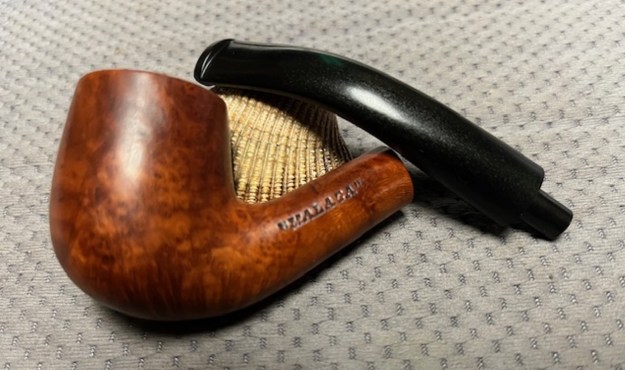
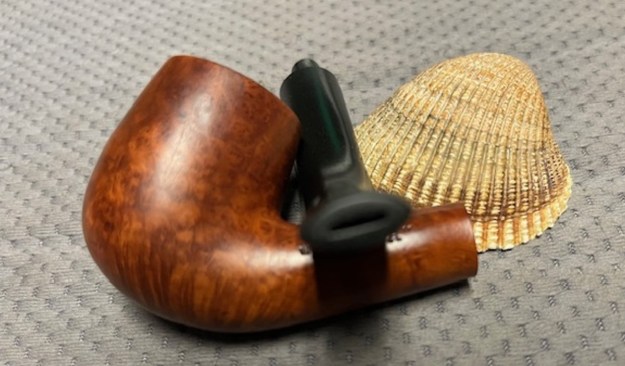
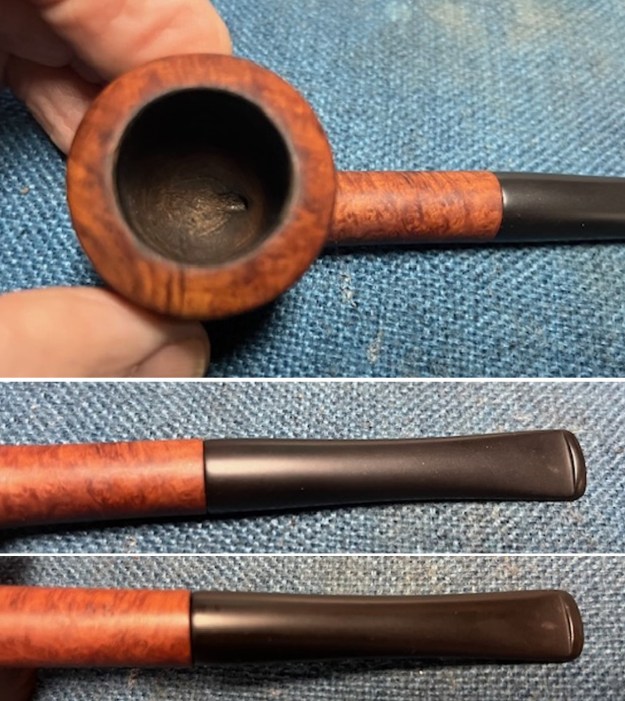
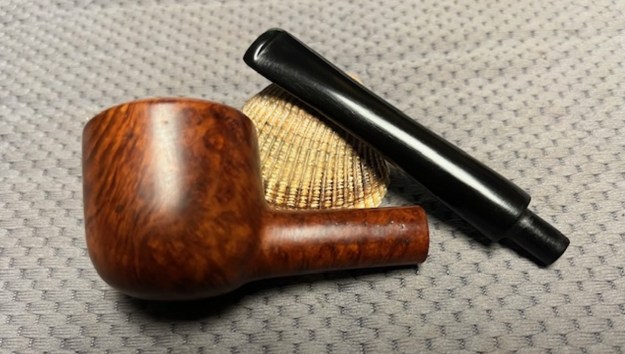
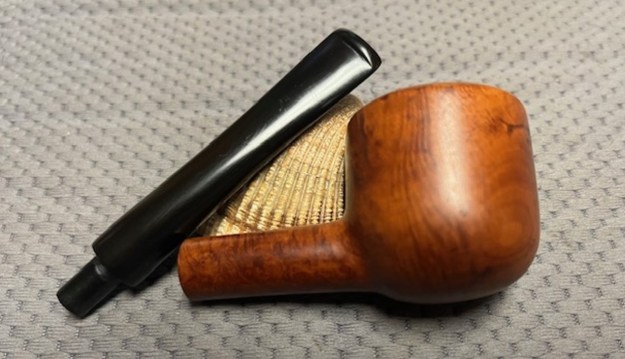
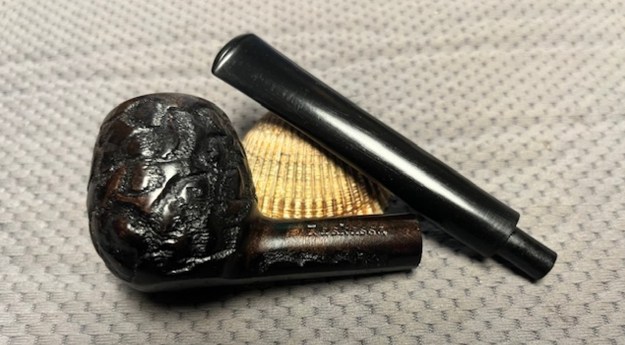
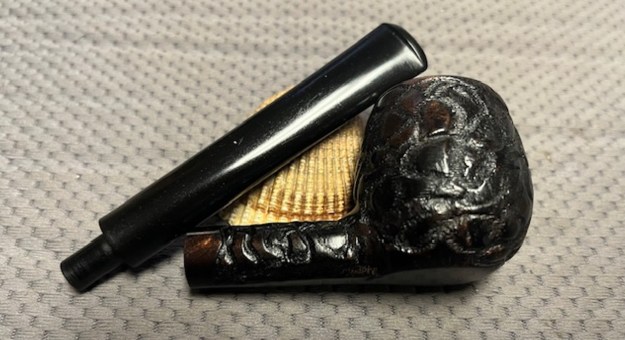
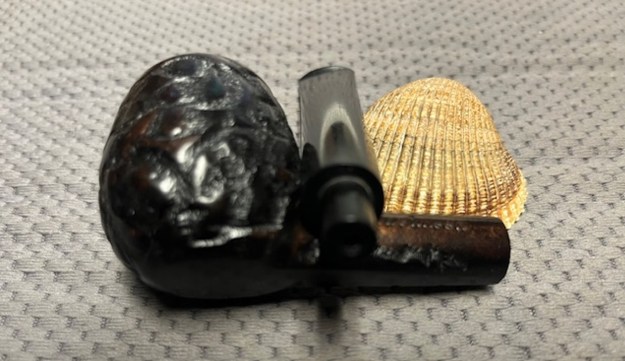
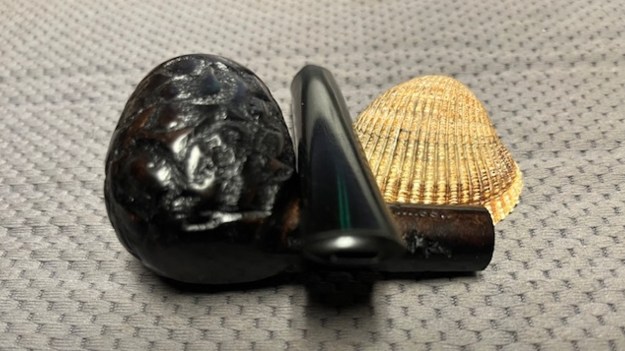
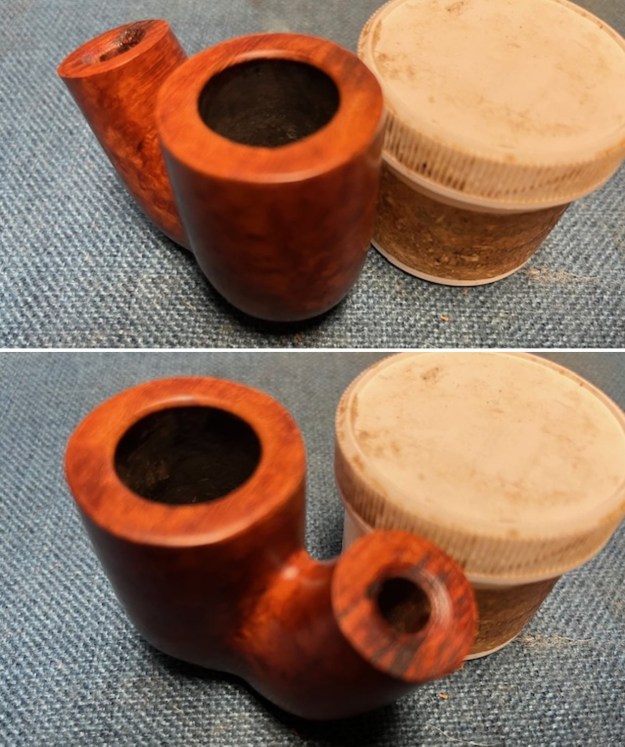
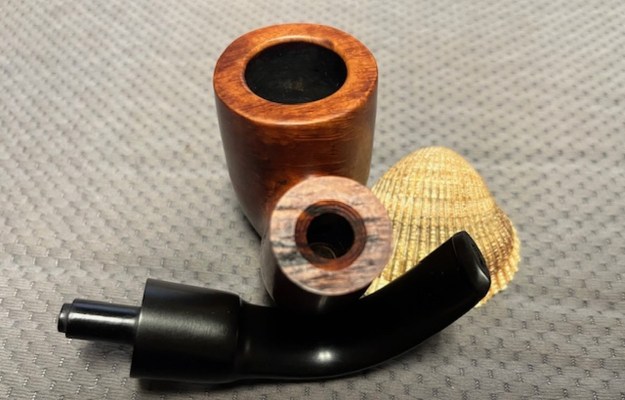
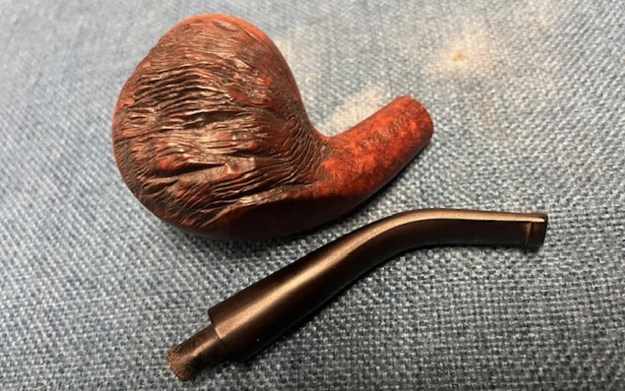
 I took a photo of the stamping on the shank to show that the clean up had not damaged it at all. It looked good. It was faint in spots but still readable. I removed the stem from the shank and took a photo of the parts to give a sense of what the pipe looks like.
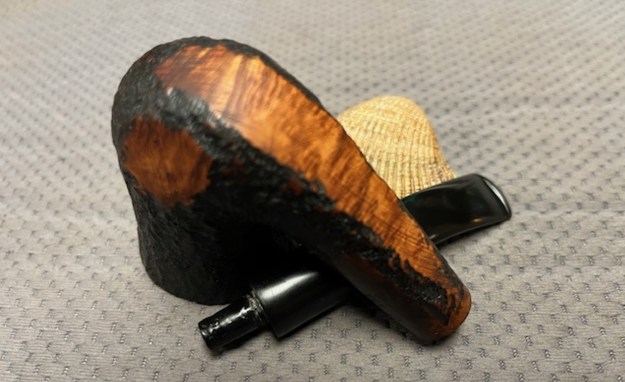
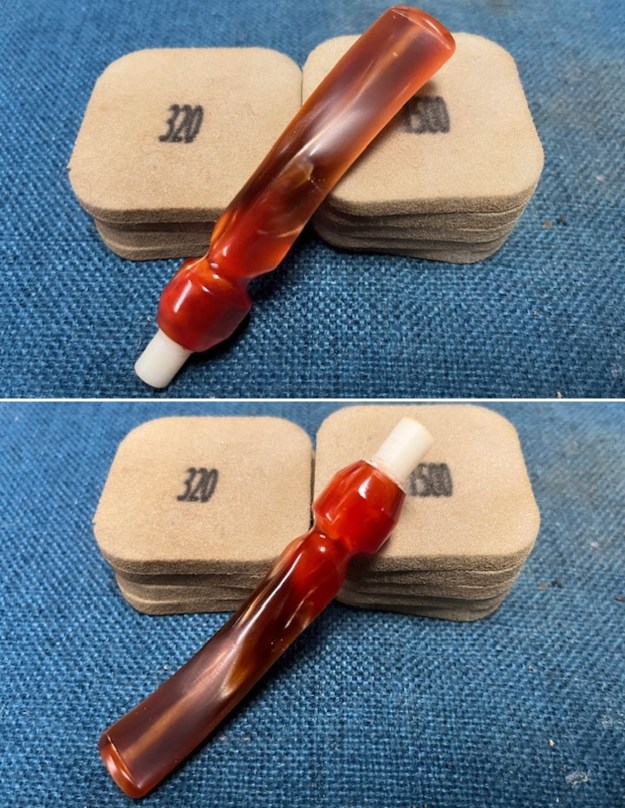
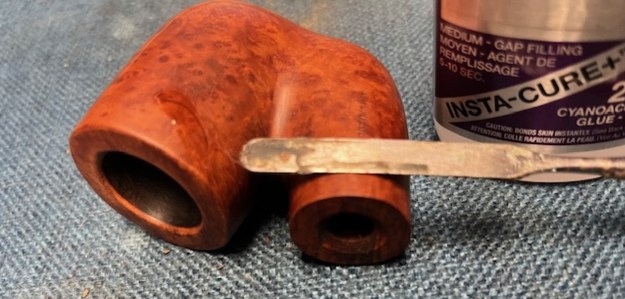
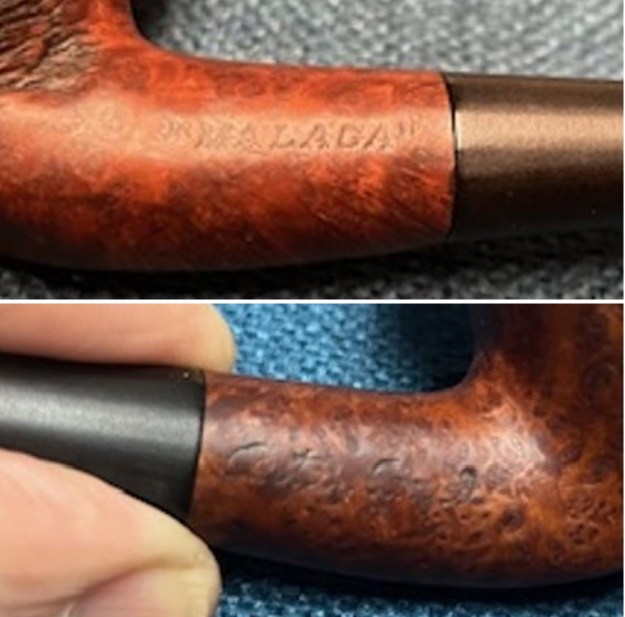
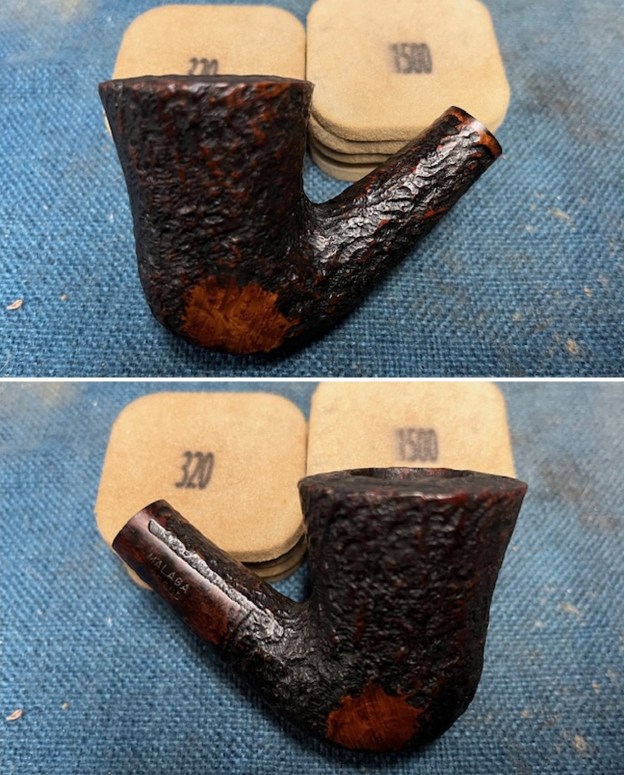
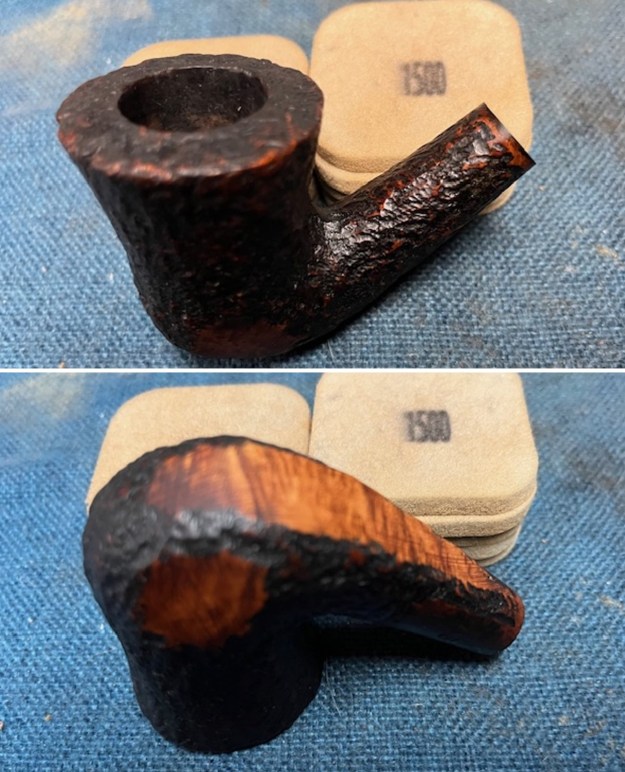
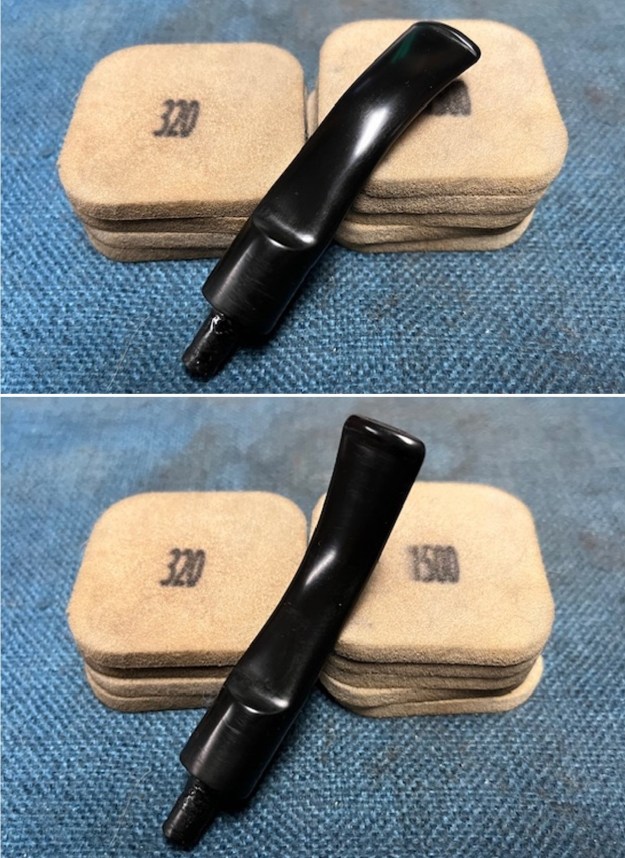
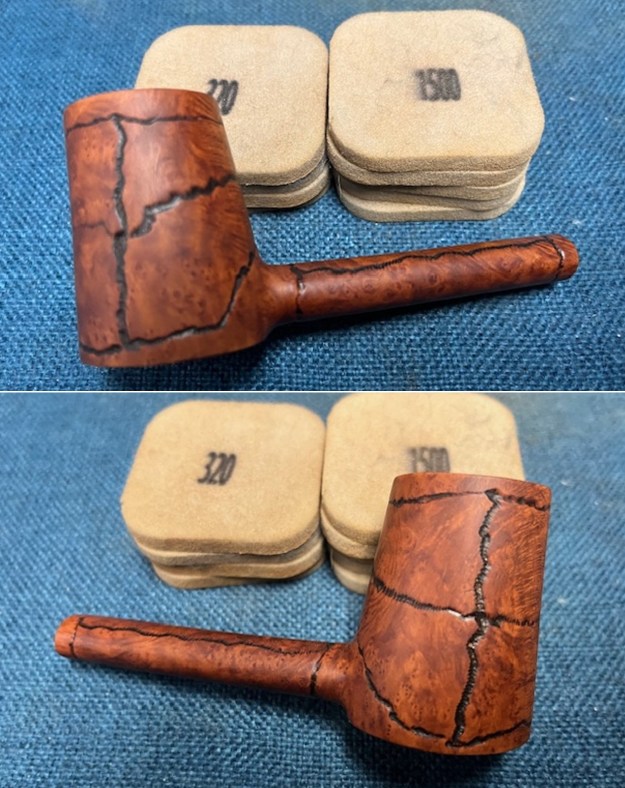
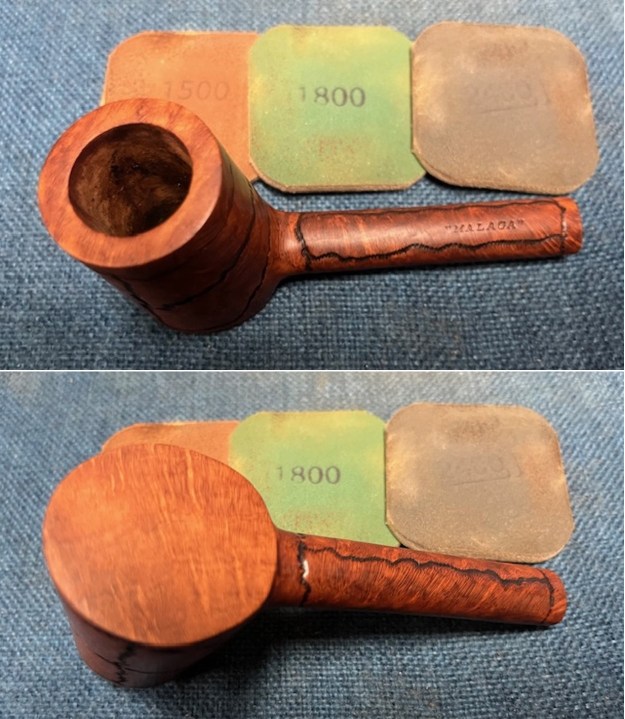
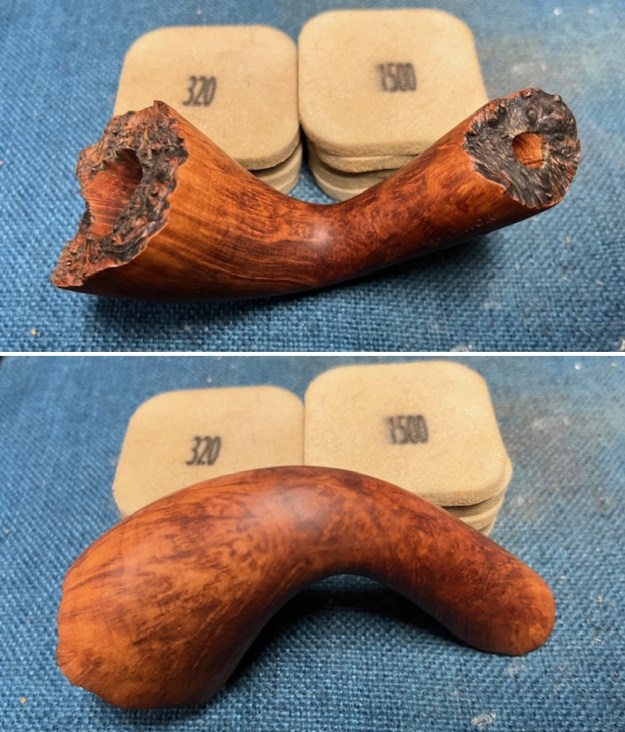
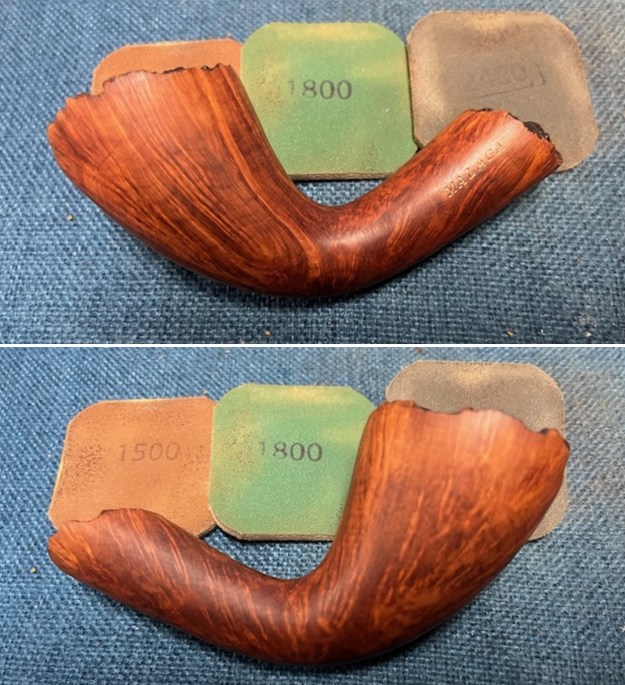
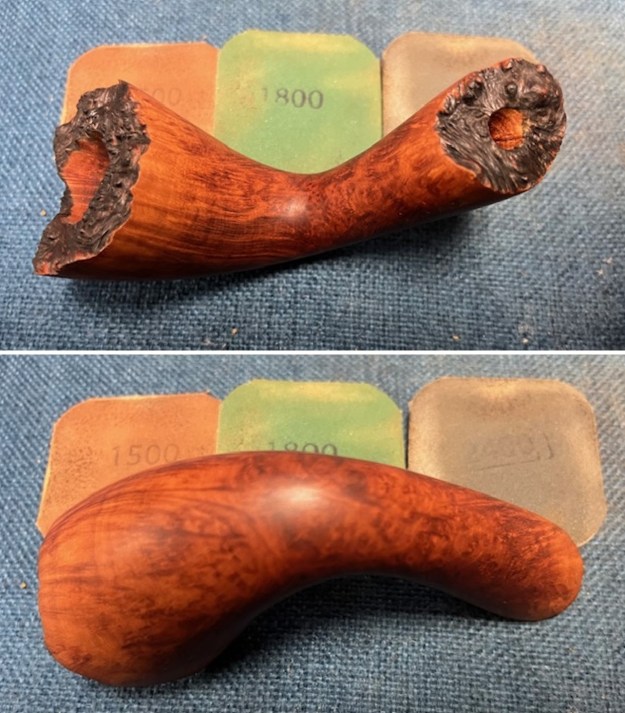
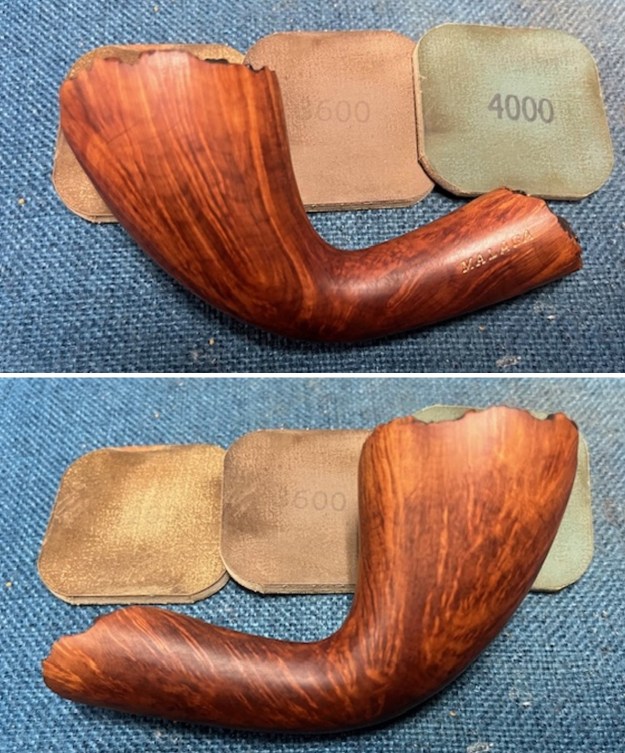
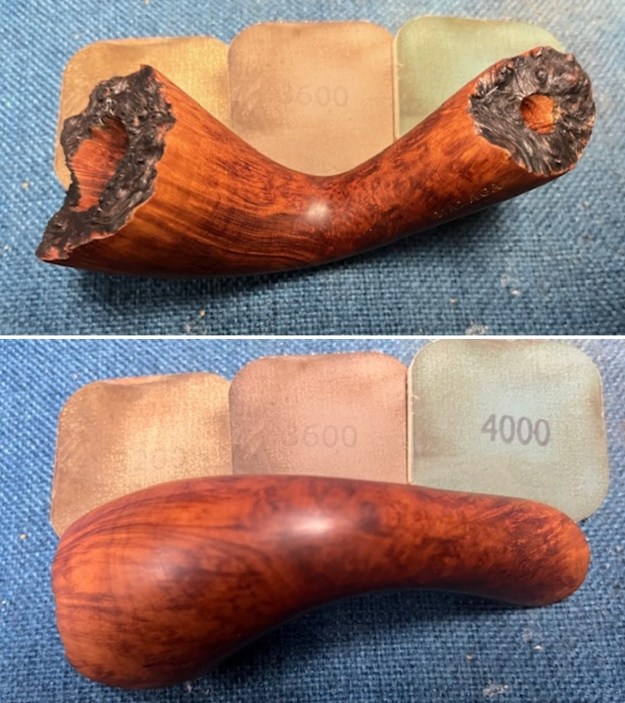
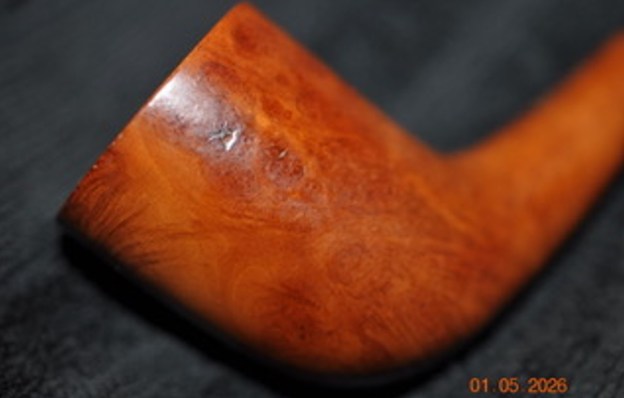
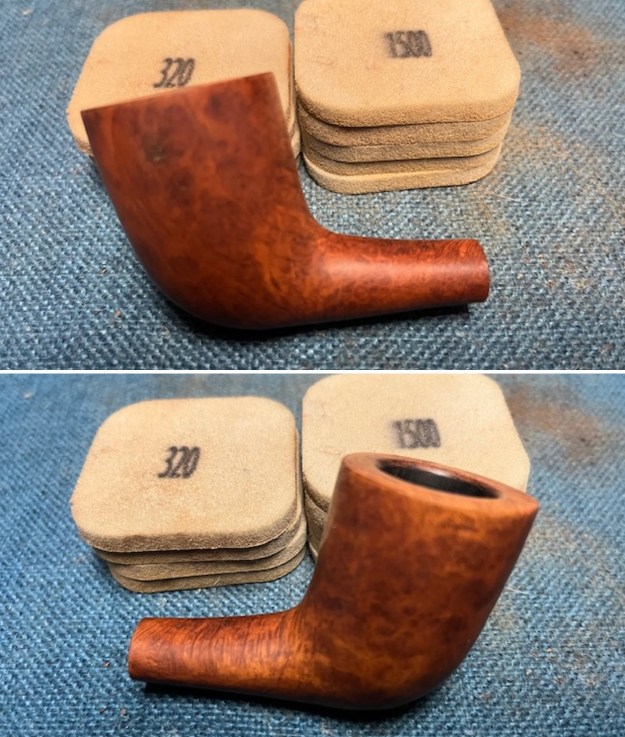
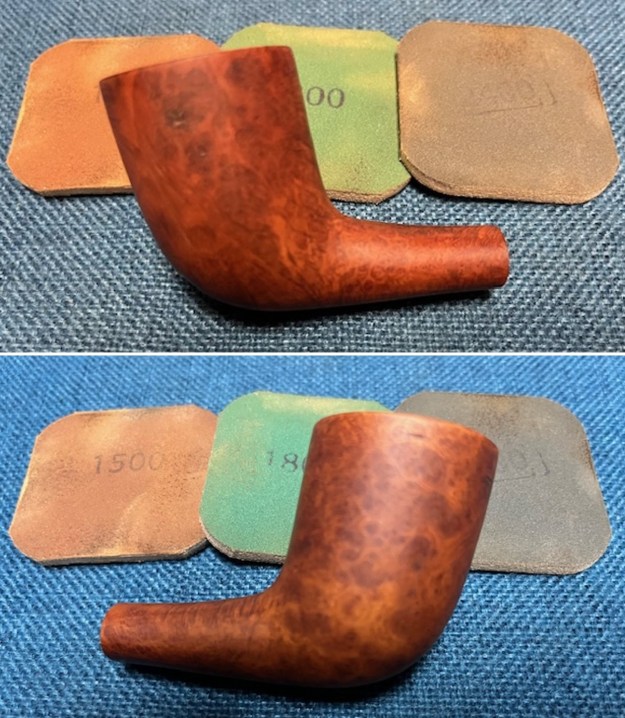
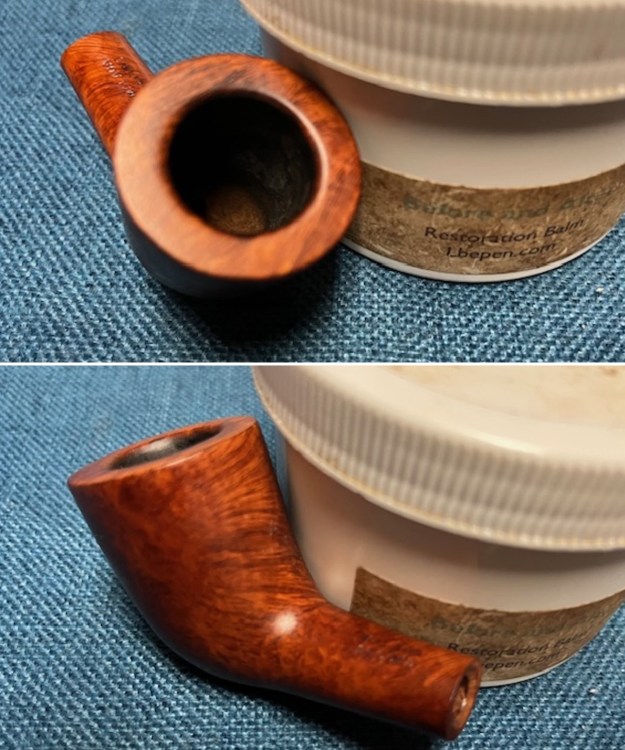
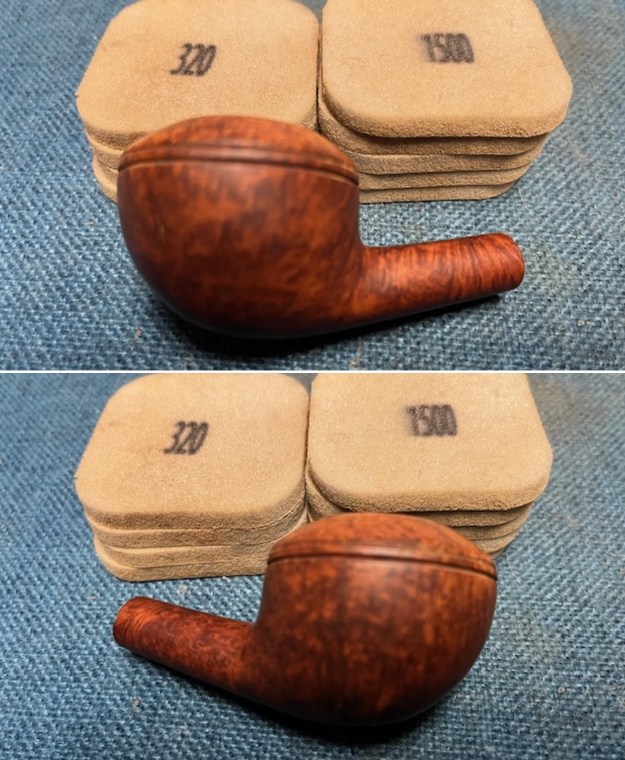
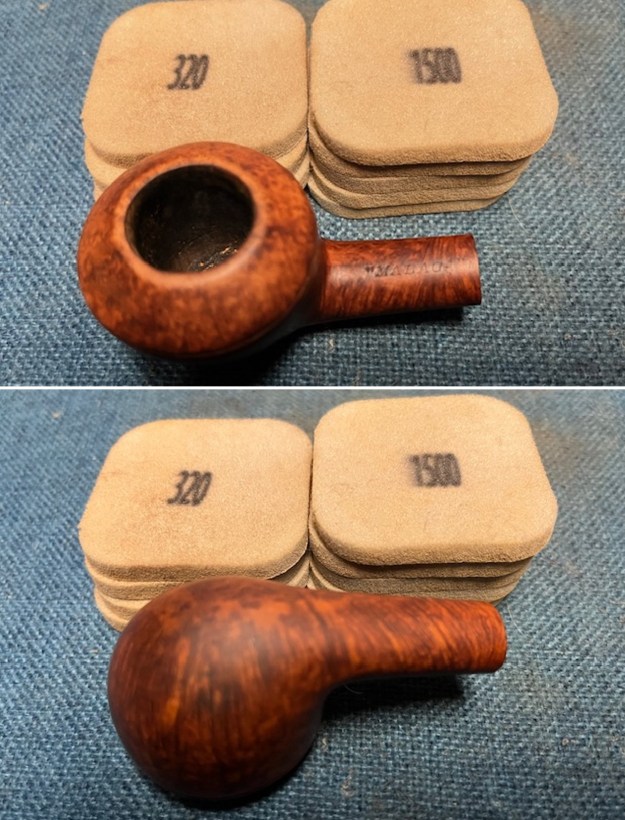
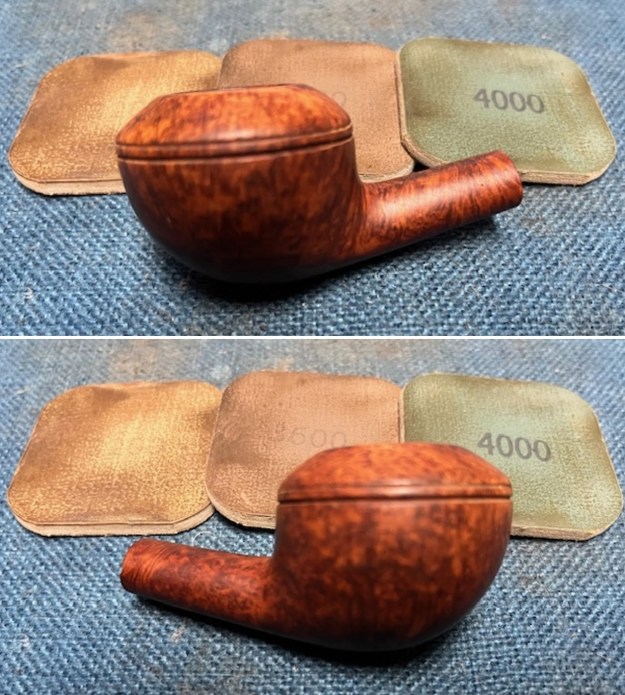
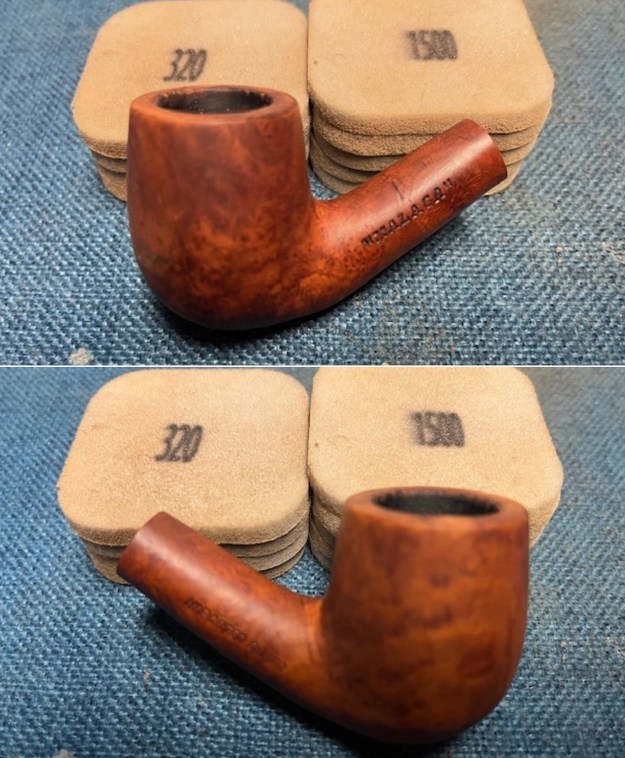
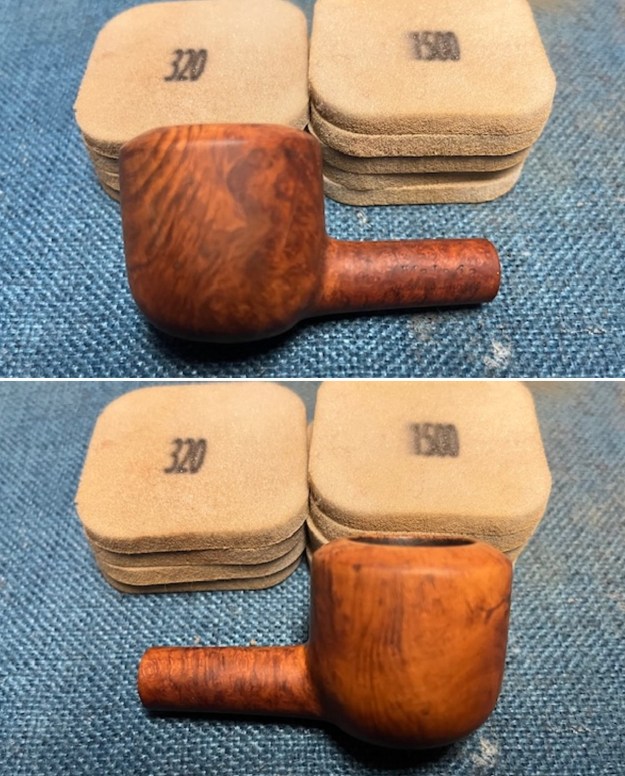
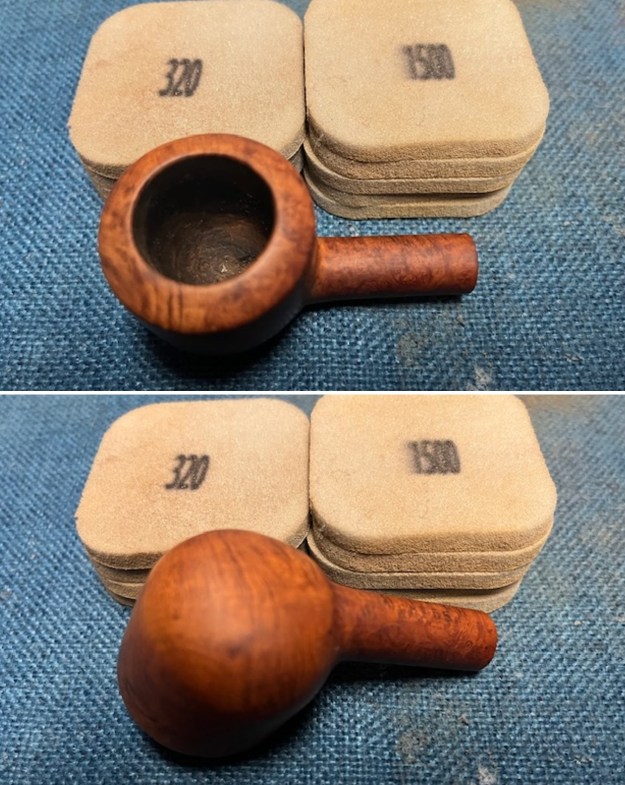
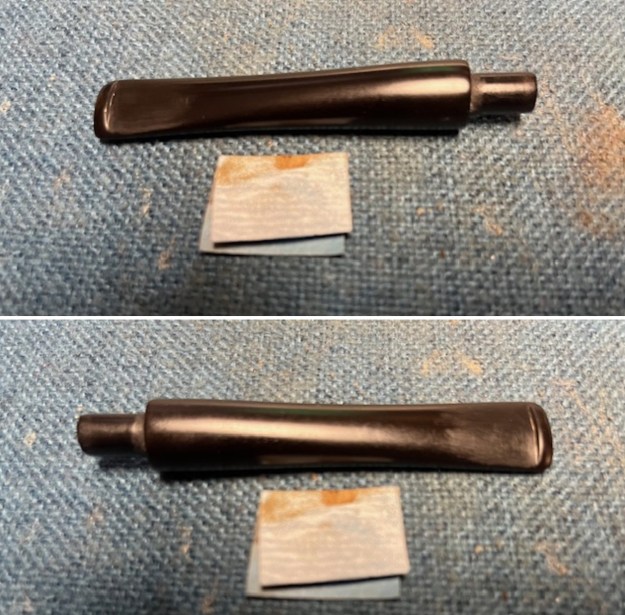
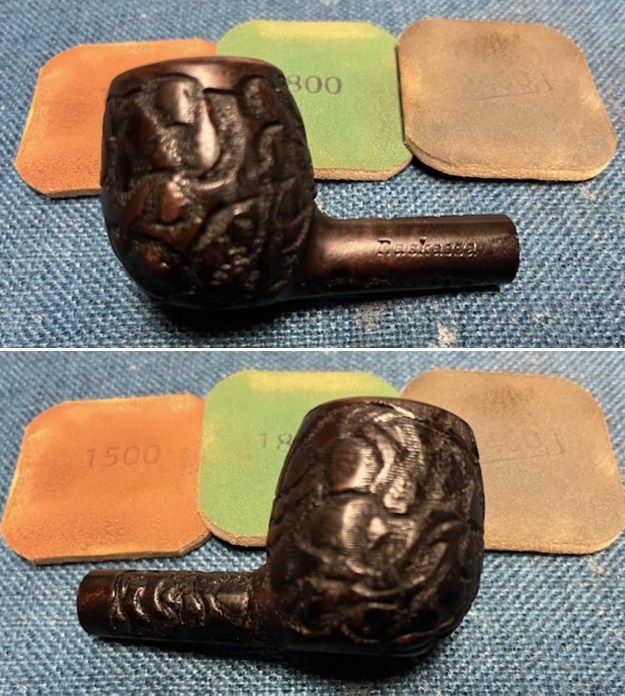
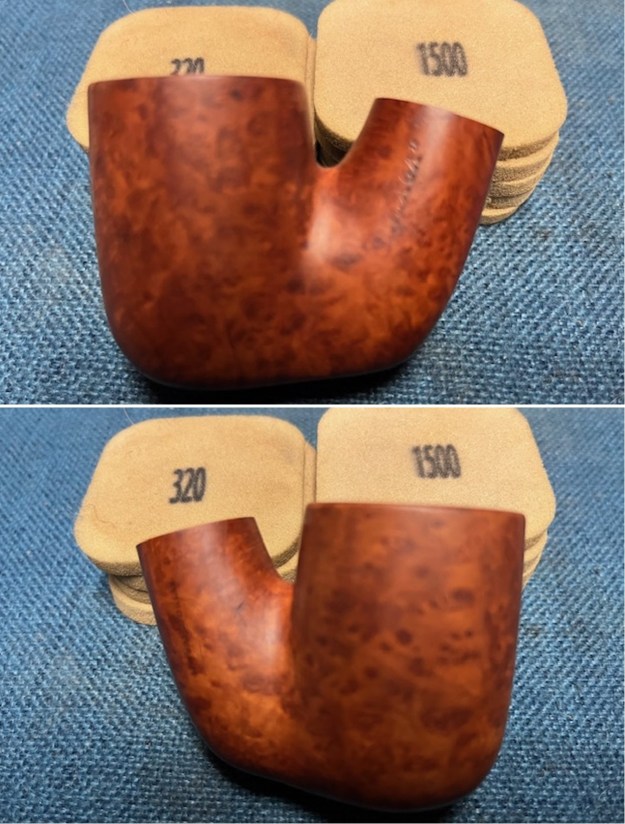
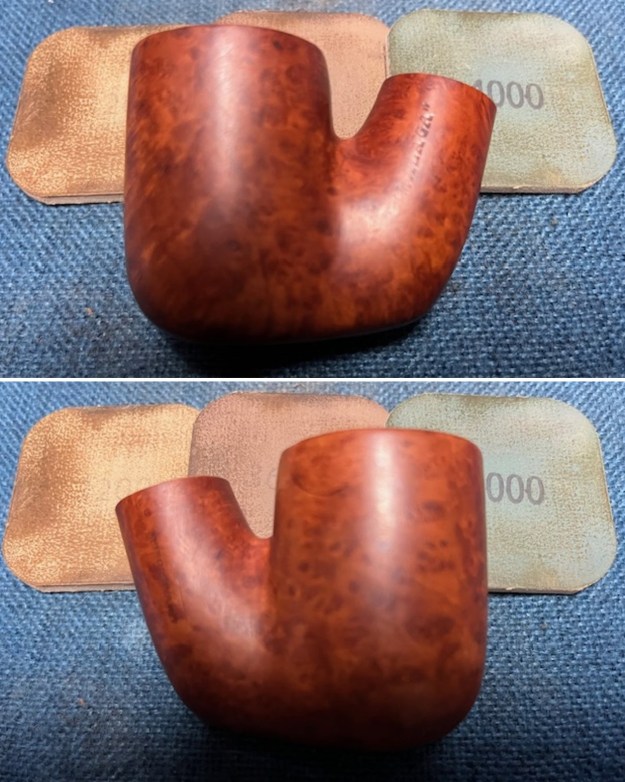
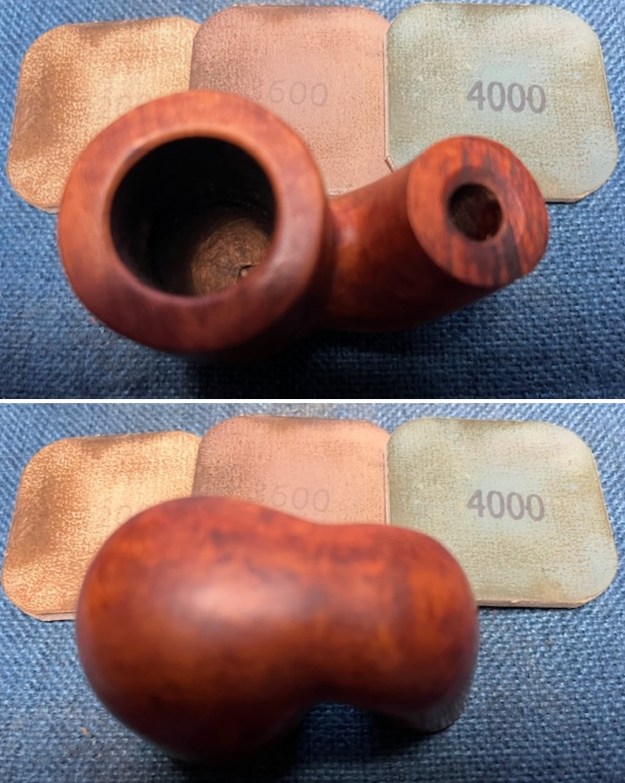
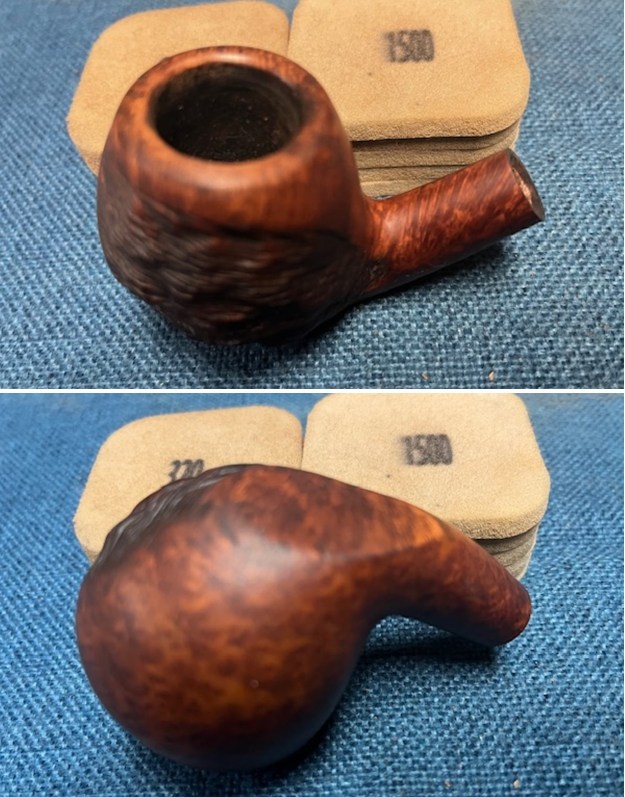
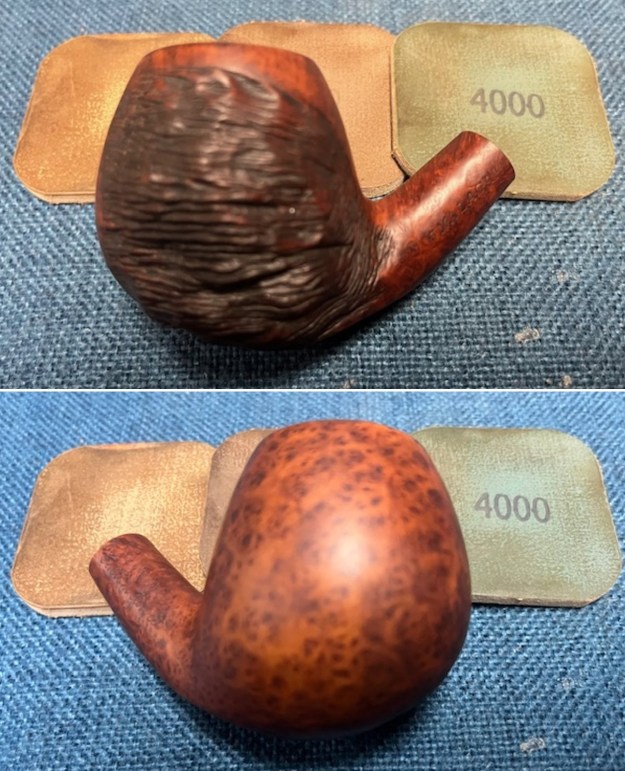
 I wiped the bowl down with a damp cloth and sanded the smooth portions of the bowl with 320-3500 grit sanding pads. The finish began to have a rich shine. The work on the rim top made it certainly look better. The briar and the bowl looked very good.
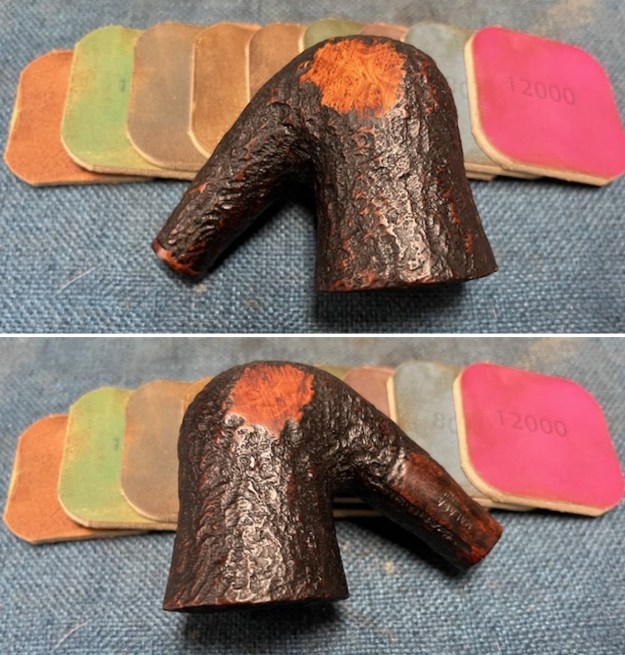
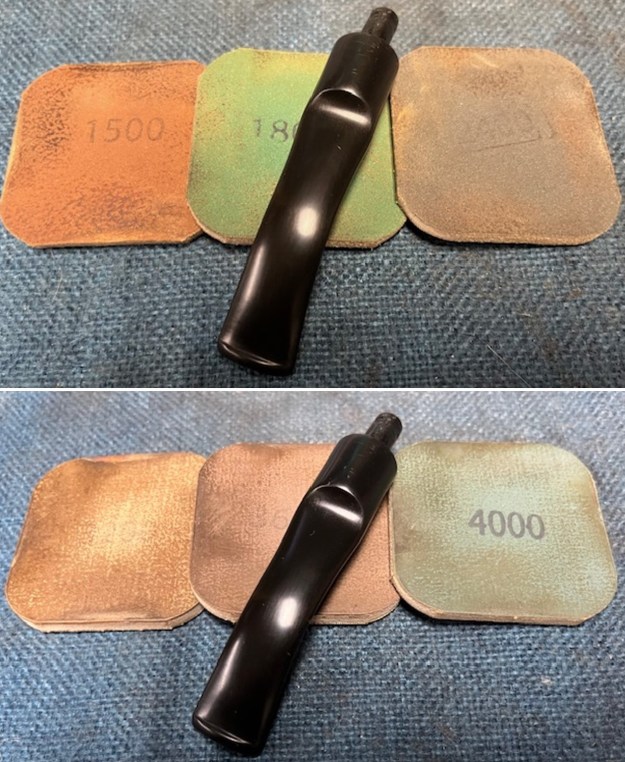
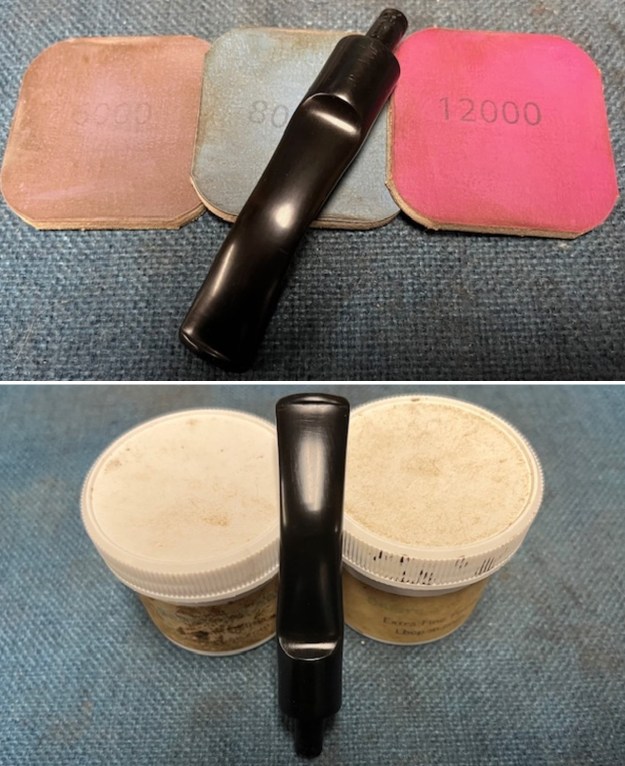
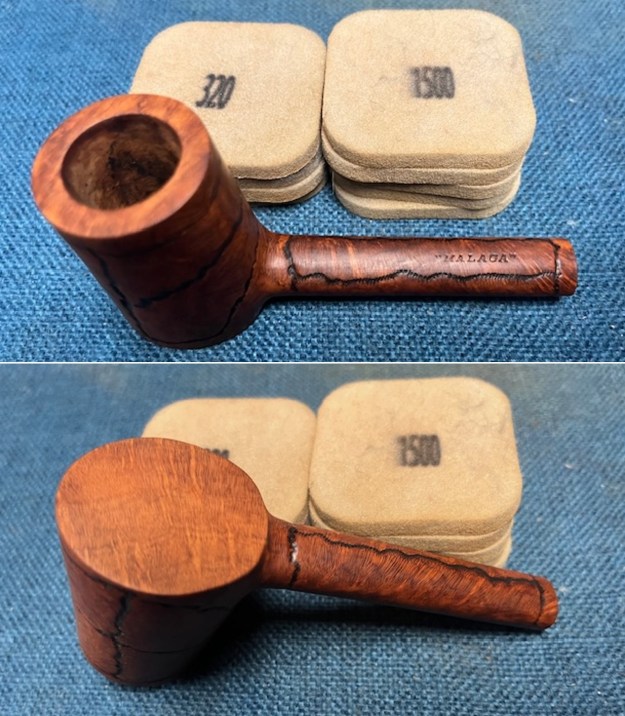
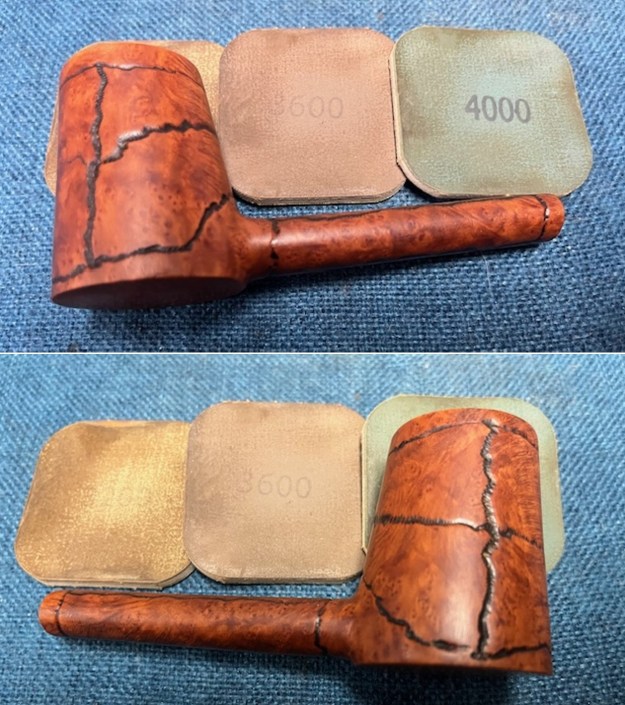
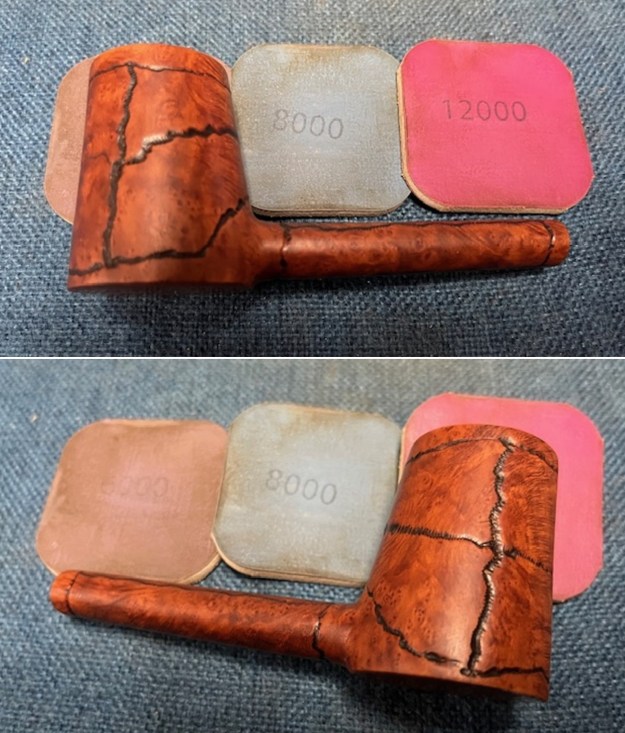
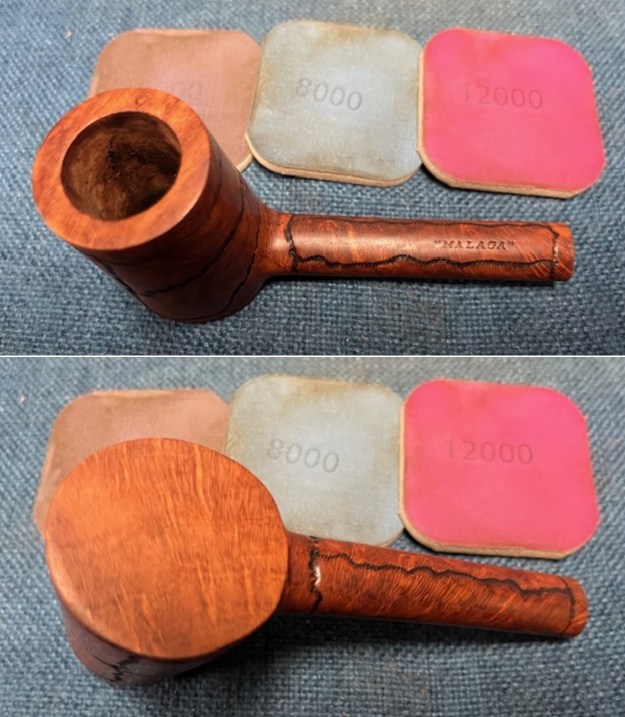
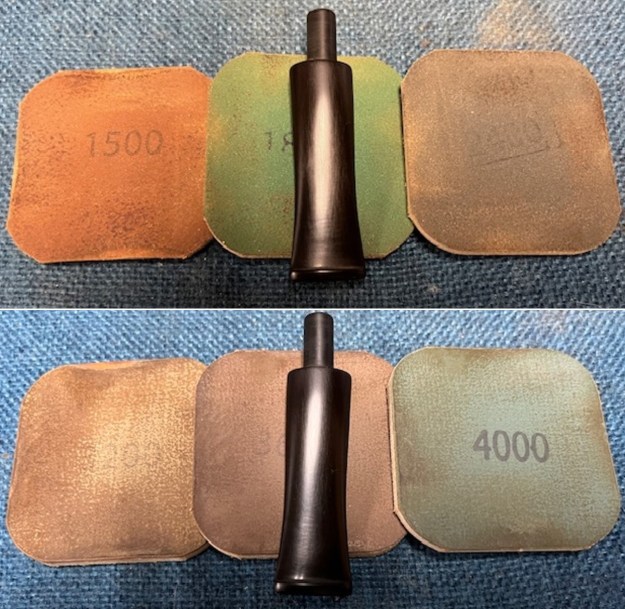
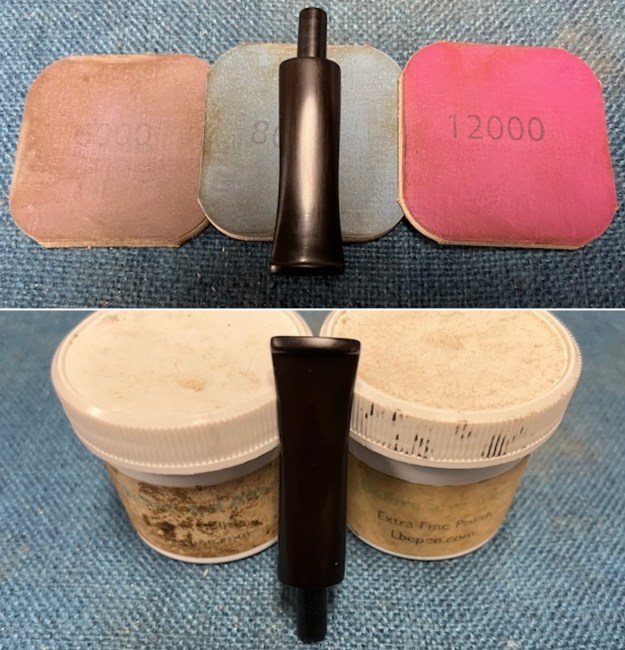
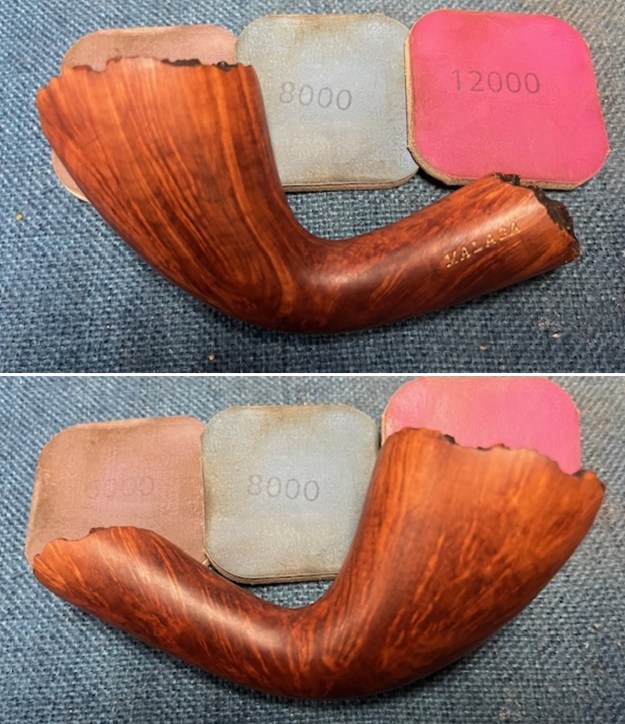
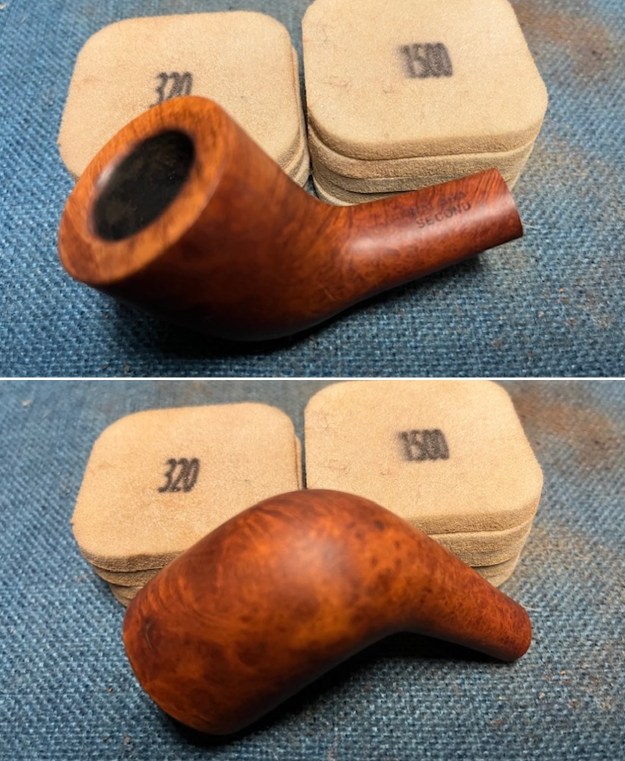
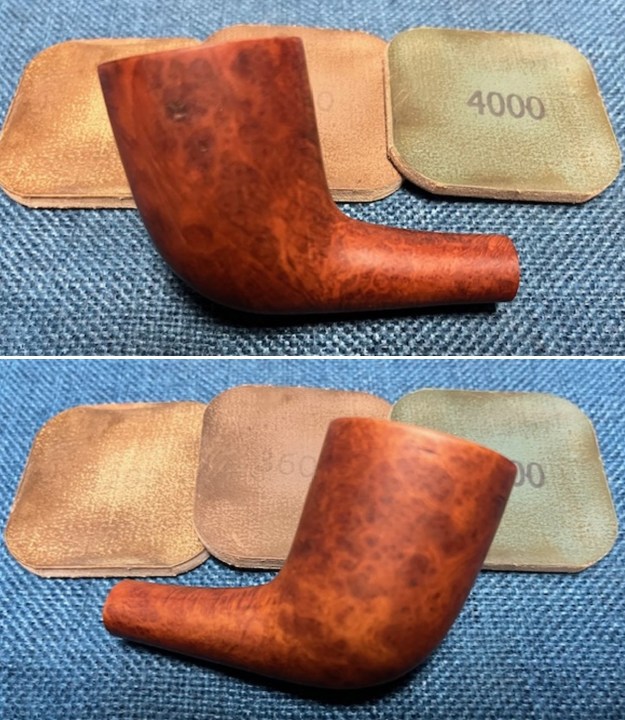
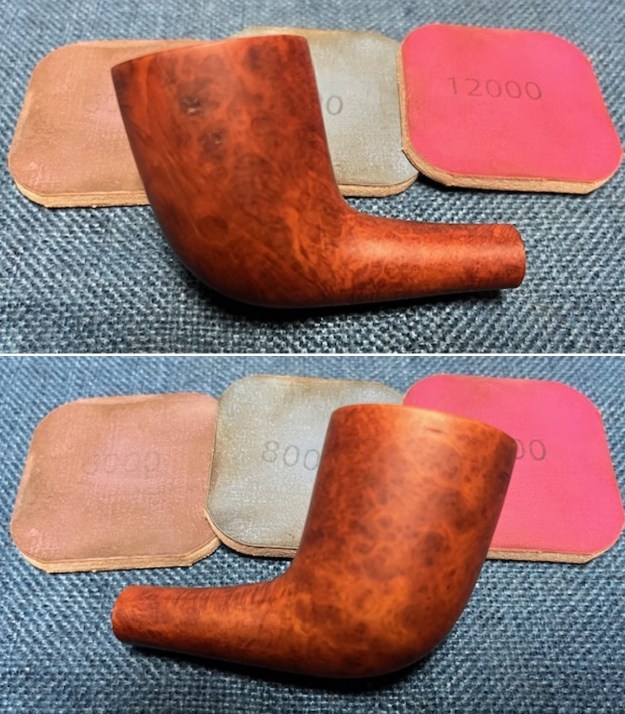
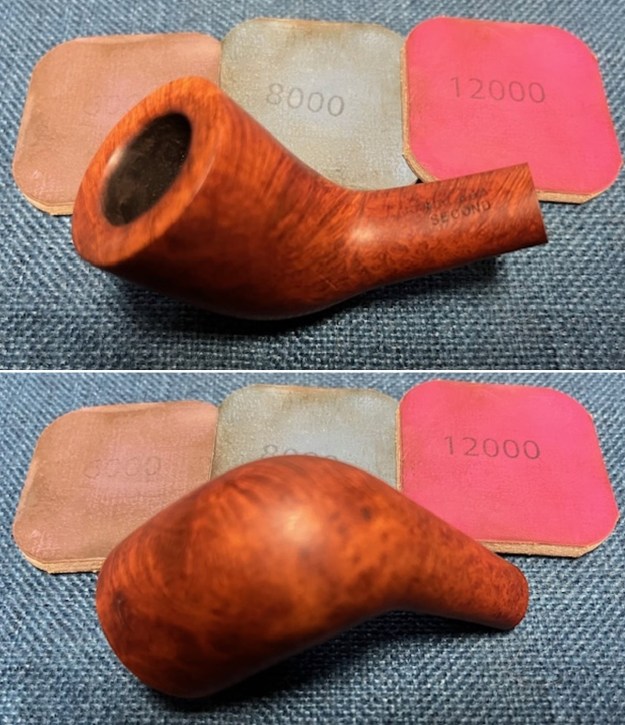
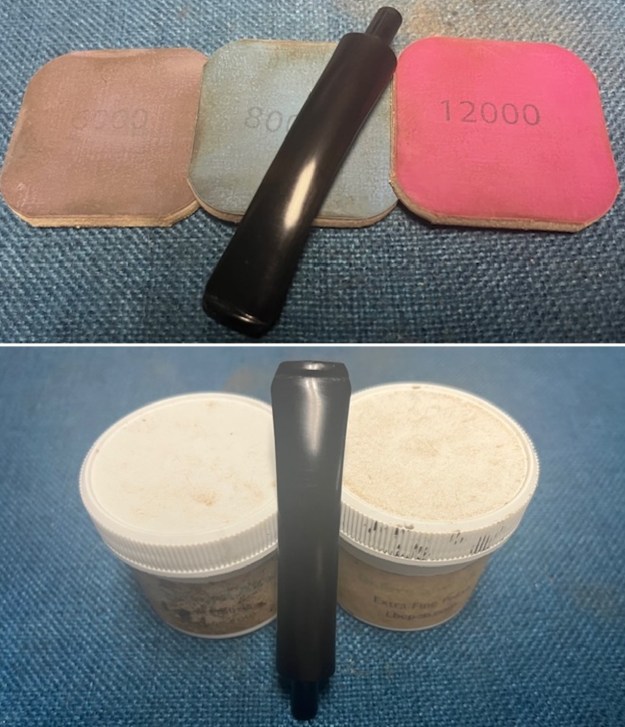
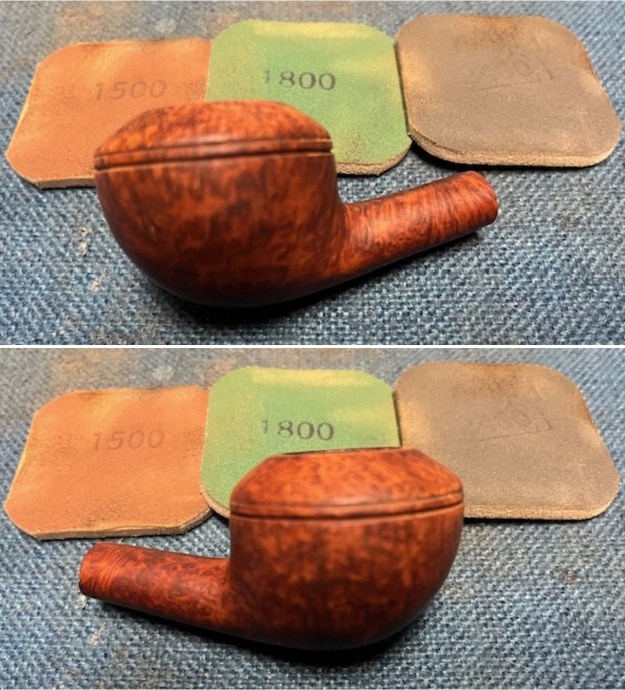
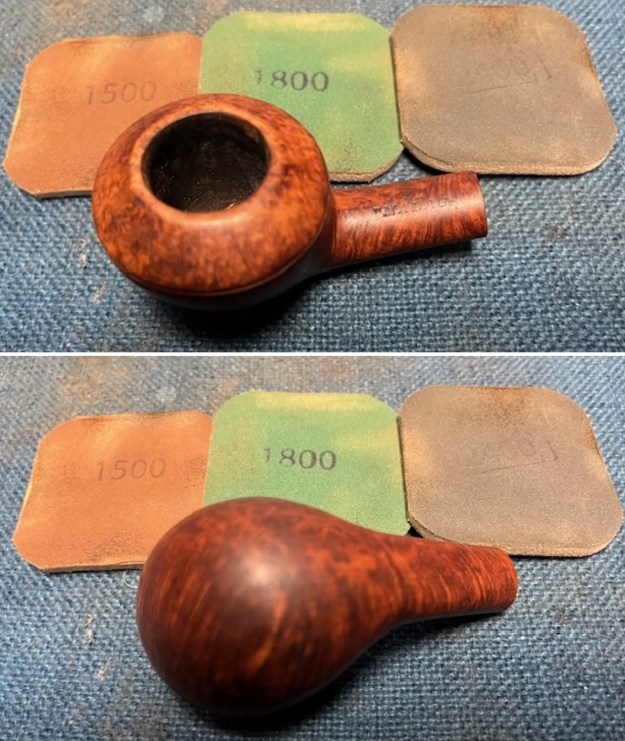
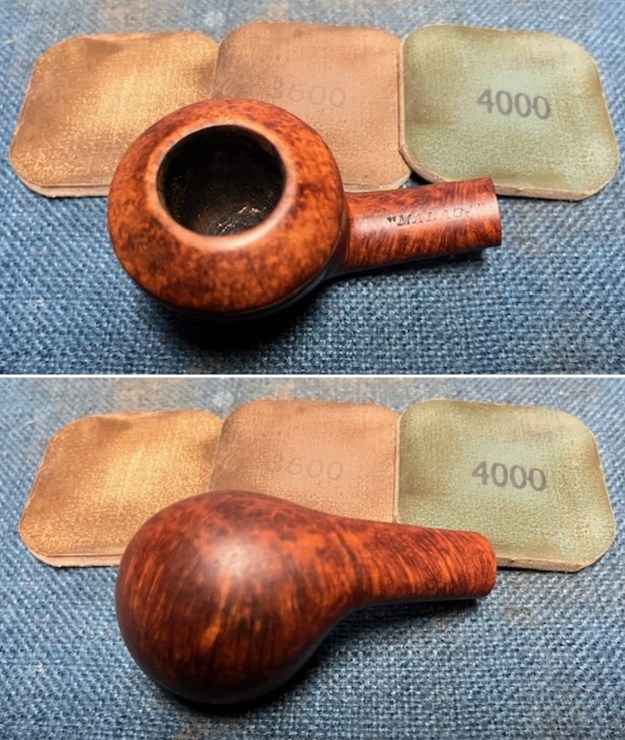
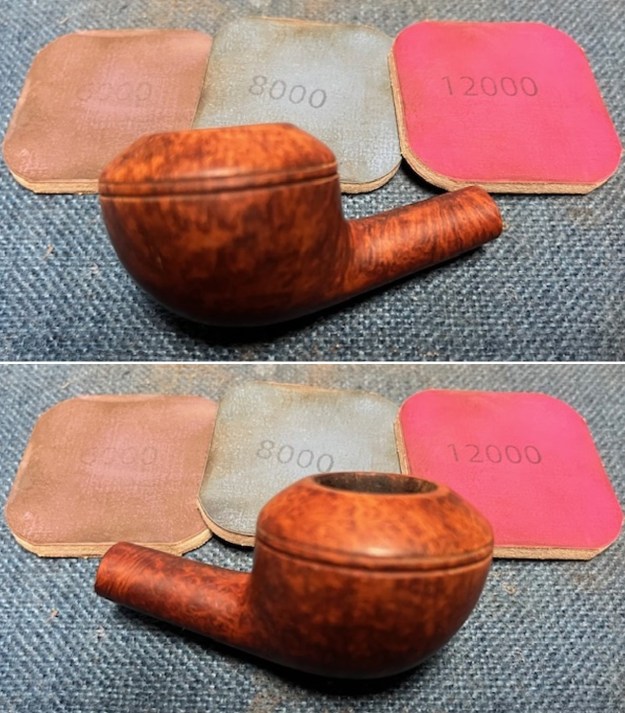
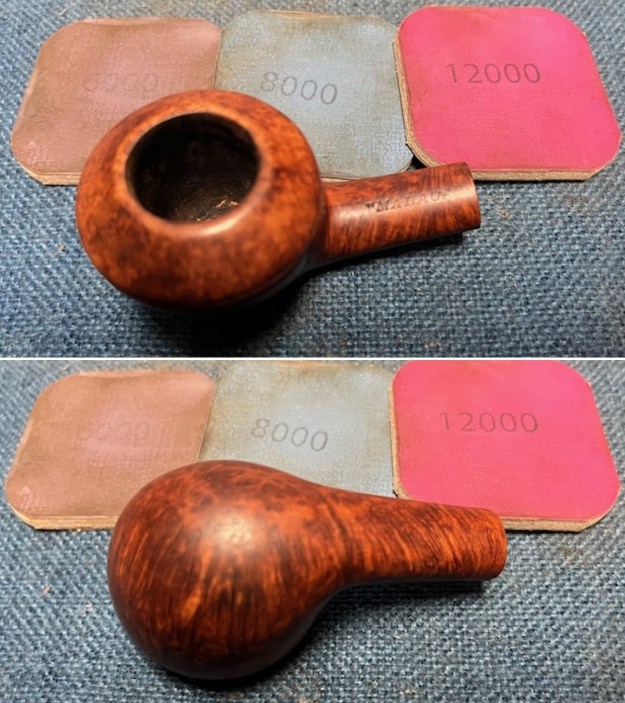
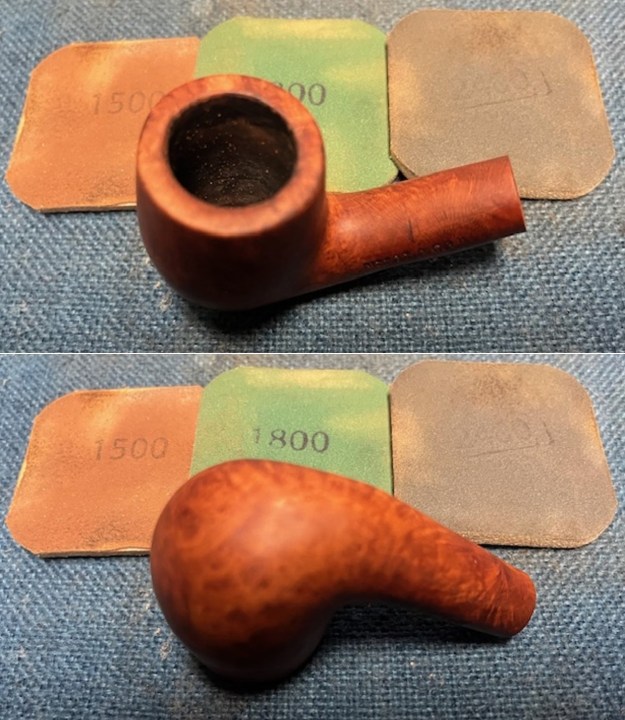
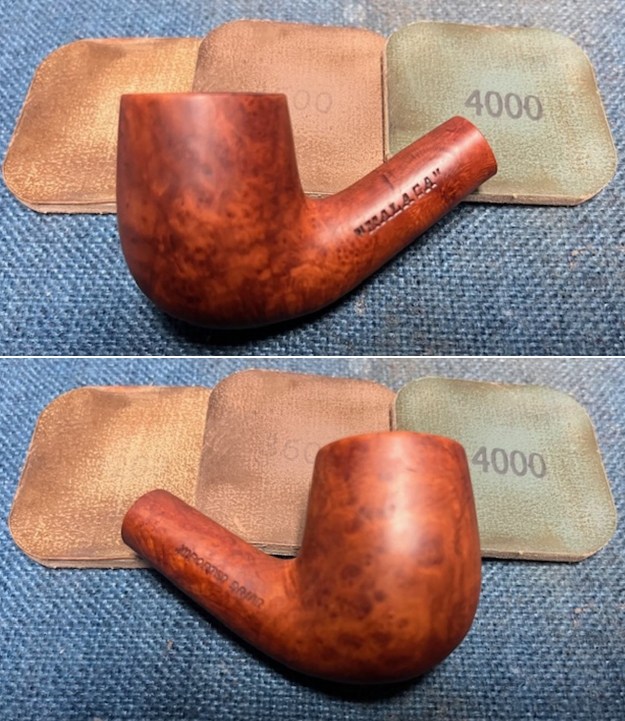
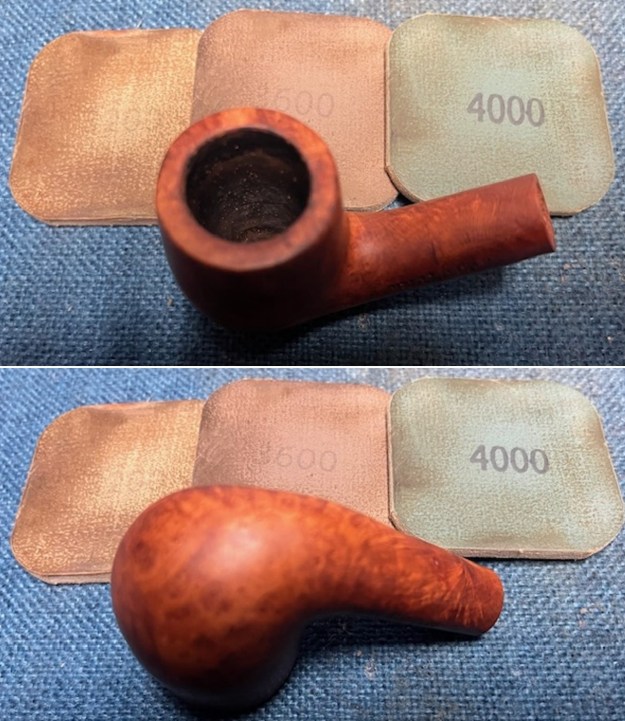
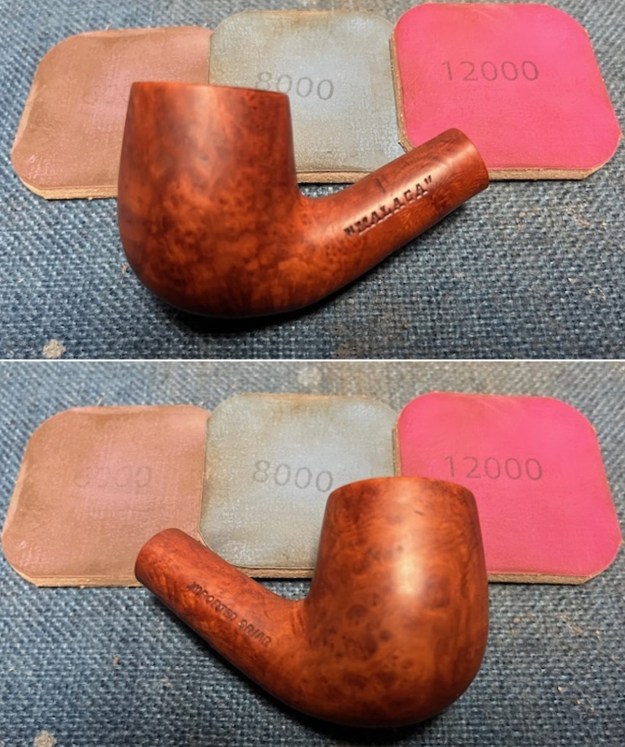
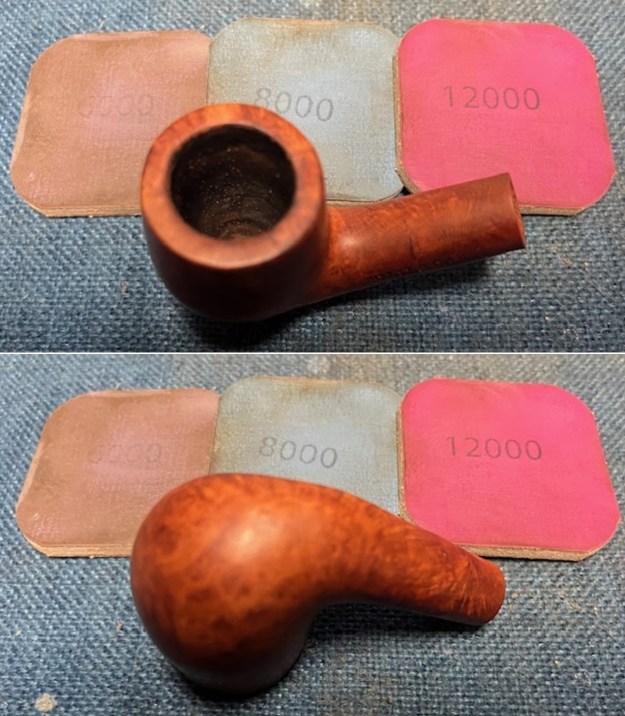
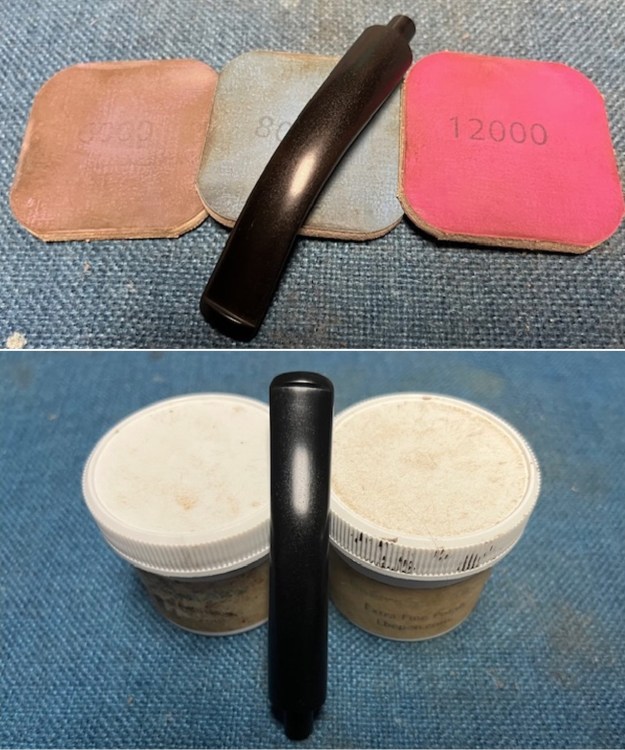
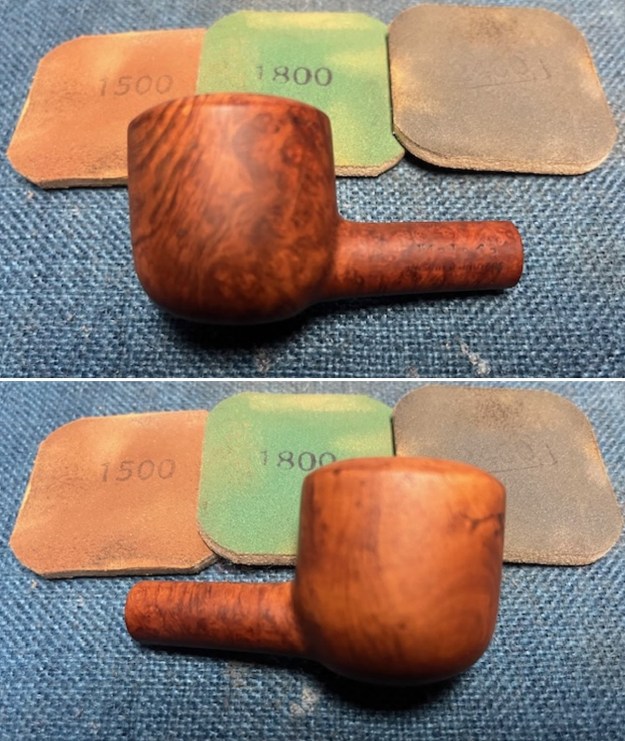
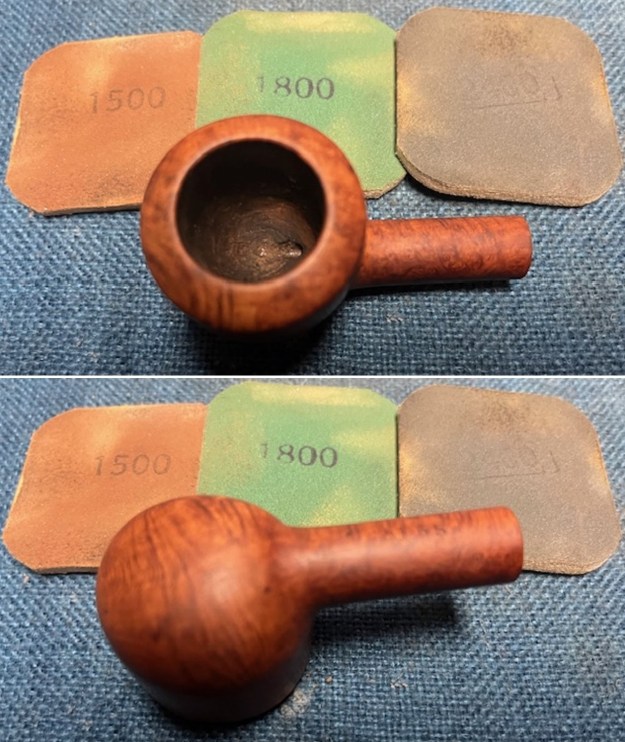
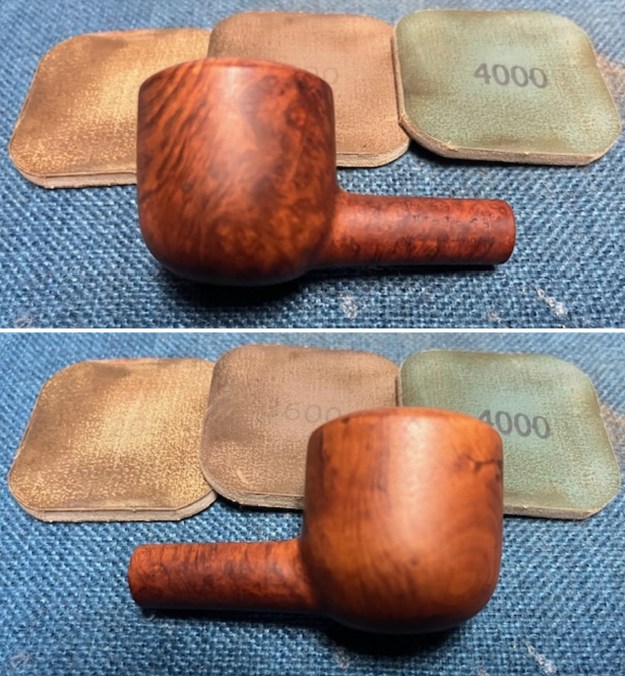
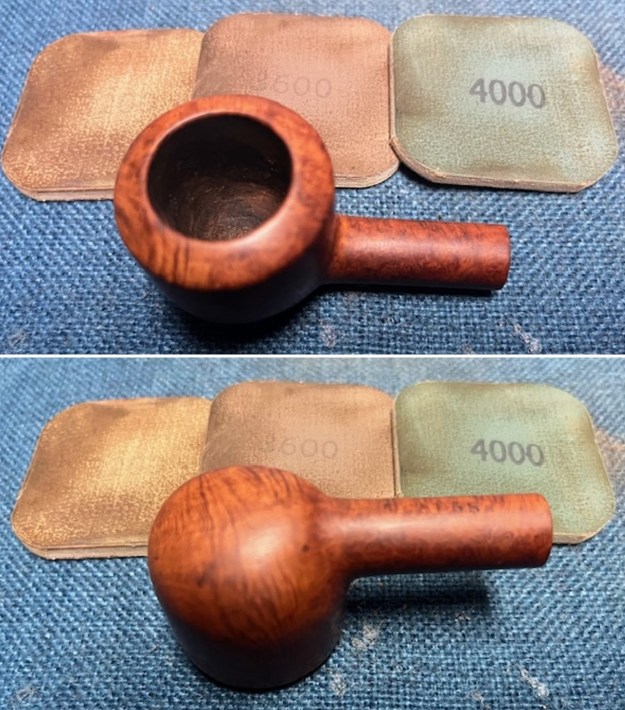
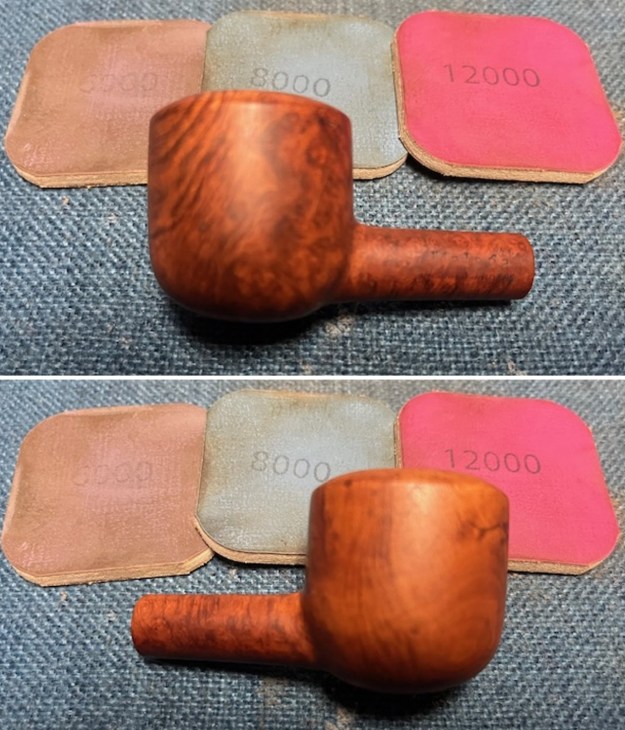
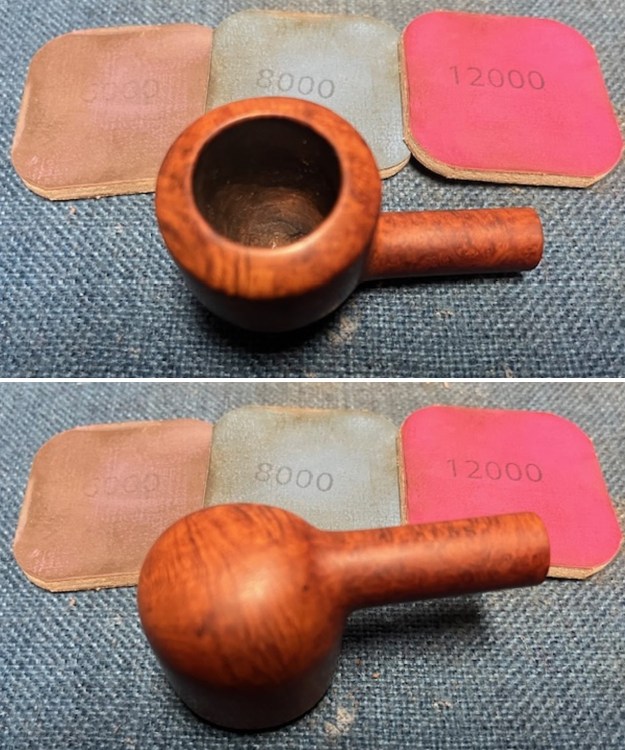
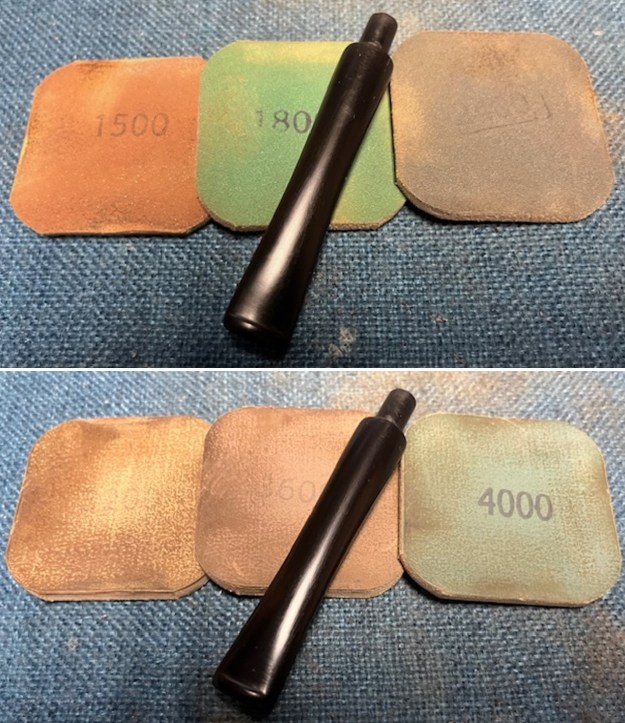
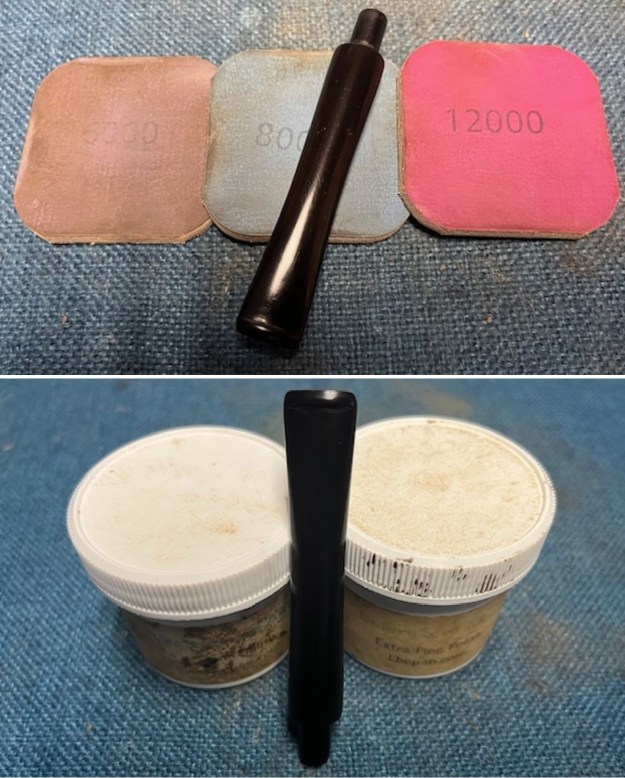
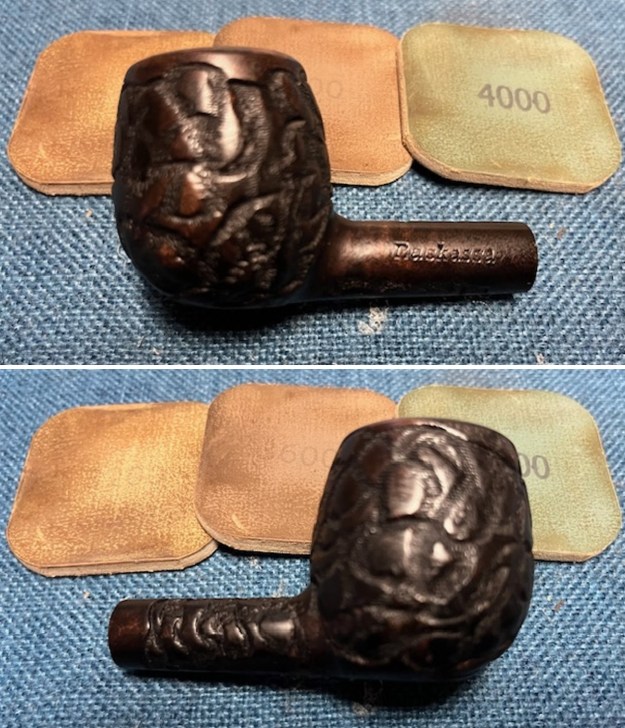
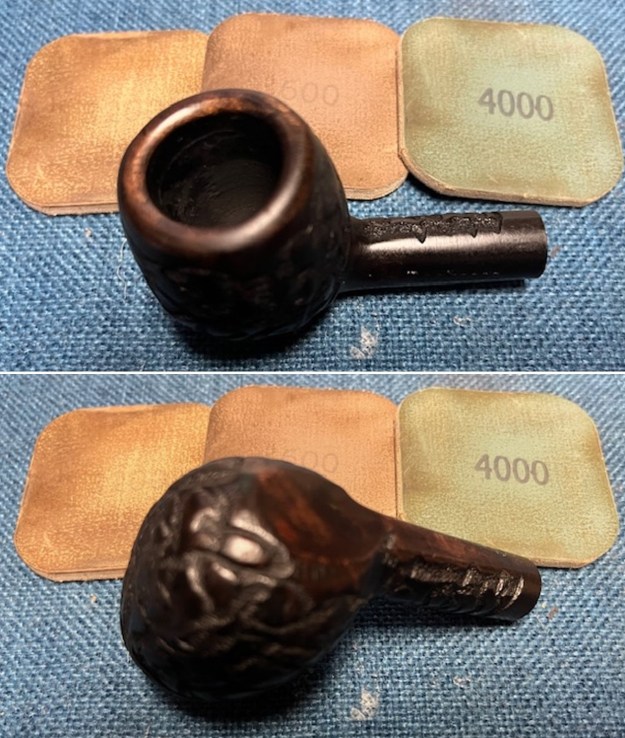
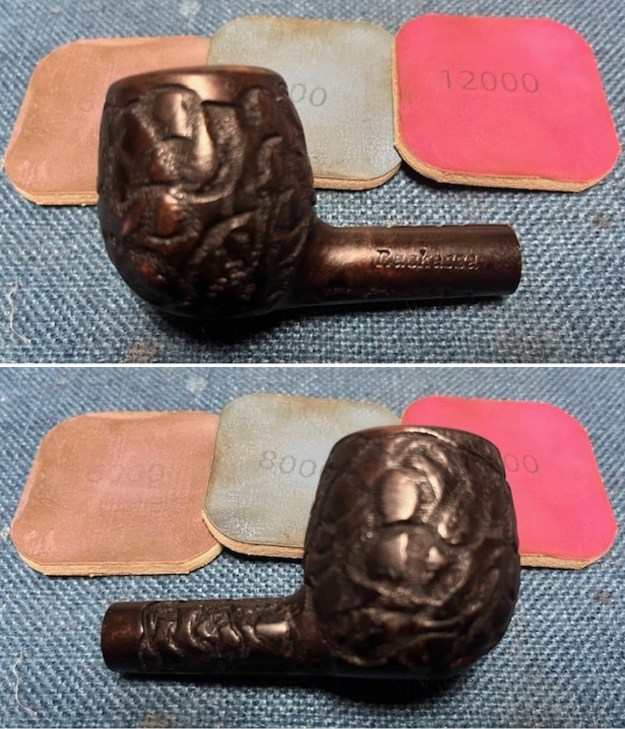
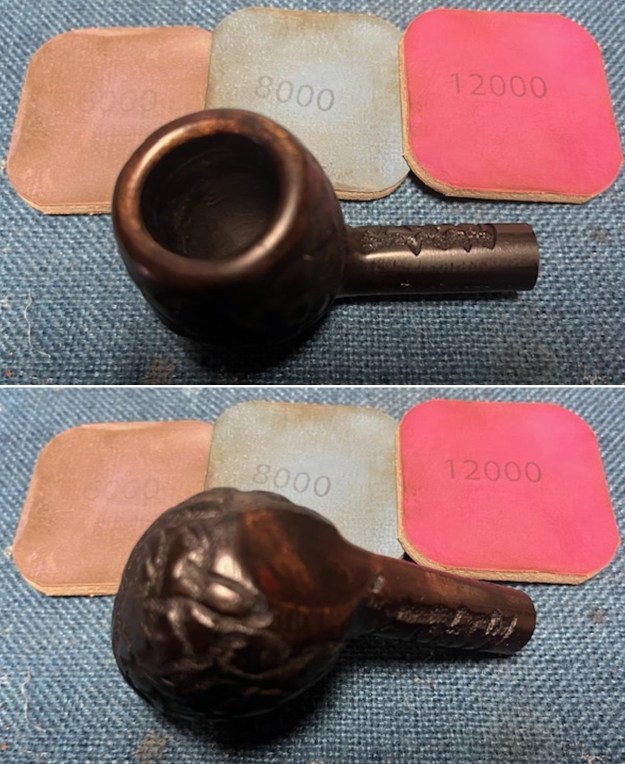
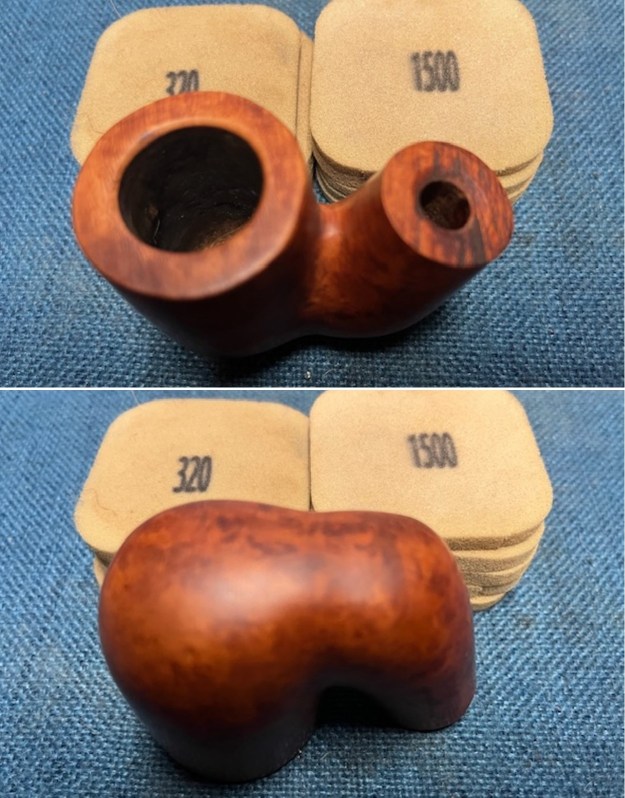
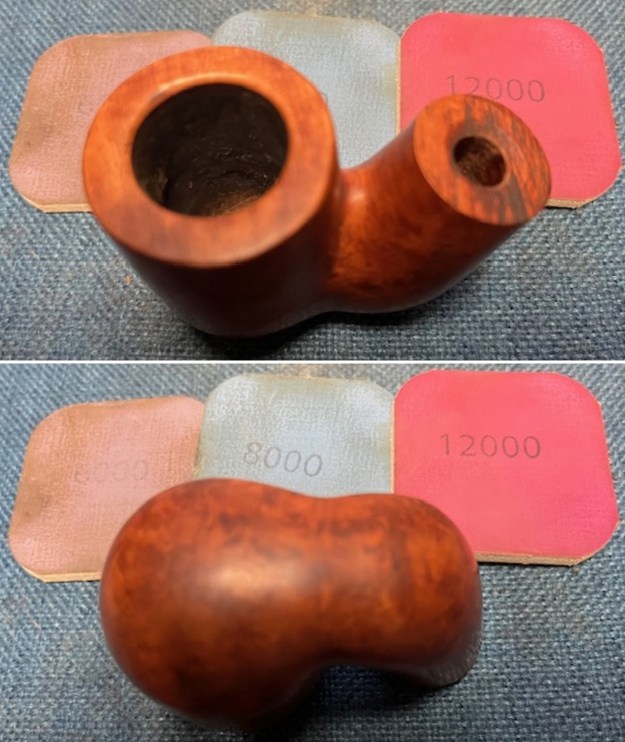
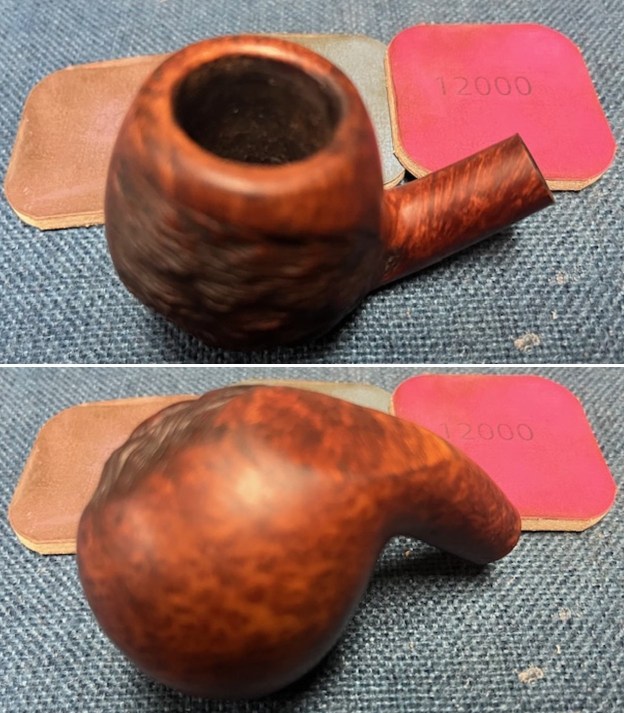
 I polished the bowl sides and the smooth rim top with micromesh sanding pads. I dry sanded it with 1500-12000 grit micromesh pads. I wiped it down with a damp cloth after each pad. It really began to be beautiful.
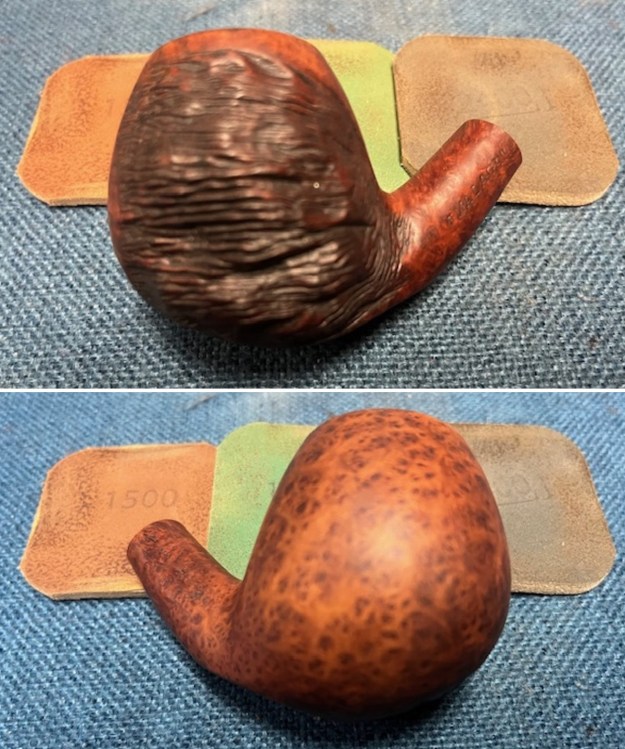
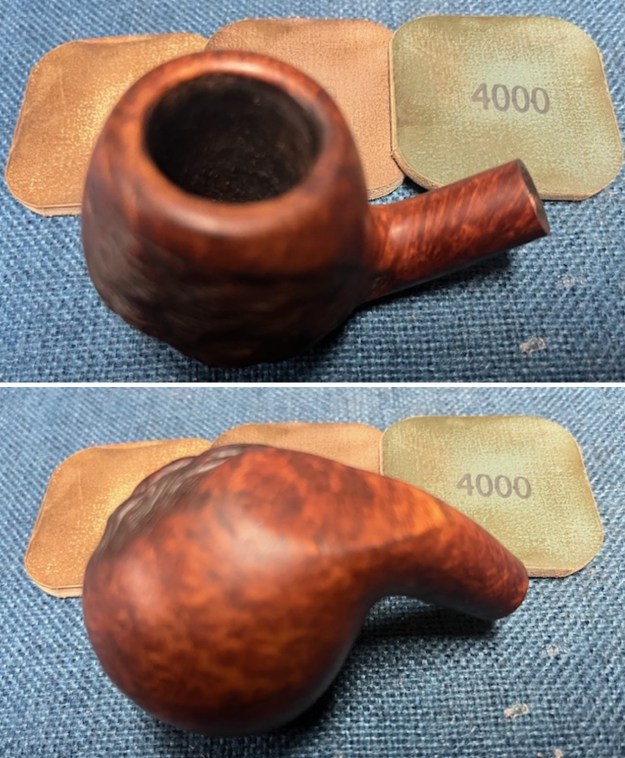
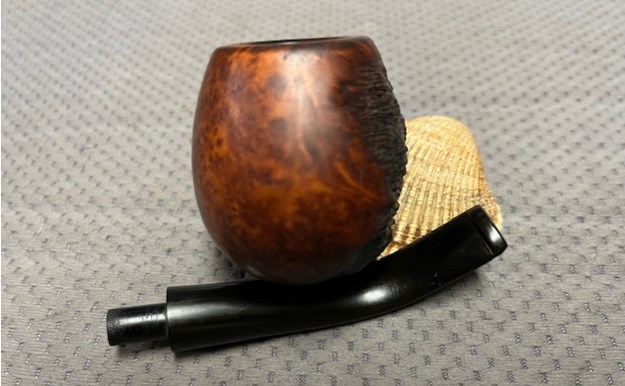
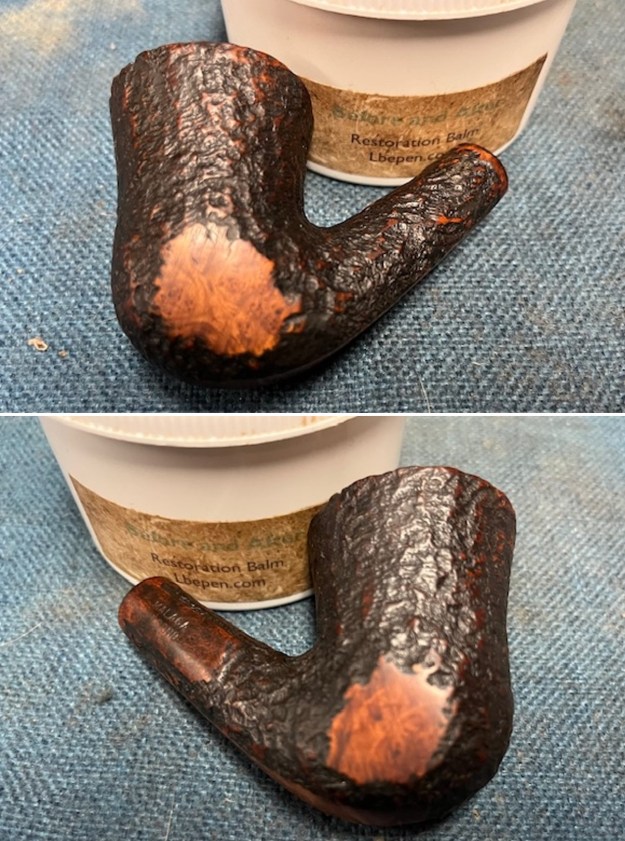
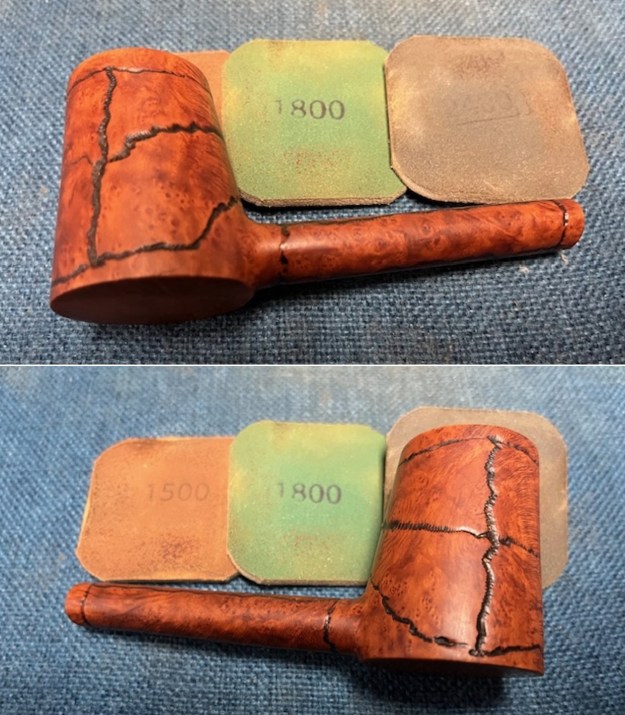
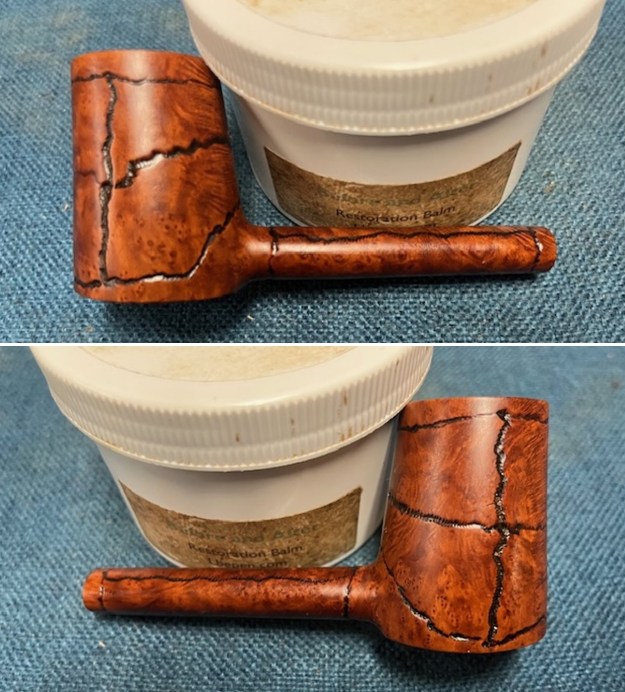
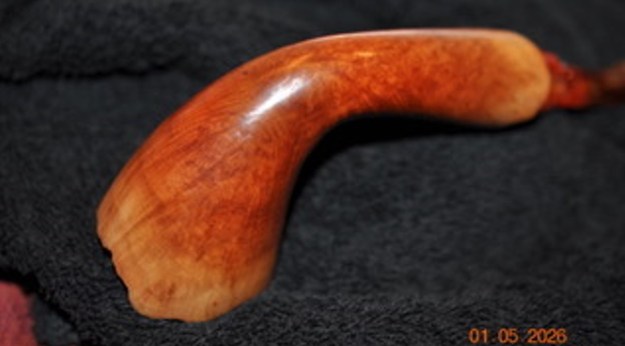
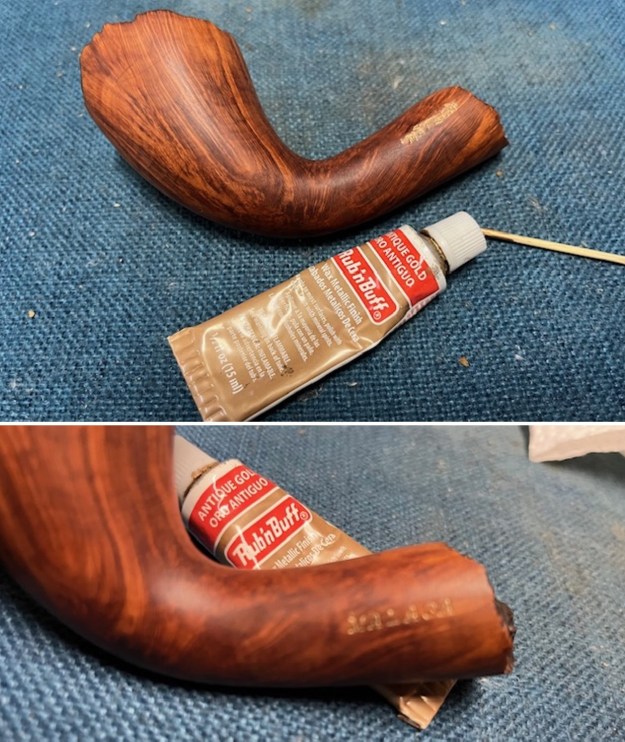
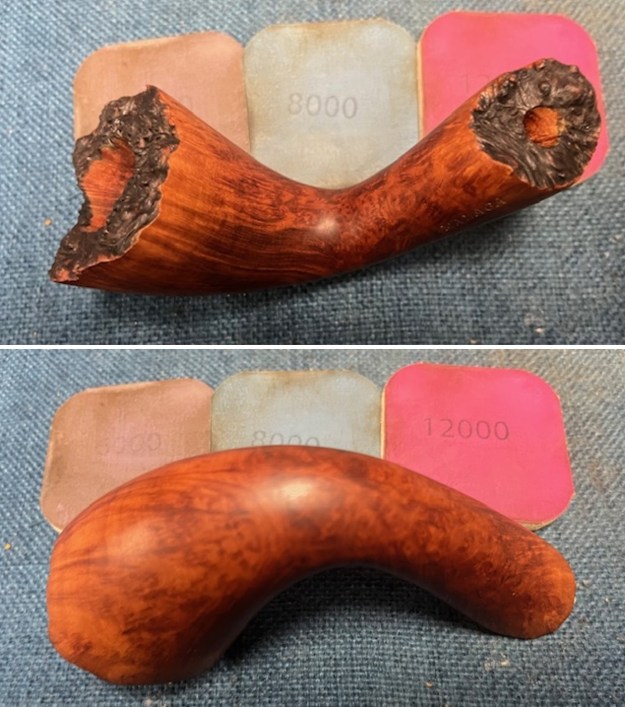
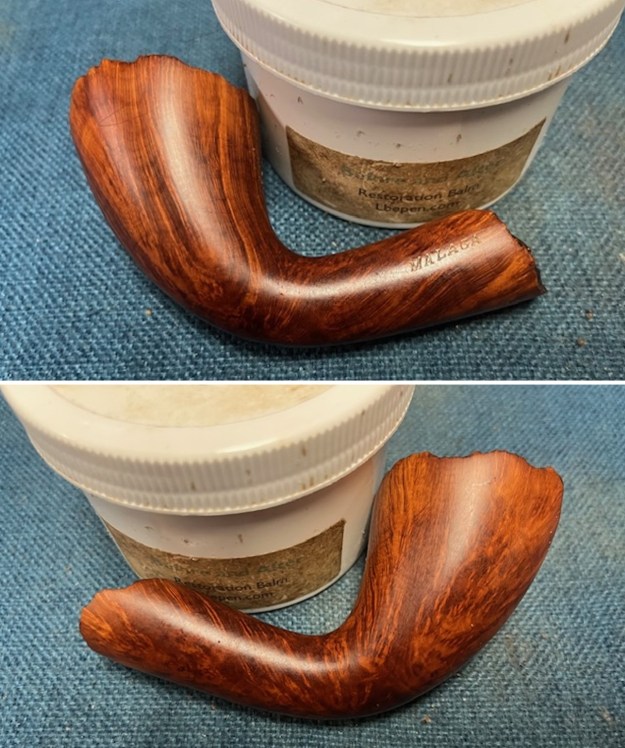
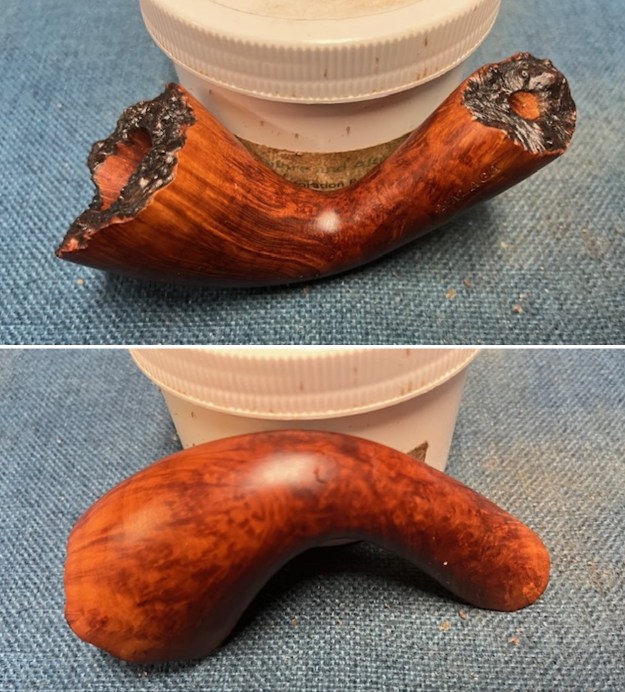
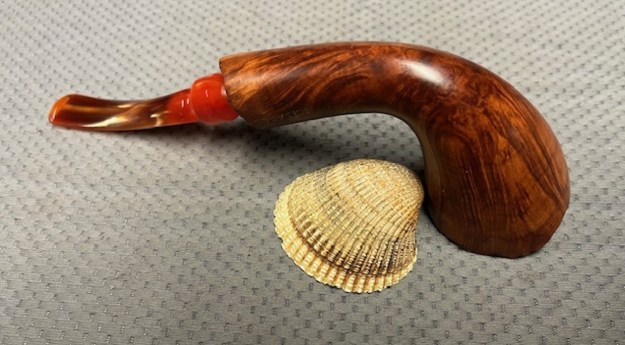
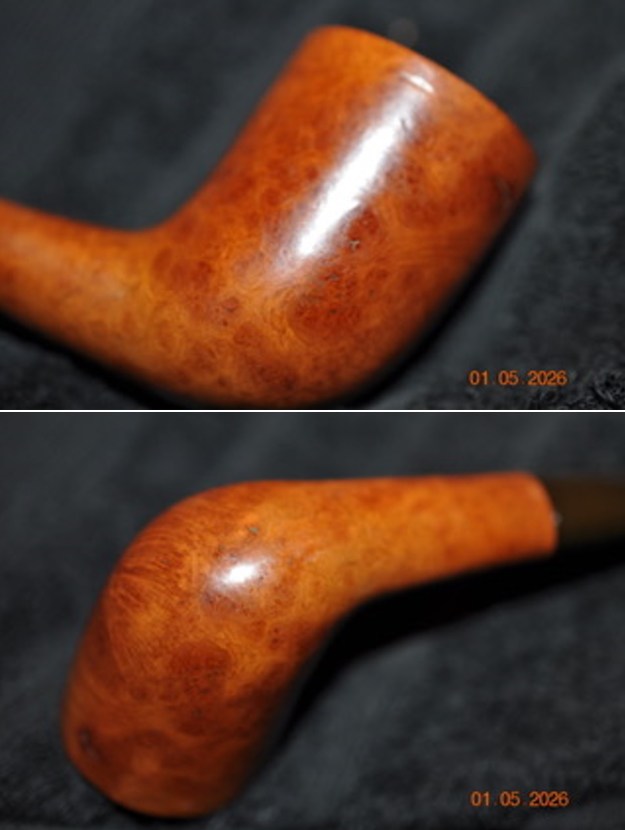
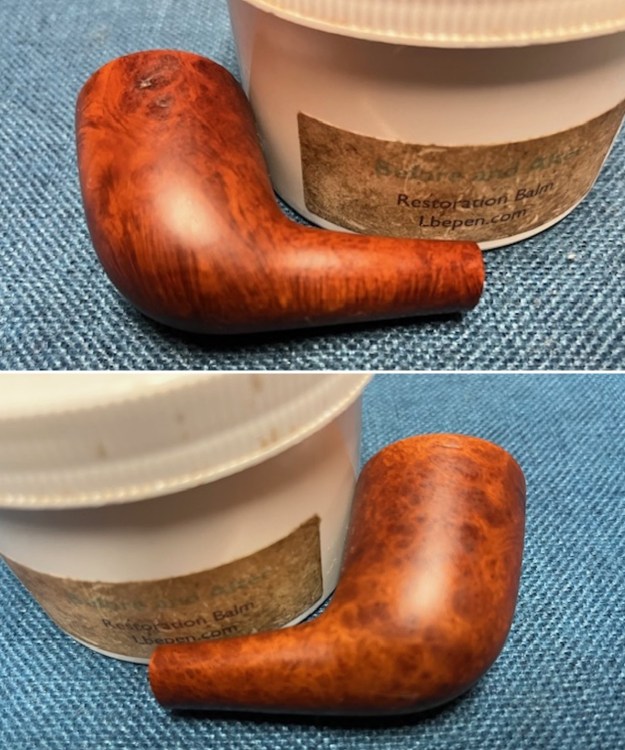
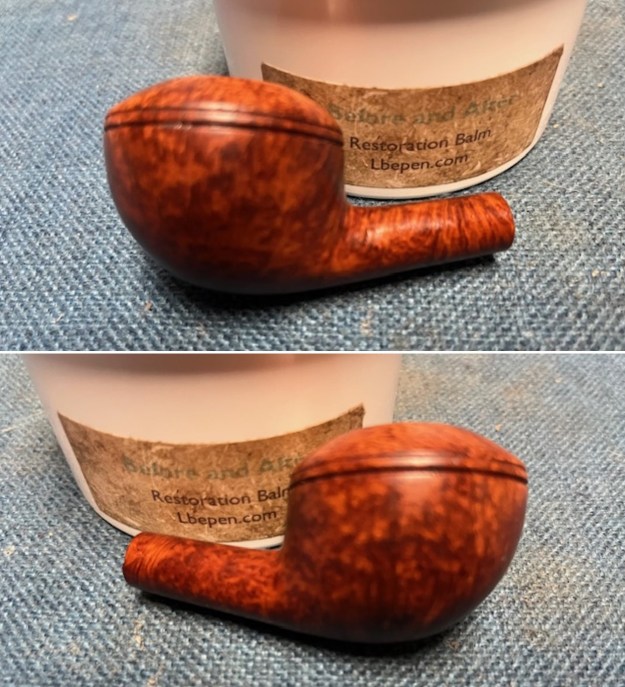
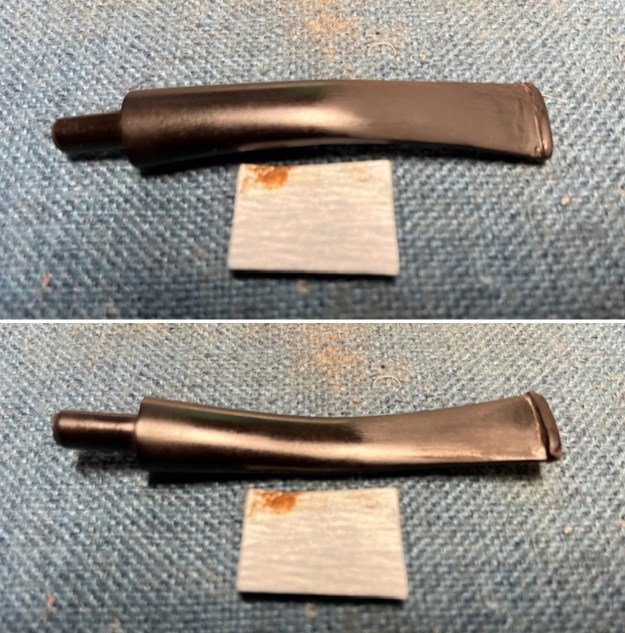
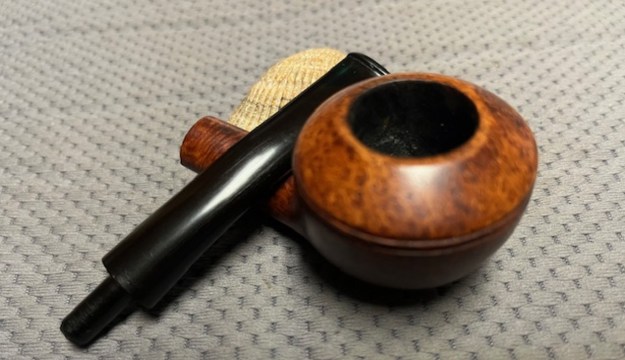
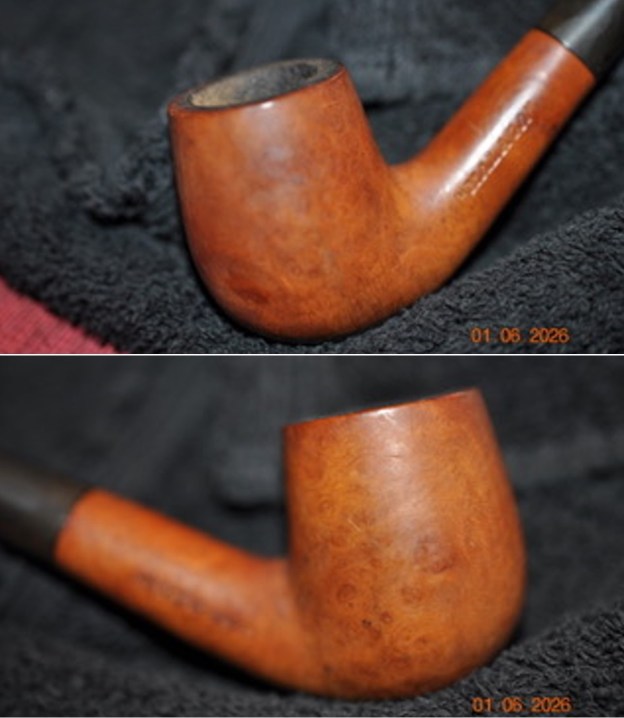
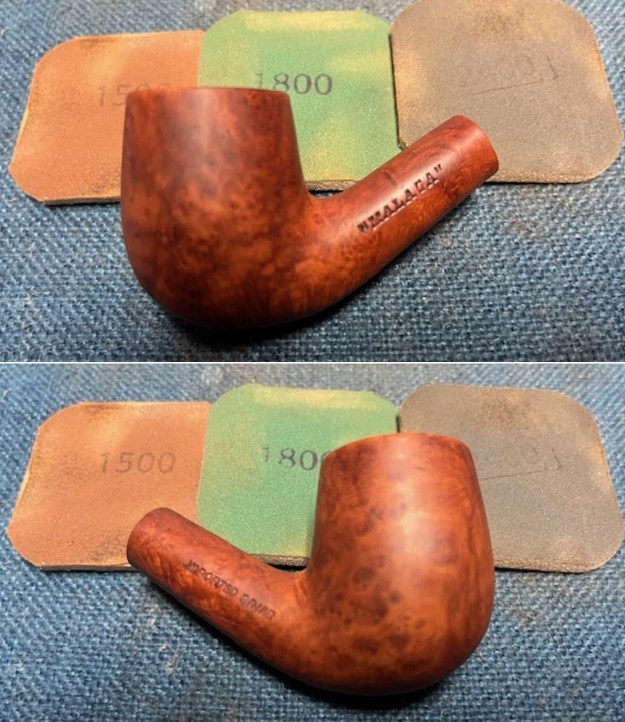
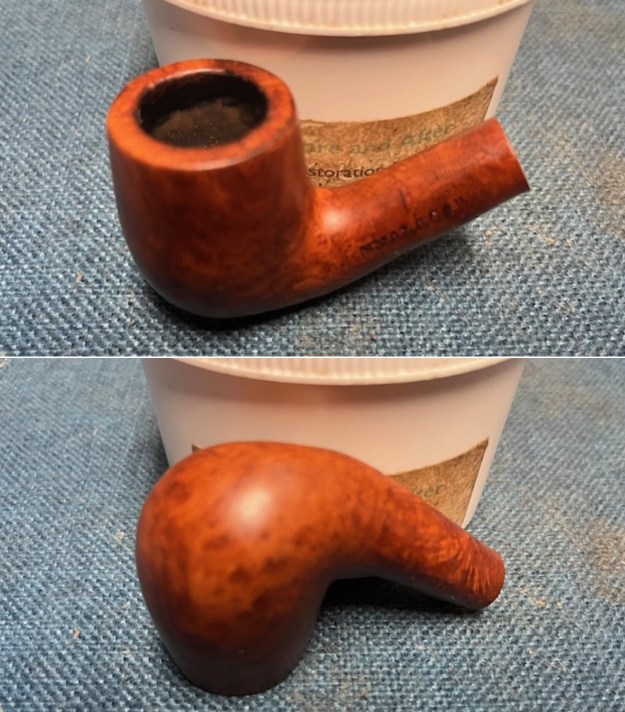
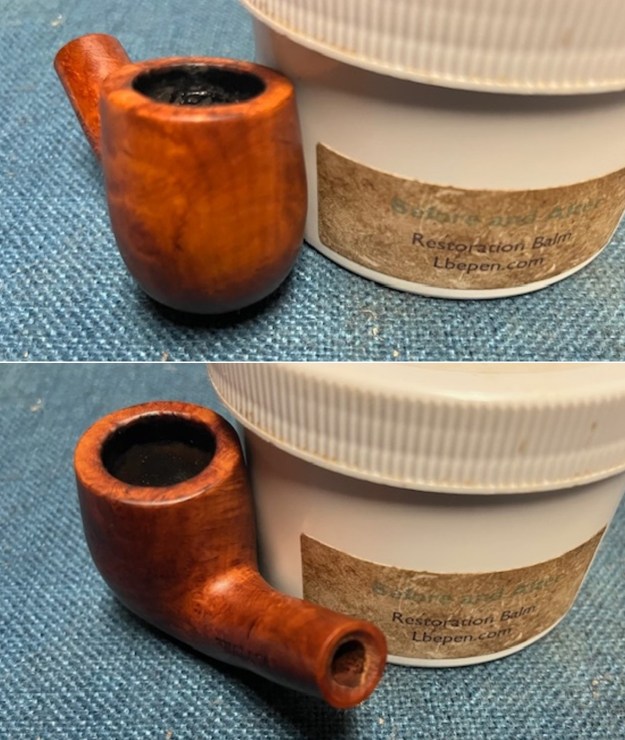
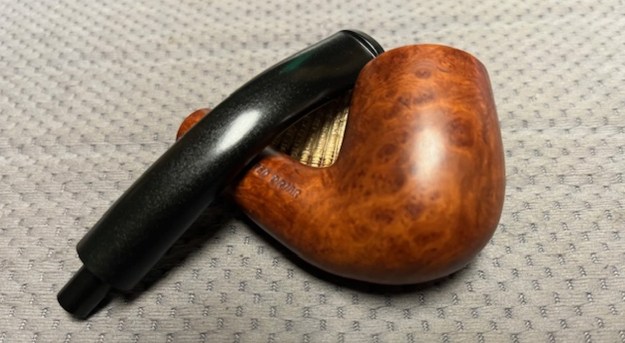
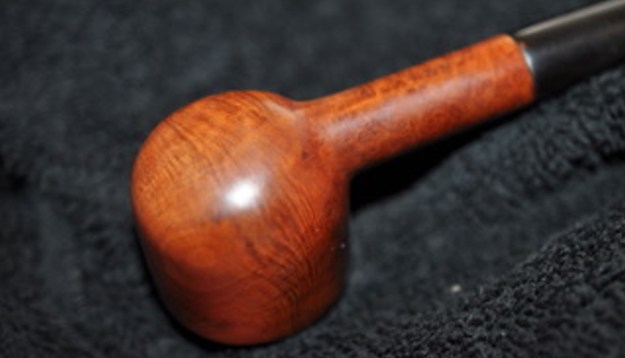
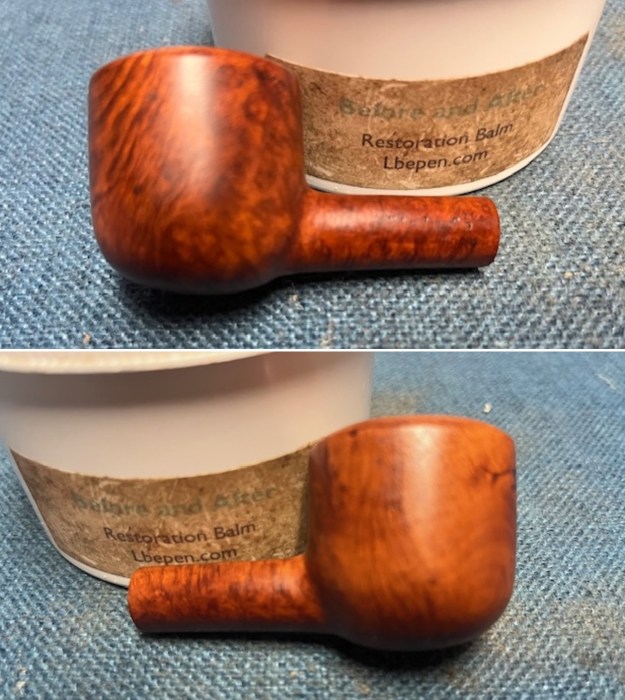
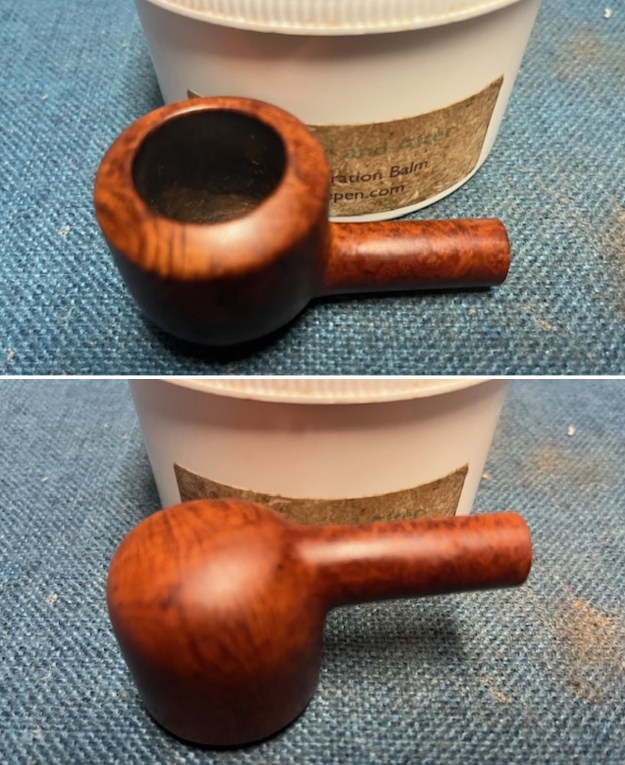
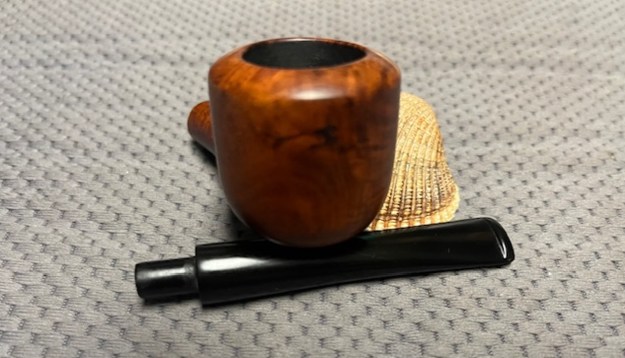
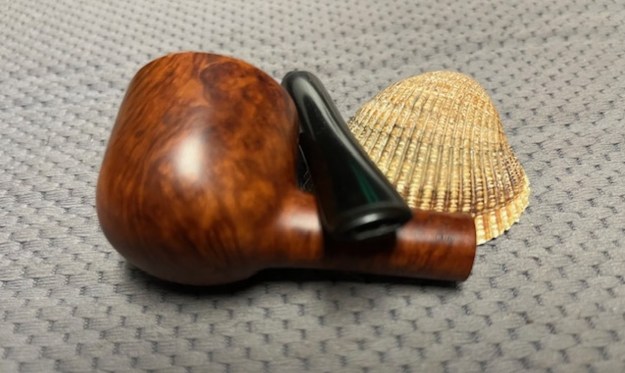
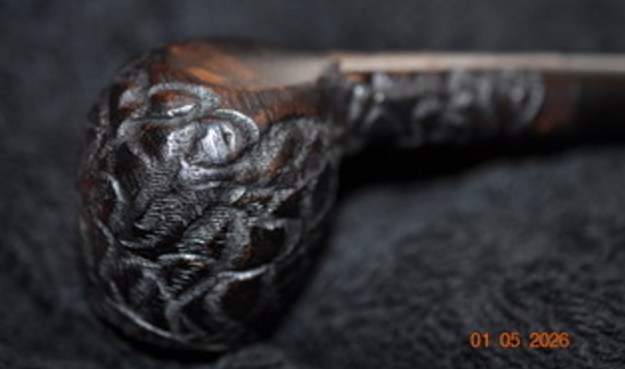
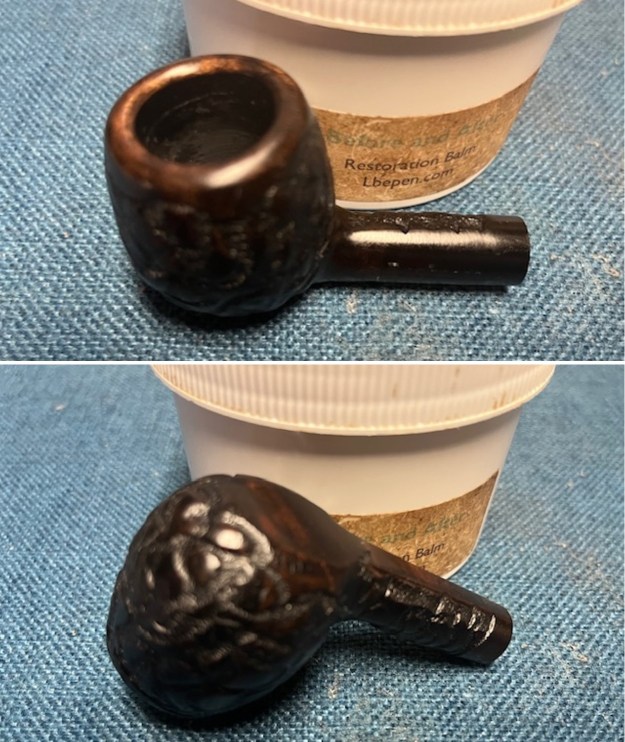
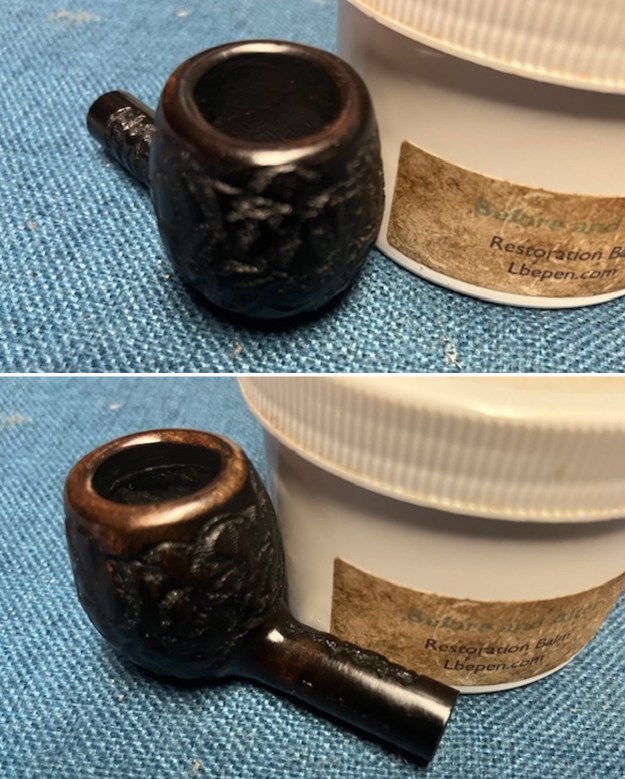
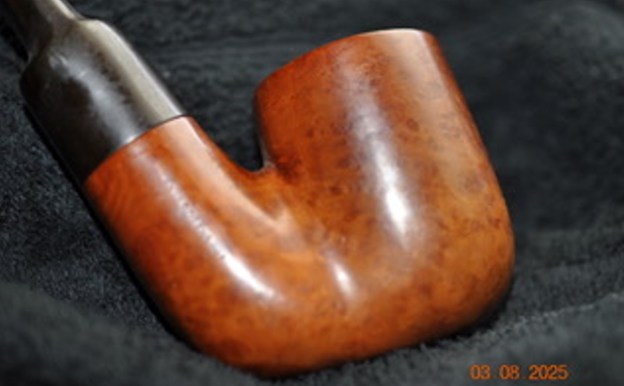
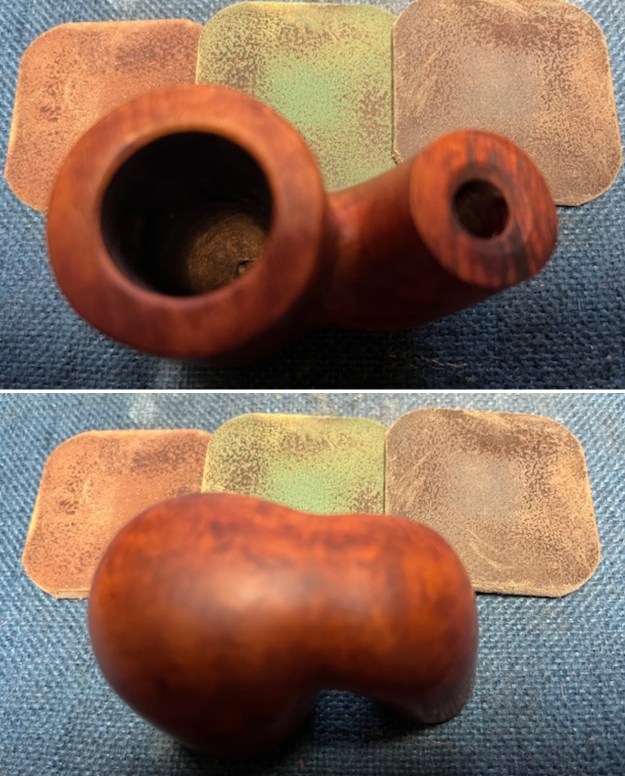
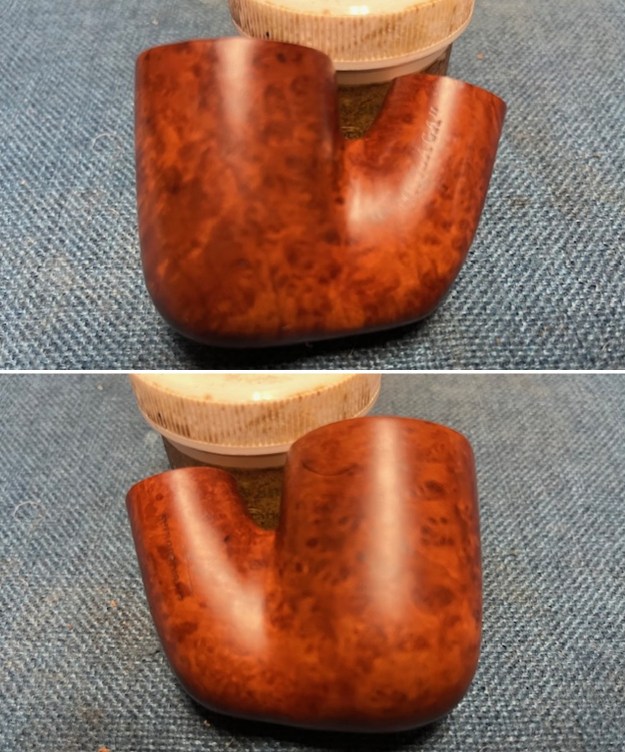
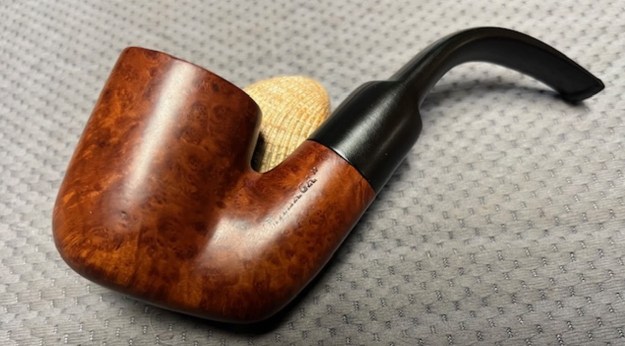
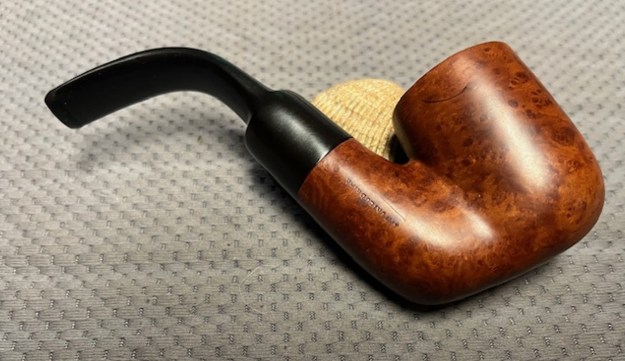
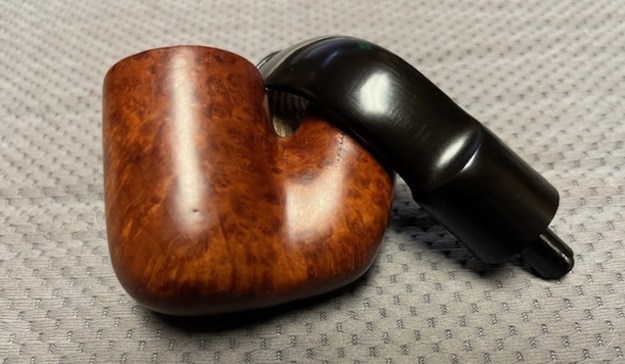
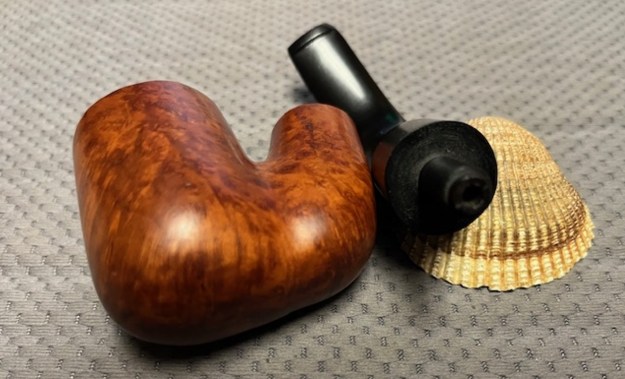
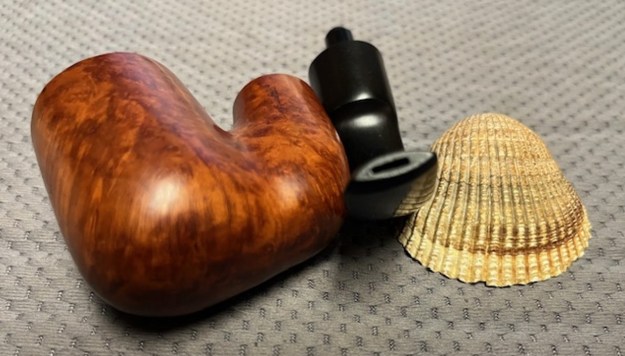
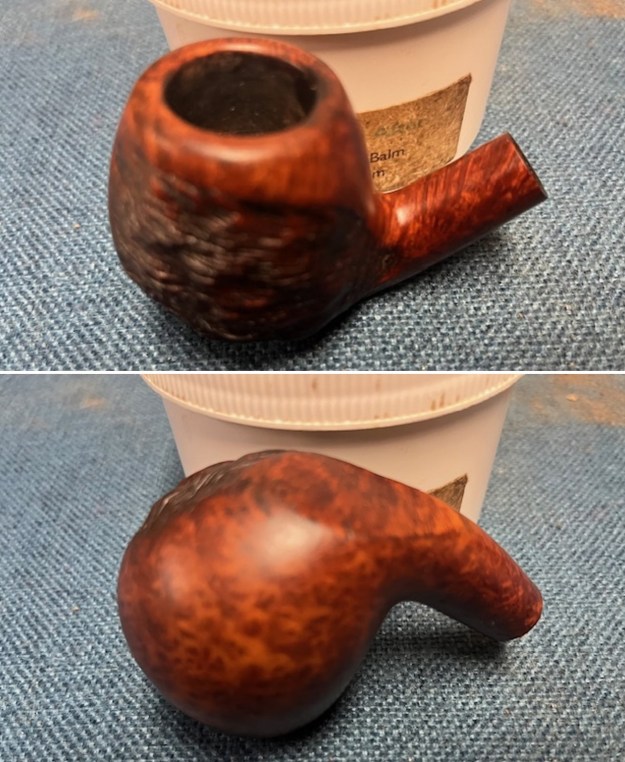
 I rubbed the bowl and shank down with Before & After Restoration Balm to deep clean the finish on the bowl and shank. The product works to clean, enliven and protect the briar. I worked it in with my fingers to get it into the briar. I worked it into the rustication on the left side with a shoe brush to get deep in the grooves. I let it sit for 10 minutes then I wiped it off and buffed it with a soft cloth. The briar really began to have a rich shine. I took some photos of the bowl at this point to mark the progress in the restoration. It is a beautiful bowl.
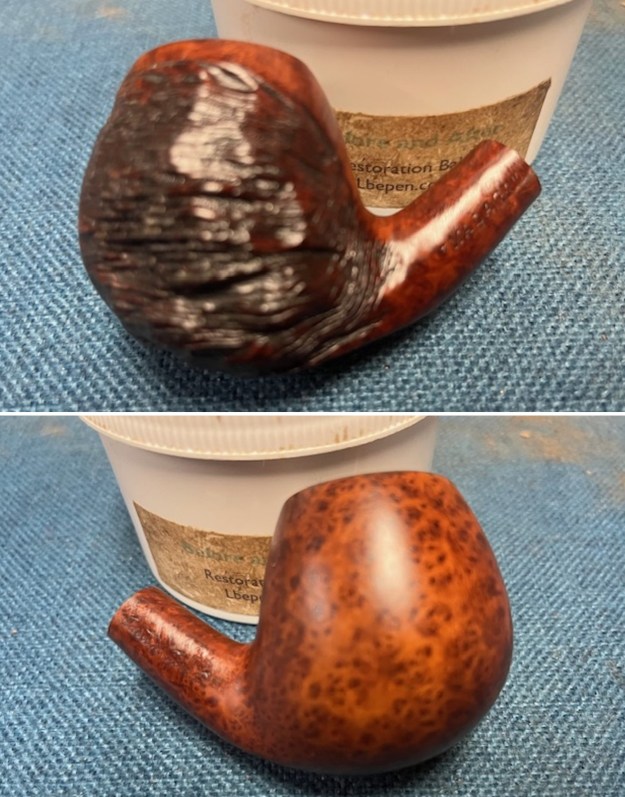
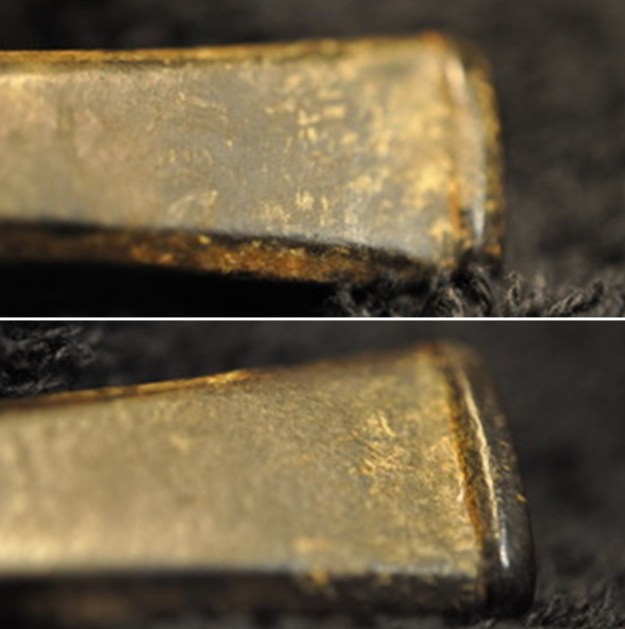
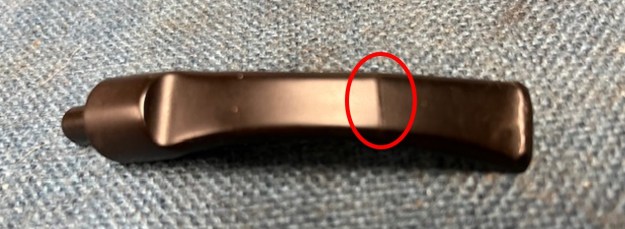
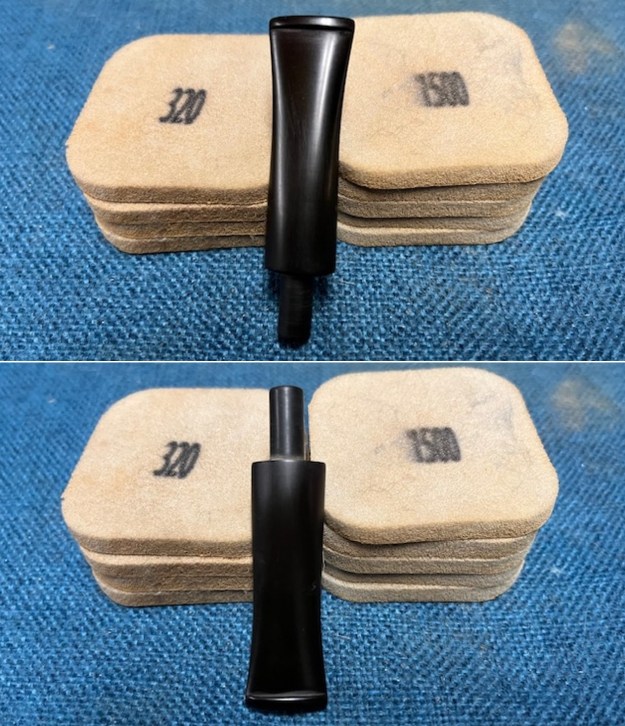
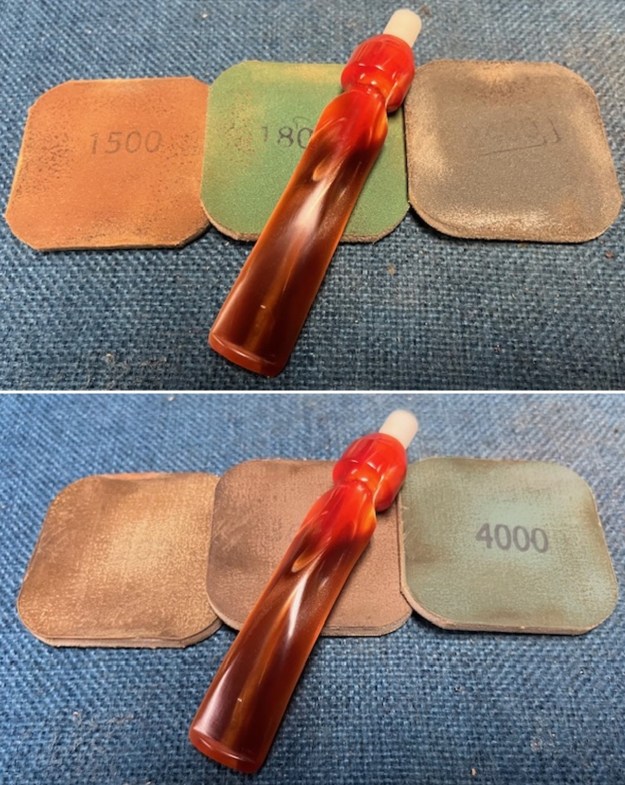
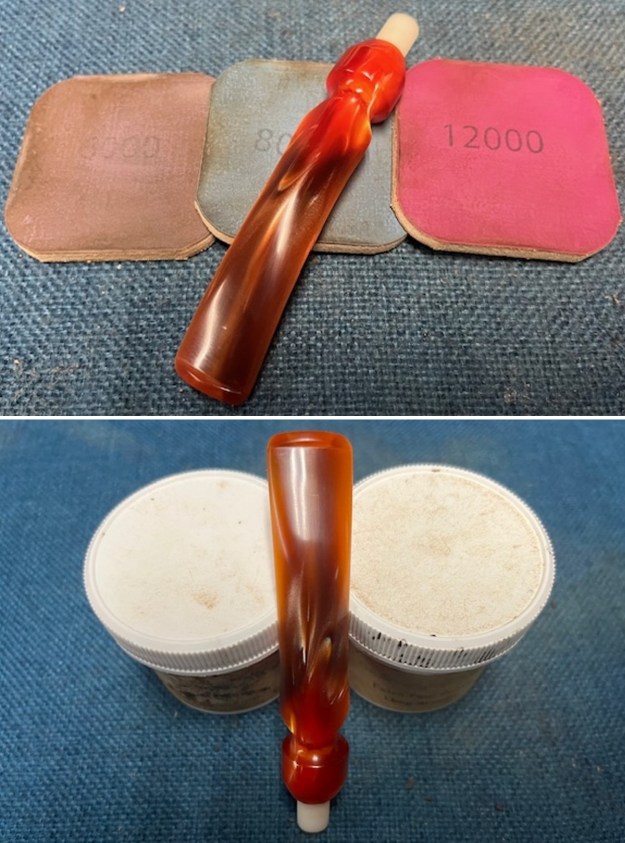
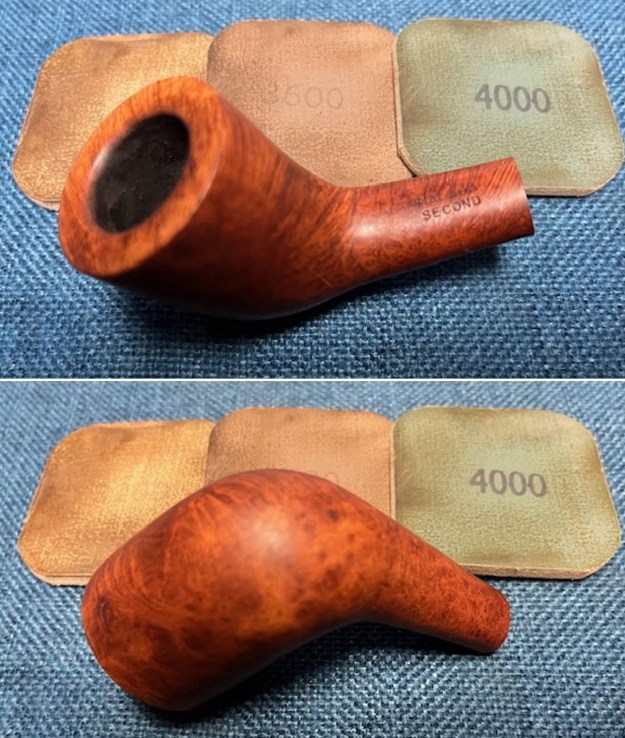
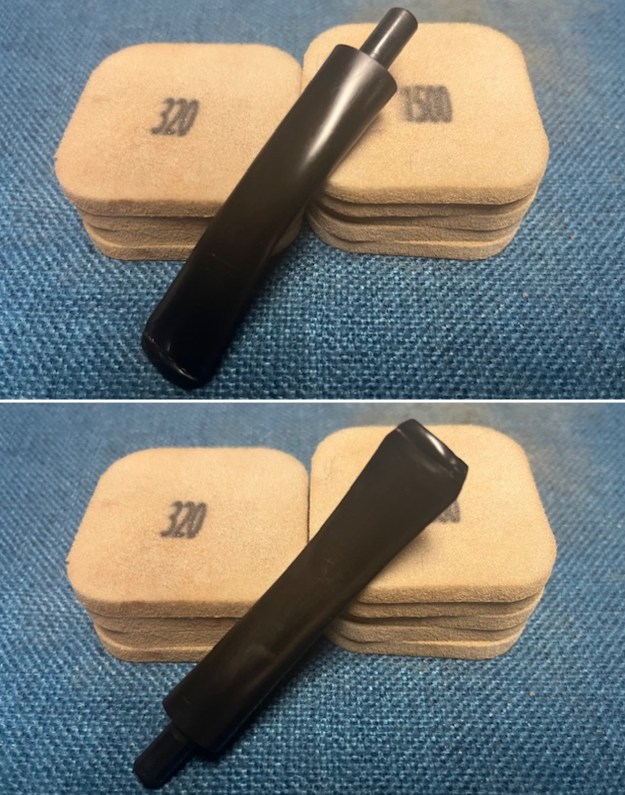
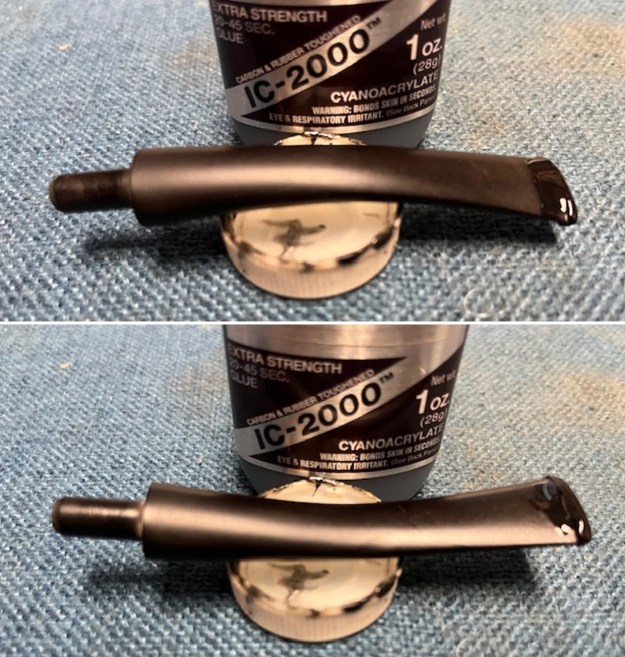
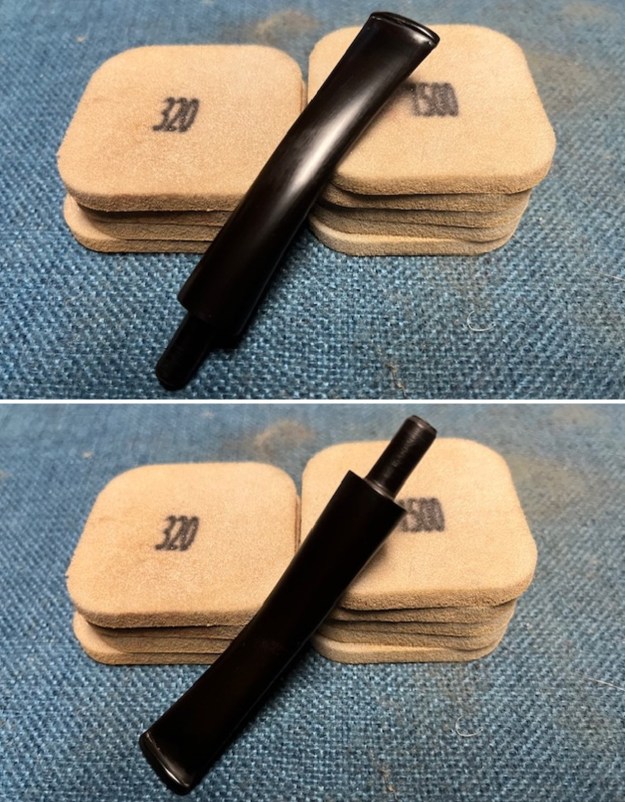
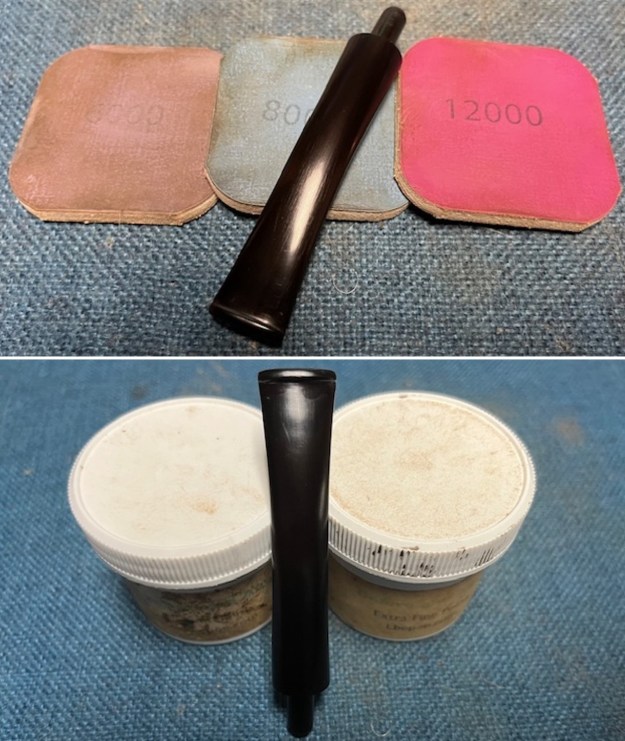
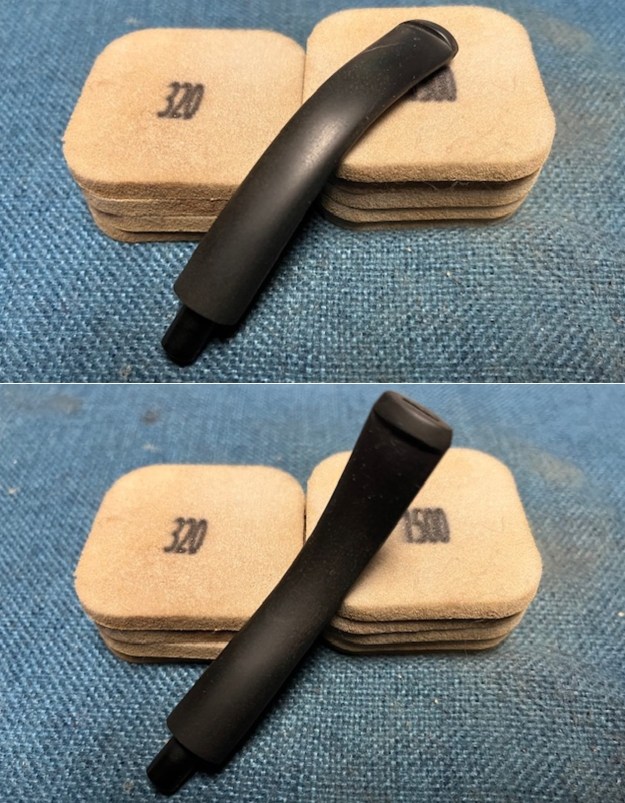
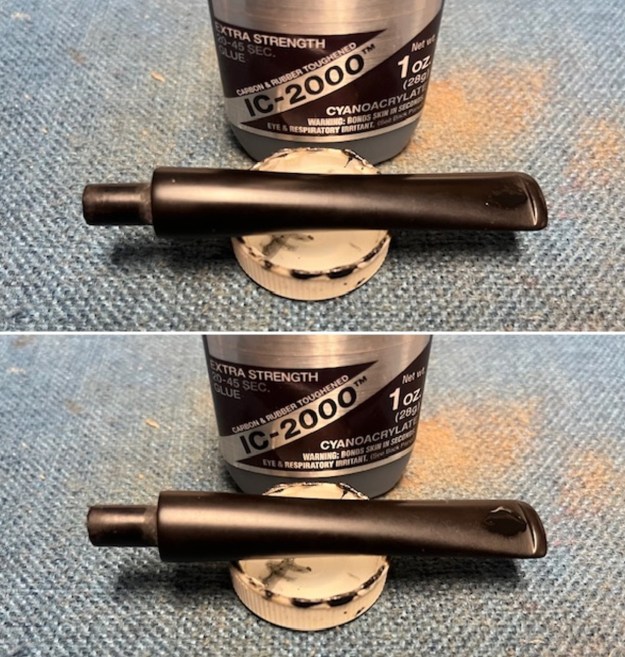
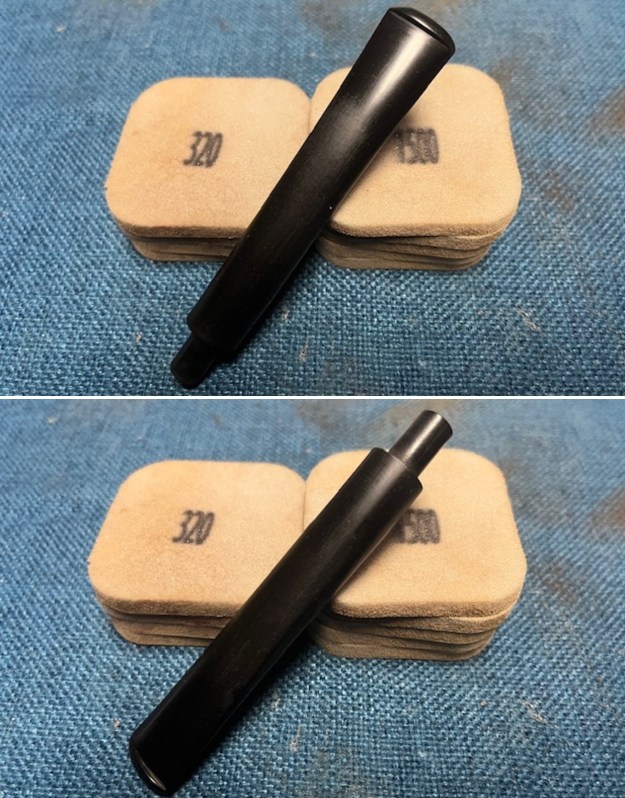
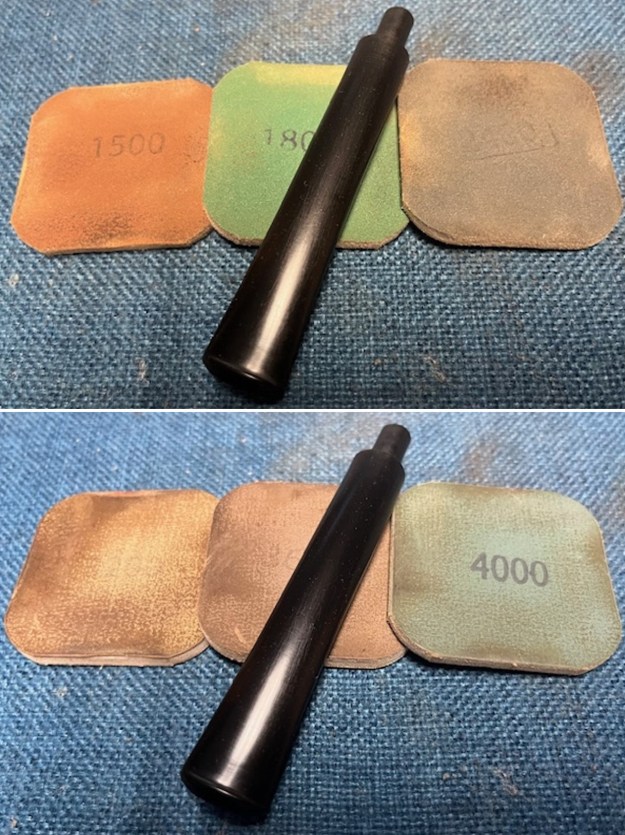
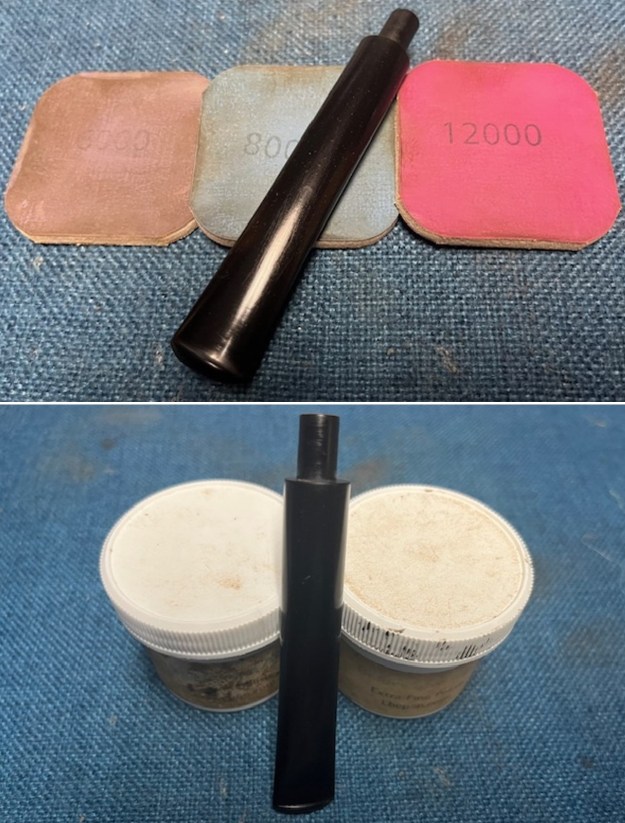
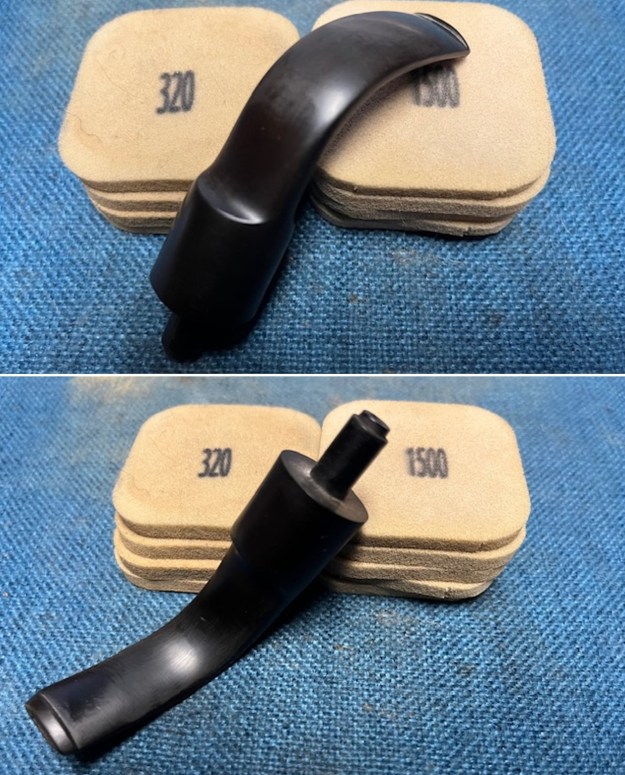
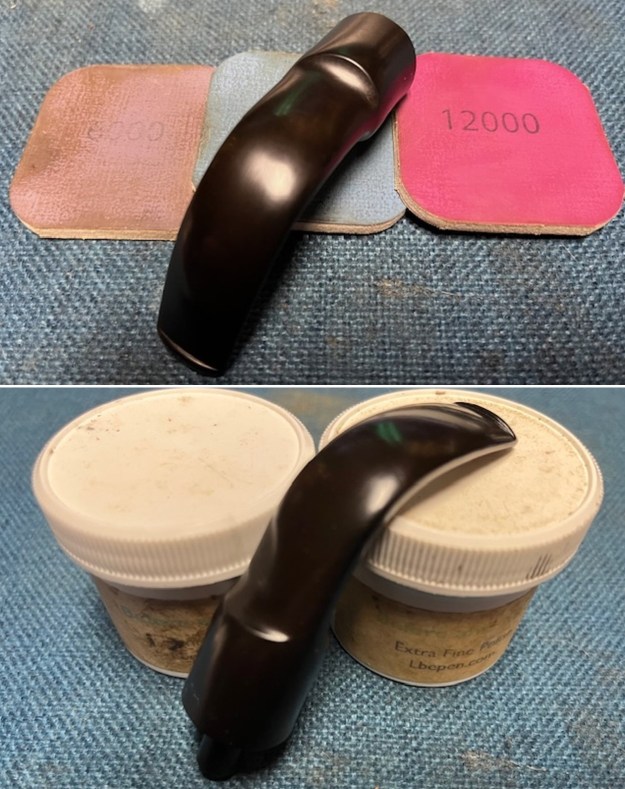
 I sanded the stem with the 2 inch square 320-3500 grit sanding pads. I wiped down the stem after each sanding pad. I was able to remove the tooth marks and chatter on both sides with the pads. The stem looked very good.
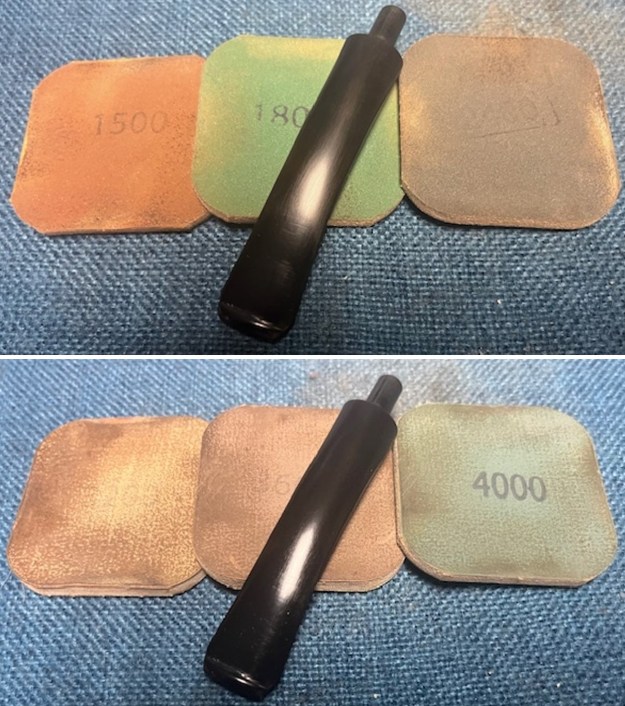
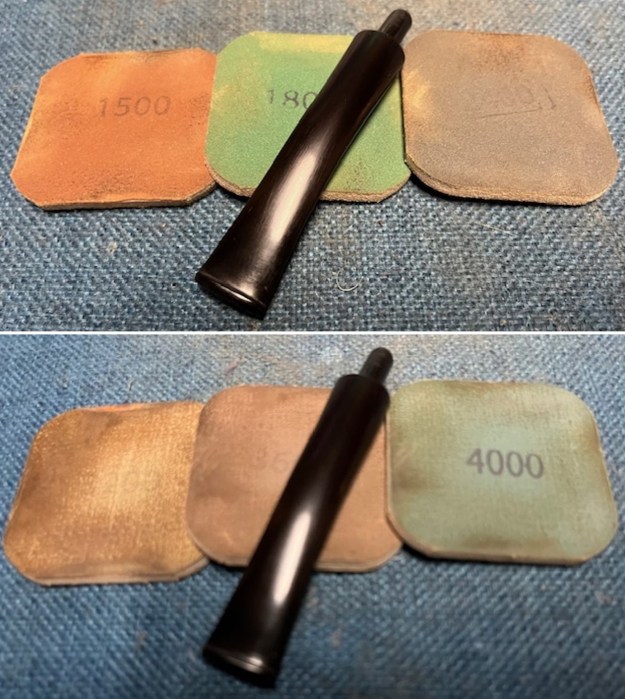
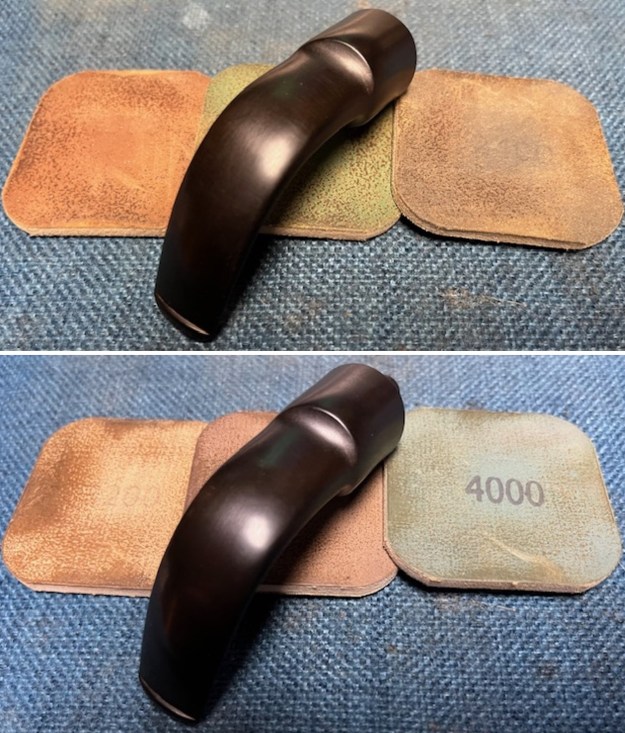
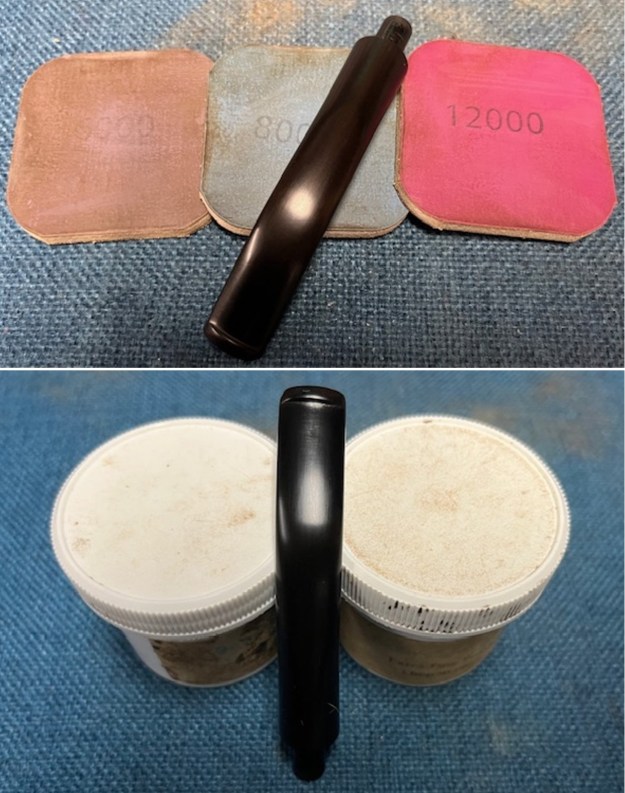
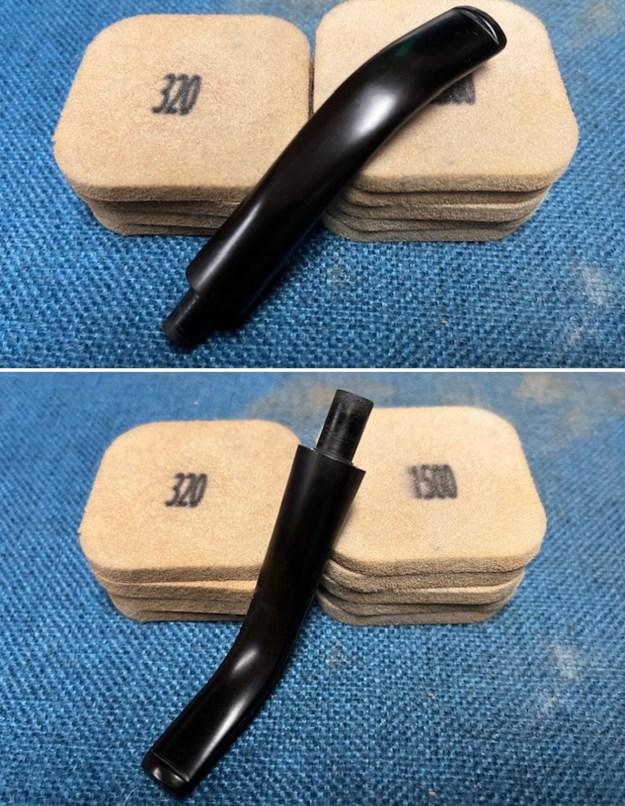 I polished the stem with micromesh sanding pads – dry sanding with 1500-12000 grit pads. I wiped the stem down after each sanding pad with Obsidian Oil. I did a final hand polish of the stem with Before & After Pipe Stem Polish – both Fine and Extra Fine. I gave it a coat of Obsidian Pipe Stem Oil. It works to protect the stem from oxidizing. I set it aside to dry.
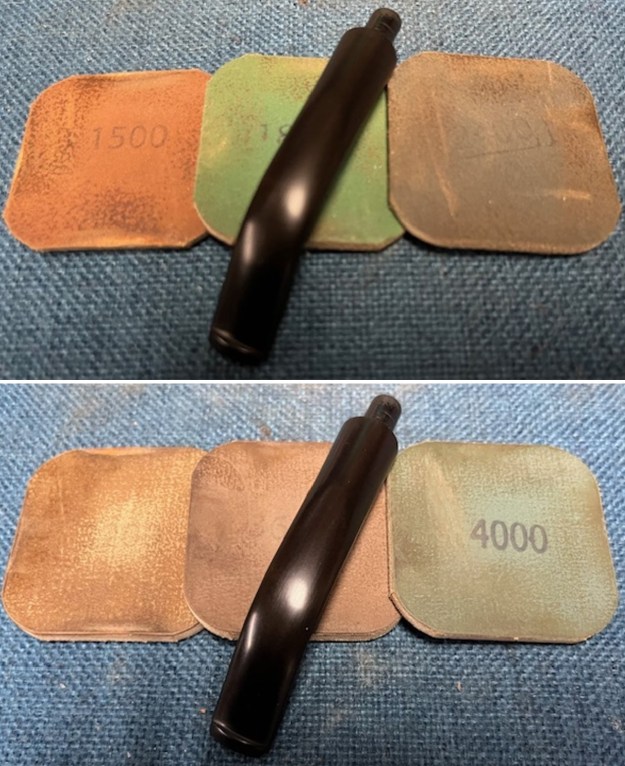
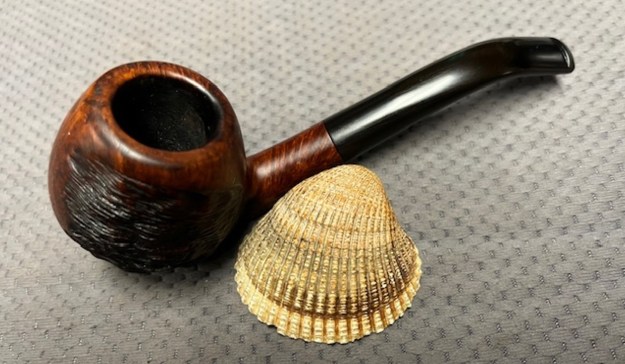
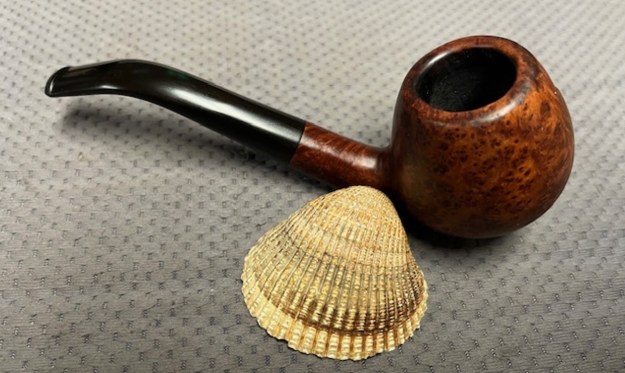
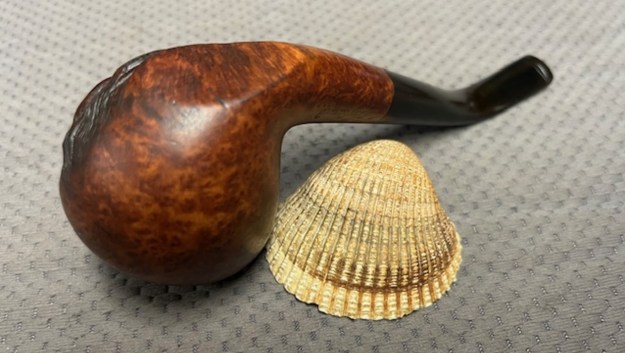
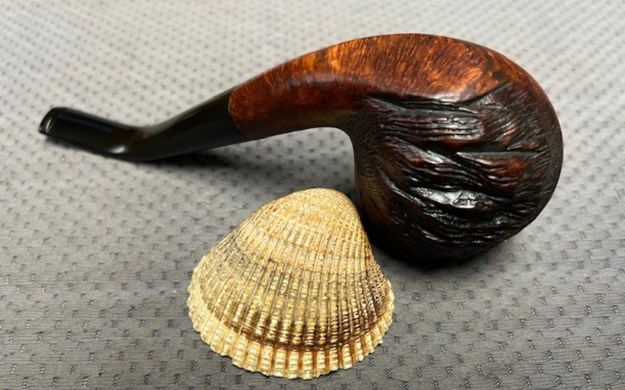
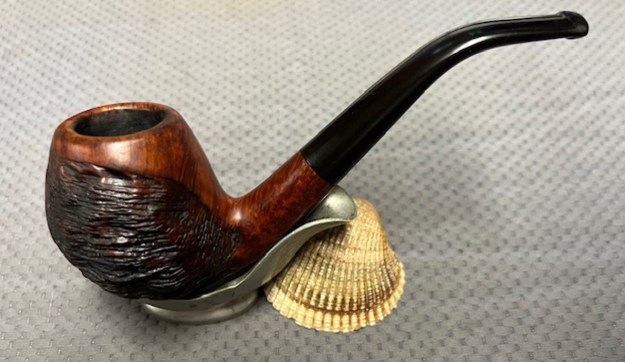
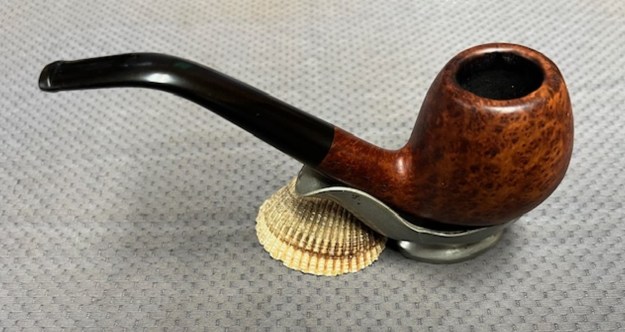
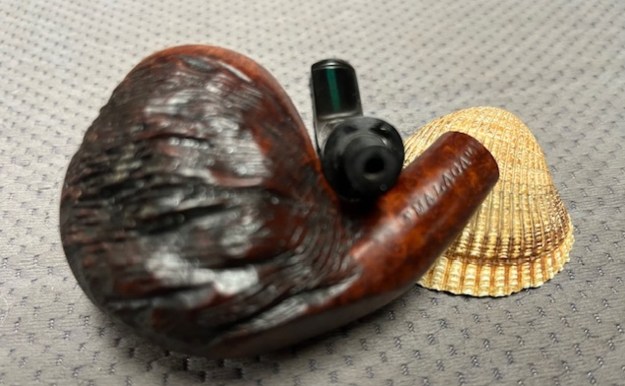
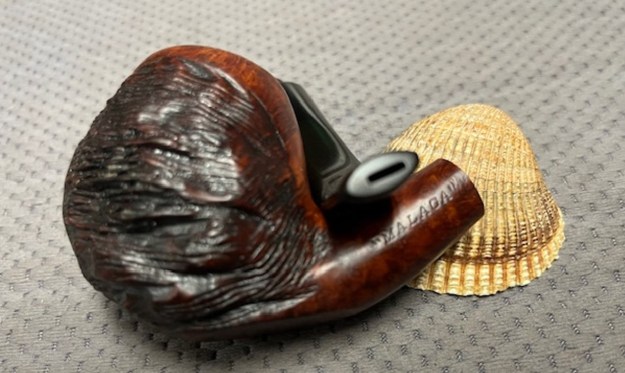
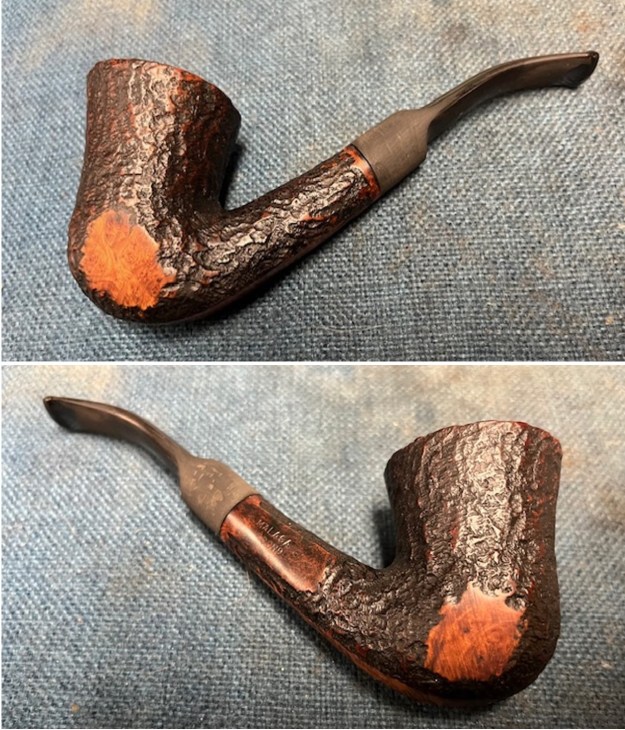
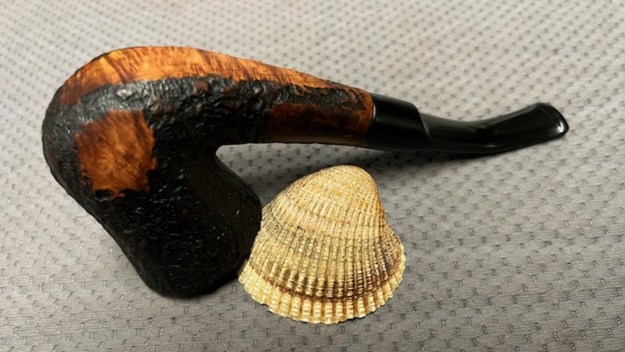
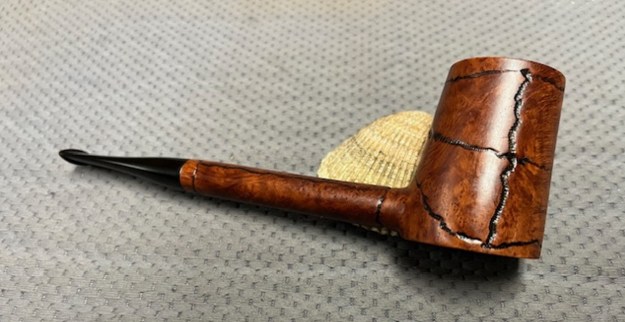
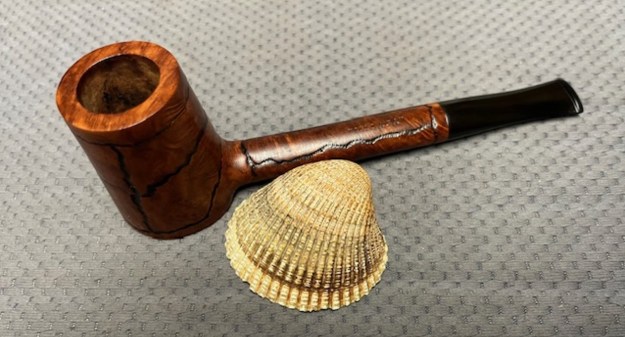
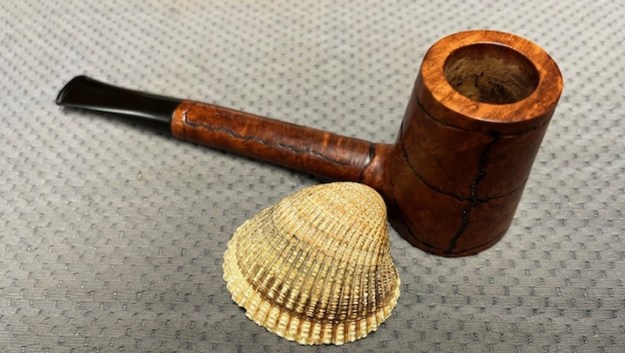
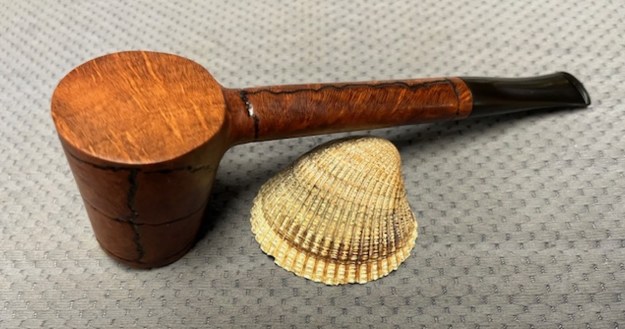
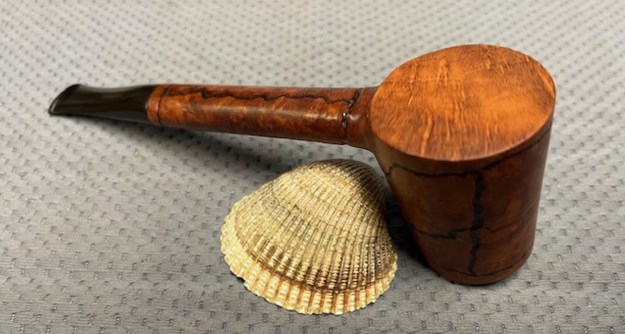
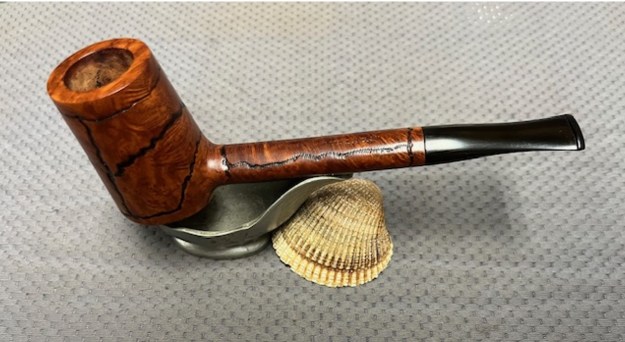
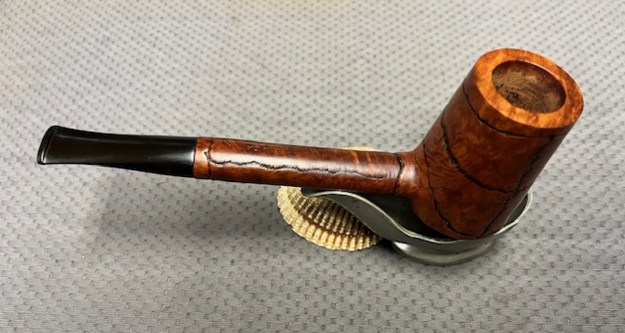
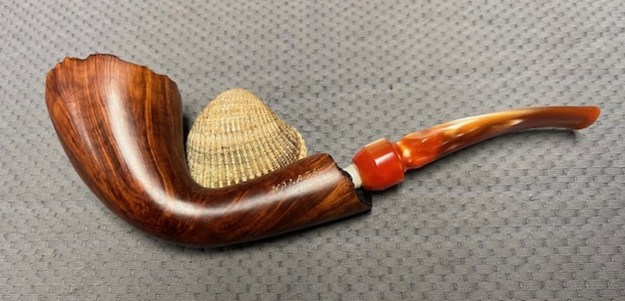
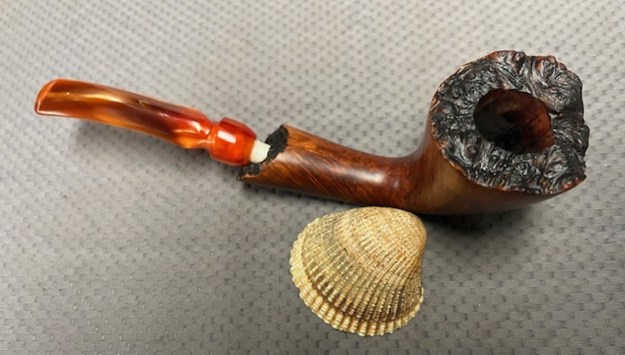
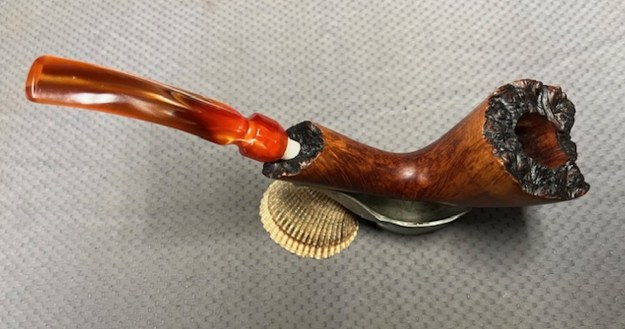
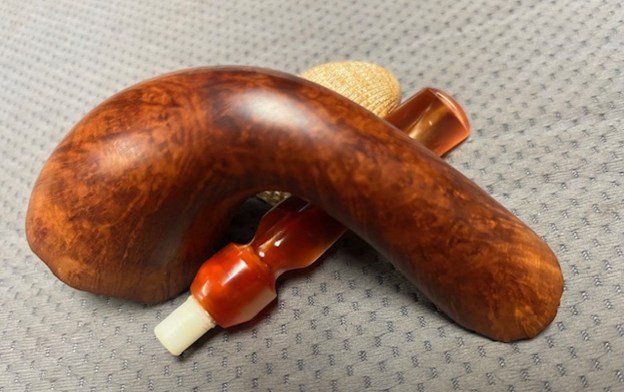
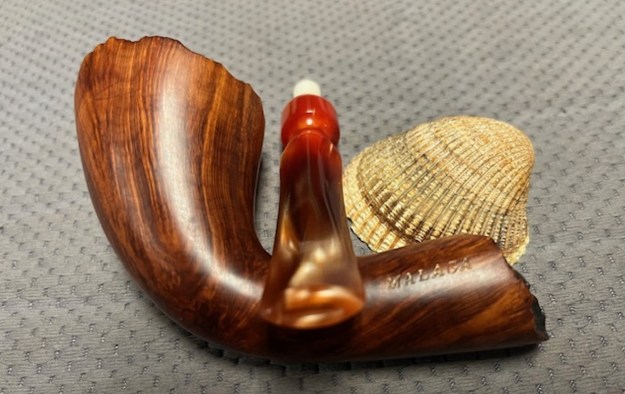
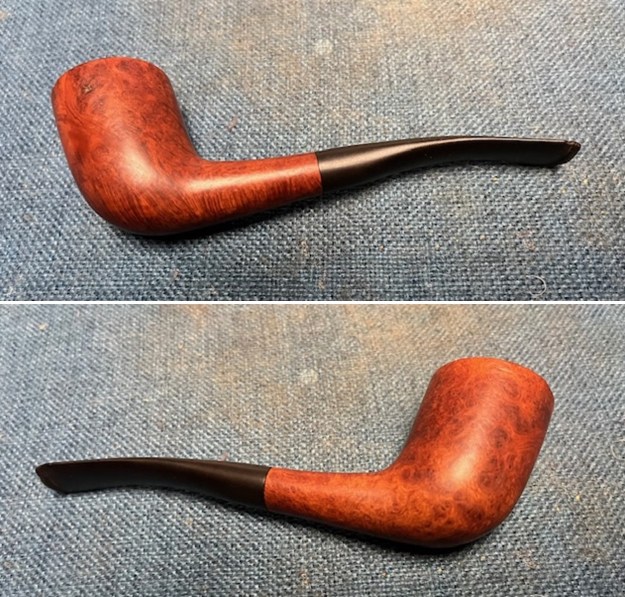
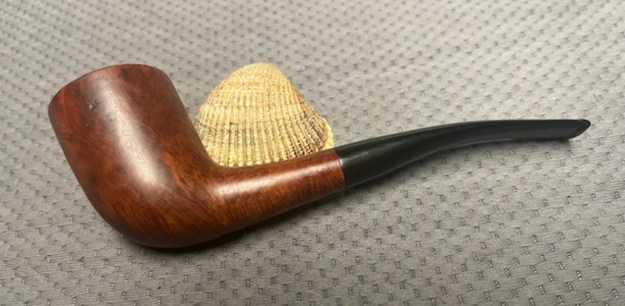
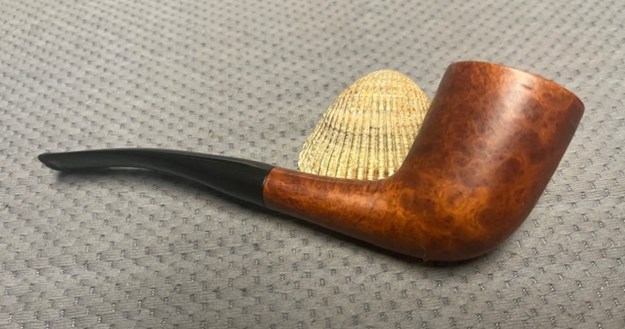
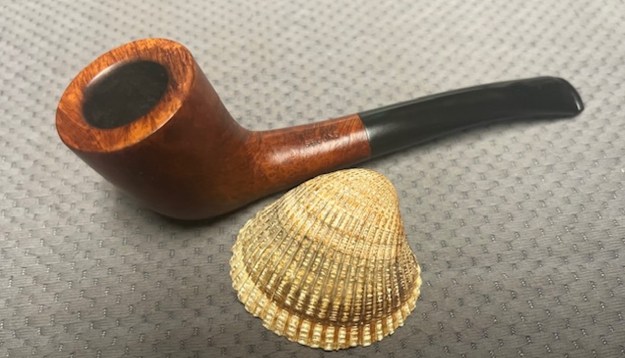
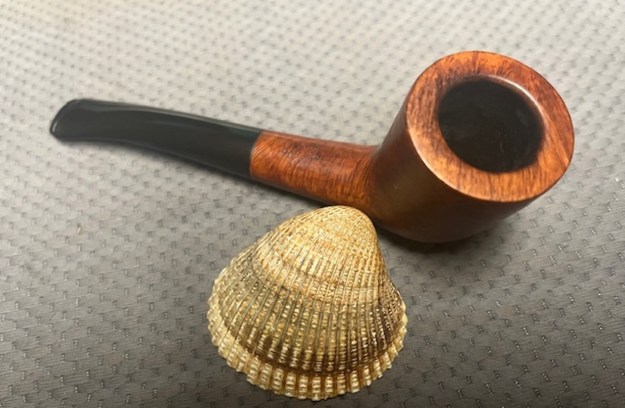
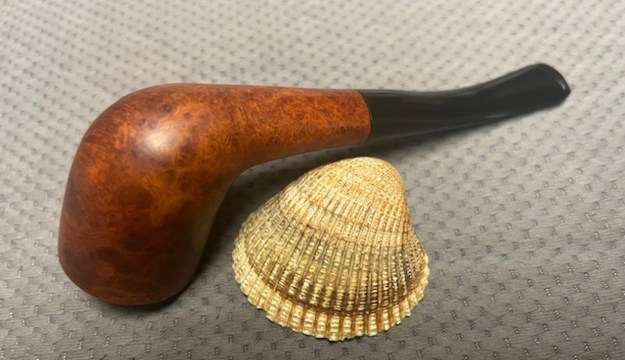
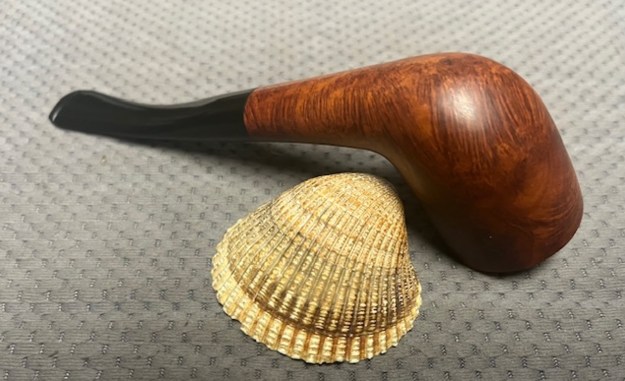
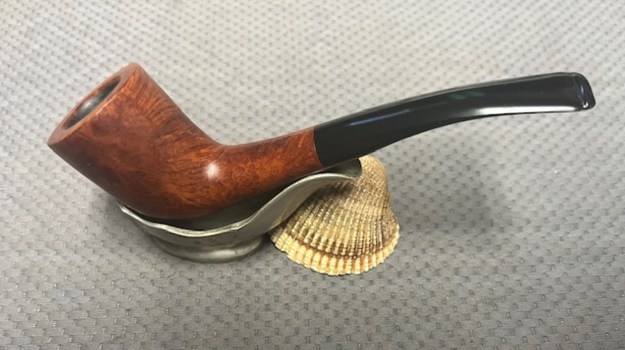
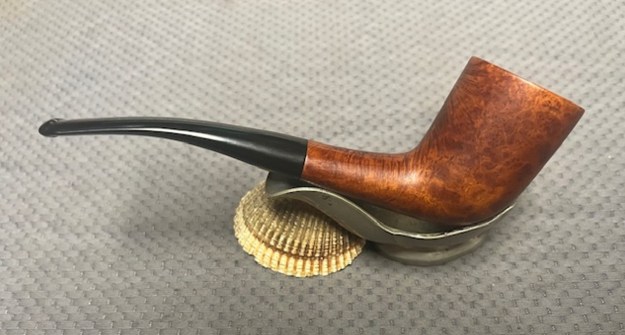
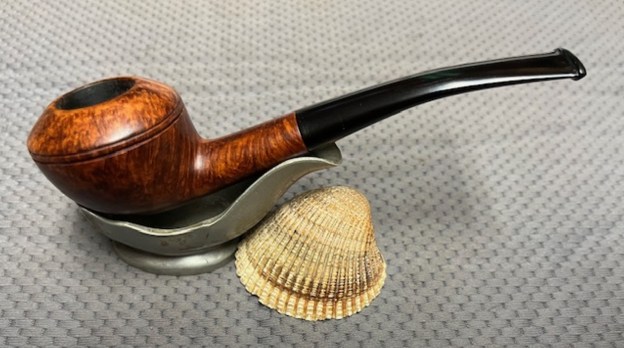
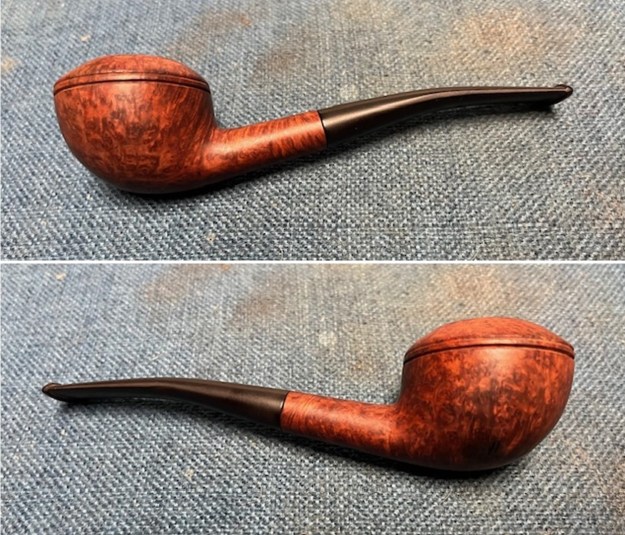
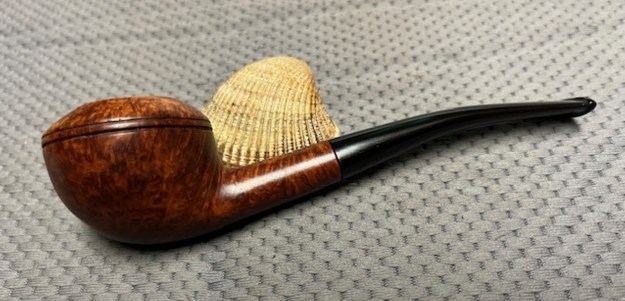
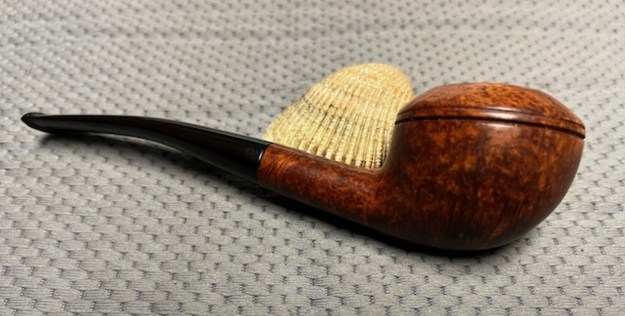
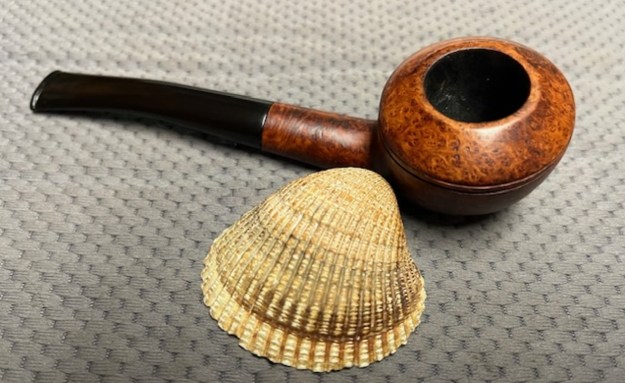
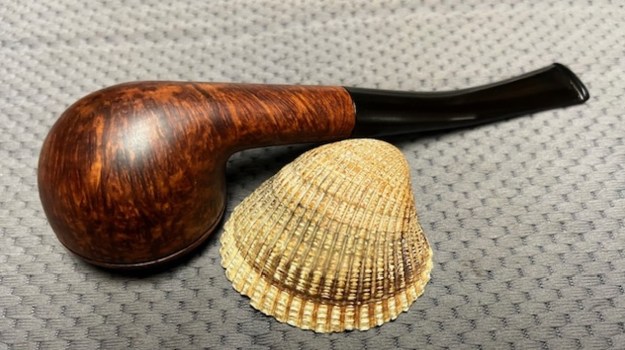
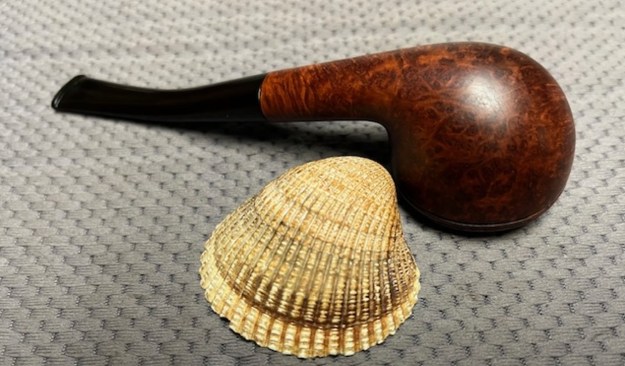
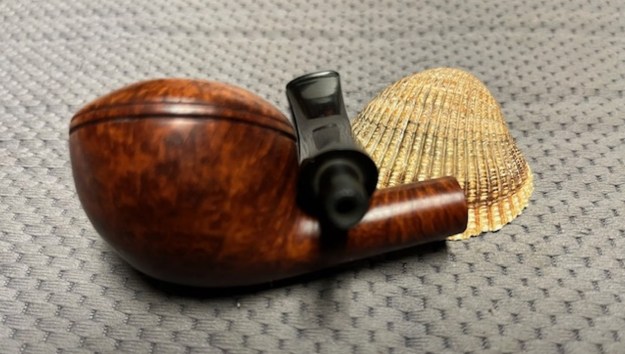
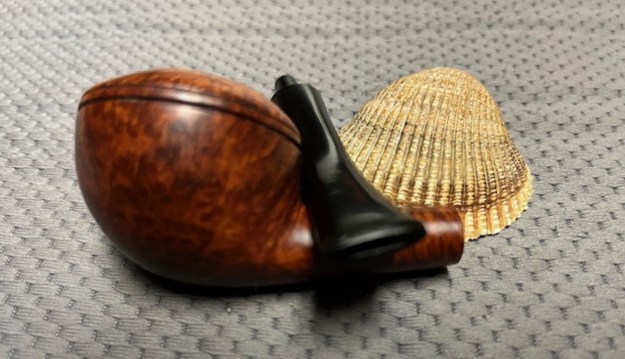
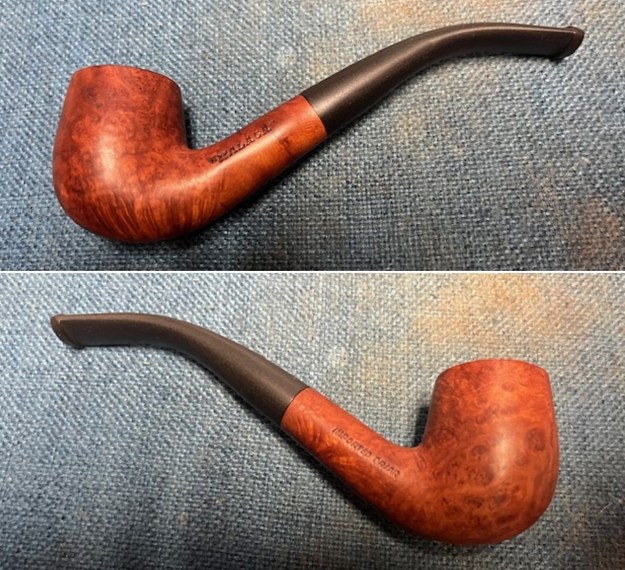
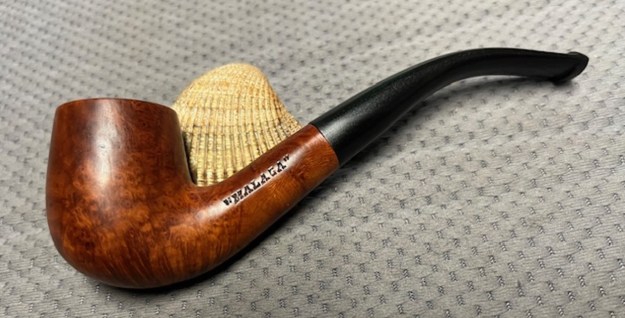
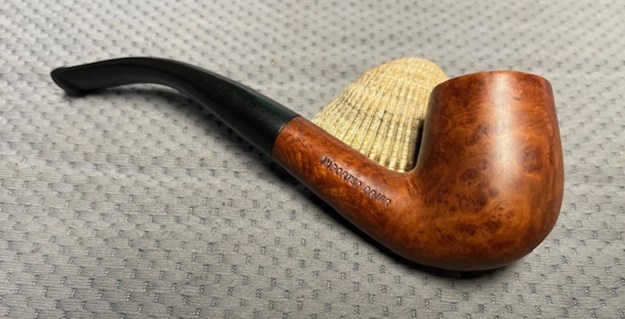
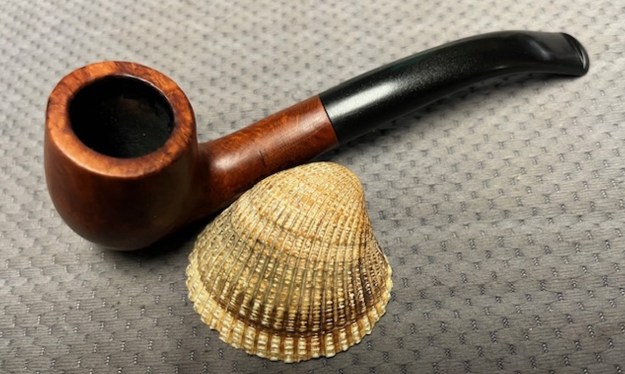
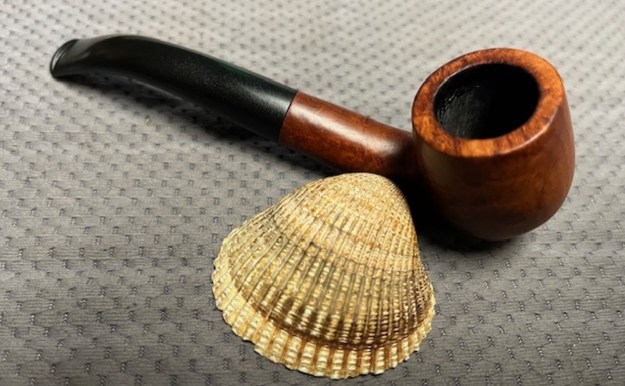
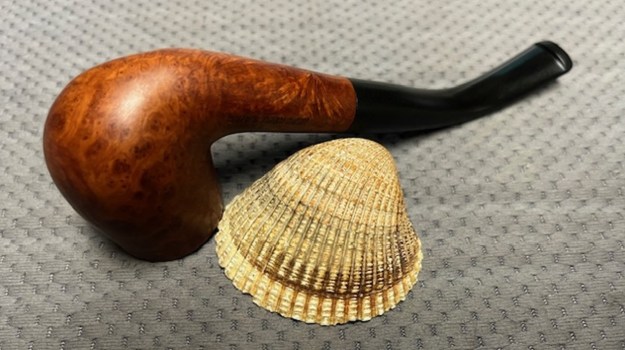
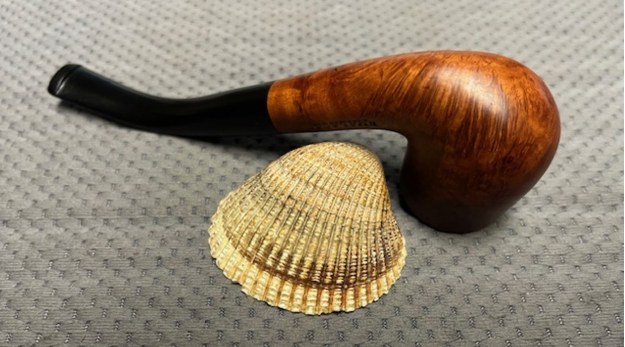
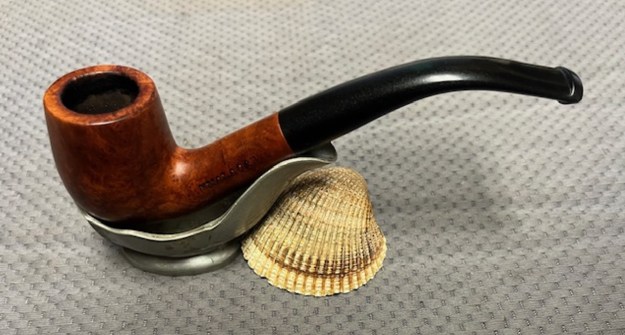
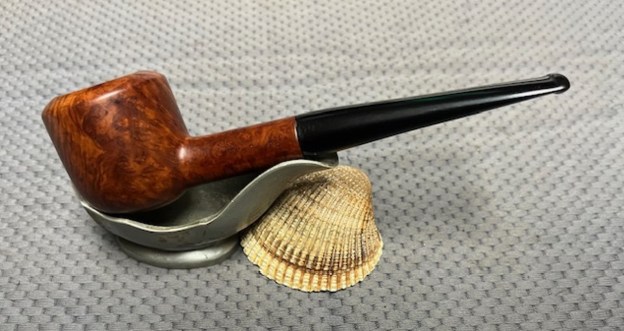
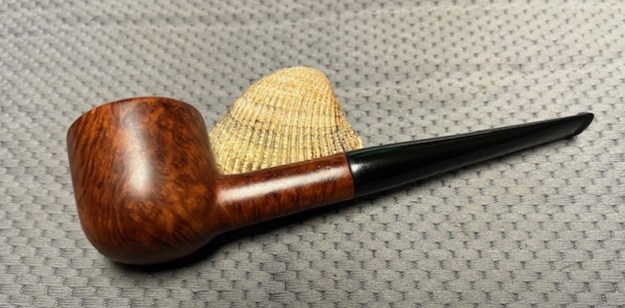
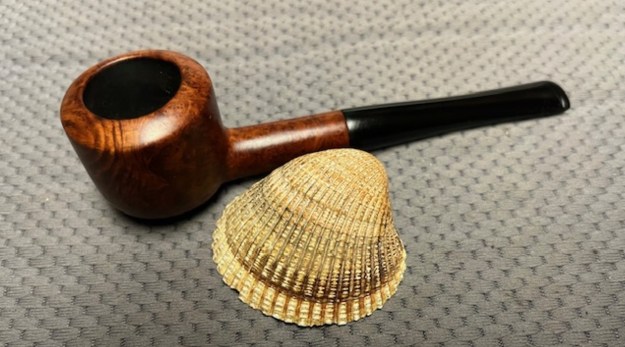
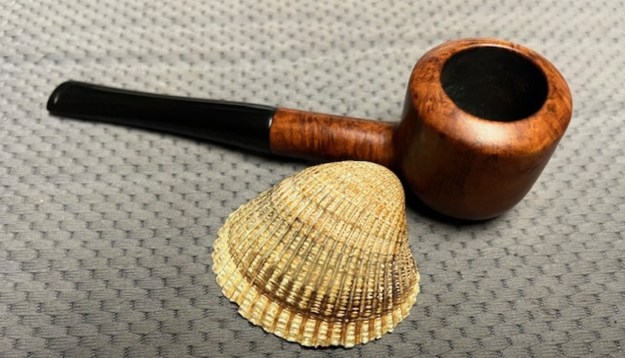
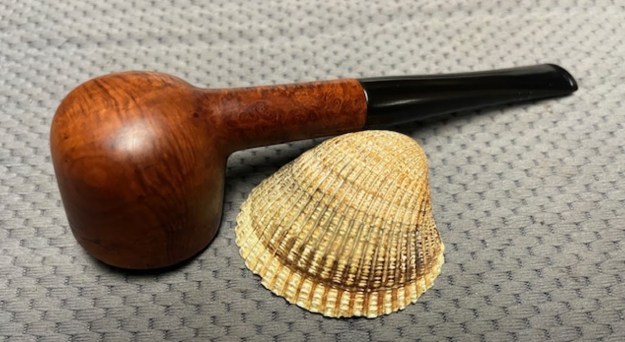
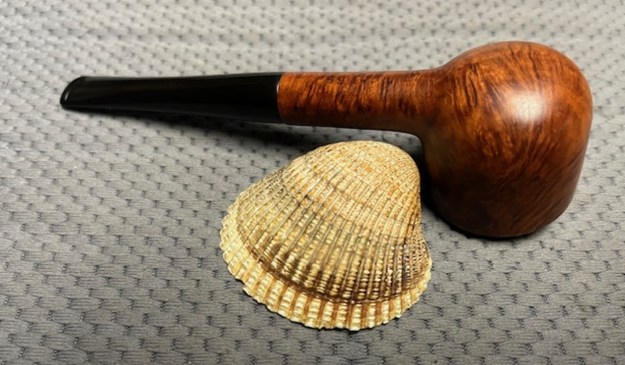
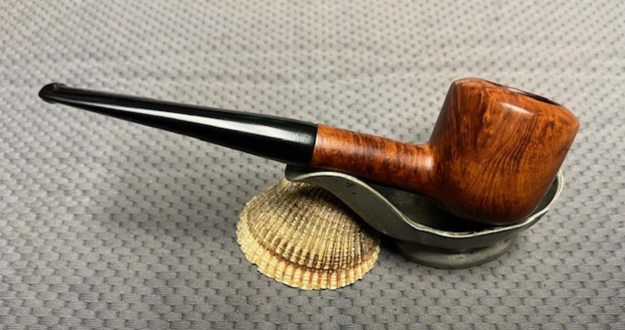
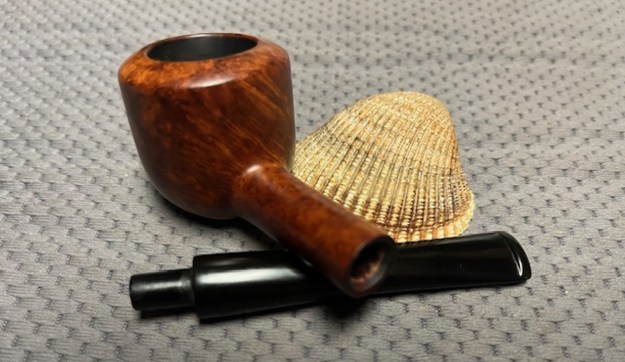
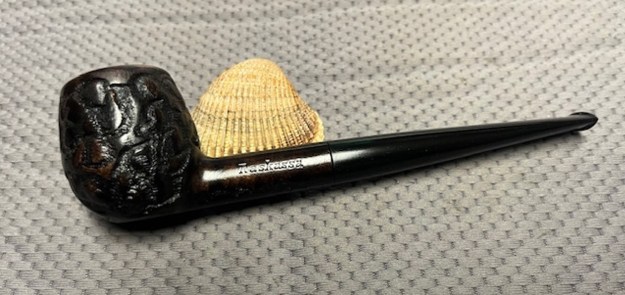
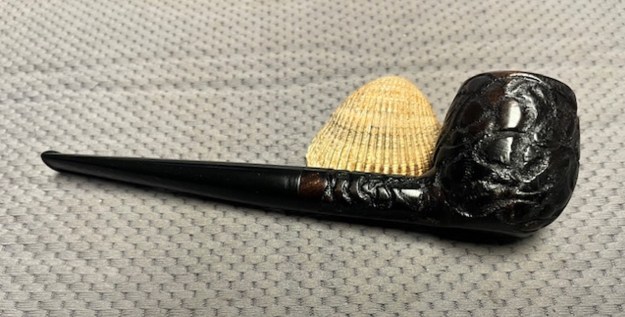
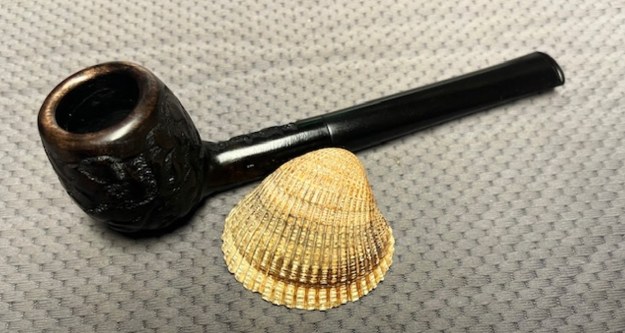
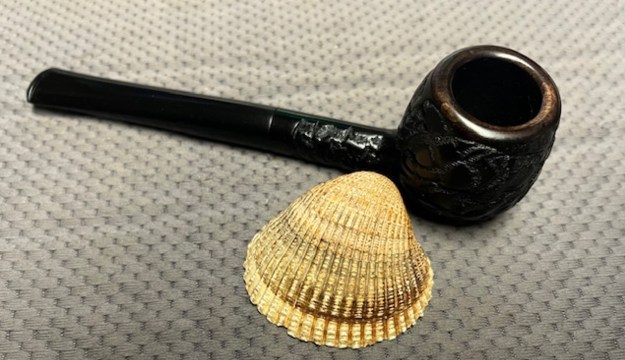
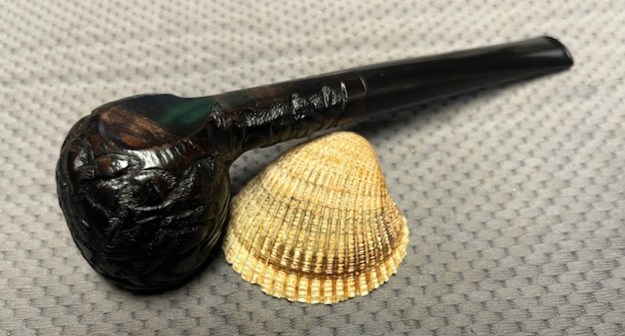
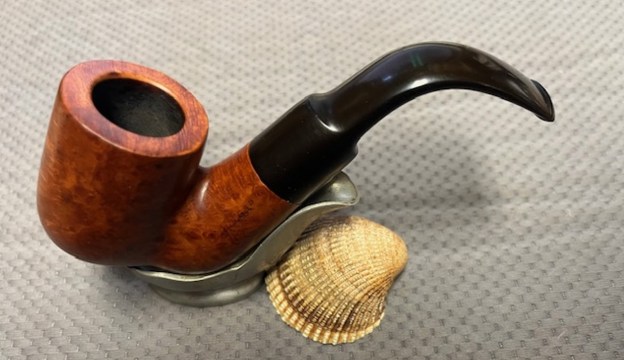
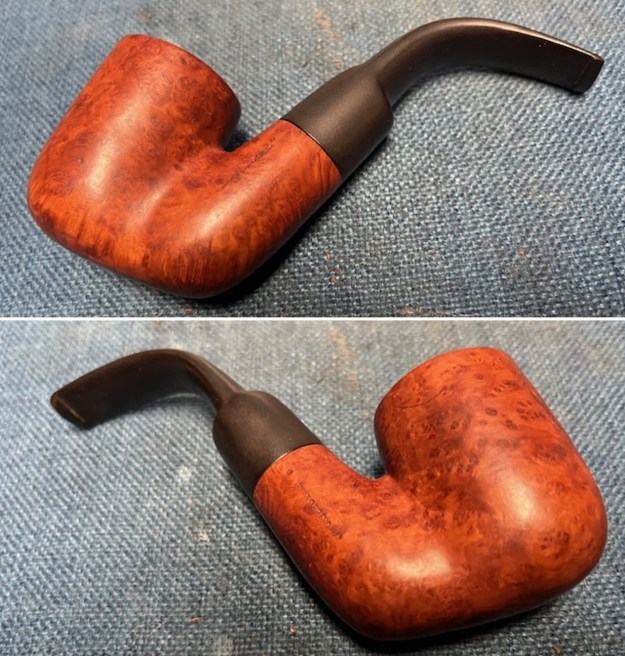
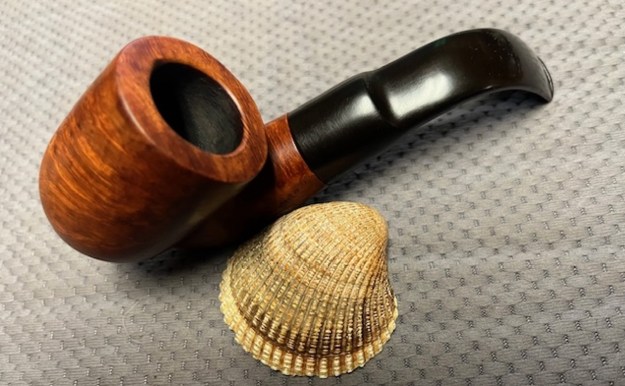
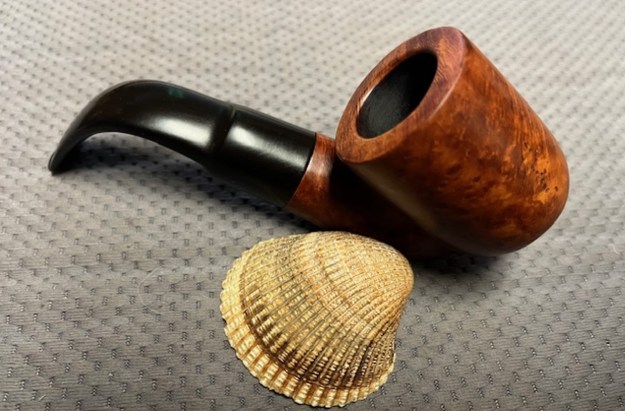
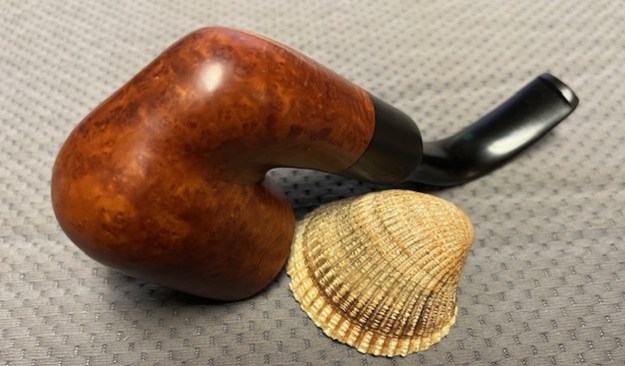
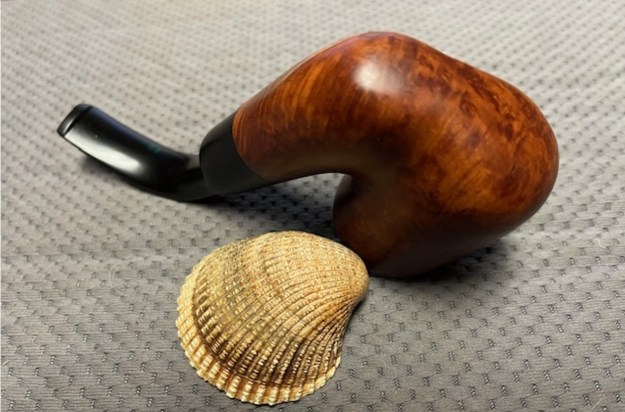
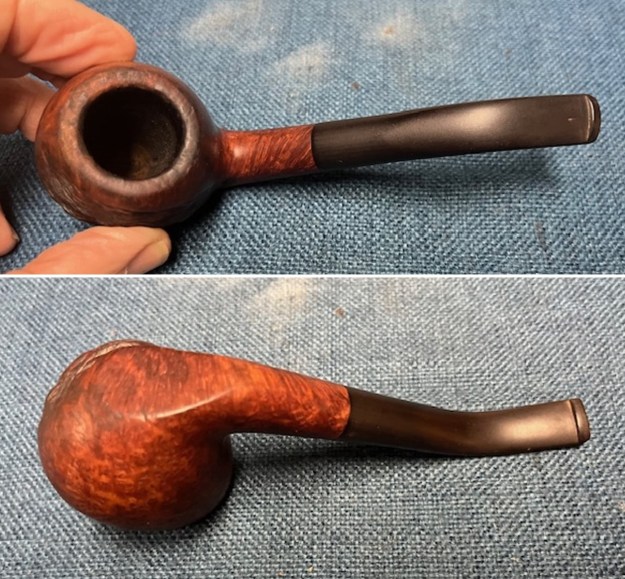
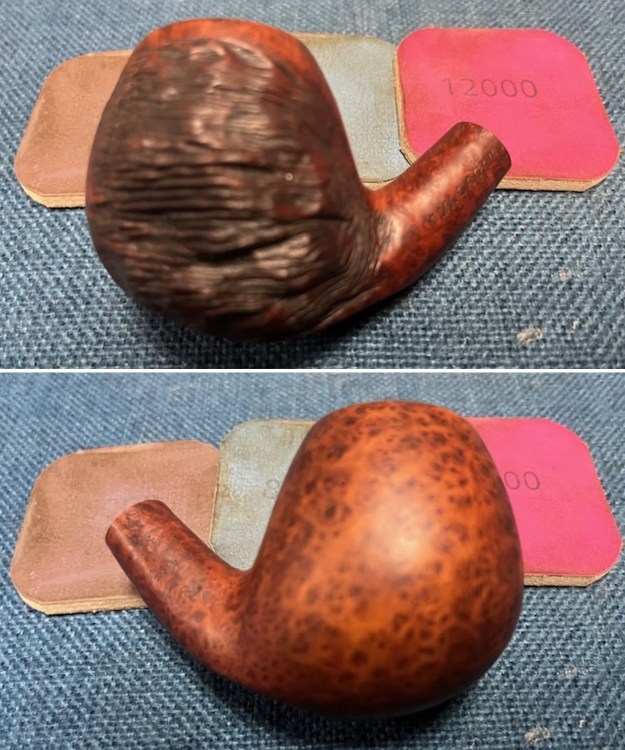
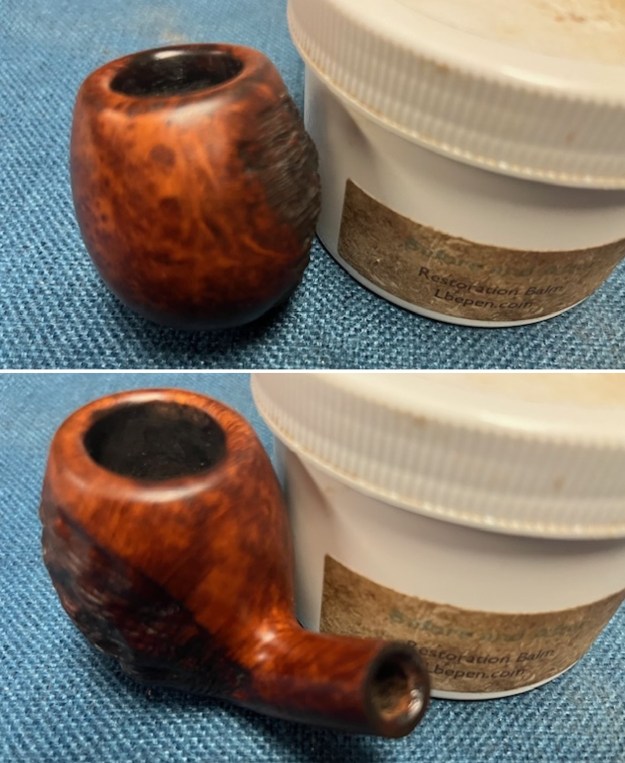
 I put the stem back on the reshaped bowl of this “MALAGA” Custom Carved Bent Brandy Sitter and took it to the buffer. I buffed the bowl and stem with Blue Diamond to polish the briar and the vulcanite. Blue Diamond does a great job on the smaller scratches that remain in both. I gave the bowl and the stem several coats of carnauba wax and buffed the pipe with a clean buffing pad to raise the shine. The grain popped and the depth of the rope rustication was stunning. I hand buffed it with a microfiber cloth to deepen the shine. The finished pipe is shown in the photos below. This is beautiful smooth finished “MALAGA” Custom Carved Bent Brandy Sitter and rusticated patch combine with the vulcanite taper stem to give the pipe a great look. The dimensions of the pipe are Length: 6 inches, Height: 2 inches, Outside diameter of the bowl: 1 ¼ inches, Chamber diameter: ¾ of an inch. The weight of the pipe is 2.15 ounces/60 grams. This is another pipe that I will be putting on the rebornpipes online store in the American Pipe Makers and Pipemaking Companies Section shortly, if you are interested in adding it to your collection. Thanks for walking through the restoration with me on this beauty!
As always, I encourage your questions and comments as you read the blog. Thanks to each of you who are reading this blog. Remember we are not pipe owners; we are pipe men and women who hold our pipes in trust until they pass on into the trust of those who follow us.