Tag Archives: Kenneth Lieblich ariticle

Having Some Fun with a Hilson Bolero Bulldog


by Kenneth Lieblich

Greetings, one and all! It’s been a little while since my last blog post, but, to my chagrin, life intervened in some challenging ways. Now I’m back with a nifty pipe that put a smile on my face and I’m sure it’ll do the same for you. 
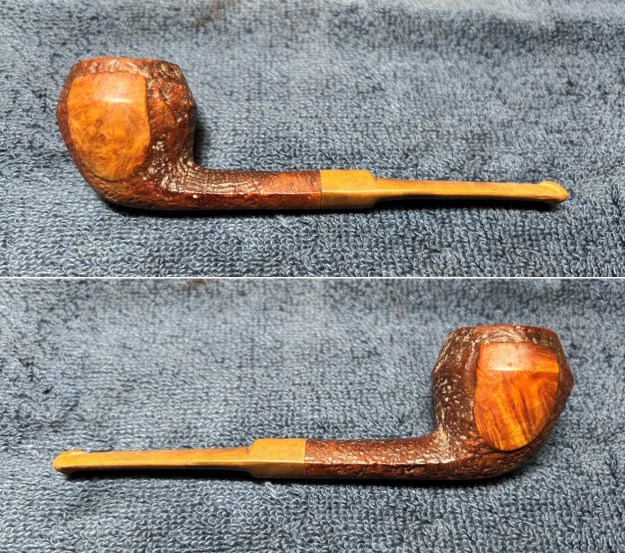
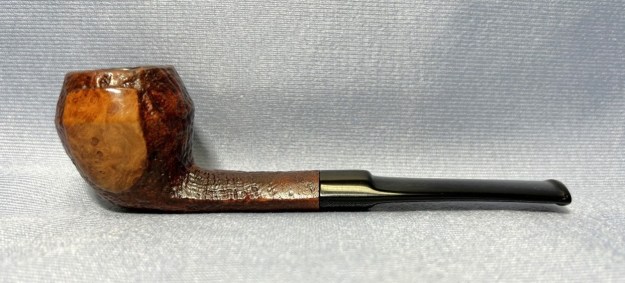
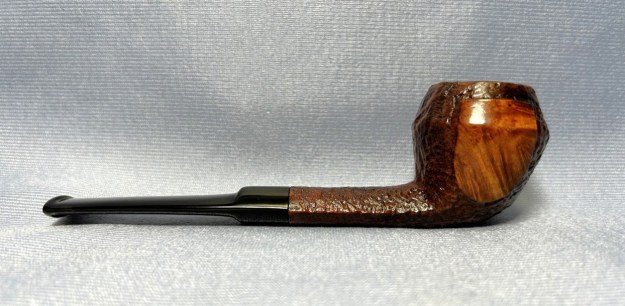
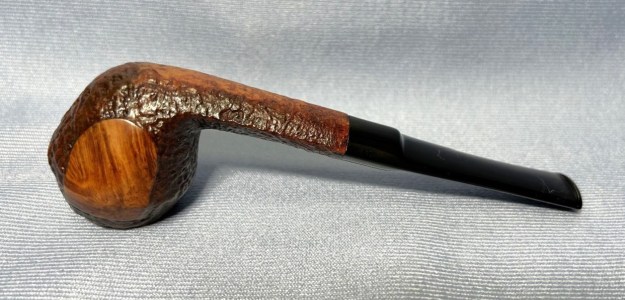
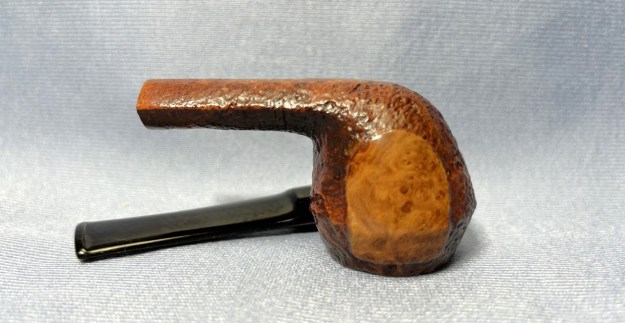
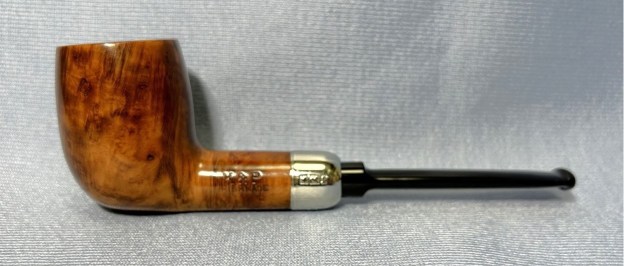
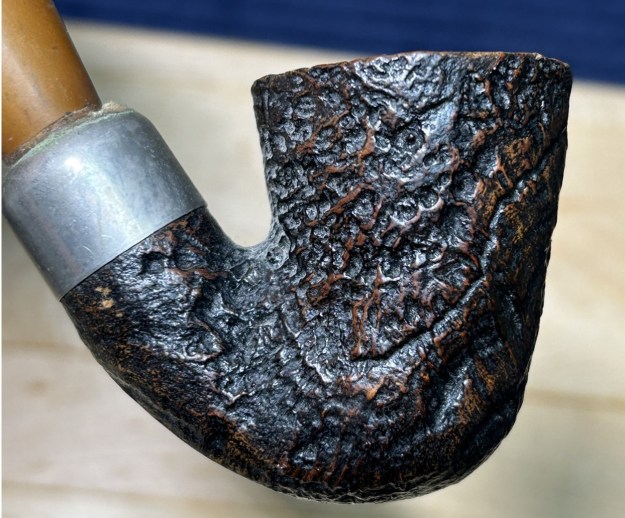
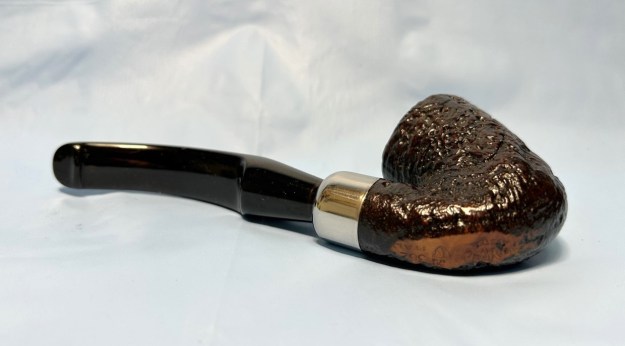
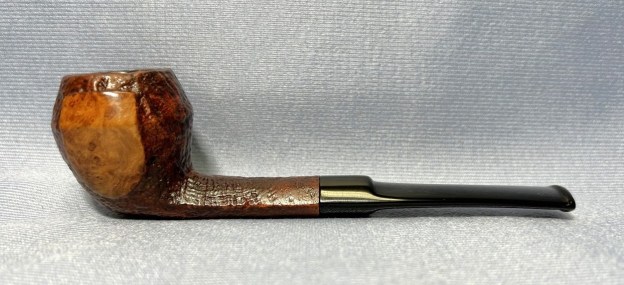
It’s a charming, whimsical Hilson Bolero 40, partially sandblasted straight bulldog. Normally, when I think of Hilson, my mind meanders to resin (or ‘pipenite’, as they called it) stylings from the Fantasia line – but not today! This is a pure briar pipe, with a lovely vulcanite stem. I acquired it in a lot from FB Marketplace, but I don’t know the pipe’s individual history. It certainly was a favourite smoker for the fellow who previously had it. It showed all the hallmarks of a much-loved pipe.

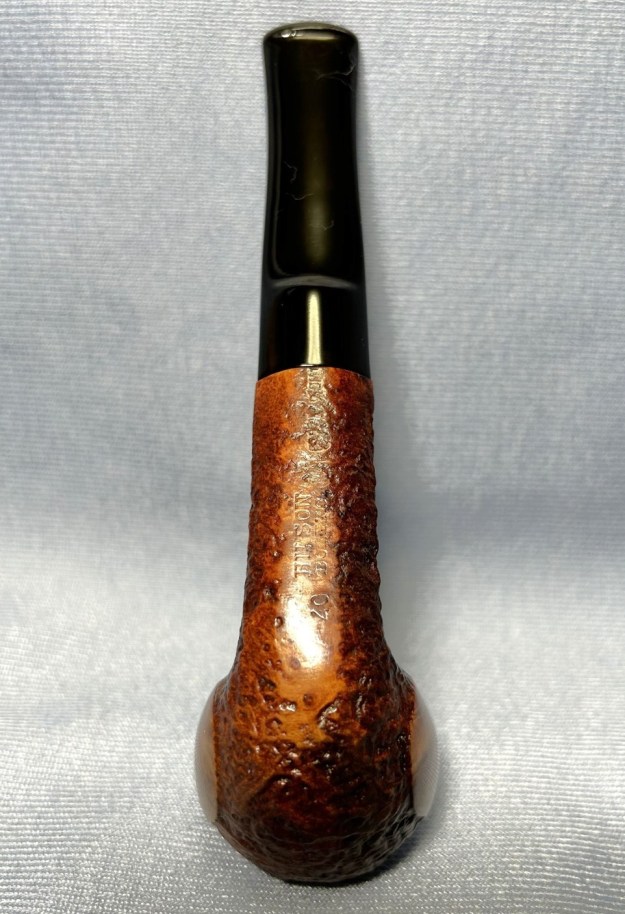
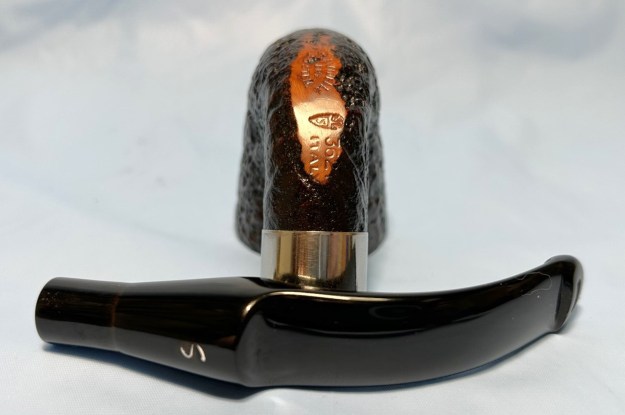
What do the markings say? The underside of the shank shows, first, the shape number, 40, and to the right, Hilson [over] Bolero. Again, to the right of that are the words Made in Belgium. There are no other markings to mention.
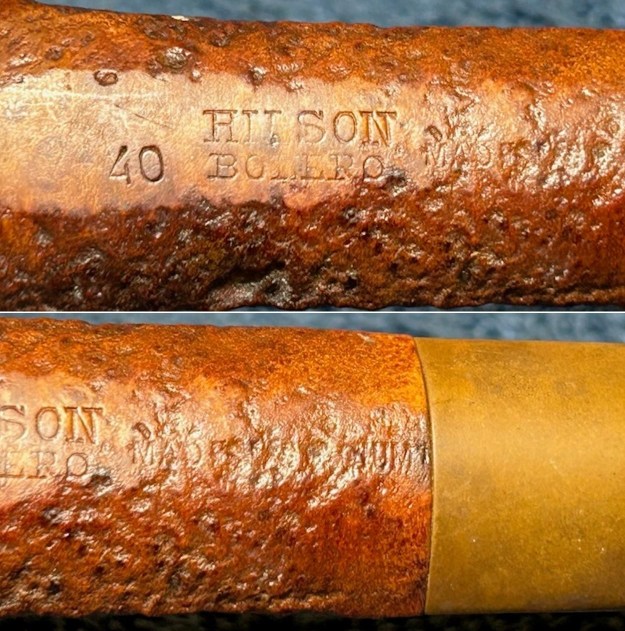
Let’s check Pipedia to see what they have to say about the Hilson brand:

Jean-Claude Hillen (other sources: Jean-Paul) founded a trading company in the City of Bree in 1846. He soon turned his main interest on pipes and other tobacco related goods. Particularly in the 1960’s and still throughout the 1970’s the brand Hilson of Broers Hillen B.V. (Hillen Bros. Co.) was quite successful in many European countries. They produced large numbers of machine-made pipes covering the whole range of shapes and finishes. The pipes were well respected for good quality and craftsmanship at very moderate prices. Rarely seen there are also nice freehands from this era stamped MASTRO and signed by A.M. Sanoul, who is otherwise completely unknown as a pipemaker. All the same, in 1980 Hillen faced major financial problems. At this time there was only a second manufacturer of briars pipes in the Benelux countries, the Elbert Gubbels & Zonen B.V. in the Netherlands. The Belgian competitor being in trouble, Gubbels used the favour of the hour and bought up the company. The reason is plausible: in some countries, particularly in Germany, Hilson held larger market shares than Gubbels’ mainstay brand Big Ben. The Hillen plant in Bree was closed down shortly after and ever since then Hilson pipes are manufactured in Roermond, NL.
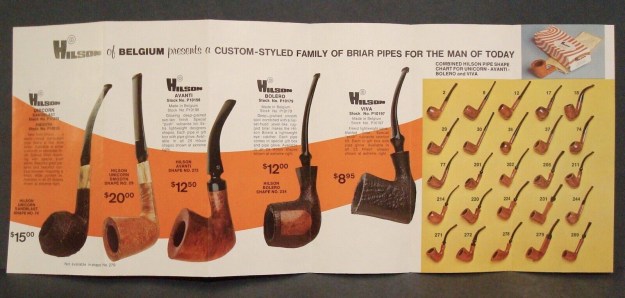
Likewise, there is a bit more to be found from our friends over at Pipephil:

In 1846 a German named Jean Knödgen started to produce clay pipe in Belgium. In the late 19th century Jean Hillen who married into the Knödgen family took over the company and changed the firm in order to manufacture briar pipe. Jean Hillen had 2 sons: Jos Hillen was responsible for sales and Albert Hillen was responsible for the production. After WWII Albert founded the HILSON brand (Hillen and Son) and exported his pipes all over the world. In 1980 after having gone bankrupt, the Belgian brand from Bree (Limburg) was taken over by the Royal Dutch Pipe Factory.It’s also worth noting that I’ve seen several posts over at the PipeMagazine forums that state that the older (and better) Hilsons are marked “Made in Belgium”, as this one is.

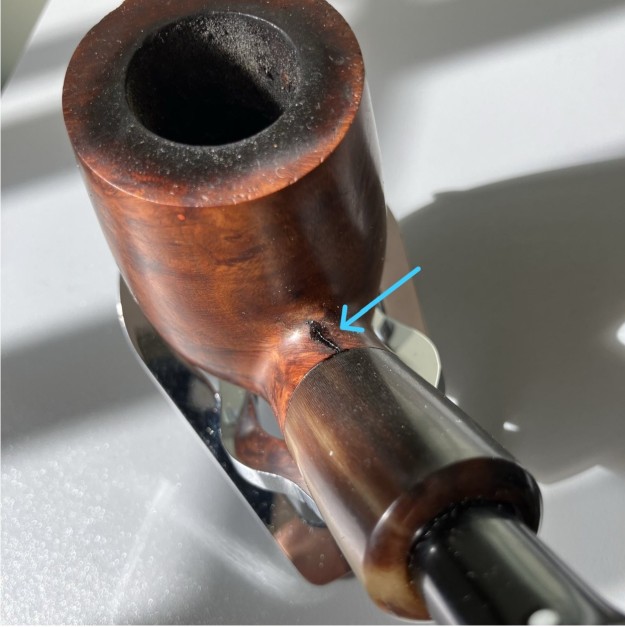
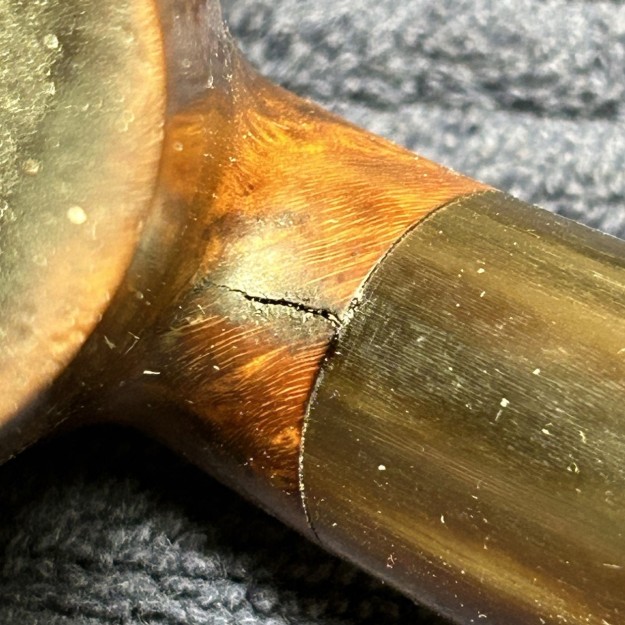
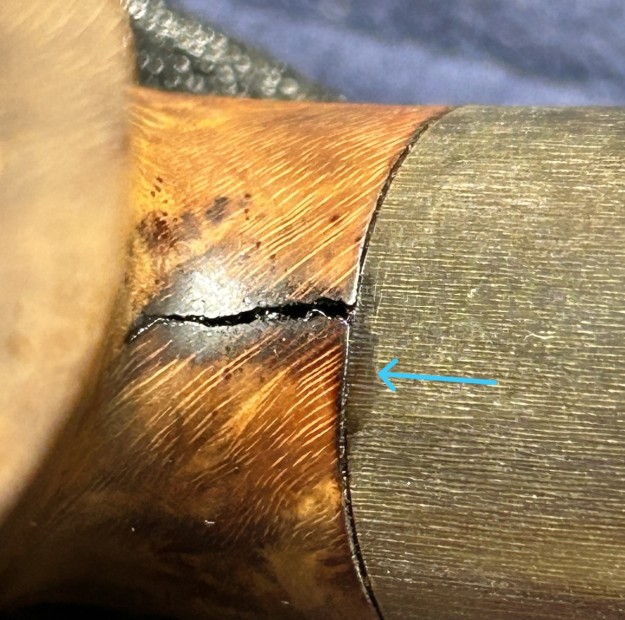
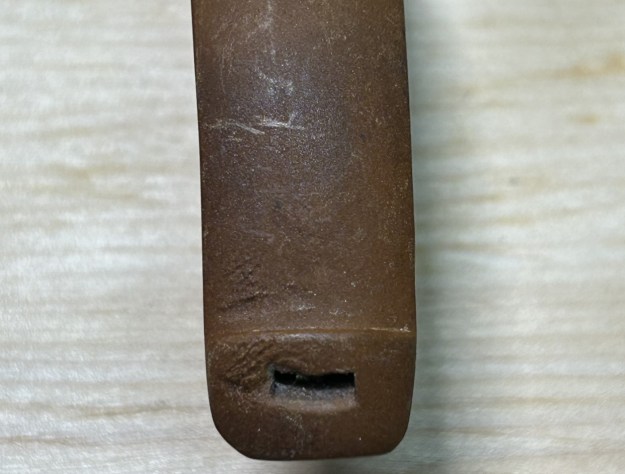
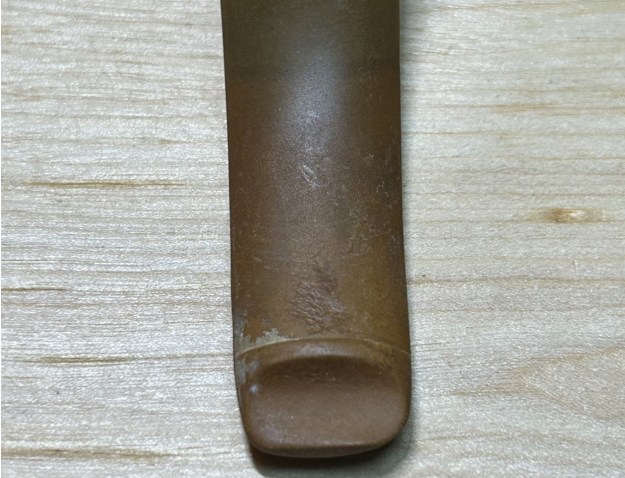
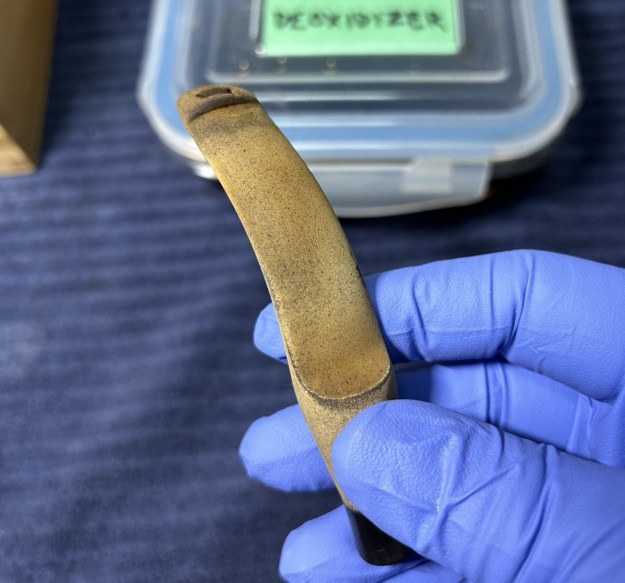
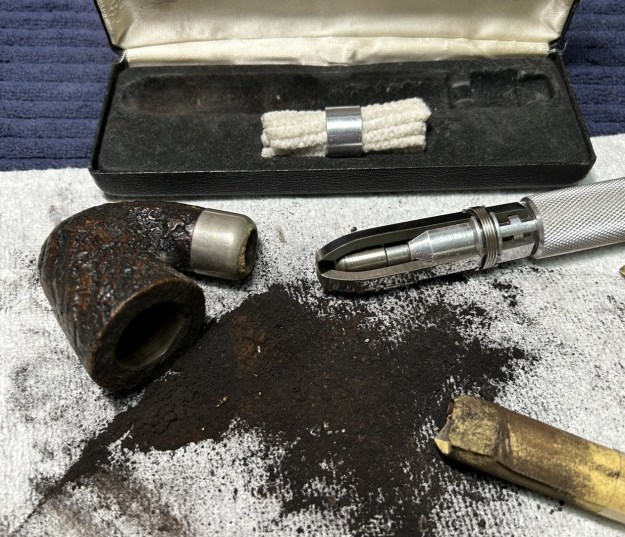
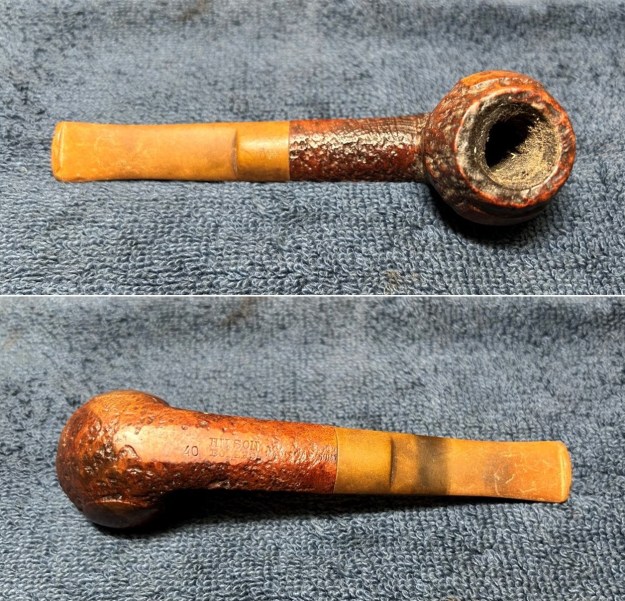
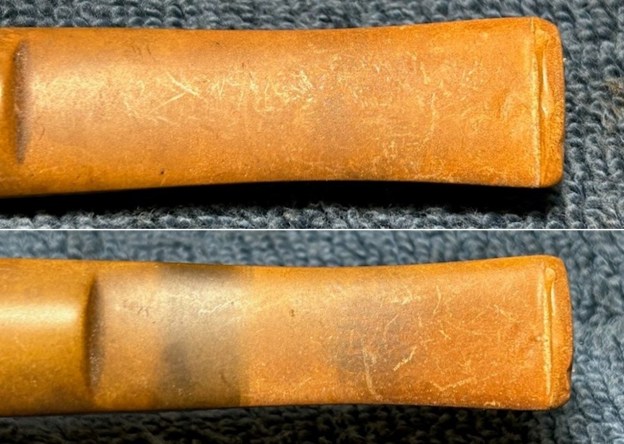
The pipe is in very nice shape and was well-loved. The stem had some tooth scratches and dents, plus it was coated with a lot of oxidation – a LOT. There were no significant issues with the stummel, although it did have a bit of lava on the rim and the bowl was choked with cake. 
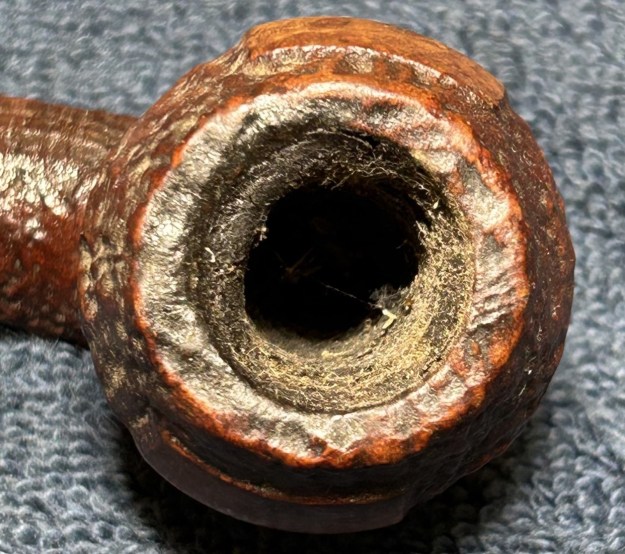
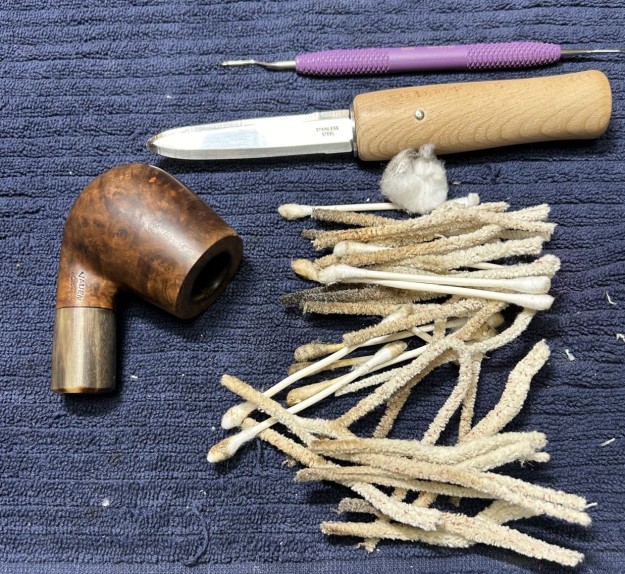
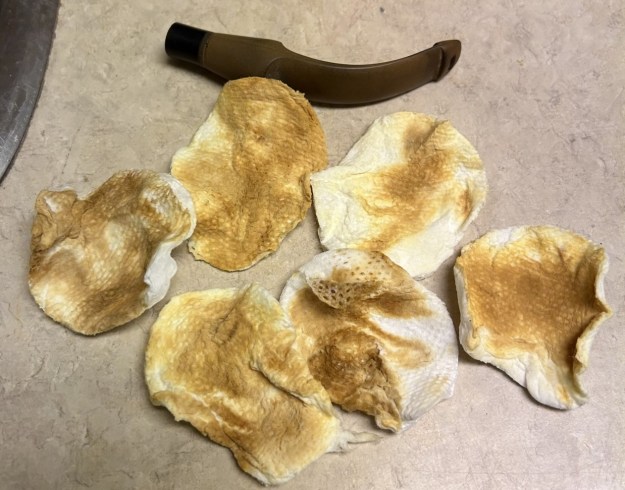
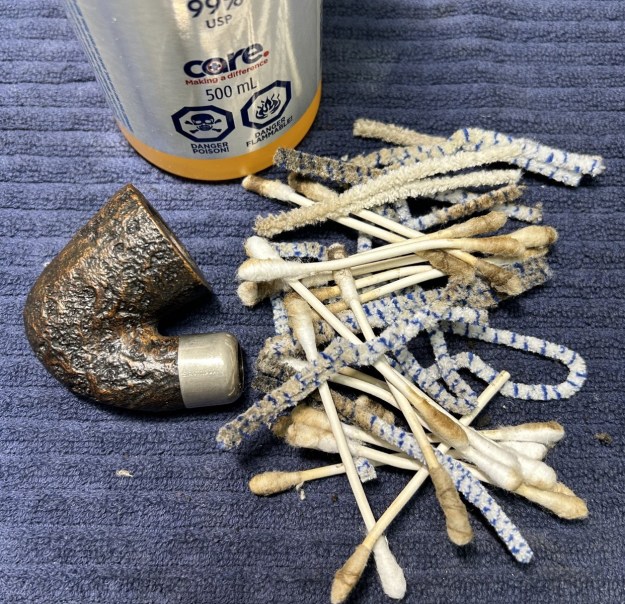
I started out by cleaning the inside of the stem with 99% isopropyl alcohol and some pipe cleaners. It was dirty, but not too bad. I also wiped the stem with some Murphy’s on some cotton rounds. As you can see, the stem was pretty filthy.
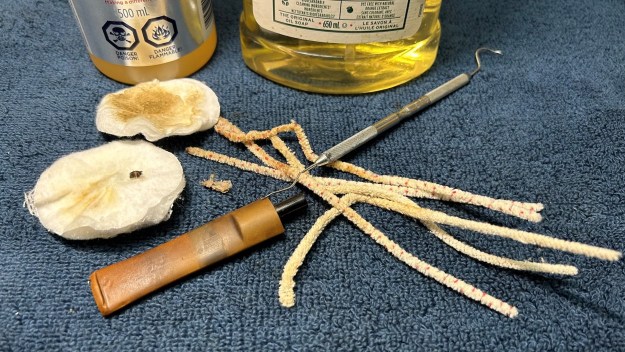
This was going to take some work, so I went to the sink and scrubbed the stem with some cleanser on a few cotton pads. The photos testify to the icky oxidation that came off.
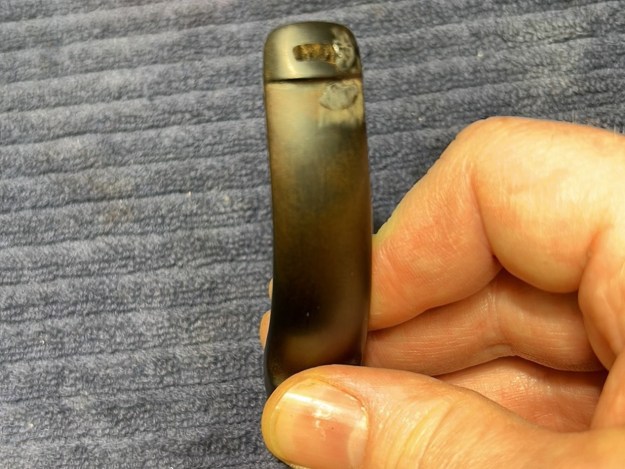
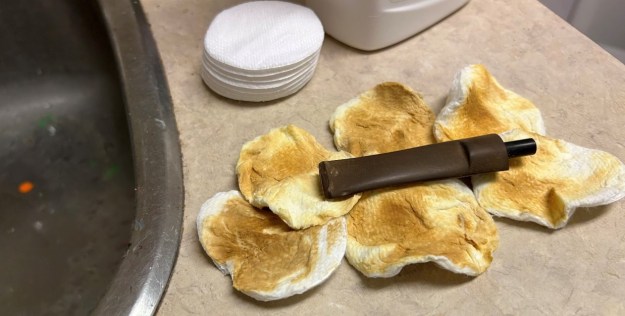
After that, the stem went for a dip in the stem oxidation remover. I let it sit overnight, to allow all the oxidation to rise to the surface of the stem. The next day, I cleaned up the stem again with more cleanser on some cotton pads. This took some serious scrubbing, but, in the end, worked very nicely.
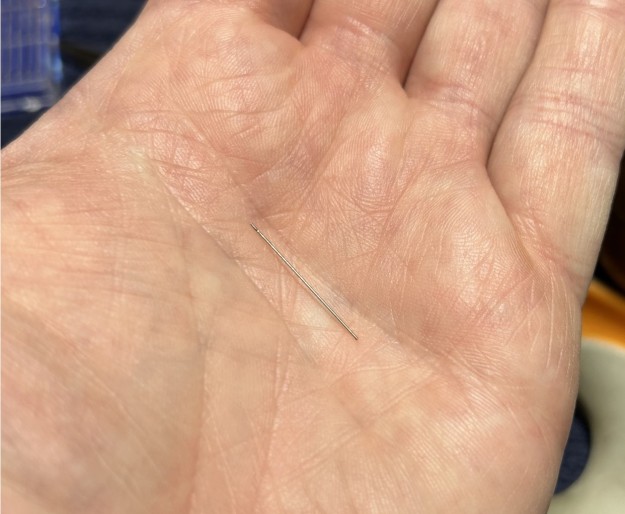
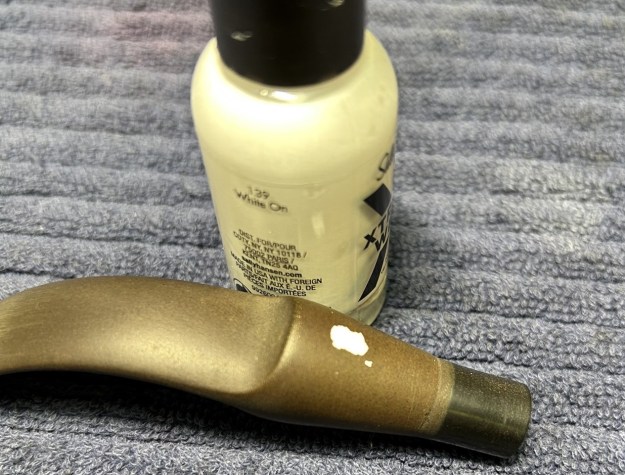
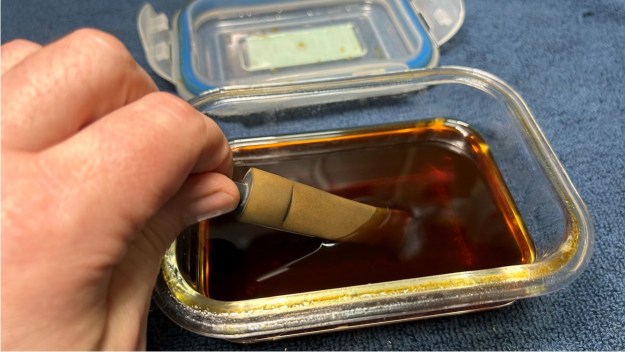
Once complete, I filled the tooth marks with my carbon and rubber enhanced cyanoacrylate adhesive. Once cured, I took down the excess with my needle files. After that, I took my nine Micromesh pads and sanded the whole stem until it was shining like new. I also used my pipe stem oil in between the pads (from 3600 on) to bring out some extra lustre.
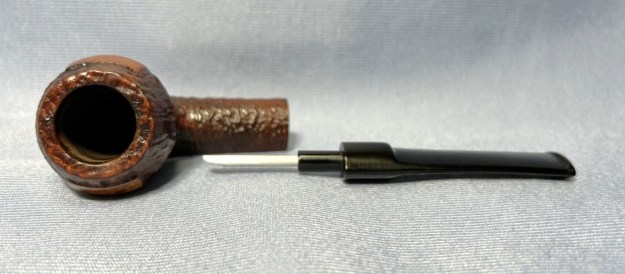
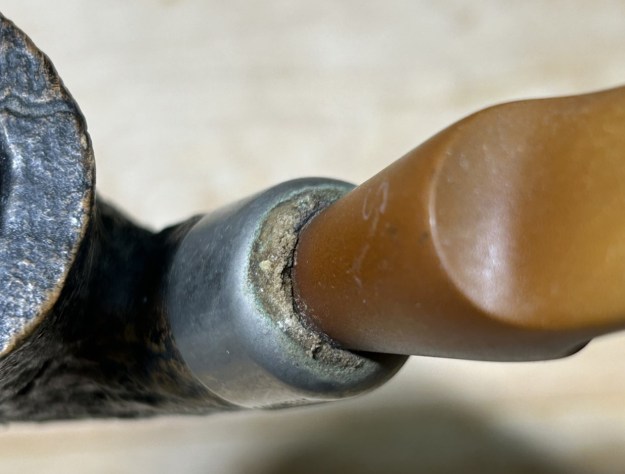
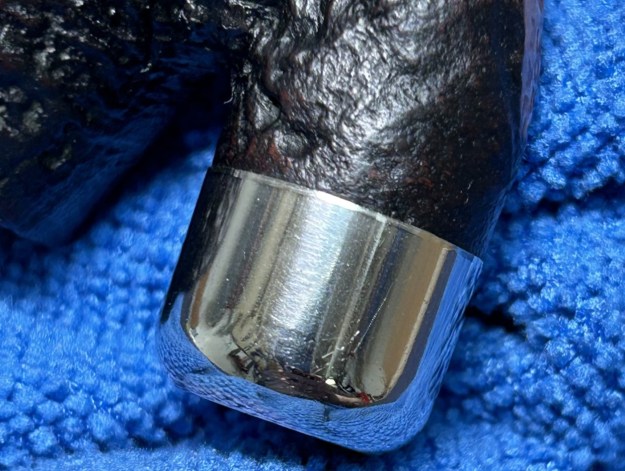
This pipe comes with an innertube, so I cleaned that too. I used rubbing alcohol to remove all the tars and oils of the past, then scrubbed with some 0000 steel wool to make the tube shine.
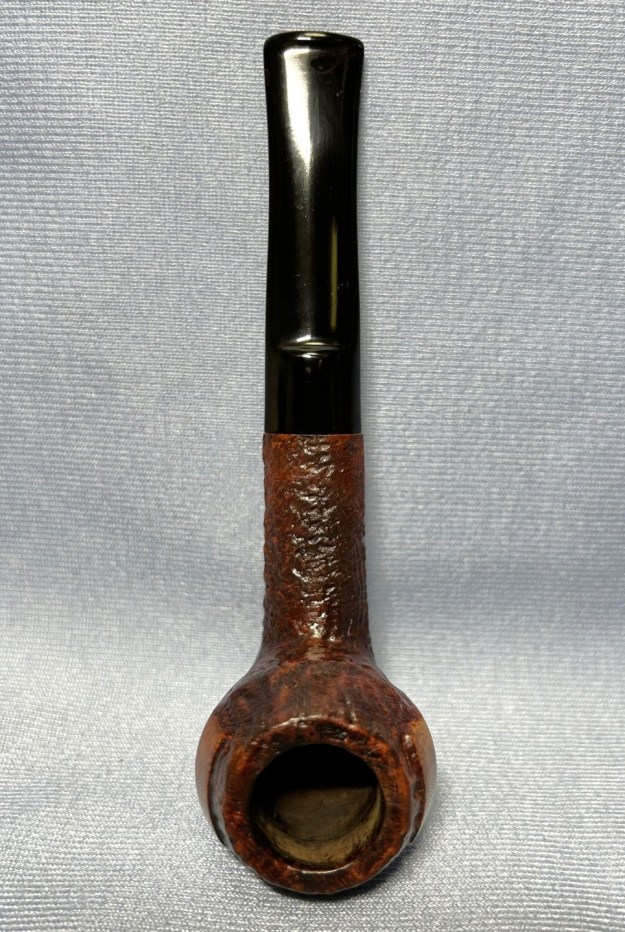
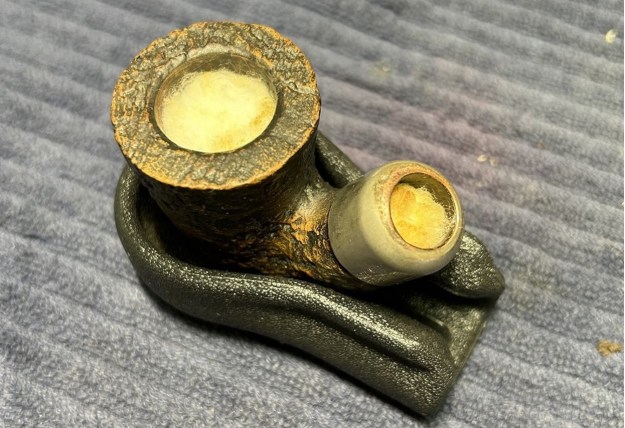
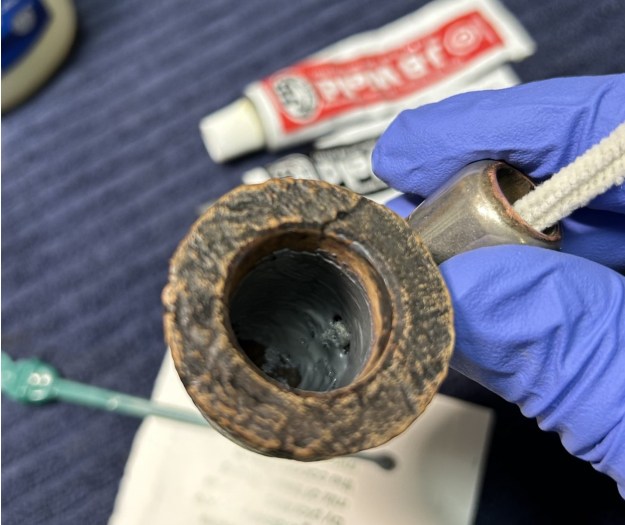
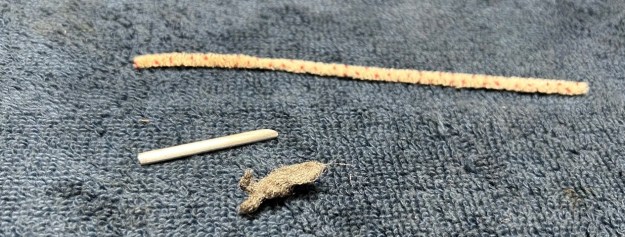
Onto the stummel. In order to clean out the massive amount of cake in the bowl, I used the Pipnet reamer and followed that up with a piece of sandpaper taped to a wooden dowel. I sanded down the cake until I hit the briar walls, so that I could inspect them for potential damage. Everything looked good on the inside, which is great. I proceeded to clean out the inside of the shank with 99% isopropyl alcohol and pipe cleaners and cotton swabs. It was surprisingly dirty in there! But I got it clean in the end.
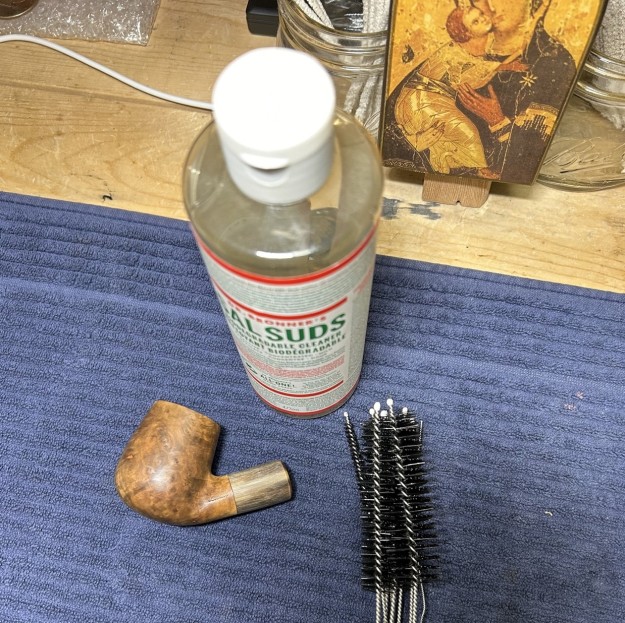
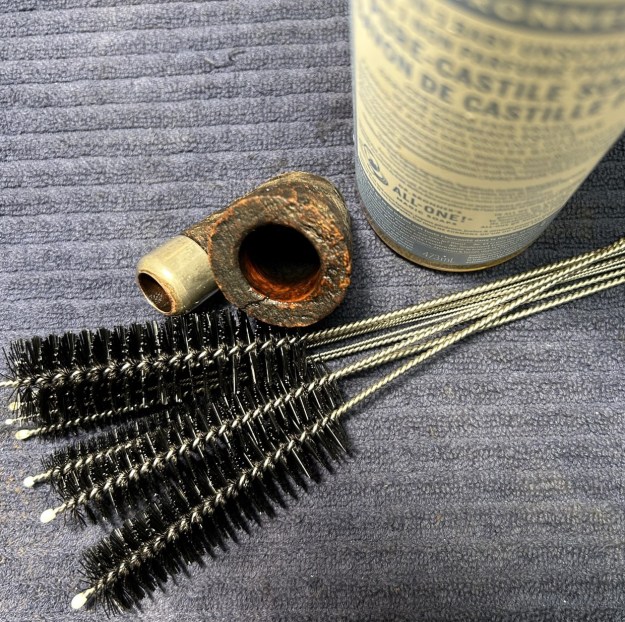
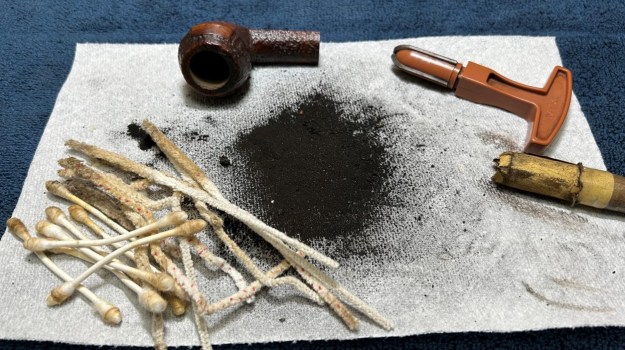
When that was done, I set up to de-ghost the pipe. I put some cotton balls into the bowl and the shank and soaked them with 99% isopropyl alcohol. I let that sit overnight so that any remaining smells and/or filth would leach out into the cotton. I also scrubbed the insides with some soap and tube brushes. It was beautifully clean after that!
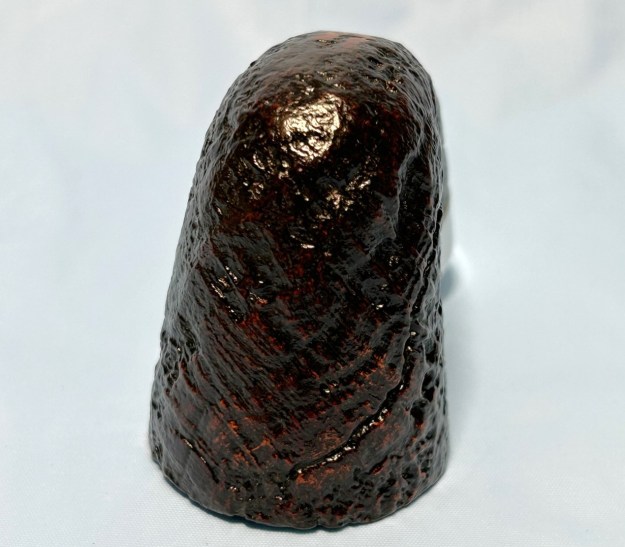
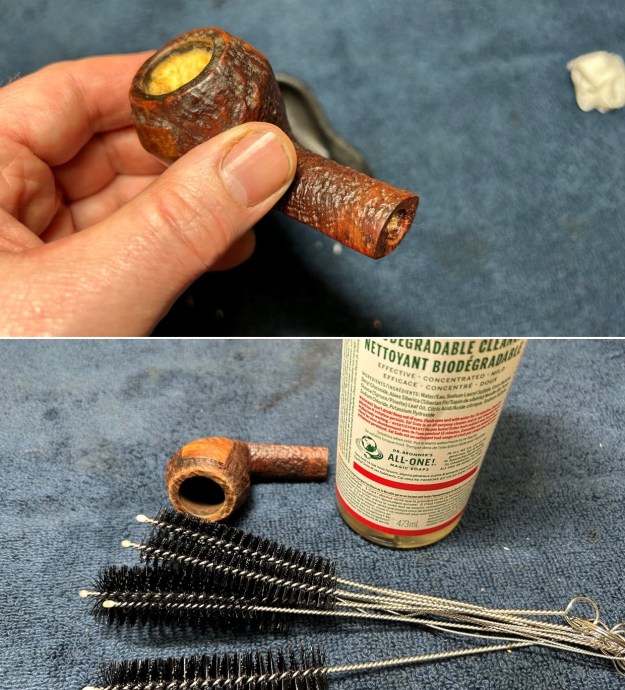
The stummel was in very nice shape, although the rim did have some lava on it, as previously mentioned. I soaked the rim in some Murphy’s to loosen this up, then used more Murphy’s to clean the whole stummel. This removed any external dirt and oils, and it was much improved.
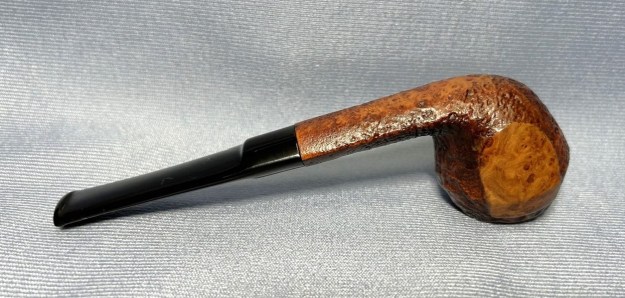
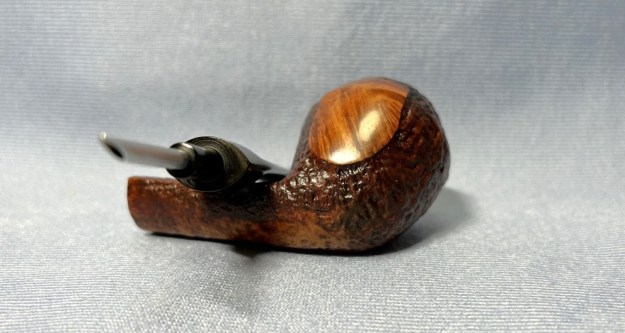
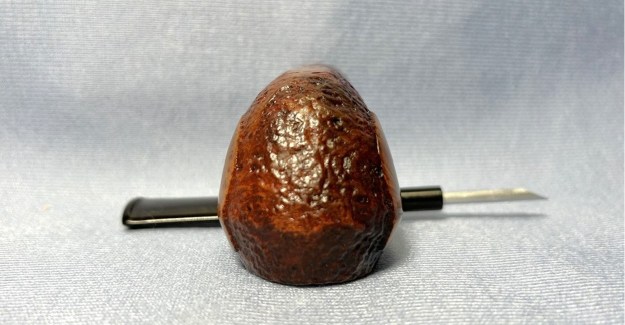
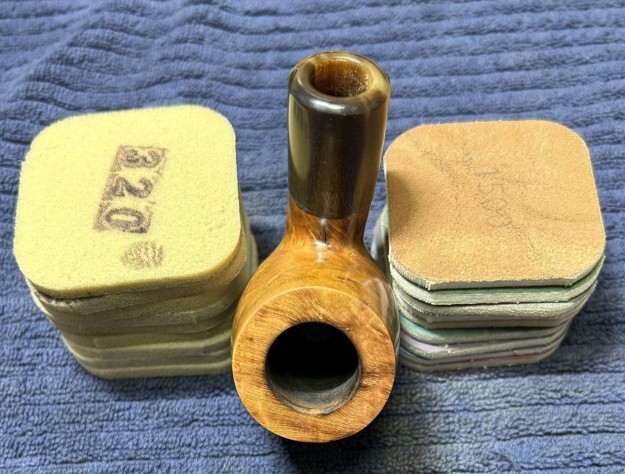
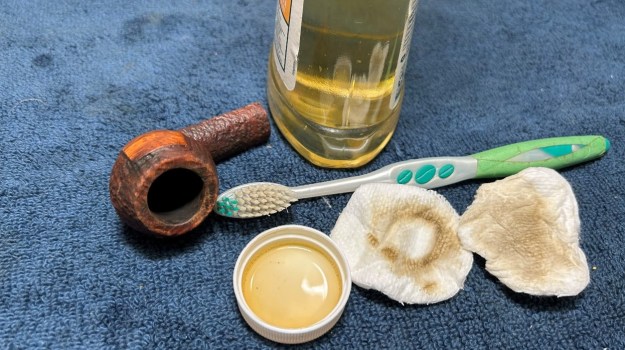
Most of the pipe was sandblasted, but there were three areas of smooth briar: the two shield-shaped patches on the sides of the bowl, and the underside of the shank where the markings were. On those smooth areas, I sanded down with the Micromesh pads to make it beautiful. 
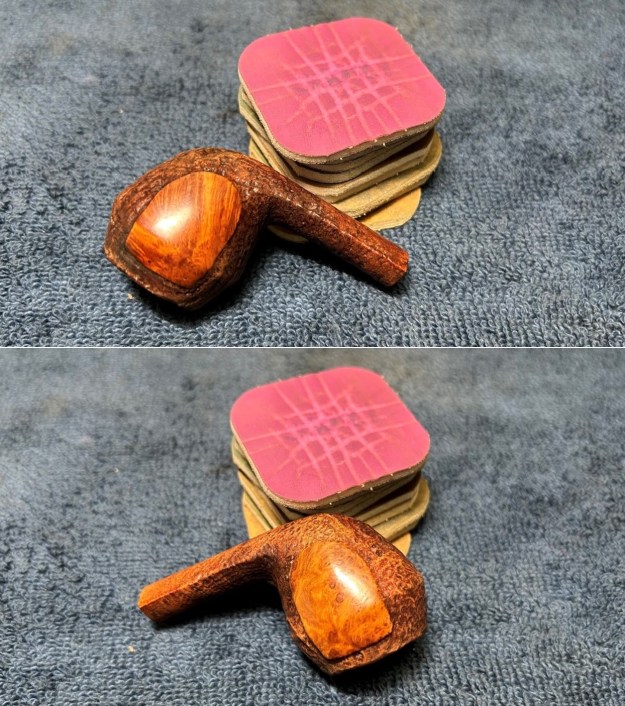
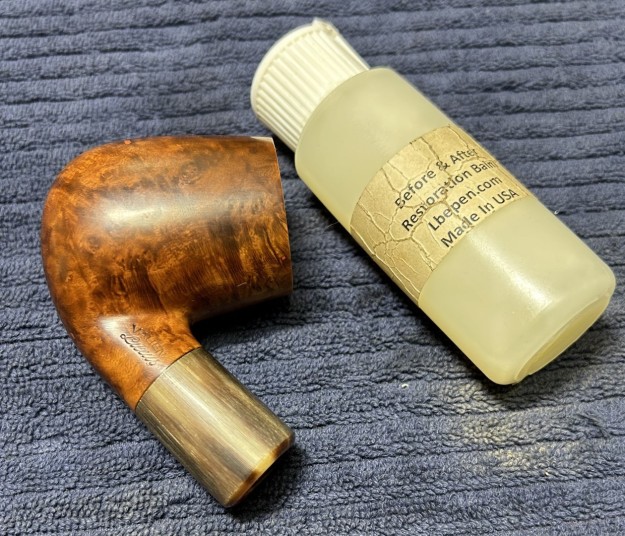
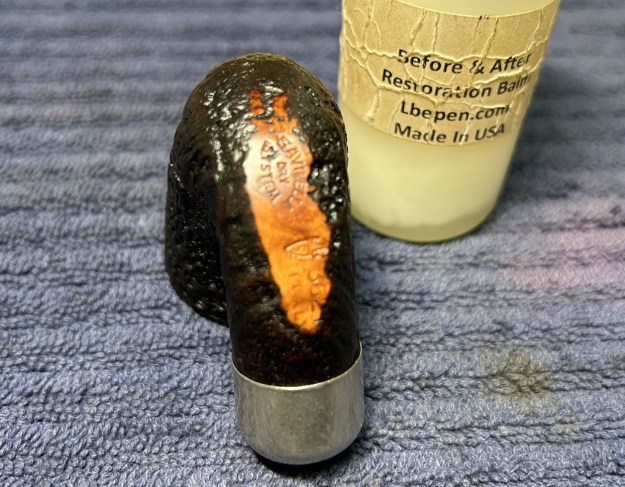
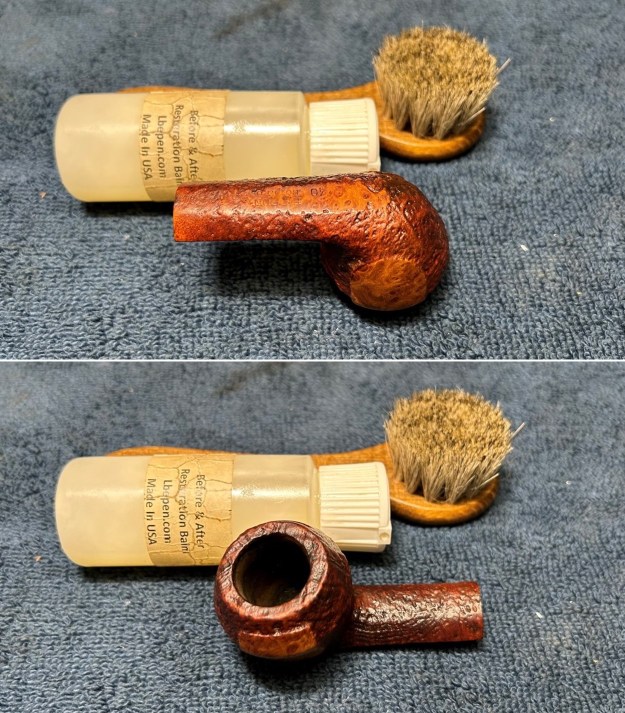
I then took my restoration balm, rubbed it in the wood with a horsehair brush and let it sit for about 20 minutes. This balm is fantastic stuff and does wonderful things to nourish the wood. After letting it sit, I used a microfibre cloth and buffed it. 
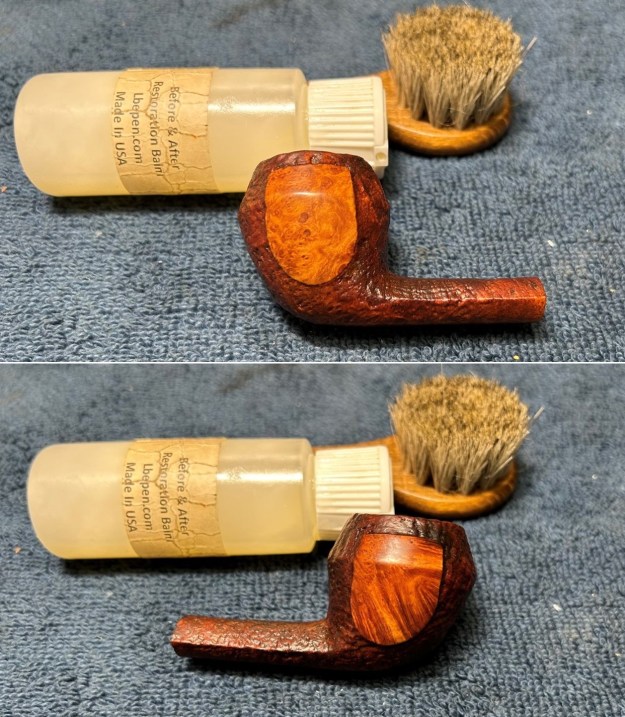
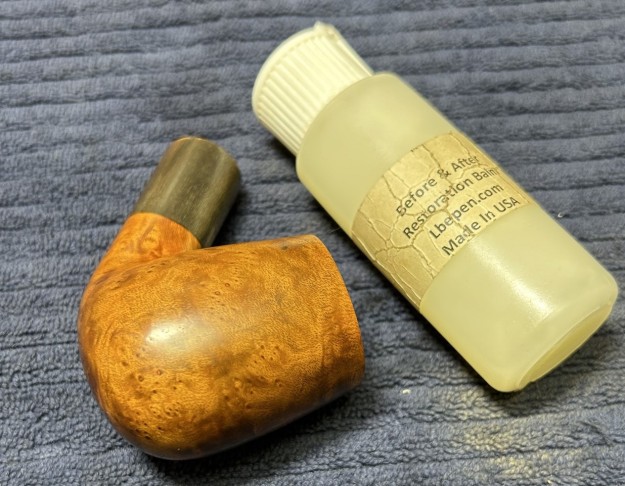
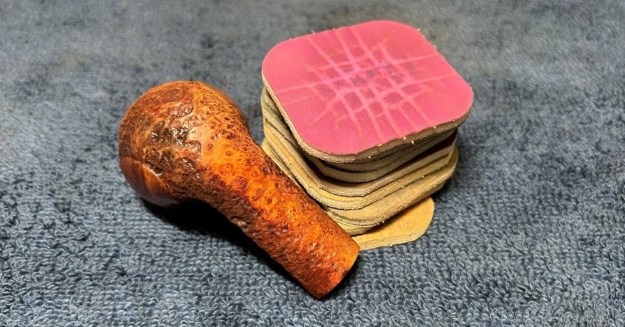
Off to the bench polisher to put the final touches on this pipe. I first gave the smooth sections (only) a thorough (but light-handed) going-over with White Diamond compound. Following that, several coats of conservator’s wax created a beautiful, glossy seal on the pipe.
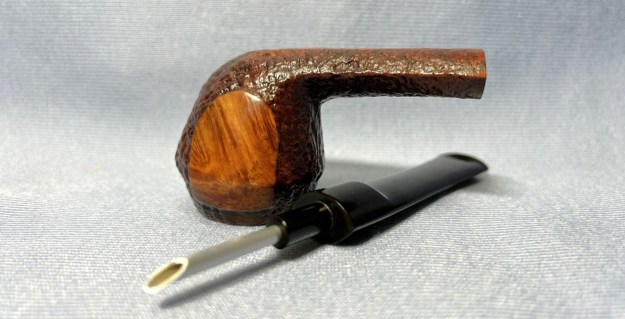
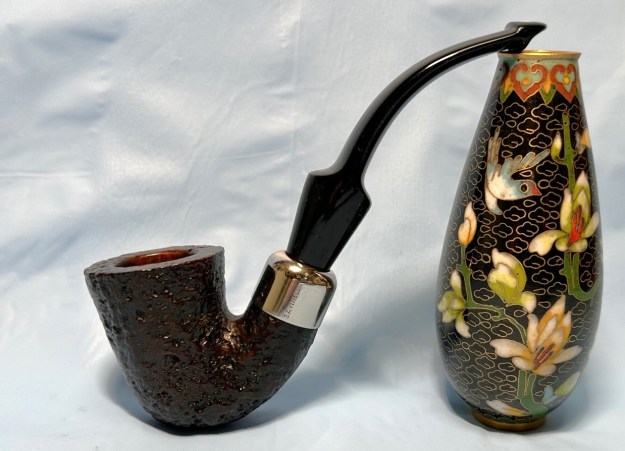
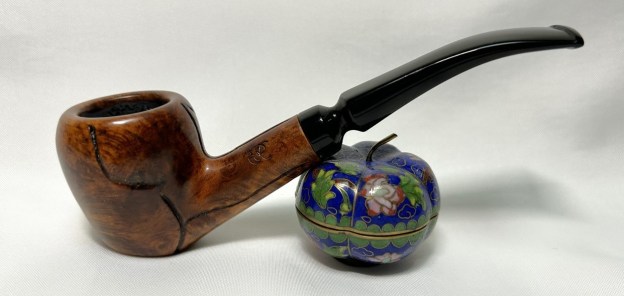
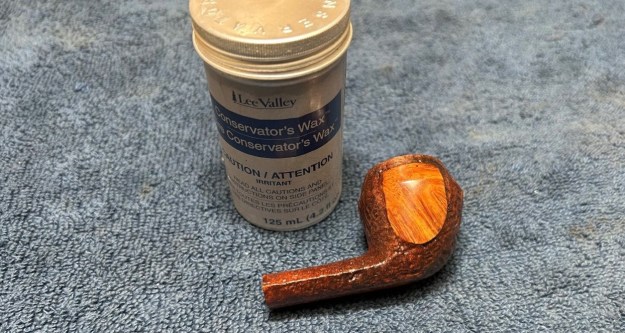
All done! This Hilson Bolero 40 straight bulldog looks fantastic and is ready to be enjoyed again by the next owner. It promises to be a great smoker and conversation piece. I am pleased to announce that this pipe is for sale! If you are interested in acquiring it for your collection, please have a look in the “Various” section of the store here on Steve’s website. You can also email me directly at kenneth@knightsofthepipe.com. The approximate dimensions of the pipe are as follows: length 5⅔ in. (145 mm); height 1⅝ in. (41 mm); bowl diameter 1½ in. (37 mm); chamber diameter ¾ in. (18 mm). The weight of the pipe is 1⅛ oz. (35 g). I hope you enjoyed reading the story of this pipe’s restoration as much as I did restoring it. If you are interested in more of my work, please follow me here on Steve’s website or send me an email. Thank you very much for reading and, as always, I welcome and encourage your comments.

Fixing an Unusually Tricky Crack


Blog by Kenneth Lieblich

Welcome to another instalment of my Pipe Incident Reports. The idea, in general, is to provide a brief write-up – focusing on a particular pipe-restoration-related issue – rather than an entire restoration story. Today’s story is on the resolution of a very specific pipe repair, with some added challenges. I hope this blog post will be useful for those undertaking a similar repair.

A couple of years ago, I restored a handsome Vauen Luxus 2013 for a friend and he’s smoked it with great gusto since then. In fact, you can see the story of its restoration here. By his own testimony, it’s a great pipe, smokes well, feels good in hand, etc. However, he noticed that a crack had appeared in the stummel and he wondered what I thought about it. This news sounded concerning, so I asked him to text me some photos and here is what he sent me: Yikes! Not good at all. Aside from the obvious damage, I wondered if I had missed something the first time around. I went back in my files and closely examined all the photographs of the pipe from two years ago. There was no hint of any damage or potential for damage. Naturally, I asked Steve about it, and he posited that there must have been a pre-existing flaw in the briar. As it was hidden in the shank, there’s no way we could have known about it in advance. Whatever the cause, it was up to me to fix it. The photos show that, as the pipe was smoked, tobacco oils leeched through the crack and stained the wood. Furthermore, the horn shank extension was also being stained. That isn’t a good sign, but – first things first – let’s get the pipe clean. I did my usual thing: reaming out the bowl, cleaning the tars and oils with isopropyl alcohol, etc., and scrubbing the insides with a cleaner and some tube brushes. I also used a dental pick to remove as much debris as possible from the crack. Here it is looking clean, albeit a bit the worse for wear:Fixing a crack like this isn’t the end of the world: it usually involves drilling micro-holes at both ends of the crack and then sealing it. In this case, its location added some considerable challenges. One end of the crack was adjacent to the horn shank extension and I didn’t want to risk drilling there and potentially damaging the horn. The other end of the crack was in the trickiest location to access – right in the lowest point of the bend in the stummel.

As usual, I used the smallest micro-drill bit I owned. This drilling is done to stop the crack from extending on its own. Before I stated drilling, however, I covered everything around the crack with some clear hockey tape. I wanted to prevent my drill from rubbing against the wood or horn, or potentially gouging anything during this rather precarious procedure. With great care, I managed to successfully drill the hole through the briar. I then plugged the shank with pipe cleaners coated in petroleum jelly, as it prevents the soon-to-be-applied cyanoacrylate adhesive from adhering to the insides (in case it drips inside). I created a thin bead of adhesive along the damaged area and ensured that it was well filled. I left the adhesive to cure and came back to inspect my work. It looks like it worked well. This sort of restoration will never be invisible, but will ensure a very strong repair for the future.Once again, the location of the repair proved challenging as I set about sanding down the excess adhesive with needle files and then using my Micromesh pads over the whole stummel. I added some Before & After Restoration Balm and worked that into the wood. I also took it to the buffer for some wax, but the photos below were taken before that. Thanks so much for joining me on this tricky repair. I hope you enjoyed reading this instalment of the Pipe Incident Report – I look forward to writing more. If you are interested in my work, please follow me here on Steve’s website or email me directly at kenneth@knightsofthepipe.com. Thank you very much for reading and, as always, I welcome and encourage your comments.

Restoring a Beautiful Danish Freehand


Blog by Kenneth Lieblich

From time to time, I come across a pipe that seems to embody everything one wants a pipe to be: aesthetically pleasing, well proportioned, skilfully carved, forcefully present. This is one of those pipes. It is a Granhill Select Freehand. The grain on this pipe is absolutely beautiful. There is precious little information on the Granhill name. Yonks ago, Steve did a blog post on a Granhill pipe and it contained all the available information at the time. The maker was either a carver named Michael Kabik or a tobacconist named Lonnie Fay. Now, Fay may well have produced pipes under this name, but I think we can say with certainty that this pipe is by Kabik, based on the similarity of design and logo. I will reproduce here some of what is written is Pipedia:

Michael Victor Kabik or Michael J. Kabik, now retired artisan and pipe repairman, was born in Annapolis, Maryland in 1950. As a student he was fascinated by science, but finally turned to the arts. In the early 1970s he started working as an artisan and designer for Hollyday Pipes Ltd., and when the company closed he set up in his own right.

Kabik writes as follows:

…In the 1960s, I had helped Jay build Jay’s Smoke Shop and was his first employee. Since that time, he had set up one of the very first freehand pipe-making operations in the U.S. along with his partner, Chuck Holiday, called CHP-X Pipes. The staff consisted of four full-timers actually making the pipes and perhaps another four in sales and office work. Chuck, who did the actual design and carving, had long since had serious disagreements with Jay and split. Chuck’s replacement from the staff was quitting, and Jay was in a bind. Jay offered me the job, and I gladly accepted. The fellow quitting was supposed to train me for two months but left after two weeks, leaving me with an awesome responsibility. I felt as though the future employment of all these people depended on me as the designer and cutter…and it did.

 …Sadly, CHP-X closed its doors two years after my arrival, due primarily to distribution, sales force problems, and other issues to which I was not privy…In love with a medium that satisfied my creative impulses while, pretty much, paying the bills, I bought up the essential equipment and produced pipes on my own. I did this from a farm house my wife and I rented in Phoenix, Maryland. I produced pipes under the name KANE, Gran Hill and others I can’t remember as well as a private label line for a store in, I believe, South Dakota.

 …In 1973, I was approached by Mel Baker, the owner of a chain in Virginia Beach called Tobak Ltd. Mel was interested in producing a freehand pipe line and was alerted to my product by Al Saxon, one of his managers and a former CHP-X employee. Mel wanted to relocate me to Virginia Beach, give me carte blanche, and recreate the CHP-X studio with, of course, a new name for the product. I’m sure my answer came very quickly.

 …We decided on the name Sven-Lar. Why? Well, when I bought out CHP-X, I also got a small drawer full of metal stamps that were created for private-label work. The Sven-Lar name was conceived but never realized. Aside from having the stamp already made, there were other reasons we chose Sven-Lar. First, we were making a line of pipes in the Danish freehand tradition and also, sadly, we knew the difficulty American pipe makers had breaking the foreign market mystique barrier. The latter certainly played a big part in the demise of CHP-X.

You can read the entire Pipedia article on Kabik here. Just to close the loop on this, I also found Kabik on Facebook. I haven’t contacted him yet, but I may to see if we can get some more historical information. Here is a relatively recent photo of him:

The markings on the pipe are as follows. On the shank, there is a large letter Z [over] Danmark [over] Granhill [over] Select. Mysteries abound! I don’t know what the “Z” refers to, I don’t know why he uses the Danish spelling of Denmark rather than the English (given that he’s American), I don’t know if Granhill is the same as Gran-Hill, etc., and, finally, I don’t know where “Select” ranks in the pantheon of Kabik pipes. Frustrating.

Let’s have a closer look at the pipe itself. It really is an attractive piece. Overall, it is in good condition – no major issues to resolve. Just a few minor ones – particularly on the stem. It had some significant tooth marks in the button and, as the photo shows, debris clogging the bore. I started with the BIC lighter and “painted” the stem with its flame, in the hopes of raising some of the dents in the vulcanite. Although they did not disappear altogether, they were substantially improved and I was pleased with the results.I wiped down the stem with some Murphy’s on some cotton rounds. Then, I cleaned out the insides of the stem with pipe cleaners and lemon-infused isopropyl alcohol. Once that was done, the stem went for an overnight soak in the Before & After Hard Rubber Deoxidizer. After soaking, I cleaned off the de-oxidizing fluid with alcohol, pipe cleaners, et cetera. The oxidation had migrated to the surface and I used SoftScrub to work it off. I built up the tooth damage on the stem with black cyanoacrylate adhesive and let it fully cure. I used my miniature files to take down the majority of the dried glue. I then used all nine Micromesh pads (1,500 through 12,000 grit) to bring out the lovely black lustre on the stem. I also used Obsidian Pipe Stem Oil in between each pad scrubbing. I used the PipNet Reamer (and some sandpaper taped to a wooden dowel) to take the bowl down to bare briar, as I wanted to ensure there were no hidden flaws in the walls of the bowl. Fortunately, there were none. I then proceeded to clean out the insides of the shank with Q-tips, pipe cleaners, and isopropyl alcohol. It took a fair amount of cotton to get this thing clean!A de-ghosting session seemed like a good idea. This de-ghosting consisted of thrusting cotton balls in the bowl and the shank, and saturating them with 99% isopropyl alcohol. I let the stummel sit overnight. This caused the oils, tars and smells to leech out into the cotton. Finally, a relatively clean and fresh-smelling bowl emerged. I then moved on to cleaning the outside of the stummel with Murphy’s Oil Soap and some cotton pads. I also scrubbed the plateau with a toothbrush. What a difference that made! I then cleaned the insides with some Castile soap and tube brushes. After this, I used all nine Micromesh pads (1,500 through 12,000 grit) to smooth out everything in the briar. Then a light application of Before & After Restoration Balm brought out the best in the stummel’s grain. The grain on this pipe is pretty fantastic! Off to the bench polisher to put the final touches on this pipe. A dose of White Diamond and a few coats of carnauba wax were just what this pipe needed. The lovely shine made the wood look absolutely beautiful.

All done! This Granhill Select Freehand looks fantastic and is ready to be enjoyed again by the next owner. I am pleased to announce that this pipe is for sale! If you are interested in acquiring it for your collection, please have a look in the “American” section of the store here on Steve’s website. You can also email me directly at kenneth@knightsofthepipe.com. The approximate dimensions of the pipe are as follows: length 6 in. (155 mm); height 2½ in. (64 mm); bowl diameter 1⅞ in. (47 mm); chamber diameter 1 in. (24 mm). The weight of the pipe is 1¾ oz. (52 g). I hope you enjoyed reading the story of this pipe’s restoration as much as I did restoring it. If you are interested in more of my work, please follow me here on Steve’s website or send me an email. Thank you very much for reading and, as always, I welcome and encourage your comments.

Restoring Five Pipes at Once


Blog by Kenneth Lieblich

One of my customers very kindly sent me five pipes to clean up for him. I had the pleasure of working on some beauties and I thought I would share the results with all of you. I was sent two Jobeys and three Peterson Sherlock Holmes pipes. On this occasion, I did something different than I usually do: I restored all five at once, rather than one at a time. The results on the pipes were as good as usual, but the results on your author’s sanity were perhaps less good. This blog is more of a show-and-tell than my usual restoration stories. Onward ho!

Let’s examine the five pipes. First is a Jobey Band E79 partially rusticated bullmoose with a variegated, acrylic, fishtail, saddle stem. Second is a Jobey Hand-Rubbed 680 smooth bent egg with a black, vulcanite, fishtail, saddle stem. Third is a Peterson’s Sherlock Holmes Professor large bent billiard with a sterling silver band and a black, vulcanite, P-lip, tapered stem. Dated 1998. Fourth is a Peterson Sherlock Holmes Hansom large (and very tall) bent bulldog with a sterling silver band and a black, vulcanite, P-lip, tapered stem. Dated 1997. And fifth is a Peterson Sherlock Holmes (without a specific name) large bent Rhodesian with a sterling silver band and a black, vulcanite, P-lip, tapered stem. Dated 1987. I cleaned the outside of all of the stems with Murphy’s and the insides with pipe cleaners and Q-tips dipped in isopropyl alcohol. The vulcanite stems were tossed into the oxidation removal fluid for a good soak. I later cleaned off the oxidation and went to fill in the tooth dents with black cyanoacrylate adhesive. I worked off the high points with my needle files and sanded them all with Micromesh pads and Obsidian Oil. On to the stummels. I reamed out all the bowls and removed all of that old cake. Some bowls had lava on the rim, so I carefully removed that without damaging anything further. I also cleaned the outside of the stummels with Murphy’s. These stummels had been quite well maintained over the years, so there wasn’t much difficulty in cleaning out the gunk inside – with one exception. The Jobey bent egg had a hidden trap of debris inside that had evidently never been noticed. As the photos show, there was some dreadful goo to remove from there! I set all five pipes up for a de-ghosting session and, since I was doing them all at once, an egg carton made an excellent holder for multiple pipes at once.Again, four of the five stummels were in great condition and didn’t really need much work to the outside briar. The exception was that same Jobey egg – it had a couple of significant blemishes which I repaired with briar dust and cyanoacrylate adhesive. After this, all of the stummels were sanded down with Micromesh pads and then left to sit with a coat of Before and After Balm. It sort of moisturizes the wood and gives it a lovely gloss. I took the pipes to my bench buffer and spiffed them all up with some White Diamond and carnauba wax. My last stem was to polish the sterling silver ands with my jewellery cloth. And voilà! These beauties are already on their way back to their owner. I trust that he will enjoy their new and improved status. I hope you enjoyed reading this quick write-up of this lovely bunch of pipes. If you are interested in my work, please follow me here on Steve’s website or email me directly at kenneth@knightsofthepipe.com. Thank you very much for reading and, as always, I welcome and encourage your comments.

Beautifying a Bountiful Bullmoose


Blog by Kenneth Lieblich

This is the third pipe I’m restoring for my cousin – and in many ways, this is the most interesting. Allow me to introduce the Federal Bullmoose. It is a big, chunky pipe with a thousand fills in it, but looks like I could be a great smoker. It has a charming acrylic stem and feels terrific. The markings on the pipe come from the underside of the shank. There, it reads Federal [over] Ogunquit, ME. Further to the right is the word Italy, indicating where the briar is from. These markings lead me to believe that the pipe comes from the Federal Cigar company, formerly of Ogunquit, Maine. The company has been around for more than 100 years, and their three current locations are in New Hampshire: Epping, Dover, and Portsmouth – which is just a stone’s throw from Ogunquit. It seems reasonable to assume that this pipe is from that establishment.The stem was first on my list. Acrylic stems are always a bugbear of mine. No matter how much one scrubs, they never lose the tobacco colour inside. Ah well, it is what it is. I cleaned out the inside with pipe cleaners and isopropyl alcohol. It was pretty dirty, and I went through a good number of pipe cleaners. I also tried using some cleanser on the inside and that did help. I gave it a thorough rinse and moved on. There were a few tooth marks in the stem, so I filled them in with some clear cyanoacrylate adhesive. After allowing that to cure, I sanded the glue down with some sandpaper, then the whole stem with my Micromesh pads. For the last few pads, I also added some pipe stem oil. On to the stummel, and there was some work to be done here! Look at all those fills! But before that, I needed to get the darn thing clean. I used a dental tool to mine some chunks of gunk out of the mortise – yuck! Just like the stem, I also used pipe cleaners, cotton swabs and alcohol to scrub the insides. It was quite dirty – much cotton was expended.

I decided to de-ghost the pipe in order to remove any lingering smells of the past. I thrust cotton balls into the bowl and the shank and saturated them with 99% isopropyl alcohol. I let the stummel sit for a while. This caused any remaining oils, tars and smells to leach out into the cotton. The bowl was nice and clean after this.I used cotton rounds and some Murphy’s Oil Soap to scrub the outside of the stummel. You’ll notice in the photos that my cousin added some superglue to many of the fills before I got my hands on it. I actually removed some of the glue and redid some of the repairs. As usual, I used a mix of super glue and briar dust. I filled in everything that needed it and then it looked like a pipe with measles. The bowl had already been reamed, but I gave it a quick sanding anyway, as I needed to inspect the integrity of the briar walls. There were quite a few heat fissures and I would need to address them. At this point, I decided to mix up some pipe mortar, as I did with the last pipe. I wanted a good, solid coating on the inside of the bowl to prevent any further damage. I sanded down the fill repairs with some sandpaper and then the whole stummel with all nine Micromesh pads. It really looks improved. We’re on the home stretch! It’s time for the most obvious step to make this pipe look good: staining. My cousin and I agreed from the start that this pipe was going to need some make-up to make it pretty. I opted for Fiebing’s Cordovan. I thoroughly coated the stummel with a dauber, then flamed it with a candle to set the color. I repeated this process to ensure a good colour. This was never going to be a cure-all, but I am very pleased with the results. The contrast between the dark stummel and the light stem is terrific. I then coated the pipe with restoration balm and let it sit for 20 minutes or so, before polishing with a microfibre cloth. The balm does wonderful things to the wood and makes the whole thing sing. Then it was off for a trip to the buffer. A dose of White Diamond and a few coats of carnauba wax were just what this pipe needed. The lovely shine made the wood very attractive. This is a very handsome pipe and will provide many years of smoking pleasure.This Federal Bullmoose looks beautiful once again. I’m sure my cousin will love it. I hope you enjoyed reading the story of this pipe as much I as I did restoring it. If you are interested in more of my work, please follow me here on Steve’s website or email me directly at kenneth@knightsofthepipe.com. Thank you very much for reading and, as always, I welcome and encourage your comments.

Restoring a Modified K&P Irish Made


Blog by Kenneth Lieblich

This is the second pipe in a series of three that I was given by my cousin to clean up and bring back to life. This is a republic era K&P Irish Made X105 straight billiard from Peterson. It’s a handsome pipe, for sure, but there are lots of fills all over the bowl and it was in rough shape. It is important to note that this stem is not the original, but, after some back-and-forth with my cousin, we decided to leave the stem as it is. The markings are clear enough. On the left side of the shank, it reads K & P [over] Irish Made. On the right side of the shank, it reads Made in the [over] Republic [over] of Ireland. Near to that is the shape number, X105. There are also some maker’s marks on the ferrule. Quoting from a previous blog of Steve’s, regarding an Irish Made, “There is a nickel ferrule on the shank that is stamped with three symbols – a shamrock. a wolf hound and a tower. These makers marks put the pipe as pre-circa 1963.” That helps! On to the pipe work… It turns out that this stem is the dirtiest stem I’ve dealt with for quite a while. I don’t think it’s ever seen a pipe cleaner in its life until I got a hold of it. The thing was absolutely filthy inside, and it took ages and ages to clean out with pipe cleaners and lemon infused 99% isopropyl alcohol. In fact, it was dirty enough that I actually used some tube brushes as well (along with some detergent) to scrub out the insides and finally got it vaguely clean. Another thing you’ll notice is how badly chomped the button and bit are. It looked pretty bad, but I took my BIC lighter and tried to raise those dents with its flame. This didn’t work very well, if at all.The oxidization on the stem was pretty brutal, so I used some SoftScrub on some cotton rounds and scrubbed the dickens out of it for quite a while. The photo shows how much came off the initial scrubbing. I then threw it into the deoxidizing solution to sit overnight. The next day, with the stem nice and clean, I needed to address those dents on the stem. I applied a type of black cyanoacrylate adhesive (impregnated with carbon and rubber) to the damaged area. I sprayed these areas with an accelerant to cure the adhesive immediately.I then had to shape these repairs so that they would look great! I began by taking a needle file and shaping the hardened adhesive. Continuing, I used 200- and 400-grit sandpapers on the repairs to smooth them out. I finished up by using all nine of my MicroMesh pads to sand the entire stem. I also used some pipe stem oil to assist with the sanding and protect the vulcanite. The stummel was also pretty nasty. I begin by reaming it out. First, I took a drill bit and hand cranked (never with a drill) it into the shank to break up the incredibly hardened debris in there. Of course, I followed that up with cotton swabs and pipe cleaners and isopropyl alcohol. It took a lot of scrubbing to get it clean. I also used some soap and tube brushes to make it extra clean. I cleaned the outside wood with some Murphy’s and then I set the stummel up for a de-ghosting session. I took a couple of cotton balls, gently stuffed them into the bowl and into the shank, and saturated them with 99% isopropyl alcohol. I let that sit overnight, and the alcohol did its thing, leaching out more of the filth from the stummel. As the photos have shown, this pipe had a lot of fills, so I dealt with them, with a mixture of cyanoacrylate adhesive and briar dust. There was also a chunk missing from the rim, and I filled that up with the same. There was a lot of burning and damage to the rim which I addressed with my topping board and some sandpaper. This is always a balancing act: you want to make it look better, but you don’t want to take off too much. There was a crack in the shank, and a crack at the rim. Both of those required drilling before I could repair them. I took my micro drill bit and delicately drilled a hole through the briar right at the very end of the crack. This tiny hole – almost too difficult to see – serves as an endpoint for the crack, ensuring that it will not grow any further. I then carefully laid a thin bead of CA, glue along both cracks and let it cure. This pipe had obviously had a hard life, and one thing I noticed was that the bowl had quite a few craze lines on the inside. I wanted to fix them to make sure they weren’t a problem in future. Recently, I learned about a new mixture for a pipe mortar that I wanted to try inside this bowl. I found the mix on an old YouTube video, but I honestly can’t remember who the fellow was, otherwise I would credit him here. If anybody remembers who that was, please let me know. Anyway, I mixed up a combination of plaster of Paris, table salt, and activated charcoal. Once blended, I added a few drops of water to make a very thick paste. I then put a thin layer on the inside of the bowl and let it set overnight. It worked like a charm.The next step was to sand everything down. I started with some 220-grit sandpaper and sanded the repairs down so that they were level with the briar. I then took my nine micromesh pads and sanded the whole thing. Despite its fills, the pipe will be much improved once I’m done with it. Of course, I used my restoration balm and rubbed that into the wood to have its nourishing properties work on the wood. I left it set for 20 minutes or so and, while I was waiting, I decided to fix up the nickel ferrule that goes at the end of the shank. I used most of my micromesh pads to polish it up and it came out beautifully. I glued it back on and set the stummel aside. Off to my bench polisher! As usual, I used white diamond as my first compound and followed that with a few coats of carnauba wax. It provides just the sort of glam this pipe needs to pop!This K&P Irish Made X105 straight billiard so much improved that I’m delighted and I’m sure my cousin will be too. I hope you enjoyed reading the story of this pipe as much I as I did restoring it. If you are interested in more of my work, please follow me here on Steve’s website or email me directly at kenneth@knightsofthepipe.com. Thank you very much for reading and, as always, I welcome and encourage your comments.

The Ghost of Tobaccos Past


by Kenneth Lieblich

About fifteen months ago, I wrote a blog post here on my first attempt at blending tobacco. From some online forum, I had learned of a “recipe” to recreate McClelland’s Frog Morton tobacco, and this mix was (appropriately) called the Ghost of Frog Morton. This consisted of a 50-50 mixture of Peter Stokkebye English Luxury PS 17 and Lane Limited HGL. I was mildly concerned about the volume of Lane Limited HGL, as I’m not a strong aromatic fan, but figured it was worth a shot. At the time, I committed to jarring the stuff for a year (to let flavours blend) before trying it out. More than a year on, I’ve had some requests for an update on how it turned out and this is that update.

Let’s have a closer look at the two tobaccos that make us Ghost of Frog Morton. First, Peter Stokkebye English Luxury PS 17 is made with Georgian Virginias, black cavendish, Mexican burleys and Cyprian Latakia. This is a milder English blend than I tend to smoke (which is ok) and it has a certain sweetness to it. I’m not sure if this is a topping or not, but it is noticeable. Second, Lane Limited HGL is an American blend (not usually my style) made with toasted black cavendish, Latakia, white burley and golden Virginia. It is quite sweet. Despite the four components of each tobacco being the same, they are quite different as mixtures.I want to acknowledge that many sympathetic correspondents were correct in saying that this mixture bears little resemblance to the original Frog Morton. This has no bearing on whether the tobacco is enjoyable or not, but it’s worth noting that someone must have very odd tastebuds to think that Frog Morton and Ghost of Frog Morton were alike!

Upon opening a jar of the stuff a year on, I decided to try the tobacco in a corn cob for two reasons. First, I felt this would provide a neutral medium through which to try GoFM. Second, the blend smelled too “aromatic” for me and I didn’t want to ghost (pun intended) a briar with it, in case it wasn’t to my taste.Ghost of Frog Morton is a decent blend for those wanting a hybrid between English and aromatic tobaccos. I don’t claim any great expertise in either tasting or blending, but this is a bit too aromatic for me. I’m glad I tried it, but it is not really my thing. I like the idea of having a slightly hybrid tobacco on occasion, but I would lean towards something even less aromatic than this. If I tried this again, I would alter the Stokkebye/Lane ratio from 1:1 to 3:1 or even 4:1. For those who enjoy hybrids, I would recommend trying this blend. The base tobaccos are quite inexpensive and it is easy to produce.

In the comments to my original post, Jack Gillespie suggested Sutliff’s Eastfarthing as a similar hybrid that suits him. I tried that too, and it was better than GoFM but still a bit too vanilla/aromatic for me. I guess I’m an inveterate English and Virginia man! I hope you enjoyed reading this brief review of Ghost of Frog Morton. If you are interested in my work, please follow me here on Steve’s website or email me directly at kenneth@knightsofthepipe.com. Thank you very much for reading and, as always, I welcome and encourage your comments.

Resurrecting a Savinelli Dry System


by Kenneth Lieblich

Next on the old chopping block is a wonderful Savinelli Dry System 3621 Bent Dublin. It’s a really good-looking pipe and I understand that this is a popular and well-loved series. I got it recently in a lot of pipes and it called out to me for some help. I suppose this pipe is meant to be reminiscent of the Peterson system pipes – it even has a sort of P-lip button! It’s a terrific-looking pipe, with a bit of a rough history. The main markings of the pipe are on the underside of the stummel. On the left it reads Savinelli [over] Dry [over] System. Next to that is the Savinelli crown and “S” logo. And next to that is 3621 [over] Italy.  The shank has a nickel cap with Savinelli stamped on it. Finally, the stem has a worn, but still readable, stylized “S” on the top.Savinelli is one of the most recognized names in pipe smoking and they have a long and storied history. You can read about them from their own website or from Pipedia’s article about them. However, I was particularly interested in learning more about the Dry System. Sadly, Pipedia had nothing on this subject. I checked with Pipephil and they did have a bit of information which I provide here below:However, the definitive word on the Dry System comes from Savinelli’s own website. It provided some very useful information.

In 1981, after several years of research, Savinelli launched the “Dry System”, combining trap and filter. The name “Dry” comes from the introduction of the balsa “filter” into the traditional system pipe – the “System” being the presence of the built-in moisture trap in the shank. The balsa mops up the moisture in the smoke hence the term “Dry” system, and if the pipe is smoked without the balsa all that will happen is that this moisture will condense and collect in the trap. It can then either be mopped up with a folded pipe cleaner, or flicked out.

Finally, here’s an image of the pipe from an old Savinelli shape chart:This was obviously a terrific smoker, as the wear and tear on this pipe shows. The stummel was quite dirty – both inside and out – and even appeared to have some dust-bunnies inside the bowl (not to mention all the cake). The finish was well worn and would need to be addressed. The nickel cap had some mess on it too. The stem, however, was from another planet. Have you ever seen such oxidation on a pipe stem? In fact, my wife asked me if the stem was actually meant to be brown. “No” was my emphatic answer! Aside from that, the stem had some tooth marks and nicks. I could tell that this stem was going to be a bear to deal with. This pipe is always going to retain some marks from its hard life, but it is my job to make sure this pipe looks as good as possible. It’s a wonderful pipe and it deserves to be part of someone’s collection again.

The stem is going to take a lot of work, so let’s get started. I took up the stem and cleaned it off with Murphy’s Oil Soap. It was quite dirty and needed some scrubbing. I then cleaned out the insides of the stem with pipe cleaners and lemon-infused isopropyl alcohol, and, as you can see, if was pretty dirty inside. I also took a BIC lighter and ‘painted’ the stem with its flame in order to lift the tooth marks. This was only moderately successful in raising the dents.Now to tackle the epic oxidation. Next, I scrubbed (and scrubbed and scrubbed) the stem with some SoftScrub cleanser and then put the stem in my container of deoxidizing fluid overnight. This works to draw the oxidation to the surface of the stem, so that it can be cleaned off again with more SoftScrub. As you can see, this worked in the sense that it drew out the oxidation, but there remained a lot of labour ahead. In fact, I repeated the process of scrubbing and soaking overnight, because the situation was so dire. Eventually, I got to a point where the stem was something I could work with. Before I moved on to sanding, I built up the tooth marks on the stem with black cyanoacrylate adhesive and let them fully cure. I then sanded them down with sandpapers to merge a bit better into the stem. I also added some nail polish to the ‘S’ on the stem. At this point, it was clear that more than the ‘usual’ sanding was going to be required here. I took two sanding sponges (220- and 320-grit) and worked the stem hard. I needed to sand out the remaining oxidation to get this stem the best chance of looking decent again. I then used all nine Micromesh pads (1,500 through 12,000 grit) to bring out the lovely black lustre. I also used Obsidian Pipe Stem Oil in between each pad scrubbing. As I mentioned before, there are still hints of its past life, but I’m pretty pleased with how the stem came out. On to the stummel and the usual cleaning procedures were in order for this pipe. I used the KleenReem to remove the cake in the bowl and I followed up by sanding the walls down with some 220-grit sandpaper attached to a wooden dowel. I took it down to bare briar, as I wanted to see if there were any issues in the walls of the bowl. There was some charring and some slight fissures, but nothing serious. I then proceeded to clean out the insides of the shank with Q-tips, pipe cleaners, and isopropyl alcohol. There was some nastiness inside this stummel and it took a lot of cotton to get this thing clean. I decided to de-ghost the bowl to be on the safe side. I thrust some cotton balls into the bowl and the shank and saturated them with 99% isopropyl alcohol. I let the stummel sit overnight. This caused any remaining oils, tars and smells to leach out into the cotton. I then moved on to cleaning the outside of the stummel with Murphy’s Oil Soap and a toothbrush. What a difference that made! I followed that up by cleaning the insides with some dish soap and tube brushes. As I mentioned earlier, there were some minor issues to fix inside the bowl. The solution to this problem is an excellent one: epoxy. I prepared some J.B. Weld epoxy and smeared the walls, ensuring that the epoxy was evenly spread. Once done, a good 24 hours was needed to ensure that the epoxy was properly cured. After that, I gently sanded the inside of the bowl to provide a rough surface for what was to come later. I coated the entire inside of the bowl with a mixture of activated charcoal and my wife’s homemade yogurt. Once hardened, this provides a good, slightly rough surface for a new cake to build. Due to the pipe’s hard life, it was clear to me that the pipe needed to be stained. I applied some Fiebing’s Dark Brown Leather Dye. I flamed it with a BIC lighter and let it set. I then removed the excess with isopropyl alcohol on a cotton round. It looked so much better after this. I then rubbed some Before & After Restoration Balm into the wood. I gently brushed it into the rustication grooves and let the balm sit for fifteen minutes or so. The BARB works so well at bringing out the best in the wood. I brushed it with a horsehair brush and buffed it with a microfibre cloth. Beauty! I rubbed the nickel band with 0000 steel wool. This is the least abrasive grade of steel wool and I wouldn’t use anything harsher than that. I then used a few MicroMesh pads to make the metal shine. Later, I went to the bench buffer and applied some White Diamond to the stummel and stem. Then the final polish! The rusticated surface meant that I didn’t use carnauba wax – it gets gummed up in the grooves. Instead, I used Lee Valley Conservator’s Wax which worked like a charm. This was a nifty restoration and I had fun with it. I think the result is terrific and it’s a very handsome pipe once again. I am pleased to announce that this pipe is for sale! If you are interested in acquiring it for your collection, please have a look in the “Italy” pipe section of the store here on Steve’s website. You can also email me directly at kenneth@knightsofthepipe.com. The approximate dimensions of the Savinelli Dry System 3621 Bent Dublin are as follows: length 5 in. (126 mm); height 4 in. (101 mm); bowl diameter 1⅜ in. (36 mm); chamber diameter ¾ in. (19 mm). The weight of the pipe is 1⅛ oz. (35 g). I hope you enjoyed reading the story of this restoration as much as I enjoyed restoring it. If you are interested in more of my work, please follow me here on Steve’s website or send me an email. Thank you very much for reading and, as always, I welcome and encourage your comments.

A Major Overhaul for an S&R Woodcrafters Pipe


Blog by Kenneth Lieblich

I’ve mentioned before that there are some pipes that are so challenging that they are an entire pipe-restoration course in and of themselves. This is one may not be as bad as some I’ve tackled in the past, but it certainly needs some major help! This is a S&R Woodcrafters Pipe and it belongs to my cousin in Montréal. He asked me if I could bring it back to life and I said I’d give it the old college try. This pipe reminded me that sometimes the wear-and-tear of the years needs to remain on a pipe as part of its story. This pipe has been abused over the years. I managed to bring great beauty back to this pipe, but it would always retain signs of its past. The pipe in question was made by Stephen and Roswitha Anderson (hence, S&R Woodcrafters) of Columbus, Ohio. They make unique, handcrafted pipes and are fascinating pieces. I read a blog Steve wrote on an S&R pipe earlier this year to learn more about the pipe’s background. I was directed to the Pipedia page on S&R and it has a lot of good information:

Stephen and Roswitha Anderson of S&R Pipes, also known as S&R Woodcrafters, have become pipe makers renowned throughout the world as talented carvers of high-grade briar pipes. They have been featured in several trade publications and magazines such as Pipes and Tobaccos and PipeSmoker, and have several pieces on display in museums in Europe and the United States. 

They are the first American pipe carvers honored with induction into the Conferee of Pipe Makers of Saint-Claude, France; the very place where the carving of briar pipes became a world-wide industry. Sadly, Steve passed away in March of 2009. Roswitha is still carving S&R pipes and carrying on with the shop with help from her “guys” David, Marty, and Tony. 

Steve and Roswitha began carving pipes in the 1960’s. They travelled to pipe shows and arts and crafts shows throughout the country and Europe selling their pipes and built up quite an extensive loyal customer base. Eventually, it became time to offer their pipes to the retail fraternity of pipe smokers. 

Pipes & Pleasures had its grand opening in a distinct red brick house on Main Street in Columbus, Ohio in 1977. The front section of the house was converted into a traditional tobacco shop selling pipe tobacco, cigars, and pipes manufactured by well known companies such as Dunhill, Charatan, and Savinelli as well as the high-grade S&R pipes that Steve and Roswitha carved. A workshop was set up in the back section of the house. 

When the cigar boom hit in the ’90’s, the shop was expanded by building a large computer controlled walk-in humidor. It’s no secret throughout the country that Pipes & Pleasures has the best maintained cigars in the Columbus area as well as the best selection of premium cigars available in the area including the much sought-after Davidoff line. 

Soon after the boom began, Steve and Roswitha moved their pipe making workshop to their farm and converted that space into a large smoking lounge for their many customers. The lounge features comfortable easy chairs, a television set, a stereo, a library of books and magazines about every aspect of tobacciana, a chess table, and a couple of card tables. The lounge is populated daily with long-time loyal customers and newcomers to the enjoyment and relaxation of cigar and pipe smoking. It’s also the room where several cigar tastings and samplings are held every year by representatives from cigar companies such as Davidoff and La Flor Dominicana.

In fact, their shop, Pipes & Pleasures, is still running. You can visit their website here.This is a charming pipe, but it had a number of significant issues, aside from the usual. Let’s take a closer look.

  • The rim is heavily shredded and notably burned.
  • The opening of the bowl is badly out of round.
  • There’s a big gouge on the side of the bowl.
  • There are several fissures inside the bowl (one of which might connect to the gouge).
  • There’s a crack on the top of the button.
  • There’s a piece missing on the underside of the button.
  • The mortise and tenon are not seated properly, but this might be corrected by a thorough cleaning.

I began by cleaning the outside of the stem with some Murphy’s Oil Soap on cotton rounds. This removed some of the surface staining. Then, I started cleaning the insides with isopropyl alcohol, cotton swabs, and pipe cleaners. The inside was dirty and it took a bit of cotton.There was some oxidation and calcification on the stem, so I wiped it down with SoftScrub cleaner. Once this process was done, the stem went for an overnight soak in the Pipe Stem Oxidation Remover. This allows me to clean the oxidation off in a couple of ways: by applying a mild cleaner to the surface and sanding the stem. The next day, I used SoftScrub again with some cotton rounds. As the photos show, the bit of the stem was badly damaged. The top side was significantly cracked and ruptured, while the underside was missing a chunk of vulcanite. I brought out my black cyanoacrylate adhesive and I applied it to the topside damage. I used some accelerant to get the glue going, and then moved on to the underside.The major gouge would need far more work. I made a patch out of black cyanoacrylate adhesive and a little activated charcoal in). I first plugged up the stem’s draught hole with a shaped piece of cardstock, coated in petroleum jelly. This ensured that any of the CA glue would not accidentally plug up the air passage in the stem.This was a tricky business and it took some real patience and effort to make it work. As the photos show, after I applied the cyanoacrylate, it looked pretty darn ugly, but I was expecting that. After the curing, I ended up sanding down the end of the stem to reduce some of the excess material. To carry this process on, I used some miniature files to further shape the button and make it suitable for sanding. I used another file on the inside to ensure there were no rough edges in the bore.I then sanded the stem down with 220- and 400-grit sandpapers to meld seamlessly into the stem. This ensures that it keeps its shape and looks like it should. I then used all nine Micromesh pads (1,500 through 12,000 grit) to bring out the lovely black lustre on the stem. I also used Obsidian Pipe Stem Oil in between each pad scrubbing. It is worth noting that a repair this big on a stem will never be completely invisible, but I was pleased with the results. On to the stummel – and there was plenty of work here too. As the photos show, there was a notable crater on the outside of the bowl and I could see a couple of fissures. This concerned me greatly, as I wondered if the two wounds were connected (literally and figuratively). The insides (both bowl and shank) had plenty of cake and tar. The bowl really needed to be reamed, so I used the KleenReem tool to scrape off as much built-up cake. Generally, I prefer to sand the chamber down to bare briar. When restoring, it is important to ensure that there is no damage to the briar under the cake. There are a few situations when I might leave some cake in the bowl, but not today. Sadly, there were definitely some hidden flaws to the briar on this pipe. I’ll come back to that later. I wiped down the wood with some Murphy’s and pulled off lots of grime. Then I started cleaning the insides with isopropyl alcohol, cotton swabs, and pipe cleaners. The inside was pretty dirty and required some cotton to clean it up.I decided to de-ghost the pipe in order to remove any lingering smells and dirt of the past. I thrust cotton balls into the bowl and the shank and saturated them with 99% isopropyl alcohol. I let the stummel sit overnight. This caused oils, tars and smells to leach out into the cotton. I finished this part off by cleaning the shank with Castile soap and tube brushes. The bowl was nice and clean after this. I went back for another go with the Murphy’s and a toothbrush, to ensure the grooves were done too. Now that the pipe was clean, I wanted to have a closer look at the state of the briar. One piece of good (and remarkable) news was that the crater on the outside of the bowl and the fissures on the inside did NOT meet up. This was a great relief. Nonetheless, both areas needed to be repaired. But before that, I wanted to correct the appalling roughness (and burns) on the rim of the pipe. It was bad – really bad – and it would be a challenge to make the pipe look normal. At the same time, it was necessary to address the bowl being so badly out of round. I put a sanding drum (and a couple of other bits) on my Dremel and carefully began removing the burns and shredded wood, and correcting the out-of-round- bowl. This is NOT an option that I use regularly. The risk of oversanding is high and that can be an even bigger problem. However, I worked slowly and cautiously. I only used the Dremel briefly before moving on to sandpaper. I also used a solid wooden sphere on the inner edge of the rim. In addition to this, I also sanded down the outside of the bowl, near the rim, so as to minimize the visual effect of the bashed edge. I sanded all the way around to ensure that the pipe retains its look. It was a laborious process to sort out these issues, but I was delighted in the end. Moving back to the fissures – the solution to this problem is always a tricky one: epoxy. I prepared some J.B. Weld epoxy and filled the cracks and gouges, ensuring that the epoxy was evenly spread throughout the bowl. Of course, I did plug the draught hole with a folded pipe cleaner (coated in Vaseline) to make sure none of the epoxy made its way up there. Once done, a good 24 hours was needed to ensure that the epoxy was properly cured. Once done, I gently sanded the inside of the bowl to provide a rough surface for what was to come next. I coated the entire inside of the bowl with a mixture of activated charcoal and my wife’s homemade yogourt. Once hardened, this provided a good, slightly rough surface for a new cake to build.As mentioned earlier, there was a crater on the bowl. It was large enough that I would not be able to make it disappear entirely, but I wanted to make it solid and smooth, and meld into the rest of the wood. I fixed it up with a mixture of cyanoacrylate adhesive and briar dust. This, too, was tricky, as the wound occurred immediately adjacent to one of the stylized grooves in the pipe. Next, I used all nine Micromesh pads (1,500 through 12,000 grit) all over the stummel to make it lovely and smooth. Then, applying some Before & After Restoration Balm added that je ne sais quoi which brings out the wood’s beauty. At long last, I was off to my bench buffer to put the final touches on this pipe. I first gave it a thorough going-over with White Diamond compound. Following that, several coats of carnauba wax created a beautiful, glossy seal on the pipe and some closure to this long and involved repair.The lovely shine made the wood look beautiful! Once again, I’m sure my cousin will love this pipe! I hope you enjoyed reading the story of this pipe as much I as I did restoring it. The approximate dimensions of the pipe are as follows: length 5¾ in. (146 mm); height 3½ in. (90 mm); bowl diameter 1½ in. (39 mm); chamber diameter ¾ in. (20 mm). The weight of the pipe is 1½ oz. (46 g). If you are interested in more of my work, please follow me here on Steve’s website or email me directly at kenneth@knightsofthepipe.com. Thank you very much for reading and, as always, I welcome and encourage your comments.

Life-Support for a Butz-Choquin Oom Paul Egg


Blog by Kenneth Lieblich

Another pipe in my ongoing “French Collection”, this new addition came in a lot of pipes from France (appropriately). I pulled it out of the pile of filthy pipes and found it quite charming. This pipe is an Oom Paul Egg shape. It was made by the famous and long-standing French pipe maker Butz-Choquin and is a small, wounded, but very attractive pipe. On the left side of the shank, it reads Butz-Choquin [over] Cocarde (which is the model name). On the right side of the shank, it reads St Claude [over] France [over] 1307. On the left side of the stem is the company’s logo, a “BC”. The logo is badly worn and will be difficult to restore.Both Pipedia and Pipephil have good write-ups on the history of Butz-Choquin and I encourage you to read both. Also, Steve has restored quite a few and it’s worth having a look at his writings too. For the moment, here is some information from Pipedia:

The pipe, from Metz to Saint-Claude.

Jean-Baptiste Choquin of Metz started out as a tobacconist. This enterprise was prosperous; he had several employees. Among those, there was a certain Gustave Butz who was its first workman and who became his son-in-law by marrying Choquin’s daughter Marie in 1858.

In 1858 Jean-Baptiste Choquin created, in collaboration with Gustave Butz, the Choquin pipe. This bent pipe with a flat-bottomed bowl was finished with an albatross-bone mouthpiece, fixed with silver rings.

In 1858, still in Metz, Gustave Butz built an establishment for the manufacture of the Choquin pipe which took the name of . In 1951, the Berrod-Regad company bought the trademark, continuing manufacture until 2002. Departing from Metz, the workshop was relocated to Saint-Claude, then also called “the world capital of the briar pipe”, under the Berrod-Regad group. The Berrod-Regad group would go on to completely rebuild the network of representatives until finally entering the export market in 1960 and has since won several prizes, as well as the Gold Cup of French good taste.

In a few years, the brand’s collection increased from ten to seventy series. 135 years after it was founded, the pipe is still well-known not only in France but throughout the world. In 2002, the Berrod family, wishing to preserve manufacture of pipes in Saint-Claude, handed over the company to Fabien Guichon, a native of the area, who will continue to develop the brand during the 21st century.

Meanwhile, Pipephil says this:

The origin of the brand reaches back to 1858 when Jean-Baptiste Choquin in collaboration with his son-in-law Gustave Butz created their first pipe in Metz (France). Since 1951 Butz-Choquin Site officiel Butz Choquin, pipes de Saint-Claude jura. BC pipe de bruyere luxe is a brand of the Berrod-Regad group (Saint-Claude, France).

Jean Paul Berrod managed the company from 1969 to 2002 when he retired and sold the corporate to Mr Fabien Gichon. Denis Blanc, allready owner of EWA, took over the S.A. Berrod-Regad in 2006.

In an old Butz-Choquin catalogue, I found the pipe shape in question, listed with its requisite number:This is an older pipe, and is heavily used, though the stem is in reasonably good shape, compared to the stummel. There are a few minor tooth marks, some oxidation and calcification, but nothing too serious. Additionally, over the decades, the stem has straightened somewhat, so it will need to be bent back into place. The stummel is a different kettle of fish. The wood is very nice, but it has several fills on the outside of the bowl, there are nicks around the rim, the wood is filthy, and there are scratches around the bowl. It just looks tired and worn. The stem was first on my list. . .  This stem has a stinger in it – and it was being quite stubborn about coming out! The goo had glued the stinger into the tenon, so I opted to warm the stem and stinger with my heat gun and this provided just enough softening of the internal gunk to allow me to pull it out. It then went for a soak in some lemon-infused isopropyl alcohol. I let it sit for several hours and then cleaned it off and it looked much improved. I then finished it with some metal cleanser and moved on. Next, I wiped the outside down with Murphy’s Oil Soap on some cotton pads. I also took a BIC lighter and ‘painted’ the stem with its flame in order to lift the few bite marks and dents. Then I cleaned out the inside with pipe cleaners and isopropyl alcohol. It was pretty dirty, and I went through a good amount of pipe cleaners. I then wiped down the stem with SoftScrub cleaner to remove surface oxidation. Once this process was done, the stem went for an overnight soak in the Pipe Stem Oxidation Remover. This allows me to clean the oxidation off in a couple of ways: by applying a mild cleaner to the surface and sanding the stem. The next day, I used SoftScrub again with some cotton rounds. After this, I used some nail polish to restore the logo on the stem. I painted the area carefully and let it fully set before proceeding. I built up the dents on the stem with black cyanoacrylate adhesive and let them fully cure. I then sanded the adhesive down then with 220-, 400-, and 600-grit sandpapers to meld seamlessly into the stem. As I previously mentioned, the stem had straightened itself out over the years; so I used my heat gun to warm the stem and return it to its original shape.I then used all nine Micromesh pads (1,500 through 12,000 grit) to bring out the lovely black lustre on the stem. I also used Obsidian Pipe Stem Oil in between each pad scrubbing.On with the stummel! I decided to ream out the bowl. I used the PipNet Reamer and the KleenReem to remove the built-up cake and followed that with 220-grit sandpaper taped to a dowel to eliminate as much as I could. I took the chamber down to bare briar, as I wanted to ensure there were no hidden flaws in the wall. Fortunately, there were none. I used cotton rounds and some Murphy’s Oil Soap to scrub the outside of the stummel and a toothbrush with Murphy’s for the lava on the rim of the pipe.I then proceeded to clean out the insides of the shank with Q-tips, pipe cleaners, and lemon-infused isopropyl alcohol. The shank was absolutely caked with debris and I went through an extraordinary amount of cotton to clean it out. With all the filth in this pipe, I opted for an alcohol bath to clean it thoroughly. I followed that up by cleaning the insides with some dish soap and tube brushes. I decided to de-ghost the pipe in order to remove any lingering smells of the past. I thrust cotton balls into the bowl and the shank and saturated them with 99% isopropyl alcohol. I let the stummel sit overnight. This caused any remaining oils, tars and smells to leach out into the cotton. The bowl was nice and clean after this.Having completed that, I was able to address the blemishes to the outside of the bowl. First, I repaired the half-dozen fills with CA glue and briar dust. For the nicks on the rim and bowl, I dug out my iron and a damp cloth to raise the nicks. The hot and moist steam can often cause the wood to swell slightly and return to shape. A little unusually, this technique worked brilliantly and the next two photos (before and after) show a good example of what the iron can do. Now I could address the burn on the rim. I took some sandpaper and my Micromesh pads to sand and smooth everything out. After that, a light application of Before & After Restoration Balm brought out the best in the stummel’s grain, then took it to the buffer. A dose of White Diamond and a few coats of carnauba wax were just what this pipe needed. This little pipe looks fantastic again and is ready to be enjoyed again by the next owner! I am pleased to announce that this pipe is for sale! If you are interested in acquiring it for your collection, please have a look in the ‘French’ pipe section of the store here on Steve’s website. You can also email me directly at kenneth@knightsofthepipe.com. The approximate dimensions of the pipe are as follows: length 4 in. (100 mm); height 3¾ in. (94 mm); bowl diameter 1⅜ in. (36 mm); chamber diameter ¾ in. (19 mm). The weight of the pipe is 1⅜ oz. (41 g). I hope you enjoyed reading the story of this pipe’s restoration as much as I did restoring it. If you are interested in more of my work, please follow me here on Steve’s website or send me an email. Thank you very much for reading and, as always, I welcome and encourage your comments.