by Kenneth Lieblich
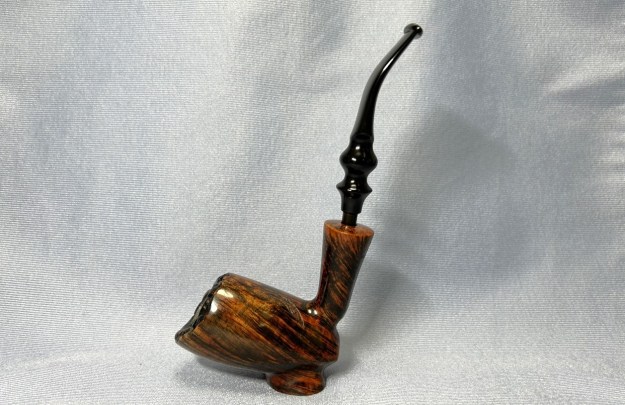
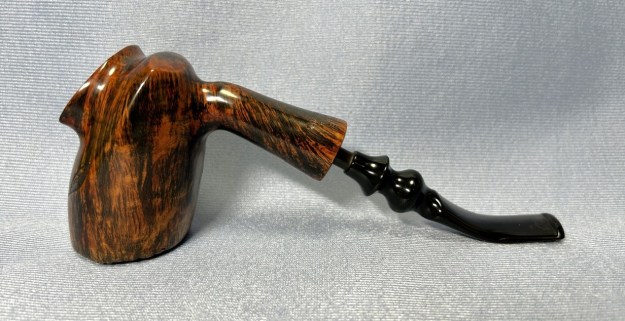
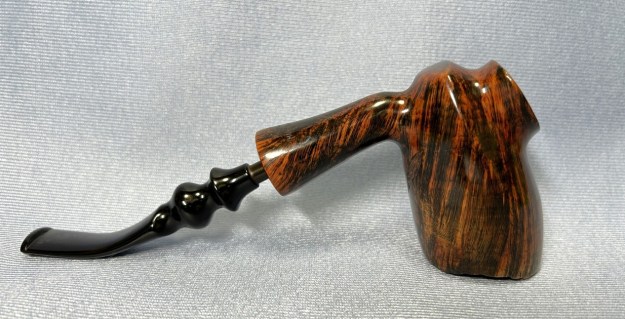
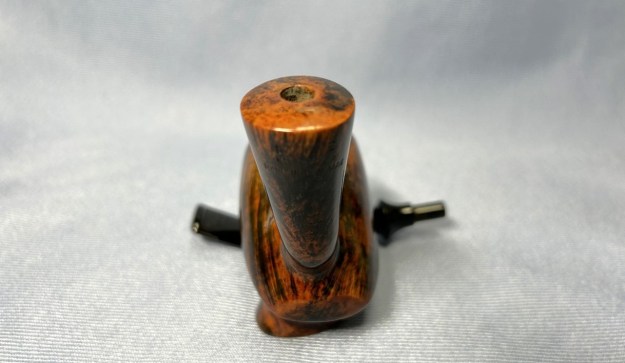
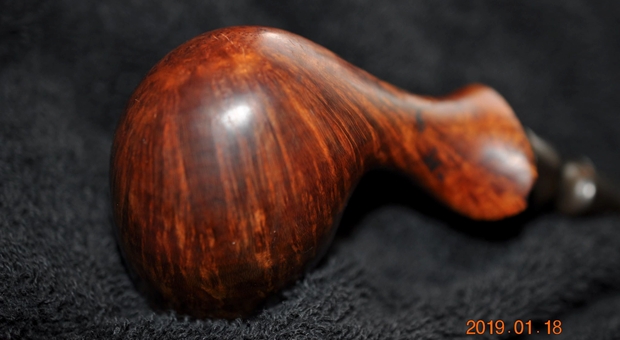
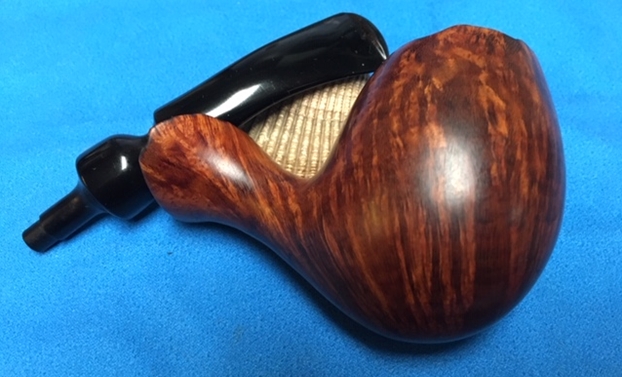
Hold on to your hats, folks – you’re in for a wild ride of pipe restoration. This amazing pipe has had quite a life, and its latest chapter includes coming into my possession. This is a Bjarne Hand-Carved freehand sitter from one of the great characters of the Danish pipe industry, Bjarne Nielsen. This pipe found its way to me through an auction and I was immediately besotted. It is a wonderful piece of briar, with a spacious bowl, and a charming, bent vulcanite stem. It’s a beauty and really makes an impression.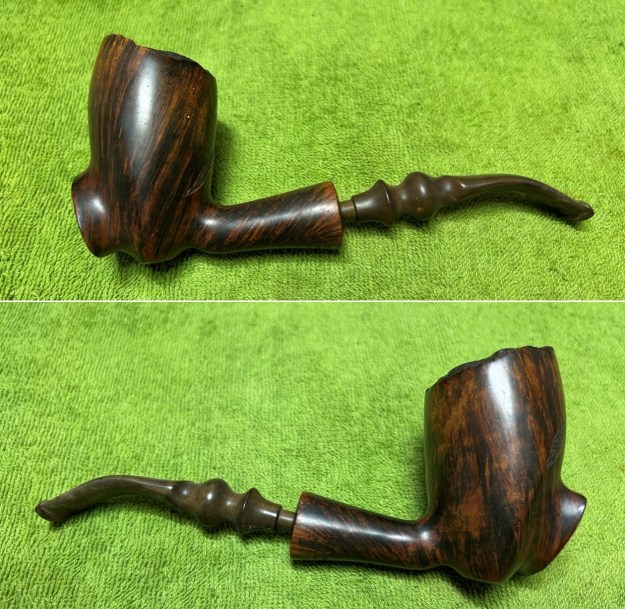
 Underneath the shank, the following words are engraved: Bjarne [over] Hand-Carved [over] Made in Denmark. There is no logo on the stem. Given the absence of a logo, I suspect that this is an older Bjarne pipe.
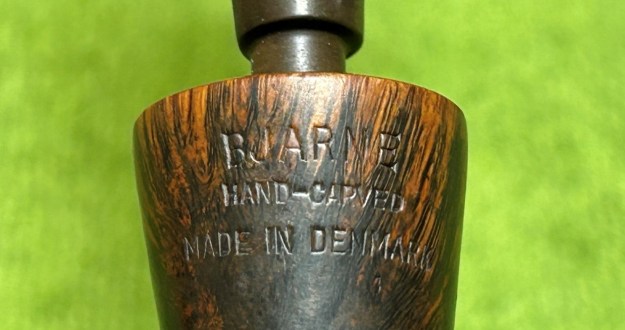 Pipedia has a good article on Bjarne Nielsen and I recommend reading it here. For now, here is a part of that biography:
Bjarne Nielsen was born in 1941, and started smoking a pipe when he was 16 years old, and he also made some pipes for his own use at that time. He liked the pipes and made some more, giving some away as presents to friends. At the University of Copenhagen he obtained an MBA degree and found work at the Danish Ministry of Foreign Affairs where he helped Danish companies that were exporting their products establish contacts in foreign countries. That was in the 1960’s when the high demand for Danish freehand pipes started, so Bjarne was often asked if he knew of any companies that could sell those types of pipes. But all those companies had their order-books filled, so Bjarne always had to give a negative answer. One day he decided to send some pictures of his own pipes, and the response was overwhelming. He was asked how many pipes he could make and how quickly he could deliver them, and at once Bjarne had order for more pipes than he could make. What had been a relaxing hobby now became much more than that.
With a demanding job it was hard to find time to make pipes in that quantity, and Bjarne had to choose. His dream had always been to have a company of his own, and if he wanted fo fulfill that dream, now was the time to do it. But to leave a promising career, in which he probably would have become a Danish ambassador in some foreign country, was indeed a big step to take. “Many thought I was crazy”, Bjarne says, “and one of them was my wife. But she supported my decision anyway.”
He made that decision in 1973, and became a fulltime pipemaker. But he soon realized that it was impossible for one person to handle all of it–he could not make a lot of pipes, sell them and collect money for them all by himself. So he decided to find some pipemakers to help him. In those days Preben Holm was one of the biggest makers of fancy pipes, and he employed a great number of pipemakers. But not all of them were happy to work for Preben,m so Bjarne recruited a few of those.
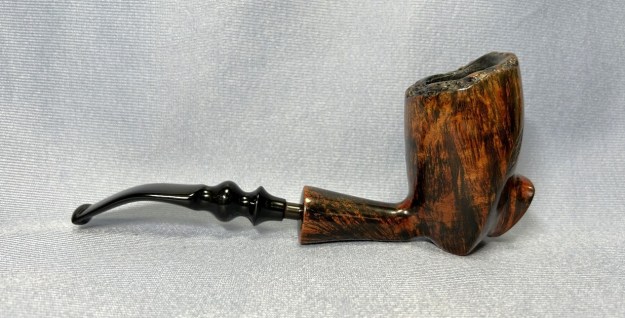
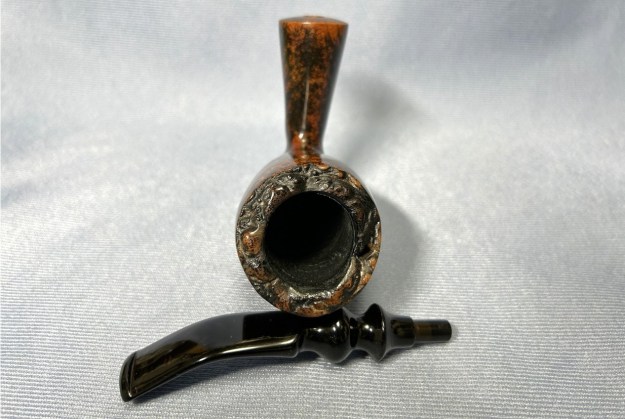
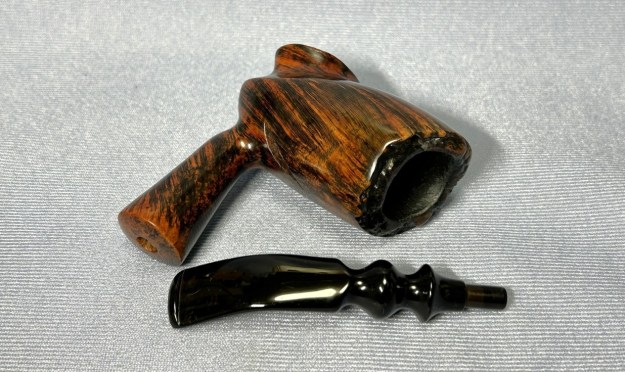
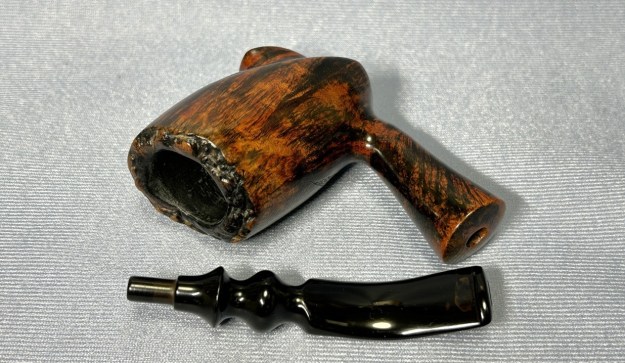
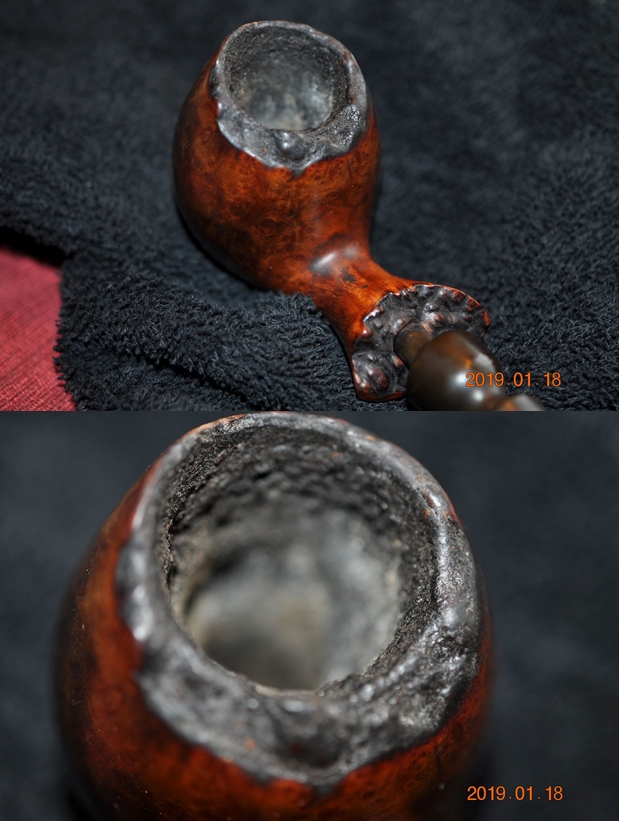
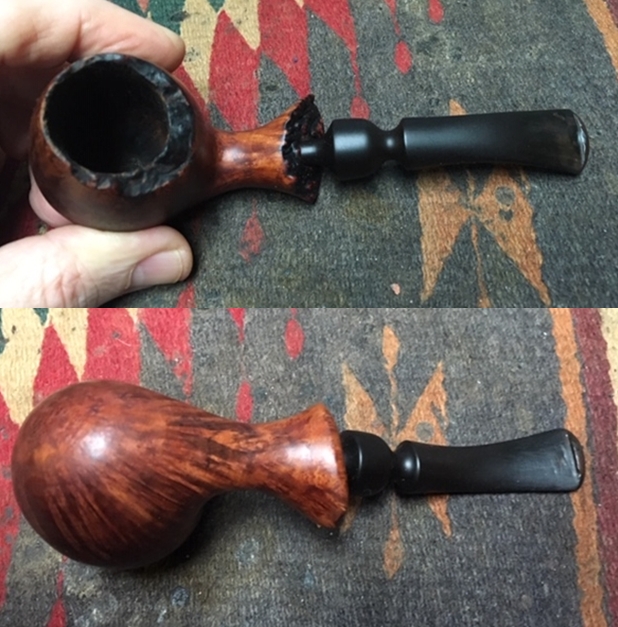
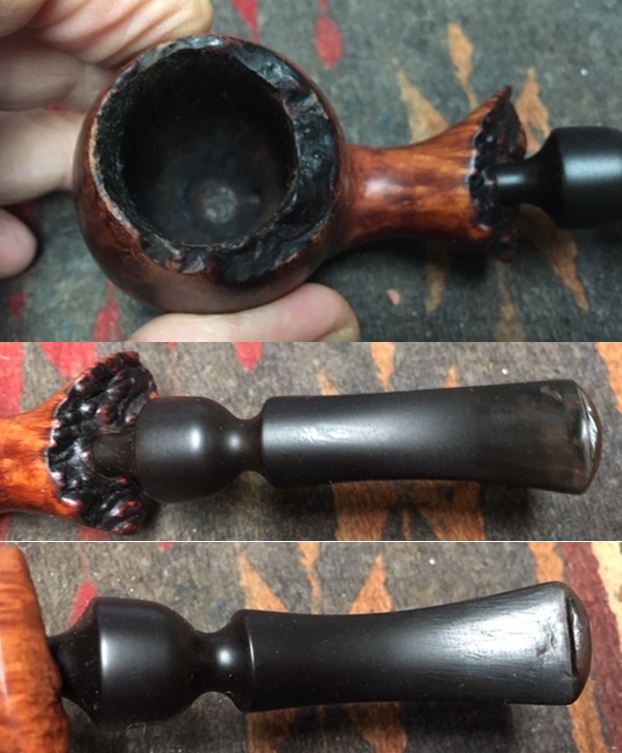
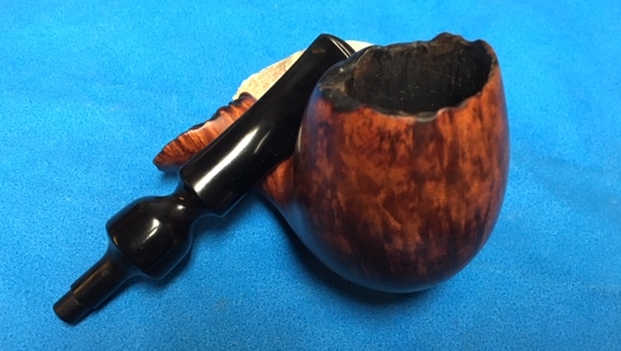
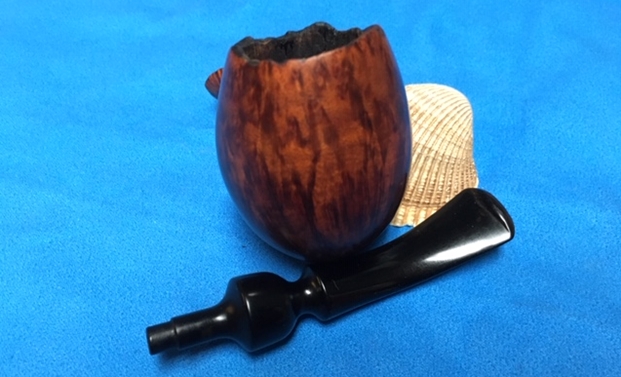
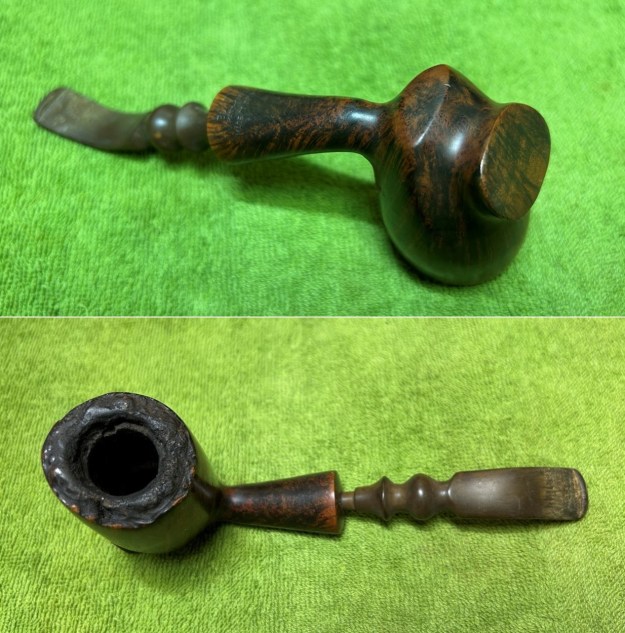
During the first years all of Bjarne’s pipes were sold in the USA, but at the end of the 1970s he visited the pipe show in Frankfurt and found that there was a market for his there as well. However, he found that the Germans wanted a completely different style of pipes–pipes in traditional shapes. So if he wanted to be successful there, he had to add a completely new line to his production. “It was not easy, we learned it the hard way,” Bjarne says. But they certainly succeeded, and for a number of years Germany became the top-selling market for Bjarne’s pipes.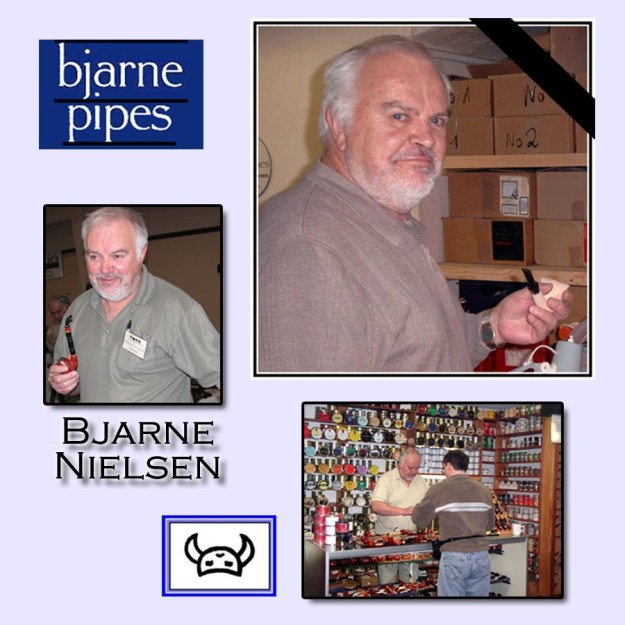 Let’s take a closer look at this pipe’s condition. It was obvious right away that this was a terrific pipe – but, boy, was it dirty. The stem was heavily chewed, with some significant dents in the vulcanite. There was a lot of calcification and oxidation. The stem will be fine in the end – it’ll just take some hard work. Similarly, the stummel needed help. The briar was dirty and tired. The rim was coated in lava, and the bowl was full of cake. I just needed to uncover the beauty of this baby. Let’s get on with it.
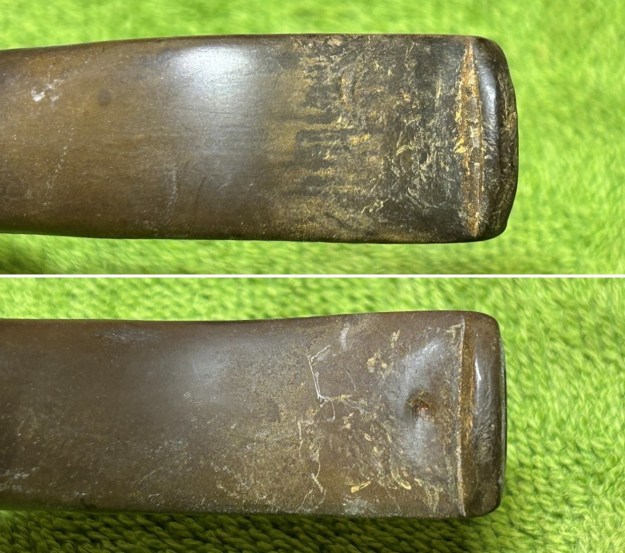
 To begin, I used a disposable lighter and ‘painted’ the stem with its flame. The gentle heat of the flame can cause the dents in the vulcanite of the stem to expand back into shape. In this case, it worked quite well and I got some lift in the dents. Not perfect, but definitely some improvement. The stem’s calcification was quite substantial. I used an old butter knife and gently scraped some of the thicker accretion off. Doing this now helps later in removing the oxidation. I used oil soap on a few cotton rounds and wiped down the stem to provide an initial cleaning of filth before moving on to the next steps.
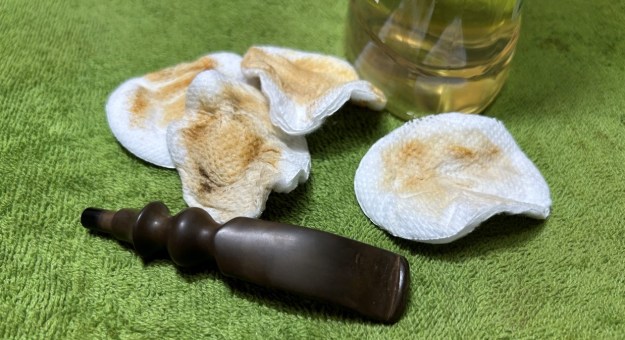 The primary cleaning came next. I disinfected the inside of the stem with pipe cleaners dipped in lemon-infused 99% isopropyl alcohol. I scrubbed thoroughly to make sure the interior was very clean. I used a good numbers of pipe cleaners.
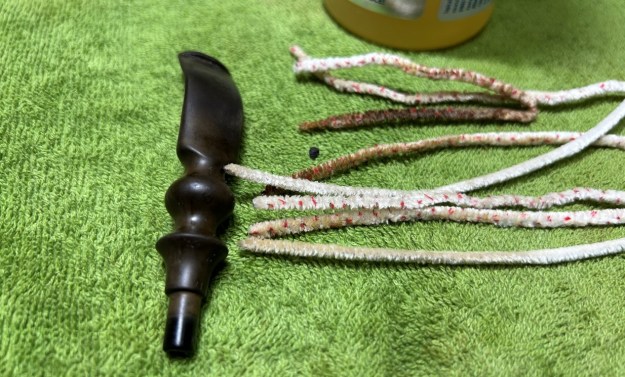 The goal of the next step is the removal (or minimization) of oxidation. Going to my sink, I used cream cleanser, cotton rounds, and a toothbrush, and scoured the stem to remove as much surface oxidation as possible. As the photos show, the result was a hideous, brownish mess – but better off the stem than on it.
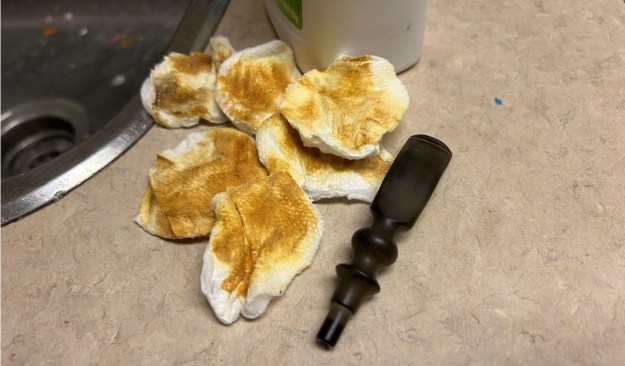 Once the stem was reasonably clean, I soaked it overnight in some Briarville Stem Oxidation Remover. This solution works to draw oxidation in the stem to the surface of the vulcanite. This is a major aid and an important step in ensuring a clean stem. The following day, I drew out the stem from its bath and scrubbed the lingering fluid with a toothbrush. Due to the severity of the oxidation, I then repeated the scrubbing with the cream cleanser for maximum effect. This really helped a lot.
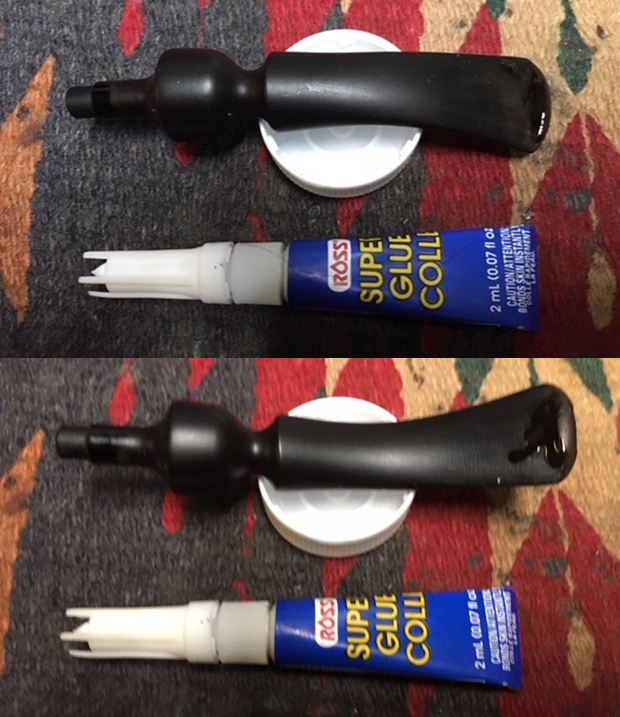
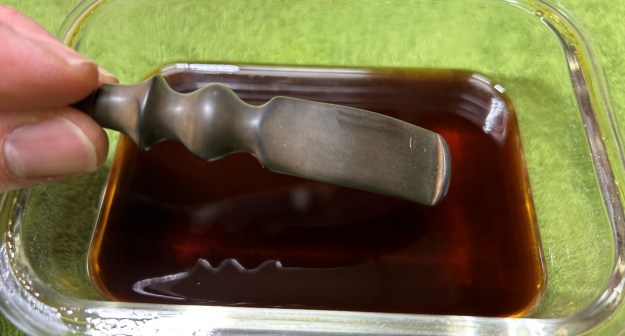 As the stem was now clean and dry, I set about fixing the marks and dents in the vulcanite. This was done by filling those divots with black cyanoacrylate adhesive, impregnated with carbon and rubber. I left this to cure and moved on.
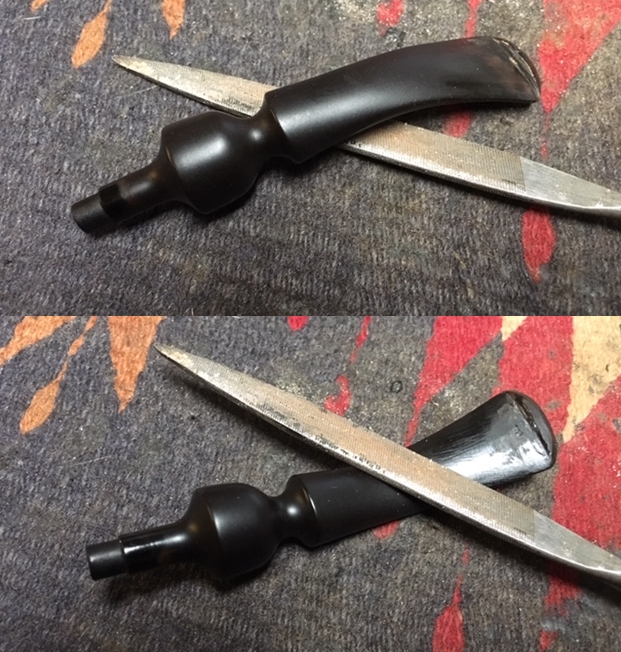
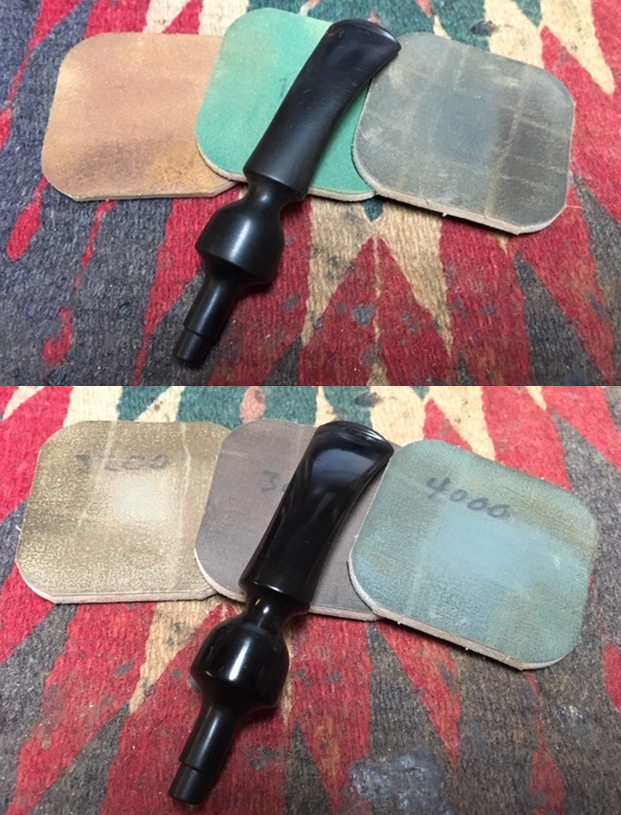
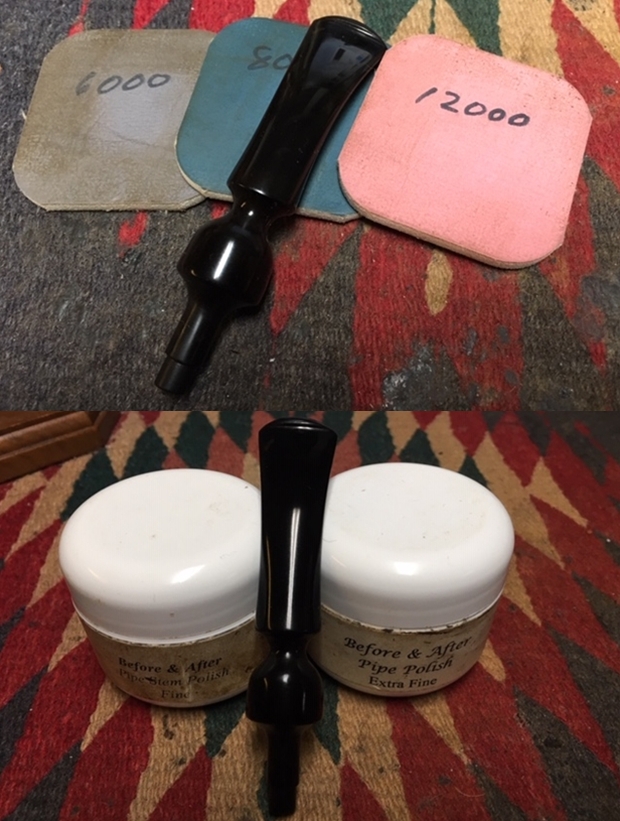
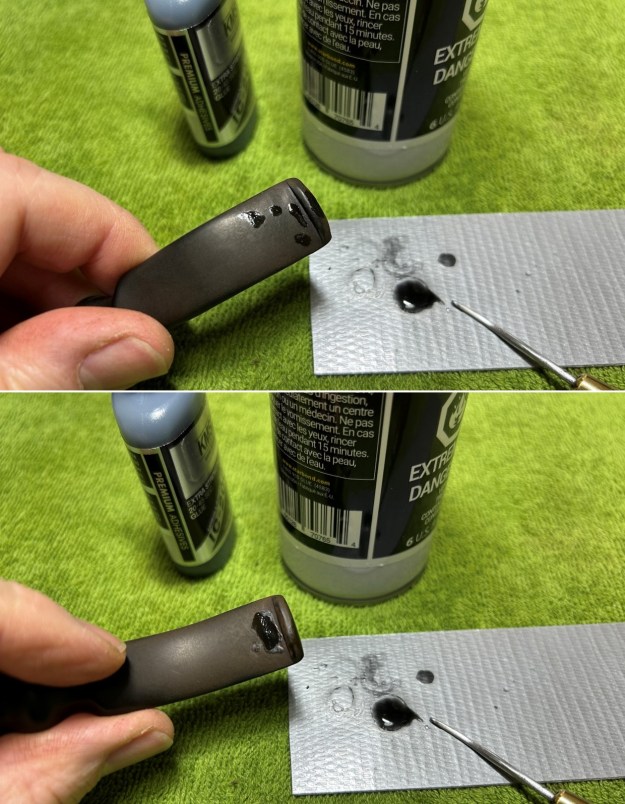 The penultimate step for the stem is sanding. First, with my set of needle files, I reduced the bulk of the cyanoacrylate repairs. I removed the excess adhesive as near to the surface as possible, without cutting into the vulcanite. Following that, I used all nine of the micromesh sanding pads (1,500 through 12,000 grit) to sand out flaws, even out the vulcanite, and provide gentle polishing of the finished surface. I also applied pipe-stem oil while using the last five micromesh pads. There was a wonderful, deep black shine to the stem when I was done.
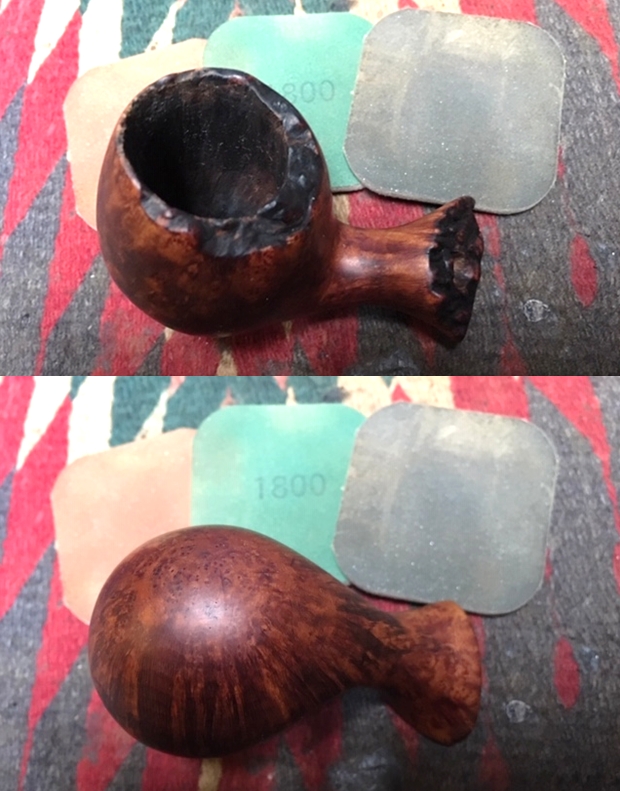
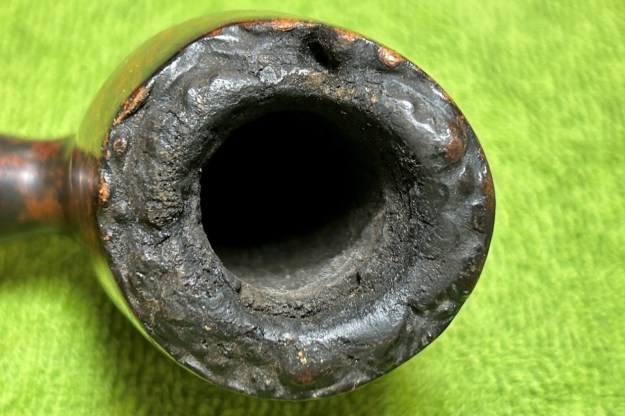
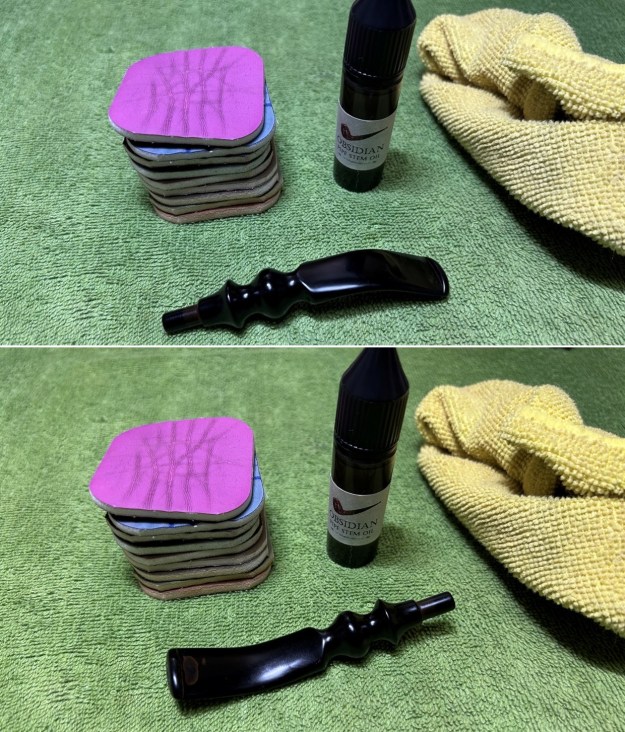 As the stem was (nearly) complete, I moved on to the stummel. The first step was to ream out the bowl – that is to say, remove all the cake inside the bowl. This accomplished a couple of things. First (and most obviously), it cleaned the bowl and provided a refurbished chamber for future smoking. Second, when the old cake was removed, I could inspect the interior walls of the bowl and determine if there was damage or not. I used a reamer, a pipe knife, and a piece of sandpaper taped to a wooden dowel. Collectively, these ensured that all the debris was removed. However, it was clear that there were a few heat fissures inside the bowl that would need to be repaired. It’s difficult to tell from the photo below, but the quantity of debris removed was enormous. It must have been a well-loved pipe!
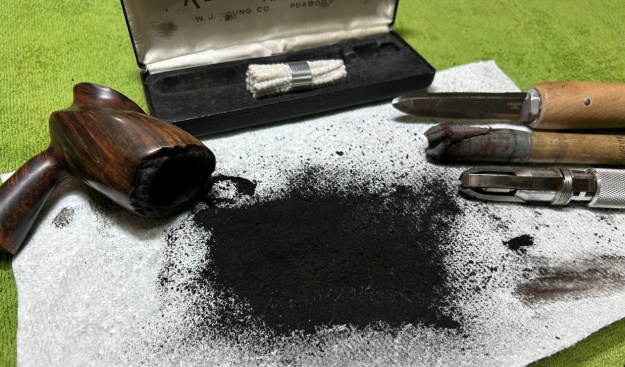 Similar to the stem, I then cleaned the stummel with both pipe cleaners and cotton swabs dipped in lemon-infused 99% isopropyl alcohol. With a pipe this dirty, it took quite a while and much cotton to get clean.
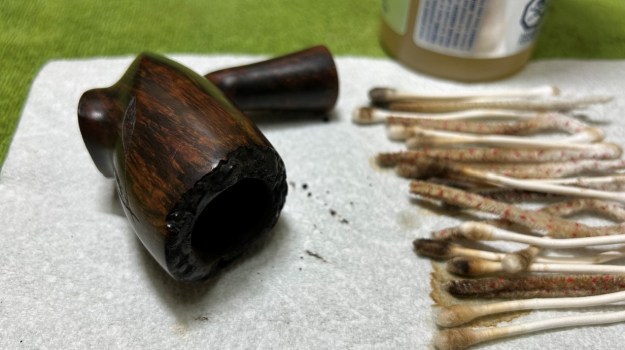 I then decided to ‘de-ghost’ the pipe – that is to say, exorcize the remaining filth from the briar. I filled the bowl and the shank with cotton balls, then saturated them with 99% isopropyl alcohol. I let the stummel sit overnight. This caused the remaining oils, tars and smells to leach out into the cotton.
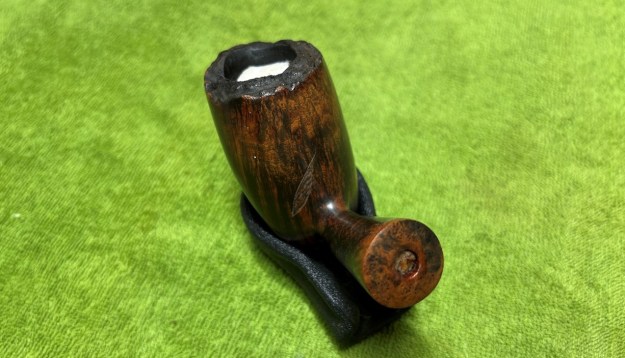 My next step was to remove the lava on the rim. For this, I normally take a piece of machine steel and gently scrape the lava away. However, a jackhammer would have been more appropriate in this case! Instead, I soaked the rim in some oil soap and this softened things up enough for me to scrub the debris off with a nylon-bristle brush. To tidy up the briar, I also wiped down the outside with some oil soap on cotton rounds and used a toothbrush in the crevices. This did a good job of cleaning any latent dirt on the surface of the briar. The last step of the cleaning process was to scour the inside of the stummel with some soap and tube brushes. This was the culmination of a lot of hard work in getting the pipe clean. Additionally, there was a minuscule line on the bottom of the stummel. It was so small, in fact, that I couldn’t really determine if this was a craze line in the briar or just a little scratch. Just to be on the safe side, I applied a tiny bit of clear cyanoacrylate adhesive and sanded it down.
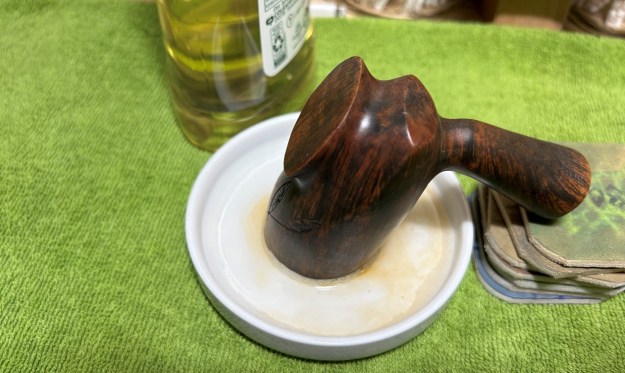 To address the heat fissures inside the bowl, I used an epoxy adhesive that is extremely hard, resistant to high temperatures, and completely inert when cured. It worked superbly. I gently filled the affected area with the epoxy and let it cure for a full 24 hours. The next day, I roughened up the epoxy’s surface with 220-grit sandpaper for the next step. I thinly coated the inside of the bowl with a mixture of my wife’s homemade yogurt and activated charcoal. Once hardened, this provides a good, faintly rough surface for a new cake to build.
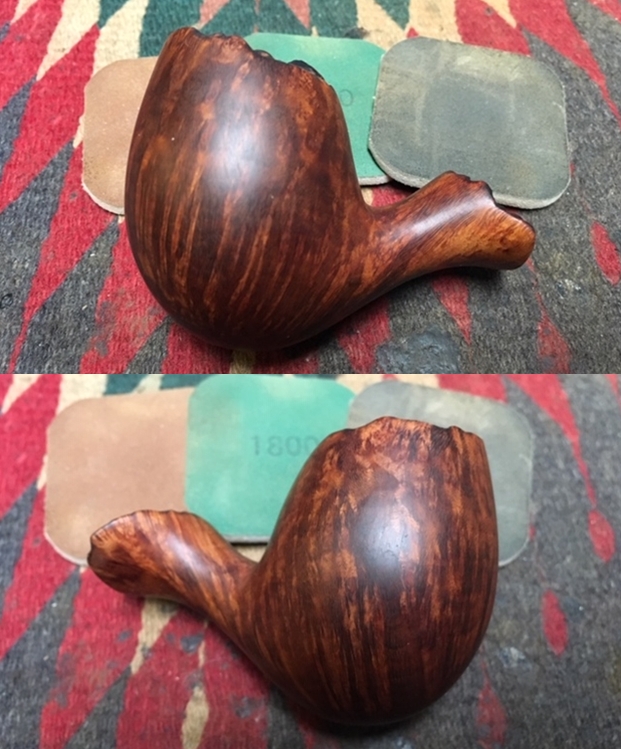
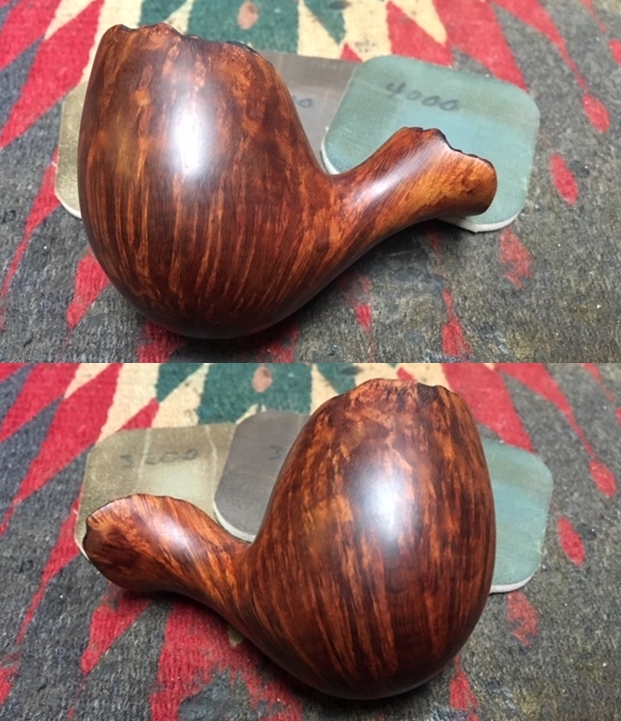
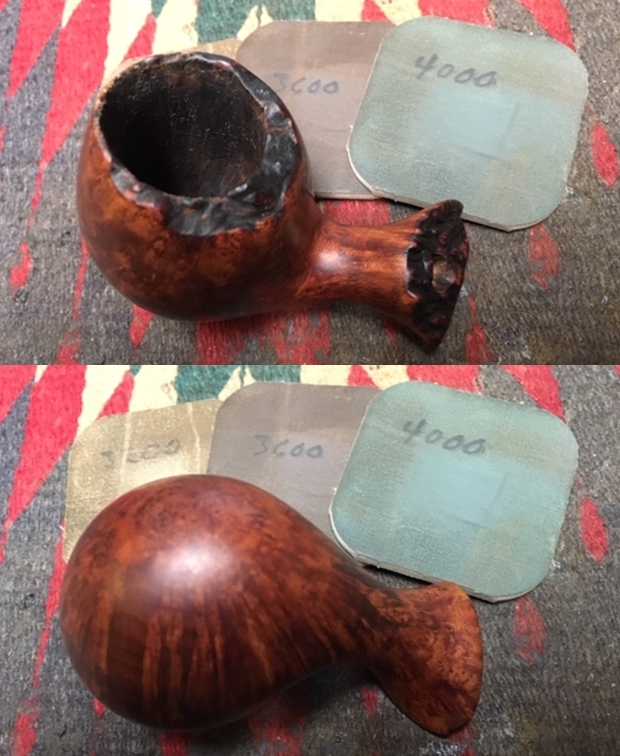
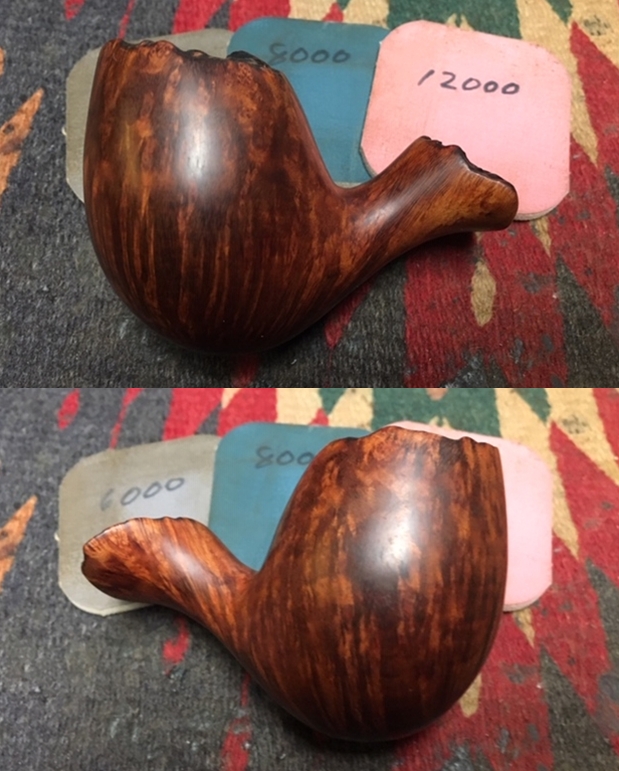
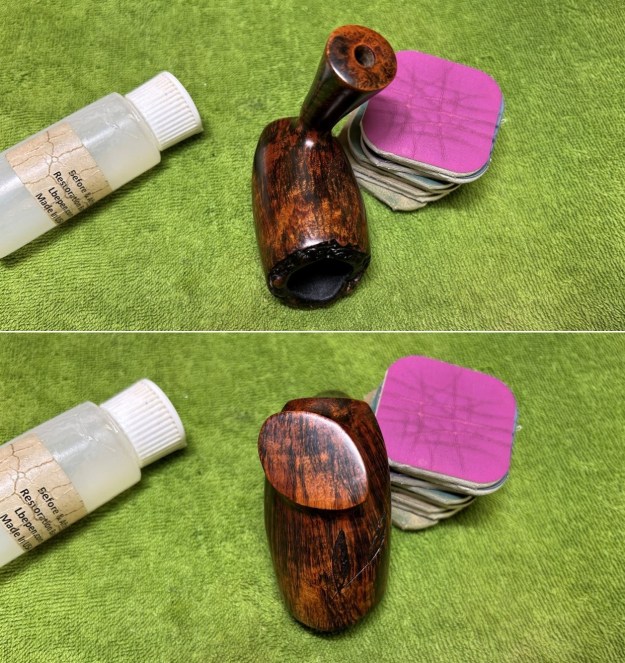
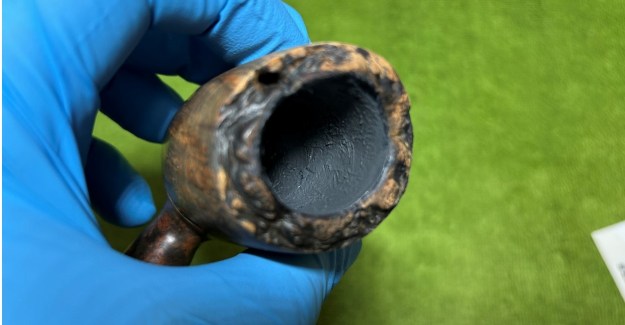 I used all nine micromesh pads (1,500 through 12,000 grit) to sand the outside of the stummel and finish it off. This sanding minimizes flaws in the briar and provides a beautiful smoothness to the wood. I rubbed some LBE Before & After Restoration Balm into the briar and let it sit for 30 minutes or so. The balm moisturizes the wood and gives a beautiful depth to the briar. I then buffed the stummel with a microfibre cloth.
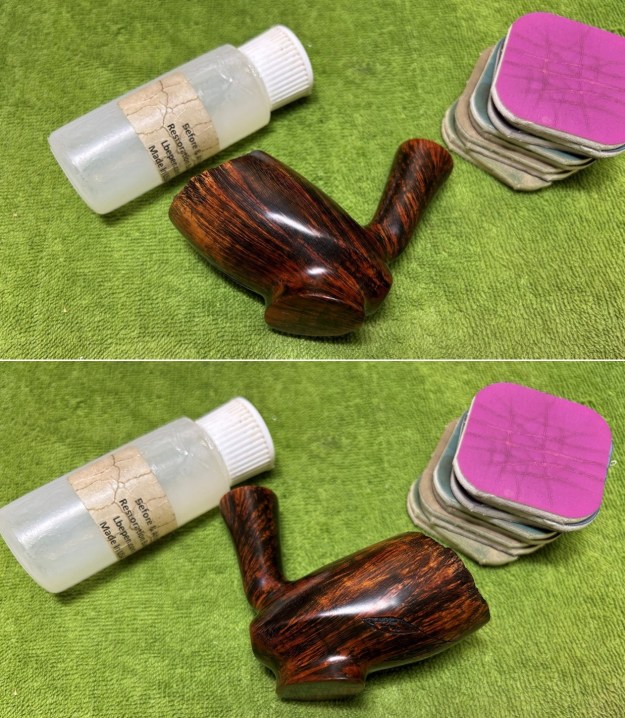
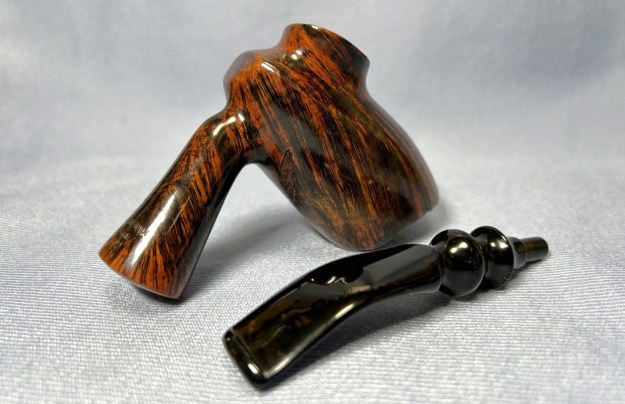
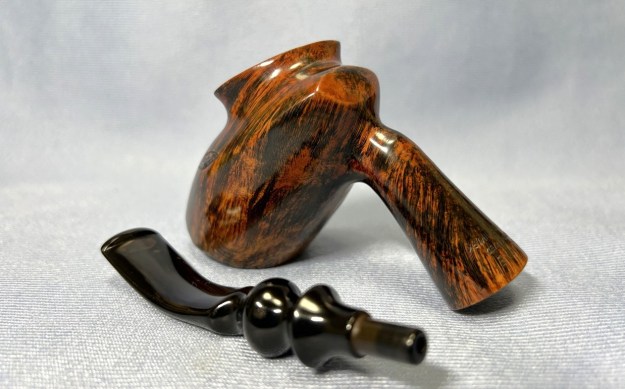
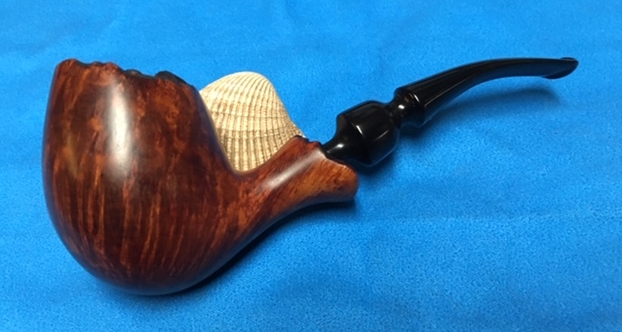
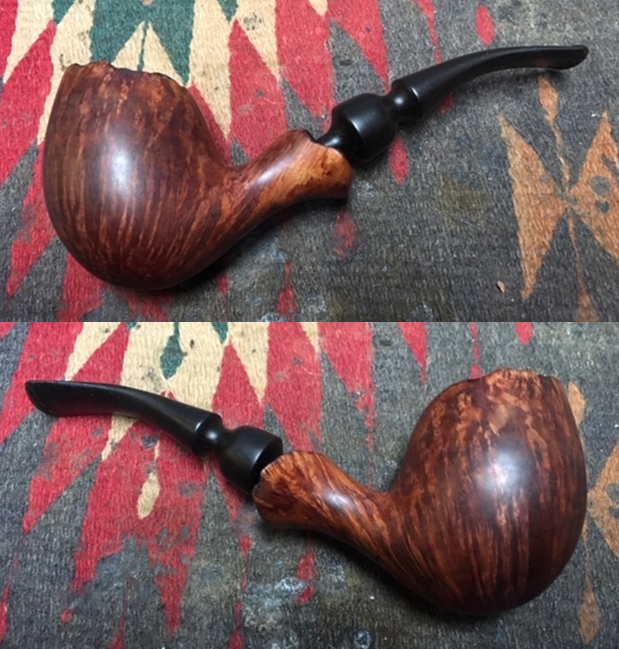
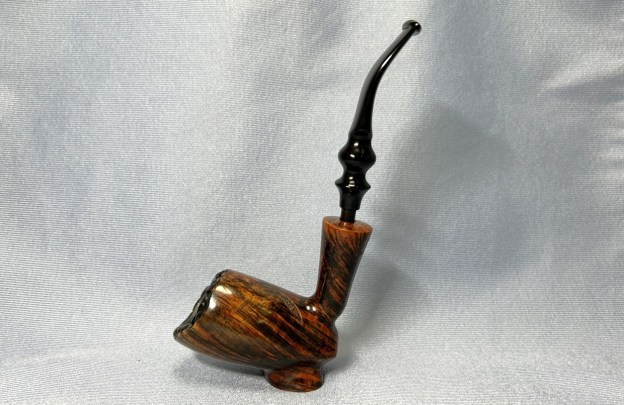
 For the final step, I took the pipe to my bench polisher and carefully buffed it – first with a blue diamond compound, then with three coats of carnauba wax. This procedure makes the pipe look its best – the stummel sings and the stem glows. You can now see why I called this article ‘You’ve Come a Long Way, Baby!’
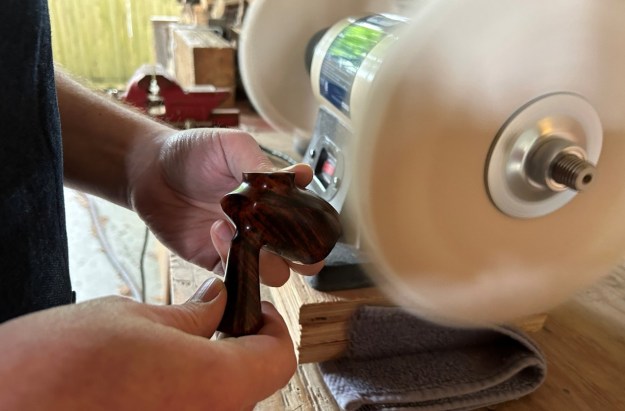 All done! This Bjarne Hand-Carved freehand sitter looks fantastic again and is ready to be enjoyed by its next owner. I am pleased to announce that this pipe is for sale! If you are interested in acquiring it for your collection, please have a look in the ‘Danish’ section of the store here on Steve’s website. You can also email me directly at kenneth@knightsofthepipe.com. The approximate dimensions of the pipe are as follows: length 6¾ in. (175 mm); height 3 in. (75 mm); bowl diameter 1¾ in. (44 mm); chamber diameter 1 in. (25 mm). The weight of the pipe is 2½ oz. (74 g). I hope you enjoyed reading the story of this pipe’s restoration as much as I enjoyed restoring it. If you are interested in more of my work, please follow me here on Steve’s website or send me an email. Thank you very much for reading and, as always, I welcome and encourage your comments.