
by Steve Laug
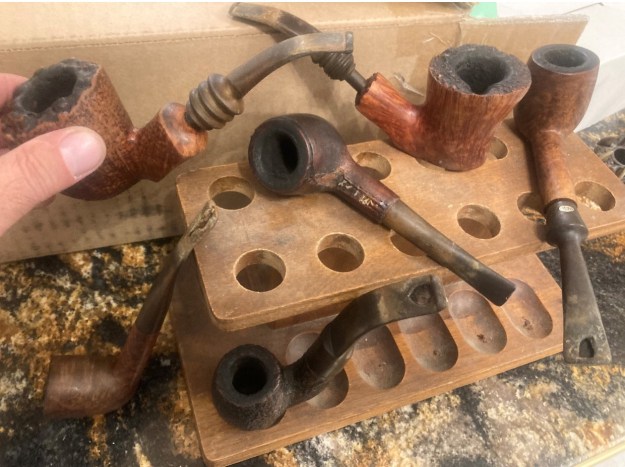
In January Jeff found out about an estate sale in Pocatello, Idaho, USA. It turned out that the sale was for a fellow Jeff and I had purchased pipes from in the past, Gene. He had been the owner of Outwest Tobacco in Pocatello (long closed now) and I bought tobacco and other smoking items from him in the past. As I think about it now, it seems that I had known Gene for over 30 years Jeff and I had been to his home and enjoyed coffee and a few pipes together. I have no idea how many pipes we bought on those visits as well as to the antique shop of his daughter. I know that there were many pipes. When we heard that it was Gene’s personal collection that was for sale and that he had passed away we decided for Jeff to go to the house and have a look. He went on January 25, 2024 to scope it out as we had seen his personal collection of pipes and there were definitely some among those well smoked old warriors that would be great to pick up. Perhaps there would even be one that could join my own collection in memory of Gene.
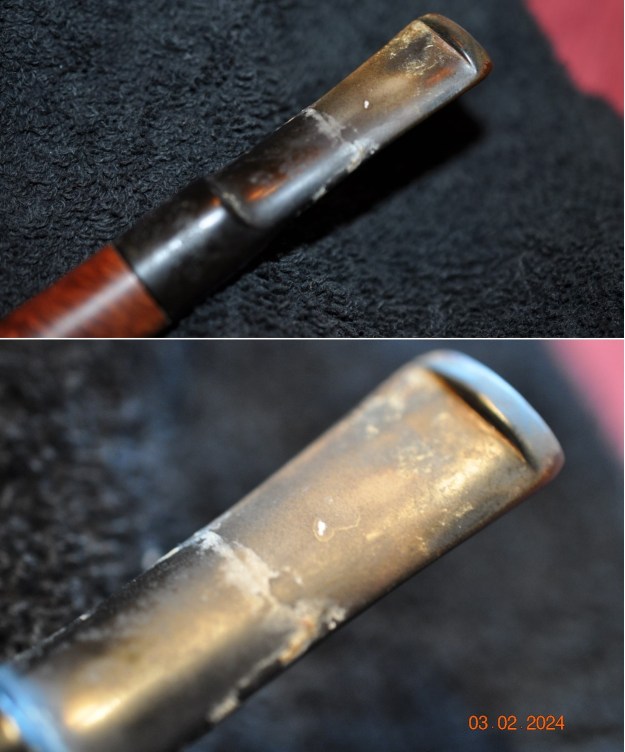
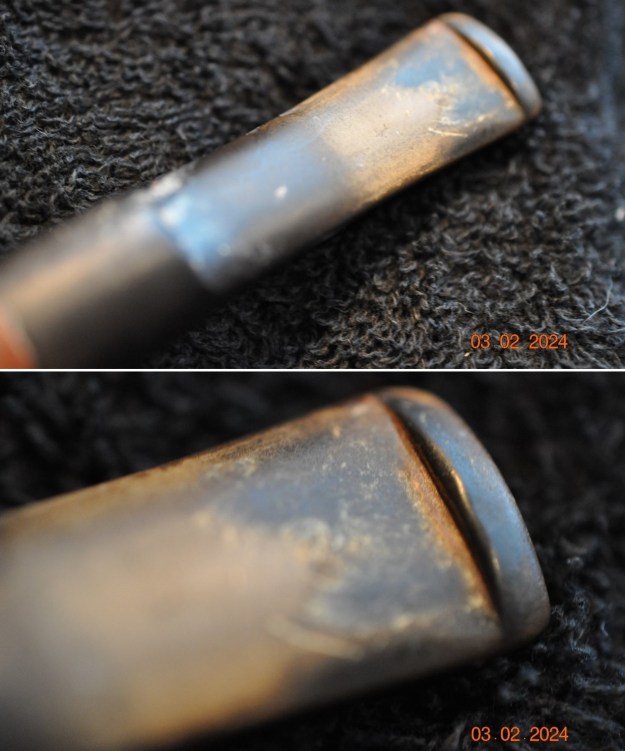
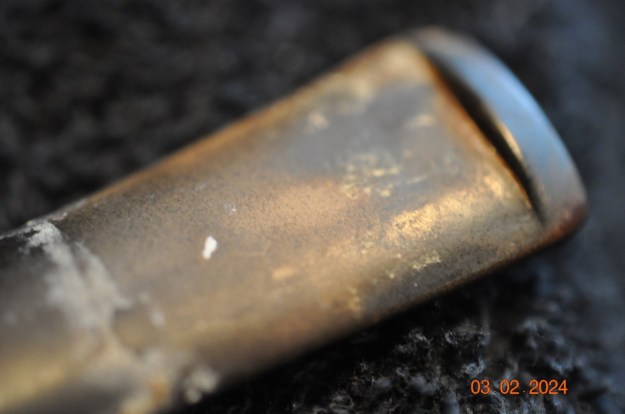
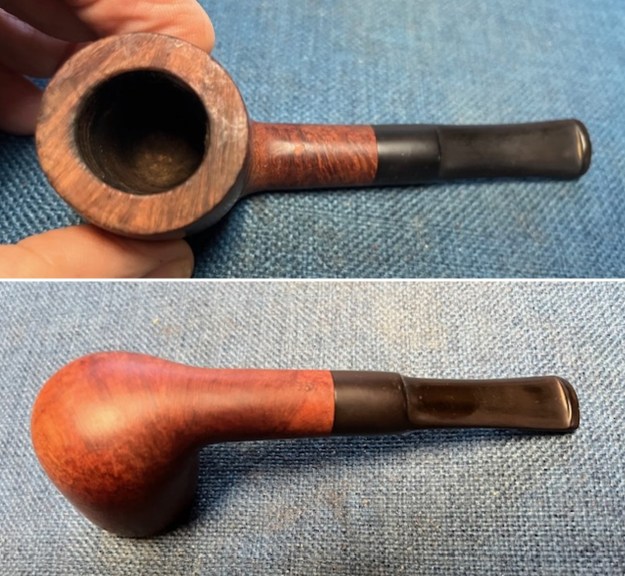
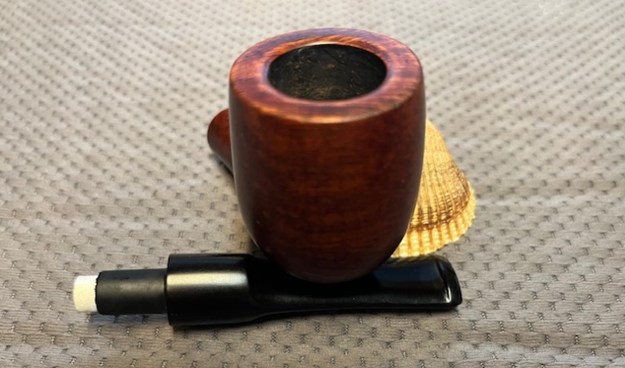
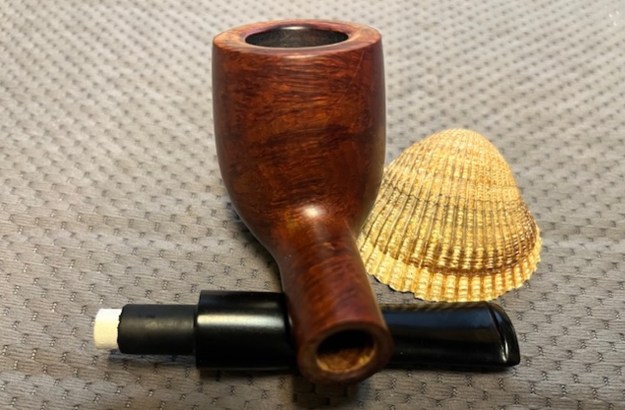
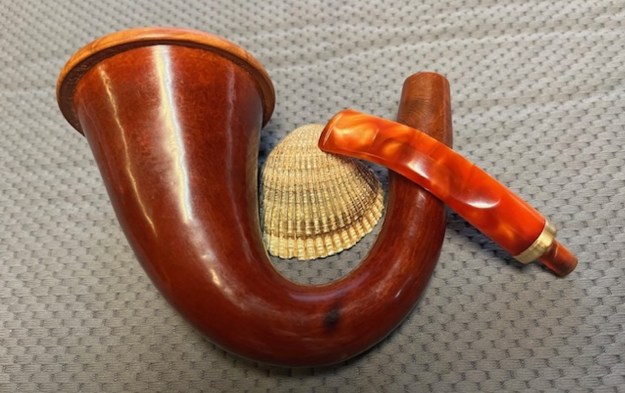
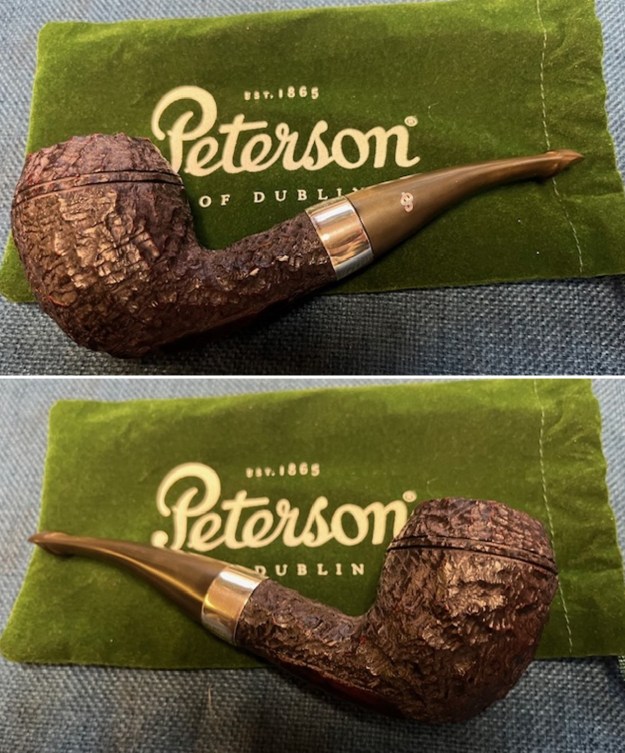
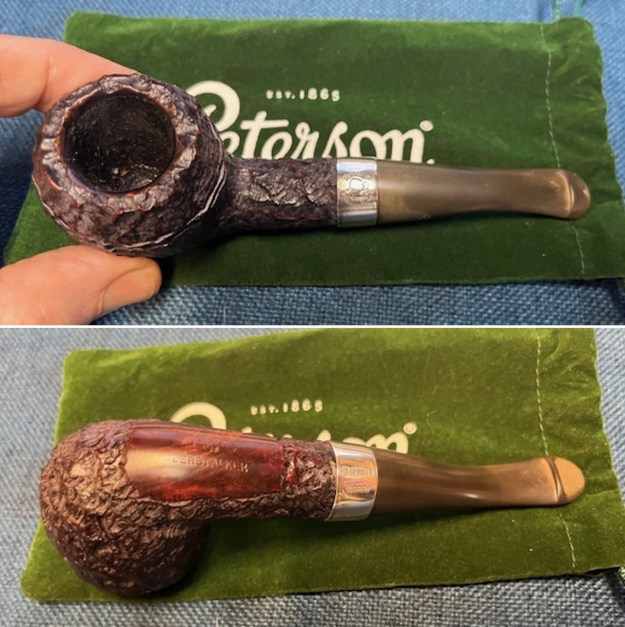
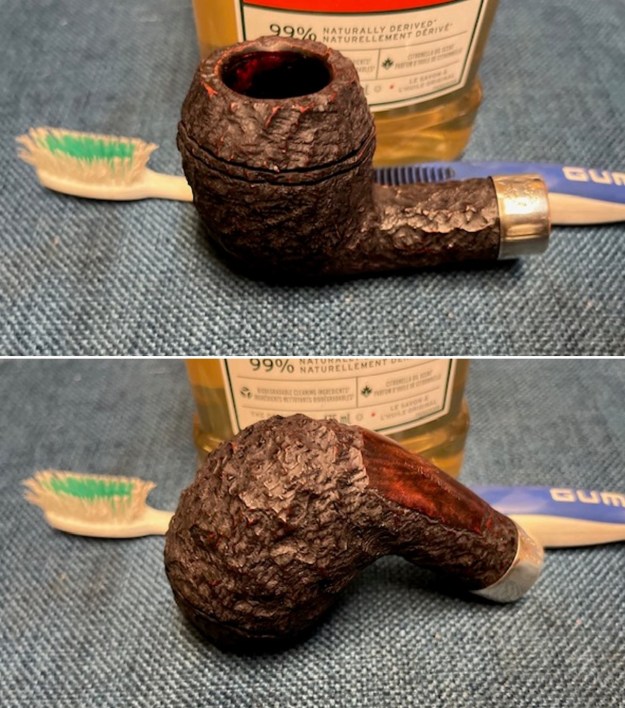
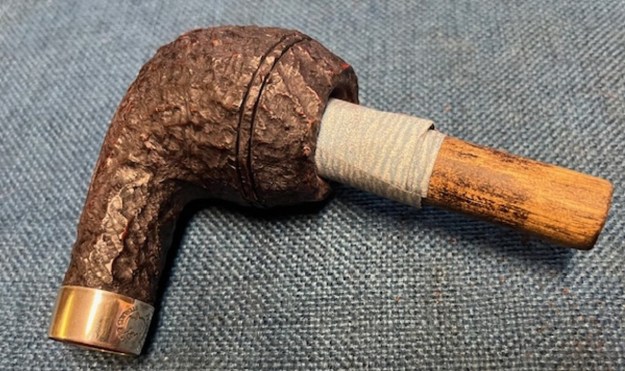
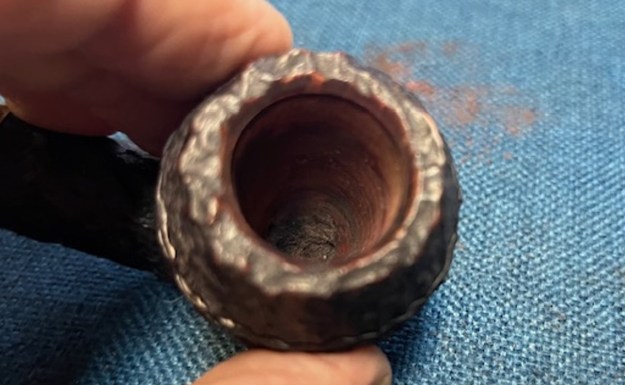
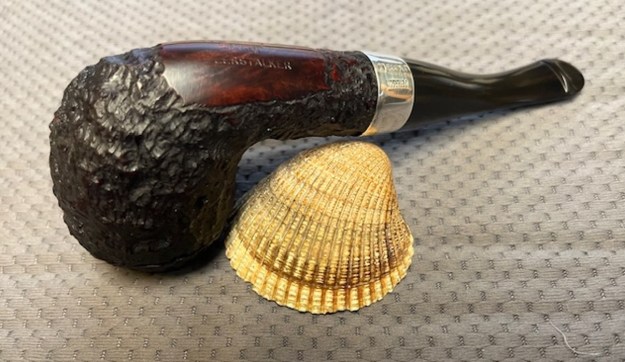
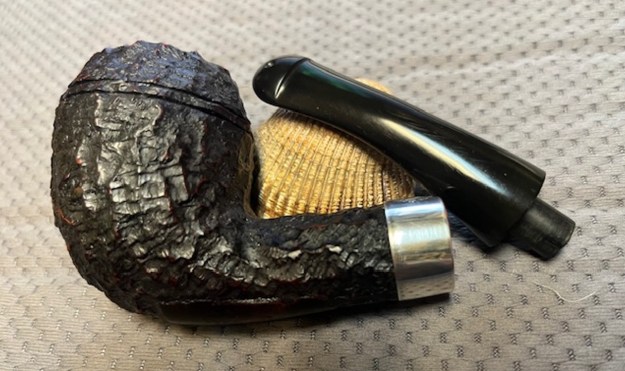
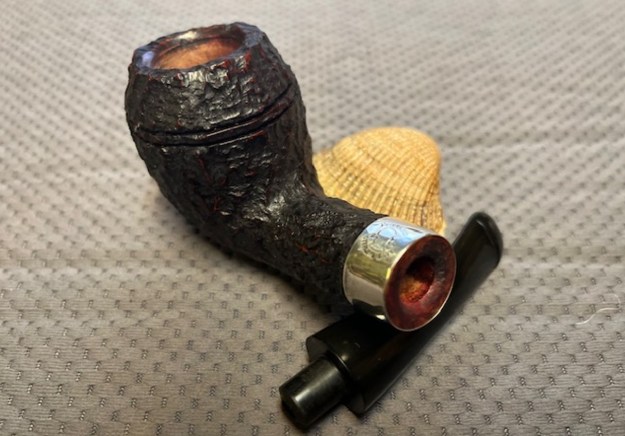
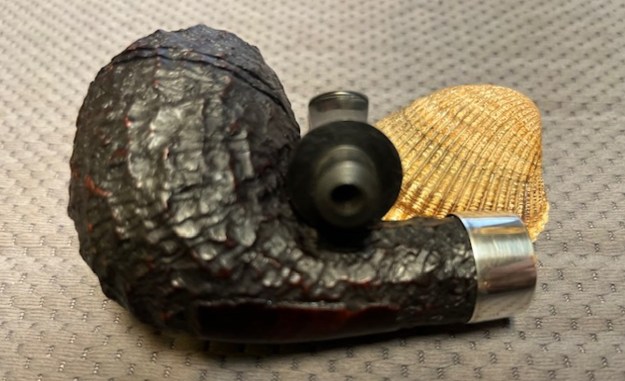
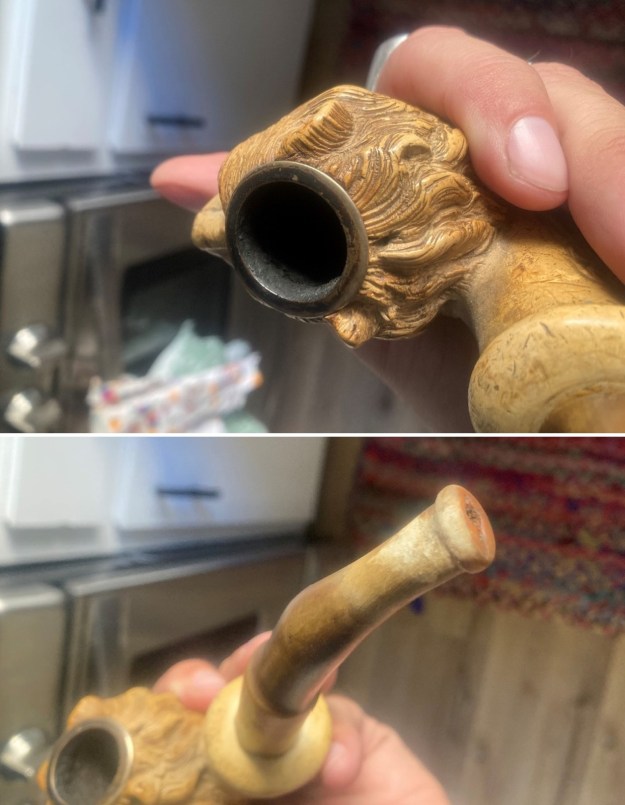
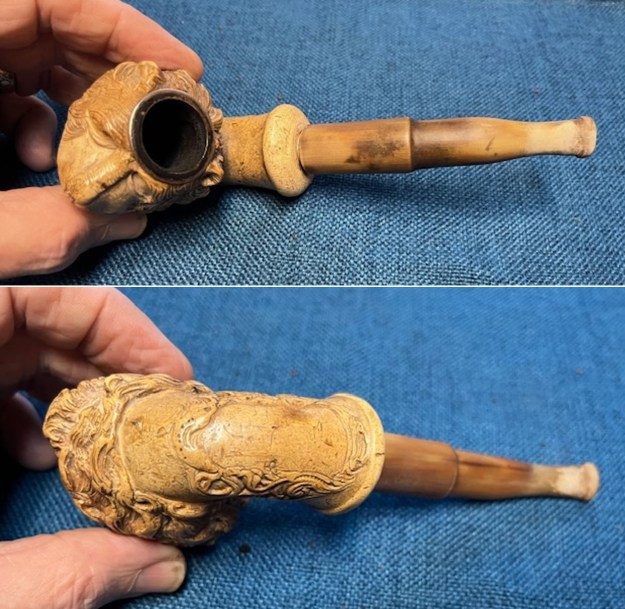
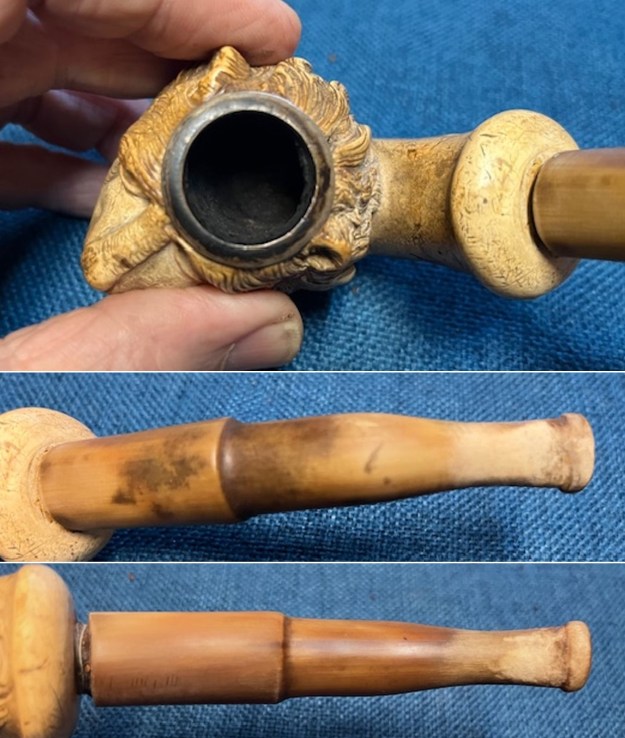
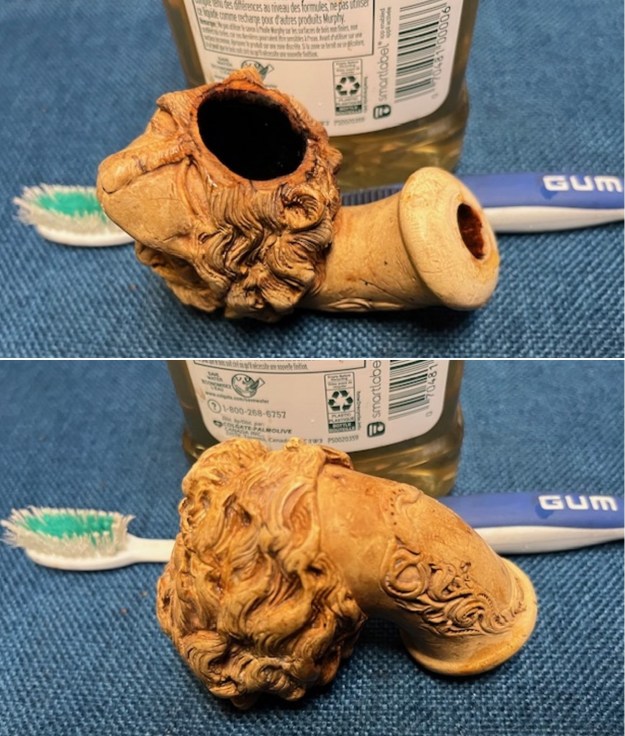
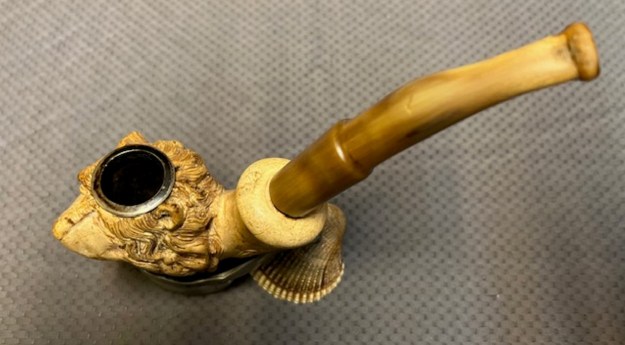
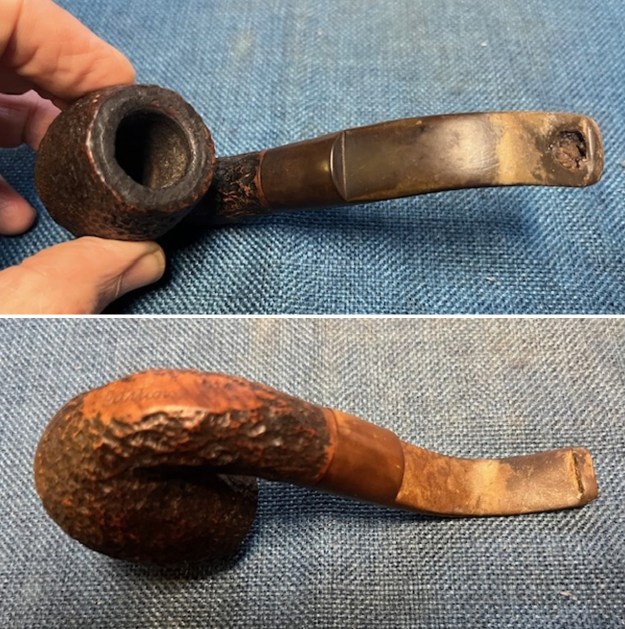
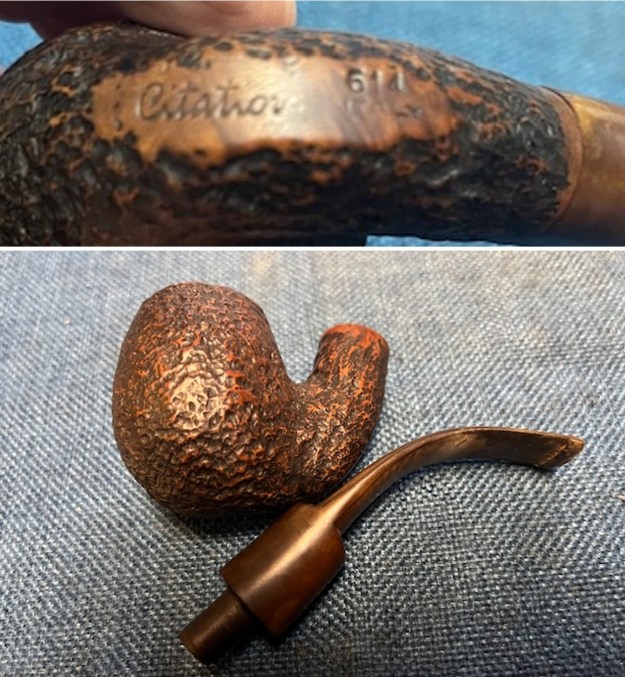
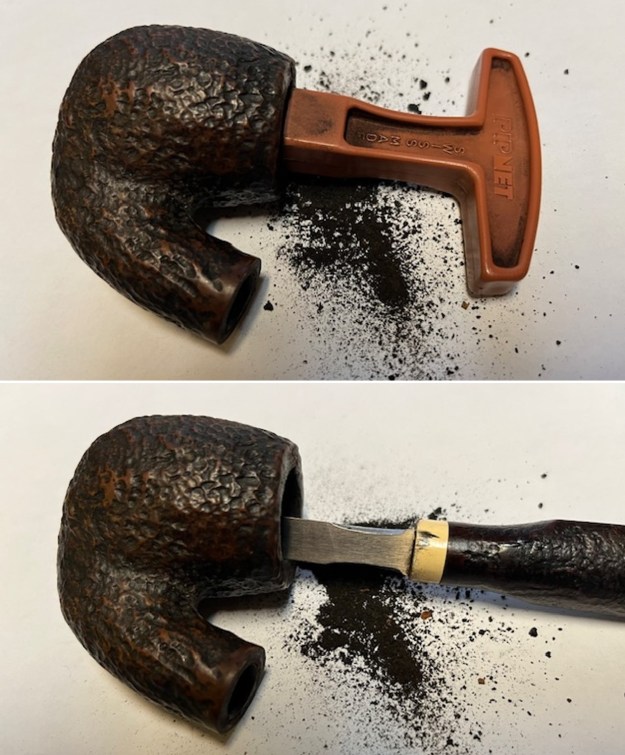
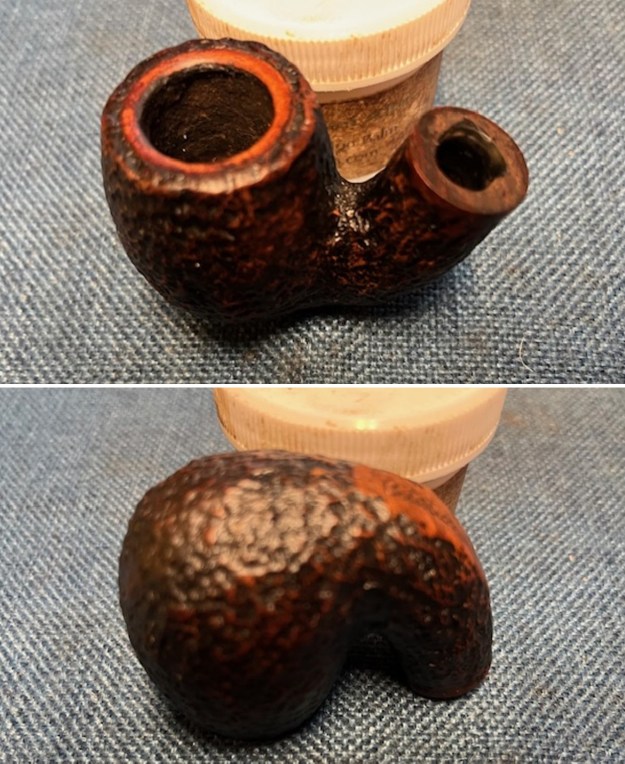
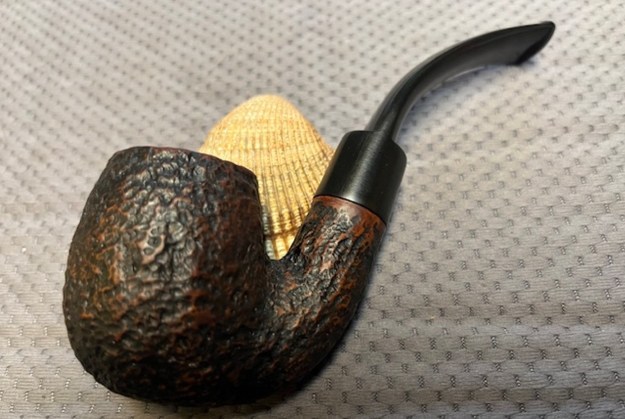
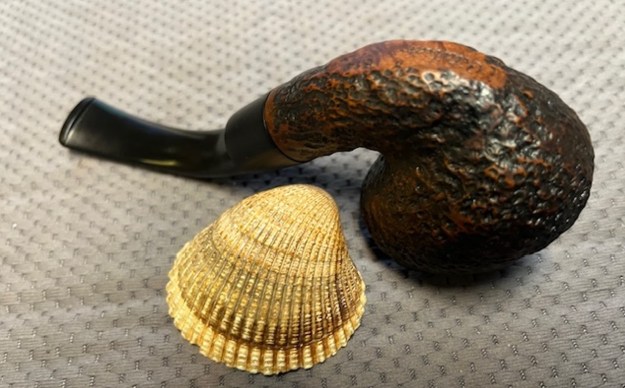
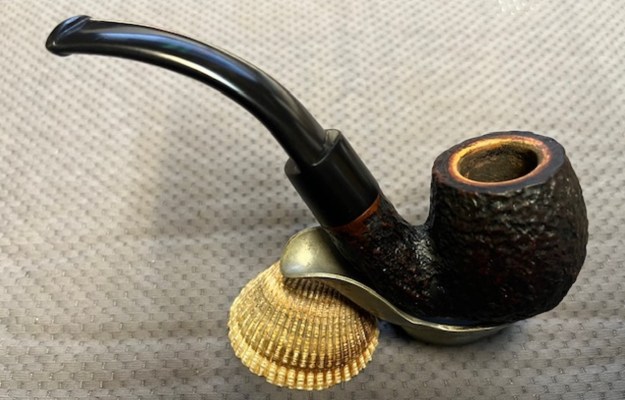
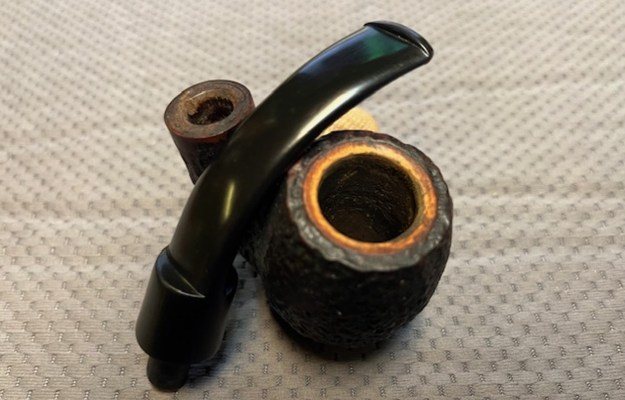
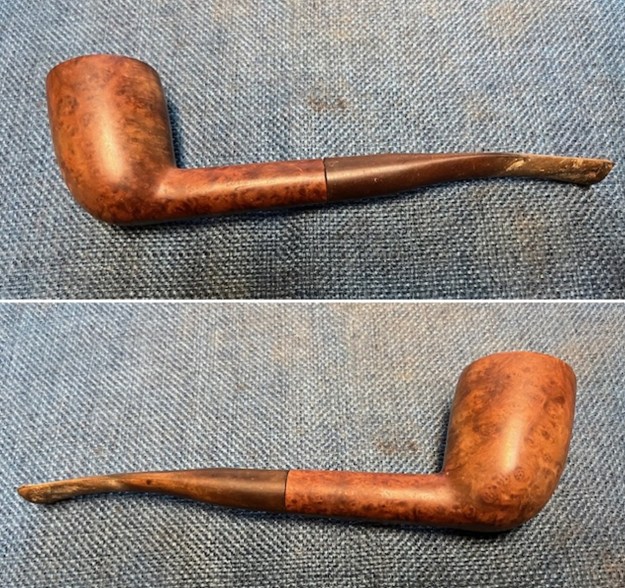
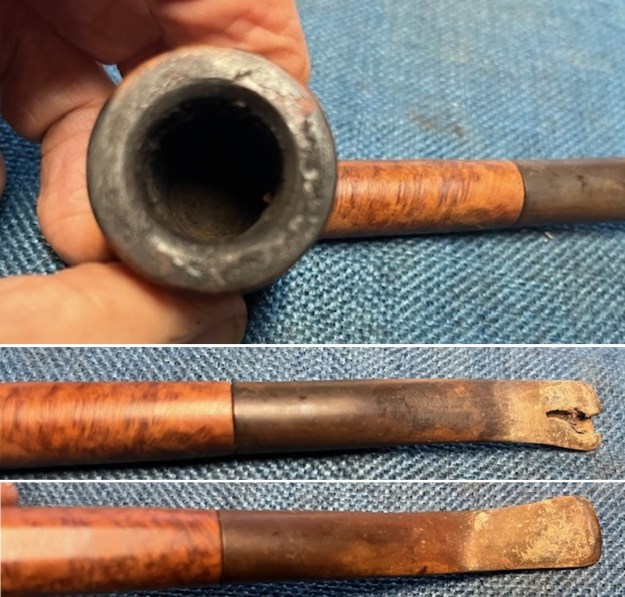
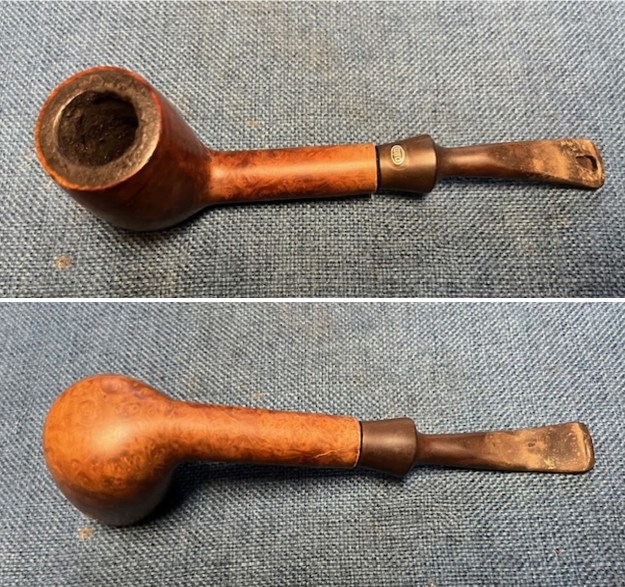
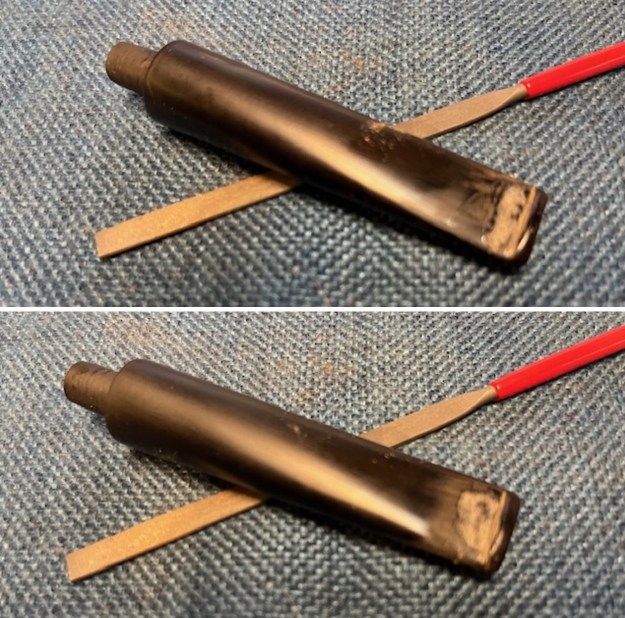
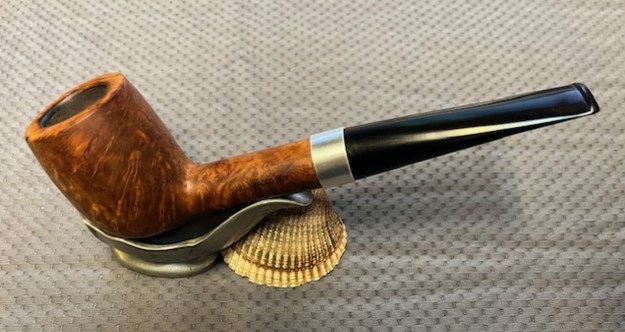
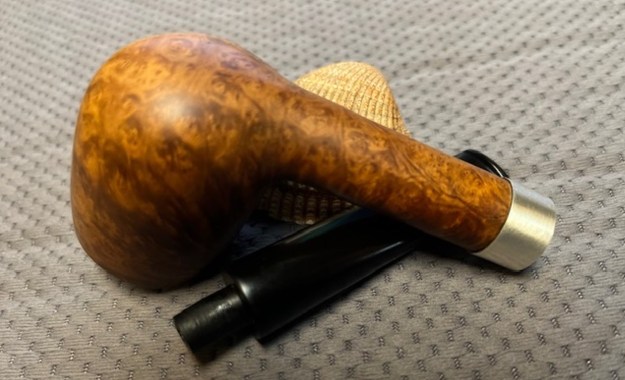
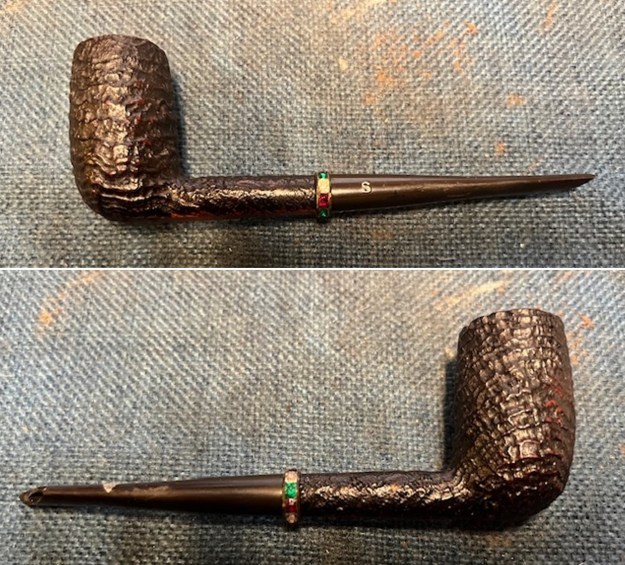
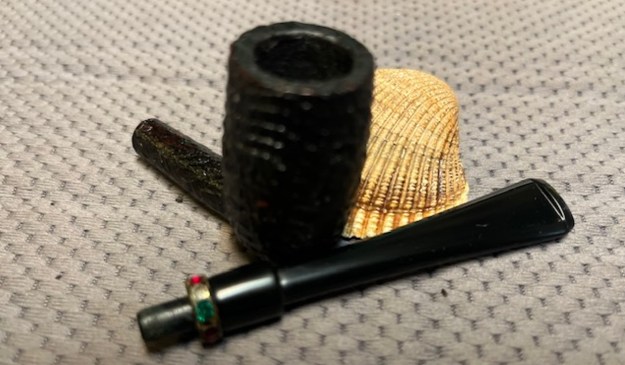
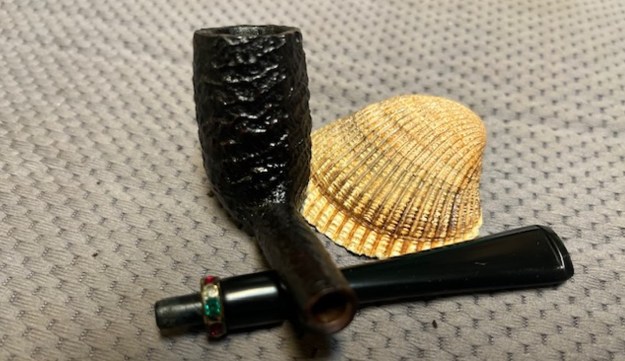
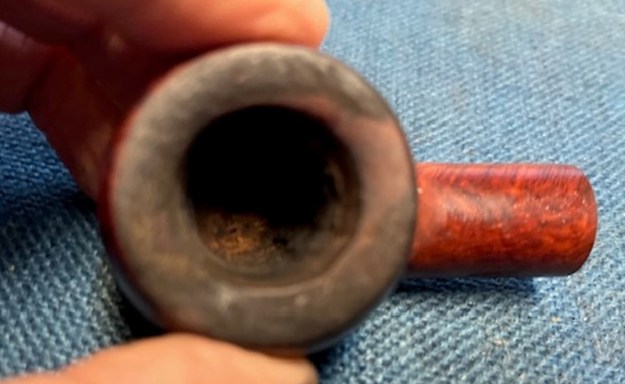
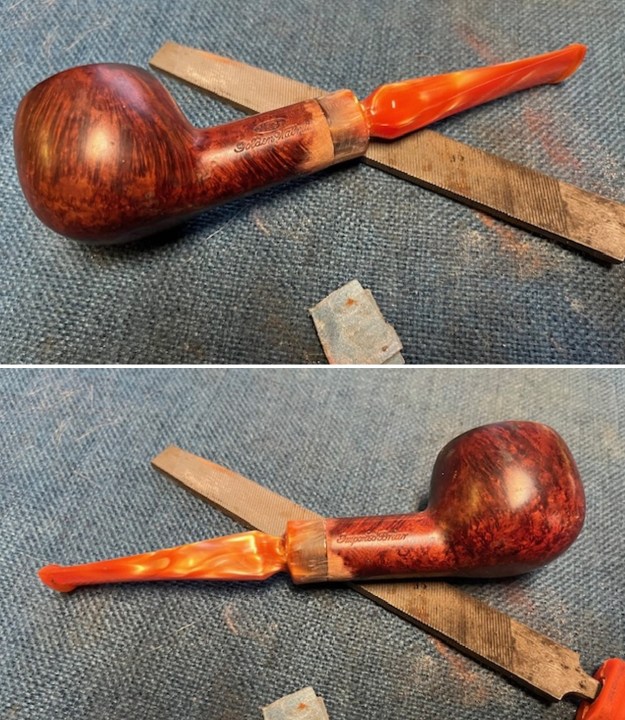
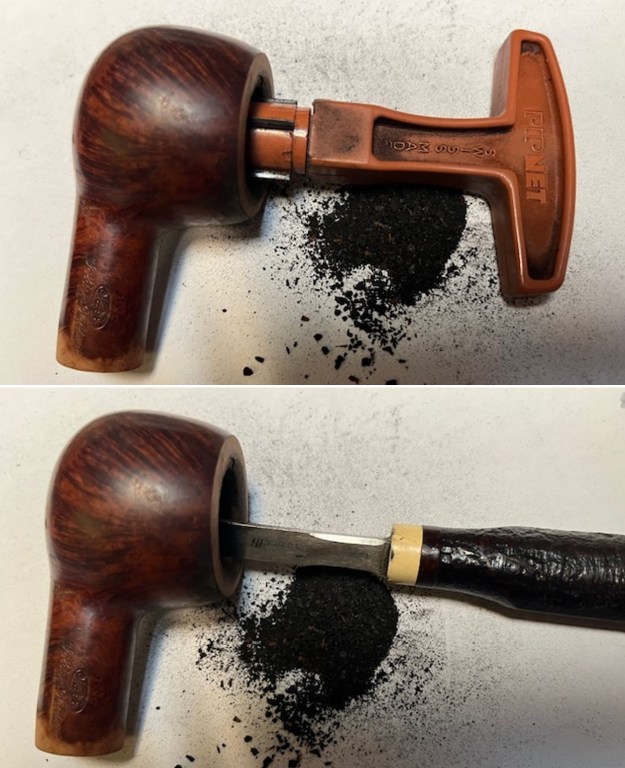
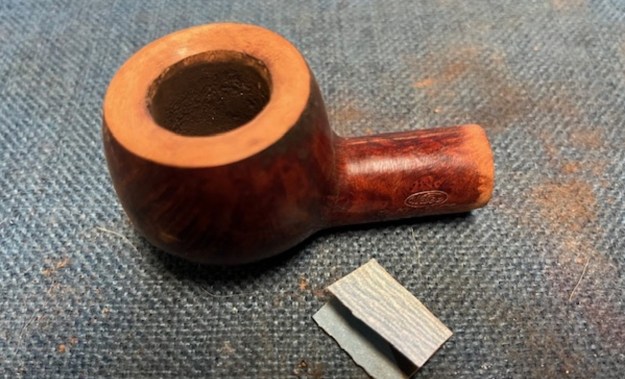
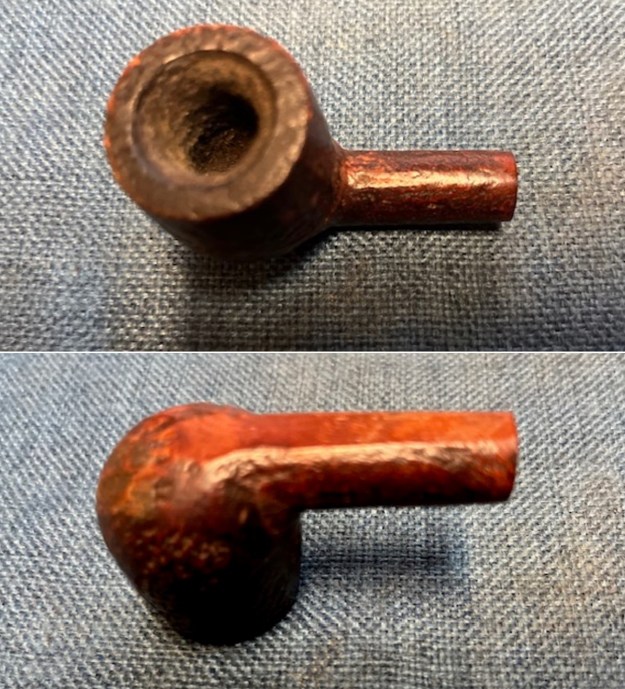
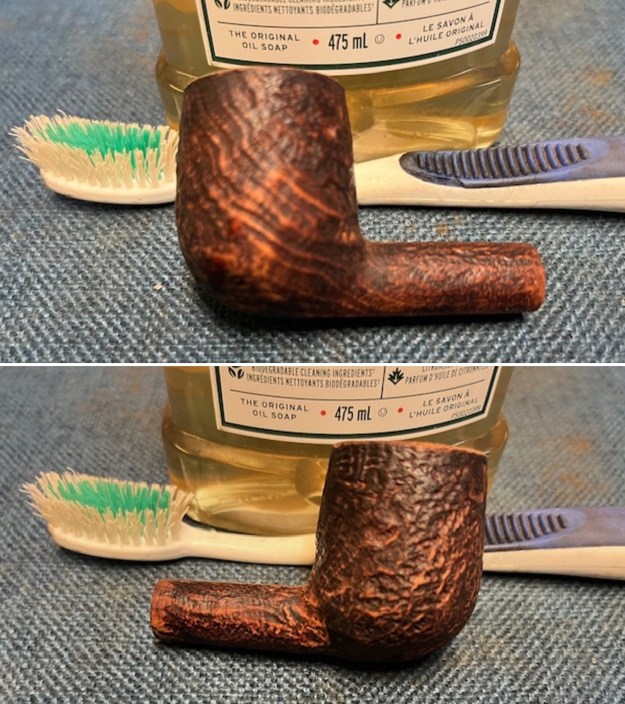
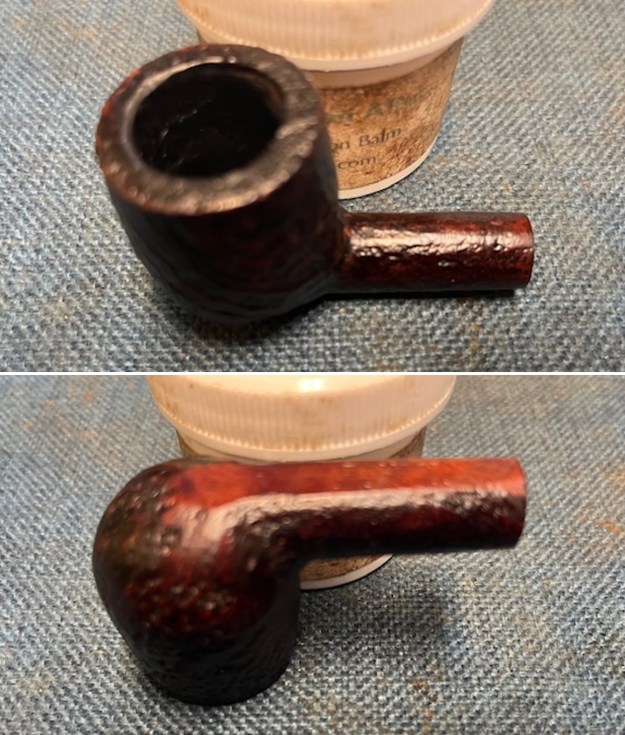
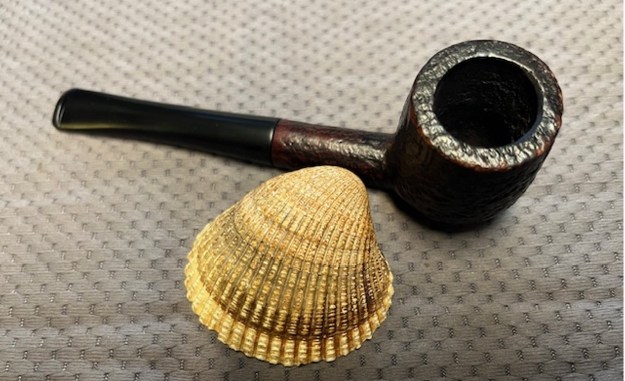
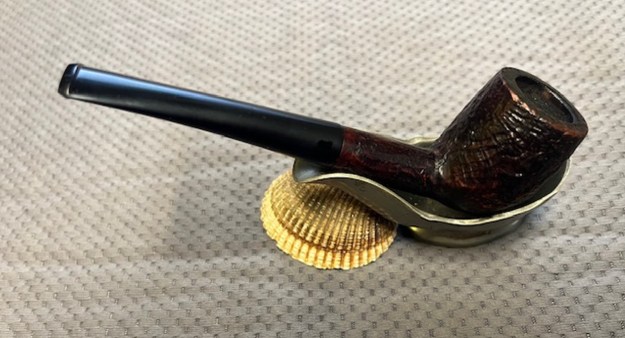
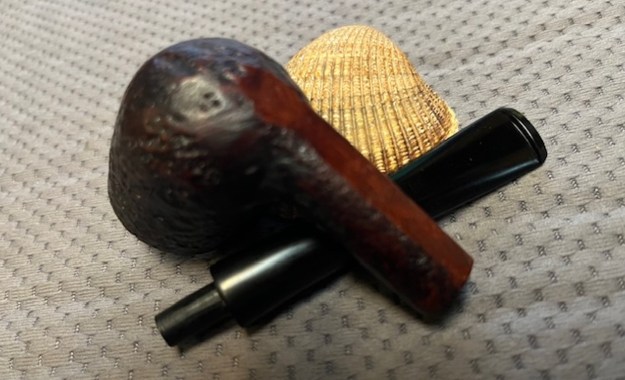
Jeff went to the house and looked through the racks, pipe bags, tobacco both bulk and tinned as well as a variety of pipes. All the pipes were well smoked and needed serious cleaning. Another one of the pipes he picked up was this A. Jason Billiard with a well fitting vulcanite saddle stem. It was very dirty and was a reddish, brown coloured pipe when it started. The smooth finish around the bowl was dirty and had hand oils ground into the grooves. The bowl had a thick cake that overflowed in lava onto the rim edge and top of the bowl. The stem was vulcanite that was very dirty and had the marks of a rubber Softee Bit on the end. It was also a very dirty 9mm filter stem. It had become discoloured and there was a line where the debris from smoking had accumulated along the edge and under the bit protector. The good news was that there were some deep tooth marks and chatter under the calcification and grime. The rest of the stem was dirty and had lost the characteristic shine. The pipe was stamped on the left side of the shank and read A. Jason in script in an oval. On the underside of the shank it is stamped with the shape number 96. Jeff took photos of the pipe so I could have a sense of what it looked like before he started his work on it.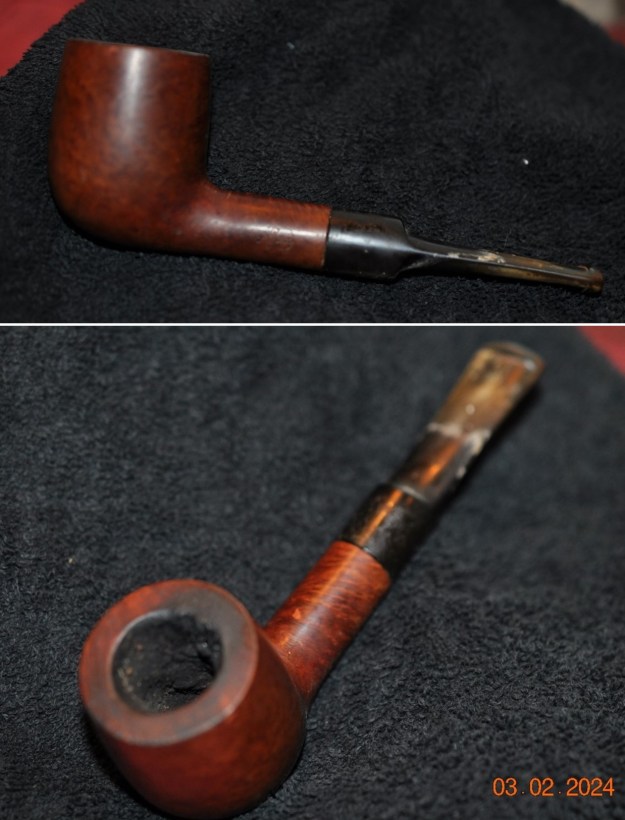 Jeff took photos of the stem surfaces and the bowl and rim to give a sense of condition of the pipe. You can see the thick cake in bowl and the lava overflow on the edges and rim top of the bowl. It is hard to know if there is any damage as the cake and lava is quite thick. The stem surface is very dirty and you can see the area on the end of the stem where the Softee Bit had protected it from chewing though there were some previous deep tooth marks covered by the dirt and debris.
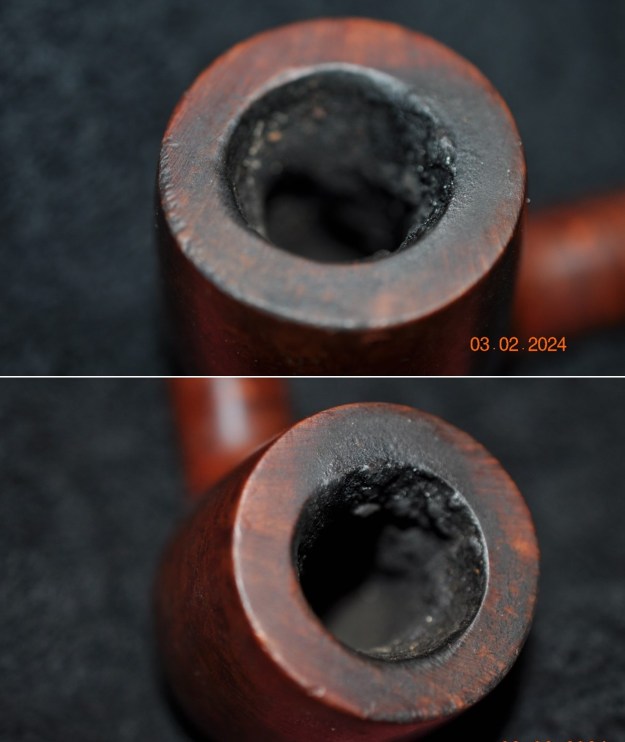
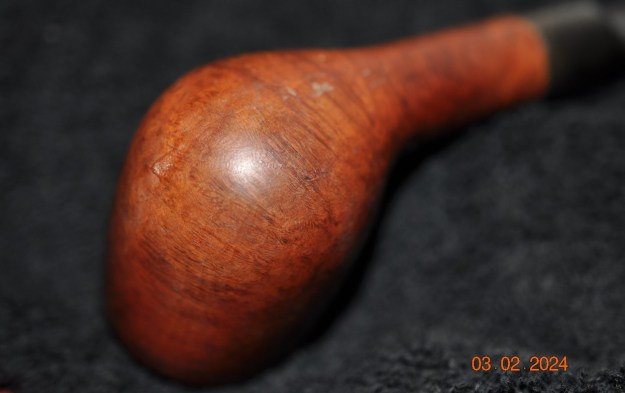
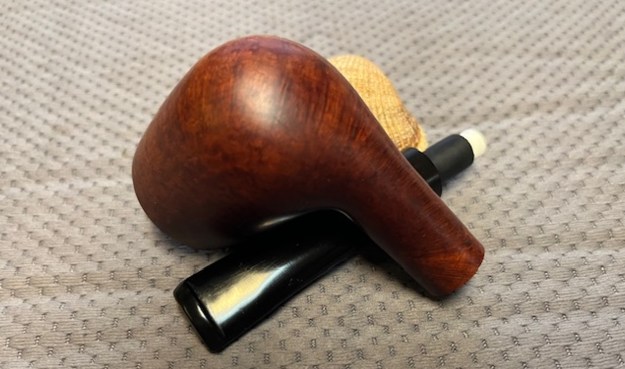
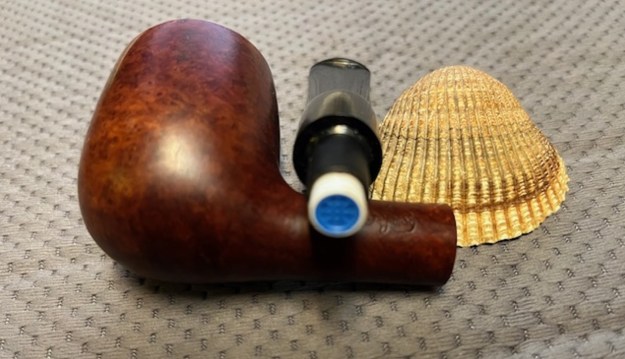
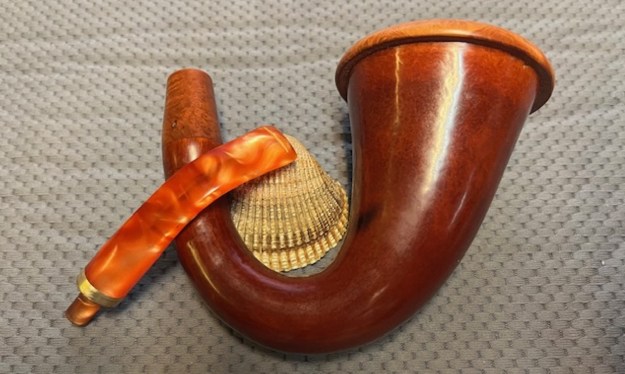
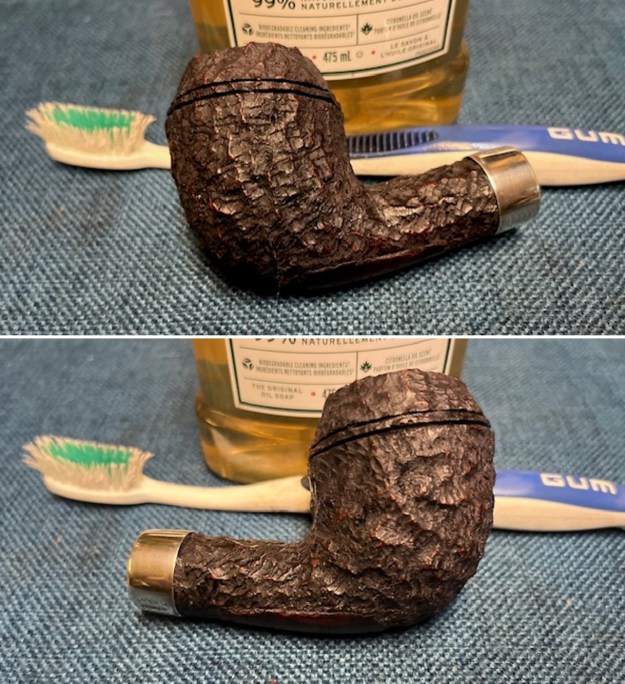
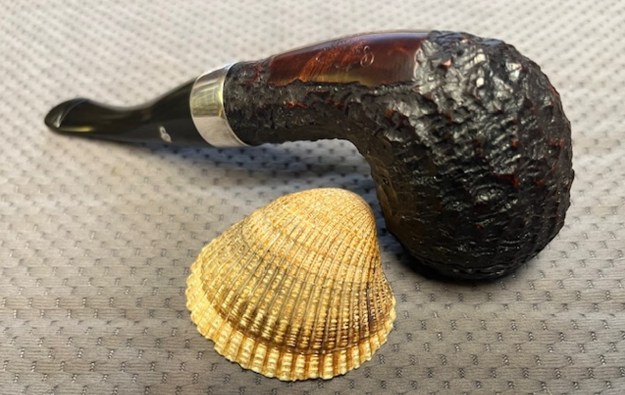
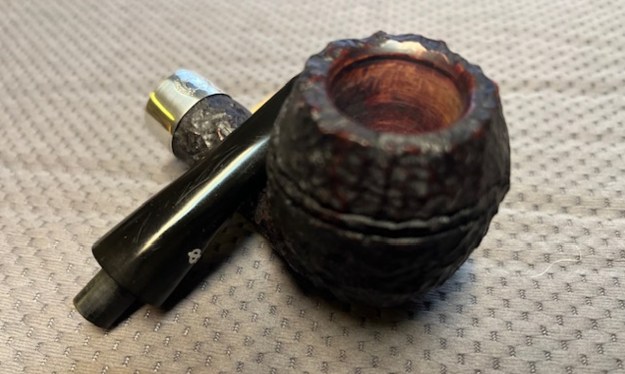
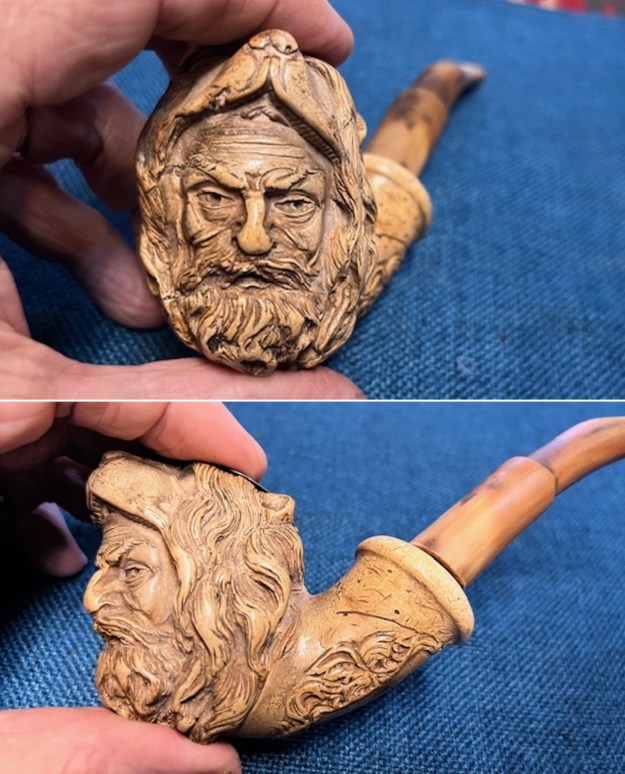
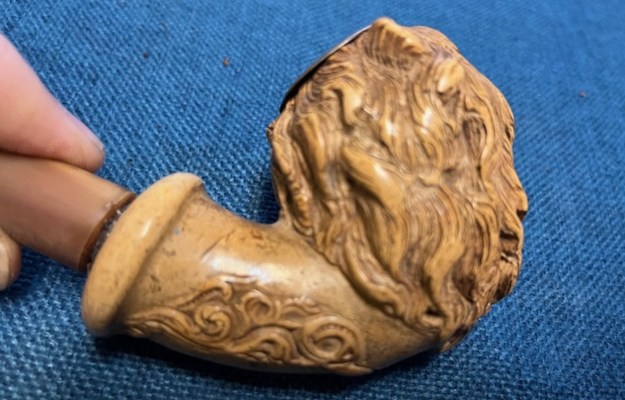
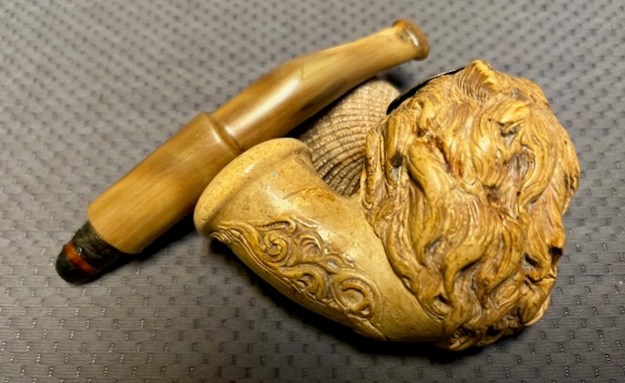
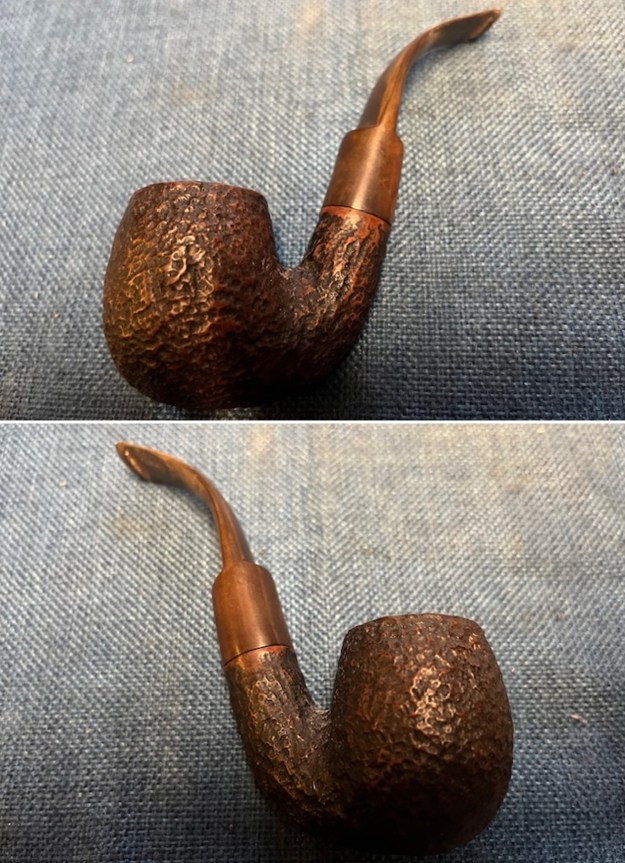
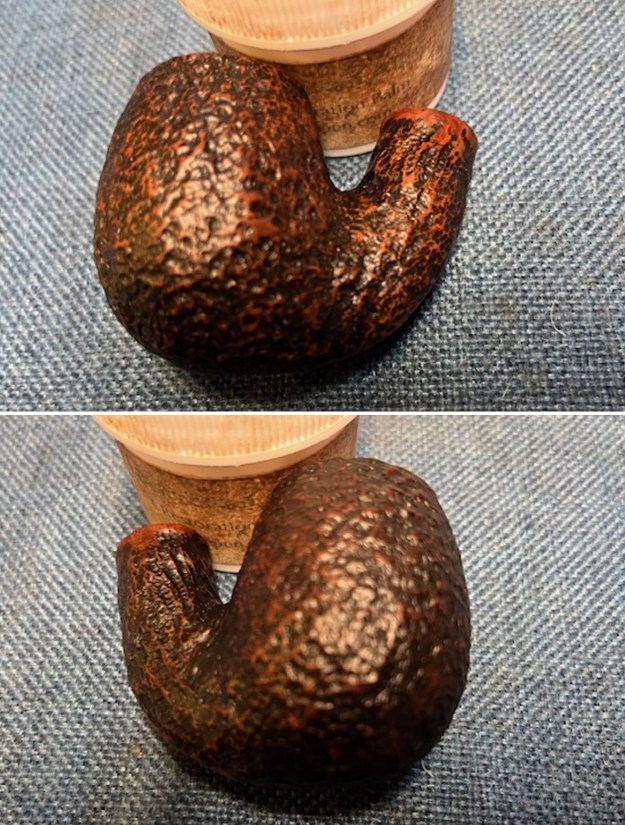
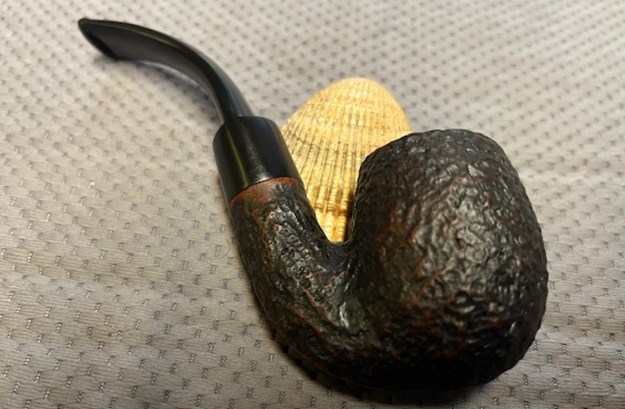
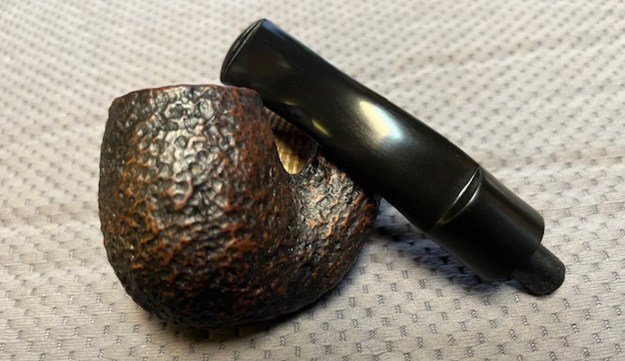
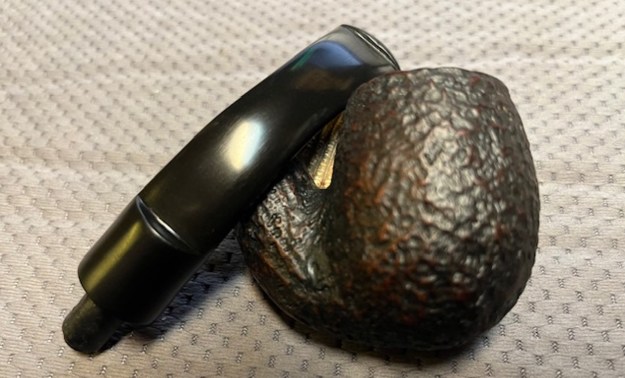
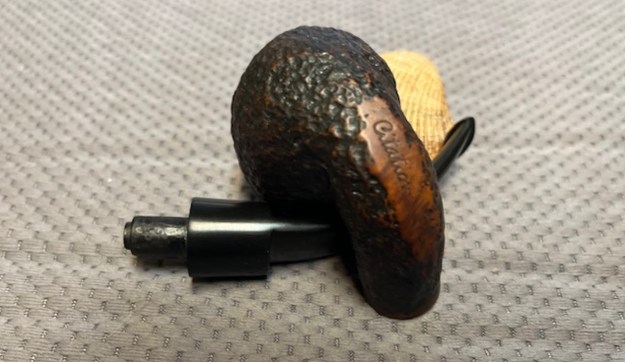
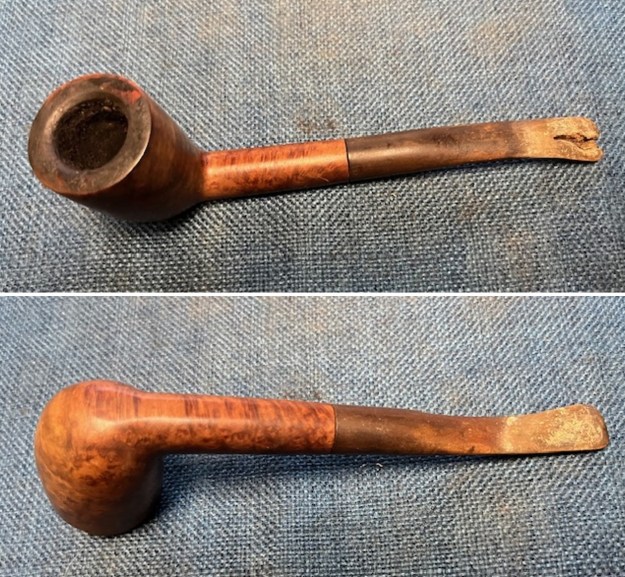
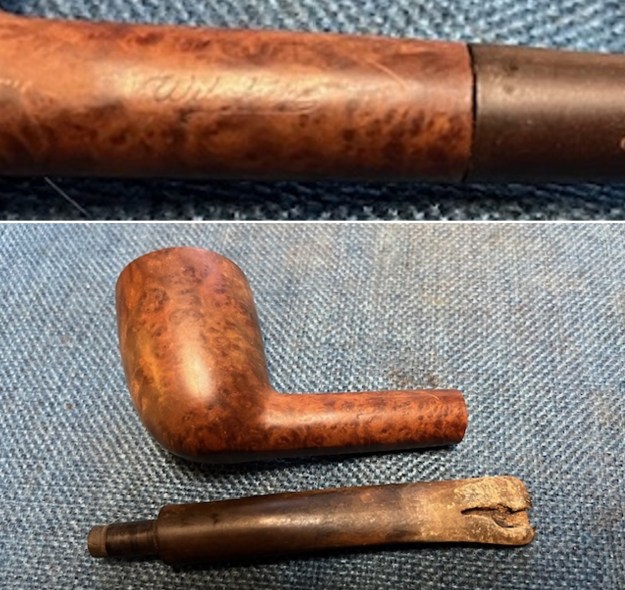
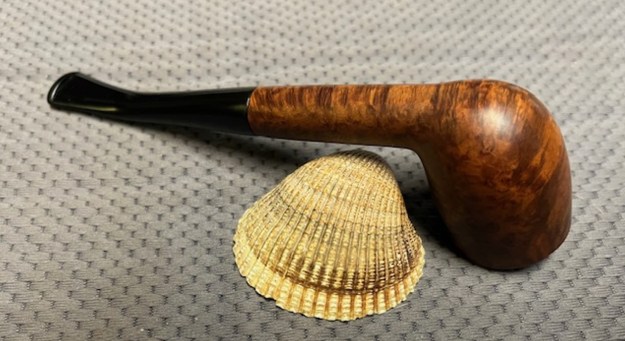
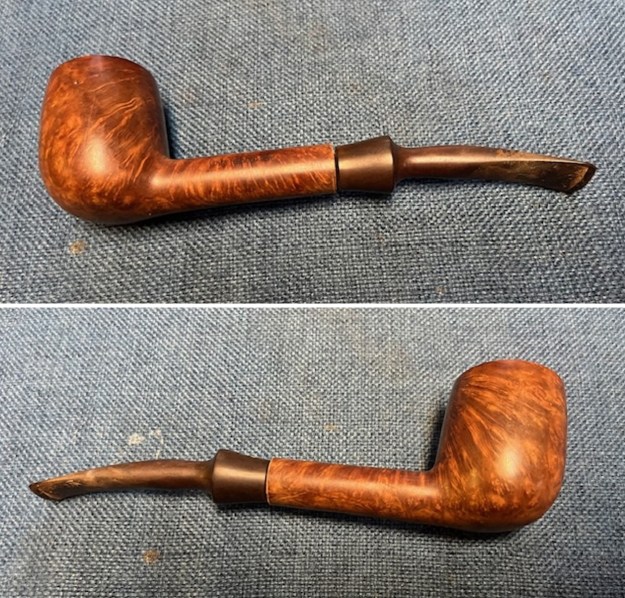
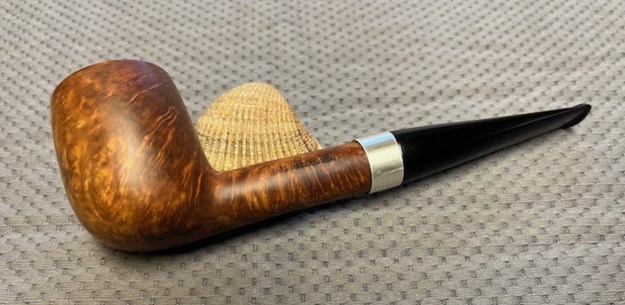
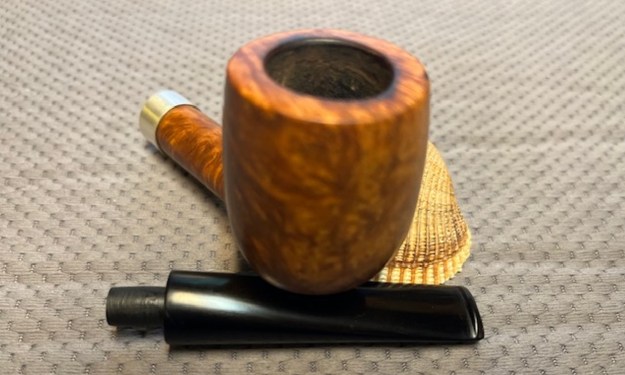
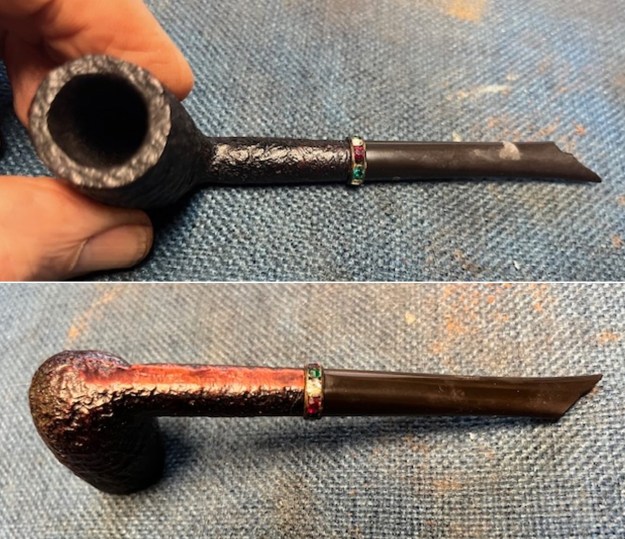
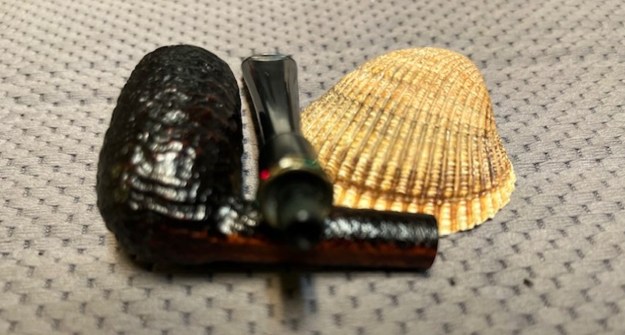
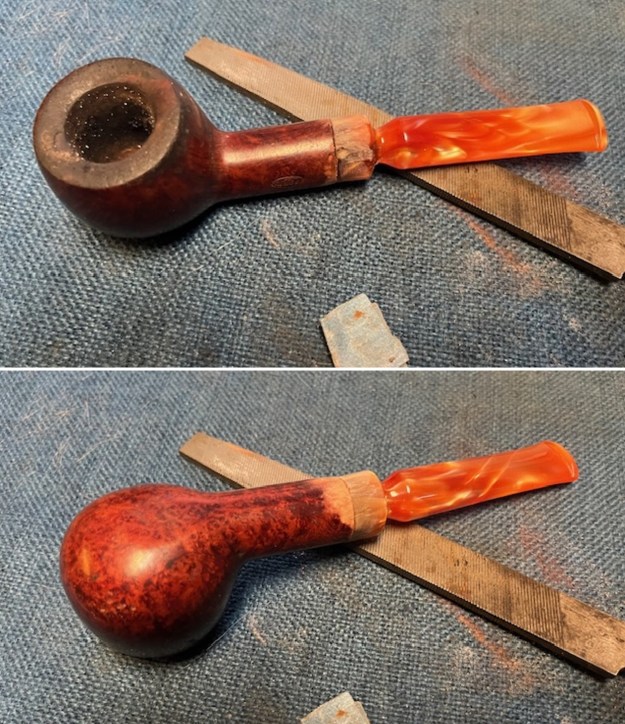
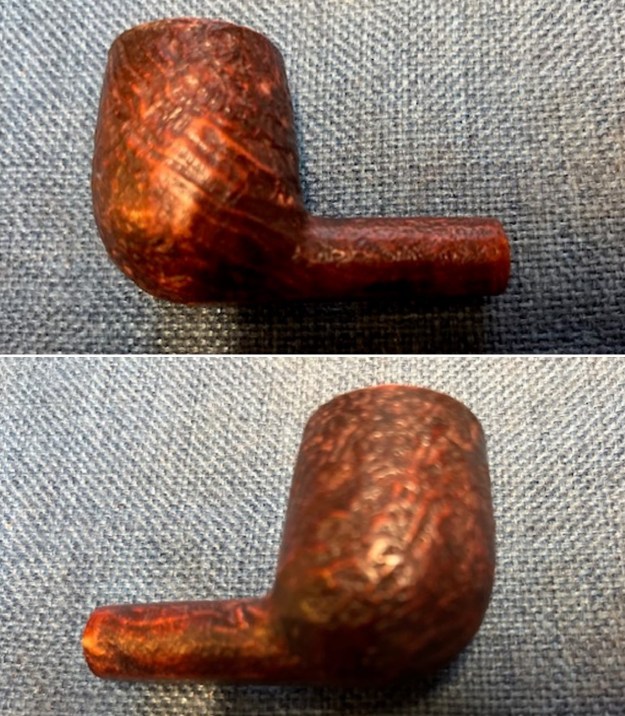
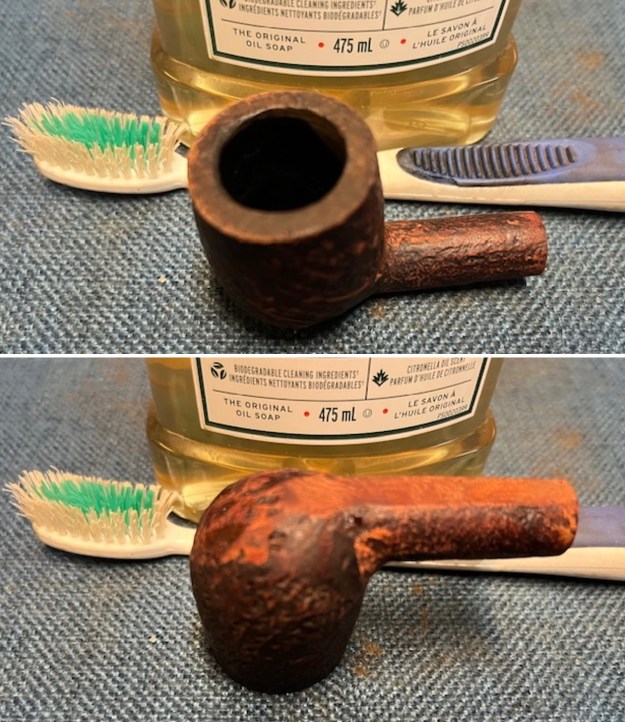
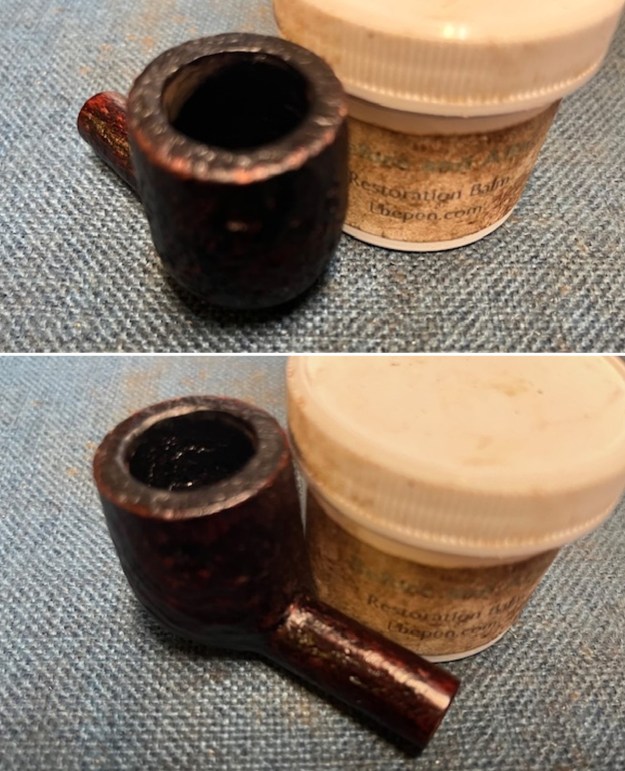
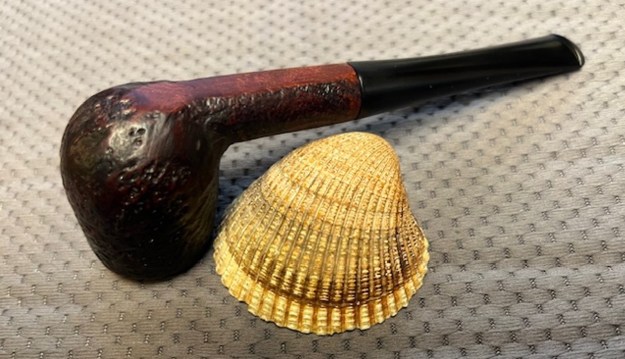
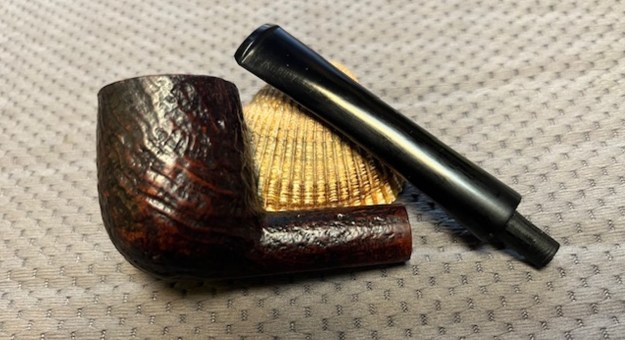
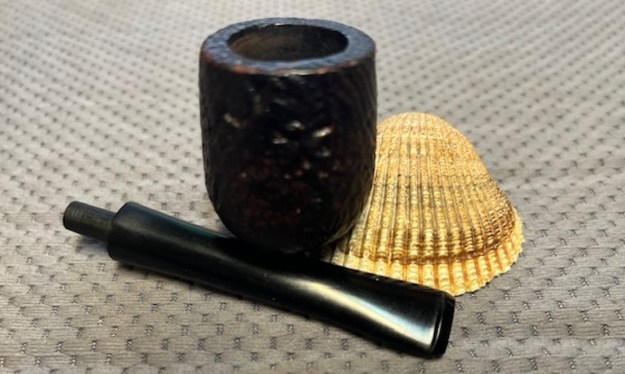
 He also took photos of the sides of the bowl and the heel to show the interesting grain that went around the bowl. The grain is beautiful and you can see the oils and debris in the surface of the briar.
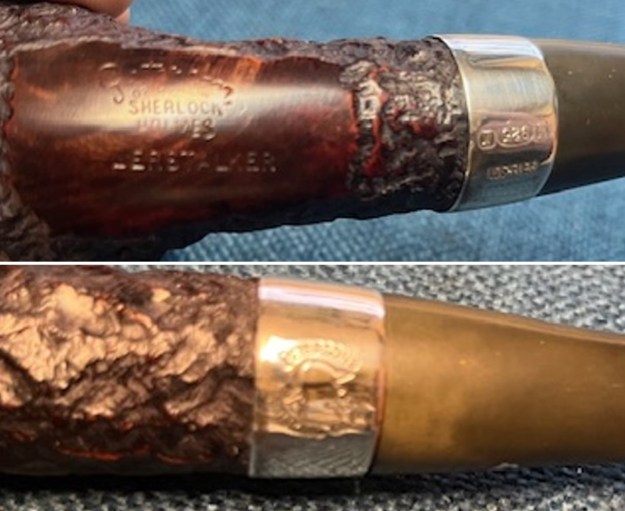
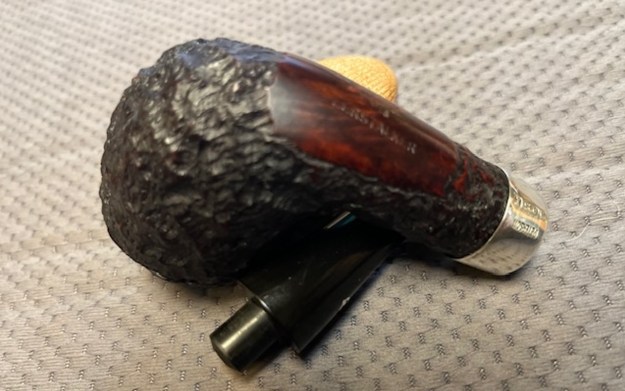
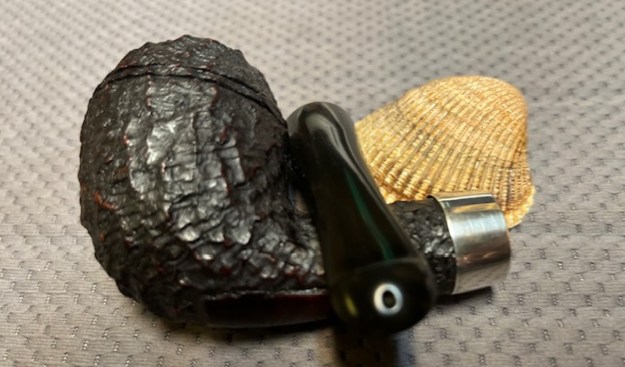
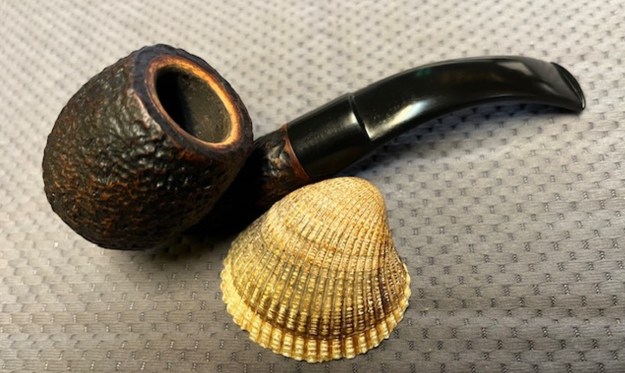
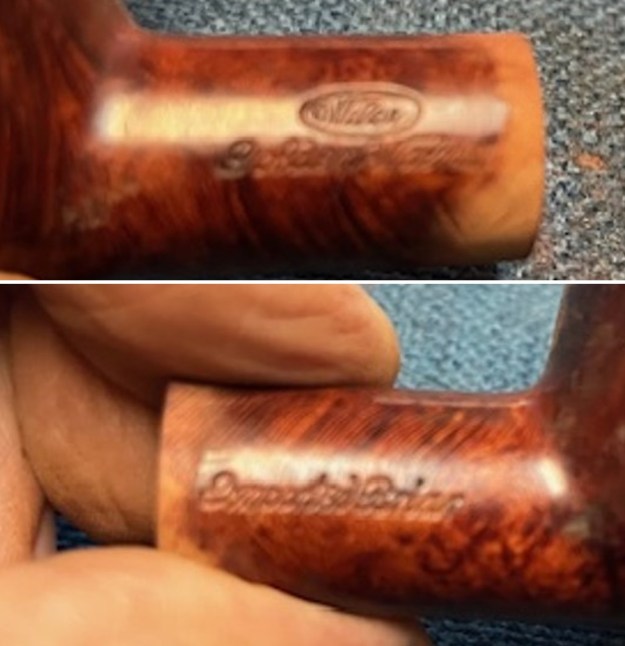
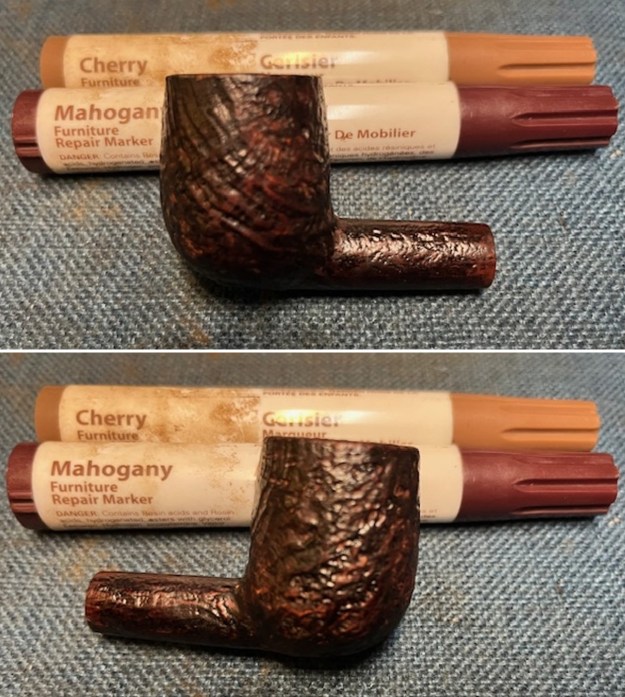
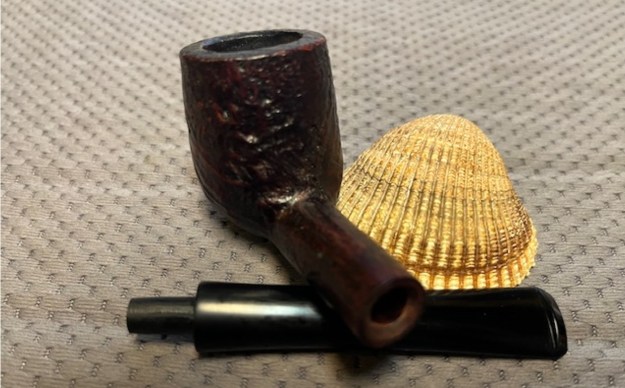
 He took photos of the stamping on the sides of the shank. It is clear and readable on all the shank sides as noted above.
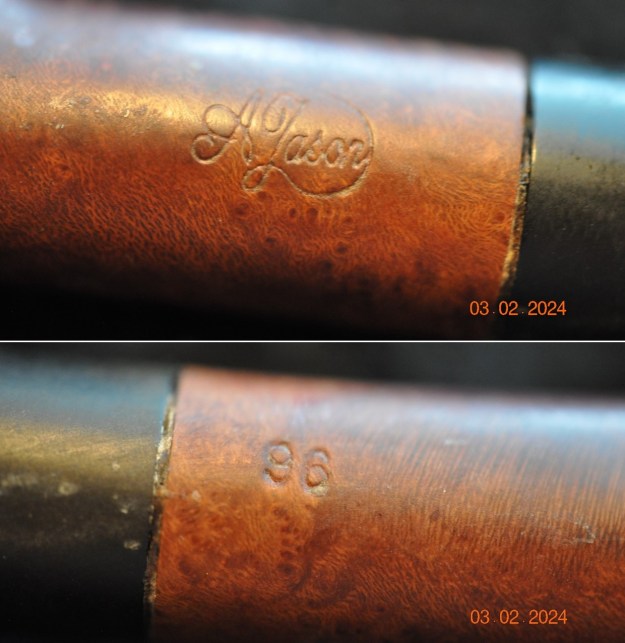 I did some searching on Google and could not find any pipe makers with the name A. I did a search in Washington and Oregon as well as Idaho and Utah all states within reach for Gene to have either visited or ordered a pipe. There was nothing that I could find in terms of a US pipe maker. I did a search on Google for A. Jason tobacco products and came across a cigar label and cigar cutter with the same stamp as the pipe – A. Jason. Further searching took me to a German tobacco supplier called A. Jason-Hanse Hamburg, Germany. They are a small tobacco shop located at Barmbeker Str. 17-19, 22303 Hamburg, Germany that sells cigars, humidors, cigar cutters, pipes and pipe tobacco. They were some pictures of the label on a humidor and a cigar label with the same stamp.
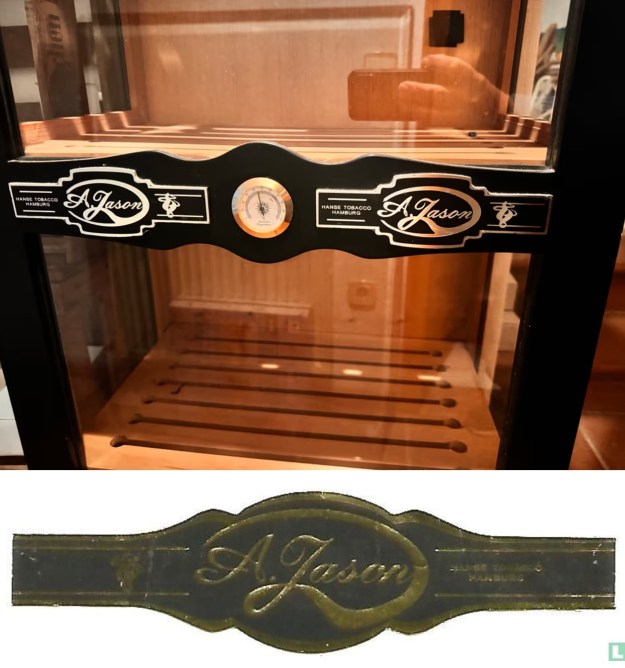 I posted a question about the brand on Facebook pipe groups and Sascha Martens answered and did a bit of research on the brand and sent a link to the Hanse Tobacco Company in Hamburg who was a cigar cutter and tobacconist. Thank you for the information Sascha. Here is the link (https://www.northdata.com/Hanse%20Tobacco%20GmbH,%20Hamburg/HRB%20109995). I have included the information from the link below:
Hanse Tobacco GmbH
Heinrich-Hertz-Str. 139 – 139 a, 22083 Hamburg, Germany
Norderstedt, Germany
Corporate purpose – The object of the undertaking is the trade in goods of all kinds, insofar as they are not subject to authorisation, in particular tobacco products and smoking supplies. In addition, the company is engaged in the operation of catering, beverages and restaurants, with the dispersing of alcoholic beverages.
I knew from the above information that I was working on a German made pipe or at least one made for the German market. I also knew that originally it had come from the A Jason-Hanse shop in Hamburg. How it got to Pocatello, Idaho in the US is truly anyone’s guess. Was it a gift from a customer to Gene or did he pick it up on a trip to Europe? I suppose we will never know. Now it was my turn to work on the pipe.
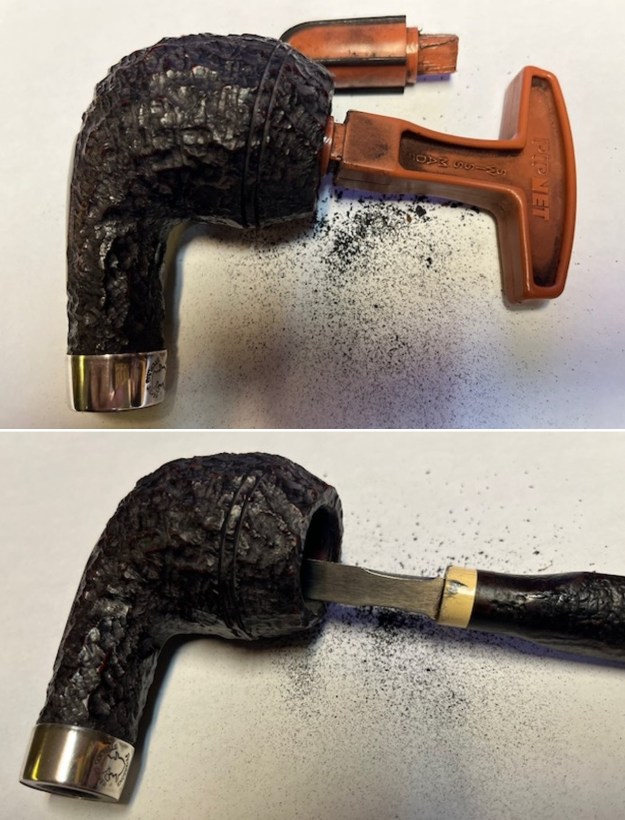
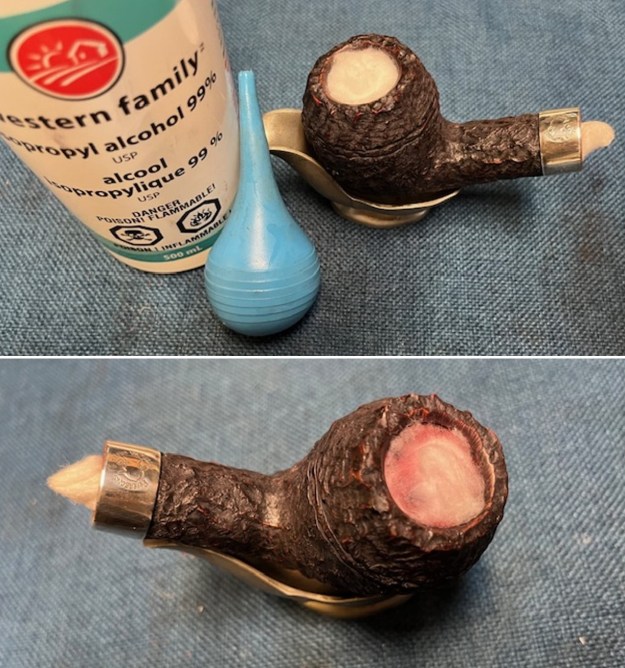
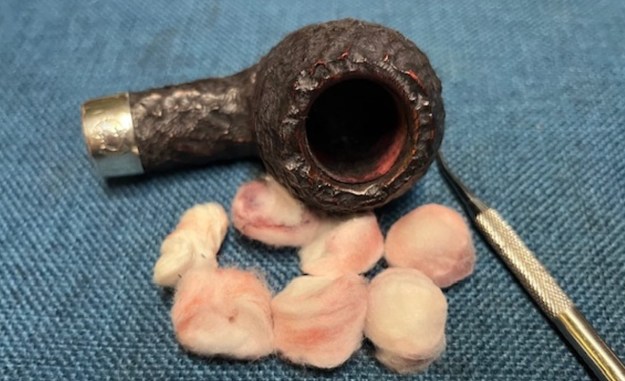
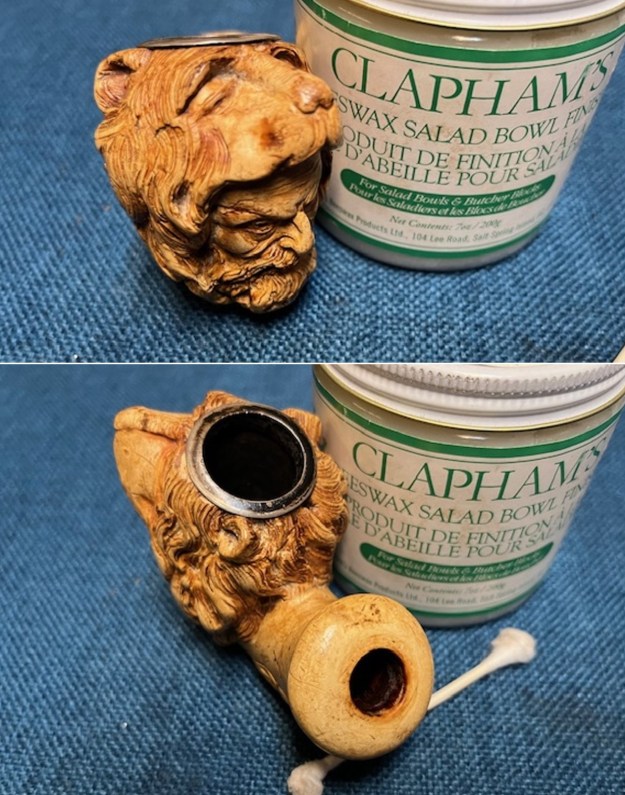
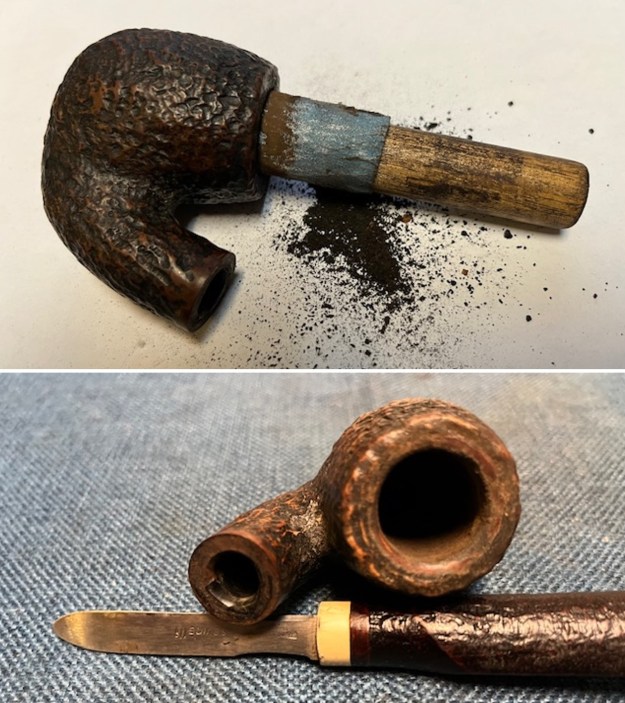
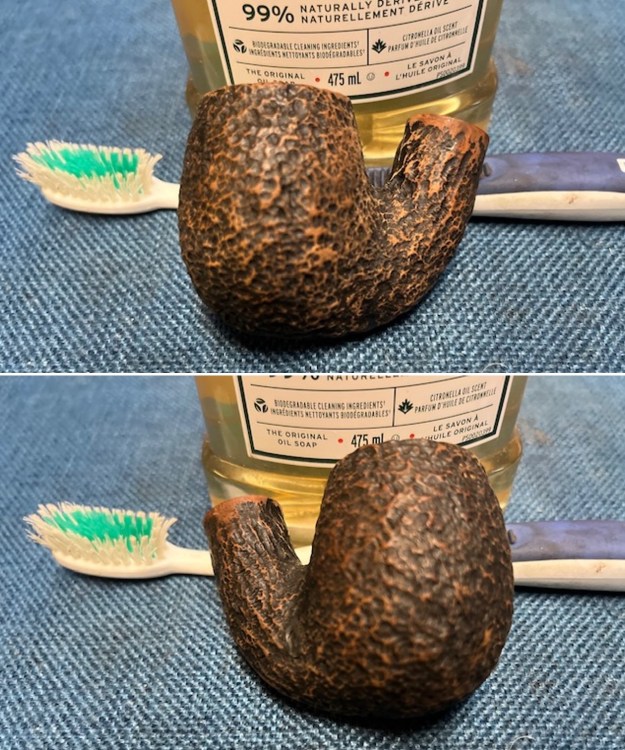
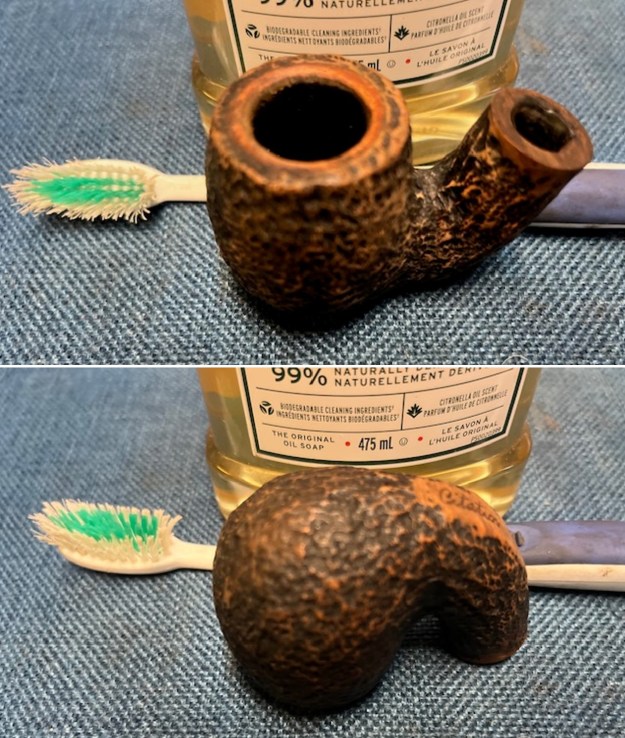
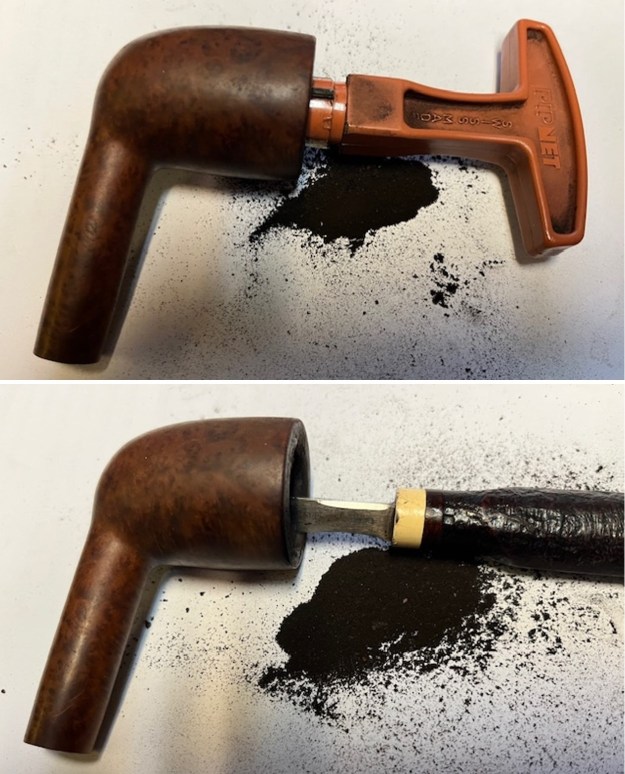
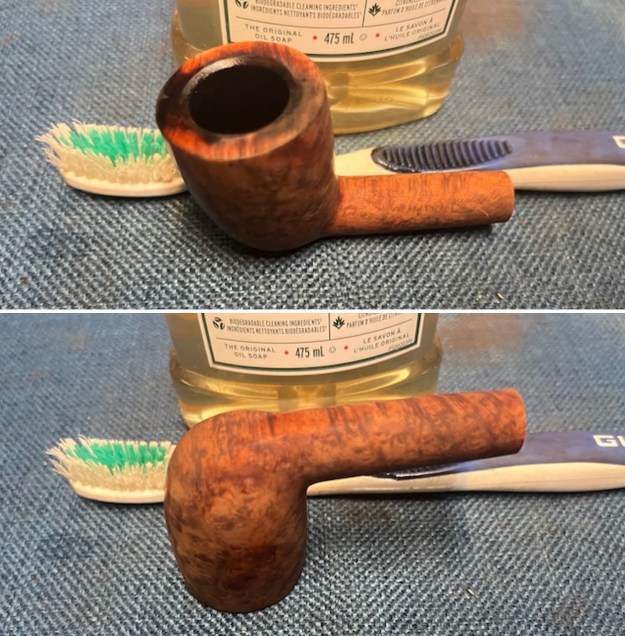
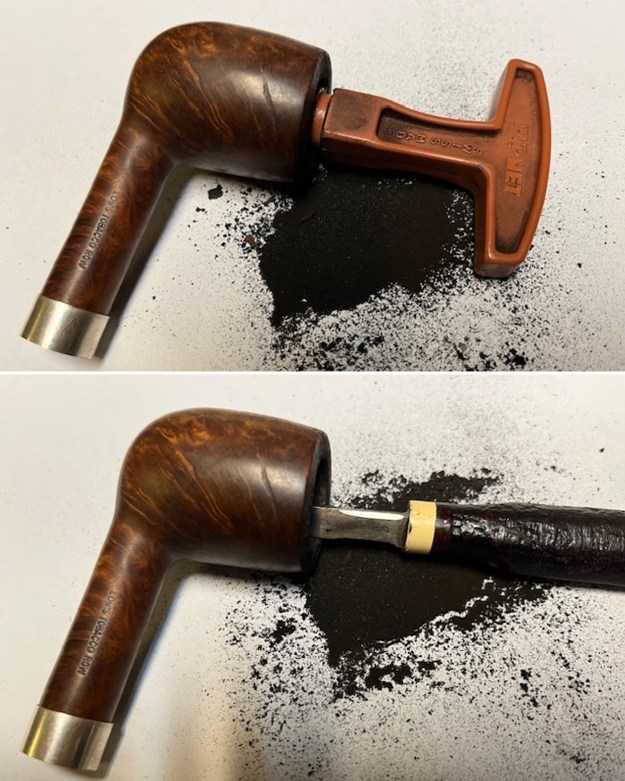
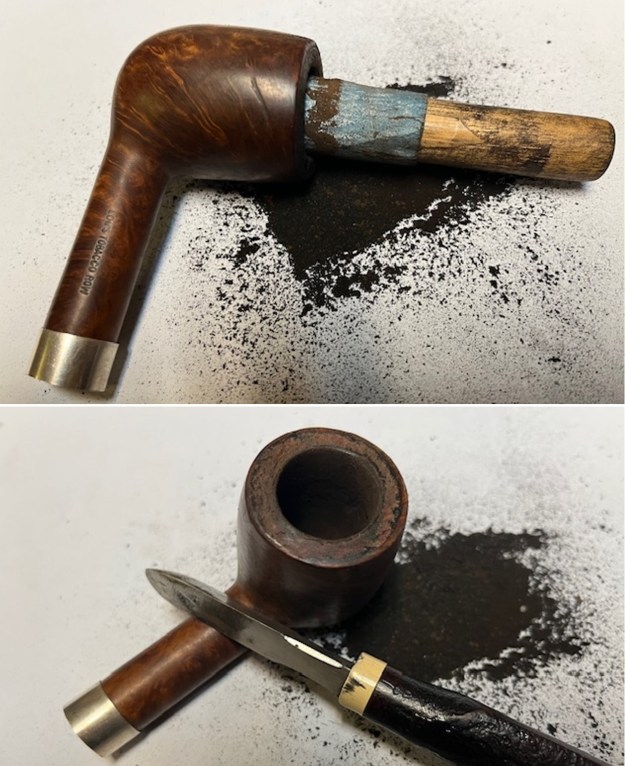
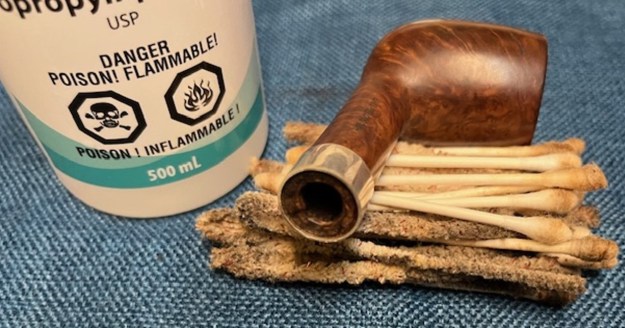
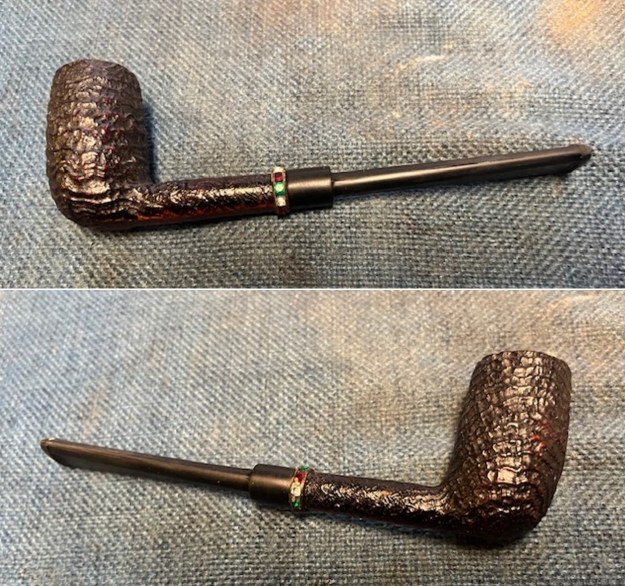
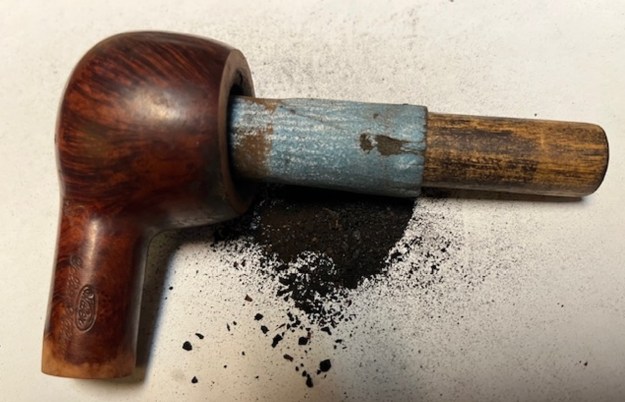
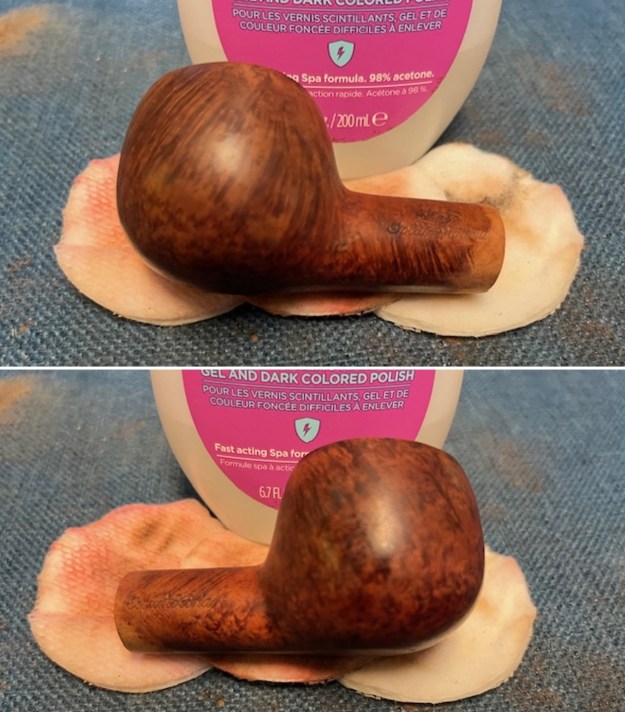
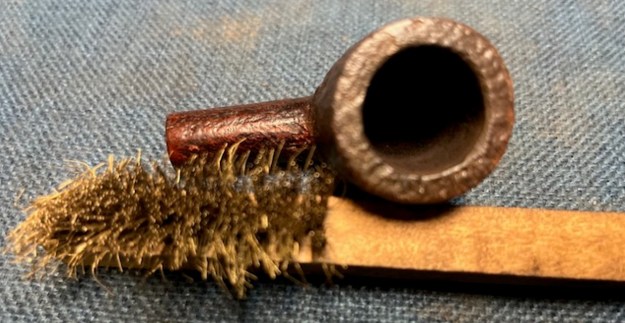
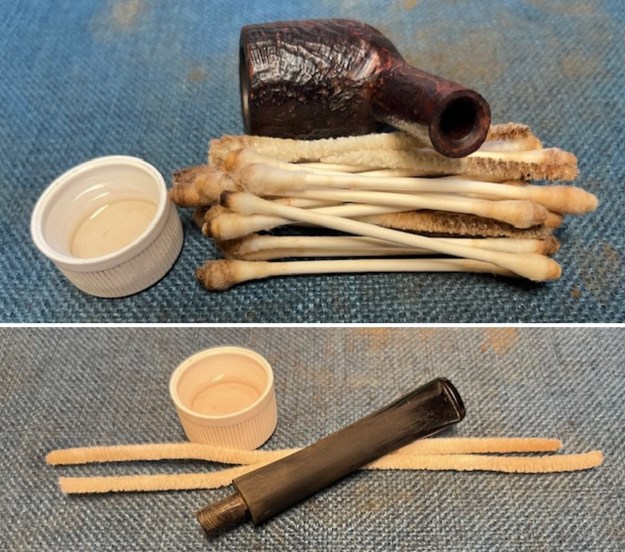
Jeff had done an amazing cleanup of the pipe. He reamed the cake with a PipNet reamer and cleaned up that with a Savinelli Fitsall Pipe Knife. He scrubbed the internals of the bowl and stem with alcohol, cotton swabs, shank brushes and pipe cleaners. He scrubbed the externals with undiluted Murphy’s Oil Soap and rinsed the bowl off with running water. He soaked the stem in Briarville’s Pipe stem Deoxidizer and once it had soaked, rinsed it off with warm water to remove the residual solution. He dried it off and rubbed it down with Soft Scrub to remove any oxidation that was still on the stem. The pipe looked very good when I received it.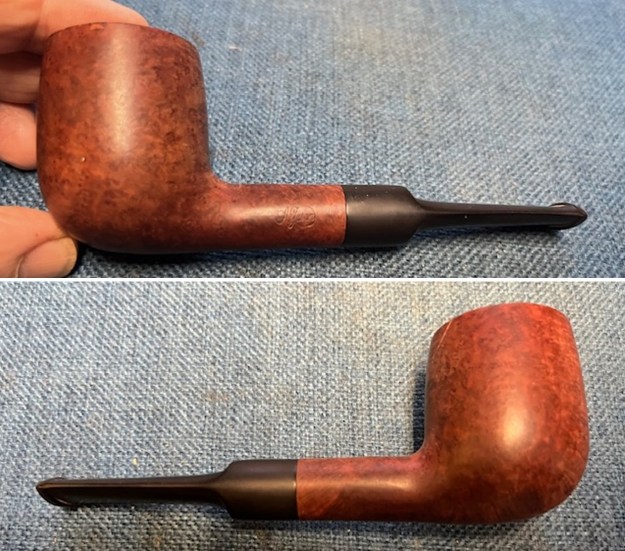
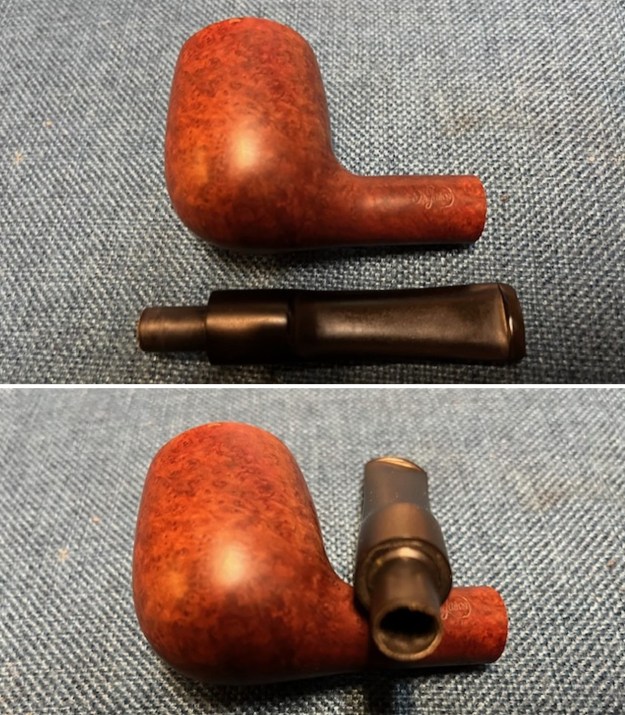
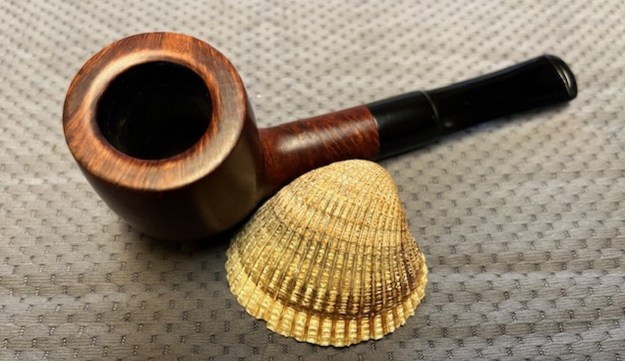
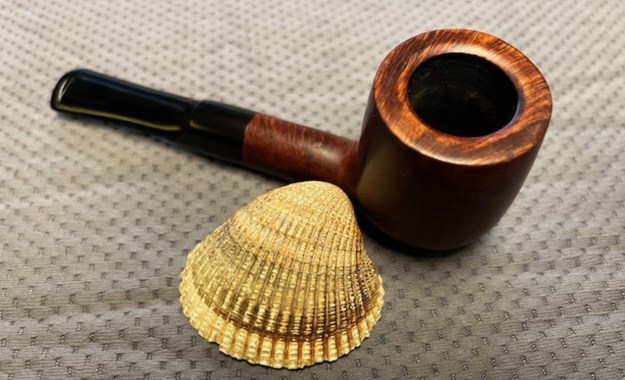
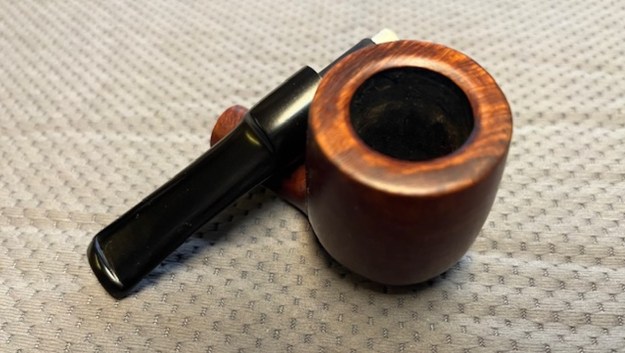
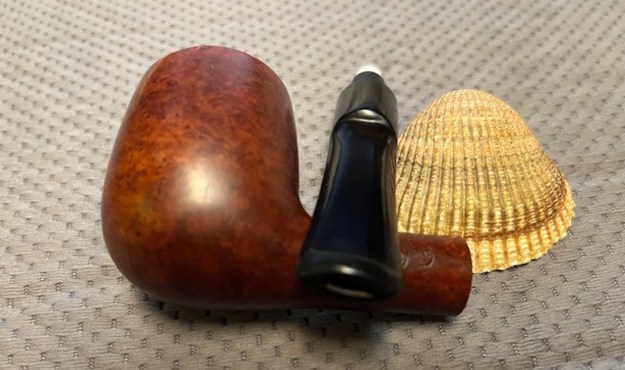
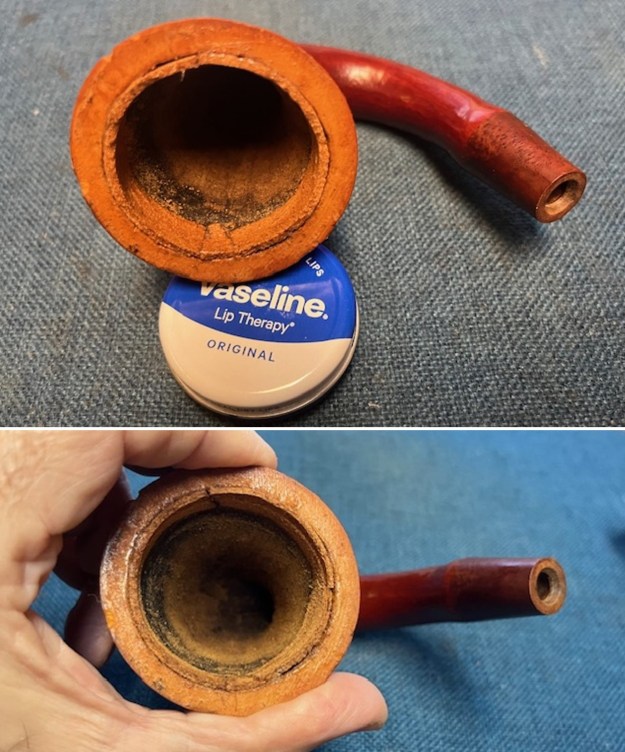
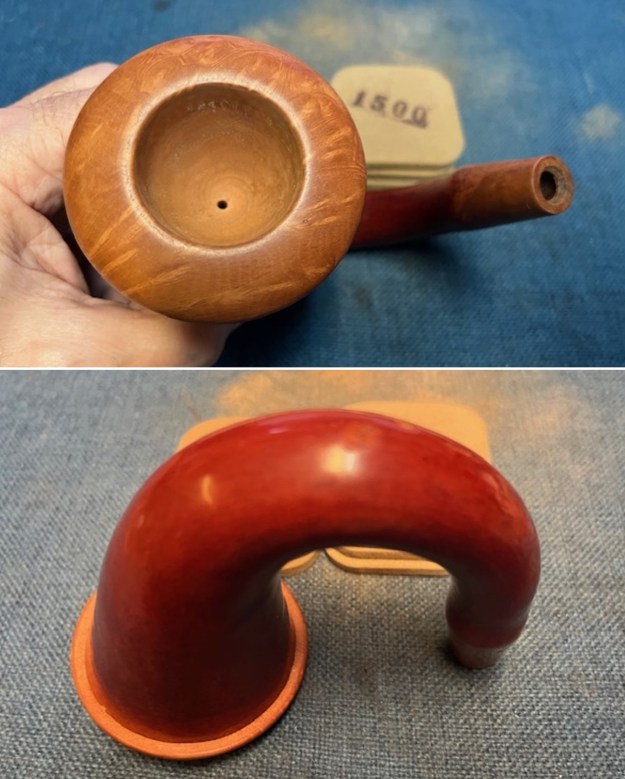
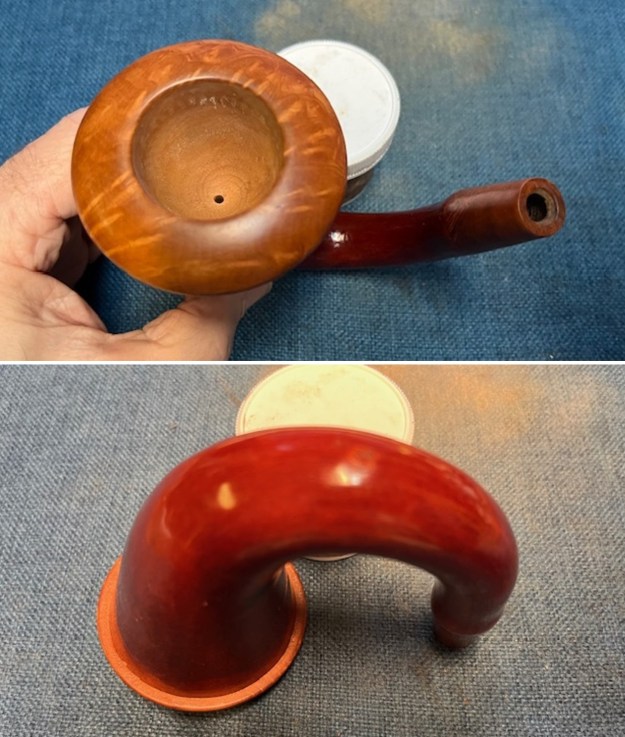
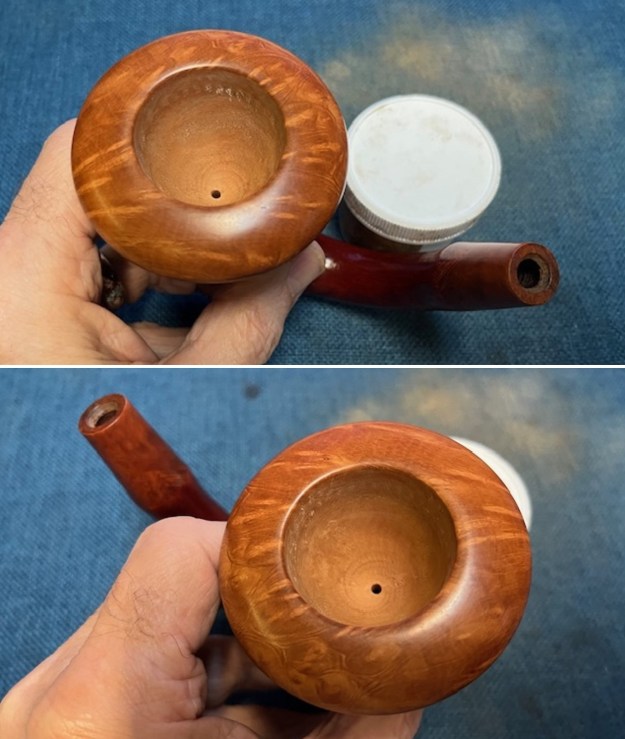
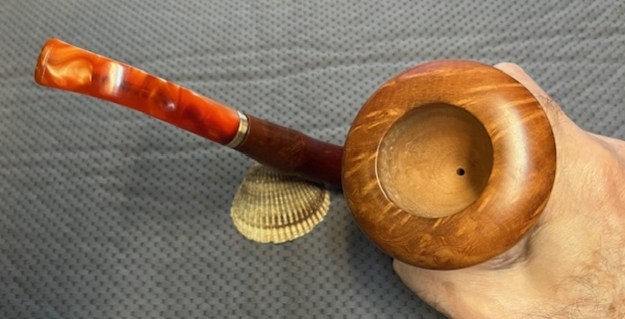
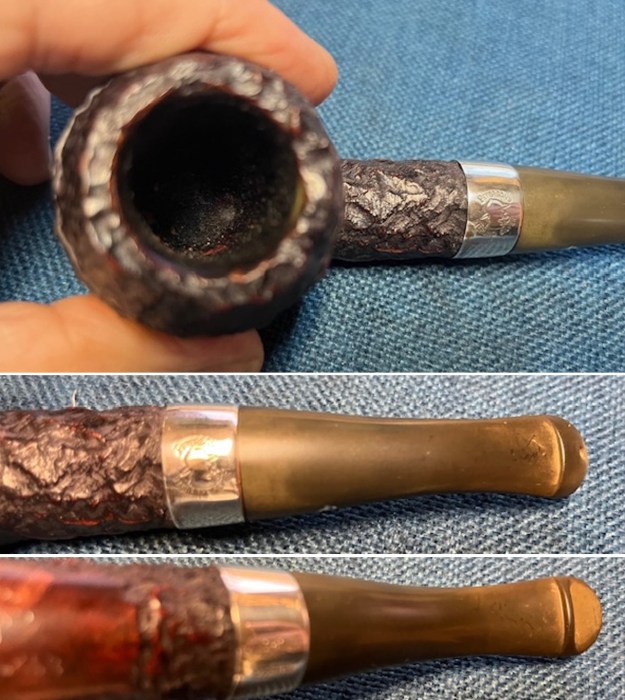
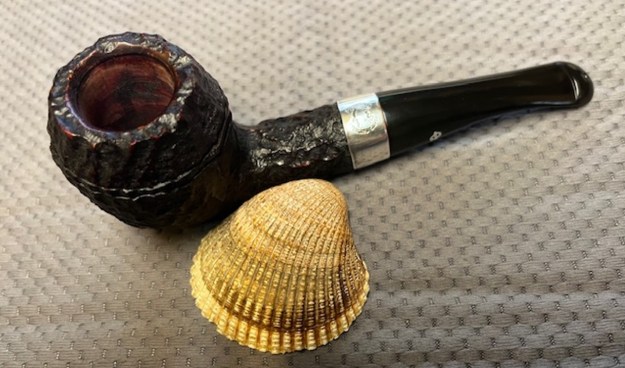
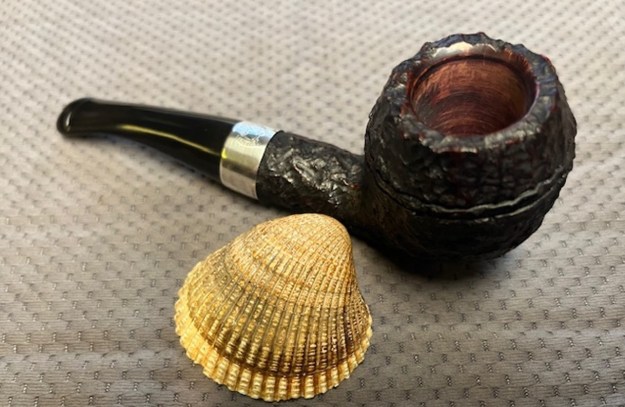
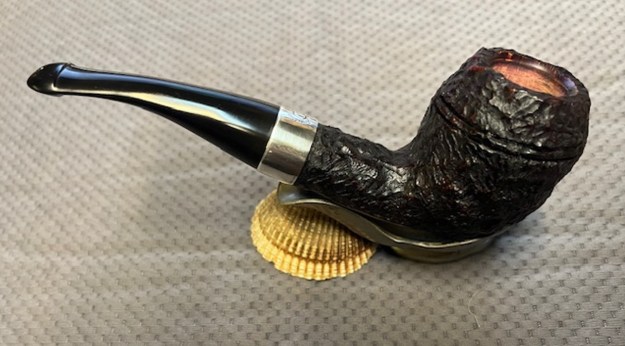
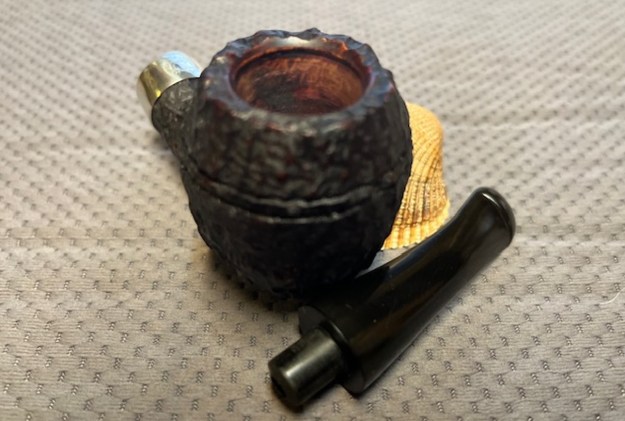
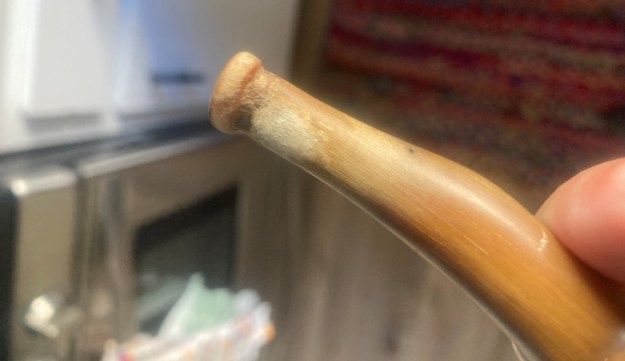
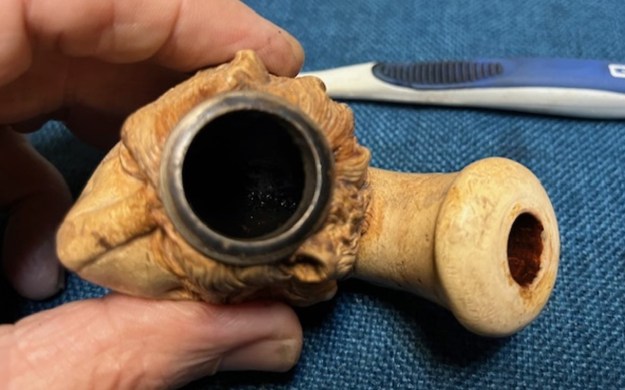
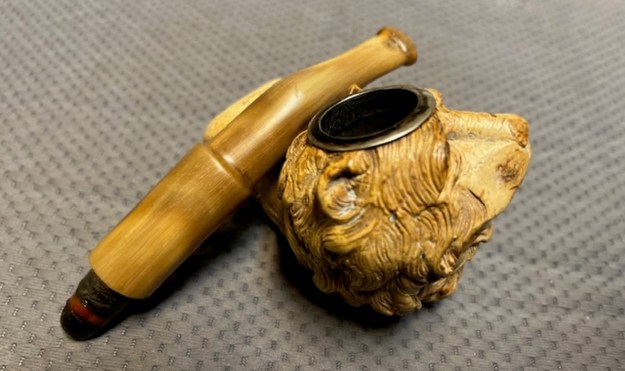
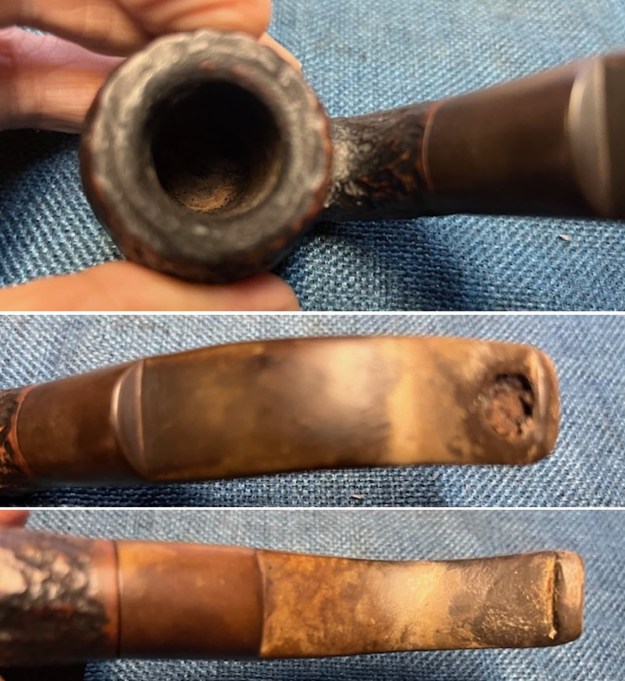
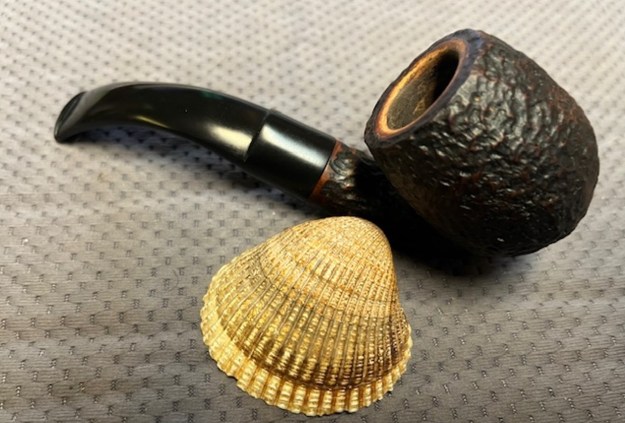
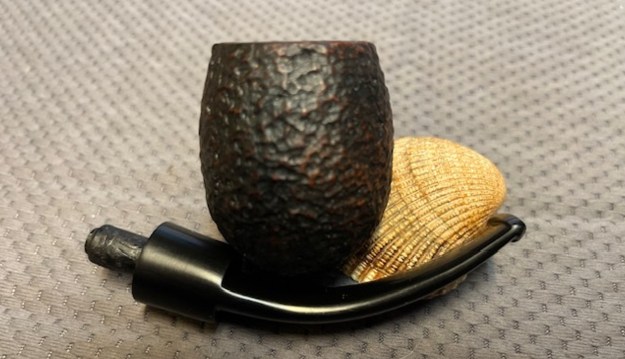
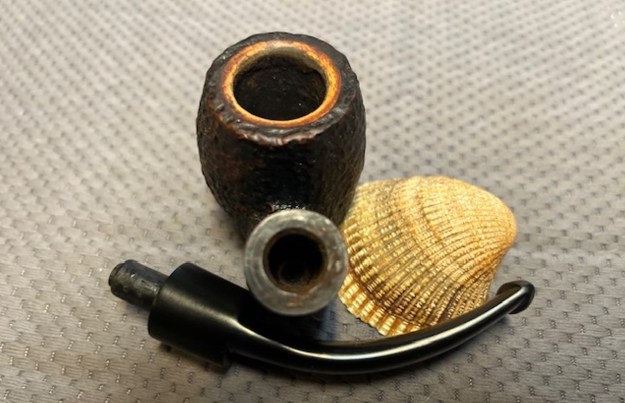
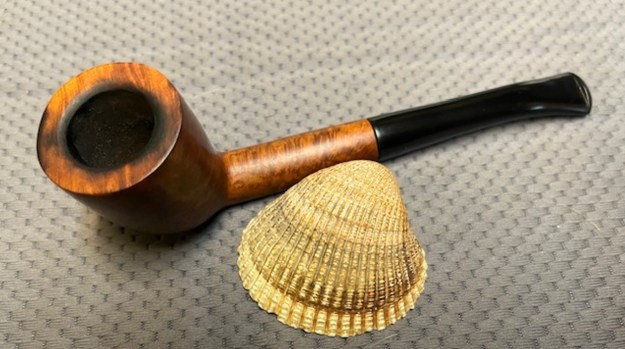
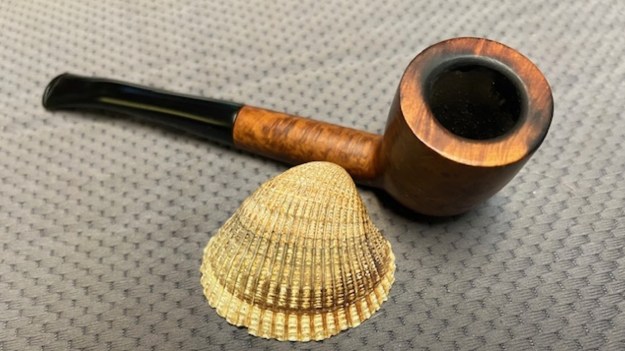
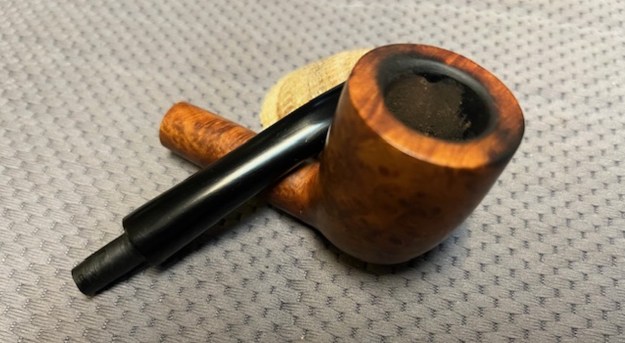
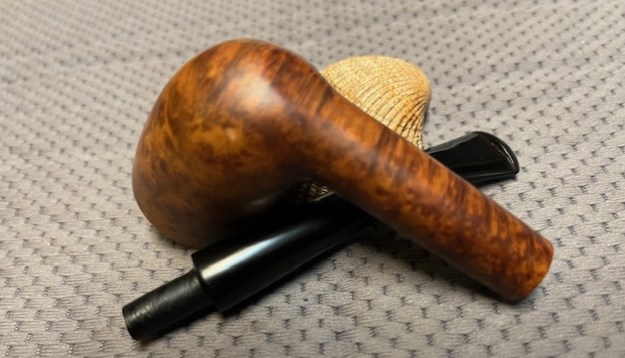
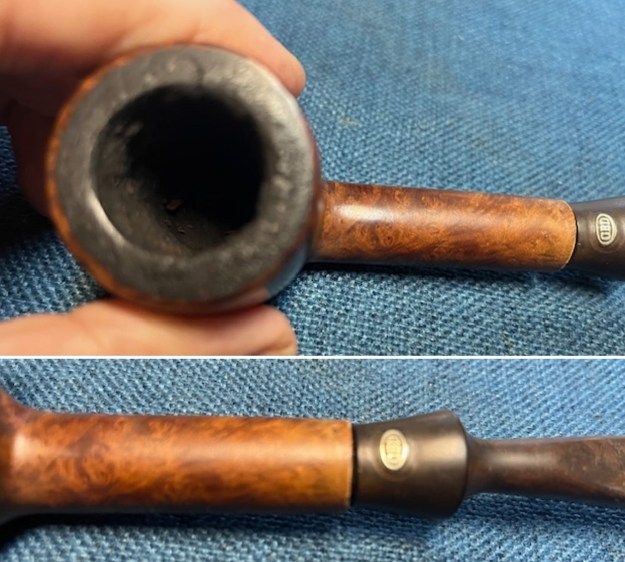
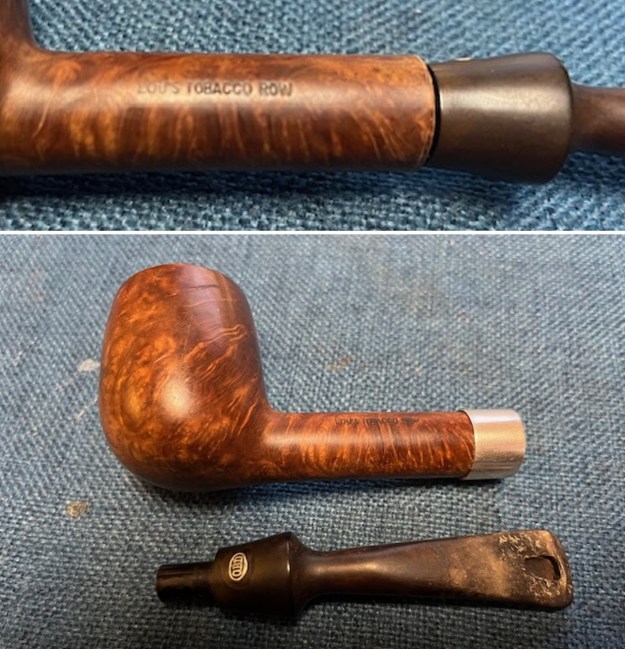
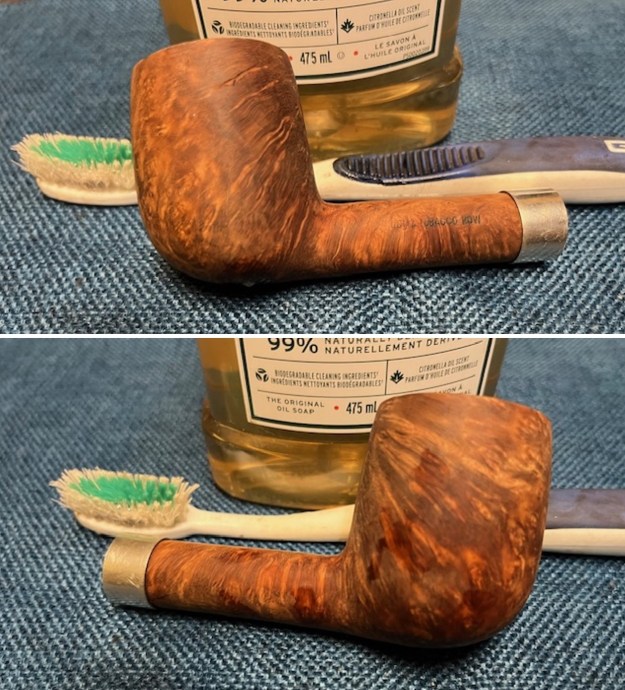
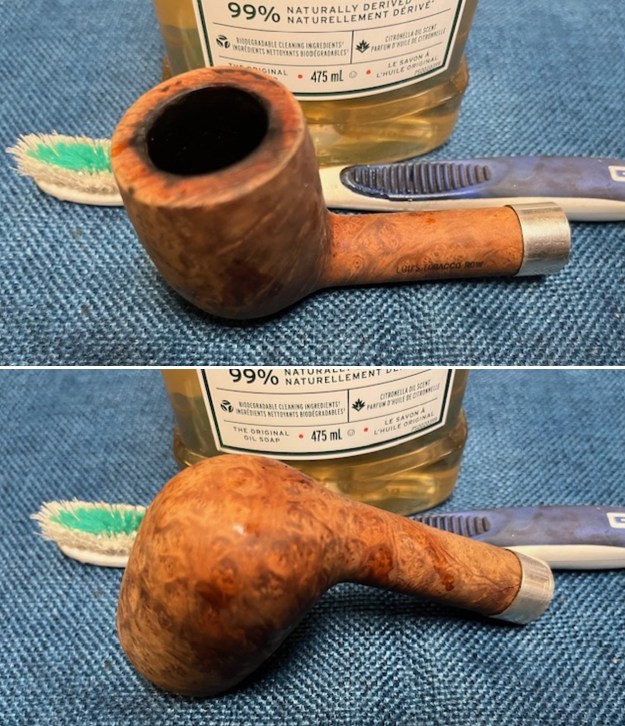
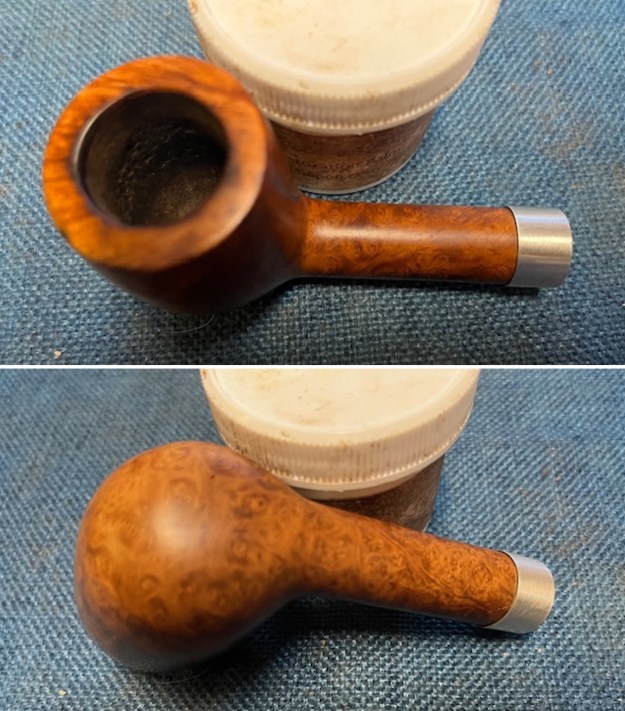
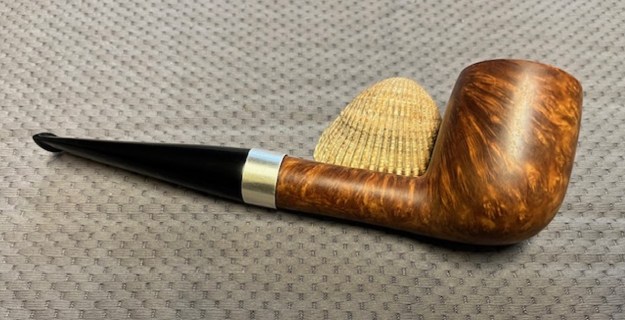
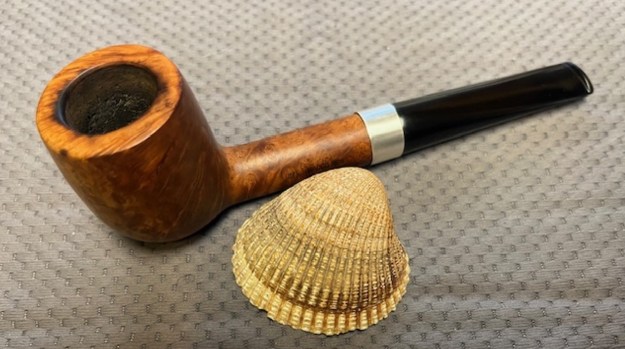
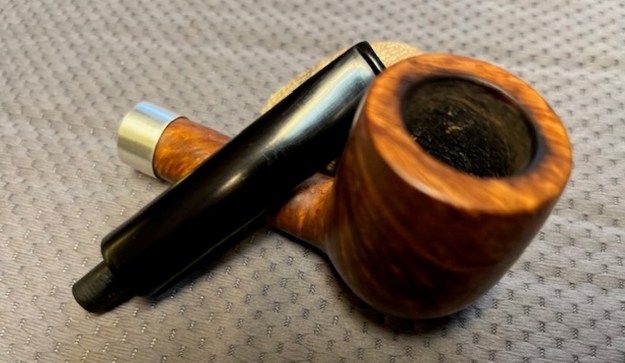
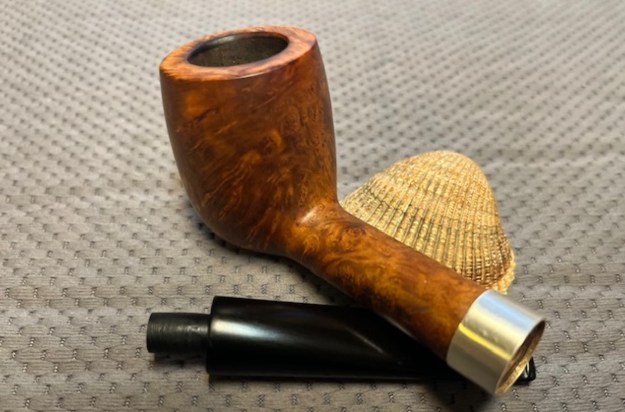
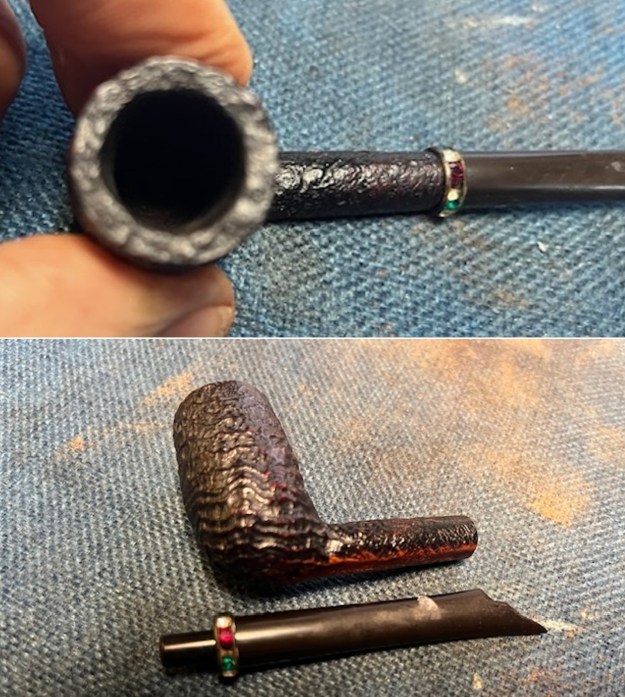
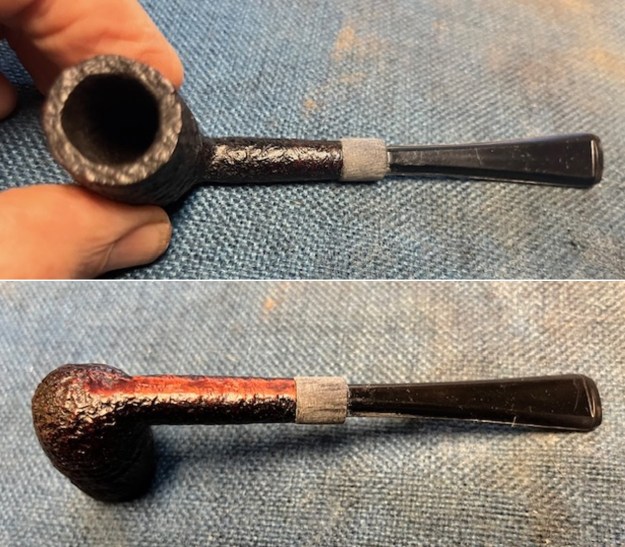
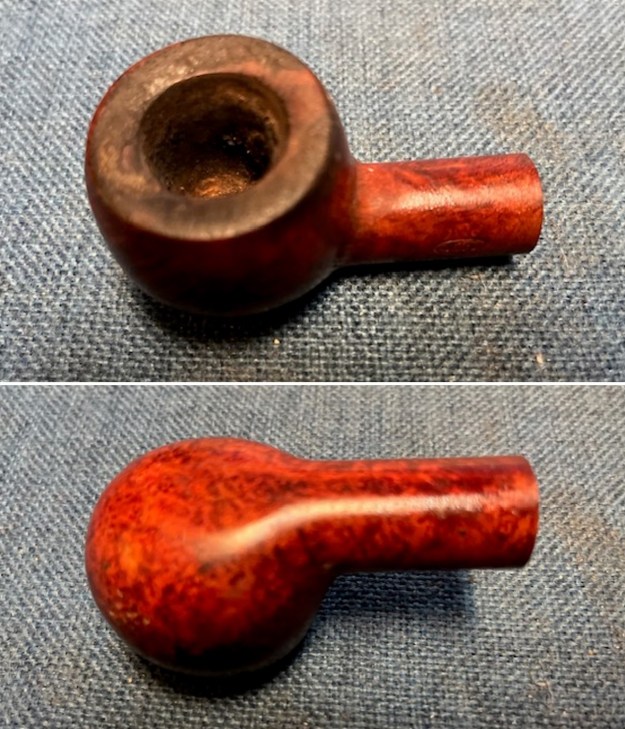
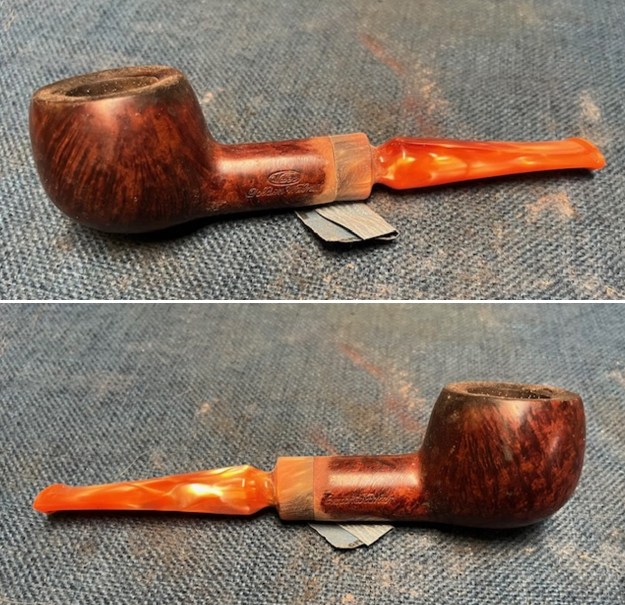
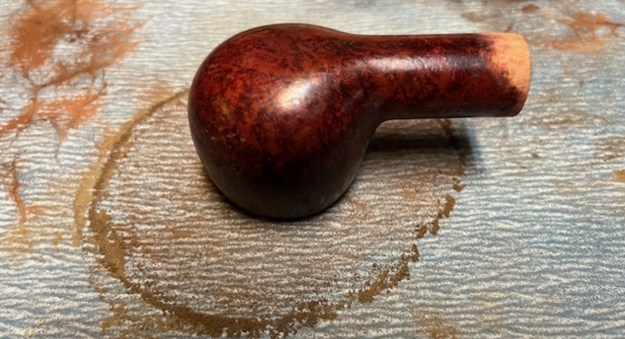
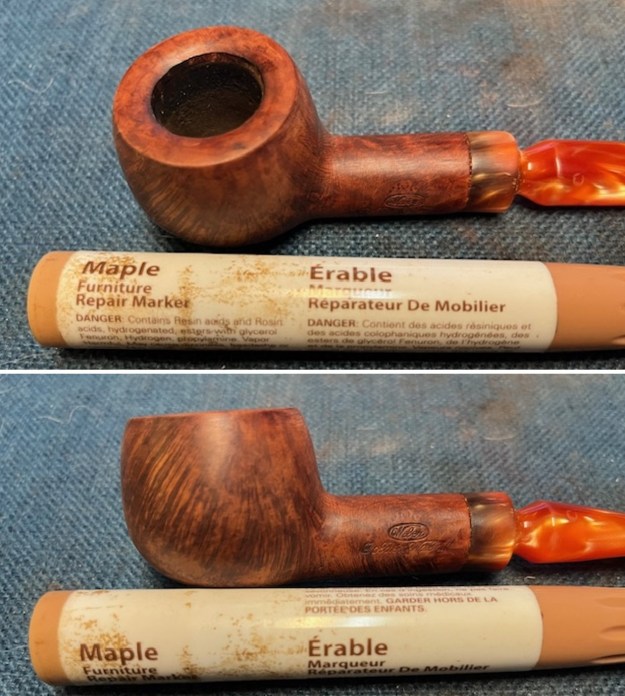
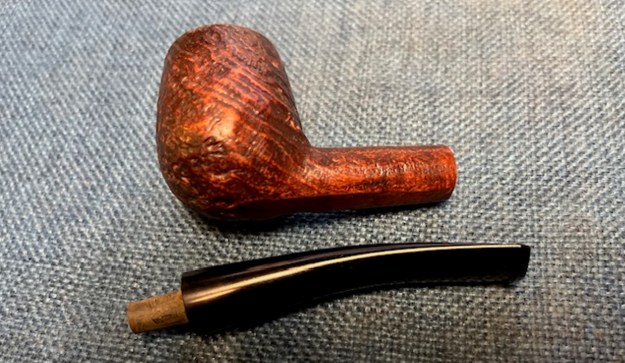
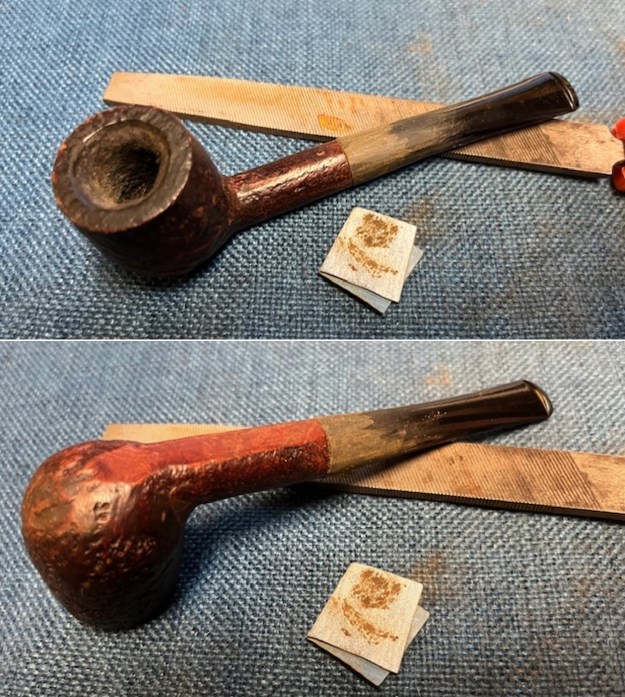
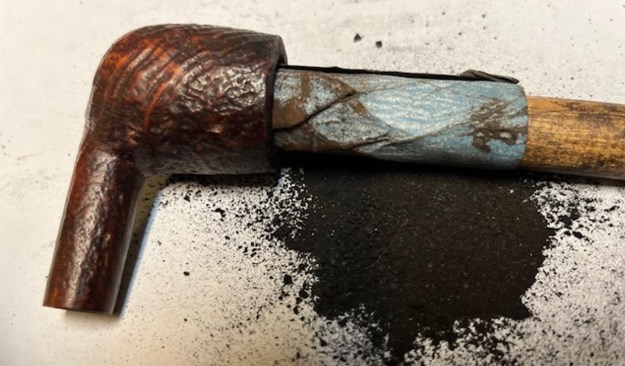
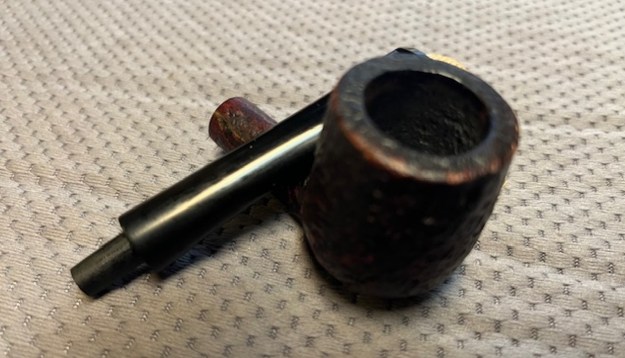
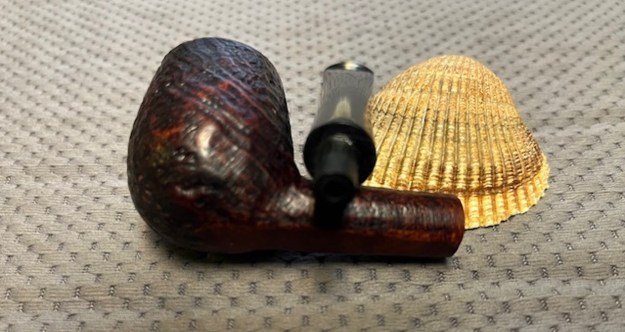
 I took a photo of the rim top to show the condition. You can see the clean bowl. The bowl is in excellent condition and is clean. The rim top and the inner edge had a few issues. The top had some pitting and nicks and the inner edge had some burn damage toward the front of the bowl. The stem came out looking clean. There were some tooth marks and chatter on both sides.
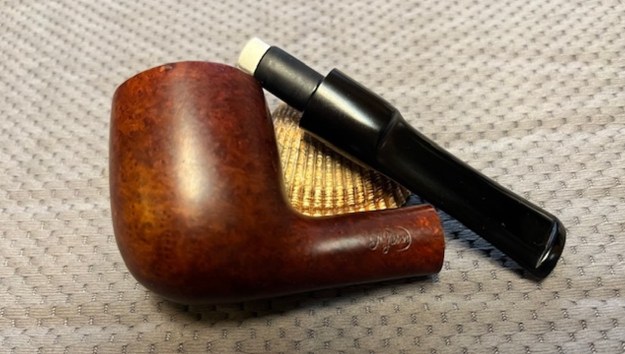
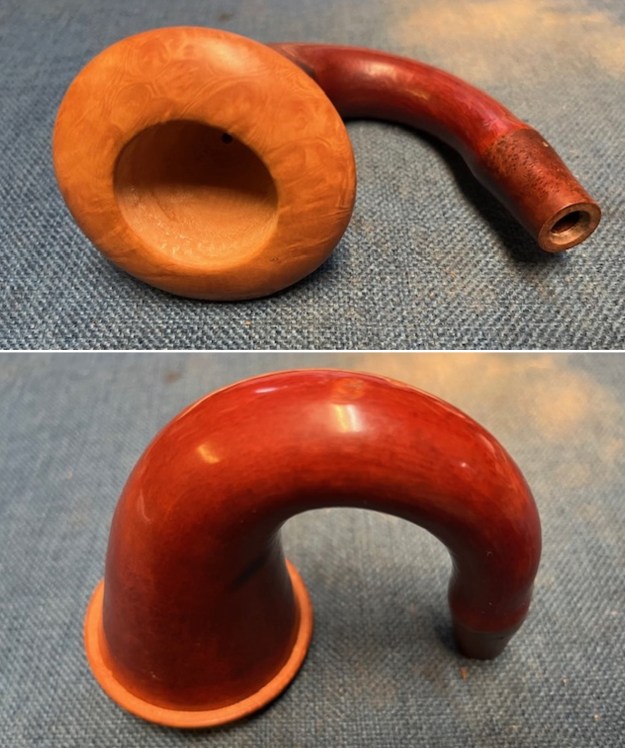
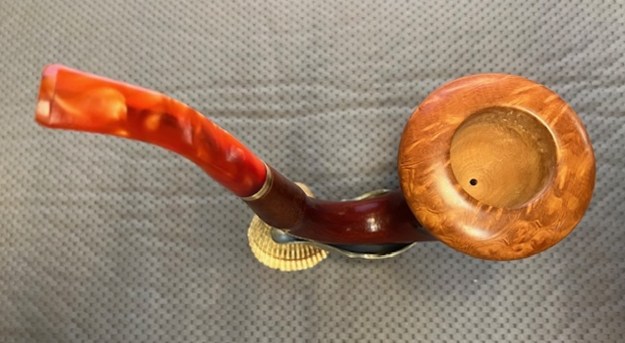
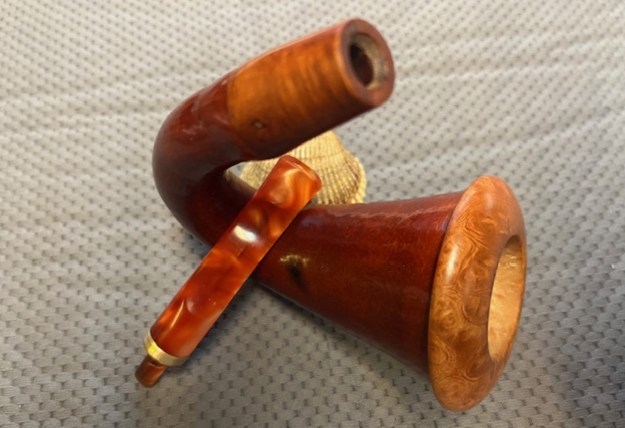
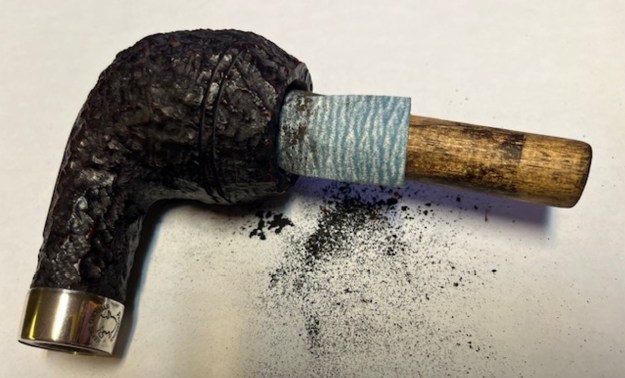
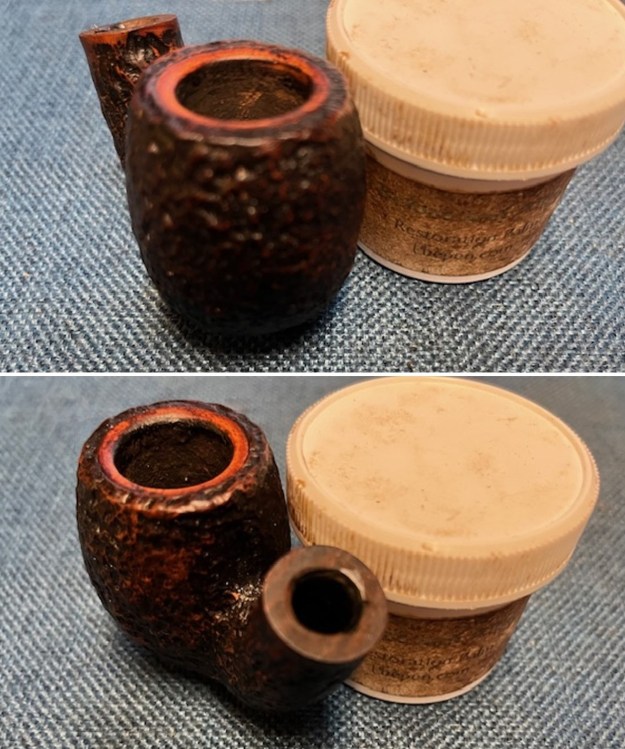
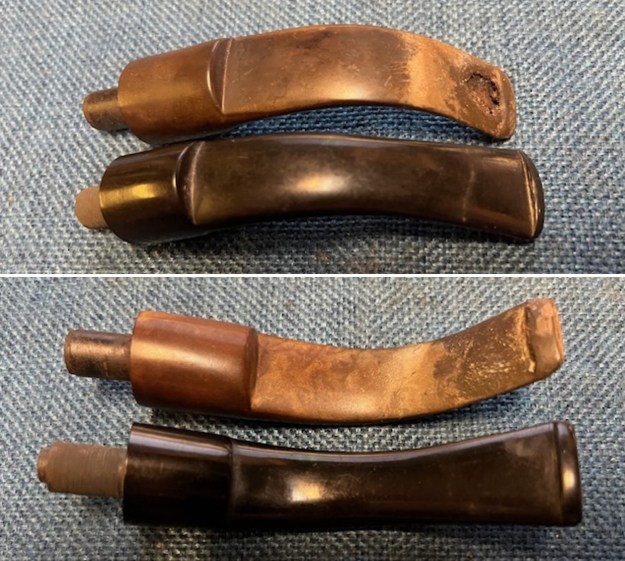
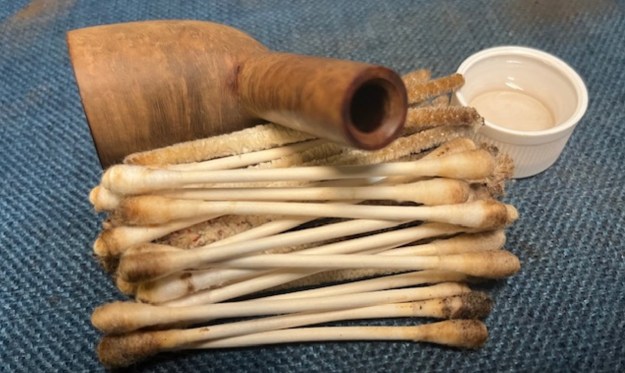
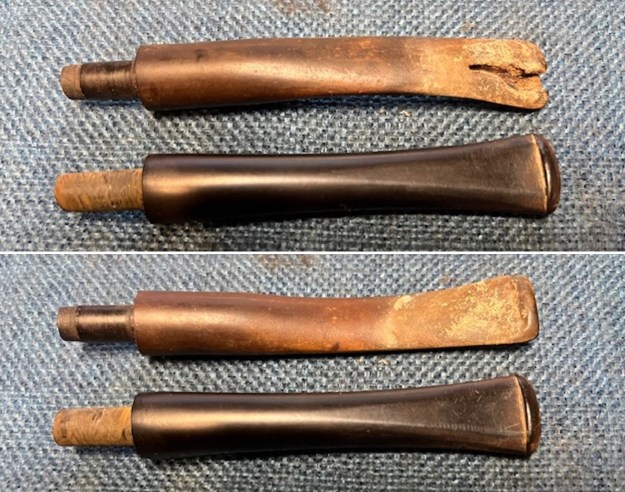
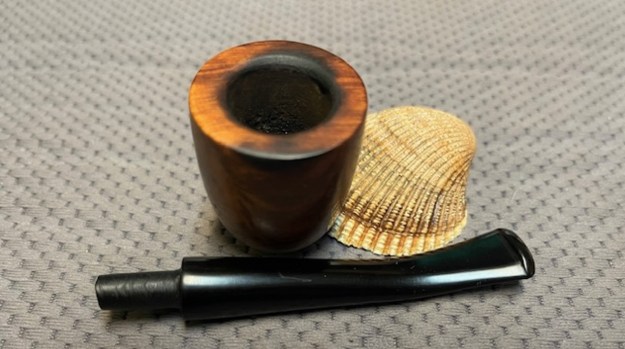
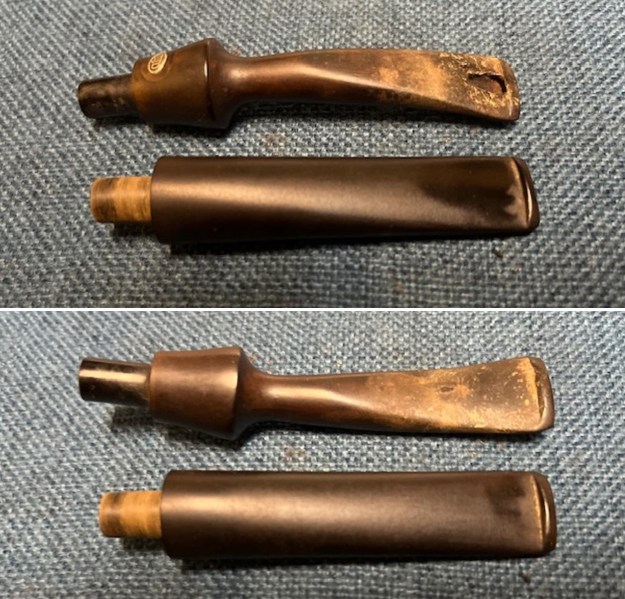
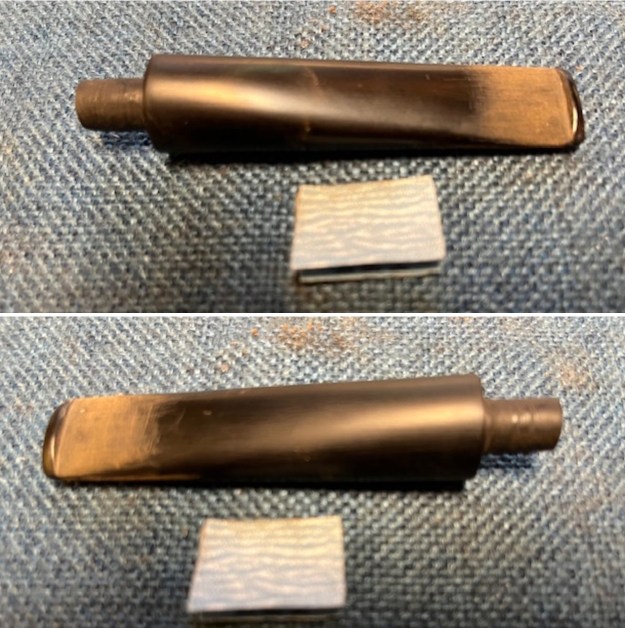
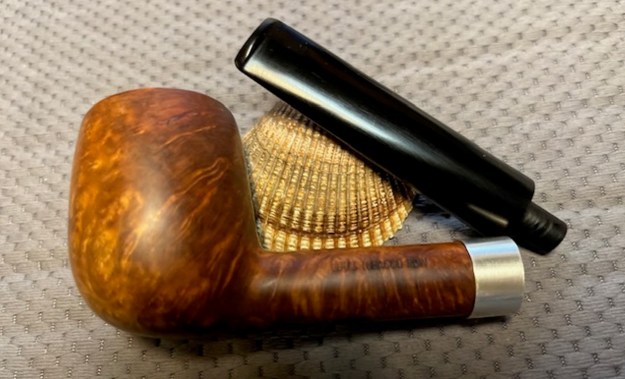
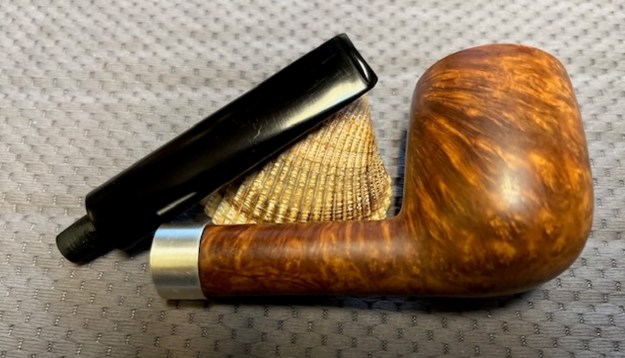
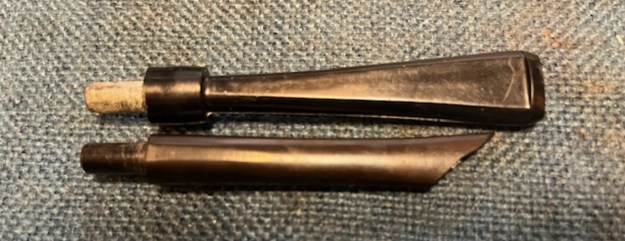
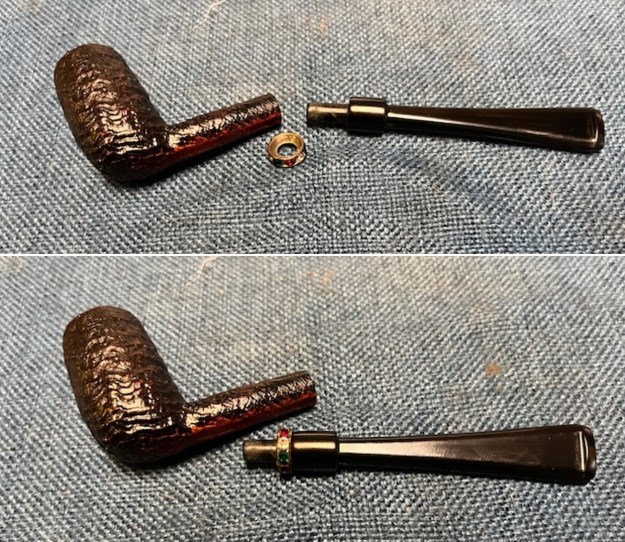
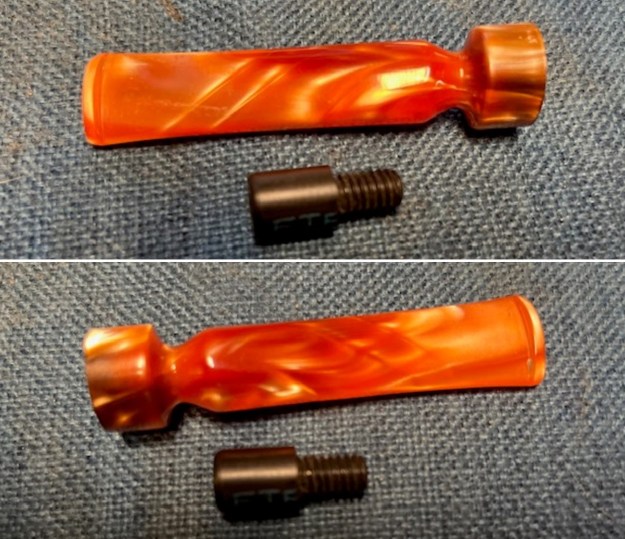
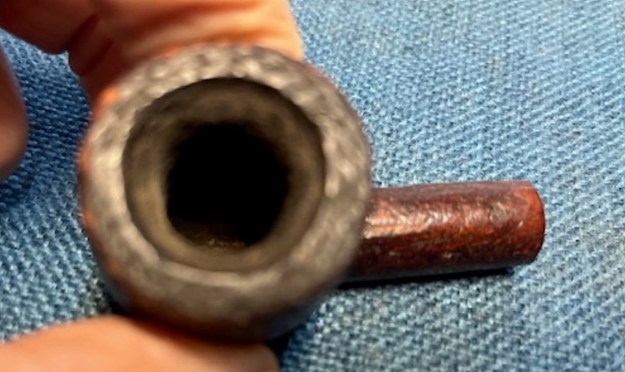
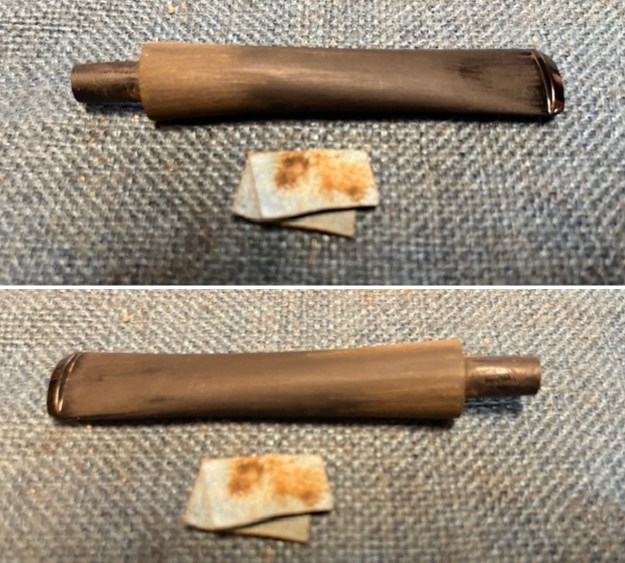
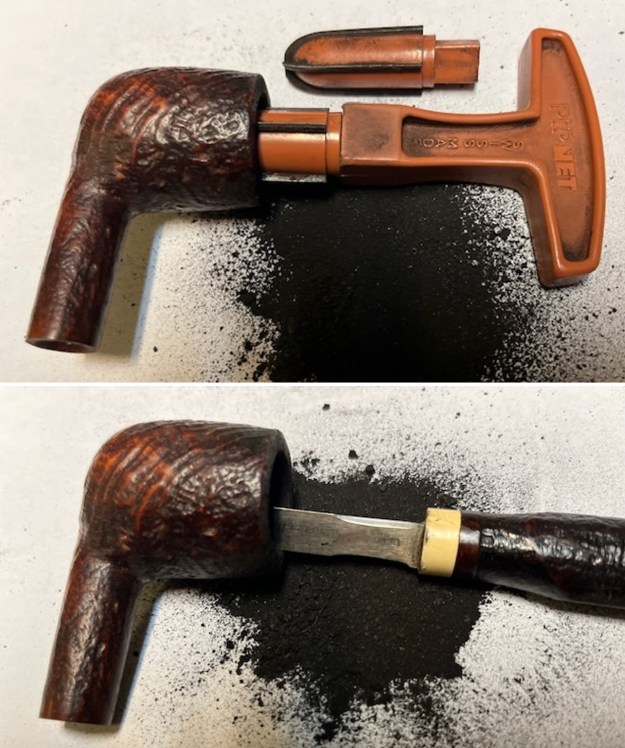
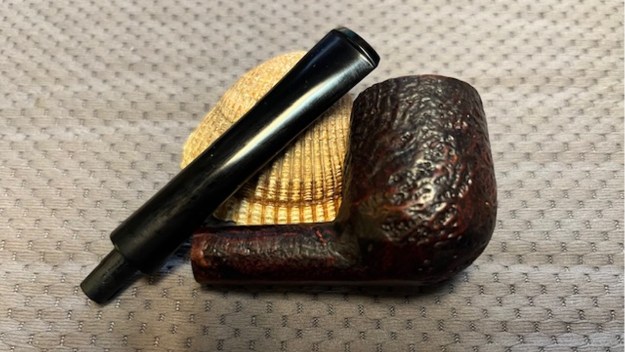
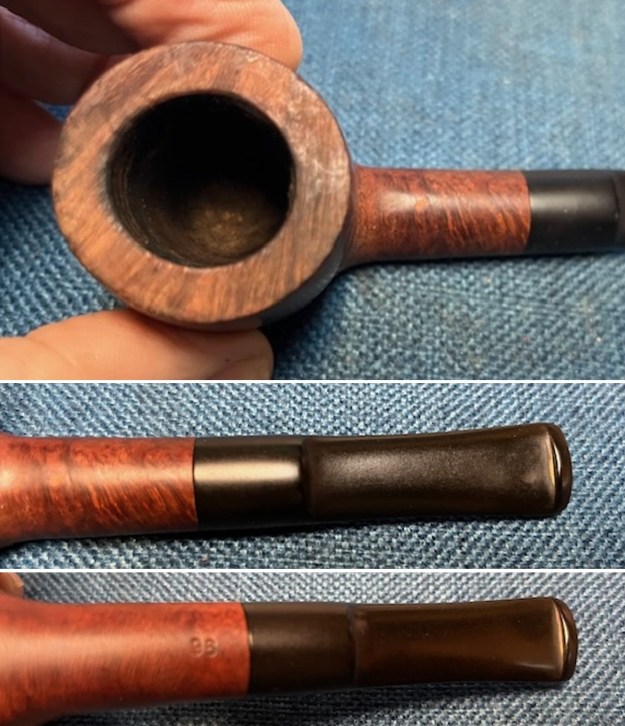 I took photos of the stamping on the shank sides. It is clear and readable as noted above. I removed the stem from the shank and took a photo of the pipe parts to show what I was working with. The first is a side view and the second is showing the 9mm filter tenon on the stem.
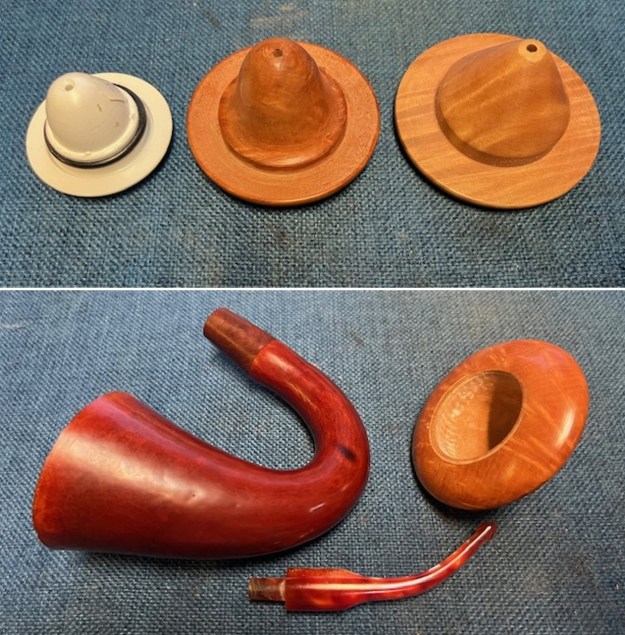
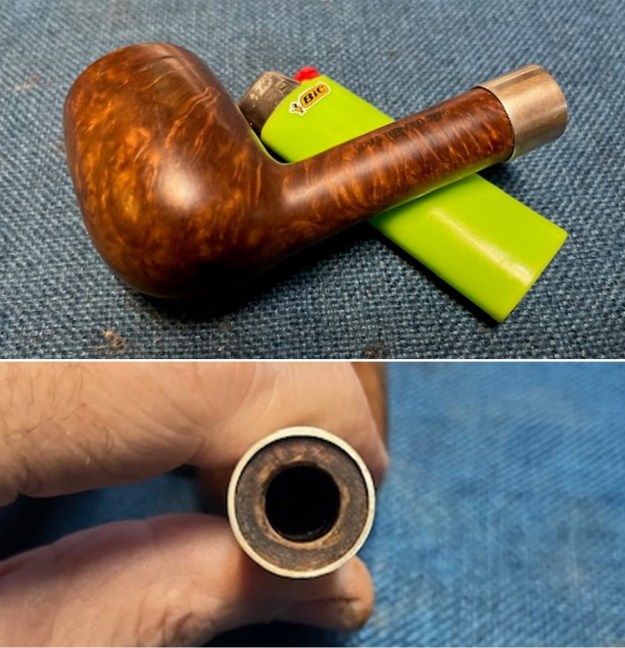
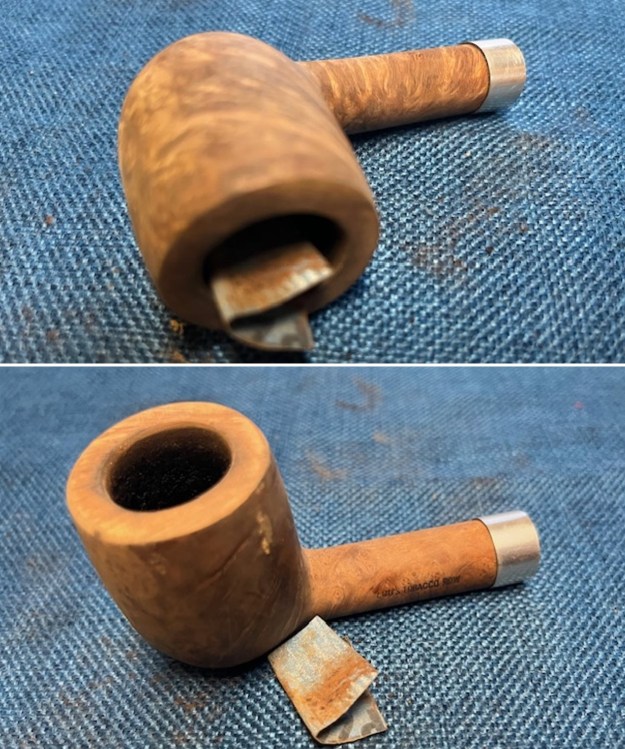
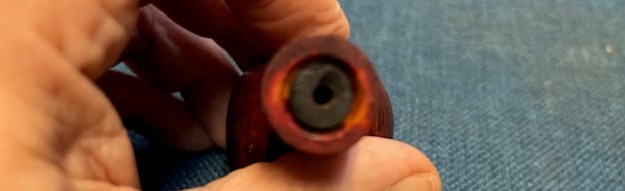
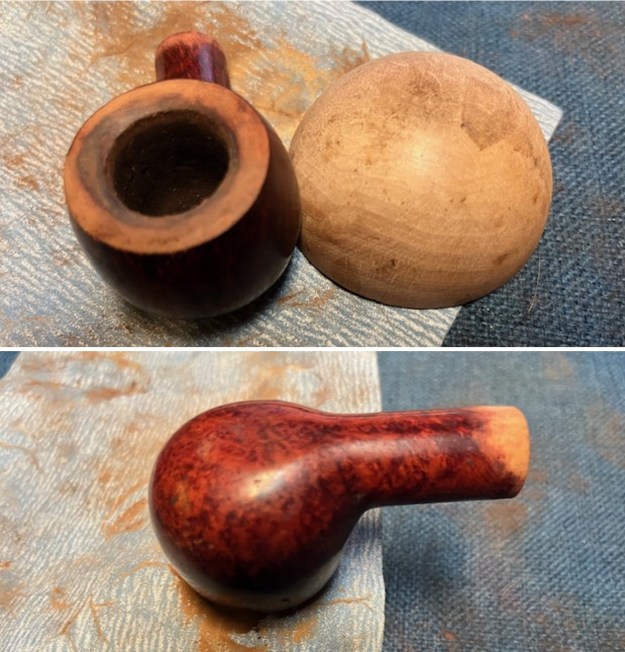
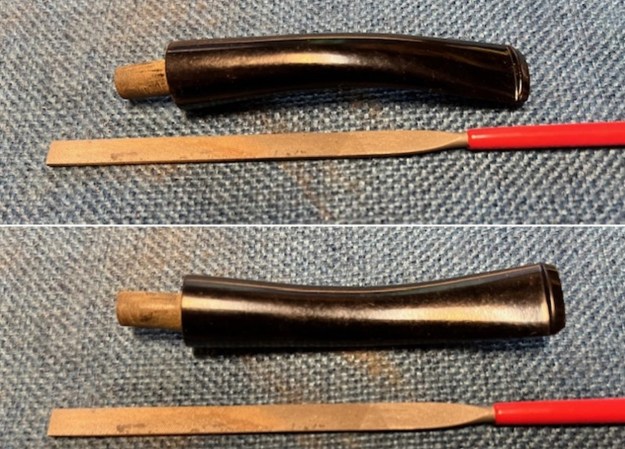
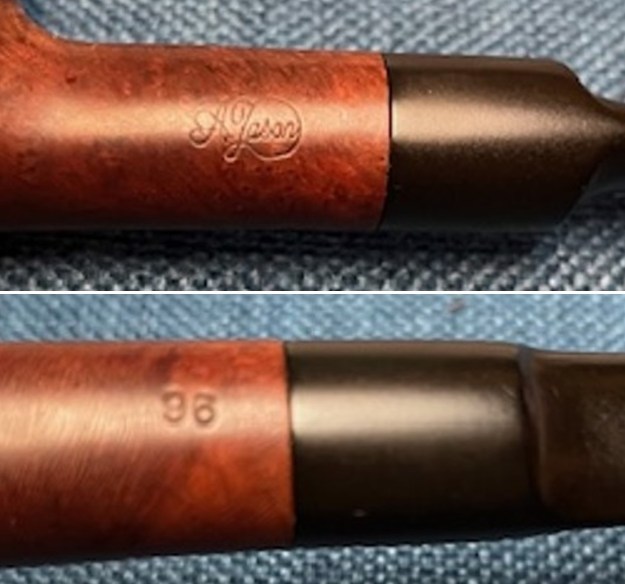
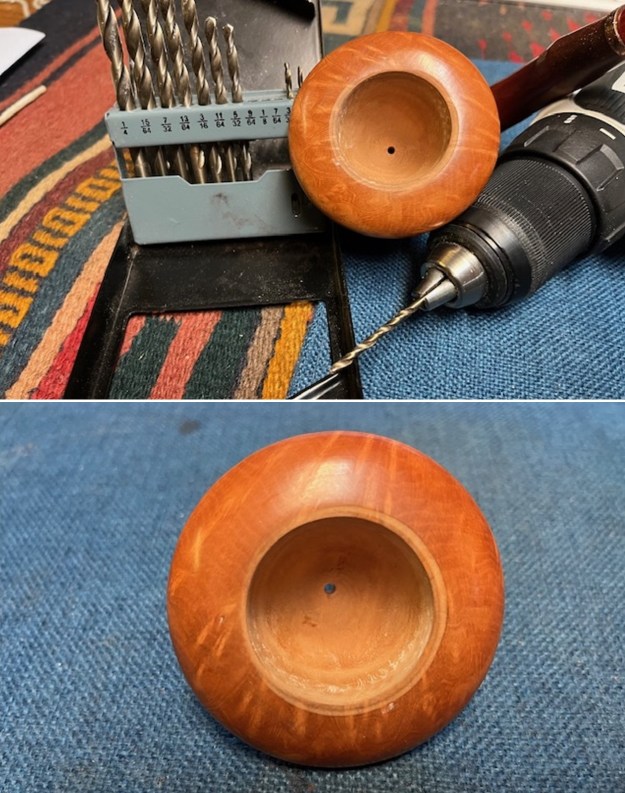
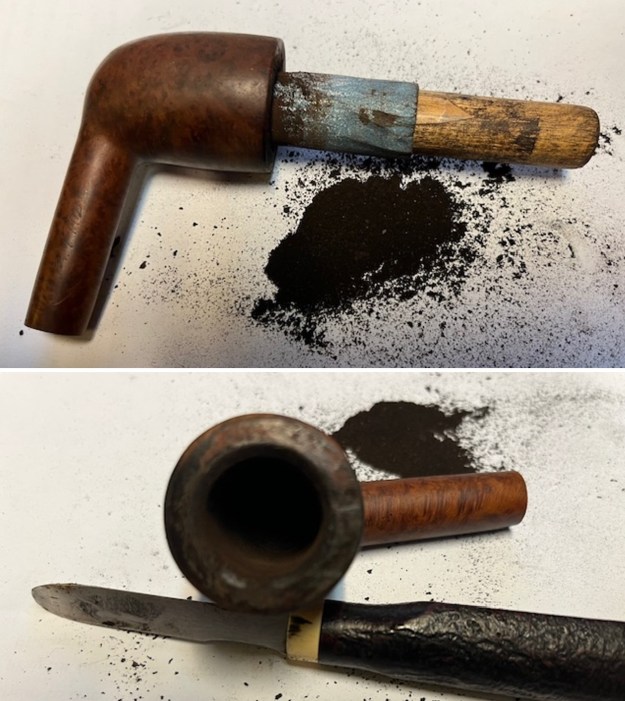
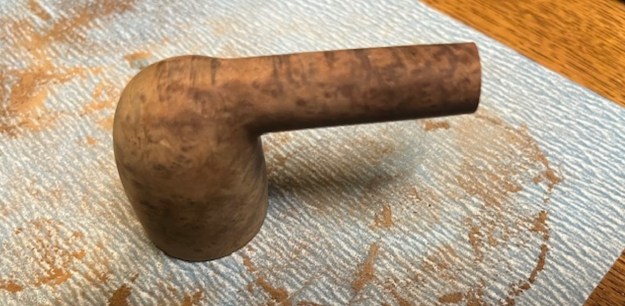
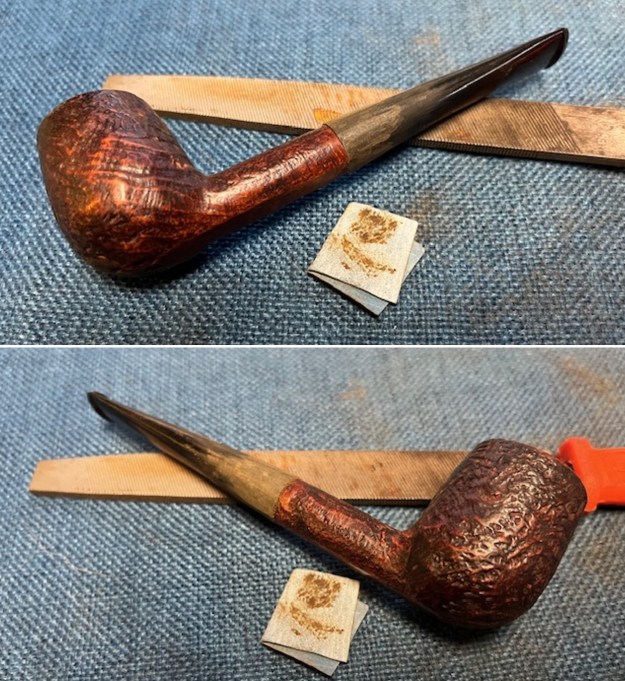
 I worked over the rim top and inner edge with a folded piece of 220 grit sandpaper to minimize the damage. I followed that by using a wooden ball and some 220 grit sandpaper to give the inner edge a light bevel to take care of the burn damage on the front inner edge of the bowl. A benefit of the sanding with a sphere is that it also cleaned up the damage on the rim top.
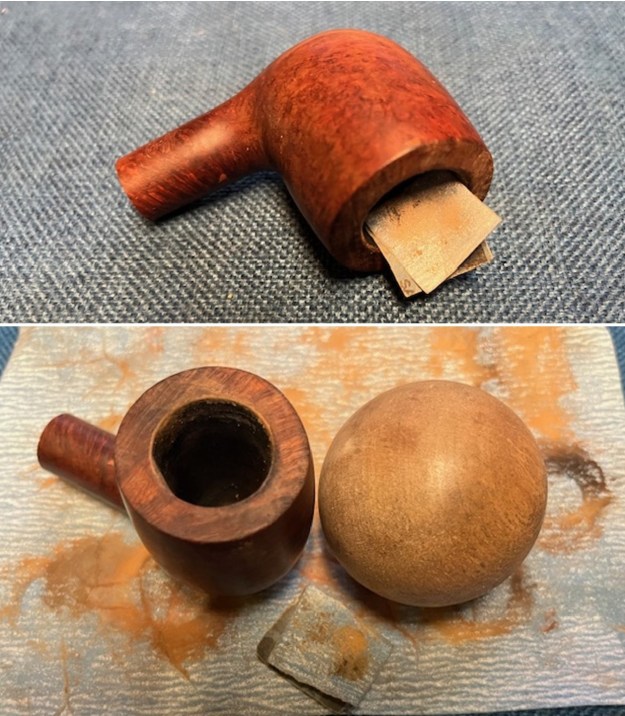
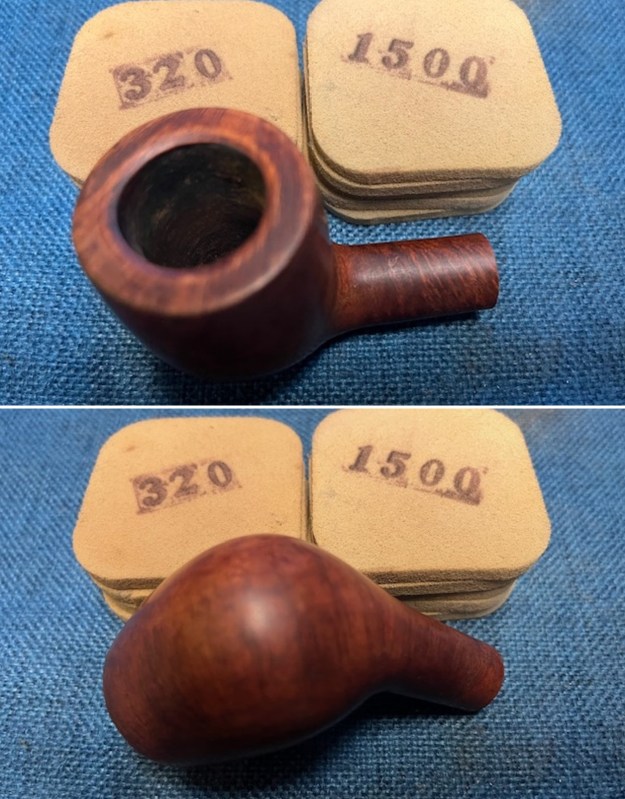
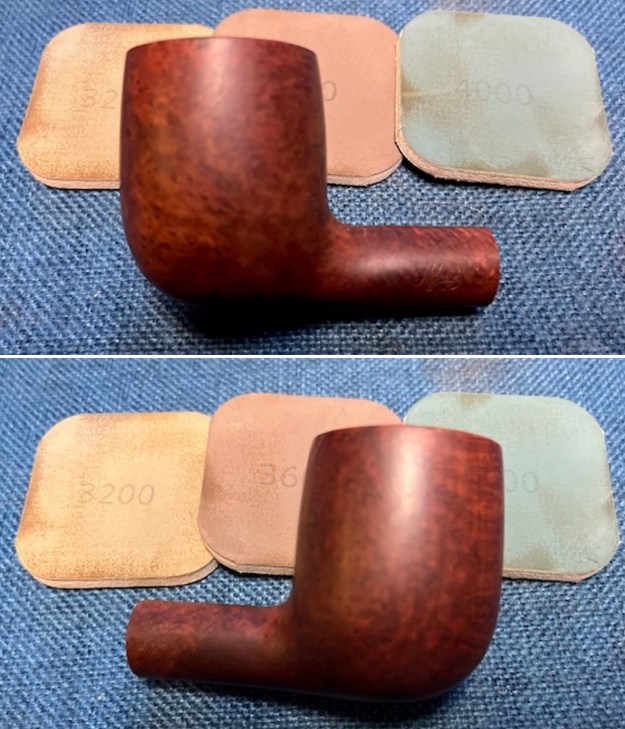
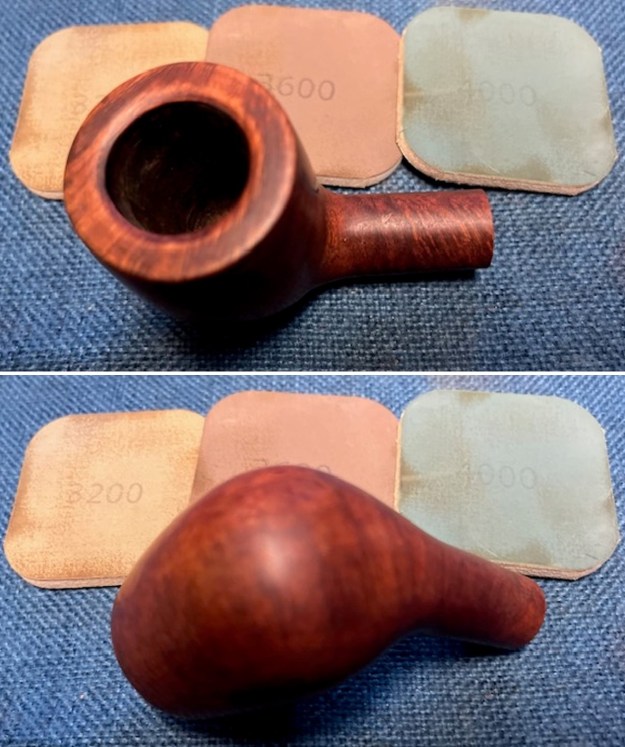
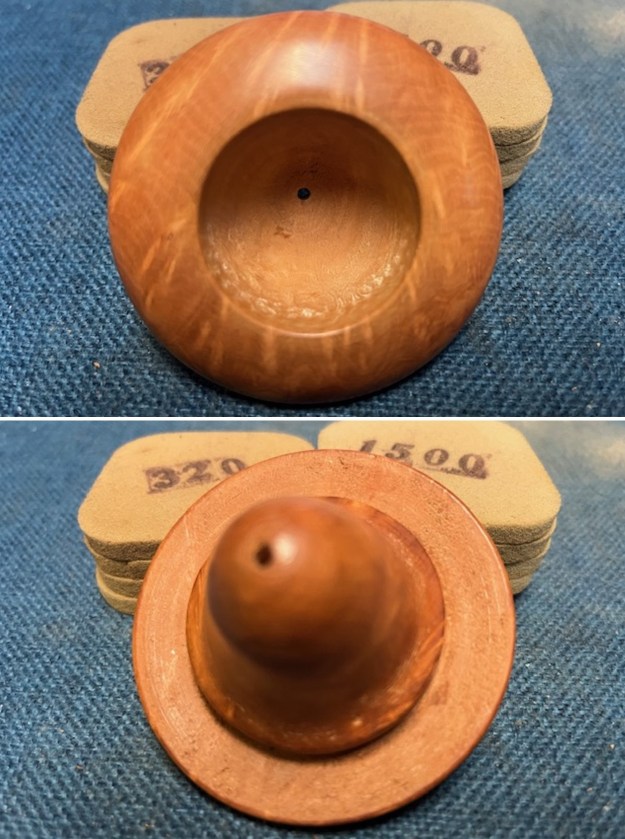
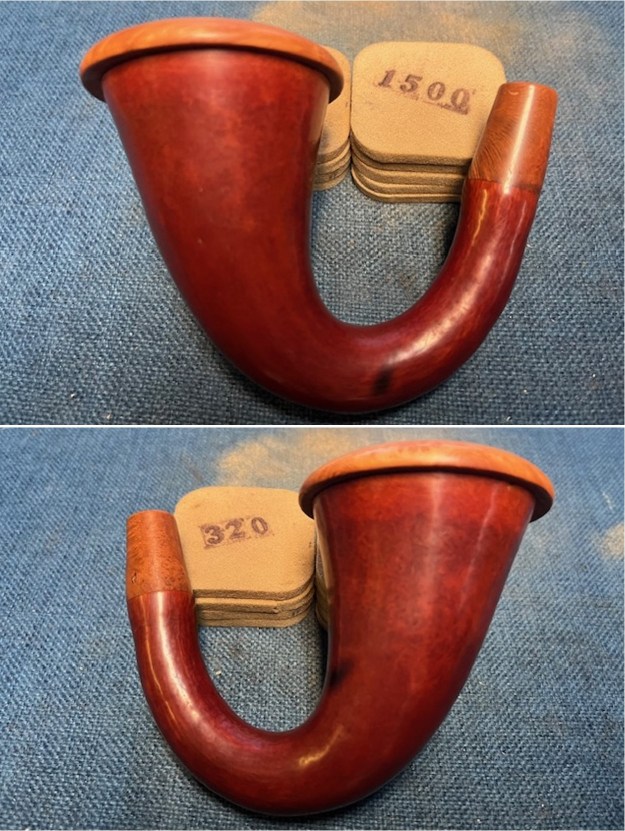
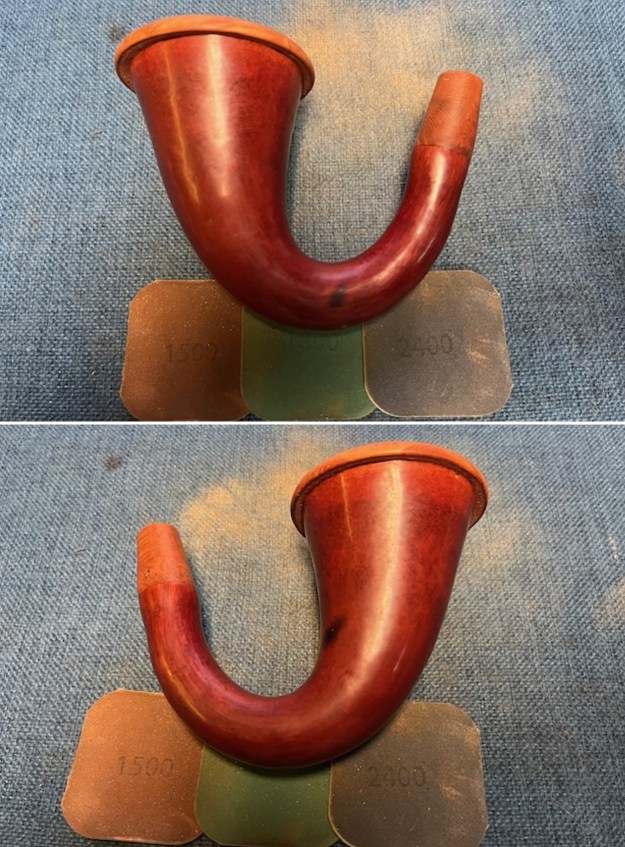
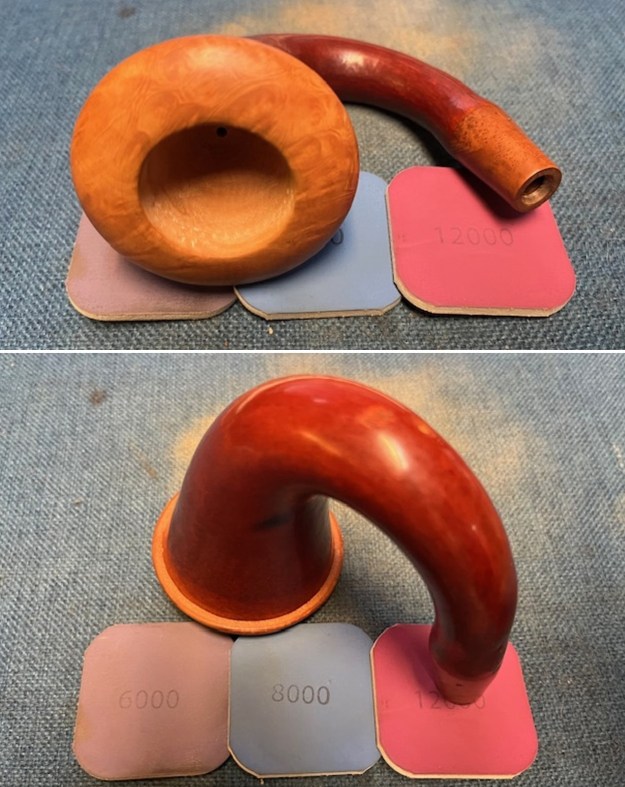
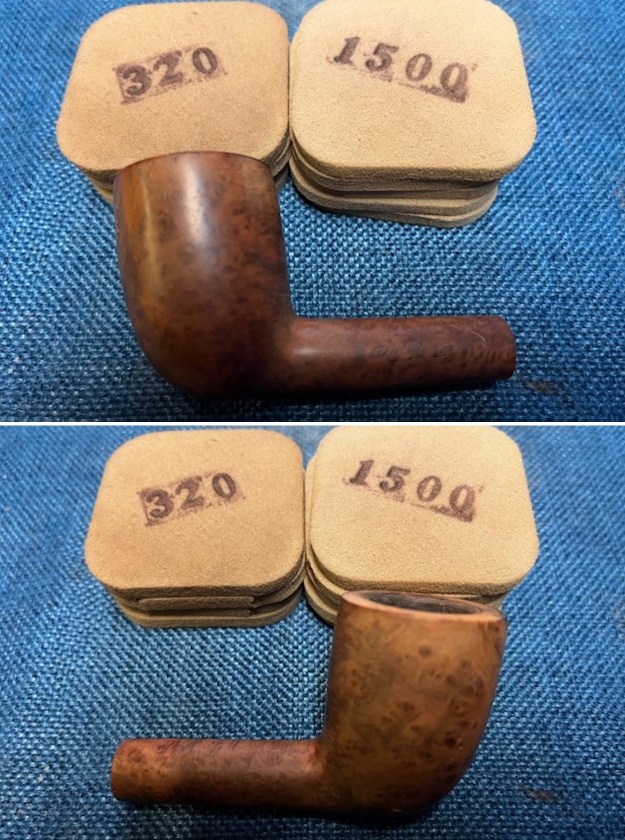
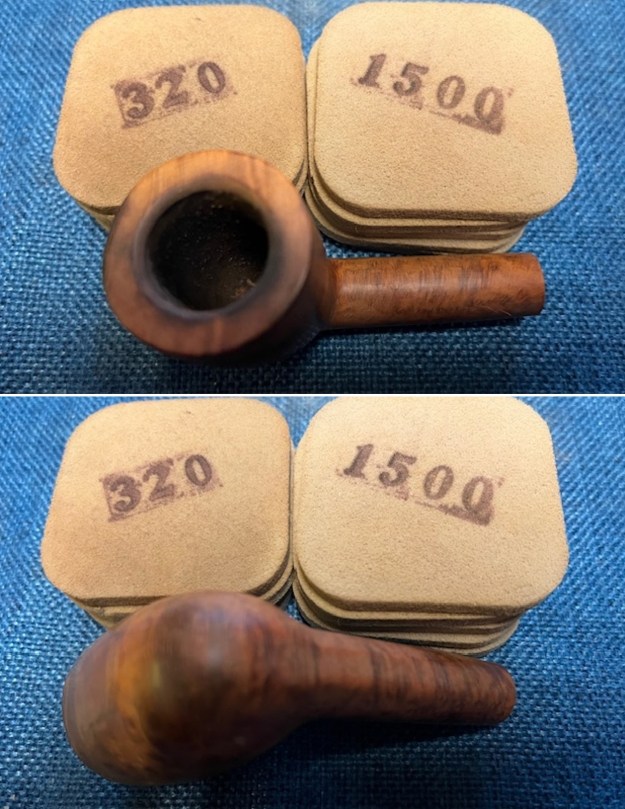
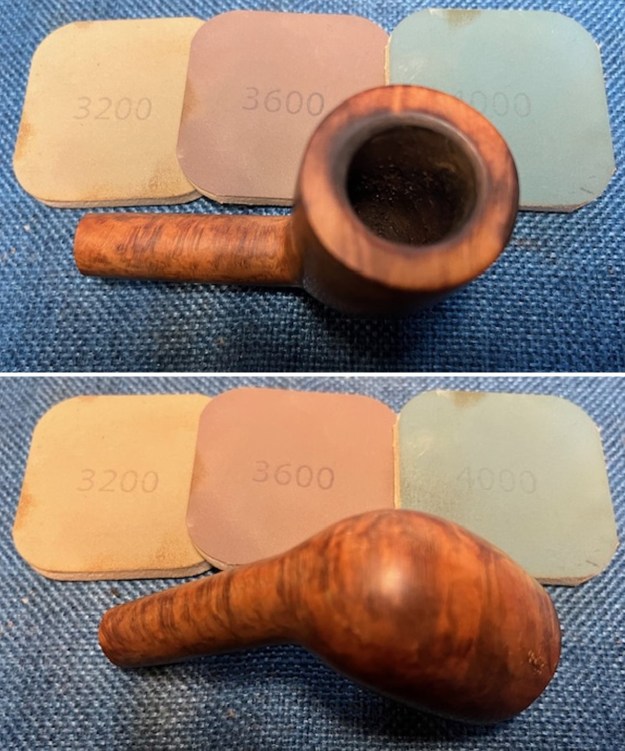
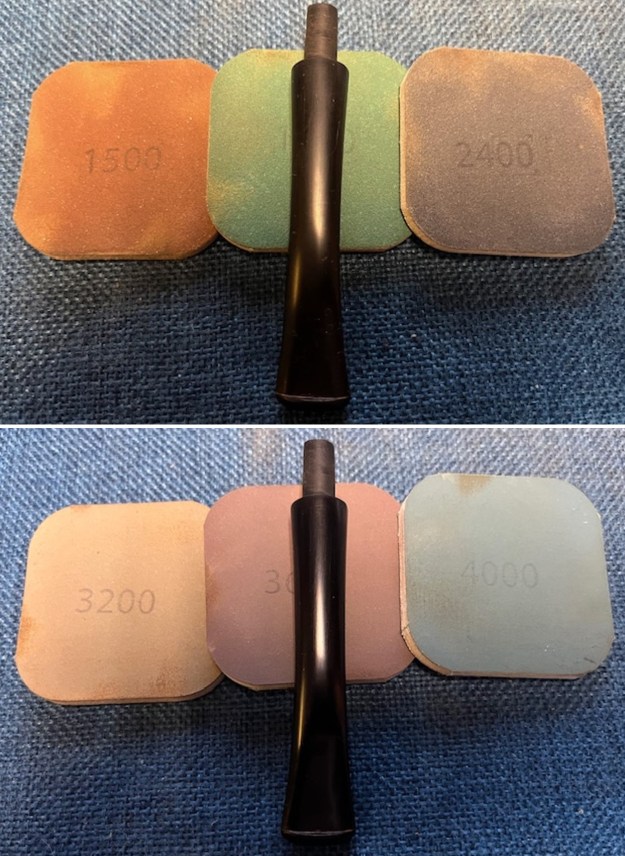
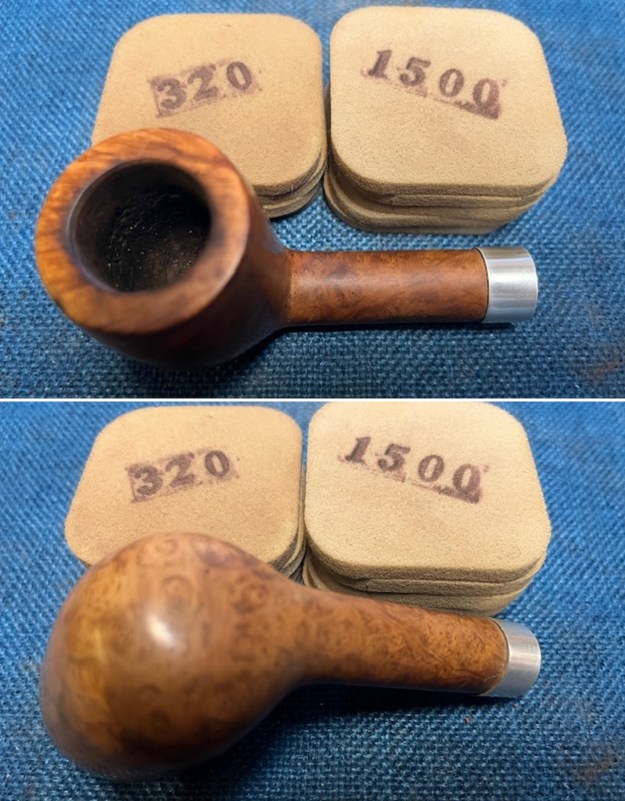
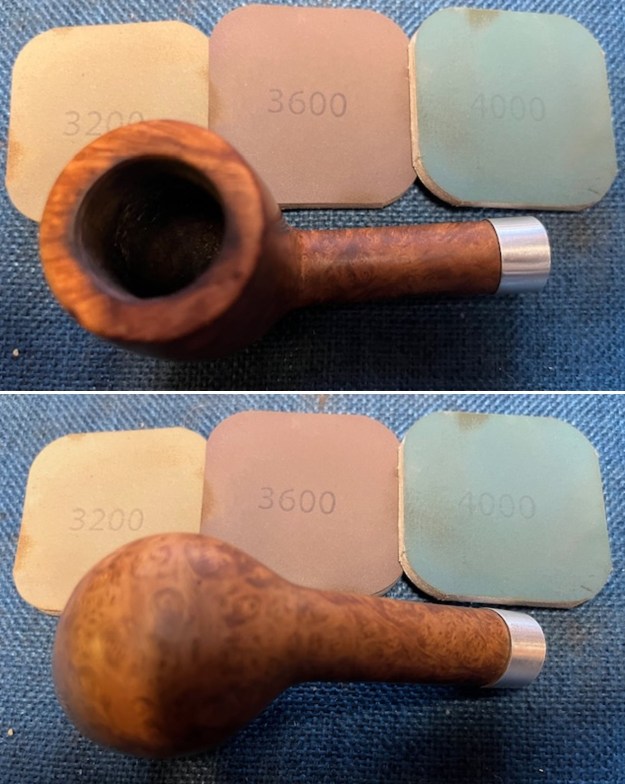
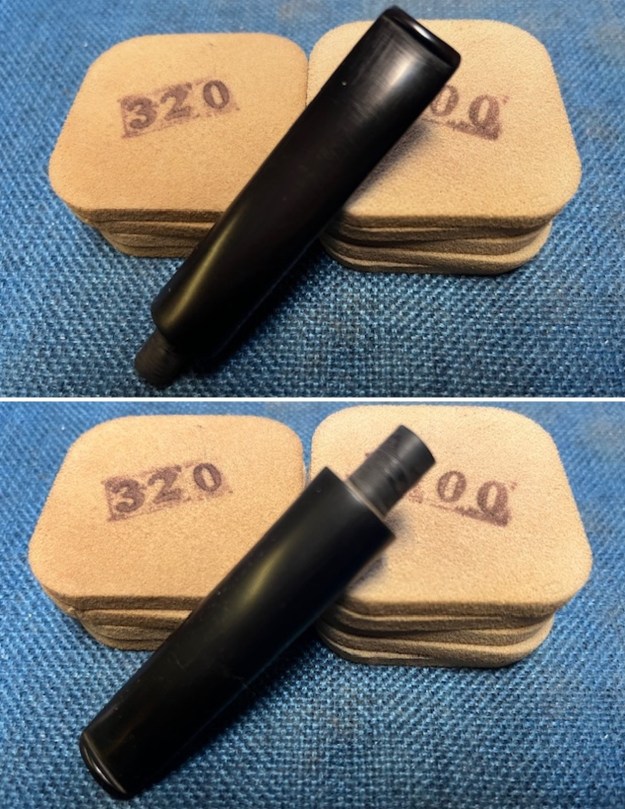
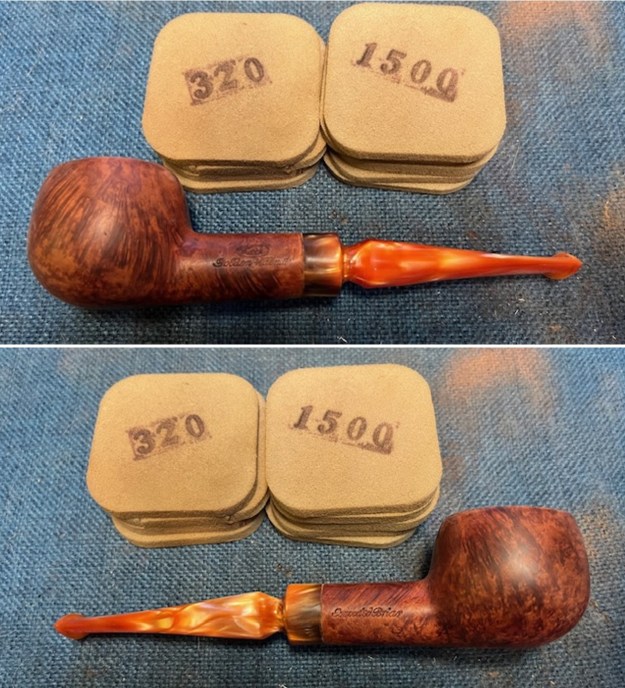
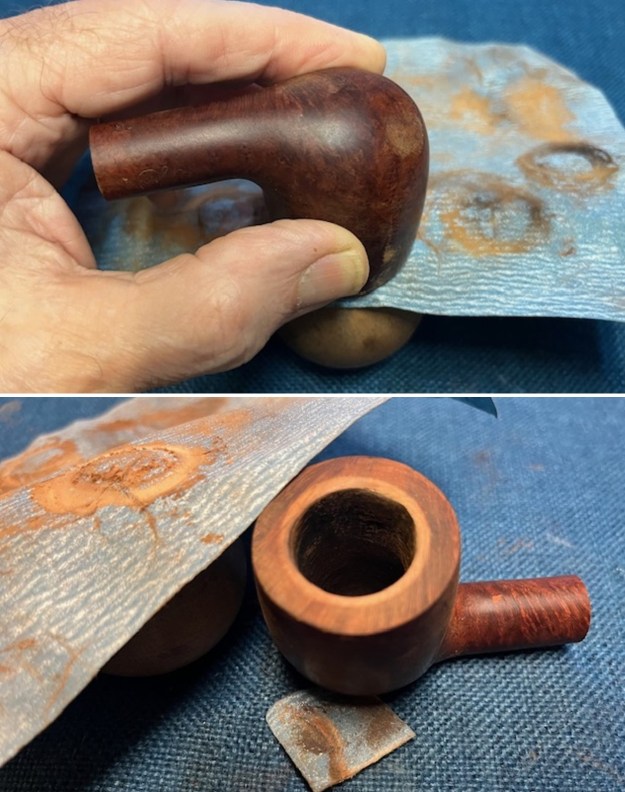 The top looked better. The bowl is a little out of round but it is much better. I sanded the surface of the bowl and rim top with 320-3500 grit sanding pads. They well to remove the surface scratches and nicks in the briar. I wiped it down after each sanding pad with a damp cloth.
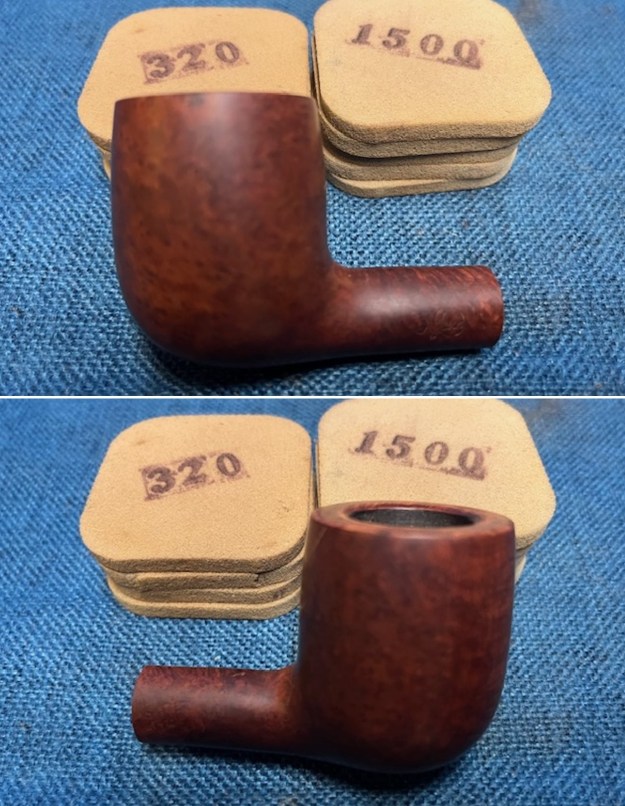
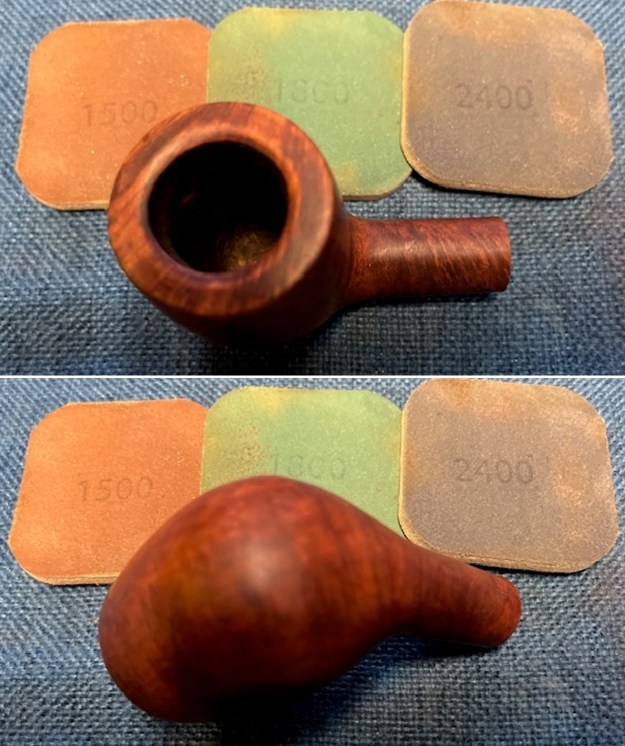
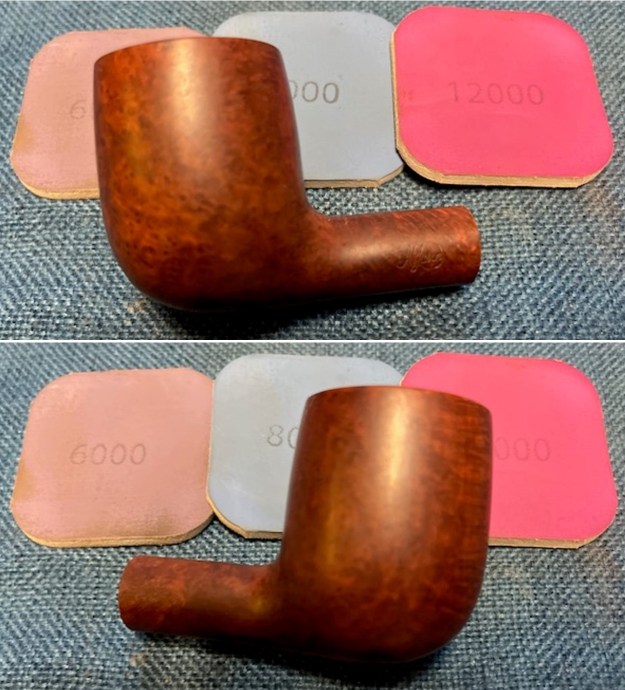
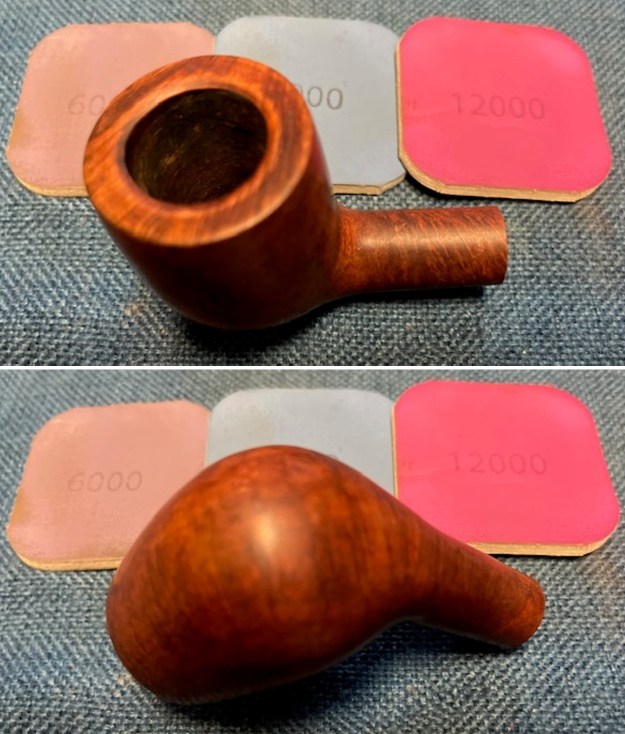
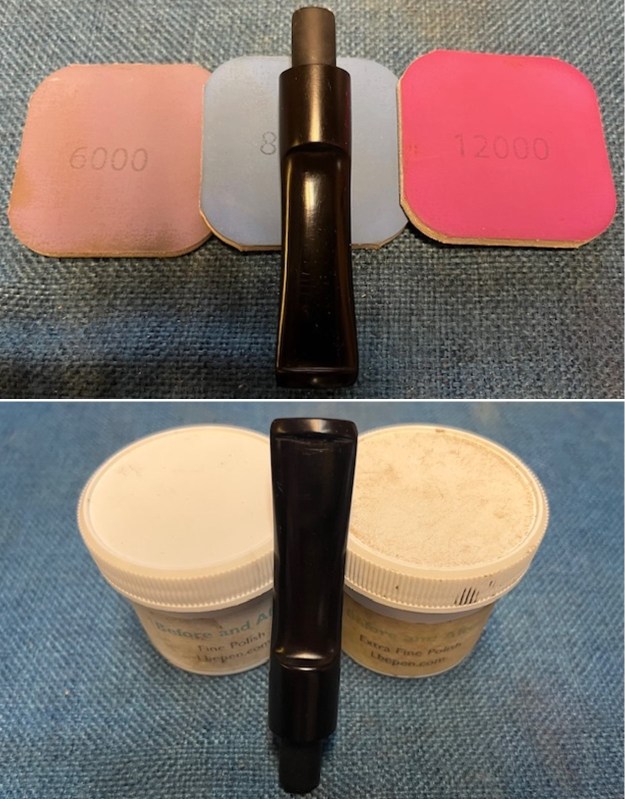
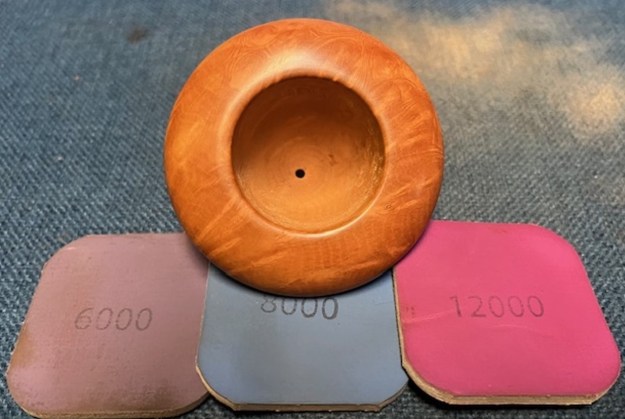
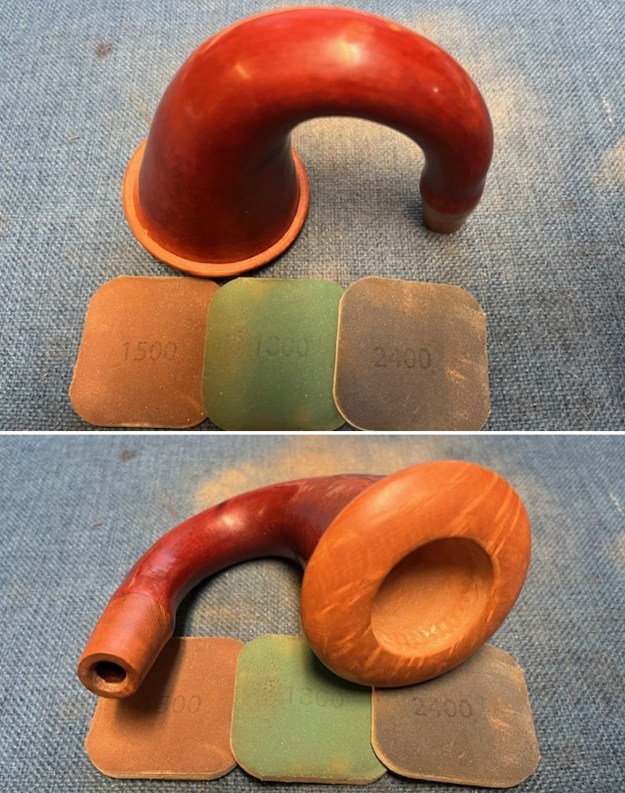
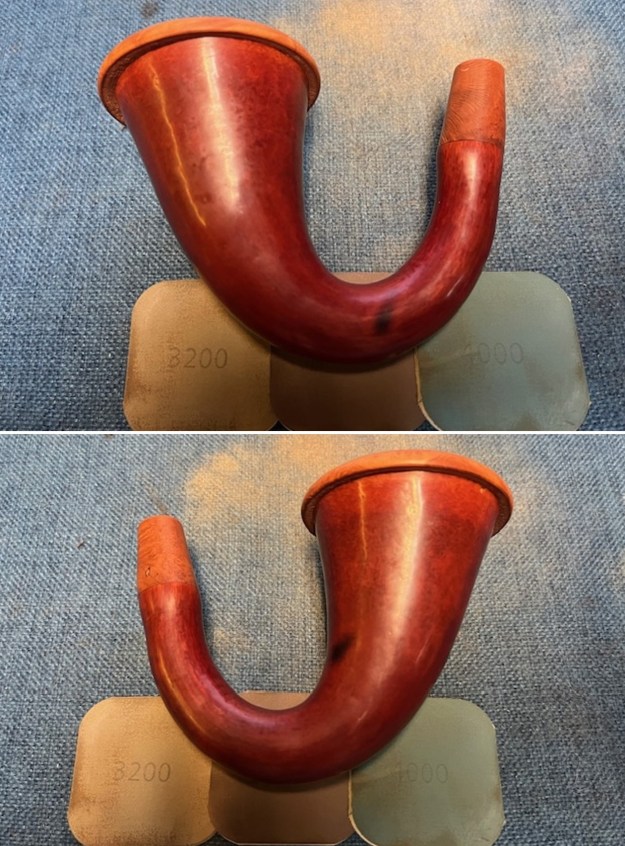
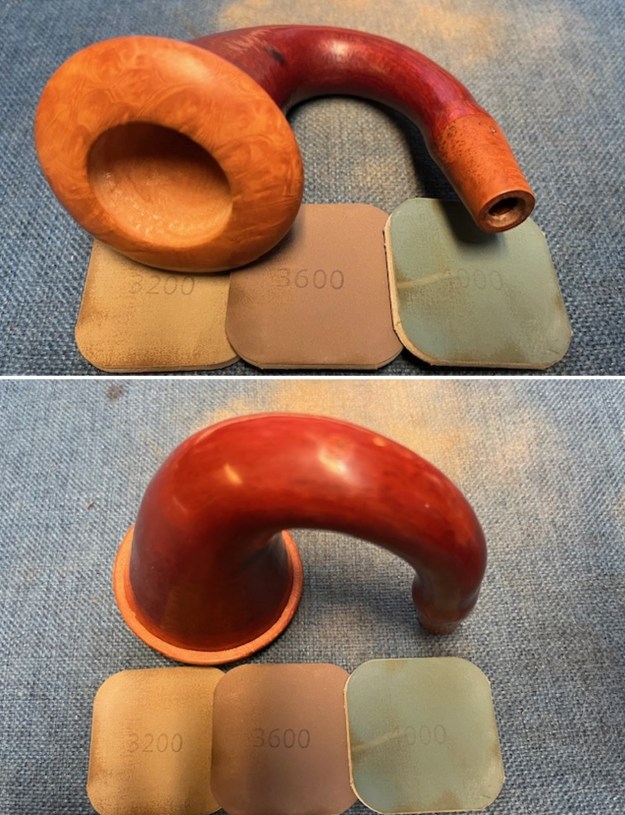
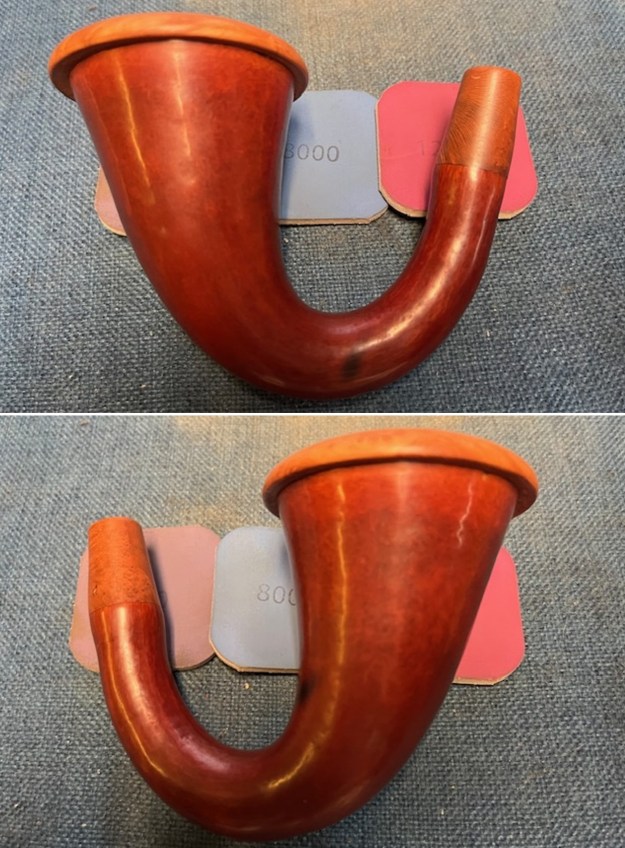
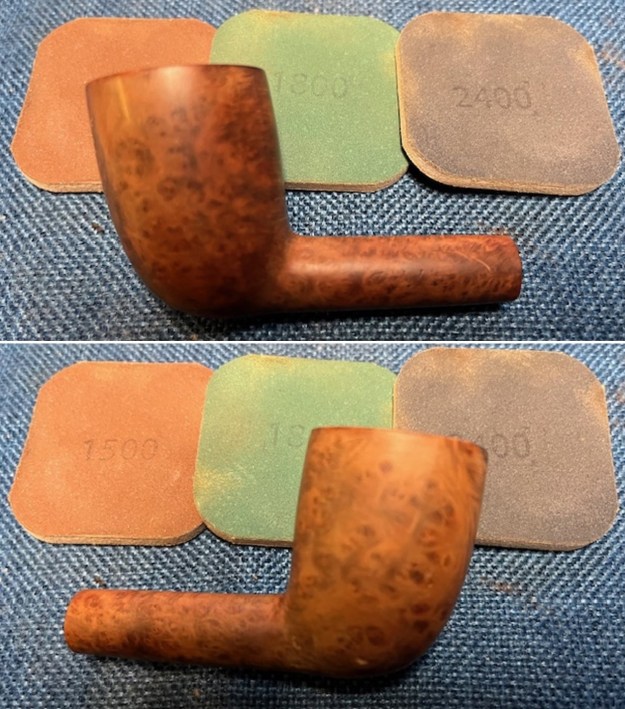
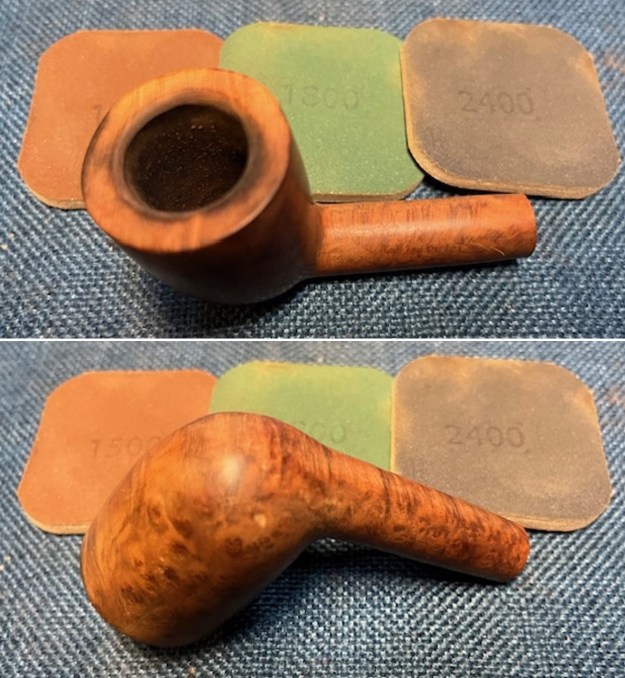
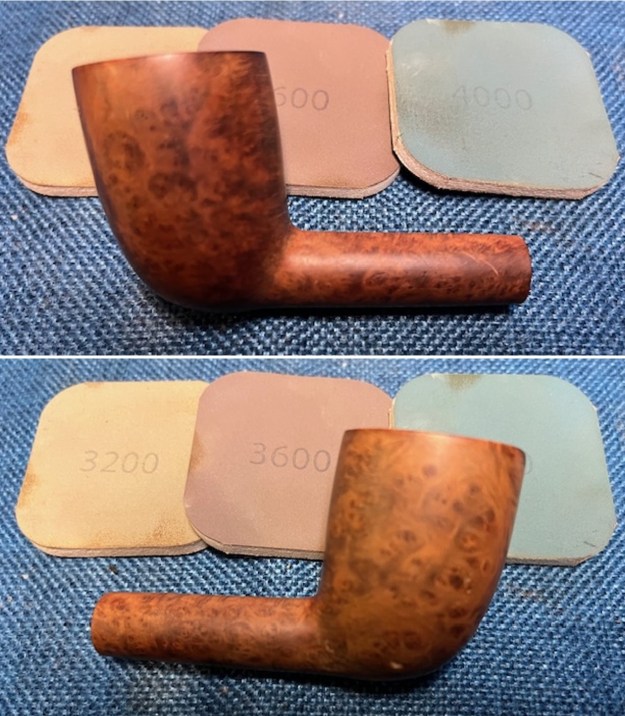
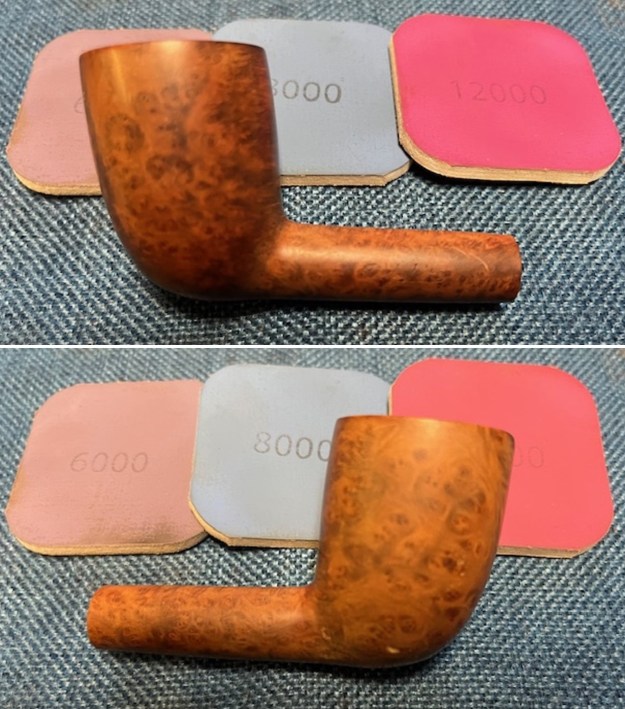
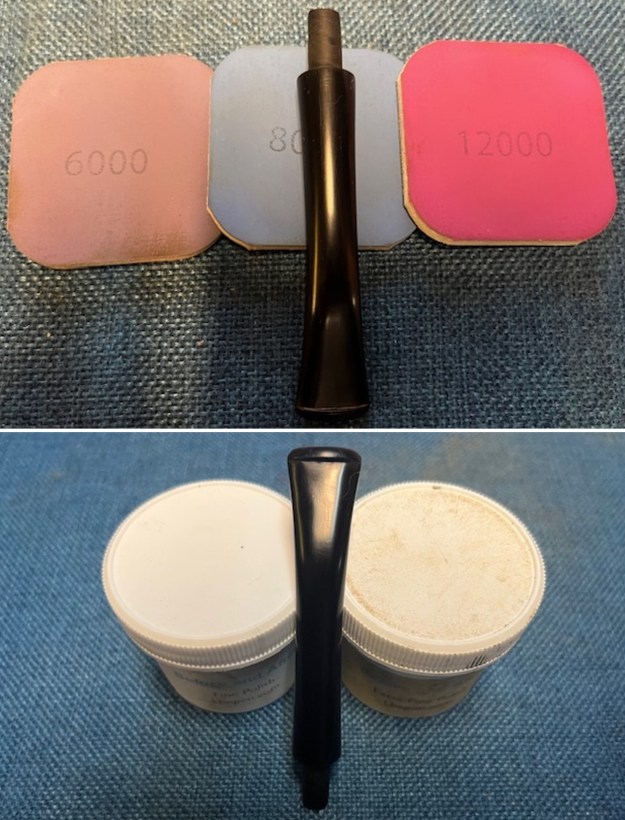
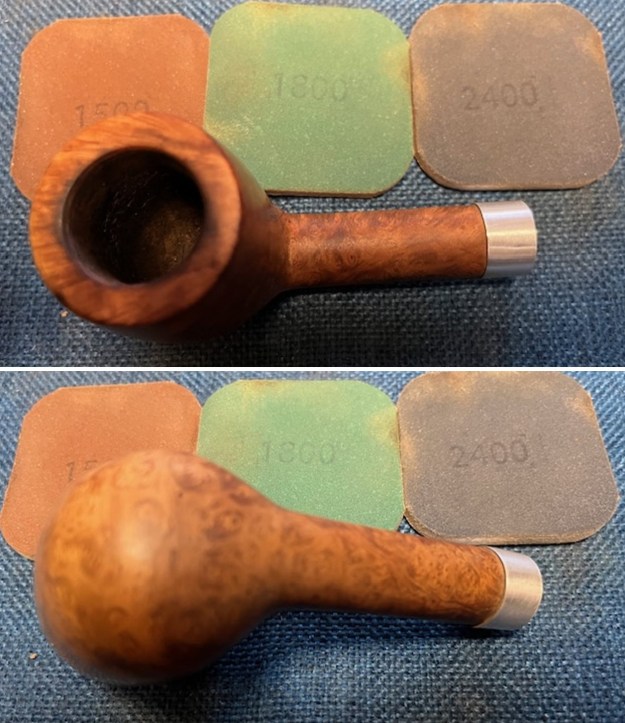
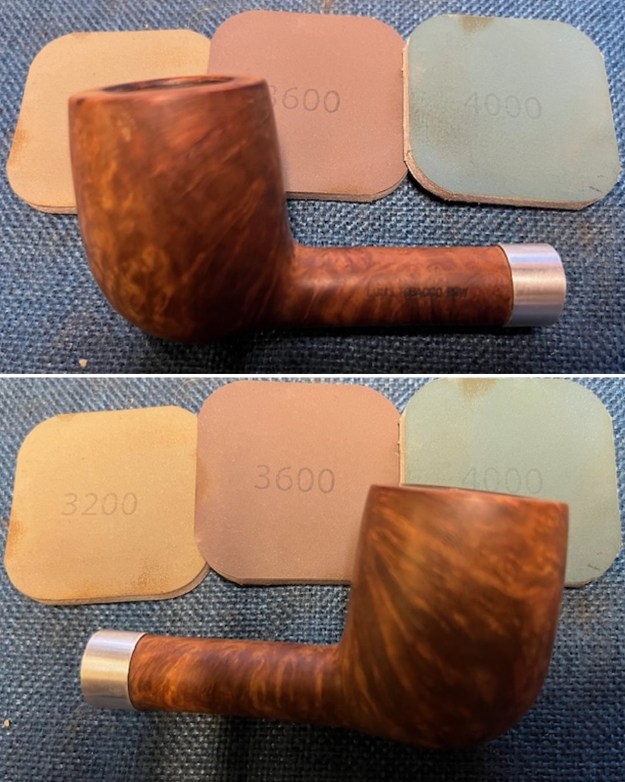
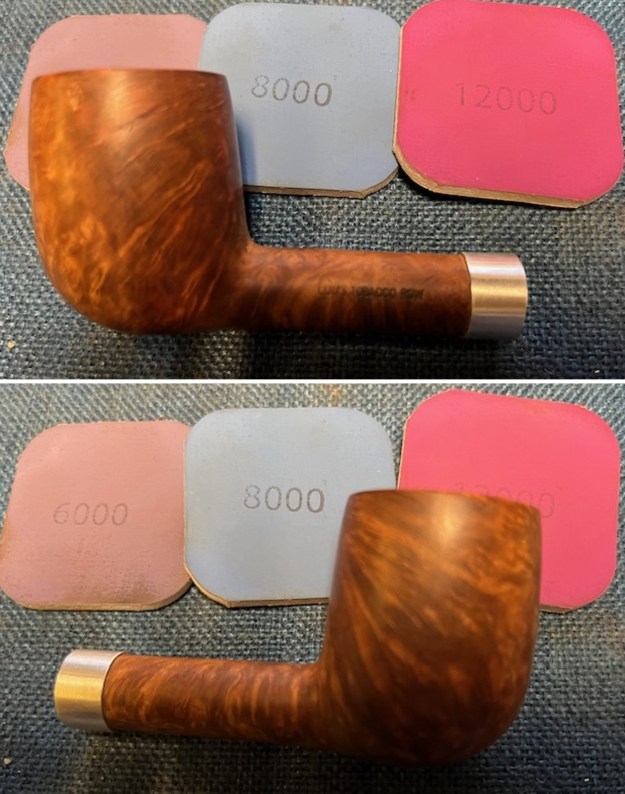
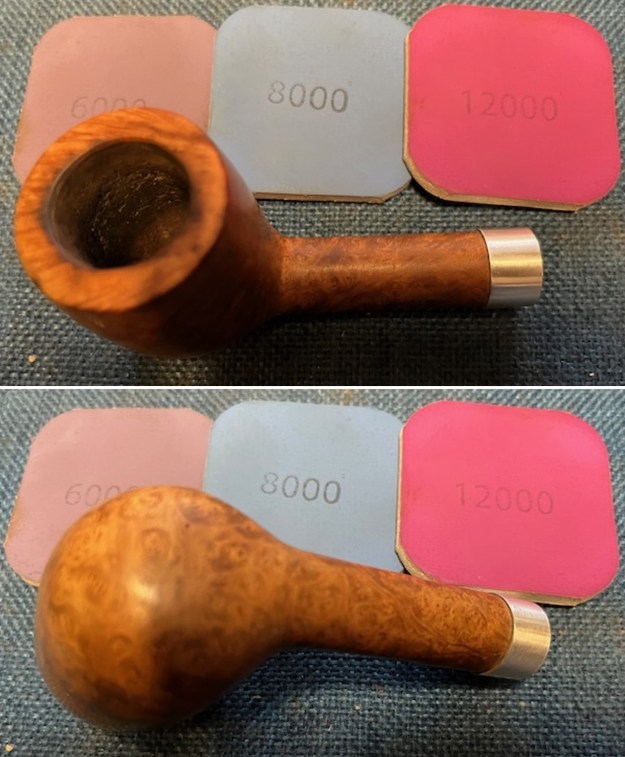
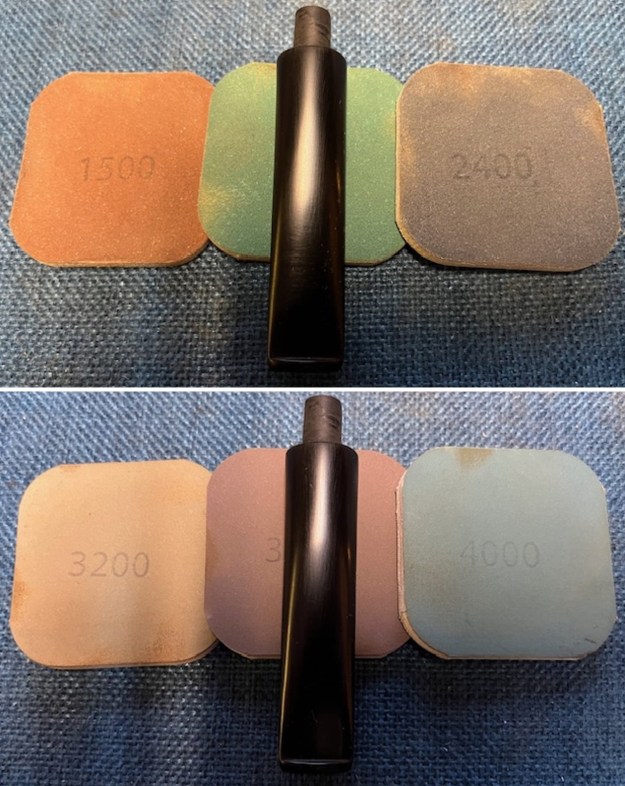
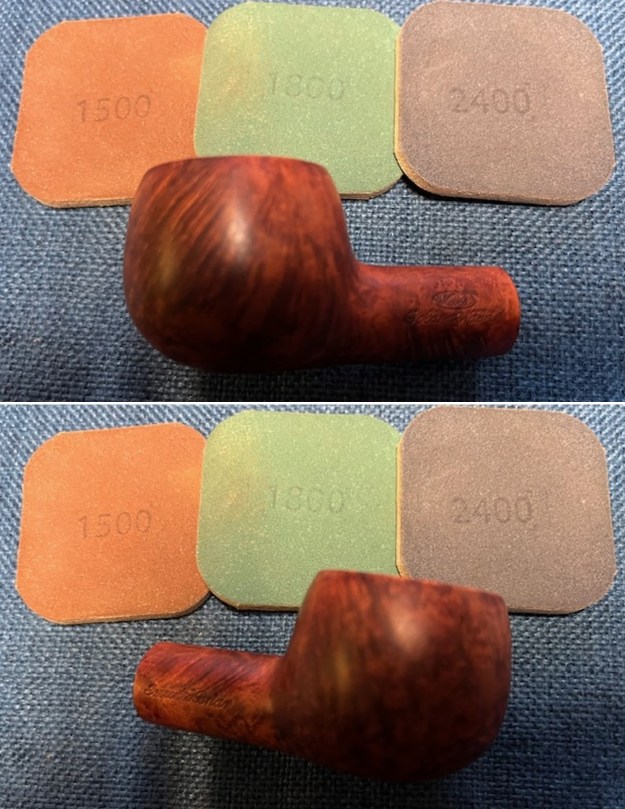
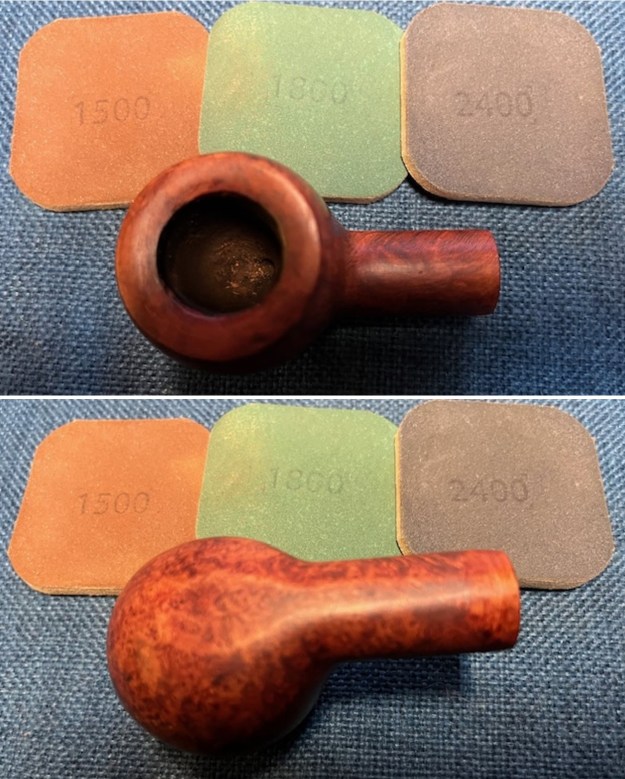
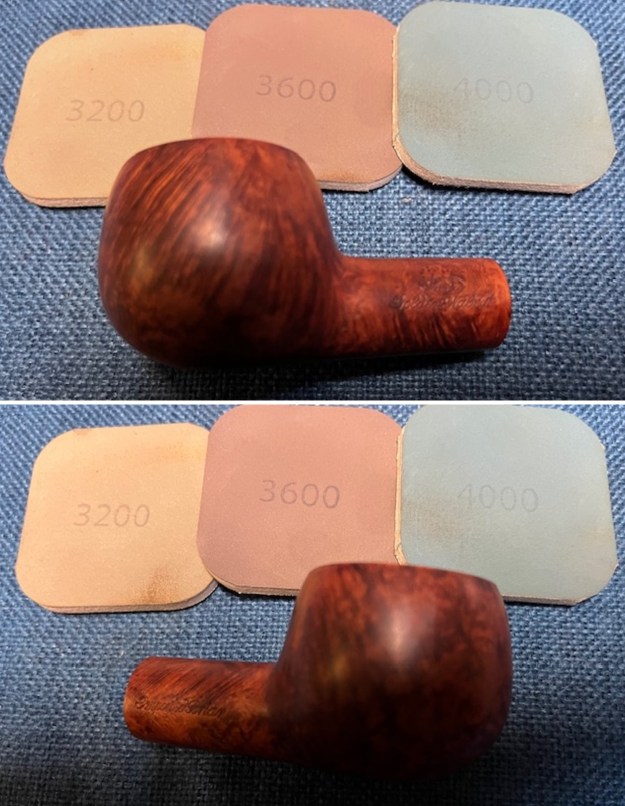
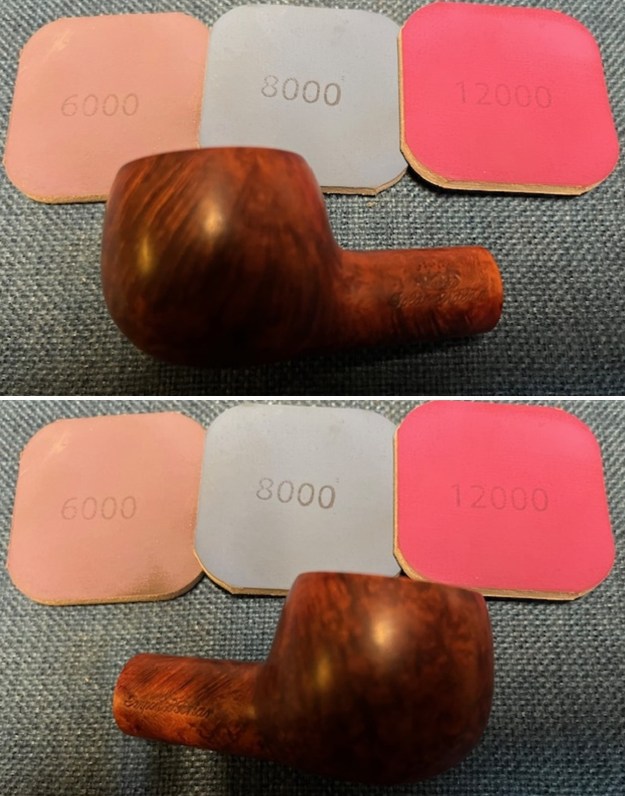
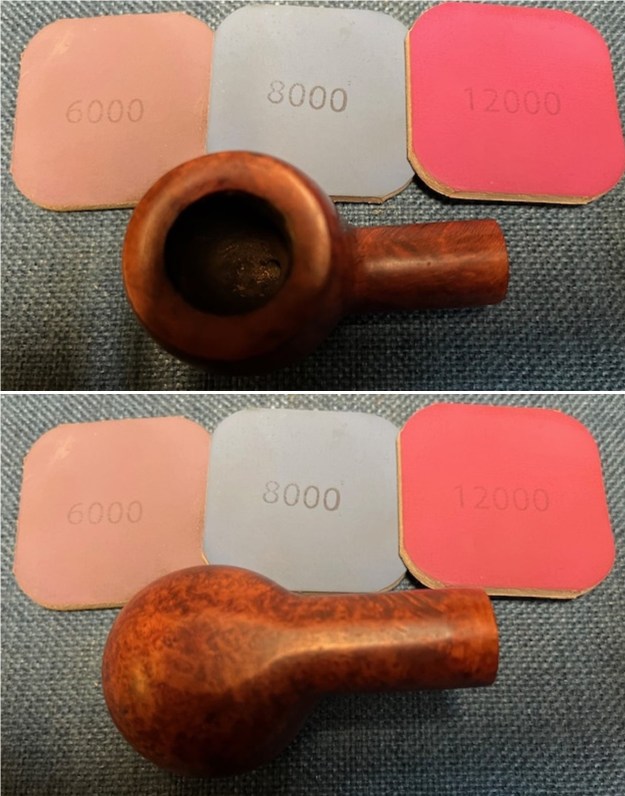
 I polished the briar with micromesh sanding pads. I dry sanded it with 1500-12000 grit sanding pads and wiped the bowl down after each pad with a damp cloth. By the final pads the briar really had a shine.
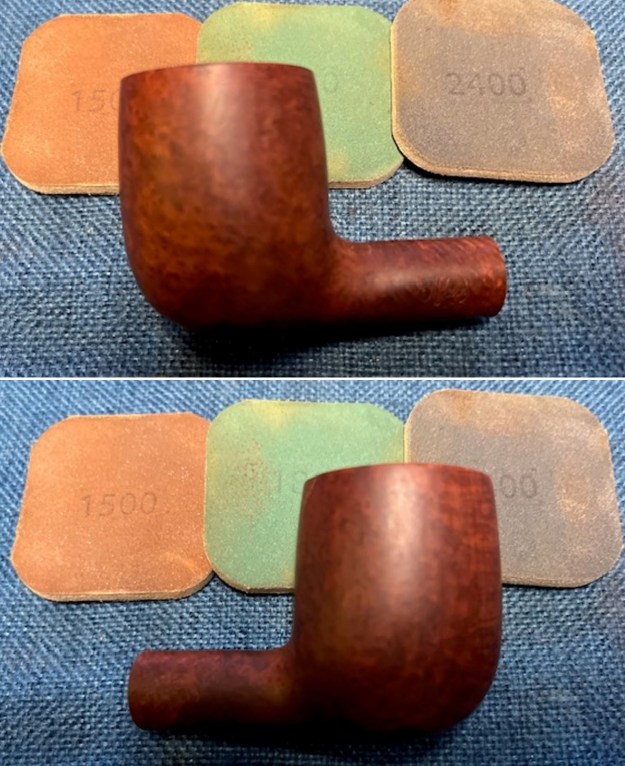
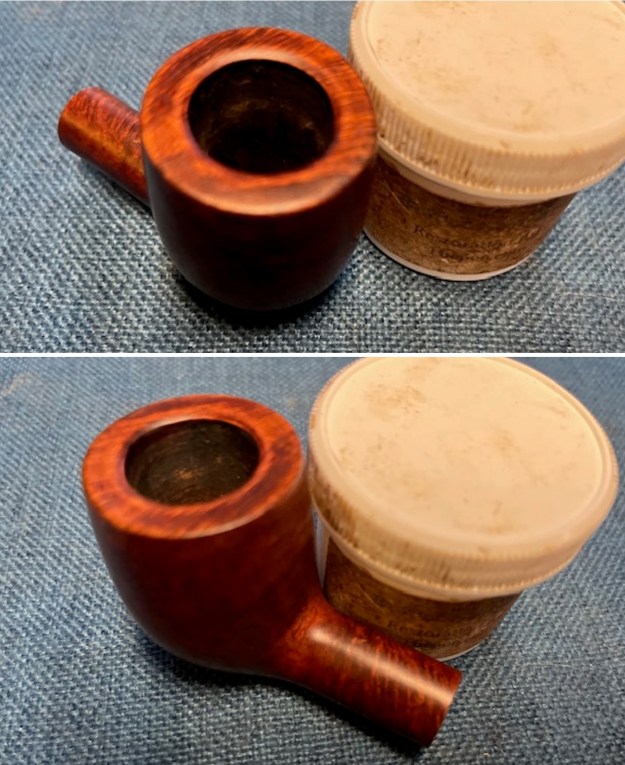
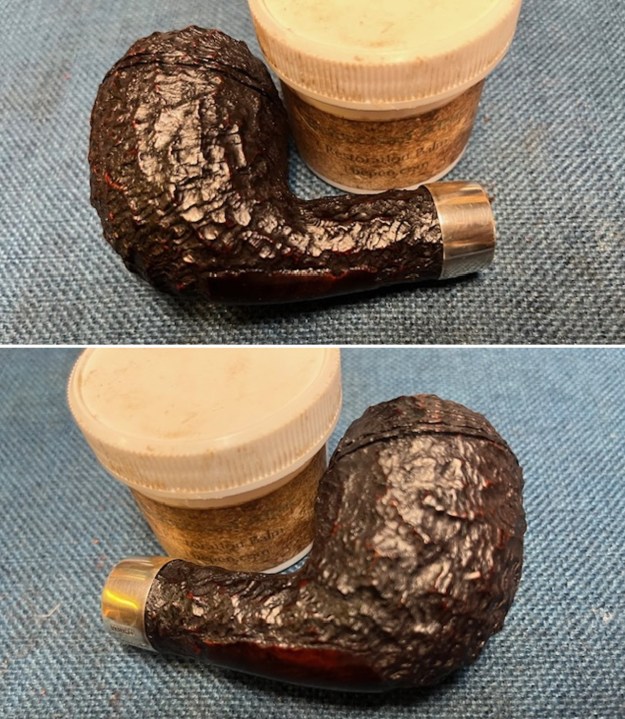
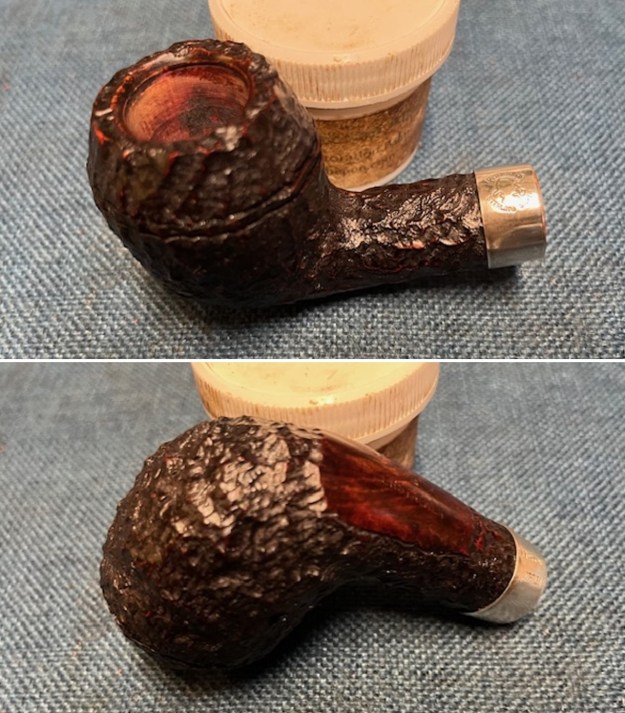
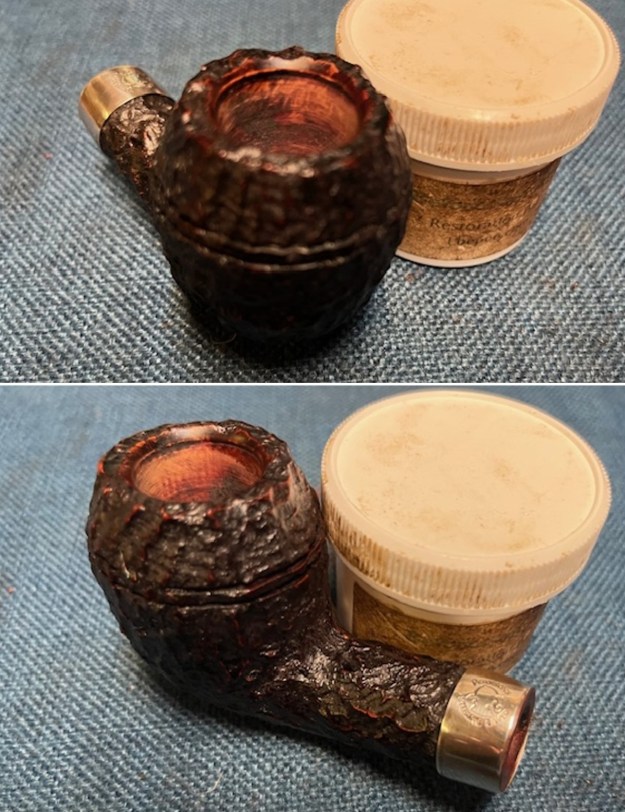
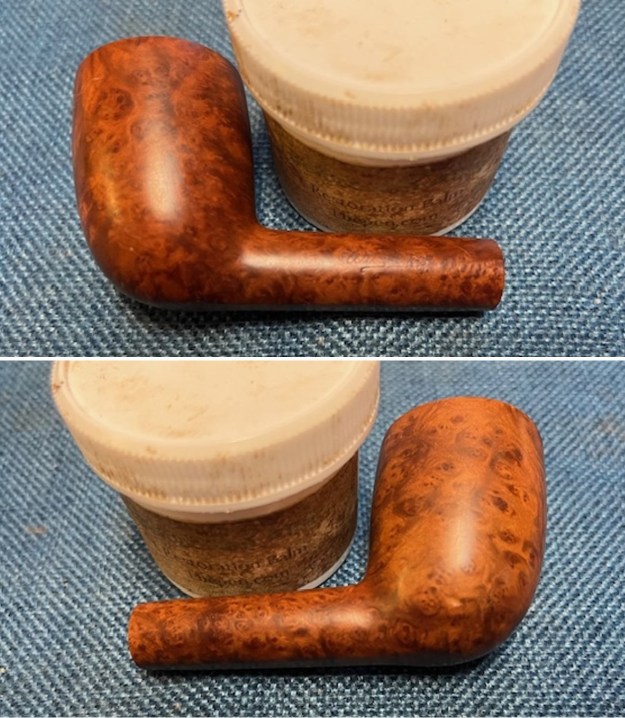
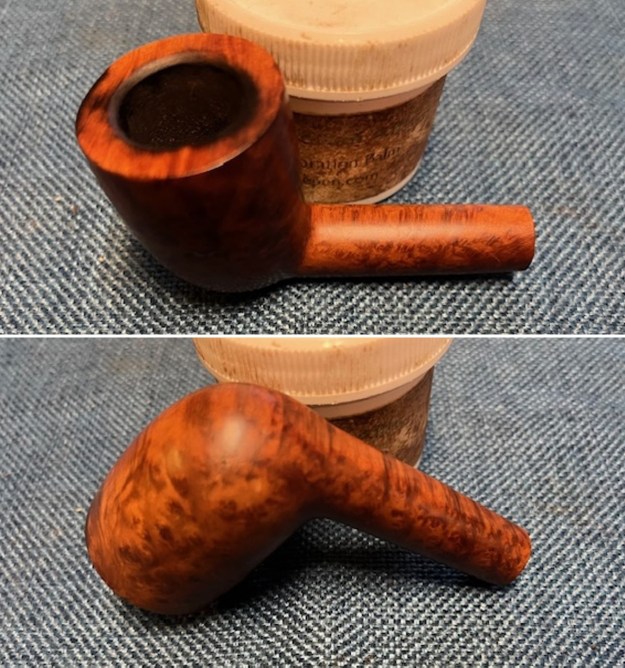
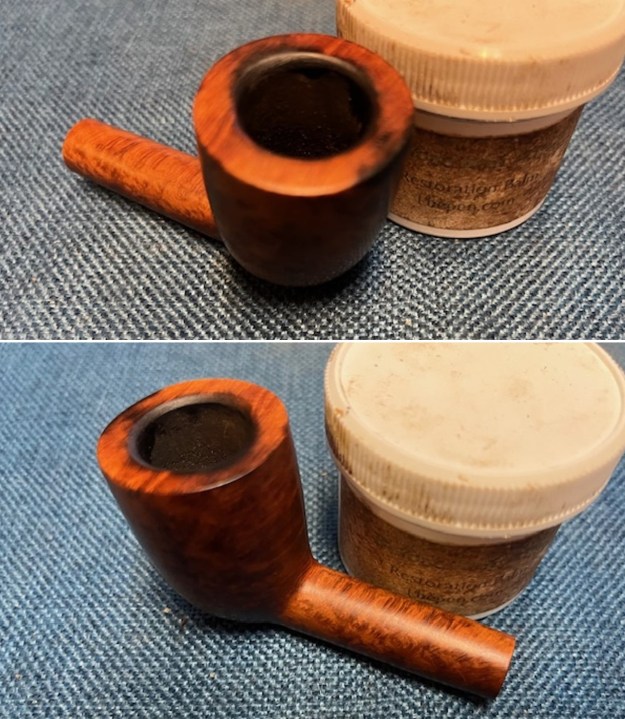
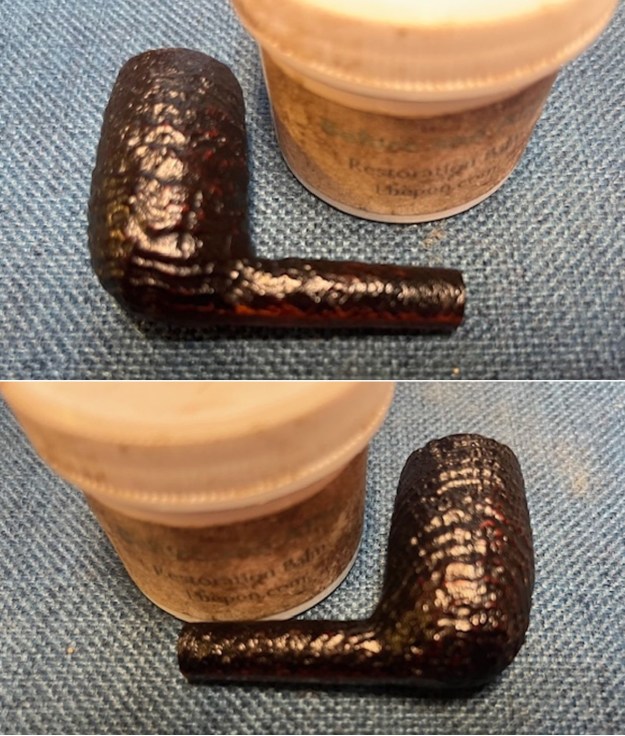
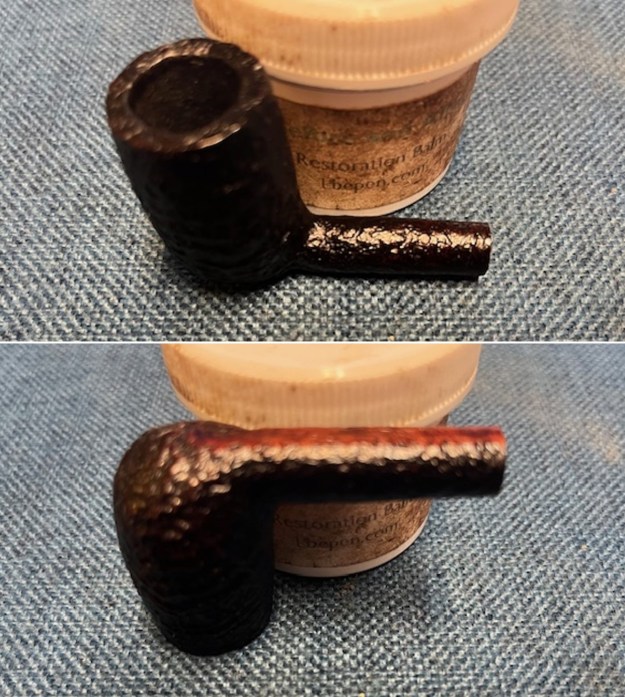
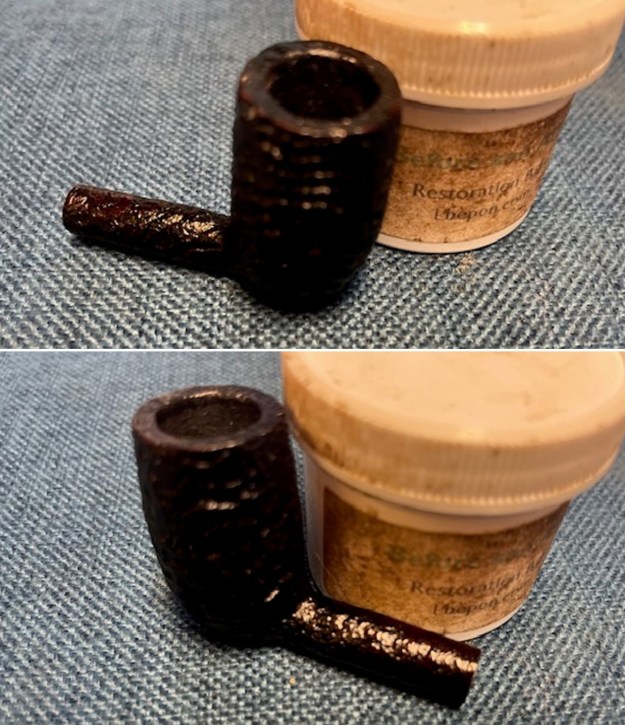
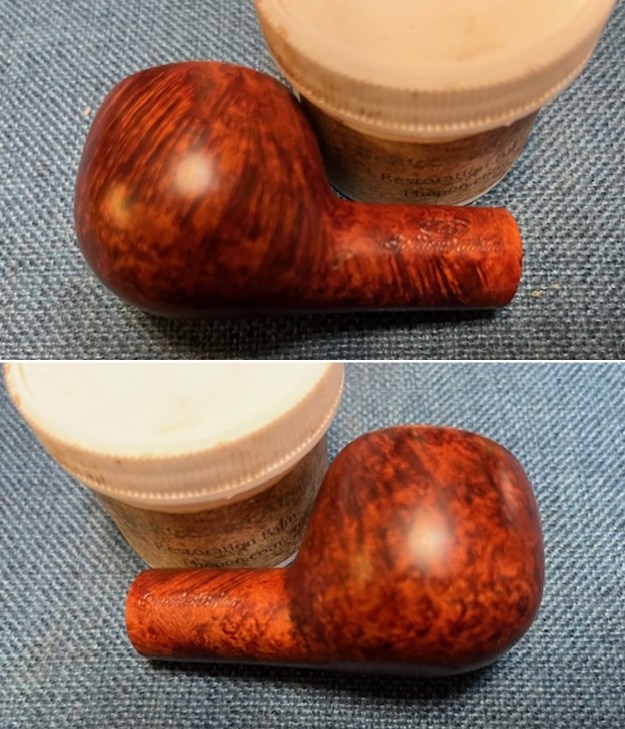
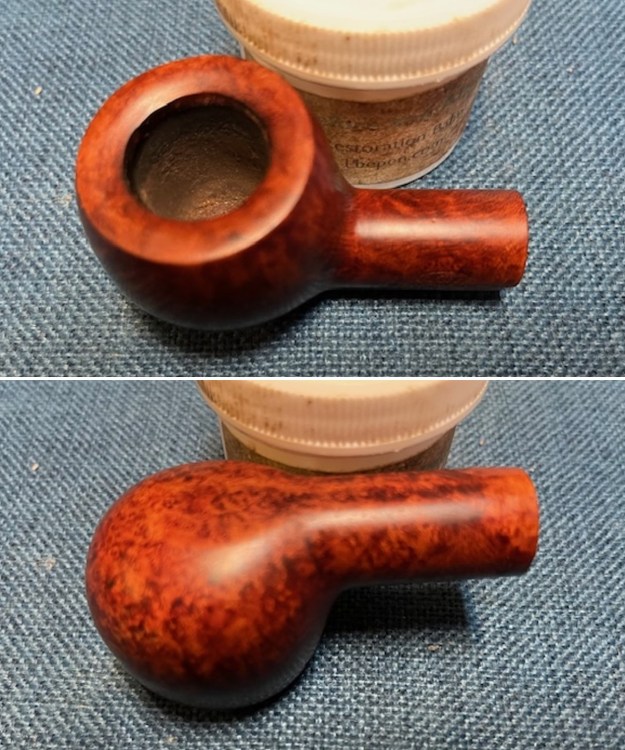
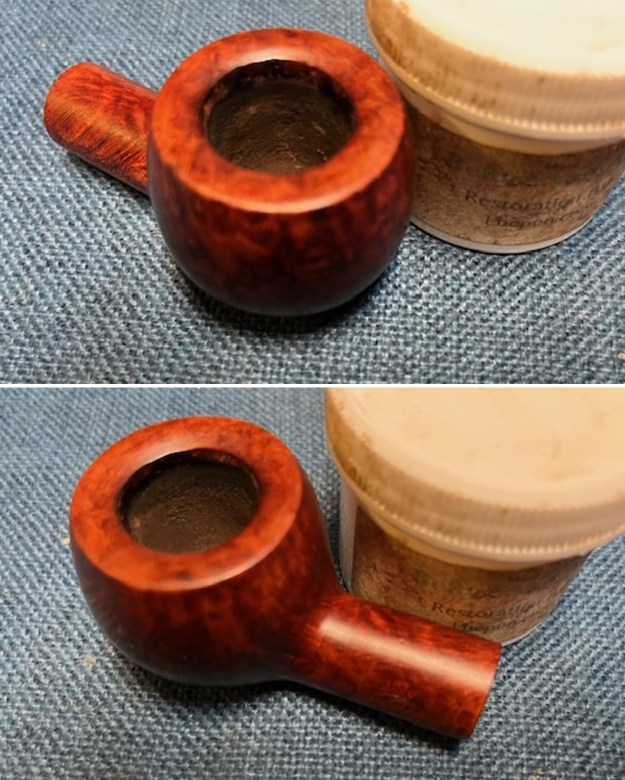
 I rubbed the briar down with Before & After Restoration Balm. I worked it into the briar with my fingertips. The product works to clean, enliven and preserve the briar. I let it sit for 10 minutes then I buffed it with a cotton cloth to deepen the shine. The briar really comes alive with the balm.

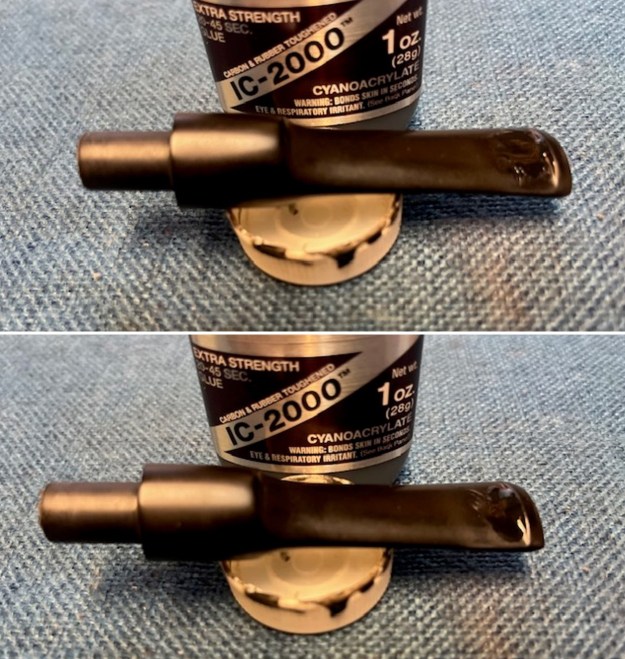
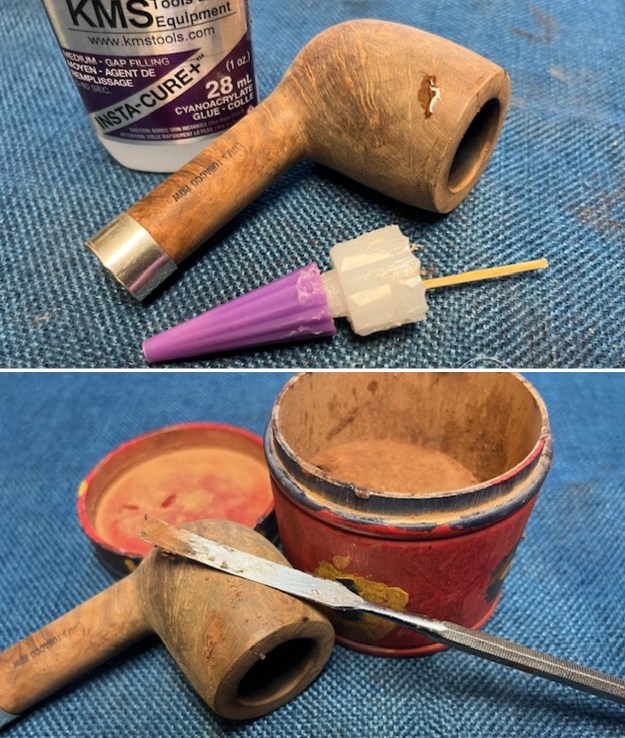
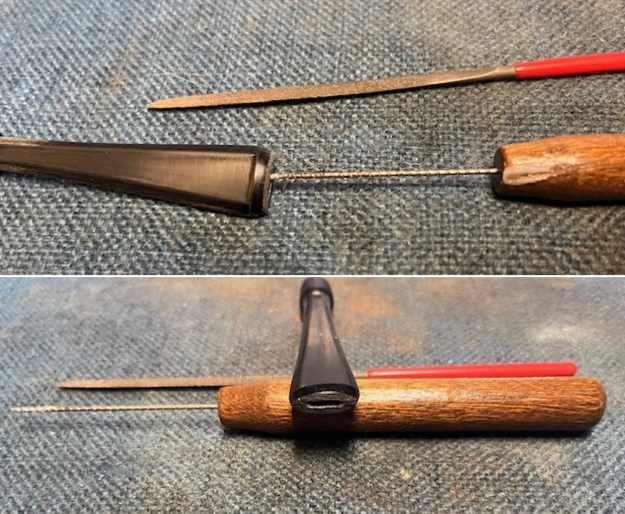
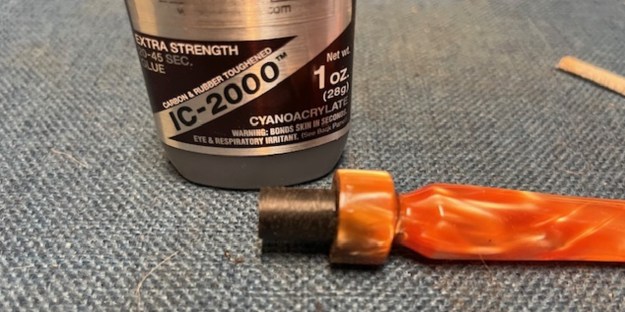
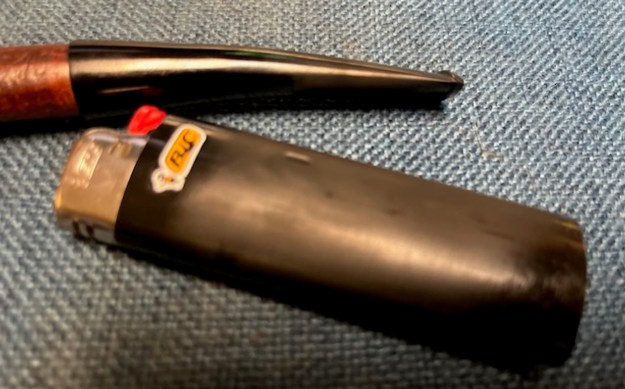
 I set the bowl aside and turned my attention to the stem. I “painted” the surface of the stem with the flame of a Bic lighter to lift the tooth marks. I was able to lift many of the marks significantly. I filled in what remained with black CA glue (rubberized and carbonized). It is a great product that has some elasticity and cures hard but not brittle. Once it cured I used a flat file to smooth out the repairs. I finished blending them in with 220 grit sandpaper.
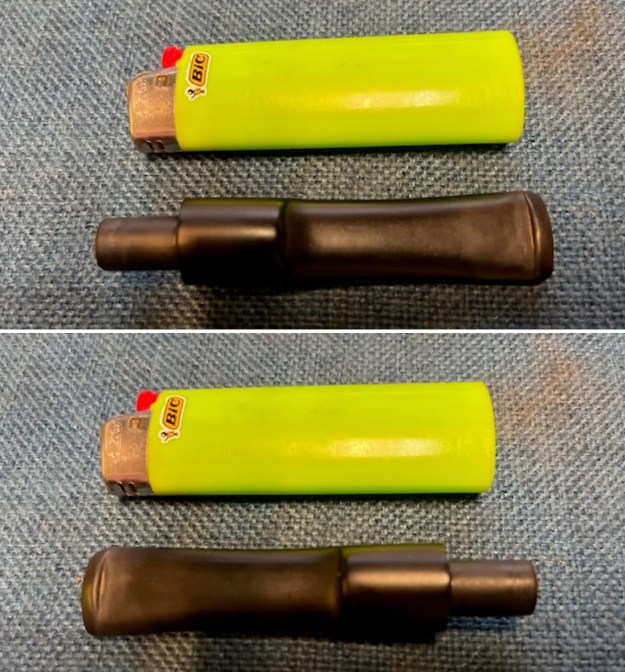
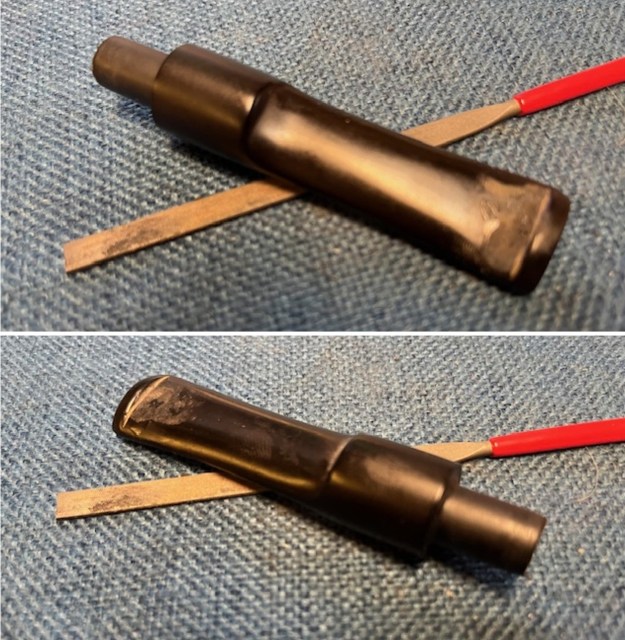
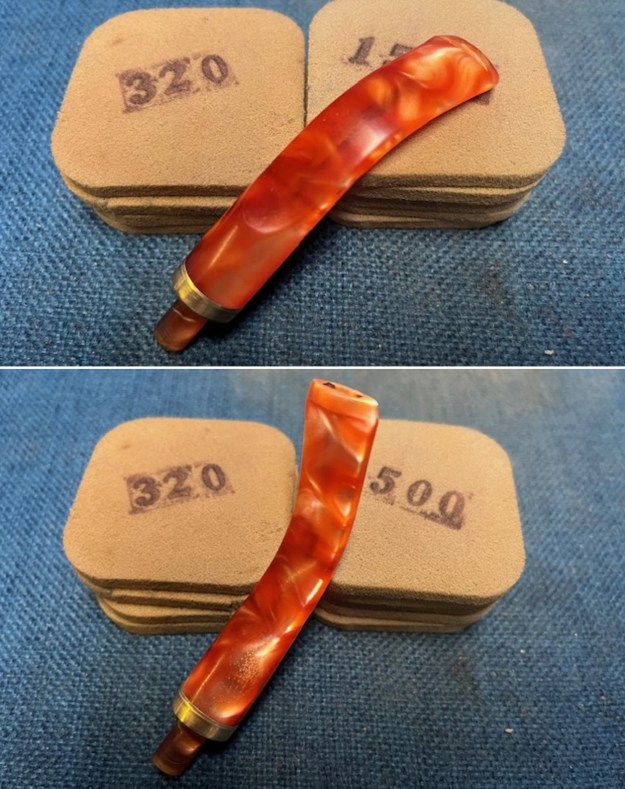
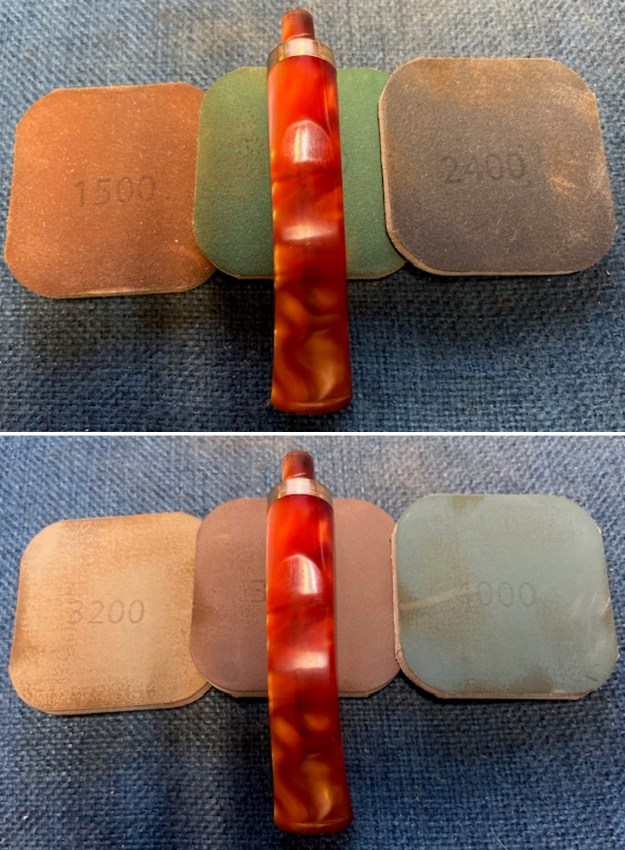
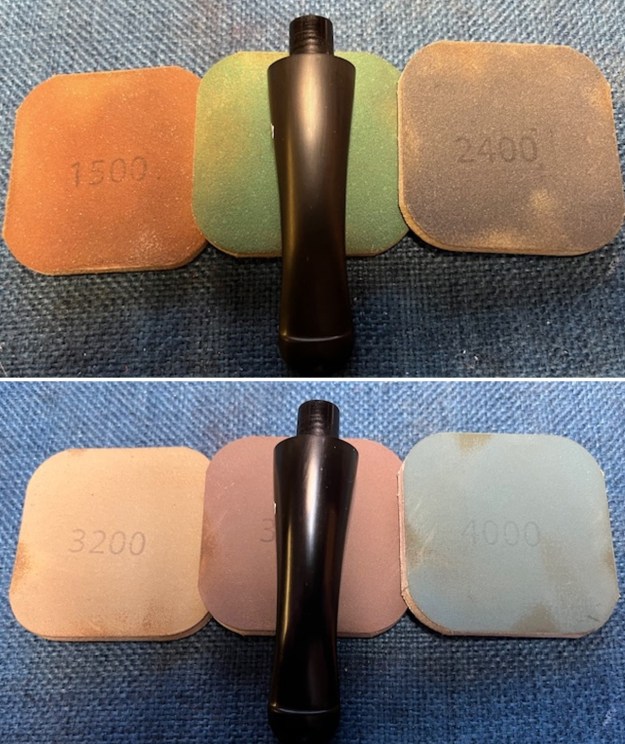
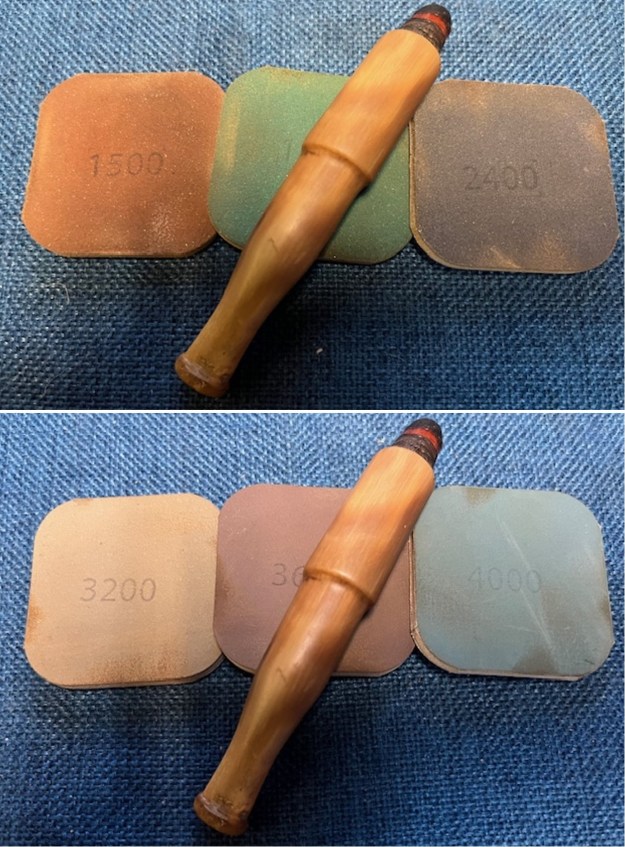
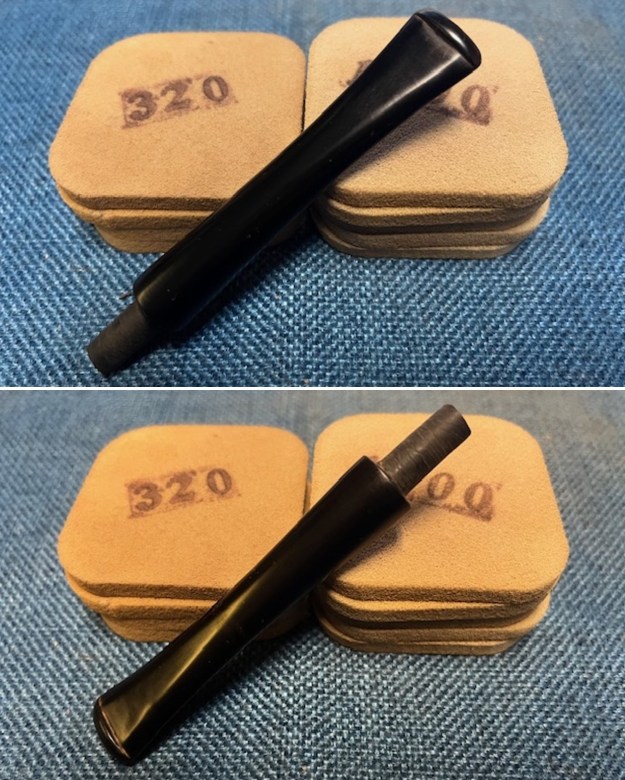
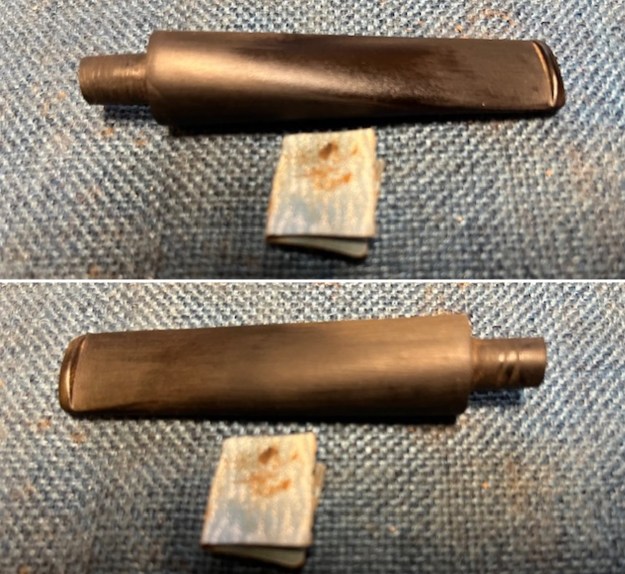
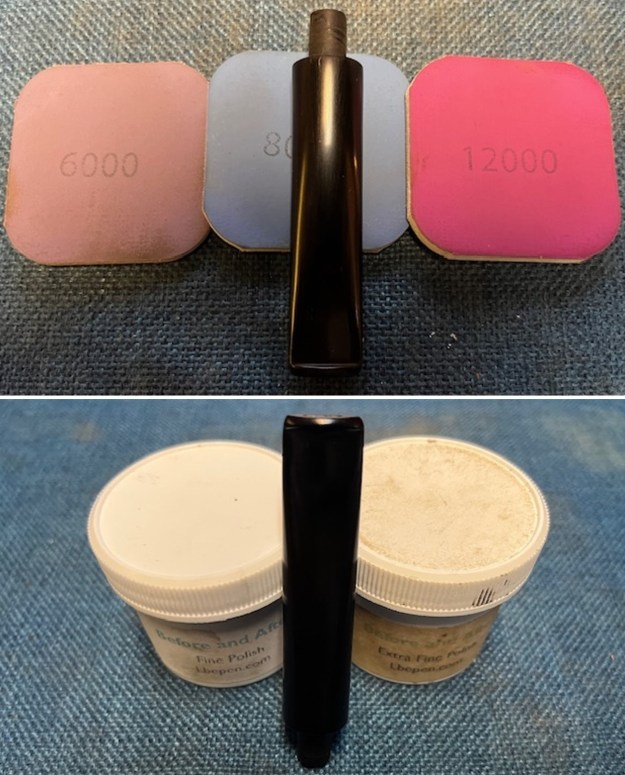
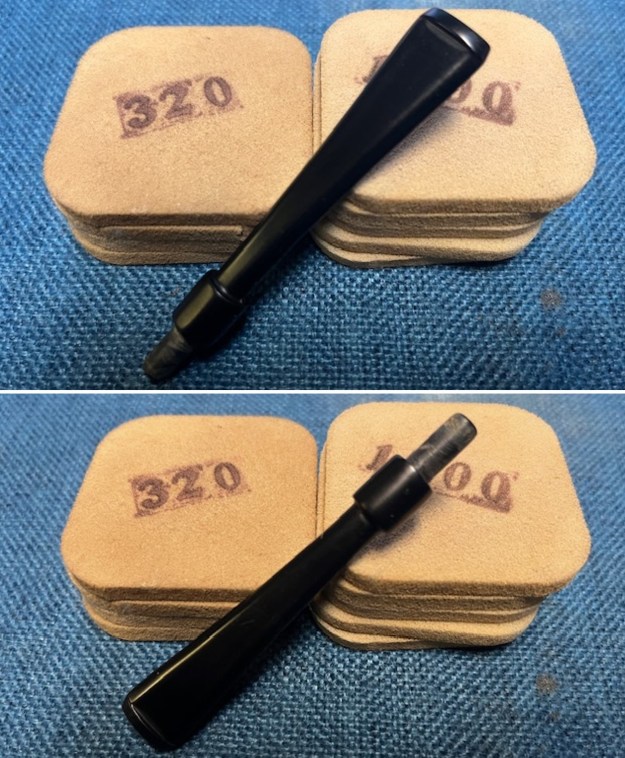
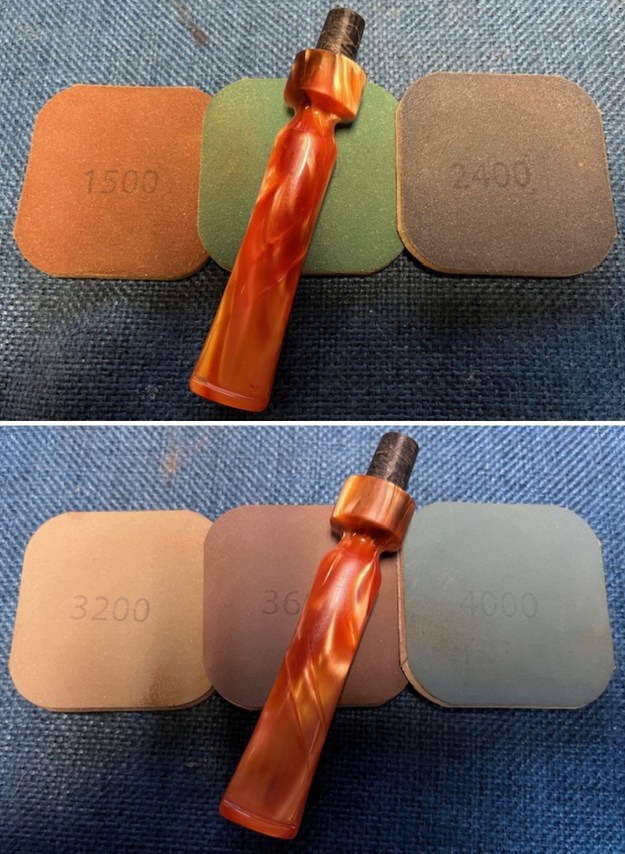
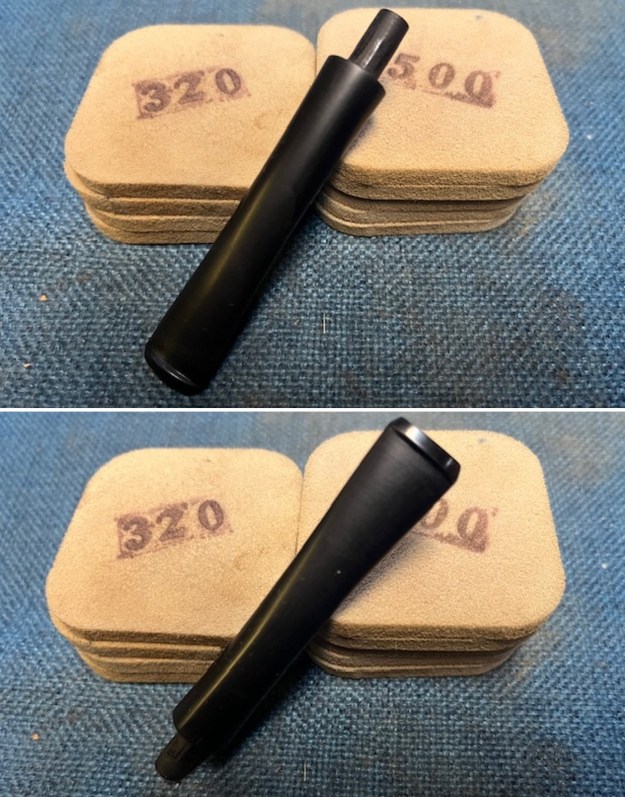
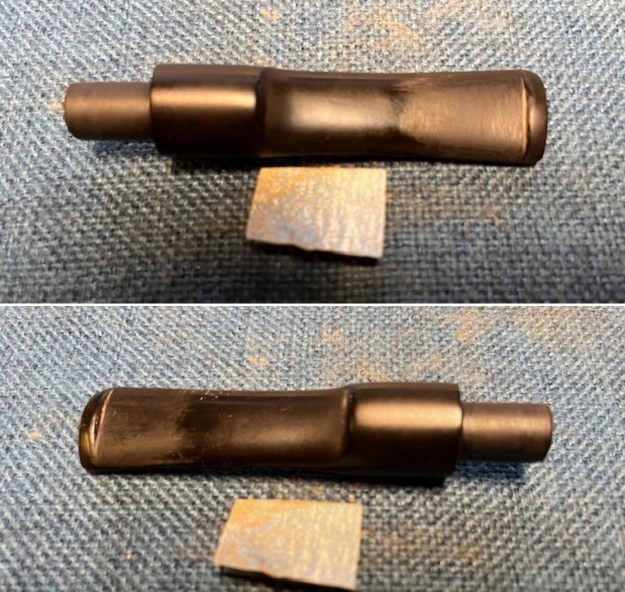 I moved on to further smooth out the surface of the repairs to the vulcanite. I sanded them smooth with 320-3500 grit sanding pads to further blend them into the surface of the stem.
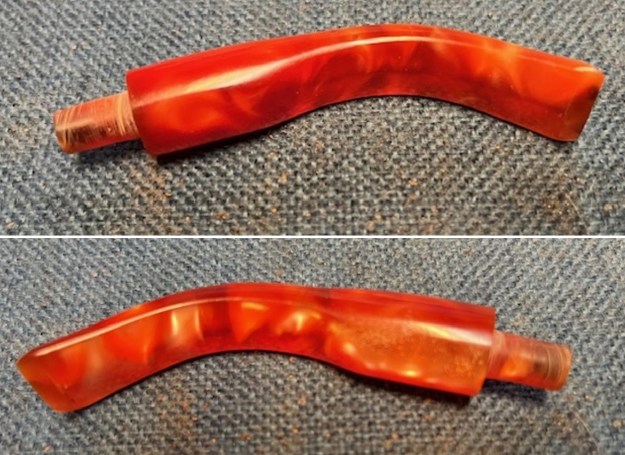
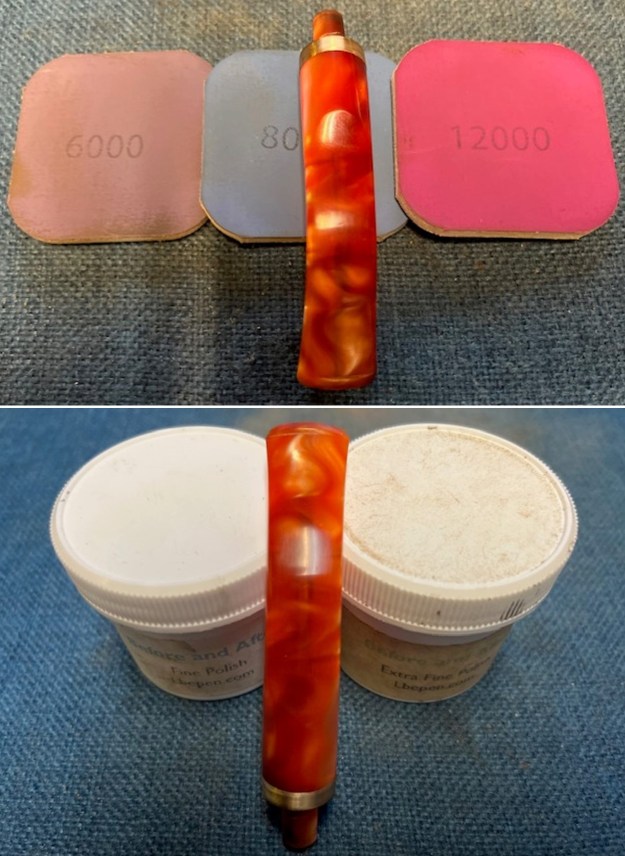
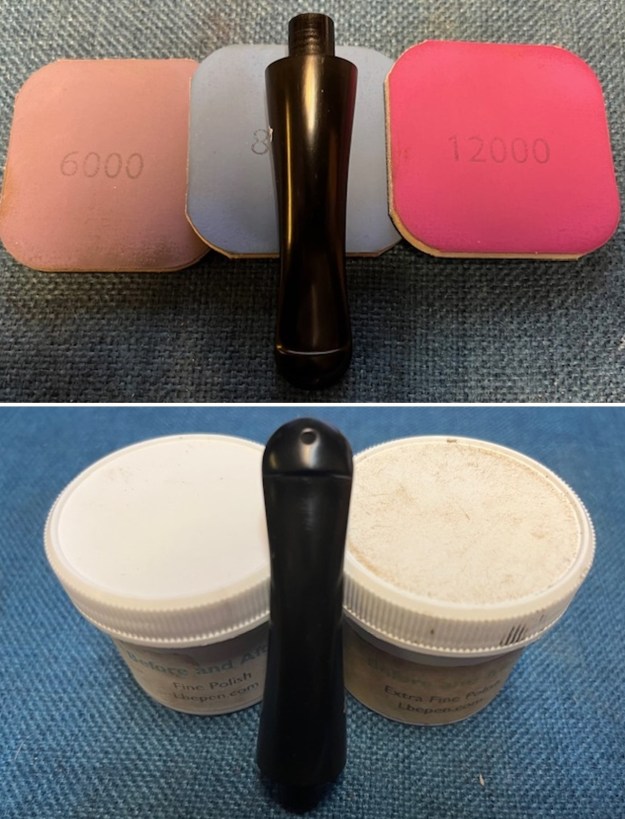
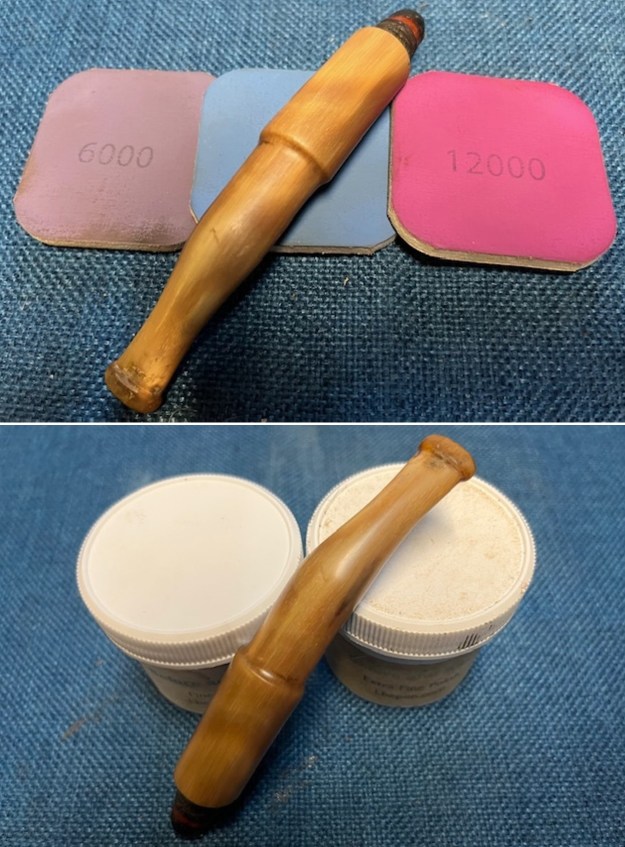
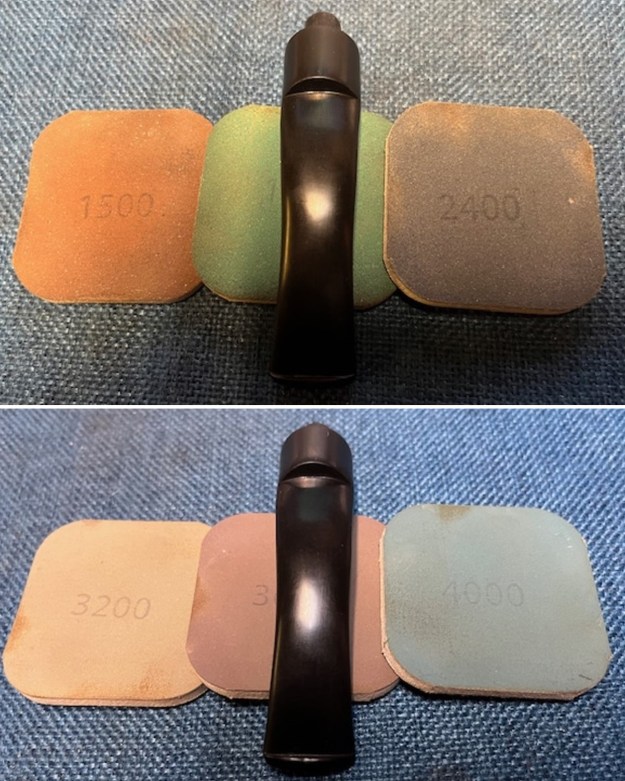
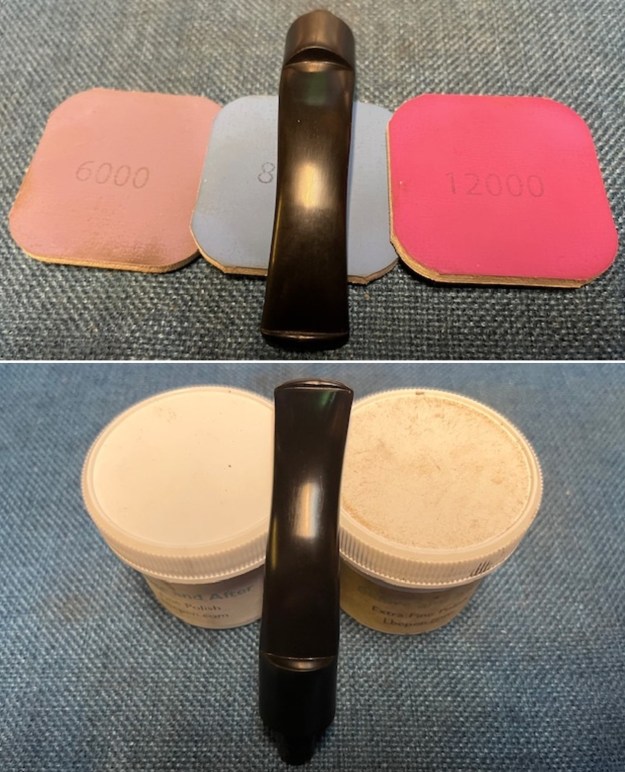
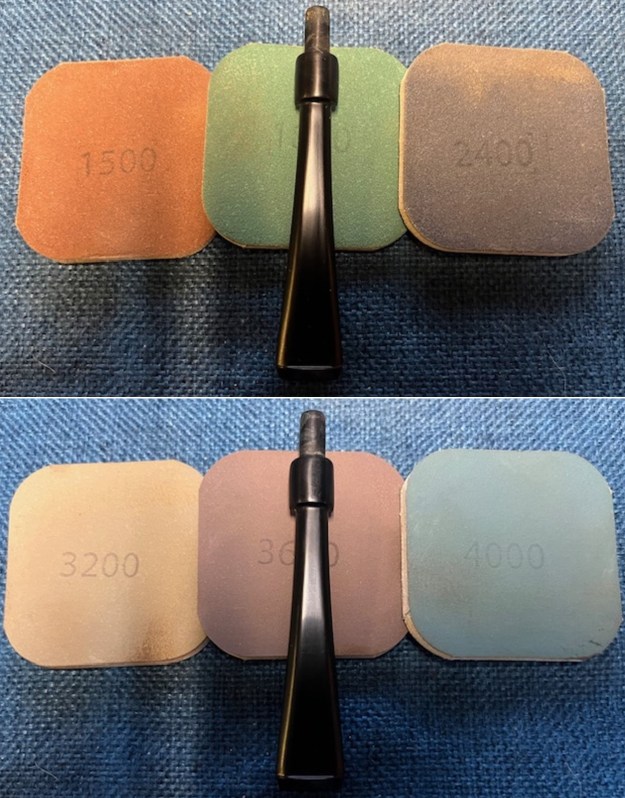
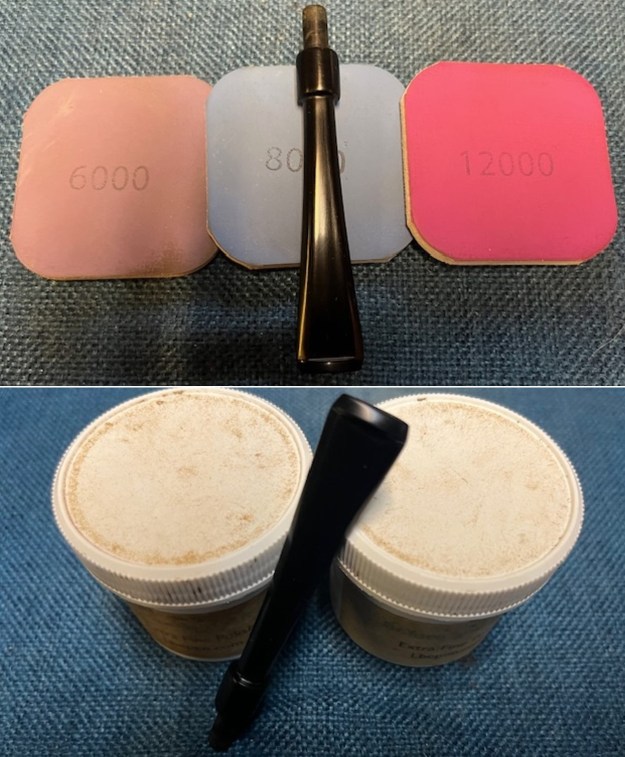
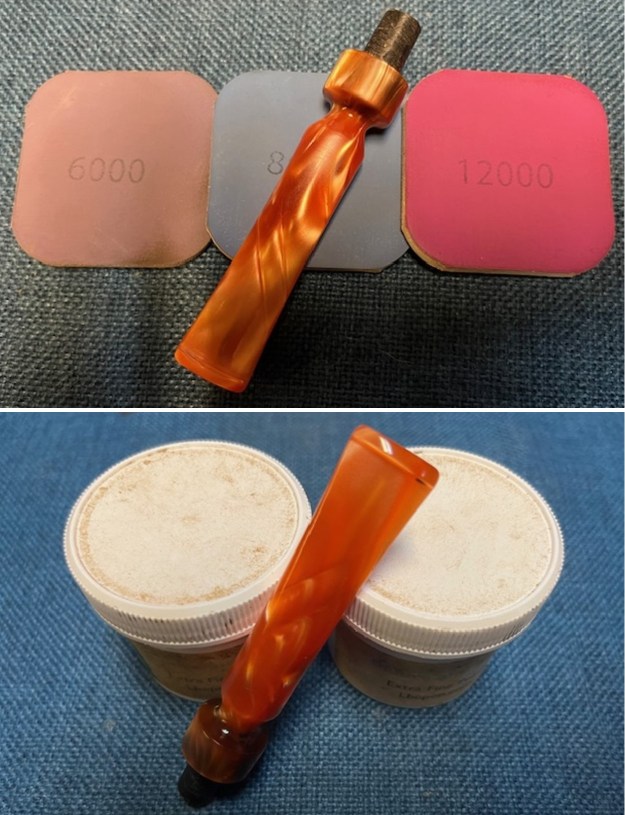
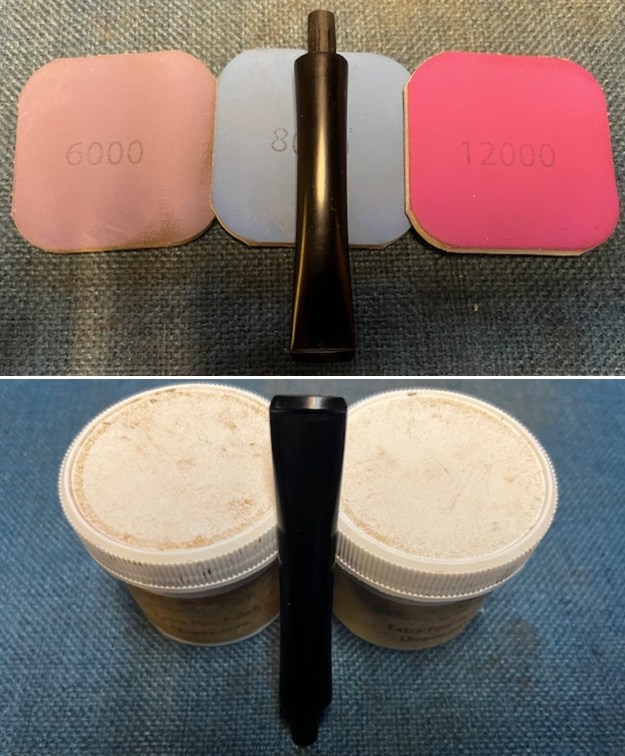
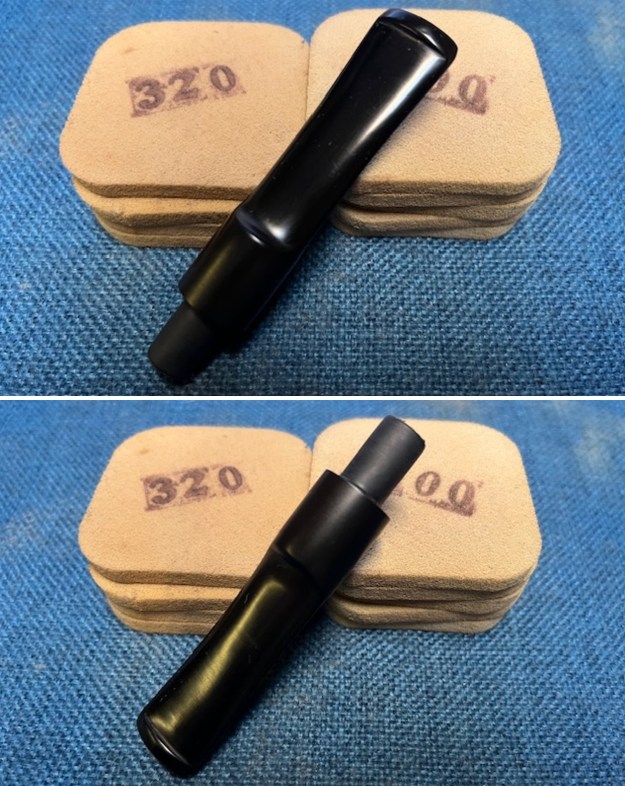 I polished the vulcanite with micromesh sanding pads – 1500-12000 grit pads. I wiped it down with Obsidian Oil after each sanding pad. I used Before & After Pipe Polish – both Fine and Extra Fine to further polish the stem. It really took on a shine and I knew that once it was buffed it would look amazing.
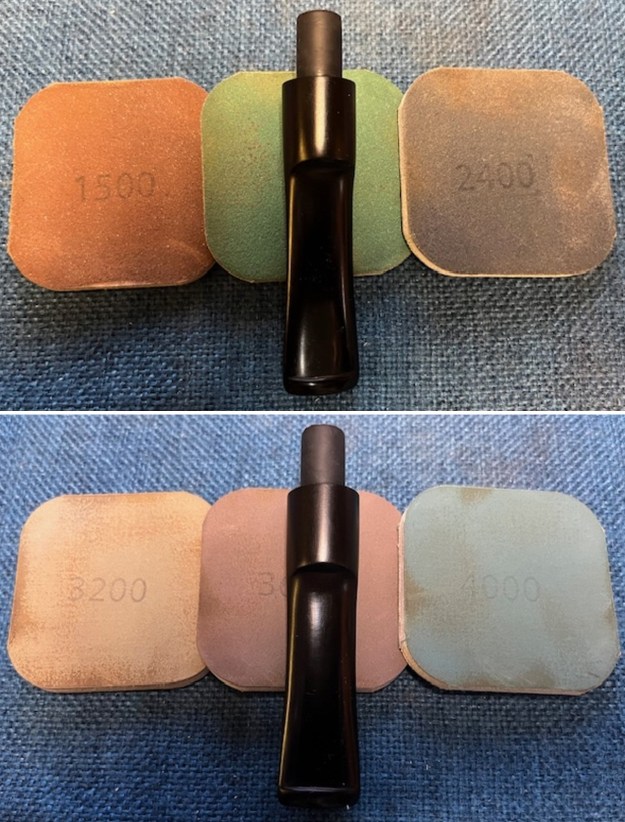
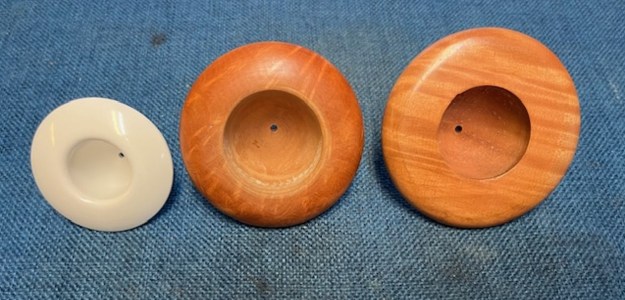
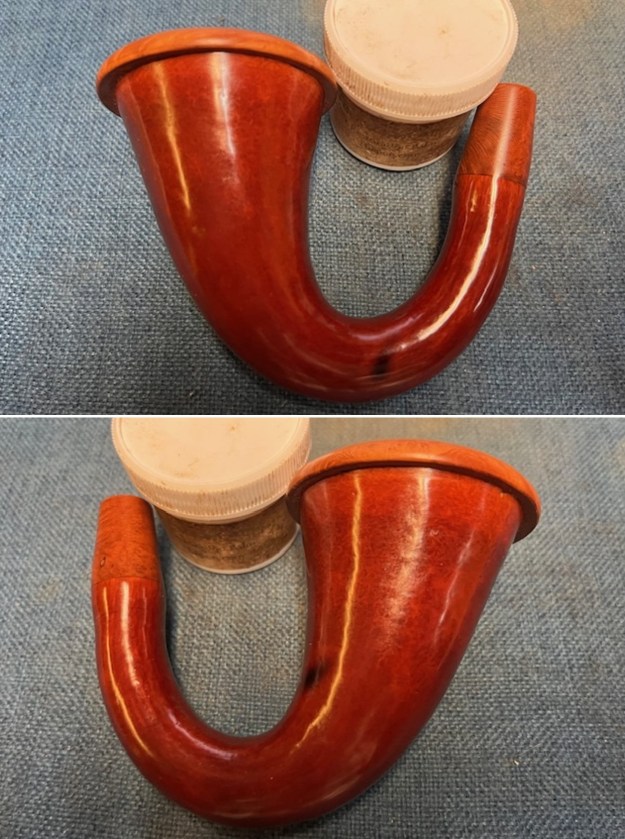
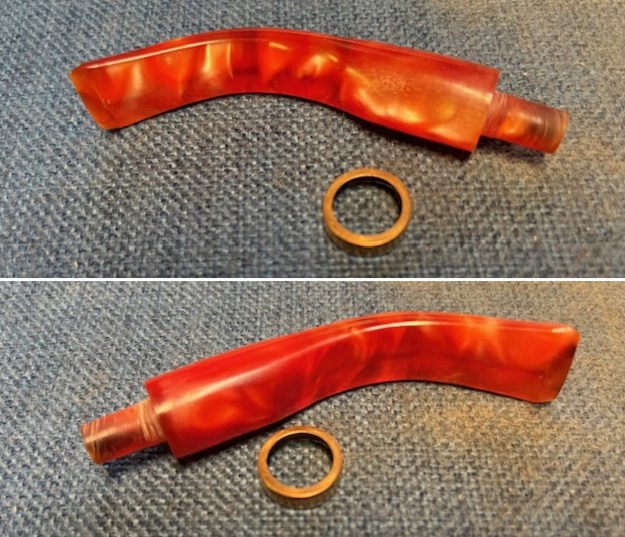
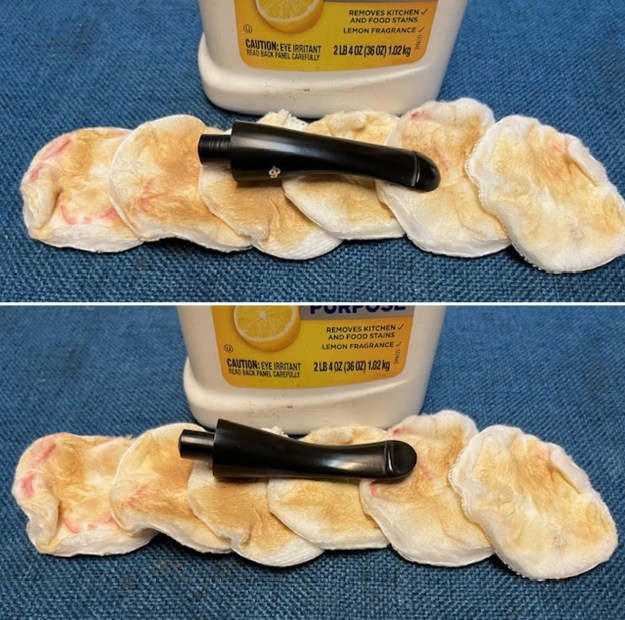
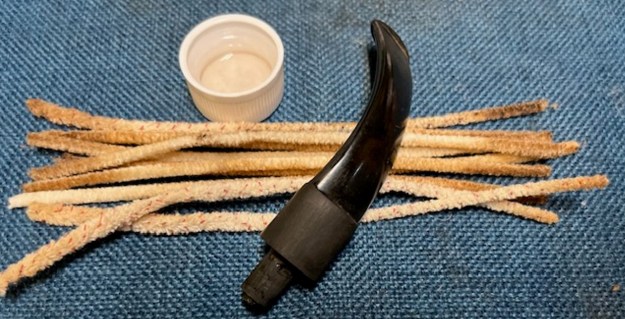
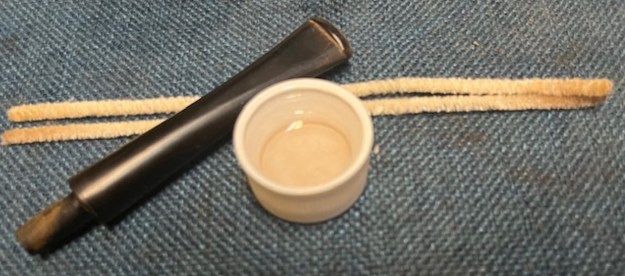
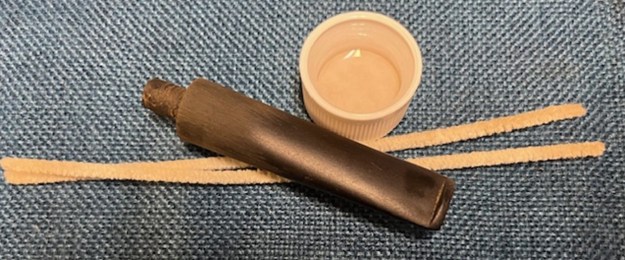
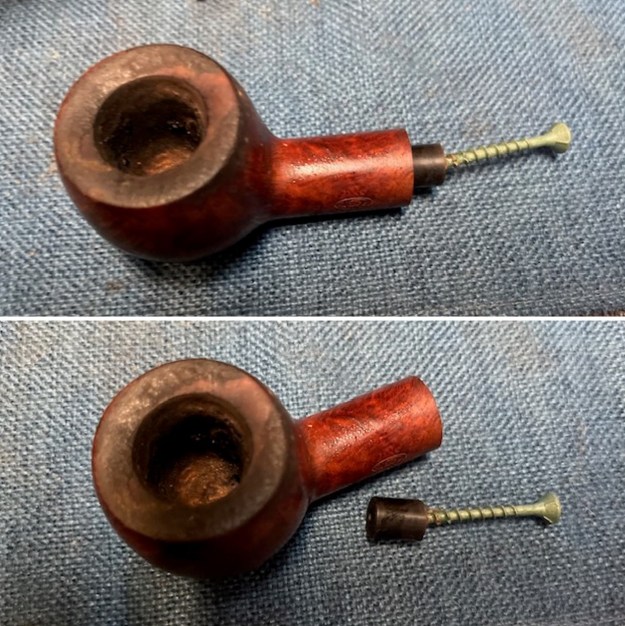
 I fit the stem with a 9mm filter. I used some Vauen Dr. Perl Junior Filters when I am replacing 9mm filters. The fit was perfect and the draught very good.
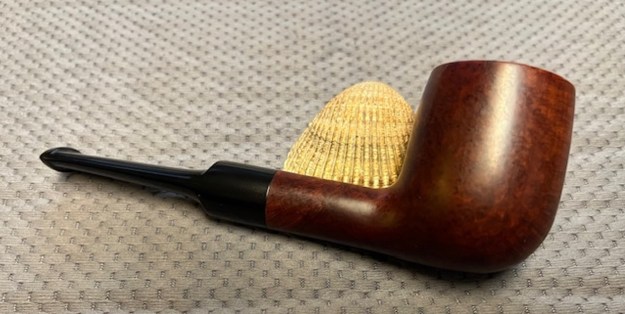
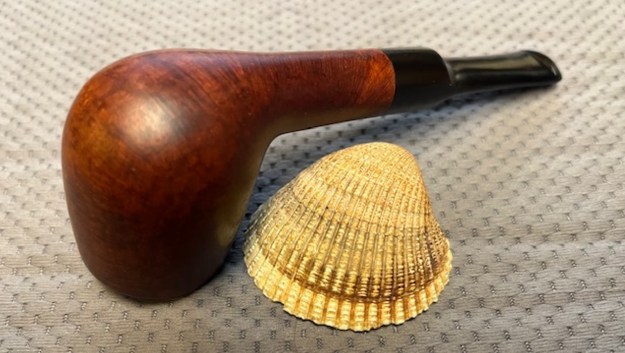
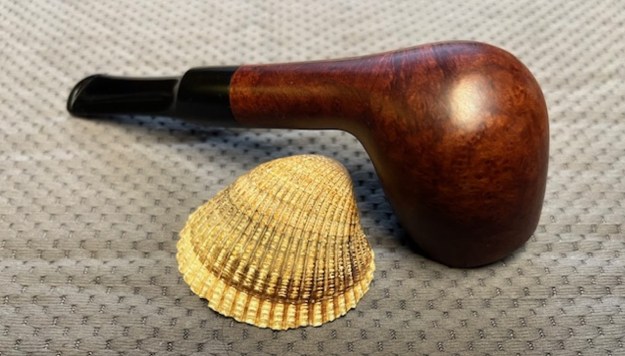
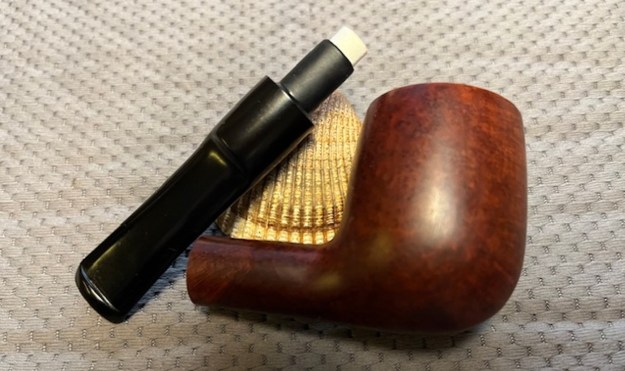
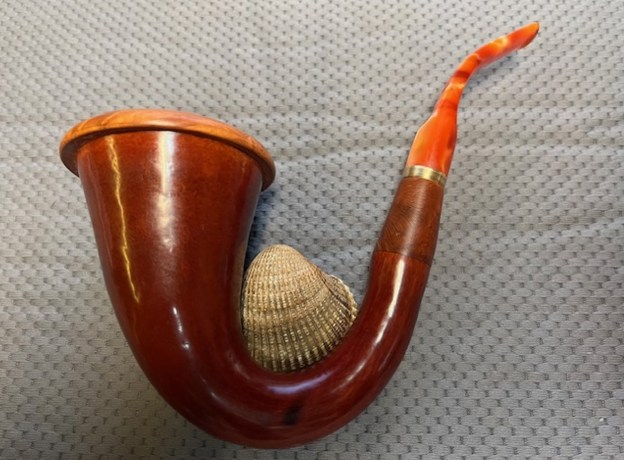
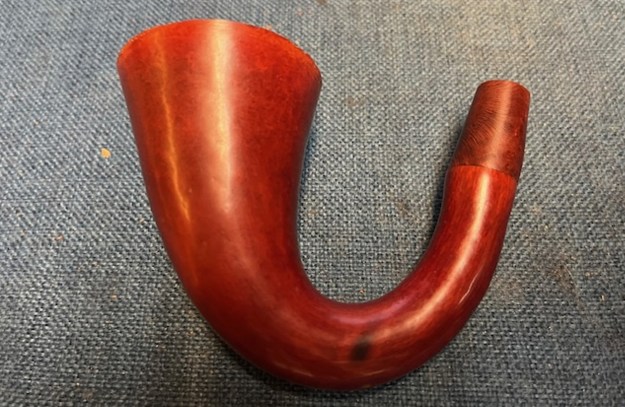
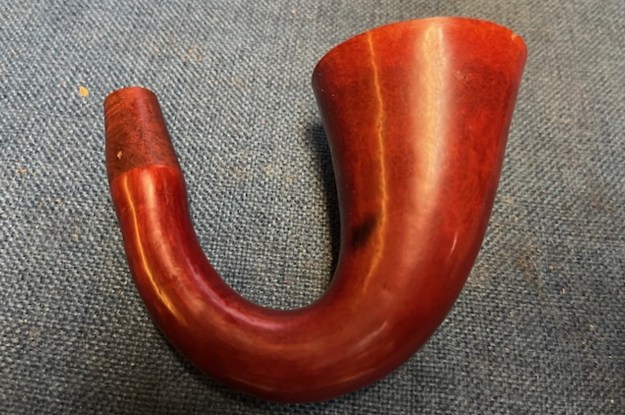
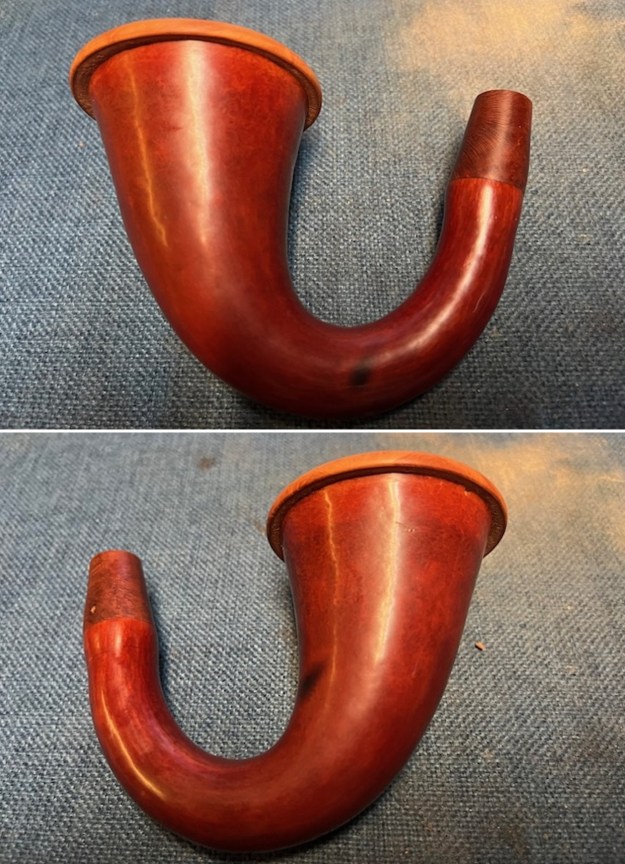
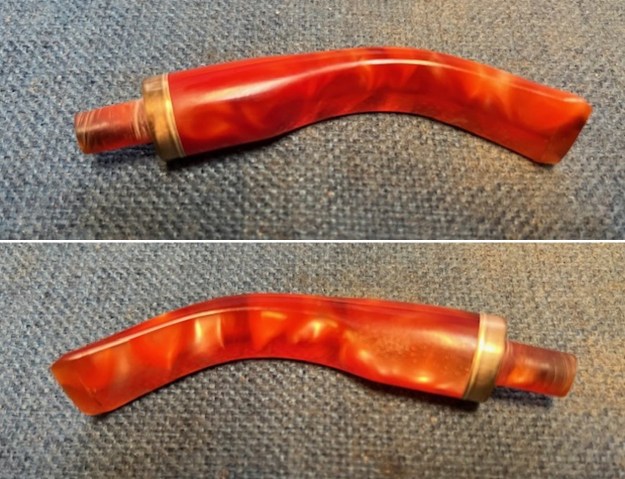
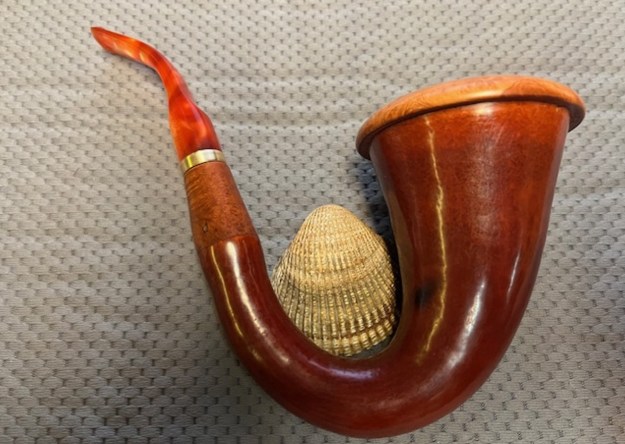
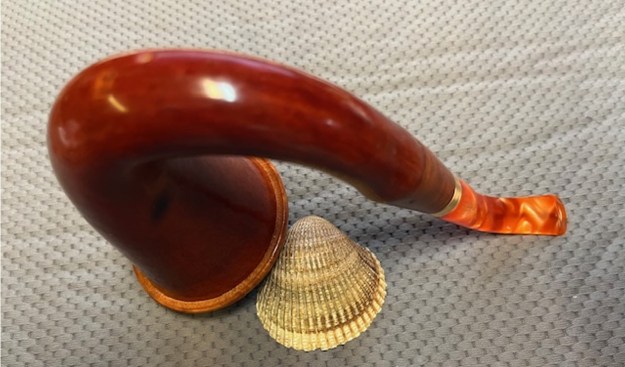
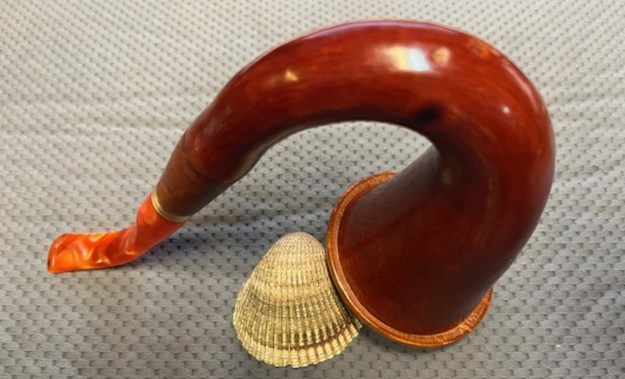
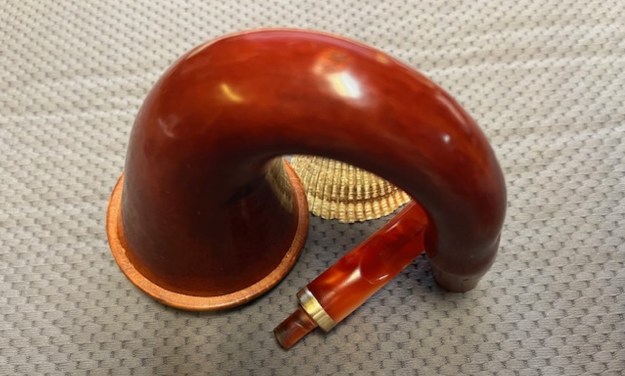
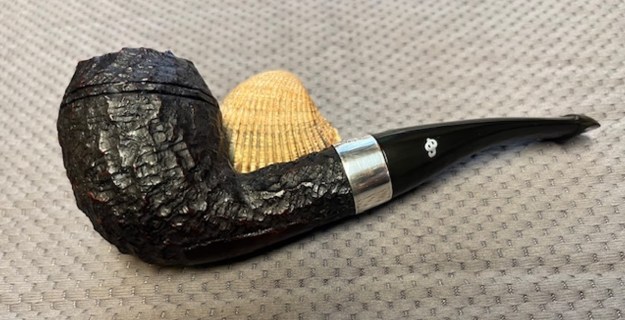
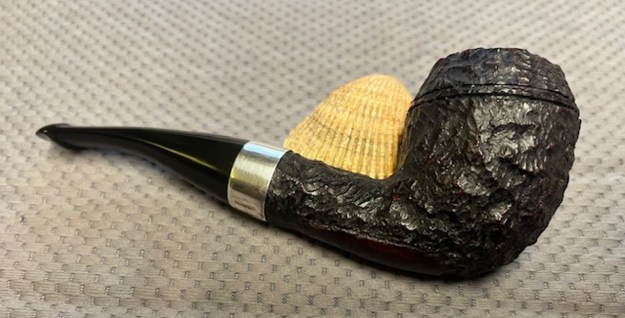
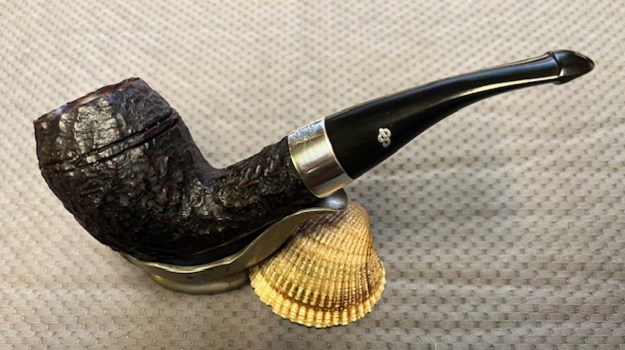
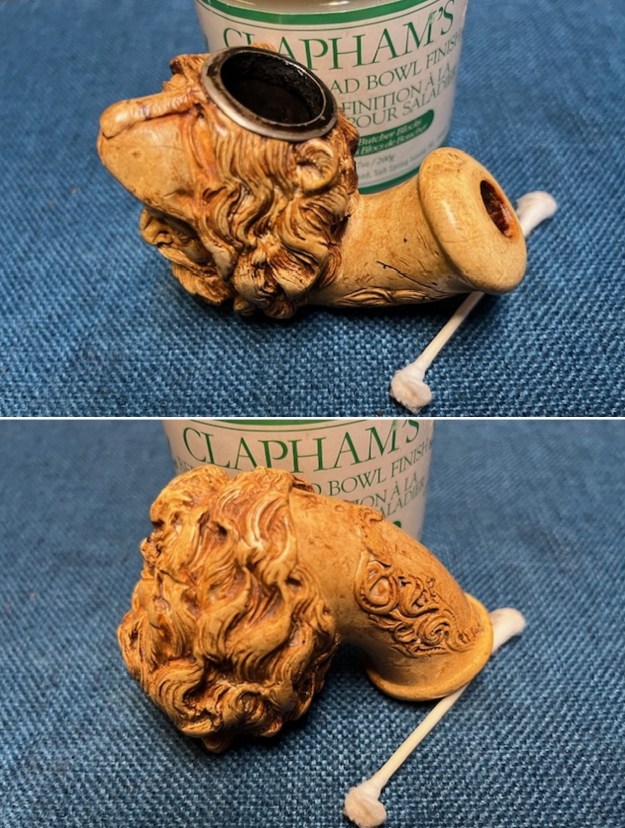
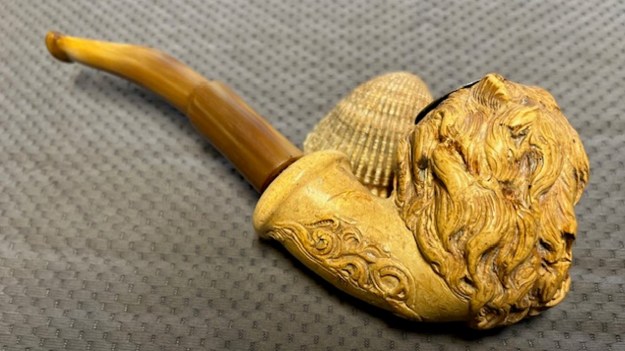
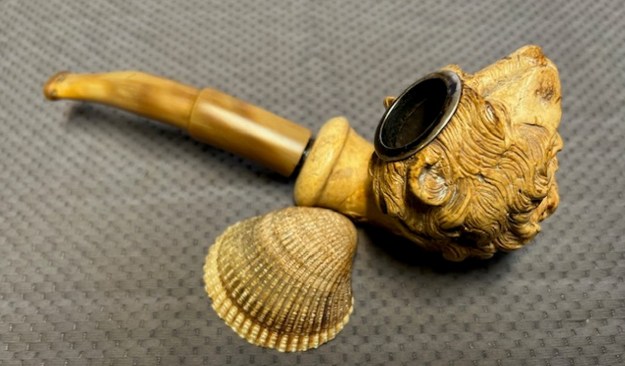
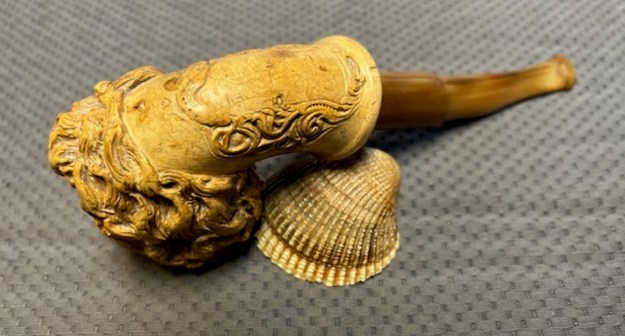
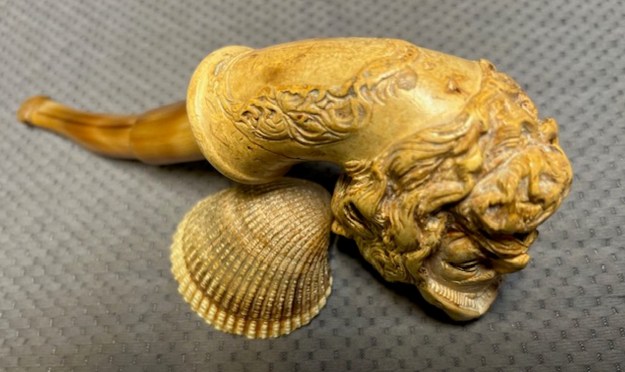
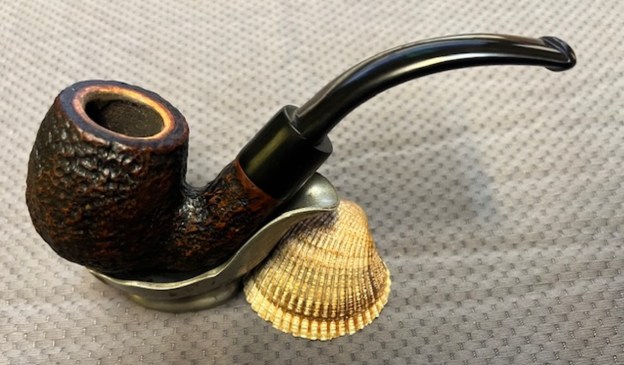
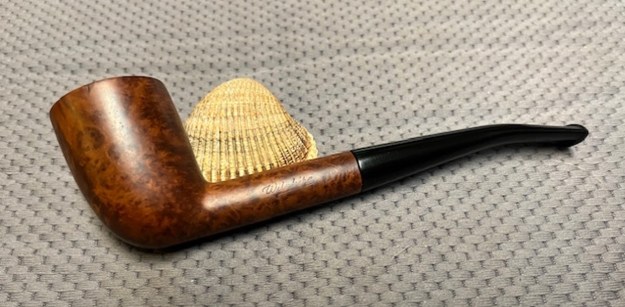
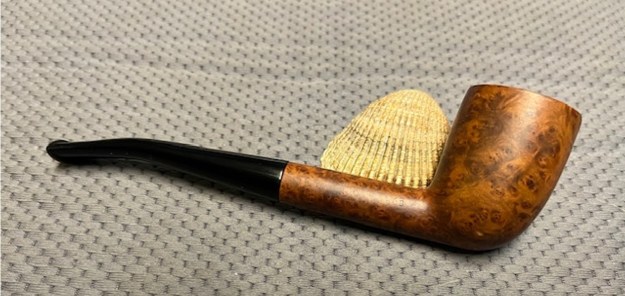
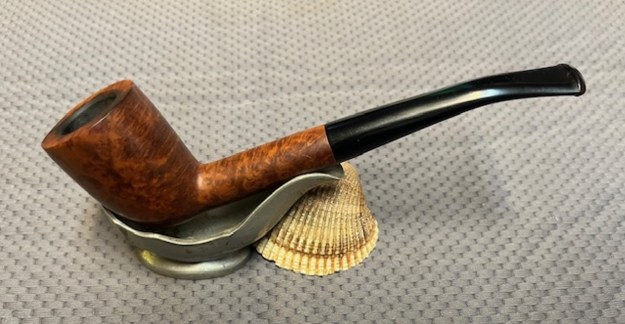
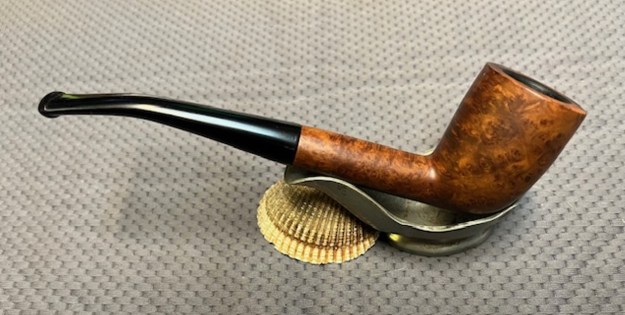
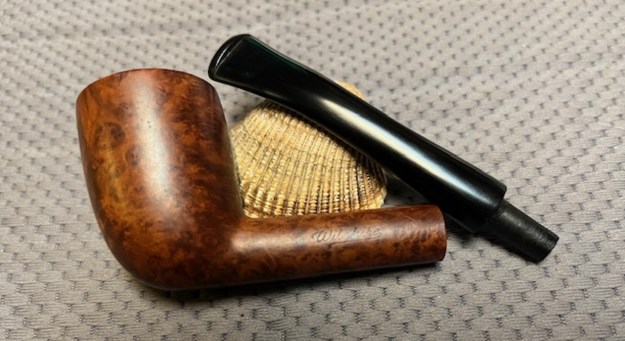
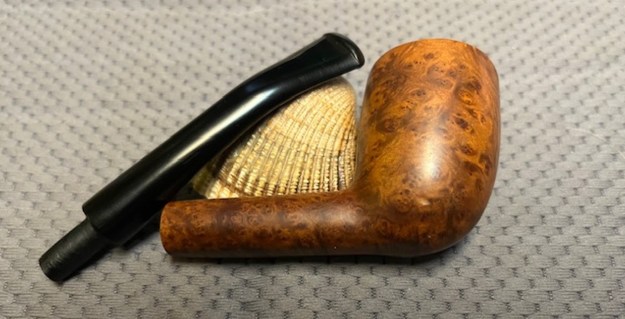
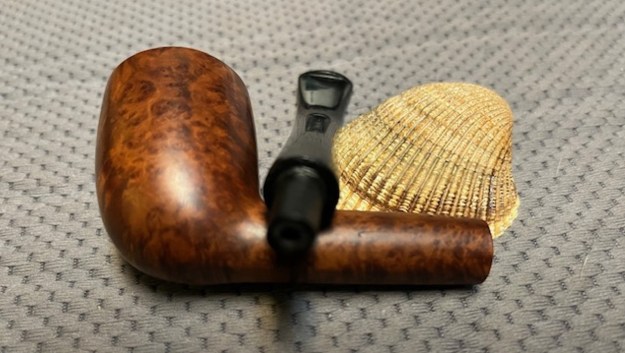
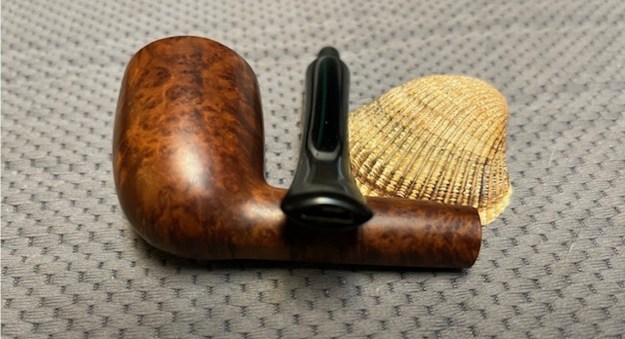
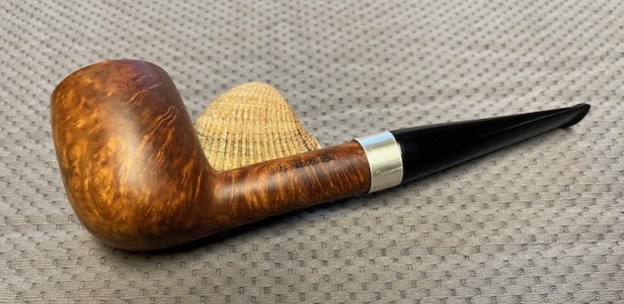
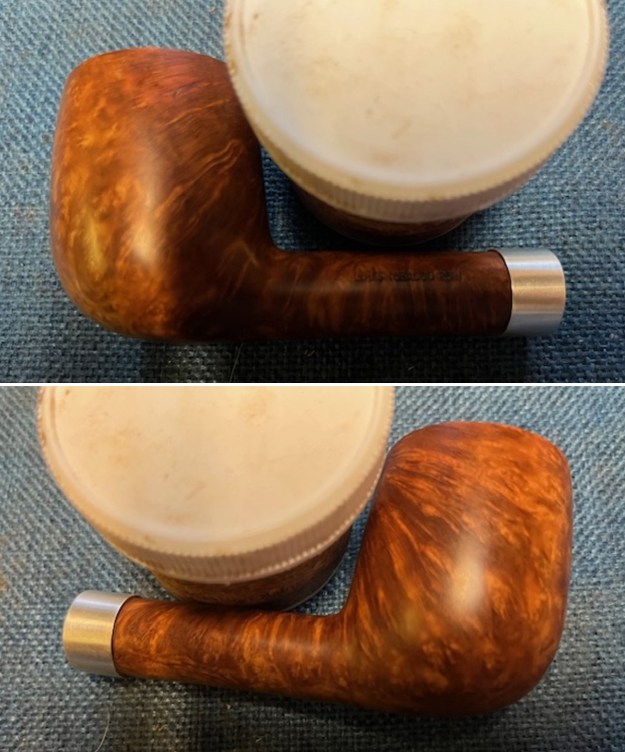
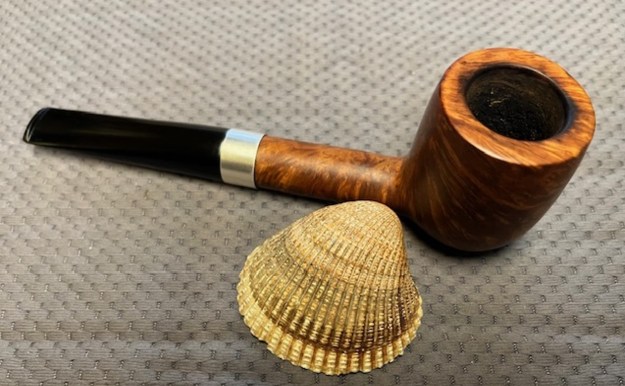
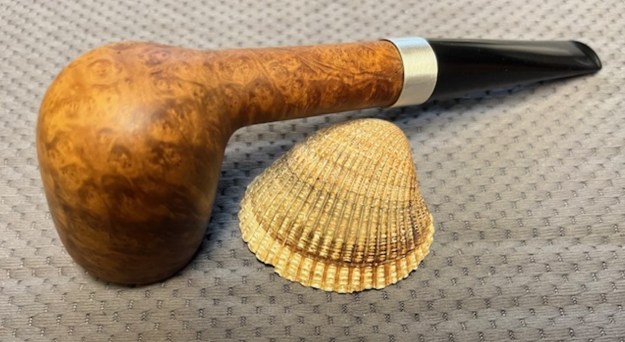
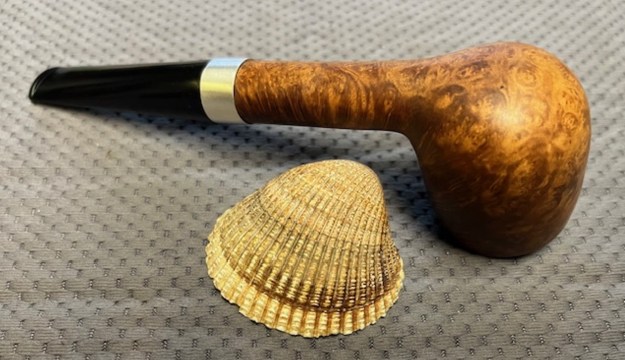
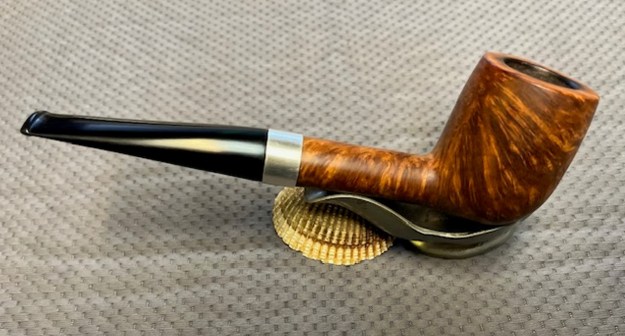
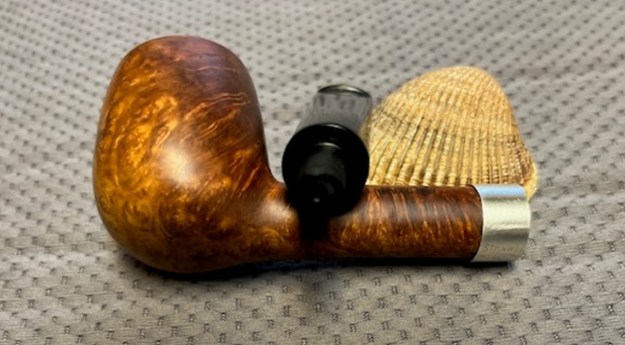
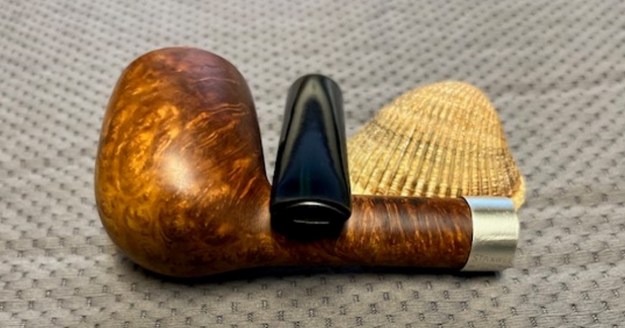
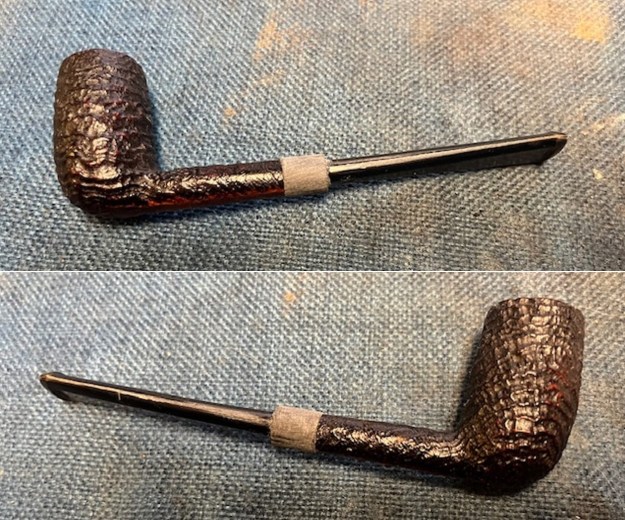
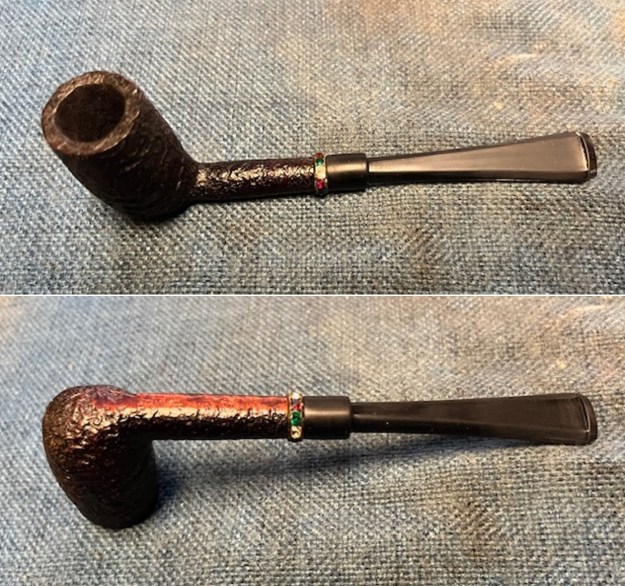
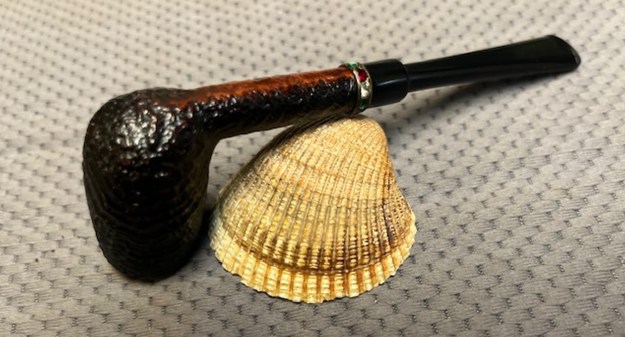
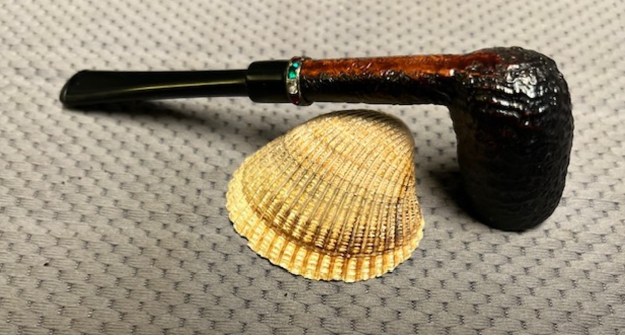
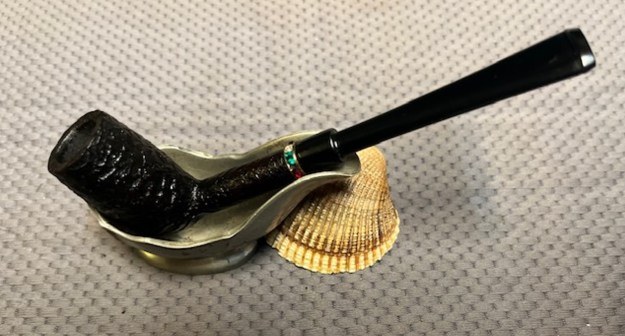
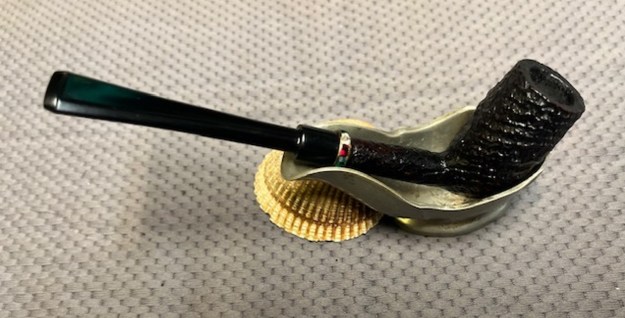
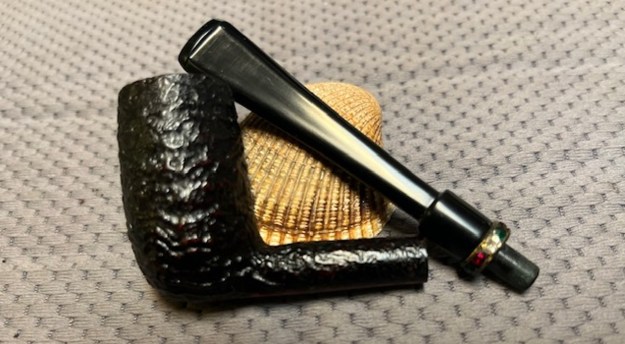
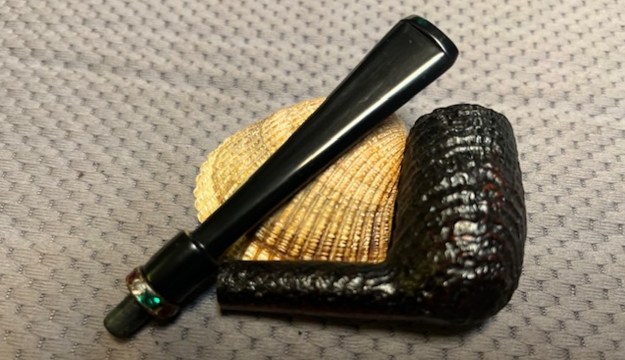
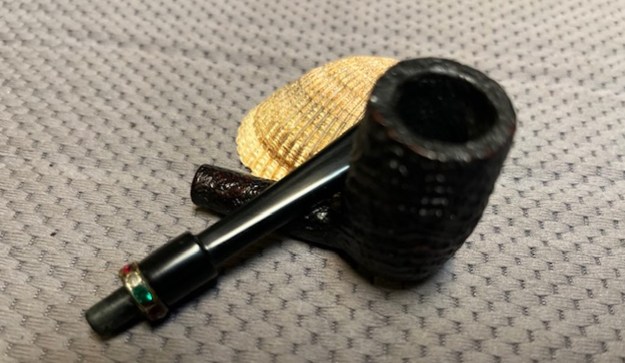
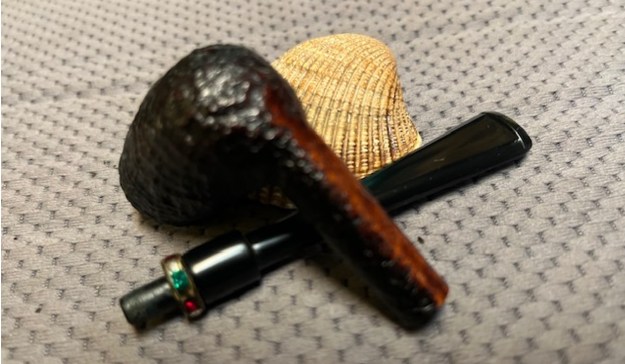
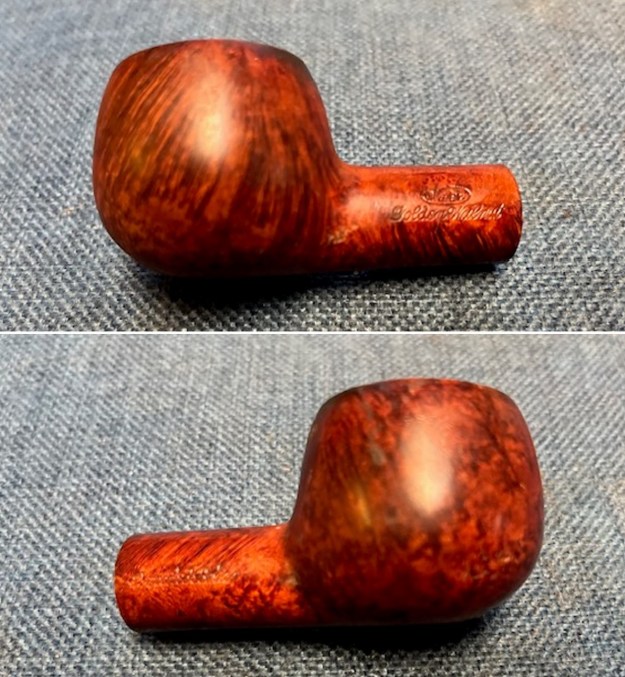
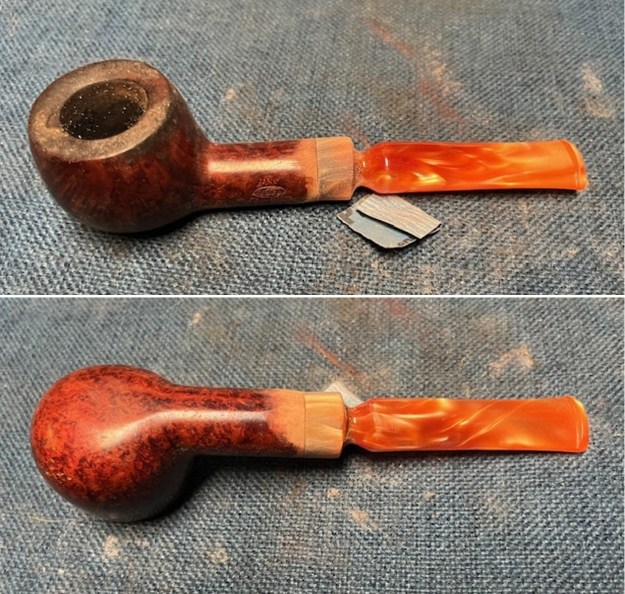
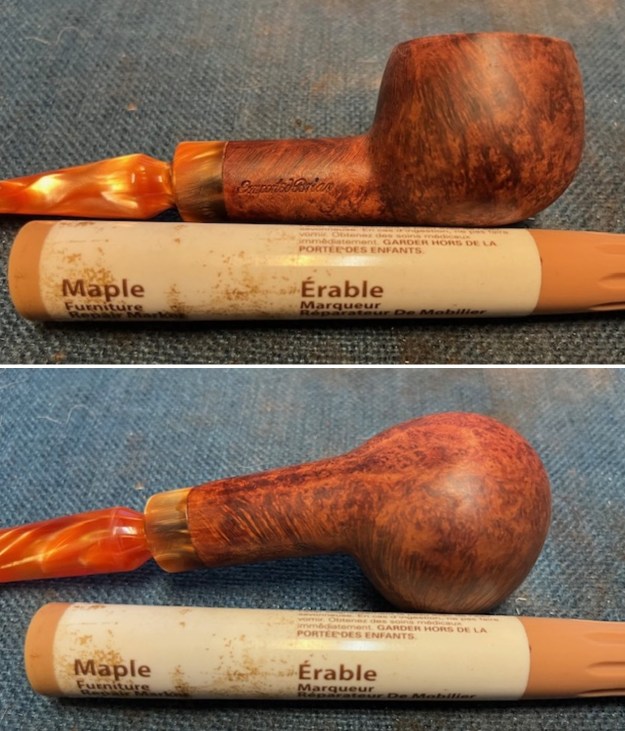
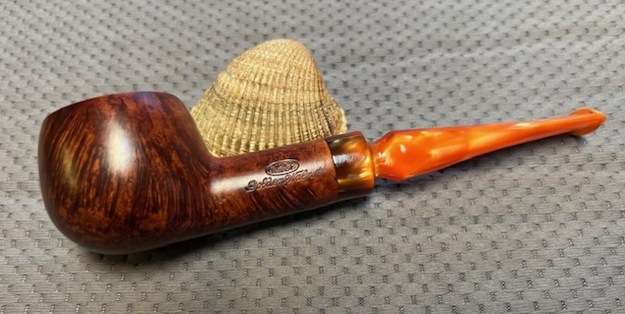
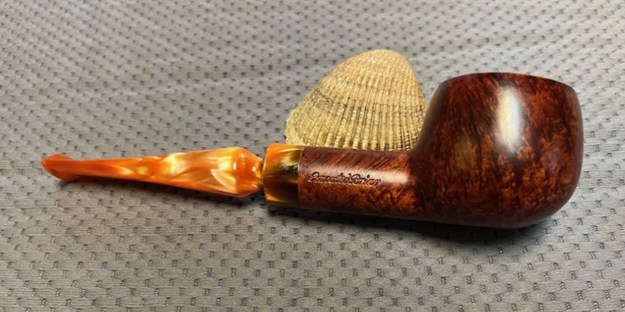
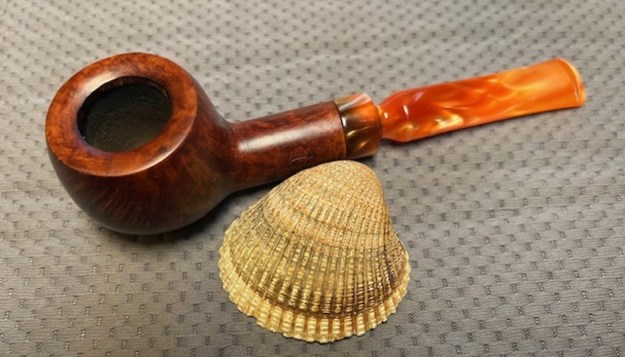
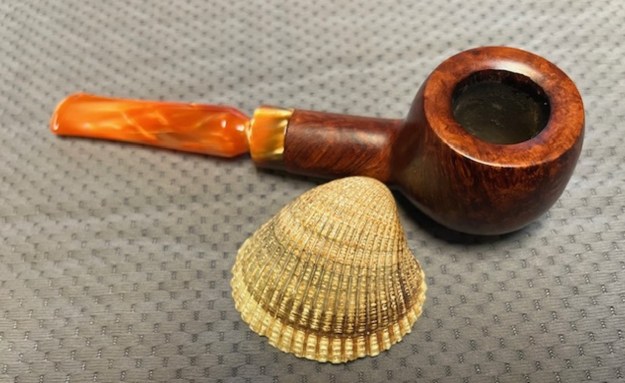
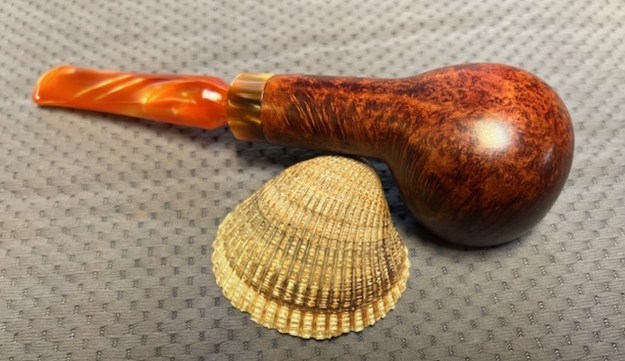
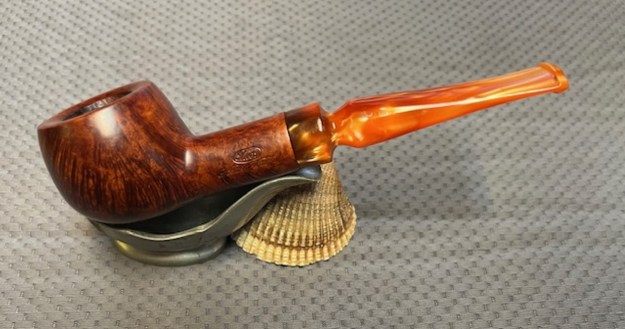
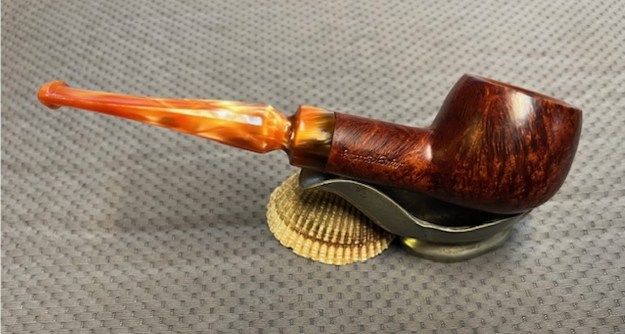
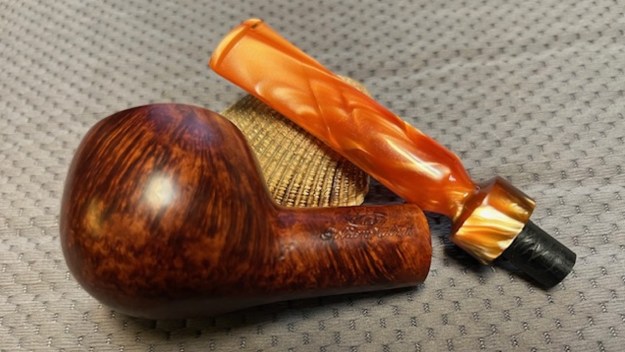
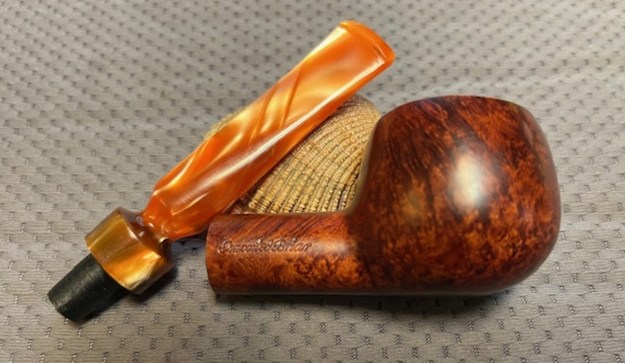
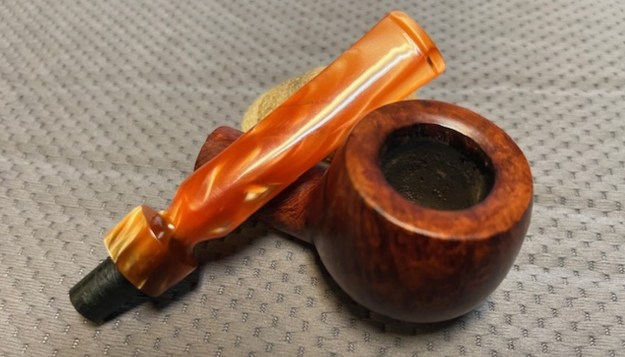
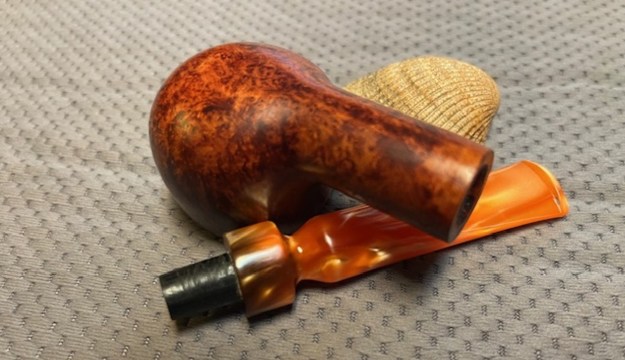
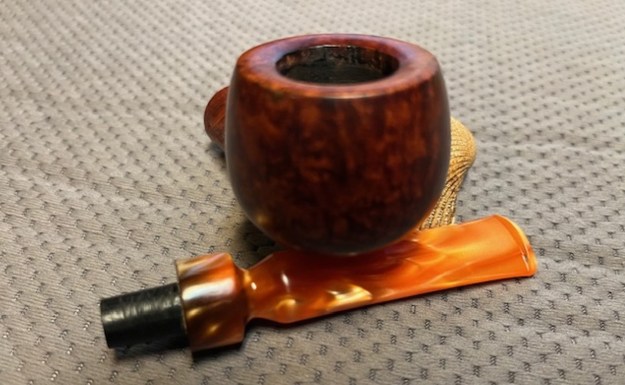
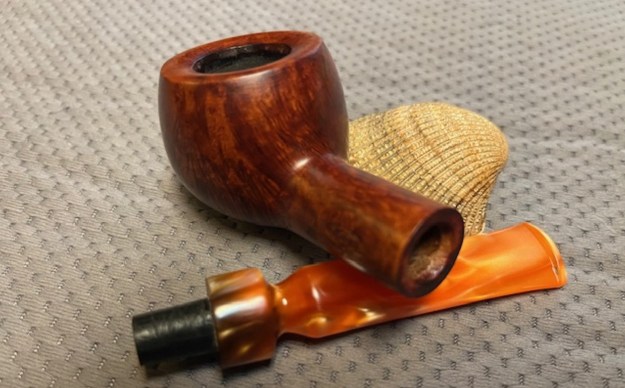
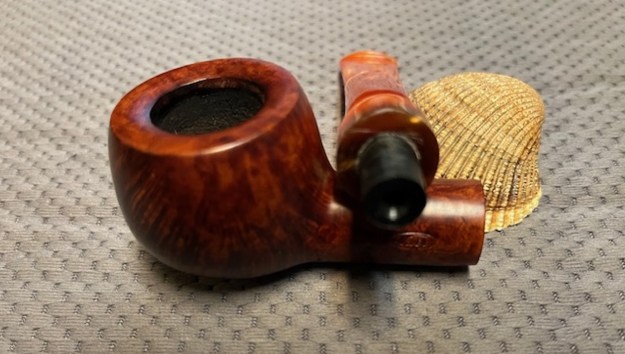
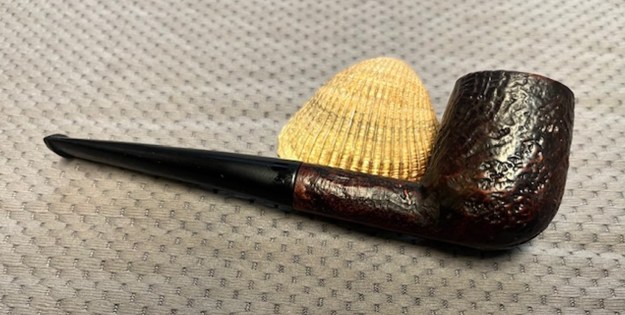
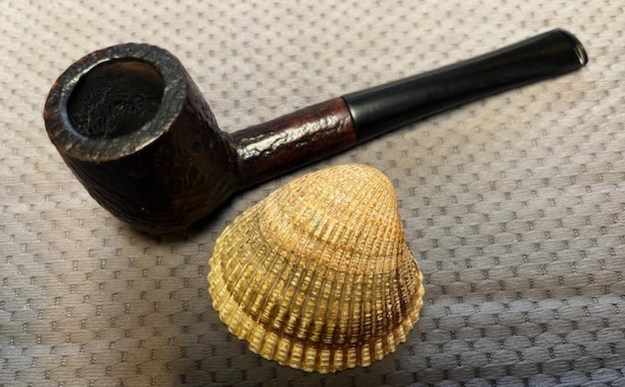
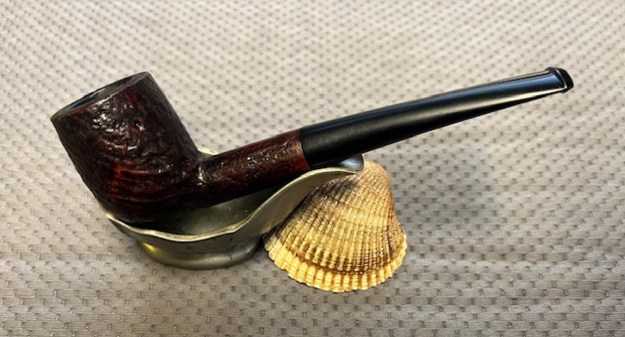
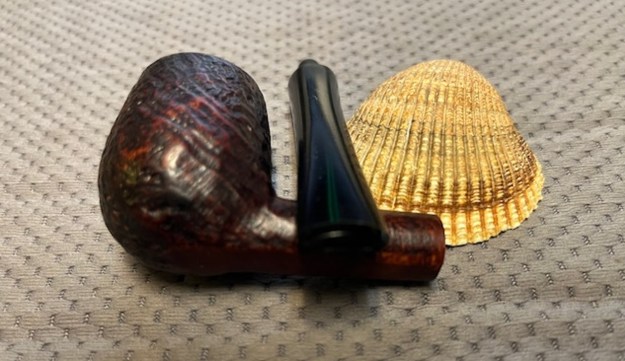
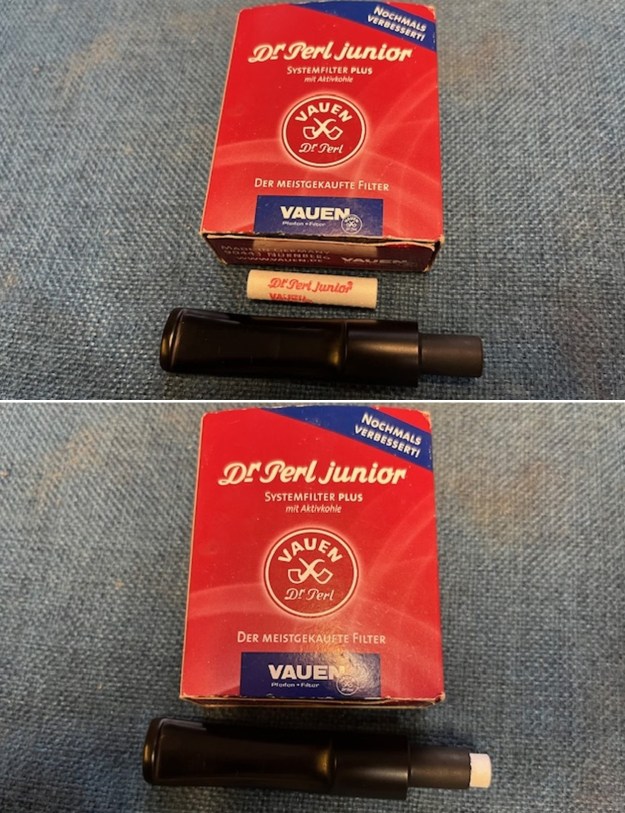 I put the stem back on the A. Jason Billiard 96 with a vulcanite saddle 9mm filter stem and took it to the buffer. I worked it over with Blue Diamond to polish out the remaining small scratches. I gave the bowl and the stem several coats of carnauba wax and buffed the pipe with a clean buffing pad to raise the shine. I hand buffed it with a microfiber cloth to deepen the shine. The pipe polished up really well and the rim top looked good. I was happy with the look of the finished pipe. The photos below show what the pipe looks like after the restoration. The German made A. Jason Saddle Stem Billiard 96 is a beautiful and unique take on a classic shape. The polished vulcanite saddle stem looks really good with the browns of the briar. The dimensions of the pipe are Length: 5 ½ inches, Height: 1 ¾ inches, Outside diameter of the bowl: 1 ¼ inches, Chamber diameter: ¾ of an inch. The weight of the pipe is 1.80 ounces/52 grams. This is another pipe that I will be putting it on the rebornpipes store in the Pipes from Various Makers Section shortly, if you are interested in adding it to your collection. The pipe looks and feel great in the hand. This one should be a great smoker. Thanks for walking through the restoration with me on this beauty!
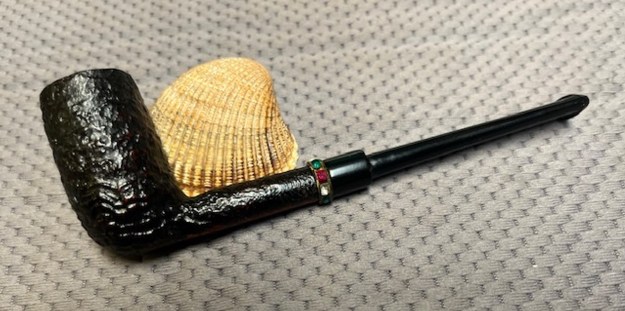
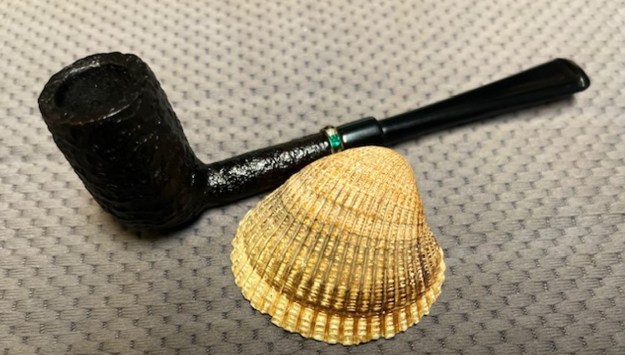
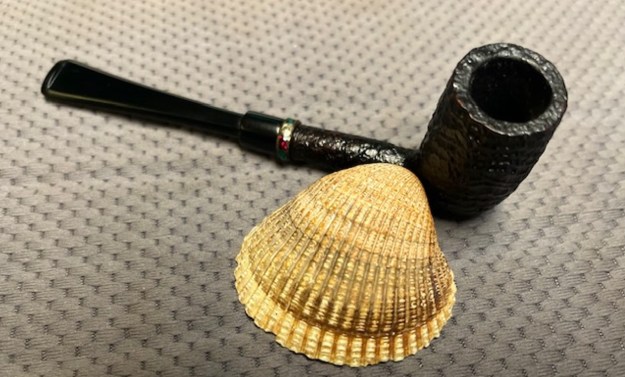
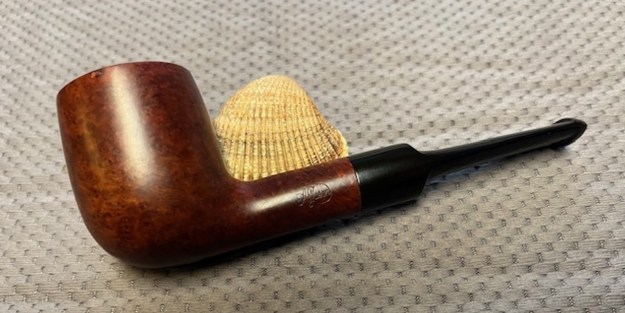


