Tag Archives: Charatan Make Pipes

Cleaning Up a Charatan’s Make London England Deluxe 502 Prince


by Steve Laug

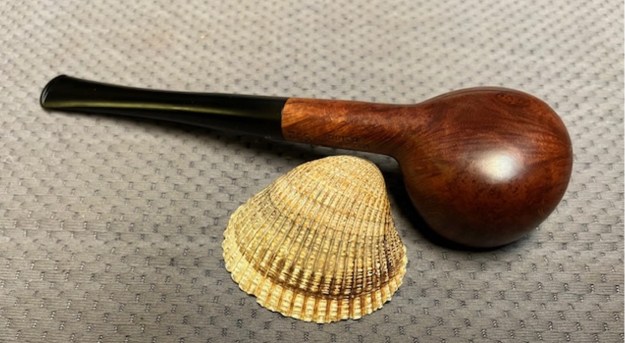
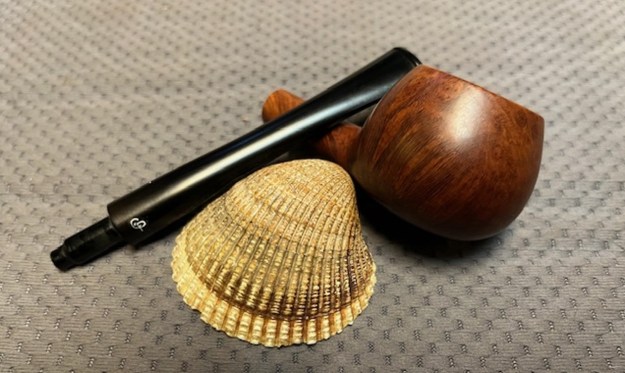
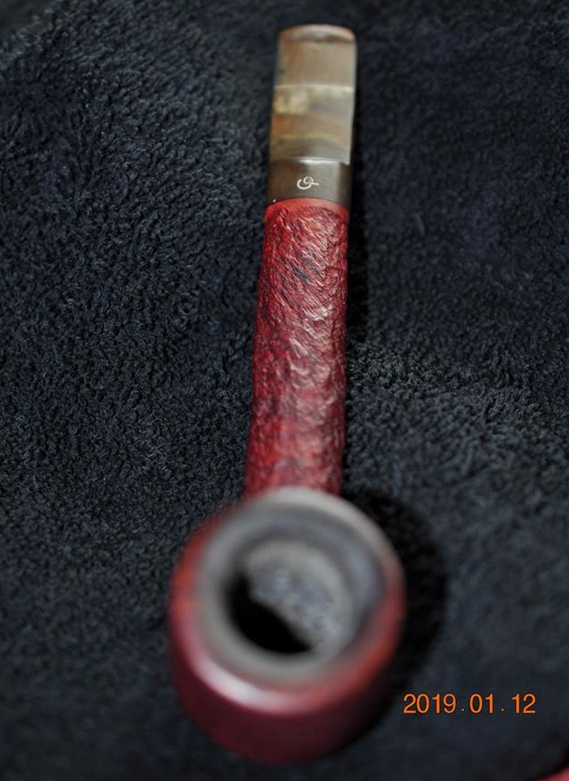
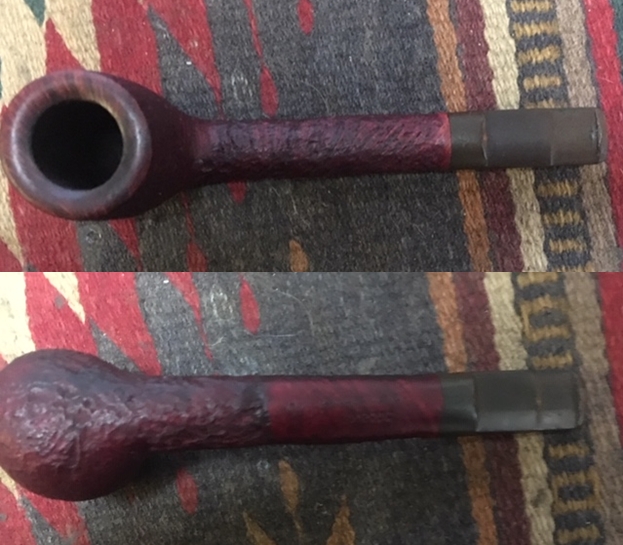
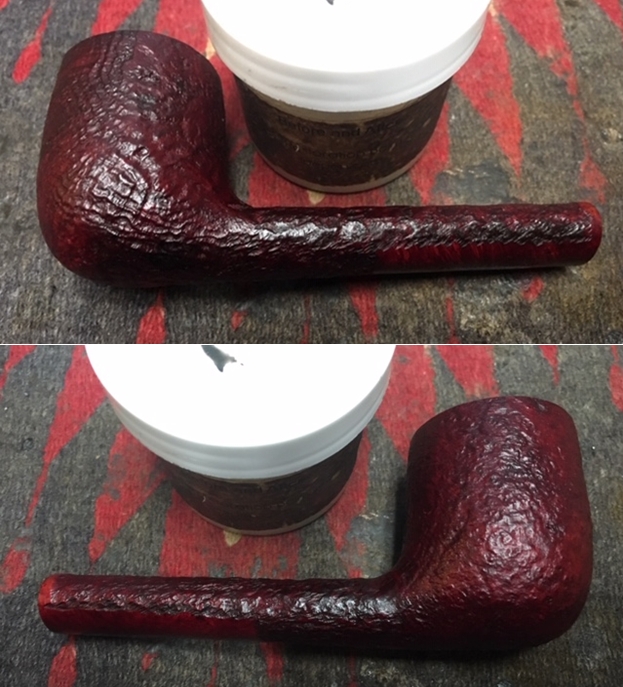
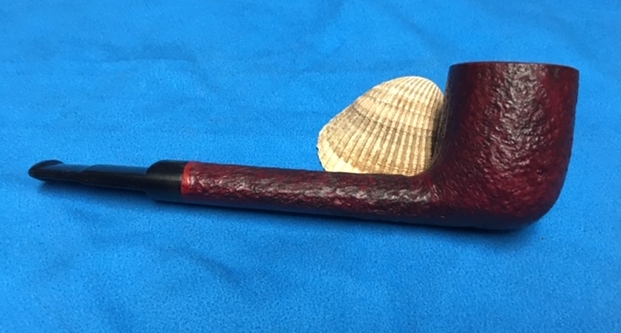
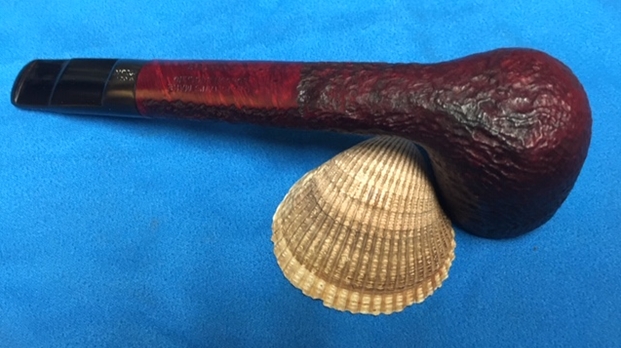
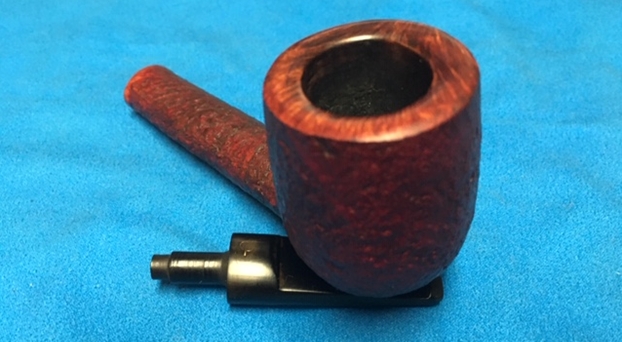
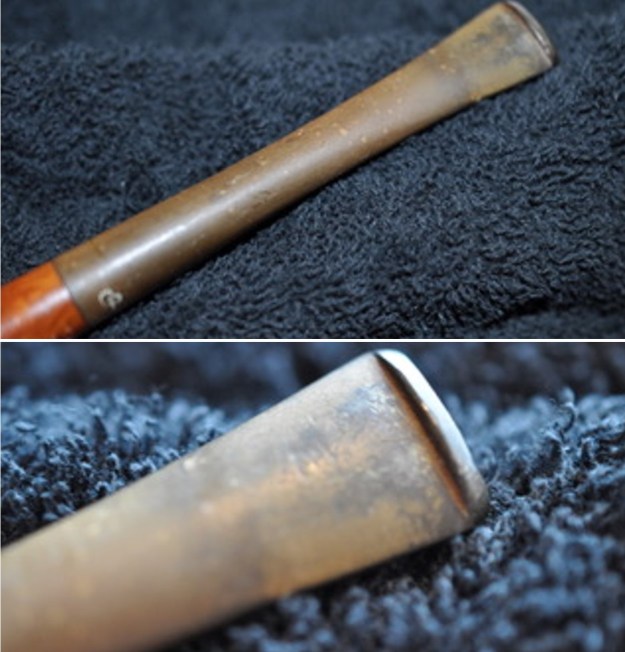
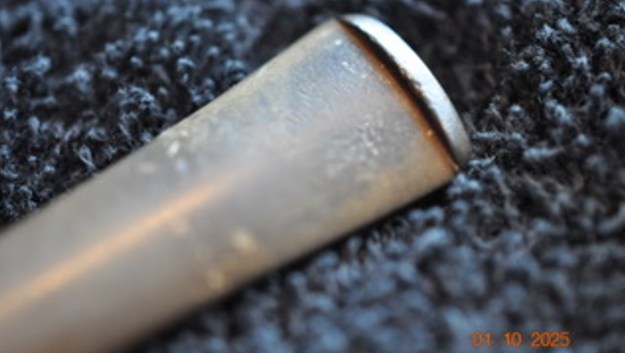
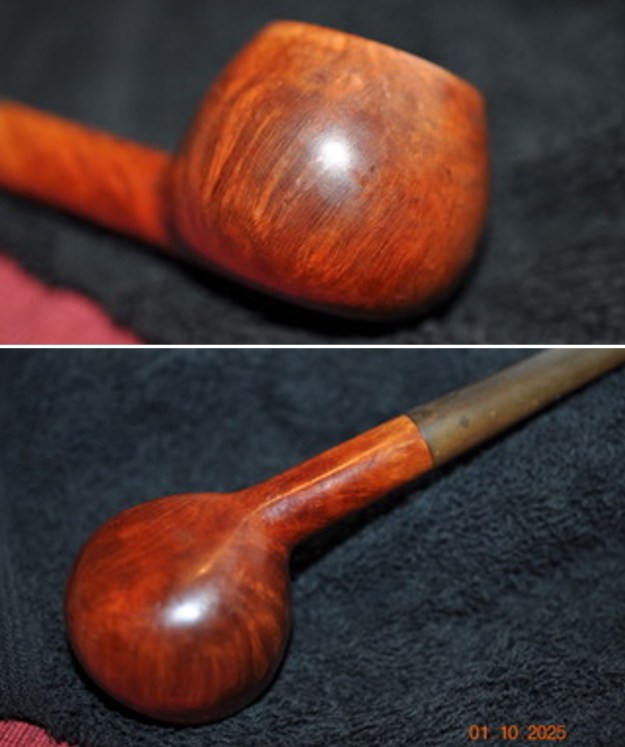
The next pipe on the work table is a classic Prince shaped pipe with a vulcanite taper stem. We picked the pipe up from a seller in Ogden, Utah, USA on 12/12/2024. It is stamped on the left side of the shank and reads Charatan’s Make [over] London, England [over] De Luxe. That stamping is followed by the shape number stamp, 502. The finish is smooth and has some great straight grain around the bowl sides and birdseye on the rim top and heel of the bowl. It was quite dirty but still had a charm about it. The bowl was caked and there was a light lava coat and spots on the top and the inner edge of the rim. The stem was vulcanite and was a tapered. There were light tooth marks and chatter on both sides of the stem. The was a Charatan CP interlocked logo on the left side of the stem. Jeff took some photos of the pipe to show the general condition of the pipe before he started his clean up.
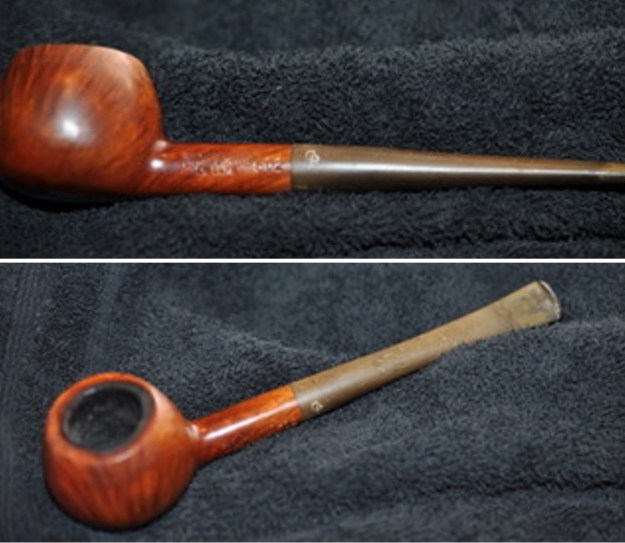
He took some photos of the rim top and bowl from various angles to give me a clear picture of the condition of the rim top and bowl. You can see the cake in the bowl and the darkening and lava coat on the rim top. It is hard to tell if there was any damage to the inner edge at this point. The next photos show the top and underside of the stem. It is dirty and has oxidation and calcification on both sides at the button. There is also some tooth chatter and light tooth marks. 
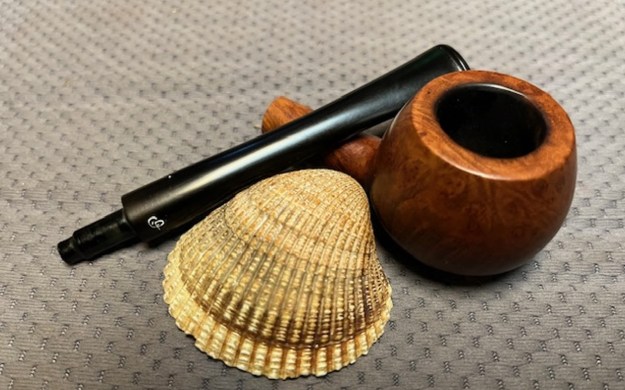
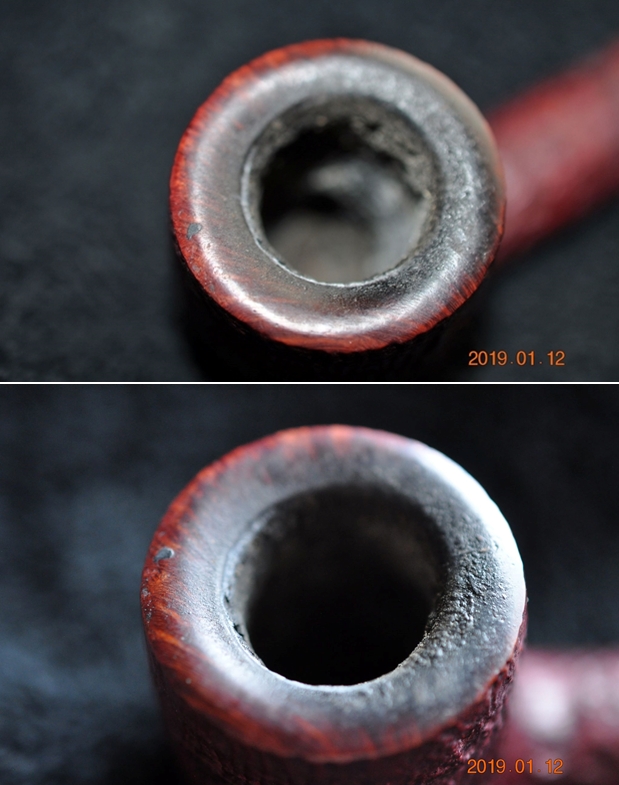
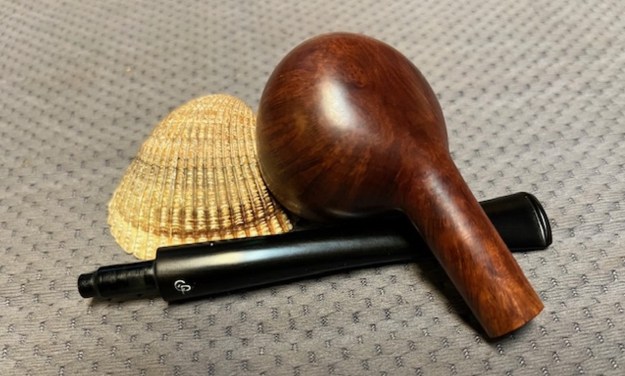
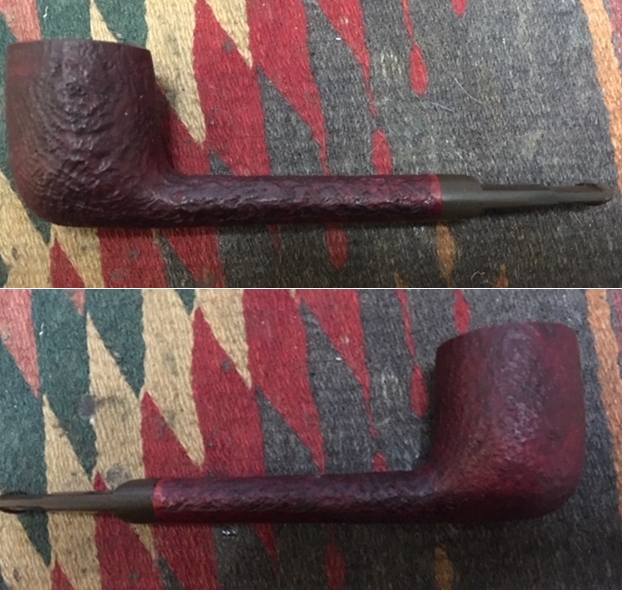
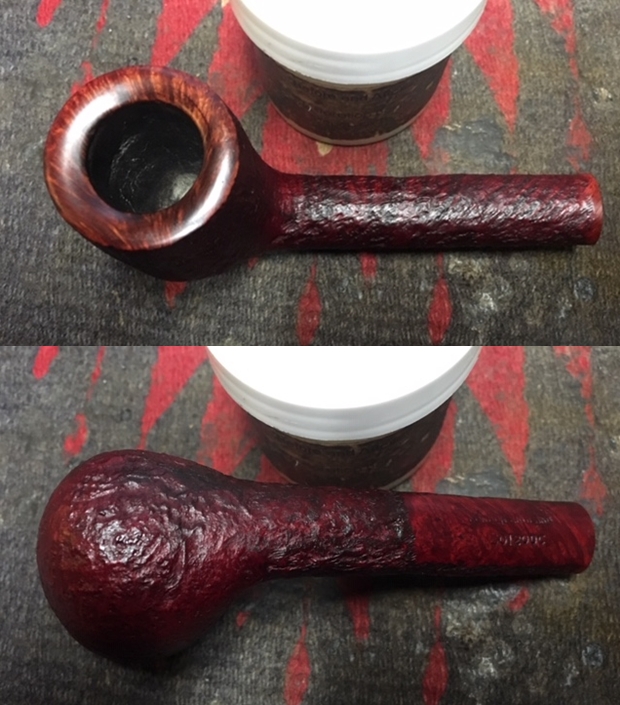
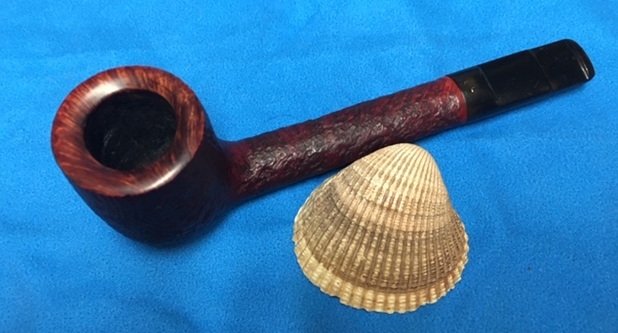
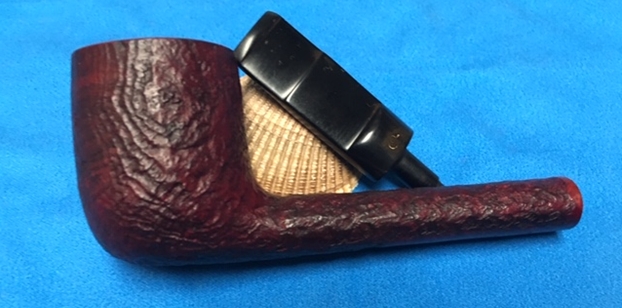
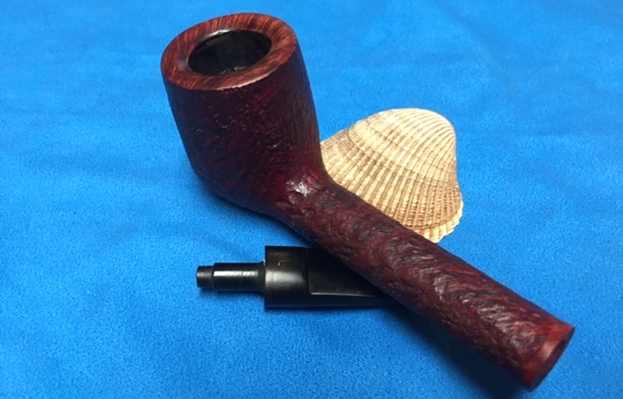
Jeff took some photos of the sides of the bowl to show the condition of the finish on the pipe. The photos showed beautiful grain around the bowl sides. Under the oils and grime, it is a nice looking bowl. 
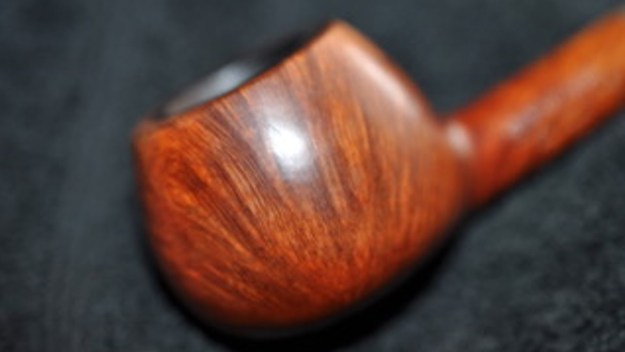
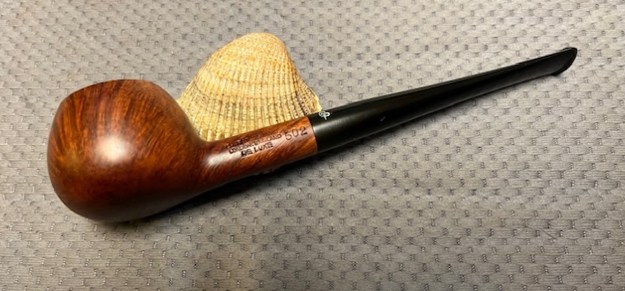
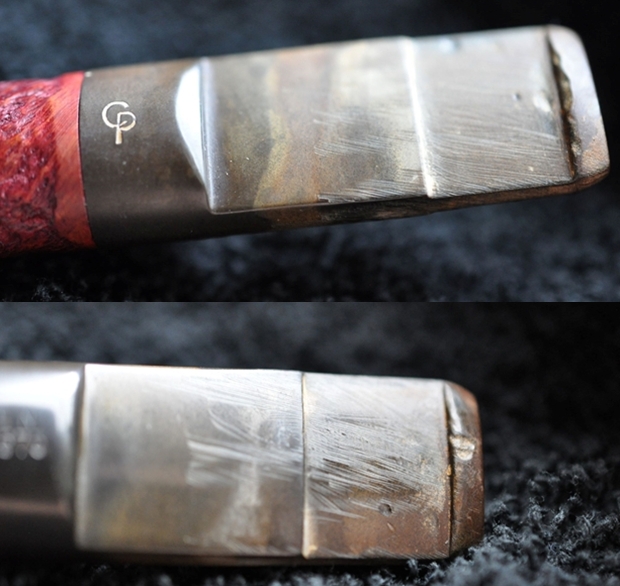
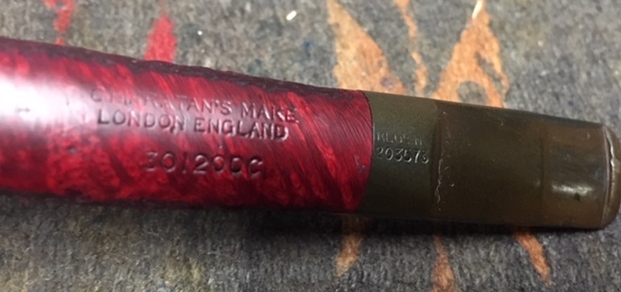
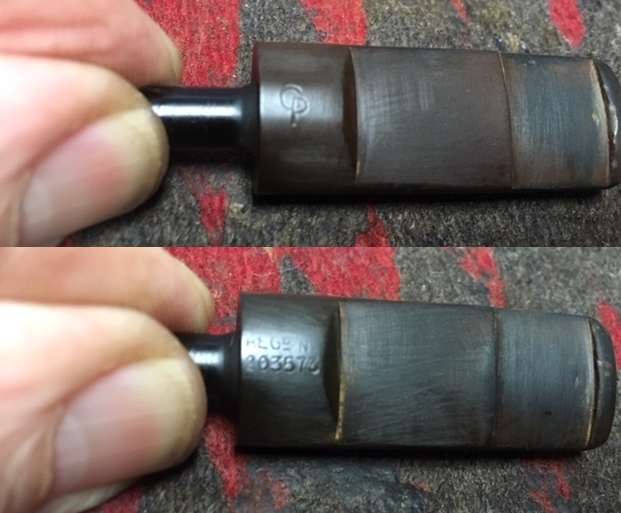
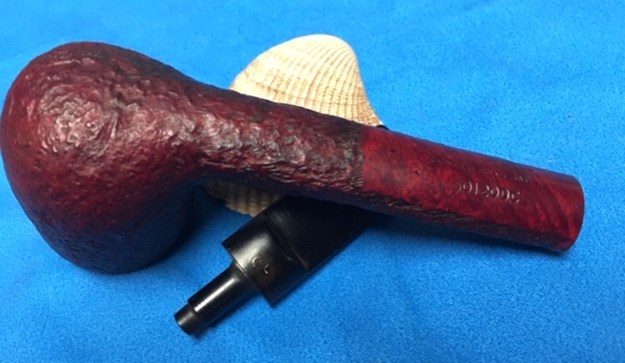
He took a photo of the stamping on the left side of the shank. The stamping was clear and readable. He also captured a photo of the Charatan logo on the left side of the stem.
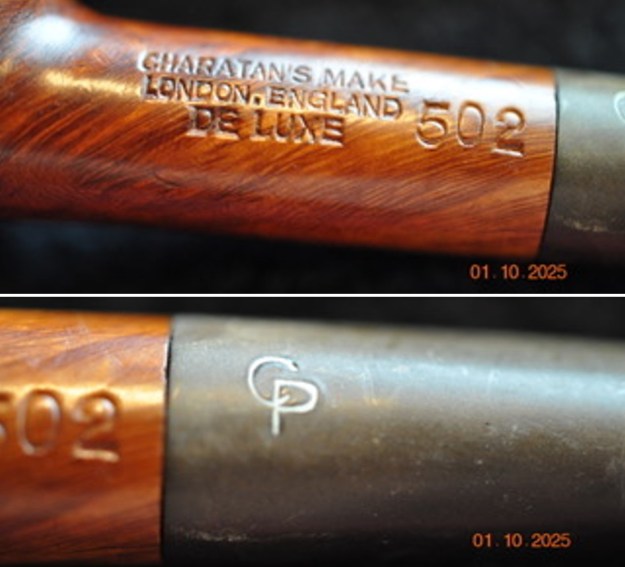
I looked up an article on determining dates of manufacture of Charatan’s Make pipes (https://pipedia.org/wiki/Dating_of_Charatans). That article helped me date this pipe with some level of certainty to the Rueben Era Charatan made between the years 1910-1960. I quote from the portion of the article that gave the identifying characteristics of that era. I quote in full.

Identification of a second era pipe (Rueben’s era, 1910-1960)

Pipes belonging to this period are rare, however is it possible to come across one. They can be distinguished from a pipe of the first era mainly because their larger size. Their characteristics are similar to the ones of the previous era.

1) Pipes can be larger, up to the dimension of a Dunhill group 5

2) The mouthpiece is tapered or saddle.

3) No double comfort

4) the CP logo is engraved so that the C enters the P

5) Absence of £ on the pipe shank (note that from 1955 all the pipe imported in the USA by Lane has it, however that stamping is not synonymous of the Lane era).

6) Absence of the letter X on the shape code engraved on the shank (for ex. 2502 and not 2502X)

7) Absence of letters DC after the shape number (for ex. 2502 and not 2505DC)

8) Absence of the engraving “MADE BY HAND” on the shank (introduced for the first time in 1958)

9) Presence of the writing “CHARATAN’S MAKE LONDON ENGLAND” on 2 lines

10) The CP logo is finer than in following eras

All ten of the items in the above list apply to the pipe in hand. From the stamping on the stem where the C enters the P to the missing L which places it as pre-1955 to the lack of a double comfort bit all help to place this pipe in this time period.

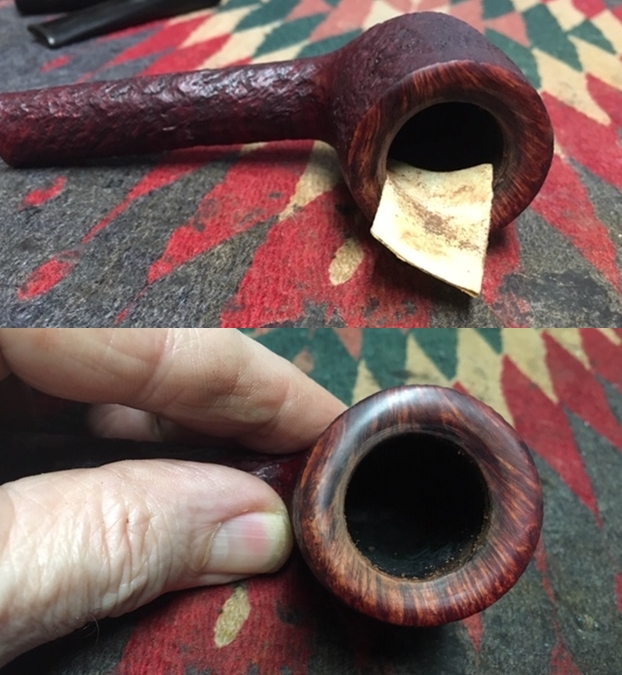
Armed with that information I turned to work on the pipe itself. Jeff had done a great job cleaning up the pipe as usual. He cleaned up the inside of the bowl with a Savinelli Fitsall Pipe Knife. The rim top and the inner edge of the bowl are in excellent condition. The bowl walls looked very good. He scrubbed the interior of the bowl and shank with shank brushes, pipe cleaners, cotton swabs and alcohol to remove the tars and oils. He scrubbed the exterior of the pipe with Murphy’s Oil Soap and a tooth brush to remove the grime from the finish. He scrubbed the inside of the stem with alcohol and pipe cleaners. He scrubbed the exterior with Soft Scrub and then soaked it in Briarville’s Pipe Stem Deoxidizer. He washed it off with warm water to remove the deoxidizer. The stem looked very good. I took photos of the pipe before I started working on it. 
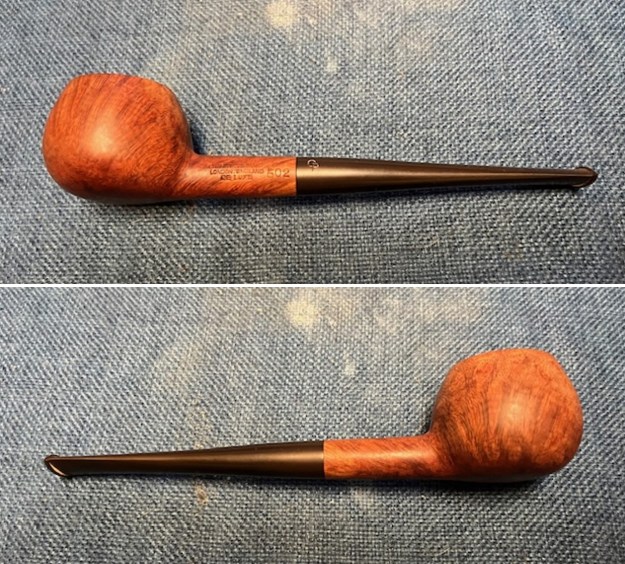
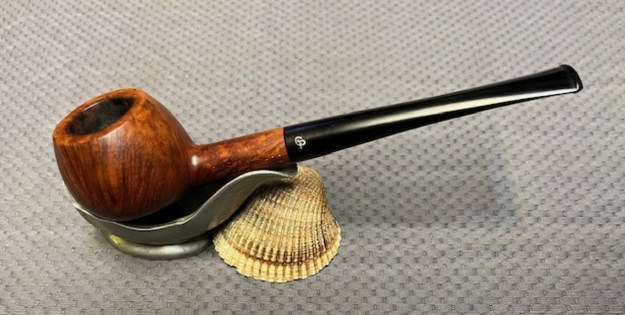
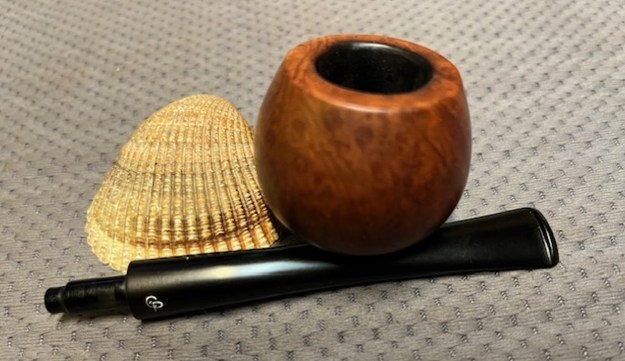
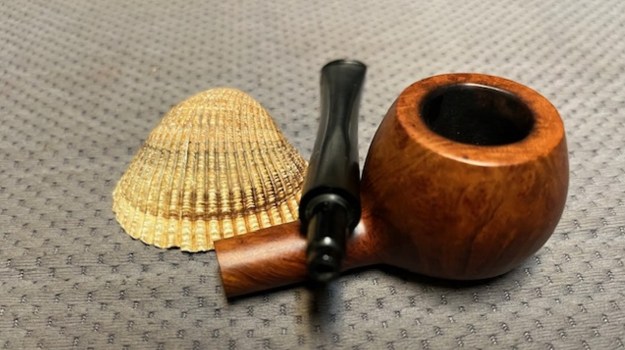
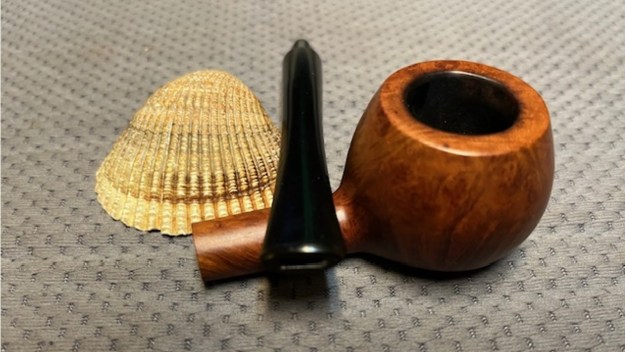
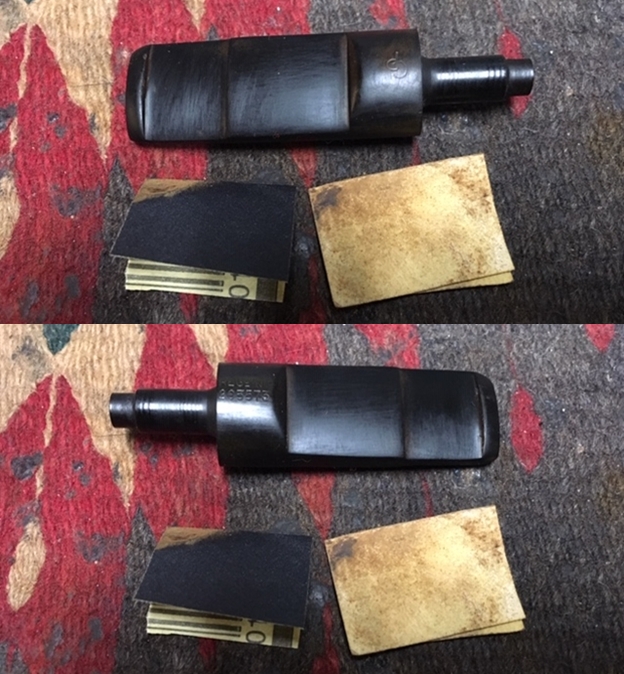
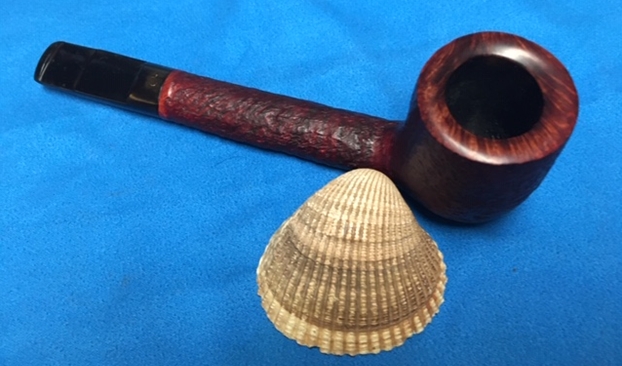
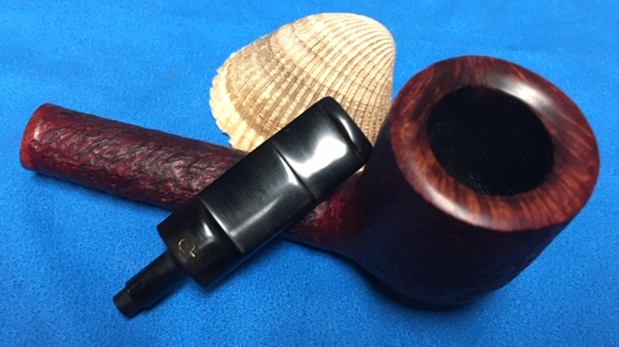
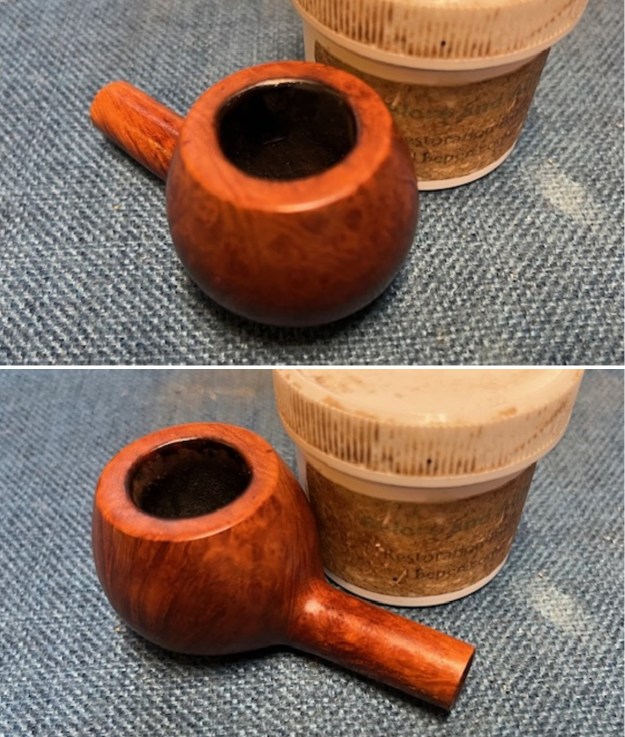
I took close up photos of the bowl, rim top and stem to show how clean the pipe was. The bowl was clean and the rim top and the inner edge look beautiful. The stem was clean and did not show either tooth marks or chatter.
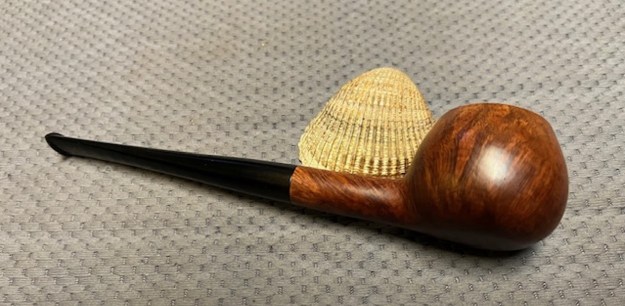
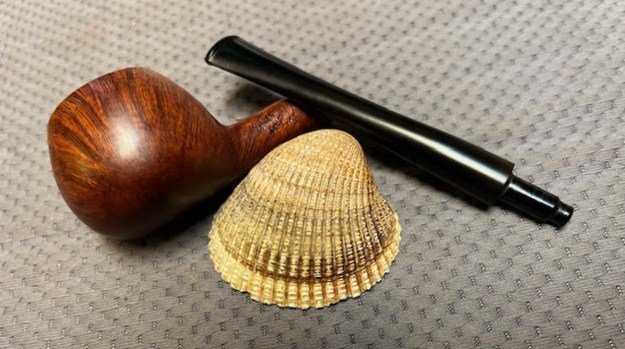
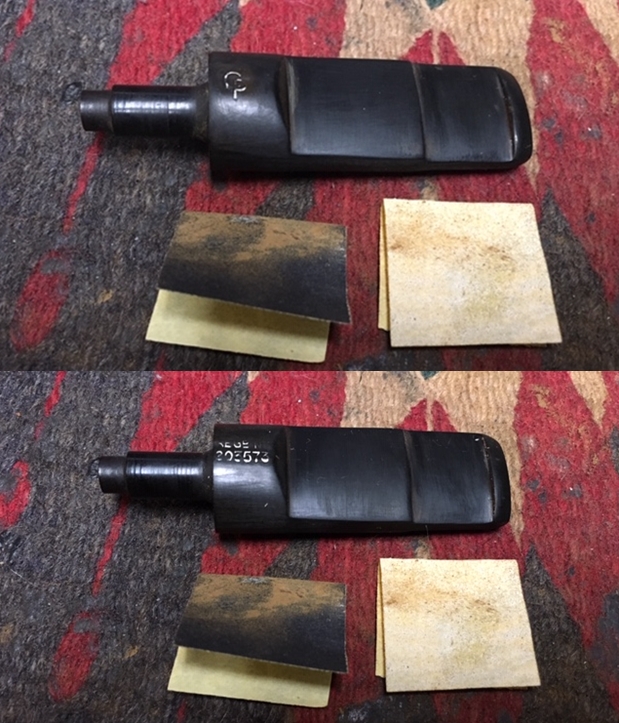
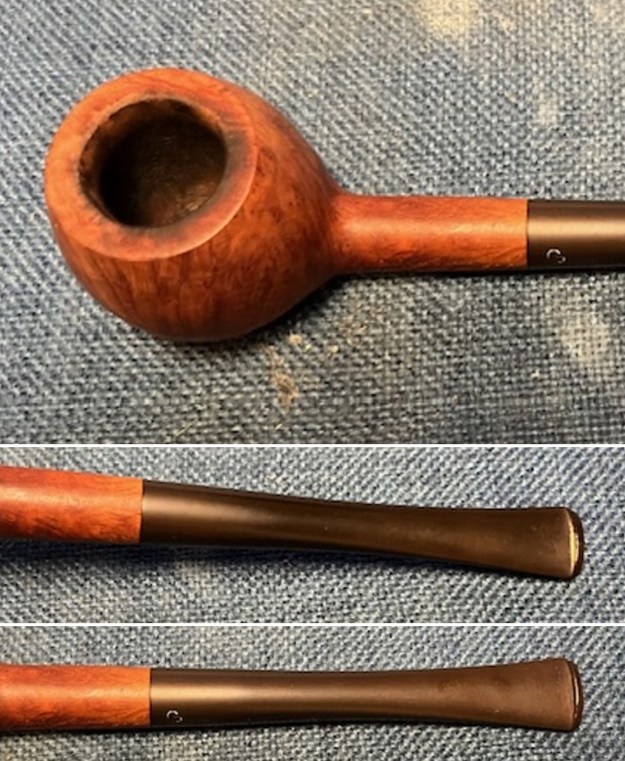
I took a photo of the stamping on the side of the shank. It is very clear and readable and read as noted above. I also removed the stem from the shank and took photos of the pipe to show the look of the parts. 
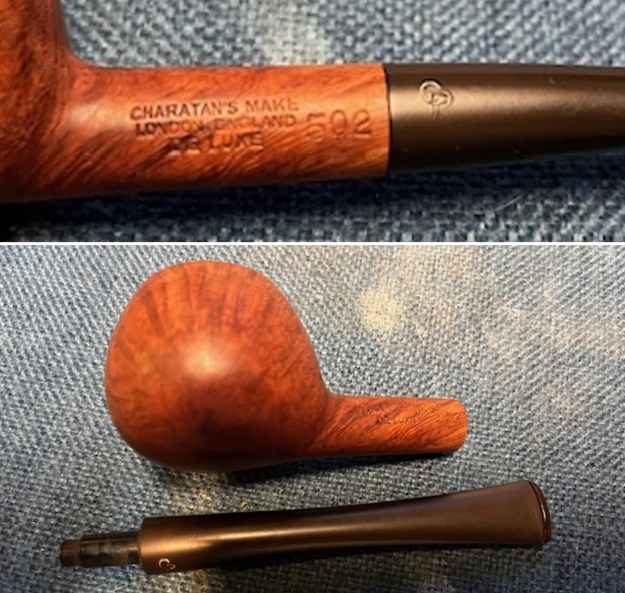
I started my work on the pipe by addressing the damage on the inner edge of the rim. I used a folded piece of 220 grit sandpaper to clean up the darkening and the damage on the inner edge of the bowl.
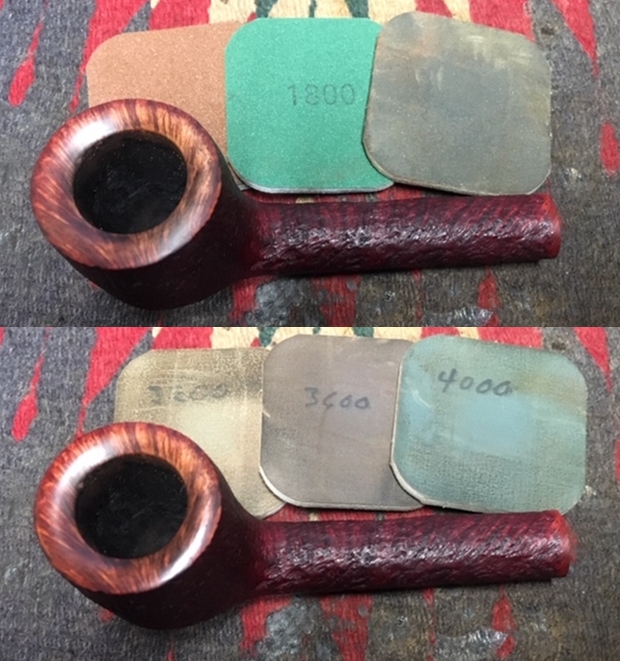
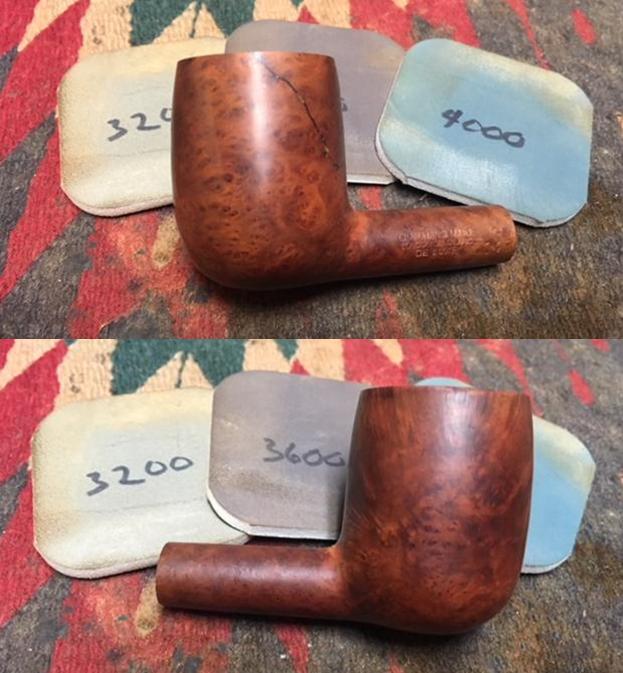
I sanded the bowl with 320-3500 grit sanding pads to smooth out sanding on the rim top and also to blend in the scratches on the bowl sides and heel. 
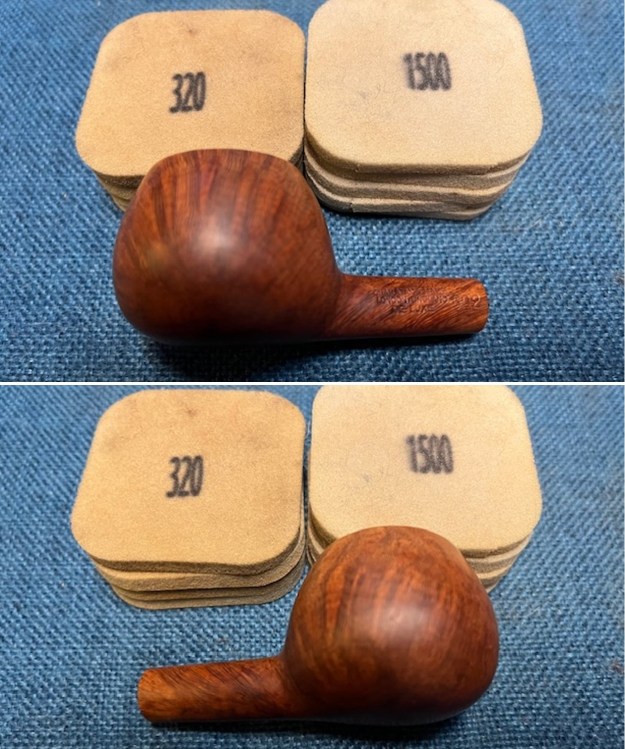
I polished the bowl and shank with 1500-12000 grit micromesh sanding pad – dry sanding it with the pads. I wiped the bowl down with a damp cloth after each pad. It began to take on a deep shine. 
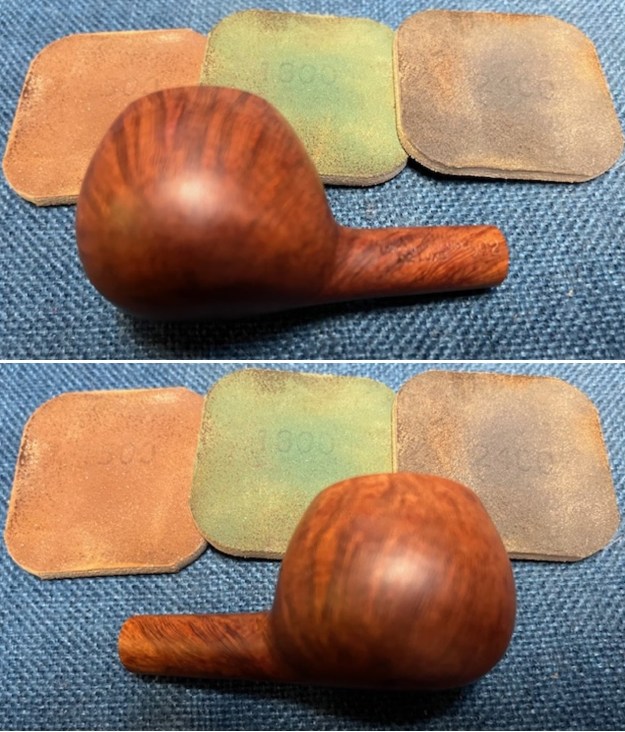
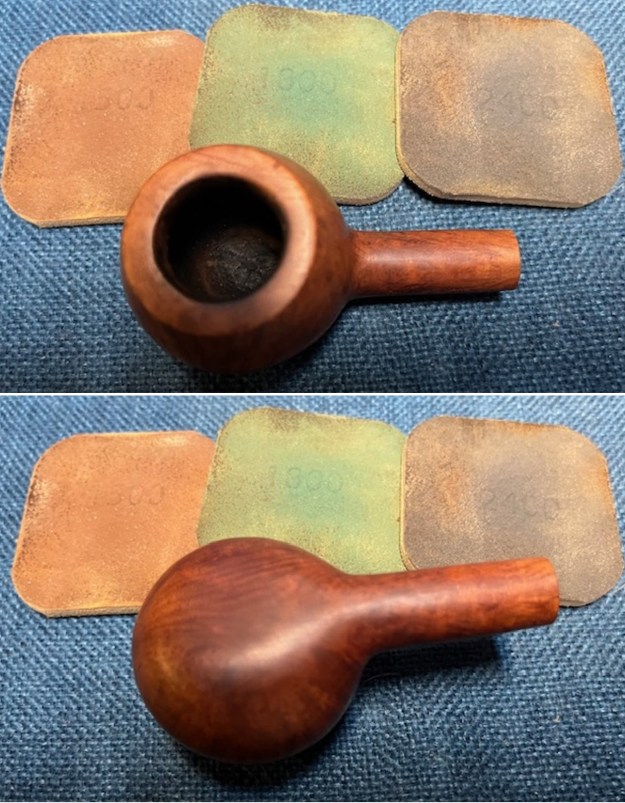
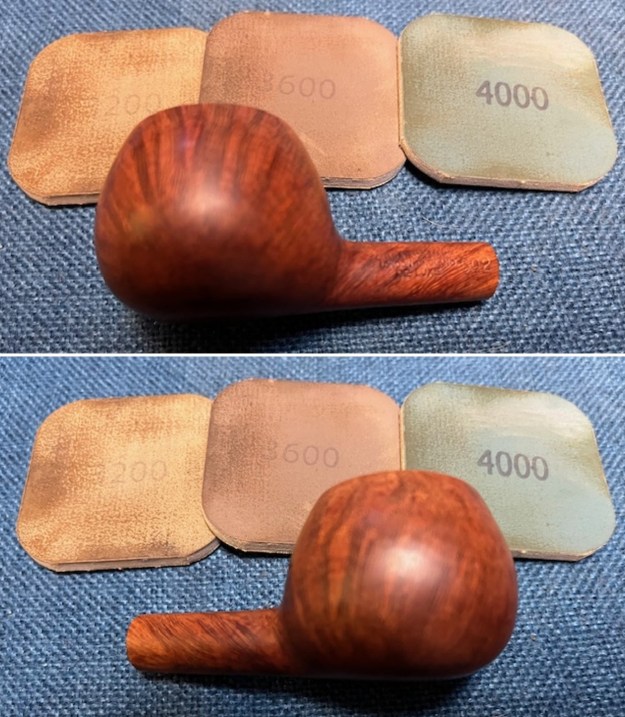
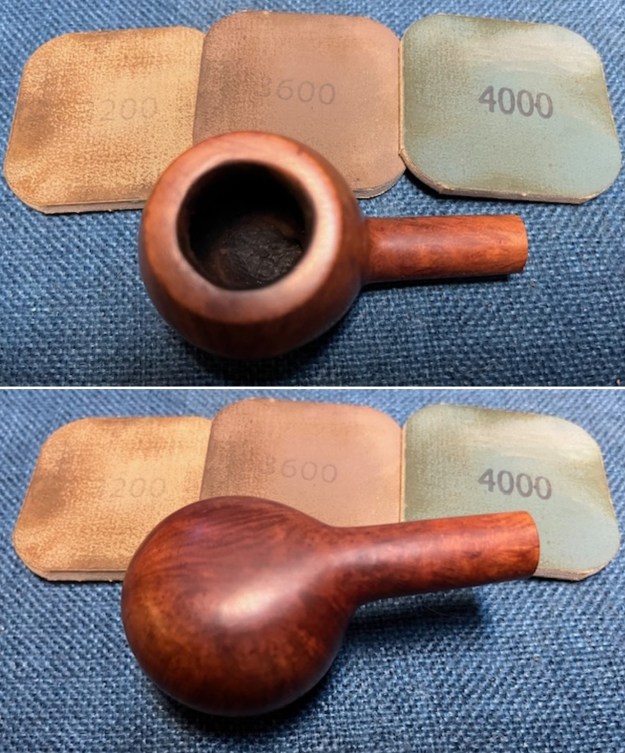
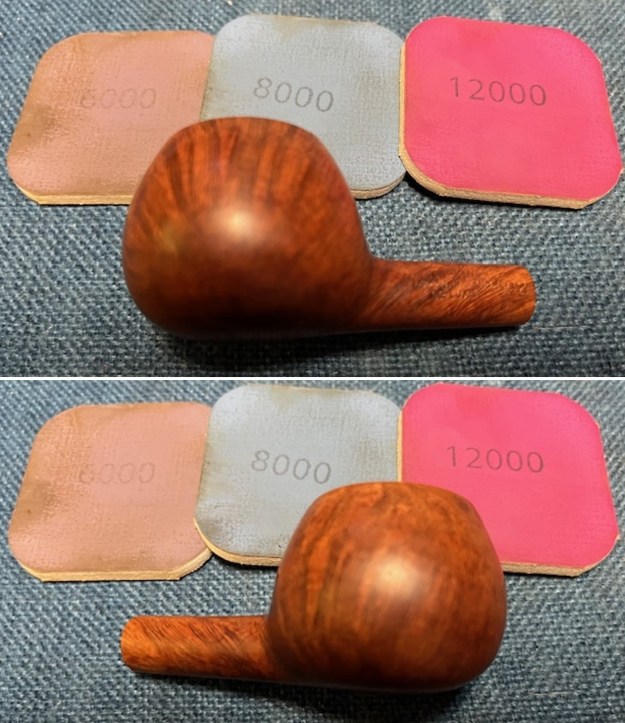
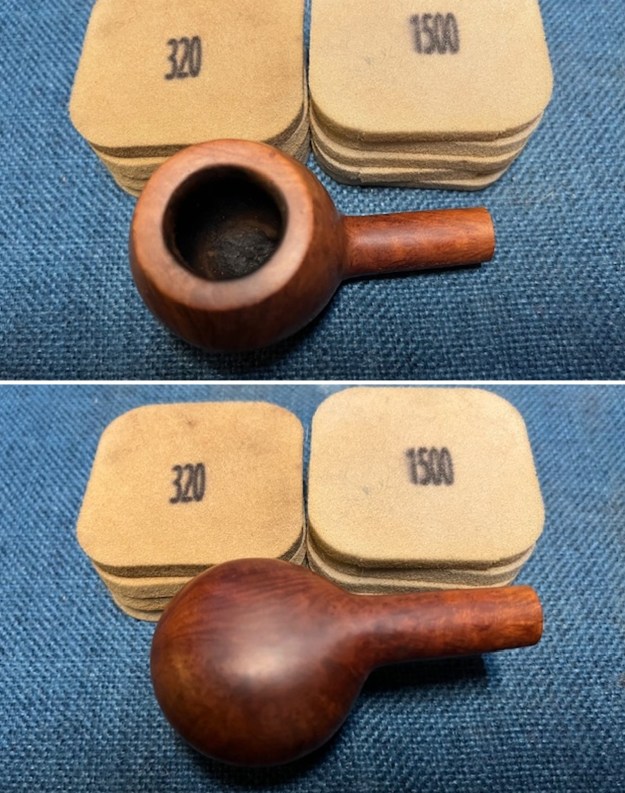
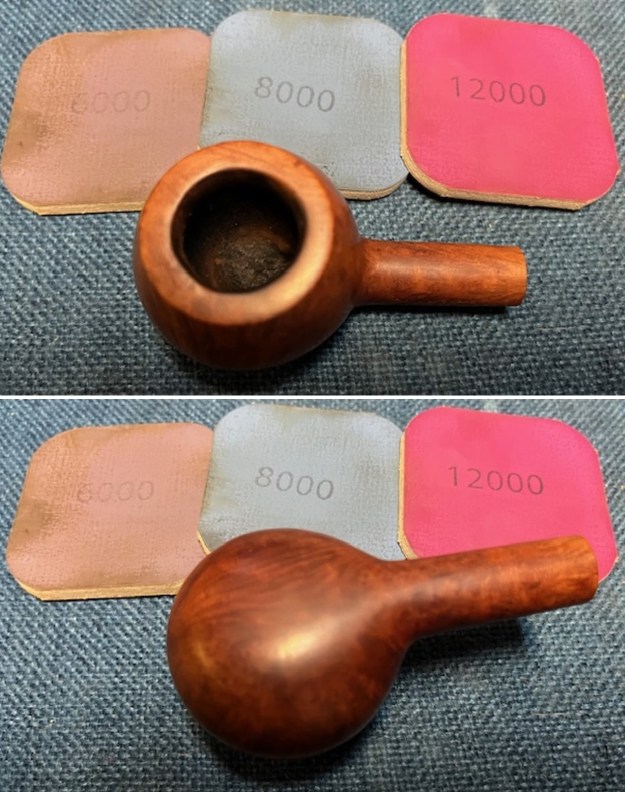
The exterior of the bowl look better after sanding. I worked some Before & After Restoration Balm into the briar with my finger tips. I let it sit on the bowl for 10 minutes and then buffed it off with a paper towel and soft cloth. The product is a great addition to the restoration work. It enlivens, enriches and protects the briar while giving it a deep glow. It is a product I use on every pipe I restore. 
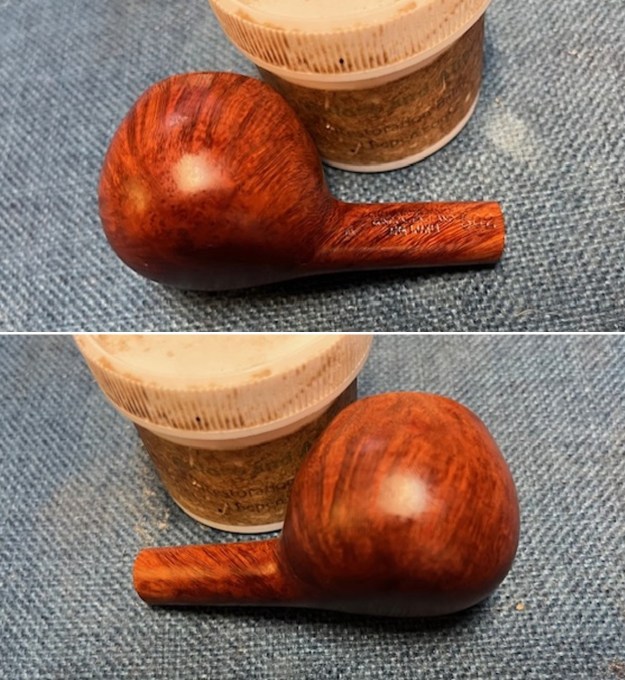
I set the bowl aside and turned my attention to the stem. I sanded it with 320-3500 grit sanding pads to remove the light tooth marks and chatter. It did not take much for them to be gone. I wiped the stem down with Obsidian Oil after each sanding pad to remove the debris and dust of the sanding. By the last pad the stem looks very good.
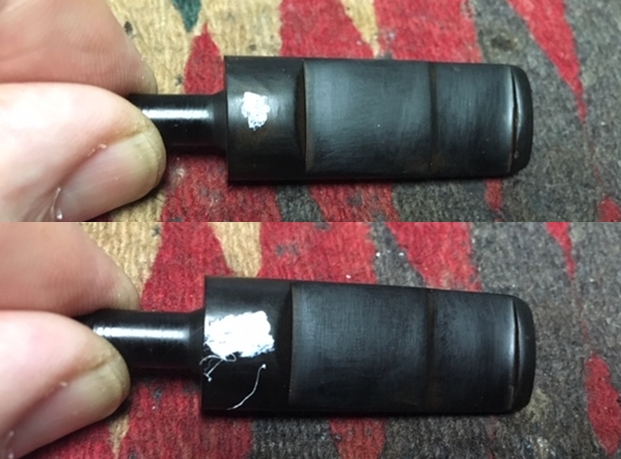
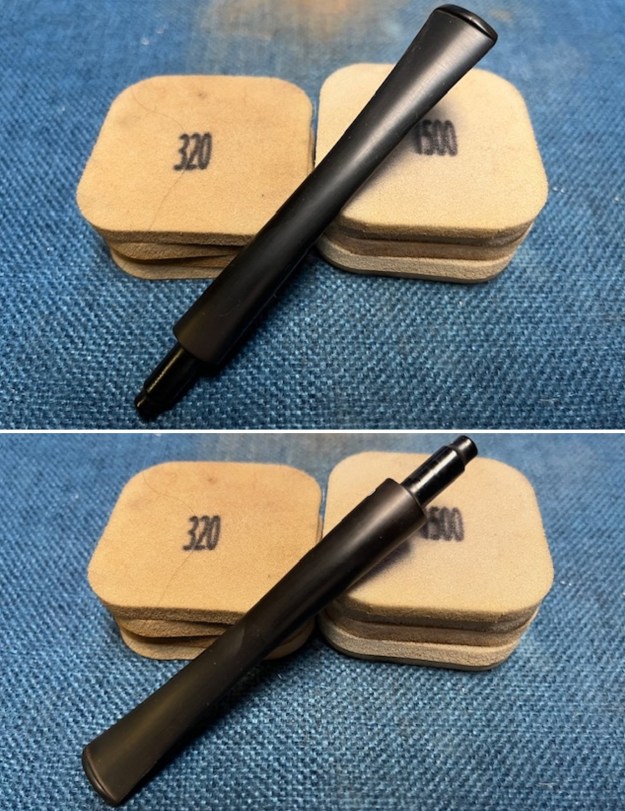
I touched up the Charatan logo stamp on the left side of the stem with white acrylic fingernail polish. I worked it into the stamping with a tooth pick. I scraped off the excess and used a worn 1500 grit micromesh sanding pad to finish removing the excess. 
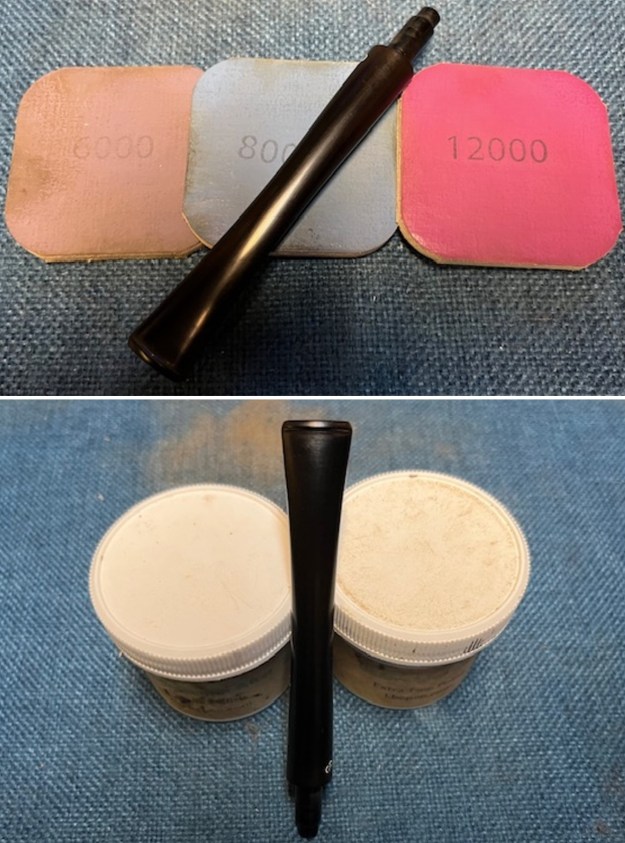
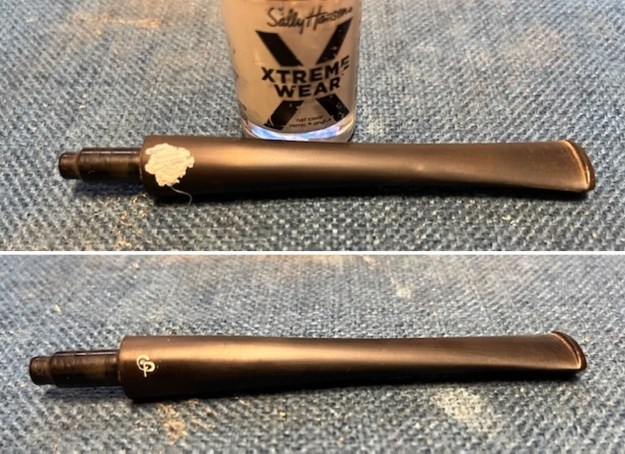
It was ready for the next step. I polished it with micromesh sanding pads – dry sanding with 1500-12000 grit pads and wiping the surface down with Obsidian Oil after each sanding pad. It is really shining. I polished it further with Before & After Stem Polish – both Fine and Extra Fine. I gave it another coat of Obsidian Oil to finish this step. 
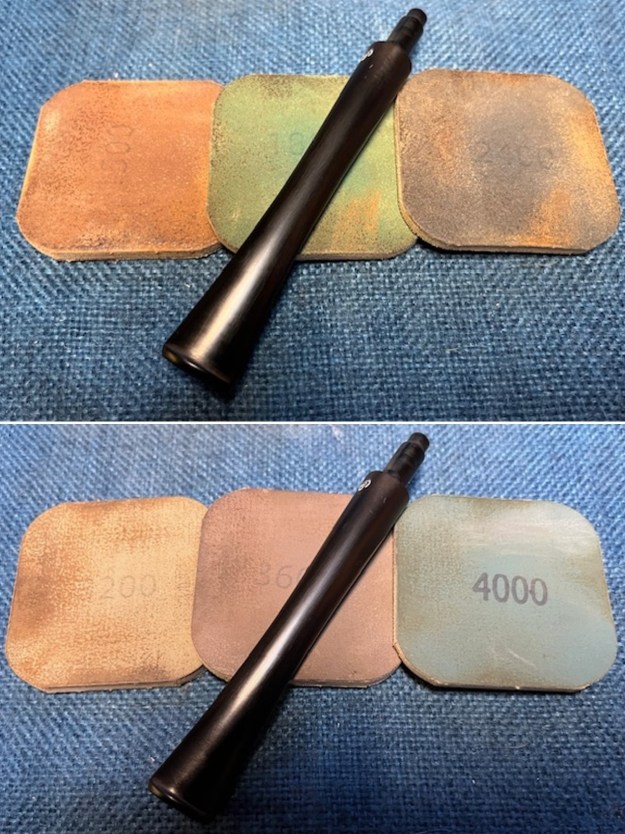
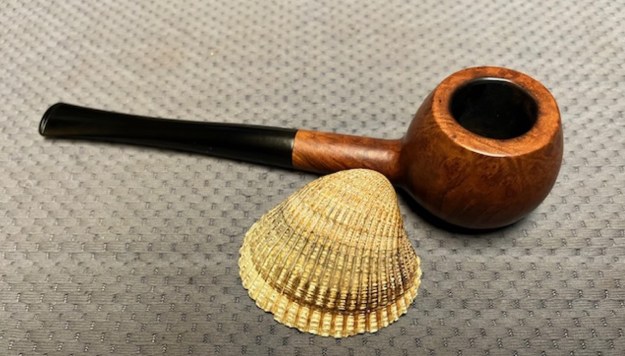
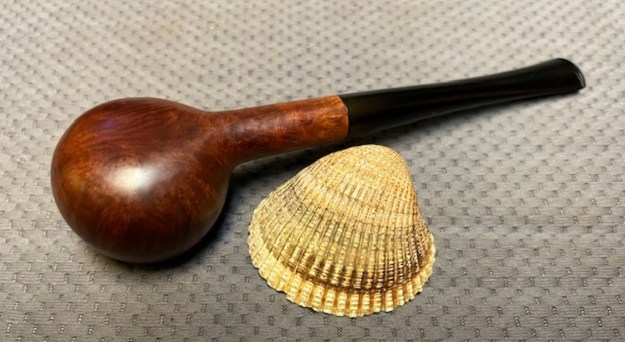
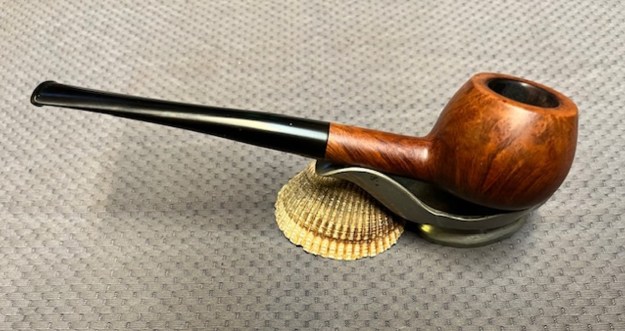
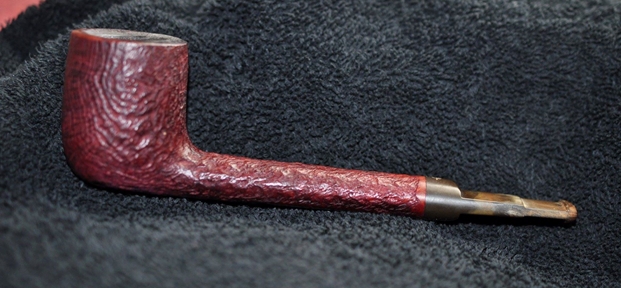
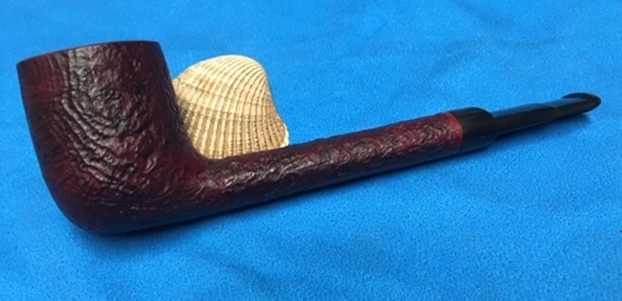
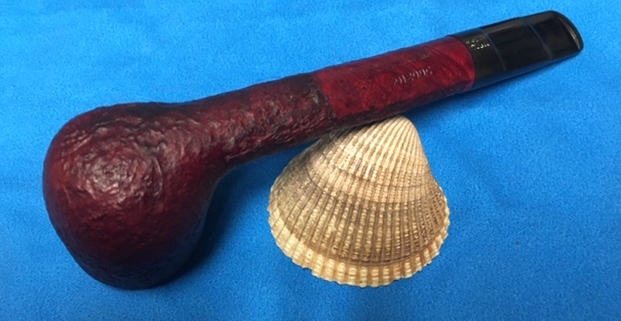
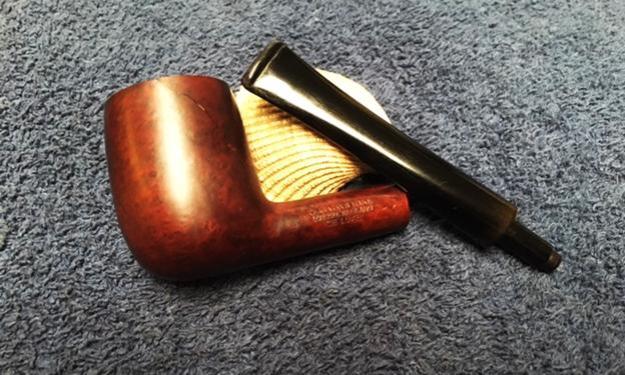
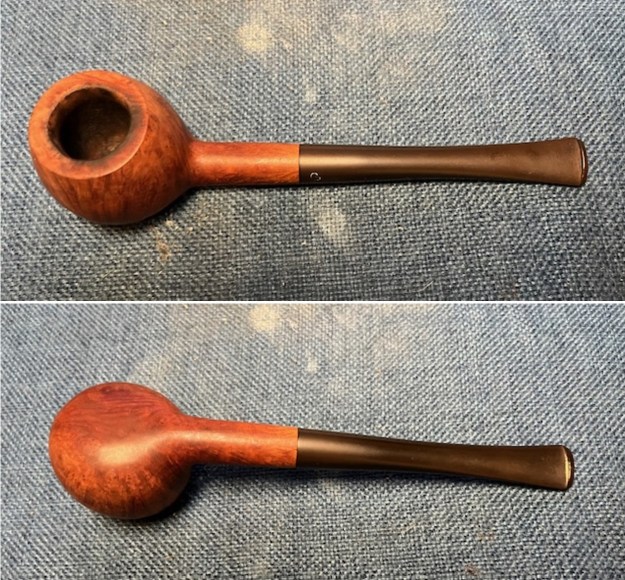
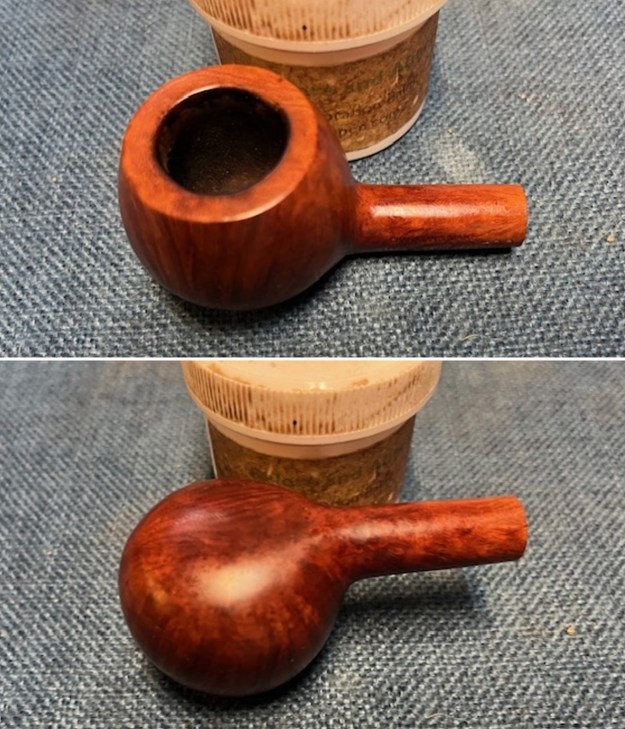
It was great to finish this Charatan’s Make London, England De Luxe 502 Prince. I put the pipe back together and buffed it with Blue Diamond on the buffing wheel. I gave the bowl multiple coats of carnauba wax. I buffed the pipe with a clean buffing pad to raise the shine. I hand buffed the pipe with a microfiber cloth to deepen the shine. It is fun to see what the polished bowl looks like with deep sandblast all around it. Added to that the polished black, vulcanite, saddle stem was beautiful. This Charatan’s Make De Luxe Prince is great looking and the pipe feels great in my hand. It is light and well balanced. Have a look at it with the photos below. The dimensions are Length: 6 ½ inches, Height: 1 ¼ inches, Outside diameter of the bowl: 1 ¼ inches, Chamber diameter: ¾ of an inch. The weight of the pipe is 35 grams/1.20 ounces. It is a beautiful pipe and one that will soon be on the rebornpipes store in the British Pipe Makers Section of the store. If you want to add it to your collection let me know. Thanks for walking through the restoration with me as I worked over this pipe.

As always, I encourage your questions and comments as you read the blog. Thanks to each of you who are reading this blog. Remember we are not pipe owners; we are pipe men and women who hold our pipes in trust until they pass on into the trust of those who follow us.

New Life for a Charatan’s Make 30120DC Canadian


Blog by Steve Laug

The next pipe in the queue is a Charatan’s Make Canadian with a Double Comfort saddle stem. It came to my brother and me in the lot that included the pipe cabinet and 21 pipes. It has a beautiful sandblast finish on the shank and bowl. There is a smooth, crowned rim top and a smooth band at the shank end. The bottom of the shank has a smooth panel that has the stamping on it. It is stamped Charatan’s Make (over) London, England (over) 30120DC which is the shape number and the DC which marks a Double Comfort bit from the Lane Era. Once again is a nice looking piece much like the rest of those in this lot. It is a brand that I have worked on over the years. It is on the far right side of the first shelf in the photo below. I have circled it in red to make it easier to identify.Jeff took some photos of the pipe when he received them to show the general condition of the pipe before he started his cleanup work. It was dirty and worn looking. There was a thick cake in the bowl and heavy lava overflow on the rim top. The smooth rim top was hidden under the grime and lava coat so it was hard to know what was underneath in terms of damage. The sandblast is well done and really shows the grain. It is quite deep and rugged and the oxblood stain over black stain makes it really stand out. The stem is vulcanite and oxidized. There are deep tooth marks on both sides of the stem at the button edge and some scratching on the stem surface. The photos below tell the story and give a glimpse of the saddle stemmed Canadian shape. Here are two close up photos of the bowl and rim top to show you the thick build up on the rim and the heavy cake in the bowl. It is hard to see if there is any damage on the inner or outer edge of the rim. There is a thick cake in the bowl that is hard and rough. There appears to be some interesting grain underneath all the lava. The close up photos of the stem shows the damage to the top and underside of the bit in front of the button and on the button surface itself. The next photo shows the stamping on underside of the shank of the pipe. It is clear and legible.I decided to take some time to review my knowledge of the brand. I turned to the Pipephil website for a quick overview of the brand (http://www.pipephil.eu/logos/en/logo-charatan.html). I quote a short overview of the history from that site.

The brand founded in 1863 by Frederik Charatan. When his father retired in 1910, Reuben Charatan took over the family business. All the pipes were handmade until 1973. The brandname was overtaken by Dunhill in 1978 and sold in 1988 to James B. Russell Inc. (NJ, USA). During the period 1988-2002 Charatans were crafted by Butz Choquin in St Claude (France). Dunhill re-purchased Charatan brand name in 2002 and Colin Fromm (Invicta Briars, Castleford) follows up on freehand production…

…The “DC” stamping after shape # was introduced when Dunhill took control of the company in 1979. DC means “Double Comfort” saddle bit.

I turned to Pipedia for a bit more history of the brand (https://pipedia.org/wiki/Charatan). I quote pertinent parts of the article.

…Charatan records indicate the DC (Double Comfort) bit was introduced in the 50’s, but some report seeing them in earlier production. Still others indicate they were introduced by Lane in 1960. Regardless, the DC bit is not an accurate way to date a pipe because many Charatan’s were made with regular and saddle type bits throughout the “Lane Era”.

I also read the translated article on Pipedia that was referenced in the opening article. It is entitled Dating of Charatans has been translated for Pipedia by Mathias Acciai. This study by Fabio Ferrara of Monterubbiano – Italy is based on more than 2000 old Charatan pipes he studied from the “Basciano stock” purchased by Mario Lubinski – Fermo. (https://pipedia.org/wiki/Dating_of_Charatans). I quote in part.

…Things started to change in 1965 after Lane’s acquisition of the Ben Wade brand and related machinery. (Actually Lane acquired only few of Wade’s machines and not its entire factory in Leeds, that was destroyed during WW II).

Essentially Charatan acquired a brand, rather than a real pipe manufacturing business. Furthermore Lane commissioned some pipes to Preben Holm and Wilmer, for the Ben Wade brand. Charatan took part in this operation too since some Danish freehands were displayed in its catalogue (while the so called ‘seconds’ were marked Ben Wade).


In mid 1976 Charatan was acquired from Lane by Dunhill. That obviously resulted in some major changes until 1982, when Dunhill decided to shut down the historical Charatan factory in Grosvenor Street.

From this moment on all Charatan’s pipes have been produced by Dunhill in the Parker/Hardcastle factory in Forest Road, Walthamstow.

It is worth noting that the factory was in Forest Road and not in 32 St. Andrew Road, Walthamstow, where the Dunhill factory was located since 1982.

In 1988 Dunhill sold Charatan to J.B. Russell and the production was moved to France. For many this is considered Charatan’s dark period.

The last change was in 2000, when Charatan was once again acquired by Dunhill and for a few months, the production was moved again to the Parker /Hardcastle site. This operation has to be viewed as Dunhill’s goal to give a new life to an old brand of the past, and the production of Charatans, Invictas, Simmons, and Hardcastles is taken over by Colin Fromm in Invicta’s site in Chatham. This information leaked during a recent interview with Marc Burrows, head of Dunhill’s shop in London’s Jermyn Street, who claimed that recent Charatans (from 2003) seem to be superior to those of the first Lane era!…

I quote a section of the article that helps me date the pipe I am working on.

…Pipes that belong to eras till the 1960 have the engraving ‘CHARATAN’S MAKE LONDON ENGLAND’ in two lines, the shape code is composed by numbers only. The X and the DC appear only on pipes after 1960…

This tells me that the pipe I have on the table came out after 1960. To try to date it further I moved on in the article. I found some help there from a section entitled, Identification of a fifth era pipe (First Dunhill era, 1977-1981).

Dunhill finally acquired Lane Ltd. in April 1976. To be honest this era should begin that year, however to clarify matters, knowing that during the first months everything changed in the production, I assume the beginning of this era to be 1977.

The characteristics of this era are close to the previous one, except for the absence of the LANE symbol (approx. ending of 1980).

In this very first period Dunhill didn’t change the production site and the original methods, making plans for the future, and the real revolution took place in 1982.

You may come across a pipe of the ‘old generation’, It is important to note that if the DC has been added later, it is often out of line with the shape code…

1) The mouthpiece is frequently double comfort, rarely saddle without the double comfort, never tapered. If the stem is not a double comfort but a saddle one, it is characterized by the letter X on the right of the shape code (e.g. 2502X), naturally in this case the letters DC are not displayed.

2) In the CP logo, the C enters the P (until approx. 1980)

3) Absence of £ on the shank (from the end of 1980 approx., this is because during the first period Dunhill kept the £, as Lane Ltd was property of Dunhill that could use its trademark)

4) Presence of the letter DC just after the shape number (e.g. 2502 DC) or of the letter X only if the stem is not a double comfort one

5) Presence of the writing “Made by Hand – In – City of London” (until 1979)

6) The pipes marked Chippendale are just a Belevedere series, On the mouthpiece, instead of the CP they display CD.

The Charatan’s Make on my work table has a double comfort saddle bit and has the DC code after the shape number. There is an absence of the L on the shank and “sings the praise of London production. The CP logo appears to match pipes from this period so I would date the pipe to the First Dunhill era, 1977-1981. That is getting the date a bit closer for me and is probably as close as I can get at this point.

Jeff reamed the bowl with a PipNet pipe reamer and followed up with a Savinelli Fitsall pipe knife to remove the cake. He scrubbed out the mortise and the airway in the shank and the stem with alcohol, cotton swabs and pipe cleaners. He scrubbed the exterior of the bowl, rim, shank and stem with a tooth brush and Murphy’s Oil Soap to remove the oils and tars on the rim and the grime on the finish of the bowl of the pipe. He rinsed it off under running water. He dried it off with a soft cloth. He was able to remove most of the lava build up on the rim top of the pipe leaving a clean rim. I took photos of the pipe to show its condition before I started my work. I took a close up photo of the rim top to show the darkening on the surface of the rim toward the back of the bowl. There were also some small nicks in the surface of the rim. The inner and outer edge of the bowl looks really good. The stem photos show the oxidation on the surface of the Double Comfort bit and the tooth marks and the wear on the button surface on both sides. The top of the saddle is stamped with the CP mark and the underside bears a Regd No. that will be clearer in the next photos of the stamping.The underside of the shank has clear stamping with the name and shape number of the pipe. The underside of the stem also bears a Reg’d No stamp with the number 203573. The photo below shows the stamping on the shank and the stem.I started my cleanup on the rim top. I used a folded piece of 220 grit sandpaper to remove the darkening and damage on the inner edge of the round rim top. I wiped the rim top down with a damp cotton pad to remove the dust. I polished the rim top with micromesh sanding pads – wet sanding with 1500-2400 grit pads and dry sanding with 3200-12000 grit pads. I wiped the rim down after each pad with a damp cloth. I touched up the stain on the rim with a Mahogany stain pen and blended it into the grain. Once it dried I buffed it with Blue Diamond to spread it out. With the rim top cleaned and restained, I worked some Before & After Restoration Balm into the sandblast and smooth surfaces of the briar with my fingertips to clean, enliven and protect it. I let the balm sit for a little while and then buffed with a cotton cloth to raise the shine. The following photos show the bowl at this point in the restoration process. The bowl and the rim top look good. I am very happy with the results. With the bowl finished I set it aside and turned my attention to the stem. I sanded the scratches and the tooth marks on the stem with 220 grit sandpaper avoiding damaging the stamping on both sides of the saddle. I cleaned off the surface with a cotton swab and filled in the tooth marks on both sides with clear super glue. I set it aside to cure for a few hours and when it had cured I smoothed out the fills with 220 grit and 400 grit sandpaper to blend them into the surface. I filled in the stamping on the saddle of the stem with white liquid paper. I worked it into the grooves with a tooth pick. Once it dried it I scraped off the excess with the tooth pick and sanded the stem some more with the 400 grit sandpaper. I polished the stem with micromesh sanding pads – wetsanding it with 1500-2400 grit pads and dry sanding it with 3200-12000 grit pads. I wiped the stem down with Obsidian Oil after each pad. I polished it with some Before & After Pipe Polish – both Fine and Extra to deepen the shine. I wiped it down with a final coat of Obsidian Oil and set it aside to dry.

Paresh’s Grandfather’s Pipe #7 – Charatan’s Make De Luxe 140 Billiard


Blog by Steve Laug

I have repaired 6 of the 7 older pipes (1937-1950s) left to Paresh by his Grandfather. I have enjoyed working on and researching them. His Grandfather was a pipeman who worked for the Indian Railroad. Paresh recently learned that his Grandfather smoked a pipe. This 7th pipe is a Charatan’s Make De Luxe 140 Billiard with a taper stem. I took photos of the pipe before I stated to work on it. The bowl was in rough shape with a series of cracks running down two spots on the bowl – one on the left side at the centre of the top and running down the bowl and connecting with another crack just right of the centre of the bowl at the back. It was a U shaped crack that went all the way through the bowl. The finish was dirty and the rim top had damage and lava on the rim top. The bowl was out of round. The outer edge of the bowl was damaged from knocking out against hard surfaces. The stem had tooth marks on the top and underside near the button. The stem had the CP stamped on the left side. The rim top had been cleaned and the bowl reamed. There was still some cake in the bowl. Abha (Paresh’s wife) had once again done a great job cleaning the finish. She had scrubbed it with Murphy’s Oil Soap and removed all of the debris and dust from the smooth finish. The cracks showed up on the outside of the bowl and also on the inside of the bowl. The inner edge of the bowl was damaged and slightly out of round. I also took a close up photos of both sides of the stem. You can see the tooth marks on both the top and underside of the stem just in front of the button. The surface of the stem is lightly oxidized.The stamping is readable. On the left side of the shank reads Charatan’ Make over London, England over De Luxe. Next to that is the shape number 140 next to the stem shank junction. There was no stamping on the right side of the shank. I looked up an article on determining dates of manufacture of Charatan Make pipes (https://pipedia.org/wiki/Dating_of_Charatans). That article helped me date this pipe with some level of certainty to the Rueben Era Charatan made between the years 1910-1960. I quote from the portion of the article that gave the identifying characteristics of that era. I quote in full.

Identification of a second era pipe (Rueben’s era, 1910-1960)

Pipes belonging to this period are rare, however is it possible to come across one. They can be distinguished from a pipe of the first era mainly because their larger size. Their characteristics are similar to the ones of the previous era.

1) Pipes can be larger, up to the dimension of a Dunhill group 5

2) The mouthpiece is tapered or saddle.

3) No double comfort

4) the CP logo is engraved so that the C enters the P

5) Absence of £ on the pipe shank (note that from 1955 all the pipe imported in the USA by Lane has it, however that stamping is not synonymous of the Lane era).

6) Absence of the letter X on the shape code engraved on the shank (for ex. 2502 and not 2502X)

7) Absence of letters DC after the shape number (for ex. 2502 and not 2505DC)

8) Absence of the engraving “MADE BY HAND” on the shank (introduced for the first time in 1958)

9) Presence of the writing “CHARATAN’S MAKE LONDON ENGLAND” on 2 lines

10) The CP logo is finer than in following eras

All ten of the items in the above list apply to the pipe in hand. From the stamping on the stem where the C enters the P to the missing L which places it as pre-1955 to the lack of a double comfort bit all help to place this pipe in this time period.

With that I reread Paresh’s biographical write up on his Grandfather once again. There Paresh stated that his Grandfather had visited England in 1946 and that later after 1947 the British left India for good. Many of the Superior Officers gave his Grandfather pipes as parting gifts. I am fairly confident that this was one of those gift pipes given to him around 1947. I am including his bio now as part of the background information on this pipe. Here is Paresh’s tribute.

Respected Sir,

Now that the first batch of my Grandfather’s pipes has reached you, I would like to share my memories of him with you, the aim being to provide you with an insight to his personality, the era in which he lived, and a brief history associated with the pipes that I have inherited from him.

My Grandfather, Ananta (named after an exotic seasonal white flower having lovely fragrance), was born in a small coastal town of Konkan region of Maharashtra, India, in 1918. These were very turbulent times when India’s freedom struggle against British rule was gathering momentum and the atmosphere was charged with “Quit India Movement”. Having completed his graduation from Bombay, he joined Railways in 1937. This also marked the beginning of his journey into the world of pipe smoking!!!!!

Having seen his potential, in 1945, he was sponsored by the Government to visit England, for gaining further experience and expertise in his profession. This was a period when India’s Independence was round the corner and efforts were being made to train Indians for various administrative appointments in future Independent India. He returned back to India after a year, in 1946 and with him came some pipes that he had purchased in England. I believe a few of his Petes, Barlings, Charatans and GBDs are from this visit.

In 1947, when the British finally left India for good, my Grandfather was gifted pipes by his British peers, subordinates and Superior Officers as a parting gift. He stayed in touch with a few of them over all these years, even visiting them in 1959-60. Some of his later era Charatans and Barlings and Petes are from this trip. He quit smoking in early 1970s (before I was even born!!!!) and his pipes were packed up. There were a number of pipes which were used as TINDER for lighting fires (CAN’T BELIEVE IT…… I have not overcome my grief of this loss till date!!!!!) due to ignorance!!!!!!

My Grandfather was a very strict disciplinarian and temperamental (I did not know this as he was neither when dealing with me as I am the youngest of all his grandchildren!!!!!! He was always the most understanding and loving person in my life). I later learned that in his office, he was not to be disturbed when his pipe was lit, as he would be in his thinking/ contemplating mode while it was just the opposite as he lit his pipe in the evening while at home, when he would be at his relaxed best!!!!.

The interesting part is that neither of us knew that we each smoked a pipe until after his demise in Jan 2018!!!! In our culture, to this day, smoking or alcohol consumption is socially never talked about (mute acceptance!!!). It was during his last rites that absent mindedly I lighted my pipe and looking into the flickering flames of his funeral pyre, remembered and recollected all the wonderful memories and talks that we had shared. No one said a word to me about my lighting up a pipe!!!!!! Immediately thereafter, I rejoined my duty station. A few days later, my wife, Abha, received a box from my Uncle with a note that said “Grandfather would have loved Paresh to have these”. This box contained a collection of his fountain pens and 8-10 of his pipes (since then as my folks are winding up his belongings, I have received 2-3 packets and a large number of pipes, some in decent condition and some in unspeakable state). Abha immediately messaged me with pictures of these pipes and pens. I had been collecting and restoring (no major repairs, though) fountain pens since long and immediately recognized some of them as highly collectibles, however, pipes were a totally different ball game! I was inexperienced with no knowledge/ information regarding various brands/ pipe makers, shapes and materials. I knew nothing about the value of these pipes, nothing about pipe restorations, nothing about caring for them; I mean zero knowledge about collecting pipes. I smoked some real cheap Chinese pipes which were readily and unfortunately, the only ones, available in India and some inexpensive pipes from eBay India!!!!! Also regular pipe cleaning, pipe rotation, pipe cleaners and such things were unknown to me.

Thus, to know more about the REAL pipes, I embarked upon the journey of exploring finer nuances of pipe brands/ makers, their history and watching “How to videos” on packing a pipe, cleaning, repairing and caring for ones pipes. I found it extremely interesting and satisfying. It was while meandering through this confusing quagmire of pipe world that I came across rebornpipes.com website and eventually established contact with you, Mr Steve, who has since been my mentor, guide and GURU, making this journey a wonderful and satisfying experience.

Sir, there is one more thing that I need to thank you for and that is when you asked me to write a brief about my grandfather and his pipes, I realized how little I knew about him, in fact, knew nothing, as I was not even aware that he was a “pipeman” as no one in my family ever spoke about it being taboo subject and since he had quit a long time before I was even born!!!! This led me to ask the elders in my family, questions on the subject and came to know the above details. I cannot thank you enough for prodding me to get to know my grandfather and his pipes a lot better. Sir, these pipes of his, with your help and guidance, will remain with me forever in mint condition…

I began work on the pipe by cleaning up the reaming of the bowl first with a PipNet pipe reamer. I began with the smallest cutting head and worked on cleaning up the inside of the bowl. While I cleaned it up the cracked section of the bowl came loose. I cleaned up the unbroken portion of the bowl and the broken chunk with a Savinelli Fitsall Pipe Knife to remove the remnants of cake left behind. I cleaned off the edges of the broken chunk of bowl and the remaining bowl with alcohol on cotton swabs. I used a slow curing clear super glue to repair the cracked chunk of briar. I painted the edges of the bowl and the chunk with the super glue and pressed the chunk in place in the bowl side. I held it in place until the glue had set and the chunk was firmly in place. I wiped the bowl down with alcohol on a cotton pad to wipe off the excess glue. I sanded the repaired cracks with 220 grit sandpaper and smoothed out the finish to blend in the repairs with the rest of the bowl. Once I had cleaned up the repairs I touched them up with clear super glue to fill in the divots in the repair. I sanded the bowl with 220 grit sandpaper to smooth out the repair further after the touch ups. I took pictures of the repair at this point to show the progress.I topped the bowl with 220 grit sandpaper and a topping board to smooth out the finish on the top. I removed the damaged areas, removed the glue that had squeezed out from the repairs and cleaned up the rough areas on the outer edge of the rim.I polished the bowl with micromesh sanding pads to blend the repairs into the finish of the bowl. I wet sanded with 1500-2400 grit pads and dry sanded it with 3200-12000 grit pads. I wiped it down with a damp cotton pad after each grit sanding pad. I mixed up a batch of JB Weld and applied it to the inside of the bowl with a paper clip and a folded pipe cleaner. I worked it into the inside of the cracks and lined the bowl walls all around the cracks until it was smooth. I set it aside to let it cure.Abha had done a great job cleaning out the internals of the mortise and shank with pipe cleaners, cotton swabs and alcohol. I ran a pipe cleaner through the shank to remove any of the debris that I had loosened when reaming the bowl. It was pretty clean so it did not take much as the interior was clean.I worked Before & After Restoration Balm deep into the briar of the bowl and shank to clean, enliven and protect it. I worked it in with my fingertips and set it aside for a few minutes to let the balm work. I wiped it off and buffed it with a soft cloth to polish it. The briar really began to have a deep shine and the grain began to shine through. I took photos of the bowl at this point to mark the progress in the restoration.   I worked on the inside edge of the rim with a folded piece of 220 grit sandpaper to smooth out the damage to the edge of the bowl.I stained the briar with a Dark Brown aniline stain and flamed it with a Bic lighter to set the stain. I repeated the process until I had even coverage on the bowl. I wanted to leave the stain pretty opaque to blend the repaired crack into the rest of the briar. I let the Dark Brown stain dry. Once it was dried I gave the bowl a coat of Conservator’s Wax, let it dry and then buffed the bowl by hand. I repeated the wax until the pipe looked good to my eye. I set the bowl aside and began the work on the stem. There were some deep tooth marks in the surface of the stem near button. I cleaned the areas with alcohol and filled in the marks with black super glue.  When the super glue cured I sanded it with 220 grit sandpaper to blend it into the surface of the stem. I used a needle file to sharpen the inside edge of the button.I sanded the repaired areas with 220 grit sandpaper to smooth out the repairs and blend them into the surface of the surrounding vulcanite.I cleaned out the airway on the stem with pipe cleaners and alcohol to clean out the tar and oils. It did not take much work to remove all of the remaining tars because Abha had done a really good job cleaning out the stem.I polished the stem with micromesh sanding pads – wet sanding with 1500-2400 grit sanding pads and dry sanding with 3200-12000 grit pads. I wiped the stem down with Obsidian Oil after each sanding pad and set it aside to dry. I polished it with Before & After Pipe Polish – both Fine and Extra Fine polishes. I wiped it down with some Obsidian Oil to fine the polishing process. With the stem polished I put it back on the pipe and lightly buffed the bowl and stem with Blue Diamond. I gave the bowl multiple coats of Conservator’s Wax and the stem multiple coats of carnauba wax. I buffed the pipe with a clean buffing pad to raise the shine and hand buffed it with a microfiber cloth to deepen the shine. The pipe polished up pretty nicely. I left a little oxidation around the CP stamp on the stem so as not to damage it. The finished pipe is shown in the photos below. It is the final pipe from Paresh’s Grandfather’s pipes that I finished and I will get them packed up and sent across the sea to India where he can carry on the legacy. I know that he is looking forward to having them in hand and enjoying a bowl of his favourite tobacco in memory of his Grandfather. Thanks for walking through the restoration with me as I worked this pipe over.