Blog by Steve Laug
 Once again I want to take you through my process of working on each pipe that we purchase. Jeff has set up a spread sheet to track where the pipe came from, the date of purchase and what we paid for it so that we know what we have invested in the pipe before we even work on it. This takes a lot of the guess work out of the process. This particular pipe was purchased on 10/20/2022 from an Antique Store in Vancouver, Washington, USA. I also want you to understand why we take the photos we do. If you have followed for a while then you will see the familiar pattern of the photos in the before and midstream process of working on a pipe. It is not accidental as the photos have been taken to help me make an assessment of the pipe Jeff sees before he starts his clean up work. We do this to record the condition that the pipe when received it and assess the work needed to be done. When I look at these photos this is what I see.
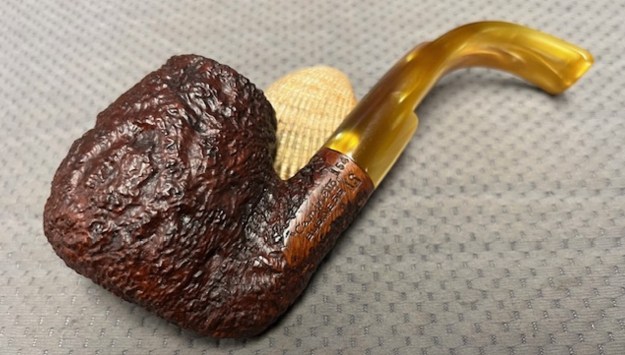
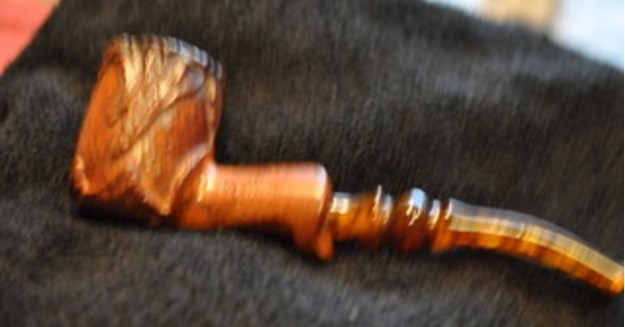
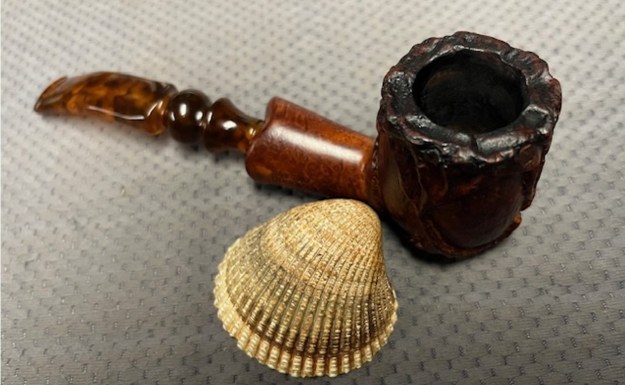
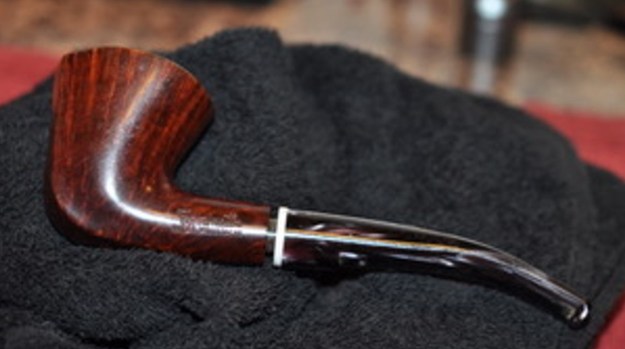
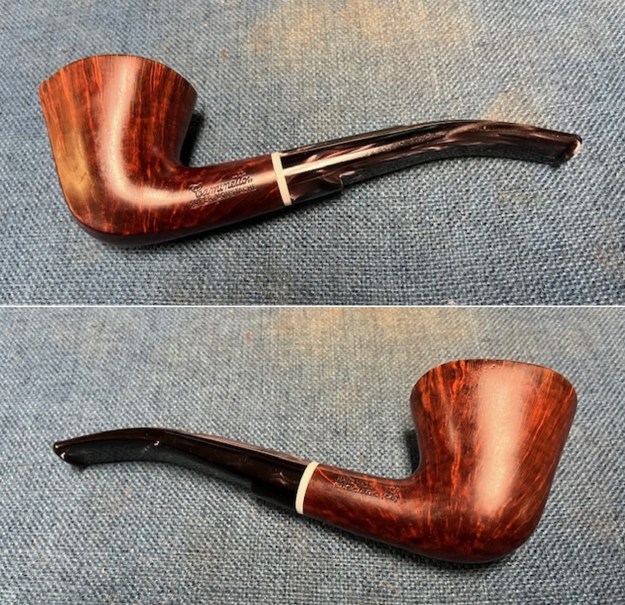
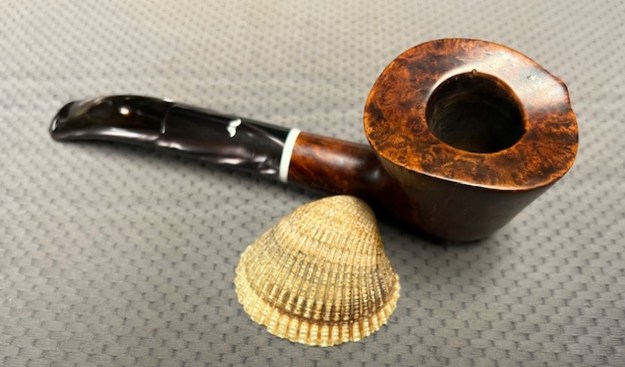
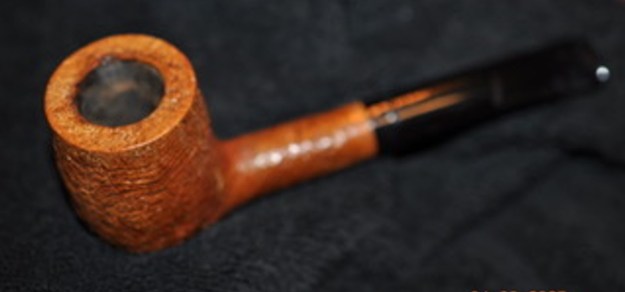
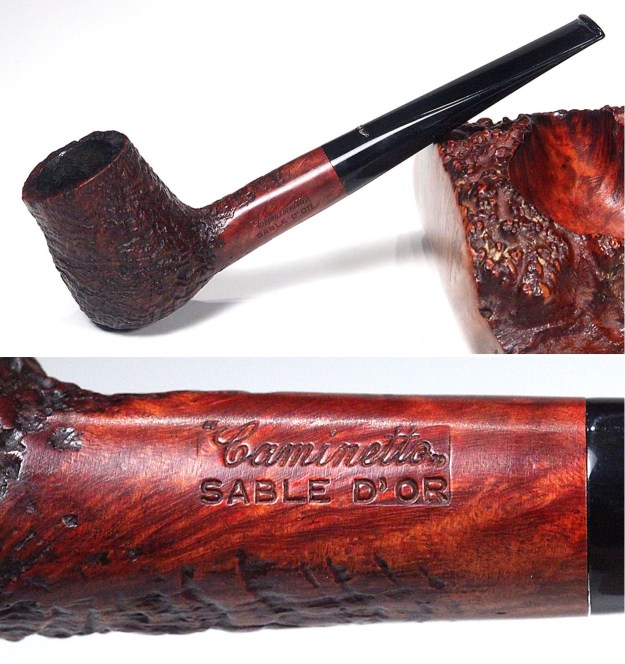
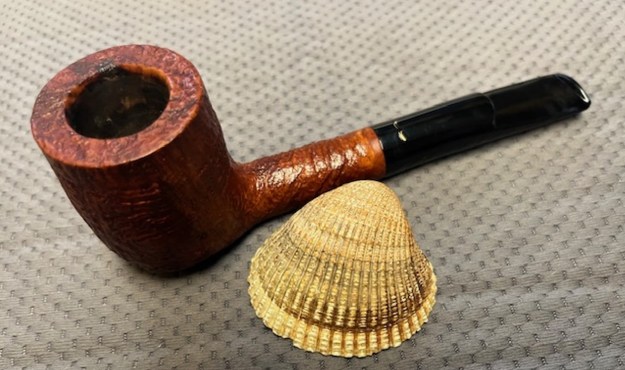
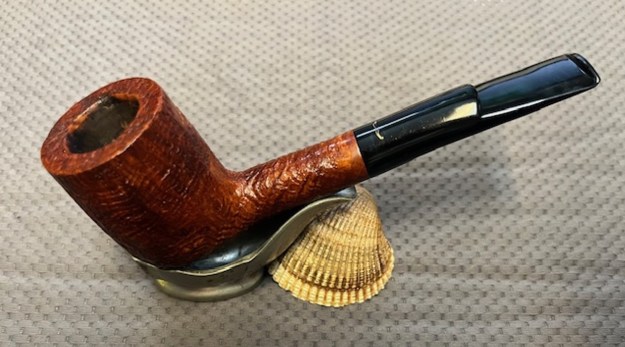
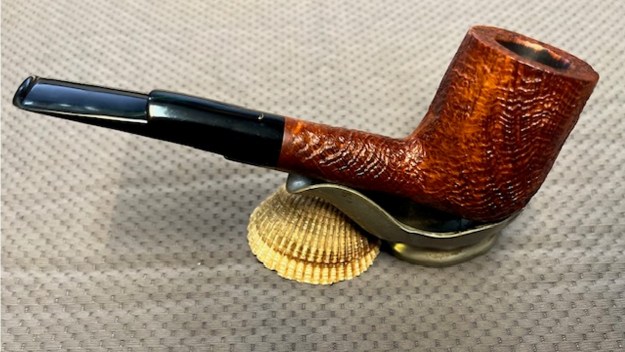
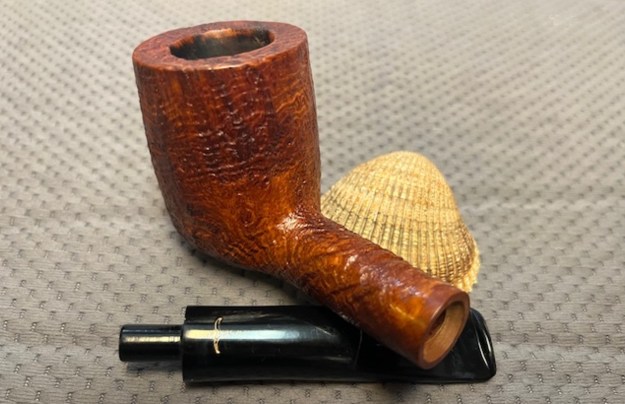
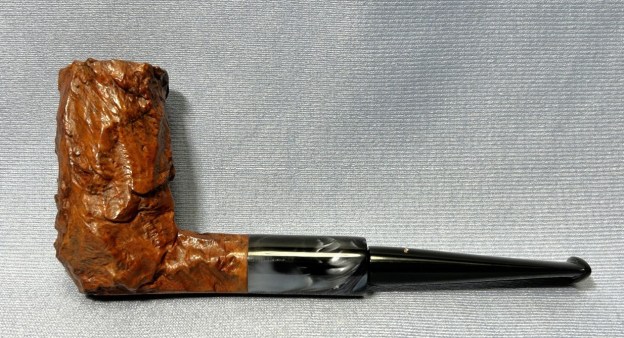
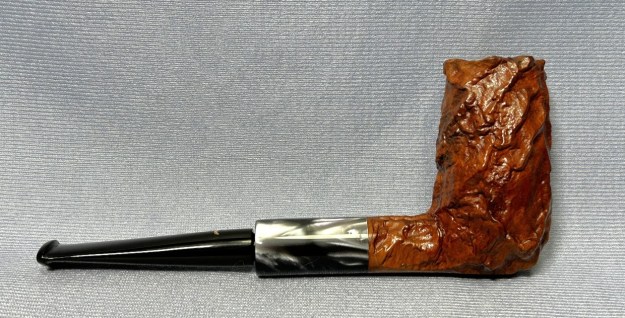
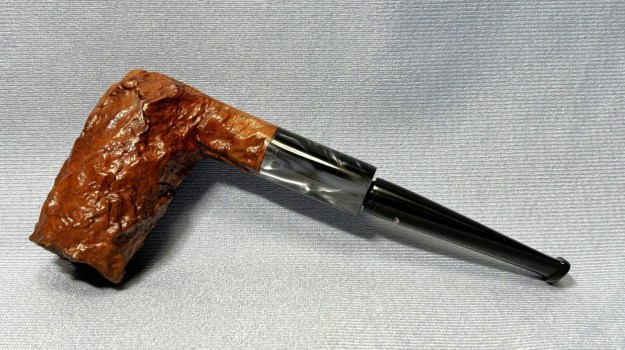
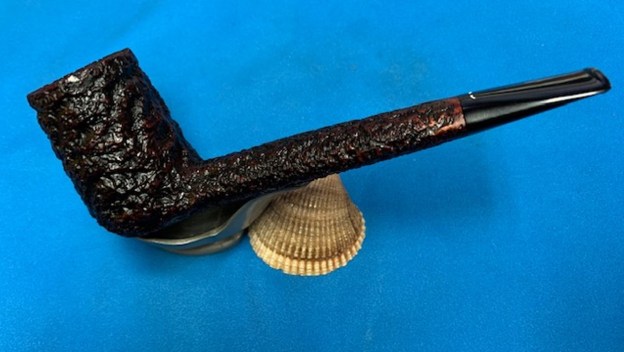
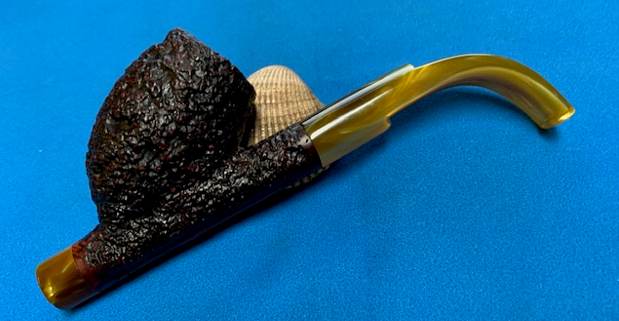
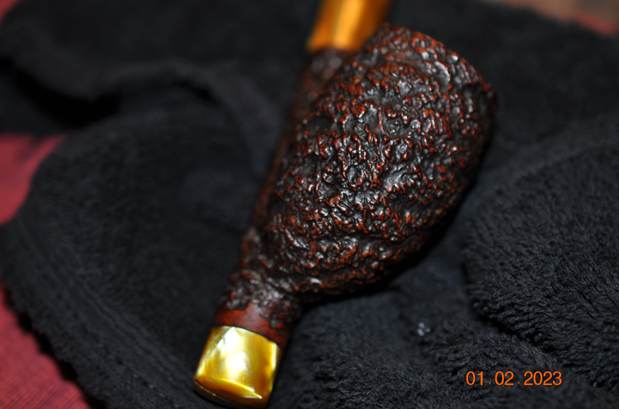
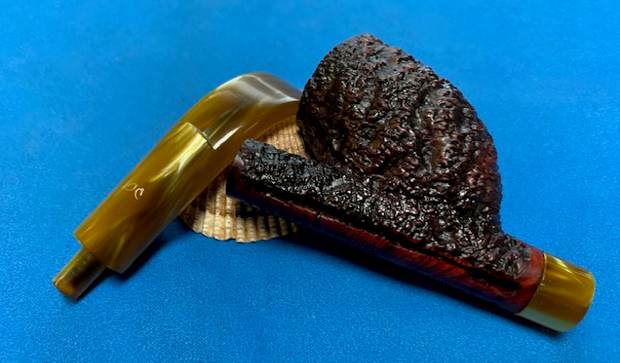
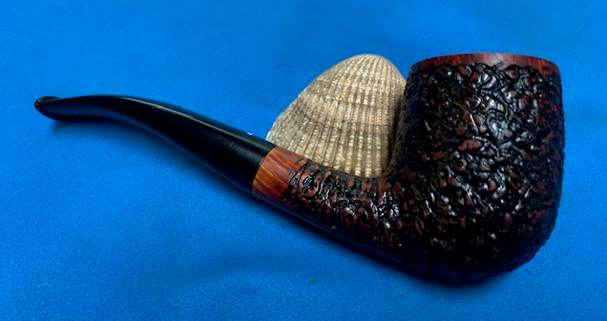
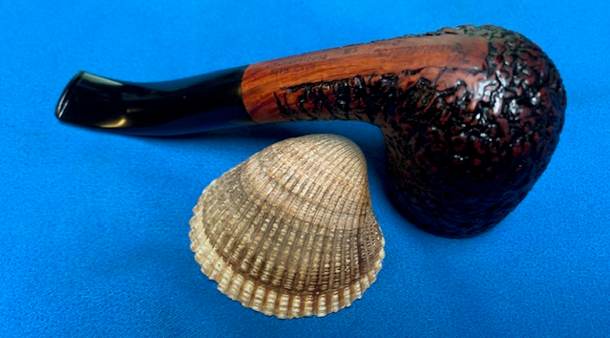
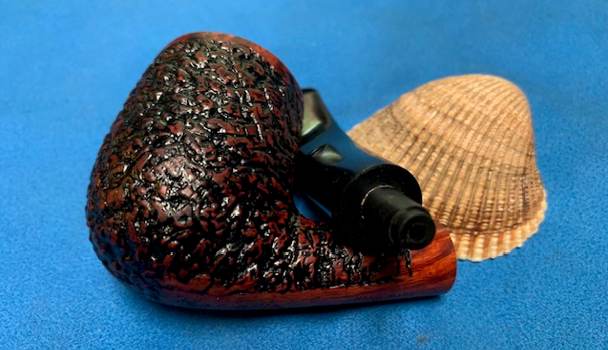
- The first thing I see is a pipe that has a classic bent Italian Billiard shape.
- The finish is dirty and there is grime and grit ground into the rusticated finish. The rustication is very nicely done in a classic Caminetto style.
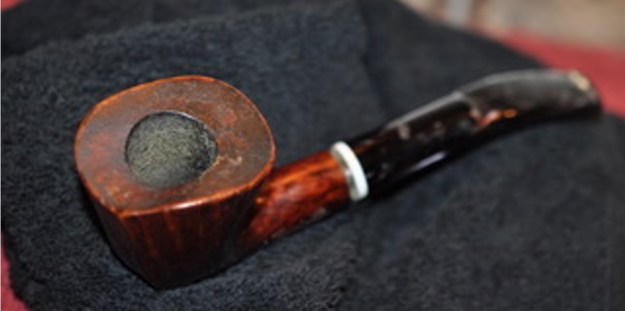
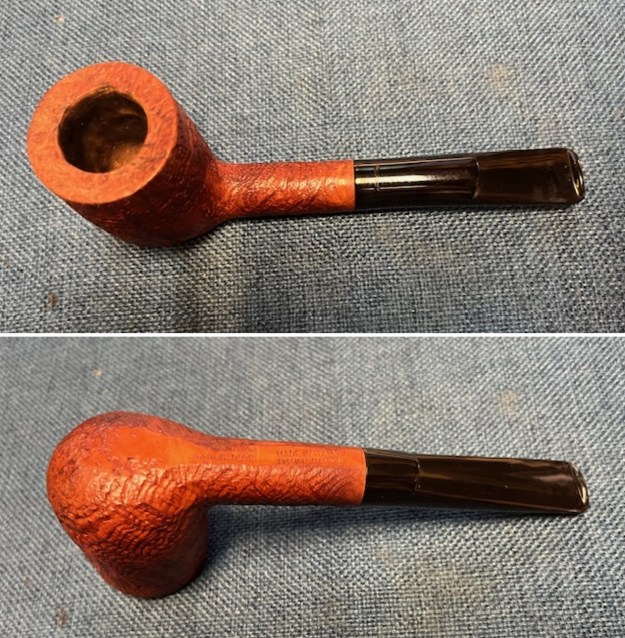
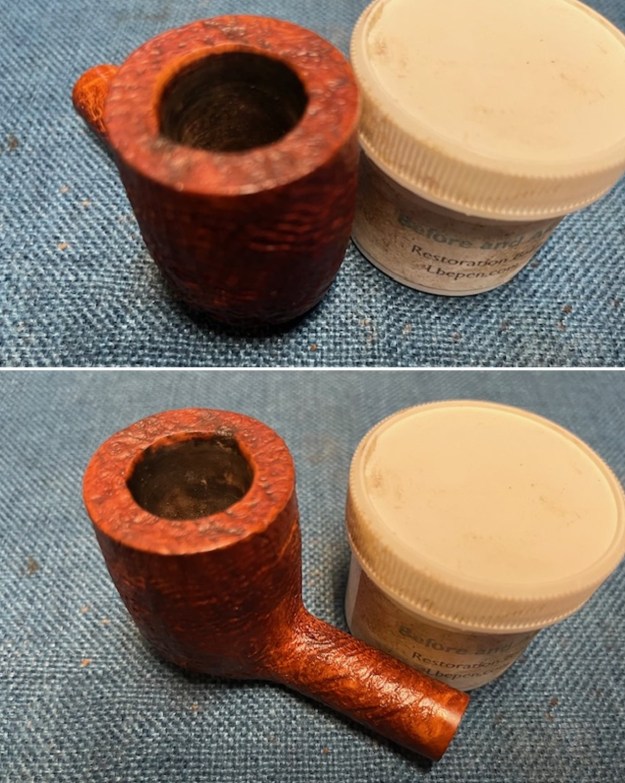
- The rim top has thick lava on both the top and the edges. The cake makes it quite hard to know whether there is any damage to the top or the edges.
- The bowl has a thick cake and debris on the walls that hides the walls and edges. The outer edges have some darkening and potential damage on the front smooth portion.
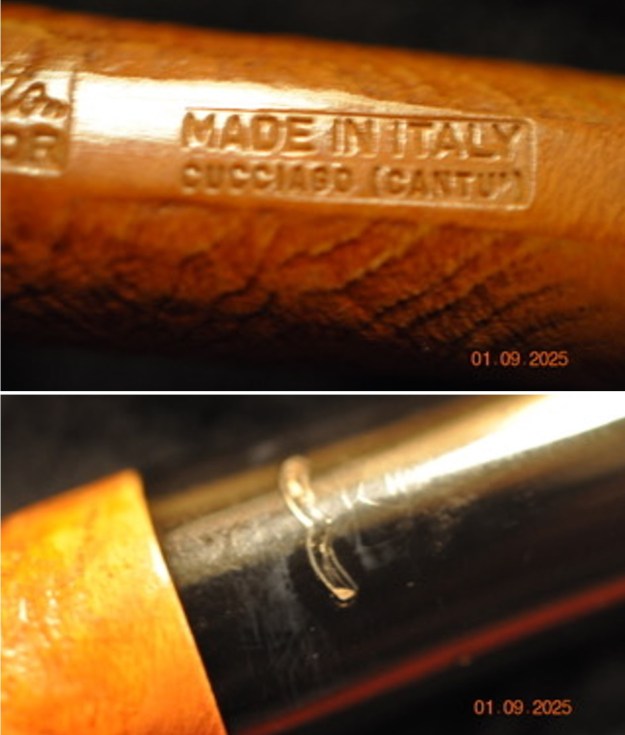
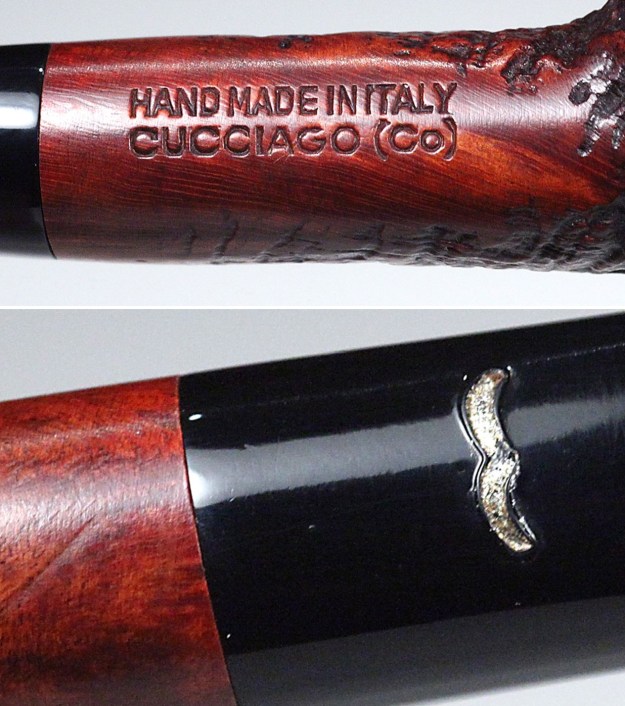
- The acrylic stem is in excellent condition – dirty and has tooth chatter and marks on both sides ahead of button. The diameter of the stem is off from that of the shank. There is a Caminetto white mustache logo inlaid in the stem top.
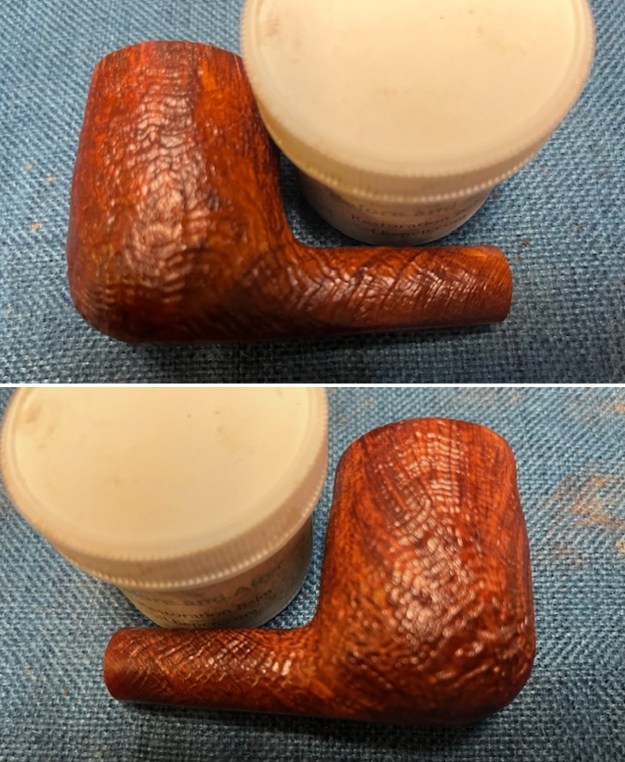
Overall my impressions of this pipe is that it is a great looking Bent Billiard with a mix of rustication and smooth finishes that once cleaned up will be another pretty pipe. The photos below confirm the assessment above. 
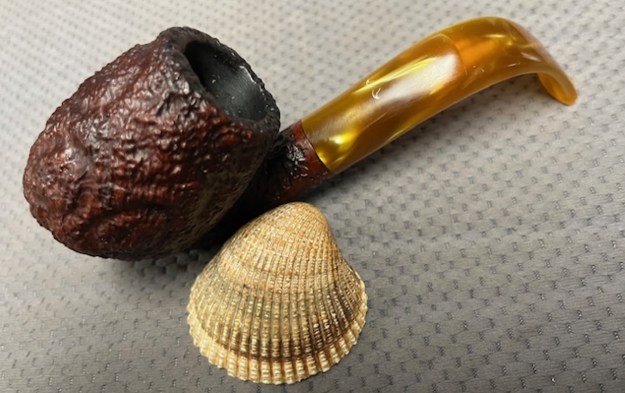
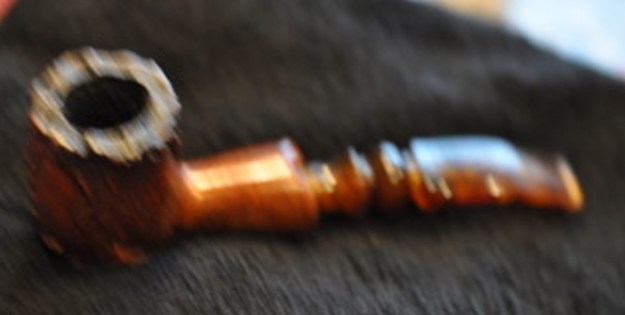
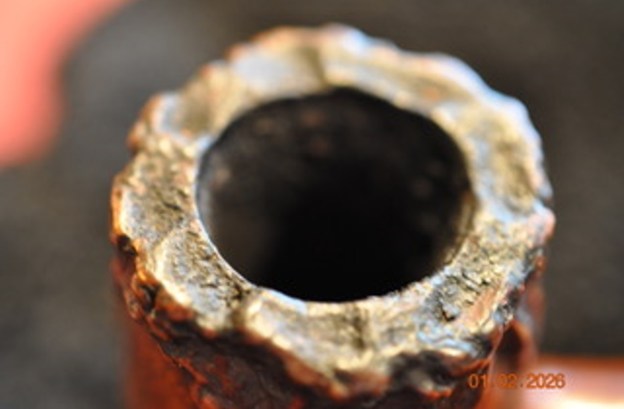
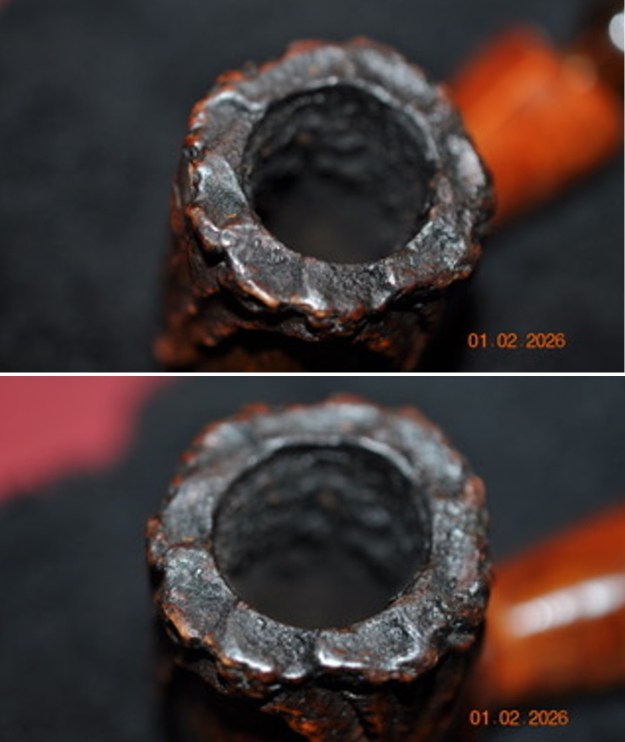
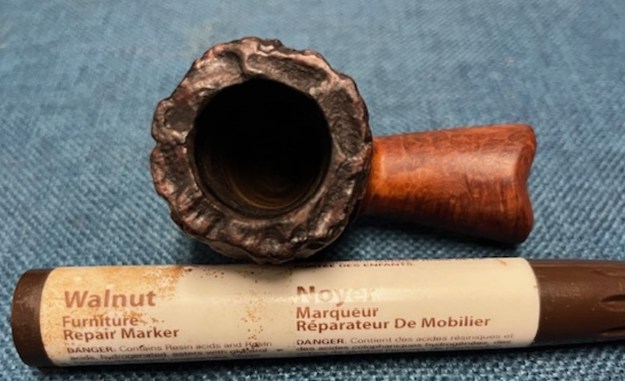
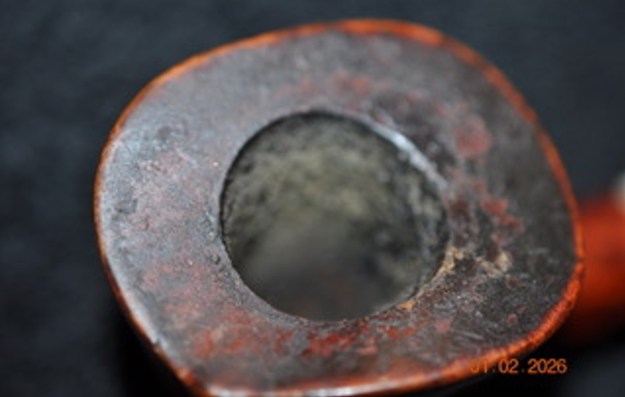
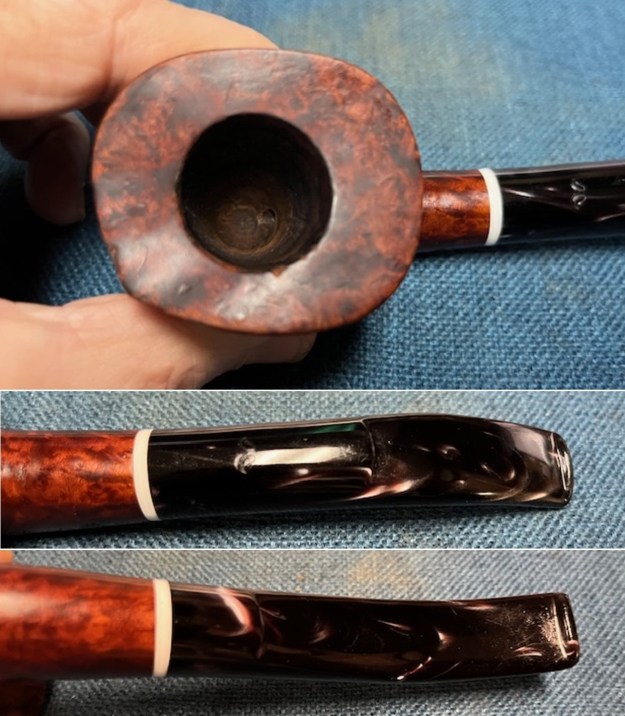
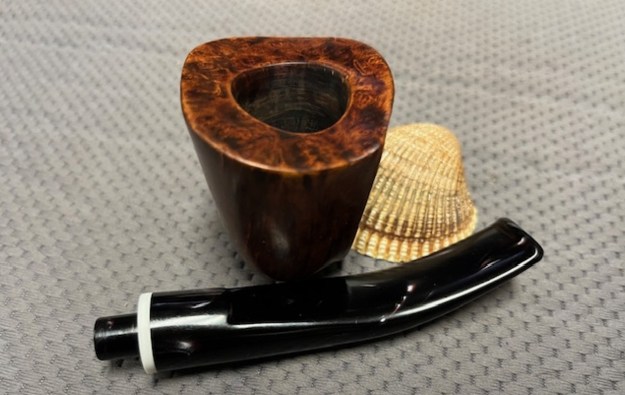
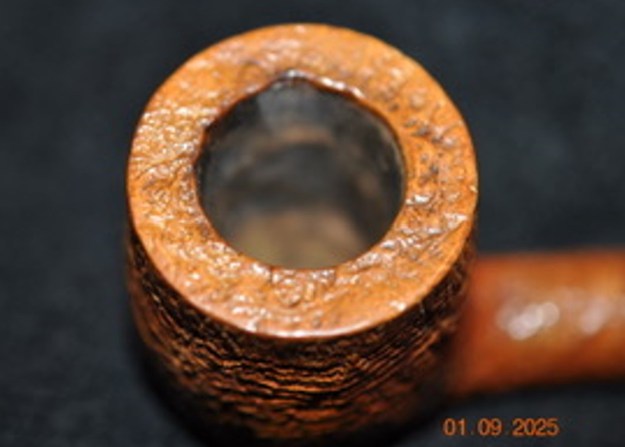
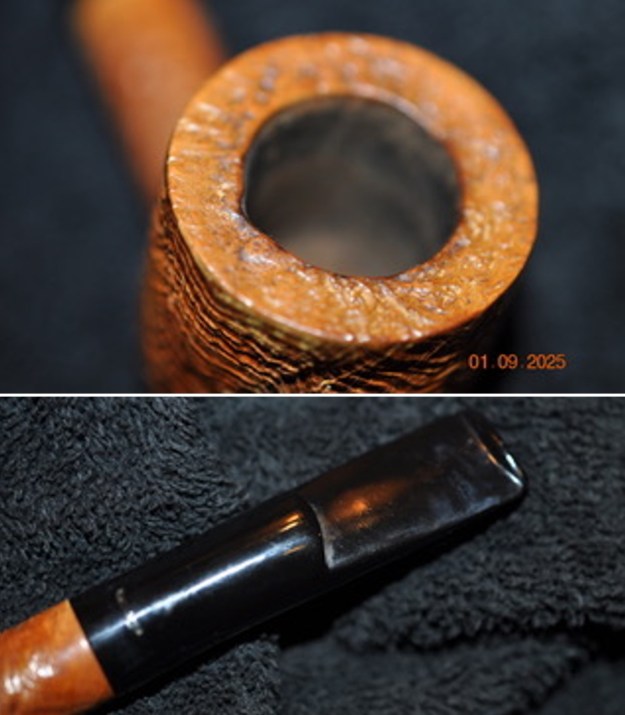
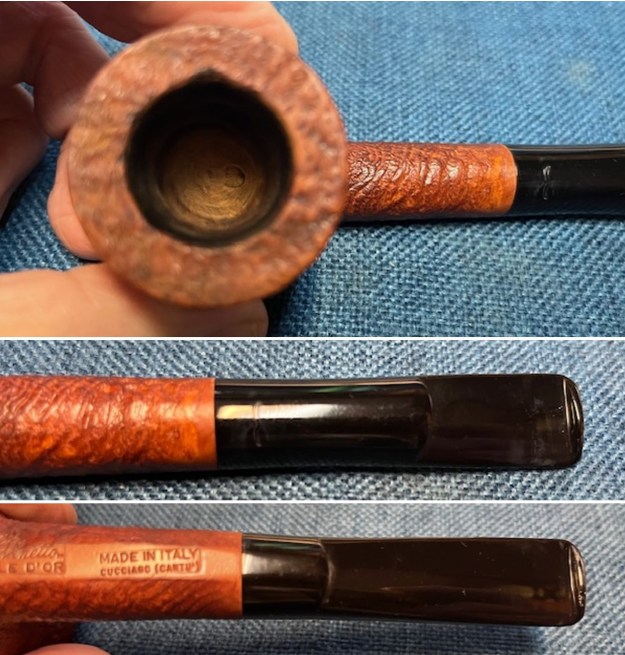
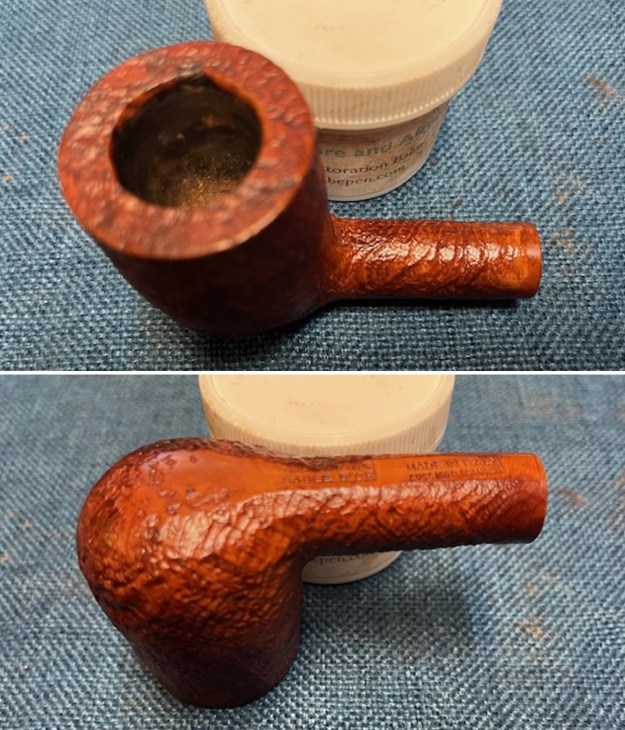
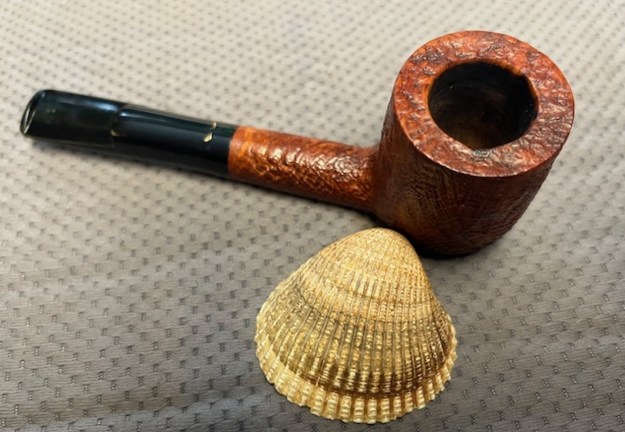
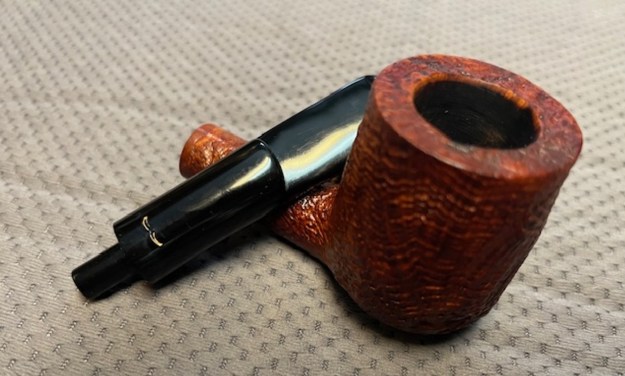
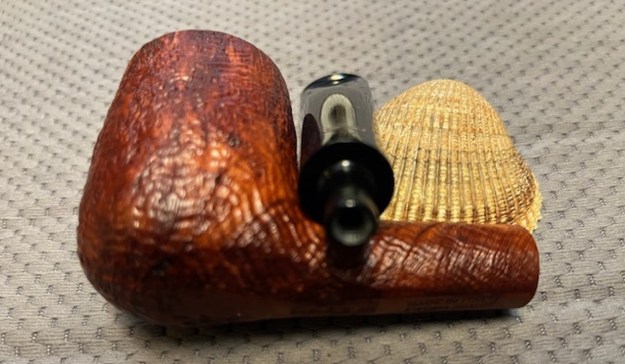
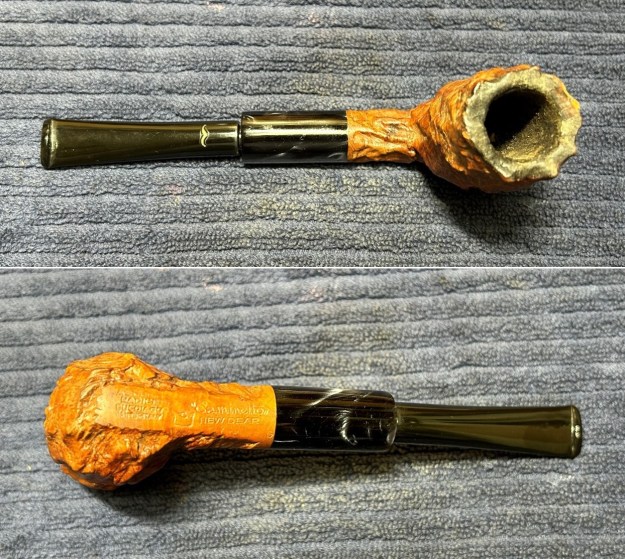
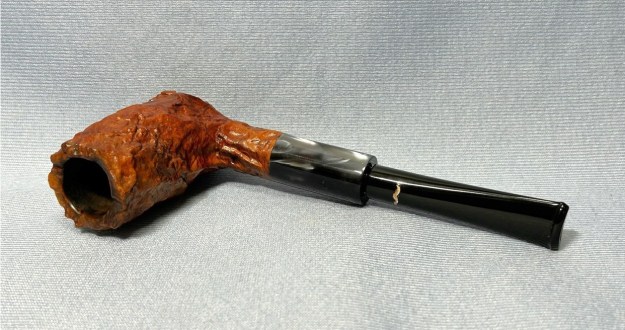
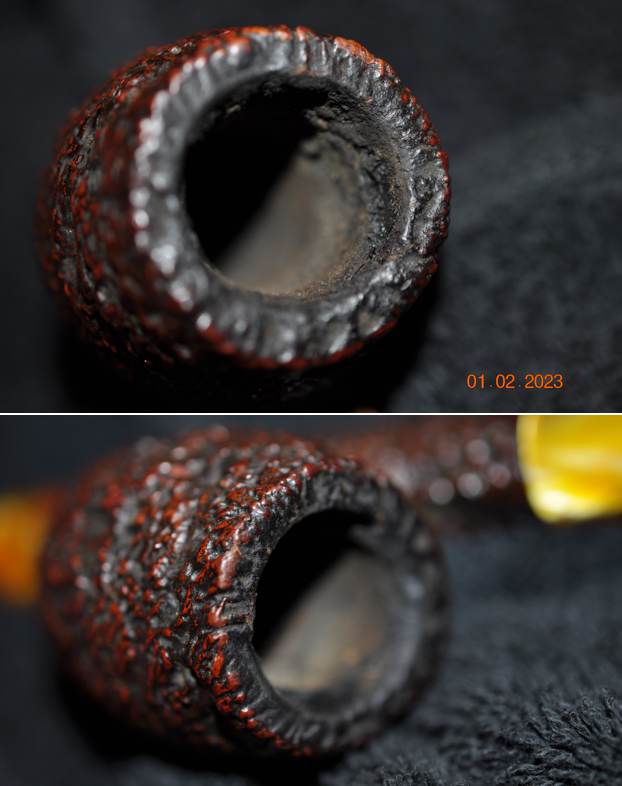
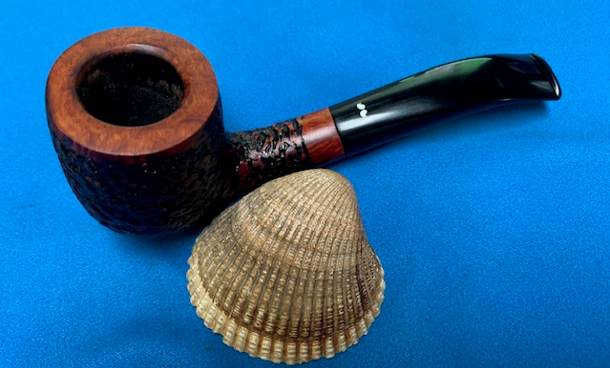
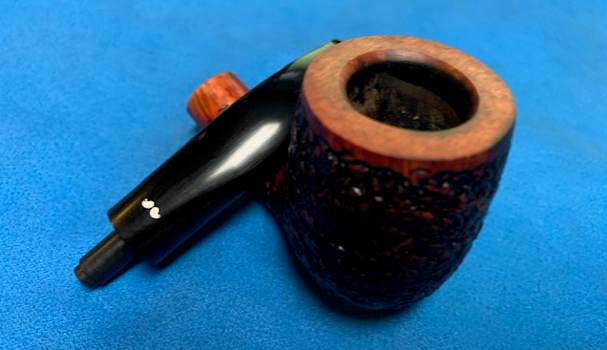
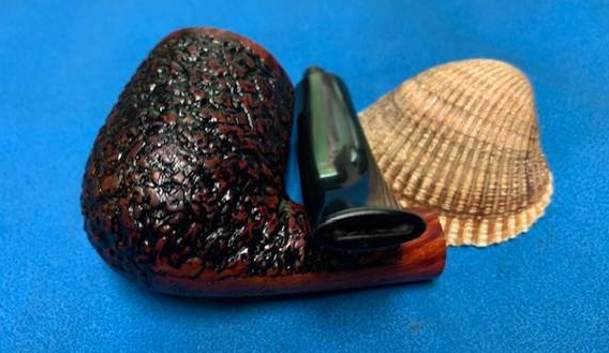
 Jeff took close up photos so that I could have a clearer picture of the condition of the bowl, rim edges and top. The rim top photos confirm my assessment above. The cake in the bowl is very thick and almost clogging the bowl. The rim top has thick lava, grime and debris covering it. The inner and outer edges are hard to assess at this time. This is what I look for when assessing a pipe. It is unclear if there is any burn damage at this point. I look forward to viewing it in person after the clean up work.
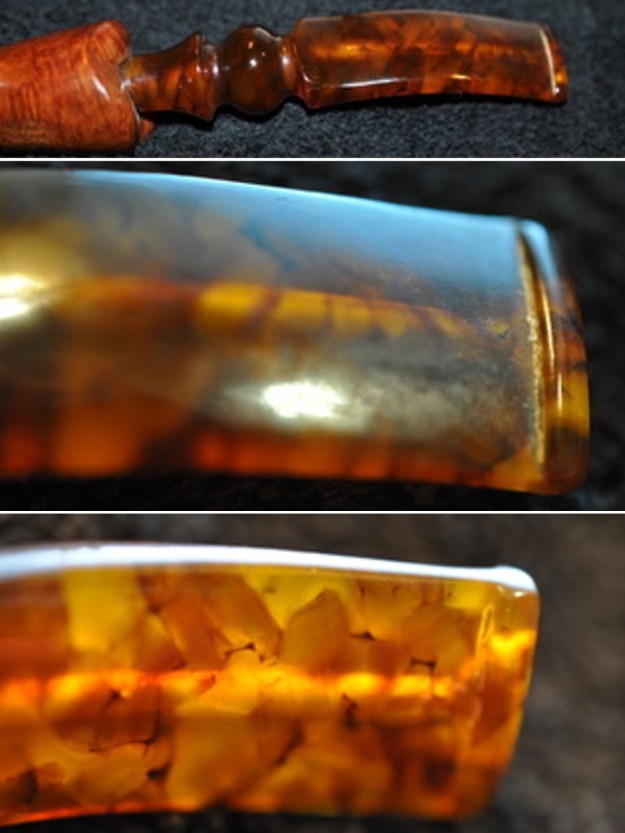
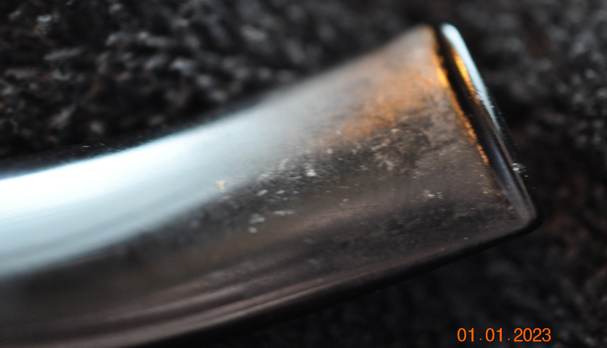
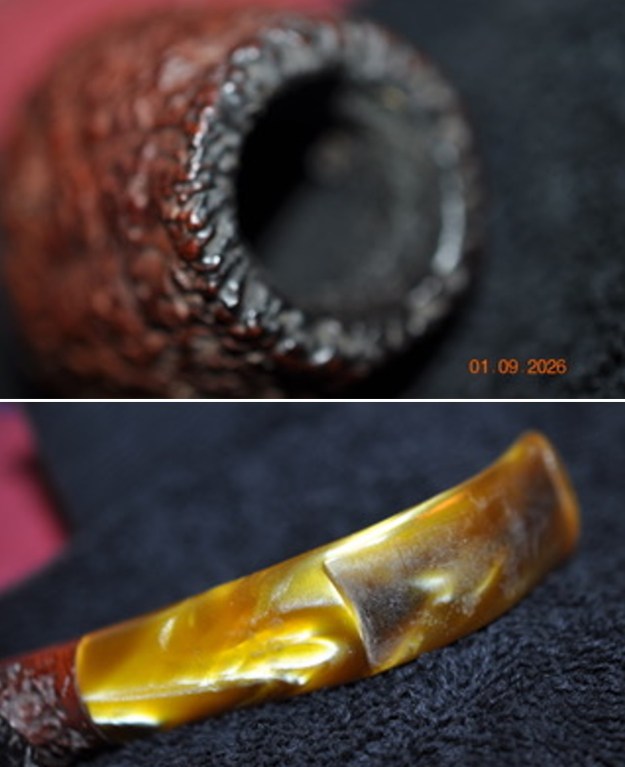
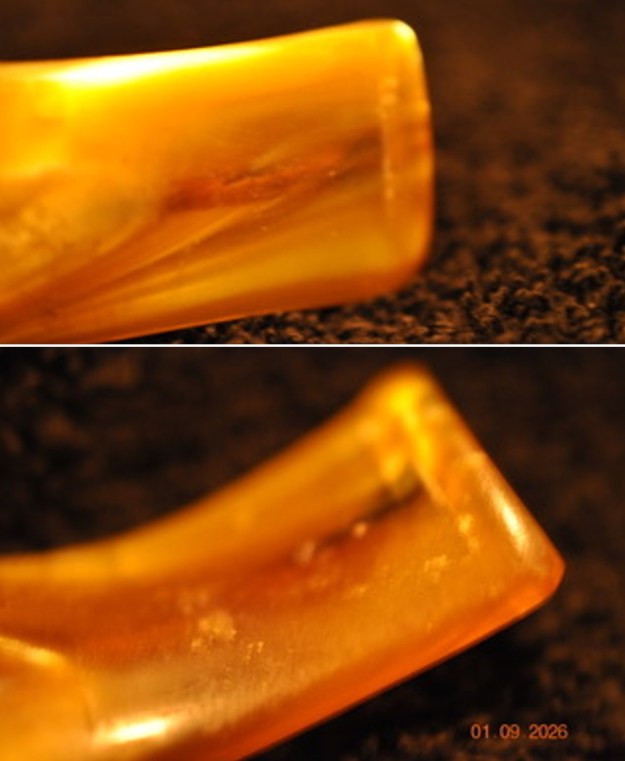
 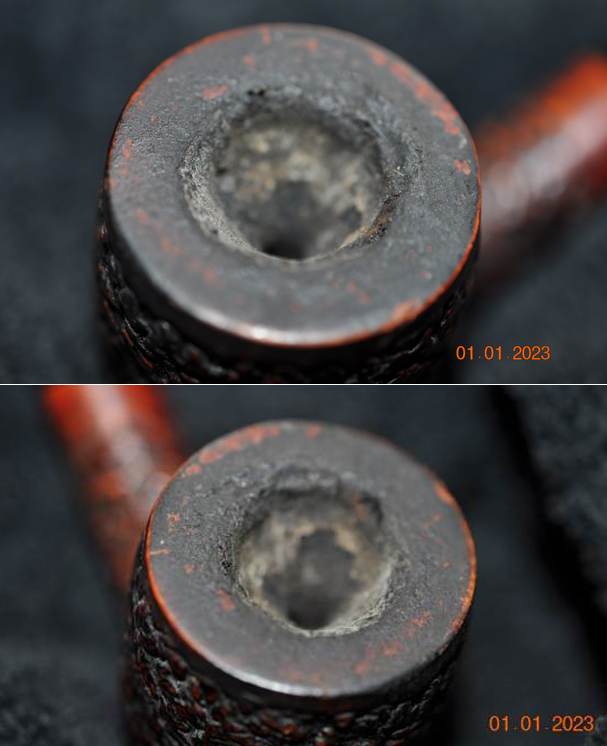 The photos of the acrylic stem surface from various angles confirm my assessment of its condition. You can see the dirty/sticky substance on the stem in the first photo below. The stem is quite dirty but the fit of the stem to the shank is good. The white mustache logo on the top is in good condition.
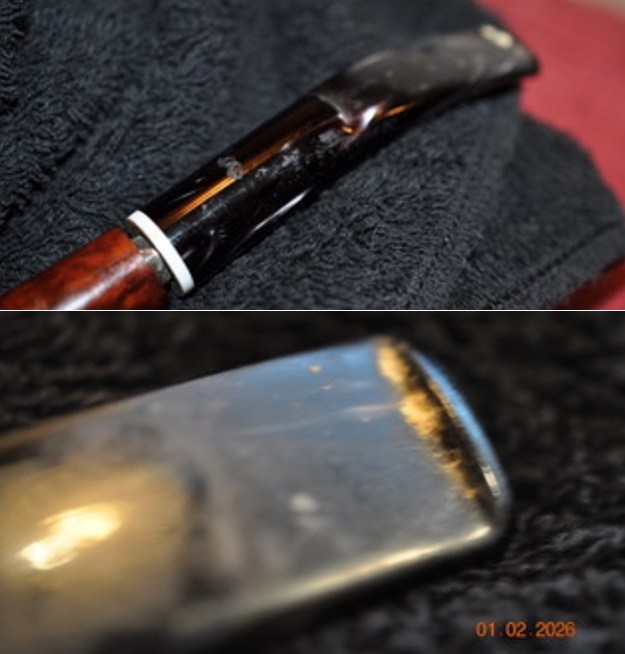
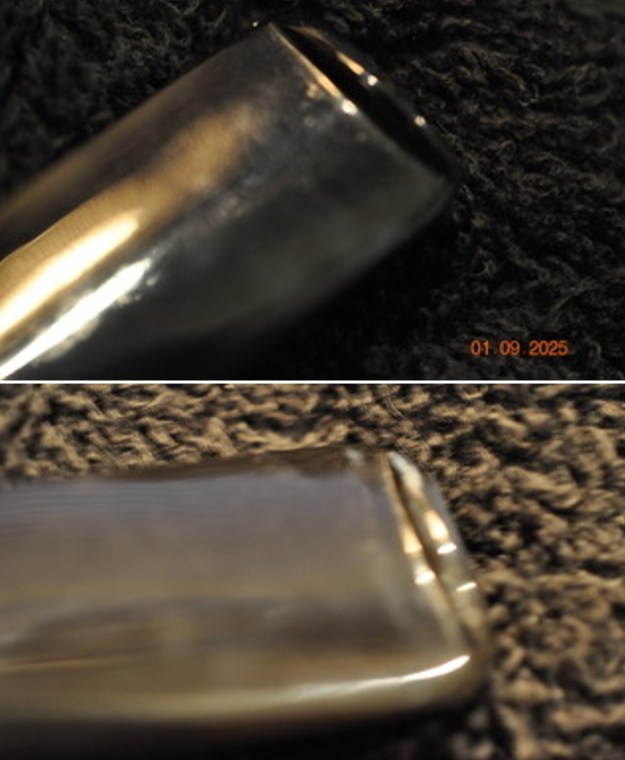
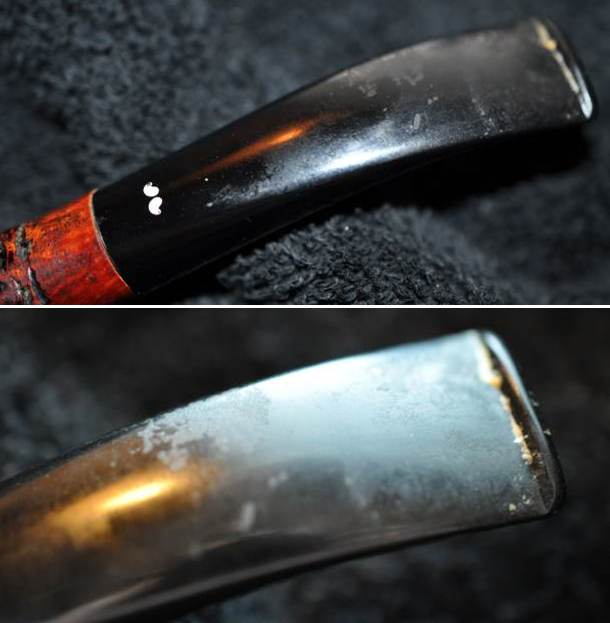
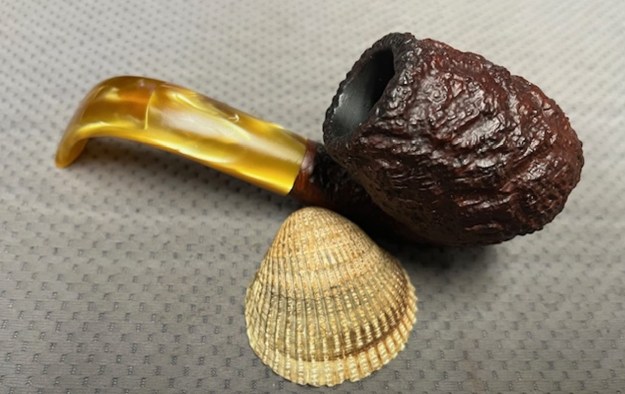
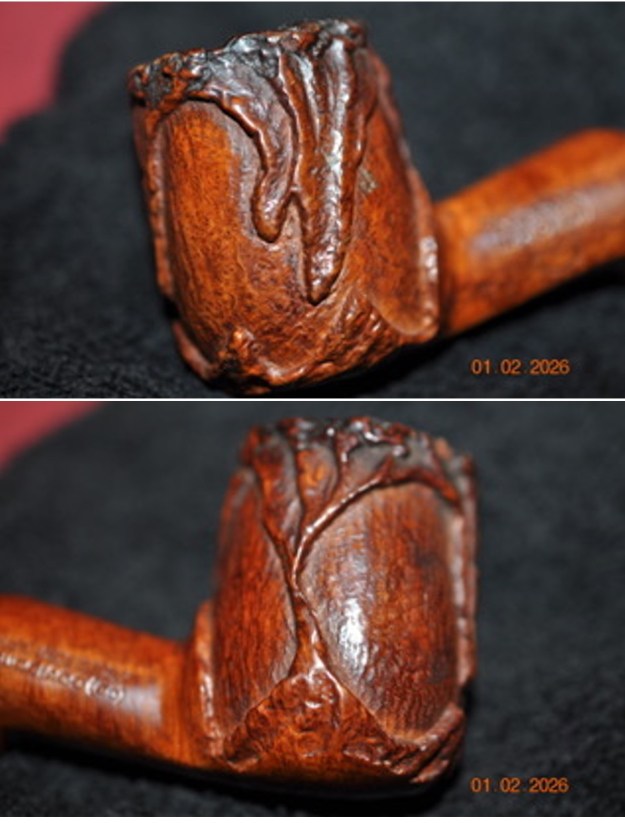
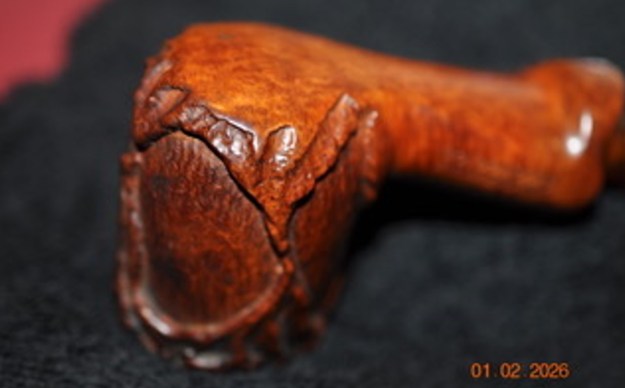
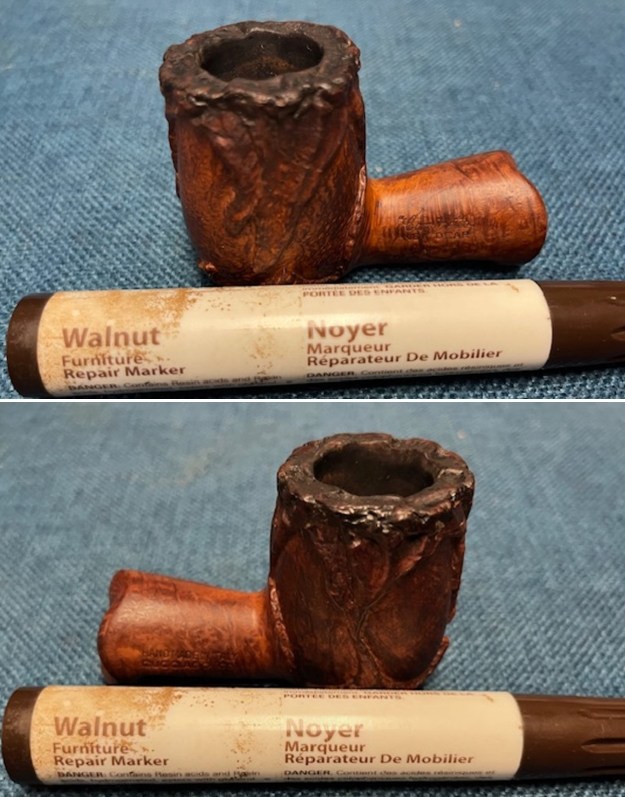
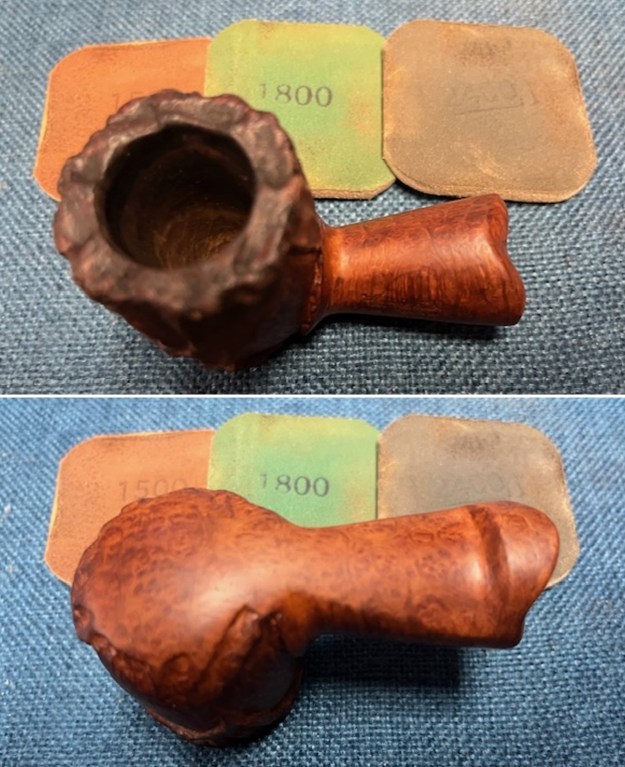
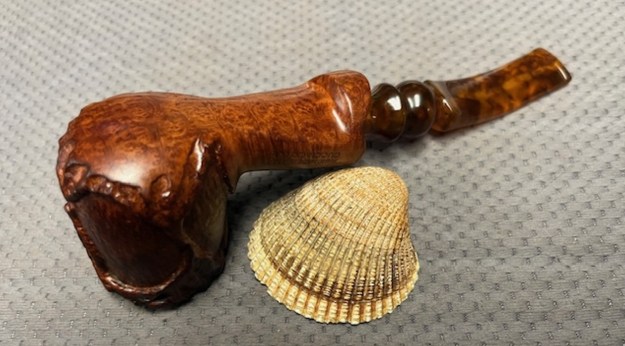
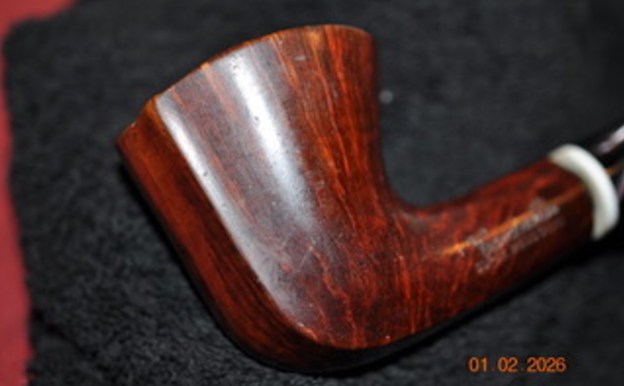
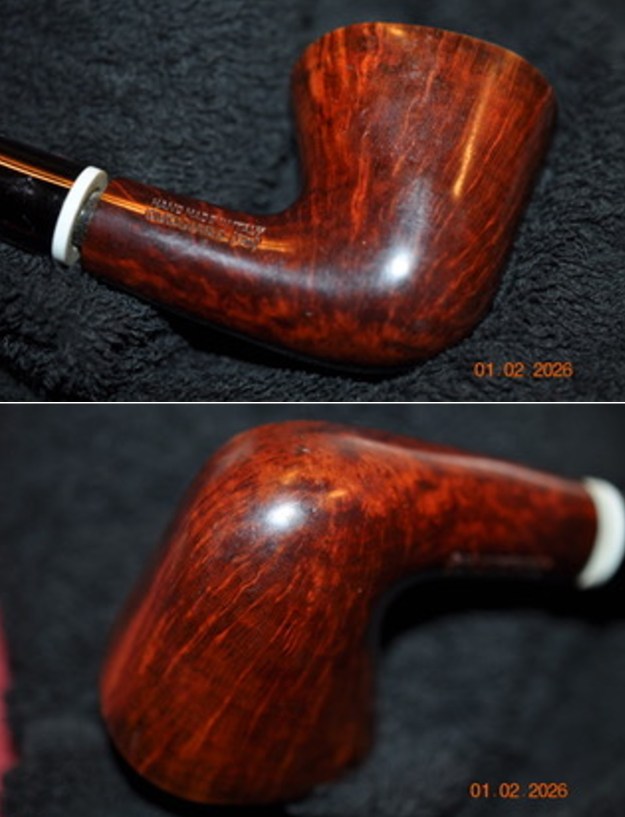
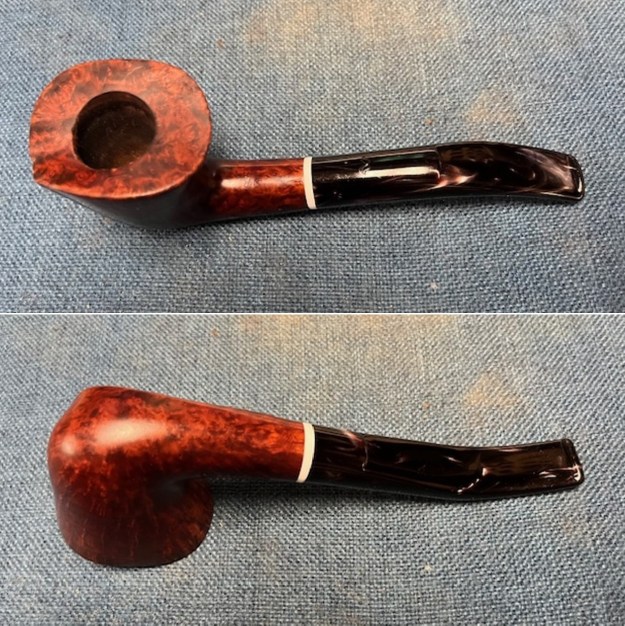
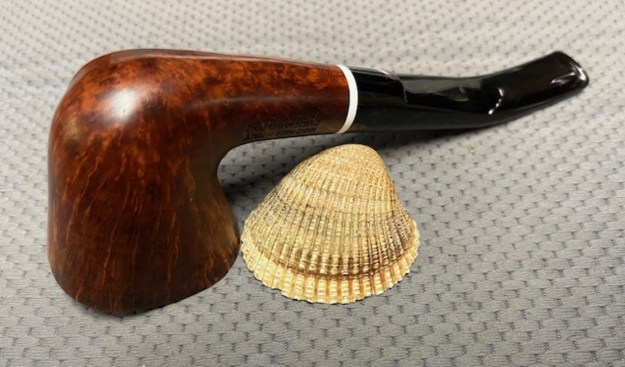
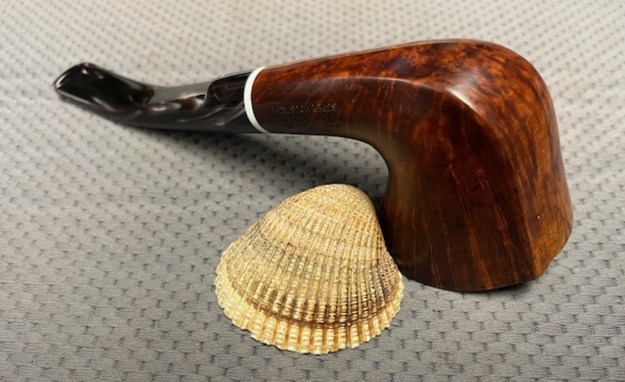
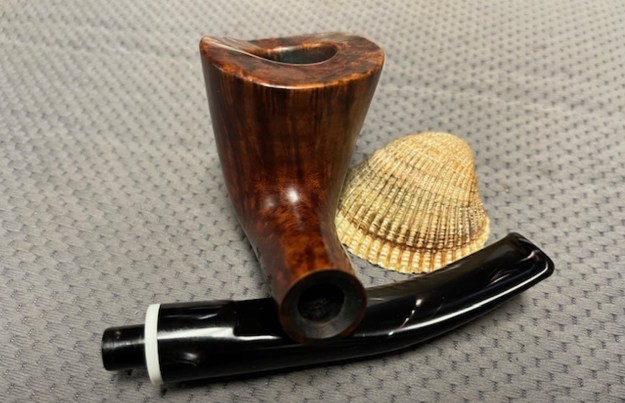
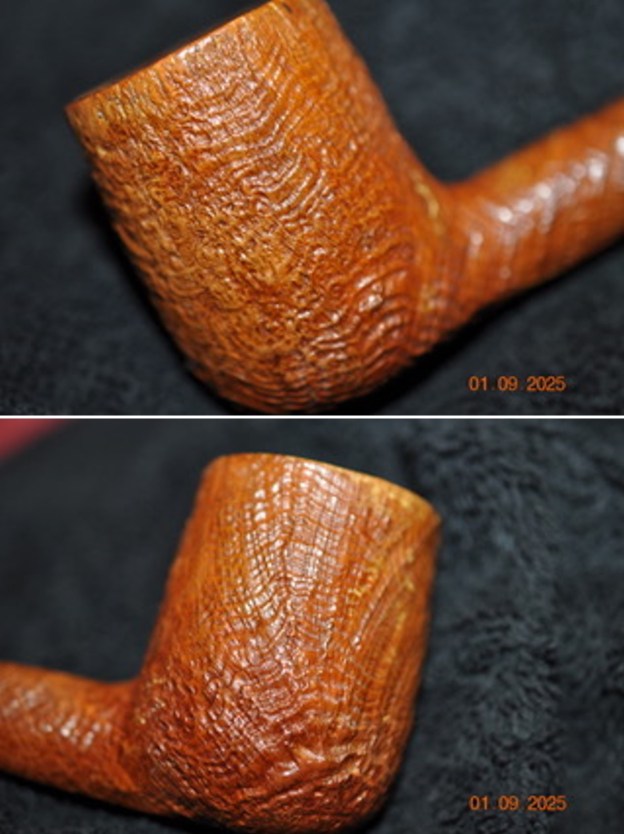
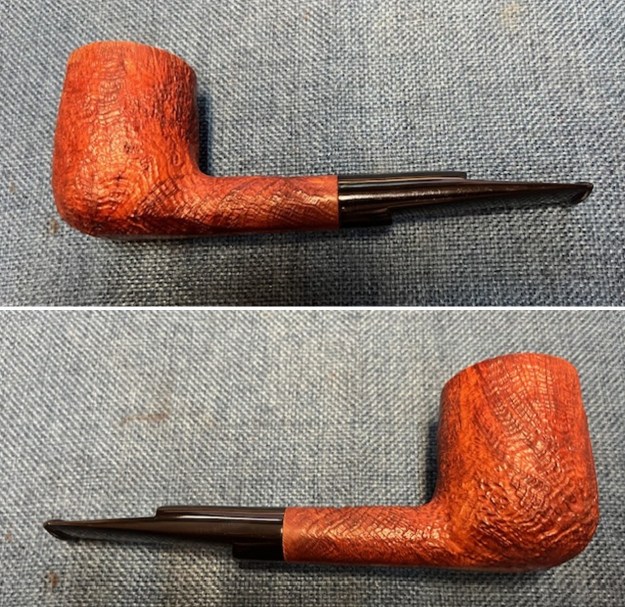
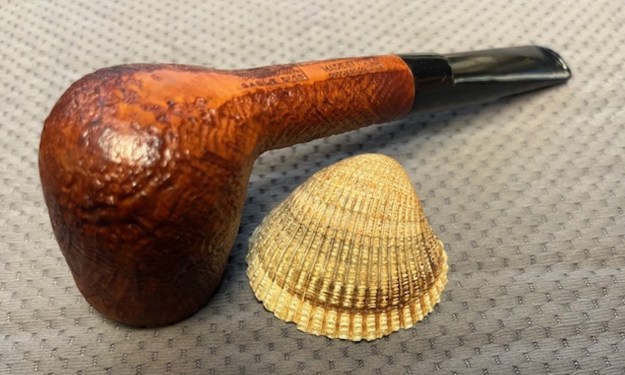
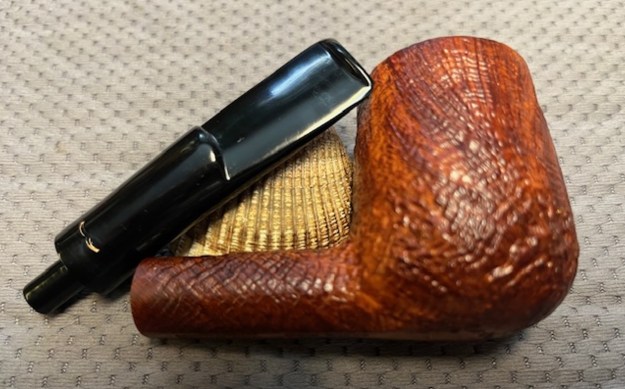
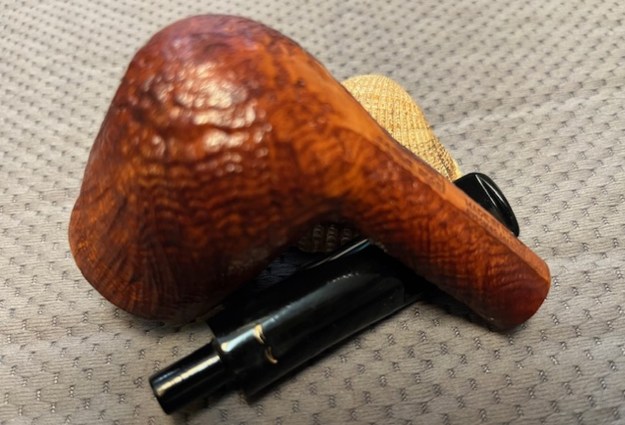
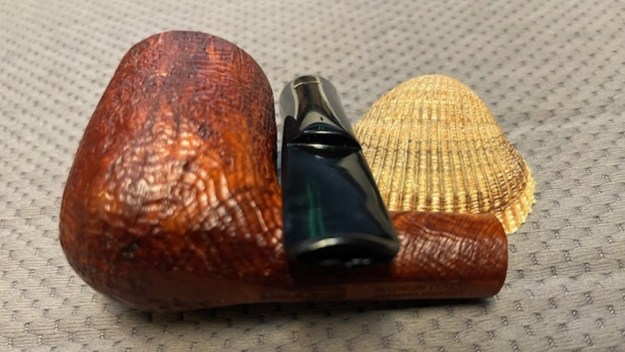
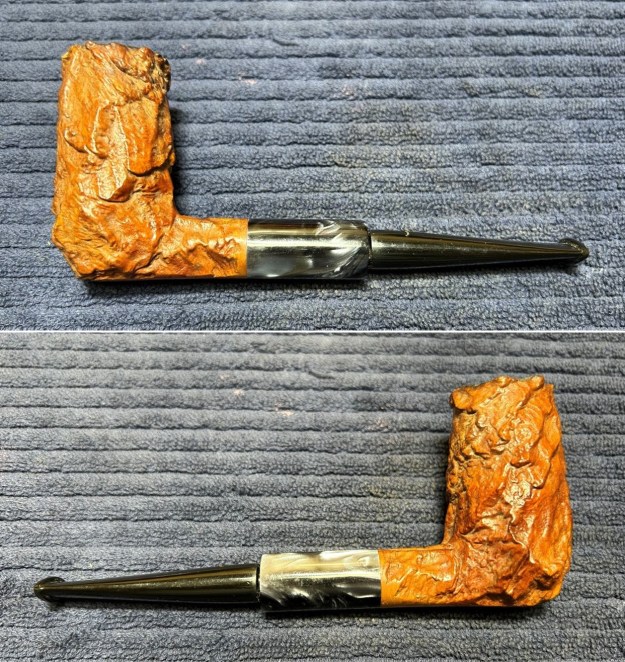
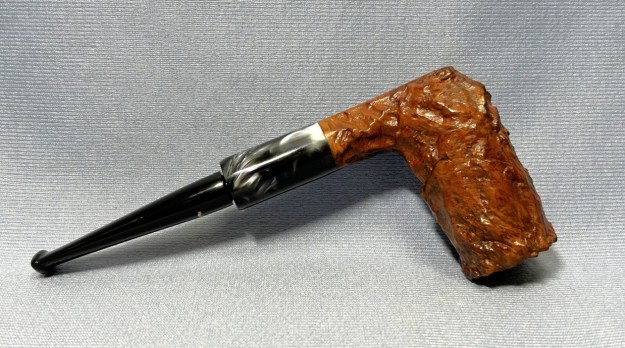
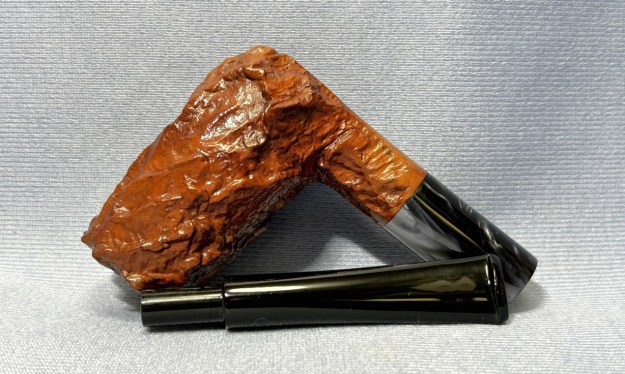
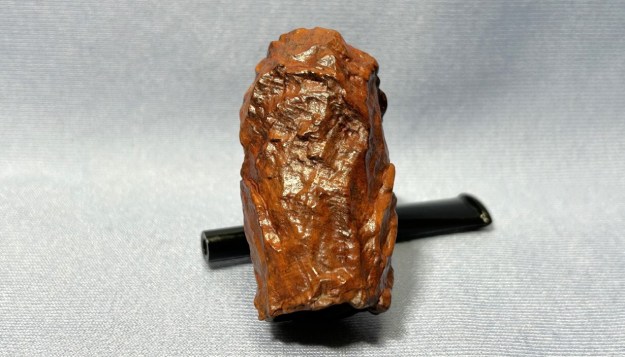
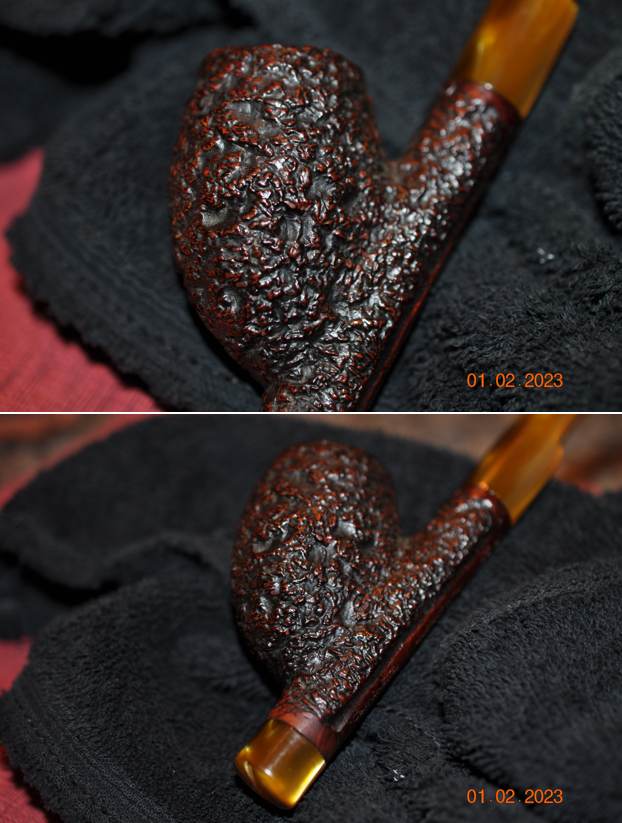
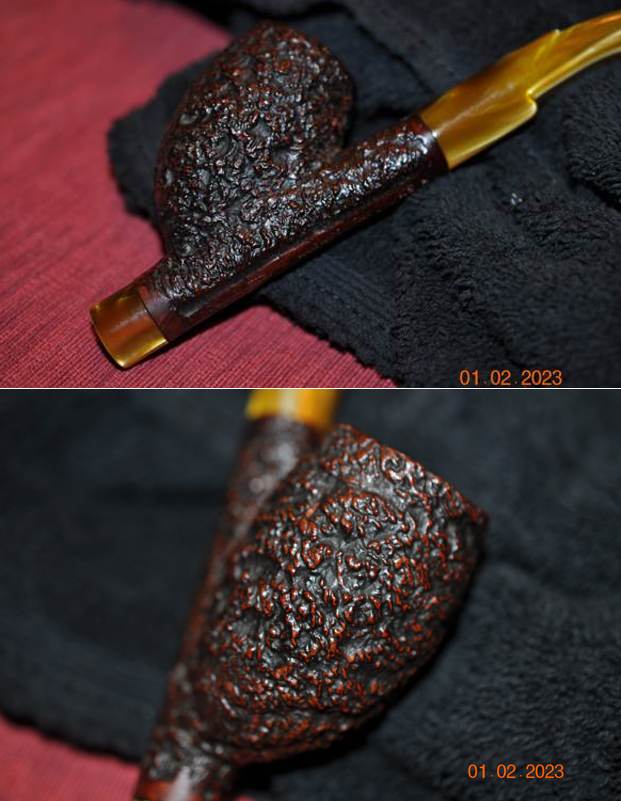
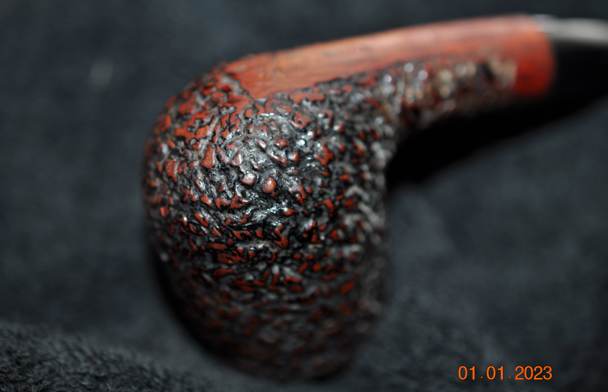
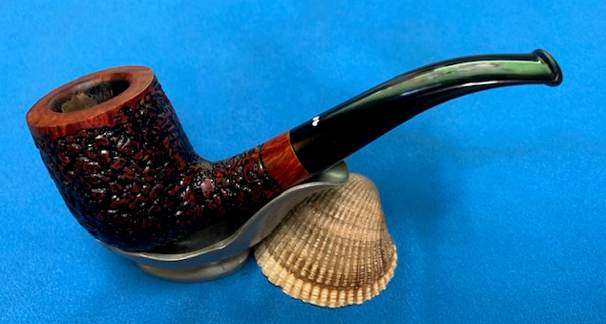
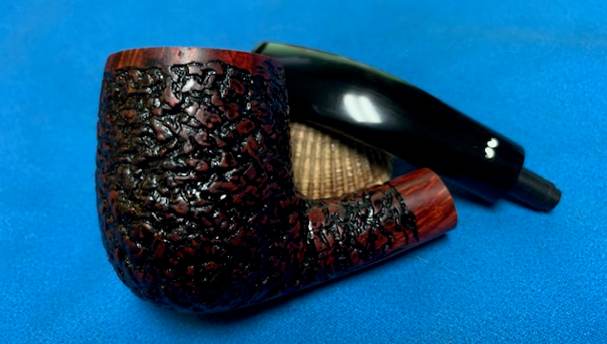
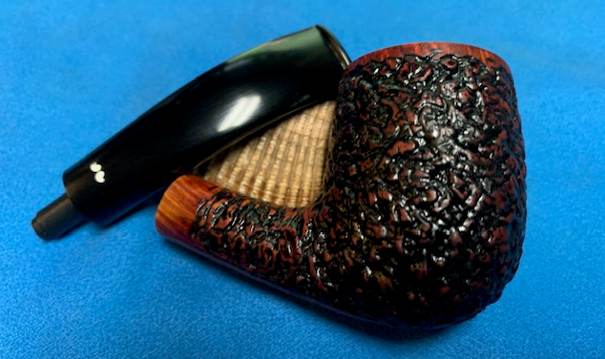
 Instead of telling you what I see in the next photos of the sides of the bowl and the heel I want to hear from you. Tell me what you see? What does the finish look like to you? Are there any visible problems or issues that stand out to you? Are the cracks or scratches in the valleys of the rustication or the high spots? Are there visible flaws or fissures in the briar? How random does the deep rustication look? Is there a pattern to it? Any visible issues on the heel of the bowl? These questions should help you to see what I am looking for when I see these photos.
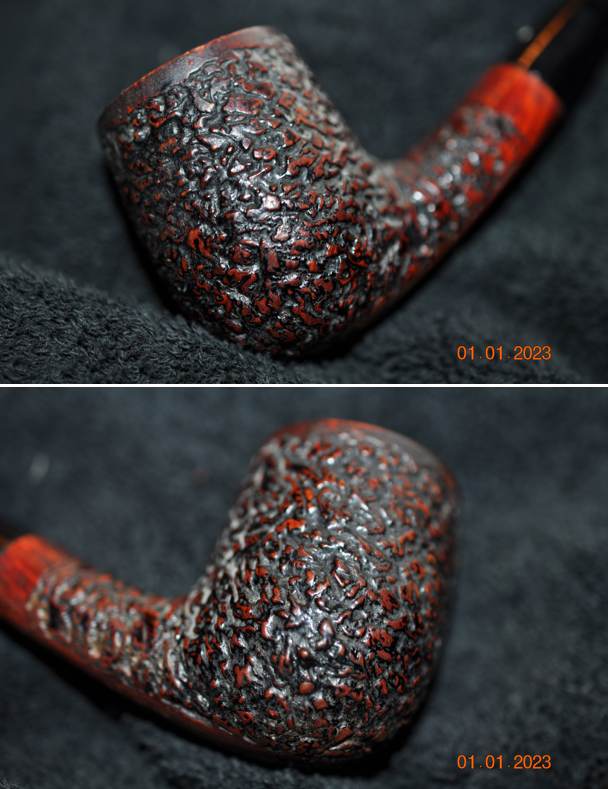
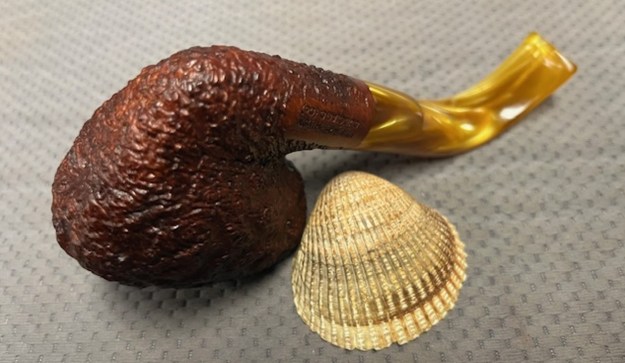
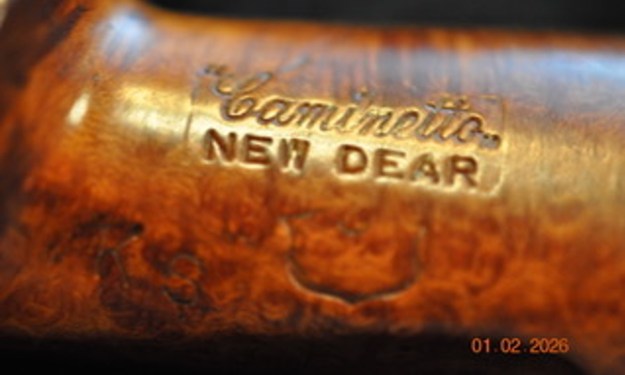
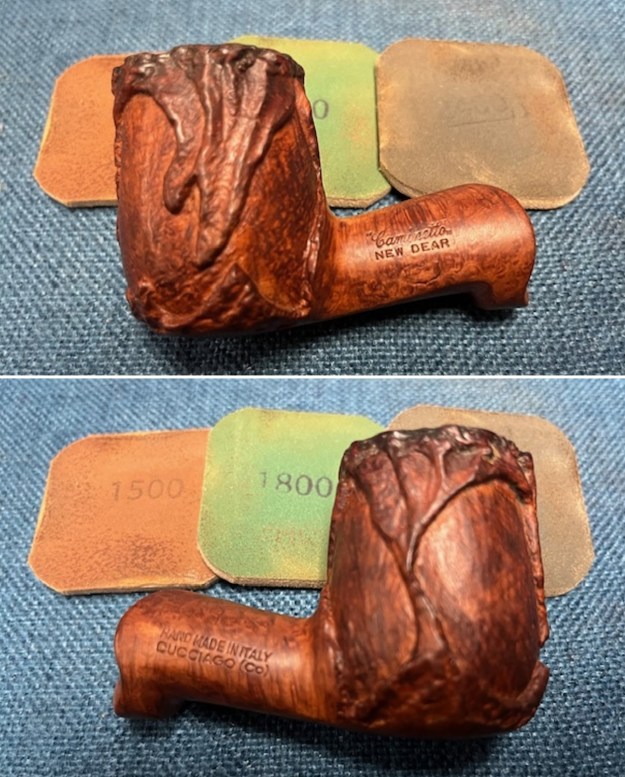
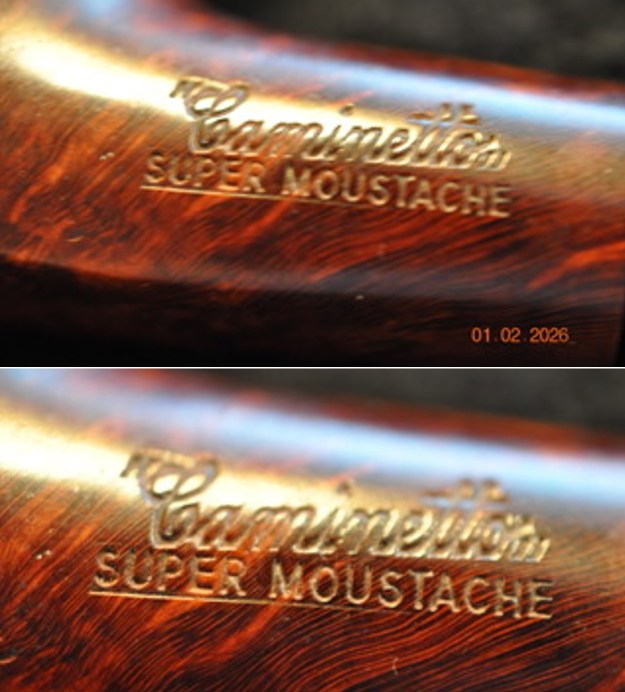
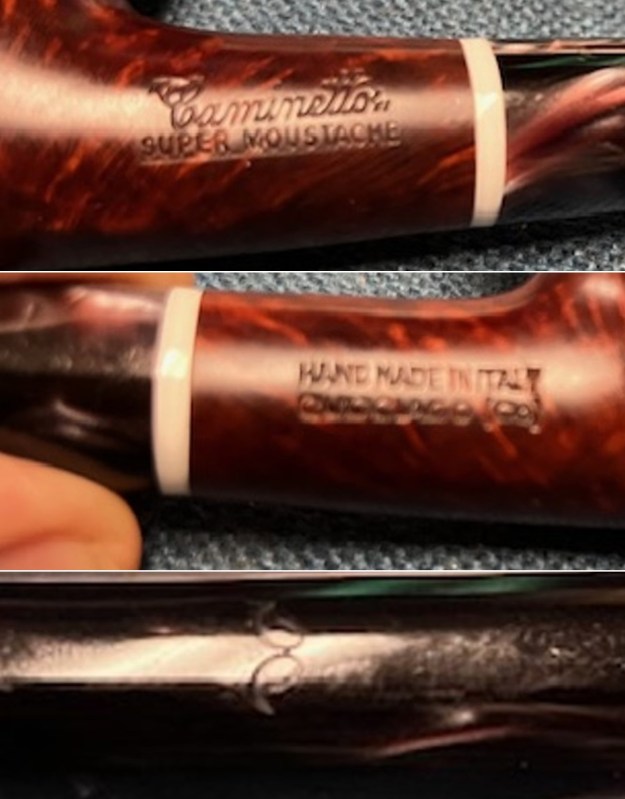
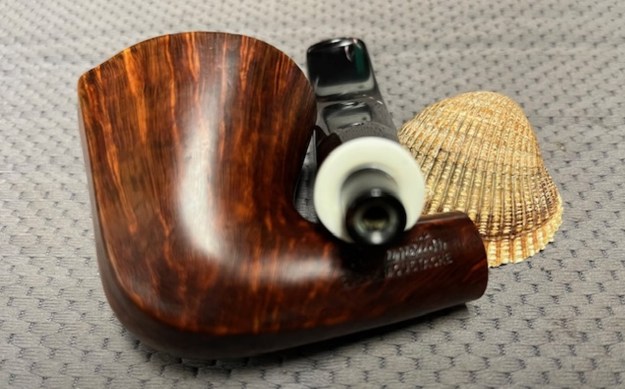
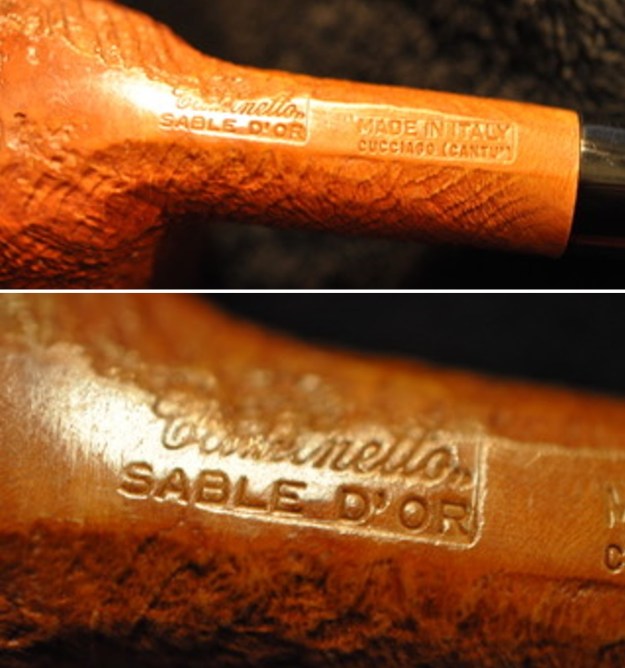
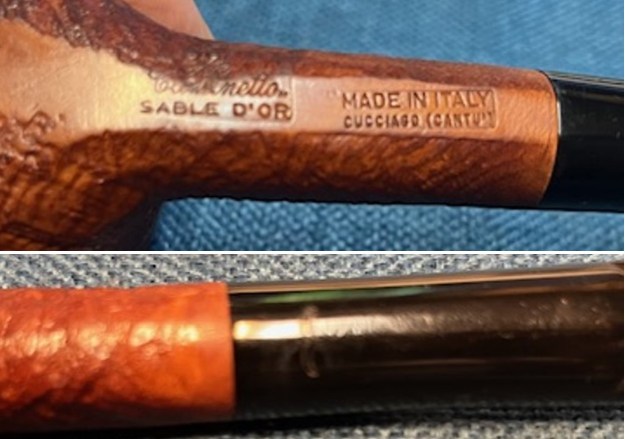
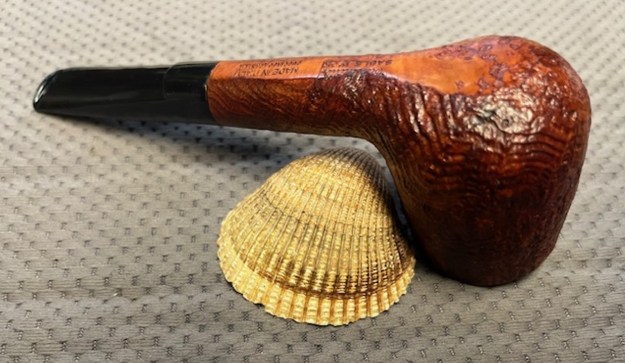
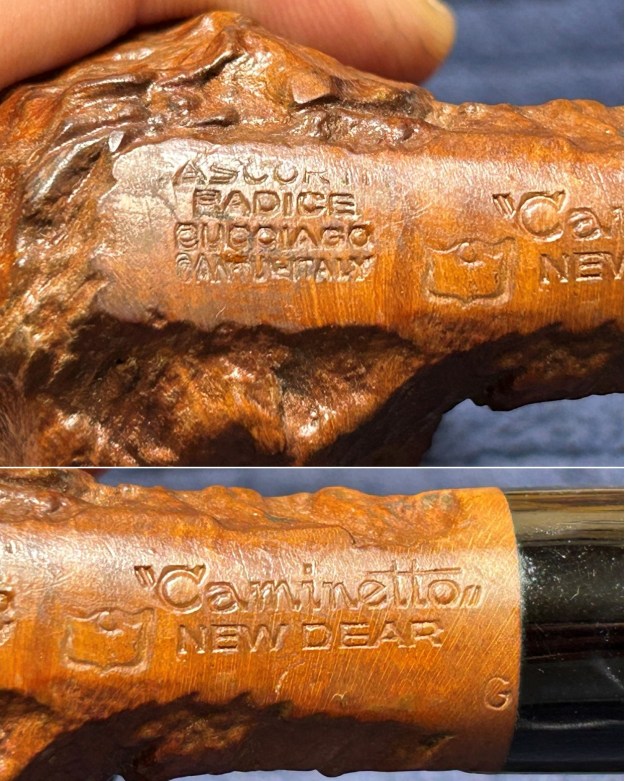
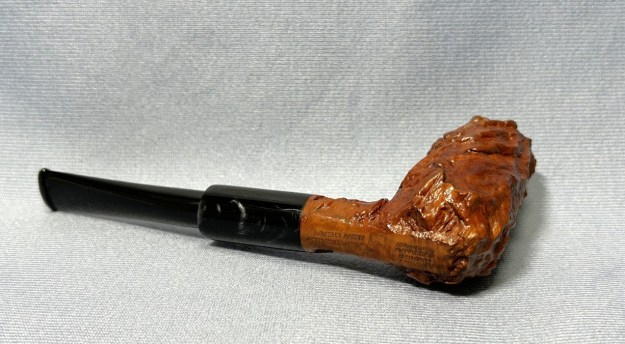
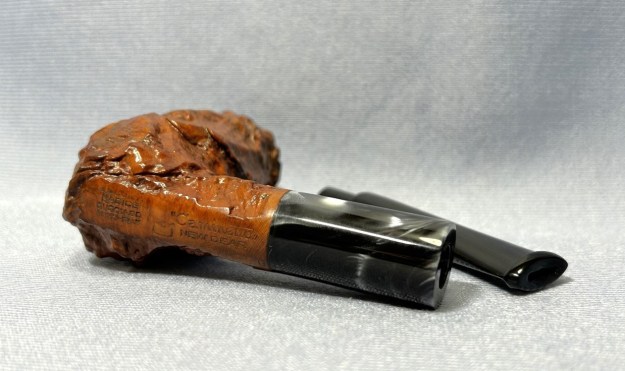
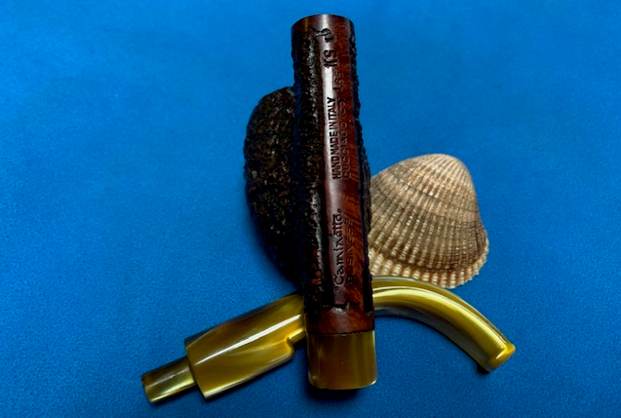
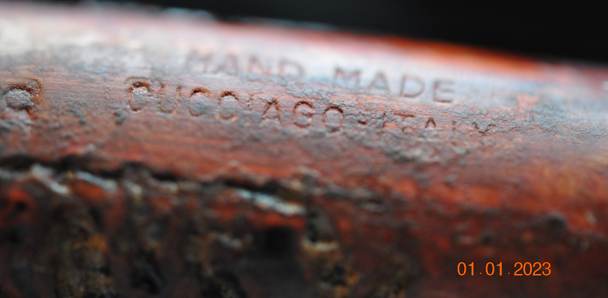
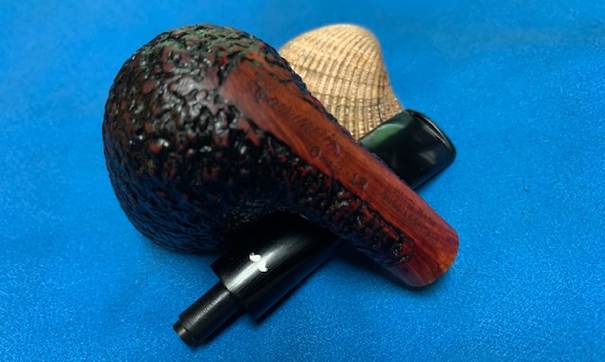
 He took a photo of the stamping on the sides of the shank. The underside reads “Caminetto” [over] 08.R.18. That is followed by Hand Made [over] Cucciago – Italy. The acrylic stem has an inset white mustache. What stands out for you in the photos of the stamping? What do you look for in the stamping? It is dirty but what do you see underneath the grime on the surface of the briar?
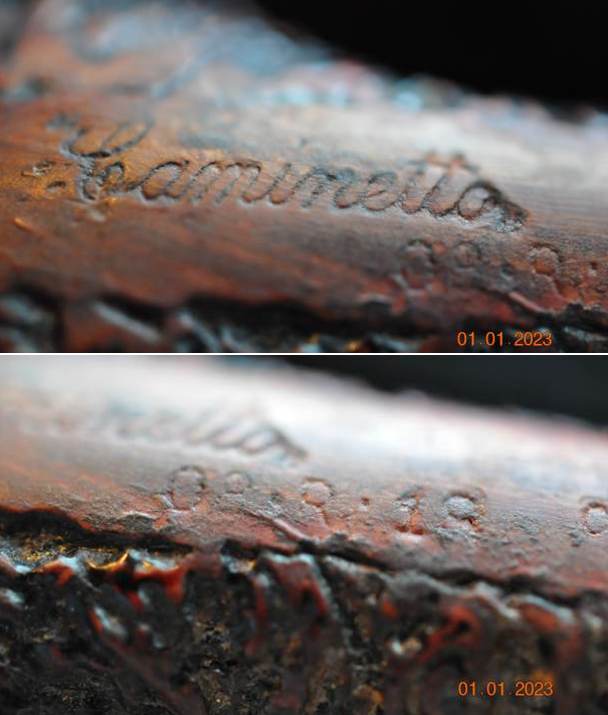
 If you have been following the blog for any length of time you have come to know that when I am working on interesting old pipes (even sometimes those not so interesting) I like to know a bit about the background of the brand. I like to “meet” the carver to get a feel for their work and style.
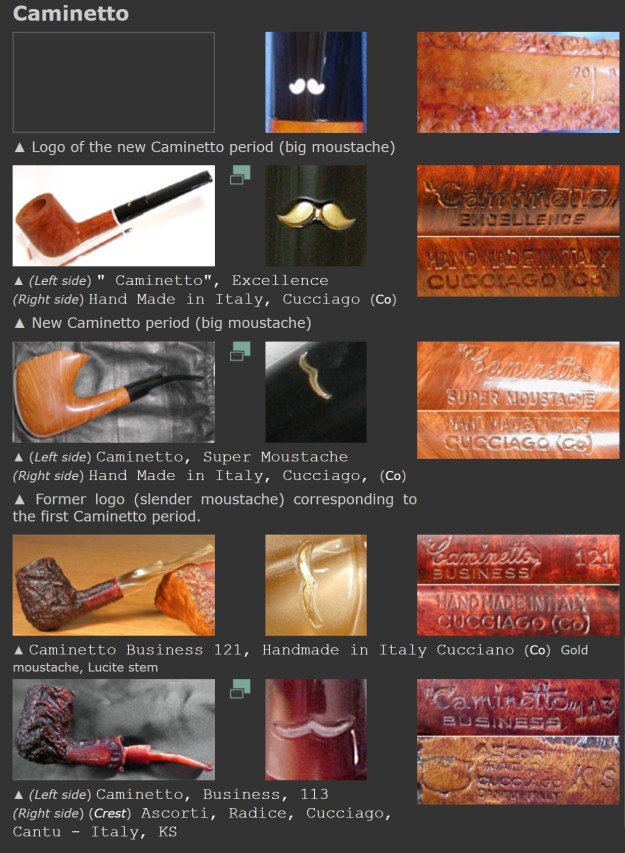
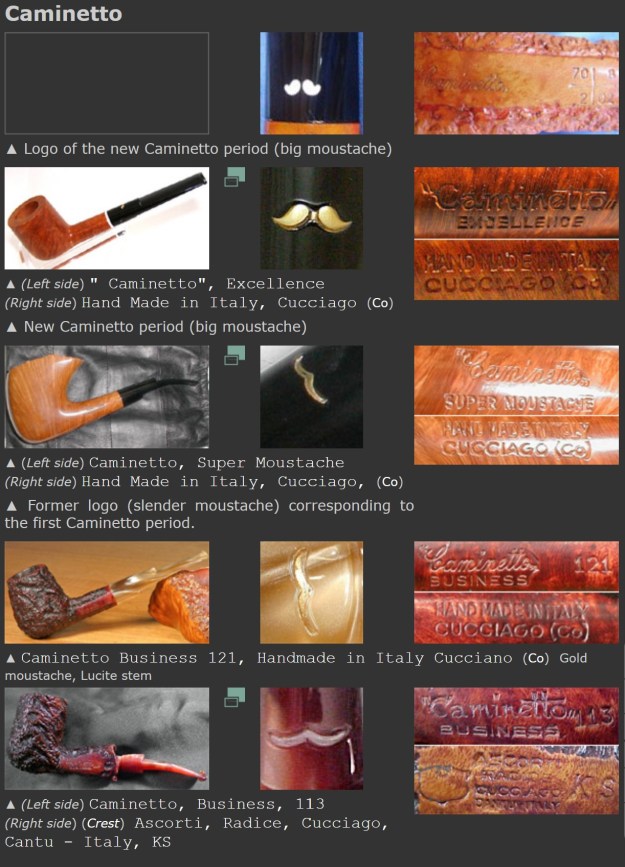
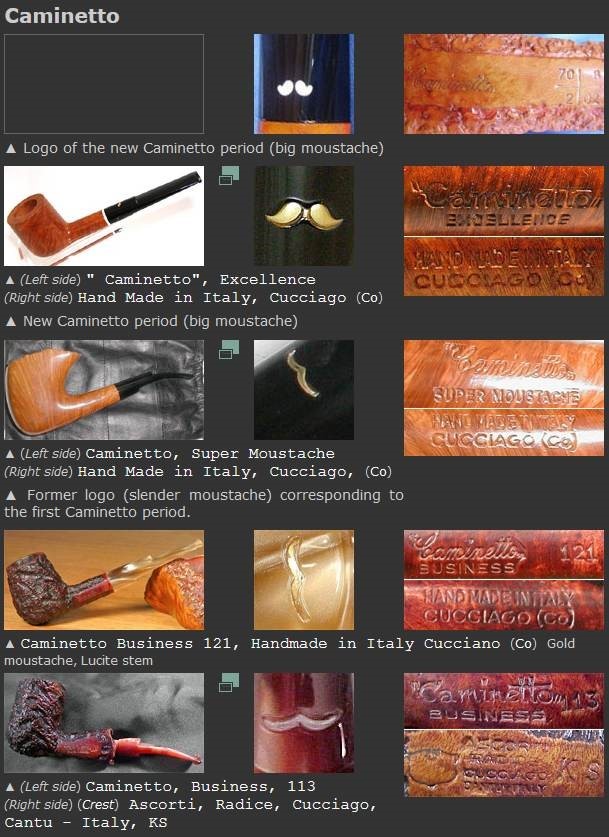
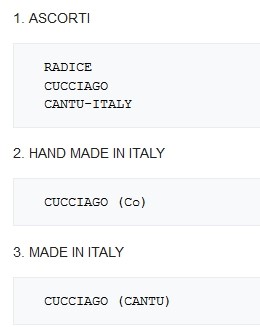
I turned to Pipephil’s site (http://pipephil.eu/logos/en/logo-c1.html) to see what I could find. I did a screen capture of the entry there and have included the side bar information below then the photo. It reads
Brand created in 1968 by Giuseppe Ascorti († 1984), Luigi Radice and Gianni Davoli as distributor.
-
- 1979 : End of the first Caminetto period. Luigi Radice left the company. Giuseppe Ascorti produced the Sergio pipes (a short time) and moved into his new workshop with his son Roberto. (See also Capitello)
- 1986 : New Caminetto period by Roberto Ascorti
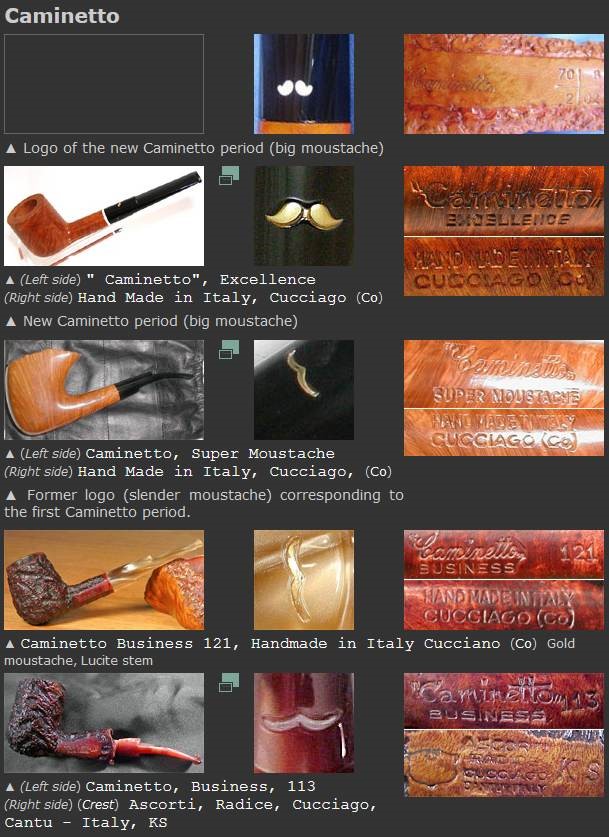
From the information there I am fairly certain that the pipe was made after 1986 when the New Caminetto period began by Roberto Ascorti. The pipe is probably crafted by Ascorti.
From there I turned to Pipedia for more detailed information about the Caminetto brand (https://pipedia.org/wiki/Caminetto). I quote below:
Caminetto’s history started in 1959 when Guiseppe Ascorti, from Cucciago, and known to his friends as “Peppino”, was hired by Carlo Scotti to work at Castello, located in nearby Cantu. Since it’s foundation in 1947 Castello had contributed substantially to regained glory for Italian pipemaking.
Talent and assiduity soon made Ascorti one of Scotti’s most notable pipemakers – a man he counted on for the future. But, Ascorti had his own far reaching plan: He wanted to work as a self-employed pipemaker! After his wife, Paola, had taken over her parent’s small greengrocery in the early 1960’s this plan became more concrete. The additional income from the shop enabled him to buy tools and machines little by little to furnish his own workshop. By the end of 1968 he was ready and left Castello. Ascorti also persuaded his co-worker, the young and highly-talented pipemaker Luigi Radice (born 1939), to join him – the two were neighbors in Cucciago. Carlo Scotti, whom is known as a perfect gentleman, is reported to have spoken unreservedly about this development.
Ascorti & Radice started to manufacture pipes on their own. One of the first who agreed to market their pipes was Gianni Davoli, proprietor of a tobacco shop in Milan. The situation was perfect–two pipemakers in search of a distributor, and a pipe merchant in search of a mainstay brand to market. Davoli – via friends and relations in the States – had made flourishing contacts with US pipe wholesalers and traders. He shipped some pipes across the pond for inspection and received excellent feedback for the very high quality of the pipes. He, shortly after, offered to be the sole distributor worldwide, and Ascorti & Radice happily accepted.
Then came the legendary evening when Ascorti, Radice and Davoli gathered around the fireplace after a hard day’s work enjoying their pipes, a glass of wine, and humorous conversation. Davoli is said to be the one who associated the pipes with the fireplace or chimney, which is “camino” in Italian. Hence “Caminetto”, the diminutive (smaller) singular version of camino, was coined as the brand’s name. Ascorti, Radice and Davoli later became famous as “I tre Camini” – the three chimneys. Maybe, they had more than one glass of wine each, but it’s not certain whether the distinctive mustache logo on the stem and the Caminetto slogan “La Pipa del Baffo” – “the pipe with the mustache” – was created the same night. In fact, Ascorti and Radice both wore impressively large mustaches, and a pharmacist in the neighborhood had been kidding them about that. (Davoli, for reasons of corporate identity, later wore a big mustache, too.)
Now, Davoli concentrated on marketing the Caminetto brand in the United States. His strategy was as simple as it was brilliant. There was a remarkable Castello hype at the time. Castello pipes were highly sought after but hard to get due to limited production. Davoli filled the gap, promoting the Caminetto to be absolutely equal to the Castello in terms of quality, while asking only half the price. And best of all: the Caminetto pipes were consignable! The Tinder Box International would be under contract with successful nationwide distribution. The brand’s success was overwhelming – far beyond any expectation, with the rusticated Business line becoming the most popular.
Ironically enough, the increasing demand soon drove Ascorti and Radice to the limits of their production abilities. The brand had been introduced successfully in Germany, and in Italy to some extent. By the end of 1970 more hands were needed. Even Ascorti’s elder son, Roberto Ascorti (born 1958; and the current owner) helped with stamping and shipping the pipes when he was just a schoolboy. The most important employee is Cesare Vigano, who has worked for Caminetto /Ascorti for more than thirty years. To bring about more stability and higher production, Davoli invested a considerable amount of money in modern pipemaking machinery, and in doing so went from distributor to co-owner of Caminetto. By 1973 he held the vast majority of the company’s capital.
The boom continued strongly – especially in the US. Production increased steadily, from 3,000 to 5,000 and then 7,000 pipes being made per year, placing Caminetto at the top of US sales in their market segment. The 1974 Tinder Box catalog celebrated Gianni Davoli as “master pipe maker and designer” and “sole creator of Caminetto” without a single mention of Ascorti or Radice!
Dating Caminetto pipes is very difficult. However the way the pipe is stamped can narrow it down some and the look of the mustache logo also helps. Pipedia has a helpful article on the process (https://pipedia.org/wiki/The_History_of_Caminetto_(shapes,_stamping,_articles,_etc.). I quote from it below.
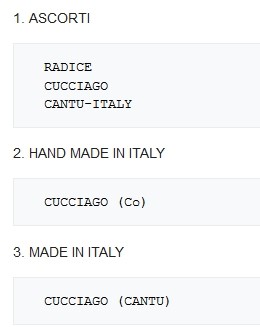
First off, dating earlier Caminetto’s is nearly impossible. Nevertheless, there were three phases, some in which were much earlier, of development that occurred in the stamping process of Caminetto. Before that though, every pipe had the stamp of Caminetto in one of two ways: Caminetto in script or Caminetto within quotation marks in block letters (I do not know how it was decided which pipe got which stamp, as I have had EARLY Caminetto’s with both). The stampings:
RADICE
CUCCIAGO
CANTU-ITALY
CUCCIAGO (Co)
CUCCIAGO (CANTU)
In addition to the above stampings, there was always the trademark mustache on the stem. The earlier models (1968/69-1974/75) had the iconic gold, sometimes white, “bird-in-flight” mustache and the later models (1975-1979/80/81) had a gold, or white, “double comma” mustache. Tinder Box often stamped their shield on the pipes as well. Now I wanted to understand the stamping 08.R.18. How was that to be interpreted. The same article above gave the following information on the stamping.
The newer model Caminetto stampings are quite different and easy to date. Roberto upgraded the stamping technique of Caminetto so that it was possible to figure out when the pipe was made. There are two different types of stamps, one in which is not in use anymore. The first is the traditional “Caminetto” stamp in script, followed by a 4 part grid with numbers. The second is a 3 part stamp (two numbers and one letter, which is most of the time an “L”)
The first number in the old stamp of the grid refers to the shape of the pipe. The second number, which is the first in the stamp most are familiar with refers to the grade or of the pipe:
0 standard smooth (red or orange stained)
1 highest grade natural straight-grain smooth (realllllly rare)
2 smooth natural.
6 sandblast
7 New Dear
8 Business finish.
The third number in the old grid stamp is the series.
And the fourth number, which is the third in the newer stampings, refers to the year it was made in. For instance, if one has a 54/6/2/01, they would have a pipe made in the first year of production of the newer Caminetto line (i.e. 1985-86). I include the 85 because some hold that Ascorti was making Caminetto’s in 1985, but the majority of who I have talked to and the information I have researched claim official production and retail sale did not begin until 1986.
The second part of the newer stamp is a letter, usually L, which I have no idea what it stands for, but there are others I have seen “B” on. In short, the old stamp has a 2×2 grid specifying the shape, finish, series, and year (in that order), while the newer stamp only shows the finish, the letter ‘L’, and the year.
With that information I knew that the 08.R.18 gave me quite a bit of information. It is to be read as follows:
08 – the grade or the finish of the pipe in hand is a Business Finish.
R – unclear what it stands for.
18 – is the year of manufacture which I believe would make this one 2018
Now it was time to work on the pipe.
I am sure many of you will shake your head and ask maybe even out loud, “Why is he including this again?” However, please remember that the point of these blogs is not to wow your with the work or make you shake your heads but I want you to know the details of the work we do so you can do your own. Back in 2020 Jeff wrote a blog about his cleaning process. I am including a link to that now so you can see what I mean about his process. Do not skip it! Give it a read (https://rebornpipes.com/2020/01/20/got-a-filthy-estate-pipe-that-you-need-to-clean/). Here is the introduction to that blog and it is very true even to this day.
Several have asked about Jeff’s cleaning regimen as I generally summarize it in the blogs that I post rather than give a detailed procedure. I have had the question asked enough that I asked Jeff to put together this blog so that you can get a clear picture of the process he uses. Like everything else in our hobby, people have different methods they swear by. Some may question the method and that is fine. But it works very well for us and has for many years. Some of his steps may surprise you but I know that when I get the pipes from him for my part of the restoration they are impeccably clean and sanitized. I have come to appreciate the thoroughness of the process he has developed because I really like working on clean pipe!
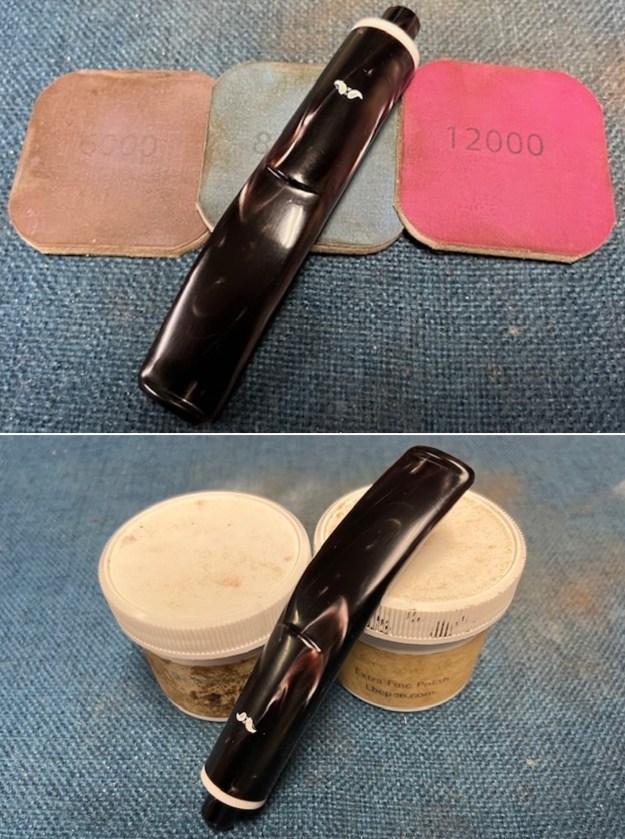
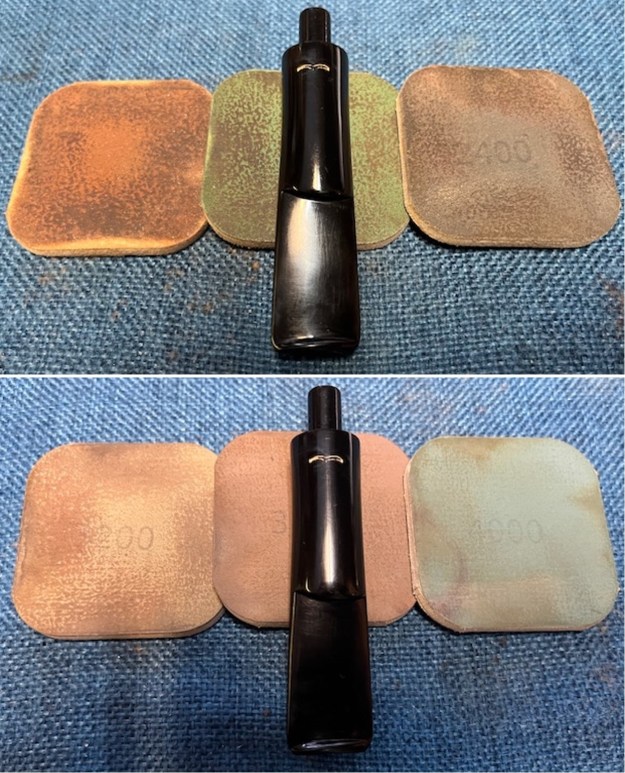
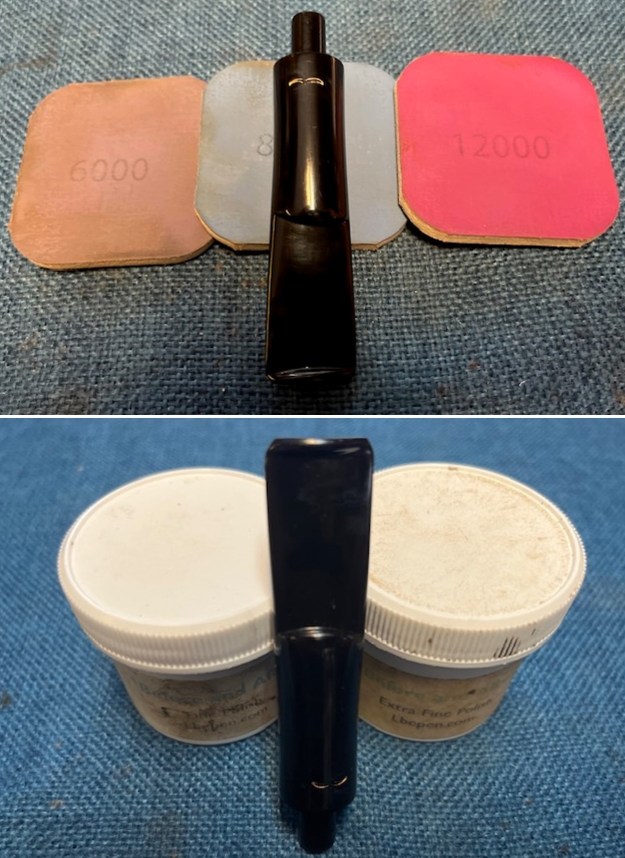
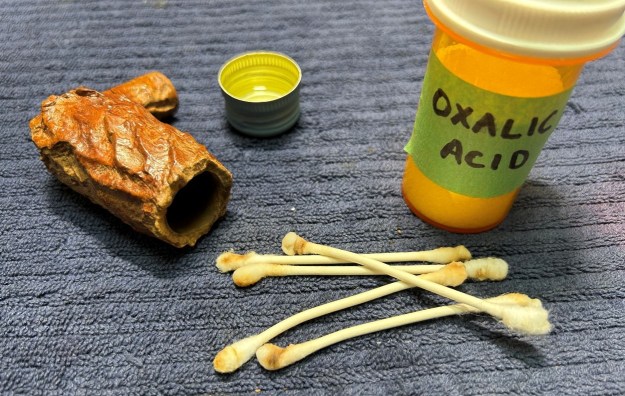
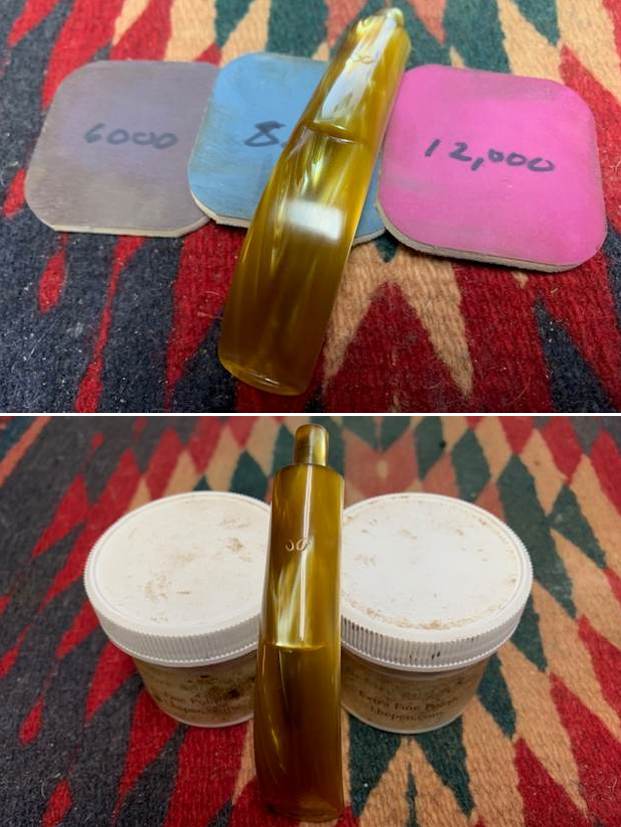
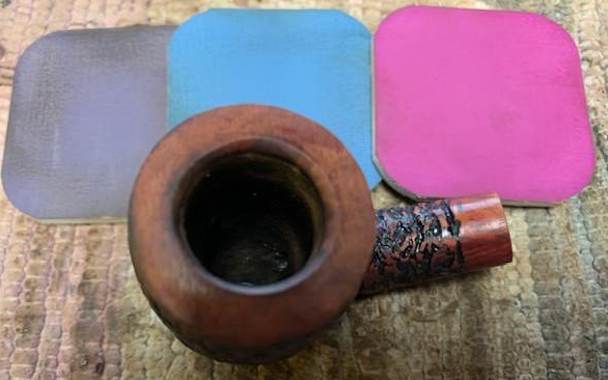
For the benefit of some of you who may be unfamiliar with some of the products he uses I have included photos of three of the items that Jeff mentions in his list. This will make it easier for recognition. These three are definitely North American Products so you will need to find suitable replacements or order these directly on Amazon. The makeup pads are fairly universal as we were able to pick some up in India when we were with Paresh and his family.
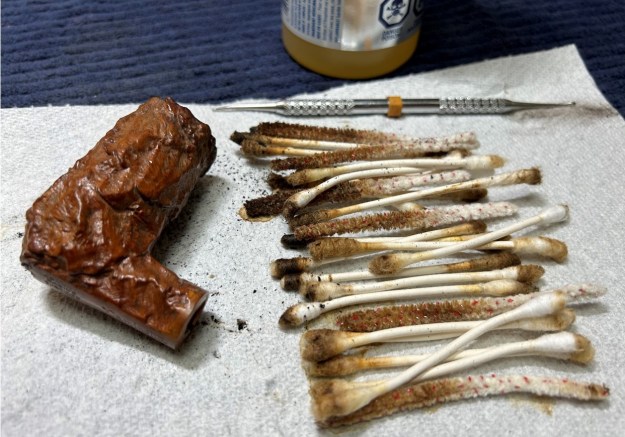
In the blog itself he breaks his process down into two parts – cleaning the stem and cleaning the bowl. Each one has a large number of steps that he methodically does every time. I know because I have watched him do the work and I have seen the pipes after his work on them. He followed this process step by step and when the pipe got to me it was spotlessly clean and ready for my work. The inside of the stem, shank and bowl were clean and to me that is an amazing gift as it means that my work on this end is with a clean pipe! I cannot tell you how much difference that makes for my work.
-
-
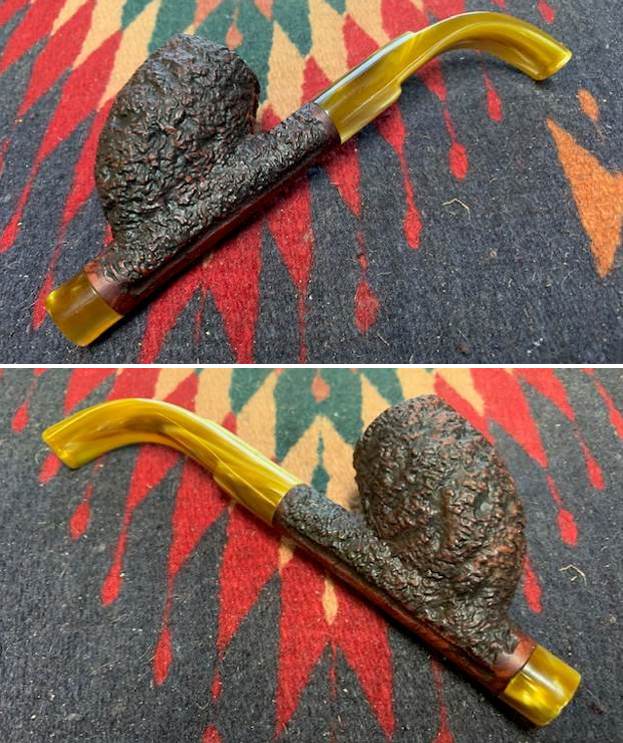
- The first thing I see is a pipe that has a classic bent Italian Billiard shape.
- The finish is clean and the grime and grit have been removed from the finish on the bowl. The rustication looks very good as well.
- The thick lava, grime and dust on the rim top has been removed and it has revealed that the inner edge is damaged and has some burn marks. The outer edge of the bowl is also in good condition other than the burn damage on the front smooth ring on the outer edge of the bowl
- The walls of the bowl are clean and they look very good with no checking or burn damage to the walls.
- The acrylic stem is in excellent condition – dirty and has light tooth chatter and marks on both sides ahead of button. The diameter of the stem is off from that of the shank on both sides and will need to be adjusted for a decent fit. There is a Caminetto white mustache logo inlaid in the stem top.
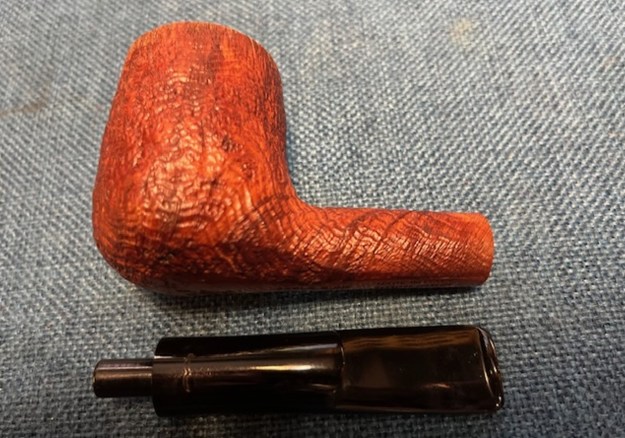
Hopefully the steps above show you both what I look for when I go over the pipe when I bring it to the work table and also what I see when I look at the pipe in my hands. They also clearly spell out a restoration plan in short form. My work is clear and addressing it will be the next steps. I took photos of the whole pipe to give you a picture of what I see when I have it on the table. This is important to me in that it also shows that there was no damage done during the clean up work or the transit of the pipe from Idaho to here in Vancouver.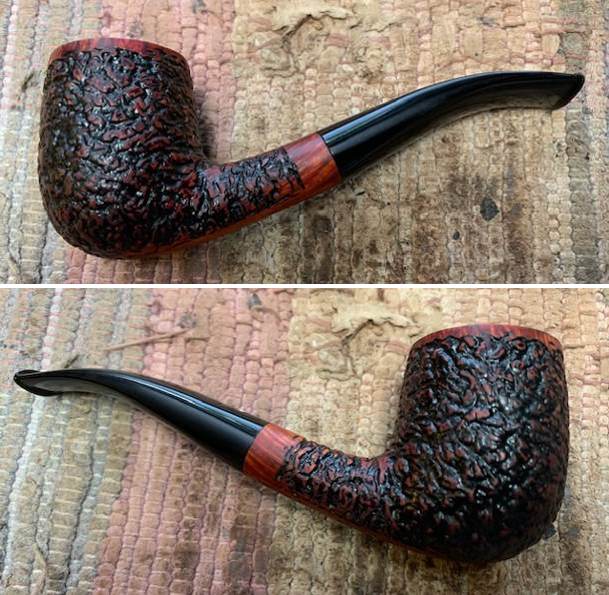
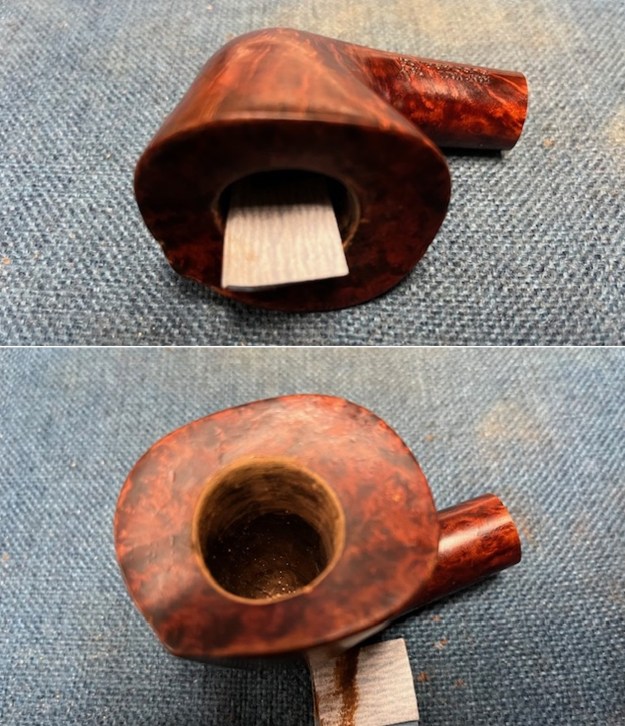
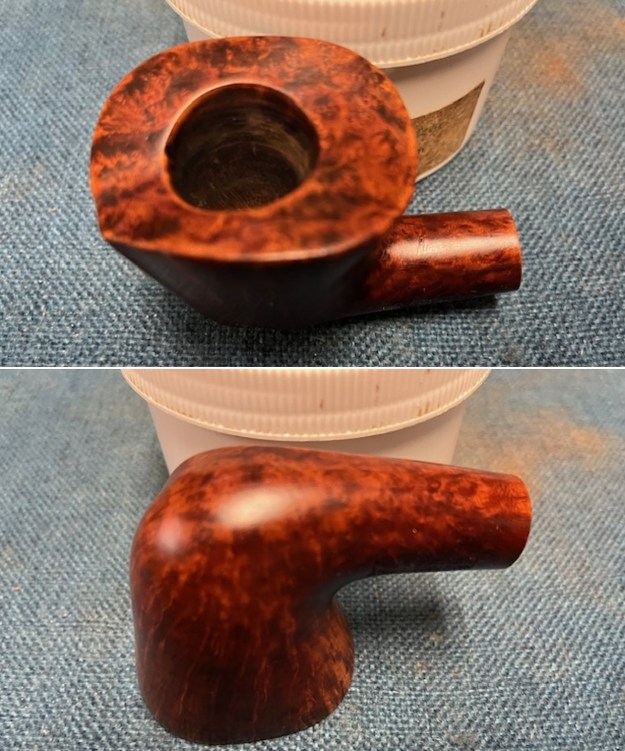
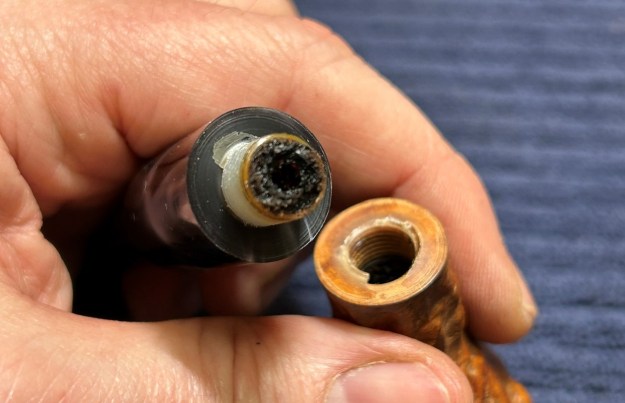
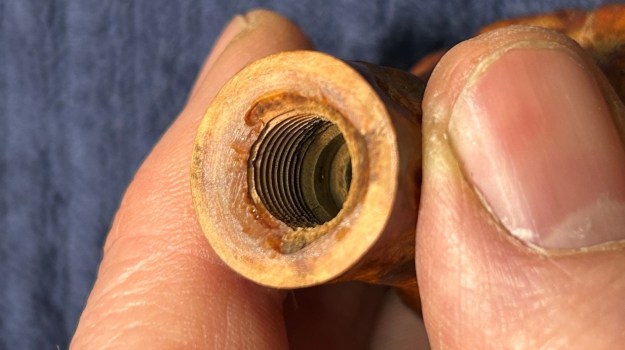
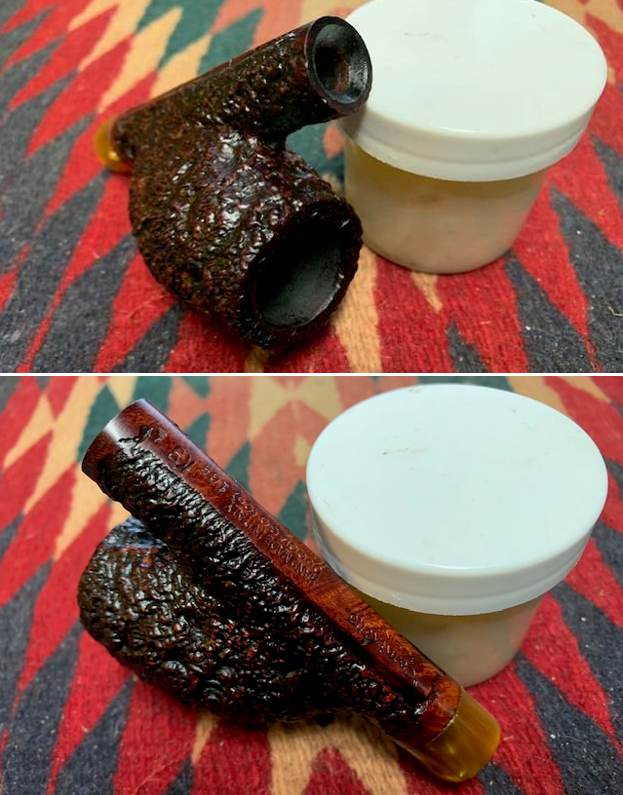
 I carefully went over the bowl and rim top to get a sense of what is happening there. In this case once the rim top and edges were cleaned the top and edges showed a lot of damage on the top, inner and outer edge of the bowl. There was burn damage all around the inner edge, on the top at the back and front as well as on the outer edge of the bowl at the front. I also go over the stem carefully. The stem had some minor issues as noted. The fit to the shank is noted in the photo below circled in red with arrows pointing out the issues. There were some light tooth marks and chatter on the surface of the stem and the button. I took photos of the rim top and stem sides to show as best as I can what I see when I look at them.
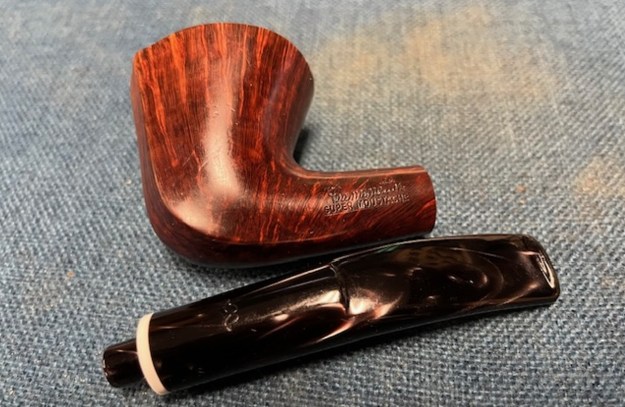
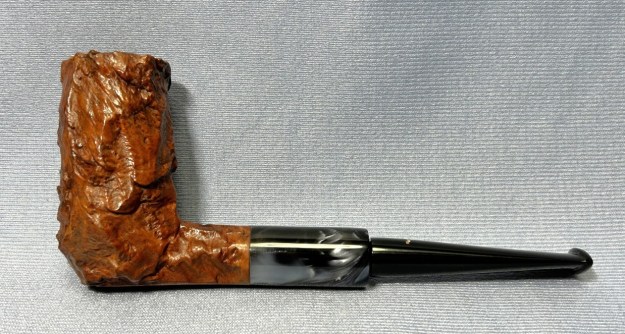
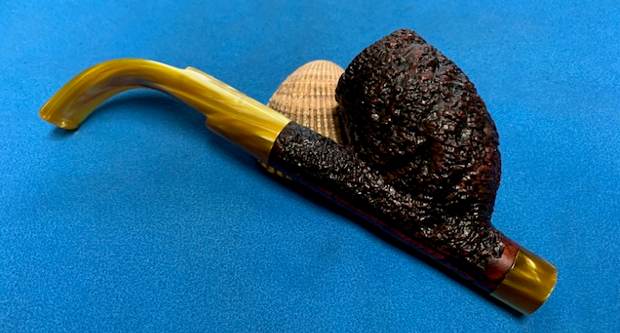
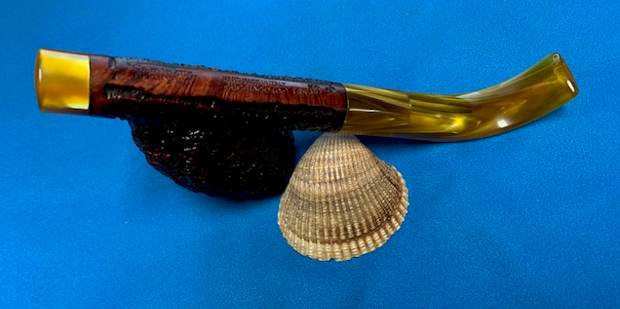
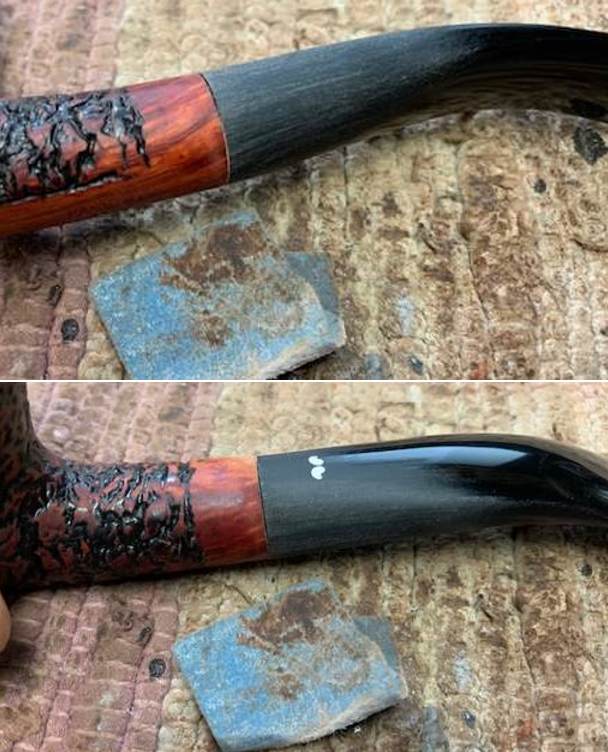
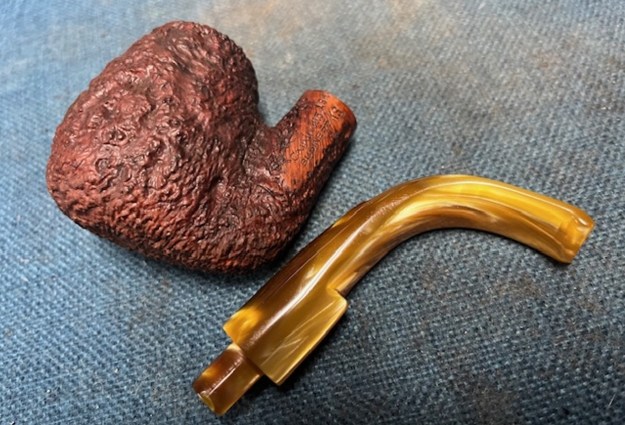
  I always check to make sure that the clean up work did not damage the stamping on the shank sides in any way. It is in excellent condition and is very clear and readable. You can also see the misfit stem in the first photo. I love just looking at the lay of the pipe and the proportion of the hand made pipes. I like to remove the stem from the shank to get a sense of what was in the mind of the pipe maker when he crafted the pipe. The photo shows its beauty in flow and shape.
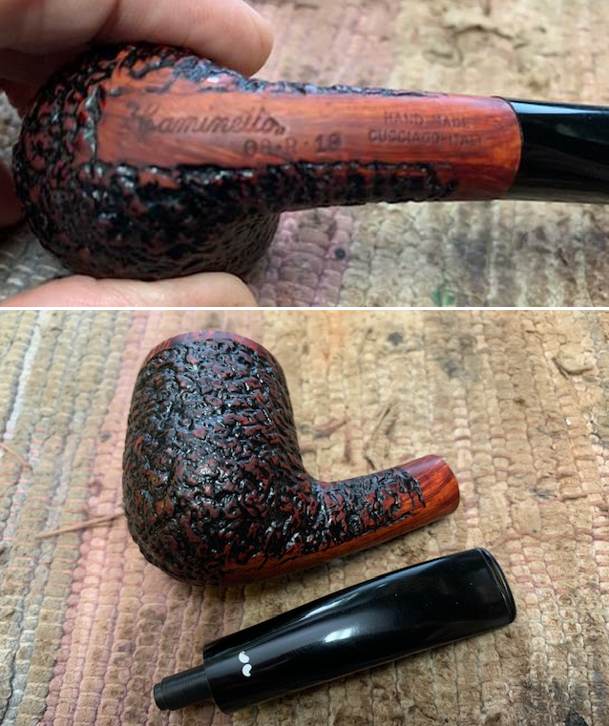 Now it was time to start working on the pipe. I decided to address the fit of the stem to the shank first. I sanded the shank and stem on the right side until the transition was very smooth. You will notice in the photos of the top and the right side of the pipe that the shank has been sanded and will need to be restained. On the left side I sanded the stem to remove the excess acrylic and make the transition smooth. You will note in the photos that the surface of the stem shows the sanding on the acrylic. Once finished the fit was perfect and the transition was smooth.
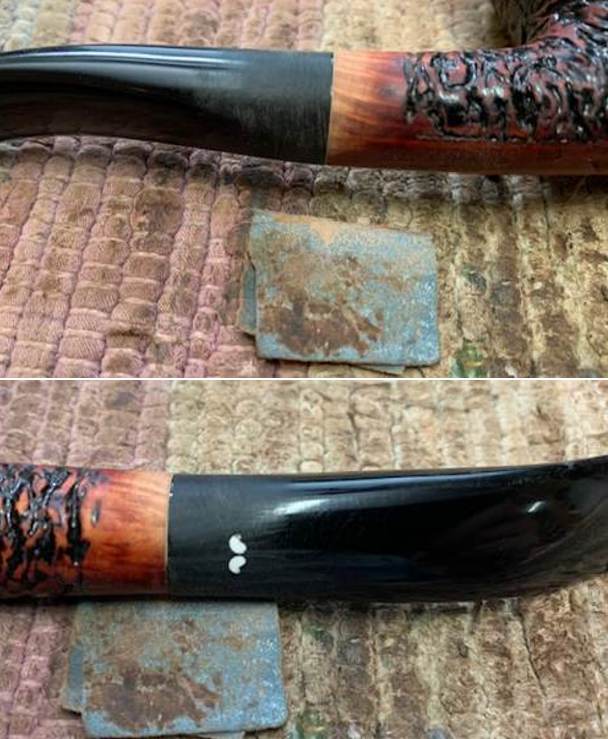
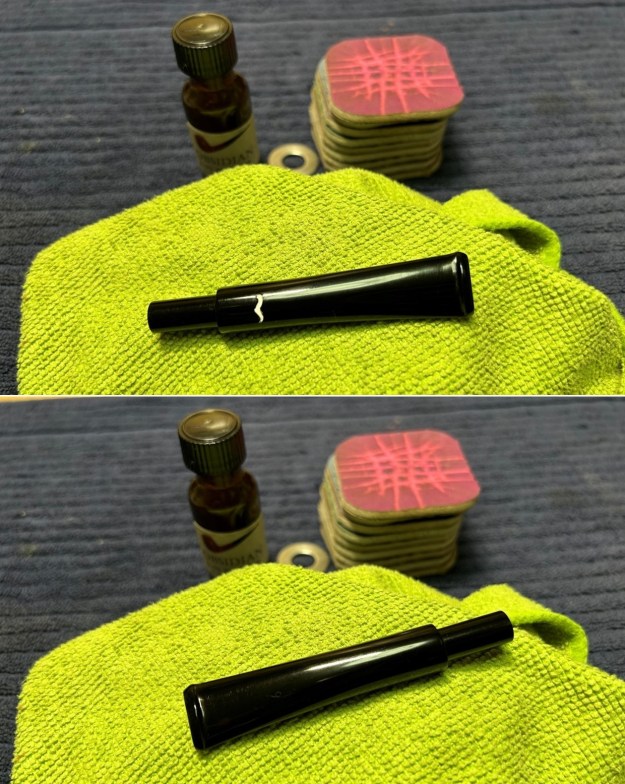
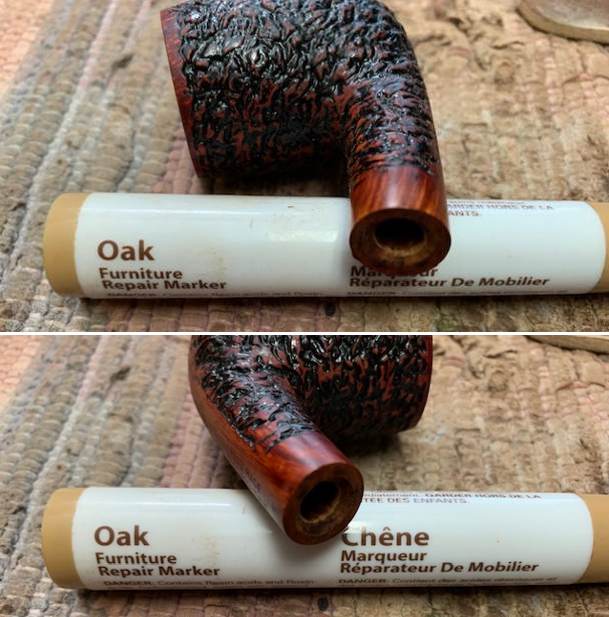
 Once the transition was smooth I took photos of the stem/shank transition. It is very smooth and there is no longer a lip on either the stem or the shank.
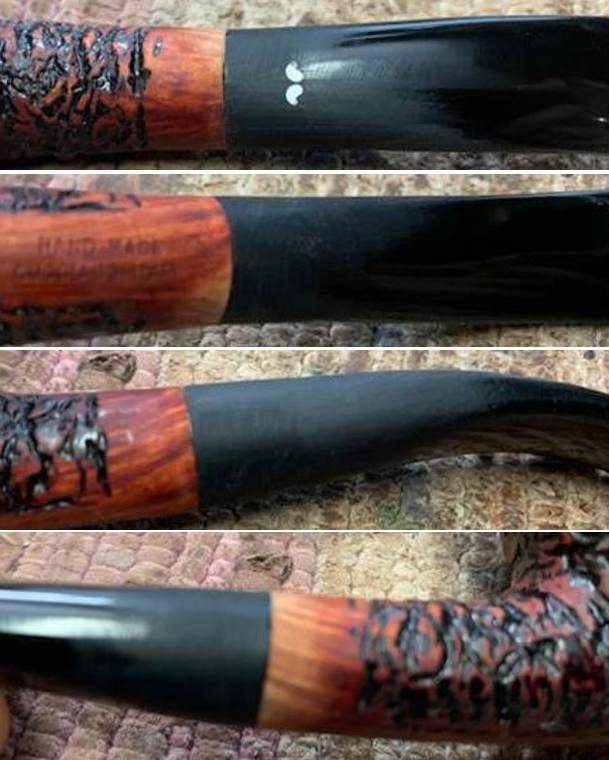 I polished the sanded briar with micromesh sanding pads and then restained the portion with an Oak Stain Pen to match the rest of the bowl and the shank.
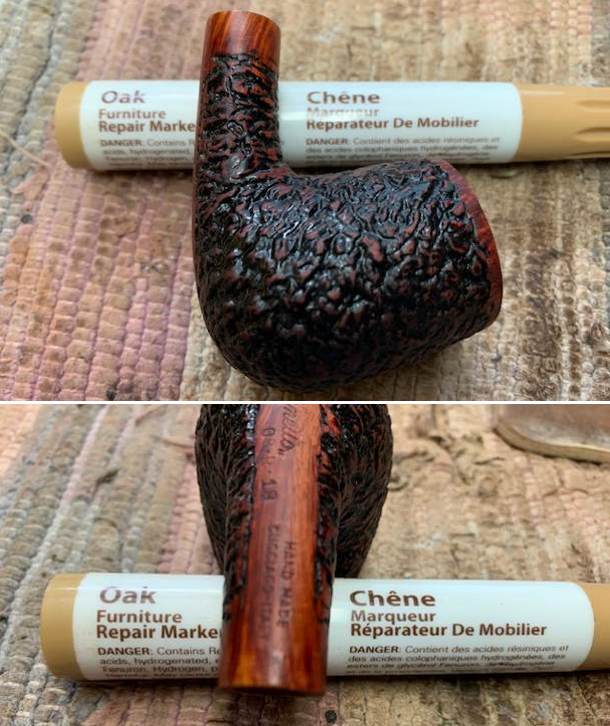
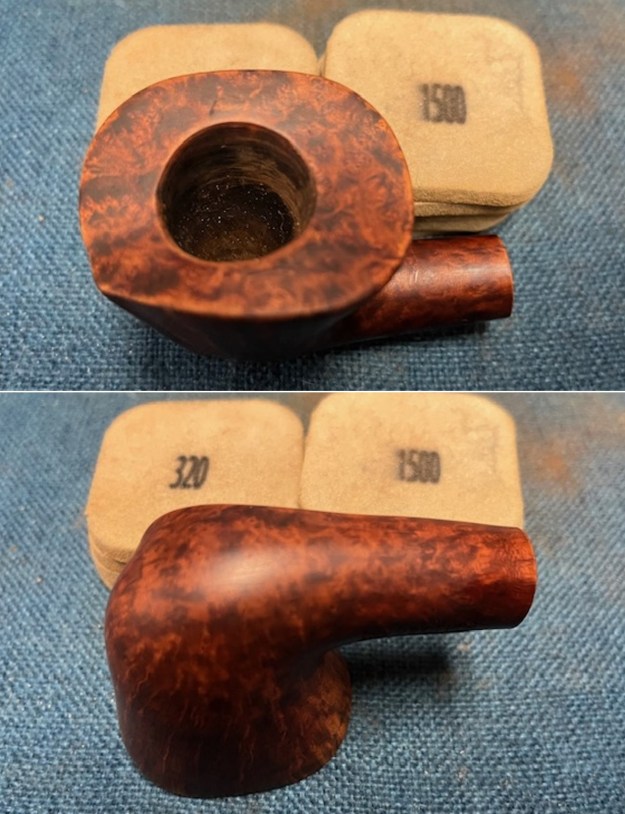
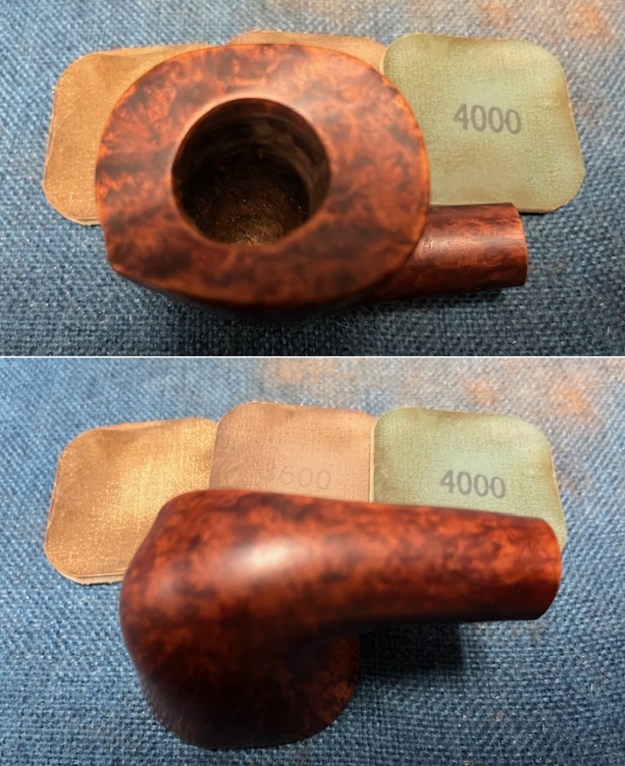
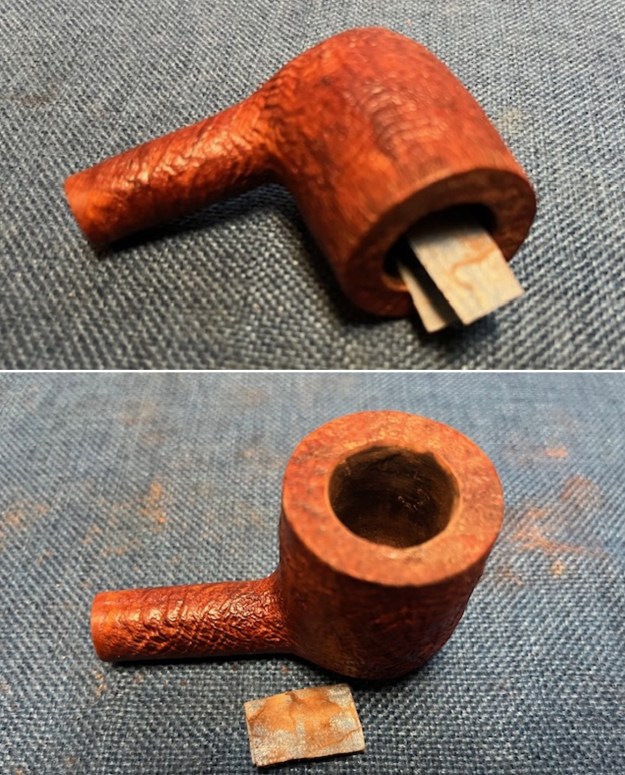
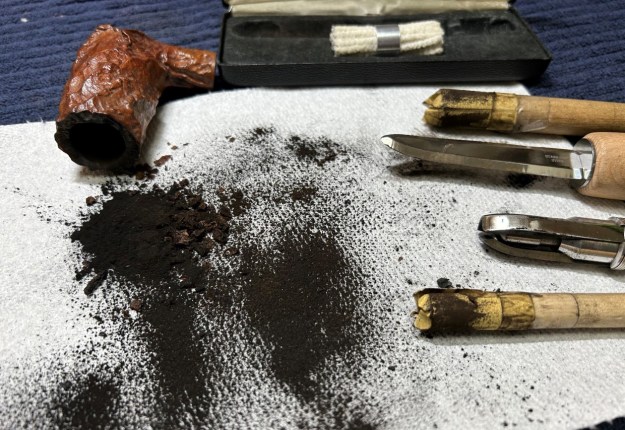
 With that portion finished I turned to address the darkening on the rim top and edges I started by topping the bowl with 220 grit sandpaper on a topping board. I need to remove the darkening to be able to see the damage. The damage is very evident on the top of the bowl and the inner edge on the right front. To deal with the rim damage on the top and the inner edge I used a wooden ball and a piece of 220 grit sandpaper to give the inner edge a slight bevel and remove the damage. Now I was getting somewhere. I used a folded piece of 220 grit sandpaper to fine tune the shape. I topped it once again with 220 grit paper. I am happy with the end result.
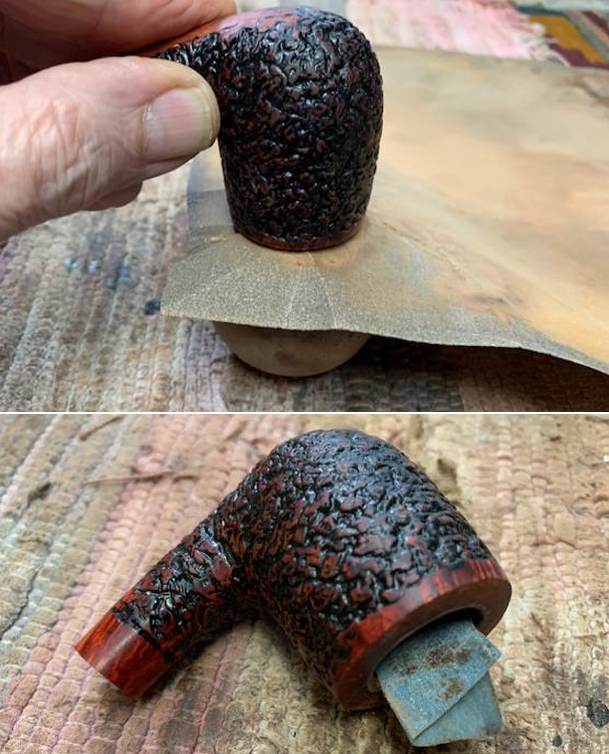
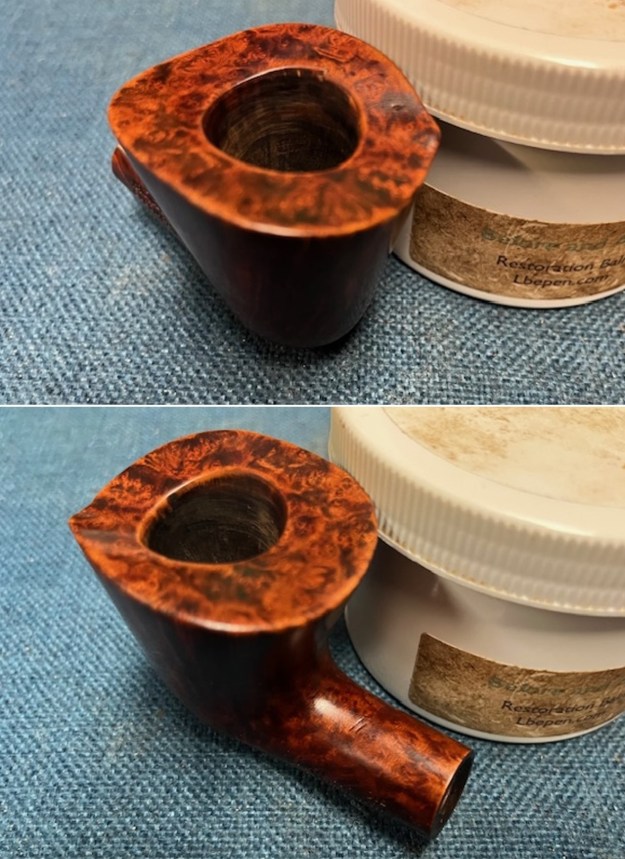
 I stained the rim top with a oak stain pen to match the rest of the bowl and shank colour. It as a little dark but once it was polished and waxed it would be a perfect match.
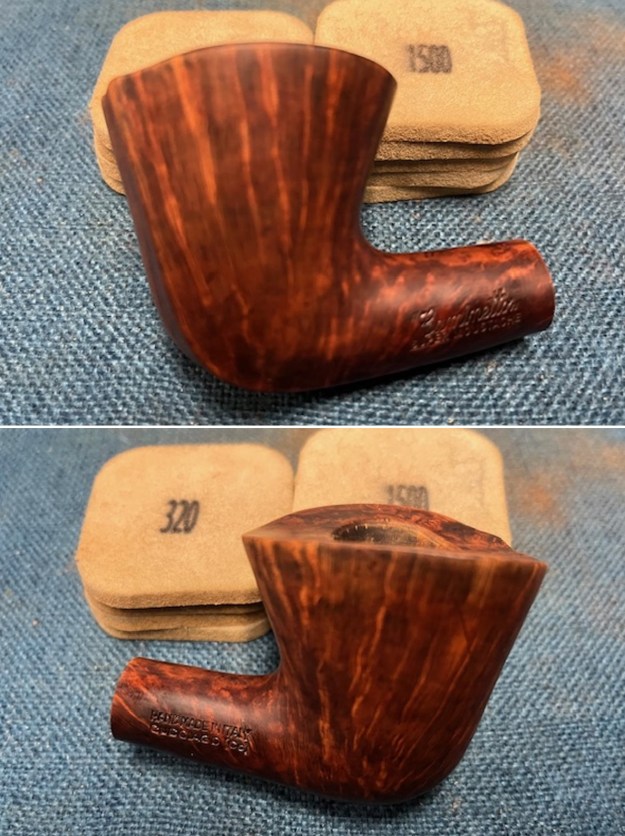
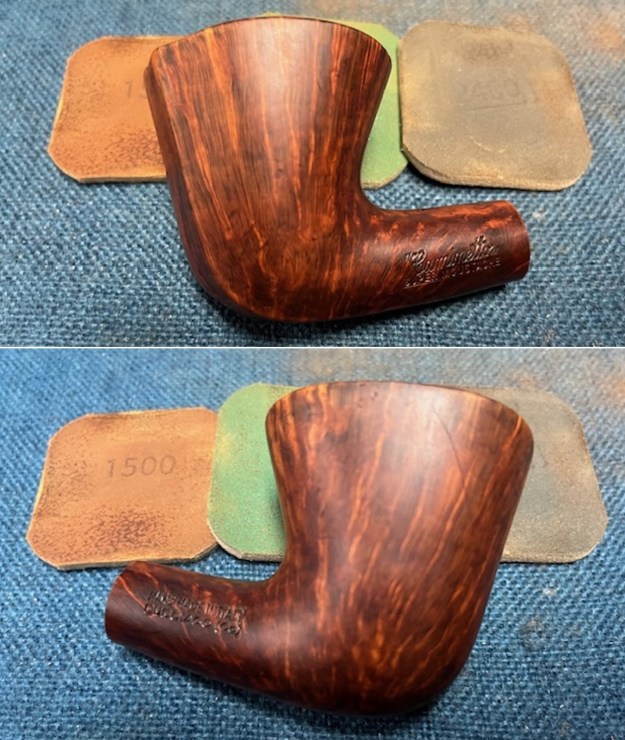
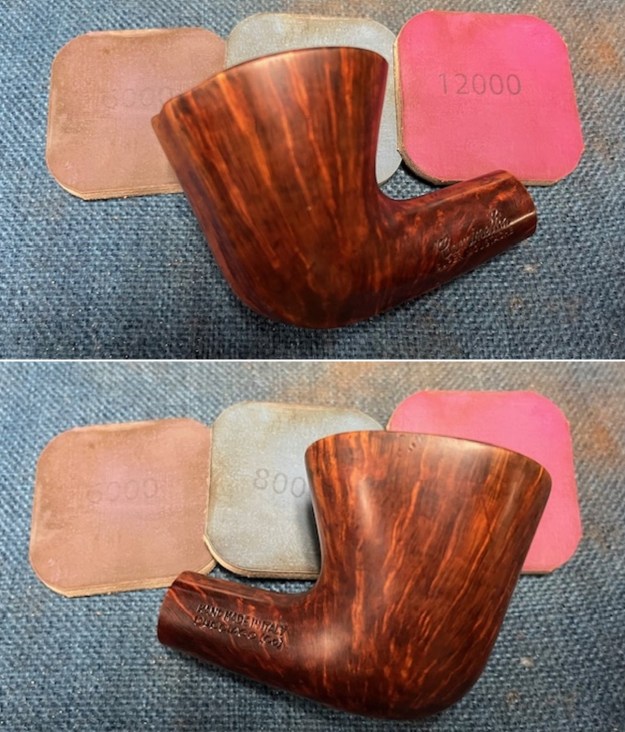
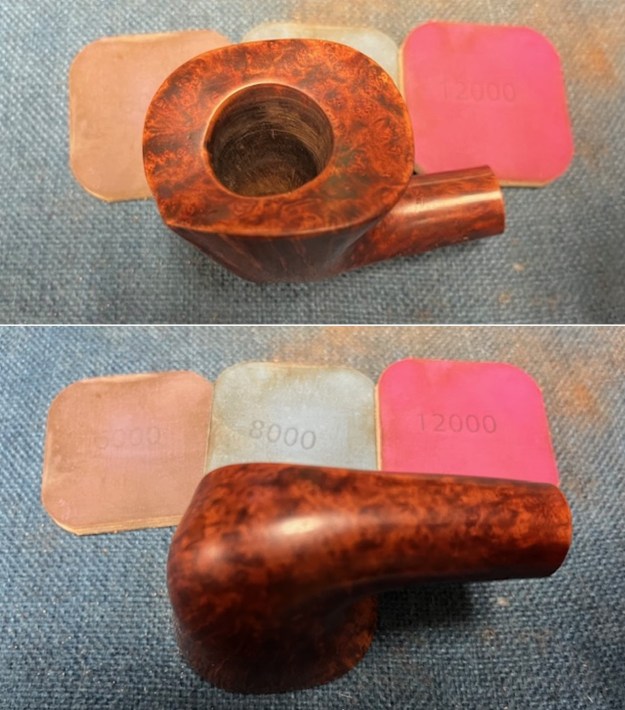
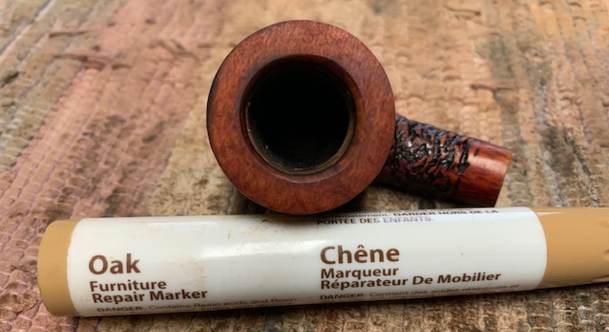 I polished the smooth portions of the briar with micromesh sanding pads. I choose to dry sand the briar rather than wet sand it. Again it is a matter of personal preference. I prefer to use the pads dry and find they work very well on the briar. I sand with each pad (9 in total) and group them by threes for ease of reference. I wipe the bowl down after each pad with a damp cloth to remove the sanding debris and check the briar. I love seeing the developing shine on the briar as I move through the pads which is why I include so many photos of this step.
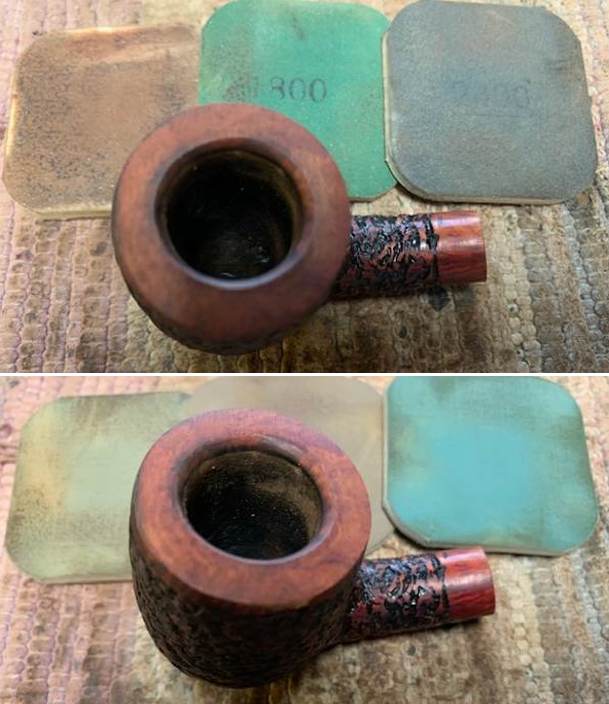
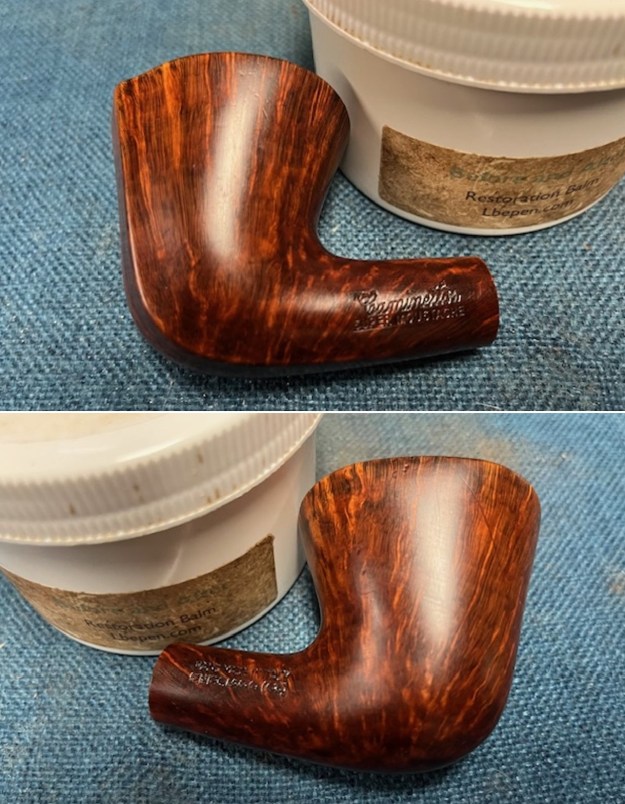
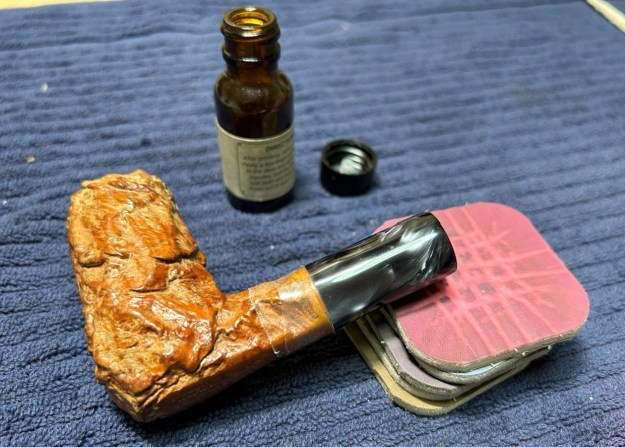
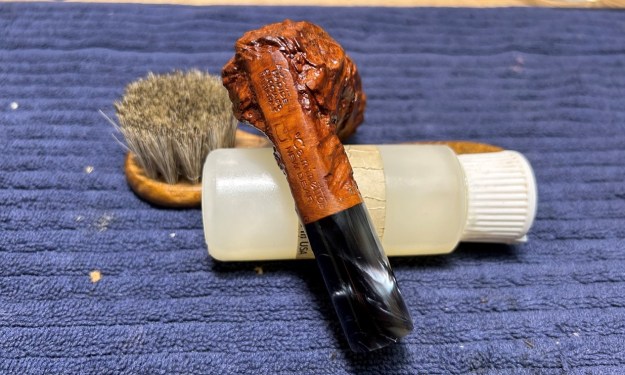
 After polishing it with the micromesh pads I rubbed it down with Before & After Restoration Balm. It is a paste/balm that is rubbed into the surface of the briar and the plateau. The product works to deep clean the nooks and crannies of finish, enliven and protect the briar. I worked it into the briar with my finger tips and into the rustication with a horse hair shoe brush. I let it sit for 10 minutes then wiped it off with a soft cloth then buffed it with a cotton cloth. The briar really began to have a deep shine in the briar and the grain shone through. The photos I took of the bowl at this point mark the progress in the restoration. It is a gorgeous pipe.
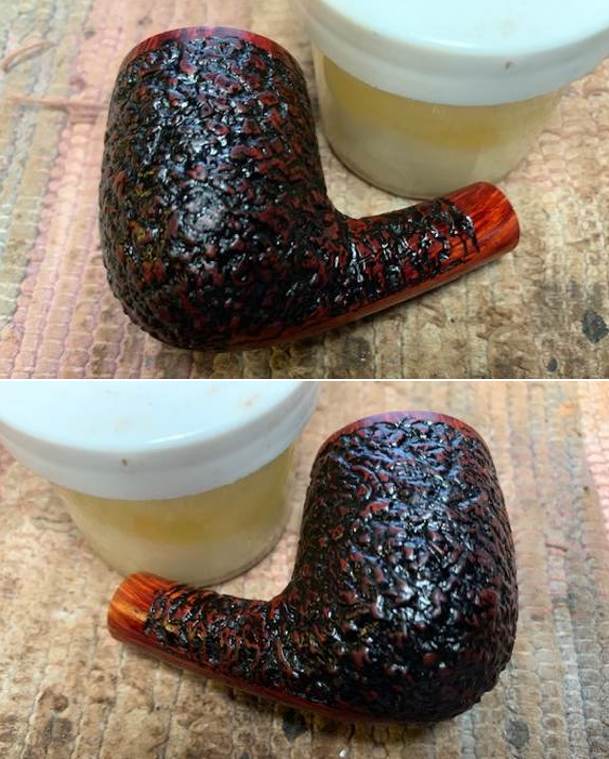
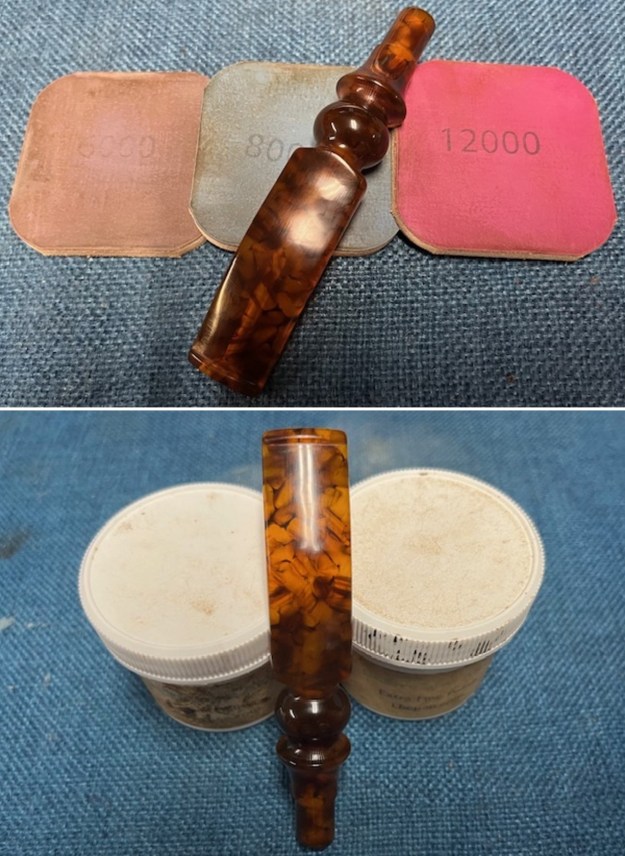
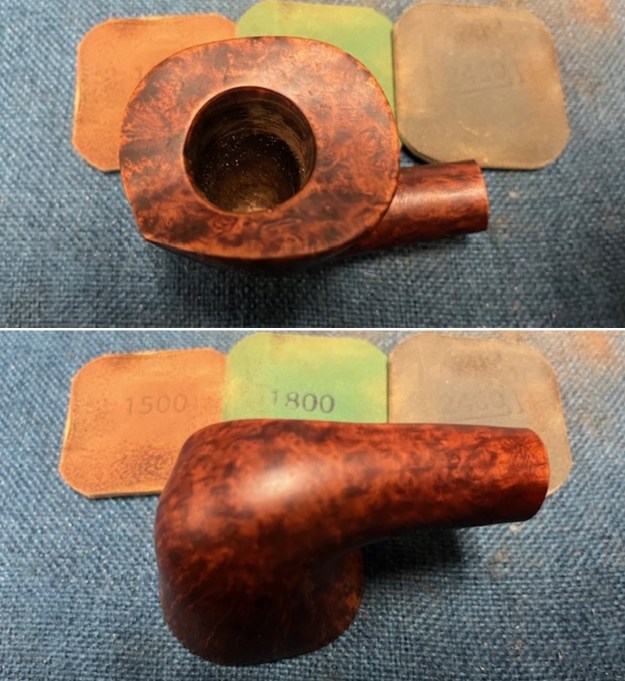
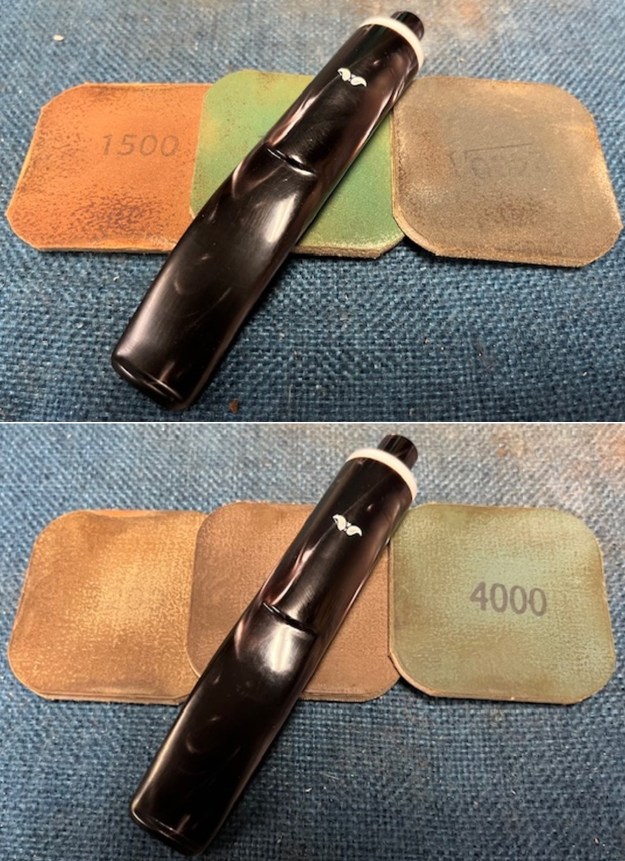
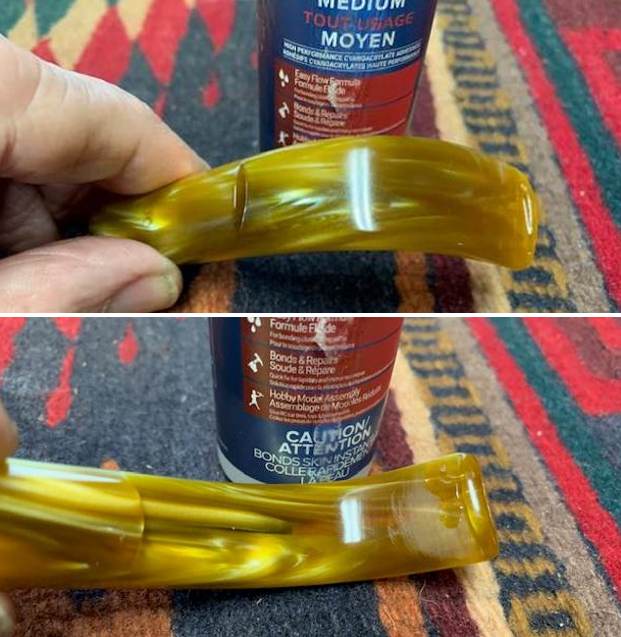
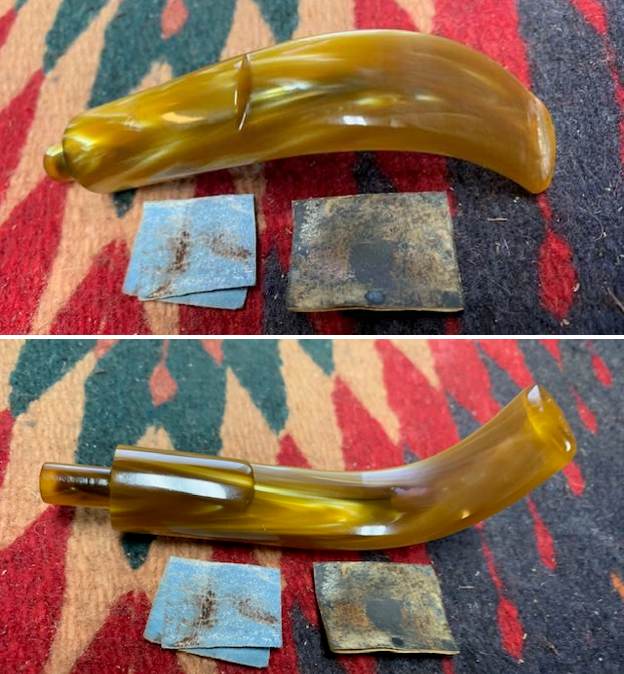
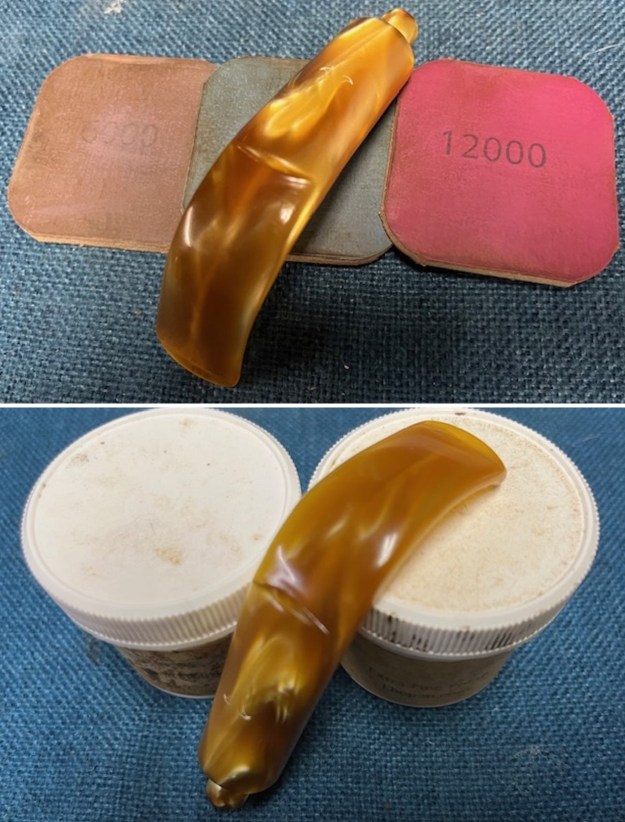
 I set the bowl aside and turn to work on the stem. I polished the stem with micromesh sanding pads – 1500-12000 grit sanding pads and water to wet sand the stem. I wiped it down after each sanding pad with Obsidian Oil on a cotton rag after each sanding pads. But I find it does two things – first it gives some protection to the stem from oxidation and second it give the sanding pads bite in the polishing process.
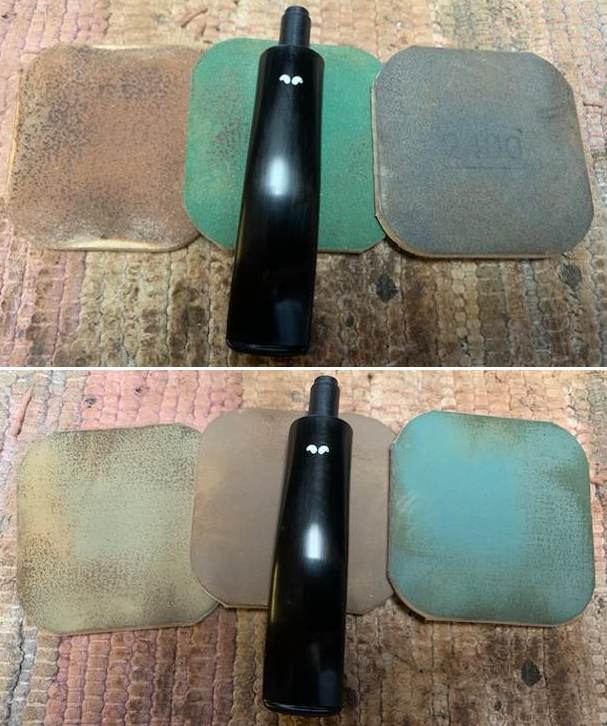
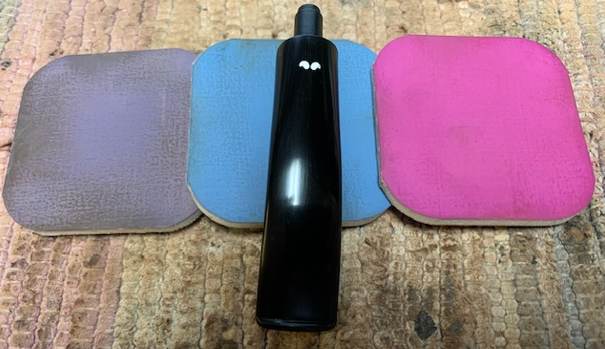 After finishing with the micromesh pads I rub the stem down with Before & After Fine and Extra Fine stem polish as it seems to really remove the fine scratches in the vulcanite. I rub the Fine Polish on the stem and wipe it off with a paper towel and then repeat the process with the Extra Fine polish. I finish the polishing of the stem down with a final coat of Obsidian Oil and set the stem aside to let the oil absorb. This process gives the stem a shine and also a bit of protection.
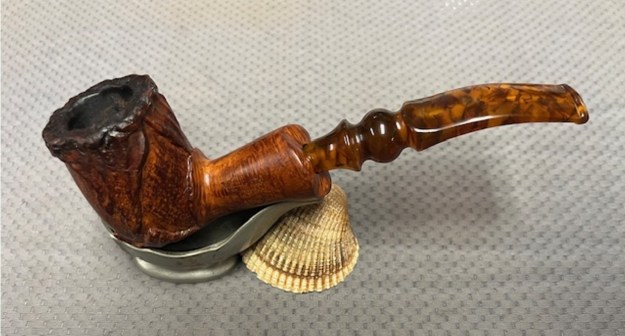
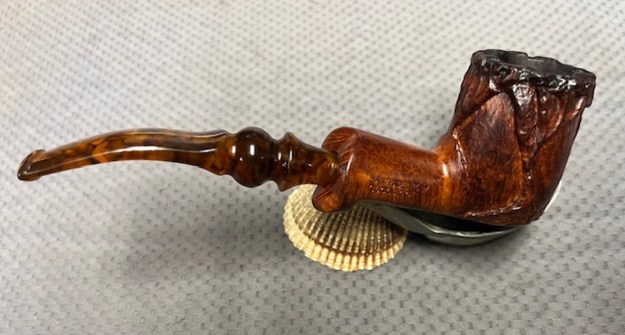
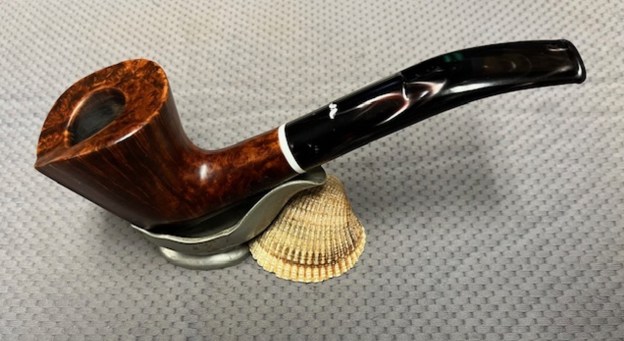
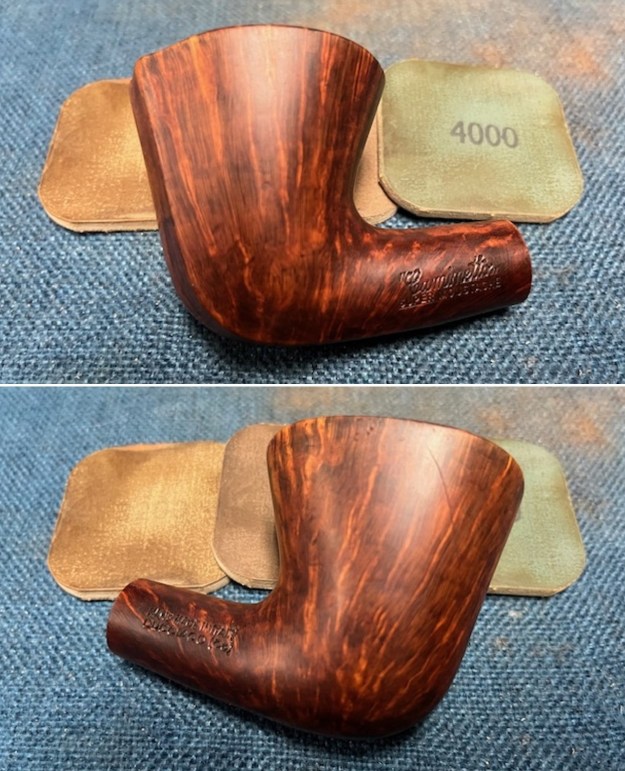
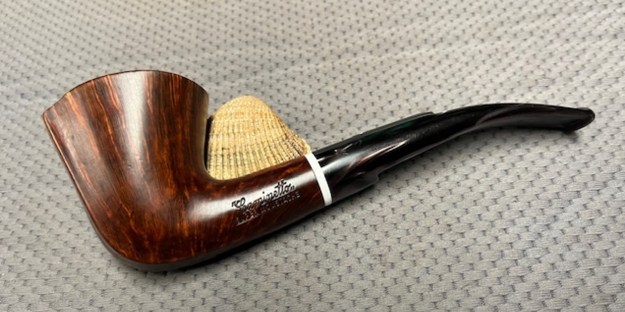
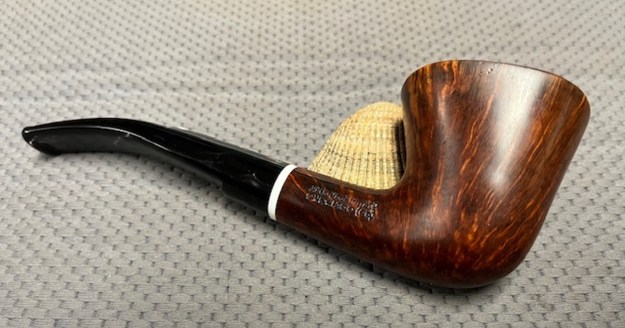
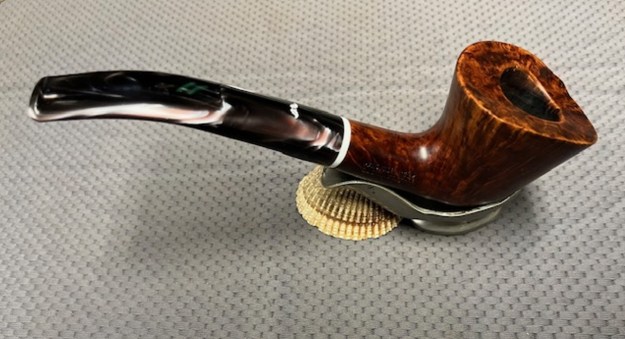
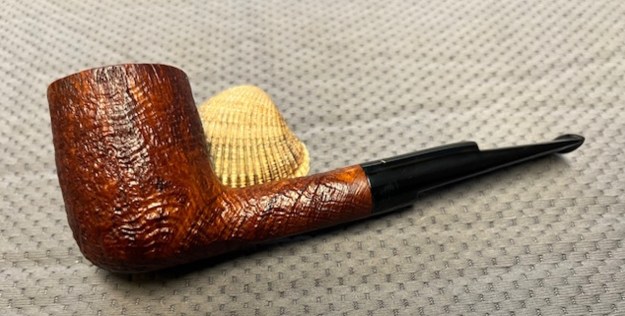
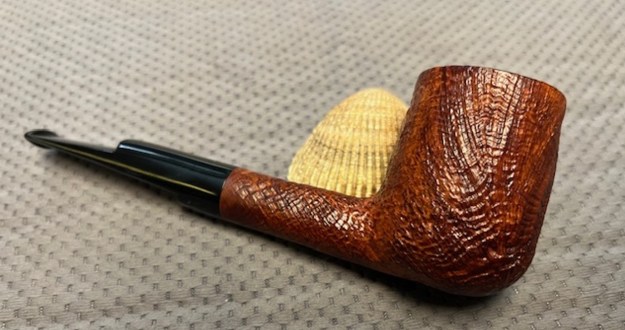
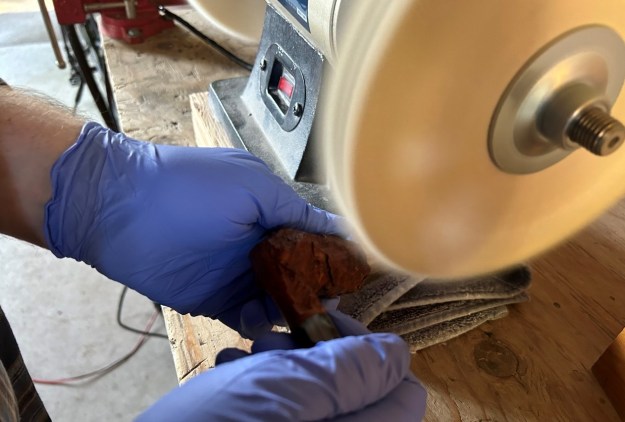
 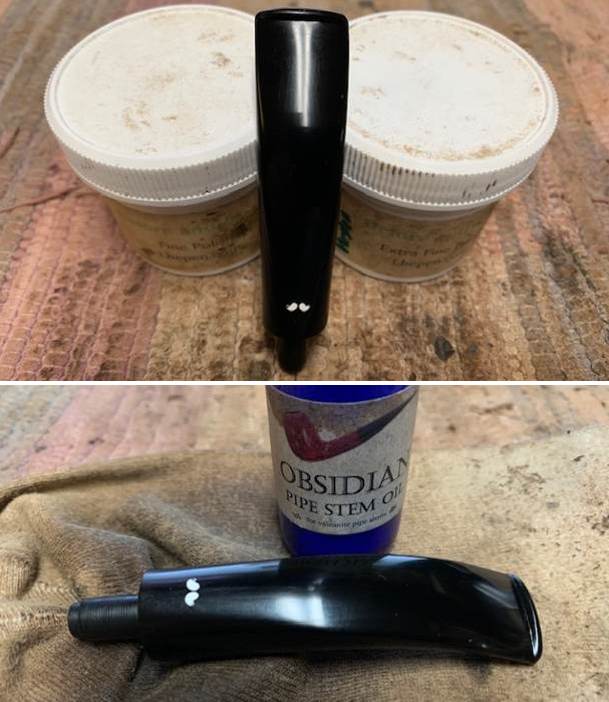 The final steps in my process involve using the buffer. I buffed the stem with Blue Diamond to polish out the light scratches in the acrylic. I gave the bowl multiple coats of Conservator’s Wax and the stem multiple coats of carnauba wax. I have found that I can get a deeper shine if I follow up the wax buff with a buff with a clean buffing pad. It works to raise the shine and then I hand buff with a microfiber cloth to deepen the shine. It is always fun for me to see what the polished bowl looks like with the polished stem. It really is a nice pipe. The mix of smooth and rusticated finishes around the bowl sides and shank looks great with the rich black and brown stains. The Caminetto 08.R.18 Bent Billiard feels great in my hand. It is a well balanced pipe. Have a look at it with the photos below. The dimensions are Length: 5 inches, Height: 2 inches, Outside diameter of the bowl: 1 3/8 inch, Chamber diameter: ¾ of an inch. The weight of the pipe is 1.73 ounces/49 grams. It is a beautiful pocket sized pipe that I will soon be adding to the rebornpipes store in the Italian Pipemakers section. If you would like to add it to your collection let me know. It should be a great smoking pipe.
Hopefully the style of writing of this blog is helpful to you in some way. In it I wanted to show both what I am looking for and how I move forward in addressing what I see when work on a pipe. Let me know if it is helpful to you. It is probably the most straightforward detailed description of my work process that I have done. As always I encourage your questions and comments as you read the blog. Thanks to each of you who are reading this blog. Remember we are not pipe owners; we are pipe men and women who hold our pipes in trust until they pass on into the trust of those who follow us.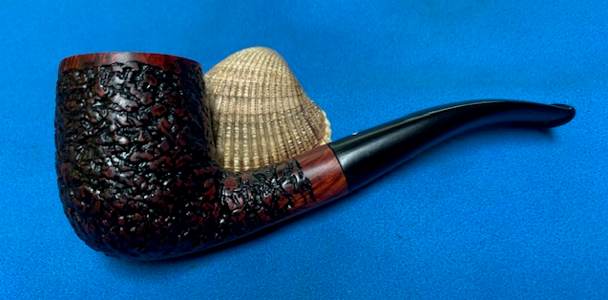

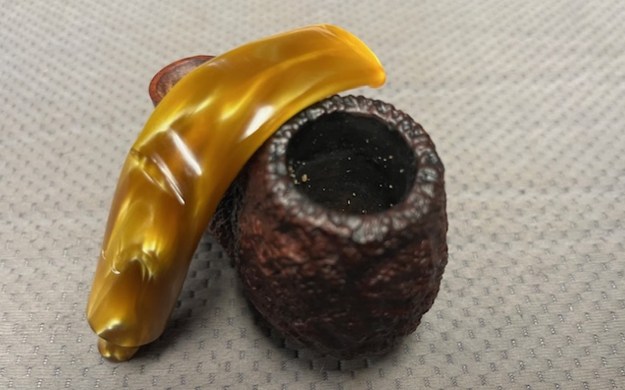
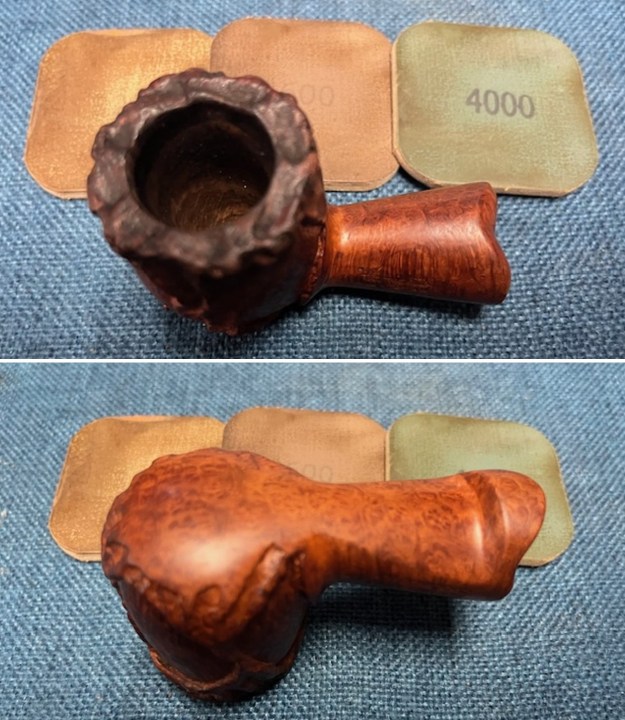
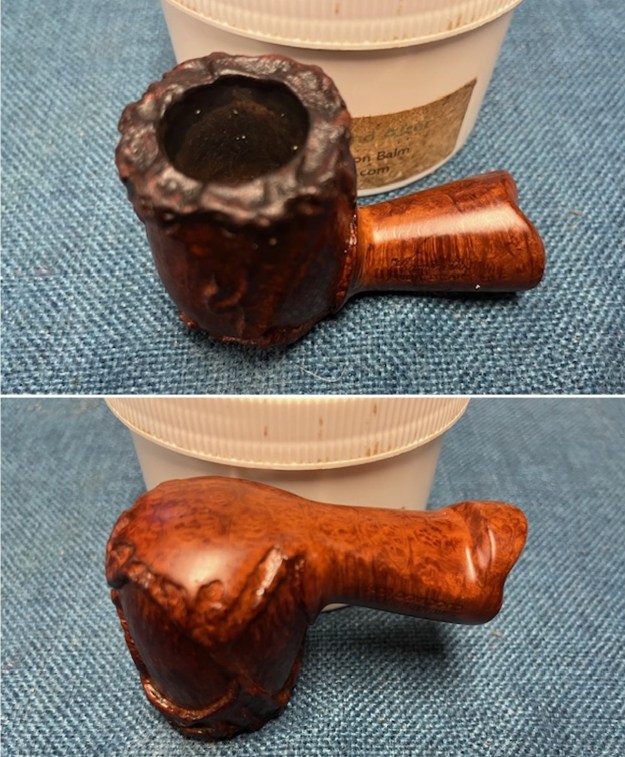
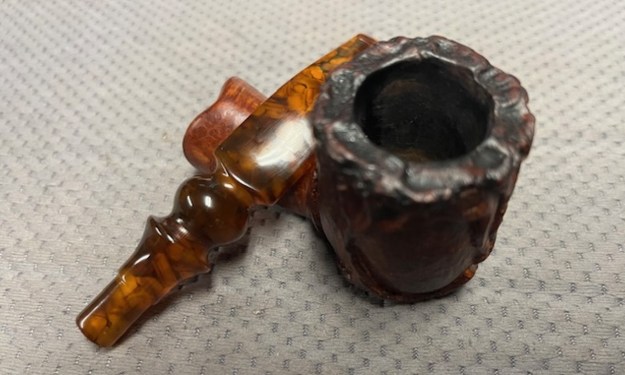
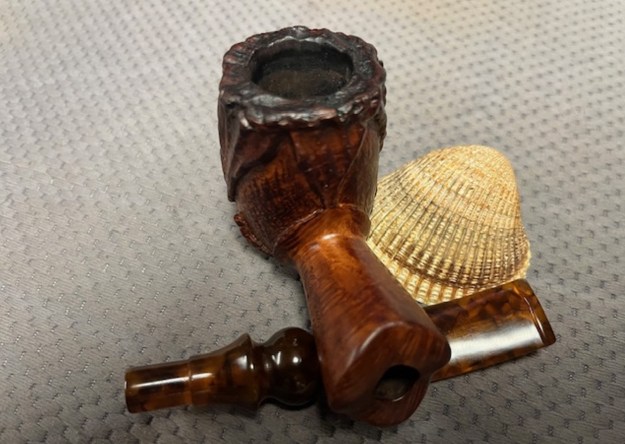
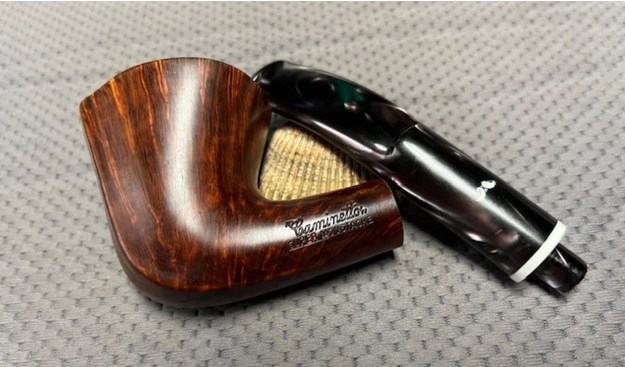
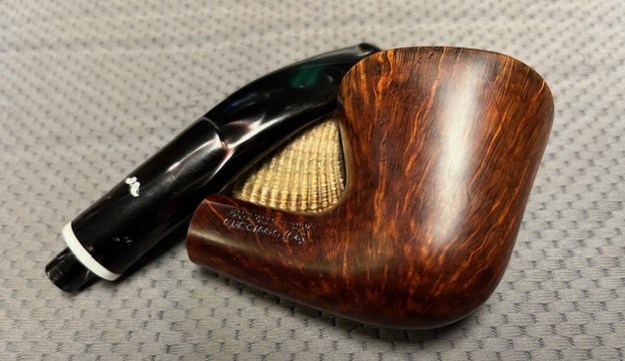
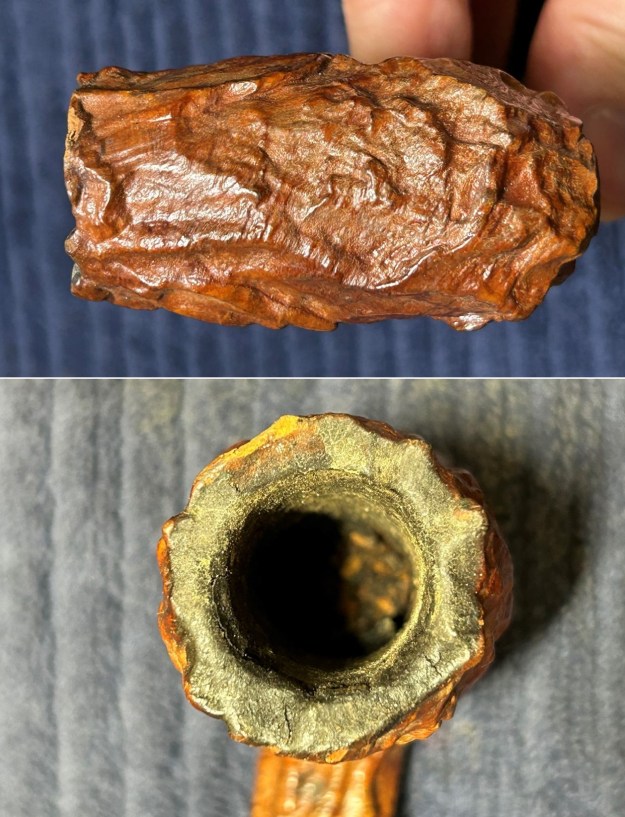
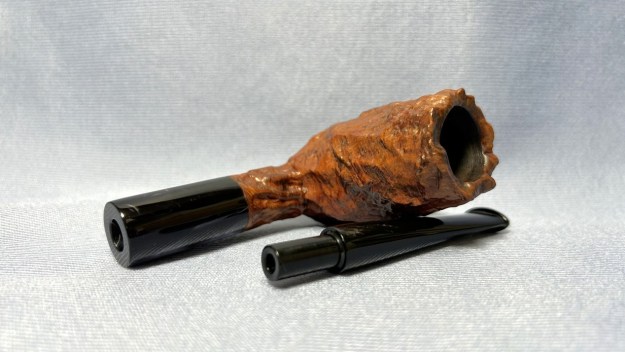
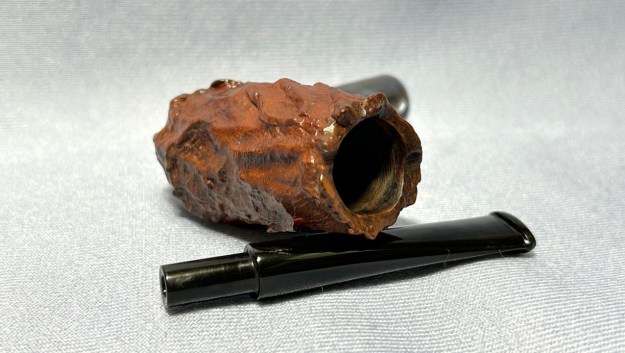
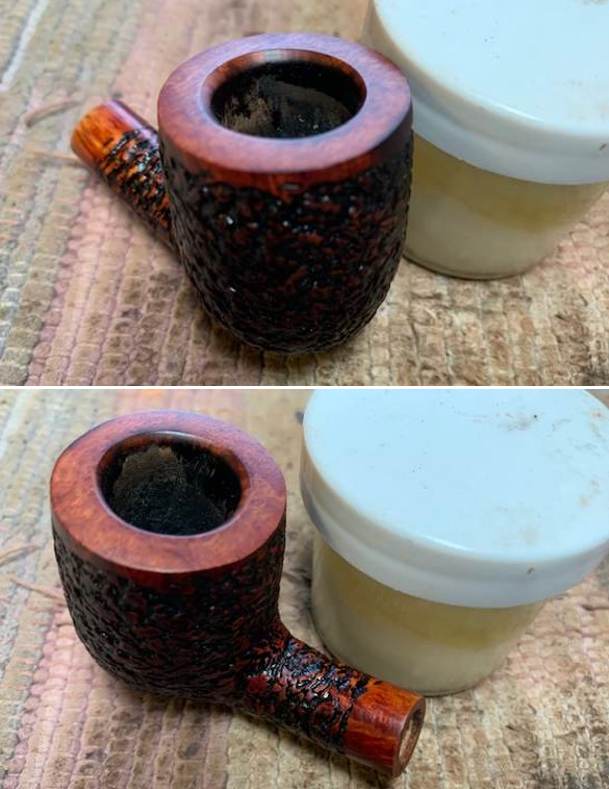
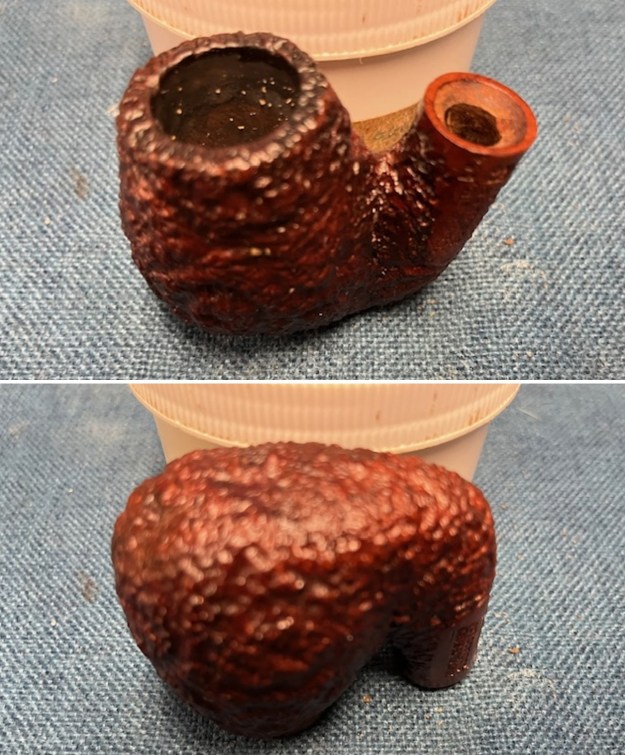
 He took close-up photos of the bowl and rim top from various angles to capture the condition of the bowl and rim top edges. You can see the lava overflow and debris in the rustication of the rim top. You can see the cake in the bowl. This was a dirty pipe but it was the finish was in great condition. The stem is also very dirty with light tooth marks and chatter on both sides near the button.
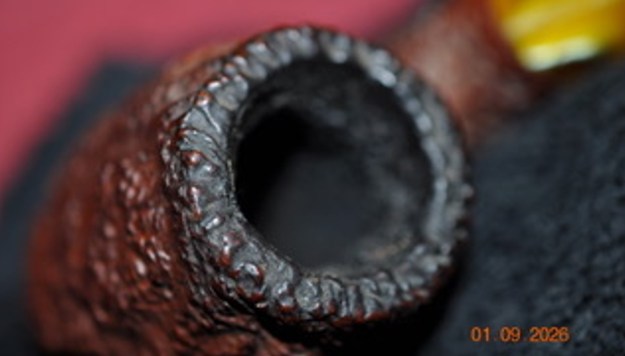
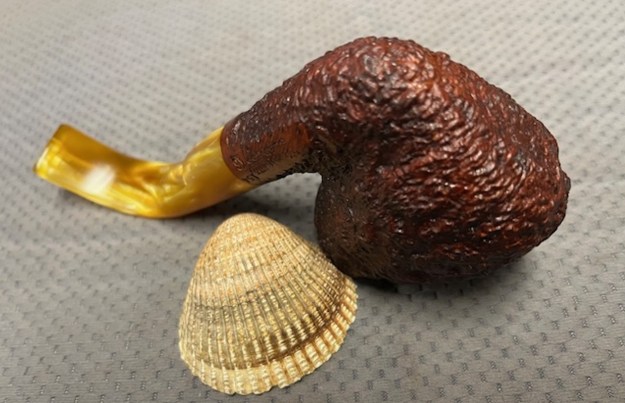
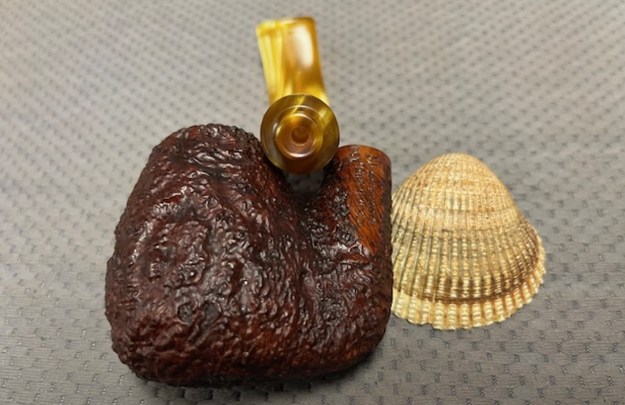
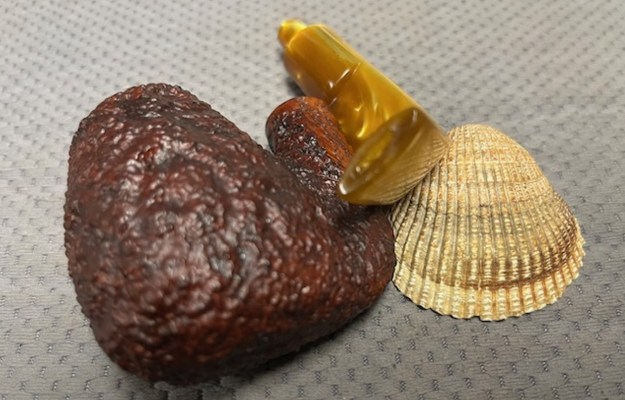
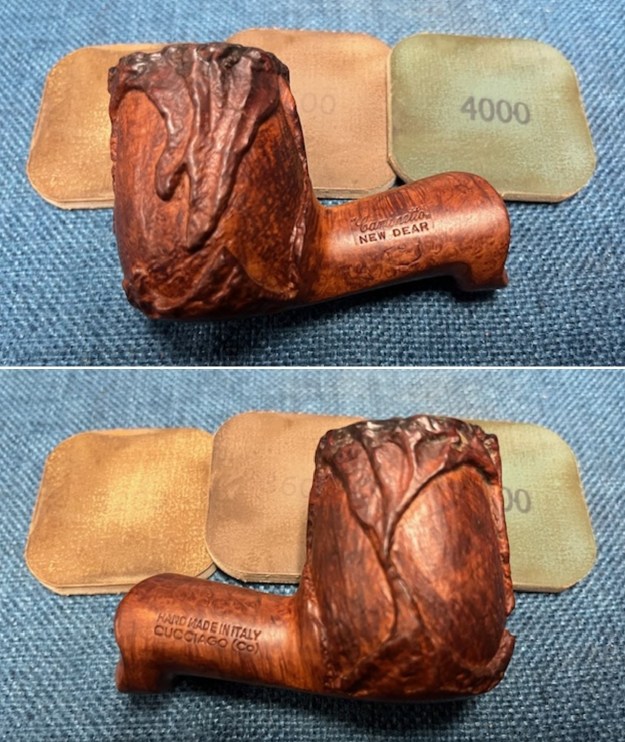
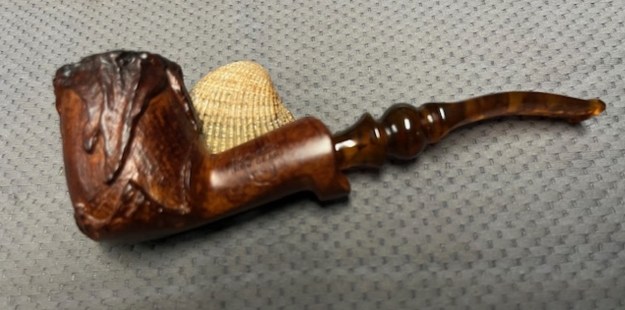
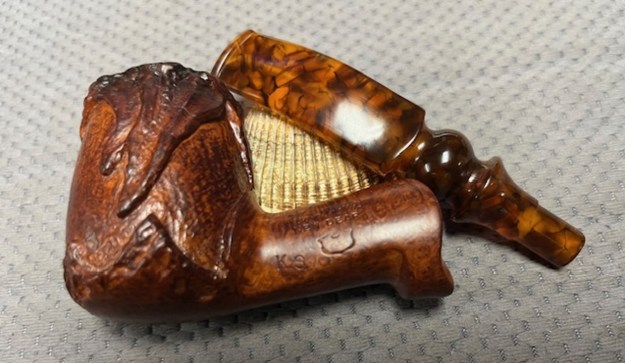
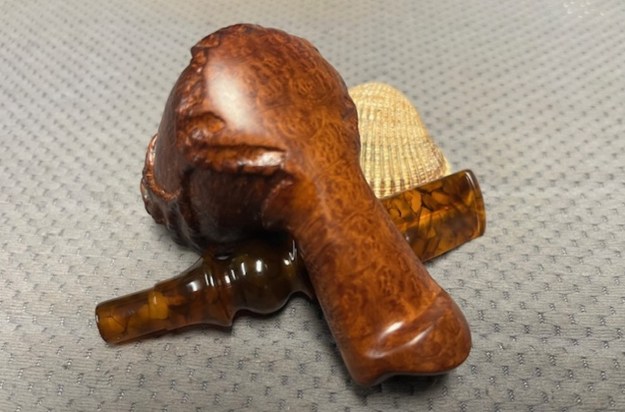
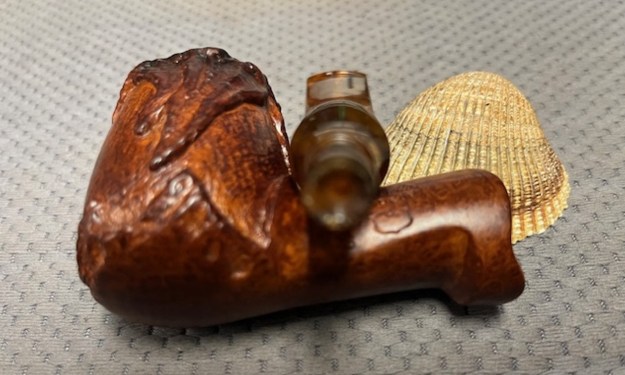
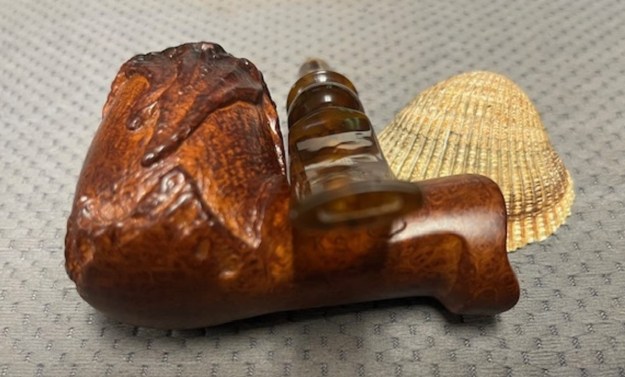
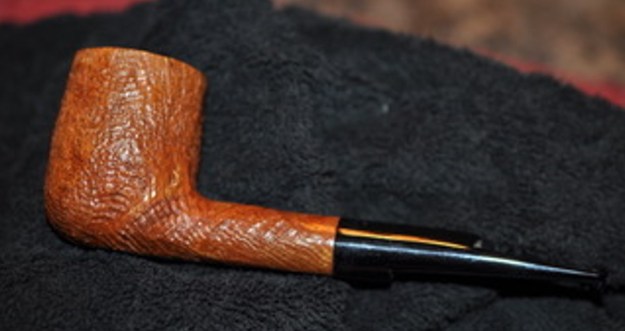
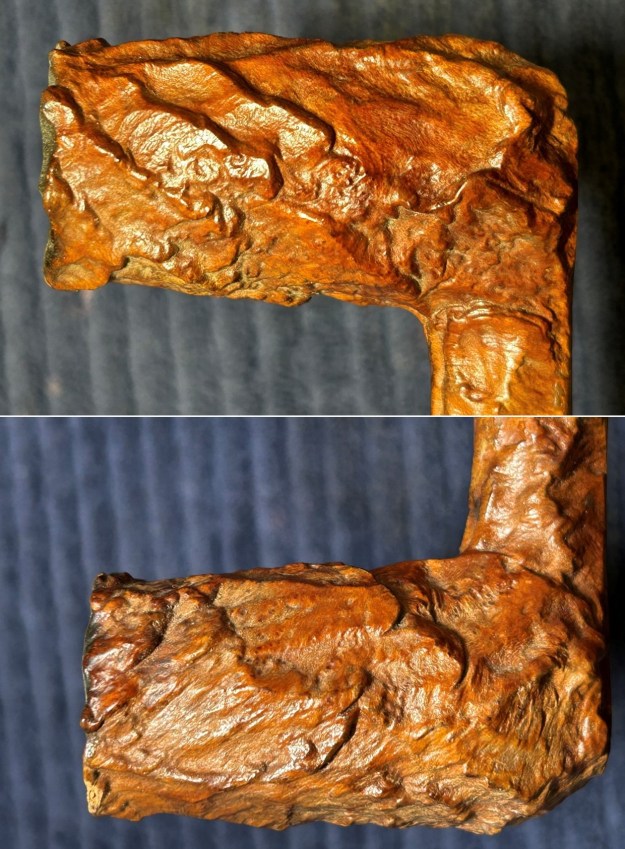
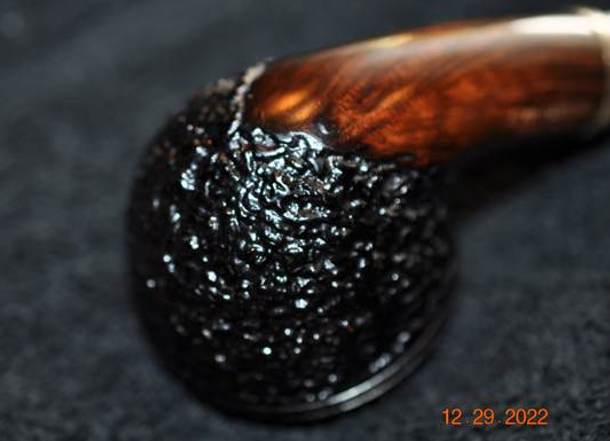
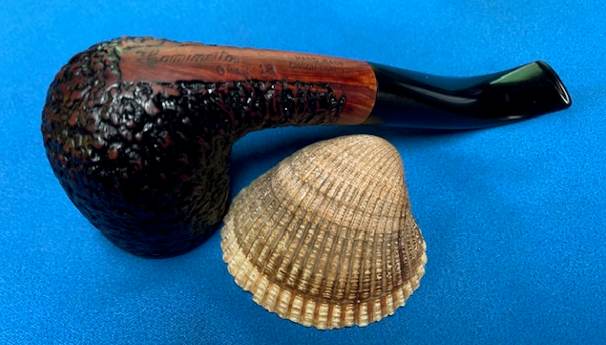
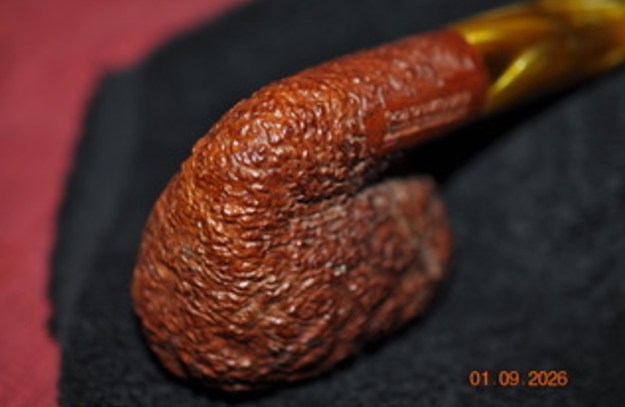
 He took photos of the sides and heel of the bowl to show the beautiful incredibly deep rustication around the bowl. It is similar to the rough finish on Castello Sea Rock and Savinelli Capri Pipes. You can see the oil, dust and debris in the finish on both sides of the bowl.
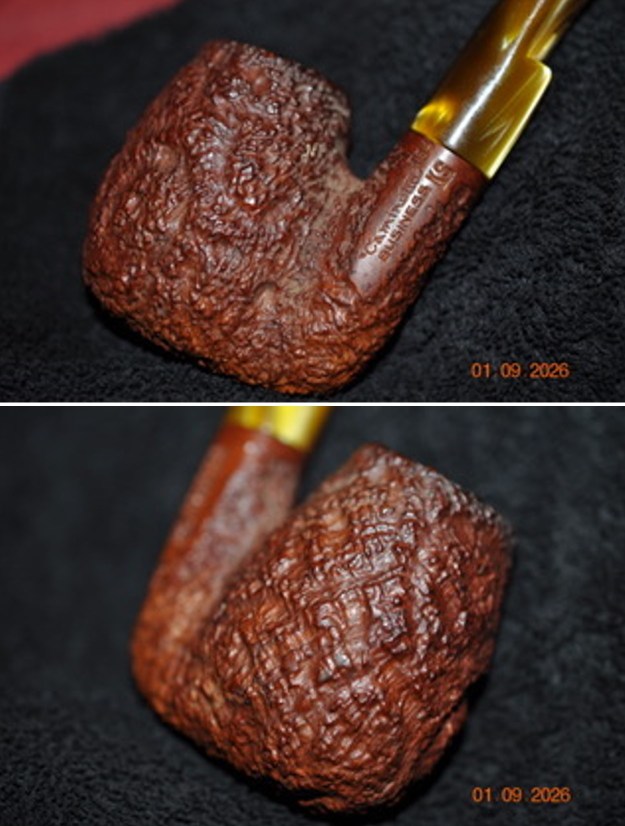
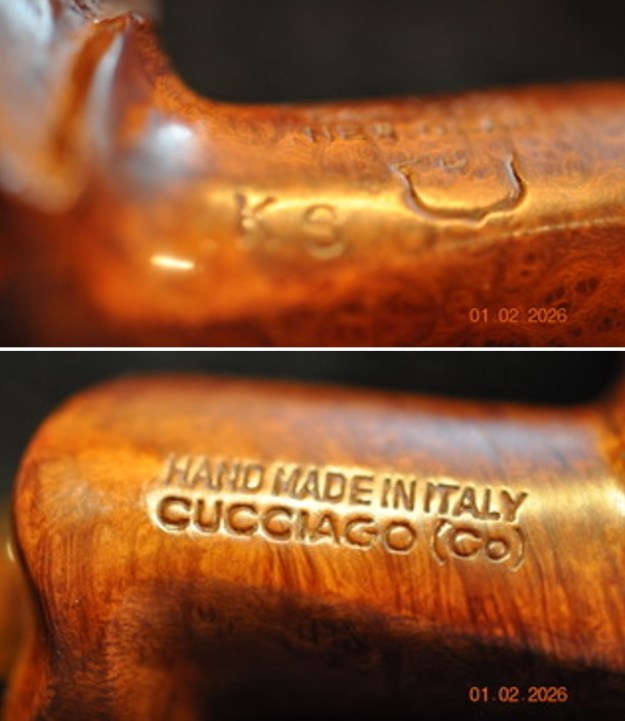
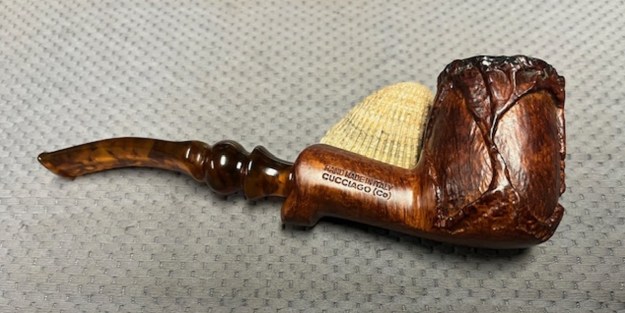
 Jeff took a photo of the stamping on the left side of the shank. It reads as noted above. The stamping is clear and readable. There is no photo of the stamping on the right side of the shank.
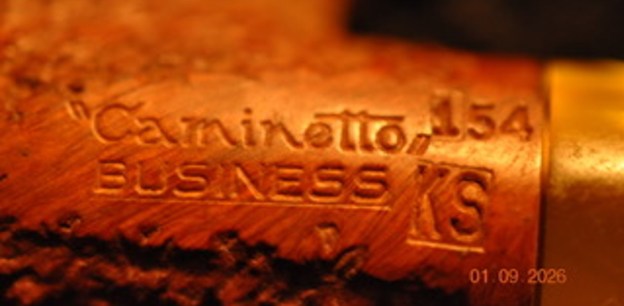 I have worked on several Caminetto in the past so I turned to one of the restorations on the rebornpipes blog and reread the background information on the brand. I am including that info here with this restoration (https://rebornpipes.com/2020/04/19/pretty-tired-and-dirty-messy-restoration-of-a-caminetto-business-tomahawk-182/).
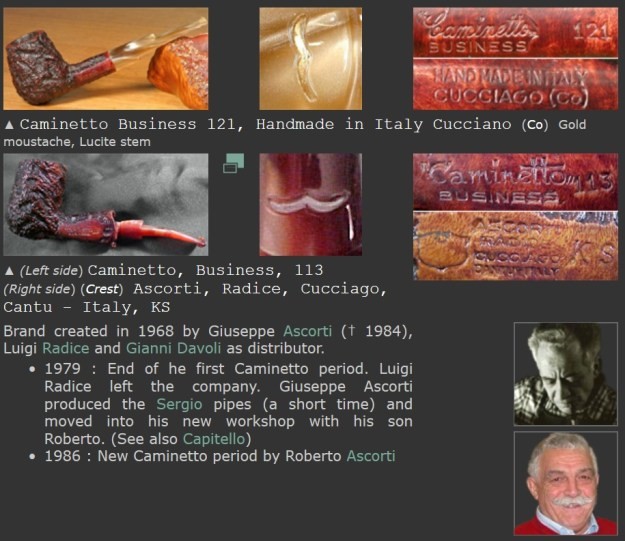 I turned to Pipedia for more information on the Caminetto and how to date the pipe I had in hand (https://pipedia.org/wiki/The_History_of_Caminetto_(shapes,_stamping,_articles,_etc.). I quote a pertinent paragraph:
 Stampings and dating: First off, dating earlier Caminetto’s is nearly impossible. Nevertheless, there were three phases, some in which were much earlier, of development that occurred in the stamping process of Caminetto. Before that though, every pipe had the stamp of Caminetto in one of two ways: Caminetto in script or Caminetto within quotation marks in block letters (I do not know how it was decided which pipe got which stamp, as I have had EARLY Caminetto’s with both)…
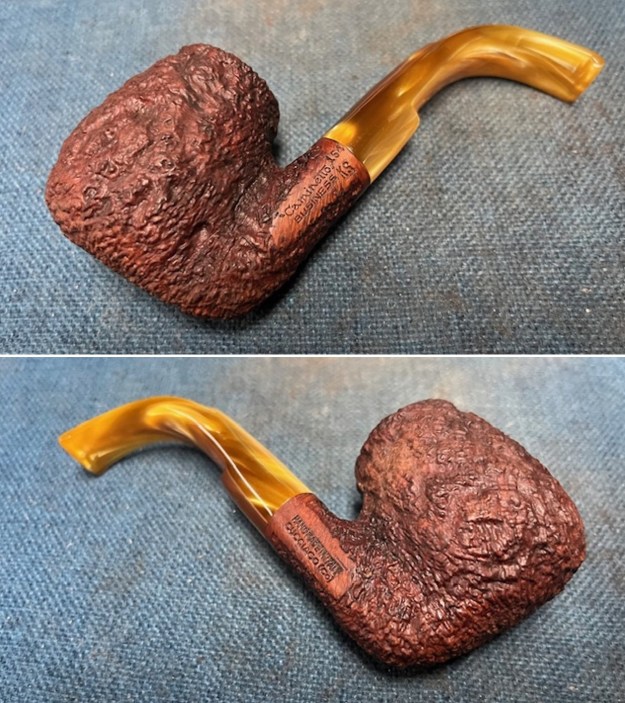
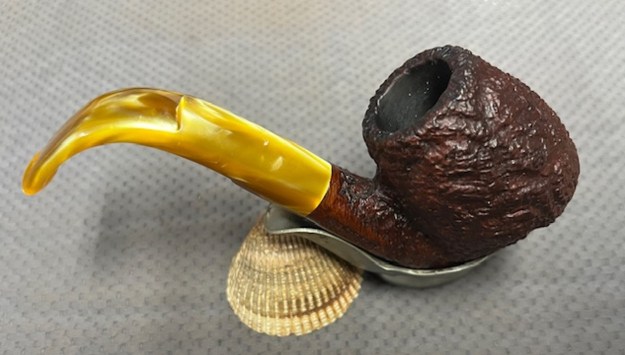
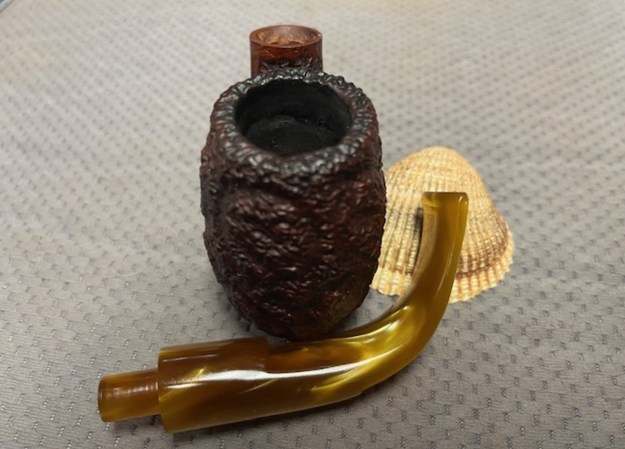
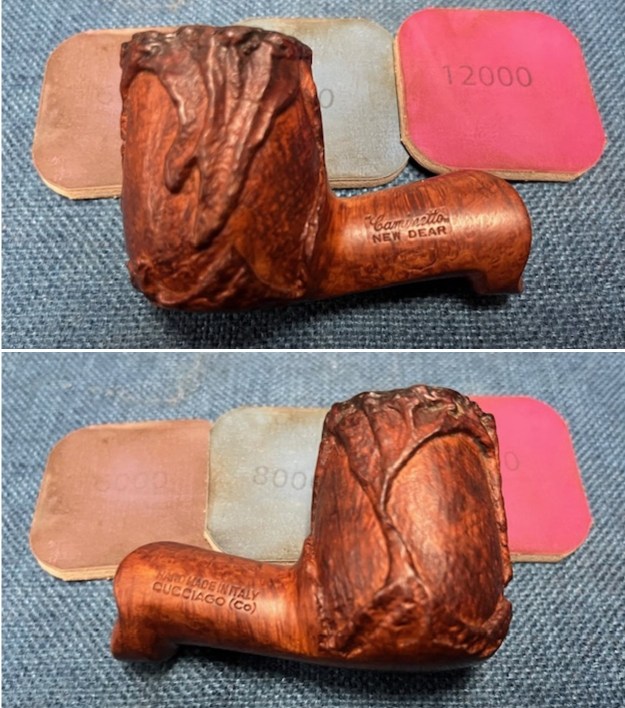
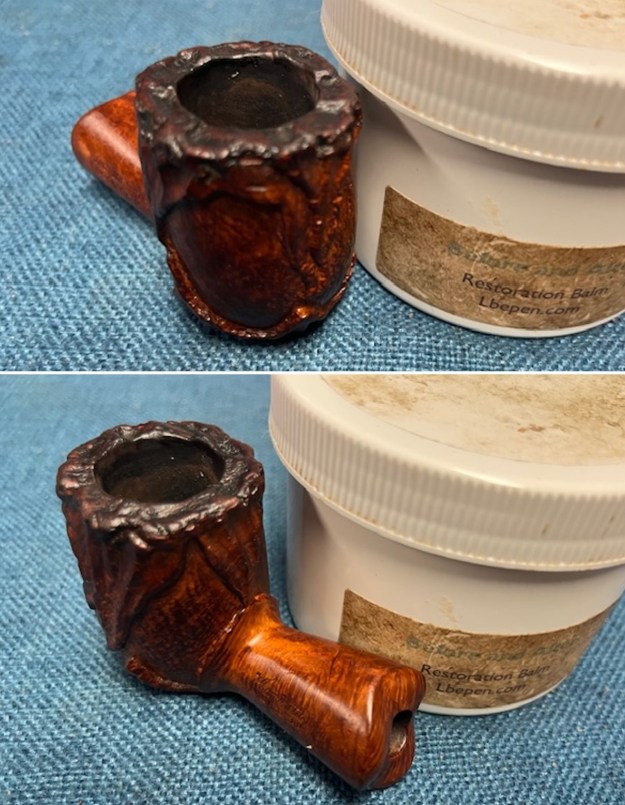
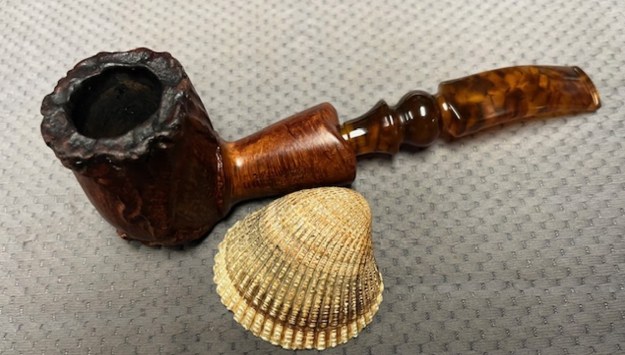
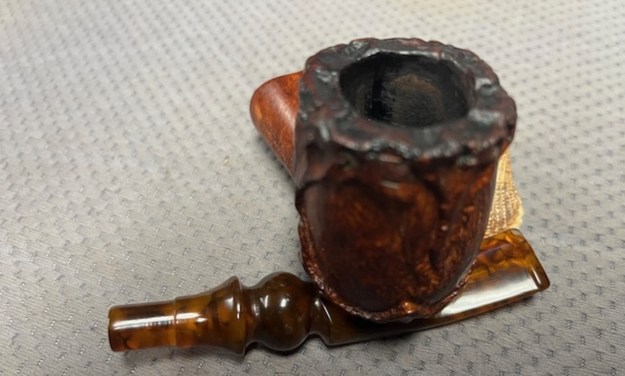
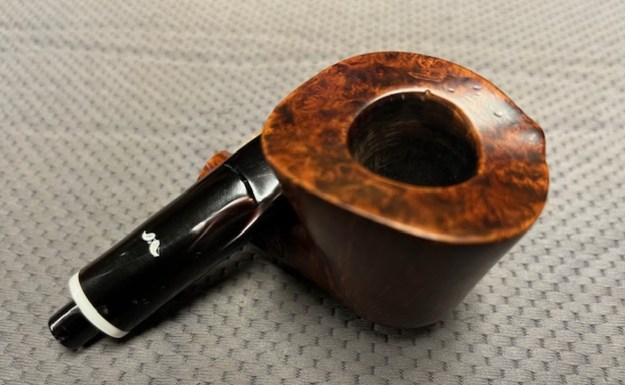
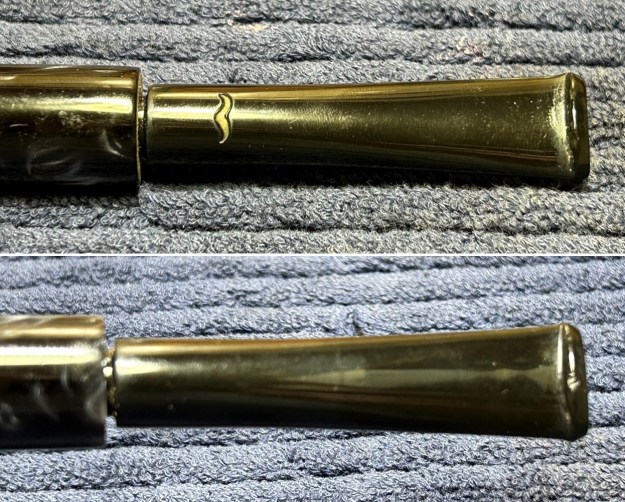
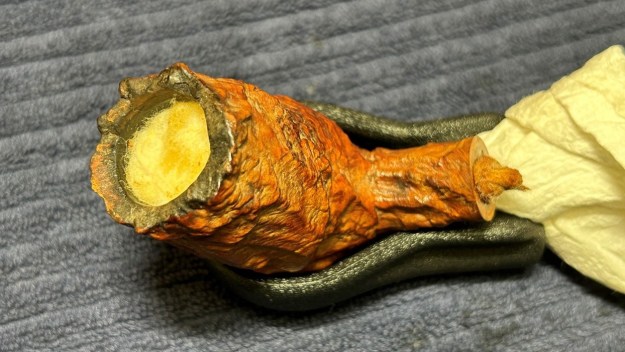
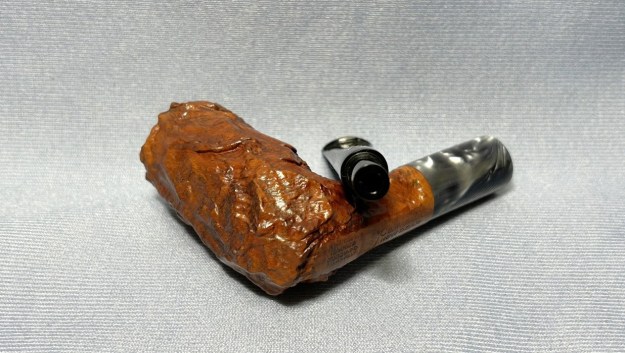
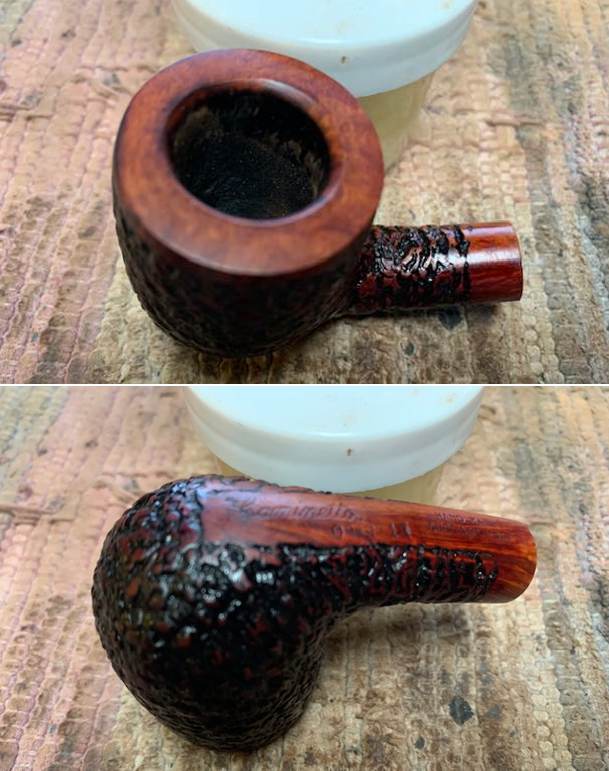
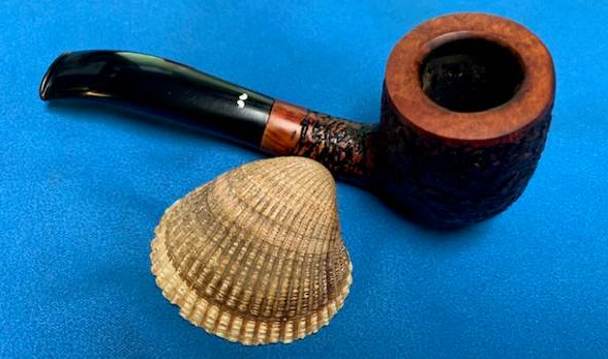
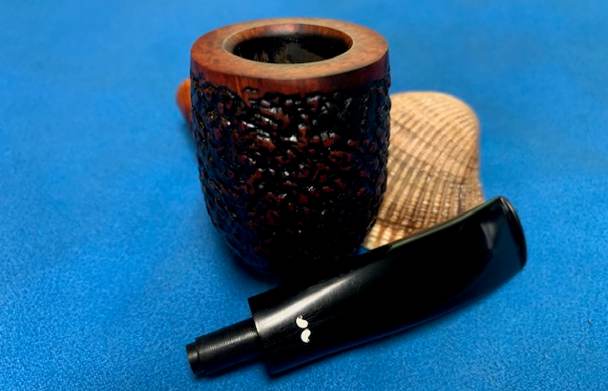
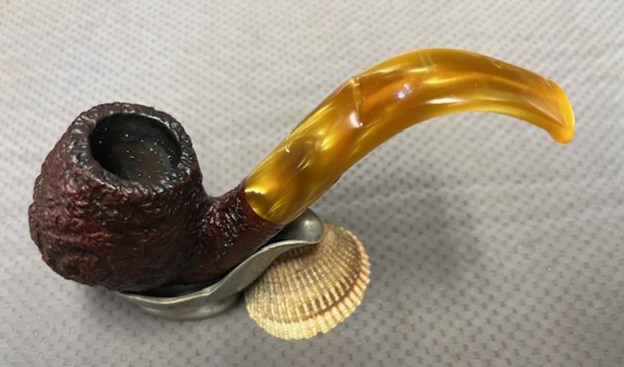
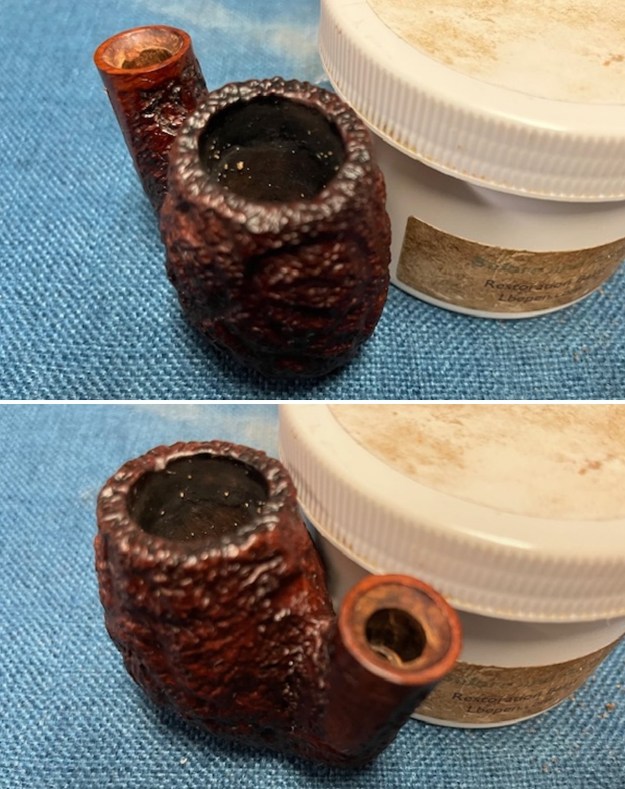
 To show how clean the rim top and stem really was I took a close-up photo of the rim and stem. The bowl was clean and cake free. The rim top is very clean with no residual lava in the finish. The inner edges of the bowl look good. The variegated golden acrylic saddle stem cleaned up nicely. The surface had some light tooth marks but the button edge looked really good.
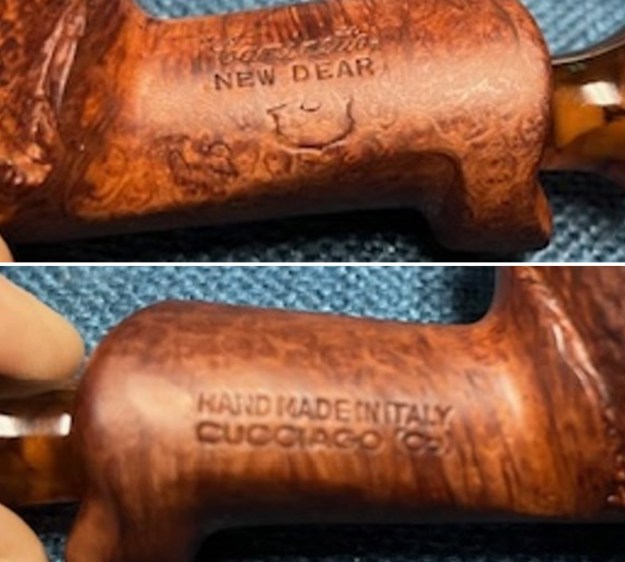
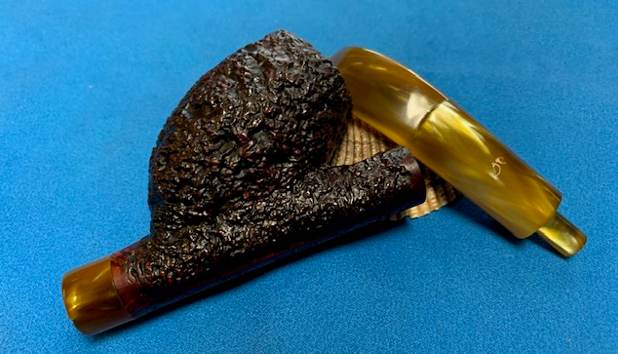
 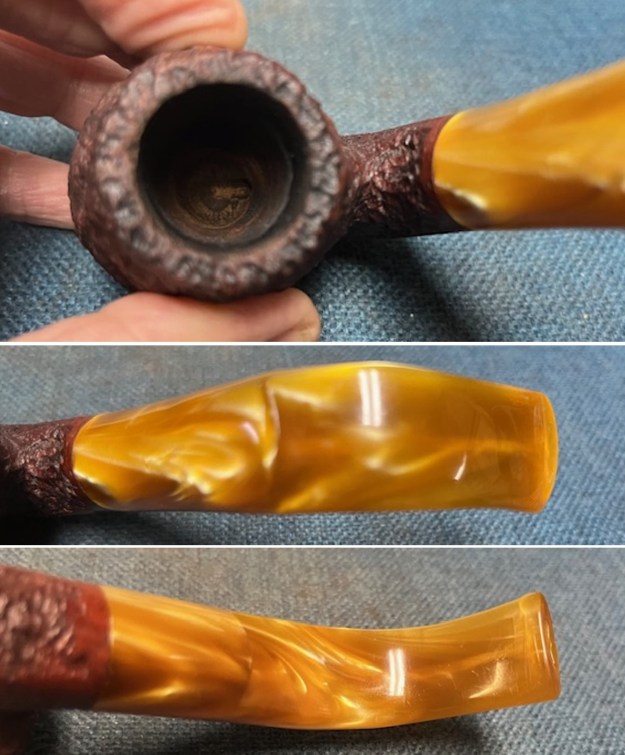 I took a photo of the stamping on the smooth panels on each side of the shank. The stamping was clear and readable and reads as noted above. I took the stem off the bowl and took a picture of the pipe to give an idea of the look of the rustication and the stem. It is going to be a pretty pipe.
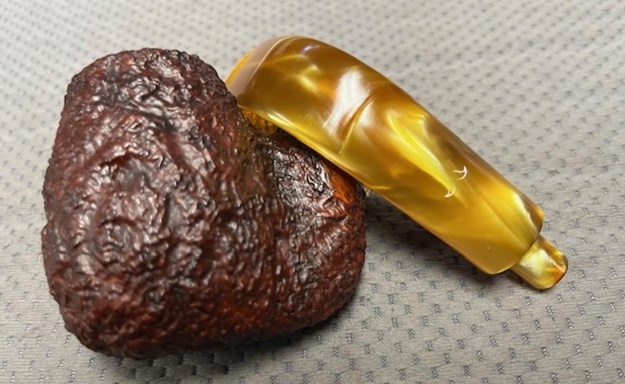
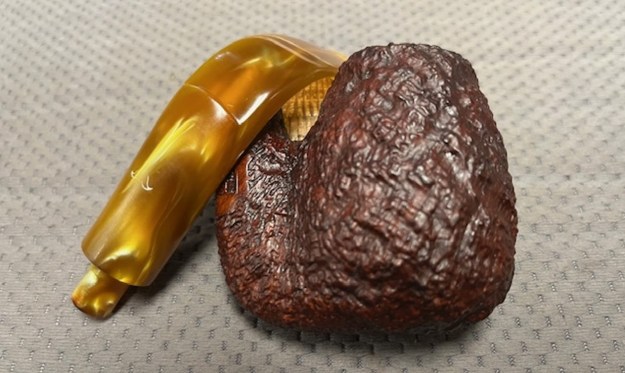
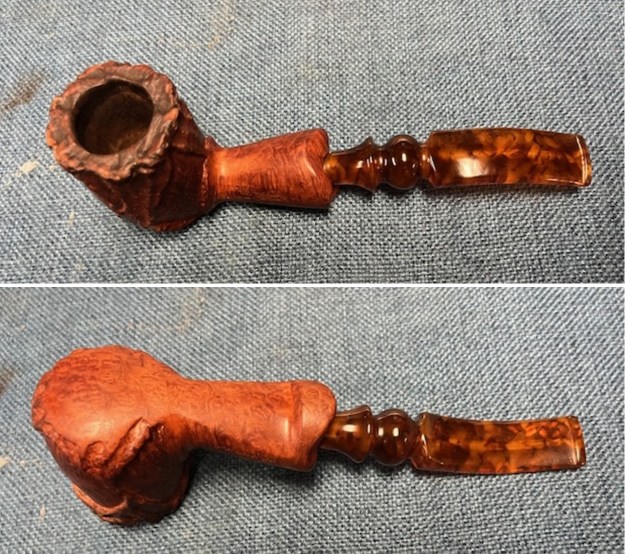
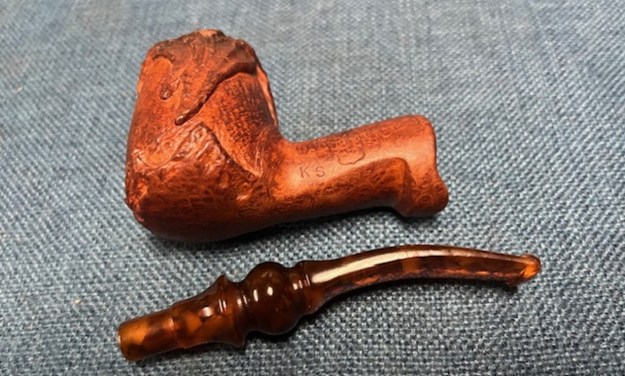
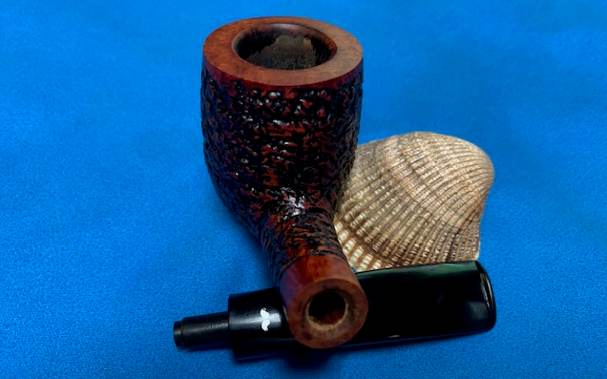
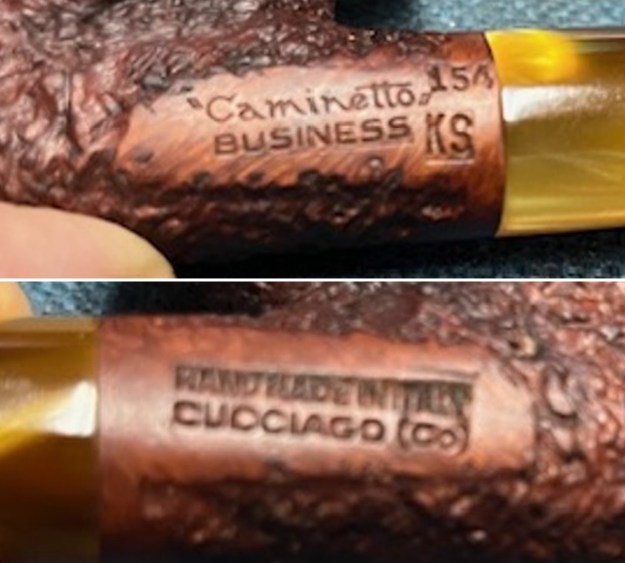
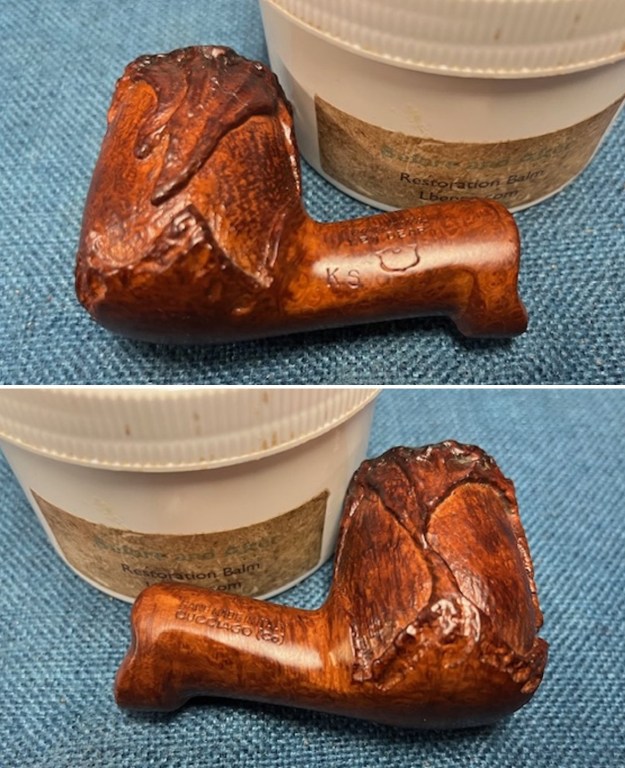
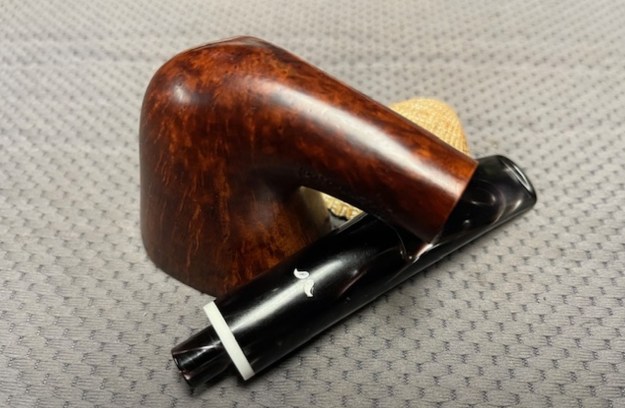
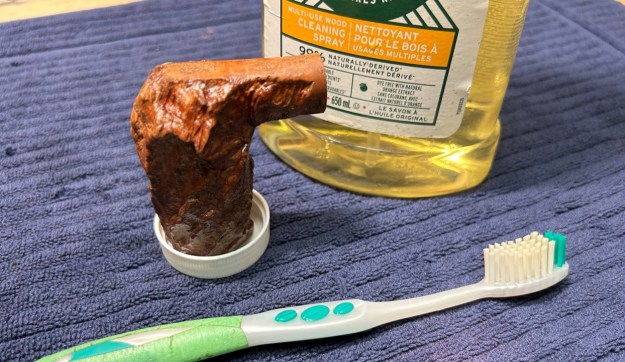
 The bowl looked very good so I did not need to do any further work on it. I rubbed the bowl and shank down with Before & After Restoration Balm to deep clean the finish on the bowl and shank. The product works to clean, enliven and protect the briar. I worked it in with my fingers and with a horse hair shoe brush to get it into the nooks and crannies of the deep rustication of the finish on the bowl and shank. I let it sit for about 20 minutes to let it do its magic. I buffed it with a soft cloth. The briar really began to have a rich shine. I took some photos of the bowl at this point to mark the progress in the restoration.
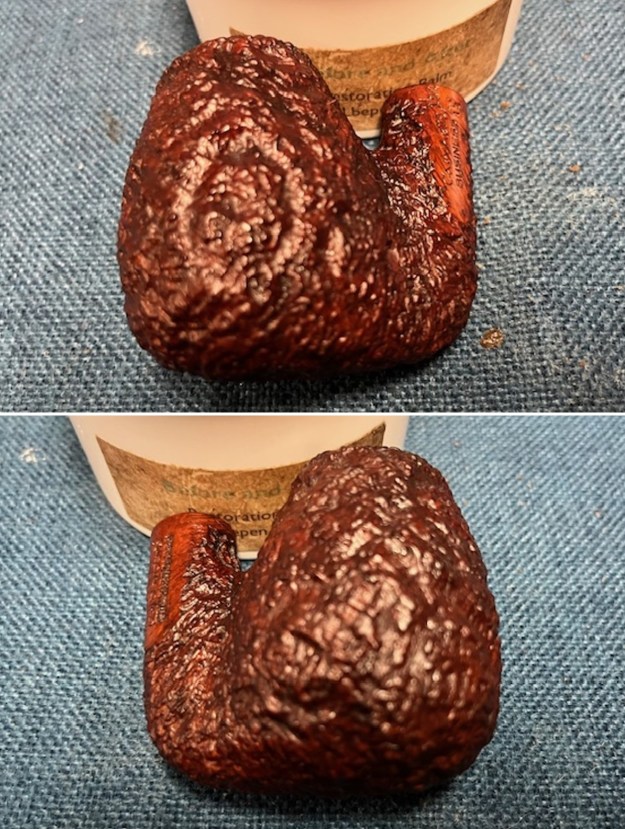
 The bowl was finished so I set it aside and turned my attention to the stem. I sanded out the tooth marks on the surface ahead of the button with a folded piece of 200 grit sandpaper. It looked significantly better.
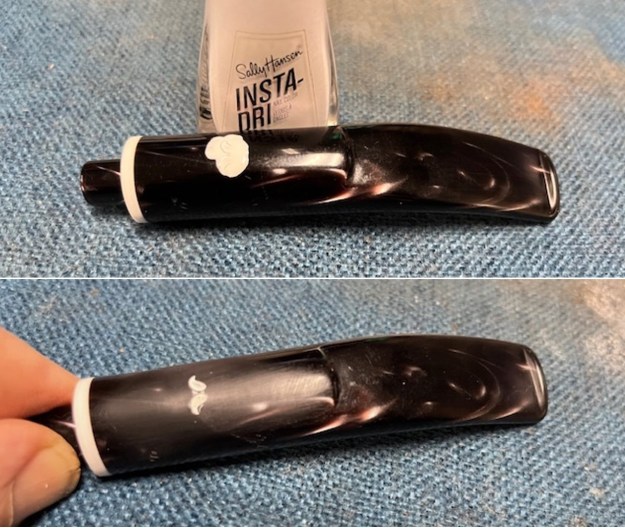
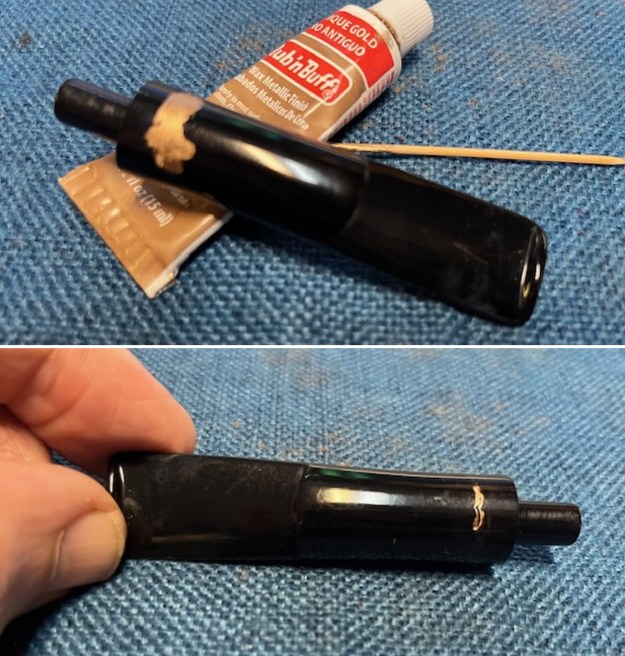
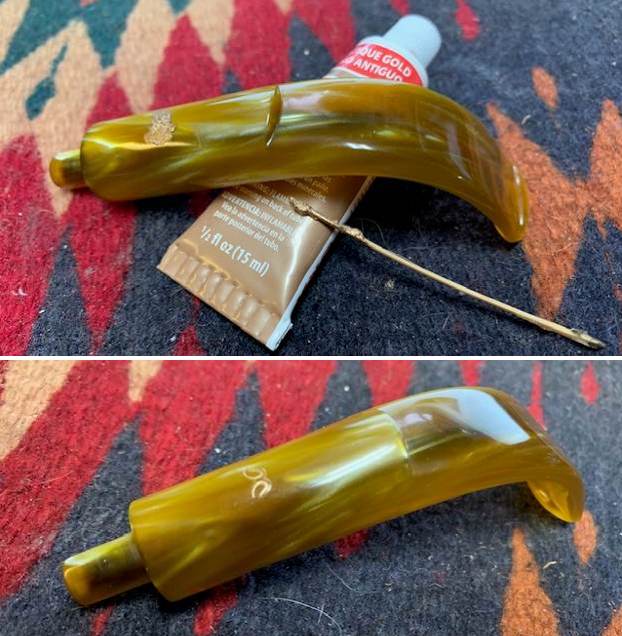
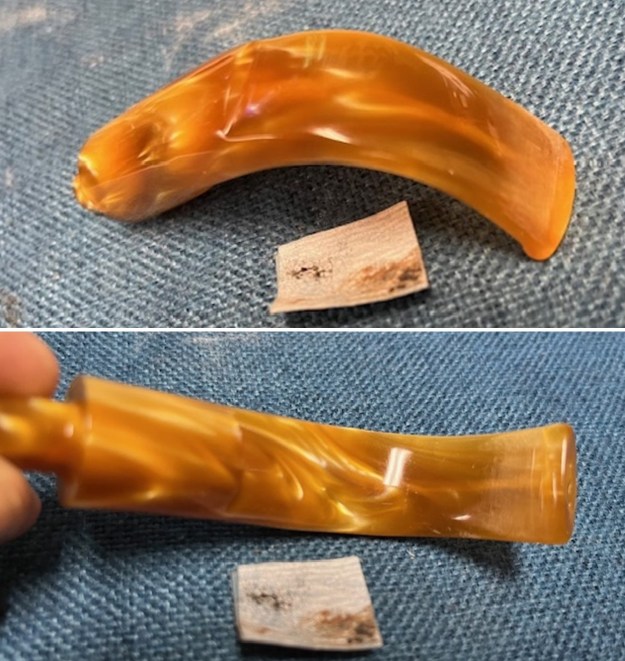 There was a faint large moustache stamped on the top of the saddle portion of the gold acrylic stem. It was faint but I filled in what remained with some white acrylic. I pressed it into the stamping with a tooth pick. Once it cured I scraped it off and sanded the surface with a 1000 grit sanding pad to remove the excess. It was fain but identifiable.
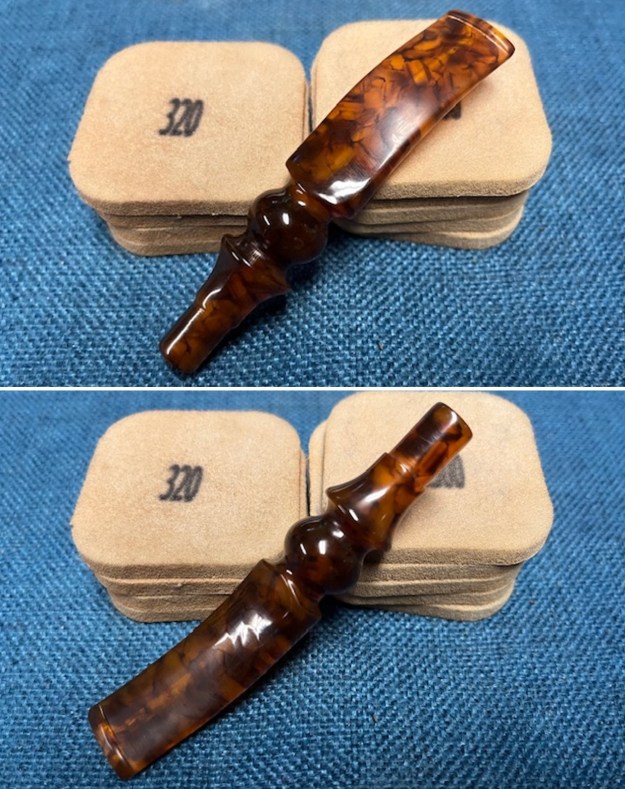
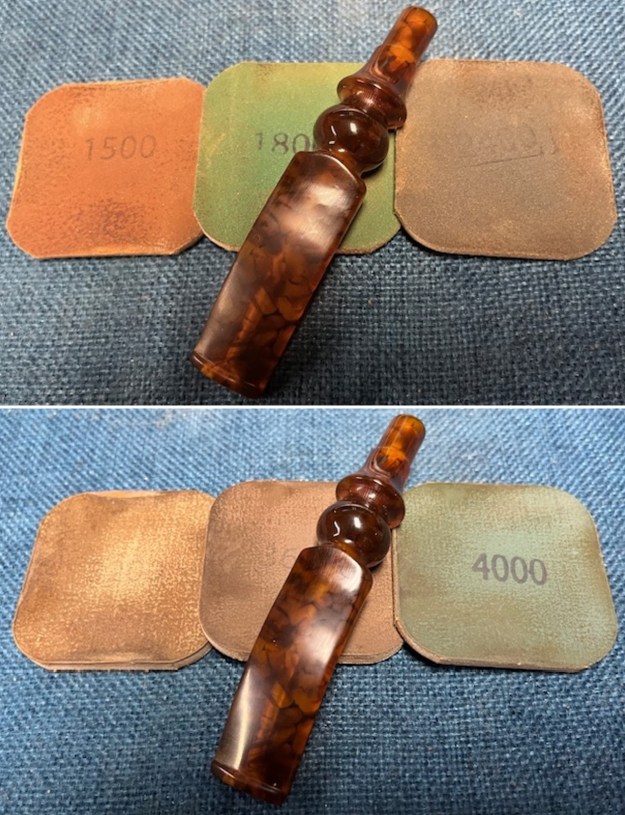
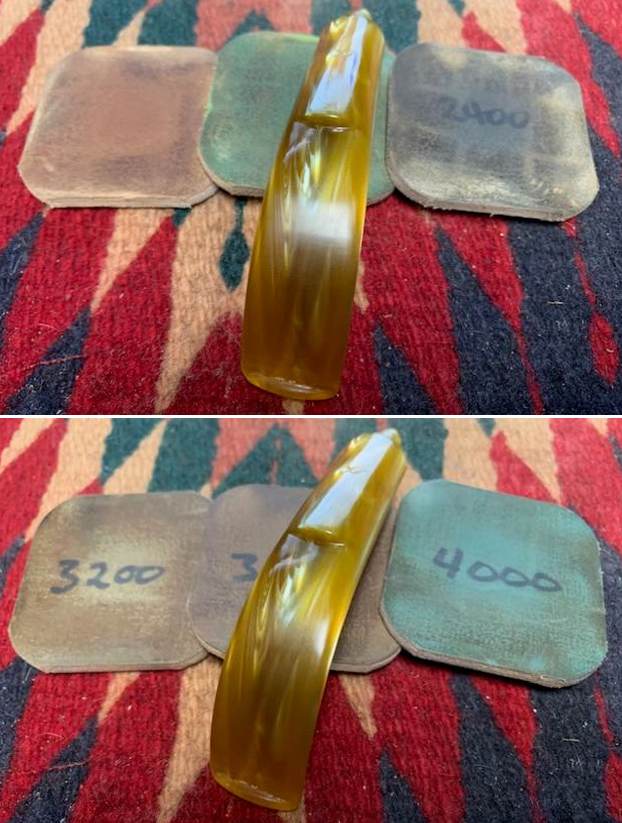
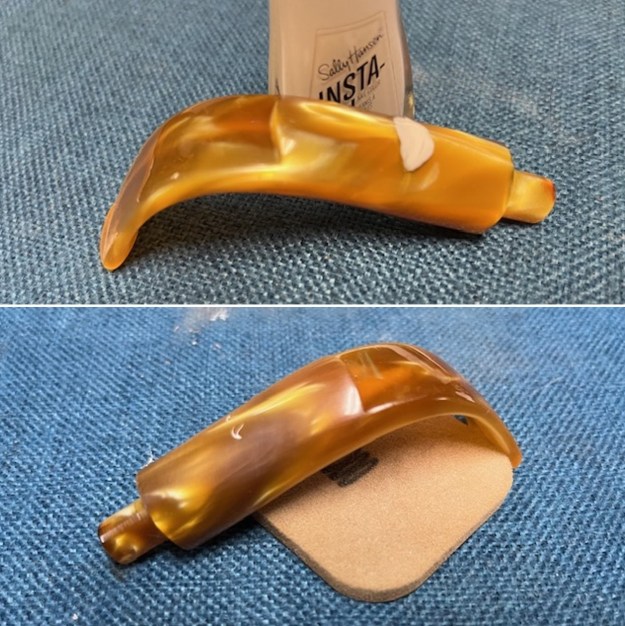 I sanded the stem with 320-23500 grit sanding pads. I wiped it down with an Obsidian Oil cloth after each sanding pad. The stem began to take on a rich shine.
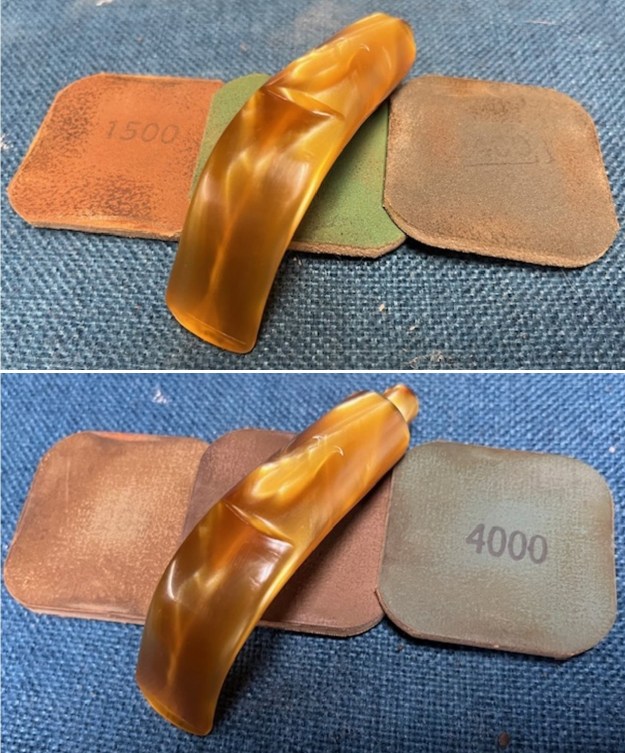
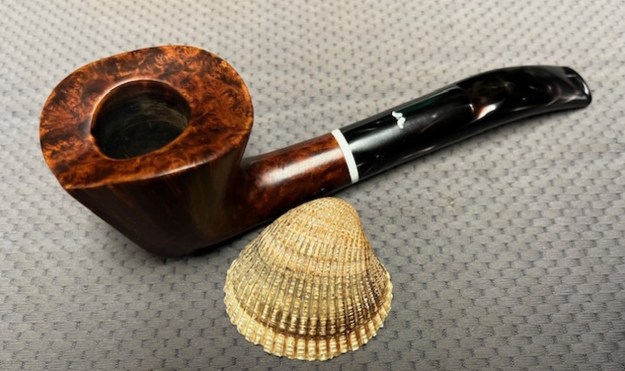
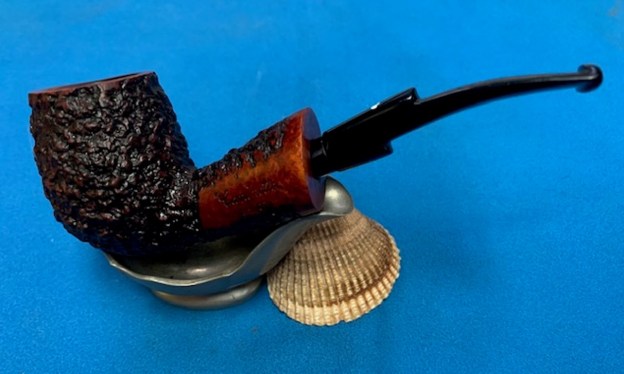
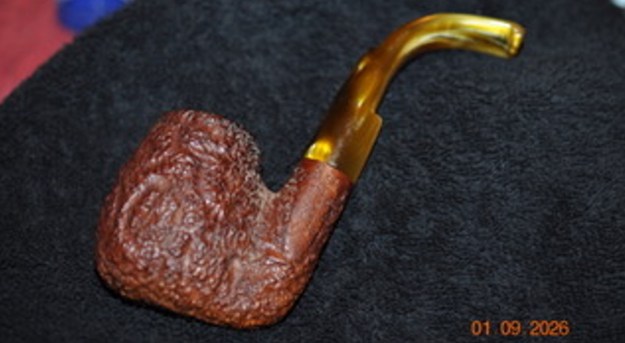
 This Caminetto Business 154KS Oom Paul with a variegated gold arylic saddle stem is a real beauty and has a lot of life left. I put the bowl and stem back together again and buffed the bowl and the stem with Blue Diamond on the buffing wheel. I used a soft touch on the rusticated bowl so as not to fill it in with the polishing product. I gave the bowl several coats of Conservator’s Wax and the stem several coats of carnauba wax. I carefully buffed the entire pipe with a clean buffing pad to raise the shine. I finished buffing with a microfiber cloth to deepen the shine. The finished pipe looks very good. The rustication is very tactile and feels great in the hand. It is comfortable and light weight. The finished Caminetto Business 154KS Oom Paul is shown in the photos below. The dimensions of the pipe are Length: 6 inches, Height: 2 ¼ inches, Outside diameter of the bowl: 1 ¼ inches, Chamber diameter: 7/8 of an inch. The weight of the pipe is 81 grams/2.86 ounces. This great looking rusticated Caminetto turned out very well. It should be a great pipe. It will be going on the rebornpipes store in the Italian Pipe Makers Section if you are interested in adding it to your collection. Thanks for reading this blog and my reflections on the pipe while I worked on it.