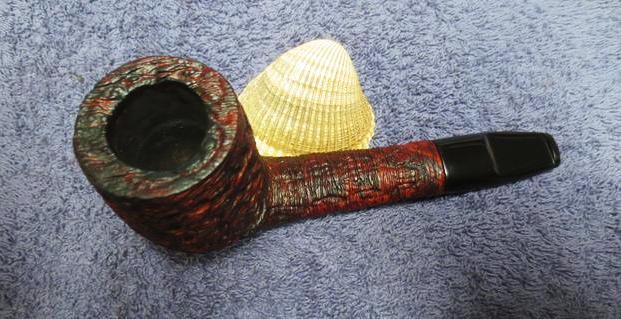
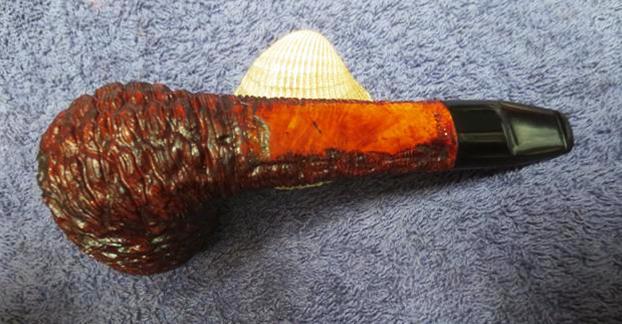
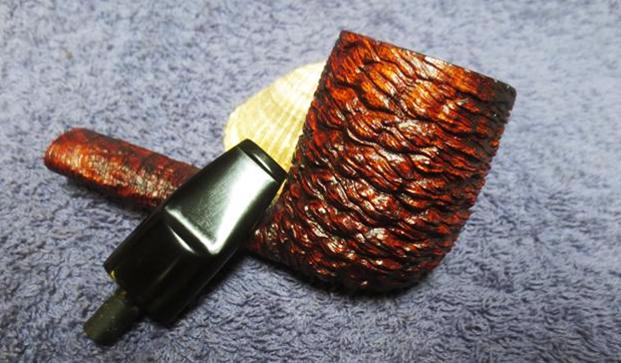
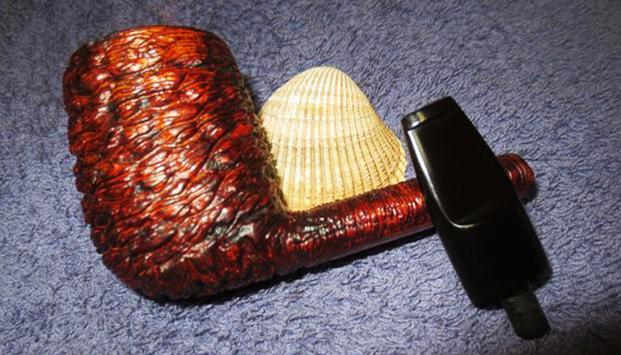
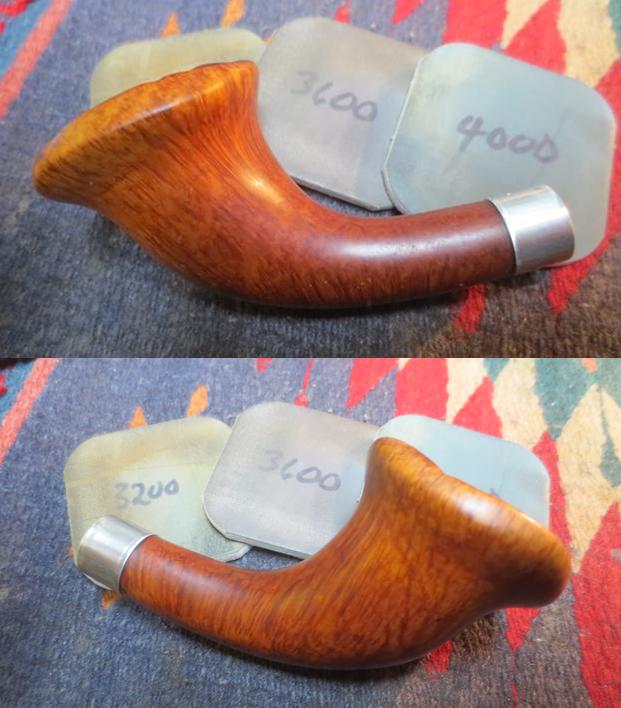
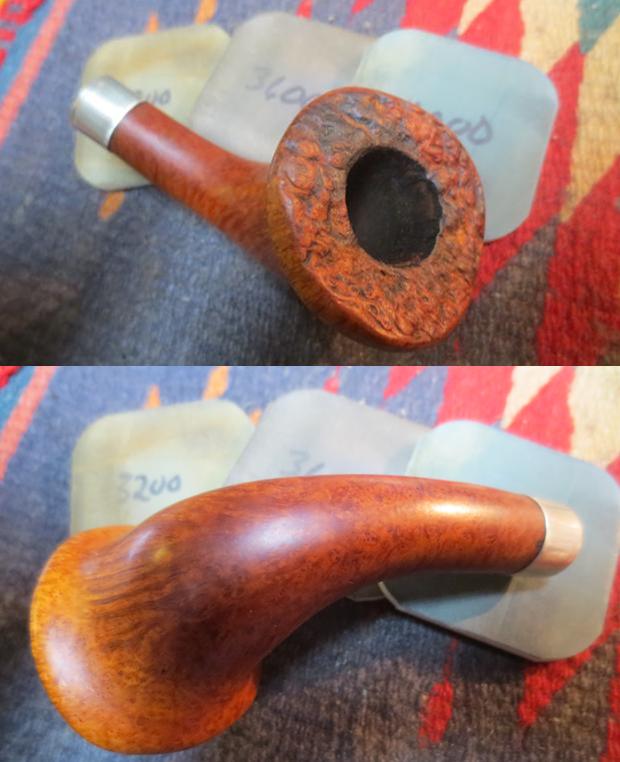
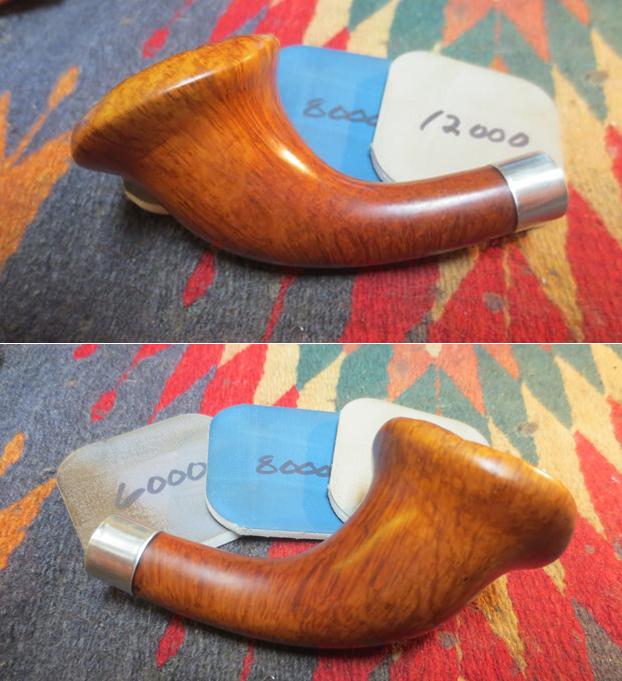
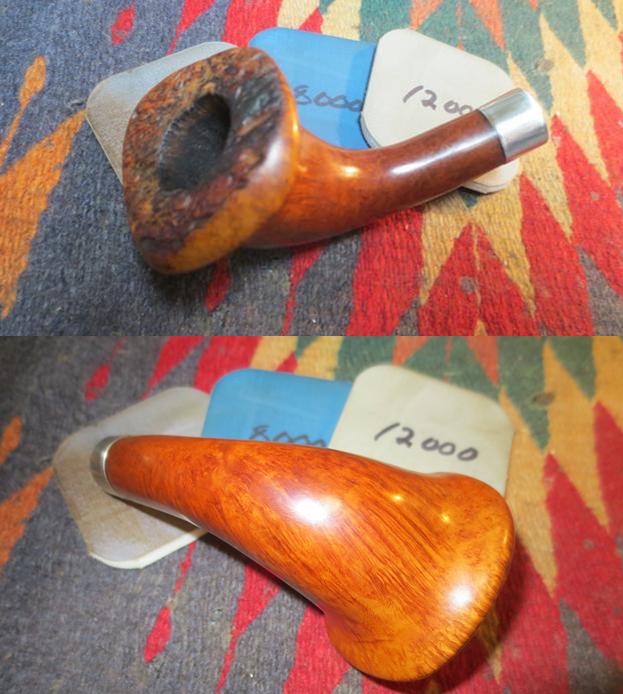
Tag Archives: buffing

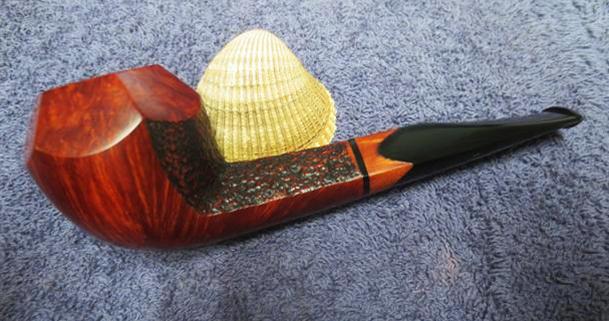
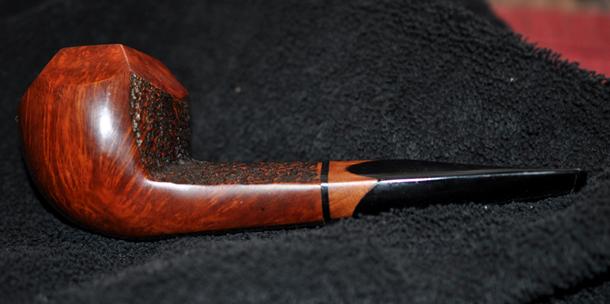
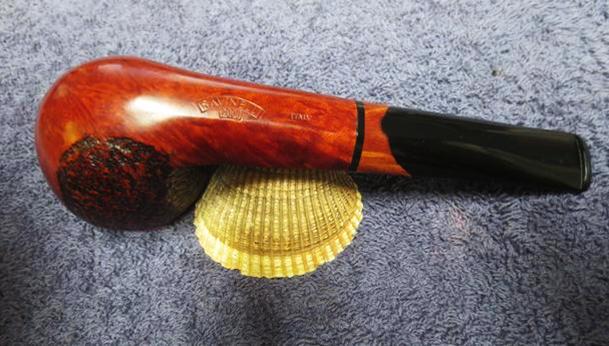
I needed an easy clean up and this Savinelli Y2K Bulldog was just the ticket


Blog by Steve Laug

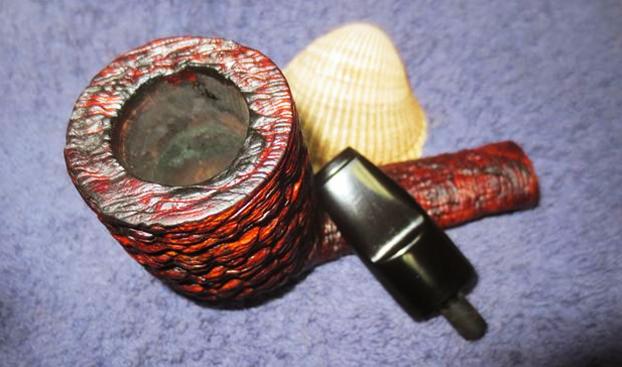
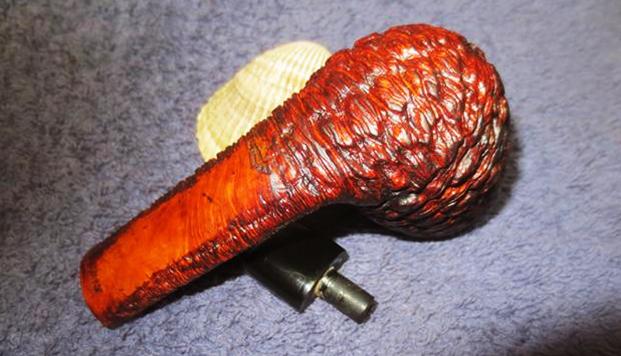
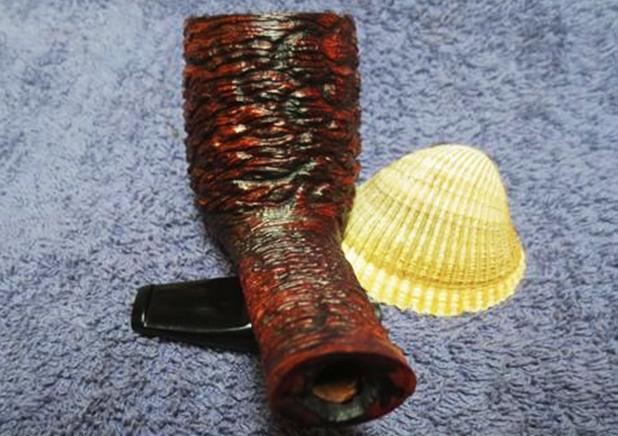
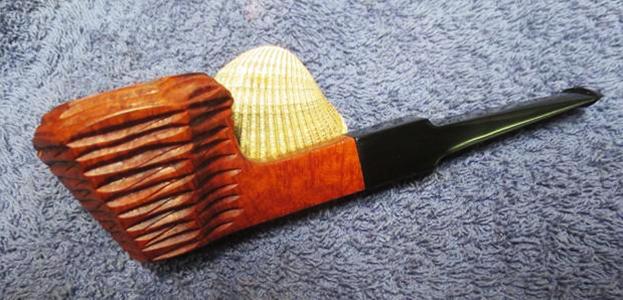
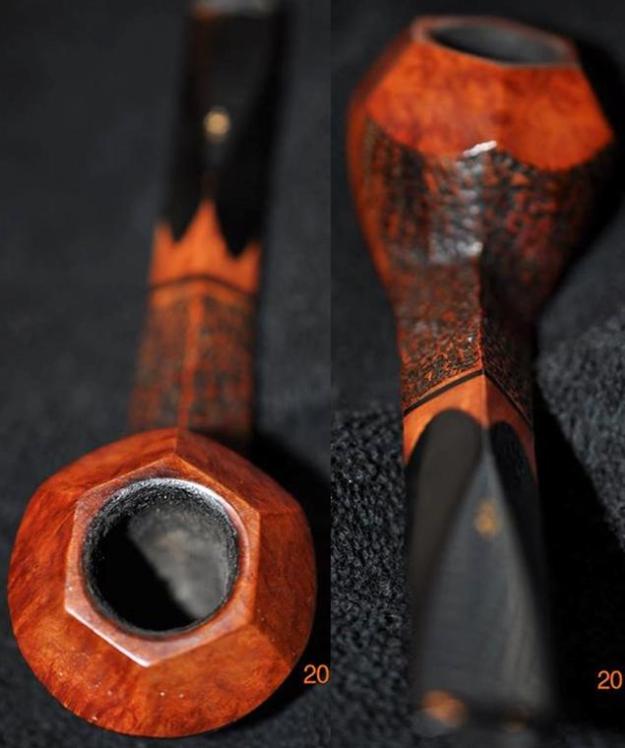
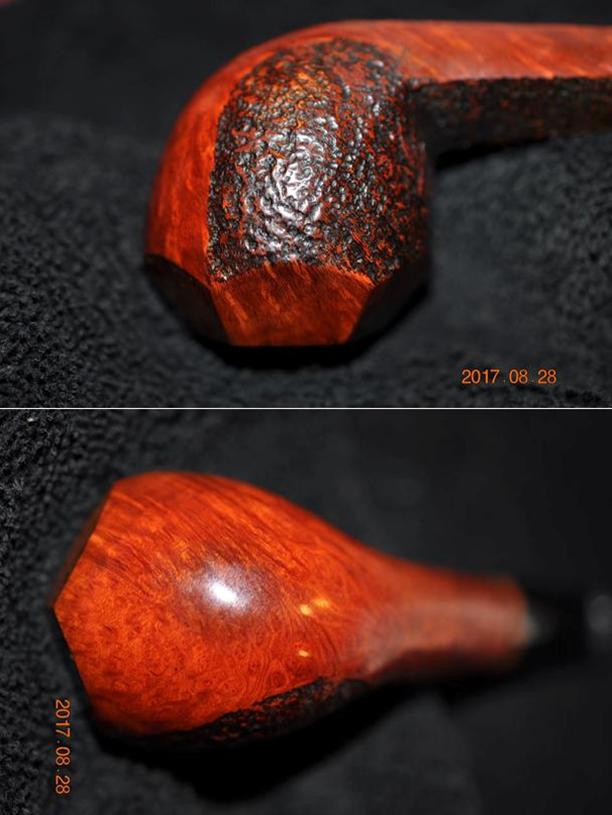
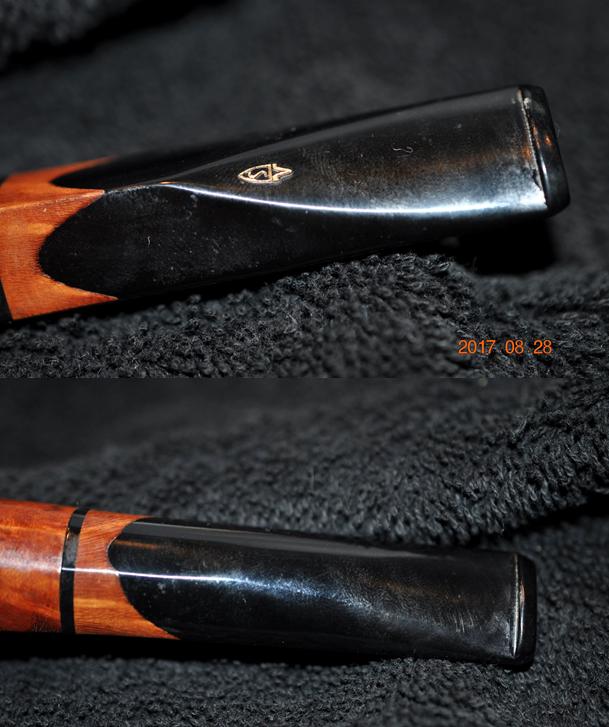
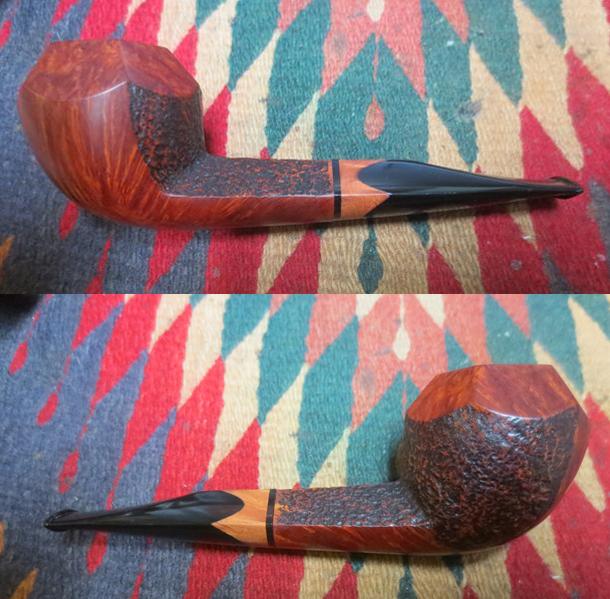
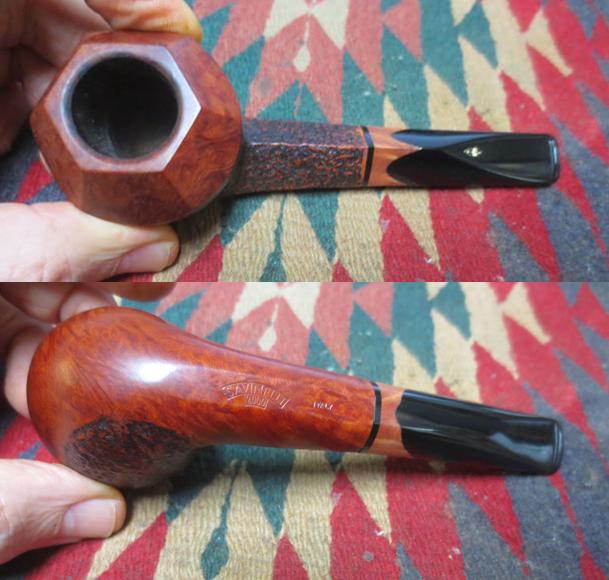
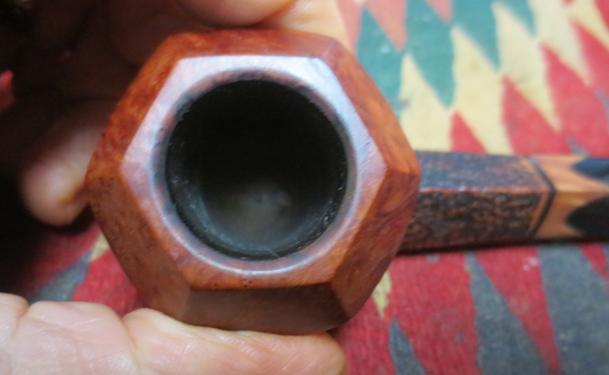
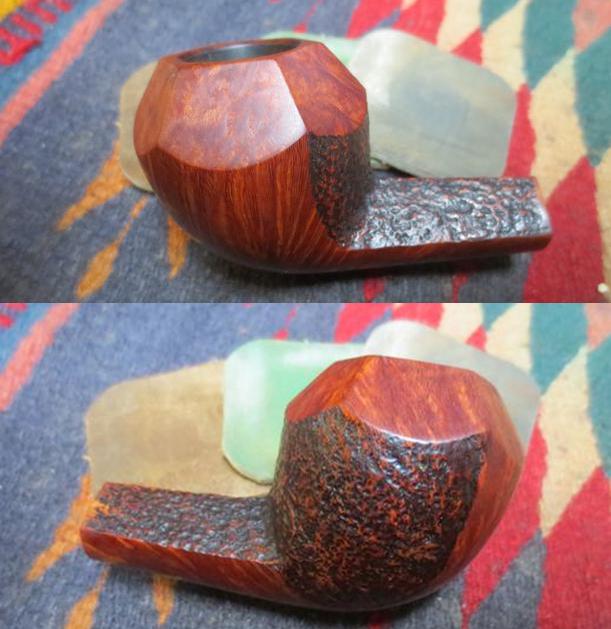
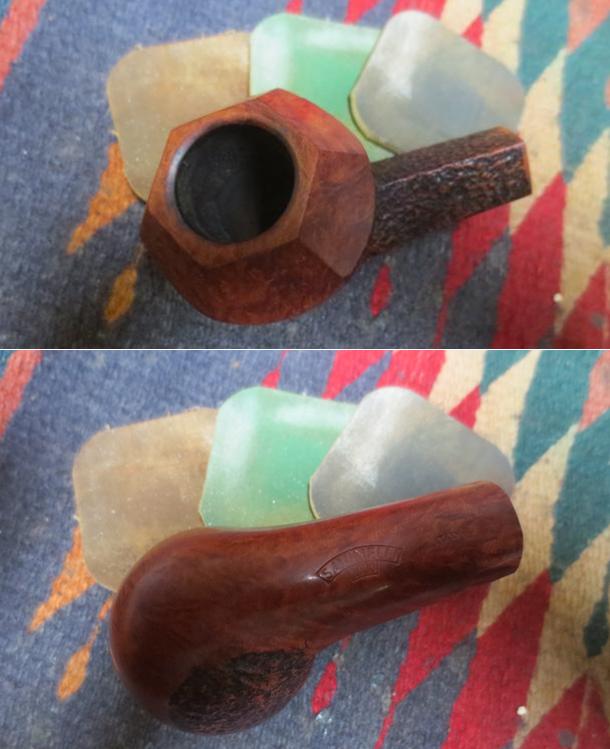
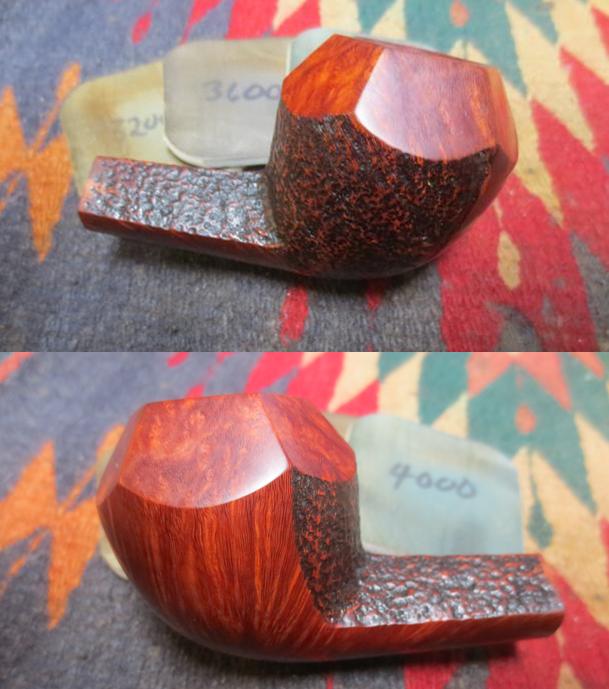
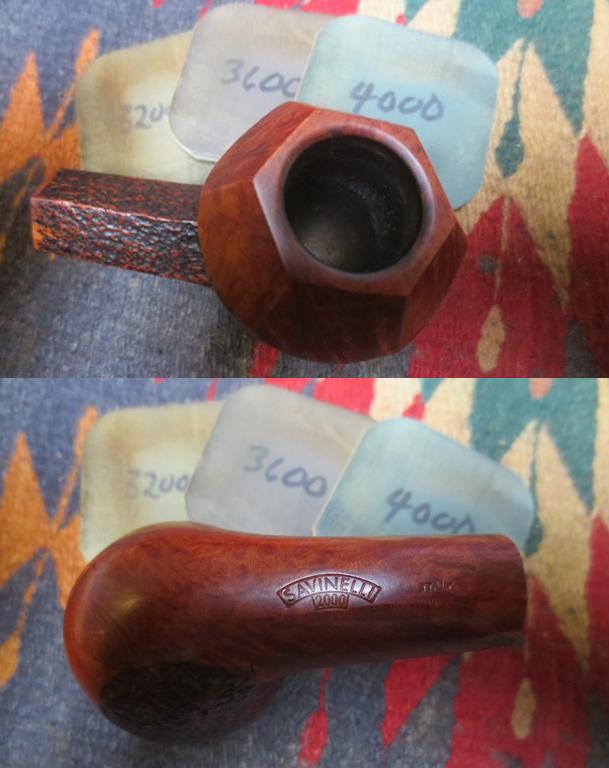
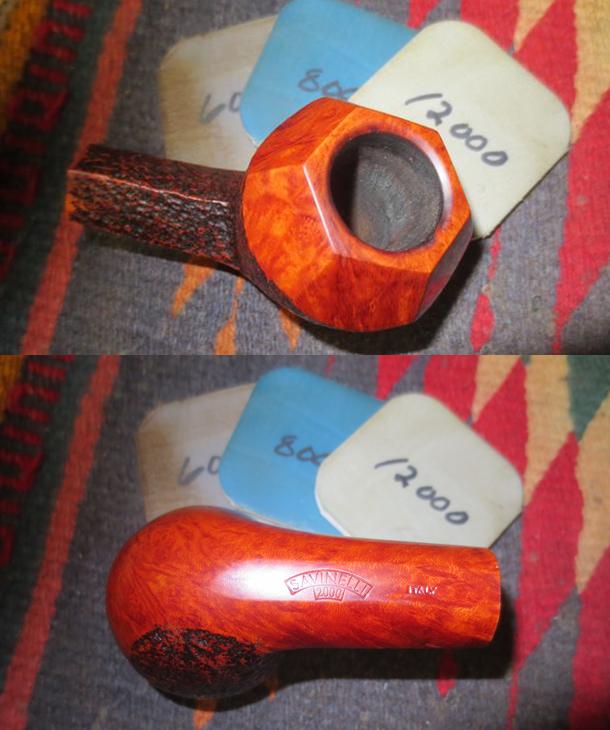
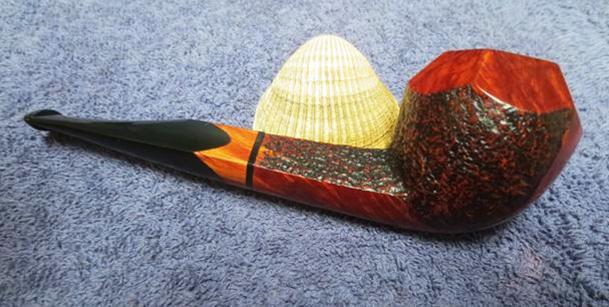
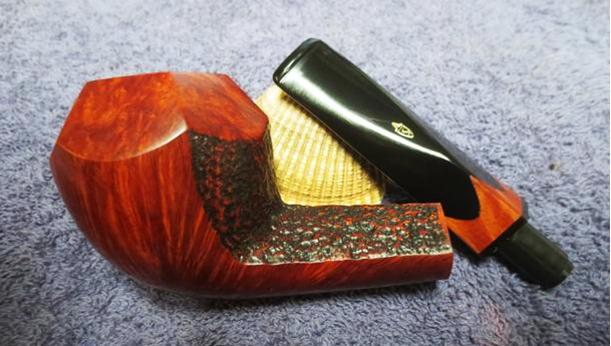
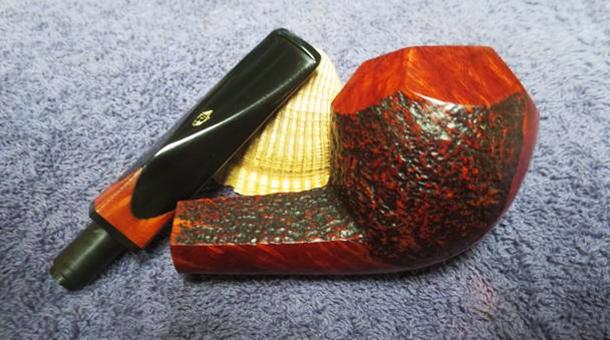
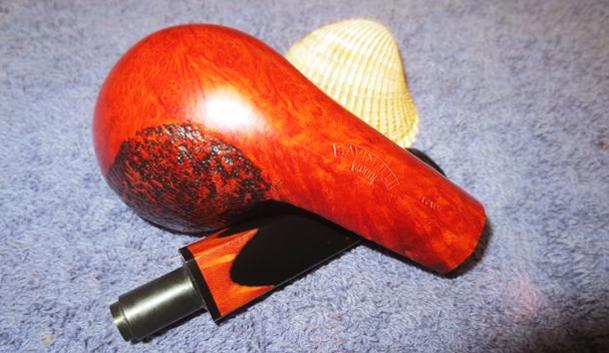
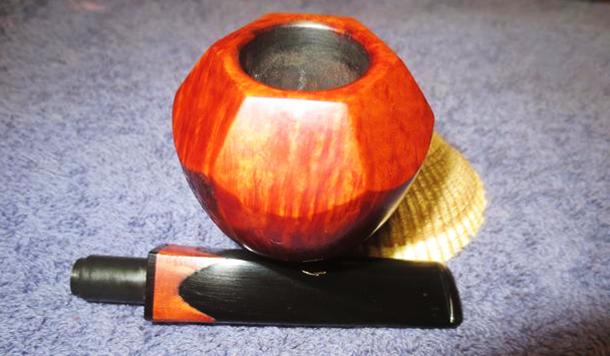
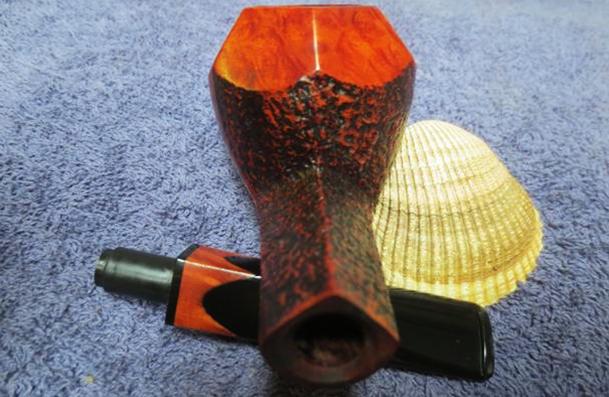
After finishing up the little MLC Redmanol French Briar bent billiard and dealing with many issues in the restoration I needed something different and something a bit less labour intensive. My brother had included a beautiful Savninelli straight Bulldog in the box he just sent me. It was a 6mm filter pipe made especially for the Savinelli triangular shaped balsa filter. It has a mix of finishes on the bowl and shank. It is predominantly smooth with a section that is sandblasted on the back part of the bowl wrapping part way around the right side and on the top side of the shank. The blast is nicely done and is rich looking. The grain on the rest of the bowl and shank is mixed straight, flame and birdseye. The stem has a thin band of acrylic between an insert of briar and the acrylic stem. The stem and shank are diamond shaped on the top and round on the underside. The stem provides a striking contrast with the rest of the pipe and matches the dark stain in the sandblast portion of the bowl. My brother took the following photos of the pipe before he started cleaning it.The pipe was in pretty good shape when it arrived at my brother’s place in Idaho. It had been smoked and had a thin cake in the bowl and some light lava on the inner edge of the bowl and the rim top. There were some light scratches in the briar but the finish was quite clean. The stem was in good shape though there was some light tooth chatter on both sides of the stem near the button.I wanted to know more about this particular line of Savinelli pipes so I did a quick search and found the following link that had a great deal of information on it that I found helpful. The linkis: http://www.smokeshopmag.com/0600/pipe.htm. I quote in full from the site because I could not have summarized the information any better. The pipe is one of the Y2K Limited Edition Pipes from Savinelli.

Each year, Italian pipe manufacturer Savinelli produces a limited production Collection Pipe – its so-called “pipe of the year.” Only 500 units are manufactured.

The 2000 Collection Pipe, the 16th in the series which extends back to 1985, has a flat bottom allowing the pipe to sit upright, referred to as a ‘sitter.’ Each comes with a pack of balsa inserts, an informational leaflet, and a presentation package. Suggested retail is $220.

This year, Savinelli is also offering a special limited edition Millennium Series, known as the Year 2000 Pipe. “We have developed a product possessing charismatic lines and an alluring design not previously seen in a pipe,” the company says of the unique six-sided, faceted bowl.

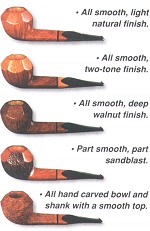
The pipe is available in five finishes.

All smooth, light natural finish.

All smooth, two-tone finish.

All smooth, deep walnut finish.

Part smooth, part sandblast.

All hand carved bowl and shank with a smooth top.

Like all Savinelli pipes, materials are selected from top quality plateaux briar and seasoned naturally for many years. Only ecological finishes and waxes are used, allowing the pipe surfaces to breathe.

Each of the five Year 2000 pipes is available together in the Year 2000 VIP Set, which also includes an additional Smooth Red finish R version with a Savinelli VIP Case.

They were available through Savinelli Pipes, Inc., PO Box 526, Morrisville, NC 27560, Tel.: (919) 481-05111, Fax: (919) 481-1948.

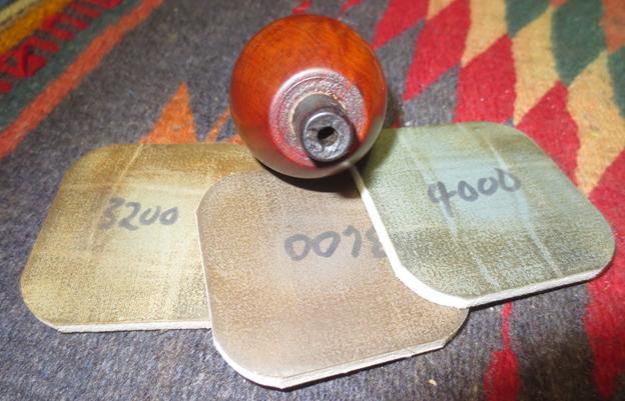
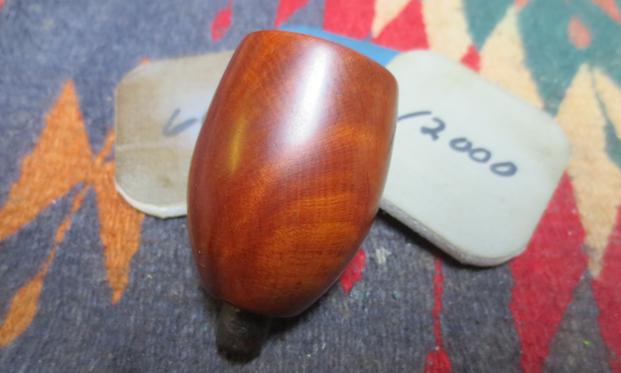
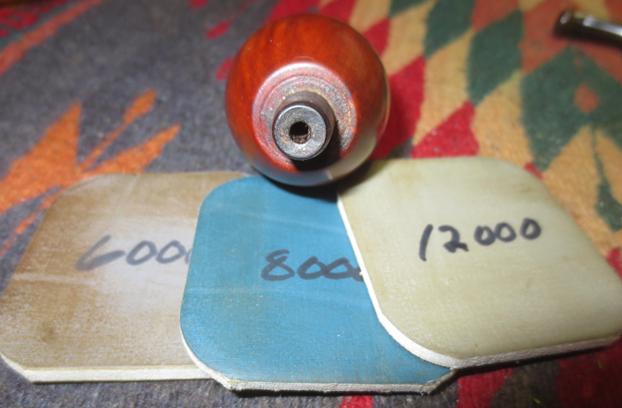
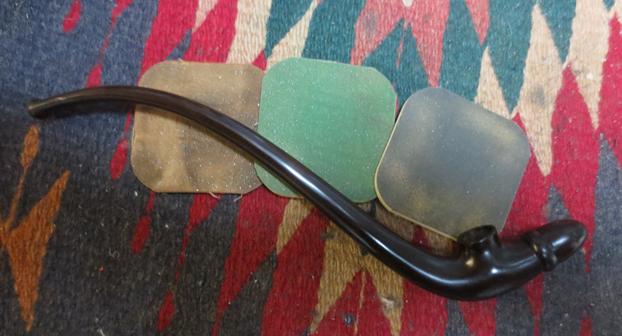
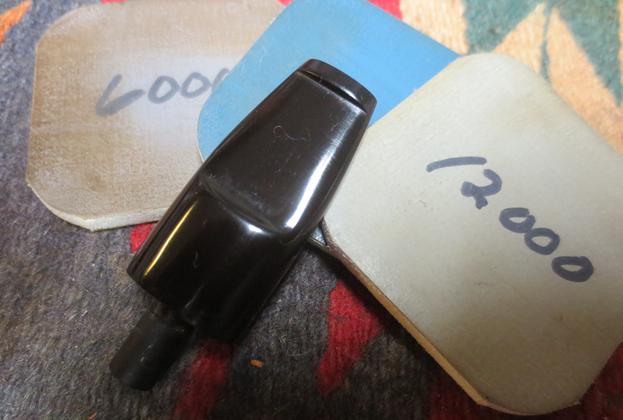
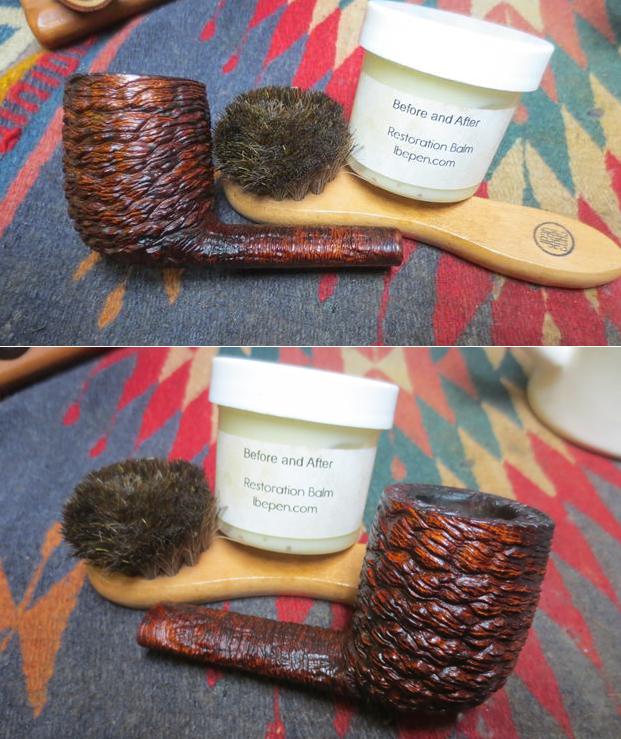
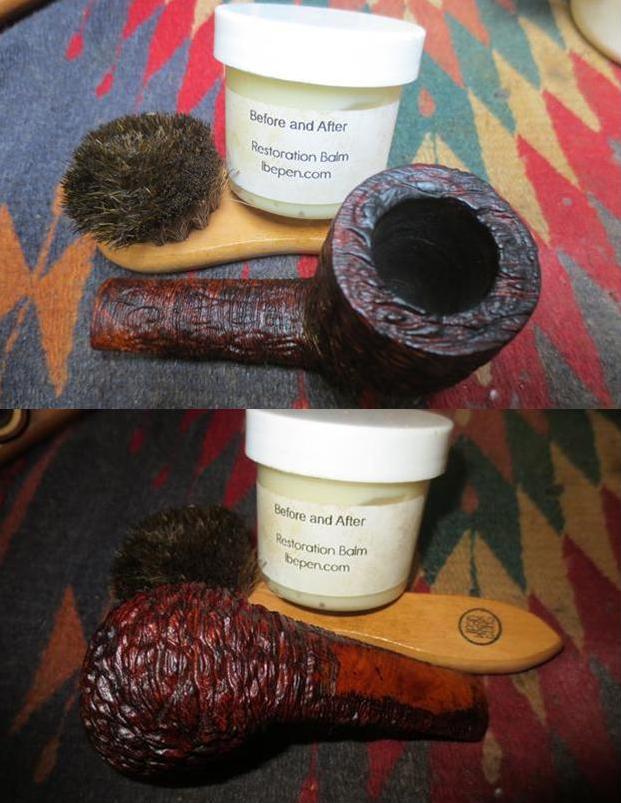
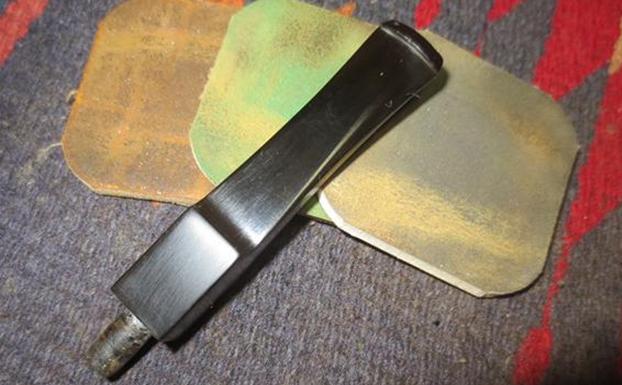
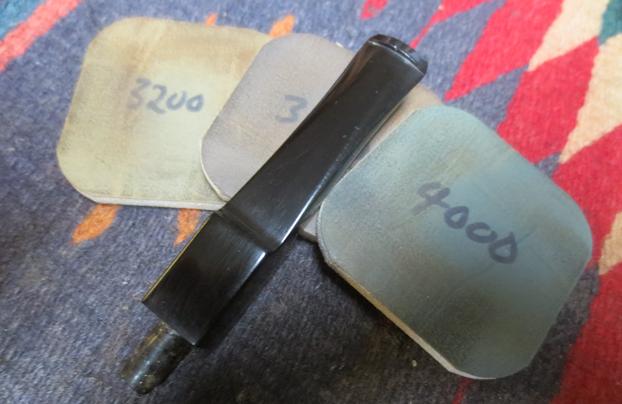
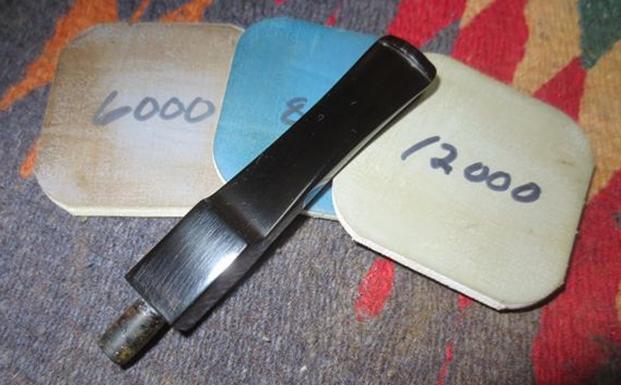
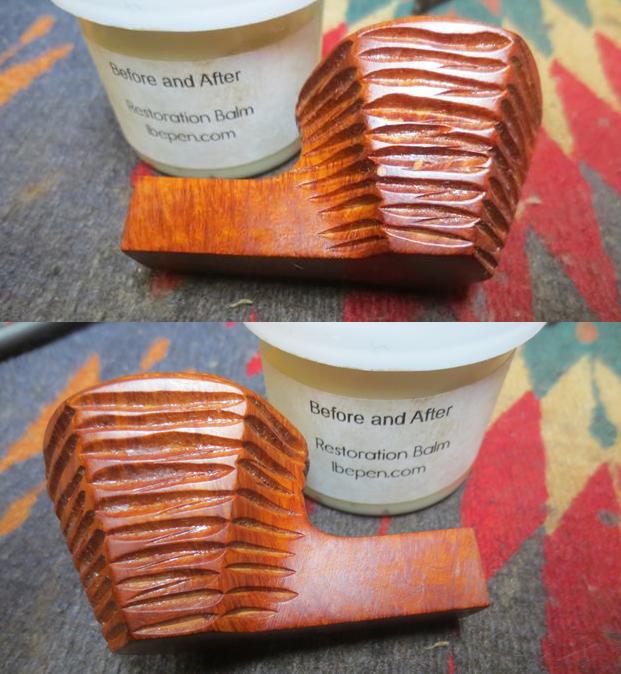
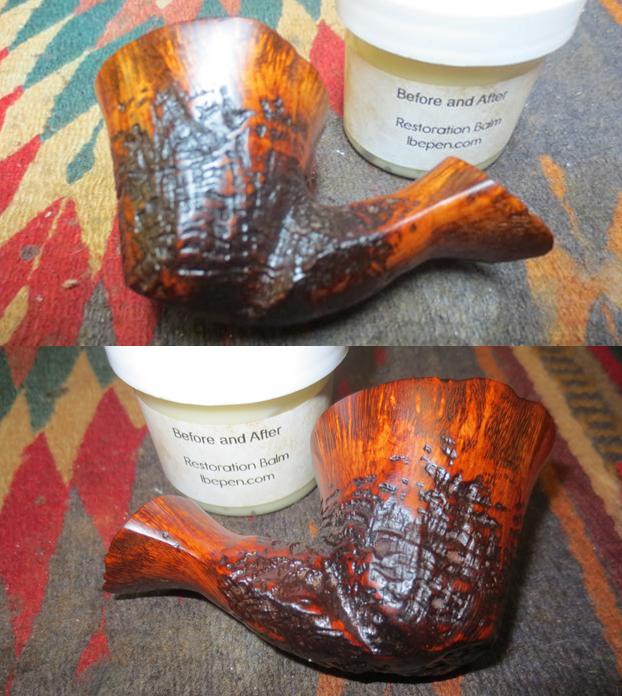
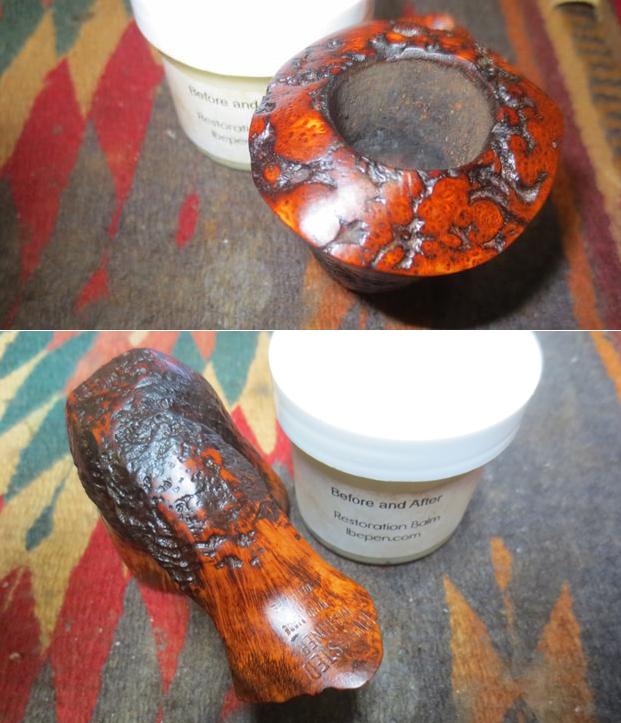
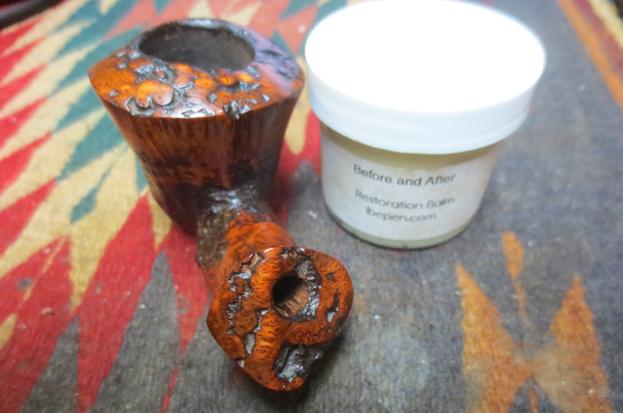
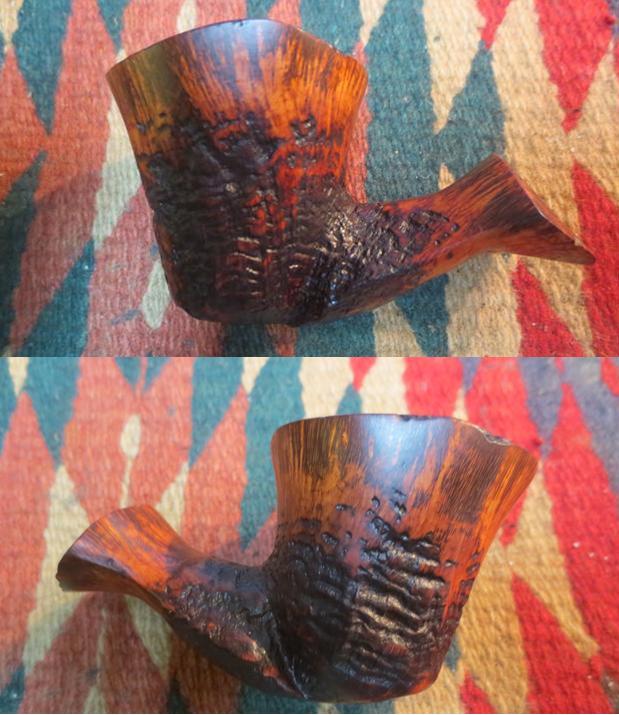
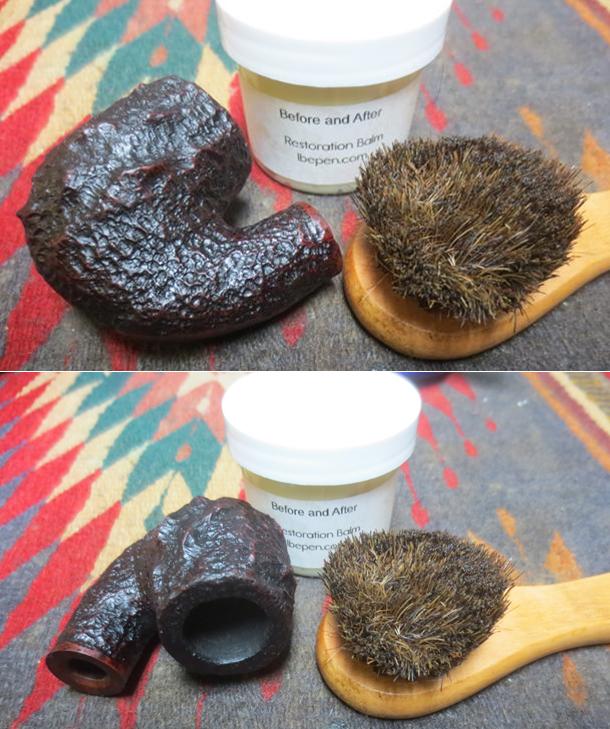
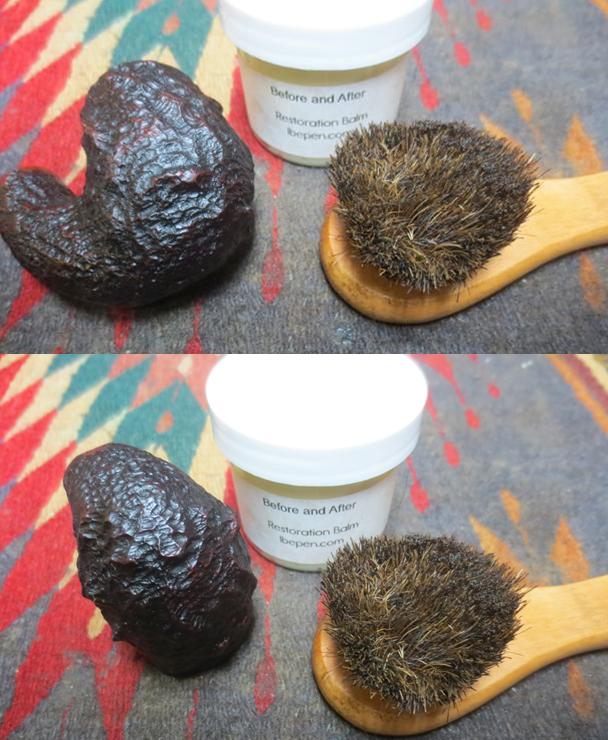
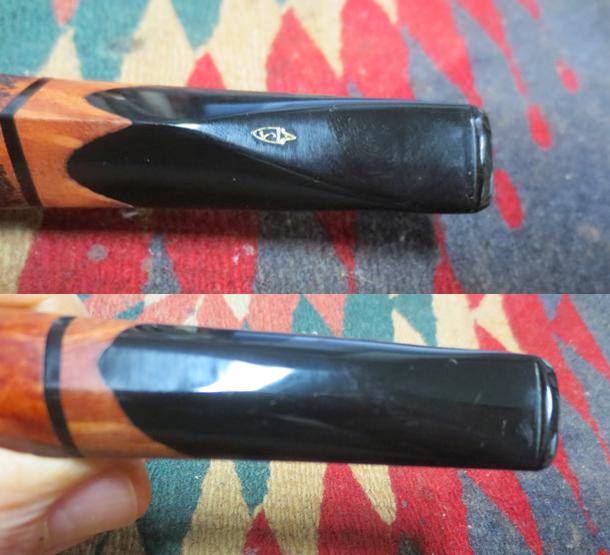
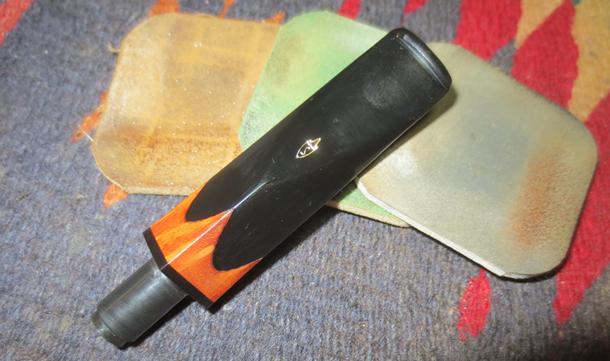
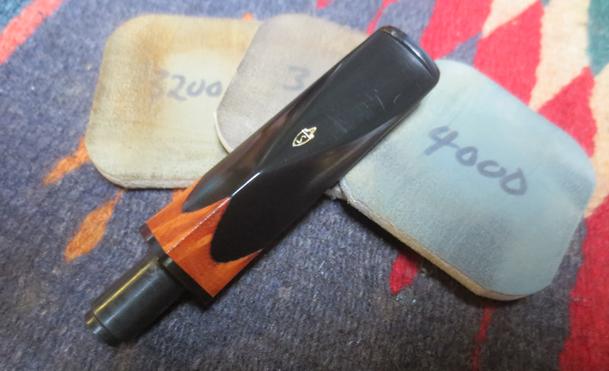
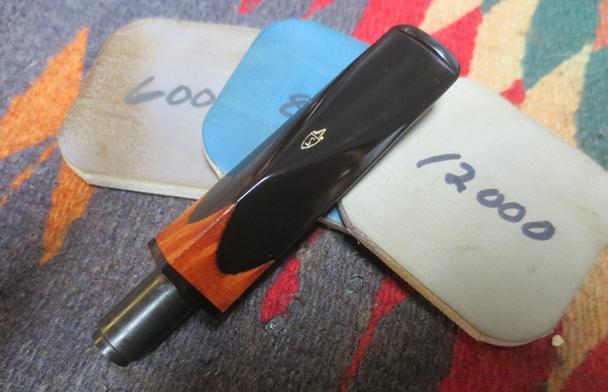
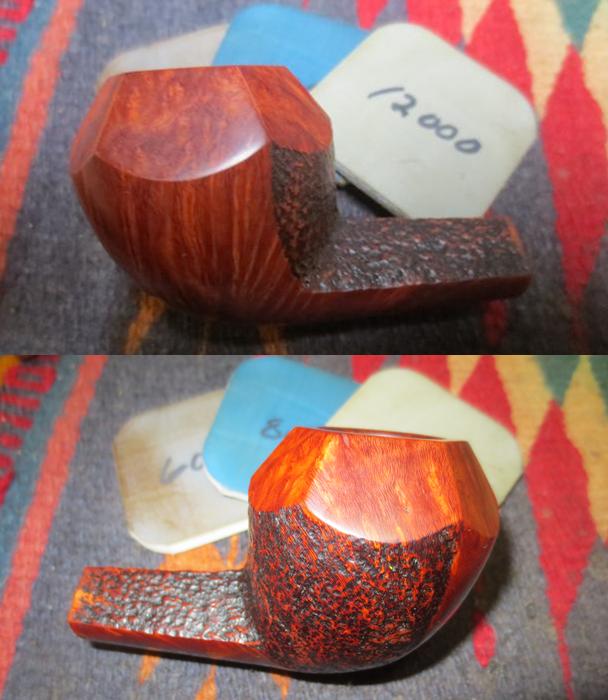
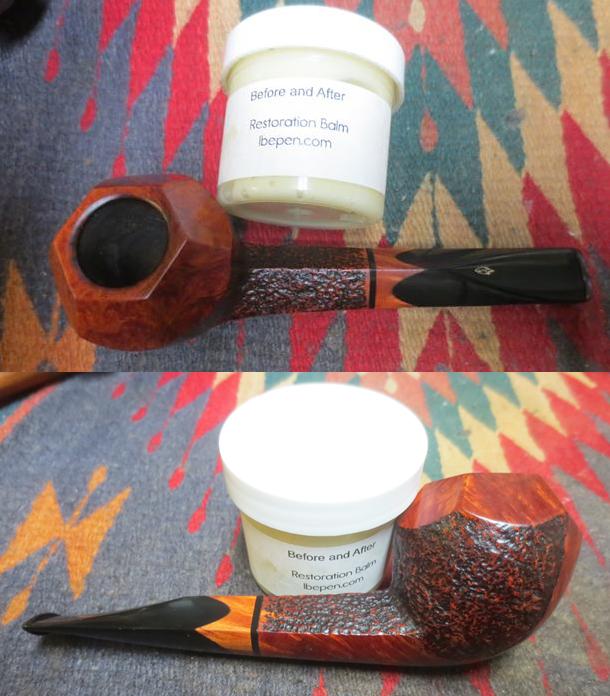
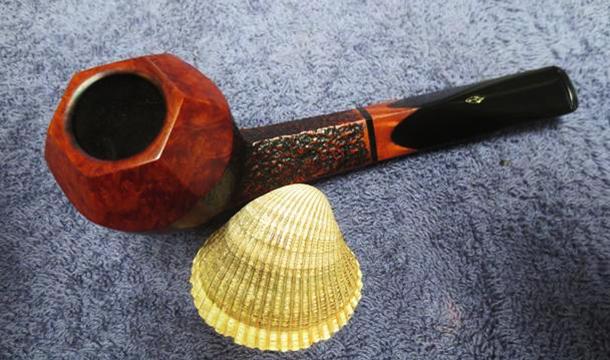
I really liked the look of the pipe. The fact that it was one of 500 pipes made that year made it interesting. It was not numbered so there was no way of knowing what number of the 500 this pipe was but that was ok. The finish on it is quite stunning and Jeff included some photos of the pipe from various angles. The last photo in the next set of four shows the stamping on the underside of the shank. It reads Savinelli in its classic banner over 2000 with Italy stamp to the right of it. The stem shows the combination of acrylic and briar that was done before the stem was cut and shaped. It is kind of an arched cut away stem – diamond shaped tapering back to the button on the top and rounded on the underside. There is some light tooth chatter as noted above on both sides of the stem at the button. The gold Savinelli crest is stamped in the top of the stem as it tapers back to the button. The crest is in excellent condition.This one was also a bit easier for Jeff in terms of the cleanup. He was no less thorough, nor did he very his process. He reamed the cake back to the walls of the bowl with a Pipnet reamer and cleaned it up with a Savinelli Fitsall pipe knife (somehow fitting on this pipe). He scrubbed the exterior carefully with Murphy’s Oil Soap and rinsed it off. He cleaned the exterior of the stem the same way and rinsed it. He cleaned out the internals with alcohol, pipe cleaners and cotton swabs until they were spotless. The pipe was really clean and would take polishing but little else to bring it back to top form. I took some photos of the pipe when I got it to record what it looked like before I did my refurbishing work. The top is very clean, though there is some darkening on the inner beveled edge of the rim that would need to be removed.The stem looked very good. He seemed to have been able to remove the tooth chatter on both sides. It would only need to be polished with micromesh and buffed to bring back the deep acrylic shine.I polished the stem with micromesh sanding pads – wet sanding it with 1500-2400 grit pads and dry sanding it with 3200-12000 grit pads. I rubbed the stem down with Obsidian Oil after each pad to give traction to the next pad and help me polish it. After the final pad I wiped it down with a damp cloth. The next series of photos show the development of the shine on the rubber stem. I lightly buffed the bowl with Blue Diamond to polish it a bit and see where I needed to do some work before the final buff. I hand polished the briar with micromesh sanding pads – wet sanding with 1500-2400 grit pads and dry sanding with 3200-12000 grit pads. I worked on the beveled inner edge of the bowl to clean it up some more. I wiped the bowl down with a damp cloth after each pad. I hand buffed it with a microfibre cloth after the 12000 grit pad. The pictures below show the progress of the polishing on the briar. I am experimenting with a new product from Mark Hoover – the creator of the Before & After Pipe Stem Deoxider and polishes. It is a Restoration Balm that can be used on briar or stems – whether vulcanite, acrylic or horn. He said it was made to pull the dirt off of the briar as well as polish it. He added some anti-oxidants to keep the briar from getting damaged from both UV rays and water. This is the first pipe I have used it on the briar. Earlier I used it on a horn stem and was really impressed by the life it gave back to the horn. I will keep using it for a while and see how it works in a variety of settings. I put the stem back on the bowl and buffed it with Blue Diamond on the buffing wheel to polish the briar. I used a soft touch on the sandblasted areas as I did not want to flatten them or fill in the grooves with polishing compound. I gave the stem and the smooth portions of the bowl multiple coats of carnauba wax and I gave the sandblasted areas several coats of Conservator’s Wax. I buffed it with a clean buffing pad to raise a shine. I hand buffed it with a microfiber cloth to deepen the shine. The handmade briar and acrylic stem and the combination of the dark stain in the sand blast and medium brown stain on the smooth portions of the bowl work well together to present a beautiful pipe. The pipe looks fresh and new. The dimensions of this pipe are Length: 6 inches, Height: 2 inches, Bowl diameter: 1 ¾ inches, Chamber diameter: ¾ inches. The finished pipe is shown in the photos below. I will soon be adding it to the rebornpipes store if you are interested in adding to your collection. It is a beauty and will serve someone very well. Email me at slaug@uniserve.com or send me a message on Facebook.Thanks for looking.

Rode Hard & Put Away Wet – MLC Redmanol French Briar Bent Billiard


Blog by Steve Laug

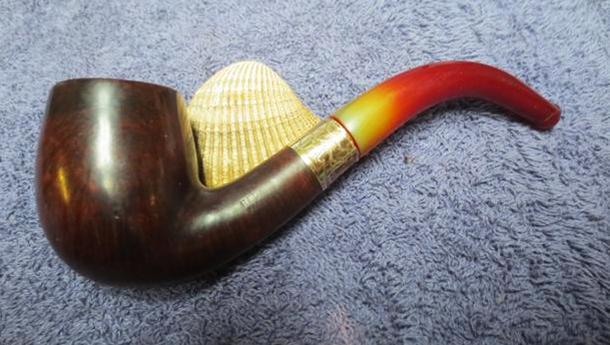
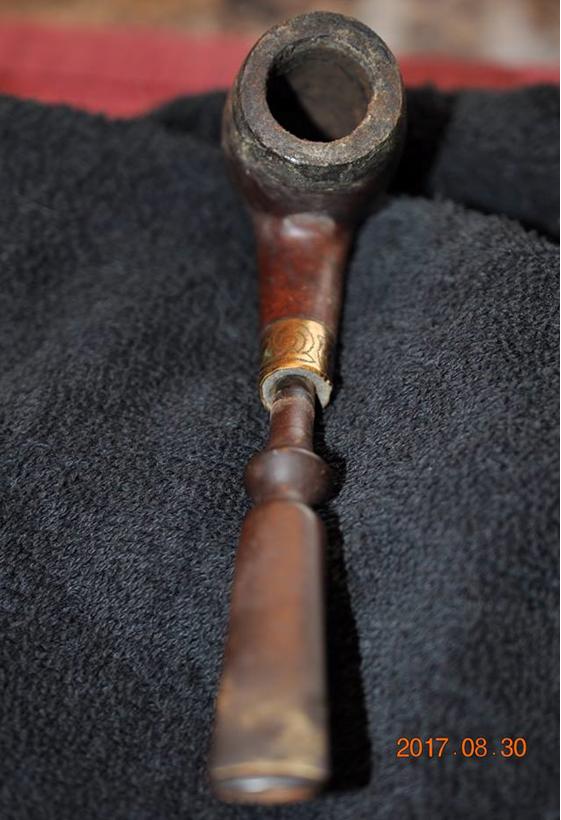
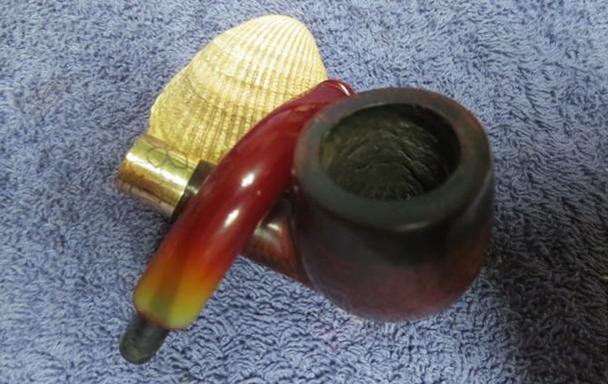
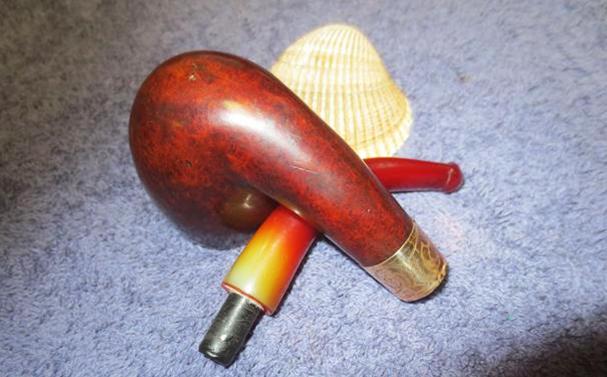
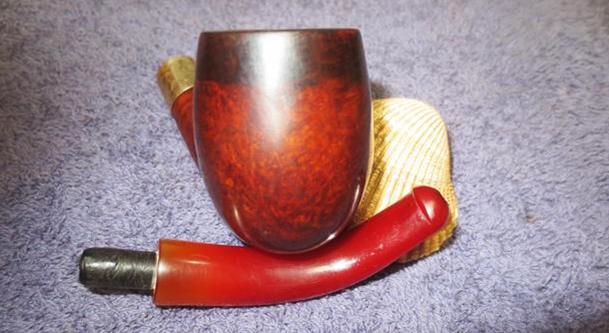
This older MLC bent billiard is a turn of the 20th century pipe. According to Pipedia, (https://pipedia.org/wiki/M._Linkman_%26_Co) the initials stand for M. Linkman Company which was thought to mean Mary Linkman Company. They were a Chicago based company that produced both briars and meerschaums. The company was named for the mother of the same Linkman who branded pipes under that same name and then eventually became the Dr. Grabow pipe manufacturer with which we are familiar. Pipephil’s site gave a little more information at this link (http://www.pipephil.eu/logos/en/logo-l4.html). M. Linkman and Co. was established by Louis B. Linkman and August Fisher in 1898. The company closed down in the 1950s and the Dr Grabow branch was sold to Henry Leonard and Thomas Inc. There was also a note that early Linkman’s pipes were stamped MLC in an oval.

If you have followed this blog for a while you have come to know that I love really old pipes and this one fits into that category of pipes. It is stamped MLC in an oval over Redmanol over French Briar on the left side of the shank. There are no other stampings on the pipe. The band is brass and is etched with a pattern of vines and flower around the entire band. The band was a mess on the shank end. It was bent and dented and no longer round. It was loose on the shank and would need to be straightened out before it was reglued. It is a small bent billiard and definitely sporting the wrong stem. It should have had a Redmanol stem to go with the stamping on the shank of the bowl.

I have written a bit more about the MLC brand on several early blogs (https://rebornpipes.com/2016/11/12/an-interesting-the-nuvo-mlc-italian-briar-hidden-in-a-wdc-case/ https://rebornpipes.com/2017/08/17/restoring-a-sad-old-mlc-bent-billiard/).

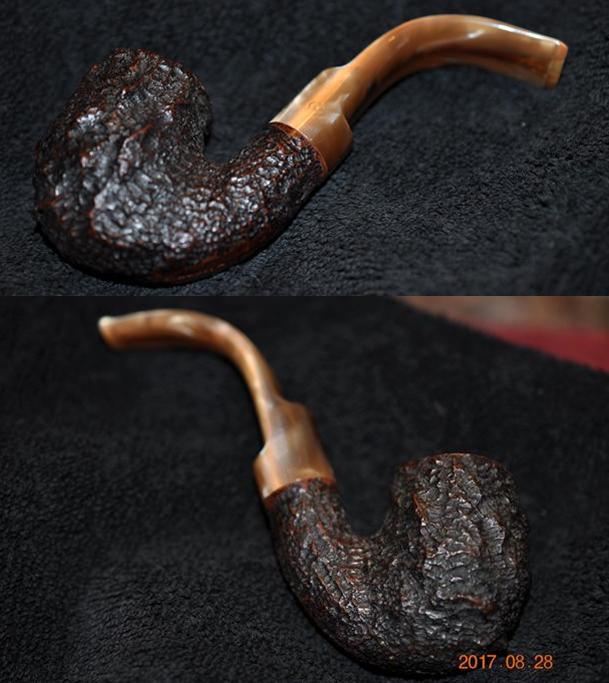
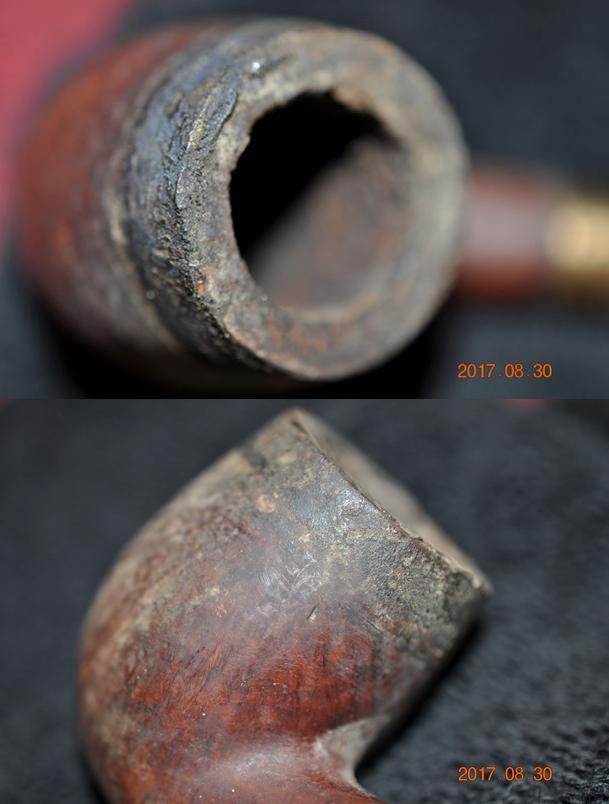
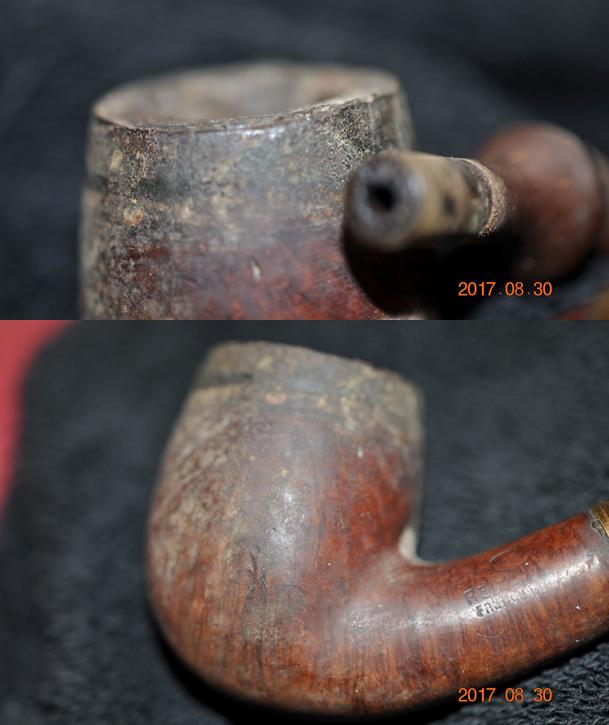
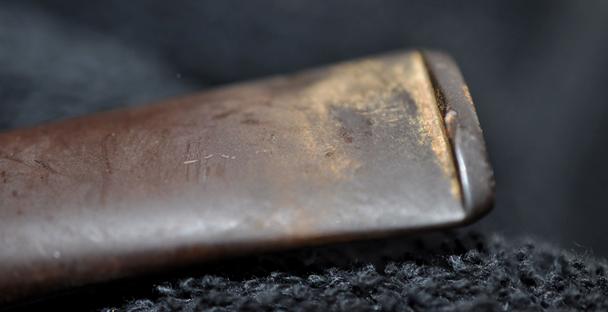
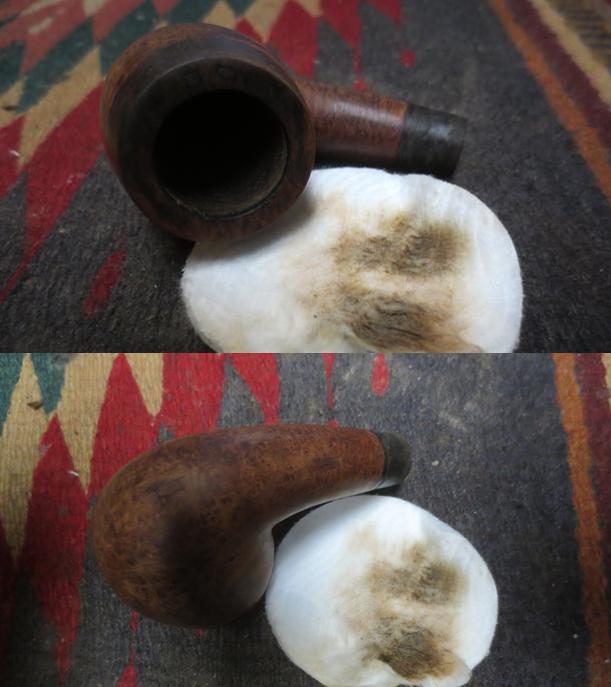
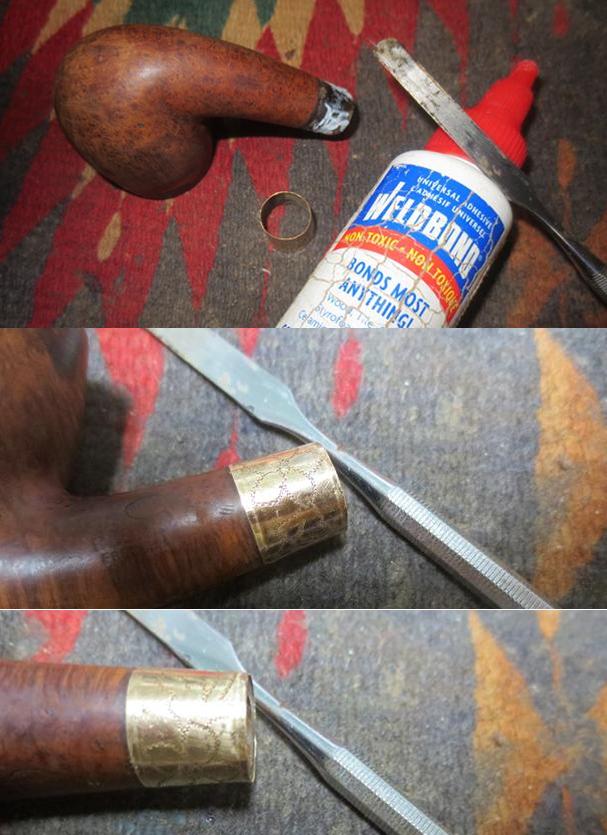
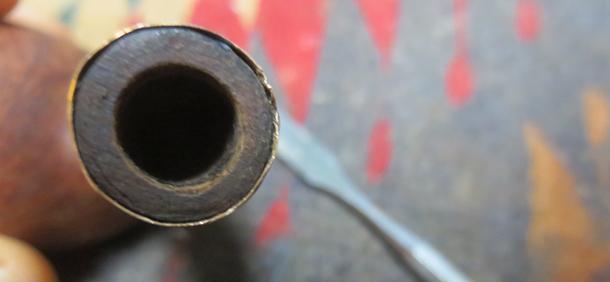
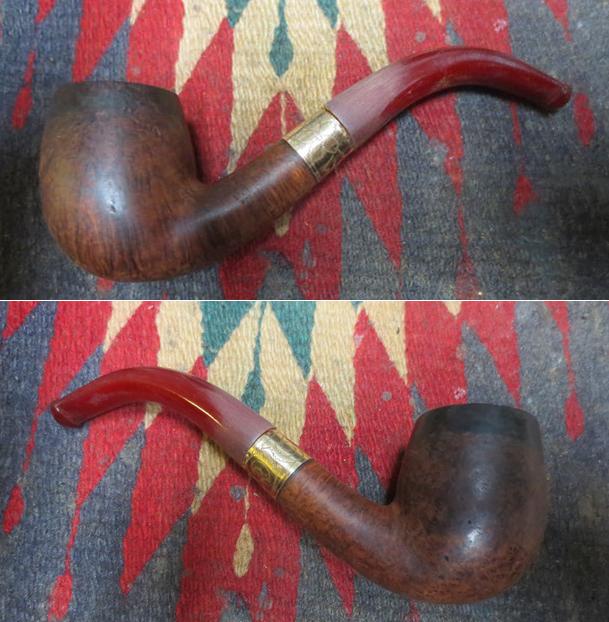
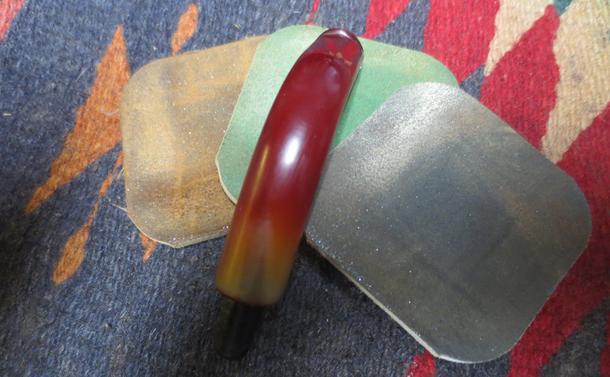
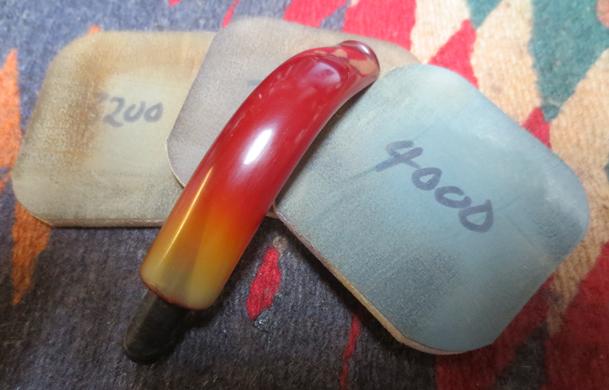
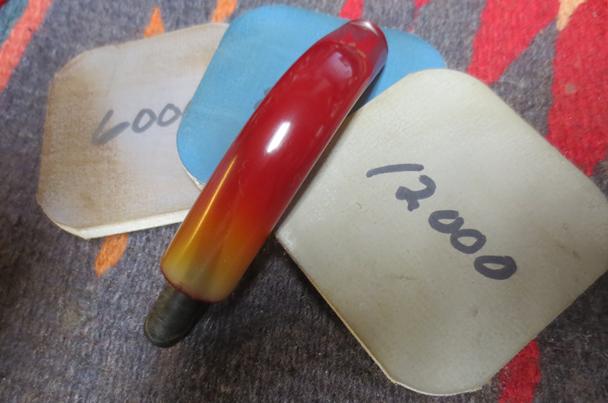
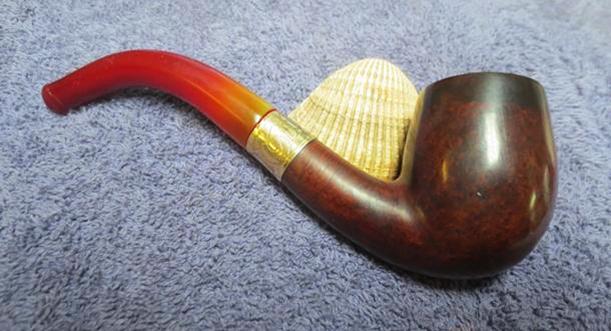
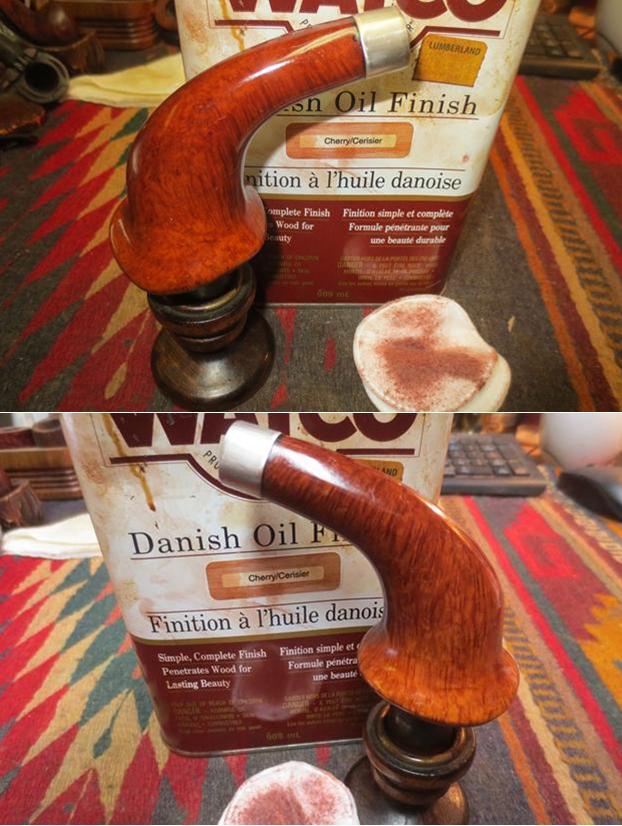
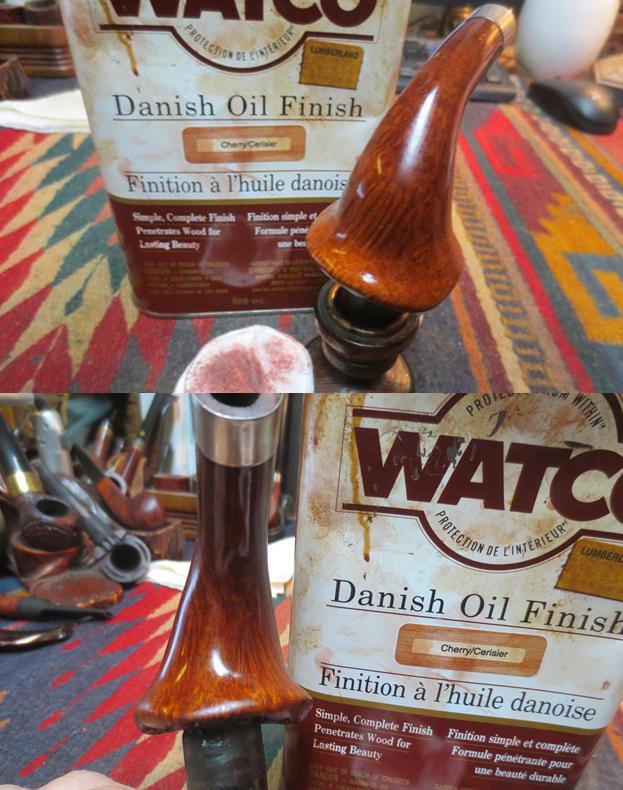
Jeff took the photos that follow before started the cleanup. You can see from the photos the condition of the pipe. The bowl exterior was absolutely filthy. It is the first time I have seen the lava that usually is on the rim flow over the top and down the sides of the bowl. The lava on the outside edge of the bowl and the thick cake in the bowl made it hard to know what the condition of the rim edges. The incorrect stem and the condition of the pipe told me that it was someone’s favourite smoker and when the old stem broke or wore out a convenient replacement was stuck in the shank and it continued to be smoked. The next photos of the bowl, rim and the flow of lava down the outside of the bowl shows how filthy this pipe was before Jeff started his clean up. The bowl is scratched and nicked but even that damage is hard to assess given the condition of the pipe. If you look closely you can see the MLC oval on the next photo of the shank. Below that it reads Redmanol over  French Briar. You can see the tars that have built up on the shank and pushed the band toward the end of the shank. It really was a dirty pipe. The photo of the bottom of the bowl and shank show more of the worn condition of the briar.The next three photos show the condition of the end of the band. It was in rough shape. As the band was pushed off the shank end because of the tars the end that extended beyond the briar of the shank was bent and damaged.The last photo Jeff took showed the condition of the stem. I was not particularly concerned with the stem as I was planning on replacing it with a fitted stem. If I used it in the future I would clean it up.I reread the blogs on the MLC pipes that I had restored previously to refresh the information. Now I was ready to see what I could do with this old pipe. It is really nice working on clean pipes. I have done enough repairs recently that have required me to ream and clean them that I have a greater appreciation for how nice it is to have this done for me. Thanks Jeff for your work and the way it makes my part a bit easier. He worked his usual magic in cleaning up this messy pipe. I really wondered what would lie beneath all of the grime and tars. Jeff reamed it with a PipNet reamer and cleaned up the remnants with a Savinelli Fitsall pipe knife. He scrubbed out the mortise and the airway in the shank and the stem with alcohol, cotton swabs and pipe cleaners. He spent quite a bit of time scrubbing the exterior of the bowl, rim cap and shank with a tooth brush and Murphy’s Oil Soap to remove the build up. He rinsed it under running water. It took a lot of scrubbing to get it free of the tars but it worked well. He dried it off with a soft cloth. Once the grime was removed it was clear that the finish underneath was in rough shape. The briar was quite nice with a mix of straight and birdseye grain around the bowl and shank. I took photos of the pipe to show its condition before I started my work on it. Jeff had done a miracle in removing the thick cake, cleaning the lava on the rim and sides of the bowl. The inner edge was in pretty  decent shape as was the outer one. I was happy to see the condition. There was however a darkening on the rim top and all around the bowl coming down the sides about ¼ inch. At first I thought that it might have been left behind by a rim cap of some sort but there were no small nail holes in the briar on the sides of the bowl. I think that actually it is what is left behind by the greasy hands of the pipe man and the lava that had flowed down the bowl sides.He was also able to remove much of the grime around the band on the shank and leave the stamping undamaged.I removed the stem and carefully slid the band off the shank. I wanted to clean up the end of the shank with alcohol and sandpaper. I also want to smooth out the back edges of the band and see if I could make it smooth and useable once again. I heated the end of an awl/ice pick and pressed it against the damaged areas of the band. The brass was quite thin so it was really quite workable. I was able to remove all of the damaged areas but one that was a compressed area on the bottom side. It would be hidden on the underside of the shank once it was glued back in place.I scrubbed the shank end and the dark area with acetone to remove more of the grime that was on the surface of the briar. I was able to reduce quite a bit of the buildup around the top of the bowl and the rim top with this method. I sanded the end of the shank to smooth it out. I used a dental spatula to spread the all-purpose glue around the shank. I pressed the band back on the shank with the small damaged spot on the underside.I took a photo of the end of the shank to show that the band fit tight on the shank and was even with the shank end. You can see the damaged area on the underside of the shank on the right side of the photo.I looked through my can of stems because I remembered having a bent Redmanol stem that I had picked up somewhere along the way. Sure enough it was there. It was slightly larger in diameter than the shank of the pipe so it would need to be sanded to fit nicely on the shank. It also had a push stem on it that would need to be removed and replaced with a normal tenon. Both of those were relatively easy jobs. I was anxious to get moving on the stem so of course I forgot to take photos of the stem with the meerschaum push tenon. It was loose so I unscrewed it from the stem. I had a small threaded Delrin tenon with the threads that were close to the same and threaded it into the airway on the stem. It worked well so I unscrewed it and glued it in place in the stem. The photos below show the new tenon on the stem.The tenon fit well in the mortise. The fit against end of the shank was nice. I sanded it to remove the excess material and reduce the diameter of the stem to match the shank using 220 grit sandpaper. In the photos below it is getting close to a nice fit. What you can’t see in the photos is that the nice, rich, red colour of the Redmanol lightened with sanding to shades of blood orange. I could not start over so I decided to keep sanding until the fit was correct. At first I did not like the effect on the Redmanol and I was disappointed by the colour shift. Looking at the stem from the drilled airway before I put the tenon in place and the flat end of the stem it appeared that the red was solid all the way through the material so when the oranges and yellows started to show up I was a bit frustrated. Now as I look at it I have to say it is growing on me. It reminds of the Popsicles that we used to by when I was a kid. I stopped sanding the bowl and put the stem on the shank to get a couple of photos so I could look at it on the screen and get the effect. It is almost like flame… kind of a nice variation. It is interesting to see the fine red line between the band and the stem – the flat end still is an even red. I don’t quite understand it but I am resolved to live with it. I am going to stain the bowl so that should also add to the variations of colour on this old pipe.I decided to try to bleach out the darkening on the rim top and first ¼ inch of the bowl all the way around. I wiped it down with bleach on a cotton pad and left it on the dark area to do its work. It worked better on the left side than the right.I stained the bowl with a dark brown aniline stain to try to blend in the dark rim stains. I applied the stain, flamed it and repeated the process. Once it dried I wiped the bowl down with alcohol on cotton pads to make it more transparent and let the grain shine through.  In the process some of the nicks in the briar showed up more clearly. I decided not to fill them in but to leave them as war wounds on this old timer. They tell a story that I wish the pipe could tell us. I polished the briar with micromesh sanding pads. I started polishing with 3200-4000 grit pads and wiped the bowl down after each pad with a damp cloth. I continued to polish with 6000-12000 grit pads and wiped it down after each pad. I hand buffed it with a soft cloth. The dark ring around the top of the bowl is still visible but less than before. The rim looks good. To further blend the darkened top portion of the bowl with the rest of the pipe I gave the bowl a contrast coat of Danish Oil Cherry Stain. I applied it by hand and rubbed it off and repeated the process to get a good smooth coat.I wiped the stain coat off and hand buffed the pipe lightly. The photos below show what the pipe is looking like at this point in the process. The right side still shows darker than the left at top edge of the bowl. I polished the stem with micromesh sanding pads – wet sanding it with 1500-2400 grit pads and dry sanding with 3200-12000 grit pads. I wiped the stem down with Obsidian Oil after each pad. After the final 12000 grit pad I gave it a final coat of oil and set it aside to dry. I put the stem back on the bowl and buffed it with Blue Diamond on the buffing wheel to polish the briar. I gave the pipe multiple coats of carnauba wax and buffed it with a clean buffing pad to raise a shine. I hand buffed it with a microfiber cloth to deepen the shine. The newly variegated Redmanol stem did not too bad with the old pipe. It shines like polished horn and the flow of the colours worked with the colours on the bowl. The way the colours shifted on the parts worked well together to present a beautiful pipe. The dark rim edge almost looks like the way meerschaum pipes were flumed with a dark edge. The pipe looks fresh and new. Later I will need to give it a bowl coating to protect the bowl inside as there are spidering cracks all around the briar. The finished pipe is shown in the photos below. Thanks for looking.


A Pipe by Lee Limited Edition 2 Star Rhodesian worth restoring


Blog by Steve Laug

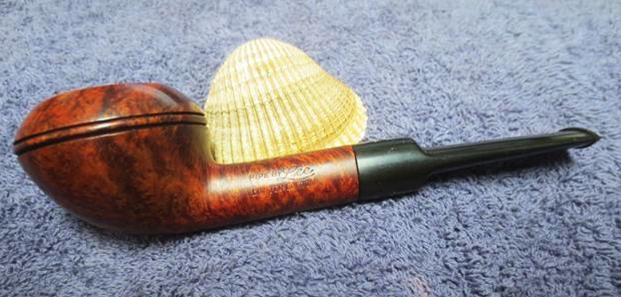
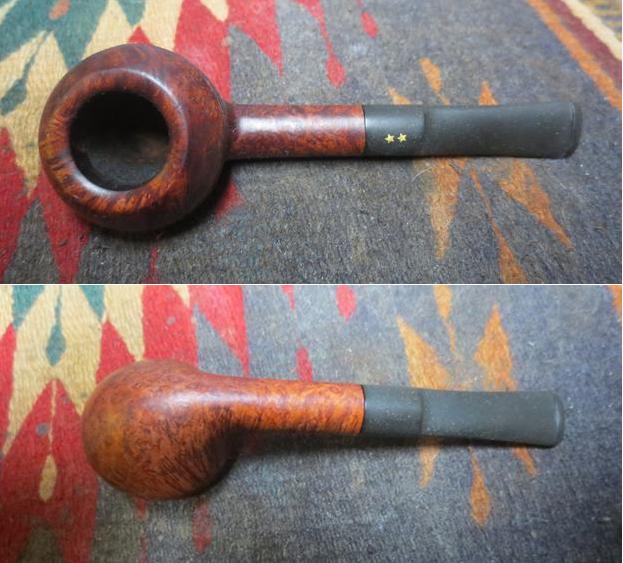
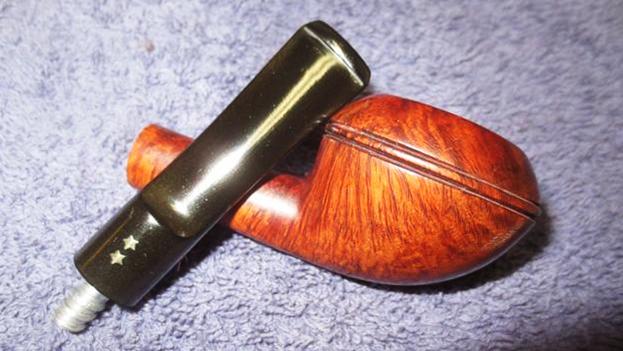
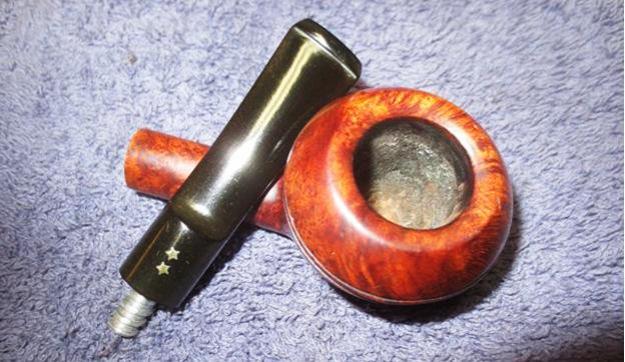
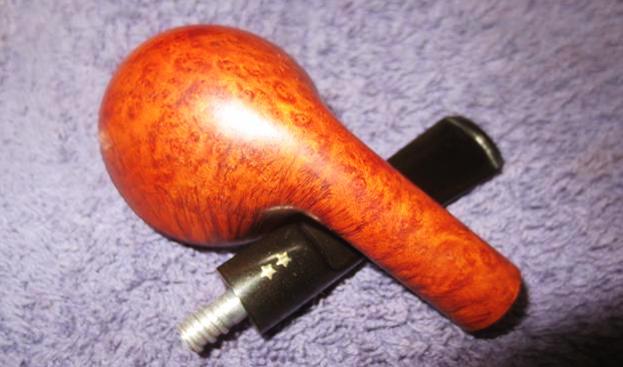
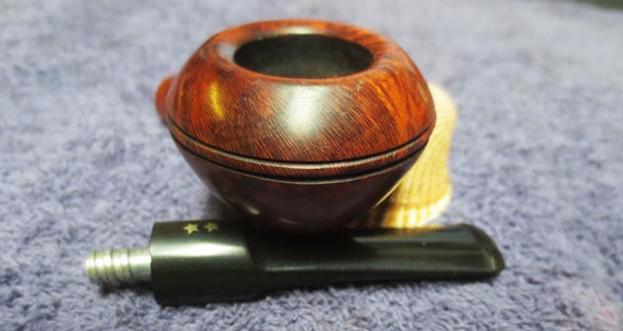
Over the years I have gained a soft spot for Pipe by Lee pipes. I have found them in antique and junk shops around Canada and the US. They seemed to have had quite a following. Most of the pipes I have found have been 2 or 3 star pipes – designated by the number of gold stars on the stem. I have had a variety of shapes from Billiards, Bulldogs, Bull Moose, and Rhodesians. All have been well cut shapes and fairly decent pieces of briar. Some of the 2 star pipes have had small fills but generally they are well blended into the rest of the briar with the stain. Many have obviously been favourite pipes judging by the thick cake in the bowl and the wear and tear on the stems. They are workhorses and when cleaned up there is always a lot of life left in the pipe.

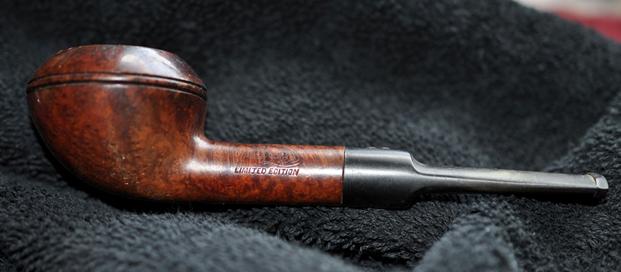
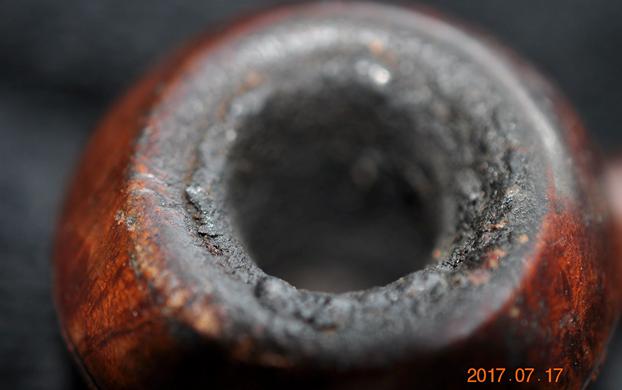
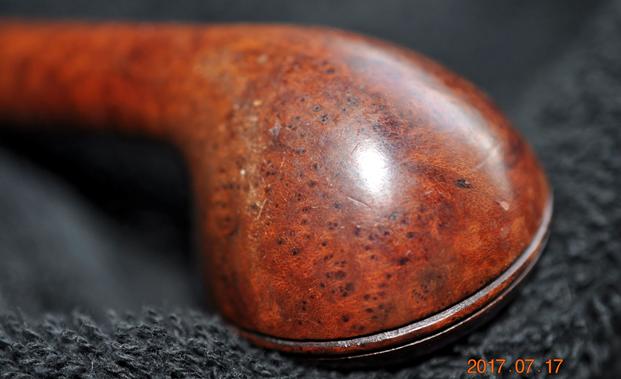
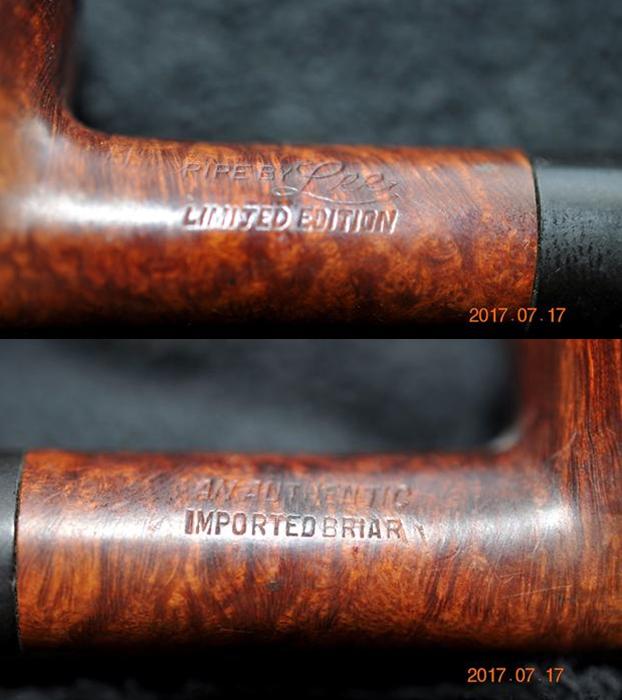
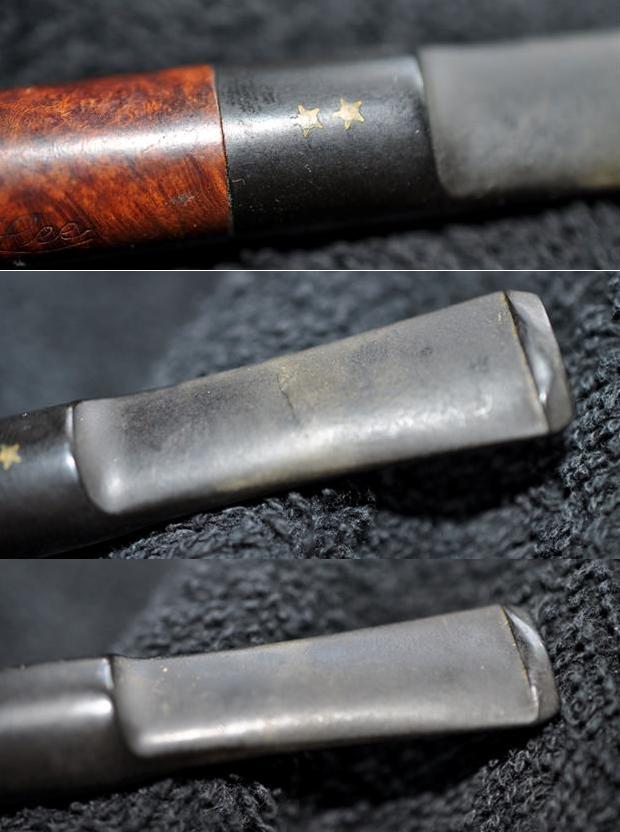
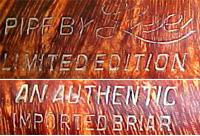
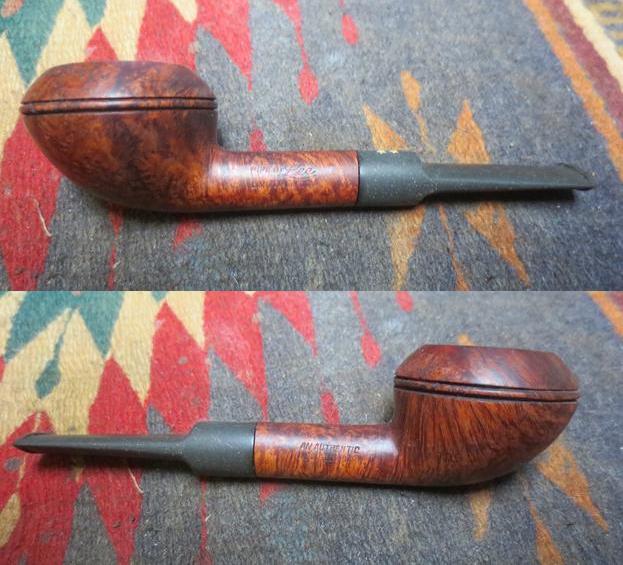
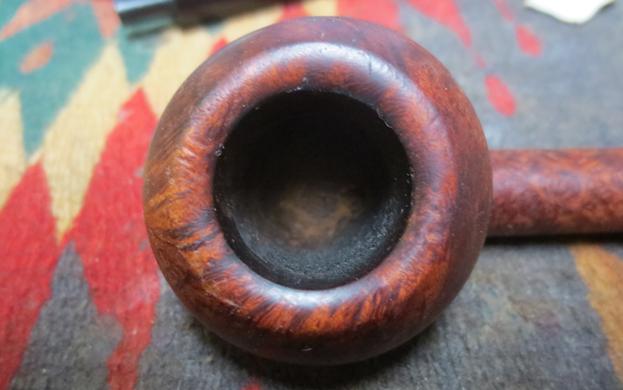
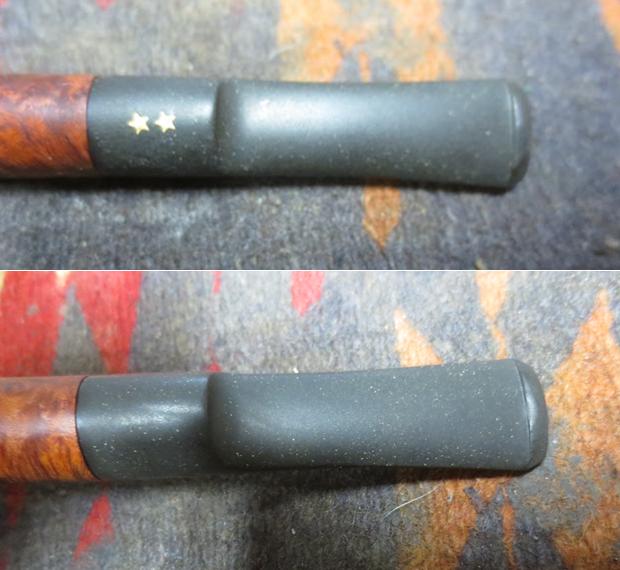
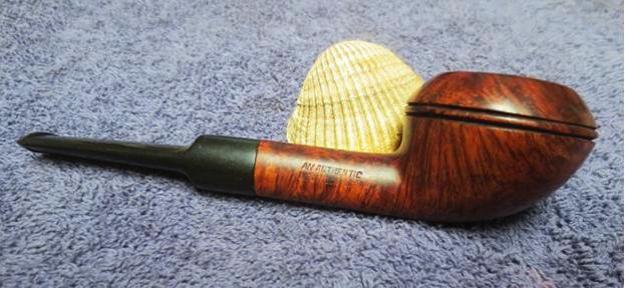
My brother Jeff picked up a Pipe by Lee Rhodesian that is on the delicate side – far different from the chunky ones that I have cleaned and restored. This one is a low profile Rhodesian with a round shank and a saddle stem. It has a dark stain on the briar, which is also different from other Lee pipes I have worked on. Jeff took some photos of the pipe before he started to work on it.The next two photos show the condition of the bowl. You can see from the photos that the bowl is thickly caked and there is a heavy lava overflow on the rim top and the inner edge of the bowl. It covers the beveled rim top to where it almost looks flat. There appears to be some nicks and damage on the front outer edge of the bowl but I won’t know until it has been reamed and cleaned. The finish on the bowl was dirty and had a lot of nicks and scratches in the surface of the briar. The double rings around the rim cap are in excellent condition with no damaged areas.Jeff took some photos of the shank sides to show the stamping on the pipe. It is stamped Pipe by Lee on the left side of shank over Limited Edition. On the right side it is stamped An Authentic over Imported Briar. The saddle stem had two gold stars inset in the top portion of the saddle equidistant from the front and back of the saddle. The stem was dirty, sticky and lightly oxidized. There were light tooth marks on the top and underside at the button and on the sharp edge of the button.

I decided to refresh my memory regarding the Pipe by Lee brand. I checked on my usual sites to learn what I could. I went to Pipedia and looked up the brand. Here is the link https://pipedia.org/wiki/Lee

I quote the entirety of the listing as it is brief and pointed regarding the history of the brand.

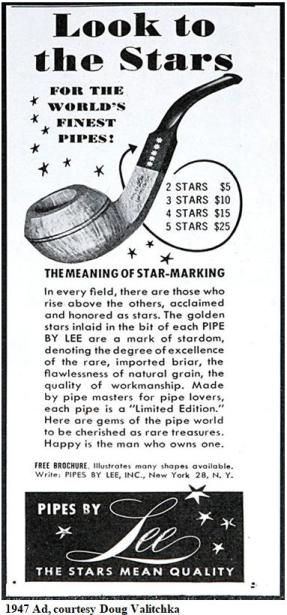
This brand was distributed by Stewart-Allen Co. Inc., NY. The Grading (ascending): 1 to 5 stars. Early pipes have seven pointed stars, middle run have five points and later pipes are stamped with coloured gold stars.

The site also quoted a section from the pipephil website regarding the brand. Lee seconds: Briar Lee, Gold Coast (preceding content from  “Pipes: Logos & Markings” website http://www.pipephil.eu/logos/en/logo-l3.html#lee)

I quote the next section of the article because it pertains to the pipe I am working on.

I have seen one pipe. “Pipe By Lee” stamped on left side of shank over “LIMITED EDITION”. Right side of shank stamped “AN AUTHENTIC” over “IMPORTED BRIAR”. Logo on top of the stem is three gold seven pointed stars in a row. Additional information on time frame of operation or quality of the pipes would be helpful. — Dgillmor 21:51, 10 May 2012 (CDT)

I went directly to the pipephil site to look at the stamping and logo markings that are included there. There was a photo of a similar pipe though it had a tapered stem rather than the saddle stem on the one that I am working on. The shape is a Rhodesian as well. Below that there was a photo of the stamping on that pipe that matches the stamping that is on the pipe have. http://www.pipephil.eu/logos/en/logo-l3.html#lee

I decided to do some more searching and look for sites other than Pipedia or Pipephil. I wanted to find a good summary of the history of the brand from someone who collects the pipe. I found a great link to a conversation on the Shotgun World BBS. The link is as follows http://www.shotgunworld.com/bbs/viewtopic.php?f=75&t=269843 I am including portions of that conversation from a member there, going by the screen name SuperXOne. He obviously collects pipes from Pipe by Lee. If you are interested in reading the entire interchange you can go to the site. For my purposes I only wanted the one side.

For any of you pipe smokers, I want to share something I’ve discovered about “estate” pipes. You may come on a pipe at a garage sale, flea market, or eBay that is marked “Pipes by Lee”. This pipe will be, if not completely abused beyond salvation…a goodun!!!

Evidently, there was somebody named Lee who made pipes in New York City from just after WW2 on up until sometime in the 1970’s. Lee’s pipes were not ever cheapies. He sold them mail order and wholesale, and Lee met Kaywoodie grade for grade back when Kaywoodie was winding down from making their best pipes into a slow, declining mediocrity.

Lee Pipes came marked with stars to determine quality. As of 1950, a one star pipe was $3.50, Two stars were $5, and Three stars were $10. Four star pipes were $15 and Five star pipes were $25. $3.50, $5, and $10 were the exact prices in the first three grades of Kaywoodies, the Drinkless, Super Grain, and Flame Grain. Later prices went up gradually for both brands, but somewhere along the line Lee lost the race and yet you can still buy a brand new pipe that says Kaywoodie Flame Grain in 2011…but it’s only a decent, basic pipe that wouldn’t have even made the lowest cut for a $3.50 Drinkless or One Star in 1950.

The overwhelming majority of Lee Pipes that I own and I’ve seen were three stars. There are two periods of quality, and no Lee Pipe is ever junk. The earlier, better Lee Pipes had actual gold inlaid stars into the rubber stem. The later, still good but not as nicely polished Lee pipes, had the stars cast into the stem but have no gold inlaid in the stars. Every so often, I’ll see a two star Lee and it will always have nice grain, but a few “fills” here and there. A three star Lee will have no noticeable “fills” and will always have excellent grain structure, but not quite on a level with a Pre War Kaywoodie Super Grain or Flame Grain. Evidently, Lee saved his best wood for his four star and five star pipes…but I’ve never seen one and never seen one advertised for sale. Likewise, for some odd reason, I’ve never seen a “one star” Lee pipe. Perhaps because the one stars all got used up and smoked out and thrown away within a few years of purchase.

What you’ll likely find is a “Three Star” Lee in a conventional shape such as an Author, Billiard, Apple, or Bulldog. They pretty well matched Kaywoodie in their shapes offered. Do not pretend that a Lee Pipe is the equal of a Pre War Kaywoodie “four hole” Super Grain or Flame Grain. But they are probably better than the Pre War “four hole” Kaywoodie Drinkless…at least the three star Lees are…and a Pre War “four hole” Kaywoodie Drinkless is a truly fine pipe. I’ve found the Lees to be better quality than the later “three hole” Kaywoodies, as well…even the higher grades of Kaywoodie. I’ve never seen a trace of varnish on a Lee pipe of any grade, and the workmanship is wonderful. Remember too that all that incredibly fine briar that Kaywoodie used before the war to make all those wonderful “four hole” Kaywoodies was already more or less gone by the time that Lee starts making his pipes after the war. Lee pipes more than hold their own against Kaywoodies of the same year of manufacture.

Prices on Lee pipes are cheap. A brand new one in the box is often less than fifty bucks. Well-used ones are giveaway cheap at flea markets and yard sales. A fair price for a good condition, lightly smoked three star Lee is probably twenty five dollars. For that you’ll get a pipe that you’d have to pay several hundred for if it was made brand new today…if you could even find one as good.;)

Here’s a web page that shows the Lee 1950 dealer’s catalog. Drool away!: http://pipepages.com/pblpage

But while Lee might have equaled Kaywoodie pipes, Kaywoodie had Lee beat hands down in catalogs. If you smoke a pipe you just have to see this 1947 Kaywoodie catalog: http://pipepages.com/47kaycat2.htm

All links are to Pipe Pages. A fine place to while away the time looking at old pipes.;)

And here’s a link to the existing Kaywoodie Company. Sad to compare them with the 1947 Kaywoodie, but at least they are still kicking and still in the USA: http://www.smfrankcoinc.com/

Too further illustrate just how high quality the Lees and the Kaywoodies were in the 1940’s, here is the 1949 price list of Alfred Dunhill. You could get your choice of Dunhill pipe in the USA in 1949 for $15 retail. In those days that would have included tariffs, and of course transportation to the USA from England. Dunhills are, of course, still being made to the exact same standards as they were in the late 1940’s. Today any Dunhill is over five hundred dollars…at the very least,,,,even the sandblasted ones. Back in the 40’s Lee and Kaywoodie hardly sold any sandblasted pipes at all, because their customers demanded for ten dollars a completely perfect, flame grained, smoothly polished, outrageously high quality pipe, and they would have only sand blasted a pipe that somehow didn’t make the grade. For fifteen dollars an American expected a Lee or Kaywoodie to be out of this world wonderful, and I can’t even imagine those $25 grade Kaywoodies and Lees…but we know that some were made. We Americans don’t think about us making the finest of anything, but we did back in the 1940’s when it came to making smoking pipes. Our pipes were the absolute best in the world, using the very best briar. http://pipepages.com/49rtda13.htm

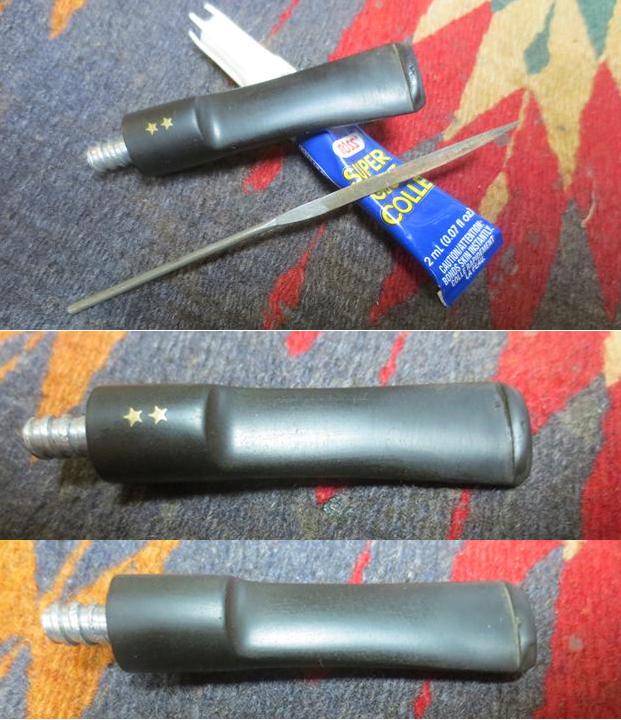
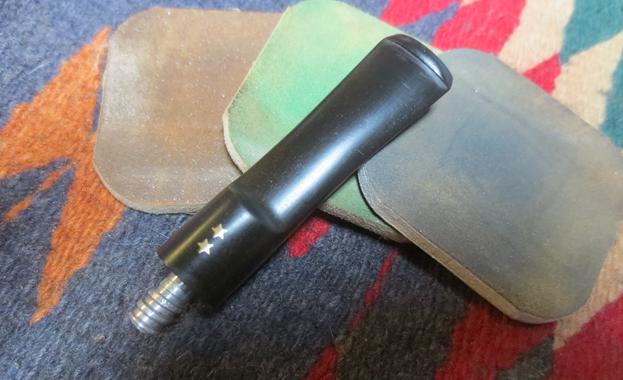
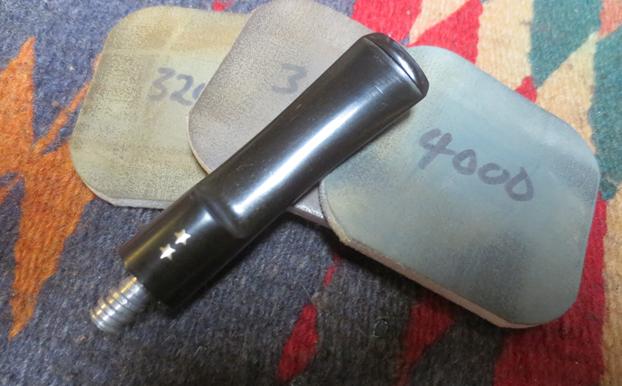
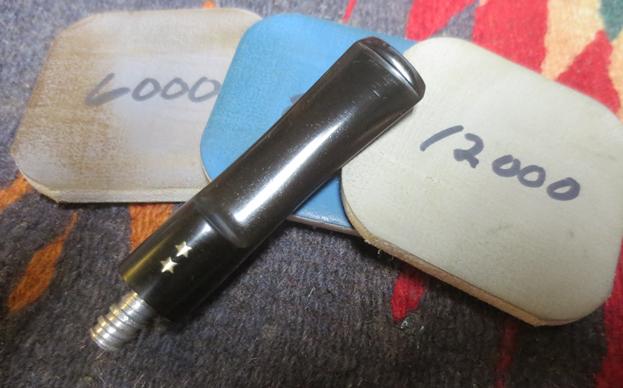
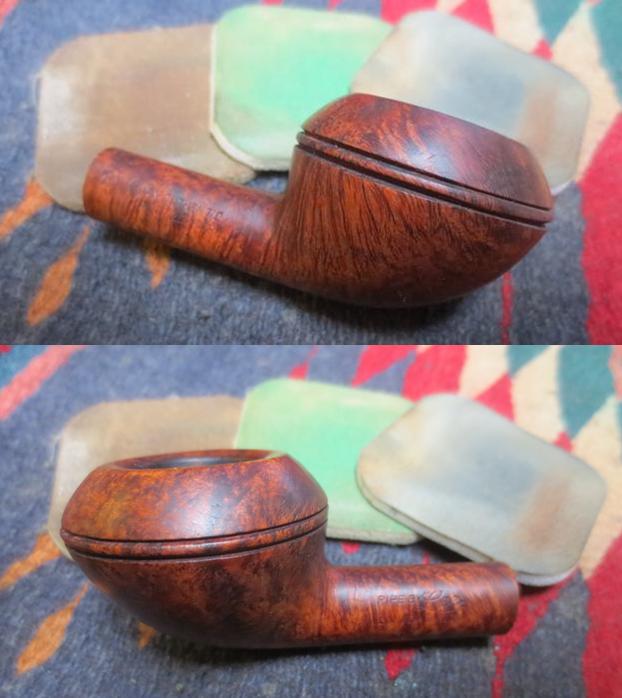
Armed with the renewed information it was time to work on the pipe. Jeff did his usual thorough clean-up work. He reamed it with a PipNet reamer and cleaned up the remnants with a Savinelli Fitsall pipe knife. He scrubbed out the mortise and the airway in the shank and the stem with alcohol, cotton swabs and pipe cleaners. He scrubbed the exterior of the bowl, rim cap and shank with a tooth brush and Murphy’s Oil Soap and rinsed it under running water. It took a lot of scrubbing to get it free of the tars. He dried it off with a soft cloth. Once the grime was removed the finish was in excellent condition with a mix of straight and birdseye grain around the bowl and shank. He cleaned up the vulcanite stem and metal threaded tenon with the oil soap as well and was able to remove much of the debris. There were some light tooth marks on both sides of the stem.I took photos of the pipe to show its condition before I started my work on it. Jeff did an excellent job removing the cake from the bowl and scrubbing the rim cap. The bevel came out absolutely clean and looked great. The rounded outer edge of bowl looked good as well. There were a few light scratches that could be lifted from the right front of the rim top.The stem looked very clean. The vulcanite was pitted but did not show much oxidation on the surface. The wear on the sharp edge of the button on both sides was clear. The tooth mark on the top of the stem near the button was deeper than the chatter on the underside.I repaired the worn sharp edge on the top and underside of the button with clear super glue and used a needle file to clean up the edges. I sanded the tooth mark out with a folded piece of 220 grit sandpaper.I sanded the stem surfaces with 220 grit sandpaper to remove the light oxidation and the button. I polished the stem with micromesh sanding pads – wet sanding it with 1500-2400 grit pads and buffed it with red Tripoli to remove the oxidation that showed up in the first photo below. I dry sanded it with 3200-12000 grit pads. I rubbed the stem down with Obsidian Oil after each pad to give traction to the next pad and also bring a little life to the vulcanite stem. After the final pad I gave it a last coat of the oil and set it aside to dry. The next series of photos show the development of the shine on the rubber stem. I buffed the bowl with Blue Diamond to polish it a bit and see where I needed to do some work before the final buff. I hand polished the briar with micromesh sanding pads – wet sanding with 1500-2400 grit pads and dry sanding with 3200-12000 grit pads. I wiped the bowl down with a damp cloth after each buffing pad. I hand buffed it with a microfibre cloth after the 12000 grit pad. The pictures below show the progress of the polishing on the briar. I put the stem back on the bowl and buffed it with Blue Diamond on the buffing wheel to polish the briar. I gave the pipe multiple coats of carnauba wax and buffed it with a clean buffing pad to raise a shine. I hand buffed it with a microfiber cloth to deepen the shine. The black stem of polished vulcanite and the polished dark stained briar work well together to present a beautiful pipe. The pipe looks fresh and new. The finished pipe is shown in the photos below. Thanks for looking.


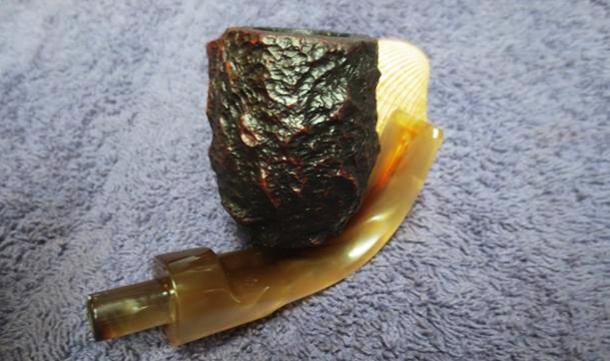
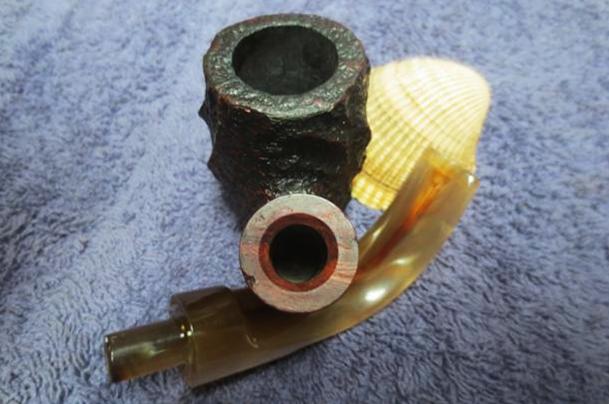
The Rebirth of an Unmarked Horn


Blog by Steve Laug

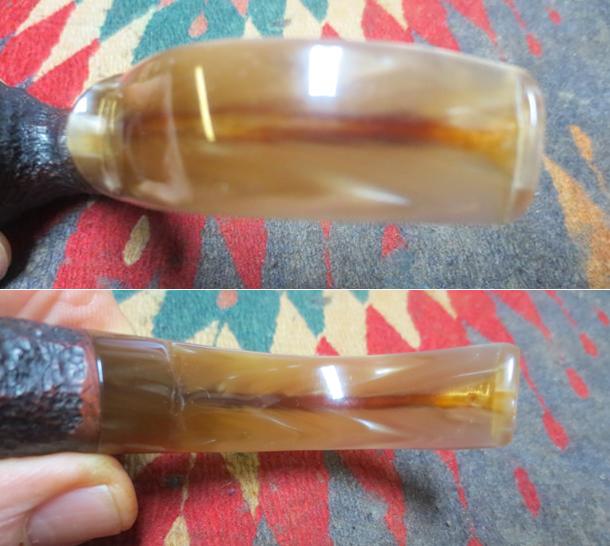
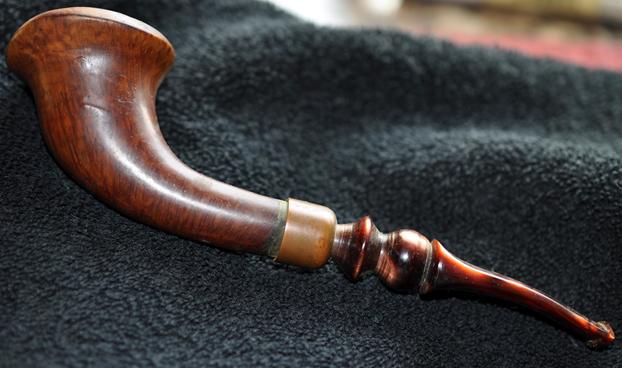
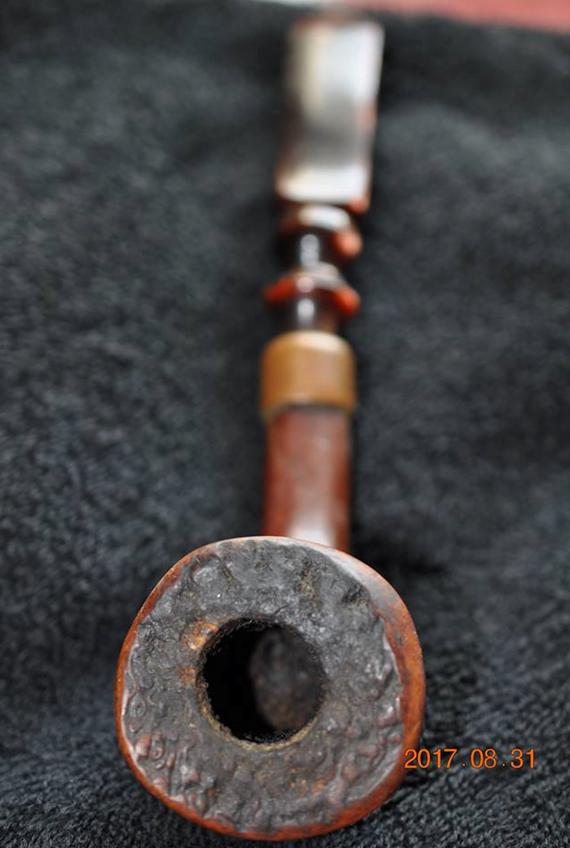
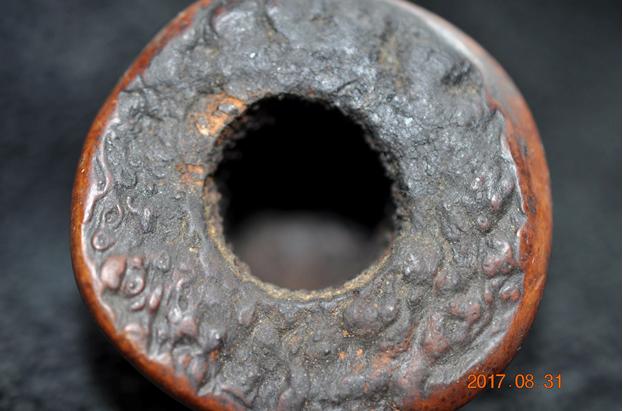
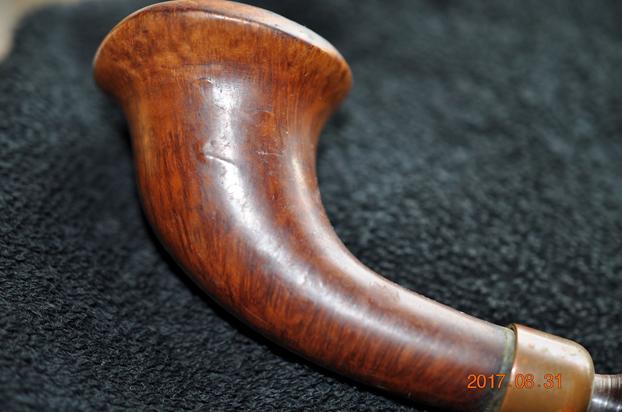
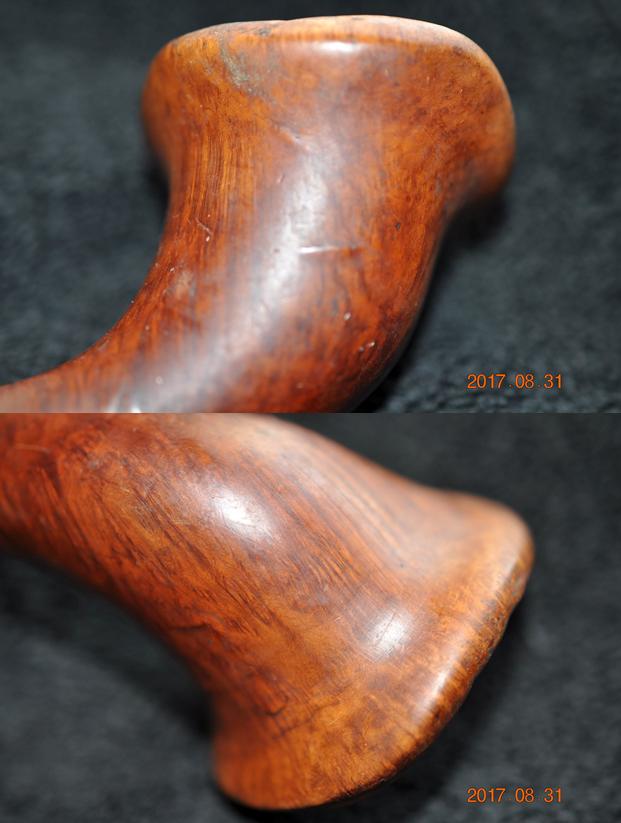
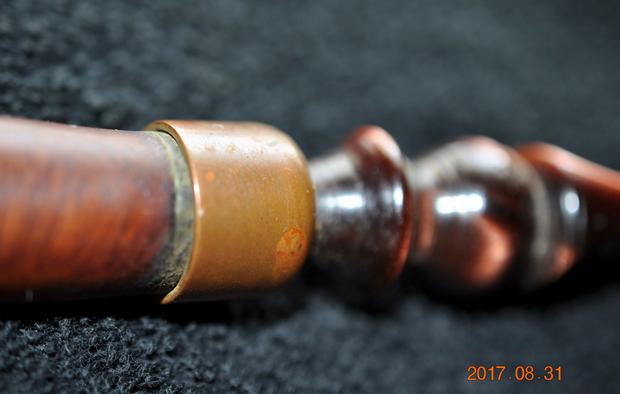
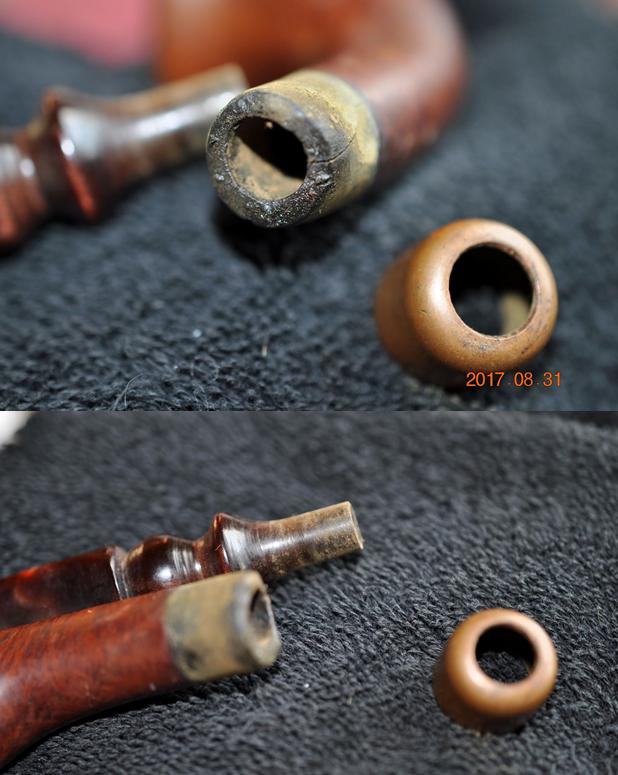
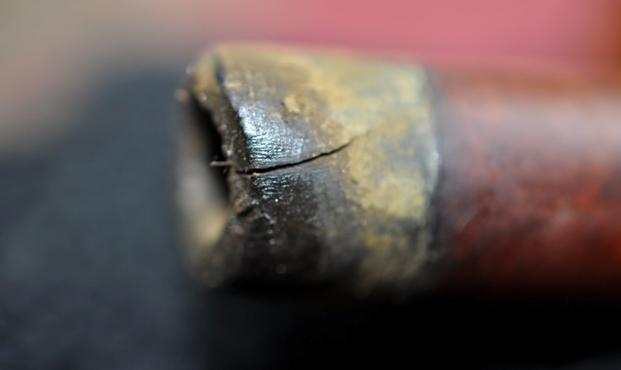
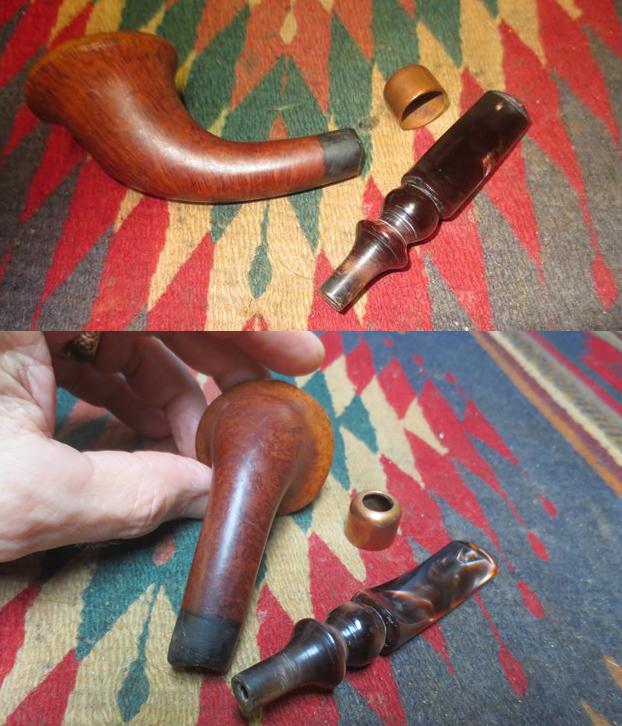
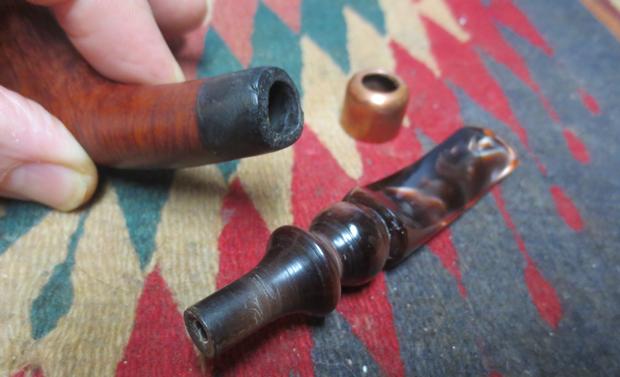
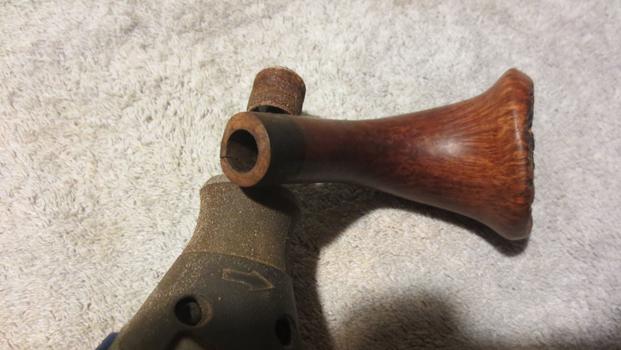
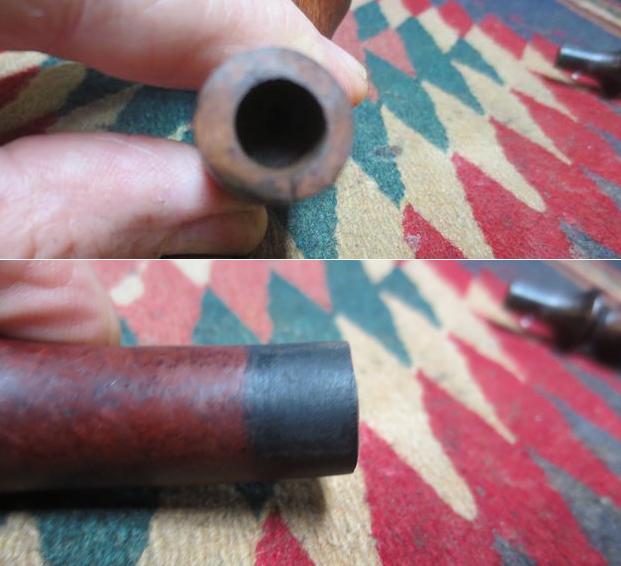
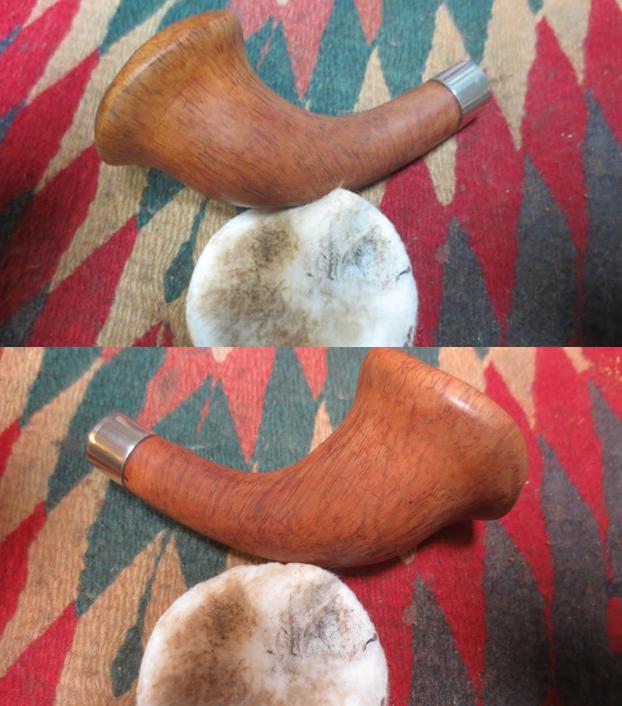
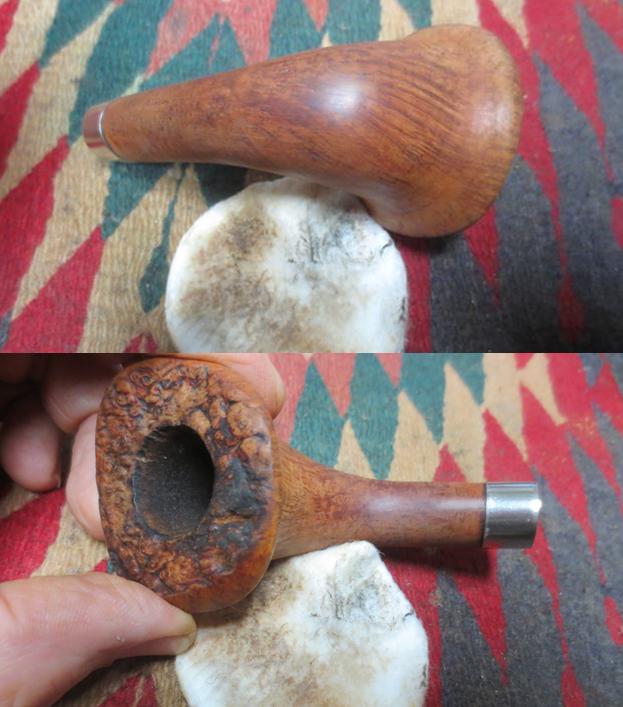
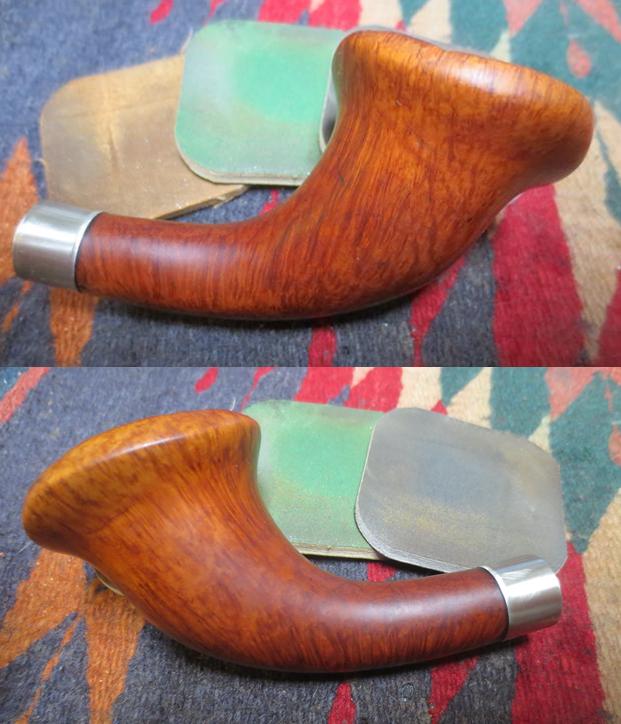
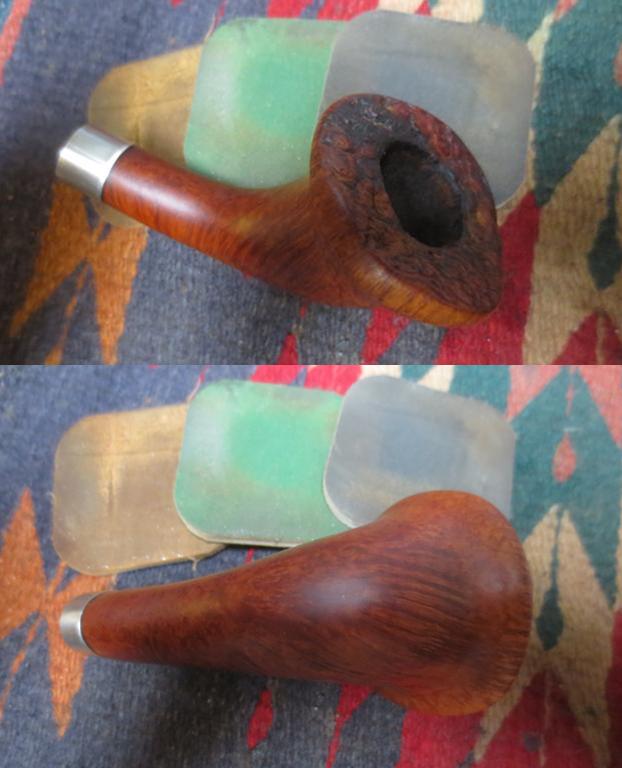
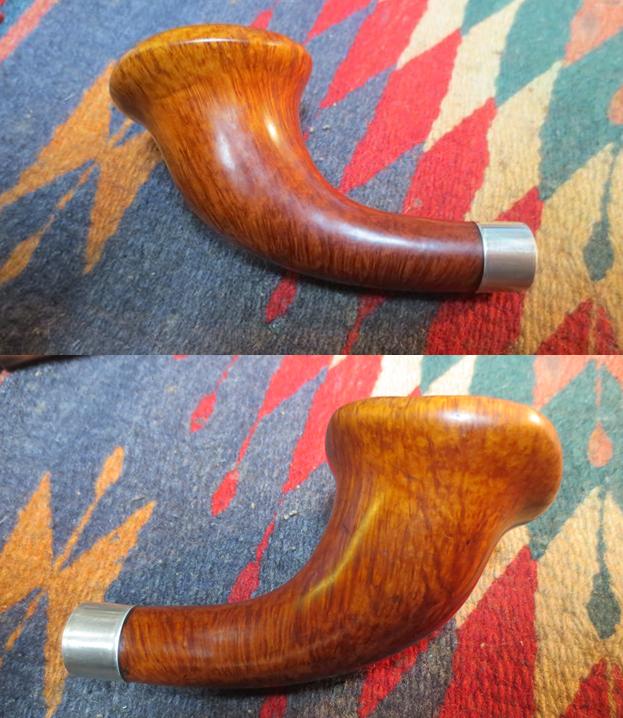
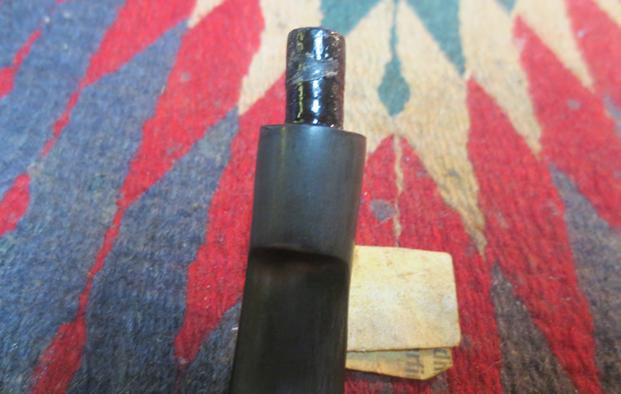
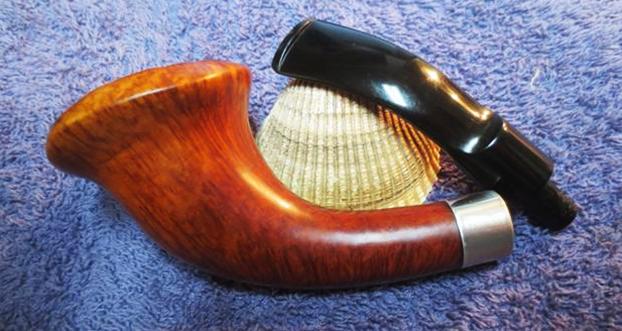
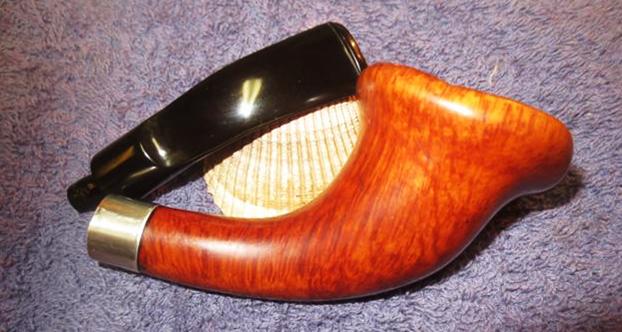
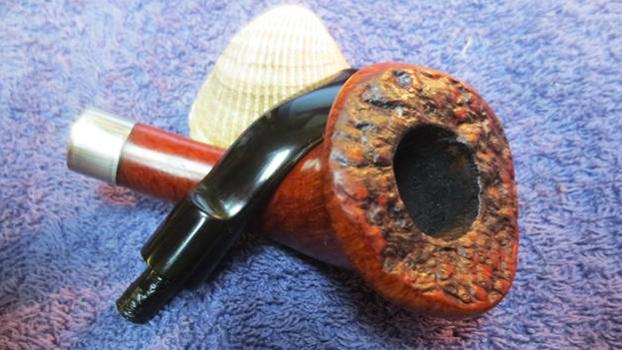
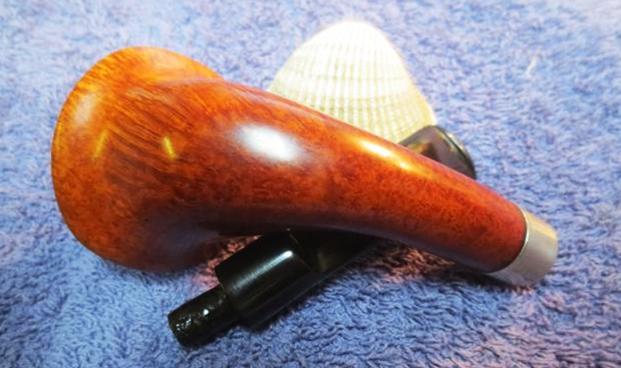
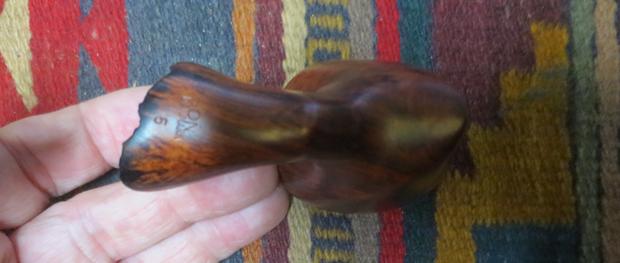
When my brother sent me photos of this particular pipe I could not see what he saw in it. It was just ugly in my opinion. The shank was crooked, the plateau crown had been sanded slightly, the shank was cracked and missing a chunk of briar, the copper ferrule looked like it fit better under a sink than on the shank and the finish had warts in it all around the bowl. To top it off the stem was clunky, thick Lucite and had lots of divots and tooth marks. It did not look like it belonged at all. The entire pipe looked like a failed shop project to me – one that took its own direction as it was being made. He purchased it and took photos of it before he cleaned it up thinking I might be charmed by it as he was.The next photo from the top shows the bow in the shank. I figured that the drilling would be way off once I got it and took it apart. I was pretty certain this one was going to interesting to work on to see if I could get anything resembling a nice looking pipe out of the concoction that it was in the photos. Note also the thick cake in the bowl and the overflow of lava on the rim filling in the smoothed out plateau. It was hard to know at this point if there was damage to the inner edge of the rim because of the thick cake and lava. Only a thorough clean up would reveal the condition. The next three photos show the warts on the sides of the bowl. The finish was rough. It was hard to tell if these were fills or if the pipe had not been sanded smooth when it was originally finished. In the photos, they look like scratches but they are actually standing above the finish on the briar. Some of them have scratches around the edges on the surface of the bowl. As I looked at the horn, I had to admit there was something strangely alluring to the shape and it was growing on me. The copper fitting is not snug on the shank it rattles around and is only held in place by the stem. You can see the gap between the cap and the shank. The shank under the band is coated with grime and there is a dark oxidized buildup.When the stem is removed the cap falls off and reveals the damaged shank. You can see the crack in the shank end and up the side on the right side of the photo below. The tars and oils that have built up on the end of the shank and in the mortise are quite thick. In the second photo below you can see the missing piece of briar. The third photo is a close up of the shank end. It shows the damage clearly as well as thick tars on the shank  under the cap. The stem is Lucite and in rough condition. It is the thick kind of stem that came out when Lucite first came on the market. It thick and poorly shaped. There are major dents in the surface and many tooth marks and chatter on both sides of the stem at the button. I do not intend to reuse the stem as it is not my kind of stem. I will replace it with a vulcanite stem and fit it to the shank. Jeff did his usual thorough clean up even on this ugly, old pipe. He reamed it with a PipNet reamer and cleaned up the remnants with a Savinelli Fitsall pipe knife. He scrubbed out the mortise and the airway in the shank and the stem with alcohol, cotton swabs and pipe cleaners. He scrubbed the exterior of the bowl and shank with a tooth brush and Murphy’s Oil Soap and rinsed it under running water. He scrubbed the rim on the bowl to clean out the lava on the plateau. It took much scrubbing to get it free of the tars. He dried it off with a soft cloth. The bowl itself was very light weight. It is a good looking piece of briar and has flame grain all around the bowl and shank with some birdseye on the shank top and bottom. He cleaned up the Lucite stem with the oil soap as well and was able to remove much of the debris. There were tooth marks and tooth chatter on both sides of the stem. The freehand style stem had a tapered tenon that sat tightly in the copper end cap. The copper cap was loose and fell off when the stem was removed from the pipe. I spent time turning the pipe over to see if I could find any identifying stamping that would help me know who made it and when it was made. There was nothing there. It was an unstamped pipe by an unknown maker at an unspecified point in time. I took photos of the pipe to show its condition before I started my work on it. Jeff did a great job on the rim top and the bowl. The inner edge of the rim was in good condition with little damage. There was still a little lava on the back side of the rim top that would need to be taken care of.The Lucite stem was clean but looking at it close up I knew that I did not want to keep the stem. I would need to go through my can of stems to find one that would work on this pipe.I removed the stem and the end cap and looked closely at the damage to the end of the shank. Once Jeff had cleaned it up the damage was really clear. The end of the shank had deteriorated and chunks of briar were missing. The surface of the shank end was rough and damaged. There was a large crack on the right side near the underside going from the shank end up the shank for ½ inch. I used a Dremel and sanding drum to remove the damaged shank end. I evened up the end of the shank and took off all of the compromised briar. I cleaned up the end so that a regular stem would work with it. I smoothed out the inside of the mortise. During this cleanup is when I discovered that the mortise and the airway in the shank were drilled at an angle. The airway was high in the end of the mortise and came out at the bottom of the bowl. The mortise itself curved and was poorly drilled in the shank. I cleaned up the briar that had been under the copper band. The briar was black with the colour going deep in the briar. I sanded it smooth and used a microdrill bit to drill a pin hole at the end of the crack to stop it from spreading further. I filled in the hole and the crack with clear super glue and let it cure.When the glue repair had dried, I sanded it smooth and pressure fit a nickel band over the end of the shank. I heated the band with a lighter to expand it and pressed the shank end and band so that the band went up the shank to cover the crack and the repair. I think that the band was a far better look for the pipe than the copper shank cap had been. I scrubbed the plateau top with a brass bristle tire brush to remove the remaining lava in the crevices of the surface. I worked on it until the rim top was clean.I sanded the bowl with 220 grit sandpaper to remove the warts from the surface and smooth out the scratches and dents. I wanted the surface to be smooth the way it should have been when the pipe was made. I worked on it until it was smooth to the touch. When I finished I washed the surface of the bowl and shank with acetone on a cotton pad to remove the last of the dust and the remaining finish from the briar. I buffed the bowl with Blue Diamond to polish it a bit and see where I needed to do some work before the final buff. I hand polished the briar with micromesh sanding pads – wet sanding with 1500-2400 grit pads and dry sanding with 3200-12000 grit pads. I wiped the bowl down with a damp cloth after each buffing pad. I hand buffed it with a microfibre cloth after the 12000 grit pad. The pictures below show the progress of the polishing on the briar. I used a black Sharpie Pen to colour in the crevices on the plateau top. I wanted the smooth high spots to shine through the deep black in the grooves. The contrast would look really good once the pipe was given a finish coat of stain and was buffed and waxed.I stained the briar with a Danish Oil Cherry stain to highlight the red colours in the briar and bring about a contrast with straight grain. I stained the plateau as well to give red hues to the high spots and contrast with the black of the crevices on the top. I hand buffed the bowl with a soft cotton cloth and then with a microfiber cloth to raise the shine. The bowl looks really good and the grain stands out. The straight grain all around the bowl sides looks really good. I chose a vulcanite saddle stem for the replacement for the Lucite stem. I knew it would be a bit of work to get things lined up because of the drilling in the shank. I measured the angles in the shank and figured I would need to bend the tenon at the angle shown in the photo. I heated the tenon and put it in the shank while it was still pliable and set the angle to match the angle of the mortise. The photo below shows the angle on the tenon. Bent at that angle the stem sits tight against the mortise. It gives you a good idea of the how poorly drilled the pipe was and what measures I had to take to line things up. I gave the tenon a coat of clear fingernail polish to make it fit snug in the mortise and let it dry. I roughened it up with the edge of a needle file to give it a bite in the shank. I tried the fit and all was well.I sanded the stem surfaces with 220 grit sandpaper to remove the light oxidation and the tooth marks and chatter on both sides of the stem. I worked on it until it was black and there was no remnant of oxidation or tooth marks.I polished the stem with micromesh sanding pads – wet sanding it with 1500-2400 grit pads and dry sanding it with 3200-12000 grit pads. I rubbed the stem down with Obsidian Oil after each pad to give traction to the next pad and also bring a little life to the vulcanite stem. After the final pad I gave it a last coat of the oil and set it aside to dry. I left the tenon with a few ridges to add bite to the inside of the mortise and hold it firmly in place. Some oxidation showed up on the top side of the stem near the saddle in the photos above so I worked it over in that area once again. When I finished I buffed the pipe on the wheel using Blue Diamond Polish and worked over the stem and bowl to remove any remaining scratches. I buffed the nickel band to give it a shine. I gave the pipe multiple coats of carnauba wax and buffed it with a clean buffing pad to raise a shine. I hand buffed it with a microfiber cloth to deepen the shine. The warts and nicks that I had sanded out were gone and the grain just popped on this old pipe. The new stem, with the angled tenon brought things into line and to me the pipe looked much better. The black of the polished vulcanite and the polished briar work well together to present a beautiful pipe. The finished pipe is shown in the photos below. It really is a beauty. Thanks for looking.

Renewing an old GBD Lattice Work Meerschaum Calabash


Blog by Steve Laug

When Jeff messaged me that he had picked up a GBD lattice meerschaum pipe, I was a bit surprised. I had read the there were GBD meets out there but I had never seen one let alone worked on one. I was excited to see what he had found. He sent photos of the pipe and case before he cleaned it up. The case was covered in brown canvas that had been waterproofed. It was in excellent condition and showed little wear or tear. The brass hardware looked new.When he opened the case, it was lined with a taupe plush fabric. The GBD logo was inside the base just above the inset for the pipe. It read, “Hand carved in Turkey from Genuine Turkish Block Meerschaum” in a circle around the GBD oval logo. The inside of the case was in excellent condition. Sitting in the form fitted case was a lattice meer. It looked to be in good condition and was already picking up a patina on the shank and lower half of the bowl.  The rim top was also lattice work and it had a bit of lava in the crevices and grooves of the lattice. There was a thick cake in the bowl that overflowed on the back inner edge of the bowl. The next four photos give various views of the rim top so that you can appreciate the work that needed to be down on the rim top of the pipe. Jeff took a photo of the side of the bowl and the underside of the bowl and shank to show the colouration – the patina that was already beginning to develop on the pipe. The trick would be to clean up the dirt and grime without damaging the patina.The stem had the GBD rondel in the top of the saddle portion and it was in great condition. There were tooth marks and chatter on both the top and underside of the stem and wear on the button surface. The slot in the button was also very tight and it was almost impossible to pass a pipe clean through the airway without a lot of effort. The nylon tenon was in excellent condition and screwed directly into threads in the mortise of the meerschaum. There was no shank line or receptacle end to receive the tenon. The airway in the tenon was clogged with bits of tobacco and tars so even going through the tenon end was difficult to do with a pipe cleaner. Jeff had to use a paper clip to open the airway in the stem before he could get a cleaner through from tenon to slot.Jeff did his usual thorough clean up on this meerschaum. He carefully reamed it with a PipNet reamer and cleaned up the remnants with a Savinelli Fitsall pipe knife. He scrubbed out the airway in the shank and the stem with alcohol, cotton swabs and pipe cleaners. He had to open the airway in the stem with a paper clip before he could get pipe cleaners through. He scrubbed the rim top with a tooth brush and Murphy’s Oil Soap and carefully rinsed it under running water. He dried it off with a soft cloth. The meerschaum in this pipe was very light weight. The swirls and lattice work are quite unique. I have not seen that kind of carving in the past. There were tooth marks and tooth chatter on both sides of the stem. The threaded tenon was in great condition as were the threads in the mortise. The stem was Lucite and was a combination of swirled reds/browns and tans. Whoever carved this in Turkey for GBD did a great job in making a beautiful pipe. I took photos of the pipe when I brought it to my worktable. I like to have a record of what the pipe looked like before I started for comparison once I have finished working on it. I took a photo of the rim top to show what it looked like after Jeff had scrubbed it. The lava on the front right of the rim was gone. The back side lava was gone and what was left was some darkening along the inner bevel of the rim and in the edges of the swirls in the lattice work. He did a great job on it.The stem damage is more obvious after he had cleaned it up. None of the tooth chatter or marks were too deep so they would be fairly straightforward to sand out.To vary my work pattern I decided to start on the bowl on this pipe. I picked at the remaining debris in the swirls of the lattice with a dental pick and was able to remove more of the debris. I used a folded piece of 220 grit sandpaper to work on the darkening around the beveled inner edge of the rim. I was able to remove almost all of it without changing the shape of the bowl or rim top.I spot cleaned the rim with a damp cotton pad to remove the debris that my work had left behind. With the rim top cleaned up it was time to polish the meerschaum bowl. I started polishing with 1500-2400 grit micromesh sanding pads. After each pad I wiped the bowl down with a damp cotton pad. I continued polishing using 3200-12000 grit pads and wiping it down after each sanding pad. I took photos of the bowl after each set of three pads to show the progress of the shine. I set the bowl aside and turned my attention to the stem. I sanded the tooth chatter and marks out of the Lucite with 220 grit sandpaper. It did not take too much sanding to remove the damage to the stem surface and the surface of the button on both sides.I reworked the button and slot using needle files to open up the airway enough to be able to easily push a pipe cleaner through the airway.I polished the stem with micromesh sanding pads – wet sanding with 1500-2400 grit pads and dry sanding with 3200-12000 grit pads. I wiped the stem down with a wet cotton pad after sanding with each pad. I buffed the stem with Blue Diamond on the buffing wheel and carefully buffed the bowl at the same time. I used a light touch on the bowl and a heavier touch on the stem. I avoided the GBD rondel so as not to damage it. The pipe feels great in the hand. The carving is very well done and the pipe is exceptionally pointing to a quality block or meerschaum. The developing patina is a bonus for whoever adds this one to their collection. The dimensions are Length: 5 ½ inches, Height: 2 inches, Bowl diameter: 1 ½ inches, Chamber diameter: ¾ inches. I will be adding it to the rebornpipes store shortly. If you want to add it to your collection email me at slaug@uniserve.com or send me a message on Facebook. Thanks for looking.

Restoring a Wreck of a C.P.F. Rectangular Shank Bent Egg


Blog by Steve Laug

This poor old C.P.F. rectangular shank bent egg was in rough shape when it arrived in Vancouver. Not only was the tenon broken but the stem was in pretty damaged. There were tooth marks and chatter on the top and underside of the stem. The sides of the rectangular saddle portion of the stem were very damaged with deep casting marks and gouges. I think the stem is made of Bakelite but it was really a mess. Add to that the condition of the bowl – three cracks running down the front right side from the rim down and across the bowl, a cracked shank, no band, a scratched and damaged finish and you have a clear picture of the condition of the tired old pipe. There was a day when I would have retired this one and moved on to a different pipe but today it is a challenge worth taking and seeing what I can do with it. Jeff took various photos of the pipe to show what it looked like when he picked it up.The rim top was a mess. There was an overflow of lava that had hardened on the rim top. There was an average cake in the bowl that would need to go in order to repair the damaged areas. The inner edge of the rim was probably damaged though it was hard to tell at this point. There were to cracks on the right side of the rim toward the front of the bowl. I have included two photos to show the cracks in the same area from the rim down and across the bowl on the top right side. I have used red arrows to point them out in both photos.The crack in the shank is very obvious in the photo below. It was quite deep and had begun to separate. You can also see the damage to the stem at the stem/shank junction. But even with all of the damage there was still some charm to the briar. The grain was interesting – a combination of birdseye and cross grain all around the bowl. The flat bottom portion had nice cross grain that would stand out once the pipe was restained. The threads in the mortise were in excellent condition. The U-shaped divot at the bottom of the mortise shows how the airway was drilled into the bowl. The threads on the tenon looked good at this point. The next photos show the extensive damage to the sides of the saddle stem. It was rough. It almost looked as if someone had tried to pry it free from the shank rather than unscrewing it. There were some deep tooth marks and a lot of chatter on both sides of the stem in front of the button. Once again when the pipe arrived in Vancouver, I could see that Jeff had done his magic in cleaning and scrubbing it. He had reamed the bowl with a PipNet pipe reamer and a Savinelli Fitsall Pipe Knife. He cleaned up the rim and the exterior of the bowl with Murphy’s Oil Soap to remove the grime and debris on the briar itself. He had exercised care around the gold stamping on the left side of the shank. He had cleaned out the mortise and the airway in the shank and the stem with alcohol, cotton swabs and pipe cleaners. The stem damage was clearly visible and the gouges on the sides of the saddle stem stood out in clarity. There were some deep tooth marks on both sides of the stem at the button. When I brought the pipe to my work table I took some photos of it as I opened the case. It really was a beautiful old pipe. I took a photo of the rim top and bowl to show the issues there. The bowl was very clean. The rim top photo shows the cracks very clearly and the scars on the inside edge of the rim. The right side photo also shows the cracks.The stem has some beauty still, but the deep tooth marks would need a lot of work to bring them back to a smooth condition.This is where some of the issues show up. The tenon had broken when Jeff was cleaning it up. Fortunately it had not broken off in the shank or the stem so it was a clean repair. I would need to fit a new threaded tenon in the shank and stem. The gouges and nicks in the sides of the saddle are very clear in the next photos.Since the stem was such a mess and would take time to work on I started with it. I sanded the sides and top of the stem and filled in the damaged areas with amber super glue. In the next photos you can see the extent of the damage from the size of the glue repairs. I set the stem aside to dry and went for lunch with my wife and daughters. When I returned the repairs would have cured and I could continue. When I returned I used a needle file to smooth out the repaired areas and flatten out the sides of the saddle. I sanded the stem with 220 grit sandpaper to further blend in the repaired areas. I fit a new threaded tenon in the stem and set it in place. I sanded the stem more, to smooth things out. In the first photo below there looks like a crack runs along the middle of right side of the saddle. It was not a crack but a flaw in the stem material. There was still a lot of sanding to do before the stem was acceptable. I sanded the stem surfaces until they were smooth and the repairs were unnoticeable. It took quite a bit of sanding to achieve this. I polished the stem with micromesh sanding pads – wet sanding it with 1500-2400 grit pads and dry sanding it with 3200-12000 grit pads. I rubbed the stem down with Obsidian Oil after each pad to give traction to the next pad and also bring a little life to the Bakelite stem. With the work on the stem complete I set it aside and turned my attention to the issues with the bowl and shank. I decided to address the cracked shank first. I would need to fit a band on the shank. I did not have any brass bands so a nickel one would have to suffice. I used a needle file to work on the shank end to get it ready for the band. I started with the file and finished with the Dremel and sanding drum. Making a band that would fit took some work. I only had round bands so I needed to shape one that would work. I used a small nail hammer and the square edges of the needle file to make the round band rectangular. It was tedious but the finished band is shown in the photo below. I pressed it onto the shank of the pipe. It was still too large and if pressed all the way onto the shank would look awkward. I used the Dremel and sanding drum to cut the height of the band in half. It takes time and care to slowly grind the metal away. I used the topping board to smooth out the sharp edges of the band. I used an all-purpose glue to repair the crack and to anchor the band on the shank. I pressed the band in place on the shank. I took photos of the banded shank to remind myself of what it looked like at this point in the process. I still needed to polish the metal but it was looking better. The bowl still had remnants of the old varnish coat in the angles and on the shank bottom. I wiped it down with acetone on a cotton pad to remove the rest of the finish in preparation for the repairs that I needed to do on the cracks. I topped the bowl to remove the damaged areas on the rim top and to clean up the inner edge damage.I marked the ends of the cracks with a black Sharpie pen and drill the spots with a microdrill bit on my Dremel. I put these pin holes at the end of each crack to stop it from spreading further. I filled in the drill holes with clear super glue and smeared the glue over the cracks themselves. When the repairs dried I sanded them smooth with 220 grit sandpaper to blend into the surface of the briar. I also sanded the inner edge of the rim to minimize the damage there. With the repairs completed it was time to stain the bowl and blend them into the rest of the briar. For me the staining process on this pipe would be done in several steps. I stained the bowl with a dark brown aniline stain, flamed it and repeated the process to ensure an even coverage over the bowl. I wiped the bowl down with alcohol on cotton pads to make the stain more transparent. I sanded the bowl down with 1500-4000 grit micromesh sanding pads to make the grain more transparent and polish it in preparation for the next contrast coat of stain. I wiped it down with alcohol once more and then gave it a coat of Danish Oil Cherry stain for the top coat. I really like the way it brings out the reds in the grain of the briar. I touched up the gold stamping with Rub’n Buff European Gold. I rubbed it on and off leaving it in the light C.P.F. oval logo. It is faint in some places but it is readable. I gave the bowl several coats of Conservator’s Wax and buffed it with a microfiber cloth. The photos below show the renewed stamping and the waxed finish on the bowl. I used the Savinelli Fitsall Pipe Knife to clean up the remnant of the cake on the wall that is shown in the above photos. I buffed the pipe bowl and stem independently with Blue Diamond on the buffing wheel to polish them both. I worked over the briar around the bowl with the Blue Diamond. I carefully gave the briar several coats of carnauba wax and then Conservator’s Wax in the hard to reach spots. I buffed the waxed briar with a clean buffing pad to a raise a shine. I gently buffed the stem with Blue Diamond so as not to melt it or cause damage. I gave the stem multiple coats of carnauba wax and buffed it with a clean buffing pad to raise the shine. I hand buffed bowl and stem with a microfibre cloth to deepen the shine. I put the stem in the shank and hand buffed it once more. I am quite happy with the finished pipe. It is a beautiful piece of briar and the stem picked up a nice shine that brought it back to life. The damage on the stem is almost invisible now and the amberlike Bakelite looks translucent. The repairs to the cracks in the briar on the side of the bowl and the shank have disappeared into the contrast stain. The nickel band works alright with the finished look of the pipe and takes care of the shank damage. The finished pipe is shown in the photos that follow. Thanks for putting up with my passion for these old C.P.F. pipes from another time. Thanks for looking.
 

An Interesting Find – An FEC Cased Briar with a lot of Bling


Blog by Steve Laug

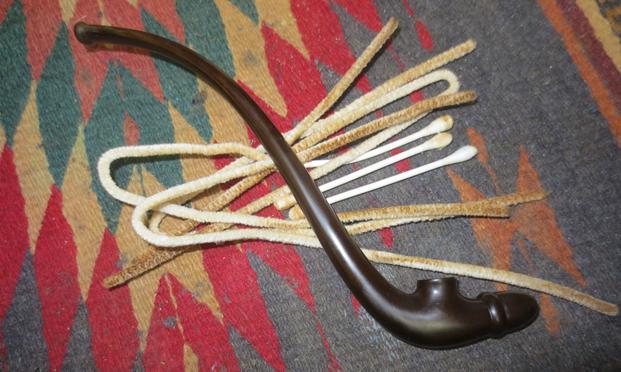
My brother Jeff sent me a link to a pipe he thought might interest me on eBay. He was right; we bid on it and won. The shape of the clamshell case (even though it is worn and tired looking) caught my attention. At its widest point it is 4 inches long, it is 3 ¼ inches wide and 2 inches tall. It is the perfect size case to put in a coat pocket with not too much of a bulge. The brass catch/latch was visible and was attached with nails to the front of the bottom half of the case. The wooden case is visible under the worn leather. On the back side of the case you can see the hinges, also attached with nails. (He took photos of the case and the pipe before he cleaned it up.)The plush red lining covered entire inside of the case. While it was worn and a little soiled it still showed some of its original glory. The top half of the case had a gold banner with FEC in a shield and two ribbons unfurled below the shield that read “FINEST QUALITY”. The bottom half the plush lined case had been form fitted to hold the bowl and stem separated but safely held in place. Then the pipe itself was intriguing. It looked to be in decent condition and was a brand with which I was unfamiliar. It looked very old and clean for a pipe of this age.Jeff took a photo of the inside of the case to show the form of the underside without the pipe and stem in place. It is obvious the case was made especially for this pipe and stem. The fit is perfect and the forms match the shape of the bowl with its bling and the saddle stem.Jeff took photos of the pipe and stem from various angles to capture the condition of the pipe. Other than some grime and dirt from sitting and the normal cake and tars in the bowl and shank the pipe was in really good shape. There were some scratches and dings in the briar and in the Bakelite stem but nothing too serious. The first and last photos below show the FEC shield on the left side of the shank. It was worn on the right side of the shield but it was very clear. The filigree shank and rim adornments were in really good condition with no chipping or scratching. There were also no nail caps showing that held both in place on the rim and the shank. The flat portion of the gold rim top was dented and there was some darkening. The next photos show the rim top and sides of both the rim cap and shank cap. There was grime and grit in the swirls of the gold but other than being dirty it was in good condition.  The next photo is a view of the pipe looking down the end of the shank. The build up of tars and oils on the walls of the mortise are very clear. The debris flowing out of the end of the tenon is also visible in this photo.The stem was a bit of a wreck with tooth chatter, tooth marks and nicks all around the top and underside. The airway in the stem is black with tars and oils. The third and fourth photos below show the nicks and scratches in the tenon of the Bakelite stem. The fifth photo below shows the airway at the end of the tenon – note how dirty the airway is. As I mentioned above I had no idea of who made the FEC brand or even what country it came from. In many ways it looked like an older American pipe of the same ilk as CPF or WDC. The gold filigree on the cap and shank made me think of both of those but hunting for an American brand with those initials turned up absolutely nothing. I looked in the index of my copy of “Pipes, Artisans and Trademarks” by Jose Manuel Lopés’ and found a listing. It was short and to the point but now I had my information.

FEC is the old English brand of Friedrick Edwards & Co., established in London around 1884, and which mainly produced meerschaum and calabash pipes. The company was bought in 1904 by S. Weingott & Sons, but continued separately until 1916.

Armed with the company name behind FEC I went back to the web and did some more searching. I found the same information as quote above on Pipedia. I also found a Briar Pipe Makers in London Directory on Pipedia. There was a listing for FEC. https://pipedia.org/wiki/Briar_Pipe_Makers_in_London_Directories. It read as follows:

Edwards, Friedrich & Co. – 25 Gingshouse St., W [at this point in time, John Solomon Weingott was a full partner of F. Edwards & Co. who were primarily meerschaum pipe makers]

Now I had some idea of the age and provenance of the pipe in my hands. It was made in the FEC factory at 25 Gingshouse St., W in London, England. Since Friedrich Edwards & Co. made primarily meerschaum and calabash pipes before joining with S. Weingott & Sons in 1904 I was pretty confident that this pipe came out after that merger. I knew that the brand continued separately until it was subsumed by S. Weingott & Sons in 1916. That gave me the dating parameters for the pipe. It was made between 1904-1916 which certainly fit the style of the pipe and its ornamentation.

When the pipe arrived in Vancouver, I could see that Jeff had done a lot of cleaning and scrubbing on before he sent it to me. The scrubbing of the gold filigree would have been a labour of love in that it was so intricate and detailed that the grit and grime would have fought hard to remain in all of the crevices. He had reamed the bowl with a PipNet pipe reamer and a Savinelli Fitsall Pipe Knife. He cleaned up the rim and the exterior of the bowl with Murphy’s Oil Soap to remove the grime and debris on the briar itself. He exercised care around the gold stamping on the left side of the shank. He had cleaned out the mortise and the airway in the shank and the stem with alcohol, cotton swabs and pipe cleaners. The stem damage was clearly visible and the nicks and marks stood out in clarity. There were some deep tooth marks on both sides of the stem at the button and the slot in the button still had some tars and dark spots in the corner of the slot. When I brought the pipe to my work table I took some photos of it as I opened the case. It really was a beautiful old pipe. I took it out of the case and put it together to get a feel for its size and appearance. While it was petite it still have a full sized bowl. The briar had some great grain patterns around the bowl and shank. Jeff had done a great job cleaning up the gold filigree on the rim cap and shank cap. It looked amazing and had a rich shine to those spots on the pipe. The dents on the top of the rim can be seen in the photo below as can the clean bowl. I took a picture of the FEC Shield on the left side of the shank to show the condition of the stamping.When it arrived I could see that he had really worked over the stem and the airway from the top and bottom looked clean. The tooth chatter and marks on the top and underside are shown in the photos below.I decided to start working on the stem as it was the part of this pipe that needed the most work. I sanded down the tooth chatter with 220 grit sandpaper and was able to remove all of the chatter and some of the lighter tooth marks. I sanded the scratches and nicks on the rest of the stem and the tenon end and was able to smooth most of them out.I wiped off the stem with a cotton pad to remove the sanding dust and filled in the deep tooth marks on both sides near the button with amber super glue.When the glue repairs had cured I sanded them flat with 220 grit sandpaper to blend them into the rest of the surface of the stem. I was really happy with the blend achieved by the amber super glue and the Bakelite stem.I cleaned out the remaining dark spots in the slot in the button and the tenon area of the stem with pipe cleaners and warm water. I was able to remove all of the left over darkening and the stem looked better.I polished the stem with micromesh sanding pads – wet sanding with 1500-2400 grit pads and dry sanding with 3200-12000 grit pads. I rubbed the stem down with Obsidian Oil after each pad and then proceeded through the pads. After the 12000 grit pad I gave it a final coat and let it dry. I spoke with Jeff this morning and he told me that the top cap was not glued or pinned to the top of the bowl and could easily be removed. I wiggled it free without doing and damage to the edges. I used a small flat blade screw driver that fit perfectly in the last ring before the opening. It worked to smooth out much of the dents and damage to the top of the rim. While I was not able to remove all of it I was able to minimize it in this manner. I decided to pressure fit the rim cap back on the top of the bowl rather than glue it or pin it. I figured that way if I wanted to try smoothing out the rim cap some more I could do so in the future. I polished the top of the rim cap with micromesh sanding pads to further minimise the scratching on the top. I wet sanded with 1500-2400 grit pads and dry sanded with 3200-12000 grit pads. I wiped it down afterwards with a soft cotton pad to raise the shine. I touched up the FEC Shield stamp on the left side of the shank with Rub’n Buff European Gold. I applied it with the tip of a pipe cleaner and worked it into the grooves of the stamp. I removed the excess with a damp cotton swab and polished the finished shank with a soft cotton pad. I was able to fill some of the grooves toward the top right of the shield and a bit of the letters. The stamping on the bottom right side of the shield was too shallow to hold the gold.I buffed the pipe bowl and stem independently with Blue Diamond on the buffing wheel to polish them both. I worked over the briar around the bowl with the Blue Diamond and lightly buffed the gold rim and shank cap. I carefully gave the briar several coats of carnauba wax and then Conservator’s Wax in the hard to reach spots. I buffed the briar and caps with a clean buffing pad to a raise a shine. I gently buffed the stem with Blue Diamond so as not to melt it or cause damage. I gave the stem multiple coats of carnauba wax and buffed it with a clean buffing pad to raise the shine. I hand buffed bowl and stem with a microfibre cloth to deepen the shine. I put the stem in the shank and hand buffed it once more. I am quite happy with the finished pipe. It is a beautiful piece of briar and the stem picked up a nice shine that brought it back to life. The dents in the rim cap while still present look much better. The finished pipe is shown in the photos that follow. Thanks for looking and enduring my obsession with these pipes from another time.

Cleaning up another CPF – this time it is a square shank Bulldog Setter


Blog by Steve Laug

If you have been reading rebornpipes for long, you will have figured out that I really like older C.P.F. pipes (Colossal Pipe Factory). I have quite a few of them in my collection and really like them. The history is an intriguing and enjoyable part of the brand for me. The artisanship and design of these pipes captures my appreciation and admiration. The shapes are always unique; even in the same line the shapes vary from pipe to pipe. The creativity and inventiveness of the smoking delivery systems of their pipes are always a pleasure to study. The variations of Bakelite bases and stems with briar bowls, briar bowls with Bakelite stems, briar bowls with horn and with vulcanite stems. The names the company gave their pipes always has me wondering where they came from. Sometimes they seem to be humorous like the Siamese conjoined stem pipe I just finished and sometimes descriptive like this one – the square shank, horn stem Setter. The pipe came from Jeff in a box he shipped to me just before he left for his European adventure. The box arrived last evening. I was like a kid on Christmas morning. No matter how many boxes he sends my reaction is always the same. There were two C.P.F. pipes that immediately caught my attention. Jeff had shown me these two on FaceTime before he left so I was awaiting their arrival. When he was cleaning them both he somehow switched the stems in a hurry and in the process broke the tenon off the wrong stem in the shank of this pipe. Both pipes had a bone tenon so it is easy to understand what happened. He had put both pipes in individual bags in the box. When I saw this one, I decided it was the next one I wanted to work on.The pipe is a bulldog with a square shank and square tapered horn stem. It has twin rings around the top of the bowl. The shank had a gold coloured ferrule on it with the end turned over to cover the exposed end of the shank. On the left side of the ferrule, it was stamped with the C.P.F. oval logo. There was no other stamping on the metal ferrule. The bowl had a thick cake that lightly overflowed like lava over the top of the rim. The inner edge of the rim shows a lot of damage from what looks like reaming with a knife. The outer edge showed some nicks on the right side and a few on the left front. Jeff took some photos from different angles showing the condition of the bowl. It was a beauty. The grain was quite nice and the twin rings around the rim were in excellent condition with no chips. On the top of the shank there was faint gold lettering reading Setter in a Germanic script that I have come to expect on C.P.F. pipes from this era of the late 1890s to early 1900s. The finish was worn and dirty as expected on a pipe of this age. The two photos that follow that are different views of the shank and the ferrule. The ferrule appeared to have slipped off during its life and there was a dark space just in front of it showing its original position on the shank. The diameter of the stem was larger than the diameter of the shank so it looked a little awkward making me wonder if it was not a replacement horn stem. If not it was poorly fitted and would need to be properly fitted to the shank. There were issues with the stem that might lessen with reshaping but they were present and can be seen in the photos below. These included deep nicks on the edges of the square stem – a chip at the right corner near the shank, a nick on the right side about a ½ inch from the shank end, and another on the left side that looked like a wormhole.The threads in the shank were evidently worn and someone had wrapped the bone tenon in scotch tape to facilitate a tight fit. I have seen this done often so it is not a surprise but it also makes me wonder if the stem is not a replacement. I won’t know until I check out the threads in the mortise when it arrives.The button showed some wear and tear and there was light tooth chatter on both sides of the stem. Fortunately it appeared that there were no deep tooth marks present.Jeff did a lot of cleaning and scrubbing on the pipe before he sent it to me. He reamed the bowl with a PipNet pipe reamer and a Savinelli Fitsall Pipe Knife. He cleaned up the rim and the exterior of the bowl with Murphy’s Oil Soap and removed the grime and debris of the years. He had cleaned out the mortise and the airway in the shank and the stem with alcohol, cotton swabs and pipe cleaners. The bone tenon on the stem was in good condition. The stem damage was clearly visible and the nicks and marks stood out in clarity. I drilled out the broken tenon in the shank of the pipe so that I could put it back together and check out the fit of the stem to the shank. Over the years I have developed my own method of drilling out a broken, threaded tenon. It may be different from the one that you use but it works for me. I followed that procedure on this pipe. I set up a cordless drill on my worktable and put a drill bit a little larger than the airway in the broken tenon. I slowly twisted the stummel onto the drill bit. I wanted it to grab onto the tenon and allow me to either twist it free or break it enough that I can remove it without damaging the threads in the mortis. I repeated this several times until the broken tenon came out on the bit. I blew the dust out of the shank. The pipe was now ready for me to work on.I checked out the threads in the mortise and they were slightly worn but not too severely damaged. They would easily be renewed for a better fit. I screwed the stem on the shank and took the following photos of the pipe before I started my work. These photos are kind of a benchmark for me to compare the finished pipe with the original shown in the photos. Note the fact that the stem is larger in diameter than the shank as noted above. It is the right shape but it sits above and below the top of the ferrule on the shank. The fit on the sides of the shank is perfect. That kind of fit makes me think that perhaps this was a replacement stem. The shape was correct but the fit was off. I have worked on enough C.P.F. pipes to know that they do not send them out of the factory with this kind of sloppy fit. Jeff had managed to clean up the rim quite well. The bowl was clean and the inner edge damage was clear.The next photos show the nicks and worm hole in the stem. These would need to be repaired. The side view photos show the fit of the stem against the shank. You can see from the photo that the top of the stem is significantly higher than the top of the ferrule and shank. I decided to address the nicks and worm hole first. I was not sure how much of the repair would be left once I reshaped the stem but I figured I might as well start with smoothing those out before I started shaping. I sanded the stem to smooth out the tooth chatter and the edges of the damaged areas first. I wanted to see if I had any filling to do around the button before I repaired the damaged areas. Fortunately there were no deep marks at the button. I filled the nicks and hole in with amber super glue. The photos below show the stem repairs from different angles. Note that the damage was on the top and side mid stem on the left and toward the front on the right. Once the glue dried I used a needle file to smooth out the repairs and blend them into the surface of the stem. I sanded the stem with 220 grit sandpaper to further blend them in. I used the Dremel and sanding drum to reduce the height of the stem on the top and bottom at the shank as well as adjust the width on both sides. Once I had it close I sanded it more with the 220 grit sandpaper. I painted the thread on the bone tenon with clear fingernail polish and let it dry. Once it was dry I screwed it into the shank and it was a snug fit. You can see in the photos below that the fit to the shank in terms of height and width is getting much closer. I sanded the stem until I was happy with the transition between the stem sides and the ferrule. I wanted it to be smooth. It took a lot of sanding to get it to the place where I was happy with the flow. I was happy to see that the sanding removed much of the repaired areas from the stem. The right side repairs are virtually invisible and on the left side it was quite small. Once it was there I polished the stem with micromesh sanding pads. I wet sanded with 1500-2400 grit pads and dry sanded with 3200-12000 grit pads. I wiped the stem down with Obsidian Oil after each pad. I polished the stem with Fine and Extra Fine Before & After Pipe Polish to further remove the scratches. I buffed the stem with Blue Diamond on the buffing wheel. I set the stem aside and turned my attention to the damaged rim and edges of the bowl. I lightly topped the bowl to remove the damage on the surface and the outer edges of the rim. I used a folded piece of 220 grit sandpaper to reshape the inner edge of the rim and bring it back close to round. I wiped down the surface of the bowl with alcohol on cotton pads and then put a drop of clear super glue in the damaged spot on the right side edge of the rim and bowl. When the glue dried I sanded it smooth with 220 grit sandpaper and polished it with 1500-4000 grit micromesh sanding pads. I used a dark brown stain pen to blend the repaired area on the side of the rim cap and the top of the rim into the existing colour of the pipe. It did not take much work to get a good match. I tried to add Rub’n Buff European Gold to the stamping on the shank top but the stamping was not deep enough to hold the repairs. I buffed the pipe with Blue Diamond on the buffing wheel to polish the briar and the stem. I gave the entire pipe multiple coats of carnauba wax and buffed it with a clean buffing pad to raise the shine. I hand buffed it with a microfibre cloth to deepen the shine. I am quite happy with the finished pipe. It looks far better than it did when I started the restoration. The fit of the stem to the shank and the overall look of the bowl is better. The small burn mark on the right side of the rim top is a beauty mark of the past life of the pipe. The rim and bowl look very good. The finished pipe is shown in the photos that follow. Thanks for looking and enduring my obsession with these older C.P.F. pipes.

Bringing New Life to a C.P.F. Siamese Parallel Twin Stem Billiard


Blog by Steve Laug

Like other older C.P.F. pipes I have in my collection this one has some real charm. It is another pipe on the petite side of things – 4 ½ inches long and 1 ½ inches tall. It is not a bad piece of briar, a mix of grains. The finish was worn with some gouges in the right side and the bottom of the shank and bowl, but the pipe looked like it still had some life in it. This older C.P.F. may well show a bit of the tongue and cheek humour of the era in the name that is stamped on the shank – Siamese = conjoined stems. The top of the shank bears the name Siamese in worn gold leaf over the logo of C.P.F. in an oval. The silver plated ferrule on the shank bears a series of faux hallmarks and the C.P.F. in an oval logo on the top side. The top of the stem is stamped the C.P.F. in an oval logo. The stem is unusual in that it has two silver plated spigot tenons that fit into openings in the silver collar. The conjoined, twin stems match the dual airways in the shank and in the bowl. Looking down the end of the shank I could see both airways all the way to the bottom of the bowl. When I looked in the bowl there were twin holes at the back just above the bottom of the bowl. The stem shares some of the same damage as other pipes that came from the Virtual Pipe Hunt in Montana (https://rebornpipes.com/2017/04/26/a-virtual-pipe-hunt-a-new-way-to-experience-the-joy-of-a-pipe-hunt/). The left side of the twin stem has a large piece of the vulcanite missing that has been replaced by hard putty that is painted black. Jeff took photos of the pipe from a variety of angles to show its uniqueness and condition.The next photo Jeff took shows the overall condition of the pipe from a top view. It gives a clear picture of the conjoined twin stems from which I assume the pipe derives its name.The bowl was thickly caked and there was also a thick lava coat on the top of the bowl rim. It was impossible to see if the inner edge of the rim was damaged because of the cake. More would be revealed once the cake and lava were removed. To me these were signs of a much loved and often smoked pipe. Judging from the other pipes in this collection I would love to have met the pipe man who owned them and worked the repairs on the stems to keep his pipes smokable.The next series of photos show the condition of the sides and the heel of the bowl. There were a few deep nicks and gouges that would need to be repaired. The nicks on the right side of the pipe appeared to have been repaired prior with a coat of glue as can be seen in the first and second photos below. (Note the twin silver end caps entering the ferrule in the photos below.) The next three photos show the identifying stamping on the shank top, silver band and stem. The first shows the top of the shank and the stamping is very readable. The second shows the stamp on the silver band – faux hallmarks that I have come to expect on C.P.F. pipes along with the C.P.F. oval logo. The third photo shows the same logo on the twin stem. The rest of the photos that Jeff took of the pipe before he cleaned it show the condition of the stem. Note the repair on the top left side in front of the button (I have circled the area in red for ease of reference). The third and fourth photos below show the repair quite clearly. The filled in area seems to be hard putty that is then painted black. After the black paint a coat of varnish seems to have been applied to protect the repair. The underside of the stem looks quite good. The twin bore openings in the stem are shown in the last photo. Jeff did a lot of cleaning and scrubbing on the pipe and in the process, we learned that like the earlier C.P.F. Cromwell we had worked on, the repair was a hard putty fill. The top side of the stem had been coated with what appeared to be black paint to hide the repair. On top of the paint a varnish coat had been applied to protect the repair. The oxidation seemed to be on the areas that had not been covered with the varnish coat. That led to some really strange patterns in the oxidation. Jeff reamed the bowl with a PipNet pipe reamer and a Savinelli Fitsall Pipe Knife. He cleaned up the rim and the exterior of the bowl with Murphy’s Oil Soap and removed the grime and debris of the years as well as the glue repair on the right side of the bowl. The silver ferrule on the shank and the metal military style tenon ends looked better. He had cleaned out the twin mortises and the airways in the shank, into the bowl and in the stem with alcohol, cotton swabs and pipe cleaners. I took the following photos of the pipe before I started my work. These photos are kind of a


benchmark for me to compare the finished pipe with the original. The bowl and the rim top were very clean. There was a little damage on the inner edge of the rim toward the back right side and some roughness around the front left edge. The bowl itself was internally in excellent condition.The stem was quite oxidized and the putty repair is very visible now. I checked it with a dental pick and it is very hard. There is no give or softness to the putty. I will probably leave it and work at turning it black to match the stem and smoothing it out. I was glad to see that my initial assessment of the patch being only on the top side of the stem was correct. They underside was solid.The nicks and sand pits in the underside and right side of the bowl were very clear and would need to be addressed. They are obvious in the photos below. There were also some small sand pits on the left side of the bowl as well. I put the stem in the Before & After Pipe Stem Dexodizer bath and left it to soak while I worked on the bowl. I am pretty pleased with the deoxidizer and even after about 35-40 stems it is still working its magic.The band was loose on the shank so I slipped it off before I started to work on the repairs to the sand pits and nicks in the briar.Since the nicks and sand pits were not too deep I decided to use clear super glue and not mix it with briar dust on these repairs. I filled them each with a bubble of super glue and set the bowl aside so the glue could harden. It does not take too long as those of you who use the technique have learned so I did not need to wait long. I decided to leave the small pits on the left side of the bowl as they were and did not repair them. When the glue dried I sanded the repaired areas with 220 grit sandpaper to blend them into the surface of the briar. I have yet to figure out how to avoid the way the glue makes dark spots when it cures. To me it is the price for having a smooth surface. I keep experimenting but have not found the solution. I wiped the bowl down with a damp cloth and dried it off. I applied some all-purpose glue to the surface of the shank where the band would sit. I pressed the band in place and wiped off the excess glue with a damp cotton pad. Before staining the repaired areas I turned to address the damaged areas on the inner edge of the rim. I used a folded piece of 220 grit sandpaper to smooth out the edge. I chose not to bevel it as it was not beveled originally. Once it was smooth I used a dark brown stain pen to colour in the repaired areas on the bowl sides, bottom and rim top. I don’t worry too much about streaks at this point because they will buff smooth when I am finished. I lightly buffed the stained areas of the bowl and gave the entire bowl a coat of Danish Oil Cherry stain to blend the colours to match what was originally there. I really liked the finished look of the contrasting stain. The grain stood out really well and the repairs blended in as well as could be expected. They were smooth to the touch and felt good in the hand. I then used a Rub’n Buff European Gold to touch up the gold stamping on the top of the shank. I applied the product with a cotton swab and rubbed off the excess with a pad.I called it a night and turned off the lights in the shop and went to bed. In the morning I took the stem out of the Before & After bath and dried it off. It had done its magic on the oxidation on the stem and the putty repair was clear and hard. I cleaned out the airway with alcohol and pipe cleaners to remove the deoxidizer from the stem internals.I sanded the surface of the stem particularly around the patch in preparation for repairing it further with black super glue. I wiped off the dust and used a black Sharpie pen to stain the putty black. It was porous so I was hoping that the putty would stay black. I applied a coat of black super glue on top of the stained putty, smoothing it out with the dental spatula. I set it aside to dry and headed out to work. I polished the stem with micromesh sanding pads – wet sanding with 1500-2400 grit pads and rubbing the stem down after each pad with Obsidian Oil. In doing so I learned that the black stain I had put on the putty repair did not work. I had a decision to make at this point. Did I keep the repair as it was or did I remove it and refill it in my own way – that was the question.  I buffed it with Tripoli after that because of the stubborn oxidation in the groove between the twinned stems. In doing so the black was totally removed from the repaired area on the stem. As I looked at it I made my decision. The repair would stand as a memorial to the nameless repair person who had concocted this repair on the stem. It had lasted at least 100 years and it was solid. I decided to leave it alone. I would try to darken it a bit but I was not hopeful. I dry sanded it with 3200-12000 grit pads to polish it even more. After each pad I rubbed it down with Obsidian Oil. After the 12000 grit pad and rubdown I set it aside to dry. I certainly wish that the black stain would have sunk deep into the putty repair on the stem but it did not. I may one day pick it out and replace it but I figured that it is still workable the way it is. I buffed the pipe and stem with Blue Diamond on the buffing wheel. I gave the stem and the bowl multiple coats of carnauba wax to give it a shine. I hand buffed it with a microfiber cloth to deepen the shine. The finished pipe is shown in the photos below. It is really a nice looking pipe. The mixed grain on the bowl and the silver ferrule and tenon caps on the twin military mount stem look good with the black (well almost all black) of the stem. I think this is one that will enjoy. Thanks for looking.
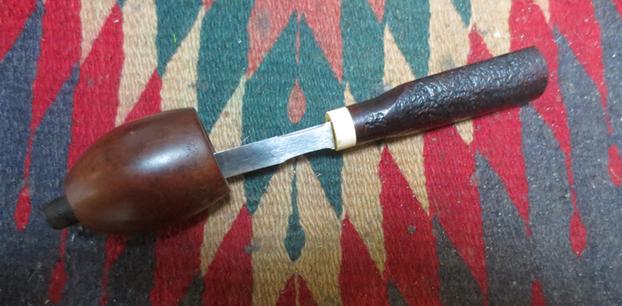
 

The Brief, Shining History behind an Italian Dublin and Its Easier Than Usual Refurbish


Robert M. Boughton

Copyright © Reborn Pipes and the Author except as cited


— “The Treachery of Images” (1929, also known by the translation of the message on it, from the French, “This Is Not a Pipe”), an oil on canvas painting by the great Belgian Impressionist, René Magritte (1898-1967)


INTRODUCTION

Sometimes I wonder if the D in P.A.D. shouldn’t be replaced with S for Serendipity, in the sense of being in the right place at the right time, or with still more sneaky spin, Fate with a capital F.  Then my sense returns, and I realize the musing rationale is only a symptom of the Disorder.  My most recent bout with this overwhelming inner turmoil was lost within minutes after I chanced (yeah, right) to read an informative and enthusiastic, yet brief, account of a little known but masterful creator of hand-carved Italian pipes in the 1980s and into the early ‘90s.  Thinking of an assertion in the post that claimed the brand in question is difficult to find as a sort of challenge, I clicked on eBay and searched for the name.  Indeed, only two samples popped up, as well as a nice, dark brown pipe sleeve.  Not really able to afford either pipe, or the $11 sleeve for that matter, I was nevertheless torn between both and knew I had to have one.  The source of the information that set my P.A.D. careering is an acquaintance on the Smokers Forums UK, on the Pipes page.  The gentleman’s SF handle is fishnbanjo, which I suppose indicates two things he enjoys very much other than pipes.  He and most everyone who knows him at all shortens the moniker to the simpler Banjo, which is also, after all, a kinder, gentler re-nicknaming than Fish, or even Fishn.

‘The title of the post caught my eye before I noticed it was started by Banjo: “The stepchild of Italian pipes.”  I always enjoy Banjo’s contributions because of the rugged good looks of the pipes he has a knack for acquiring and his keen knowledge of the subjects he covers, and when it comes to pipes the brands of which, most of the time, I find I have never heard but without fail would like to own.  Often spoken in pipe smoking circles is the comment, “That pipe looks good on you,” which is one of those statements that of course in intended to be courteous and friendly but, when considered in literal terms, is preposterous.  Somehow, though, with Banjo the expression is more à propos than anyone I’ve ever seen, even if only in excellent selfies.

His own looks being a cross between Spencer Tracy, who played the down-on-his-luck old Cuban fisherman in the 1958 classic movie version of Hemingway’s The Old Man and the Sea, and Anthony Quinn, who reprised the role of Santiago in a 1990 TV remake, are complemented to perfection by his good, strong, masculine, bold taste in pipes.  Here he is in an example of one of those apparent self-photos, from the Capitello post I had the good fortune to find.  The self-portrait really is quite good since I decided to contact Banjo and ask for his permission to use it in full rather than lop off the top half of his head for the silly sake of protecting his privacy without even knowing if he minded. When Caminetto Pipes (1968-1979, the official Caminetto Period) stopped production, all by hand, the assorted partners went their own ways. Giuseppe Ascorti produced Sergio pipes for a short time before forming the company bearing his own last name with his son Roberto; Luigi Radice opened Radice Pipes, and Enzo Galluzo, who was the official carver for Caminetto and had worked at Castello and later Ascorti’s shop, founded the Capitello Pipe Company with his partner on the business end, Corrado Ripamonti, c. 1982.  Capitello closed in 1991, according to Banjo “because [Galluzo’s] distributor never paid him for the pipes he sold and without money to pay the bills a great, not well-known company ended its run.”  In 1986, by the way, two years after the death of his father, Roberto Ascorti started the New Caminetto Period.

Banjo wrote, with nostalgic eloquence, of Capitello being the first Italian pipe manufacturer in the 1980s to use oil curing.  The process was patented by the Alfred Dunhill Company Ltd. on November 14, 1918, just 28 days before the signing of the Armistice – at the 11th hour of the 11th day of the 11th month – that officially ended World War I (“the War to End All Wars”).  Dunhill’s Patent №. GB119,708 involved immersing natural-finish stummels in olive oil for several weeks before drying with hot air and sandblasting away large rough parts of the early irregular results.  Whether old Alfred in fact invented the procedure is debated, but I’m not going there today, so relax.  At first the use of oil was for aesthetic reasons only, as it gave the outer area of the stummel greater luster.  Pipe collectors and scholars giving every indication of being quarrelsome when it comes to just about everything, the rough effect that seems to have led to the creation of the Shell pipes (and is also the reason for the reddish tinge to the briar in that line) is yet another subject of discord in certain rarefied circles, with an emphasis on circles being never-ending. At any rate, the unavoidable consequences of Dunhill’s approach were unusual shapes that could not be classified according to the official charts until oil curing was “perfected” some years later.
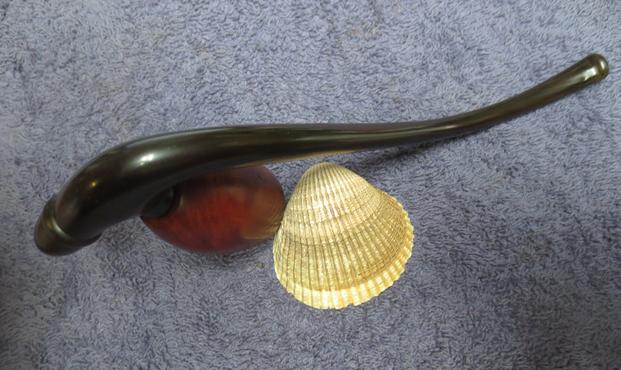
Returning to Banjo’s humble eloquence, he wrote of buying the pipe more than 30 years ago from “someone with much more experience than I who told me it would color much like a Meerschaum does.”  As would most experienced pipesters familiar with the differences of wood and meerschaum, Banjo had his doubts, but he liked the huge, pebbled specimen, so why worry about it?  I can’t help thinking and interjecting the notion that such a refreshing thought process could benefit certain more vocal experts.  To Banjo’s lasting surprise, his old pipe indeed continues to color, just like a well-aged meerschaum.  Banjo noted that today it is difficult to imagine the gorgeous piece of work in the virgin finish he first viewed it.  I suspect it looked something like this other Capitello, minus the smooth finish.

Capitello Airlecchio 773, courtesy Haddock’s Pipes

Capitello’s peculiar, more common designs and crafting include the following.
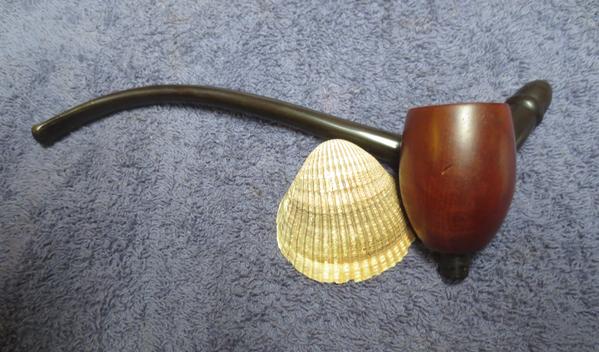
Corinzio Two Columns Sandblasted Belge, courtesy amaxwell1_eBay

Wax Drip Gotico, courtesy Pipephil

My remaining opening comments are few enough to wrap up in short order, which I will now do.  As far as the farfetched-sounding idea of smoking a wax-dipped pipe goes, see the last link in my Sources below before passing judgment.  Concerning the somewhat confusing list of Italian names – both for some of the companies mentioned and more to the point Capitello and its various lines – my curiosity got the better of me.  As a result, I discovered they have real meanings, and here they are.
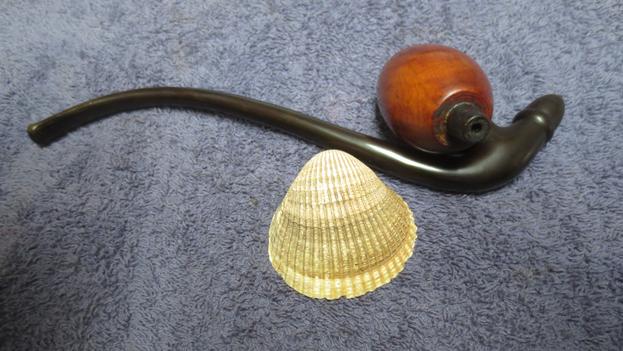
  1. Capitello – capital. I sense a dual meaning here, as in the seat of power of a government, etc., as well as the monetary distinction
  2. Caminetto – literally, fireplace, but also used to describe a very hot, small space where objects are forged by craftsmen
  3. Radice – a surname that also means root
  4. Castello – castle
  5. Corinzio – Corinthian. No, not the Corinthian leather used in a certain car promoted by Ricardo Montalbán, but Corinthian architecture, the last and most ornate of the three main orders of ancient Greece and Rome that was characterized by columns. Hence, the Corinzio Two Columns Belge shown above.  I did not find Belge anywhere.
  6. Gotico – Gothic
  7. Jonico – Ionian, or pertaining to the second primary architectural order of ancient Greece and Rome

RESTORATION

The nomenclature is crisp, although I had to edit the color and brightness levels of the photos above to make the stampings clear: on the left shank, lowercase “Capitello,” in quotations with the closing mark in subscript, above JONICO, and below that, to the right, a small square with what appears to be an Ionic column matching the brand’s logo as shown in this photo of a genuine Capitello stem, courtesy of Pipephil.

The symmetry of the classic Dublin shape combined with corresponding tight, vertical grain on the bowl except for the rear, which is more mottled, and the way all of it points to the flawless large bird’s-eye of the rim, transfixed every brain cell I possess related to reason.  My power to resist, at $26.99 with about two days of bidding left and only three other buyers interested, turned to mush like a clay or meerschaum pipe after being retorted with Everclear.   I’m happy to say I never made that mistake but have heard pained accounts from more than one friend who has, none of them more than once.  Thus, I bid $100 on the pipe, thinking that if the bidding inched up $1 at a time I would be safe.  Foolhardy but true!  Not another bid was made.

Scrutinizing each of the plentiful photos taken well and from every angle, except for the color that was a little darker, the only flaw I detected was the worse than average looking but single rim burn.  The description noted the inclusion of a replacement stem which, in my excitement, I must admit I did not notice was left only halfway turned into the shank in the photos.  I should have expected something was up with that. 

The pipe arrived from Daytona Beach, Florida only two days after shipping despite Irma’s devastation that left 80%+ of the power in that area off the grid.  I inspected the pipe, and almost all of it looked very good.  I love the olive wood ferrule.  I tried to tighten the stem.  No-go.  Less than halfway, the Ebonite screeched.  Halfway, I stopped with the certainty the tenon would break if I were to continue.

Now, adjusting the tenon circumference took only a few minutes before it fit as though hand-crafted for the Jonico.  I should add that the stem was straight and needed a gentle curve, as well as removal of slight, almost imperceptible rough edges along the sides, left-over signs of the machines that stamped them in groups.

But the end of the shank was rounded, which I had seen with a few new and restored estate pipes I bought over the years.  I just hadn’t ever given much attention to the stem fittings on these pipes.  My first impulse, therefore, was to order a stem that was the correct diameter for the shank, specifically an army mount, but then I thought, “Why wait?”  Scanning through my photos of various such pipes, I noticed that the one common trait of the stems used is that they look good on the given pipes.  That being true enough for now with mine, and its destination being my shelf, I proceeded to the required stem work until the army mount stem arrives.

I started with feather-light, focused sanding using 400-grit paper followed by micro-meshing from 1500-12000.  This stem was so shiny when I unwrapped it with the pipe that the first sight of it made me fear it might be plastic and hope it would turn out to be acrylic.  The distinct odor of burned rubber and Sulphur that rose to my nose upon sanding cleared that up.   Having already pre-heated the oven to 220° F., I slipped a regular cleaner through the stem’s airhole and placed the whole thing on a small sheet of aluminum foil.After 15 minutes in the cooker, the stem was pliant.  I used the complex tool in the following shot to accomplish most of the task that called for the slightest curve of almost nothing but the mouthpiece.  I returned the stem, already somewhat cooled, to the oven for a few more minutes and made the final, tiny bend by hand, with a cooking mitten and rag of course.  Then I ran cold water from the tap over it and removed the cleaner. As I mentioned earlier, the burn on the rim in the eBay photos worried me, and my un-ease grew when I had my first Close Encounter of the Third Kind.  The concern wasn’t whether I could fix it but how far I would need to go to do so.  The reason was the depth of the affected areas, from the rim scorch that was isolated to one spot but crept into the chamber and ate away at the top of the inner wall most of the way around the top right side.  By no means was this even close to bad as I have come to understand the word in terms of pipe rim repair, but I did not want to alter the uniform, hearty thickness of the wall any more than could be avoided.  With this pipe, re-sizing the rim with a file was like to sacrilege, yet the idea did cross my mind in a sinful flash before I rejected it at the thought of eliminating any significant fraction of a millimeter of the wonderful bird’s-eye.  Have a closer gander at the unfortunate but far less egregious degradation to the inner right rim this beautiful Dublin withstood.I began the only aspect of the refurbish that could be called any kind of challenge with the gentlest approach, purified water and a soft cotton cloth over the entire stummel.  While a fair amount of soot, skin oil and whatnot came off, no amount of scrubbing made a dent, as it were, on the blemish.  Fine grades of sand paper had no effect, either, and so, I worked my way down the numbers and up the grits to my two-in-one sanding sponge, half 180 and the other 150.  Focusing on the deep rim burn spot, I went at it with the 150.  My hand a blur and breaking out in a sweat all over, the removal of the single little spot took closer to 10 than five minutes.  But I’ll be a turkey’s behind if the dang thang didn’t disappear on me!  I reversed the harsh effects of the 150-grit sponge, minimal as they were because they only rid the fine Mediterranean briar of something that had no place pocking it, with 220- and 400-grit paper before the full scale of micro-mesh pads.  While I was in the groove with the micro-mesh, I did the whole stummel.  I remember coming across one scratch big enough to warrant 320-grit sandpaper, but to save my life I can’t remember where it was, and now it’s gone.  Oh, well.  C’est la vie!

Happy with the absence of the nasty, pernicious burn mark, I found an old, small favorite piece of 150-grit paper that’s perfect for pipe chambers and, focusing again, only on the upper circle inside the chamber, succeeded in eliminating the unwanted beginning of a groove caused by what I can only imagine was a drunken fit of excessive lighting (as in the previous owner passing out while flicking his Zippo and only coming to when he burned his thumb).  I followed the 150-grit strip with the 220- and 400-grits again, and after much careful tapping and blowing of soot and wiping the chamber clean with a piece of paper towel and alcohol, I saw that the damage was repaired, and the chamber was down to bright, clean briar as far as I had gone.  Repeating the process in steady advances down the chamber, 30 or so minutes more passed before the entire inside of the chamber was down to the wood. The end of this special restoration nigh, the time had come to re-stain the rim that had lost more than a little of its fine darker color.  I rejected the notion of making the Capitello Jonico Dublin a two-tone, which is one of my favorite habits with many pipes, and chose instead to apply a couple of Qwik-Koats of Lincoln Brown Boot Dye, alcohol-based.  You know I had my Bic handy to flick, but at least I was sober, safe and sane.Taking off the charred stain and returning the rim color to the original shiny dark brown was simple with 1800 followed by 4000-12000 micro-mesh.

As a general rule, I don’t leave the cleaning and retorting of a pipe’s insides until just before the last step, but this time I became so wrapped up in the stem bending, burn removing and, for the first time, eliminating all but the ghost of the original owner’s tobacco char that I just forgot until the mental checklist time arrived.  Whomever the previous owner was loved this pipe despite the one misadventurous rim burn incident.  I can tell, because I only needed six regular cleaners half-soaked in alcohol with the dry ends to follow up each run through the shank before the last came out clean both sides.  Also, the retort was fast and easy with only three Pyrex test tubes of alcohol boiled through the pipe.

Strolling from the living room to the “workshop” (my bedroom still, for now, but next month or November at the latest I’ll start paying an old-time rent control-level extra charge for the spare third bedroom in the house and begin assembling the proper tools for this work), I plugged in the electric buffer.  Before that, I asked the cats to leave, which they did because for some reason they don’t like the noise of the machine.  I closed the door and freshened the brown Tripoli wheel I’ve been using to give more luster to the wood, made sure there were no papers or other light objects that might blow away nearby, and turned on the juice.  The whir of a wood buffing wheel is one of the happiest sounds I know.  Lightly turning the wooden stummel with confident firmness over the spinning cloth buffer is likewise one of the finest feelings, because of the completion it brings to another project.

The brown Tripoli buffing finished, I wrapped a clean cotton cloth around the wood and, with both hands, worked the excess compound and a couple of streaks, part of it deeper into the stummel and the rest onto the cloth.  I’ve been doing this lately instead of the alternative clean buffing wheel method, and it works just as well.  Then I repeated the process with a coat of Carnauba wax, and after rubbing it with another cotton cloth gave it one more roll on the Carnauba wheel before the final rub-down.  I buffed the stem with a single coat of Carnauba and rubbed it smooth of excess wax.  For now, it is aligned with the shank as close to an army mount as I could approximate with a regular narrow tapered stem.

CONCLUSION

René Magritte had a brilliant, often hilarious imagination fueled by his wild, wicked (as my generation used it to mean “awesome” or “totally [rad]”) sense of humor, even if he apparently didn’t smoke a pipe – or anything else.  Take a close look at this photo of him as a young man, cribbed from Pinterest, and you’ll see the cigarette in his mouth appears to be backward, if it’s a cigarette at all and not a pencil.  If I had to guess, and I do, I would say he appreciated the beauty of everything in life as he saw it.  Pipes being a big part of culture during Magritte’s too-short time in this world before he moved on to the Totally Surreal Higher Place, my take on the painting I used as an atypical opening quote is that it is at the very least double-edged: the artist’s rendering of a pipe in a piece of art does not make it a pipe, and the conspicuously bland billiard he chose to create with paint and paper, without doubt using the greatest consideration of the multitude of options available to his ingenious mind, is something one might find on a basic pipe chart if they were as well illustrated as this work.  That is why I chose the subtle example of the surreal to open this blog.  Look at any pipe made by Capitello, and if you speak French, you would exclaim, “C’est une pipe [That’s a pipe]!”
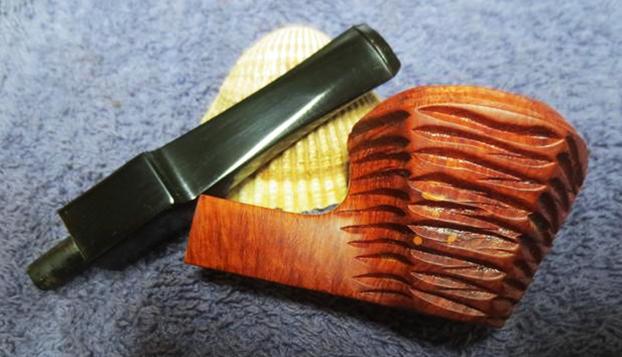
SOURCES

http://www.pipephil.eu/logos/en/logo-c2.html
https://dutchpipesmoker.wordpress.com/tag/oil-curing/
https://patentscope.wipo.int/search/en/result.jsf
http://loringpage.com/pipearticles/First%20Shell.htm
https://pipedia.org/wiki/Dunhill
http://www.pipephil.eu/logos/en/infos/wax-drip-pipes.html