Blog by Robert M. Boughton
Member, International Society of Codgers
Member, North American Society of Pipe Collectors
Member, Facebook Gentlemen’s Pipe Smoking Society
Website Roadrunner Restored Pipes
Blog RRP
Falderal About Me
Photos © the Author except as noted
From their inception, Kapp & Peterson’s goal was to make a good smoking pipe that the ordinary, common working man could afford and we believe they have, very admirably, lived up to this.
— From A Peterson Dating Guide: A Rule of Thumb, by Mike Leverette
INTRODUCTION
The restoration this blog recounts has nothing to do with Peterson’s pipes. Still, the litany of near fabled proportions in pipe lore, that Charles Peterson and the Brothers Kapp, Friedrich and Heinrich, experienced a mutual epiphany of good will toward all, even the less fortunate commoners, still rings forth in perfect, ever-flowing three-part harmony. The more probable truth, after all – that the good men of K&P had a capital brainstorm in the form of a simple but revolutionary merchandising notion to market early designs of Peterson’s System pipes starting sometime in the last quarter of the 19th century – lacks a certain universal, perpetual attraction, as it were.
Now, I should at least attempt mitigation of the foregoing critique I ’am sure will be perceived by some as an unwarranted attack on one of the last bastions of master pipe craftsmanship, as some readers may misinterpret the kind of remarks I’m prone to make after I’ve spent a good deal of time thinking a matter through. No kind of disrespect on my part for Peterson of Dublin could be farther from the truth. One fellow on the Smokers Forums UK who had never met me other than a few cursory cyber comments back and forth once made me the butt of a snarky but harmless jab after I posted a brief description of my restoration of a nice though common System Pipe that I decided to offer for sale given the number of finer samples in my collection. So far, I’ve bought about 33 Petes I kept, not counting those I passed on to others with the gleam of love in their eyes I know so well. As I recall the unhappy SF member’s words in typed reply, they were: “Wonders never cease! I didn’t think I’d live to see the day you would say you could have enough Petersons!” The member in question warmed up quite a bit after I began flooding his posts with compliments, and they were even genuine.
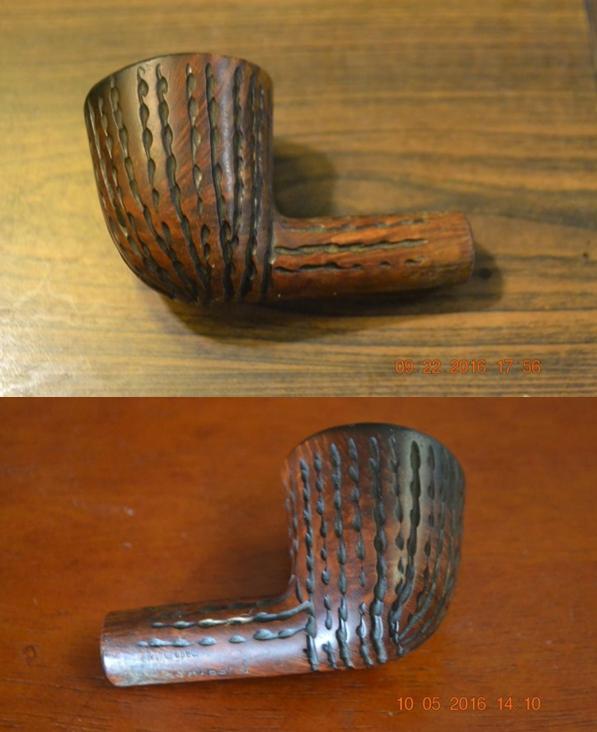
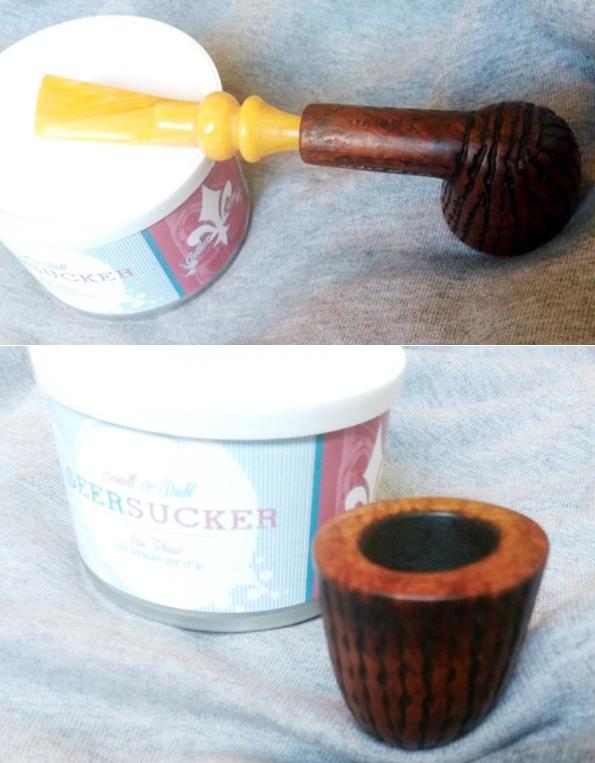
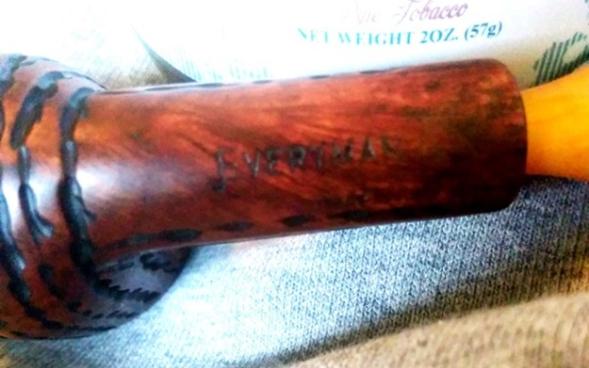
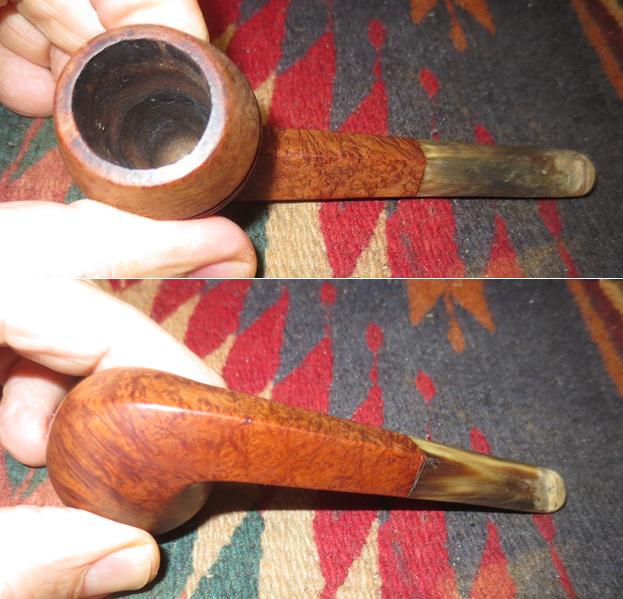
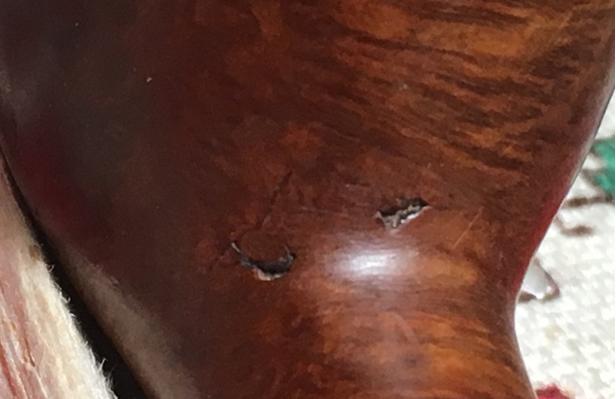
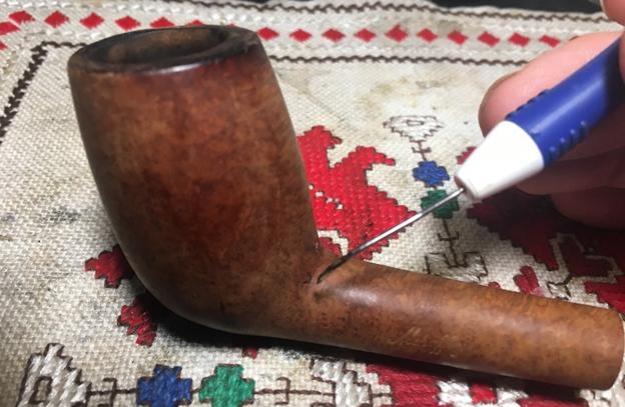
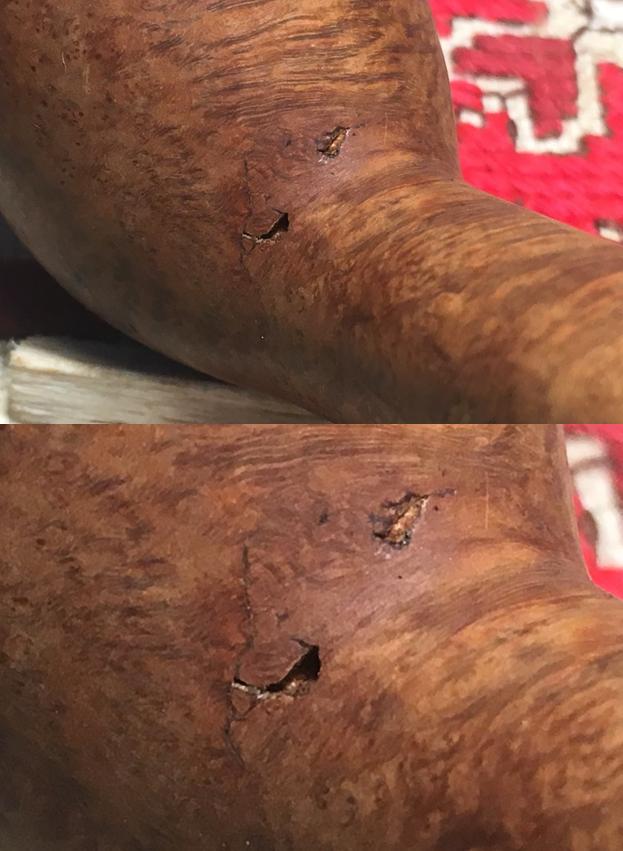
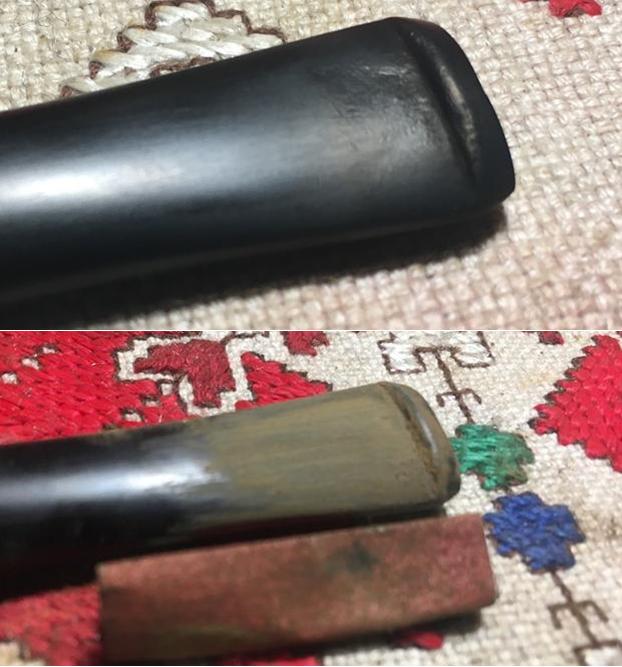
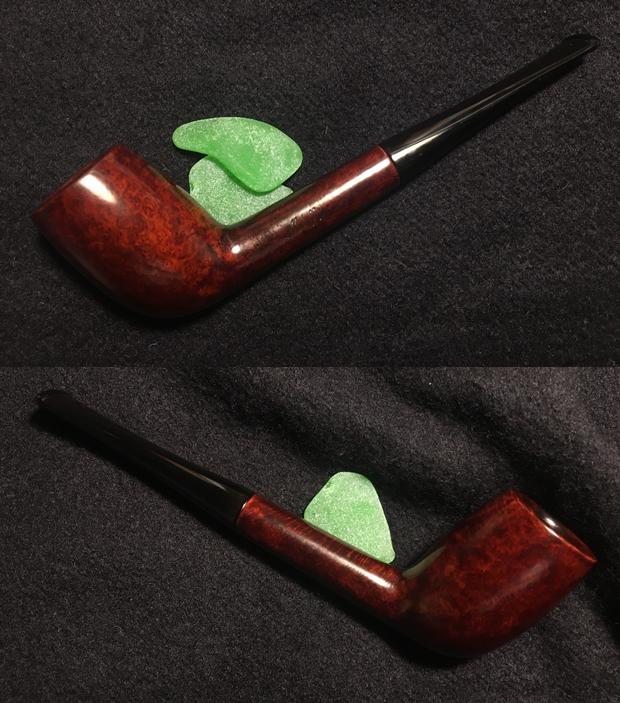
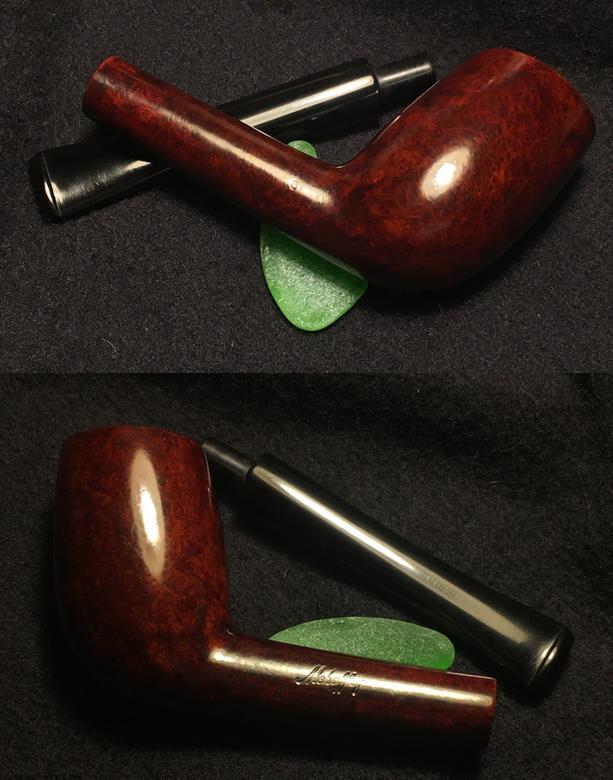
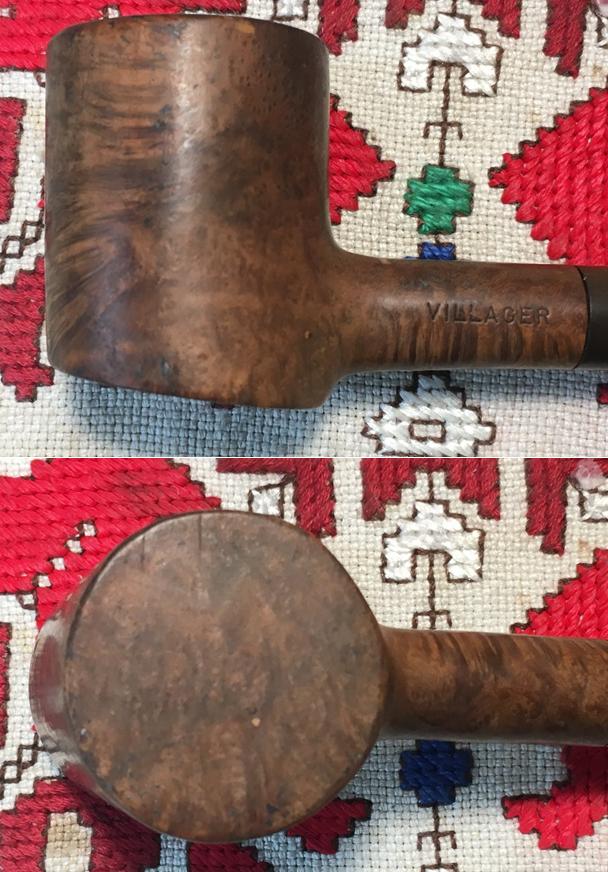
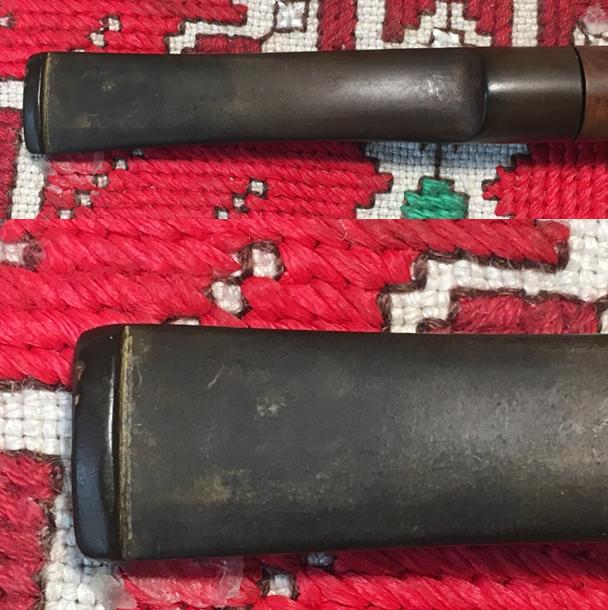
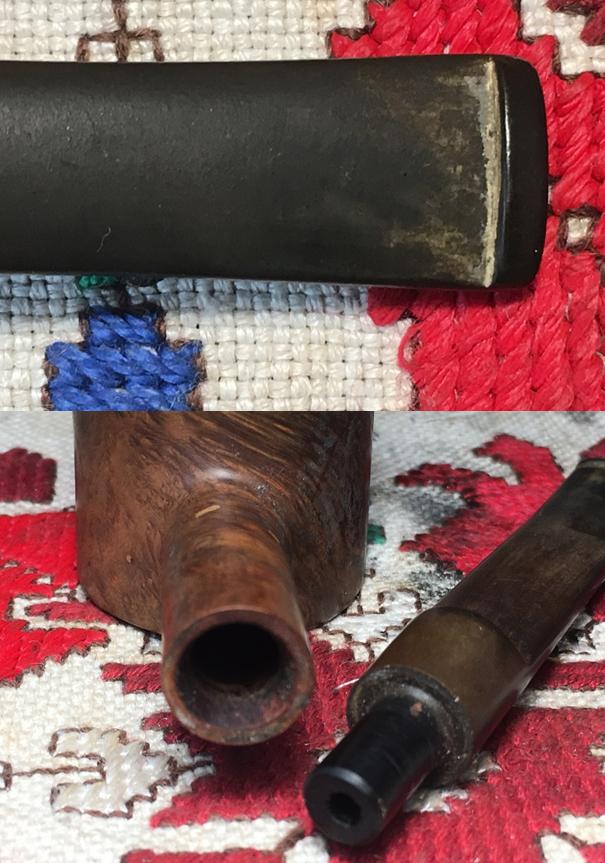
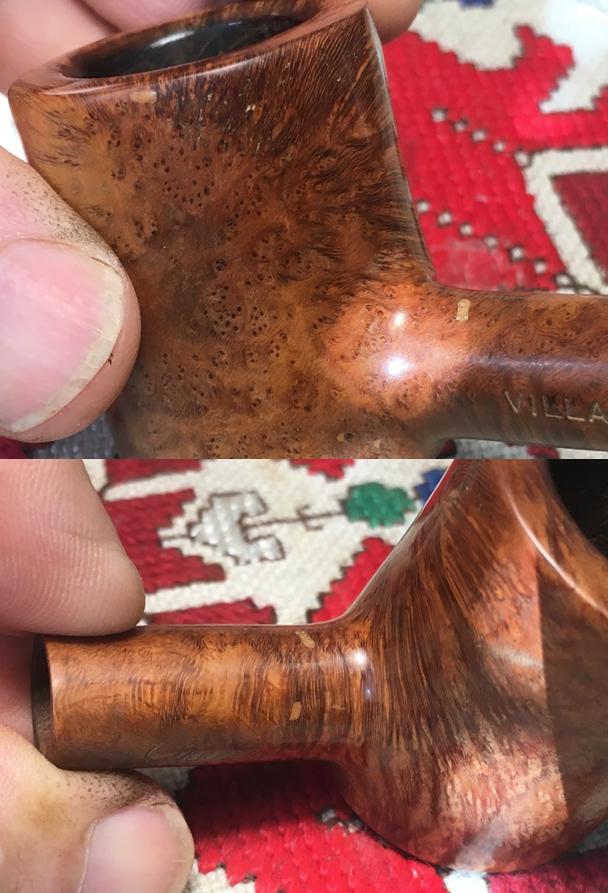
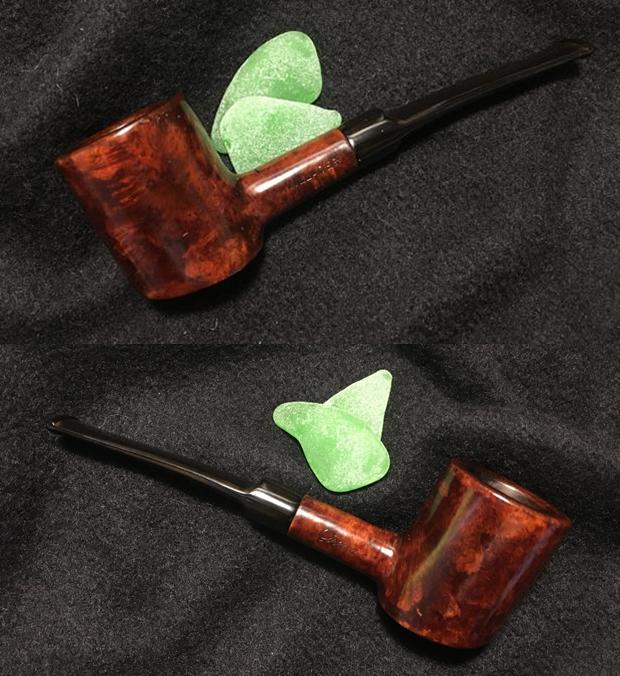
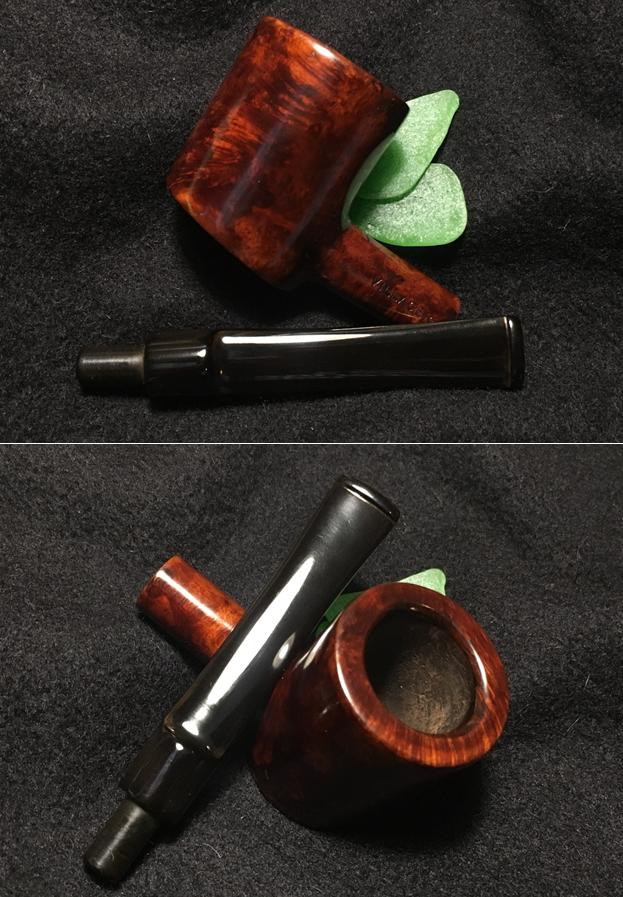
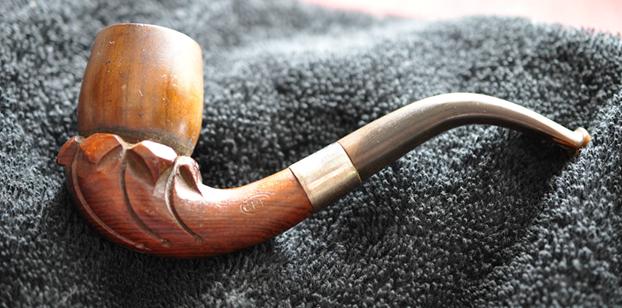
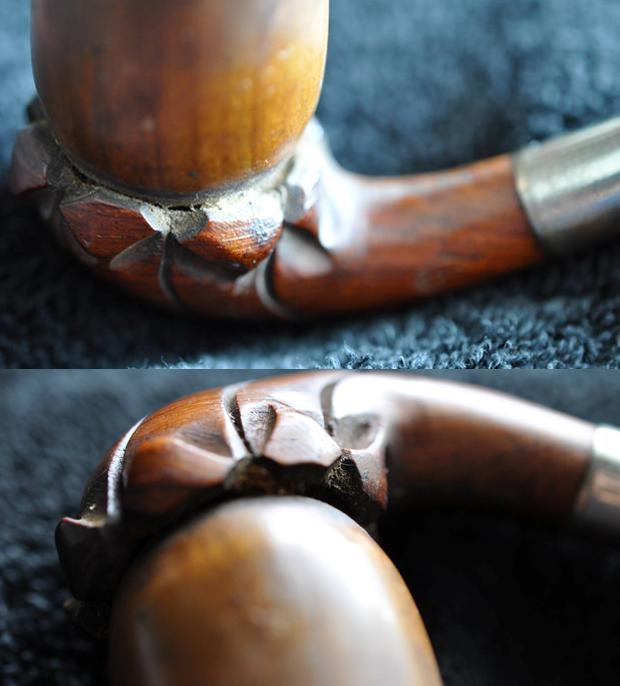
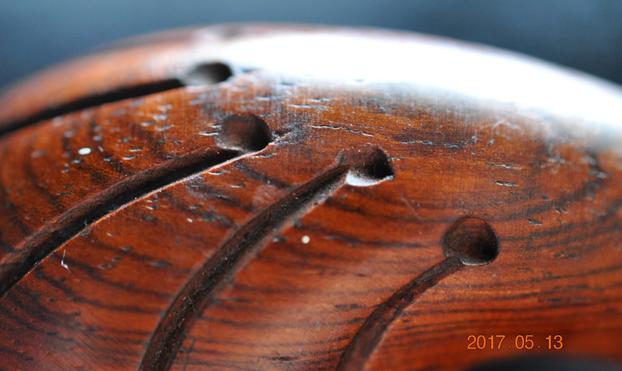
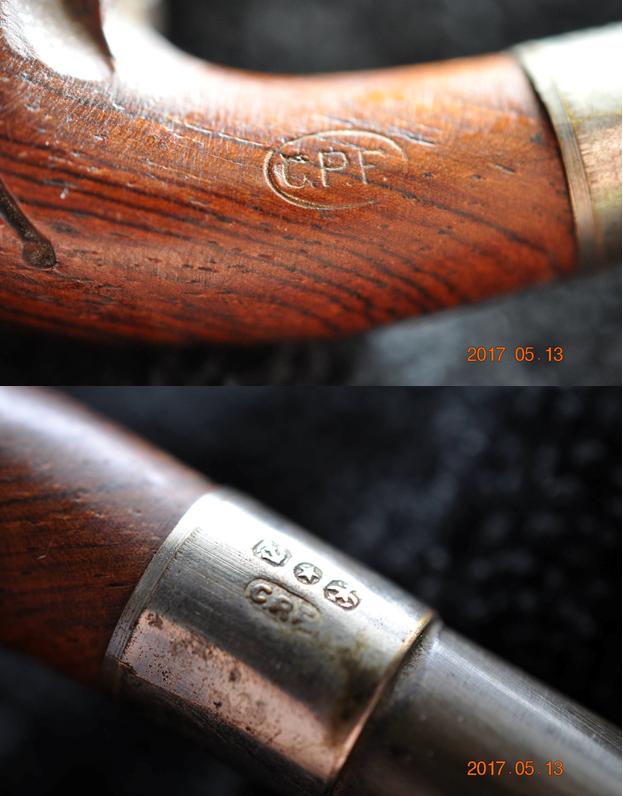
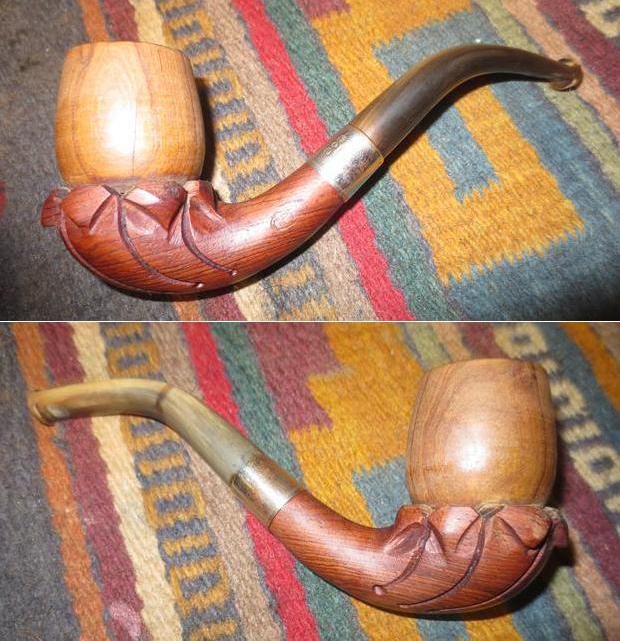
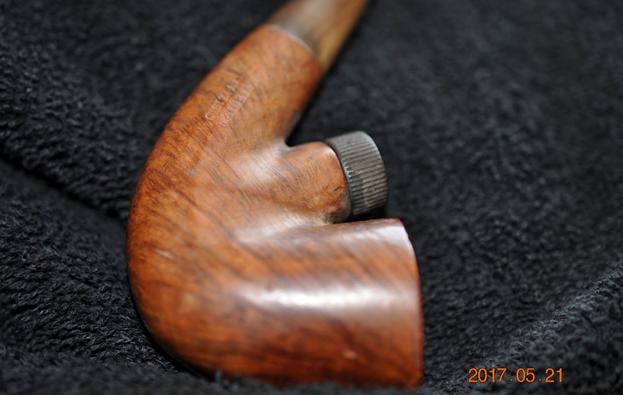
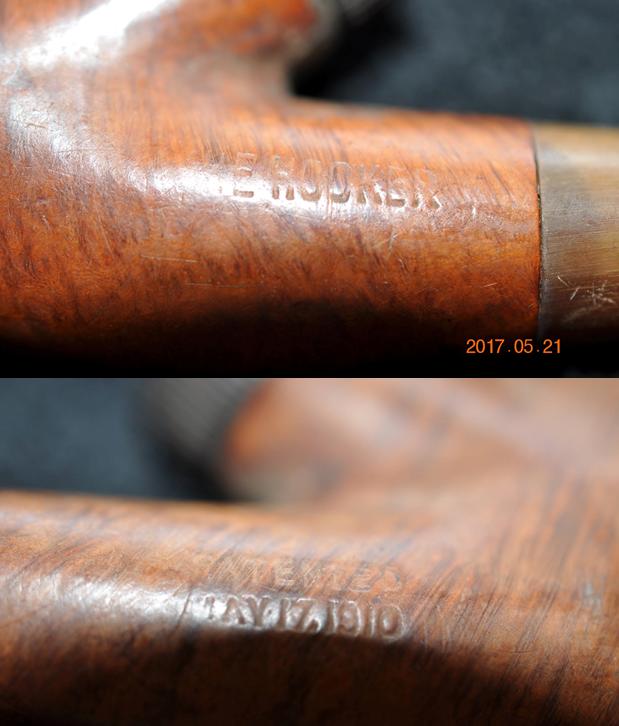
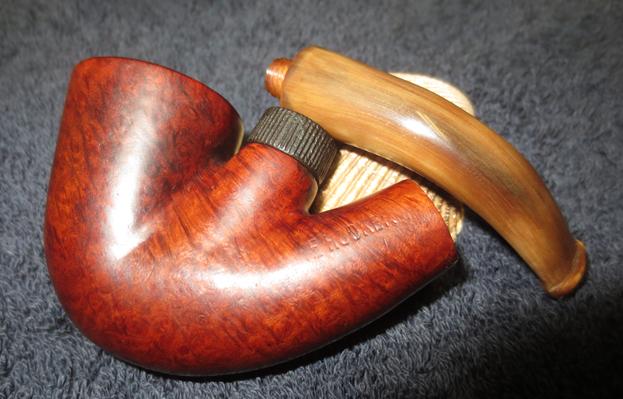
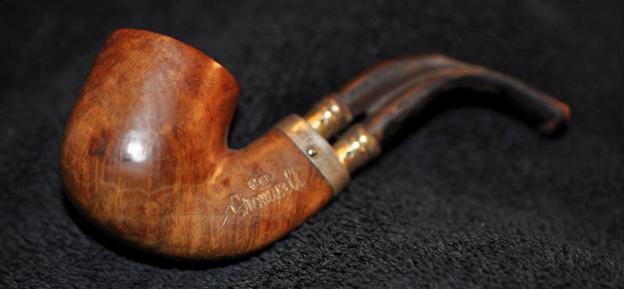
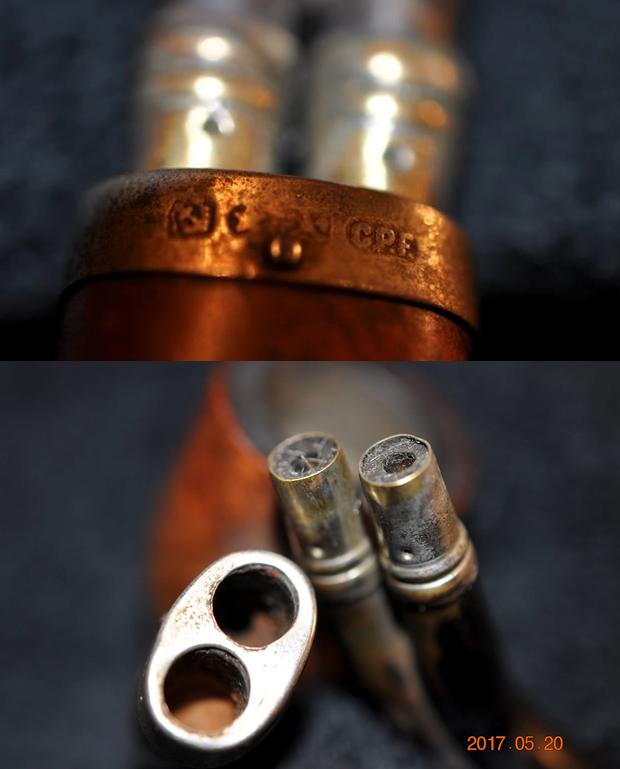
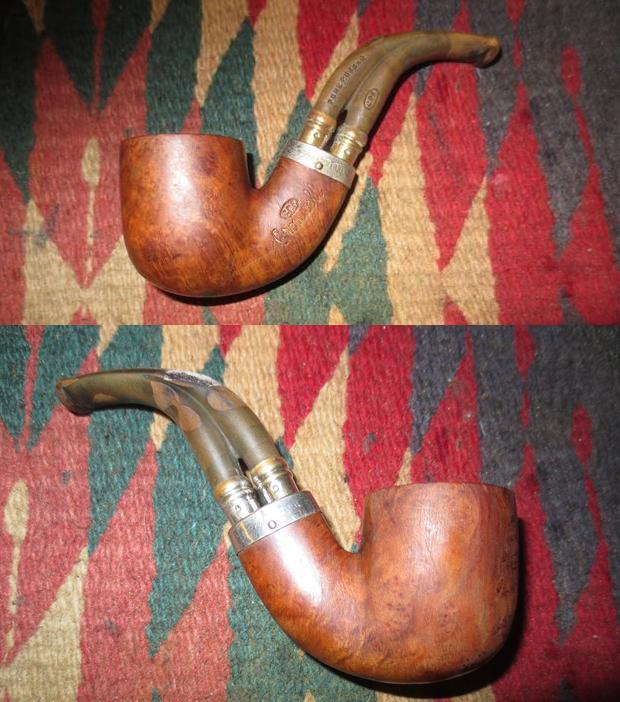
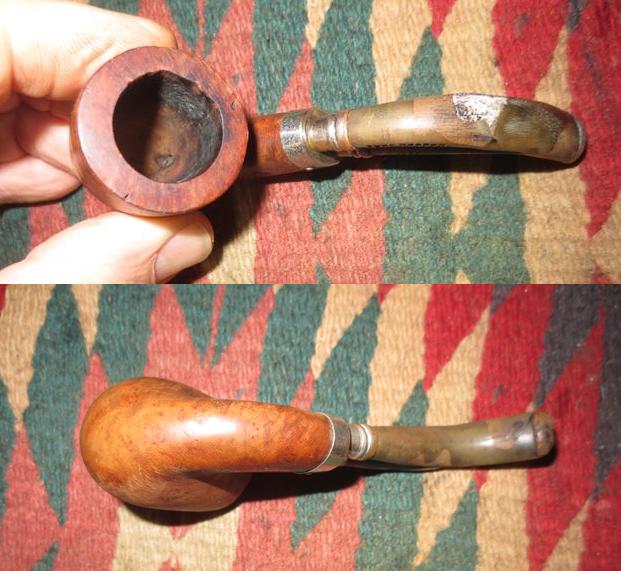
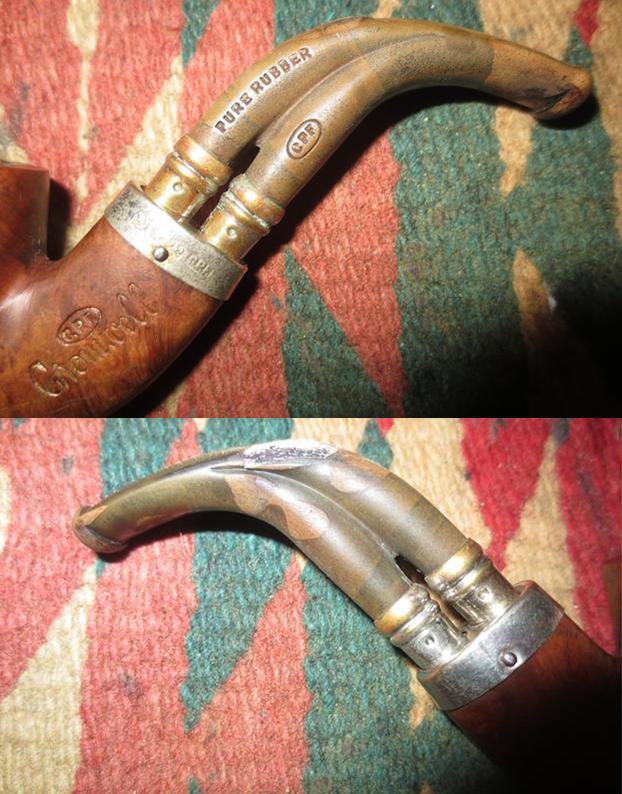
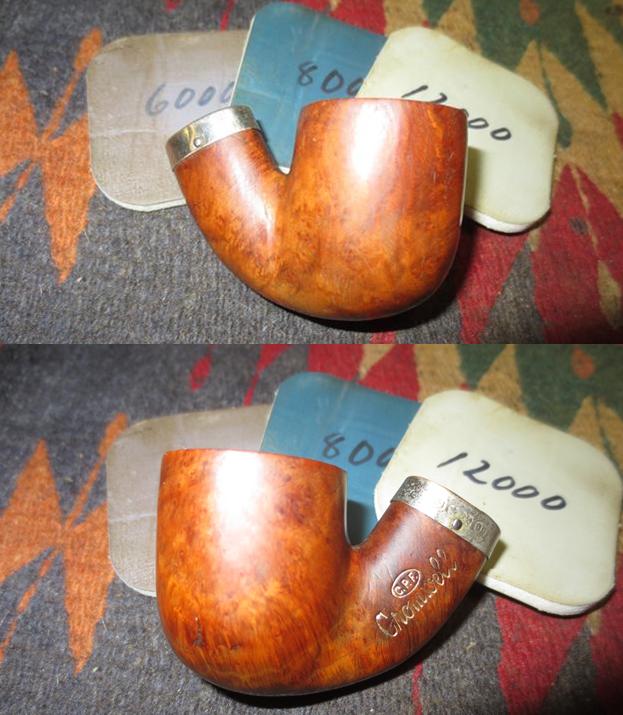
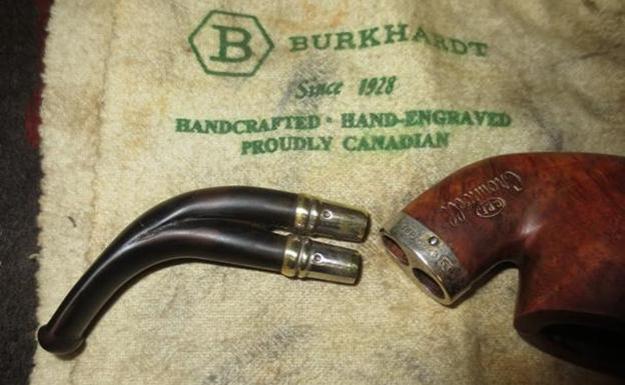
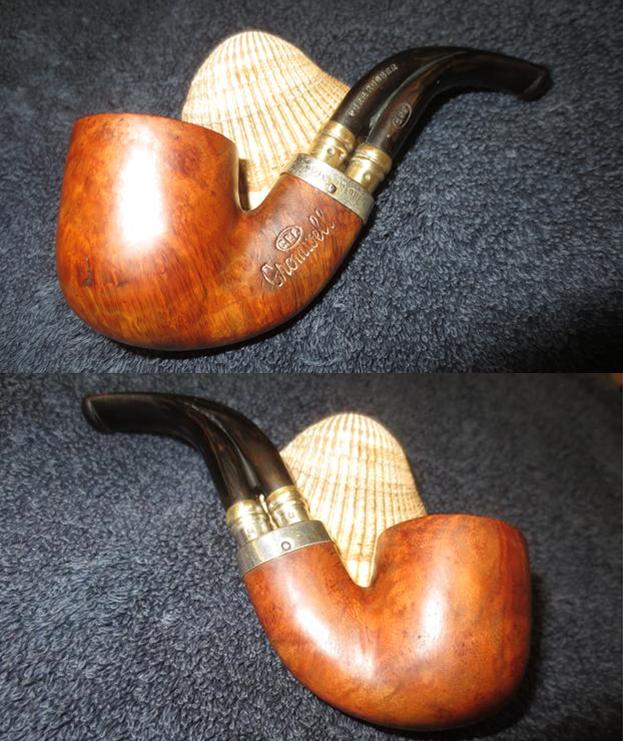
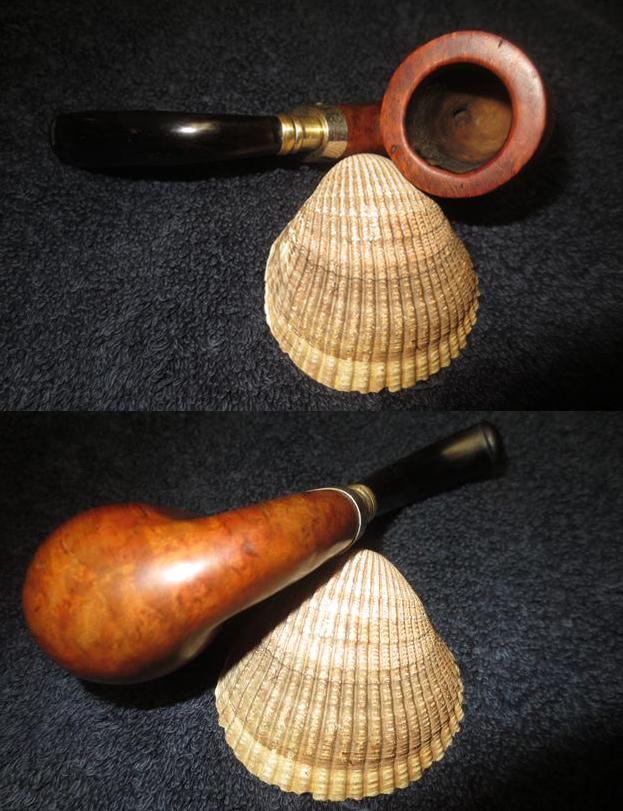
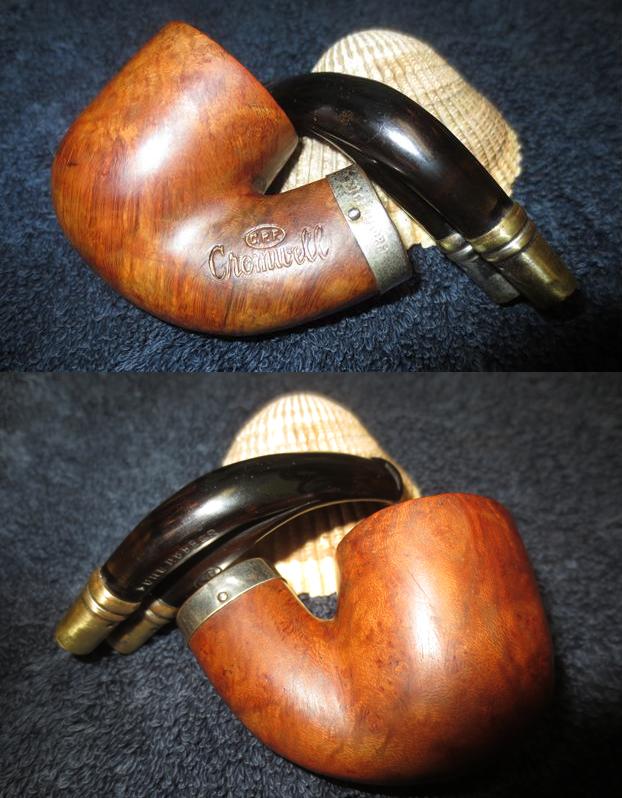
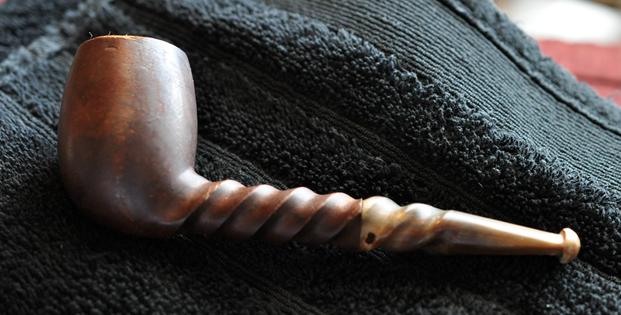
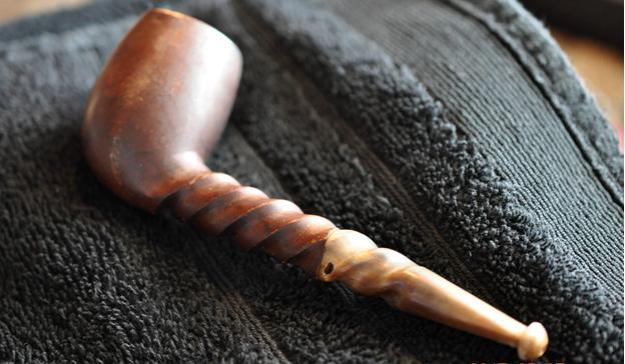
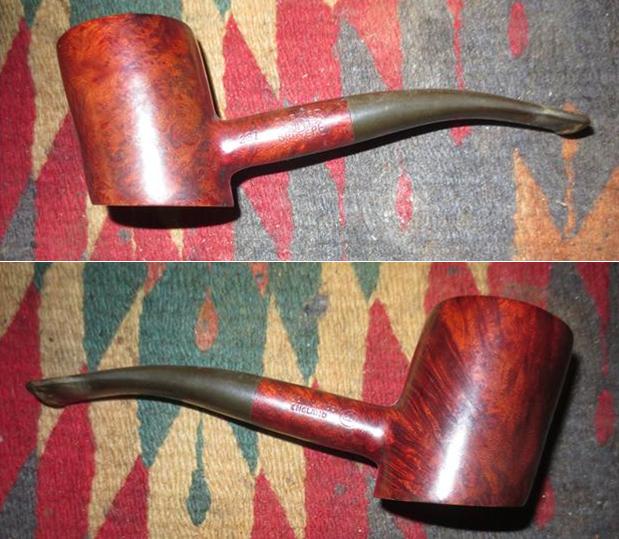
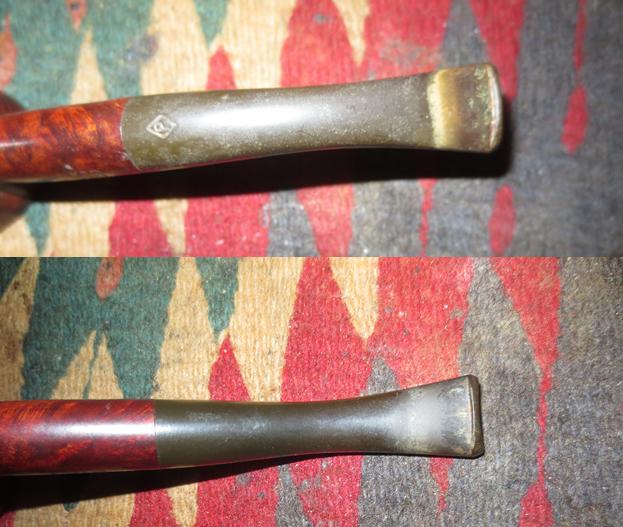
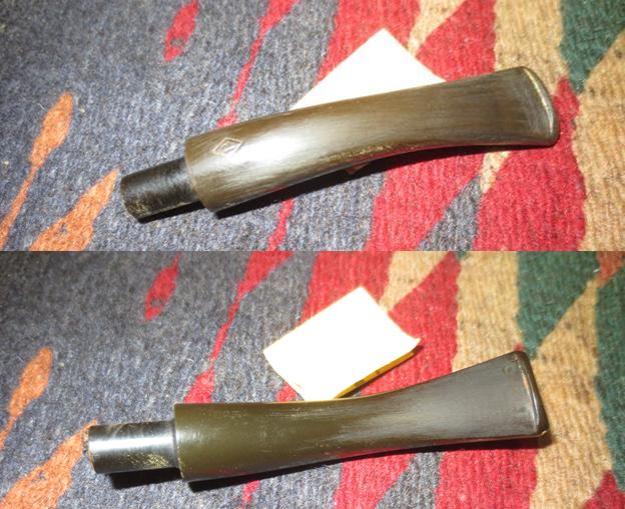
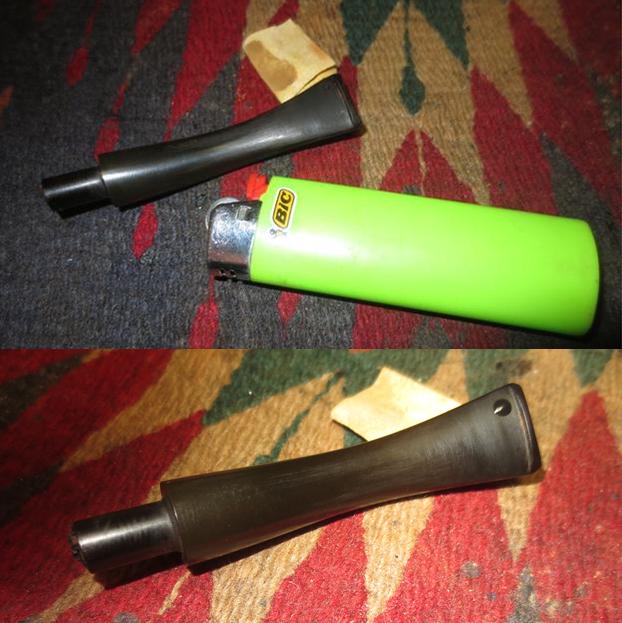
The real mystery of this blog is the single mark of nomenclature on the entire pipe, even counting the original black Vulcanite/Ebonite bit of the style called “fancy,” but which proved to be broken beyond my time and patience if not ability to repair. Even the relative ease of the kind of work needed by the likes of Steve to mend a gap in the upper lip of the mouthpiece as gaping as that shown below requires, as our host notes in the blog cited under Sources, much practice. Also – and this is an important factor, not an excuse – I intend to sell the pipe, not keep it for the shop, and at times have different standards for the two choices.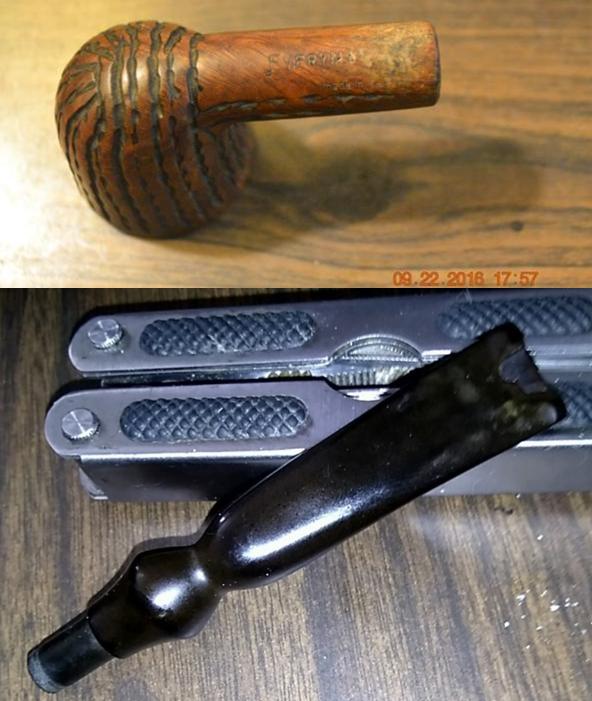 See the date and time stamps? I worked on the infernal bit from then until a couple of weeks ago before settling on the better part of valor. As can be seen from the stummel, the pipe is called, with somewhat disingenuous simplicity and similarity to the well-known The Everyman London Pipe by Comoy’s of London (with all of that and more stamping packed onto even the sandblasted versions of the latter). From the beginning, when I acquired the bedraggled waif in an estate lot at least two years ago and sat on it until late September last year, I had one of those uneasy feelings in my stomach at the mere idea of committing myself in print to the conclusion that it was in fact somehow part of the Comoy’s brood.
 Before I snapped my habitual first seven shots of the pipe as it presented in O.R. with more worthy candidates ahead of it in triage, I began my online search that only further clogged the veritable obstruction in my intestines. Having made some genuinely heroic efforts on real Everyman and Guildhall London Pipes in my limited time learning this wonderful tradecraft, in the combined senses of the words as well as the more clandestine meaning of the singular, I knew just what to expect from Pipephil and Pipedia but visited both once again anyway. Variations on this theme continued off and on during the interim period until a few days ago when I took the
Google approach of “I’m feeling lucky” and again entered the terms “Everyman Pipes.” I swear I typed the same simplest of many search terms I had tried for two years, but this time, in one of those inexplicable flashes of serendipity, the top listing was for P&K Everyman Pipes at JR Cigar!
Growing breathless, I clicked on the link and saw, more or less, my pipe in two other shapes but with the same distinctive fancy bits and rugged vertical striations around the bowls, and both were straight. One was a billiard, the other a pot, and both, marked down $10, were still, to me, listed at an outrageous $31.95. Despite all that, I was quite pleased with myself to read the blurb at the top of the page:
“A true example of eye-catching yet economical handcrafted tobacco pipes, the P&K Everyman selection by the famed Comoy’s of London promises a premium pipe-smoking experience at prices that can’t be beat.”
I scanned further down the search result page, spotting a listing for the same pipe brand at Santa Clara Cigar, possessed of a remarkable resemblance to JR but with the Comoy’s blurb, ahem, omitted. Nevertheless, at the fourth of five shapes down, there was my pipe, the P&K Straight Rustic #9, a Dublin. Better later than never, the idea of looking up P&K Everyman pipe images occurred to me and at the top I saw the following, being the perfect factory image of my pipe.
OK, then. As supremely pleased with myself as I was at this morsel of intel, even if some faiths that consider pride a sin could be right, I am not now nor have I ever been a member of the Nitwit Party, whose followers believe everything they read on the Internet or hear on TV is the truth. There are many reasons for my worldview, not the least of which being my years as a newspaper journalist and photographer, as opposed to a photojournalist. I sold my first news article when I was 15, and when I was 17 became credentialed by the Los Angeles County Sheriff’s Office as an official police and justice beat reporter for a community paper. My publisher, editor and I tried the year before, and although there was no real age clause at the time (1978), the powers-that-were in the L.A.S.O. were too – well – pig-headed to relent until I gave everyone in the issuing bureau a major headache re-applying on the first of every month.
I try, no joke, not to pester Steve with questions to which I can find or – OMG! – figure out on my own using the brain that was between my ears at birth and, operating best on the right side of it, form a working plan to press on. One of my best qualities is the willingness to admit at once when I am wrong, which in fact is a very good thing because I have had much more experience with that than, say, repairing bits with outlandish holes gnawed through them by people with Intermittent Explosive Disorder or tardive dyskinesia. And no, I’m not making fun of people with disabilities, in particular schizophrenics, who seem to have been drawn to me all of my life, other than most of those in my family for some reason. It’s sort of Cole Seer’s dramatic need in The Sixth Sense, having to be like a shrink to dead people. At any rate, Steve is one of the busiest, most productive persons I know, traveling the world almost non-stop, it seems at times, doing good works while never letting on that his constant other full-time “job” writing and publishing mostly his own pipe restoration adventures and posting those of other contributors online. All of this last part is by way of a drum roll of sorts.
You see, had I not called and left a brief message on Steve’s phone before emailing him more than the full details, as par for the course, I never would have received back the following concise words of wisdom as to the possibilities of who really made the Everyman Rustic Dublin on which I’m so very close now to describing all of the work I did! Yes, I am! Steve’s reply, in pertinent part, read:
I got your message when I got home late last evening and then read the email this morning. I have not heard of the P&K brand and Everyman pipe does not at all look English to me. I am wondering if it could possibly be from one of two original makers.
1. Alpha pipes Israel made for the cigar shop – the finish, style of the bowl and the stem make it look very much like many Alpha Israel pipes ) pre-Grabow ownership.
2. Lorenzo pipes Italy as they made many basket pipes for different shops.
That is as much as I would hazard to guess.
If I’ve ever needed Steve’s direction in research for a restore, this was it! There is no way I would have reached those conclusions with such apparent ease and speed, in fact not ever, no how, no way, because I just don’t have his experience. I mean, if there were a way I could get him to donate me a spare kidney or maybe his spleen so I could, like, grow all of his knowledge, why, I’d lie down on the table and do it in a heartbeat. For now I guess I just need to get busy buying up and devouring and going back to again and again all of the great reference books out there, such as Who Made That Pipe? The bottom line here is that Steve’s tip came back so fast my head spun like Linda Blair’s in The Exorcist, not to overdo the whole movie thing.
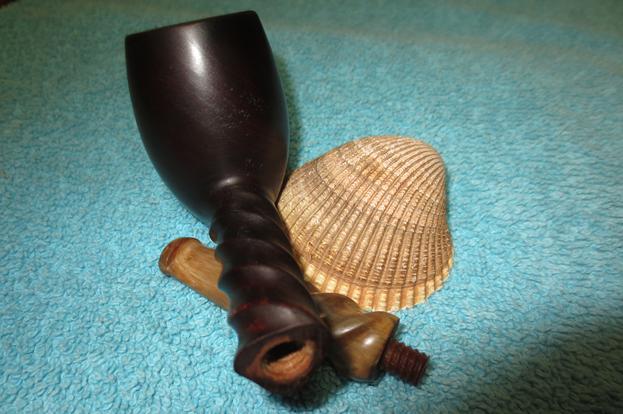
All I had to do was figure out how to look up the Lorenzo and Alpha possibilities, which I knew I could manage, and I did a few minutes after reading Steve’s email. The funniest place the Lorenzo idea led me was to some images of my own restoration of a gigantic Spitfire by Lorenzo Mille I restored and blogged just before Hallowe’en 2014. The money card turned out to be with the pre-DrG Alphas made in Israel. I found the following oddly familiar-appearing Burl Briar Freehand Pipes on eBay, complete with the same fancy bits curved just so.
Case closed.
RESTORATION


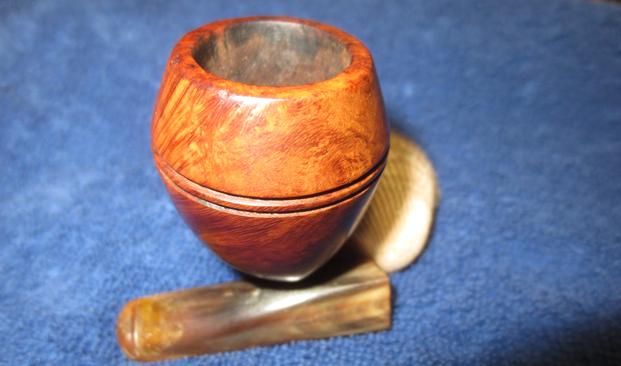
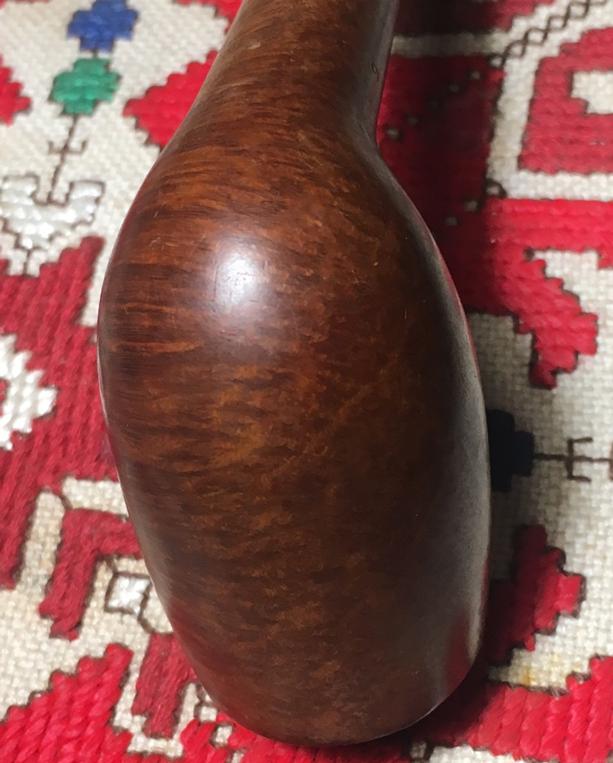
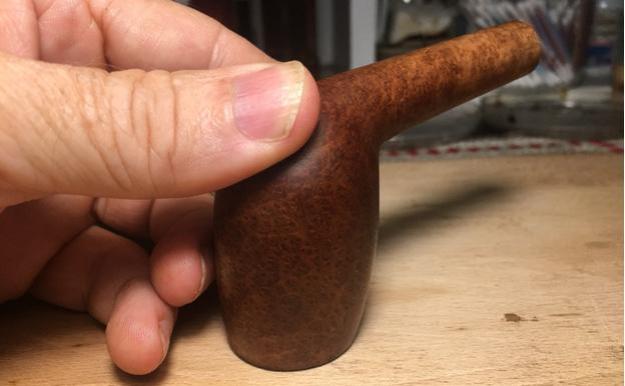
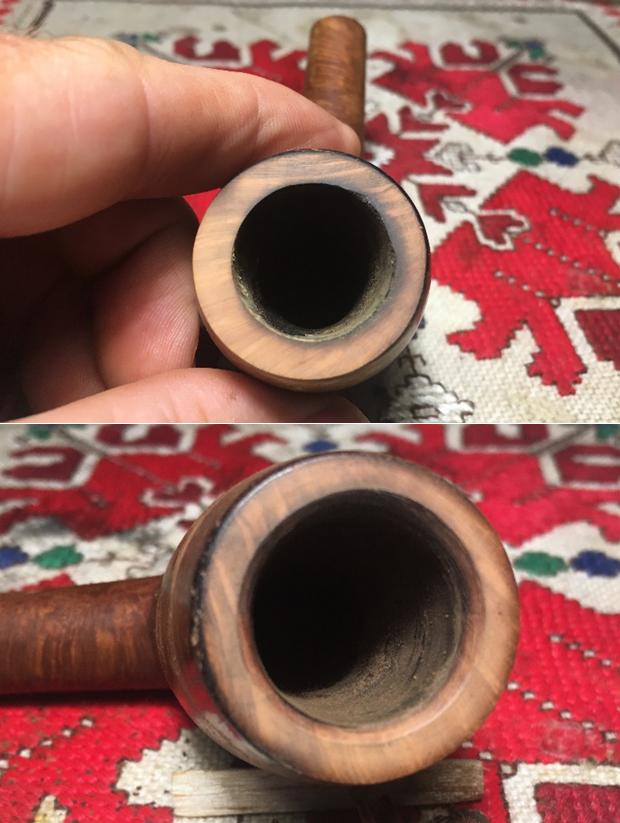
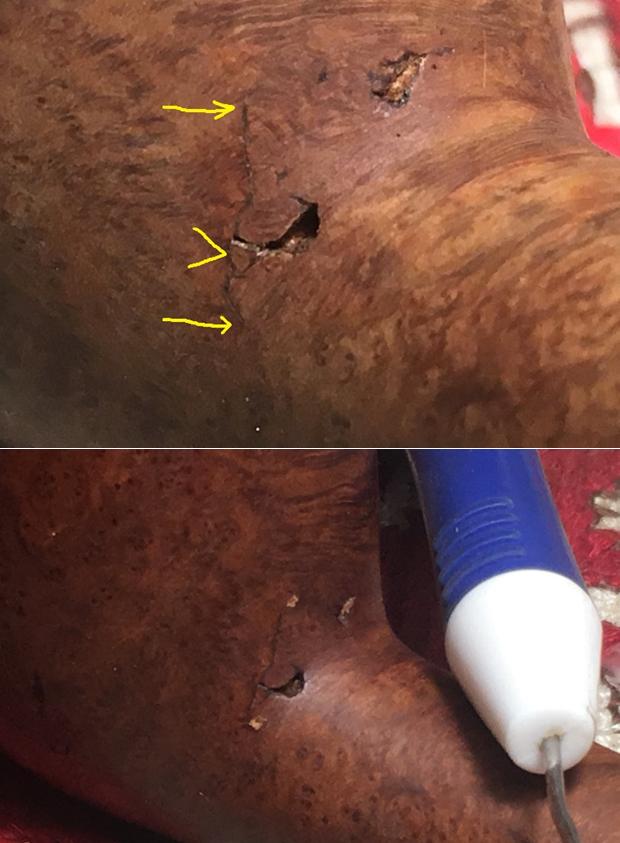
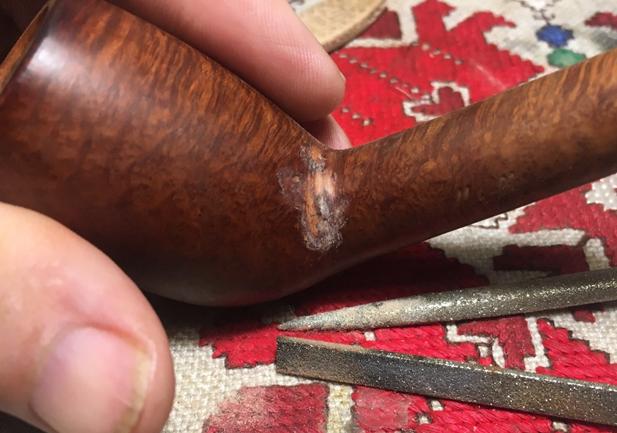
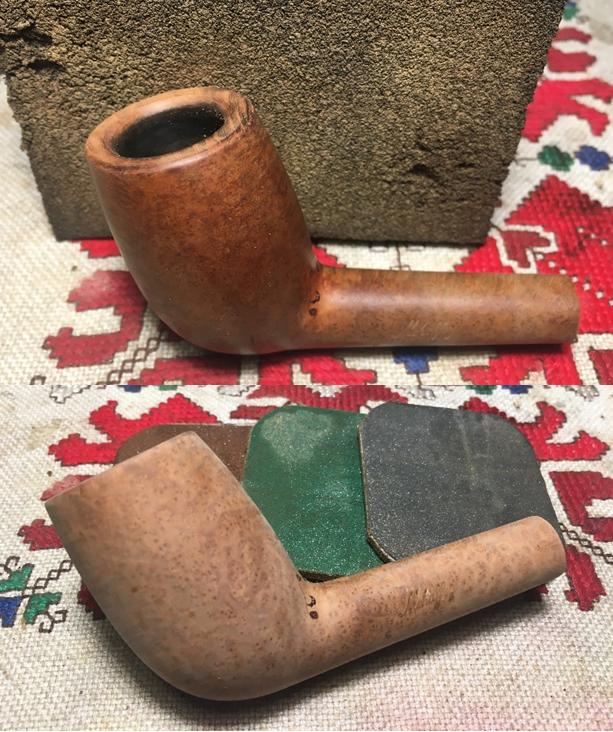
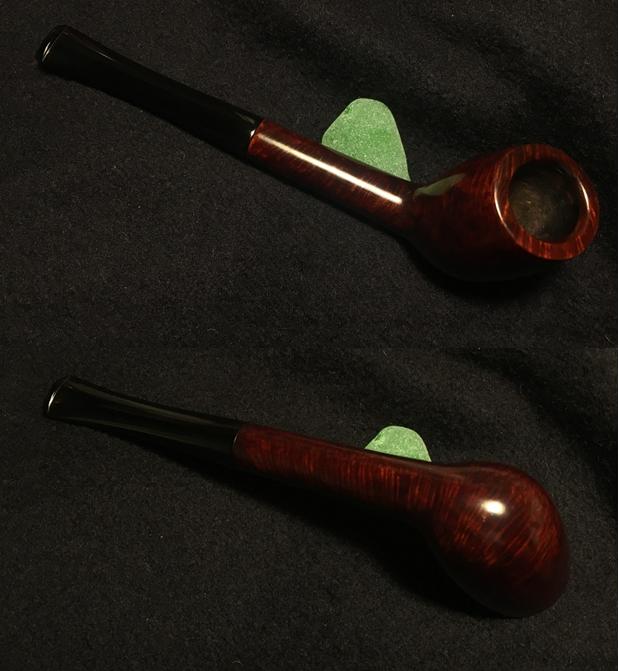
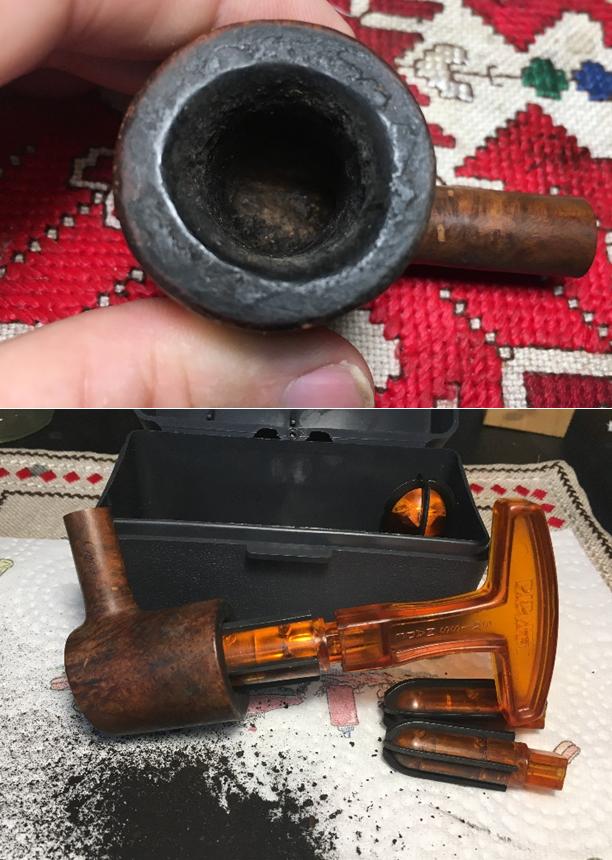
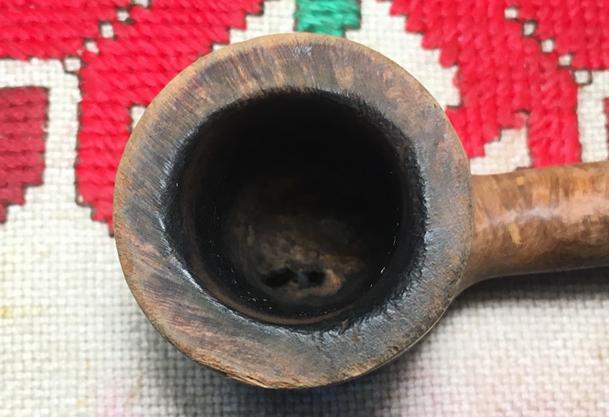
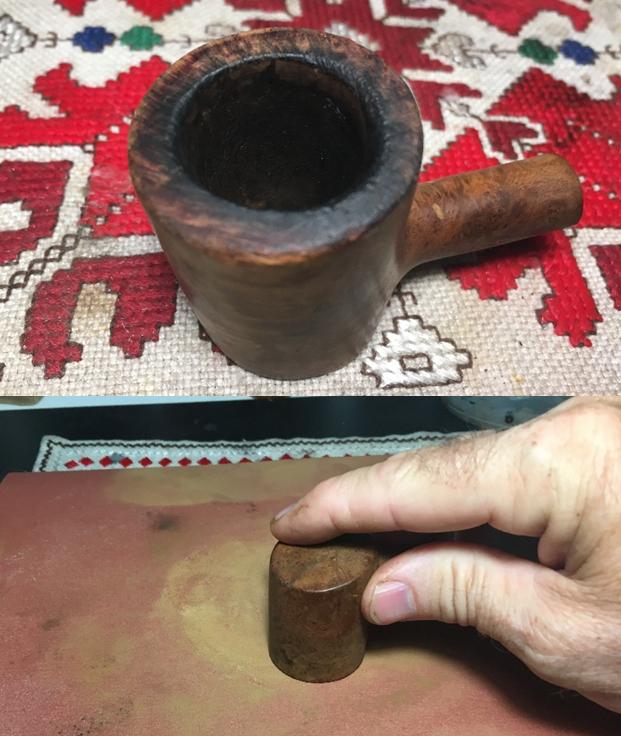
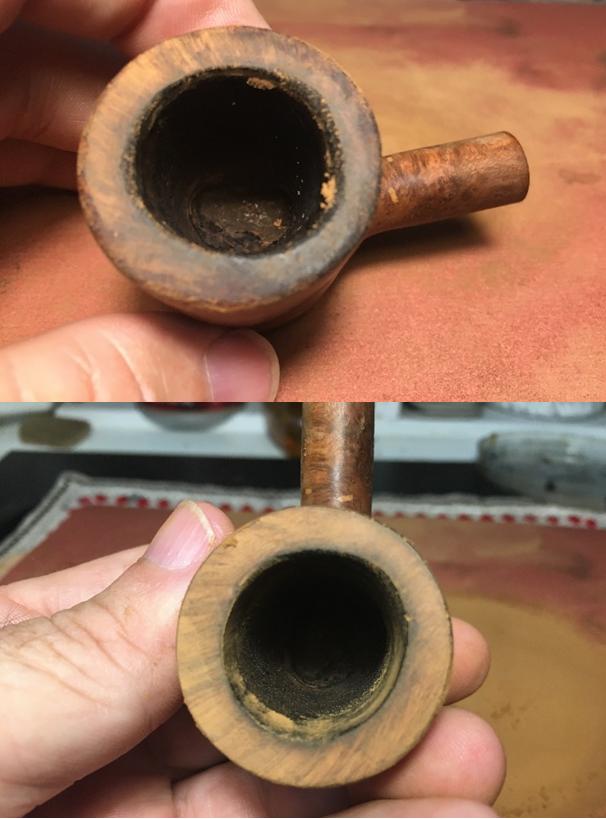
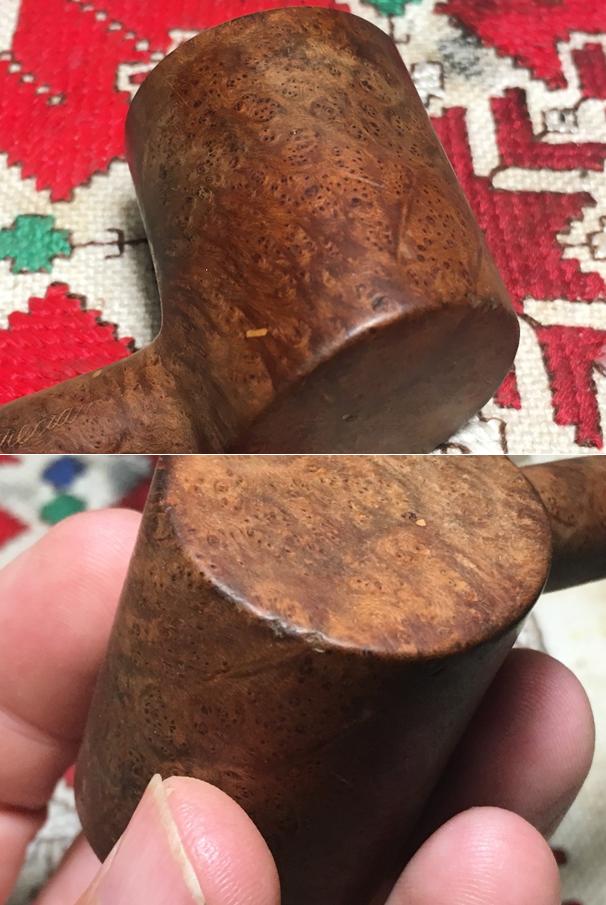
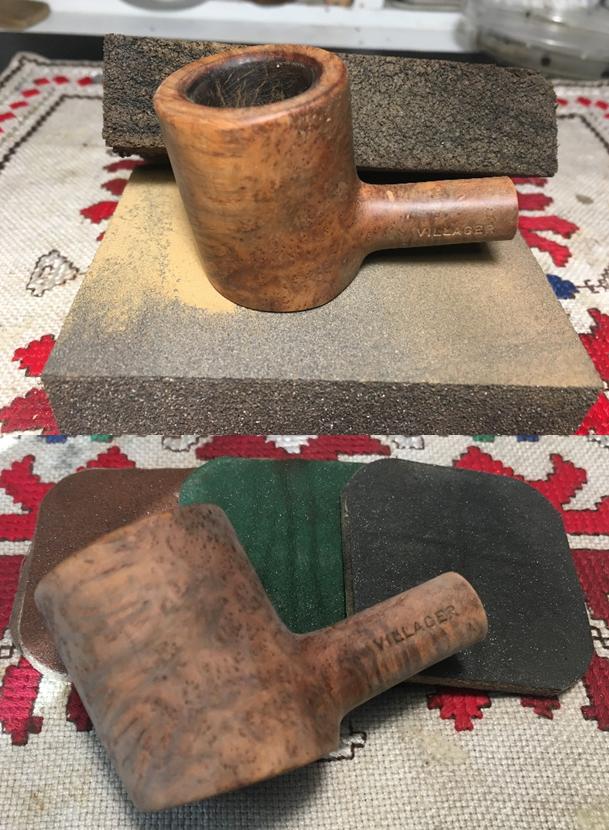
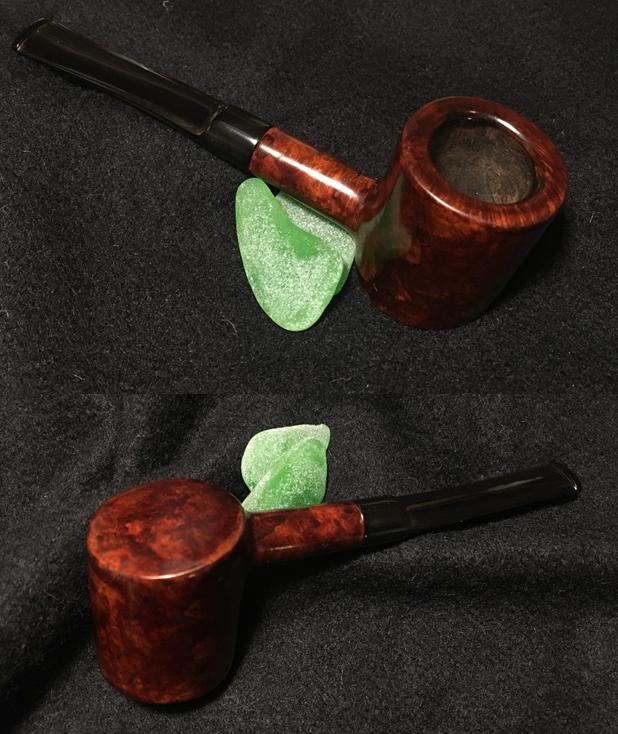
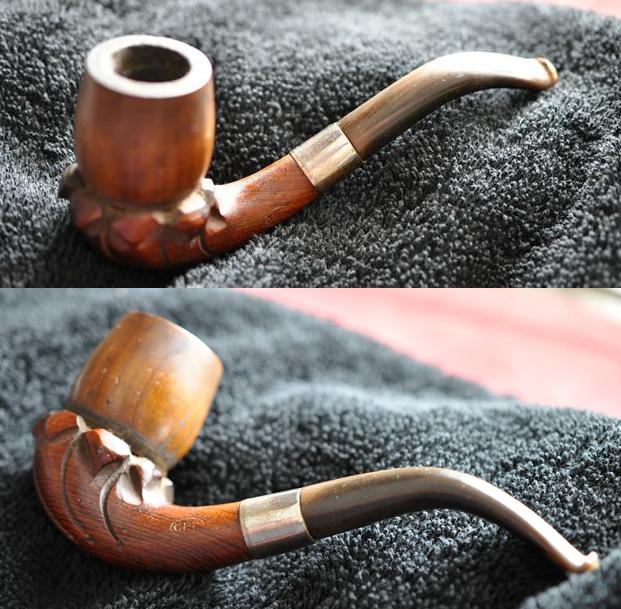
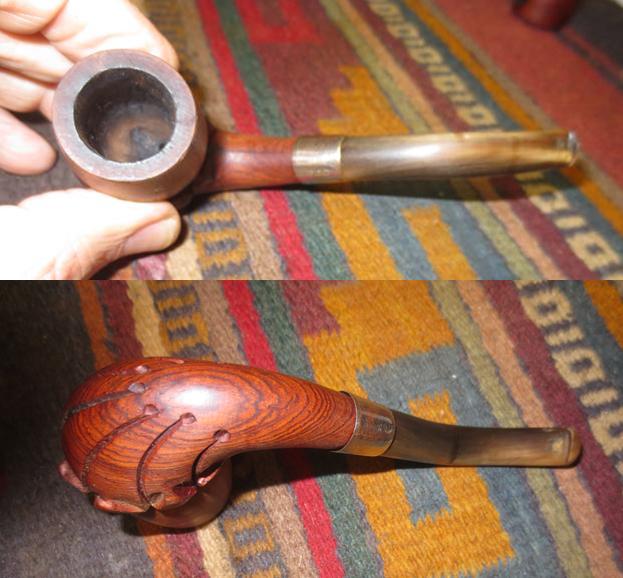
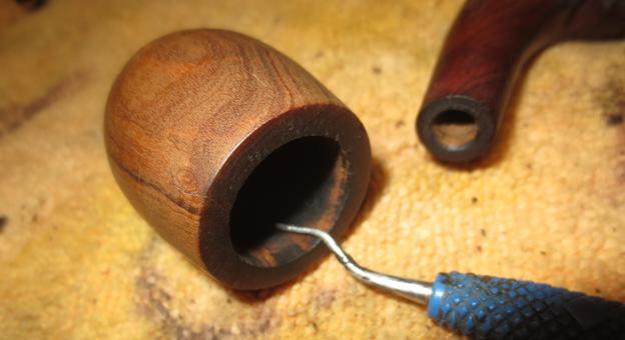
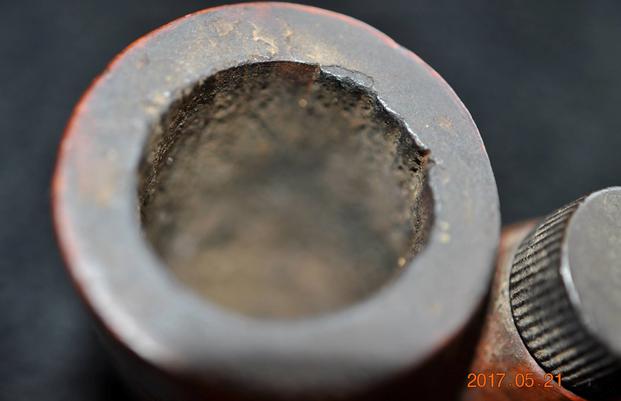
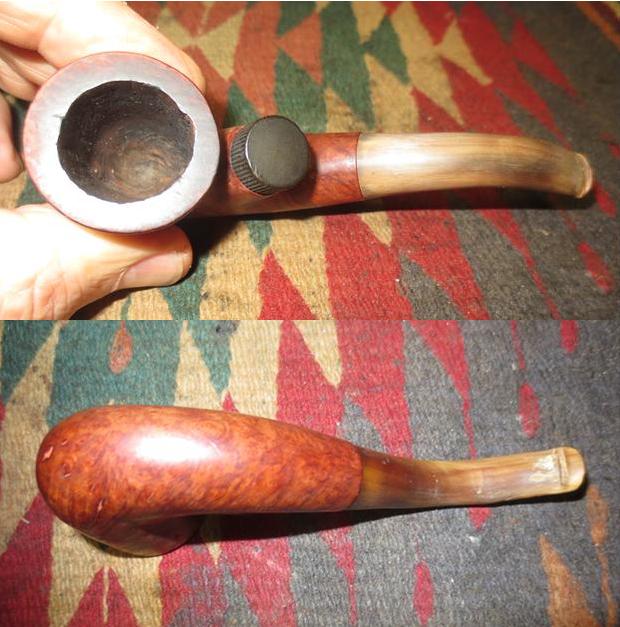
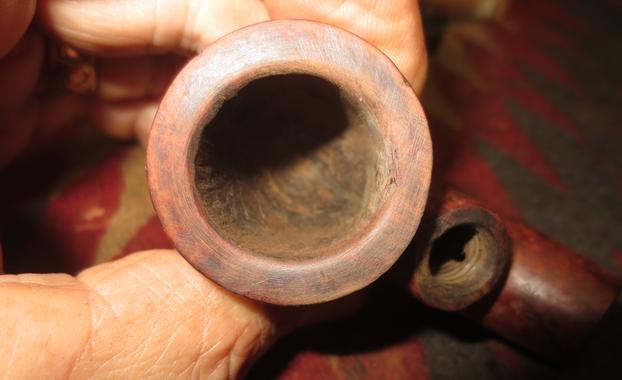
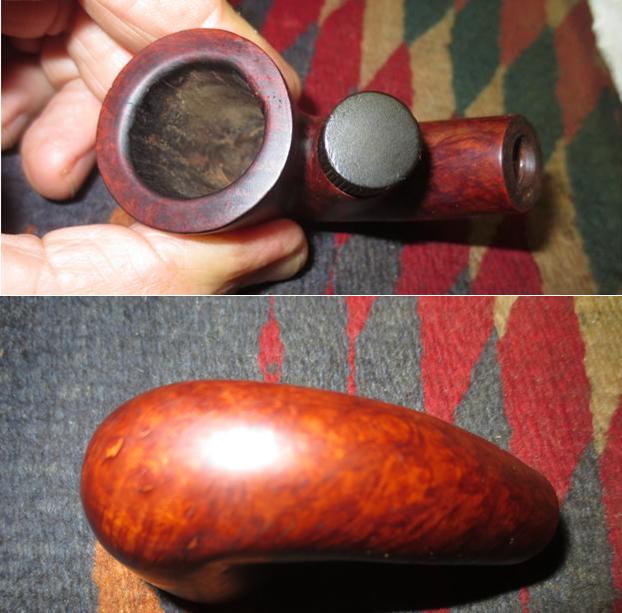
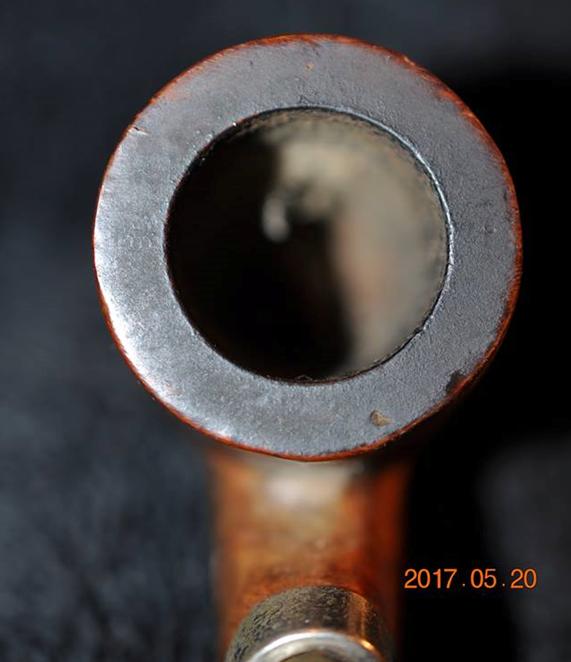
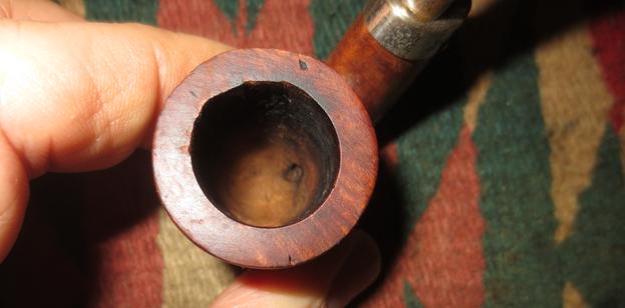
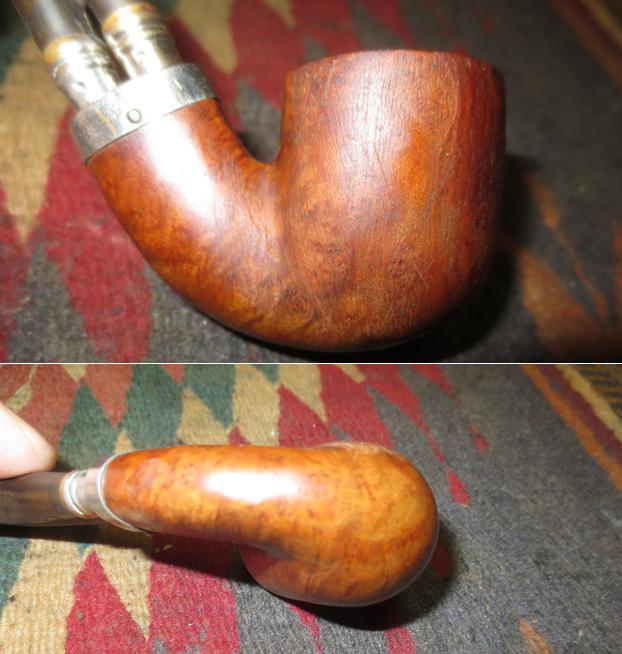
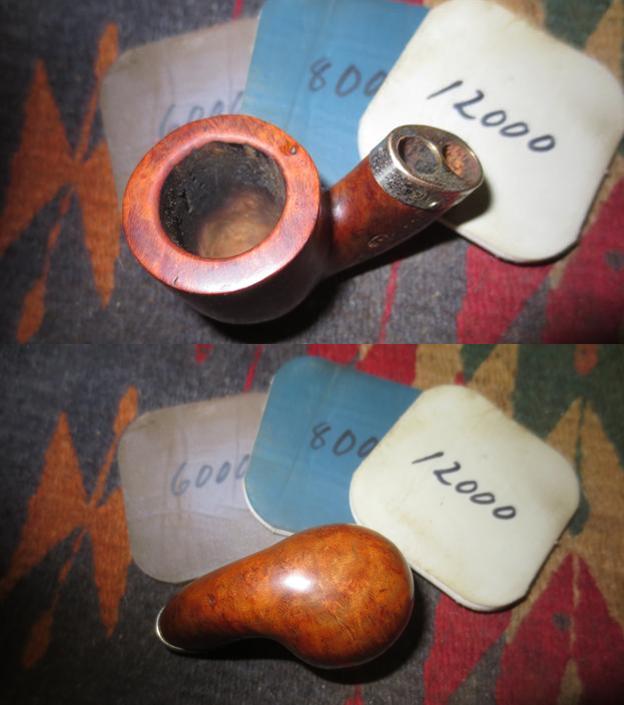
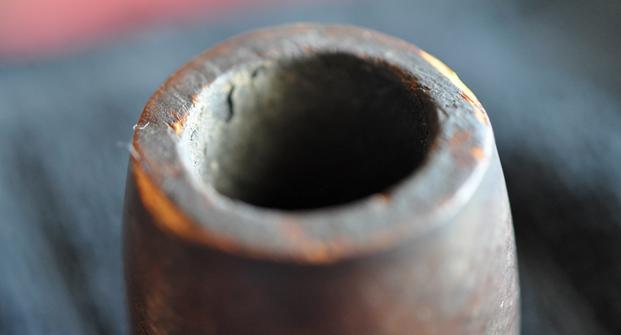
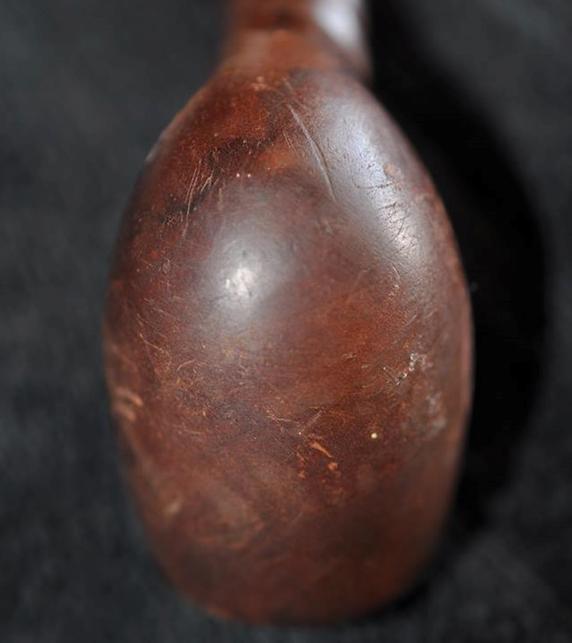
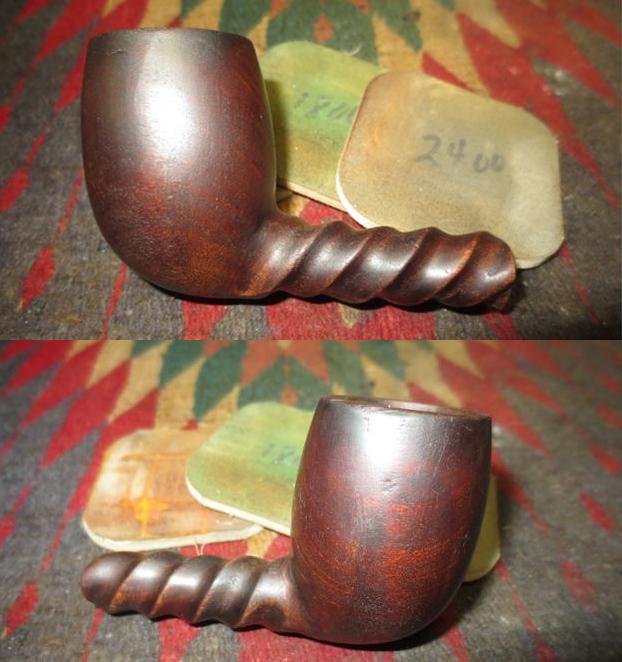
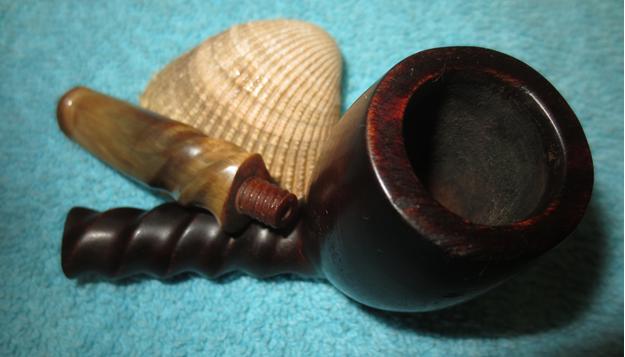
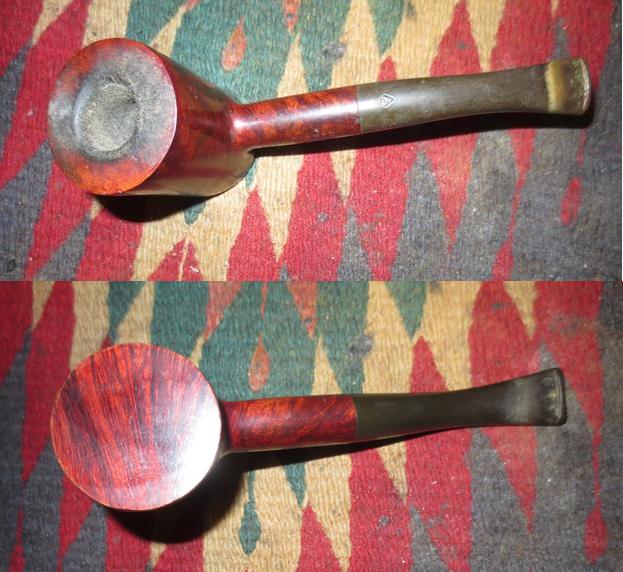
 The bit aside, the only real problem with the pipe, and it was a real problem to be sure, was the rim. Char and even the worst blistering from a close call with full-blown combustion, which so far I’ve had the opportunity to witness only with homemade corncobs, have often occasioned rise to heated anger but never cold feet. (I – tender my apologies for all three puns.) My mother for many years rose in the nursing world and enriched my vocabulary with terms the likes of crispy critter, with all of their brio, and sometimes spread cat cadavers across the dining room table, both extenders in place, on a single large thermo scientific wrap-around cover. Thus I looked at the “easy” heat damage and the acute and problematic jagged rim edge and unequal width of the bowl’s peak with a logical, methodical approach that began to form.
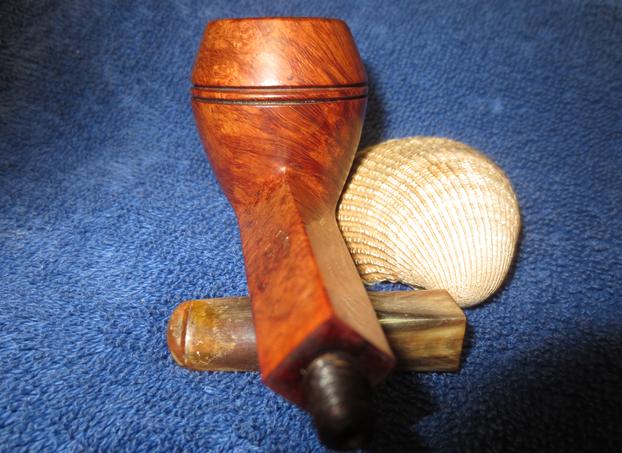
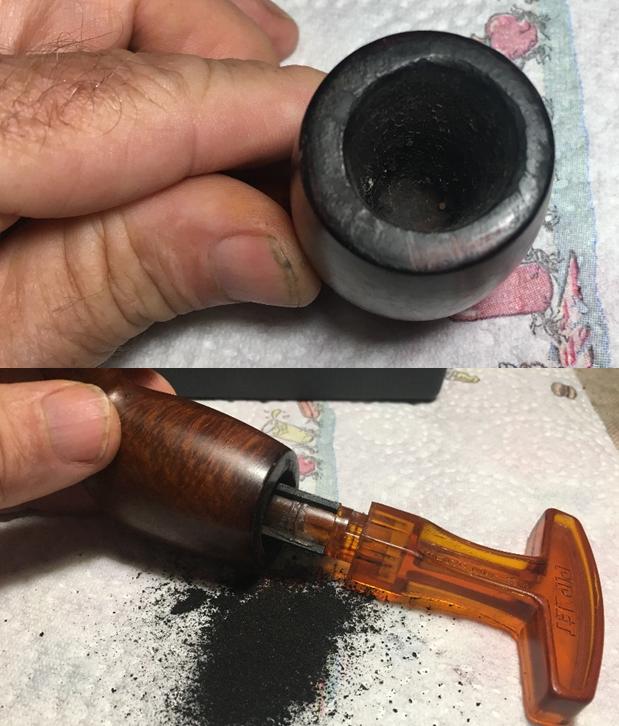
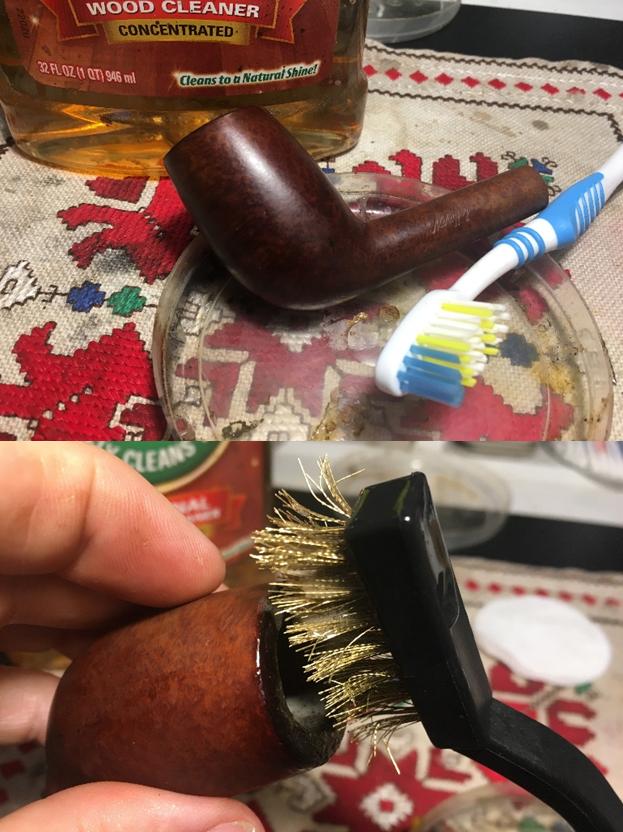
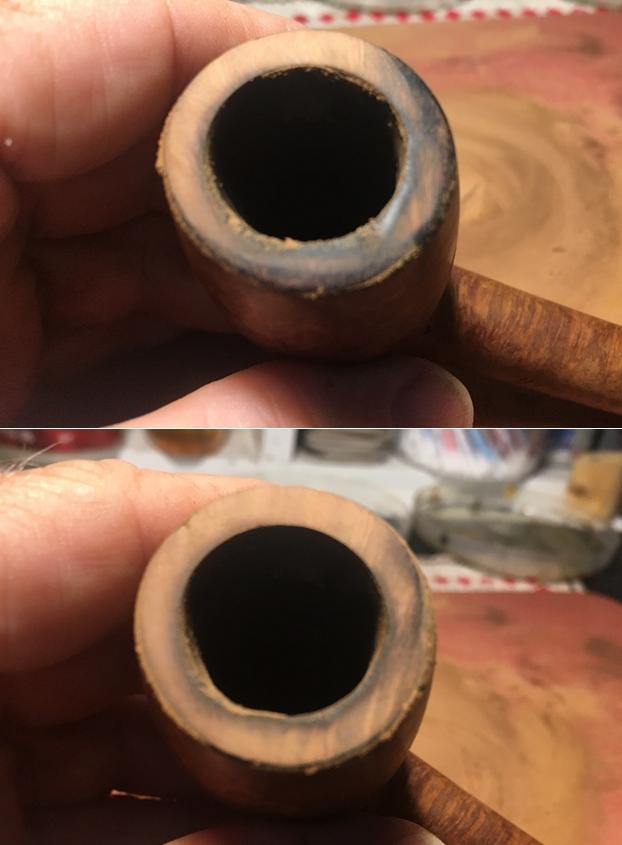
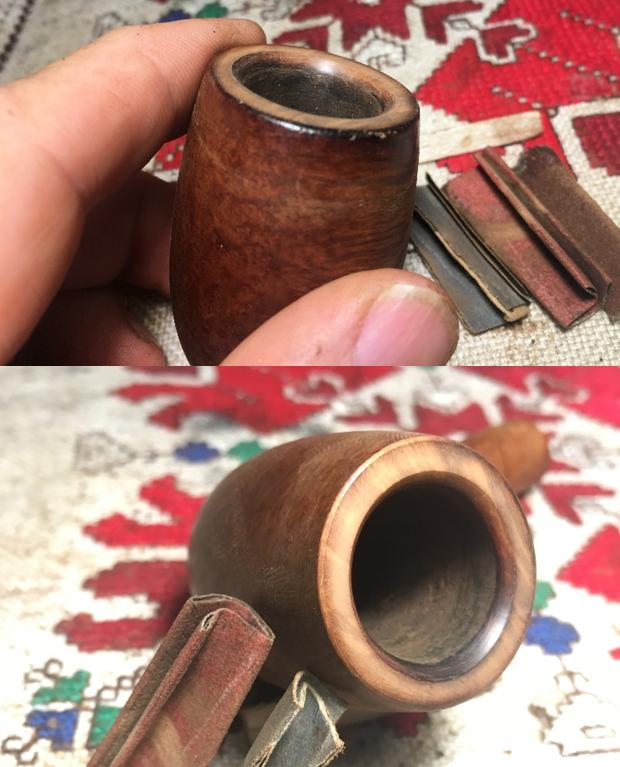
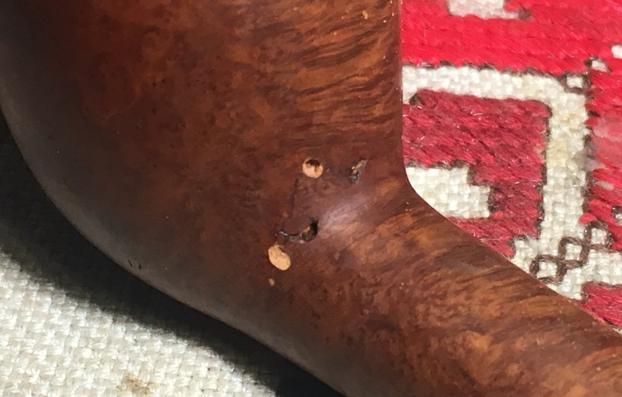
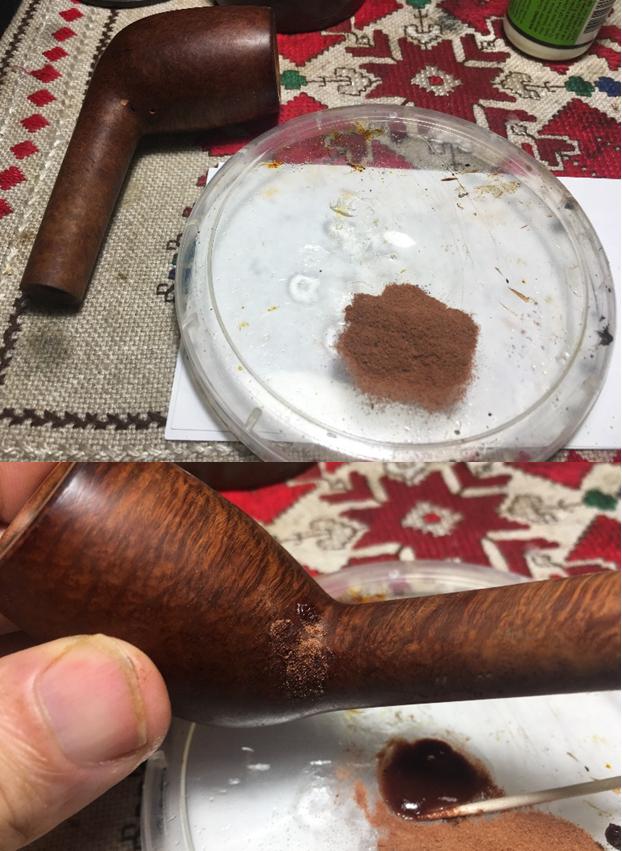
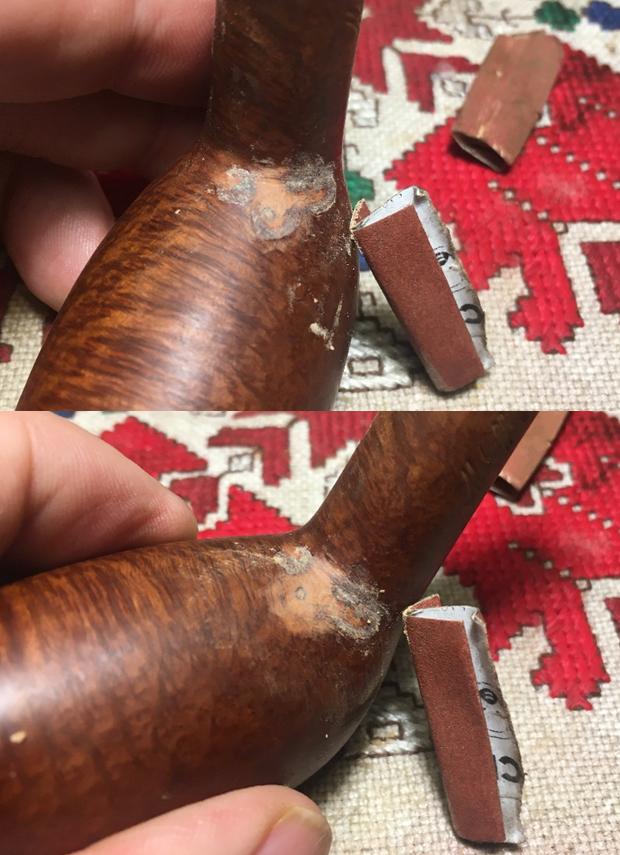
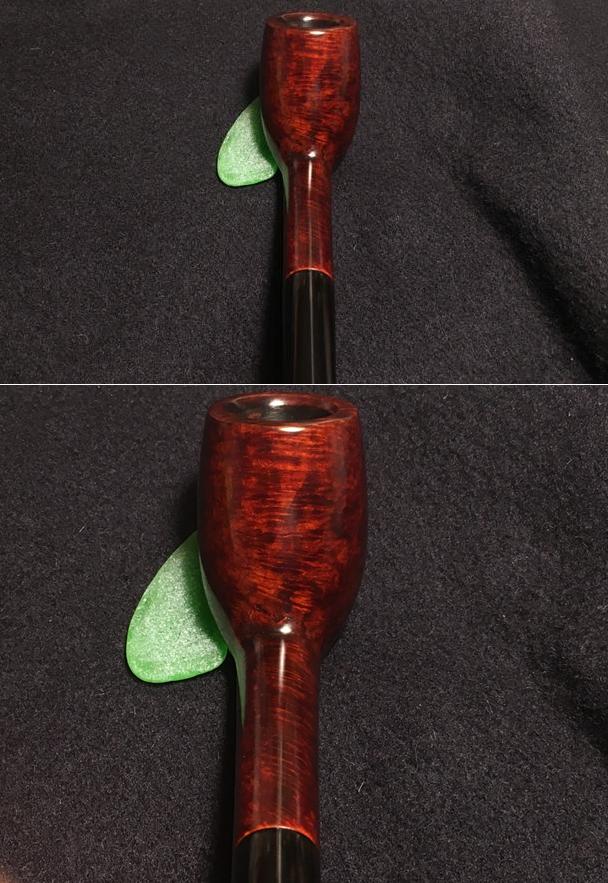
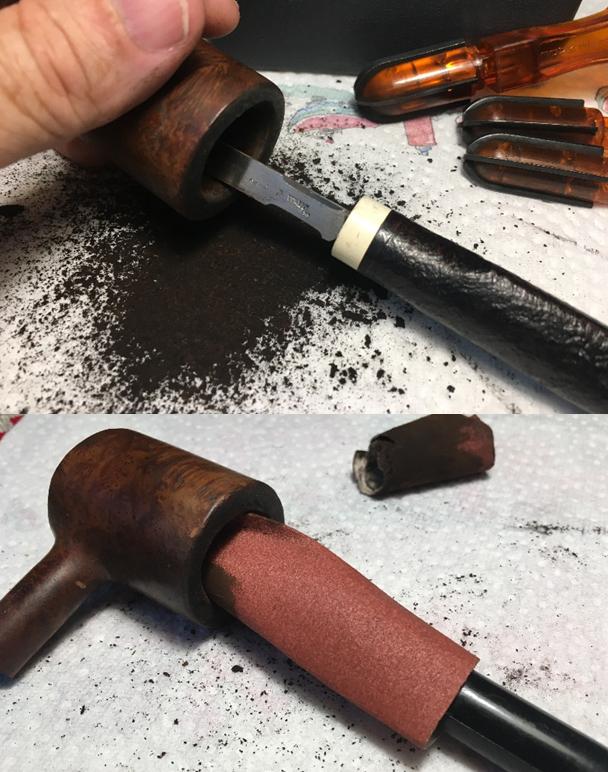
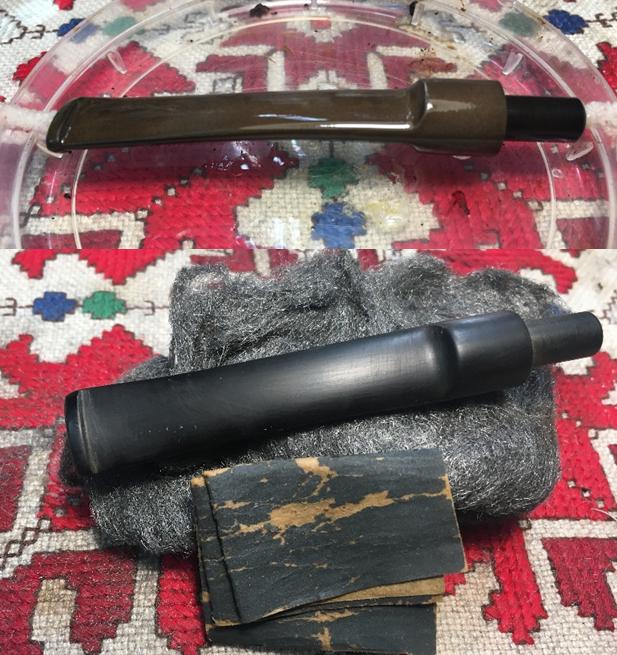
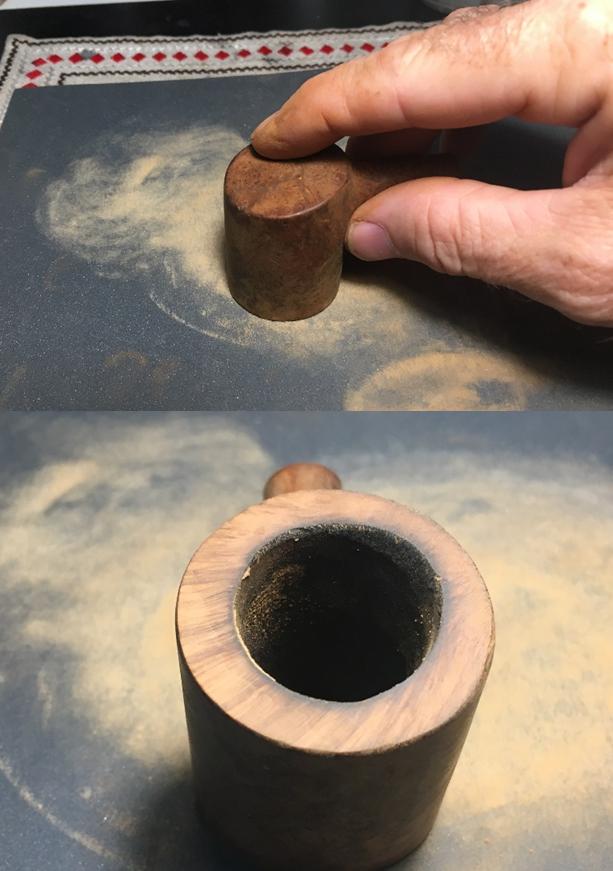
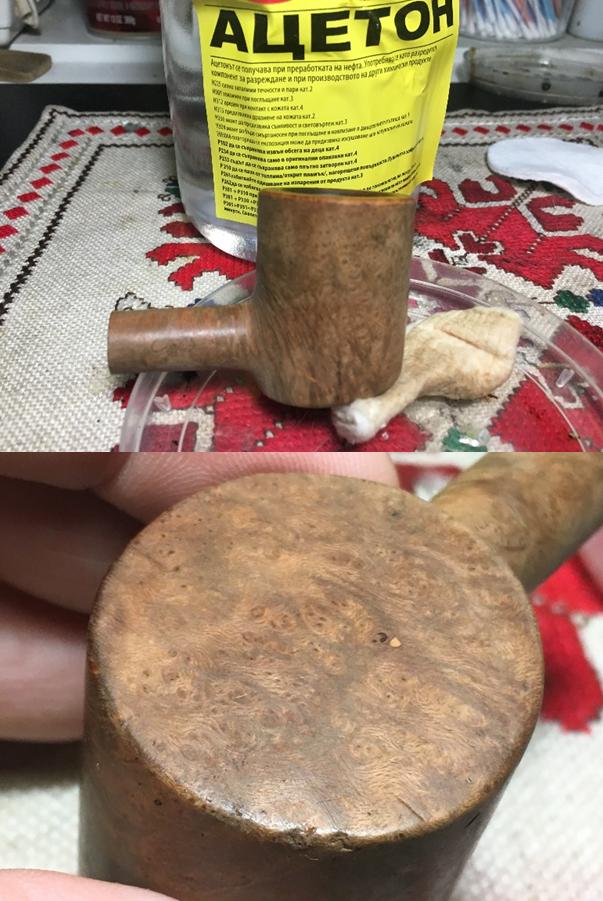
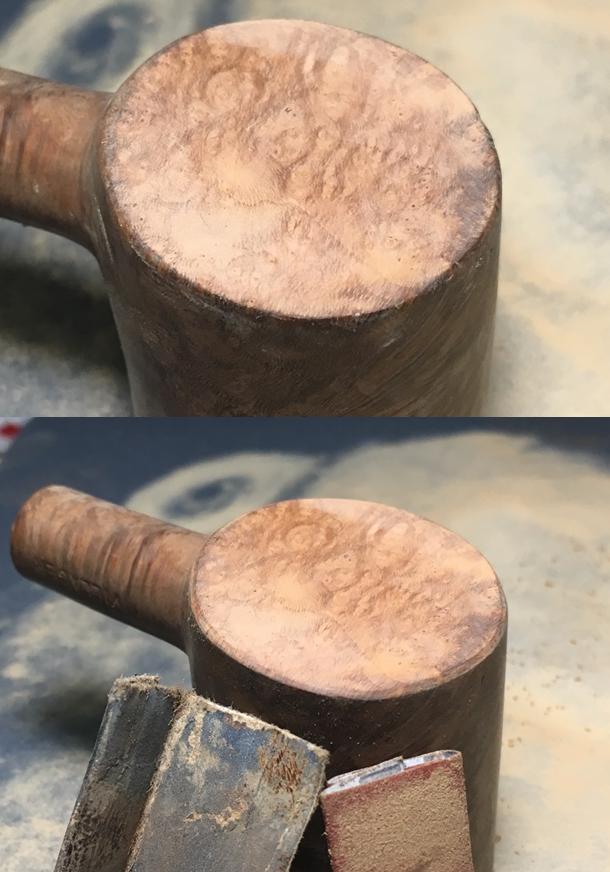
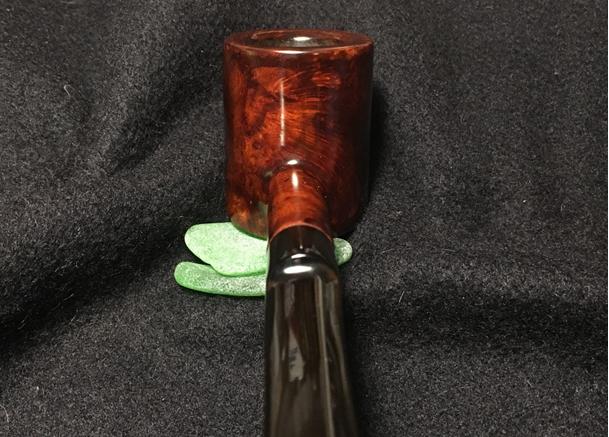
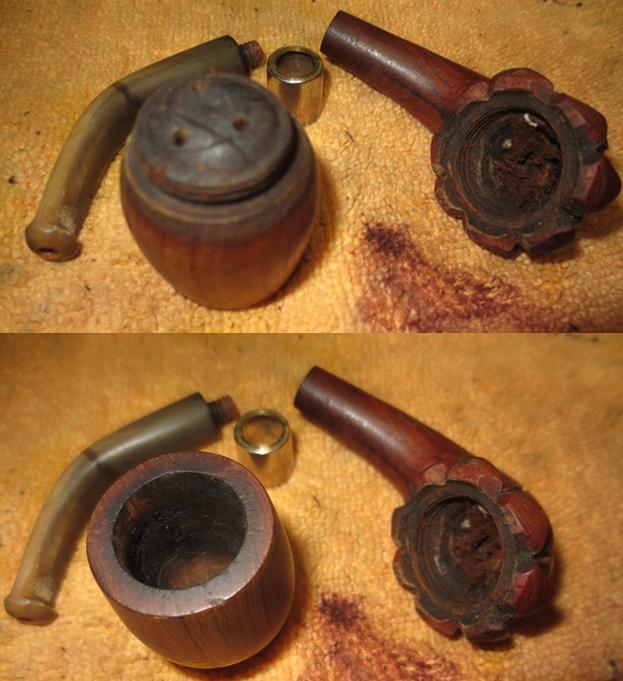
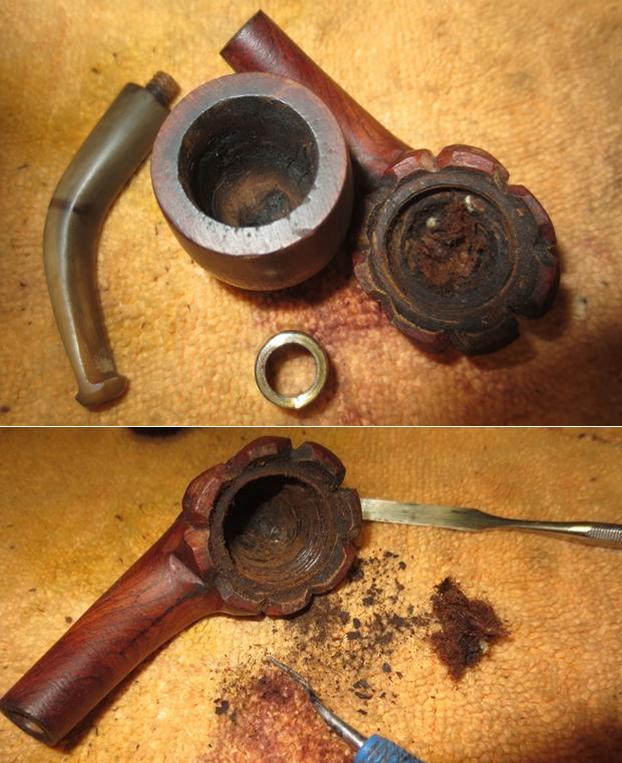
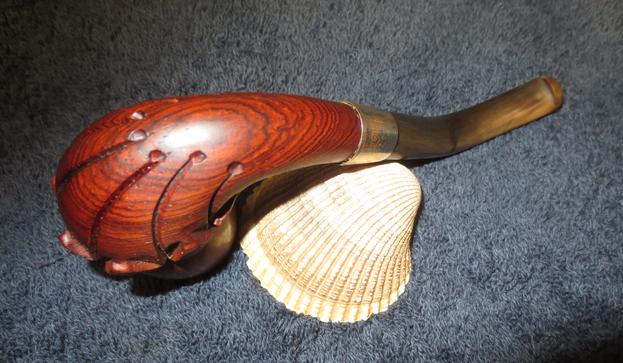
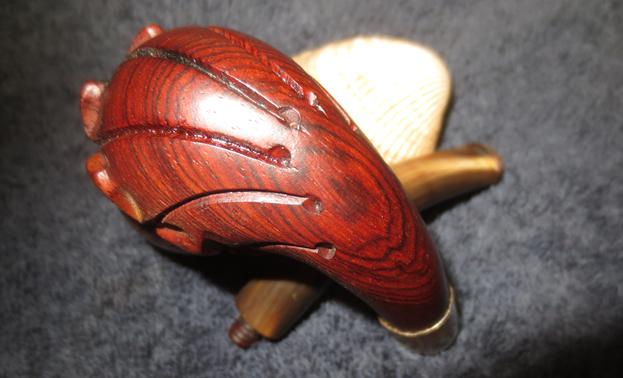
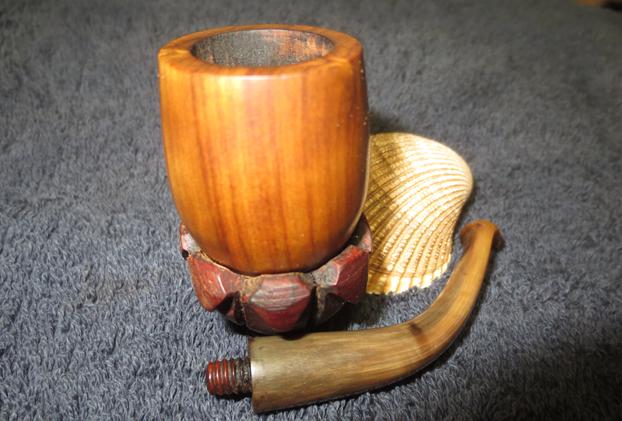
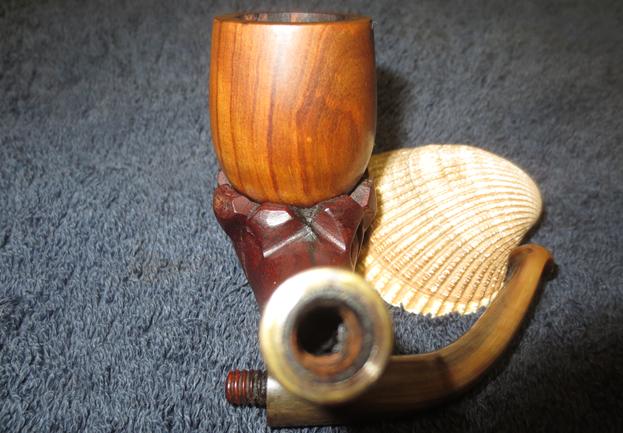
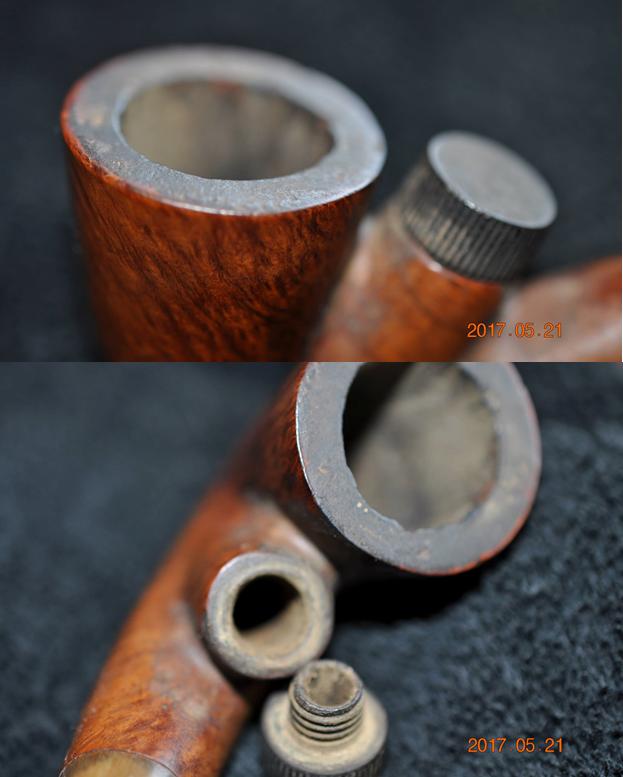
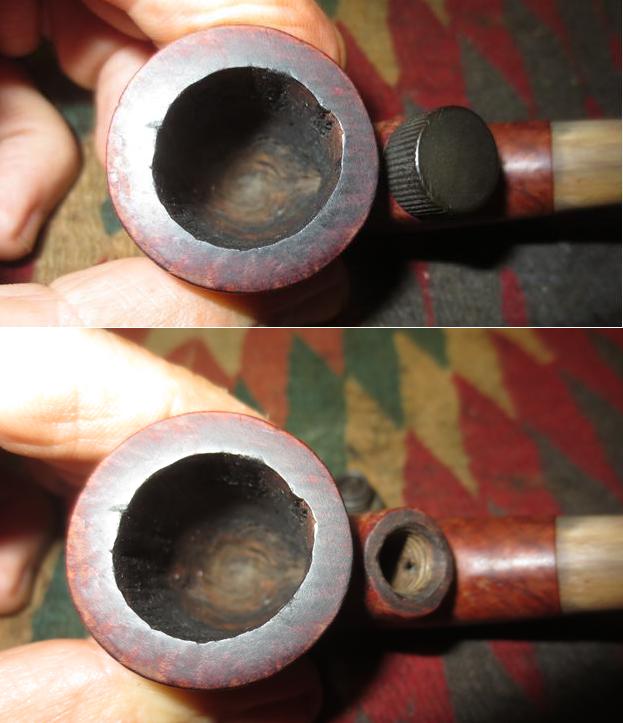
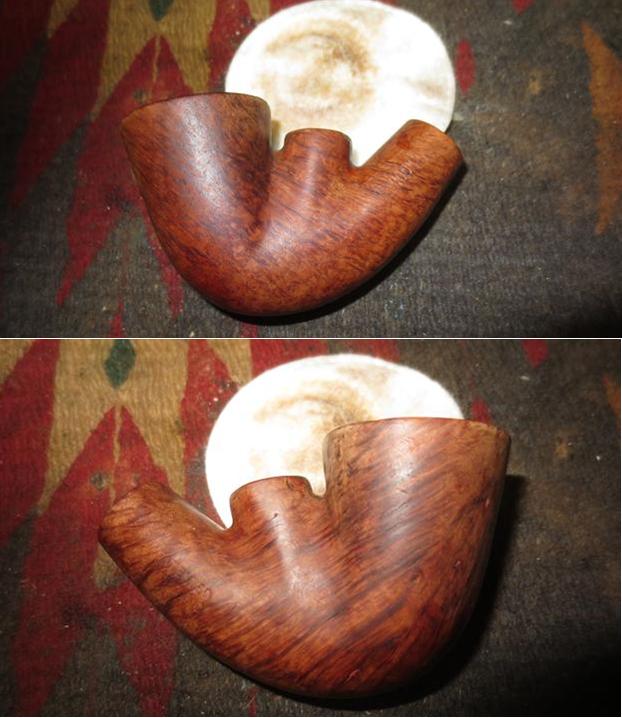
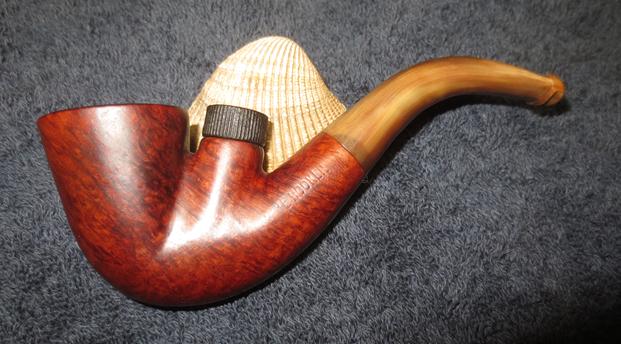
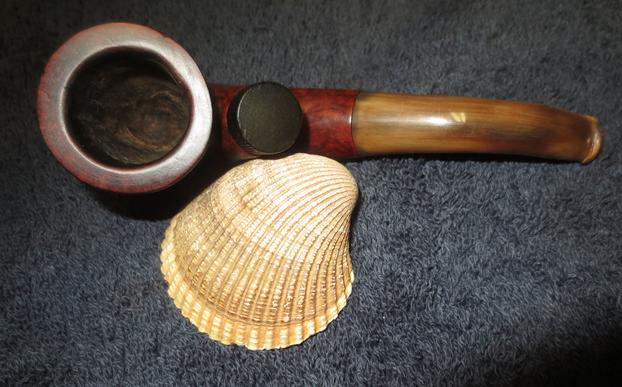
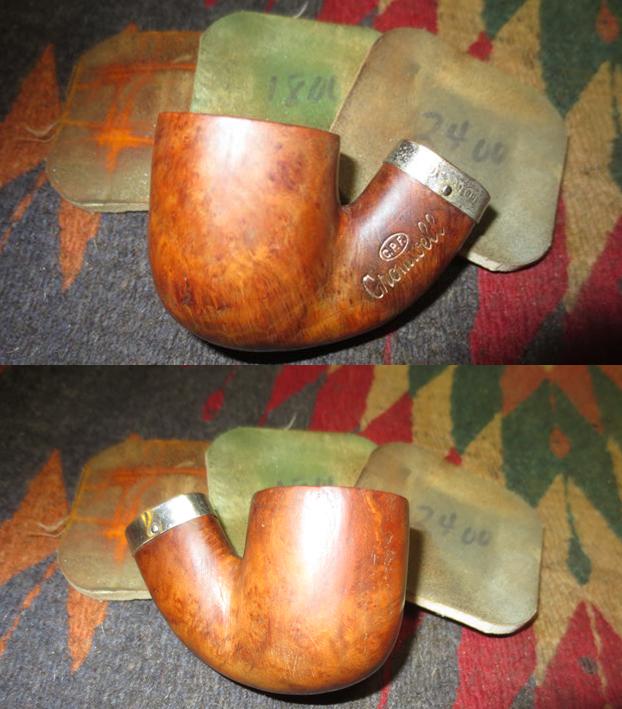
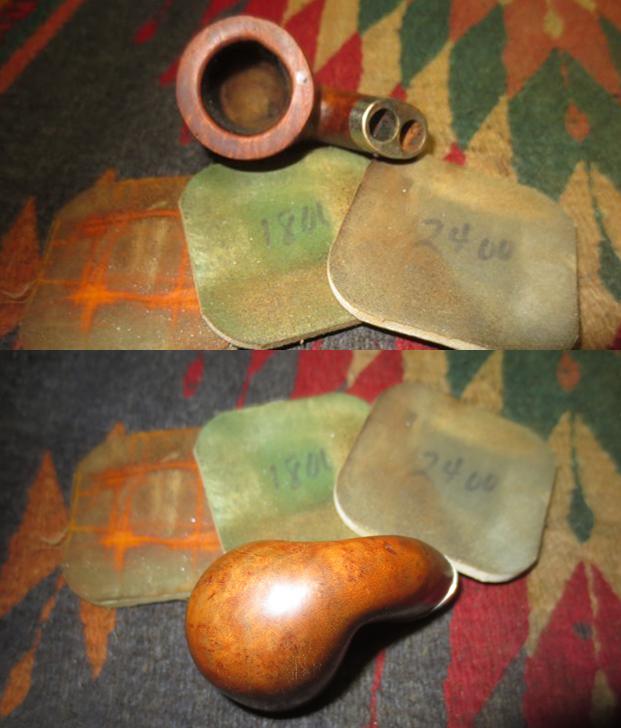
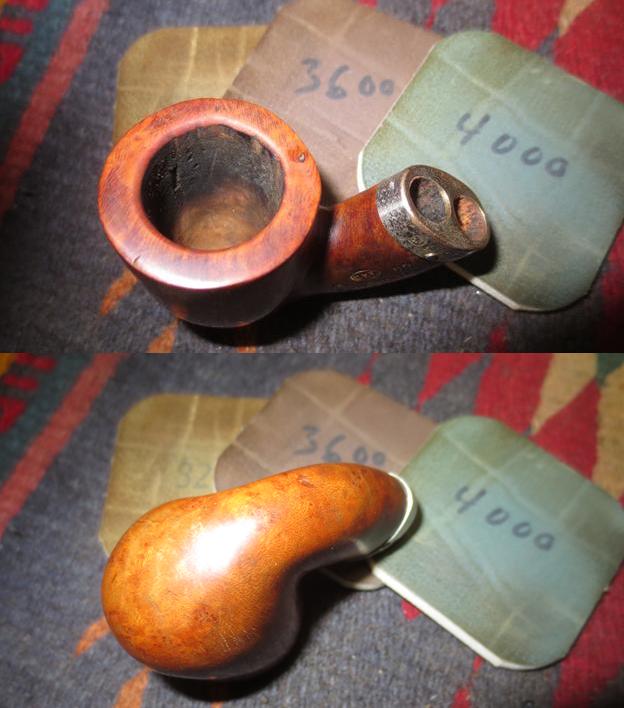
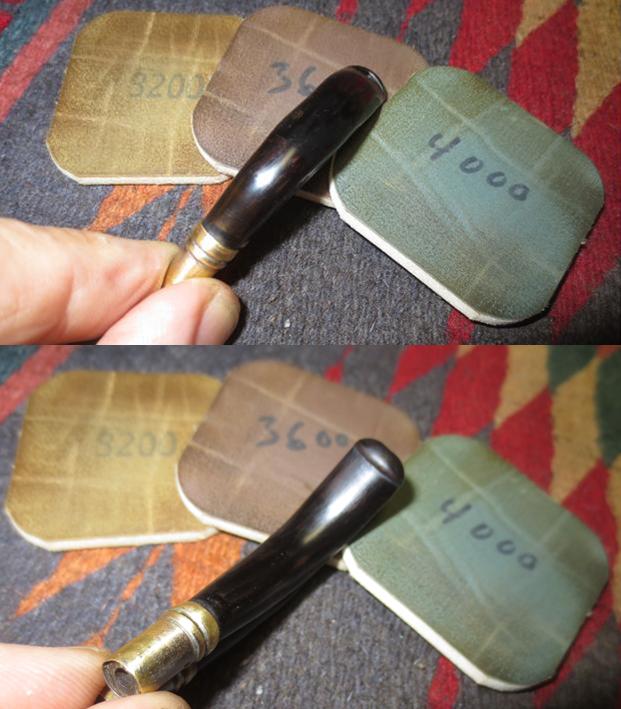
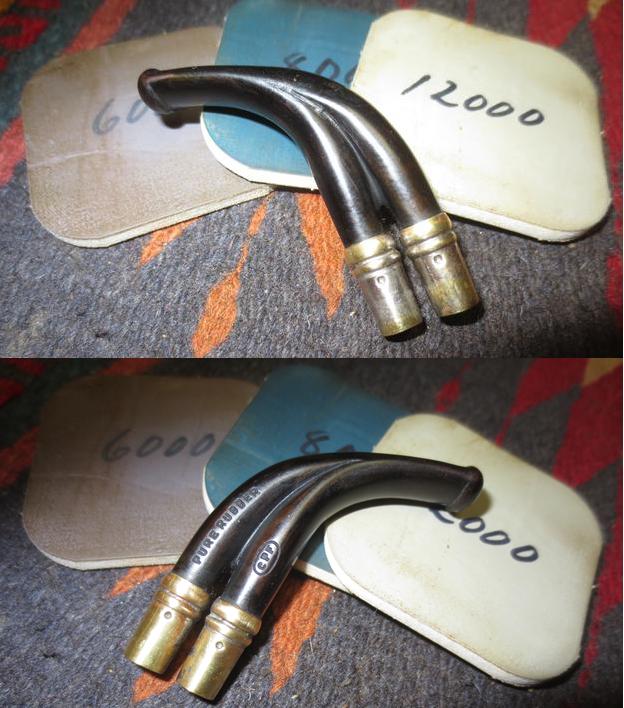
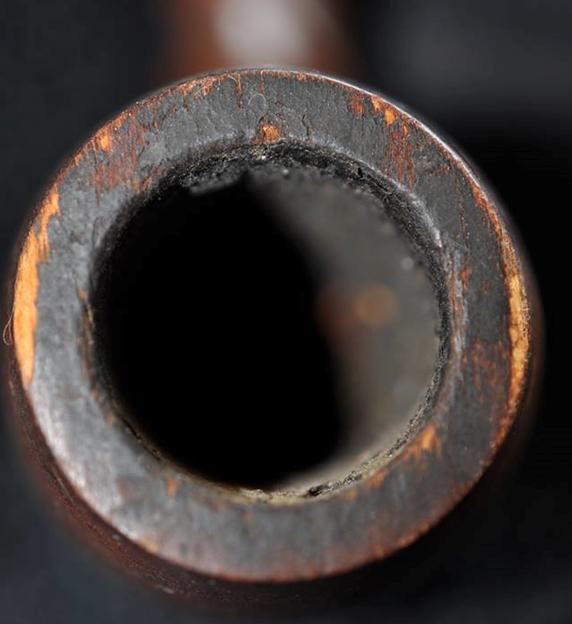
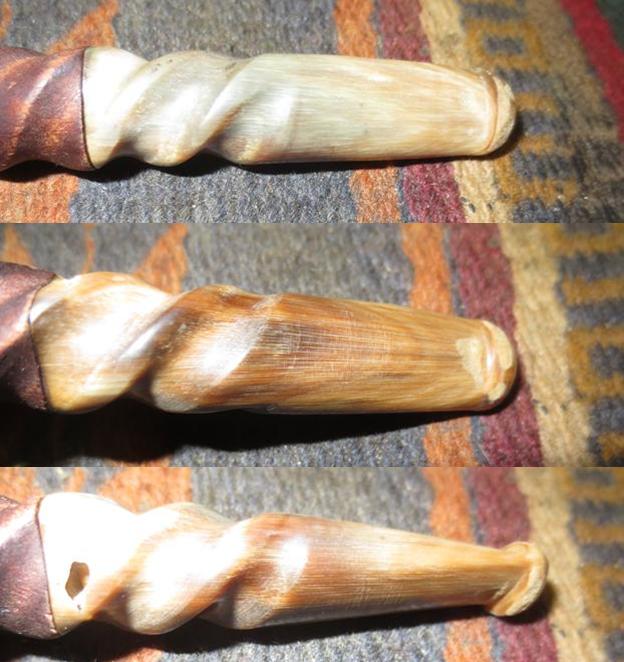
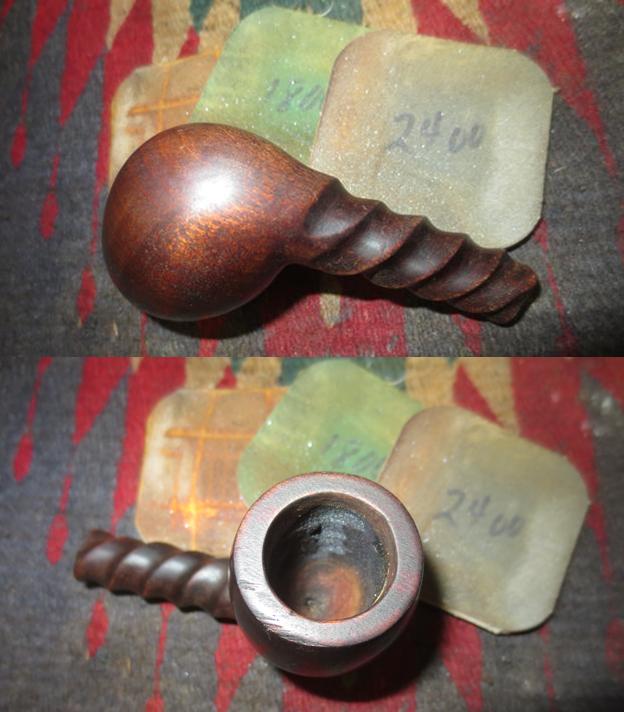
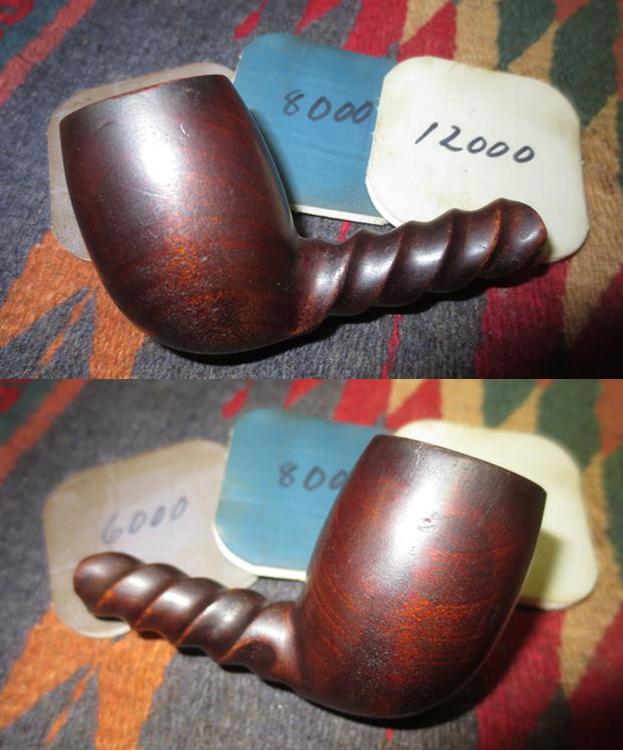
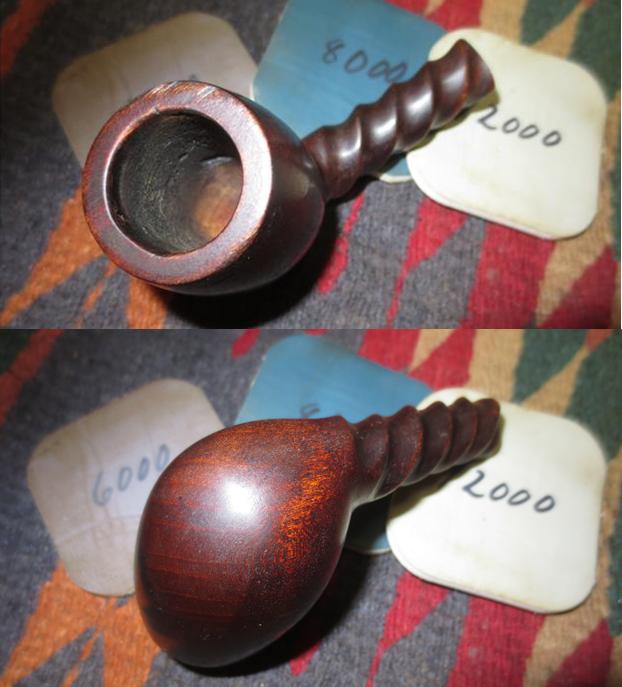
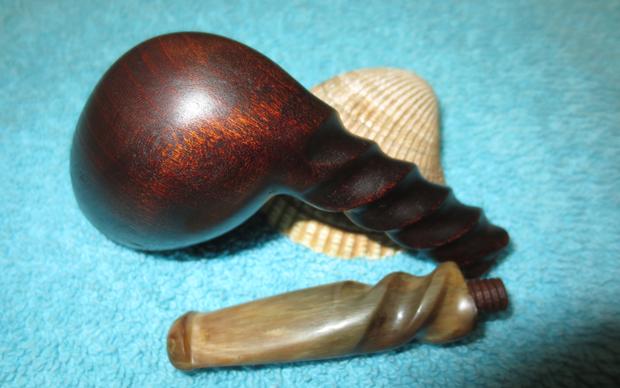
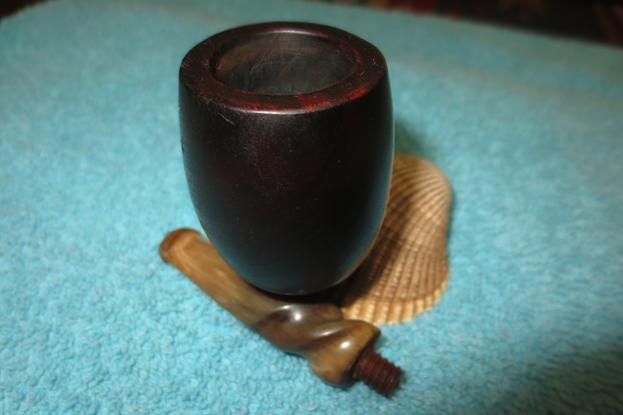
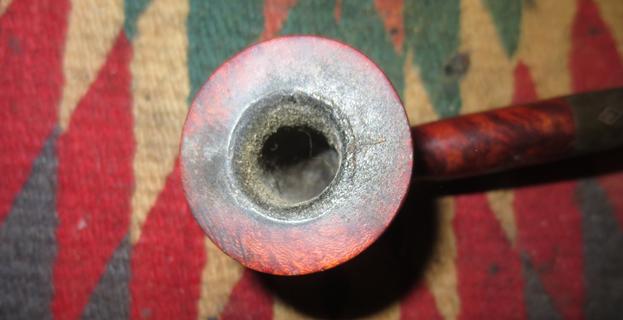
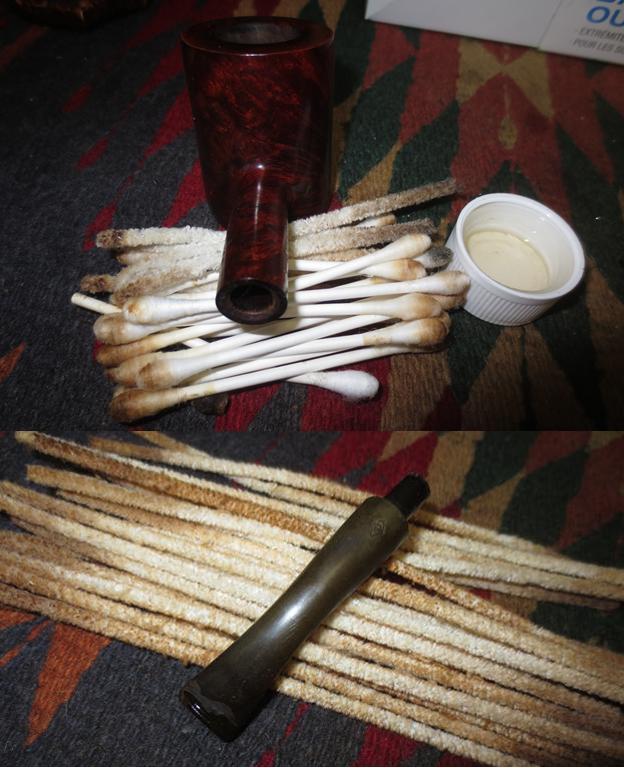
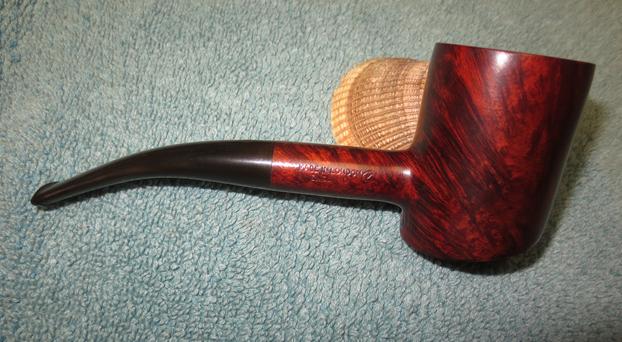
I expect to blog my restores with the methods fresh in my mind. There are even some of the jobs I hold special from the past few years that I’m sure I’ll never forget a single detail. Not to suggest this was common or insignificant, but after nine months I can’t remember the specifics of how I accomplished the result of the first shot below. The chamber had to be reamed, and when I do that I always follow up with 150-, 220- and 320-grit paper, so that’s a given. I’m guessing I started with micro mesh on the rim just for the sake of trying and found it ineffective. Then I would have turned to sandpaper and chosen 220 with the same rationale as the micro mesh but opted for 180 with the usual progression up to 400 before starting in on micro mesh and stopping when I realized I would have to solve the other obvious problems with more drastic steps. Here are the results I just described, and after the drastic measure of a file.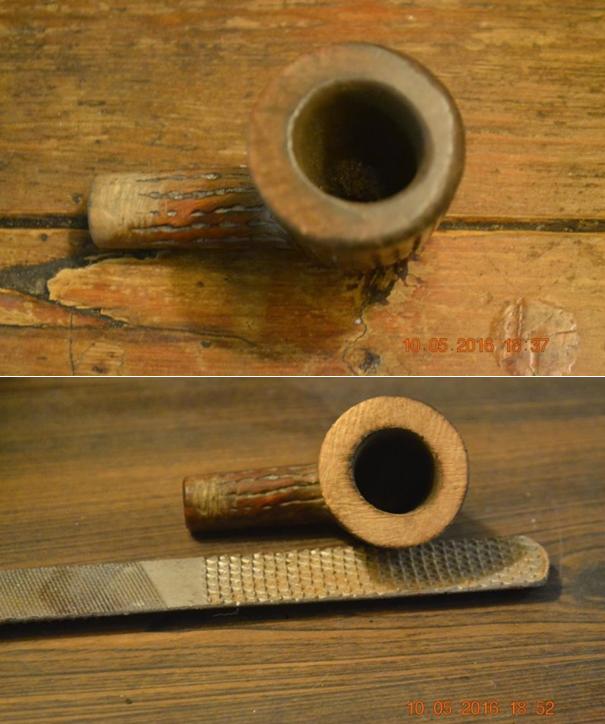 Healing the wounds of a procedure I consider radical enough that I have only used it less than the number of fingers I have on a hand (or, rather, considering the thumb is not technically a finger, the same number), in fact is not all that difficult in most cases, and seeing the result of the steps is always a great pleasure. I used 180-, 220-, 320- and 400-grit paper, and then 1500-12000 micromesh on the rim.
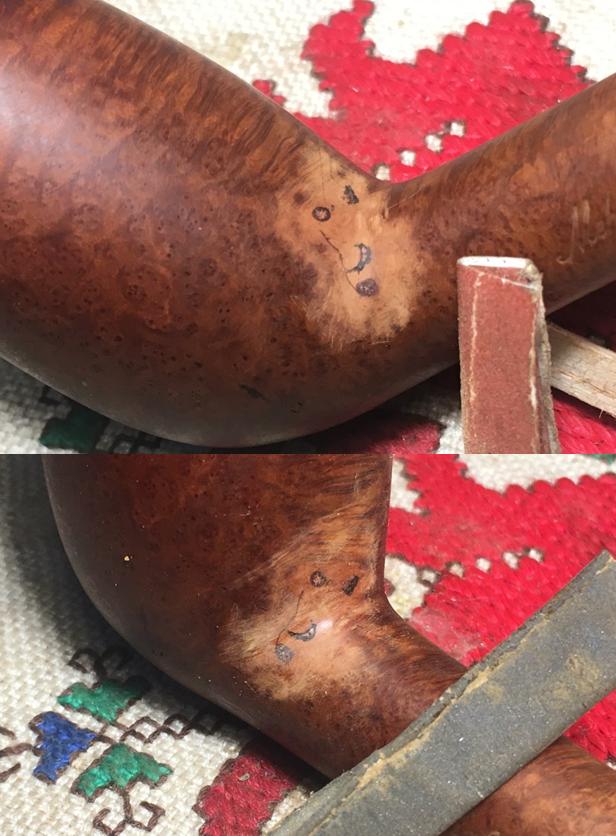
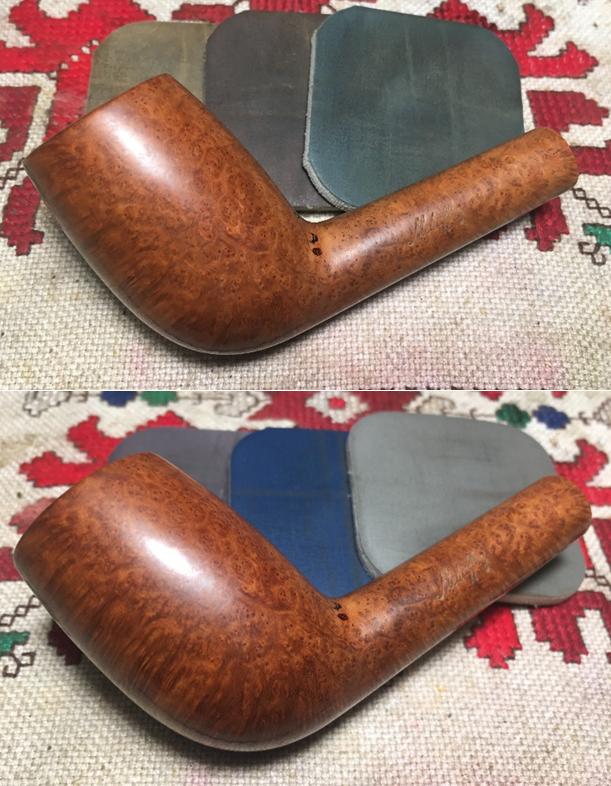
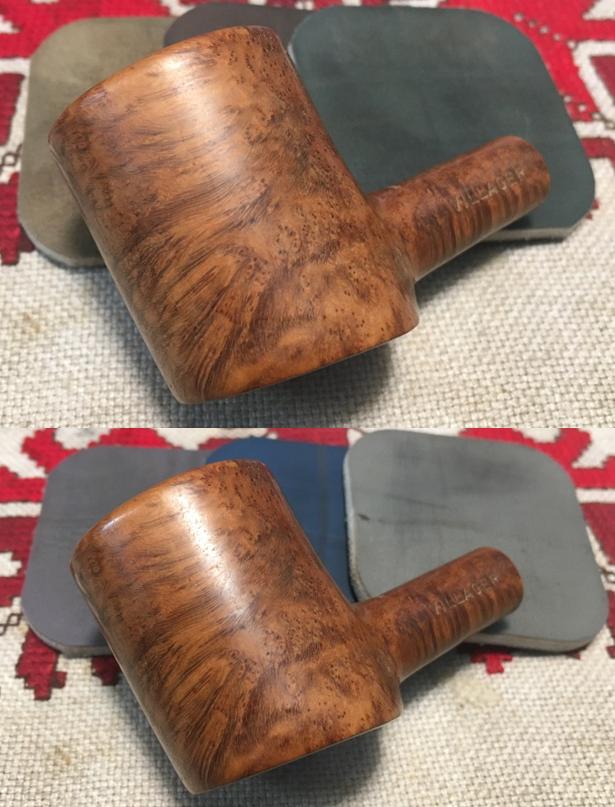
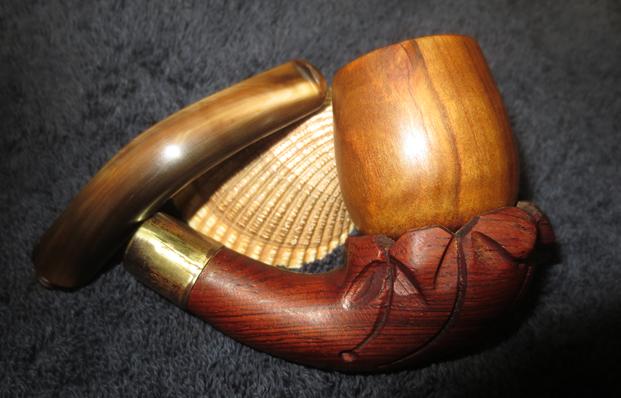
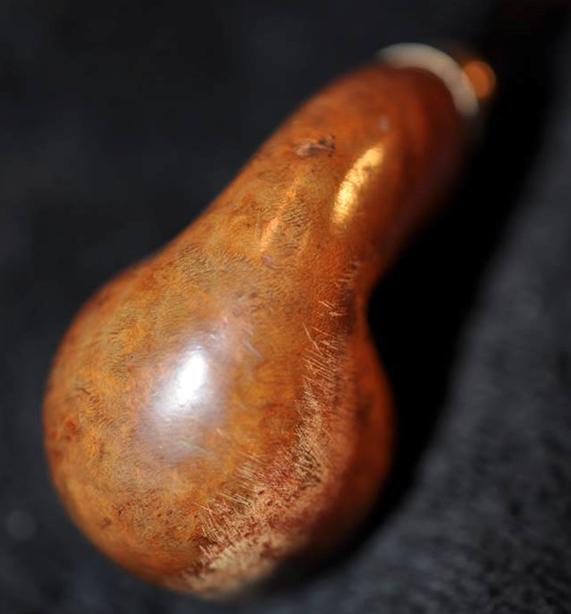
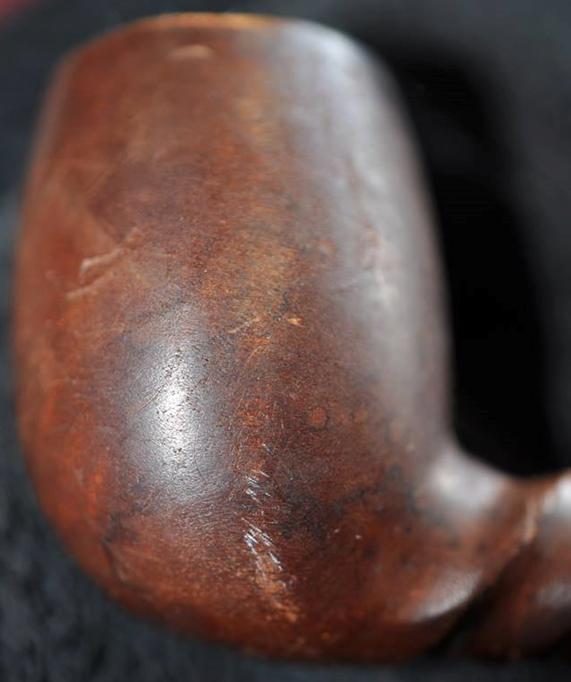
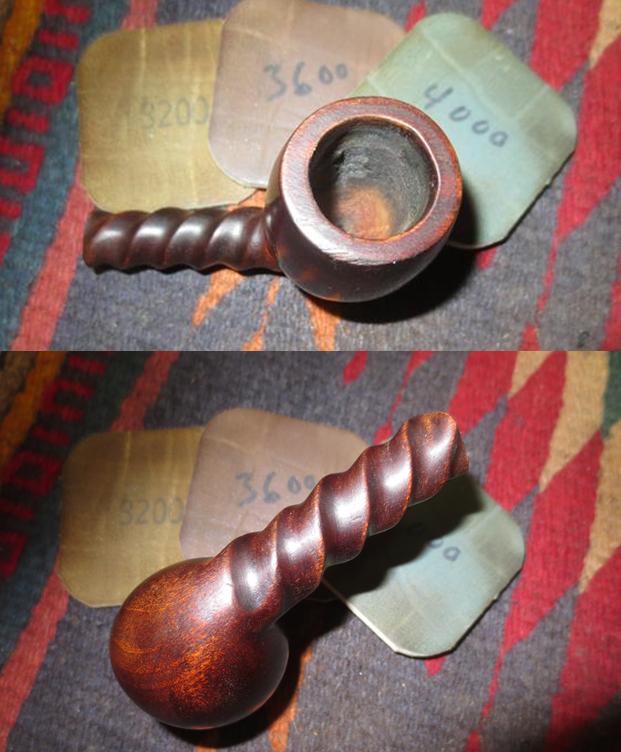
 Then, I began the rest of the outer stummel. Starting with super fine “0000” steel wool to lighten the color of the wood and easily get between the grooves, I switched to the full micro mesh.
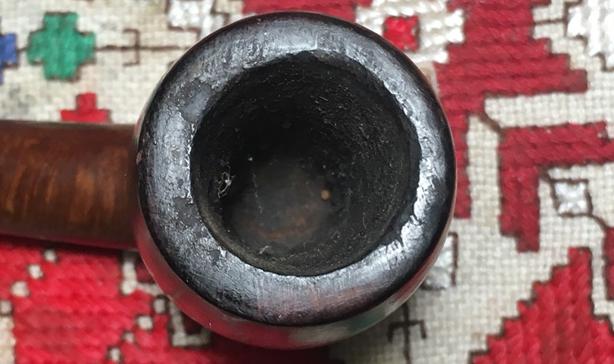
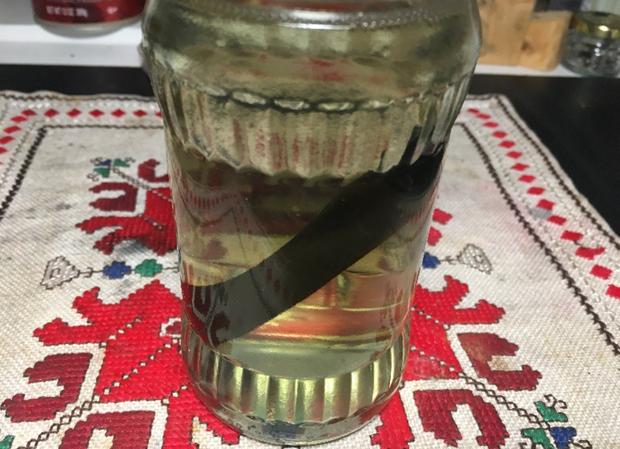
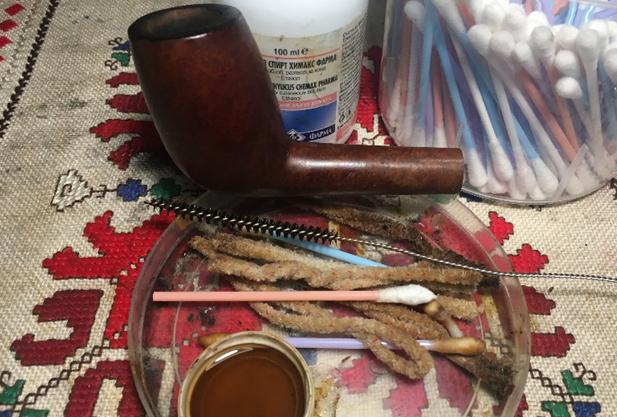
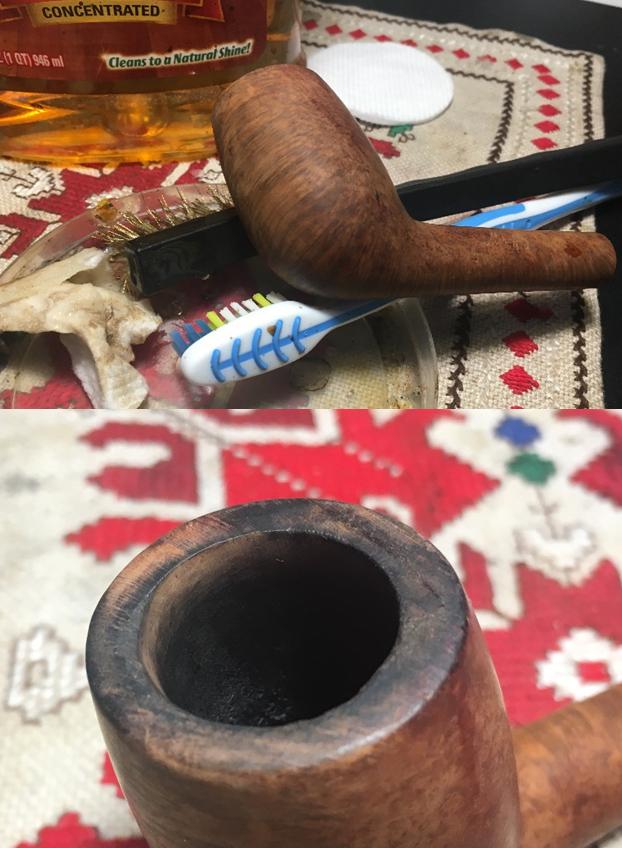
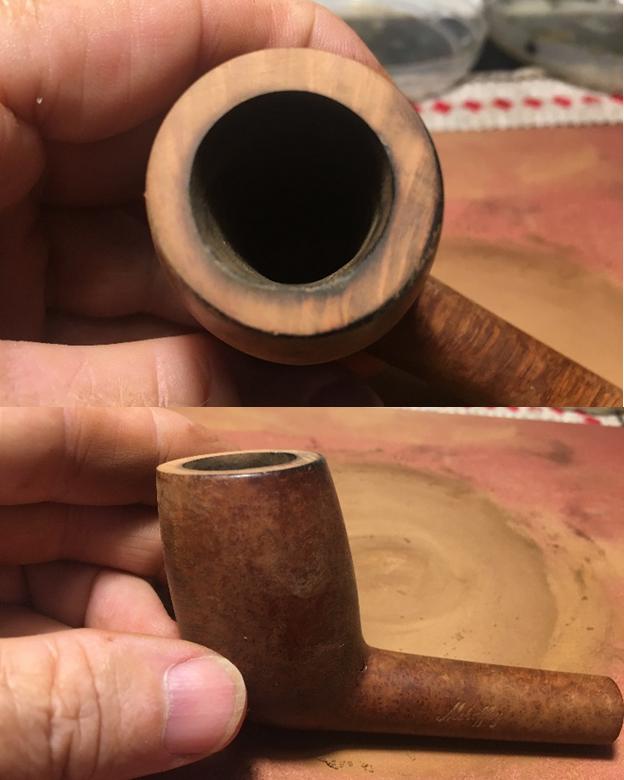
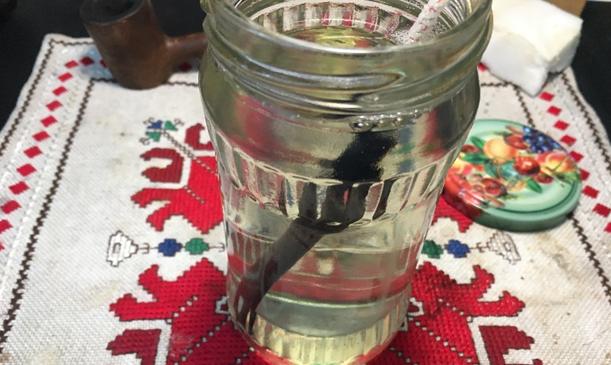
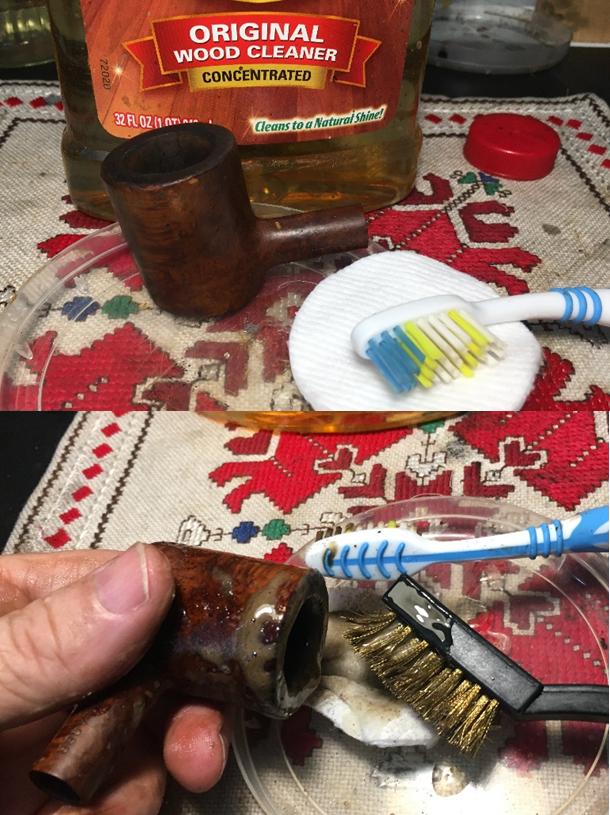
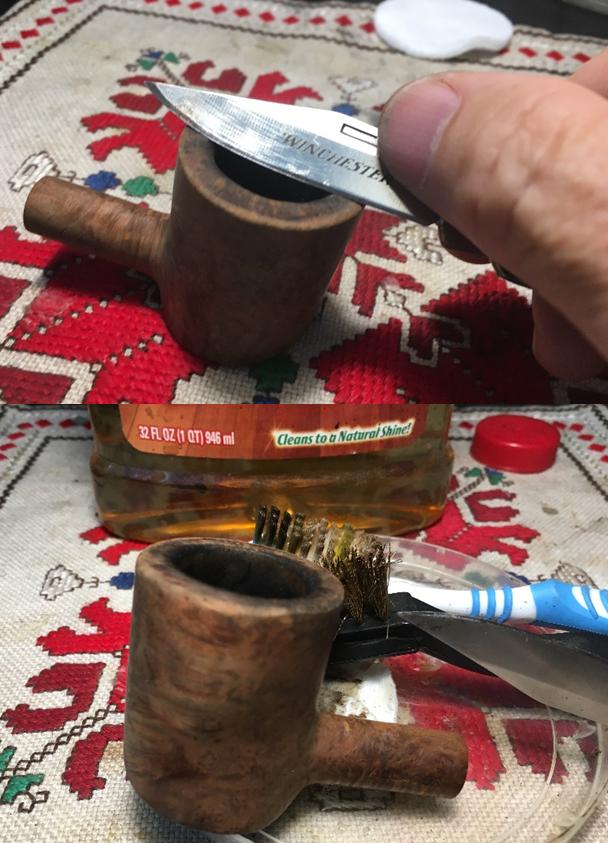
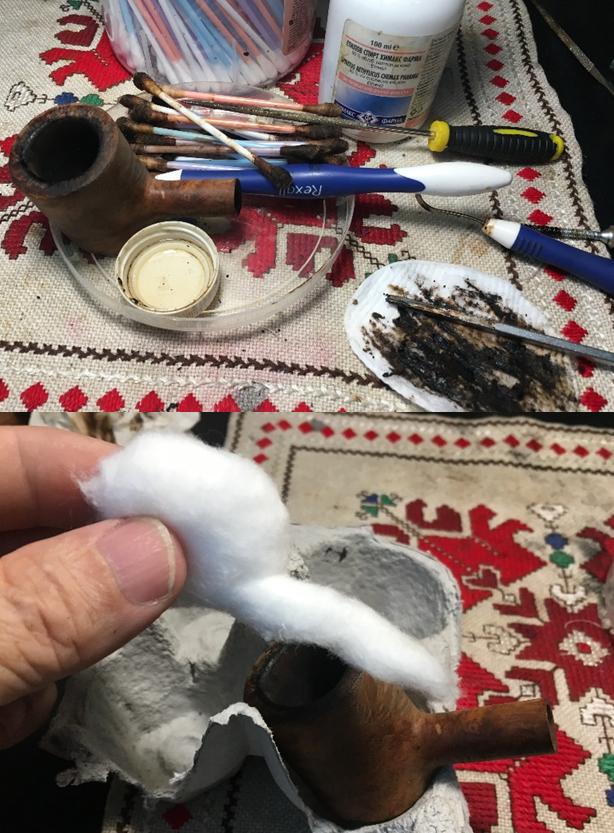
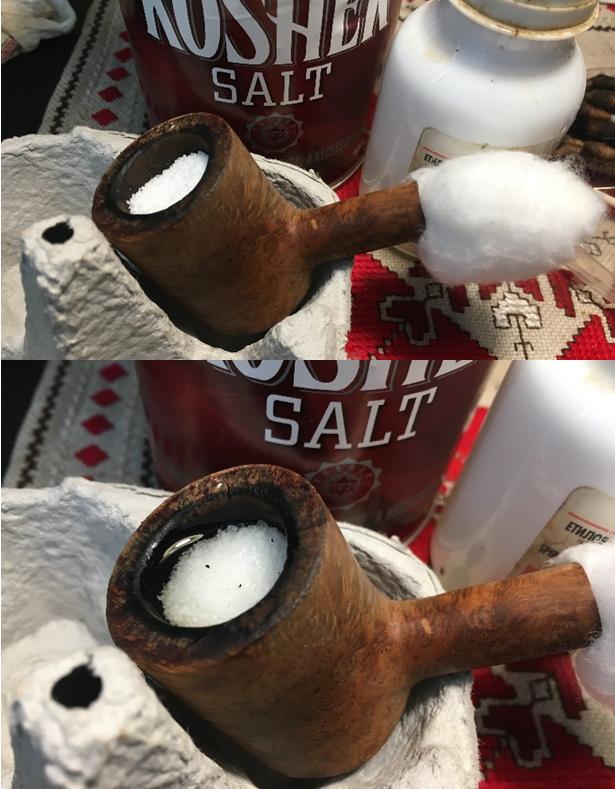
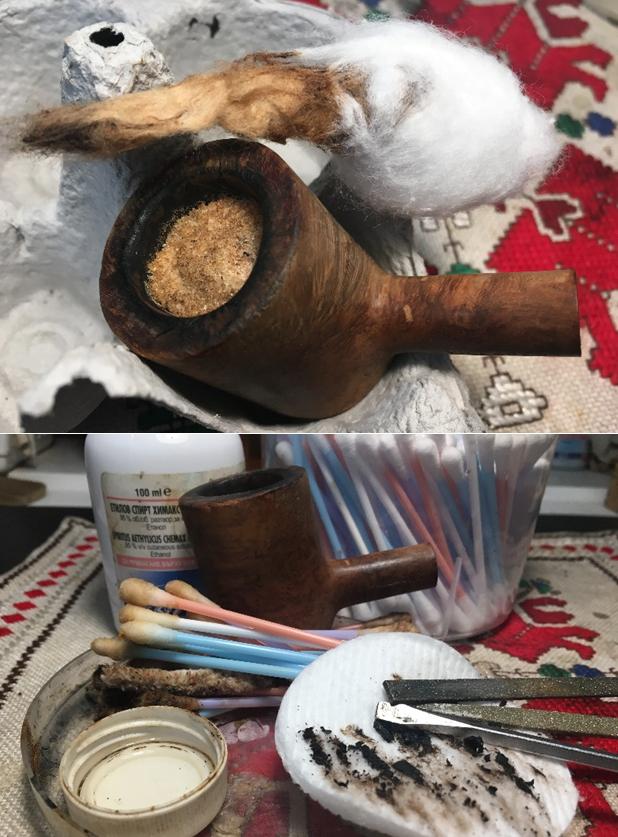
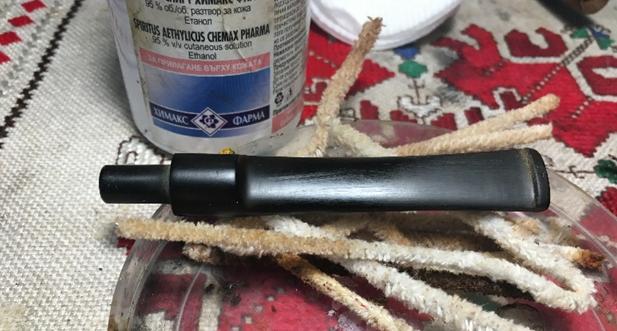
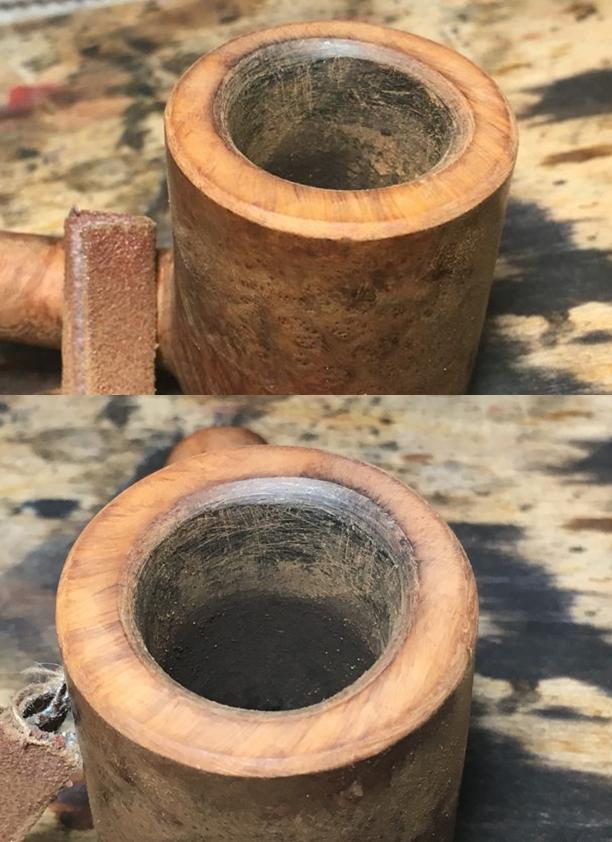
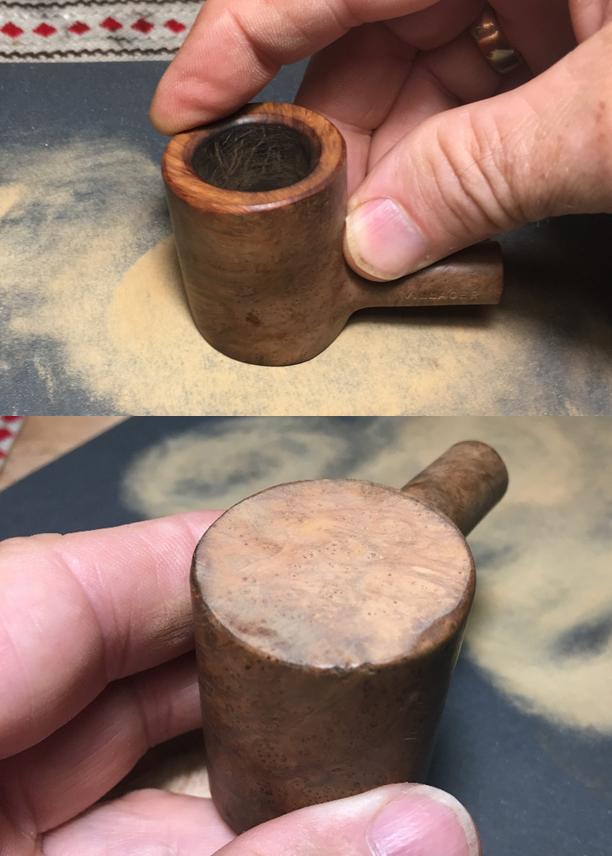
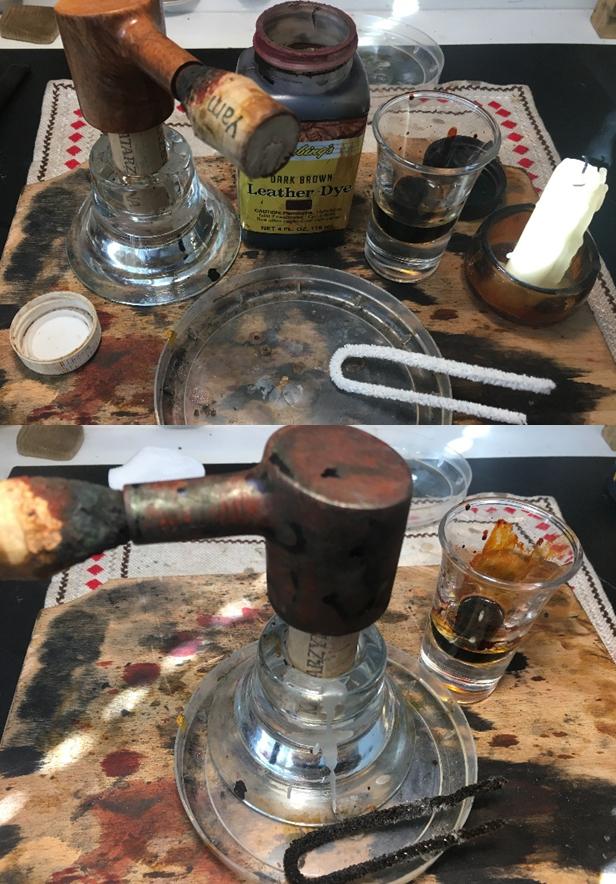
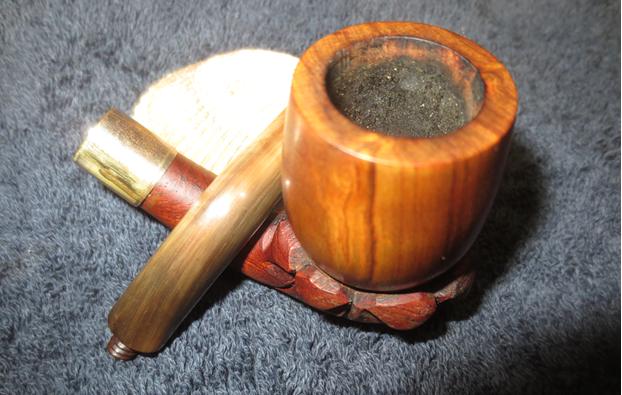
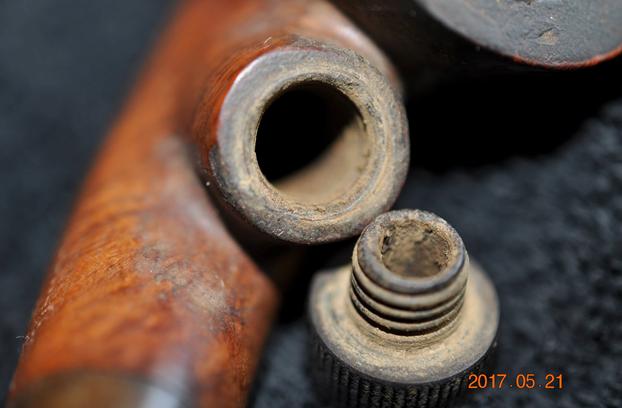
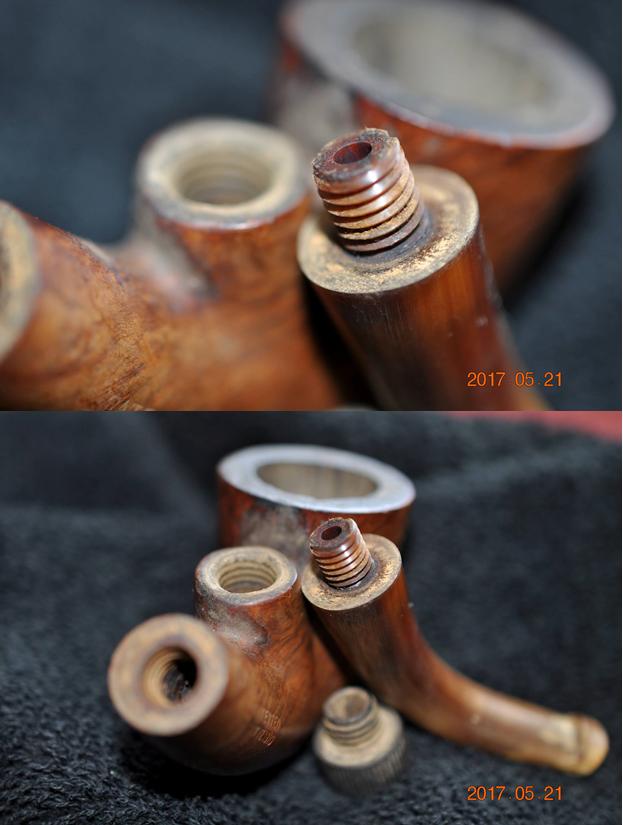
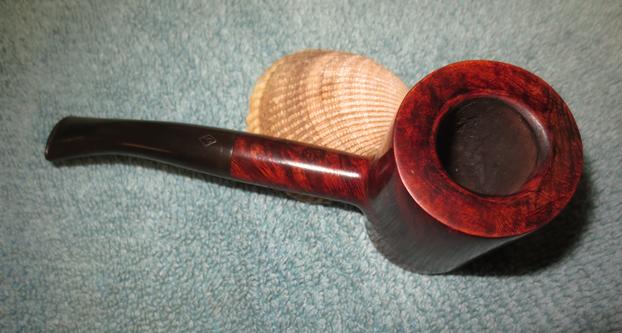
 It was time for the retort. As always, I was glad I did it, because this little stummel was filthy! I have done as many as six retorts on a single pipe, and this one “only” needed three, all of them clearer. I had no bit to connect to the shank and therefore had to stretch the rubber connector over the opening. I show only the first round below. I also followed the final retort with three cleaners dipped in alcohol alternated with three dry, all of which came out clean.
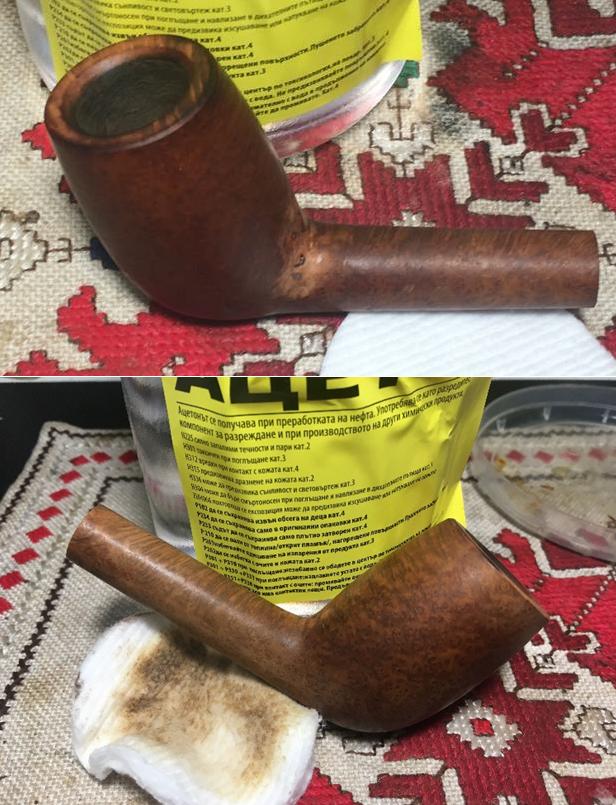
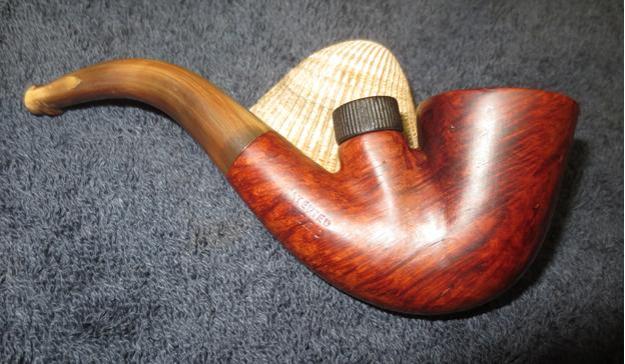
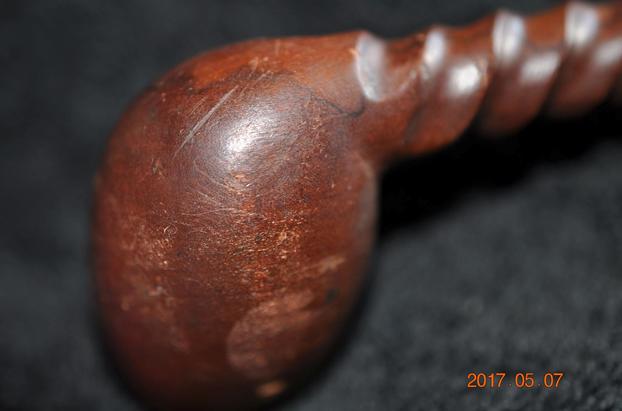
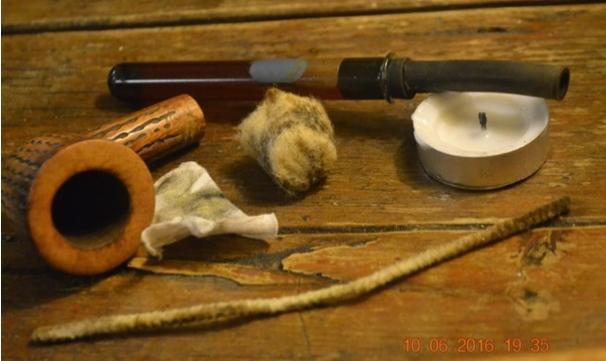 Applying alcohol-based leather stain and flaming it is always fun, and I used Fiebings Medium Brown on all but the rim to leave a definite two-tone. When it cooled, I wiped away the char and a little extra darkness with 8000 micro mesh.
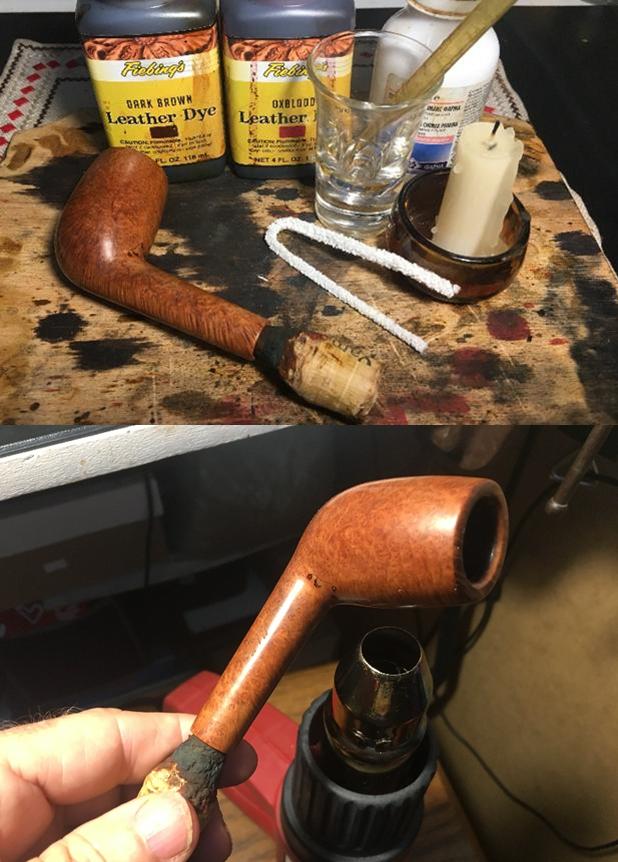
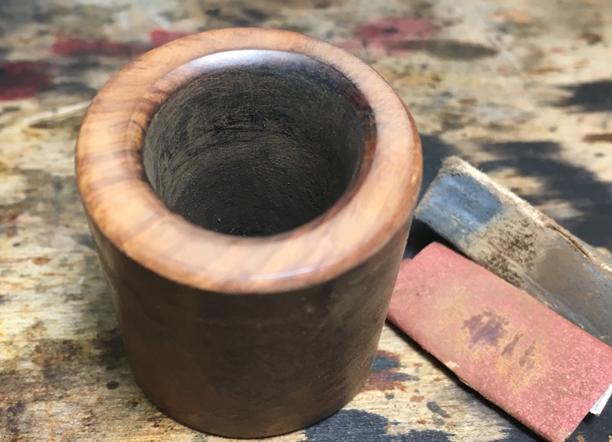
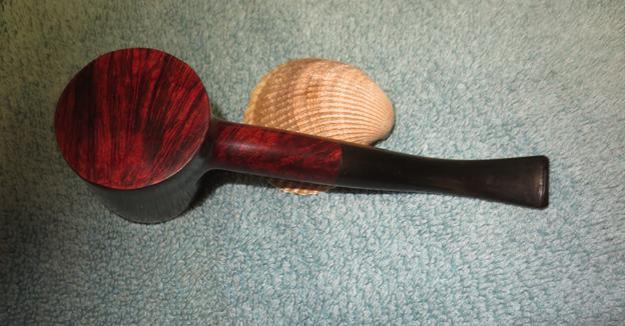
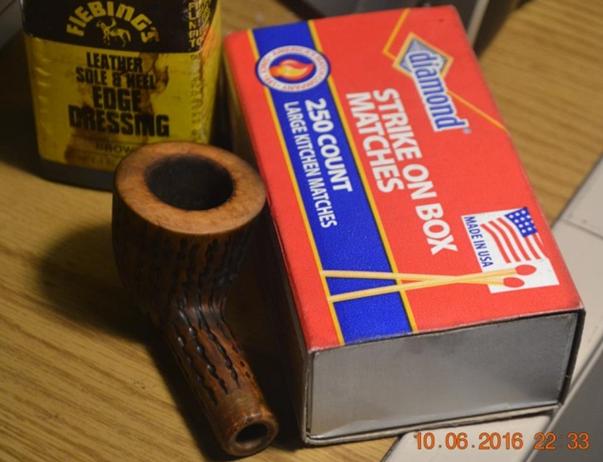
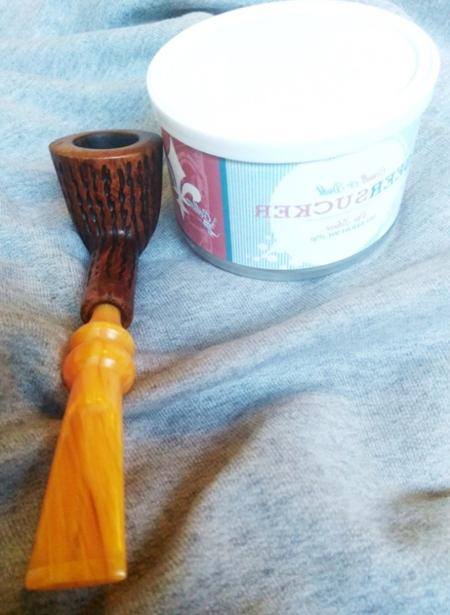
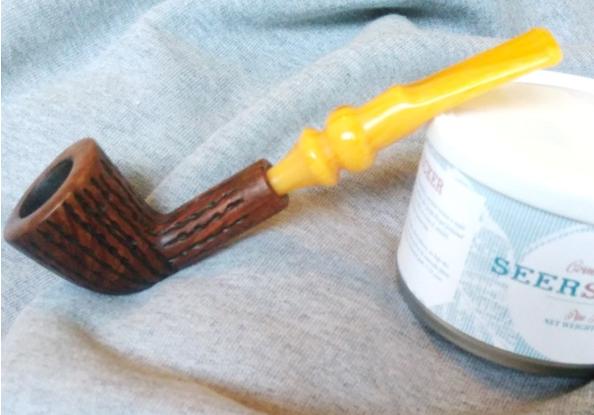
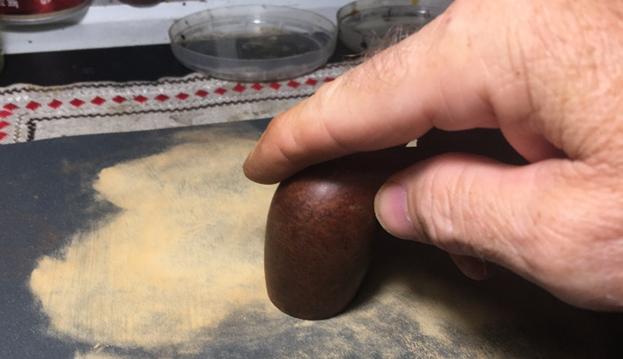
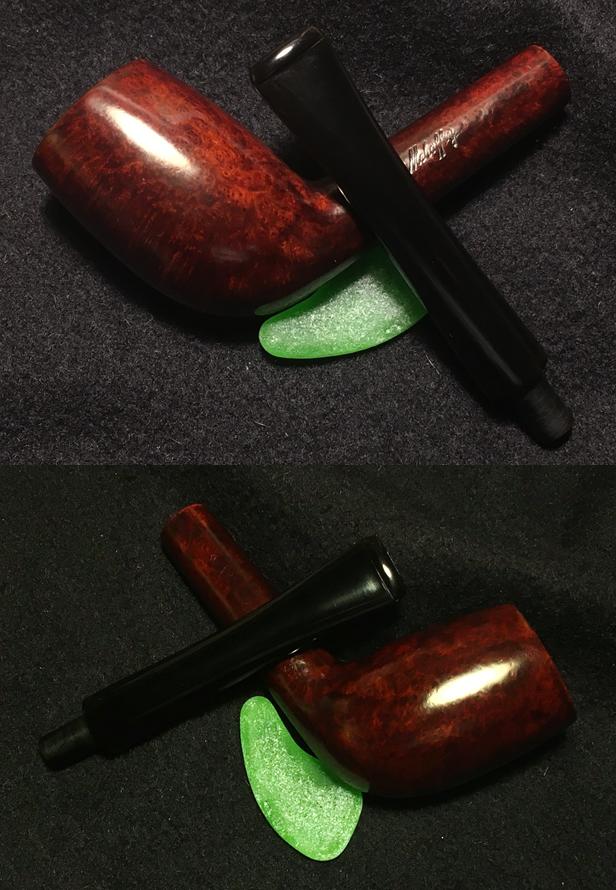
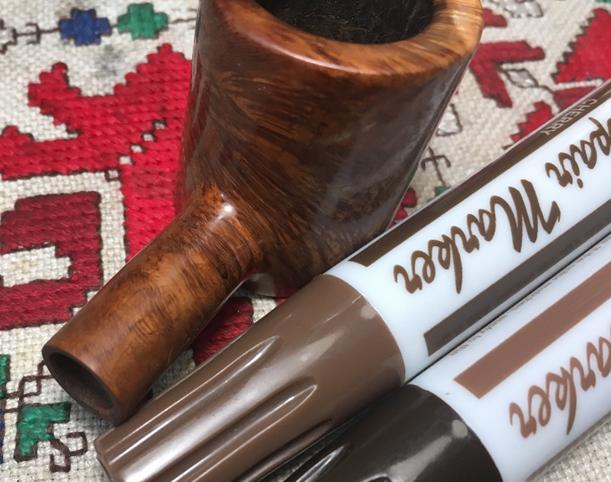
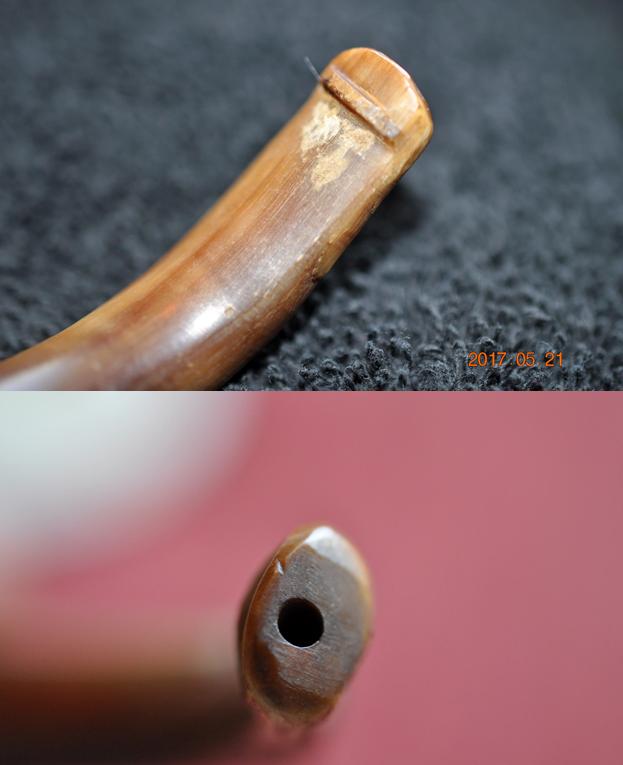
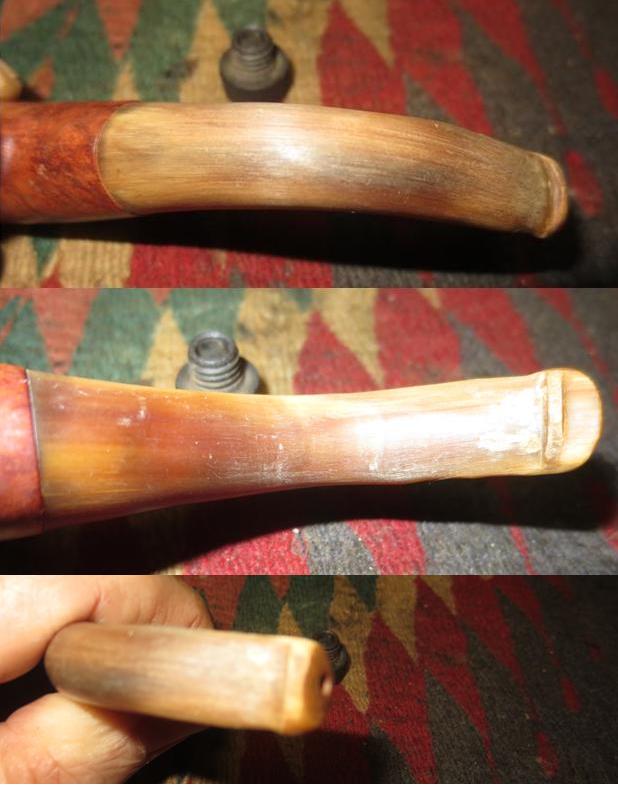
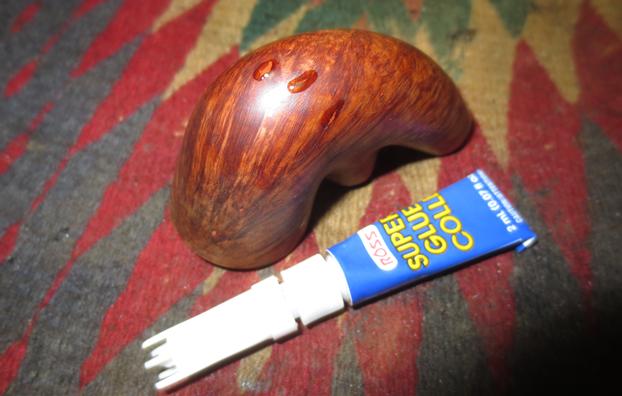
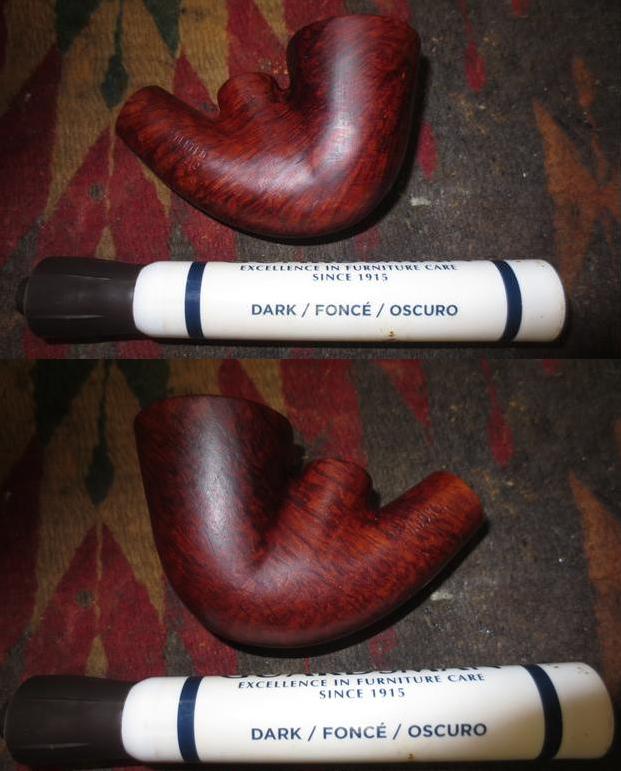
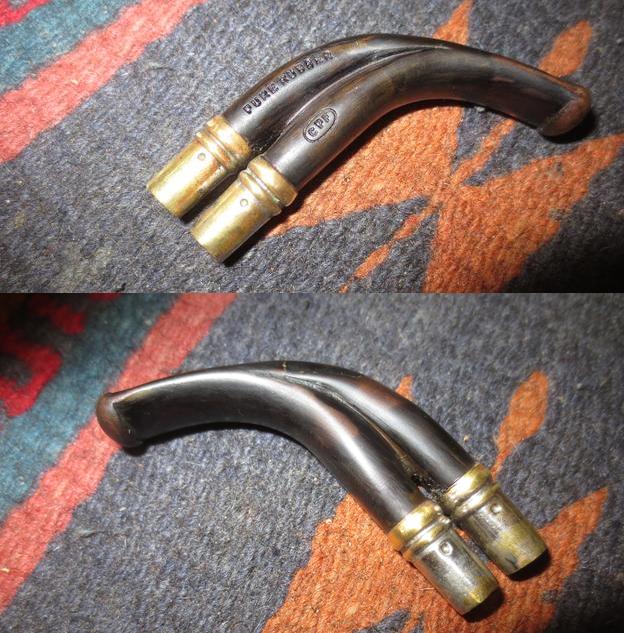
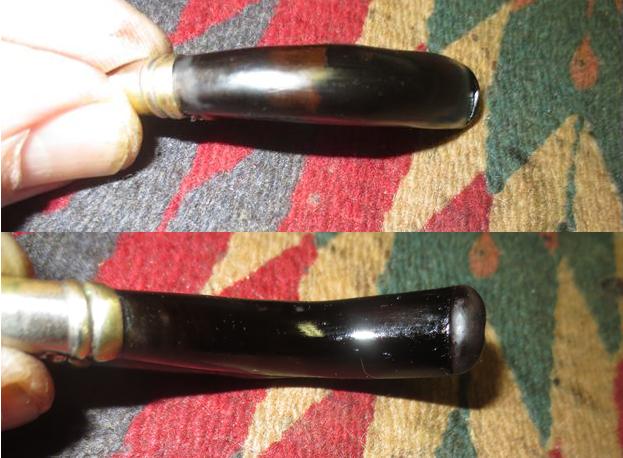
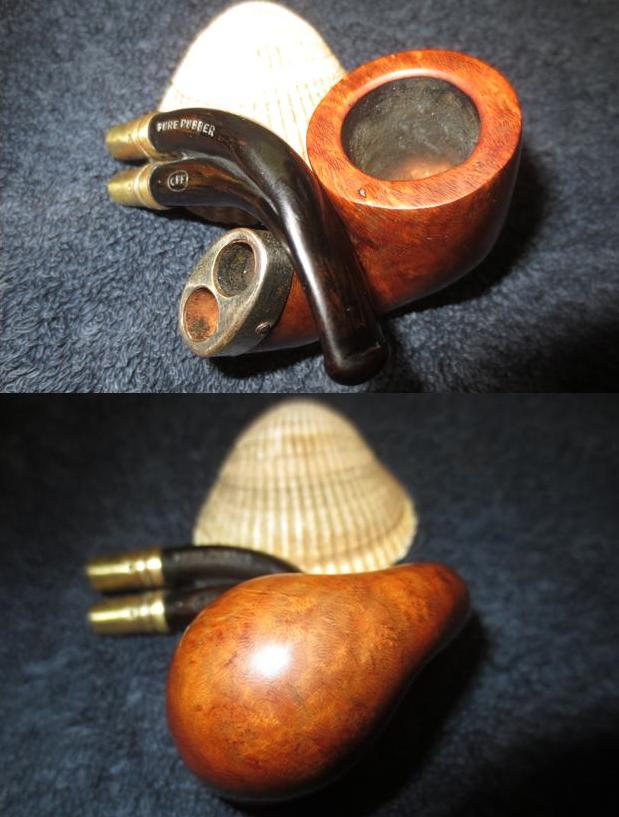
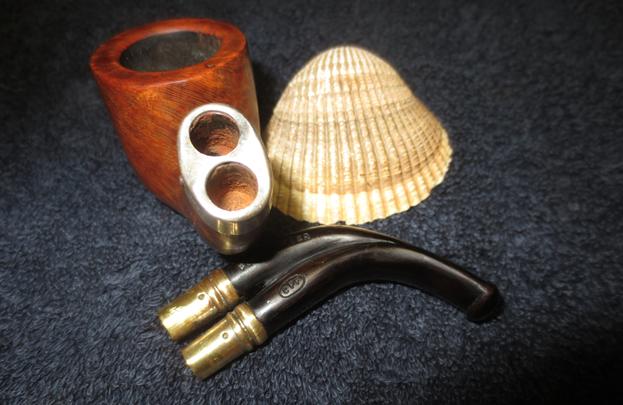
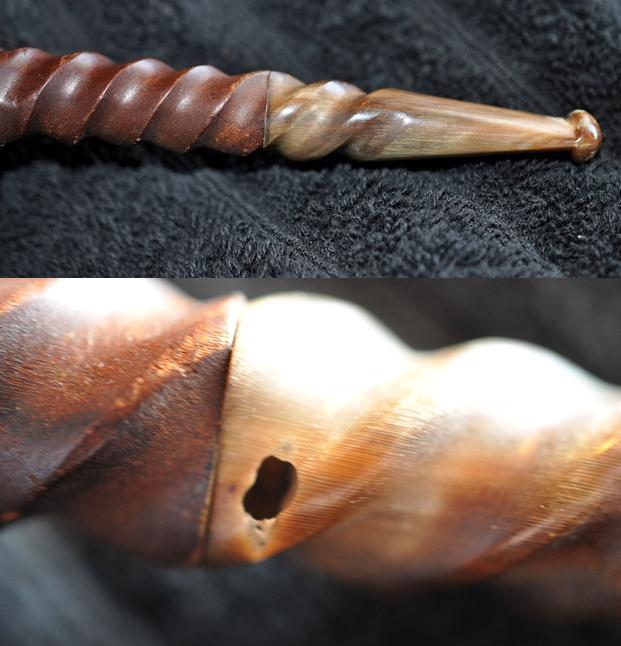
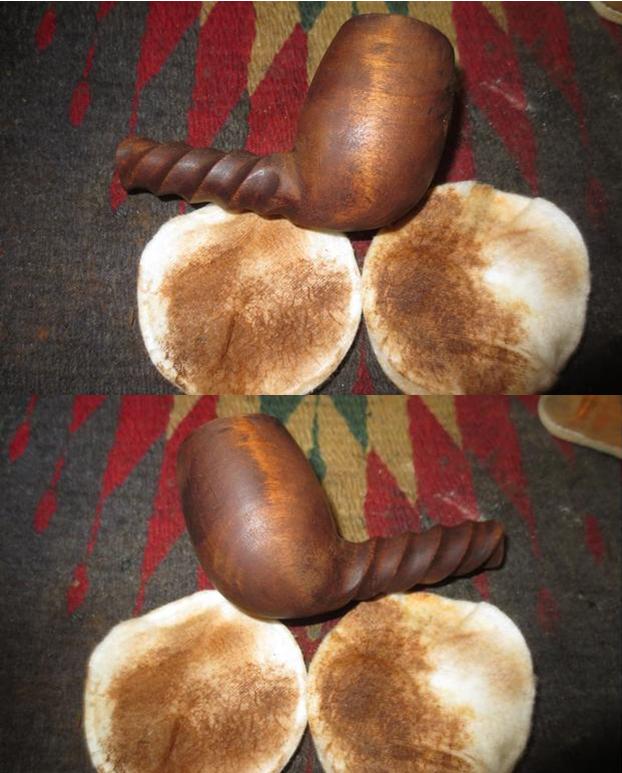
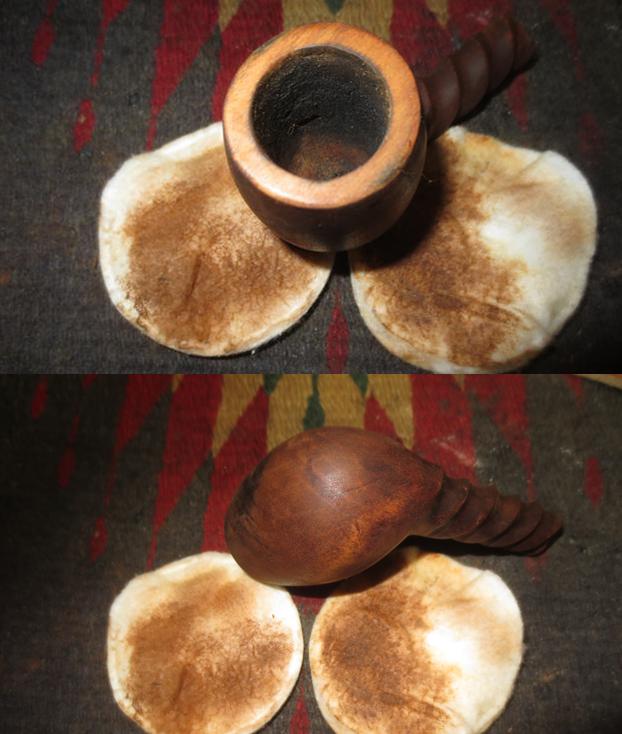
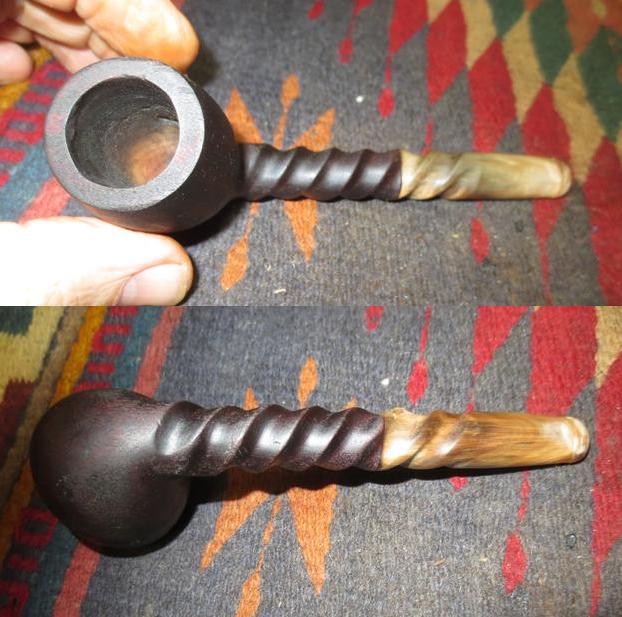
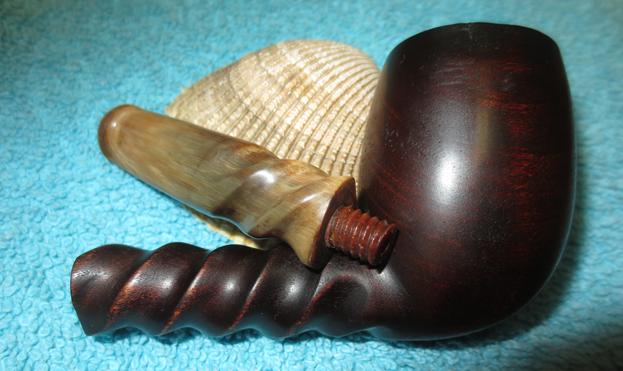
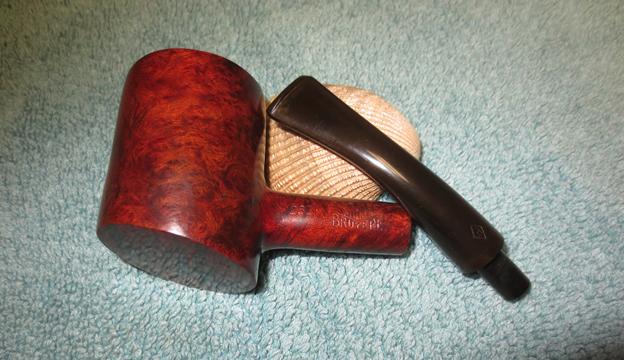
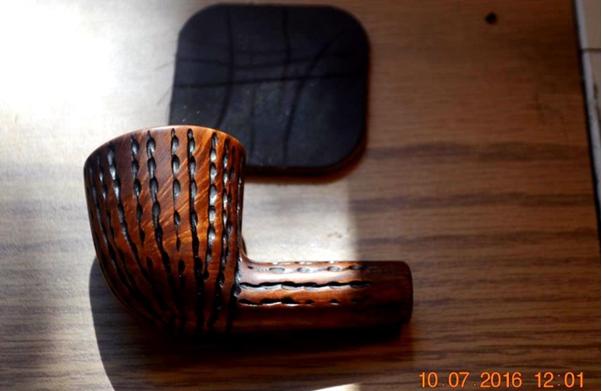 I hand-rubbed a sparing amount of Halcyon II Wax into the wood and crevices of the rusticated pipe for which it is made, not to be frugal but because a little goes a long way. In most cases, I let it dry or set or whatever as much as it can, in general 20 minutes or so but sometimes a considerable time longer, and wiped the excess off with a soft cotton rag while rubbing more into the pores of the wood. Other times, I let the setting process go on for a considerable time longer, but not often. I was then almost finished with the long project and was more than prepared to accomplish the final main task, filled with joy to tackle (thinking of football) the key part of the experience: fitting one of two fancy Lucite stems, an orange and a yellow, that arrived in the mail – eight months after I finished the stummel. In case anyone wondered at my persnickety comments regarding the amount of time I spent on a certain bit of work trying to repair a part of the original Everyman that I will now leave unnamed, in my own way, that’s why.
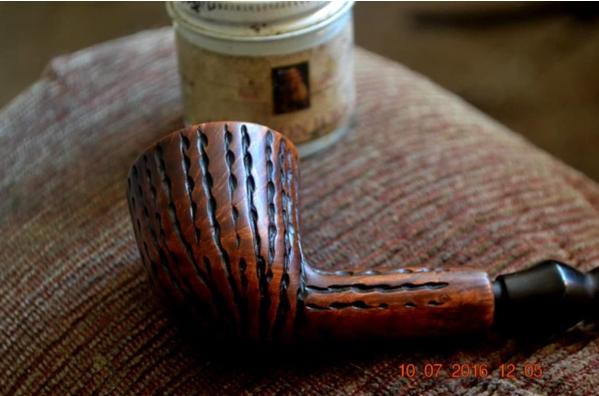
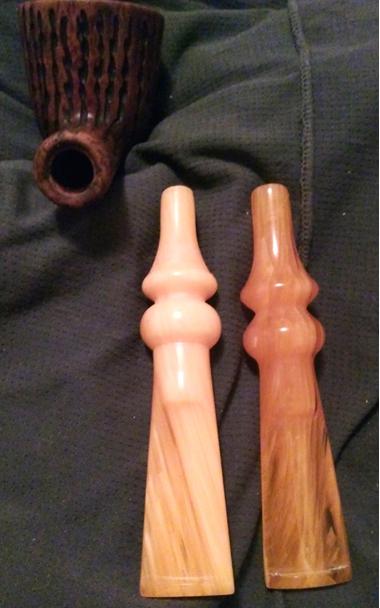
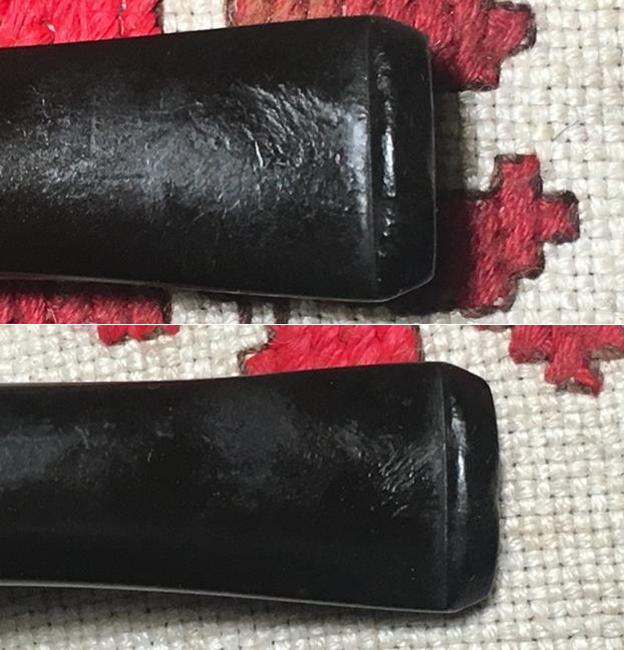
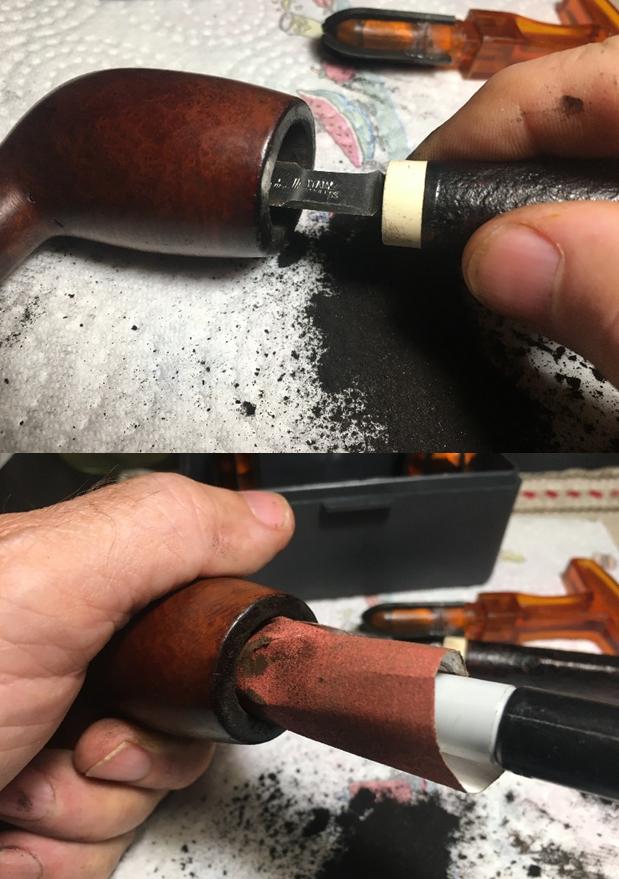
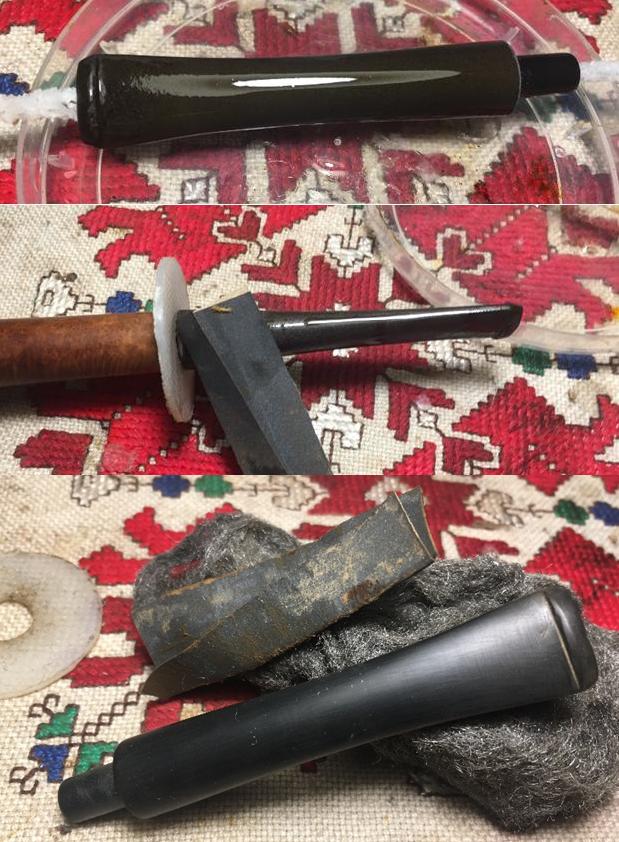
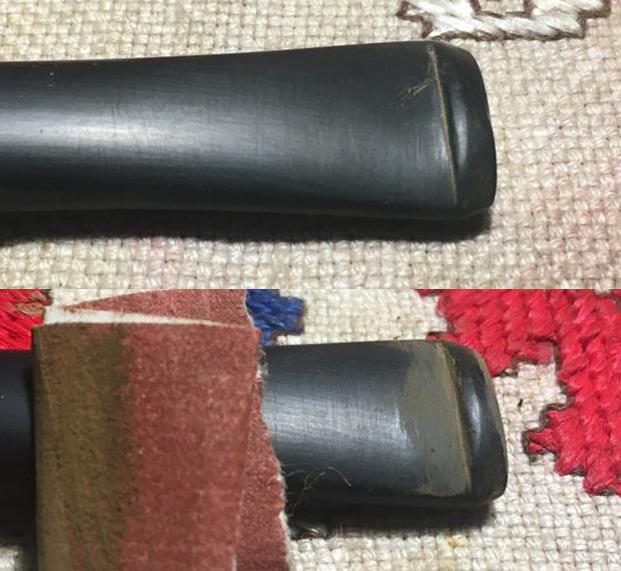
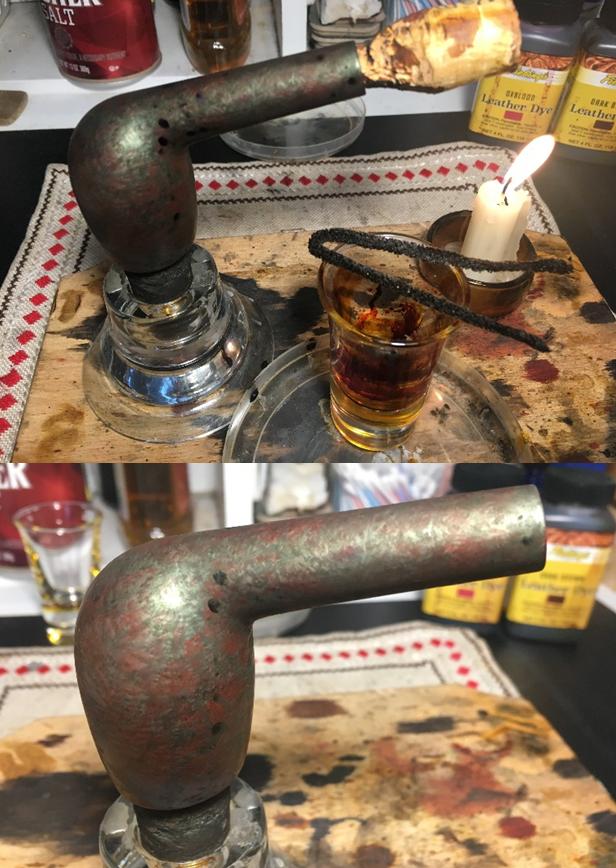
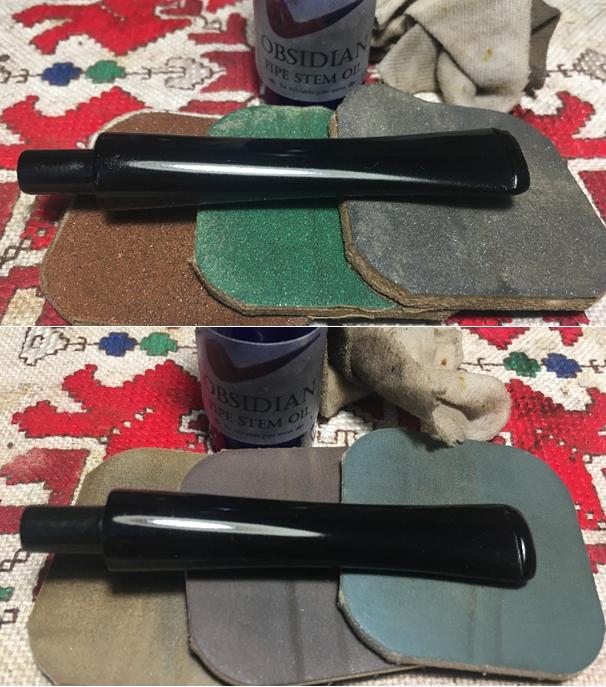
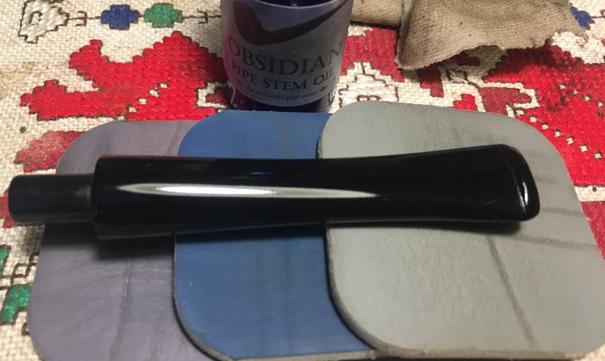
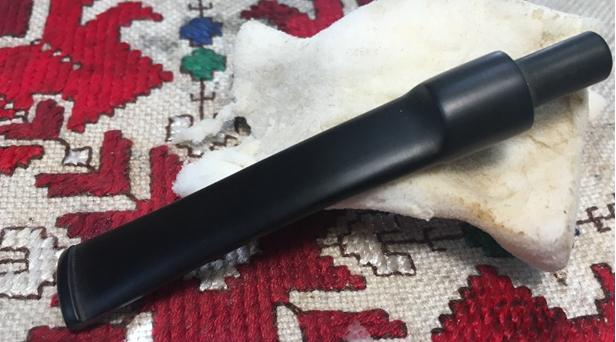
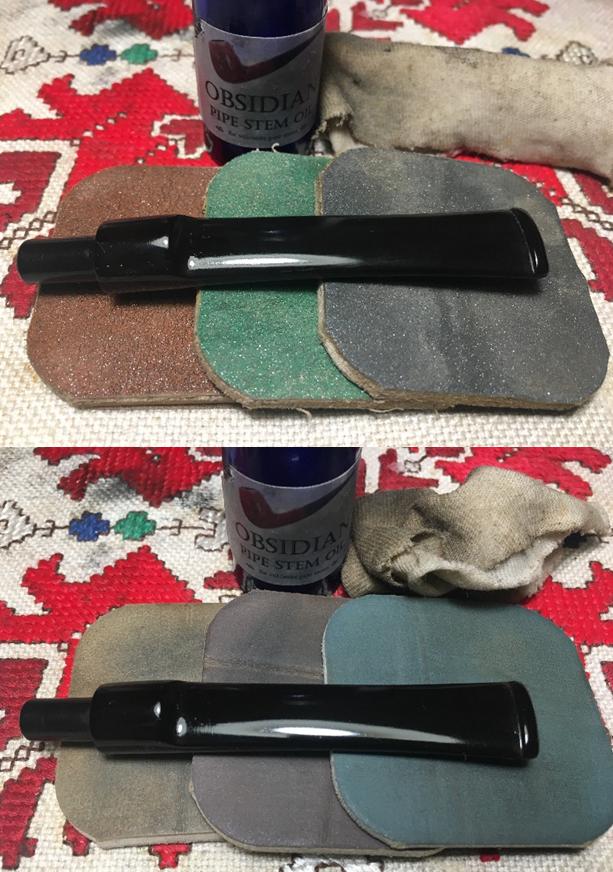
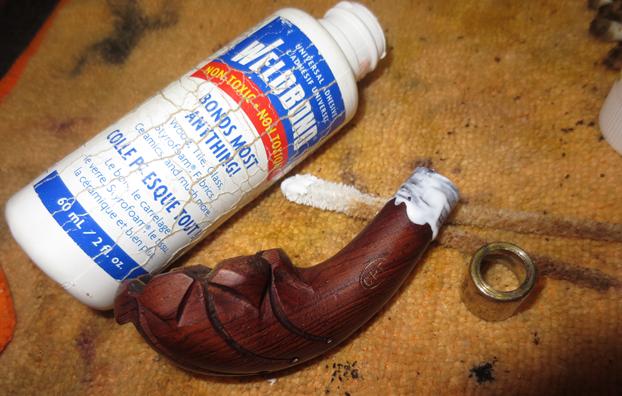
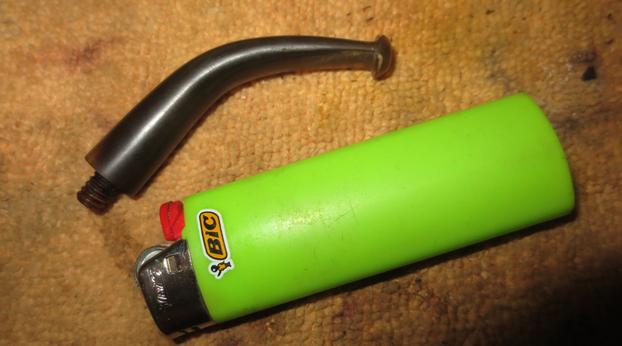
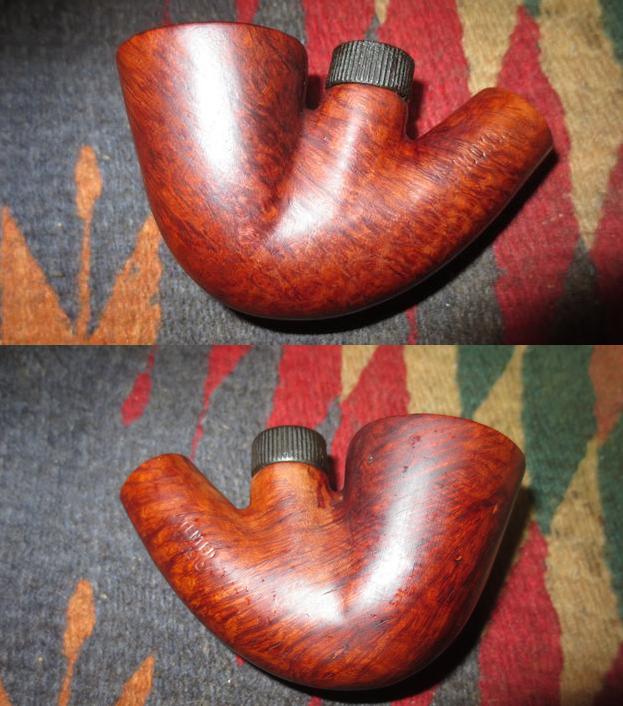
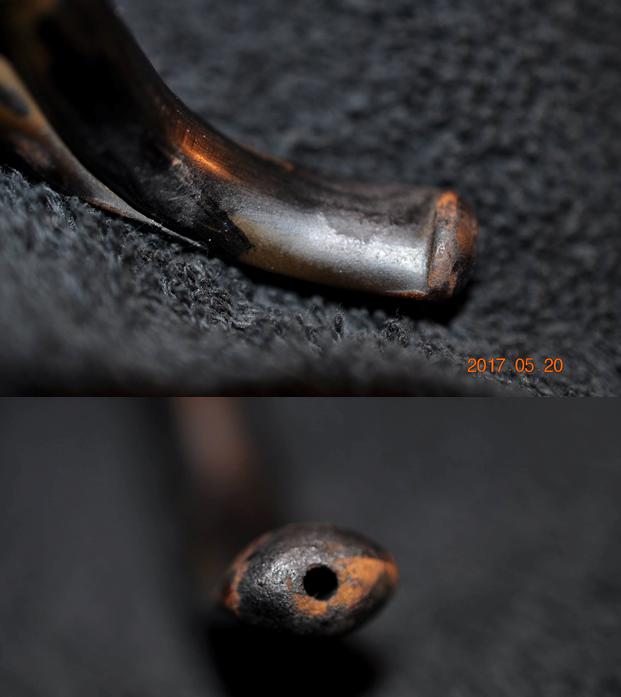
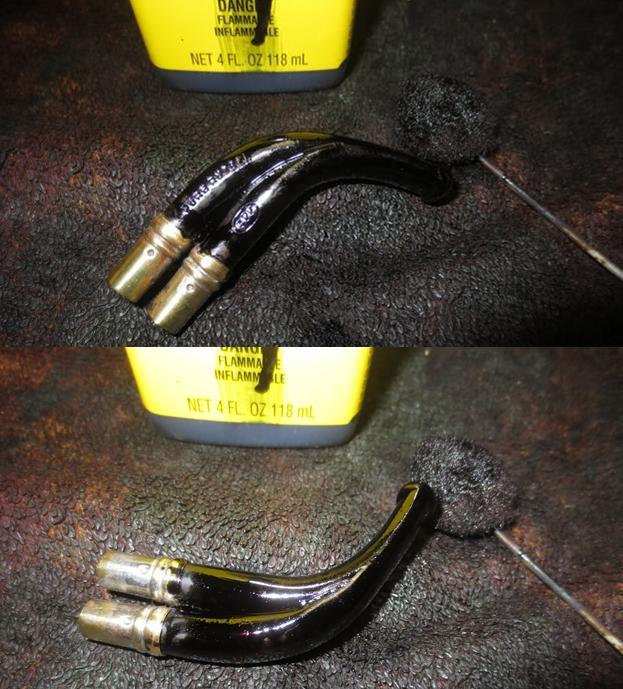
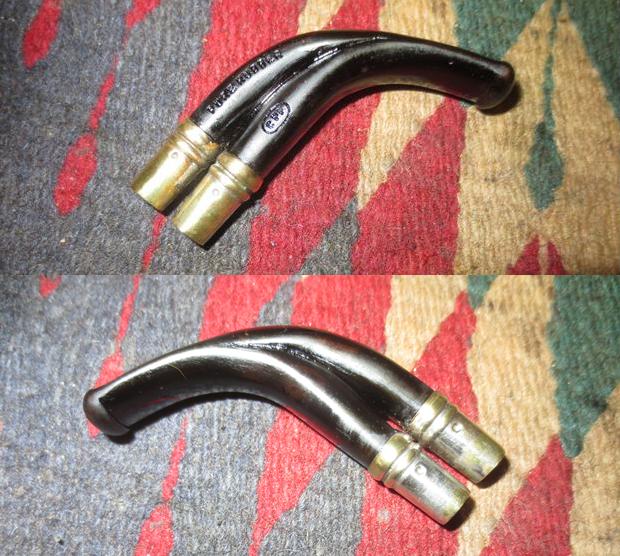
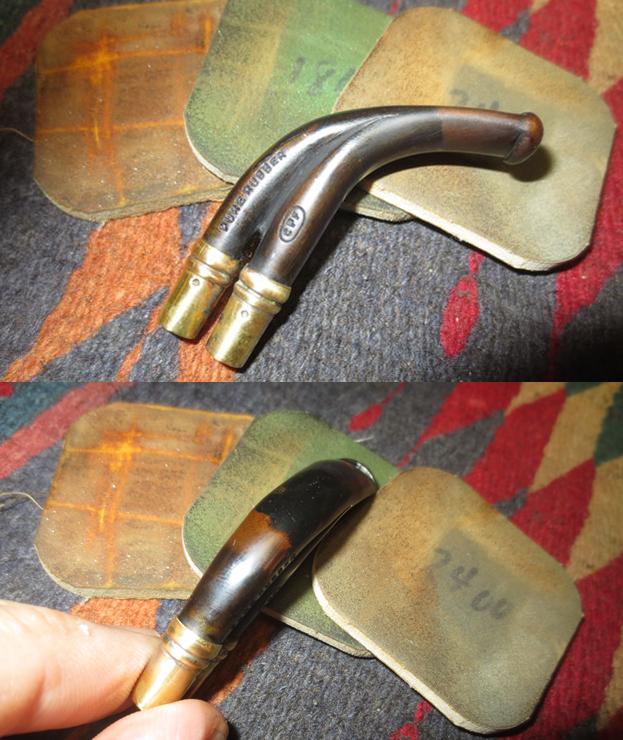
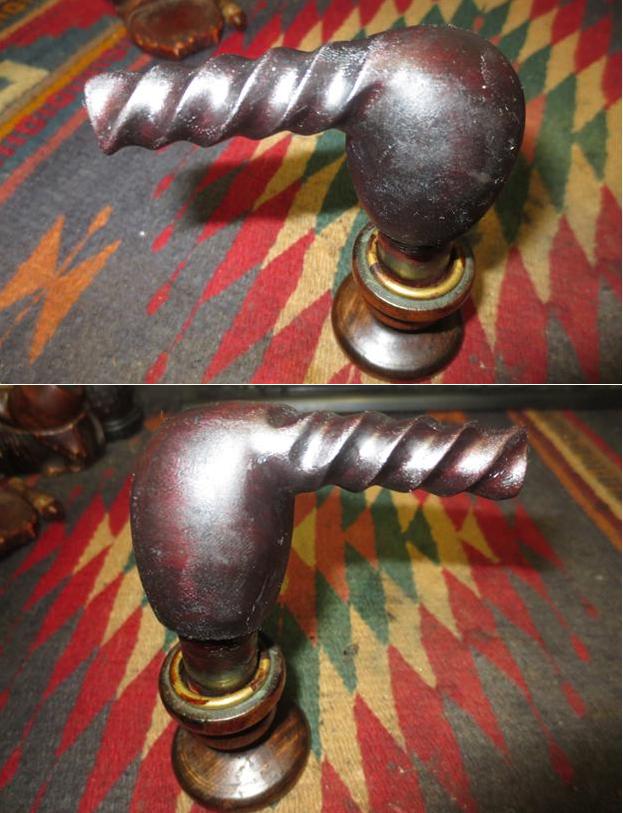
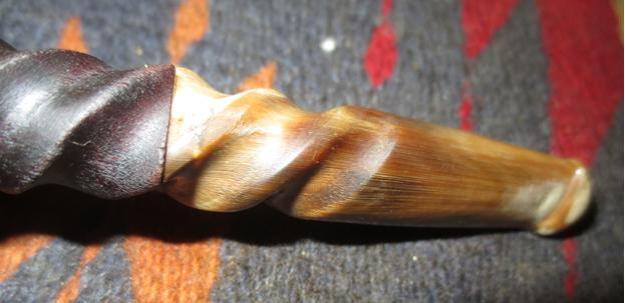
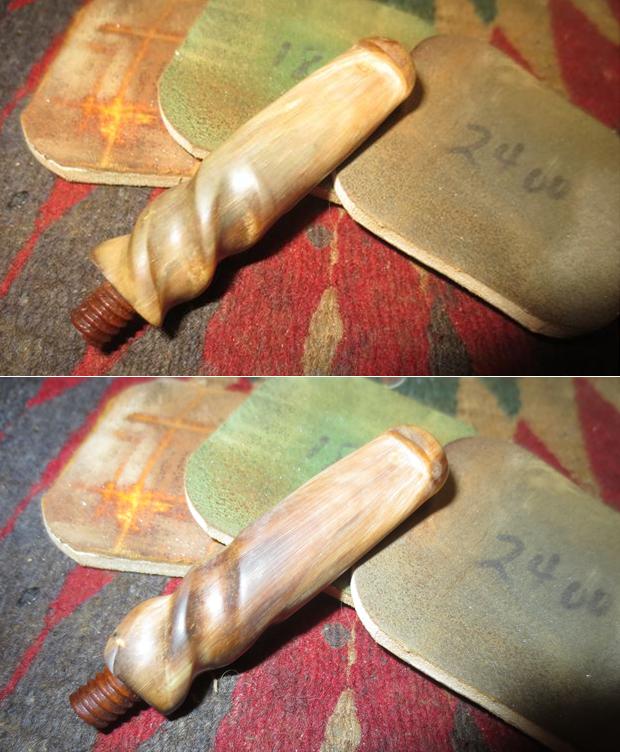
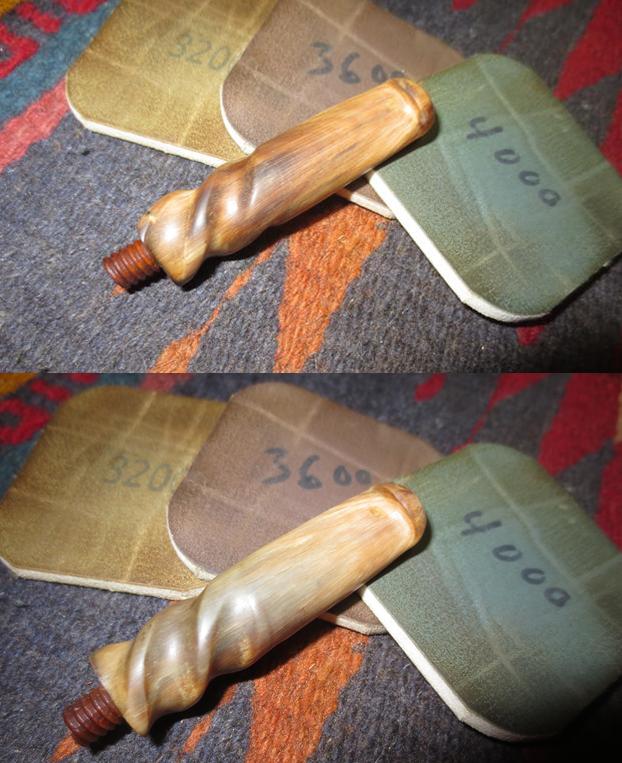
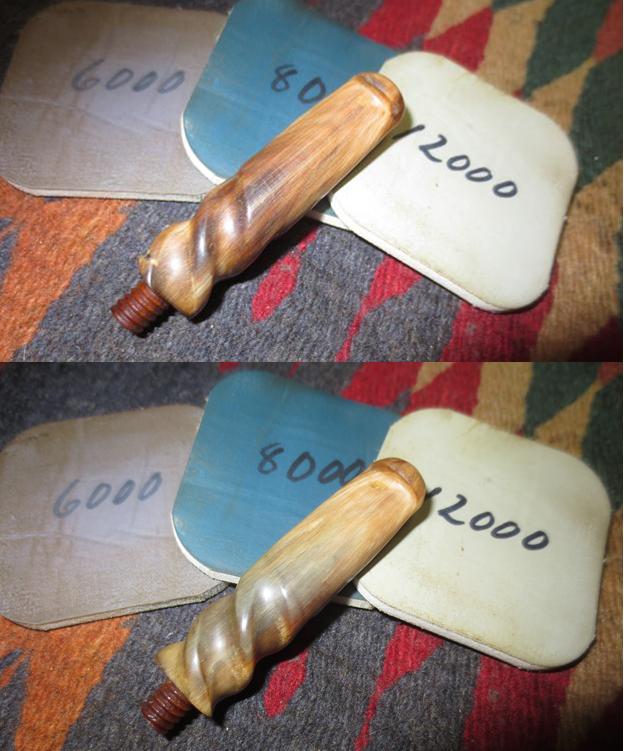
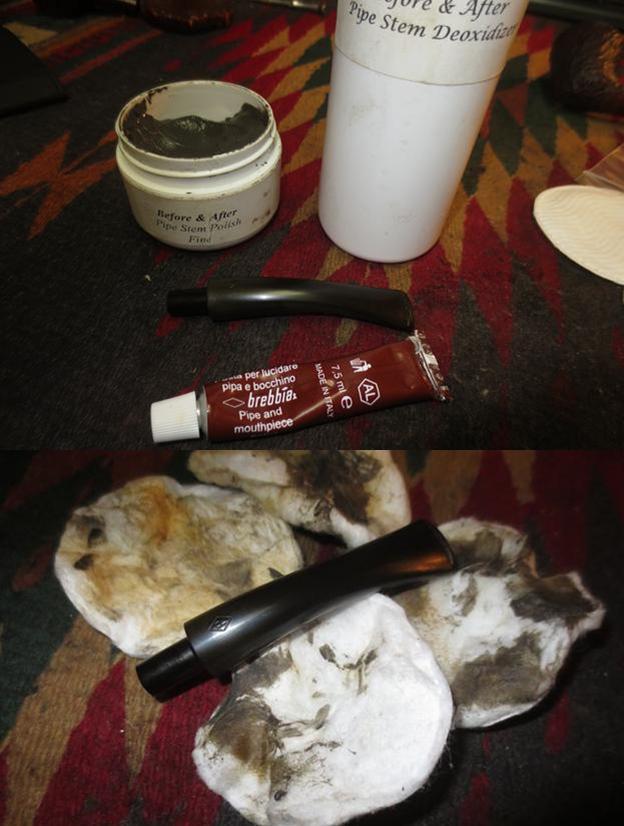
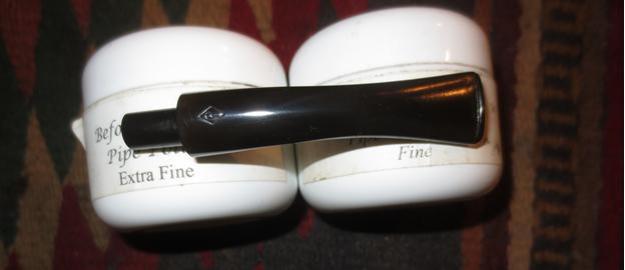
I went with the golden bit to the right. As a point of interest, the popular online site where I bought a total of three bits in one order listed these two as gold, but the system is a touch odd, to me at least, and also the viewing system for the product you in fact get wasn’t working that day for all items, including the yellow bit. But I can use it, and it was inexpensive! Having none of the finer and more expensive equipment for tenon cutting, I hand-sanded the shank insert end down to where it had a nice, tentative fit for the time being. That task took another day. Making use /of another of Steve’s blogs, on bending stems, I chose the oven method because it had worked so well on several occasions in the past with Vulcanite. BTW, I doubt the Lucite was the problem. I always take a look in the mirror before pointing a finger lest I see three others pointed right back at me. I say, go figure! After that mishap, I switched to the boiling water method that worked better but I’m sure was spoiled by already having baked the bit.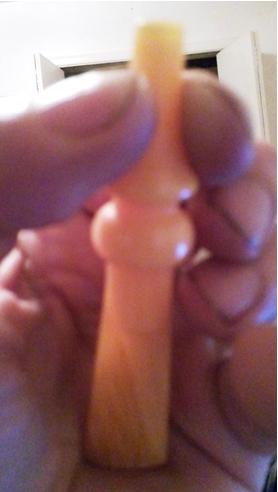

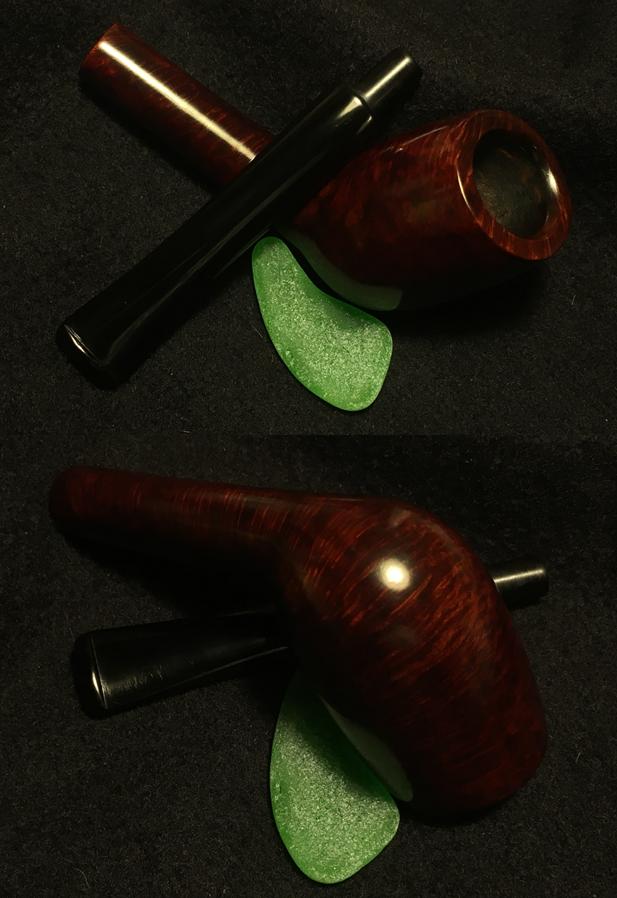
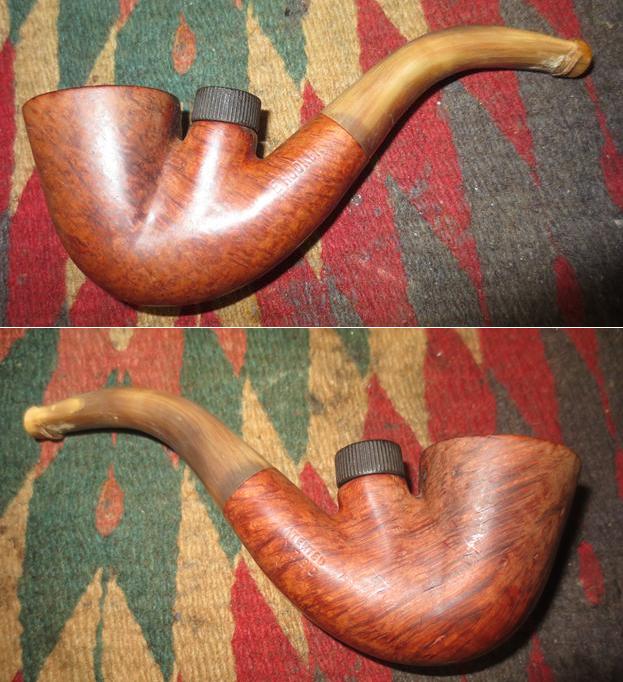
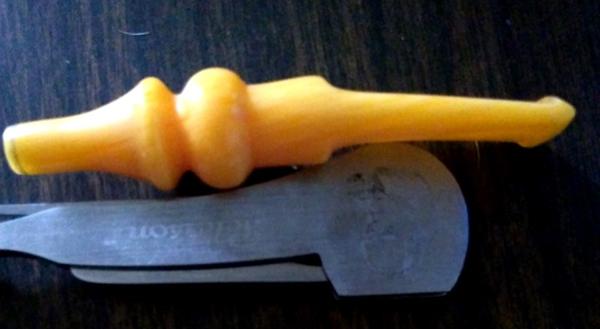 I repeated the boiling method and achieved the desired bend. Halcyon II was is meant to be used in place of regular buffing wheel waxes and compounds, but I wanted a slightly brighter finish, and so I ended with spins of Red Tripoli and carnauba.
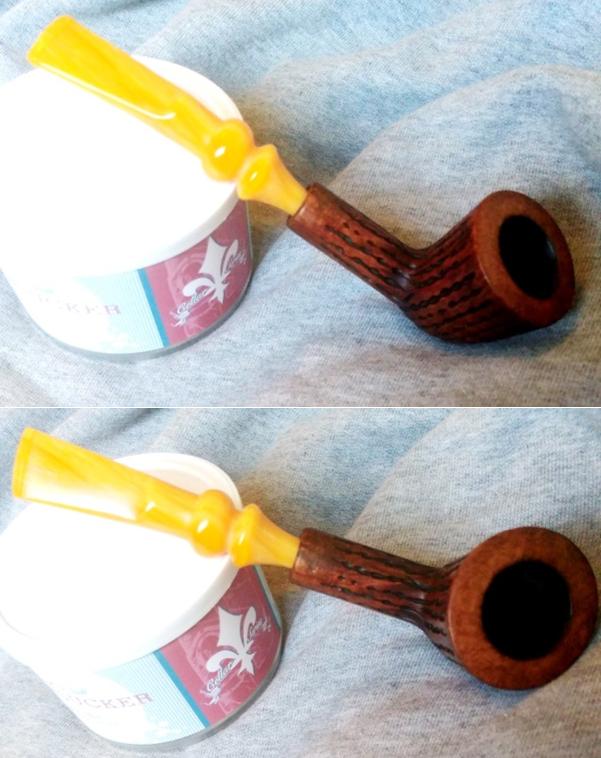
CONCLUSION
Even regardless of its look, and by that I mean nothing rude, the likelihood of this pipe being of British make – lacking any indication of such origin, whether the city or country of manufacture, a line name, or the often top secret coded markings of which our friends across the Pond are so fond – is so paltry as to end any further debate lacking official admissible documentary evidence. WikiLeaks might suffice, in particular if the disseminator were to flee his country or be arrested or renditioned or still more conclusively, become the subject of cover page stories of the world’s tabloid toilet wipes. On the other hand, and here I am not being facetious, if my already stated conclusion that the simple but honorable Everyman is a blast from the past of the pre-Dr. Grabow Alpha days of Israel, made by the Shalom Pipe Factory, and I am in fact wrong, I would as always appreciate input from any authorities or scholars among us.
SOURCES
https://www.jrcigars.com/brand/pipes-accessories/p-k-everyman-pipes
https://www.santaclaracigars.com/brand/pipes-accessories/p-k-everyman-pipes
https://rebornpipes.com/2015/07/18/bringing-new-life-to-a-gift-pipe-a-gasparini-mgm-elegante-brandy/comment-page-1/#comment-21243
https://pipedia.org/wiki/Stanwell_Shape_Numbers_and_Designers
http://www.ebay.com/itm/ALPHA-Burl-Briar-Freehand-Estate-Tobacco-Pipe-Made-In-Israel/332252221412?_trksid=p2047675.c100011.m1850&_trkparms=aid%3D222007%26algo%3DSIC.MBE%26ao%3D1%26asc%3D41376%26meid%3D0c2217f15e5f4850ad0061cb84cc5850%26pid%3D100011%26rk%3D1%26rkt%3D12%26sd%3D121269666970
http://www.ebay.com/itm/Vintage-Shalom-Select-Imported-Tobacco-Pipe-Vintage-smoking/322513288986?_trksid=p2047675.c100011.m1850&_trkparms=aid%3D222007%26algo%3DSIC.MBE%26ao%3D1%26asc%3D41376%26meid%3D0c2217f15e5f4850ad0061cb84cc5850%26pid%3D100011%26rk%3D5%26rkt%3D12%26sd%3D121269666970\
https://rebornpipes.com/2012/07/15/bending-vulcanite-stems/
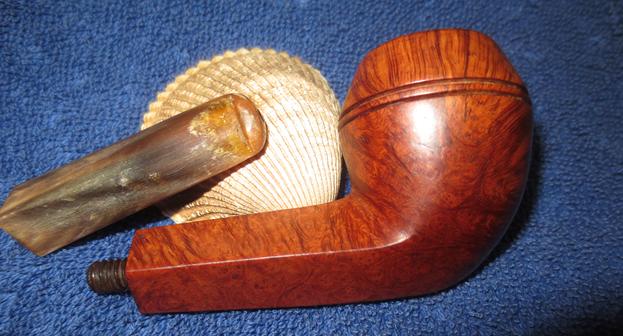
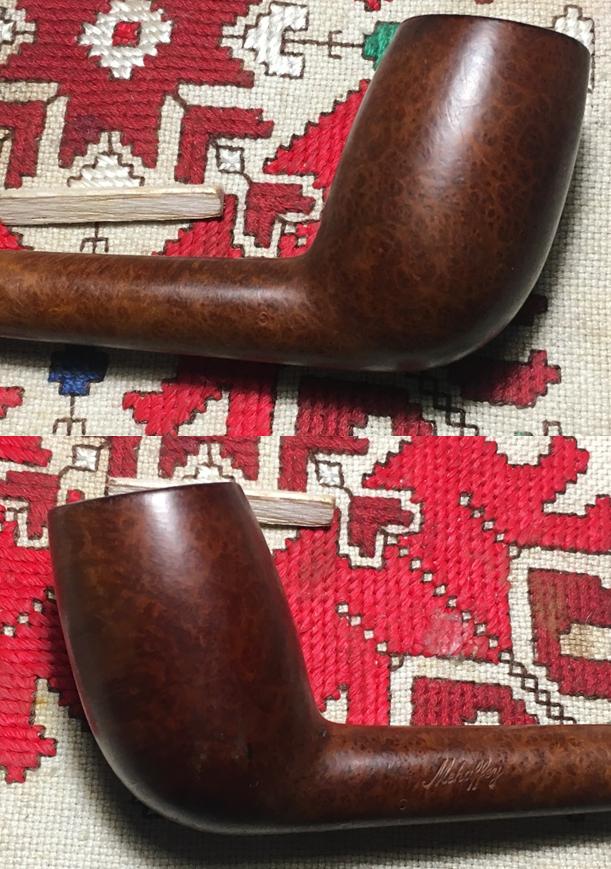
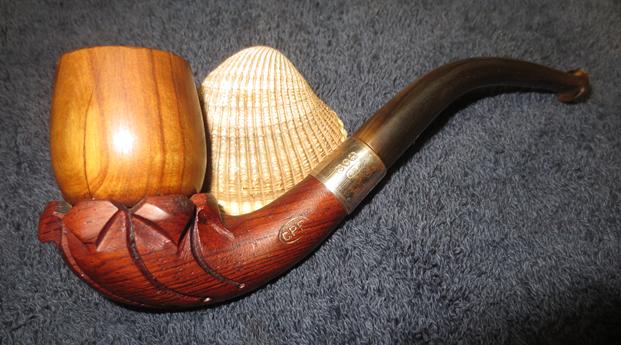
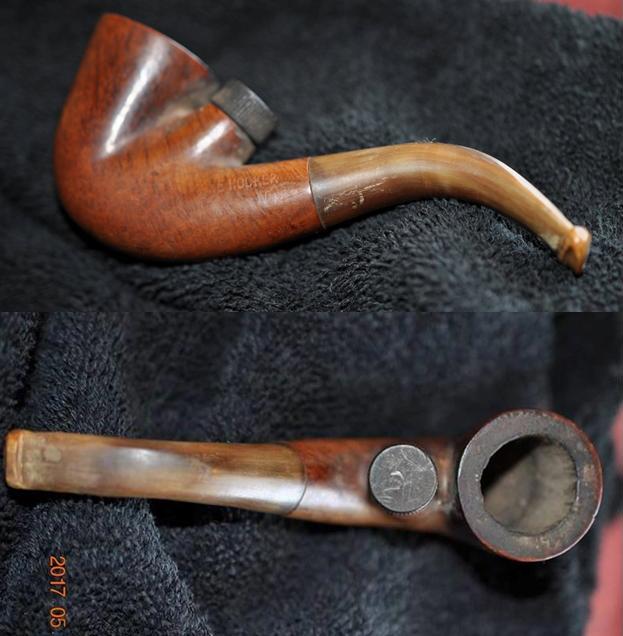
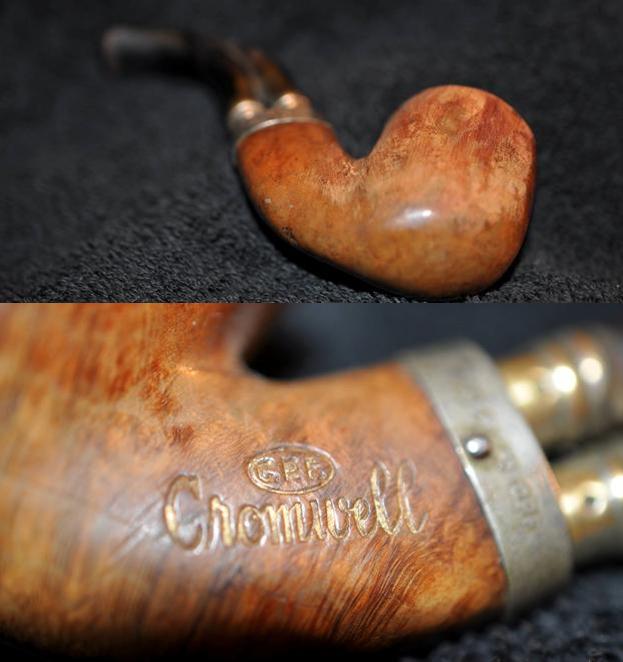
 He included a photo of the stamping on the left side of the shank. It was originally stamped with gold filigree in the letters but that had pretty much worn out. You can see the flaw or gouge going through the AR on the word Briar.
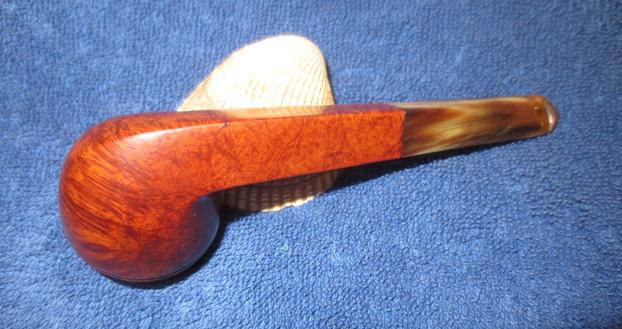
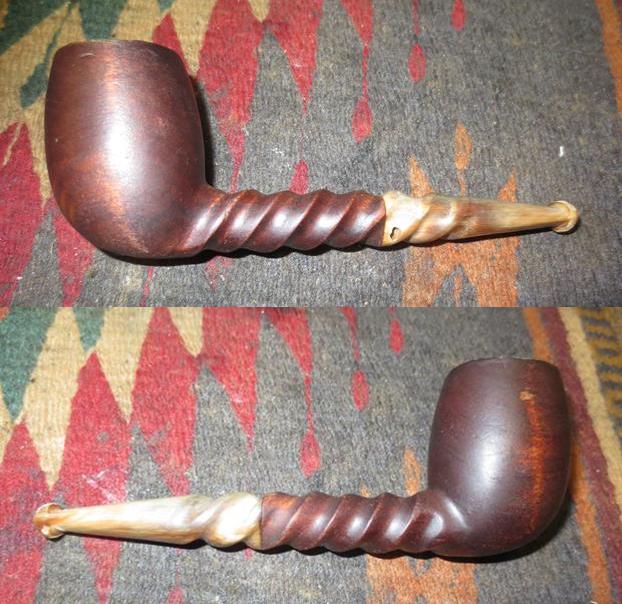
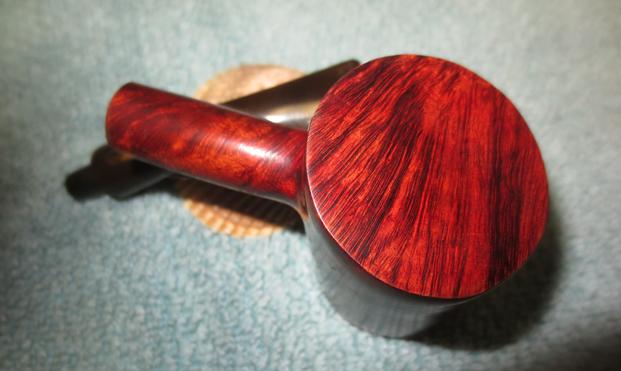
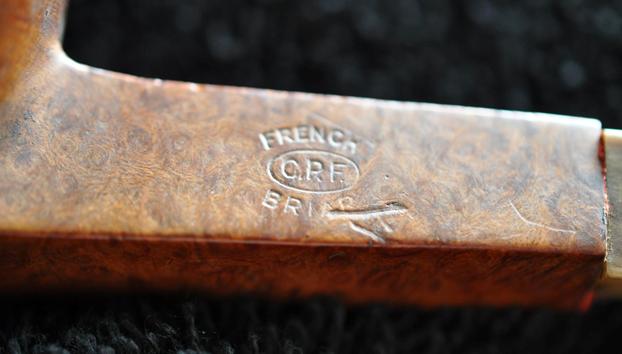 The next four photos show the grain on the bowl from a variety of angles. The finish is very worn and dirty but the grain is quite nice and there are no fills in the briar.
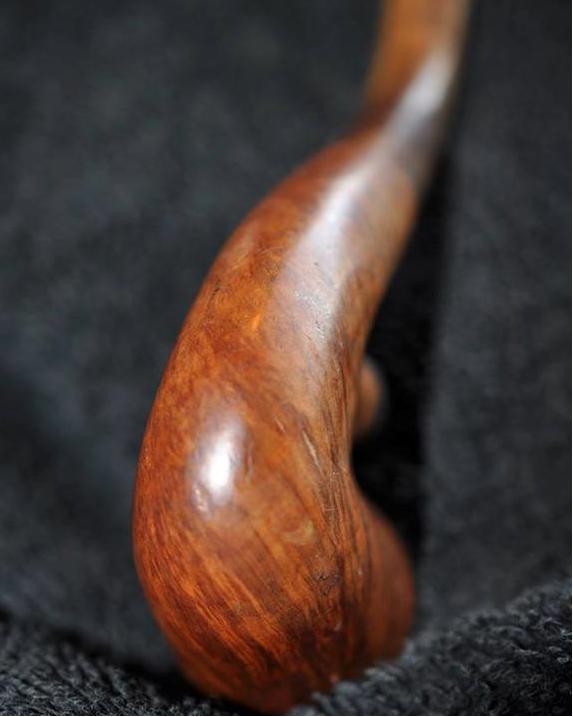
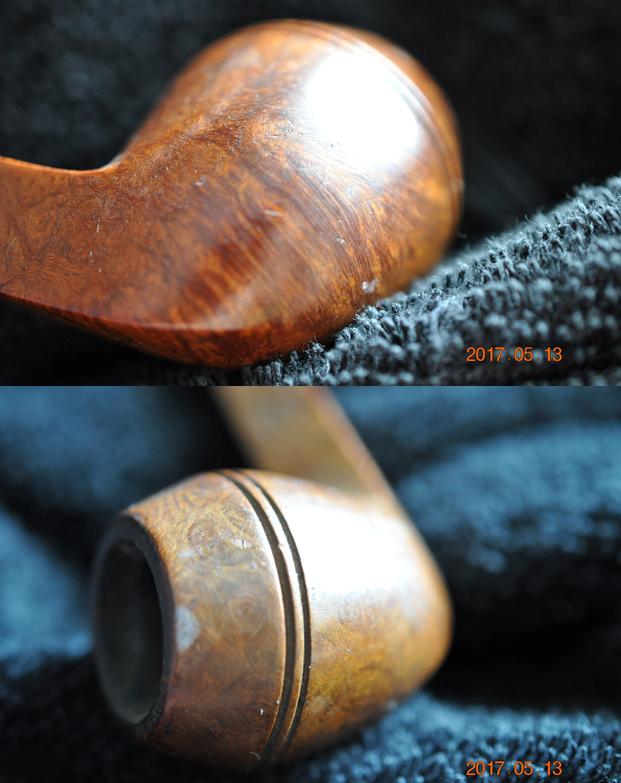
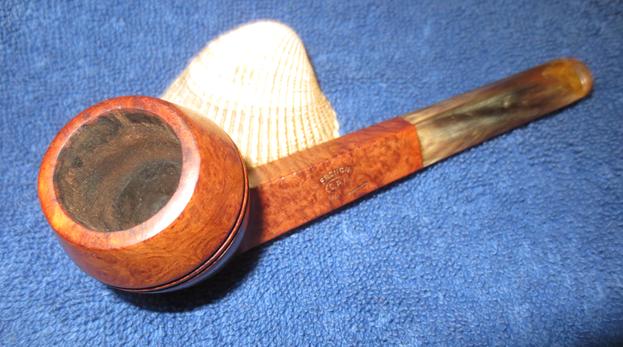
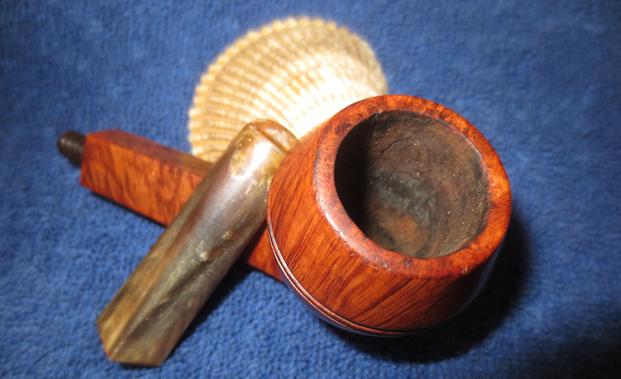
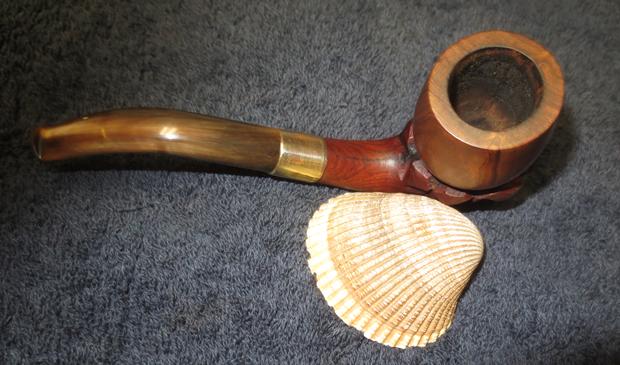
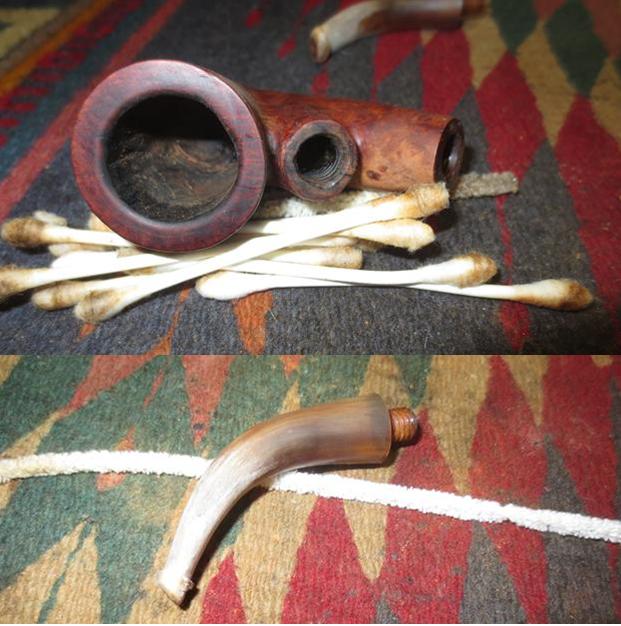
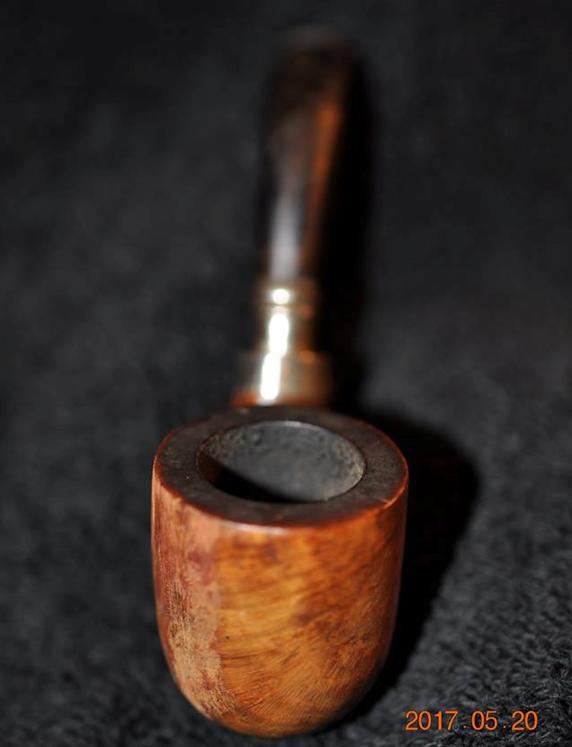
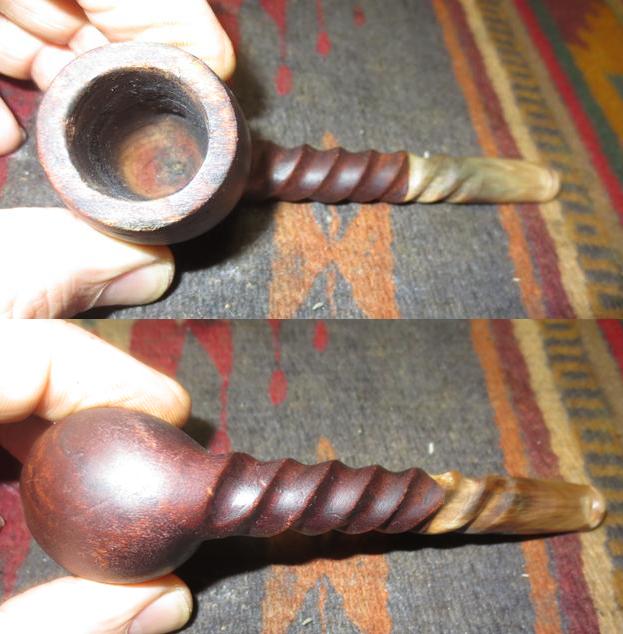
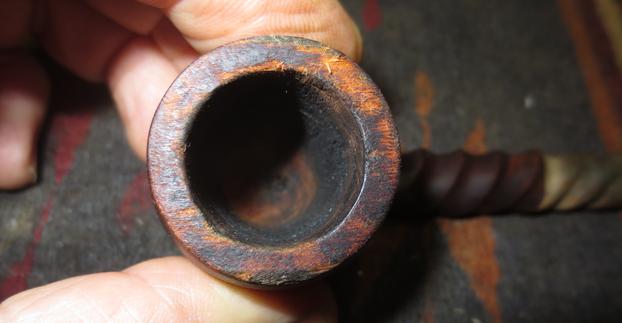
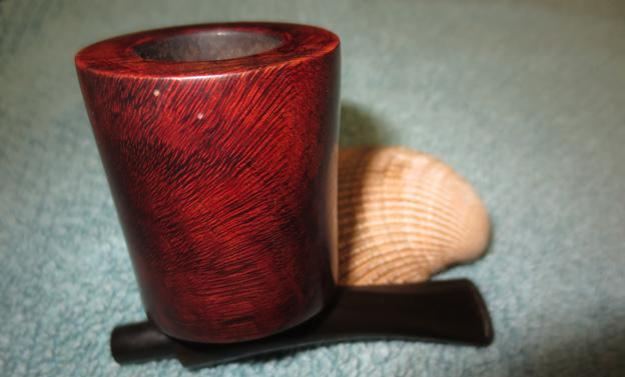
 The close up photo of the rim top shows the scratches and lava on the top and the slight damage to the inner edge of the bowl. A fairly thick cake lines the walls of the bowl and is peeling on the front edge.
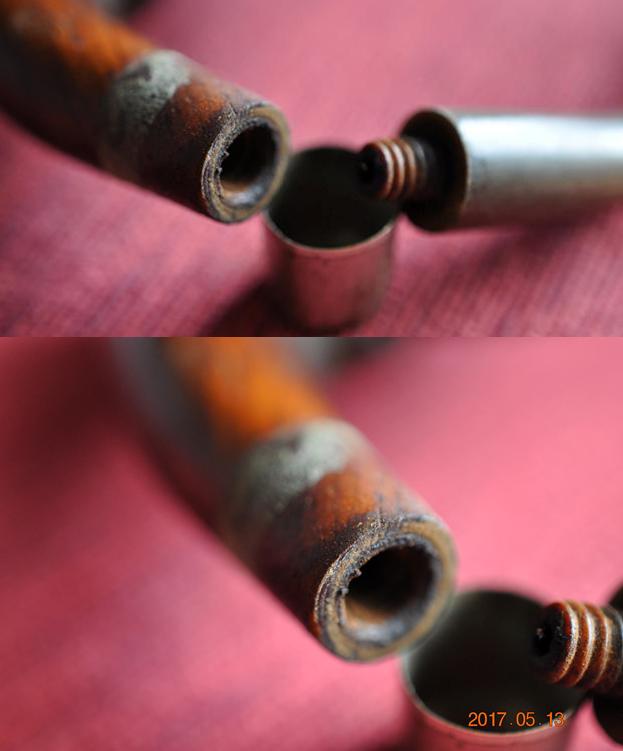
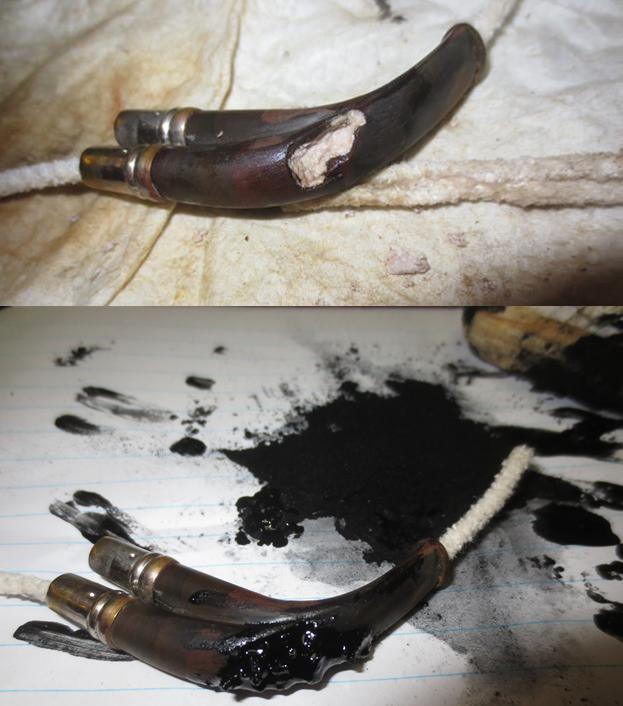
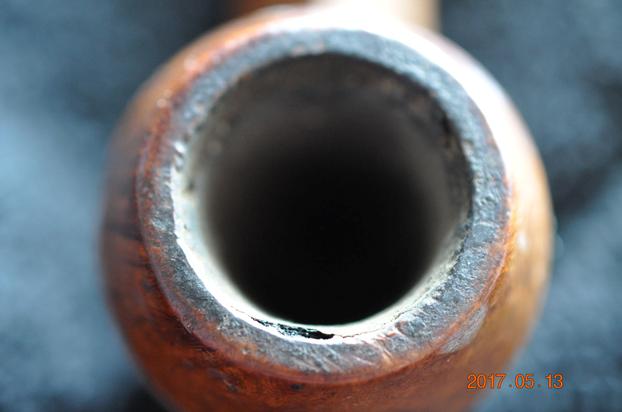 The next two photos show the underclocked horn stem and what appears to be red thread that had been used to align the stem. It had obviously not worked.
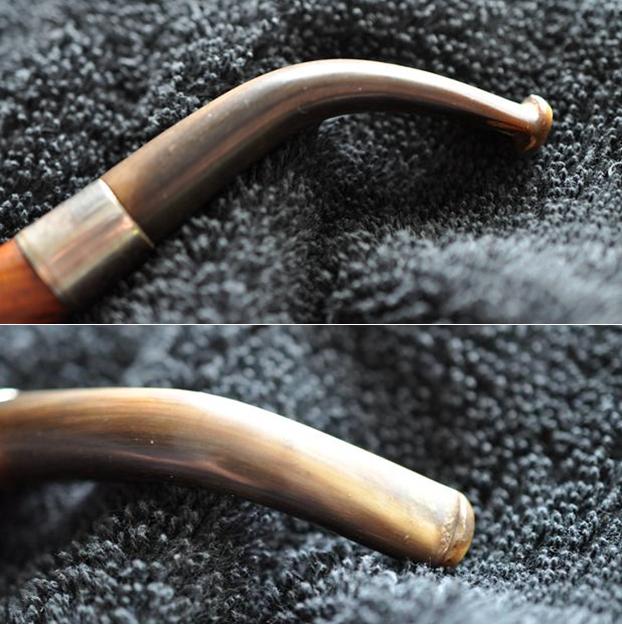
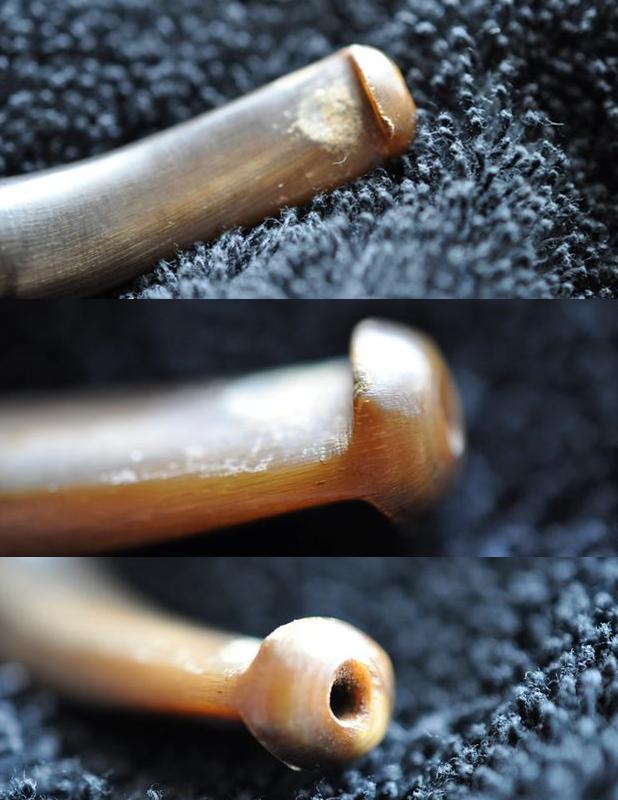
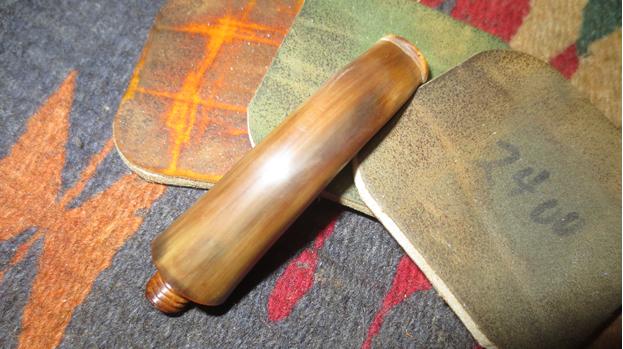
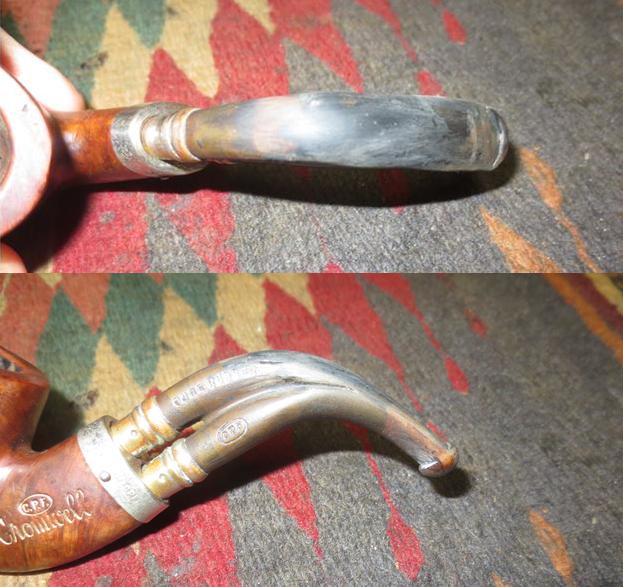
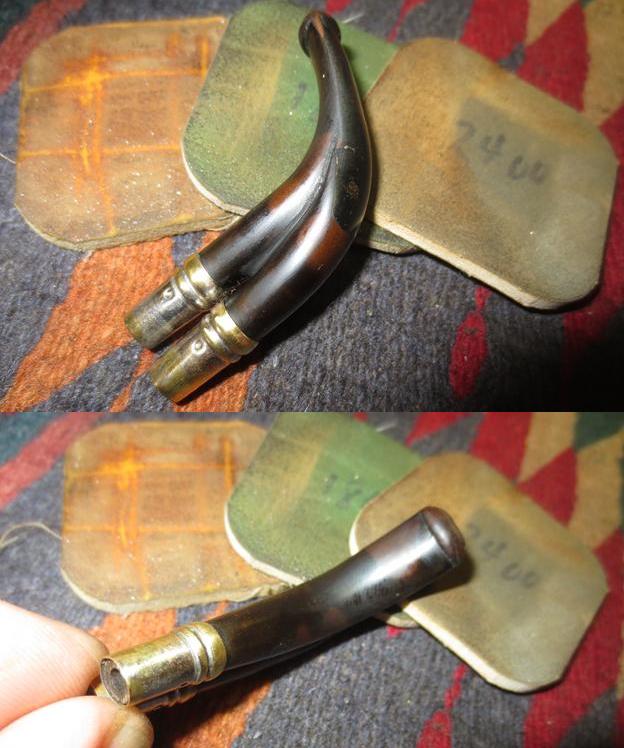
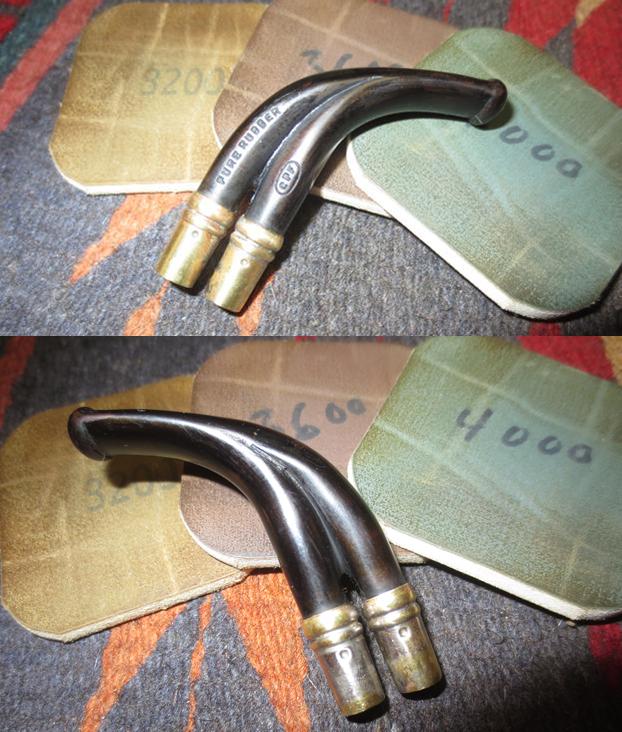
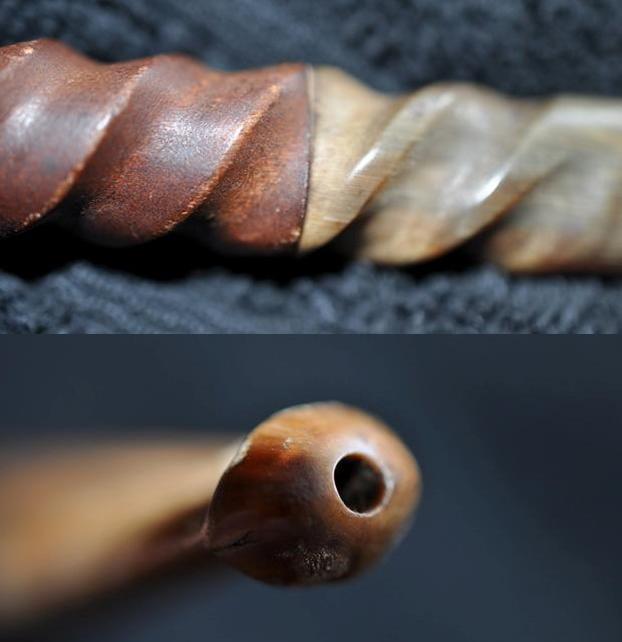
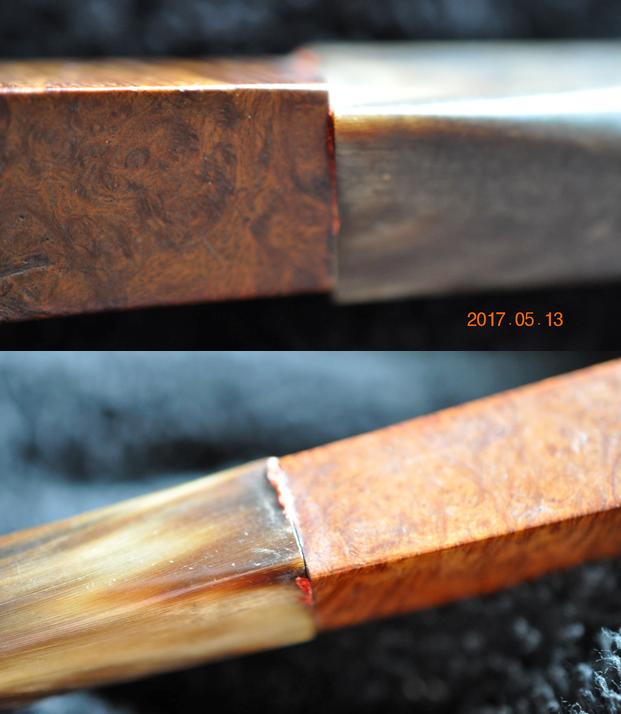 The next four photos show the condition of the horn stem. It is dried, chewed and delaminating at the button on both sides of the stem. The button itself also has some tooth damage to the top and underside. There appears to be a lot of colouration to the striations of the horn and it should clean up and be beautiful once polished.
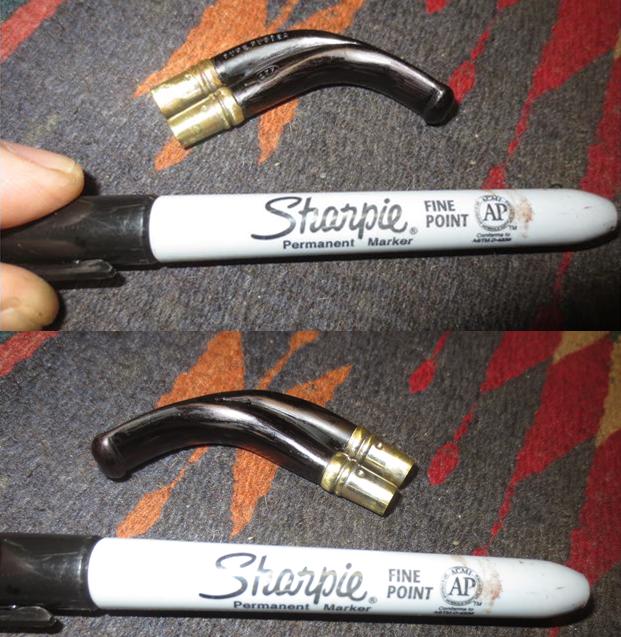
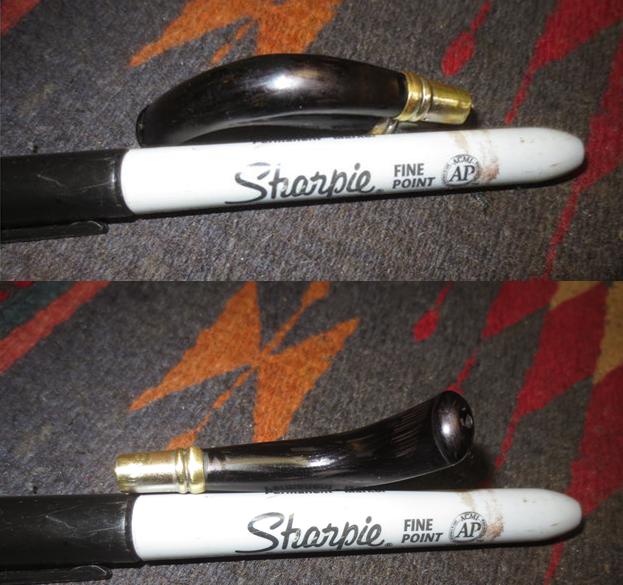
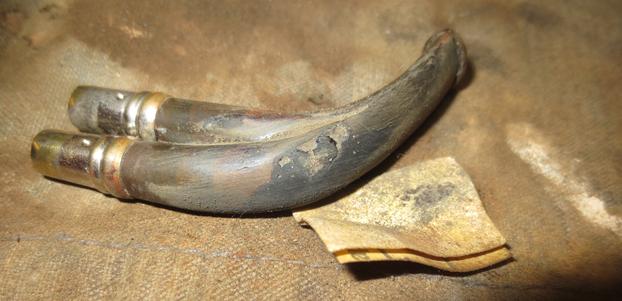
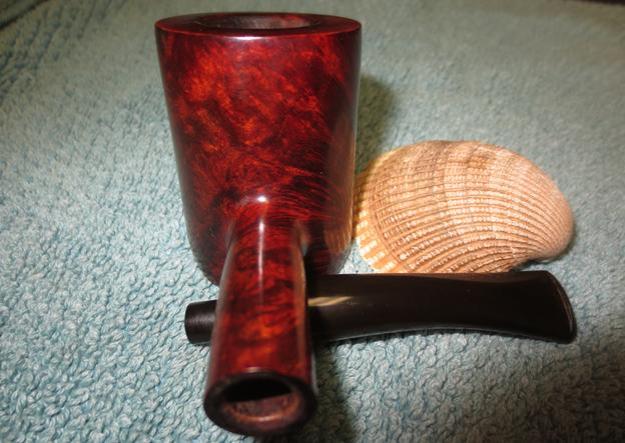
 My brother did an amazing job on the cleanup of this old timer. His work keeps getting better and better and does not damage the old briar or horn. He reamed the bowl with a PipNet Reamer and cleaned it up with the Savinelli Fitsall Pipe Knife. He scrubbed the airway through the tenon and into the shank with pipe cleaners, cotton swabs and alcohol until it was clean. He scrubbed the externals with Murphy’s Oil Soap and was careful around the remaining gold filigree in the stamping on the left side of the shank. He was able to remove the tar and lava build up on the rim top and showed that inner edge was just lightly damaged. And low and behold once he had removed the thread on the metal tenon the stem lined up perfectly. I took the next four photos of the pipe when it arrived in Vancouver.
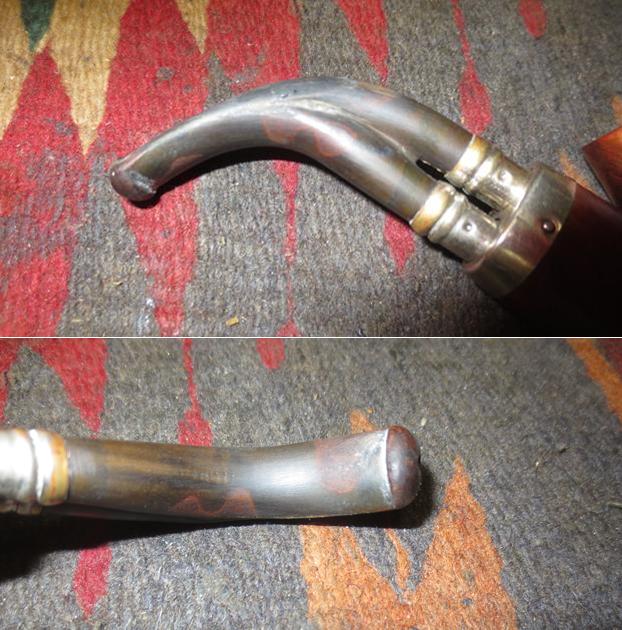
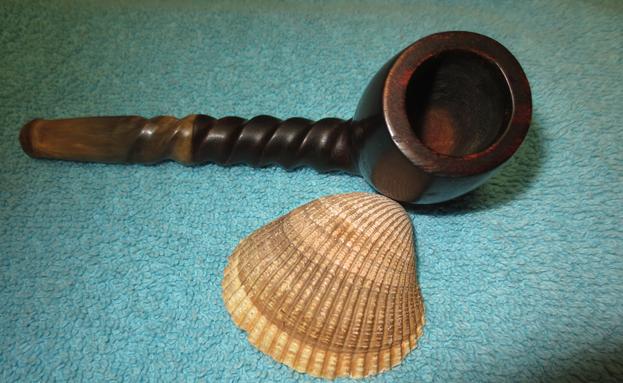
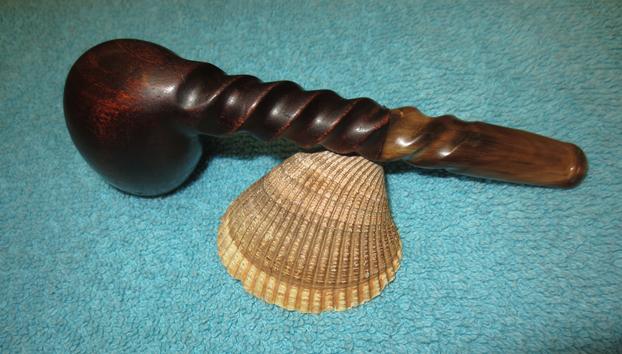
 I took a close up photo of the rim top and bowl to show how thoroughly Jeff had cleaned it. It would take very little work with a folded piece of sandpaper to smooth out the remaining damage to the inner edge of the bowl.
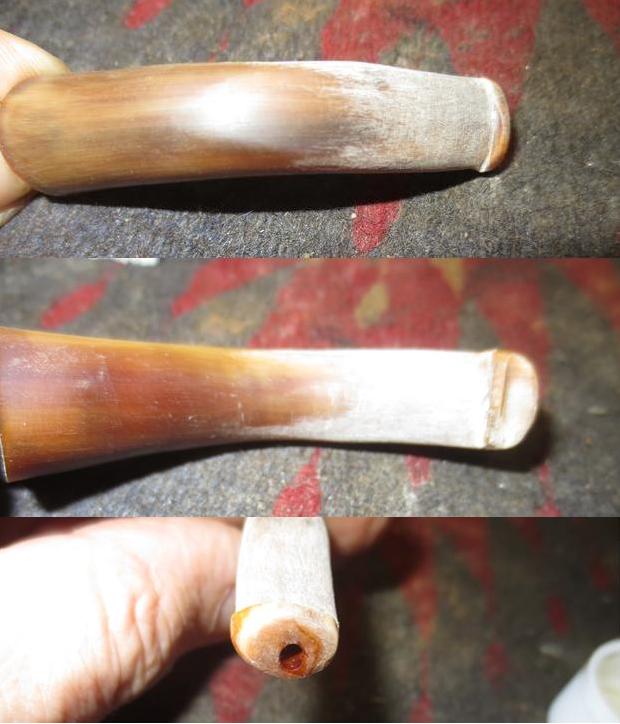
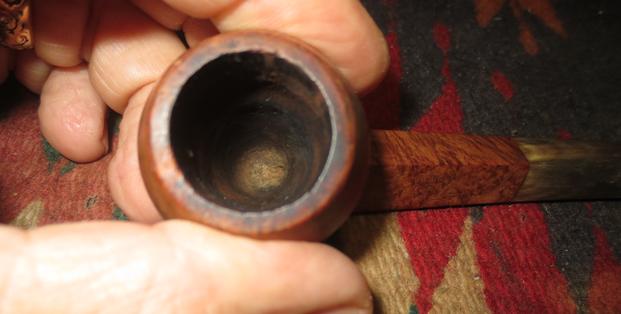 He had been able to clean out the debris from inside the stem and also smooth out the exterior of the stem. The delamination of the horn would need to be stabilized and the deep tooth wear would need to be rebuilt to restore the taper of the stem.
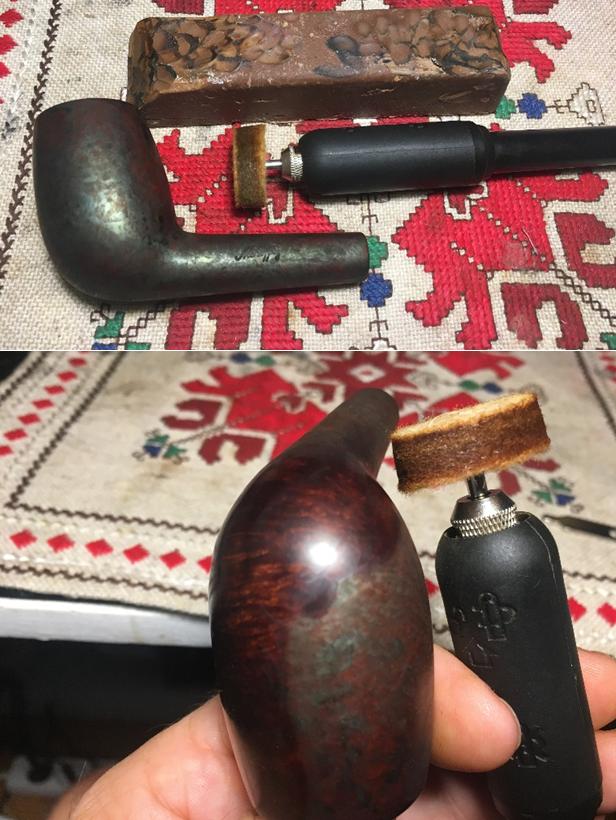
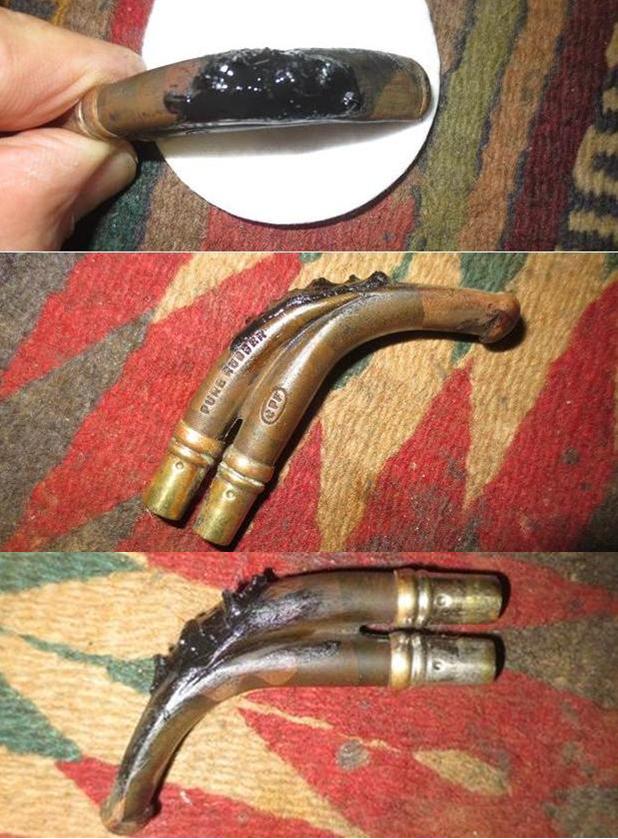
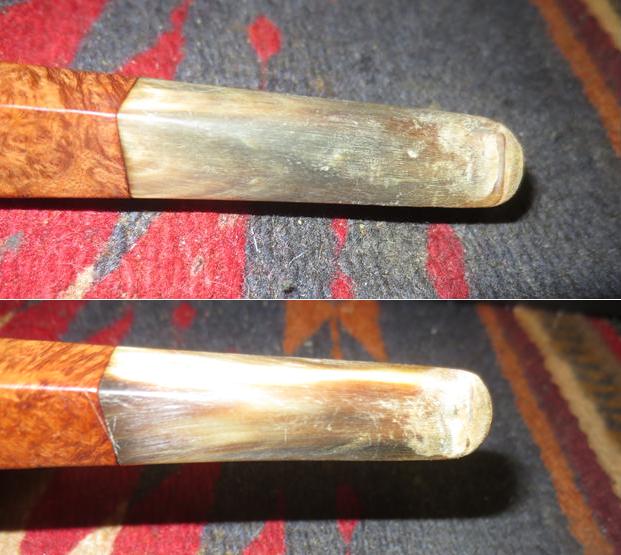 I decided to change my normal routine a bit and used amber coloured super glue from Stewart MacDonald to stabilize the horn around the button and up the surface of the stem for about an inch. This would bind together the strands of the horn and build up the tooth damaged areas on the surface. Once it dried I would be able to smooth out the repaired surface and blend it into the rest of the stem. I had an idea that the amber super glue would blend in better with the colours of the horn in this particular stem.
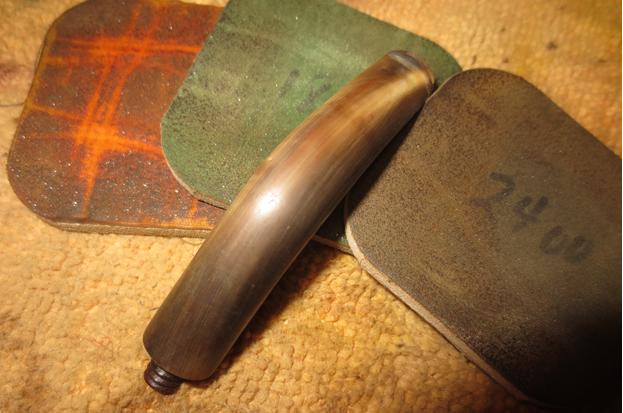
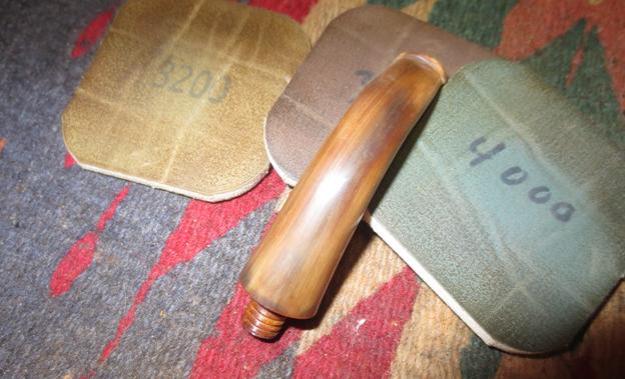
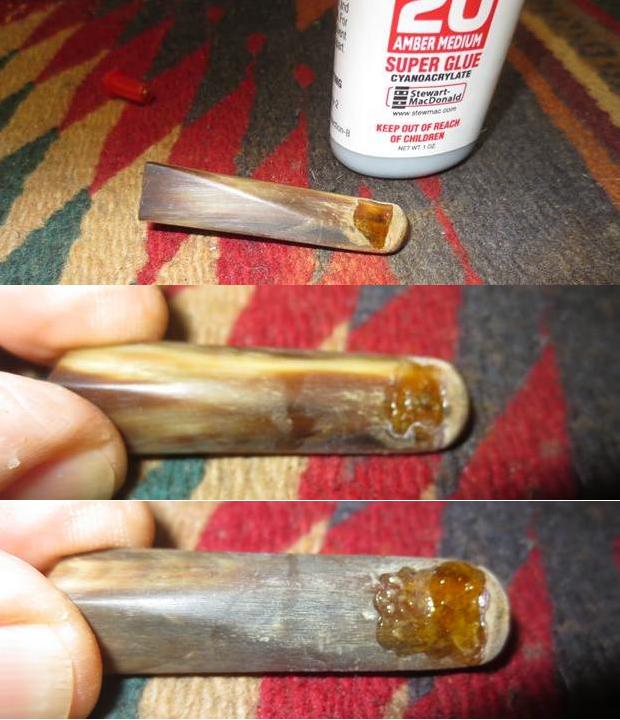 I sanded the repairs with 220 grit sandpaper to blend them into the surface of the horn. I wanted a smooth transition between the repair and the rest of the horn. I also wanted to see if I had covered the damaged area of the stem surface well enough. I was pleased by what I saw once I had smoothed the repairs out. I polished the stem with micromesh sanding pads – wet sanding with 1500-2400 grit pads and rubbing the stem down with Obsidian Oil after each pad. I dry sanded the stem with 3200-4000 grit pads to further polish it and gave it more oil after each pad. The oil serves to give life to the dried horn.
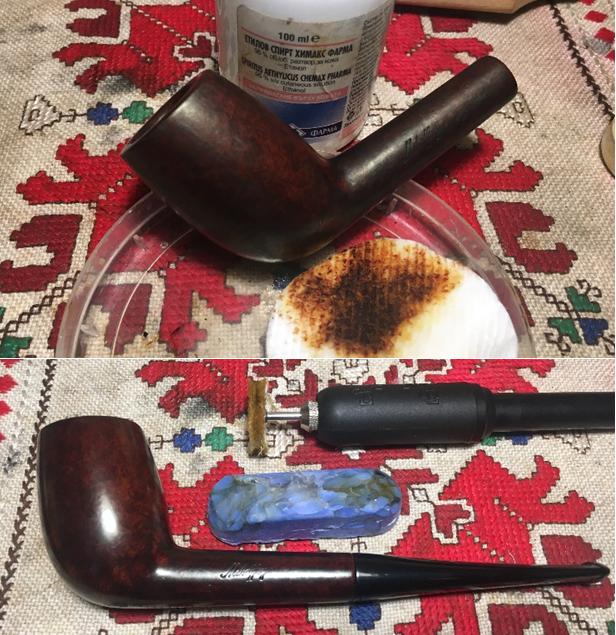
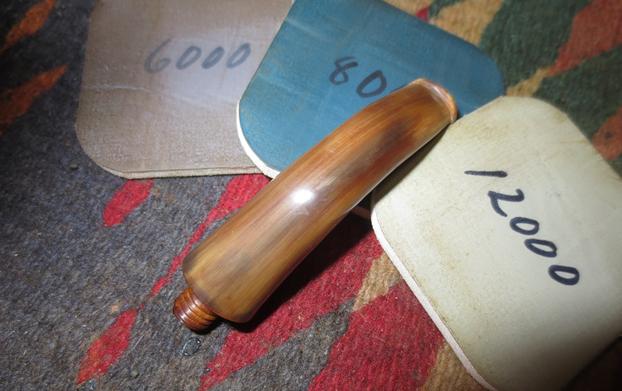
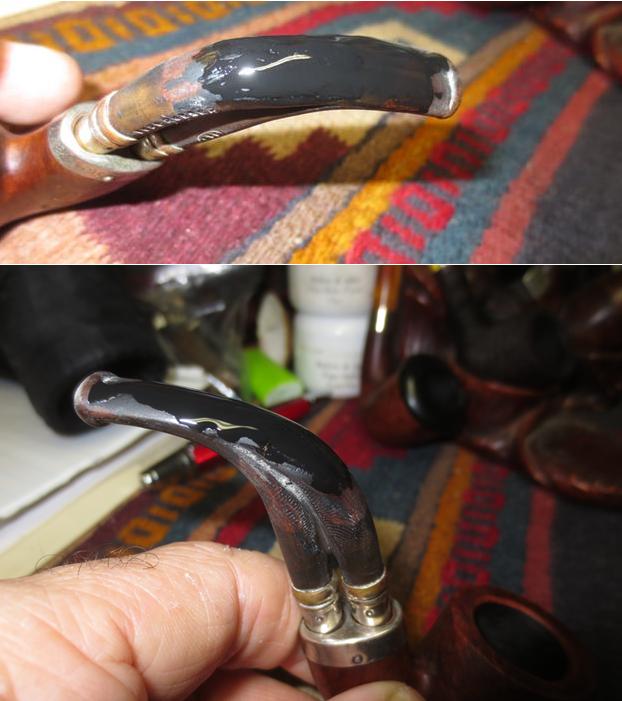
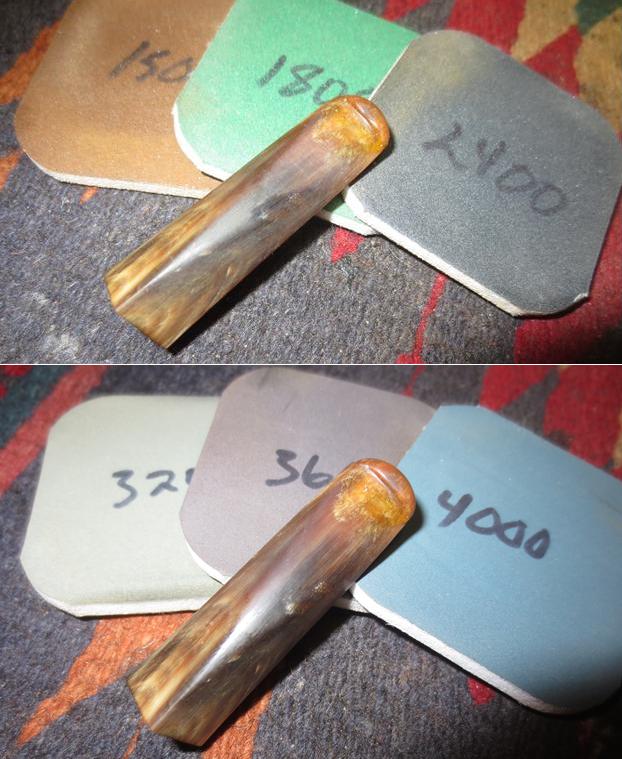 I buffed the stem with Blue Diamond on the buffing wheel before finishing polishing it with 6000-12000 grit micromesh sanding pads. I rubbed it down with Obsidian Oil after each of the micromesh sanding pads and let it dry after the final pad.
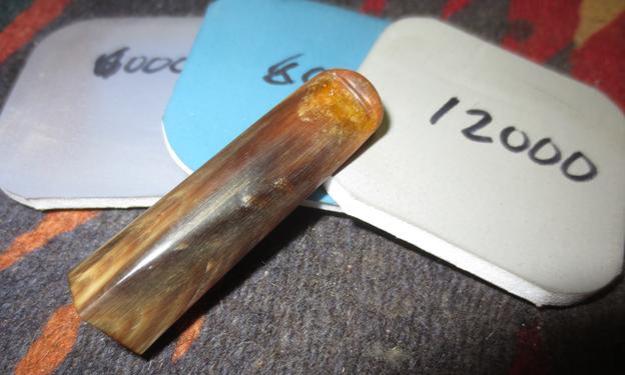 With the stem finished I worked on the inner edge of the bowl. I used a folded piece of 220 grit sandpaper to smooth out the damage on the bowl edge. It did not take too much work to make it smooth once again. I sanded the top of the rim with micromesh sanding pads – wet sanding with 1500-2400 grit pads and dry sanding with 3200-12000 grit pads (I forgot to take photos of the work on the rim top with the 3200-12000 grit pads).
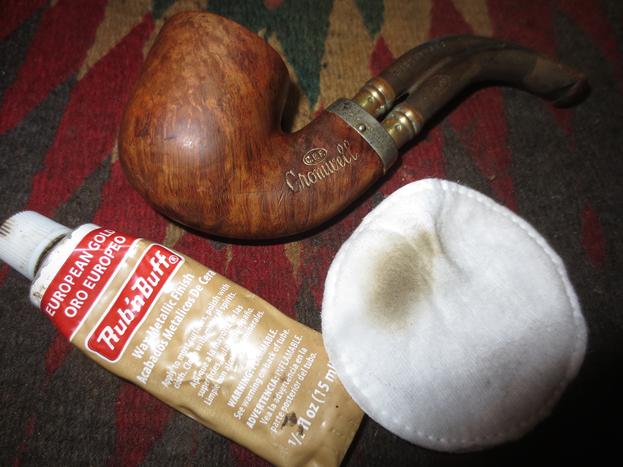
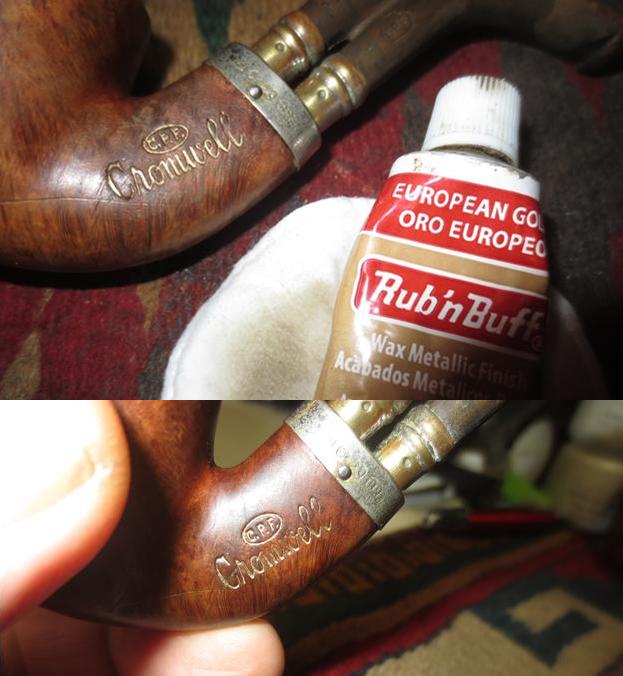
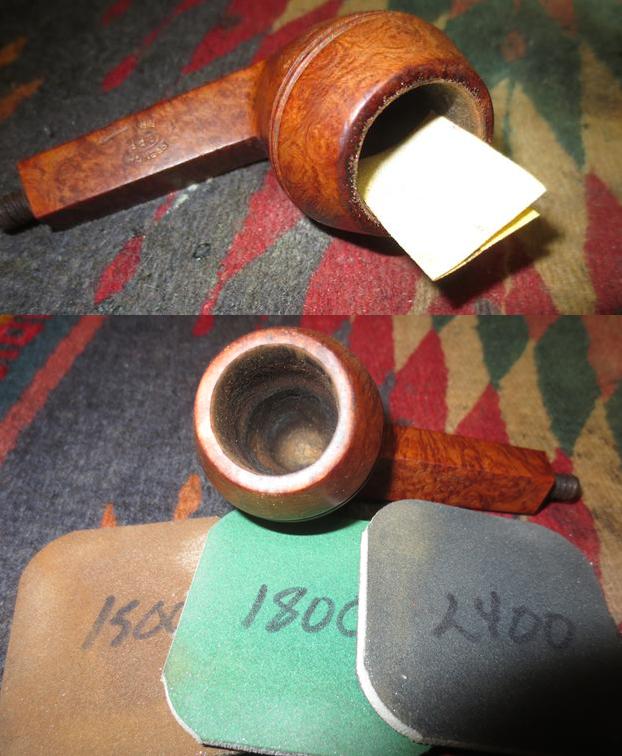 I used some European Gold Rub’n Buff to rework the stamping on the shank side. I applied it to the stamping with a cotton swab and then wiped off the excess. The photo below shows the stamping with the gold applied.
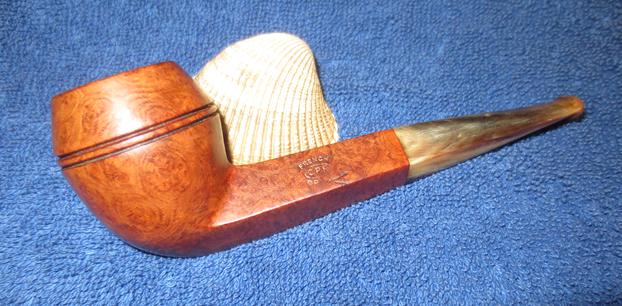
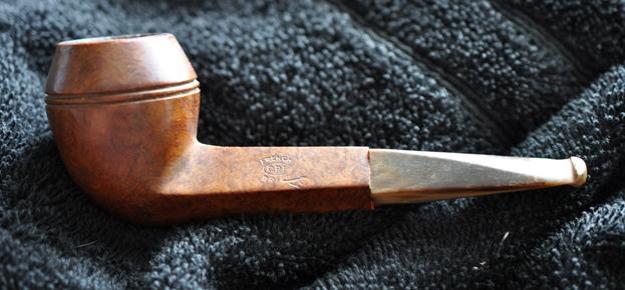
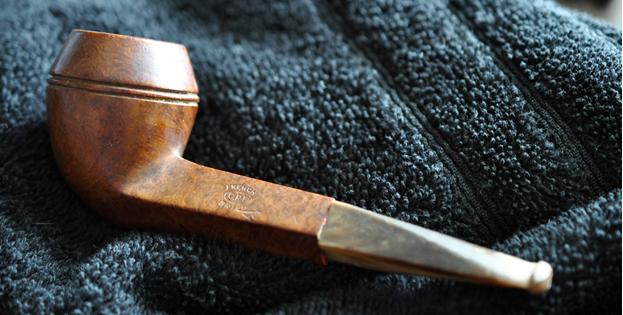
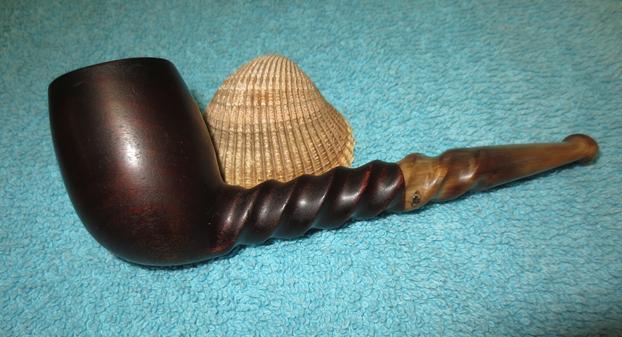
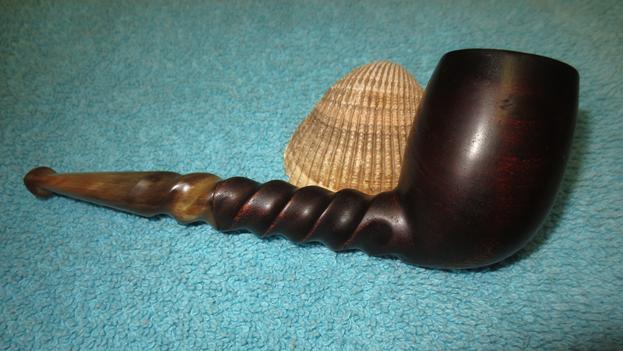
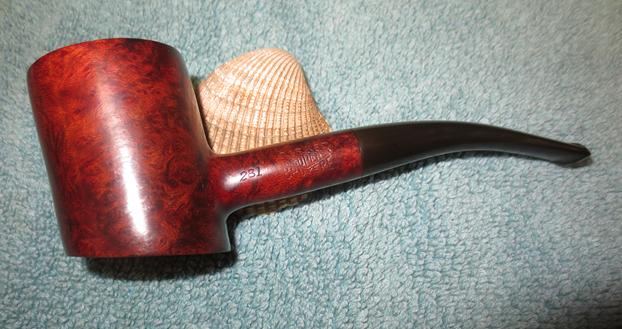
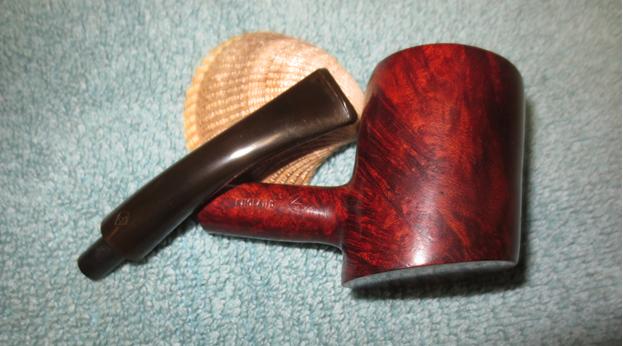
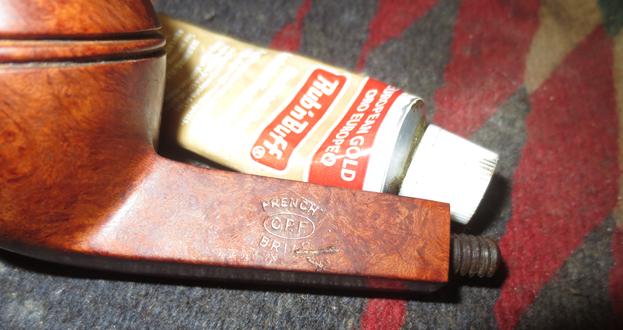 I put the stem back on the shank and buffed the pipe with Blue Diamond on the buffing wheel. I carefully worked over the shank so as to not damage the stamping. I gave the entire pipe multiple coats of carnauba wax to protect the briar and the horn. I buffed it with a clean buffing pad to raise the shine and hand buffed it with a microfiber cloth to deepen the shine. The finished pipe is shown in the photos below. It is a classic piece of pipe history. The shape and the finish of the pipe are exceptionally well done and show European craftsmanship that Colossus Pipe Factory was famous for. This is one of those pipes that will have a place in my own collection. It is just too beautiful to part with!


 While waiting for each layer of glue to dry I worked on the rim top. I topped it lightly with 220 grit sandpaper on a topping board to smooth out the damage to the rim. I took enough of the damage off to leave the rim top smooth to the touch.
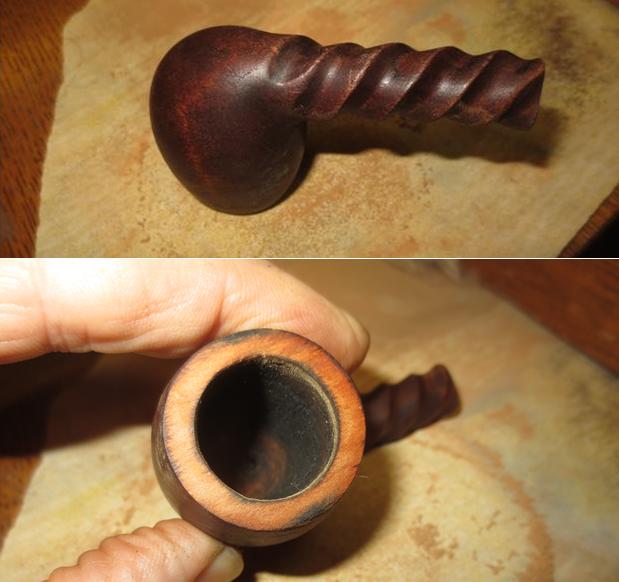


