Tag Archives: bowl topping

Wally Frank Shipmate


Blog by Greg Wolford

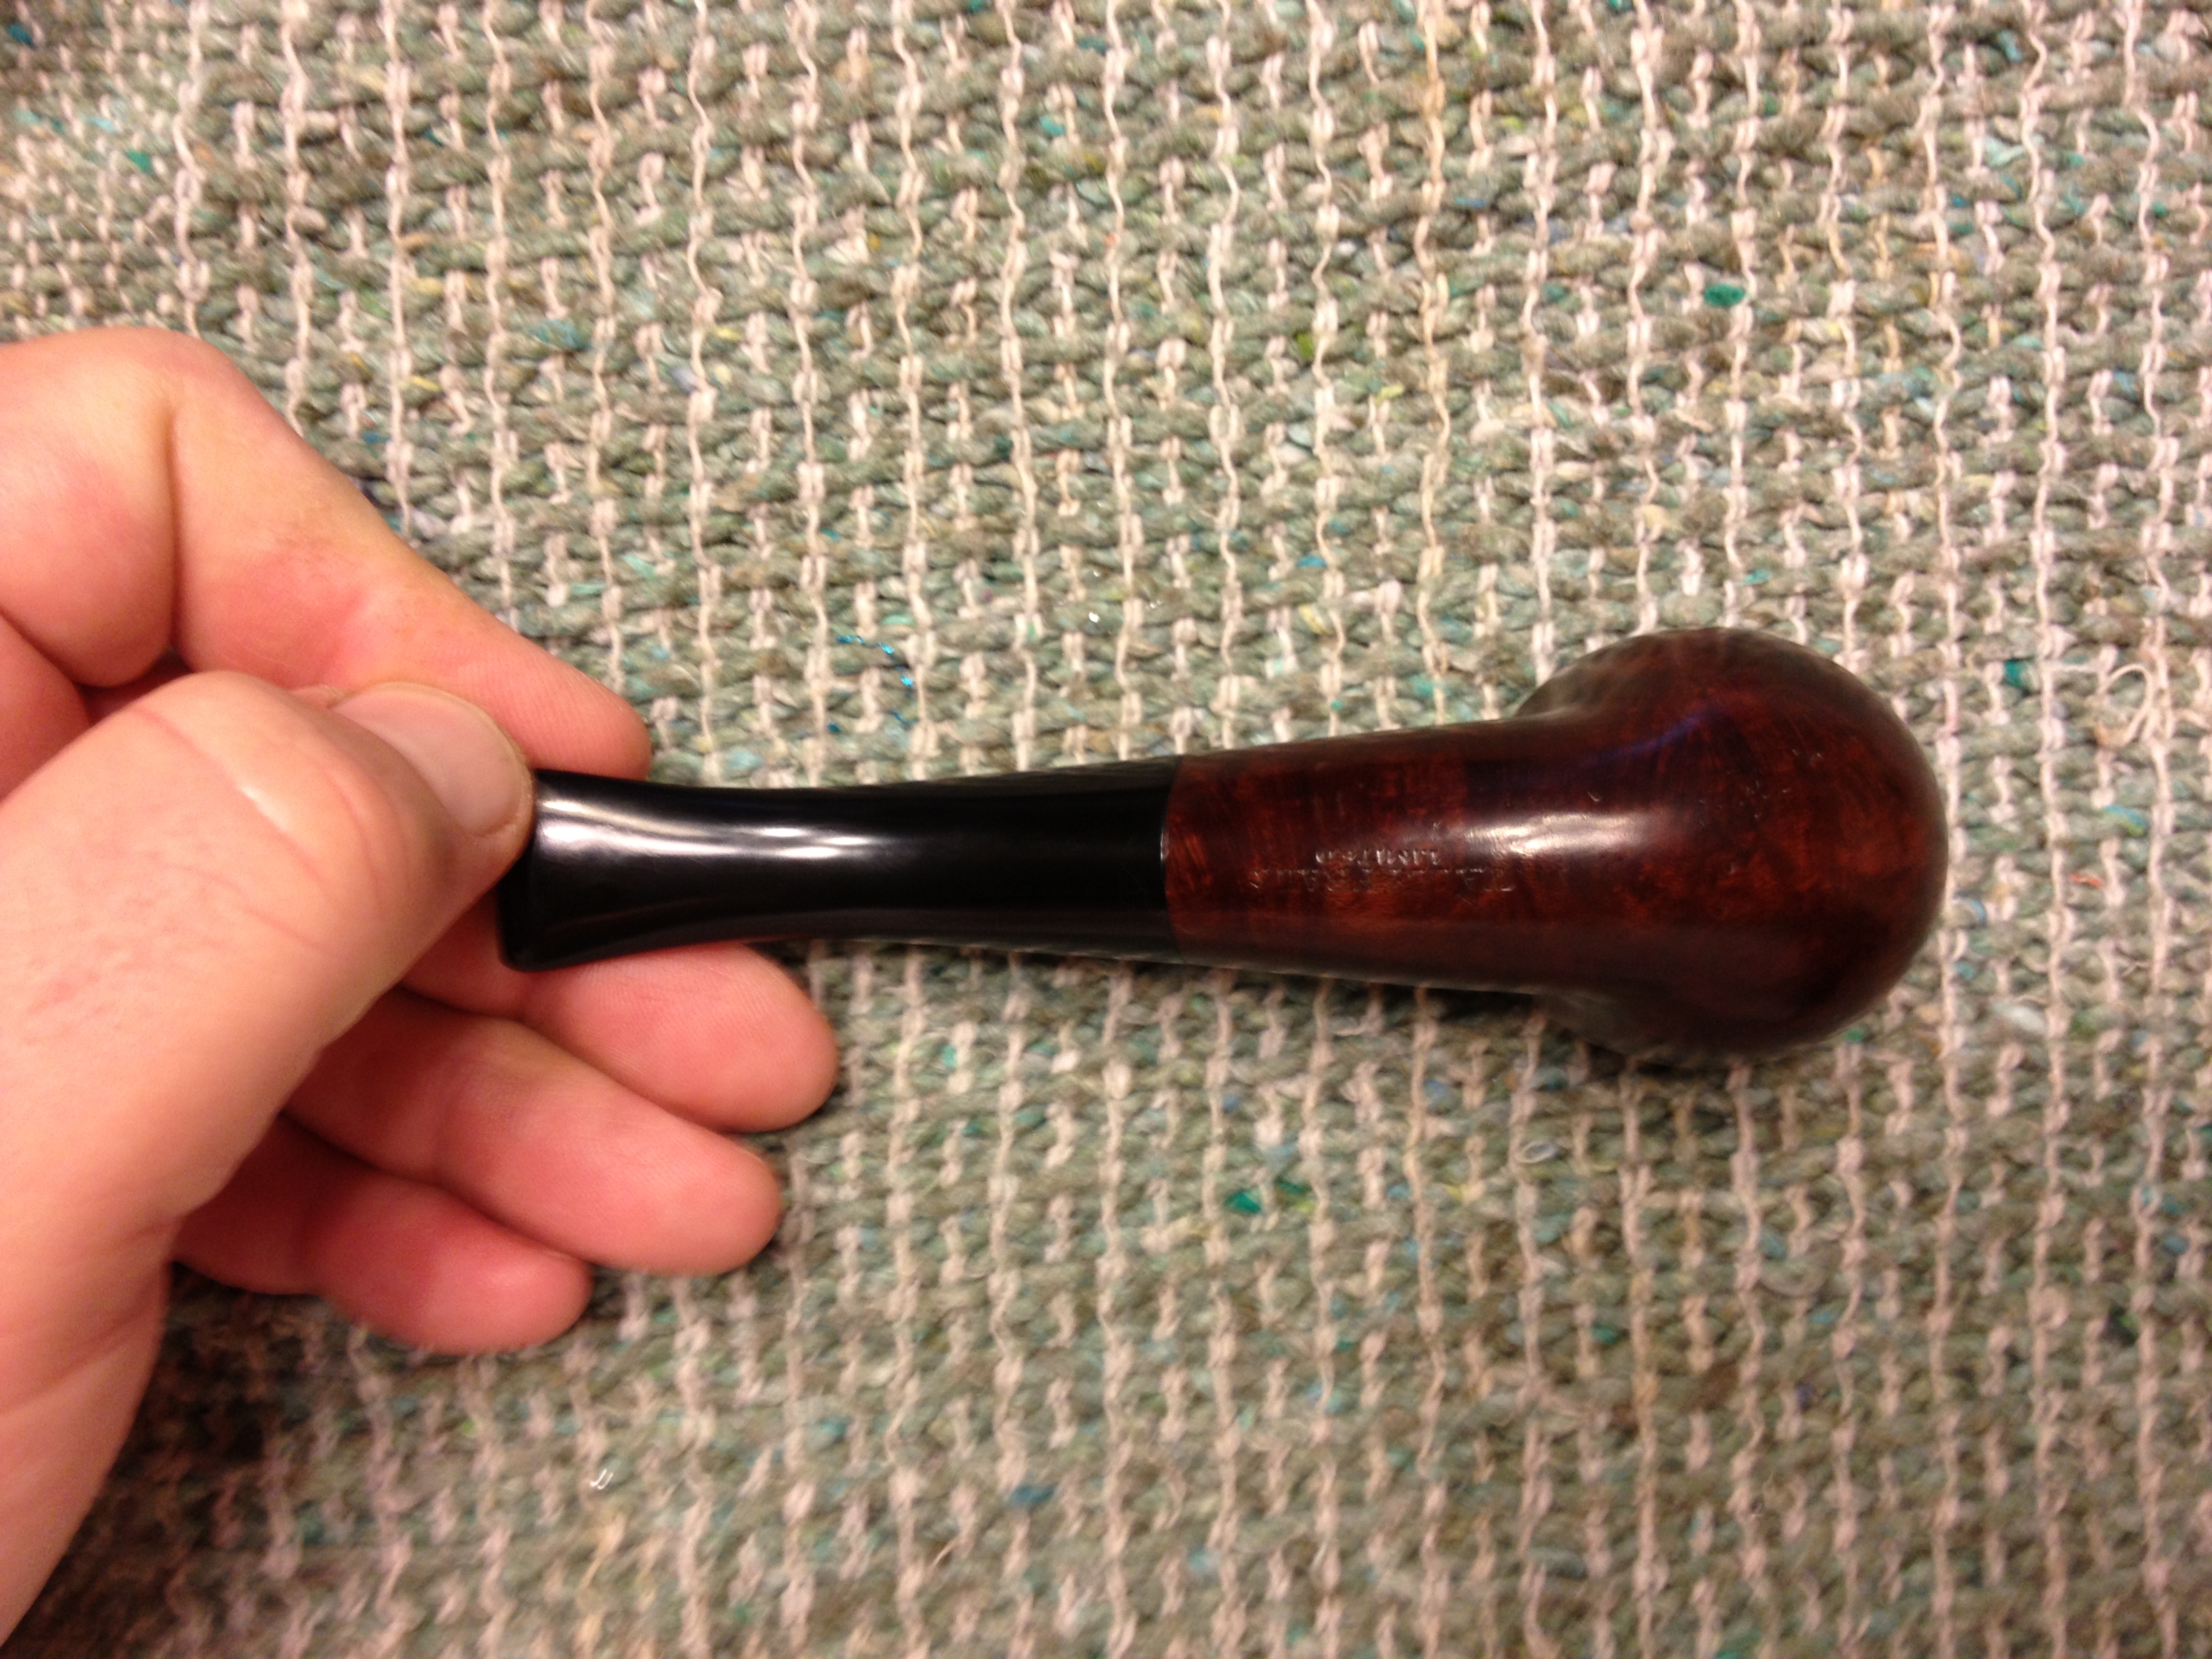
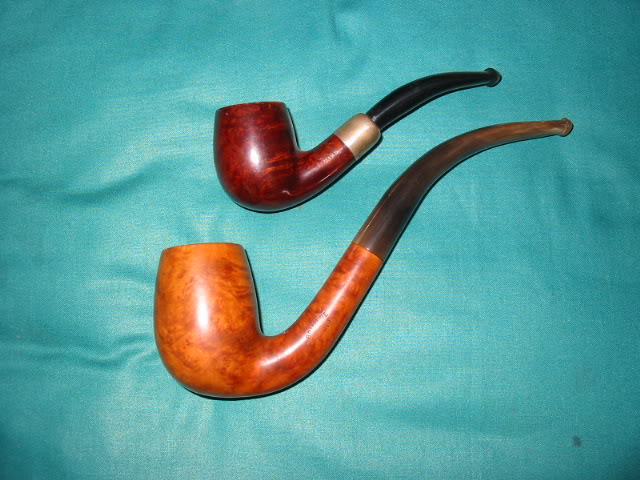
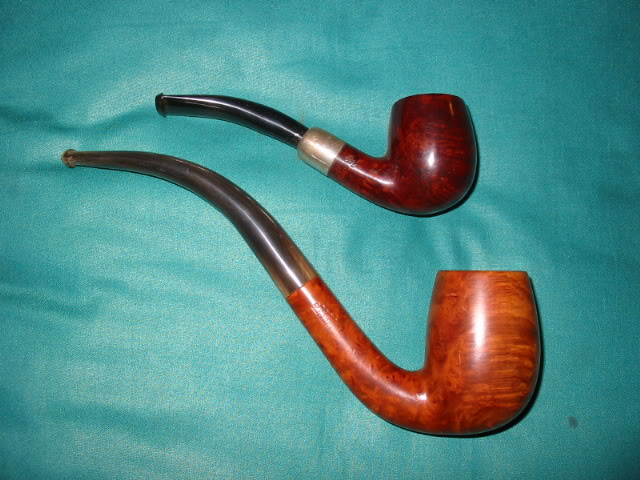
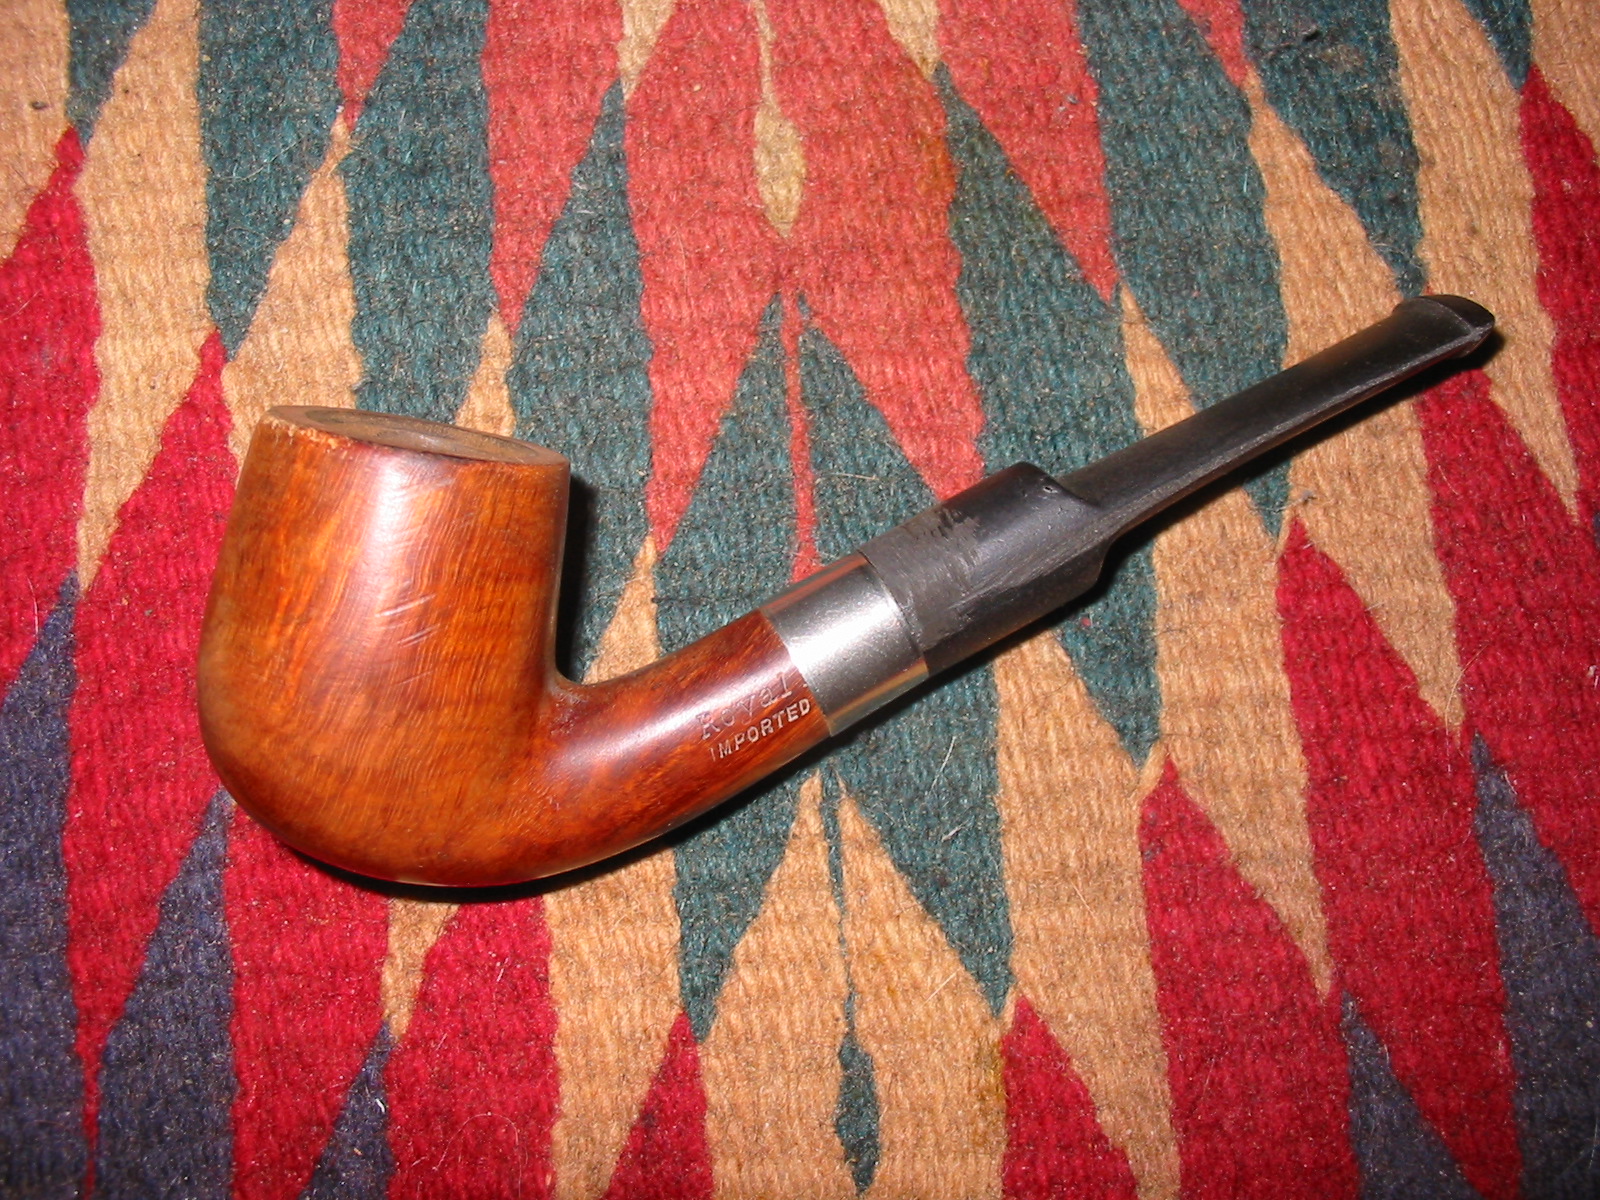
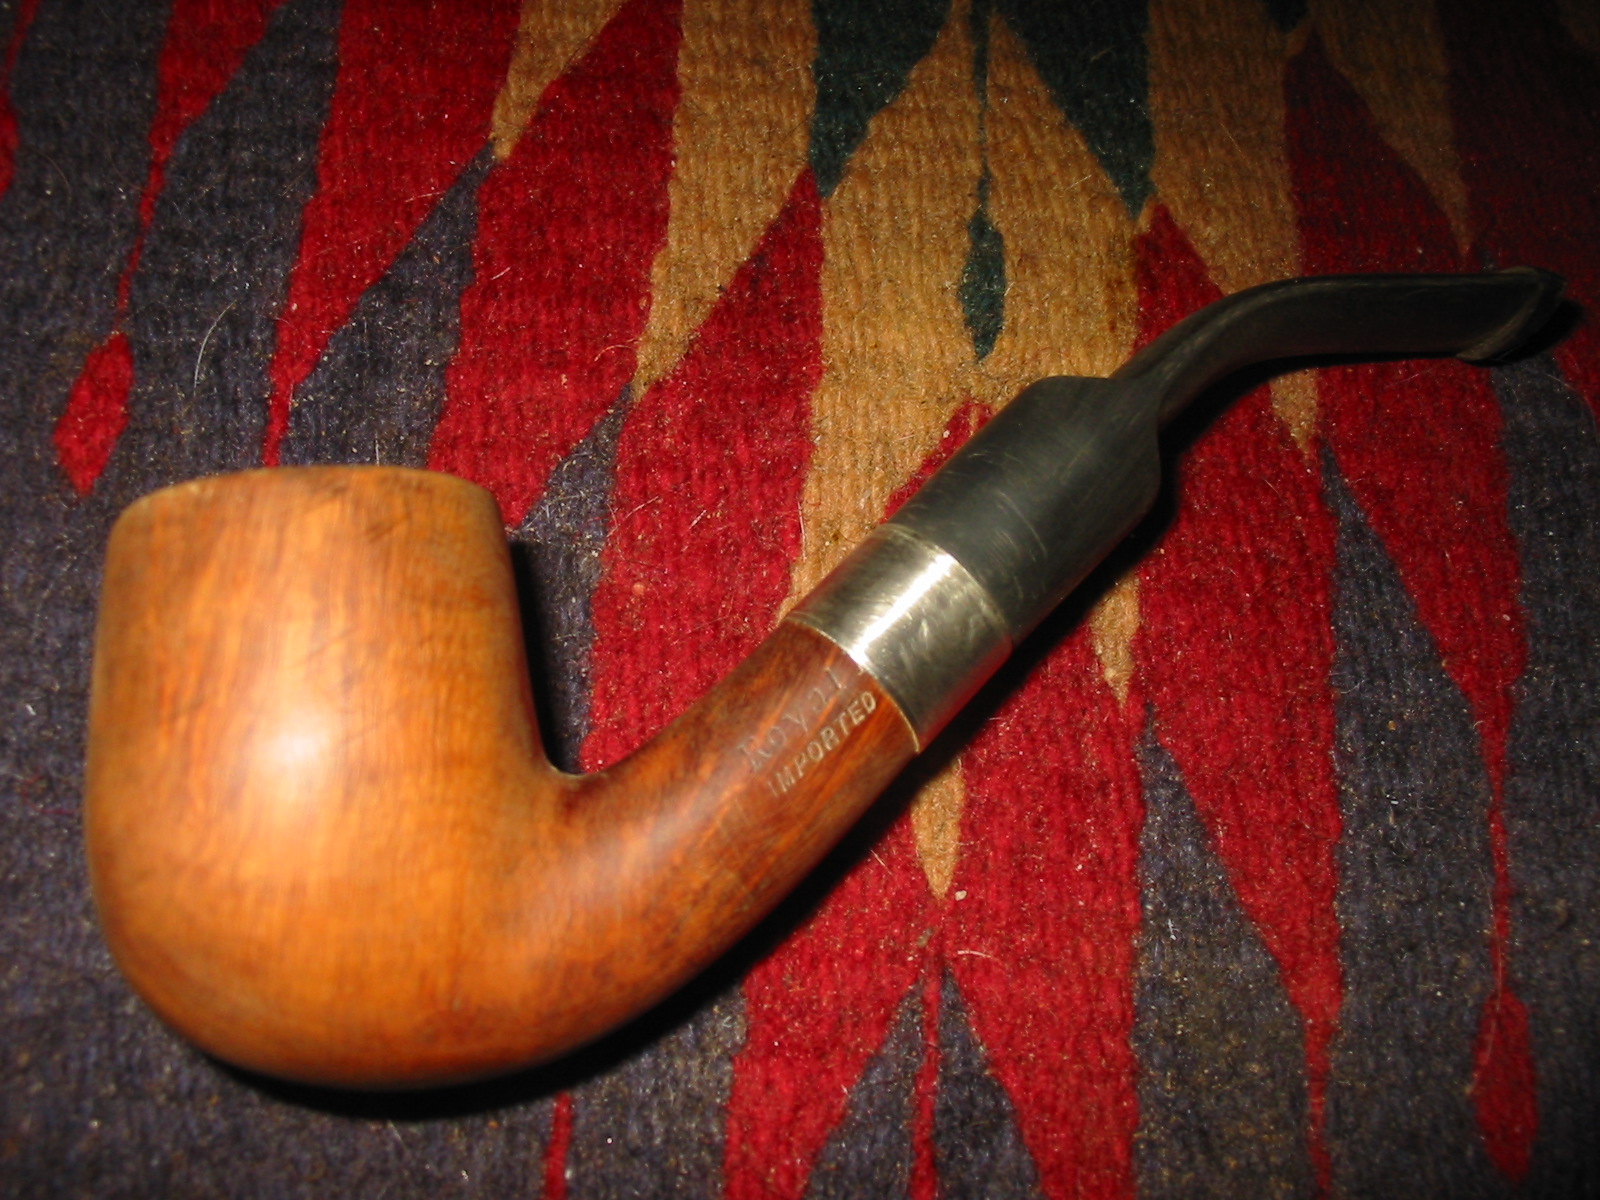
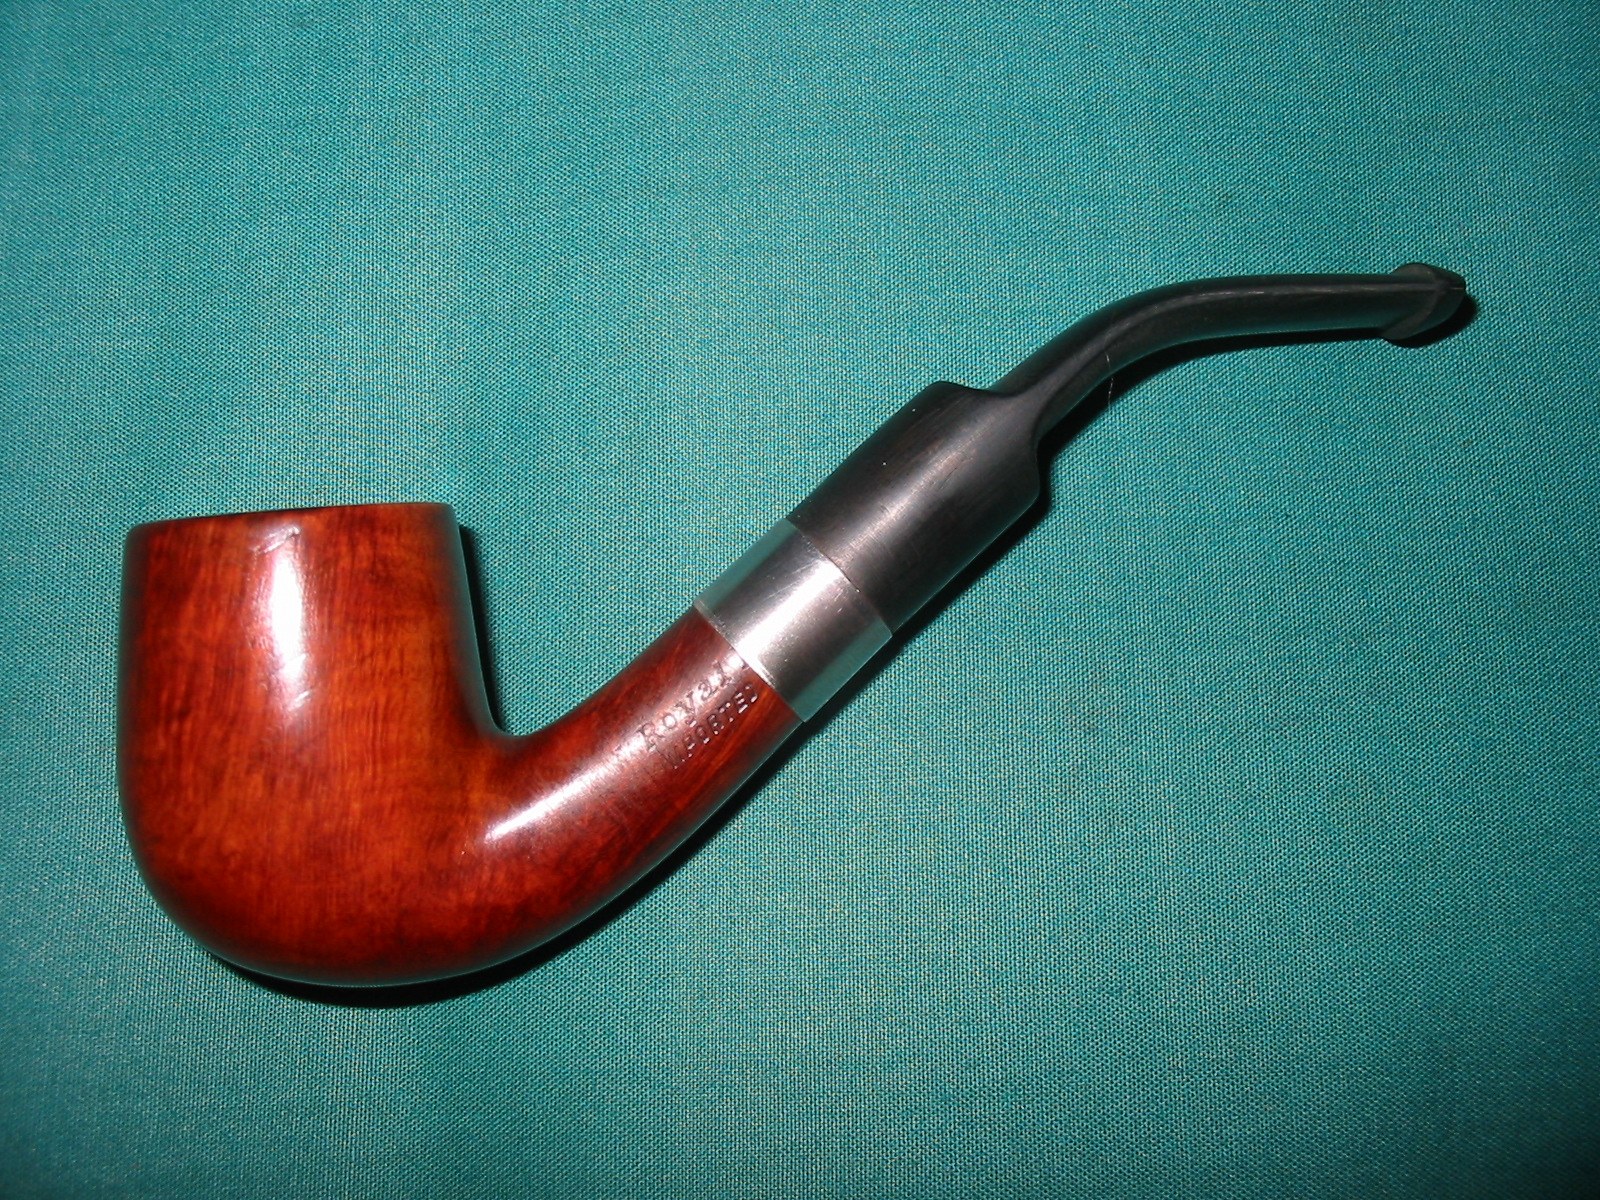
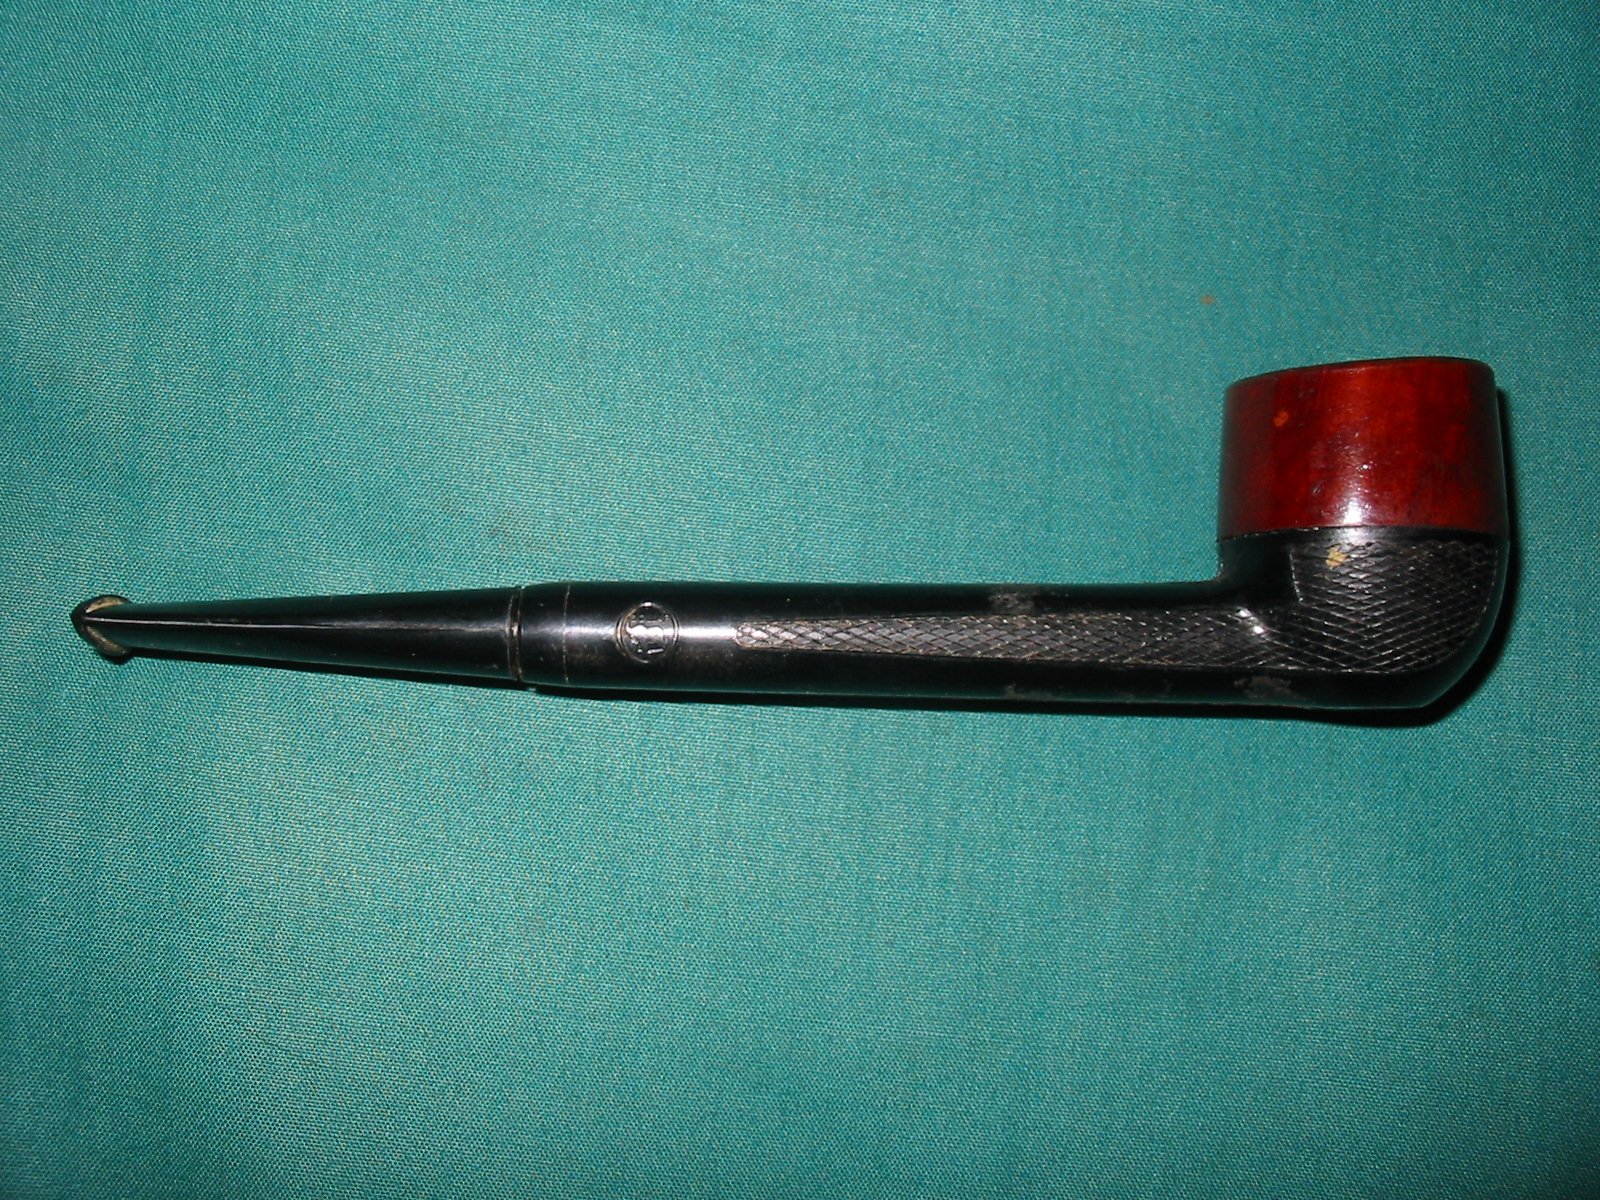
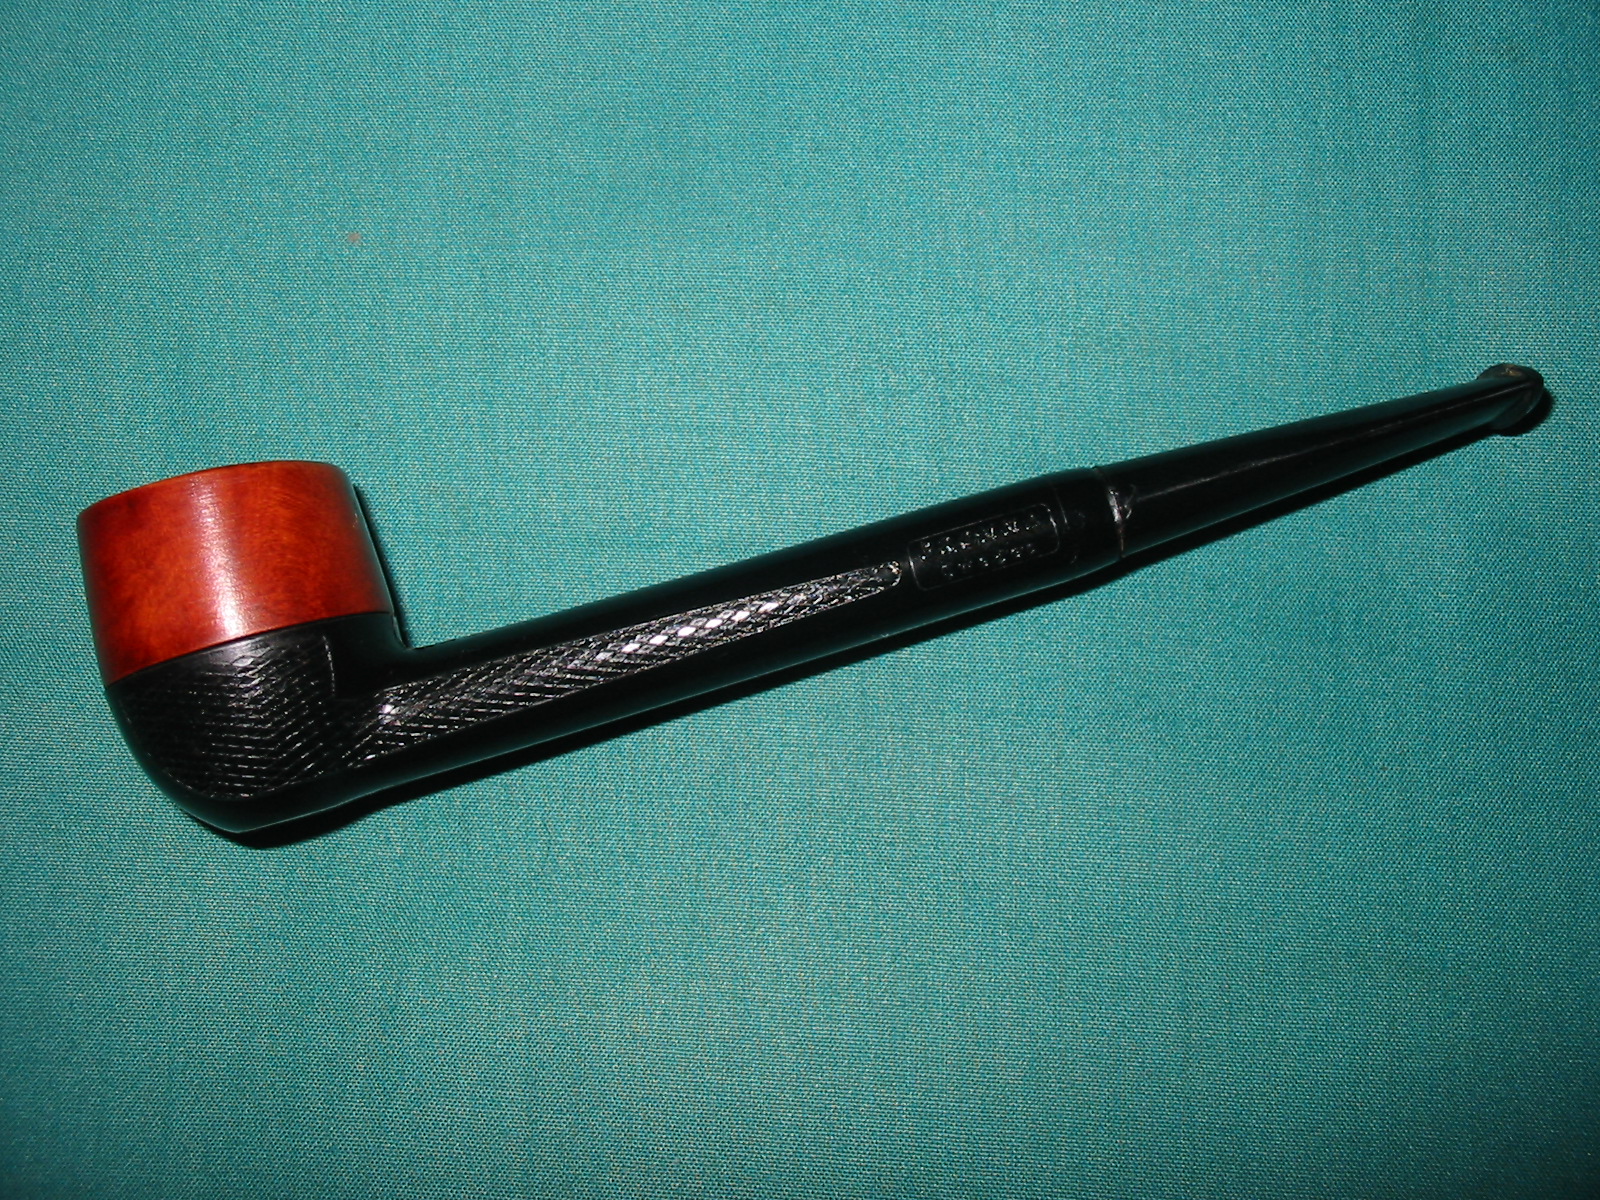
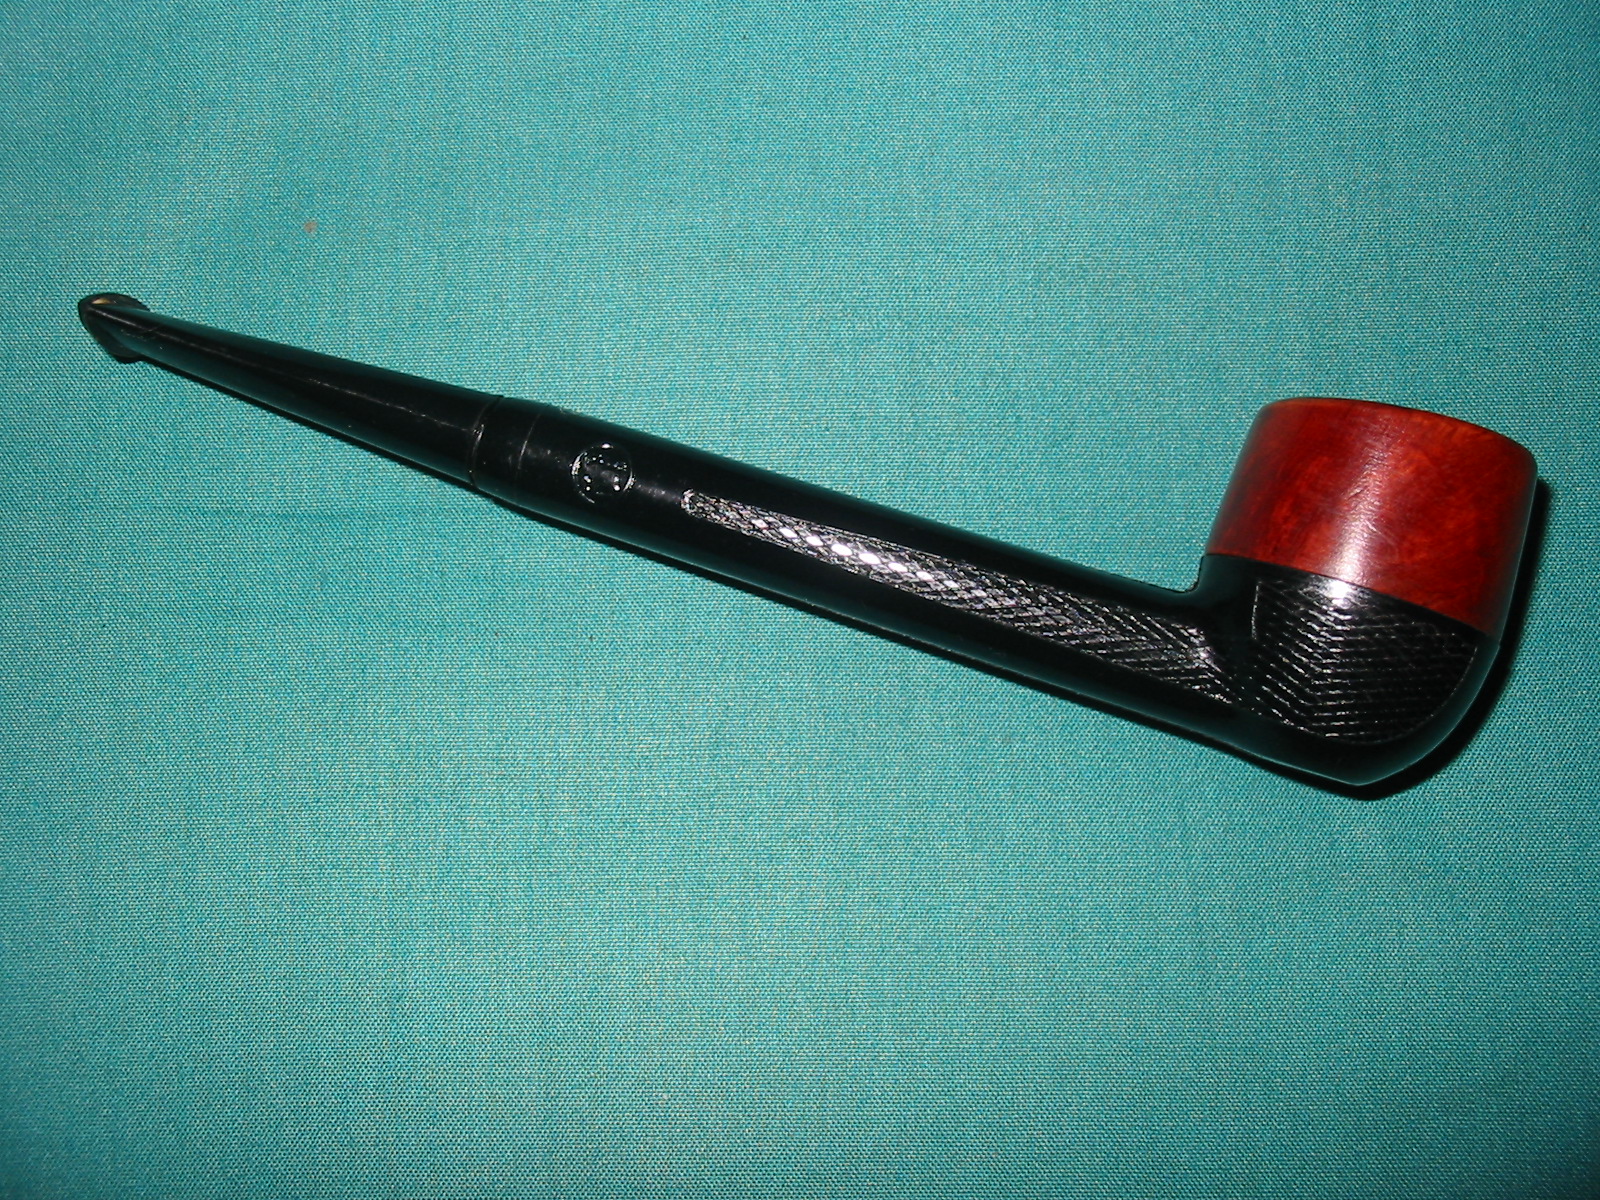
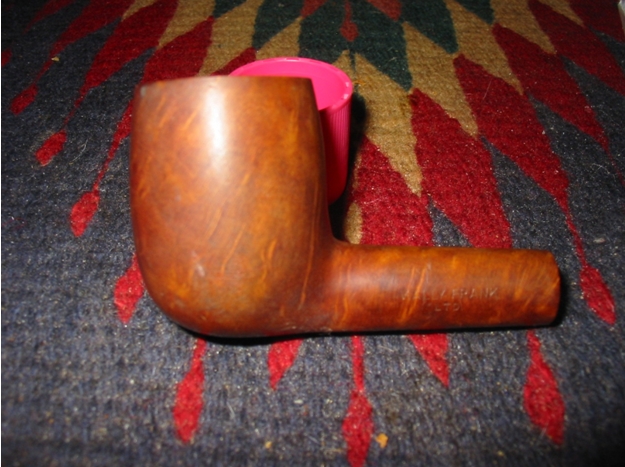
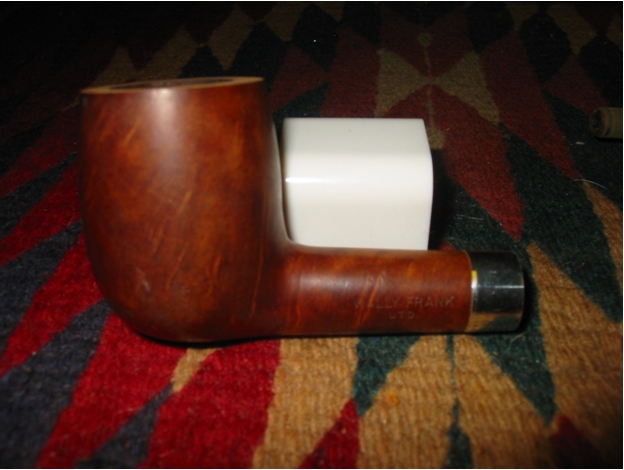
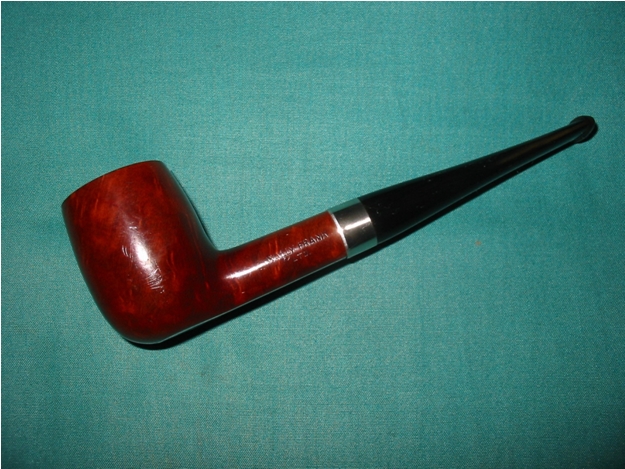
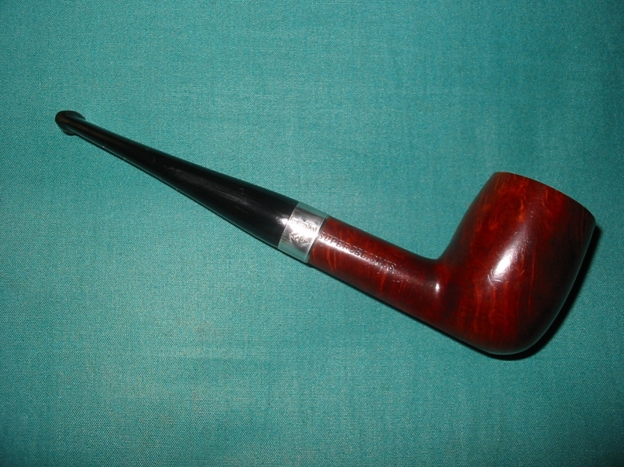
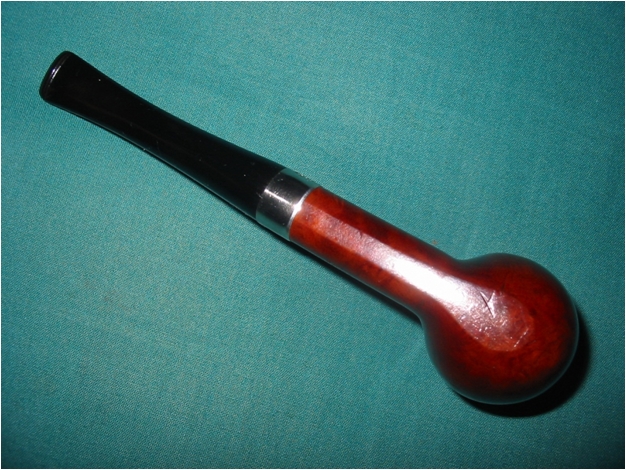
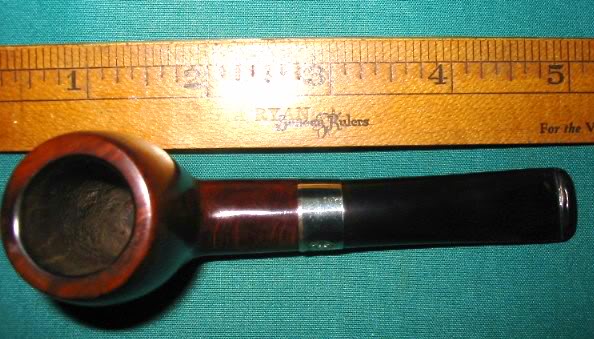
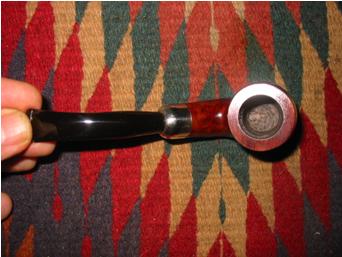
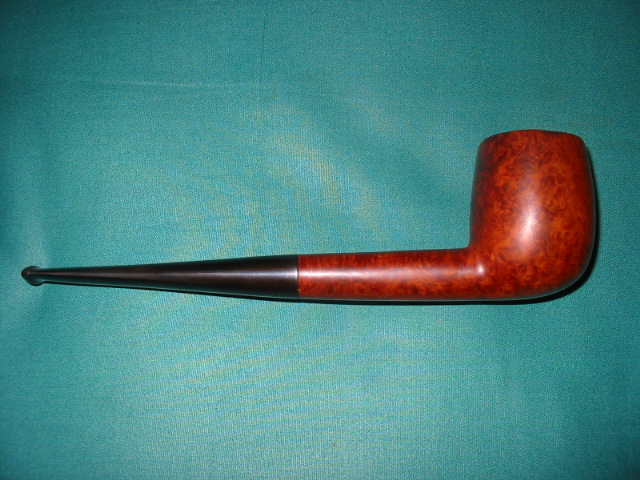
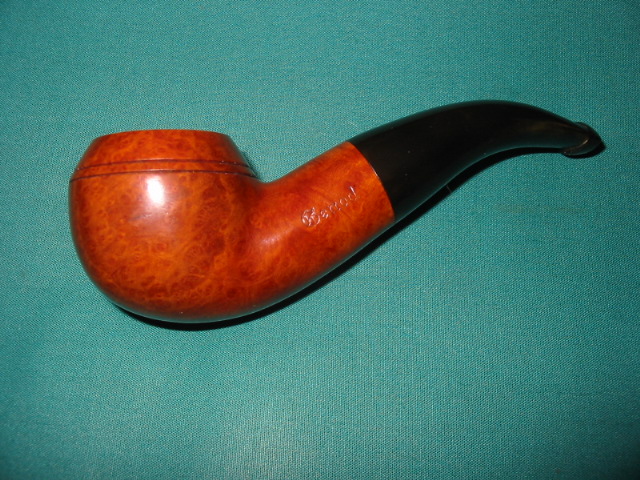
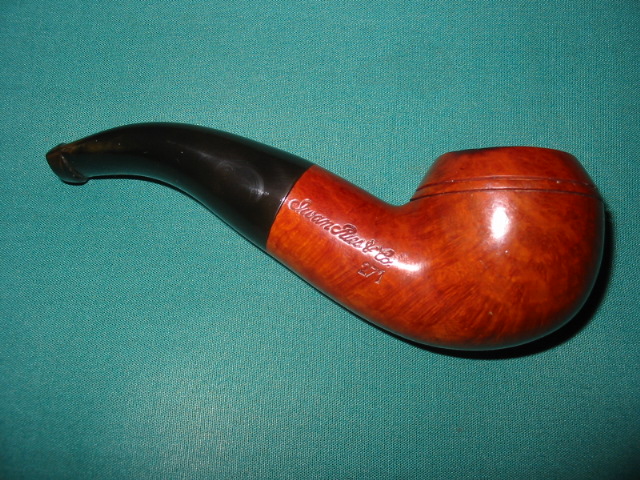
The same trip out that I picked up the Dr. Grabow Freehand I also picked up this Wally Frank. It was in pretty good condition, really just needing a good clean up. I’d never had a Wally Frank before, like the Freehand, so that was part of my interest. But the real interest laid in its shape: a Rhodesian.  The Bulldog and Rhodesian top my list of favorite shapes so this one had to come home with me.

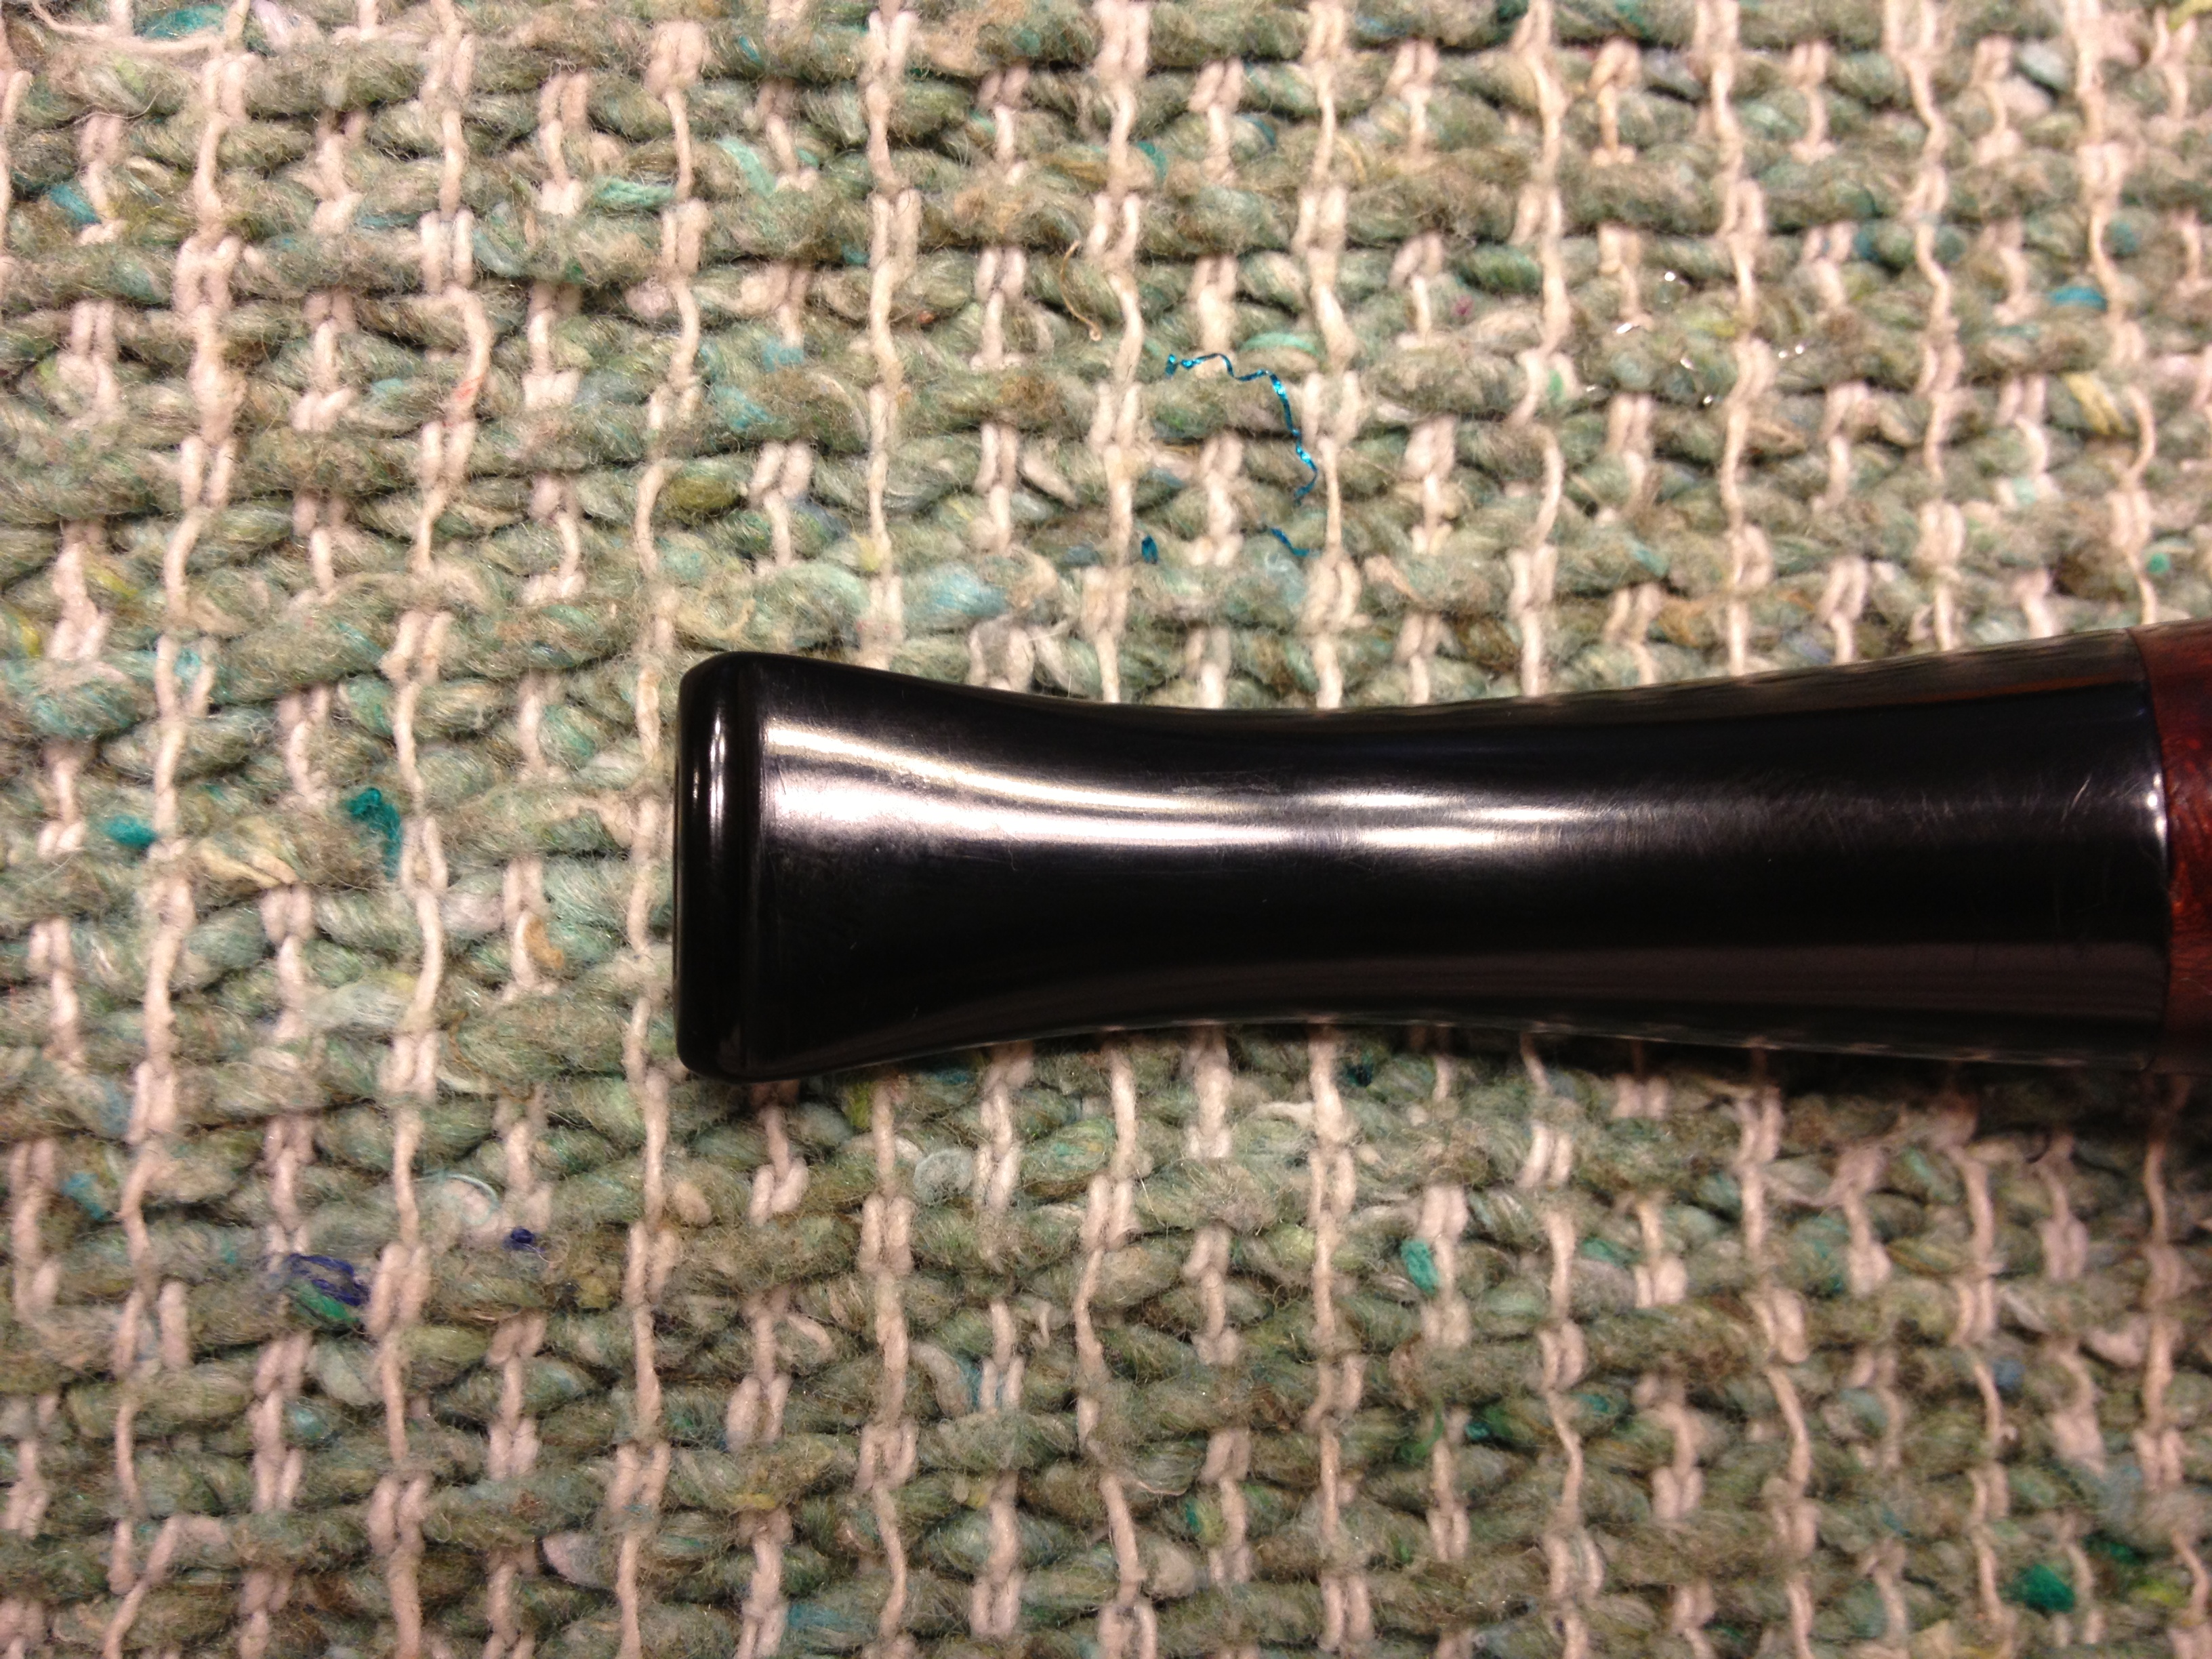
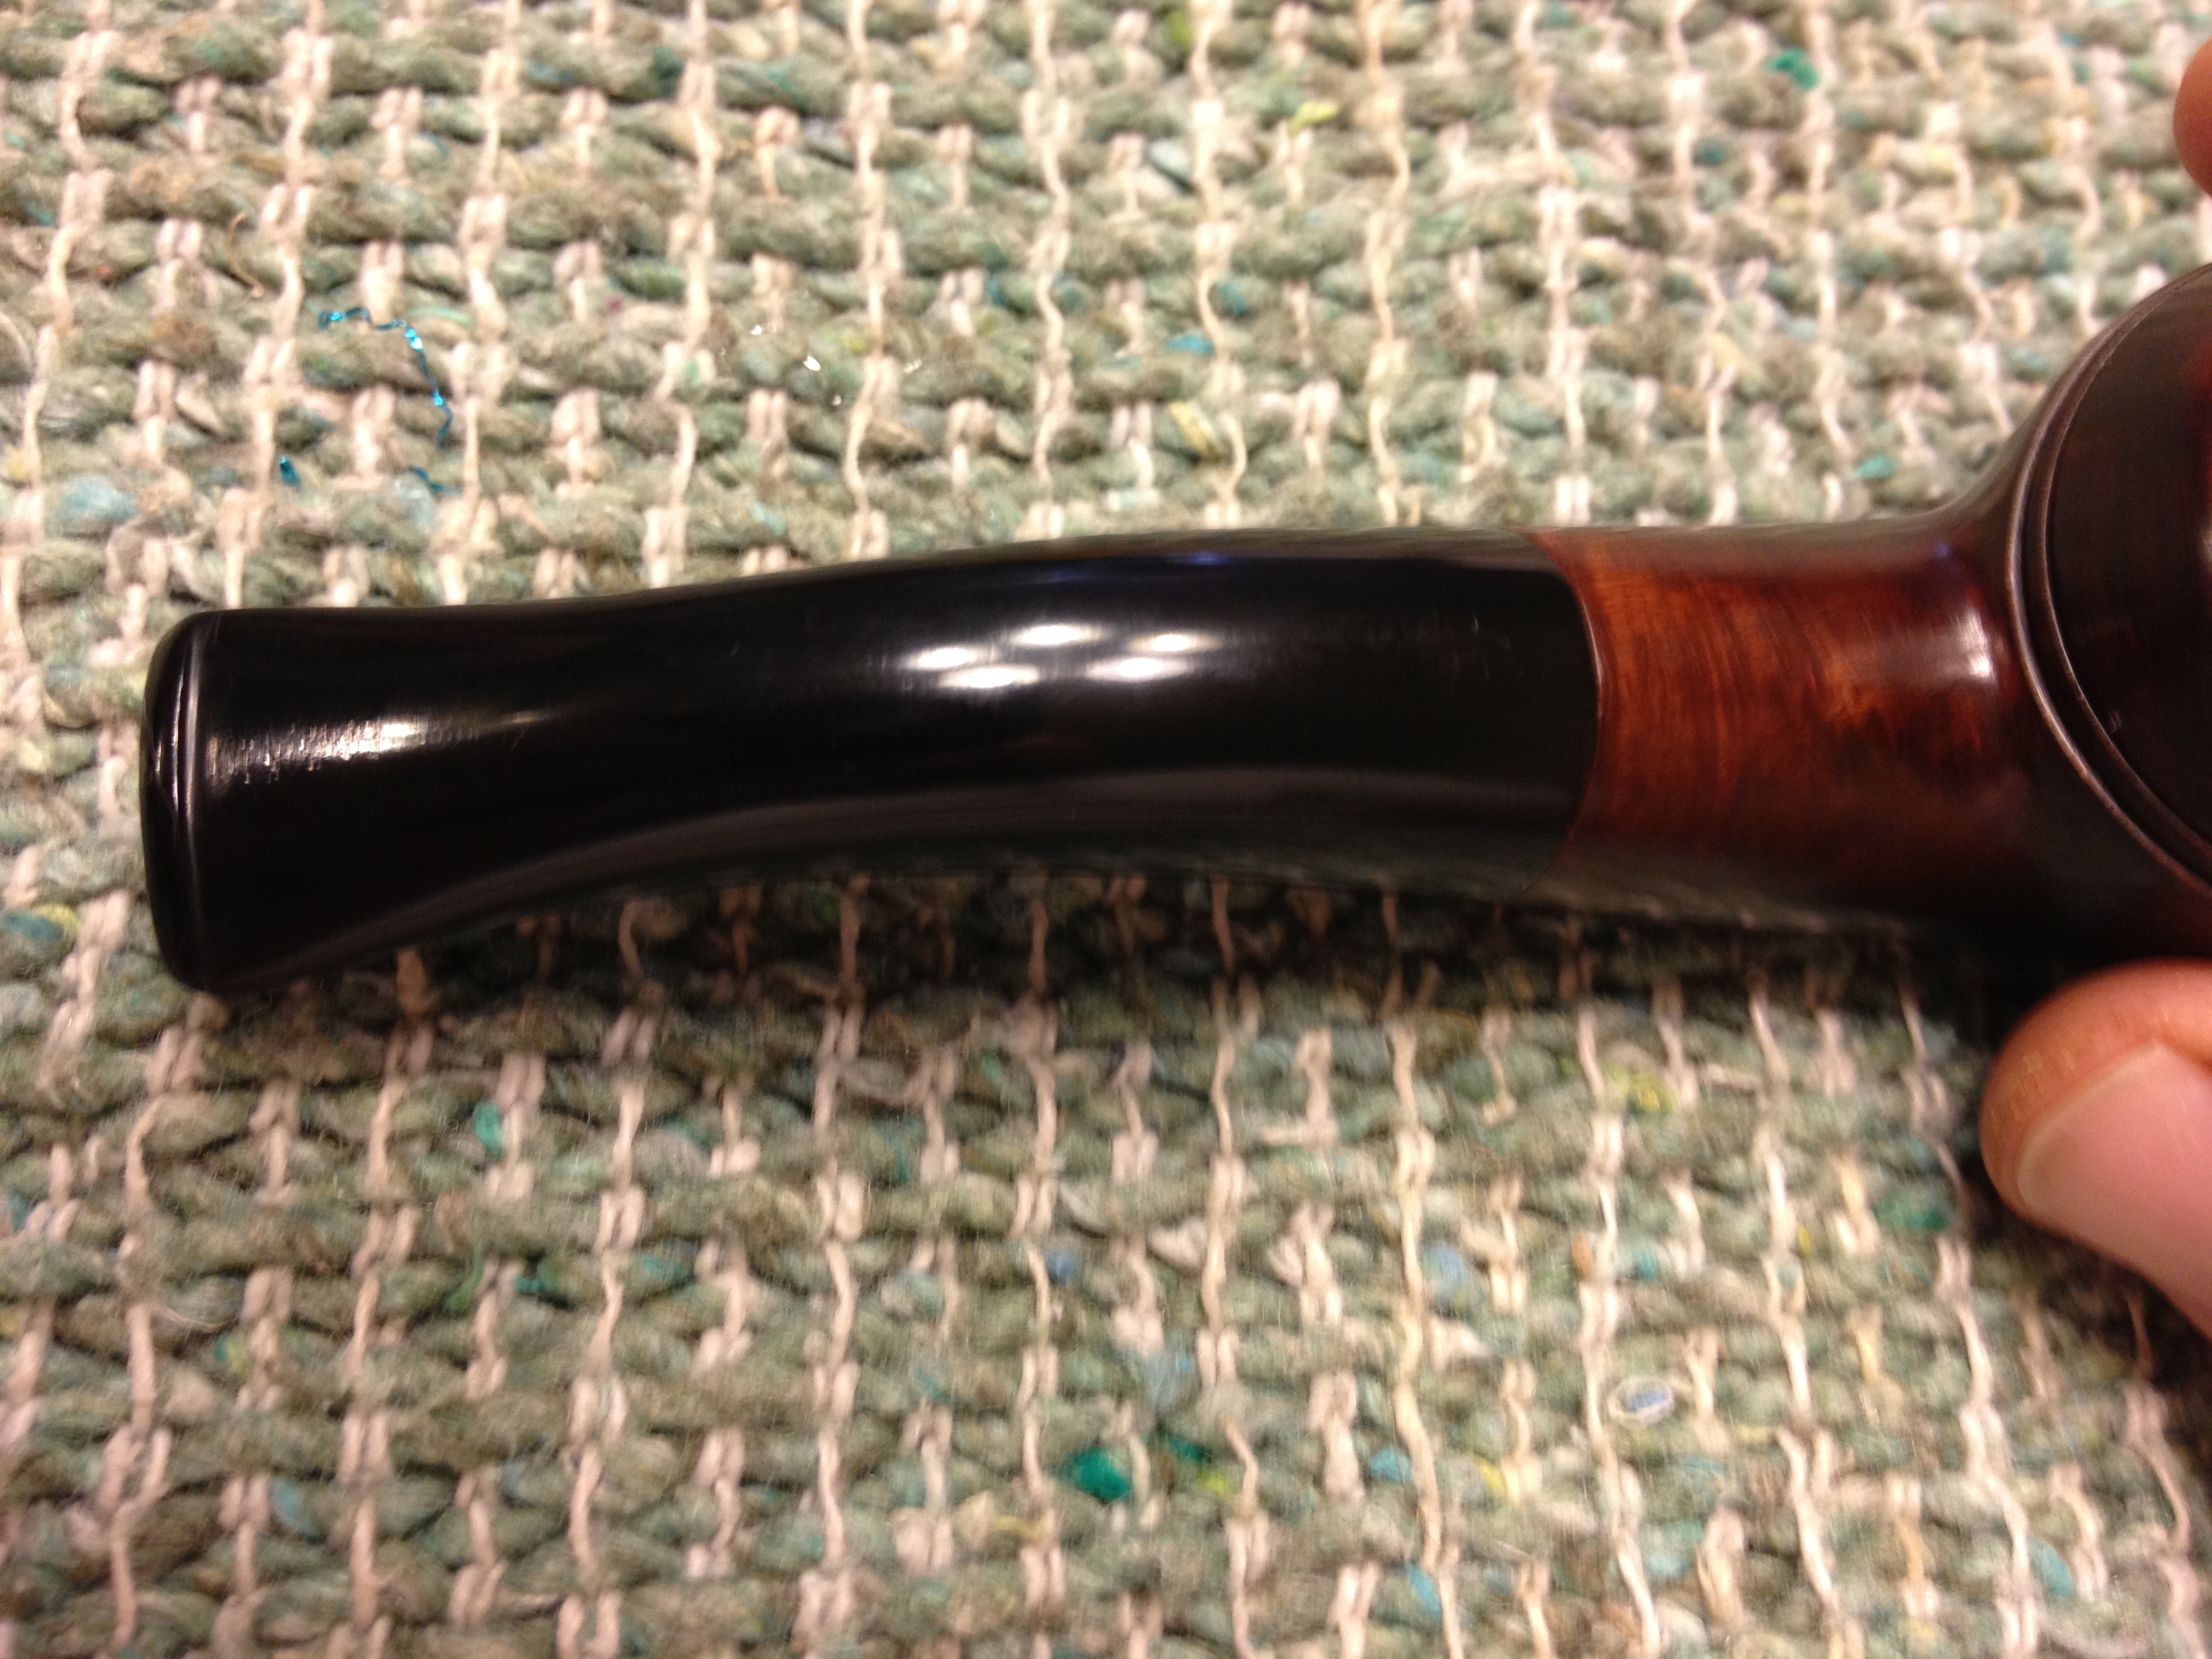
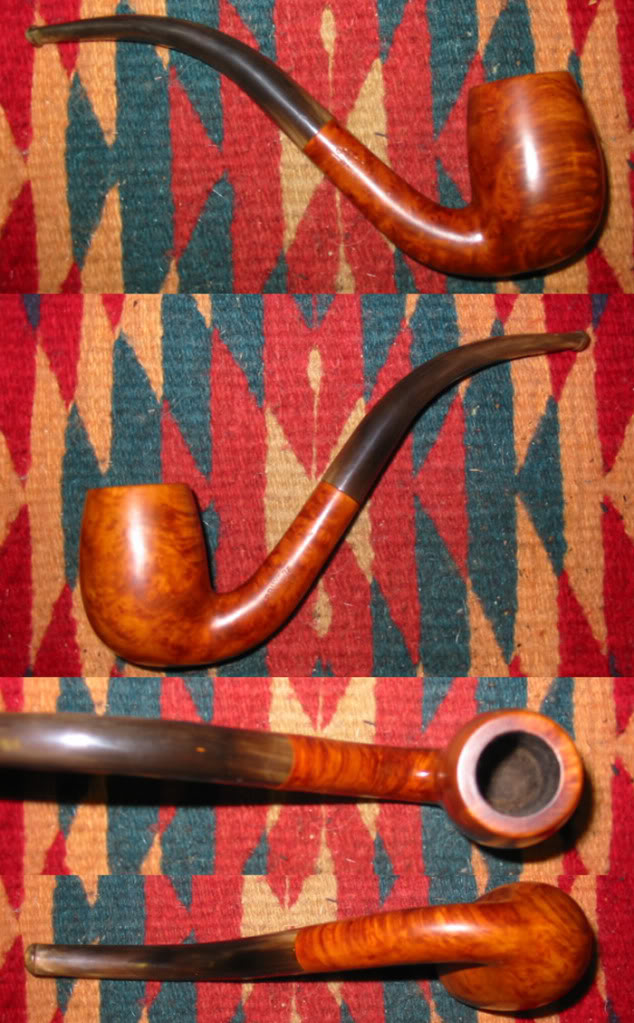
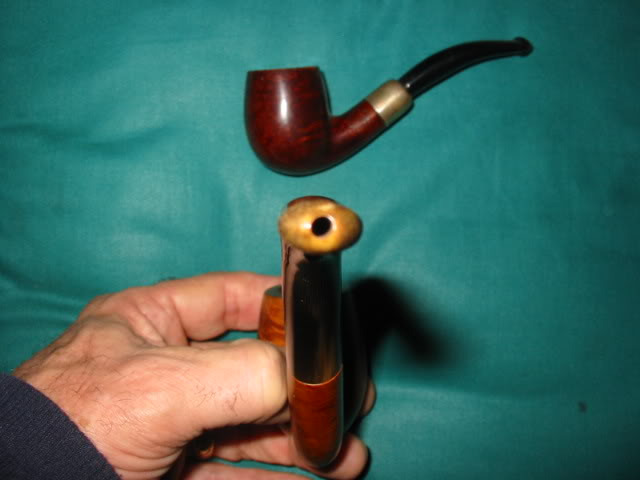
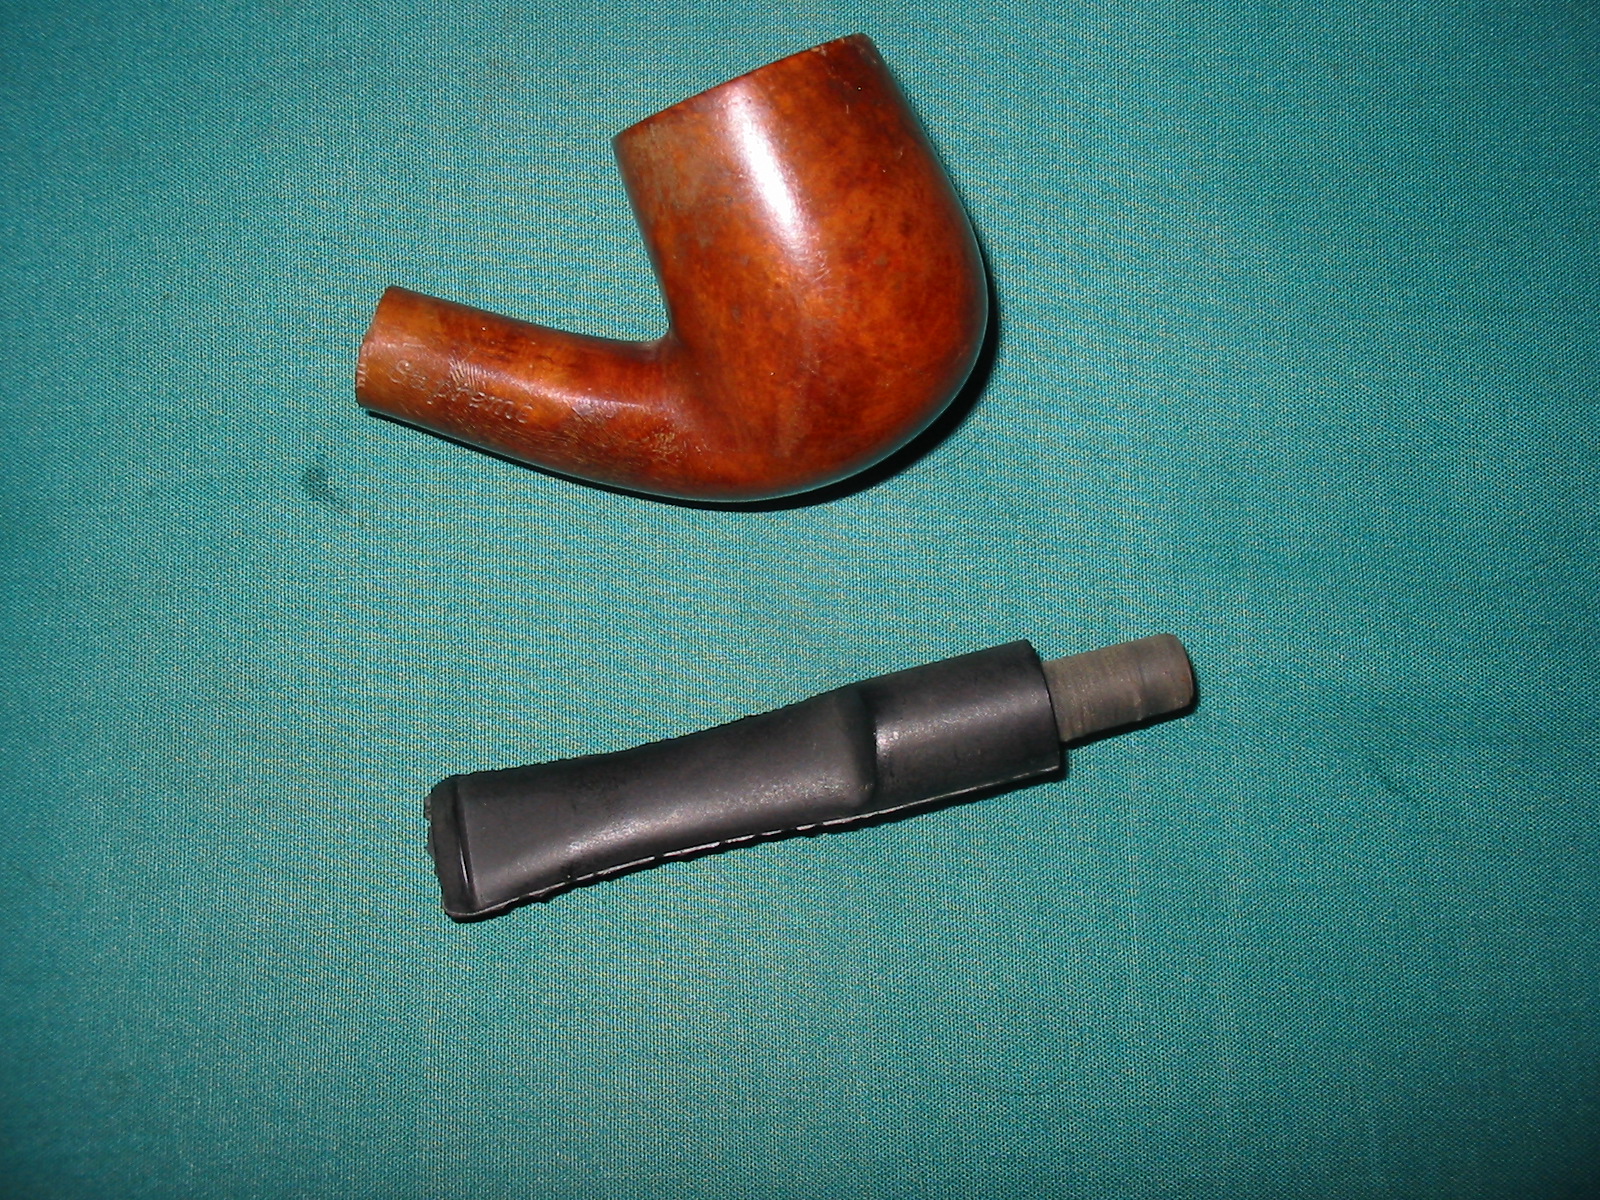
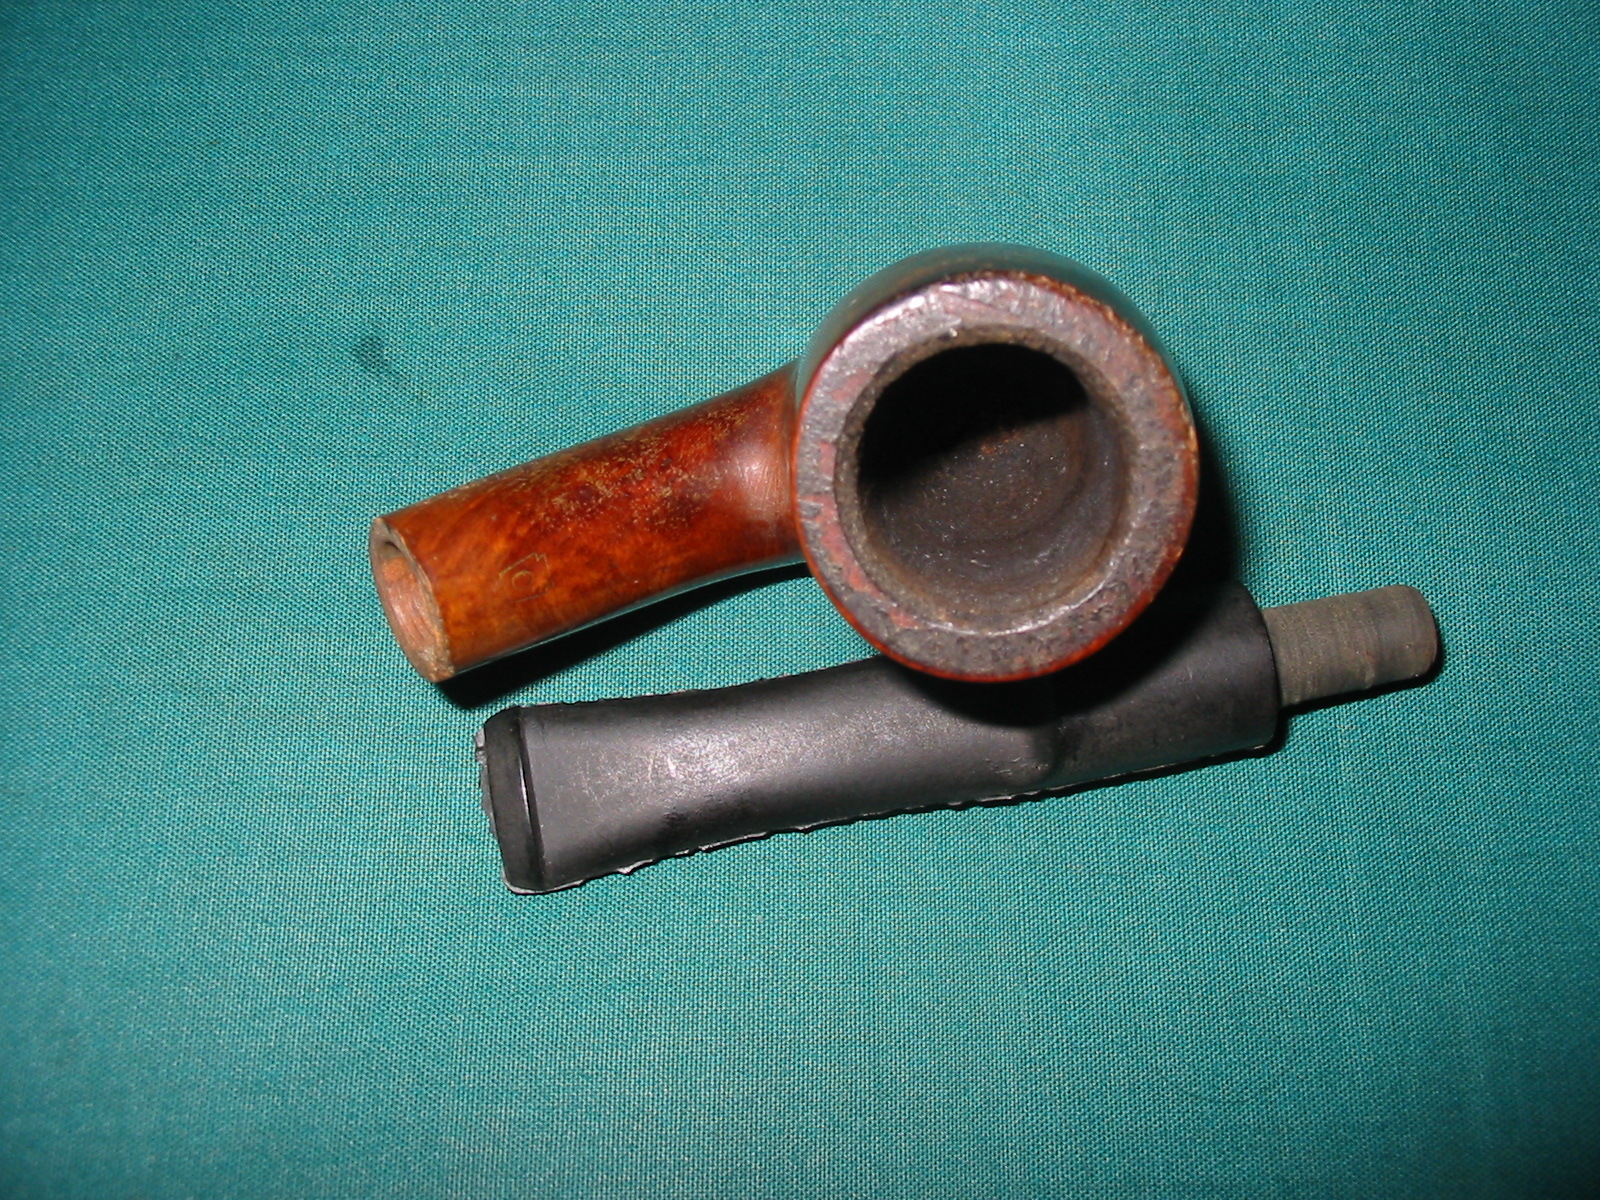
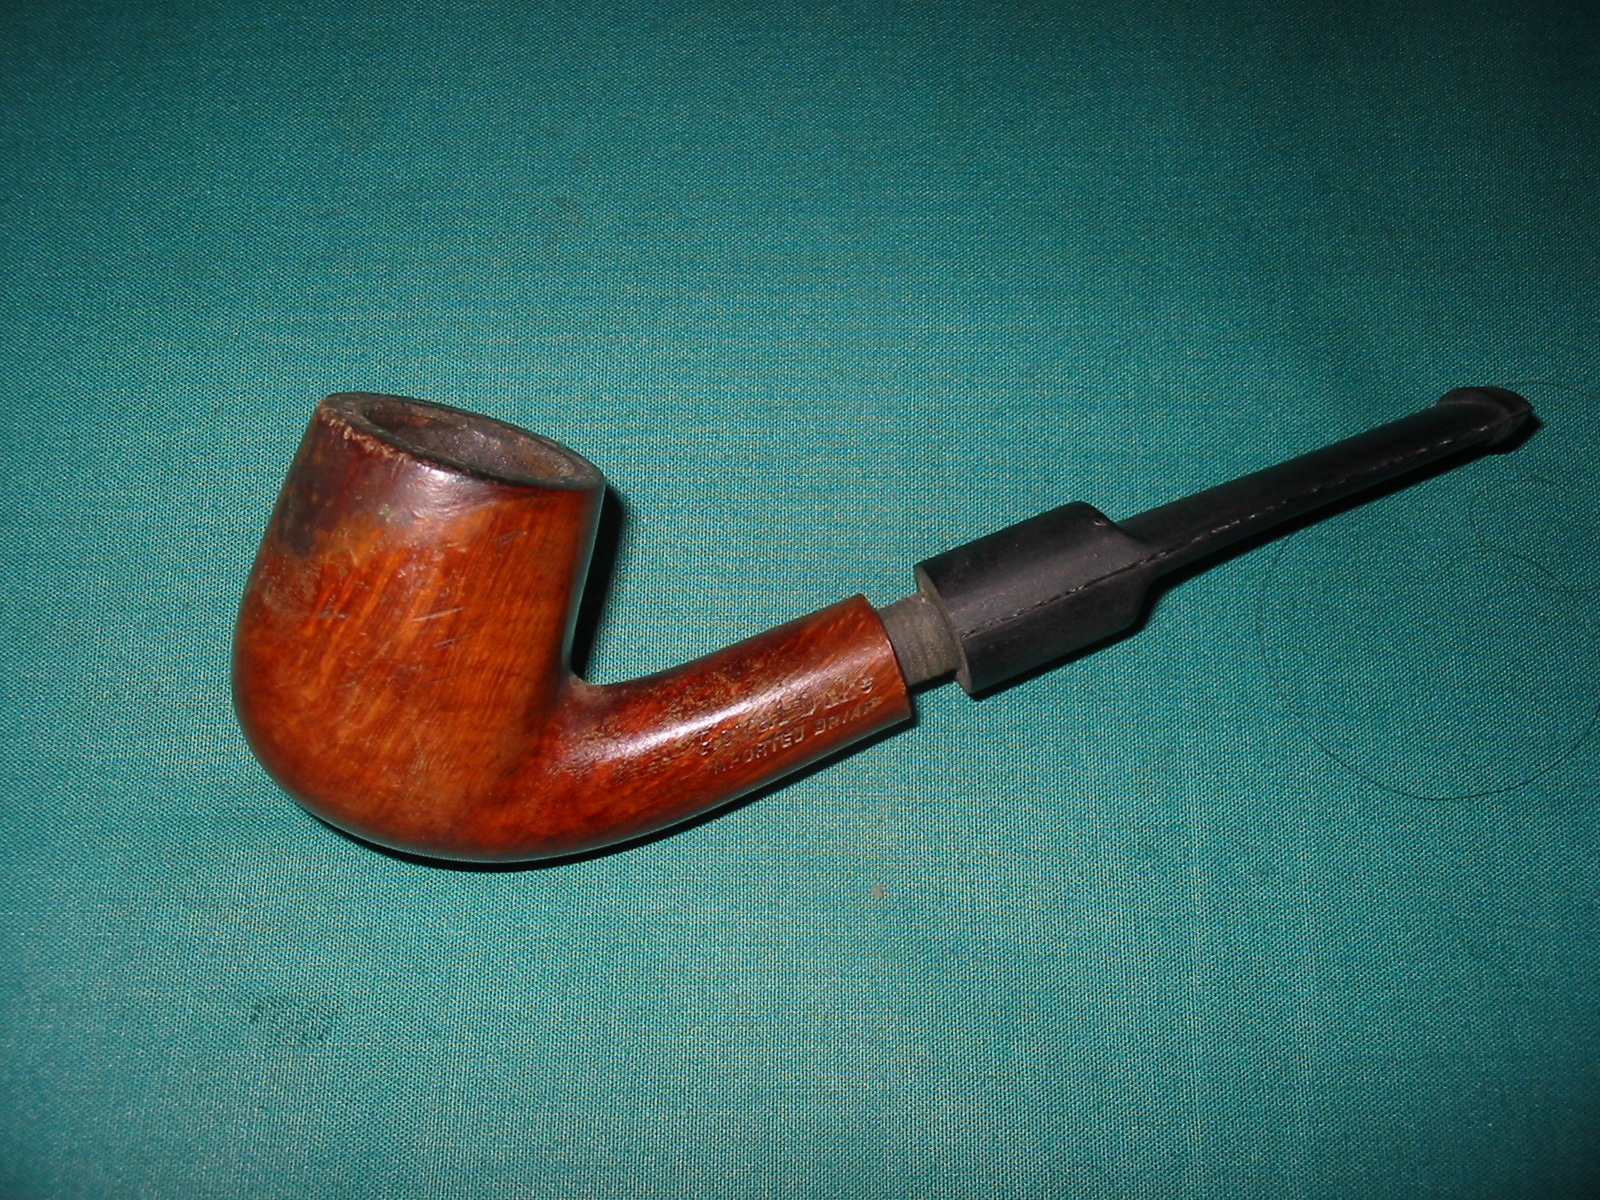
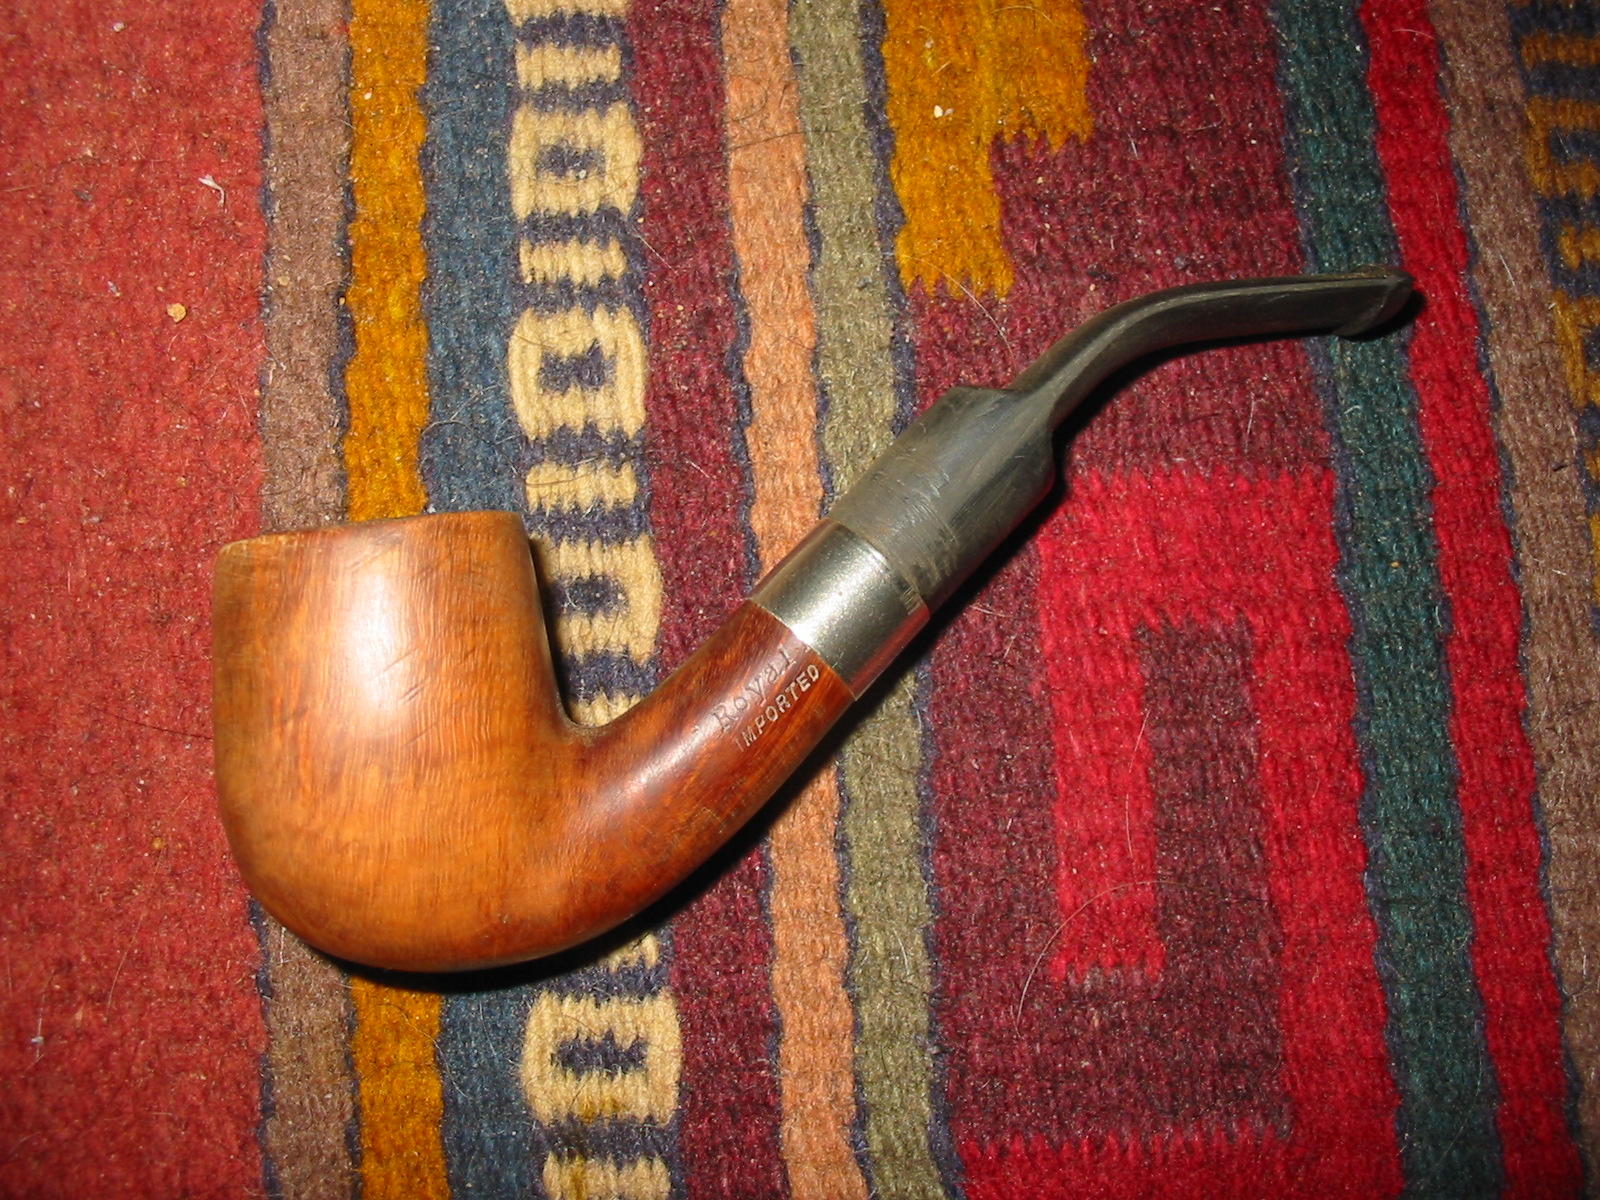
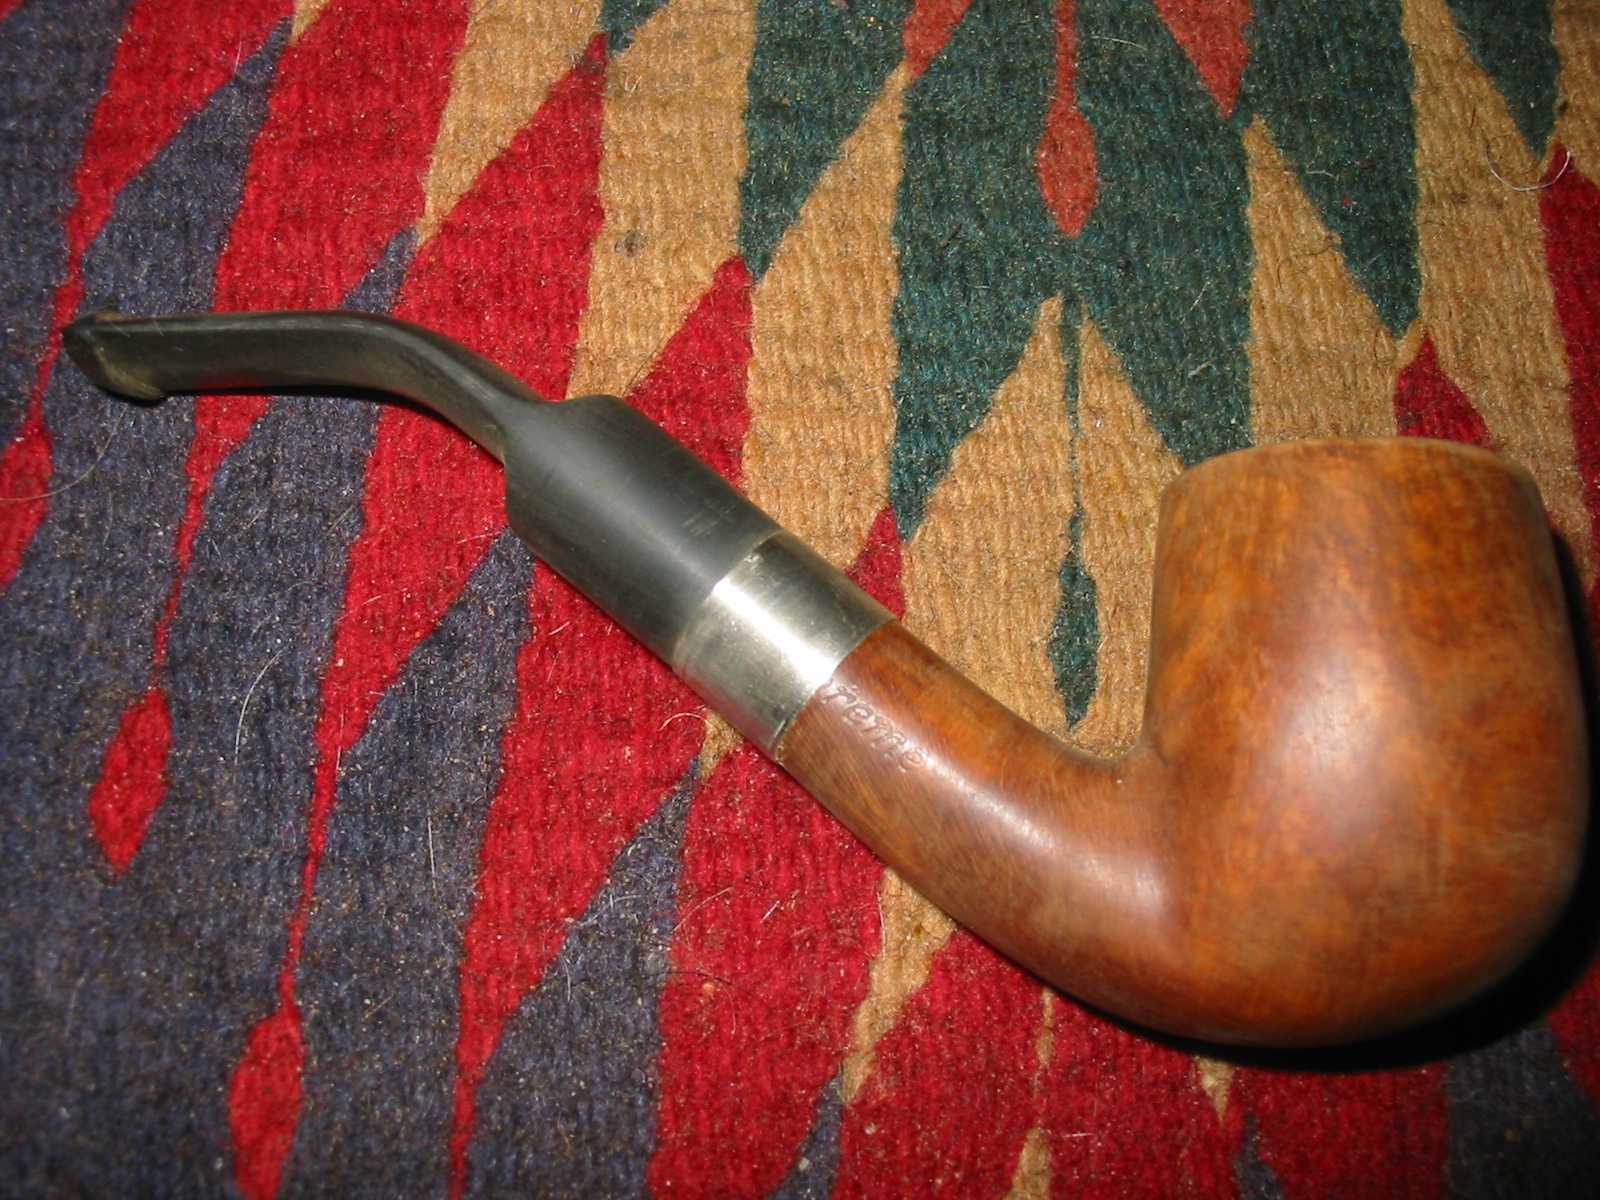
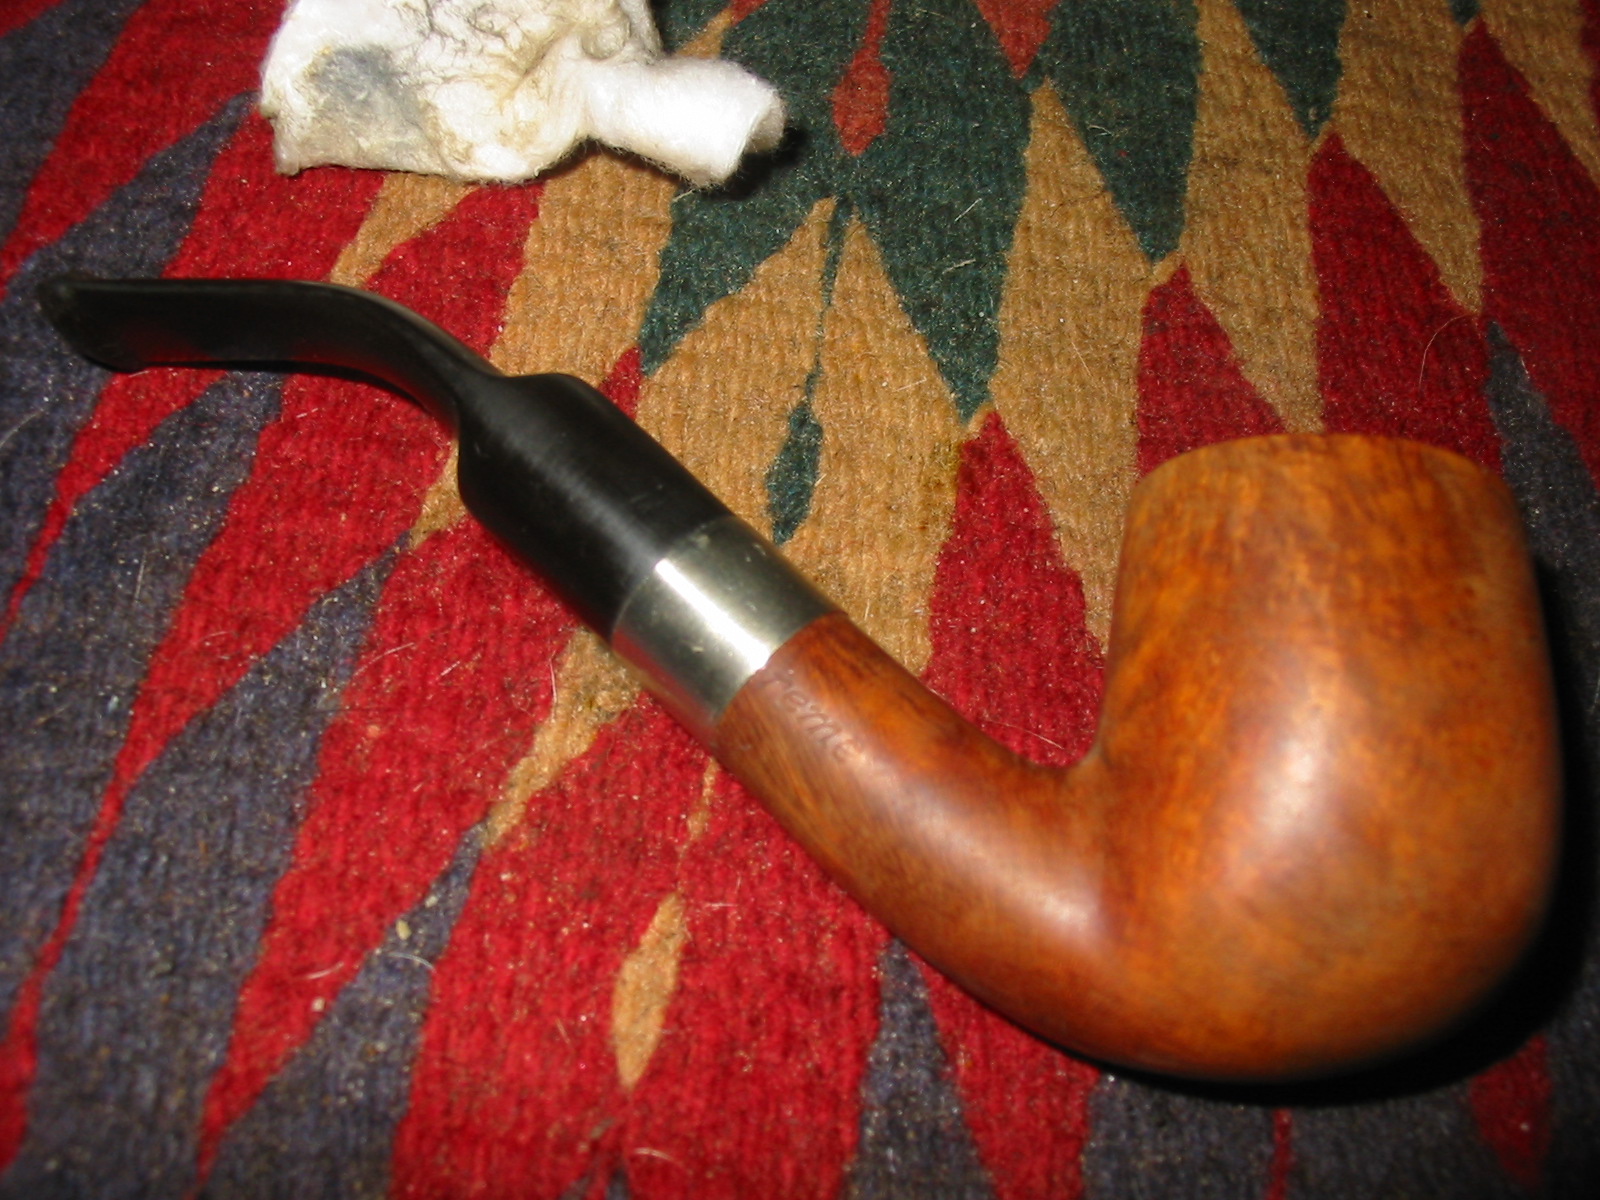
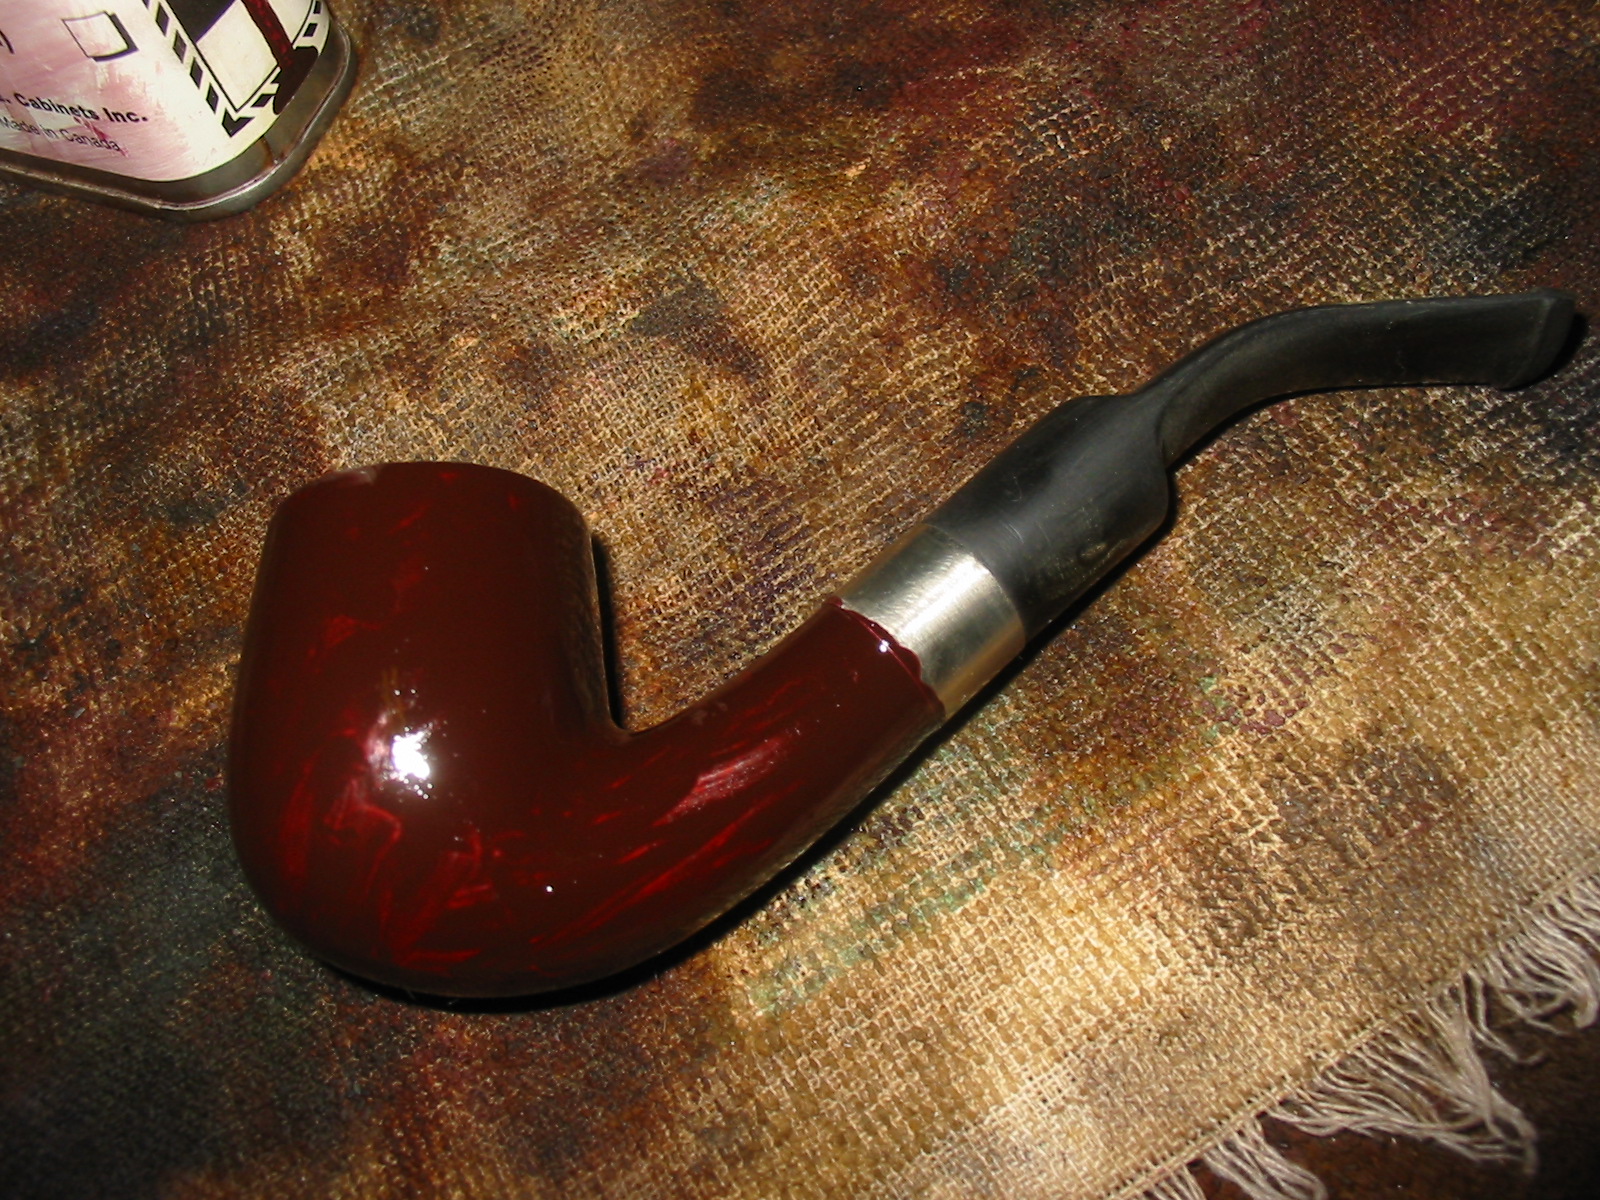
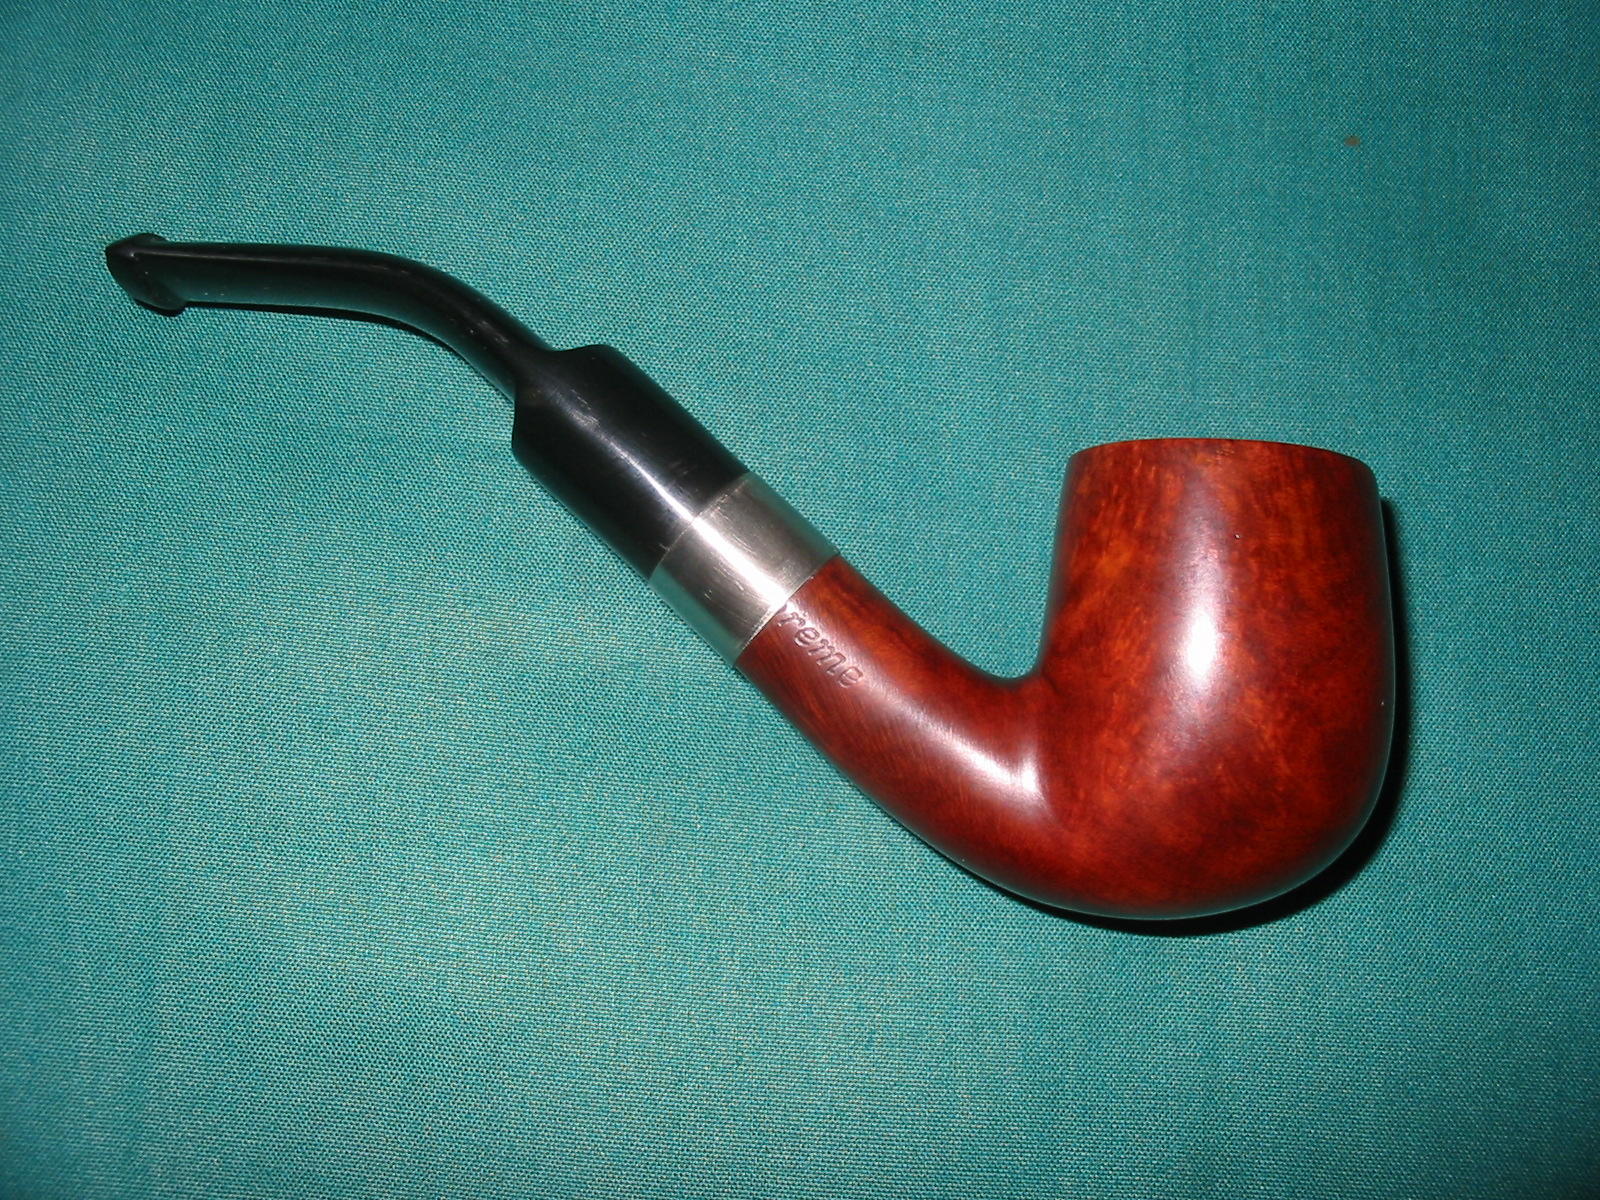
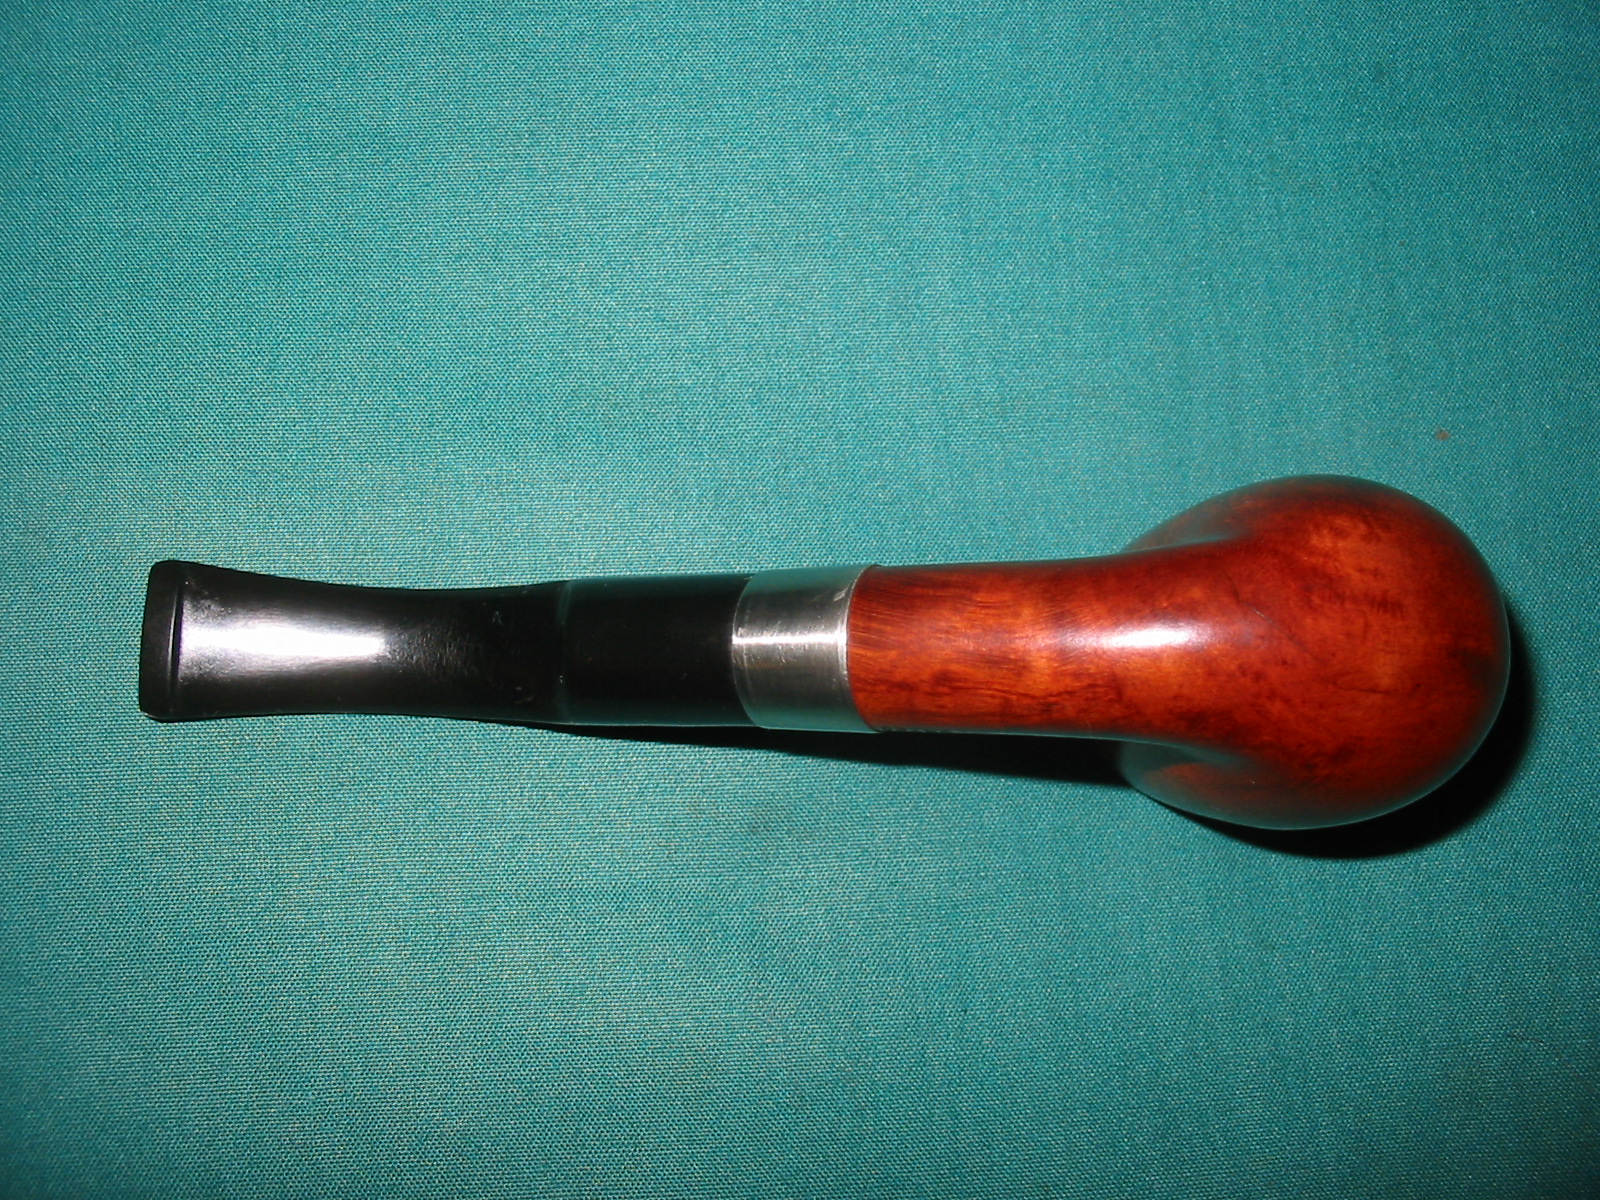
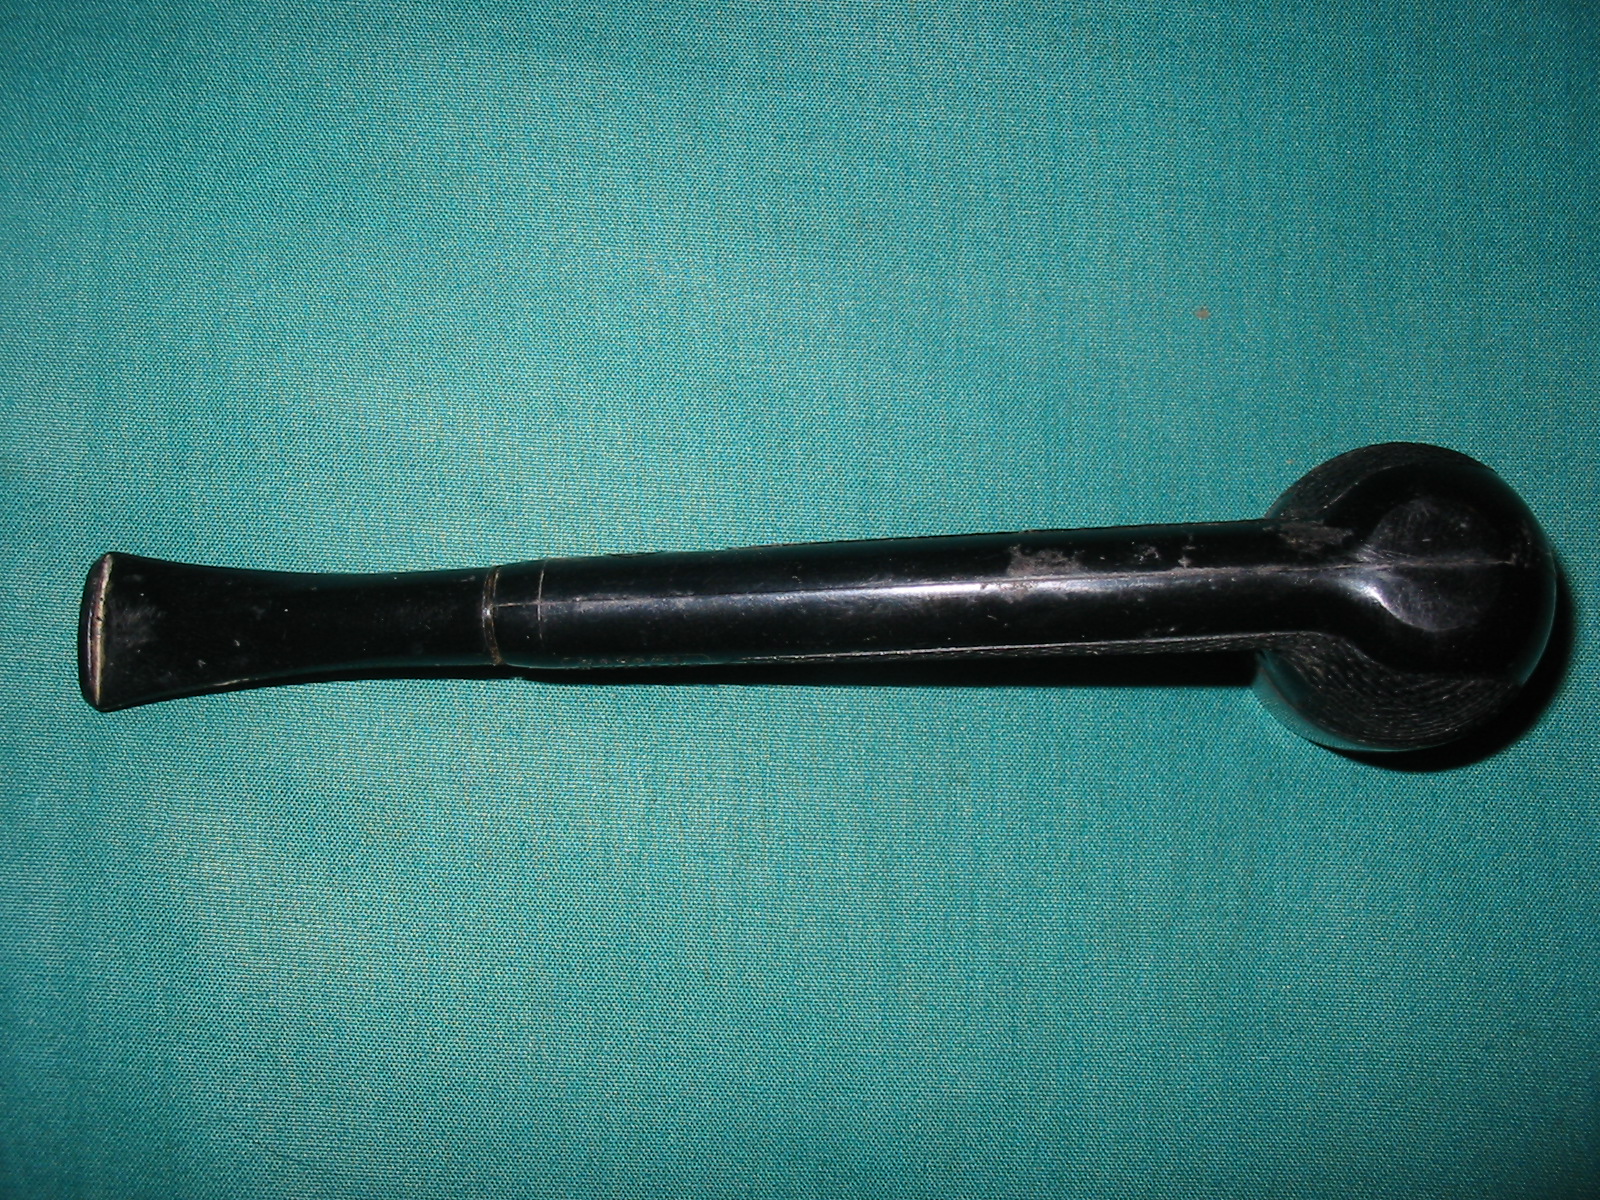
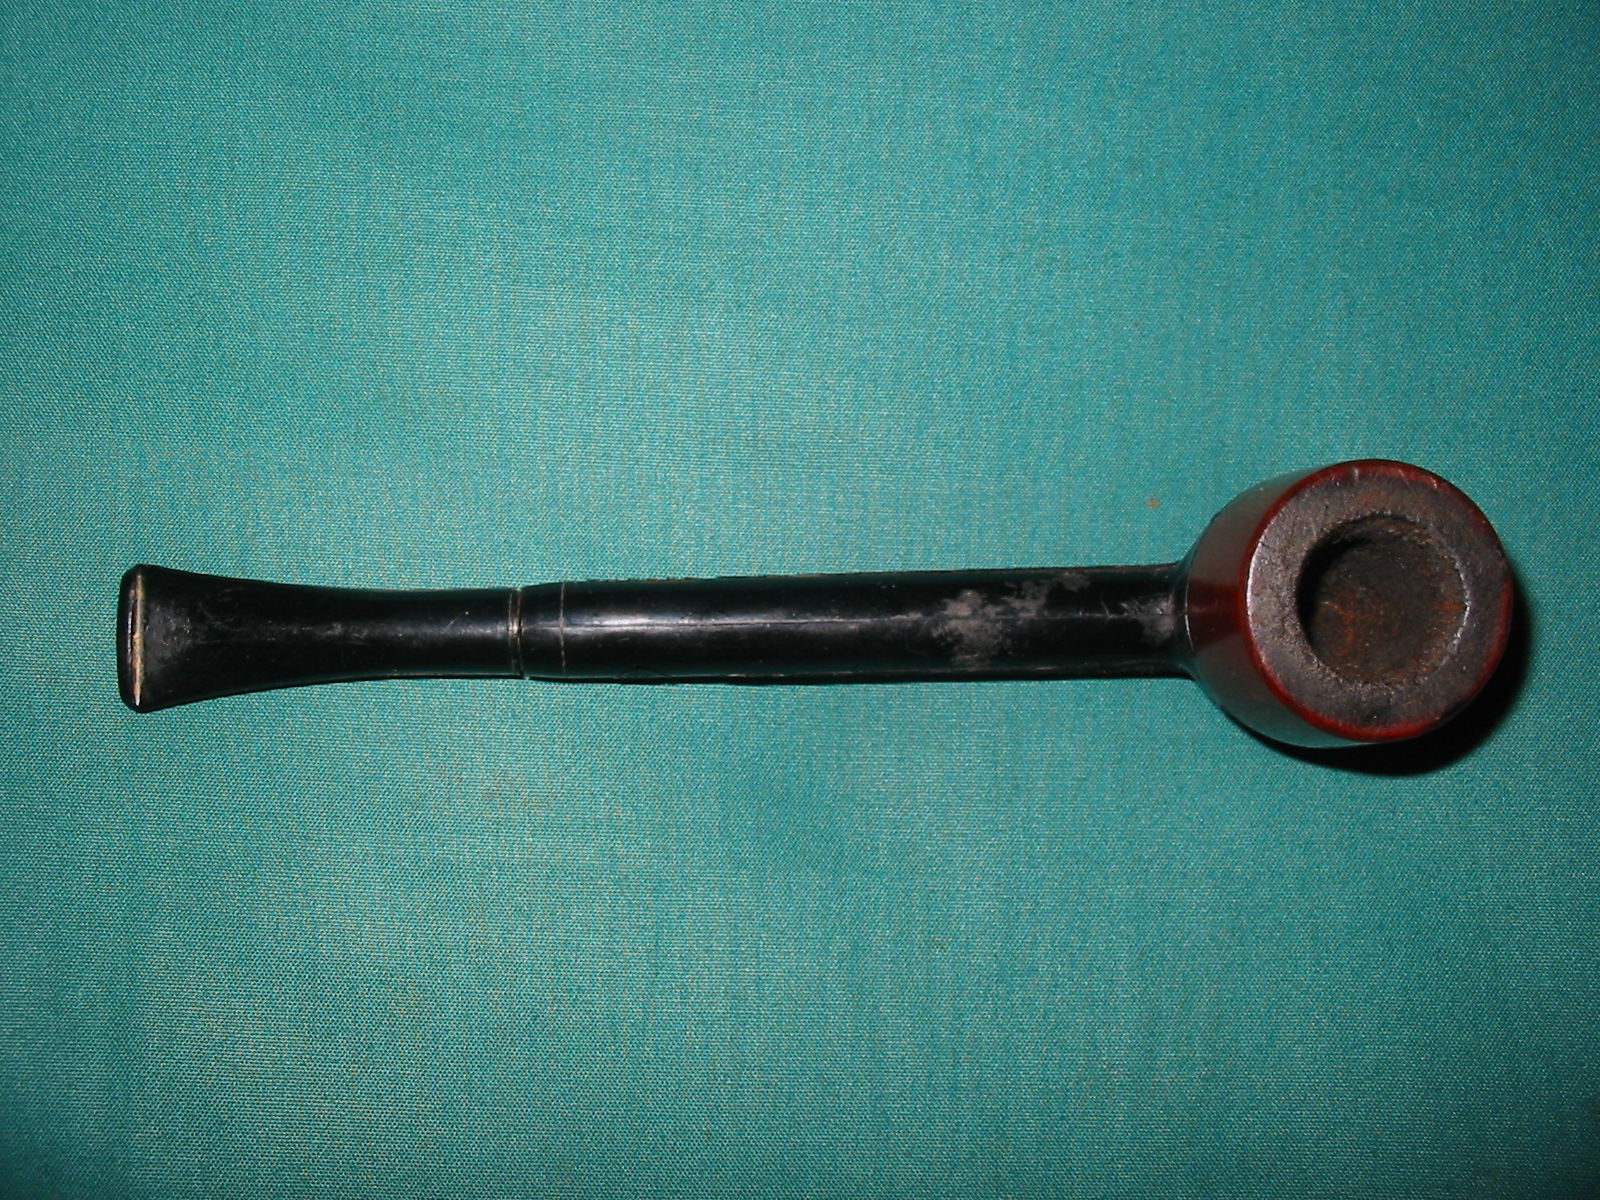
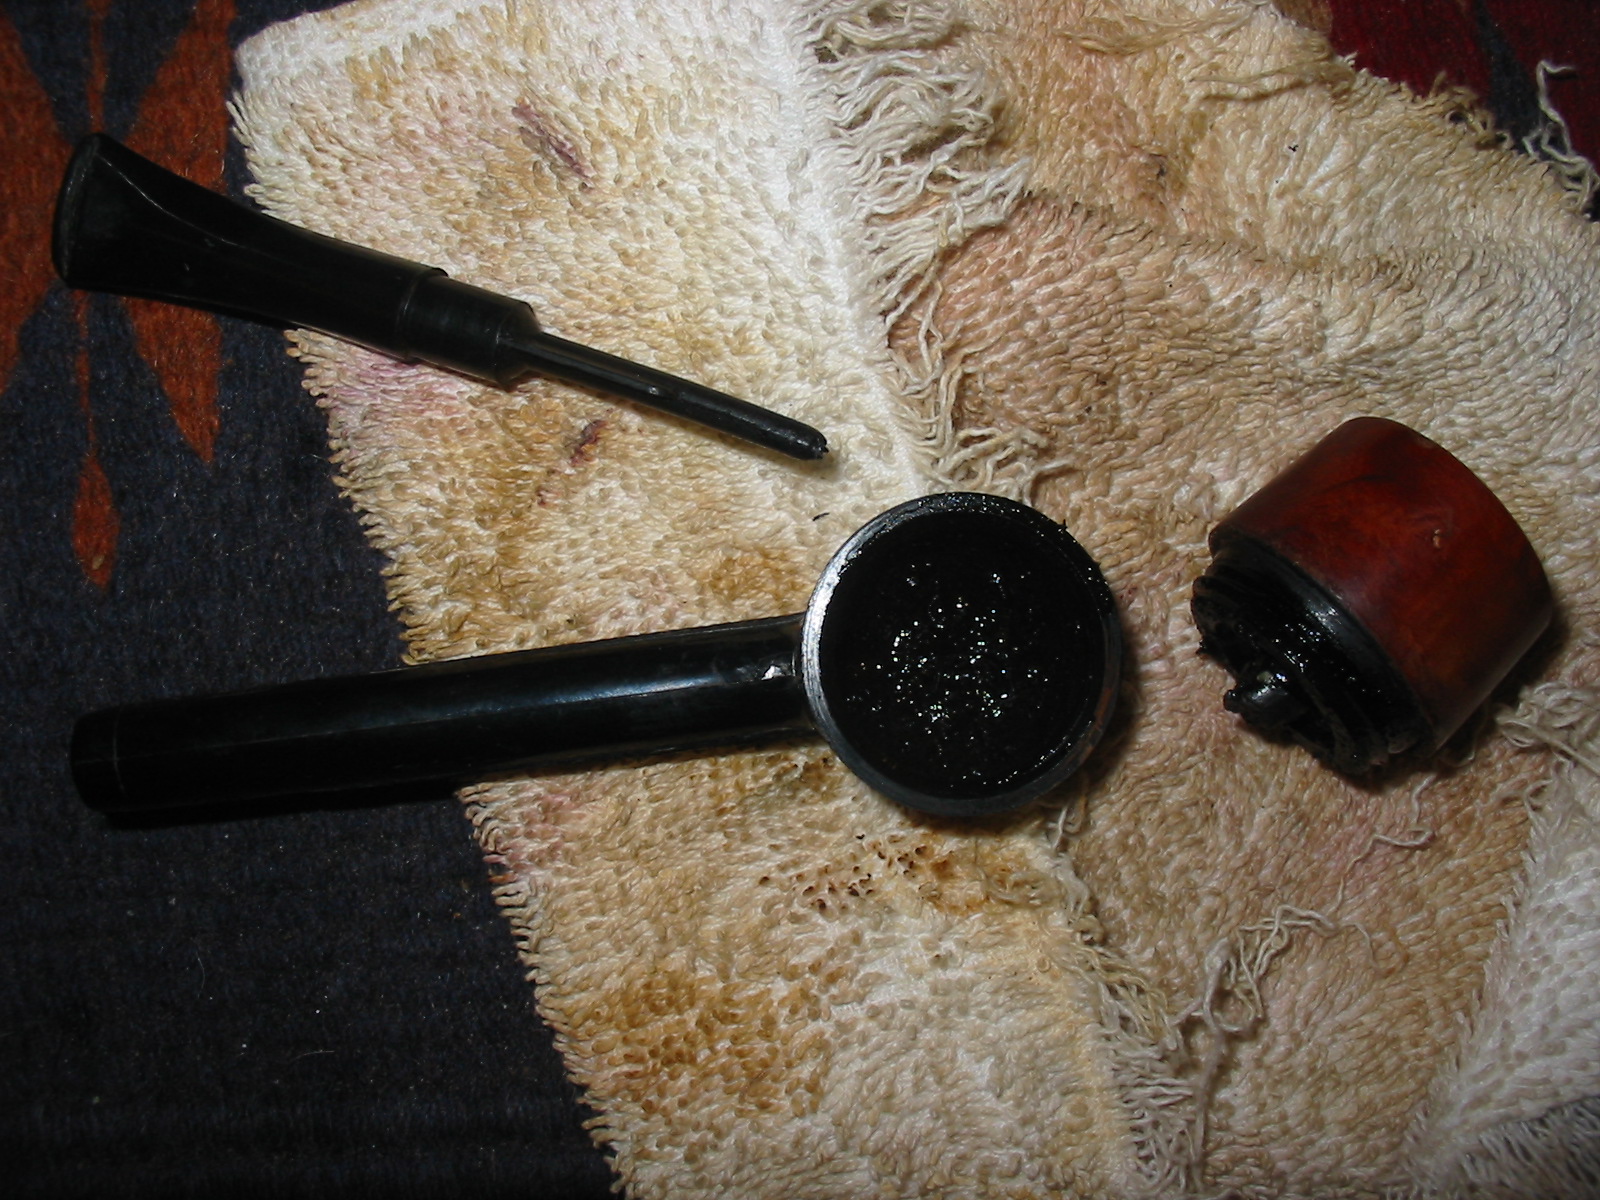
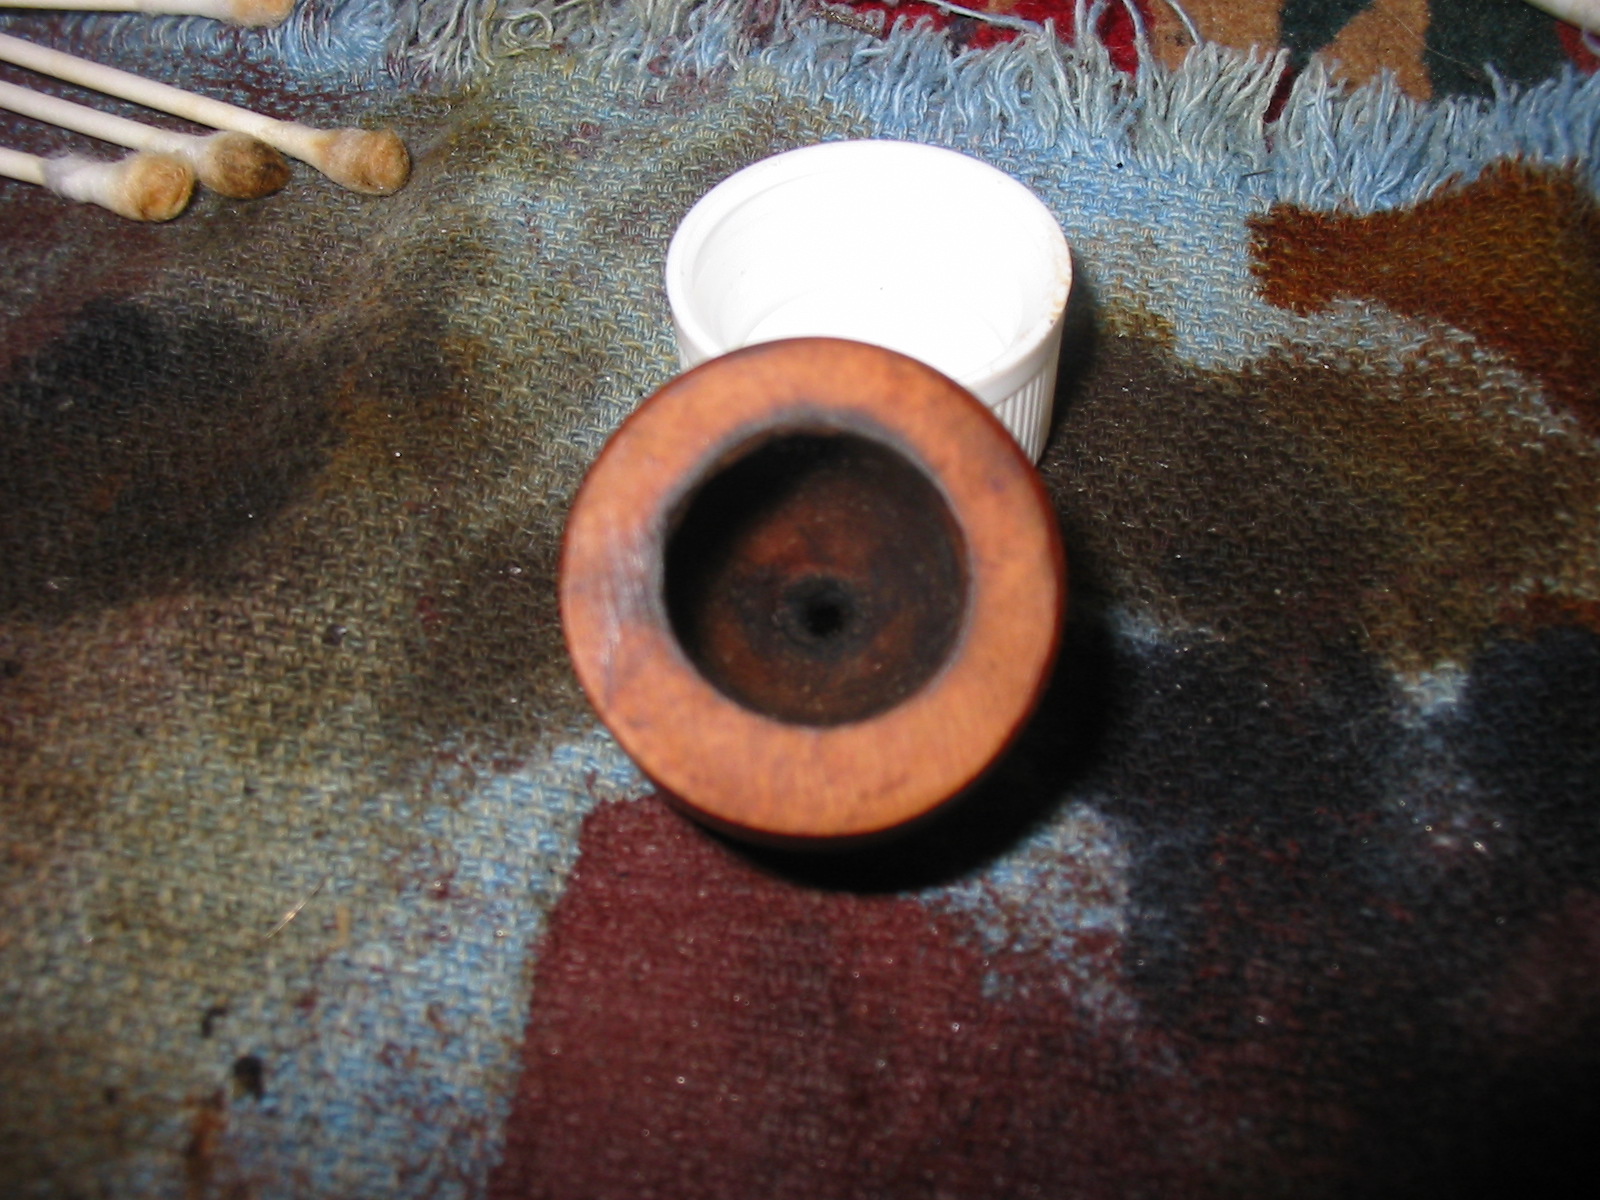
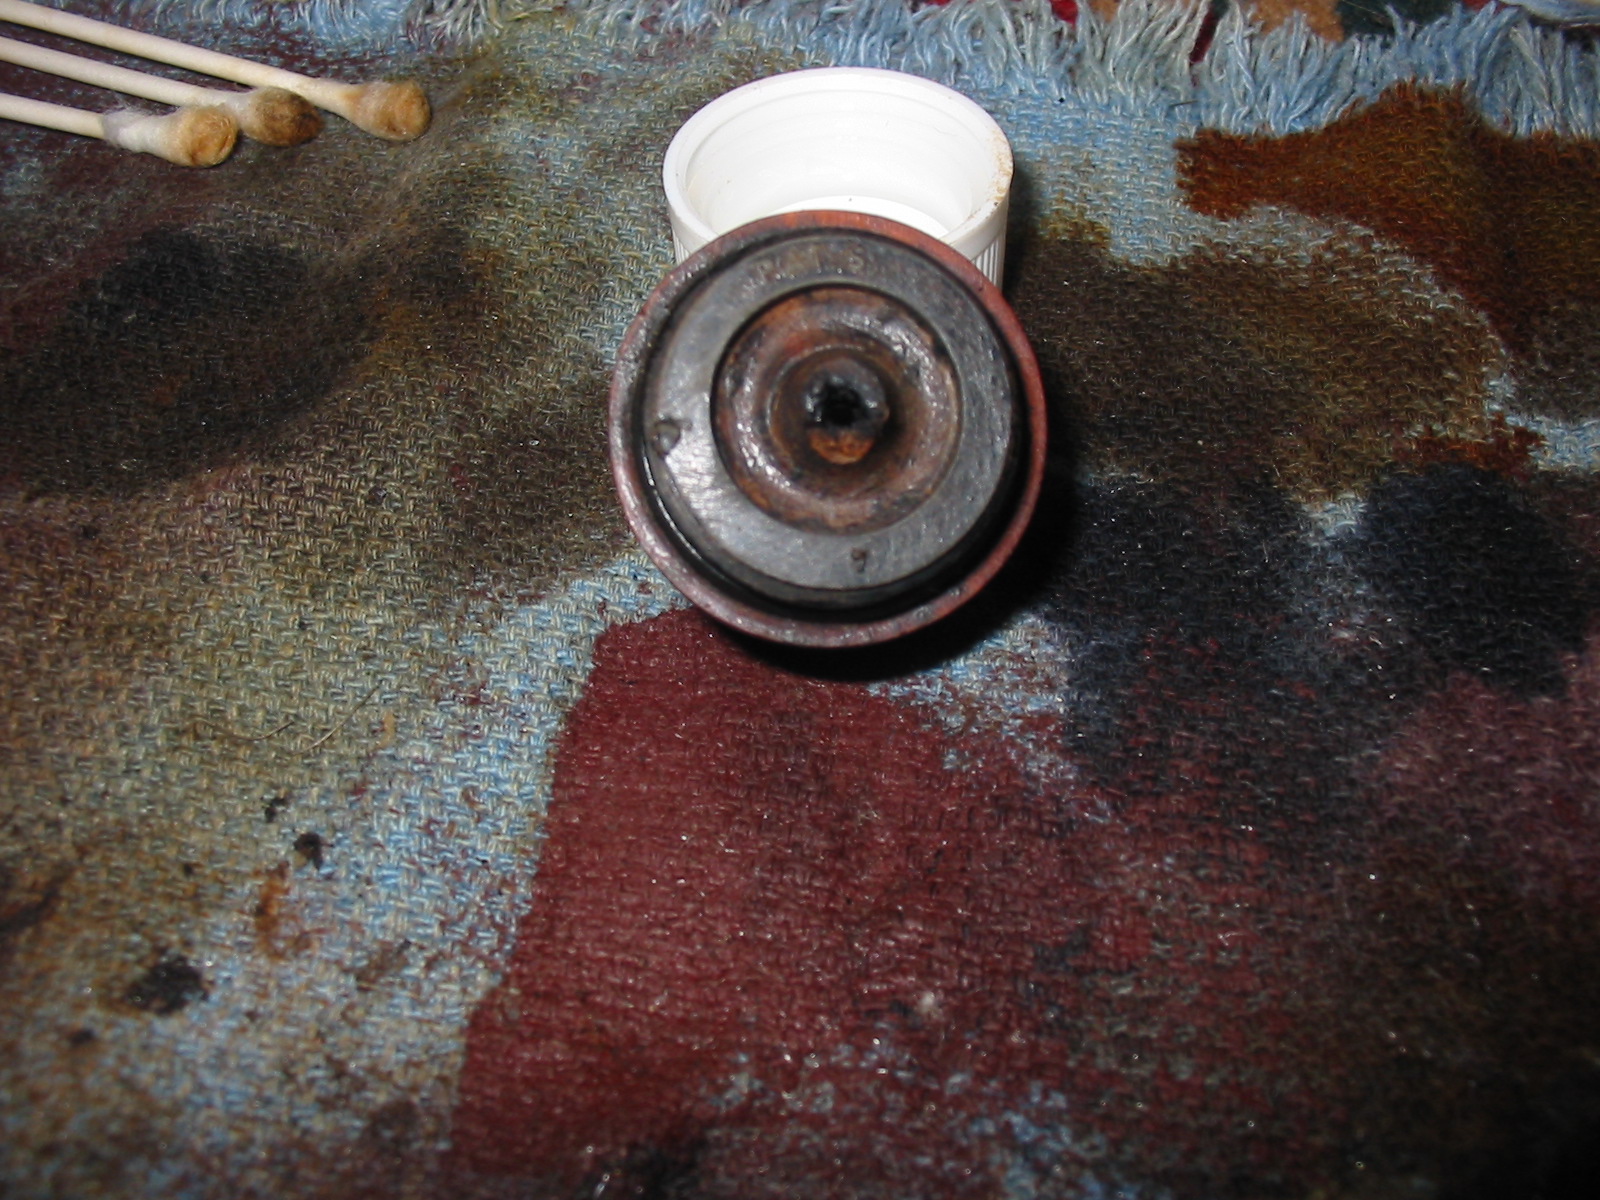
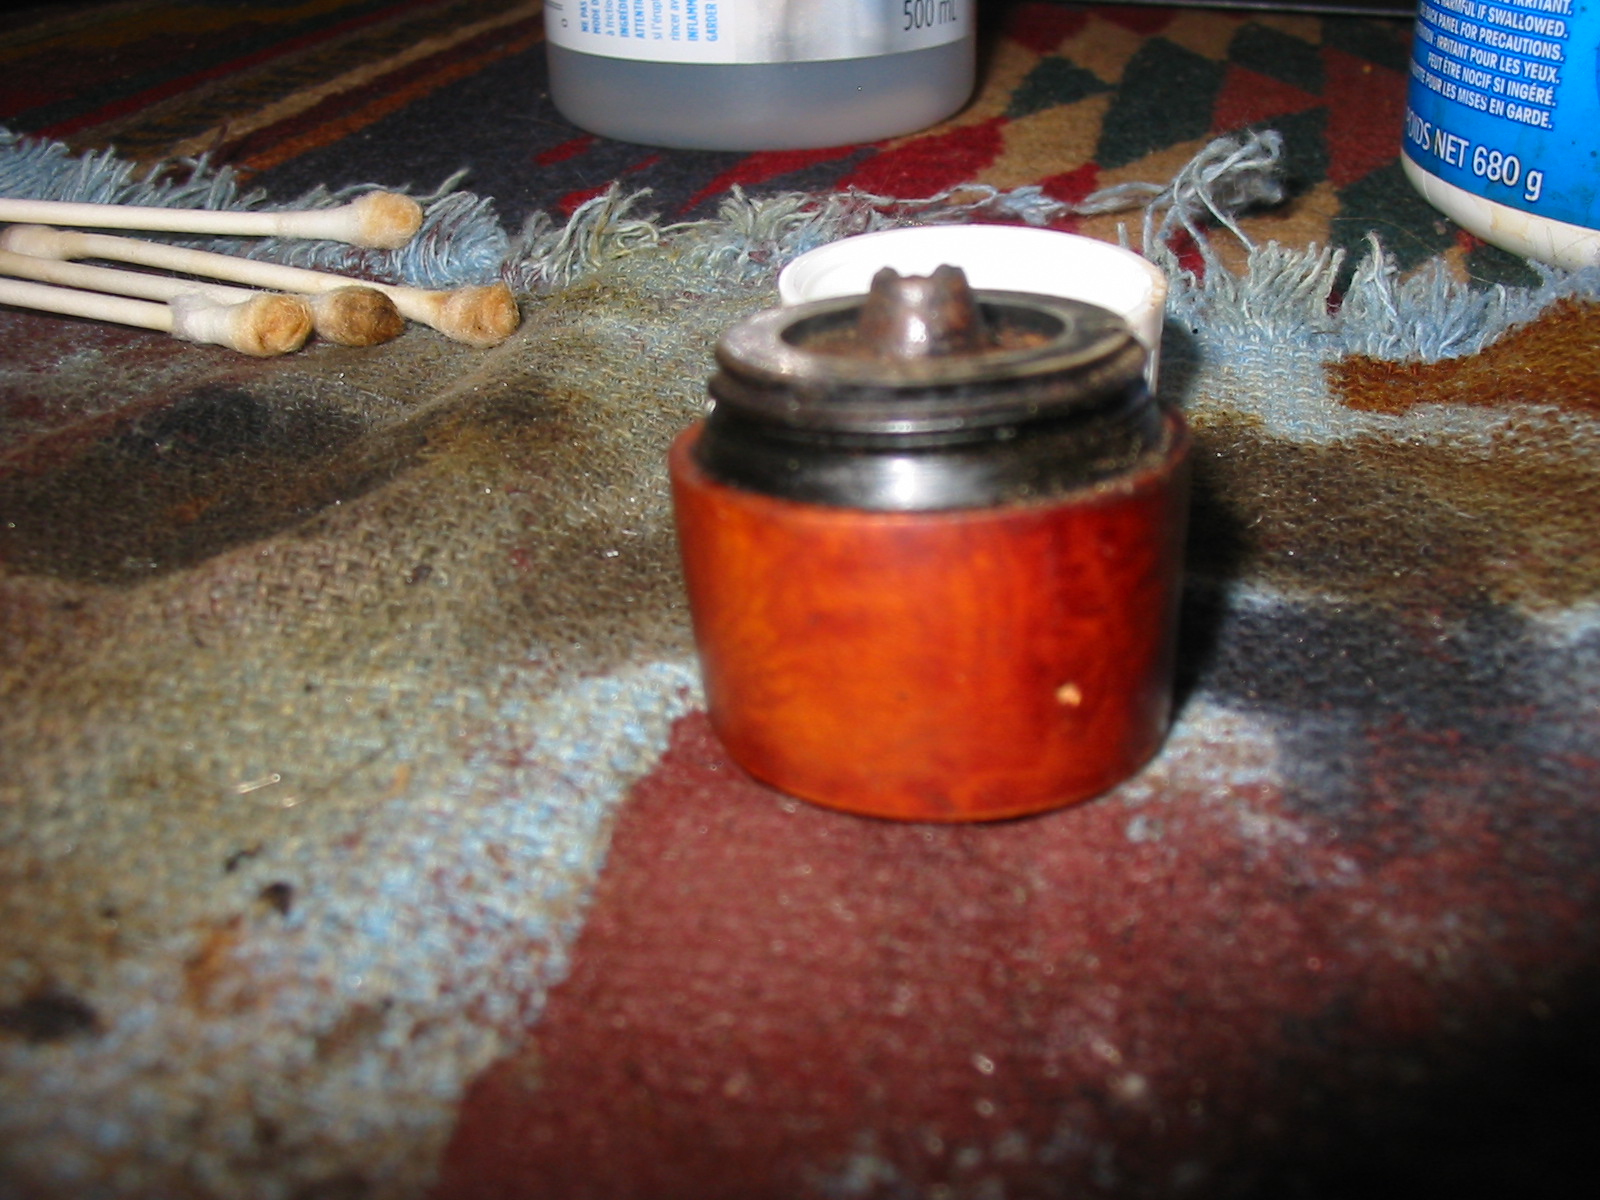
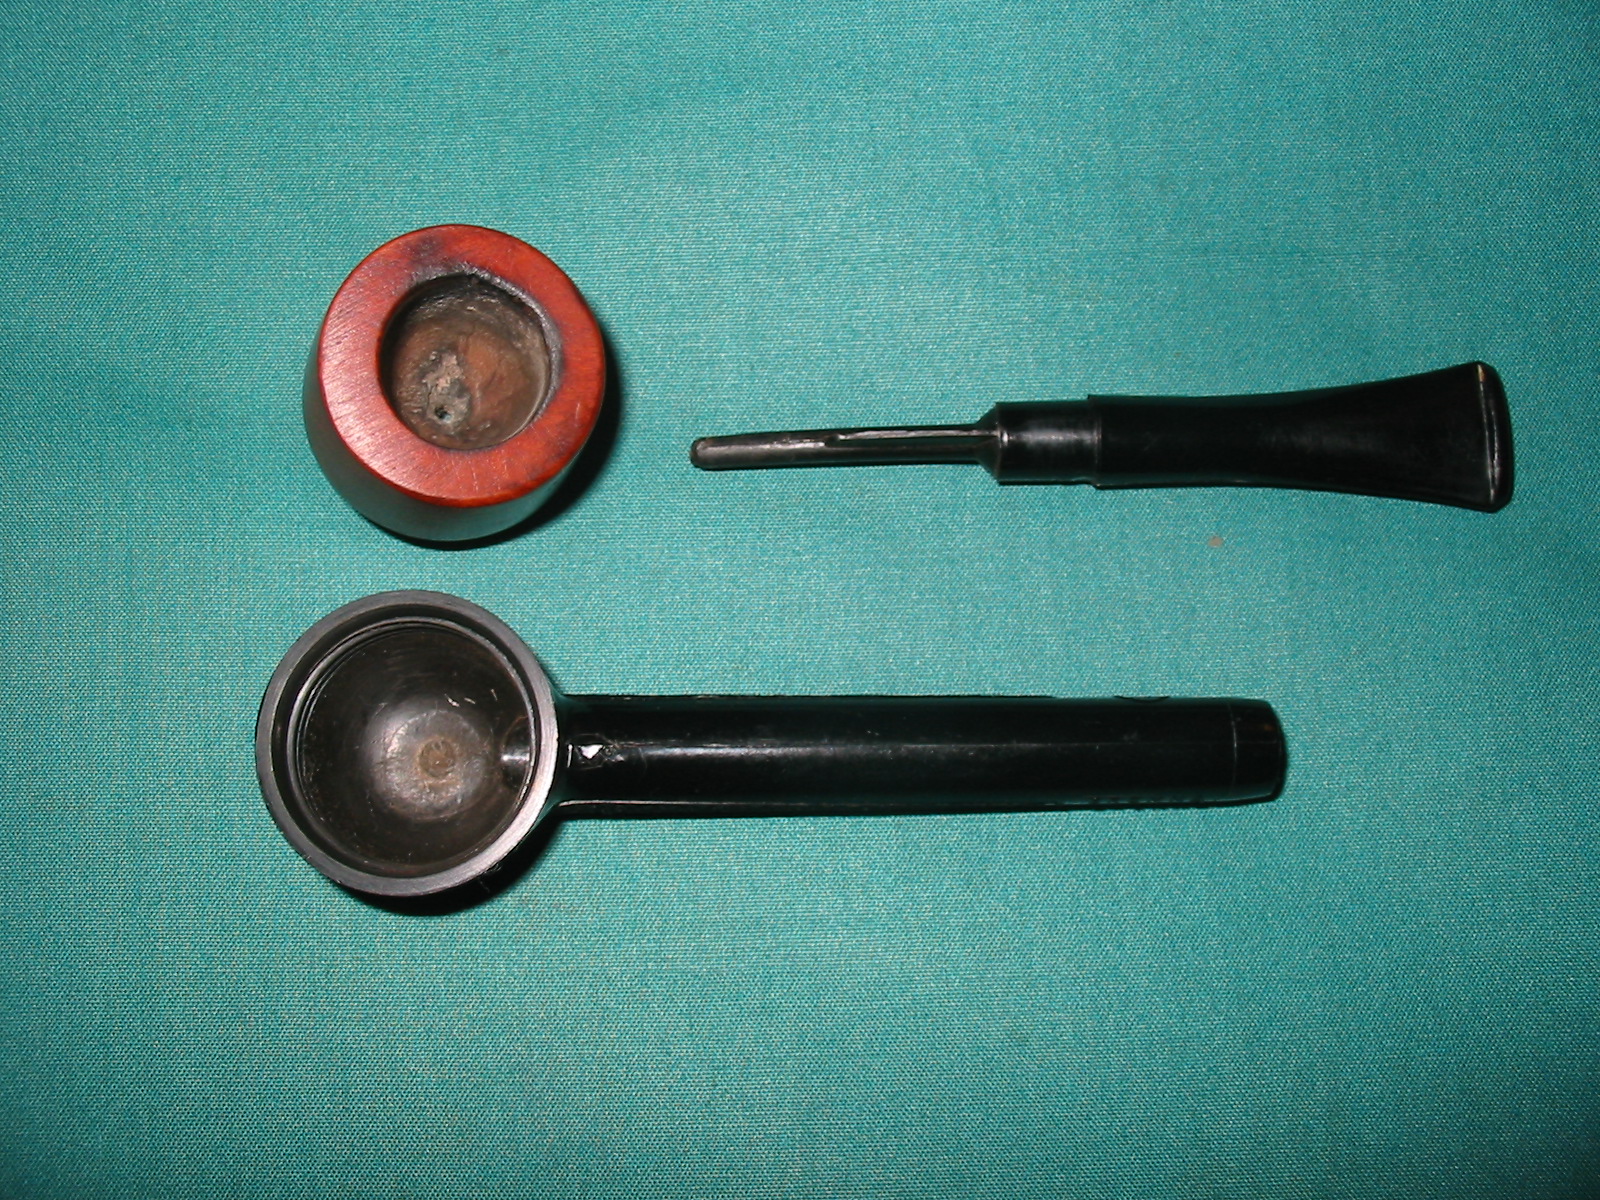
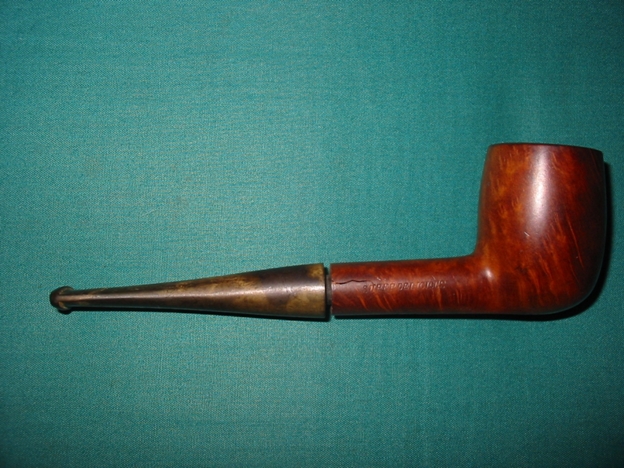
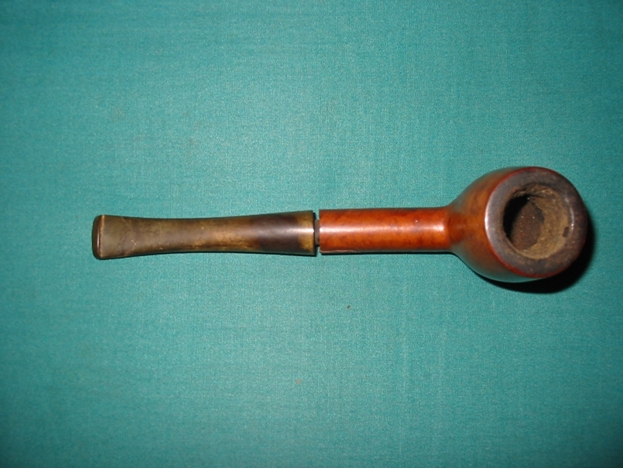
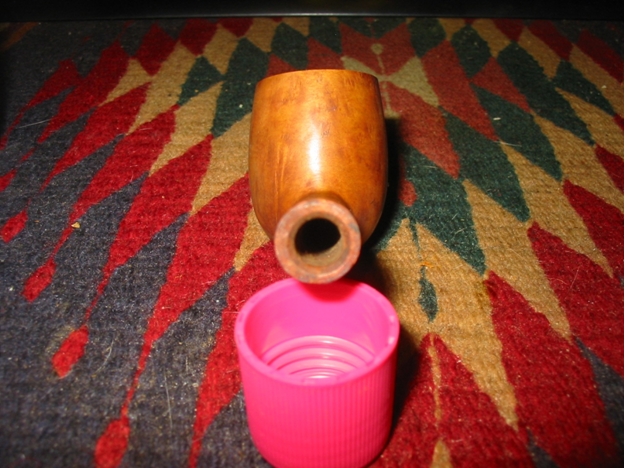
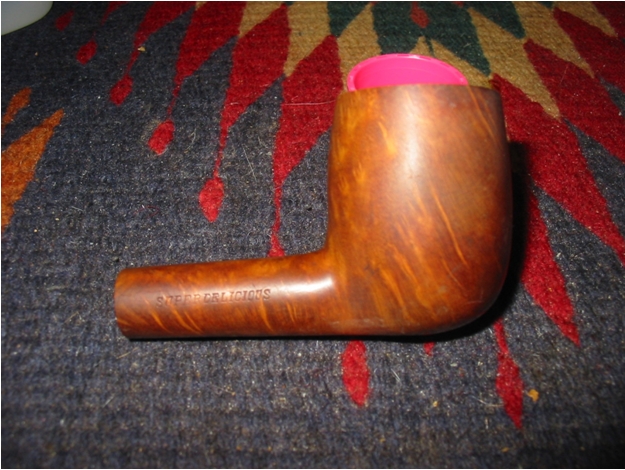
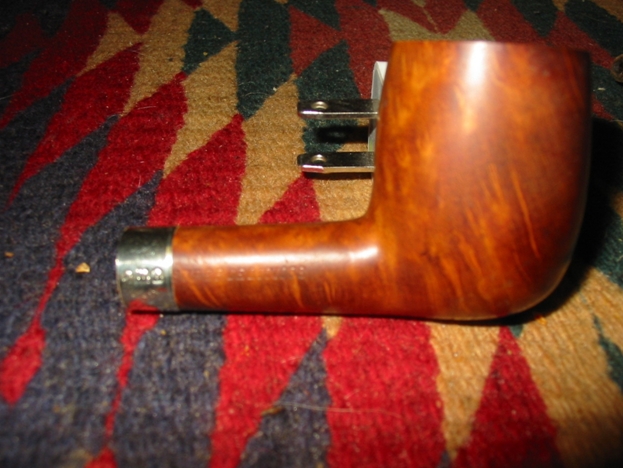
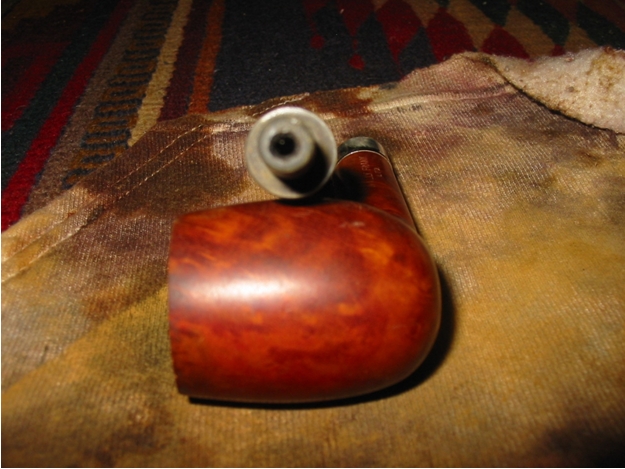
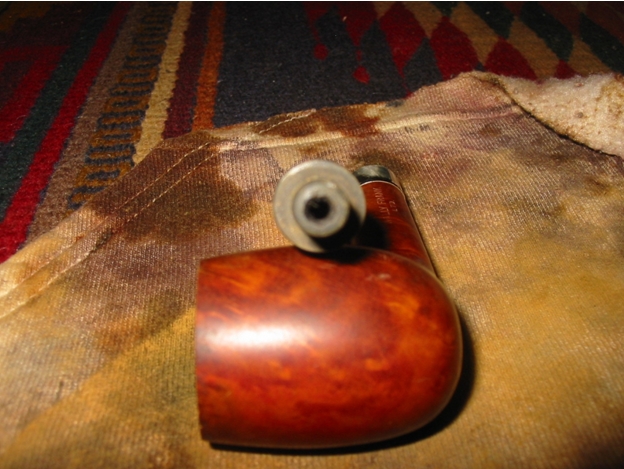
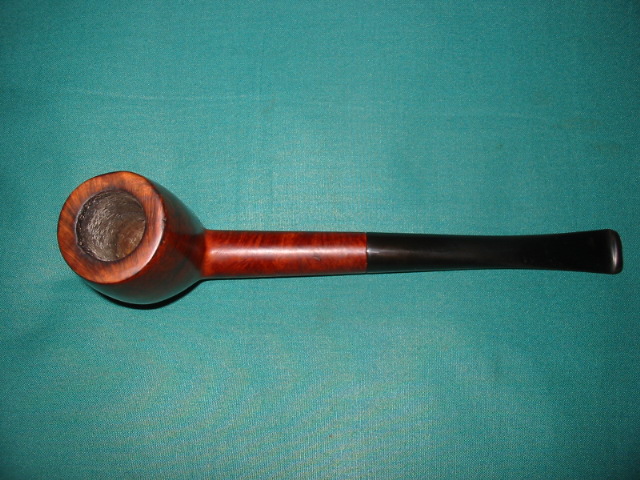
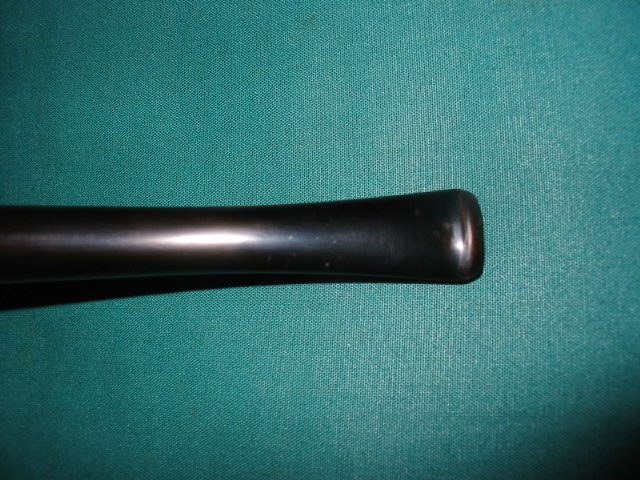
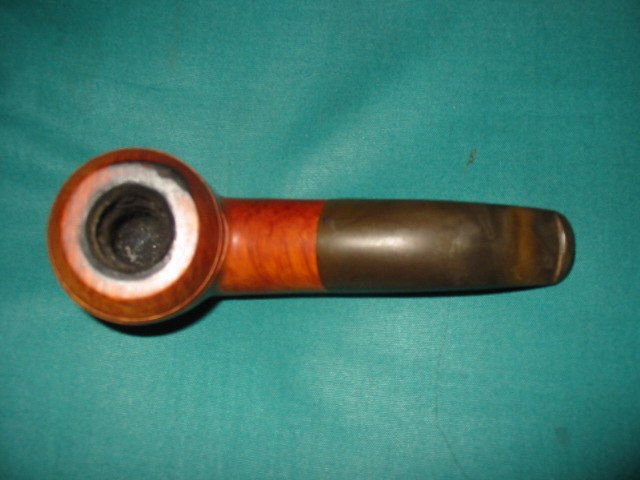
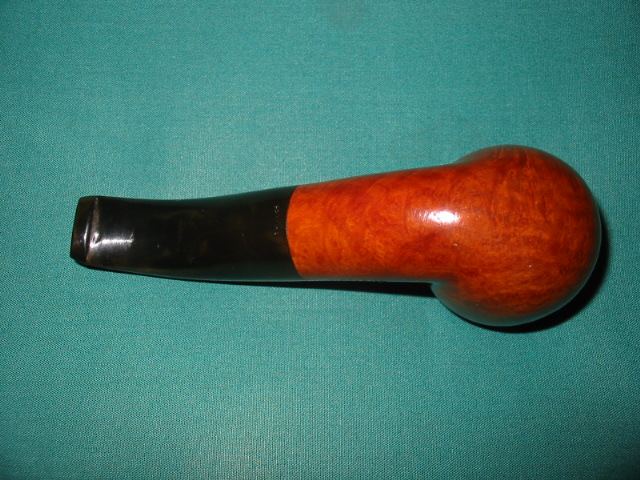
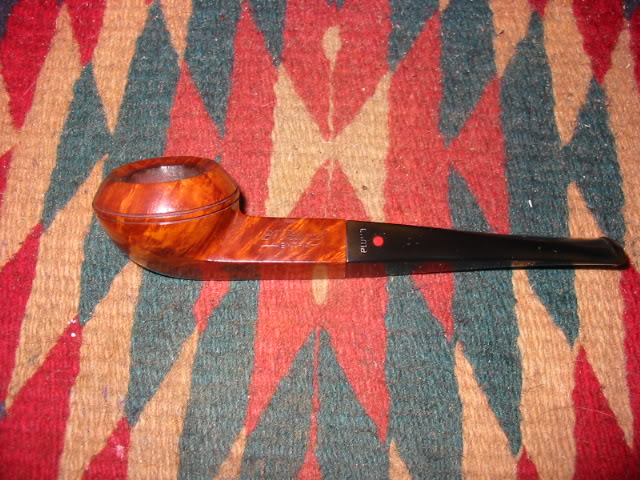
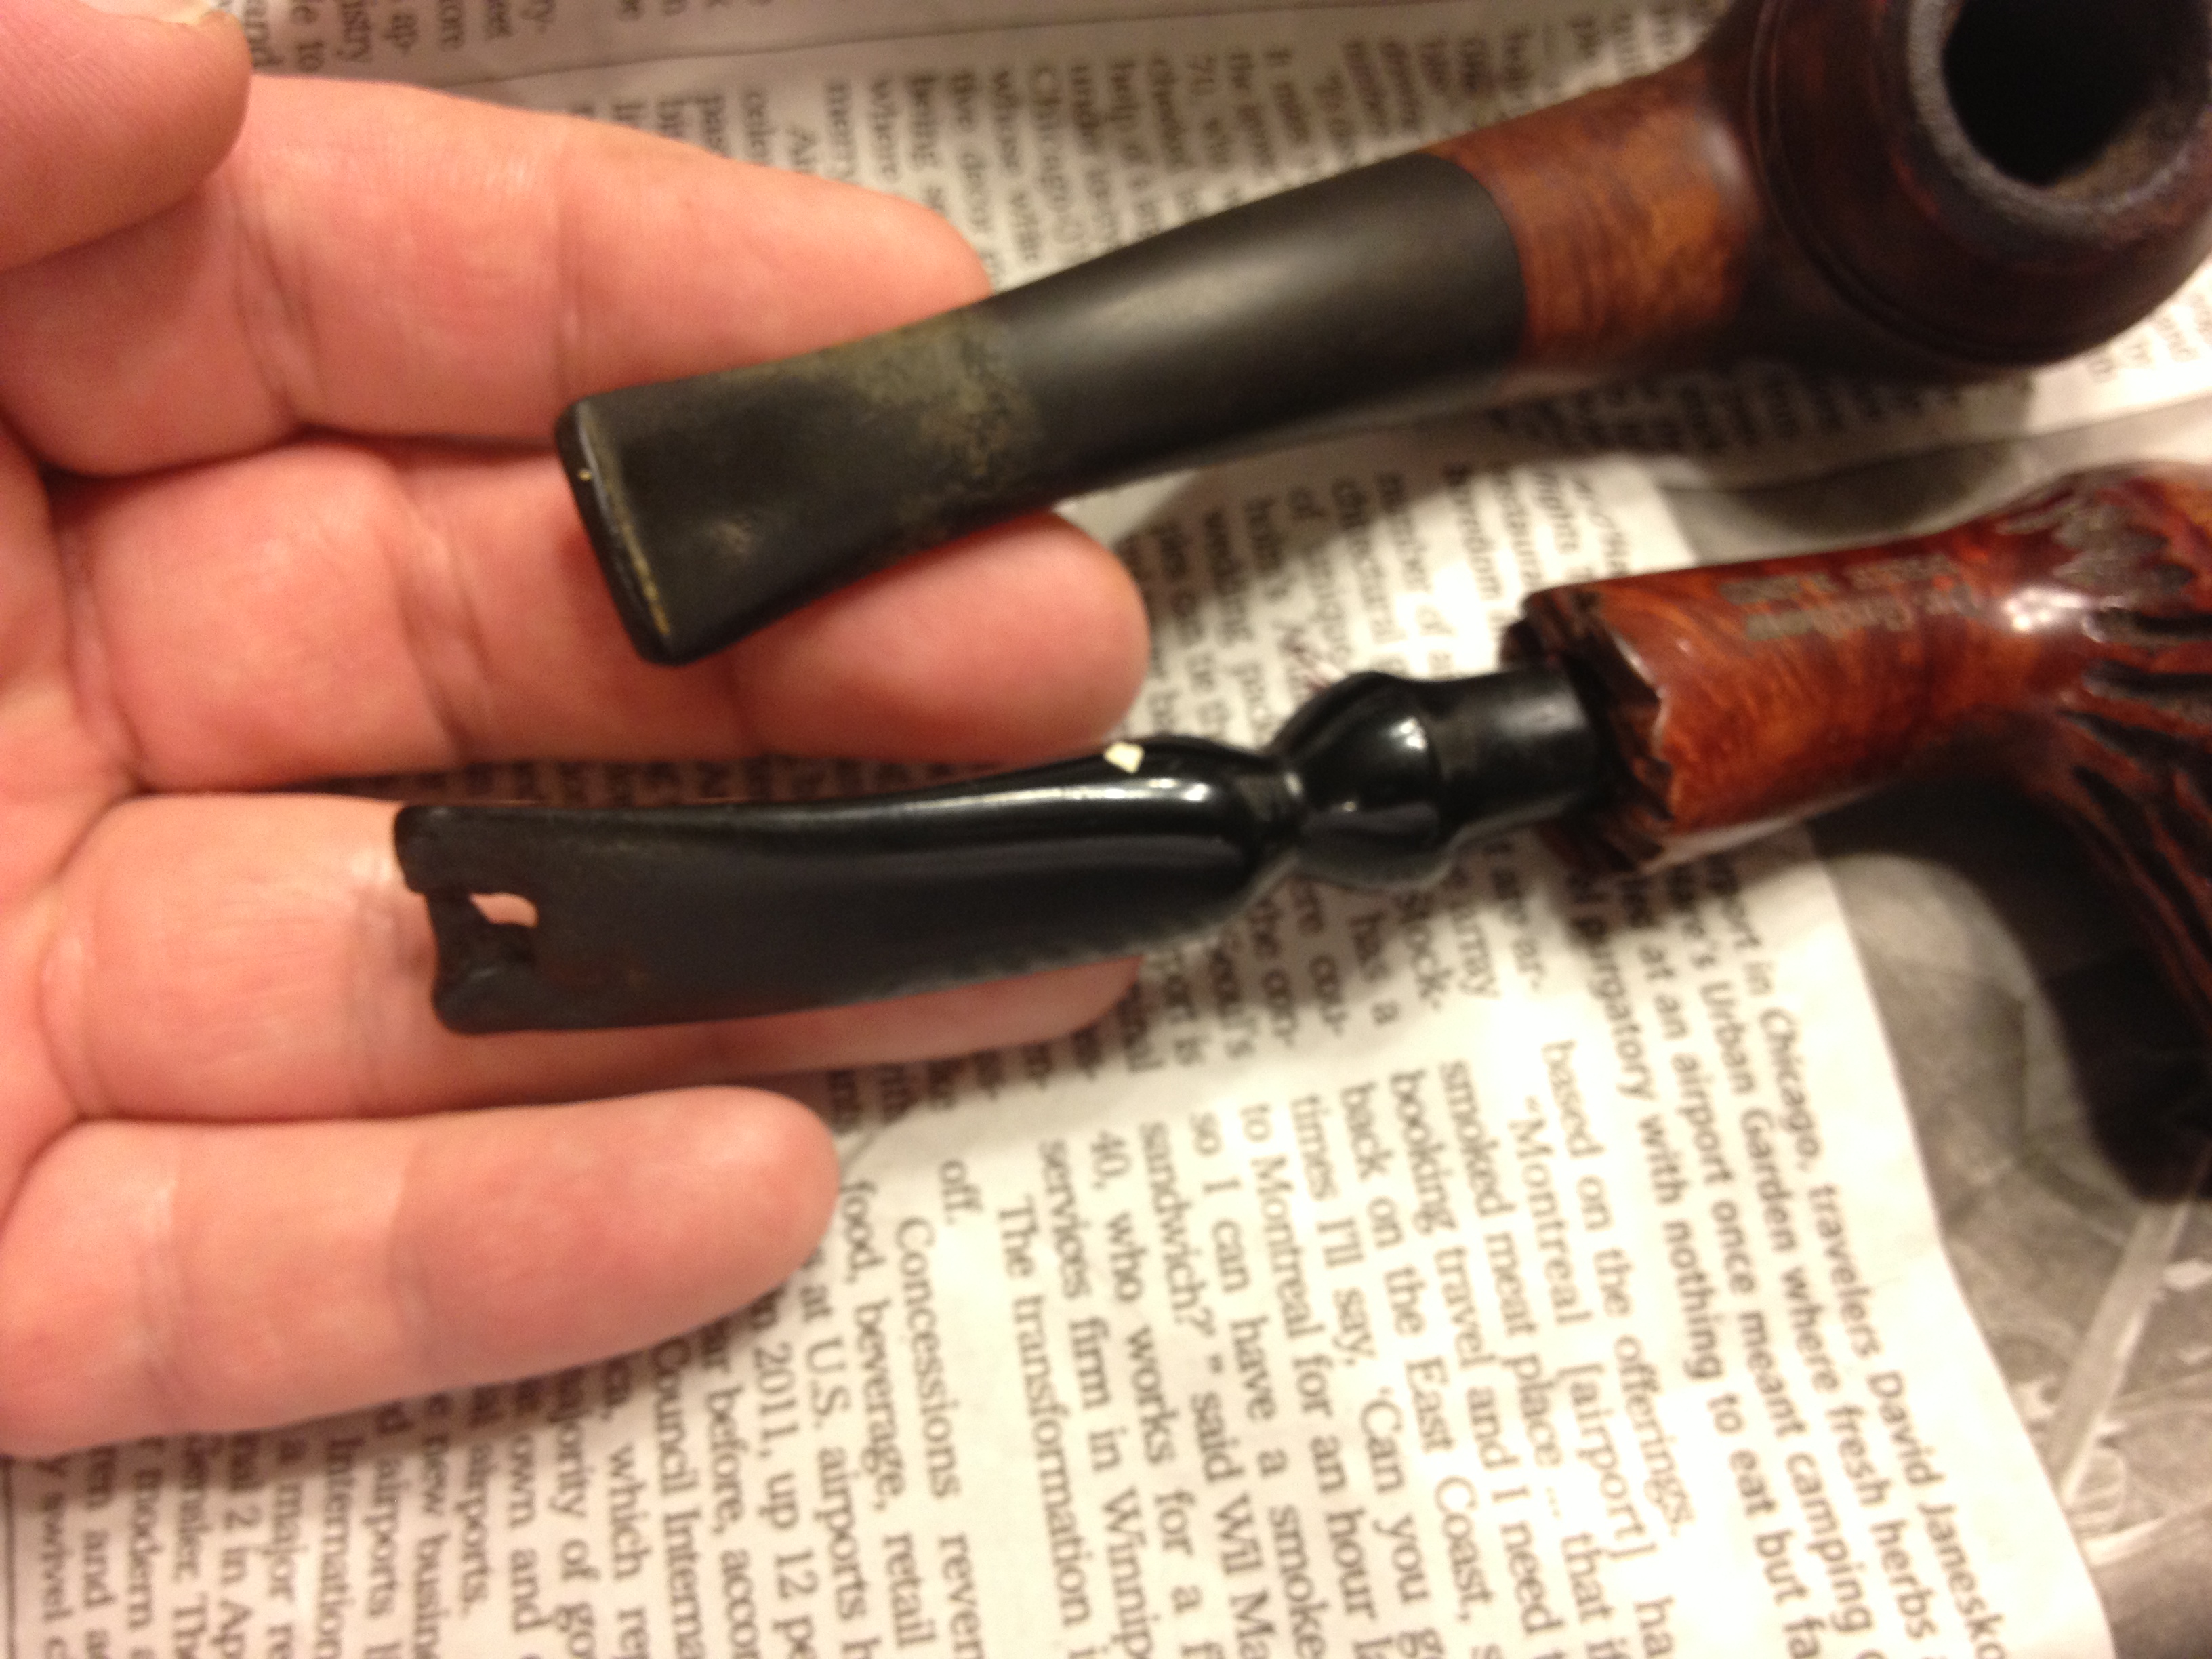
The following photos show the Wally Frank and the aforementioned Dr. Grabow as they looked when I unwrapped them at home. You can see that the Frank was in much better condition than the Grabow, especially the stem!

IMG_4431 IMG_4432IMG_4433 IMG_4436 IMG_4436IMG_4434IMG_4435IMG_4436IMG_4438

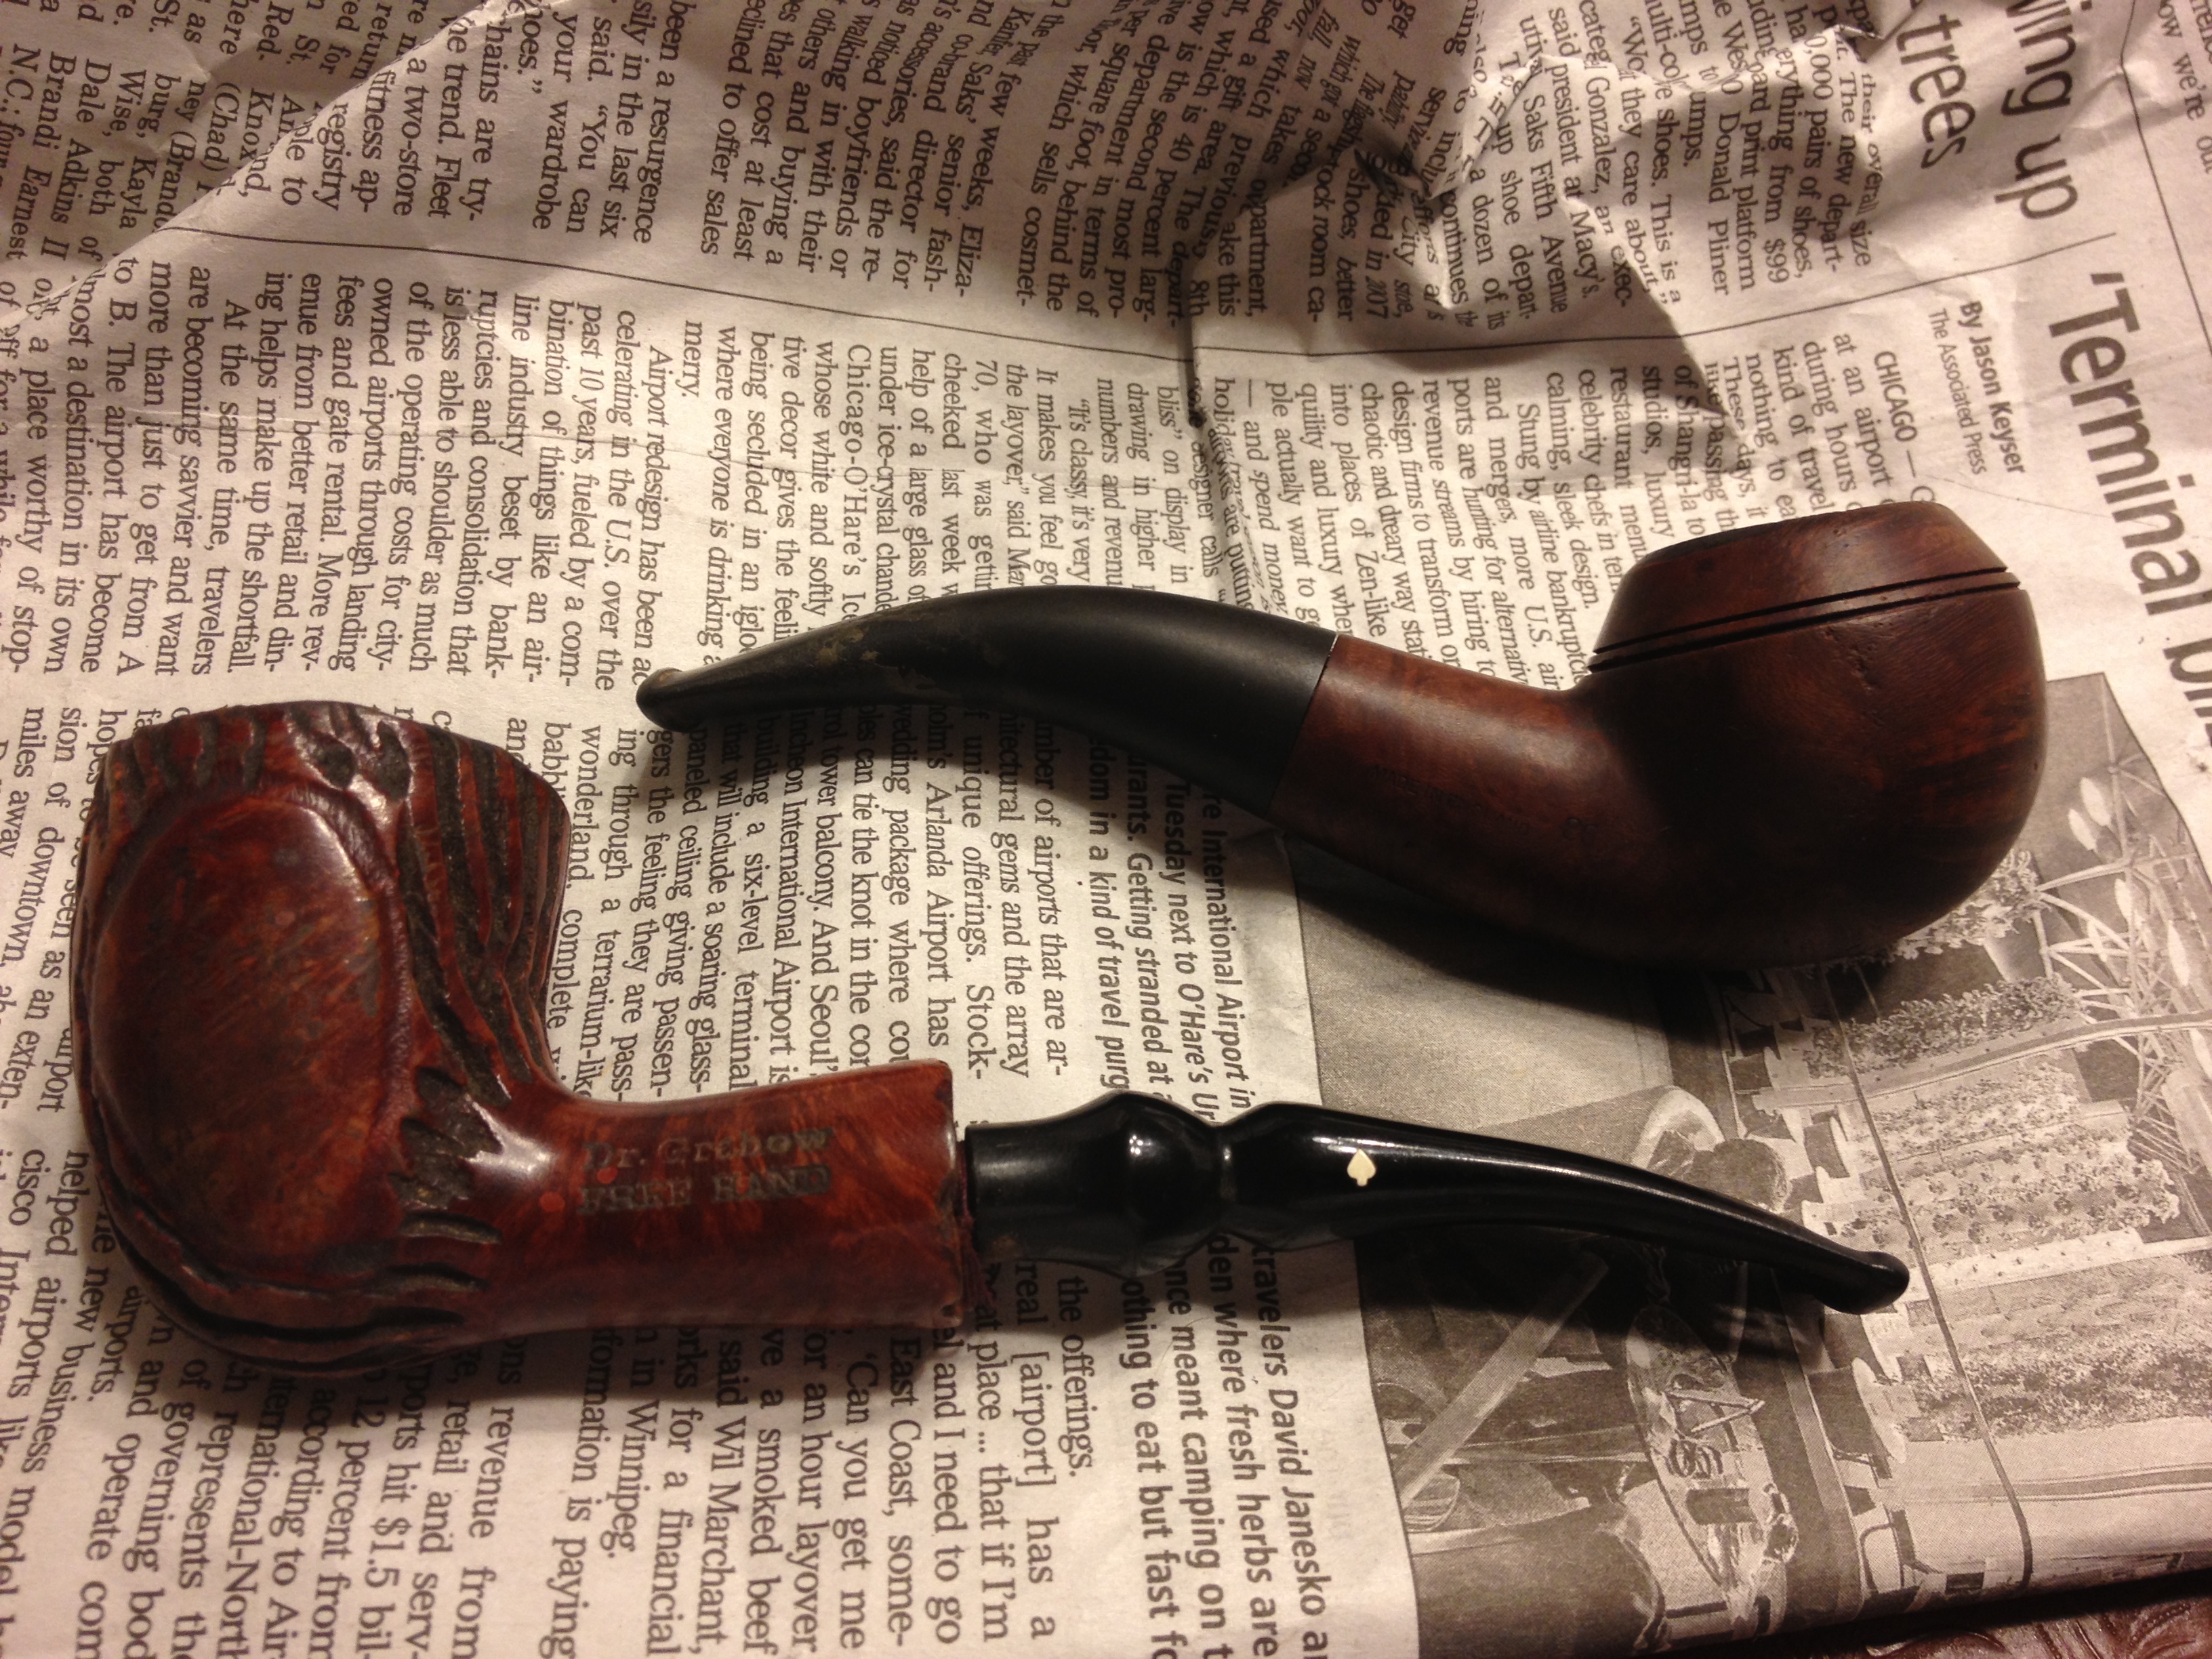
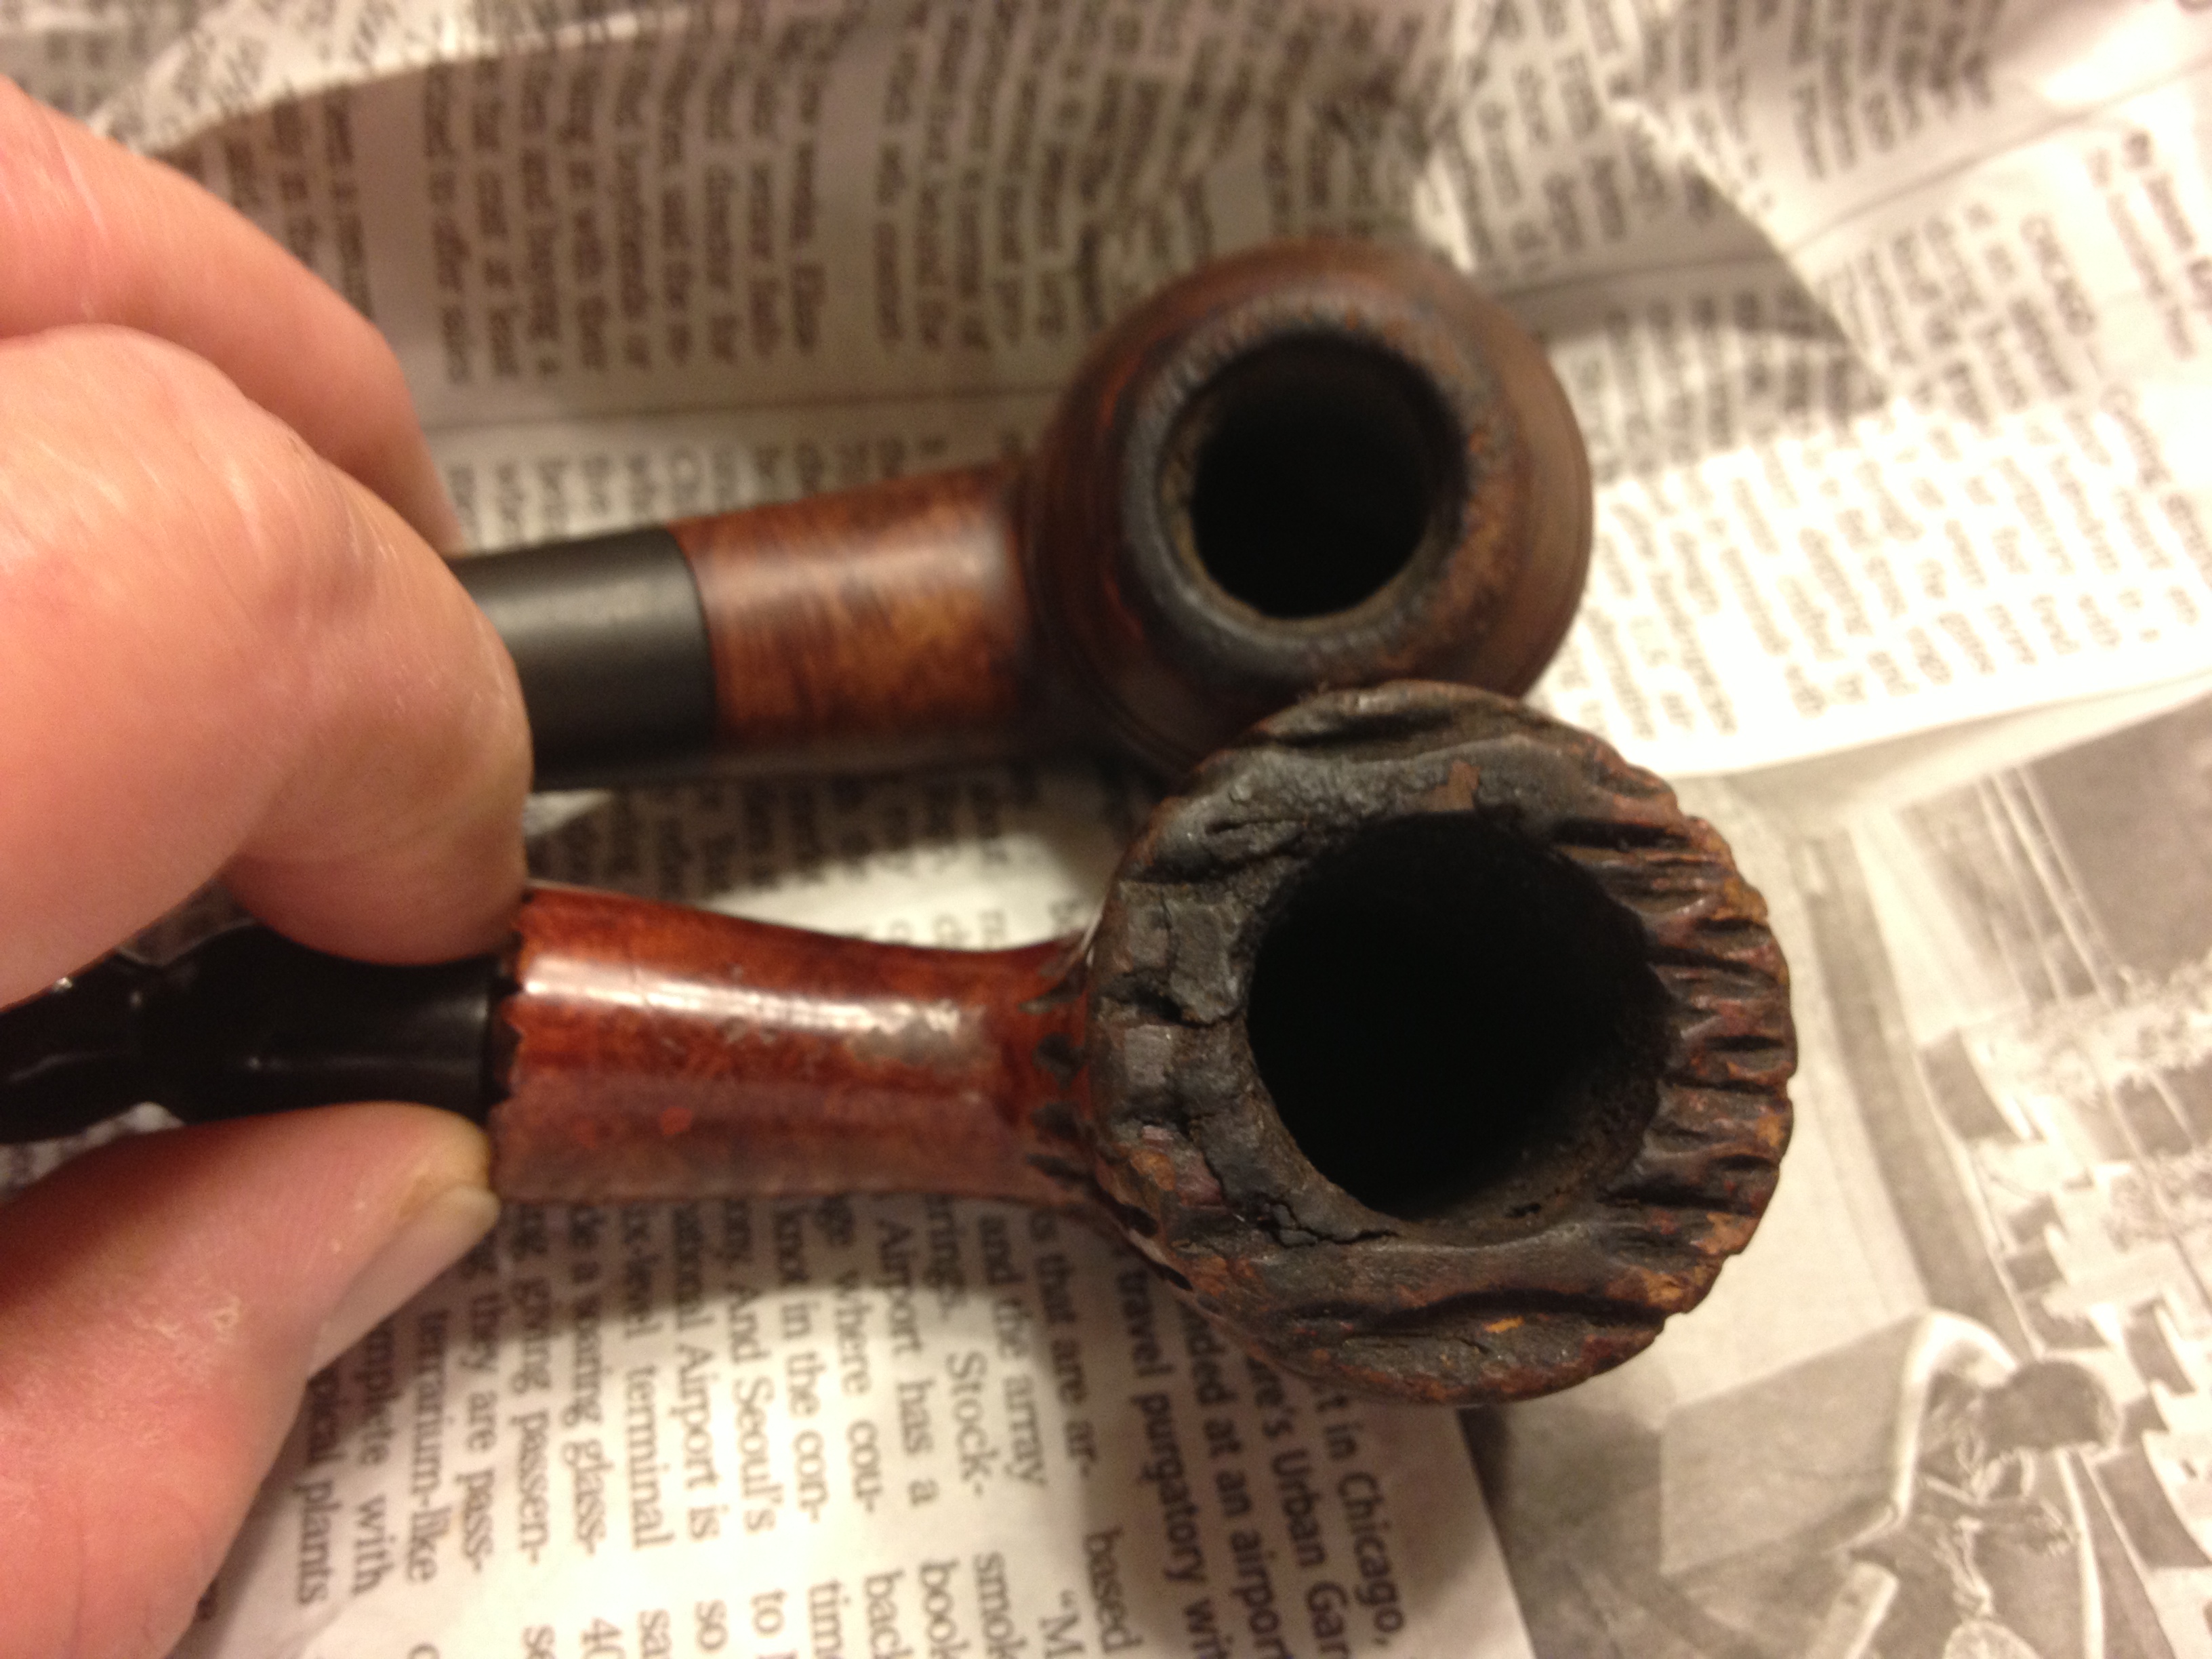
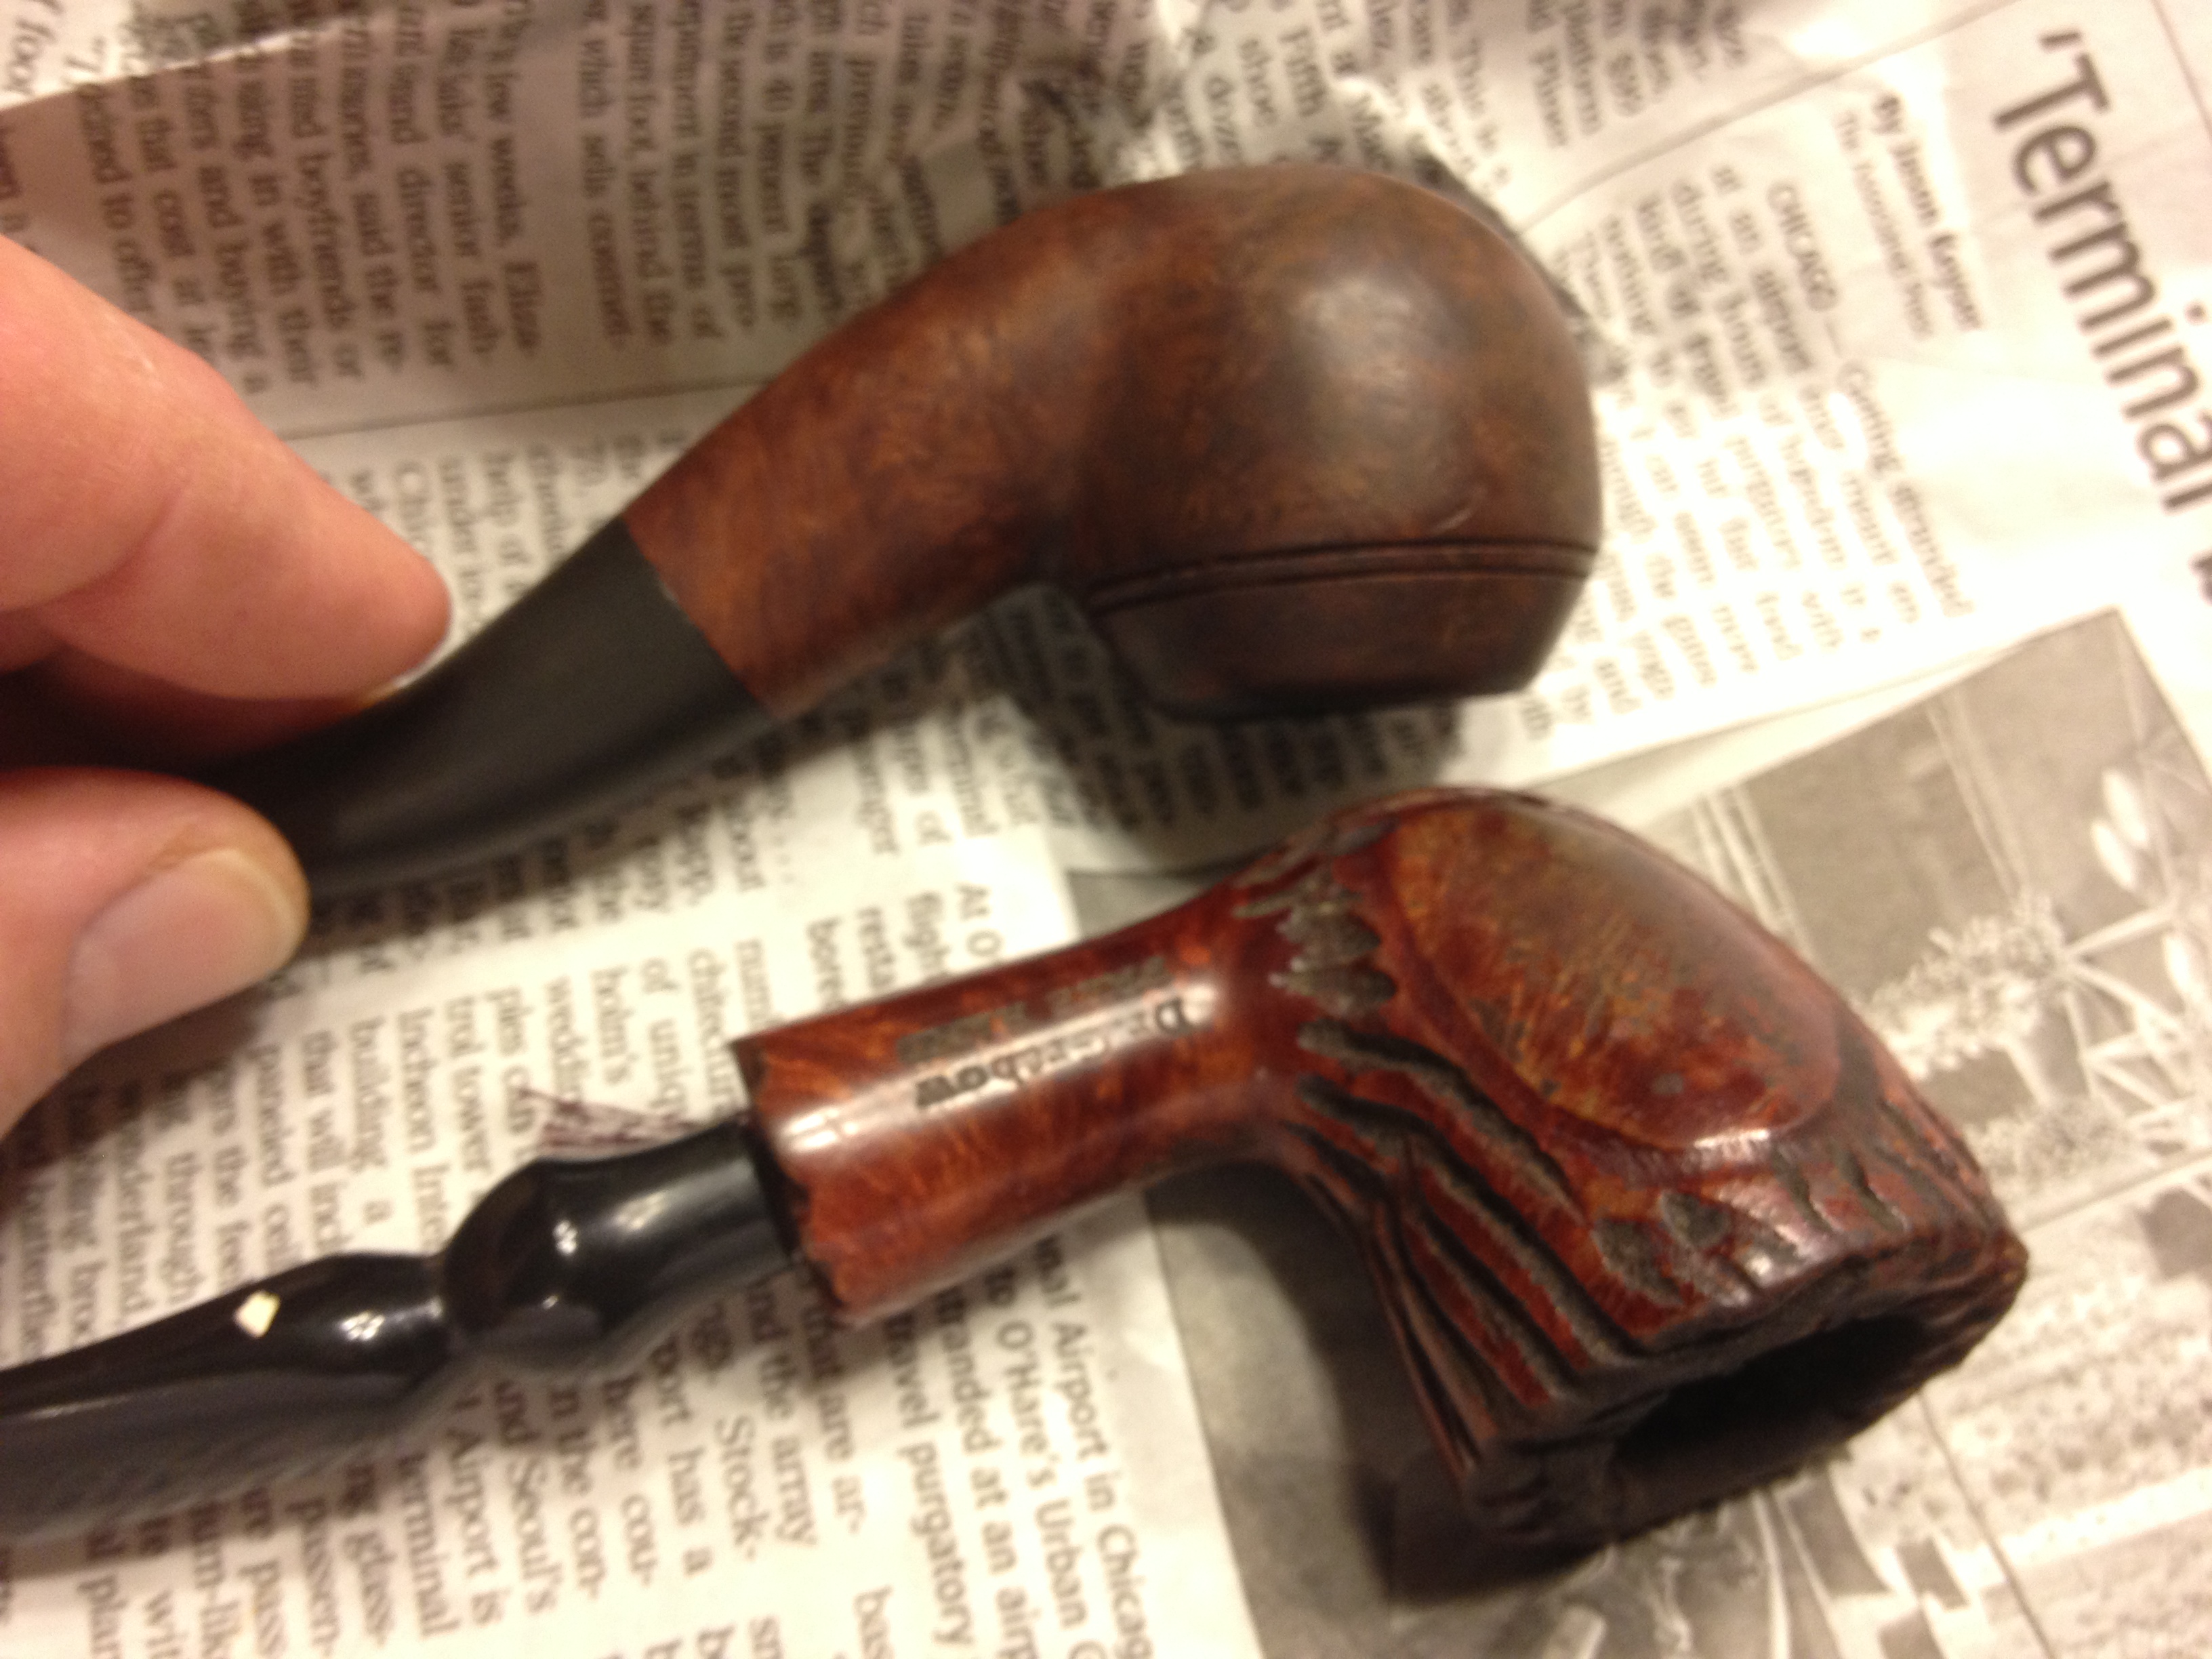
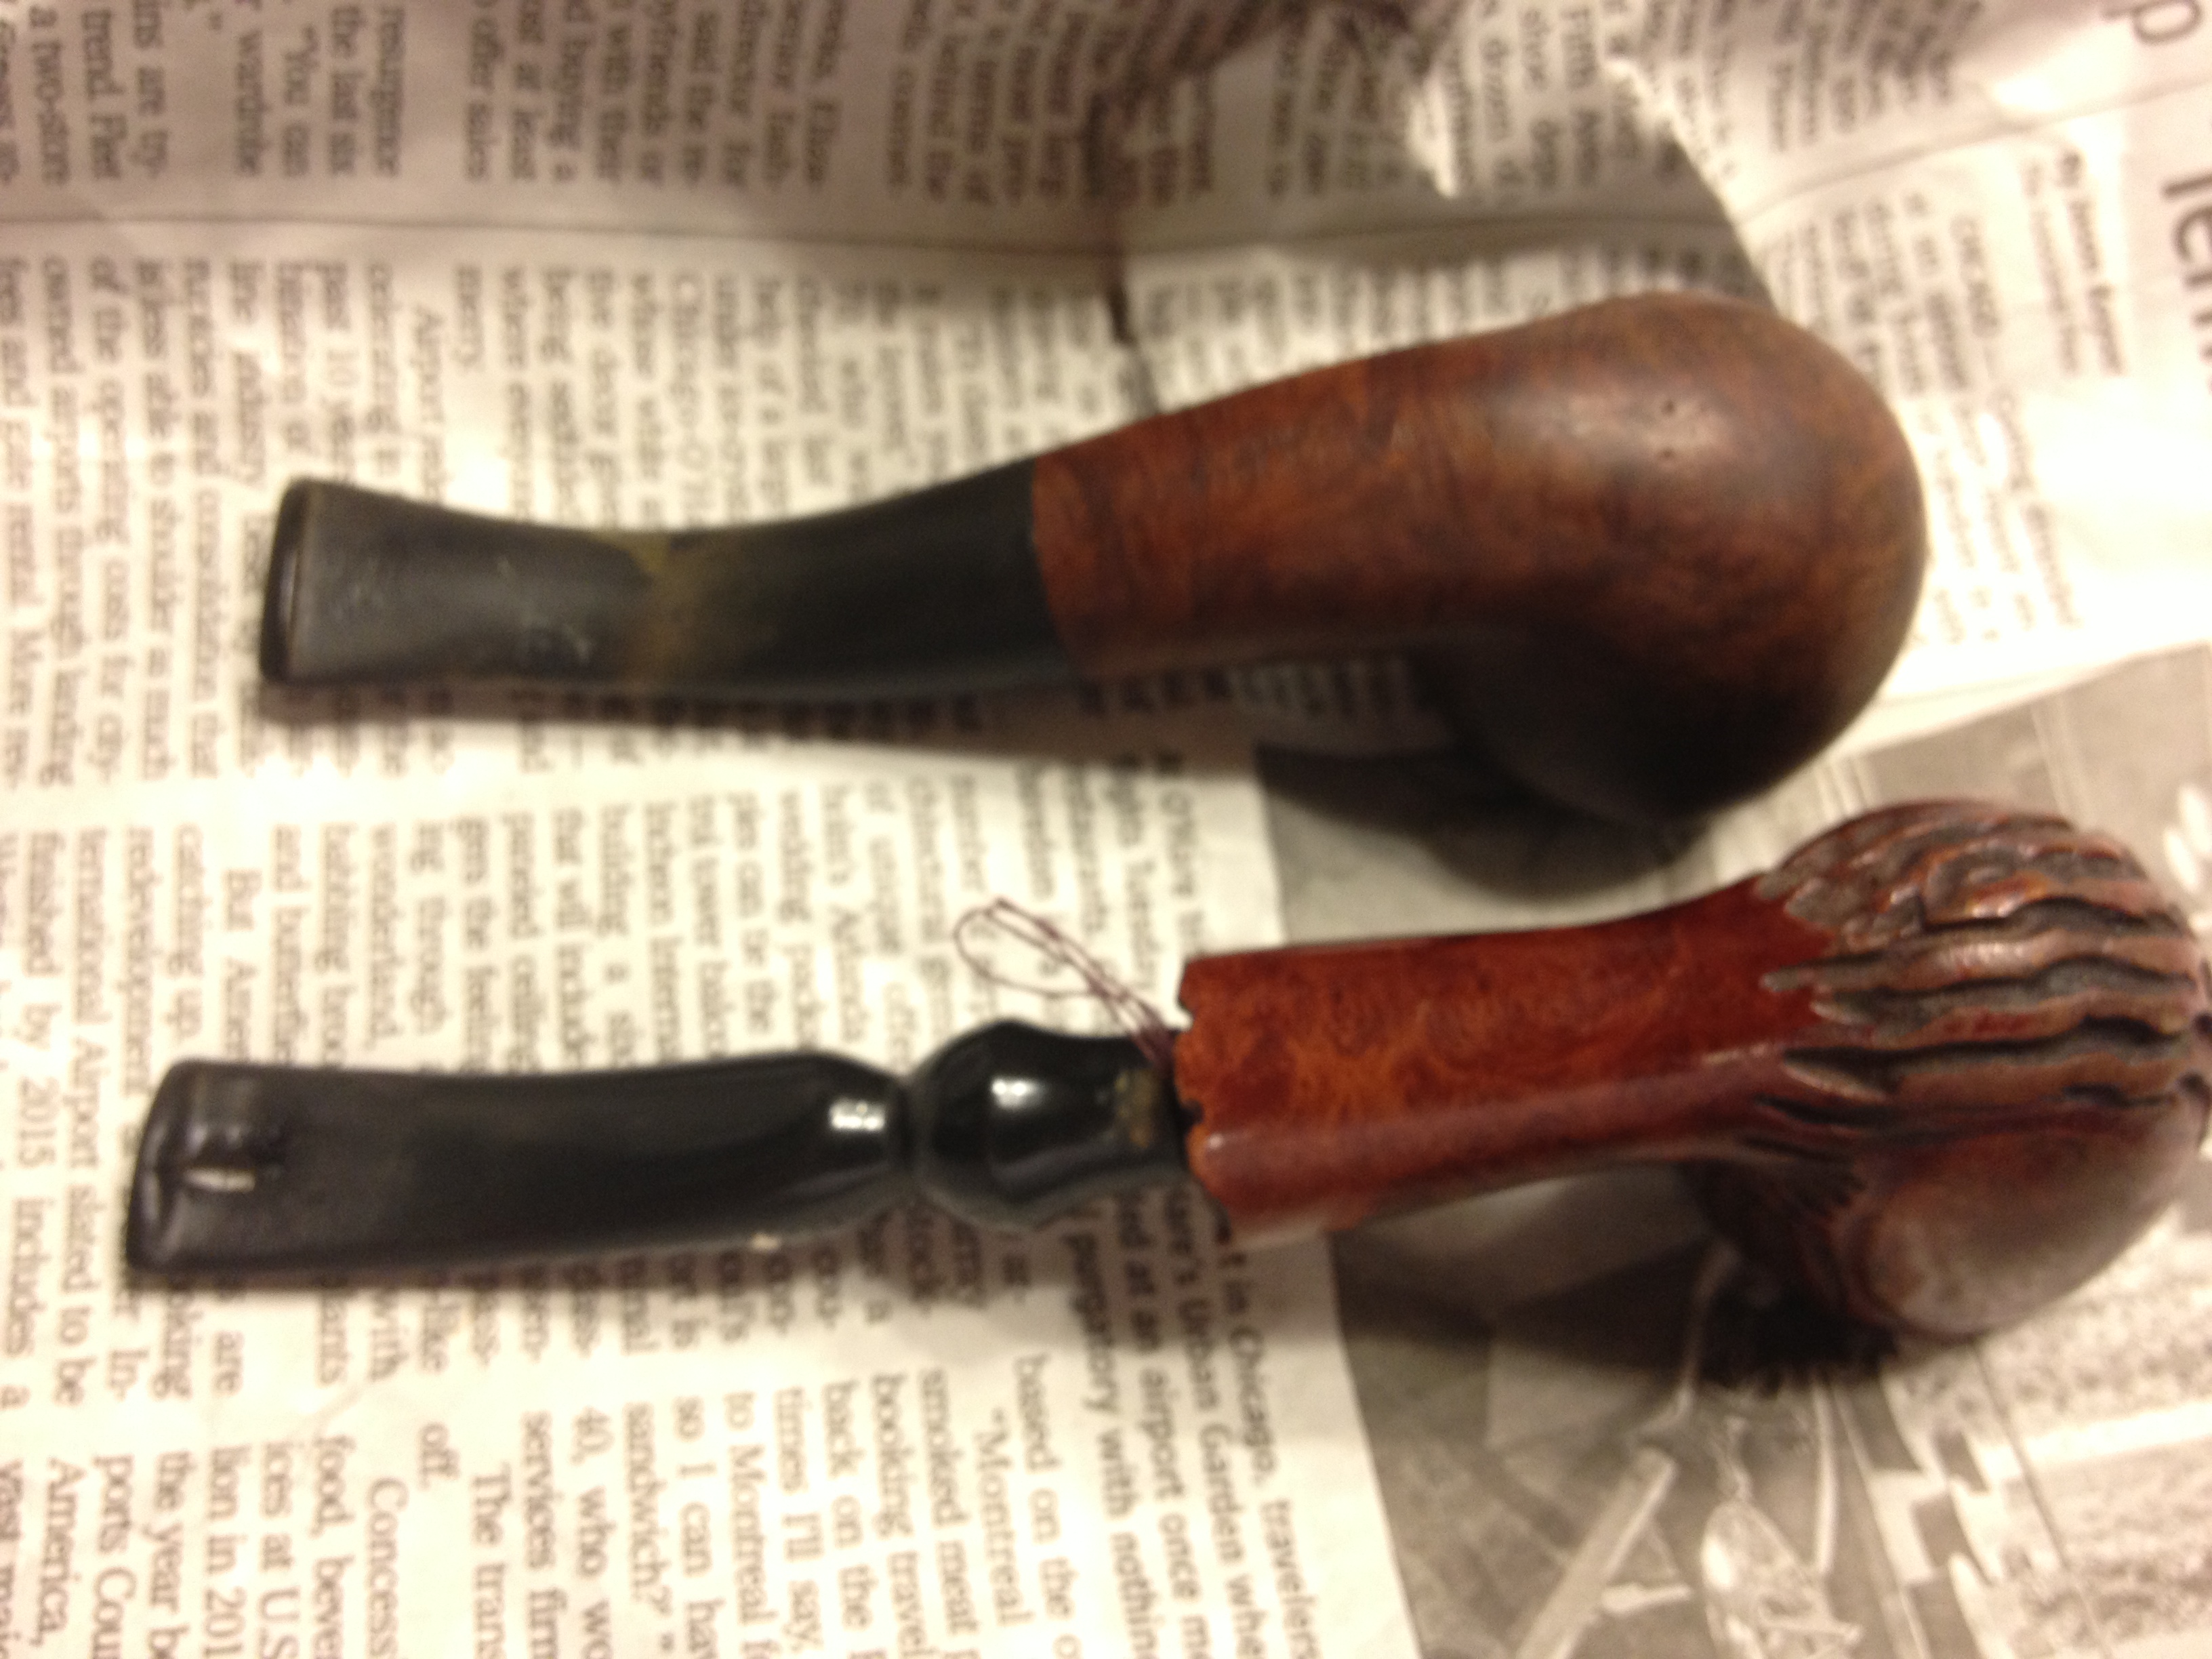
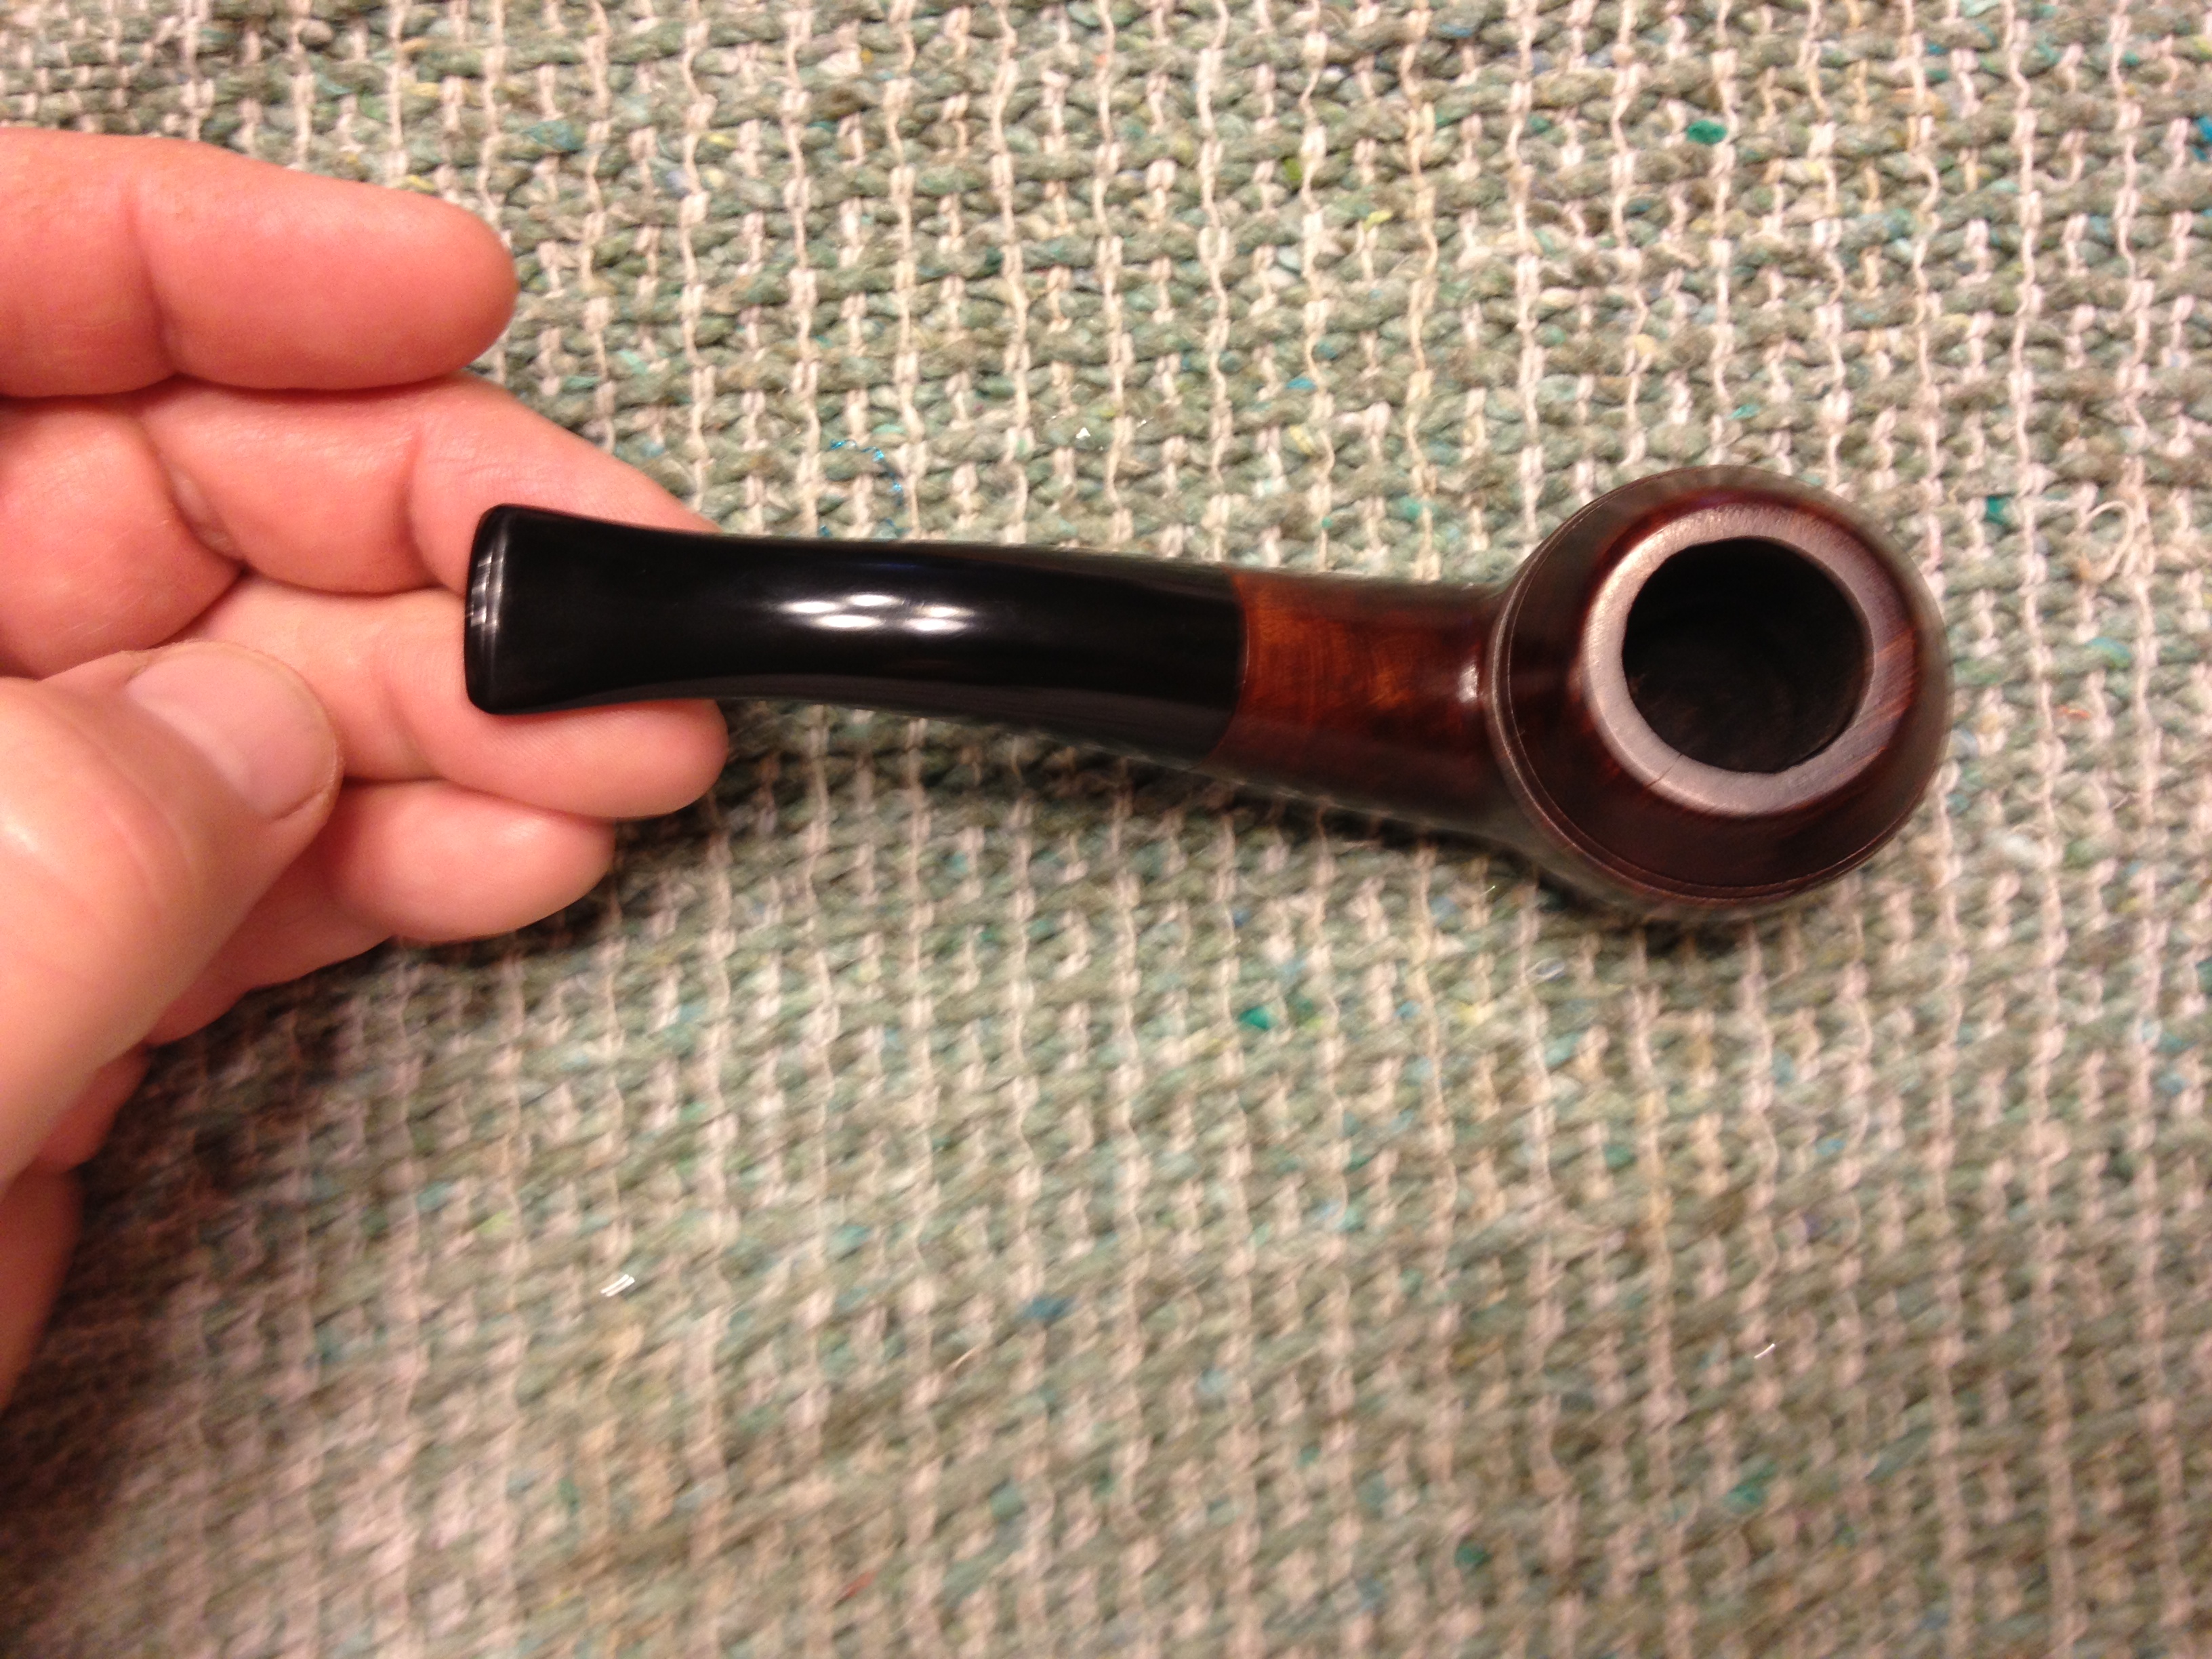
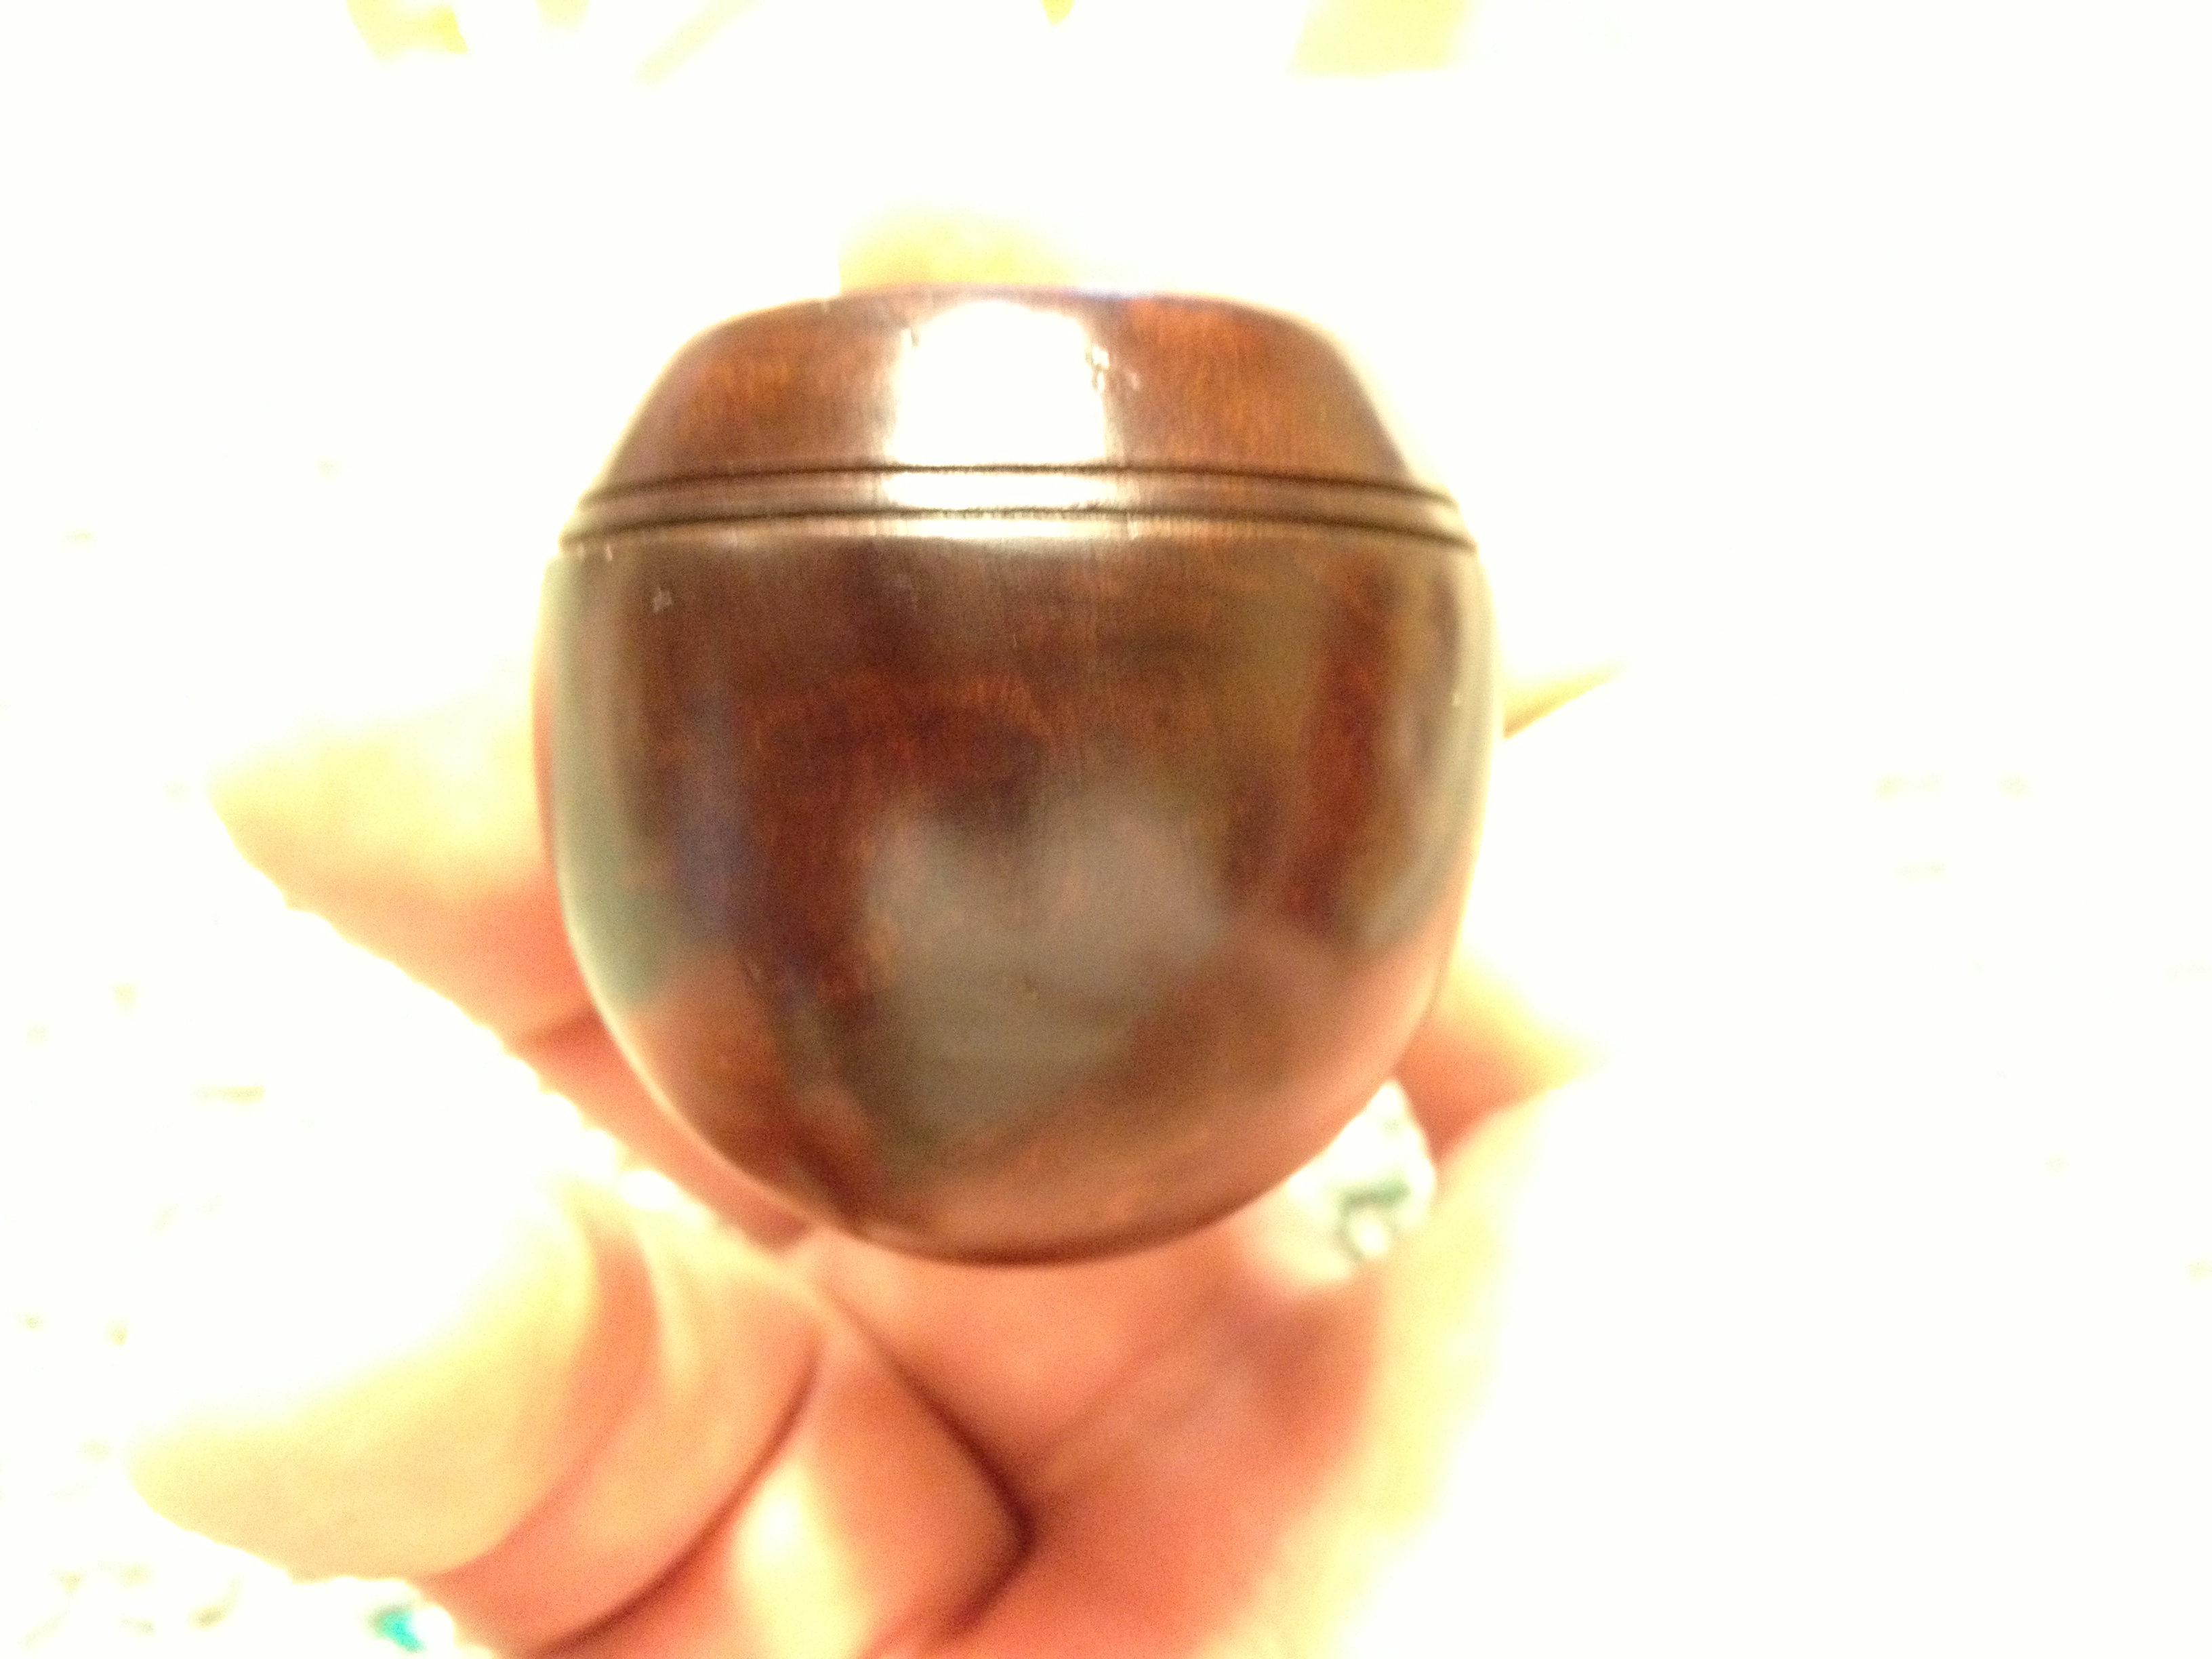
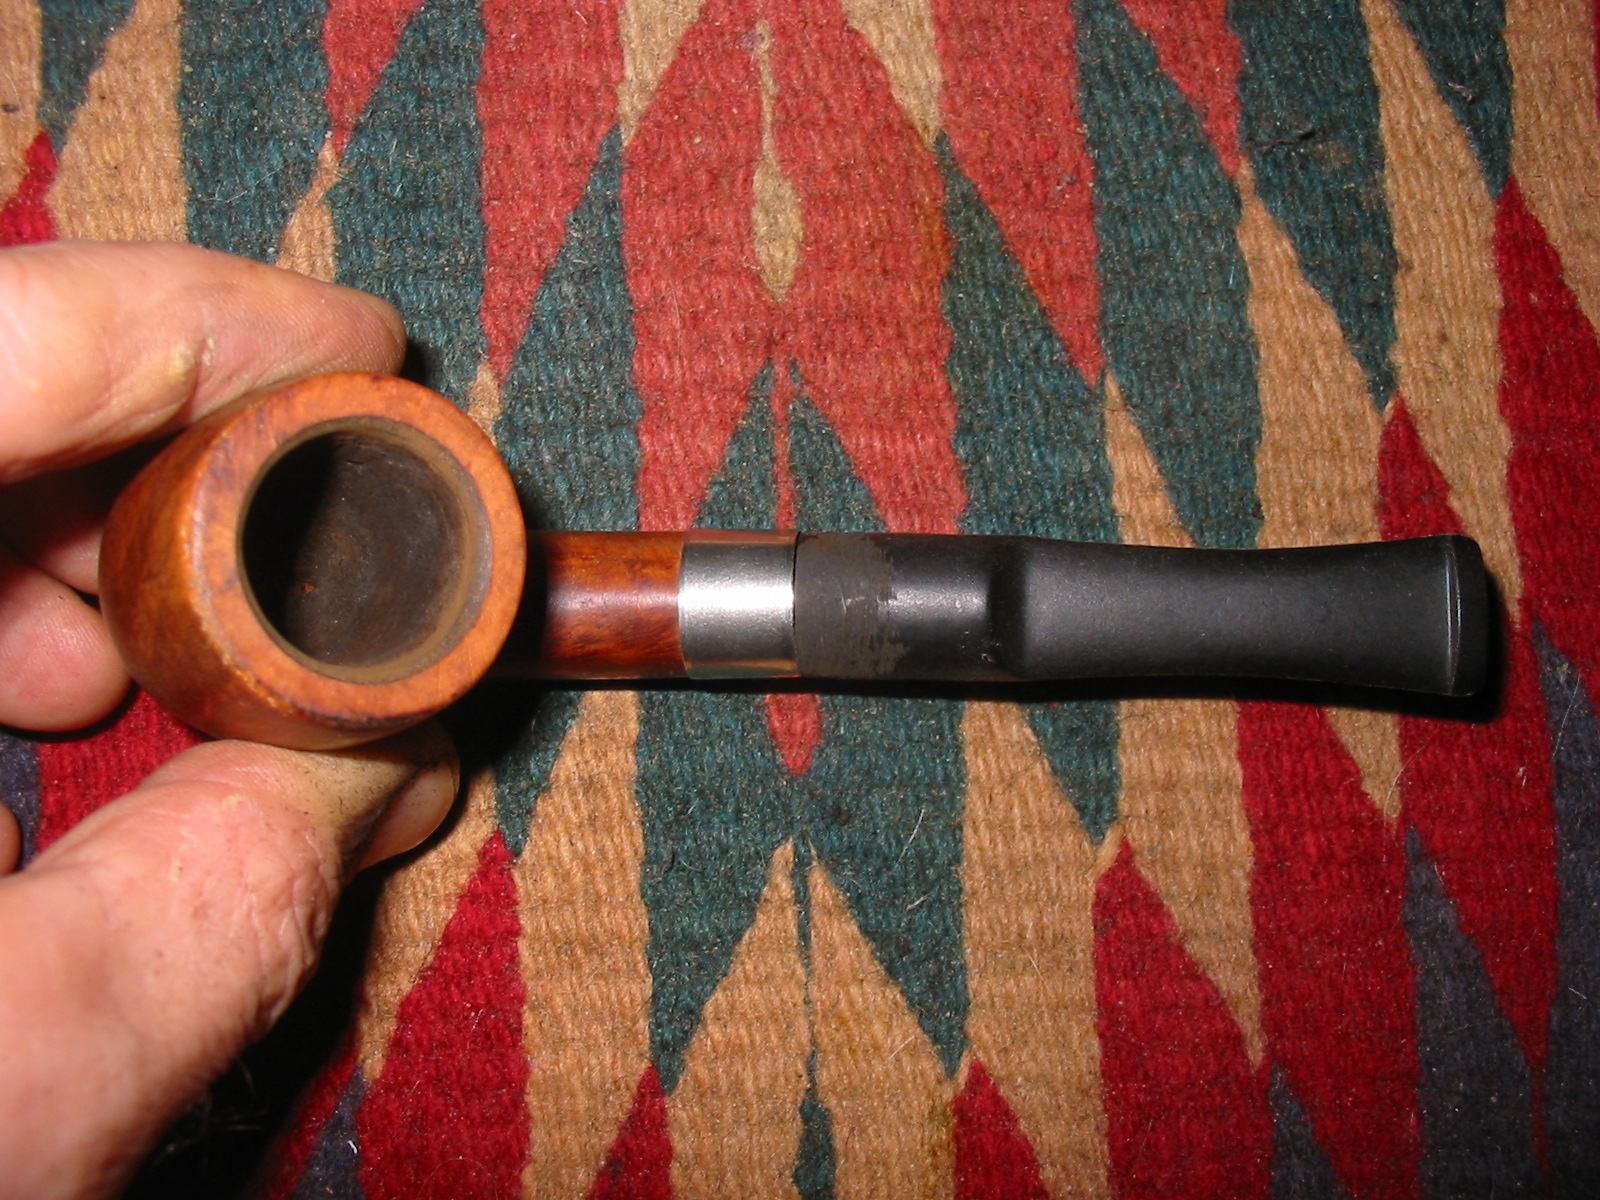
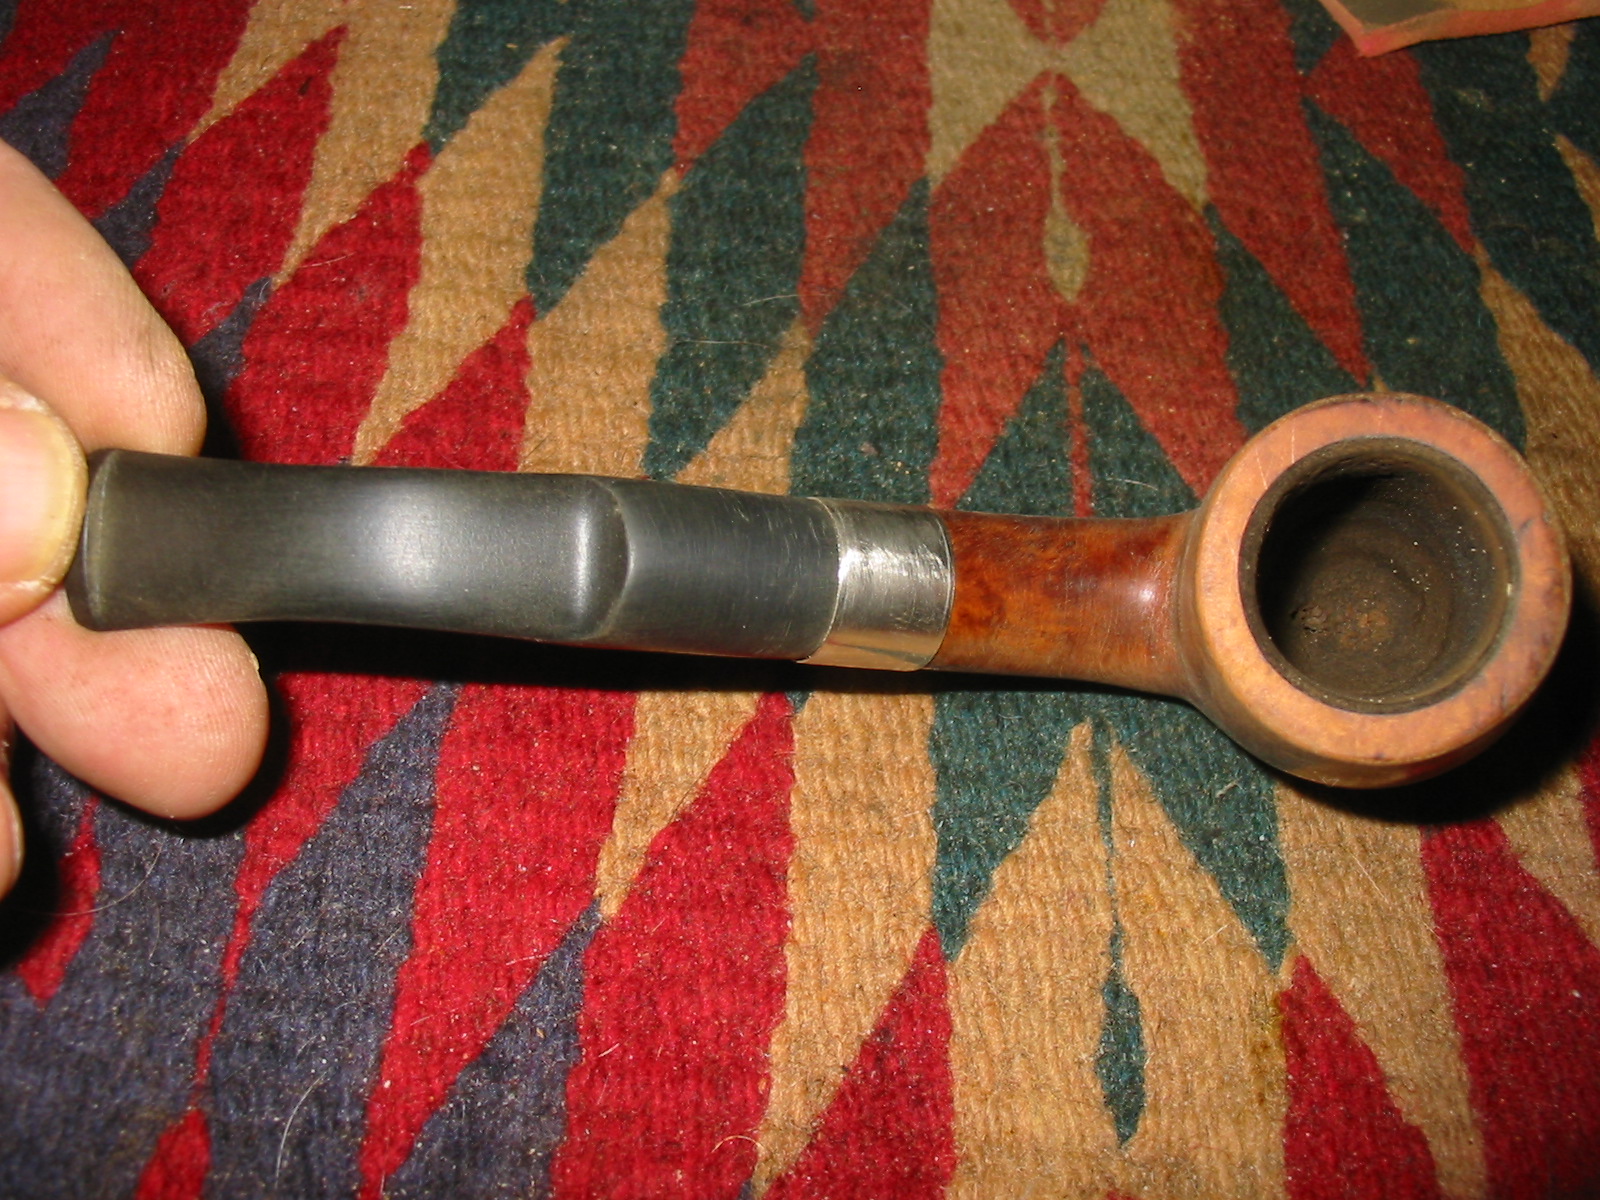
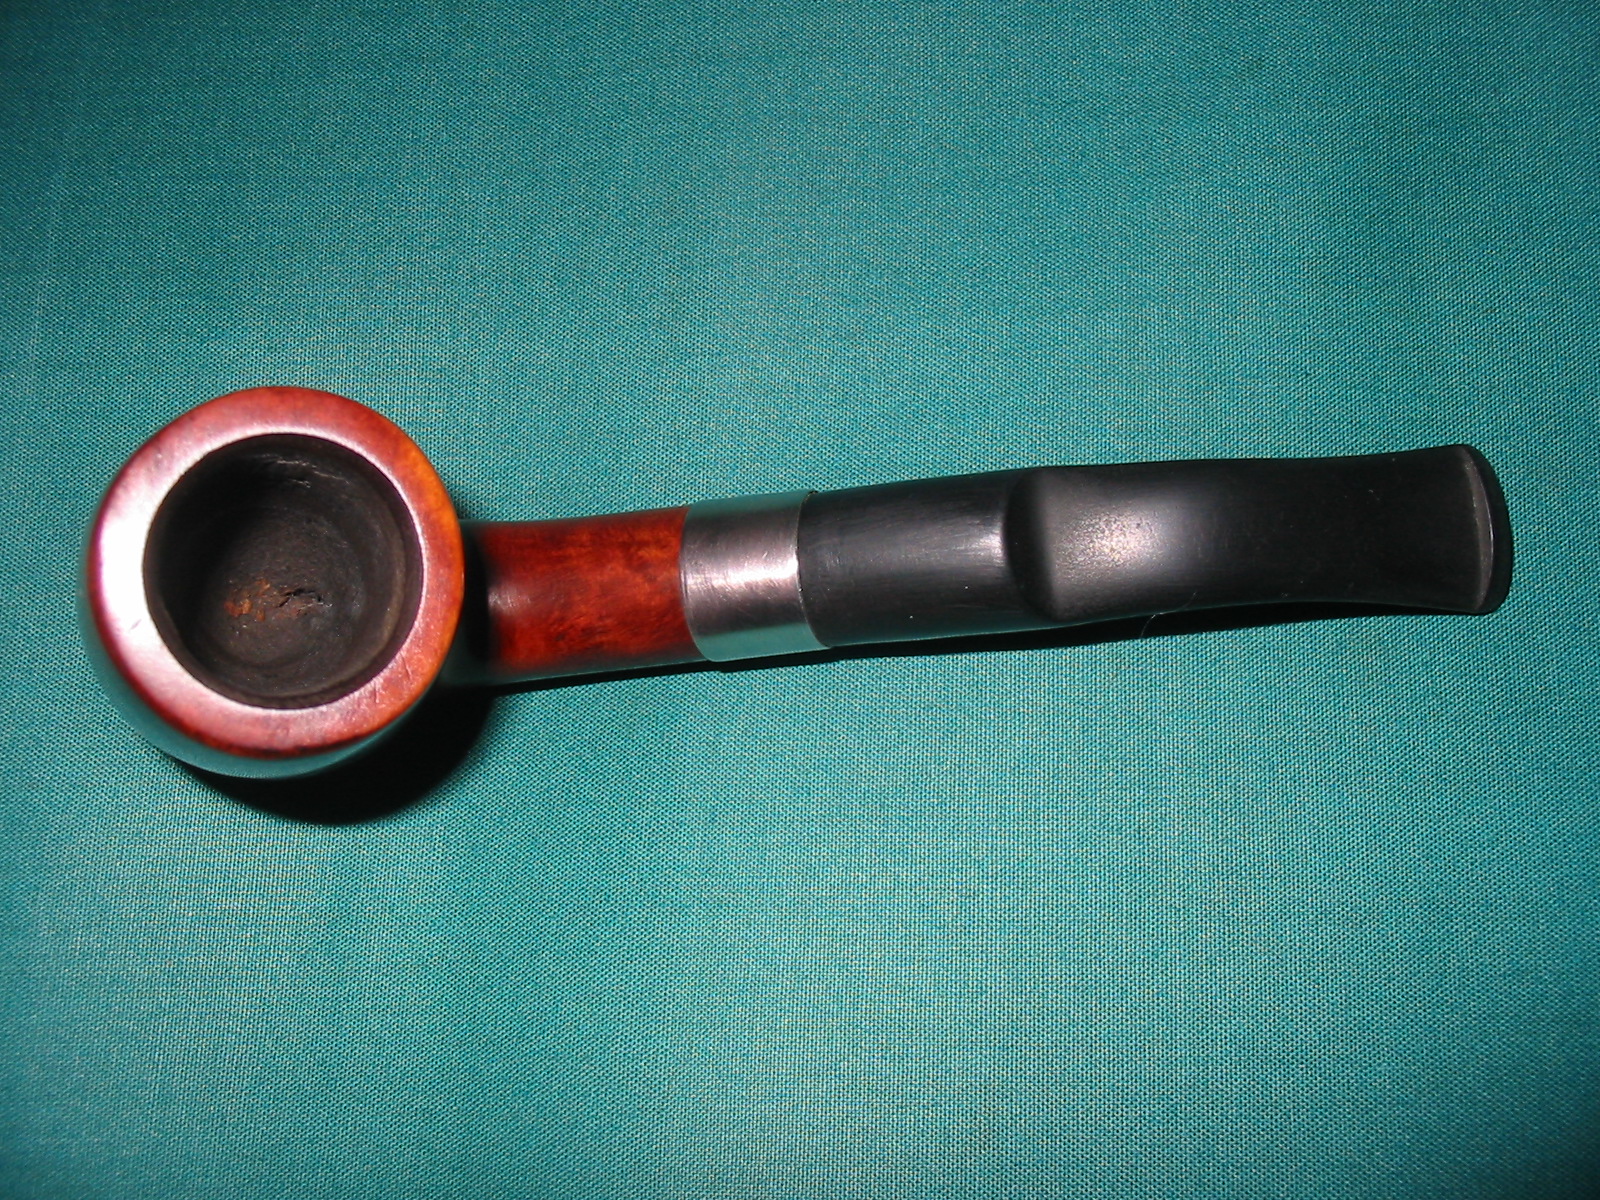
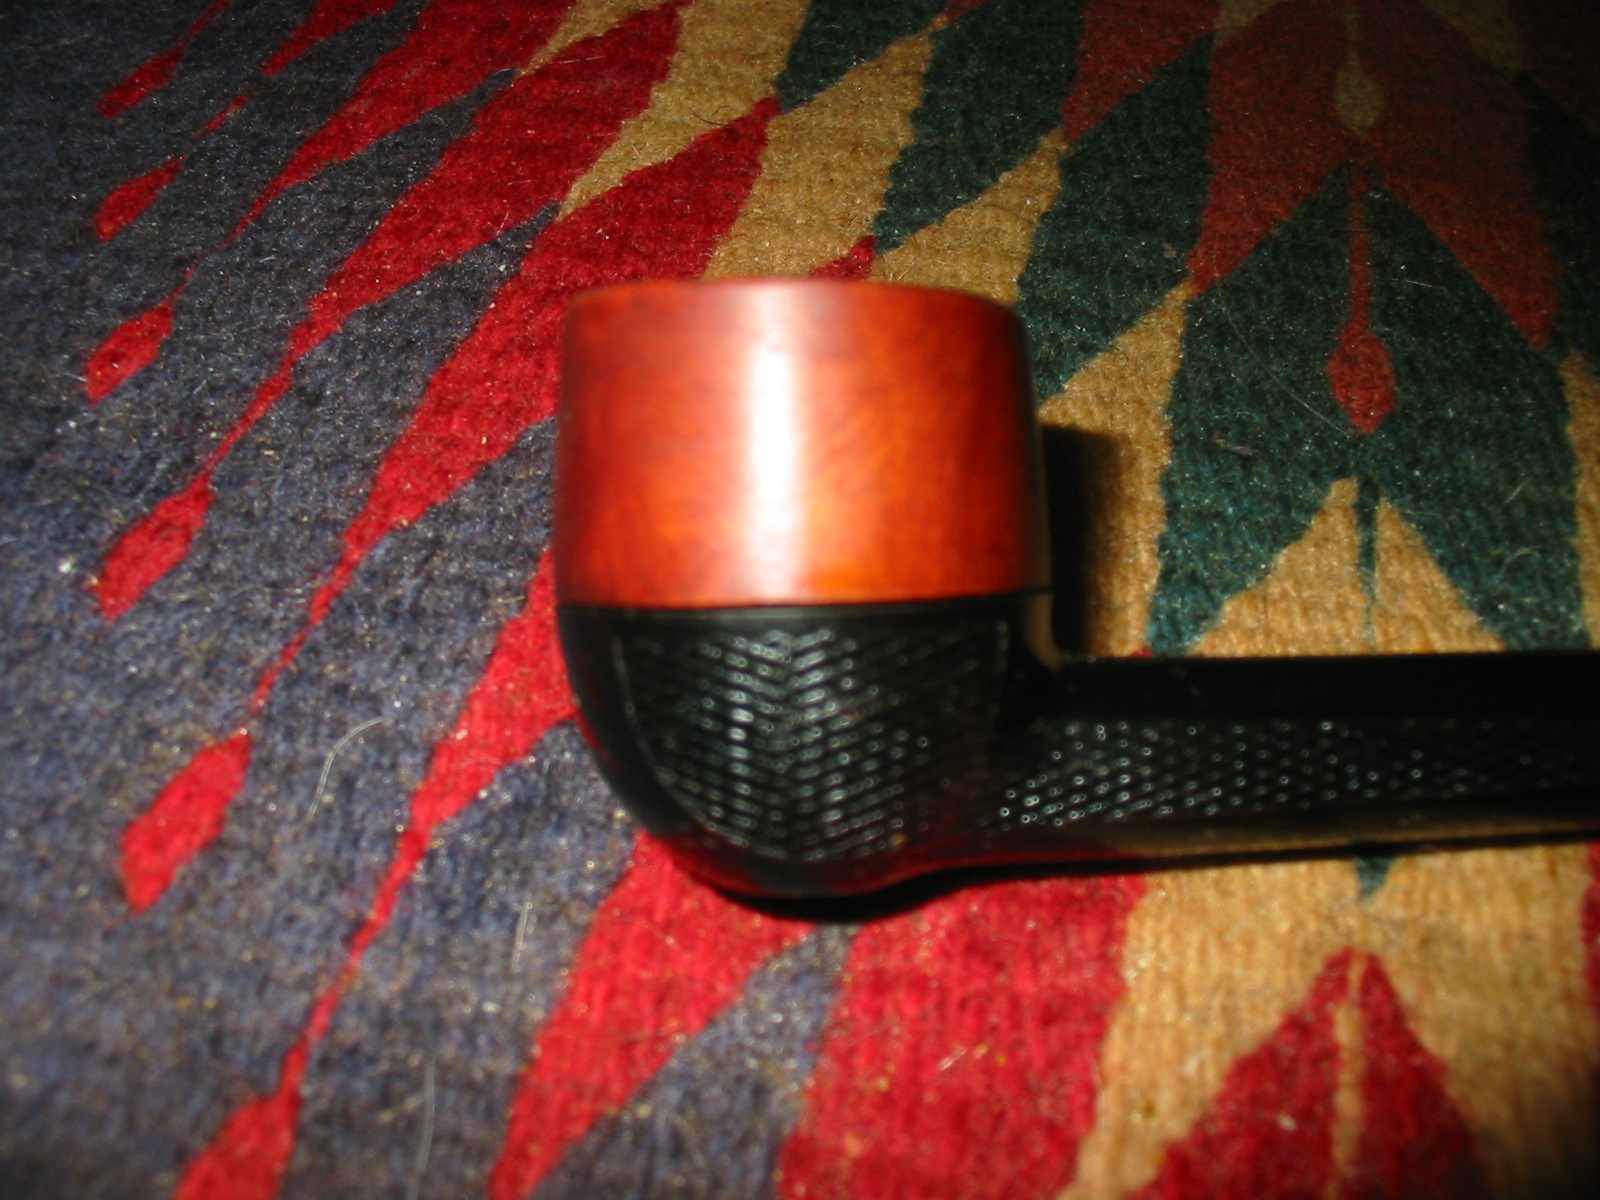
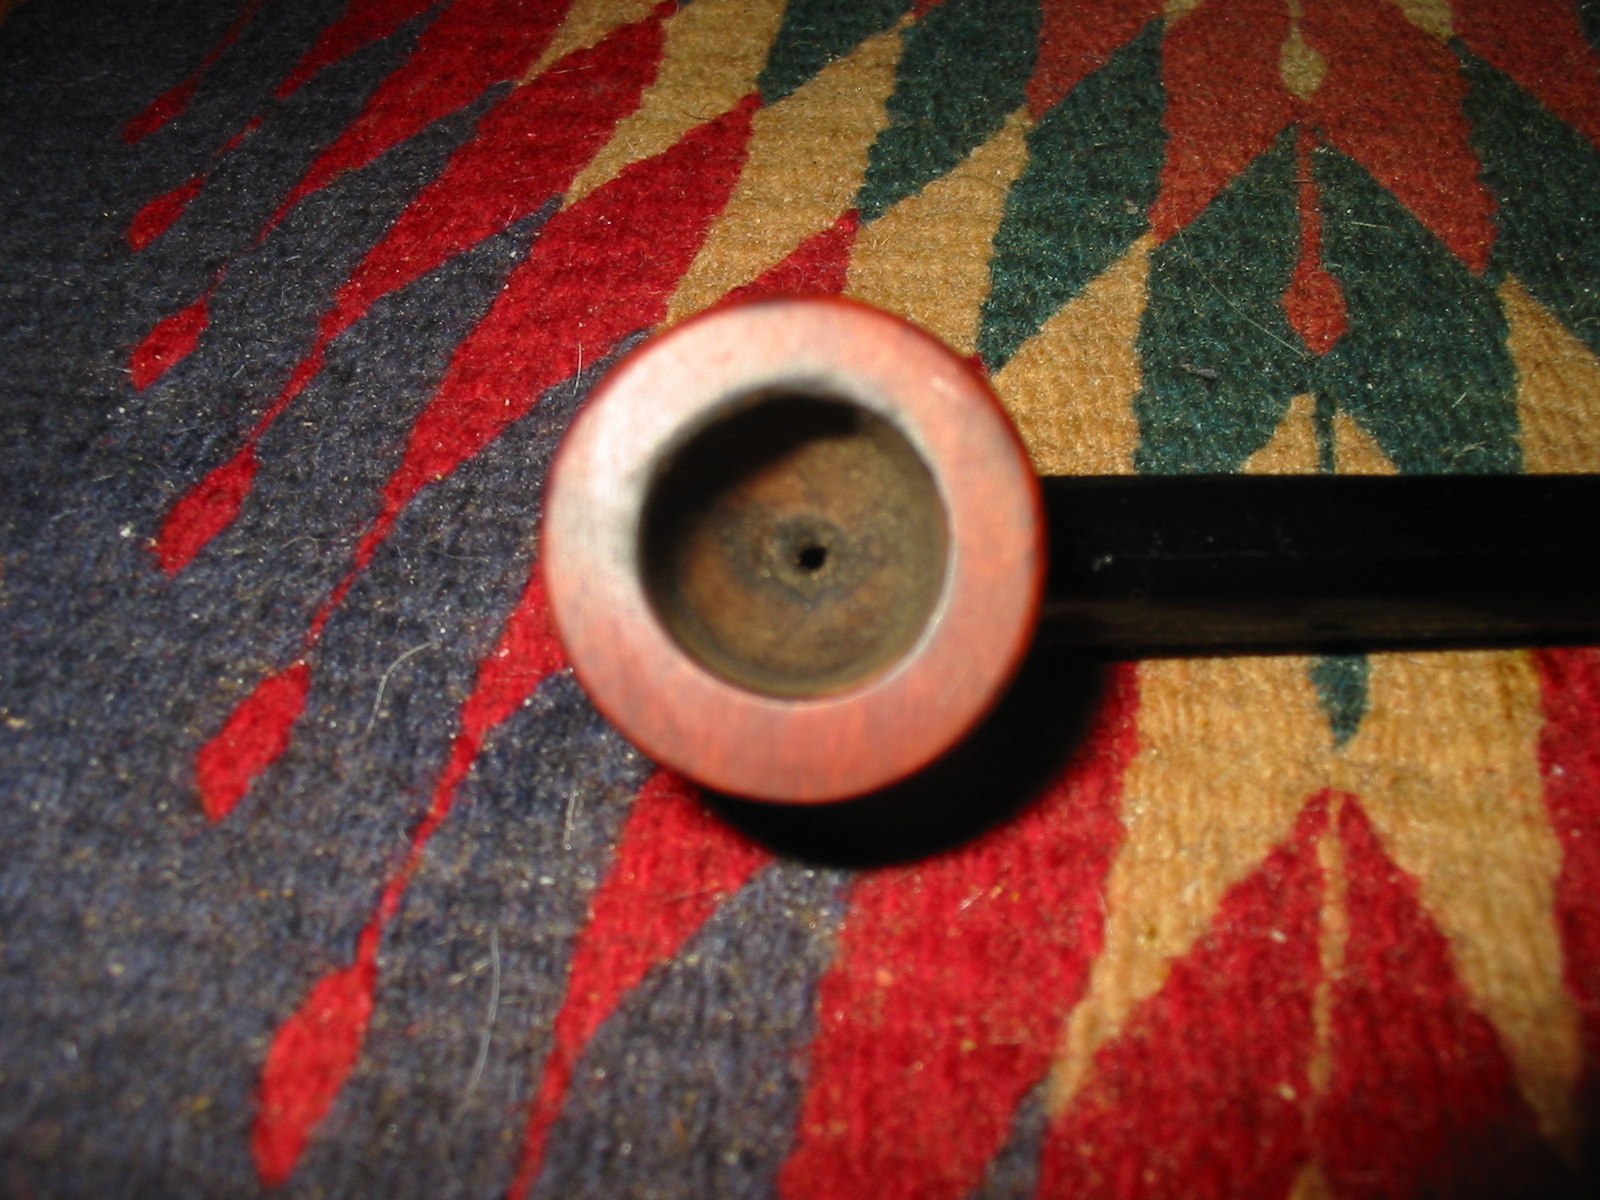
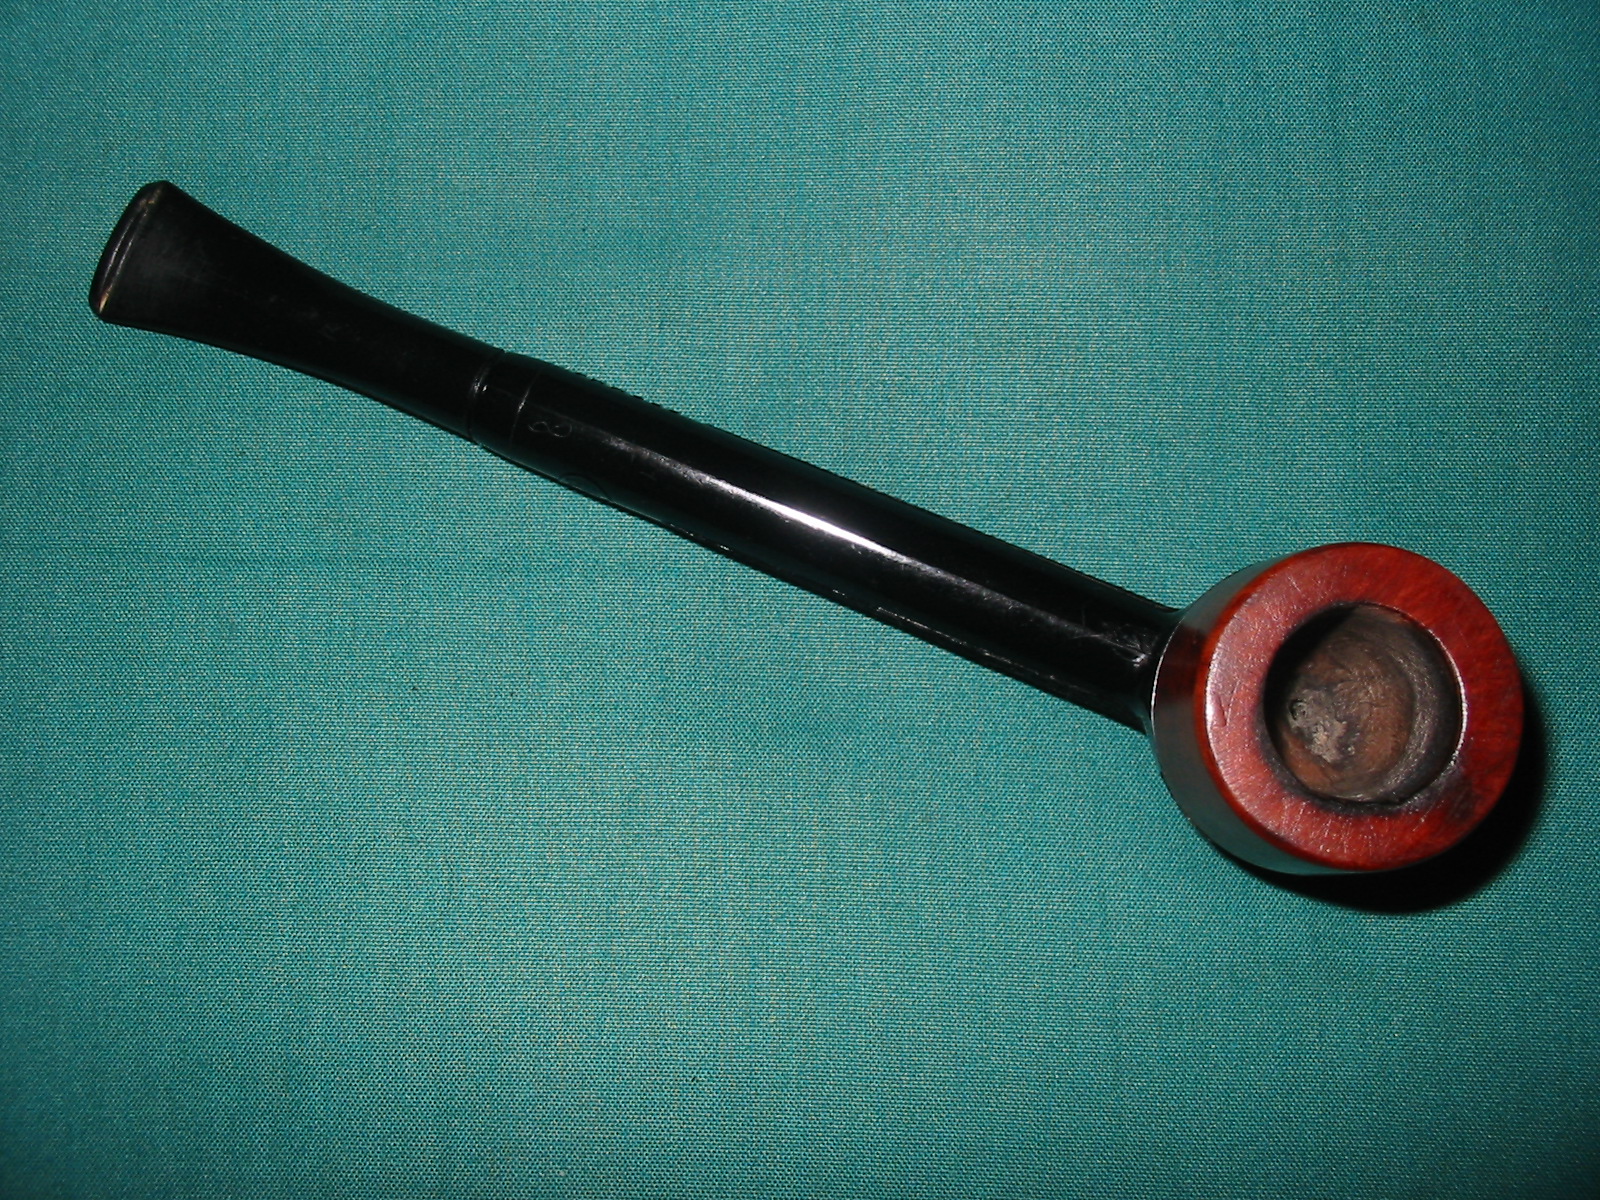
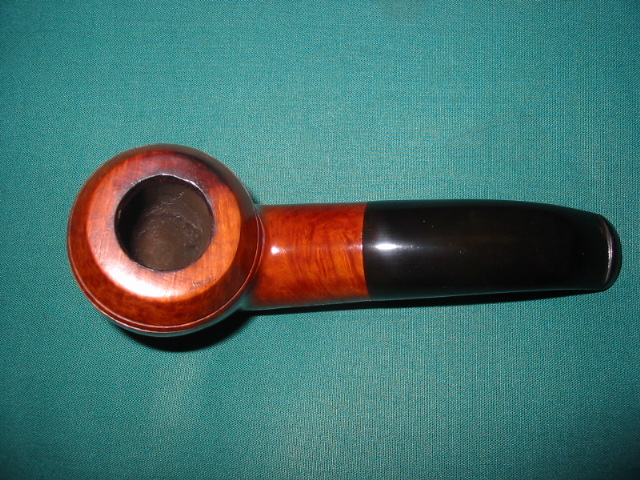
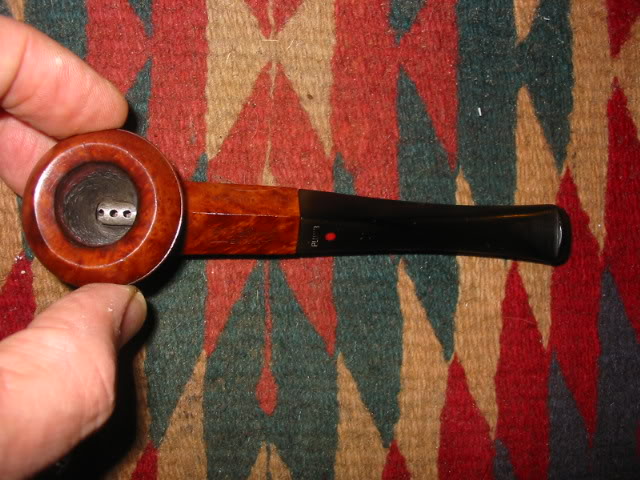
There are some fills in the pipe but the only one that really bothered me was the one on the face of the bowl (last photo), though I’m not sure how well you can see it. That one irritation made me decide to refinish the pipe but to keep it as close to original as I could.

At the time I was working on this pipe I didn’t know I would be writing about the experience, so there are no in progress photos to share.

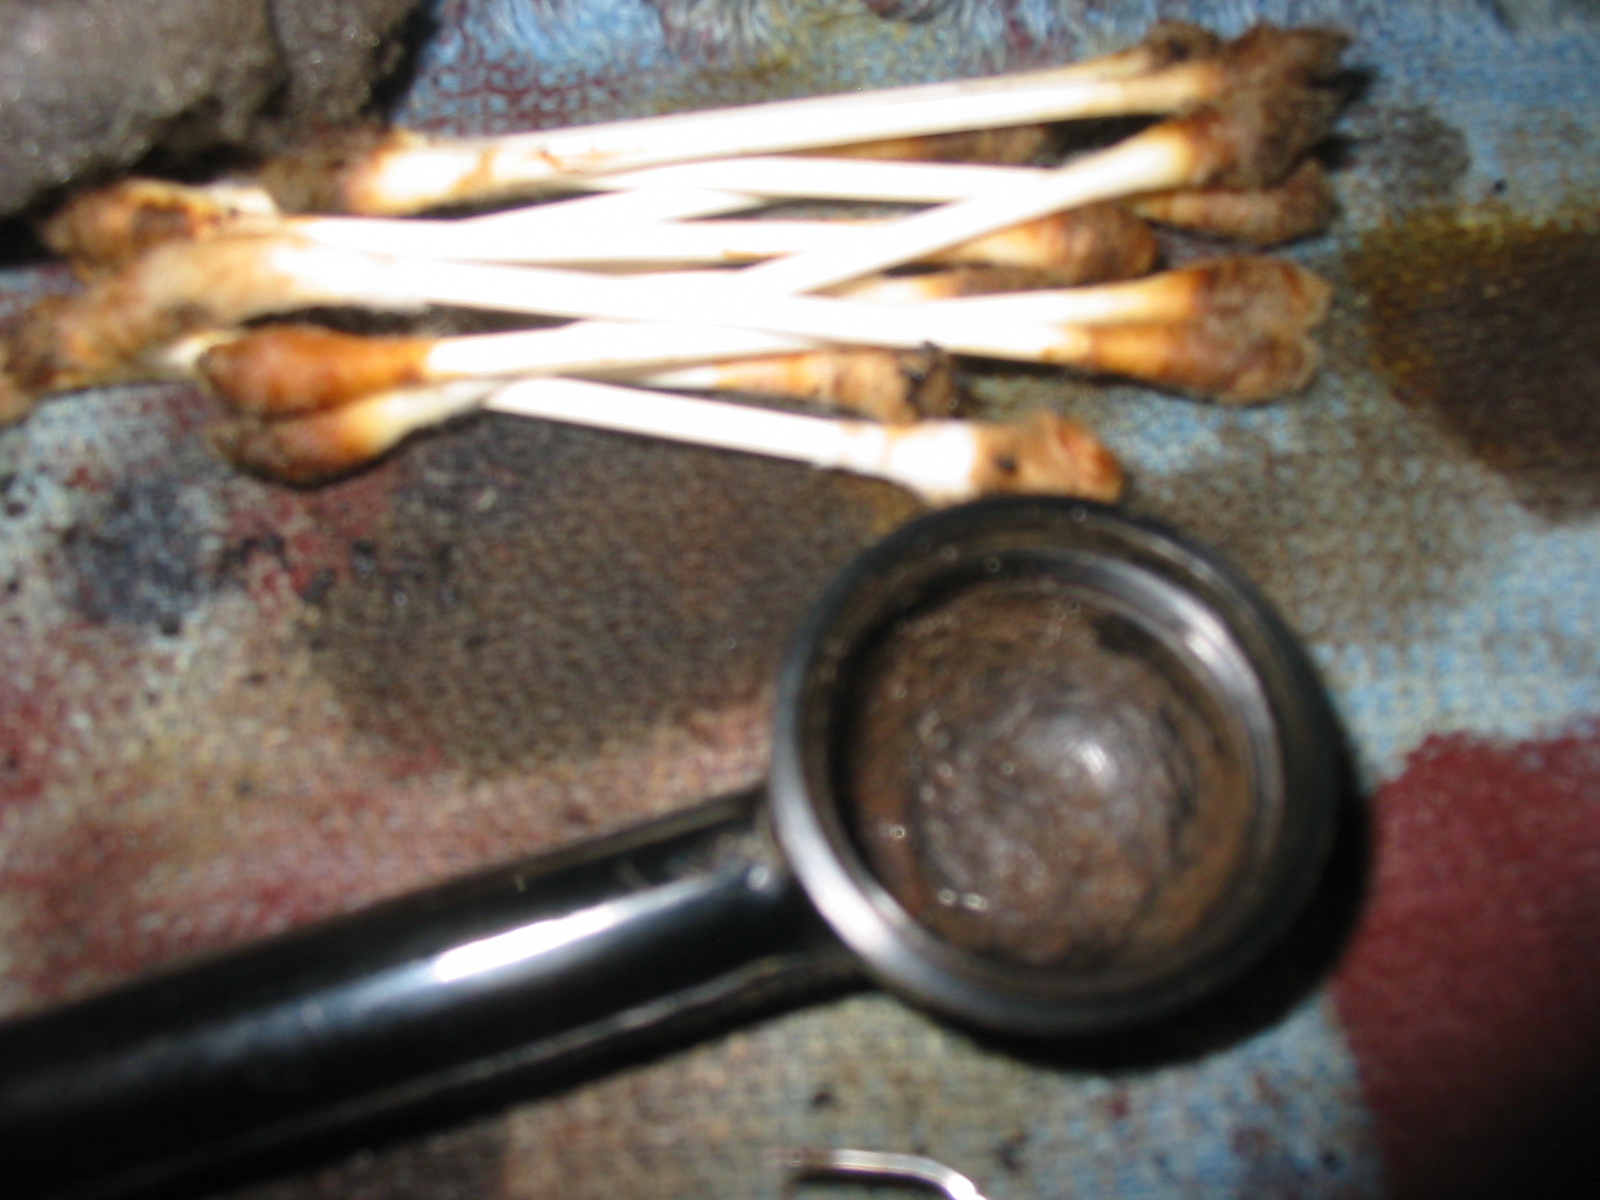
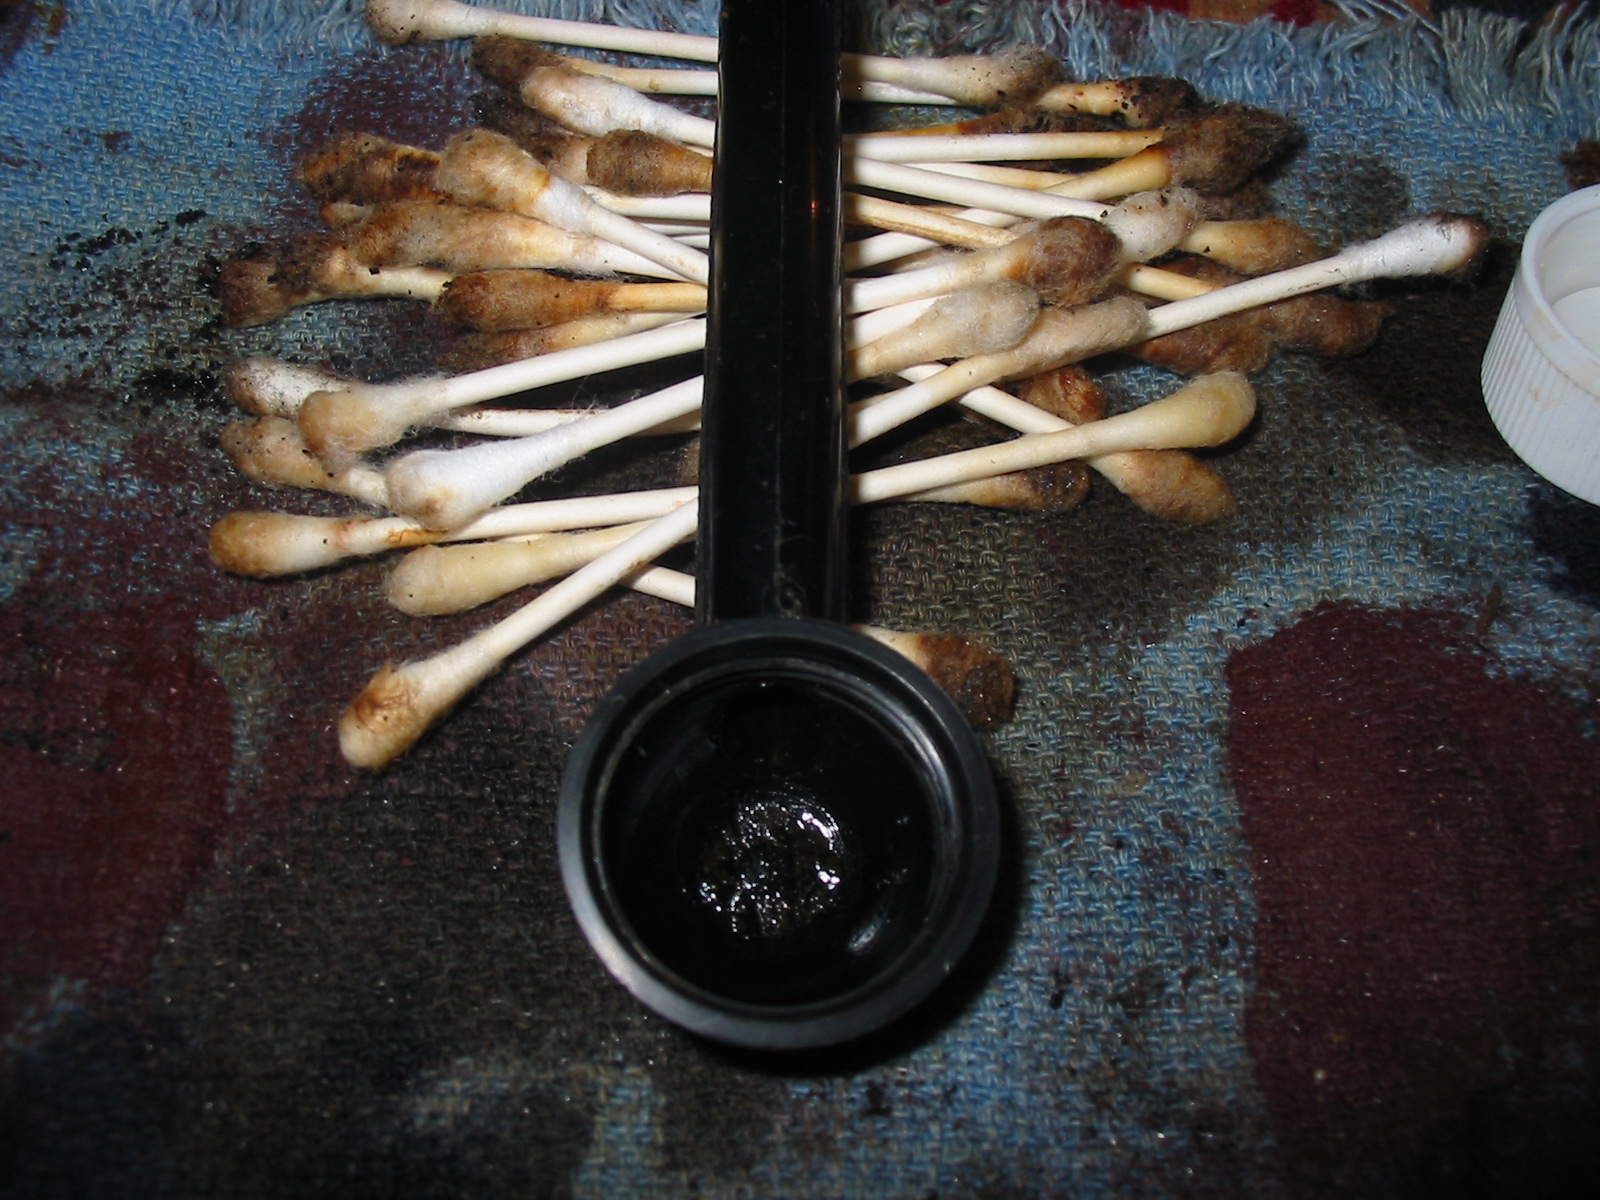
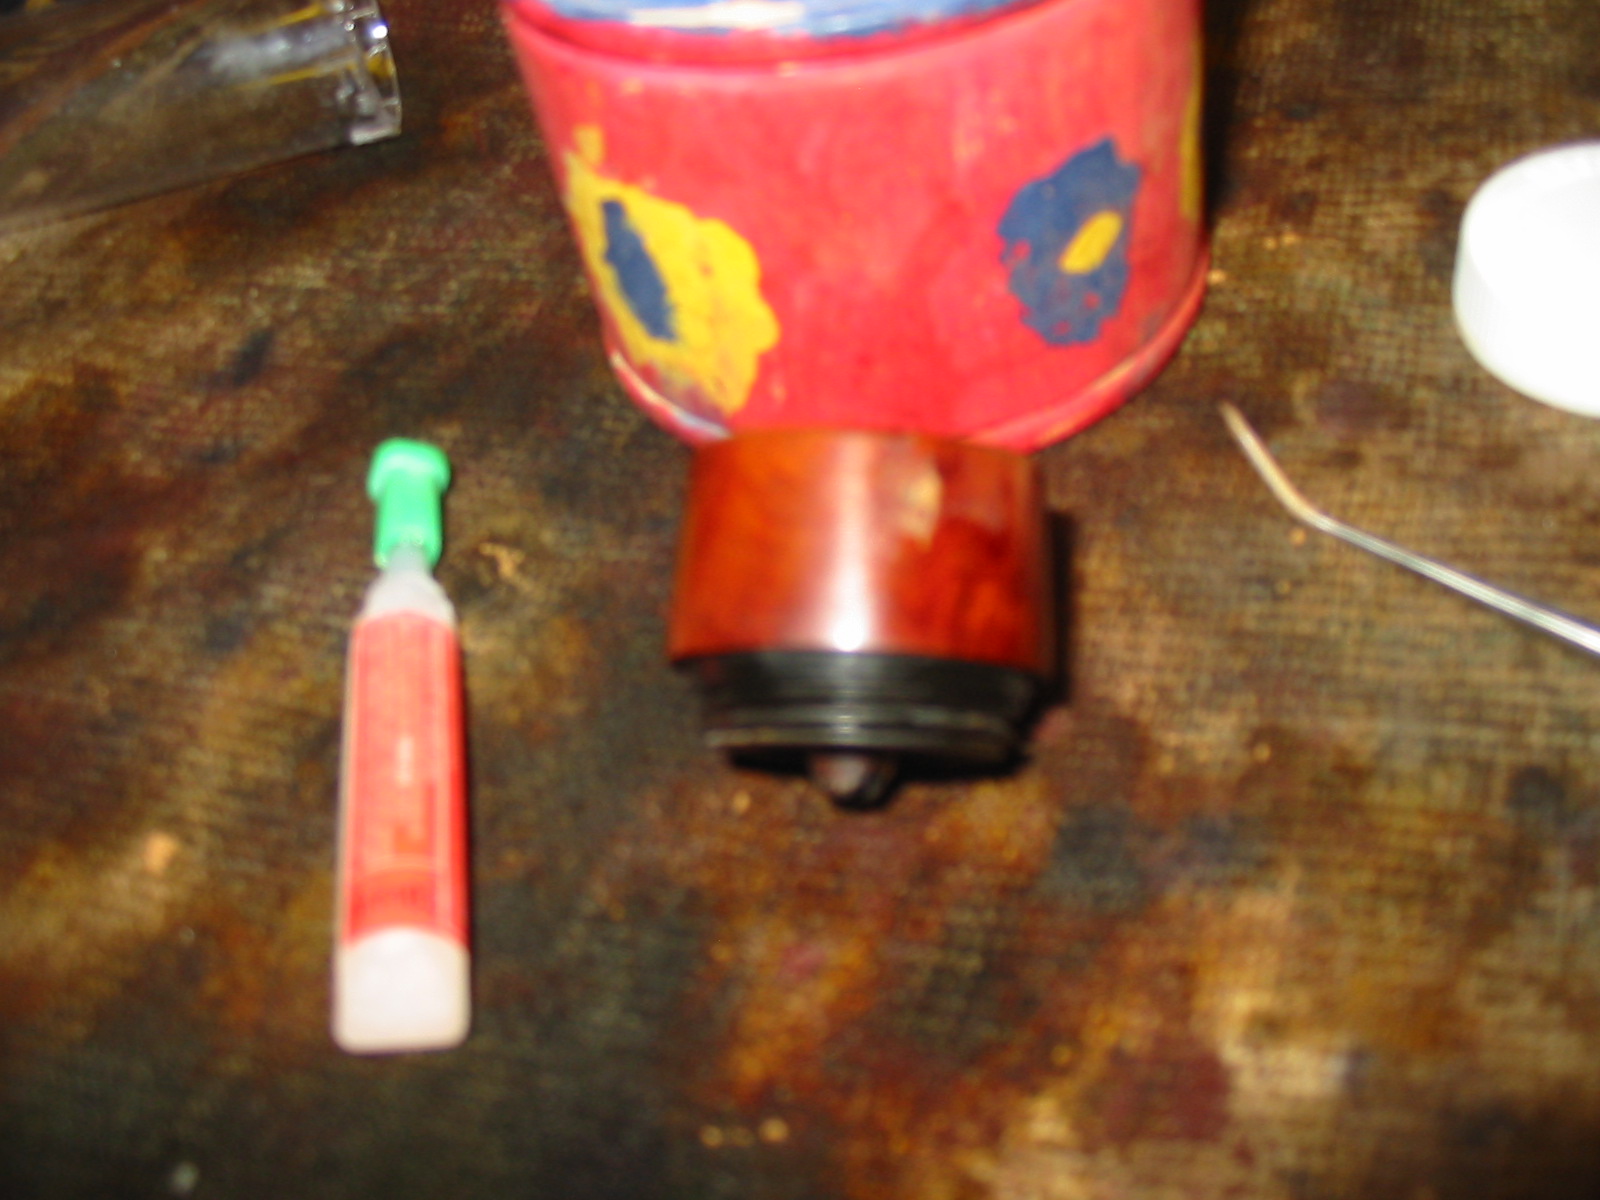
I started by dropping the stem into a OxiClean bath to loosen the gunk and oxidation. Since I didn’t want to remove all the stain I didn’t do an alcohol bath. I began by lightly reaming the bowl which was actually not bad at all; there was virgin briar still in there! After reaming, I began to clean the bowl with acetone on disposable cotton pads; I buy them in the make-up section of Wal-Mart. Once cleaned I then topped the bowl. For topping I used 320 wet/dry sandpaper laid out on my workbench which has a granite slab on it for my leather working. Once the bowl was sufficiently evened out to my satisfaction I began to work on the fill that annoyed me.

I used some 400 grit wet/dry sandpaper to touch up the area a but before I picked out the fill. I then cleaned the area with a isopropyl dampened cotton pad and then, using briar dust from the bowl topping, I packed the area with dust and dripped on some Super Glue. I let it penetrate for 30 seconds or so and then quickly wiped off the excess. The result looked nice, with little extra glue. I gave it another few minutes to set well and then moved on to sanding.

As I said, I wanted to preserve the original look as much as possible and the other smaller fills didn’t really bother me. I decided the best approach was to lightly sand the whole pipe with 400 grit wet/dry paper, avoiding the nomenclature completely. I would work over the entire bowl, wipe it with alcohol pads, evaluate, and repeat; I belive it took three passes to get it to where I liked it.

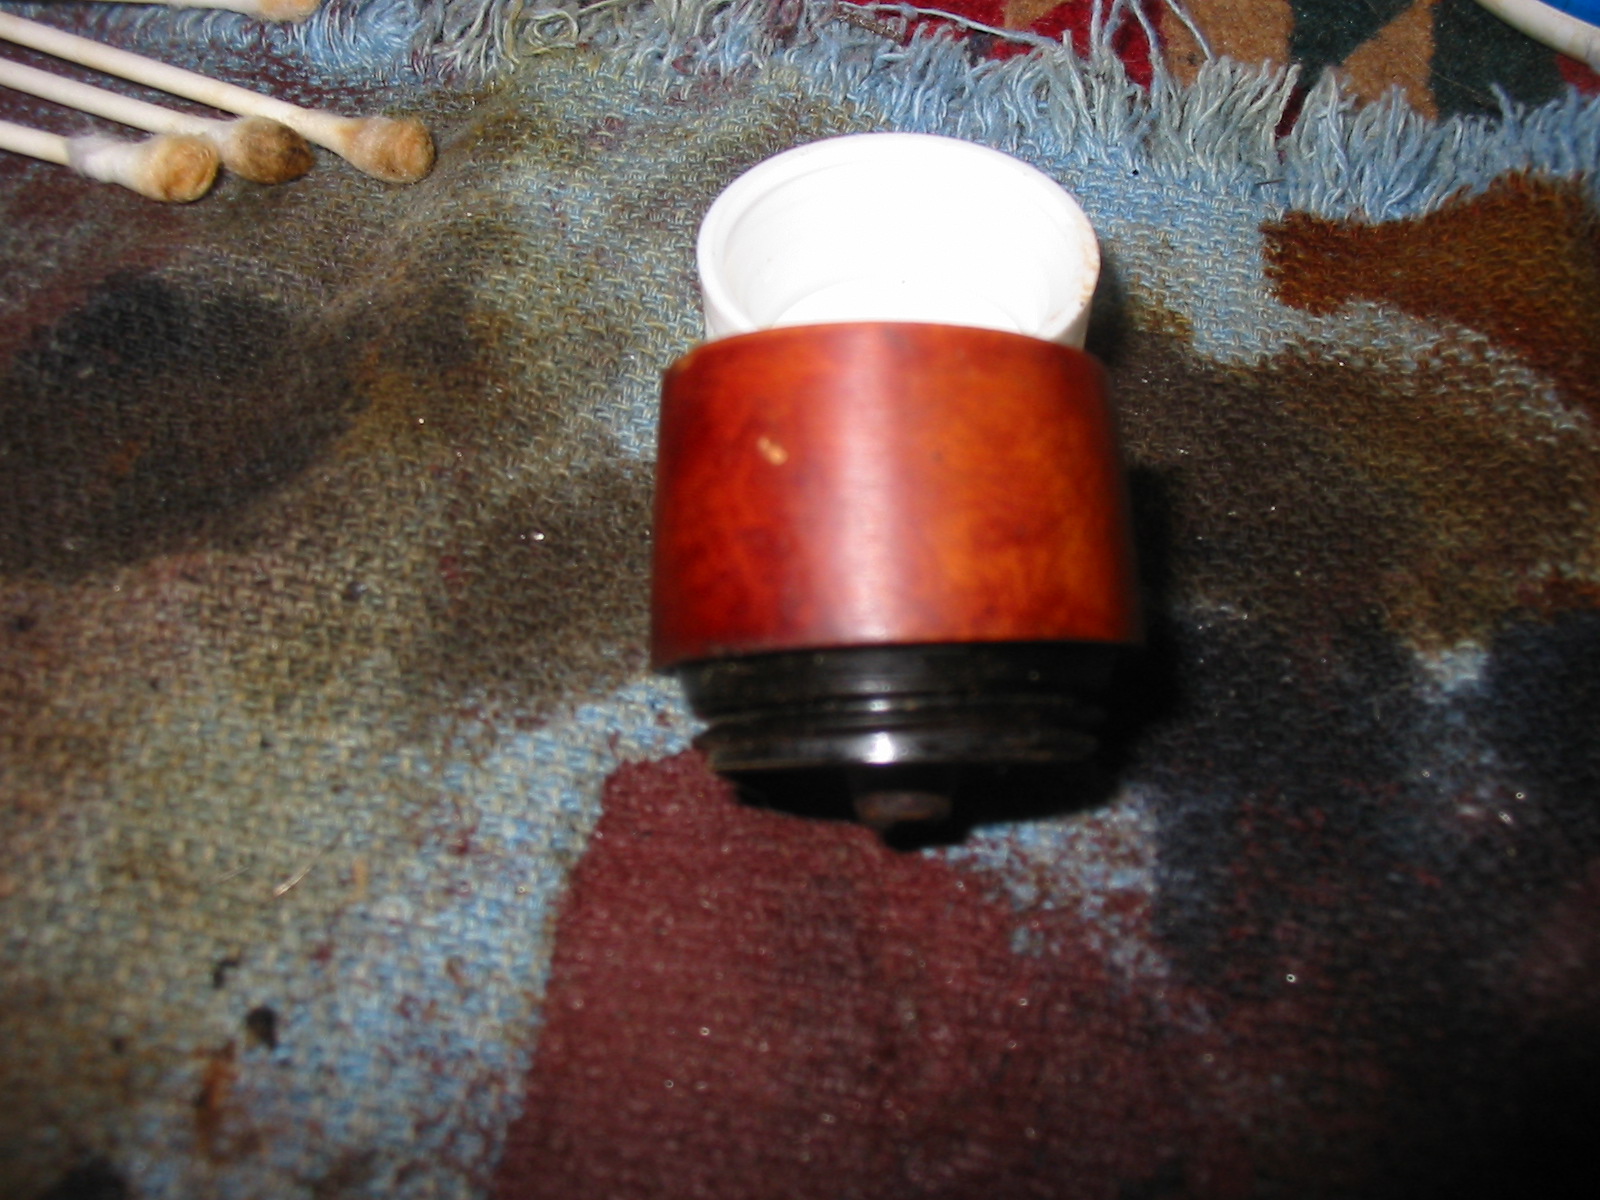
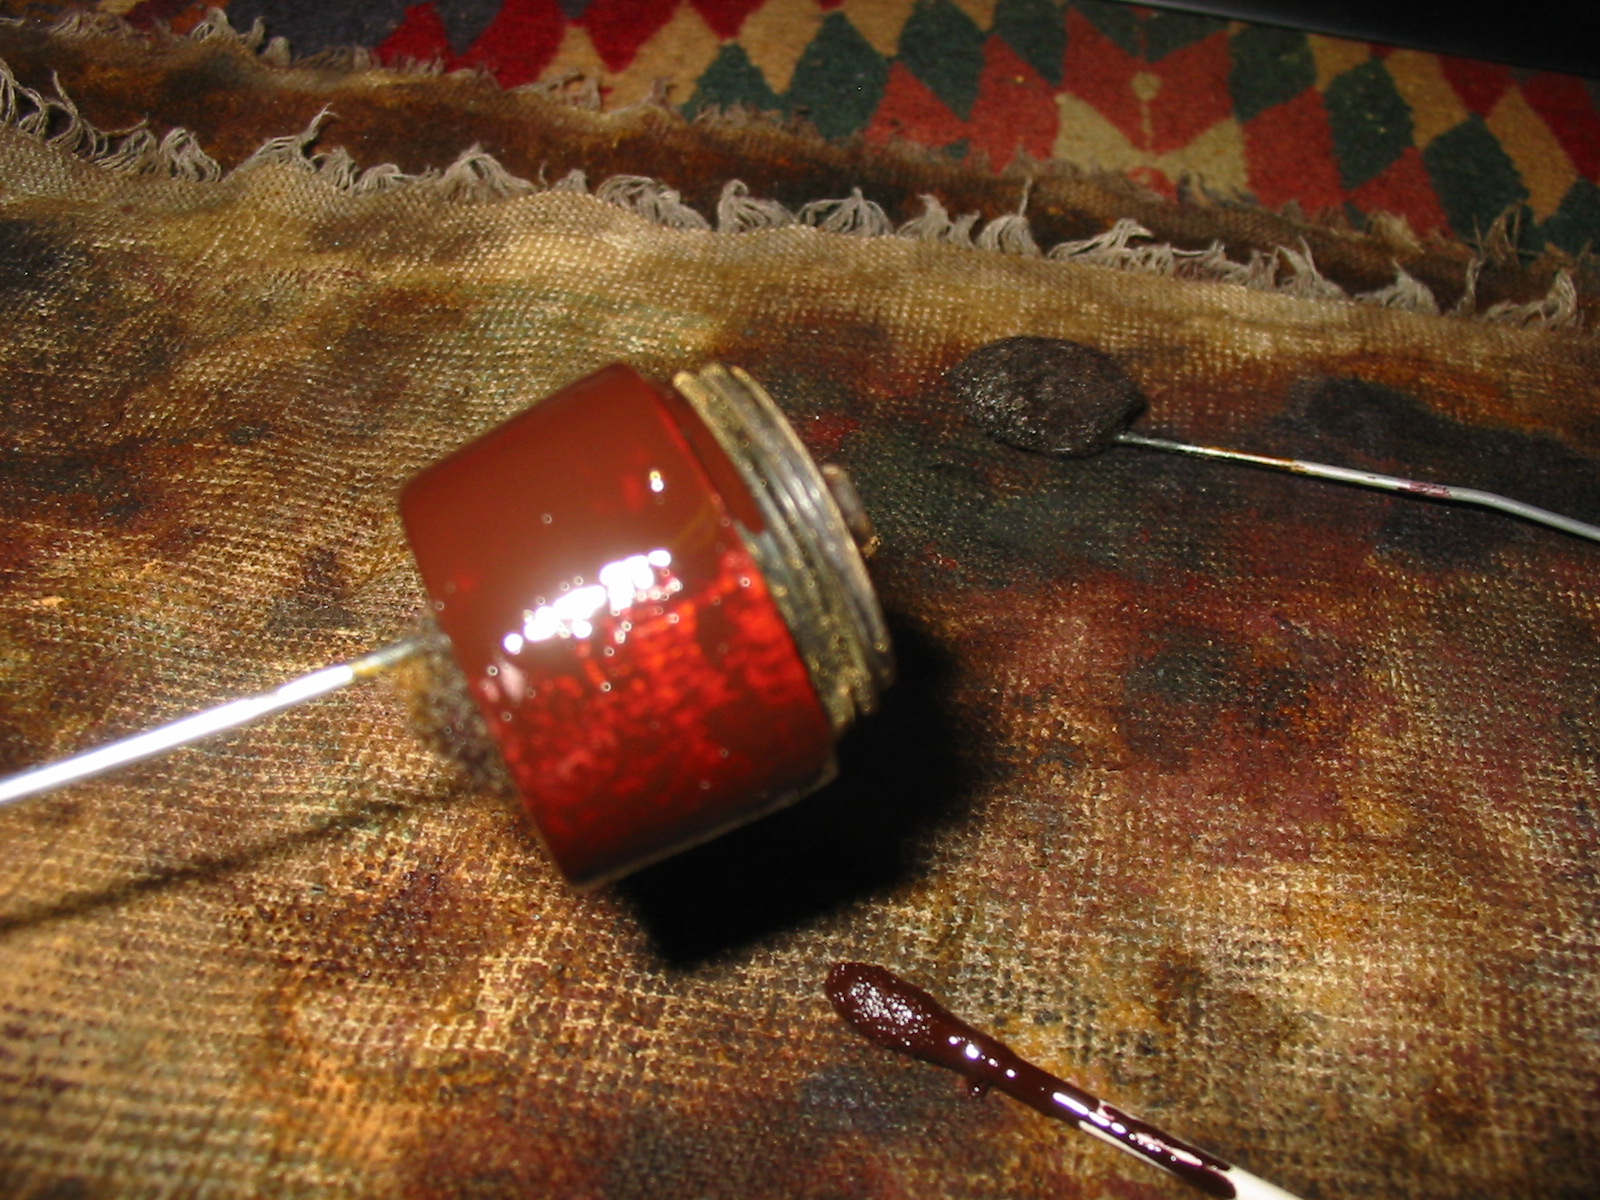
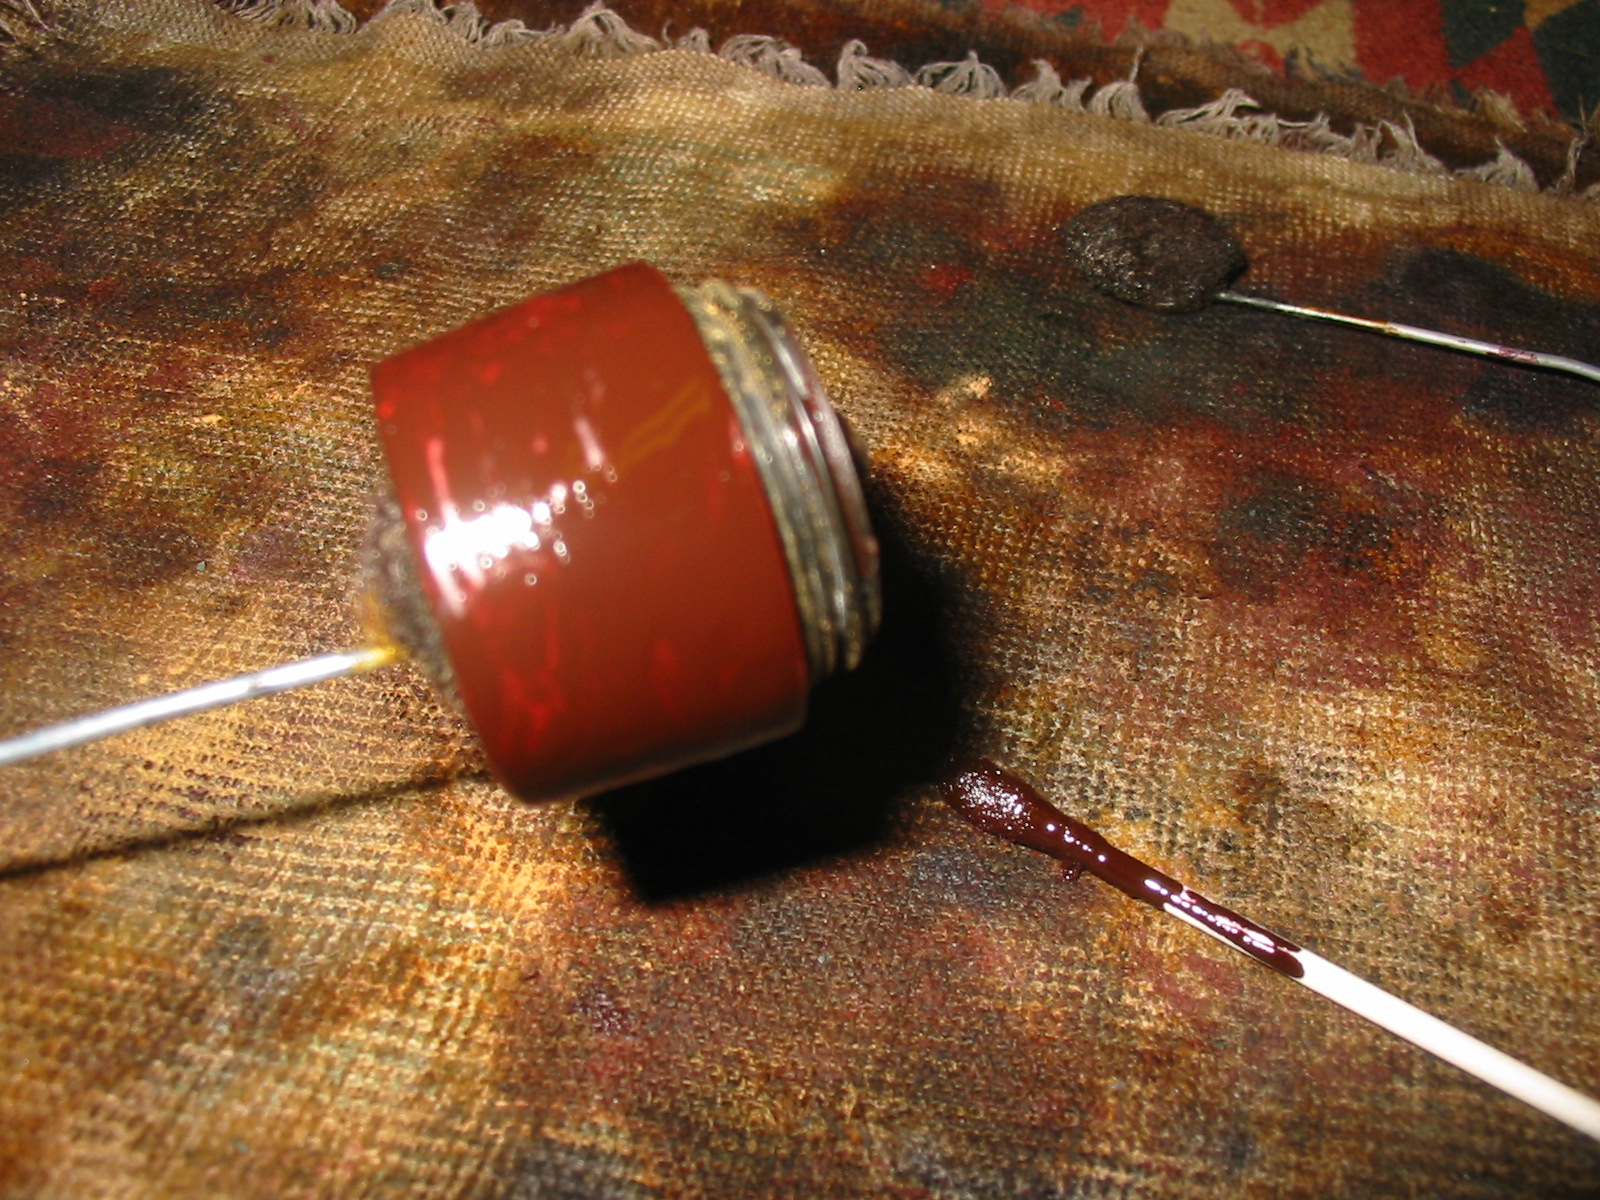
I then mixed up some Fiebing’s Medium Brown leather dye 50/50 with 91% isopropyl alcohol which I applied with a wool dauber and flamed in. I buffed it by hand to see what the color looked like, trying to blend the sanded briar with the mostly untouched stamped areas; it was a very close match but needed another application. The bowl rim needed more, too, due to the topping so I started by applying and flaming the dye to the rim only and then applying and flaming the entire bowl. Again I buffed it by hand and compared the two areas; I was happy with the results so it was time to move on to the stem.

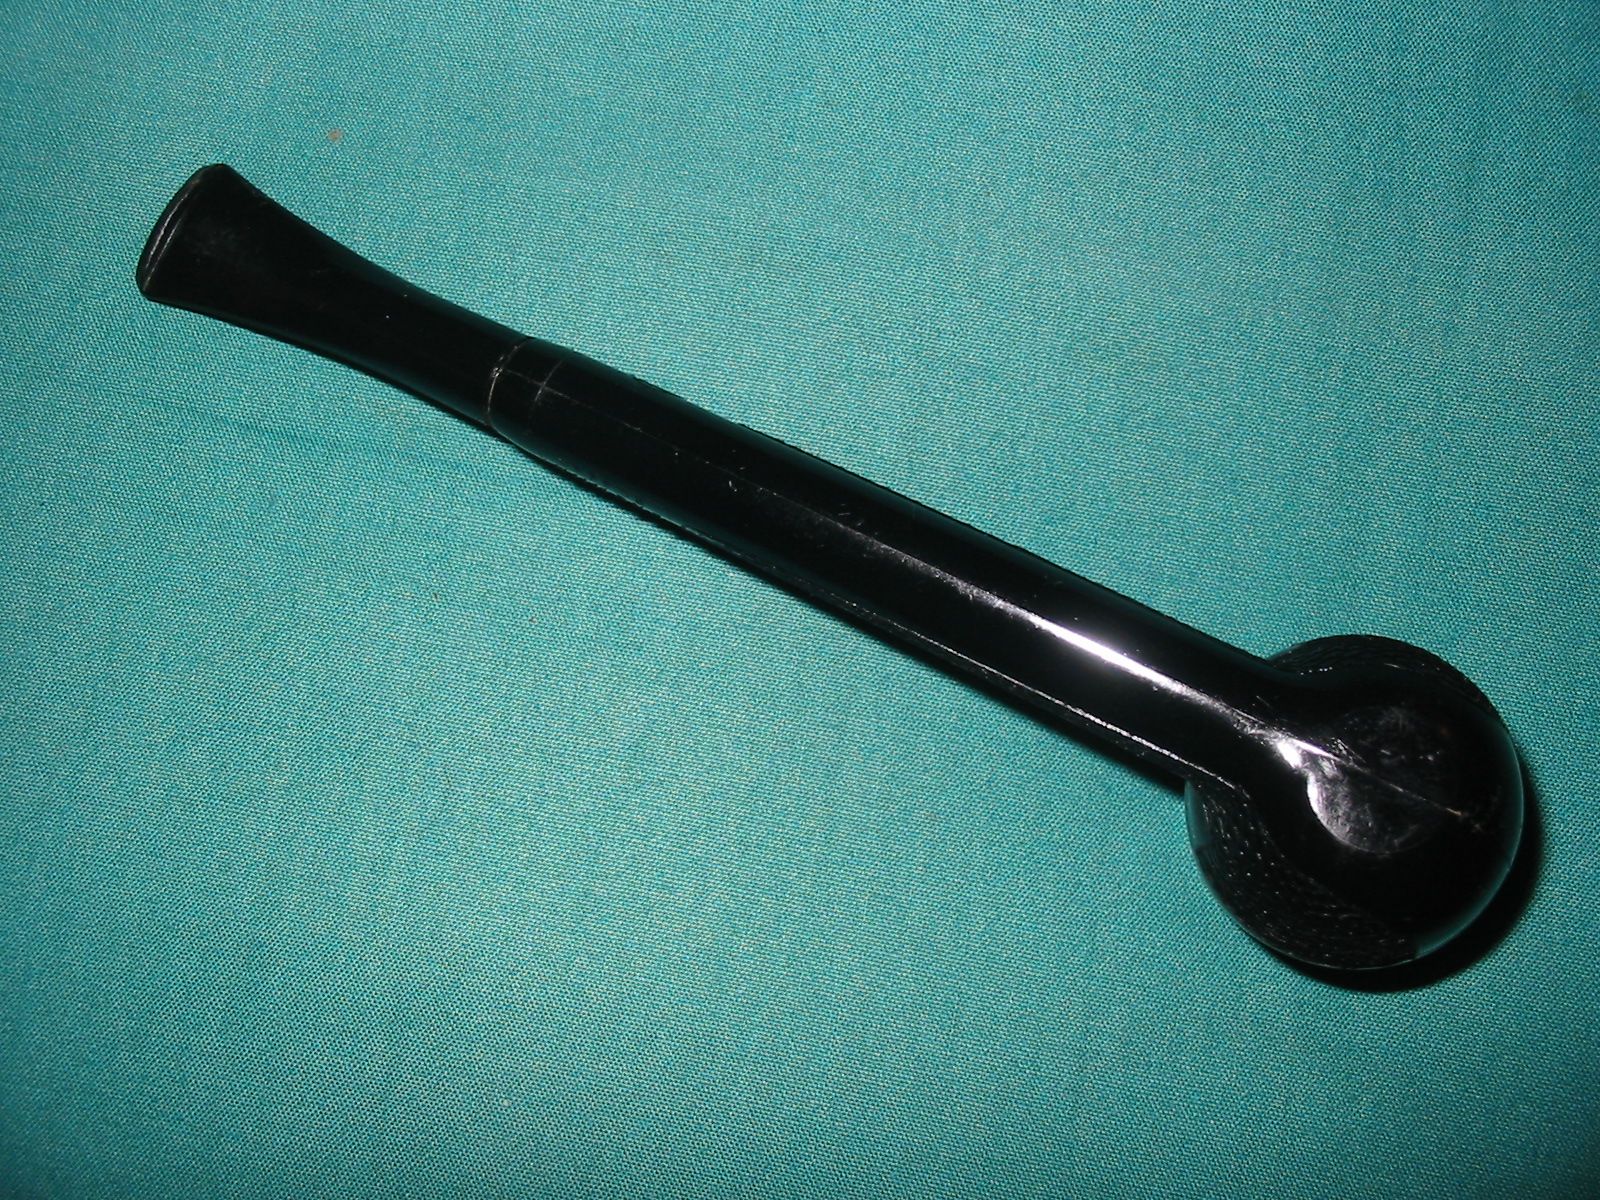
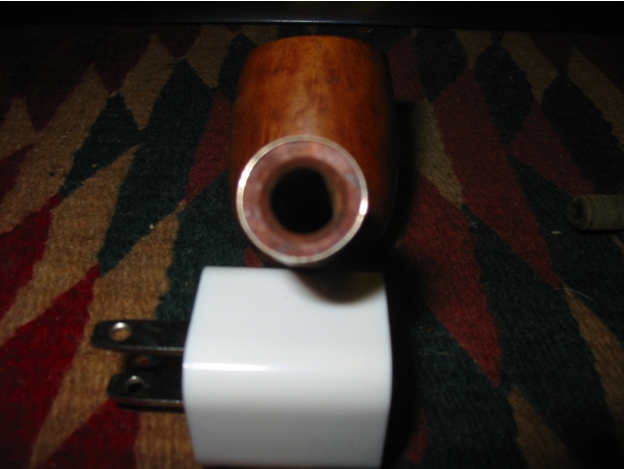
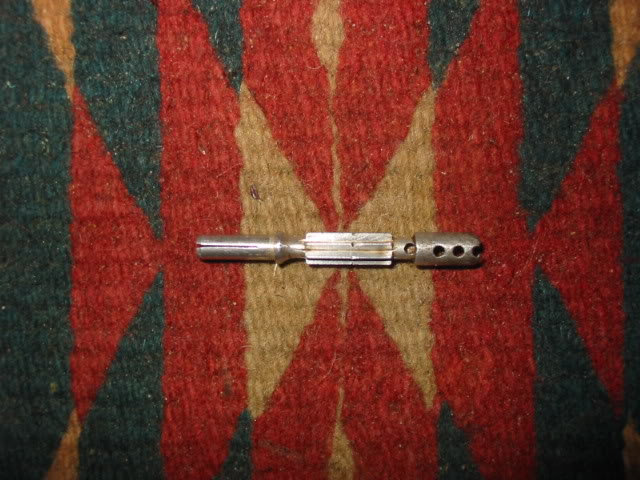
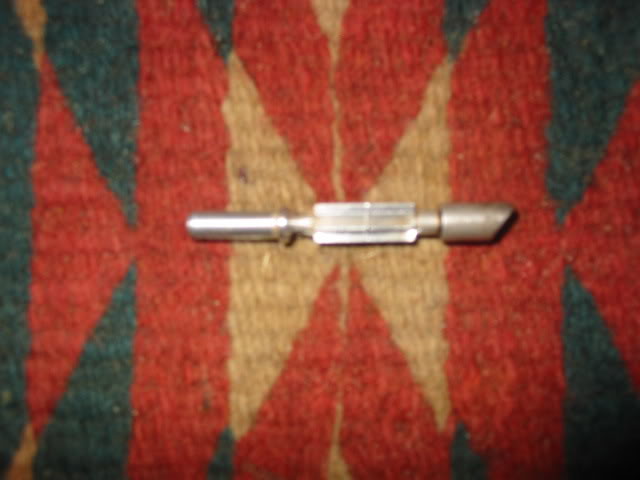
After taking the stem out of the OxiClean bath I washed it well and scrubbed it with a Miracle Eraser, which removes a lot of the loosened oxidation. From there I began wet sanding with 320/400/800 grits; thankfully there were no holes, dents or even much chatter to work on with this stem. Next I applied the Novus 2 plastic polish. Sometimes I don’t use the plastic polish this soon but I wanted to get an idea of the shape of the stem at this point. The stem looked better than I expected so I then moved on to the micro mesh, wet sanding with 1500-4000 grits. I used another application of the Novus 2, which I work in with a cotton pad and then polish off with another clean one. I then polished with the micro mesh, dry, through 12000. At this point I switched to the Novus 1 plastic polish to bring up the shine.

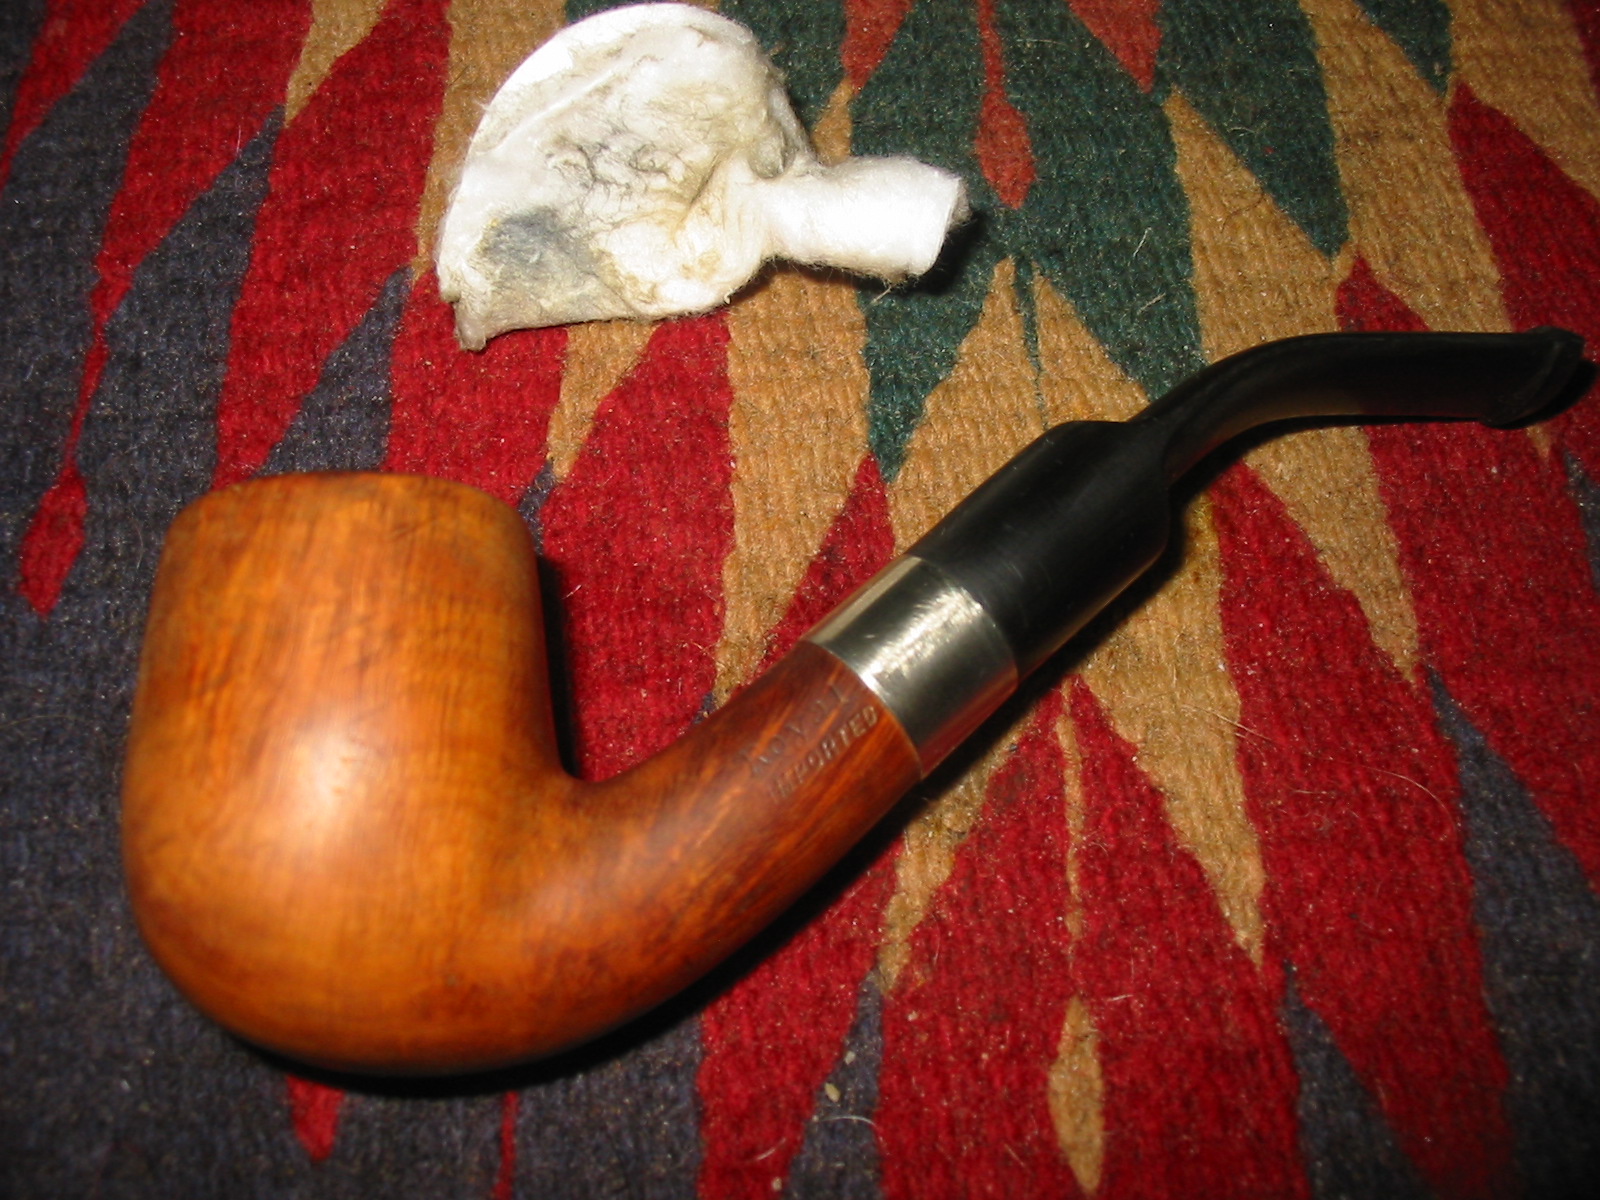
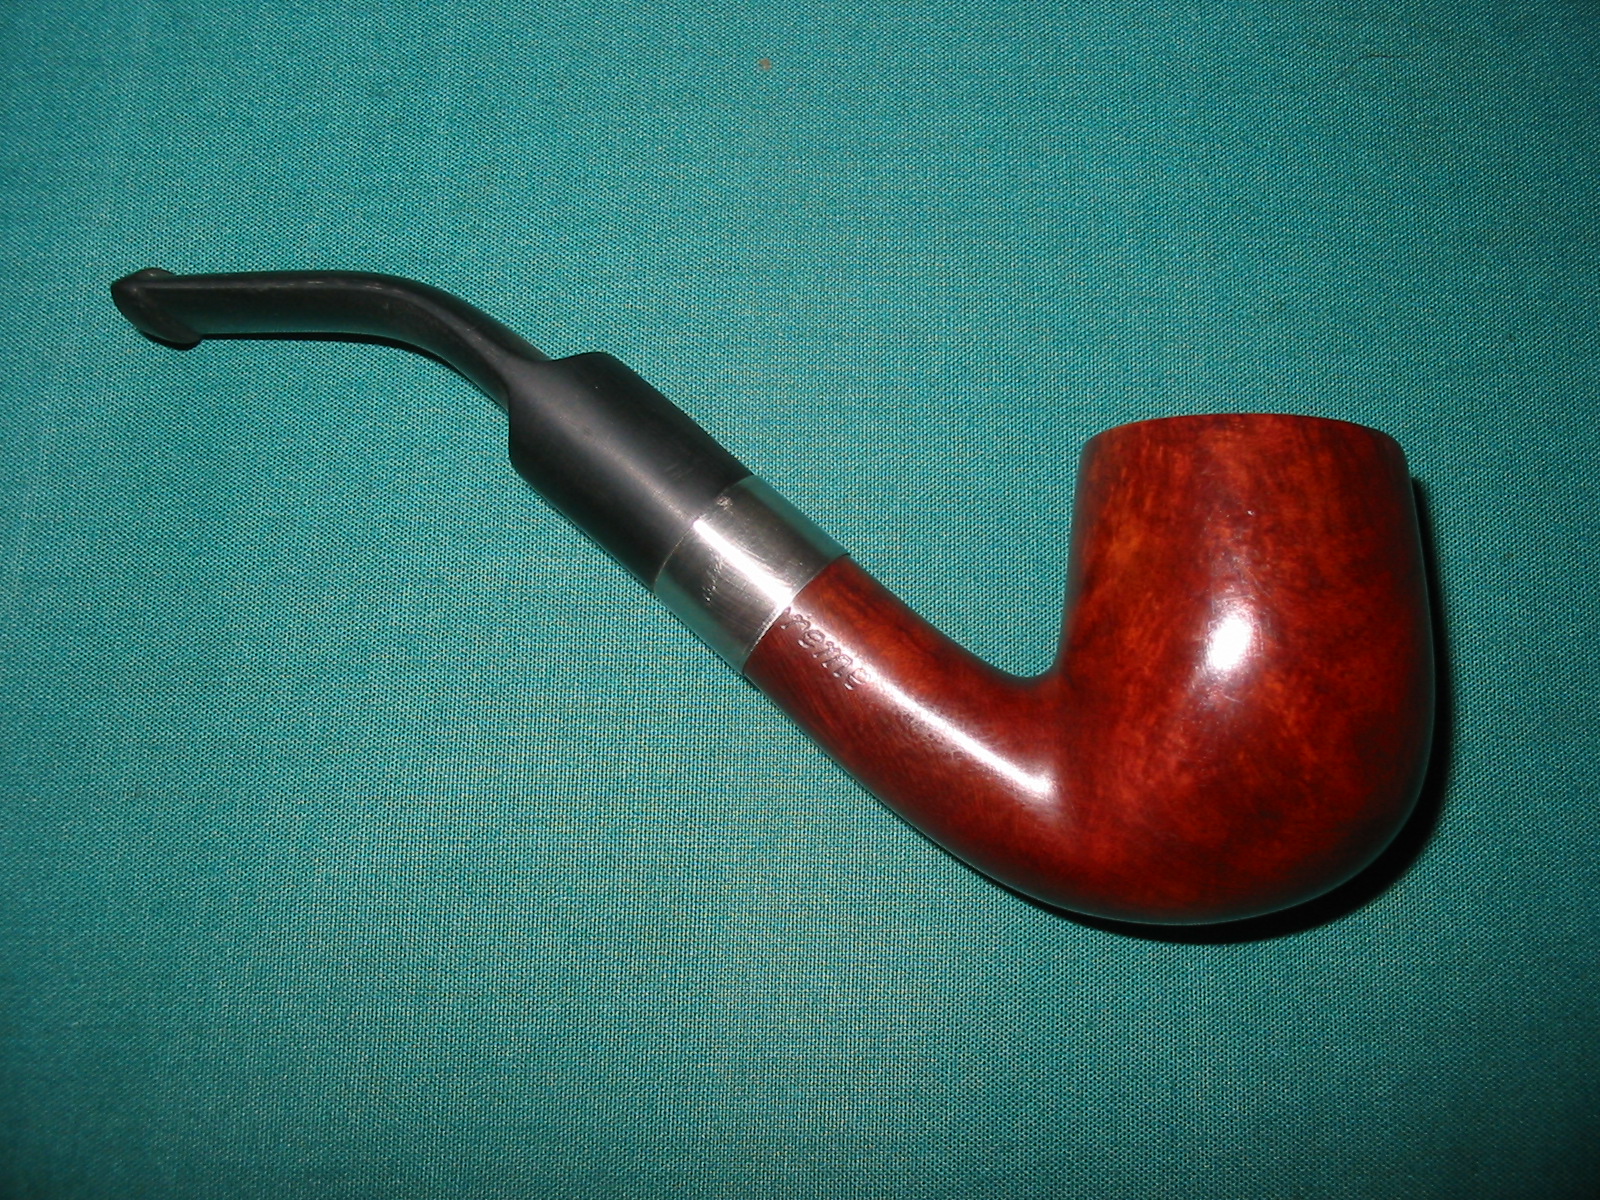
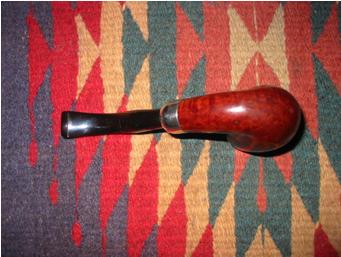
I moved to the buffer and buffed the bowl with Tripoli. I then put the pipe and stem together and buffed the entire pipe with white diamond and a few coats of carnauba wax. I buffed the pipe out to the final shine with my “mushroom” on my cordless drill.Mushroom

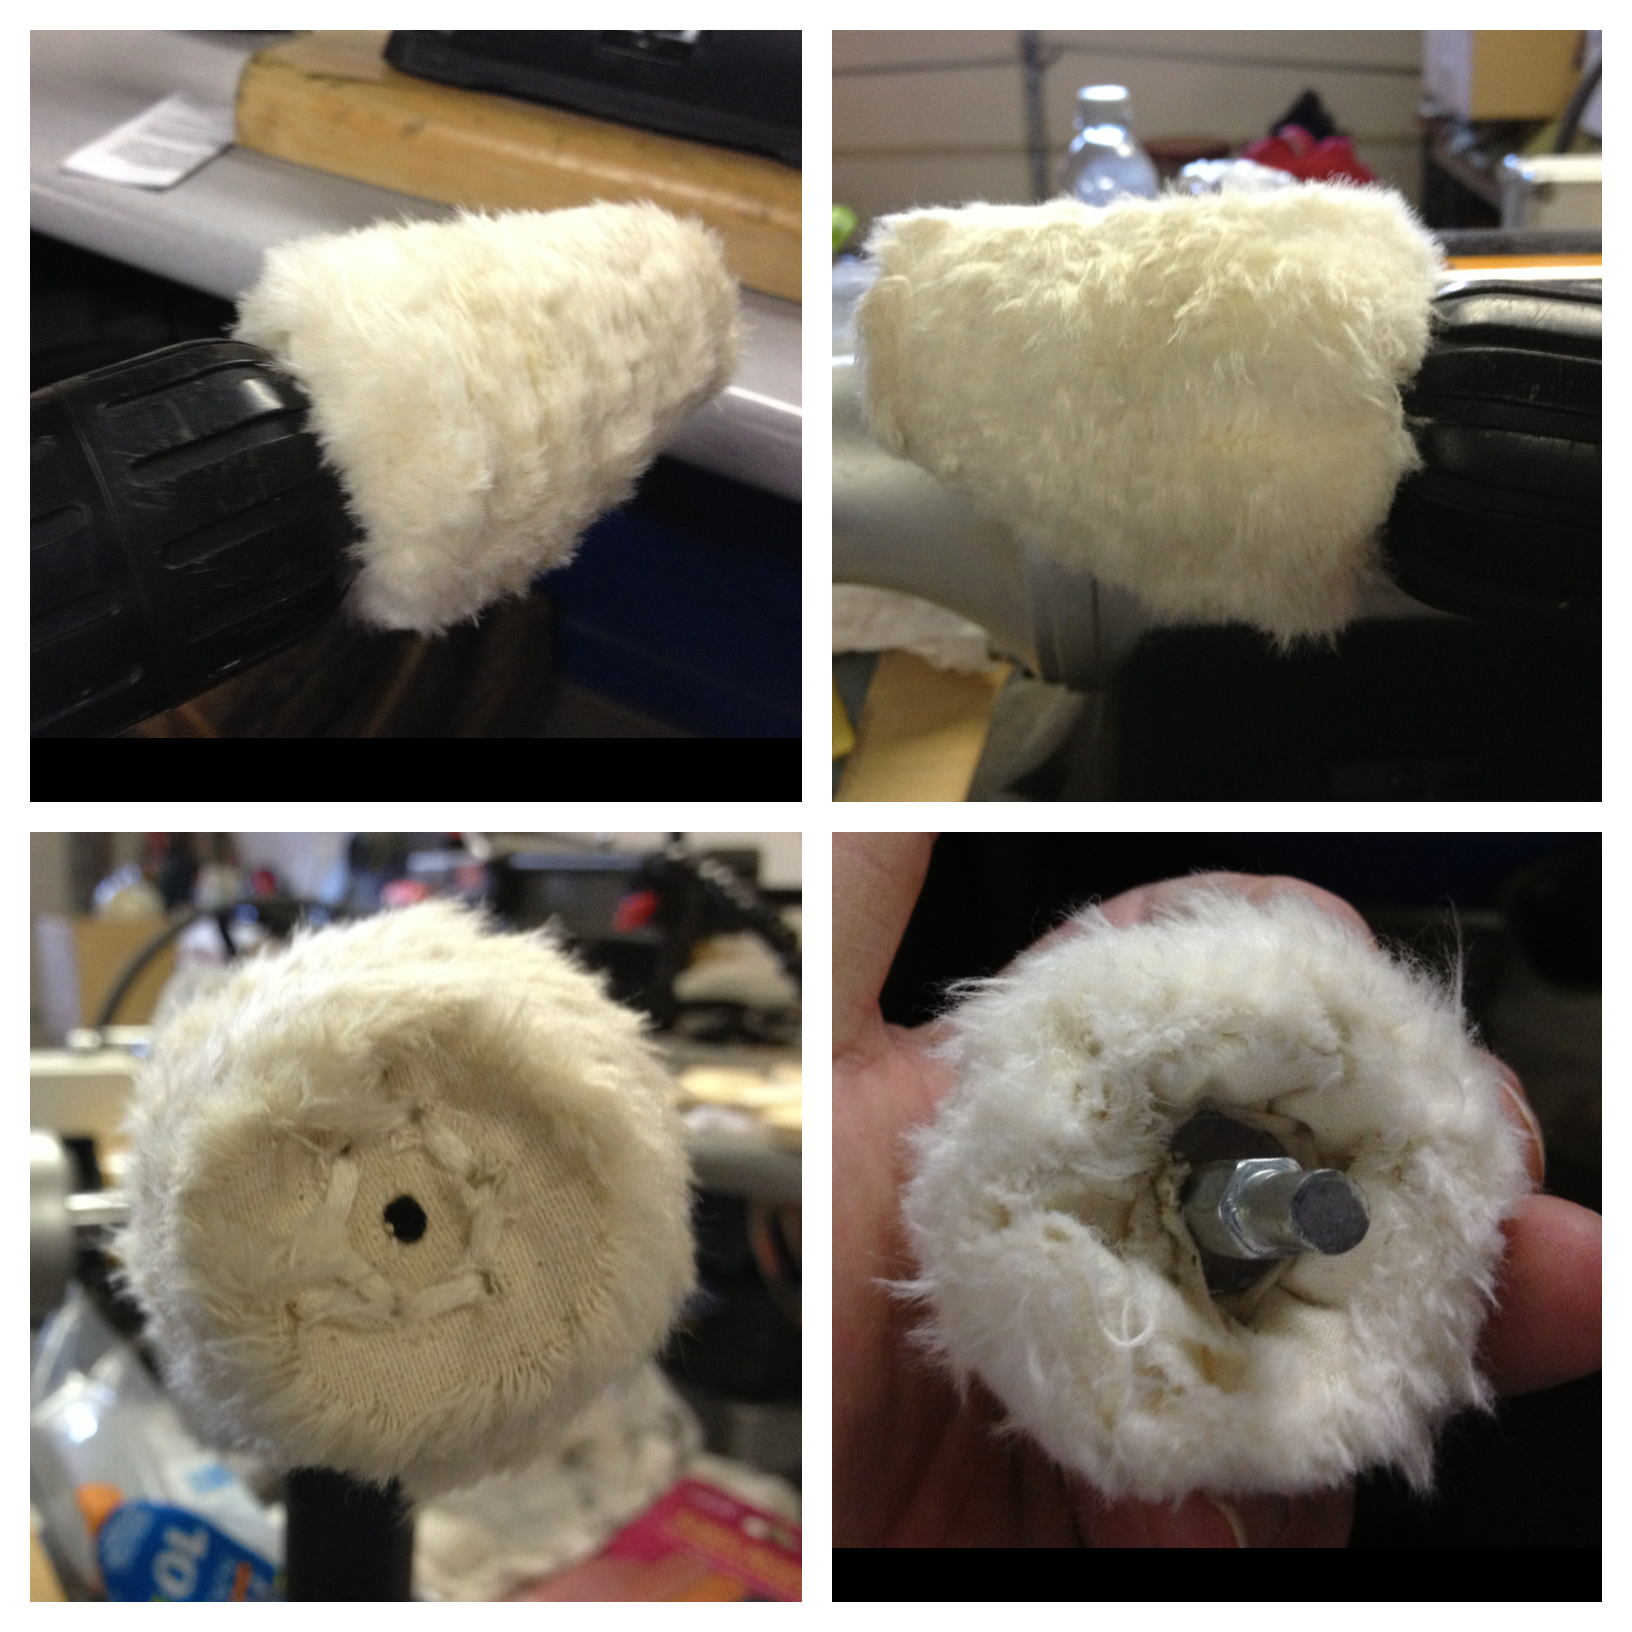
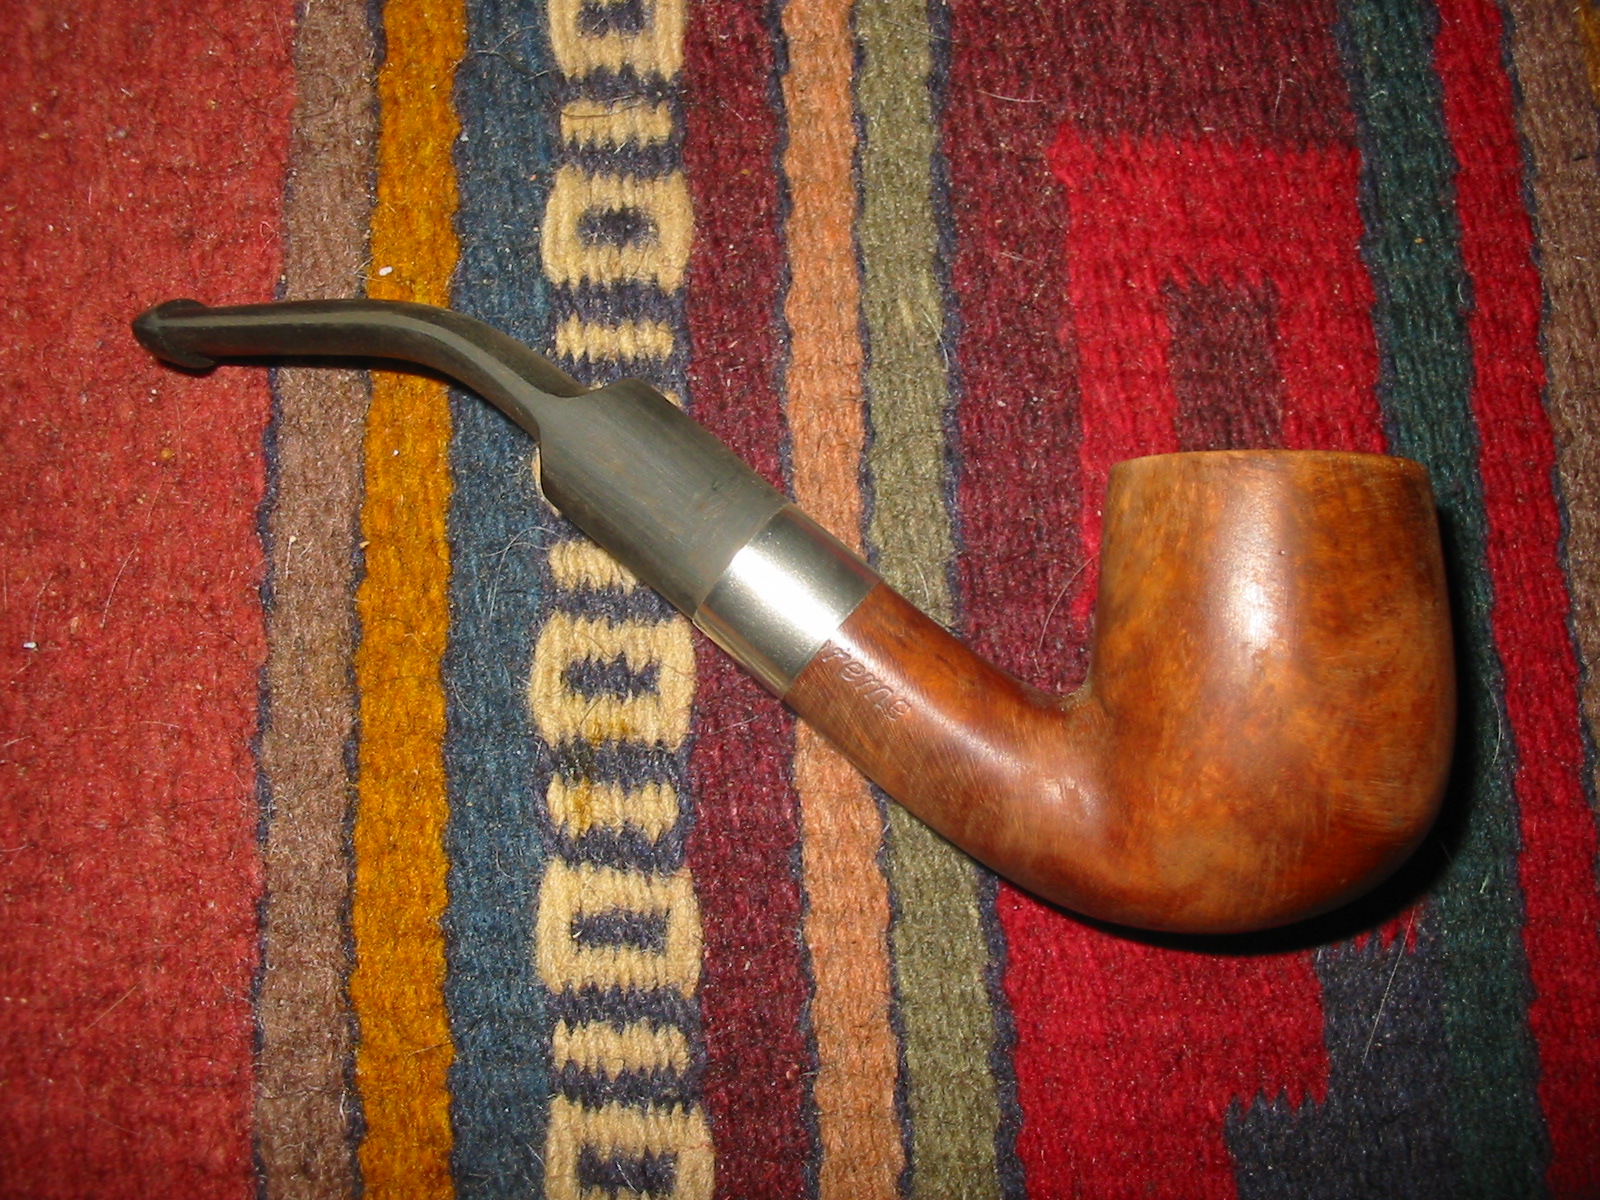
The final result was one I am happy with. The pipe smokes much better than I’d anticipated; there is no more virgin briar in its bowl. The fit and feel of it are fantastic and now it looks more like it once did, when someone else loved it.

IMG_5186 IMG_5187 IMG_5188 IMG_5189 IMG_5190 IMG_5193

Refurbishing a horn stemmed Bruyere Garantie Beautiful Swan Necked Pipe


I picked this old timer up in an antique shop near Vancouver, quite a few years ago now. When I got it the bowl was almost black and dirty. The rim had a good 1/8 inch of grime and tar built up so that it looked like a plateau top. The finish was so opaque that you could not see the grain through it. The stem was dirty and to be honest with you all, when I got it I had no idea it was a horn stem. I worked hard to get the oxidation off it and all I got was more of the brown tones coming through. There was tooth chatter on the top and bottom of the stem. The chatter was kind of white coloured. I asked several guys about the stem and they also did not even think about a horn stem. I had the pipe in my collection for about 5 years or more before it dawned on me that it was a horn stem.

This is a big pipe and it is elegant. It is 8 inches long and the bowl is a little over 2 inches tall. It is stamped on the left side of the shank Bruyere in an arch over Garantie. On the right side it is stamped St. Claude in script over Bruyere. Once I stripped it down there are a few visible fills in the briar but they blend in quite well surprisingly – no pink putty on this one. I cleaned the rim meticulously by hand with warm soapy water on a damp paper towel. I scrubbed it until it was clean. I then sanded the bowl to remove the varnish coat and grime. I had not learned many of the tricks I use now so it was one of the first old timers that I refurbished. I wiped the bowl down with Isopropyl alcohol once I had sanded the majority of the finish coat off the pipe. It took quite a bit of time to carefully wipe away the finish around the stamping without damaging that. The bowl was finally cleaned and smooth – I remember sanding it with 1200 wet dry sandpaper to finish. Then I stained it with a medium brown wood stain – I have no idea if it was an alcohol stain, it well could have been Watco Danish Oil for all I know!

The stem took quite a bit of work to sand it smooth. I cleaned it up twice. Once when I first got it and then again when I figured out it was a horn stem. It is a big piece of horn and quite pretty in terms of the sheen and depth of colouration in it. I used the method I spelled out in a previous post on polishing horn stems and it is like new. I sanded it with wet dry sandpaper up to 2400 grit and then buffed it with lots of carnauba wax. Later I used the micromesh sanding pads on it and really gave it a depth of shine. The pipe is a great smoking pipe and is definitely a sitting pipe. It is a handful. The first picture shows the finished pipe. I wish I had some before photos but this was found in the days I never thought of doing that. So all I have is finished photos. The next series of photos show the size of the pipe in comparison to a nice little bent billiard that is about a group three sized pipe. The grain is quite nice. Nothing striking in terms of straight grain but there are several spots with nice birds eye and then the rest is swirling grain that almost seems to have movement to it. The stem is multicoloured and has the old orific (round) airhole in the button.

ImageImageImageImage

A Classic Rework of A Royal Duke Supreme


Blog by Steve Laug

I had this old Royal Duke bowl in my box. It had some promise to my eye but it needed some work. The first thing I did was drill out the metal mortise that took a threaded tenon. I did not have any stems that fit it anyway and I wanted to try something new. The issue that remained once it was gone was the fact that the mortise rough inside and the end of the shank was not square so that there was no way to get a new stem to fit it seamlessly. The finish was very rough as can be seen in the photos below. The varnish on the outside of the bowl had bubbled and blistered. The front edge of the bowl was actually darkened as the varnish seemed to have burned or at least coloured. There were dents in the bowl and the rim was rough. I turned a precast stem with my tenon turner and got it close. I had to custom fit it as the shank was a little tapered toward the end.

ImageImageImage

The stem fit fairly well but would take a bit of customizing to get a good tight fit to the shank. It would also need a good cleanup to trim off the castings on the stem. The vulcanite was fairly decent quality as I have had it a long time but it showed no oxidation.

Image

I decided to work on the bowl first to clean up the remaining finish and remove the varnish from the bowl. I also wanted to see if I could remove the darkening around the front and back of the bowl. I washed the bowl with acetone on a cotton pad and cleaned off the finish. It took repeated washing to break through the varnish coat and also the burned and bubble finish. The next two photos show the pads after the wash. You can begin to see the grain coming out on this beauty. That is what drew me to the pipe in the first place and I was glad to see that it was truly there.

Image

I repeated the washing until the pipe was clean and had no remaining finish coat. The dark undercoat of stain still remained and light brown topcoat also was still present. This is clearly seen in the photos below. I worked on the fit of the stem and tapered the tenon enough to get a good snug fit to the bowl. I also used my Dremel to remove excess vulcanite from the top and the sides of the stem so that it lined up smoothly with the shank of the pipe. It was at that point I decided to pressure fit a nickel band to the shank to square things up a bit. There was no way that the stem and the shank would meet squarely as the shank was a bit angled and dented from the metal inserted mortise. The previous mortise had been threaded in and it had a thin band or flat top on it that sat against the briar. It was also patched a bit with putty to make the flow from the shank to the insert smooth. I fit the nickel band with heat and pressed it into place. I liked the finished look of the band and it gave me a straight edge to work with on the new stem. I again used the Dremel with a sanding drum to shave off more of the vulcanite and make the stem fit against the band inside edge. The next two pictures below show the stem after the fit and the shaving with the Dremel. You can see the rough surface on the saddle and the cleaned up edges of the cast stem and the button.

ImageImage

I then sanded the bowl and the stem with 240 grit sandpaper to remove the scratches in the briar and also on the vulcanite stem. It took quite a bit of sanding to smooth out the saddle of the stem. The next five photos show the progress of the sanding on the stem. I also sanded the bowl to remove the remaining finish and scratches. I topped the bowl and smooth out the inner and outer rim to remove the damages to them both. I also used my heat gun to put the bend in the stem. I have a curbed dowel here that I put the heated stem on to ensure that the bend is straight and that I do not crimp or bend the stem unevenly.

ImageImageImageImageImage

Once the sanding was at this point I wiped the bowl down with Isopropyl alcohol. I find that it removes any sanding dust and also the wet look shows me places where I still need to sand the bowl and stem. Once that was done I sanded the bowl again with 400 and 600 grit wet dry sand paper and water. I progressed through micromesh sanding pads 1500-12,000 grit – the first four pads with water and the remaining ones dry sanding. Once it was completed and smooth I wiped it down a final time before staining it.

ImageImage

While I was sanding the pipe and working on the stem I tried to visualize what stain I wanted to use on this pipe. At this point remember I was not trying to restore the original Royal Duke colouration. I was working a new pipe out of this piece of briar even though I left the stamping. I decided to go with an oxblood aniline stain. I applied it with a cotton swab, flamed it and then took it to my buffer and buffed it with White Diamond.

ImageImage

The next three photos show the pipe after the buffing with White Diamond. I had not applied any wax at this point nor was I finished working on the stem. The colour came out better than I imagined. The dark under notes of the grain come through nicely in the finished pipe. The light areas have a reddish brown hue that is a bit lighter as the pipe has been waxed and buffed.

ImageImageImage

Once the pipe was stained I coated the bowl with multiple coats of carnauba wax to protect the new stain while I worked on the band and the stem. The nickel bands shine up really well with the higher grit micromesh sanding pads. I sanded the band with the 6000-12,000 grit pads and then polished it with some wax as well. I moved on to the stem. I sanded it some more with 240 grit sandpaper to remove some more of the scratches in the saddle area left by the Dremel. I then sanded it again with the 400 and 600 grit wet dry and water to smooth out the lesser scratches left behind by the 240 grit sandpaper. I went on to use 1500-3200 wet micromesh sanding pads to polish up the stem some more. These early grits of micromesh leave behind a matte finish as they sand out the scratches. It takes the grits above 4000 to really see the depth and polish that is there when finished. Once I used the lower grits I then polished the stem using Maguiar’s Scratch X2.0 polish and rubbed it on with a cotton pad and polished it off. I buffed the stem with White Diamond following this to see what I needed to work on.

I took the stem back to my work table and used the higher grits of micromesh. I started with 3600 and worked through 4000, 6000, 8000 and 12,000. Once I finished I buffed it again with the White Diamond and then coated the stem with Obsidian Oil and let it sit while the oil soaked the stem. I hand buffed the oil with a soft cotton cloth and then polished it with some carnauba wax paste and then buffed the entire pipe with several coats of carnauba. I buffed it with a clean cotton buff between coats of wax. The final photos are of the pipe as it stands now.

ImageImageImageImage

Cleaning up a Swedish Bromma Dollar System Pipe


Blog by Steve Laug

I picked up this old Swedish Pipe in a little town in Northern Alberta, Canada. It was an antique mall, the only one in town and I was able to pick up this one for about $10 so I did not feel too bad about it. I had not seen one of these pipes before. It is stamped BROMMA over Sweden on one side of the shank. On the other there is an Elephant logo in a circle and inside the circle is the word DOLLAR. The bowl is briar and the rest of the pipe seems to be either plastic or Bakelite. It is interesting. I was able to take the stem out when I picked it up but the bowl would not budge. It was definitely a screw on bowl as it was on crooked and at somewhat of an angle. The stem had tooth chatter on the top and bottom but no tooth dents. I sprayed some solvent on the bowl stem connection to try to loosen it. I twisted it carefully but it would not budge so I set it in my box of pipes for repair.

ImageImageImageImage

Today was my day to work on it. I took it out of the box and gave the bowl a twist and it would not budge. I used the sanding board to top the bowl and once it was smooth and clean I wiped the entire bowl with acetone. I was careful not to get any on the shank or bottom of the part. I then used Isopropyl and a cotton swab to swab alcohol around the bowl and the bottom portion of the pipe – the keeper for lack of a better word. I repeated this several times and tried to carefully twist the bowl off the keeper. I repeated the swab and alcohol until finally I was able to twist it off the keeper. The next two photos below show what I found inside the keeper portion of the pipe. This is amazingly like the stem portion of the Falcon pipes. The difference is the material it is made of. It is incredibly lightweight and resilient. The base was absolutely full of hardened tars and sludge. My guess is that it had never been taken apart after the initial purchase and after the bowl was put on and misaligned. This would take some work to be sure. The stuff was as hard as rock and would not budge with a pipe cleaner.

ImageImage

I decided to drop the bowl into the alcohol bath and let it soak away while I worked on the stem and base portion. I used my dental pick and Isopropyl alcohol to work at the rocklike tar in the base. I soaked the tarry stuff with alcohol and picked at it with the dental pick. Once I had some of it loose I would use the cotton swabs to daub out the gunk and alcohol and then repeat the process. The next series of three photos show the process of picking away the tar and the results after wiping it clean with the swabs. I probably used about 60 or more swabs and removed a lot of the gunk from the bottom of the base. I soaked it and kept at it. I used 0000 steel wool to scrub the tars once I had the majority of the material picked free. Then I took it to the sink and used a microfiber cloth to scrub the base with hot water and degreaser.

ImageImageImage

The next two photos show the inside of the base after it has been thoroughly cleaned. The shank itself was almost like a Kirsten barrel and need lots of soft tissue and cloth run through it until it was clean and shiny on the inside. The photos are slightly out of focus but the cleanness of the base is very visible.

ImageImage

I then removed the bowl from the alcohol bath and went to work on it. I picked out the two putty fills with my dental pick. I also followed the threads with the dental pick to remove the grime and grit that filled the threads and did not allow the bowl to be threaded on correctly. I also used a bristle tooth brush and alcohol to scrub the bottom of the bowl from the threads down to the nipple like structure on the bottom. The next four photos show the bottom of the bowl and the threads after cleaning them. There is an inset portion of the bowl bottom that is like a moat around an island that has the moutainlike nipple in the centre. This took quite a few cotton swabs to clean the grime out of the channel. Once it was clean there is a patent stamp on it. It reads Pat. S. I am guessing it is a Swedish Patent mark. The portion of the bowl that is threaded seems like it is made of the same kind of material as the base of the pipe. The mountain in the middle is briar. It is an interesting and unique design. I am looking forward to firing it up and giving it a smoke once it is finished.

ImageImageImageImage

Once the bowl was clean I decided to replace the fills with briar dust and super glue. The next series of photos show that process. I had already picked out the putty fill. I used a dental pick to tamp briar dust into the pits on the bowl. The first picture shows the briar dust before I wiped it smooth and added a few drops of super glue to the mix. The second and third photo are a bit out of focus but show the repaired fills after I sanded them down with sandpaper to smooth the surface to match the surface of the bowl.

ImageImageImage

The bowl was now ready to be stained with an oxblood coloured aniline stain. I applied the stain with a cotton swab and then flamed it and buffed it off. The first two photos below show the stain applied and ready to be flamed with a match. I held the bowl with a dauber so that I could manipulate it to apply the stain.

ImageImage

The next two photos show the bowl after a buff with Tripoli. I had not polished them at all at this point I merely buffed off the stain to get an even coat on the bowl sides and rim. The great thing with the briar and super glue fill is that it takes the stain and darkens with the finish coat. It is far more attractive to me than the pink putty fills that were originally present.

ImageImage

The next two photos show the pipe taken apart. There is the bowl base and long shank that is made of the plastic or Bakelite material, the bowl itself. It has a small burn mark on the top of the rim but I left it rather than take it down any deeper into the surface. The third portion is the stem unit with a four finned stinger apparatus. The airflow is straight through from the bottom of the bowl to the slot in the button. The stinger with cooling fins is designed to cool the smoke and trap the tar and oils along the fins. This portion and the inside of the stem took work to clean. It is open enough to take a pipe cleaner through it with no problem.

ImageImage

The final four photos are of the complete pipe reassembled and ready to smoke. I coated the bowl base and stem with Obsidian Oil and then hand waxed it with Halcyon II wax and buffed it to a shine by hand as I did not want to risk it on the buffer. I have had this kind of material melt when buffed so I am shy to try it on this pipe. The stem was sanded with micromesh sanding pads from 1500-12,000 grit and then polished with Maguiar’s Plastic polish as I have been doing on all of the pipes lately. I put some carnauba wax on the threads of the bowl to lubricate make the threads as I screwed on the bowl.

ImageImageImageImage

New Life for a Wally Frank Super Delicious Billiard


Blog by Steve Laug

I have become familiar with many of the Wally Frank lines of pipes but this was one I had not heard of before. It almost sounds like something to eat rather than smoke. It is stamped Wally Frank Ltd on the left side of the shank and on the right Super Delicious – interesting stamping indeed. The pipe was one of the bowls that I had in my box needing to be restemmed. It also had a cracked shank that was present before I matched a stem to it. Often a shank will crack like this if a tenon that is oversized is forced into the shank. That obviously had happened to this old pipe sometime in its life. I found a stem that fit the shank and inserted it enough to show the crack in the shank for the first photo below. The crack approximately ½ inch long and was in a portion of the shank where it was thinner than the other side. One of the challenges in restemming these older pipes is the fact that the shank is very often out of round and the stem has to be shaped to match it accordingly. The bowl has some nice grain on it and was well worth restoring. The remaining three photos in the first group of four show the grain and shape of the pipe. Note that rim was not only darkened but was worn on the front edge of the outer rim.
super1

super4

super3

super2
I reamed out the bowl and removed the cake that was present only in the top half of the bowl. It seemed that the lower portion of the bowl was not even broken in. The top of the bowl needed to be topped to even out the flat top of the bowl. The way the angle was after the tars and grime were removed was d a slight slant toward the front of the bowl and the front edge was rounded from tapping out the bowl repeatedly on a hard surface. I used the board and sandpaper to top the bowl and even out the top. I also made certain that the bowl was held against the board to even out the angle and make the top smooth and flat. The first photo below shows how out of round the shank is in proportion to the mortise. Notice the difference in thickness all around the shank diameter. The crack in the shank is at about 3 o’clock on the shank. The next two photos show the bowl after it has been topped and is even with no slant toward the back or front of the bowl.
super5

super7

super6
After I had topped the bowl and evened things out I wiped the entirety of the bowl down with acetone on a soft cotton pad to remove the grime and the remaining finish on the bowl. It came off almost black when I was finished cleaning it. I then needed to band the crack shank. I opened it with the stem and then dripped a bit of superglue in the crack before pressure fitting the band in place. The first photo below shows the shape of the shank and makes the thin area very clear. This would require quite a bit of shaping to make the stem fit the shank correctly. The next two photos show the banded stem and how it fits on the shank. I kind of like the look of the band against the natural colour of the briar.
super8

super10

super9
The next two photos below show the stem shape after I had removed much of the material at the top left corner of the picture. The stem is round at this point but the tenon is no longer in the center of the stem. It is proportionately toward the top left of the picture and on the top bottom when it is in place in the shank.
super11

super12
At this point in the process I restained the bowl with a dark brown aniline stain that I thinned with isopropyl alcohol so that it would match the colour of the bowl. My goal was to match the rim that I had topped and was raw briar to the natural patina of the bowl and shank. I mixed the stain until it was the colour I was aiming for and then stained the entire bowl with multiple applications of the stain to the rim. I flamed the stain and reapplied it to the rim, flamed it again and then took the pipe to the buffer. I buffed the bowl and stem with Tripoli and White Diamond. Once I was done with that I buffed the bowl and shank with multiple coats of carnauba wax to bring depth to the shine and also to blend the rim and bowl together.

I then worked on the oxidation of the stem. I had shaped it to fit the shank with my Dremel and when it fit well I sanded the stem from front to button with 280 grit sandpaper and then 400 and 600 grit wet dry sandpaper to remove the oxidation and scratch marks from the Dremel. Once it was smooth I progressed through the micromesh sanding pads from 1500-12,000 grit. In between 4000 and 6000 grits I polished the stem with Maguiar’s Scratch X 2.0 and then finished sanding with the micromesh. I finished the stem with a coat of Obsidian Oil and then multiple coats of carnauba wax to give it shine. The next series of four photos show the finished pipe. It is shined and ready to smoke.
super13

super14

super15

super16

New Life for a BBB Ultima Thule Pocket Billiard


Blog by Steve Laug

I picked up this little BBB in the same lot as the little BBB bulldog that I posted about recently. It is a similar pocket size (4 and ½ inches) and needed a bit of work. It is stamped BBB in the standard diamond and over that Ultima Thule. (According to Wikipedia the name refers to any distant place beyond the known world.) Under the diamond it is stamped Own Make. The first two pictures are the EBay seller’s photos. When the pipe arrived I can honestly say that the seller did a great job on taking honest photos. The pipe was solid but in rough shape. The rim was slanted toward the front and round all the way around with many nicks and dents in it from tamping the pipe out. It was still round on the inner edge which is pretty amazing on these old timers. This was a pretty well cared for pipe other than the tamping. The finish was dirty and spotty – lighter in some places than others – with a mottled look to it. The stem was oxidized and the edge/ shoulder at the shank junction was rounded and no longer a good smooth fit. There were no bite marks on the stem and the surface was smooth under the oxidation. This would not be a bad clean up.
ult1

I separated the stem and bowl and reamed the bowl. I wiped the exterior with acetone to remove the remaining finish and the grime. Then I placed the bowl in the alcohol bath to soak while I worked on the stem.

The stem actually was relatively easy to clean up. I wiped it down with a damp magic eraser and removed the majority of oxidation. Then I sanded it with 400 and 600 grit wet dry sandpaper followed by 1200-6000 grit micromesh sanding pads. I gave it a coating of Obsidian Oil and set it aside to dry. Once the bowl was finished I would buff them together. I did not want to chance rounding the edges even more. I also did not want to lose any more of the button on the pipe stem by over buffing.

I removed the bowl from the alcohol bath after 1 hour of soaking. I dried it off and cleaned out the shank with pipe cleaners, shank brush and cotton swabs soaked in isopropyl alcohol. I worked those until they came out clean. I used sandpaper on the interior of the bowl to smooth out the remaining cake and clean the surface. I wiped it down with cotton swabs and isopropyl afterwards. I used the sanding board and paper to top the bowl and bring it back to a flat and even condition. I did not have to remove very much of the top but I wanted it to be straight and not slanted toward the front. I used my normal variety of sandpapers (280, 400 and 600) to do this and finished it with micromesh sanding pads 1200-6000 to remove the remaining scratches. I wiped down the bowl with a cotton pad dampened with acetone to remove any sanding dust and remnants of the topping process. I restained this bowl with an oxblood stain thinned with isopropyl to arrive at the original colour. I flamed the stain and when dry took it to the buffer and gave it a buff with White Diamond.

I reinserted the stem and the gap and roundness of the shoulders on the stem made a smooth fit impossible to attain. I decided to use an old BBB band that I had in my box and heated it and pressure fit it to the shank. I liked the finished look of the pipe. I gave the entirety several coats of carnauba wax and a polishing buff with a clean flannel buffing pad. The pictures below show the finished product.
ult2

ult3

Restemmed Petersons 69 – Second Try was a Charm


I had this old Peterson 69 bowl in my refurb bin for quite awhile. It is stamped also on the other side K&P Dublin, Made in the Republic of Ireland. I cleaned and reamed the bowl and cleaned out the mortise area with cotton swabs. I wiped the bowl down with acetone to remove the surface grime. I topped the bowl as it had major dents and roughening on the top from abuse. It needed a stem so I researched the kind of stem it needed and called a Peterson repair person in the states to have one sent to me.

Here is where the story gets a bit dicey. All I really wanted was to have the stem sent and I would fit it to the pipe but I let myself be talked into sending it south. It came back with the wrong stem on it and also had some serious cut marks on the tenon end. It also was a stem for a p-lip system pipe and the 69 is not a system pipe as far as I can tell. I was a bit frustrated to say the least so I set it aside for a week or two before calling the repairman and letting him know what I was feeling. I have to say that it is frustrating to expect one thing and get another. It is also frustrating to know that I could have done the work myself in less time if only I had a stem blank that I could have used.

I sent it back to him for a redo and included this internet photo of the pipe with the stem.
peter1

When it finally came back it was better – see the photos below. It was much better so I decided I was done with sending it back. Two times is enough. Once it was back I finished working on the rim and the rest of the bowl. I stained it with a medium brown aniline stain. It took the stain well and came out a reddish brown colour. I buffed it with Tripoli and White Diamond to polish the stem so the grain would show through. I finished it with several coats of carnauba wax and buffed with a soft flannel buff. The silver ferrule was polished with silver polish. It is a good smoker and is comfortable in the mouth.
Peter2

peter3

peter4

peter5

Refurb on the London Made


I finished up the refurb on a London Made billiard. It is a big pipe 7 1/2 inches long. This one was by far the worst one in the lot of three large pipes that I had in my box to refurbish. The rim was in very rough shape with burn marks on the right hand side and dents and scuffs from banging out the dottle. The bowl was heavily caked and the stem and shank were virtually plugged with tars.

I reamed the bowl and cleaned the shank with pipe cleaners, cotton swabs and a shank brush and isopropyl alcohol. Then I gave the bowl an alcohol bath over night. The next morning I took it out of the bath, dried it off with a soft cloth. Once it was dry I sanded the bowl with micromesh sanding pads (1500-6000 grit) until it was smooth. I wiped it down with a cotton pad and some isopropyl to clean off the sanding dust and any remaining oils from my hands. I restained it with an oxblood aniline stain thinned with isopropyl alcohol.

I went to work on the stem after that. The stem was in bad shape. There was a very deep cut mark on the top of the stem about a 1/4 inch from the button. There was also a bite through hole on the underside of the stem. I cleaned and sanded the stem until it was black once again. I left the area around the button, on top and bottom, a bit rough and then filled the cut on the top with krazy glue. I greased and inserted a pipe cleaner in the slot and then filled the hole with krazy glue. Once the glue was completely dry I sanded the two fills I made with sand paper – 400, 600 grit, and then micromesh sanding pads from 1800-6000 grit. (I have read of concern by different folks on how the super/krazy glue can melt or cause damage on vulcanite. I have now been using this process for several years and never had a problem. I have used it on both vulcanite and Lucite. In the past weeks I have also used it on a nylon stem without any probems.)

I took the pipe to my buffer and finished the refurbishing with a buff of White Diamond to polish the finish on the bowl and the stem. I gave the entirety several coats of carnauba wax and buffed it with a clean flannel buff to give it a shine.

Here are the pics of the finished pipe (once again I forgot to take pictures of the pipe before I worked on it). Thanks for looking. ImageImageImageImageImage

Reviving a Genod Shaped like a 9242 GBD


Blog by Steve Laug

When I saw this one on EBay I immediately put in a bid that would make it mine. When it arrived this is what it looked like. The bowl was relatively clean and easy to work on. The rim had a pretty serious burn on the inside and the outside edge of the bowl on the right side. It is visible in the second photo below. The bowl was also slightly out of round due to reaming with a sharp blade. The stem was oxidized and was an uneven brown tone. There were two small tooth marks on the stem one on top near the button with a match on the underside near the button. The first picture is a bit blurry but I include it as it gives an idea of the shape of the pipe and why I compared it to a GBD 9242. This one is stamped Genod on the left side of the shank and on the right side Iwan Ries & Co (in script) over the shape 271. 
Image

Image

I cleaned the bowl and reamed it carefully to remove the carbon build up and uneven cake. I then used sand paper to smooth the inner edges of the bowl and bring it back as closely as possible to round. I topped the bowl minimally to remove the burn damage on the flat surface and minimize it on the outer edge of the bowl. For the most part it came out but left a little darkening on the surface of the rim. The right edge also has some remaining darkening and a small divot out of the edge.  I cleaned the shank with isopropyl alcohol and many pipe cleaners, cotton swabs and a shank brush. I then place the bowl in an alcohol bath to soak while I worked on the stem.

The stem is very hard vulcanite. The tooth dents are more cuts than dents and one day I may fill them with super glue but decided to leave them at this point. I sanded the stem with 400 and 600 grit wet dry sandpaper and water to remove the oxidation. It was not terribly deep so it came off very easily. I then used micromesh sanding pads from 1500-6000 grit to polish the stem. When it was finished I rubbed it down with some Obsidian Oil and set it aside to dry.

I took the bowl out of the alcohol bath and dried it off. I used some medium brown aniline stain mixed 50/50 with isopropyl alcohol to lighten and thin it. I rubbed it on with the dauber and then flamed it and buffed it. I put the stem on it before buffing and gave the entirety a buff with Tripoli and White Diamond. Once it was finished it was given multiple coats of carnauba wax.
Image

Image

Image

Image

This little Dr. Plumb Bulldog is a beauty


Blog by Steve Laug

This little pipe came to me via a friend in Germany. I finished cleaning up what has turned out to be a very nice squat straight bulldog that is stamped Dr. Plumb Extra on one side and 13 D.R.G.M. on the other. I have been familiar with Dr. Plumb pipes for quite a while and love the fact that they were a GBD seconds line. In fact they often share the same numbering system for shapes. This little guy had some serious issues when I took it under my wing. It needed a bit of work. The bowl was scorched along the front outer edge of the rim as it looked to have been lit with a torch lighter. The finish was shot and not only faded and washed out but also pitted and darkened along the bowl sides. The stem was oxidized and a bit chewed on the end. The stinger apparatus was dark and filled with tars and hardened tobacco oils.

My friend had started removing the burn mark and the bowl angles were slightly out or line. I finished removing the scorched briar and reworked the angles on all the outer edges of the bowl to keep the perspective and rim correct. I gave a ream and clean to remove any of the remaining cake and the sanding dust that had become embedded in the cracks in the cake. I put the bowl in the alcohol bath and then worked on the stem.

The pipe had the strangest stinger contraption I have ever seen that extends into the bottom of the bowl. It almost looks like a motorcycle exhaust pipe. I have inserted a few pictures of the stinger and fit in the bowl. I removed the stinger and placed in a small bowl of alcohol to soak. The stem was badly oxidized – not the brown oxidation that sat on the surface but a deep oxidation that left the stem a deep brown under the surface. I had been soaking the stem in Oxyclean while I worked on the burn on the rim of the bowl so that when I removed it from the water the oxidation had been brought to the surface. I used my buffer to remove the surface oxidation that had softened. I use Tripoli at this stage and work the stem carefully on the buffer to avoid rounding the shoulders on the stem. Then I sanded it with 240 grit sandpaper until it was matte black and clean. I then sanded it with 400 and 600 grit wet dry sandpaper and water to remove the scratches. I finished the stem by sanding with the micromesh pads 1500-6000 grit until the stem had a sheen to it. ImageImage

I then took the bowl out of the alcohol bath and dried it off. I sanded it with the 1800-2400 grit micromesh pads until the surface was free of scratches and grooves and was smooth. Then I refinished it with an oxblood aniline stain to bring out the red highlights in the briar. I put the stem back on the pipe and took it to the buffer to buff with White Diamond. Once finished I gave the whole pipe several coats of carnauba wax. ImageImageImage