Blog by Steve Laug
 I thought it might be worth taking time to talk about my methods of cleaning and restoring a rim top and edges of the bowl. I will address the process in the blog below by starting with the least intrusive method and work my way through the options and conclude with the most intrusive. I think if you were to just read the blogs you would default to topping a bowl and beveling a rim edge to deal with damage while there are actually several other options available to you. Obviously, some of the bowls that I have to deal with have a lot of rim top and edge damage so those restorations go into quite a bit of detail on that process. So if you are ready and interested let’s work through the process together.
1. I begin with the least intrusive method for smooth rim tops. For all intents and purposes this really is a cleaning and reconditioning process.
- Ream the bowl and clean it up while carefully paying attention to the rim edges. You do not want to add damage to the shape of the bowl or edges by the reaming. I use a PipNet pipe reamer with four different cutting heads to fit a variety of bowls. I touch up that cleaning with a Savinelli Fitsall Pipe Knife.
- Carefully scrape off the thick lava coat on the rim top and edges with a Savinelli Fitsall Pipe knife. I work to get the thick coating off as gently as possible with the knife.
- Scrub the rim top and edges using Murphy’s Oil Soap (undiluted) and a Scotch Brite pad. It works well to remove buildup on the top without scratching the rim top. I use it to also scrub the inner edge of the rim to carefully remove the darkening and build up there. The goal is to keep the rim as round as possible and still smooth out the edge.
- Scrub the entire bowl with the Murphy’s Oil Soap (undiluted) and a tooth brush to remove any residual grime on the bowl, rim top and edges.
- Rinse bowl exterior and top with warm water to remove residue left behind by the soap and scrubbing.
- Dry the bowl off and check for residue on the rim top and edges. Repeat to take care of those spots as necessary. Don’t worry too much about the lightening of the stain on the rim top at this point. We just want it clean.
- If the stain has lightened considerably from the cleaning, buff the rim top to make sure the polishing does not bring the briar to match. If not, it can be restained to match the rest of the bowl using stain pens that are available on line.
2. We will look at modifications to the above procedure to arrive at the least intrusive method for plateau/sandblast/rusticated rim tops. Again, for all intents and purposes this is a deep cleaning process of the surfaces as described.
-
- Ream the bowl and clean it up while carefully paying attention to the rim edges. You do not want to add damage to the shape of the bowl or edges by the reaming. I use a PipNet pipe reamer with four different cutting heads to fit a variety of bowls. I touch up that cleaning with a Savinelli Fitsall Pipe Knife.
- Carefully work over the rim top with a brass bristle brush (brass bristle brushes are much softer than a regular wire brush and do not do damage to the finish. These are available at most Walmart stores or small auto parts stores and are used for cleaning.) I use the brush dry and carefully work over the rim top with the goal of removing the thickest and most pervasive lava. Once it is finished the finish begins to take on its original appearance.
- Scrub the rim top and edges using Murphy’s Oil Soap (undiluted) and a Scotch Brite pad. It works well to remove the remaining buildup on the top without damaging the plateau/sand blast/rusticated finish on the rim top. I use it to also scrub the inner edge of the rim to carefully remove the darkening and build up there. The goal is to keep the rim as round as possible and still smooth out the edge.
- Scrub the entire bowl with the Murphy’s Oil Soap (undiluted) and a tooth brush to remove any residual grime on the bowl and rim top and edges.
- Rinse bowl exterior and top with warm water to remove residue left behind by the soap and scrubbing.
- Dry the bowl off and check for residue on the rim top and edges. Repeat to take care of those spots as necessary. Don’t worry too much about the lightening of the stain on the rim top at this point. We just want it clean.
- If the stain has lightened considerably from the cleaning different procedures are used for the various surfaces.
a) Plateau surfaces if lightened generally will come back alive with polishing. I tend to stain the crevices in the plateau with a black Sharpie Pen to give some contrast to the rim top when polished. I will also often use the pen to colour the inner edge of the bowl.
b) Sandblast surfaces – I have found that a good buff will often bring this back to match the bowl. If not, it can be restained. I work to find a match the rest of the bowl with a variety of stain pens are available. These can be purchase online or at hardware stores.
c) Rusticated surfaces – Buff the surface to see what the finish looks like after buffing. It may well match the rest of the bowl with just that work. If not you can restain it in the same manner as the sandblast surfaces.
If the rim top and edges look good at this point proceed as usual to buff and wax them with the rest of the bowl.
3. Let’s move on to moderate intrusion when the above procedures do not work to address the issues on a smooth rim top and there is still damage to the inner edge of the bowl. The process below carries on from where you left off above in 1.
- The rim top has been cleaned and the edges cleaned as noted above. The inner edge of the bowl is out of round and has darkening and burn damage that remains.
- I use a folded piece of 220 grit sandpaper to give the edge a slight bevel and remove the damage from burning or nicks. The angle of the bevel varies depending on the depth of the damage, as the idea is to minimize it and bring the bowl back to round.
- Sometimes that is all it takes -sand a slight bevel and bring the bowl back to round and clean up the edges.
- Sometimes you have to decide how far to go – a bevel generally covers a lot of issues in shaping the edges of the bowl.
- Polish the sanded rim edge with micromesh sanding pads to smooth it out.
- Reclean the bowl and edge with a clean cloth. If the edge matches the rest of the bowl you are finished and can buff and wax the pipe.
- If they do not blend in then use a stain pen and match the stain as much as possible to the rim top and bowl. Then buff, wax and polish on the wheel.
4. Let’s move on to moderate intrusion when the above procedures do not work to address the issues on a plateau/sandblast/rusticated rim top and there is still damage to the inner edge of the bowl. The process below carries on from where you left off in 2 above .
- The rim top has been cleaned and the edges cleaned as noted above. The inner edge of the bowl is out of round and has darkening and burn damage that remains.
- I use a folded piece of 220 grit sandpaper to bevel the rim edge inward and remove the damage from burning or nicks. The angle of the bevel varies depending on the depth of the damage and the overall structure of the bowl. The idea is to minimize the damage and bring the bowl back to round.
- Sometimes that is all it takes – sand a slight bevel and bring the bowl back to round and clean up the edges.
- Sometimes you have to decide how far to go – a bevel generally covers a lot of issues in shaping the edges of the bowl.
- Polish the sanded rim edge with micromesh sanding pads to smooth it out. Remember on all three of these types of finishes a smooth inward bevel can add a real touch of finesse to the rim top that is stunning.
- Reclean the bowl and edge with a clean cloth. If the edge matches the rest of the bowl you are finished and can buff and wax the pipe.
- If they do not blend in then use a stain pen and match the stain as much as possible to the rim top and bowl. Then buff, wax and polish on the wheel.
If the rim top and edges look good at this point proceed as usual to buff and wax them with the rest of the bowl. If the damage is even more extensive than originally thought after proceeding through the steps and procedures above then more intrusive measures will be required to bring the bowl back to round and the rim top to undamaged condition. Once again, how far you go with this process depends on choices that only you can make. As a general rule I will not change the visual profile of the pipe regardless of the work I do and that sets the limits for the degree of work I will do.
5. Let’s move on to the most intrusive methods when the above procedures do not work to address the issues on a smooth rim top and there is still damage to the inner edge of the bowl. The process below carries on from where you left off above in 1 and 3.
- On a smooth rim top where there is damage to the top itself as well as the inner and outer edges several methods are available to try.
- If you have cleaned up the edges already and the top has burn damage or is dented and nicked the first step is to steam out the dents with a damp cloth and a hot knife or small steam iron. I wet the cloth and lay it on top of the dent then apply the heat source that generates steam and lifts the dents. I repeat until the surface is smooth. That leaves the burn marks to address.
- If the steaming has left behind damage that could not addressed using the method then it is time to move forward. If the damage is on the inner edge of the bowl then I generally use a wooden ball or darning egg wrapped with a piece of sandpaper (220 grit) to give the inner edge more of a bevel (deeper bevel) to accommodate the damage and minimize it. (both the bevel and the following topping will minimize burn damage).
- If the damage is to the rim top itself then I use a topping board and 220 grit sandpaper to top the bowl and carefully remove the damaged part. Topping does not have to be too deep or drastic. I always proceed slowly checking often to see if the surface is smoothing out. Remember it is easier to remove than to put wood back. 😉
- If all is done and you still feel the burn damage is too intrusive you can make a wash of oxalic acid and warm water and use a cotton pad or paper towel to apply it to the burn damaged area. Repeat until you are convinced that no more damage can be removed.
- When finished smoothing out the rim top polish it and the edges with micromesh sanding pads (1500-12000 grit pads). You can either wet sand or dry sand. As you polish the rim top it should begin to shine. That may be enough if it matches the bowl sides and you can buff and wax it.
- If it does not match then you will need to restain the rim top and edges to match the rest of the bowl. This can be down with an aniline based stain like Feibings or even with the small Stain Pens I have referred to above.
- Buff the bowl and rim with a buffer and a polish like Blue Diamond and then generously wax the briar with carnauba wax and buff with a clean buffing pad.
- At this point the rim top will likely look very good and match the bowl well. The damage from burn marks or nicks and dents will have disappeared and the edges will look like they were meant to be as they are now.
6. Let’s move on to the most intrusive methods when the above procedures do not work to address the issues on a plateau, sandblast or rusticated rim top and there is still damage to the inner edge of the bowl. The process below carries on from where you left off above in 2 and 4. Each of these take slight variations to accommodate the finish.
When the damage on a plateau rim top is beyond the work listed above in sections 2 and 4. If the damage is on the plateau top itself then I proceed as follows.
- I used the brass bristle wire brush more aggressively than I did in previous sections above to remove all of the loose char and burn damage on the plateau itself. Once all is removed I wipe it down with a damp cloth.
- I wipe down the damaged area with a mix of oxalic acid and water on cotton swabs and pads to get deeply in the grooves. I repeat until I am not getting any coloration on the cotton pads. I wipe it off with a damp cloth.
- I work over the inner edge with 220 git sandpaper again to remove the damage that remains and reshape it. I stain it at the same time as the plateau.
- Generally a plateau rim is darker than the bowl colour so it can be safely stained with a black or a dark brown stain. That will take care of most of the damage on the top of the bowl.
- Buff and wax rim top and edges with a buffing pad and Blue Diamond and then coat generously with carnauba wax. Buff the top with a clean buffing pad to deepen the shine.
When the damage on the rusticated rim top remains after the work in sections 2 and 4 above.
- I used the brass bristle brush more aggressively than I did previously above to remove as much of the loose char as possible. If that does not make better then and even more aggressive fix is needed.
- I top the bowl on a topping board with 220 grit sandpaper to remove the damage and even out the rim top. Sometimes it takes removing all of the rustication but sometimes it does not. Once I have it cleaned up I wipe it down with alcohol to remove the sanding dust.
- I even out the inner edge of the bowl with a folded piece of 220 grit sandpaper. I wipe it down with alcohol.
- I use a Dremel and burrs to replicate the rustication pattern from the bowl sides on the rim top. I used several burrs – ball, cone and cylinder to work over the rim top to match the previous rustication. When I am happy with it I use a brass bristle wire brush to knock of the high spots and any loose debris.
- I restain the rim top with a stain pen to match the bowl. Sometimes I darken the inner edge with a black stain pen.
- Buff and wax rim top and edges with a buffing pad and Blue Diamond and then coat generously with carnauba wax. Buff the top with a clean buffing pad to deepen the shine.
When the damage on the sandblast rim top remains after the work in sections 2 and 4 above.
- I used the brass bristle brush more aggressively than I did previously above to remove as much of the loose char as possible. If that does not make better then and even more aggressive fix is needed.
- I top the bowl on a topping board with 220 grit sandpaper to remove the damage and even out the rim top as I do with the rusticated rim top. Sometimes it takes removing all of the sandblast but sometimes it does not. Once I have it cleaned up I wipe it down with alcohol to remove the sanding dust.
- I even out the inner edge of the bowl with a folded piece of 220 grit sandpaper. I wipe it down with alcohol.
- I use a Dremel and burrs to replicate the sandblast pattern from the bowl sides on the rim top. I used several burrs – ball, cone and cylinder to work over the rim top to match the previous blast. I use smaller burrs and work to keep the pattern close and tight like a sandblast. When I am happy with it I use a brass bristle wire brush to knock of the high spots and any loose debris.
- I restain the rim top with a stain pen to match the bowl. Sometimes I darken the inner edge with a black stain pen.
- Buff and wax rim top and edges with a buffing pad and Blue Diamond and then coat generously with carnauba wax. Buff the top with a clean buffing pad to deepen the shine.
That is the process I generally follow. As with any restoration, refurbishing you have to make a decision how far you want to go. My goal is to minimize the damage without changing the bowl profile or shape. I want the pipe to still retain the marks of its maker not me. Have fun in the process.
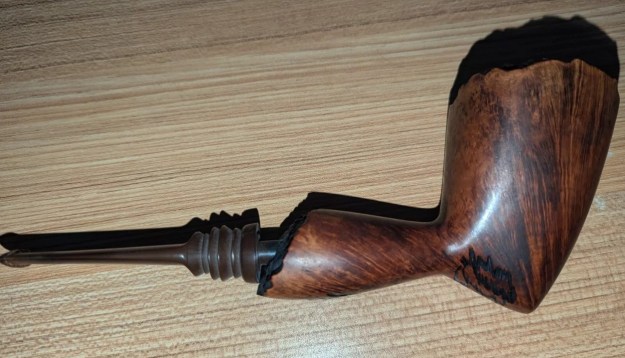
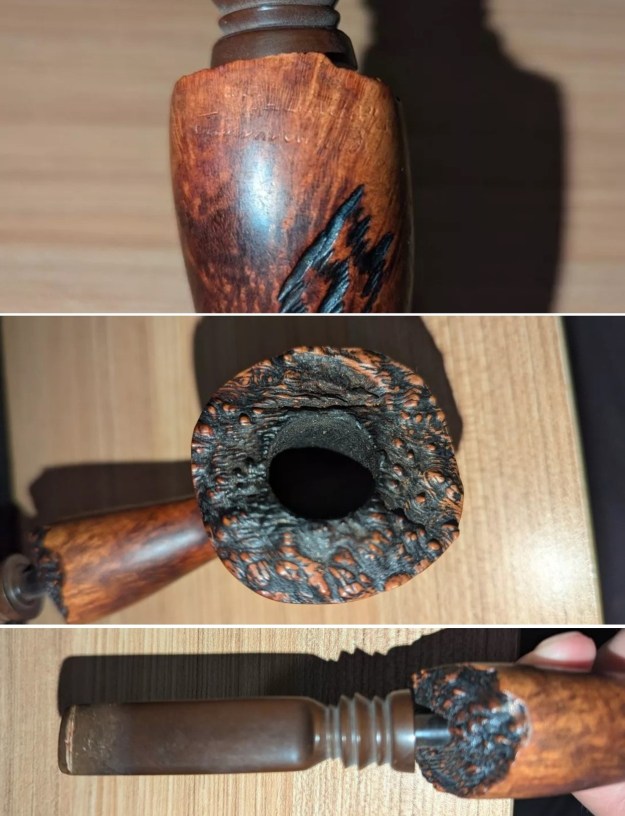
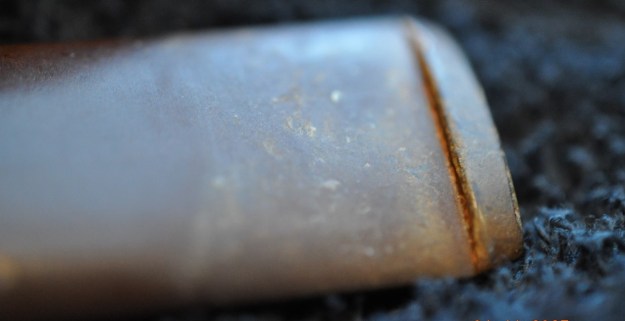
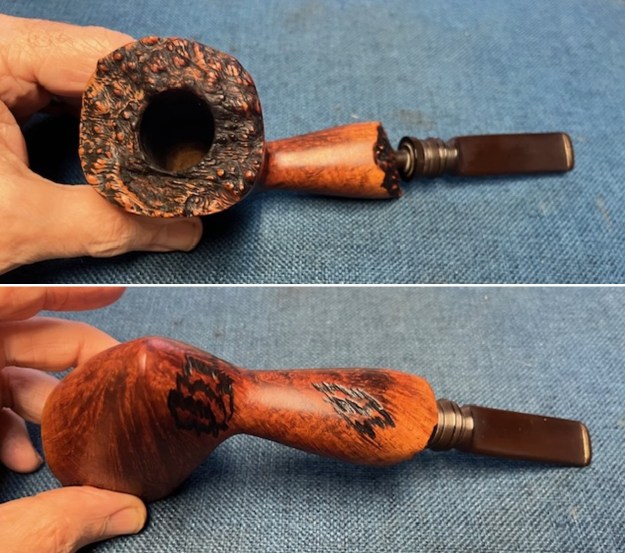
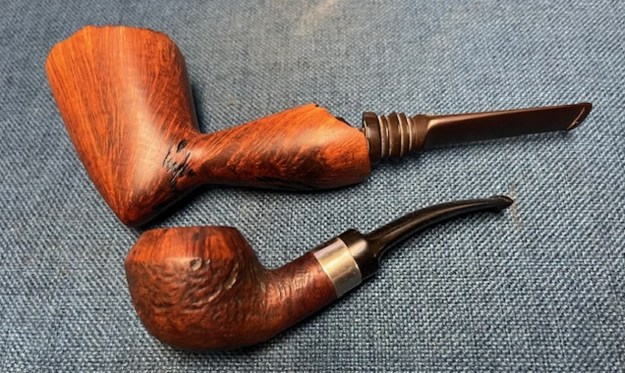
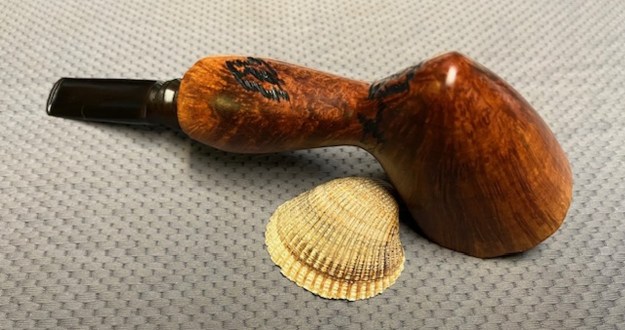
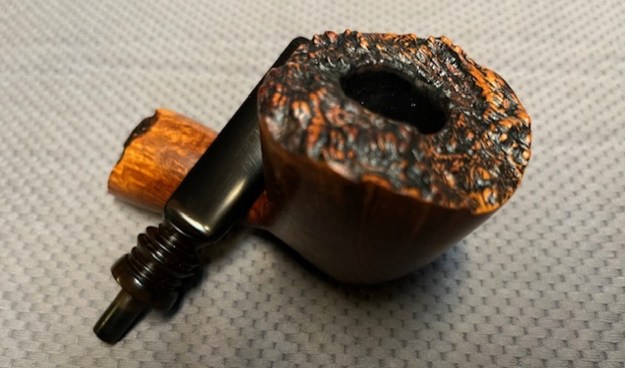
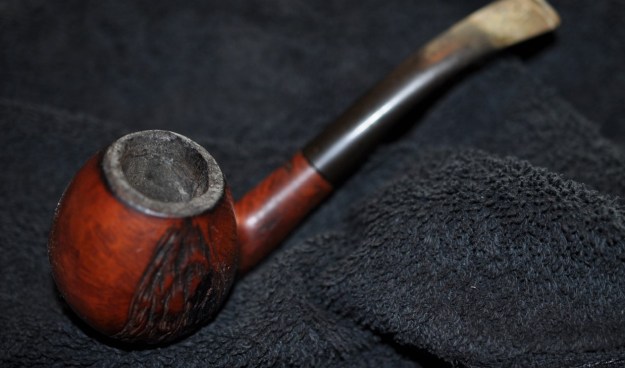
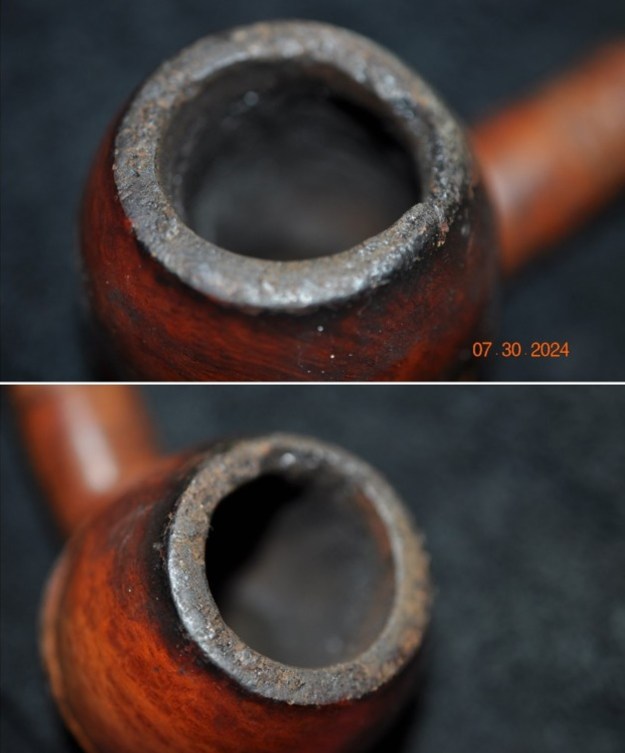
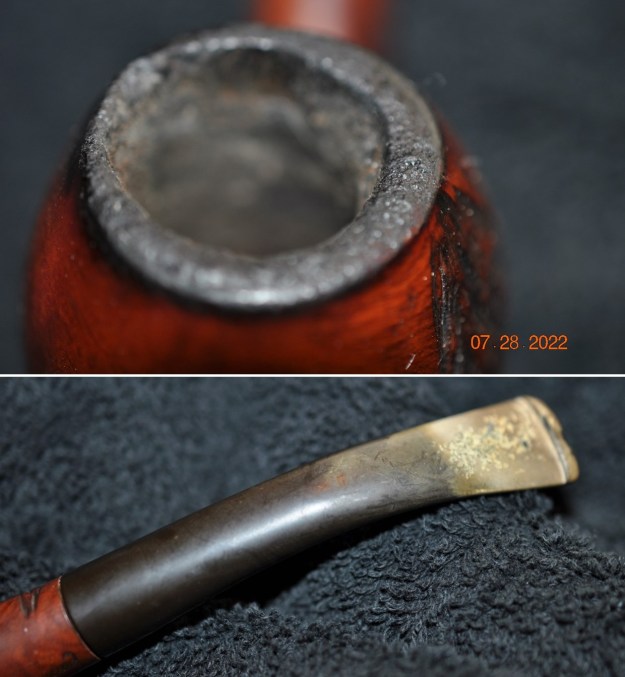
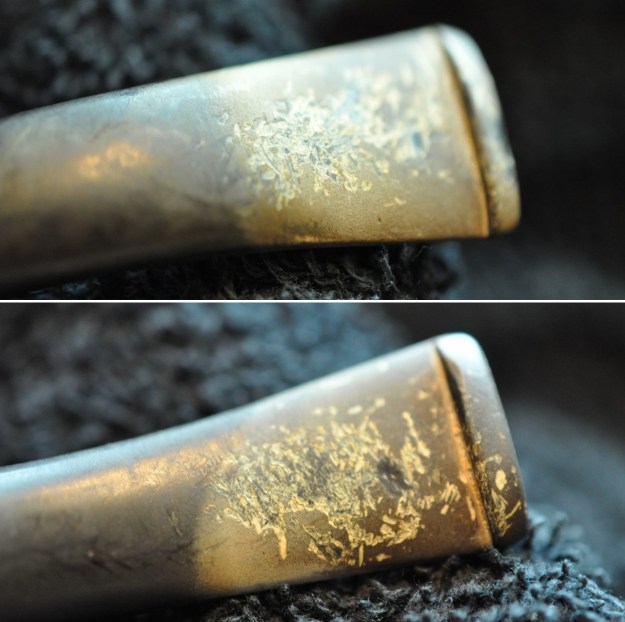
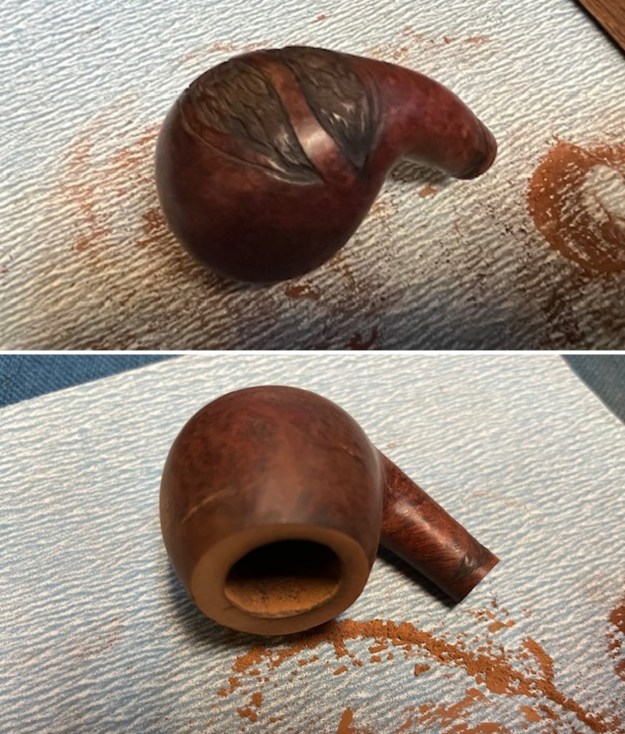
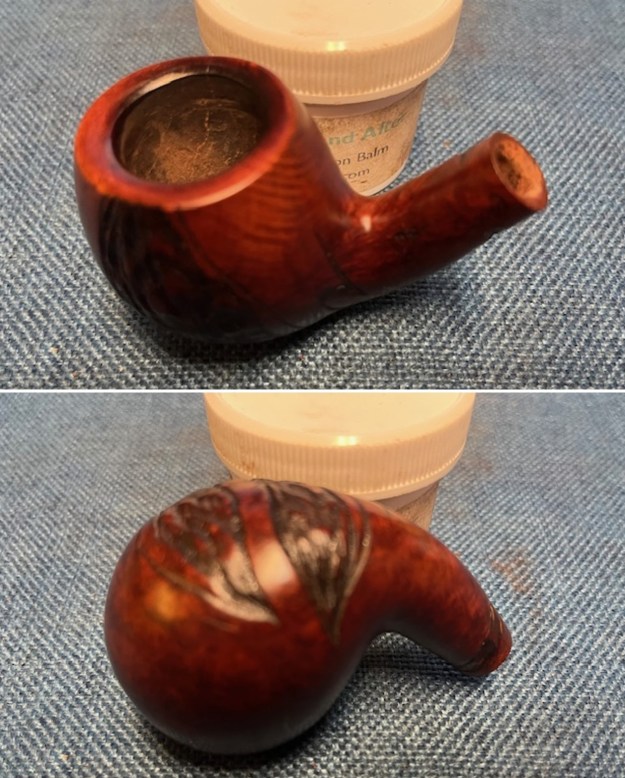
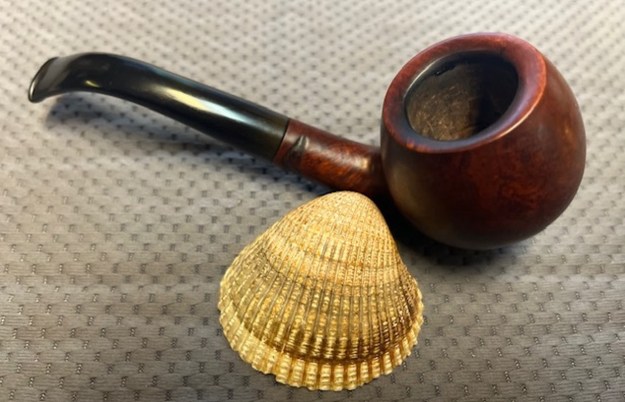
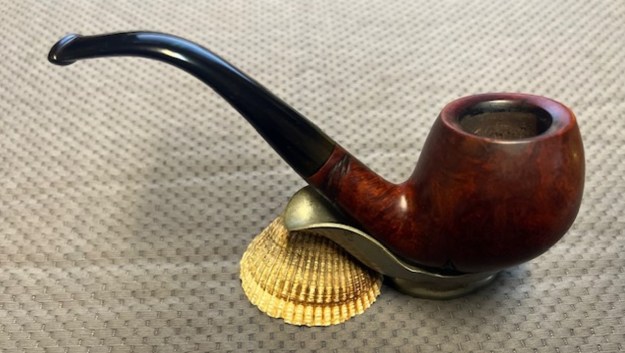
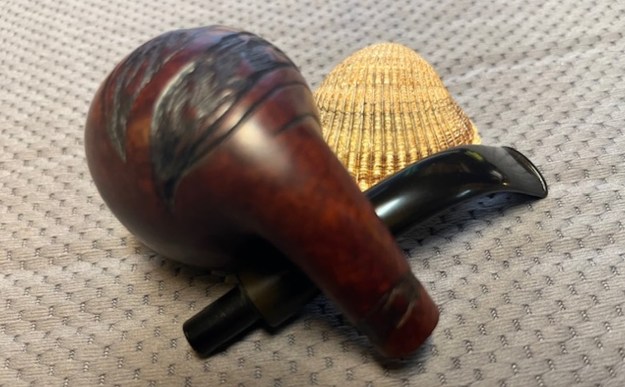
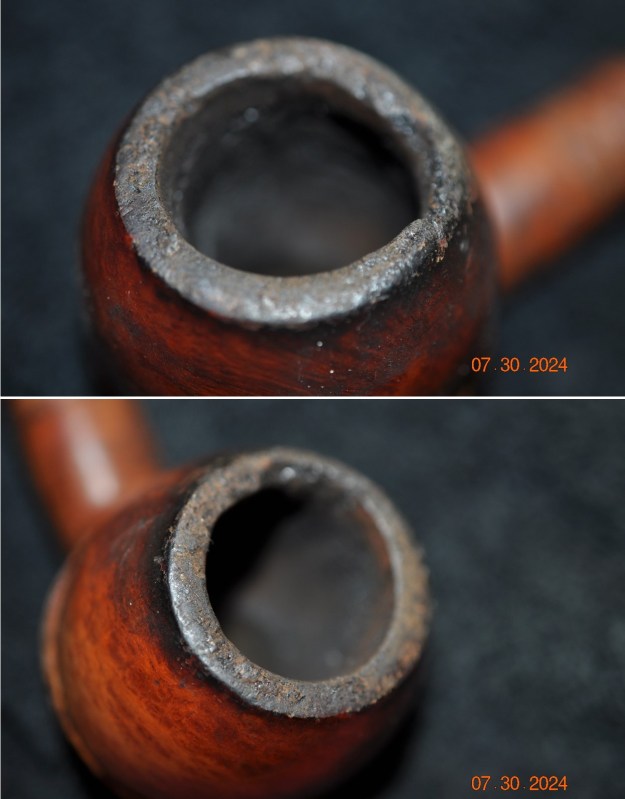
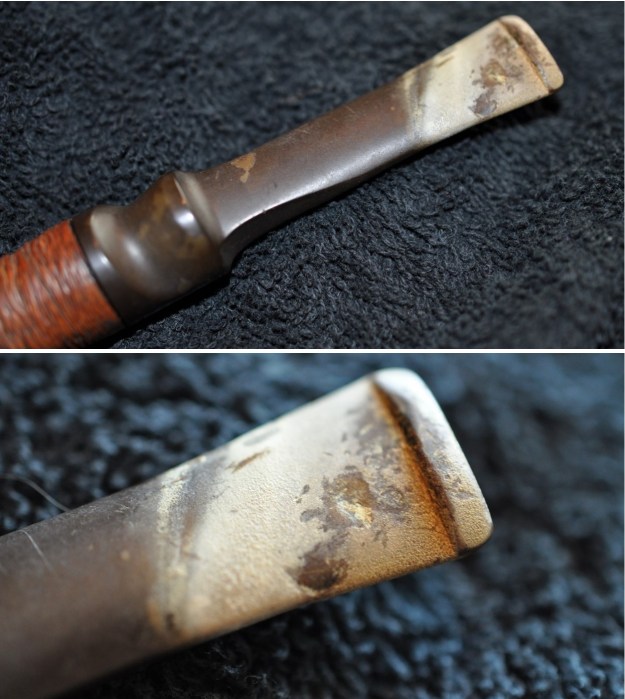
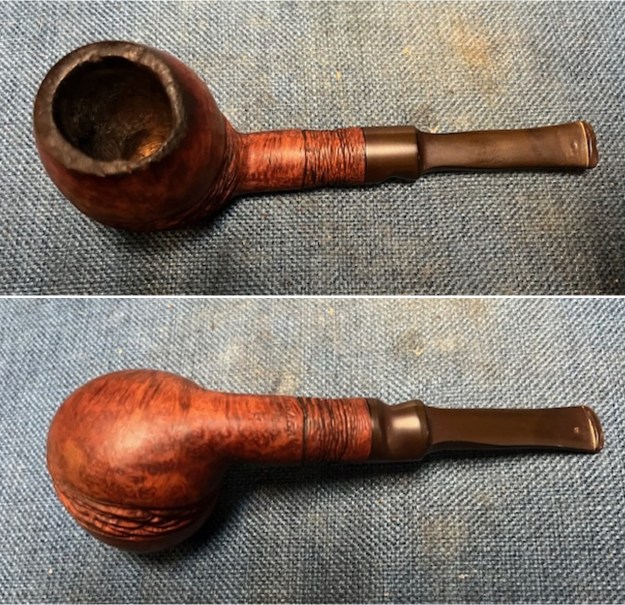
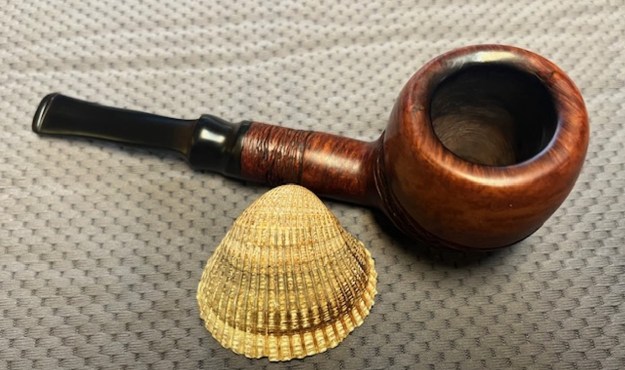
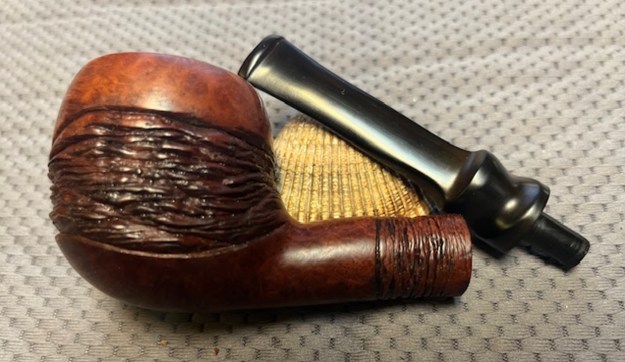
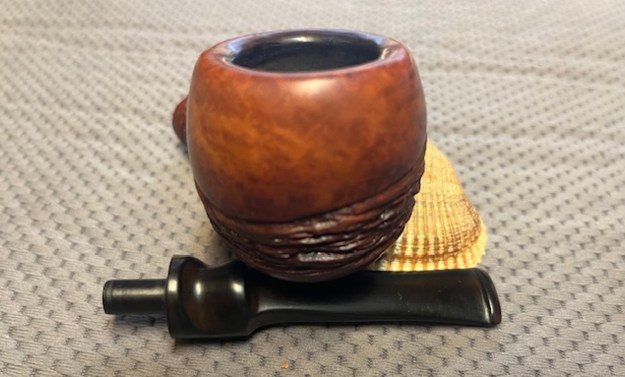
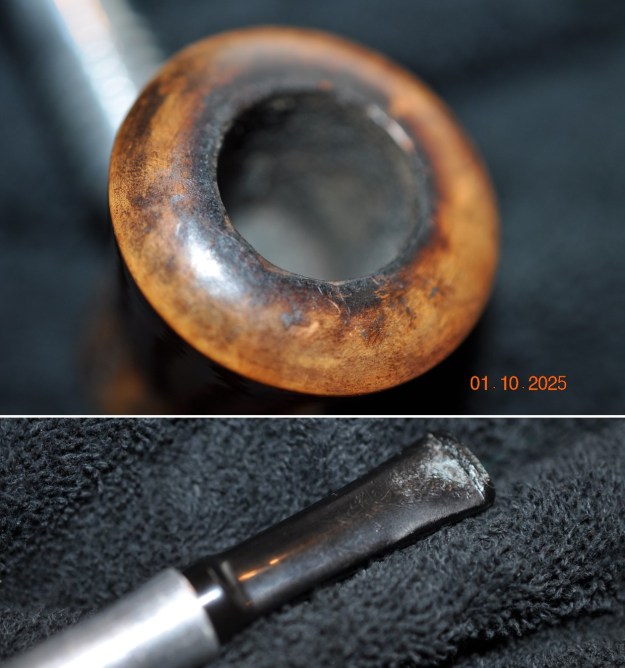
 Jeff took photos of the rim top and bowl to give a sense of the thickness of the cake and the lava overflow on the rim top. It should clean up well as the edges do not seem damaged. The stem photos also show the tooth chatter and marks on the stem. I think it is vulcanite but I am unsure.
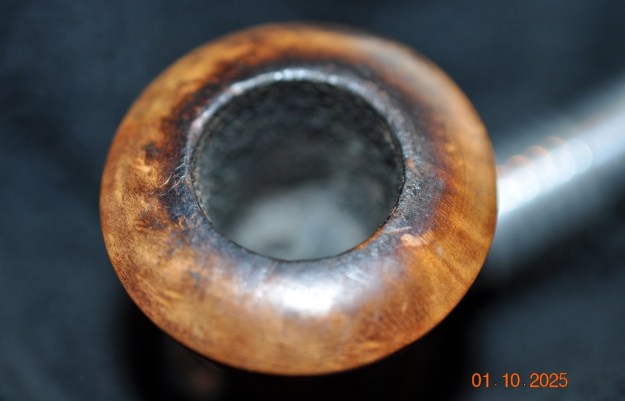
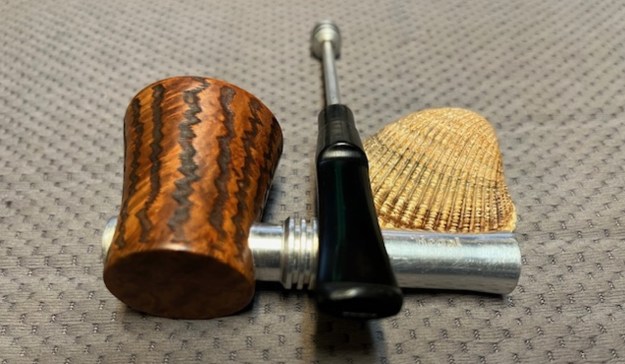
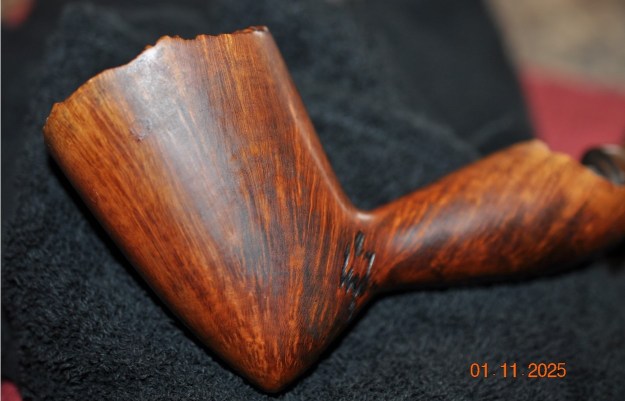
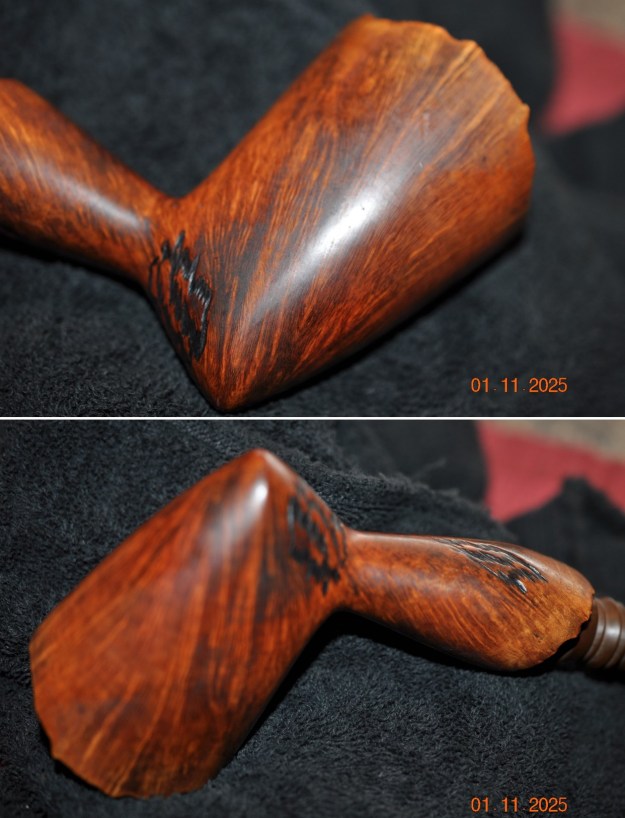
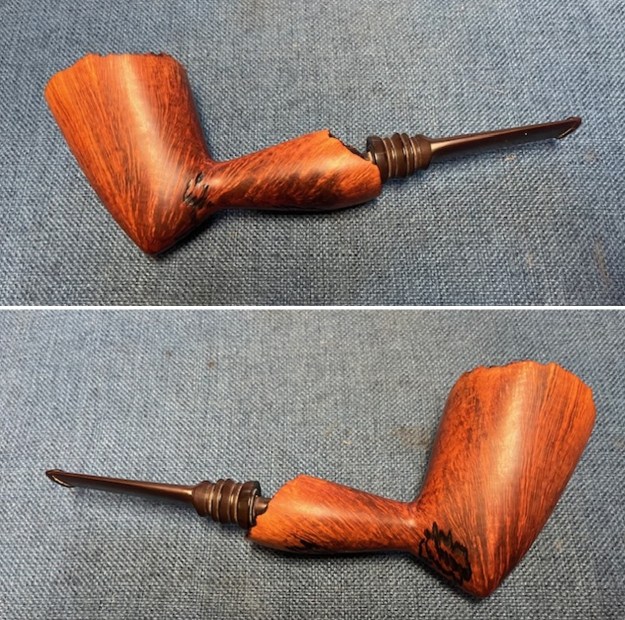
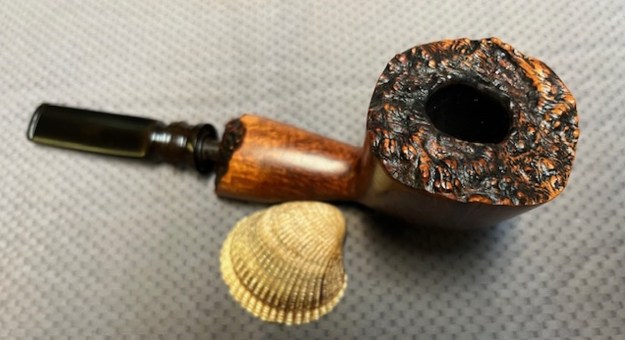
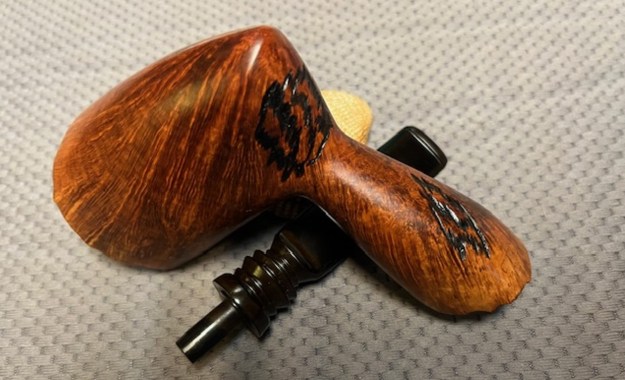
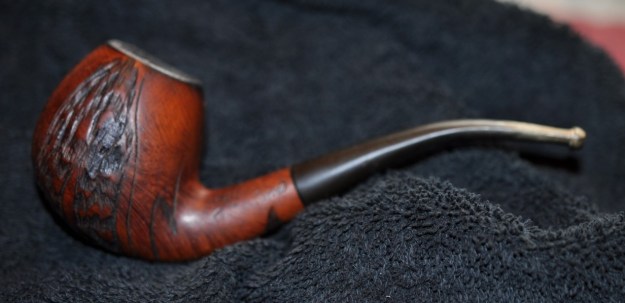
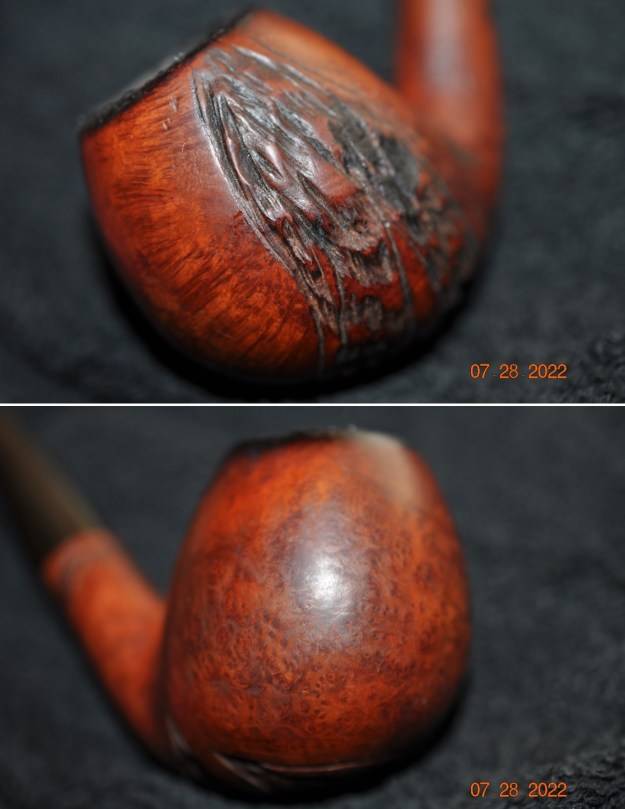
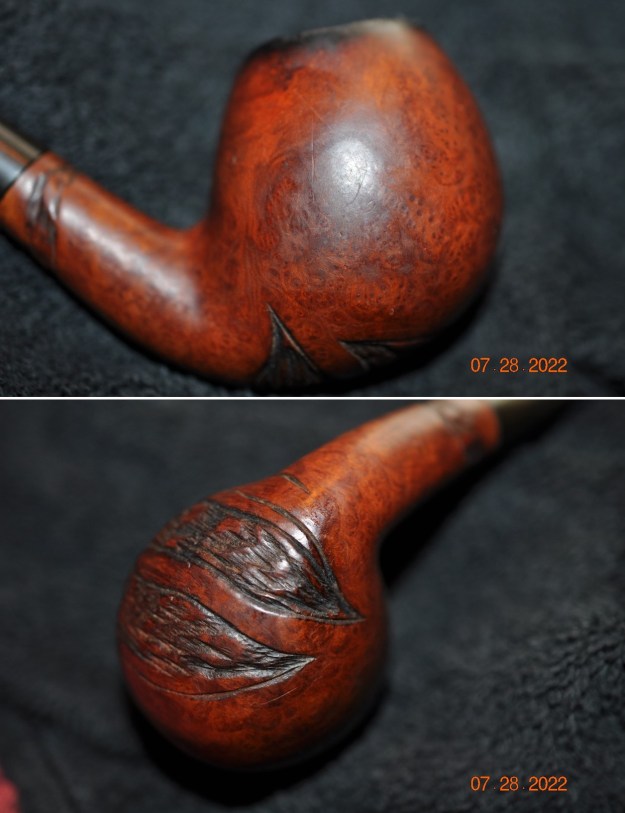
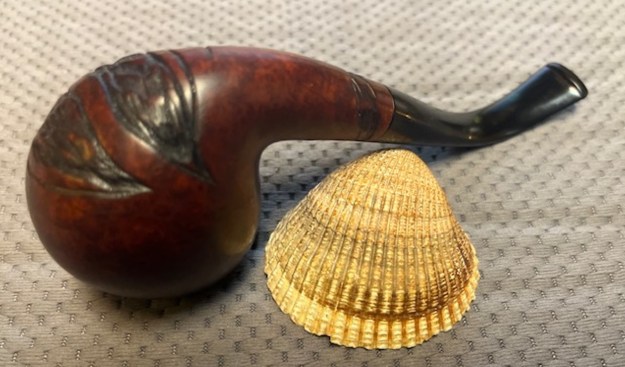
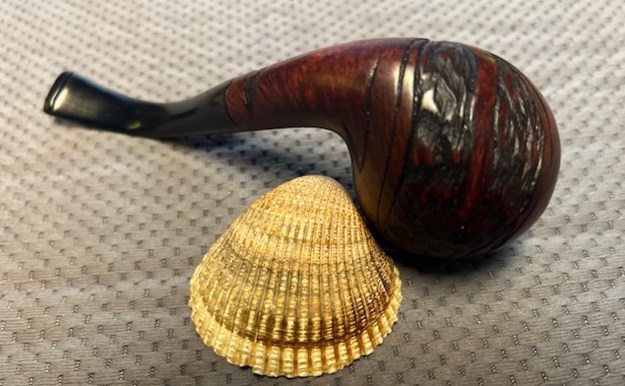
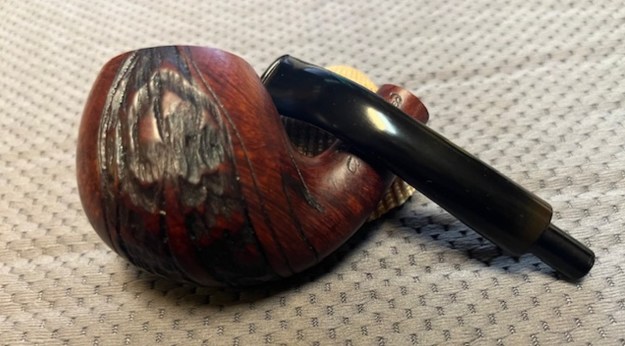
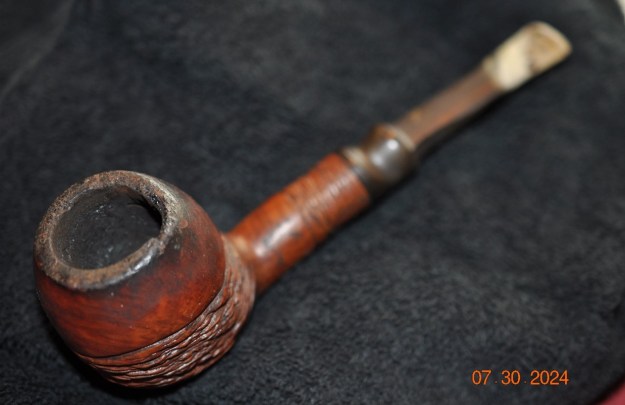
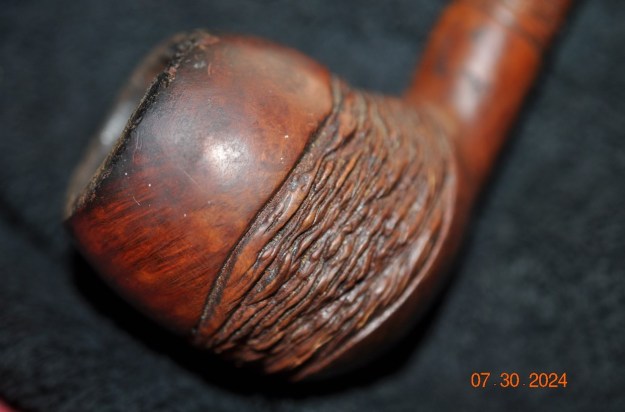
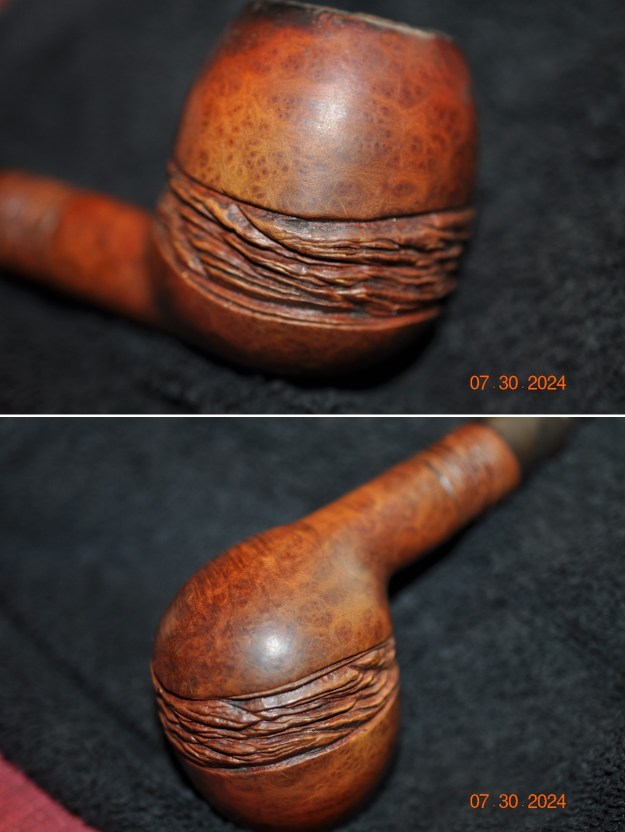
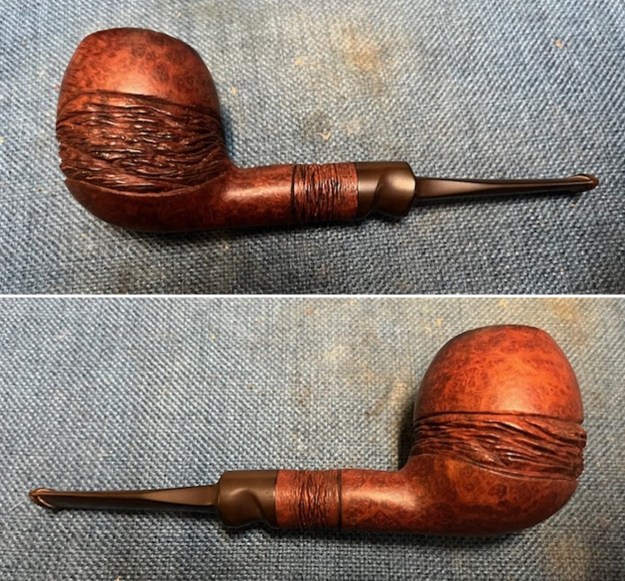
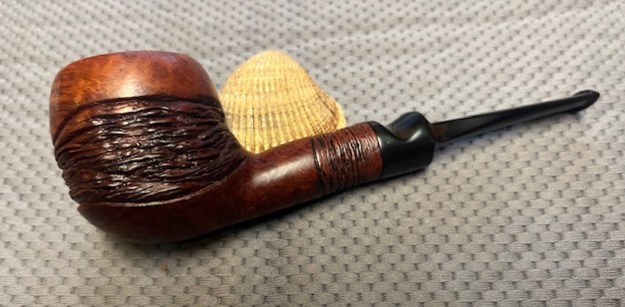
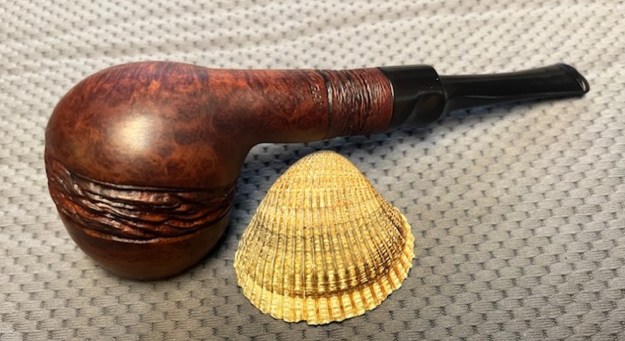
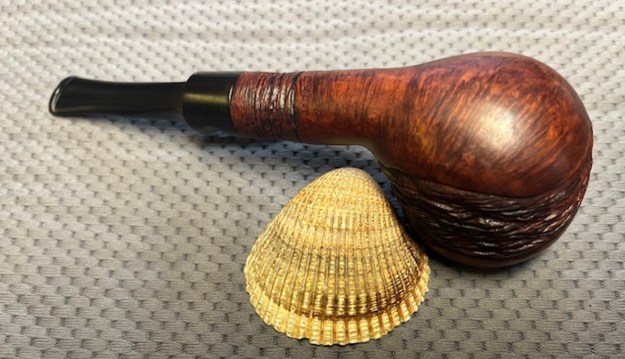
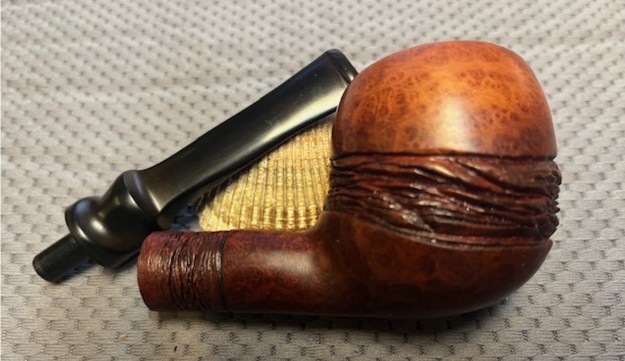
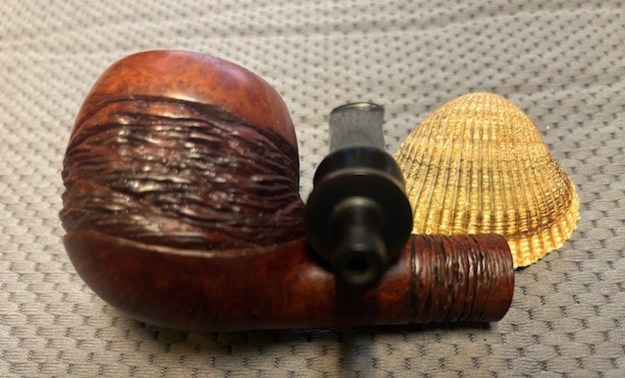
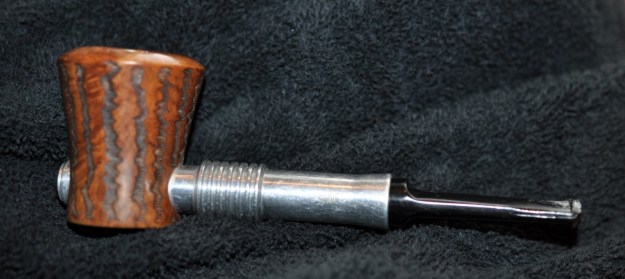
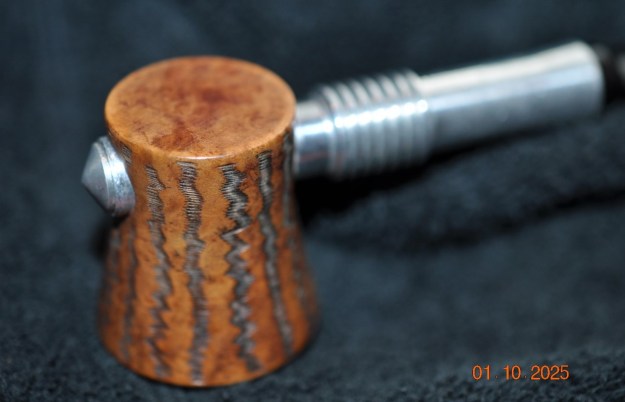
 He took photos of the rustication around the Poker shaped bowl sides. Both the rim top and heel of the bowl were smooth. The rustication is almost “Tracy Mincer” like in it patter in each groove. It is a unique finish.
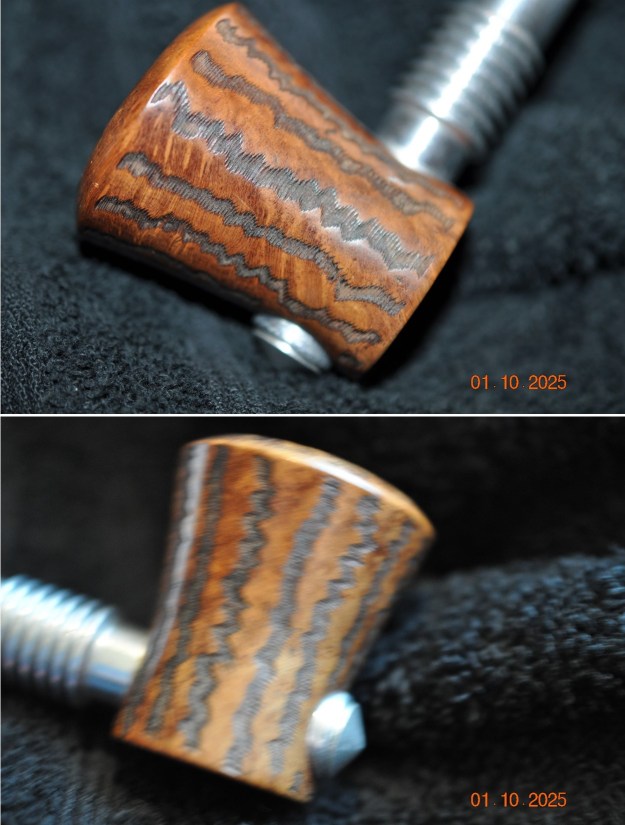
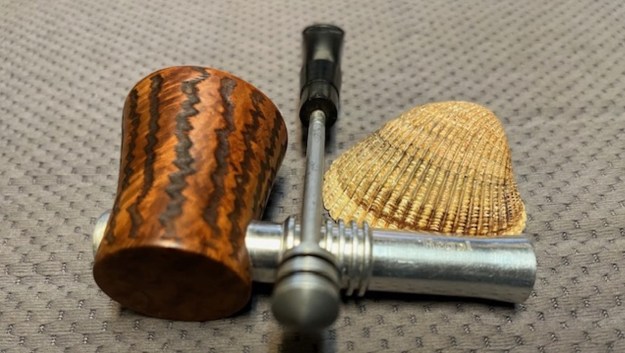
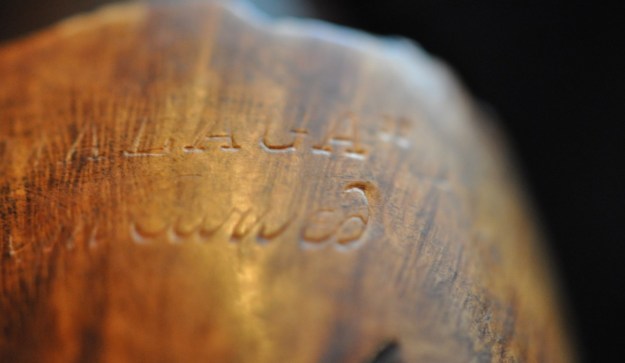
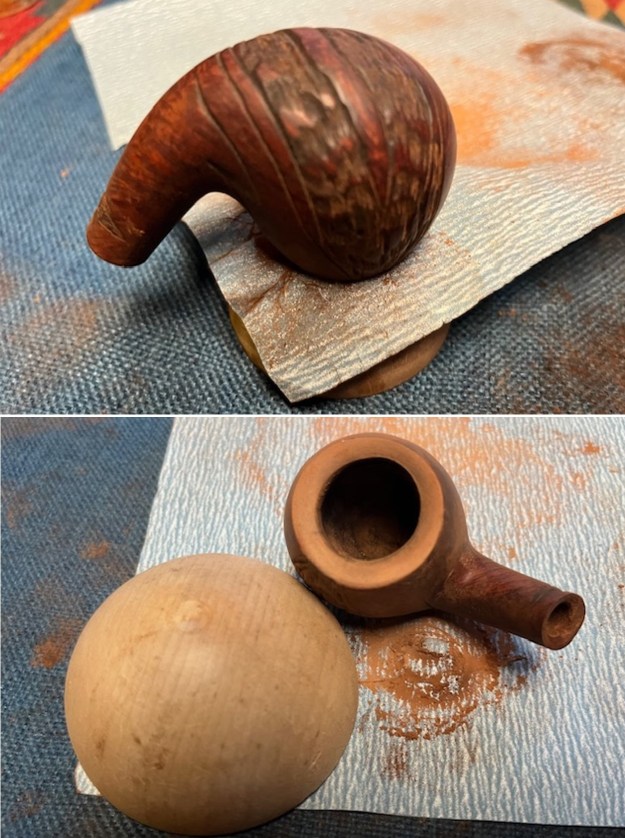
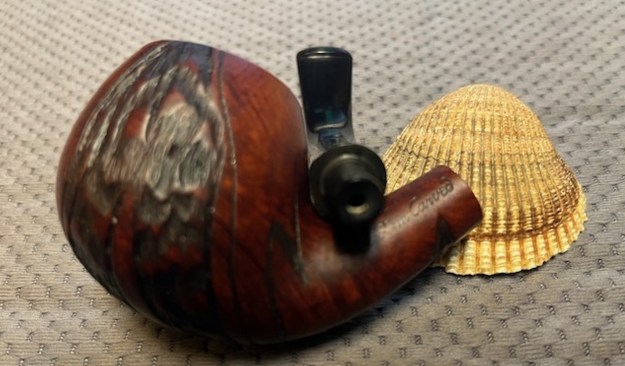
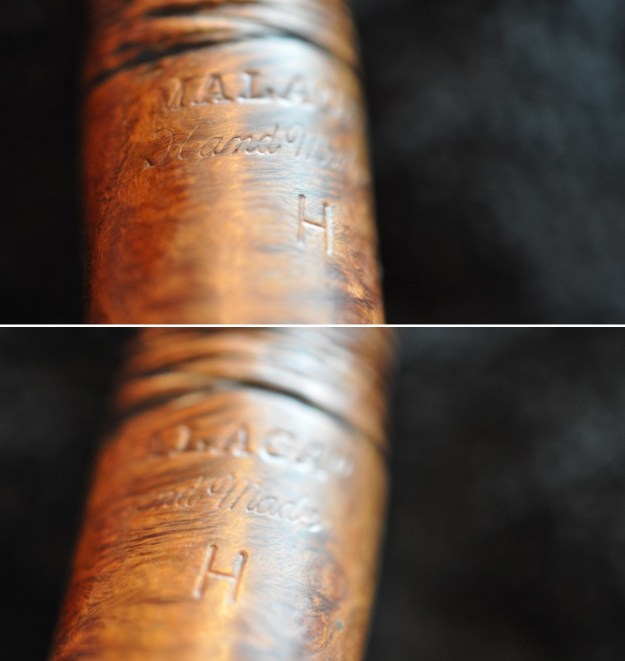
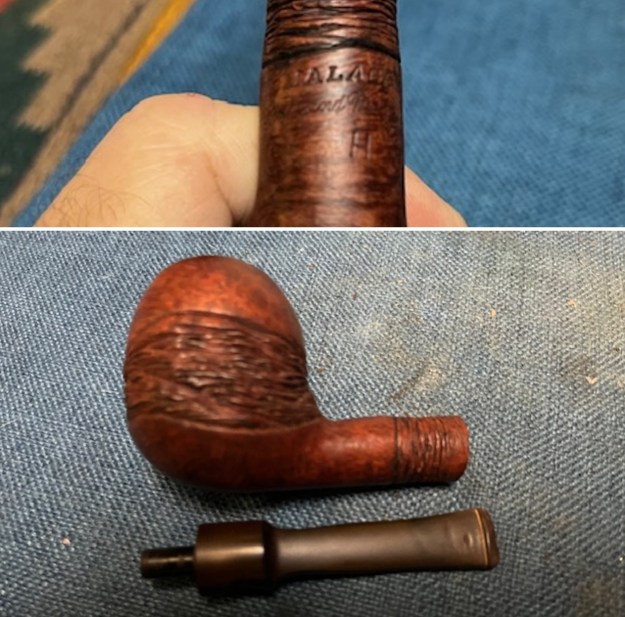
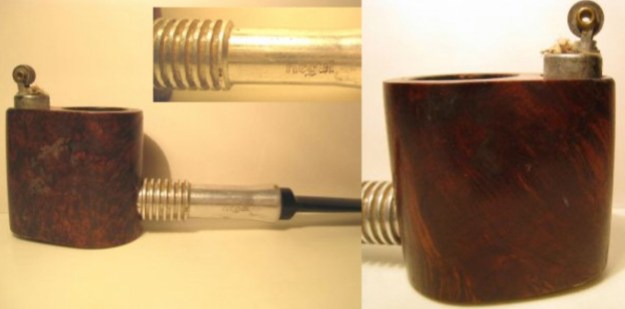
 Jeff took a photo of the stamping on the metal shank Barrel of the pipe. It is readable though the RE are a bit faint.
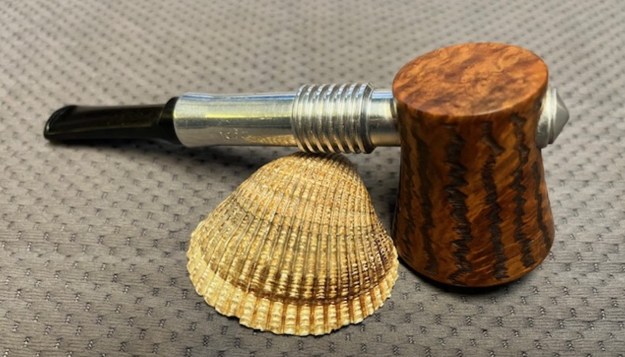
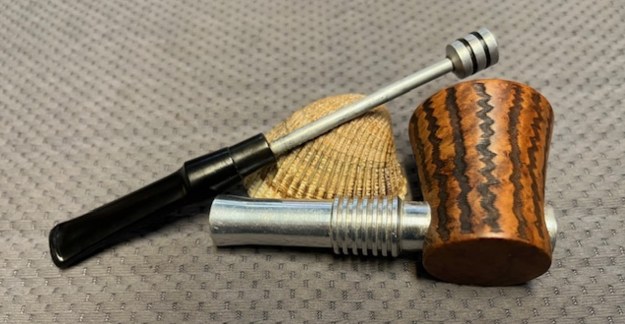
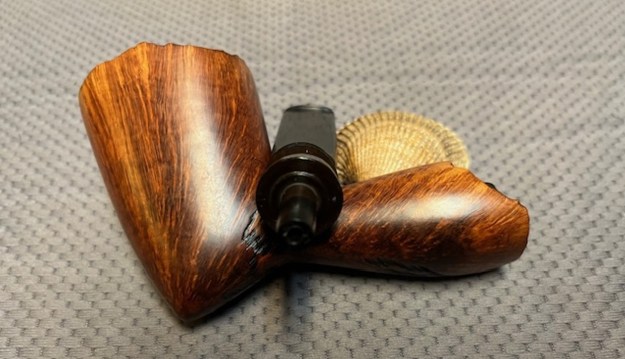
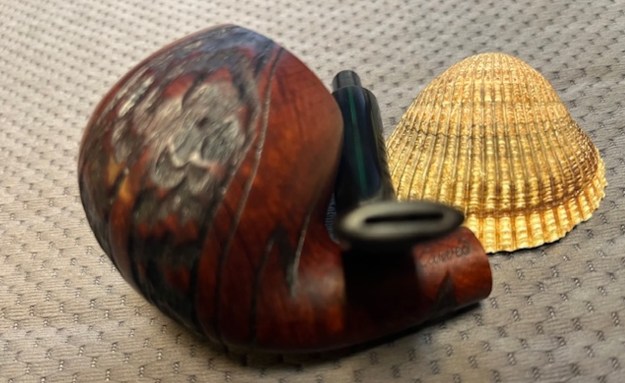
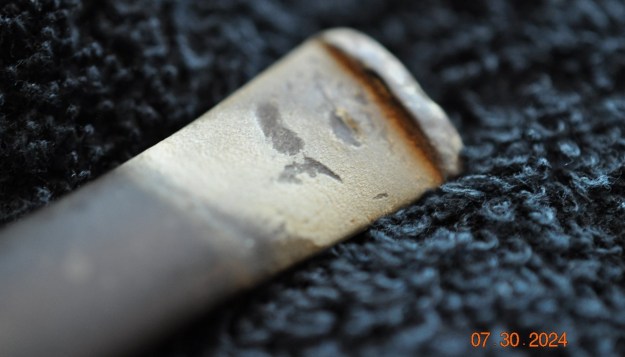
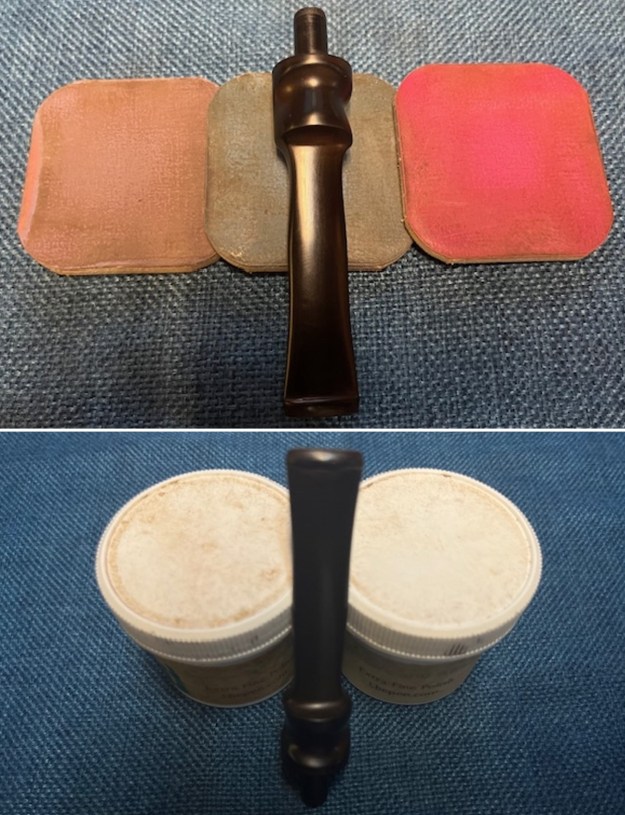
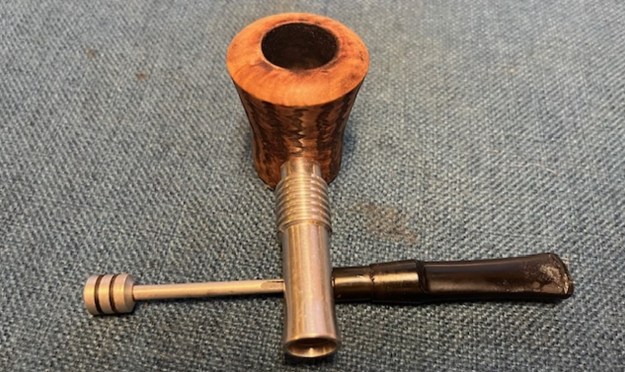
 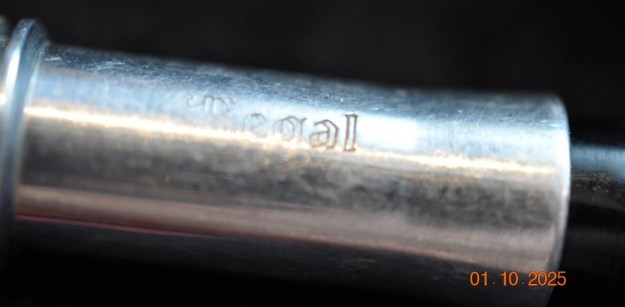 The next two photos show the part of the pipe. It has some unique plumbing. There is a plunger tube not unlike the plunger in Kirstens. However, the end of the plunger has a fitting that serves to close off the shank and has two rubber o-rings around it. It is quite different. The plunger and o-rings are very tarry and grimy.
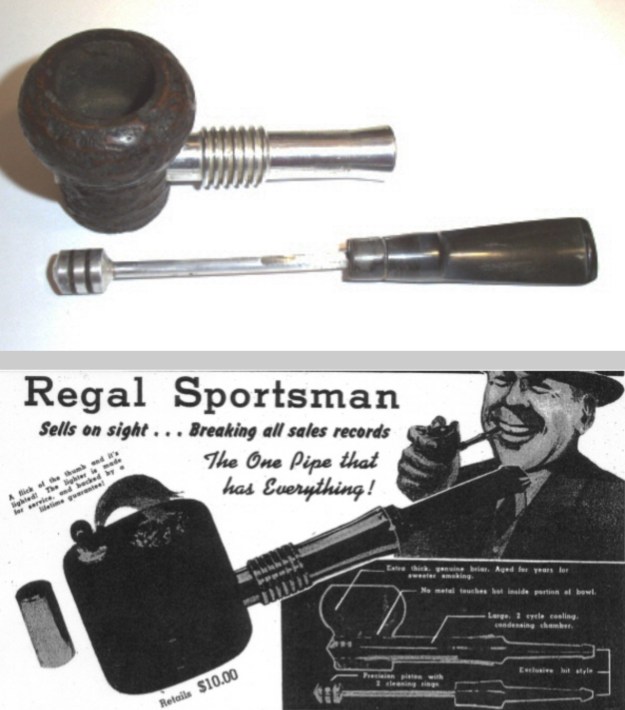
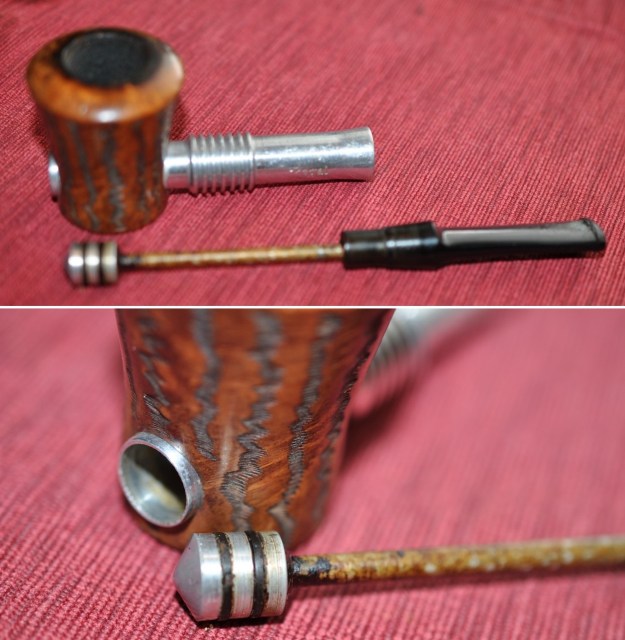 Before I started my clean up work on the pipe I wanted to know more about the brand. I turned to my go to site on metal pipes – Smokingmetal to see if they listed it and what information they gave on it (http://www.smokingmetal.co.uk/pipe.php?page=137). I have included the photos and the information below.
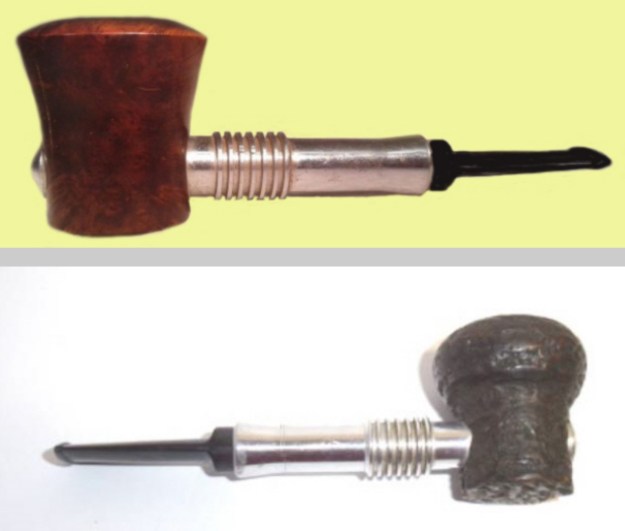
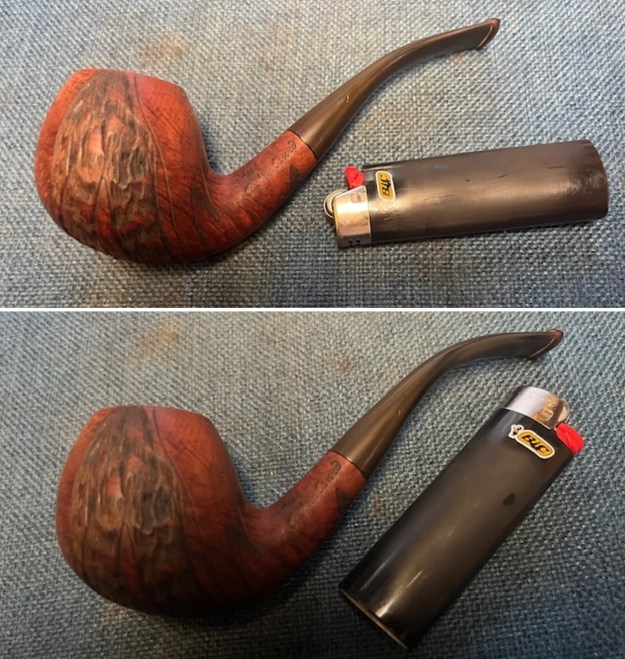
 Jeff had cleaned up the pipe using his usual procedure. He reamed the pipe with a PipNet pipe reamer and removed the rest of it with a Savinelli Fitsall Pipe Knife. He scrubbed the bowl with undiluted Murphy’s Oil Soap with a tooth brush. He rinsed it under running warm water to remove the soap and grime from around the bowl sides. It looked better but the rim top and outer edge was darkened and burned. He cleaned out the inside of the shank and the airway with alcohol, cotton swabs and pipe cleaners. The stem looked better but there were a lot of tooth marks on both sides were still visible and would need work. I took photos of the pipe once I received it.
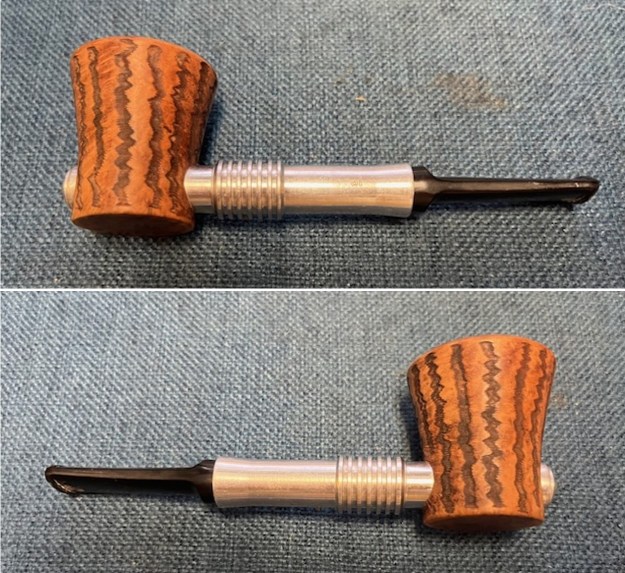
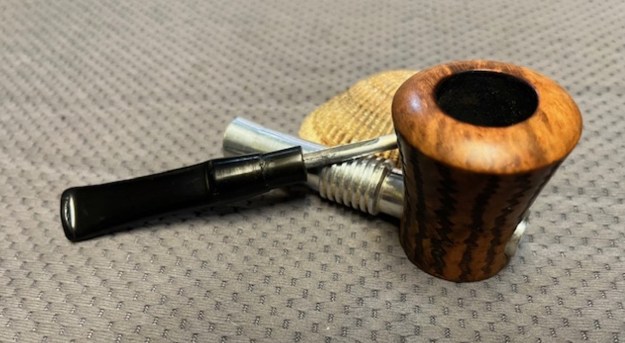
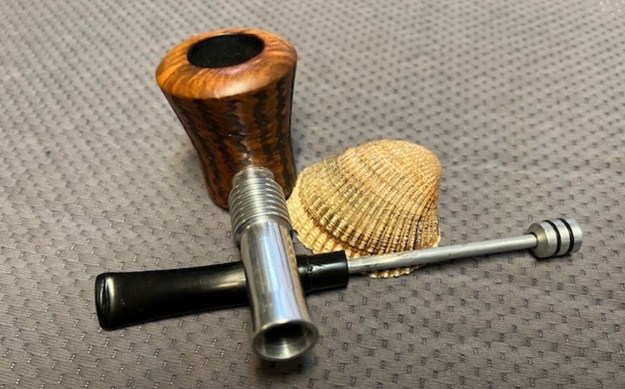
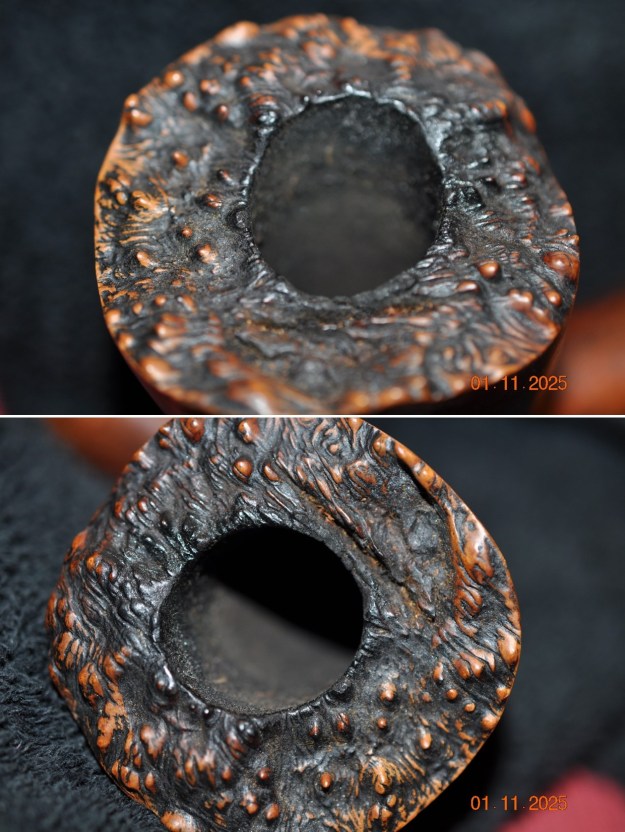
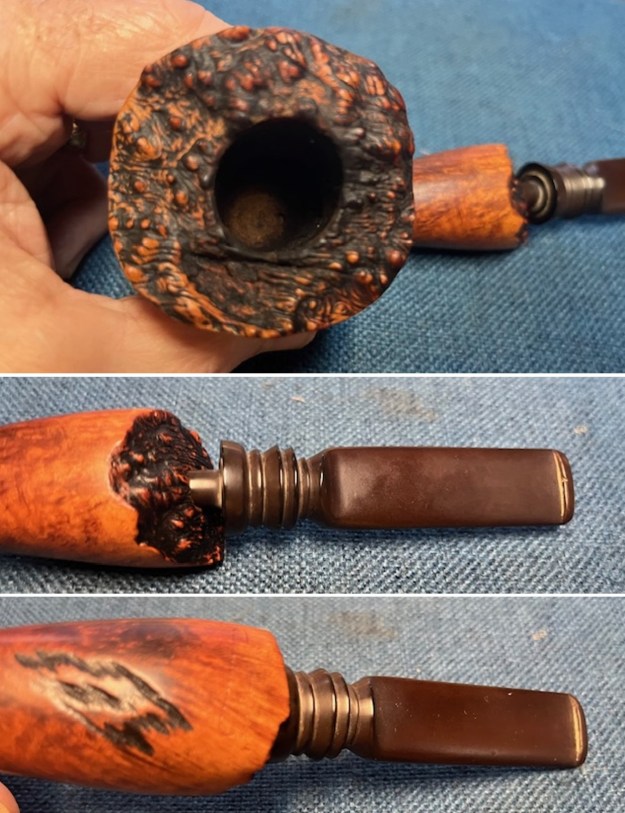
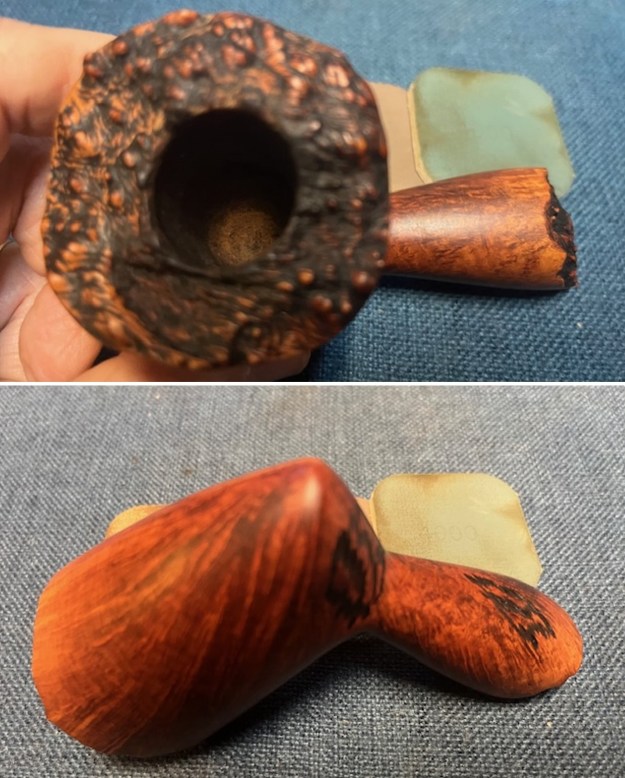
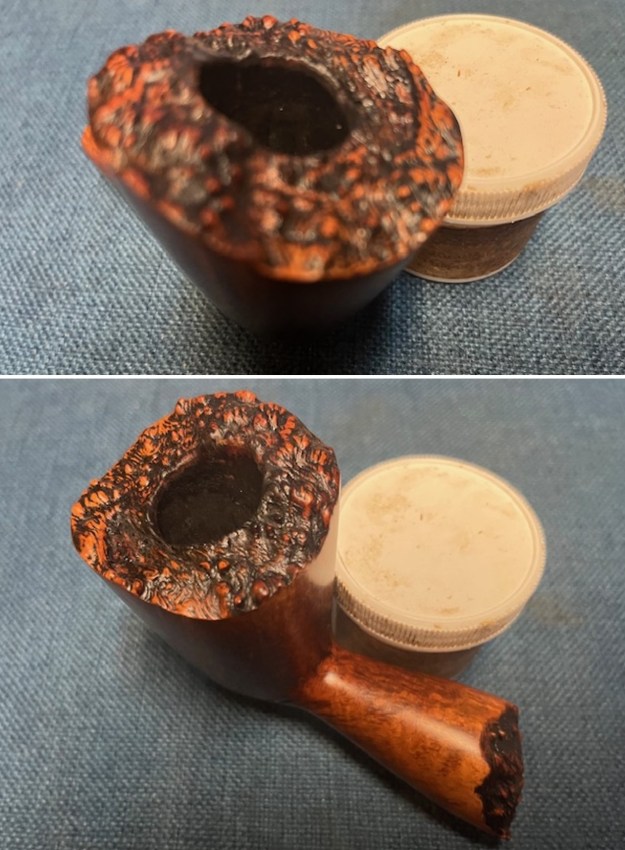
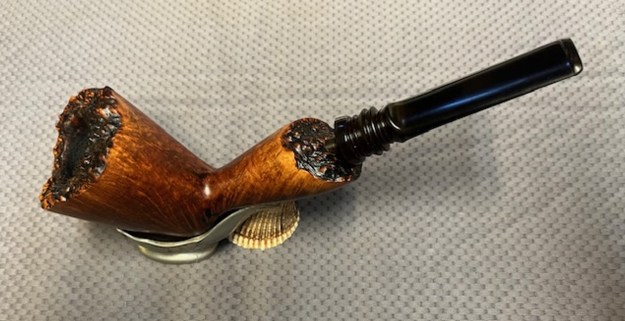
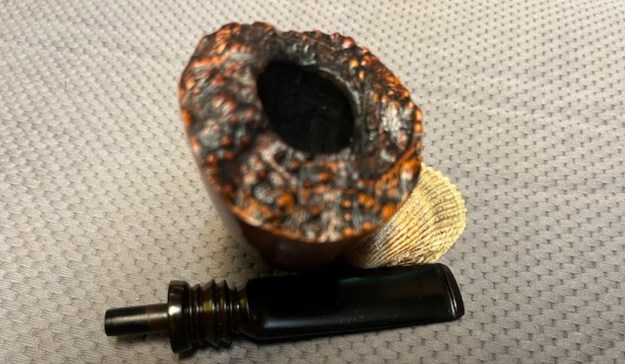
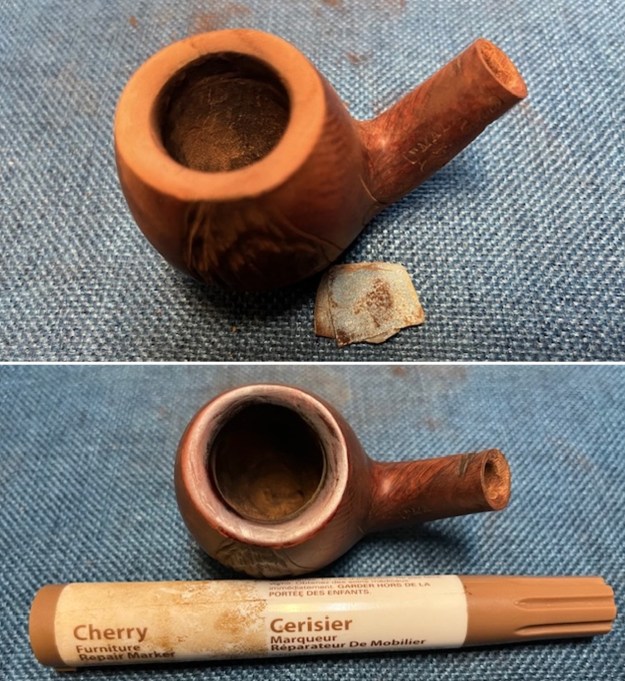
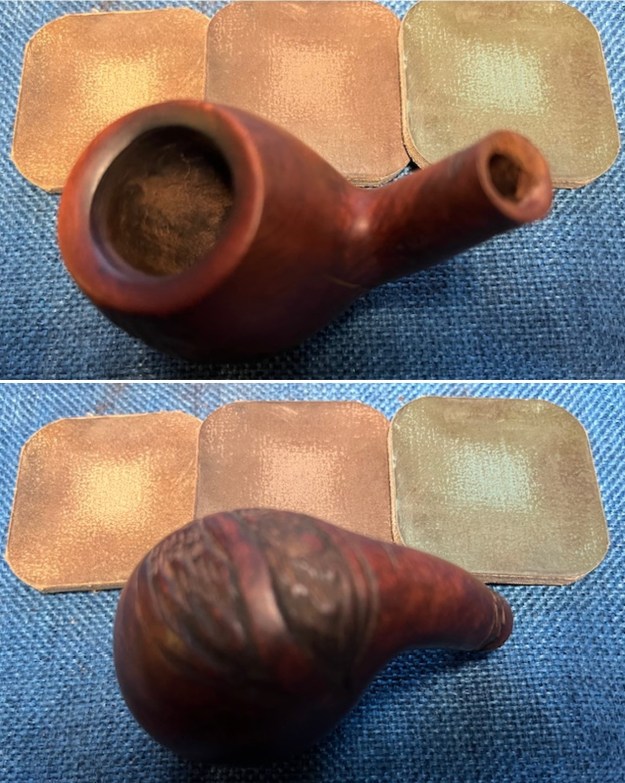
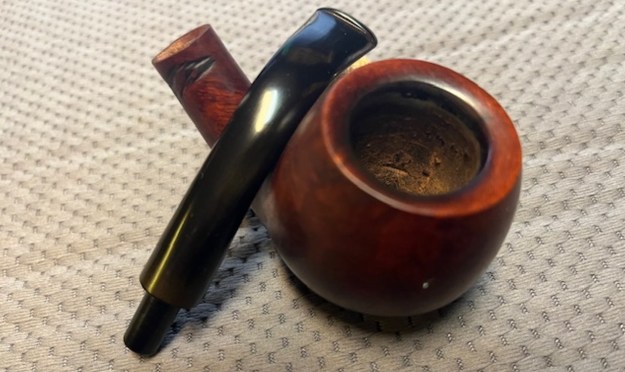
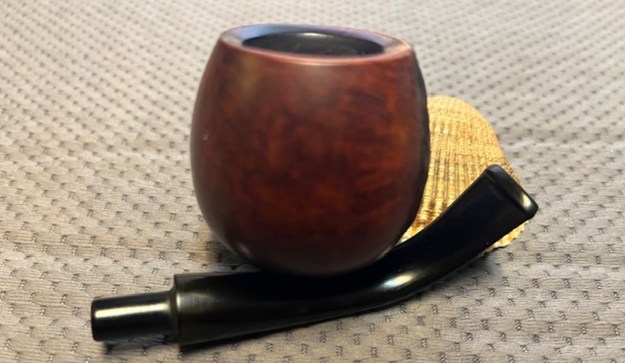
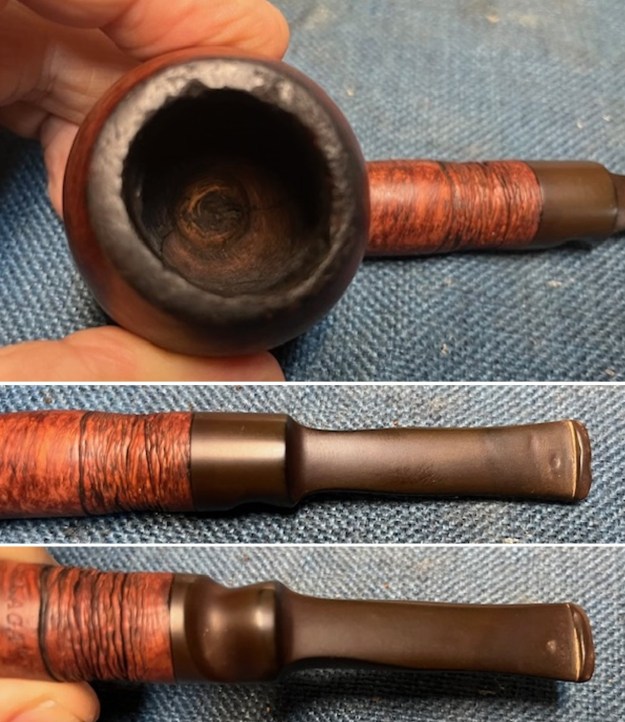
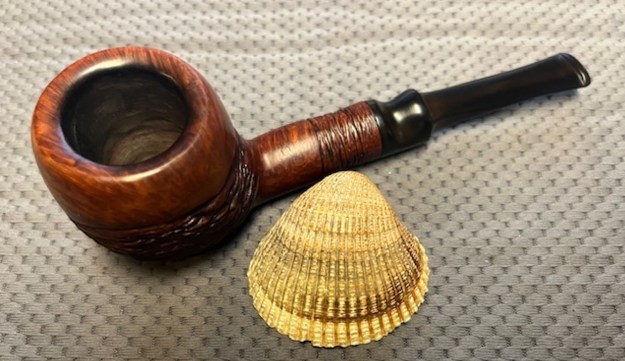
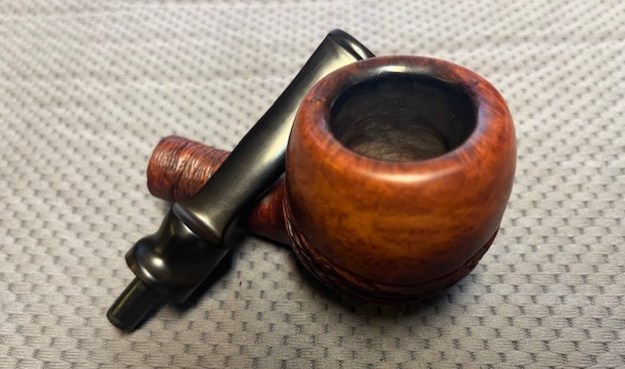
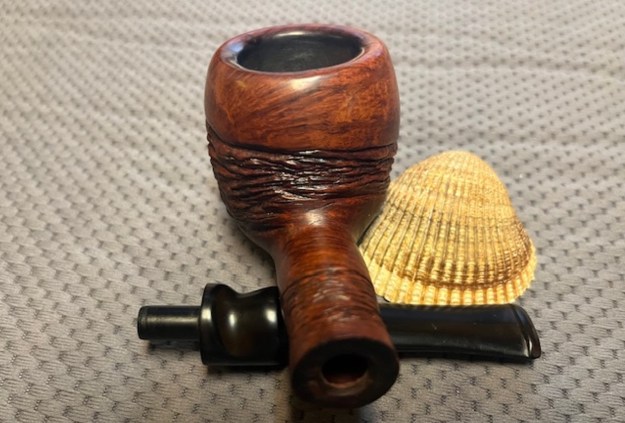
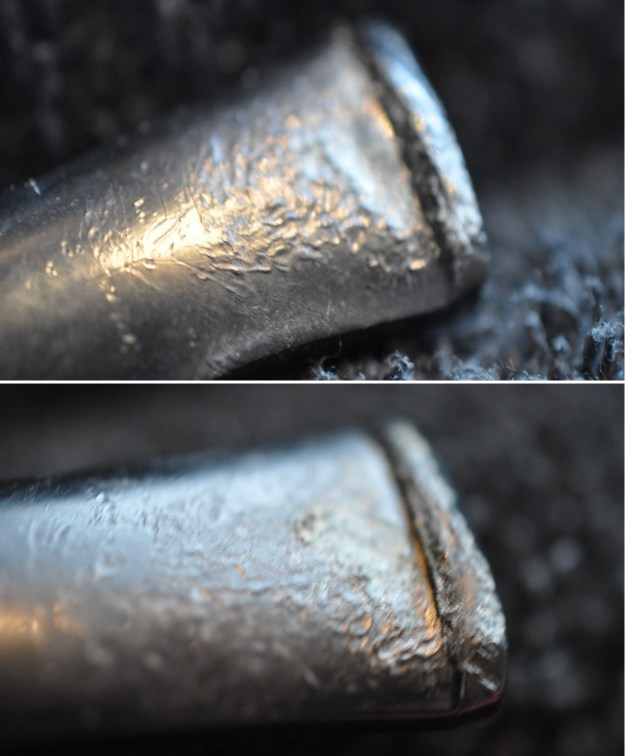
 I took a photo of the rim top and the stem to show their condition. Jeff was able to clean up the cake and the lava overflow that was shown in the rim and bowl photos above. The rim top and edges looked very good. The stem looked better, though there were many tooth marks and much chatter on both sides ahead of the button.
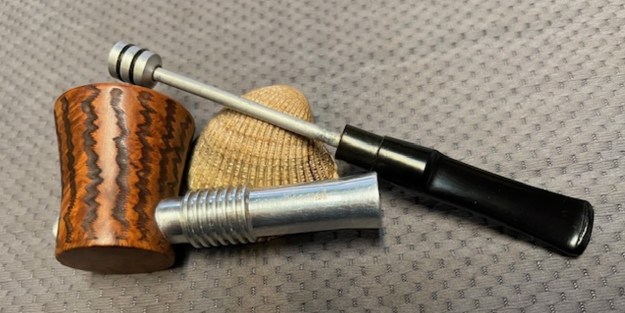
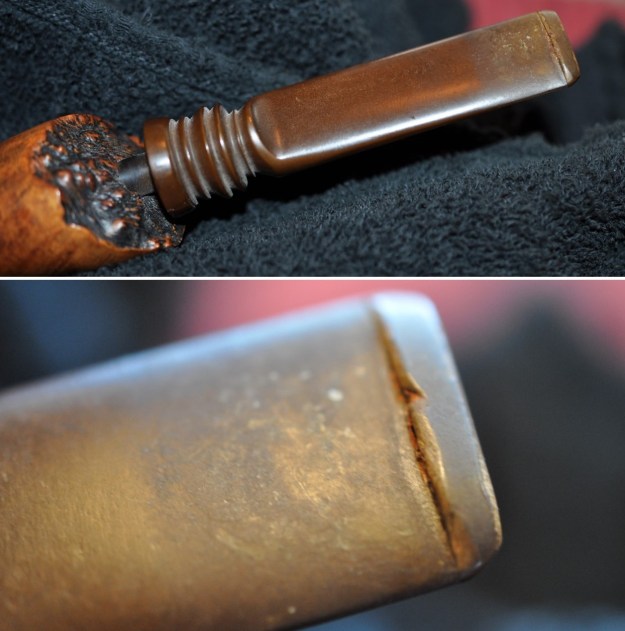
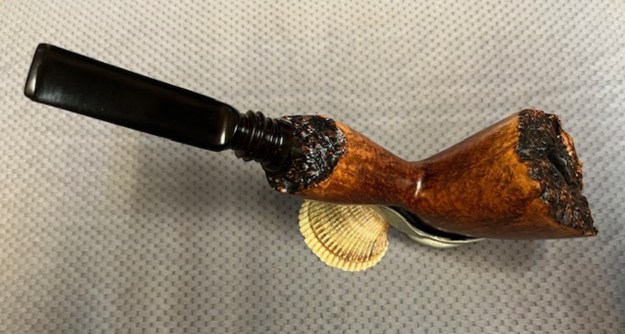
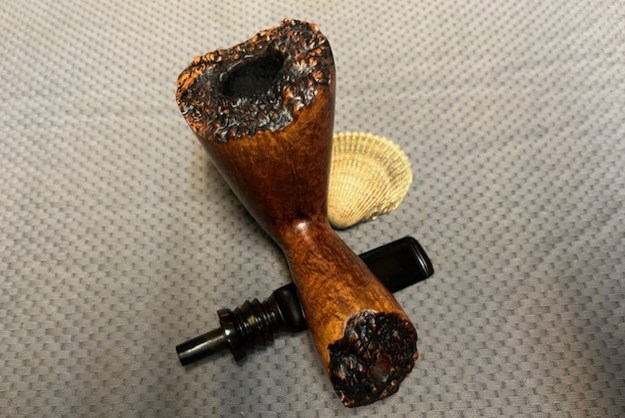
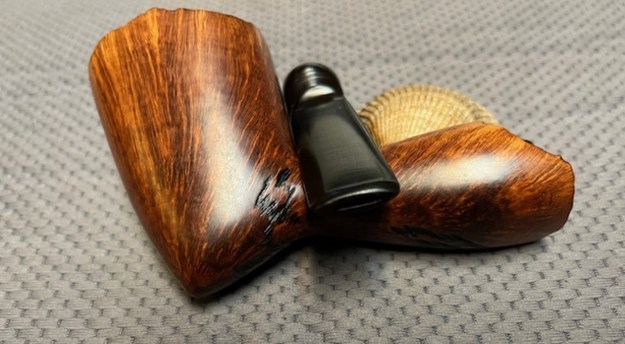
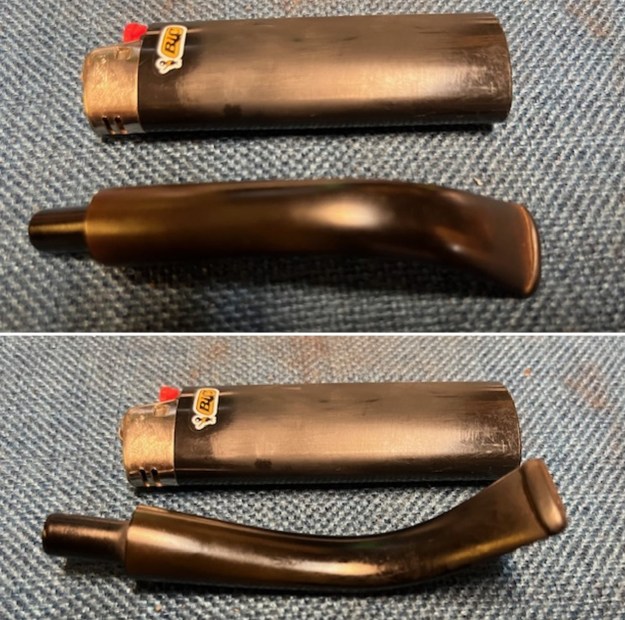
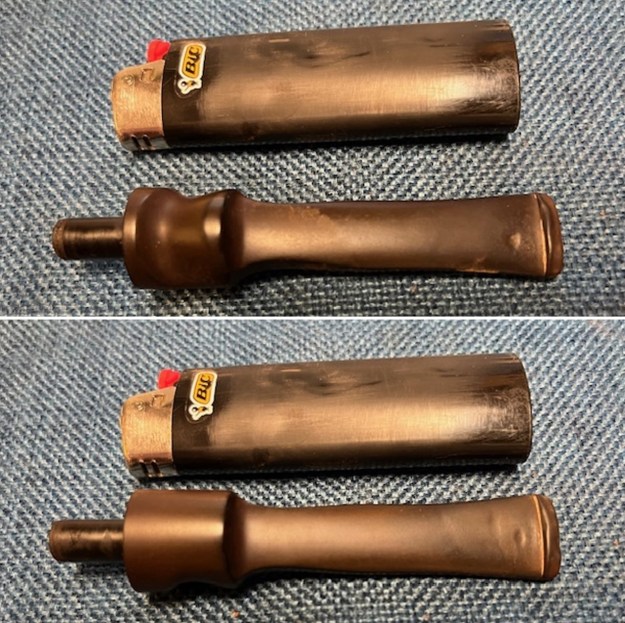
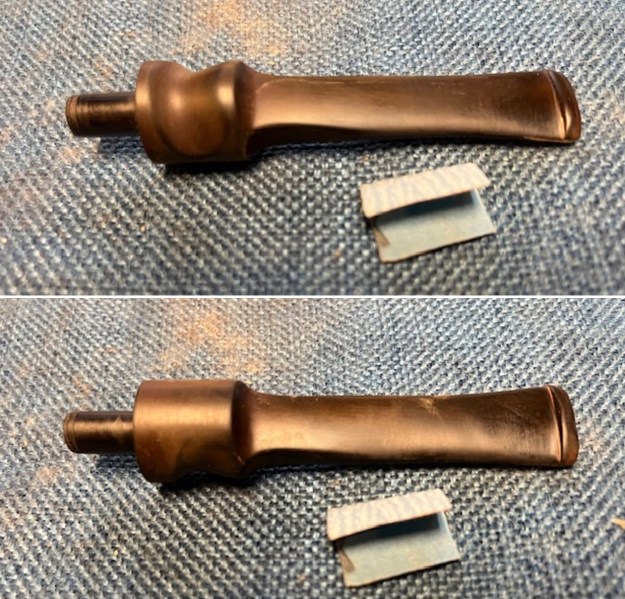
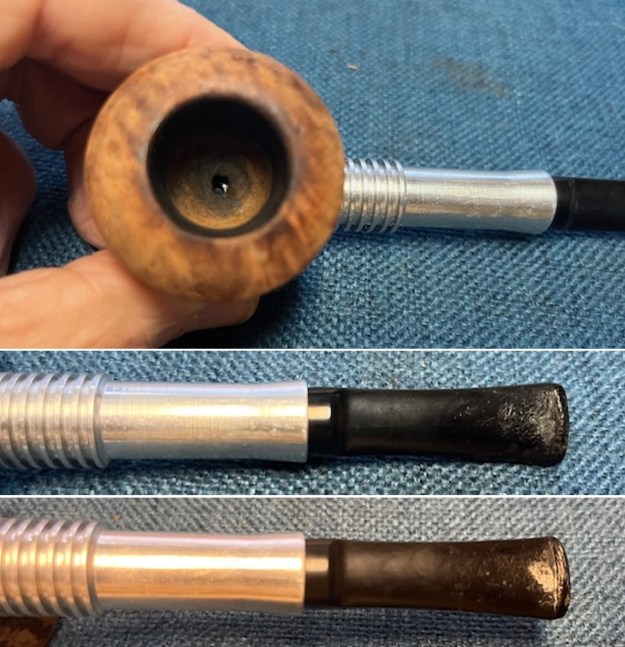 I removed the stem and plunger and took photos of it from various angles. It is truly unique with the rubber o-rings on the end of the plunger. It is very clean now. The barrel has some darkening and wear on the inside but is clean.
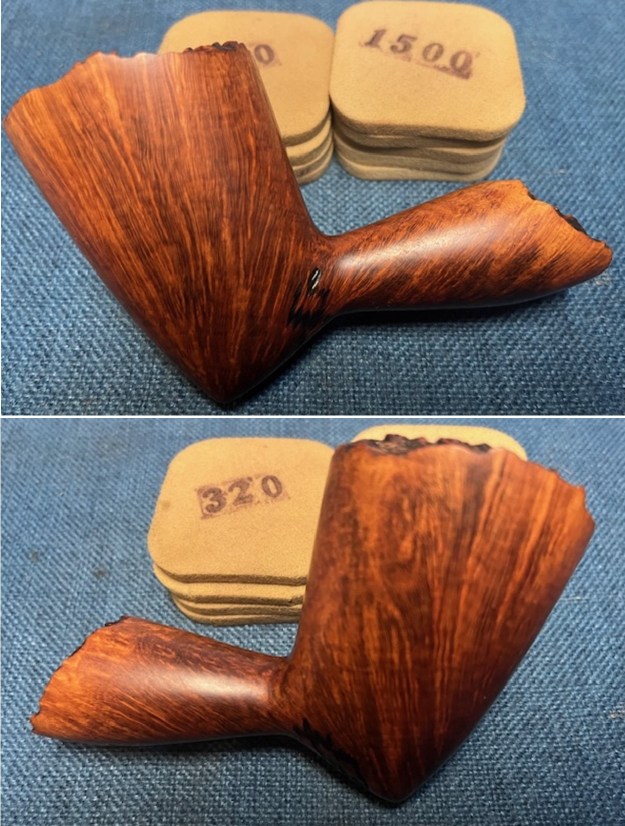
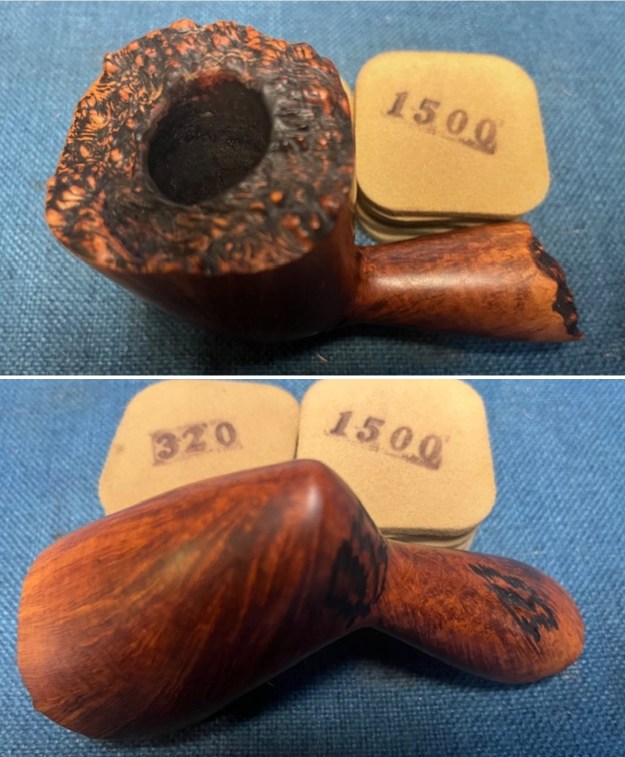
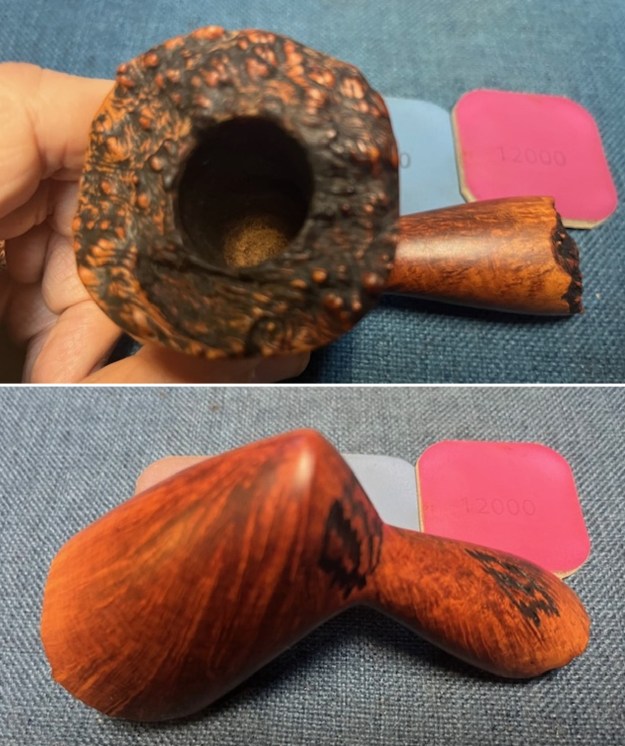
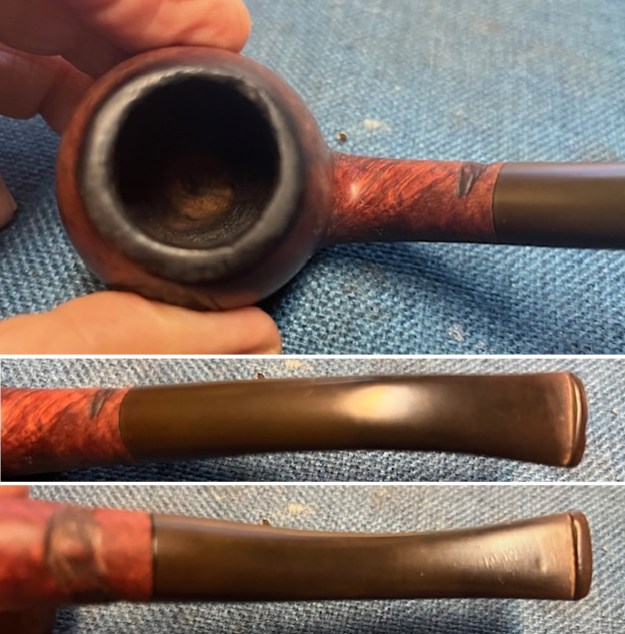
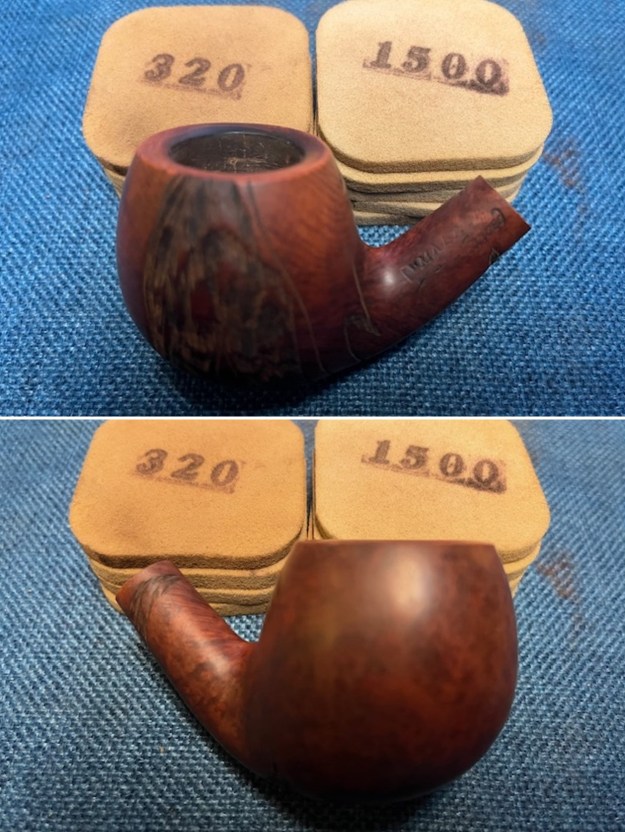
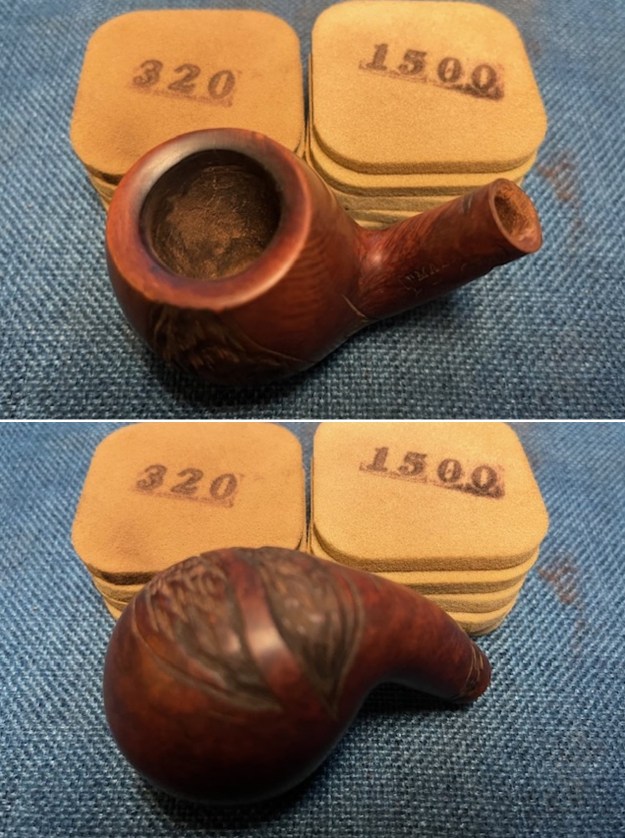
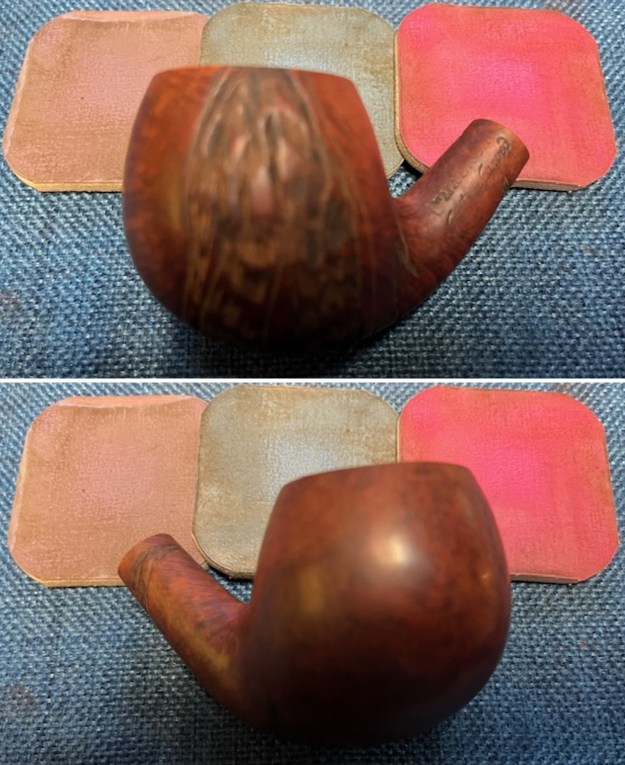
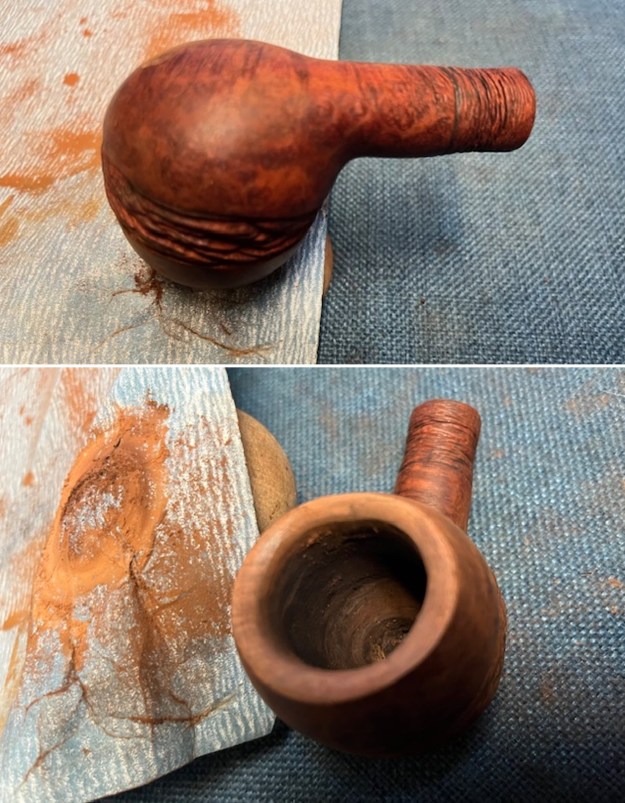
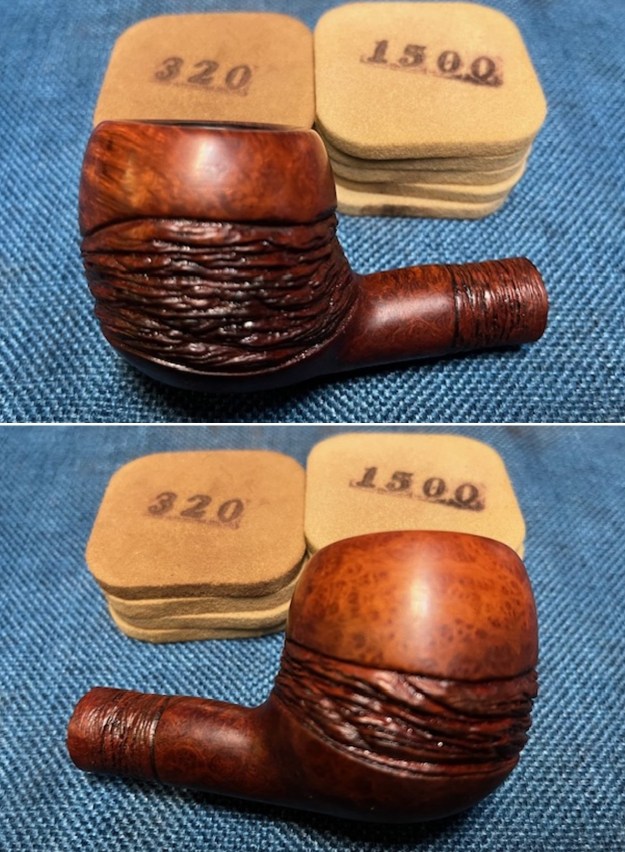
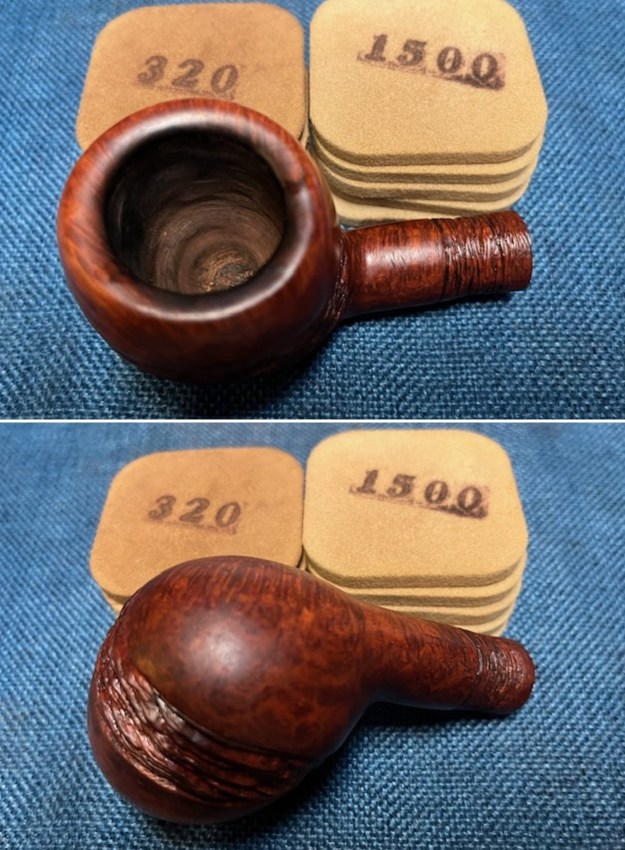
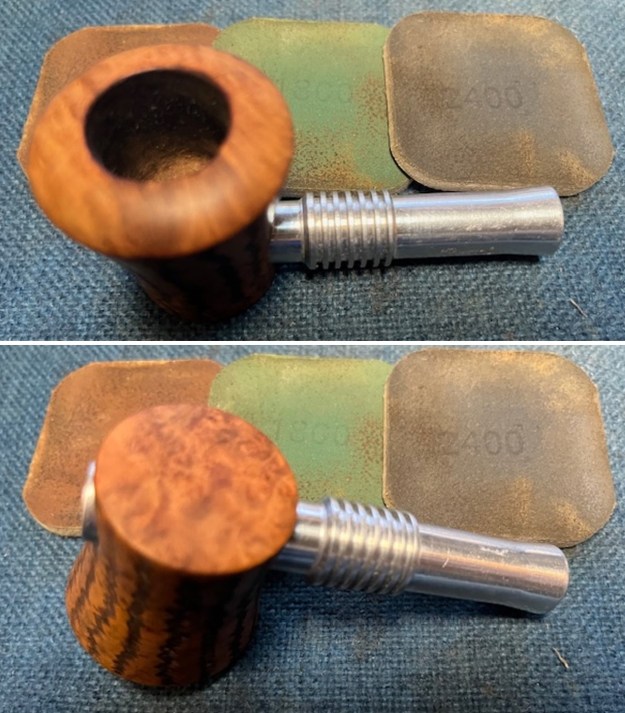
 I started my work on the pipe by addressing the bowl. I sanded the rim top and inner edge with 320-3500 sanding pads. I wiped the briar down after each sanding pad. By the end it looked very good and the rim top really had some great grain.
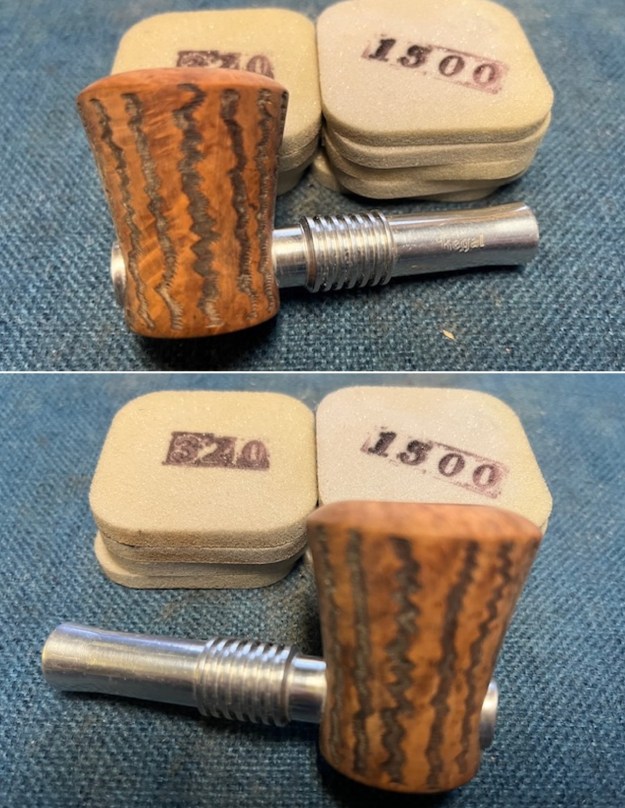
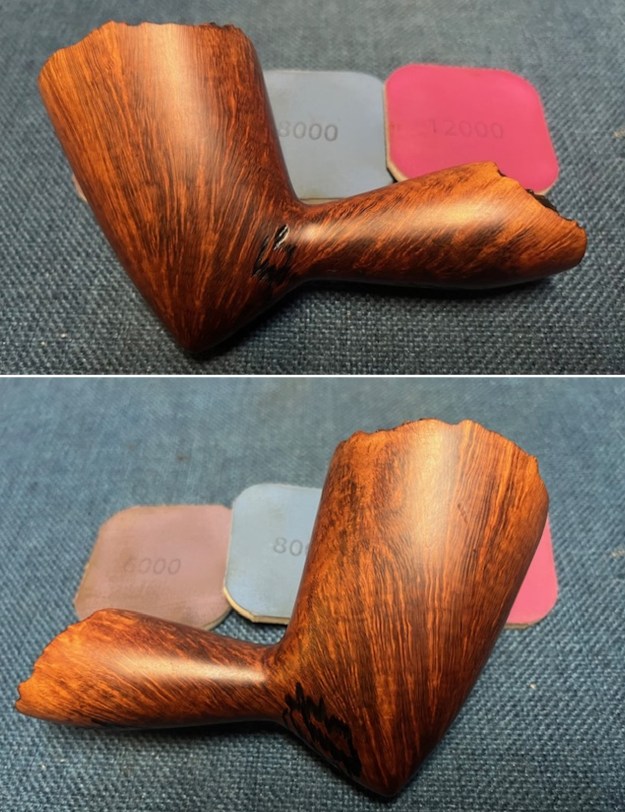
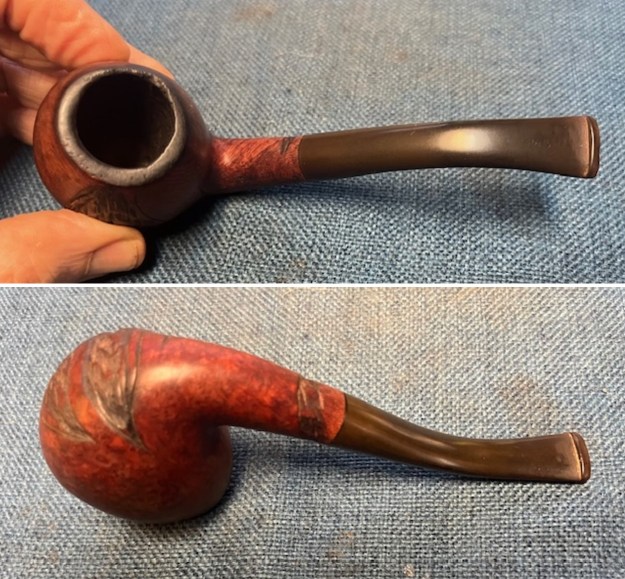
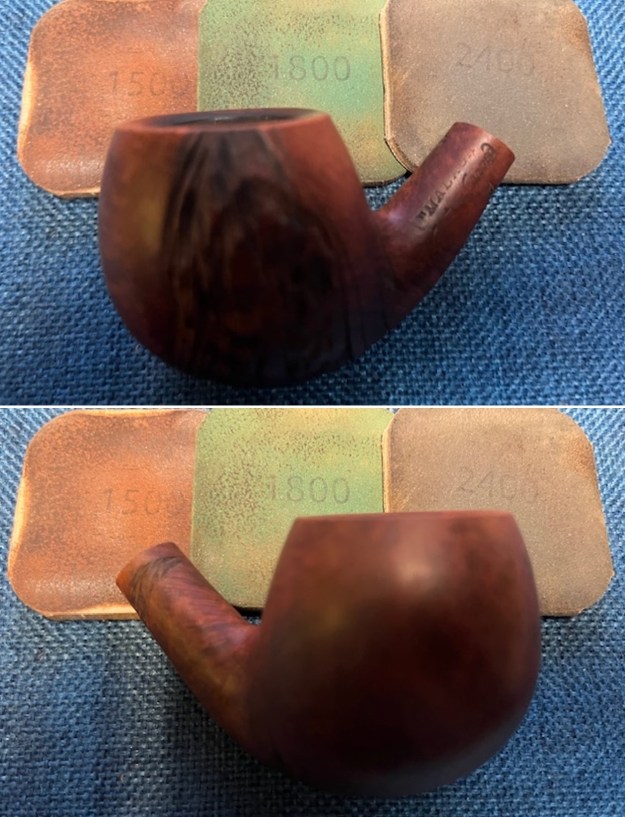
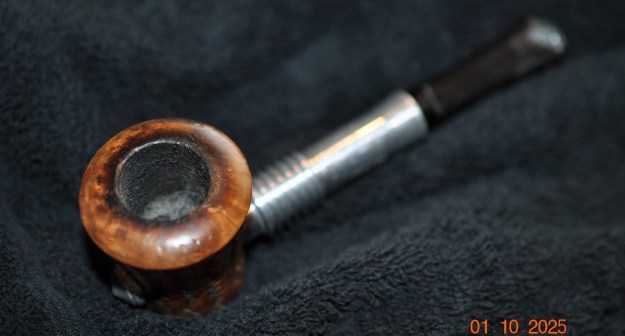
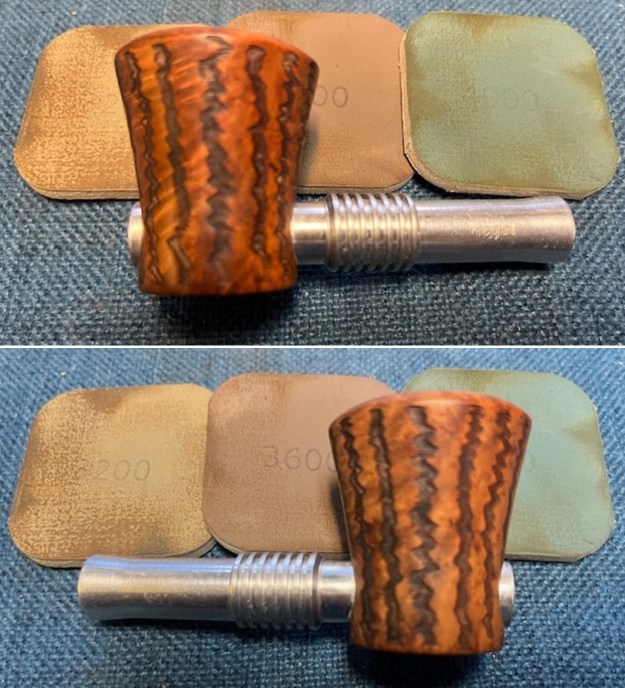
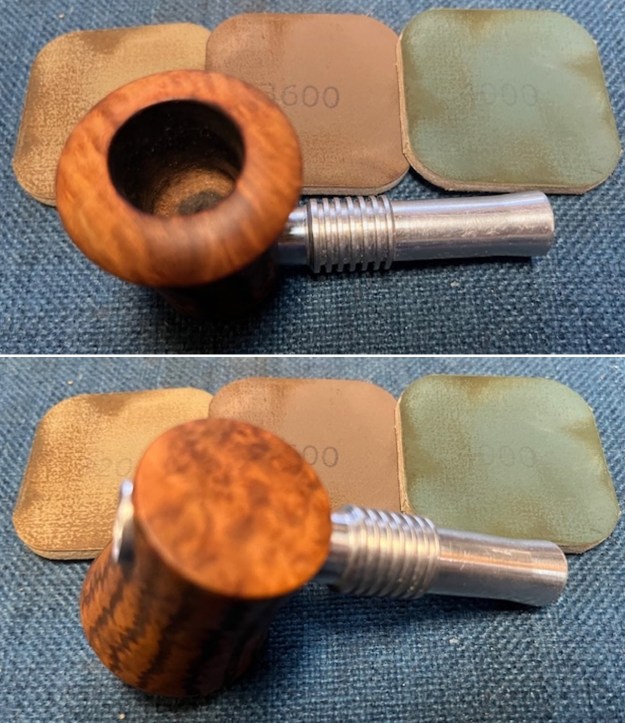
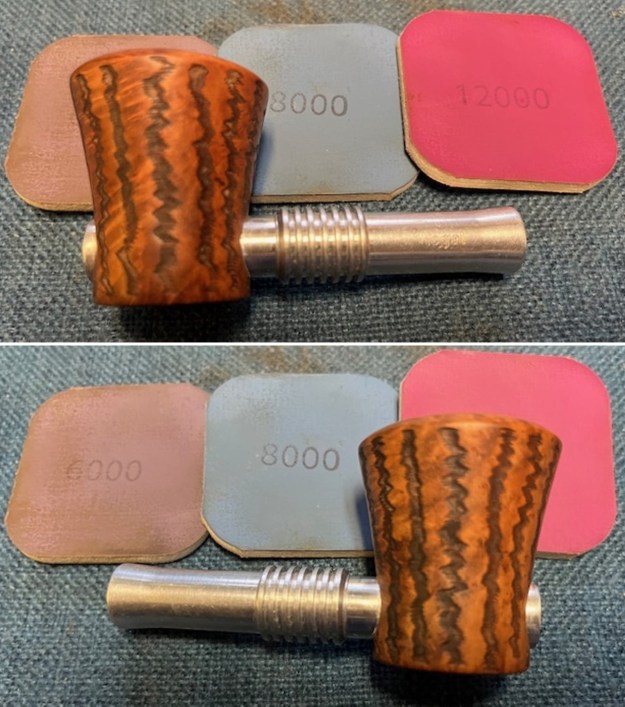
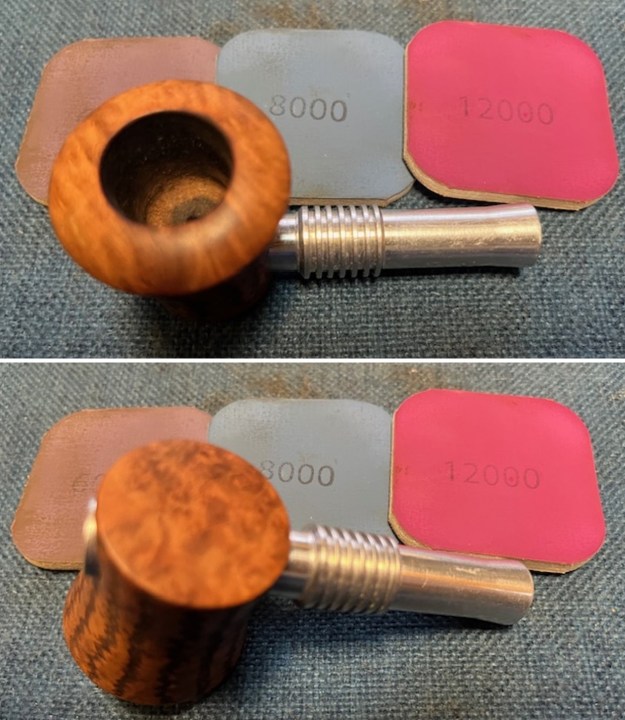
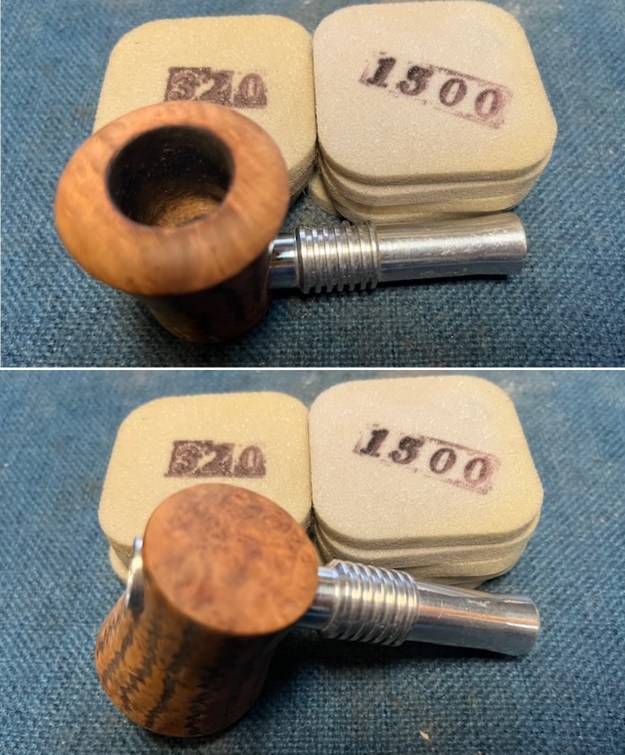 I polished the bowl sides and the smooth rim top with micromesh sanding pads. I dry sanded it with 1500-12000 grit micromesh pads. I wiped it down after each pad. It really began to be beautiful.
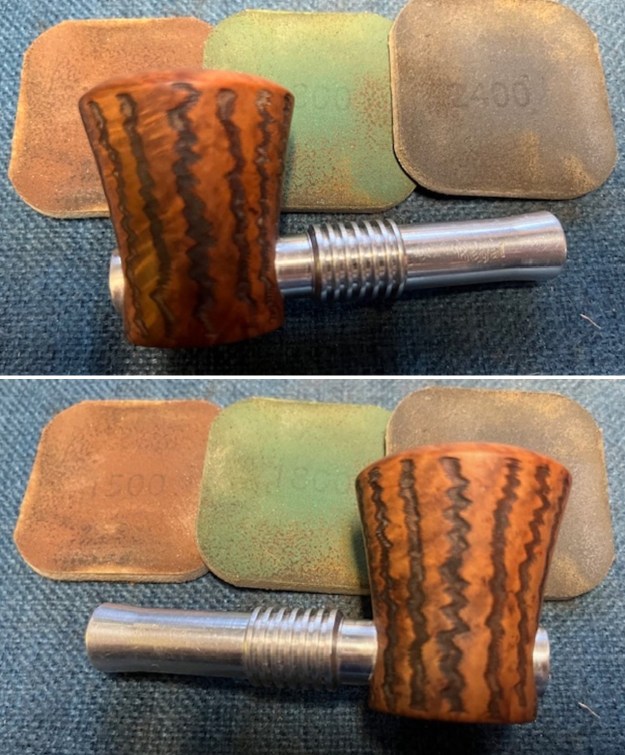
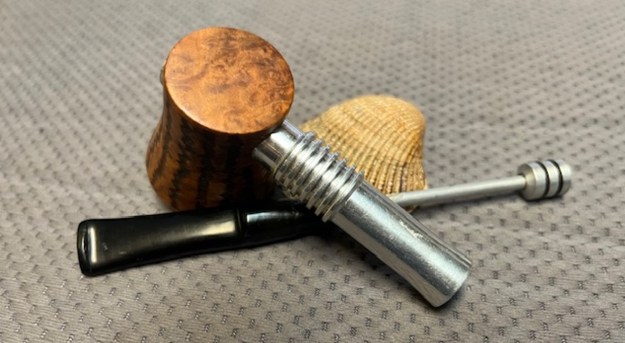
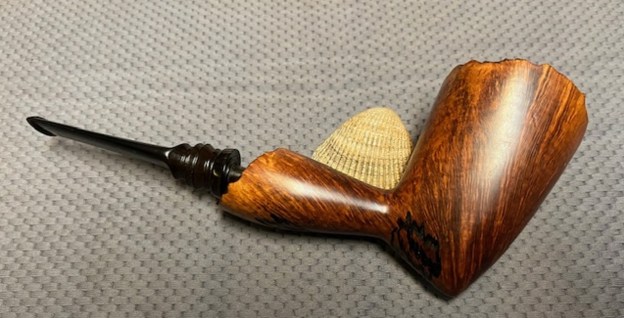
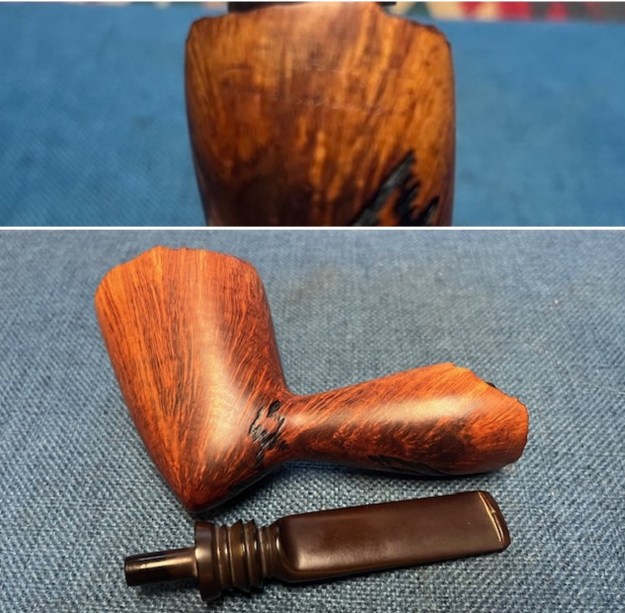
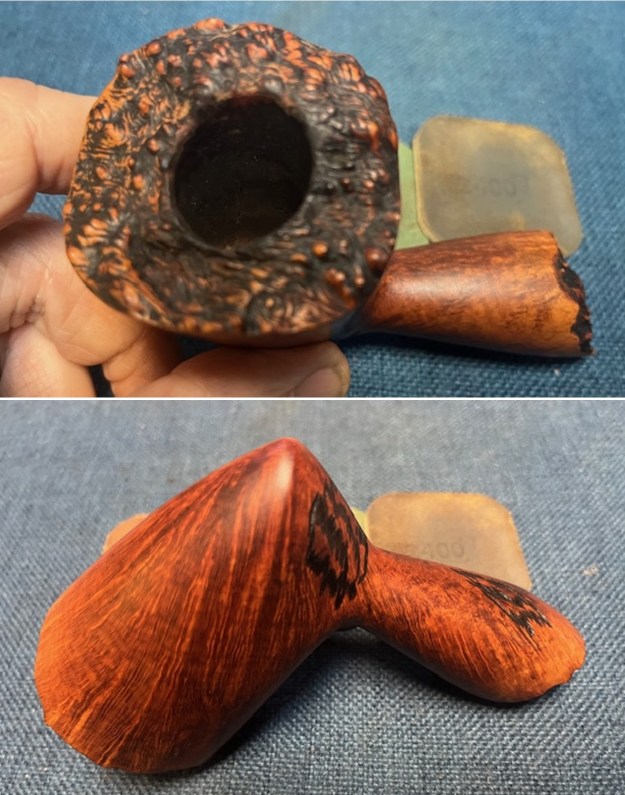
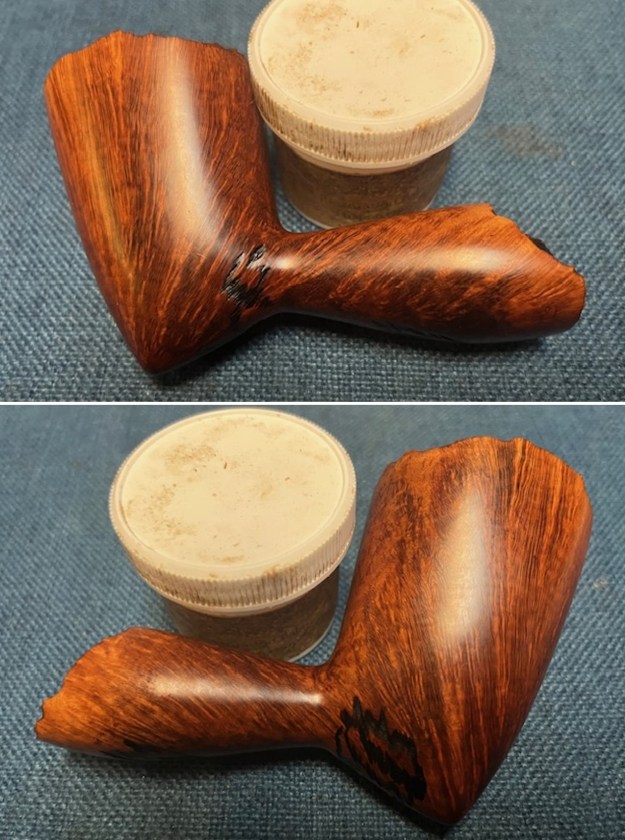
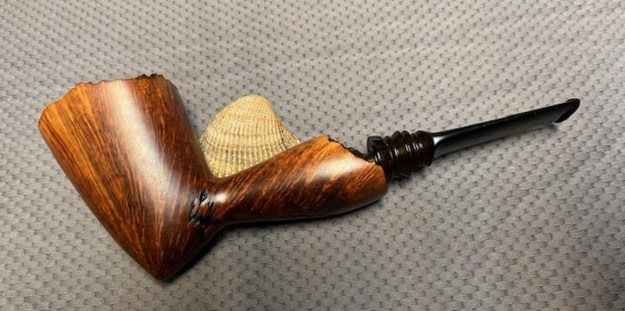
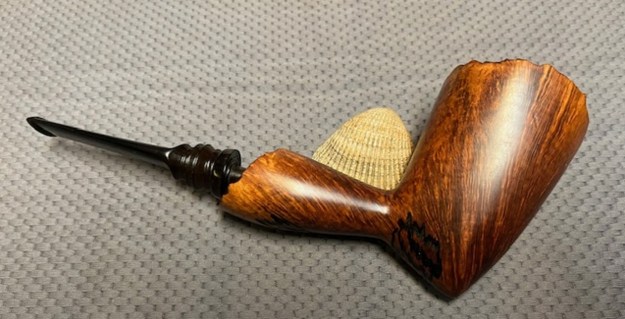
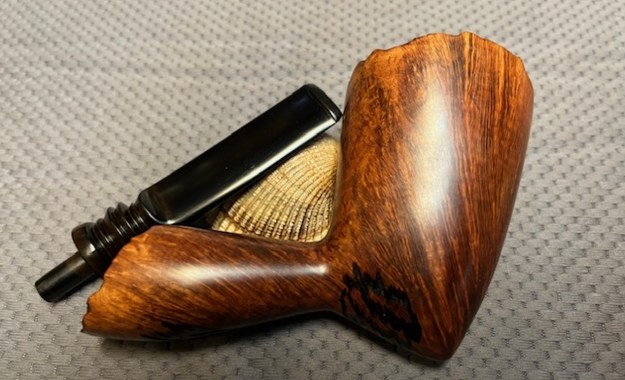
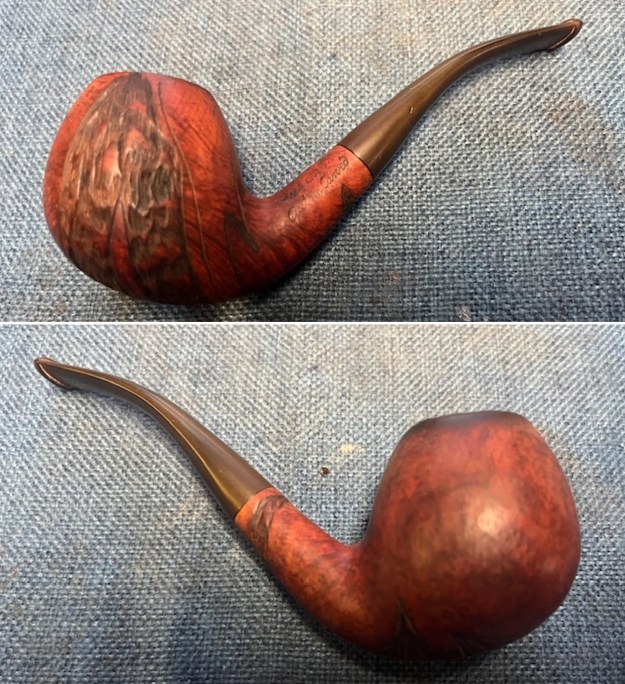
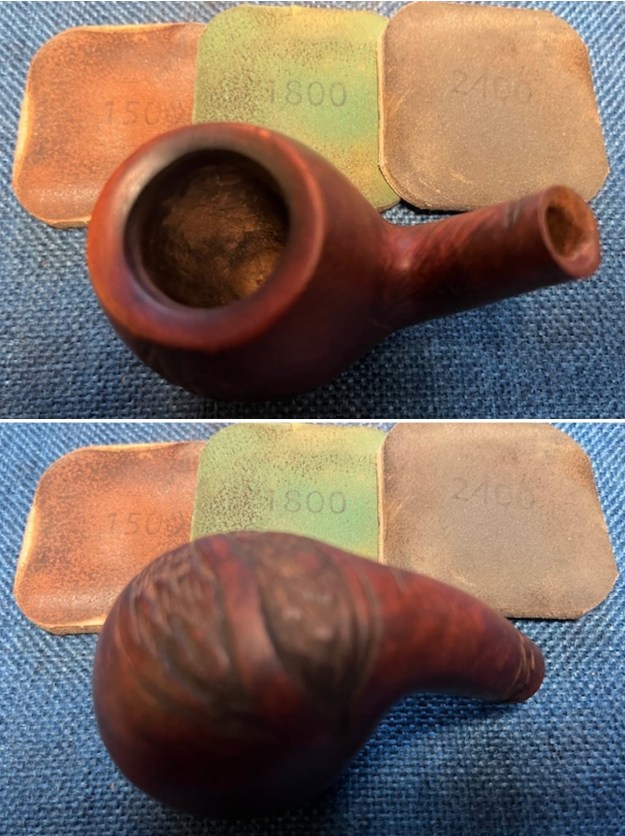
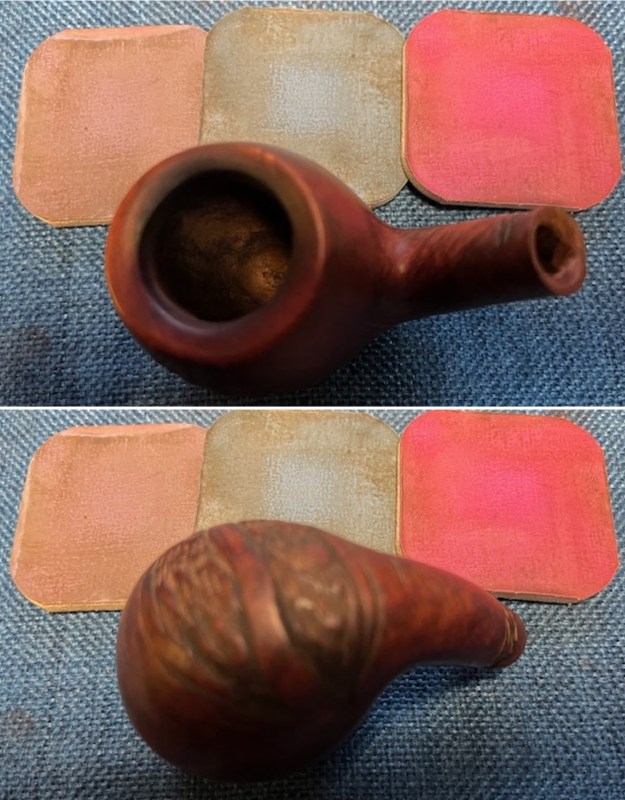
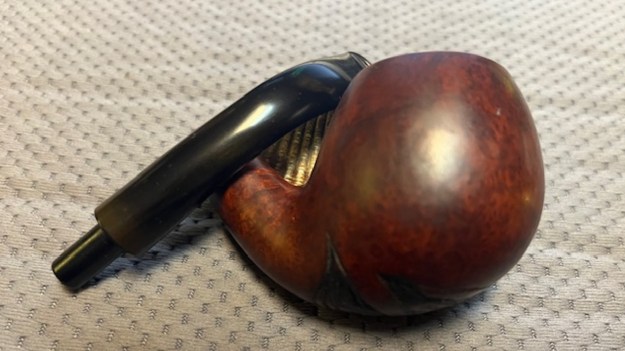
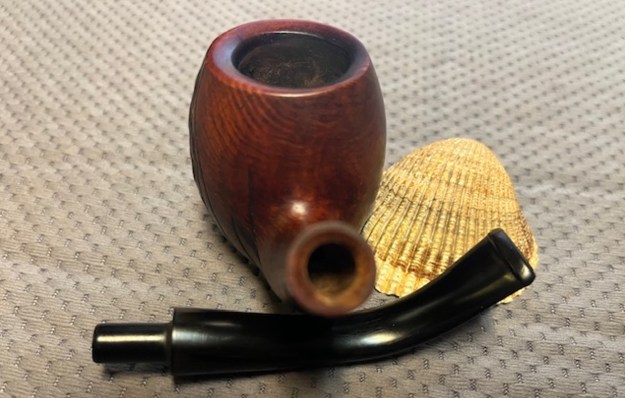
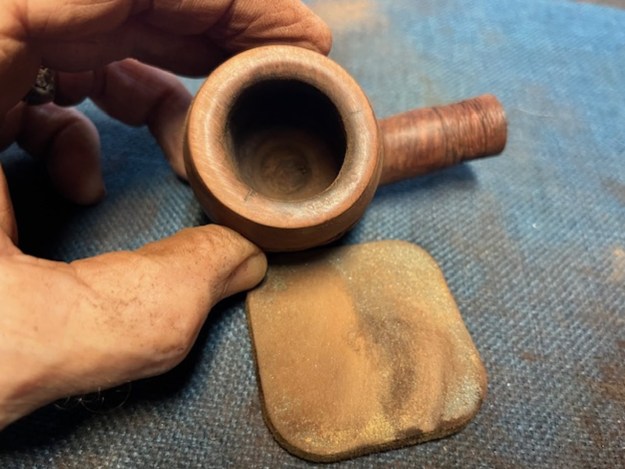
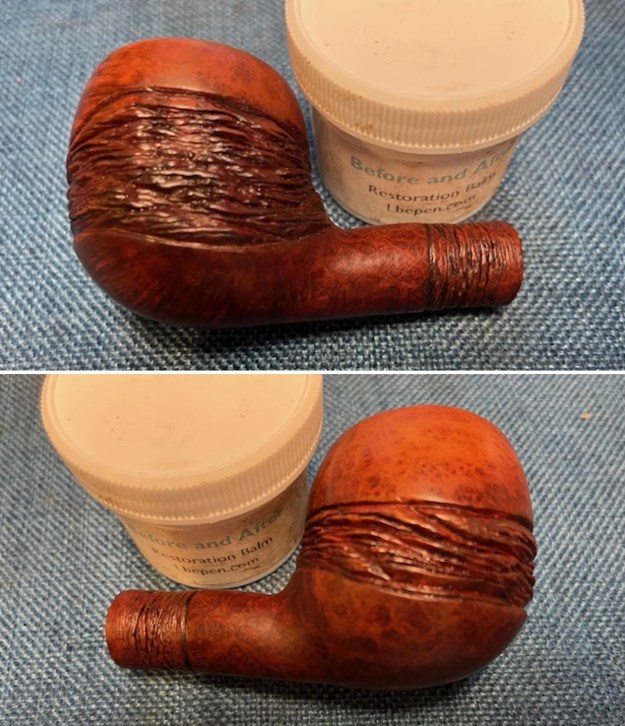
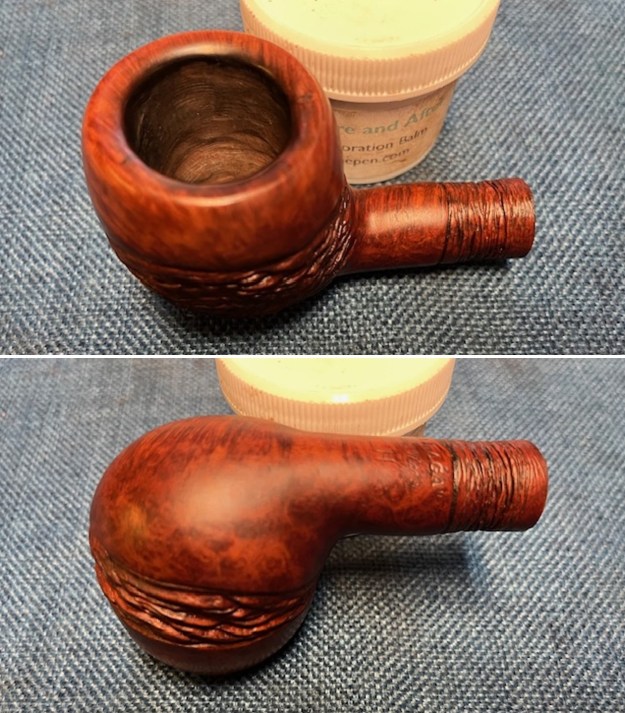
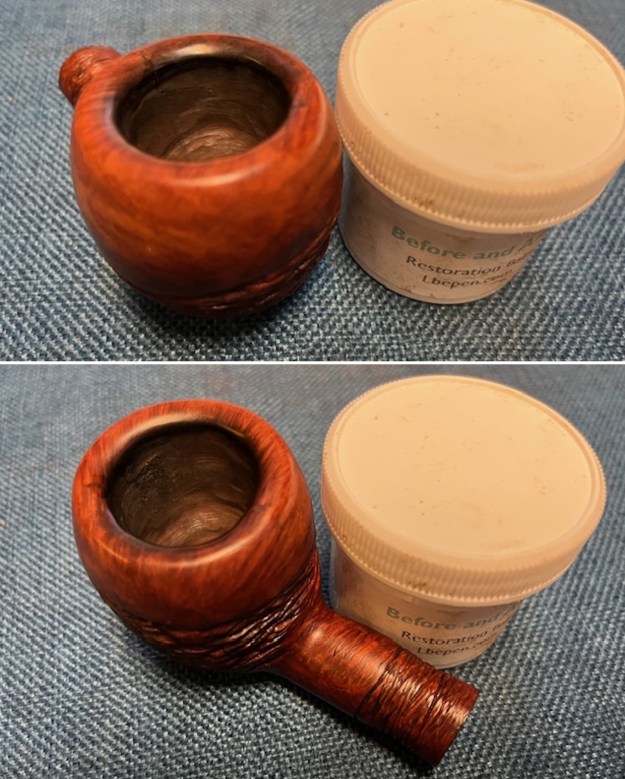
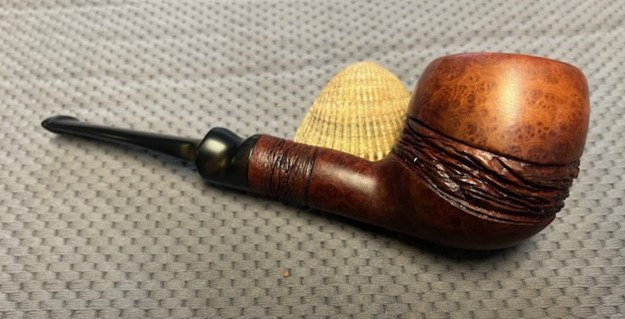
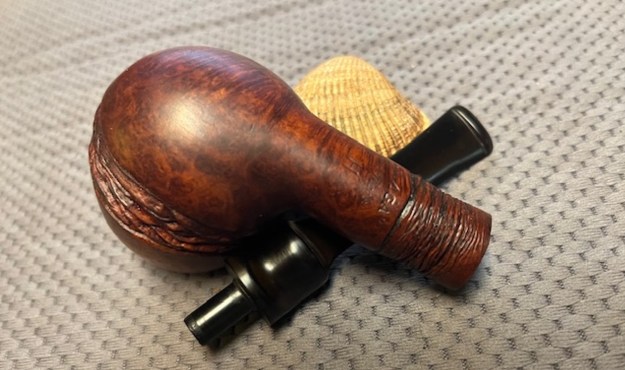
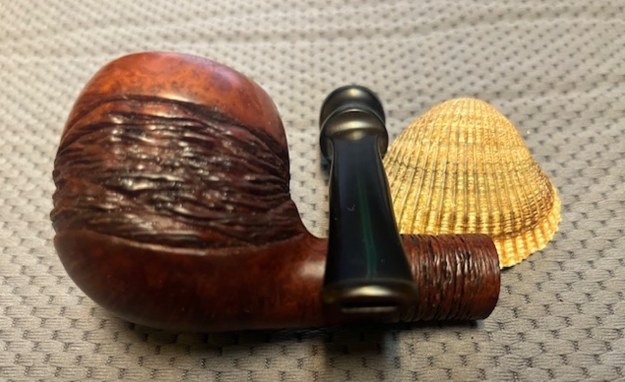
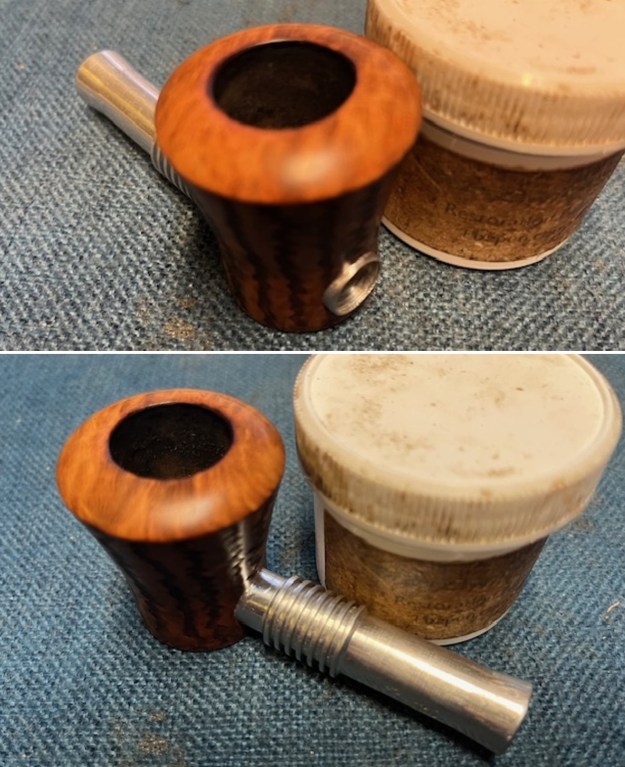
 I rubbed the bowl and shank down with Before & After Restoration Balm to deep clean the finish on the bowl and shank. The product works to clean, enliven and protect the briar. I worked it in with my fingers to get it into the briar. I worked it into the plateau on the rim top and shank end with a shoe brush to get deep in the valleys. I let it sit for 10 minutes then I wiped it off and buffed it with a soft cloth. The briar really began to have a rich shine. I took some photos of the bowl at this point to mark the progress in the restoration. It is a beautiful bowl.
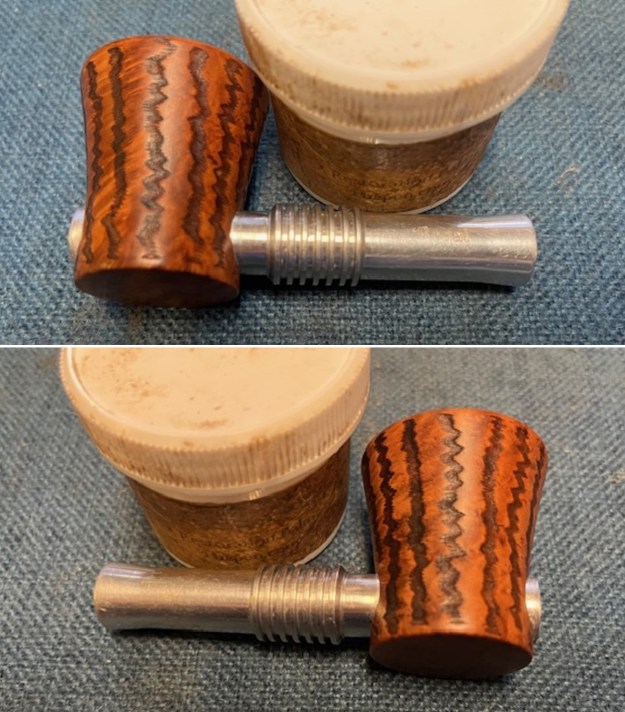

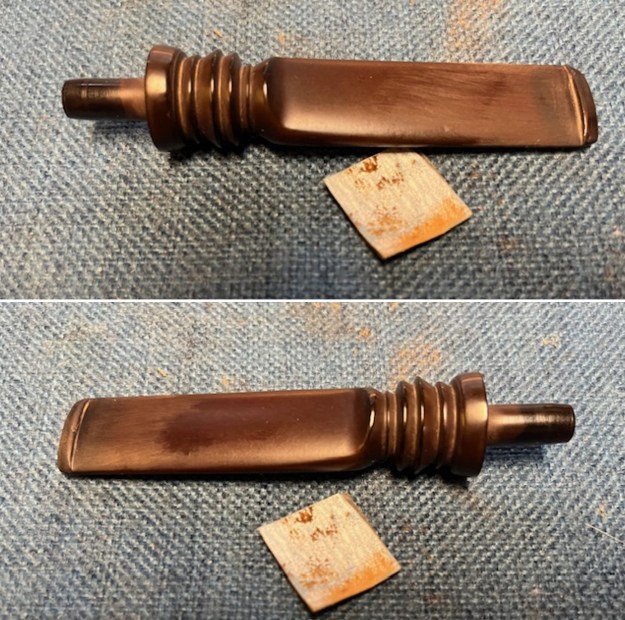
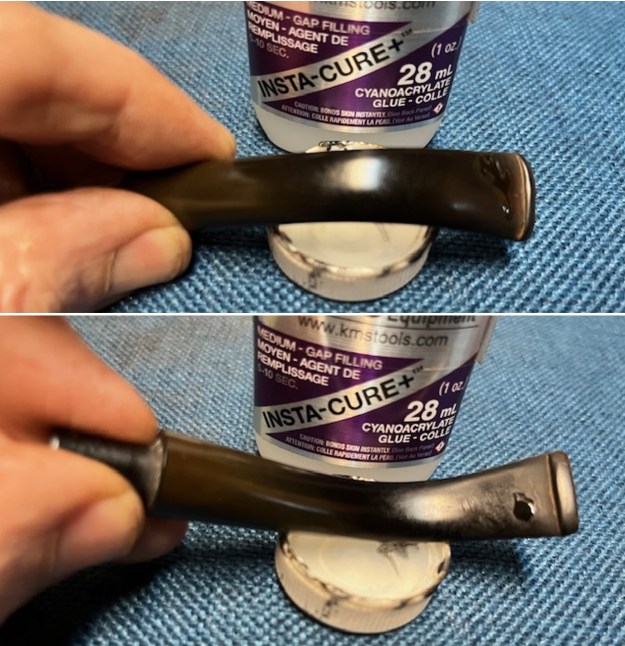
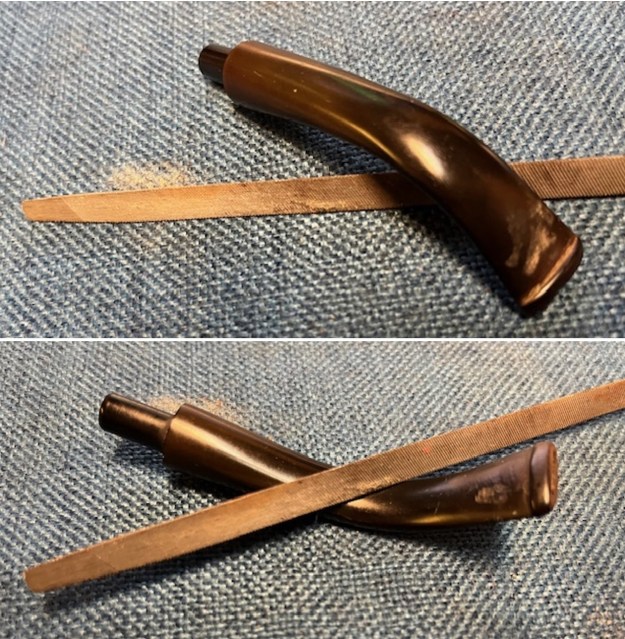
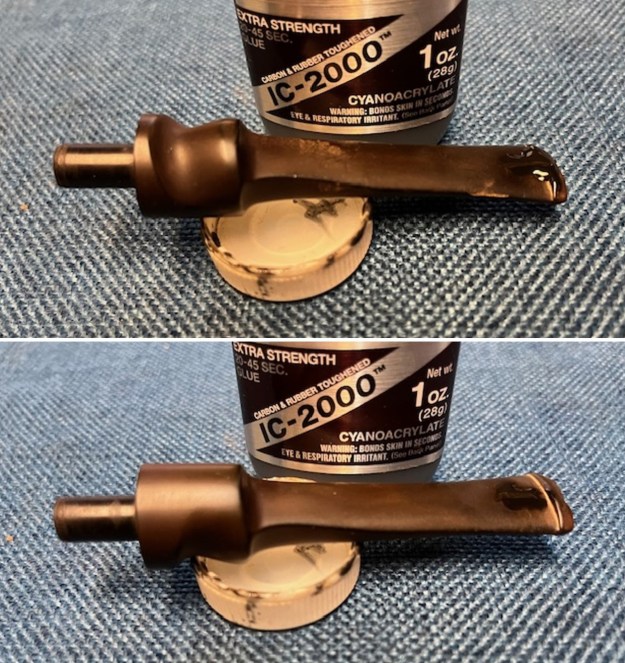
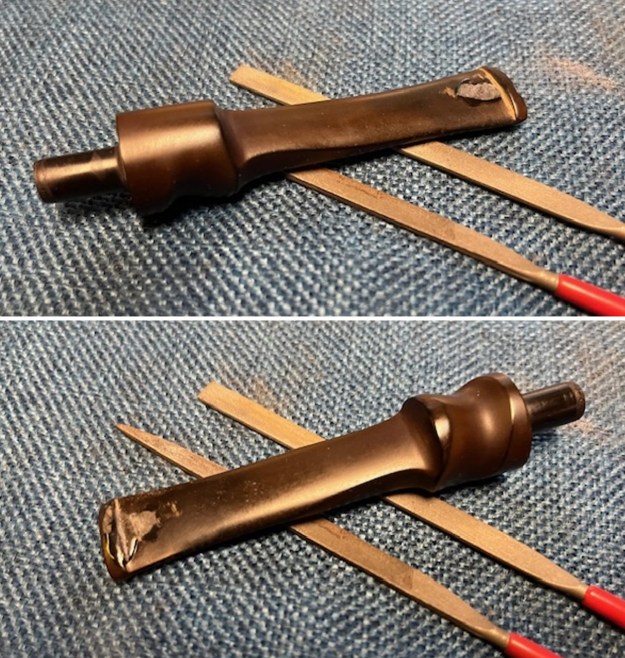
 I set the bowl aside and turned my attention to the stem. I sanded the stem surface with 220 grit sandpaper to blend them into the stem.
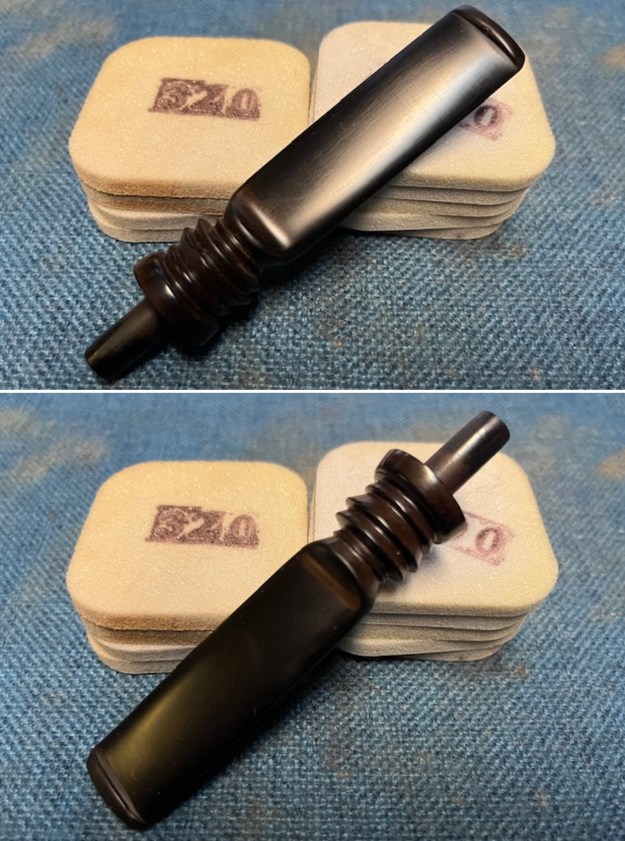
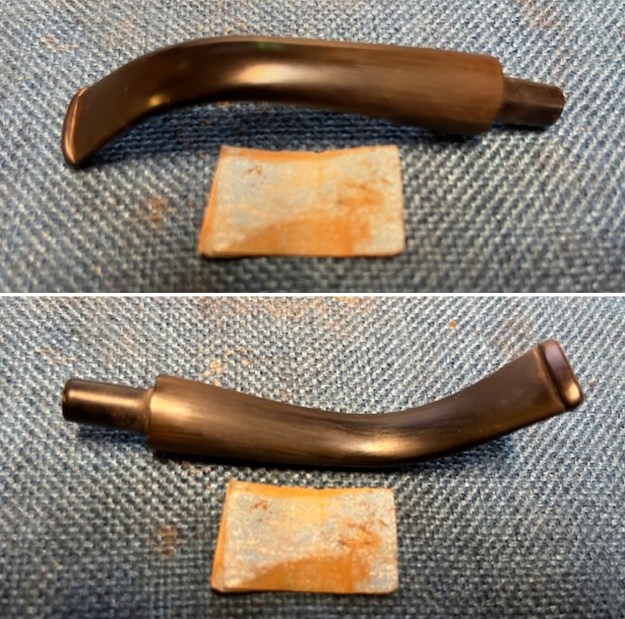
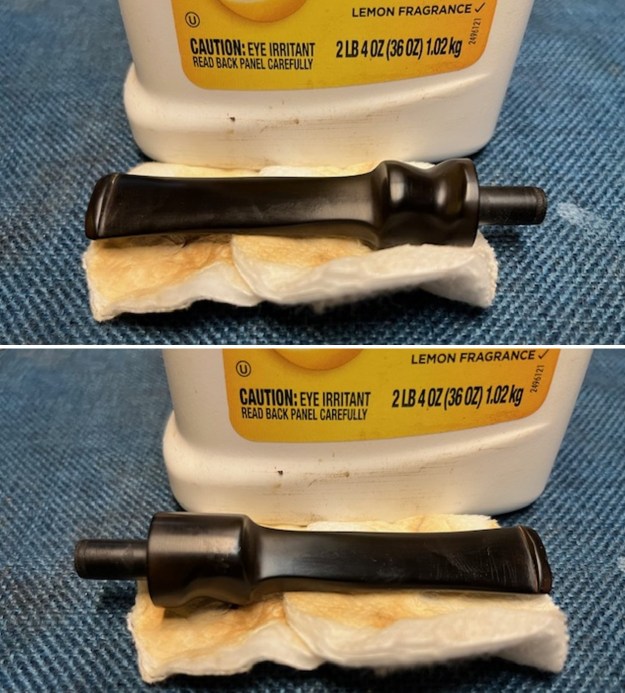
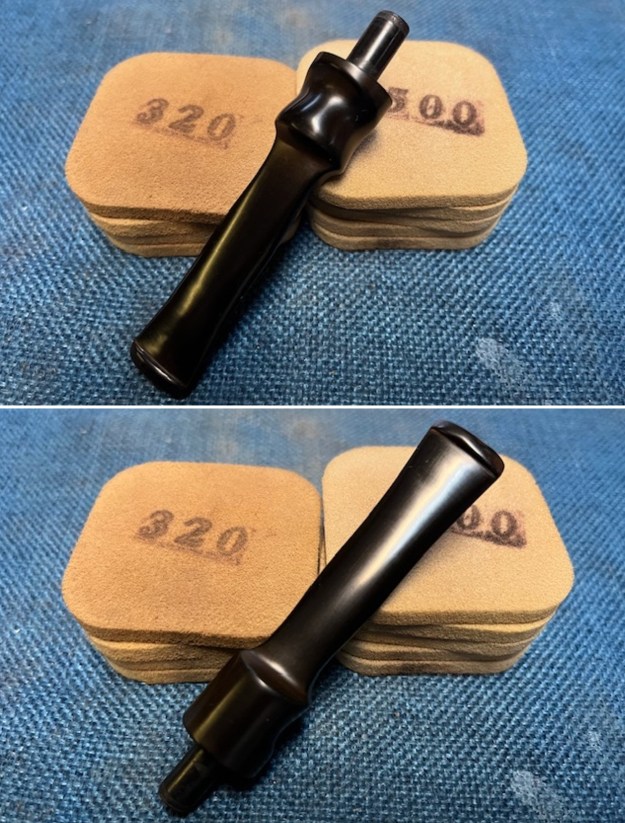
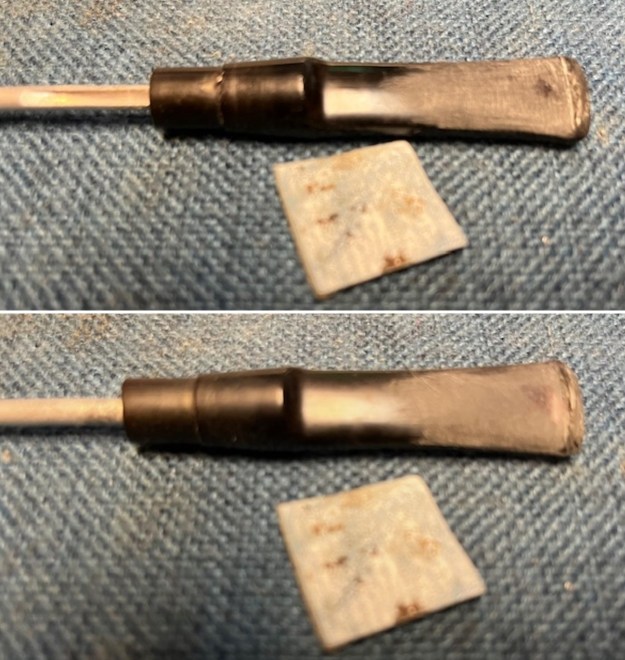 I sanded the stem with the 2 inch square 320-3500 grit sanding pads to remove the remnants of oxidation on the vulcanite. I wiped down the stem after each sanding pad with Obsidian Oil. I was able to remove the majority of the oxidation on both sides with the pads. The stem looked very good.
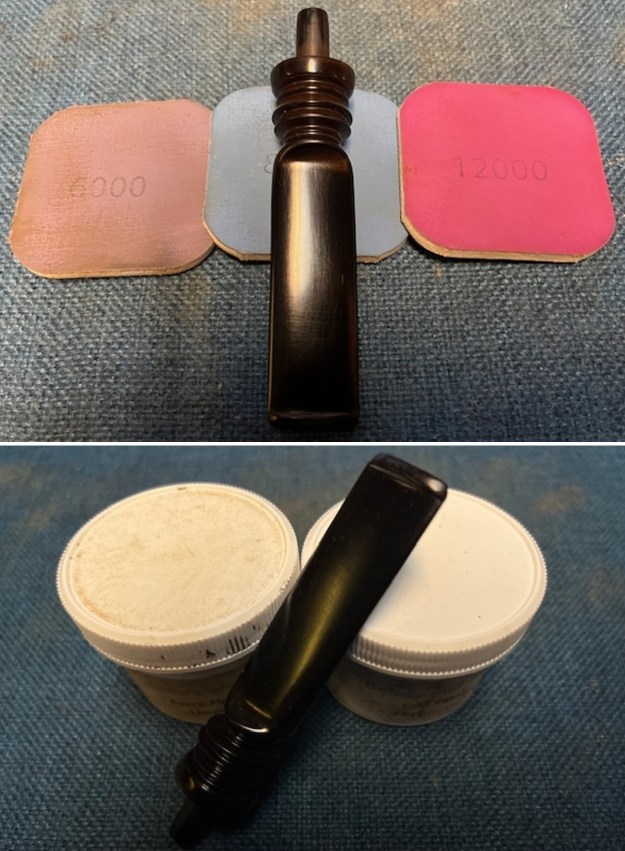
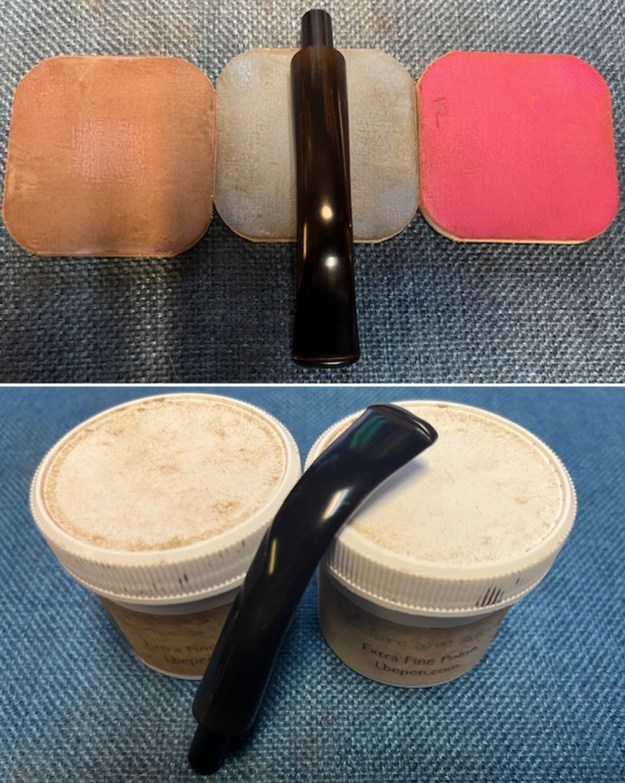
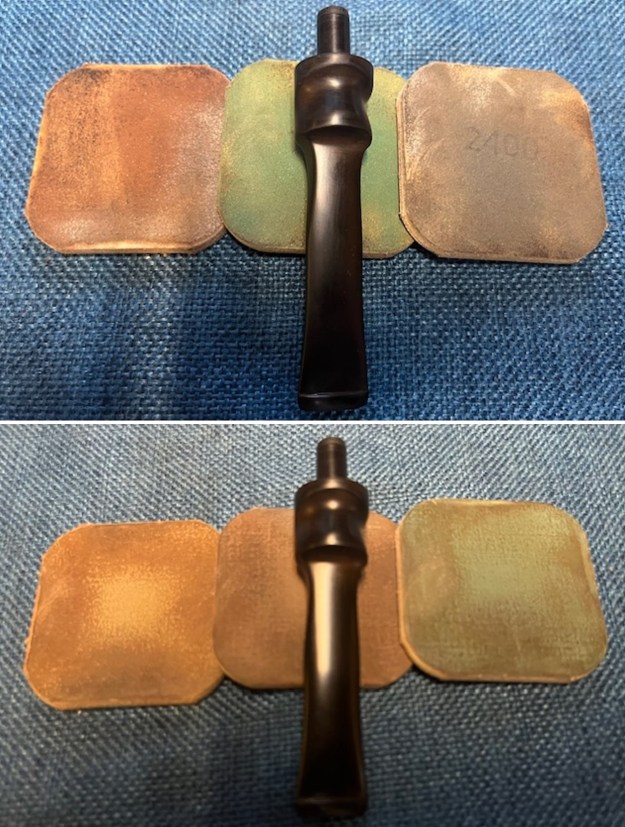
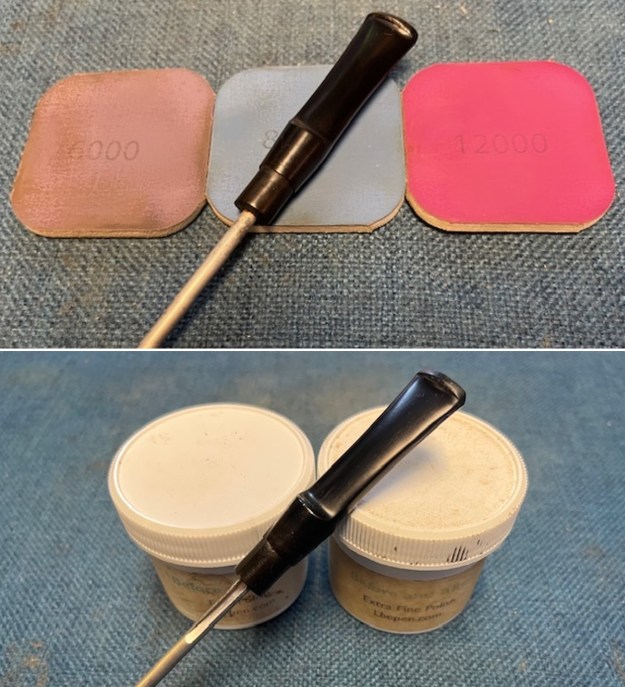
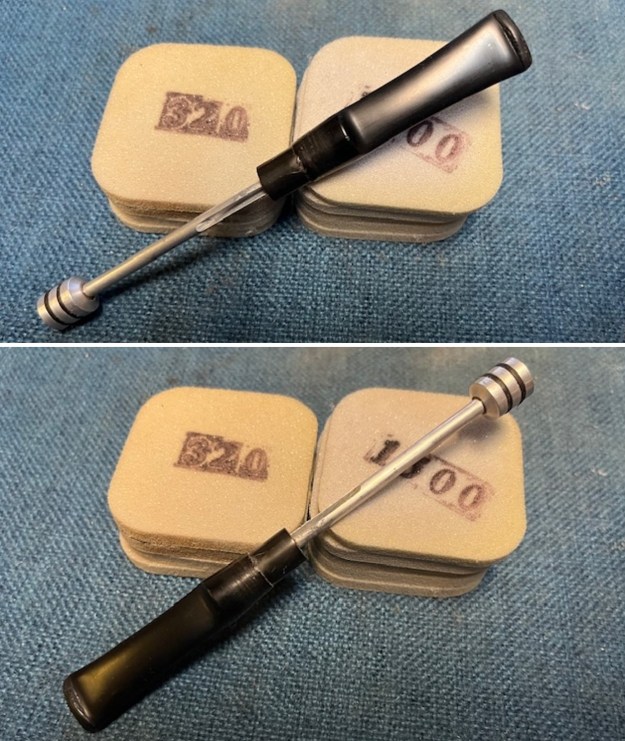 I polished the stem with micromesh sanding pads – dry sanding with 1500-12000 grit pads. I wiped the stem down after each sanding pad with Obsidian Oil. I did a final hand polish of the stem with Before & After Pipe Stem Polish – both Fine and Extra Fine. I gave it a coat of Obsidian Pipe Stem Oil. It works to protect the stem from further oxidizing. I set it aside to dry.
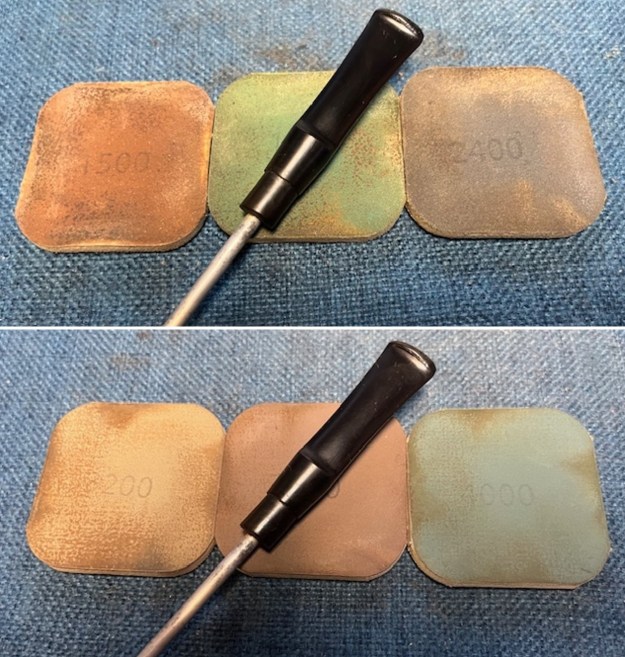
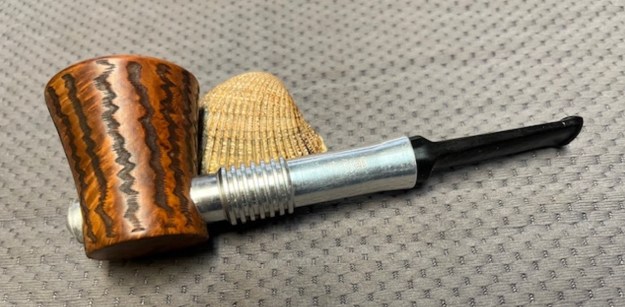
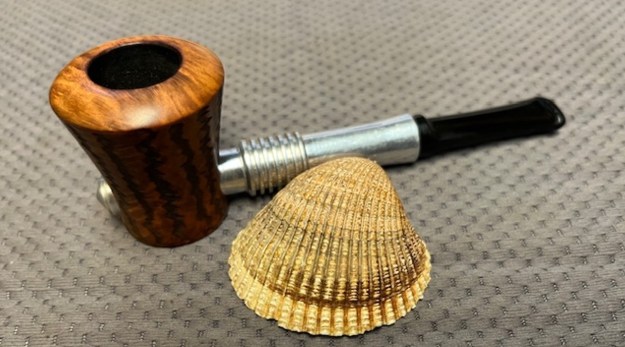
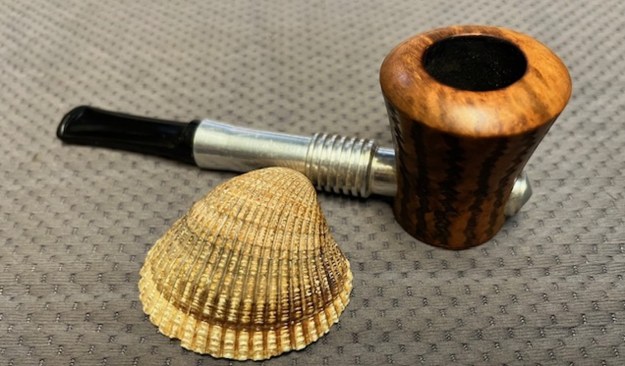
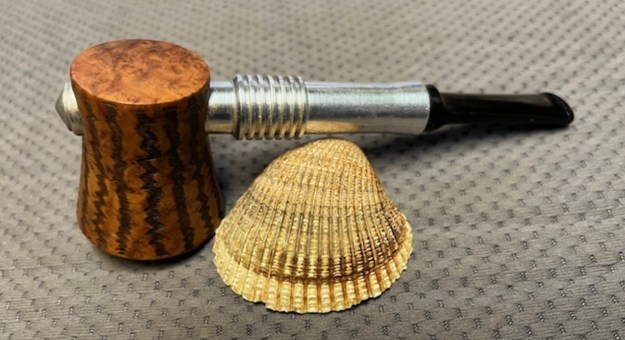
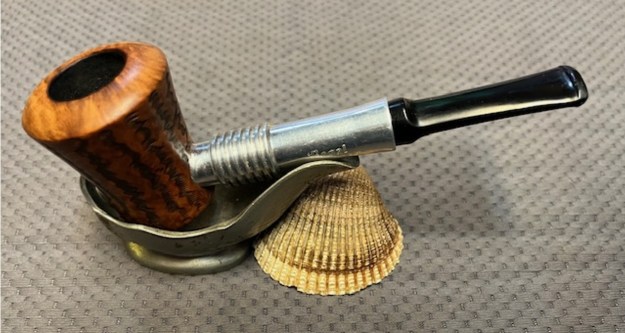
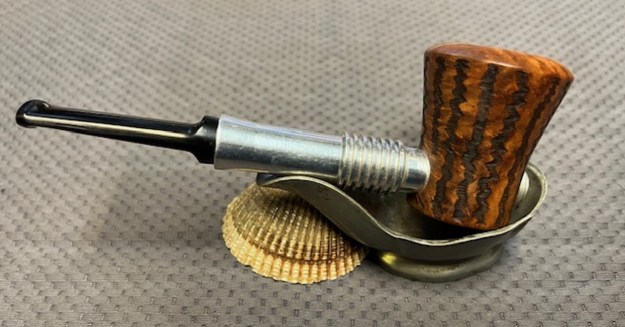
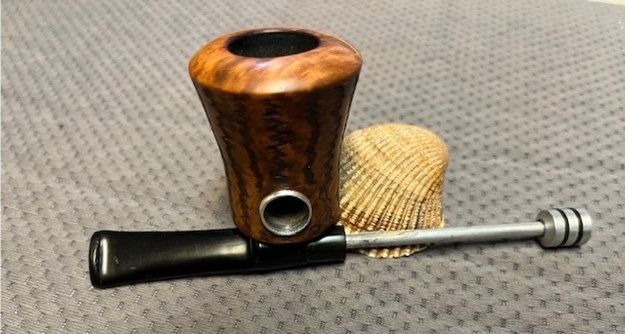
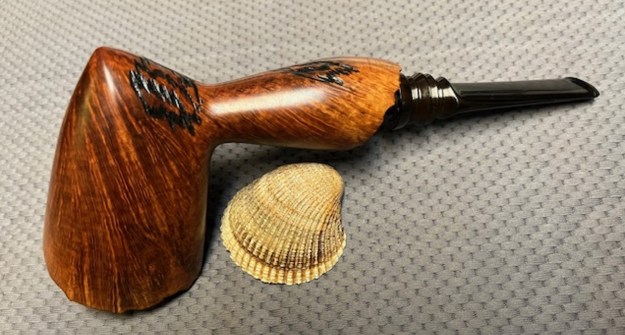
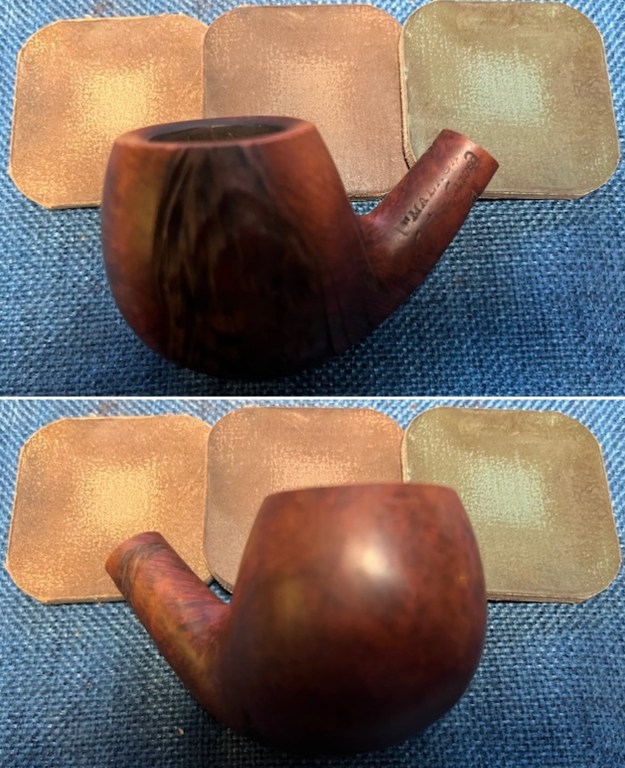
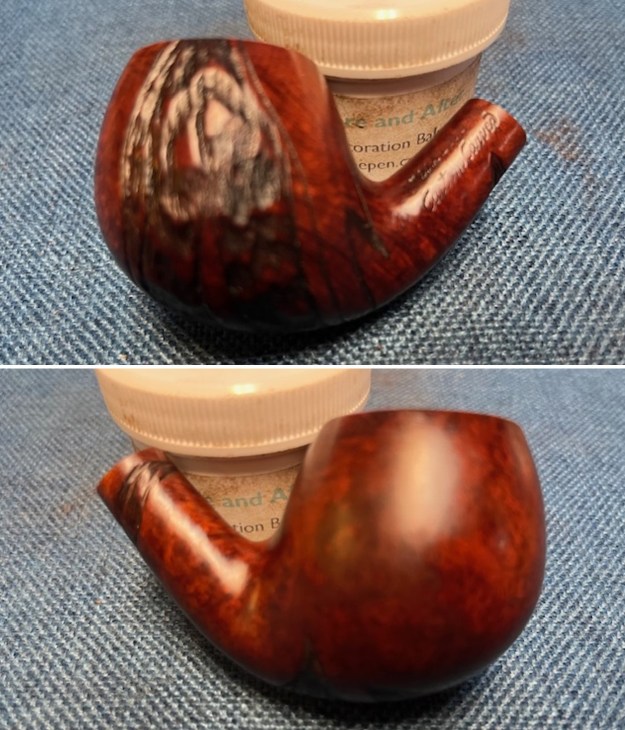
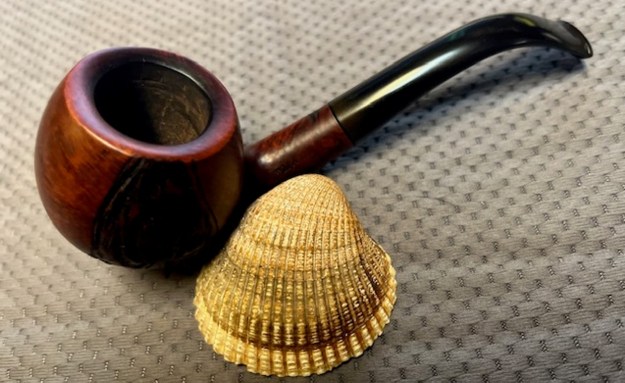
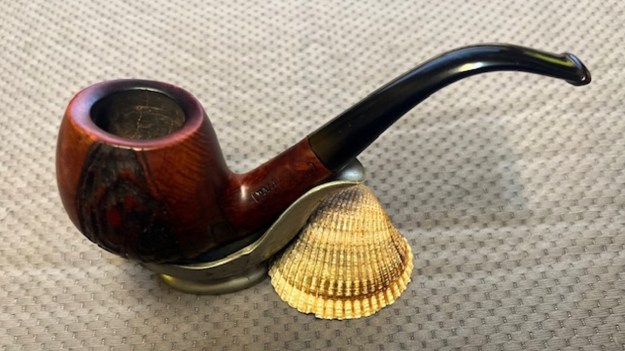
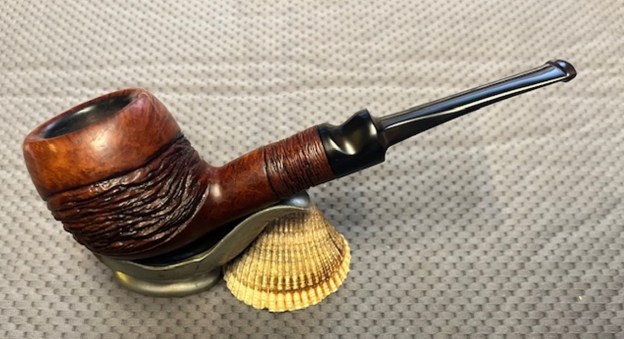
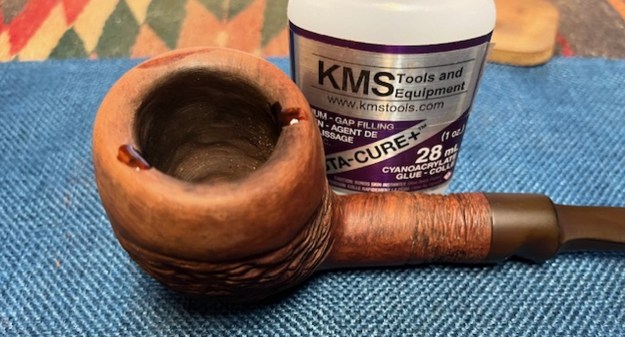
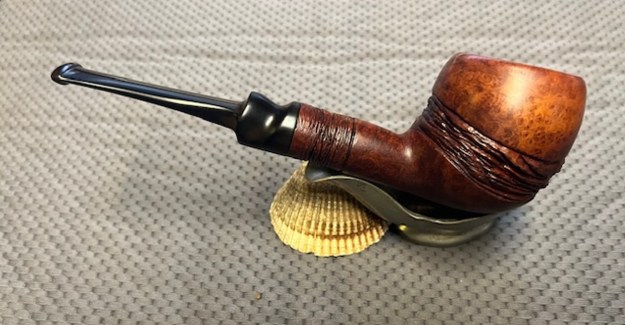
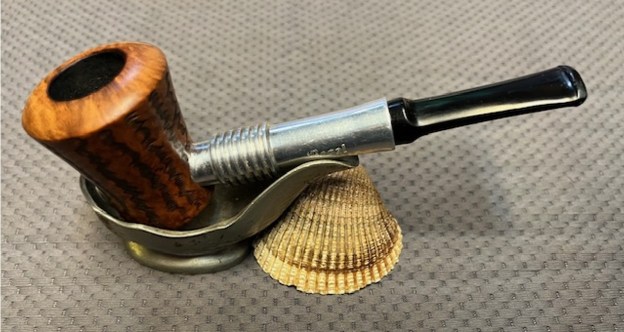
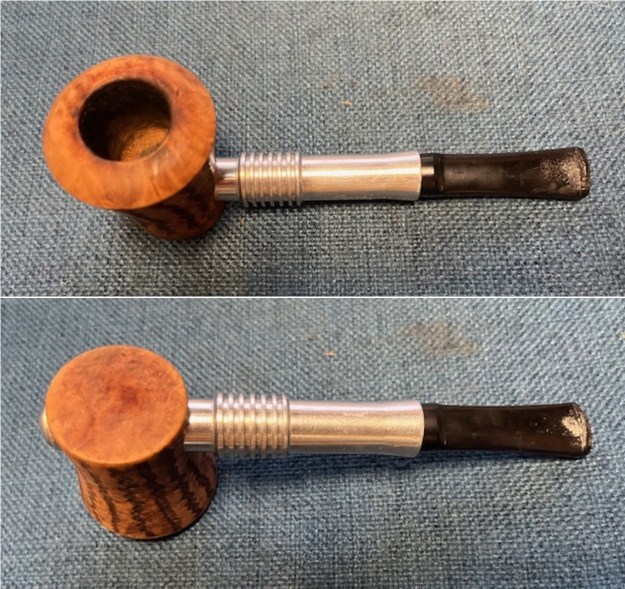
 I put the stem and plunger back on the Regal Metal Poker with a rusticated Briar Bowl and took it to the buffer. I buffed the bowl and stem with Blue Diamond to polish the briar and the vulcanite. Blue Diamond does a great job on the smaller scratches that remain in both. I gave the bowl and the stem several coats of carnauba wax and buffed the pipe with a clean buffing pad to raise the shine. I hand buffed it with a microfiber cloth to deepen the shine. I am amazed at how well it turned out. The finished pipe is shown in the photos below. This is beautiful smooth finished Regal Metal Poker, the metal barrel, and vulcanite saddle stem combine to give the pipe a great look. The dimensions of the pipe are Length: 5 ½ inches, Height: 2 inches, Outside diameter of the bowl: 1 ½ inches, Chamber diameter: ¾ of an inch. The weight of the pipe is 1.55 ounces/44 grams. This is another pipe that I will be putting on the rebornpipes online store in the American Pipe Makers and Pipemaking Companies Section shortly, if you are interested in adding it to your collection. Thanks for walking through the restoration with me on this beauty!