Blog by Steve Laug
I am finally getting around to working on Bob Kerr’s Estate. His son-in-law, Brian contacted me a few months ago saying that the family needed to clean out the estate as they were getting the family home ready to move. He asked if I would be interested in restoring and selling the pipes for them. He brought what originally he said was a few pipes over to show me. When I opened the door Brian was there with a few flats of pipes. There were Dunhills, Petersons, Comoy’s Barlings and a lot of other pipes – a total of 125 pipes and a box of parts. That is the largest estate I had seen. I put together a spread sheet of the pipes and stampings to create an invoice. I was taking on what would take me a fair amount of time to clean up. I could not pass up the opportunity to work on these pipes though. They were just too tempting.
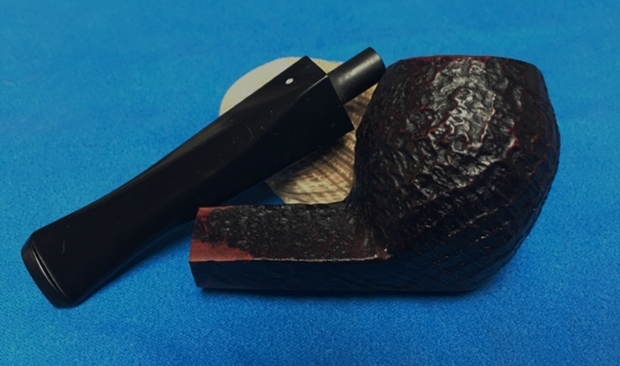
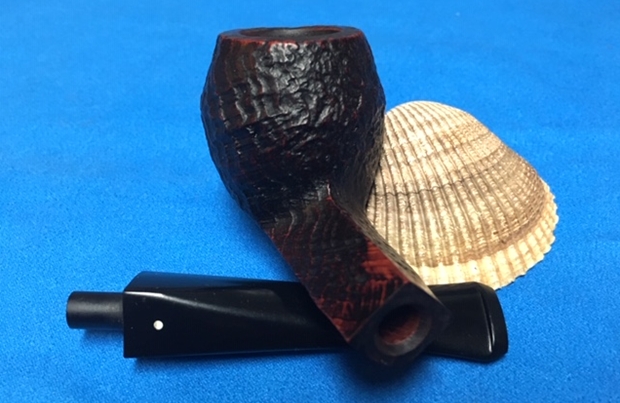
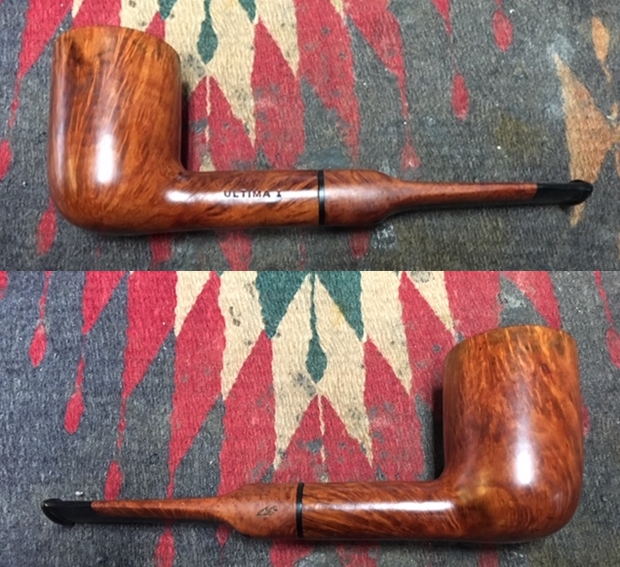
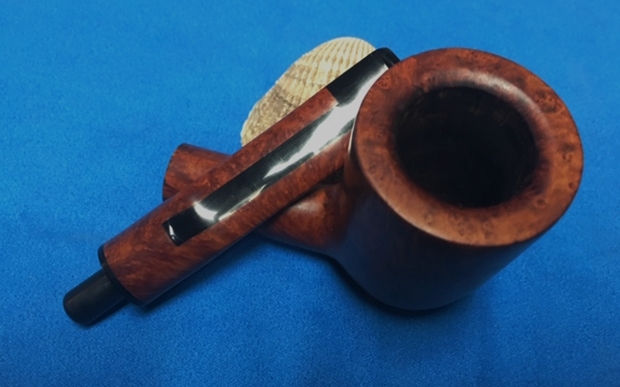
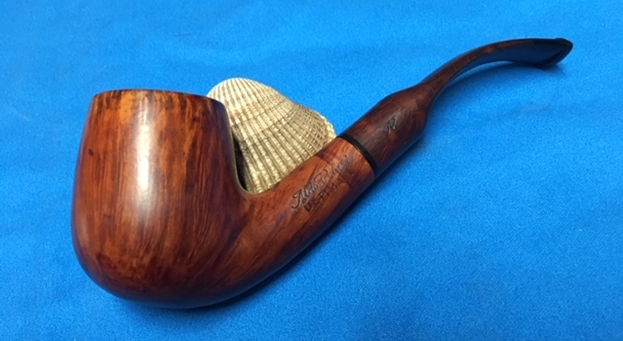
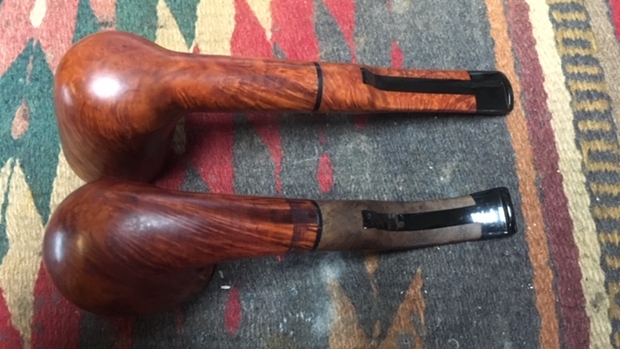
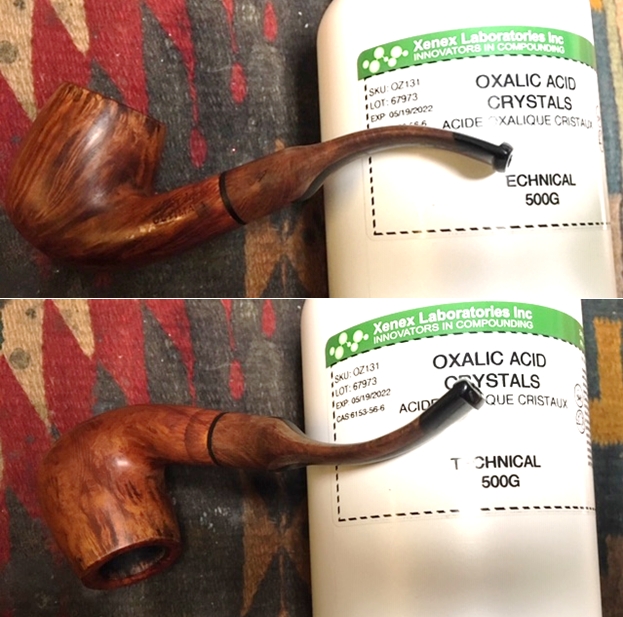
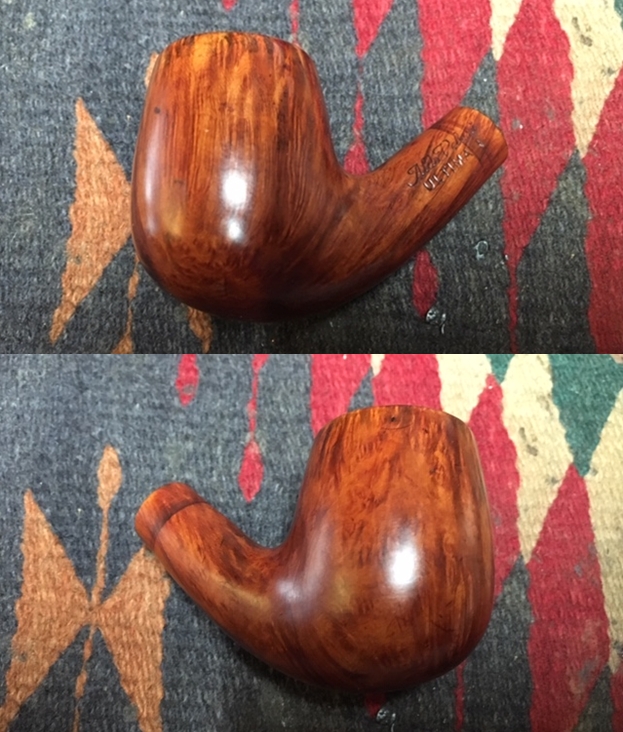
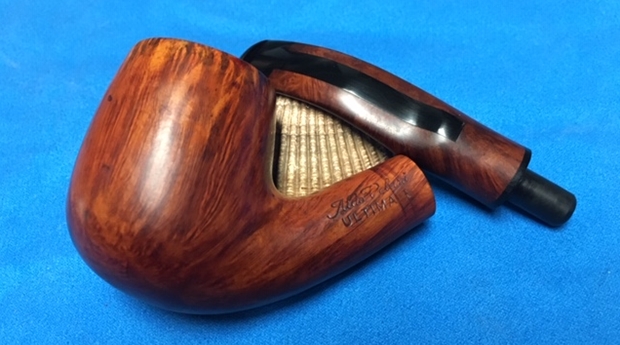
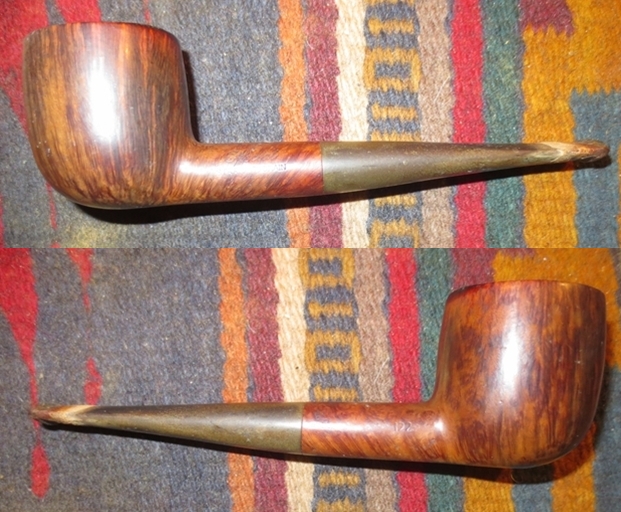
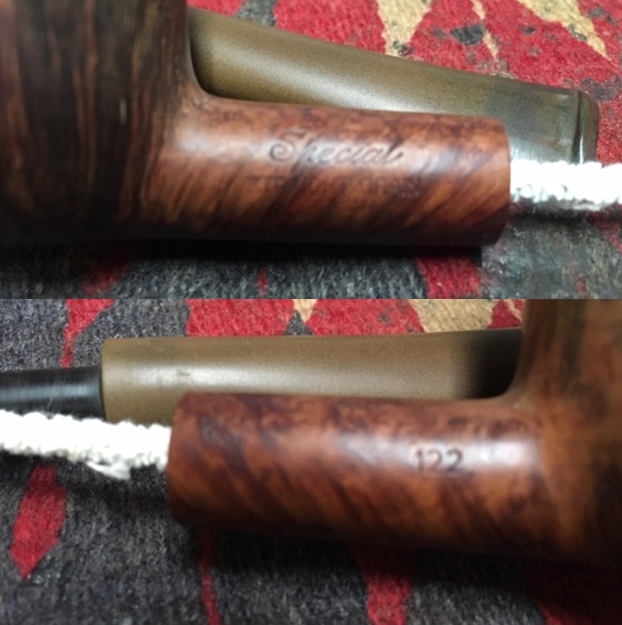
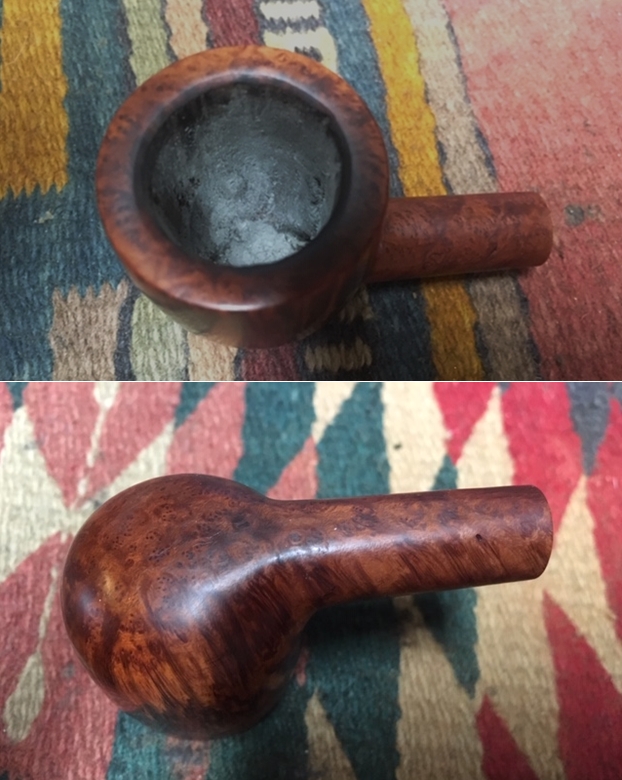
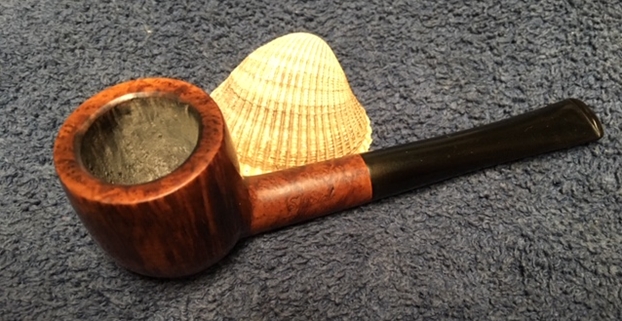
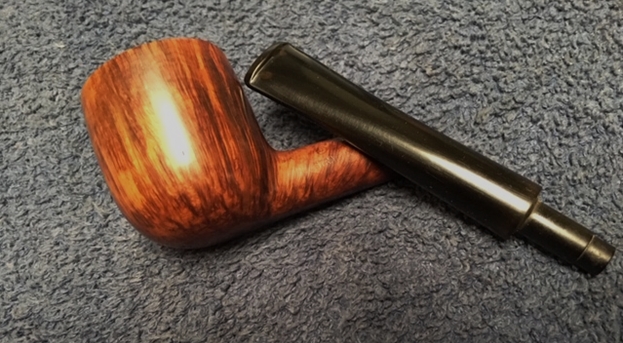
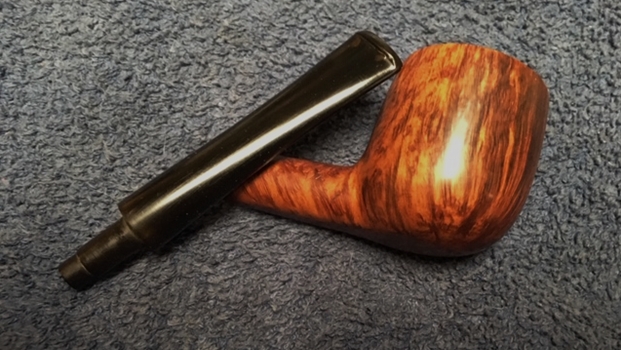
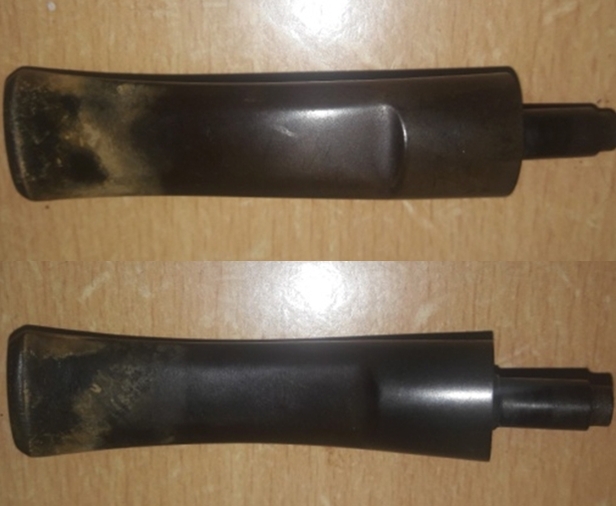
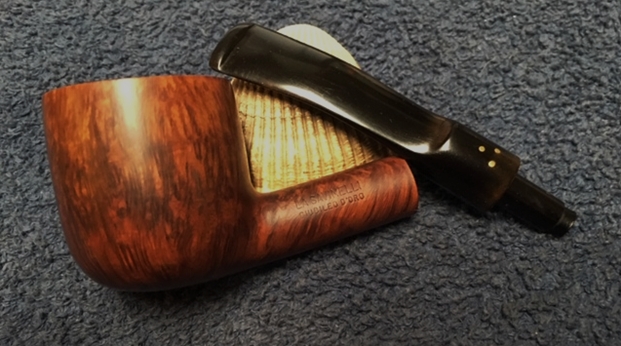
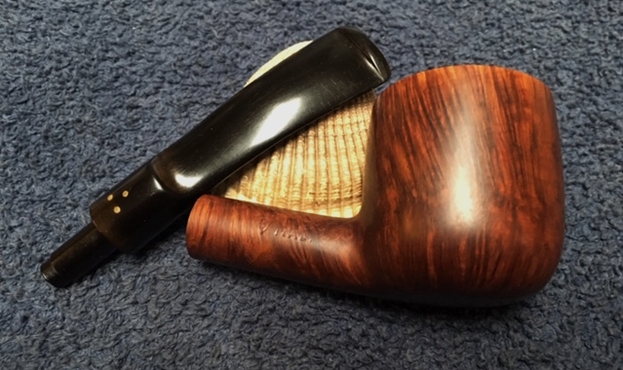
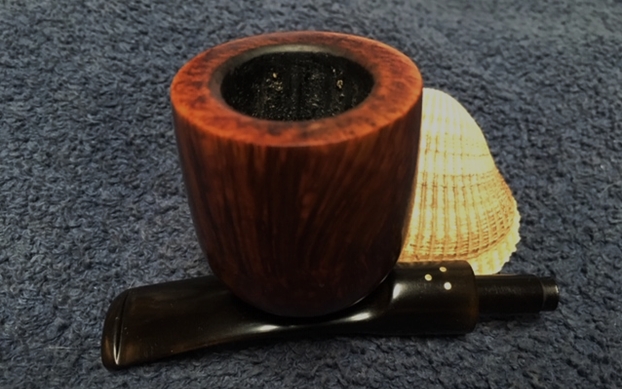
I sorted the pipes into groups of the various brands and had a box of 25 different Dunhill pipes in different shapes, styles and sizes. I decided to work on the Dunhills first. It was a great chance to see the shape variety up close and personal. The photo below shows the box of Dunhill pipes.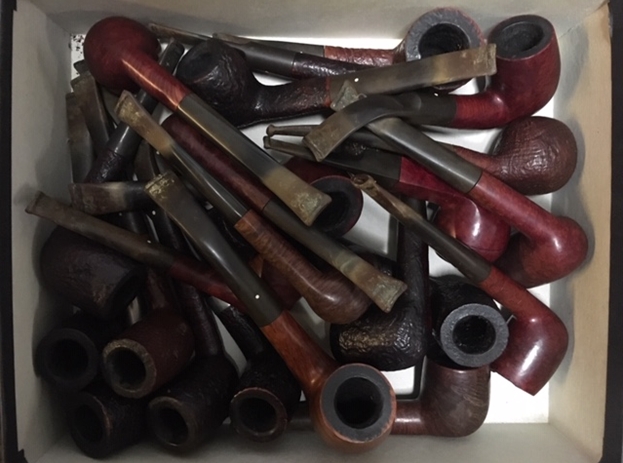 I went through the box and chose to work on a little sandblast straight shank bulldog. It is stamped on the flat panel on the underside of the bowl and shank as follows. 147F/T Dunhill over Shell Briar. Next to that it read Made in England 12/13 followed by Circle 4S. The pipe was a shape 147 Bulldog with a fish tail stem (F/T). The finish was a sandblast that Dunhill named a Shell Briar. It was a Group 4 size that was made in 1963 and sold in 1964. The finish was dirty with an overflow of the cake onto the rim top. There was still tobacco in the bowl that was stuck in the cake on the walls. The inner edge of the bowl showed a little damage toward the front. The stem was lightly oxidized and had tooth marks and chatter near the button and on the button itself. Overall the pipe would take some work but it was a beauty with solid bones. I took pictures of the pipe before I started working on it.
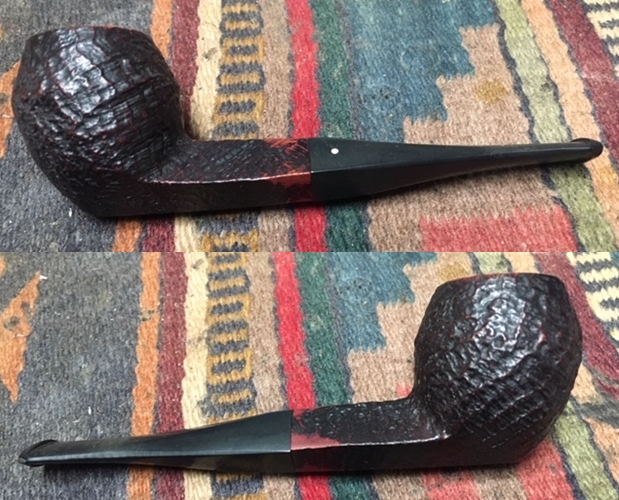
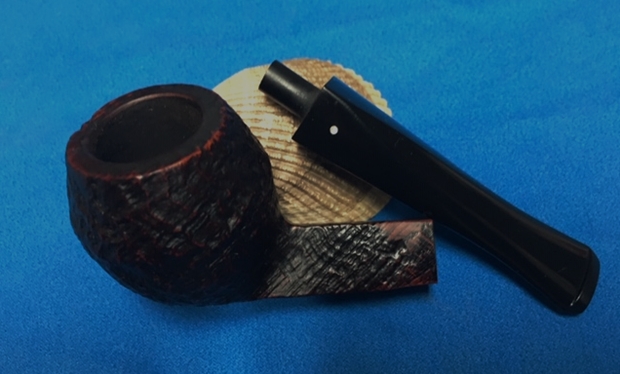
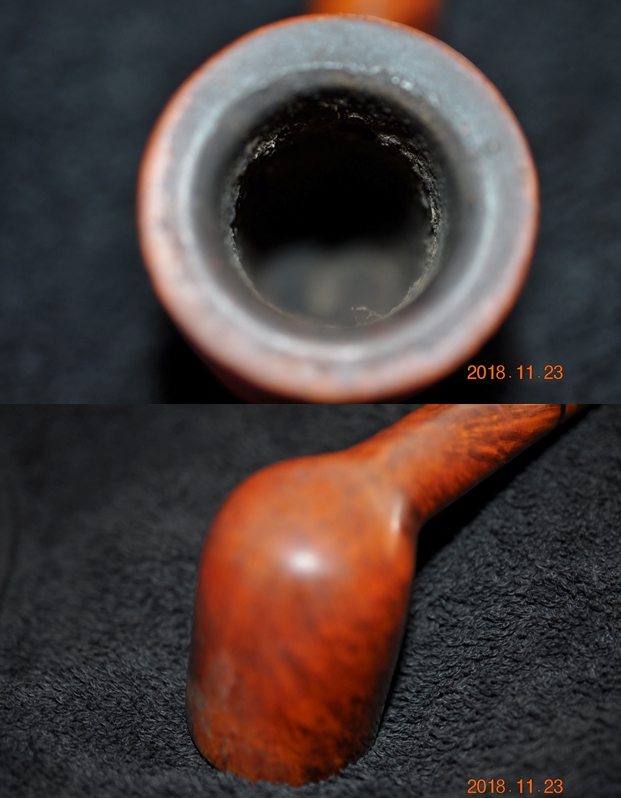
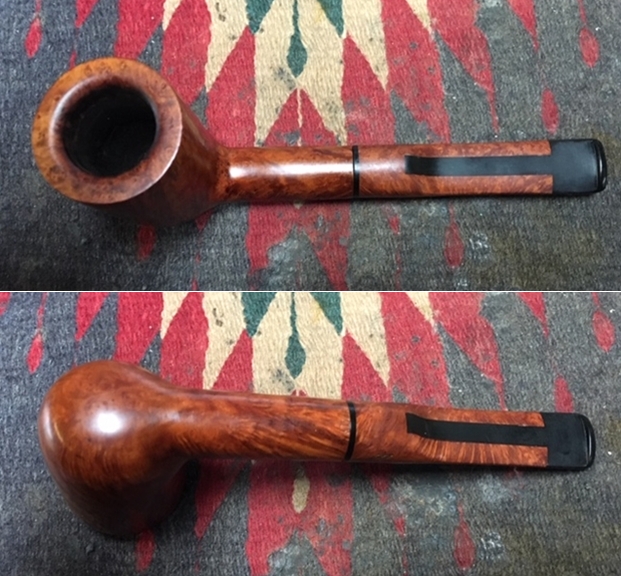
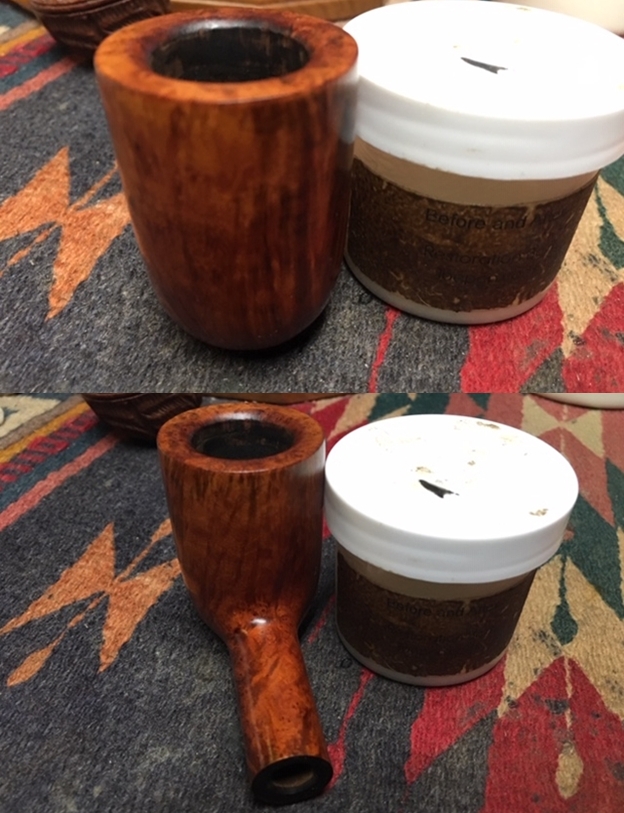
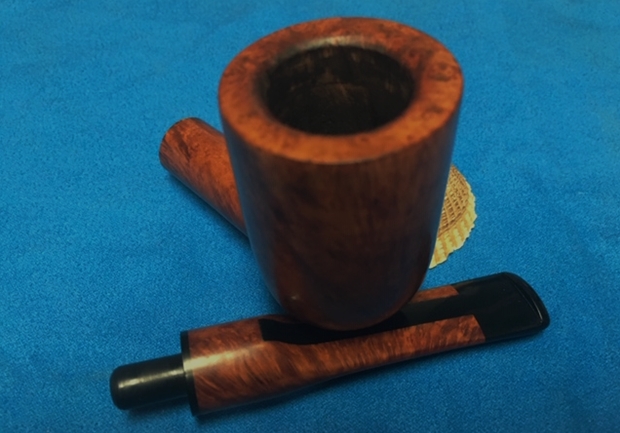
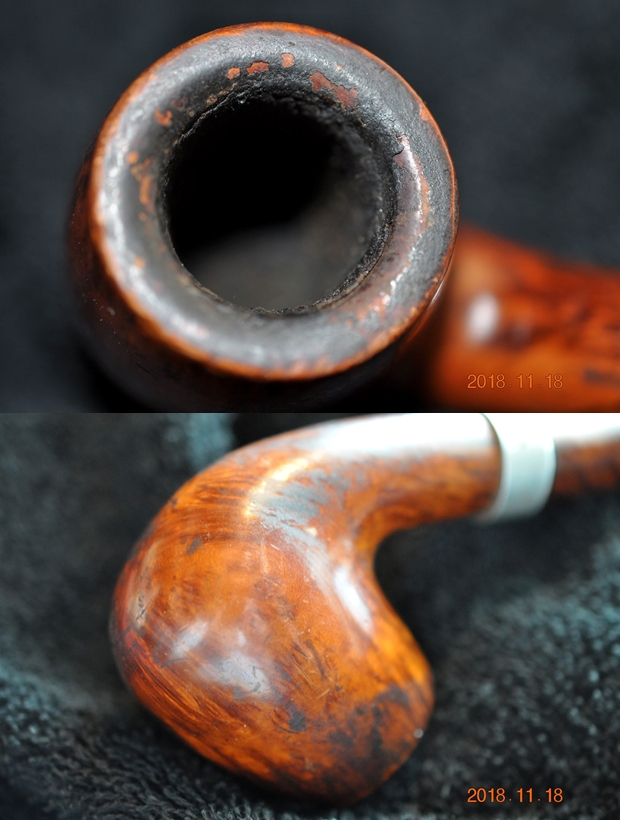
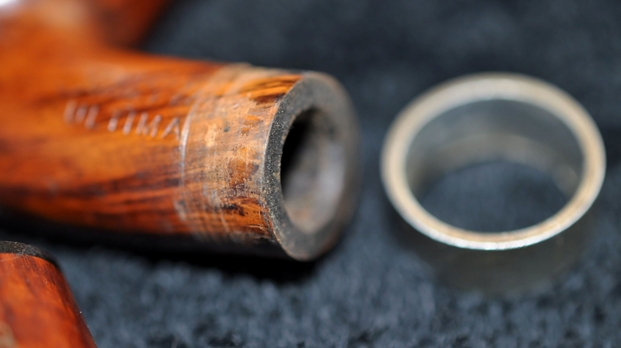
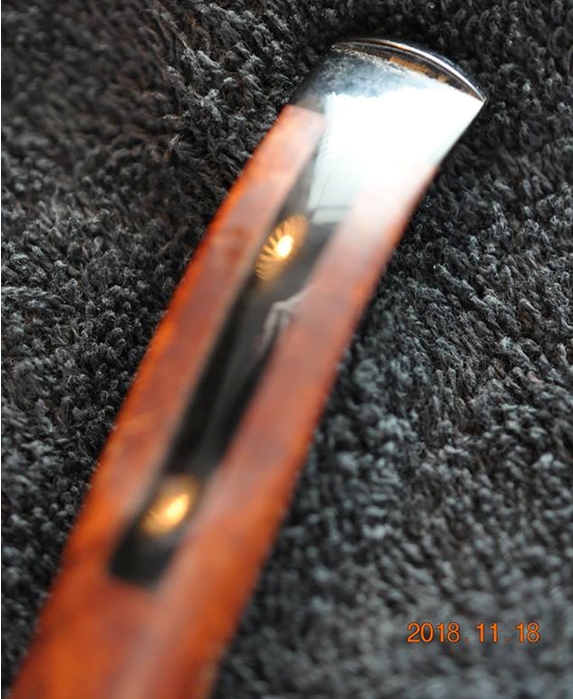
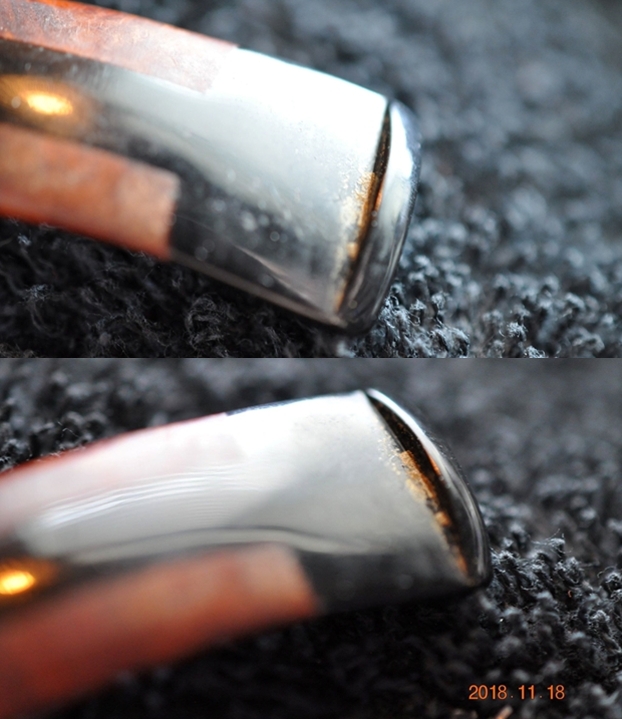
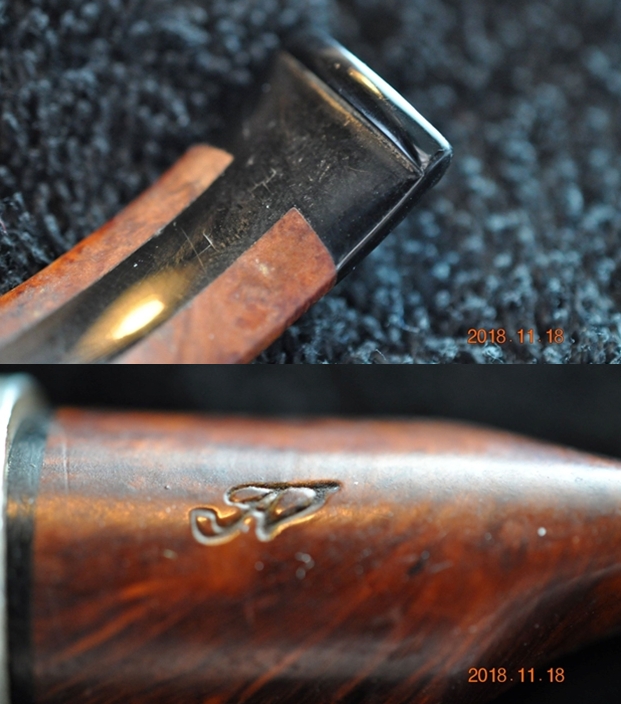
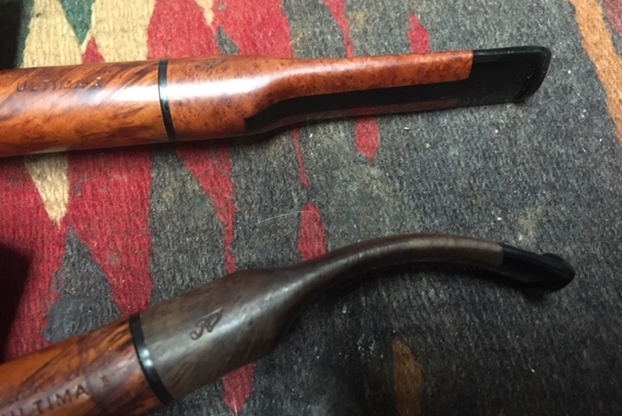
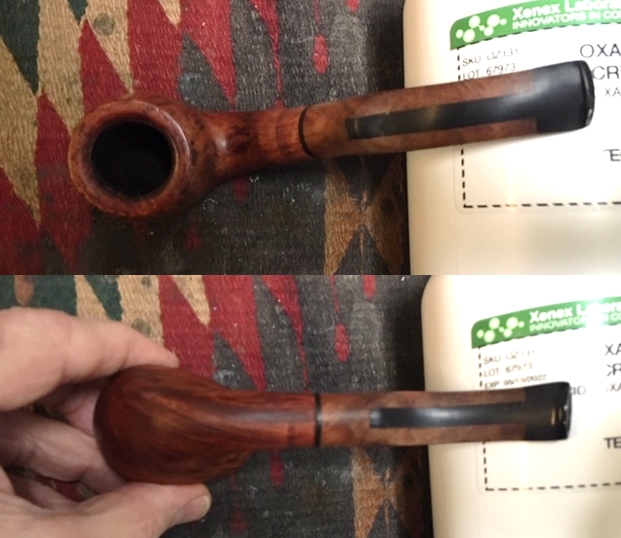
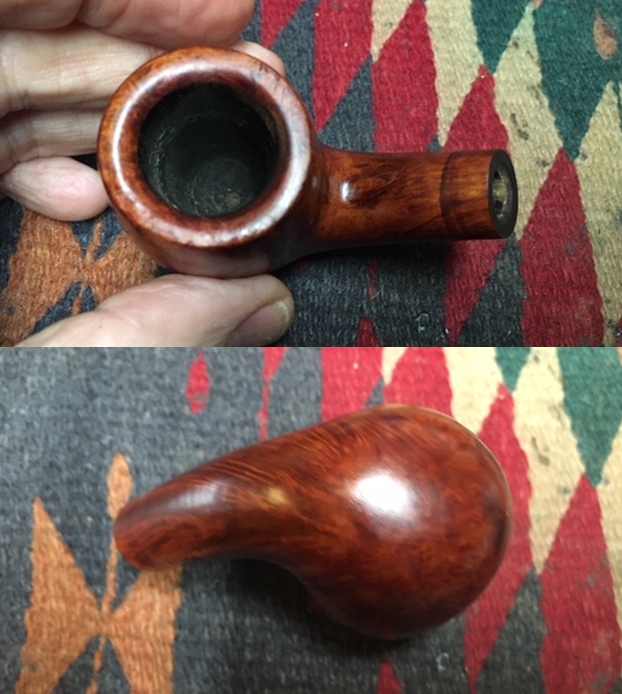
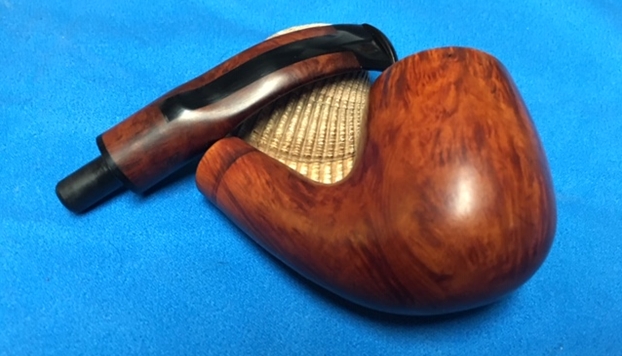
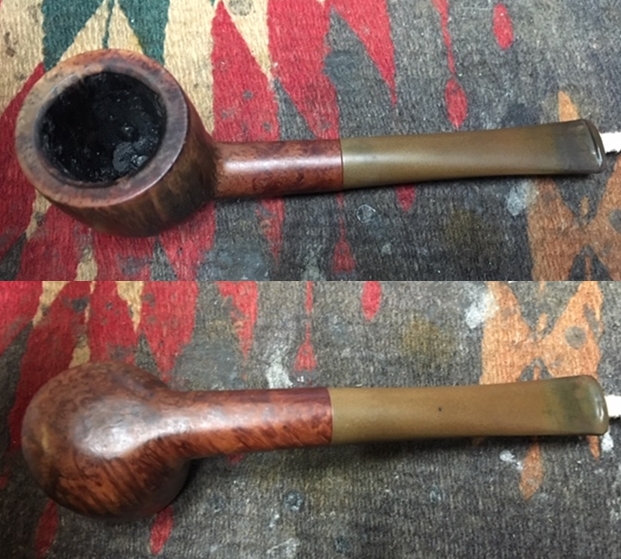
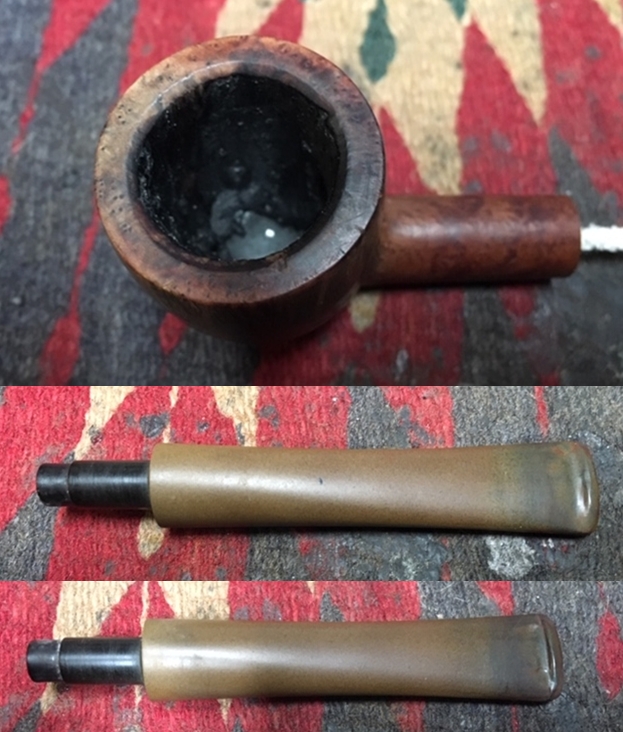
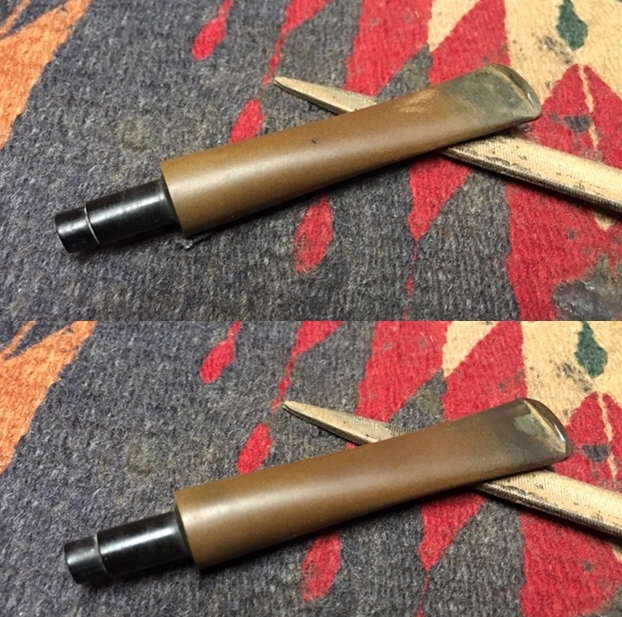
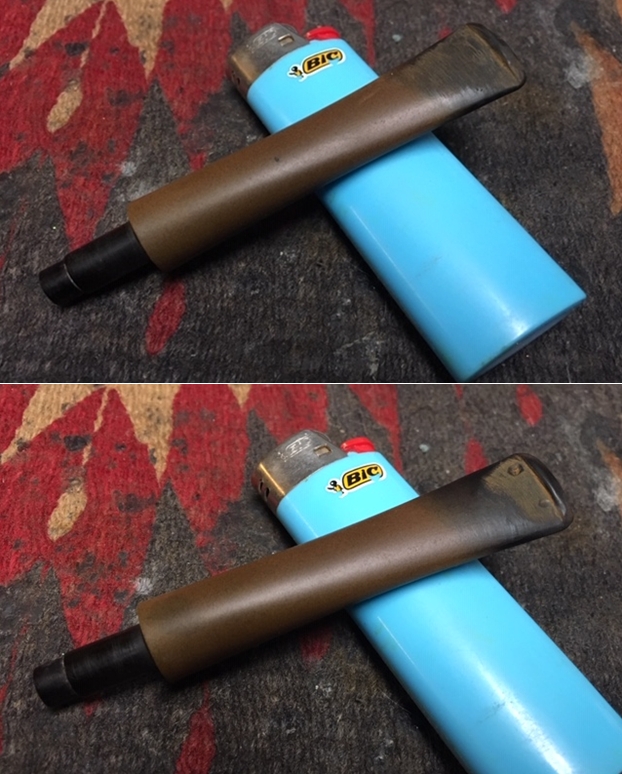
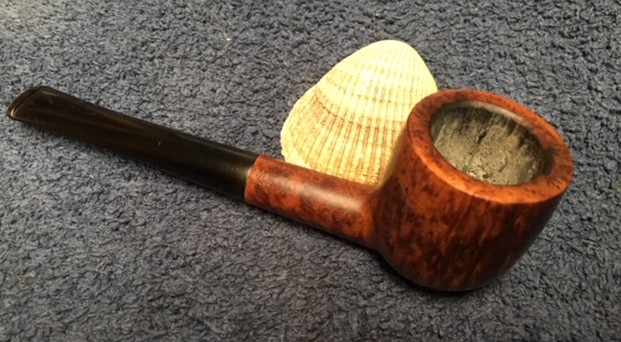
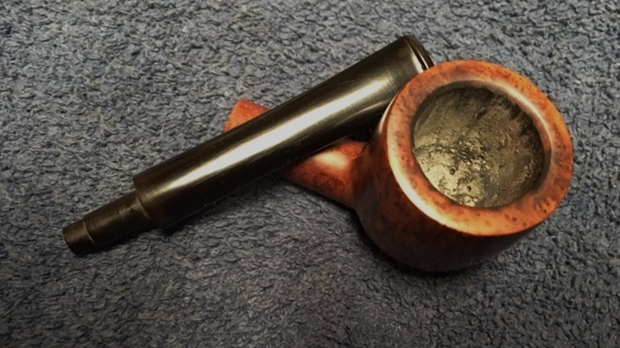
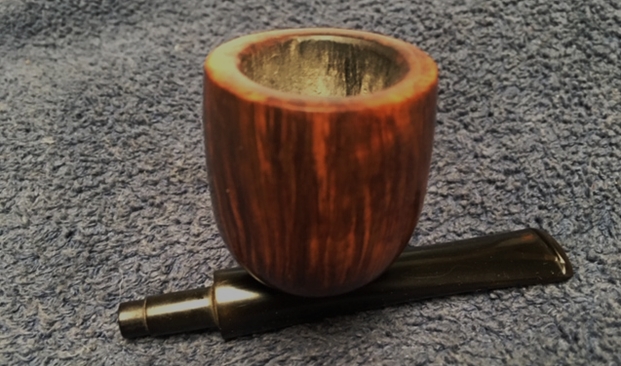
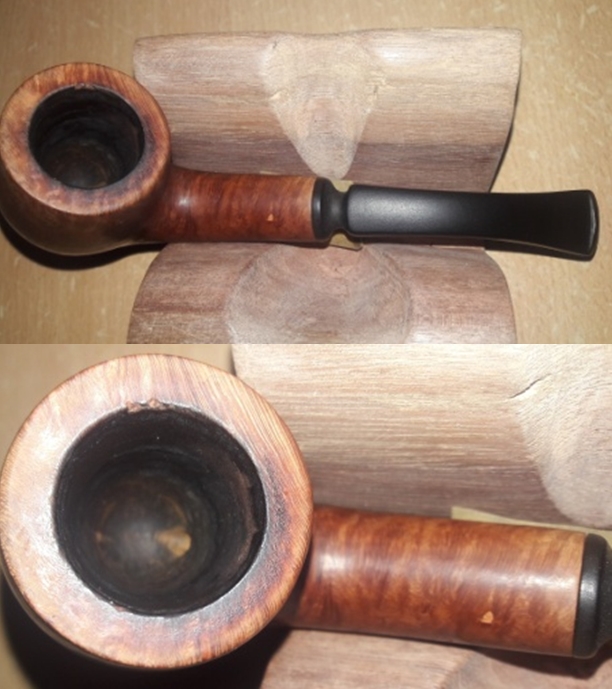
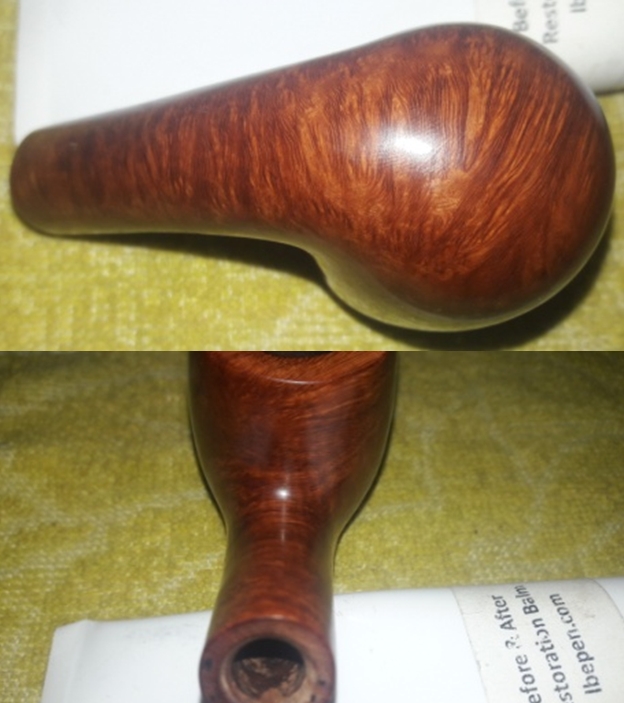
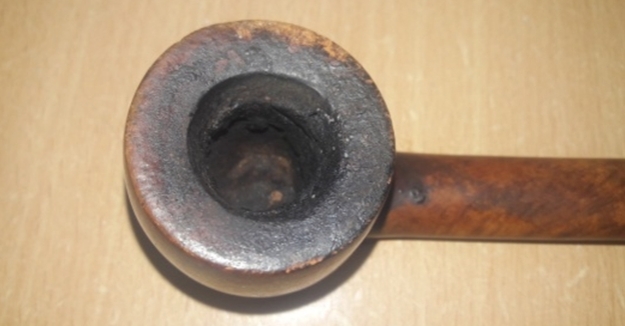
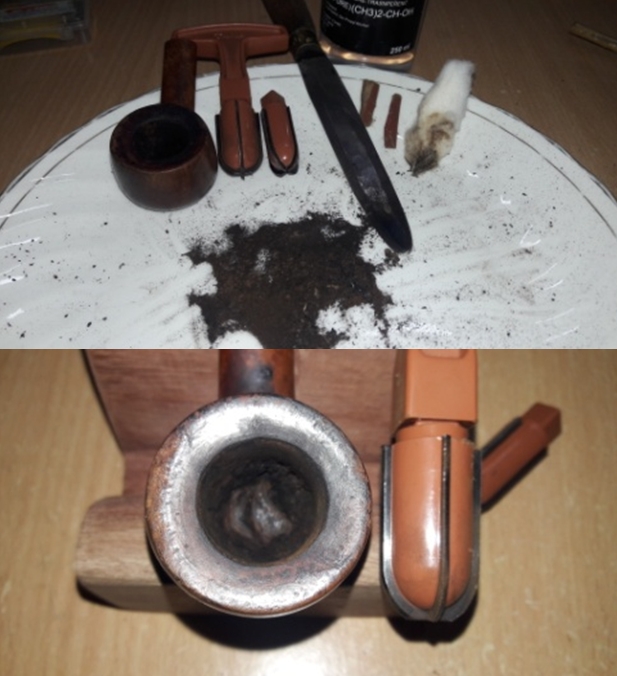
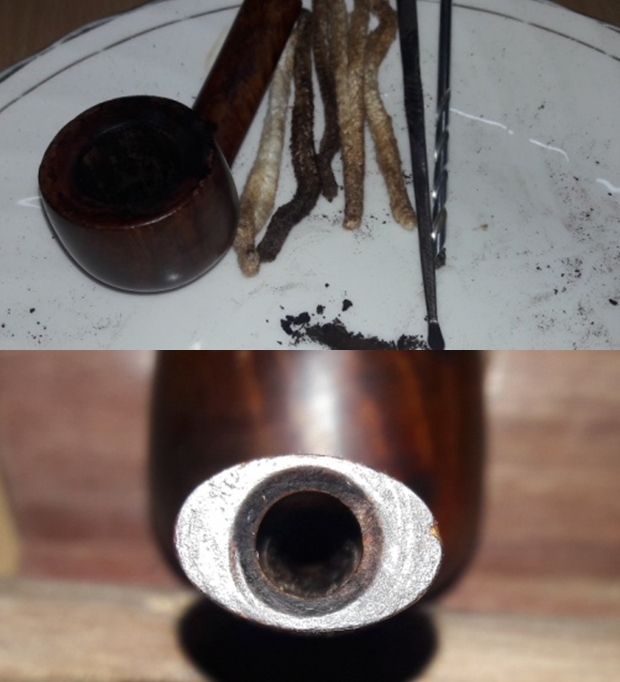
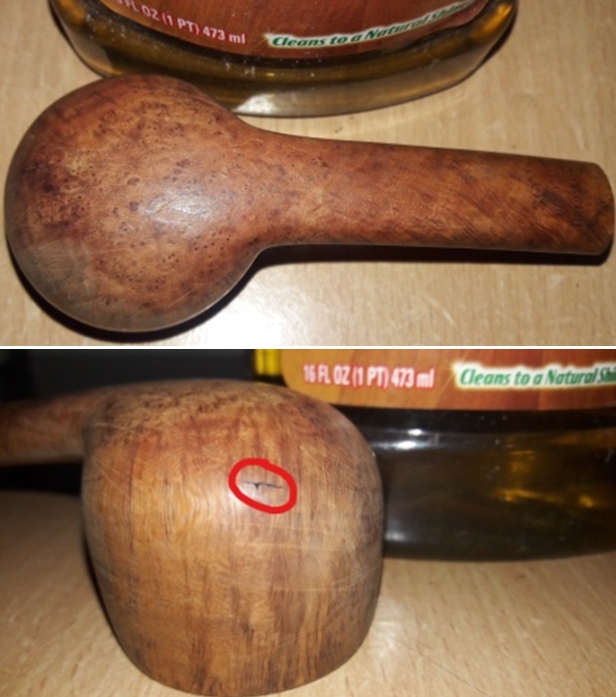
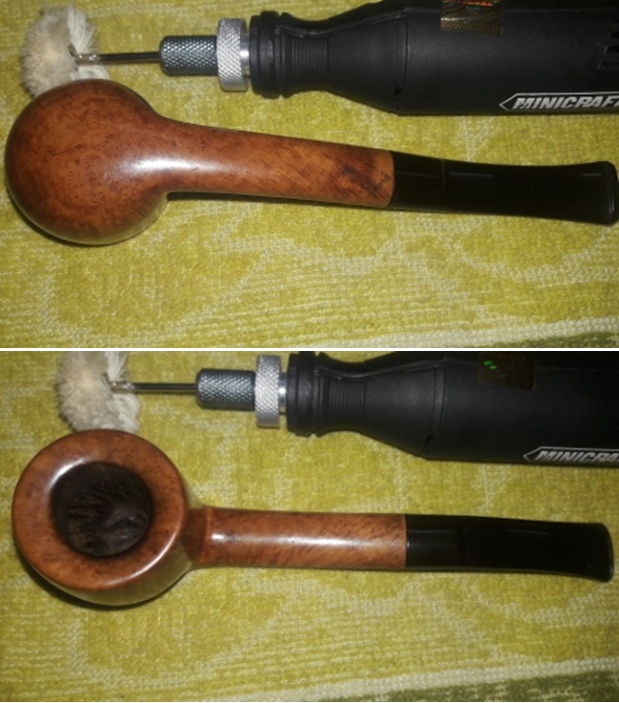
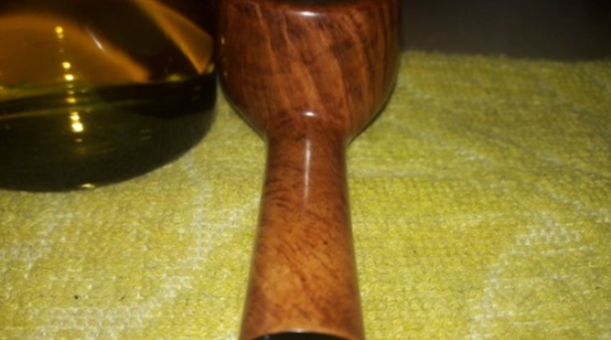
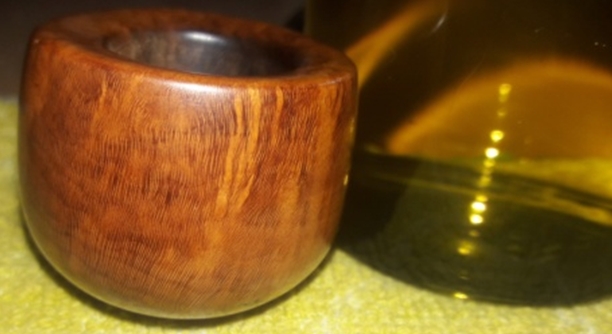
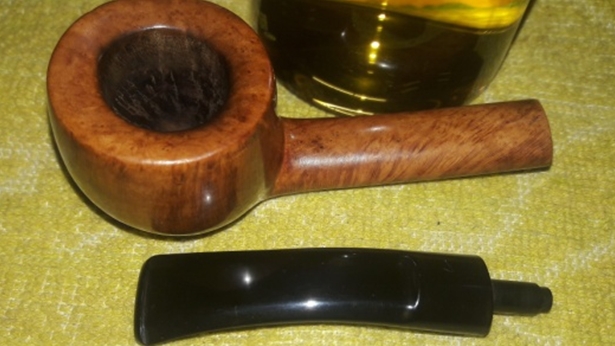
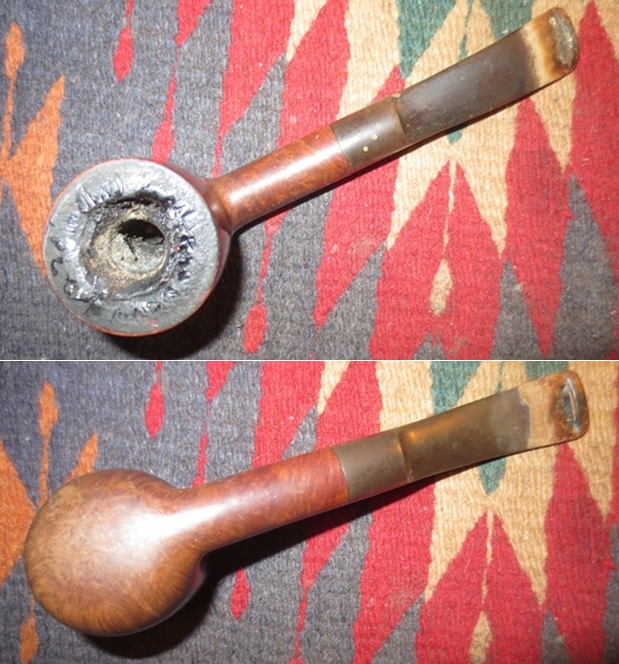
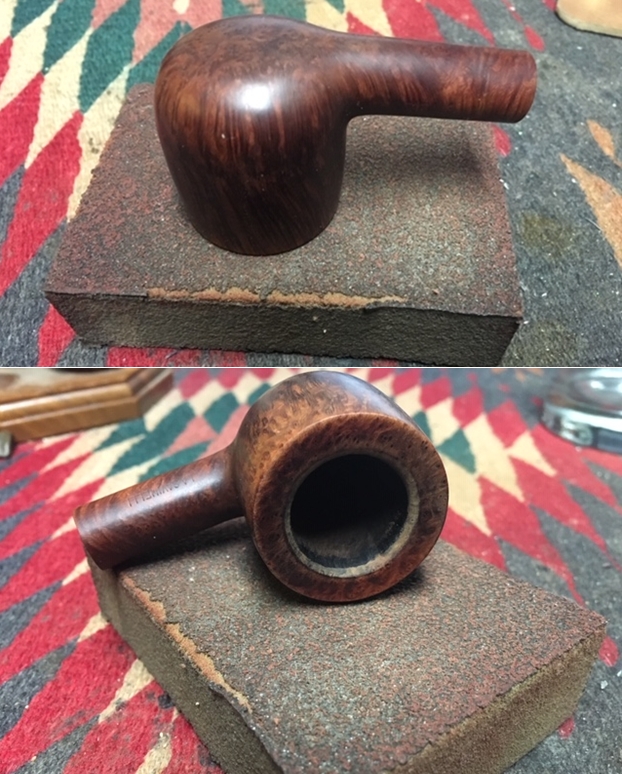
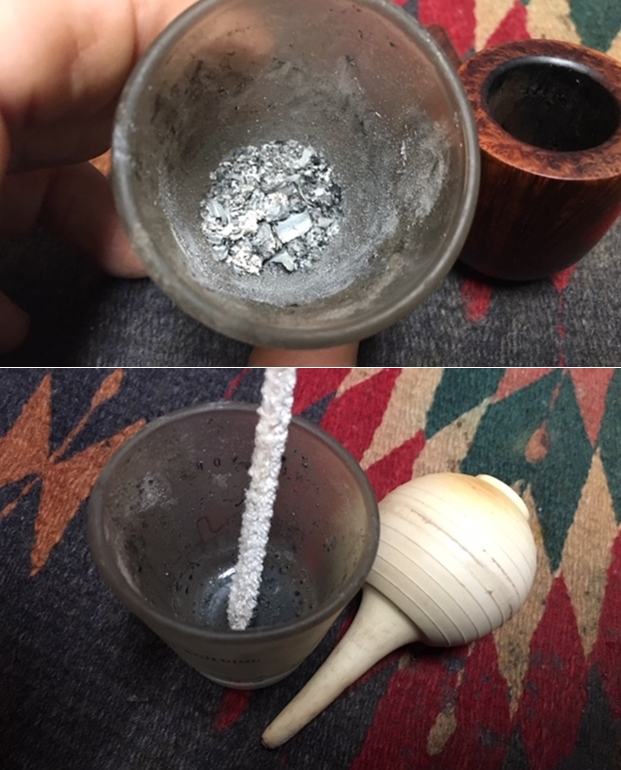
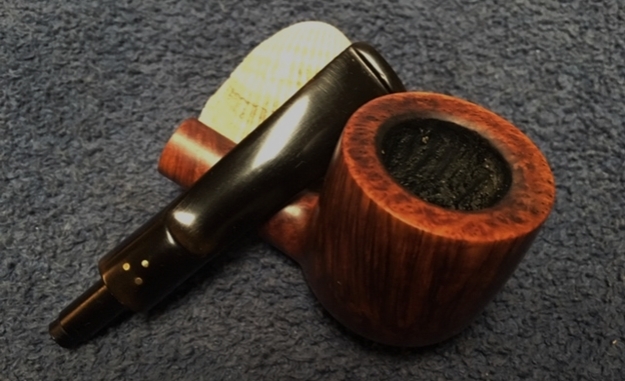
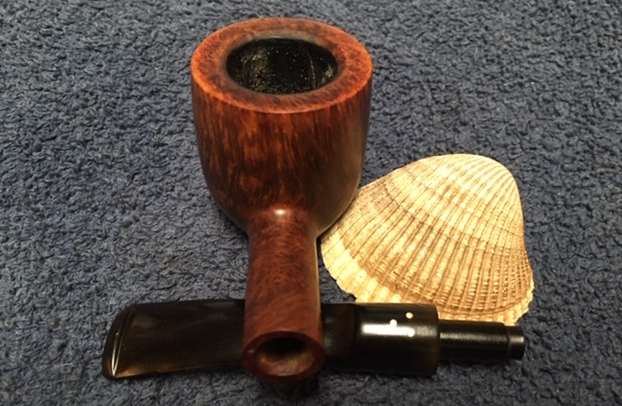
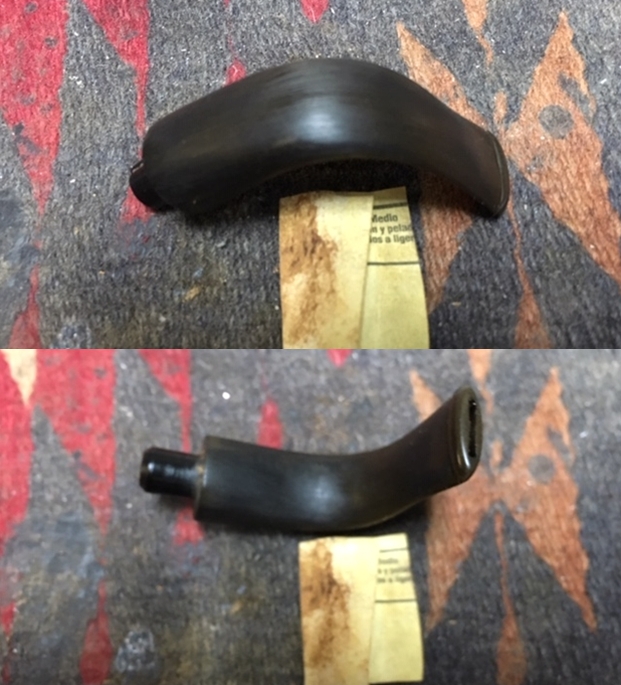
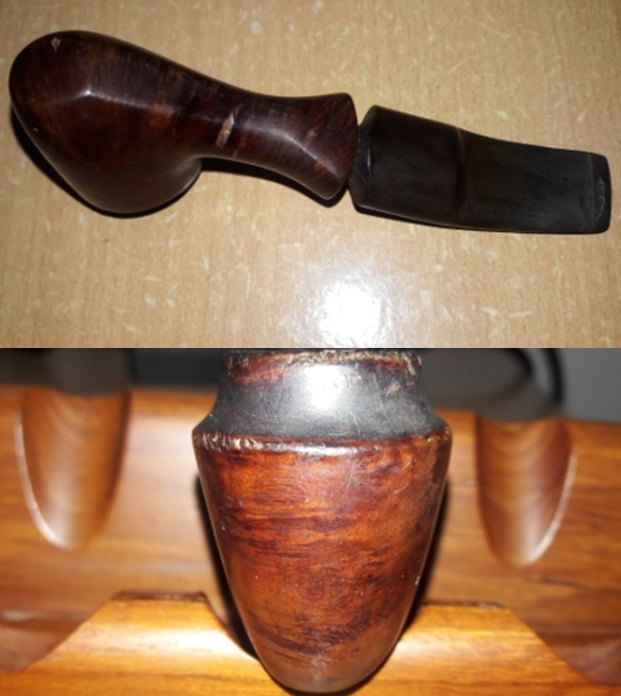
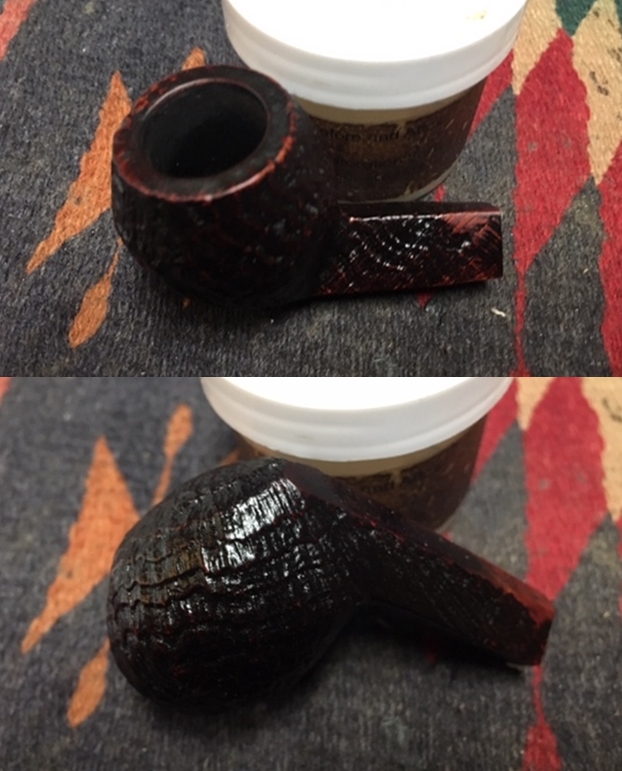
 I took some close up photos of the rim top and stem to show what I was dealing with. You can see the cake and tobacco in the bowl. It looks like Bob Kerr had laid down the pipe after just finishing a bowl with the intention of picking it up and continuing later. The rim top shows the buildup of lava particularly on the back edge. You can also see the damage at the front of the bowl on the inner edge of the rim. The stem was dirty, lightly oxidized and had a lot of tooth chatter on the top and underside for about an inch ahead of the button. The button surface was also marked with tooth chatter.
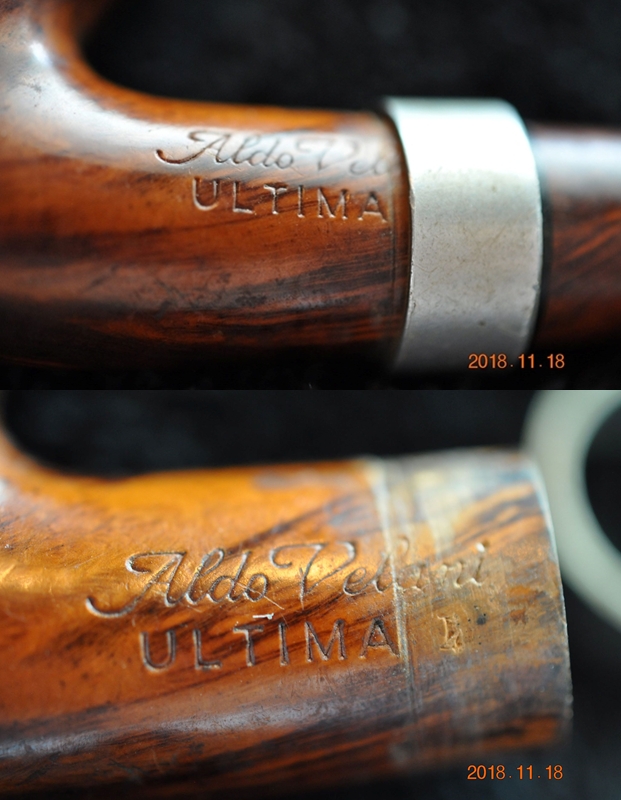
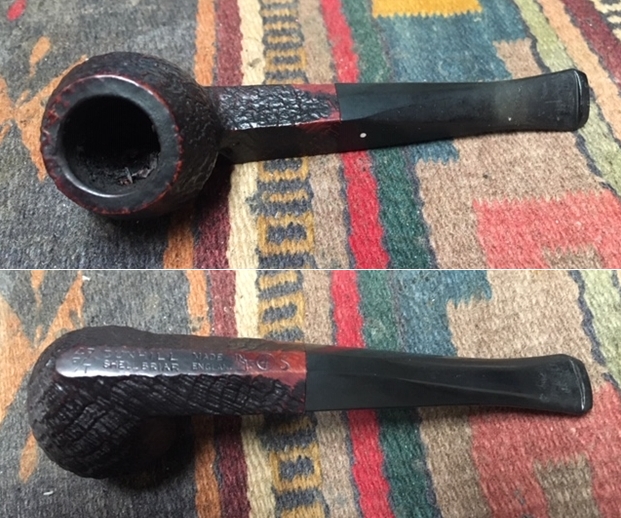
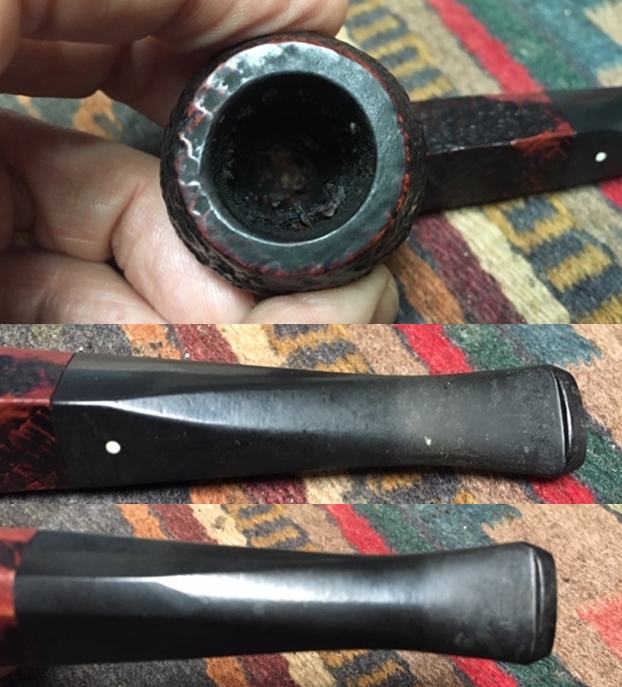 I took a photo of the stamping on the underside of the bowl and shank. It should be easier to read once I get it cleaned up a bit.
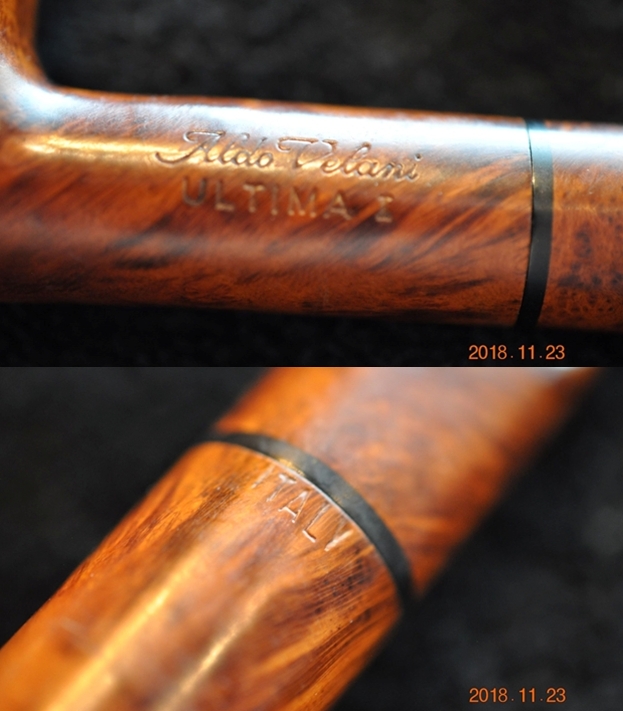
 If you have followed the blog for long then you will not be surprised when I include information on the pipeman whose pipes I am restoring. For me, when I am working on an estate I really like to have a sense of the person who held the pipes in trust before I worked on them. It gives me another dimension of the restoration work. I asked Brian if he or his wife would like to write a brief biographical tribute to her father, Bob. His daughter worked on it and I received the following short write up on him and some pictures to go along with the words. Thank you Brian and tell your wife thank you as well.
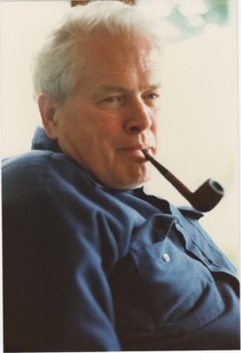 I am delighted to pass on these beloved pipes of my father’s. I hope each user gets many hours of contemplative pleasure as he did. I remember the aroma of tobacco in the rec room, as he put up his feet on his lazy boy. He’d be first at the paper then, no one could touch it before him. Maybe there would be a movie on with an actor smoking a pipe. He would have very definite opinions on whether the performer was a ‘real’ smoker or not, a distinction which I could never see but it would be very clear to him. He worked by day as a sales manager of a paper products company, a job he hated. What he longed for was the life of an artist, so on the weekends and sometimes mid-week evenings he would journey to his workshop and come out with wood sculptures, all of which he declared as crap but every one of them treasured by my sister and myself. Enjoy the pipes, and maybe a little of his creative spirit will enter you!
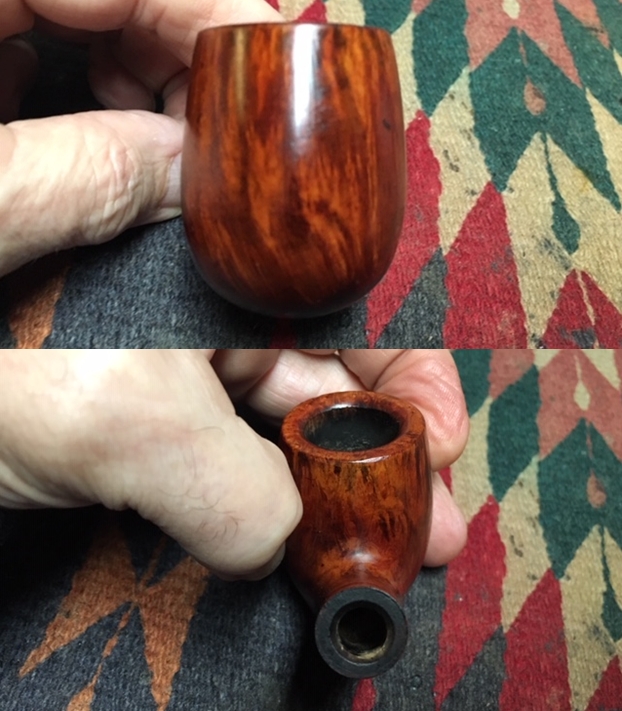
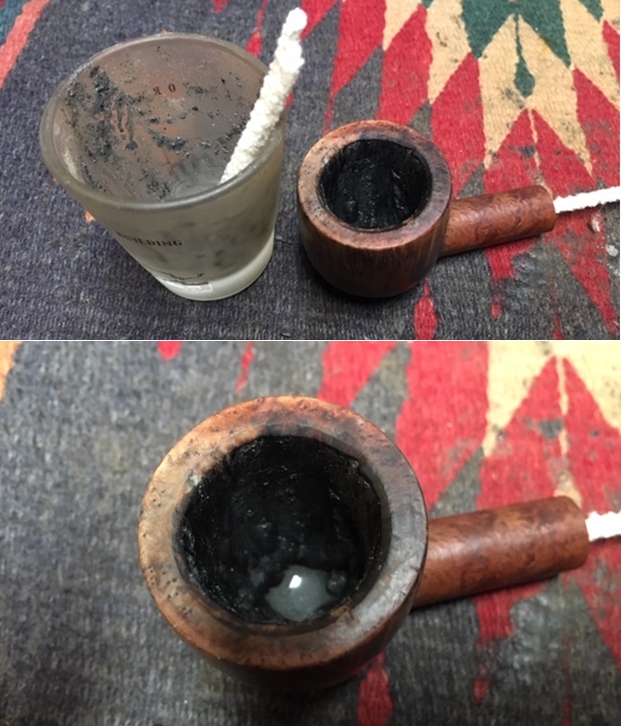
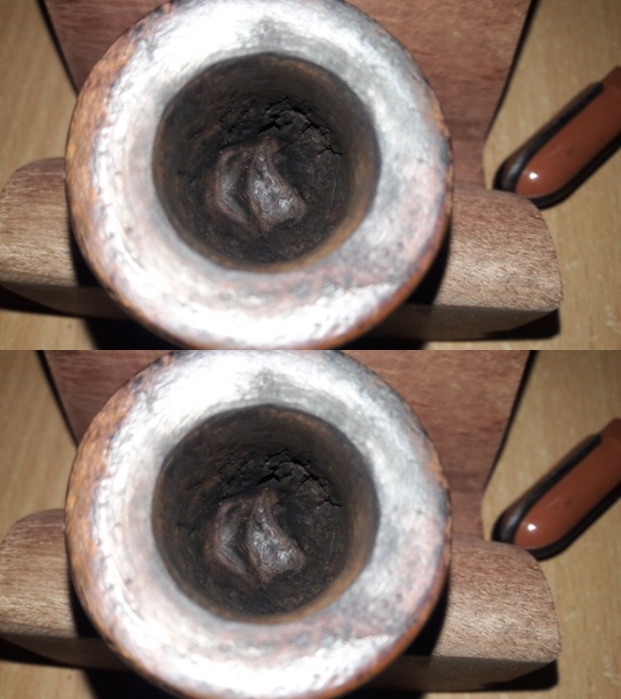
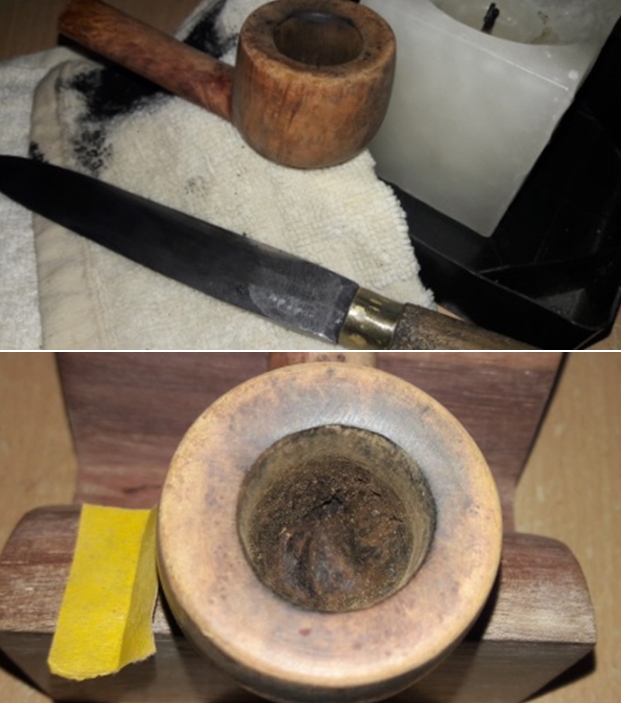
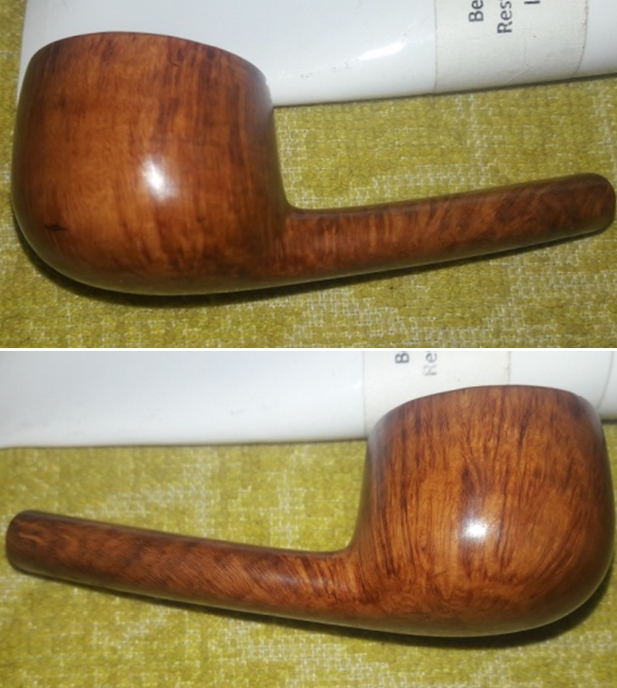
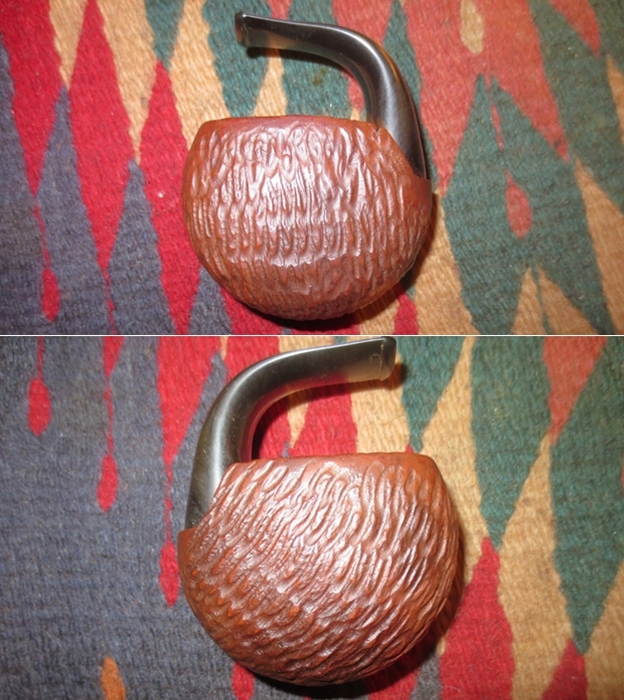
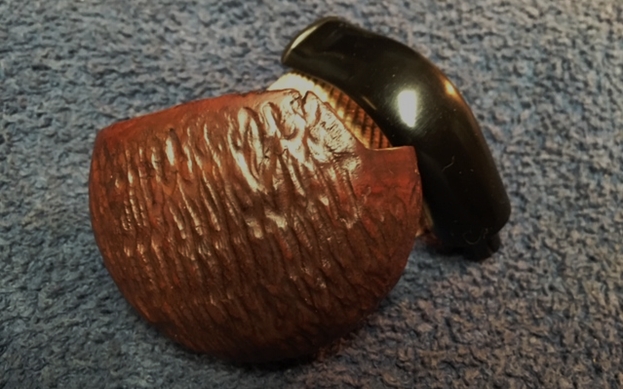
I have included one of Bob’s wood carvings to give you an idea of what he daughter wrote about above. You can see his artistry in the carving that is patterned after British Columbia’s Coastal First Nations people. To me this is a sea otter but perhaps a reader may enlighten us. Now I had a sense of Bob’s spirit as I turned to work on the first of his pipes. I reamed the bowl to remove the cake on the walls and the debris of tobacco shards that still remained. I used a PipNet pipe reamer to start the process. I followed that with a Savinelli Fitsall Pipe Knife to clean up the remaining cake in the conical bottom of the bowl. I sanded the bowl with 220 grit sandpaper wrapped around a piece of dowel. It smooths out the walls and also helps bring the inner edges back to round.
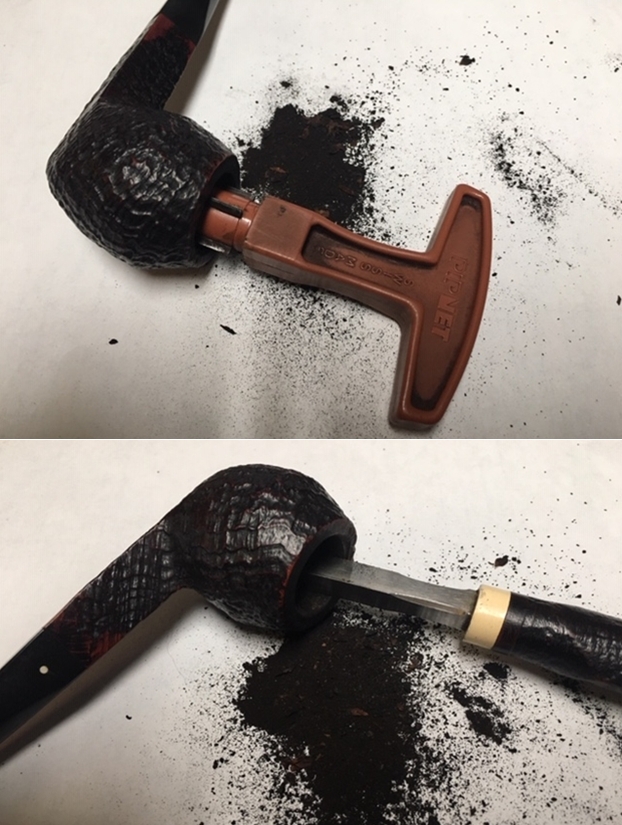
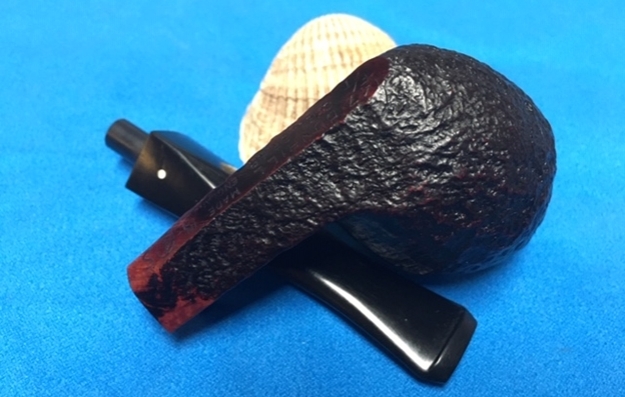
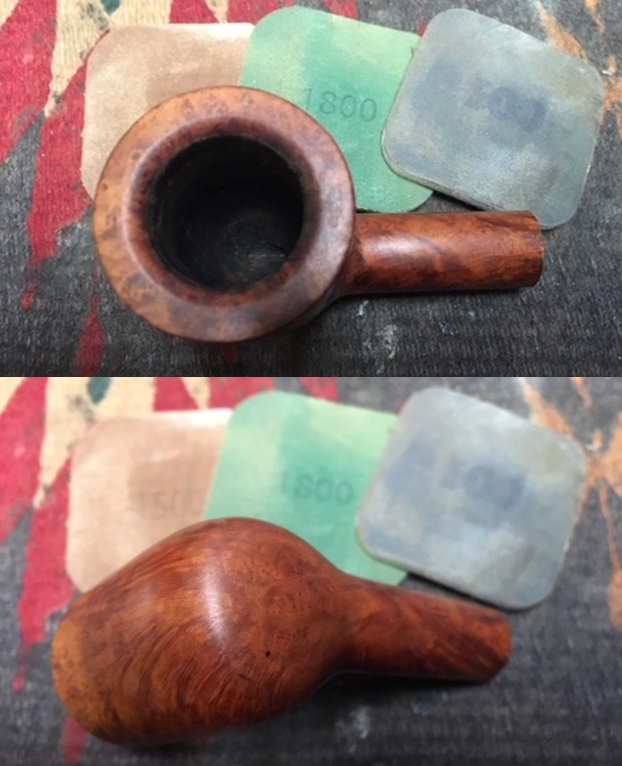
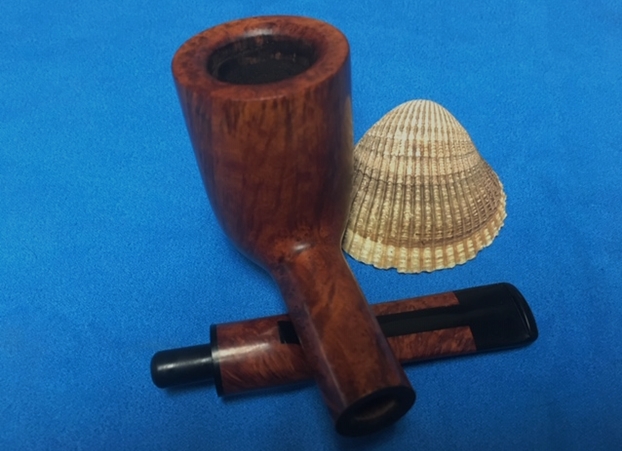
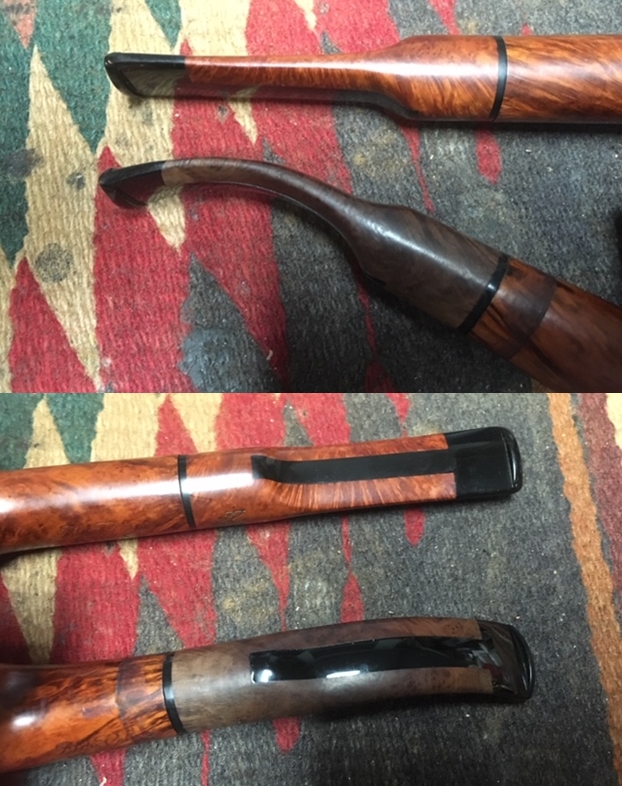
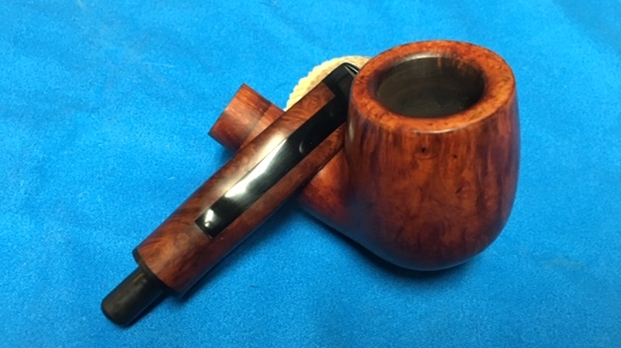
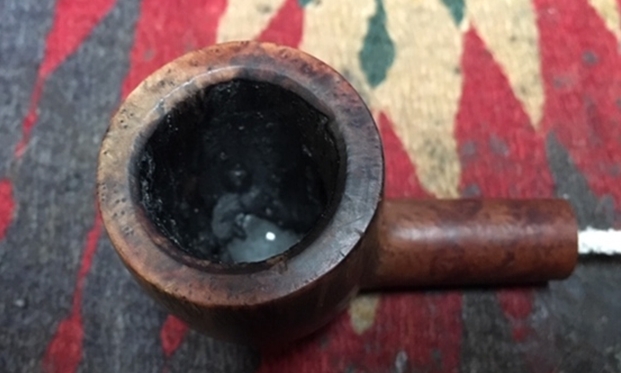
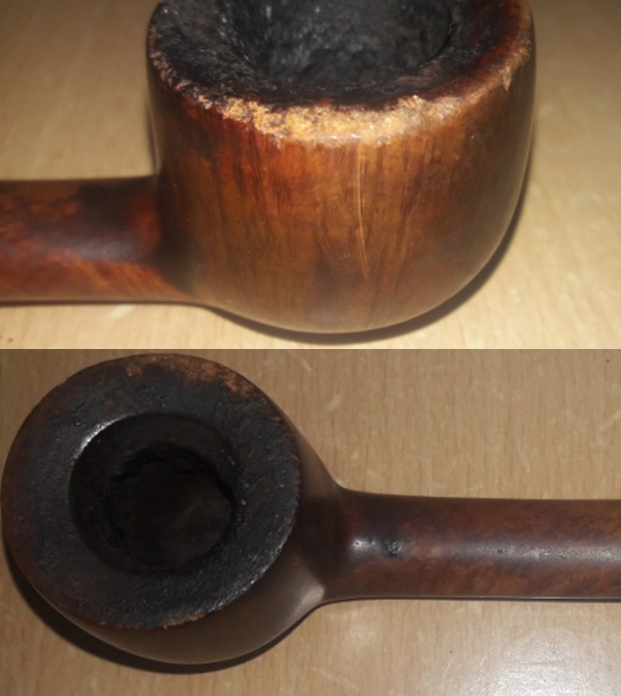
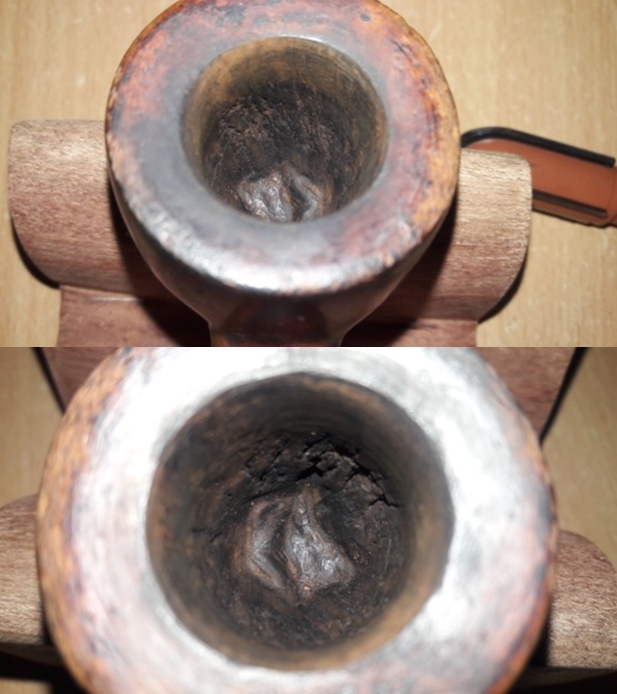
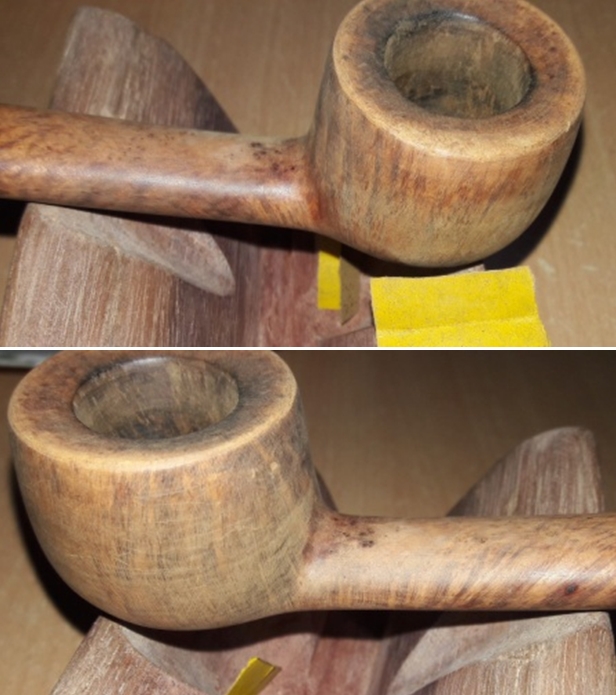
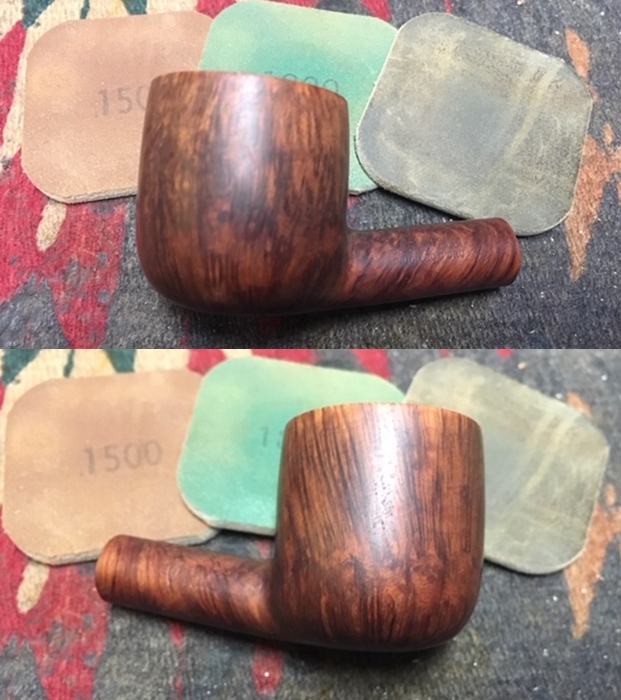
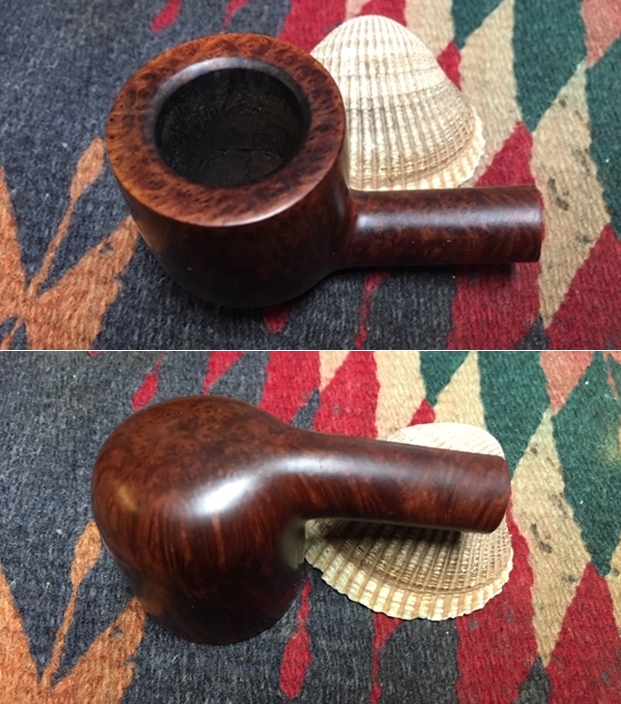
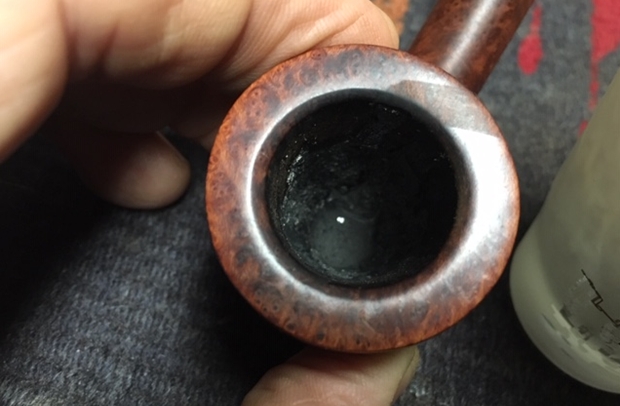
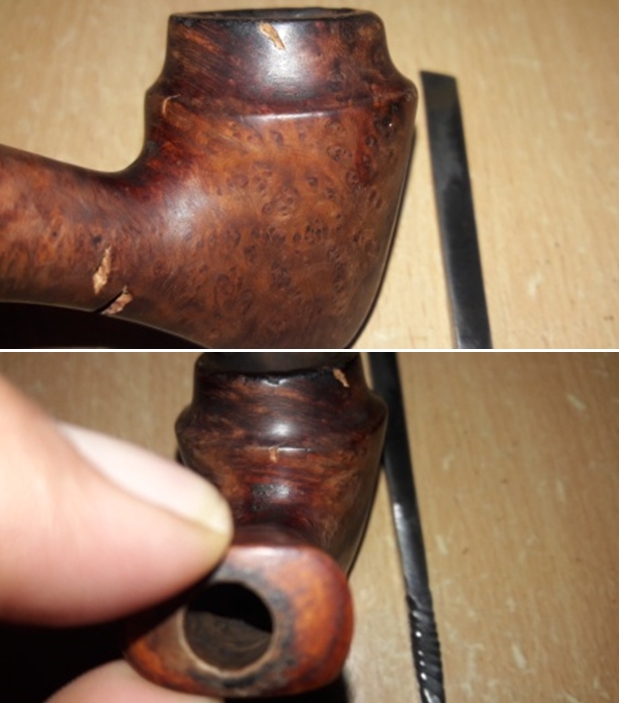
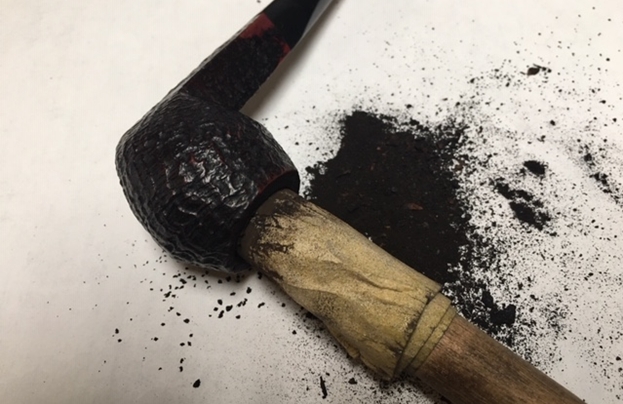 With the bowl cleaned it was time to work on the inner edge of the rim. I used a folded piece of 220 grit sandpaper to smooth out the damaged area and give the edge a slight bevel to bring the bowl back to round as much as possible and remove the damage. The photos tell the story.
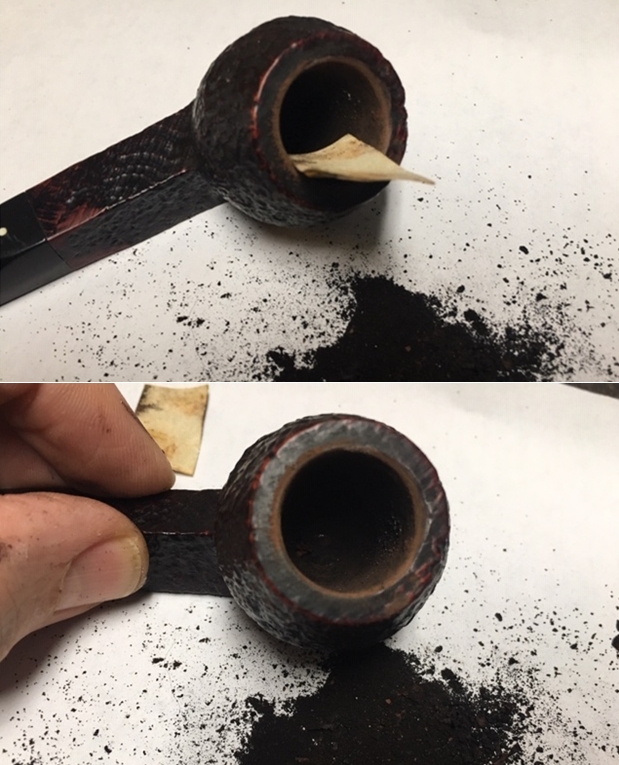 With the bowl reamed I decided to scrub the sandblast finish. I scrubbed it with undiluted Murphy’s Oil Soap and a tooth brush to remove the grime from the grooves and canyons of the blast. I worked over the tarry lava overflow on the rim with the tooth brush and a brass brush. I rinsed the pipe under running water to remove the grime. I dried it off with a soft towel.
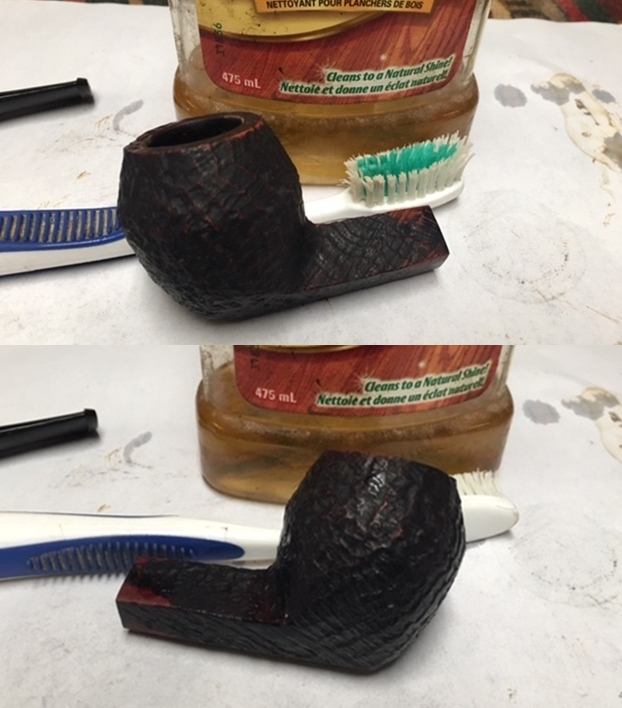
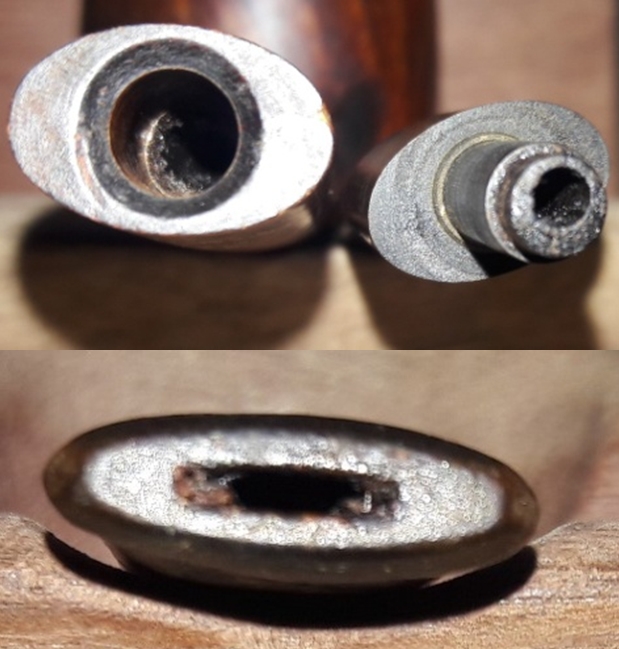
 I cleaned out the internals of the bowl, shank and the airway in the shank and the stem with alcohol, pipe cleaners and cotton swabs until they came out clean. It was very dirty in the shank and stem but it not only looks clean but smells clean now.
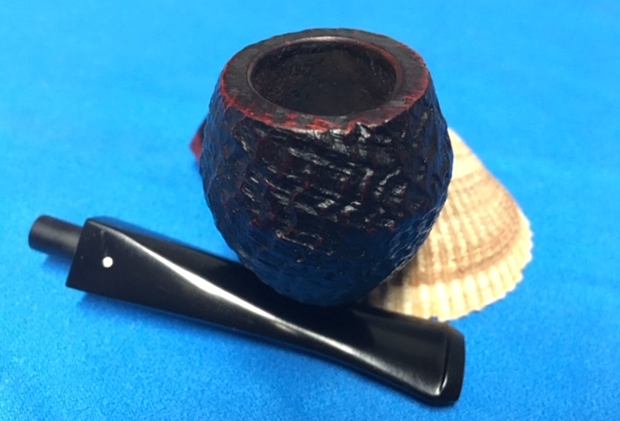
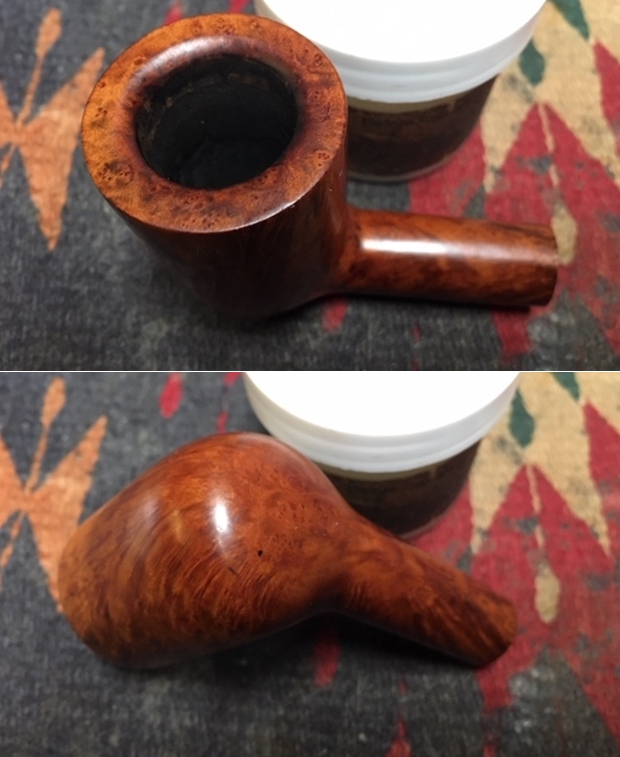
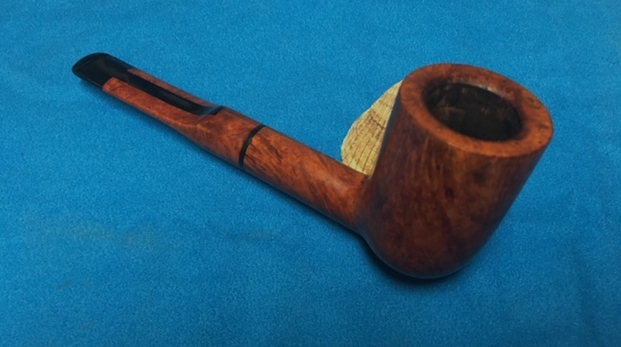
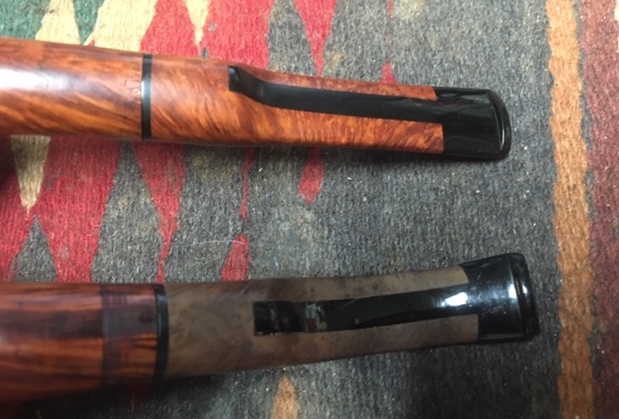
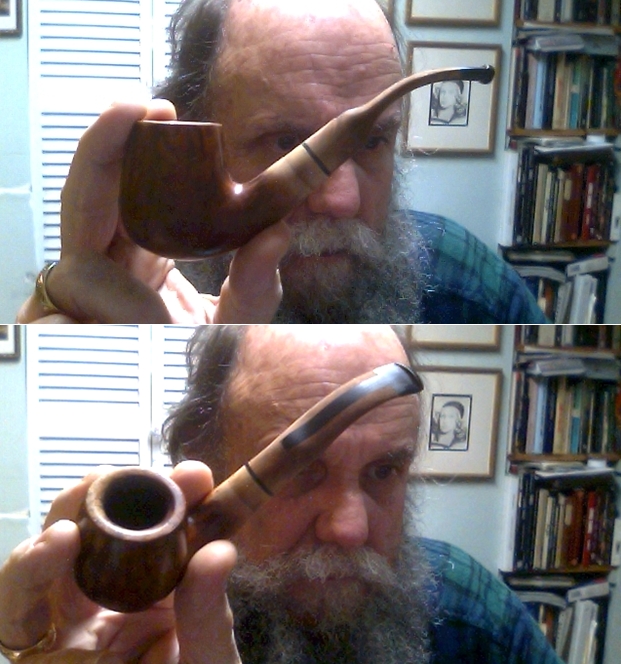
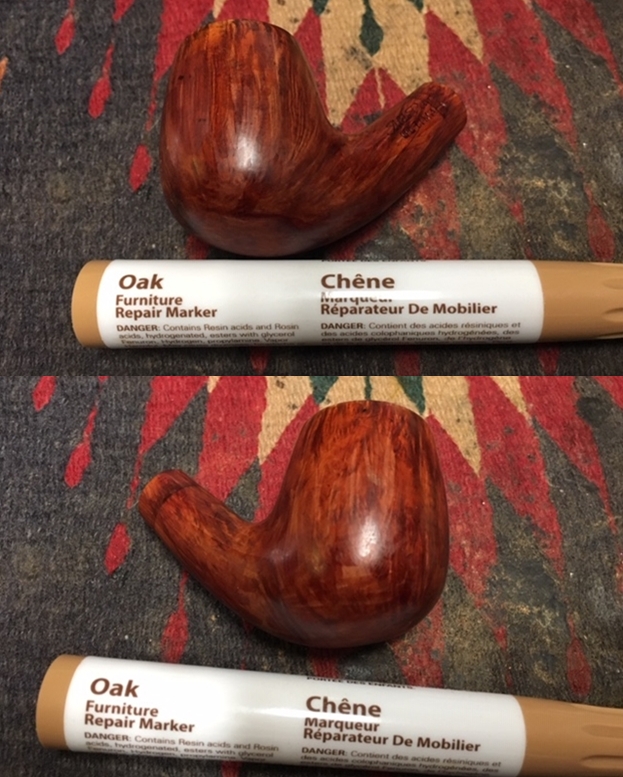
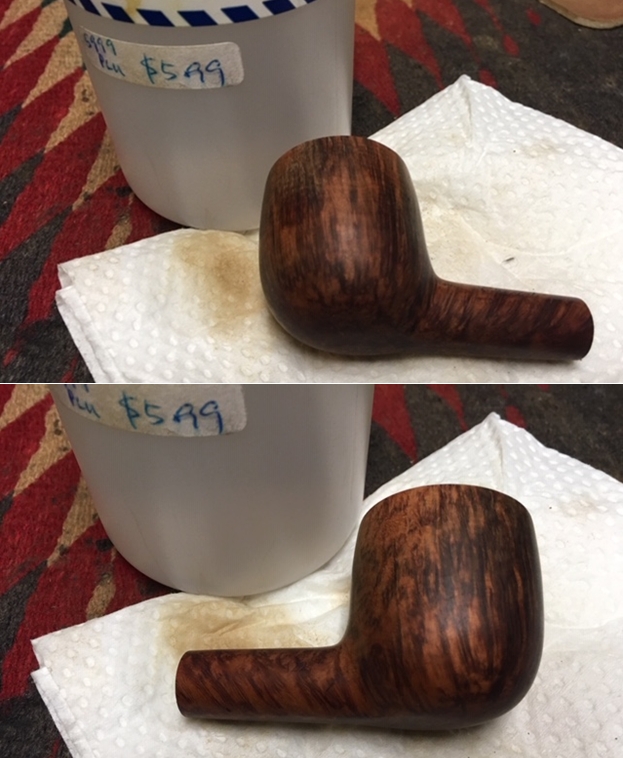
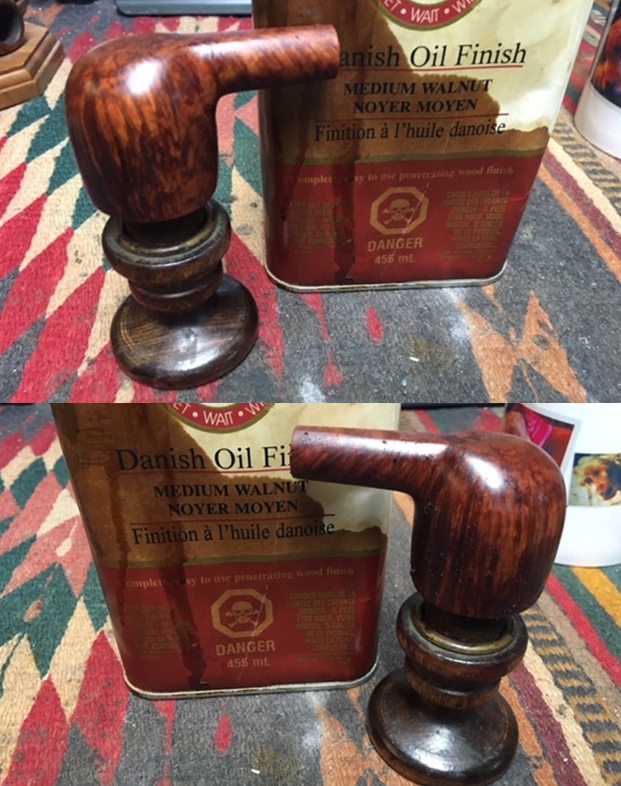
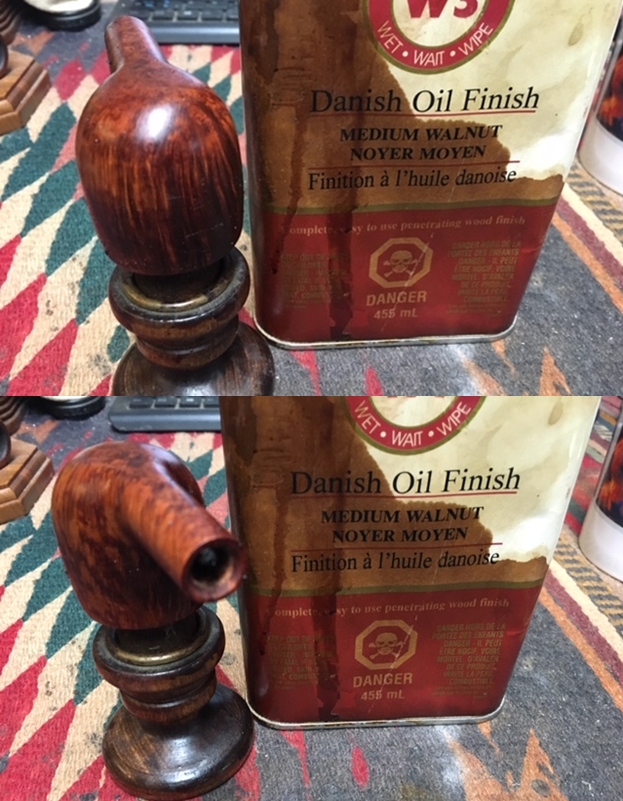
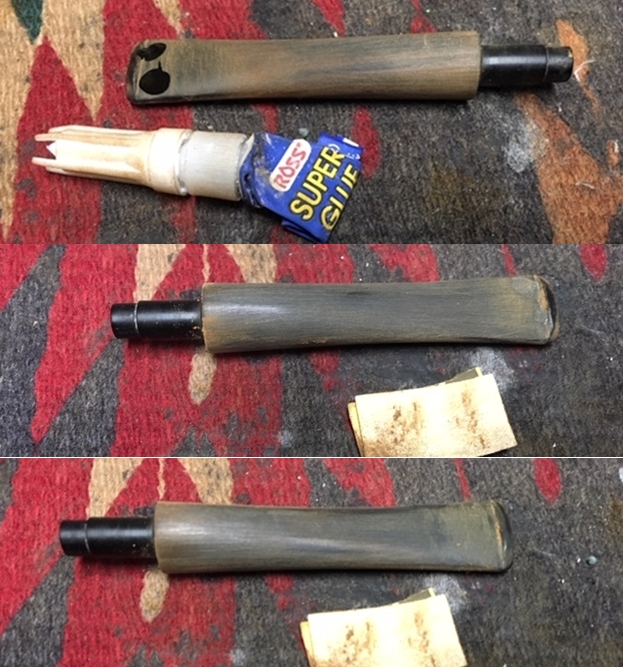
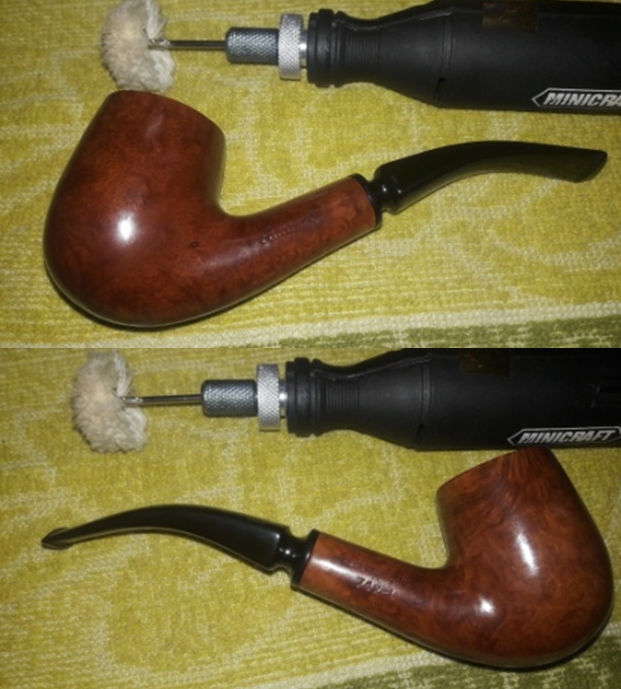
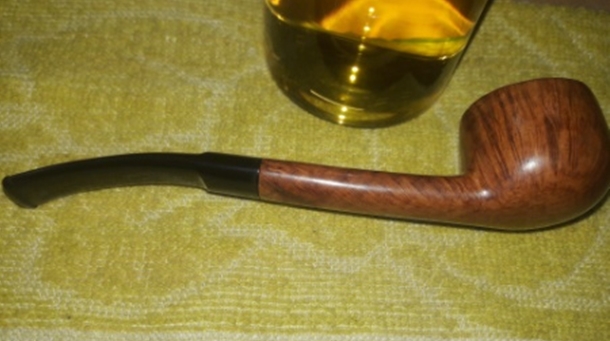
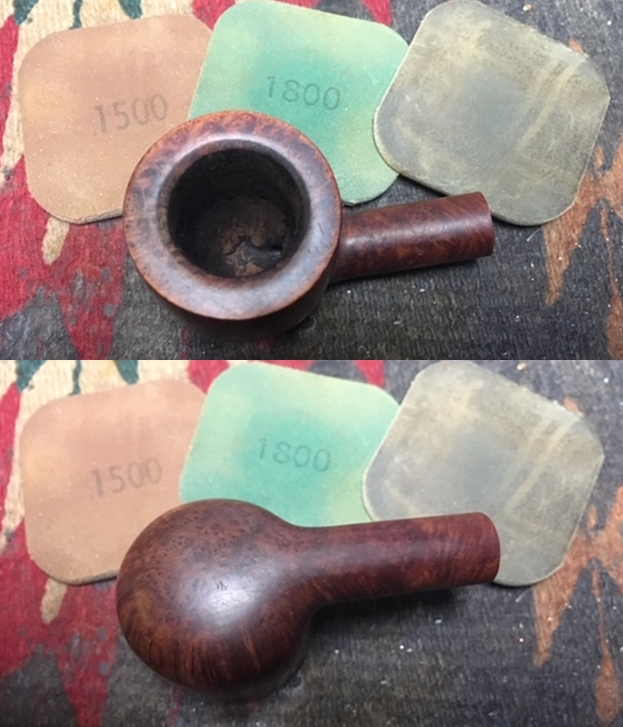
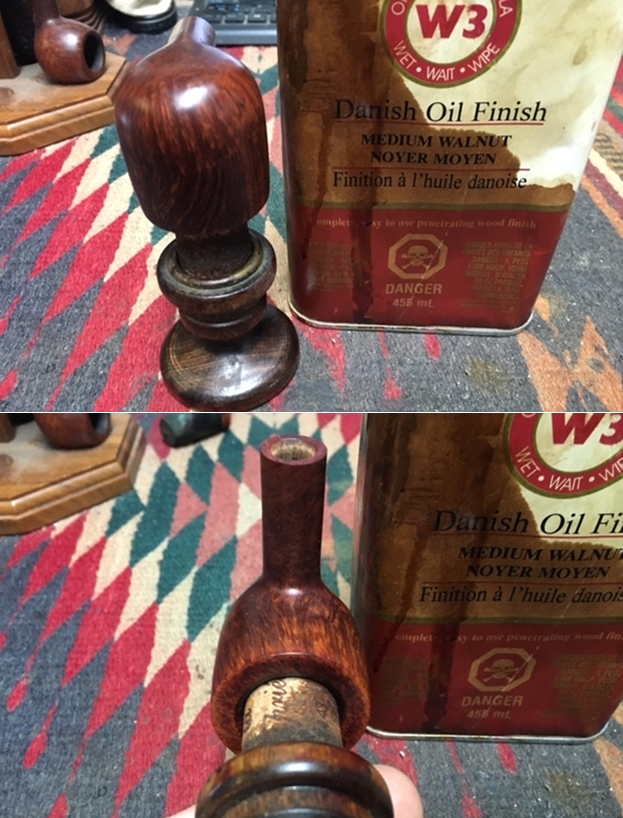
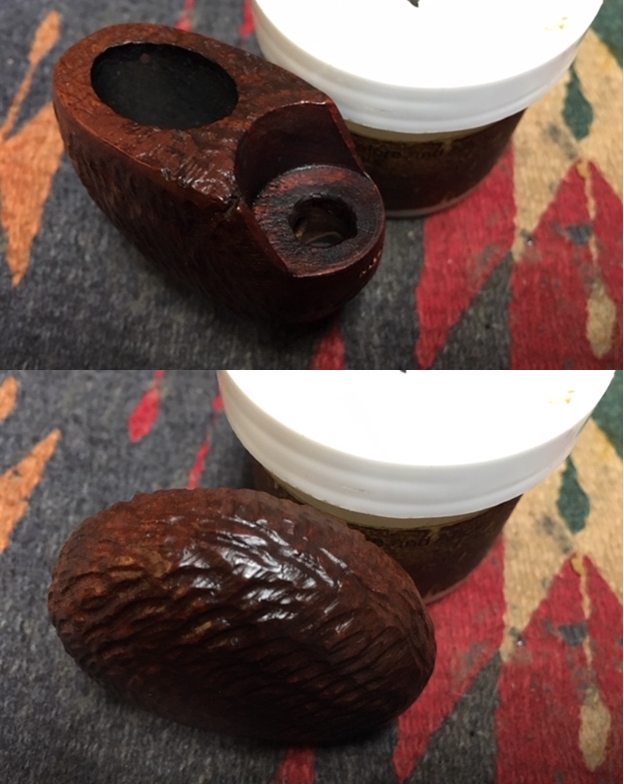
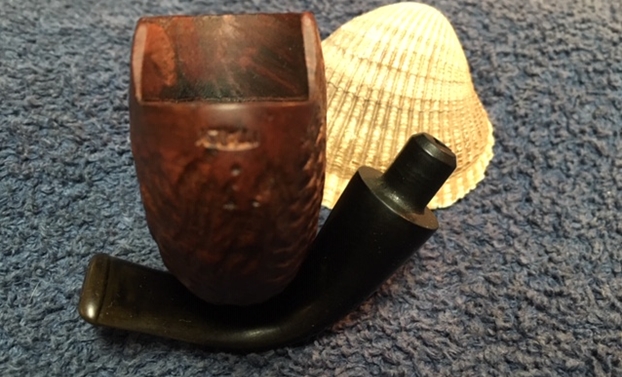
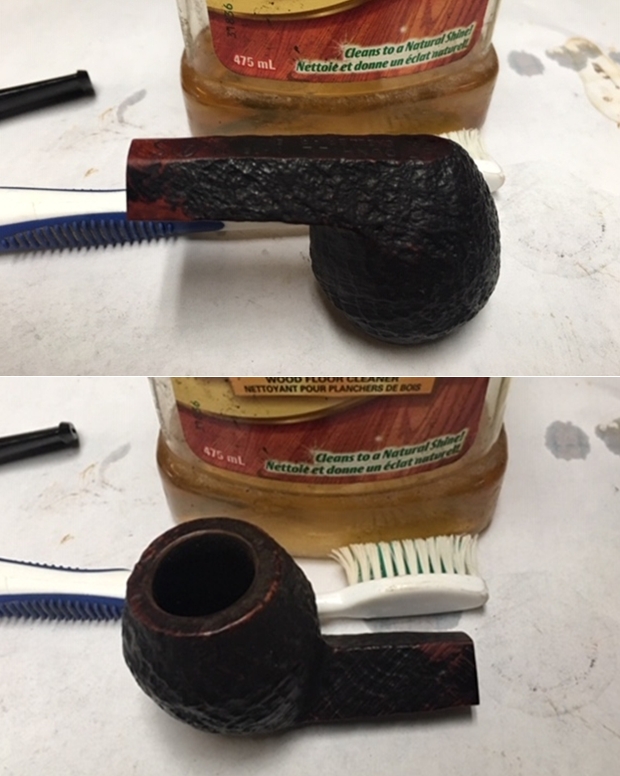
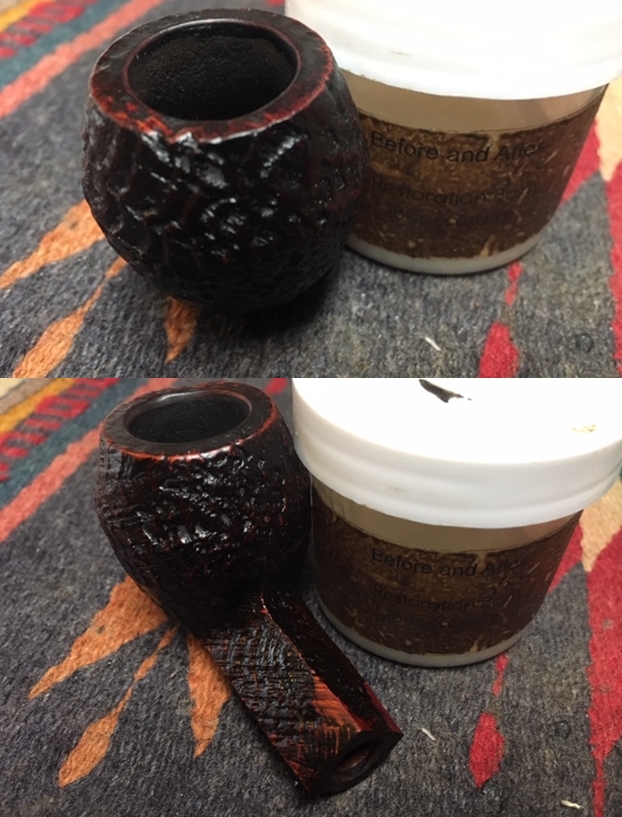
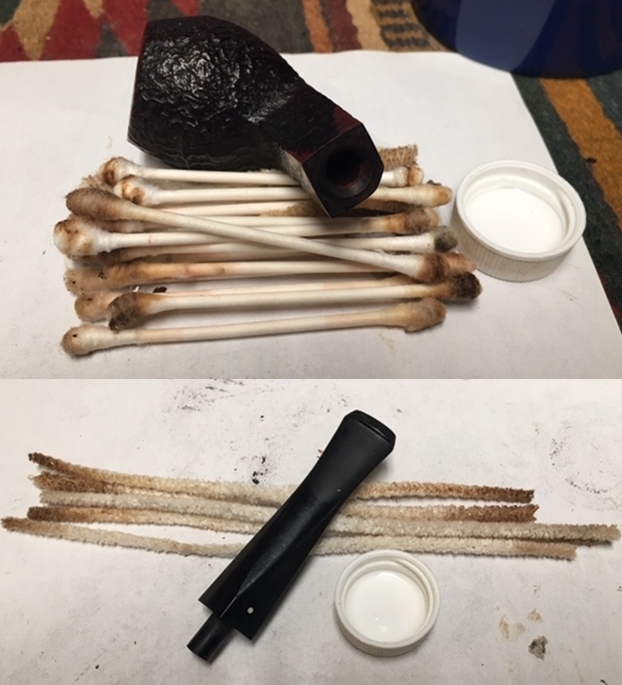 I worked some Before & After Restoration Balm into the briar on the bowl and the rim top. I worked it into the nooks and crannies of the sandblast surface with my fingertips to clean, enliven and protect the wood. I let the balm sit for about 20 minutes and buffed it off with a soft cotton cloth and then polished it with a horsehair shoe brush. I took photos of the pipe at this point in the process to show what the bowl looked like at this point.
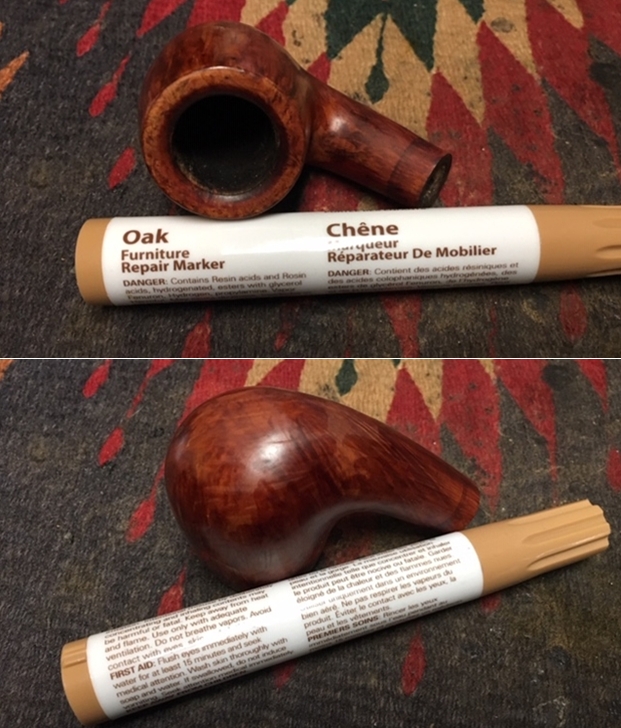
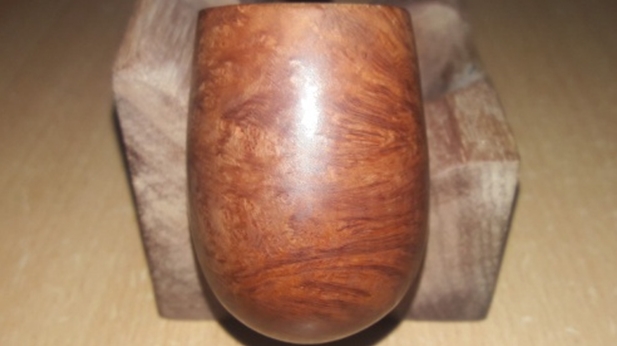
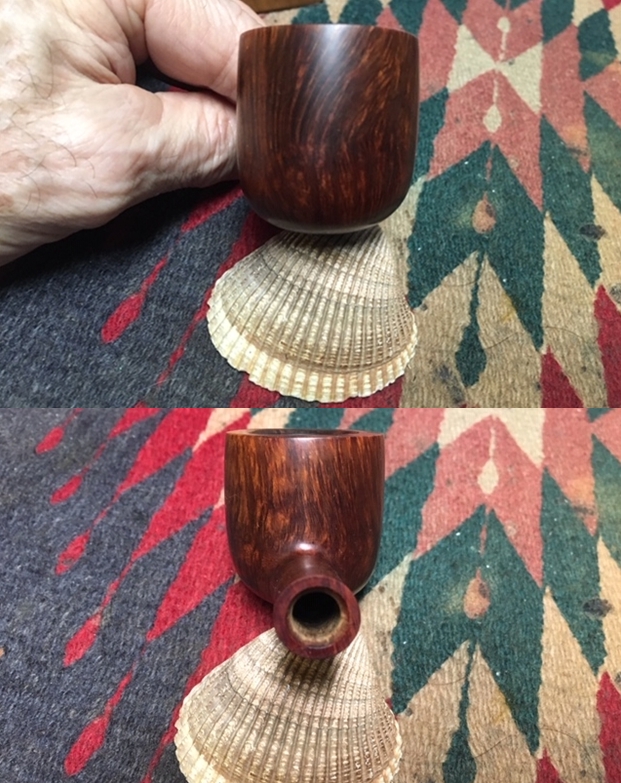
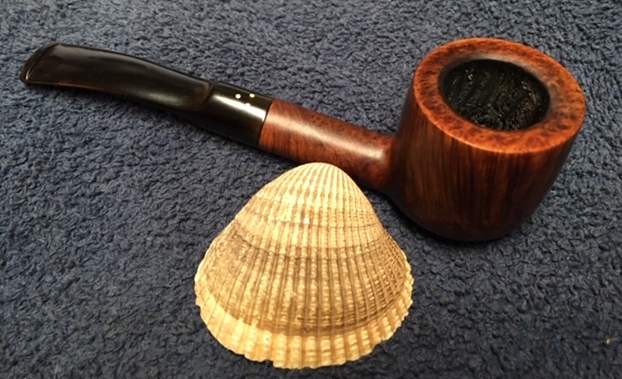
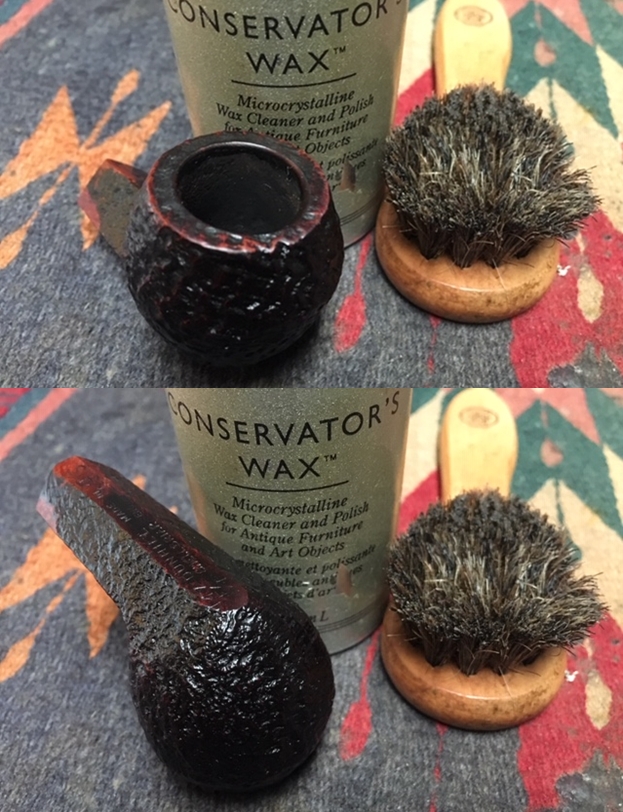
 I gave the bowl several coats of Conservator’s Wax and buffed it with a shoe brush to raise the shine. The bowl looks really good at this point. The grain just shines and the blast is showing all of the layers of colour that make up a Shell finish.
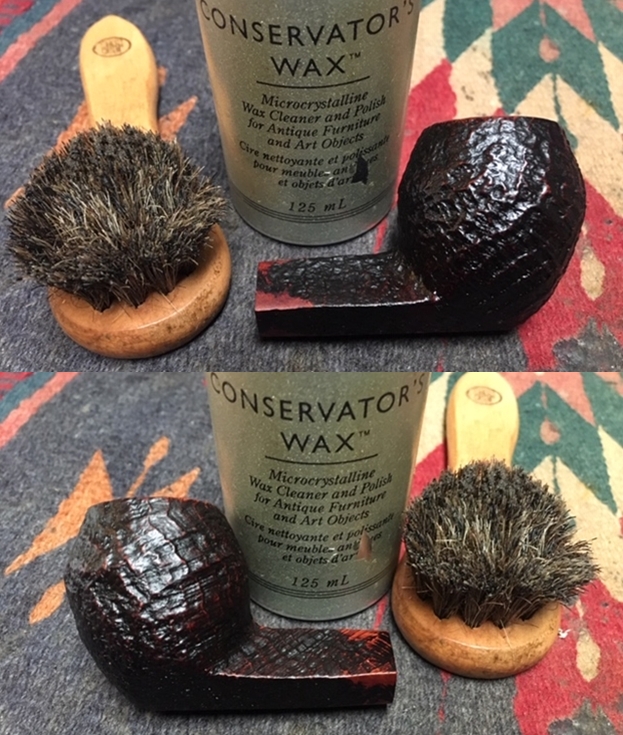
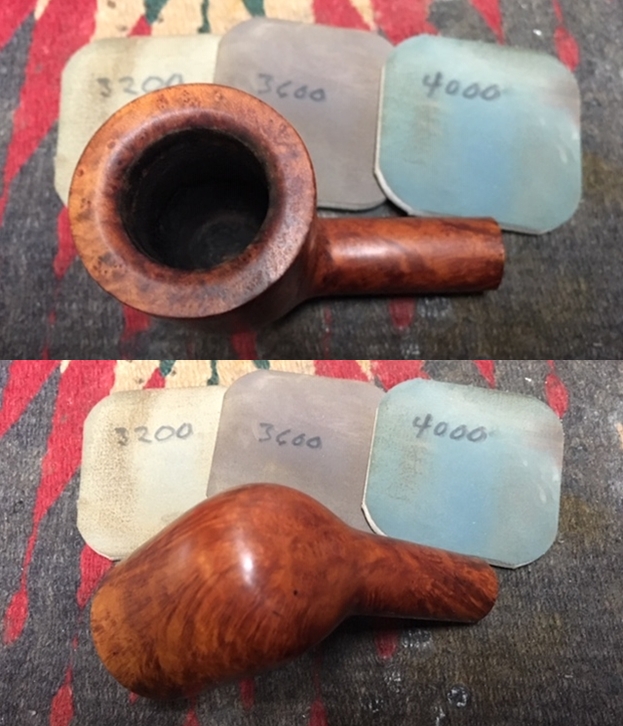
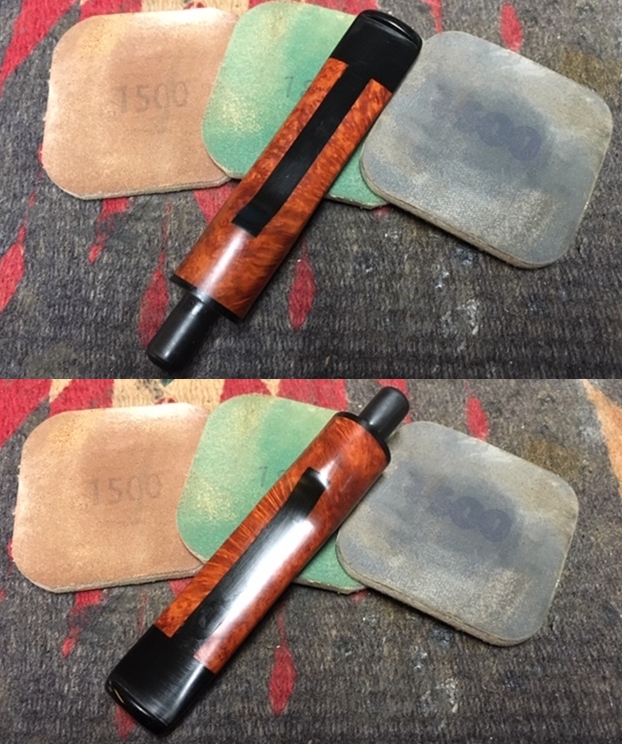
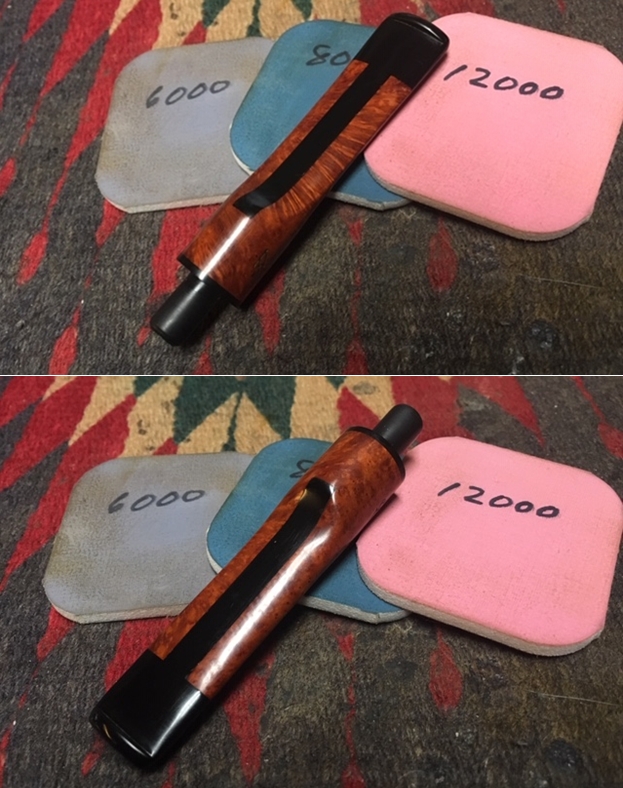
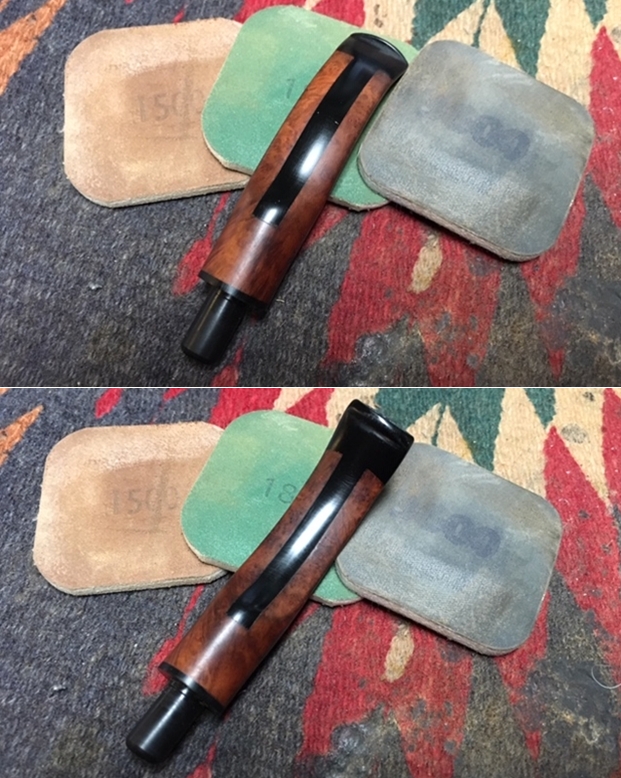
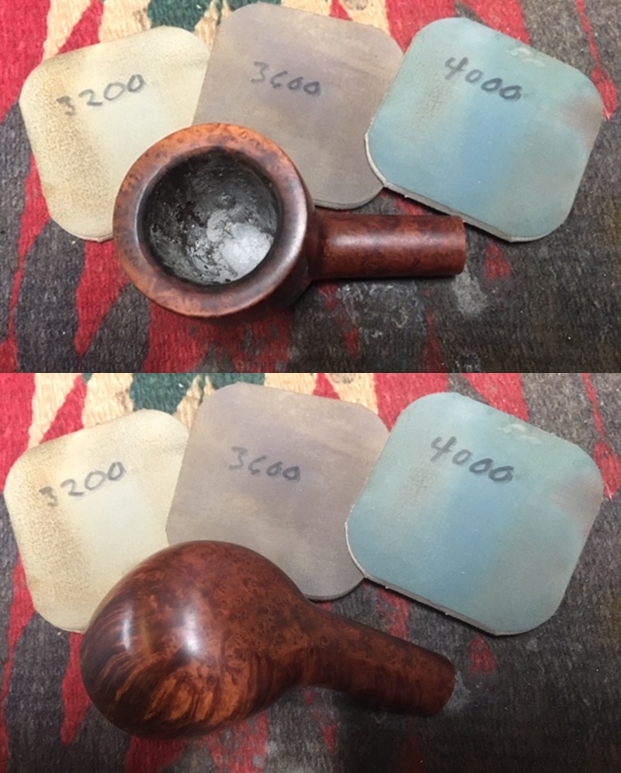
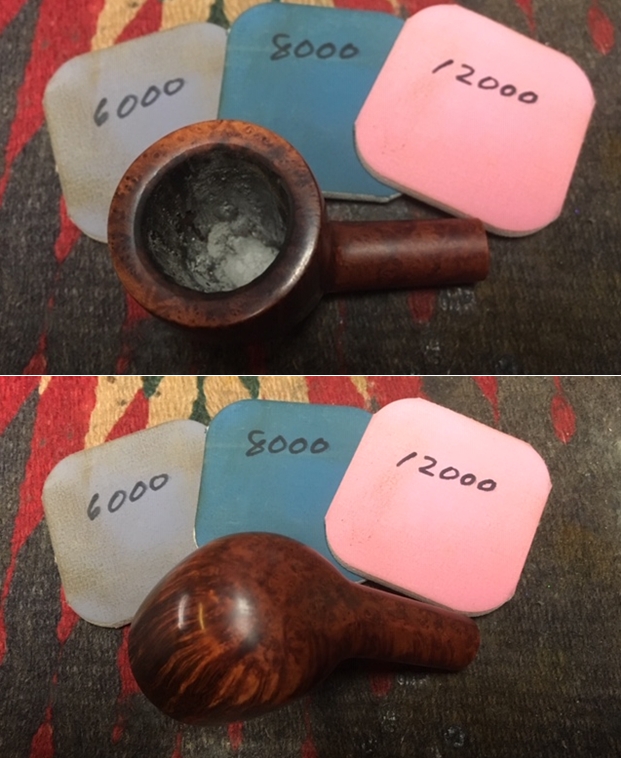
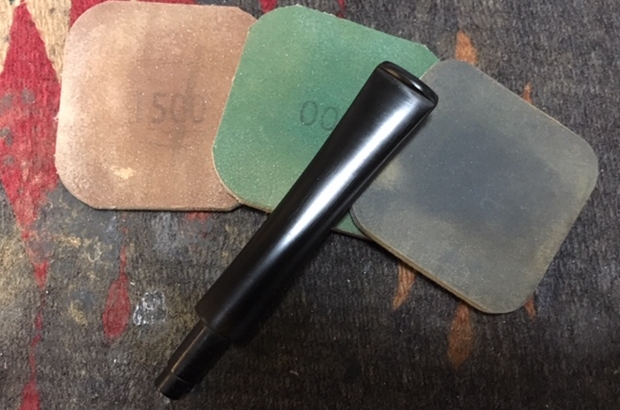
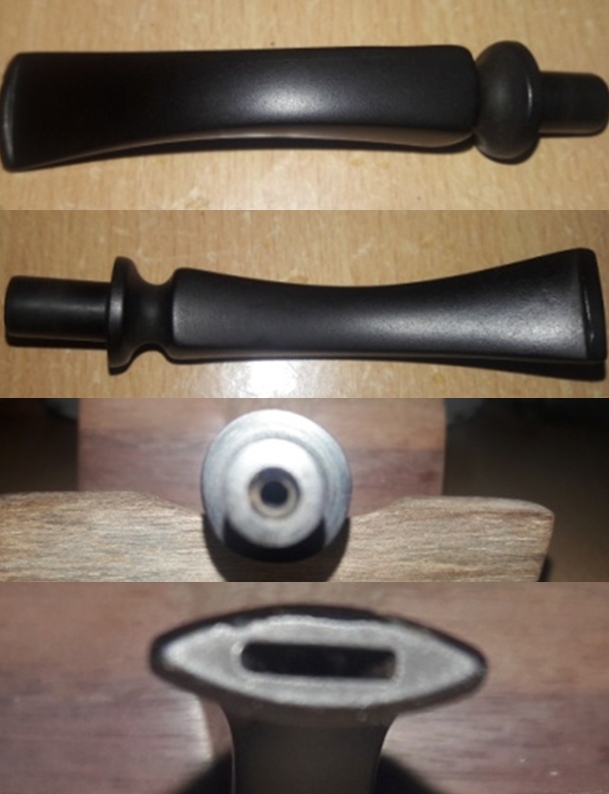
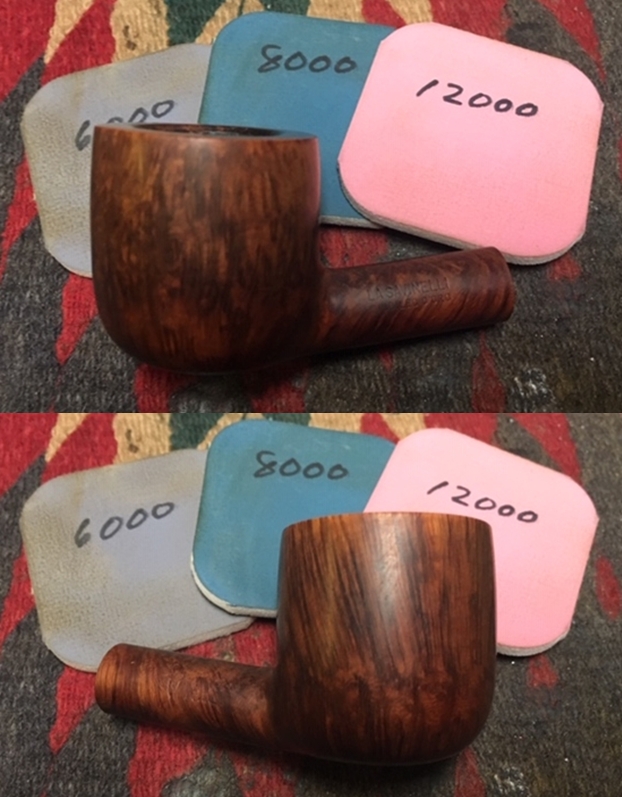
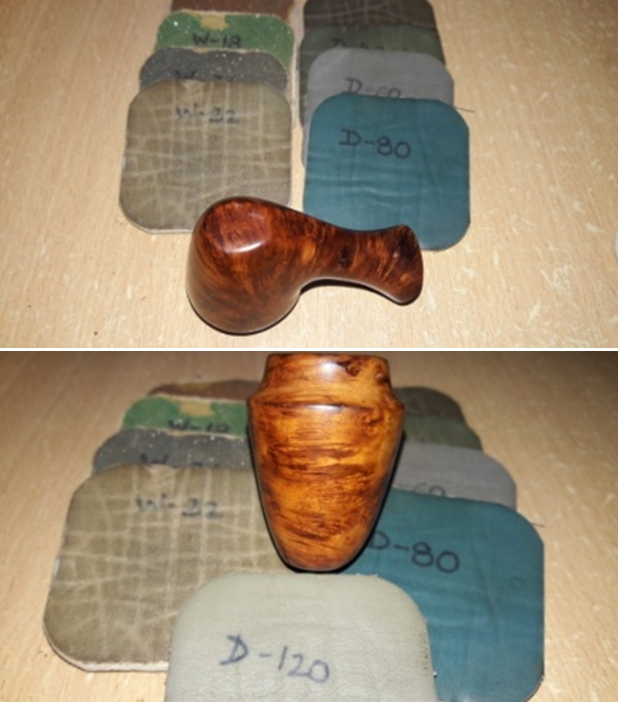
 With the bowl basically finished (I will buff it once the stem is finished and on the shank) I turned my attention to the stem. I sanded out the nicks and tooth chatter on the surface of the vulcanite with a folded piece of 220 grit sandpaper. I find that these older Dunhill stems are made of very high quality vulcanite and the sanding dust is black! Nice to work on.
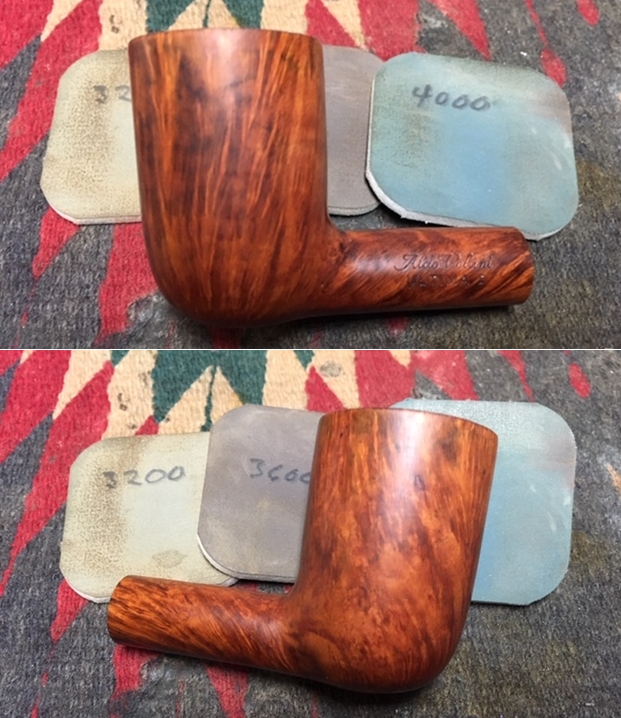
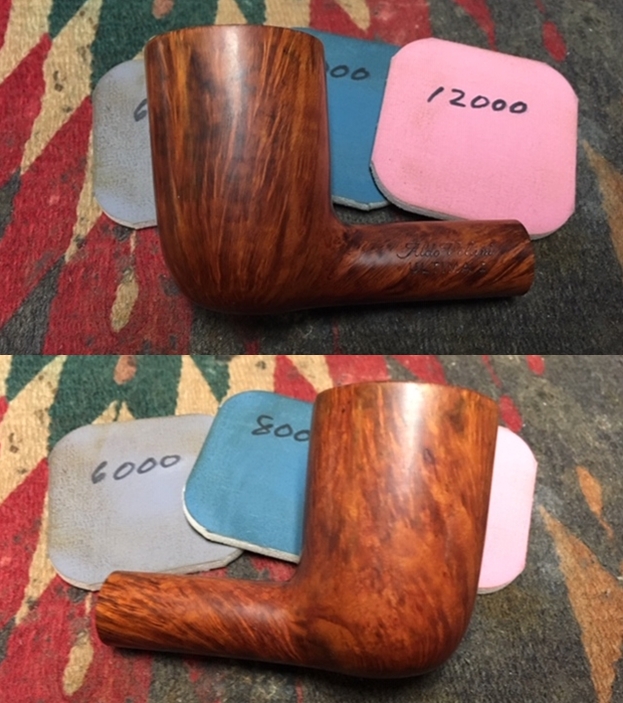
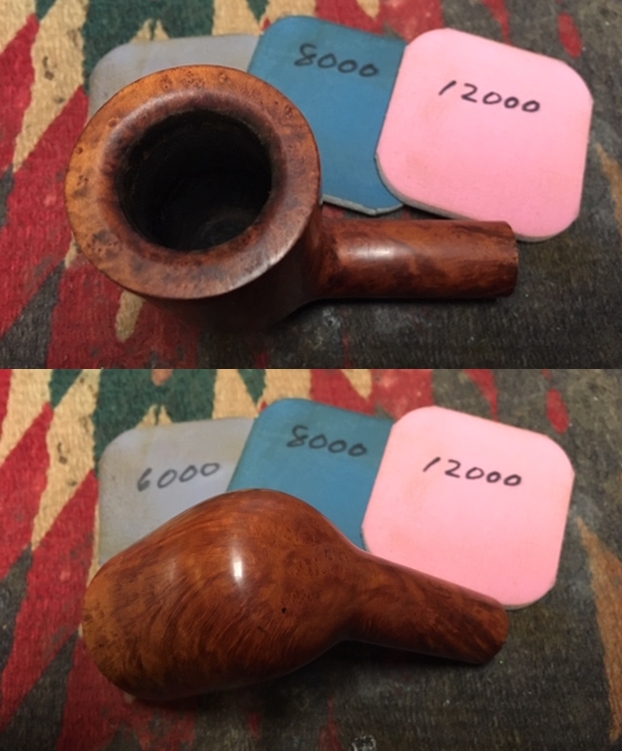
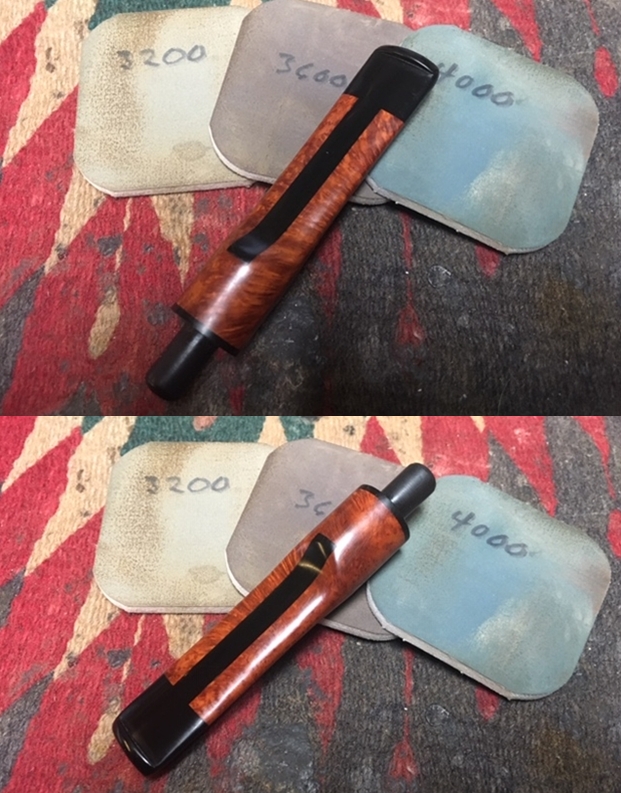
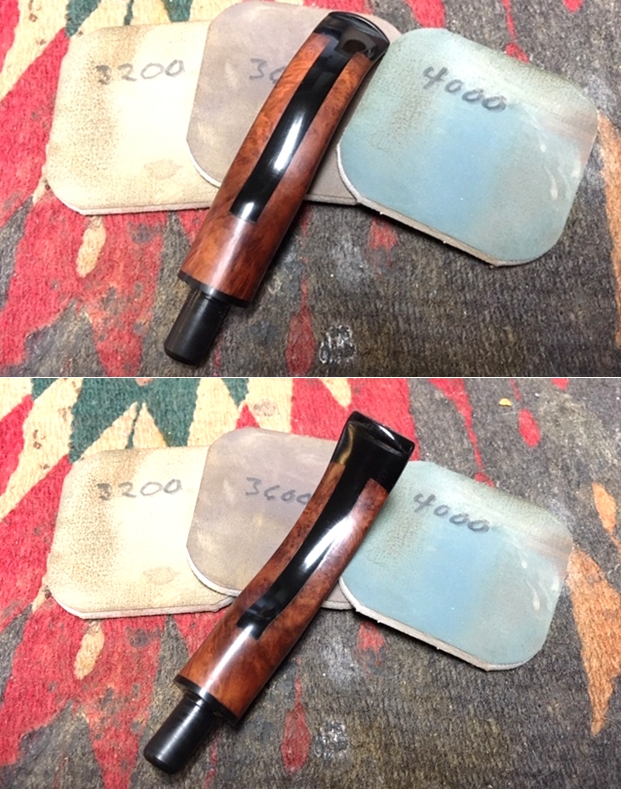
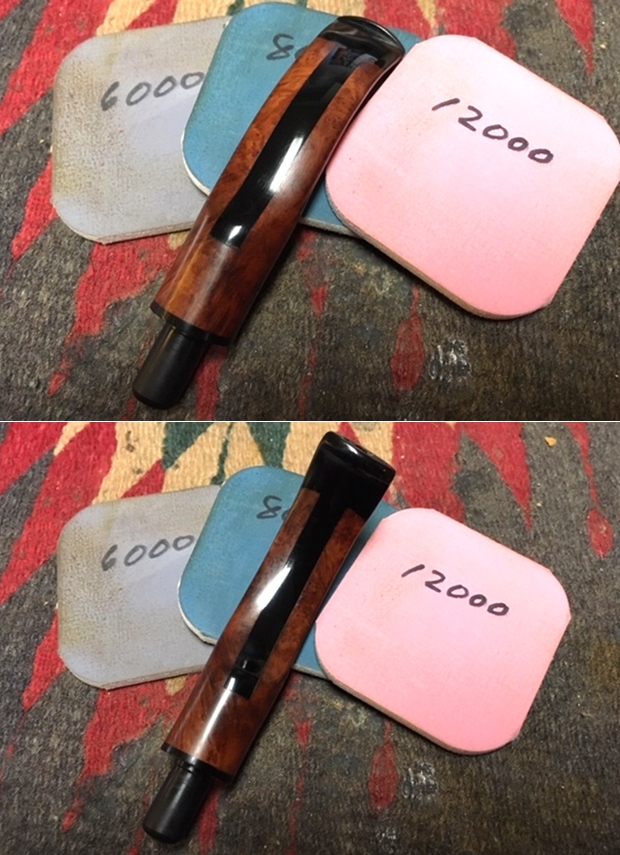
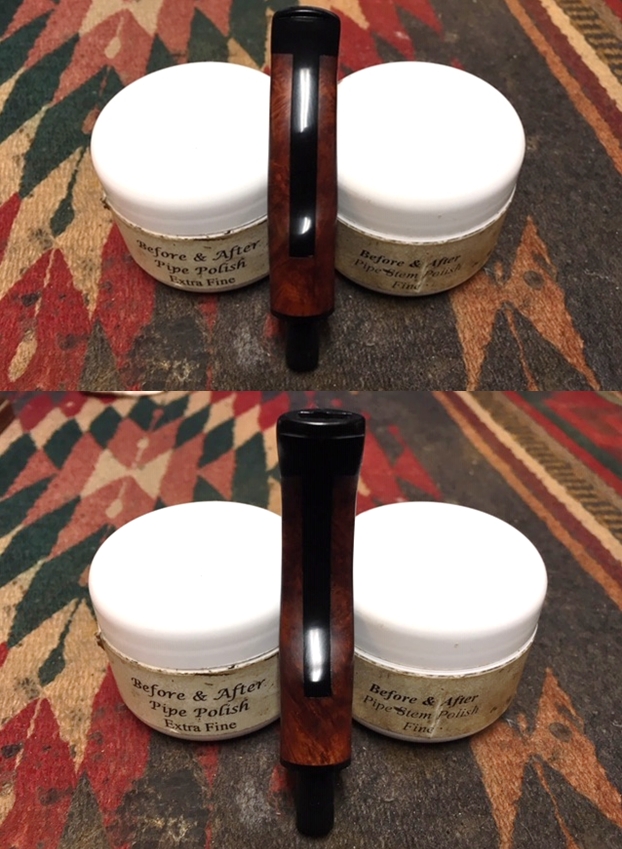
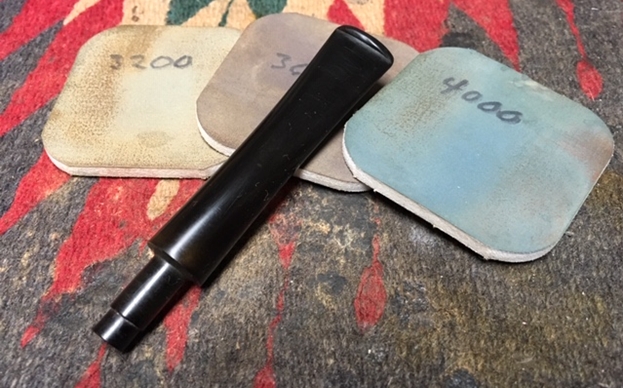
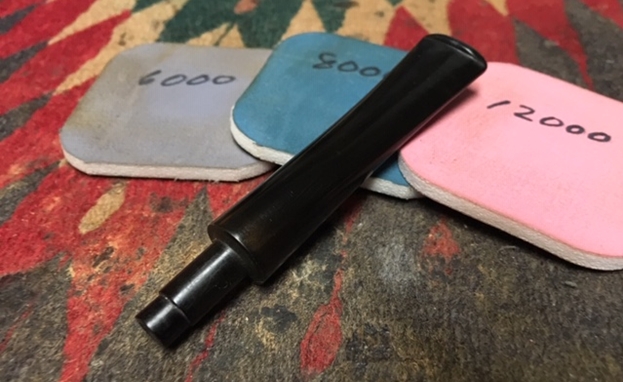
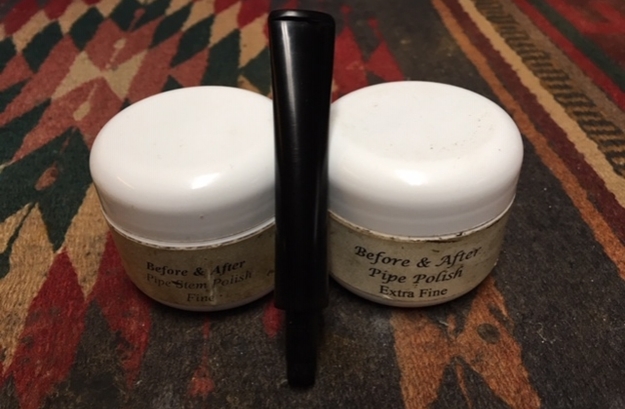
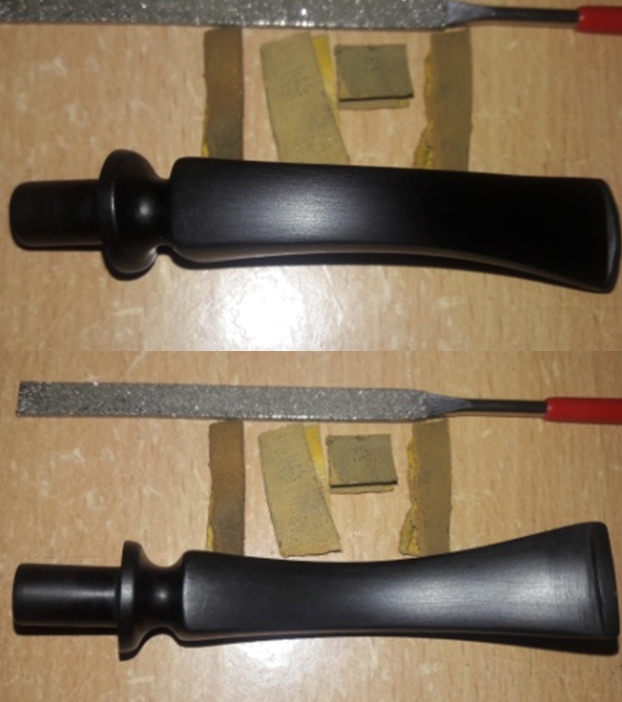
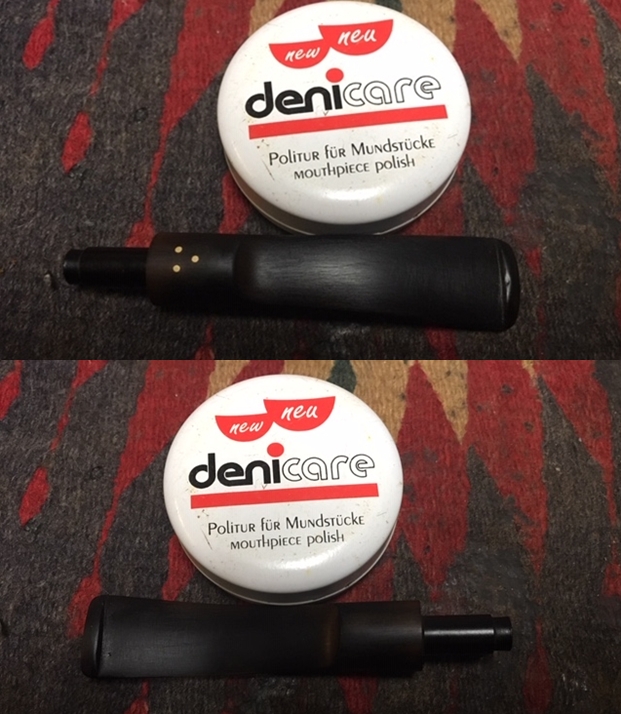
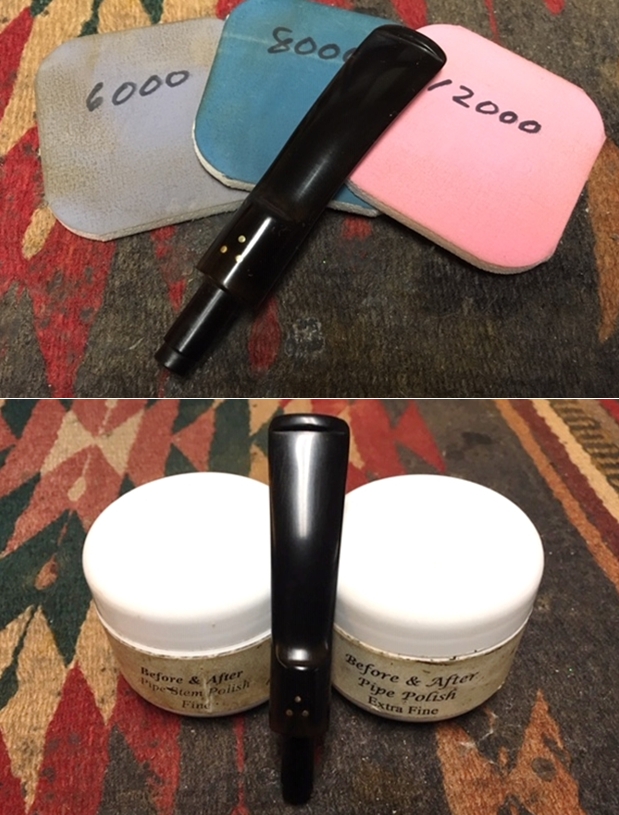
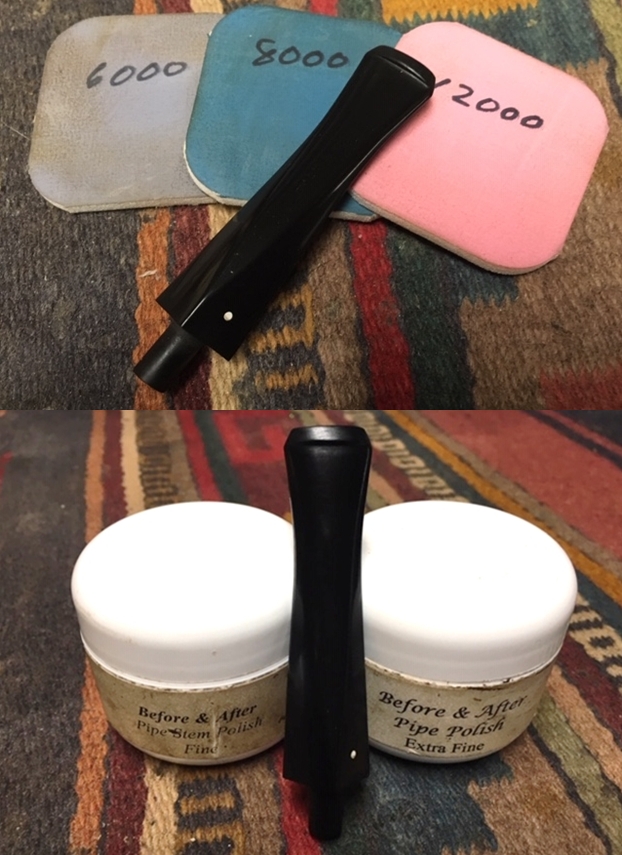
 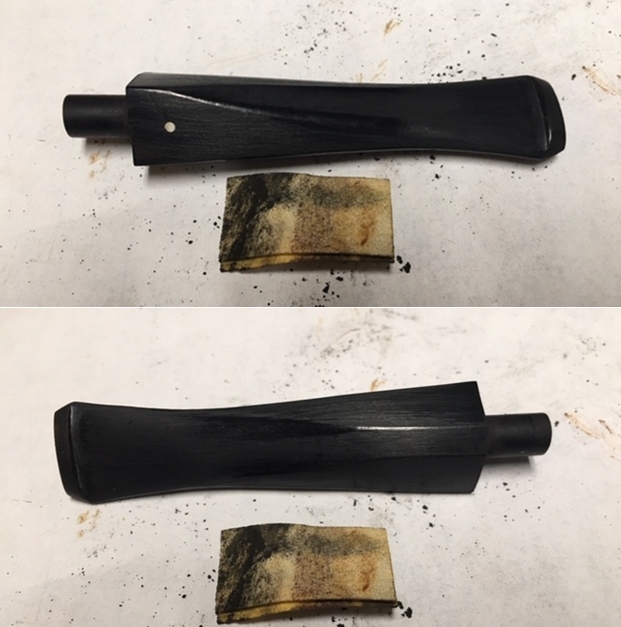 I polished out the scratches with micromesh sanding pads – wet sanding with 1500-2400 grit pads and dry sanding with 3200-12000 grit pads. I wiped the stem down after each sanding pad with Obsidian Oil. I polished it with Before & After Pipe Stem Polish – both Fine and Extra Fine. Once I had finished the polishing I gave it a final coat of oil and set it aside to dry.
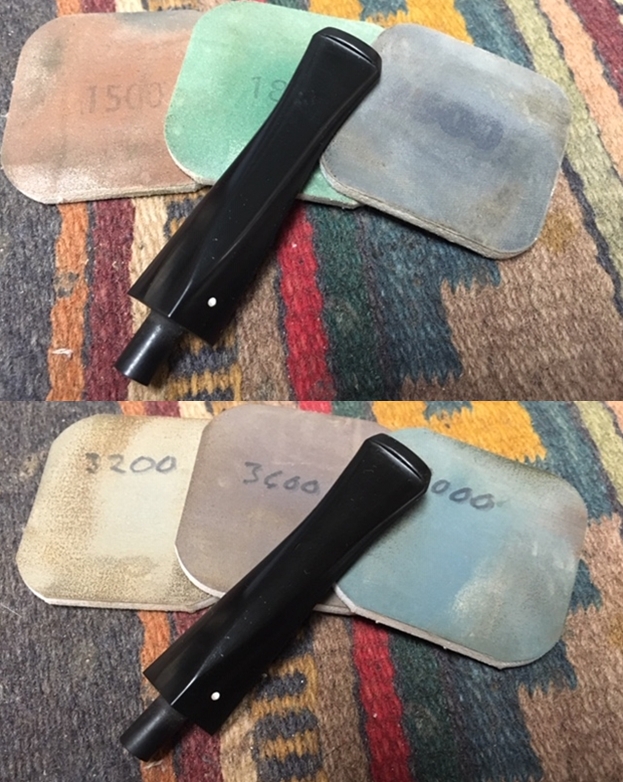
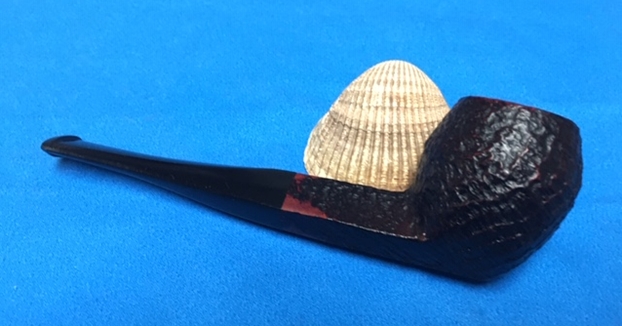
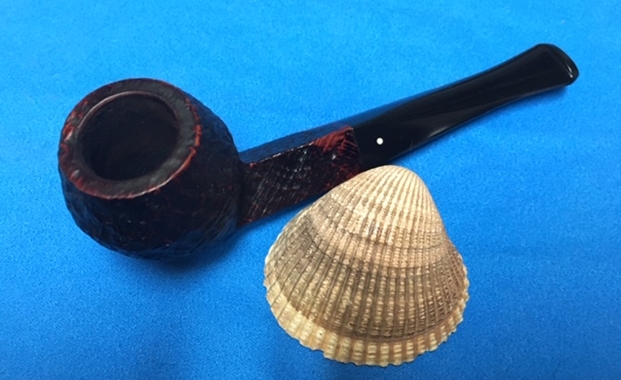
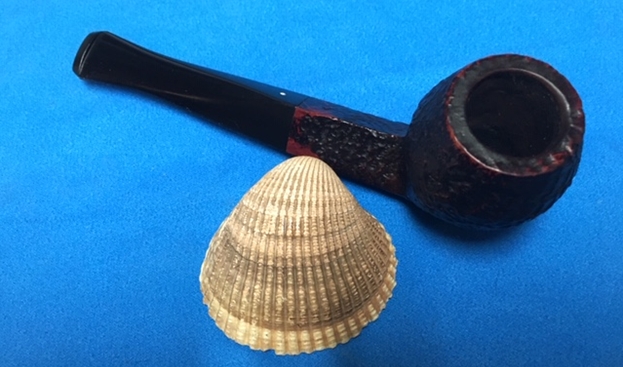
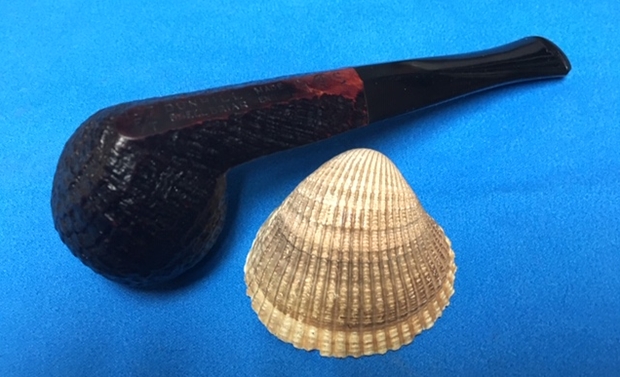
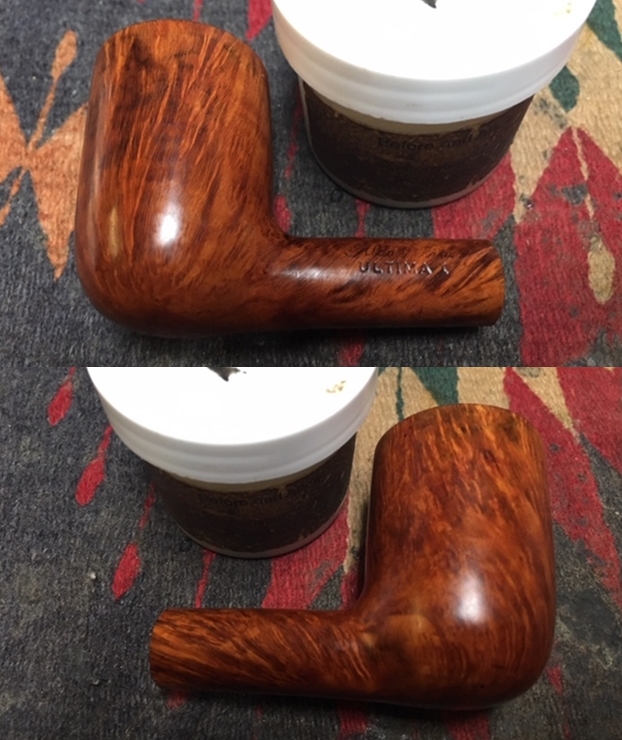
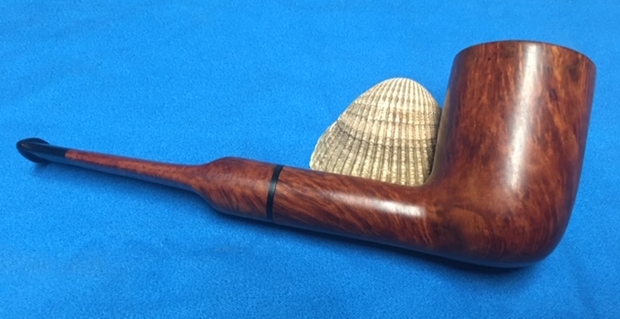
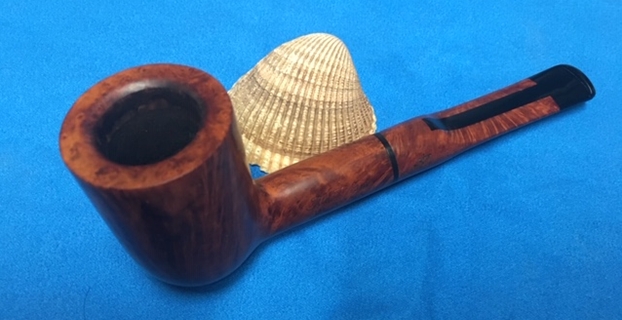
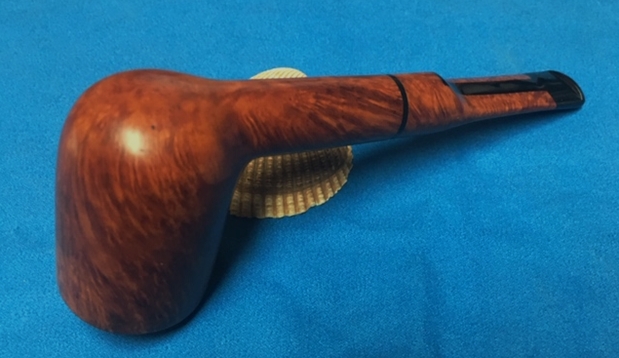
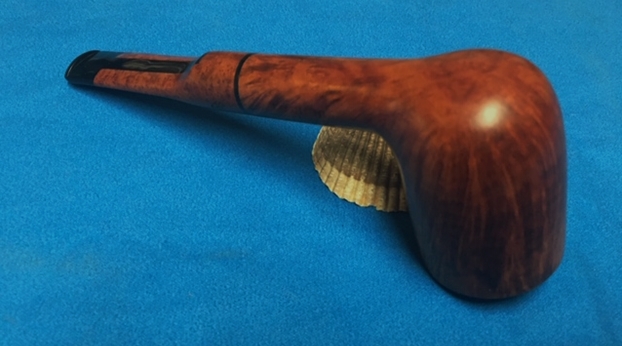
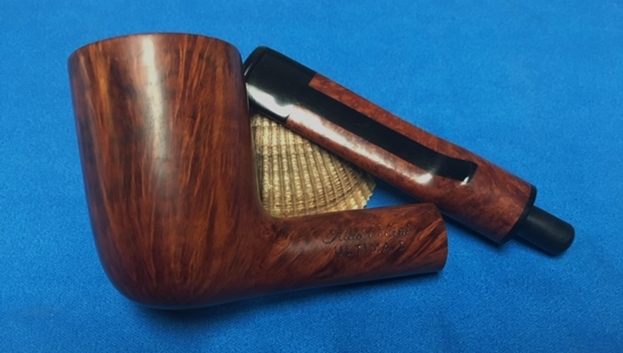
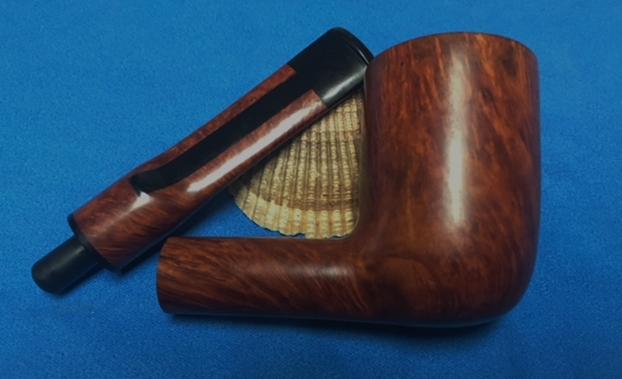
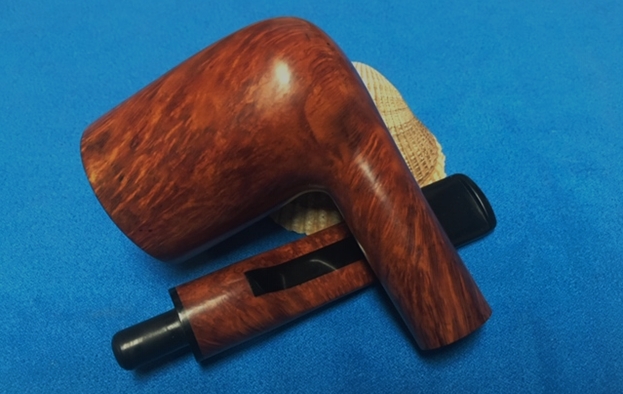
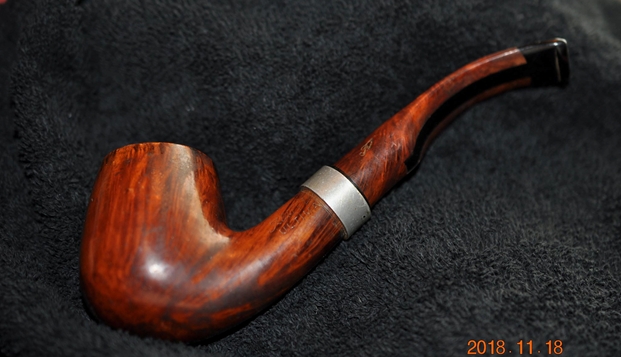
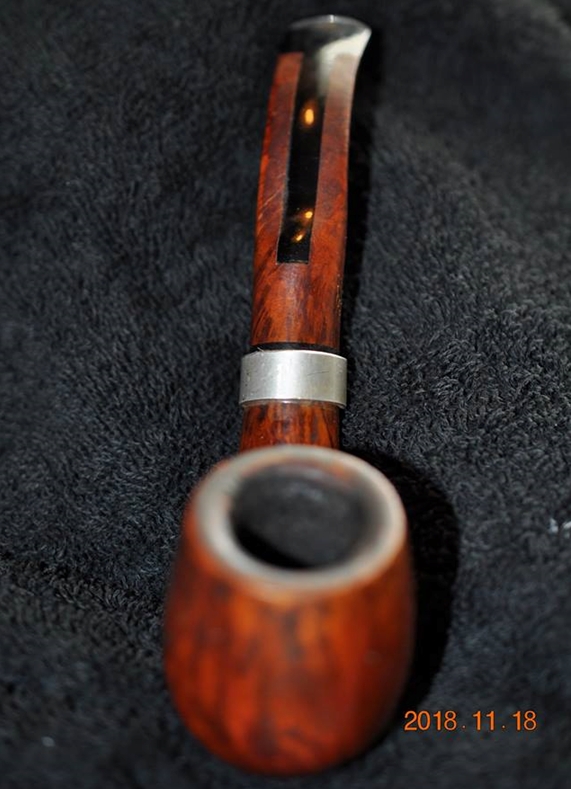
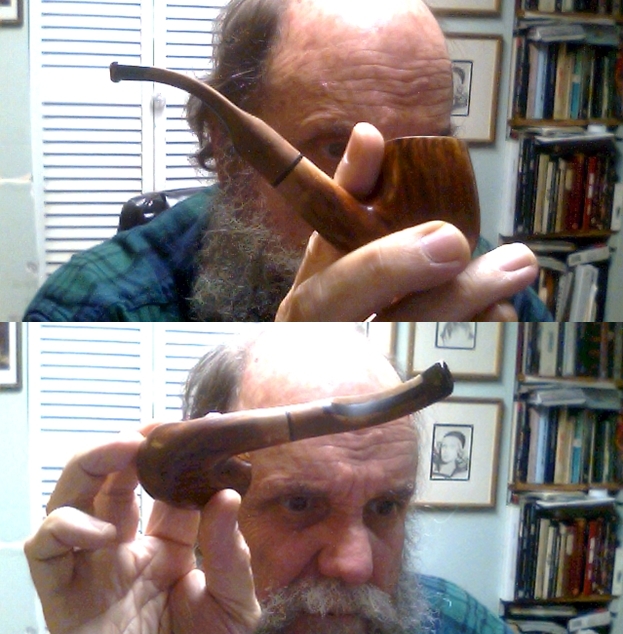
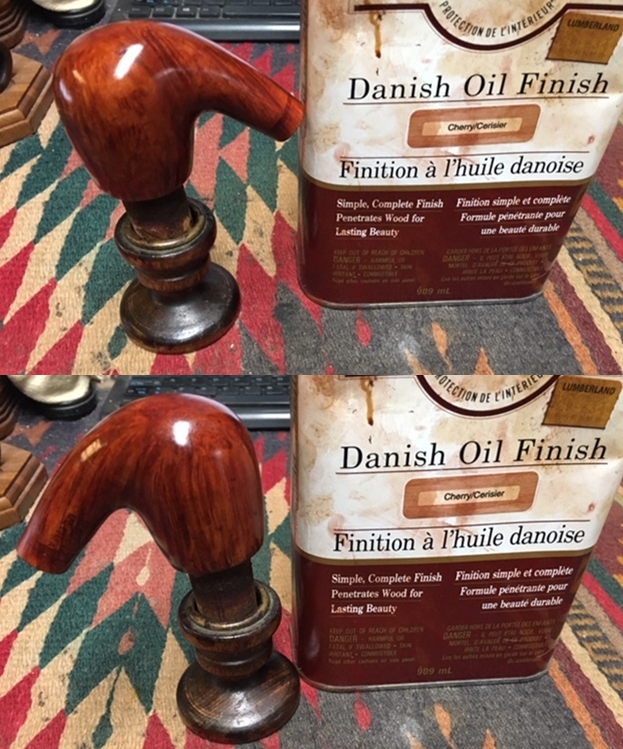
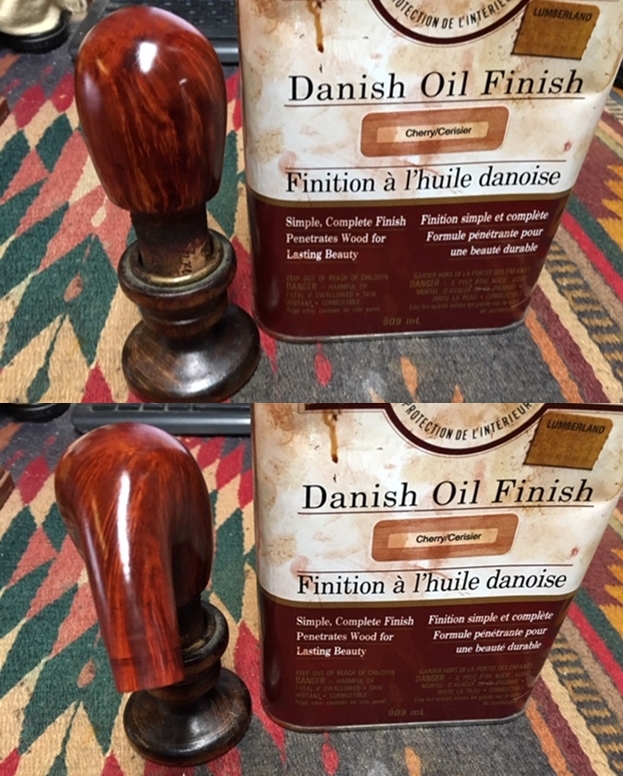
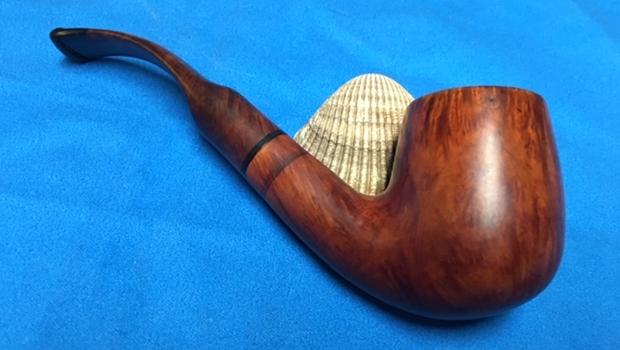
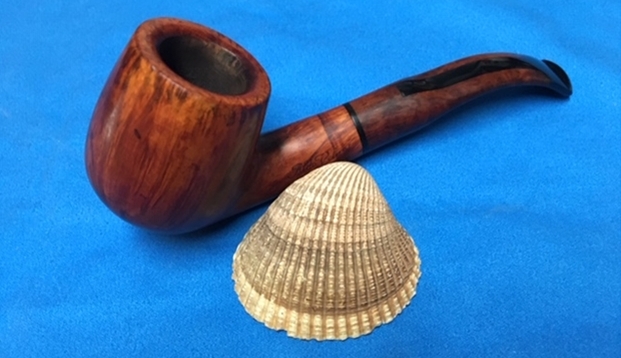
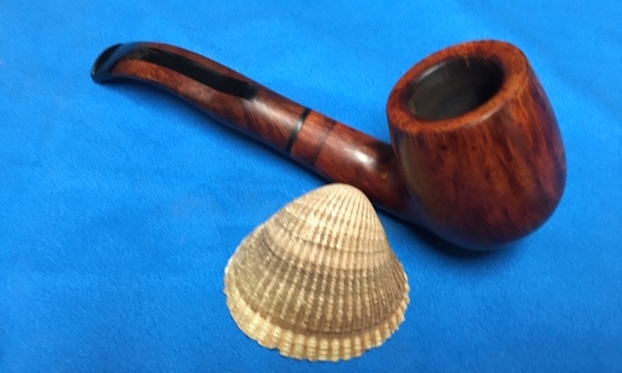
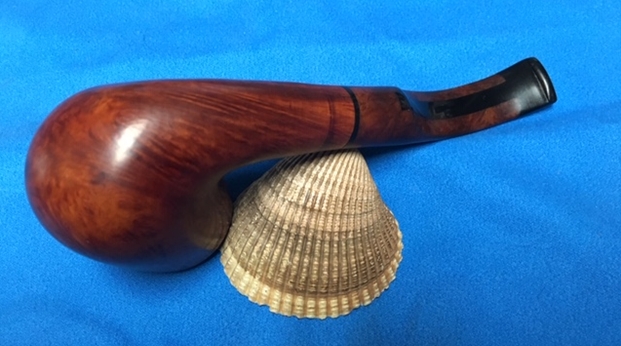
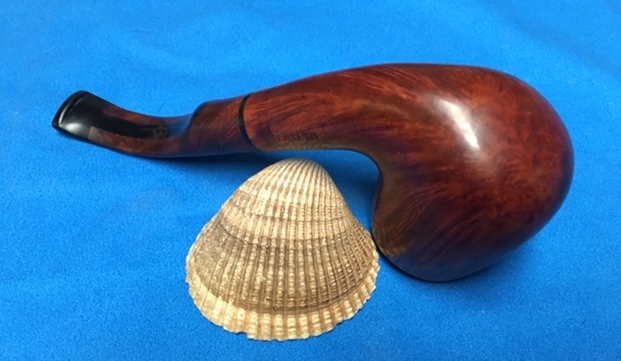
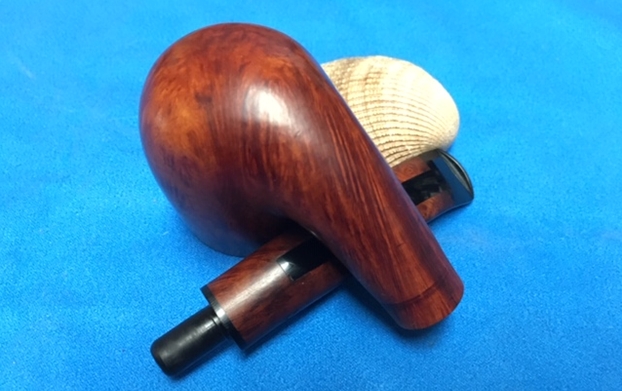
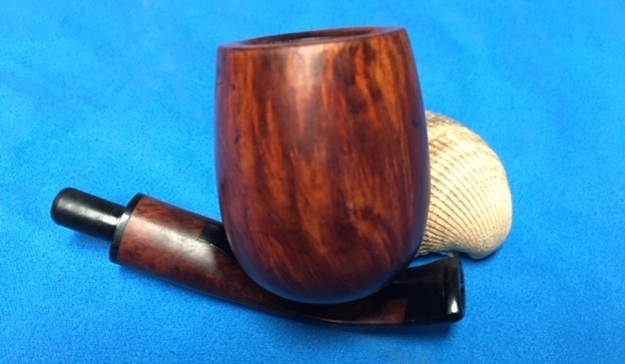
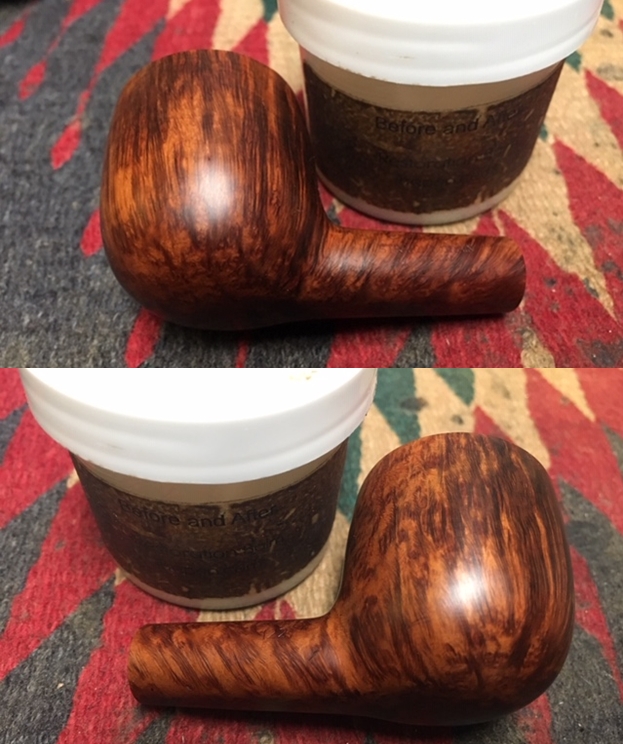
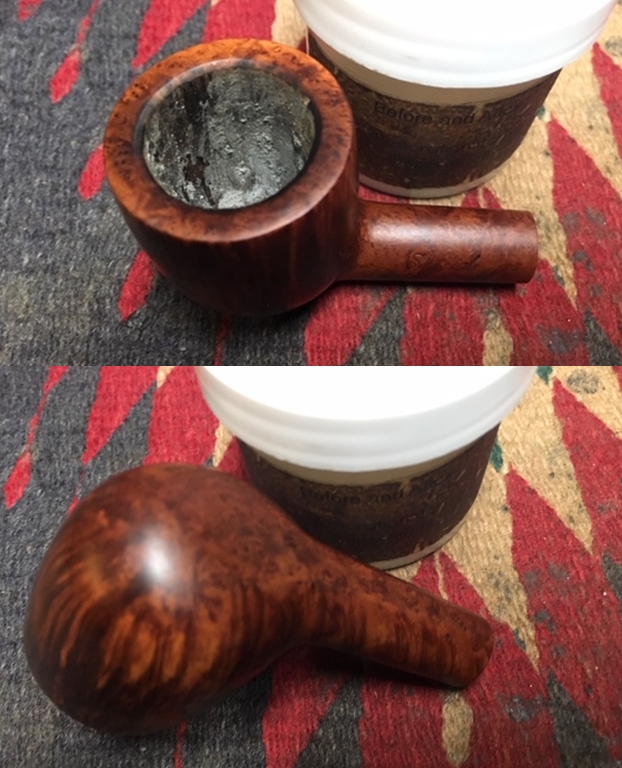
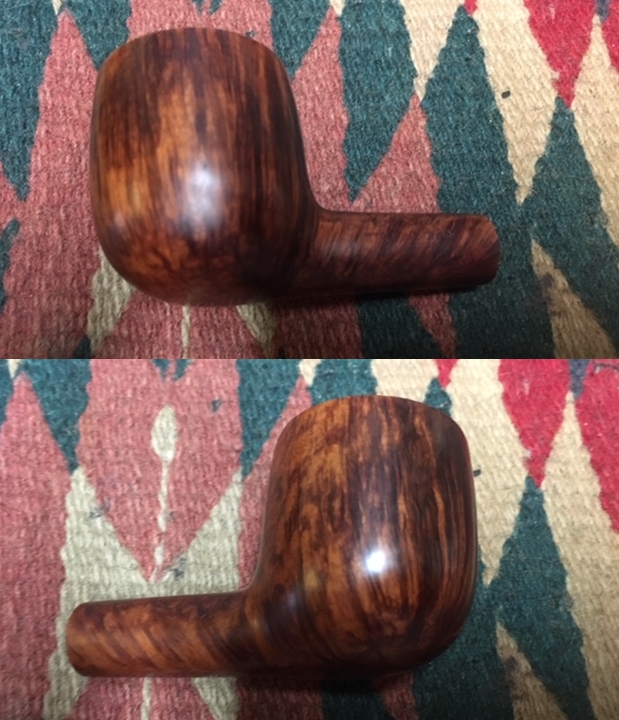
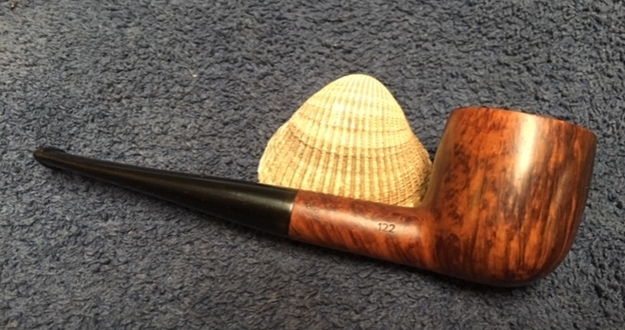
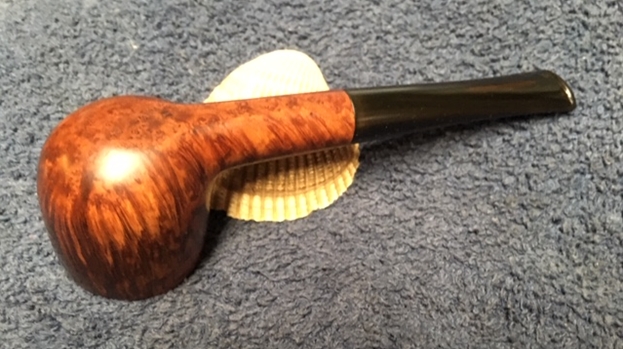
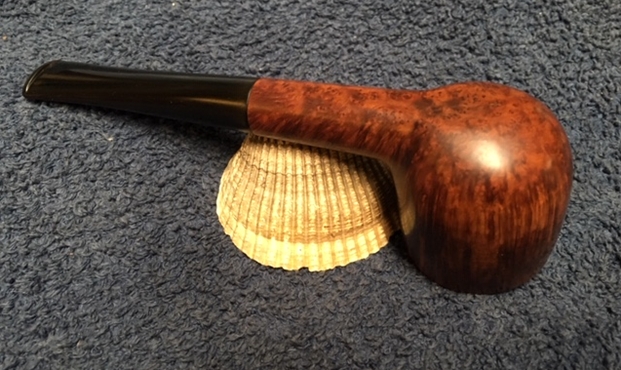
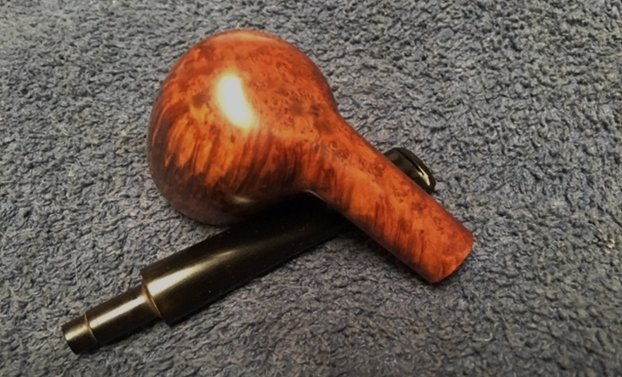
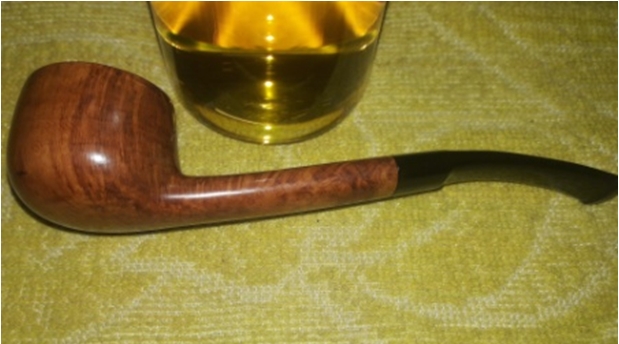
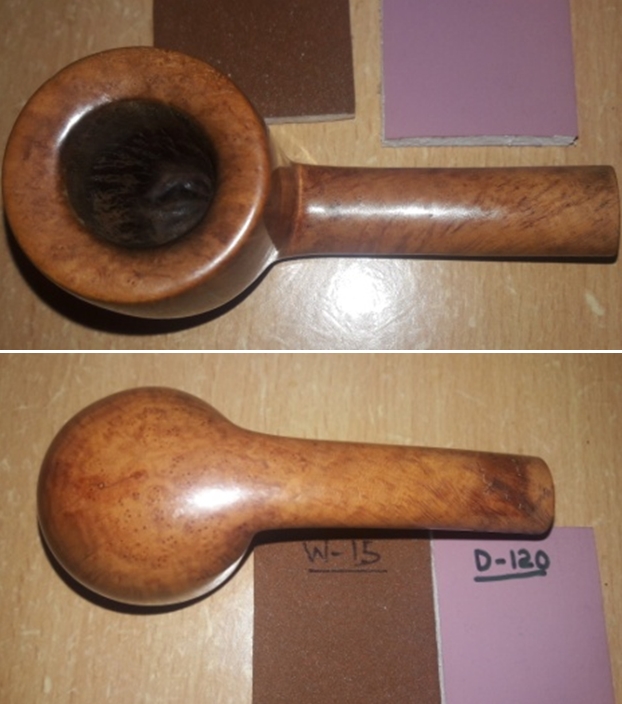
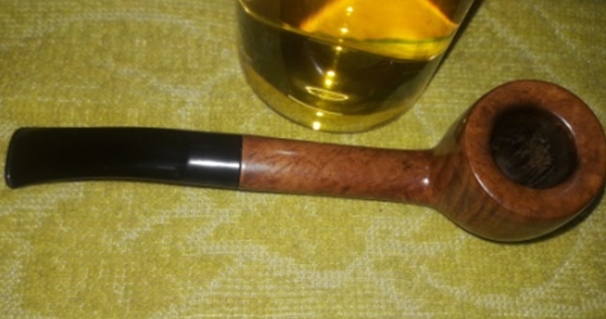
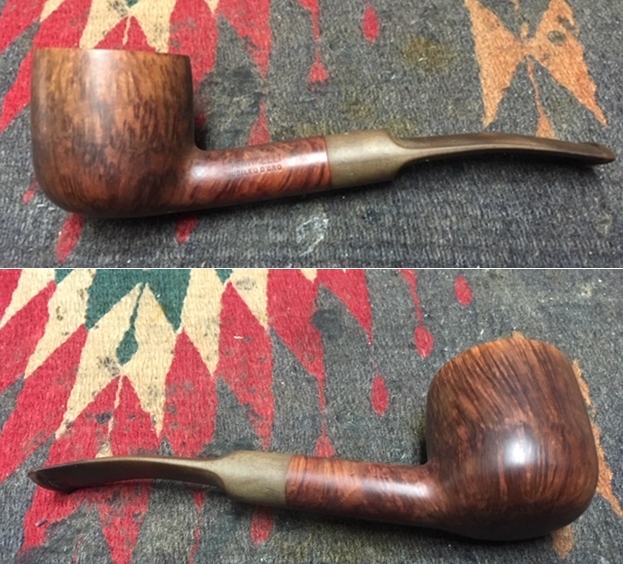
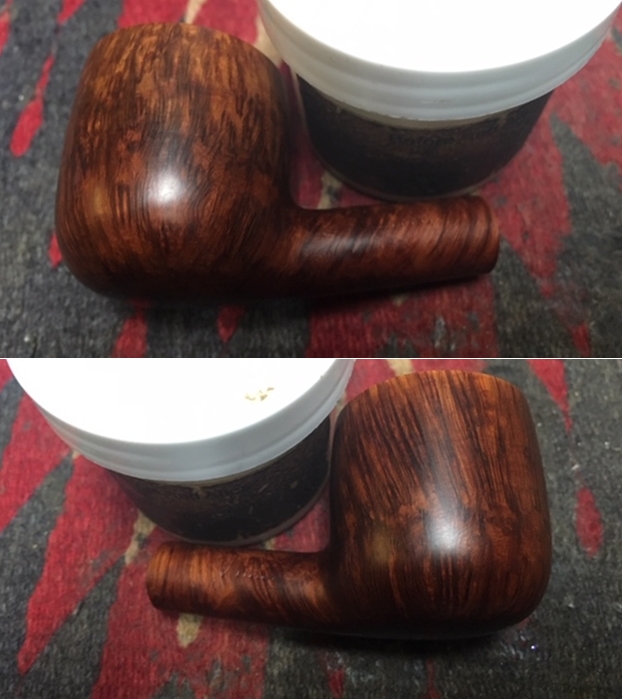
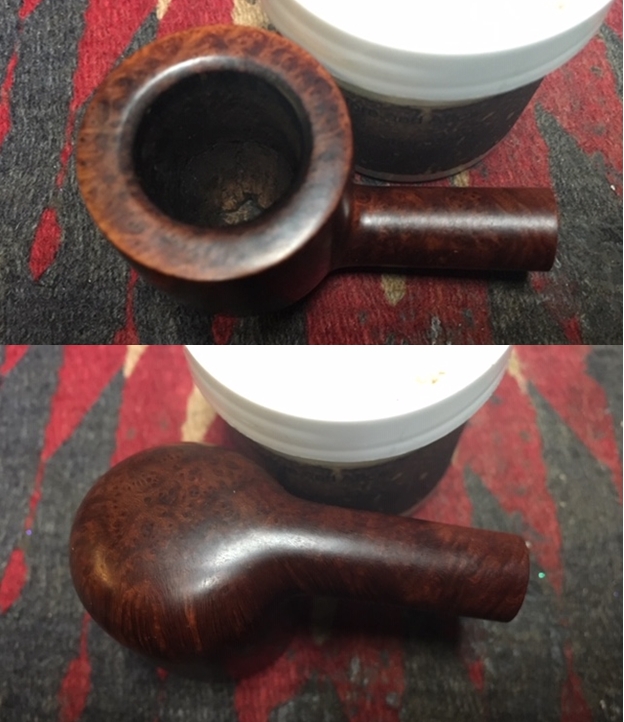
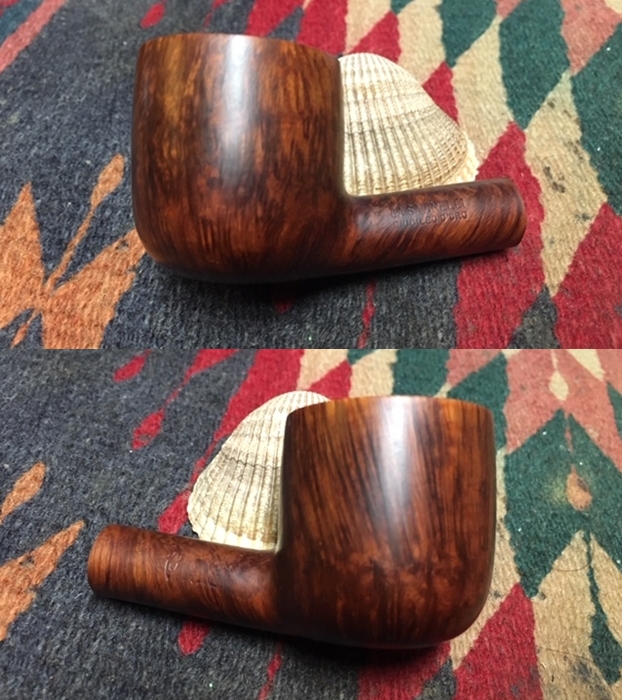
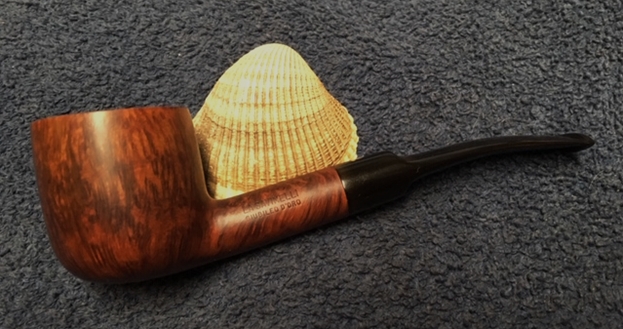
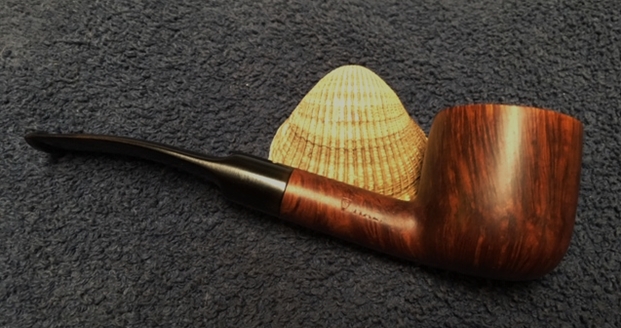
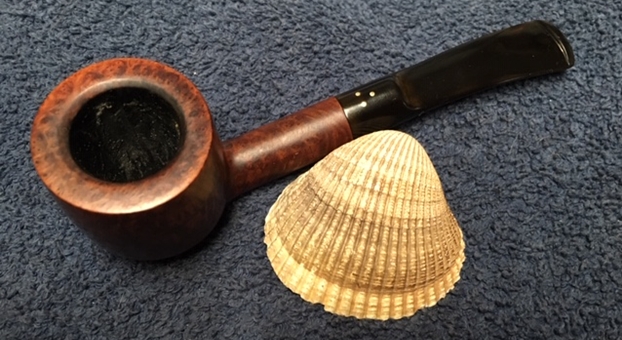
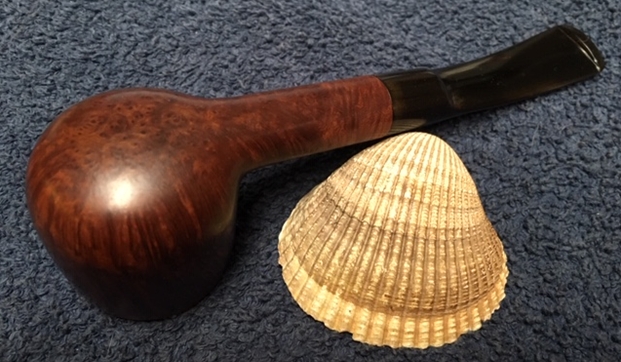
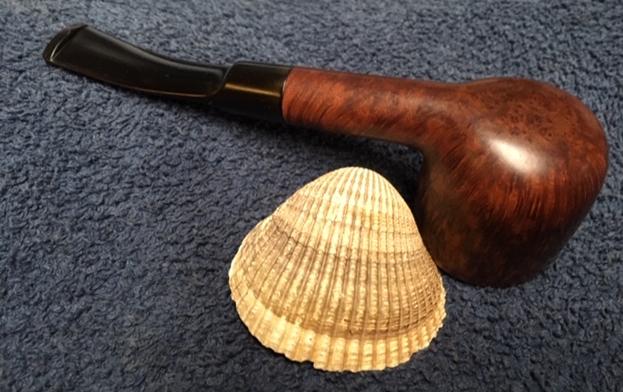
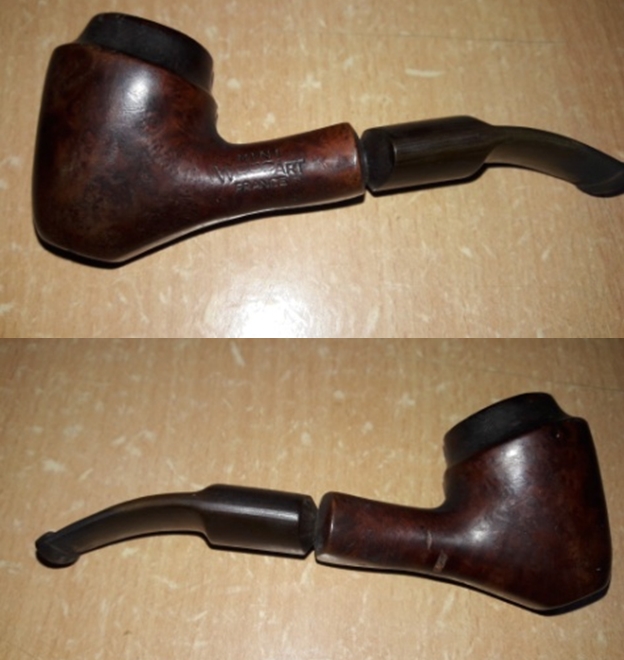
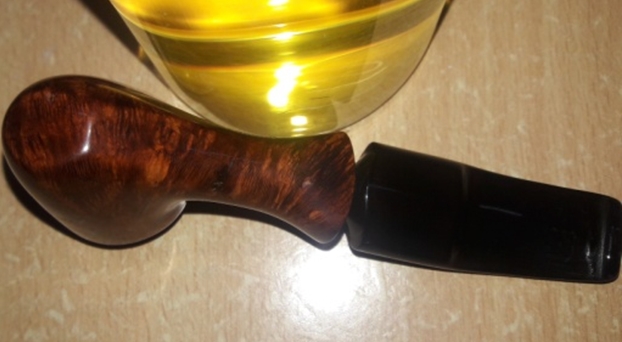
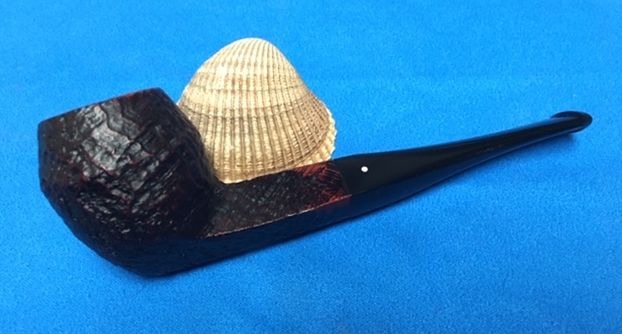
 I put the bowl and stem back together. I polished the bowl and stem with Blue Diamond to polish out the scratches in the briar and the vulcanite. I gave the bowl multiple coats of Conservator’s Wax and the stem multiple coats of carnauba wax. I buffed the pipe with a clean buffing pad to raise the shine. I hand buffed it with a microfiber cloth to deepen the shine. The pipe polished up pretty nicely. The contrast of colours that show up in the sandblast of the Shell briar bowl looked good with the polished black vulcanite. The Dunhill Shell Bulldog 147F/T looked really good. The pipe has a unique look that catches the eye. The finished pipe is shown in the photos below. The dimensions of the pipe are Length: 5 1/2 inches, Height: 1 3/4 inches, Outside diameter of the bowl: 1 1/4 inches, Chamber diameter: 3/4 of an inch. This is the first of the many pipes that will be coming onto the work table and eventually be posted on the rebornpipes store if you are interested in adding it to your collection. Thanks for reading this while I worked on it. It was a fun pipe to restore and I am pleased with the finished pipe.