Blog by Steve Laug
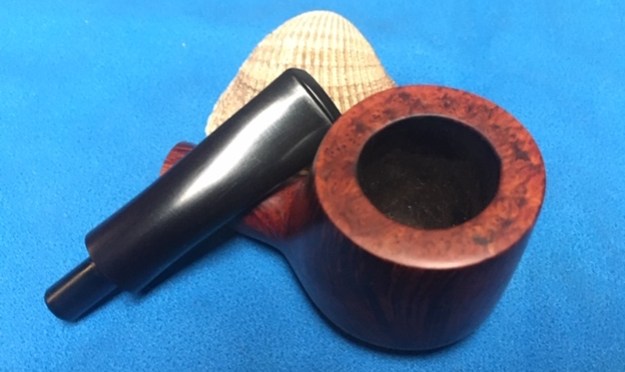
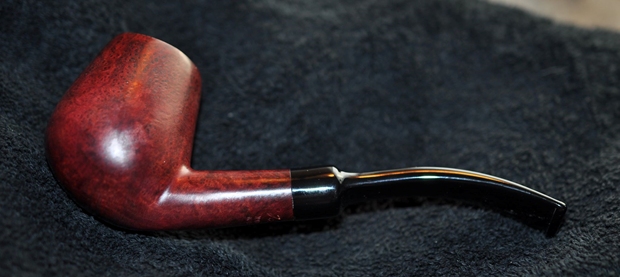
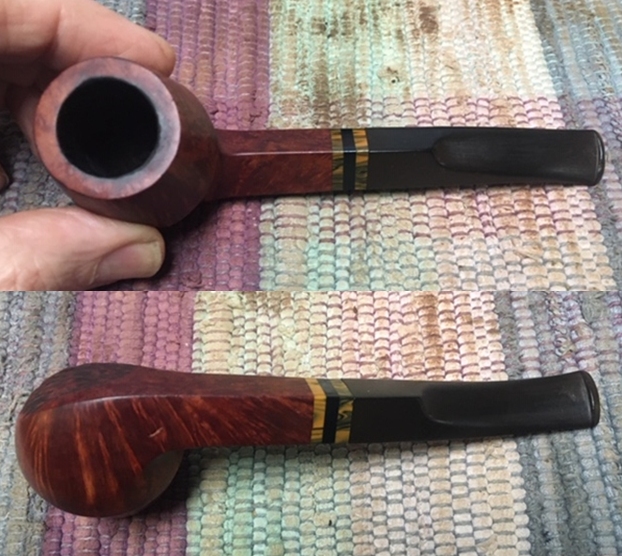
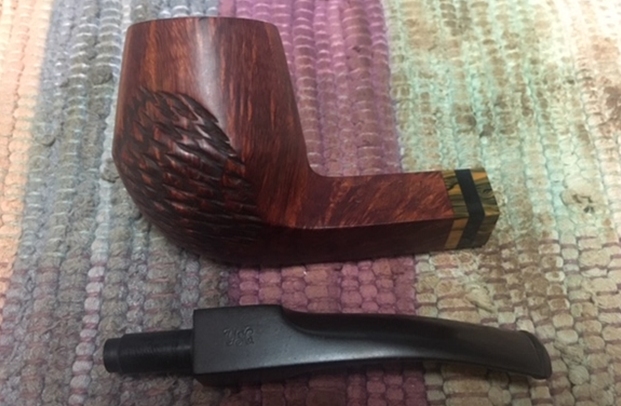
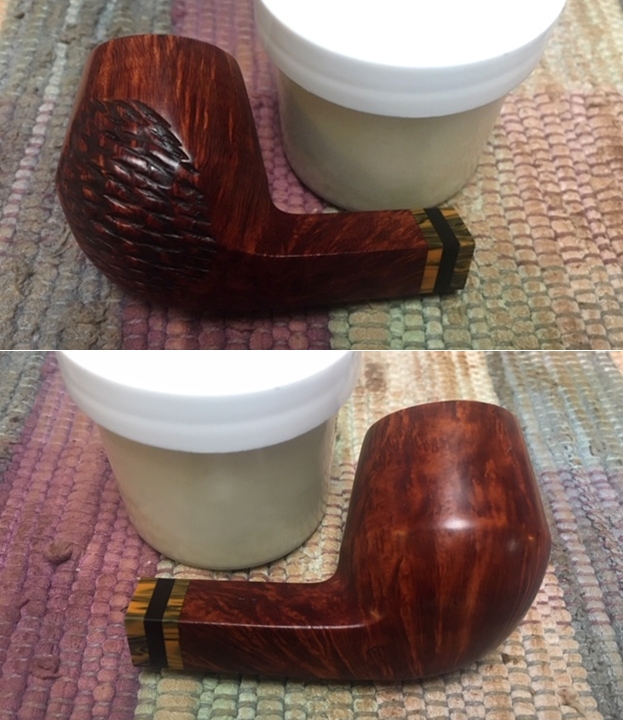
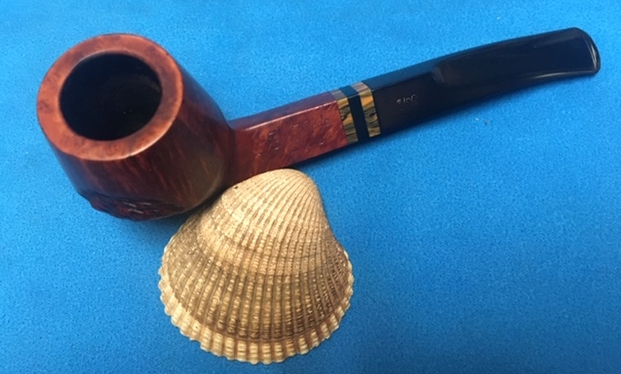
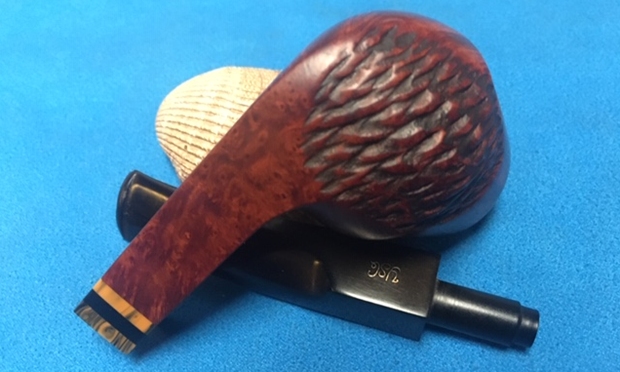
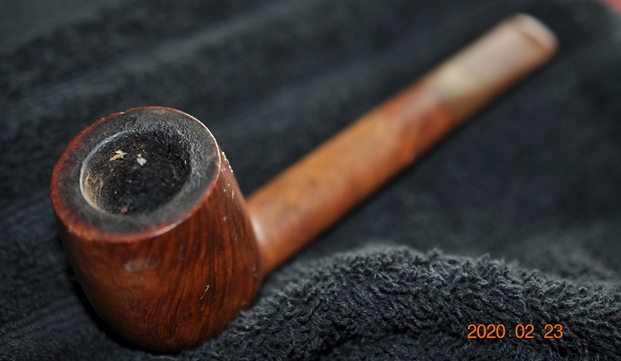
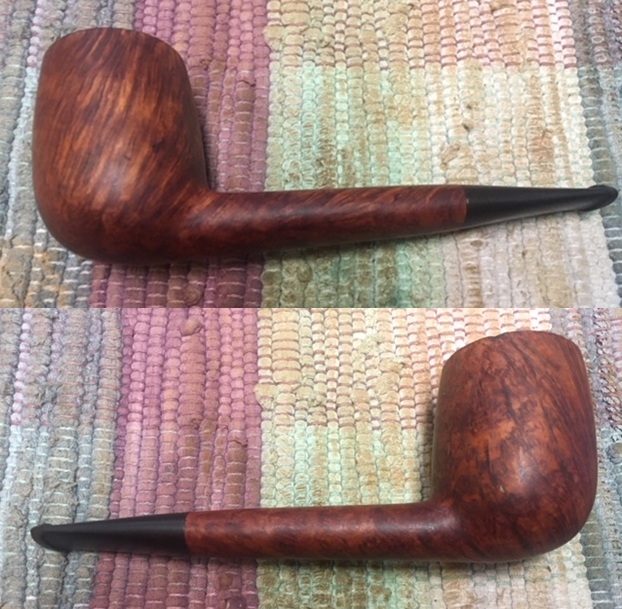
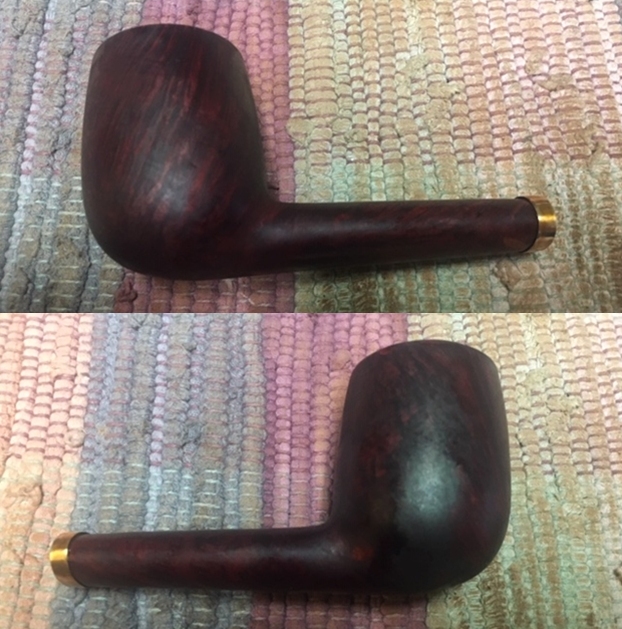
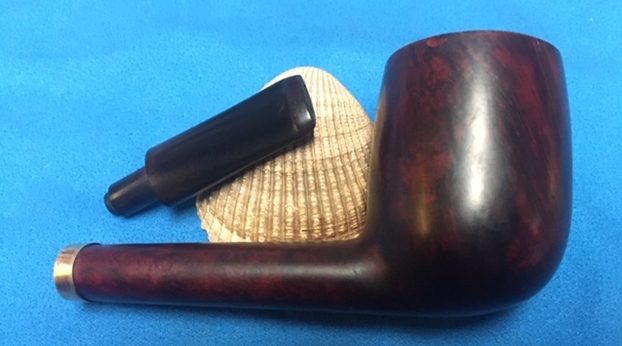
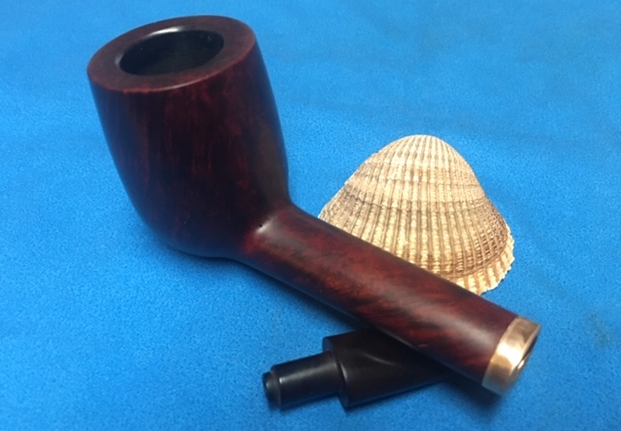
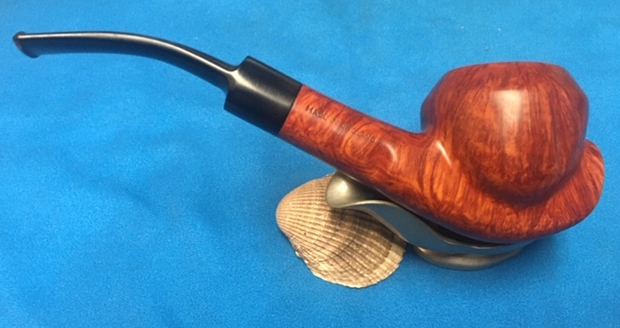
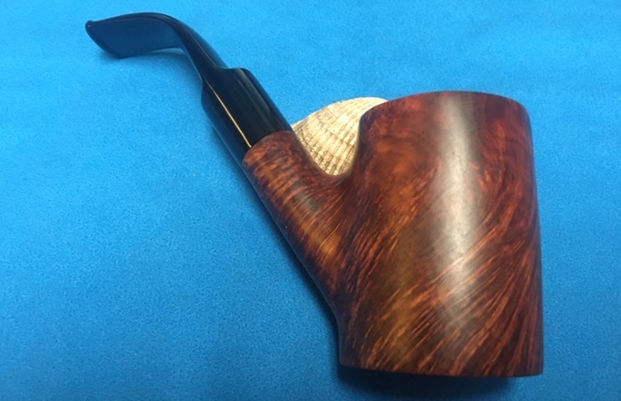
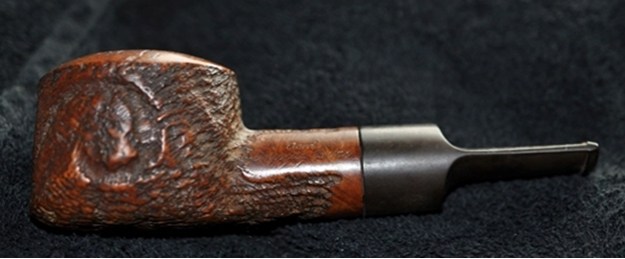
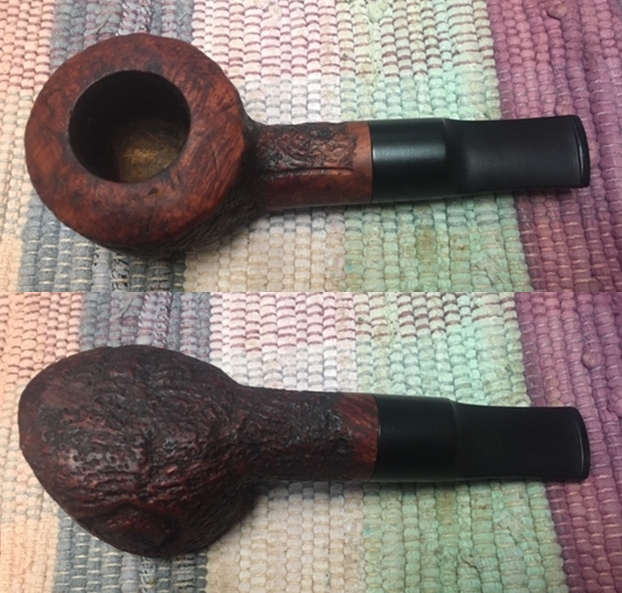
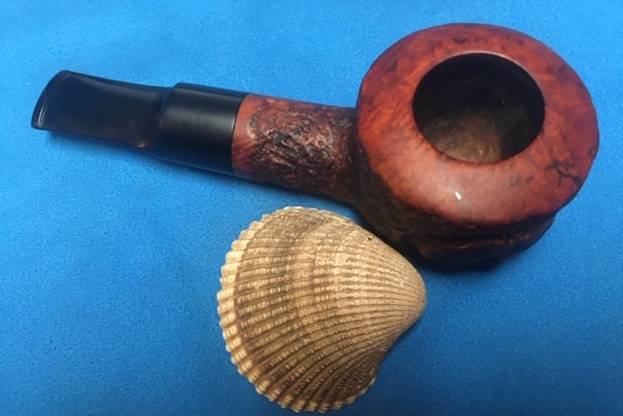
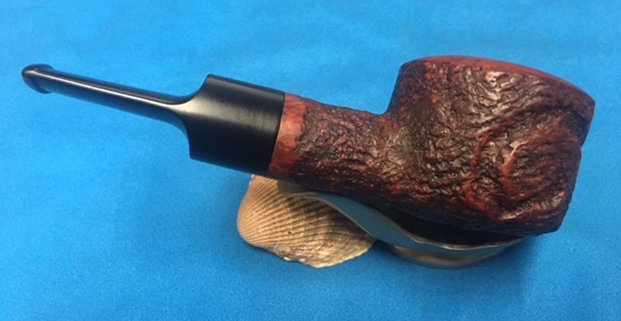
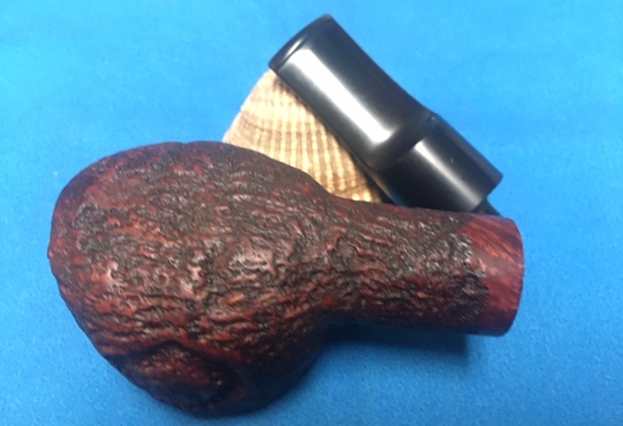
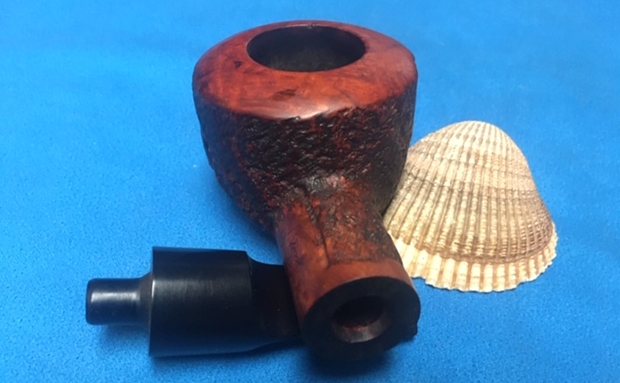
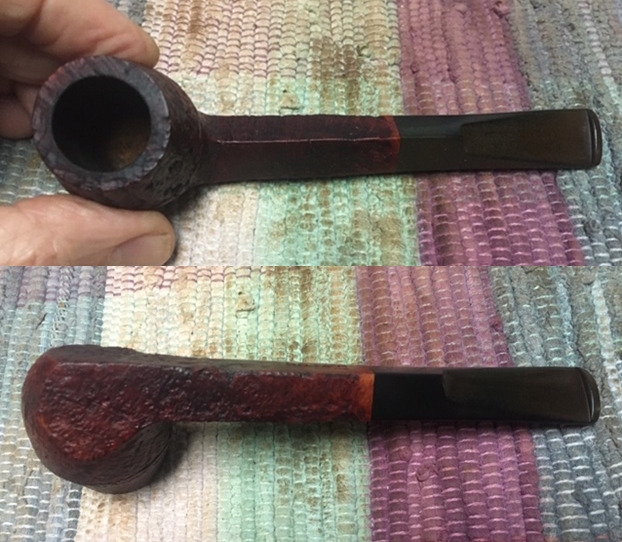
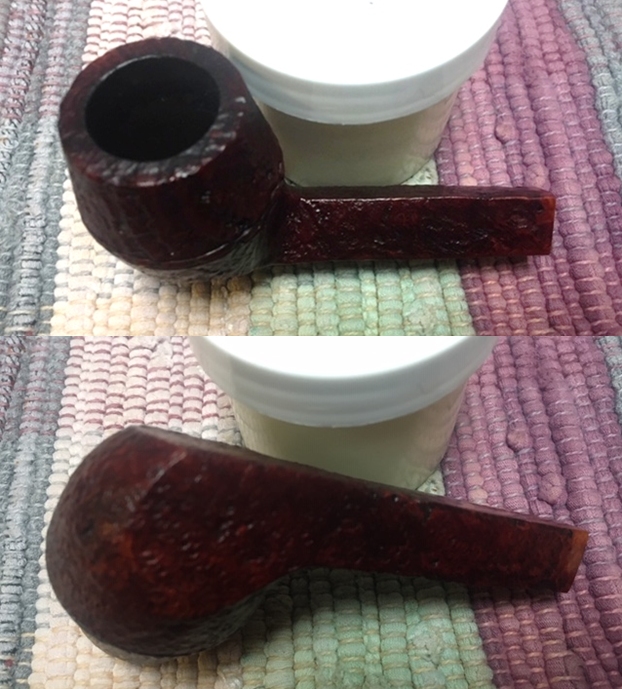
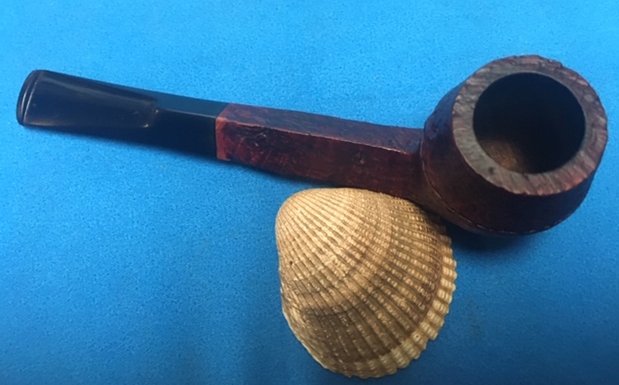
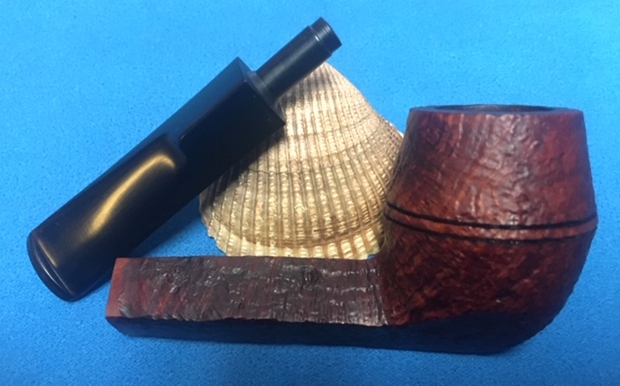
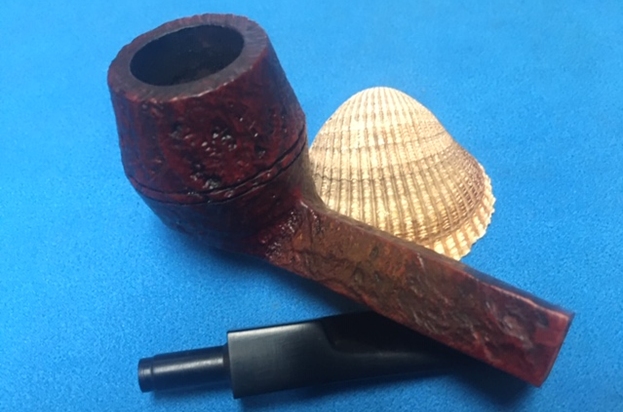
The next pipe on the worktable is a stubby, canted Butz-Choquin Volcano. It has a vulcanite tapered stem with a BC logo on the left side of the taper. The finish is smooth with some nice grain around the bowl. The bowl has a mix of various grains on the sides and on the rim top and heel of the bowl. This pipe not only looks comfortable but it amazingly comfortable in hand. The pipe is stained with black and various hues of brown. It truly is a beautiful finish. The pipe is stamped Butz-Choquin over Maitre Pipier over De Luxe on the left side of the shank. On the right side it is stamped Fait Main (Hand Made) over St. Claude France. The finish was very dirty and tired looking with a lot of grime and oils ground into the sides of the bowl. It appears that the pipe had a varnish or shellac coat that is damaged. There was a thick cake in the bowl and some lava overflowing onto the rim top. There is also some darkening on the inner edge of the rim. The tapered vulcanite stem is heavily oxidized and it appears that the last pipe man used a Softee Bit. The stem looked good. It is dirty with light tooth marks and chatter on both sides near the button. Jeff took some photos of the pipe before he started his cleanup work. 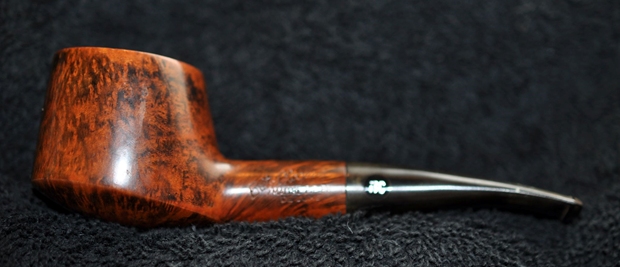
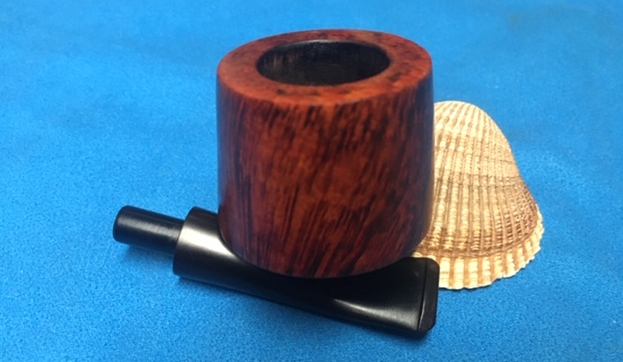
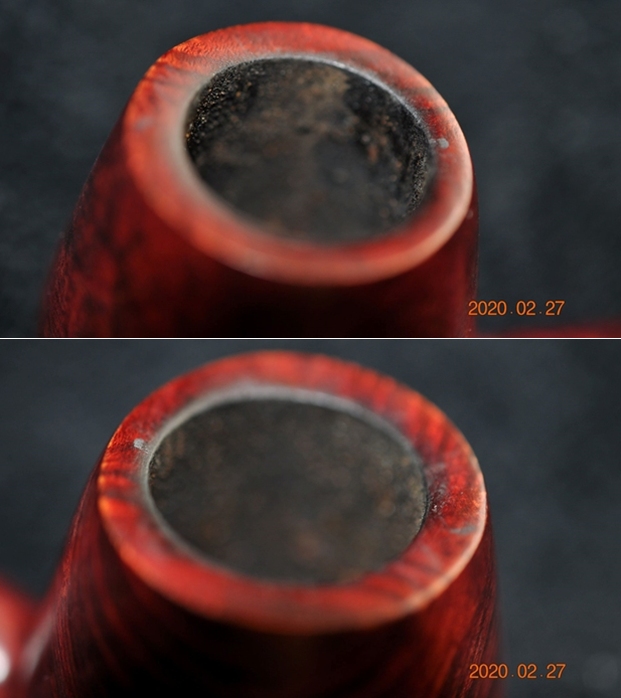
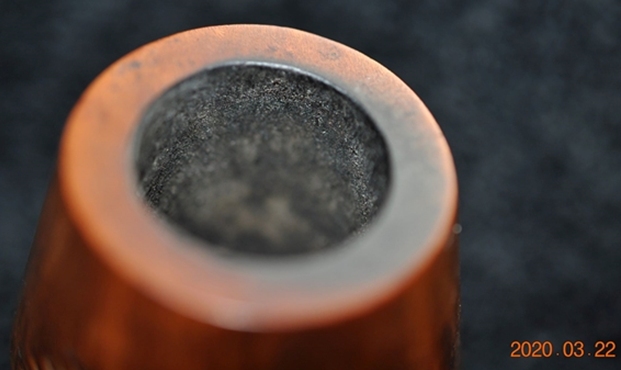
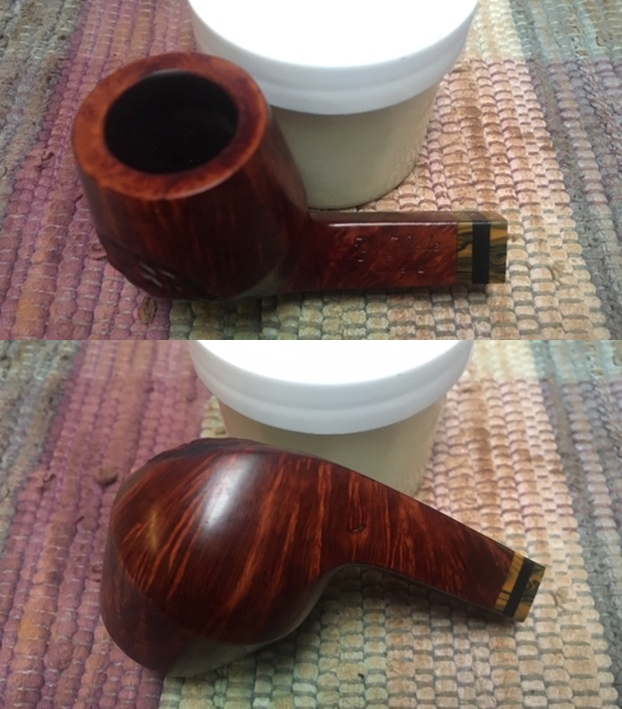
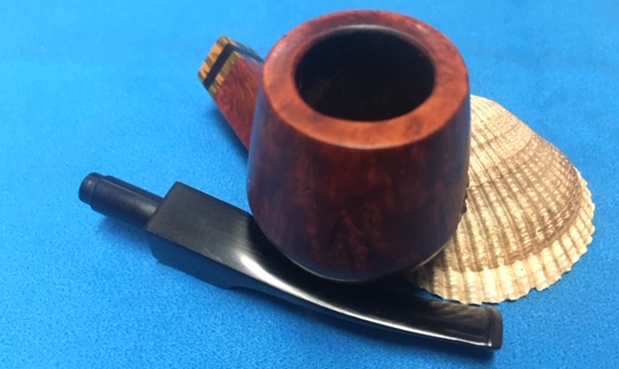
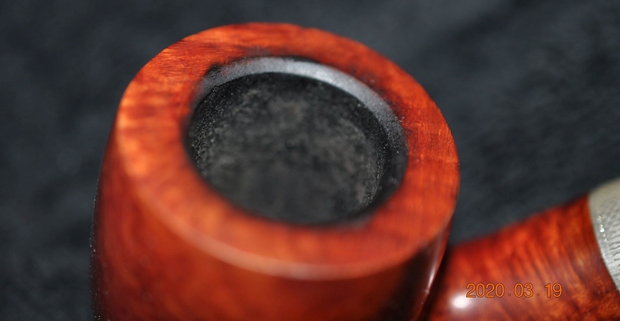
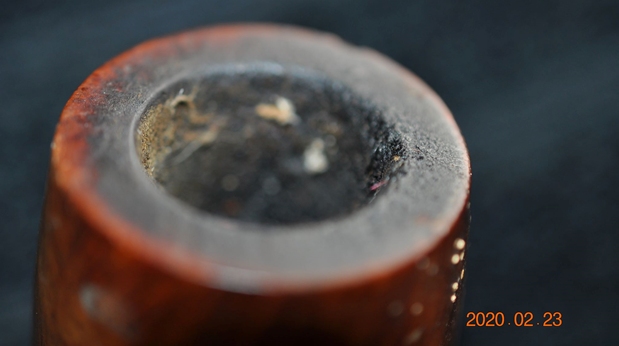
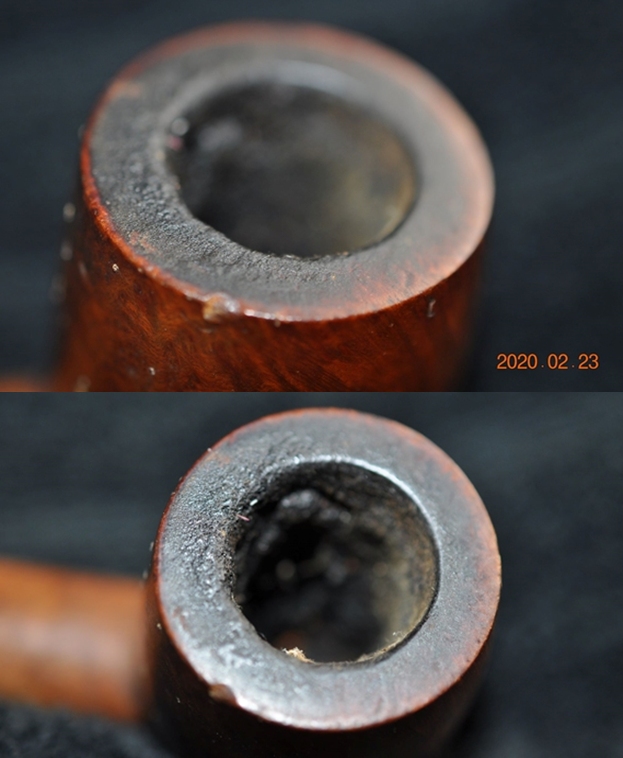
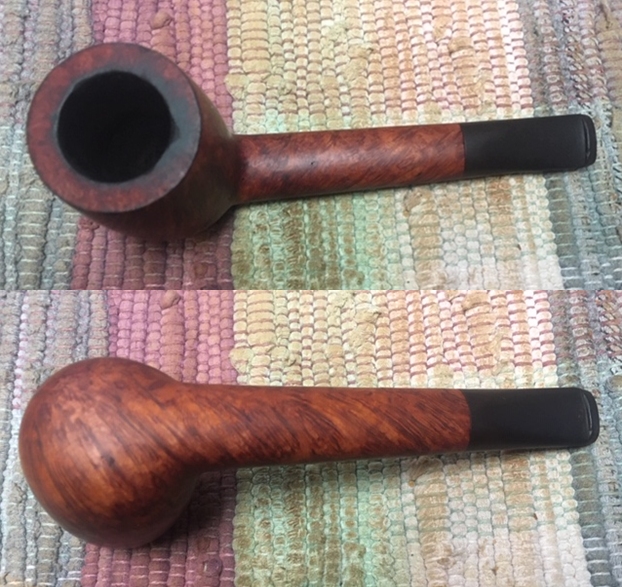
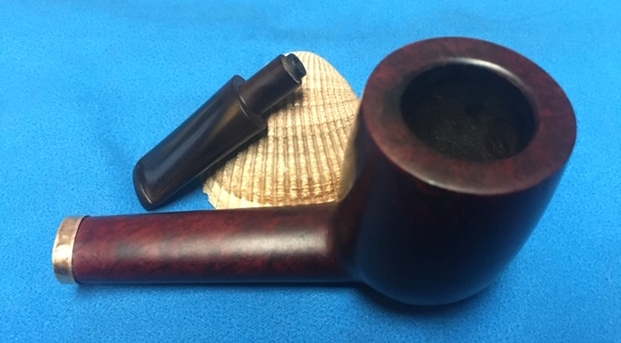
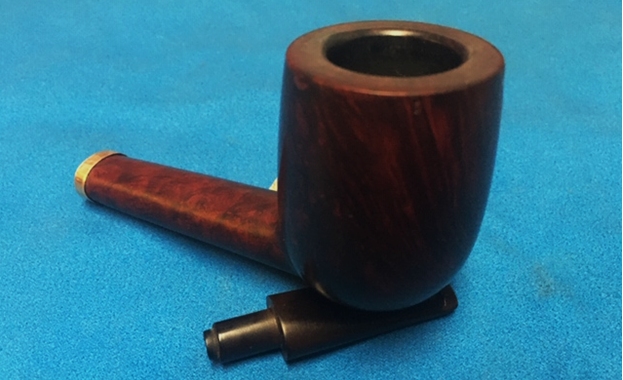
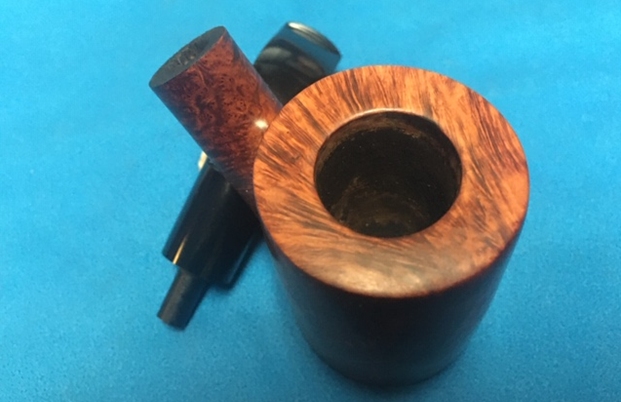
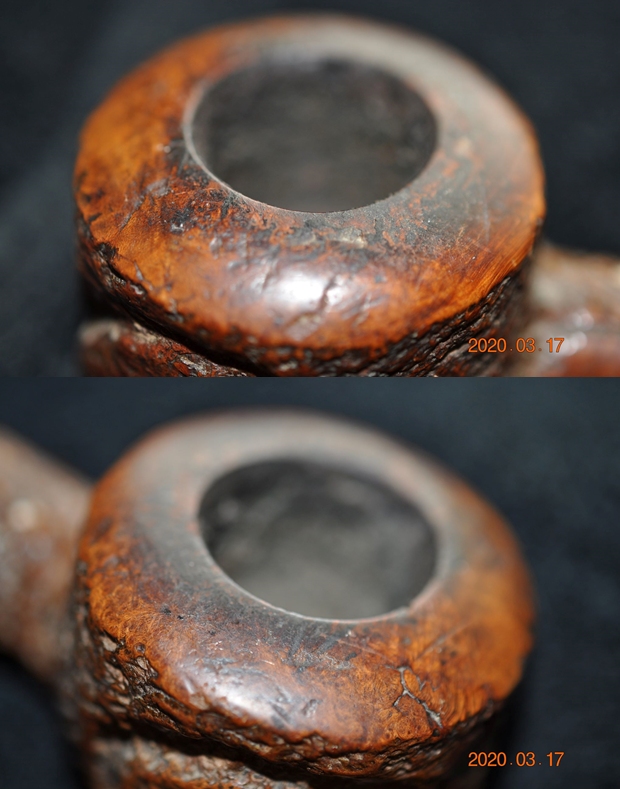
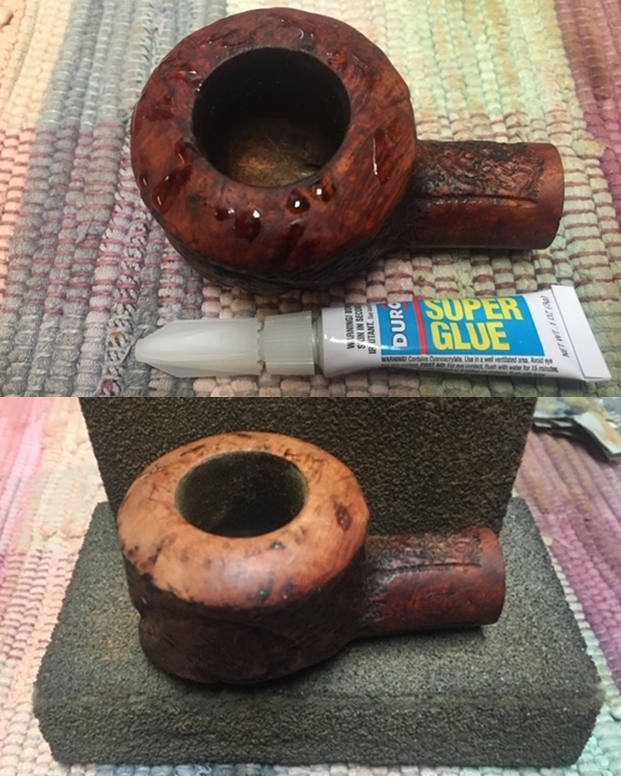
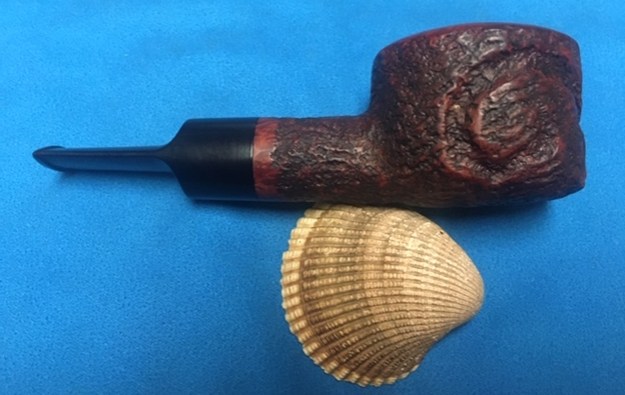
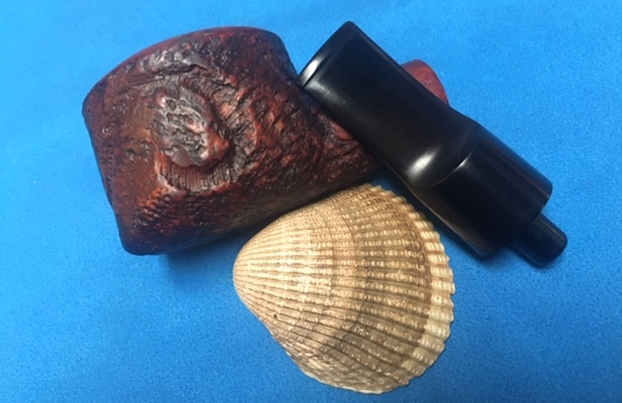
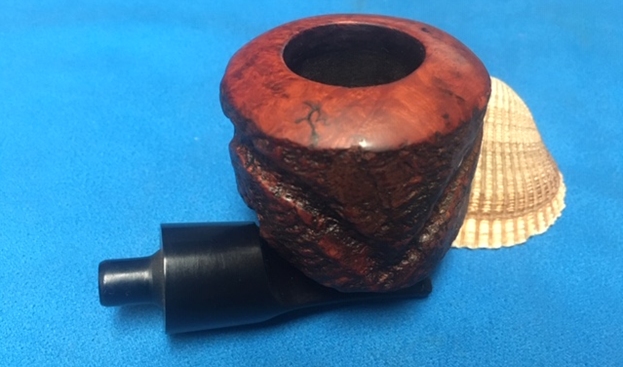
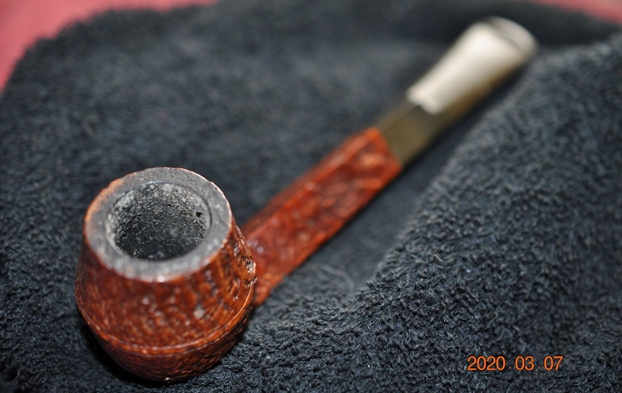
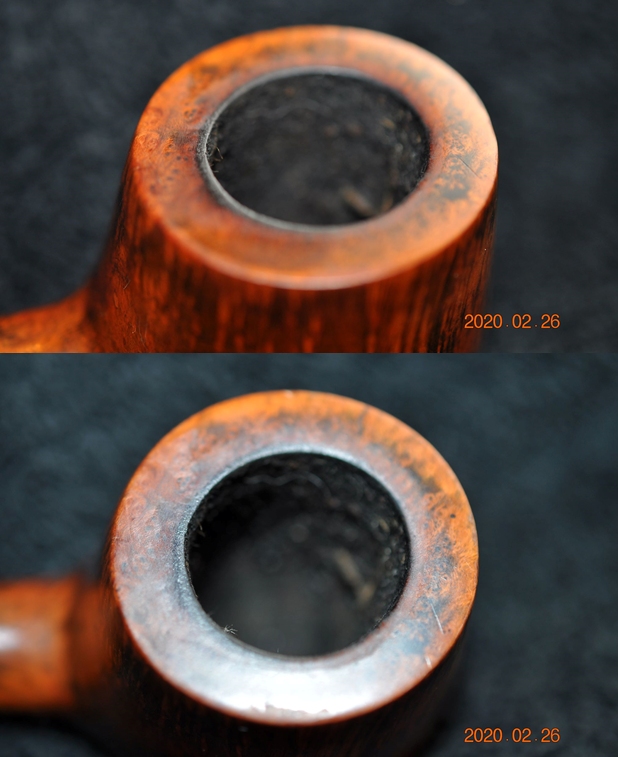
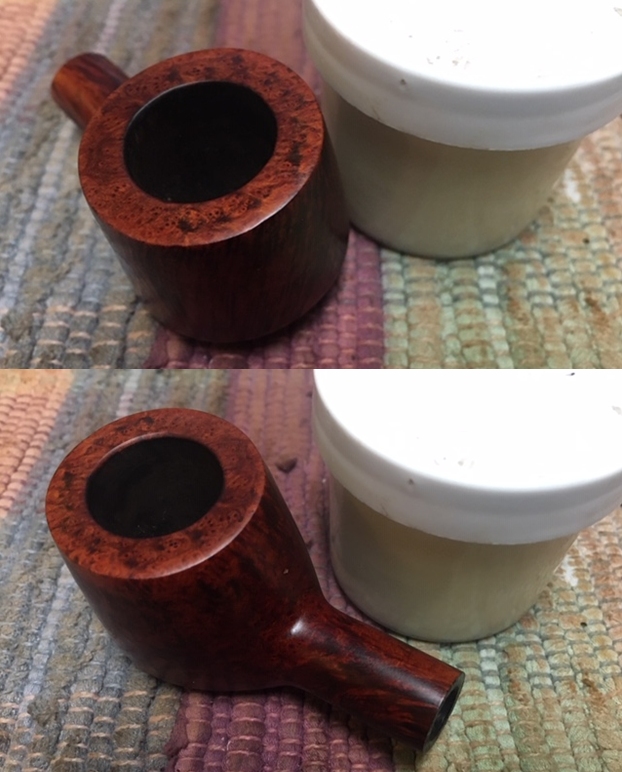
 He took photos of the bowl and rim top to show their general condition. It is hard to see the condition of the bubbling and peeling finish on the rim top because of the lava and grime but it is present. There is cake in the bowl and some darkening around the rim edges and some lava on the top of the rim.
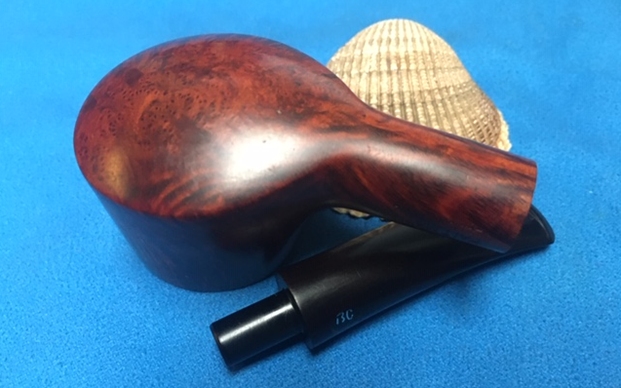
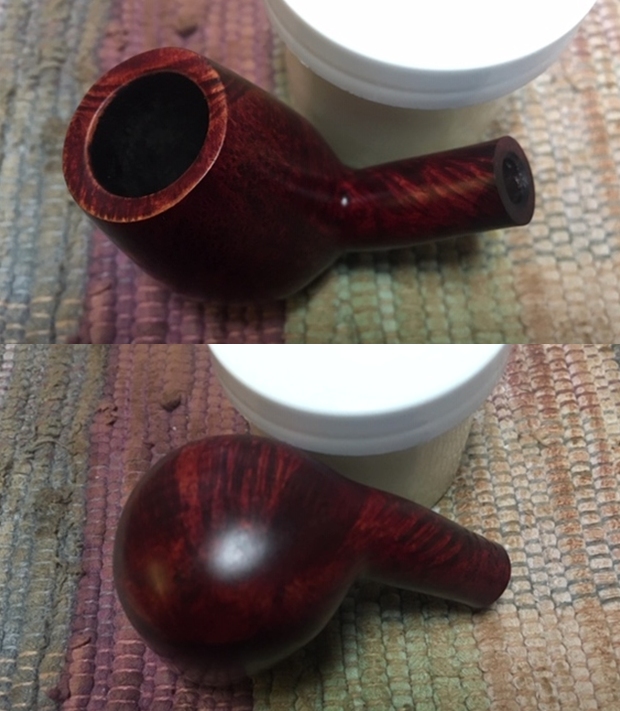
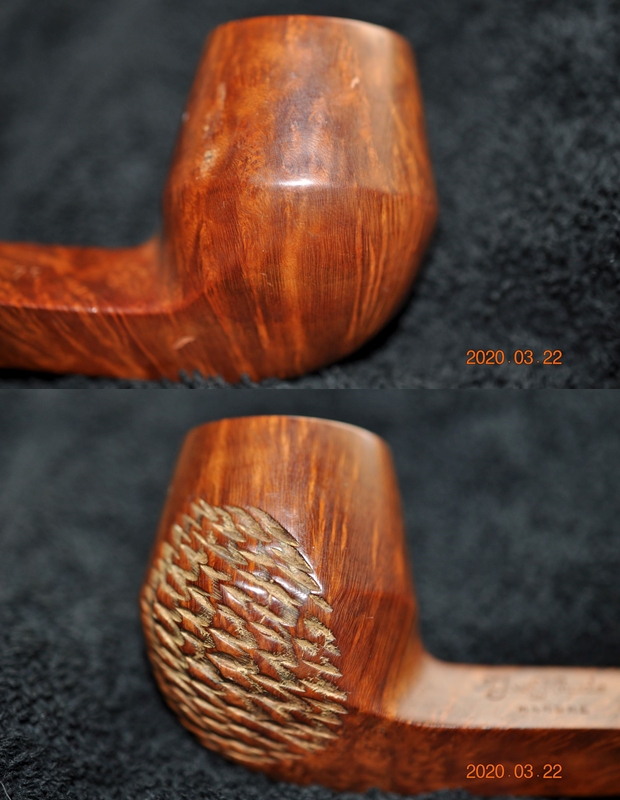
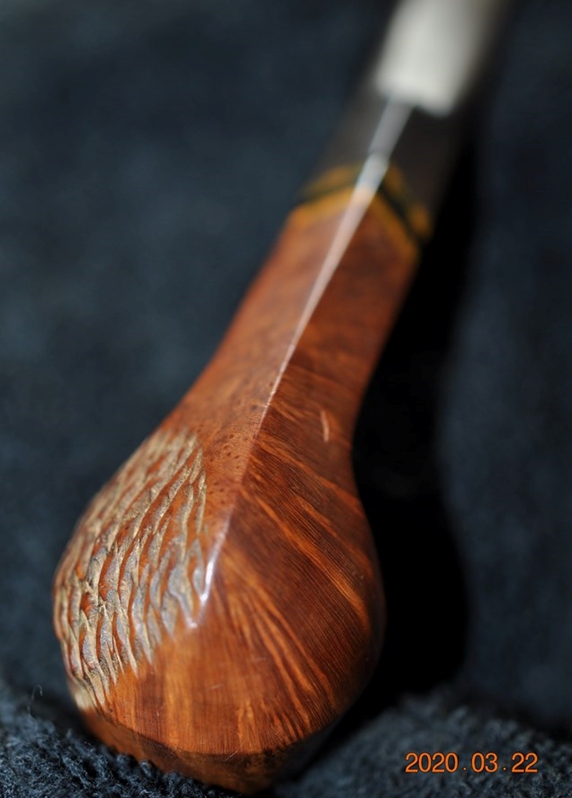
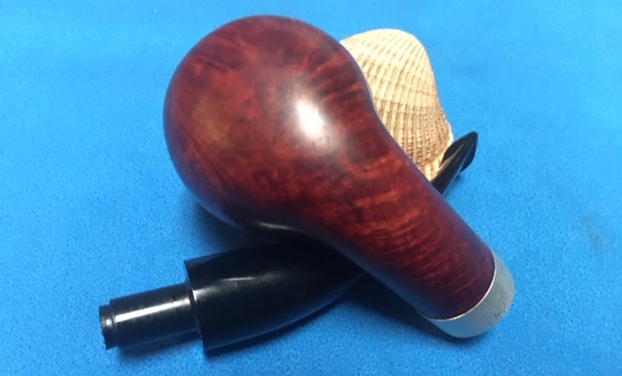
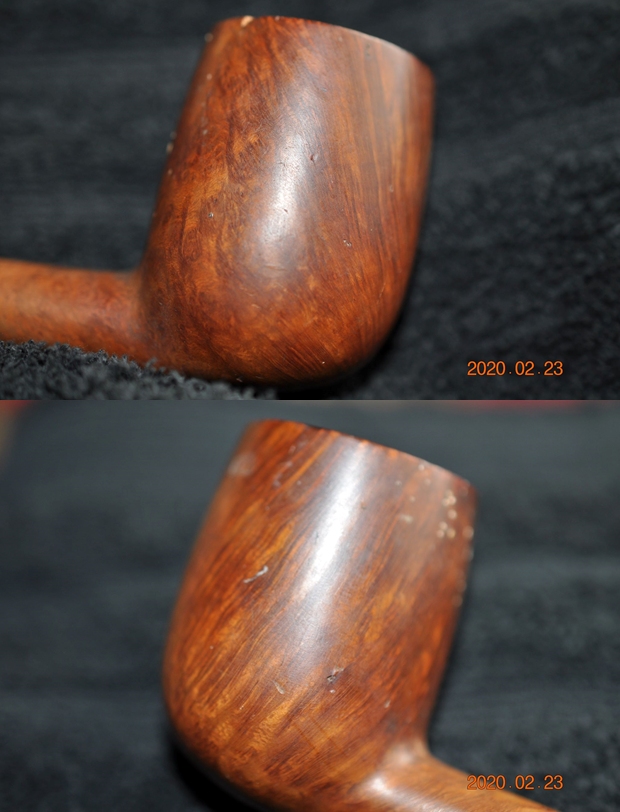
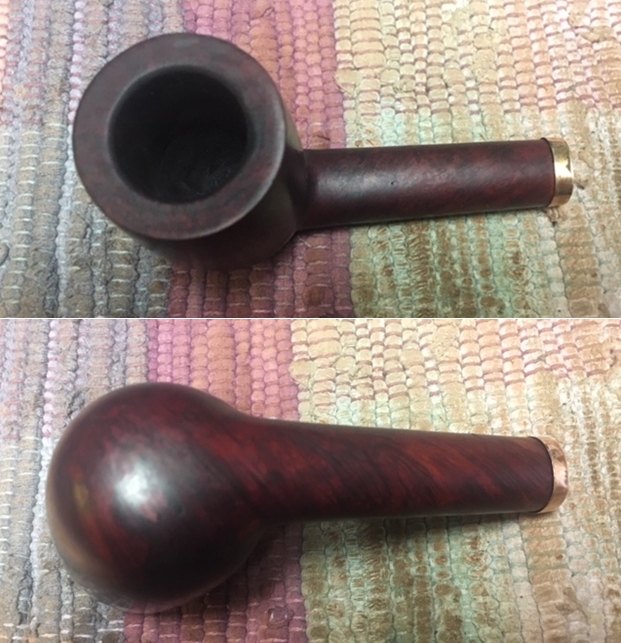
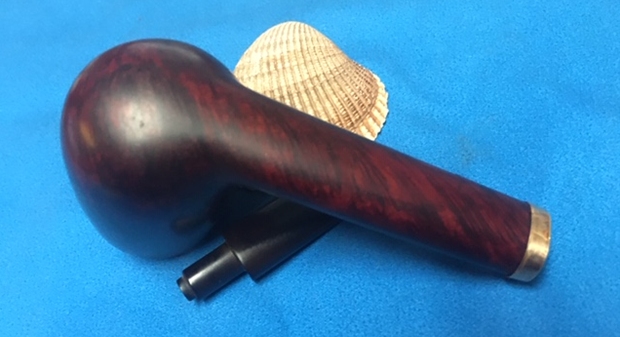
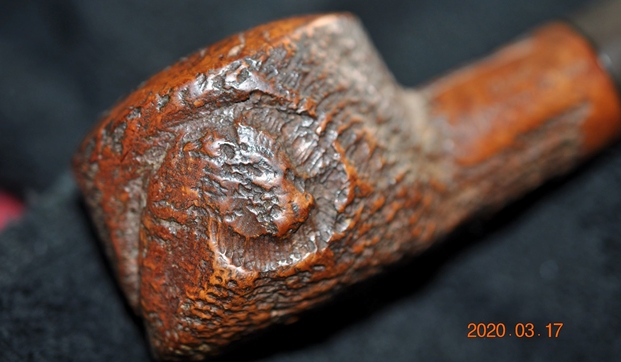
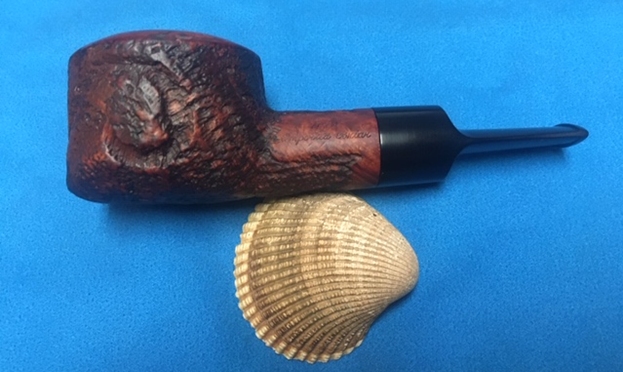
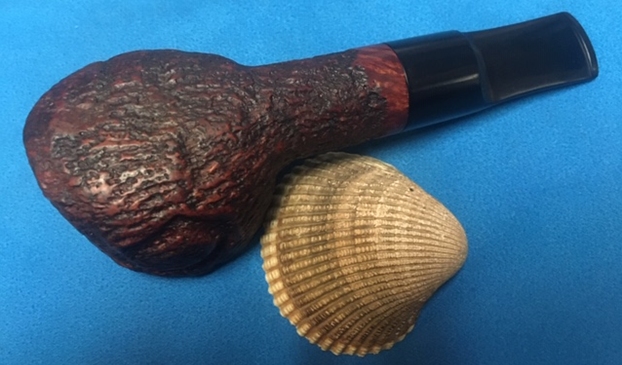
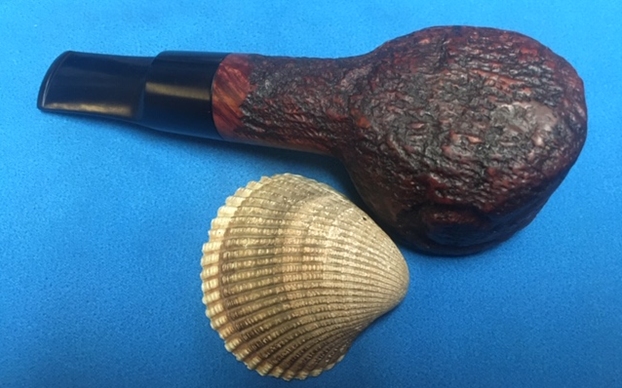
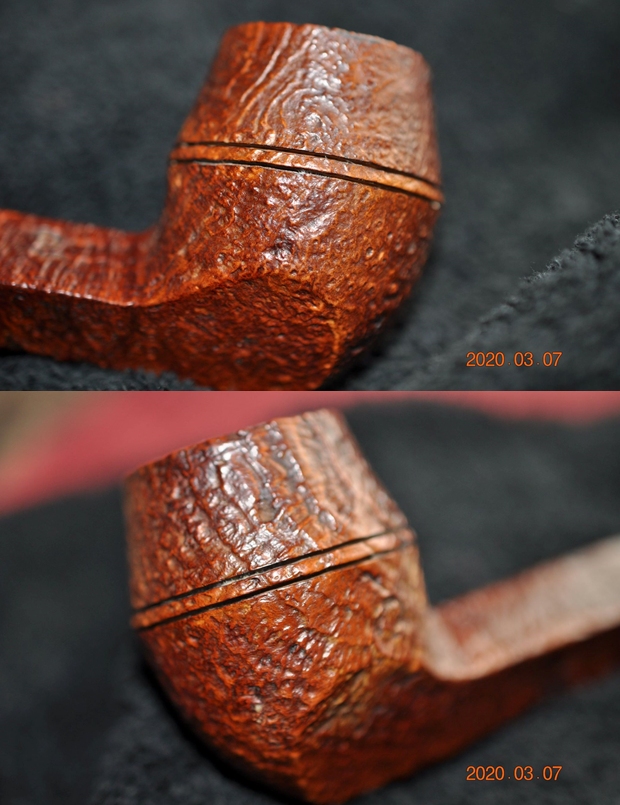
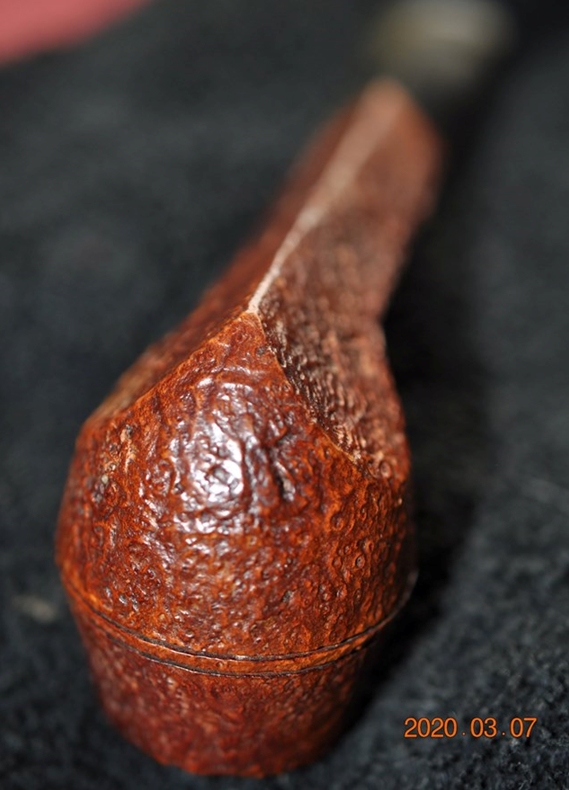
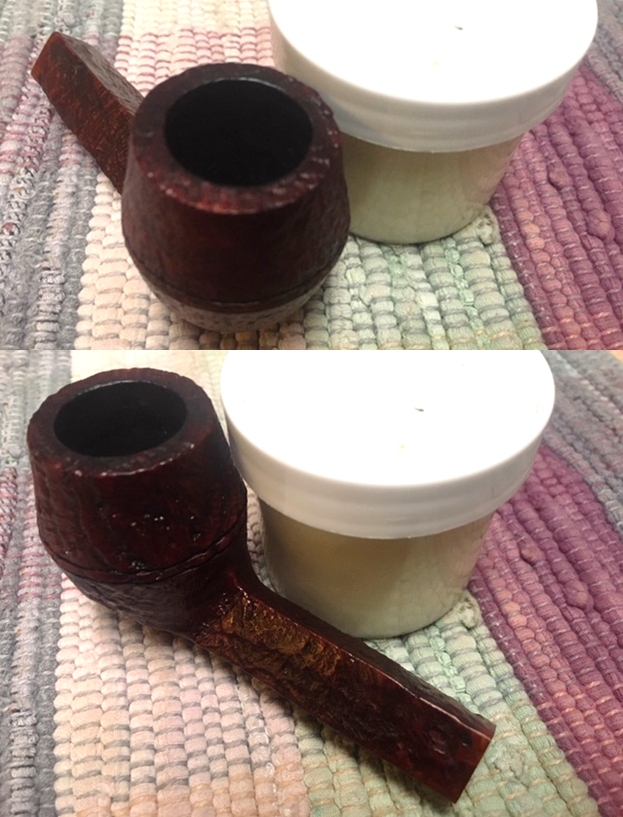
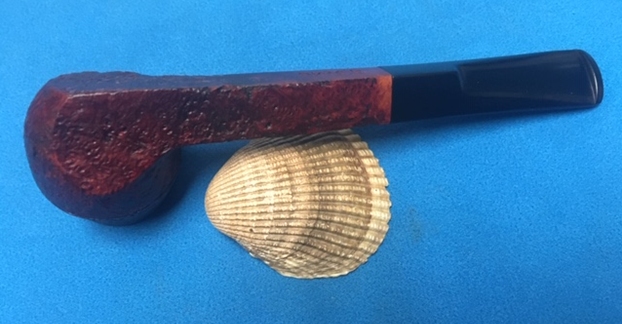
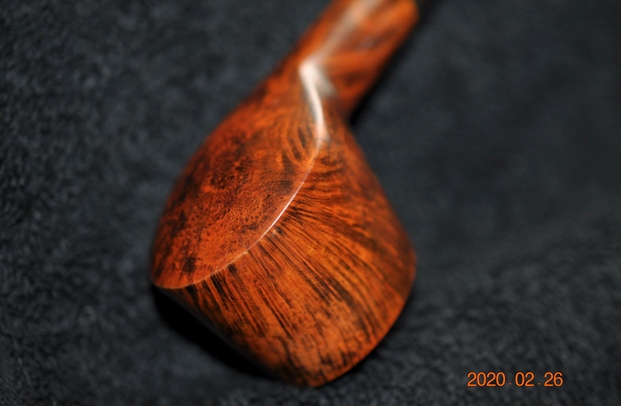
 Jeff took some photos of the sides and heel of the bowl to give an idea of the smooth finish and the grain shining through the grime. I cannot wait to see what it looks like once it is cleaned and polished.
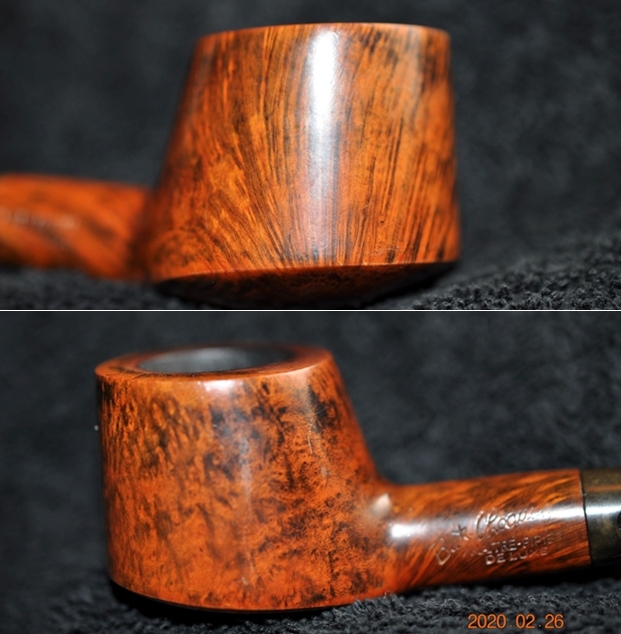
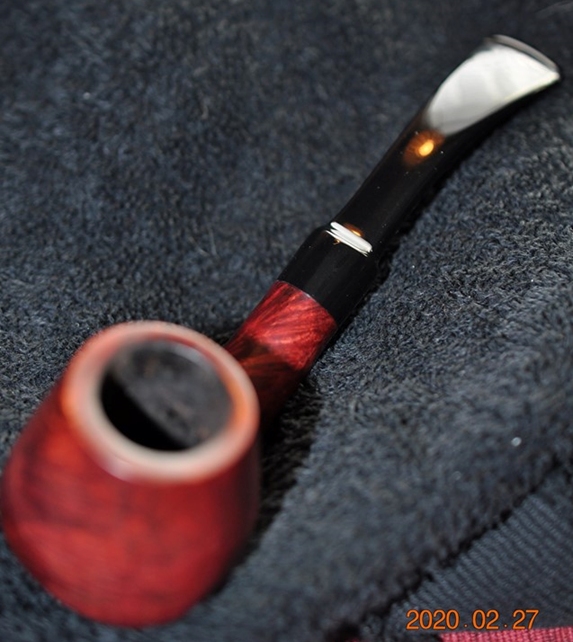
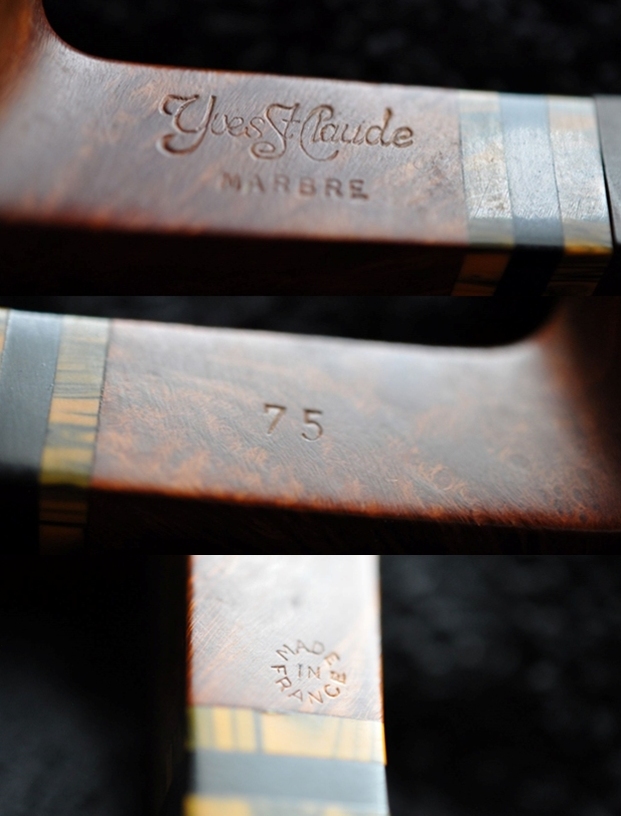
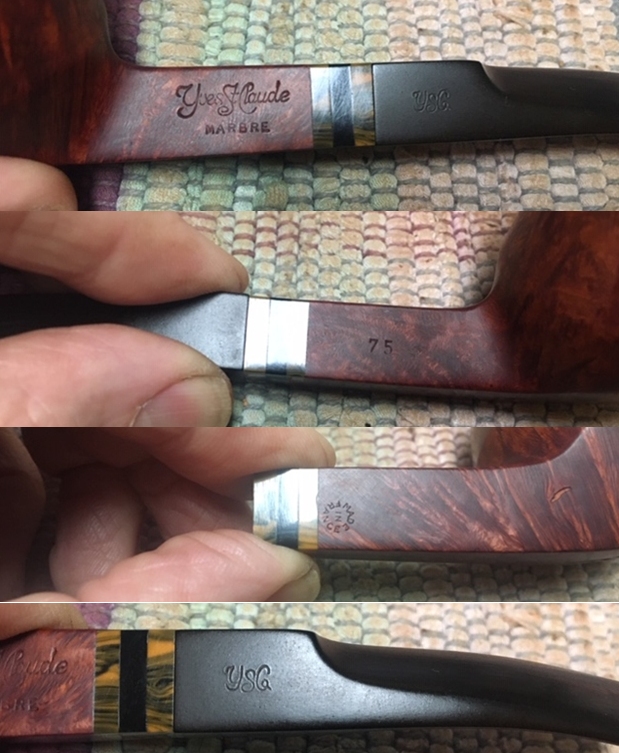
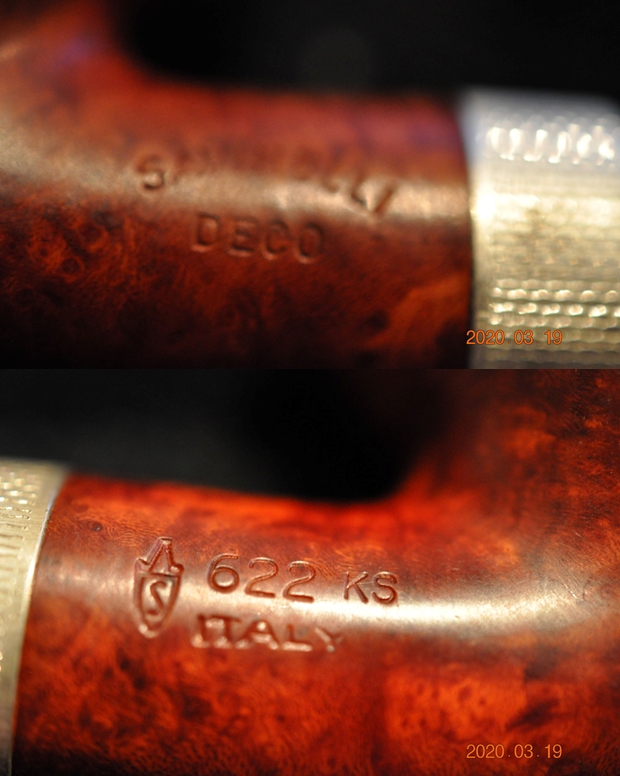
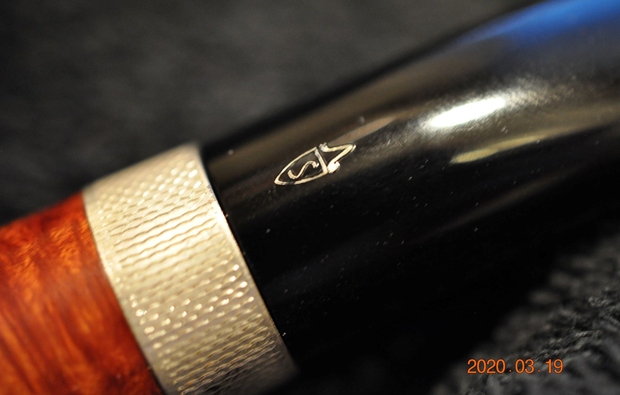
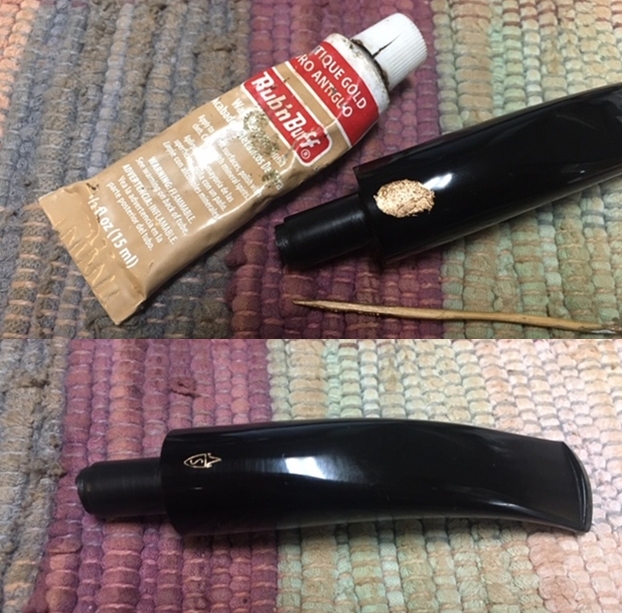
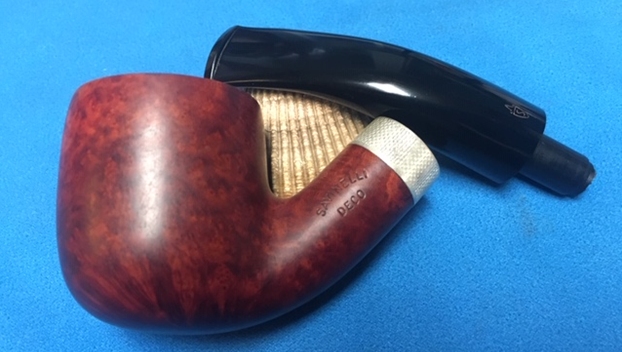
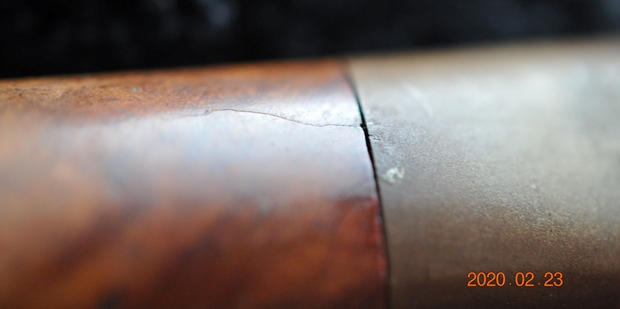
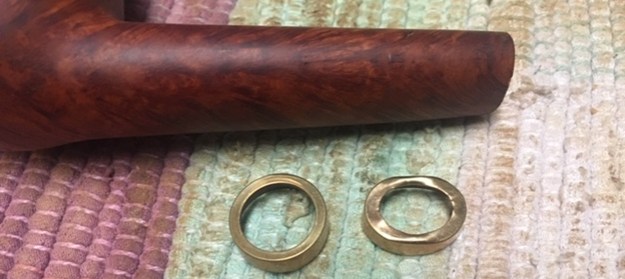
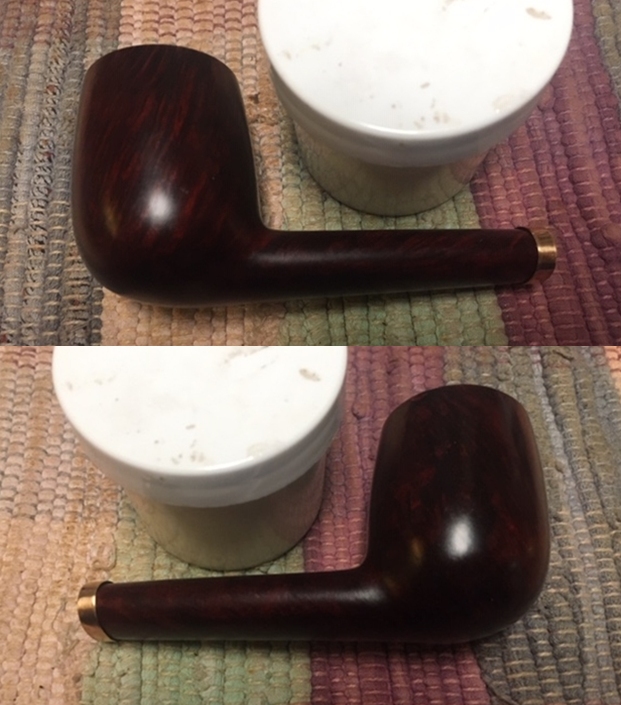
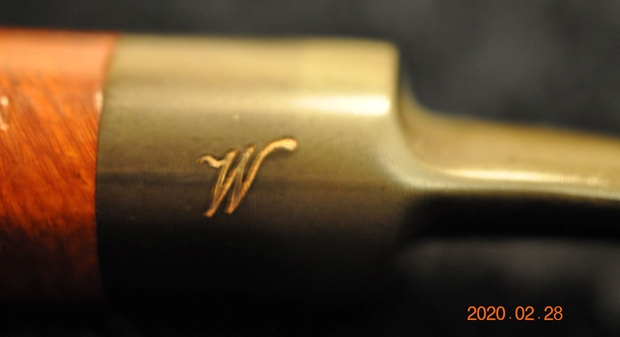
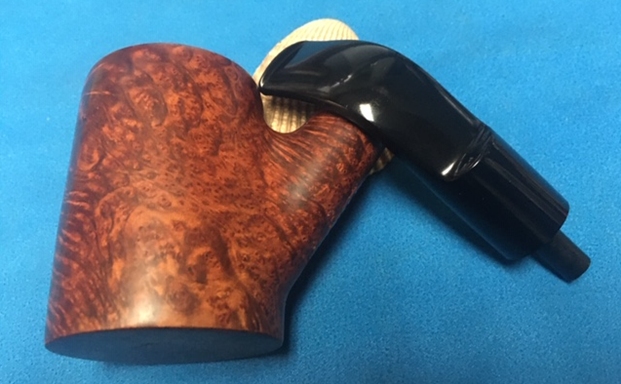
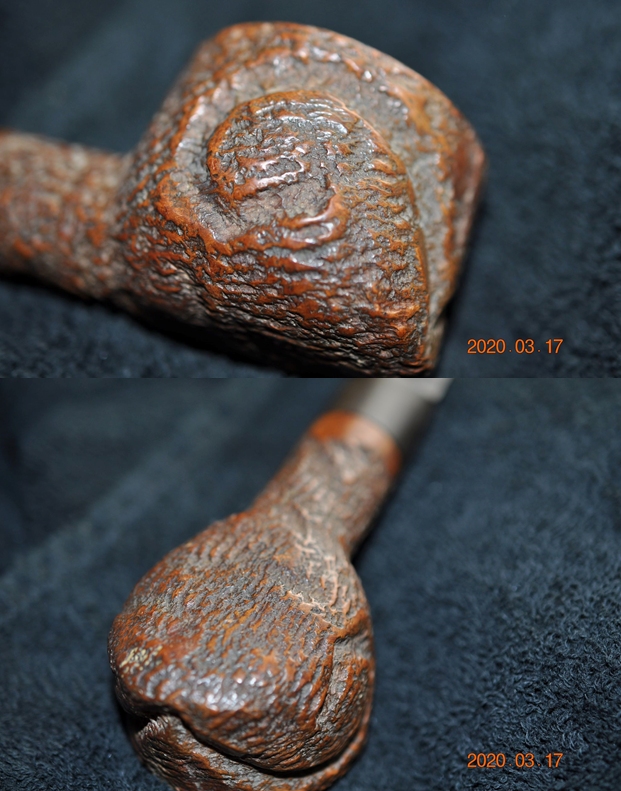
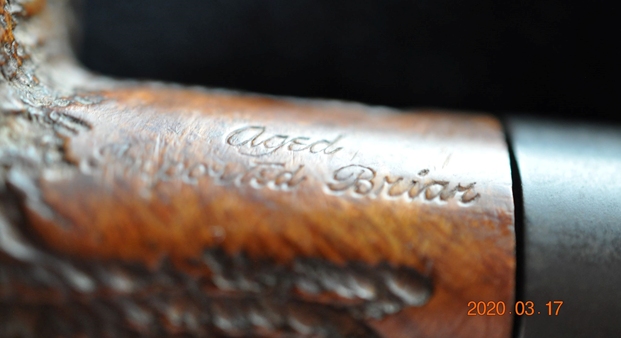
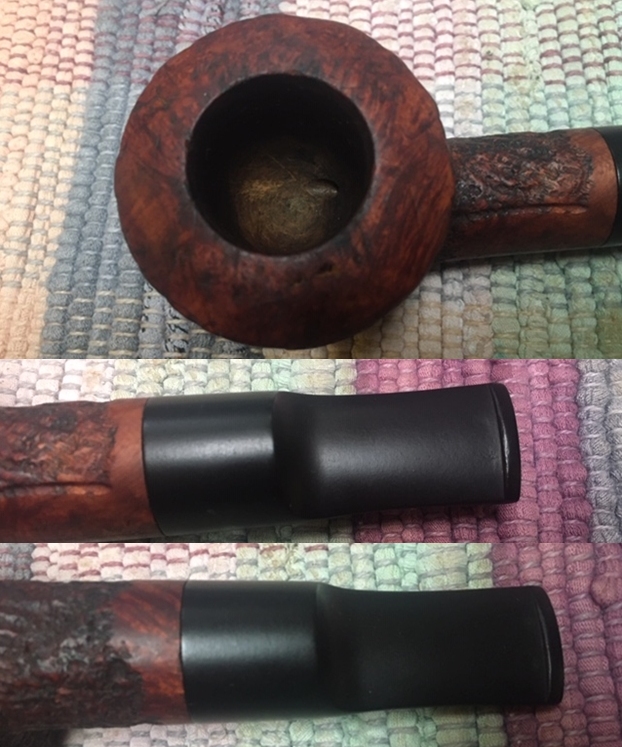
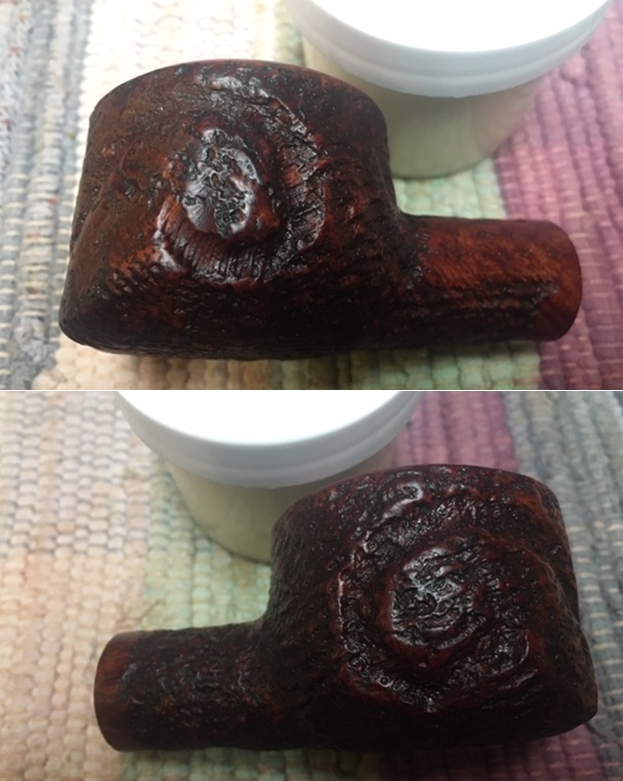
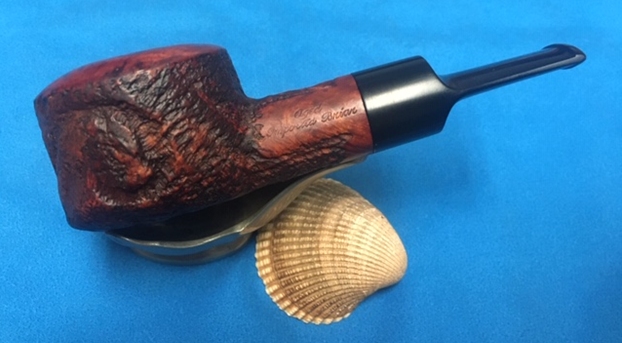
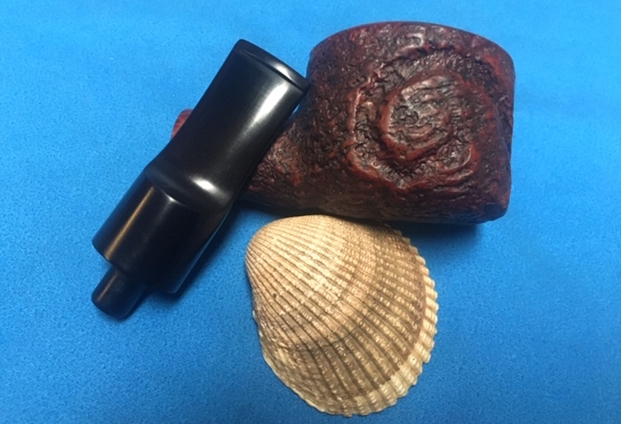
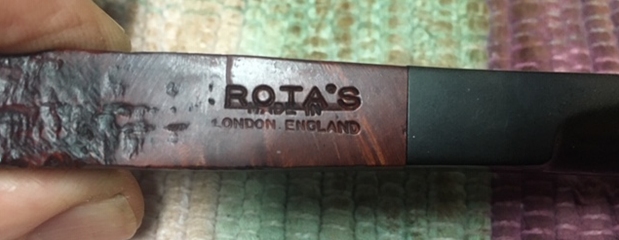
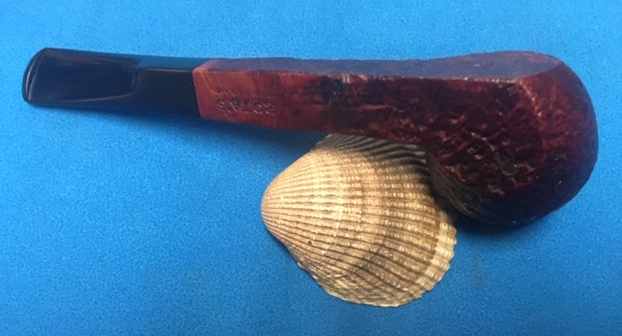
 He took several photos of the stamping on the sides of the shank to capture it for me. It is clear and readable. It reads as noted above. He also included a photo of the acrylic encased BC inlay on the left side of the stem.
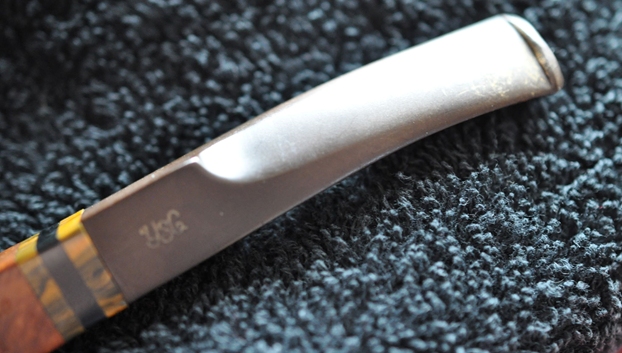
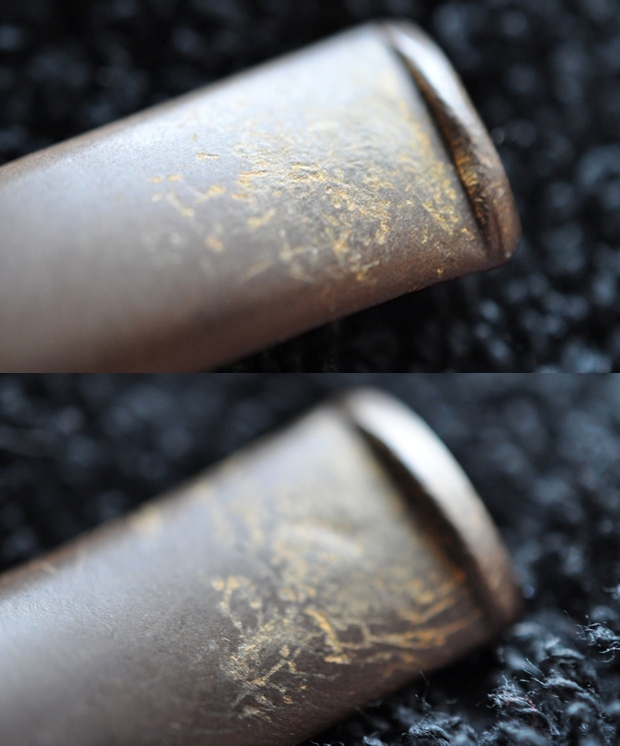
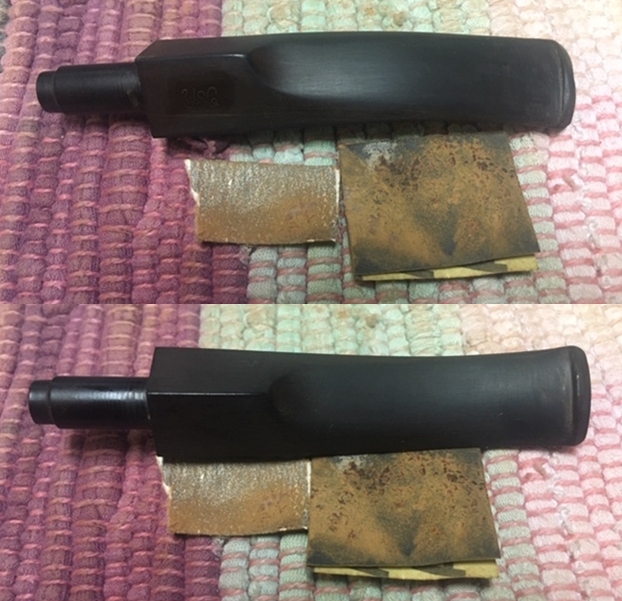
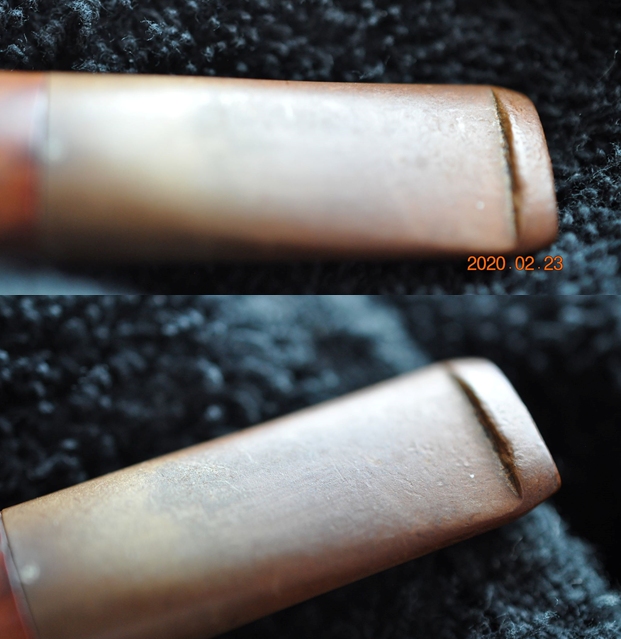
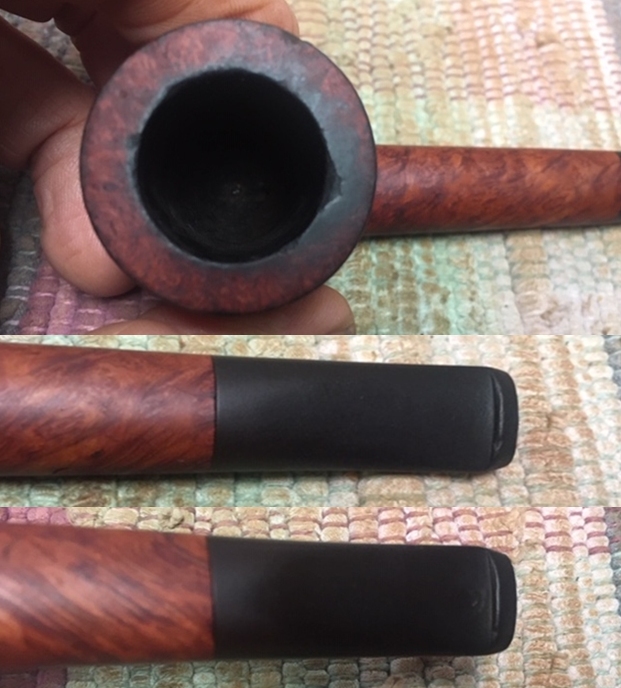
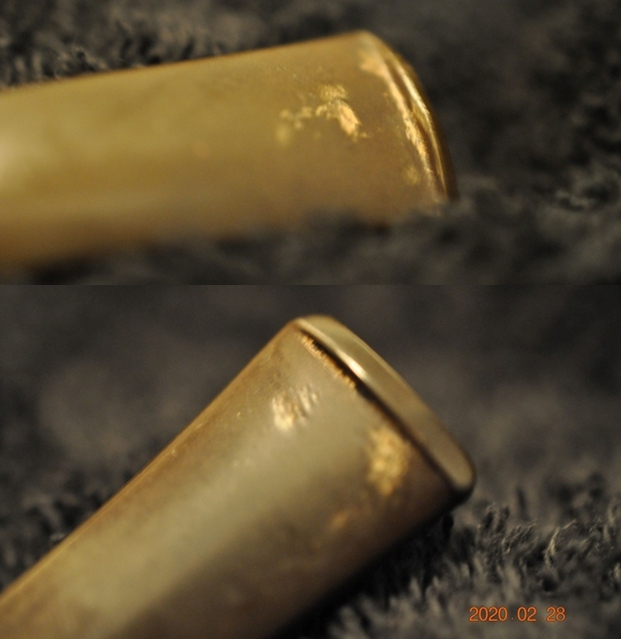
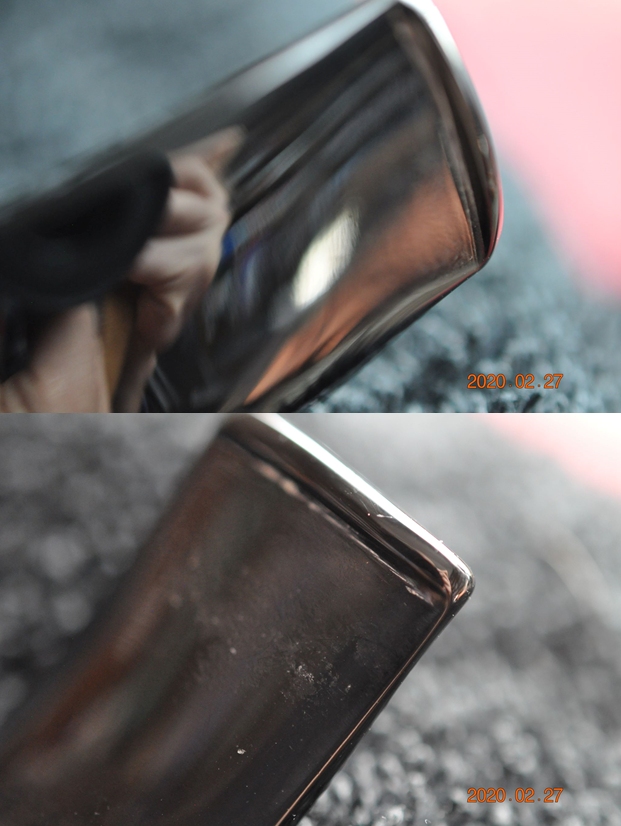
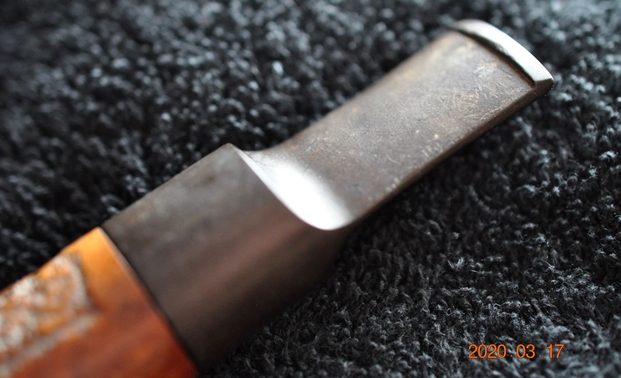
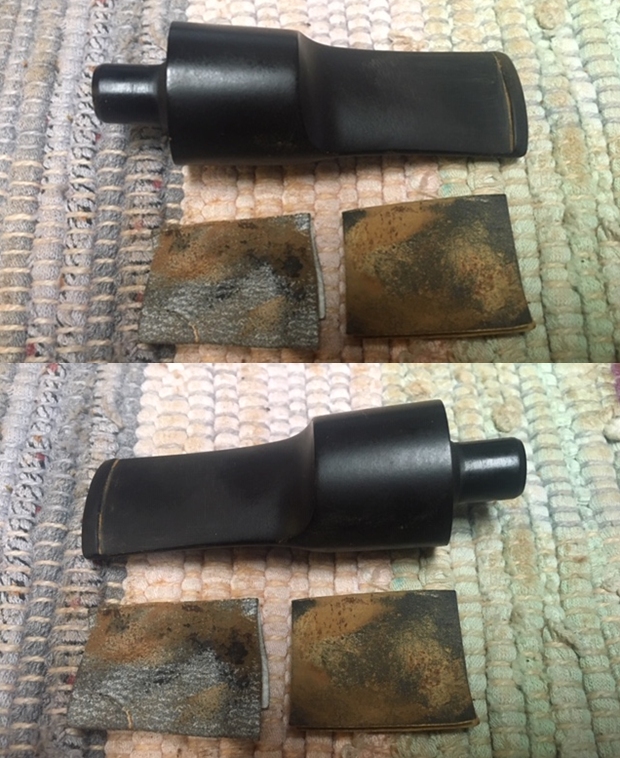
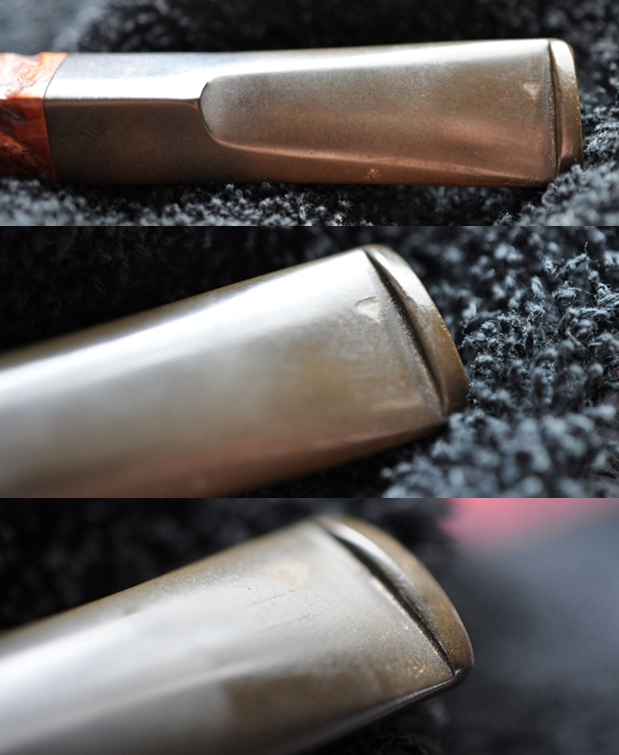
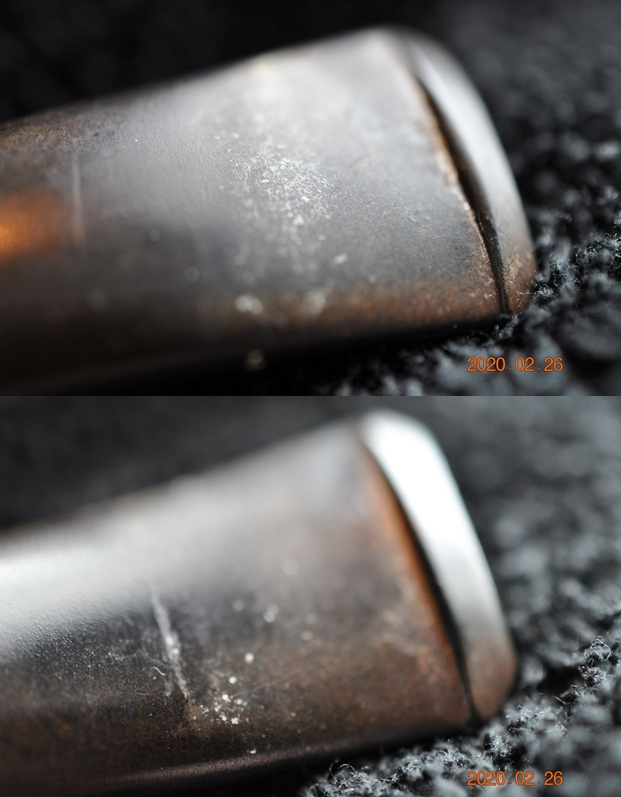
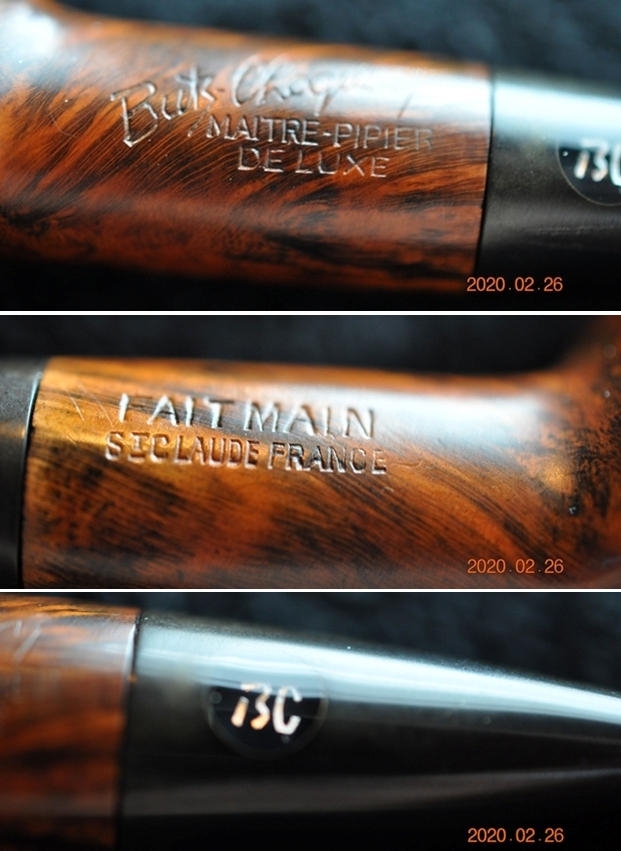 The vulcanite stem is a bit of a mess! It is oxidized and there is calcification build up all over the stem from the button forward. There are also light tooth marks and chatter on both sides of the stem. The button appears to be in good condition. The photos below show the condition of the stem.
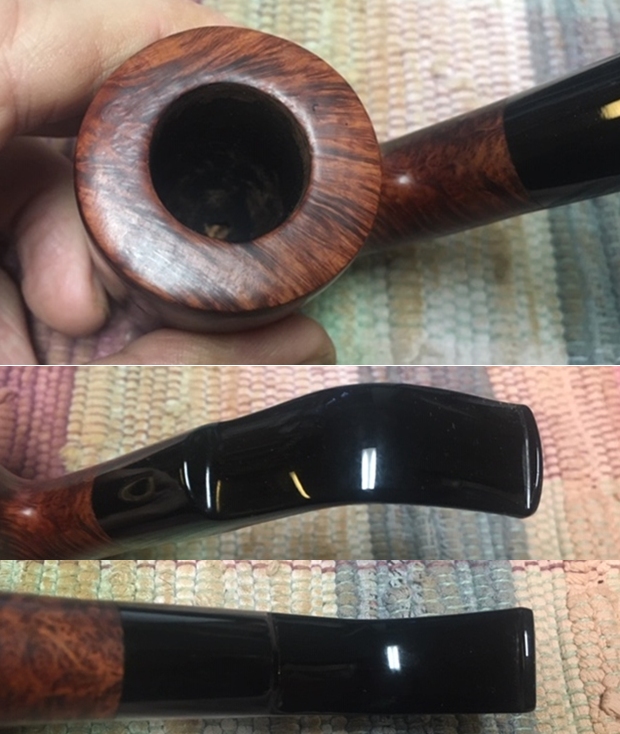
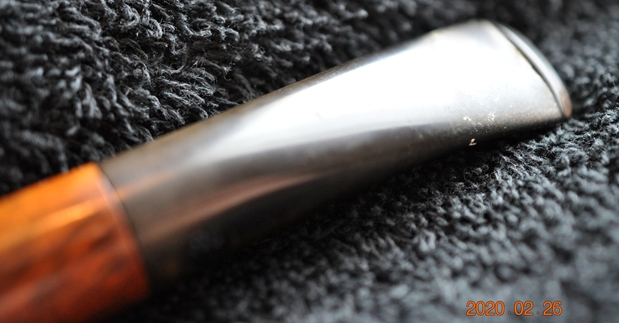
 Before I started working on my part of the restoration I quickly turned to the previous blog I had done on the Butz Choquin Maitre Pipier (https://rebornpipes.com/2020/04/09/breathing-life-into-a-weary-but-graceful-butz-choquin-maitre-pipier-de-luxe/). I had done some research on the Maitre Pipier line to see what I could learn. I quote from that blog below:
I turned first to PipePhil’s site to get a quick overview of the brand (http://www.pipephil.eu/logos/en/logo-butzchoquin.html). There found the following information. I am also including a screen capture of the pertinent section from the site.
Pipes of the “Maitre Pipier” series were crafted by Paul Lanier until he retired and after him by Alain Albuisson. The model illustrated is remarkable for its “swan neck” shank.
The one pictured in the screen capture is an Extra but the shape is very similar to the one I have that is stamped De Luxe. The same swan neck shank is a part of its beauty. I turned then to Pipedia and did not find anything pertinent to this series of pipes. If you would like to learn more about the brand here is the link (https://pipedia.org/wiki/Butz-Choquin).
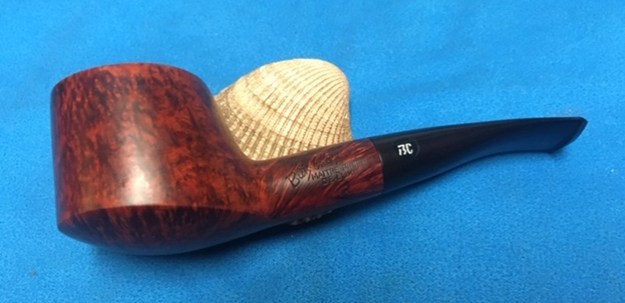
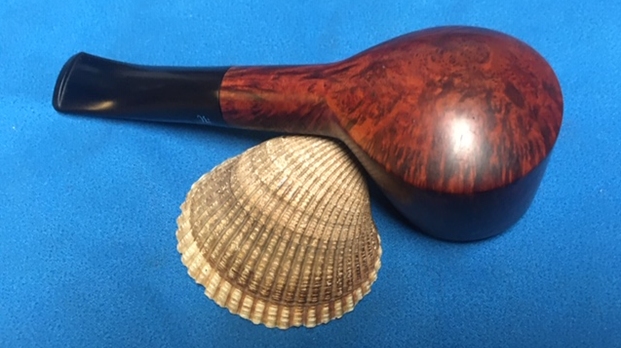
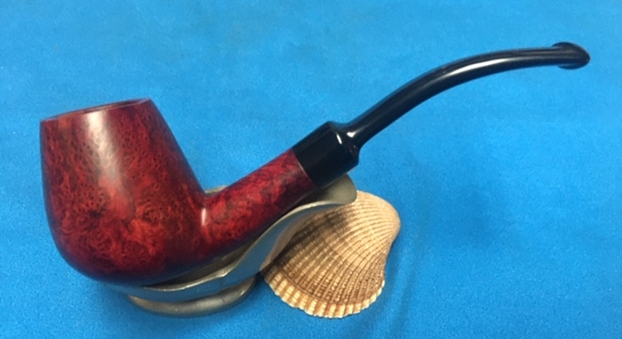
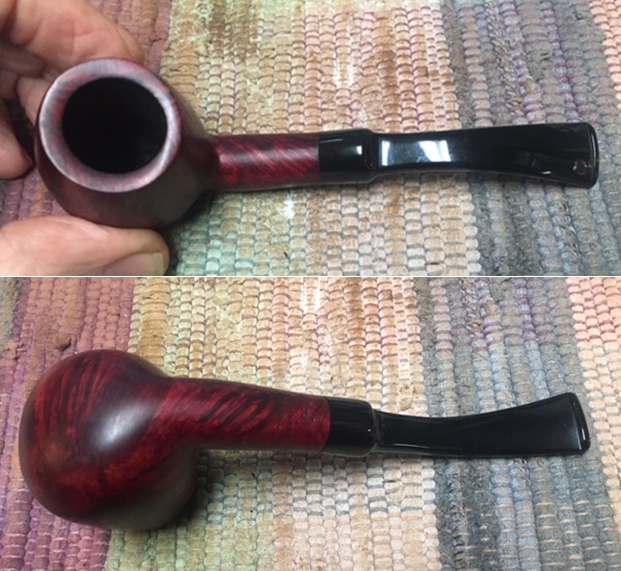
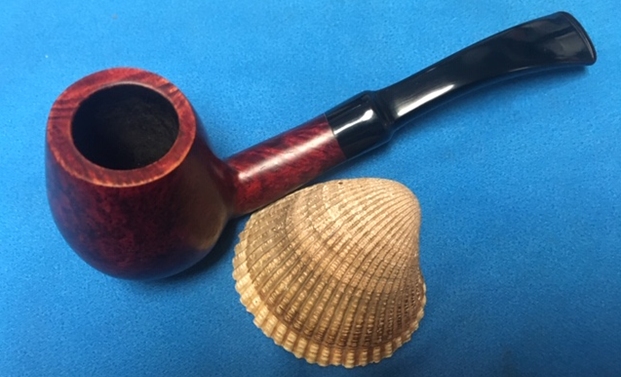
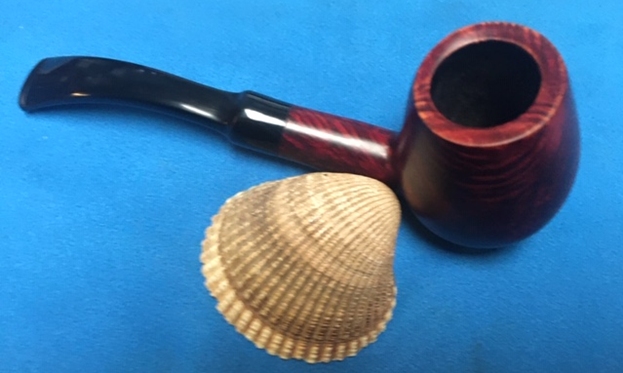
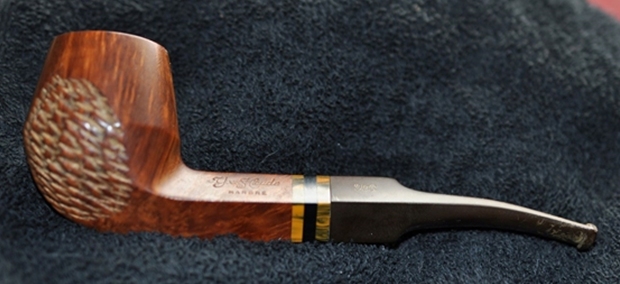
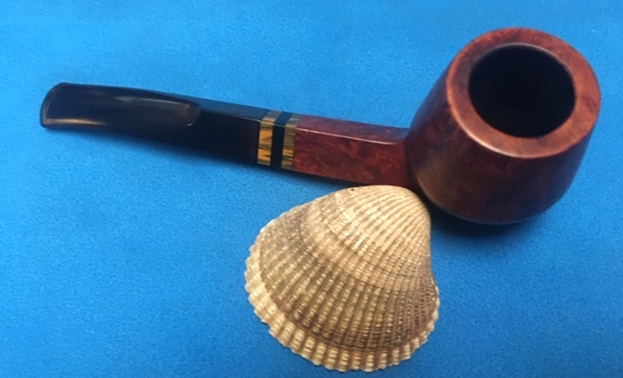
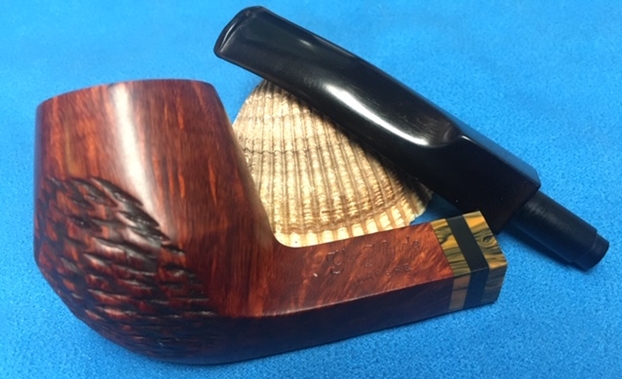
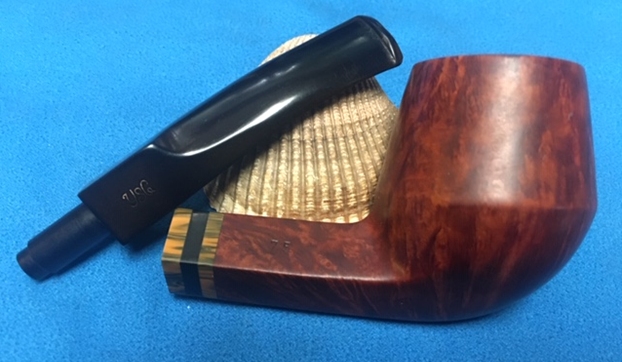
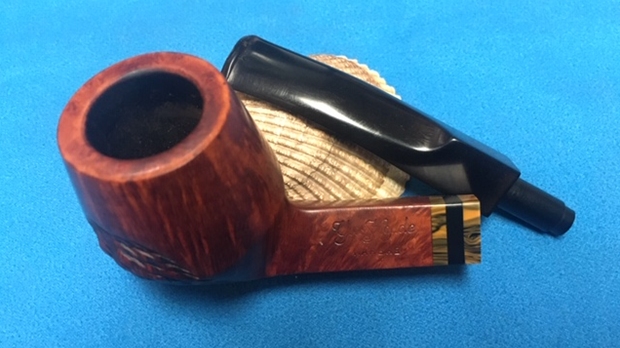
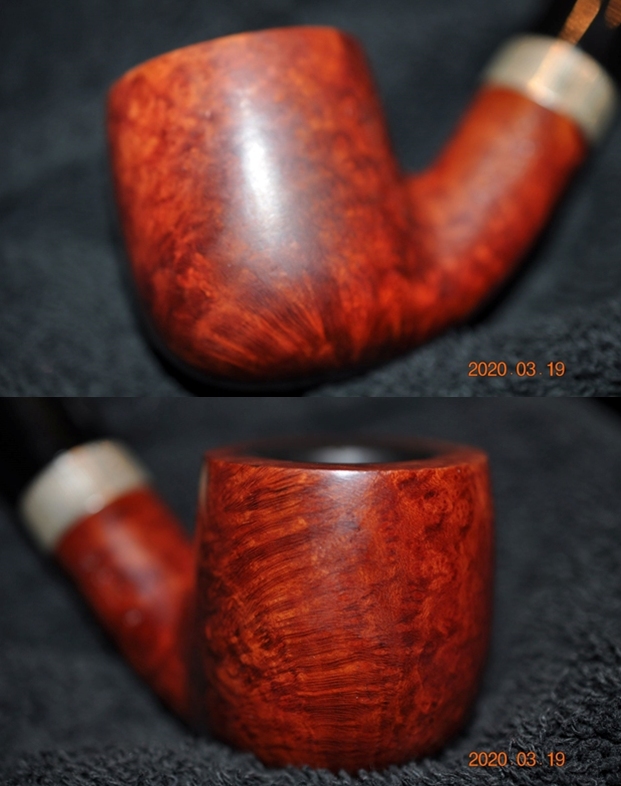
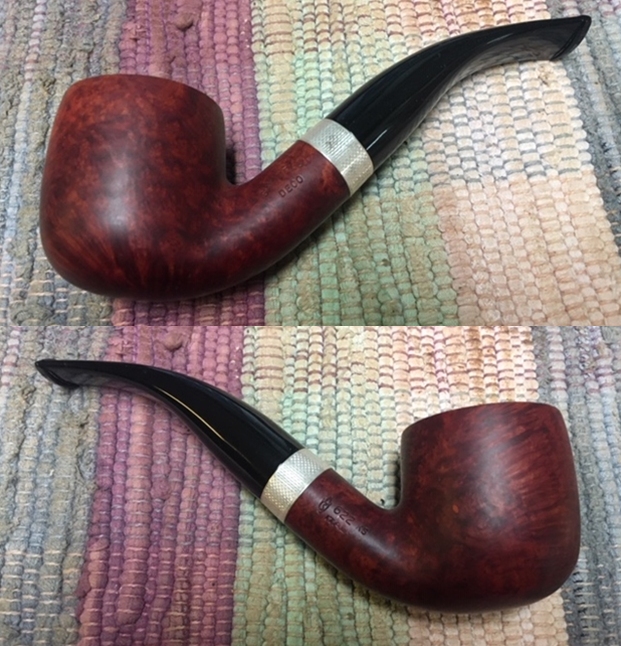
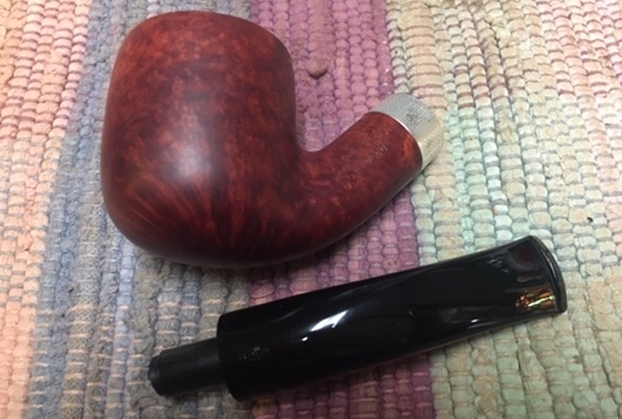
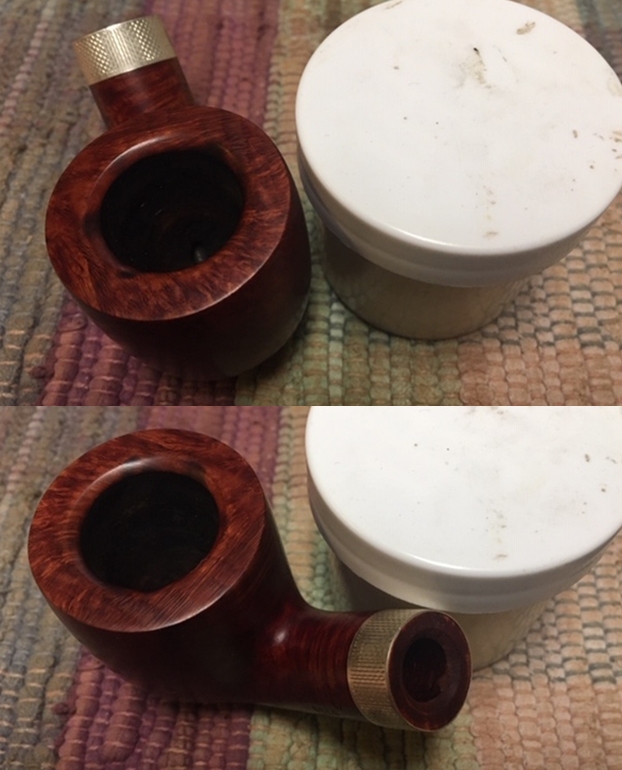
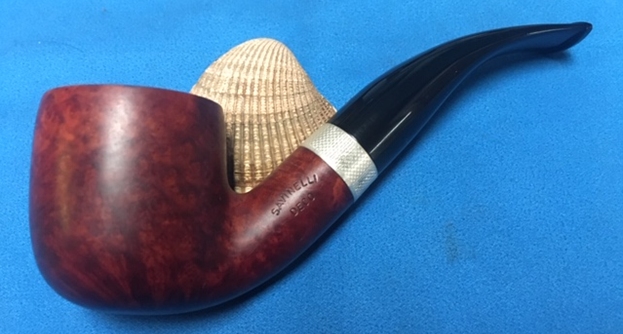
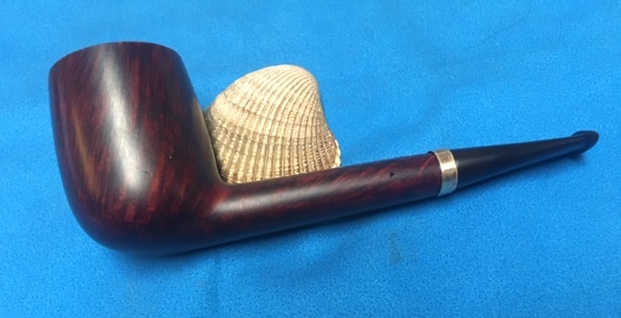
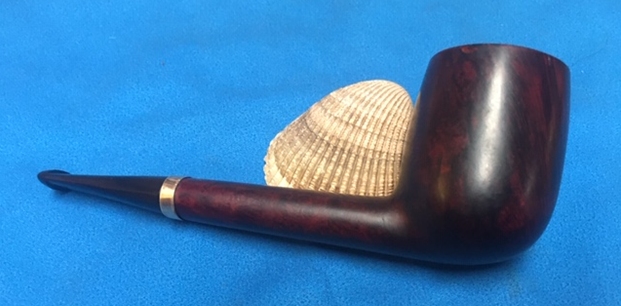
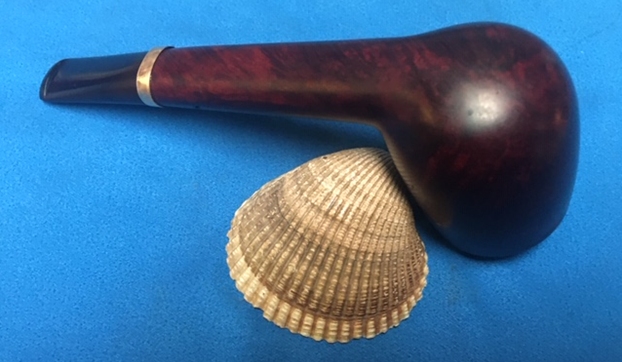
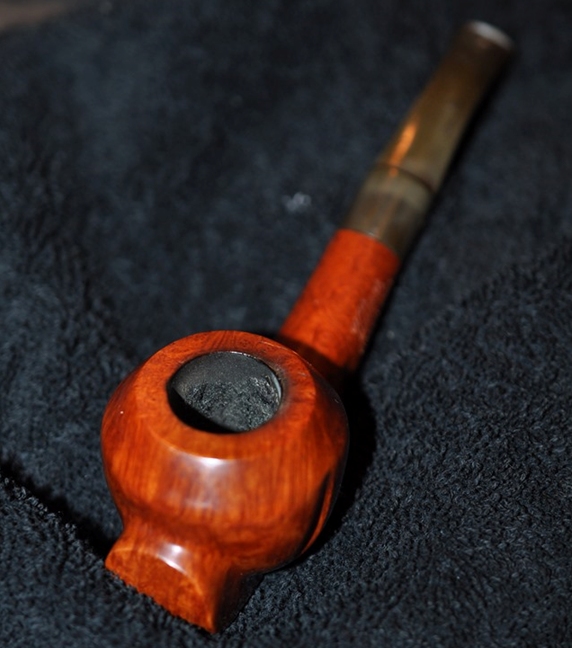
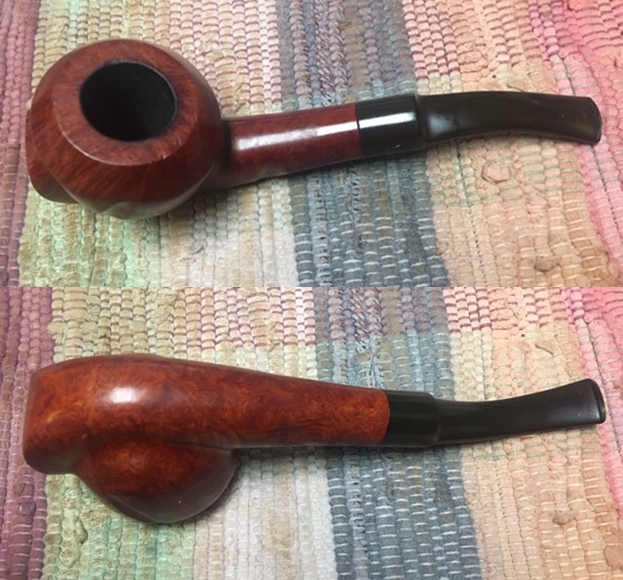
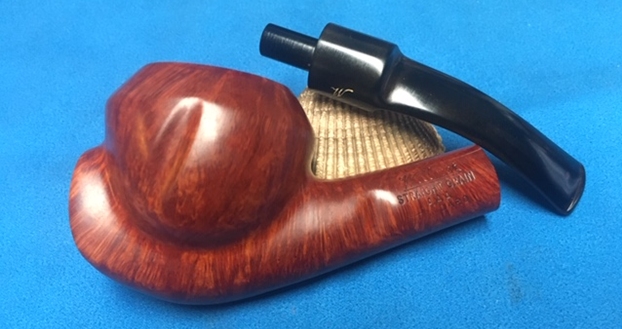
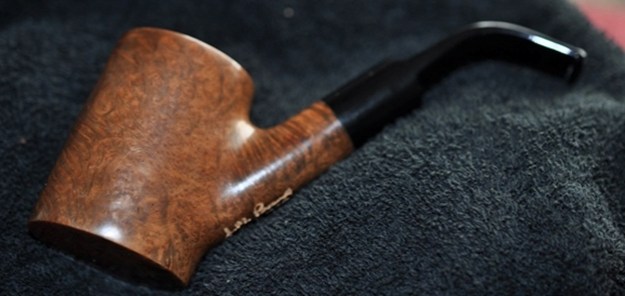
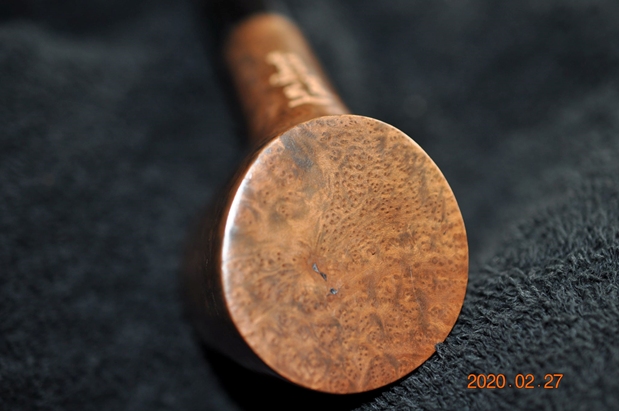
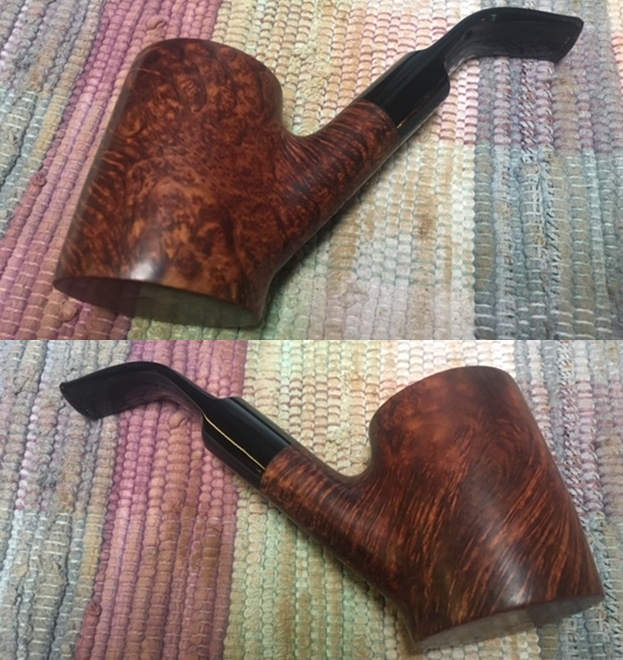
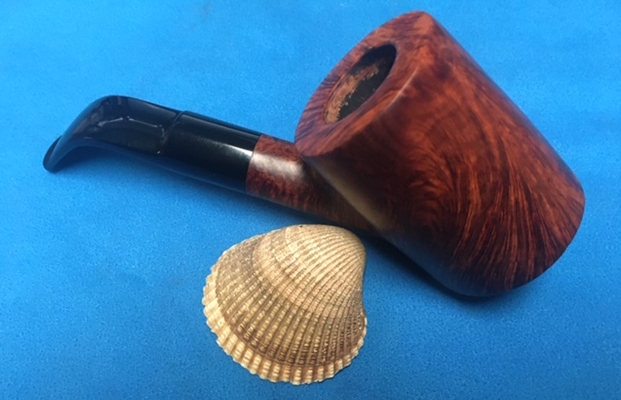
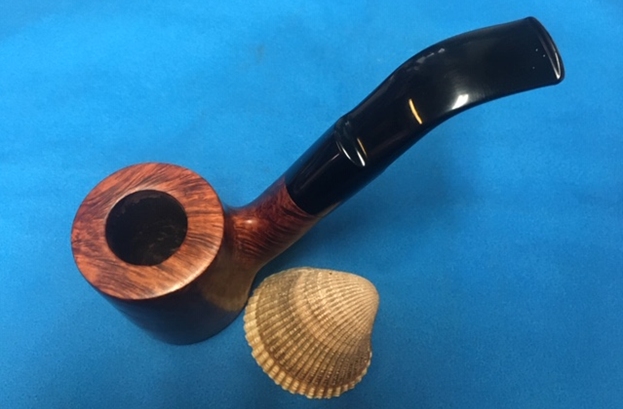
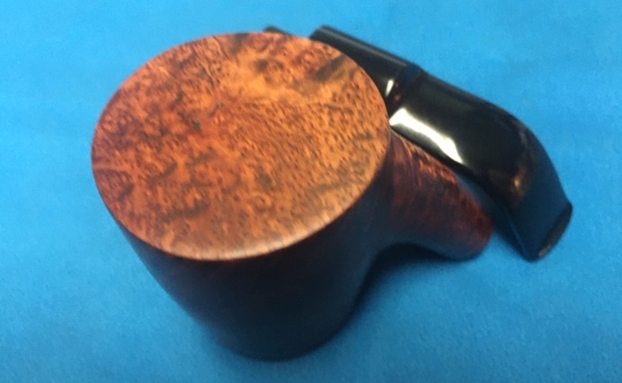
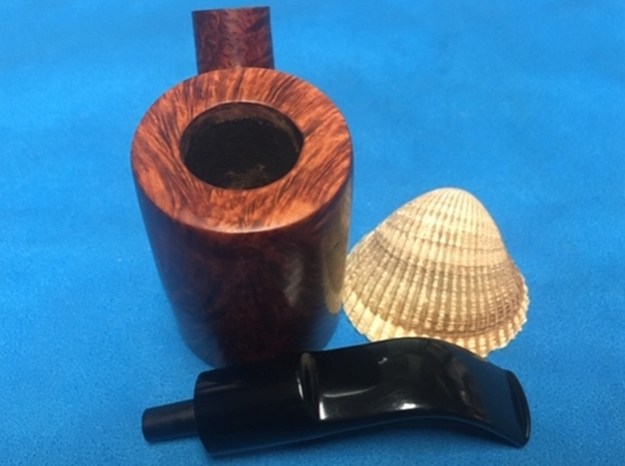
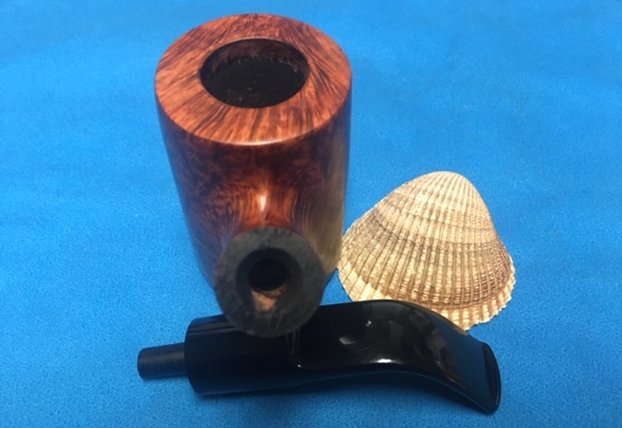
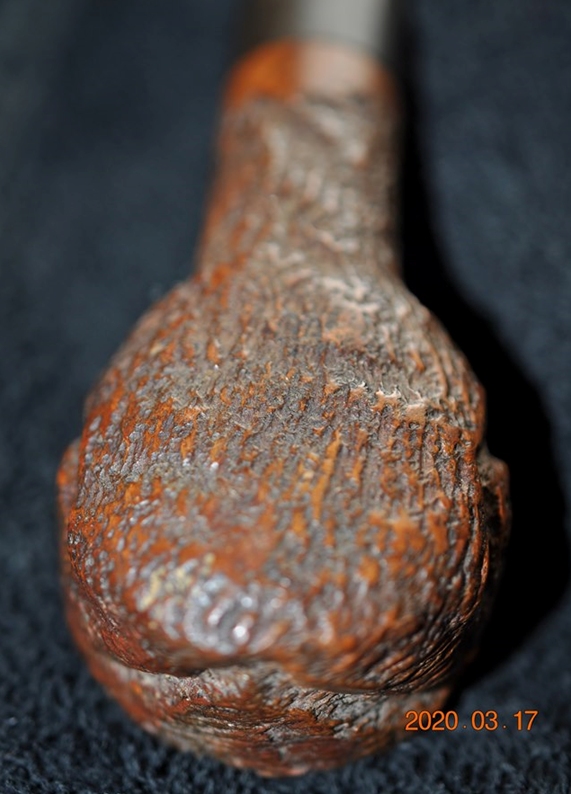
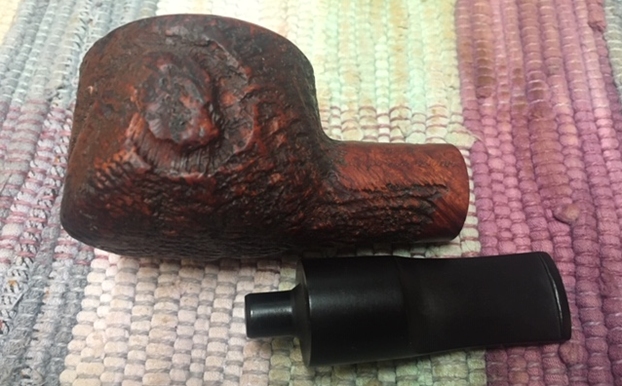
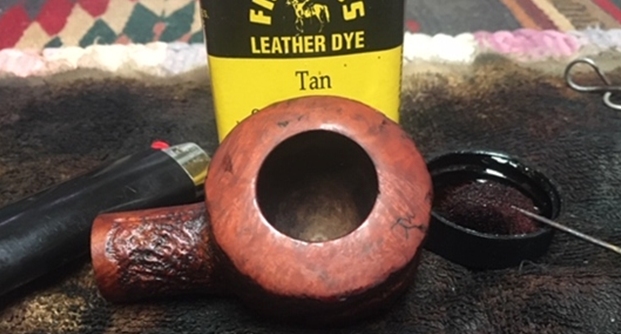
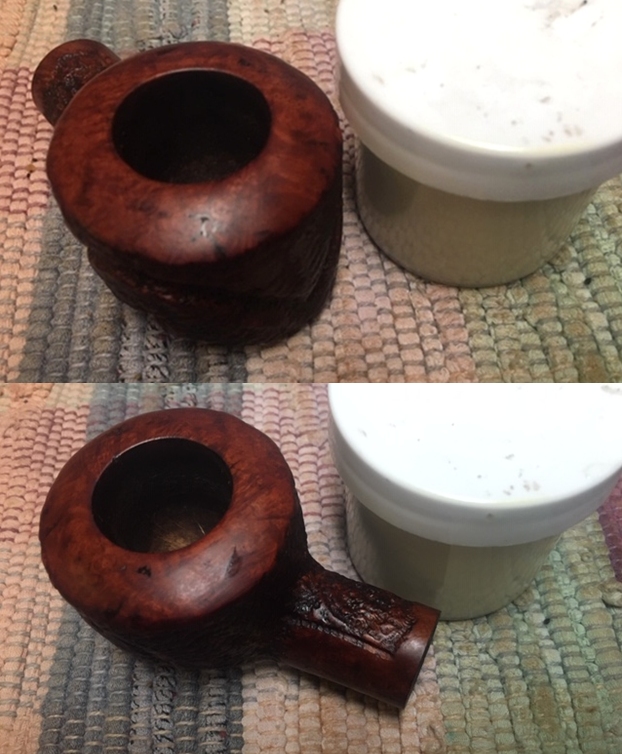
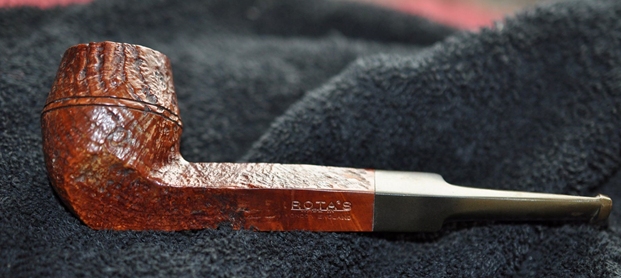
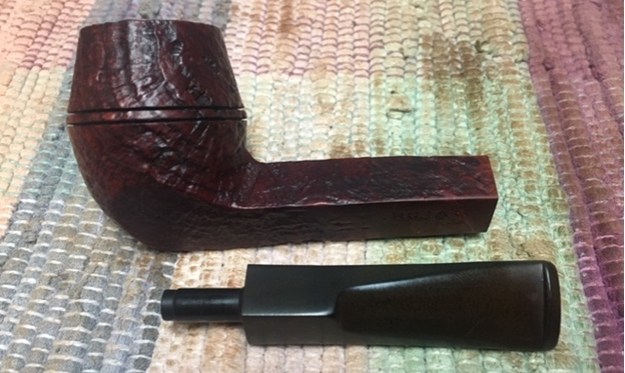
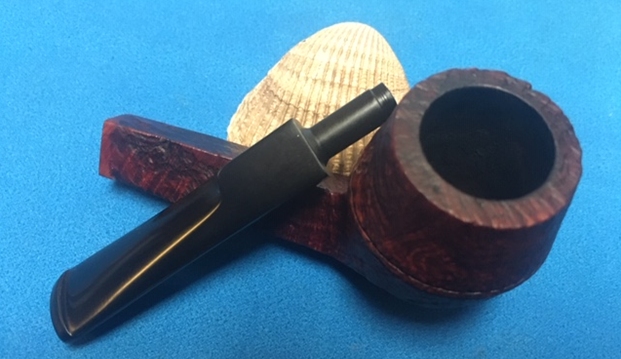
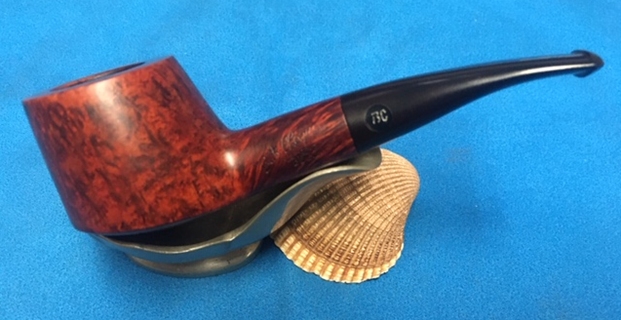
Now I had a pretty good idea the carvers of the Maitre Pipier Series. I am not sure of the date this pipe was made but I did know who made it – either Paul Lanier or Alain Albuisson. With that information I moved forward to do my part of the restoration work on the pipe itself and see what I had to do with it. The bowl looked unbelievably good in light of where it started. The rim top was the roughest looking portion but it was just odd and flaky not damaged. What remained was some very nicely grained briar. The stem looked much better with just a few tooth marks on each side of the stem just ahead of the button. Jeff had done his normal thorough clean up – reaming, scrubbing, soaking and the result was evident in the pipe when I unpacked it. I took photos of the pipe before I started my work on it. The squat shape and finish on this pipe looks great.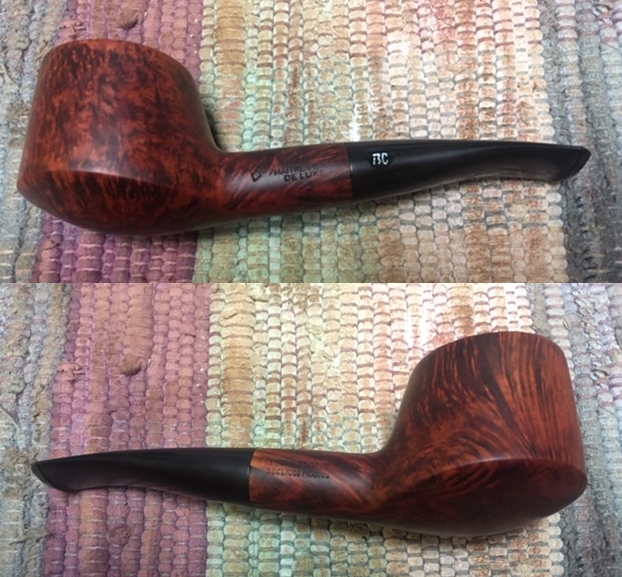
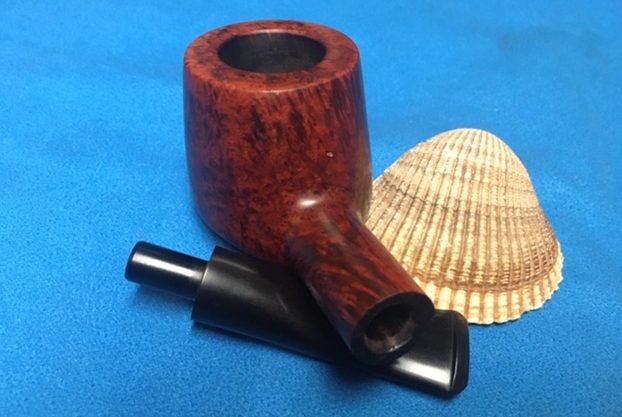
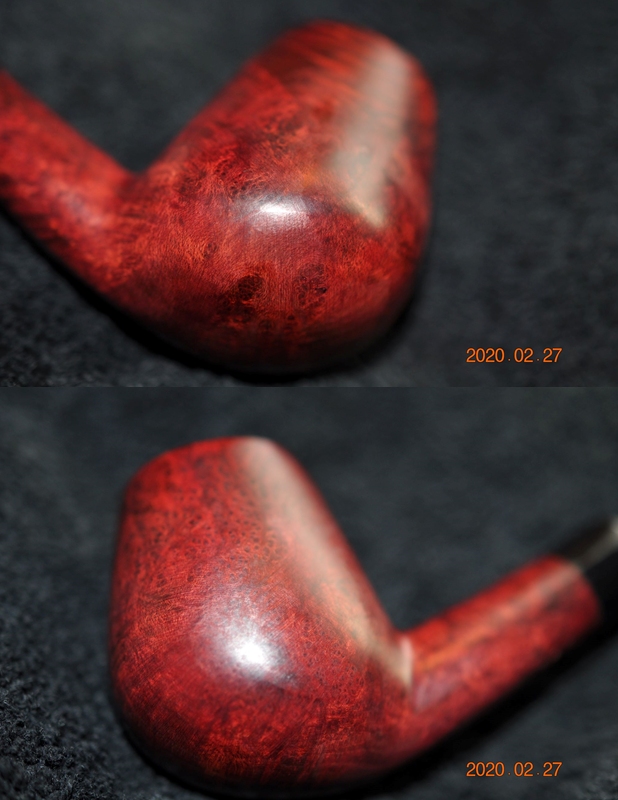
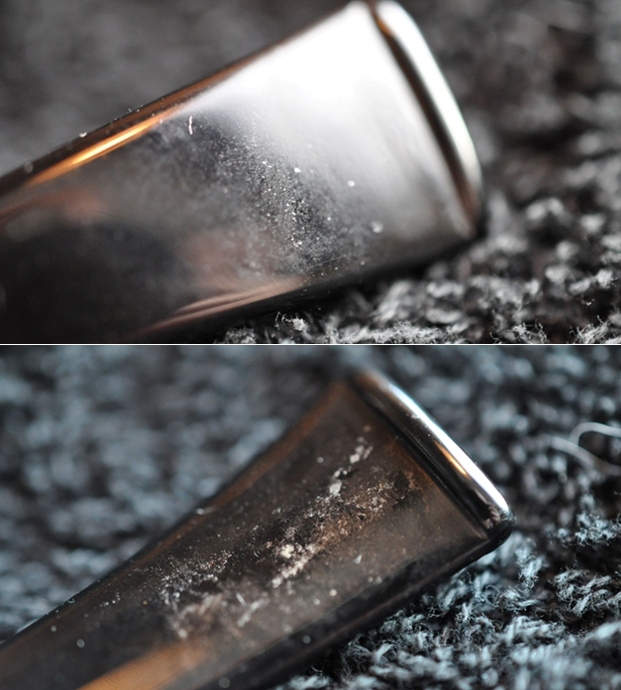
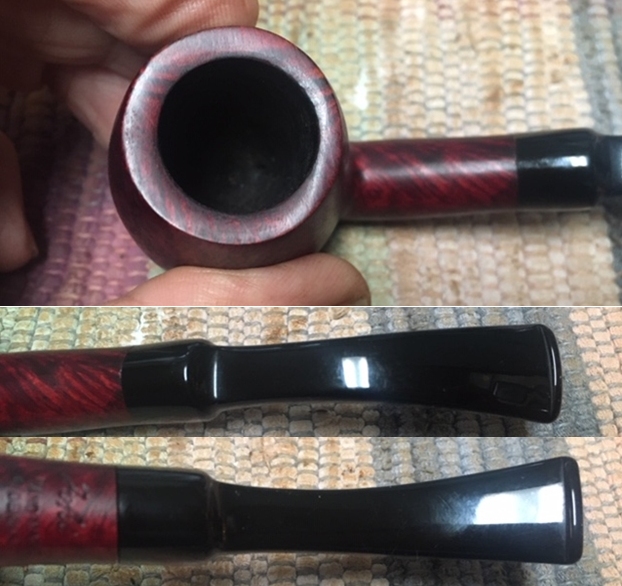
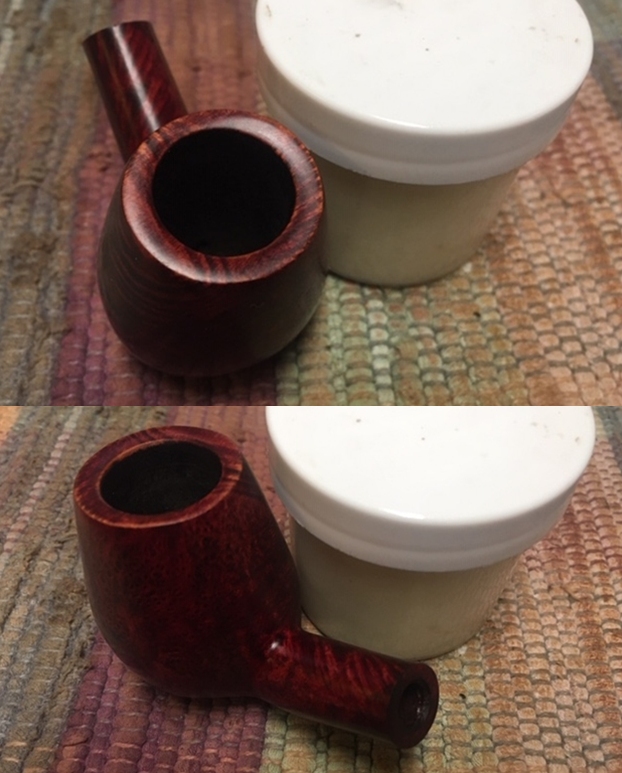
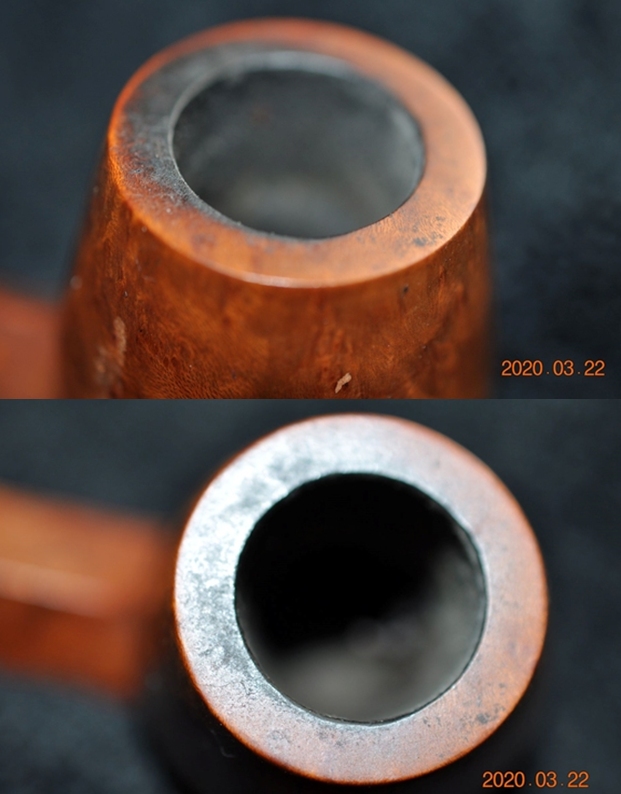
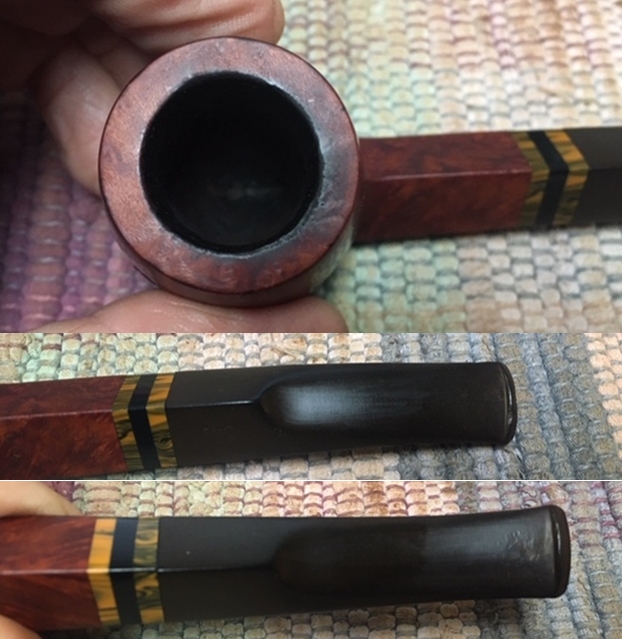
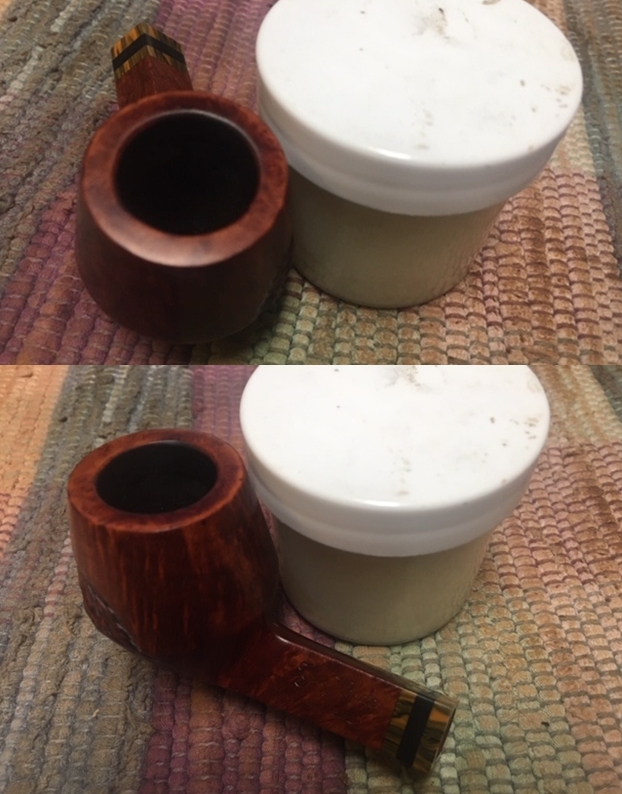
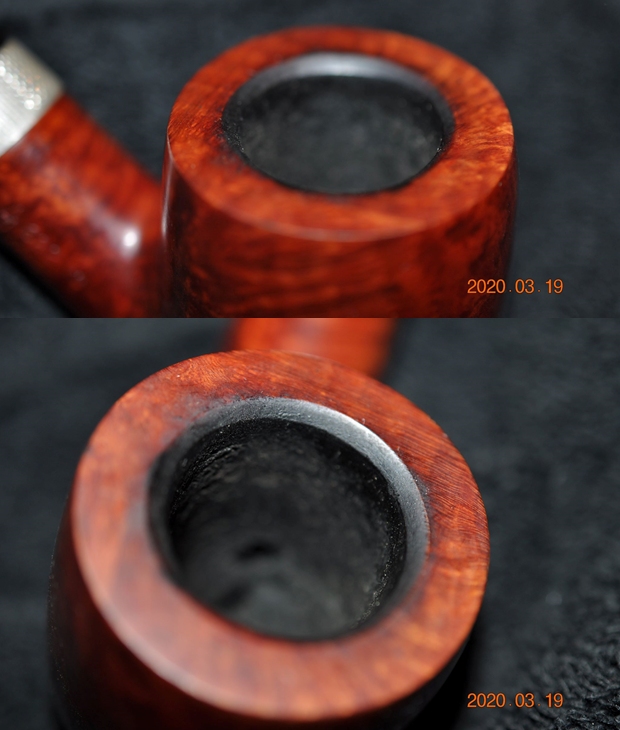
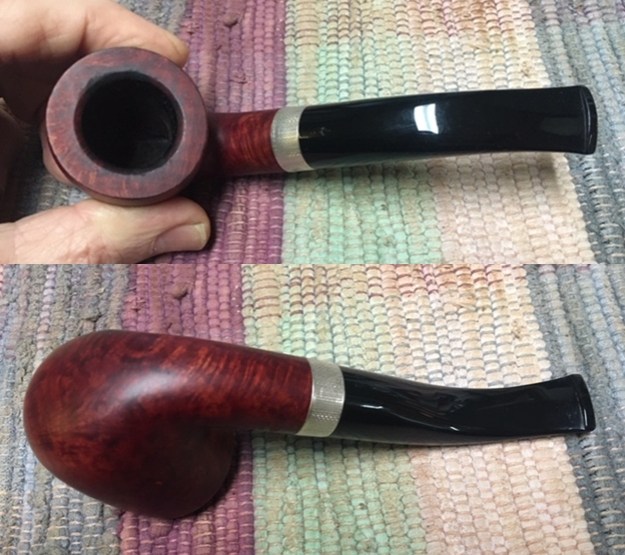
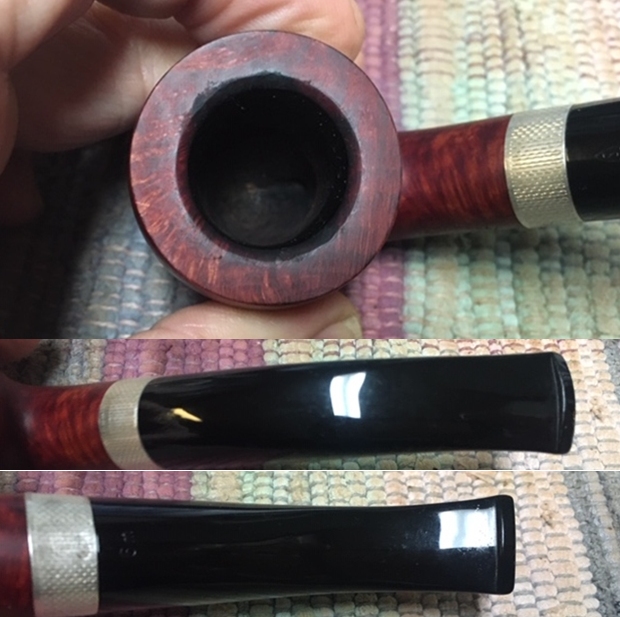
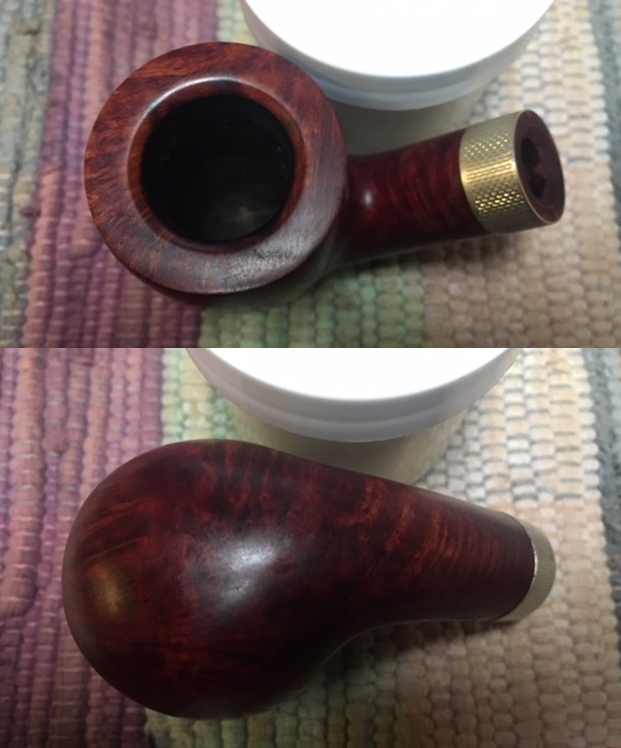
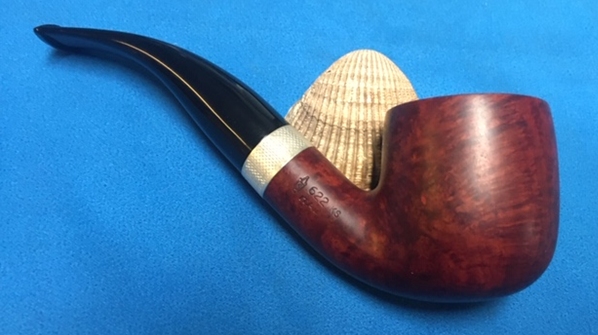
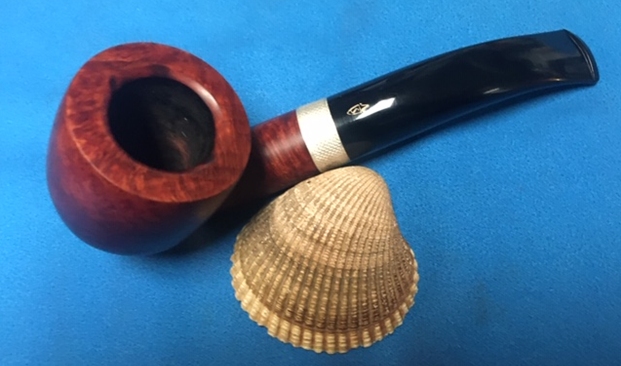
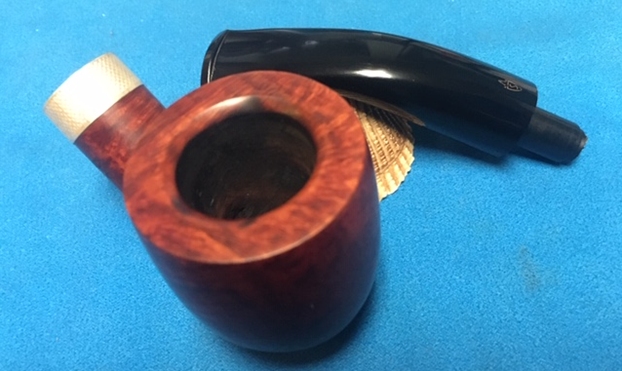
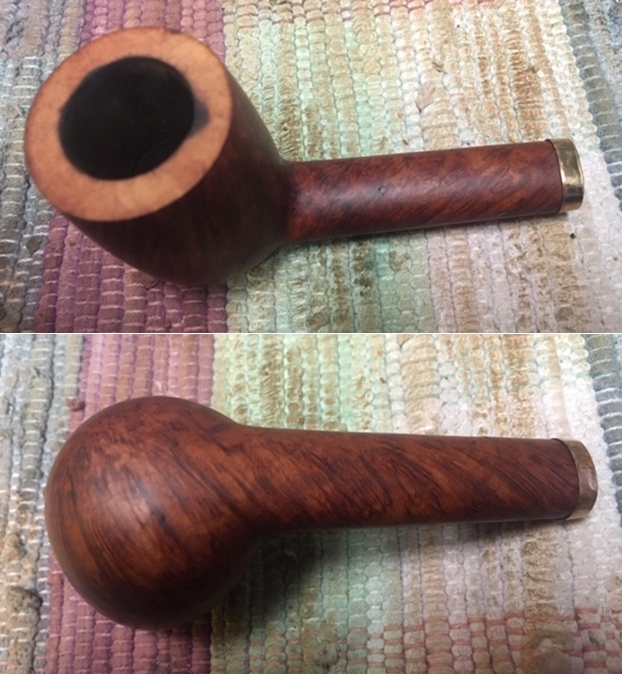
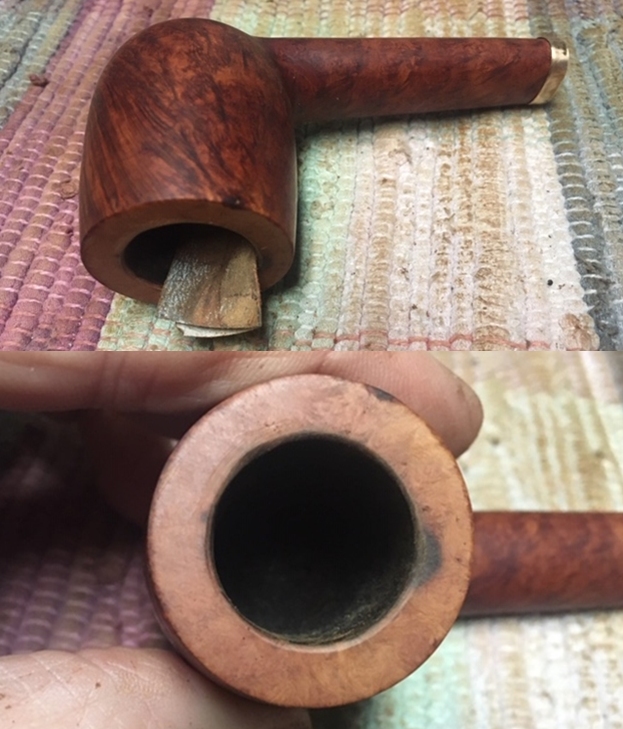
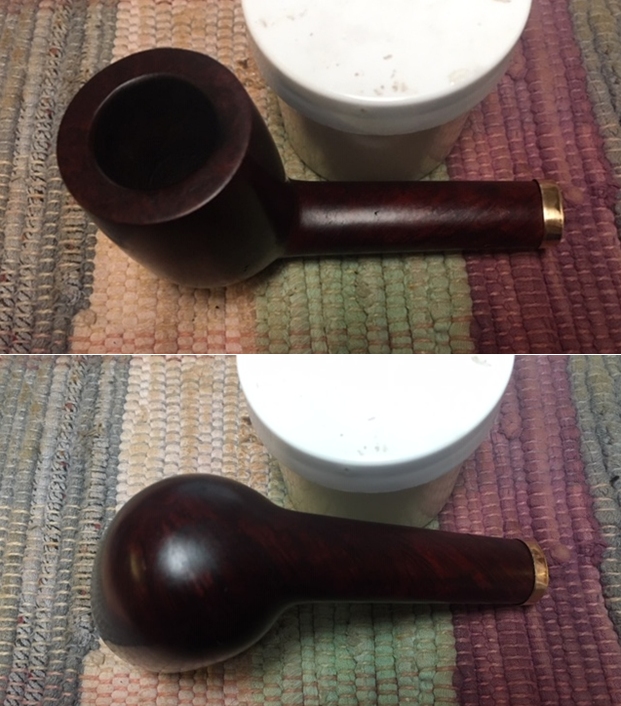
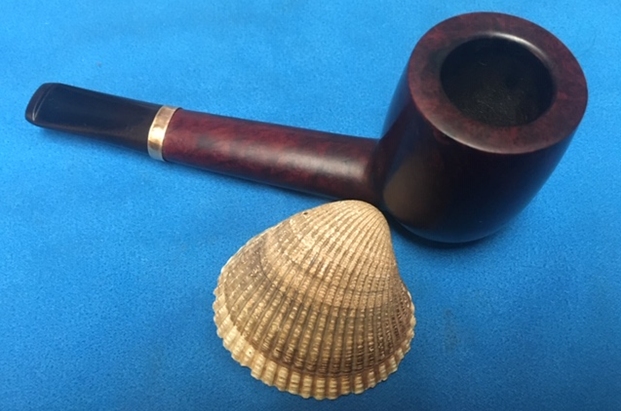
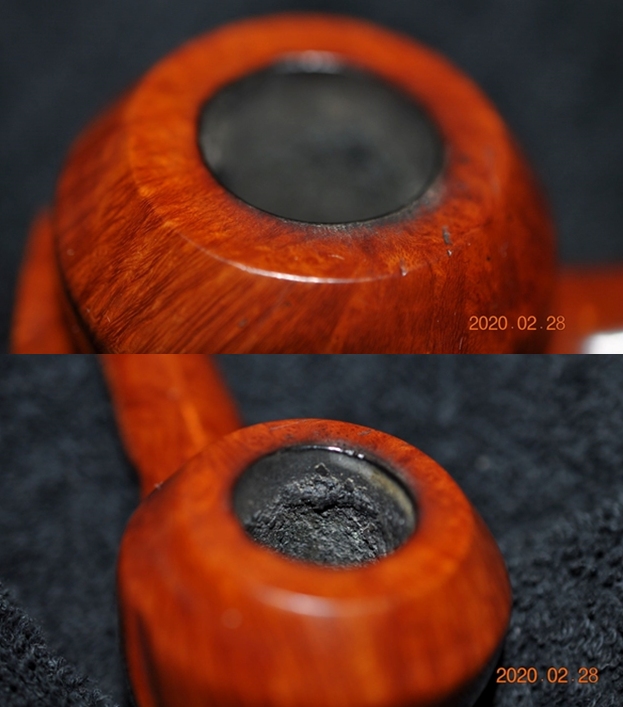
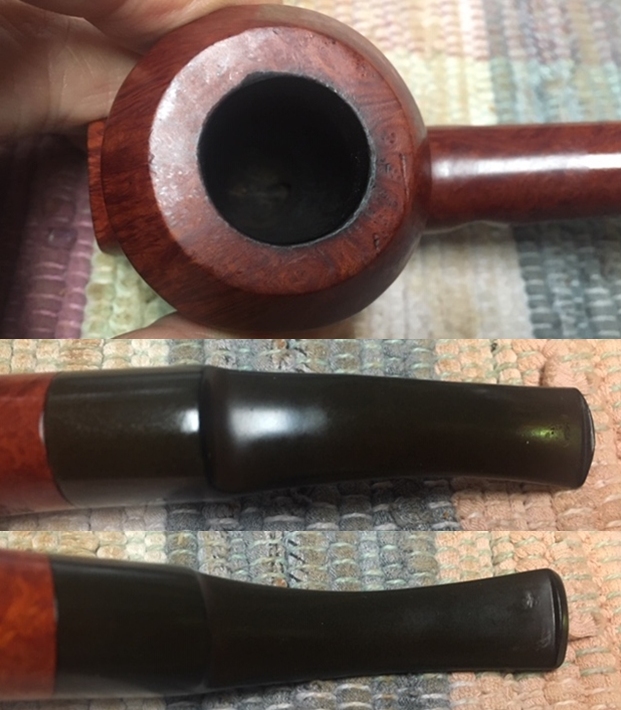
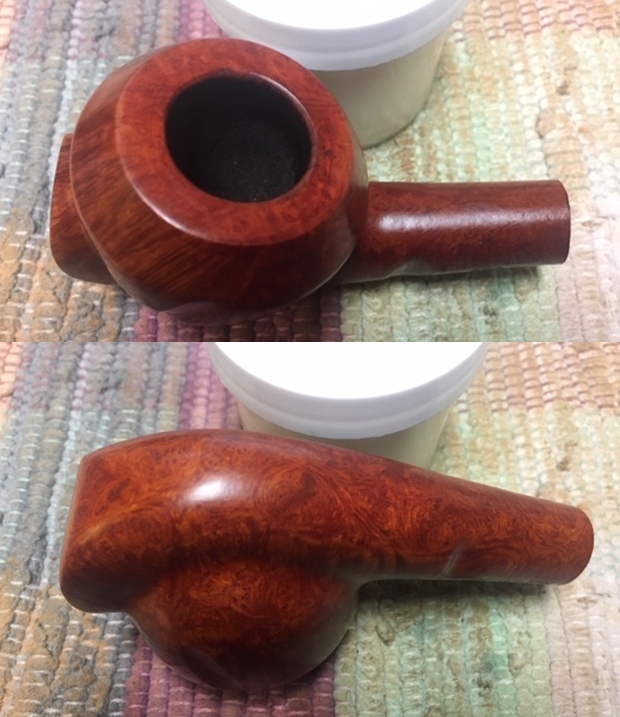
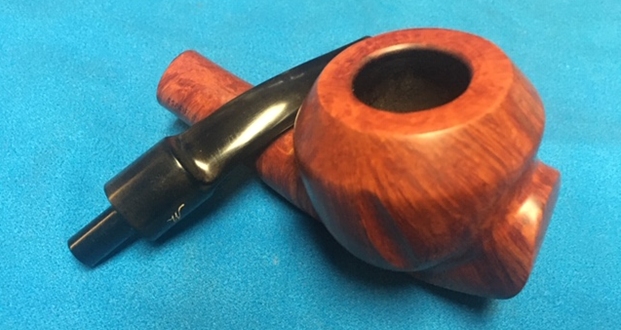
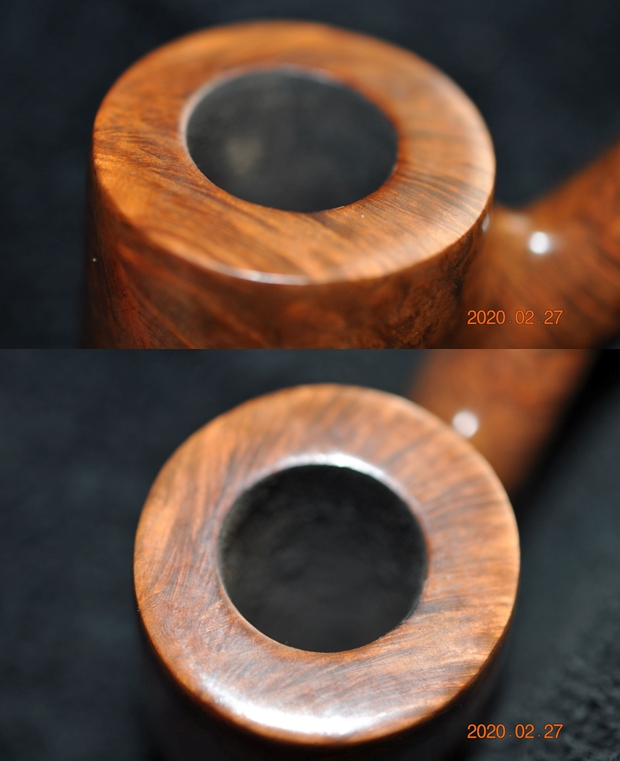
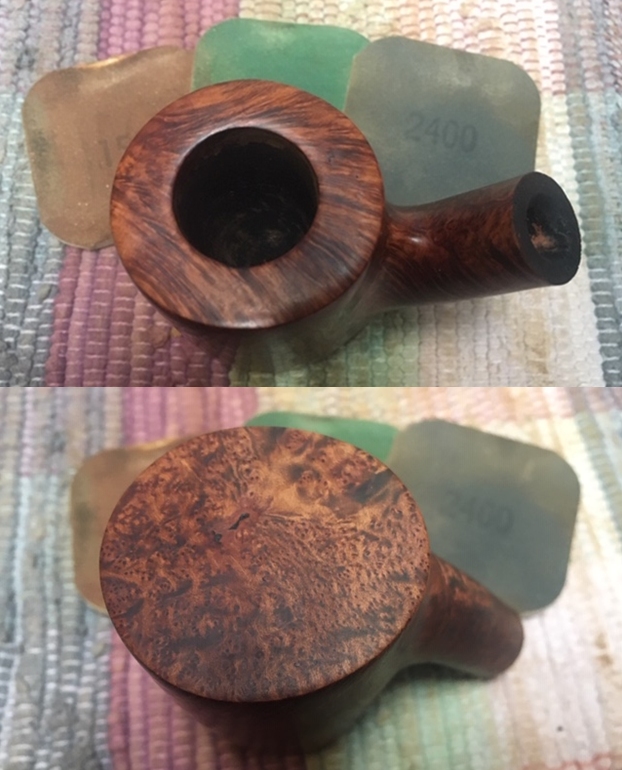
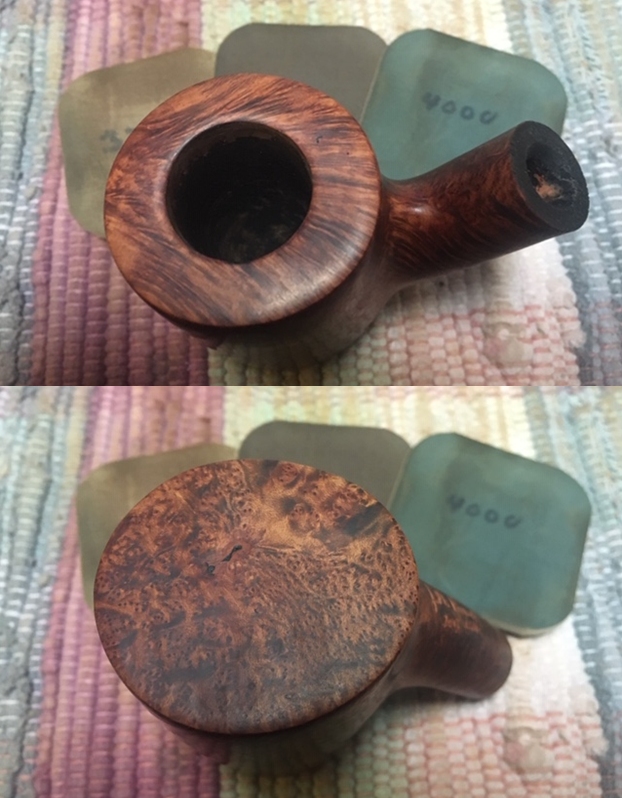
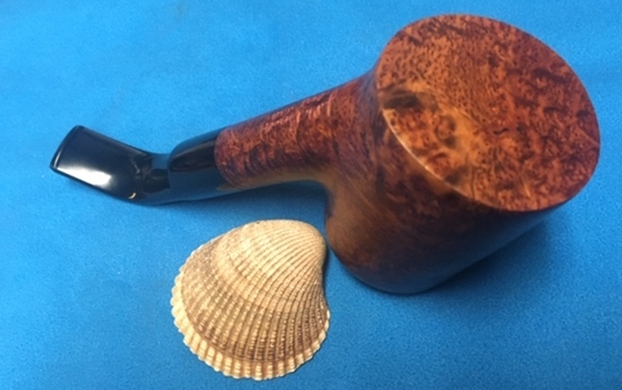
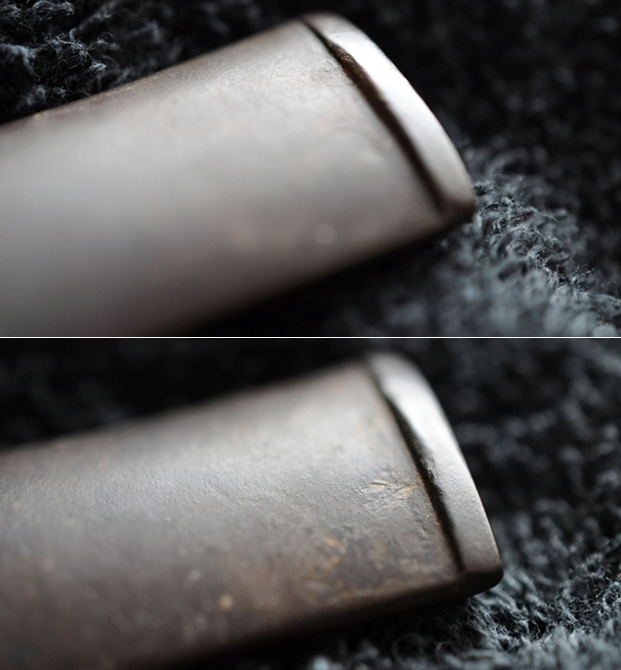
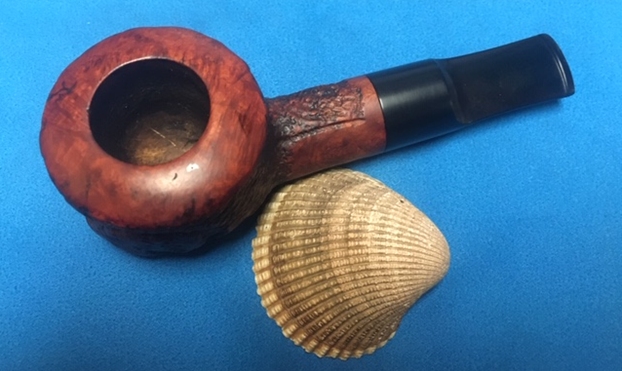
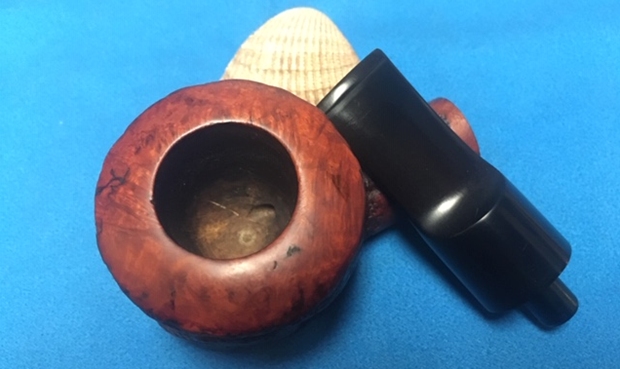
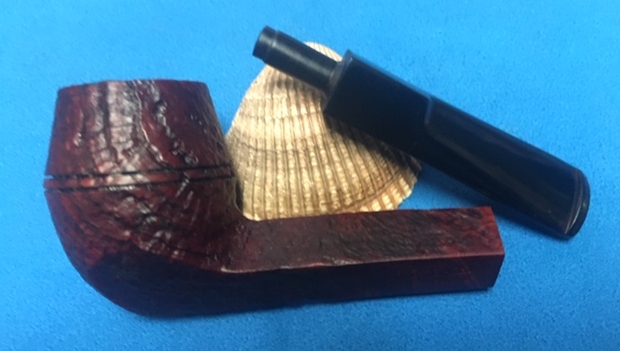
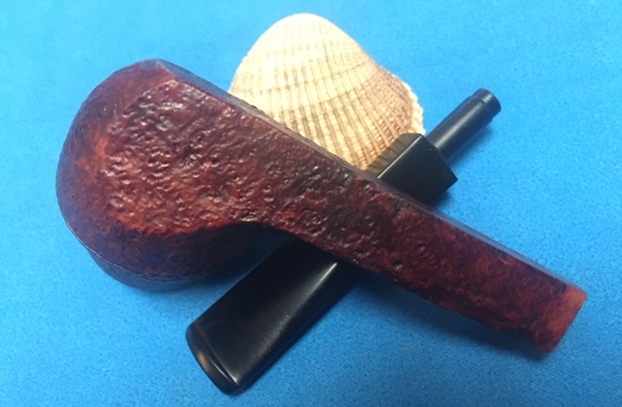
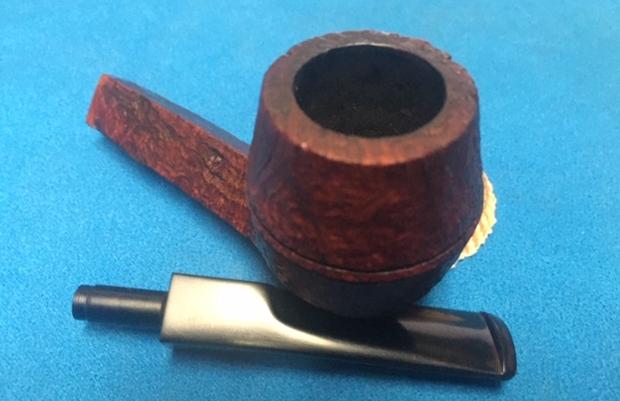
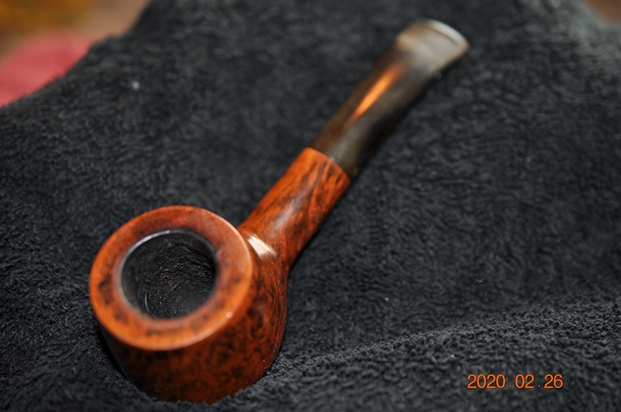
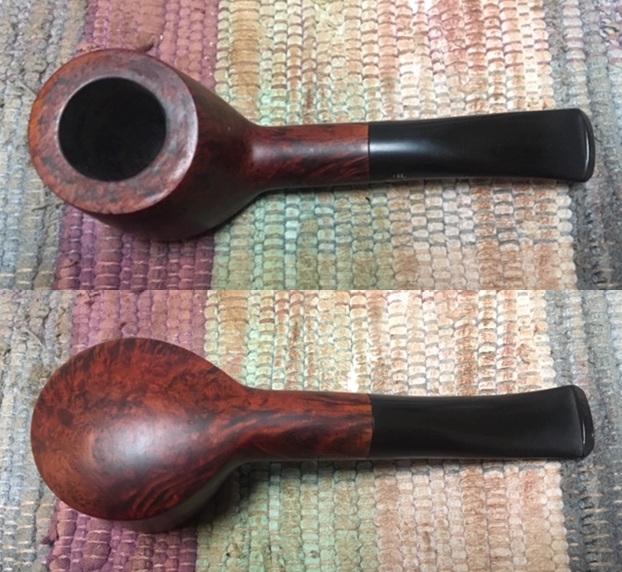 I took some photos of the rim top and stem. The rim top shows the damage I spoke of above. The bubbling and peeling was gone but there was a very mottled looking surface on the rim top. The bowl looked very good. The inner edge shows some damage on the back right side and a bit on the left side. The close up photos of the stem shows that is it very clean.
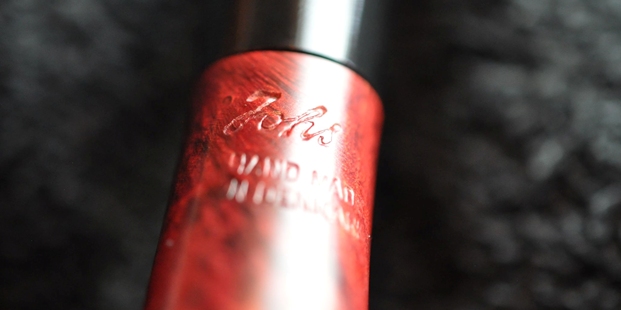
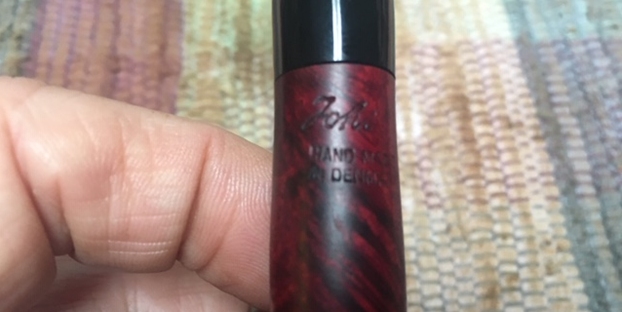
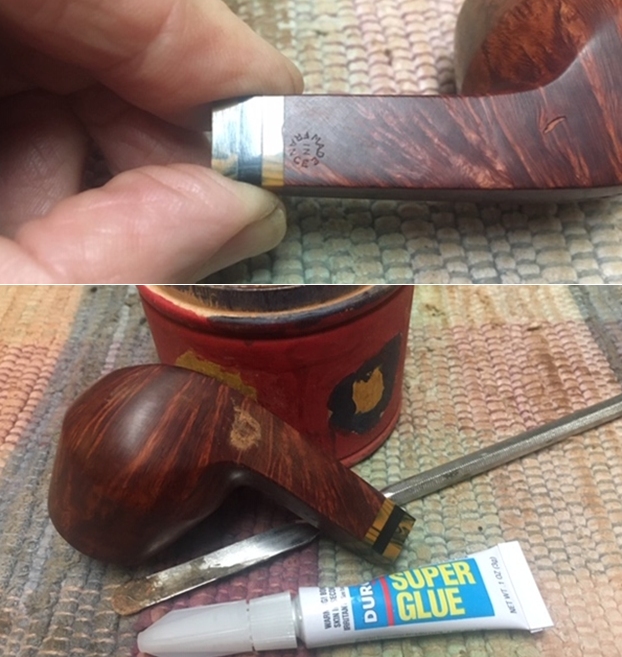
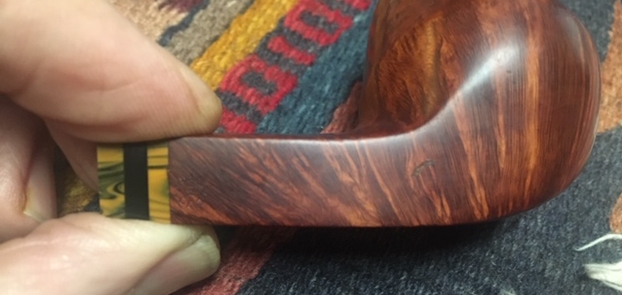
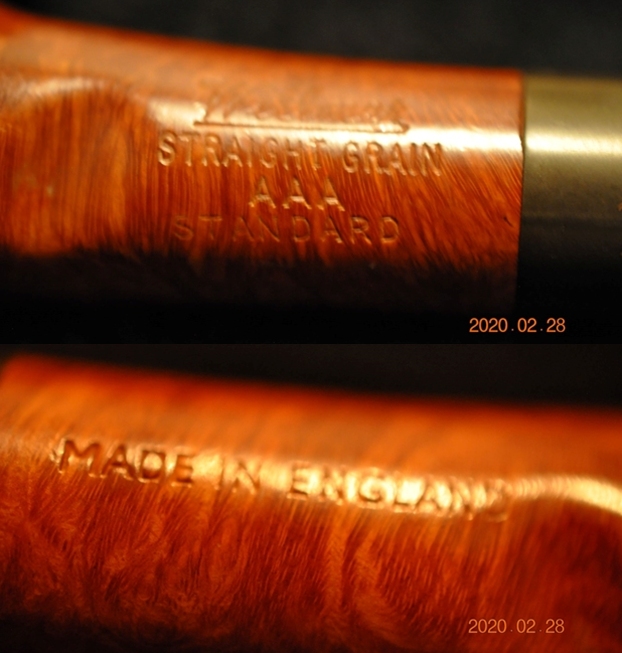
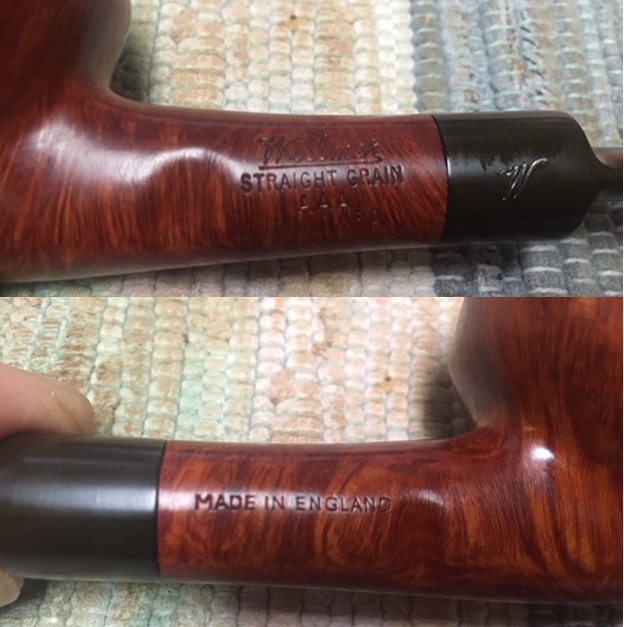
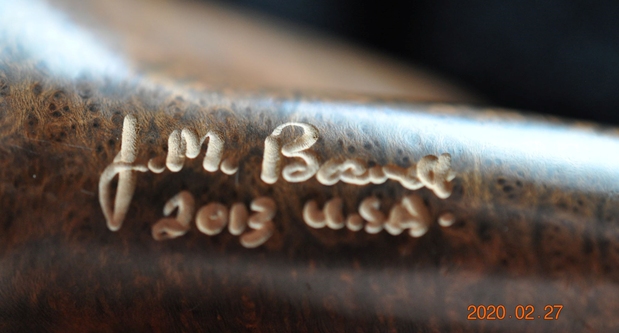
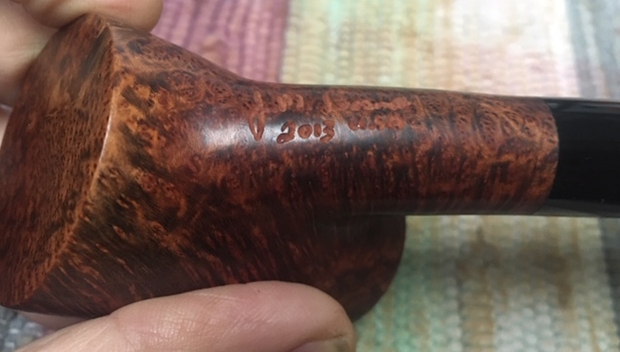
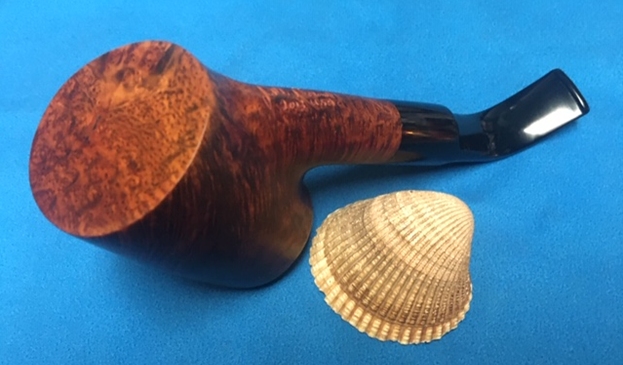
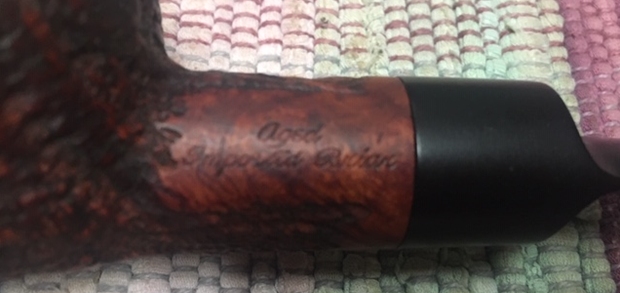
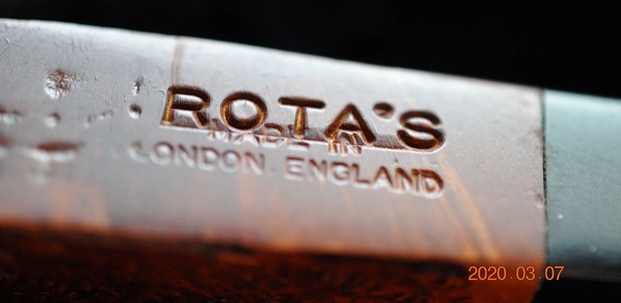
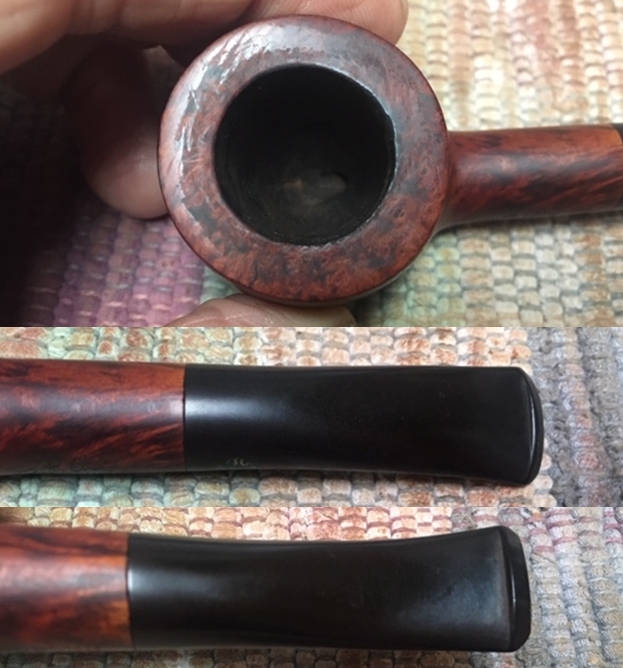 I took pictures of the stamping on the shank. It is very clear and readable. Jeff’s clean up work left it unfazed and if anything more readable now that the peeling varnish coat was gone.
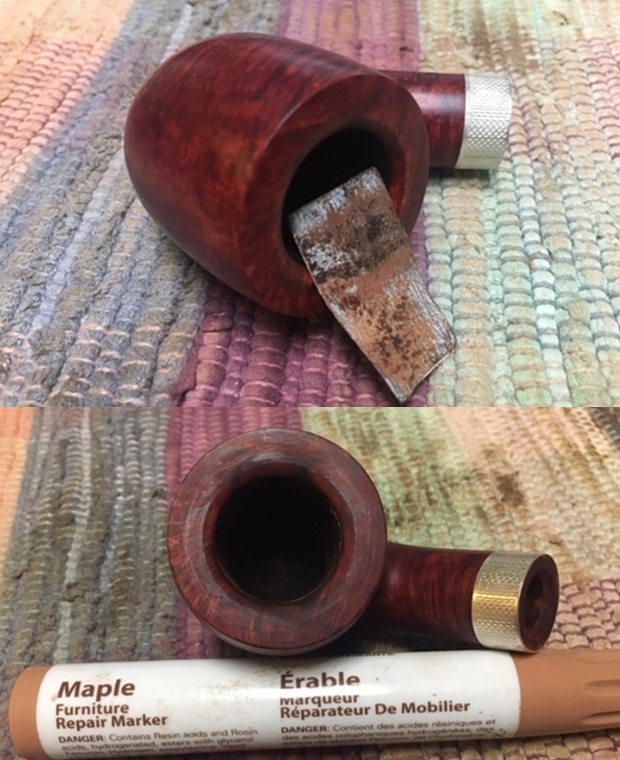
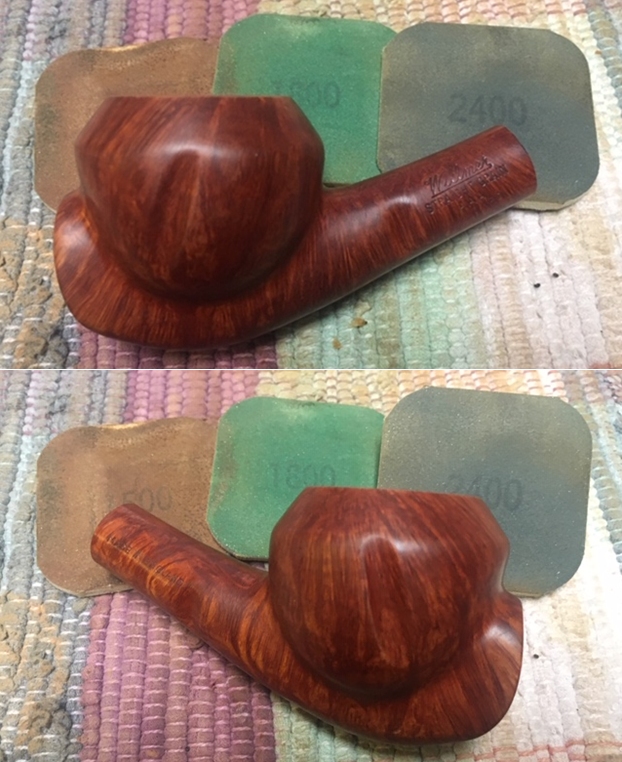
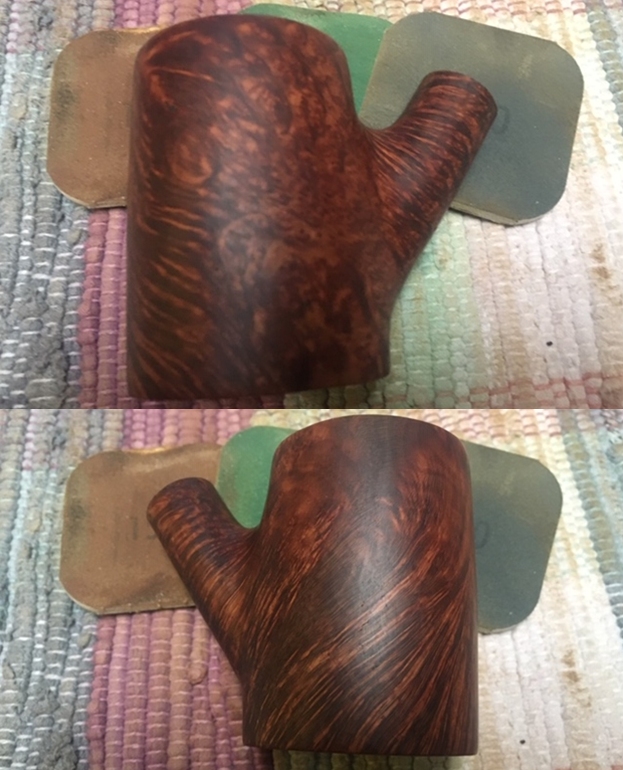
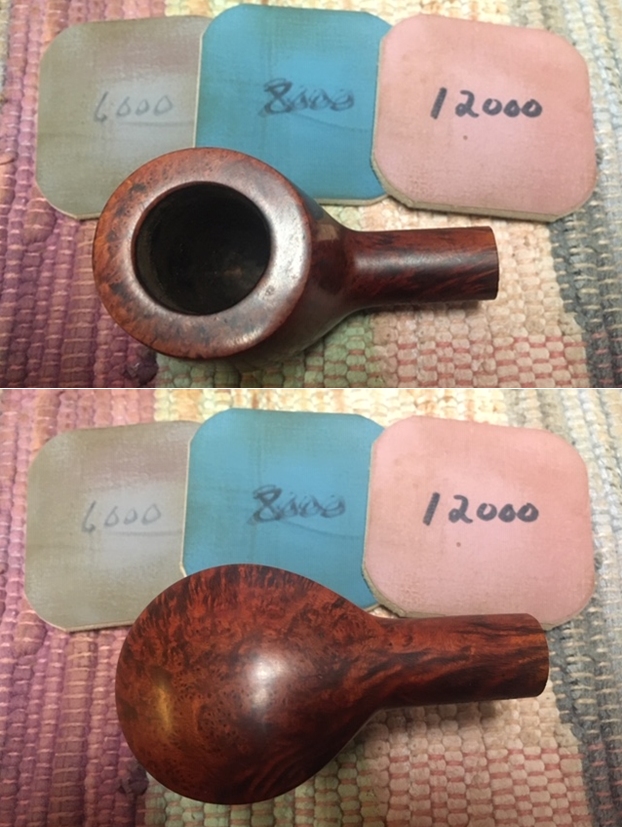
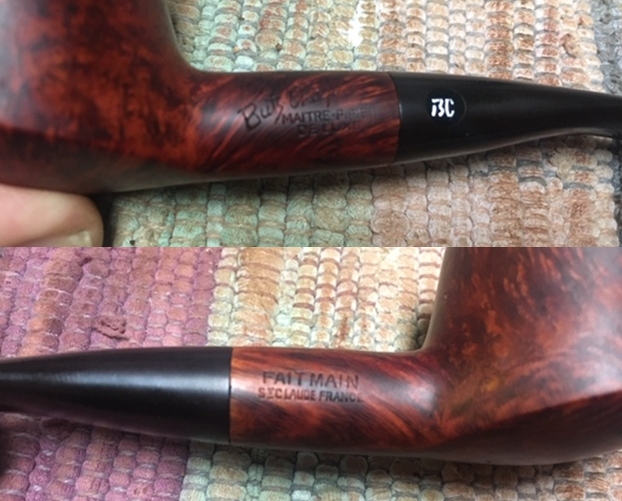 I started my restoration work on the pipe by addressing the damage to the inner edges of the rim. I used a folded piece of 220 grit sandpaper to smooth out the inner edge and bring the bowl back to round. It did not take too much work. The issues with the rim top itself would be taken care of when I polished the bowl with micromesh pads.
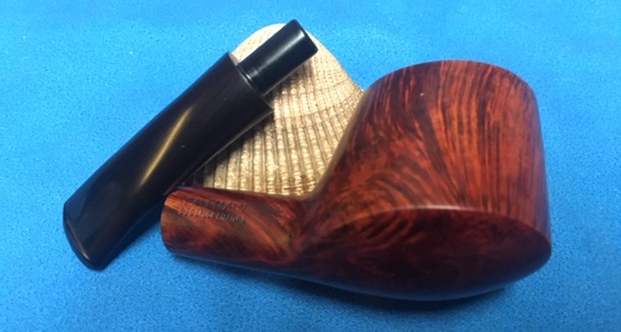
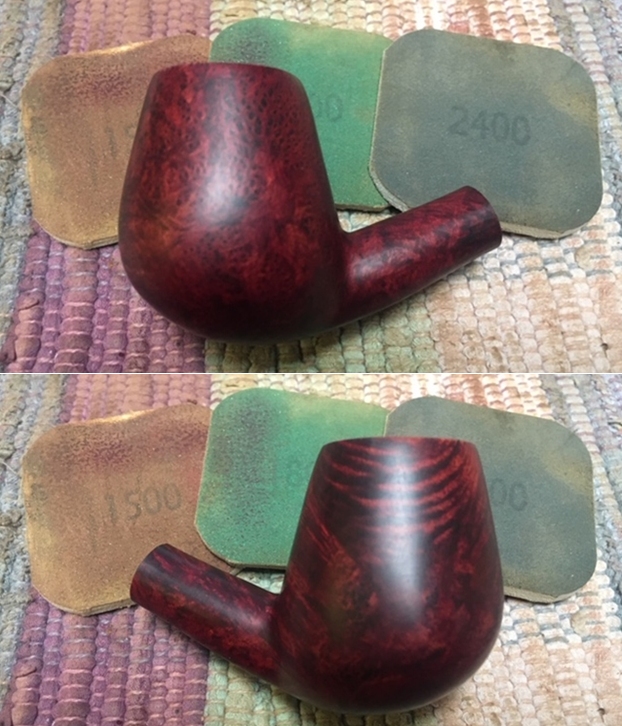
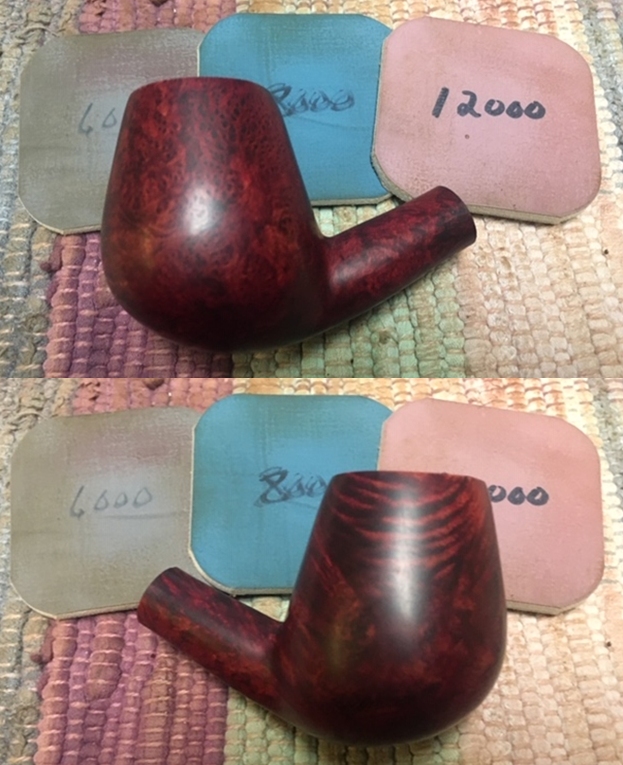
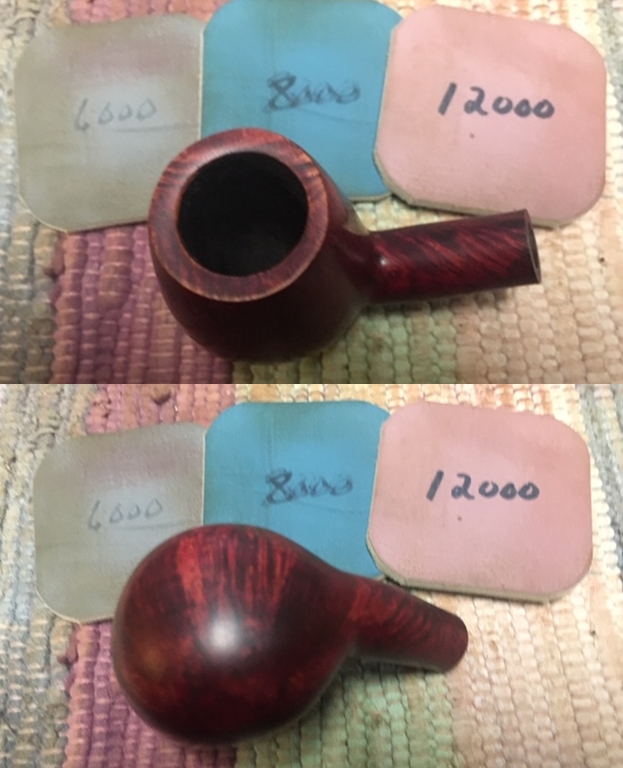
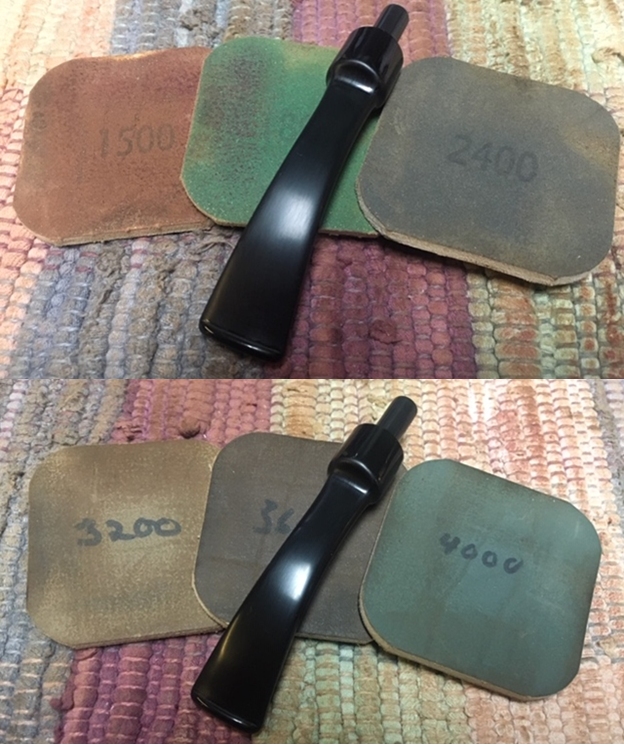
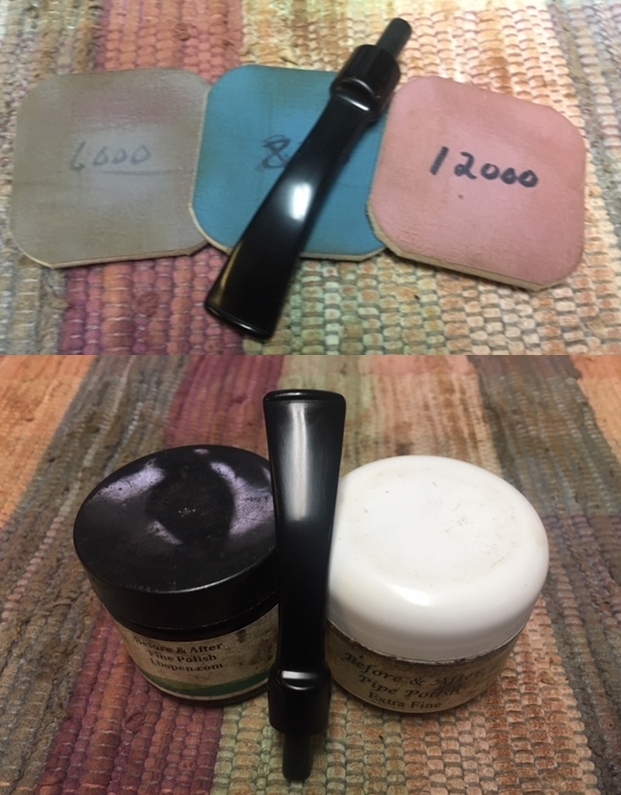
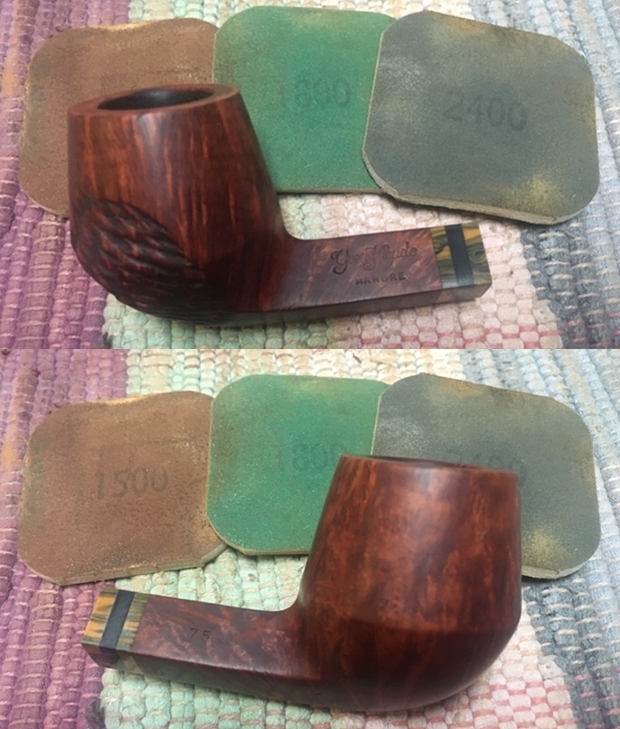
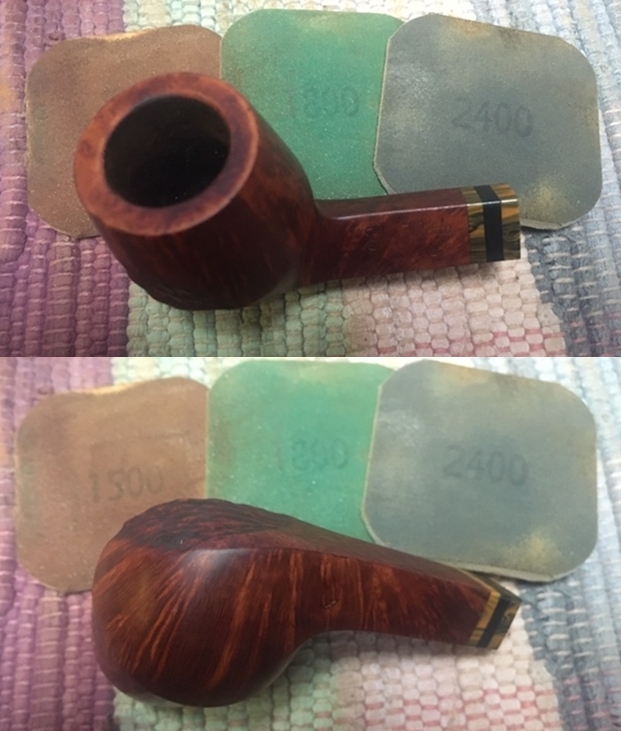
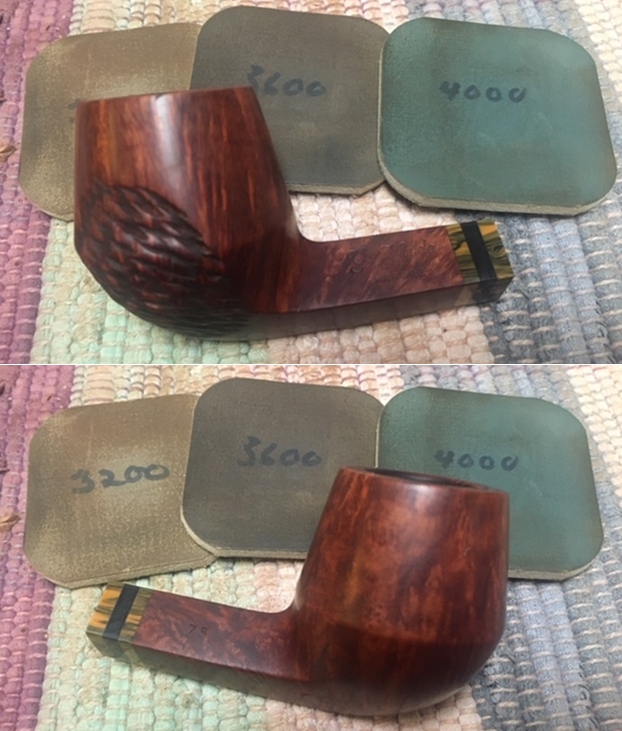
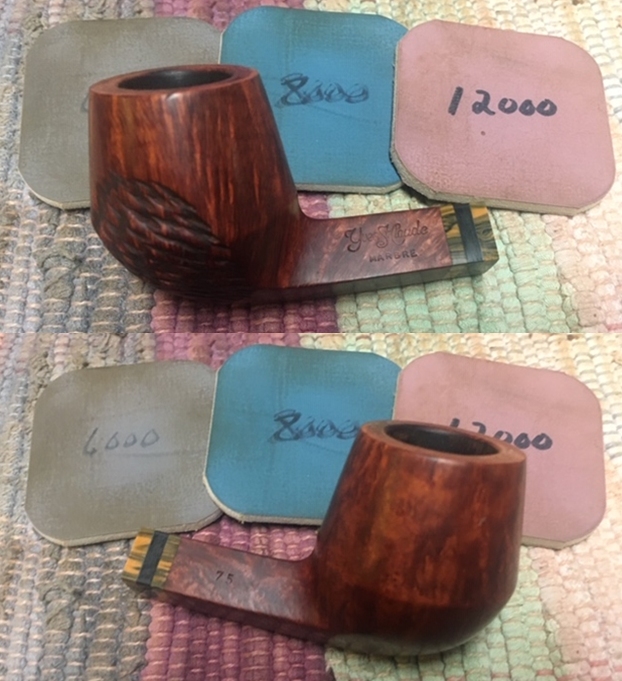
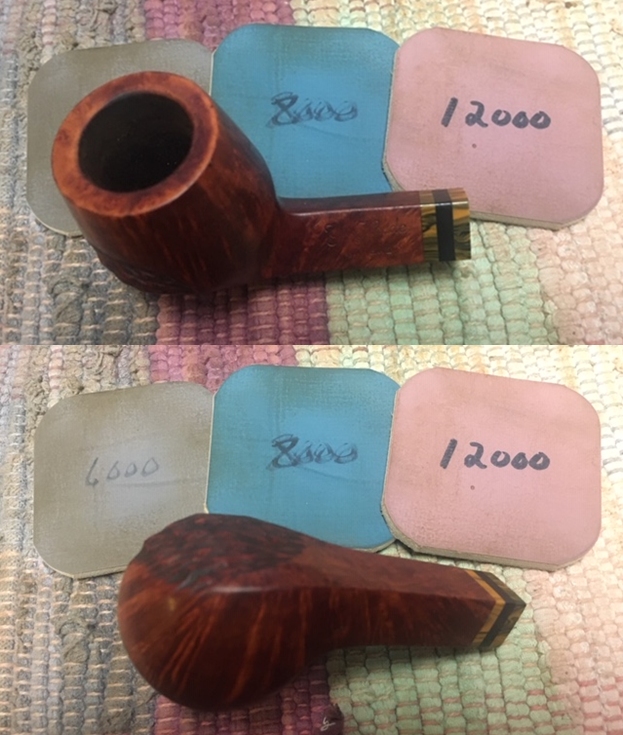
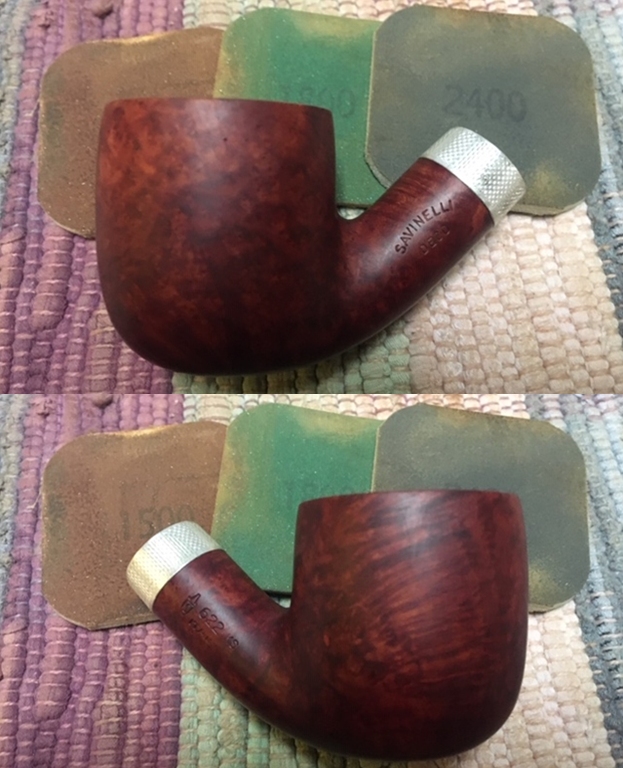
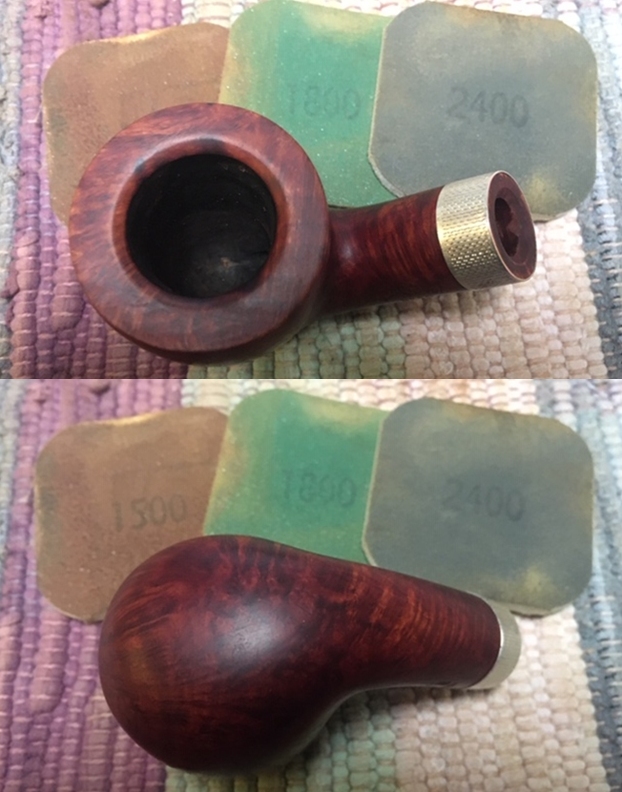
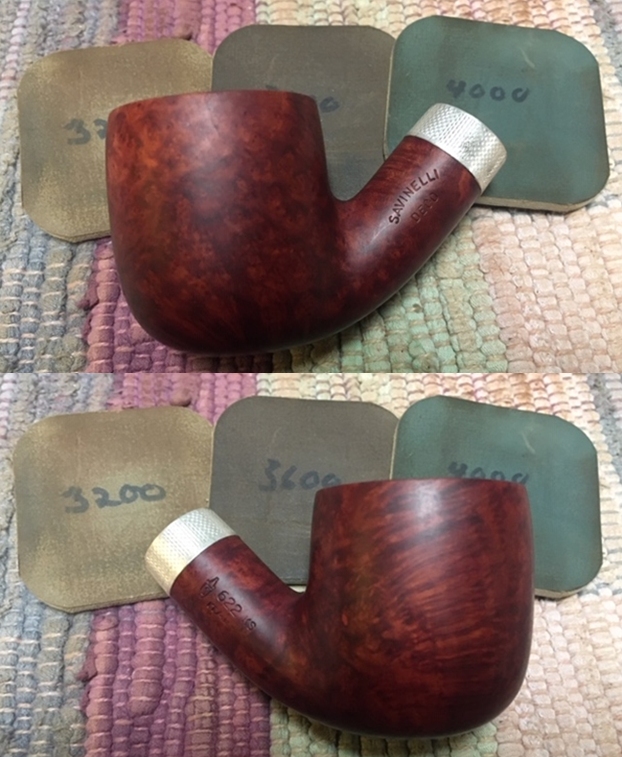
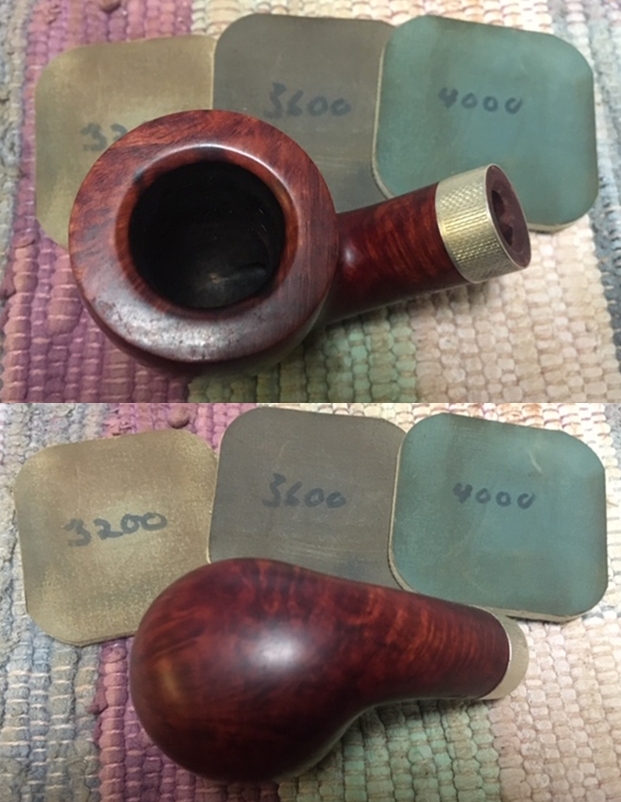
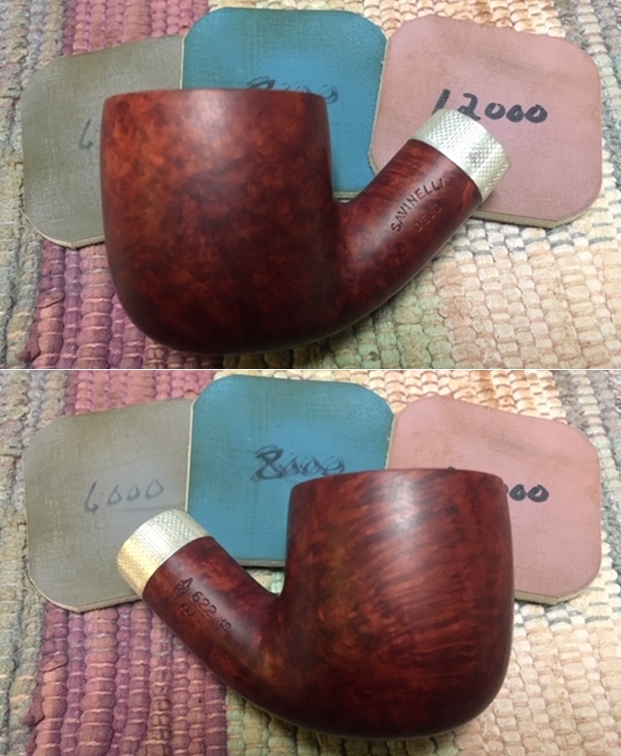
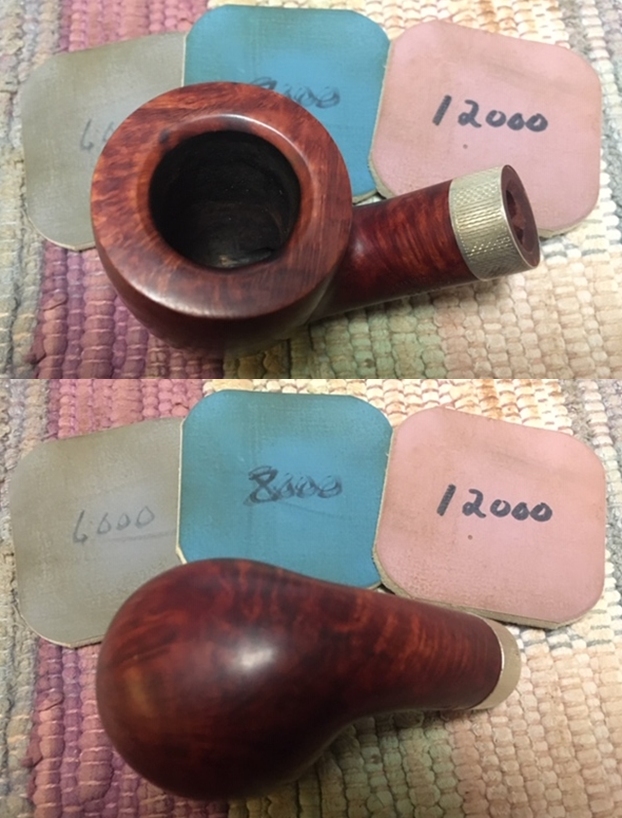
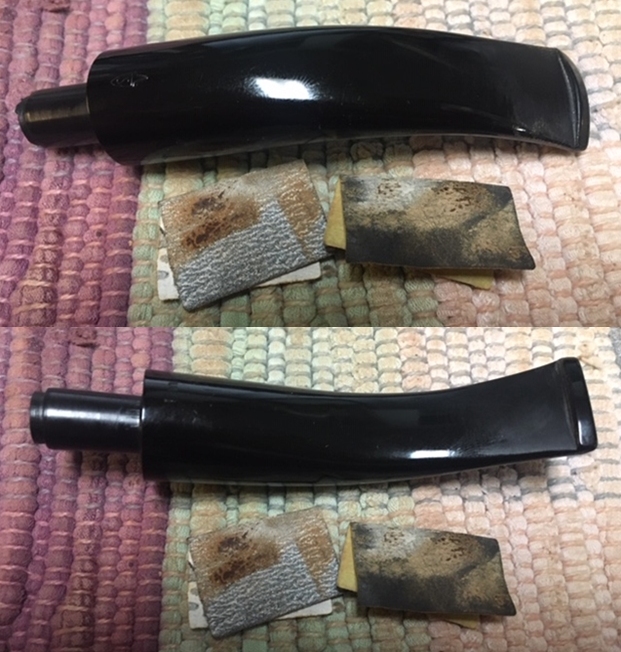
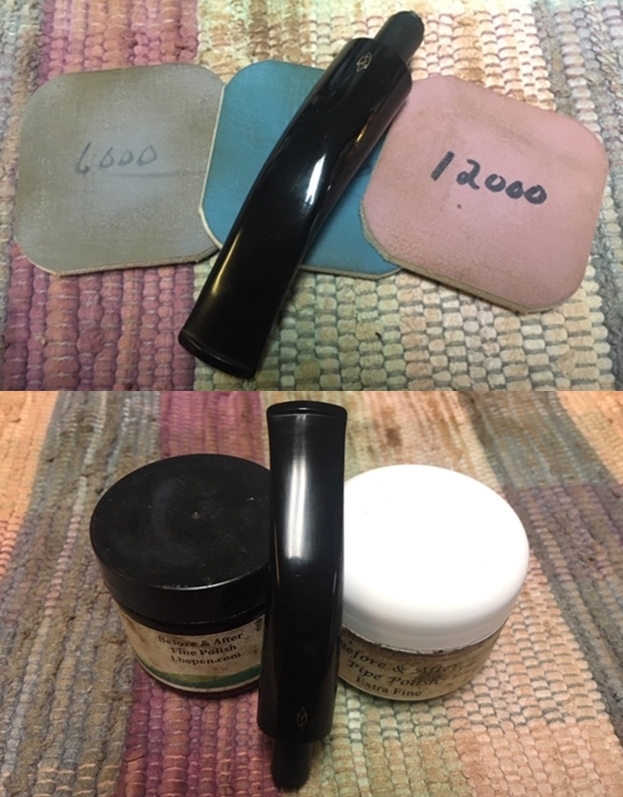
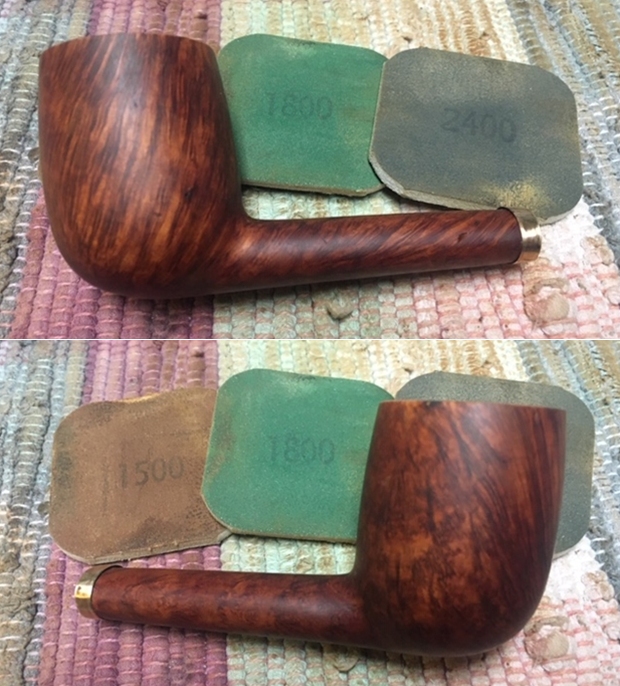
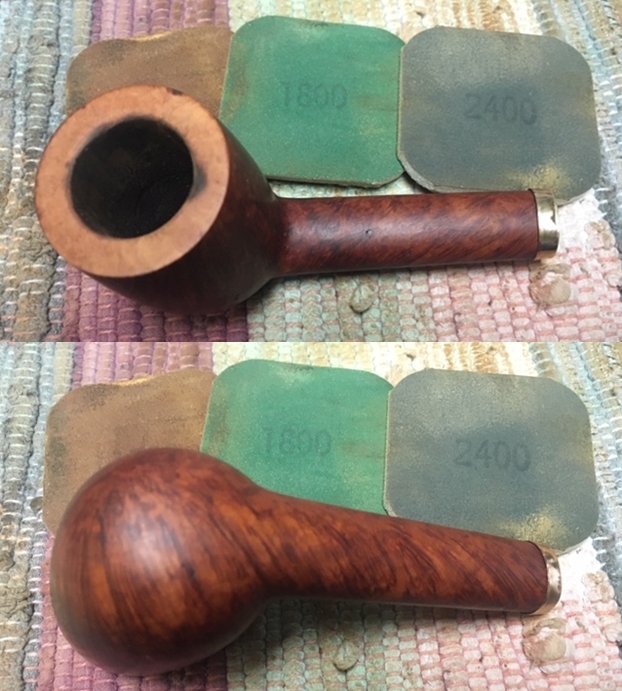
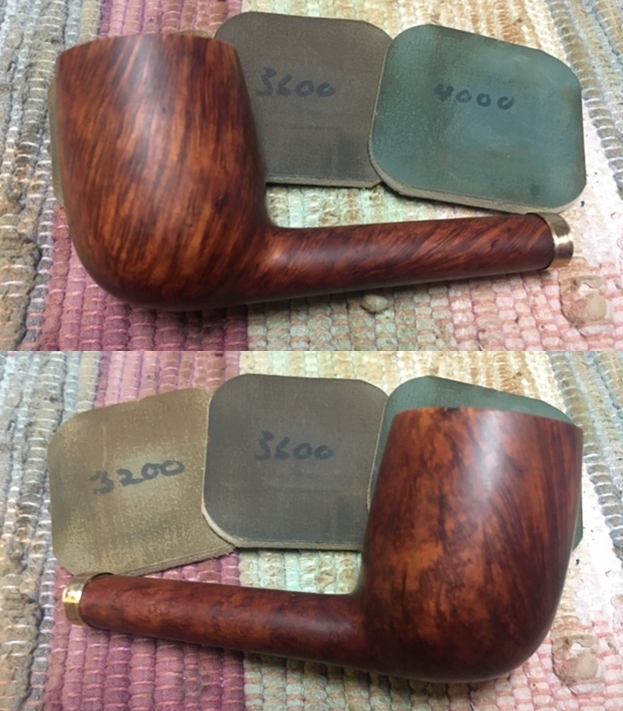
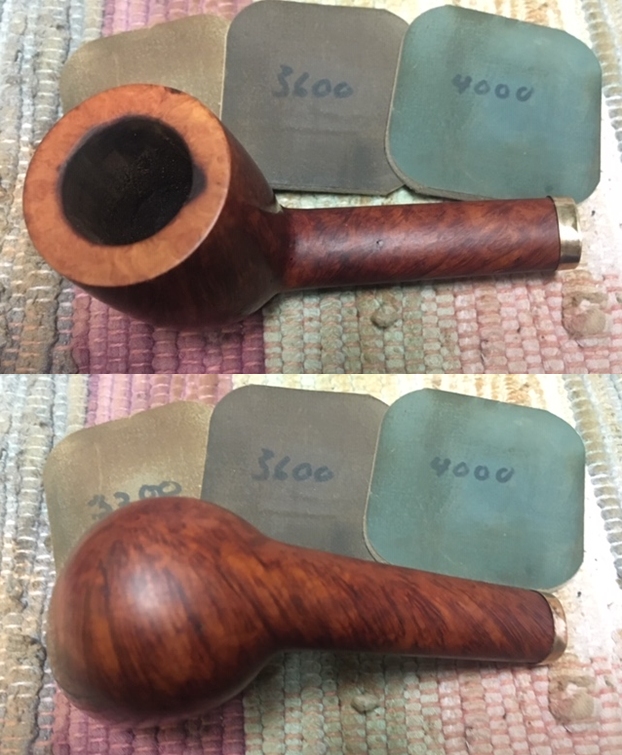
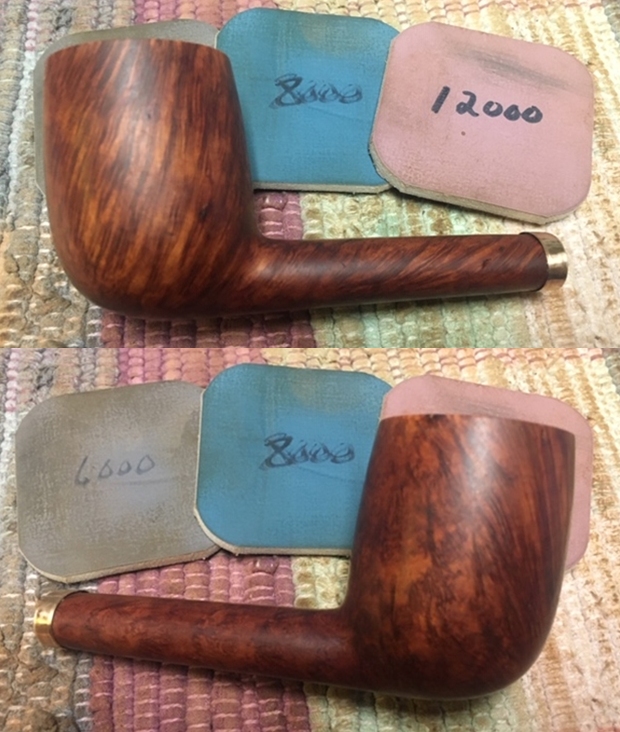
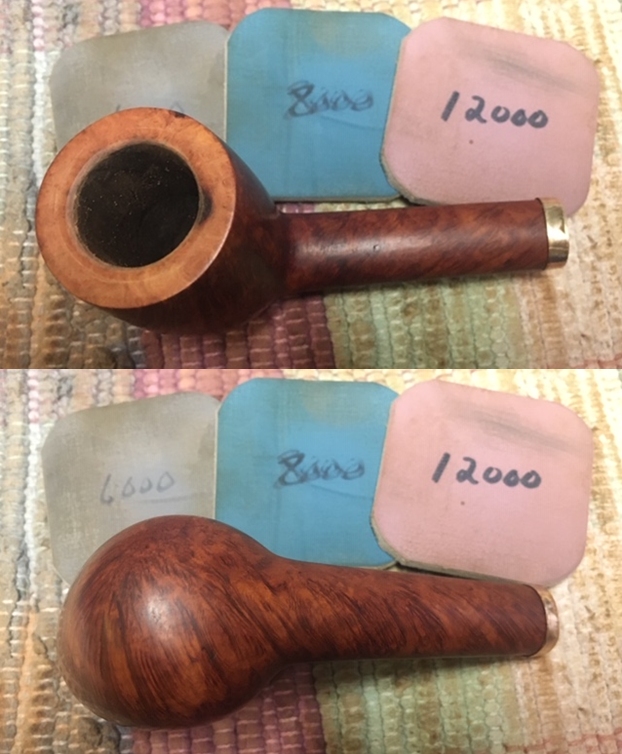
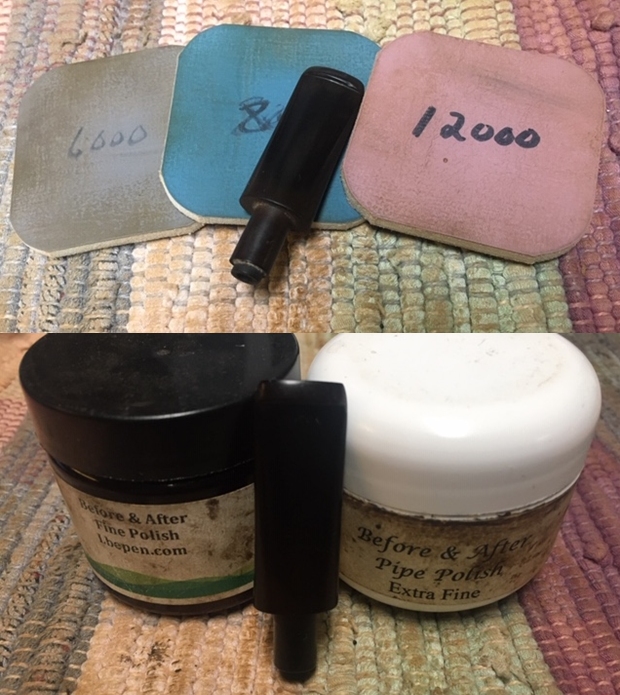
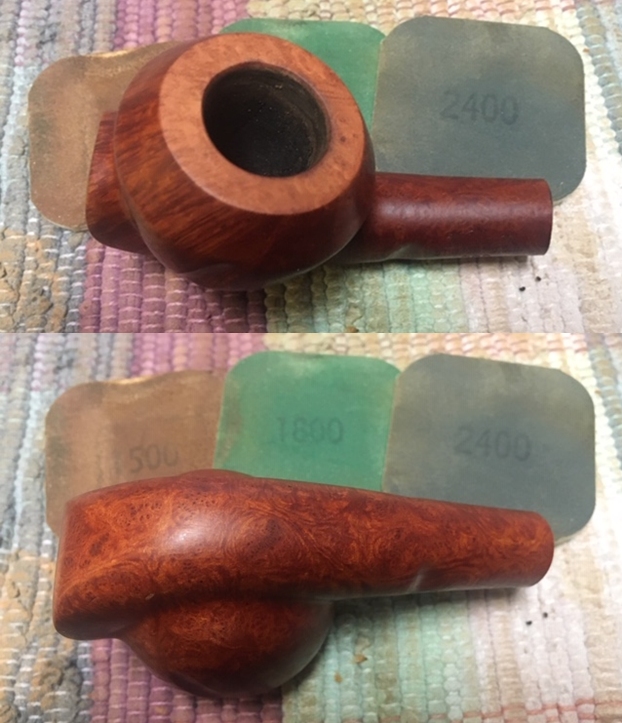
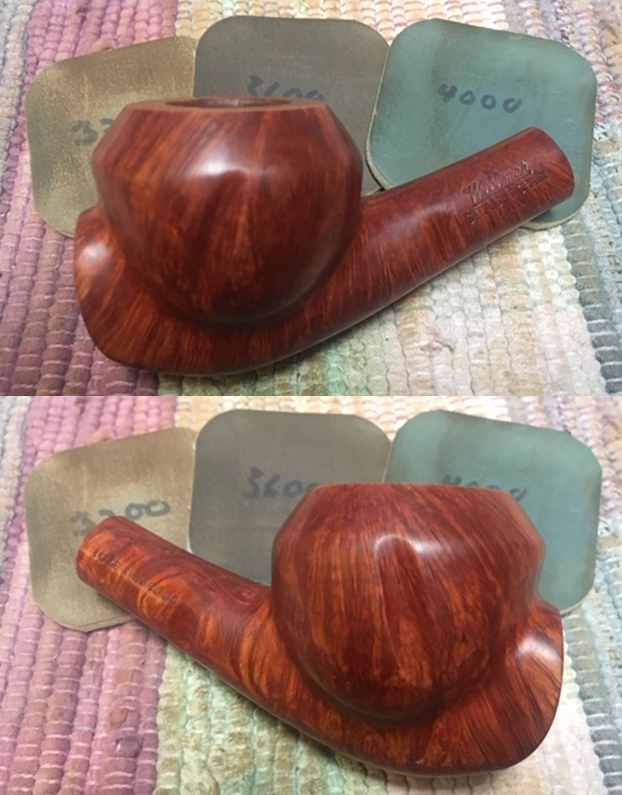
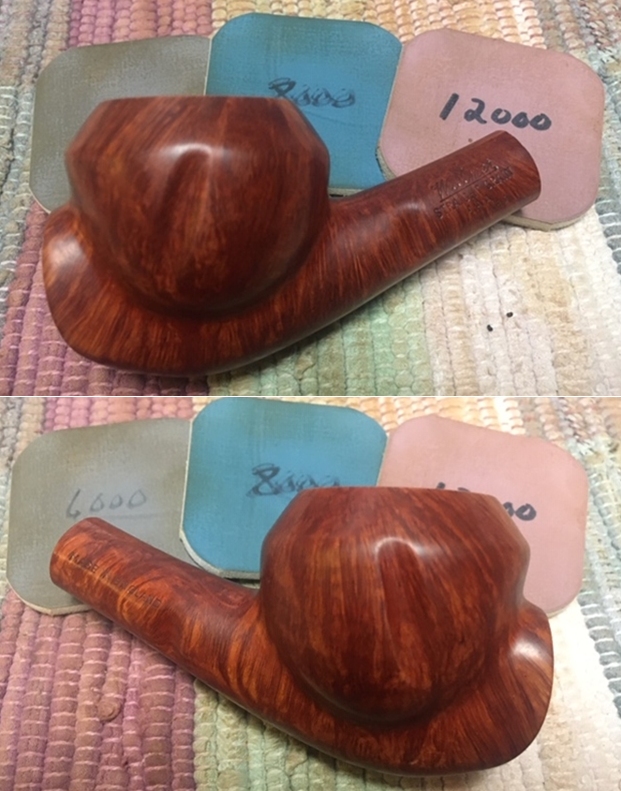
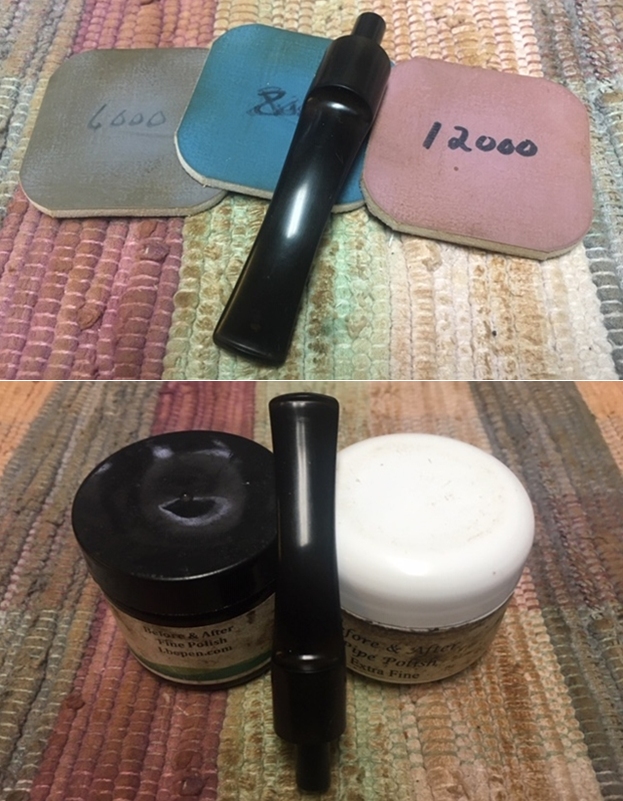
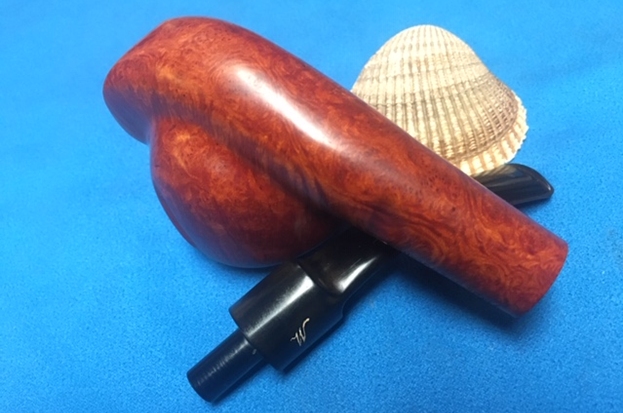
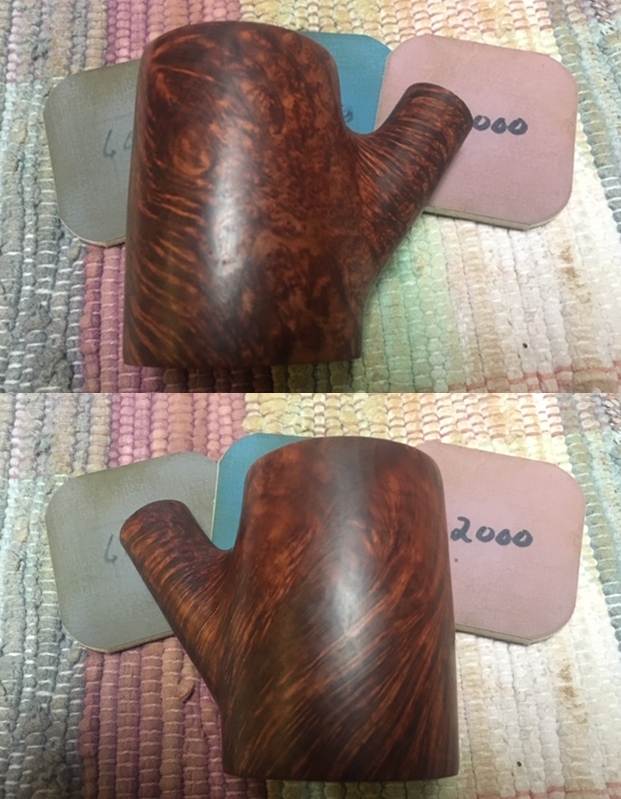
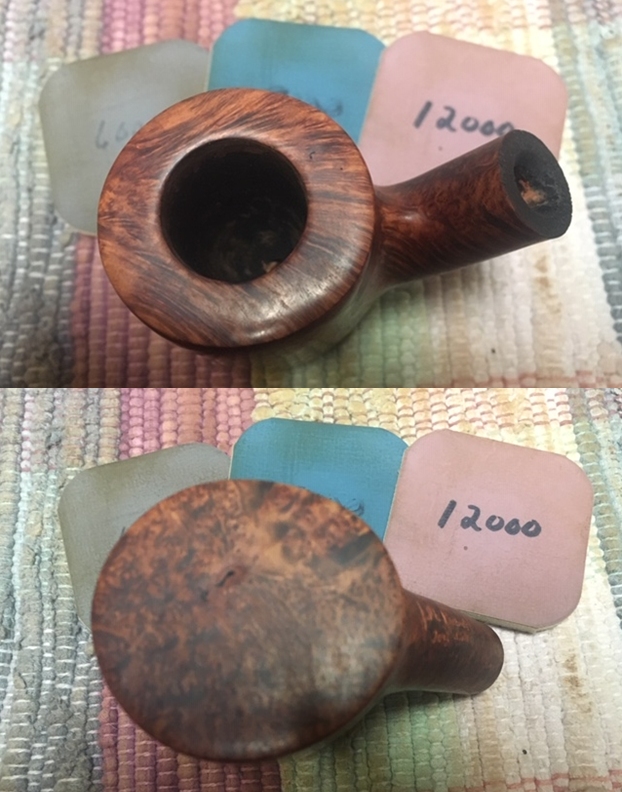
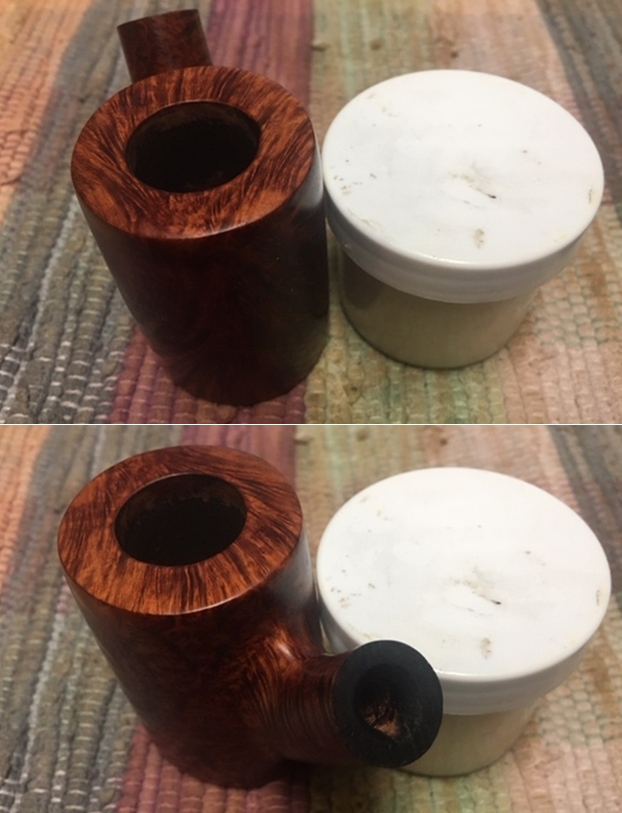
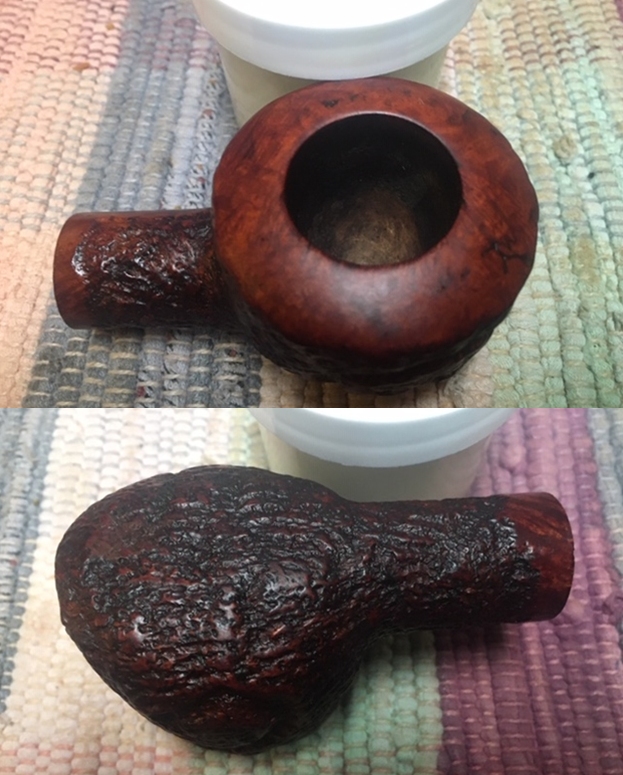
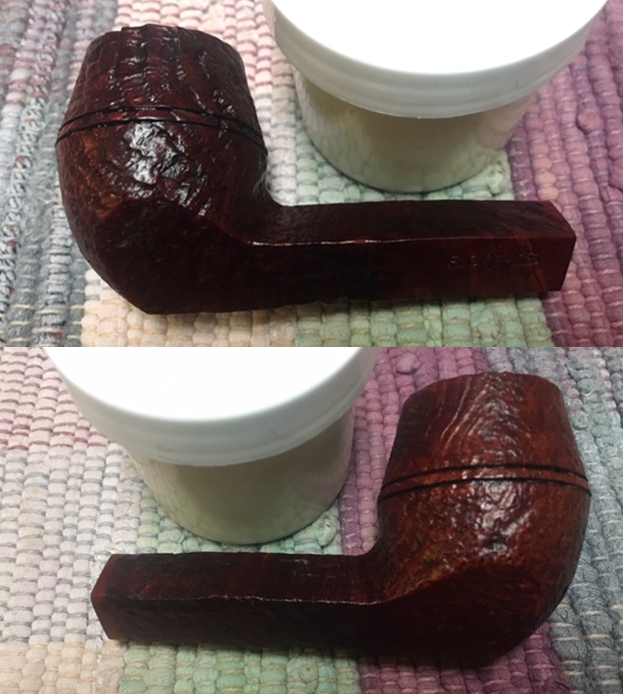
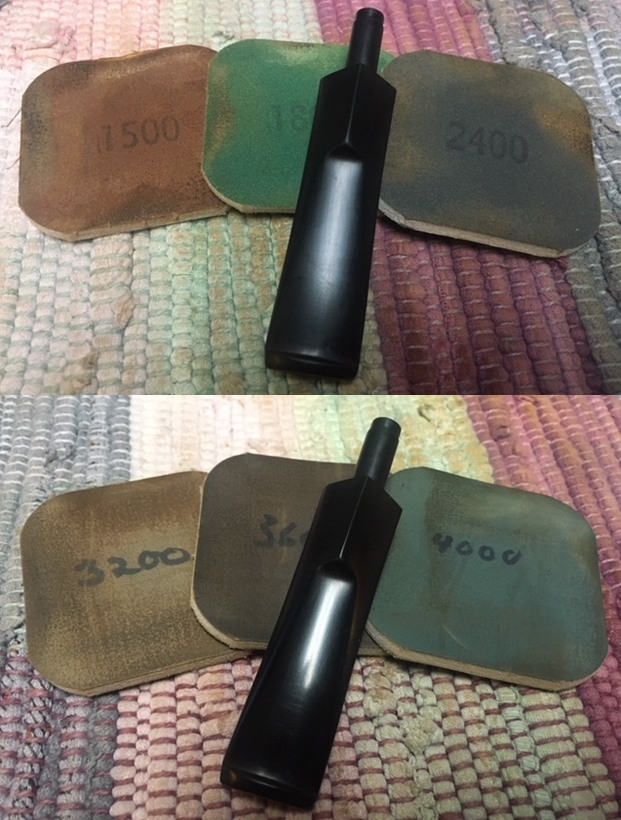
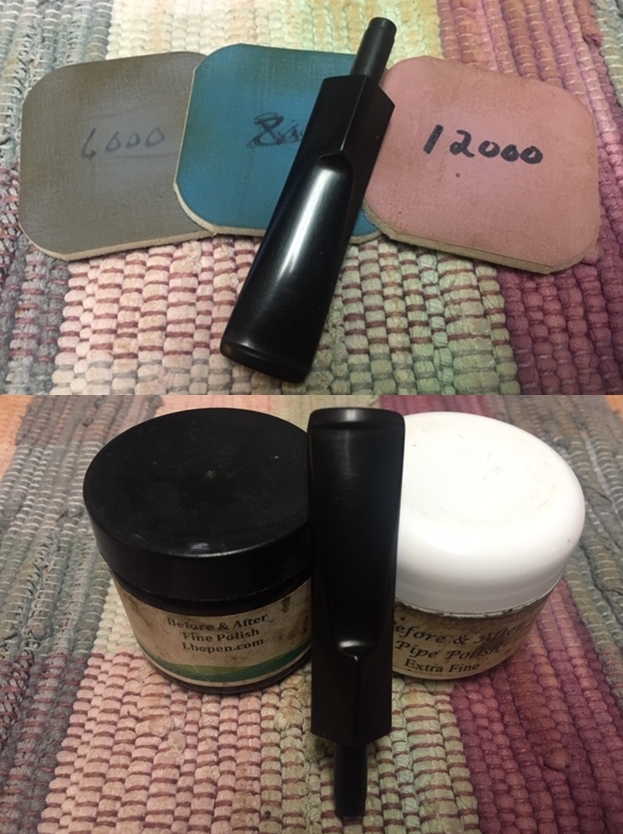
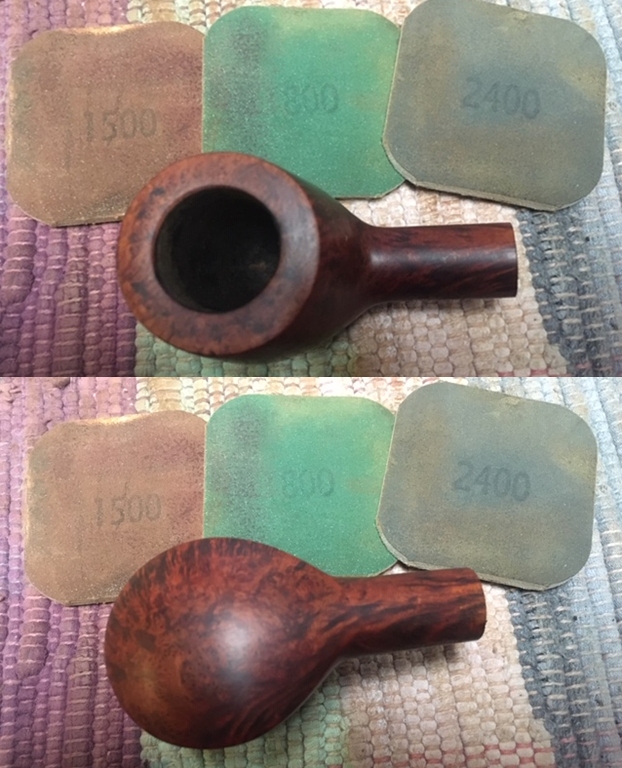
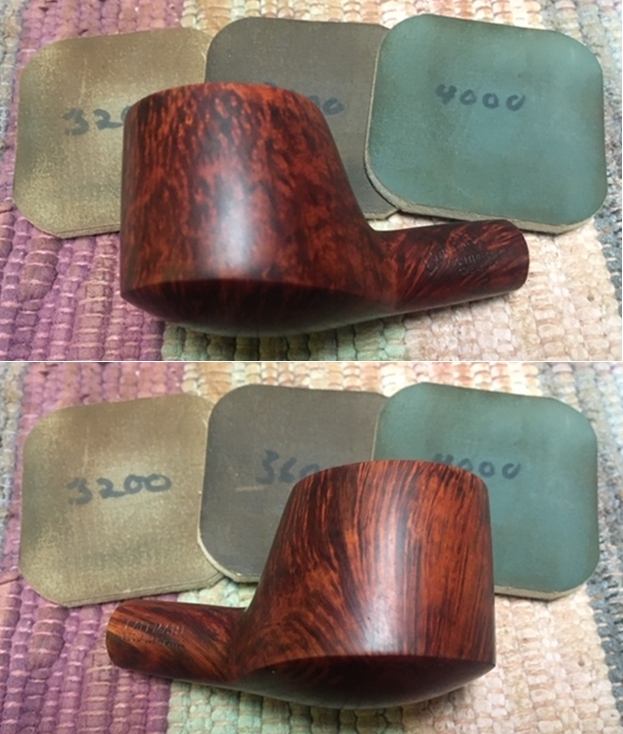
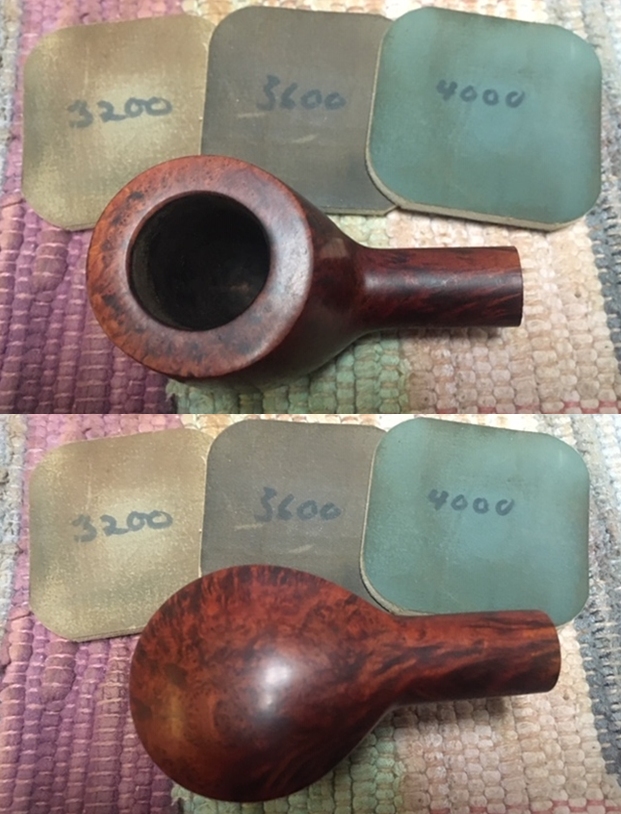
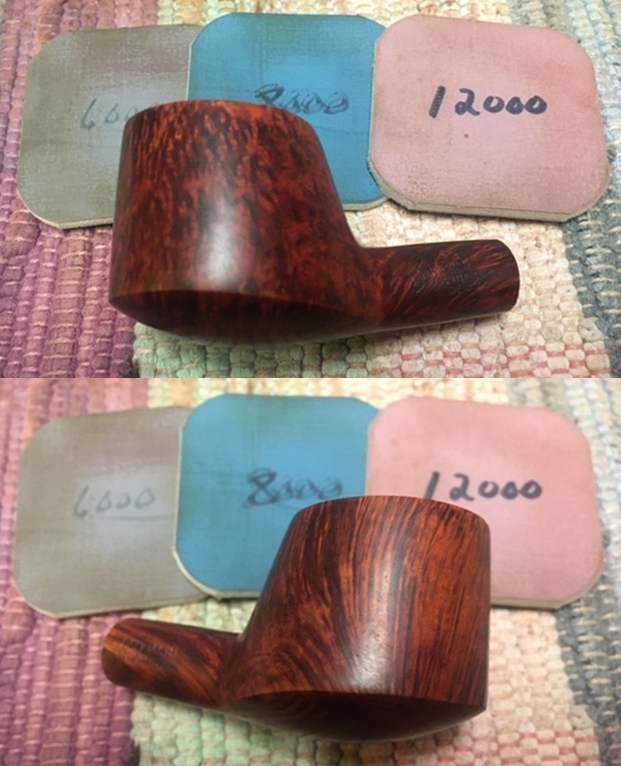
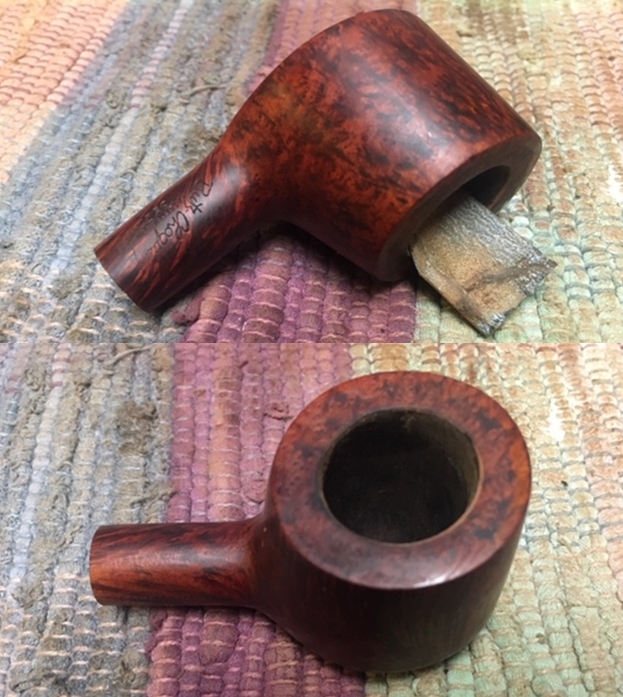 I polished the briar with micromesh sanding pads – dry sanding with 1500-12000 grit pads. I wiped the bowl down after each pad with a damp cloth. The grain really began to stand out and the finish took on a shine by the last sanding pad. The photos tell the story!
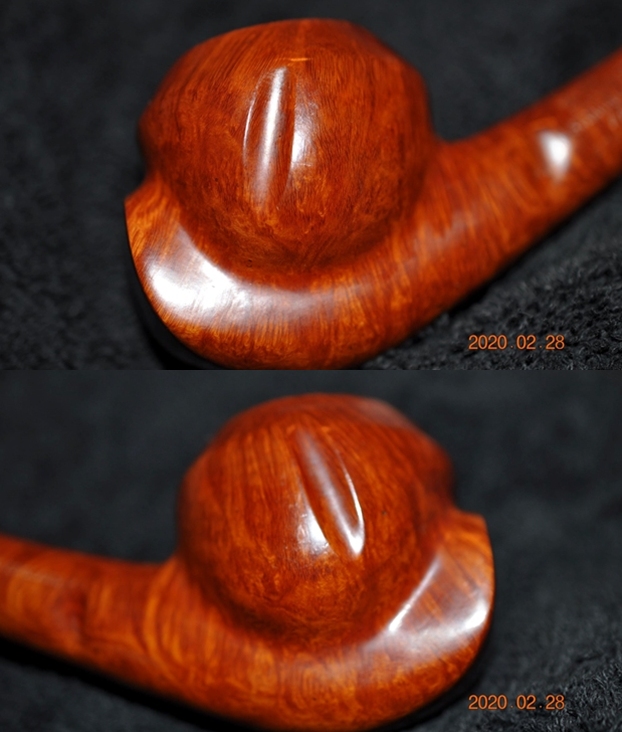
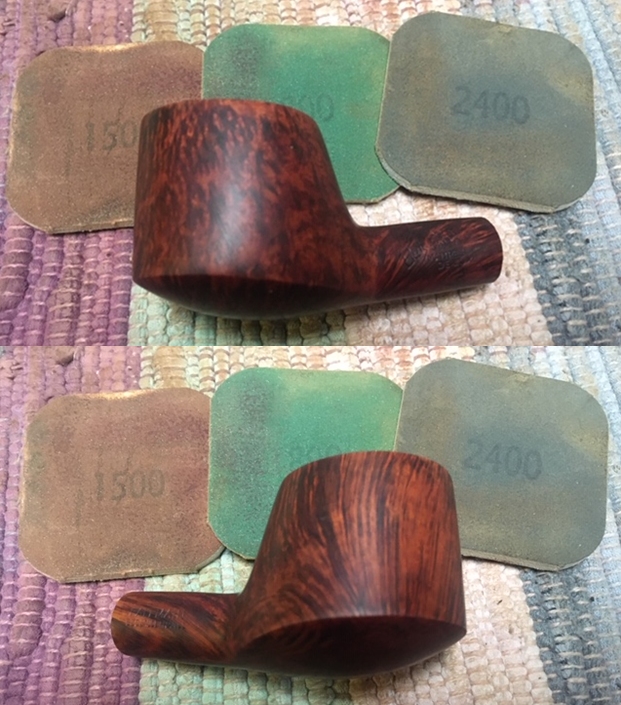
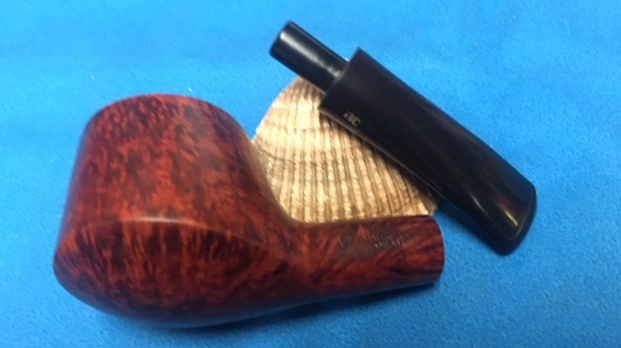
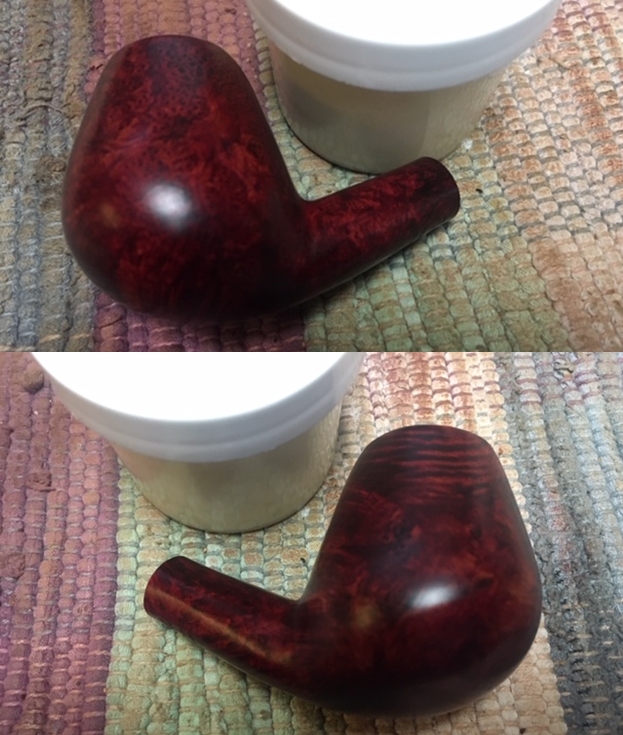
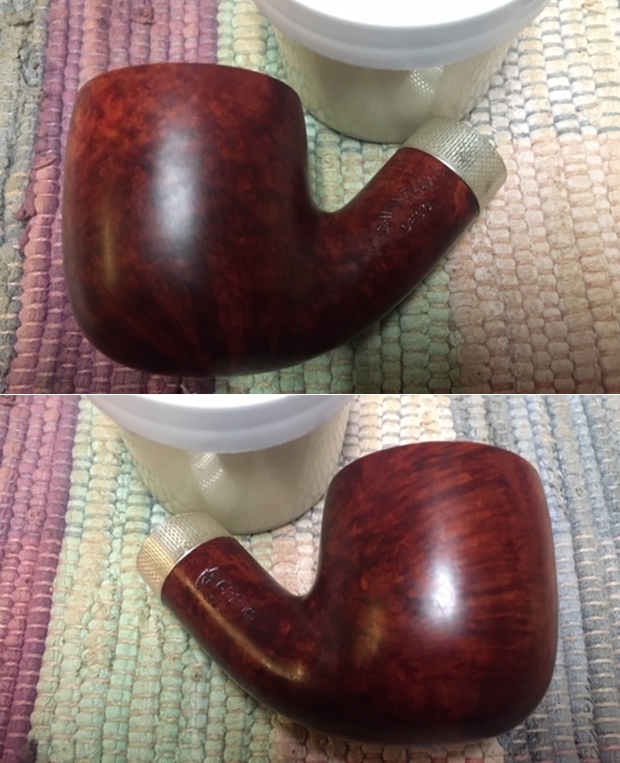
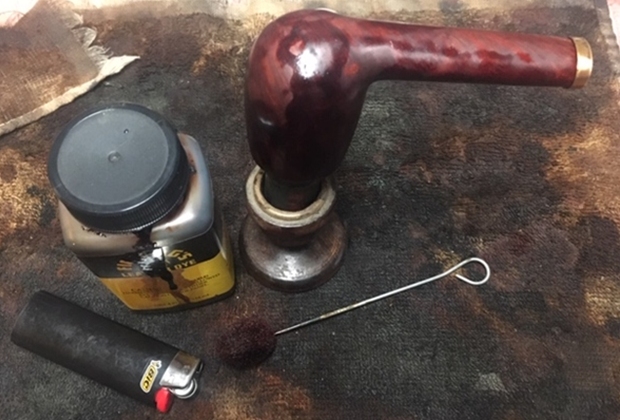
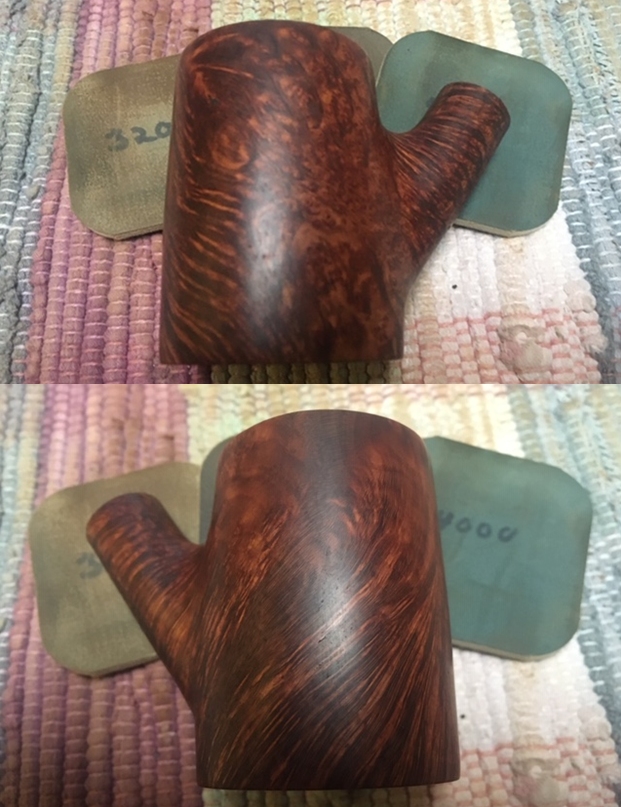
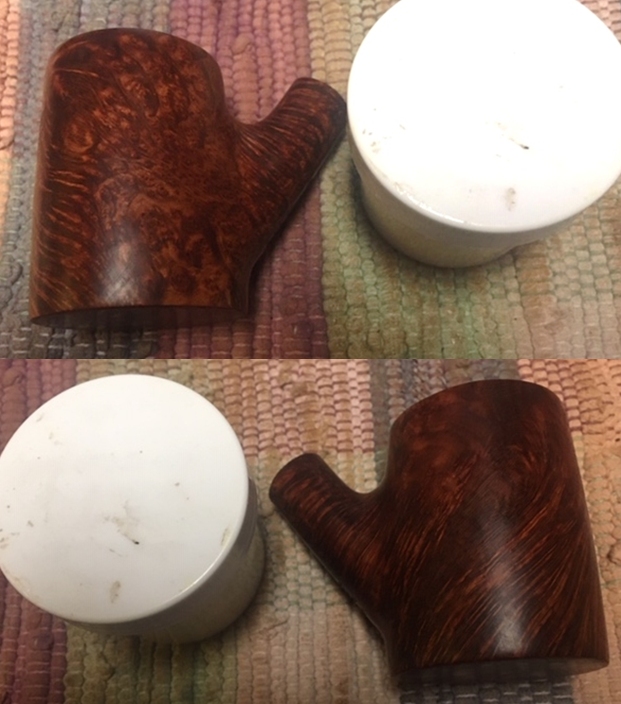
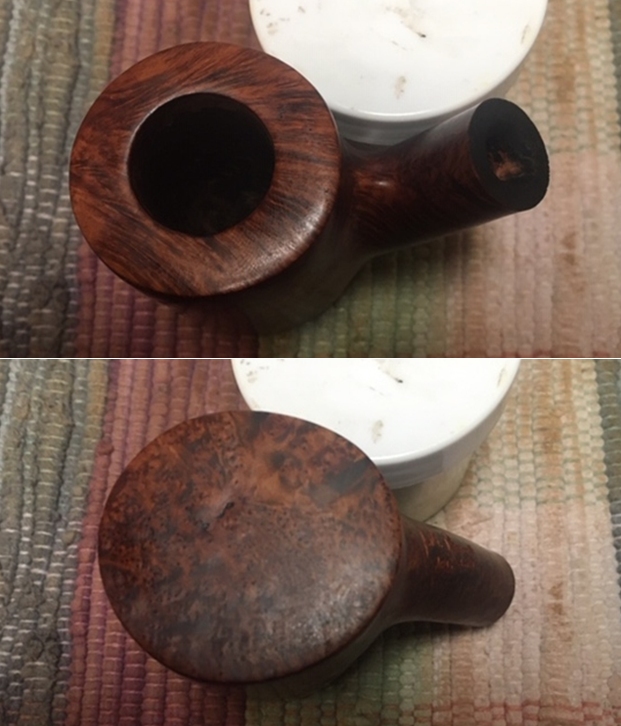
 I worked some Before & After Restoration Balm into the surface of the briar with my fingertips. The product works to clean, enliven and protect the briar. I let the balm sit for about ten minutes and then buffed with a cotton cloth to raise the shine. The photos show the bowl at this point in the restoration process.
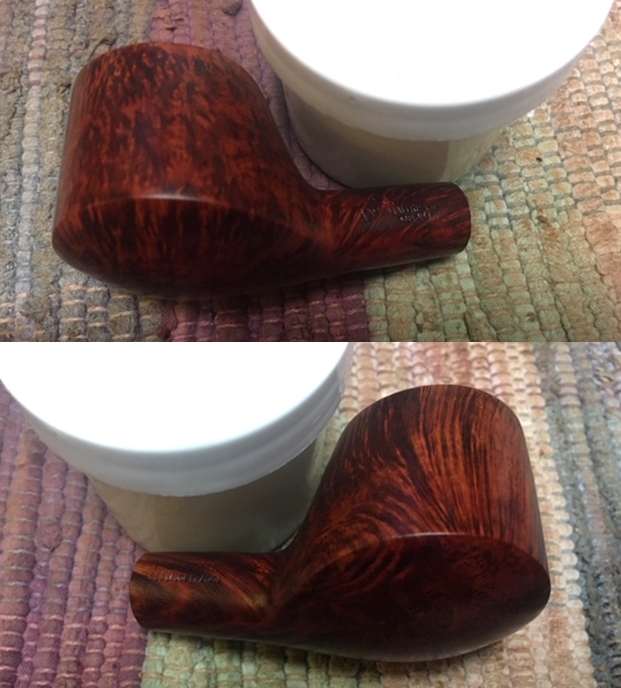

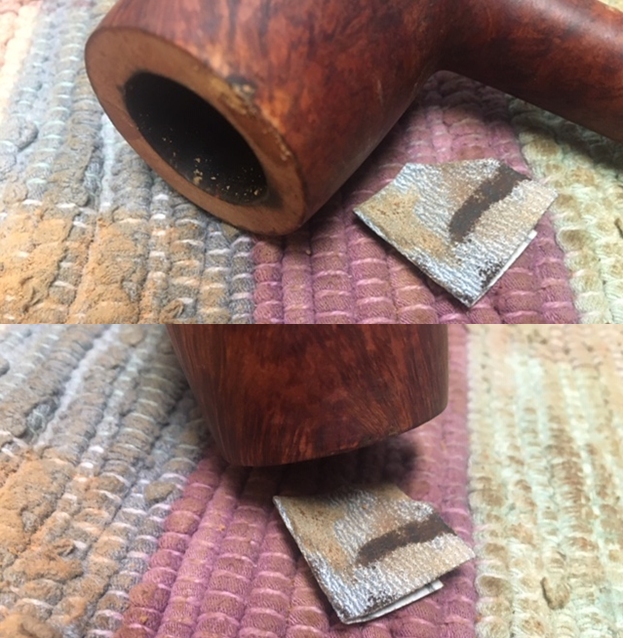
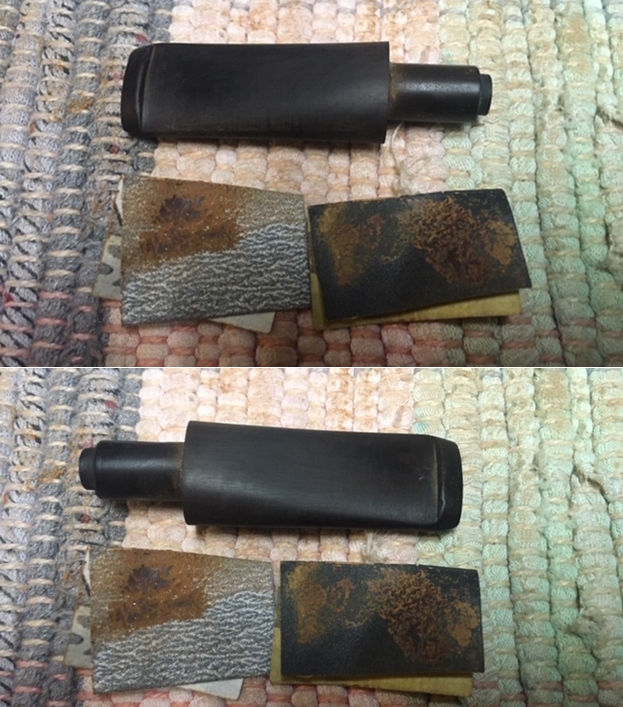
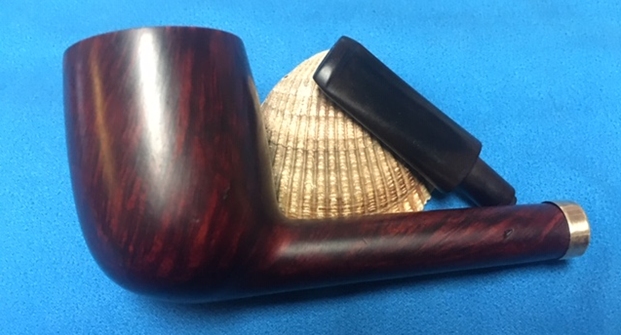
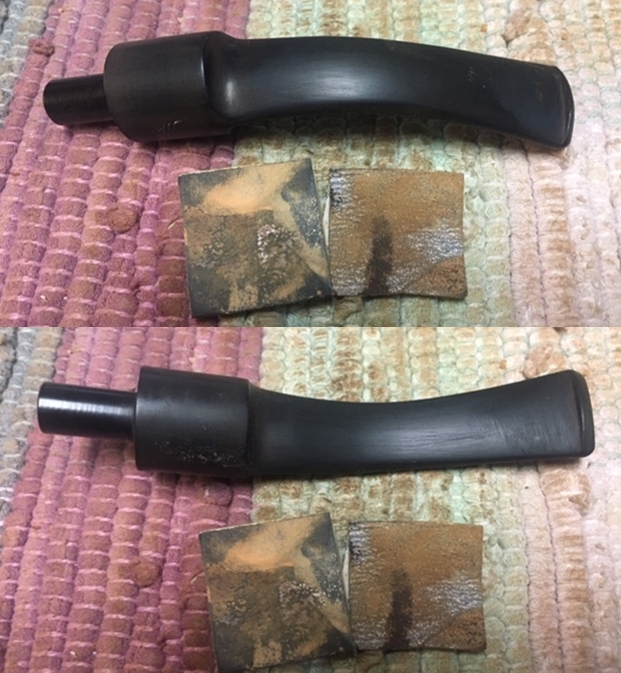
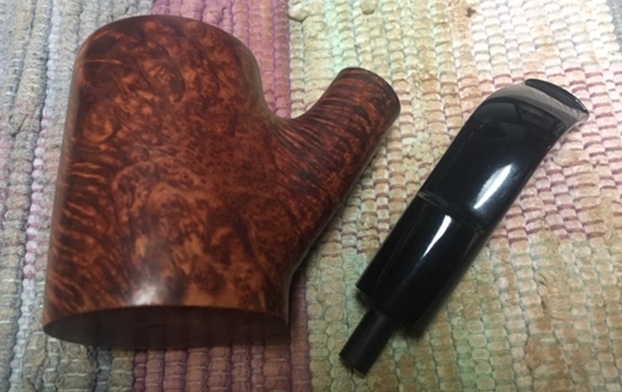
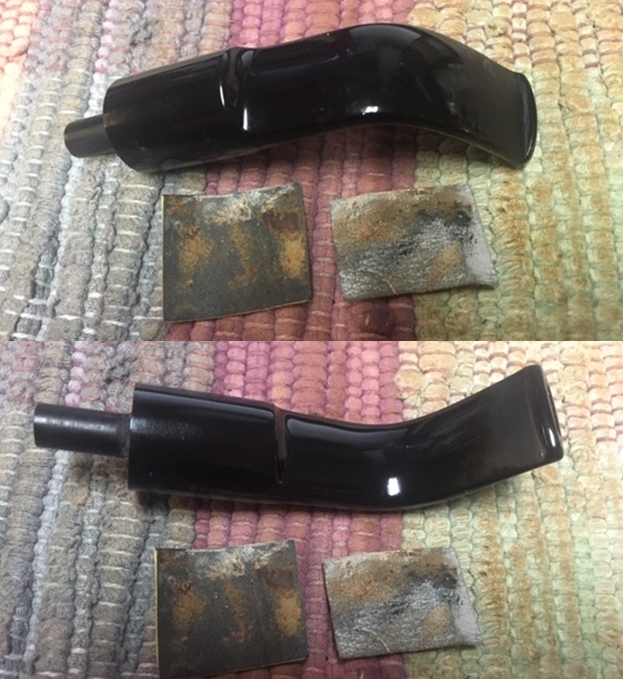
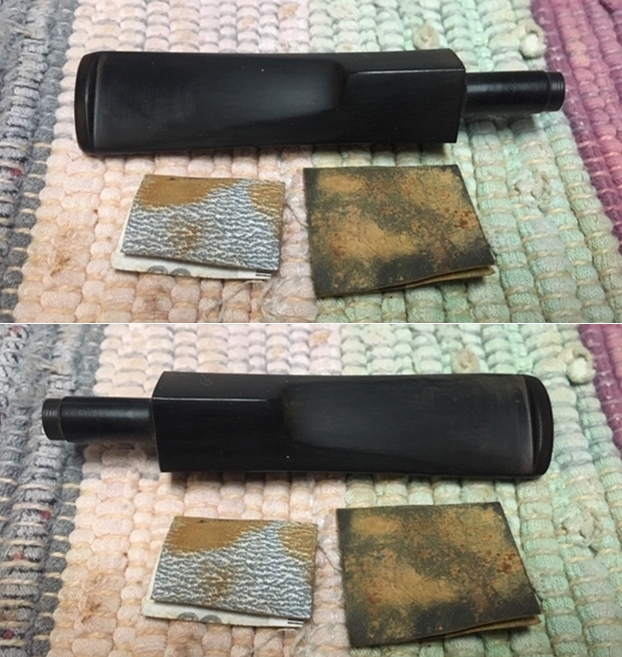
 I laid the bowl aside and turned to deal with the stem. I sanded the tooth marks and chatter on the stem with a folded piece of 220 grit sandpaper to blend them into the surface of the stem and started polishing with 400 grit wet dry sandpaper.
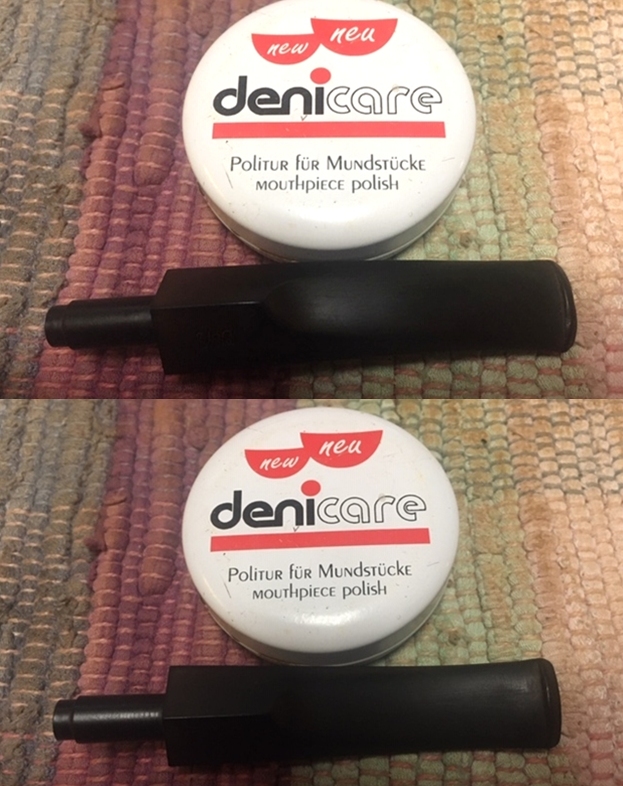
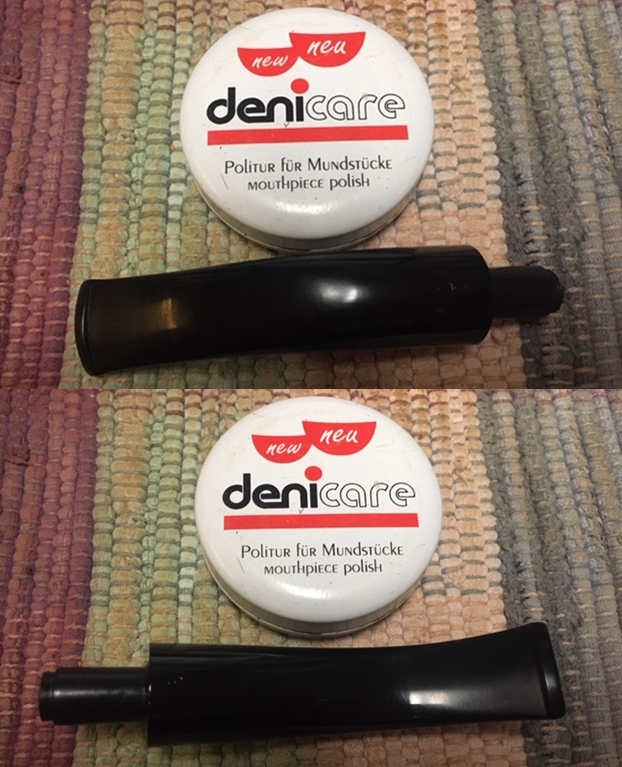
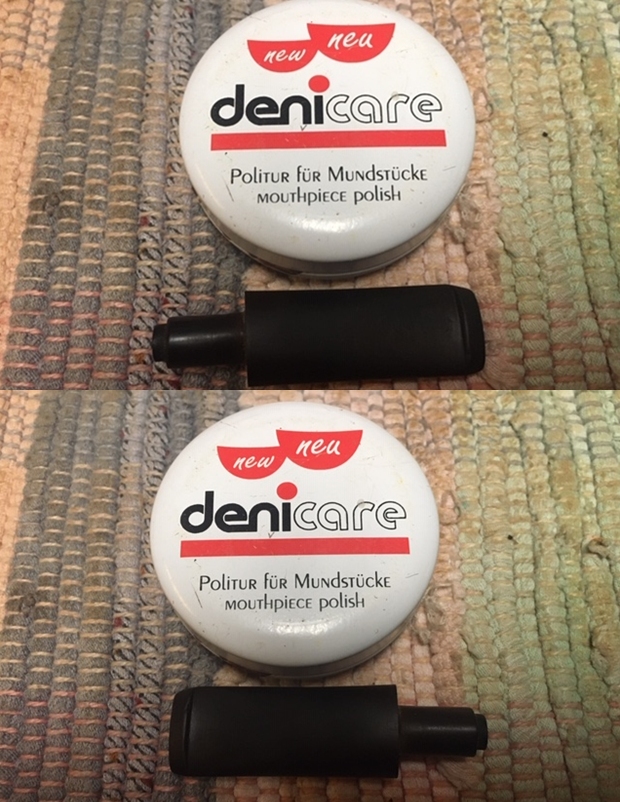
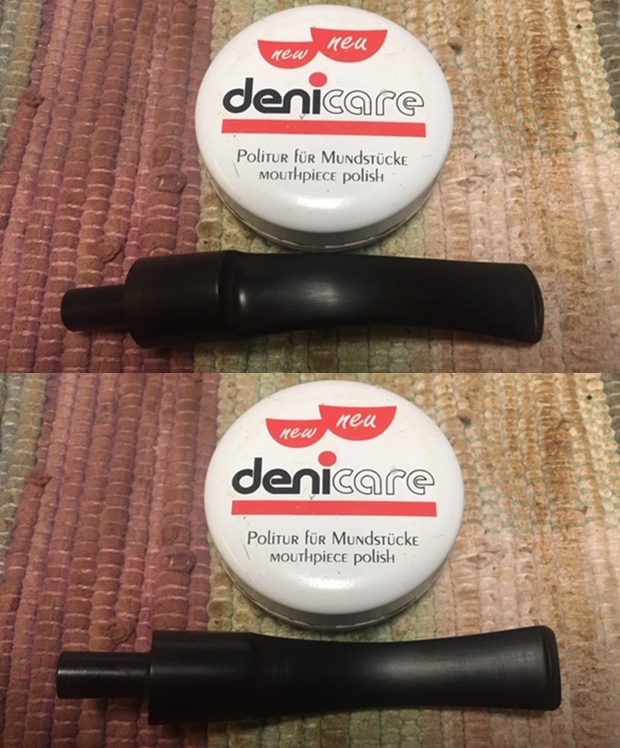
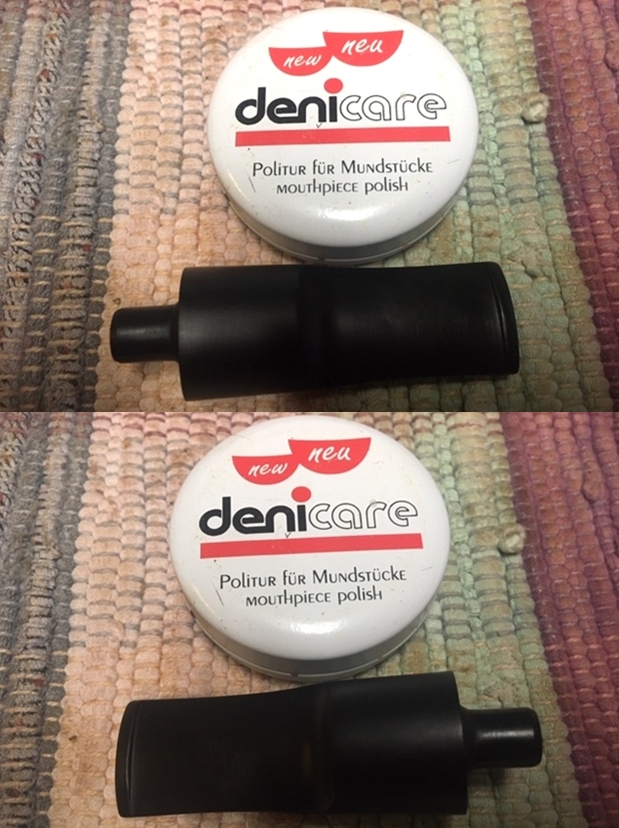
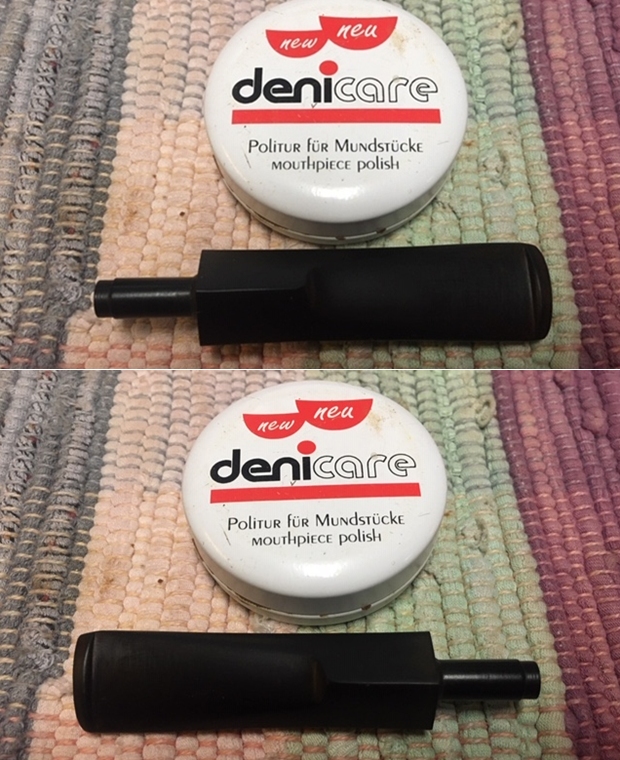
 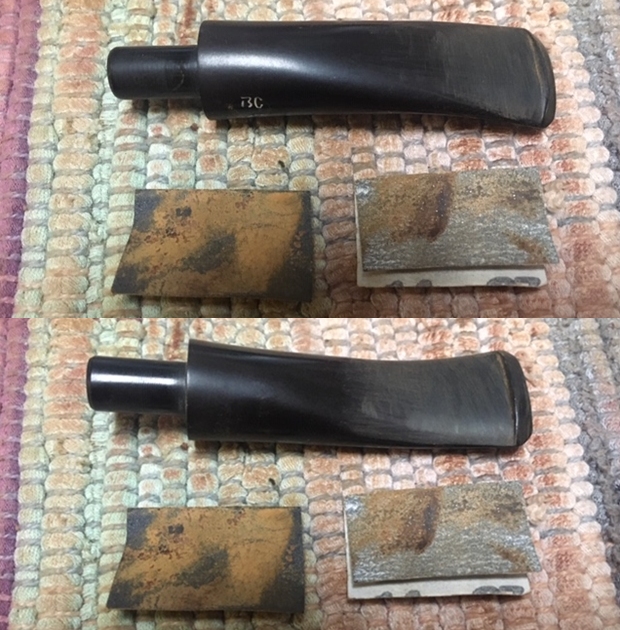 I polished the stem with some Denicare Mouthpiece polish – a red gritty paste that feels a lot like the texture of red Tripoli. It works well to polish out some of the scratches. I find that it does a great job preparing the stem for polishing with micromesh sanding pads.
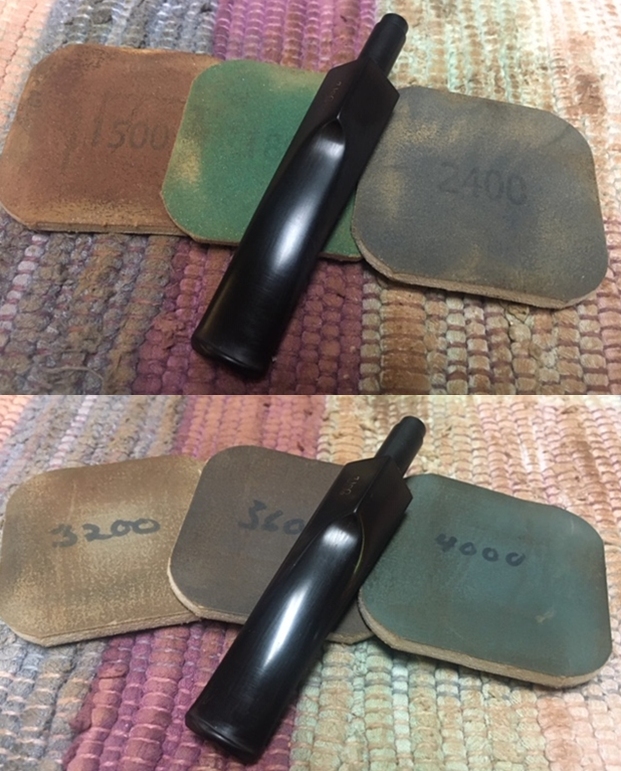
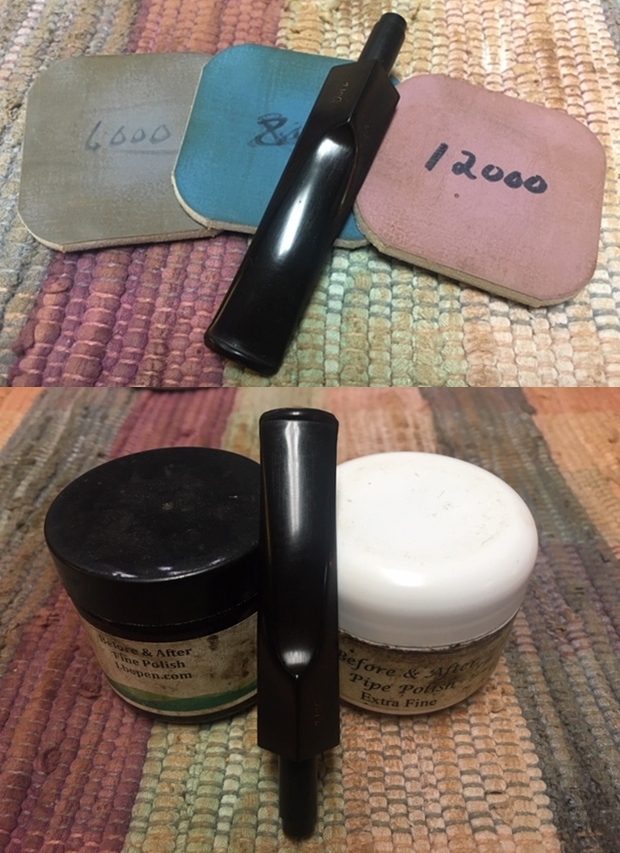
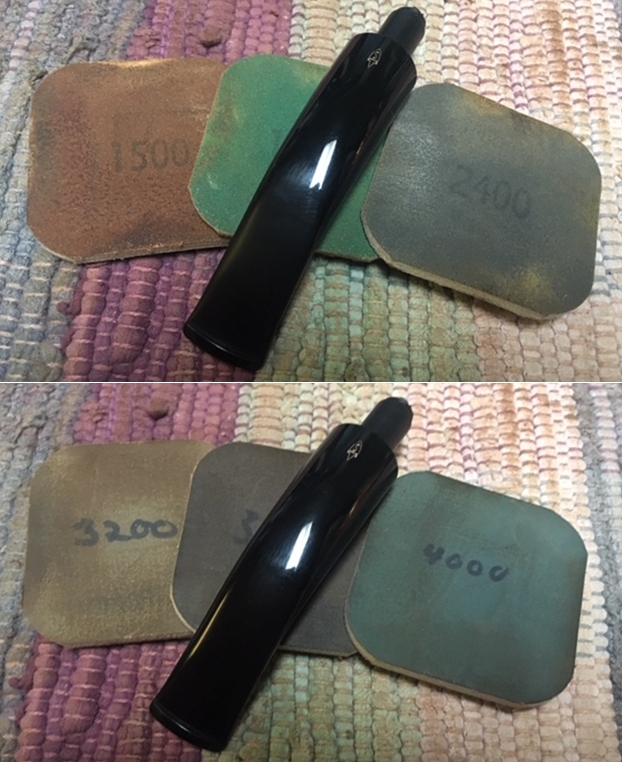
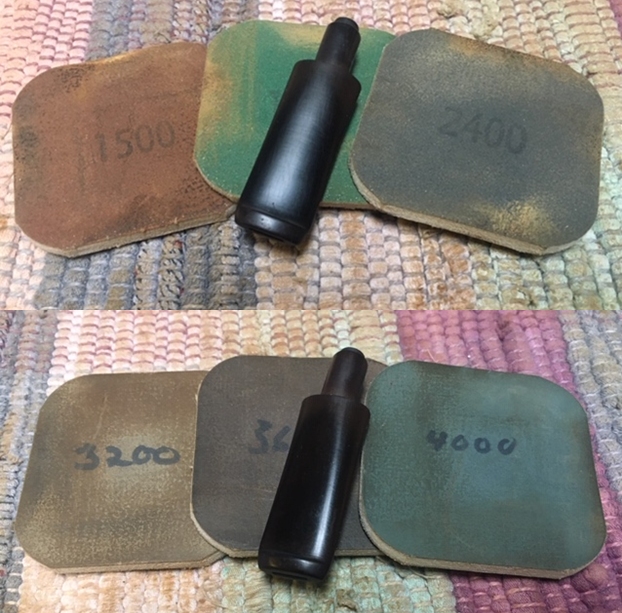
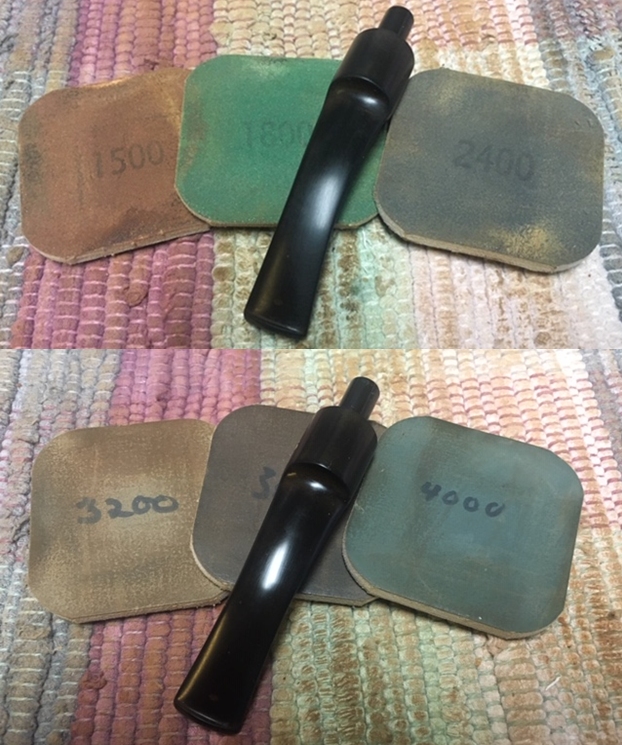
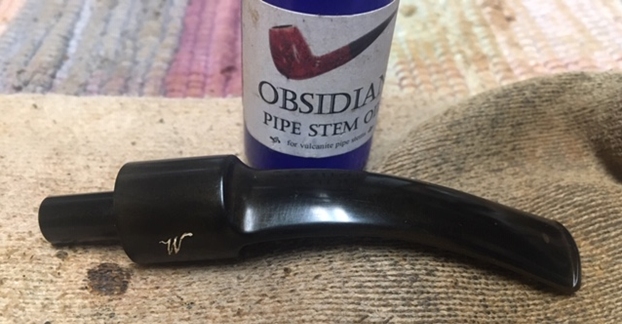
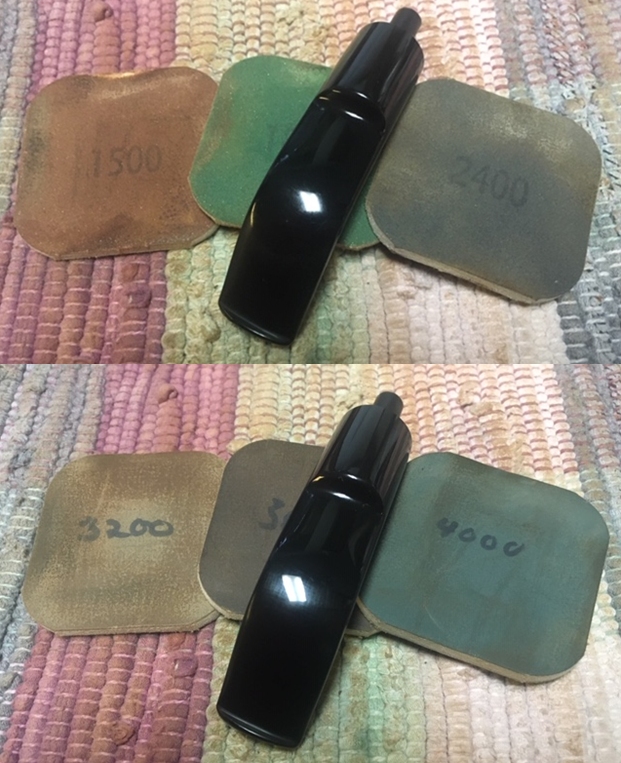
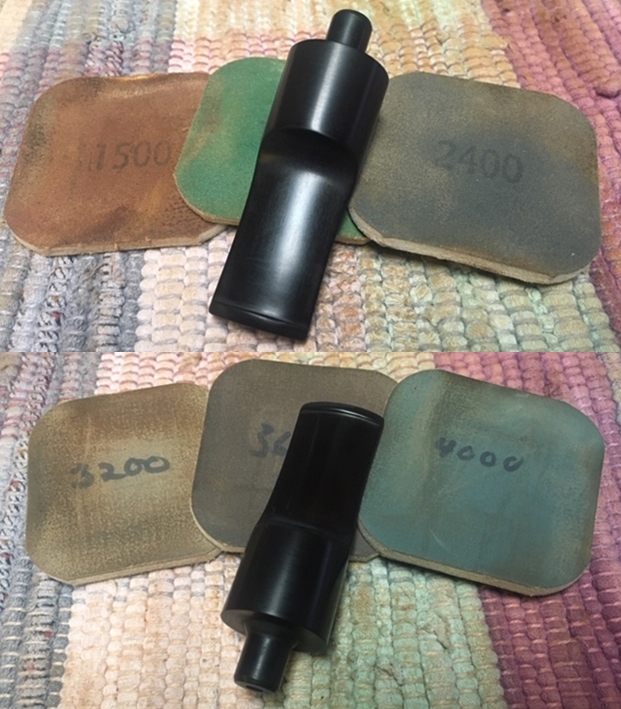
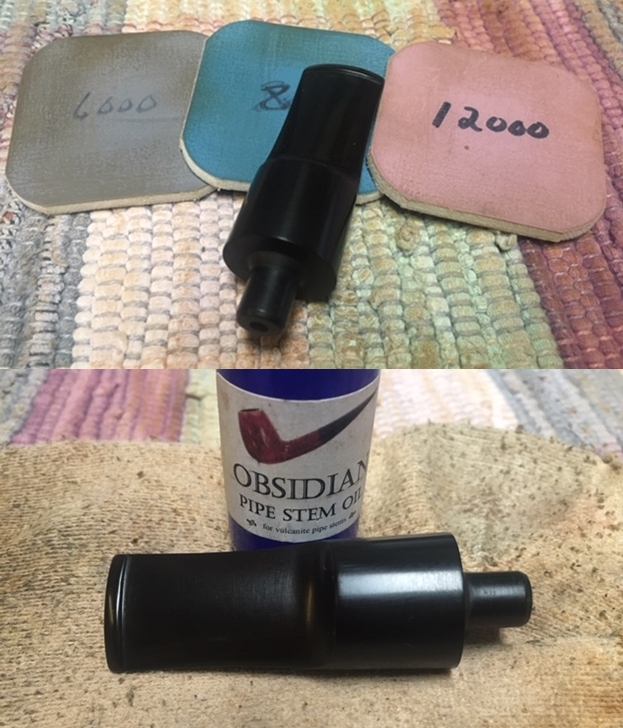
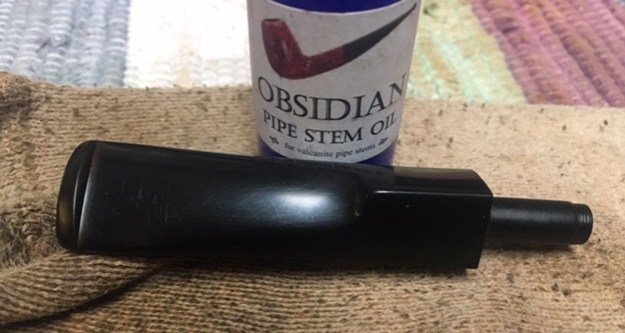
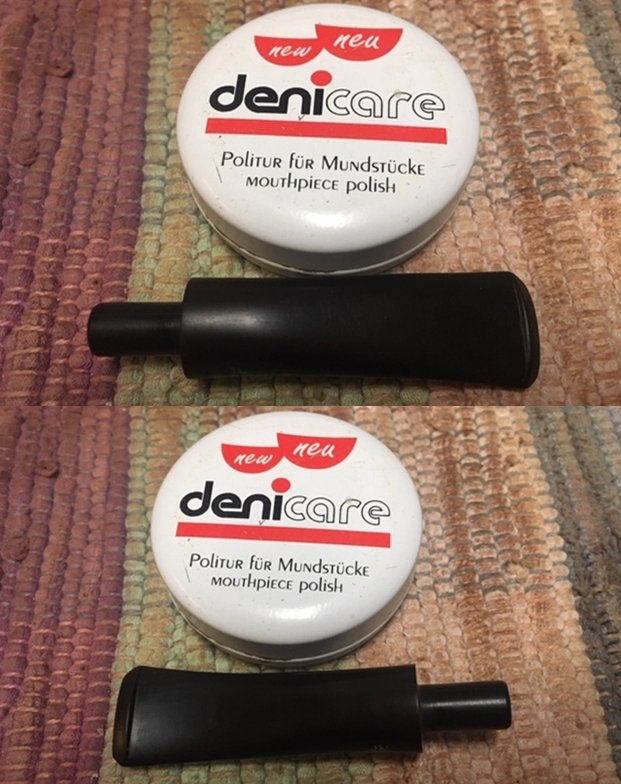 I polished the stem with micromesh sanding pads – dry sanding with 1500-12000 grit sanding pads. I wiped it down after each sanding pad with a cloth containing some Obsidian Oil. I finished polishing it with Before & After Pipe Stem Polish – both Fine and Extra Fine and buffed it off with a cotton cloth.
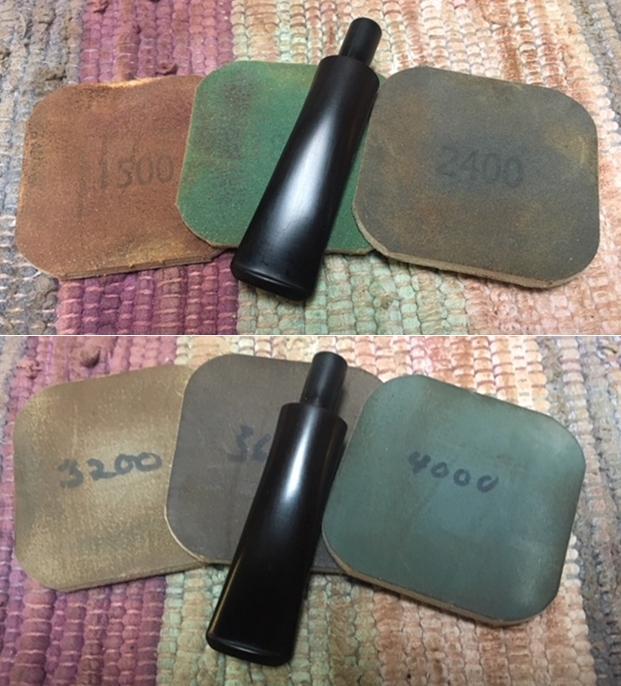
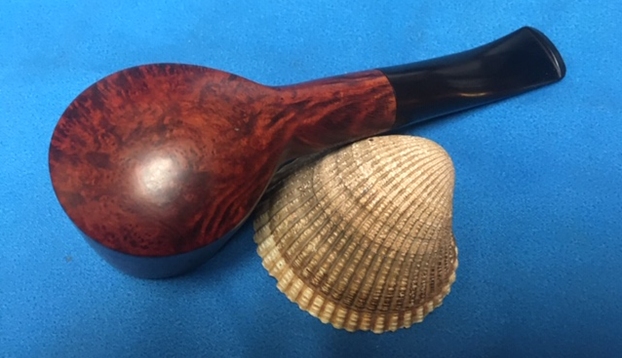
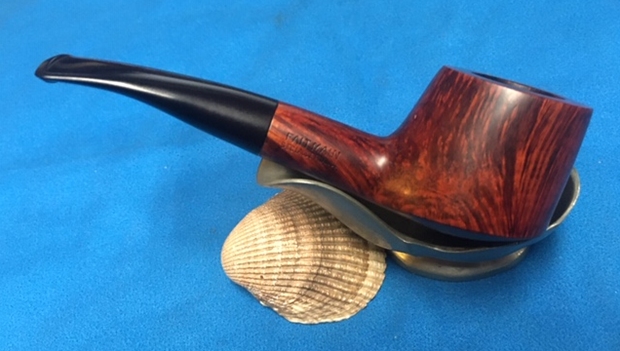
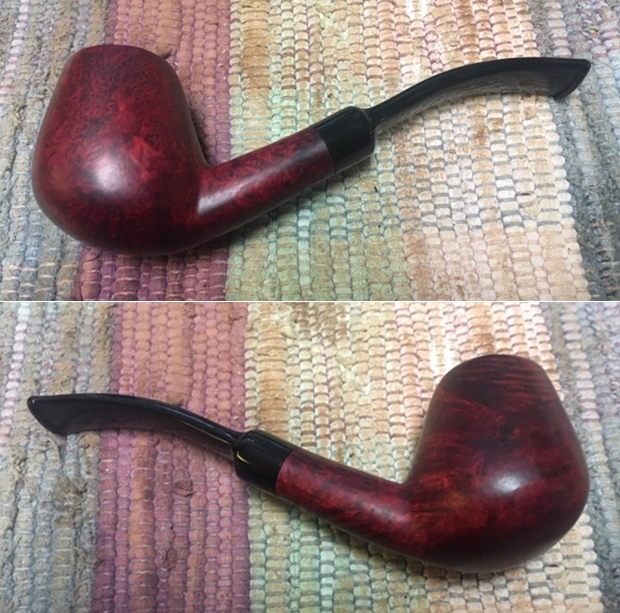
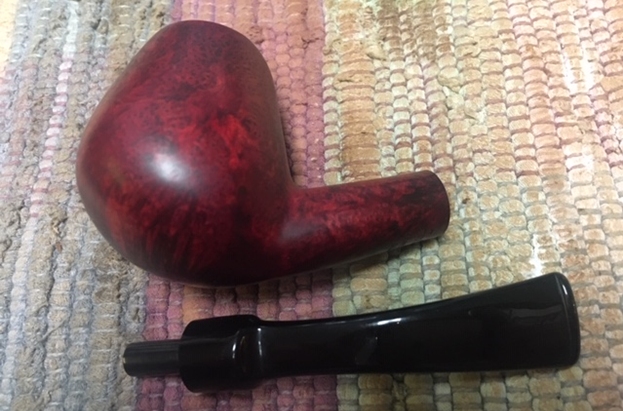
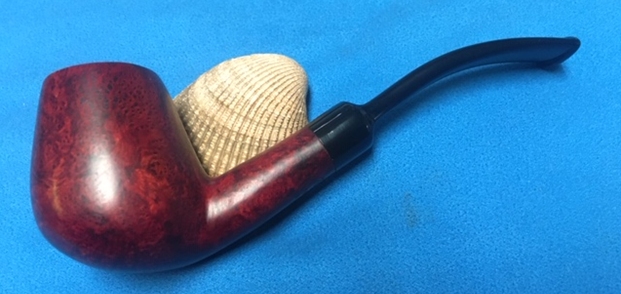
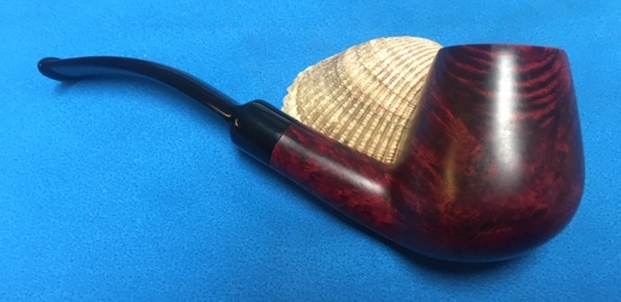
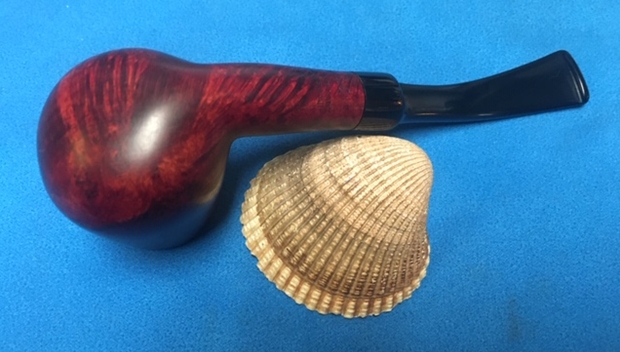
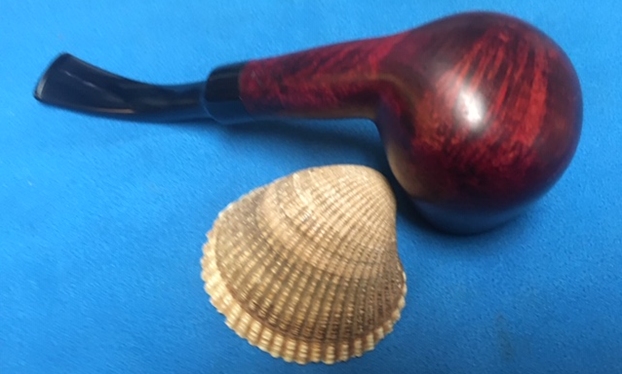
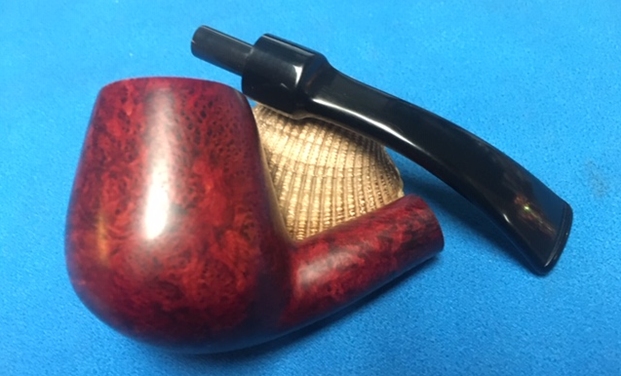
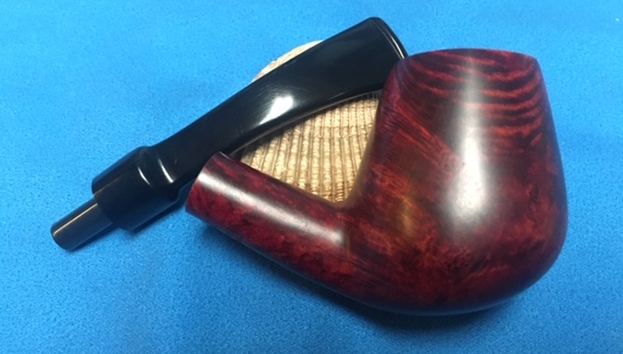
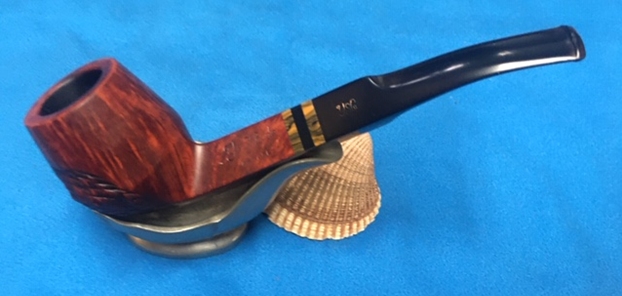
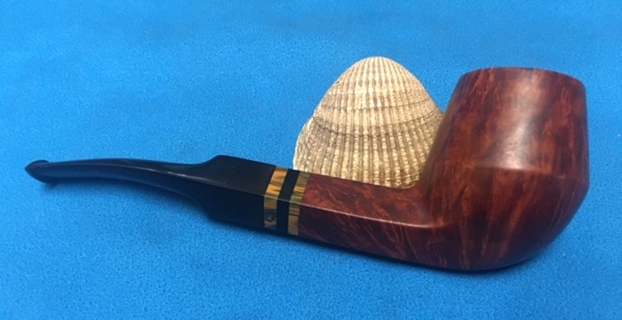
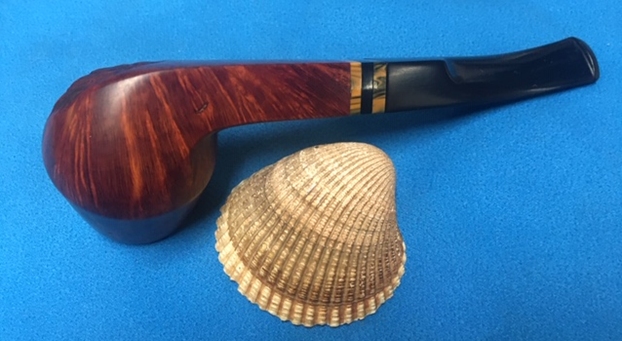
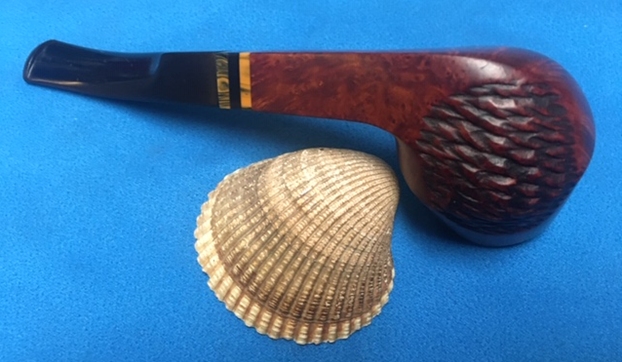
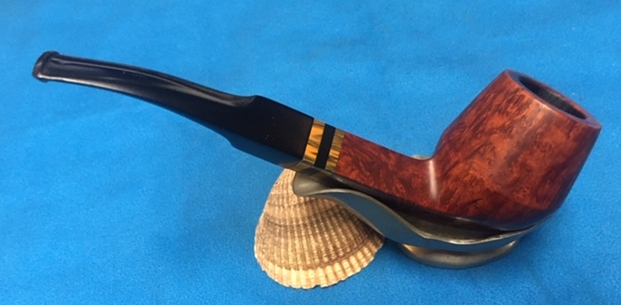
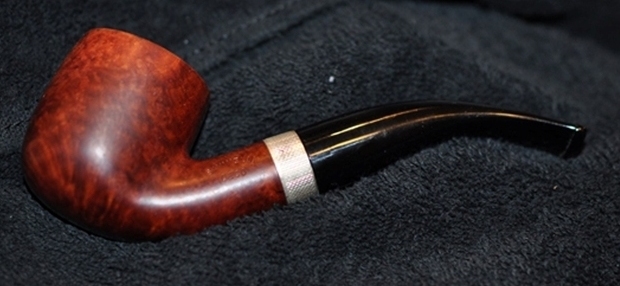
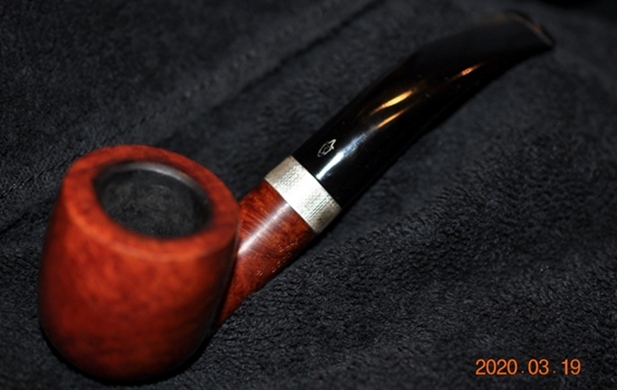
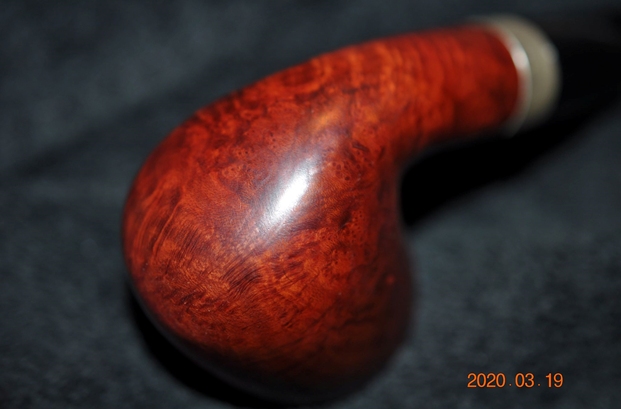
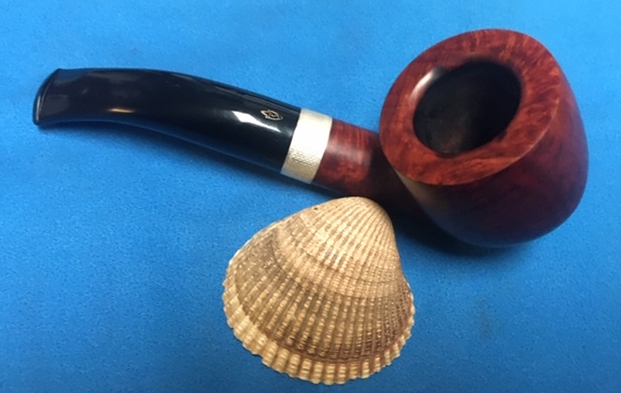
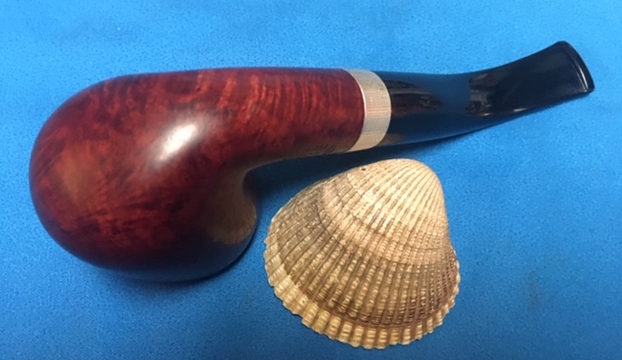
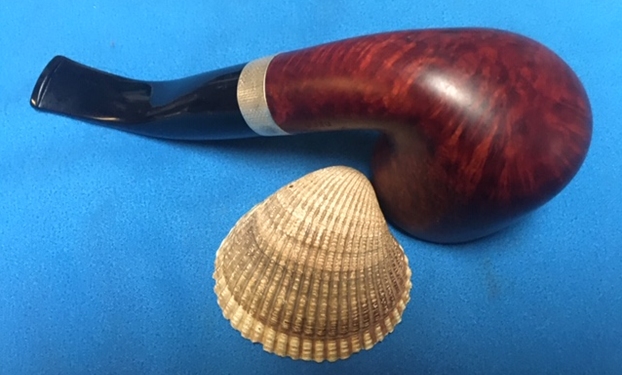
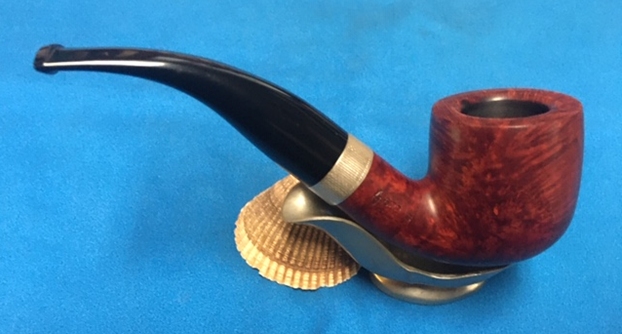
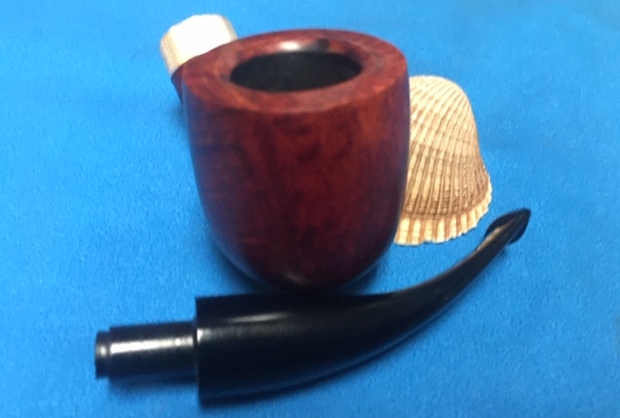
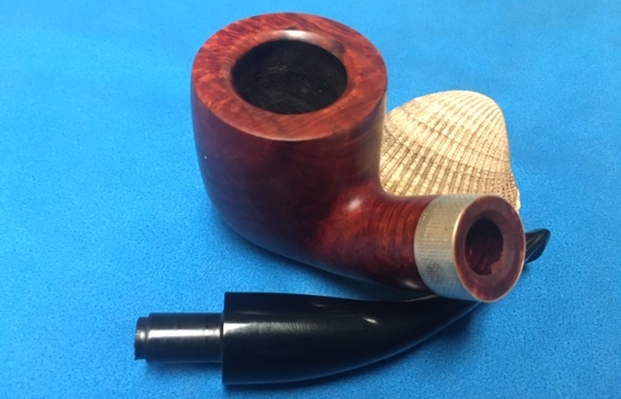
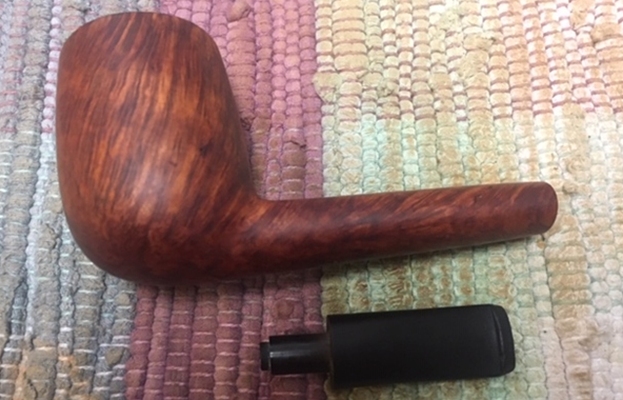
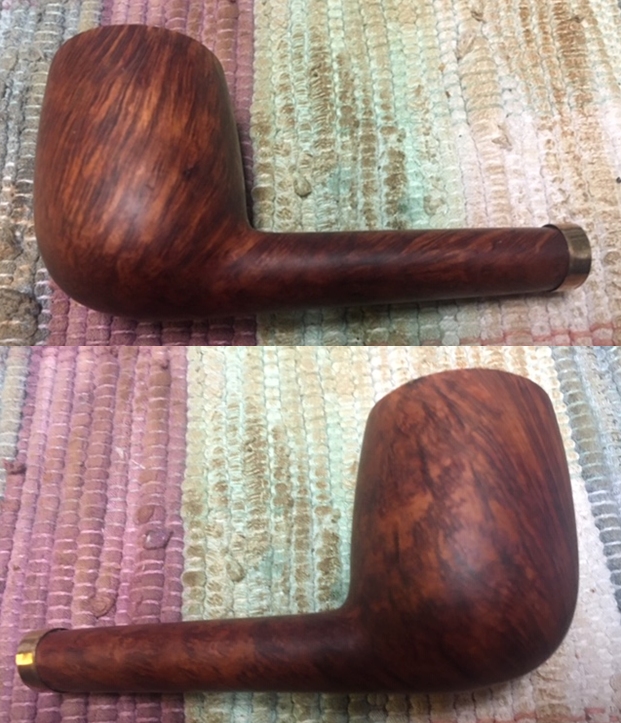
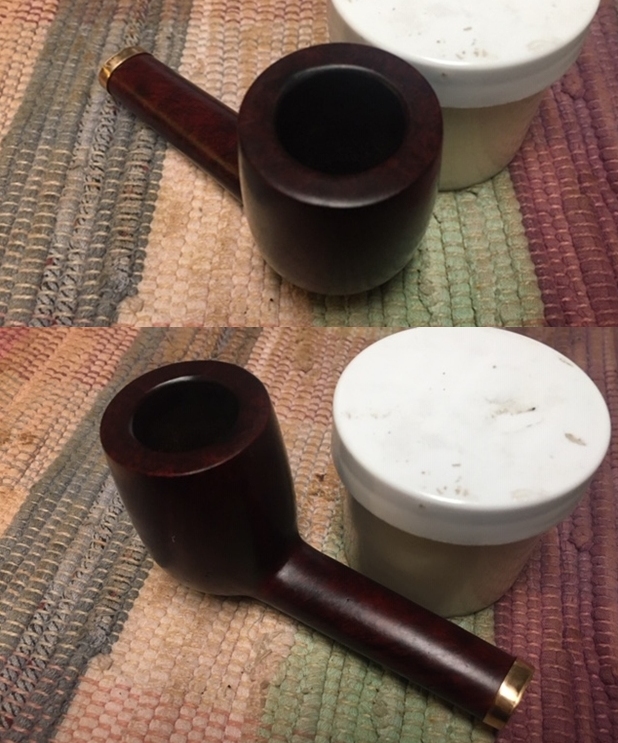
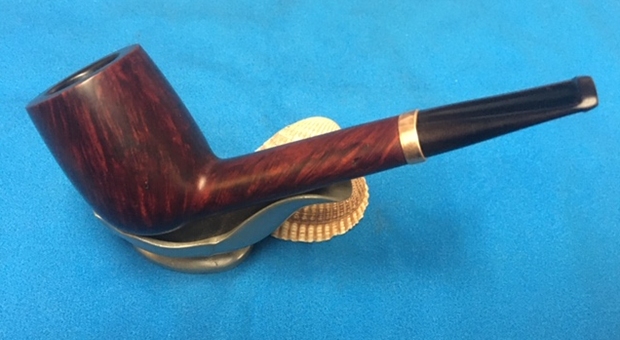
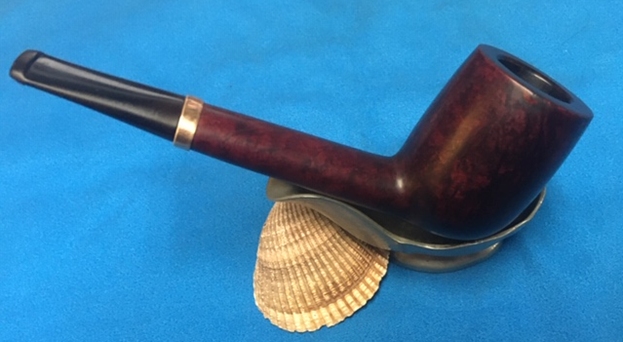
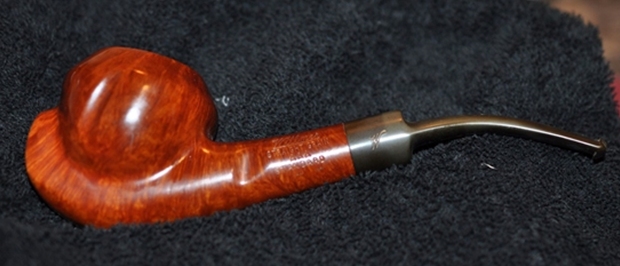
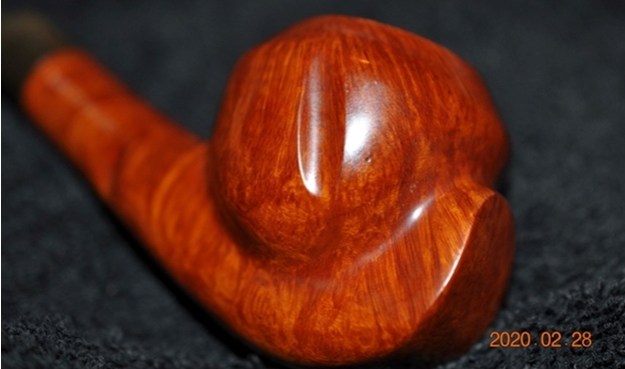
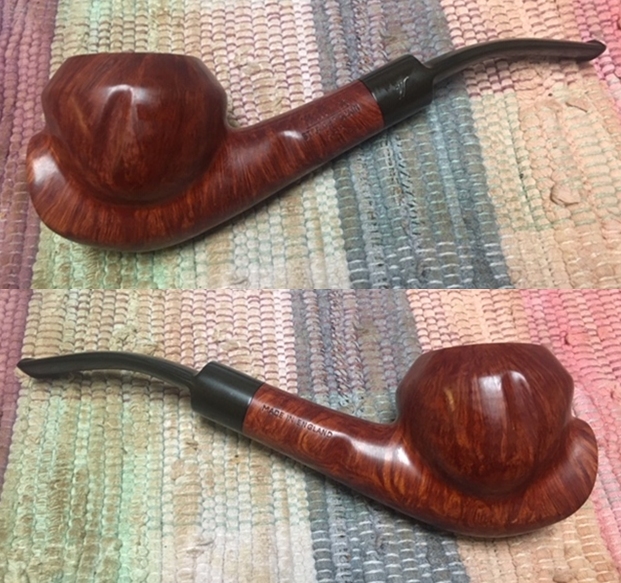
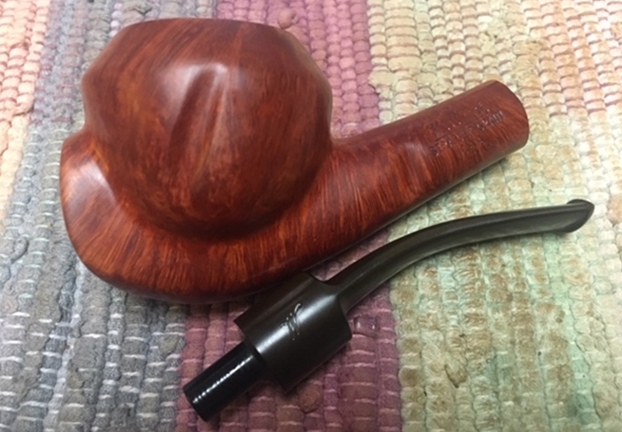
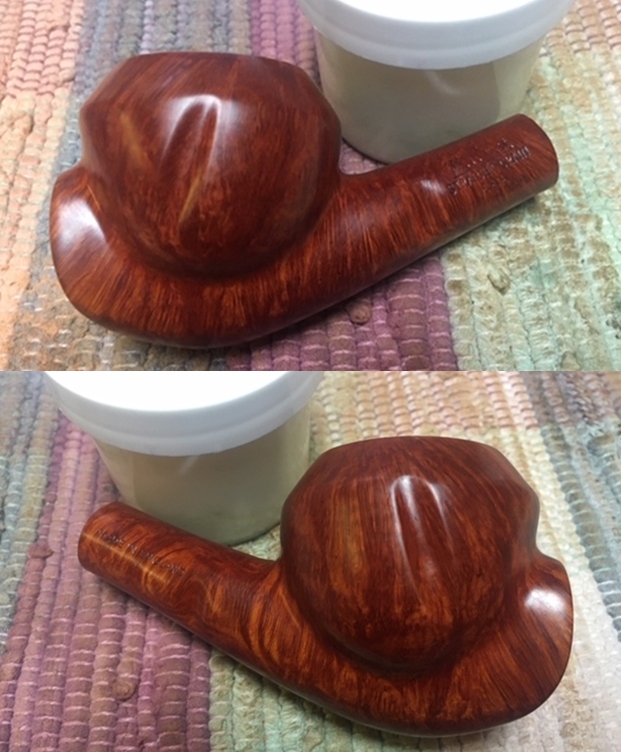
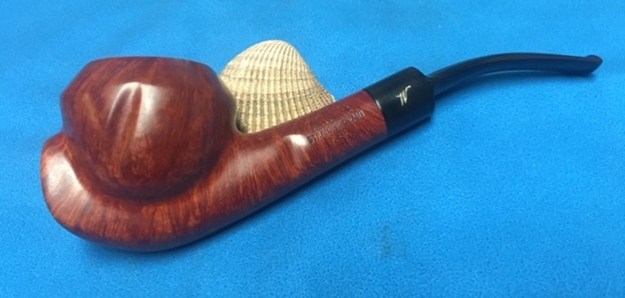
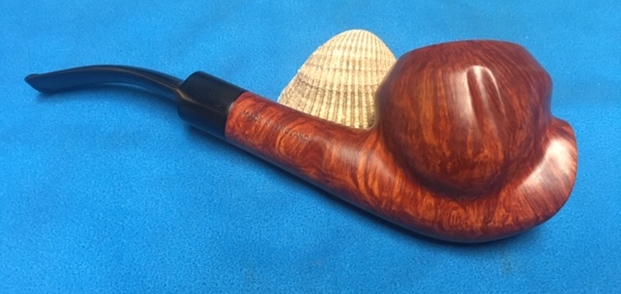
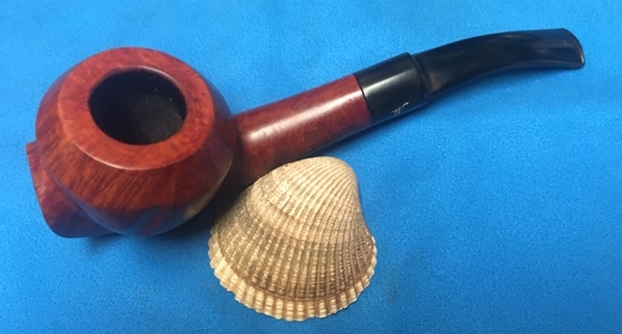
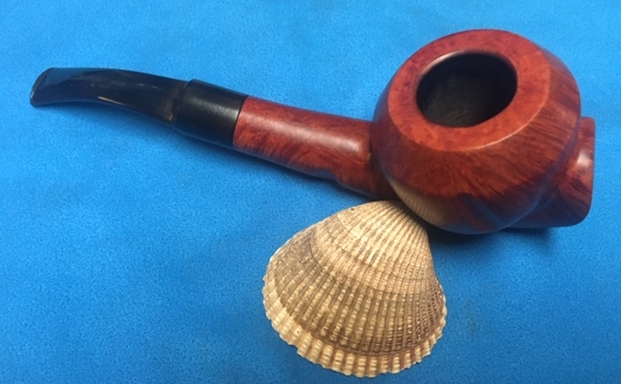
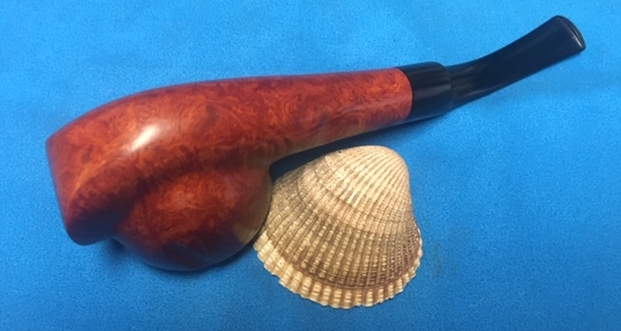
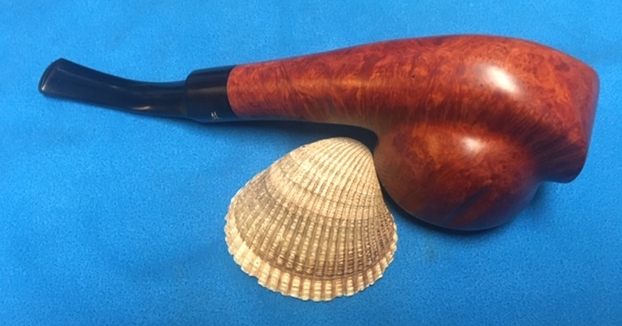
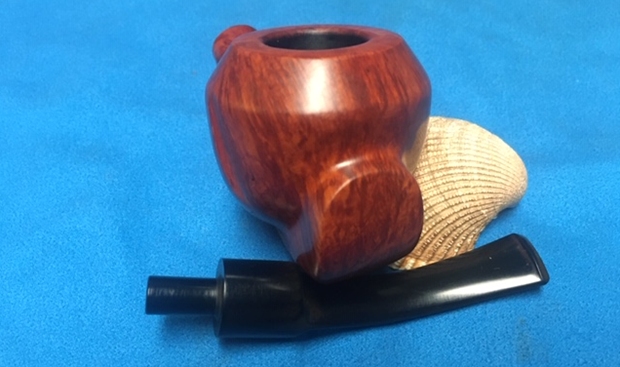
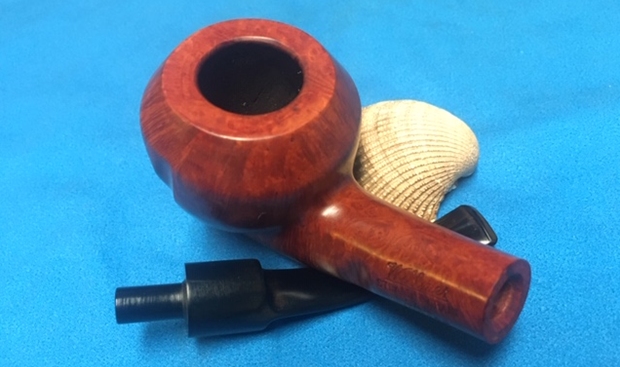
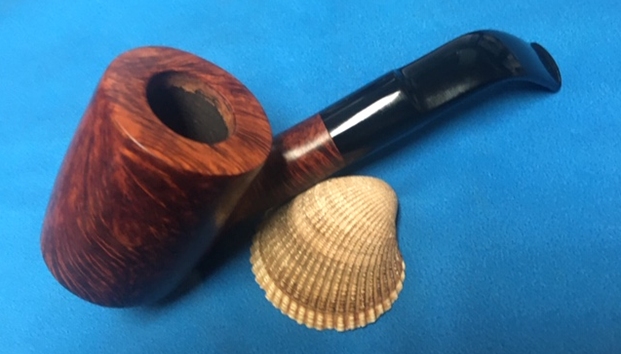
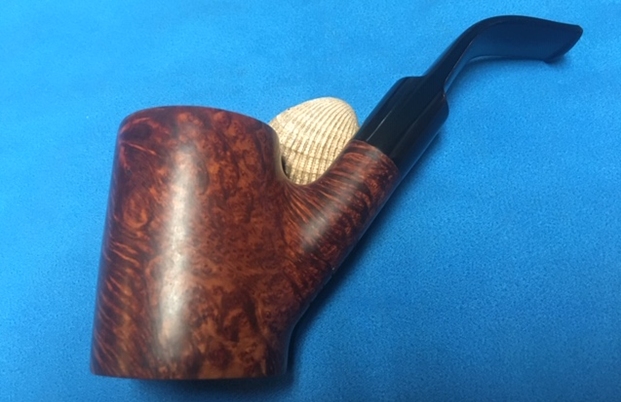
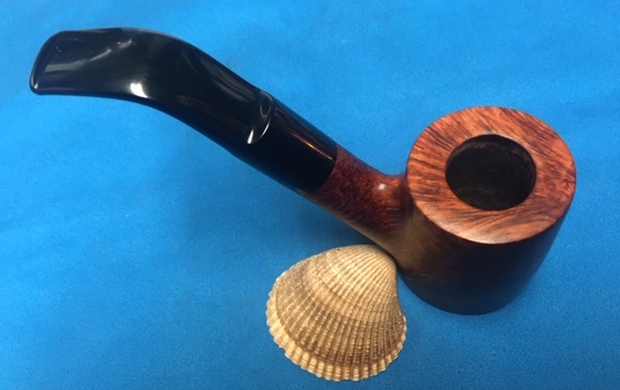
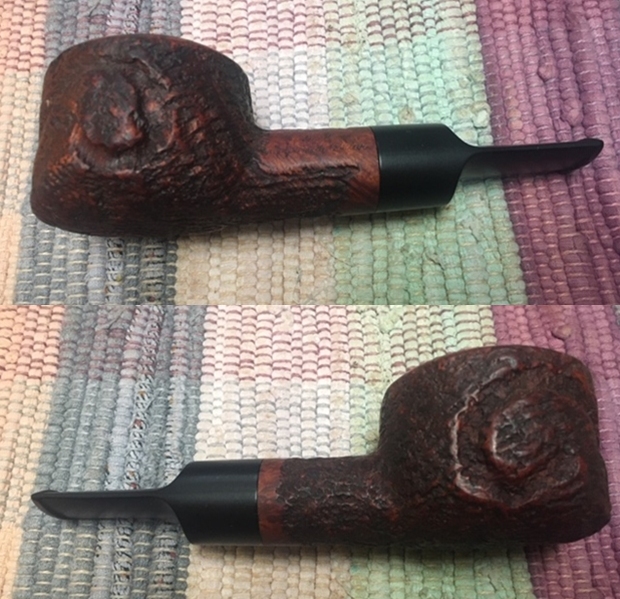
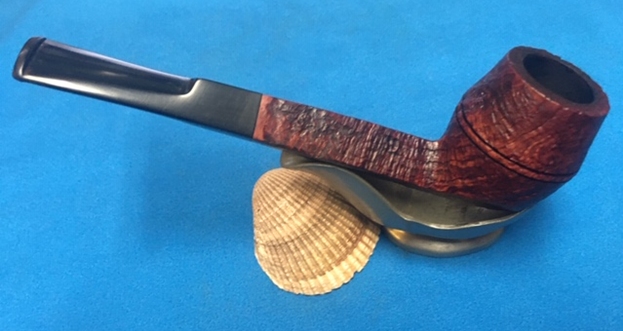
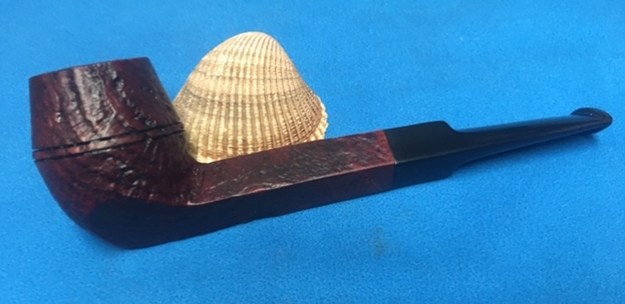
 Putting this pipe back together was very rewarding. The change in condition and appearance of the rim top alone was remarkable. The removal of the damaged peeling coat brought the briar back to life. I love seeing the grain just pop at this point. I put the stem back on the bowl and buffed the pipe with Blue Diamond on the buffing wheel. I carefully avoided the stamping on the shank during the process. I gave the bowl and the stem multiple coats of carnauba wax on the buffing wheel and followed that by buffing it with a clean buffing pad on the buffer. I hand buffed the pipe with a microfiber cloth to deepen the shine. The finished pipe is quite beautiful and is a stubby volcano/sitter pipe. The finish on the bowl combines various stains to give it depth. It is very well done. Give the finished pipe a look in the photos below. I can only tell you that it is much prettier in person than the photos capture. The dimensions of the pipe are Length: 5 inches, Height: 1 ½ inches, Outside diameter of the bowl: 1 ½ inches, Chamber diameter: ¾ of an inch. Butz-Choquin seems to have a lot of creatively shaped designs that leave me respecting the creativity. This interesting pipe is no exception and it is a great looking pipe in great condition. Thanks for walking through the restoration with me as I worked over another beautiful pipe. I will be adding it to the rebornpipes store soon. If you want to add it to your collection send me an email or a message! Thanks for your time.