Guest Blog by Robert M. Boughton
Member, International Society of Codgers
Member, North American Society of Pipe Collectors
http://www.naspc.org
http://www.roadrunnerpipesnm.biz
http://about.me/boughtonrobert
Photos © the Author
If a man loves you…he’s willing to profess it. He’ll give you a title after a while. You’re going to be his lady, his woman, his fiancée, his wife, his baby’s mama, something.
— Broderick Steven “Steve” Harvey (b. 1957), U.S. comedian, actor, TV and radio talk show host, writer of books on relationships, former New York public high school teacher
INTRODUCTION
I neither forgot nor gave up on this special series despite the relative vacuum of responses. Instead, I was sidetracked by developments in a portfolio of litigious necessity that might very well expand with more certainty and regularity than the universe. Returning to the subject of this blog, just the other day I chanced upon a woman with a rather off-putting appearance. Perhaps some significant other had at last given her a title she disliked. At any rate, she was chain-smoking cigarettes with almost the frenetic zealousness of the late great Lloyd Bridges near the end of the comic classic “Airplane.”
Nevertheless, by pure nature, I acquainted her with my name and part-time occupation, and of course mentioned the several new customers I came across in recent weeks, under circumstances that can only be called serendipitous, who were already free of cigarettes. Undeterred when the lady did protest – with a deceptively soft, dismissive laugh that was somehow more like a tiger stifling a yawn before it pounces – that the idea of a woman smoking a pipe did not seem very lady-like. Still not dissuaded, I pulled from my magic box the perfect specimen of a lithe, sleek, petite bent billiard that I had reserved for one other singularly odd woman who never claimed it.
“That’s why I also restore ladies pipes such as this,” I said with a hint of enthusiasm, and held it out.
With the most cursory pretense of a glance I never before had the pleasure of noting in my writer’s mental file, she gave a flick of the head every bit as memorable, so that her long, dirty blonde hair made room for a fresh cancer stick. She shoved in her mouth, so forcefully punctuating her contempt that the nasty, chemical laden coffin nail went farther into her mouth than anticipated and almost choked her. I had to admire the quick recovery with a lengthy, chic, palliative drag, so reminiscent of any one of the many Golden Age of Hollywood starlets now long dead from the same prop rather than age. I know when I’ve been shot down. But it still goes to show the progress society needs to make before a lady can be comfortable walking into a tobacconist to buy a pipe.
On the subject of pipes, it turns out there really was a Dr. Grabow – Paul E. Grabow, MD (1868-1965), a general practitioner in Chicago who was a friend of Louis Linkman, co-founder with August Fisher of M. Linkman and Co. in 1898. During a conversation between the two in the early years of the Great Depression, Linkman reportedly told Dr. Grabow of his idea to introduce a new and improved line of pipes that he felt would sell better if they were named after a physician. Dr. Grabow, flattered by the request to use his name, accepted. The pipe brand named for him was launched in 1932, and until his death at age 97 the good doctor was given new models whenever he wanted them. 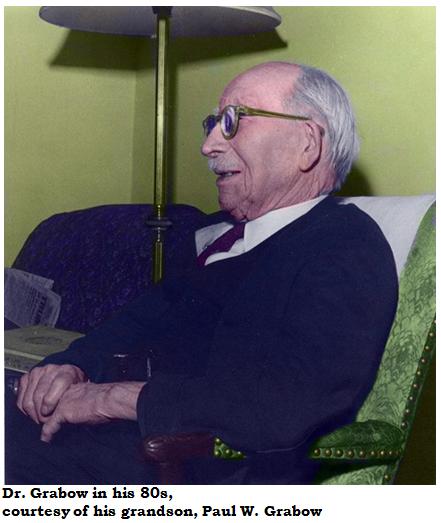
The free pipe perk persisted despite Linkman’s production of the brand stopping in February 1953, when the Dr. Grabow Pipe Co. filed for dissolution a month before Henry Leonard and Thomas Inc. (HLT) of Queens, New York bought the rights, and they were produced by Sparta Pipes Inc. U.S. Tobacco bought out Sparta in 1969, assuming control of the Dr. Grabow production until Lane Ltd. paid for the rights some time later. Around 2000, RJ Reynolds and British American Tobacco took over.
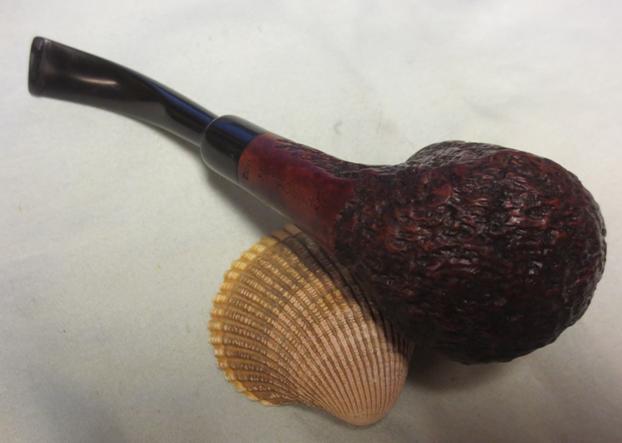
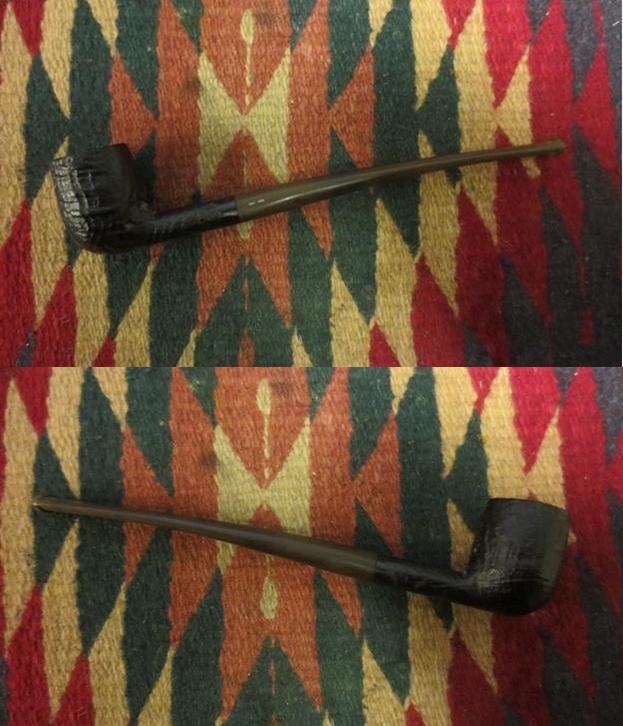
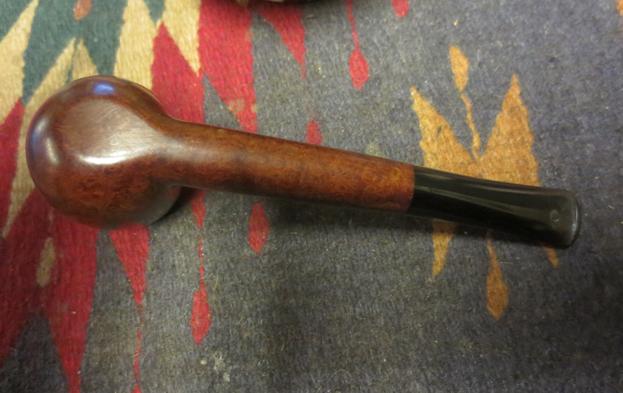
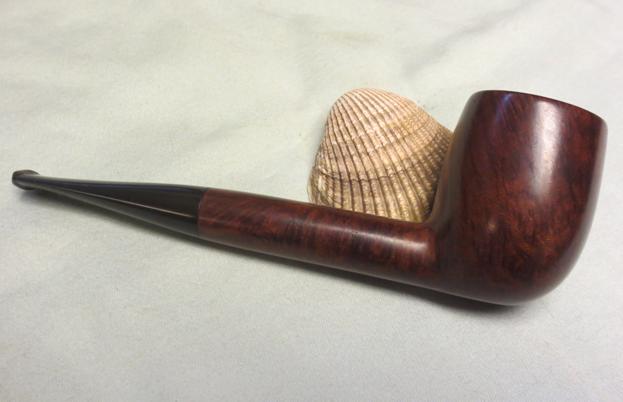
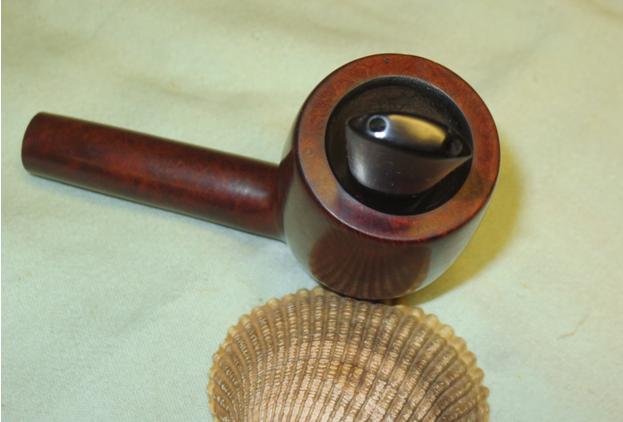
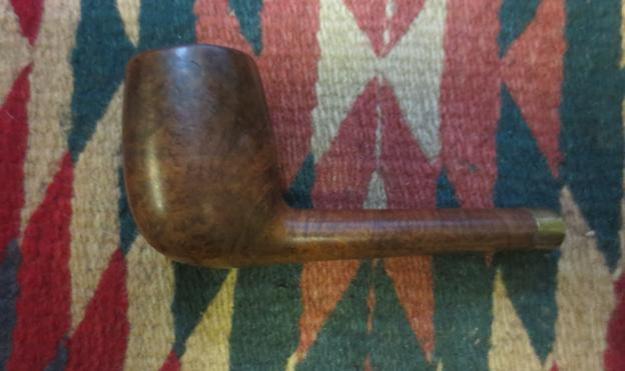
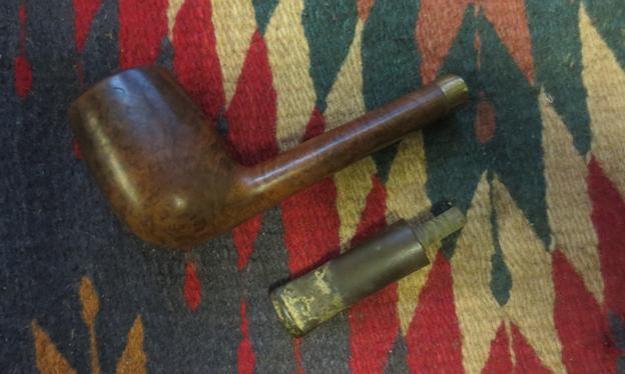
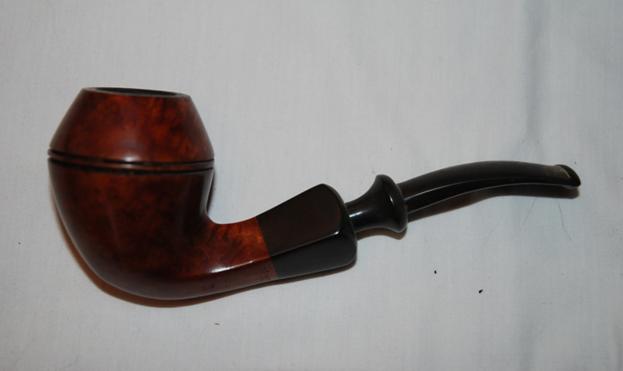
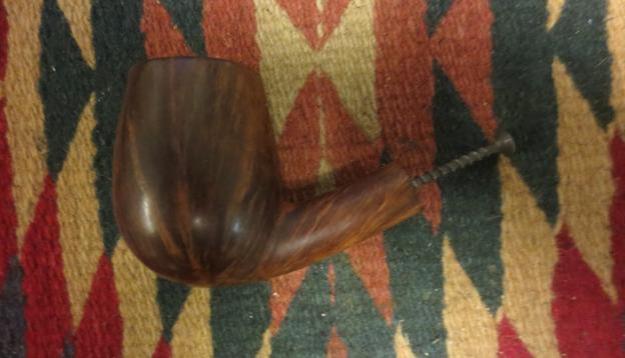
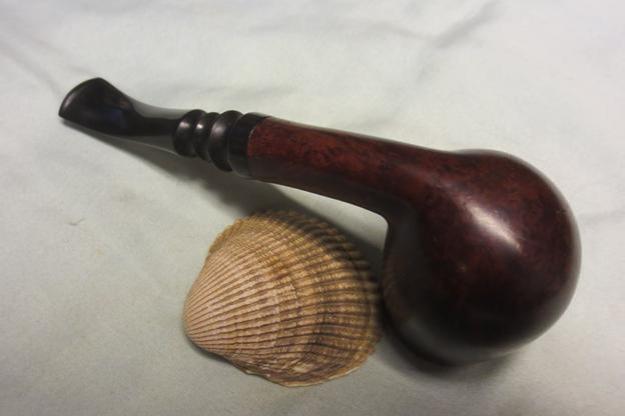
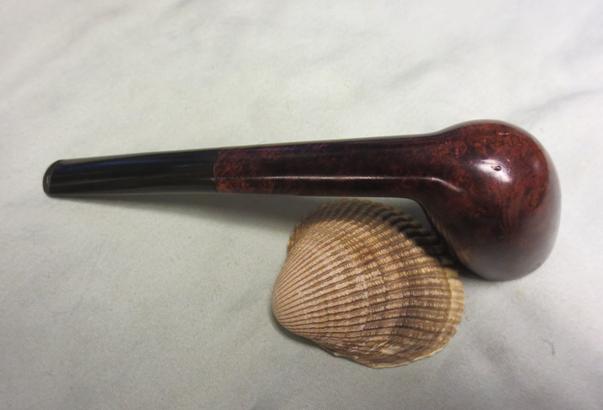
As for the peculiar little carved Duke that is the subject of this installment, regardless of its smallness, the bowl seems to have six subtle sides. I am inclined to call such a shape a panel. But the best narrowing I can do with the multitude of Dr. Grabow sites is a “textured” slim pear, shape number 74.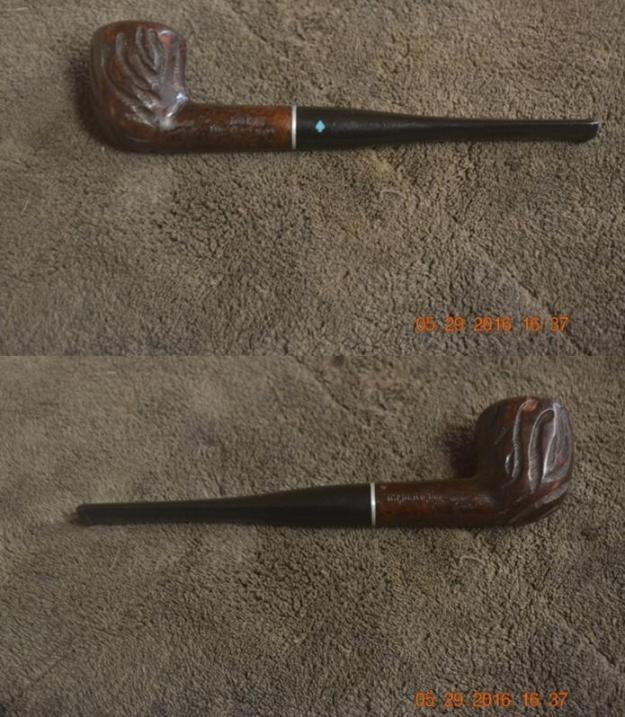


And here is a photo I found online of a Dr. Grabow “Duke G,” which appears to be the same pipe except for the white spade.
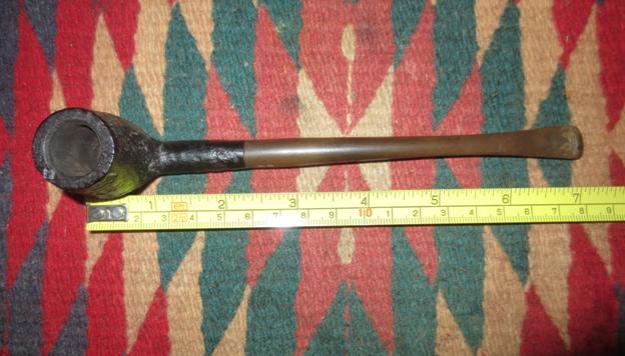
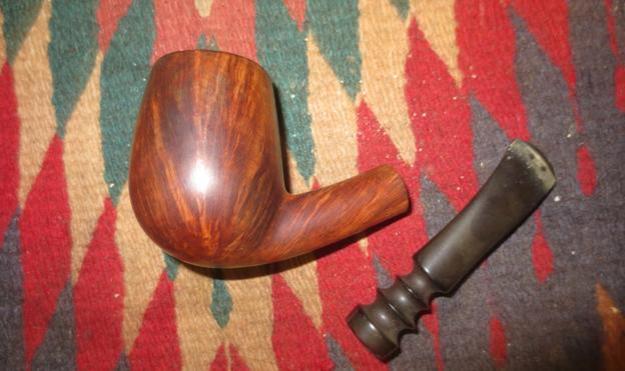
RESTORATION
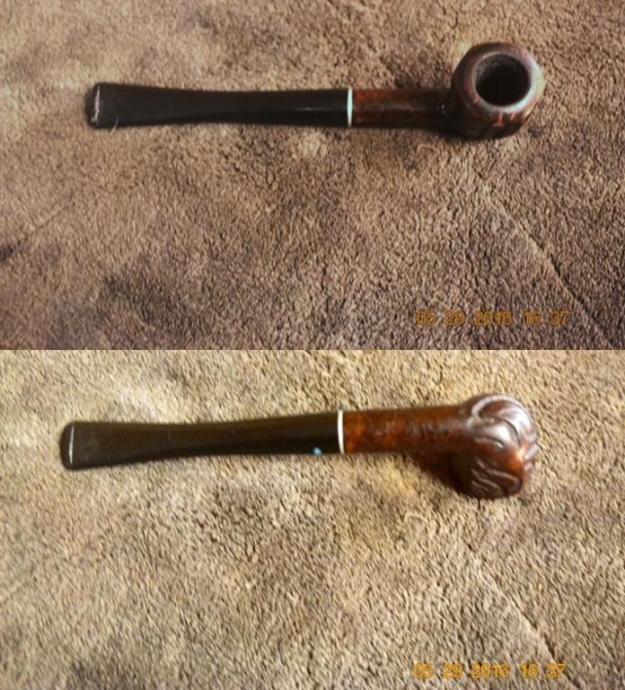
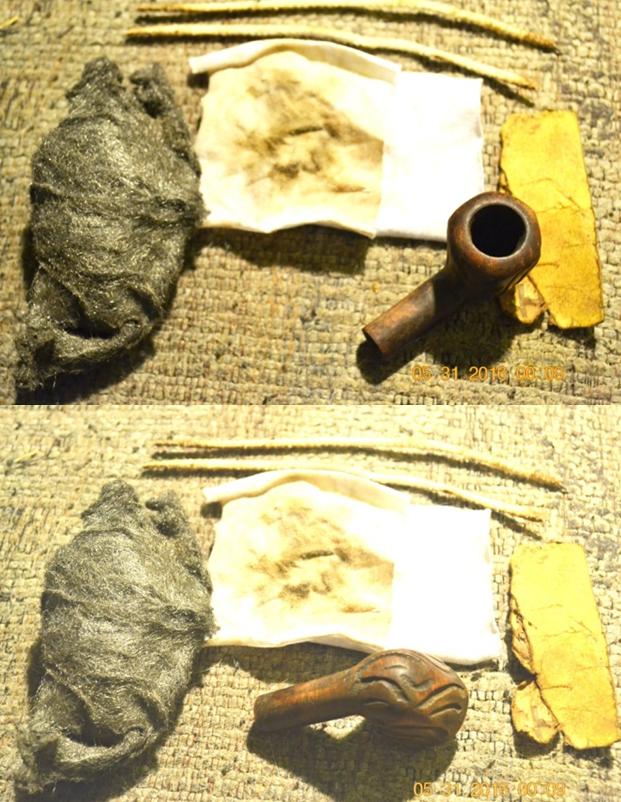
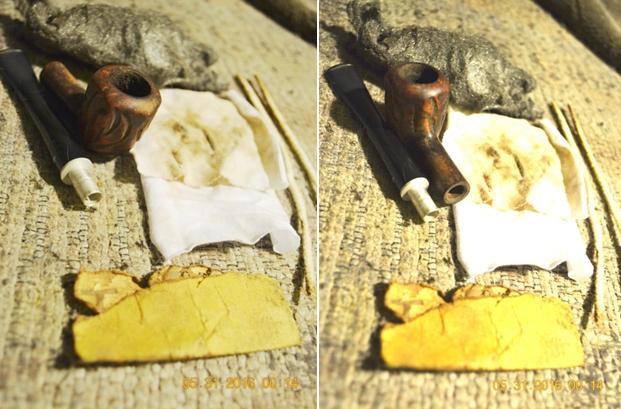
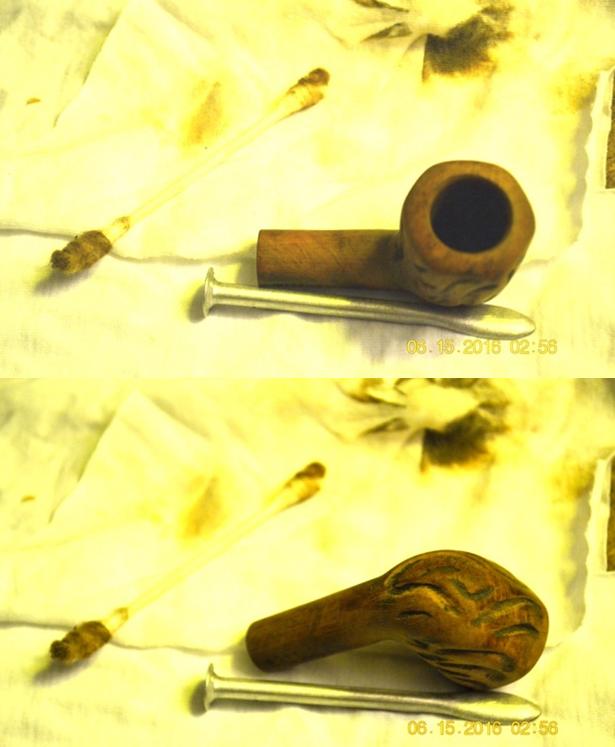
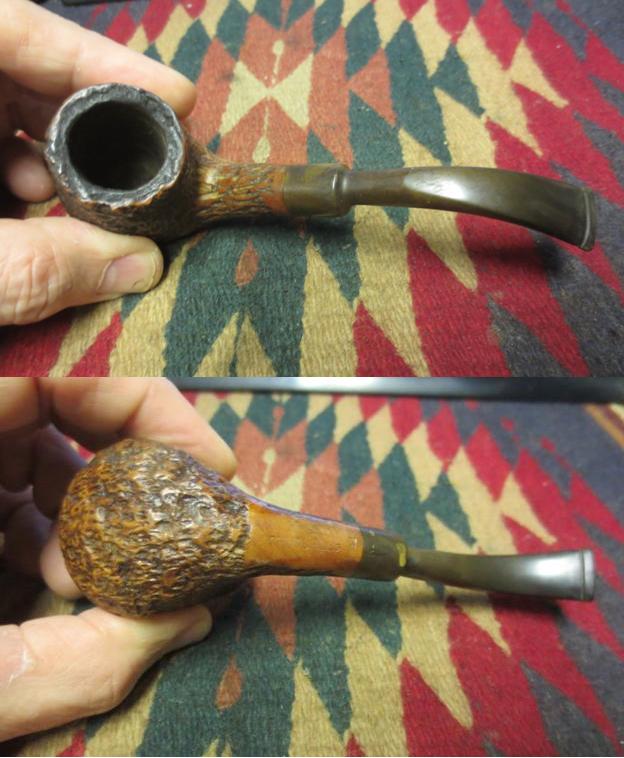
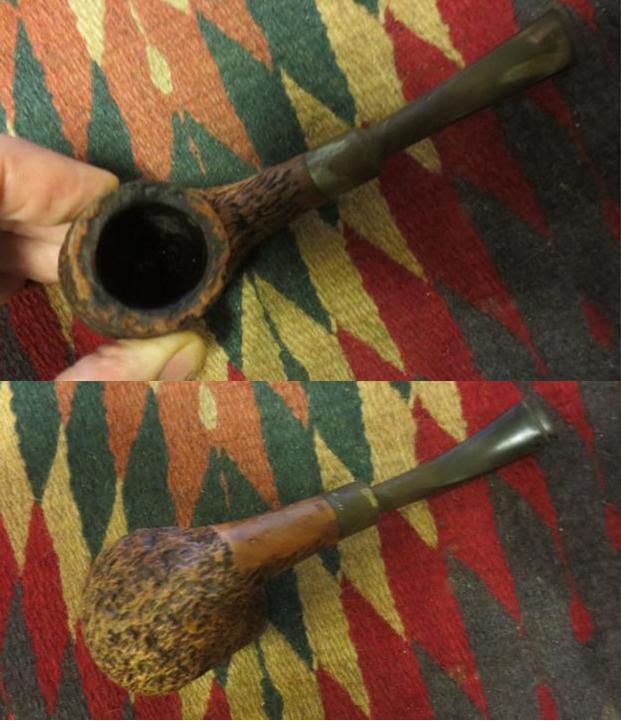
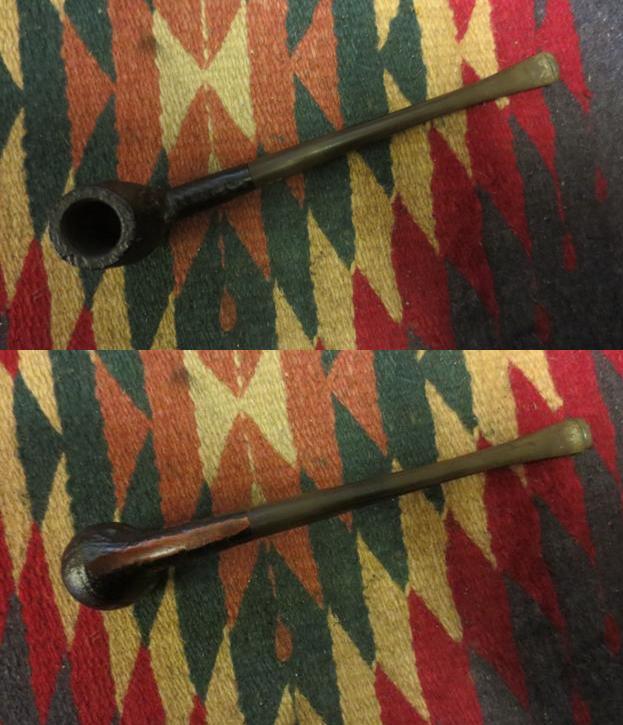
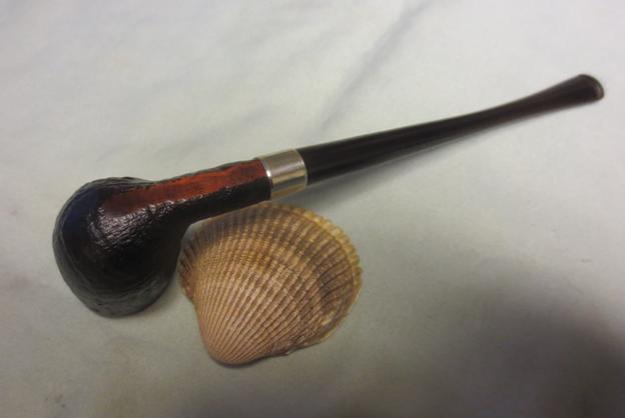
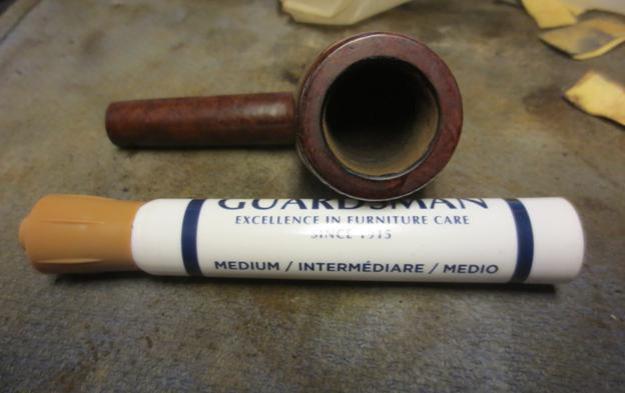
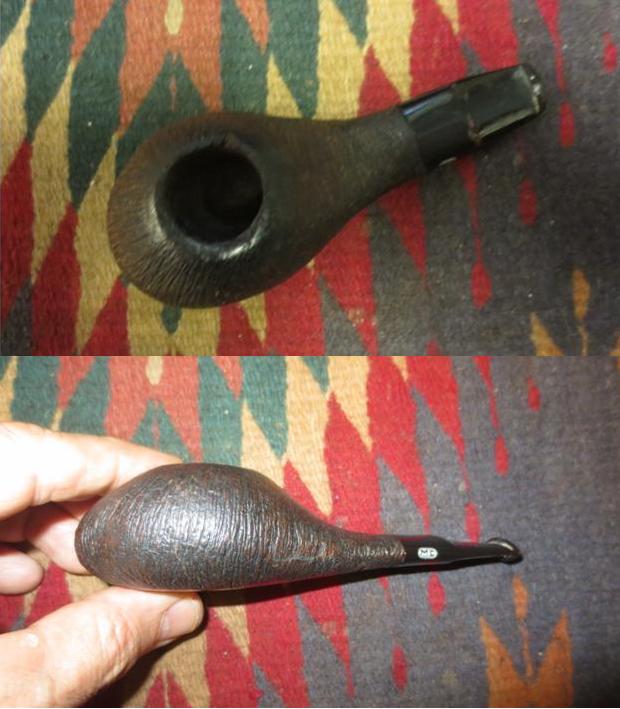
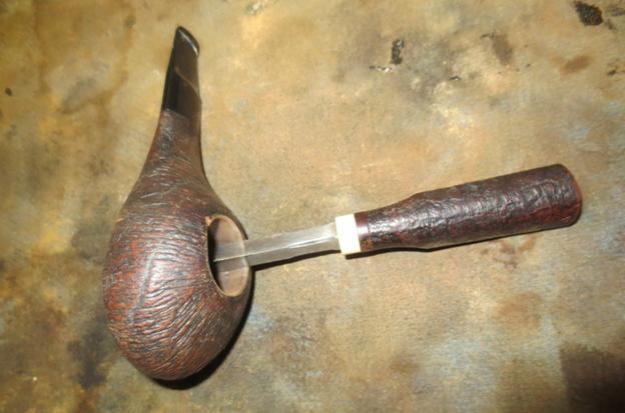
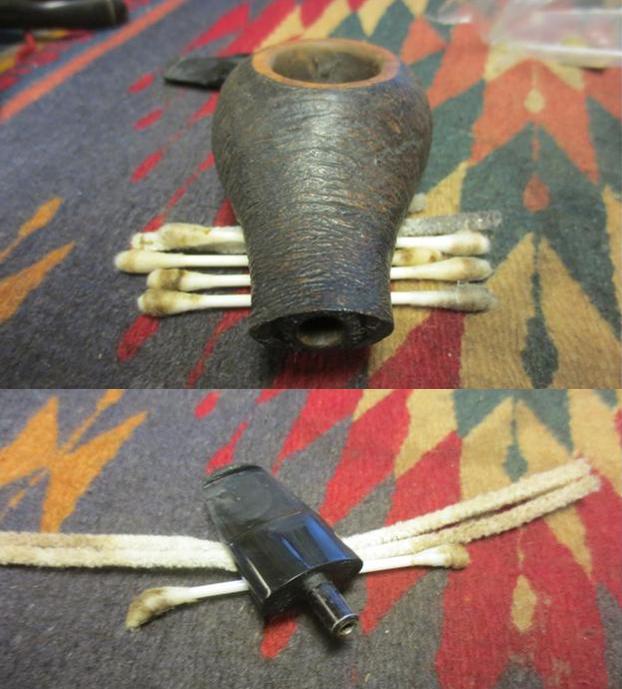
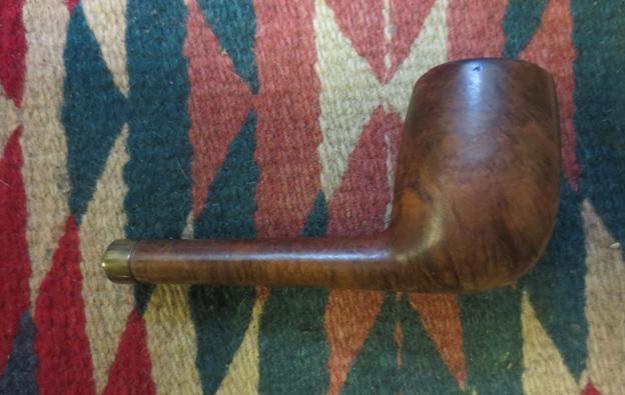
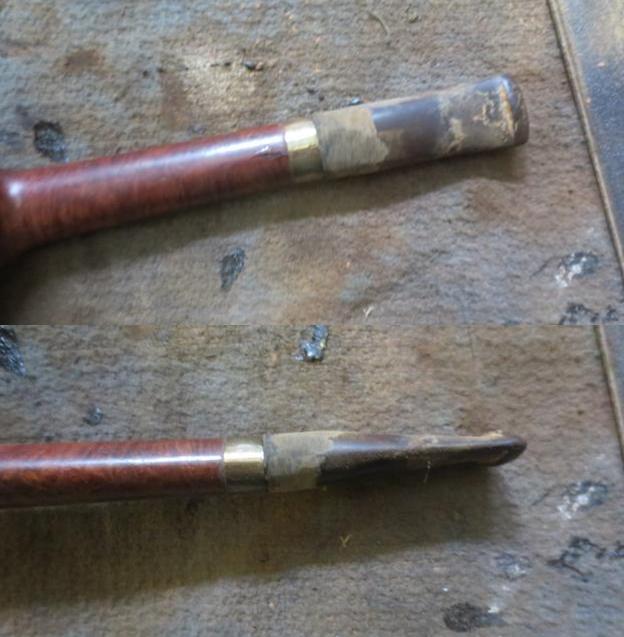
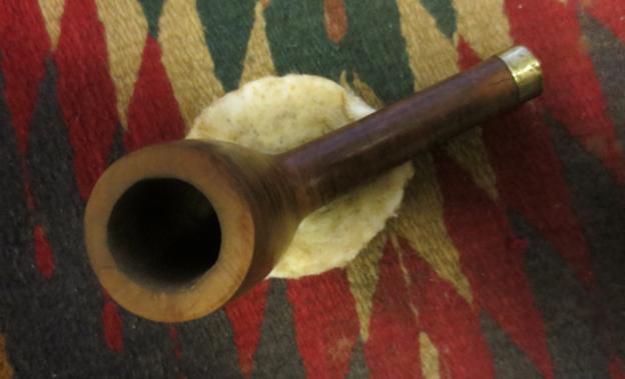
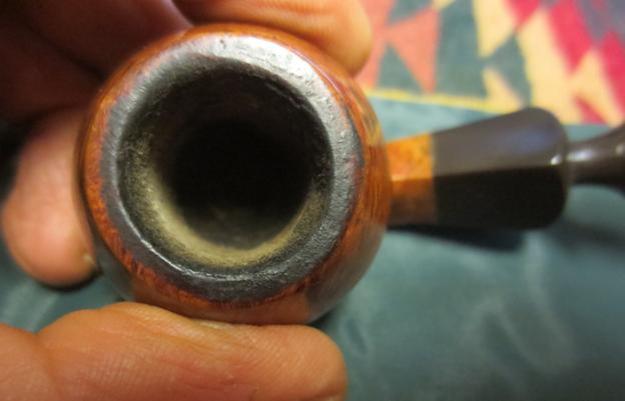
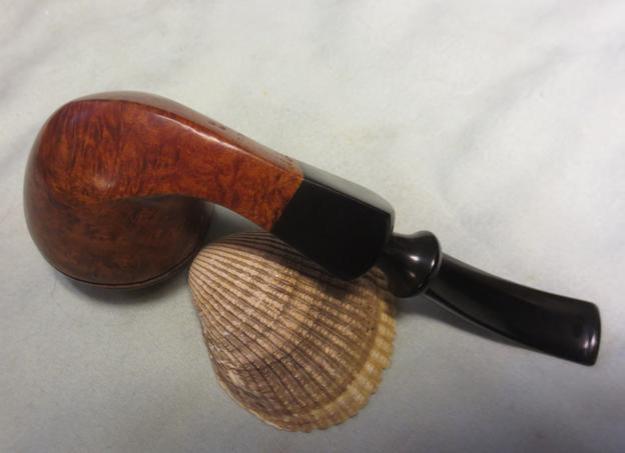
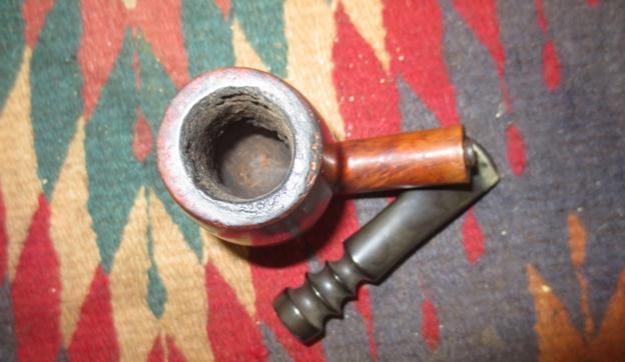
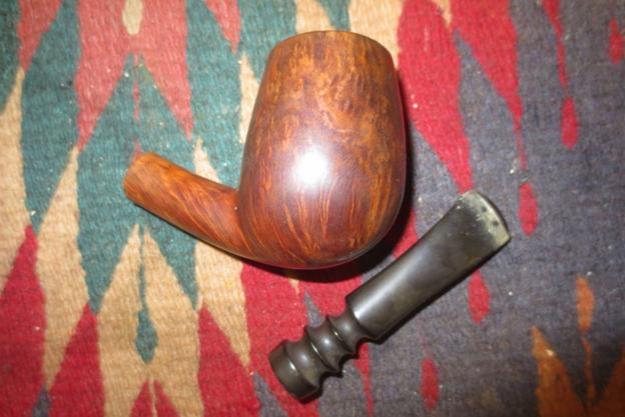
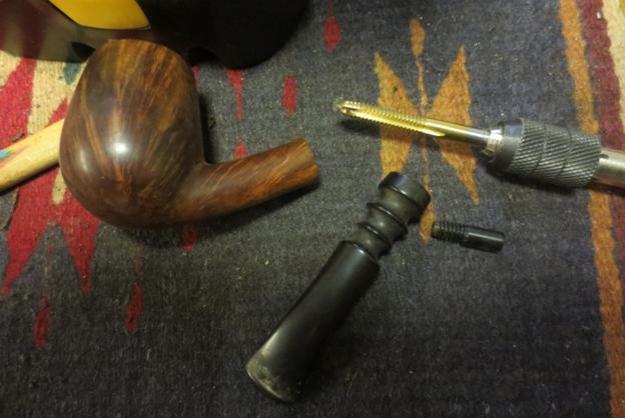
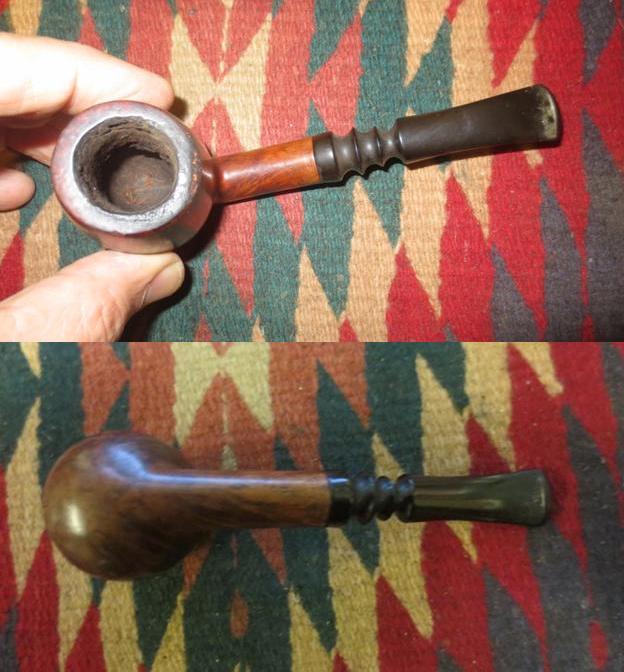
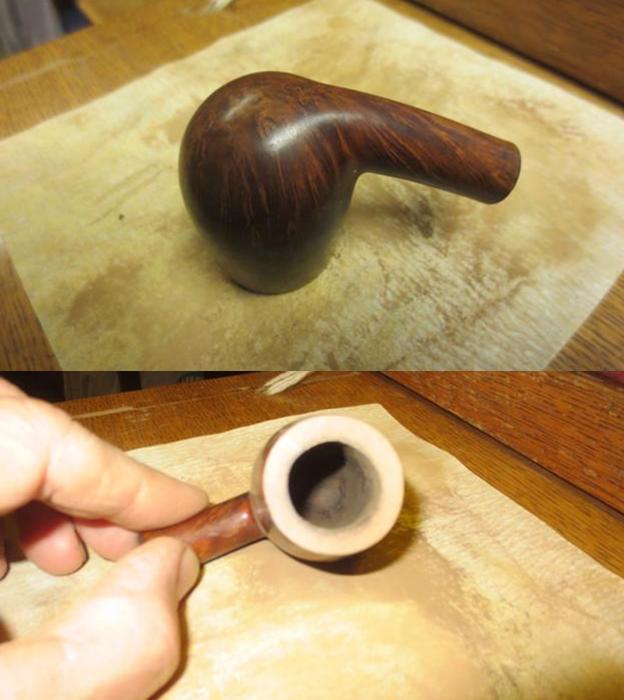
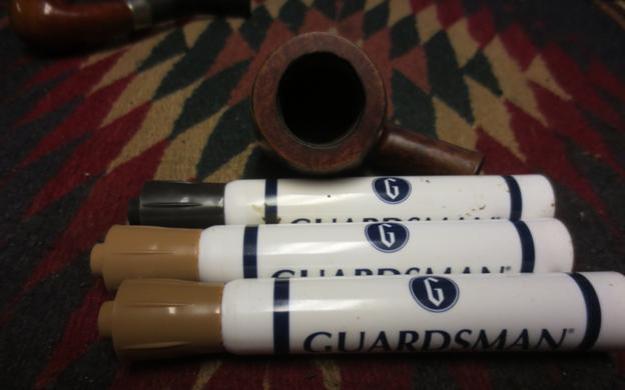
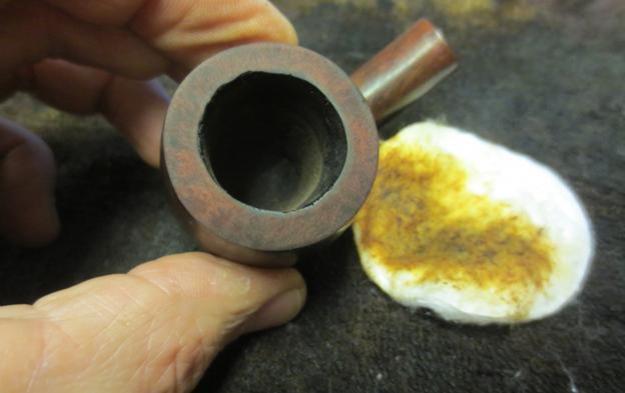
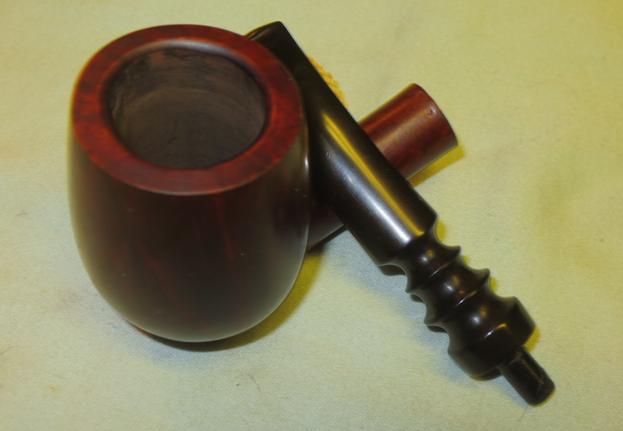
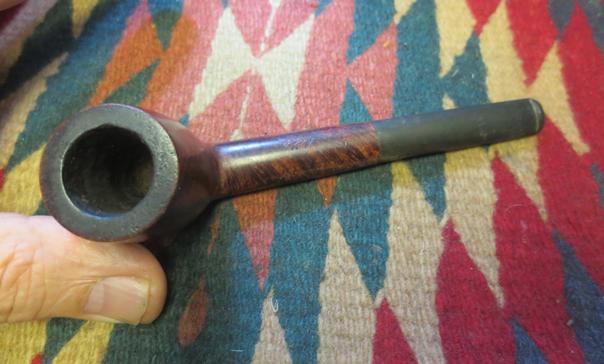
At a glance, the Duke was rough from age and unnatural wear. Here are a few close-ups of the stummel showing the thick, dark stain and some of the damages I faced, as well as the nomenclature I needed to preserve. The bit was in good shape, needing only moderate work. The six-sided paneling (two each on the front and back, and then the sides) is hard to spot by eye, but an inspection with fingers reveals the presence.

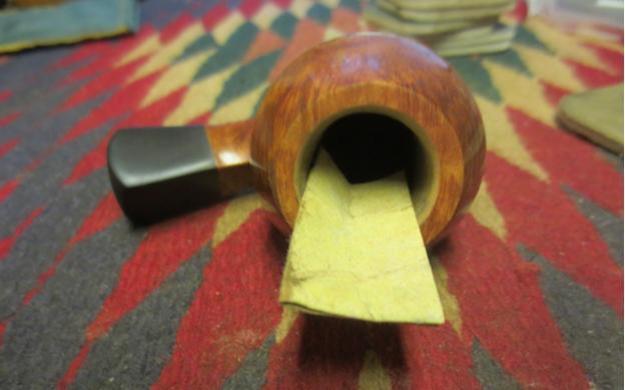
This kind of surface of a pipe stummel – whether it be referred to as carved, rusticated, textured or by any other designation – always poses a challenge in stripping the old stain. No matter how long the wood soaks in alcohol, at least by my concept of safe and sane standards, sanding is always still needed, in particular for the crevices. Of course, I could have started this project with an arduous application of several grades of paper, but the overdone original finish suggested the need for an Everclear soak to begin. And so that is how I commenced the task, putting the bit in an OxiClean bath at the same time.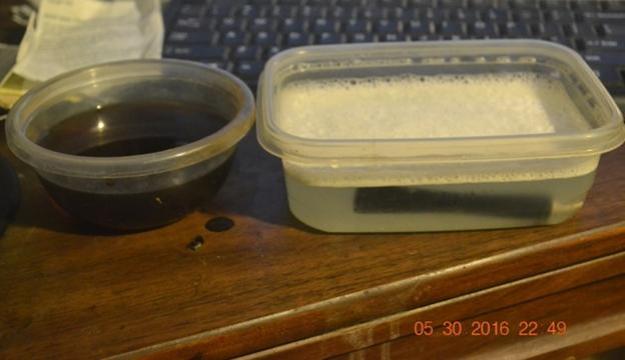
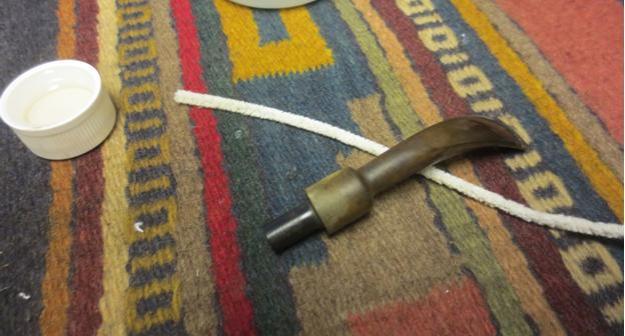
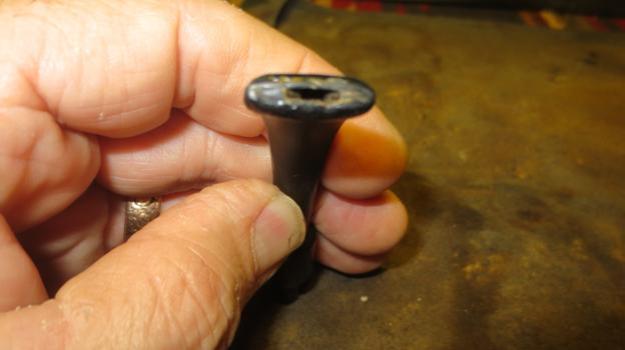
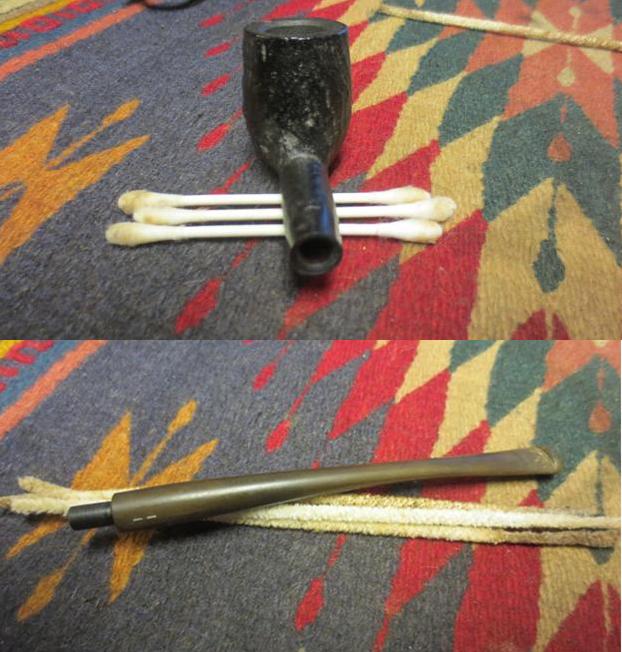
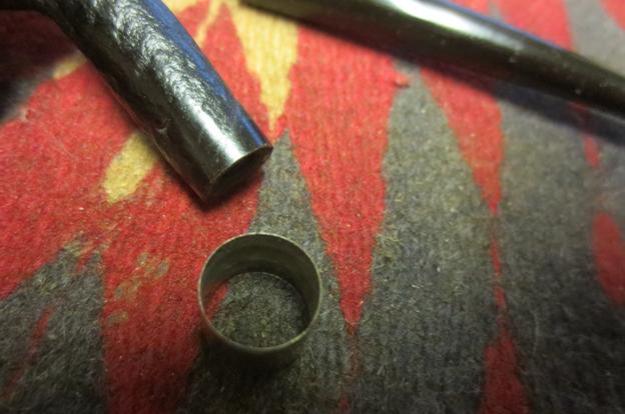
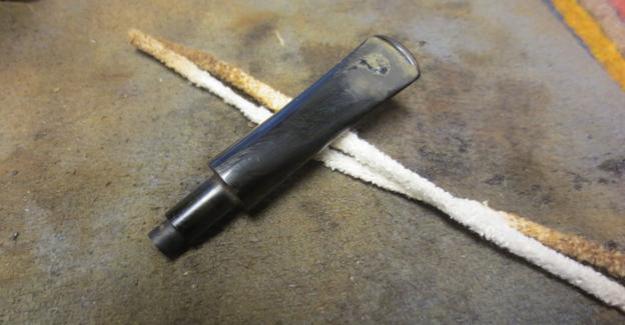
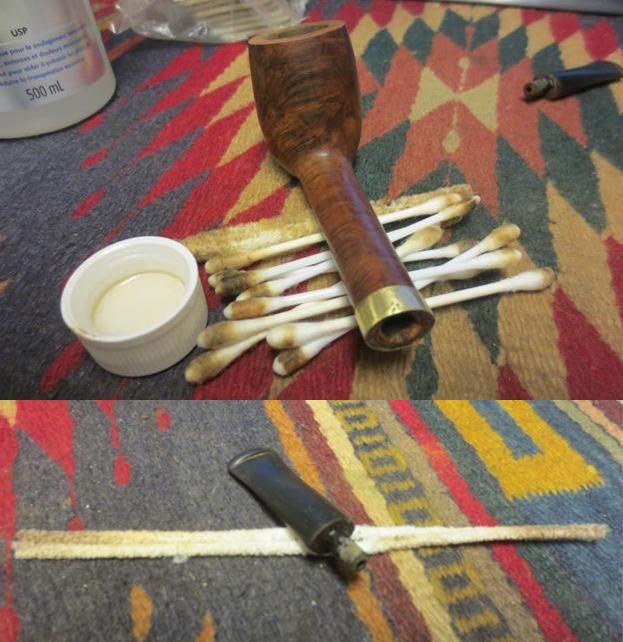
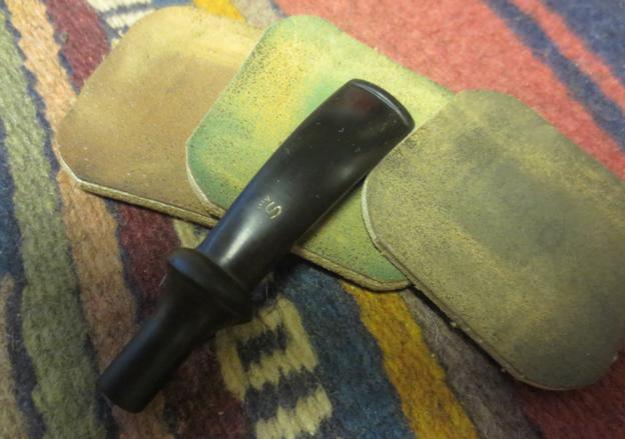
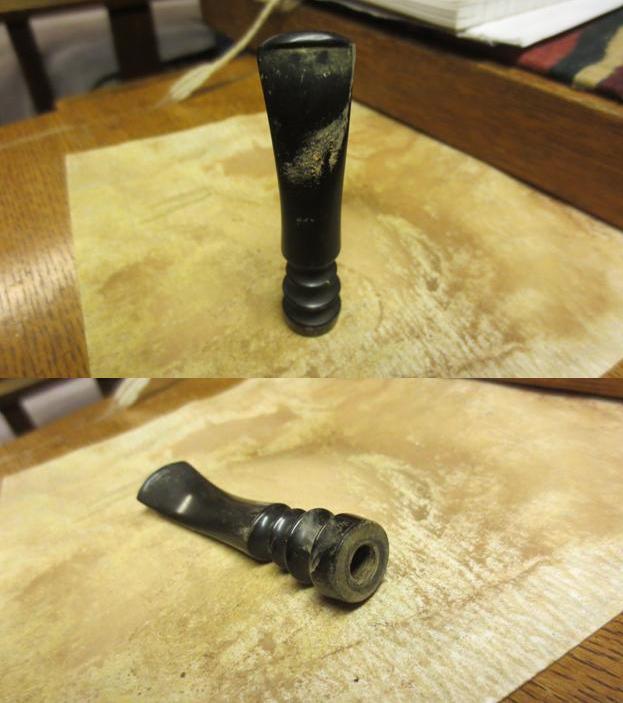
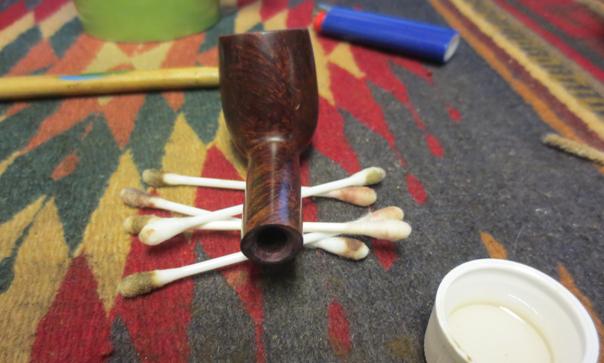
I removed the bit from its bath first and stuck a regular cleaner through the air hole. I was surprised by the remaining blackness of the Vulcanite, which I rubbed dry with a strip of soft white cotton rifle barrel cleaning cloth. 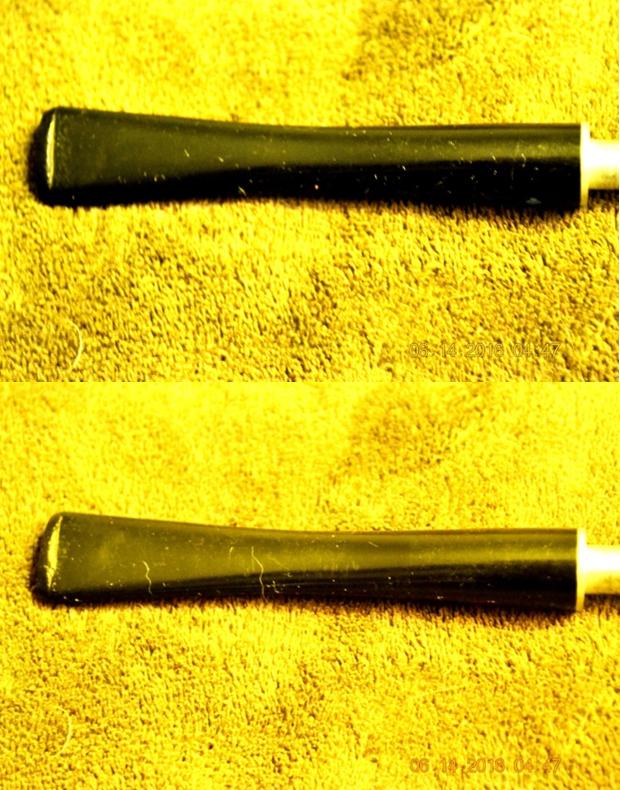
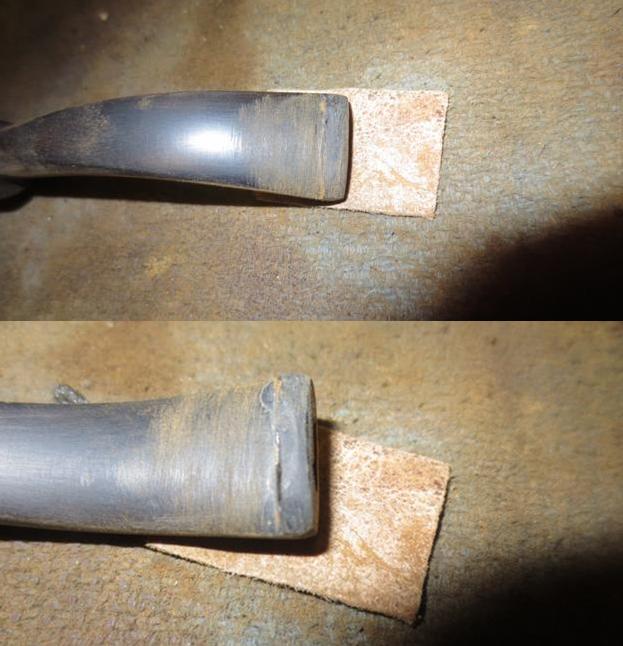
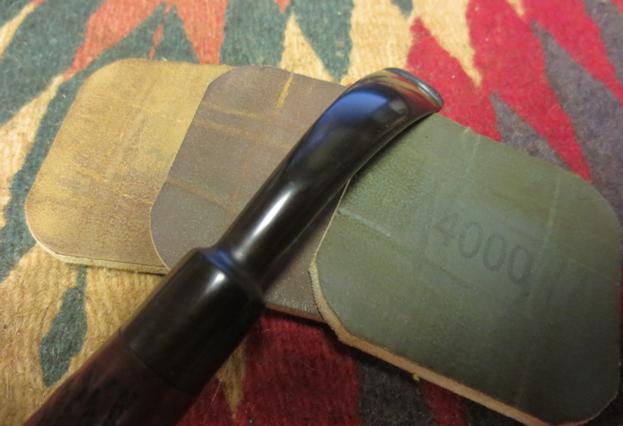
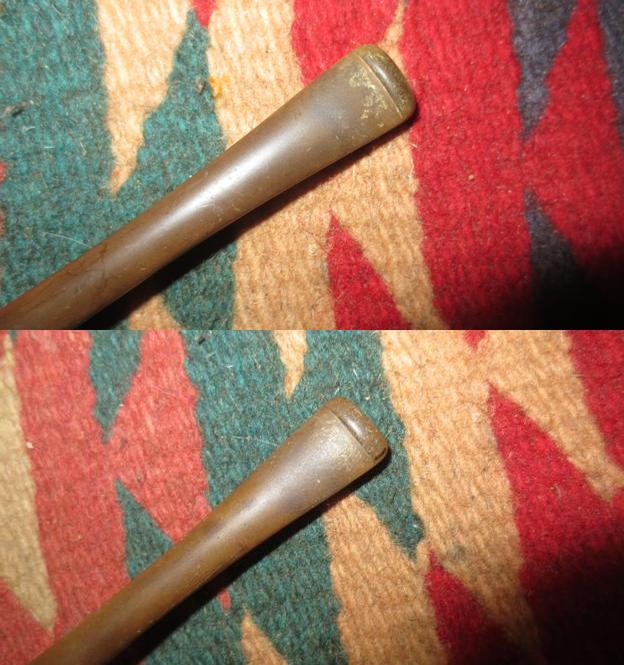
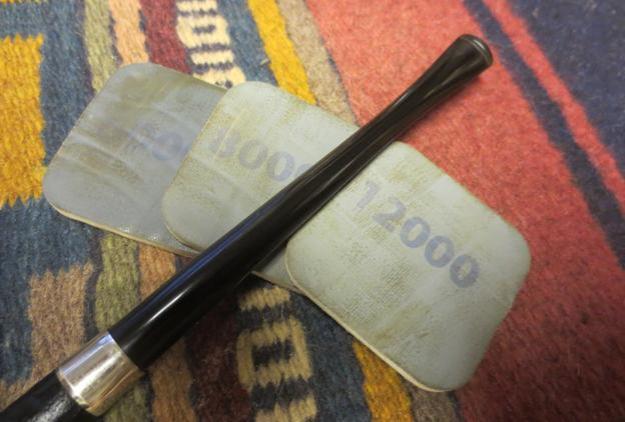
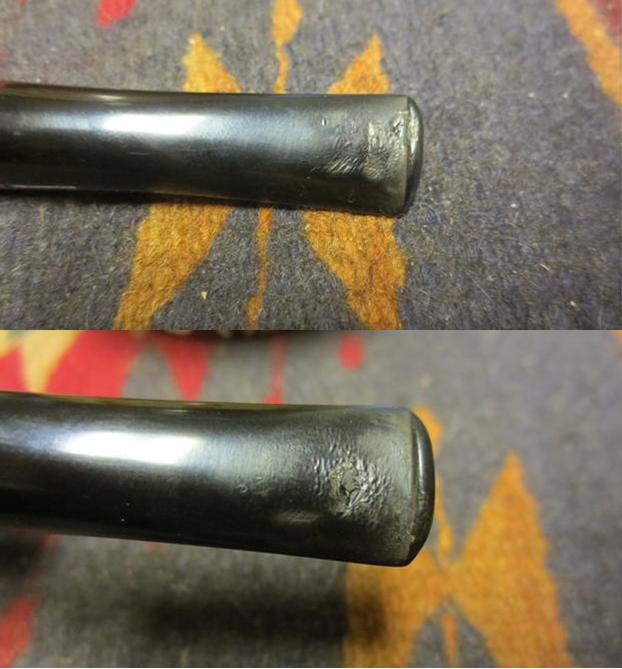
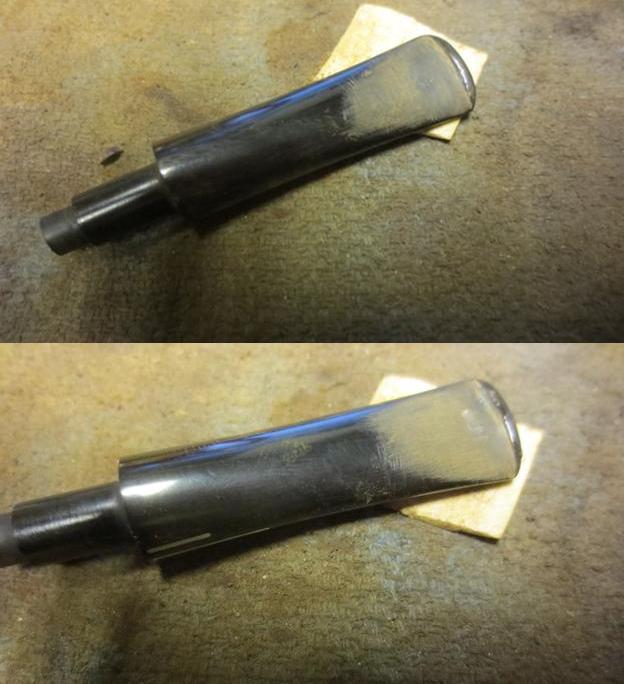
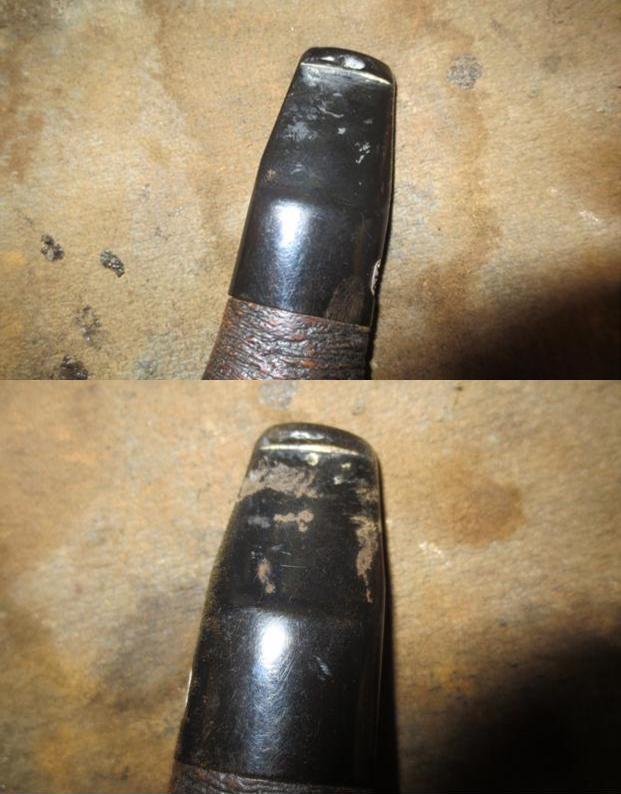
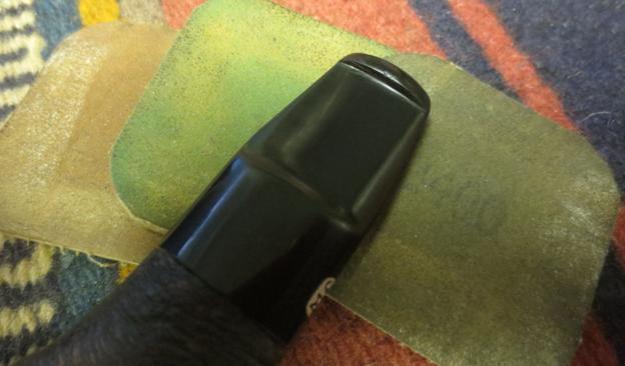
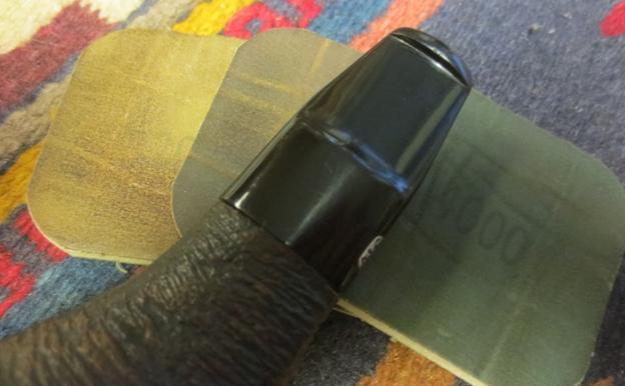
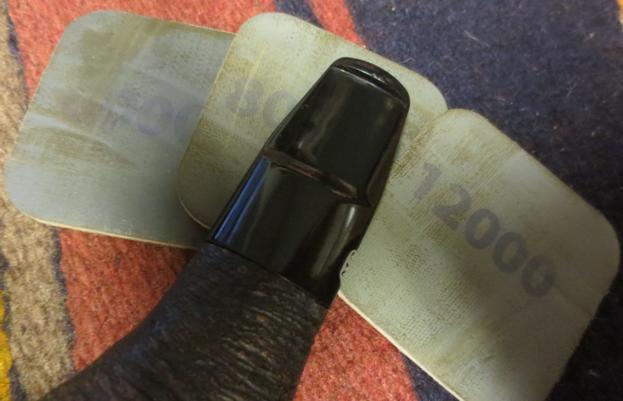
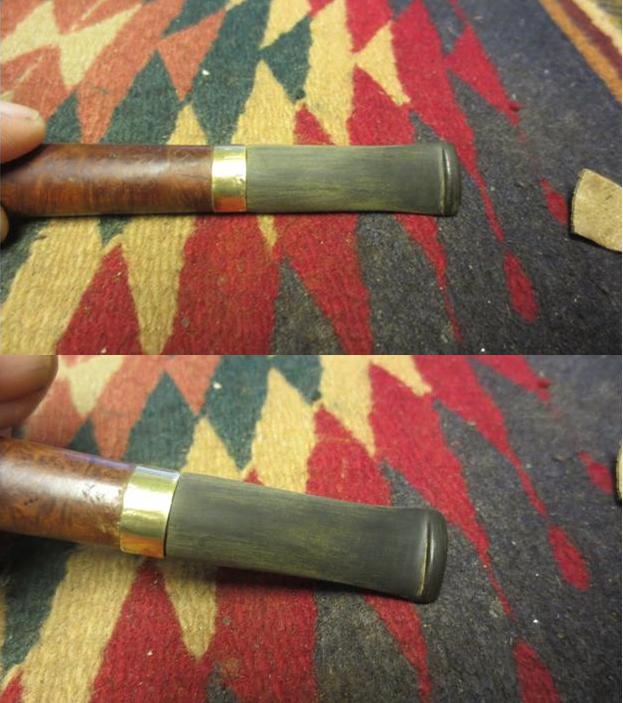
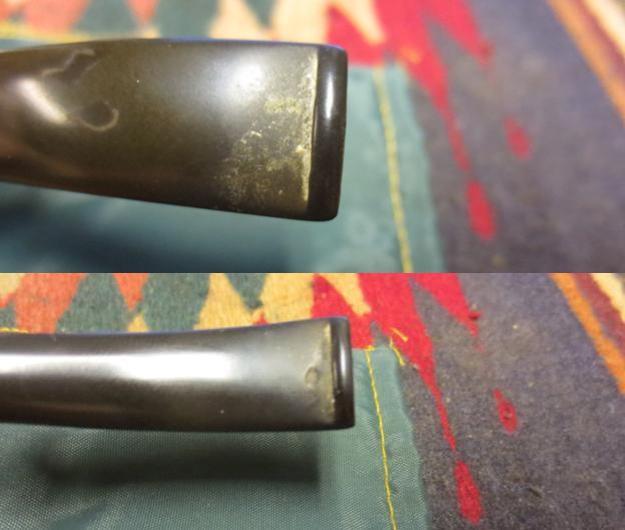
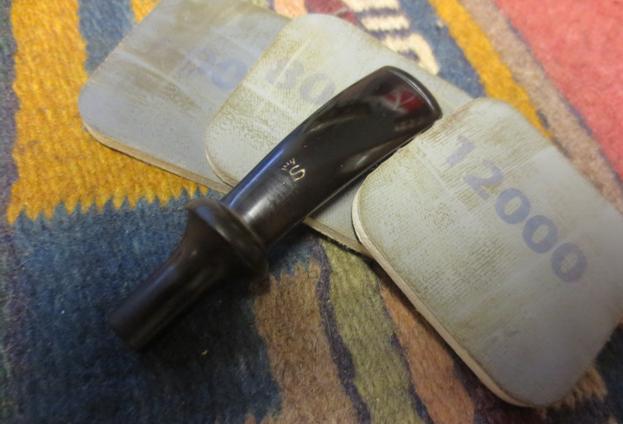
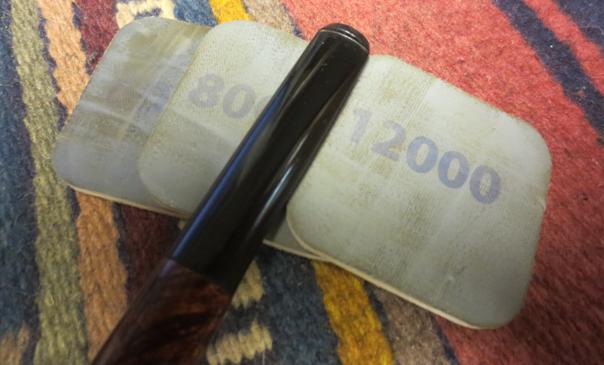
I apologize for my camera’s continuing flash problems, which for the above photos required manipulation of the color and brightness settings in my editor to show the minor scratches near the lip of the mouthpiece. Here it is, again with the editor adjustments, after light sanding with 320-grit paper and wet micro mesh from 1500-12000. I know it’s hard to see the difference, but the entire surface was smooth.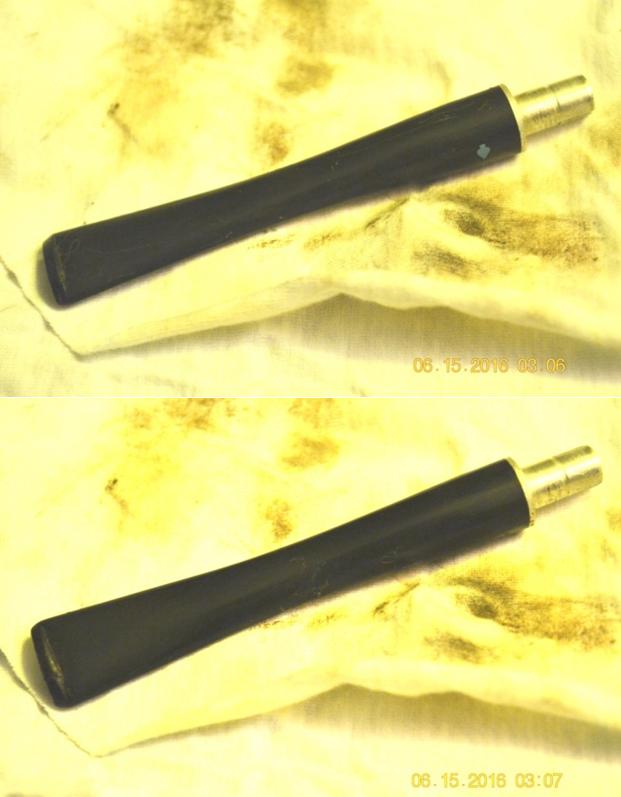
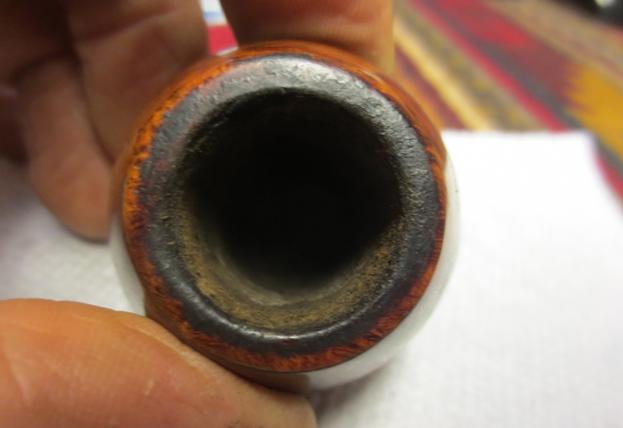
And here’s the stummel after drying with another piece of cotton cloth, running another cleaner through the shank, sanding with 200-grit paper and wiping down with 0000 super fine steel wool. The additional cleaner is from the bit. Note the still dark crevices.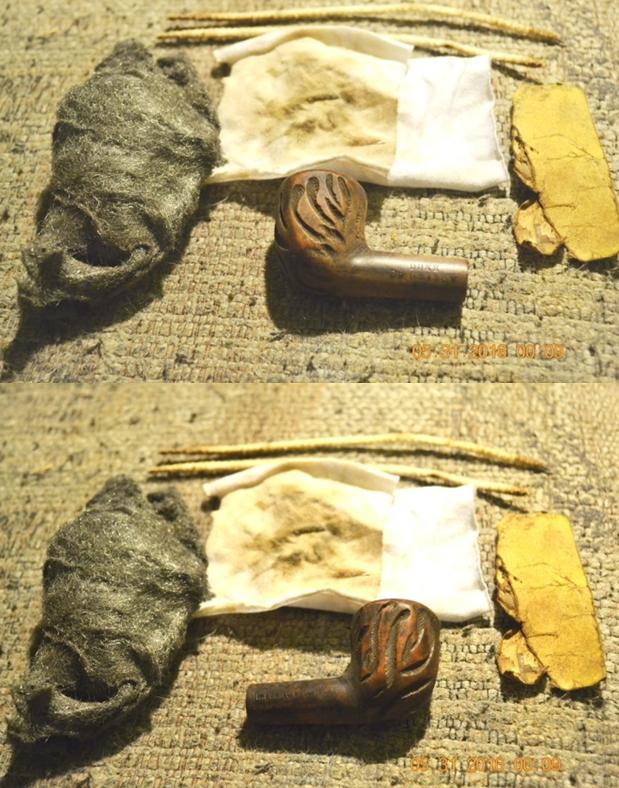
I began an assault on the crevices that turned out to be the crux of the battle to fix this nice, older Dr. Grabow. I started with super fine steel wool, squeezed into small enough edges to fit into the crevices. This was a tedious process, but it did improve the situation.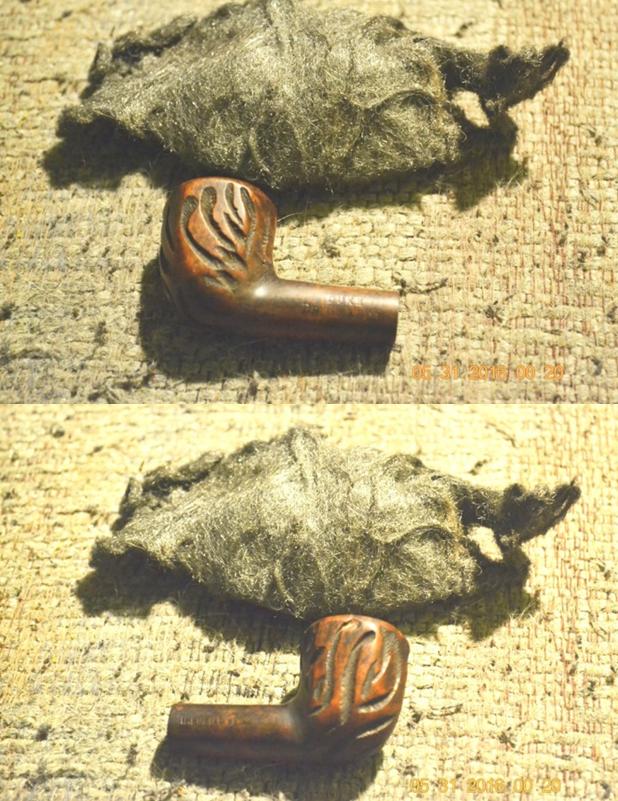 I tried 180-grit paper folded to maneuver the edge into the pesky crevices, and the result was an improvement in spots but still disappointing. I only show the next photos as emphasis of the point.

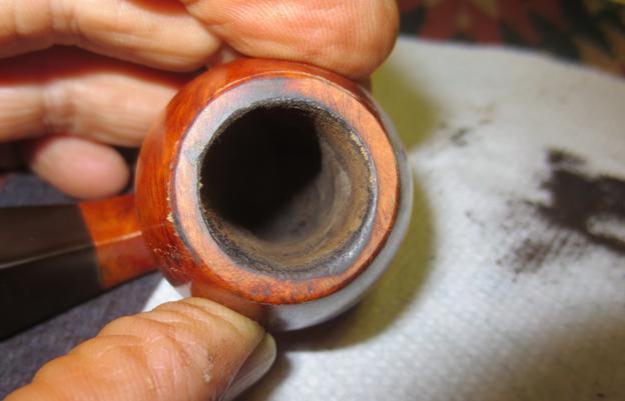
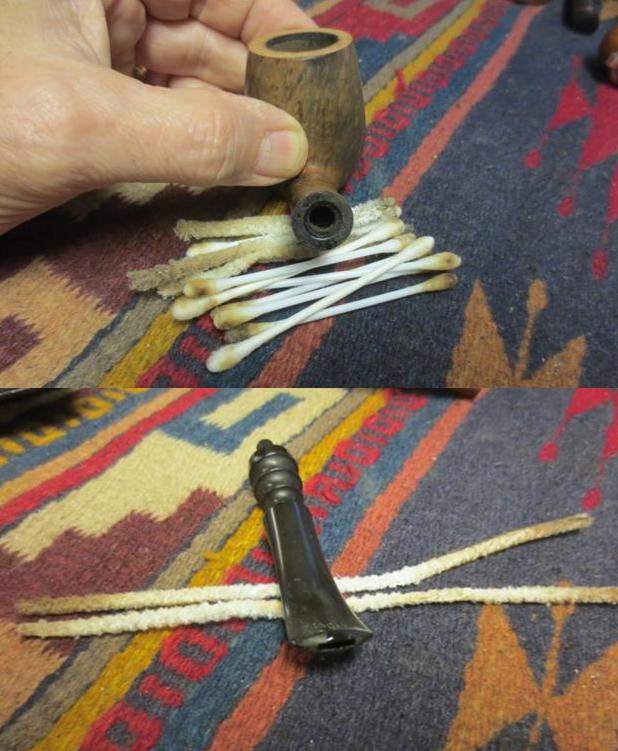
 For the first time in a long while, I concluded a second Everclear soak was needed, as I had not really let the first one complete. The success is clear, following another drying with cotton cloth and scrubbing the shank more with both ends of an ear cleaner. I flashed back to my childhood, at times when such cleaners came out of my ears in about the same condition.
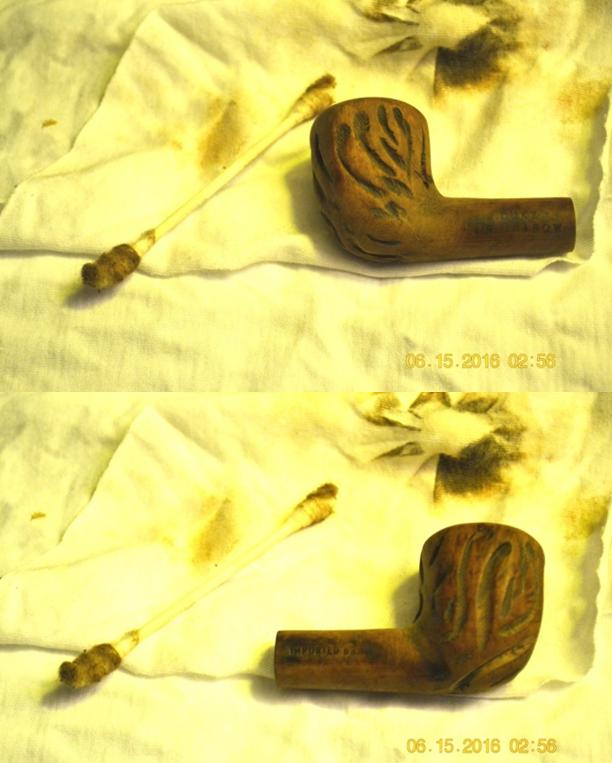
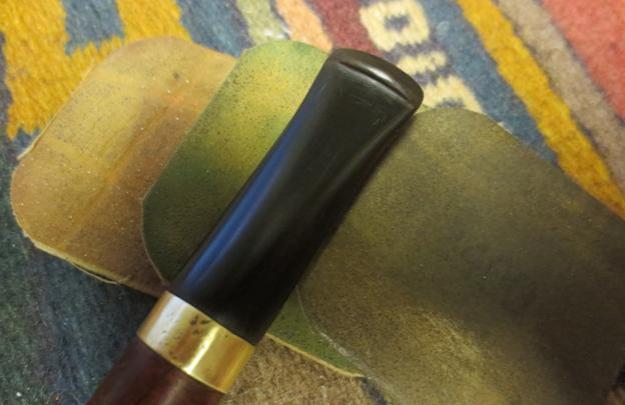
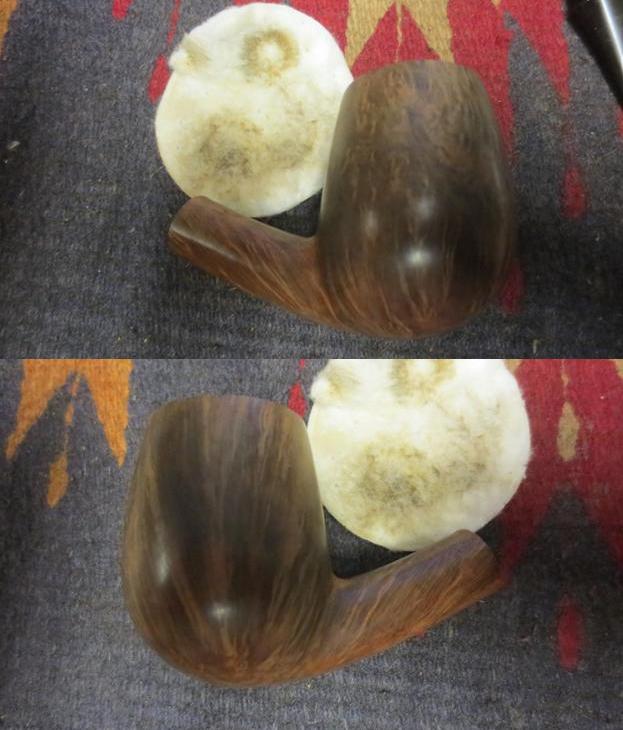
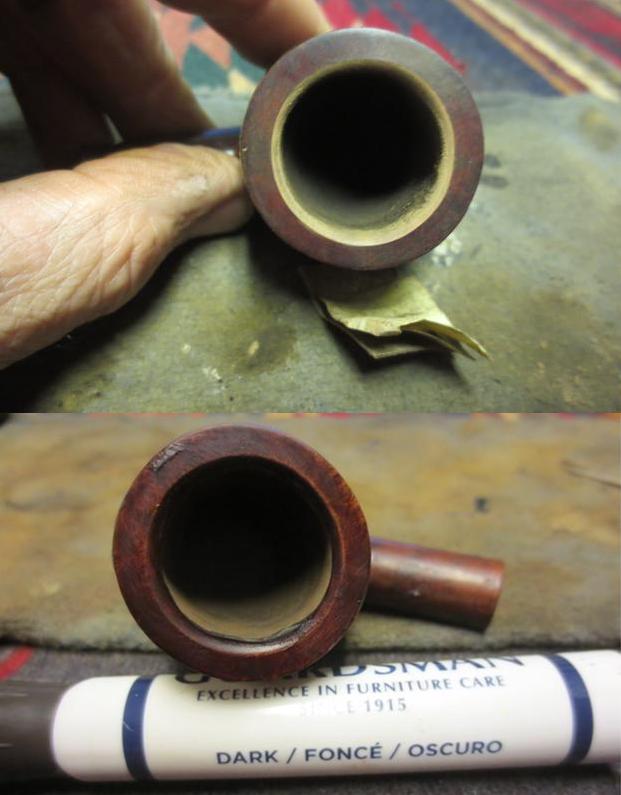
 The task of ridding the crevices of unwanted darker color accomplished, I prepared the pipe for the final steps, very gently using 320-grit paper again and the full scale of micro meshes.
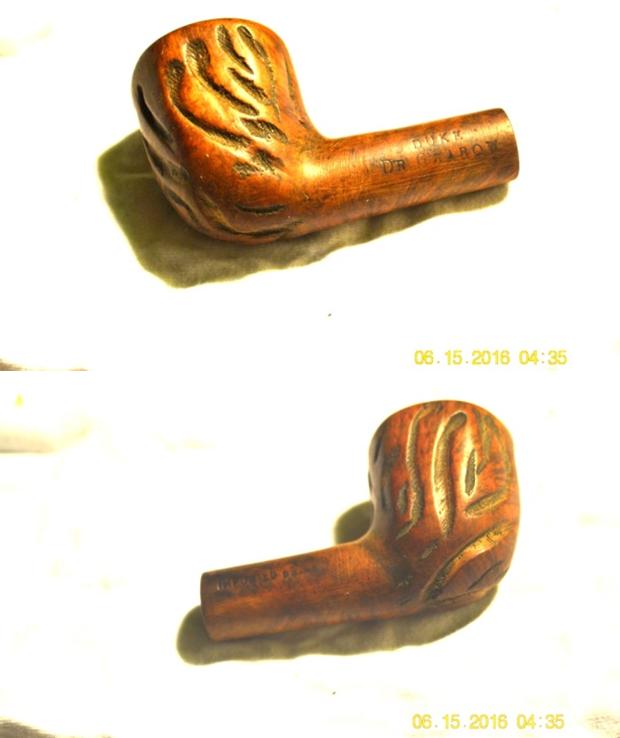

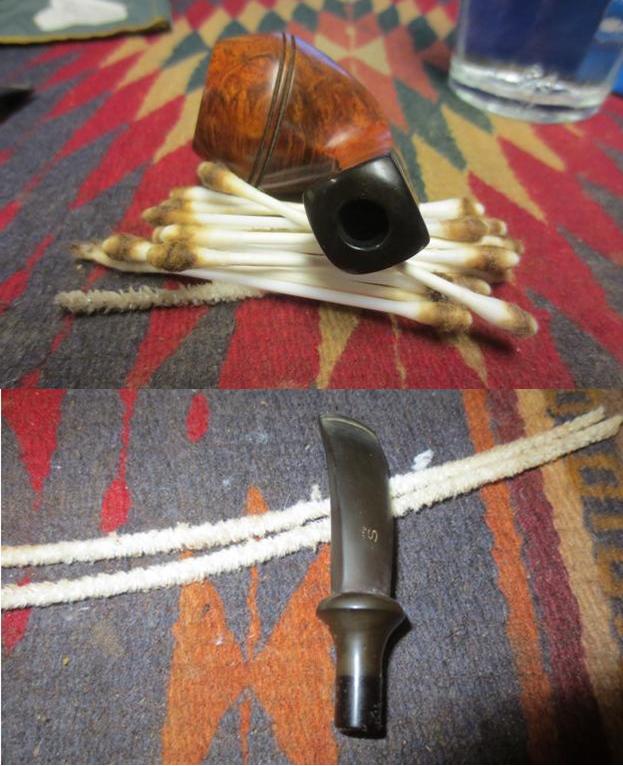
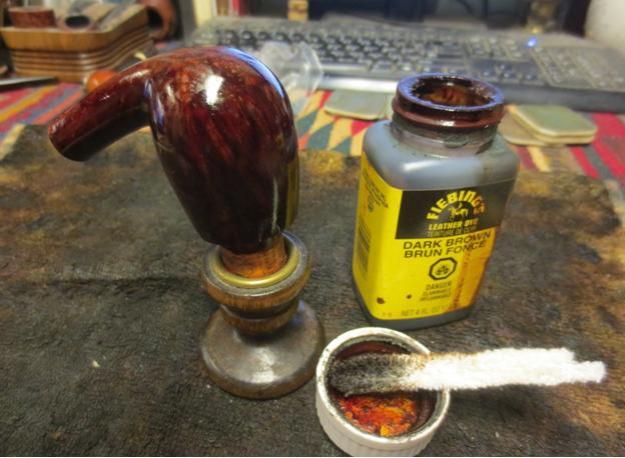
 I retorted the pipe, and for the re-stain used Fiebing’s brown alcohol-based leather conditioner and flamed it with a lighter.
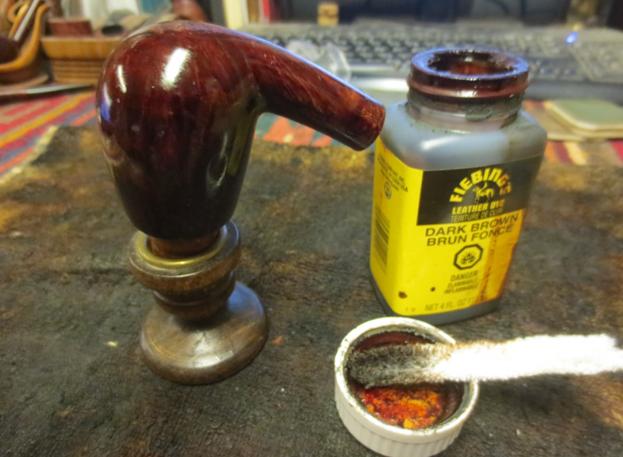
 A clean up of the char with 2400 micro mesh and a little reduction of the darkness with super fine steel wool worked well.
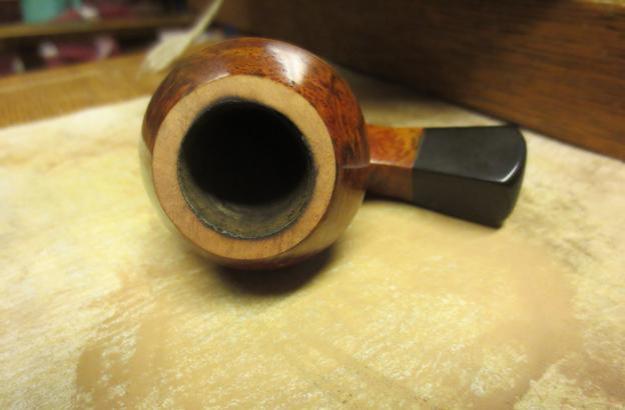
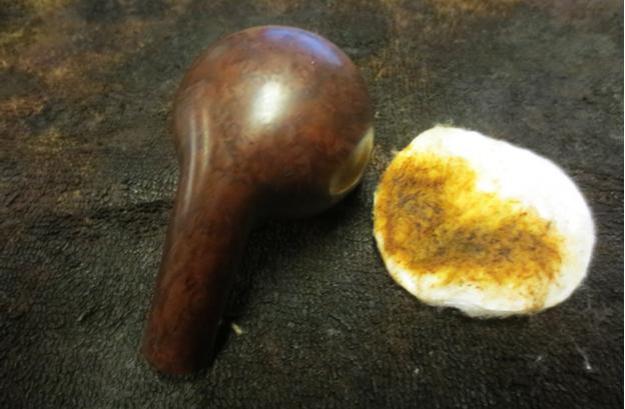
 The fine briar was ready for Halcyon II. For once I laid it on thick.
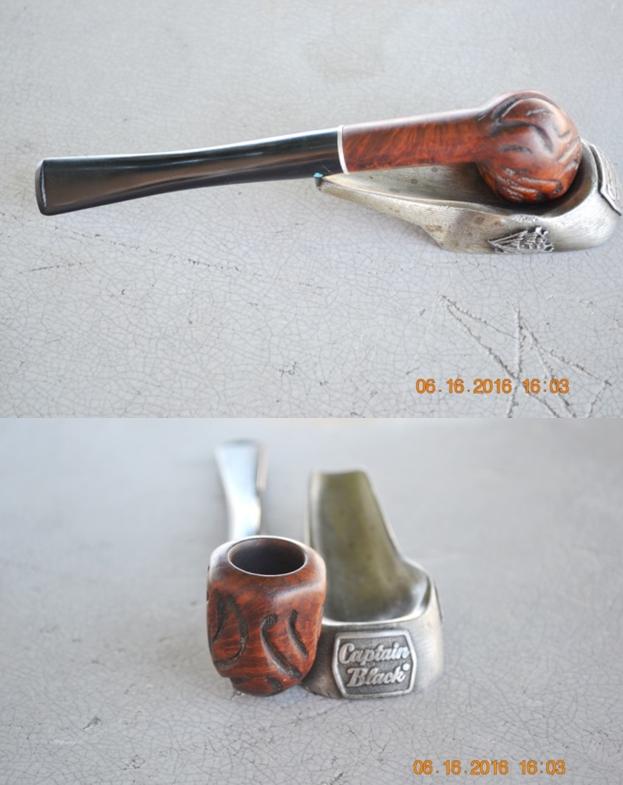
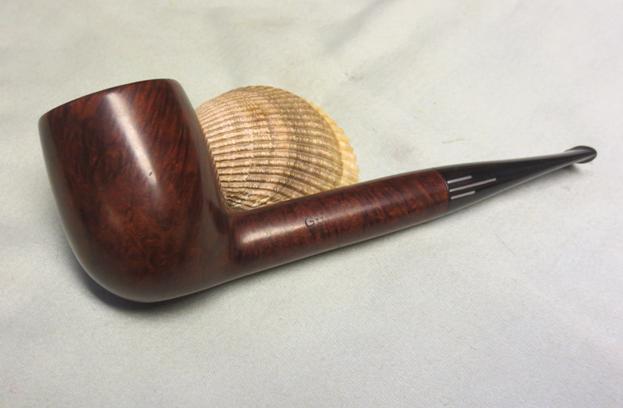
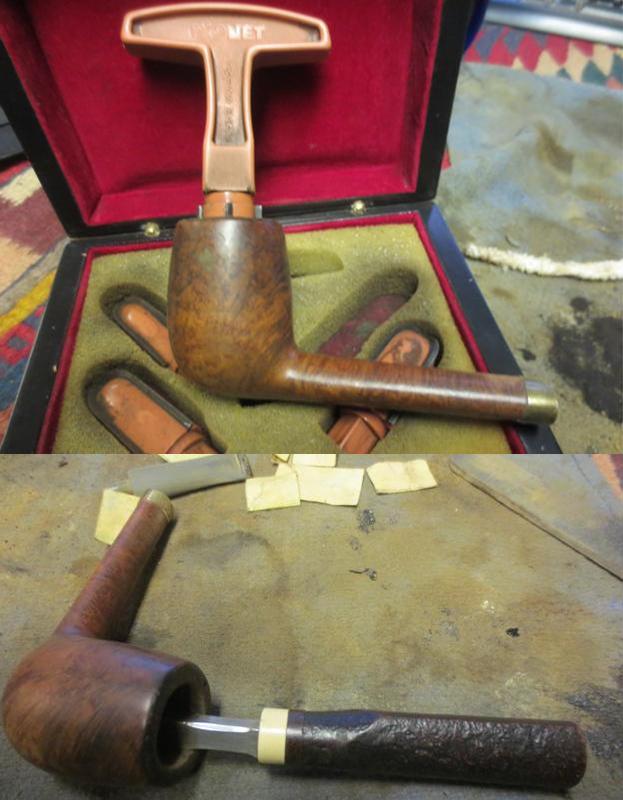
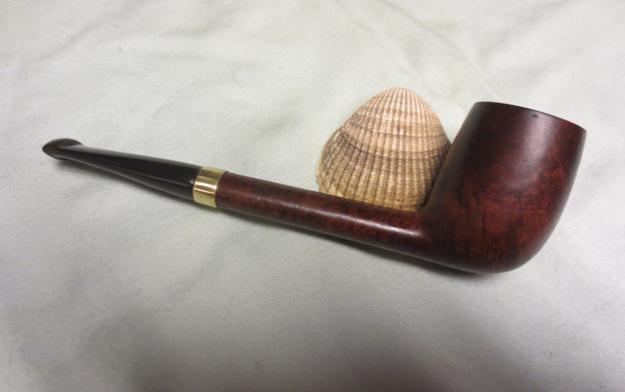
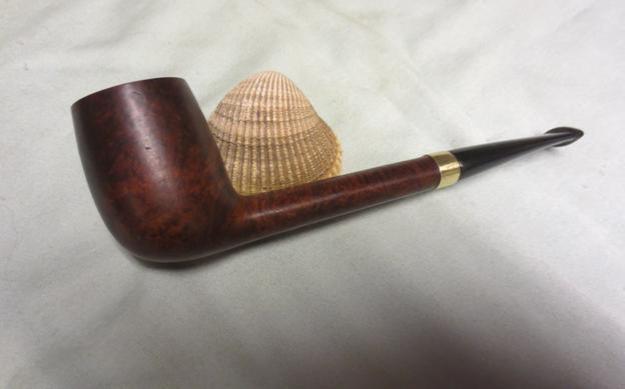
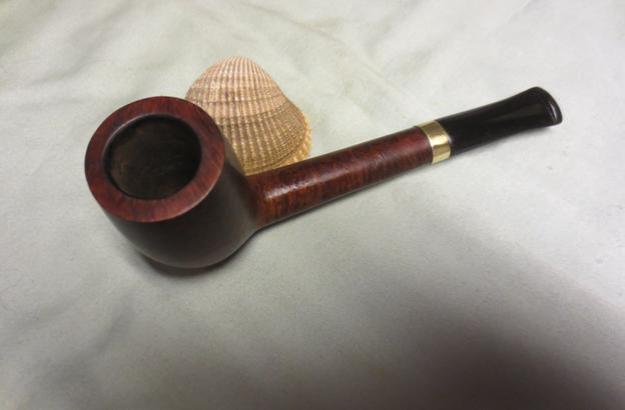
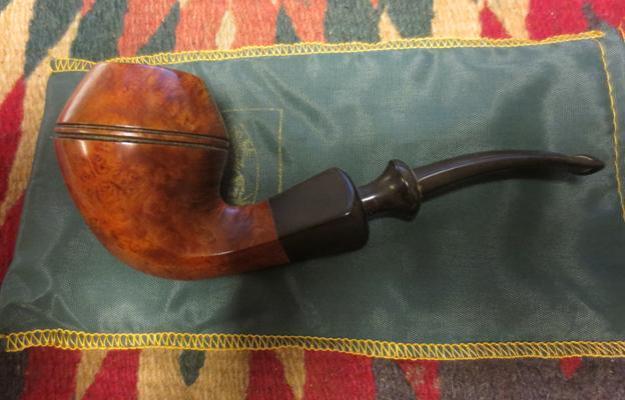
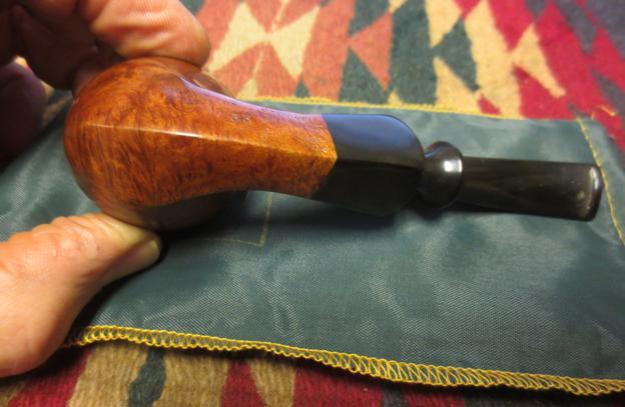
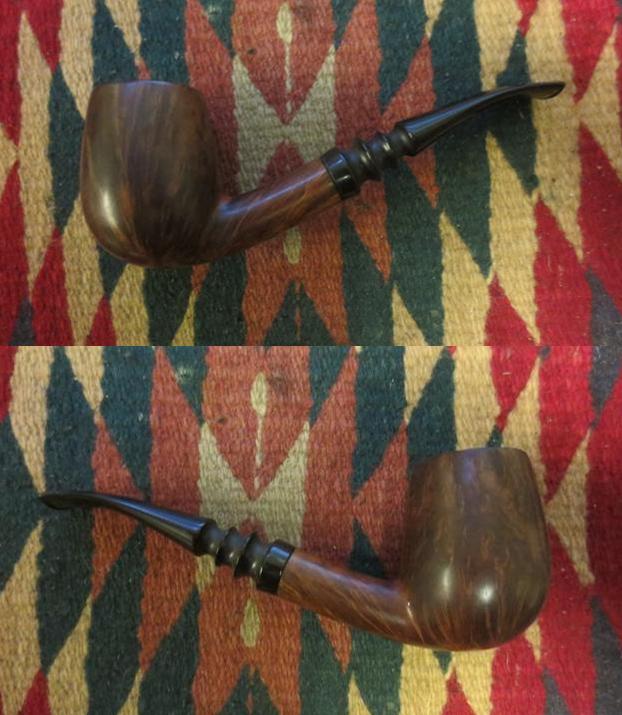
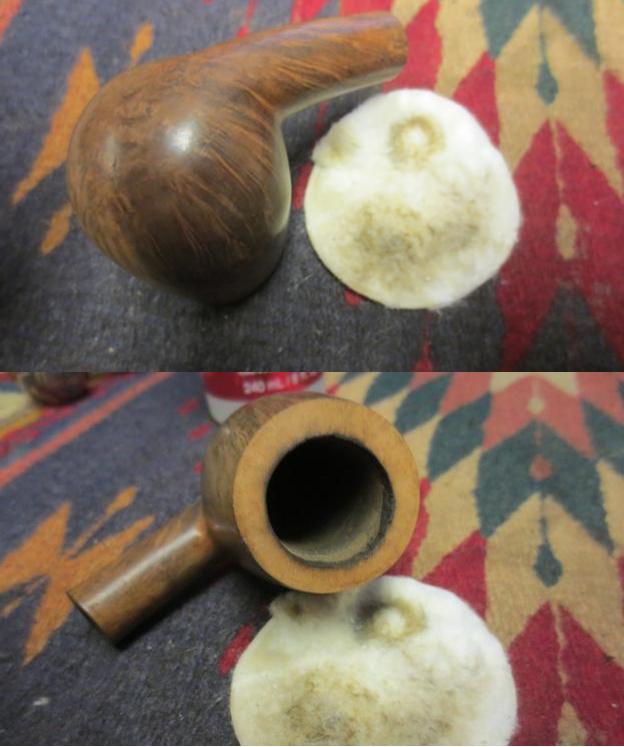
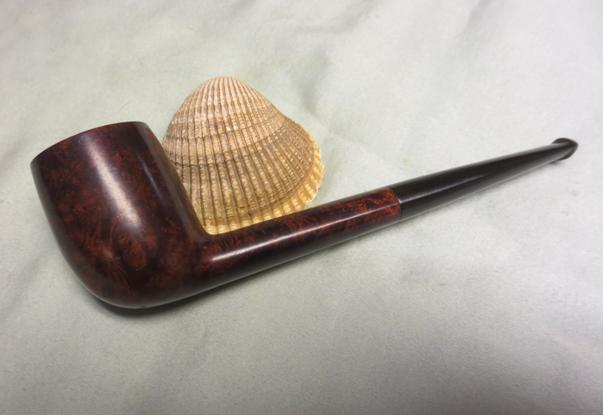
 When the wax compound had time to set in, I wrapped it in a cotton cloth and wiped it vigorously for about a minute. Then all that was left was buffing on the electric wheels, with red and White Tripoli, White Diamond and carnauba on the bit. To my eye, the wood needed a little more gloss, so I added some carnauba with the wheel, as always followed by the clean buffer. I was more happy than usual with the final results. Please excuse the unfortunate symbol in most of the following shots. I had rushed outside of the club where I was for open sunlight and didn’t notice until I saved the photos from my camera’s memory card to the computer hard drive, by which time the sun had set.
 CONCLUSION
For a weathered old Dr. Grabow, this restoration provided some interesting lessons to me in working with a carved pipe. My dear friend and mentor, Chuck Richards, has always advocated a toothbrush for the crevices, but try as I have, that venerable method has never worked for me. Every situation seems a little different. This one required attacks from several different directions.
SOURCES
http://www.drgrabow.net/dr-grabow-pipes/
https://pipedia.org/wiki/Dr._Grabow
http://www.geocities.ws/lokomac8/grabow.htm
http://drgrabows.myfreeforum.org/index.php?component=content&topicid=15&postdays=0&postorder=asc&start=40
http://www.drgrabow-pipe-info.com/drgrabowp03.html
http://www.pipephil.eu/logos/en/logo-l4.html M. Linkman & Co.
http://www.pipephil.eu/logos/en/logo-drgrabow.html
http://www.drgrabow-pipe-info.com/pipenames09aa.html Date guide
https://1fa1282d-a-62cb3a1a-s-sites.googlegroups.com/site/seanspipes/home/dr-grabow-shape-charts/drg1988shapechart1.jpg?attachauth=ANoY7coHvB5qOmn44n9H_4wsnE06IzBJemJ0T5wa-FPbZh08FdvUUxghql7wG8V643ehj8Lj3Qjz4dhyUHGqC8PjXVHPy7yUihii1MNoOToCN-ZApjh36oFXVhS77OqW1r_meXdwIMaTYJP391i8GxBuwipjRfJyF-PbV4dNJrnK4684TJR7xnektgvTVNZ52aHs8nJKdigkmmVsgS06lld4DlOYIxYa2zismOQMQ1Lavw-0v_HcC4jddbKt2qVHTLKognYdJ2tD&attredirects=0 Slim Pear Shape 74
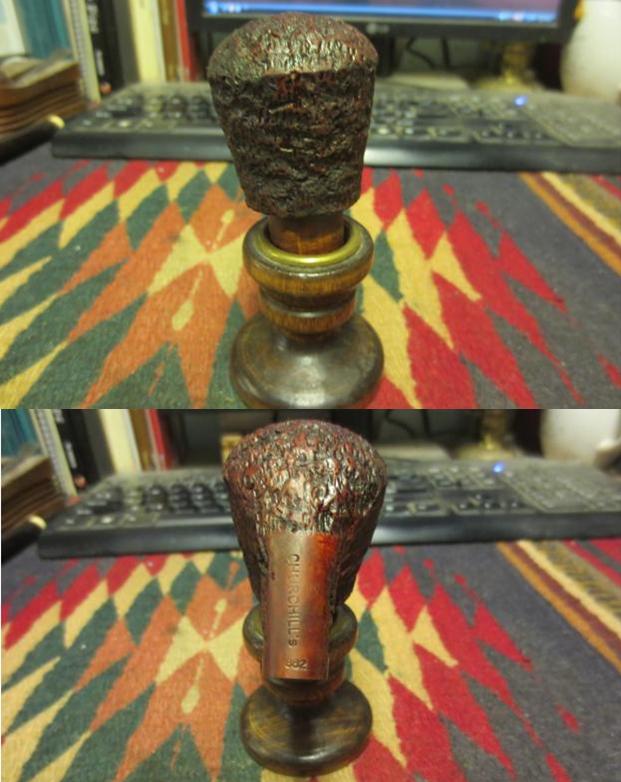
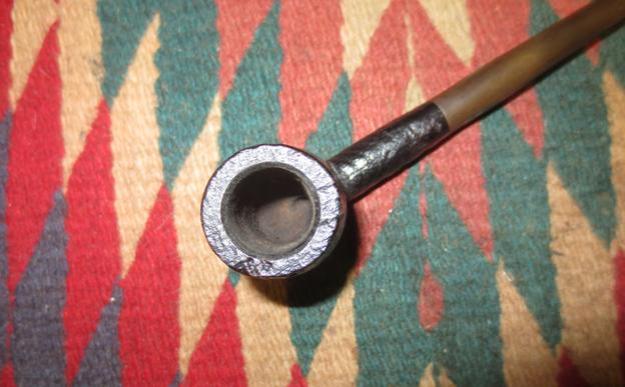
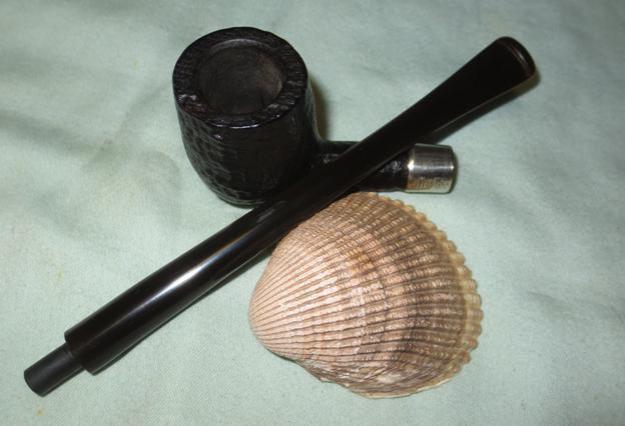
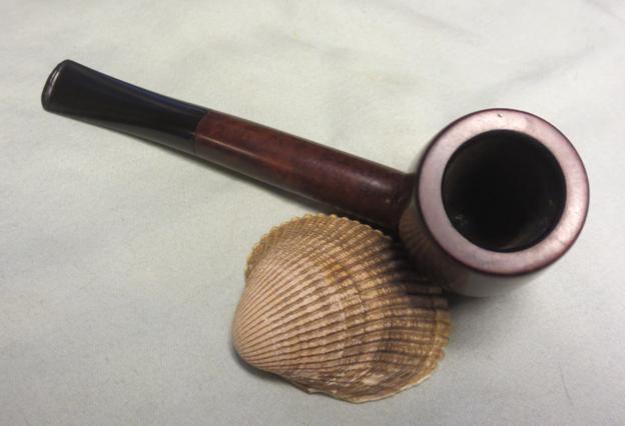
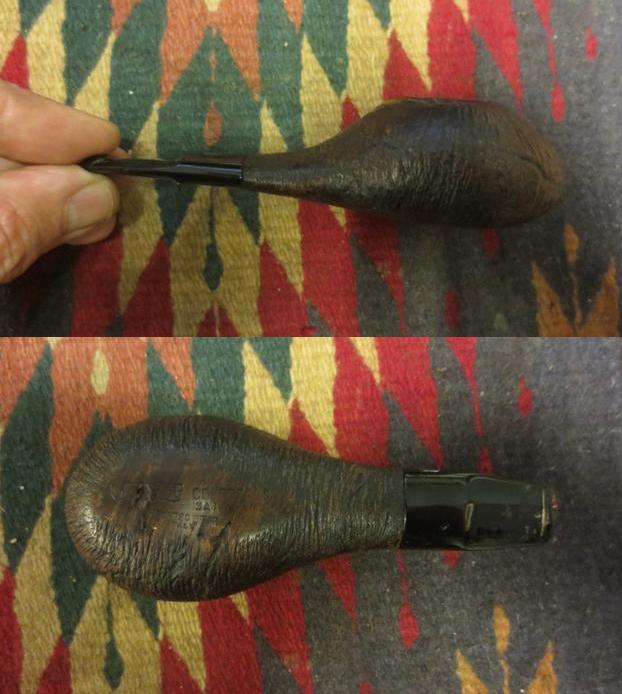
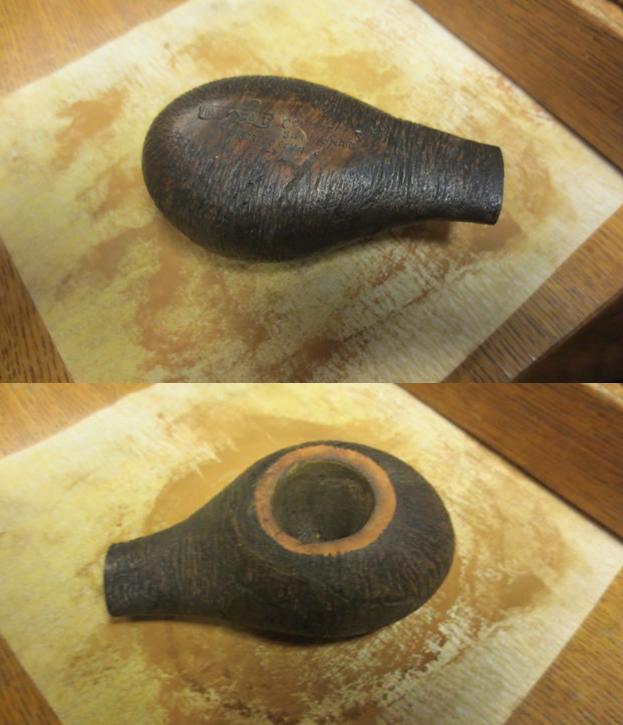
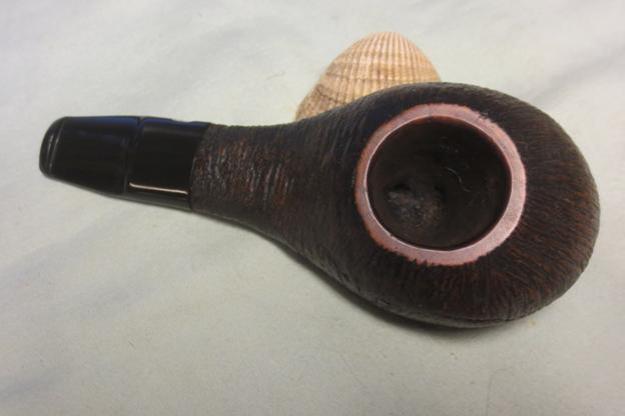
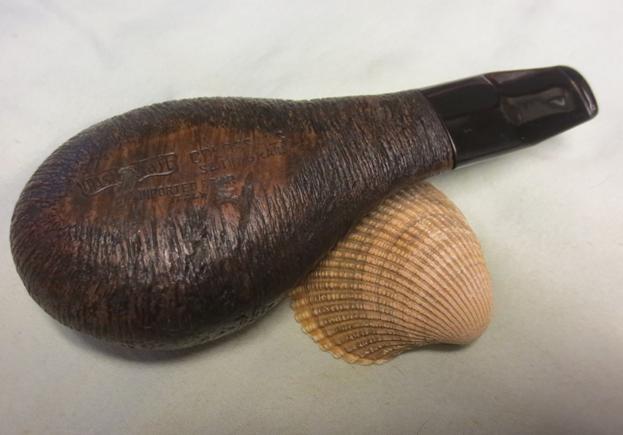
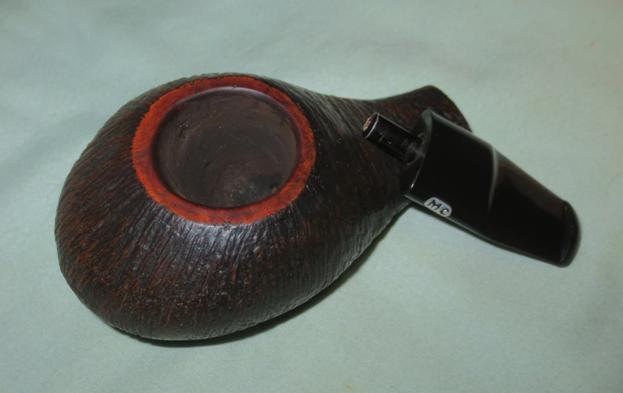
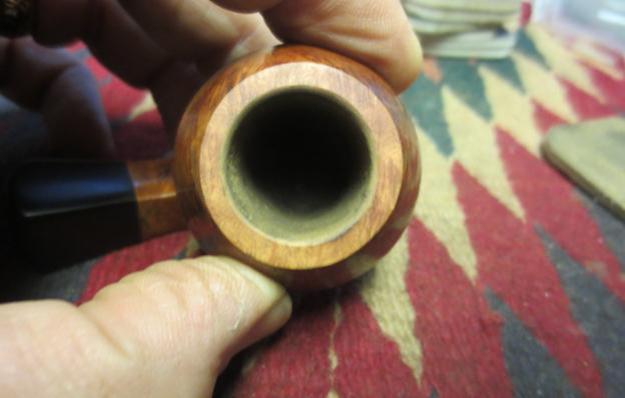
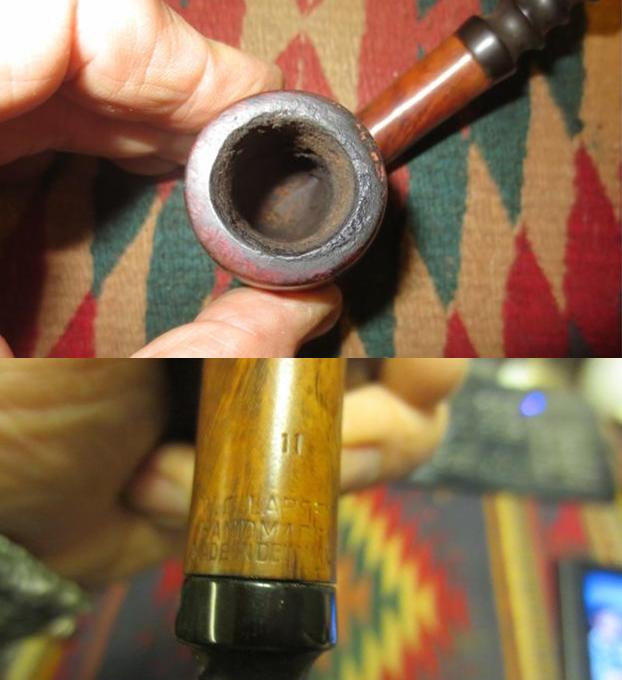
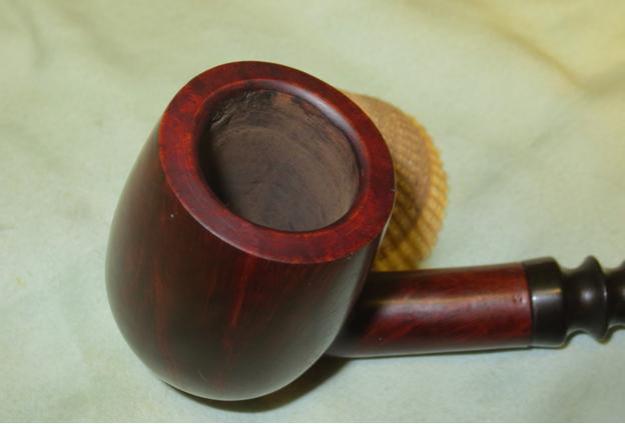
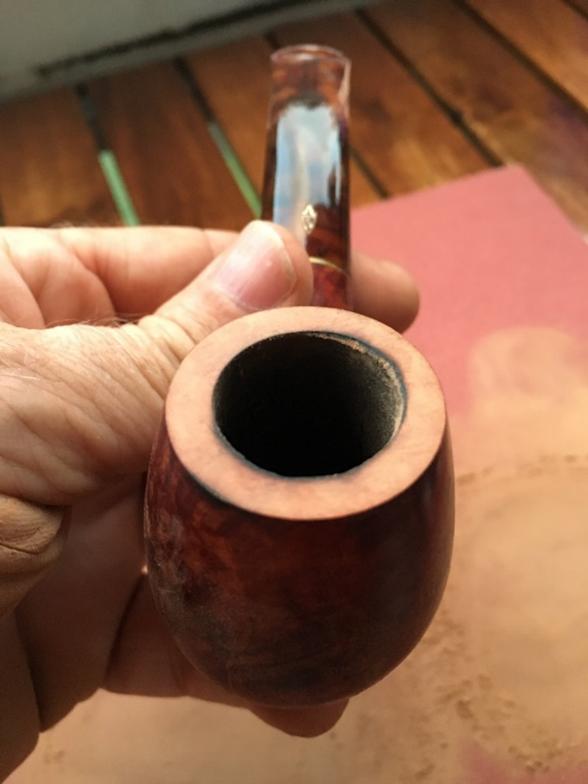
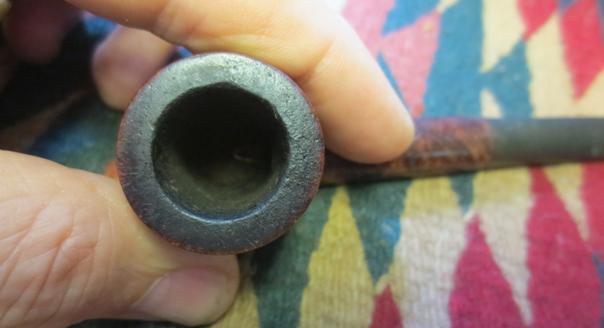
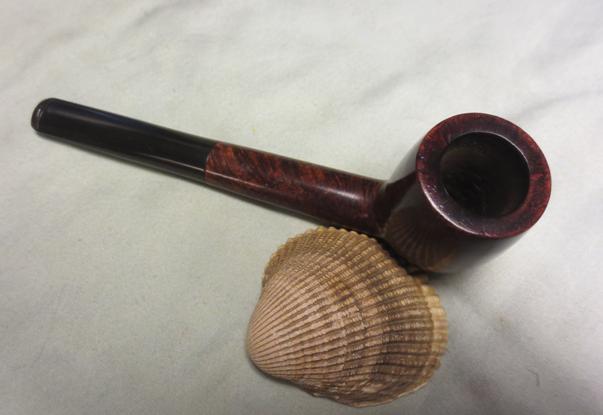
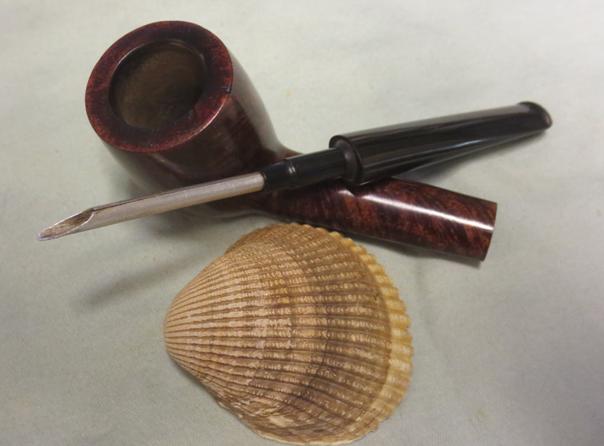
 I took a close up photo of the rim and the stamping on the underside of the bowl. The rim is dirty but the rustication is in good shape with no burn marks or damage. The stamping is also very clear.
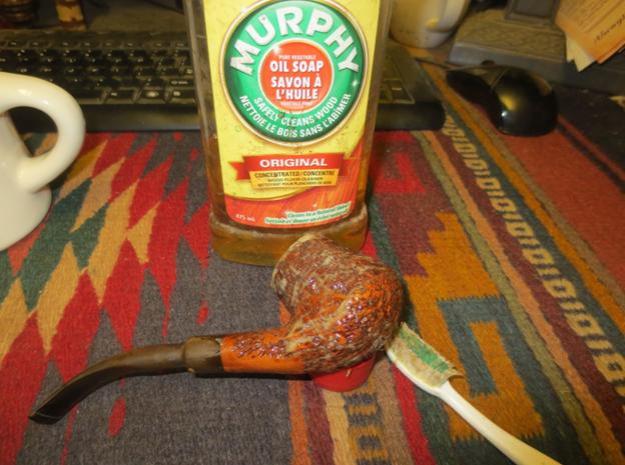
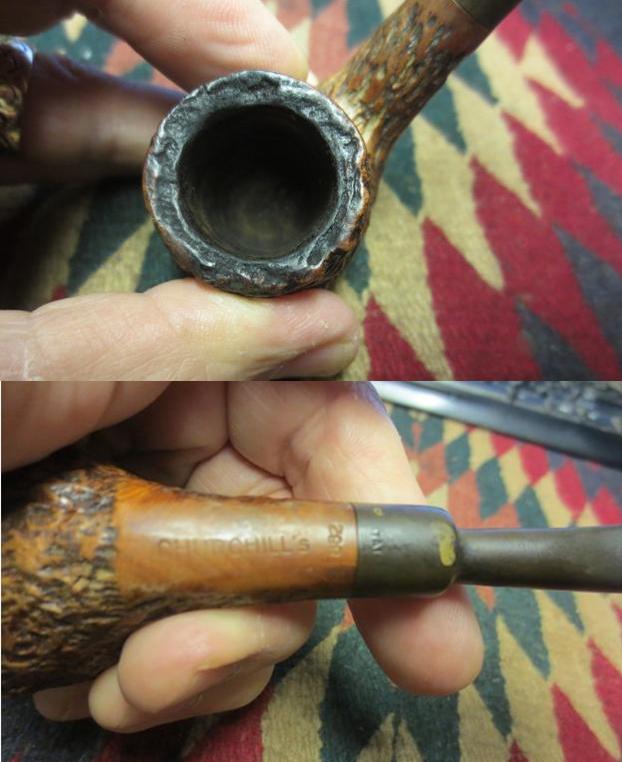 I scrubbed the rim with a brass bristle wire brush to remove the tars and oils that had built up there. Once it was loosened I scrubbed it with a tooth brush and Murphy’s Oil Soap to clean off the grime in the finish. I rinsed the bowl with warm running water to remove the grime and soap.
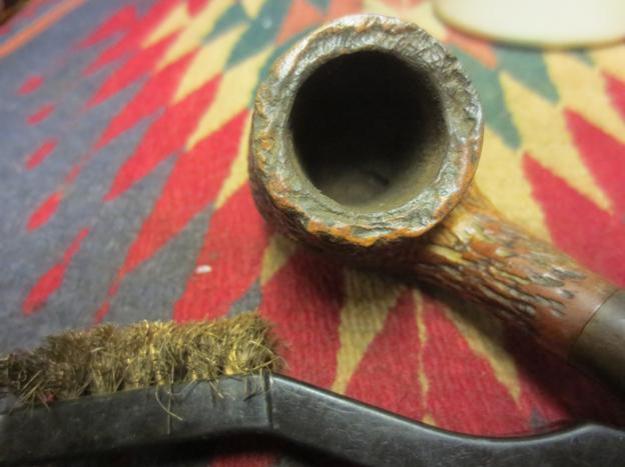
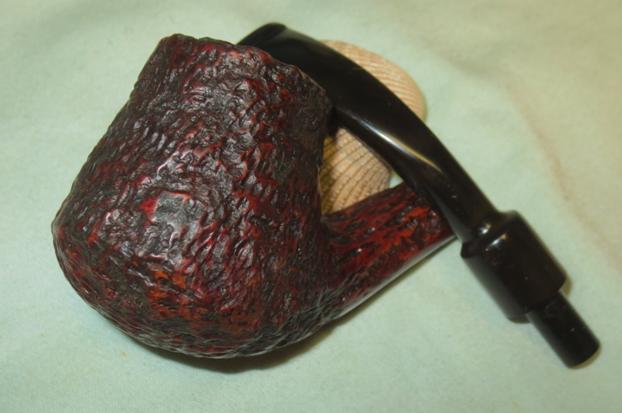
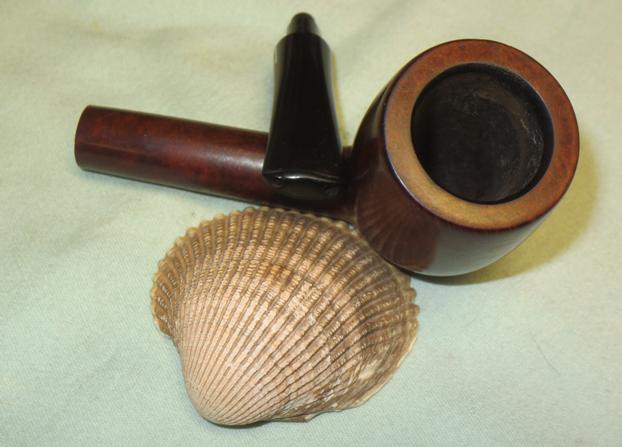
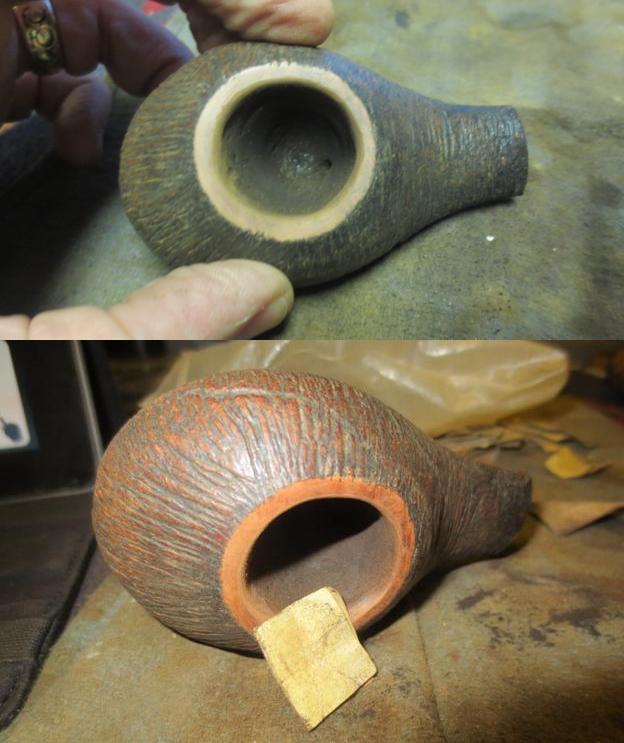
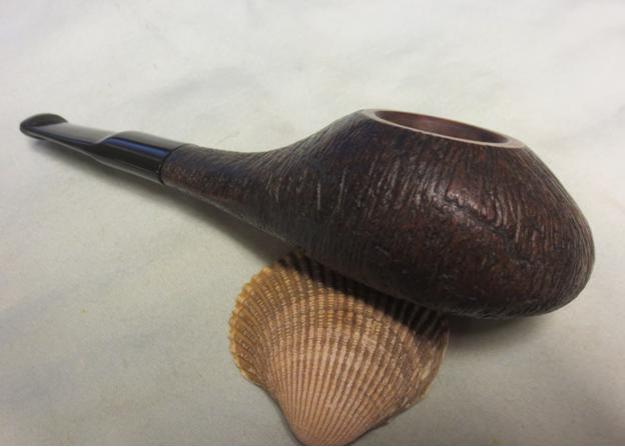
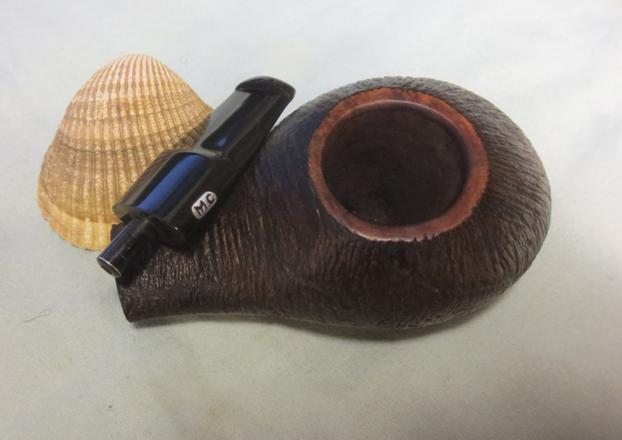
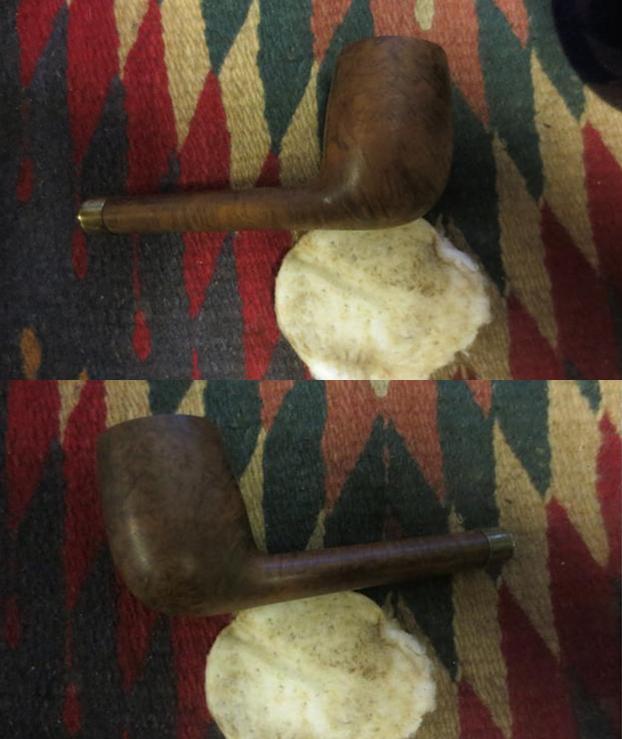
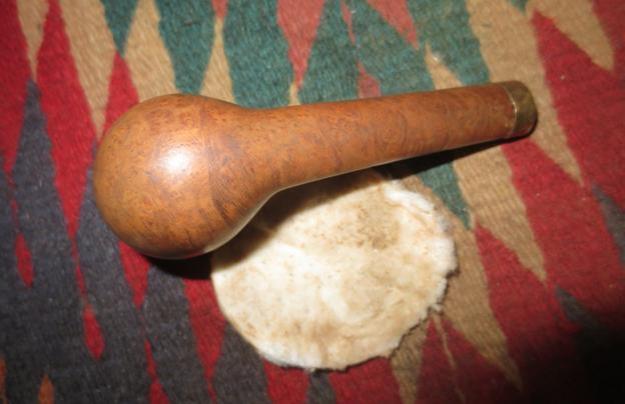
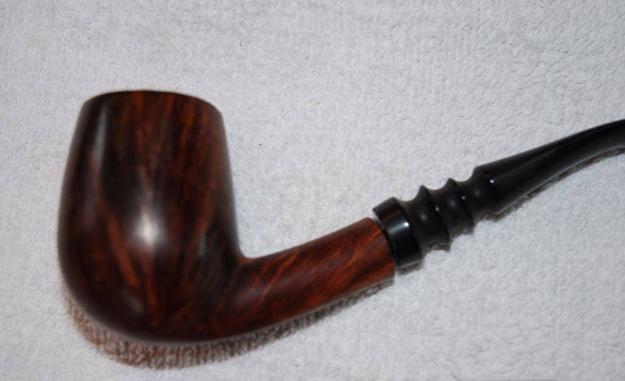
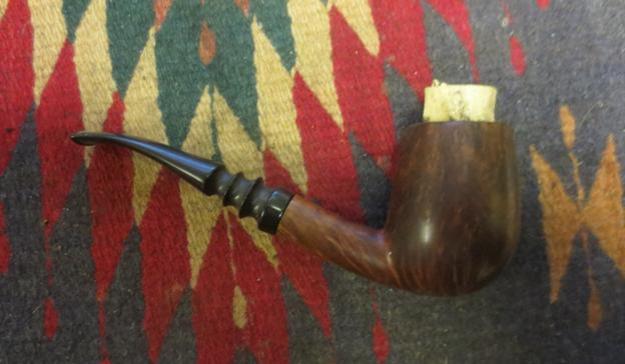
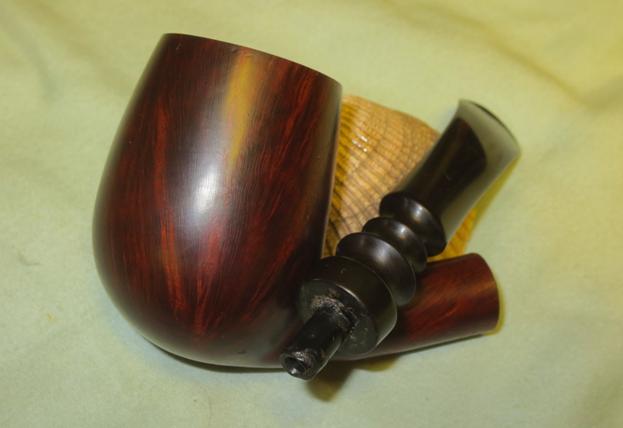
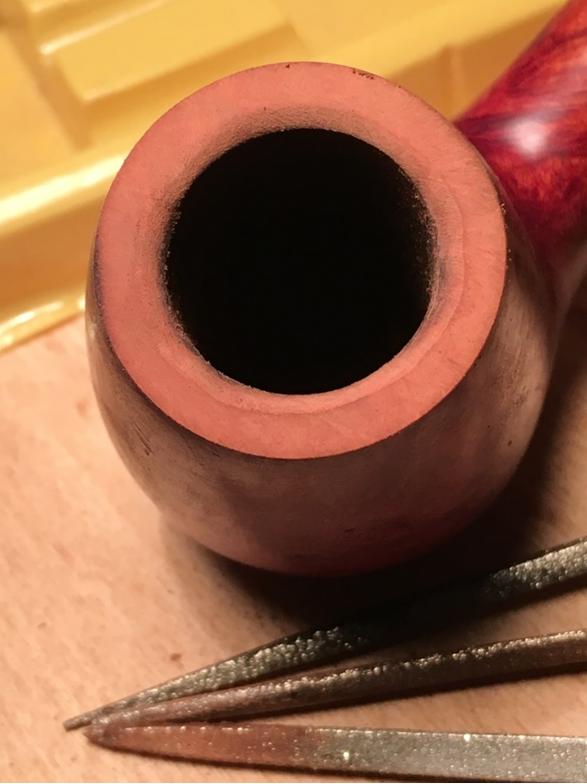
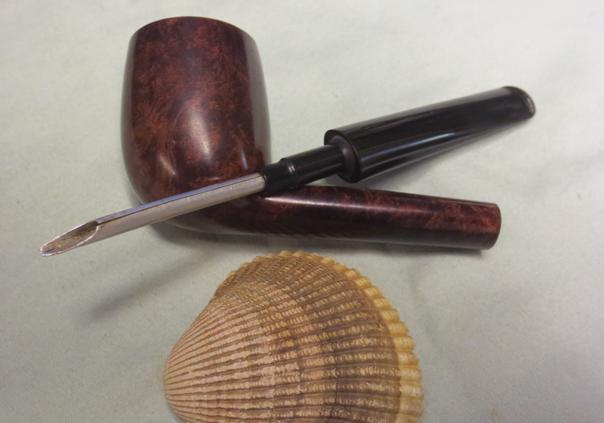
 The next photos show the cleaned finish on the pipe.
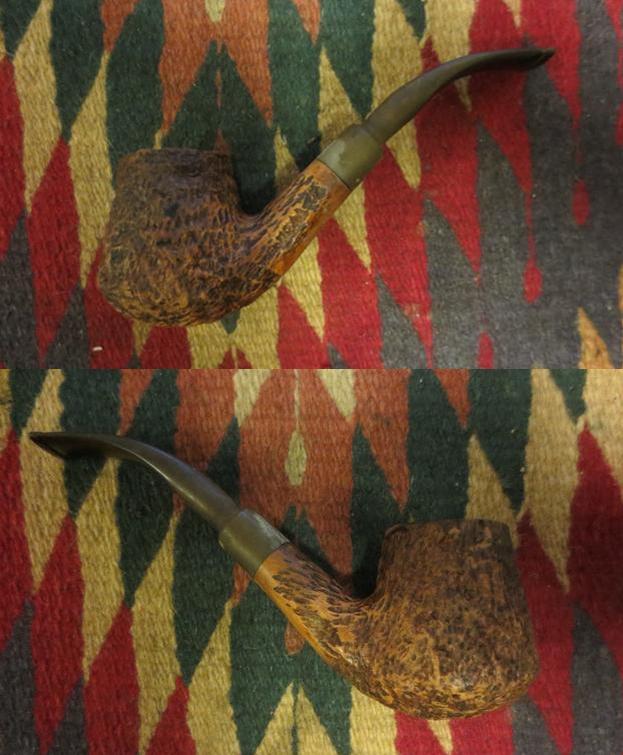
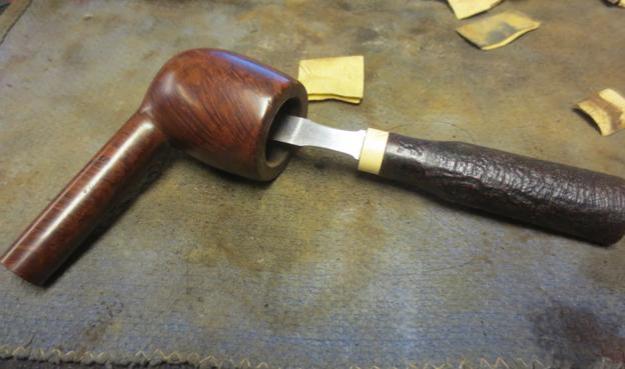
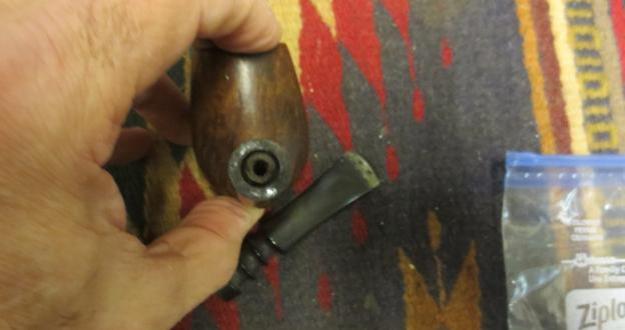
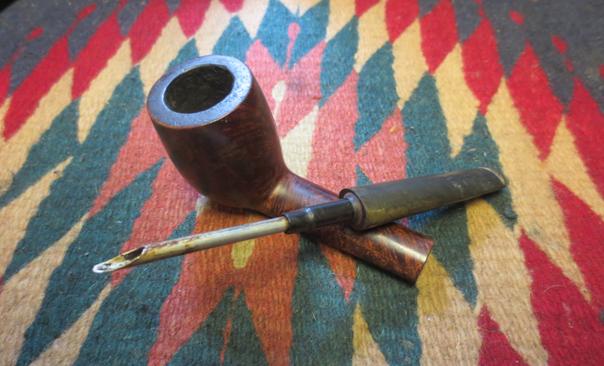
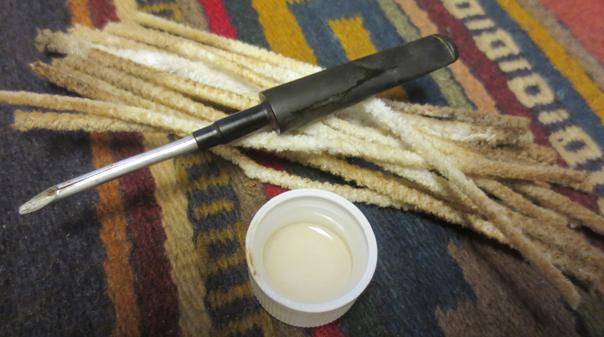
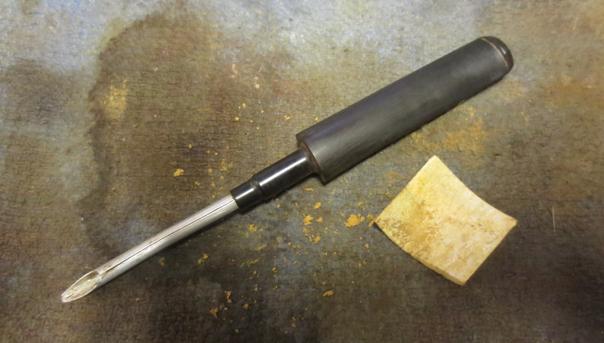
 I used the dental spatula to scrape out the inside of the shank and break the tars and oil build-up away from the walls of the shank and mortise. I cleaned out the mortise and airway in the shank and stem with pipe cleaners, cotton swabs and alcohol.
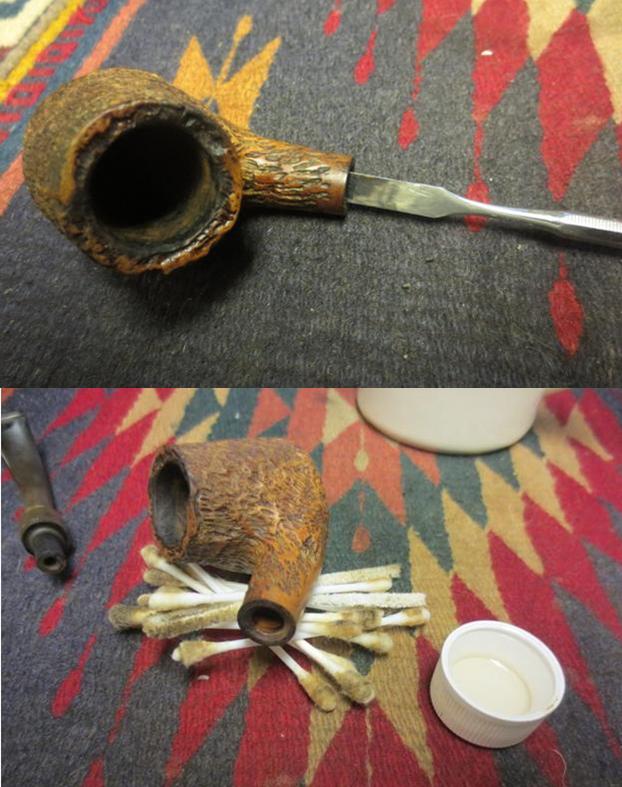
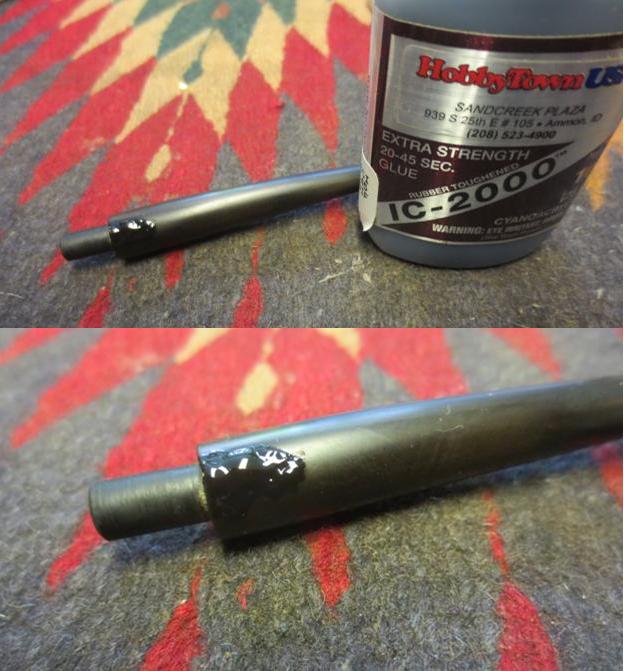
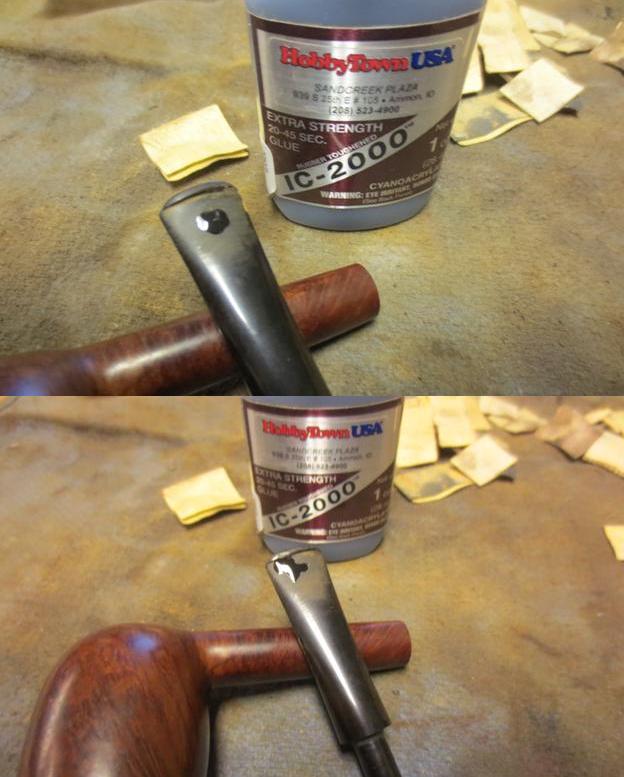
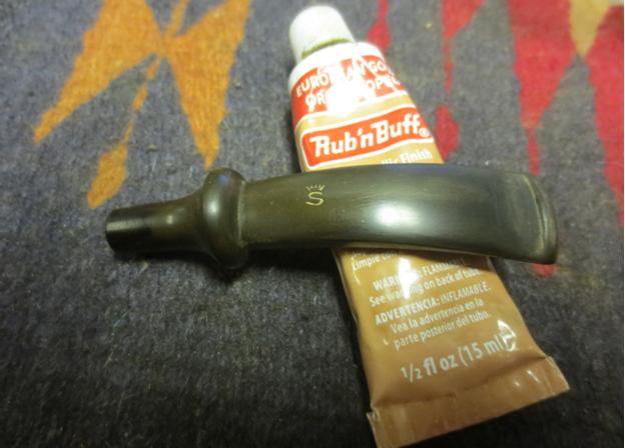
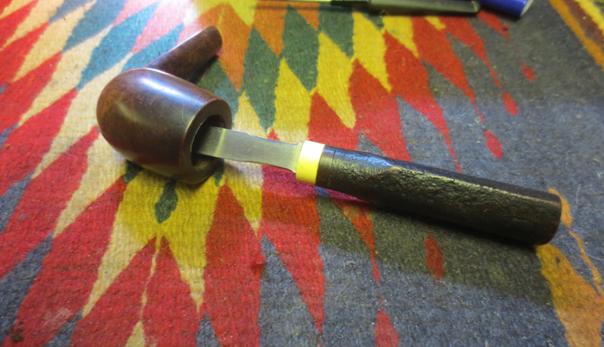
 I sanded the stem with 220 grit sandpaper to remove the oxidation. I built up the button with black super glue to add thickness and enable a grip on the button.
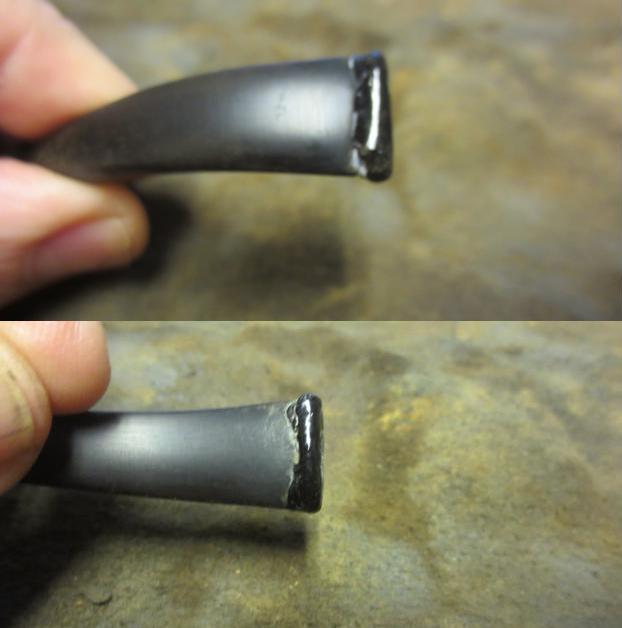
 I used a file to shape the button and recut the sharp edge against the stem surface. I sanded it with 180 grit sandpaper to smooth out the areas in front of the button on the top and the bottom sides.
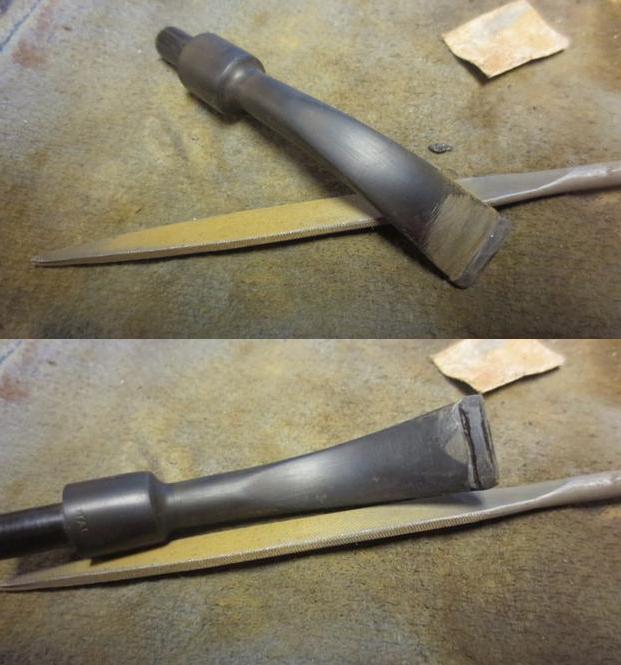
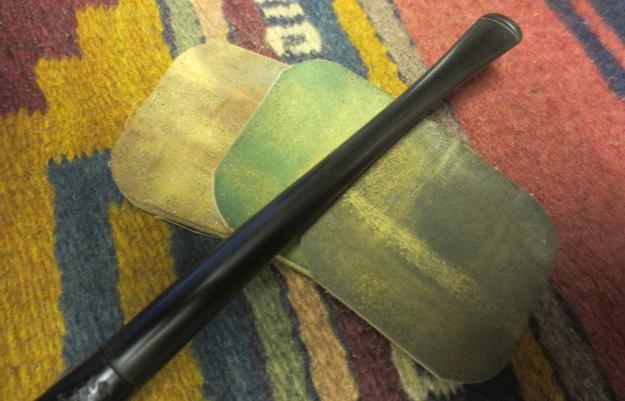
 I continued to shape the stem surface and the button with 220 grit sandpaper and also used the needle files to open up the slot in the button and reshape that.
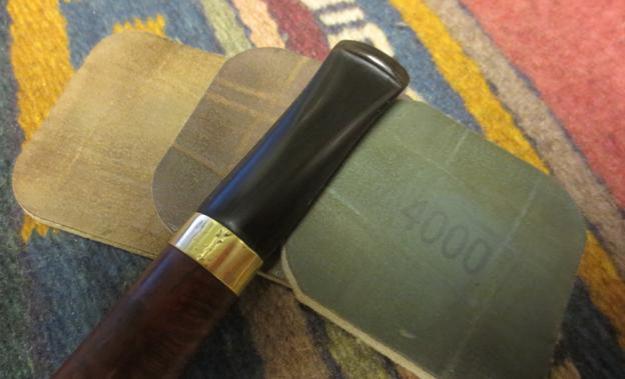
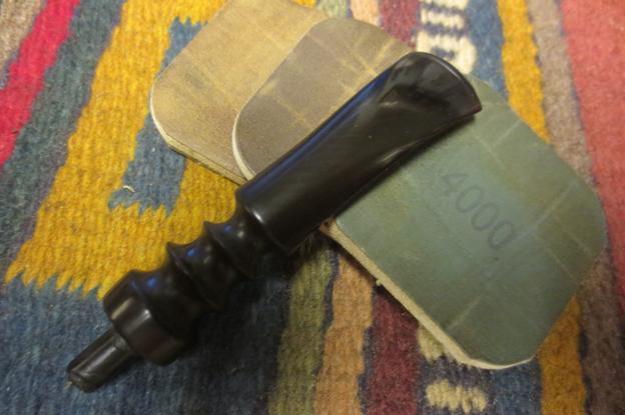
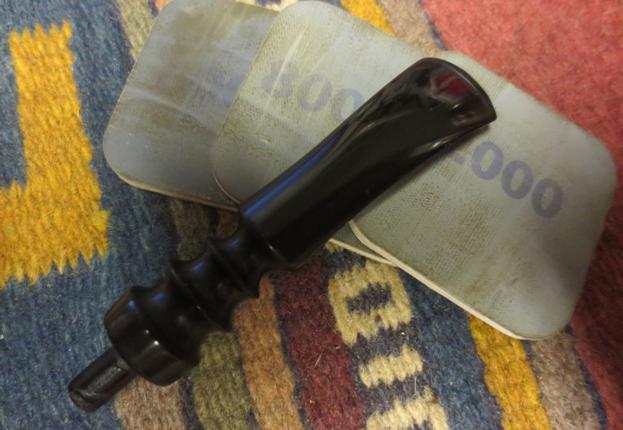
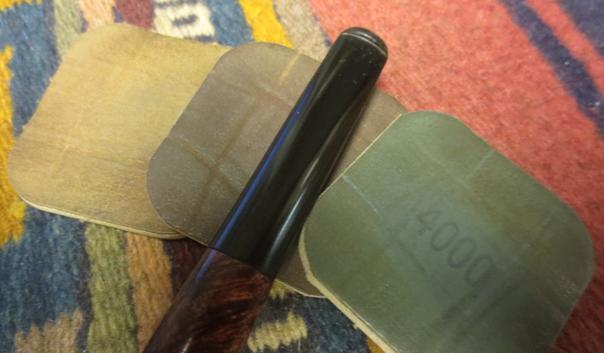
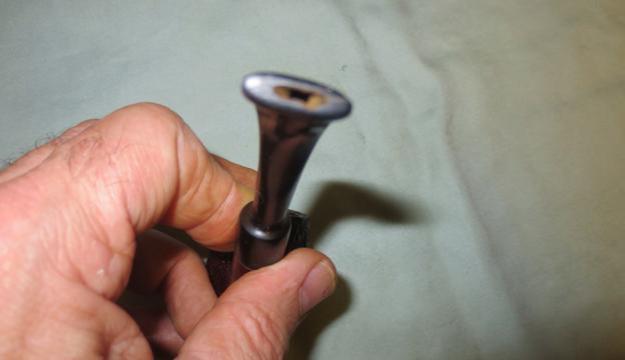 I sanded the stem with 220 grit sandpaper to clean off the oxidation. I wet sanded the stem with 1500-2400 grit micromesh sanding pads. I rubbed it down with Obsidian Oil. I dry sanded the stem with 3200-4000 grit sanding pads and gave it another coat of oil. I finished sanding the stem with 6000-12000 grit pads and gave it a final coat of Obsidian Oil. I let the stem dry.
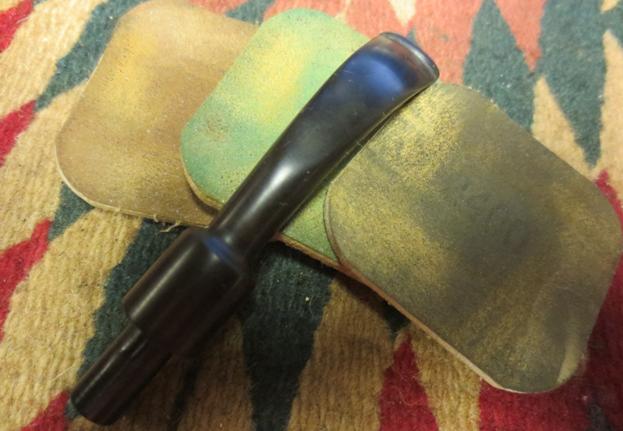
 I stained the bowl with a dark brown aniline stain and flamed it. I repeated the process until the coverage was good. I hand buffed the bowl with a shoe brush. I gave it a light coat of olive oil and hand buffed it again. I rubbed the surface down with some Conservator’s Wax and then hand buffed it with the shoe brush for a final shine.
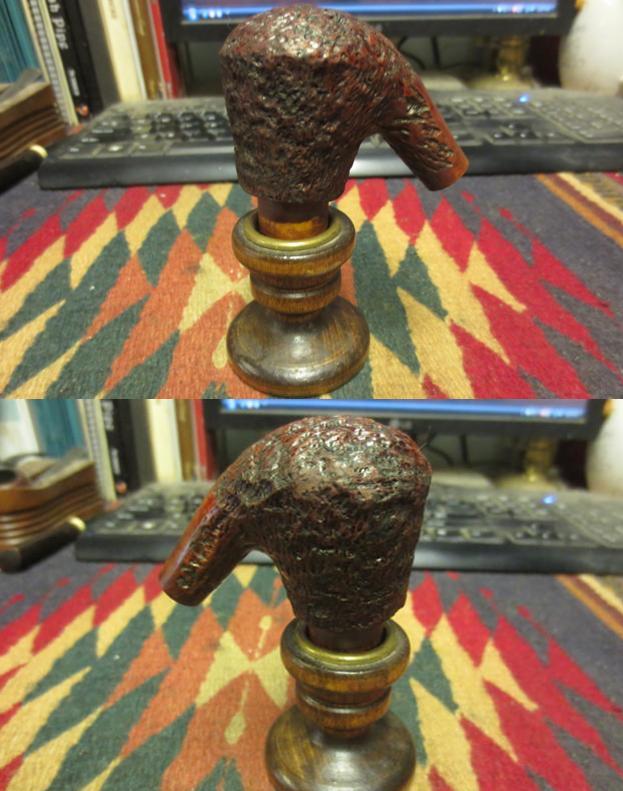
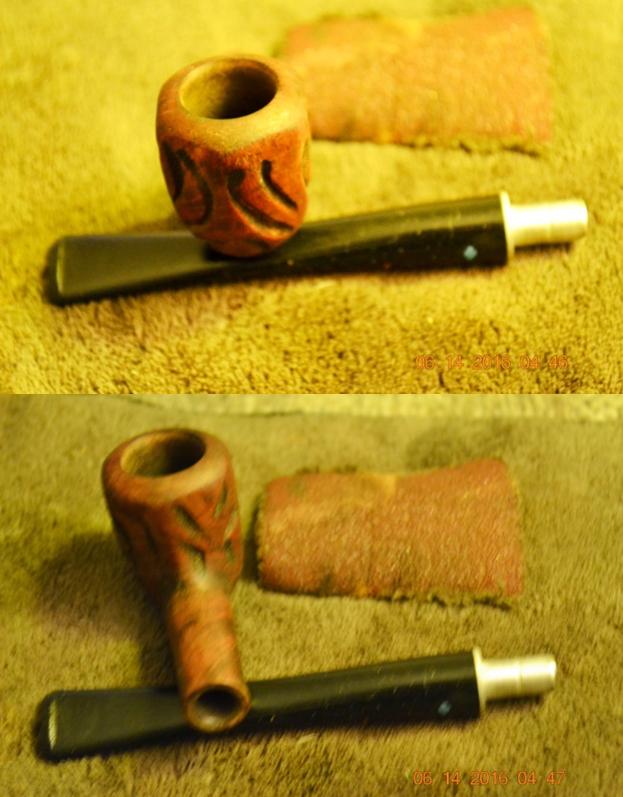
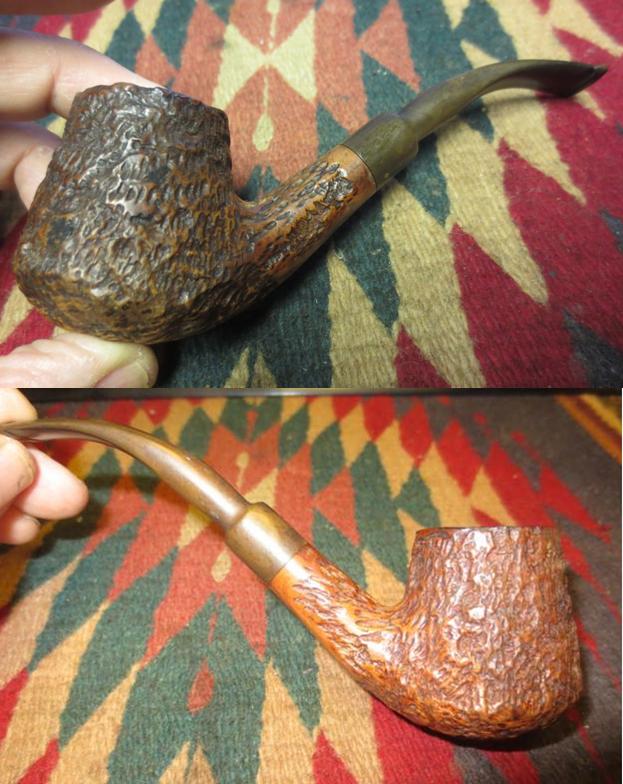
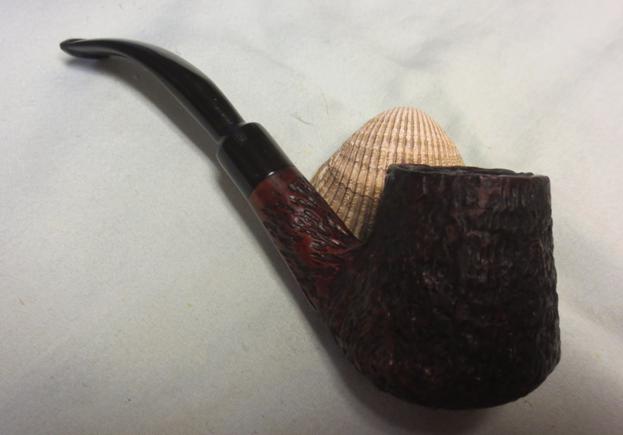
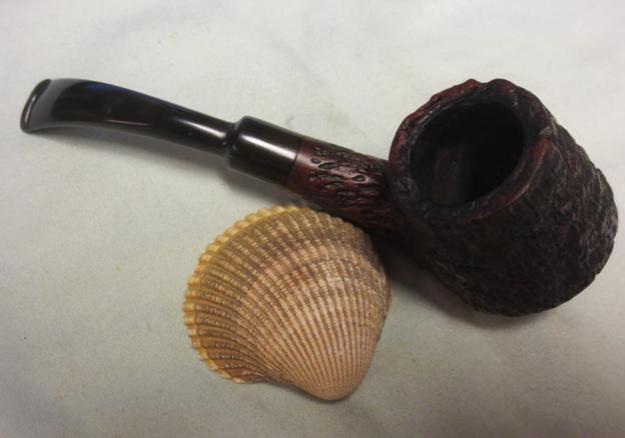
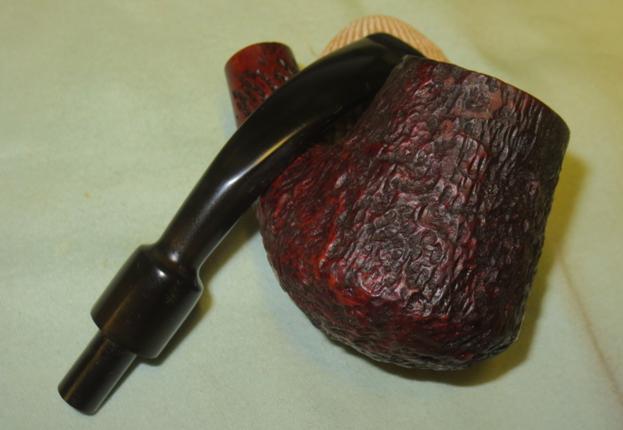
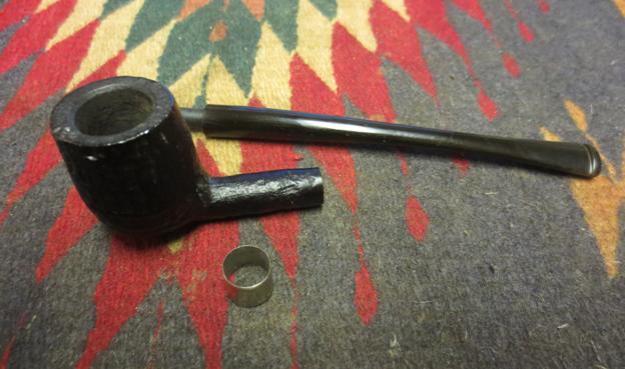
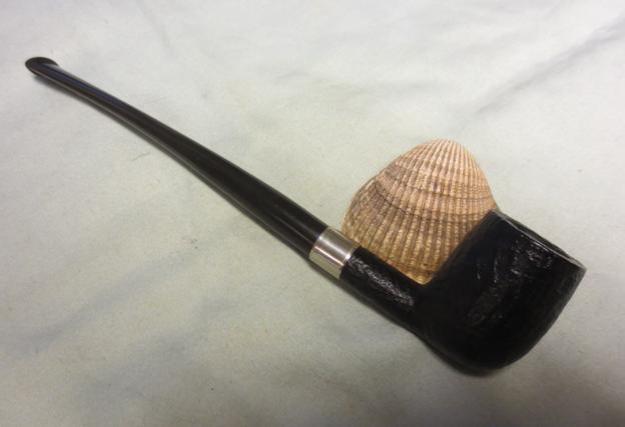
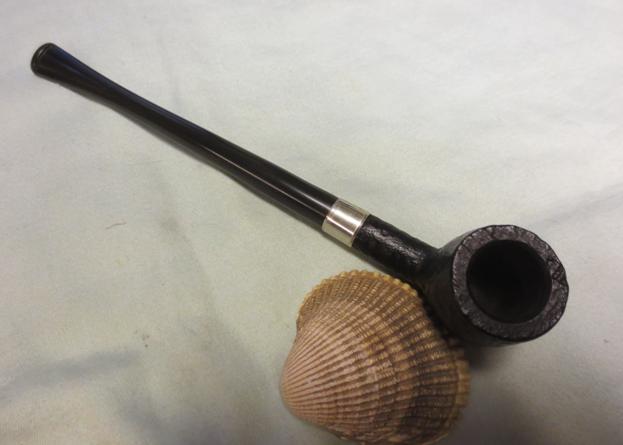
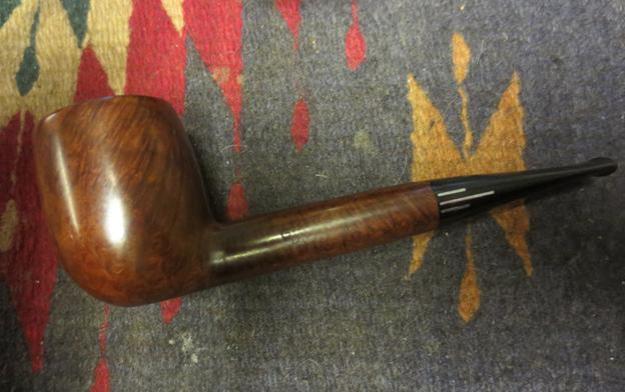
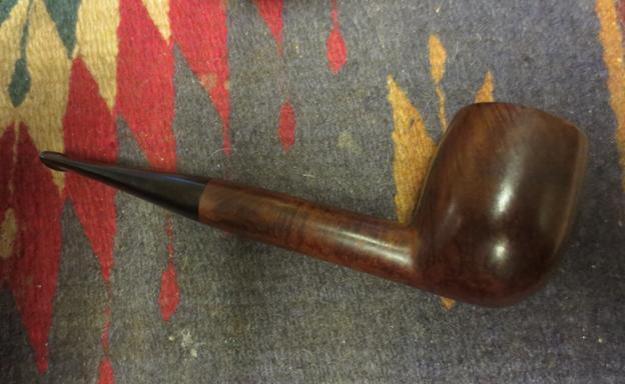
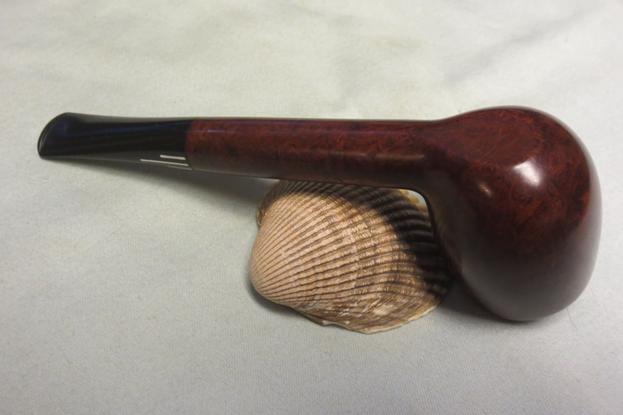
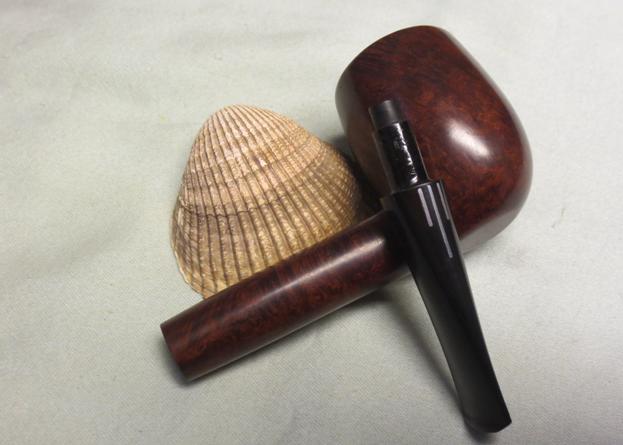
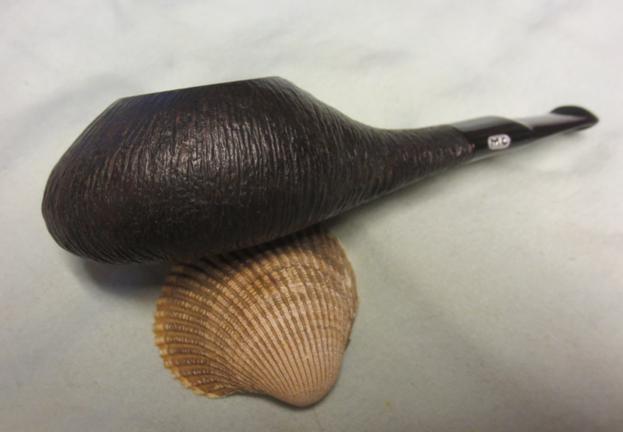
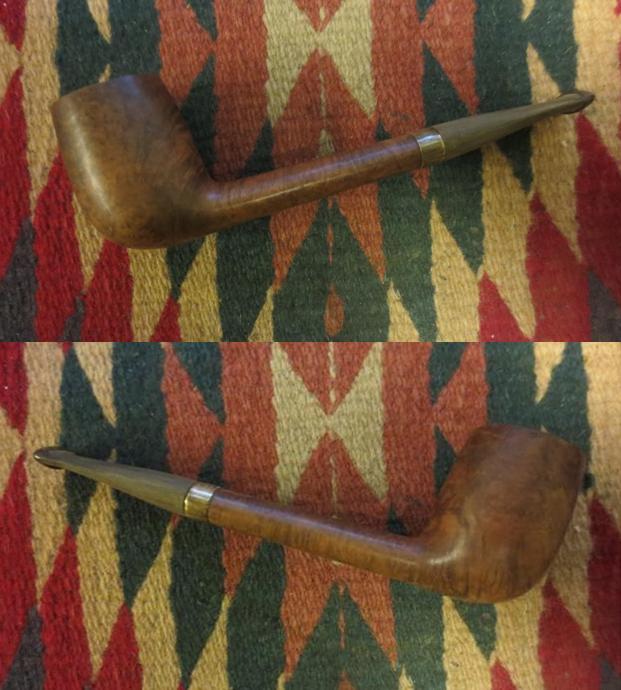
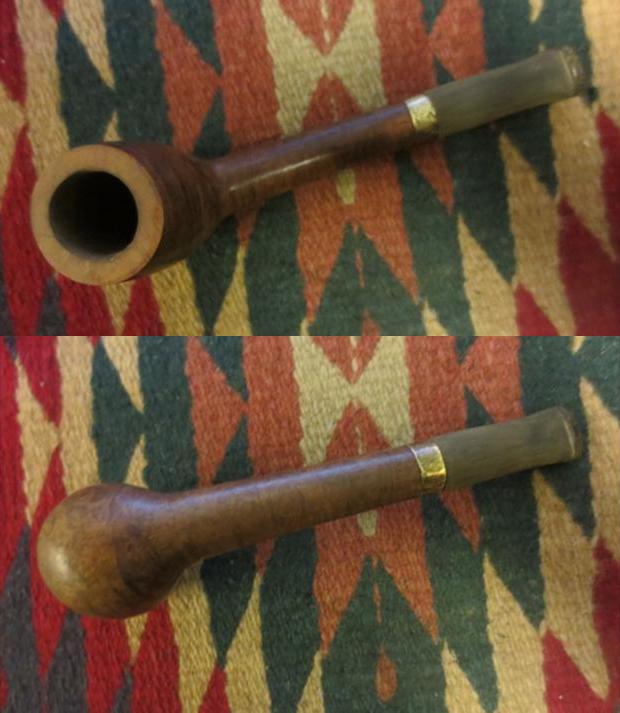
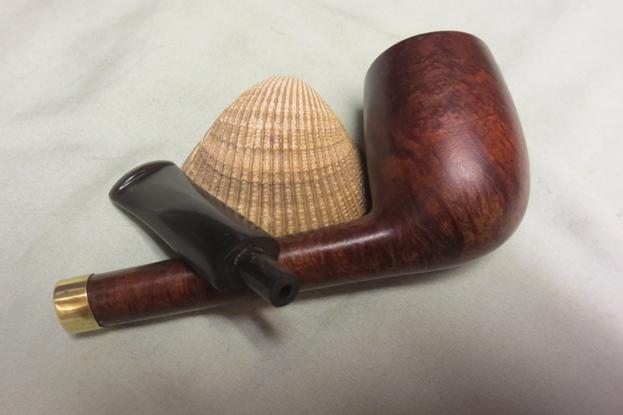
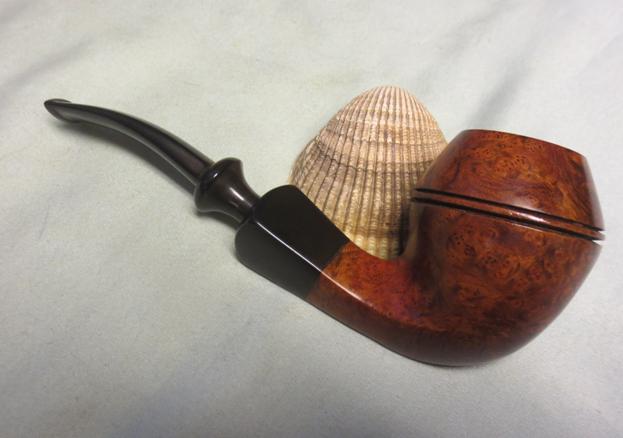
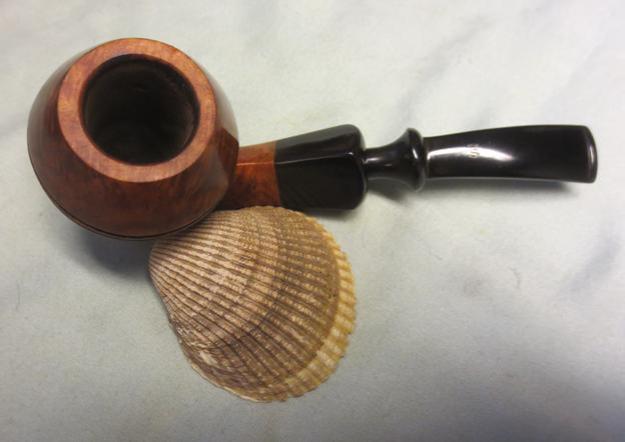
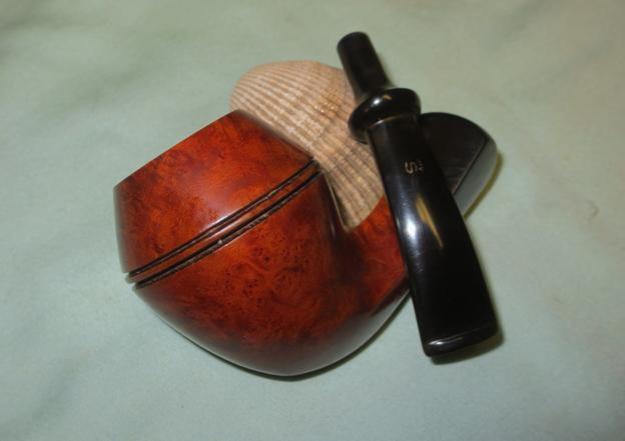
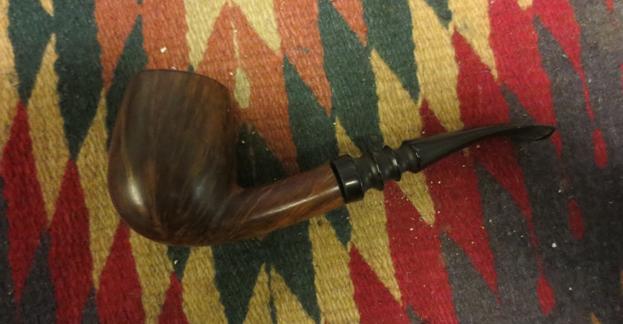
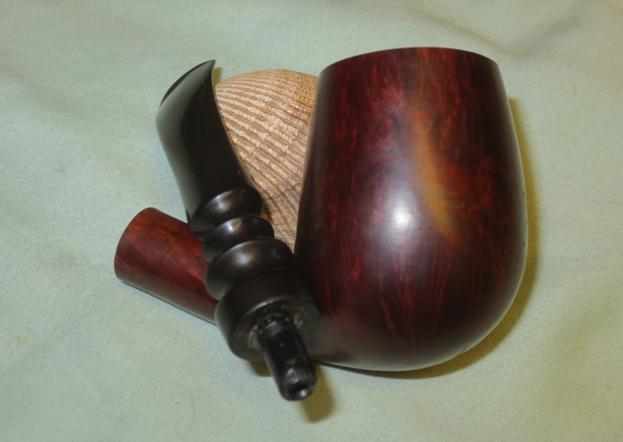
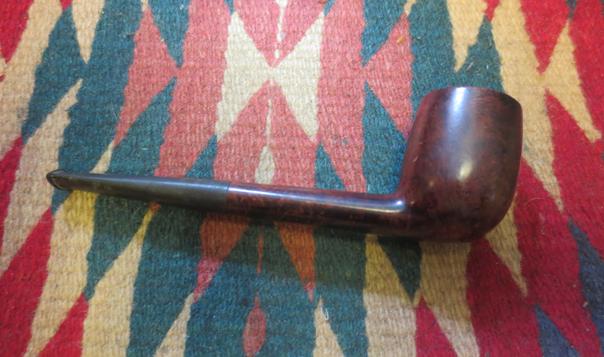
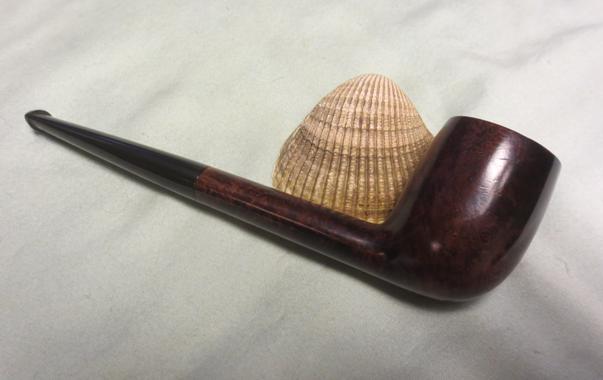
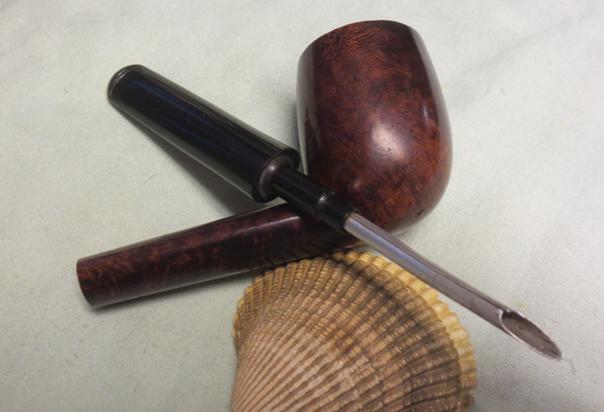
 I buffed the pipe lightly with Blue Diamond polish on the wheel and then gave the stem multiple coats of carnauba wax. I buffed the pipe with a clean buffing pad and then hand buffed it with a microfibre cloth. The finished pipe is shown in the photos below. The rustication has depth and textures both visually and tactilely. It feels great in the hand. The shape of the bowl and the faux military stem give the pipe a classic look with a flair that is almost Danish looking. I like the finished look of this one. Thanks for looking.
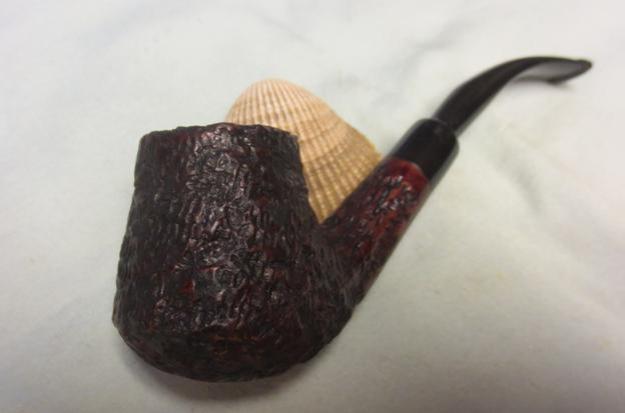


