Tag Archives: Bowl – finishing

RETURNING A CANADIAN POKER TO ITS RIGHTFUL GLORY


Blog by Robert M. Boughton
Copyright © Reborn Pipes and the Author except as cited
https://www.facebook.com/roadrunnerpipes/

I didn’t do it.  Oh, wait, THAT.  Yes, I did do THAT.
— An appropriate example of cheekiness

INTRODUCTION
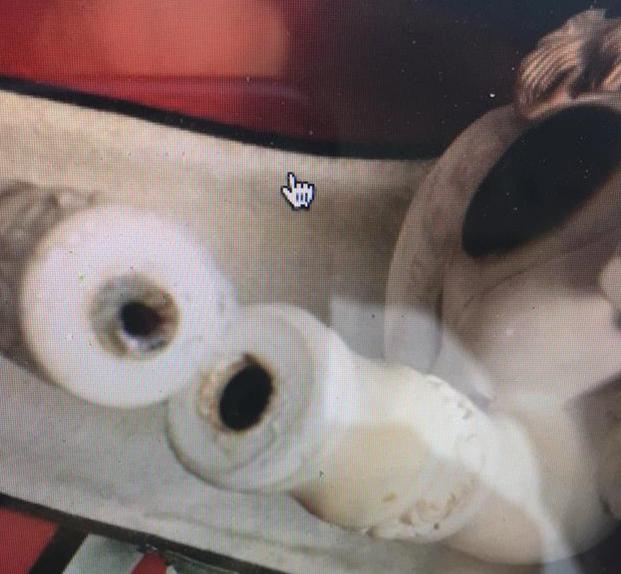
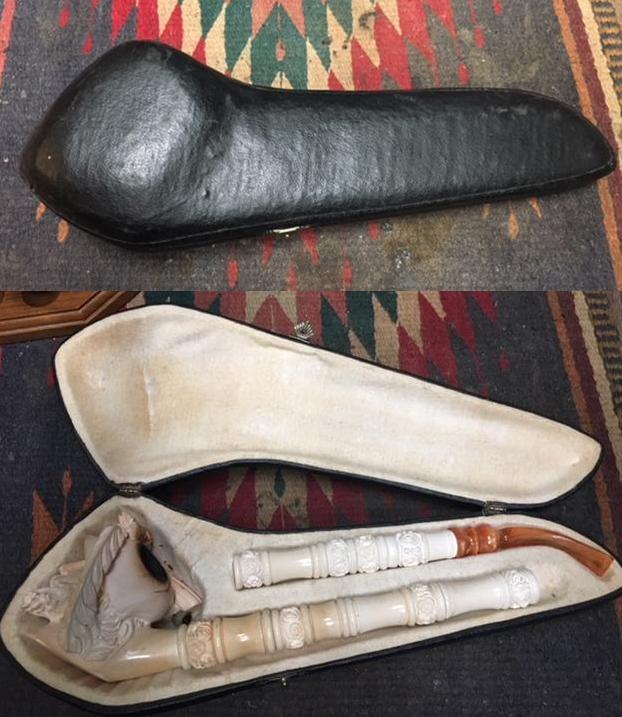
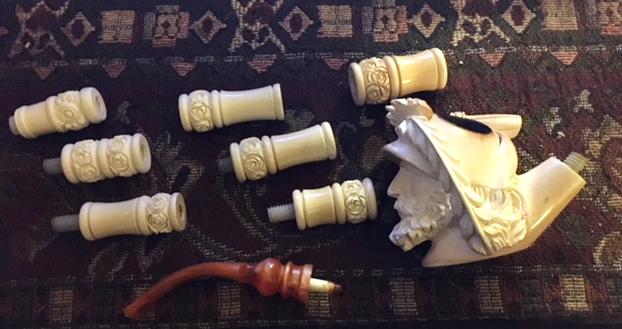
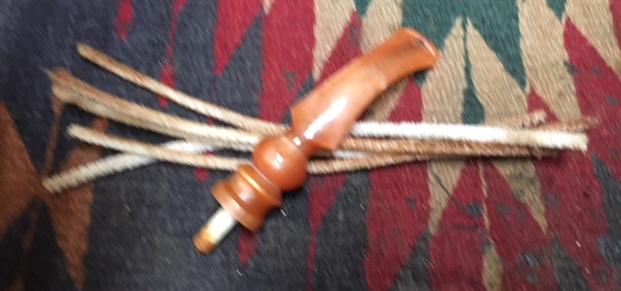
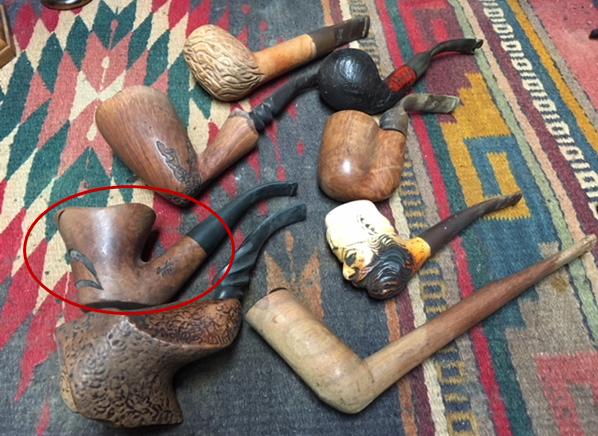
Last November, in a rare, impulsive act of sheer gullibility, or maybe wishful thinking gone wild is a better way to put it, I made one of the oldest mistakes other people – but not I – can do: I snatched up a collection of odds and ends on eBay labeled “Lot 3 Vintage Tobacco Pipes-Tobacco Tins-& Bags-1 Box,” somehow rationalizing that they were all connected, or at least, maybe, the pipes and some of the bags and box (the three pipes matching the combined number of two sleeves and one box, although it still didn’t occur to me that one sleeve matched the box).  To compound the shame of this serious folly, I jumped on the great deal, at only $21.51 plus S&H, based on the following single blurry photo provided by the seller.

Credit omitted for obvious reasons

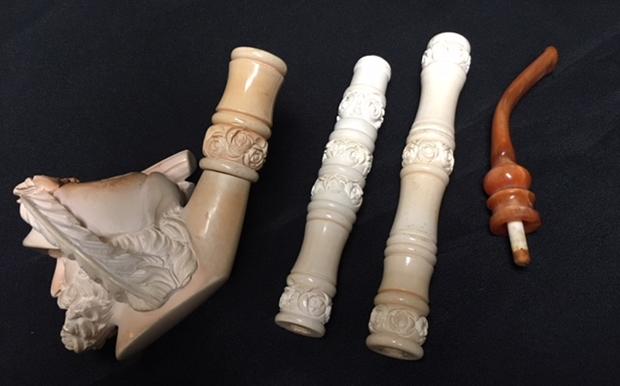
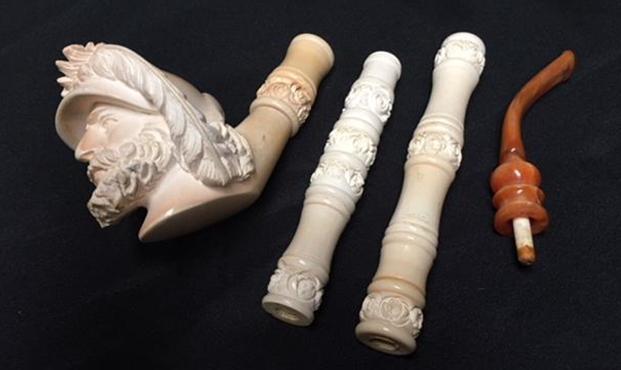
I mean, consider the clues my crazed mind somehow overlooked!  You can do it without my help, which I can’t bring myself to give anyway.  I won’t even claim I don’t know what I was thinking because it’s clear I wasn’t at all, in any sense of the word.  Okay, so the package came in the mail.  Well, indeed, there were three vintage pipes, a Grabow, a Yello-Bole and the poker I couldn’t then, in my bleary-eyed horror, identify; two sleeves, a Karl Erik and a Butz-Choquin; the one Karl Erik box, and the two olde-timey Revelation Smoking Mixture tins.  And so, I struggled to reason, I got exactly what I asked for!  God knows, and so do I, that I deserved it.  Still, in my defense, however lame it may be, the seller was more than a little disingenuous with his hazy portrayal of the goods and failure to point out that the Yello-Bole has a fatal crack extending a third of the way down the front of its 1.5” bowl.

[The Revelation tins, for those who haven’t heard the story, once contained a blend of red Virginia, cube cut Burley, Latakia and Perique made at the time by Philip Morris & Co. Ltd. Inc. and said to be Albert Einstein’s go-to.  The stuff looked like mulched, ancient twigs, tree and bush leaves, bark and other components one might find as groundcover in a forest as far from civilization as is still possible.  But Revelation switched from tins to soft packaging in 1957, so I attempted to console myself with the thought that the latest addition to my small tobacciana collection is at least 61 years old.  Then I realized that’s only five years older than I am.  Does that mean I’m vintage?  Needless to say, my attempt was a failure.]

Disheartened by my abject flop, I considered the options.  I could return the whole lot, pan the seller in my feedback or bite the bullet and get on with my life.  Not caring for any of these, I tossed all of it in disgust under my living room table with my stash of junk mail and old newspapers.  In the intervening months, the pile grew and hid all of the discarded items I had banished from my mind anyway, until one day about a week ago when gravity made the pile shift, and I spied the red Butz-Choquin sleeve.  So deep down had I stuffed the memory of the debacle that I didn’t recognize it, no joke.  Approaching the sleeve on hands and knees, like an archeologist digging for treasure, I liberated the sleeve from the heap and began removing layer after layer of the paper trash.

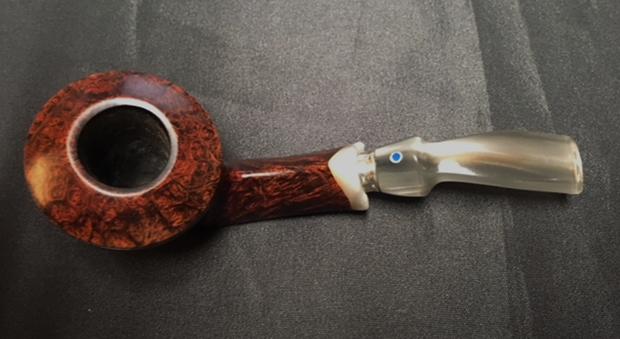
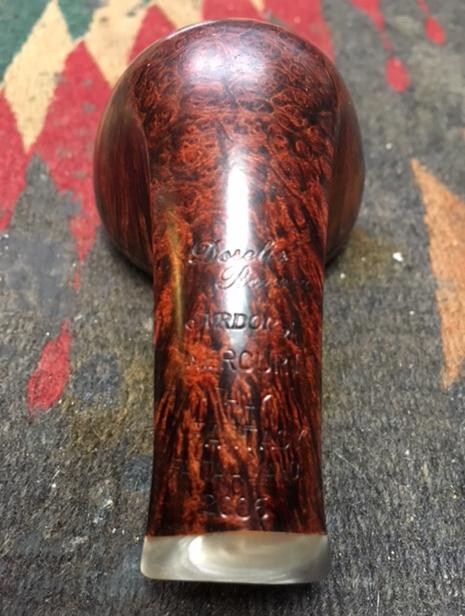
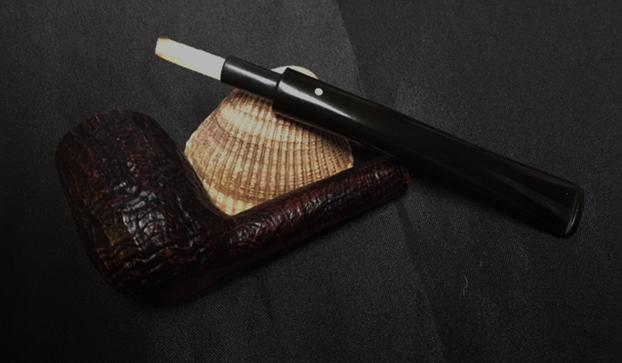
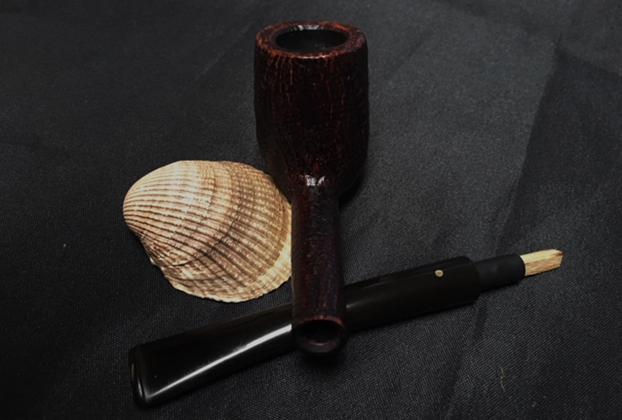
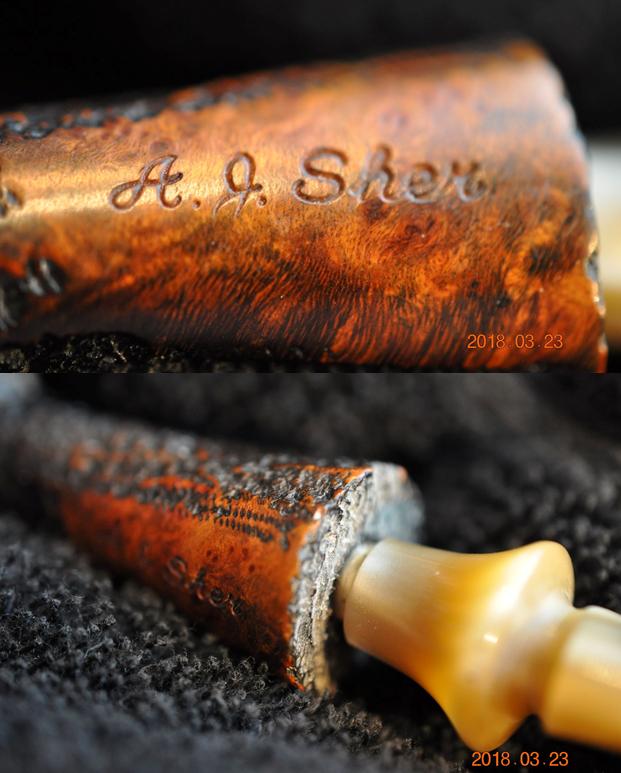
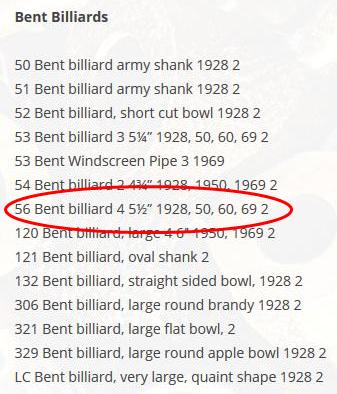
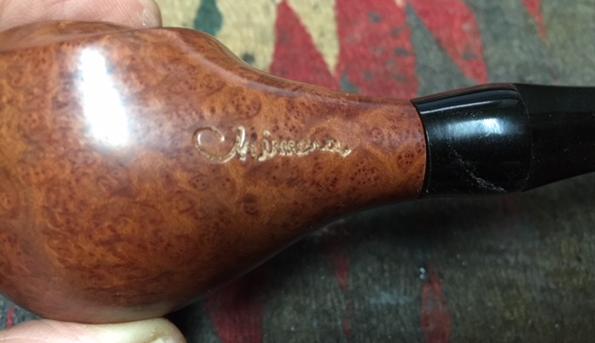
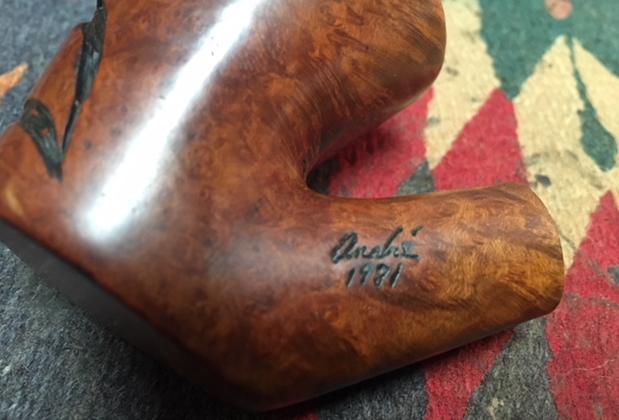
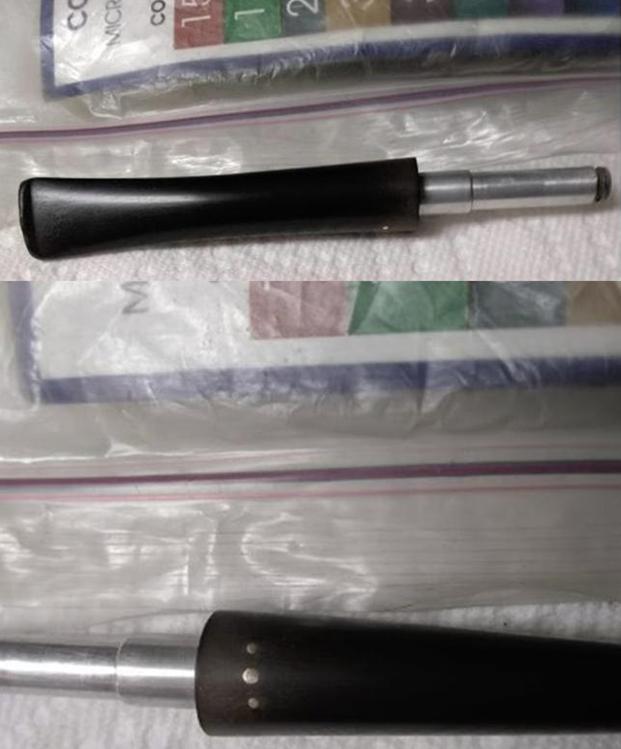
In this fashion revealing the pipes, sleeves, box and tins, and bagging the paper mountain to throw in the trash, I could not help laughing.  The poker caught my attention, and I remembered I had not established its maker but only assumed it was of the others’ ilk.  I wiped away some crud on the smooth bottom of the rustic pipe and used my magnifying glasses trying to decipher the nomenclature but was unable to do so.  Turning to the stem for a mark that might provide a clue, I saw what appeared to be three faded dots in a line from top to bottom, the middle one of them smaller than the others.  From Pipephil, I discovered the pipe was a Brigham of the 600 series, and to my surprise, from Canada.

My face flushed and misted over with sweat from a rush of blood as my mind’s eye teleported me backward in time a few years.  I’m sure Steve has forgotten all about this, having better things to store in his mind vault, but I’m cursed – or blessed – with total recall of every tasteless, fatuous or otherwise inappropriate thing I’ve ever said, for the most part well after the fact and only when something triggers a free association with the earlier mistake.

In this case, learning that Brigham is an old and respected Canadian pipe maker reminded me of an occasion several years back when I broke my usual habit of engaging my brain before my tongue, as my dear dad taught me.  Something prompted me to blurt to Steve, “Are there any Canadian pipe makers?”  I say blurt because such an ill-conceived question could not have been made in an email or else I would have researched it myself, but rather must have flown out of my mouth in a flash of cheeky, stupid impertinence during a telephone conversation.  I also remember Steve’s pause before he replied with tact, “Yes, there are a few.”

Having now made a quick, easy online inquiry into the subject, I found one good source listing 30 far North American pipe makers, including larger brands and artisans.  Brigham seems to be the biggest and best known.  Notable among the artisans is Michael Parks of Bowmanville, Ontario, whose work is astounding.  No doubt there are many more talented folks carving pipes in the vast Canadian provinces and territories, and to every one of them, I apologize for my ignorant question that now seems so long ago!

HISTORY
Roy Brigham must have been born with pipes in his genes.  After serving as an apprentice to an Austrian pipe repair master, Brigham opened his own shop in Toronto in 1906.  After 12 years, the venture included five other craftsmen and was already known across Canada for its excellent work.  In 1918, Brigham and his team started making the company’s first pipes, and again the reputation for high quality and value began to spread throughout the country’s 3.9 million square miles.

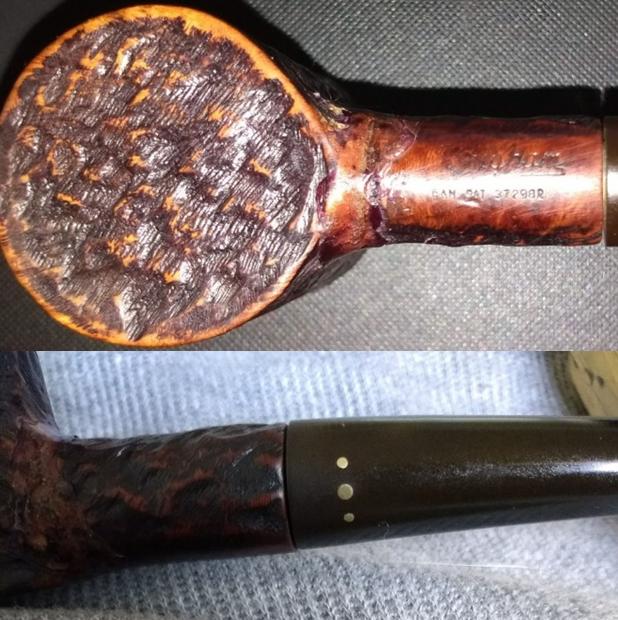
Brigham’s son Herb joined the business in 1935, and the two were known as Brigham & Son.  Together, they identified tongue bite, which at the time was thought to be caused by hot smoke from pipes, as the chief complaint of customers.  Determined to get to the bottom of the problem, father and son experimented and learned that the symptom was caused not by heat but mild burning from tars and acids in the smoke.  Trying various filters, they concluded bamboo and rock maple were the best materials.  Bamboo being much more difficult to obtain, they settled on rock maple, and in 1937 invented what they called the Distillator and applied for the Canadian patent, granted the following year.  That patent, №. 372,982, was for a metal insert in the mouthpiece which enclosed the non-porous rock maple insert that could be removed and cleaned several times before the effectiveness began to deteriorate.  The fourth page is a clarification made sometime after the Patent Act of 1955 cited in its text.
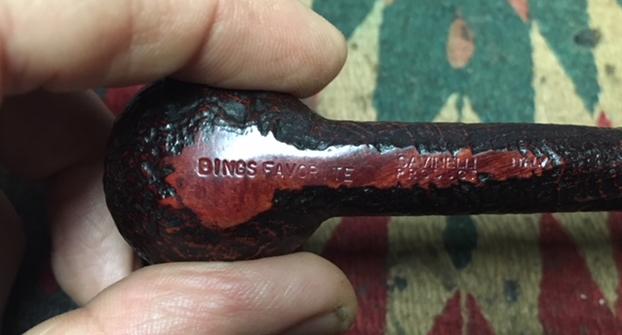
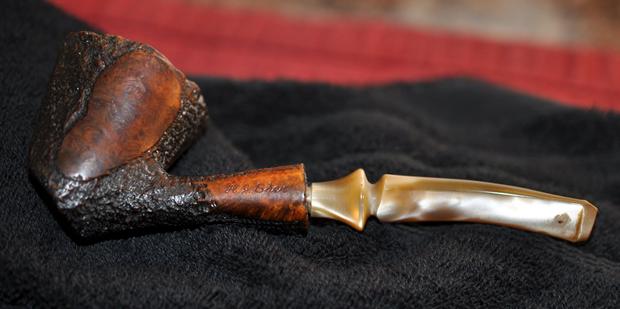
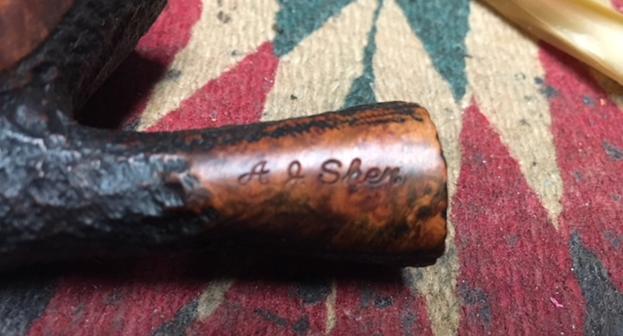
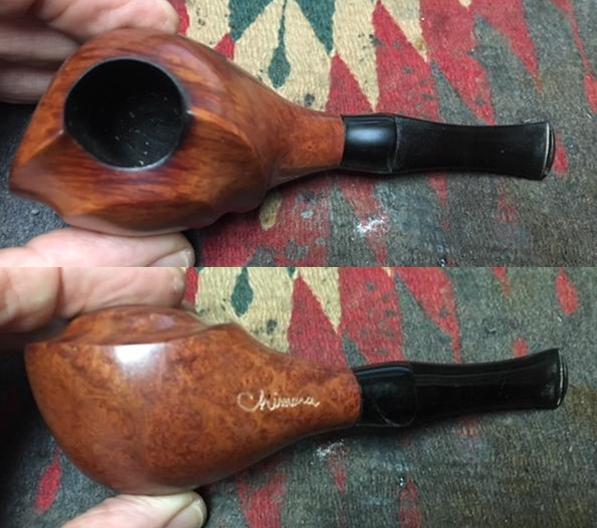
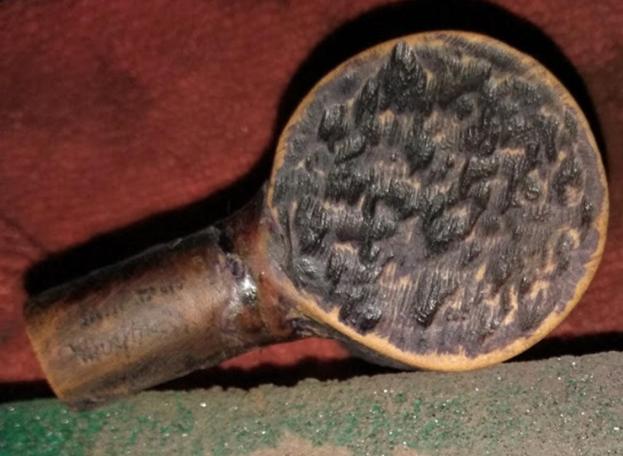
CAN. PAT. 372982 is stamped on the smooth bottom of the poker’s shank, below the Brigham mark, but as future changes were gradual and relatively minor and finished in the late 1940s after Herb rejoined the business following service in World War II, they appear not to have been filed but were relied upon based on the protection granted to the one and only Brigham patent for the Distillator.  Therefore, a precise dating of the poker is impossible, although it looks to be made in the 1950s.  Brigham has a remarkable array of pipes varying from traditional shapes to freehands to some that are just plain unique.

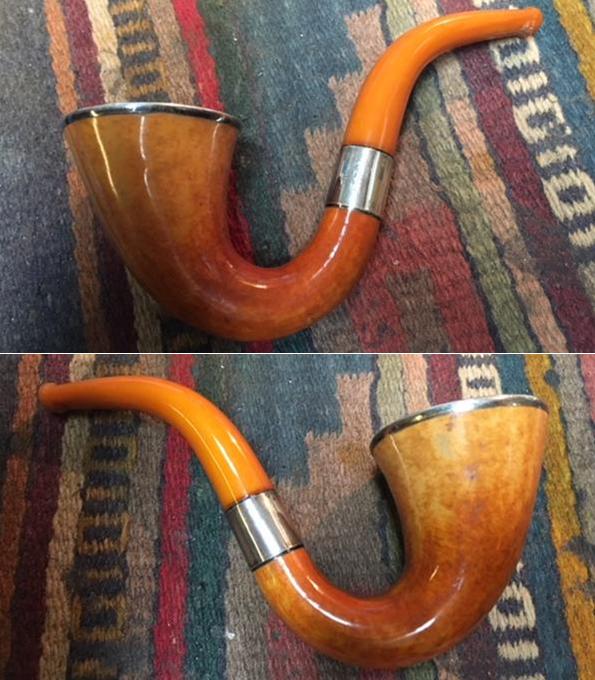
Canadian courtesy Smoking Pipes

Mike Brigham, Herb’s son, joined the family business in 1978 and began expanding the product list to include tobacco and accessories.  This is likely when the company became known as Brigham Pipes Ltd. Until 1995, when the present name of Brigham Enterprises Inc., its incarnation today.

RESTORATION
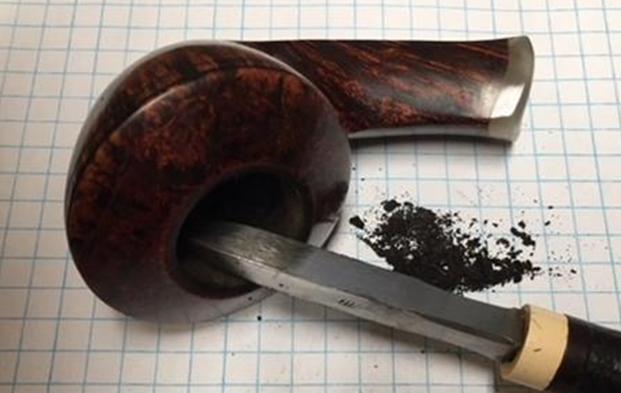
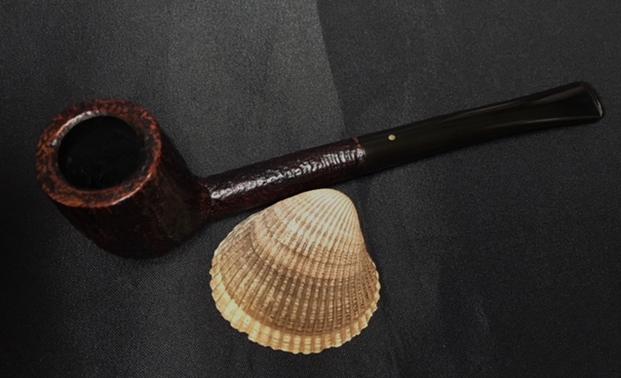
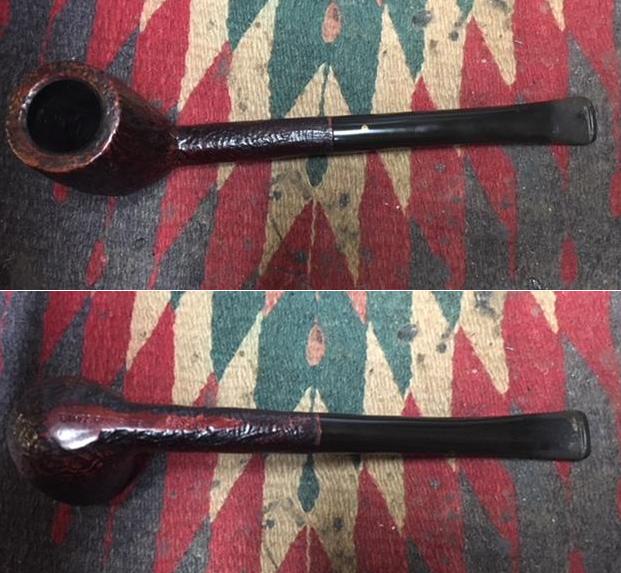
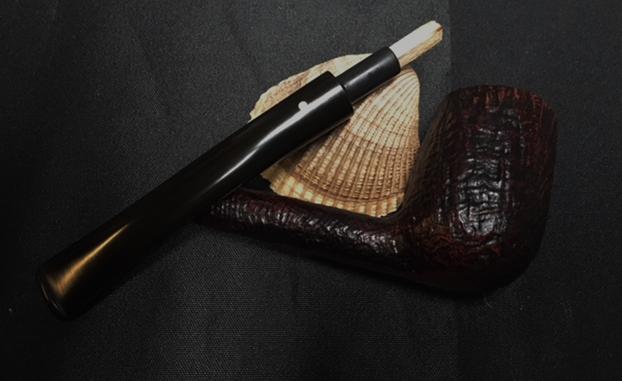
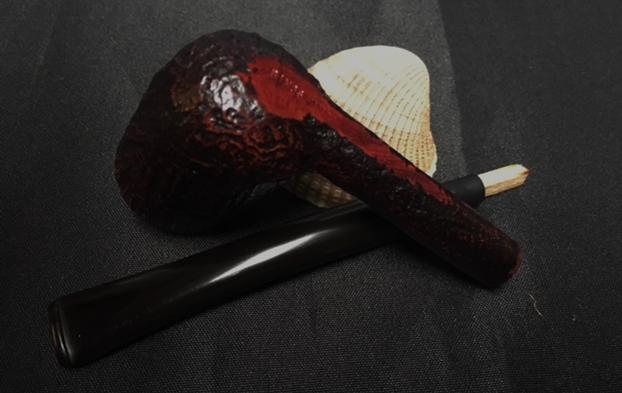
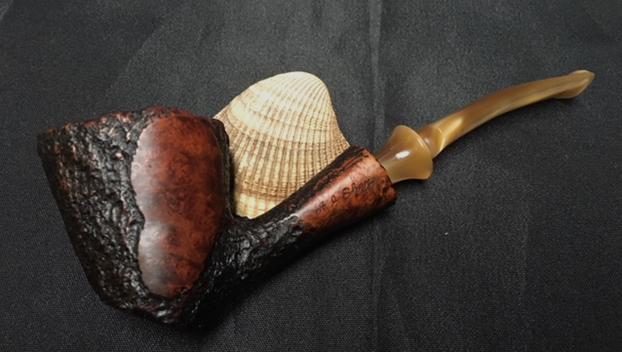
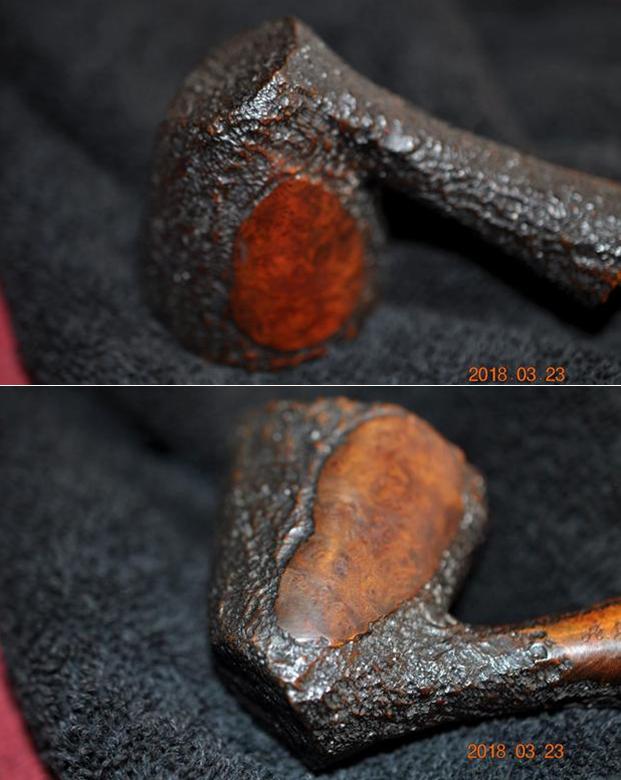
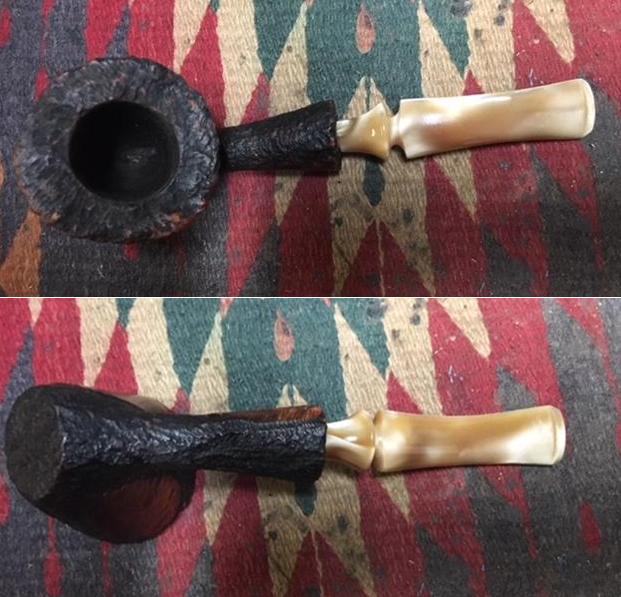
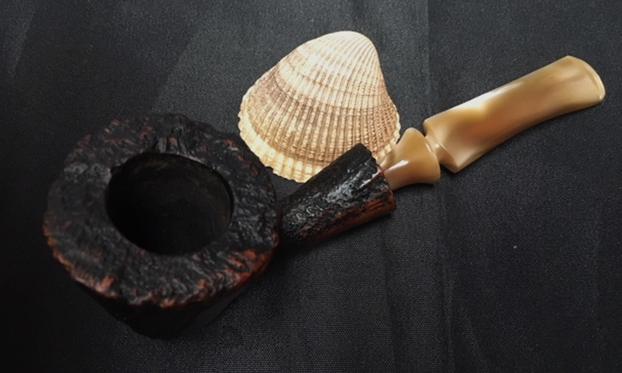
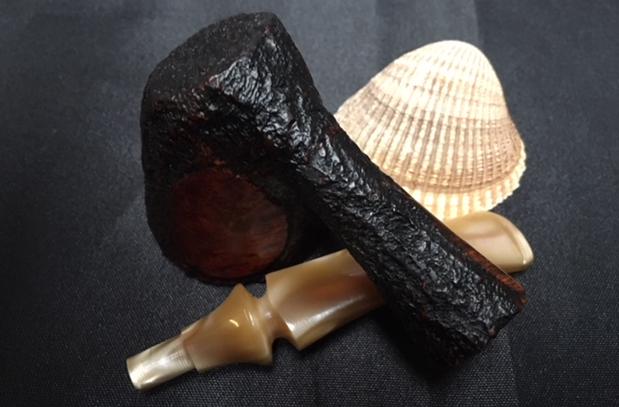
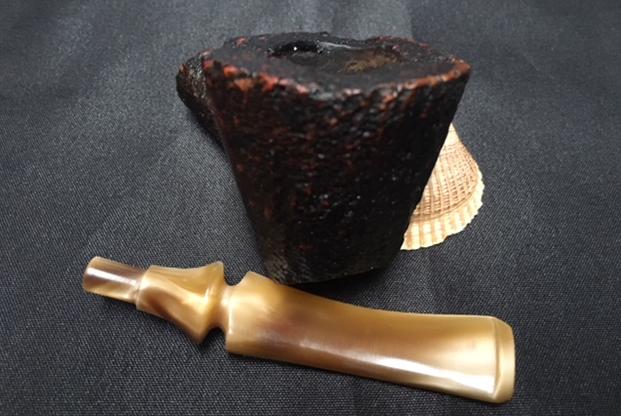
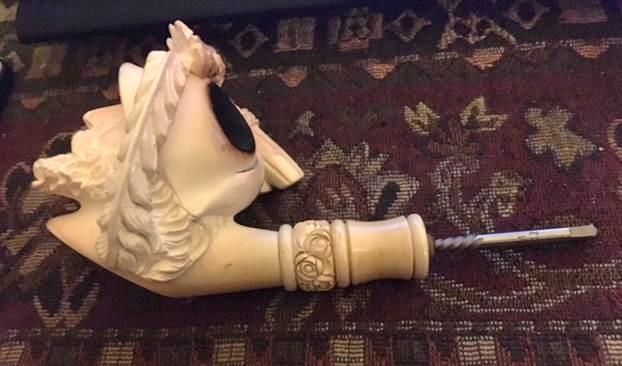
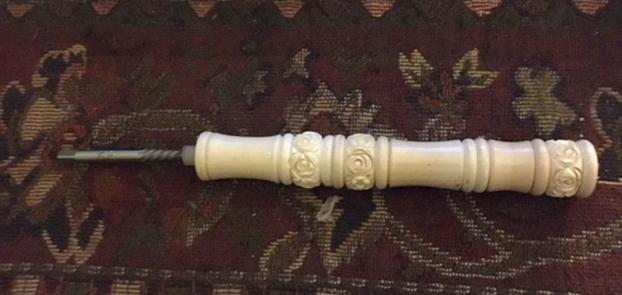
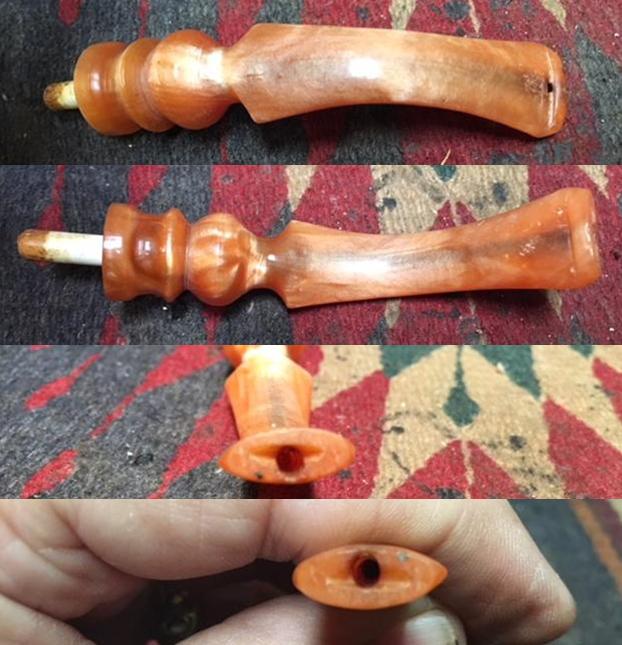
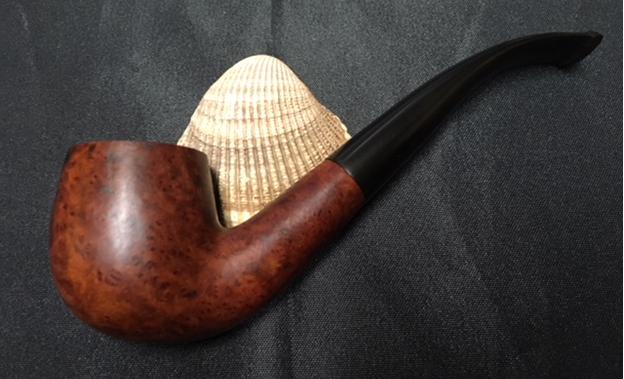
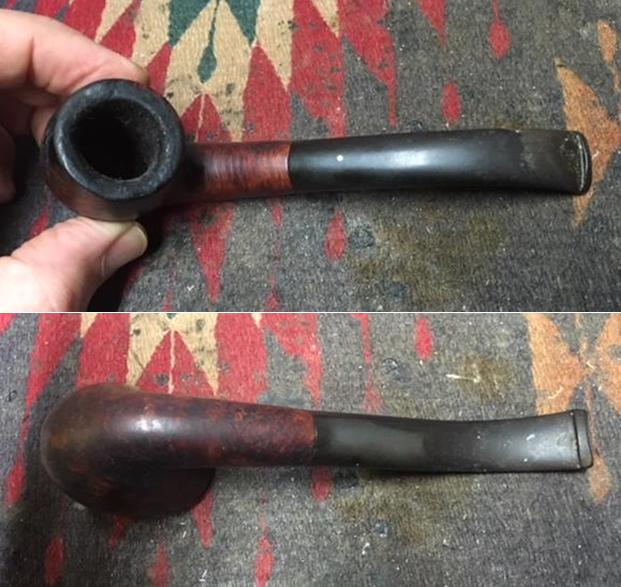
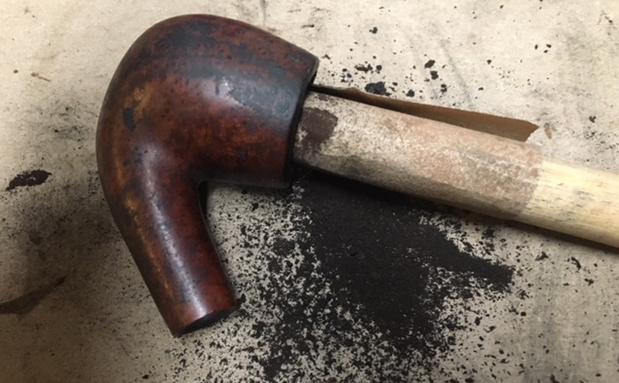
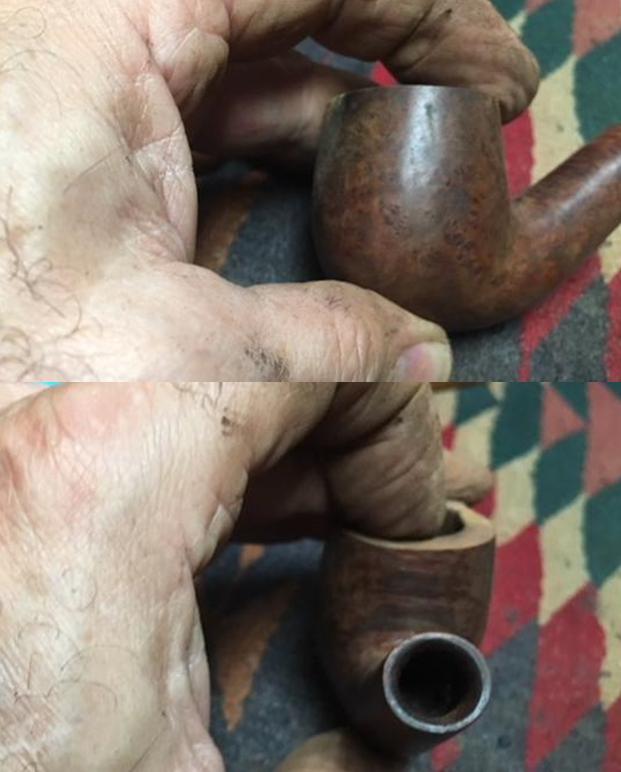
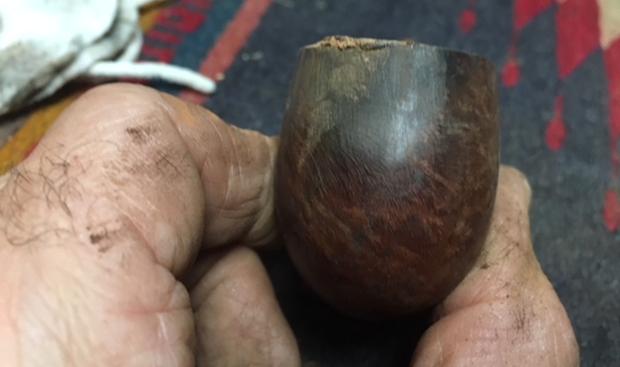
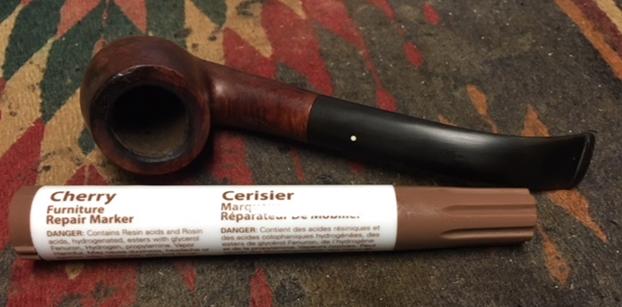
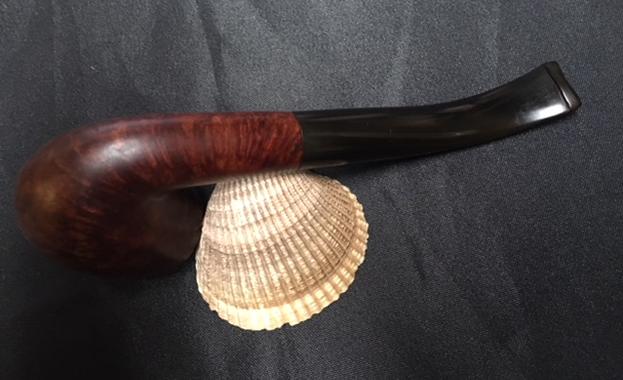
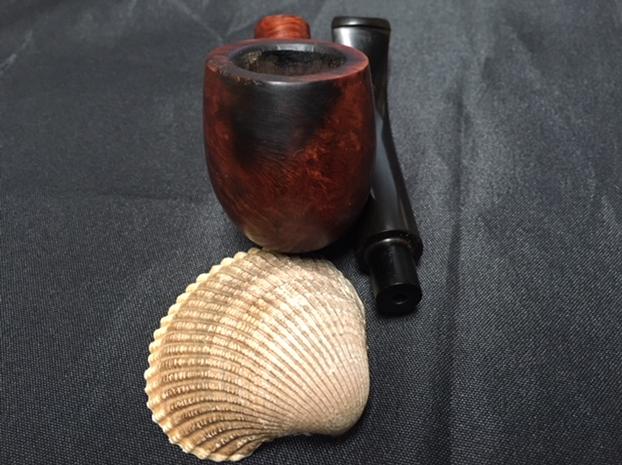
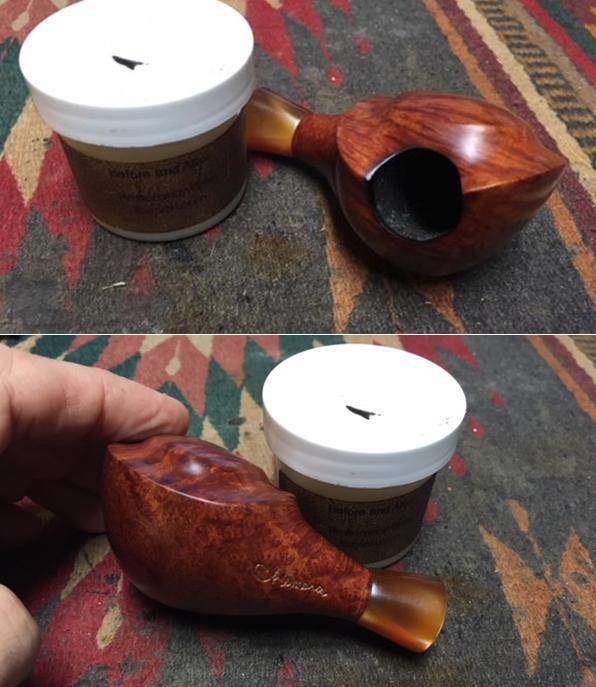
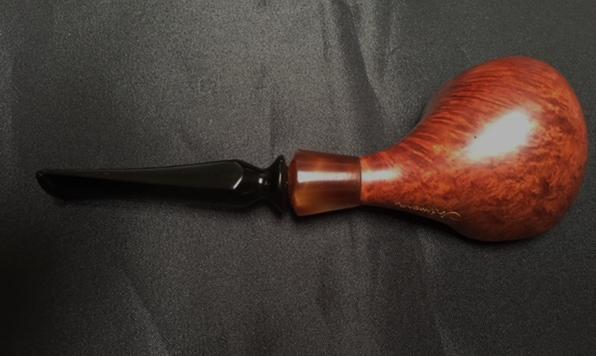
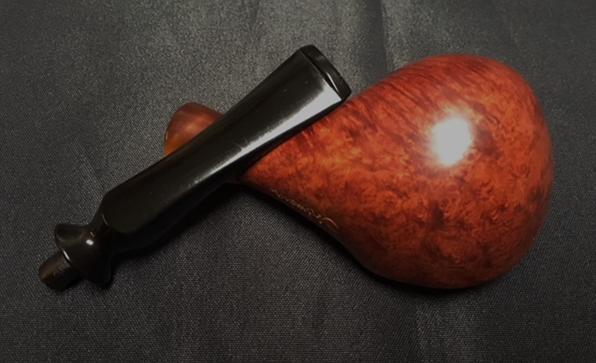
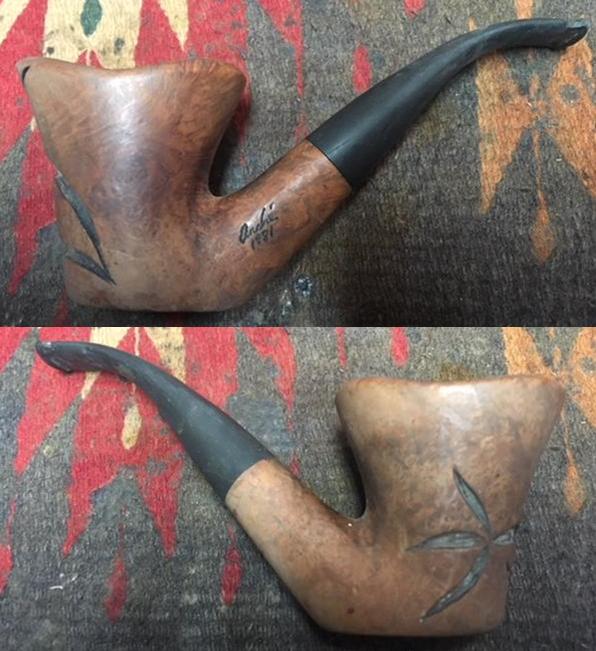
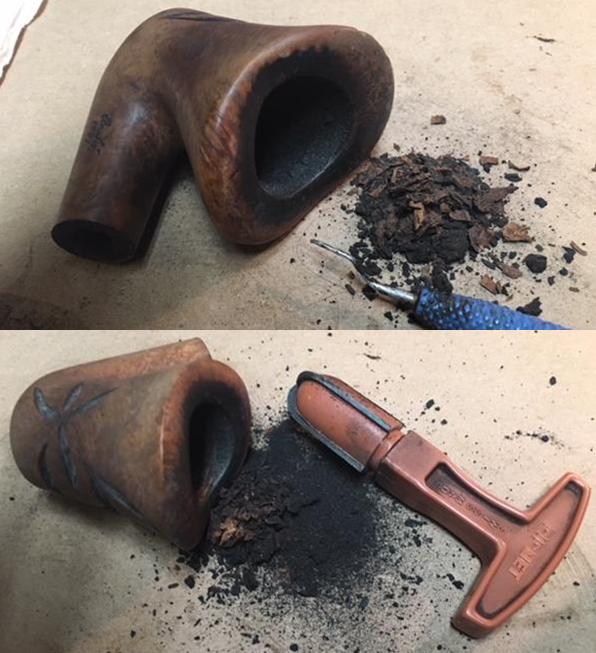
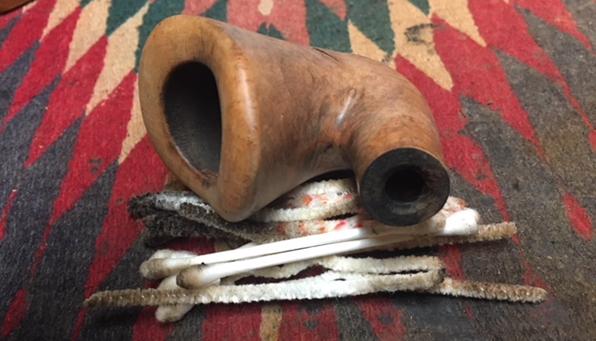
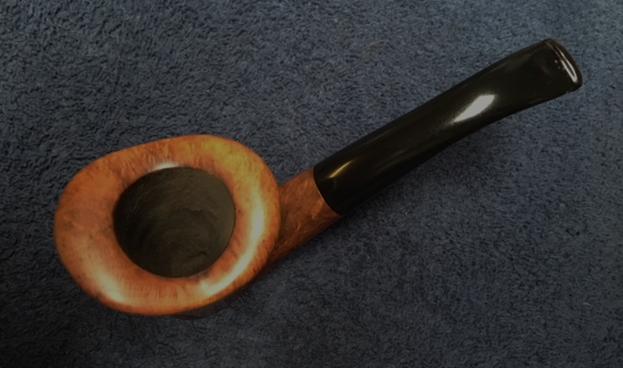
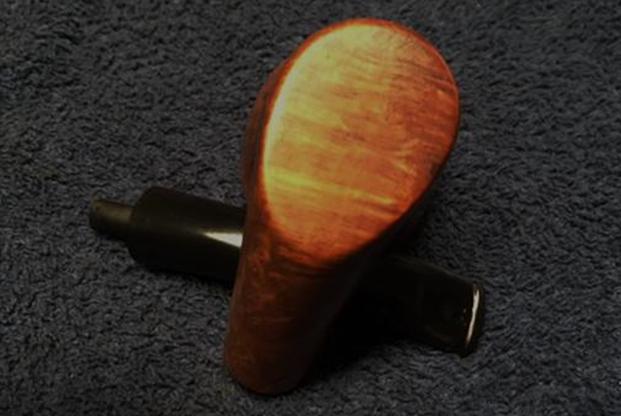
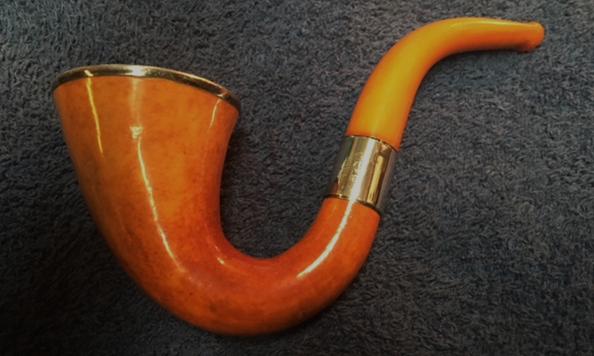
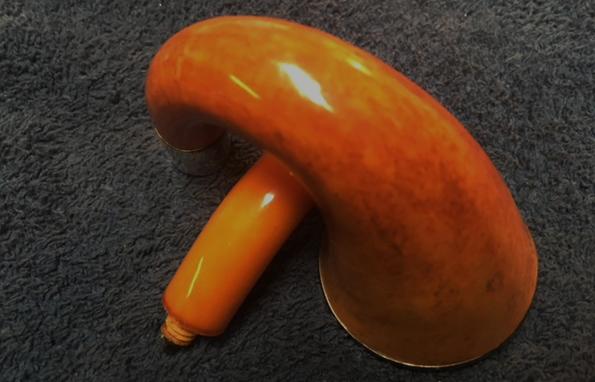
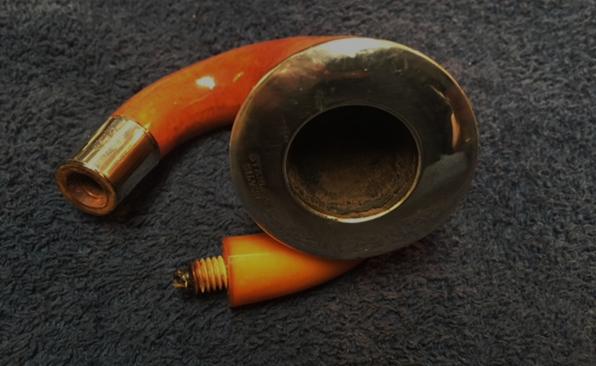
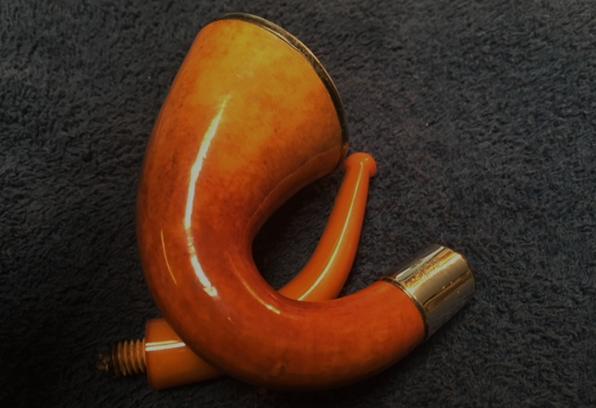
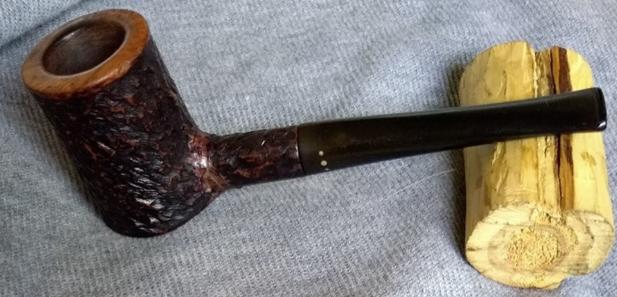
Here is the Brigham rusticated poker as I received it. 
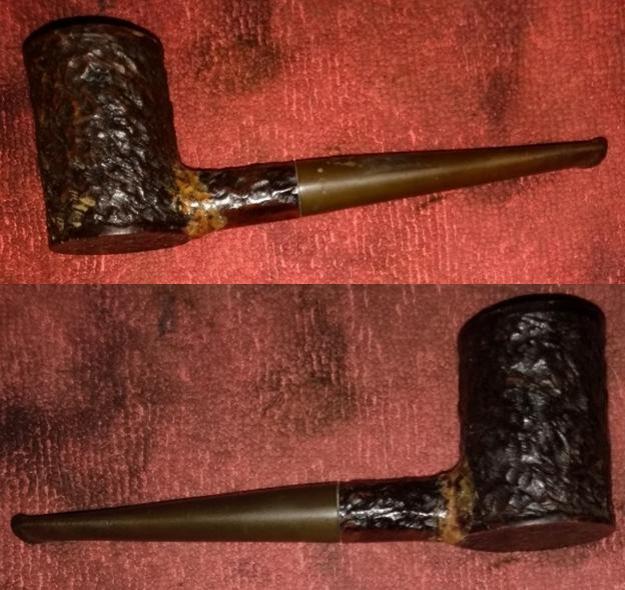
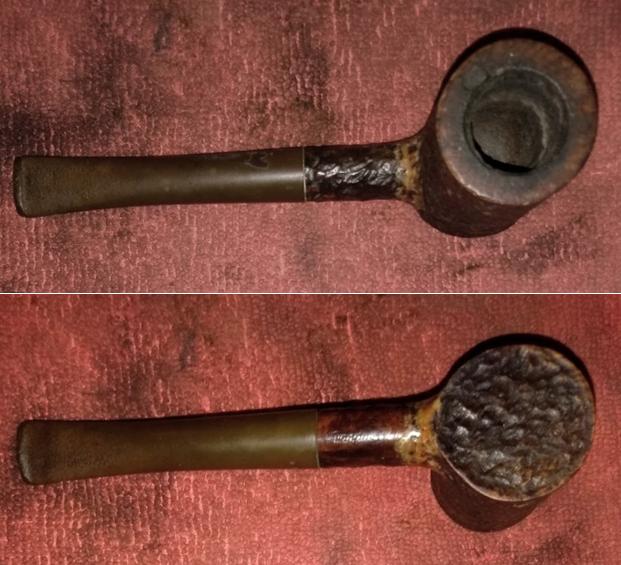
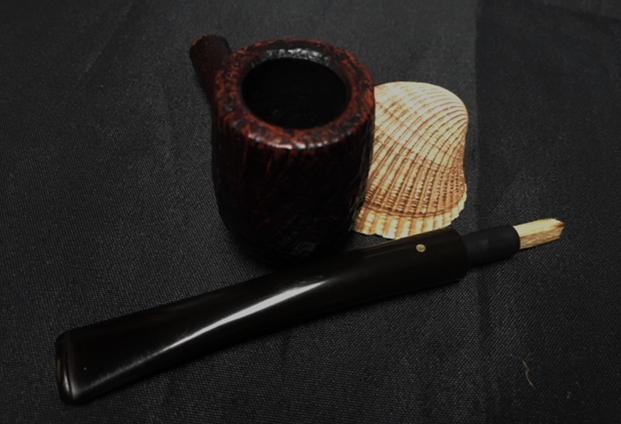
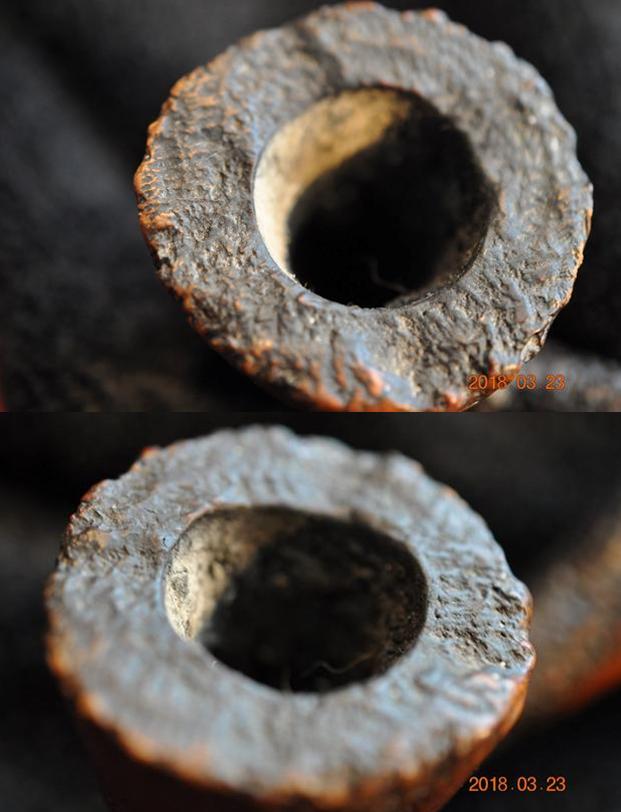
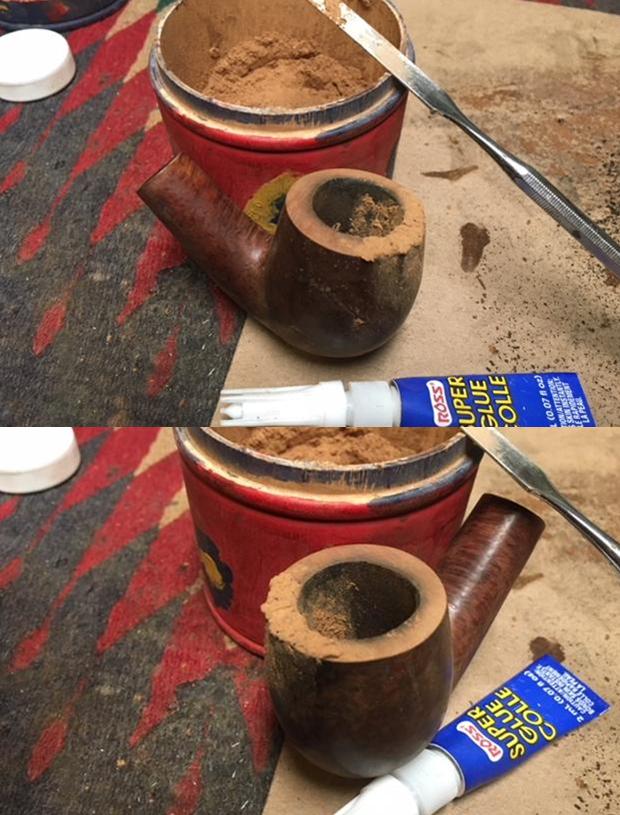
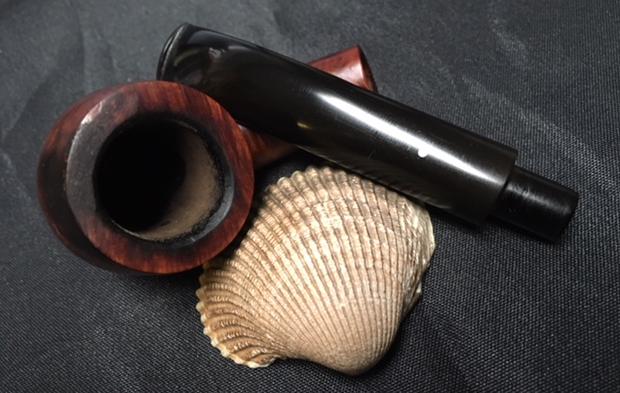
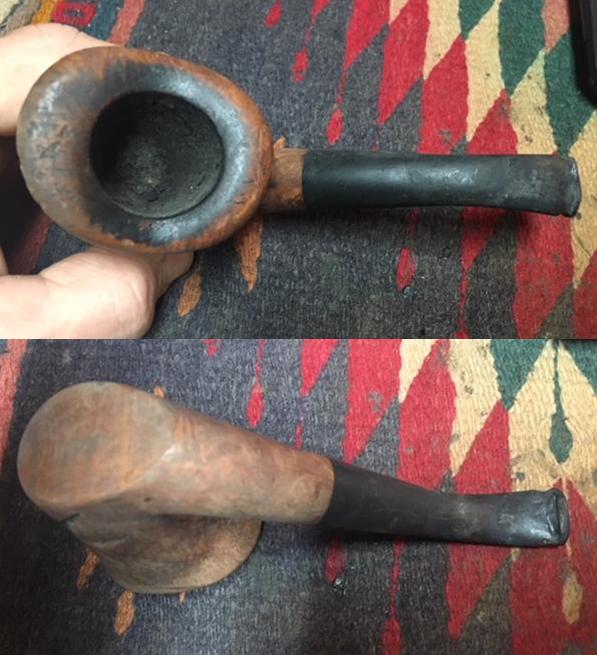
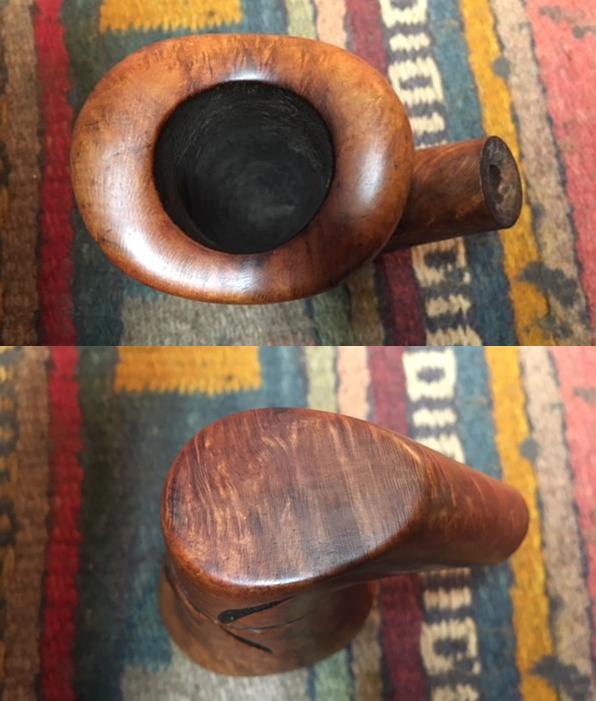
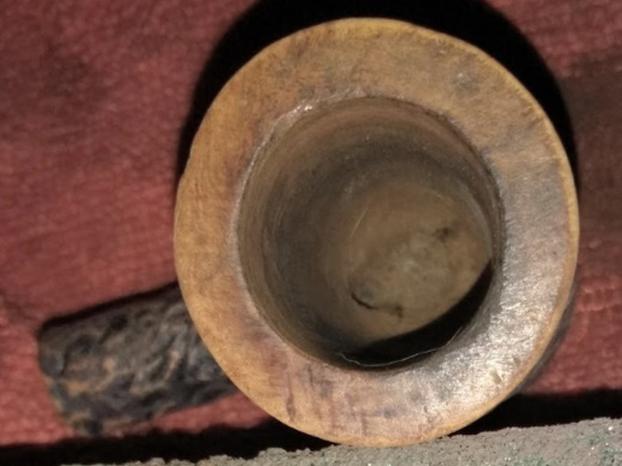
The first orders of business were to soak the stummel in Everclear and ream the chamber.  After the soak, a light touch with super fine “0000” steel wool cleared the rim. 
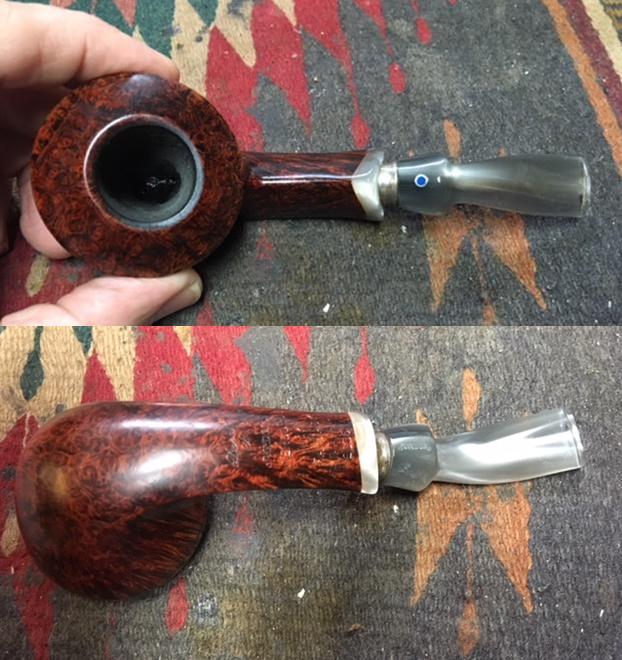
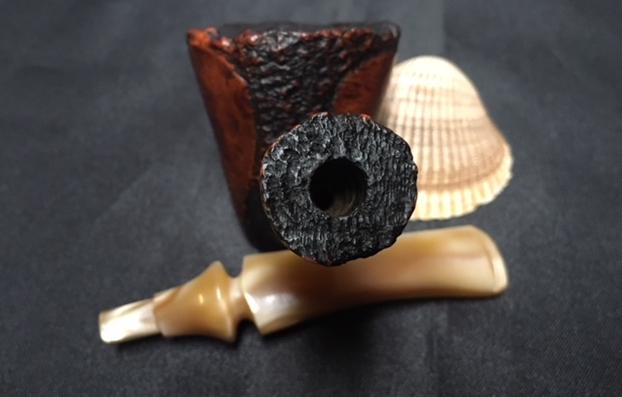
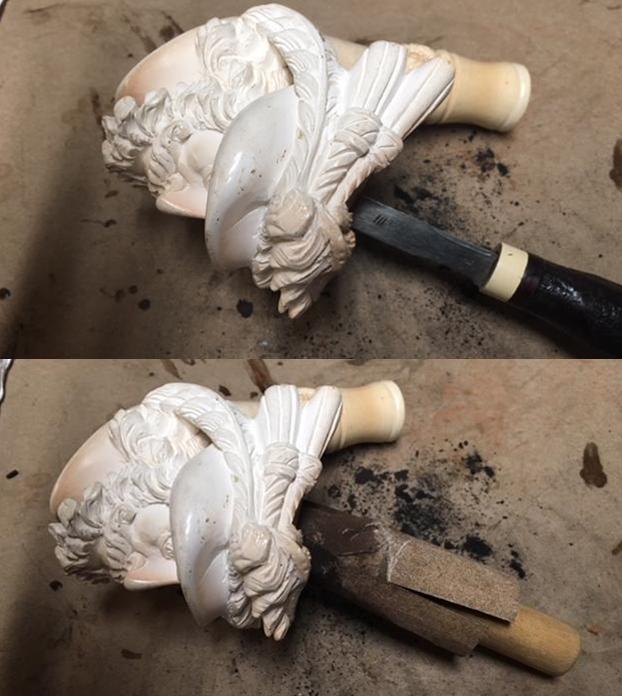
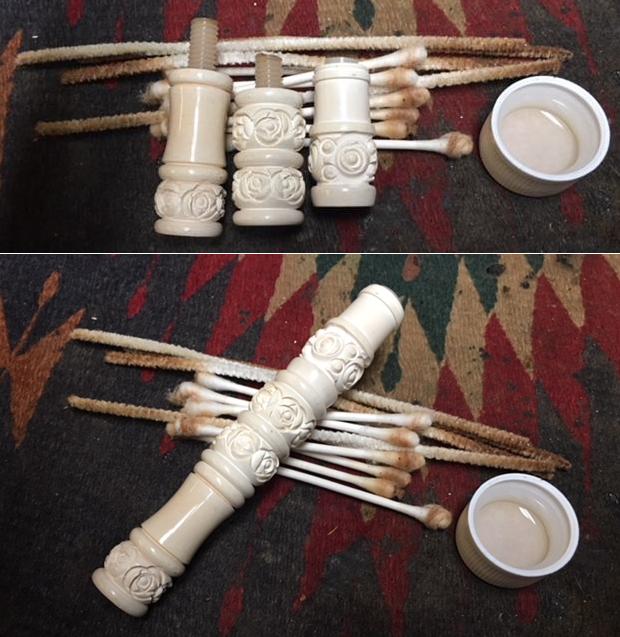
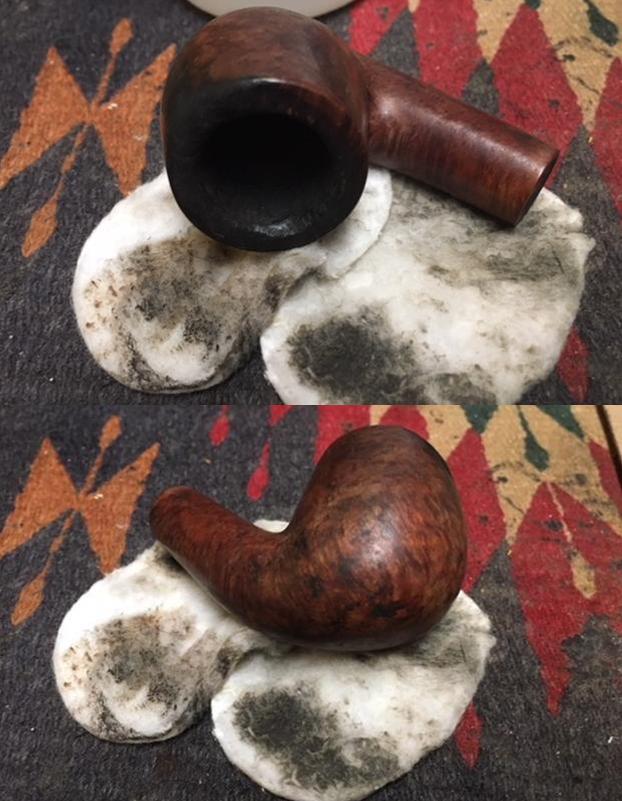
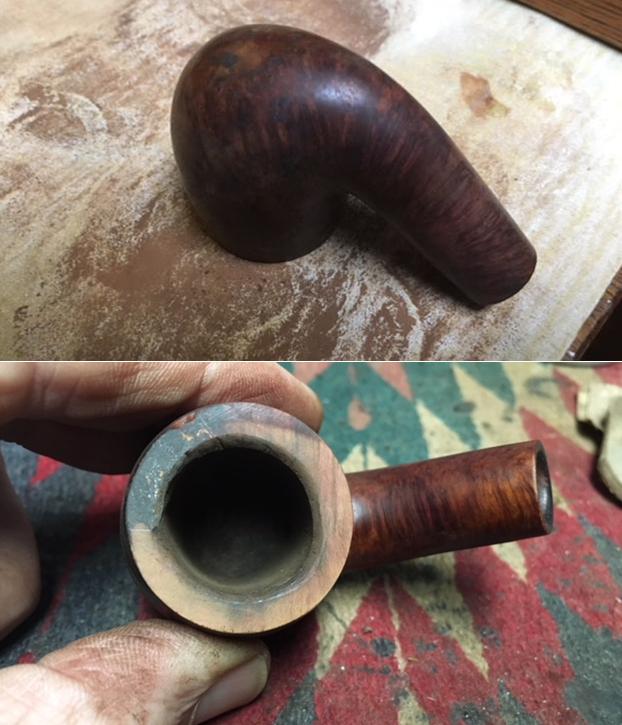
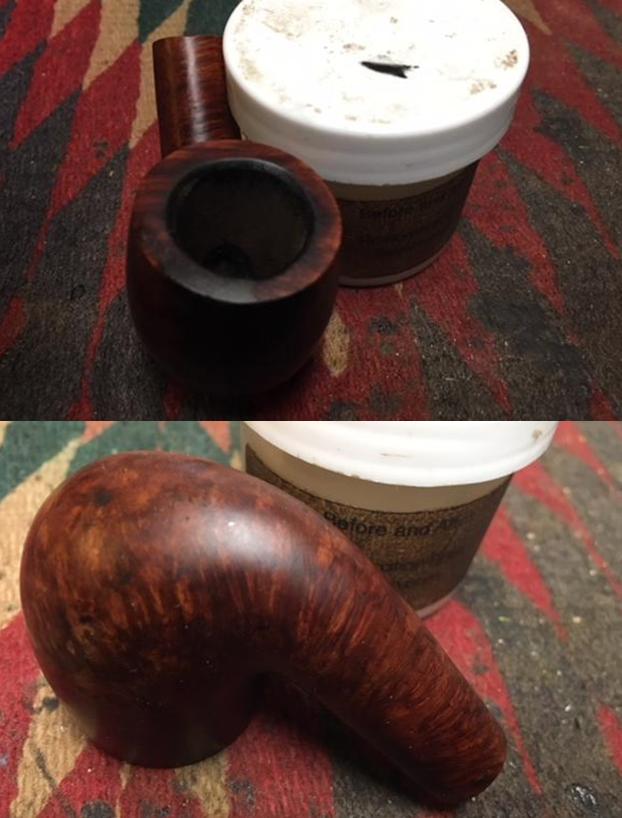
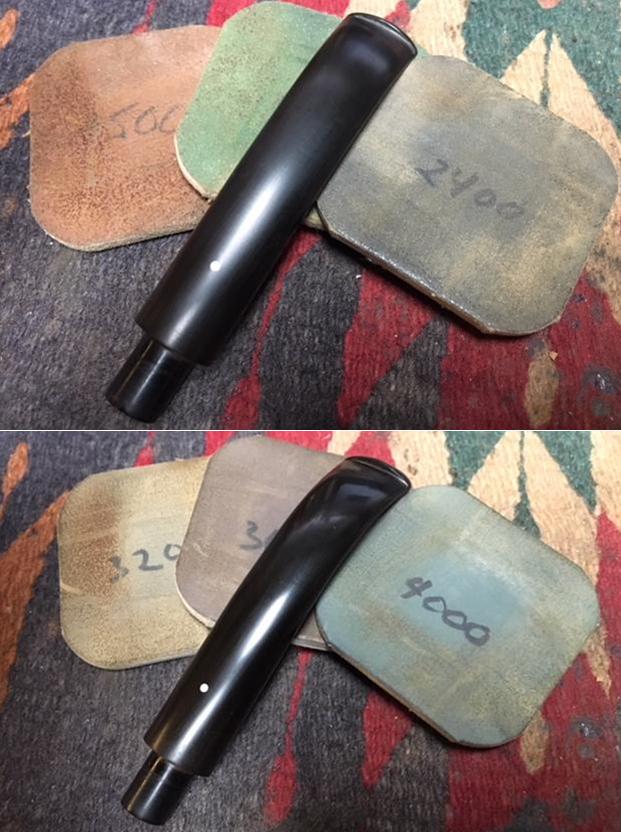
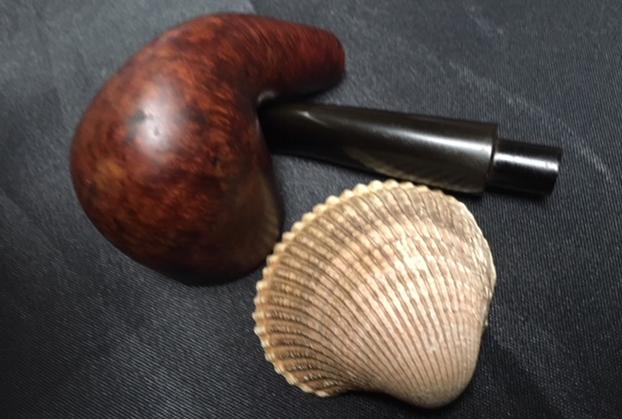
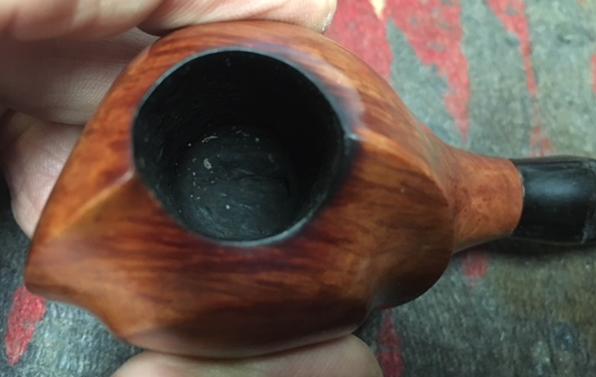
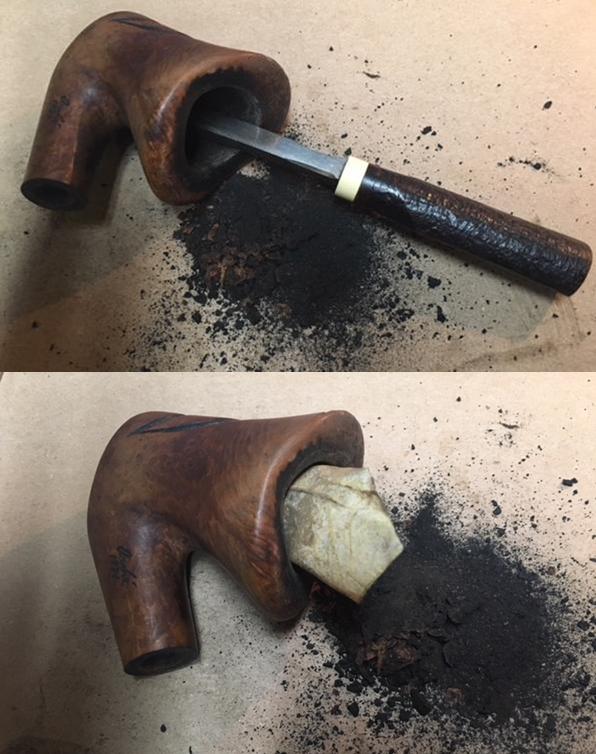
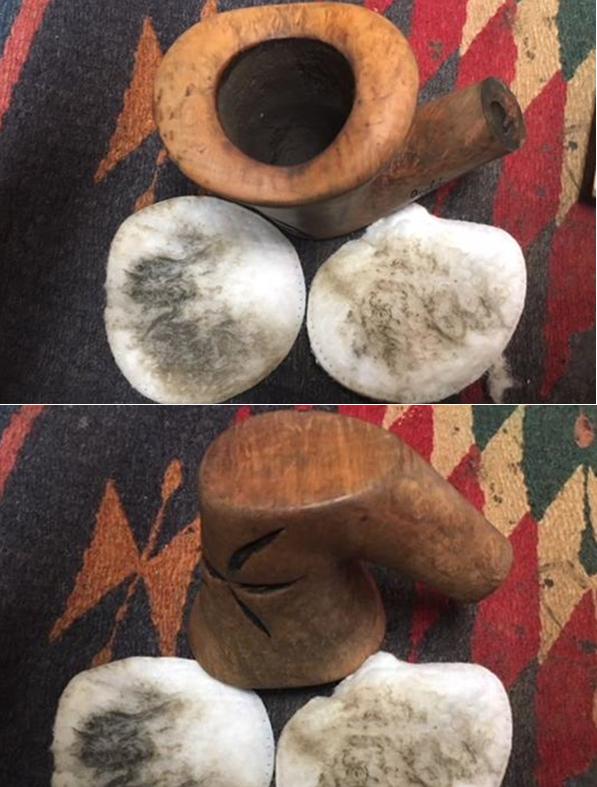
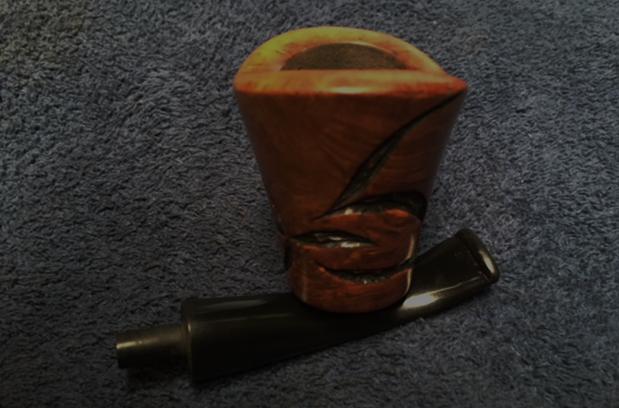
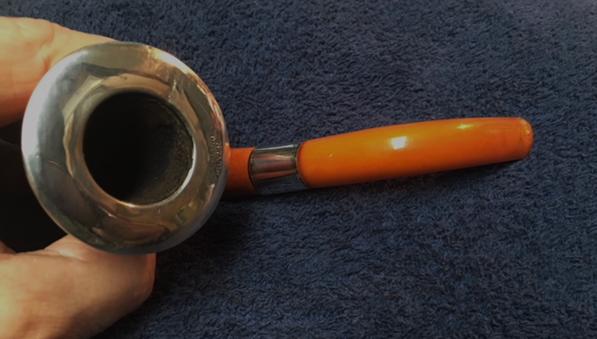
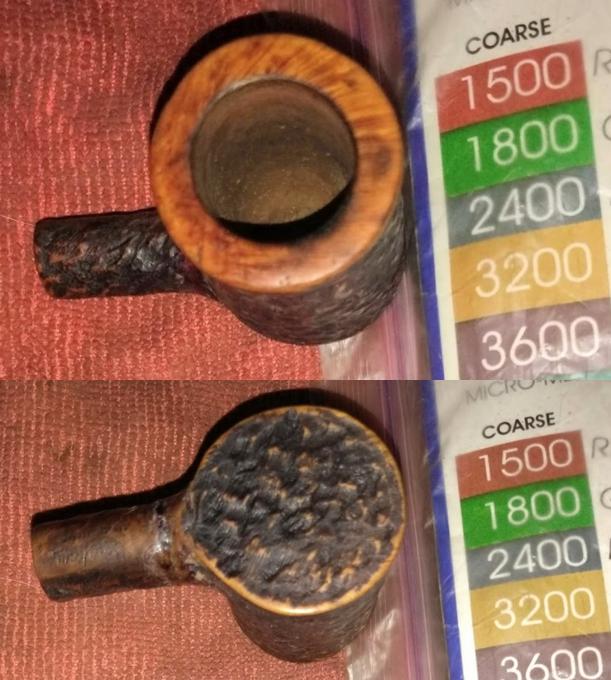
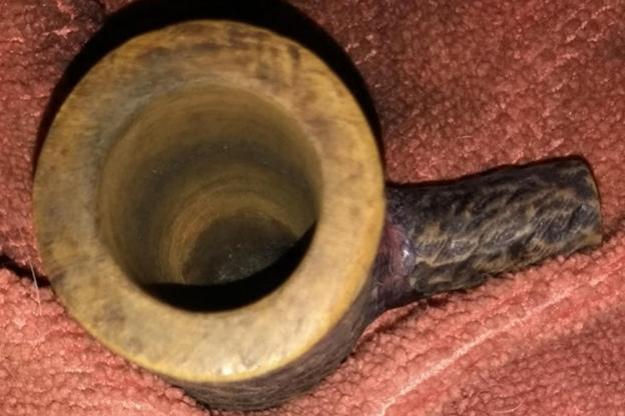
I followed that with a double 150- and 180-grit sanding pad all around, the highlights of which are shown below.  The second photo was taken after sanding the chamber with 150-, 220-, 320-, 400- and 600-grit papers. 
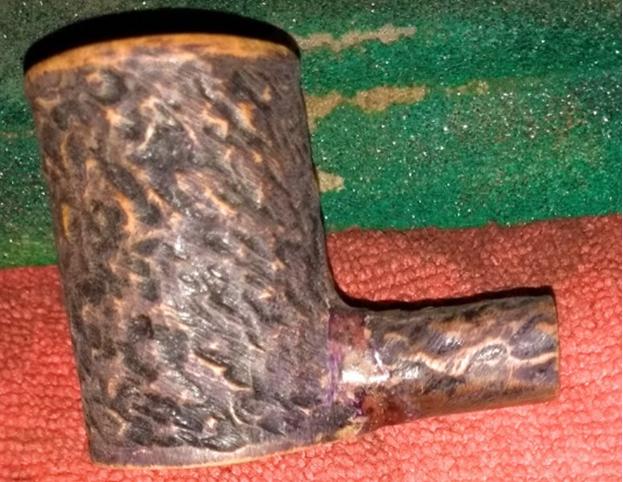
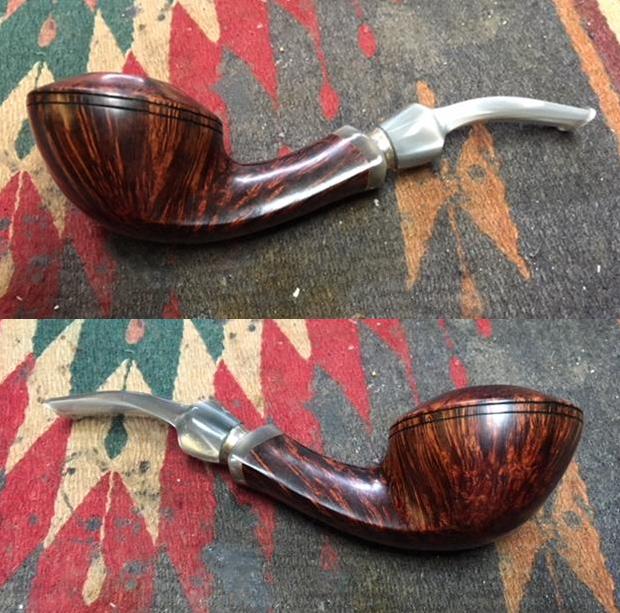
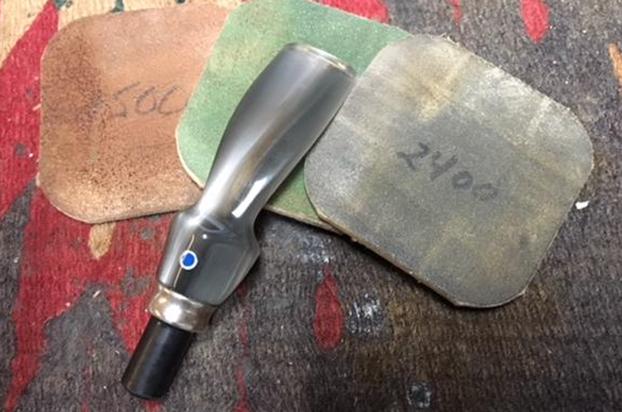
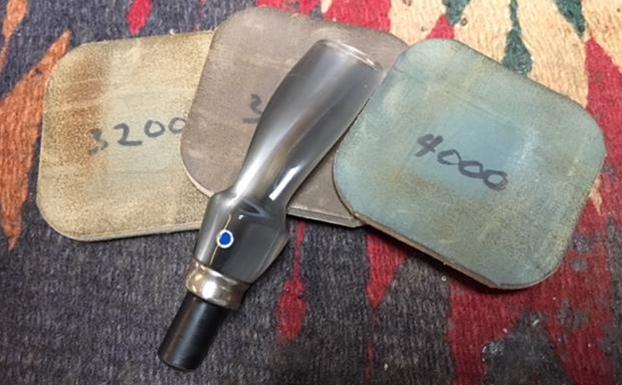
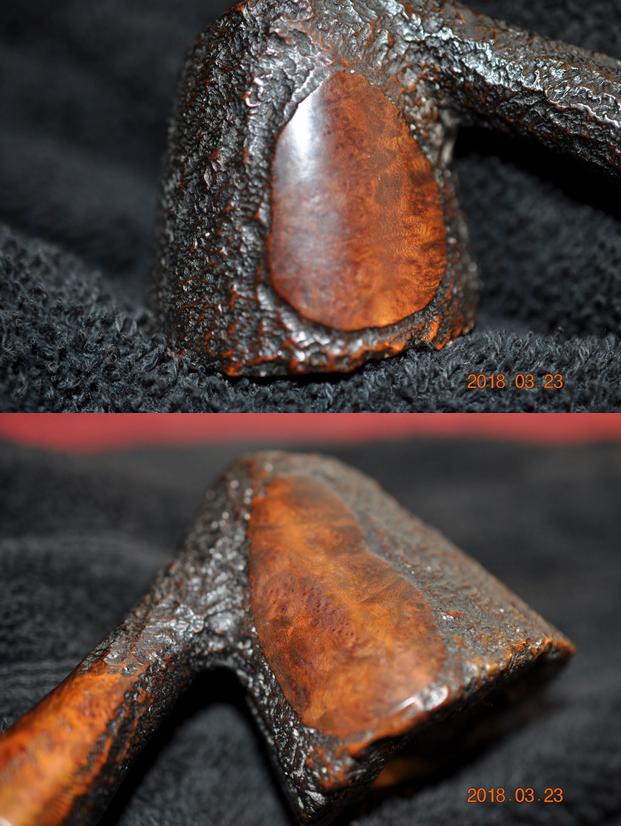
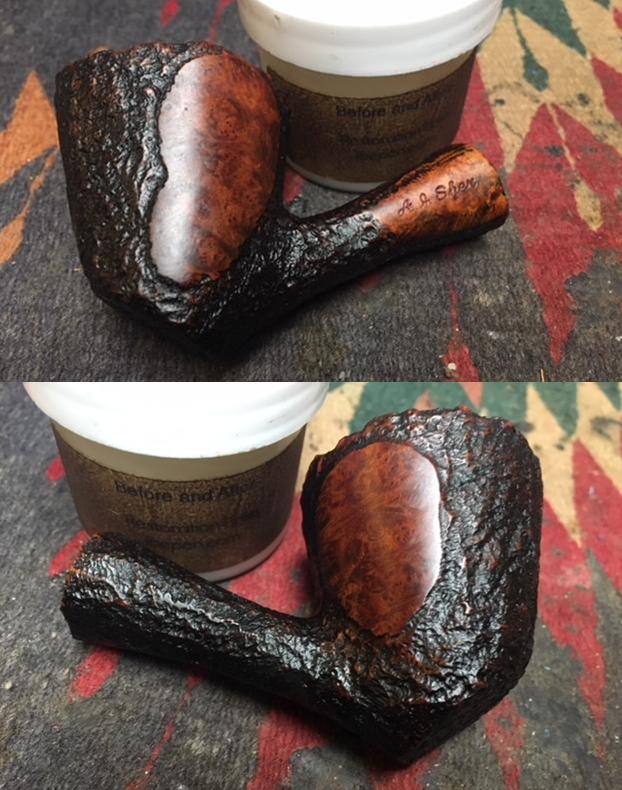
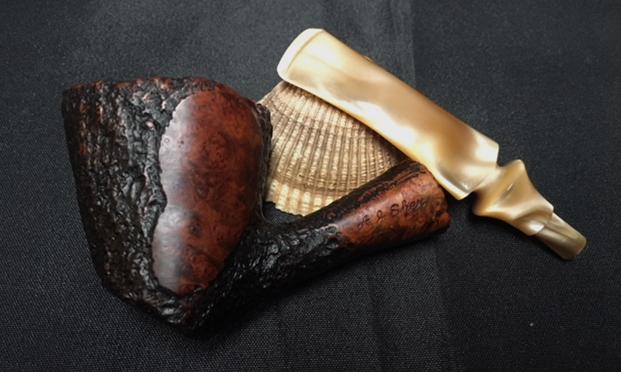
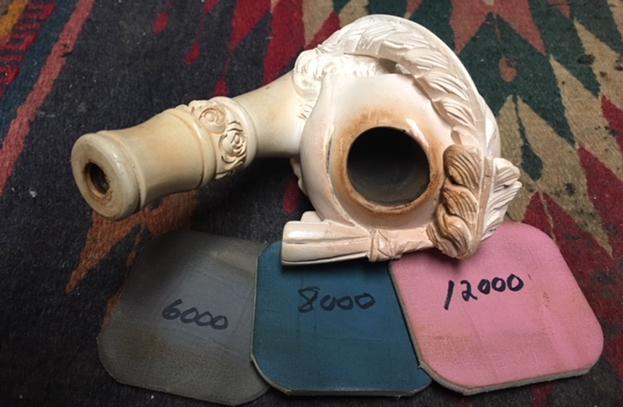
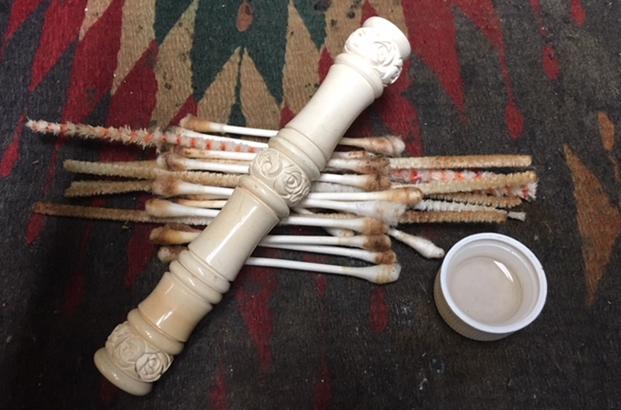
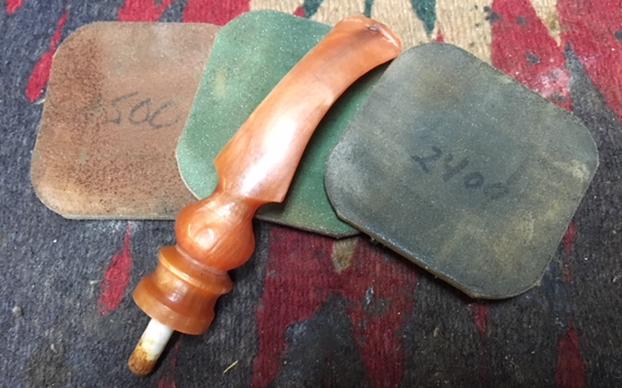
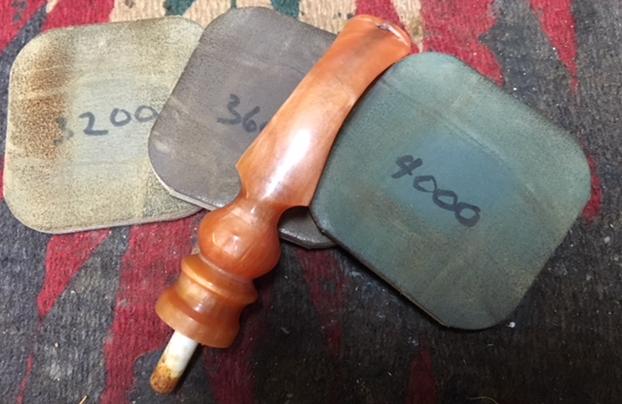
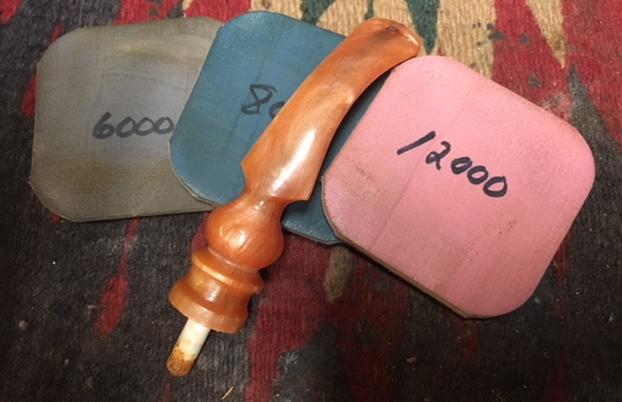
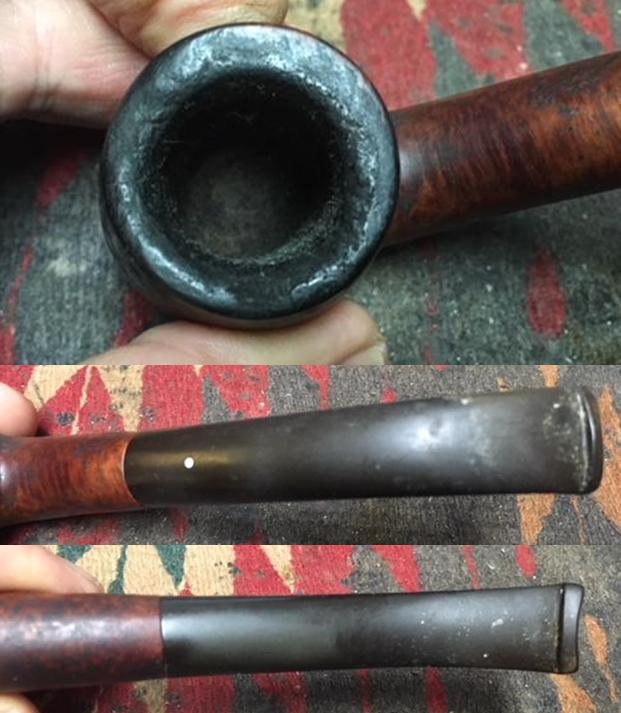
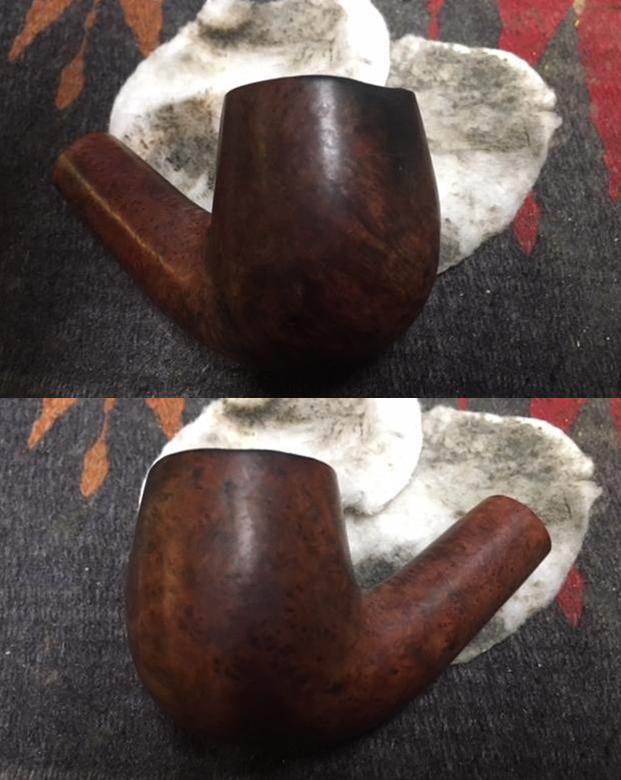
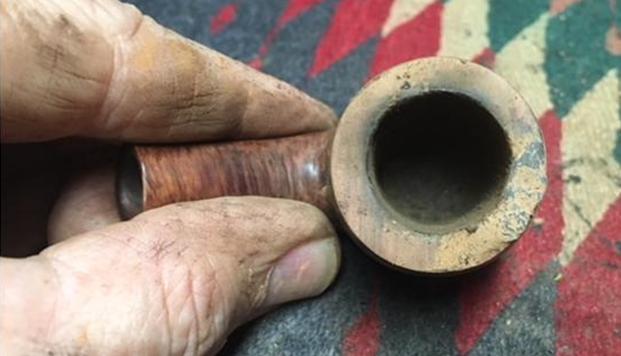
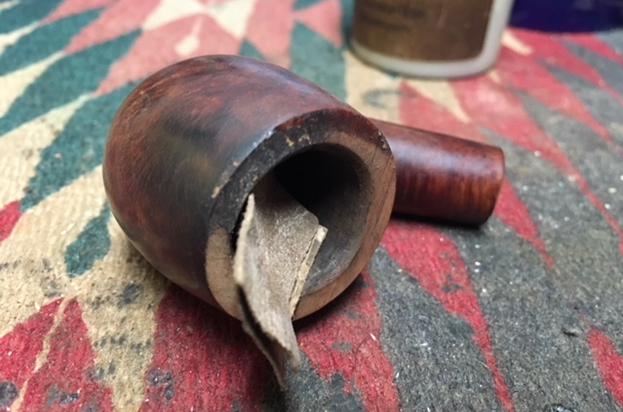
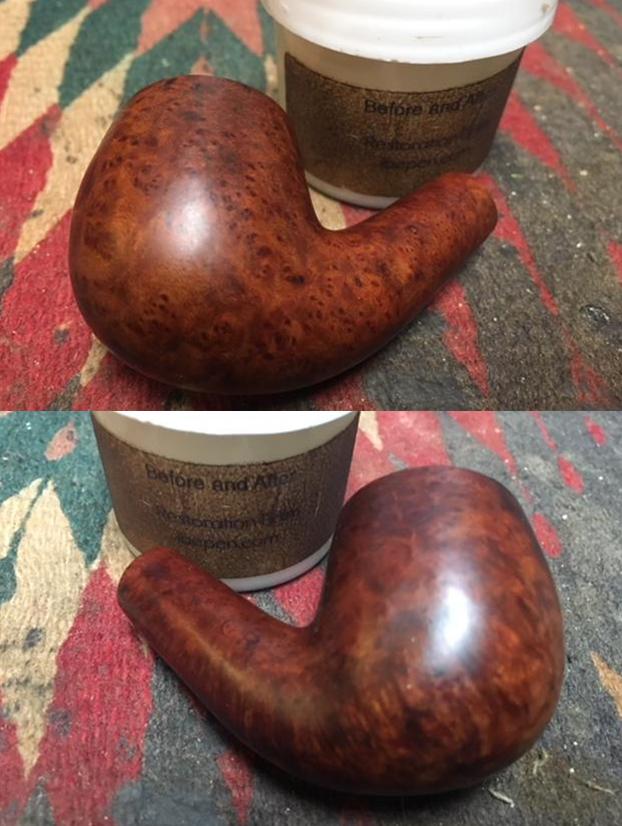
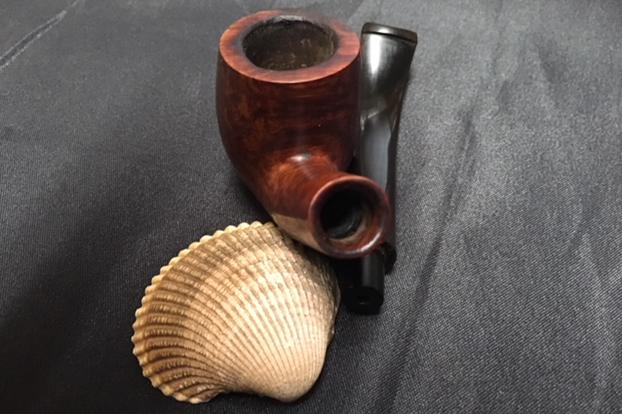
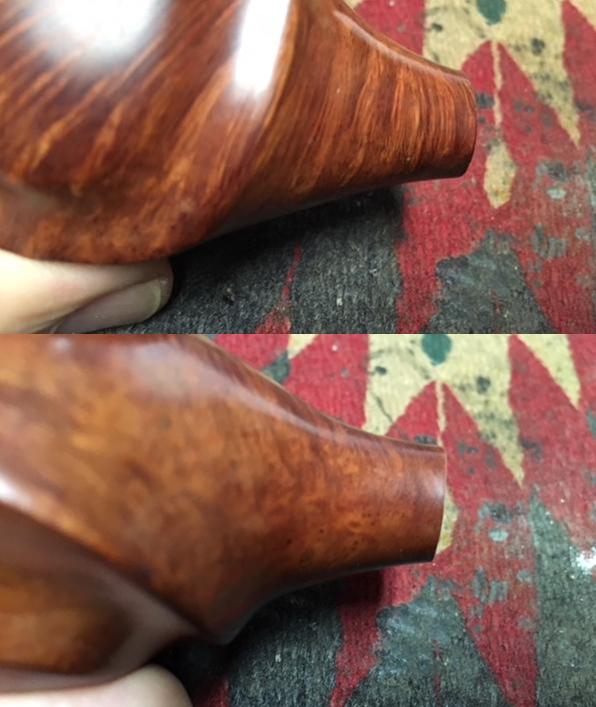
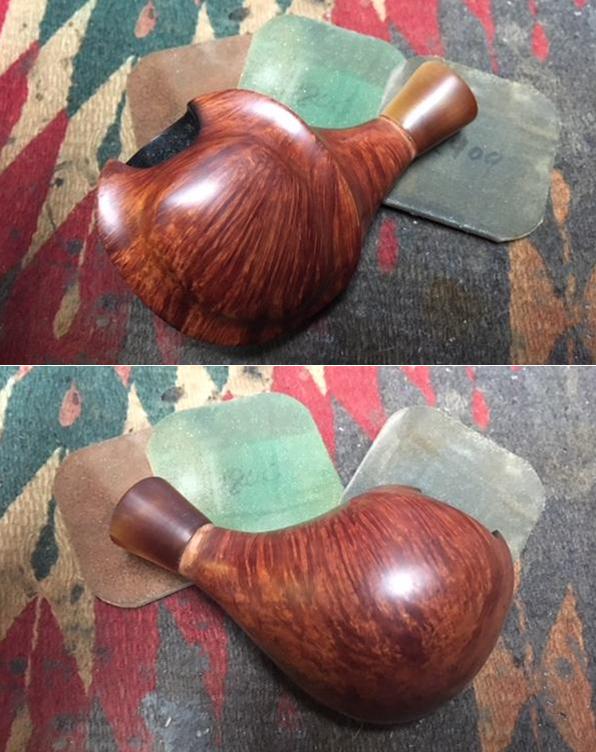
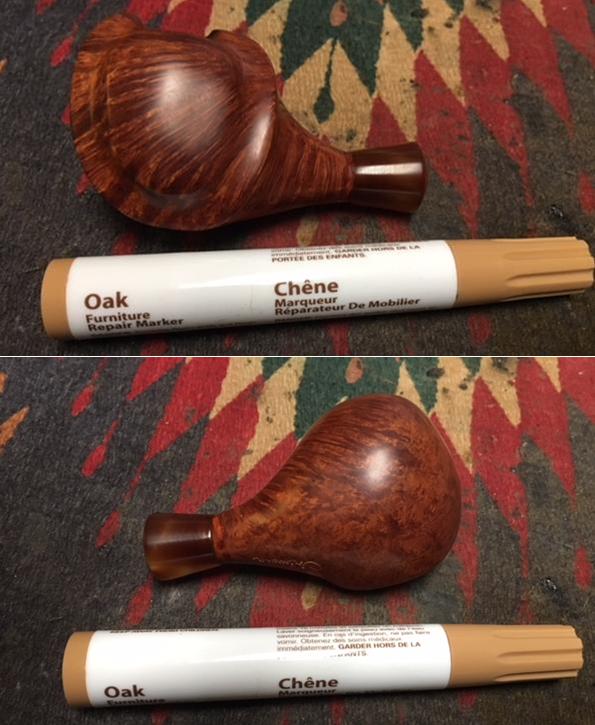
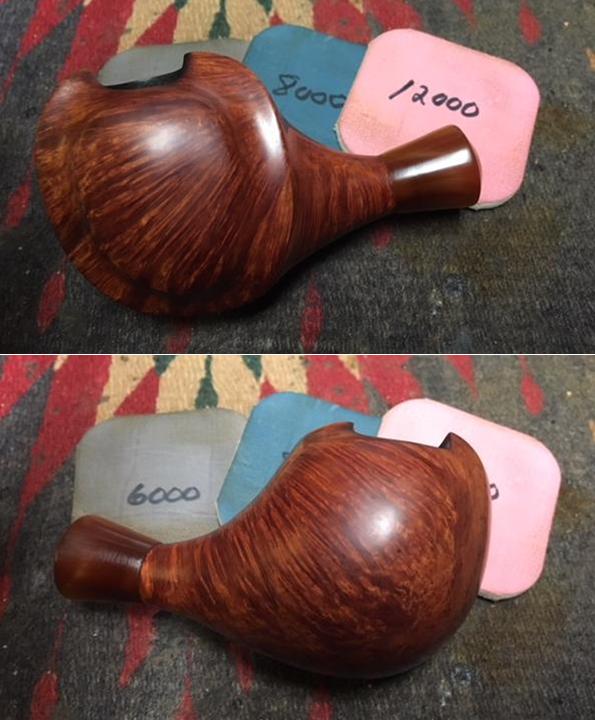
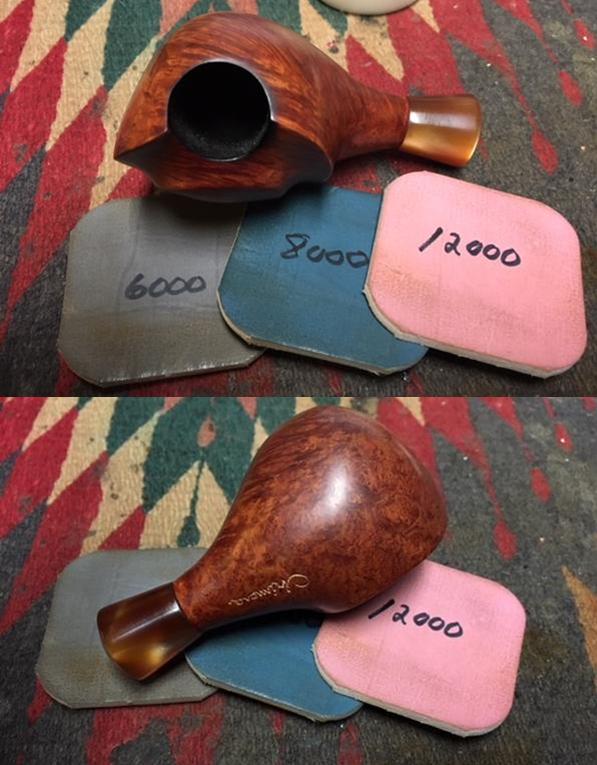
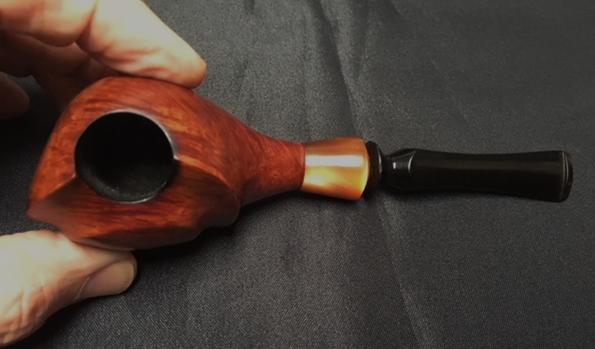
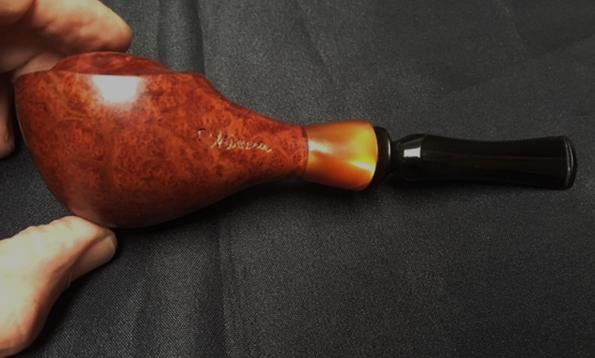
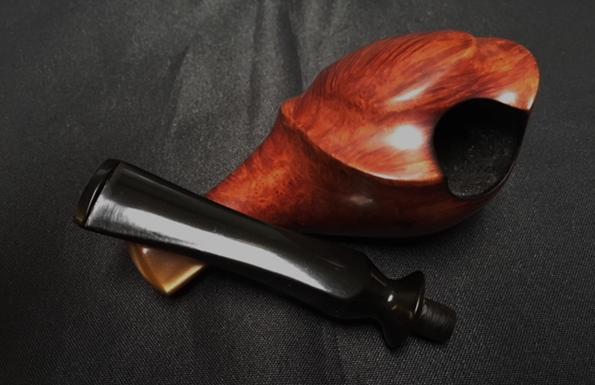
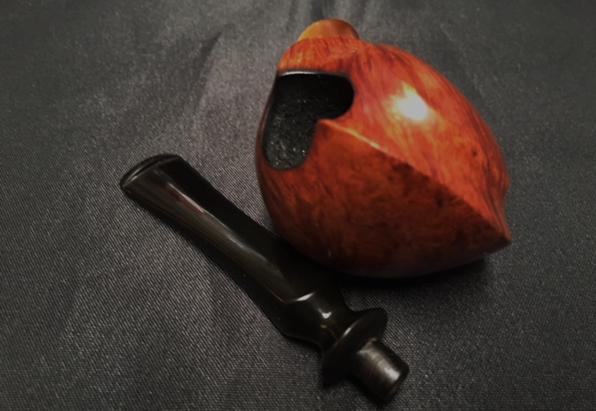
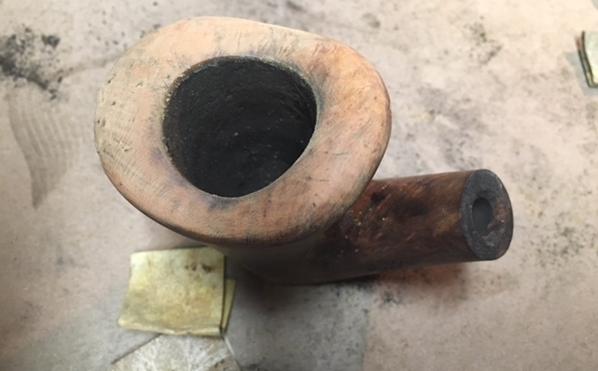
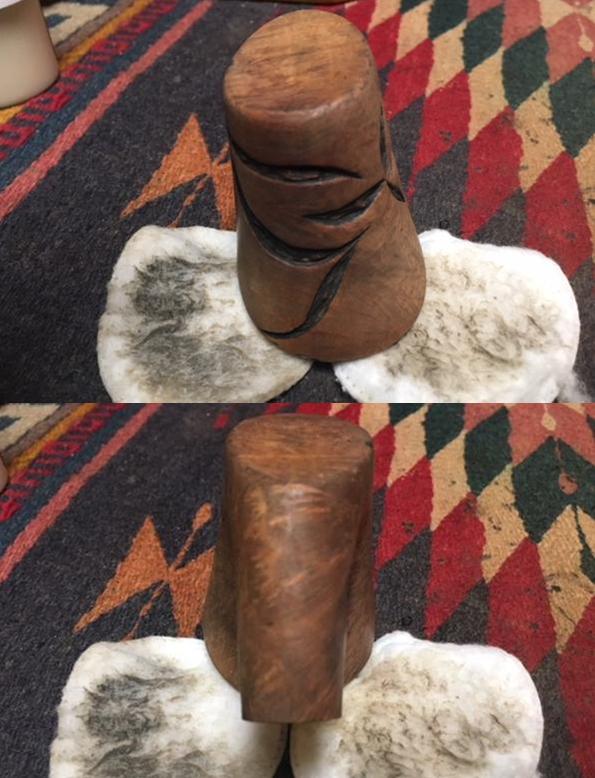
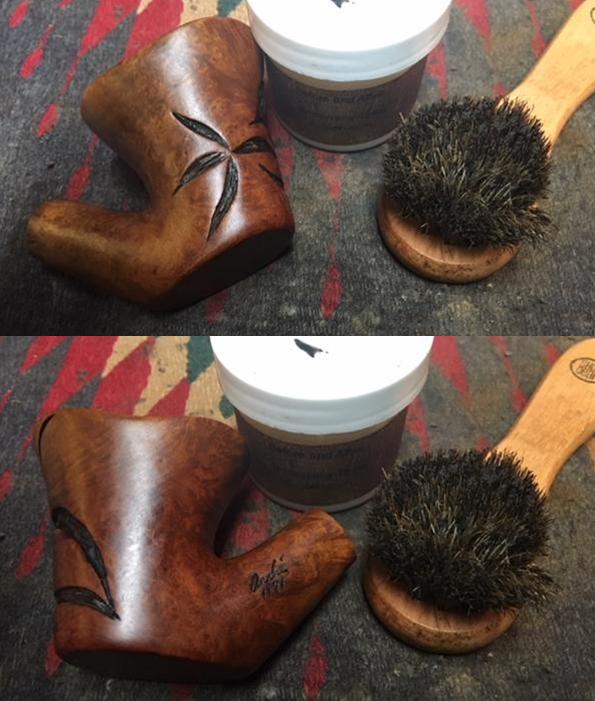
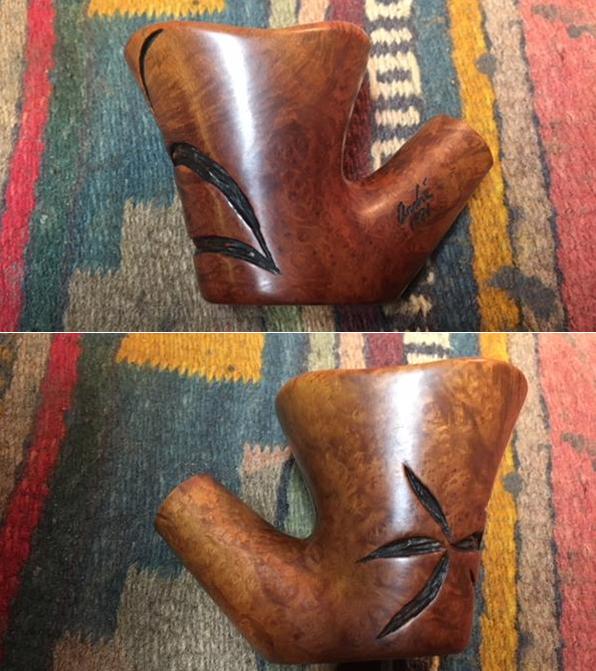
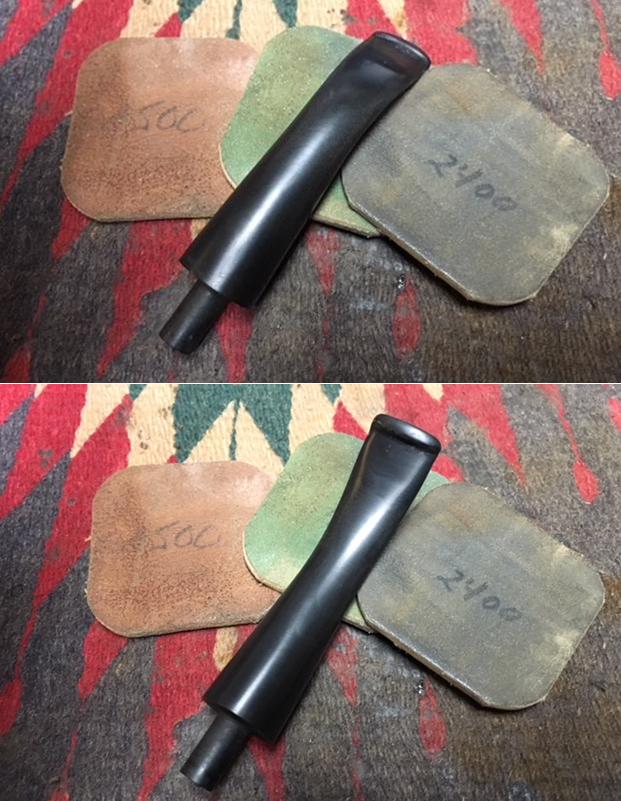
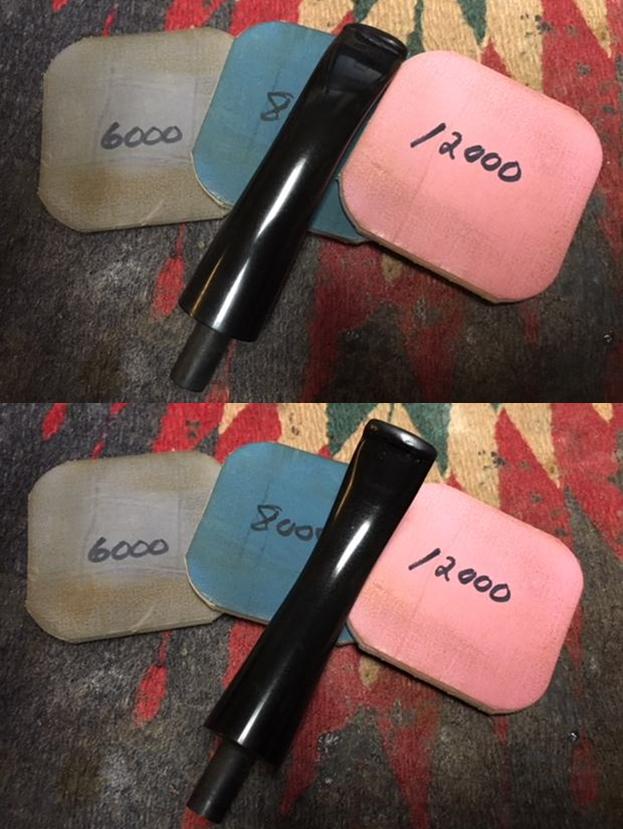
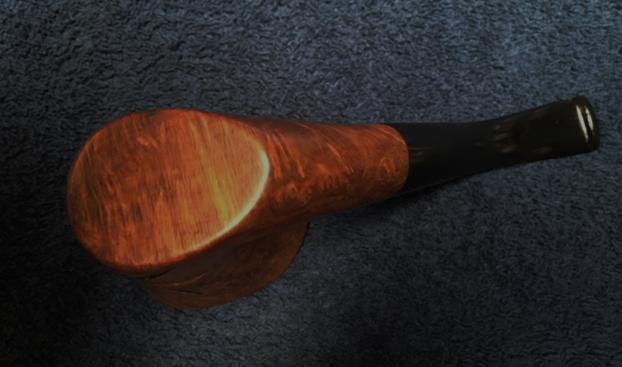
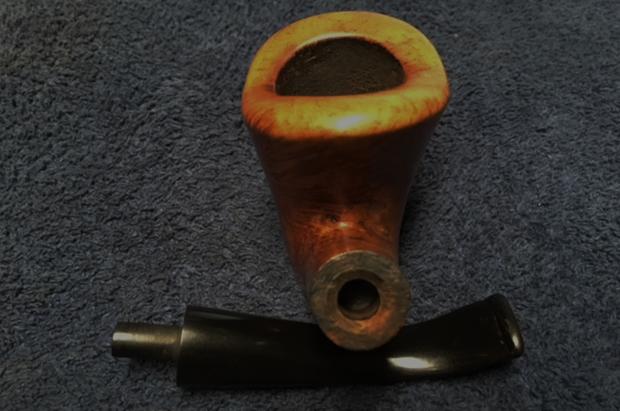
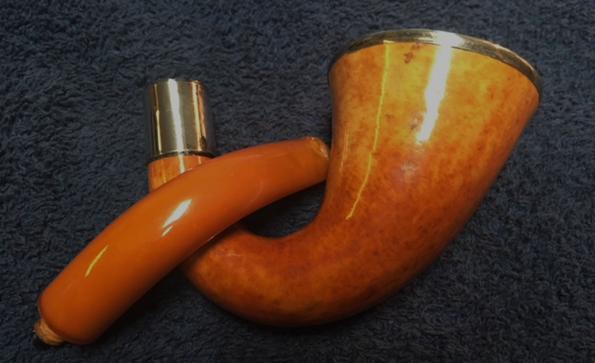
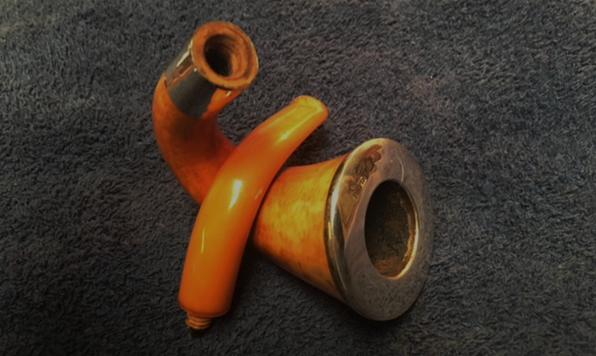
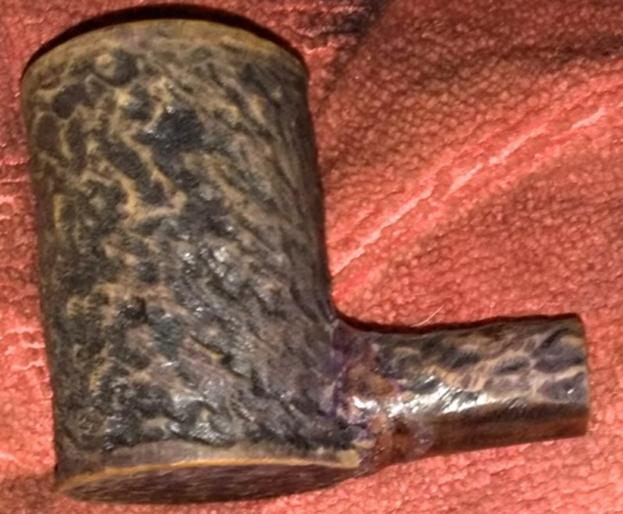
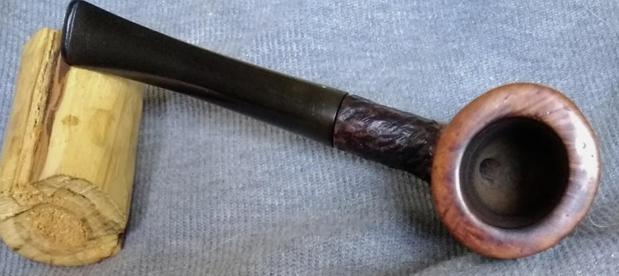
Working on the rim with papers from 220-600 grit followed by micro mesh 1500-12000, it shined up pretty well.  While I was at it, I micro meshed the rest of the stummel, focusing on the rim, and the first and third photos following show the improvement. 
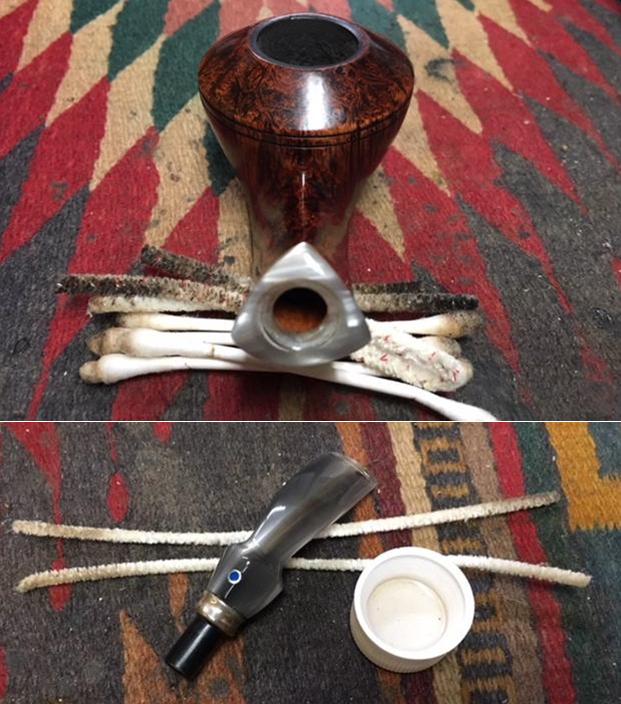
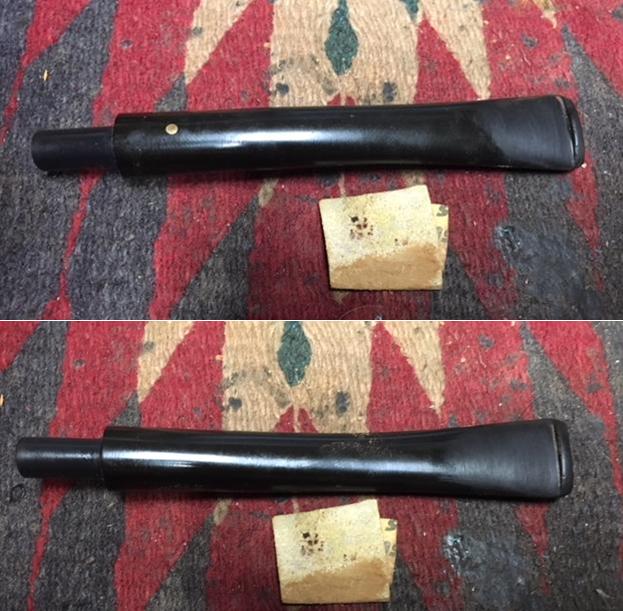
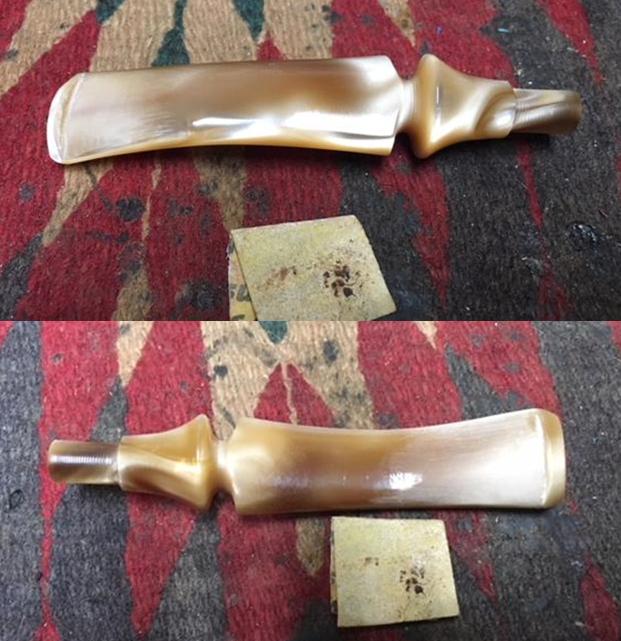
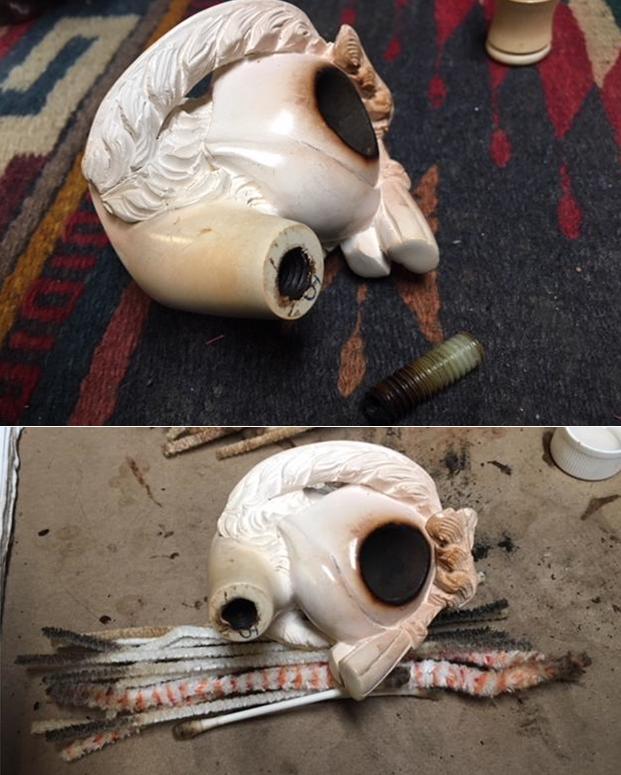
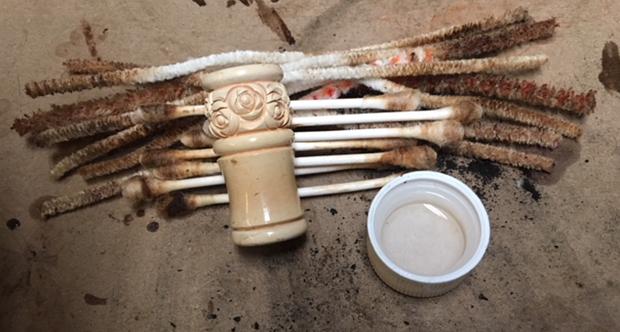
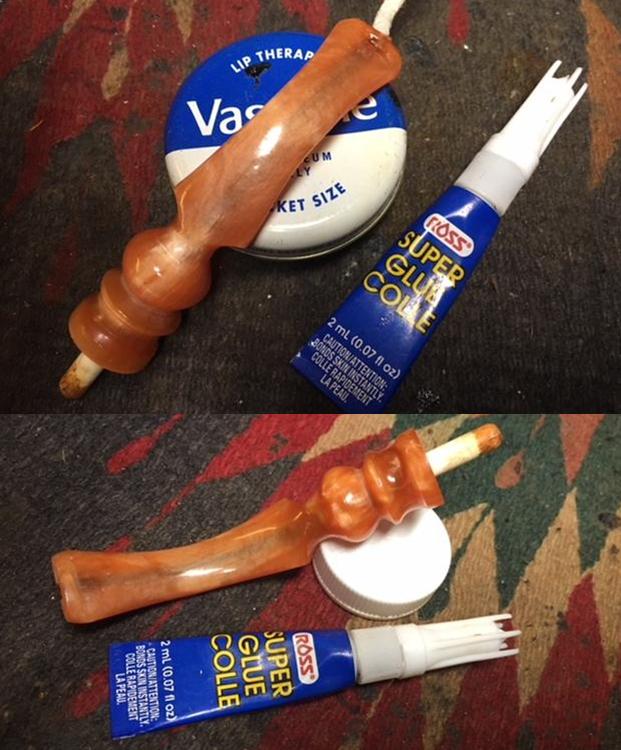
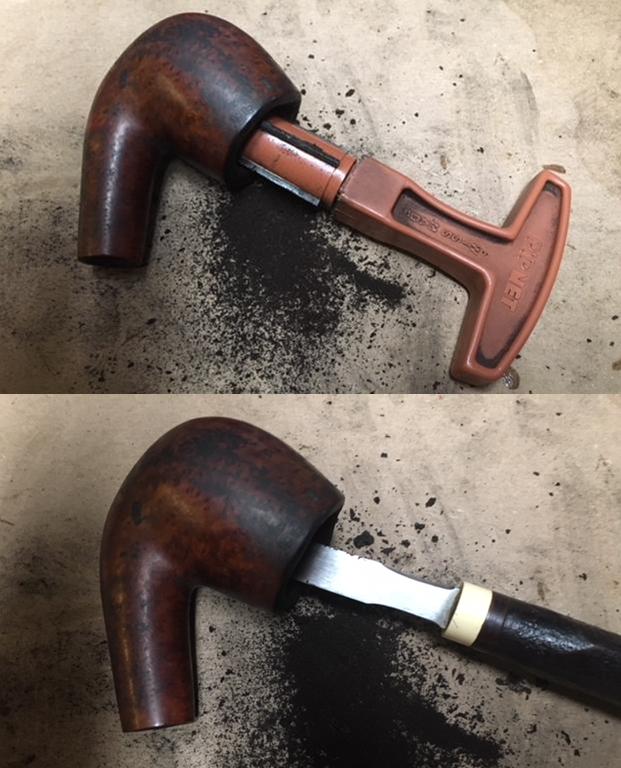
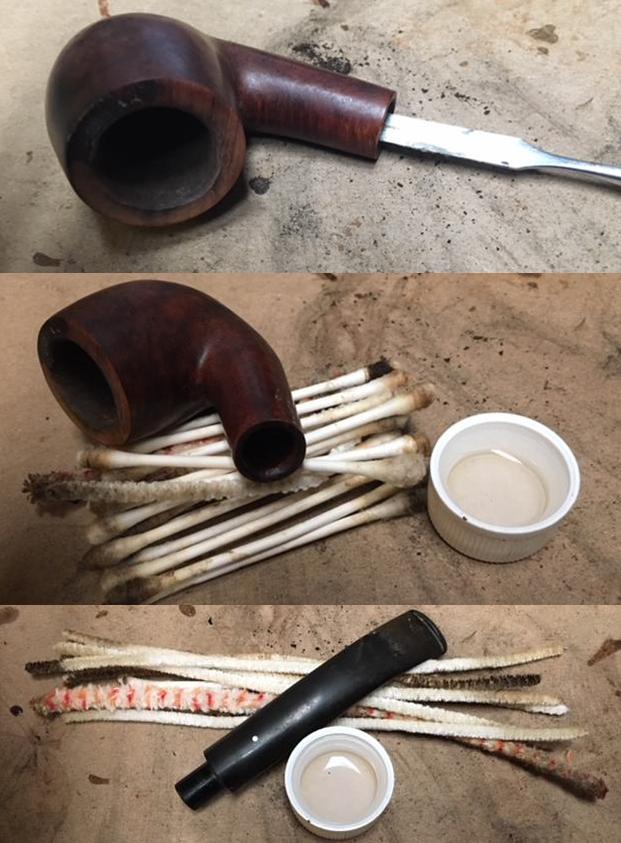
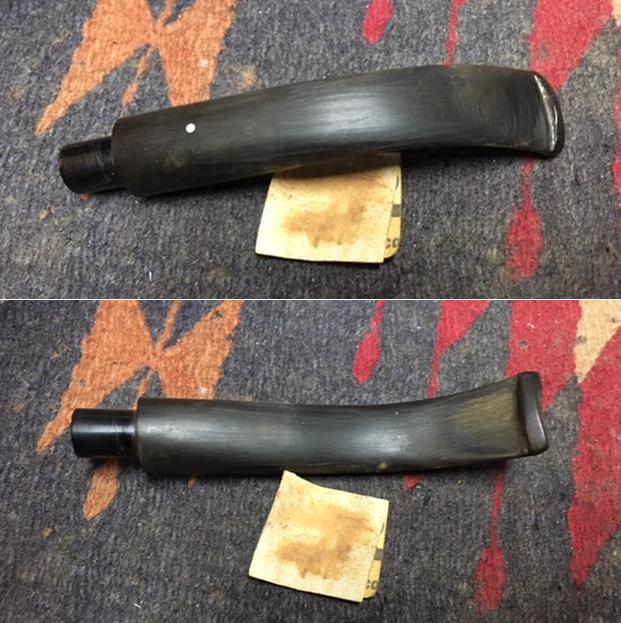
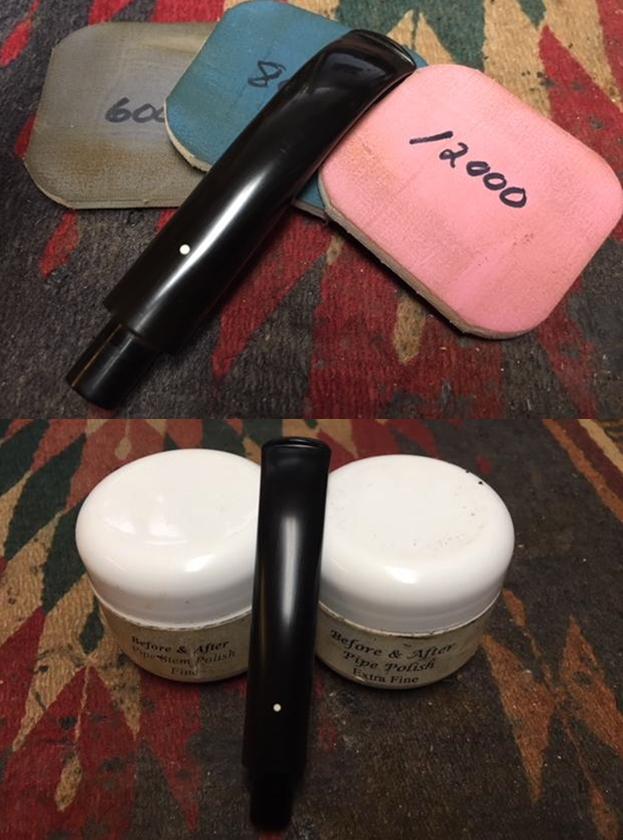
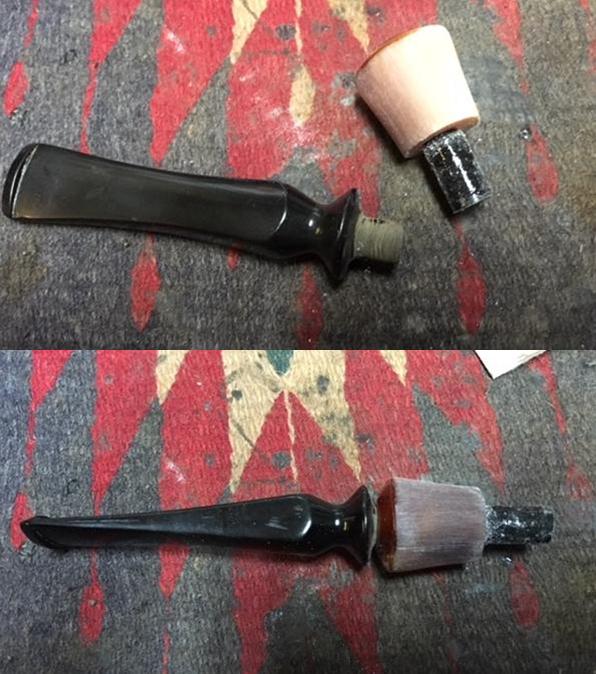
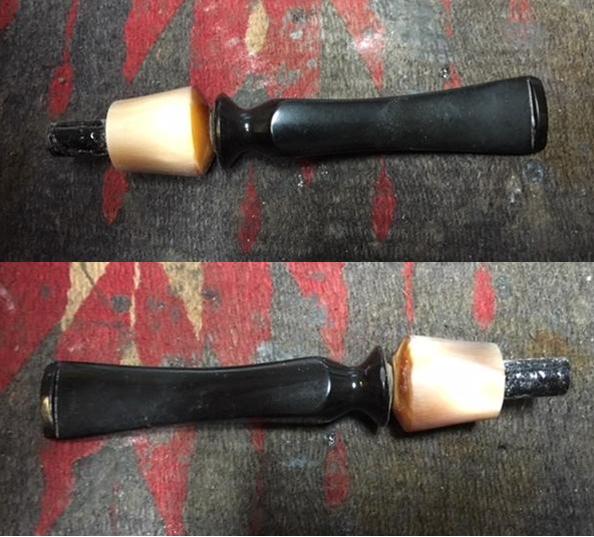
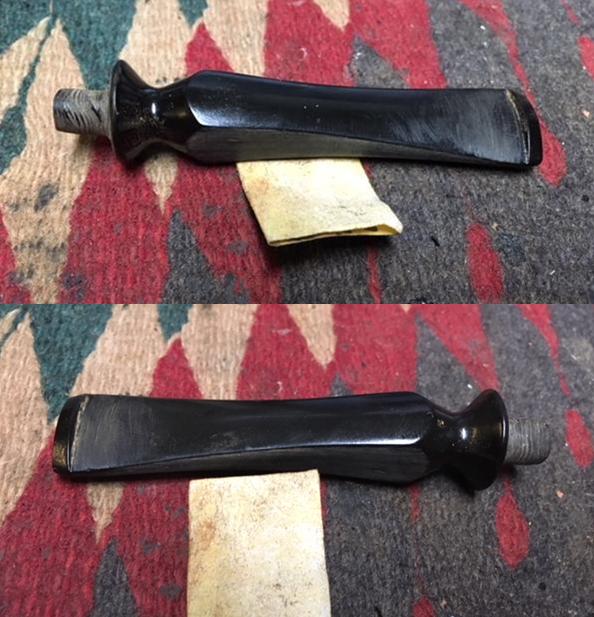
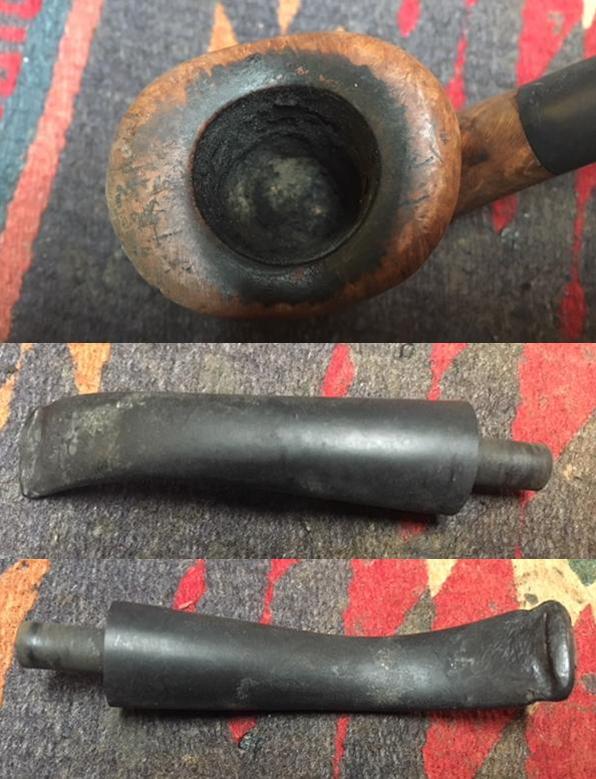
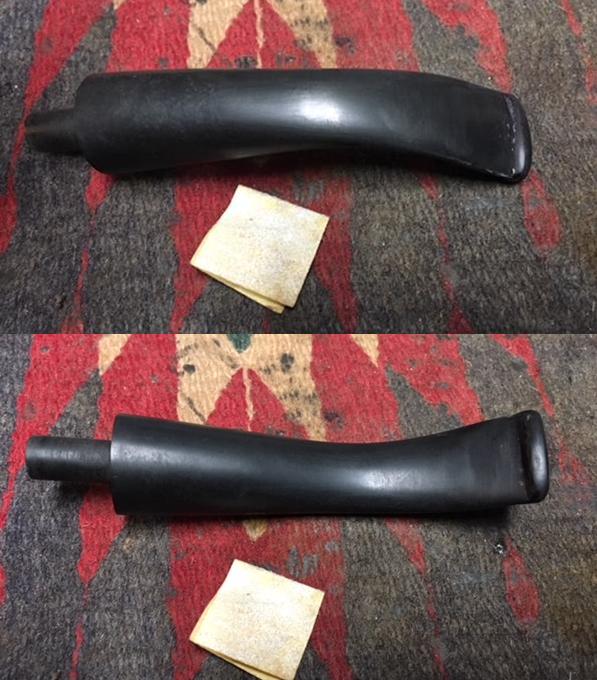
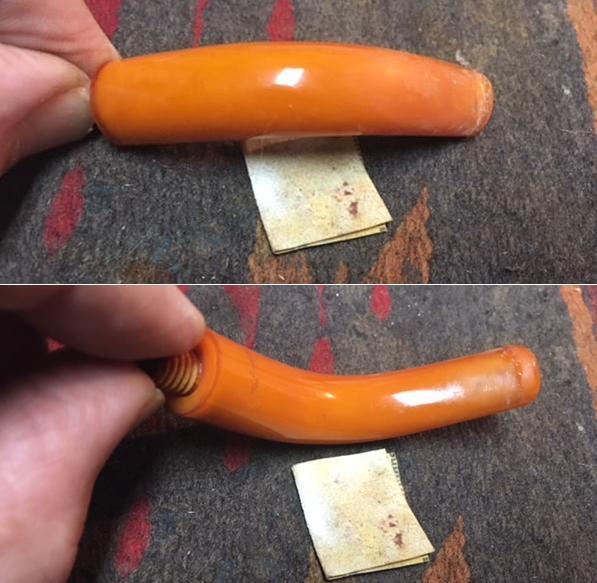
The next pics show how filthy an old, oxidized stem can be, and the aftermath of soaking in OxiClean.  I don’t know what the loose, plastic film-like stuff is in the last shot below and was worried it would become a problem. 
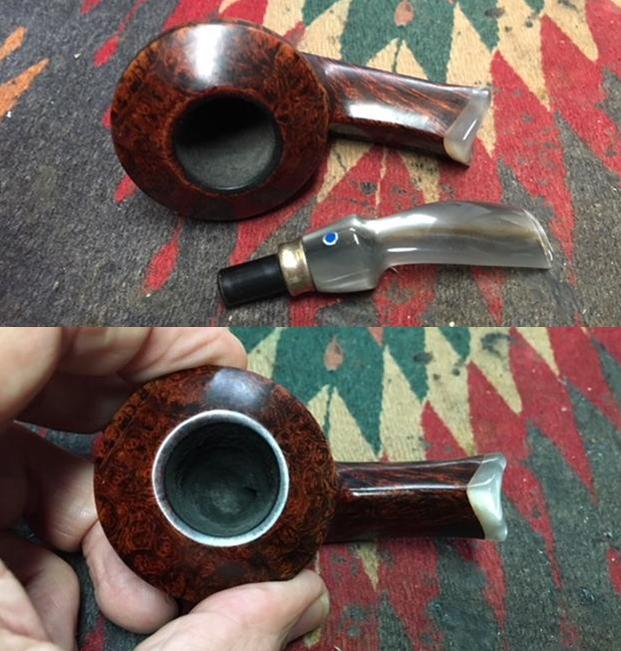
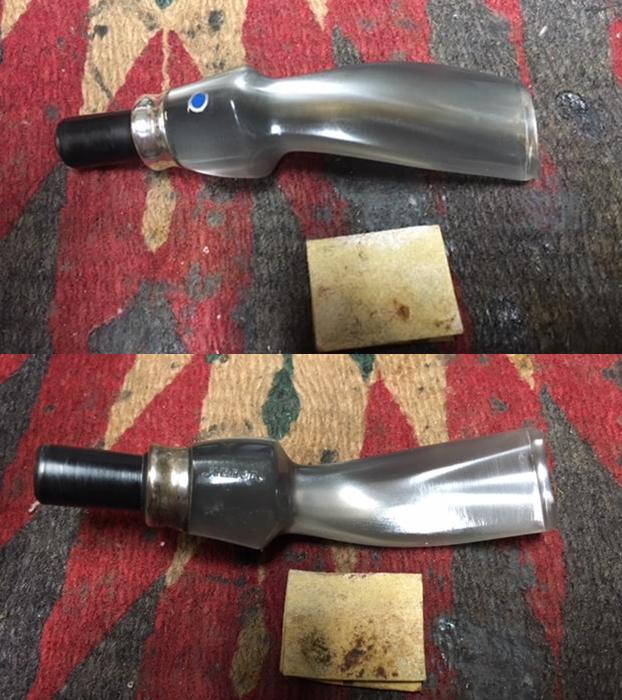
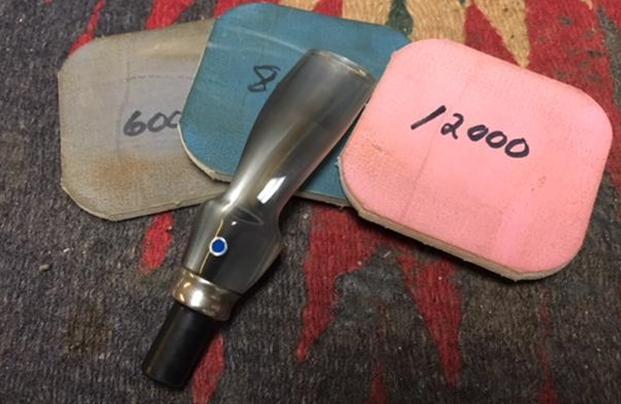
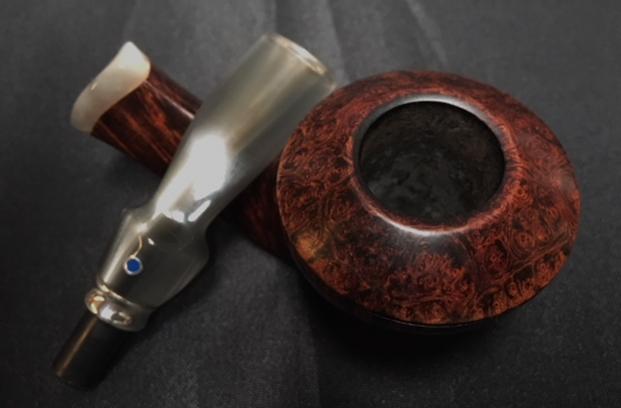
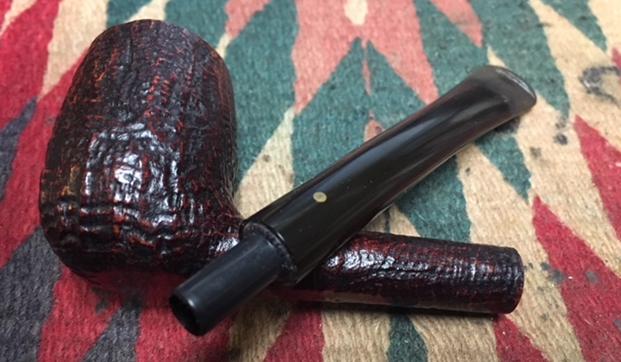
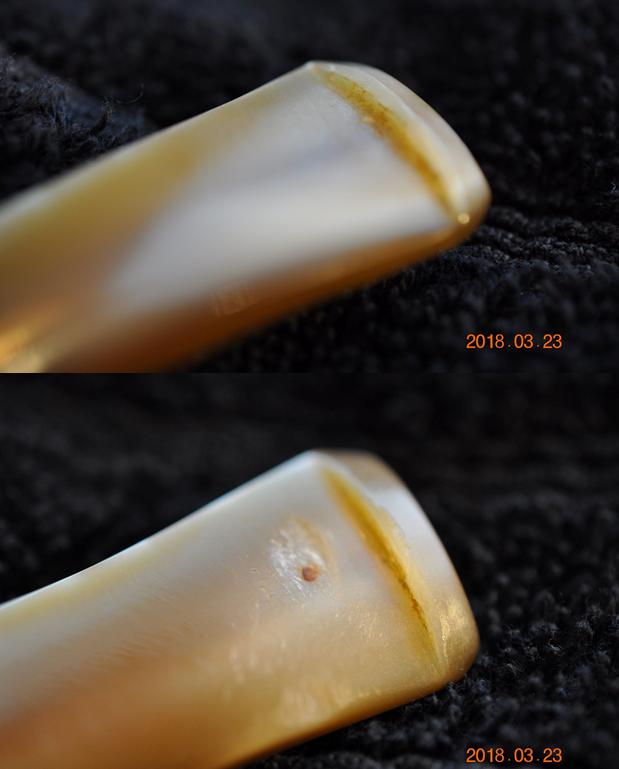
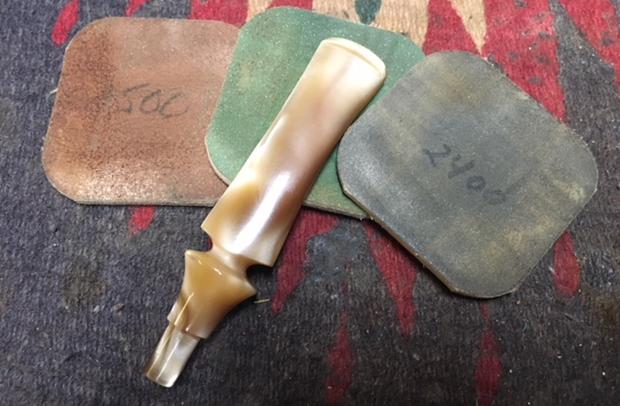
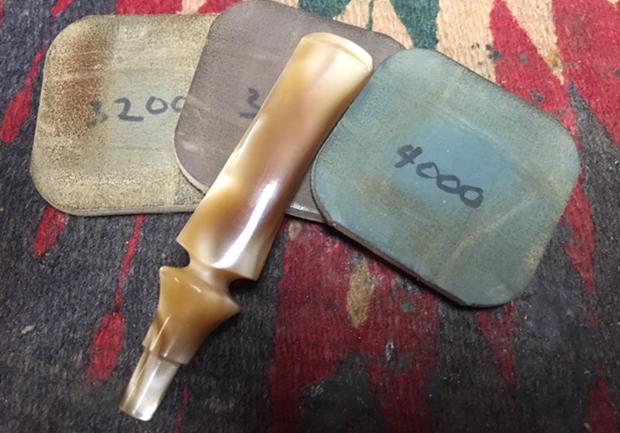
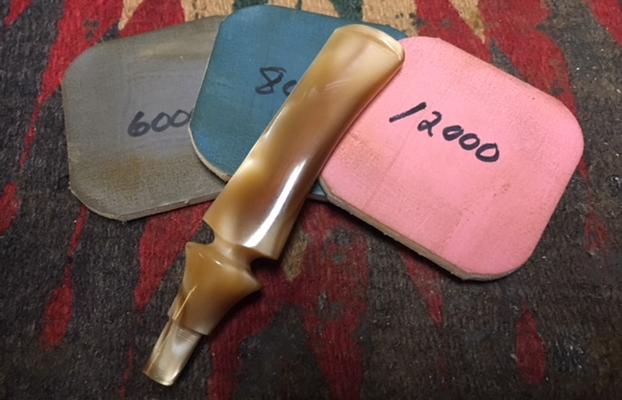
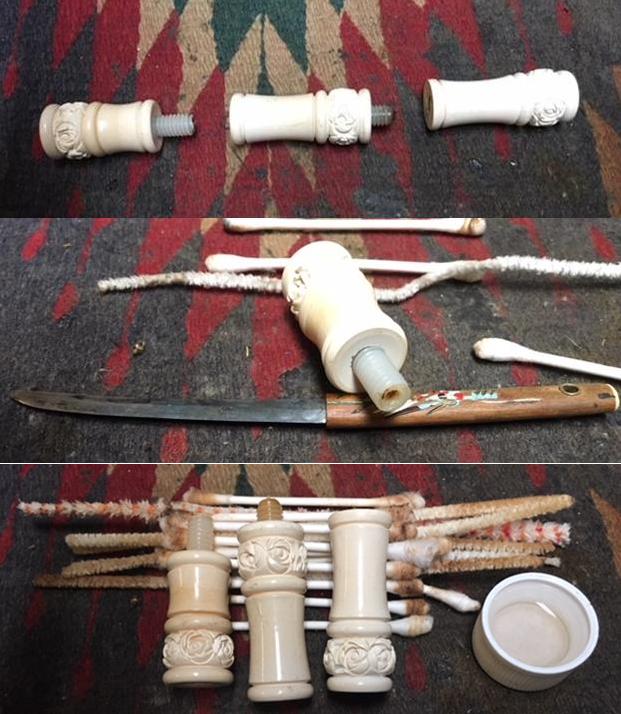
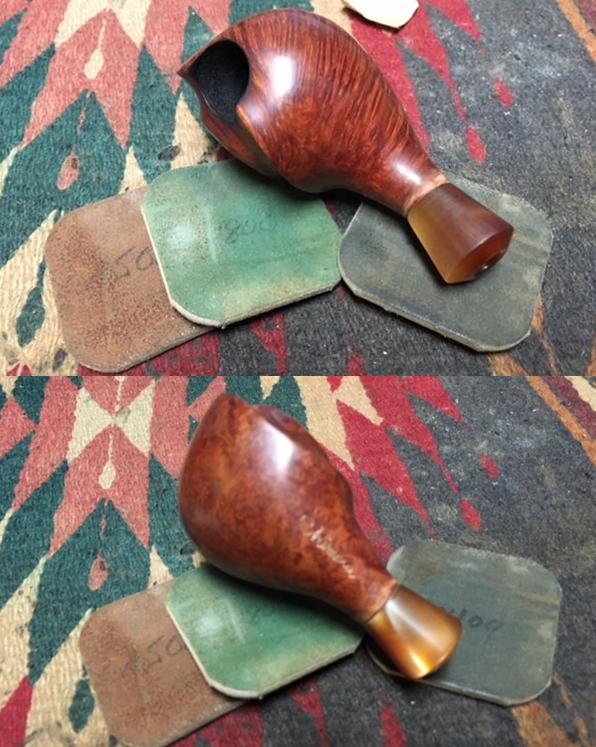
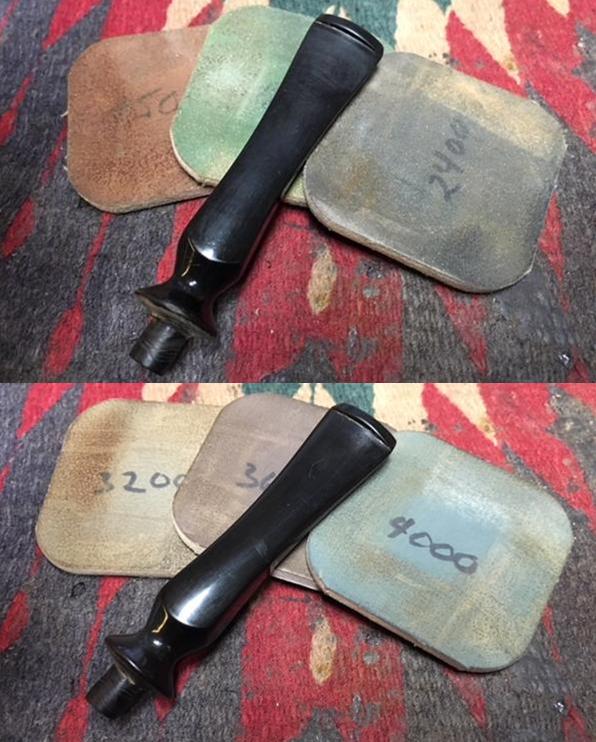
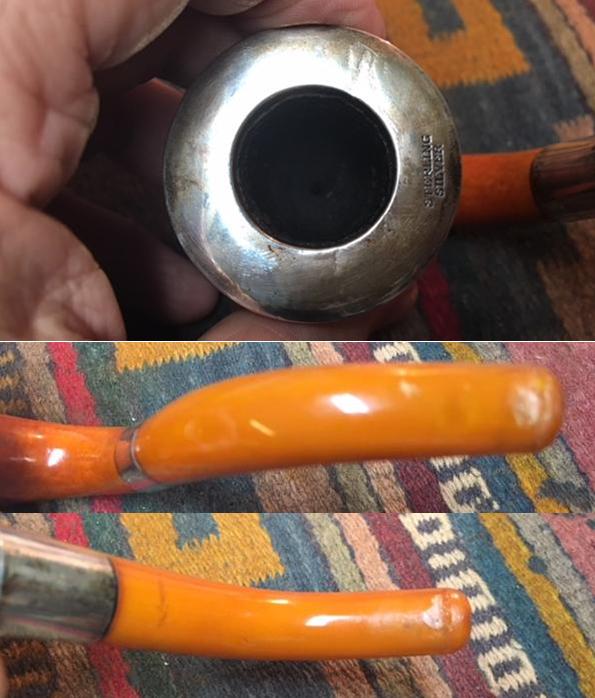
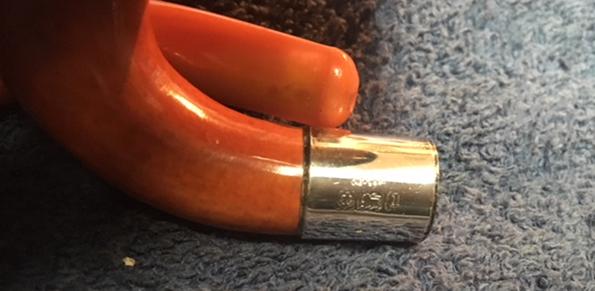
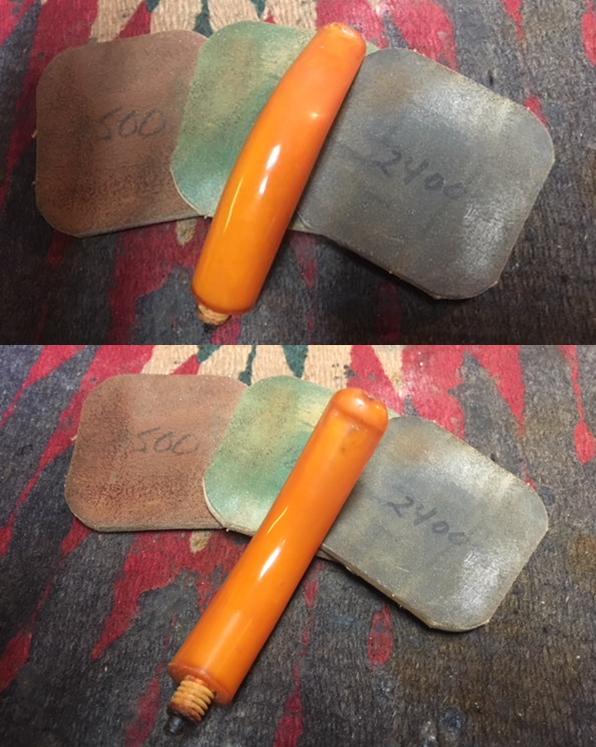
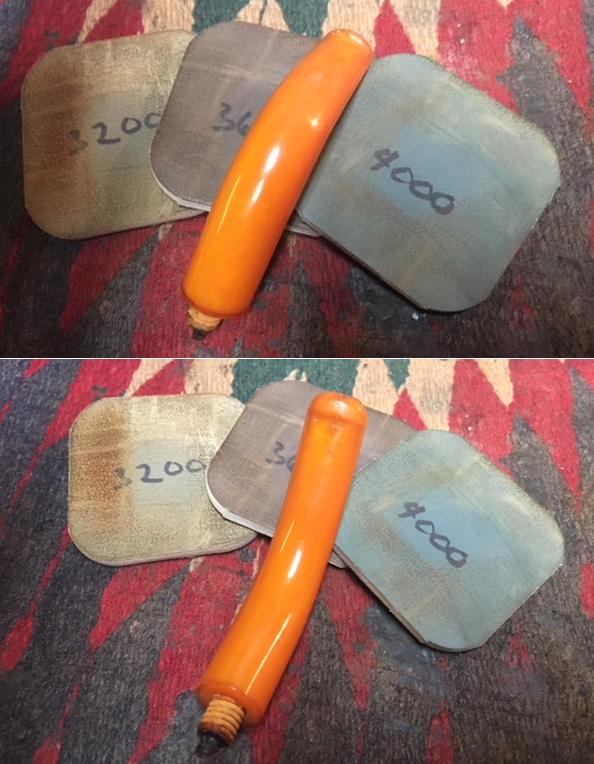
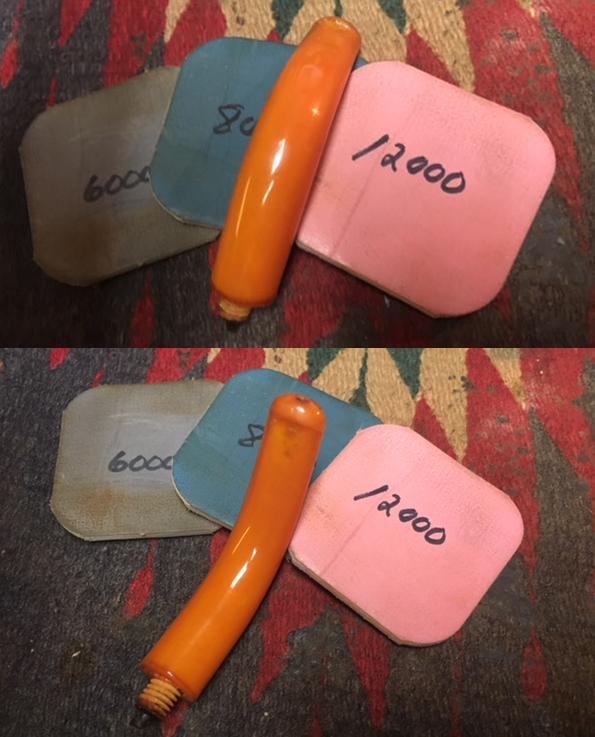
Sanding the lips and areas below them with 600-grit paper took off the roughness, and a full wet micro mesh progression followed by dry made the stems shine.  Also, the mystery film came off clean.  The last photo shows how my initial belief that the stem mark was faded dots that would require filling in was wrong.  They’re metal implants. 
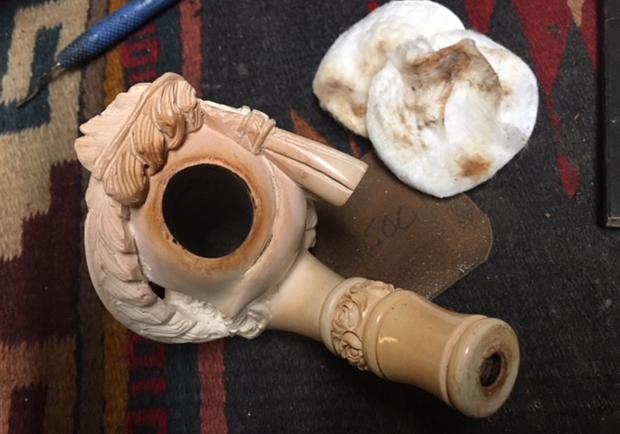
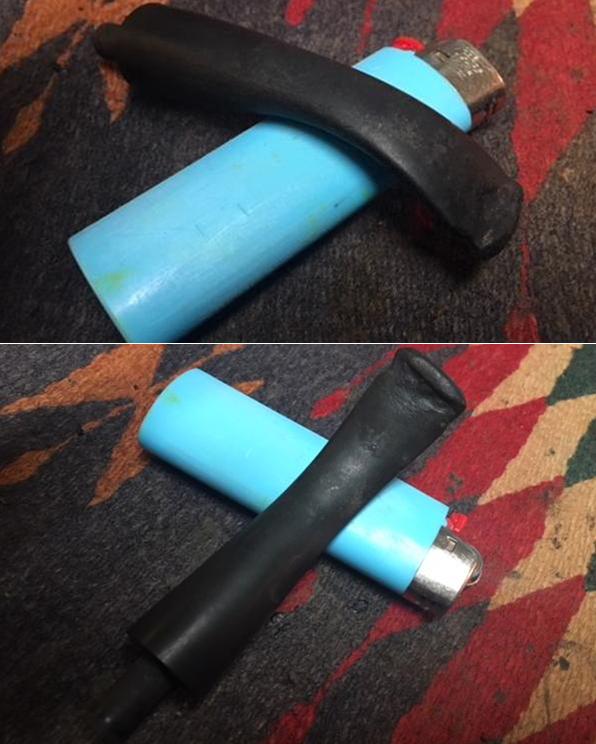
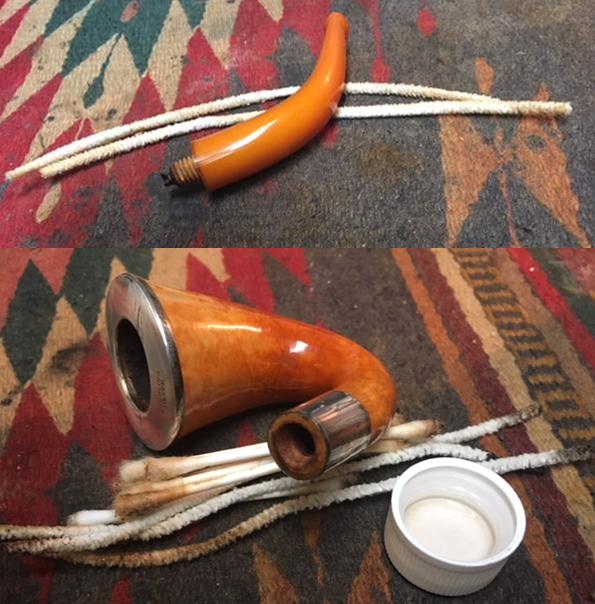
Retorting the pipe was fast and easy since it was well prepped.Then it occurred to me I hadn’t removed the Distillator rock maple insert, which I did then.  Brigham’s use chart indicates by the darker brown color of the insert that the pipe was smoked about 20 times since the last filter was added.  I’ve ordered an 8-pack replacement box.
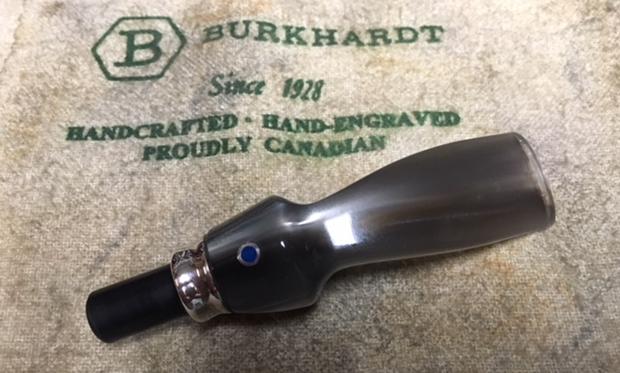
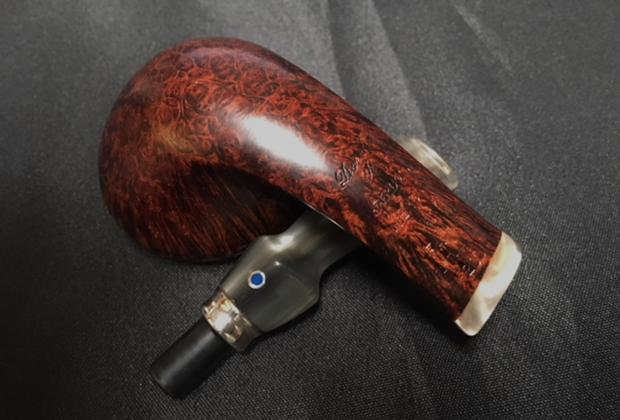
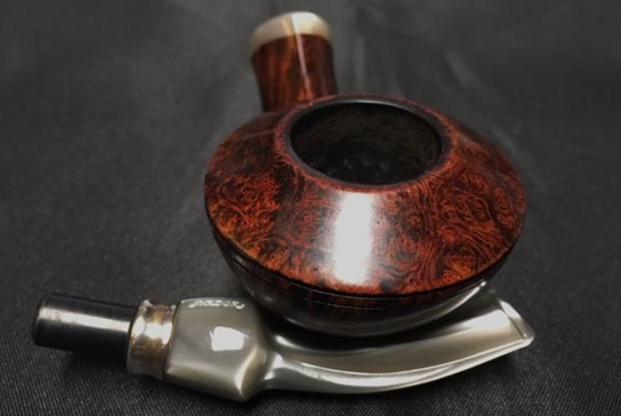
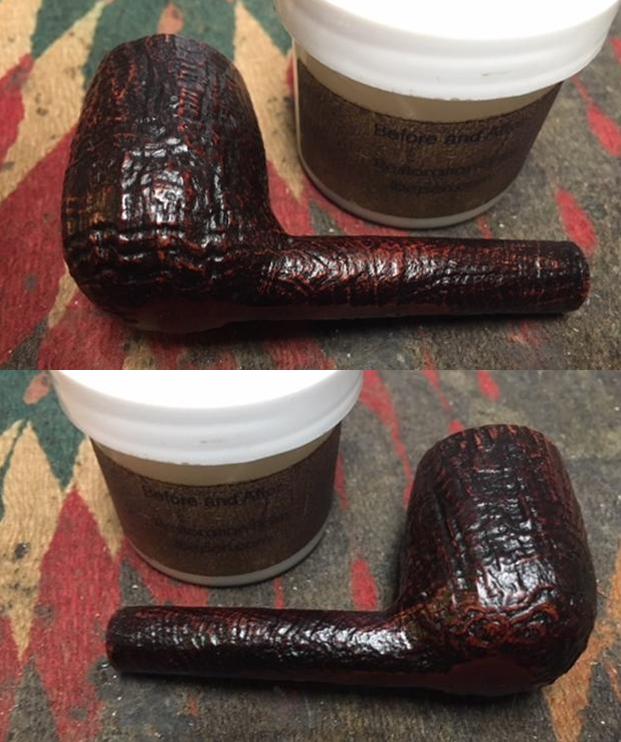
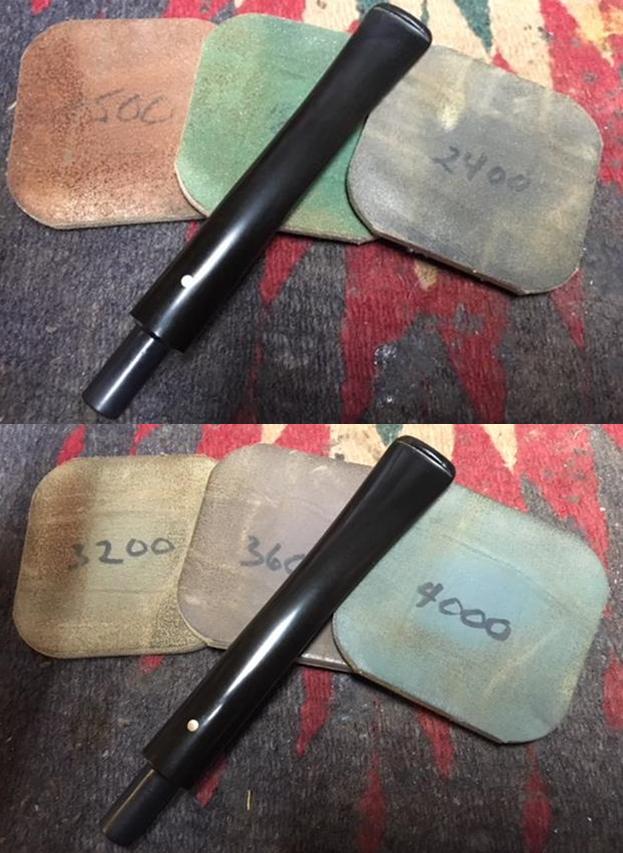
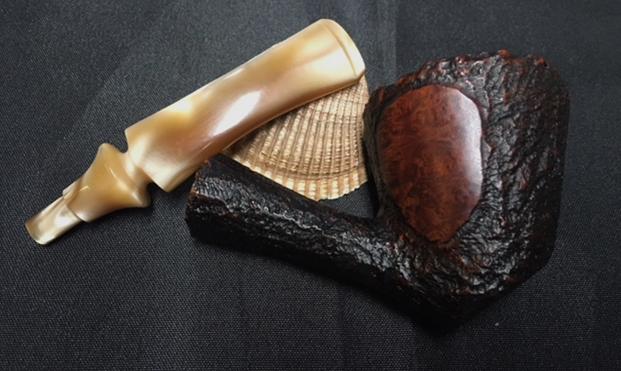
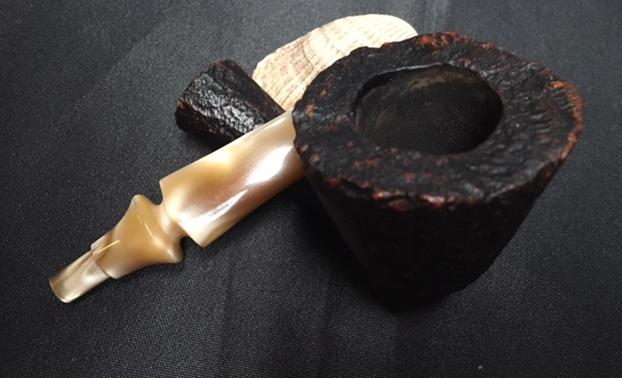
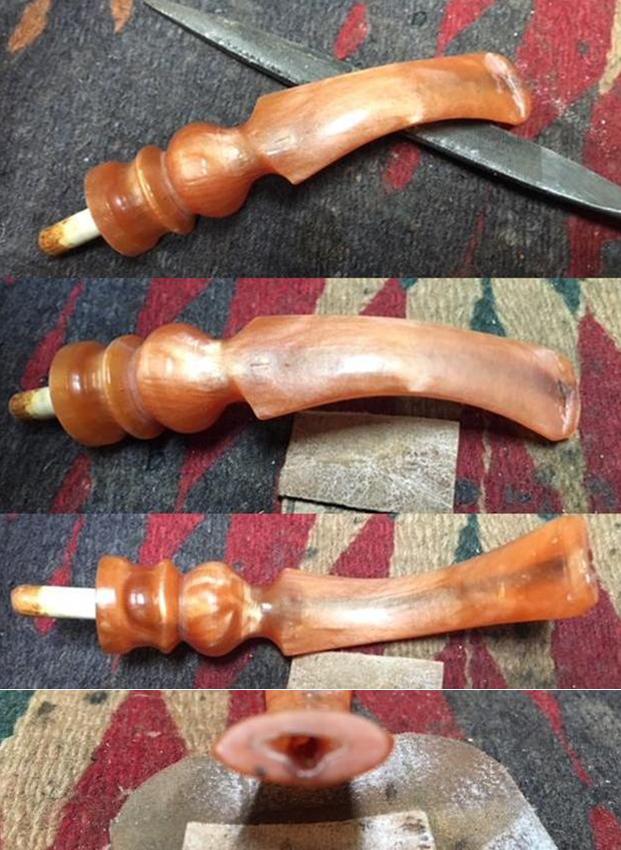
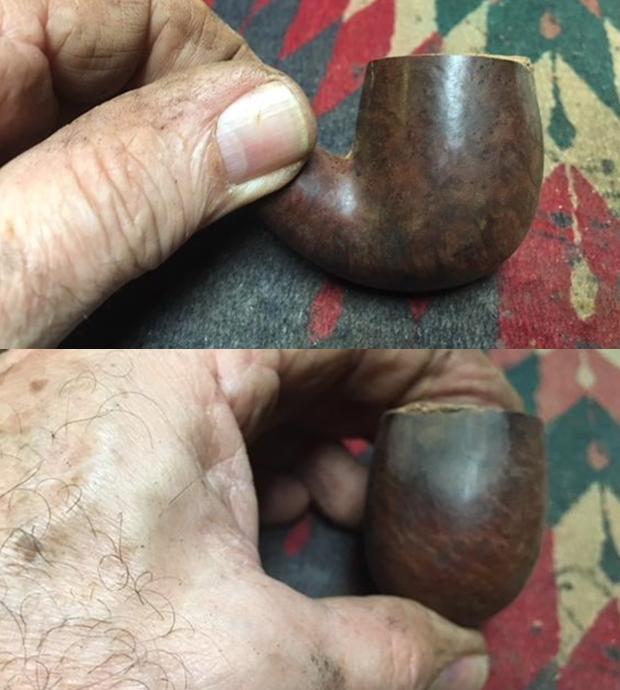
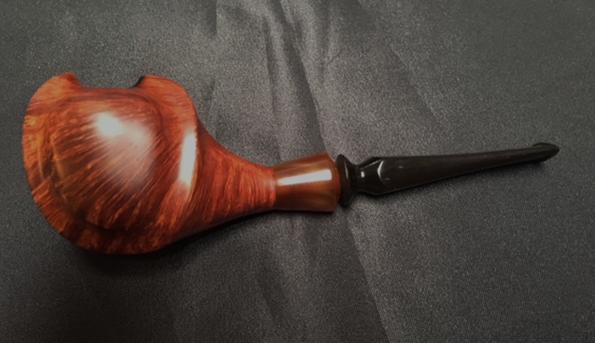
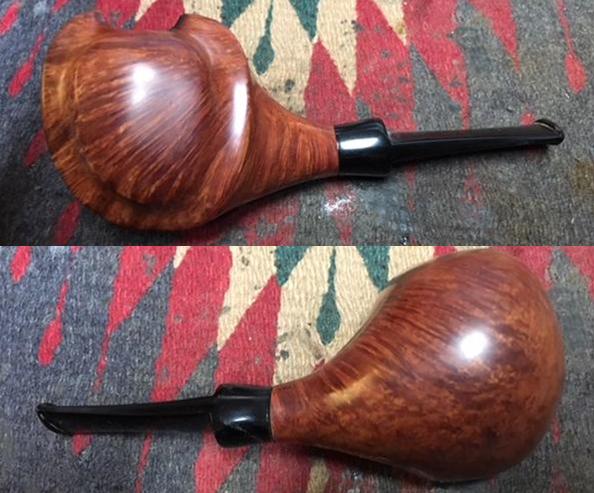
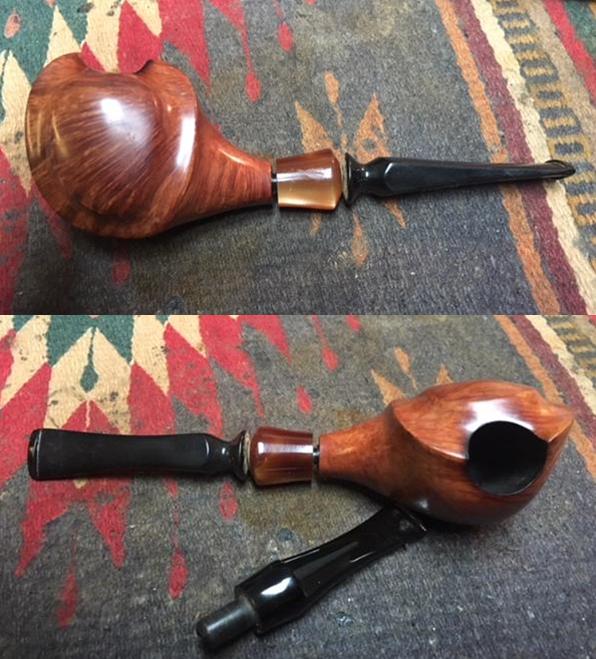
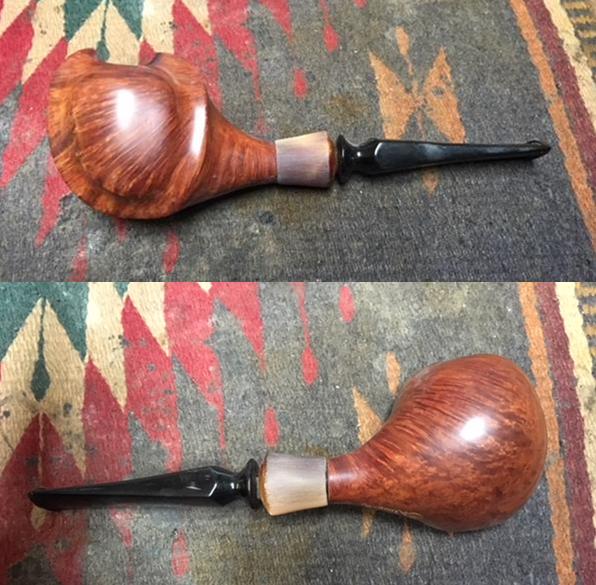
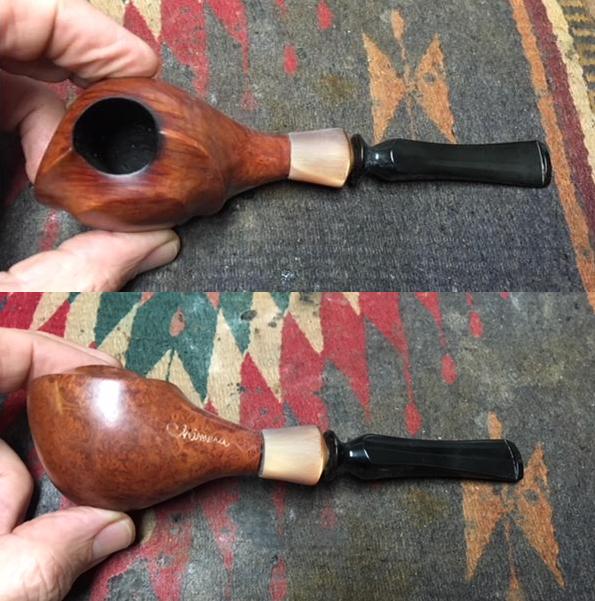
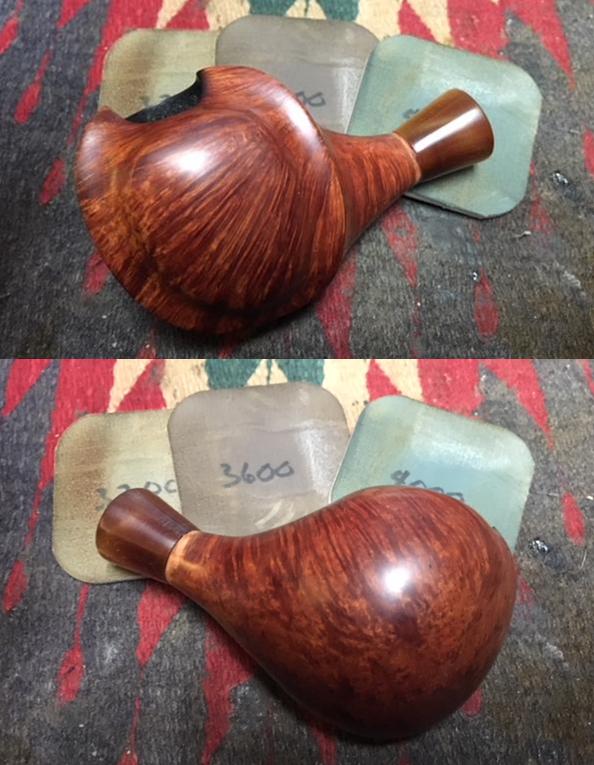
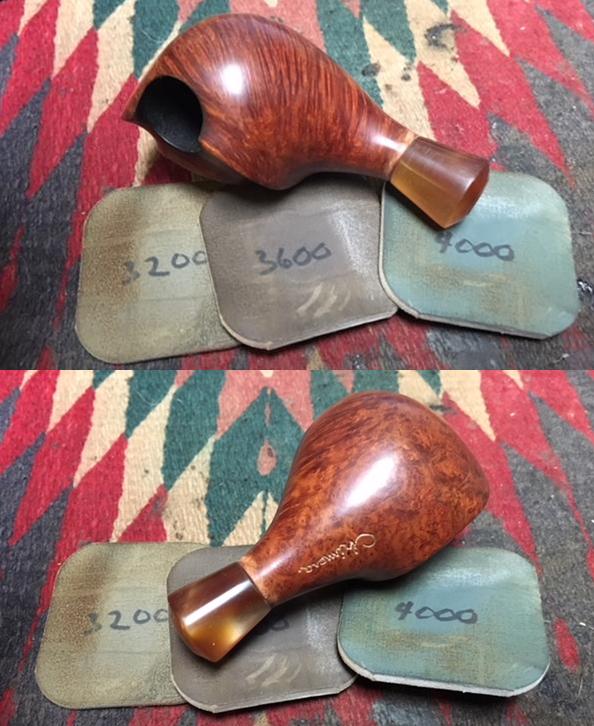
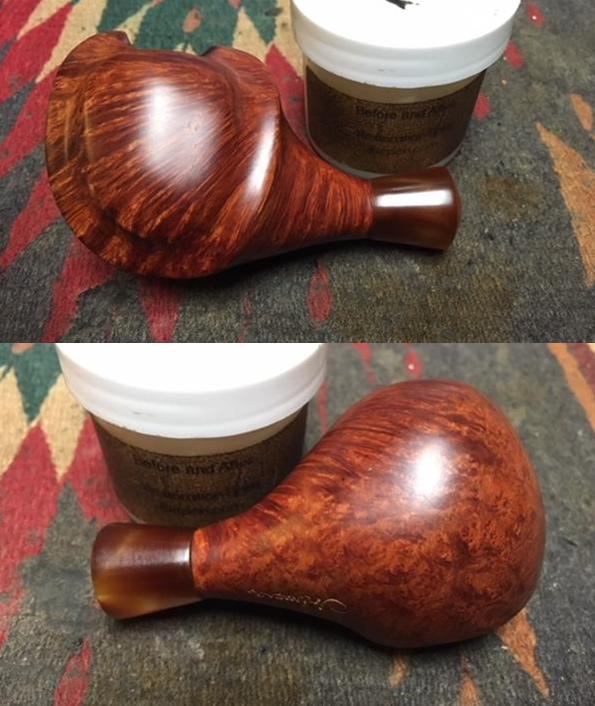
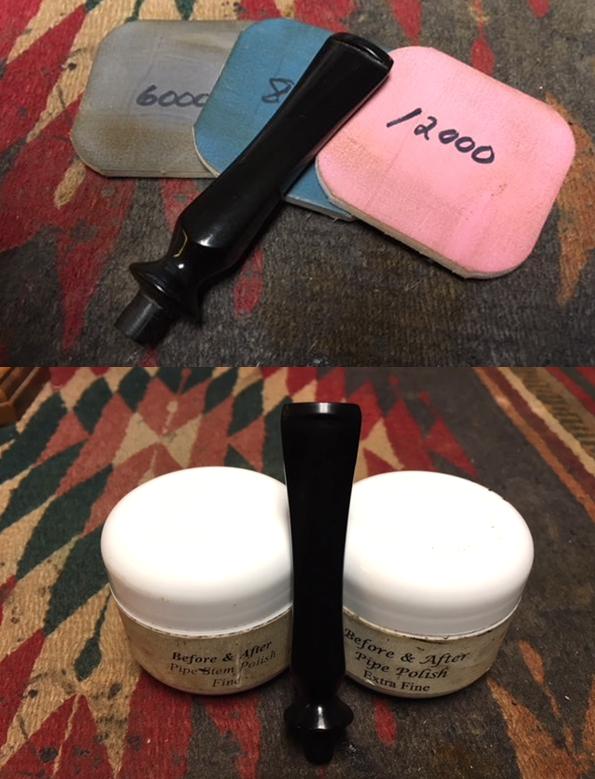
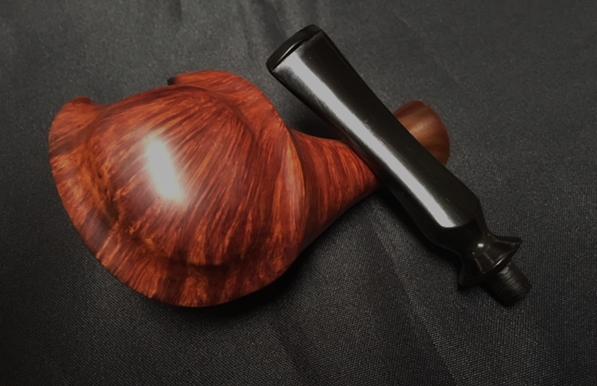
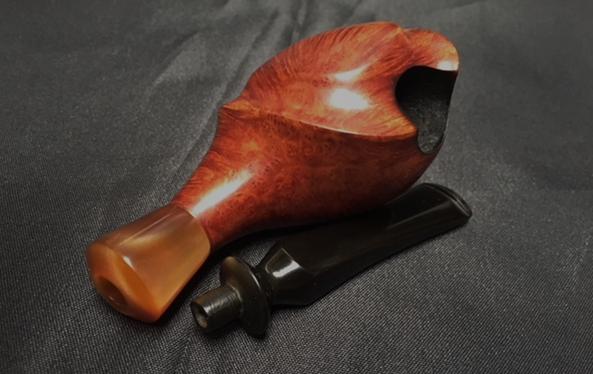
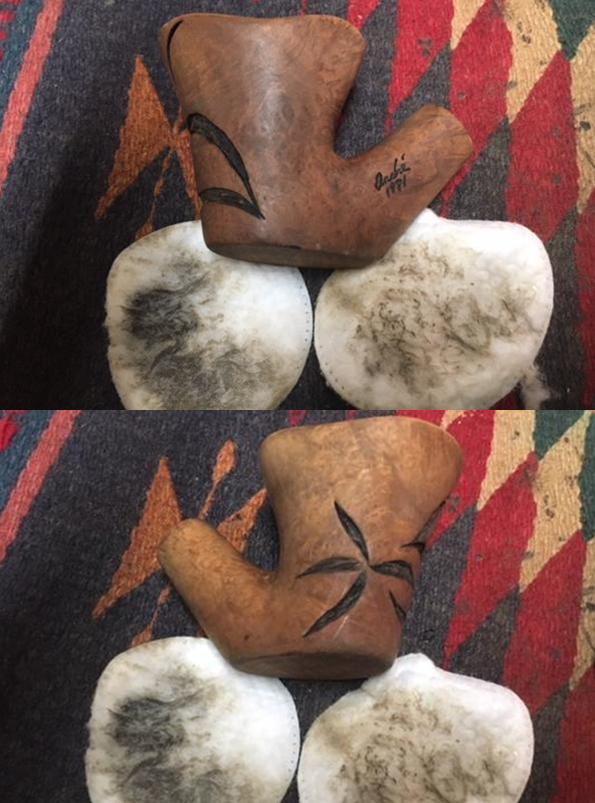
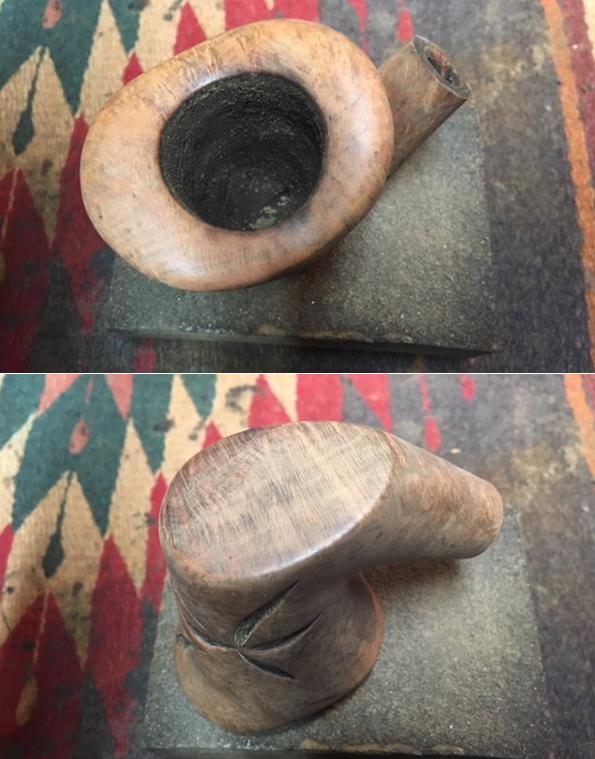
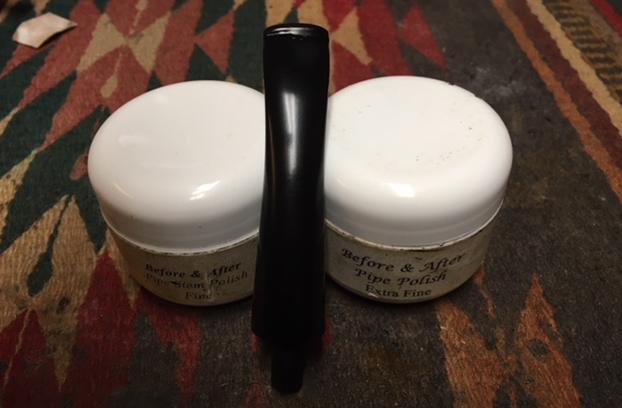
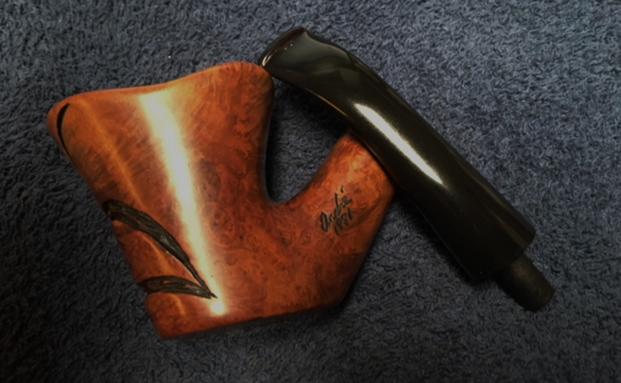
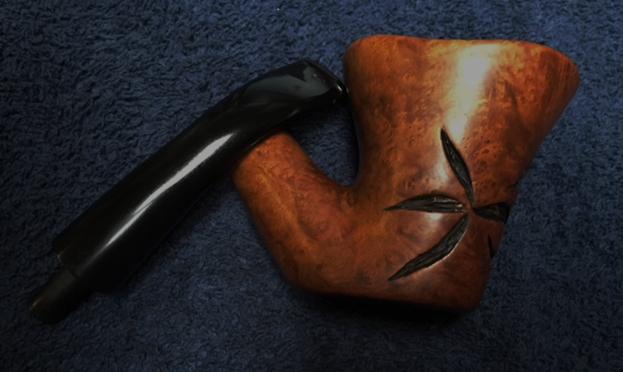
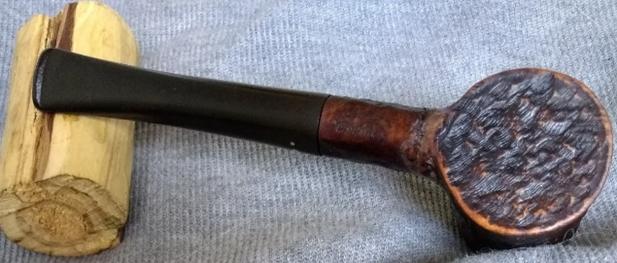
My favorite part of most restores had arrived, in this case to buff the rustic area of the stummel with Halcyon II wax and the rim with White Diamond and carnauba.  I used red and white rouge on the stem for a change since I had used it for several special pipes I’ll be blogging ASAP.
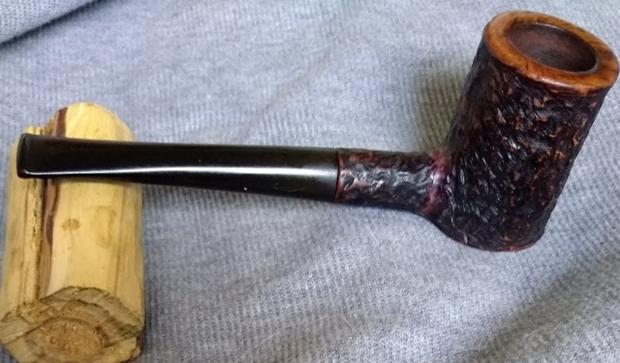
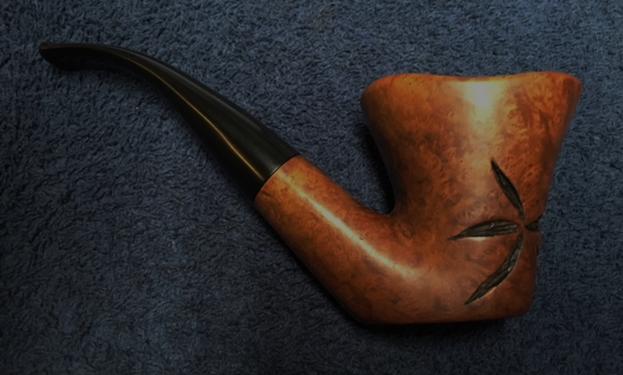
 CONCLUSION
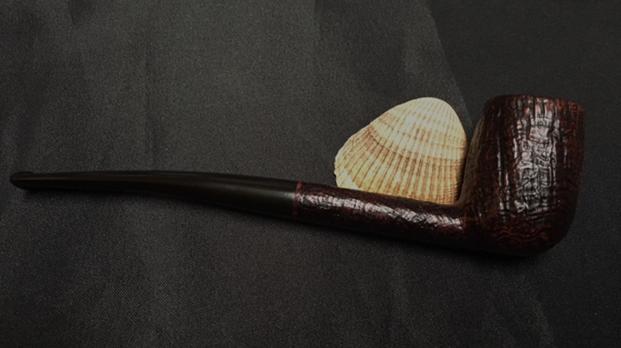
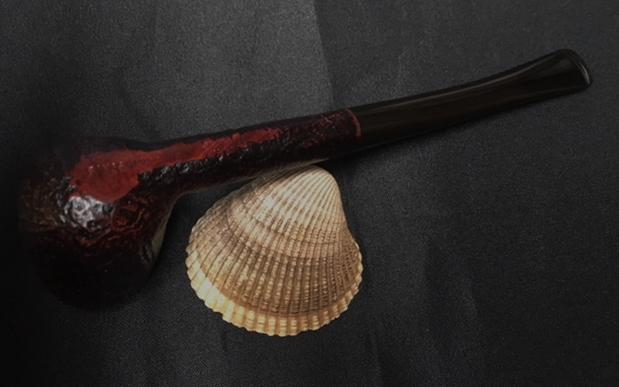
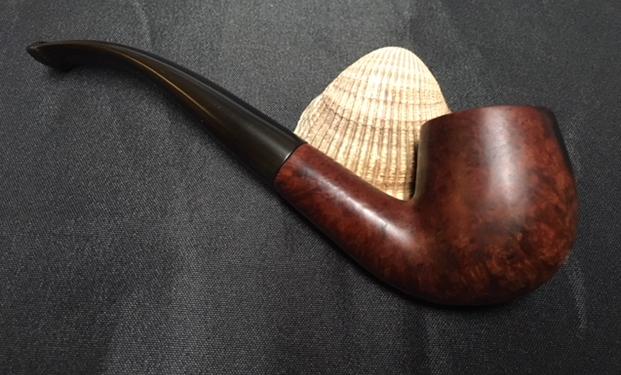
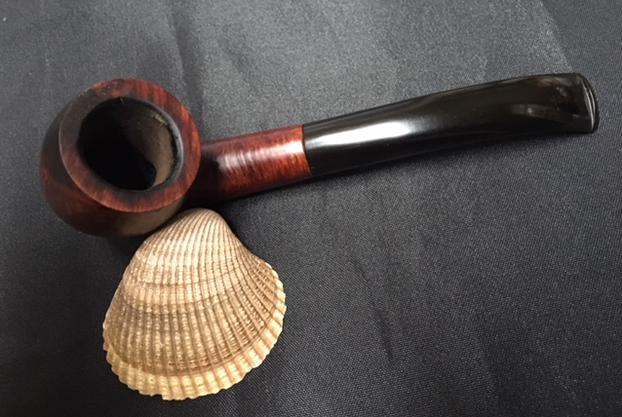
I learned quite a bit about our neighbor to the north and now have a firm grasp on the fact that Canadians indeed not only make pipes, but beautiful ones.  Nuff said about that.  But boy, am I happy I jumped on that otherwise misleading eBay lot!

SOURCES
https://www.brighampipes.com/our-system/
https://pipedia.org/wiki/Pipe_Brands_/_Makers#Canada
http://www.pipephil.eu/logos/en/logo-brigham.html
http://www.brothersofbriar.com/t17600-brigham-pipes-anybody-use-one
https://pipedia.org/wiki/Brigham_Pipes
http://www.ic.gc.ca/opic-cipo/cpd/eng/patent/372982/summary.html?type=number_search&tabs1Index=tabs1_1
https://www.brighampipes.com/

Refurbishing an Ardor Mercurio Fantasy 2006 Bulldog


Blog by Steve Laug

Last week I finished up some pipes for a guy here in Vancouver and when he came to pick them up he brought some more for me to work on for him. I finished up some of the ones on the worktable so I decided it was time to work on these. The first of them is the following Ardor Bulldog. It really is a beautiful pipe. The shape, the grain the colouration, the silver/grey acrylic shank end, the silver trim band on the stem and the silver/grey stem all make this a uniquely beautiful pipe. I have worked on one other Ardor that I added to my collection. I wrote about that restoration on the blog a few years back. While it was a rusticated Urano this one is a Mecurio. Here is the link – https://rebornpipes.com/2016/02/26/with-just-a-little-work-i-now-have-a-dr-ardor-urano-fantasy-apple/ The bowl had an uneven cake and there was some darkening on the rim top. The inside of the shank was dirty and needed to be cleaned. The silver on the stem was tarnished and dull looking. The Lucite stem had tooth marks and chatter on the top and underside of the stem near the button. There was also a tooth mark in the top of the button on the left side. I took photos of the bowl and stem to give a clear picture of the condition of the pipe before I started to work on it. I took a photo of the stamping to show what it looked like. The underside of the stem is stamped as follows – Dorelio over Rovera. Under that it is stamped Ardor over Mercurio. Under that it is stamped Italy then Fantasy. Under that is stamped Fatta A Mano and the year 2006.I did a quick review of the history of the brand by turning to Pipedia. The link there was an article that came from Italian Pipemakers.com. Here is the link – https://pipedia.org/wiki/Ardor. I quote part of the article that gives a quick view of the brands

Ardor Courtesy of italianpipemakers.com

In 1974 Dorelio Rovera, with his father Angelo, established the Ardor Pipe, name which comes from the “AR” (Angelo Rovera) and “DOR” (Dorelio Rovera), changing a medium quality level production into a completely handcrafted product, with a very high level of design and finishing.

[Editor’s Note: Angelo Rovera is the son of Francesco Rovera, who along with his brothers comprised Sociedade Rovera, a pipe company they founded in 1911.]

Dorelio personally chooses the briar which is left seasoning for at least 4 to 5 years before it is worked. It is stocked in particular baskets which leave the wood always visible and airy. The pieces chosen to become a pipe are cut with a circular saw to identify the model. Then each piece is rough hewn by hand with special files, definitely “dangerous” but very efficacious to give the shape to the wood.

Like most artisans, Ardor couples a classical style and a very original style with definite but free and fanciful lines, to offer and meet the largest number of requests, from the simple to the most complex. Ardor is a pipe company which is always looking for innovations, indispensable to collectors, but trying to offer a very high level product in the smoking aspect and performance of the briar, always dried and light for a higher comfort of the smoker.

With Damiano, Dorelio’s son, Ardor introduced the coloured methacrylate (acrylic) stems, really appreciated in the international markets. Damiano has been able to condition the Ardor style with new shapes and with a new mouthpieces style, having a modern point of view. His target is to keep up the interest of new generations, surely more variable in a shorter period.

The Ardor Urano Fantasy that I have was marked AR which told me it was made by Angelo while this pipe was made by his son, Dorelio. The coloured, interestingly shaped stems are obviously the additions of Damiano. The stems he does add a definite flair to the pipe that is unique.

I started my clean up on this pipe by cleaning out the airway in the stem and shank, the mortise and shank interior with pipe cleaners, cotton swabs and alcohol. It did not take as much as I expected to remove all the tars and oils in the shank and mortise. The stem had some darkening in the airway and in the slot in the stem. I used pipe cleaners to clean out the debris that had collected in the edges of the slot and the darkening in the airway.I evened up the cake on the walls of the bowl with a Savinelli Fitsall Pipe Knife. I took the cake back to where there was a thin layer all around the bowl.I rubbed Before & After Restoration Balm into the smooth finish on the bowl and shank. The balm cleans the surface and enlivens and protects the briar. I worked it into the lines and the finish. I let it sit for a while and then buffed it off with a soft cloth and polished it. I took photos of the bowl at this point to give an idea of what it looked like at this point. I set the bowl aside and turned to address the stem. Once the repair on the top side of the stem button had cured I shaped it with some folded 220 grit sandpaper and sanded out the tooth chatter and marks on both sides.I polished the stem with micromesh sanding pads to remove the scratches in the acrylic. I wet sanded it with 1500-2400 grit pads and dry sanded it with 3200-12000 grit pads. I wiped the stem down with a damp cloth after each sanding pad. I polished the silver band with a jeweler’s cloth. I put the stem back on the bowl and buffed the pipe with Blue Diamond polish on the buffing wheel. I gave both the bowl and stem multiple coats of carnauba wax and buffed the pipe with a clean buffing pad. I hand buffed it with a microfiber cloth to deepen the shine. The finished pipe is shown in the photos below. I have seven more pipes to finish for him – three come from his personal rotation while four of them are some finds he made while pipe hunting. This is going to be a fun bunch of pipes to work on. I look forward to moving through the rest of them. Thanks for looking.


An Easy Restoration – A Savinelli Sandblast Bing’s Favorite


Blog by Steve Laug

Yesterday was a great day. I finished working on three pipes, started a fourth and returned a group of four repairs to the pipeman who dropped them off for me to repair and refurbish for him. He loved the work and dropped off eight more pipes in various states from very nice and need a refresh to tired and worn. He also wanted to know if I would do a trade with him for part of the cost of labour. He had a pipe he no longer wanted in his collection so he was wondering. He took it out of his pipe bag and showed it to me. It was a Savinelli Bing’s Favorite in a sandblast finish with a vulcanite stem sporting a brass dot on the top. It was in great condition other than a little wear and oxidation on the stem. There was some light tooth chatter on both the top and underside of the stem near the button. It was drilled to take Savinelli Balsa filters or 6mm filters. I looked it over and we made a deal. I think that we were both pleased with the results. Here is what the pipe looked like when I received it. The combination of medium and dark brown stains on the bowl added a great contrast in the high and lows of the sandblast. The bowl was quite clean with very little cake. The aroma of good English tobacco lingered around the pipe and bowl. The rim top was very clean and the outer and inner edges of the bowl were in excellent condition. The stem had tooth chatter and tooth marks on both the top and underside near the button but none of them were too deep. I took close up photos of the bowl and stem to show the condition before I started the cleanup.I took a close up photo of the stamping on the smooth panel on the underside of the bowl and shank. It reads: BINGS FAVORITE followed by Savinelli Product and Italy. The stamping is clear and readable.I removed the stem to have a look at the 6mm filter tenon. It was pretty clean on the outside.I cleaned out the airway in the stem and shank and the mortise area with pipe cleaners – both regular and bristle as well as cotton swabs and alcohol. I cleaned out the wide open tenon with cotton swabs and alcohol as well. It was pretty clean so it did not take too long to clean those areas.I rubbed some Before & After Restoration Balm deep into the crevices and valleys of the sandblast, working it in with my fingertips. I buffed the bowl with a shoe brush to further work it into the finish. I buffed the bowl with a soft cloth to raise a shine. The photos below show the results at this point in the process. I set the bowl aside and turned my attention to the stem. I sanded out the tooth chatter and marks with 220 grit sandpaper blending the areas into the surround vulcanite stem. I sanded both the top and underside of the button as well to remove the light chatter on those areas as well.I polished the stem with micromesh sanding pads – wet sanding with 1500-2400 grit pads and dry sanding with  3200-12000 grit pads. I wiped the stem down with Obsidian Oil after each sanding pad. I rubbed it down with Before & After Pipe Polish – both Fine and Extra Fine to further polish the scratches. I gave it a final coat of Obsidian Oil and set it aside to dry. I have a few of the Savinelli Balsa filters around so I put on it the stem. It is a three sided stick of Balsa wood that absorbs tars and liquids on three sides. The fit is perfect. The tenon can also fit 6mm filters.I put the stem on the pipe and buffed the bowl and stem with Blue Diamond polish on the buffing wheel. I used a light touch on buffing the bowl so that the polish would not get into the sandblast. I gave the bowl several coats of Conservator’s Wax and the stem several coats of carnauba wax. I buffed the bowl and stem with a clean buffing pad to raise the shine. I hand buffed the bowl and stem with a microfiber cloth to deepen the shine. The contrasting brown stains look very good with the dark of the polished vulcanite stem. The brass dot stands out in stark contrast with the black. It is a beautiful pipe and in excellent condition. The measurements are – Length: 6 ¾ inches, Height: 1 ¾ inches, Outside Diameter of Bowl: 1 ¼, Chamber Diameter: ¾ inch. I will be putting it on the rebornpipes store shortly. If you would like to add it to your collection send me an email to slaug@uniserve.com or a message on Facebook. Thanks for reading through this restoration process. It was a fun one to work on.

Kathy’s Dad’s Pipes #10 – New Life for an A.J. Sher Freehand


Blog by Steve Laug

With this blog I am stepping back to work on the tenth of the pipes from Kathy’s Dad’s pipes. For a reminder to myself and those of you who are reading this blog I will retell the story of the estate. Last fall I received a contact email on rebornpipes from Kathy asking if I would be interested in purchasing her late Father, George Koch’s estate pipes. He was a lover of “Malaga” pipes as well as others and she wanted to move them out as she cleaned up the estate. We emailed back and forth and I had my brother Jeff follow up with her as he also lives in the US and would make it simpler to carry out this transaction. The long and short of it is that we purchased her Dad’s pipes. There are some beautiful pipes in that lot. The condition of all them varied from having almost pristine to gnawed and damaged stems that will need to be replaced. These were some well used and obviously well-loved pipes. Cleaning and restoring them will be a tribute to this pipeman.

Those of you who have followed me for a while know how much I love getting to know about the pipeman who held the pipes in trust before me. That information always gives another dimension to the restoration work. This is certainly true with this lot of pipes. I can almost imagine George picking out each pipe in his assortment at the Malaga shop in Michigan. I may well be alone in this, but when I know about the person it is almost as if he is with me work on his pipes. In this case Kathy sent us not only information but also a photo of her Dad enjoying his “Malagas”. Once again, I am including that information so you can know a bit about the pipeman who held these pipes in trust before they are passed on to some of you. I include part of Kathy’s correspondence with my brother as well…

Jeff…Here is a little about my dad, George P. Koch…I am sending a picture of him with a pipe also in a separate email.

Dad was born in 1926 and lived almost all his life in Springfield, Illinois. He was the youngest son of German immigrants and started grade school knowing no English. His father was a coal miner who died when Dad was about seven and his sixteen year old brother quit school to go to work to support the family. There was not much money, but that doesn’t ruin a good childhood, and dad had a good one, working many odd jobs, as a newspaper carrier, at a dairy, and at the newspaper printing press among others. He learned to fly even before he got his automobile driver’s license and carried his love of flying with him through life, recertifying his license in retirement and getting his instrumental license in his seventies and flying until he was grounded by the FAA in his early eighties due to their strict health requirements. (He was never happy with them about that.) He was in the Army Air Corps during World War II, trained to be a bomber, but the war ended before he was sent overseas. He ended service with them as a photographer and then earned his engineering degree from University of Illinois. He worked for Allis Chalmers manufacturing in Springfield until the early sixties, when he took a job at Massey Ferguson in Detroit, Michigan. We lived in Livonia, and that’s where his love for Malaga pipes began. After a few years he returned to Allis Chalmers and we moved back to Springfield. I remember that when we went back to Michigan to visit friends, Dad had to go to the Malaga store and acquire a few new pipes. Many a year I wrote to Malaga and they picked out a pipe for me to purchase that I could give Dad for a Christmas or birthday present. He was always pleased. His favorites were the straight stemmed medium sized bowl pipes, but he liked them all.  He had some other pipes, but the Malagas were his favorites. I remember him smoking them sitting in his easy chair after work, with feet up on the ledge by the fire burning in the fireplace.  Growing up it was my job to clean them and he liked the inner bowl and stem coated with Watkins vanilla, leaving a little of that liquid in the bowl to soak in when I put them back on the rack. Dad quit smoking later in life and so they’ve sat on the racks for many years unattended, a part of his area by his easy chair and fireplace. Dad passed when he was 89 years old and it finally is time for the pipes to move on. I’m very happy they are being restored by you and your brother and hope they find homes who enjoy them as much as Dad did. Thank-you for your care and interest. — Kathy, the oldest daughter

Kathy, once again I thank you for providing this beautiful tribute to your Dad. We will appreciate your trust in allowing us to clean and restore these pipes. I am also trusting that those of you who are reading this might carry on the legacy of her Dad’s pipes as they will be added to the rebornpipes store once they are finished.

The tenth of the pipes that I chose to work on is a nice looking Freehand with a mix of sandblast and smooth patches on the sides of the bowl. The top of the bowl and the end of the shank have a faux rustication that makes it look like plateau. The Lucite stem had lots of tooth chatter and a few tooth marks on both sides near the button. Some great grain peeks through the grime around the bowl. The warm combination of dark and medium brown stain on the bowl appeared to be good condition under the dust and tars of time.

The mixture of sandblast and smooth on the bowl sides and the faux plateau on the rim top of this pipe was covered with dust and grime. The blast and rustication on the rim top was all but filled in with an overflow of lava from the thick cake in the bowl. It appeared that underneath the rim top was in good condition and the inner and outer edge of the bowl was in good condition. The stamping was on the left side of the shank and was clear and read A.J. Sher on a smooth panel. The pearlized Lucite stem had tooth dents and chatter on the top and the underside of the stem. The interior of the pipe was dirty. I could see that George thoroughly enjoyed this pipe along with the others as is evidenced by the wear that all of them show. Jeff took these photos before he started the cleanup work on the pipe. Jeff took close up photos of the bowl and rim to show the condition of the pipe before he started to work his magic on it. The exterior of the bowl and shank were dirty. You can see the lava on the rim top, the thick cake and remnants of tobacco in the bowl. The second rim top photo shows the thick cake and debris in the bowl. It is dirty but in otherwise good condition. He also took photos of the sides of the bowl and shank from different angles to show the condition of the design of the bowl. The combination of smooth panels and sandblast look good. He took photos of the stamping and the shank end to show what it looked like before cleanup.The next two photos show the stem surface. There are tooth marks and chatter on both sides near the button. On the second photo below there appears to be a tooth mark/hole deep in the surface of the acrylic. I am hoping that it is not all the way the surface of the stem.Jeff cleaned this one up before he sent it my way. After having cleaned quite a few pipes lately it was nice to work on one he had cleaned for me. He is really good at the cleanup work. He had reamed the bowl with a PipNet pipe reamer and followed up with a Savinelli Fitsall pipe knife to remove the cake. He scrubbed out the mortise and the airway in the shank and the stem with alcohol, cotton swabs and pipe cleaners. He scrubbed the exterior of the bowl, rim, shank and stem with a tooth brush and Murphy’s Oil Soap to remove the oils and tars on the bowl, rim and shank. He rinsed it under running water. He dried it off with a soft cloth. The lava mess on the rim was thoroughly removed without harming the finish underneath it. Without the grime the finish looked really good. The stem would need to be worked on. I took photos of the pipe to show its condition before I started my work on it.   I took close up photos of the bowl and rim top as well as the stem. You can see the condition of the rim top and bowl in the first photo. The top was in excellent condition and Jeff was able to remove all of the lava and oils. He had scrubbed the bowl with a tooth brush and oil soap and it looked really good. The acrylic/Lucite stem had tooth chatter and some bite marks on the top and the underside of the stem just ahead of the button. I was glad to see that there was no bite through on the underside of the stem. What had appeared as a hole in the above photos of the stem seemed to have cleaned off and all that was present was a large tooth mark.The left side of the shank was simply stamped with a signature line that read A.J. Sher. I took a photo of the shank to show the nature of the stamping. I cannot find any information on the brand on any of my usual information sites so I am asking you all to help with that. Any of you know the brand?I rubbed down the briar with Before & After Restoration Balm. I worked it into the sandblast finish and smooth portions to clean, enliven and protect the new finish. I worked it into the rim top and the shank end. Both had the appearance of plateau but I think they were carved to look like it. I let the balm sit for a little wall and then buffed it with a horsehair shoe brush. I buffed the bowl with a cotton cloth to raise the shine. There were some tooth marks on the top and underside of the acrylic stem at the button. Since there was not a hole in the stem it was a pretty easy clean up. I sanded them smooth with 220 grit sandpaper to blend them into the surface of the stem. It did not take too much sanding to remove the marks and smooth out the stem surface. When it was sanded it was smooth and the marks were gone.I polished the acrylic stem with micromesh sanding pads – wet sanding with 1500-2400 grit sanding pads and dry sanding it with 3200-12000 grit sanding pads. I wiped it down after each sanding pad with a damp cloth. I the polished stem and lightly polished the bowl with Blue Diamond to remove any remaining small scratches and raise the shine. I gave the bowl multiple coats of Conservator’s Wax and the stem several coats of carnauba wax and buffed the pipe with a clean buffing pad to raise the shine. I hand buffed it with a microfiber cloth to deepen the shine. The pipe polished up pretty nicely, it was a beautiful pipe in terms of shape and finish. I will definitely be keeping an eye out for more pipes by A.J. Sher. This is the tenth pipe that I am restoring from Kathy’s Dad’s collection. I am looking forward once again to hearing what Kathy thinks once she sees the finished pipe on the blog. The finished pipe is shown in the photos below. The dimensions are Length: 6 1/4 inches, Height: 2 inches, Outside diameter of the bowl: 1 7/8 inches, Chamber diameter: 7/8 inches. Thanks for walking through the restoration with me as I worked over this pretty Freehand. I will be adding it to the rebornpipes store shortly so if you are interested in adding it to your collection and carrying on the trust from her father send me an email or a message on Facebook. Thanks for looking. 

One of those once in a life time finds – a Long Shank Figural Meerschaum


Blog by Steve Laug

My brother Jeff always comes up with some amazing finds. I am not sure how he does it, but there is never a box of pipes that I get from him that does not have a surprising find in it. In this case we had talked about a meerschaum pipe that he was interested in picking up. I can’t remember where he had seen it but his sights were set on it. He had sent me some photos that he had received from the seller to give me an idea of what I would be dealing with when the pipe arrived. Here are the photos that he sent me. They are grainy and really don’t give an idea of the size and proportions of the pipe. They do however show the issues clearly. The shank was joined in two spots with nylon/Teflon threaded tenons and those had snapped off inside the shank. It also showed that the pipe had been smoked and the rim top was dark. There was some nice patina developing on the shank and bowl. I did not have a clue what the carving on the front of the pipe looked like.The next two photos show some close up views of the damaged areas. The first partially shows the damage of the first broken tenon on two parts of the shank. What it does not show is where the rest of the broken tenon is. I am pretty sure that it is in the other half of the shank. My guess is that somewhere along the way someone tried to take the pipe apart and snapped the tenon.The second photo shows the broken tenon at the bowl shank joint. This one is a bit more disconcerting because not only are parts of the tenon broken off in each side of the shank and bowl but it appears that someone tried to glue the two parts together. I would not know for sure until I had it in hand but that was my guess at this point. We talked about it and Jeff made the deal. Soon I would see the pipe in person.At this point your guess is as good as mine in terms of what the pipe looked like, what face was carved on the front and what the size and proportion were going to be. I had no idea what to expect but Jeff told me that he would send it home with my daughters when they returned from a visit for my Dad’s 90th birthday. Sure enough, he talked them into bringing a few pipes and a rack with them in their luggage. They got home around 11:30pm but that did not stop them from unpacking their bags to show me what they had brought home with them. In my second daughters luggage there was a long trombone shaped case – the case alone is 13 inches long and 4 inches wide at the widest point. It is three inches tall on the thickest portion of the case. It is covered with a black vinyl like many meerschaum cases are these days. I could see that the pipe inside must be a big one. I knew it was the one we had spoken of above but I had no idea what I was in for once I opened the case. Here are some photos of the case and what I saw when I opened it.I put the pipe away because I did not want to be tempted to work on it until I had finished some repairs that I was doing for a guy here in Vancouver. Yesterday I finished the last of his repairs and last evening I took the pipe out to have a look. The end of the shank at the bowl had a piece of the nylon tenon broken off inside of it. I used an easy out and turned it into the tenon until it grabbed then unthreaded the tenon from the shank. One done, and not too difficult.I used the easy out section that held the stem as well. It was also relatively painless. I turned it into the tenon until it grabbed then unthreaded the tenon from the shank piece. Two done, with no breakage and without making things worse!The third section was another story. It worried me because it was the piece that had been glued to the bowl end of the short shank. It had glue on the meerschaum surface that turned out to be rubber cement. I scraped it off and tried to turn that tenon out with an easy out. No success. It was glued in solid in the shank. I took out my cordless drill and fit it with a bit slightly larger than the airway in the tenon and carefully drilled it into the tenon. You have to be careful because one wrong move and the bit could damage the shank piece. Nerve wracking for sure! I was able to drill it carefully and when the bit grabbed I reversed the drill and unthreaded the glued piece from the shank. Success! All of the broken tenon pieces were removed. I could now see what else I had to do on this one.I started by checking out the connections between each section of the shank pieces. It did not take long to realize that the shank portions were made up of shorter spool like sections. I took the spools apart and took a photo of all the pieces. It was an interesting looking pipe. This is also the first look you are all getting of the figural. I think it is called a Courtier. It is a bearded gent with a cap and feather. It is well carved and very detailed.I decided before calling it a night to put the pipe back together again using the pieces of broken tenon that I had to reconnect the parts. I wanted to have some idea of the finished look of the pipe and what the length would be once it was all put back together. It is a long pipe. I measured it once I had it put together and from the tip of the beard to the end of the stem was 17 ½ inches. I truly had no idea this was what it would be when I first saw it in those first photos above. I took a couple of photos to show you what I saw. It is a gorgeous pipe with well done, intricate carvings. Now that all the parts were working I would need to clean them each. But that is it for the night. I packed the pipe back in the case and headed to bed. The first thing I did in the morning was to take some photos of the figural carving. I wanted to have a look before I started the cleanup and have found that taking photos gives me a good idea of what I need to work on with each pipe. Here is what I saw. It was a beautifully carved, ornate piece. There was some patina developing on the shank and the bowl, particularly around the bottom portion and the sharper edges of the carving. The rim top had a bit of lava buildup that would need to be removed along with the cake. Overall this portion of the pipe was in excellent condition. I reamed the bowl with a Savinelli Fitsall Pipe Knife and removed all of the cake. I wanted the walls clean and uncaked. I followed that by sanding the inside of the bowl with a dowel wrapped with sandpaper. I wiped down the inside of the bowl with a damp paper towel to remove the dust and sanding debris. I tried to blow air through the shank and bowl and was surprised that it was clogged and nothing flowed. I unscrewed the shank piece from the bowl and blew through that. It was clear so I knew that the clog was in the bowl portion for sure. I tried to push a pipe cleaner through the airway and met a hard clog. So to open the clog I pushed a piece of stiff wire through the airway and worked it around to clear out the clog. I checked to make sure there was airflow and then cleaned out the shank with pipe cleaners, cotton swabs and alcohol until the airway was clean and there was unrestricted airflow between the bowl and shank. Part one of the airway cleanup was finished and I was ready to work on the rim top.I sanded the lava on the top of the bowl with a 1500 grit micromesh sanding pad and wiped it down with a damp cotton pad. It did not take too much work to get the rim top clean. I cleaned out the grooves in the cap with a damp cotton swab to leave the top surface clean.I polished the meerschaum top with micromesh sanding pads – wet sanding with 1500-2400 grit pads and dry sanding with 3200-12000 grit pads. I wiped down the top of the rim with a damp cotton pad after each sanding pad. The following photos show the progress. I cleaned up the shank section that was connected to the bowl. I scraped away the rubber cement on the surface of the shank end and cleaned out the interior with pipe cleaners, cotton swabs and alcohol. I beveled both ends of the nylon connector to help with the airflow. Once it was clean I attached the first spool to the bowl portion.It was time to move on to the cleaning of each of the spools that made up the first section of the shank. I unscrewed the parts so that I could better work on them. It is easier to clean up the nylon connectors and the inside of the spool when they are apart. I used a pen knife to lightly bevel and open up the end of each of the connectors to improve the airflow. I cleaned out the airways in each section with pipe cleaners, cotton swabs and alcohol until they were clean. I checked the airflow on each section and then put it back together. Now the bowl and the first section of the shank were clean.  I put the spools back together and took a photo of the first section of the shank.I moved on to the cleaning of each of the spools that made up the second section of the shank. I unscrewed the parts so that I could better work on them. It is easier to clean up the nylon connectors and the inside of the spool when they are apart. I used a pen knife to lightly bevel and open up the end of each of the connectors to improve the airflow. I cleaned out the airways in each section with pipe cleaners, cotton swabs and alcohol until they were clean. I checked the airflow on each section and then put it back together. Now the bowl and the first and second section of the shank were clean. I cleaned airway in the stem with pipe cleaners and alcohol. I used a penknife to bevel the end of the push tenon. I sanded the exterior of the nylon push tenon to remove the buildup and stain that was on the white tenon end. The photo is a bit out of focus but you can see how dirty the airway was inside from the pipe cleaners under the stem.I wiped down the exterior of the stem and found another surprise. There was a hole in the top of the stem next to the button. In examining the hole I found that I was not dealing with a bite mark but with a misdrilled stem. The airway in the button was too high and that left the Lucite material too thin at that point. I took photos of the top and bottom of the stem and of the end view and include them now. The hole is the dark spot on the top side next to the button.I put some Vaseline on the end of a pipe cleaner and inserted it in the airway below the hole in the stem surface. I filled it in with clear super glue. I build up the top of the button and filled in the over-drilled airway in the button at the same time.Once the repaired area cured I shaped the button edge on both the top and the underside with a needle file. I blended the repair into the surface of the stem with 150 and 220 grit sandpaper. I polished the stem with micromesh sanding pads – wet sanding with 1500-2400 grit pads and dry sanding with 3200-12000 grit pads. I wiped it down with a damp cotton pad after each grit. I buffed the stem with Blue Diamond on the buffing wheel. I buffed the pipe with a shoe brush and finished polishing it with a soft microfiber cloth. Finally the pipe is clean and finished. I polished all of the parts individually with the cloth and took photos of the pipe before I put it together. This is one that I think I will hang on to for my own collection. I have ordered some new nylon connectors to replace the broken ones that I am using to hold it together at the moment. I took photos of the pipe as a whole and then broke it down and put it in the case and took photos of that to close this chapter of the story. Thanks for walking with me through this restoration.

Farida’s Dad’s Pipes #5 – Restoring a Dunhill Root Briar 56 Bent Billiard


Blog by Steve Laug

I am back working on a of pipes that comes from the estate of an elderly gentleman here in Vancouver. I met with his daughter Farida last summer and we looked at his pipes and talked about them then. Over the Christmas holiday she brought them by for me to work on, restore and then sell for her. There are 10 pipes in all – 7 Dunhills (one of them, a Shell Bulldog, has a burned out bowl), 2 Charatans, and a Savinelli Autograph. His pipes are worn and dirty and for some folks they have a lot of damage and wear that reduce their value. To me each one tells a story. I only wish they could speak and talk about the travels they have had with Farida’s Dad.

When I wrote the blog on the Classic Series Dunhill and thinking about its travels, Farida sent me an email with a short write up on her Dad. She remembered that I had asked her for it so that I could have a sense of the stories of her Dad’s pipes. Here is what she wrote: My dad, John Barber, loved his pipes. He was a huge fan of Dunhill and his favourite smoke was St. Bruno. No one ever complained of the smell of St. Bruno, we all loved it. I see the bowls and they’re large because he had big hands. When he was finished with his couple of puffs, he would grasp the bowl in the palm of his hand, holding the warmth as the embers faded. The rough bowled pipes were for daytime and especially if he was fixing something. The smooth bowled pipes were for an evening with a glass of brandy and a good movie. In his 20s, he was an adventurer travelling the world on ships as their radio operator. He spent a year in the Antarctic, a year in the Arctic and stopped in most ports in all the other continents. He immigrated to Canada in the mid-fifties, working on the BC Ferries earning money to pay for his education. He graduated from UBC as an engineer and spent the rest of his working life as a consultant, mostly to the mining companies. Whatever he was doing though, his pipe was always close by. 

She sent along this photo of him with his sled dogs in the Antarctic sometime in 1953-1954. It is a fascinating photo showing him with a pipe in his mouth. He is happily rough housing with his dogs. As a true pipeman the cold does not seem to bother him at all.Thank you Farida for sending the photo and the background story on your Dad for me to use on the blog. I find that it really explains a lot about their condition and gives me a sense of who Dad was. If your Dad was rarely without a pipe I can certainly tell which pipes were his favourites. As I looked over the pipes I noted that each of them had extensive rim damage and some had deeply burned gouges in the rim tops. The bowls seemed to have been reamed not too long ago because they did not show the amount of cake I would have expected. The stems were all covered with deep tooth marks and chatter and were oxidized and dirty. The internals of the mortise, the airway in the shank and stem were filled with tars and oils. These were nice looking pipes when her Dad bought them and they would be nice looking one more when I finished.

I finished two of the pipes and have written a blog on each of them. The first one was the Dunhill Shell with the oval shank pot (https://rebornpipes.com/2018/02/04/restoring-a-1983-dunhill-shell-41009-oval-shank-pot/) and the second was the Dunhill Classic Series Shell Billiard (https://rebornpipes.com/2018/02/08/faridas-dads-pipes-2-restoring-a-1990-lbs-classic-series-dunhill-shell-billiard/). The third pipe I restored from the estate was a Savinelli Autograph (https://rebornpipes.com/2018/02/15/faridas-dads-pipes-3-restoring-a-savinelli-autograph-4/). The fourth pipe of his that I worked on was a Dunhill Red Bark Pot that was in rough shape (https://rebornpipes.com/2018/03/10/faridas-dads-pipes-4-restoring-a-dunhill-red-bark-pot-43061/).

I went back to the remaining two Dunhills in the collection today and chose to work on a Dunhill Root Briar 56 Bent Billiard. It was so dirty it was hard to read the stamping on the sides. I could see that it was worn but I could not tell much else looking through the thick grime. The smooth finish sticky with oils and thick grime and the bowl felt oily to touch. I wiped off the oils and grime on the shank sides to see the stamping. It was worn but readable. On the left side of the shank it reads Dunhill over Root Briar. To the left of the stamping is the shape number 56. On the right side of the shank there is a faint stamp R with 4 in a circle. The rest of the stamping is very faint.

I turned to a blog I have on rebornpipes by Eric Boehme on Dunhill Shapes and looked for the shape number stamped on this pipe. Here is the link. https://rebornpipes.com/2012/11/01/dunhill-pipe-shapes-collated-by-eric-w-boehm/. I did a screen capture of the section on Bent Billiards and circled the pipe I have in hand in red. The shape number 56 is noted as a bent billiard size 4. It is noted as 5 ½ inches long just as the one I have is. It is listed as coming out in 1928, 1950, 1960 and 1969. The spread of dating was pretty large and the stamping so unreadable that I could not determine the date with that normal help. It was time to move on and look for other helpful information to see if I could narrow things down a bit.

I turned to another site that I use often – the pipephil website on Logos and Stampings because there is some really helpful information on when each of the lines of Dunhill pipes entered the market. Here is the link to the section of the site that I turned to, http://www.pipephil.eu/logos/en/dunhill/root-bru-guide.html. I did a screen capture of a portion of the chart that gave me the time frame for this particular pipe. I circled the date and brand in red in the photo below. It looks like the Root Briar came out between 1960 and 1970. Now I knew that one I was working on a pipe that came from that era – which incidentally matched the other pipes in Farida’s Dad’s estate collection.The bowl was thickly caked and the cake had flowed over onto the smooth Root Briar finish on the rim top forming hard lava that made the top uneven. The inner and outer edges of the rim were both damaged. On the right front of the bowl the rim had been scraped and damaged and then burned. On the back edge there was the same kind of damage that was on the other Dunhill pipes in this estate. This one however was not quite as deep so it would need to be dealt with a bit differently when I got to that point. The stem was lightly oxidized but otherwise in good condition. There were light tooth marks and chatter on both sides in front of the button. The Dunhill white spot was intact on the top of the stem. I took photos of the pipe to show what it looked like before I started the cleanup work. I took close up photos of the bowl and rim top as well as the stem. You can see the condition of the rim top and bowl in the first photo. The outer edge has damage on the front right – burn damage and wear that comes from lighting a pipe repeatedly in the same spot. The back left side also shows damage on the inner edge. There was damage from what looked like a poor rim job. The stem has tooth chatter and some bite marks on the top and the underside of the stem just ahead of the button.I reamed the bowl with a PipNet reamer and used two of the four cutting heads to clean out the cake. The bowl thickly caked so I started with the smaller of the two and worked my way up to the second one which was about the same size as the bowl diameter. I cleaned up the reaming with a Savinelli Fitsall Pipe Knife to remove the remnants of cake. I finished by sanding the inside of the bowl with a dowel wrapped in sandpaper. I scrubbed the surface of the briar with alcohol and cotton pads. I scrubbed until I had removed the sticky tars and oils on the finish. I worked on the top of the rim with the edge of the Savinelli Fitsall Pipe Knife. I scraped the heavy buildup that was there. I scrubbed the scraped rim top with alcohol and cotton pads to remove the debris. I dried off the bowl with a soft rag. The cleaned and scrubbed pipe really made the rim top damage very clear. It looked to me that I would need to top the bowl. I topped the bowl on a topping board with 220 grit sandpaper to remove the damage to the top surface of the rim and clean up the damage to the edges. I did not have to remove a lot and repeatedly checked it to make sure that I had removed enough but not too much. I wanted to take the top down until it was smooth up to the burn damaged area on the rim top.I wiped down the rim top with alcohol and cotton pads to remove the sanding dust. I built up the damaged area on the rim with clear super glue and briar dust. I layered it until the height of the damaged area was roughly equal to the rim top. The third photo below shows the top at this point in the process. I took photos of the repaired bowl from a variety of angles to show what the repair looked like before I sanded and cleaned it up. I would need to top the bowl again to smooth things out and work on the edges. I topped the bowl again to remove the excess repair material. I worked it over the sandpaper on the board until the surface was smooth. I used a folded piece of 150 and 220 grit sandpaper to bevel the inside edge of the bowl. With the externals clean it was time to clean out the mortise and shank and airway into the bowl and the airway in the stem with alcohol, cotton swabs and pipe cleaners. I scraped the mortise with a dental spatula to loosen the tars before cleaning. I worked on the bowl and stem until the insides were clean.I used a Cherry stain pen to touch up the rim and match the colour of the rest of the pipe.I rubbed down the briar with Before & After Restoration Balm. I worked it into the smooth finish to clean, enliven and protect the new finish. It also evened out the stain coat and gave the stain a dimensional feel. I let the balm sit for a little wall and then buffed it with a horsehair shoe brush. I buffed the bowl with a cotton cloth to raise the shine. There was some darkening on the bowl front but the briar was solid. Overall the bowl looked really good. I set it aside and turned my attention to the stem. I sanded out the tooth chatter on both sides with a folded piece of 220 grit sandpaper.I polished the stem with micromesh sanding pads – wet sanding with 1500-2400 grit micromesh sanding pads and dry sanding it with 3200-12000 grit pads. I rubbed the stem down with Obsidian Oil after each pad. I polished it further with Before & After Pipe Polish, using both the Fine and Extra Fine polishes to further protect and polish out the scratches. When I finished with those I gave it a final rub down with the oil and set it aside to dry.  With the stem polished I put it back on the pipe and lightly buffed the bowl with Blue Diamond. I buffed the stem with a more aggressive buff of Blue Diamond. I gave the bowl several coats of Conservator’s Wax and the stem several coats of carnauba wax and buffed the pipe with a clean buffing pad to raise the shine. I hand buffed it with a microfiber cloth to deepen the shine. The pipe polished up pretty nicely. The finished pipe is shown in the photos below. This is the fifth of Farida’s Dad’s pipes that I am restoring from his collection. I am looking forward to hearing what Farida thinks once she sees the finished pipe on the blog. This one is already sold to a fellow in India. It will soon be on its way to him to carry on the trust from Farida’s father. The dimensions are Length: 5 1/2 inches, Height: 1 3/4 inches, Outside diameter of the bowl: 1 1/8 inches, Chamber diameter: ¾ inches. Thanks for walking through the restoration with me as I worked over another of the Dunhills. More of his pipes will follow including some one more Dunhill and two Charatans. The last photo of the front of the bowl shows the darkening to the briar that remains. It is solid and the burn mark does not compromise the briar. It looks worse in this photo than it does in reality. It is a dark spot that is solid.

Adding some length to a Chimera Blowfish


Blog by Steve Laug

I received a call from a fellow who lives nearby my house about working on some pipes for him. He happened to be packing them up to send to the US for repairs when he stumbled on the rebornpipes.com website. He stopped by with a box of pipes that he wanted to know if I could work on for him. Two were pretty straight forward – 1910 Calabash that needed a cleanup and a freehand that belonged to his dad that he wanted cleaned up so that he could send it back to him. The freehand was simple – buffing, touching up stain, cleaning the bowl and shank and removing tooth chatter and oxidation from the stem. I finished that one first and then moved on to this calabash. I have written about the calabash on a previous blog that can be found at the following link: (https://rebornpipes.com/2018/07/01/a-simple-restoration-of-a-1910-gourd-calabash/). The third pipe that he wanted me to work on was a different proposition – it was a Blowfish shaped pipe with the name Chimera etched on the underside of the shank. He did not like the stem and the way it looked on the shank. He was wondering if I could add some length to the shank and fit a different looking stem on it that better fit the shape and look of the pipe. I took photos of the pipe before I started working on it. I took a close up photo of the stamping on the shank. It is a brand that I don’t know much about. It is not listed on Pipedia or Pipephils site. I wrote an email to the owner to see what he could tell me about the pipe. He wrote back as follows:

The blowfish “Vincent” was made by Tedd Weitzman in Atlanta around 2010. He started making pipes out of the shop of a local amateur maker and this was his first sellable one… “Chimera” would have been his marque, but he hadn’t made a stamp yet, but as far as I know he never made another.The pipe had an interesting shape and worked with the grain very well. It seemed to have a clean and open draw. I took a few photos of the bowl from various angles to show the grain. Some of you may note that the shank end is not square and require that the saddle of the stem be cut at an angle. This will need to be addressed when I add the shank extension. I had an interesting faux horn (Lucite) shank extension here that I thought make an interesting contrast with the shape of the bowl. I also had a four sided, square vulcanite tapered stem that I thought would look good with the pipe. I laid out the pieces and took a photo of the proposed look of the pipe. I sent the photos to the owner and his response was to go with what I thought would look good. I was good to go on this one.I took the pipe apart and worked on the shank extension. I glued a threaded Delrin tenon in the shank end of the stem to join it to the shank of the pipe. The taper on the shank extension was not quite enough to make a smooth transition with the briar shank. I took it down with a Dremel and sanding drum and got it close. The rest of the fitting would have to be done by hand with files and sandpaper. The tenon would need to be cleaned up a bit but it was going to work nicely. I put the stem back together with the extension and took some photos. I put the stem and shank extension in place on the bowl and took some photos. You can see that the transition is getting close. I think the faux horn shank extension and new stem are going to look really good. It is        quite unique looking as a whole. I like the longer shank and stem with the large blowfish shaped bowl. Once I had the transition sanded smooth with 220 grit sandpaper I polished it and the extension with micromesh sanding pads – wet sanding with 1500-2400 grit pads and dry sanding with 3200-4000 grit pads. I wiped the extension down after each pad with a damp cloth. Before I polished it with the 6000-12000 grit pads I stained the connection with an oak coloured stain pen to match the colour of the rest of the bowl. I finished by polishing the junction and the extension with the last three grits (6000-12000) of micromesh pads. I really like the look of the longer shank. The faux horn extension looks good with the rest of the pipe. I worked Before & After Restoration Balm deep into the briar on the smooth finish to clean, enliven and protect it. I wiped it off with a soft cloth. I buffed the bowl with a cotton cloth to polish it. It really began to have a deep shine in the briar. I took some photos of the bowl at this point to mark the progress in the restoration. The grain on the bowl is really beginning to stand out and will only do so more as the pipe is waxed. I set the bowl aside and began to work on the stem that I had chosen. It was an interesting four sided taper stem with a flare at the bottom where it joined the shank. The tenon was rough so it would need to be worked on. I funneled the airway in the stem to give it a good open flow. I sanded out the tooth chatter on the top and underside near the button. I sanded out the scratches in the tenon and the underside of the disk between the tenon and the stem. I used a folded piece of 220 grit sandpaper to do the shaping and smoothing work on the stem.I polished the stem with micromesh sanding pads – wet sanding with 1500-2400 grit pads and dry sanding with 3200-12000 grit pads. I wiped the stem down after each pad with Obsidian Oil  and rubbed it into the surface. To finish the polishing I used Before & After Pipe Polish – both Fine and Extra Fine polishes. I gave it a final coat of Obsidian Oil and hand buffed it to a shine. This Chimera Blowfish has some really beautiful grain all around the bowl and shank. The grain really is quite stunning. The asymmetrical nature of the bowl and shank give it a really unique look. I can see why the original stem was a hard fit. The shank extension that has the look of faux horn looks really good in contrast between the briar and the stem. The panelled vulcanite stem is high quality and shined up well. I buffed the bowl and the stem with Blue Diamond polish to raise the shine on the briar and the vulcanite. I was careful to not buff the stamping and damage it. I gave the bowl and stem multiple coats of carnauba wax. I buffed the entire pipe with a clean buffing pad to raise the shine. I hand buffed it with a microfiber cloth to deepen the shine. The finished pipe is shown in the photos below. The dimensions of the pipe are: Length: 6 1/2 inches, Height: 2 inches, Outside Diameter: 1 3/4 inches, Diameter of the chamber: 3/4 inch. This blowfish feels great in the hand and its light weight give it the potential of being a clencher. I have one more repair to do for this pipeman and I will give him a call soon and I know that he is looking forward smoking these pipes. Thanks for walking through the restoration with me.

An Andre Hand Carved Freehand – #8 of Anthony’s Dad’s Pipes


Blog by Steve Laug

I am finishing the work that began with an email from Anthony, a reader of rebornpipes asking if I would be willing to help him clean up his Dad’s pipes. He wrote; “I have a few pipes (8 or so) that haven’t been smoked in 15 years. They were my dad’s. I would like to get someone to restore them”. We chatted back and forth via email and the long and short of the story is that I have eight of his Dad’s pipes in my shop now to work on. The photo below shows the mixture of pipes that he sent me. There are some interesting shapes and most are very dirty and have very little if any of the original finish left on the briar. All have an overflow of carbon on the rim top and all have chewed, damaged stems and buttons. Anthony remembers his Dad smoking them throughout the years he was growing up so they went from regular use to being boxed and stored. They will need a lot of TLC to bring life back to them but it should be fun to give it a go. I went through the pipes and assessed their condition and contacted him and got the go ahead to proceed on the lot.I have completed the restoration of seven of the pipes. The last pipe I am working on is a floral shaped freehand with a rounded top and a flush fit tapered, bite proof stem. It the third pipe down on the left hand column in the above photo. I have circled it in red. It is another tall freehand with a 1/4 bent stem. It has some pretty grain with carved floral patterns on the front and right side of the bowl. The bottom of the bowl is flat making the pipe a sitter. The stem that is on it is a twin bore/bite proof stem that is chewed with deep tooth marks on both the top and bottom of the stem and button. This may well be the original stem on this pipe. But in any case the fact that most of these pipes have a replacement twin bore bite proof stem tells me a lot about Anthony’s Dad’s habitual gnawing on his pipes. The pipe is stamped on the left side of the shank with the script signature Andre over 1981. The bowl had about a half a bowl of dottle and tobacco in the bottom and a thick cake, and some lava overflow on the rim top. The finish was gone and very washed out looking. Even the dirt and grime were anemic. I took photos of the pipe to show its overall condition when it arrived at my work table.   I took some close up photos of the bowl, rim top and the stem to show what I was going to be dealing with on this pipe. The rim top was in rough condition – mold filled in the grooves and valleys of the plateau. There was also some lava overflowing from the bowl that had filled in the grooves. The plateau on the shank end was worse than the rim top (if possible). The finish worn off and there was water staining all around the shank end.After I cleaned the pipe up a bit, I took a photo of the stamping on the left side of the shank. It reads Andre over 1981.The stem was in rough condition as you can see from the photos below. The “bite proof” stem evidently was not bite proof. Anthony’s Dad had gnawed on it and left behind deep tooth marks on the stem and button. It would take some work but I would save this stem.I looked up the brand on the pipephil website index and found it listed. Here is the link – http://www.pipephil.eu/logos/en/logo-a6.html. I have included a photo from the site that shows a stamp on the left side of the shank that is like the one I am working on. The only difference is the year – this is a 1985 while I am working on a 1981. The site says that André Mermet was a French craftsman who immigrated to the USA. He (and after him his son) produced pipes for Barclay Rex or Wilke pipeshops.

I looked on Pipedia https://pipedia.org/wiki/American_Pipe_Brands_%26_Makers_A_-_B and found that though there was no listing with information, there was the brand name in the list of US pipe companies and makers. It stated: North American brand, possibly associated with Andre’s Pipe Gallery.

I wondered if this was not the shop that Anthony’s Mom had referred to in her email to him that I quoted in previous blogs on these pipes. She had written about a shop called “Andre’s,” around 1969 or ’70. She said it was a unique shop, originally located in Los Gatos, or Campbell, California she thought. She said that it later moved to the Alameda area in San Jose. Anthony’s Dad also bought his favorite tobacco blends there so it makes sense to me that he may have also purchased this signature pipe from them. Perhaps Anthony will let us know when he reads this.

One last time I want to include the tribute Anthony wrote about his Dad and his pipe smoking. Here is what Anthony sent: When my dad died 6 years ago, my mom asked if I wanted my dad’s old pipes. He was a long time pipe smoker, ever since I was a kid I can remember him sitting on the couch smoking his pipe inside. He worked at IBM and used to smoke his pipe in his office before they changed the laws in California. So you can imagine he had quite the collection over the years.

I took his pipes and put them in storage for a few years, I myself recently quit smoking cigarettes and decided to take up pipe smoking as it was easier on the wallet. I asked in /r/pipetobacco if anyone could recommend a pipe restoration service and someone told me about rebornpipes.com. I was hesitant but after looking at the blog I knew it would be a good place to send my dad’s pipes.

My dad loved smoking his pipes, sitting out by the pool in the sun taking a nap or in the garage wood working. The house was my mom’s area and the garage was my dad’s area. I spent hours sitting out in the garage as a kid watching the niners or a’s and giants on tv while doing woodworking projects. I hope to do the same with my kids these days.

I’m not sure if my dad smoked other tobacco but I remember Captain Black was the kind he smoked regularly. He had tins of it in the garage, full and empty and would turn the old tin jars into storage for odds and ends, like screws or washers or miscellaneous stuff.

I remember when I played little league my dad would sit in the stands and smoke his pipes. One of my teammates asked “What is that smell?” and I ashamedly said “Oh that’s my dad’s pipe…I’ll go tell him to put it out” and my teammate said “No man, it smells good!”.  It’s funny how the little conversations over the years you remember.

Another time when I was in 3rd grade or so we learned how smoking was bad for you (this was back in the 80s). I remember I asked my teacher if smoking a pipe was bad for you too….and she hesitated and said “Not as bad as cigarettes, since you don’t inhale it”. After that I was no longer worried about my dad smoking.

Knowing my mom I have no idea how my dad pulled this off but he managed to smoke his pipe in the house. I guess she liked the smell of it. Recently when I was waiting for my girls to get out of school I was sitting on a side street smoking my pipe and someone walked by and thanked me for bringing the pipe back. He said his dad used to smoke a pipe and he loved the smell. As did mine. The only difference is my daughters complain constantly about the smell of my car, but that is mostly because I smoke cigars too.

Anyway, grab some fine tobacco, light up a bowl and sit back and relax. I don’t have a pool like my dad did but you can catch me working on my laptop sitting in my driveway smoking a nice pipe, especially one of these restored pipes from reborn pipes….I can’t wait to smoke them.

Thanks Anthony, I appreciate how your tribute gives a sense of who your Dad was and how he enjoyed his pipes. I think it is somehow appropriate that the 8th and final pipe is from Andre’s shop. I decided to start with the stem. I “painted” the deep tooth marks with a Bic lighter to raise the dents. It helped but these dents were deep and had sharp edges.  I filled in the remaining dents with black super glue. It would take several applications of the glue to thoroughly fill in and repair the dents. I set the stem aside to let the repair cure and worked on the bowl.I set the stem aside and worked on the bowl. I used a dental pick to remove the dottle and unsmoked tobacco that filled the lower half of the bowl. I reamed it back to bare briar using a PipNet pipe reamer to remove as much of the cake as I could. I finished with a Savinelli Fitsall pipe knife and then sanded it with 220 grit sandpaper wrapped around my index finger. The rim top had a thick coat of lava and many nicks and dents in the surface and along the outer rounded edge. I sanded it with a fold piece of 150 grit sandpaper followed by 220 grit sandpaper to clean off the damage and smooth out the nicks and dents.I wiped down the bowl and rim with acetone on a cotton pad to remove the remnants of stain in the bend of the shank/bowl junction and the grime ground into the finish. I was careful around the carved leaves or flower petals around the bowl and the stamping on the shank. Both seemed to have a darker stain in the grooves and I wanted to leave that undamaged. I sanded the smooth surfaces of the bowl, rim and shank with a medium and a fine grit sanding sponge to remove the scratches on the briar. I cleaned out the internals in the mortise, shank and airway with bristle and smooth pipe cleaners, cotton swabs and alcohol. It was pretty dirty but it did not take a lot of time to clean it up.I worked some Before & After Restoration Balm into the nooks and crannies of the carvings on the front and right side of the bowl and into the grain of the smooth portions of the briar. I worked it deeper into the grooves with a horsehair shoe brush. The balm works to clean, enliven and protect the briar. I really like the way it brings life to the briar. When I wipe it off with a soft cloth it not only adds a shine but takes away the grime that is in the finish.    I buffed the bowl with Blue Diamond on the buffing wheel to polish briar and further work in the Restoration Balm. The pipe is looking good. I smoothed out the repairs with a needle file and 150 and 220 grit sandpaper. I reshaped the button and repaired the straight edge. I sanded the light oxidation off the surface of the stem at the same time.I polished the stem with micromesh sanding pads – wet sanding with 1500-2400 grit pads and dry sanding with 3200-12000 grit pads. I wiped the stem down with Obsidian Oil after each sanding pad. I polished the stem with Before & After Pipe Stem Polish – both Fine and Extra Fine to finish removing the light scratches that remained. I gave stem another coat of the oil after that and set it aside to let the oil dry. I put the pipe back together and polished the bowl and stem with multiple coats of carnauba wax. I buffed it with a clean buffing pad to raise the shine. I hand buffed it with a microfiber cloth to deepen the shine. The pipe polished up pretty nicely. The finished pipe is shown in the photos below. This is final pipe of the eight pipes that I restored from Anthony’s Dad’s collection. I am looking forward to hearing what Anthony thinks once he sees the finished pipe on the blog. This week I will pack them up and send them back to him so that he will have the opportunity to carry on the trust from his Dad. The dimensions are Length: 6 inches, Height: 2 1/4 inches, Outside diameter of the bowl: 2 inches, Chamber diameter: 1 inch. Thanks for walking through the restoration with me as I worked over this final pipe from Anthony’s Dad’s collection.

A Simple Restoration of a 1910 Gourd Calabash


Blog by Steve Laug

I received a call from a fellow who lives nearby my house about working on some pipes for him. He happened to be packing them up to send to the US for repairs when he stumbled on rebornpipes. He wanted to know if I could work on them for him. Two were pretty straight forward – 1910 Calabash and a freehand that was his dad’s that he wanted to clean up and send back to him. The freehand was simple – buffing, touching up stain, cleaning the bowl and shank and removing tooth chatter and oxidation from the stem. I finished that one first and then moved on to this calabash. The rest will warrant a blog on each of them to explain the process.

This Gourd Calabash was interesting. When I first saw it I thought it had an amber stem but as I worked on it, it became clear that it was a Bakelite stem or some kind of early acrylic. The way the material acted told me that. The stem had tooth chatter and nicks in the surface of the stem. The bowl was dirty and had a pretty thick cake build up on the inside walls. I carefully scraped it back leaving a thin cake on the walls. I think that the inner bowl is clay. The bowl is held in place by a pressure fit Sterling Silver rim cap that is unmovable without damaging the gourd. The silver was tarnished and had scratches and some dents in the surface. The clay inner bowl was plugged at the bottom so that there was minimal airflow or draw on the pipe. The gourd itself was in really good shape with some kind of varnish coat on the surface. The end of the shank was bound with a tarnished Sterling Silver band that had hallmarks and maker marks on the left side. The tenon appeared to be bone and was in great condition with a slight nipple on the end that had a small chip in it. It fit in the shank perfectly and everything aligned well. This would be a fun one to clean up and restore. I took some photos of the rim top to show the scratches and dents in the silver as well as the tarnish on the silver. The dark cake on the wall of the bowl is visible as well. The photos of the stem show the tooth chatter on both sides near the button and some small nicks on both sides.I took a photo of the hallmarks and makers mark on the Sterling Silver band. The hallmarks are clear in the photo below. There is an anchor, a lion, and the lower case letter “l”. The anchor identifies the city of the manufacture of the silver to be Birmingham, England. The lion is the mark for .925 Sterling Silver and the letter “l” is the date stamp. I have included a hallmark chart for dating the pipe. I put a red rectangle around the letter for 1910. It is the same style of “l” and the cartouche that holds the letter stamp matches the photo as well. The maker stamp shows the letters and ampersand as follows: J&H in a long rectangular cartouche. I was unable to identify the silversmith from these marks. I sanded out the tooth chatter and nicks with a folded piece of 220 grit sandpaper and smooth out the areas that were damaged to blend into the surface of the early Bakelite stem.I polished both sides of the stem with micromesh sanding pads – wet sanding with 1500-2400 grit pads and dry sanding with 3200-12000 grit pads. I wiped the stem down with Obsidian Oil after each pad to clean away the debris from sanding. When I finished I buffed it with a microfiber cloth to raise the shine in the stem. I cleaned out the airway in the stem and the mortise, shank and inside of the calabash with pipe cleaners, cotton swabs and alcohol. The idea on cleaning these gourds is to not let the inside ever get too wet with the alcohol. I worked over the airway in the bottom of the bowl with pipe cleaners and cotton swabs as well after reaming it back with a Savinelli Fitsall pipe knife.I worked on the scratches and nicks in the Sterling Silver rim cap with micromesh sanding pads – wet sanding with 1500- 2400 grit pads and dry sanding with 3200-12000 grit pads. I finished cleaning the rim top and the band on the shank with a jeweler’s treated silver polishing cloth to give the silver a rich shine and protect it from tarnishing for a while. I polished the gourd with Before & After Restoration Balm and rubbed it into the surface of the gourd. It really brought more life and depth to the finish on the gourd. I buffed it with a soft cloth and removed the excess. I gave the bowl and stem several coats of Conservator’s Wax and buffed it with a soft cloth to raise the shine. It came out really well. The finished pipe is shown in the photos below. The next two that I have on the table from him are an interesting blowfish that has a very short shank and a stem that just does not work well with the shape and the other is a small, meerschaum cigarillo holder with a broken tenon between the stem and the holder. Thanks for looking.

A Harcourt Hand Carved Freehand – #7 of Anthony’s Dad’s Pipes


Blog by Steve Laug

This is a continuation of the work that began with an email from Anthony, a reader of rebornpipes asking if I would be willing to help him clean up his Dad’s pipes. He wrote; “I have a few pipes (8 or so) that haven’t been smoked in 15 years. They were my dad’s. I would like to get someone to restore them”. We chatted back and forth via email and the long and short of the story is that I have eight of his Dad’s pipes in my shop now to work on. The photo below shows the mixture of pipes that he sent me. There are some interesting shapes and most are very dirty and have very little if any of the original finish left on the briar. All have an overflow of carbon on the rim top and all have chewed, damaged stems and buttons. Anthony remembers his Dad smoking them throughout the years he was growing up so they went from regular use to being boxed and stored. They will need a lot of TLC to bring life back to them but it should be fun to give it a go. I went through the pipes and assessed their condition and contacted him and got the go ahead to proceed on the lot.I have completed the restoration of six of the pipes. The next pipe I chose to work on was the tall freehand with plateau on the rim and the shank end. It too had a replacement vulcanite stem – it is the second pipe down on the left hand column in the above photo. I have circled it in red. It is a tall freehand with a 1/4 bent stem. It is a really pretty straight grain with patterns of rustication on the bottom portion of the bowl. It has plateau on the top and on the end of the shank. The plateau finish has what looks like mold or at least water damage on both the top and end of the shank. There is also water damage around the end of the shank. The stem that is on it is again a replacement twin bore/bite proof stem that is chewed and for all intents and purposes destroyed. The fact that most of these pipes have a replacement twin bore bite proof stem tells me a lot about Anthony’s Dad’s habitual gnawing on his pipes. The stem is ruined with large pieces tooth marks and holes on both the top and underside extending from the chewed button into the surface of the stem. I will need to find a different stem. The pipe is stamped on the underside of the shank with the number 0 and under that Harcourt over Hand Carved in Denmark. The bowl had a thick cake, and some lava overflow under the water damage. The finish was gone and very washed out looking. Even the dirt and grime were anemic. I took photos of the pipe to show its overall condition when it arrived at my work table. I took some close up photos of the bowl, rim top and the stem to show what I was going to be dealing with on this pipe. The plateau rim top was in rough condition – mold filled in the grooves and valleys of the plateau. There was also some lava overflowing from the bowl that had filled in the grooves. The plateau on the shank end was worse than the rim top (if possible). The finish worn off and there was water staining all around the shank end.The water damage around the end of the shank was darker than the rest of the finish. It was water stained and those are hard to remove. I took a photo of the stamping on the underside of the shank. It reads 0 over Harcourt. Underneath that are two lines reading Hand Carved over In Denmark.The stem was ruined you can see from the second and third photos below. The “bite proof” stem evidently was not bite proof. Anthony’s Dad had gnawed through the twin bore and left holes in the deep tooth marks on the stem. It would need to be replaced.I had some vague memory about the Harcourt brand that had a connection to Preben Holm and the stamping seemed a lot like the way that he stamped his pipes. I did a bit of research on the brand to see the connection. The first place I looked was on Pipedia at the following link: https://pipedia.org/wiki/Harcourt. There I found the following information which I quote in full.

The brand Harcourt was produced by Preben Holm (†) for Dunhill to secure a share of the Danish fancy boom for Dunhill’s principal pipe dealers. Later Erik Nørding made Harcourt pipes for a shorter period. These pipe are sometimes (partially) rusticated.

It had been reported that the second generation of Harcourt pipes were sold exclusively through Dunhill stores, but we now know through Rich Mervin that the Brick Church Pipe Shop, a chain of 3 stores in NJ sold Danish freehands in the 1970s and 80s including Knute, Ben Wade, and Harcourt. They were also an authorized Charatan and Dunhill retailer. So, apparently Harcourt freehands were sold through at least some Dunhill dealers as well as the Dunhill stores.

I then turned to the pipephil site at this link and found out some more information on the brand. http://www.pipephil.eu/logos/en/infos/harcourt1.html. I followed the links there to some photos of a boxed pipe and the stamping on the shank.

This box contains a pipe carved for Dunhill in the 1970s. Harcourt pipes were Dunhill’s answer to the passion Danish style raised during this period.There was also a photo of the stamping on Preben Holm’s designed Harcourt that is recognizable by the characteristic shape of the pipe as well as by the stampings on its shank. The stampings in the photo are identical to the pipe I am working on. It is stamped with an 0 over HARCOURT and underneath that it reads  HAND CARVED over IN DENMARK.

From the two sites I was able to make the connection between the pipe I am working on and the Harcourt pipes that were made by Preben Holm. The connection between Preben Holm and Dunhill’s desire to tap into the Danish Freehand market in the US was also helpful as it gave me a potential date for the pipe. It was made in the 1970s – the height of the Danish period in the US.

So now I knew that Anthony’s Dad had purchased this pipe during the 1970s from a shop probably somewhere in California. Possibly even the pipe shop that Anthony’s Mom had written about called “Andre’s,” around 1969 or ’70. She said it was a unique shop, originally located in Los Gatos, or Campbell, California she thought. She said that it later moved to the Alameda area in San Jose. Anthony’s Dad also bought his favorite tobacco blends there so it makes sense to me that he may have also purchased the pipe there. Perhaps Anthony will let us know when he reads this.

Once again I am including the tribute that I asked Anthony to write about his Dad and his pipe smoking once again in case some of you missed that and wanted to have some background. Here is what Anthony sent: When my dad died 6 years ago, my mom asked if I wanted my dad’s old pipes. He was a long time pipe smoker, ever since I was a kid I can remember him sitting on the couch smoking his pipe inside. He worked at IBM and used to smoke his pipe in his office before they changed the laws in California. So you can imagine he had quite the collection over the years.

I took his pipes and put them in storage for a few years, I myself recently quit smoking cigarettes and decided to take up pipe smoking as it was easier on the wallet. I asked in /r/pipetobacco if anyone could recommend a pipe restoration service and someone told me about rebornpipes.com. I was hesitant but after looking at the blog I knew it would be a good place to send my dad’s pipes.

My dad loved smoking his pipes, sitting out by the pool in the sun taking a nap or in the garage wood working. The house was my mom’s area and the garage was my dad’s area. I spent hours sitting out in the garage as a kid watching the niners or a’s and giants on tv while doing woodworking projects. I hope to do the same with my kids these days.

I’m not sure if my dad smoked other tobacco but I remember Captain Black was the kind he smoked regularly. He had tins of it in the garage, full and empty and would turn the old tin jars into storage for odds and ends, like screws or washers or miscellaneous stuff.

I remember when I played little league my dad would sit in the stands and smoke his pipes. One of my teammates asked “What is that smell?” and I ashamedly said “Oh that’s my dad’s pipe…I’ll go tell him to put it out” and my teammate said “No man, it smells good!”.  It’s funny how the little conversations over the years you remember.

Another time when I was in 3rd grade or so we learned how smoking was bad for you (this was back in the 80s). I remember I asked my teacher if smoking a pipe was bad for you too….and she hesitated and said “Not as bad as cigarettes, since you don’t inhale it”. After that I was no longer worried about my dad smoking.

Knowing my mom I have no idea how my dad pulled this off but he managed to smoke his pipe in the house. I guess she liked the smell of it. Recently when I was waiting for my girls to get out of school I was sitting on a side street smoking my pipe and someone walked by and thanked me for bringing the pipe back. He said his dad used to smoke a pipe and he loved the smell. As did mine. The only difference is my daughters complain constantly about the smell of my car, but that is mostly because I smoke cigars too.

Anyway, grab some fine tobacco, light up a bowl and sit back and relax. I don’t have a pool like my dad did but you can catch me working on my laptop sitting in my driveway smoking a nice pipe, especially one of these restored pipes from reborn pipes….I can’t wait to smoke them.

Thanks Anthony, that gives me a sense of who your Dad was and how he enjoyed his pipes. I was ready to turn my attention to this seventh pipe. I went through my can of stems and found a stem that I really like the looks of. There was something classic about it and simple that looked right with the pipe. It was about ½ inch longer than the replacement stem. The tenon was the right length for the shank and once it was cleaned up it would look good. I would need to put a slight bend in the stem to fit the flow of the shank and pipe. It was lightly oxidized but otherwise a pretty clean saddle stem. I took photos of the two stems together to show how they compared.I heated the new stem with a heat gun to soften the vulcanite enough to bend it. When it was flexible I bent it over the end of the buffing wheel to get the proper bend on the shank. I put the stem in the shank and took photos of the newly bent stem. The fit was good. I liked the look of the bend and the flow of the pipe. I sanded down the circumference of the tenon with 150 and 220 grit sandpaper. It did not take too much work to get the stem to fit well in the shank  the way I wanted. I sanded the oxidation off the surface of the stem and sanded out the tooth chatter and light tooth marks on the top and underside of the stem at the button. I polished the stem with micromesh sanding pads – wet sanding with 1500-2400 grit pads and dry sanding with 3200-12000 grit pads. I wiped the stem down with Obsidian Oil after each sanding pad. I polished the stem with Before & After Pipe Stem Polish – both Fine and Extra Fine to finish removing the light scratches that remained. I gave stem another coat of the oil after that and set it aside to let the oil dry. I set the stem aside and worked on the bowl. I reamed it back to bare briar using a PipNet pipe reamer to remove as much of the cake as I could. I finished with a Savinelli Fitsall pipe knife and then sanded it with 220 grit sandpaper wrapped around a dowel. There were some deep gouges and flaws in the briar on the left side toward the bottom half of the bowl. I cleaned the area and filled them in with drops of clear superglue. When the glue cured I sanded them back to blend into the surrounding bowl side.I worked some Before & After Restoration Balm into the nooks and crannies of the sandblast finish on the rim top, bowl and shank. I worked it deeper into the grooves with a horsehair shoe brush. The balm works to clean, enliven and protect the briar. I really like the way it brings life to the briar. When I wipe it off with a soft cloth it not only adds a shine but takes away the grime that is in the finish.    I needed to stain the bowl to get some coverage on the water damaged areas. Even after sanding they were darker than the rest of the briar. I stained the pipe with Fiebing’s Tan stain. It seems the tan stain may be improperly labelled because everything seems to come out like it has been stained with oxblood or cordovan stain. It brought the red out of the briar. I applied the stain and flamed it with a lighter. I repeated the process until the coverage was even around the bowl. Once the stain had cured I buffed the bowl with Blue Diamond on thebuffing wheel to polish the stain and smooth out the finish. The pipe is looking good. The finish is a little too opaque for me so I will need to address that shortly. I decided to make the finish less opaque by polishing it with micromesh sanding pads. I sanded with 1500-12000 grit sanding pads to make the finish more transparent. The photos below show the process. I put the pipe back together and polished the bowl with multiple coats of Conservator’s Wax and the stem with multiple coats of carnauba wax. I buffed it with a clean buffing pad to raise the shine. I hand buffed it with a microfiber cloth to deepen the shine. The pipe polished up pretty nicely. The finished pipe is shown in the photos below. This is seventh of eight pipes that I am restoring from Anthony’s Dad’s collection. I am looking forward to hearing what Anthony thinks once he sees the finished pipe on the blog. Once I have the remaining pipe finished I will pack them up and send them back to him. It will give him opportunity to carrying on the trust from his Dad. The dimensions are Length: 7 inches, Height: 3 1/8 inches, Outside diameter of the bowl: 2 inches, Chamber diameter: 7/8 inches. Thanks for walking through the restoration with me as I worked over this pipe from Anthony’s Dad’s collection. One more freehand pipe remains and will soon follow in the days ahead keep an eye out for it.