by Steve Laug
Back in the end of February I received an email from a reader name John regarding a pipe of his that needed some work. I have included the email below.
Steve, I have this Ben Wade pipe that I bought new in the late 60’s early 70’s, was wondering if there was anyway to fix the crack in the shank? I just pulled my old pipes out of a drawer where they have been stored for over 40 years. Haven’t smoked them in quite some time.
Thanks for your reply, John
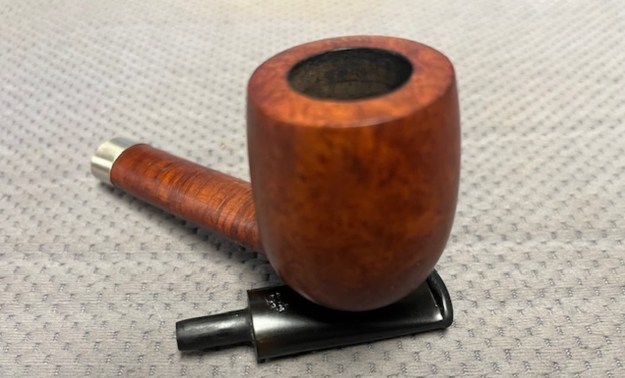
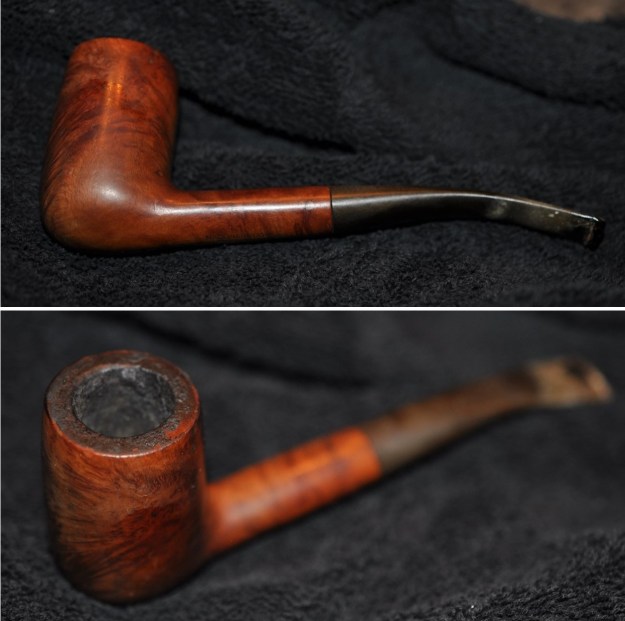
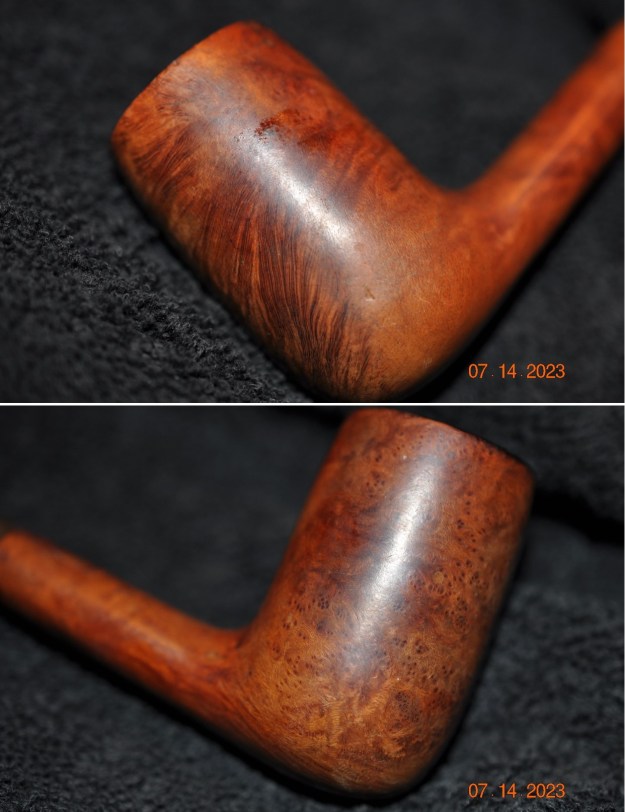
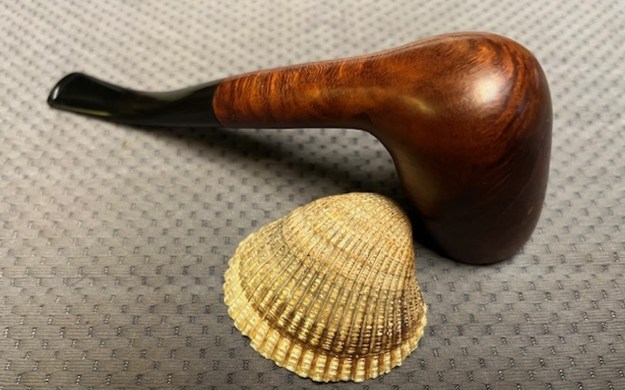
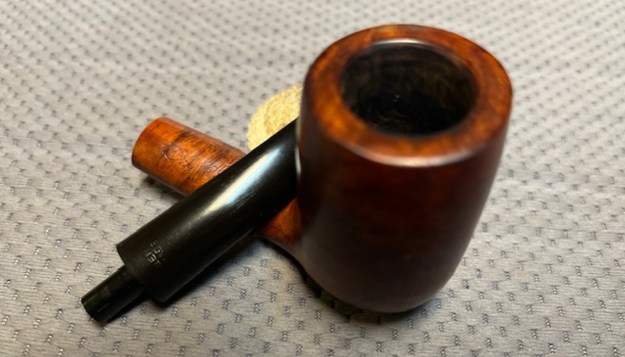
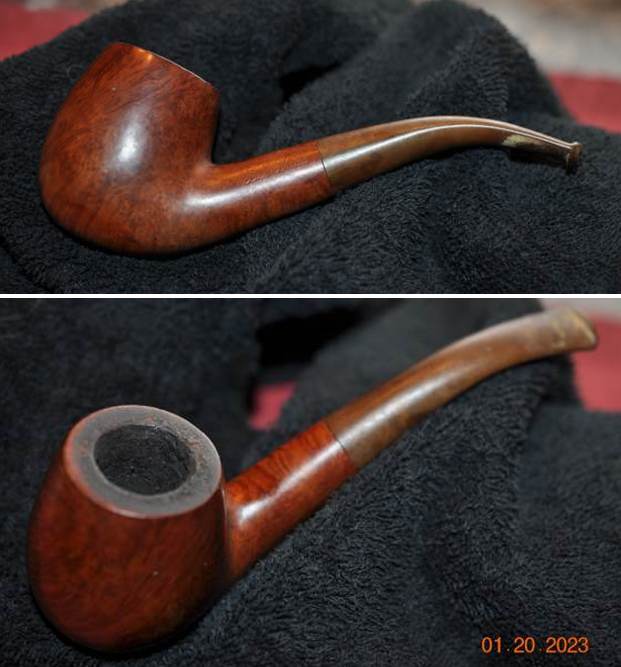
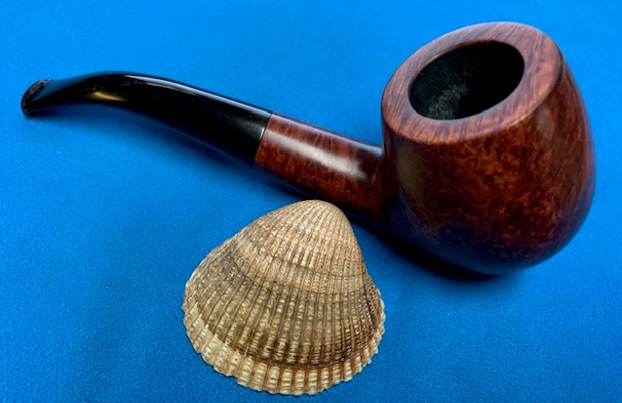
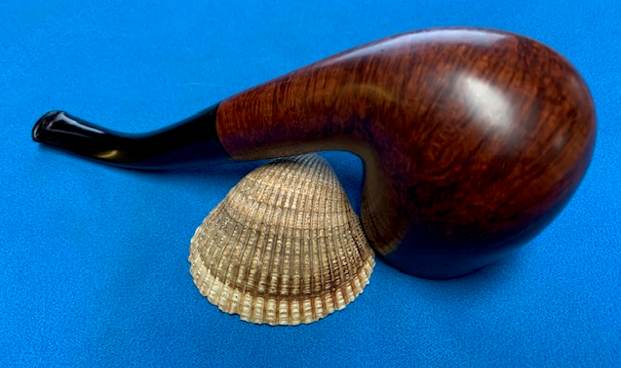
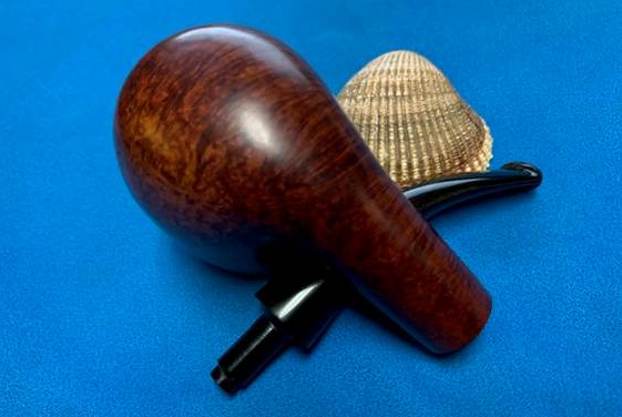
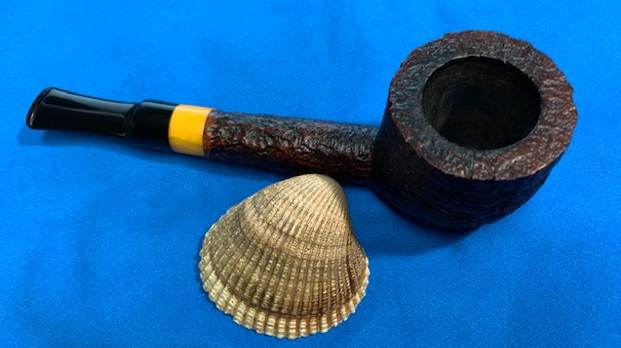
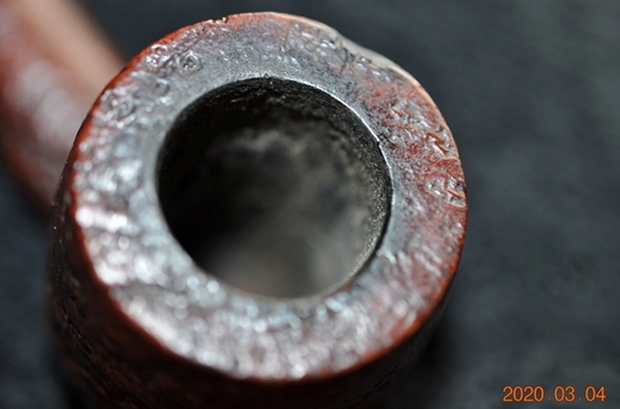
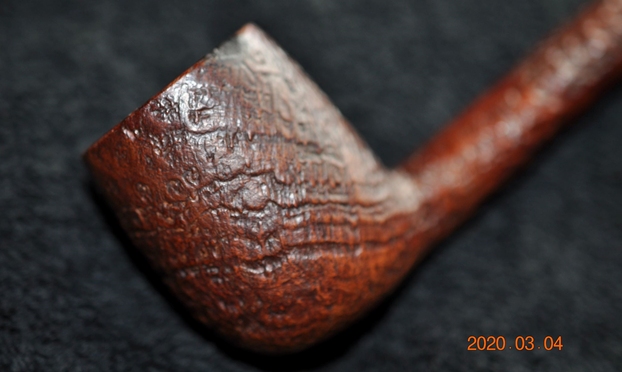
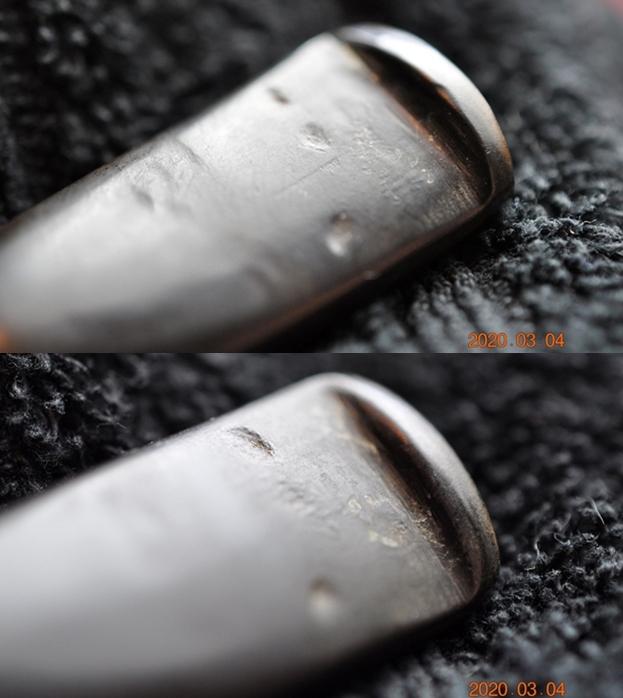
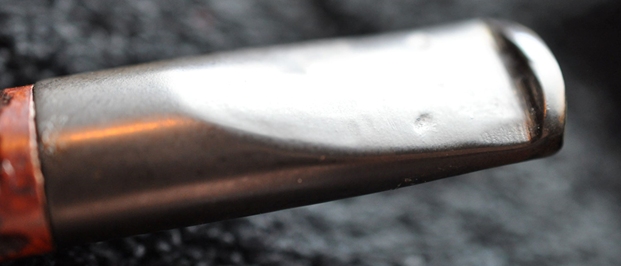
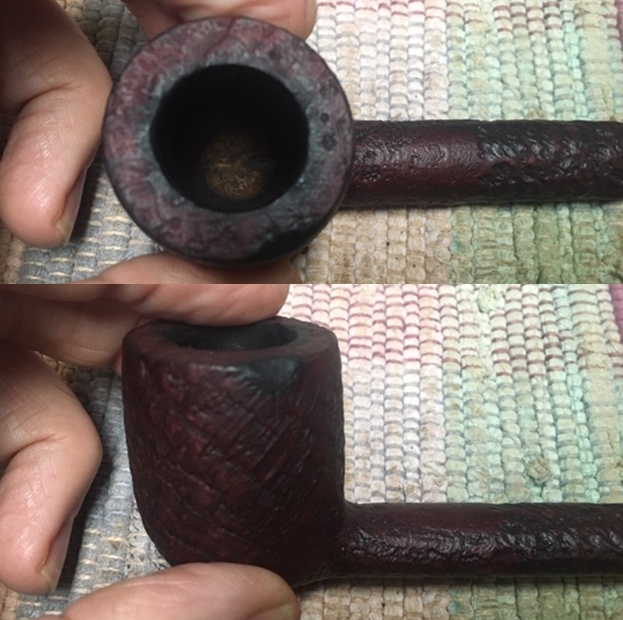
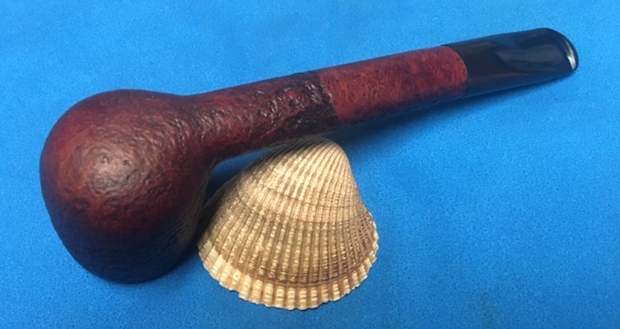
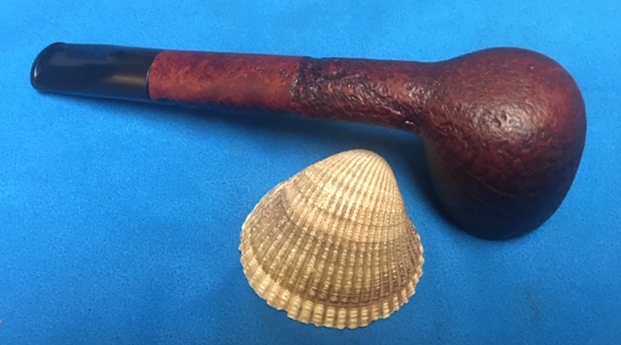
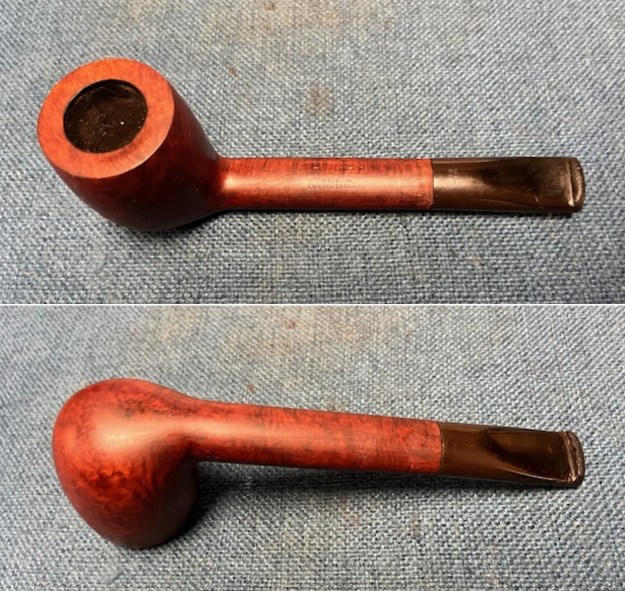
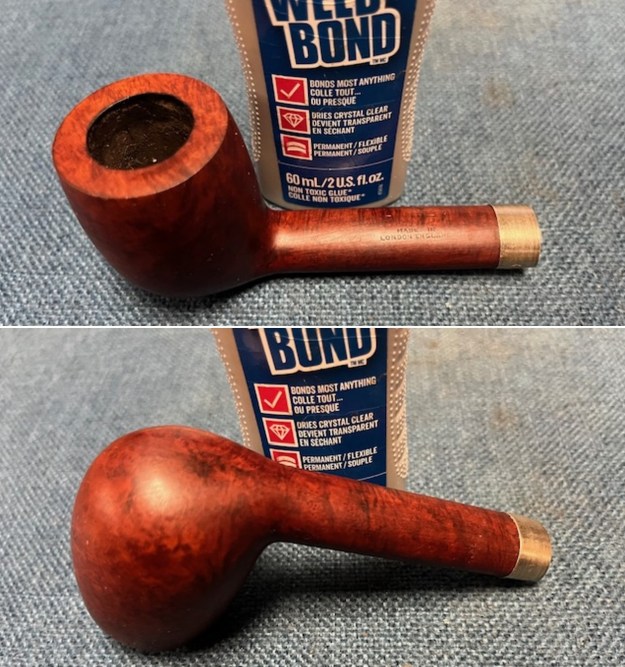
I asked for some photos of the Ben Wade and John sent photos of the rim and the shank. I have included them below. 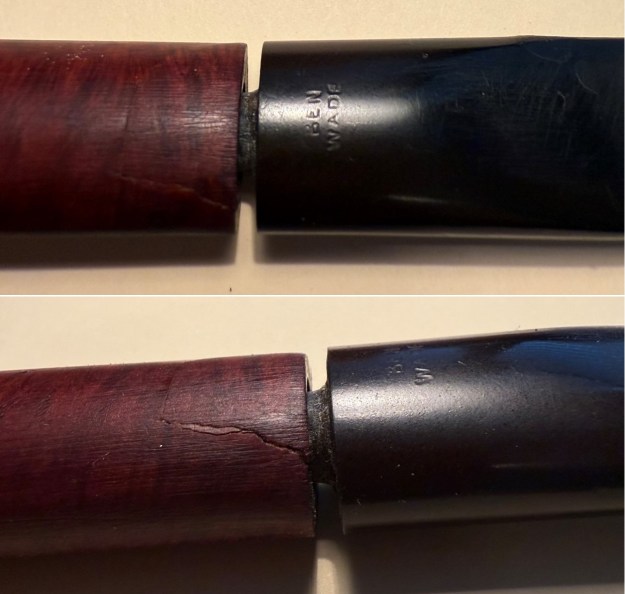

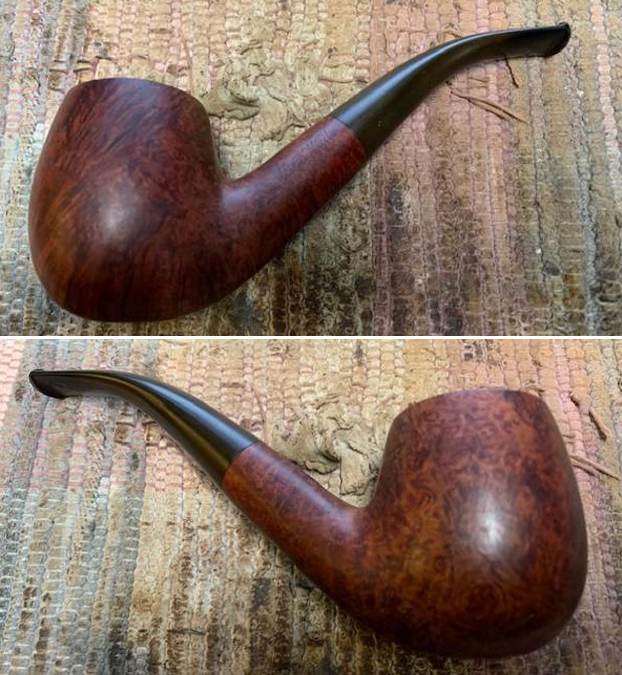
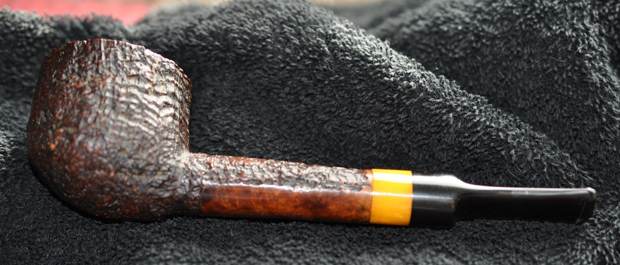
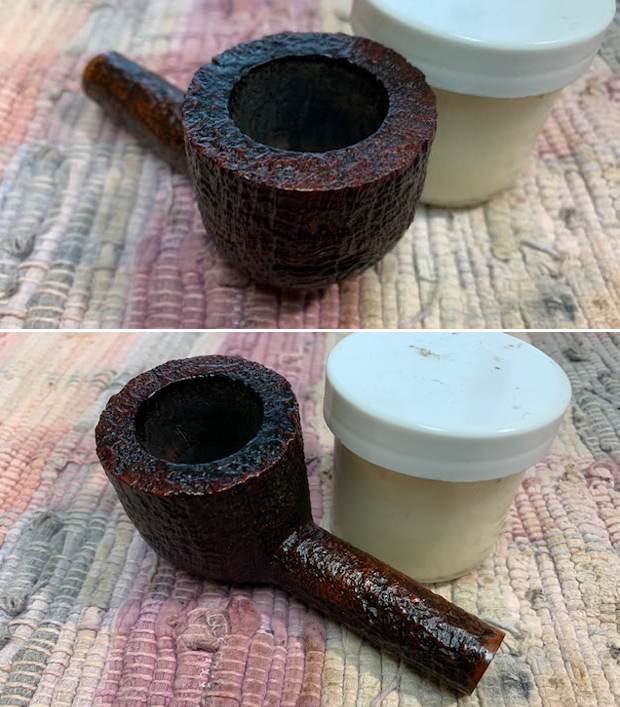
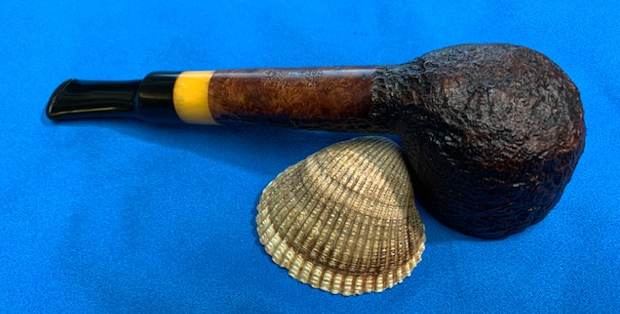
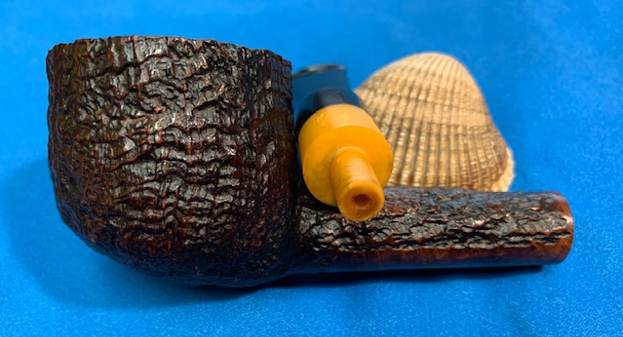
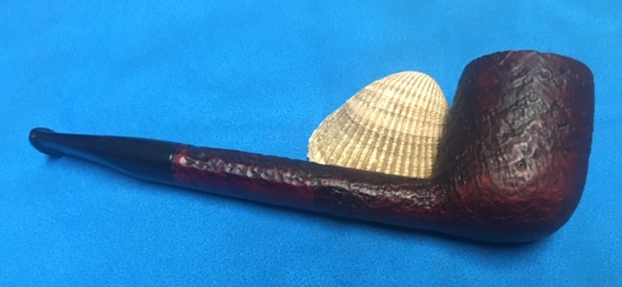
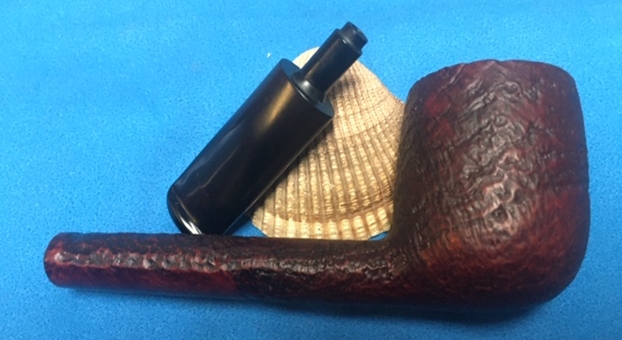
 The crack in the shank is very clean and obvious on the shank as can be seen in the second one above. It will need to be repaired and banded to repair the crack. From the photos the pipe is pretty clean but the finish is very scratched. It almost looks someone cleaned it off with steel wool and the briar is scratched from rim to heel and shank to shank end. The finish really is clean but a mess. I looked over the photos and John and I made arrangements to have him send it to me.
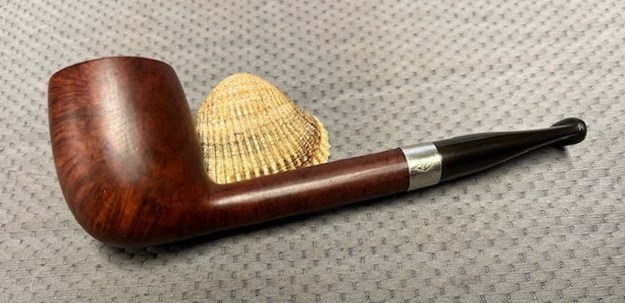
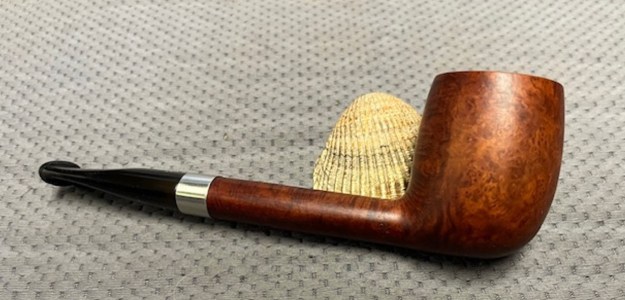
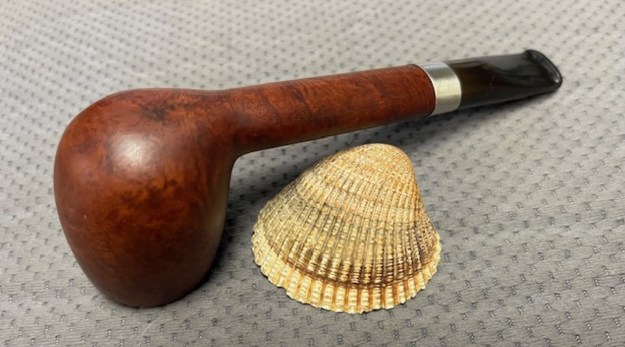
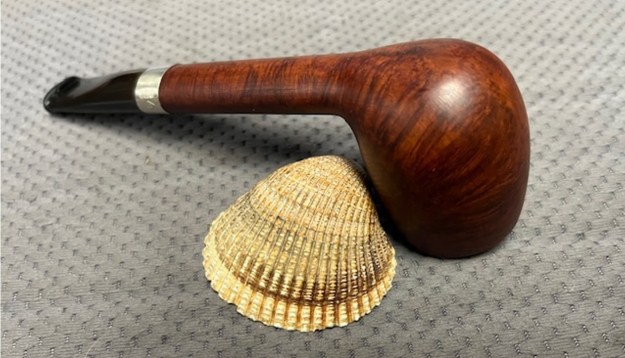
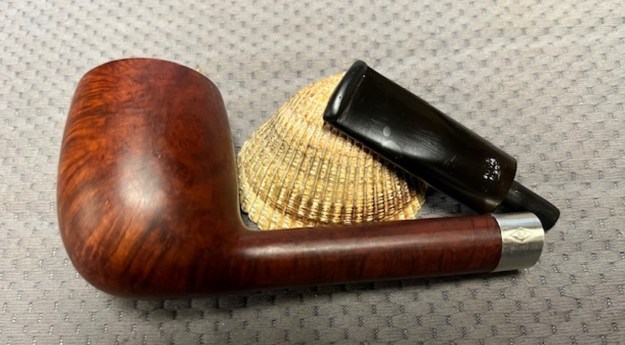
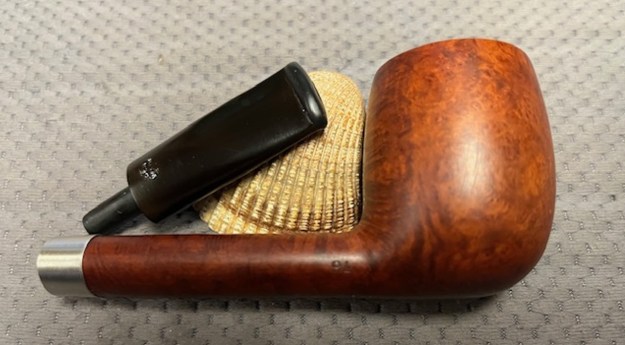
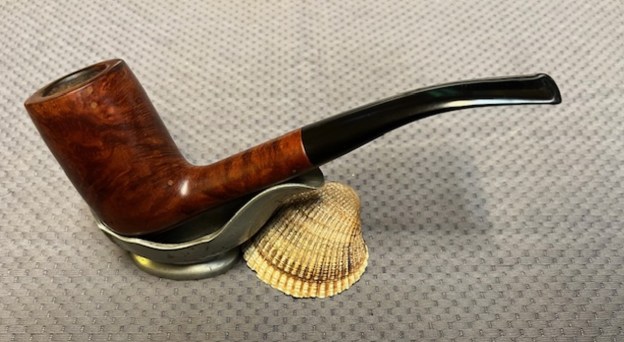
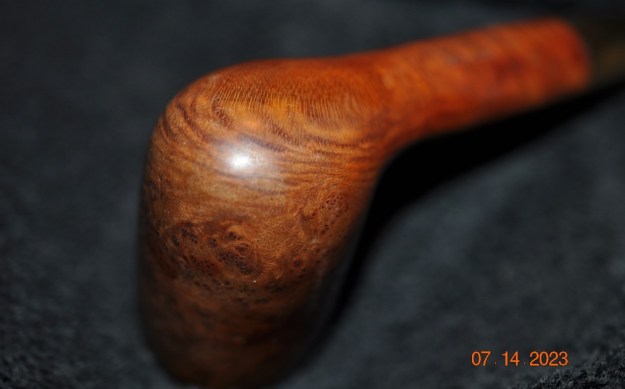
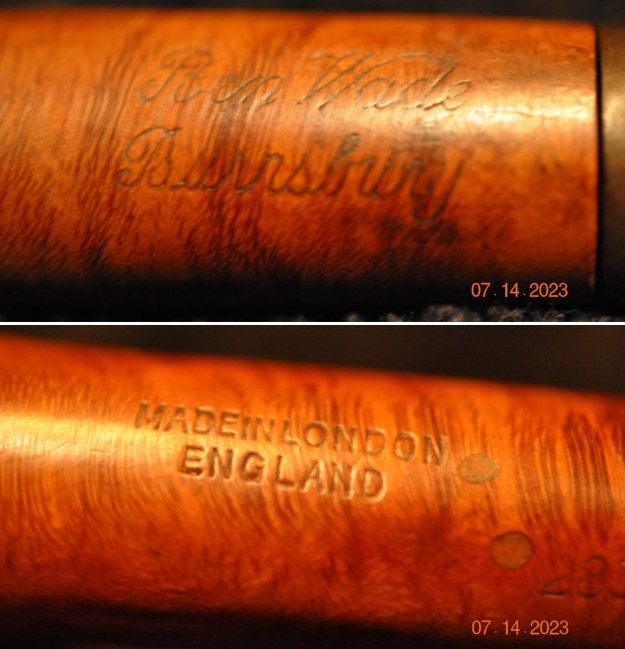
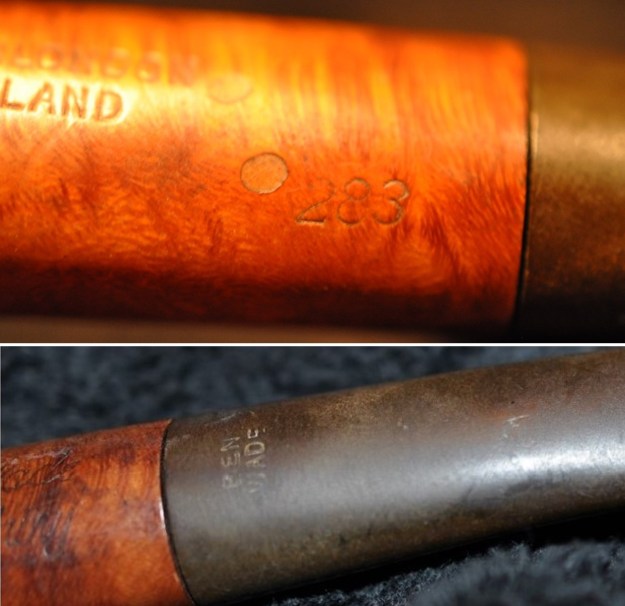
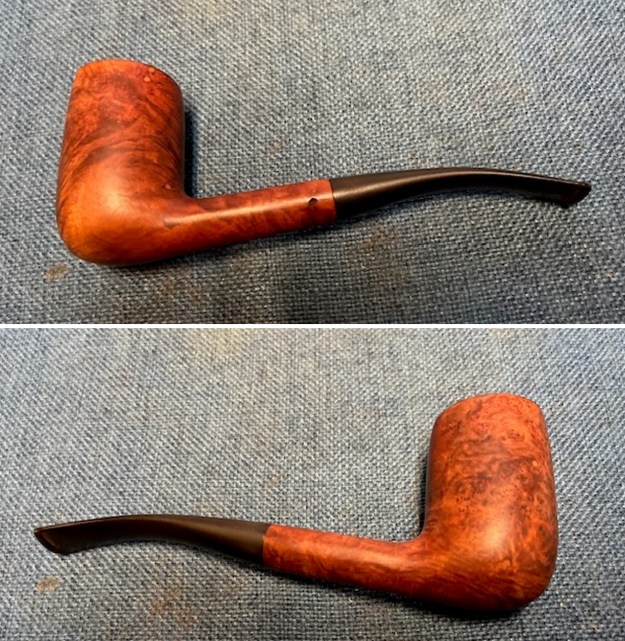
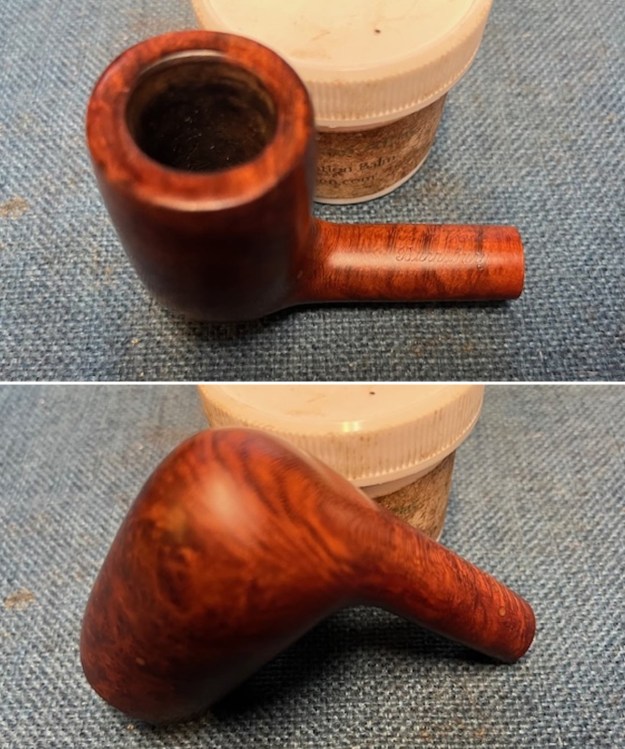
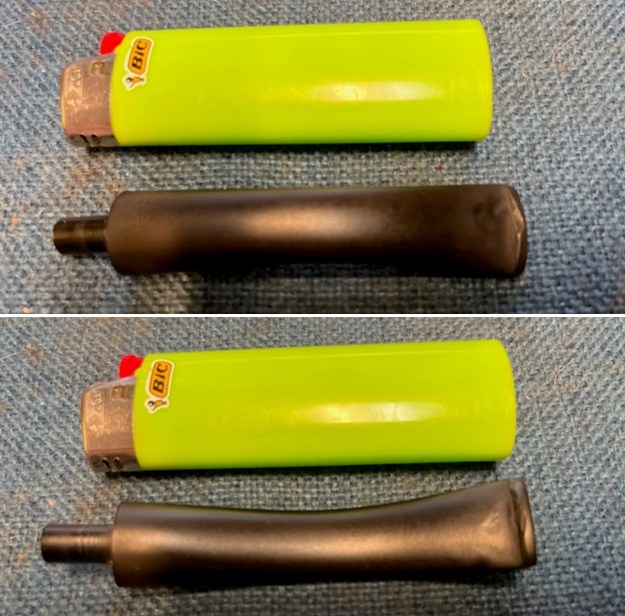
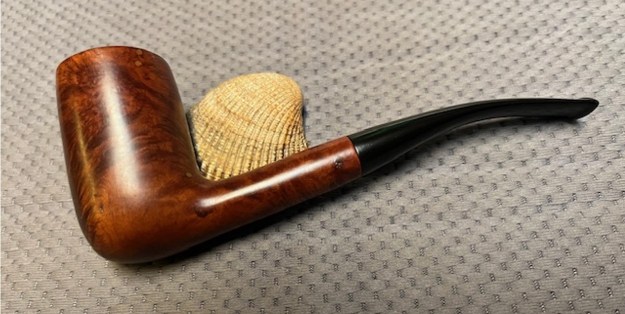
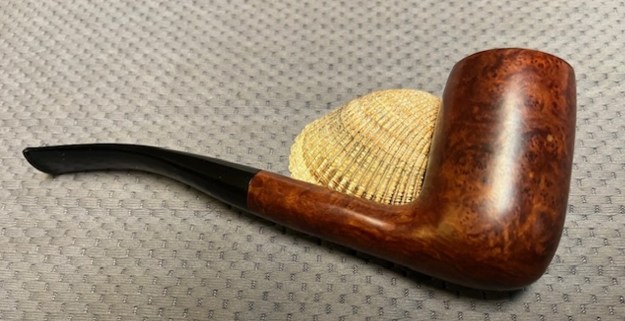
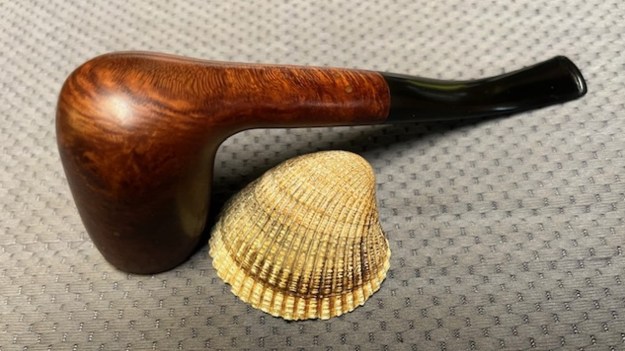
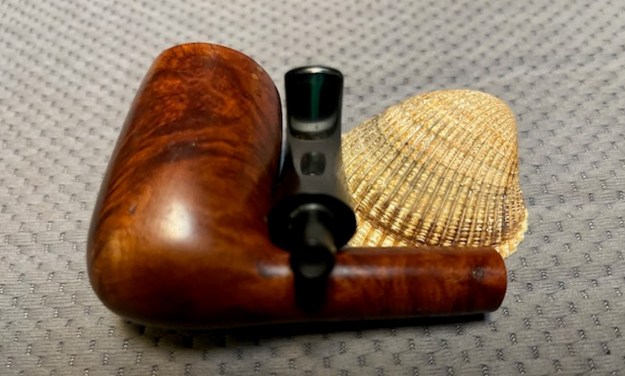
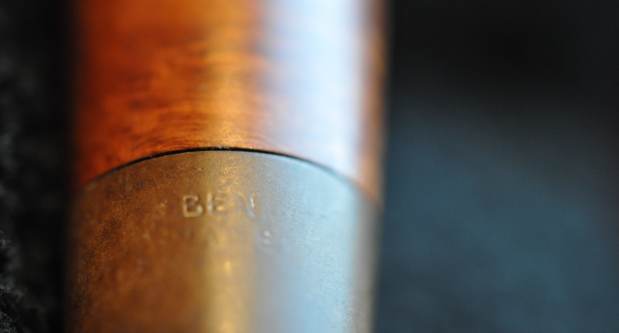
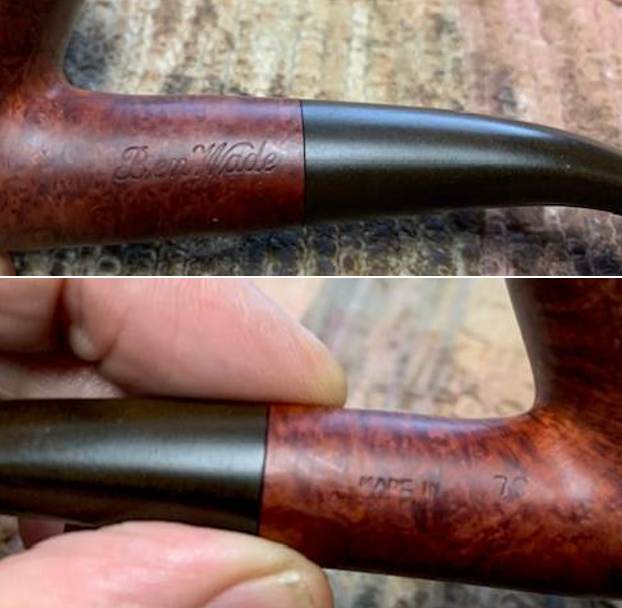
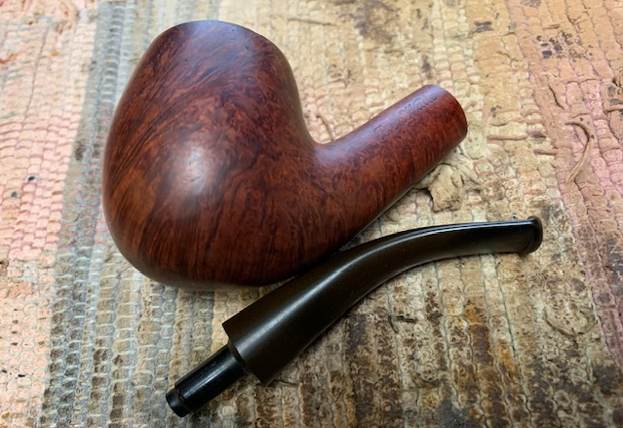
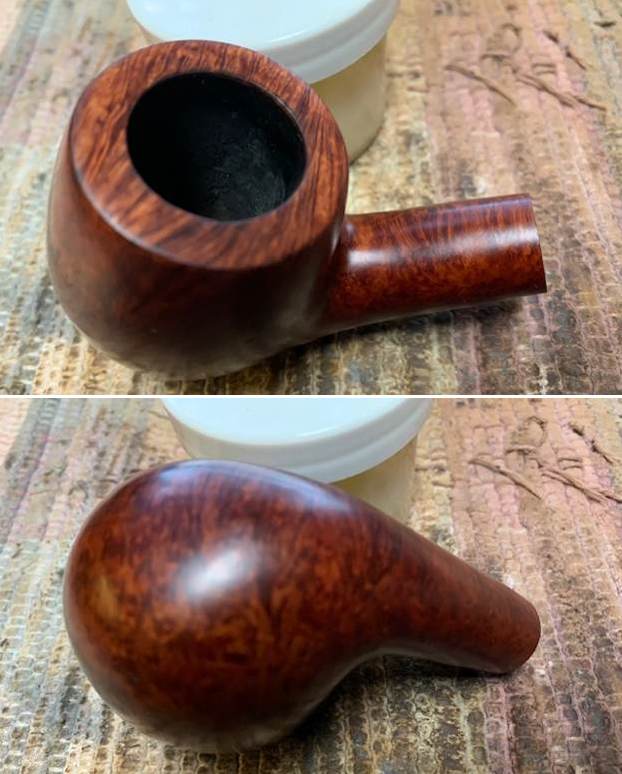
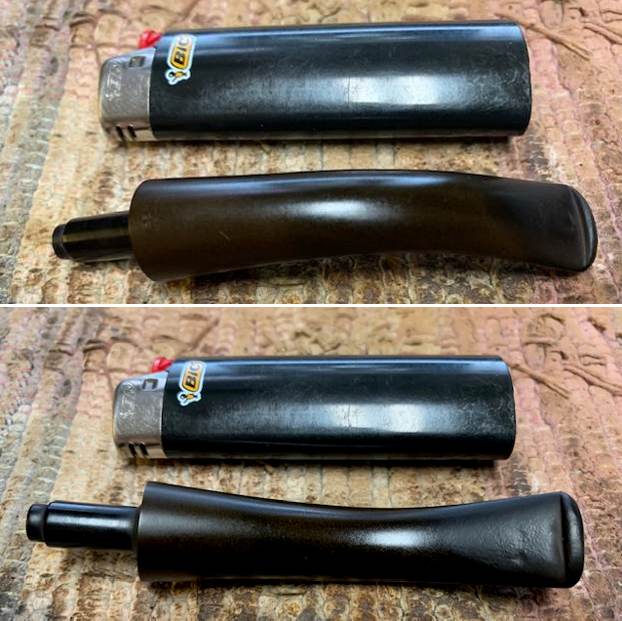
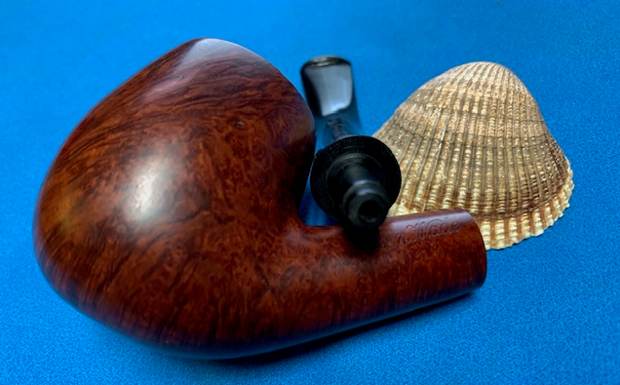
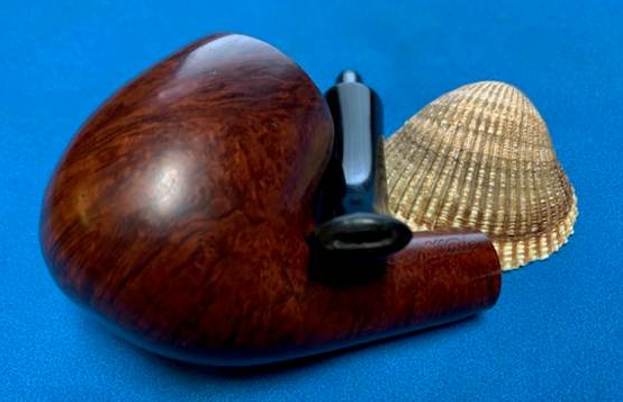
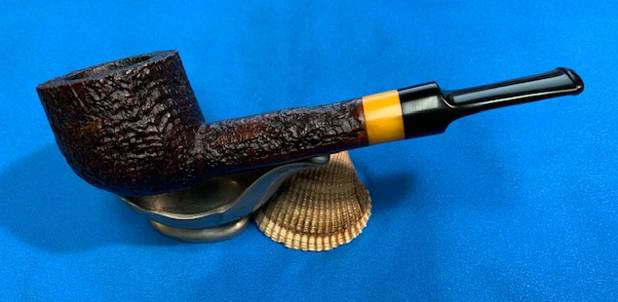
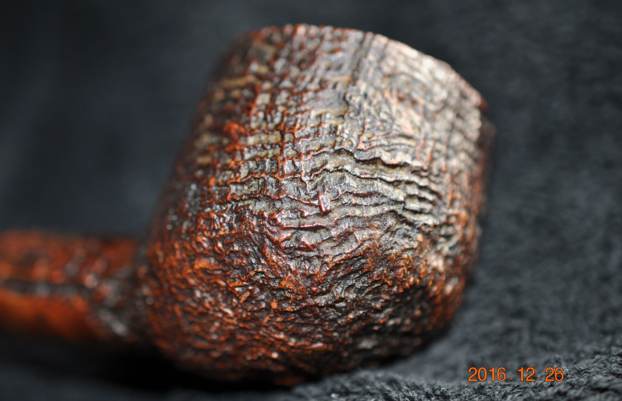
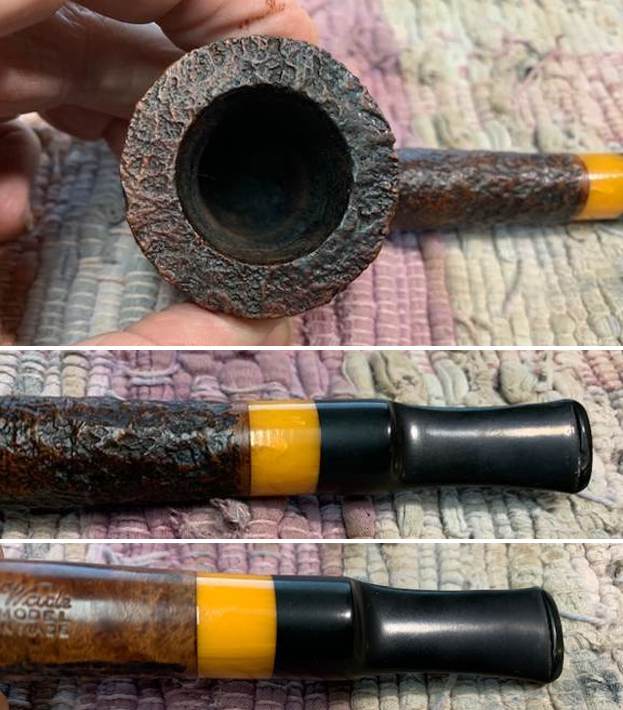
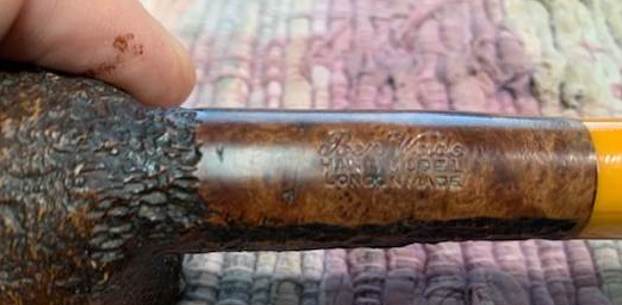
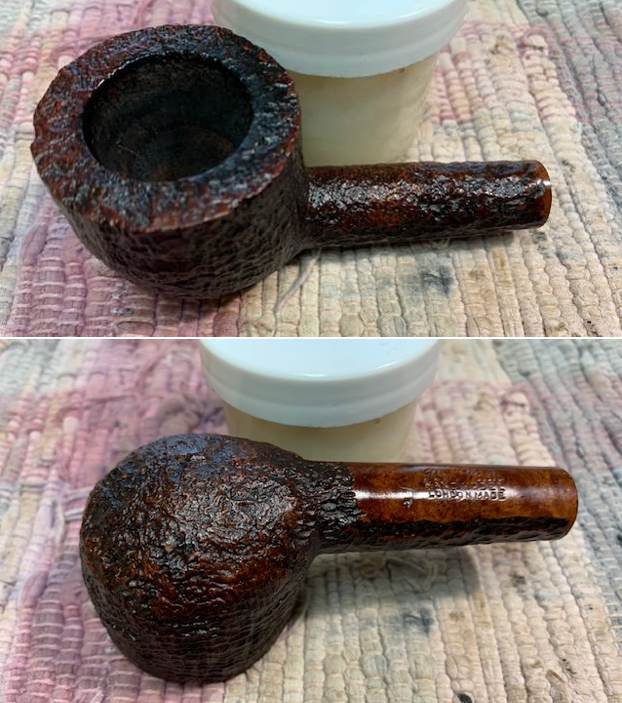
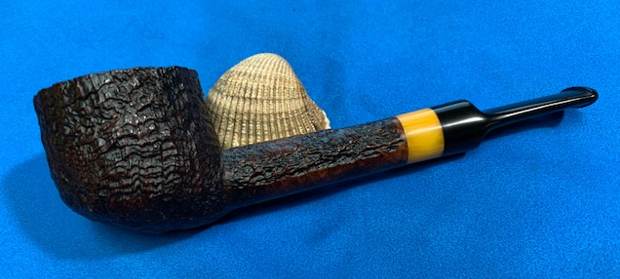
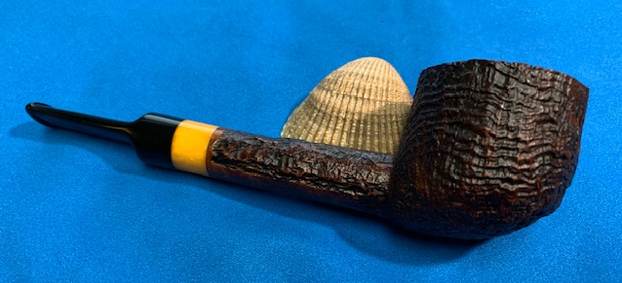
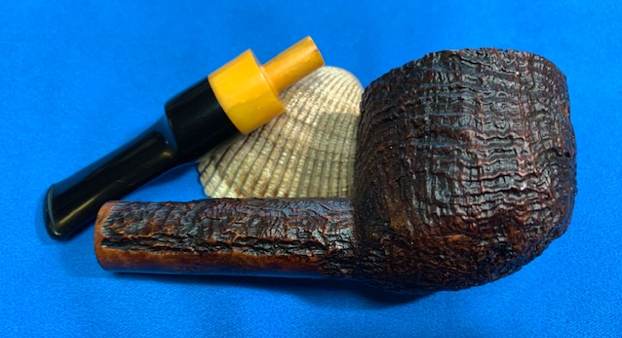
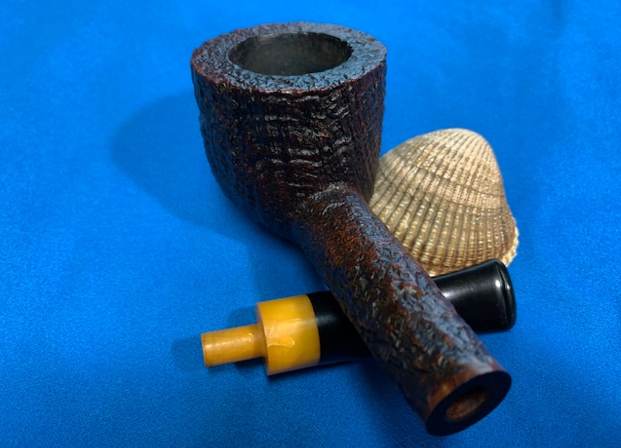
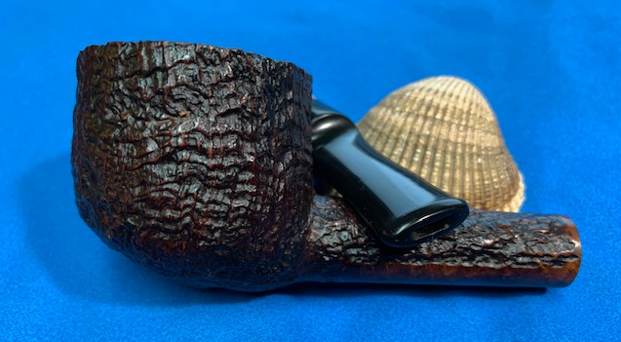
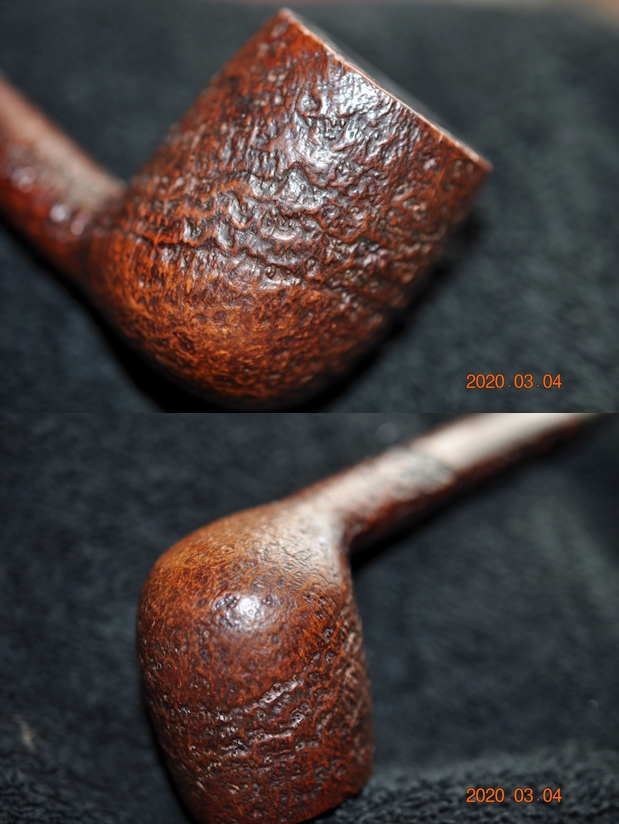
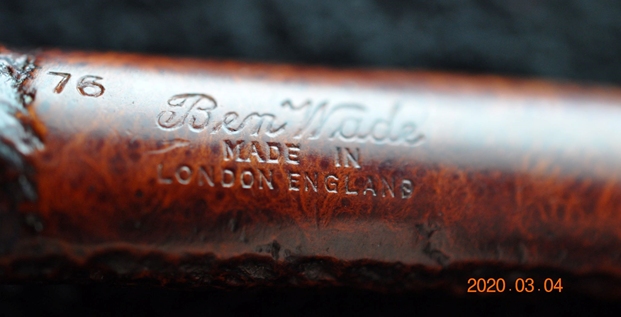
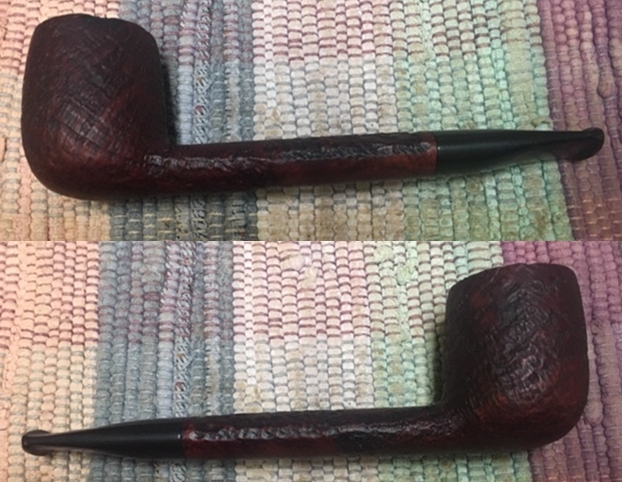
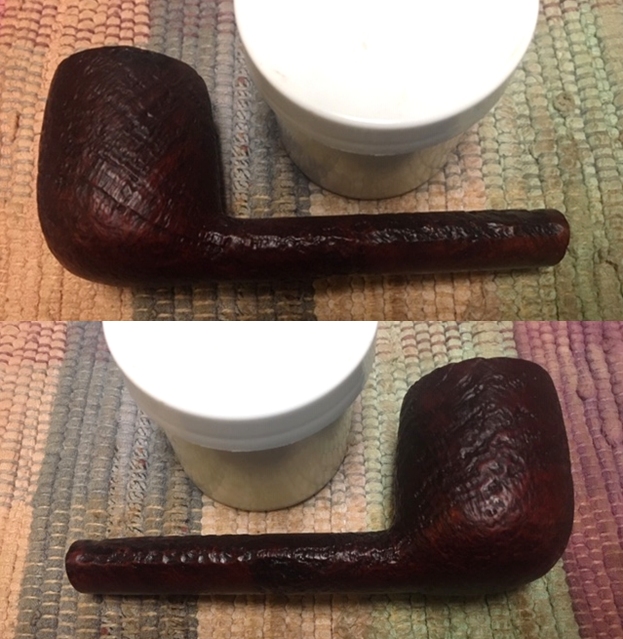
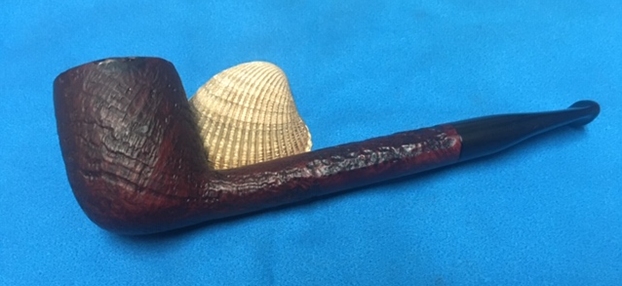
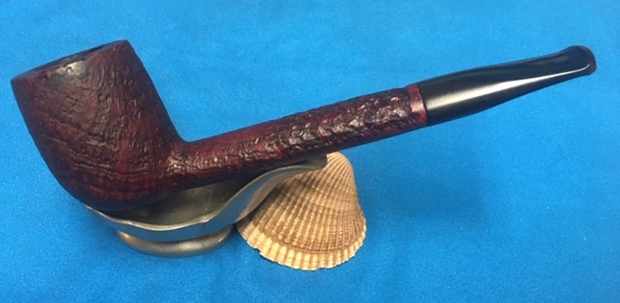
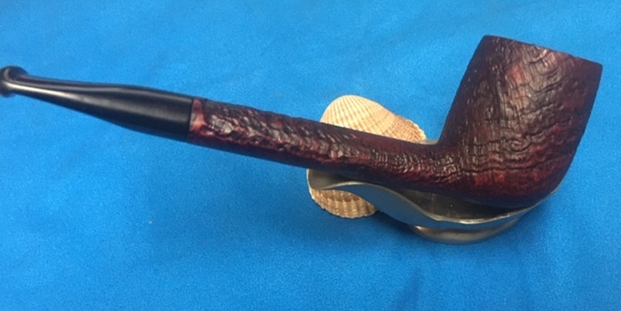
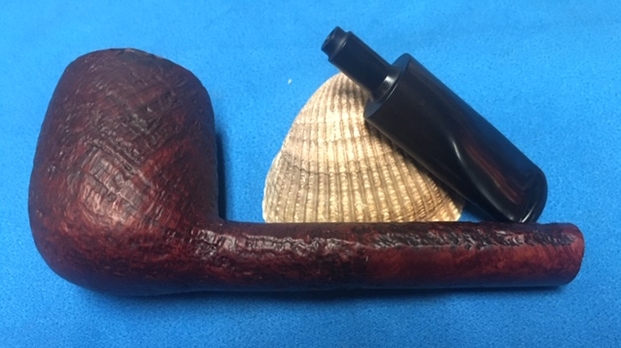
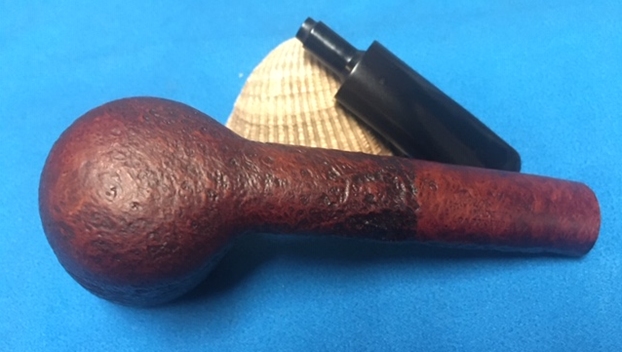
It arrived last evening. It was a well shaped Canadian with a thick shank and bowl walls. I took photos of what I saw and I turned it over in my hands. My assessment of the finish was correct, it was scratched on all of the briar surfaces. The scratches were not terribly deep but were very visible. The pipe is stamped Ben Wade [over] Made in [over] London England. On the right side of the shank it was stamped with the shape number 76. The bowl had a light cake and was dirty. The shank and airway were dirty as well. The vulcanite stem had some light stamping on the top side of the taper and it read BEN [over] WADE. It was faint but still readable. The stem was lightly oxidized and there were scratches on both sides much like those in the briar. There was some tooth wear on the button surface on both sides.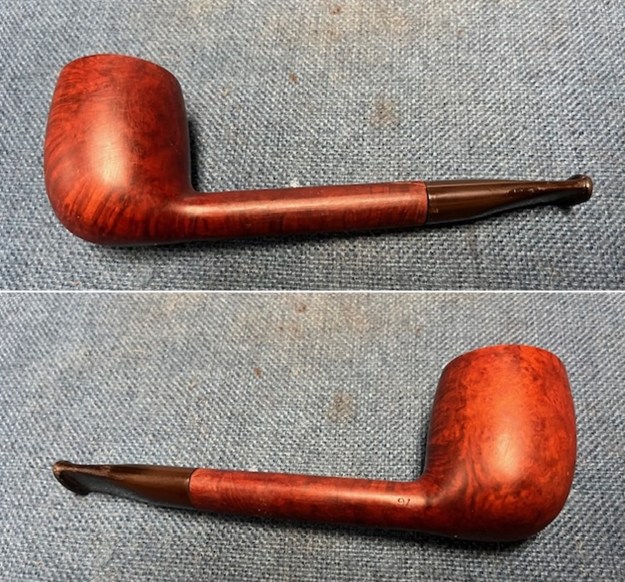
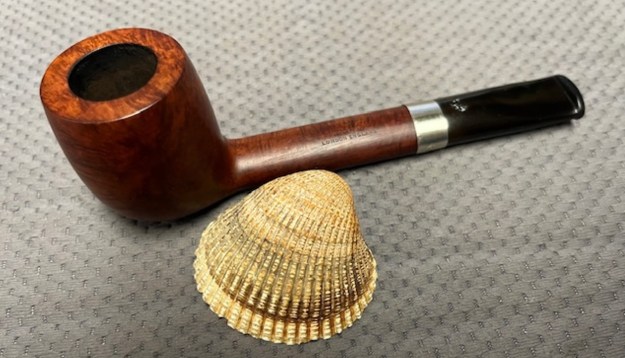
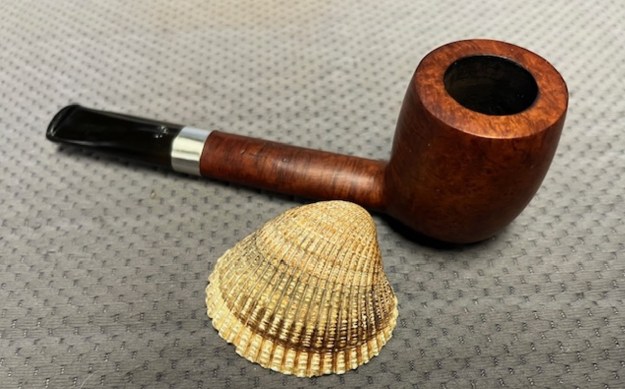
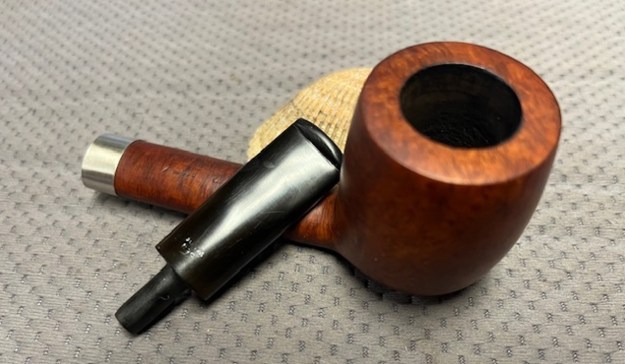
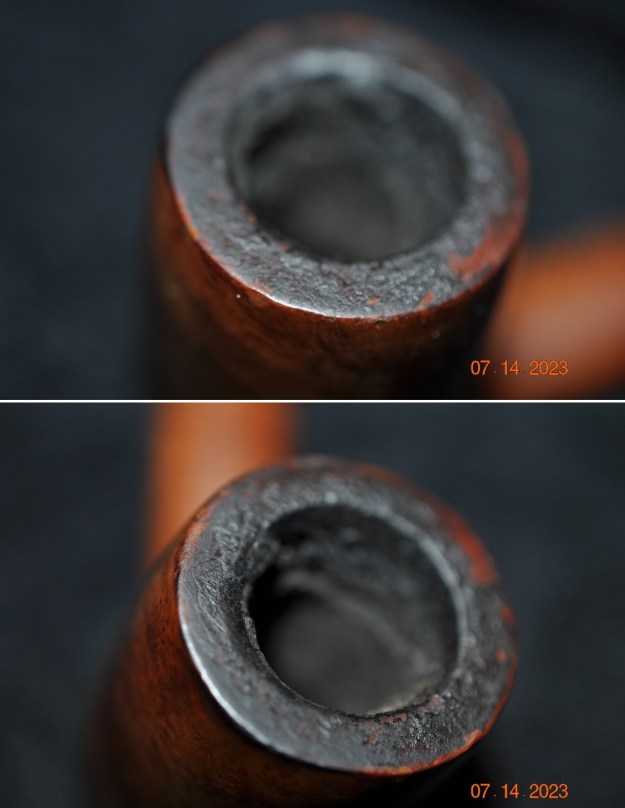
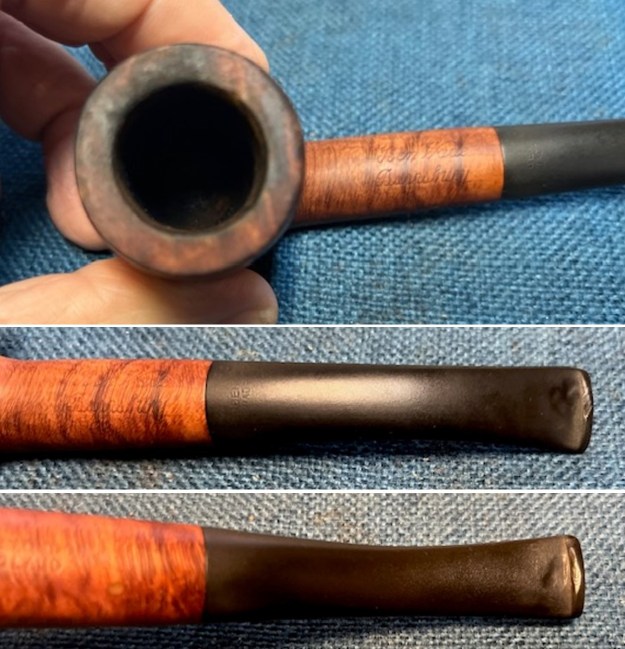
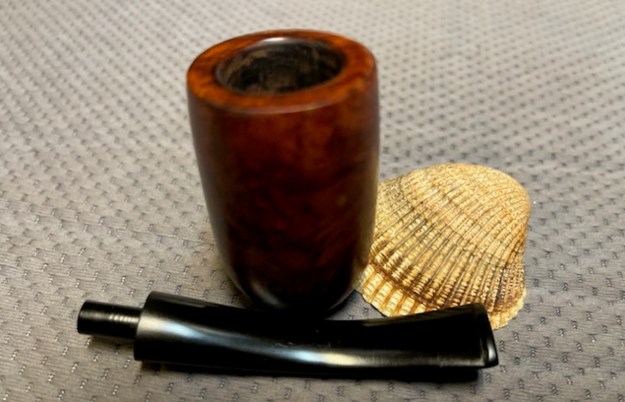
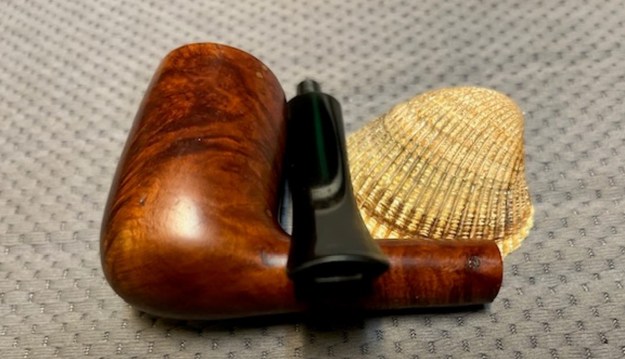
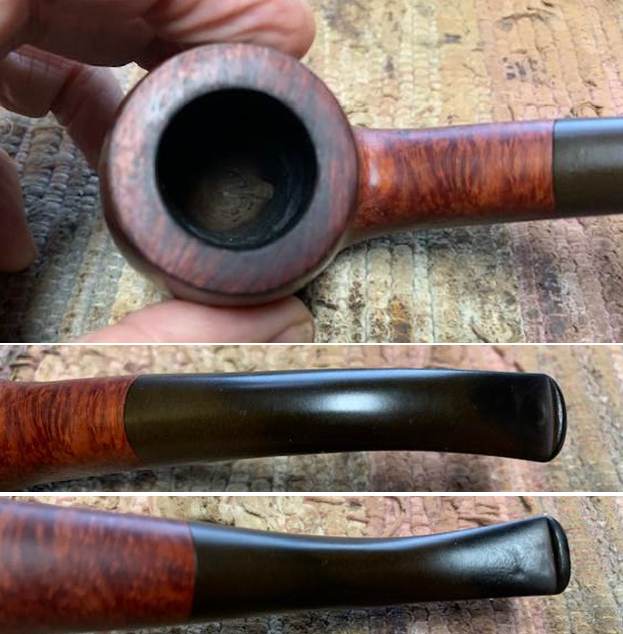
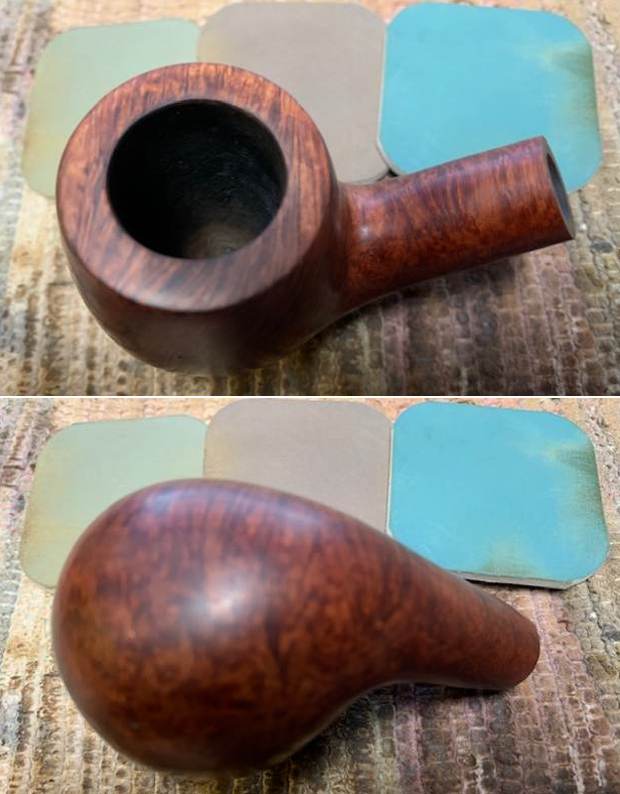
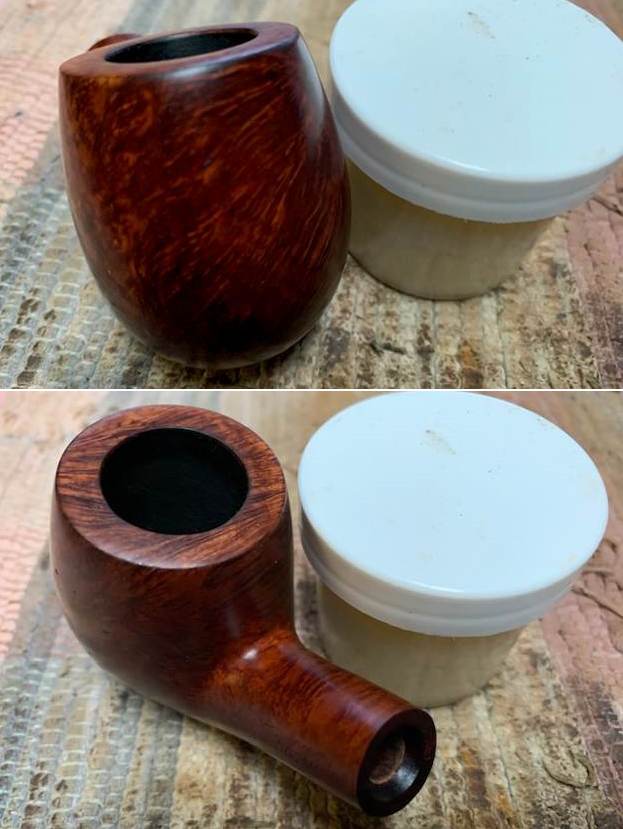
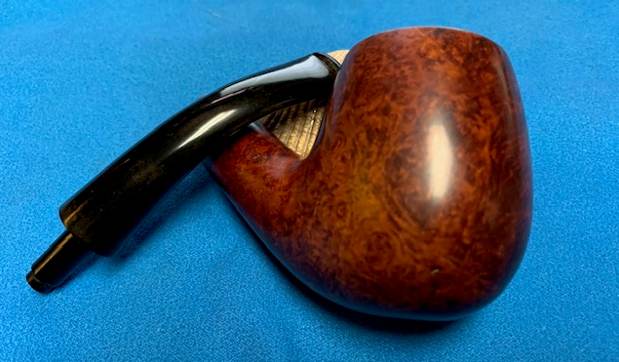
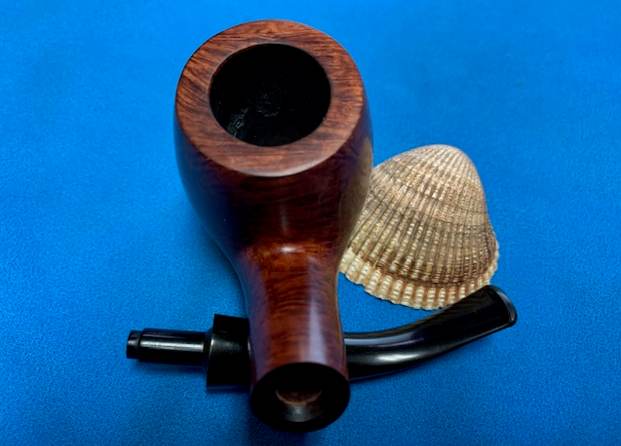
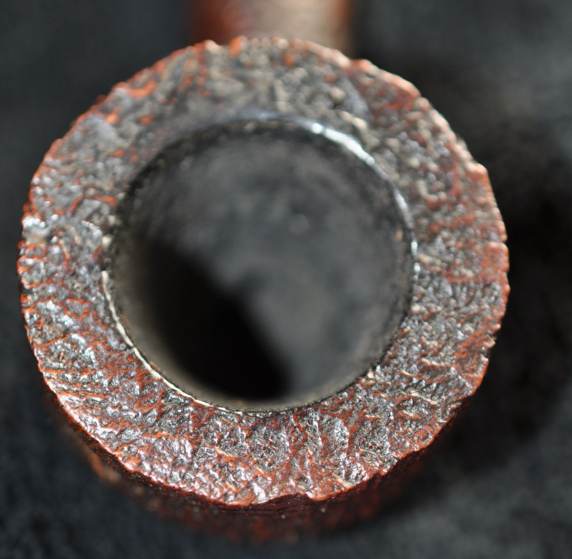
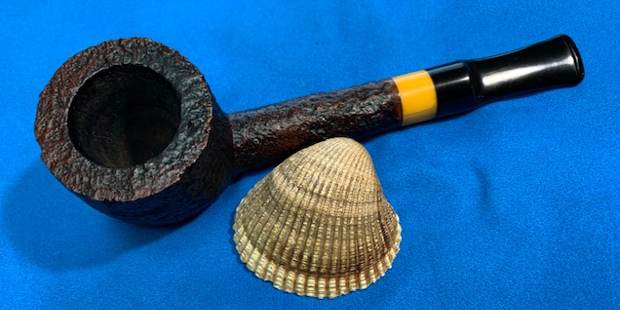
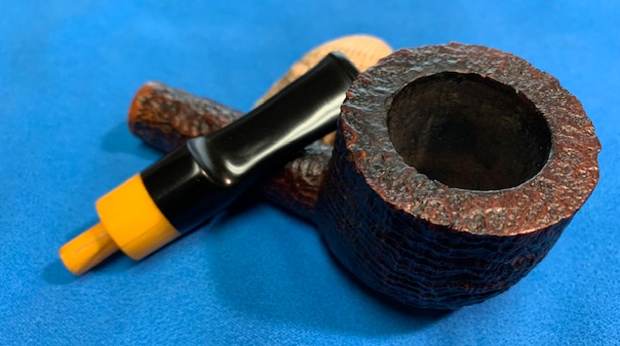
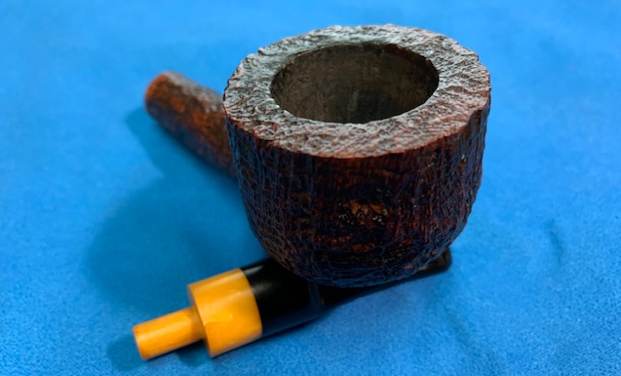
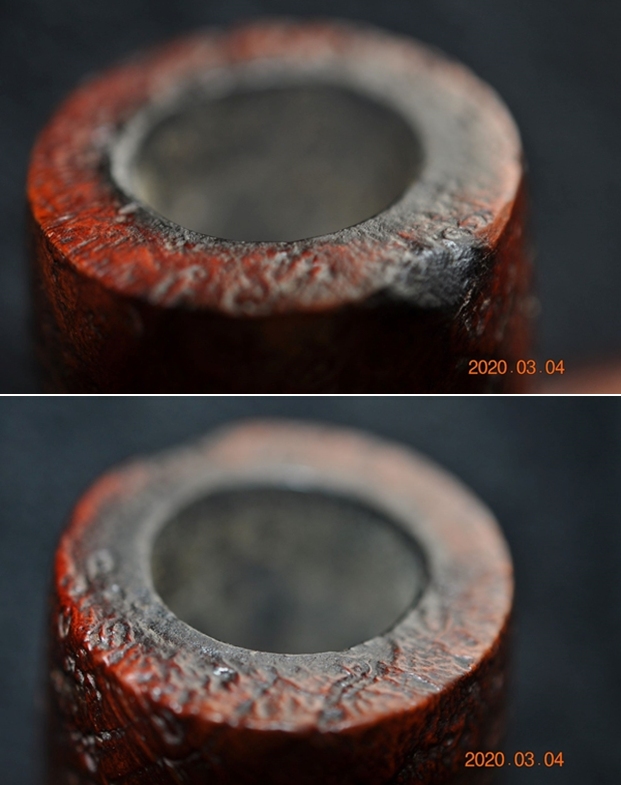
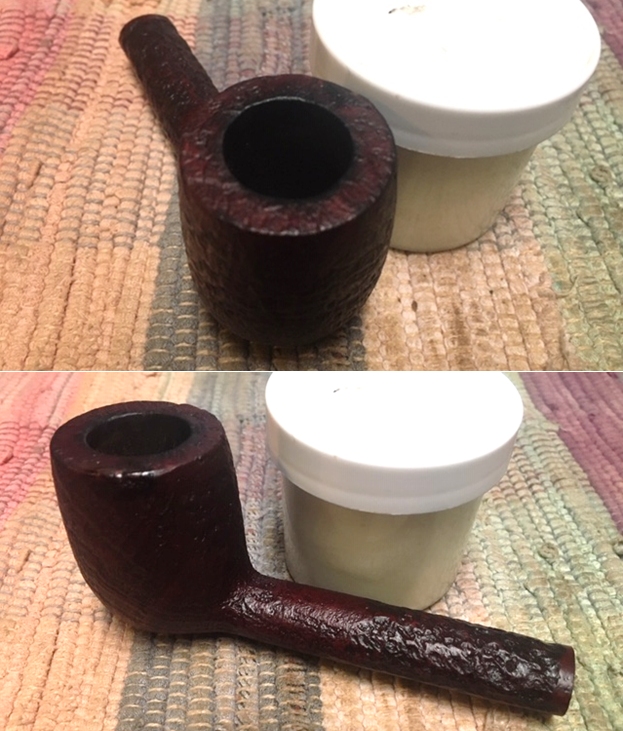
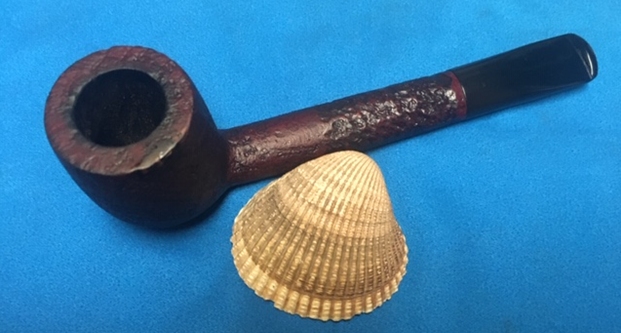
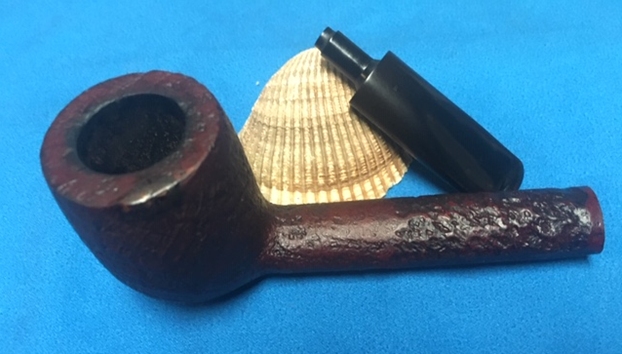
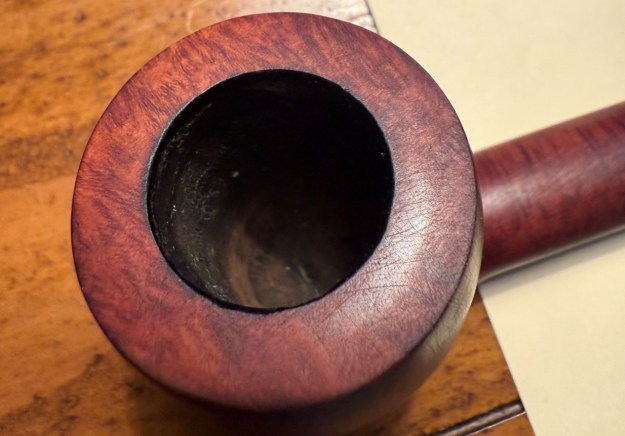
 I took some close-up photos of the rim top, bowl and stem surfaces. There was a light cake in the bowl and the stem surface showed scratches and wear. There was a faint stamp on the top side of the stem.
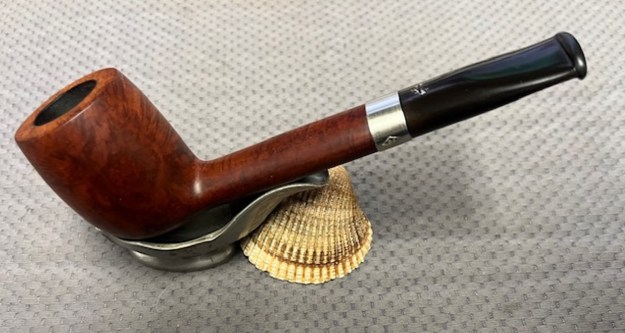
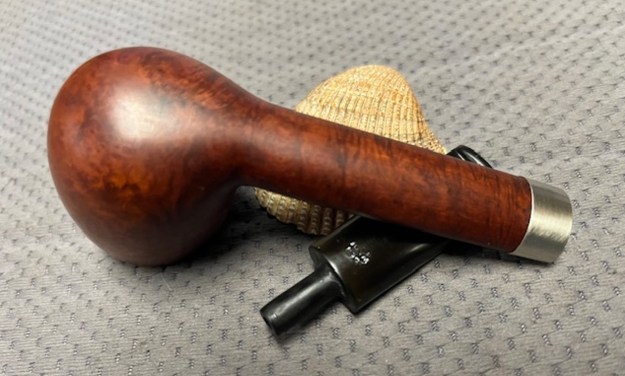
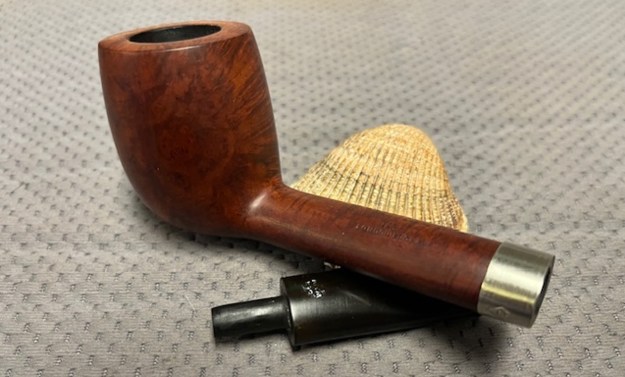
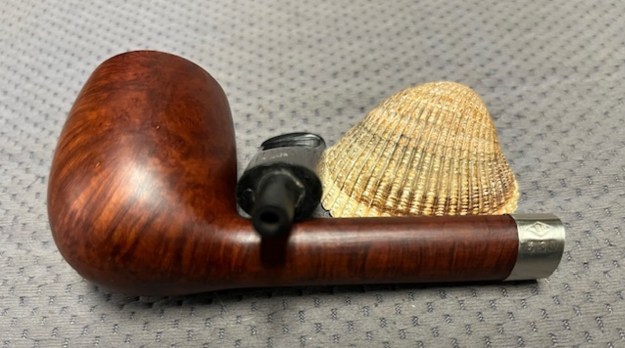
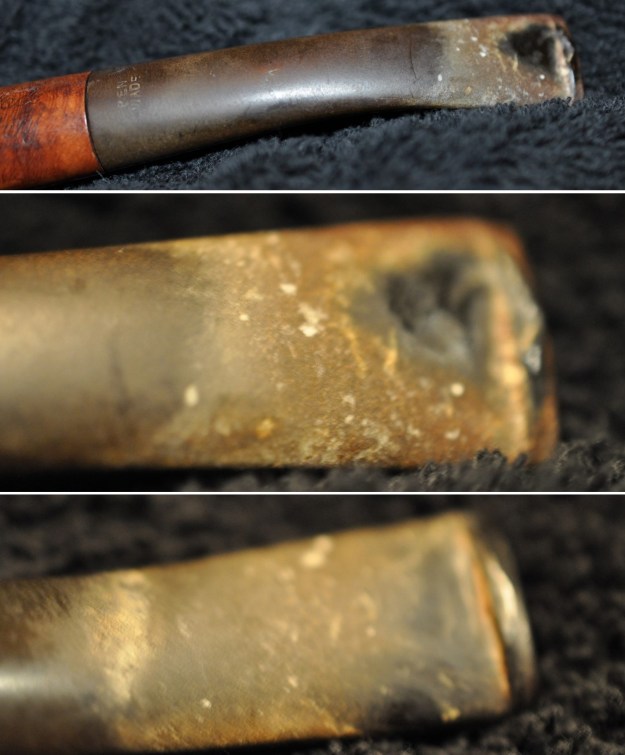
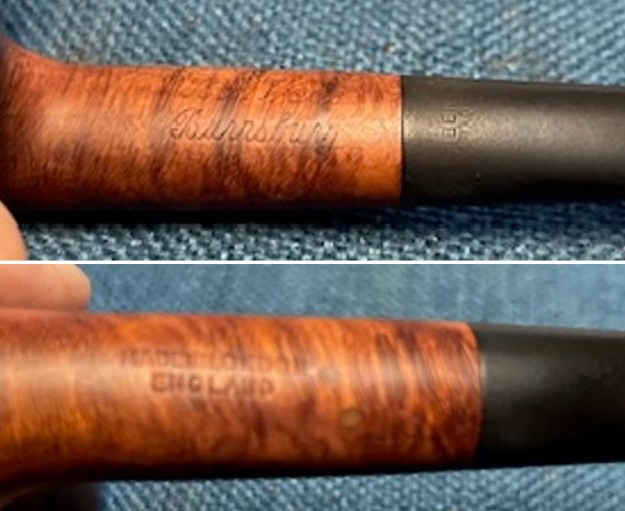
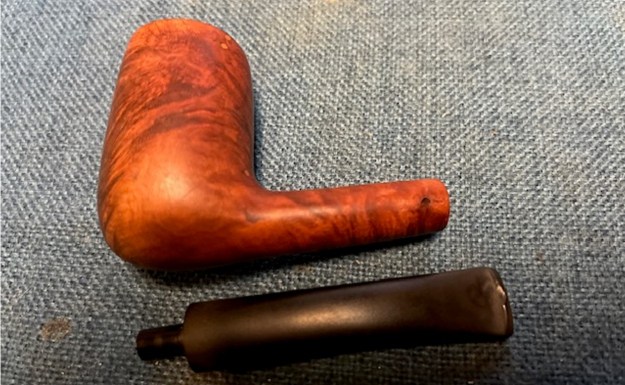
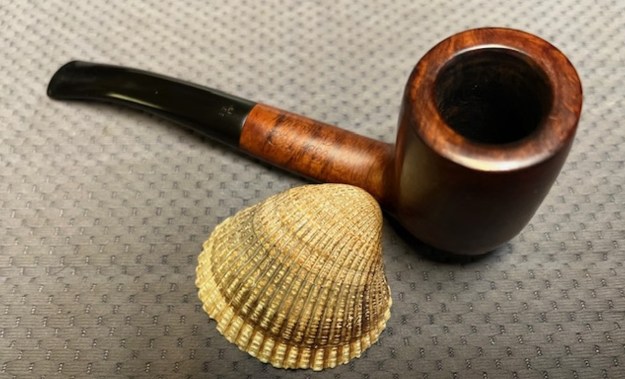
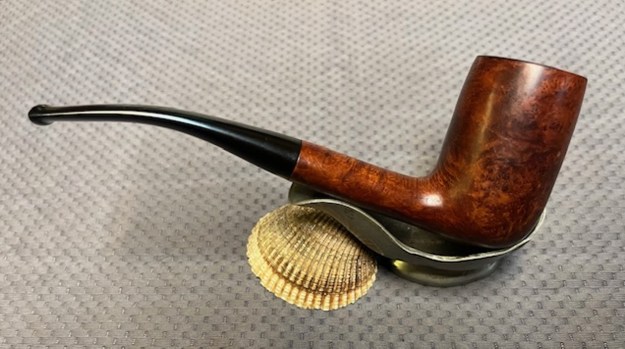
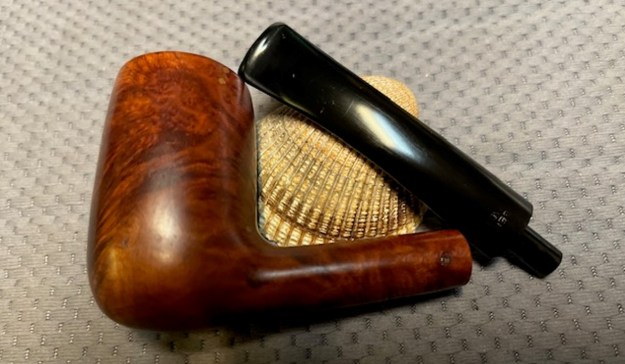
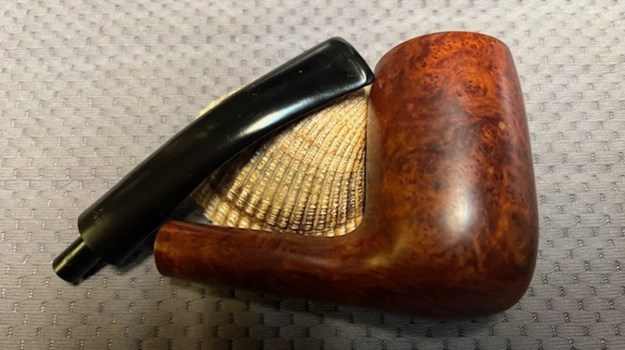
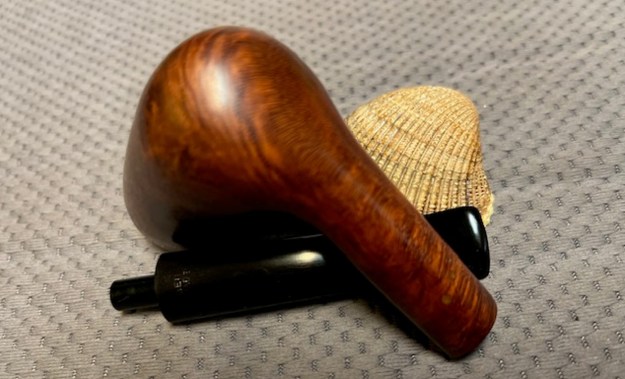
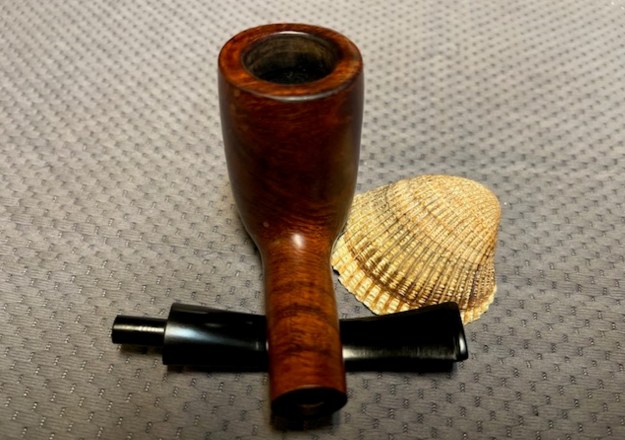
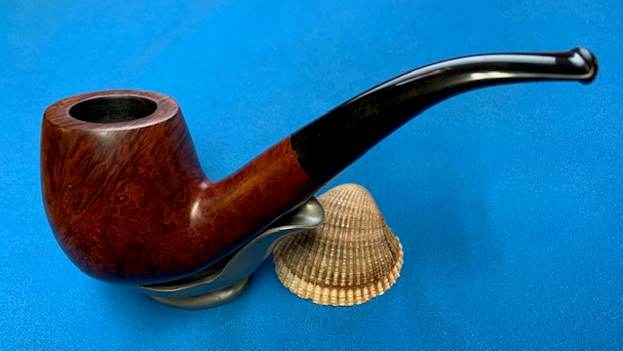
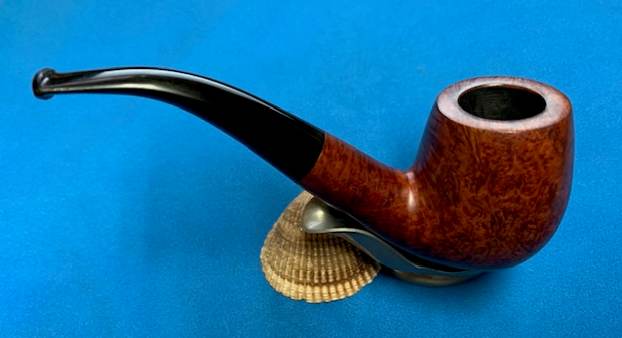
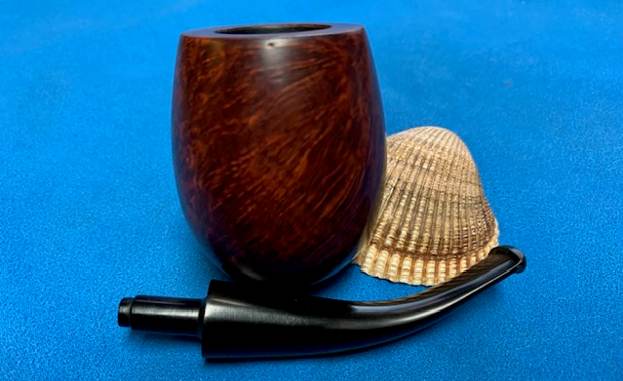
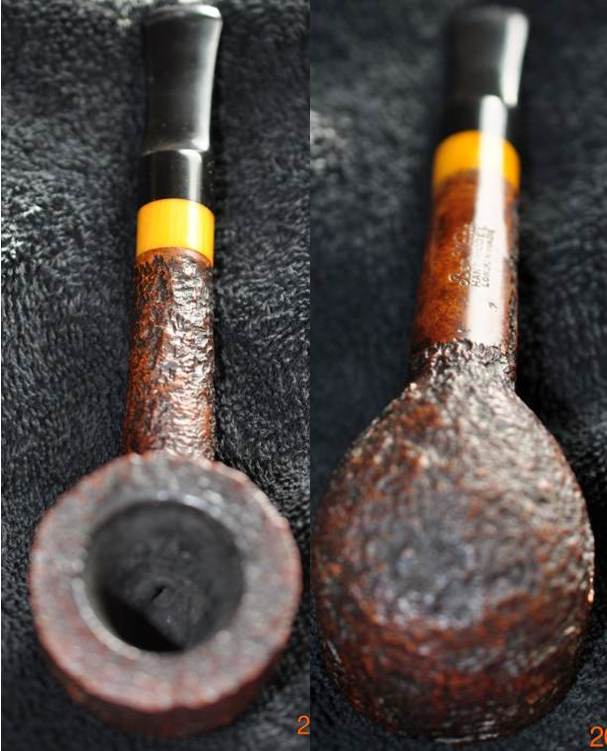
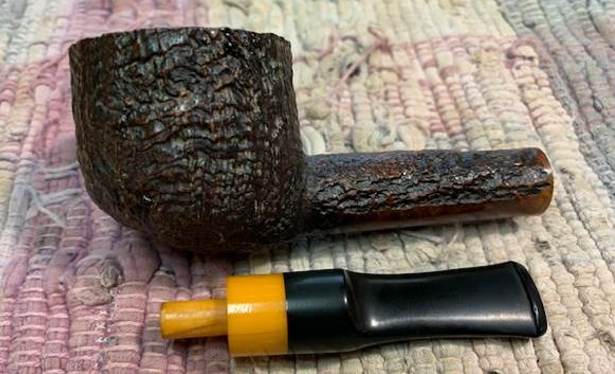
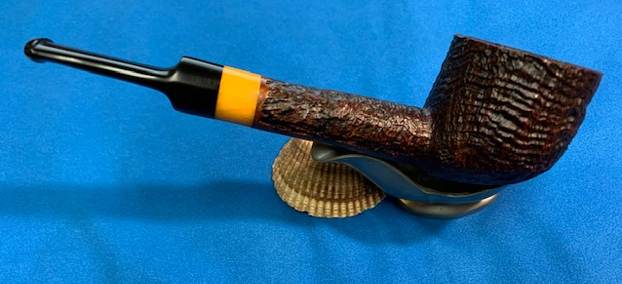
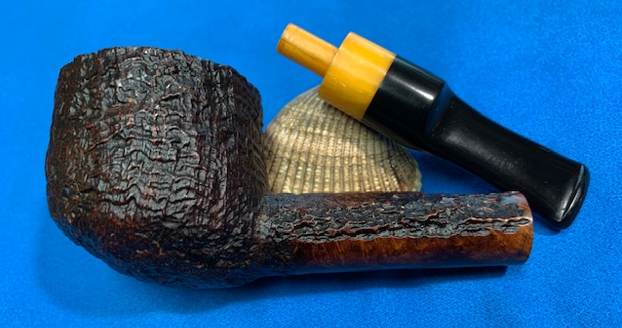
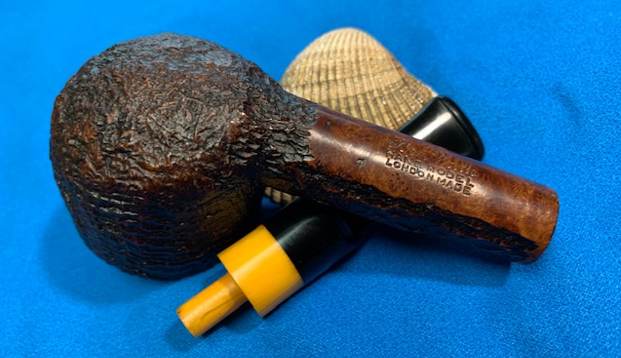
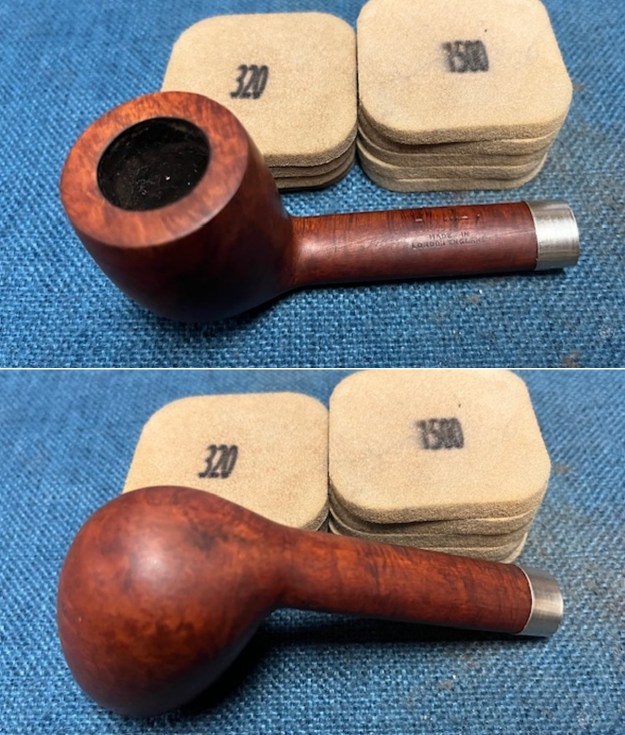
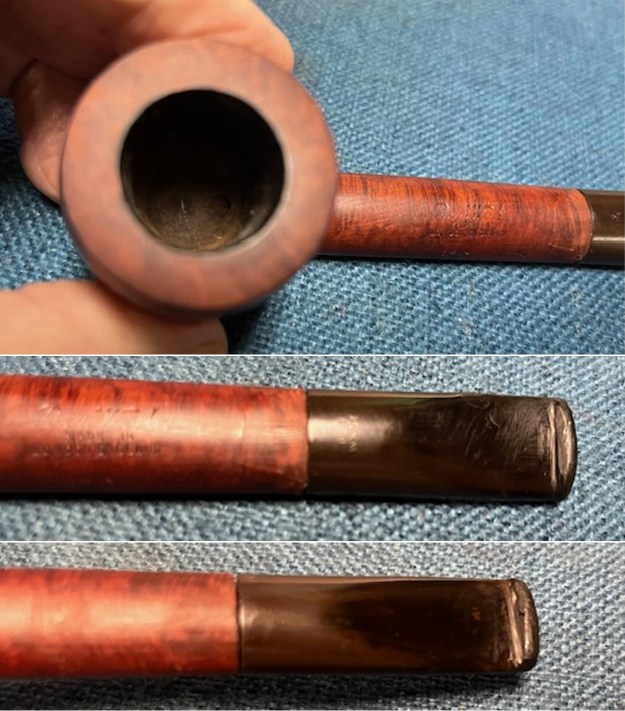 I took photos of the stamping on the top of the stem and the shank as well as the upside-down stamp on the right side. They are scratched in spots but nonetheless still very readable. I removed the stem from the shank and took a photo of the proportions of the pipe. It is quite nice.
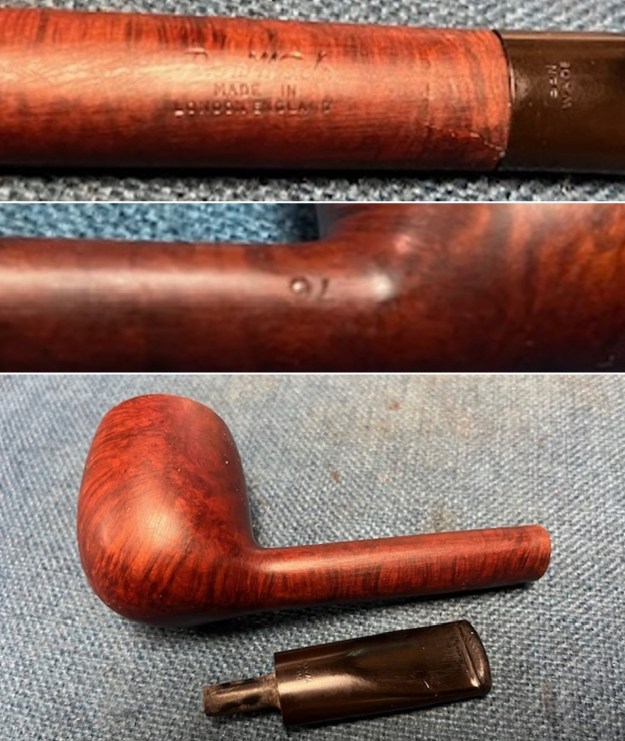 An added part of pipe restoration for me is to try to gather as much background on a brand and maker as I can find. With Ben Wade it is an enjoyable web to untangle. There is a lot of information and it can lead to understanding what era a pipe was made in. To try to figure out the era of the Ben Wade pipe I was working on I turned to the Pipephil website, Logos and Stampings (http://pipephil.eu/logos/en/logo-benwade.html). There is some really helpful information on the brand. There is an alphabetical listing of the lines and the first shown in the photo below matches the stamping both on the shank top and the stem top. The site did give a short history of the brand. I quote the portion that is most pertinent.
 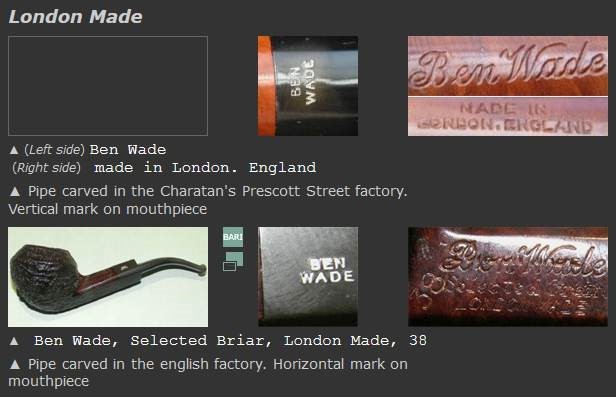 Brand founded in the 1860’s at Leeds (GB). Lane Ltd. (NYC) bought the brand in 1962 and closed the factory in Leeds in 1965. The pipes were then manufactured in London at Charatan’s. During the period 1972 (about) – 1989 Ben Wade pipes were mass produced for Lane Ltd. by Preben Holm‘s workshop in his very personal style. Peter Wilson owner of Duncan Pipes bought the rights of the brand in 1998.
Next, I turned to Pipedia to see if I could find more information on the Ben Wade brand there (https://pipedia.org/wiki/Ben_Wade). The article gives a great sense of the history of the brand from its inception until the time Preben Holm made pipes for them. I quote a few sections from the article below.
In the second World War the factory was destroyed by German air raids on Leeds. But the Ben Wade family decided to re-build it immediately after the war and pipe production was re-started soon and successfully linked to the fame from the pre-war years.
Before the second war Ben Wade clustered their offerings into three price points: “Ben Wade” included the higher end pipes (eg the Larnix, Super Grain, Selected Grain, etc), “BW” included the mid-level pipes (eg Statesman, Natural Grain, County, etc), and “BWL” were the least expensive (eg Hurlingham, Adelphi, Tense Grain). Champion was in the last group, and in the 1930s at least retailed for 2/6.
The Champion disappeared during the War when the Ben Wade line was materially slimmed down, presumably to reflect difficulties of supply. The name continued to appear in brand directories at least through the early sixties, however it’s unclear whether production was actually resumed.
Even though the owner family decided to leave pipe business and sell off the firm. The family went into negotiations with Herman G. Lane, president of Lane Ltd. in New York at about the same time as the Charatan family. Lane Ltd. bought both firms in 1962.
Herman G. Lane had been Charatan’s US sole distributor since 1955 and Charatan always remained his pet child. But Ben Wade was treated in another way by it’s new owner. The fabrication of pipes was reduced and the factory in Leeds was closed in 1965 finally.
So, this was the end of Ben Wade pipes stamped “Made in Leeds, England”.
Lane had the pipe making machines brought from Leeds to London and used the well esteemed name Ben Wade to start the fabrication of entirely machine-made pipes at Charatan’s Prescott Street factory. (Some sources say “not earlier than 1973” but proven by catalogues this isn’t true.) Alas the “new” Ben Wades were quite usual series pipes, copies of well known standard shapes. The pipes often showed hardly masqued fillings and were processed quite coarsely with hardly polished pre-moulded Ebonite stems. Therewith Ben Wade degenerated definitively to a second brand. The stamping now read “Made in London England” or just “London”. Nothing was left from the quality of the pipes once made in Leeds!
Quotation of an American pipe dabster: “It’s a shame to see how a famous old family name can be dragged into the mud by people who want to capitalize on a good reputation earned by men who are long dead. This sad little story was not one of Charatan’s or Lane’s proudest moments!”
Herman G. Lane’s heirs had no special interest in either Charatan or in Ben Wade and sold it to Dunhill Pipes Limited in 1978. Now, Dunhill had no need of machine-made series pipes like the Ben Wade as performed by Charatan / Lane since their own Parker–Hardcastle factory in Walthamstow had abounding capacities to turn out secondary pipes. Thus this was Ben Wade’s second end. Charatan’s Prescott Street factory was closed by no later than March of 1982 and Charatan was allowed to languish and discontinued in 1988.
Now I had some parameters regarding the time frame of the pipe. It was made after the closing of the Leeds factory in 1965 and made in London as early as 1973. It was definitely made before Lane sold the factory to Dunhill in 1978. That is helpful to know the time frame as well as the connection to Charatan during that time period. Now it was time to work on the pipe. Now it was time to work on the pipe.
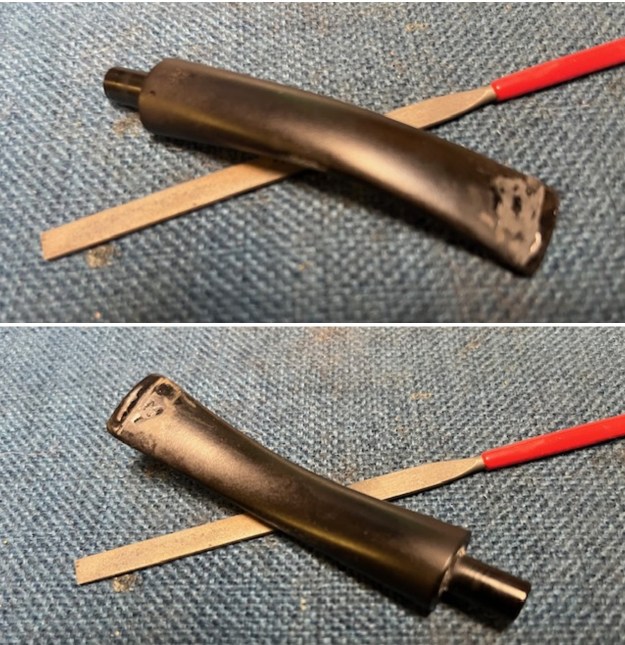
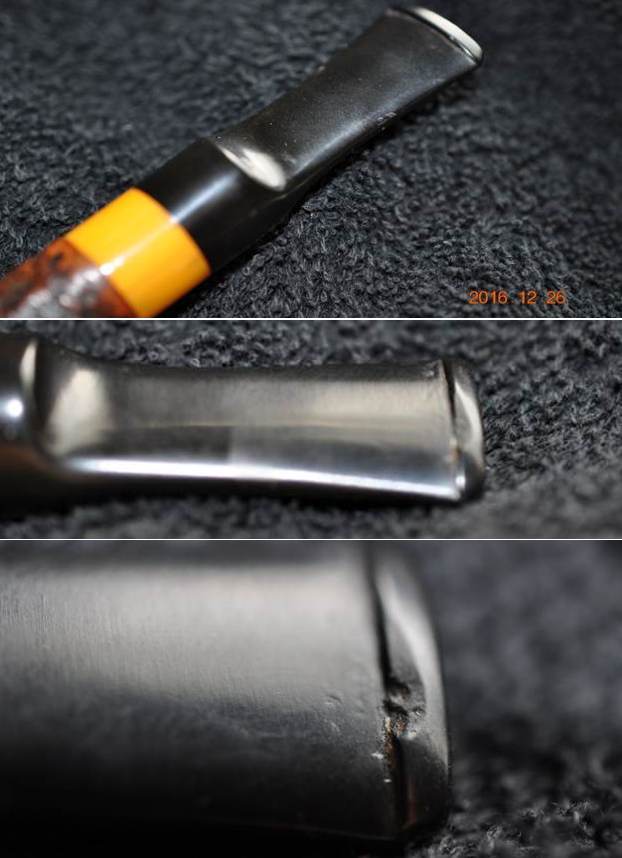
I tried to capture the crack in the shank in photos. The first photo shows the location of the crack and I have inserted a red arrow to identify it. I blew up that section of the stem in the second photo. It is pixilated but still you can see the crack clearly.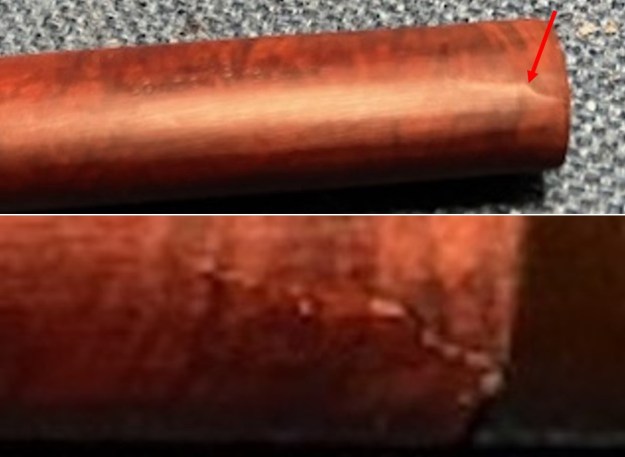 I reamed out the cake in the bowl with a PipNet pipe reamed to take it back to bare walls. I followed that up with a Savinelli Fitsall Pipe Knife. I remove all the rest of the cake remnants on the bowl walls. I was very clean.
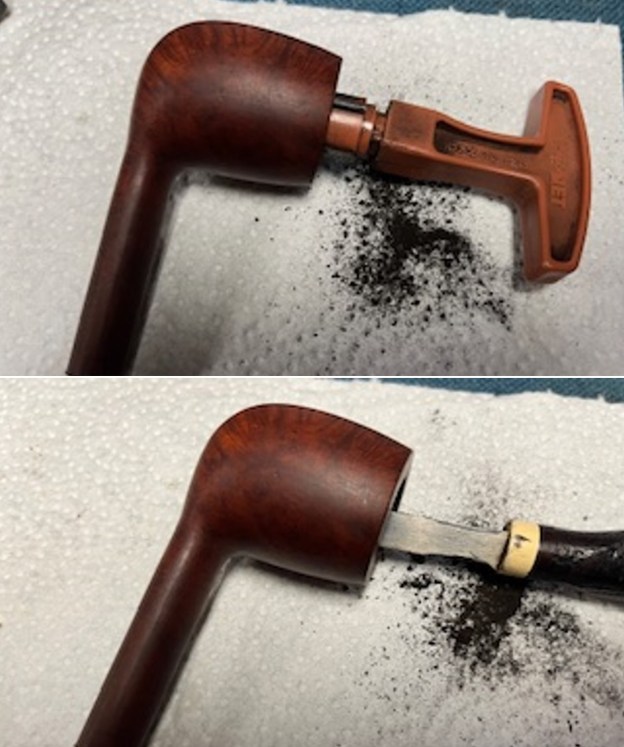 I cleaned out the airway in the shank, mortise and airway in the stem with a bristle pipe cleaner and regular smooth cleaners and alcohol. It removed a lot of oils and tars but it was not too dirty.
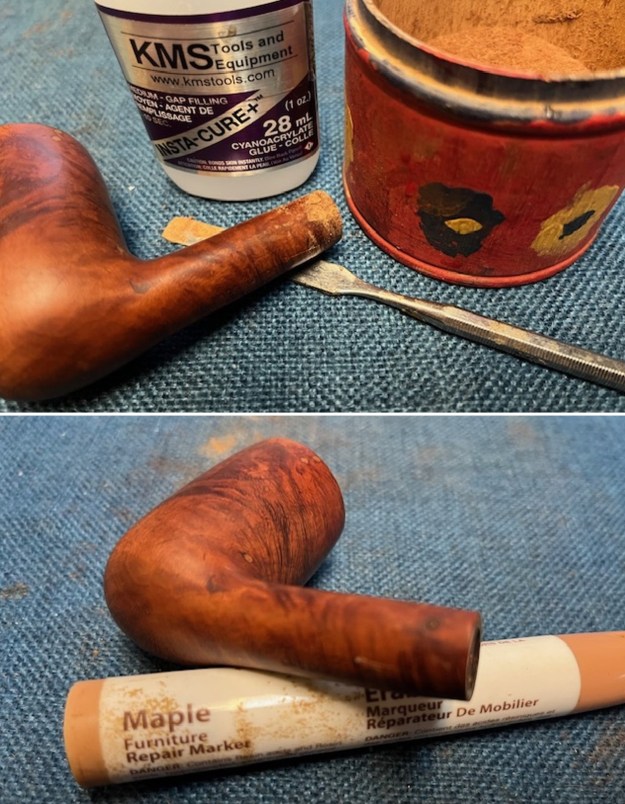
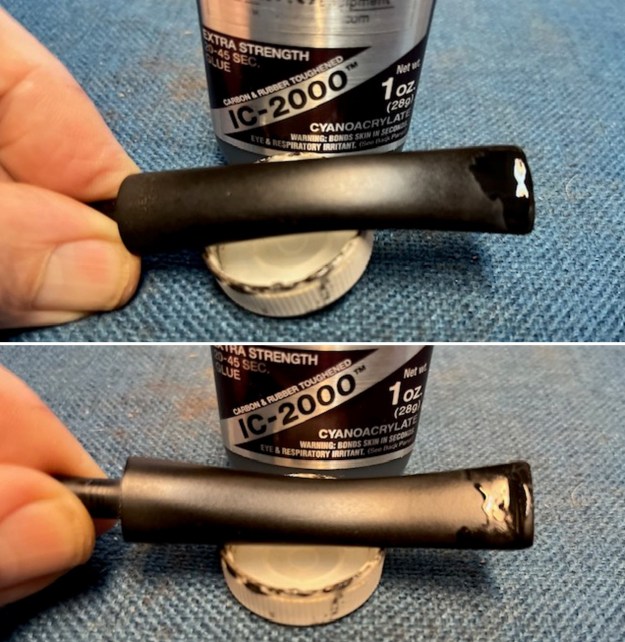
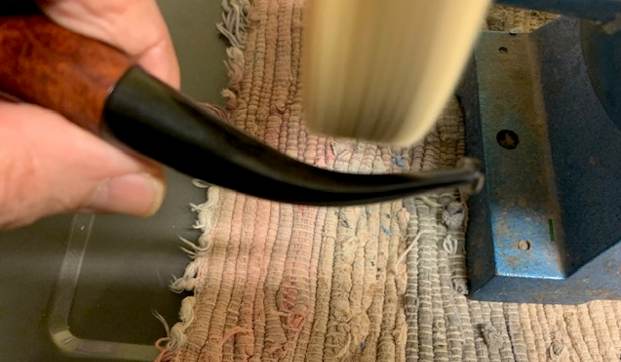
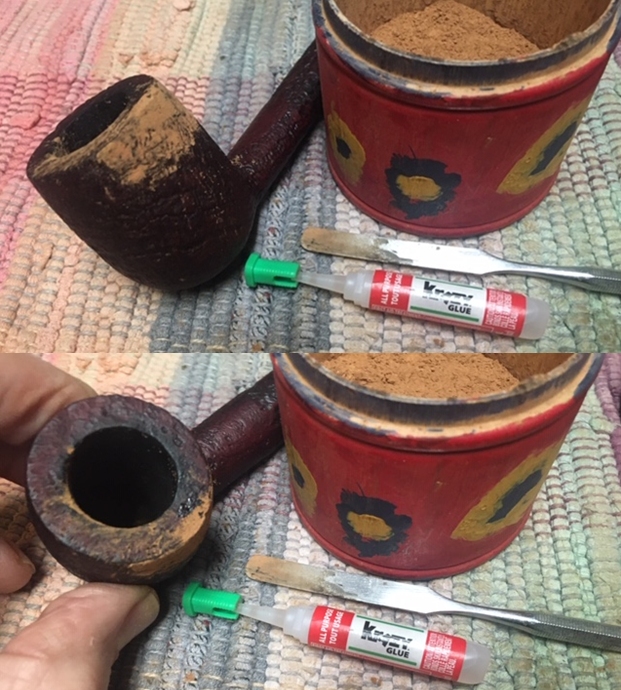
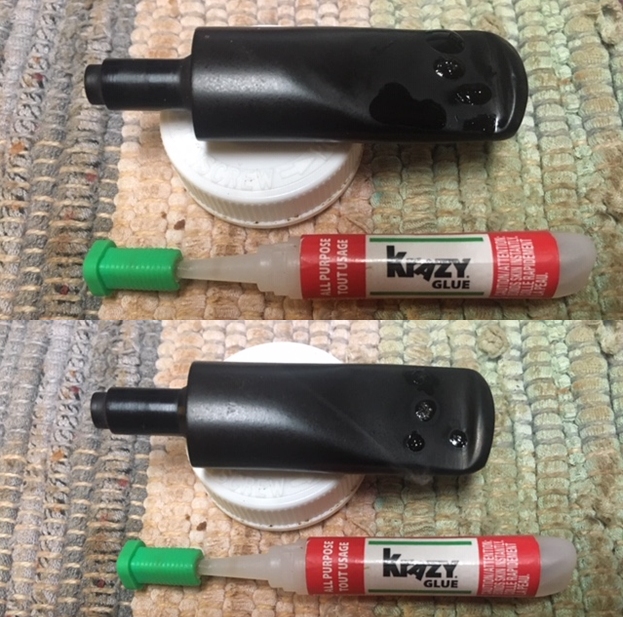
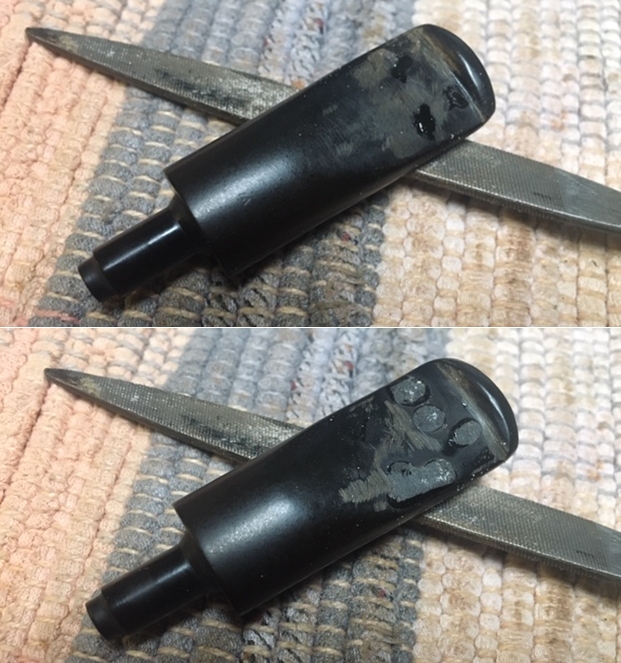
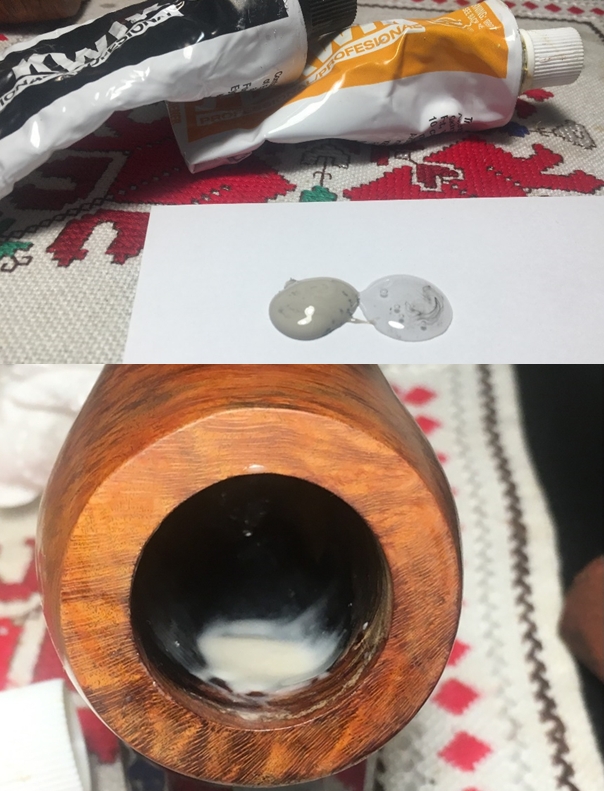
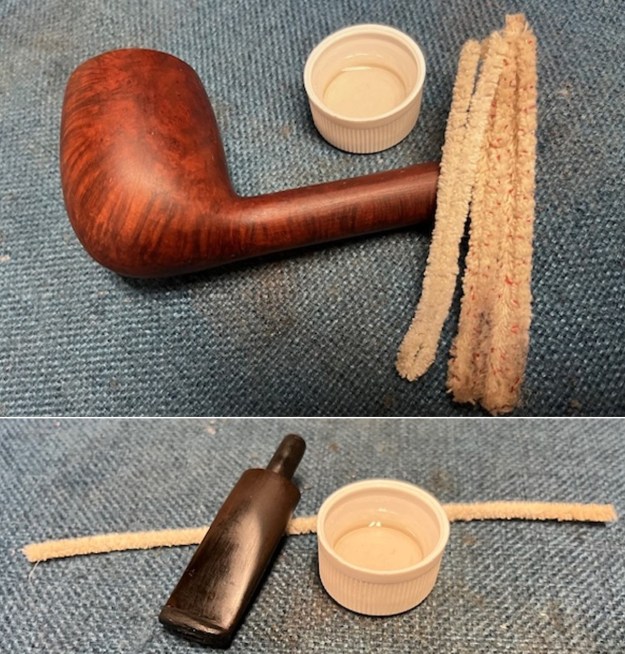 With the internals clean I turned to work on the cracked shank. I had a nice EP (Electro Plated) oval band that fit the shank perfectly. I used a tooth pick to paint the shank end with some all-purpose glue. I pressed the band in place on the shank. The glue permeated the crack in the shank and the band brought the pieces back together again. It was a snug and clean repair.
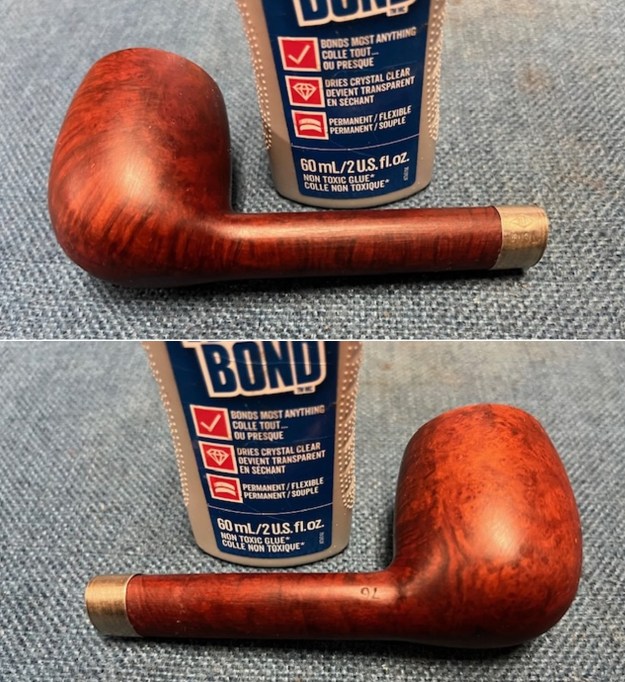
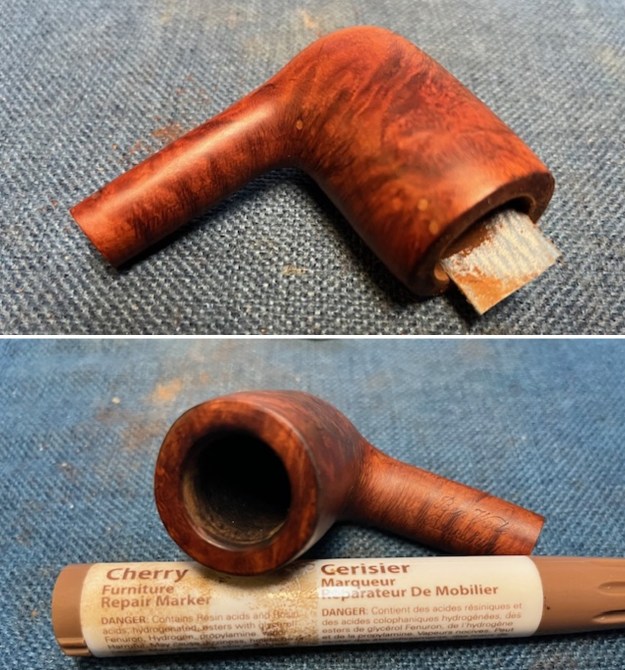
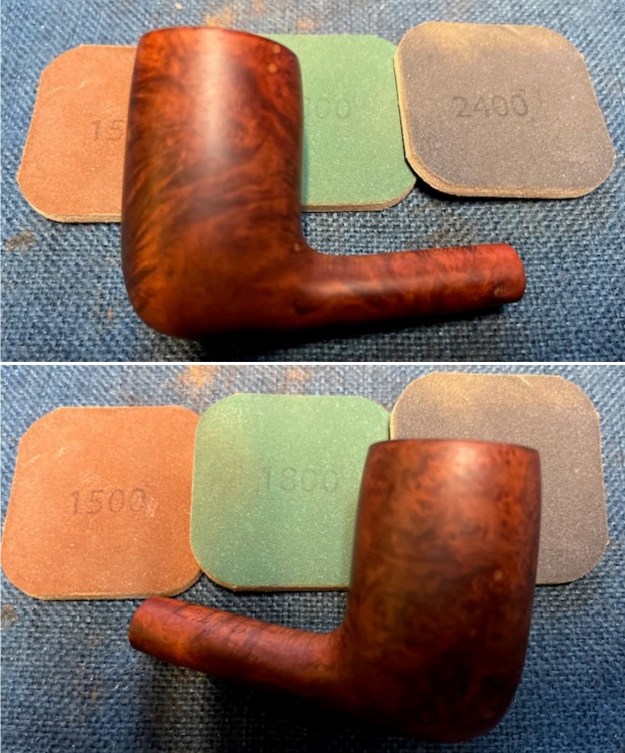
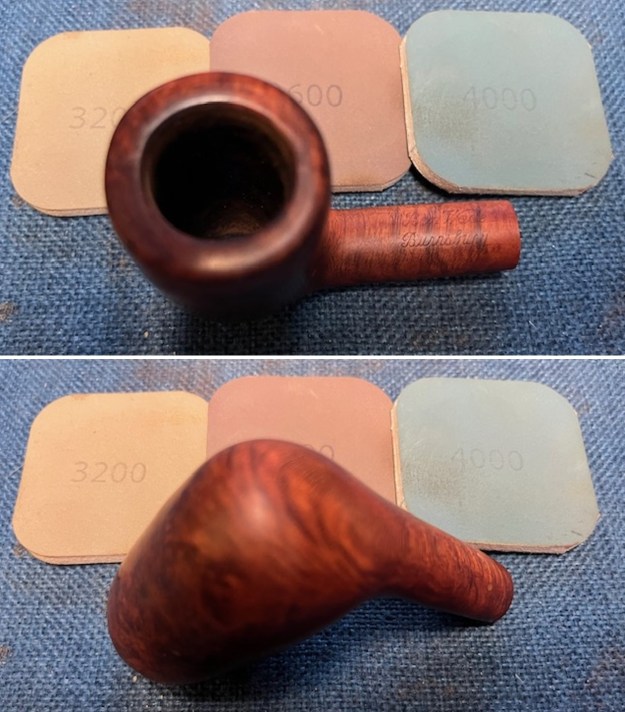
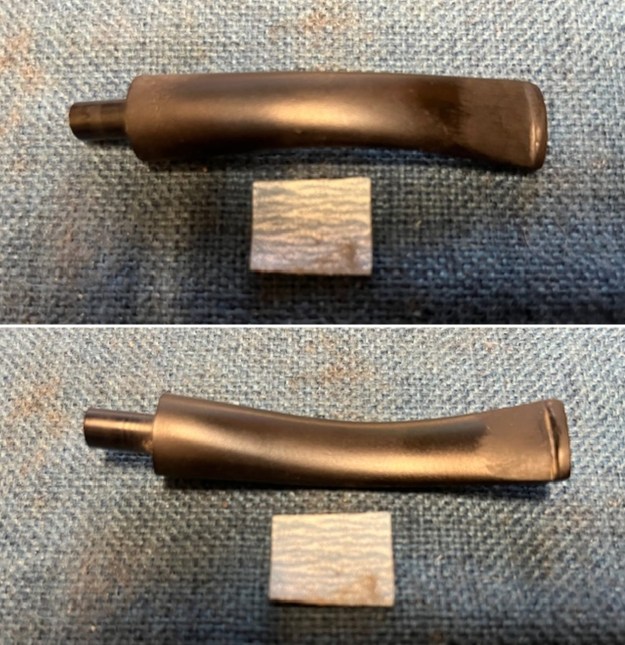
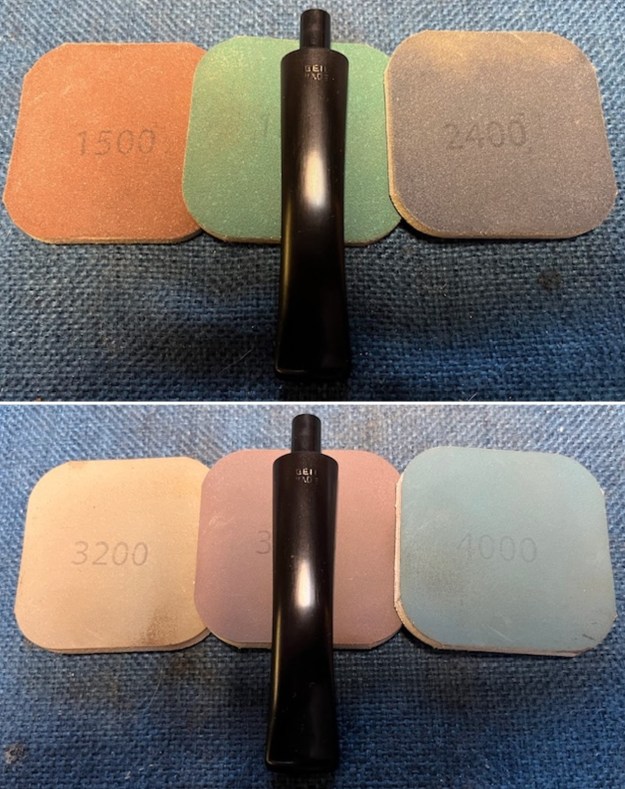
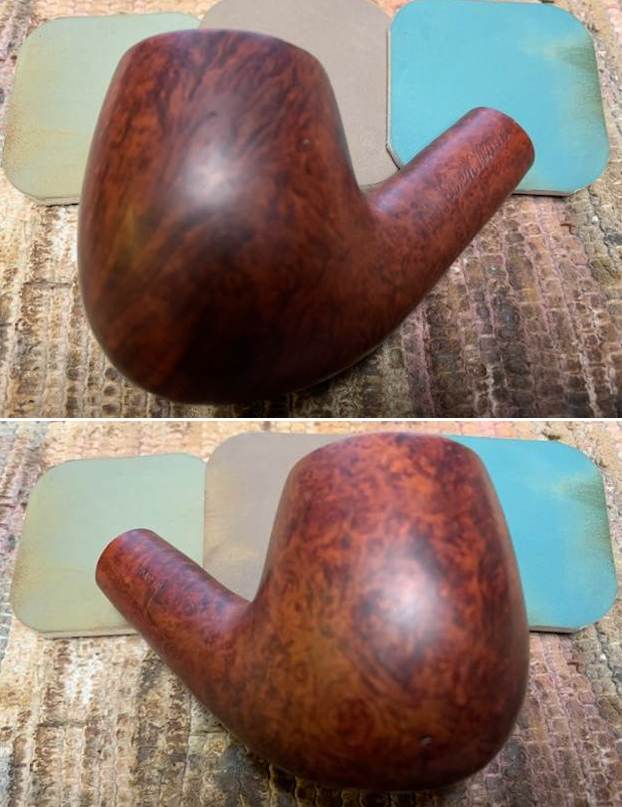
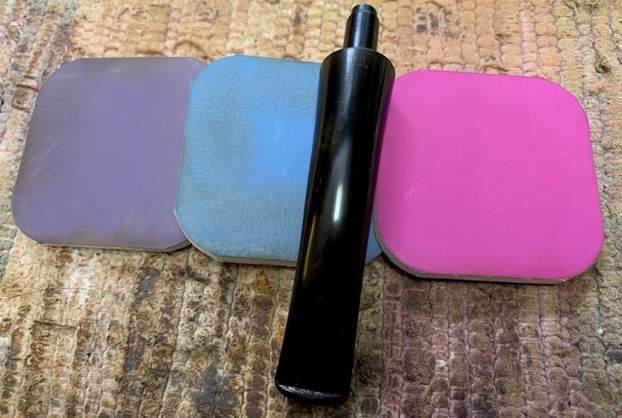
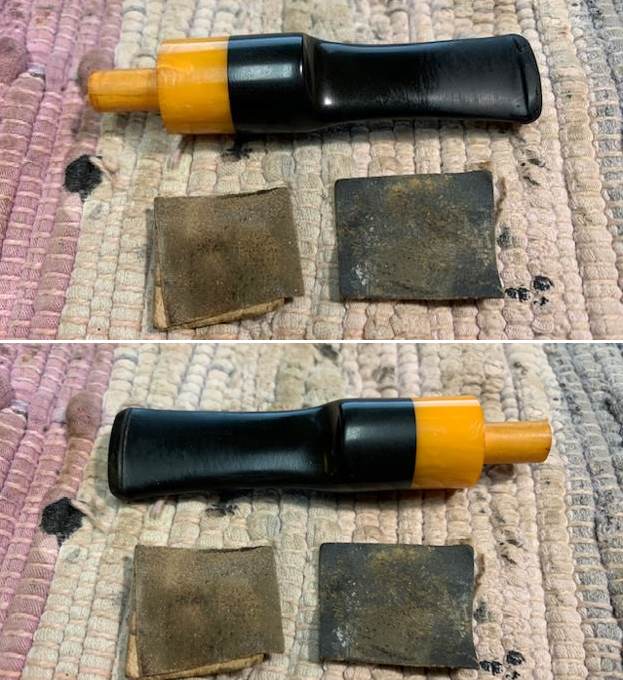
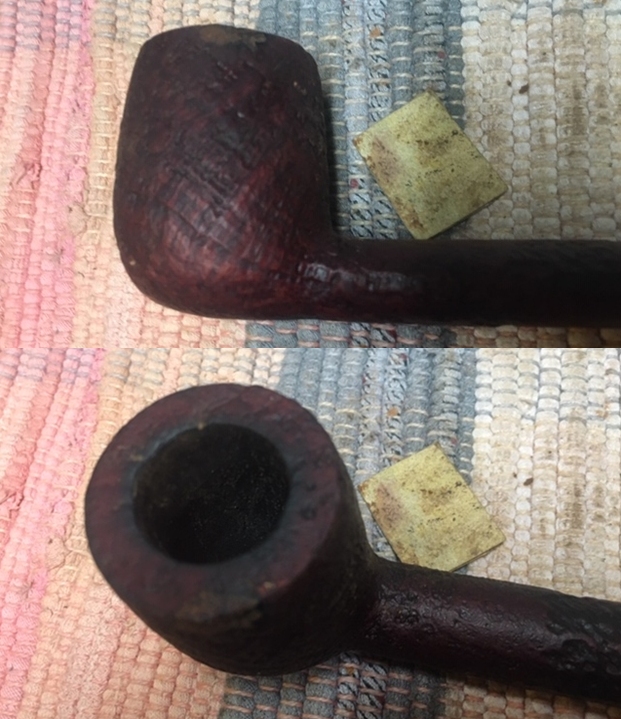
 Once the glue hardened and the band was solid in place on the shank I decided to work on the scratching around the bowl and shank. I would need to be careful with the stamping while still trying to minimize the damage. I used 320-3500 grit 2×2 inch sanding pads to take out the deep scratches or at least smooth them. I wiped the briar down with a damp cloth between pads to remove the sanding debris and to see if I could cause the scratches to swell and rise to the surface. One finish the bowl looked much better.
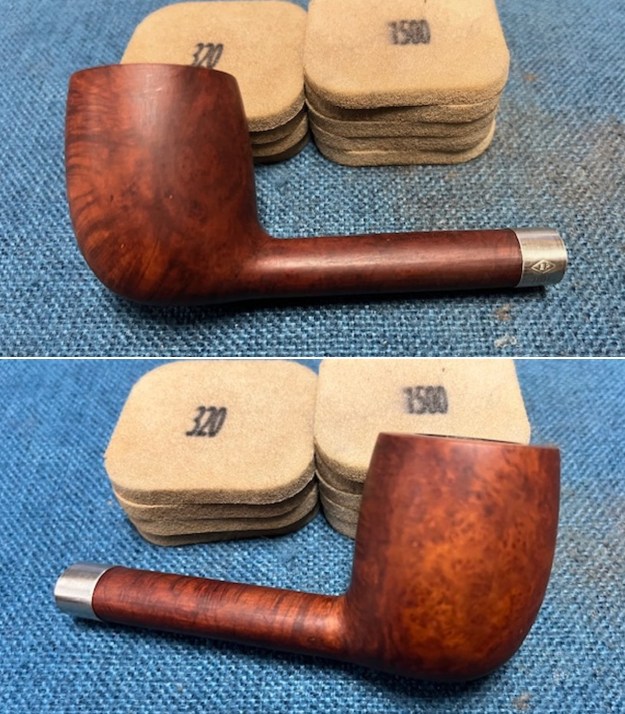
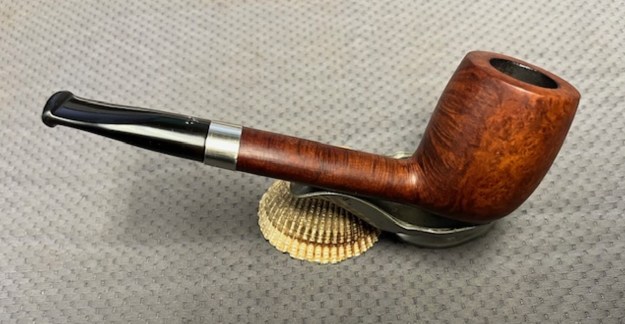
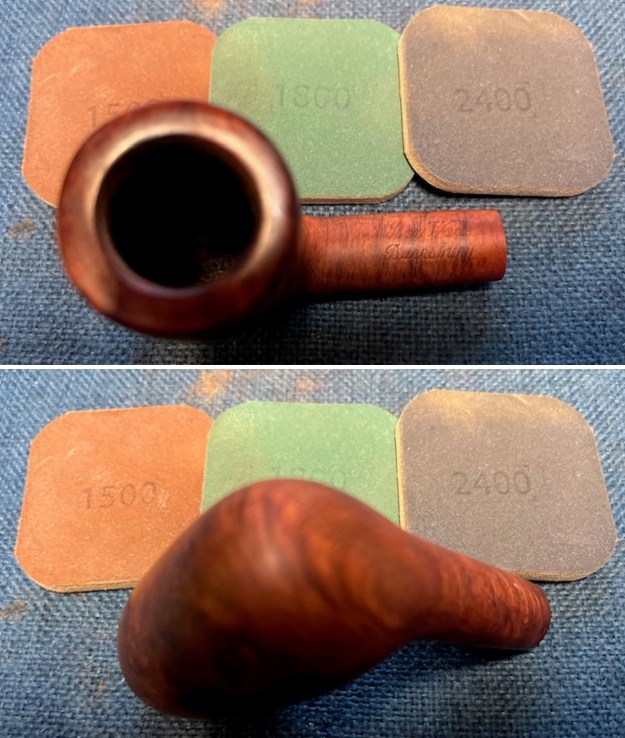
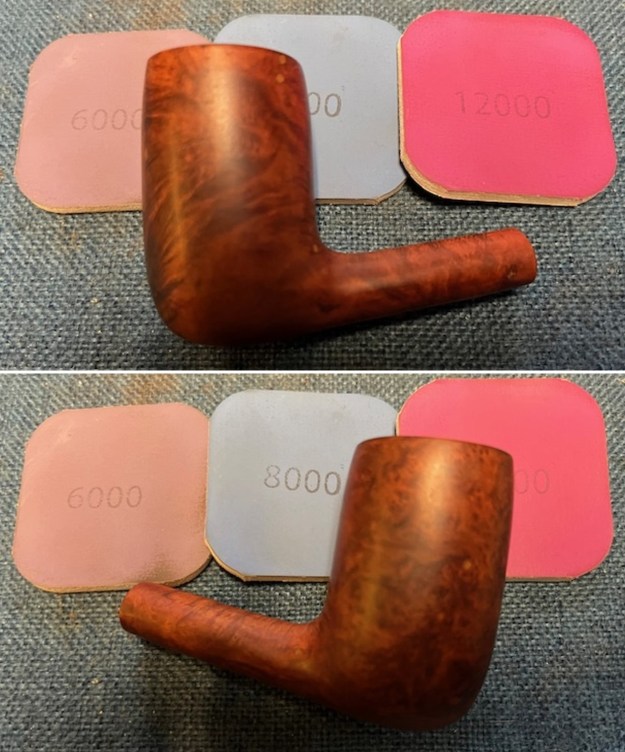
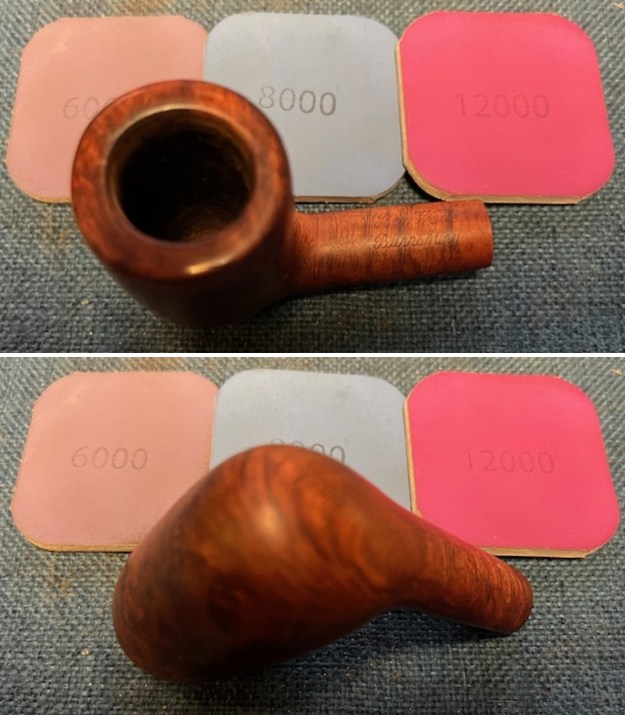
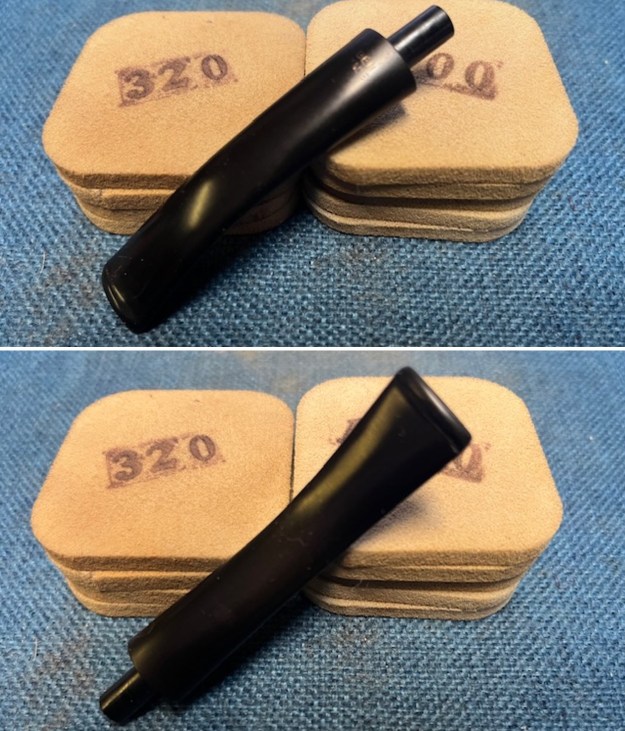
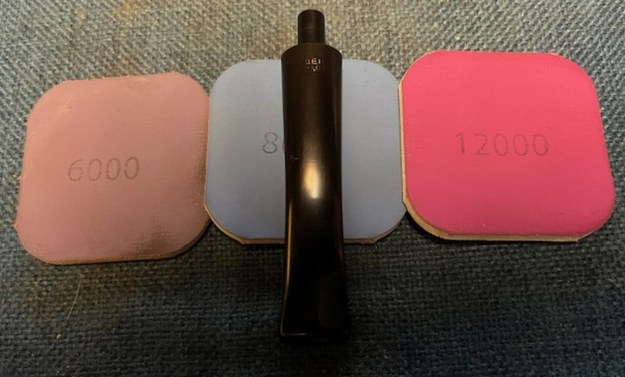
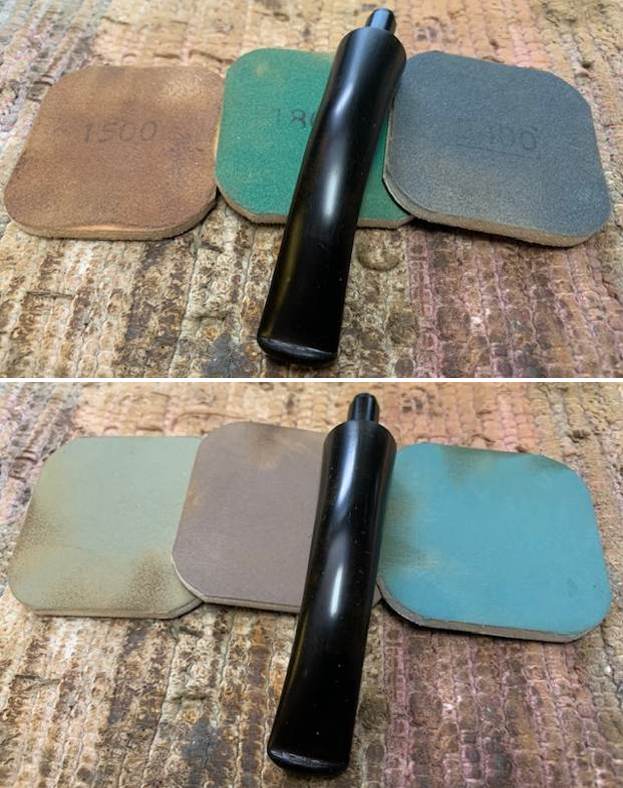
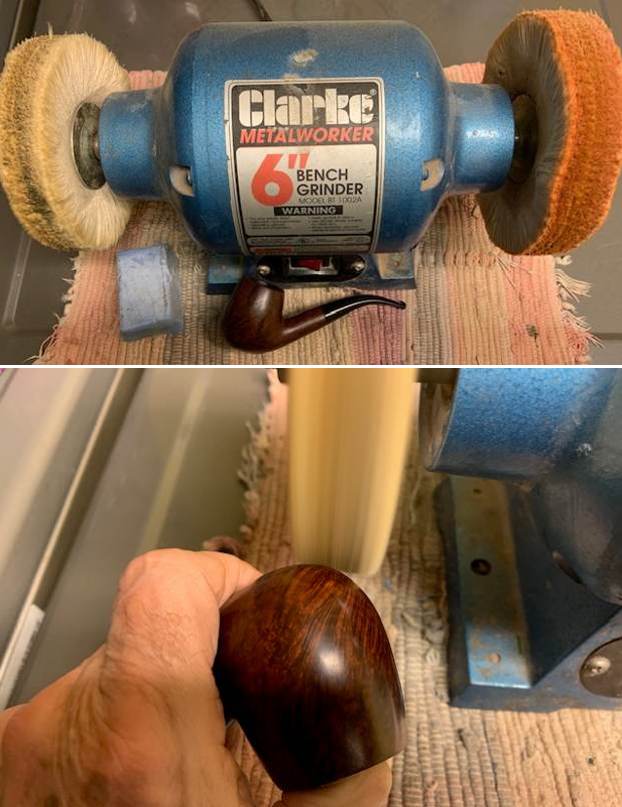
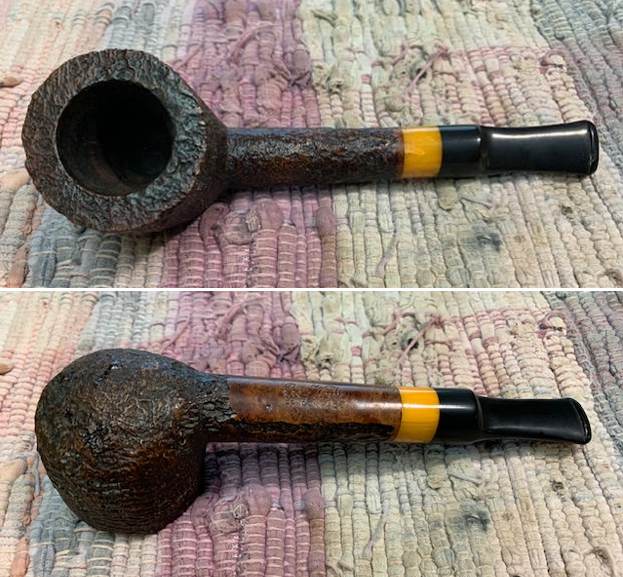
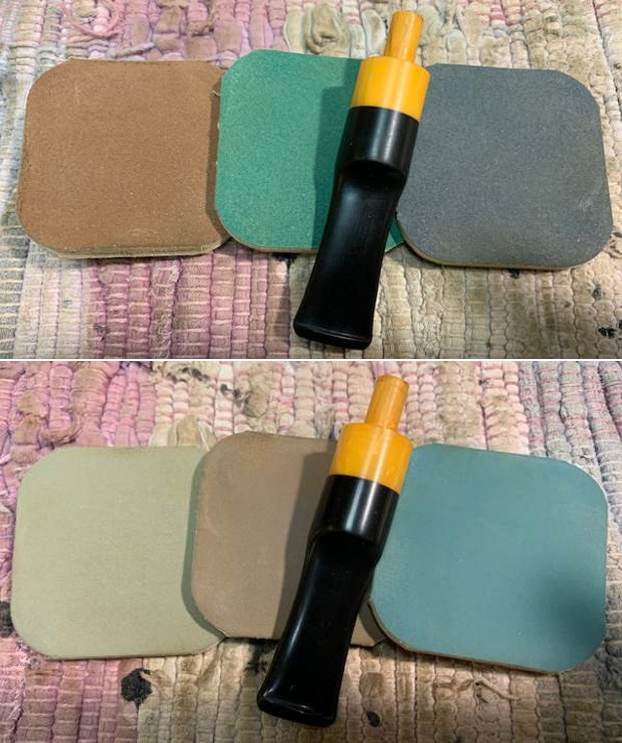
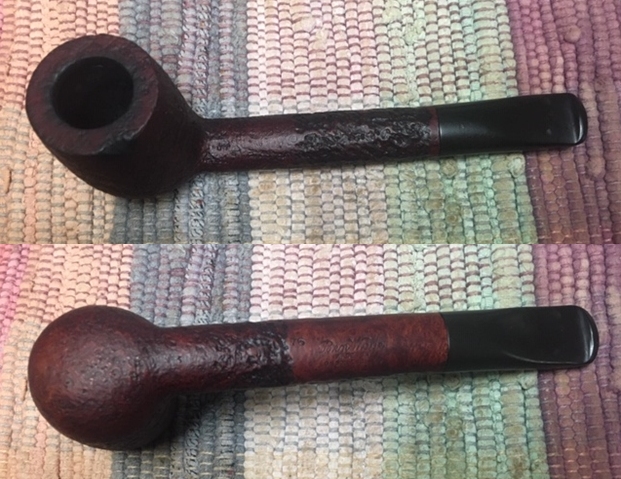
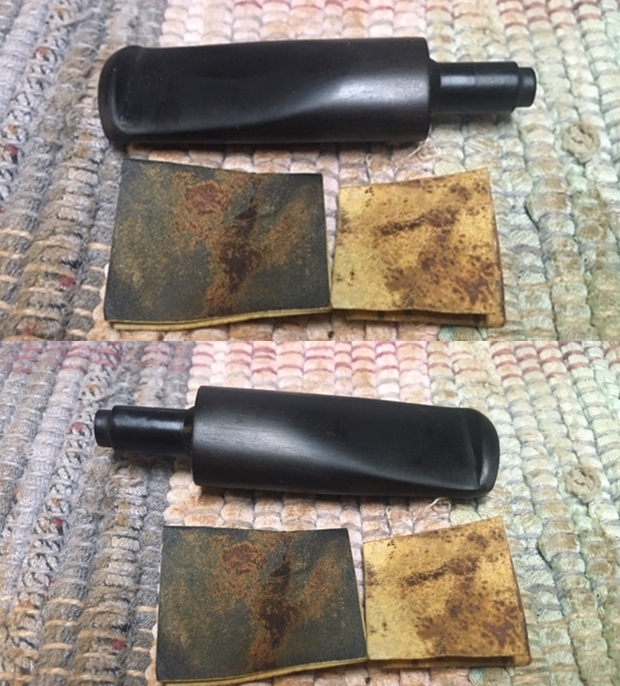
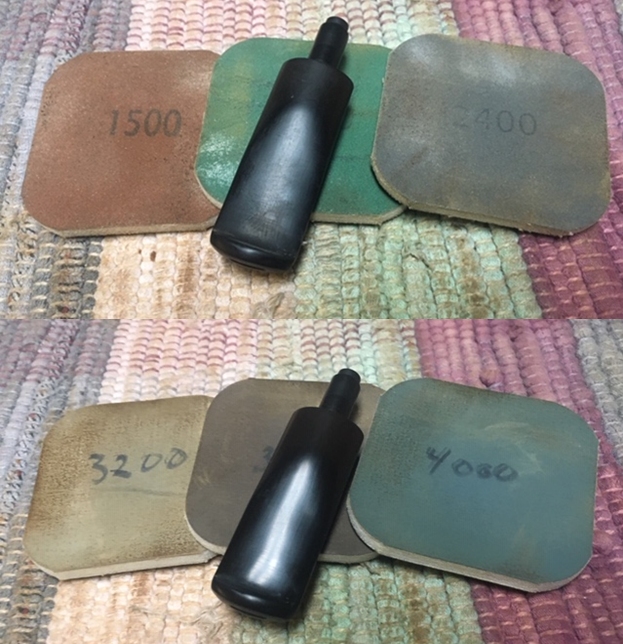
 I polished the briar with micromesh sanding pads – dry sanding it with 1500-12000 grit sanding pads. I wiped the briar down with a damp cloth after each sanding pad and the bowl began to take on a deep shine and the scratches were minimized.
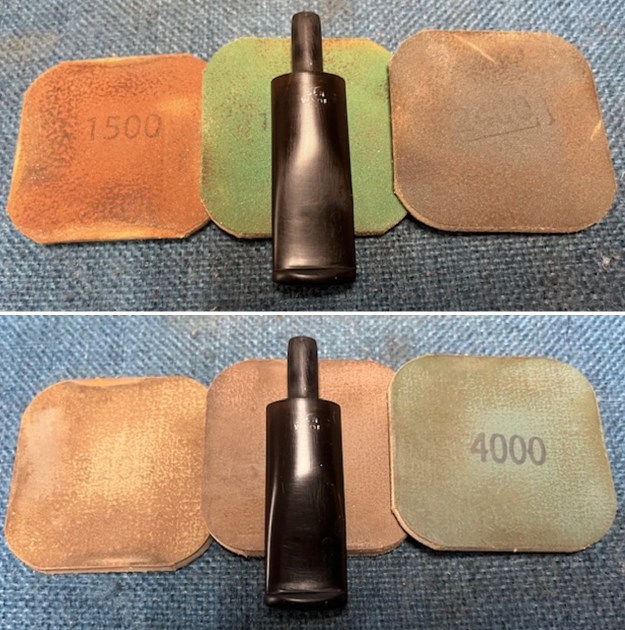
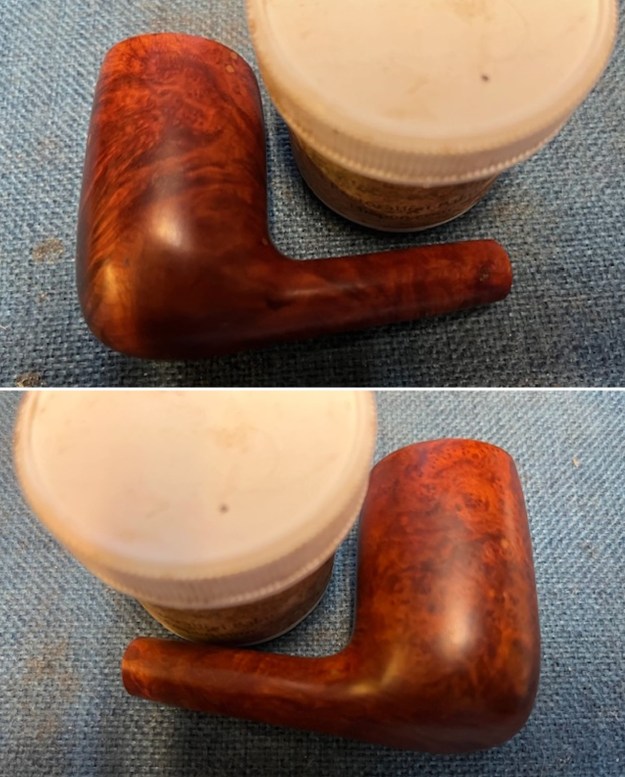
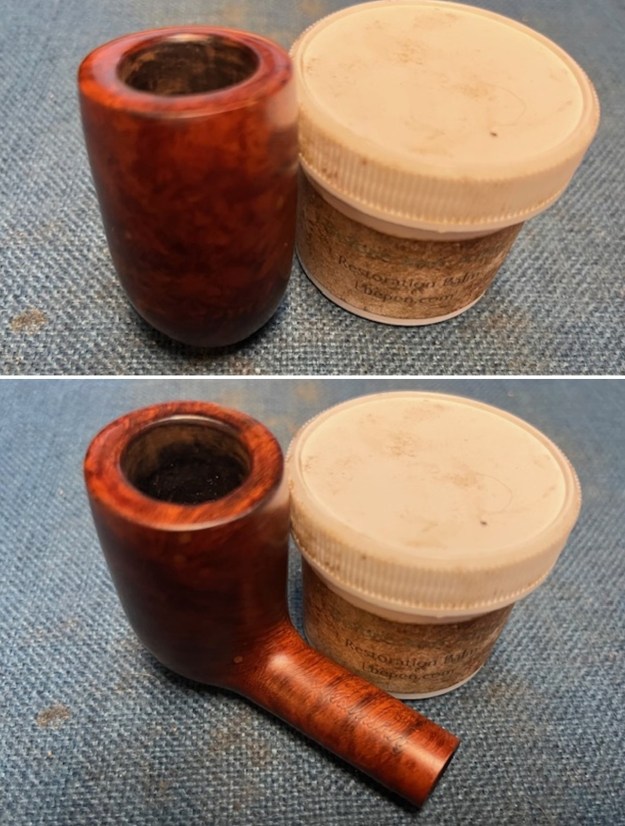
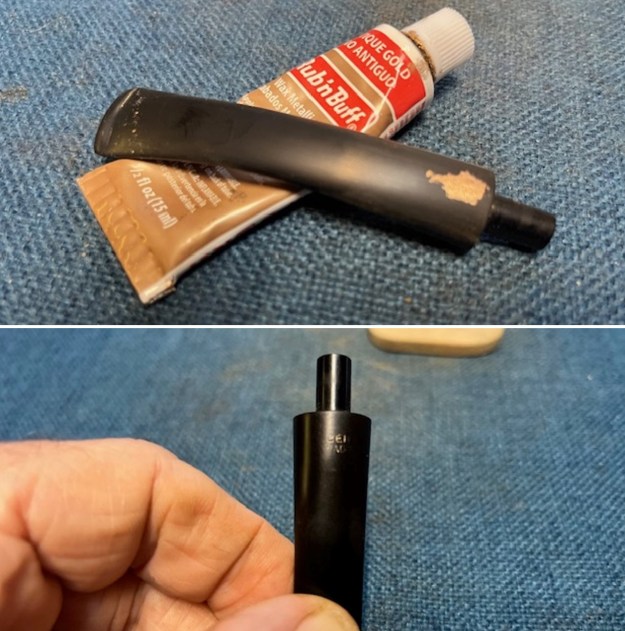
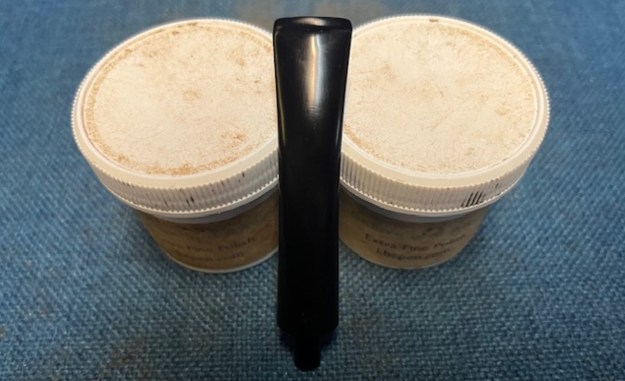
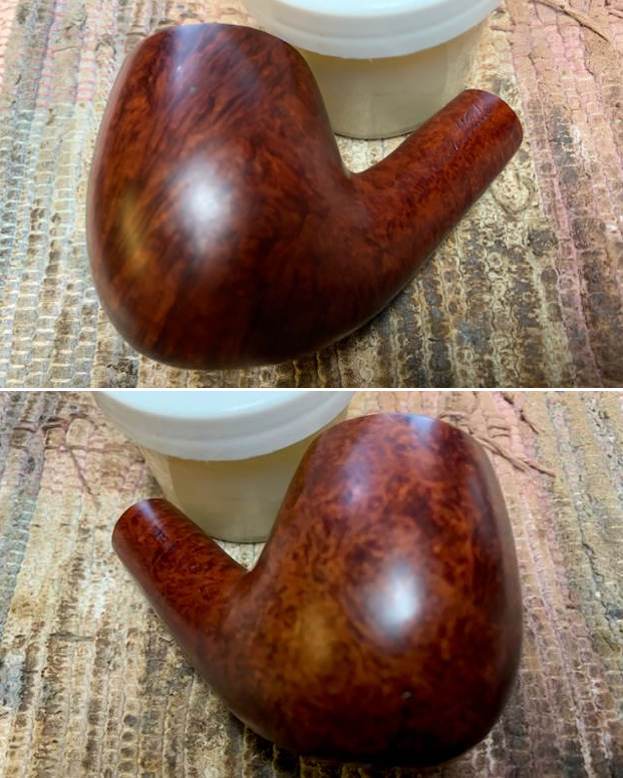
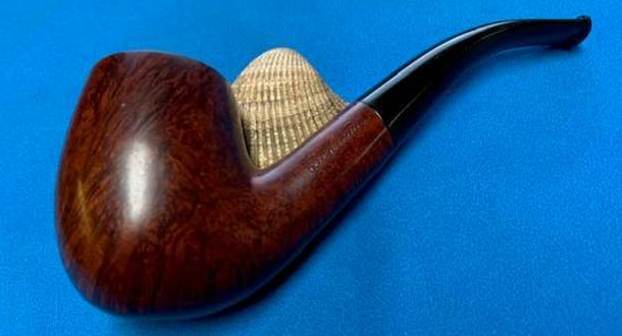
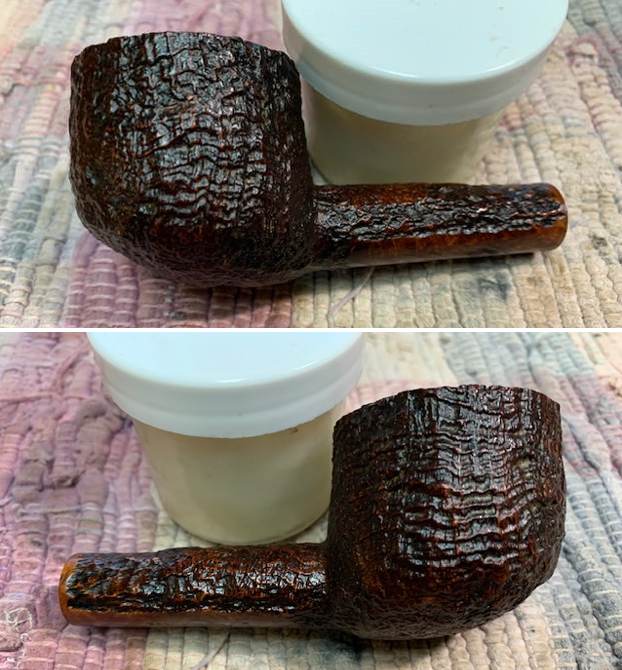
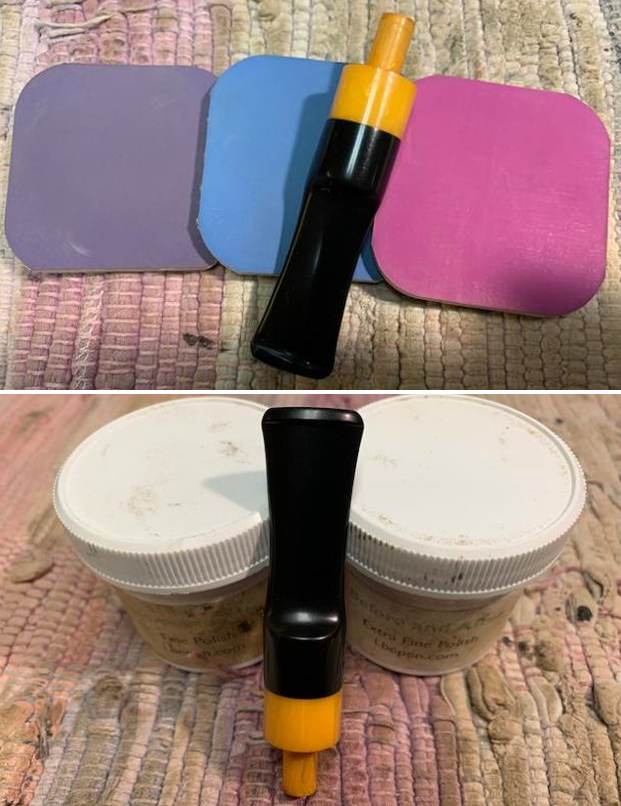
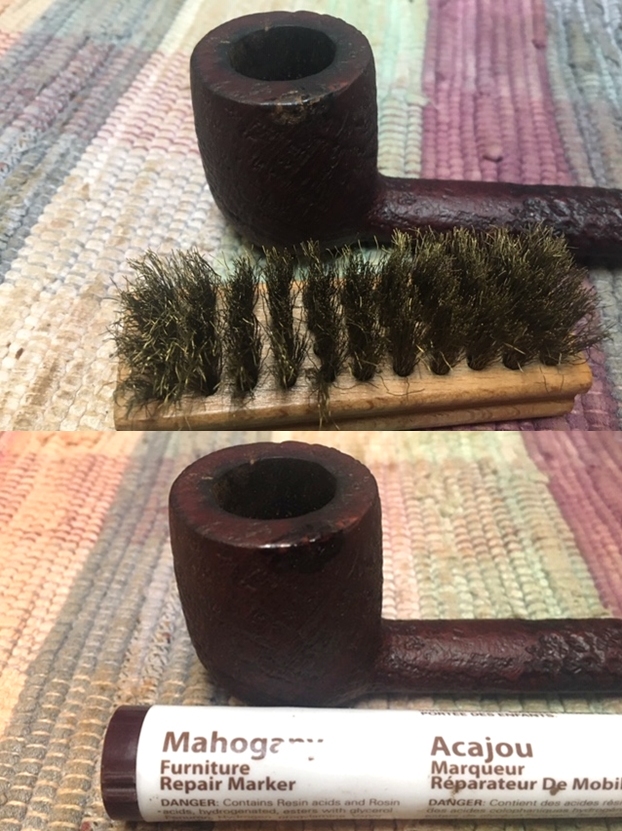
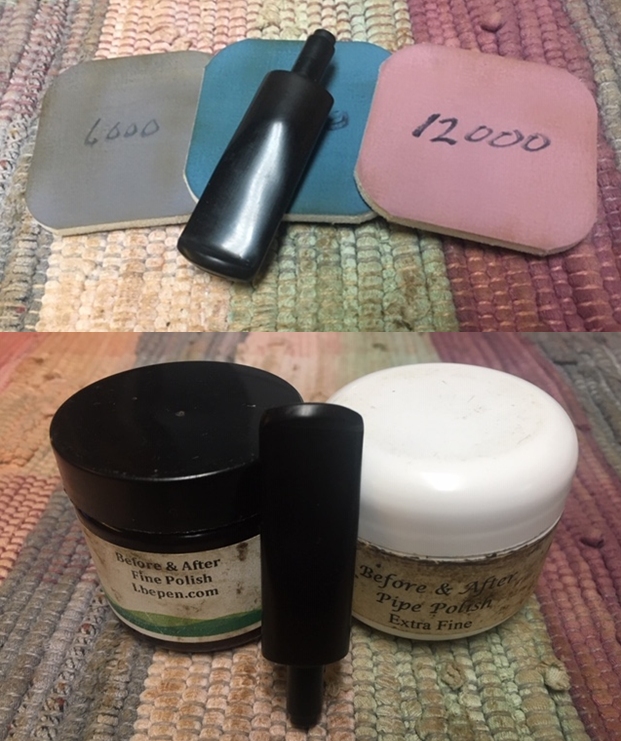
 The scratching was still present but not as visible as when I started. I wanted to keep as much of the original finish as possible and the process above made that possible. I worked some Before & After Restoration Balm into the surface of the briar with my finger tips to get into the finish of the briar. The product is incredible and the way it brings the grain to the fore is unique. It works to clean, protect and invigorate the wood.