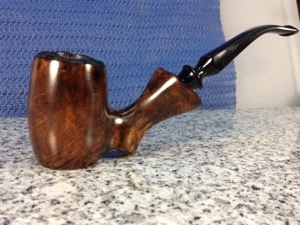
Stanwell Shapes – Compiled by Bas Stevens


Blog by Bas Stevens

In my experience Bas Stevens is one of the foremost authorities on Stanwell pipes. Whenever I find a shape I need information on or a pipe that I need help identifying the shape or the carver I email Bas and he has the information readily at hand. I picked up this shape listing from him some time ago and it identifies the shape by number and by designer. I found it extremely helpful so I wrote Bas and asked if I could post it here. Bas granted gracious permission and below is what Bas has provided.

1. Stack, straight shank; canted or angled rim, l-r;
a) Freehand, straight, angled rim, named Nefertite, by Sixten Ivarsson – late 1950s.
b) Freehand, Pick Ax, push mouthpiece, by Sixten Ivarsson. (1975)
2. Two versions of this shape number
a) Freehand, oval bowl and stem, by Sixten Ivarsson.
b) Bent, egg-shaped bowl, sloping top, full mouthpiece.
3. Billiard medium size, full mouthpiece.
4. Two versions of this shape number
a) Lovat with long stem.
b) Freehand, push mouthpiece, by Sixten Ivarsson. (Golden King)
5. Bulldog, oval shank
6. Two versions of this shape number
a) Dublin style by Sixten Ivarsson – 1951.
b) Freehand, large bent sitter, saddle mouthpiece.
7. Panel Free Hand, Free Hand w/panel or rectangular shank.
a) Slight bent, oval stem, full mouthpiece, by Sixten Ivarsson.
b) Bent, triangular stem, saddle mouthpiece.
8. Bent with push mouthpiece by Sixten Ivarsson.
9. Freehand, slightly bent, triangular bowl, special design mouthpiece, by Sixten Ivarsson.
10. Two versions of this shape number
a) Tulip bowl, oval stem, special design mouthpiece, by Sixten Ivarsson.
b) Bent with push mouthpiece by Sixten Ivarsson.
11. Two versions of this shape number
a) Billiard bowl, slightly bent, oval stem, by Sixten Ivarsson.
b) Large pot, slightly bent, saddle mouthpiece, by Sixten Ivarsson.
11R. Bulldog, bent, with long shank and long full mouthpiece by Anne Julie. Billiard w/saddle stem, Canted Pear by Sixten Ivarsson.
12. Large billiard, full mouthpiece
13. Two versions of this shape number
a) Pear-shaped bowl, oval stem, saddle mouthpiece, by Sixten Ivarsson.
b) Large billiard, saddle mouthpiece.
14. Large billiard, saddle mouthpiece.
15. Bent, triangular stem, saddle mouthpiece. (large 07-2)
16. Billiard, long stem, full mouthpiece.
17. Small billiard, rounded rim, saddle mouthpiece, by Sixten Ivarsson.
18. Pear-shaped bowl, slightly bent, oval stem, saddle mouthpiece, by Sixten Ivarsson.
19. Bent, triangular bowl, saddle mouthpiece.
20. Two versions of this shape
a) Freehand, boat-shaped, special design mouthpiece, by Sixten Ivarsson.
b) Freehand, large bent, saddle mouthpiece, by Sixten Ivarsson.
21. Bent, triangular bowl, saddle mouthpiece.
22. Two versions of this shape number
a) Billiard, oval stem, full mouthpiece.
b) Bent, flat bottom, saddle mouthpiece.
23. Freehand bent, rounded rim, saddle mouthpiece, by Sixten Ivarsson.
24. Two versions of this shape number
a) Freehand, slightly bent, oval stem and mouthpiece, by Sixten Ivarsson.
b) Freehand, push mouthpiece, by Sixten Ivarsson.
25. Two versions of this shape number
a) Same as 24a but larger, by Sixten Ivarsson.
b) Freehand, slightly bent, oval bowl, rounded top, saddle mouthpiece.
26. Freehand, slightly bent, oval, by Anne Julie.
27. Billiard, slightly bent, stem with metal ring, push mouthpiece.
28. Apple, full mouthpiece.
29. Billiard, medium size, full mouthpiece.
30. Freehand, bent, “Strawberry”, saddle mouthpiece, by Sixten Ivarsson.
31. Two versions of this shape number
a) Bulldog, saddle mouthpiece.
b) Freehand, large shape 30, by Sixten Ivarsson.
32. Two versions of this shaper number
a) Bulldog, saddle mouthpiece, Stanwell’s first pipe shape from 1942.
b) Freehand, bent, saddle mouthpiece, by Sixten Ivarsson. Redesigned by Tom Eltang in the early 1990s.
33. Two versions of this shaper number
a) Bulldog, full mouthpiece.
b) Bulldog, bent, push mouthpiece.
34. Two versions of this shaper number
a) Bulldog, slightly bent, sloping bowl, full mouthpiece, by Sixten Ivarsson.
b) Bulldog, slightly bent, push mouthpiece, by Sixten Ivarsson.
35. Two versions of this shaper number
a) Freehand, bent, saddle mouthpiece, by Sixten Ivarsson.
b) Freehand, bent, oval stem and mouthpiece, by Anne Julie.
36. Two versions of this shaper number
a) Freehand, slightly bent, oval stem and mouthpiece, saddle mouthpiece, by Sixten Ivarsson.
b) Freehand, bent, oval stem and mouthpiece, by Anne Julie – 1975.
37. Freehand, bent, sitter, oval stem and mouthpiece, by Sixten Ivarsson.
38. Two versions of this shaper number
a) Lovat, short saddle mouthpiece.
b) Small bent, short saddle mouthpiece.
39. Freehand, egg-shaped bowl, long saddle mouthpiece, by Sixten Ivarsson.
40. Small billiard, oval stem, saddle mouthpiece..
41. Medium billiard (bowl29), metal ring, push mouthpiece, by Sixten Ivarsson. Last produced in 1980.
42. Two versions of this shaper number
a) Billiard, slightly bent, long saddle mouthpiece, by Sixten Ivarsson.
b) Freehand, full bent, rectangular stem and mouthpiece.
43. Freehand, full bent, large ball-shaped bowl, saddle mouthpiece.
44. Two versions of this shaper number
a) Small billiard, full mouthpiece.
b) Freehand, slightly bent, oval stem, short saddle mouthpiece. (1975)
45. Pot, medium size, full mouthpiece.
46. Prince, medium size, full mouthpiece.
47. Small freehand, slightly bent, oval stem and mouthpiece, by Anne Julie – 1950s.
48. Freehand, egg-shaped bowl with rounded rim, long saddle mouthpiece, by Sixten Ivarsson.
49. Two versions of this shaper number
a) Dublin, slightly bent, oval stem and mouthpiece.
b) Freehand, bent saddle mouthpiece.
50. Billiard, large size, oval stem and mouthpiece.
51. Small billiard, full mouthpiece.
52. Small billiard, full mouthpiece.
53. Medium size billiard, saddle mouthpiece.
54. Two versions of this shaper number
a) Freehand, large bent, saddle mouthpiece, by Sixten Ivarsson.
b) Medium size billiard, saddle mouthpiece.
55. Two versions of this shaper number
a) Oval bent Dublin, oval stem, saddle mouthpiece, by Sixten Ivarsson. Designed and introduced in the late 1950’s to early 1960s.
b) Freehand, slightly bent, saddle mouthpiece.
56. Canadian, full mouthpiece.
57. Small billiard, full mouthpiece.
58. Small billiard, full mouthpiece.
59. Freehand, slightly bent, saddle mouthpiece, by Sixten Ivarsson.
60. “Chimney, saddle mouthpiece.
61. Small billiard, long 75mm full mouthpiece.
62. Two versions of this shaper number
a) Liverpool, medium size.
b) Freehand, Plateau top, saddle mouthpiece, by Sixten Ivarsson.
63. Freehand, Plateau top, saddle mouthpiece, by Sixten Ivarsson.
64. Two versions of this shaper number
a) Freehand, Plateau top, saddle mouthpiece, by Sixten Ivarsson.
b) Bent billiard, medium size, full mouthpiece.
65. Dublin, full mouthpiece.
66. “Chimney”, saddle mouthpiece.
67. Small oval bowl, slightly bent, full mouthpiece.
68. Poker, saddle mouthpiece.
69. Two versions of this shaper number
a) Dublin.
b) Same as shape 67 but larger.
70. Two versions of this shaper number
a) Freehand, slightly bent, sitter, oval stem and mouthpiece, by Sixten Ivarsson – 1967.
b) Canted Billiard with pencil shank.
71. Freehand, rounded rim, oval stem, saddle mouthpiece, by Sixten Ivarsson.
72. Billiard, medium size, full mouthpiece.
73. No shape
74. Canadian, medium size.
75. Freehand, slightly bent, oval stem & mouthpiece, by Sixten Ivarsson.
76. Liverpool, medium size.
77. Two versions of this shaper number
a) Freehand, slightly bent, saddle mouthpiece, by Sixten Ivarsson.
b) Freehand, oval bowl, saddle mouthpiece, by Sixten Ivarsson.
78. Freehand, oval bowl and stem, saddle mouthpiece, by Sixten Ivarsson – 1950s.
79. Dublin, slightly bent, saddle mouthpiece, by Sixten Ivarsson.
80. Two versions of this shaper number
a) Small billiard, saddle mouthpiece.
b) Large bent billiard.
81. Two versions of this shaper number
a) “Chimney”, saddle mouthpiece.
b) Large billiard, saddle mouthpiece.
82. Pickaxe
83. Two versions of this shaper number
a) Large Pot, full mouthpiece.
b) Bent Billiard, medium size, full mouthpiece.
84. Two versions of this shaper number
a) Dublin, slightly bent with oval stem.
b) Large bent, saddle mouthpiece by Tom Eltang.
85. Two versions of this shaper number
a) Freehand, bent, saddle mouthpiece by Sixten Ivarsson – late ‘50’s to ‘60’s (info rec’d from Tom Eltang).
b) Bent Billiard saddle mouthpiece. (discontinued – 2006 and replaced with shape 246).
86. Two versions of this shaper number
a) Freehand, slightly bent, full mouthpiece by Sixten Ivarsson.
b) Large billiard, full mouthpiece.
87. Four versions of this shape number
a) Large billiard, full mouthpiece.
b) Large “Chimney”, full mouthpiece.
c) Freehand, conical bowl, long saddle mouthpiece by Sixten Ivarsson.
d) Large ball, full mouthpiece.
88. Three versions of this shape number
a) Large “Chimney”, full mouthpiece.
b) Billiard, medium size, very short, full mouthpiece.
c) Billiard, full mouthpiece.
89. Two versions of this shaper number
a) Freehand, oval stem, short oval saddle mouthpiece, by Sixten Ivarsson.
b) Large pot, thin, long saddle mouthpiece.
90. Freehand, ball shaped, saddle mouthpiece by Sixten Ivarsson – 1951.
91. Freehand, large flat bowl, saddle mouthpiece, “Ukulele” by Sixten Ivarsson.
92. same as shape 91 but smaller by Sixten Ivarsson.
93. Two versions of this shaper number
a) Small Dublin, saddle mouthpiece.
b) Large Canadian.
94. Two versions of this shaper number
a) Egg-shaped bowl with oval stem.
b) Freehand, straight, oval bowl and stem – 1950s.
95. Two versions of this shaper number
a) “Chimney”, full mouthpiece.
b) same as shape 86 but larger by Sixten Ivarsson.
96. Freehand, oval bowl, long saddle mouthpiece by Sixten Ivarsson.
97. Two versions of this shaper number
a) “Chimney”, saddle mouthpiece.
b) Liverpool.
98. Two versions of this shaper number
a) Pot, saddle mouthpiece.
b) Lovat.
99. Liverpool
100.
101. “Elegence”. Push mouthpiece with a plastic connector. Small No. 48.
102. “Elegence”. Push mouthpiece with a plastic connector, bent oval bowl.
103. “Elegence”. Push mouthpiece with a plastic connector, small billiard.
104. “Elegence”, Push mouthpiece with a plastic connector. Small No. 86 by Sixten Ivarsson.
105. “Elegence”. Push mouthpiece with a plastic connector. Small No. 08 by Sixten Ivarsson.
106. “Elegence”. Push mouthpiece with a plastic connector. Small No. 79 by Sixten Ivarsson.
107. Small Billiard, full mouthpiece.
108. Freehand, sloping bowl, sadle mouthpiece by Tom Eltang.
109. Flat, ball-shaped bowl, slightly bent, full mouthpiece.
110. Freehand, oval bowl, slightly bent, saddle mouthpiece by Sixten Ivarsson.
111. Freehand, bent, saddle mouthpiece.
112. Freehand, slightly bent, short saddle mouthpiece.
113. Canadian with conical bowl.
114.
115. Same as shape 111 with push mouthpiece..
116. Pot with oval stem.
117.
118. Freehand, slightly bent, saddle mouthpiece by Sixten Ivarsson.
119. Freehand, oval bowl, slightly bent, saddle mouthpiece.
120. Large bent, conical bowl, full mouthpiece.
121. Large ball-shaped bowl, full mouthpiece.
122. Small Billiard, oval stem.
123. Small bent Billiard.
124. Freehand, long conical stem, short saddle mouthpiece by Sixten Ivarsson.
125. Freehand, slightly bent, saddle mouthpiece by Tom Eltang.
126. Same as shape 125 but with plateau top by Tom Eltang.
127. Freehand strongly bent, saddle mouthpiece, similar to shape 39, by Sixten Ivarsson.
128. Freehand, slightly bent, ball-shaped, long saddle mouthpiece by Tom Eltang.
129. Large, ball-shaped, strongly bent, long saddle mouthpiece by Tom Eltang.
130. Freehand, bent with push/long saddle mouthpiece.
131. Ball shaped with long stem, short saddle mouthpiece by Tom Eltang.
132. Large Billiard.
133. Bent, ball-shaped with saddle mouthpiece.
134. Freehand, slightly bent, with push mouthpiece by Tom Eltang.
135. Freehand, slightly bent, saddle mouthpiece by Tom Eltang. .
136. Bent, sloping bowl, saddle mouthpiece by Tom Eltang.
137. Small Dublin, sloping bowl by Tom Eltang.
138.
139.
140. Small freehand, slightly bent, full mouthpiece by Jess Chonowitsch.
141. Billiard, medium size, conical bowl, full mouthpiece by Jess Chonowitsch.
142. Freehand, bent, saddle mouthpiece by Jess Chonowitsch.
143.
144. Freehand, large bent, plateau top, long saddle mouthpiece by Jess Chonowitsch.
145. Freehand, sloping bowl, long stem, short saddle mouthpiece by Jess Chonowitsch.
146. Freehand, oval stem saddle mouthpiece by Jess Chonowitsch.
147. Small pot, oval stem, short saddle mouthpiece by Jess Chonowitsch.
148. Canadian, short saddle mouthpiece by Jess Chonowitsch.
149.
150. Special series, “Junior”, small shapes, filter only.
151. Same
152. Same
153. Same
154. Same
155. Same
156. Rhodesian by Jess Chonowitsch.
157. Freehand, slightly bent, full mouthpiece by Jess Chonowitsch.
158. Freehand, oval bowl, slightly bent, saddle mouthpiece by Jess Chonowitsch.
159. Large Billiard, conical bowl by Jess Chonowitsch.
160. Large bent, conical bowl by Jess Chonowitsch.
161. Large bent Bulldog, saddle mouthpiece by Jess Chonowitsch.
162. Calabash, with brass ring by Jess Chonowitsch.
163. Freehand, “Facet”, hexagonal, with brass ring by Jess Chonowitsch.
164. Freehand, “Trio”, with brass ring by Tom Eltang.
165. Large bent, full mouthpiece.
166. Large bent, “sitter”, saddle mouthpiece by Jess Chonowitsch.
167. Freehand, “Omega”, with brass ring by Jess Chonowitsch.
168. Freehand, “Golf”, with brass ring by Jess Chonowitsch.
169. Large Billiard, conical bowl, full mouthpiece by Bang – 1986.
170. Large “Rhodesian”, with brass ring, saddle mouthpiece by Bang.
171. Freehand “Hexagon”, large bent, with brass ring by Bang.
172. Freehand “Viking”, with brass ring by Jess Chonowitsch.
173. “Rhodesian”, with brass ring, full mouthpiece by Bang.
174. Liverpool.
175. Medium “Chimney”, full mouthpiece.
176. Small ball-shaped bowl, oval stem, short full mouthpiece.
177. Billiard, oval stem, short saddle mouthpiece by Tom Eltang.
178. Billiard, conical bowl, oval stem with panels, full mouthpiece by Bang.
179. Same as shape 178 but slightly bent.
180. Freehand, conical bowl, oval stem, short saddle mouthpiece by Tom Eltang.
181. Same as shape 180 but with Plateau top by Tom Eltang.
182. Same as shape 179 but larger and with filter only by Bang.
183. Large bent, oval stem with panels, saddle mouthpiece.
184. Large conical bowl, oval stem with panels, slightly bent, saddle mouthpiece.
185. Large bent, full mouthpiece.
186. Freehand, large bent, egg-shaped bowl, saddle mouthpiece.
187. Freehand, conical bowl, square stem, saddle mouthpiece.
188. Large bent Bulldog, saddle mouthpiece by Bang.
189. Freehand, “Rhodesian bowl”, oval stem with panels, saddle mouthpiece by Bang.
190. Billiard with hexagon stem, brass ring, full mouthpiece by Tom Eltang – 1992.
191. Small Rhodesian by Tom Eltang.
192. Large Pot with short saddle mouthpiece.
193. Apple, slightly bent, short saddle mouthpiece.
194. Freehand, “Facet” with panels, brass ring, full mouthpiece.
195. Large but short Billiard, full mouthpiece.
196. Large but short Apple, full mouthpiece.
197.
198. Freehand “Boa” with brass ring
199. Featherweight, Billiard with hexagon stem and brass ring by Tom Eltang.
200. Featherweight, Freehand, small shape 86.
201. Featherweight, Canadian.
202. Featherweight, Lovat.
203. Freehand “Diamond.
204. Freehand, slightly bent, square bowl and stem, saddle mouthpiece.
205. Freehand “Lotus” with brass ring.
206. Freehand “Lilje” with brass ring.
207. Poker.
208. Sixtus, with hexagon stem and mouthpiece, brass ring, Billiard by Tom Eltang.
209. Sixtus, with hexagon stem and mouthpiece, brass ring, Apple by Tom Eltang.
210. Sixtus, with hexagon stem and mouthpiece, brass ring, Pot by Tom Eltang.
211. Sixtus, with hexagon stem and mouthpiece, brass ring, Freehand by Tom Eltang.
212. Sixtus, with hexagon stem and mouthpiece, brass ring, Freehand by Tom Eltang.
213. Sixtus, with hexagon stem and mouthpiece, brass ring, Freehand by Tom Eltang.
214. Freehand, slightly bent, square stem and mouthpiece.
215. Freehand, slightly bent, triangular stem, saddle mouthpiece by Poul Ilsted.
216. Cutty.
217. Freehand oval Horn by Jess Chonowitsch.
218.
219.
220. Liverpool.
221.
222.
223.
224.
225. Freehand with oval shank.
226. Tulip.
227. Trim bent Dublin with saddle mouthpiece by Tom Eltang.
228. Dublin by Tom Eltang.
229.
230.
231.
232. Bent Billiard, sits on flat shank by Tom Eltang.
233.
234. Billiard with oval shank by Poul Winslow.
235. Island Pipe, FANO.
236. Island Pipe, BORNHOLM.
237. Island Pipe, SJAELLAND.
238. Island Pipe, FYN.
239.
240.
241. Featherweight by Tom Eltang – 2005.
242. Featherweight by Tom Eltang – 2005.
243. Featherweight by Tom Eltang – 2005.
244. Featherweight by Tom Eltang – 2005.
245. Featherweight by Tom Eltang – 2005.
246. Slimmed-down shape 86 – 2005.
247. Spring, by Poul Winslow – 2005.
248. Summer, by Poul Winslow – 2005.
249. Fall, by Poul Winslow – 2005.
250. Winter, by Poul Winslow – 2005.
251.
252.
253.
254.
255.
256. Statement Series by Tom Eltang.
257. Statement Series by Tom Eltang.
258. Statement Series by Tom Eltang.
259. Statement Series by Tom Eltang.
260. Statement Series by Tom Eltang.
291. 1/8 bent Apple
482. Pickaxe
1240 Pot, slightly bent, saddle mouthpiece by Sixteen Ivarsson.
2606. Sitter by Sixten Ivarsson.
POY 1985 by Jess Chonowitsch.
POY 1986 Straight Apple by Tom Eltang.
POY 1987 by Tom Eltang.
POY 1988 by Tom Eltang.
POY 1989 by Bang. (info from J.G.)
POY 1990 by Tom Eltang.
POY 1991 by Jess Chonowitsch.
POY 1992 by Tom Eltang.
POY 1993 by Sixten Ivarsson.
POY 1995 Modified Dublin/Horn by Tom Eltang.
POY 1996 Billiard w/ Saddle Stem by Tom Eltang.
POY 1997 by Tom Eltang.
POY 1998 by Tom Eltang.
POY 1999 by Tom Eltang.
POY 2000 by Tom Eltang.
POY 2001 by Tom Eltang.
POY 2002 Pot/Billiard by Tom Eltang.
POY 2003 Billiard w/oval shank by Tom Eltang.
POY 2004 Bent Apple w/oval shank by Tom Eltang.
POY 2005 Straight Apple/Brandy by Tom Eltang.
POY 2006 Bent elongated Peewit by Tom Eltang.

© Basil D. Stevens

Tobacciana – Gifted a PIPE Lighter


I was gifted a pipe lighter – no I mean really a Pipe lighter. A friend gave me this Pipe shaped lighter because he knows that I appreciate the quirky pipe ephemera that are a part of our hobby. I collect the oddities along with the pipes, so this fit right into my collection. There is a part of me that supposes it was a hoax but it is never the less actually very unique. It is a heavy lighter as the bowl is made of metal and painted to look like wood. The stem is cast plastic and the end; the button is metal as well. The oval slot in the button is where the flame comes out. The bowl cap is a plastic button, spring loaded so that when it is depressed the butane is released and the igniter in the button sparks and the flame is sent out the button. The lighter is butane and is refillable on the bowl bottom.

IMG_1728

IMG_1729

The lighter works quite well. The first time I used the lighter the heat of the flame melted the stem in front of the button and there is a “bite through” now. I may have to do a repair with the superglue and build it up so that the hole no longer is present. On the other hand it looks kind of well used the way it is. In the slot there is an igniter that sparks when the cap is depressed. The lead of the igniter is slanted toward the tube that carries the butane and when the spark hits the butane the flame leaps out as can be seen in the last photo below.

IMG_1730

IMG_1731

That is it for the quirky PIPE lighter – truly an interesting addition to my collection of tobacciana ephemera. I usually have it on the desk or in the pipe cabinet. It is quite heavy and makes a great decorative piece. Anybody else have one of these?

Courtesy of Choice – an Unheard of Option Today


My wife and I flew into Budapest and caught a ride to our hotel – the Hotel Budapest. It was a great cylindrical building on the Buda side of the Danube. We checked into our room and after unpacking set out to explore the hotel a bit. We needed some dinner and were interested in checking out the pub at the back of the hotel.

We looked through the gift shop, enjoyed the amazing embroidery and jewelry that were on display. Picked up a few postcards for the kids and then made our way back to the pub. Being from Canada we had no expectations about firing up my pipe but I had it in my coat pocket anyway. We went into the pub that first night and were quite astonished at what we saw and smelled! There were folks smoking pipes and cigars in half the room and the other half was non-smokers. The laughter and conversation was lively and loud. The two groups seemed to be quite oblivious to each other and were enjoying their evening.

The bar was in the middle of the room. So we picked our drinks and made our way to the smoking area – literally over half of the room. We put our drinks on the table and our coats on the chair backs and sat down. Sitting in the middle of the table there was a great card – I liberated one as I expect it will be a thing of the past – if it isn’t already! I read over the words below and enjoyed the sensibility of them. They were printed in Hungarian and English. Certainly very Canadian sounding to me – but certainly very foreign to the Canada I knew.

Choice2

Choice1

Here is what the card said on the inside in English:

Courtesy of Choice
The concept and symbol of Courtesy of Choice
reflect the centuries-old philosophy that
acknowledges differences while allowing
them to exist together in harmony.

Courtesy of Choice accommodates the
preferences of individuals by offering both
smoking and non-smoking areas in the
spirit of conviviality and mutual respect.

International Hotel & Restaurant Association

I packed my pipe and lit it while I settled back with my wife for a quiet evening before we headed up to our room for the night. Needless to say we spent nearly every evening in the pub during our 17 day stay in Budapest. The spirit of conviviality was alive and well in the pub with a courtesy of choice.

Another Rustication Tool


Blog by Steve Laug

Last week I was chatting with Dan Chlebove of Gabrieli Pipes about how he accomplishes the rustication pattern he uses on the rusticated pipe that he makes. I have liked Dan’s rustication style since I first started following his work. One of the Gabrieli pipes that I have in my collection displays his rustication. It has a tactile, pebbly feel to it and is comfortable in the hand.

OLYMPUS DIGITAL CAMERA

We talked about it for a while as he described the tool he uses. He sent me some photos of the tool. He says that the tool was a gift from Alberto Bonfignoli, maybe 12 yrs ago. Dan had met him in Richmond and talked with him, As Alberto looked at Dan’s early work and he asked if he had a tool to rusticate. When Dan told him no Alberto insisted on having Dan’s mailing address and promised he would send him one. Dan says, “VERY kind of him to a new
pipemaker I thought. It looks very Medieval eh?”

The tool is made up of small nails held in place by a perforated piece of aluminum and held in place with a hex screw.
OLYMPUS DIGITAL CAMERA

OLYMPUS DIGITAL CAMERA

OLYMPUS DIGITAL CAMERA

OLYMPUS DIGITAL CAMERA

OLYMPUS DIGITAL CAMERA

Thanks Dan for the photos. Now I have to figure out how to craft one for myself. That looks far more kind to the palm as it is twisted into the briar than the tools that I use.

Charatan’s Make 109 Rhodesian Restoration


Blog by Al Jones

I have been a fan of the Charatan Shape 109, but rarely see them become available. This one was recently posted on Ebay. It is a Lane era pipe, with the L stamp, but it has a tapered stem versus the more common Double Comfort. I think the Double Comfort stem on Chartan Bulldog or Rhodesian stems look a little ungainly, so this one was very appealing. The pipes small size was a definite appeal. It is similar to a Group 4 Dunhill or XX Ashton. The pipe weighs approximately 45 grams, which is my right in my sweet spot.

The Ebay pictures for the pipe weren’t very detailed and there were some pretty deep teeth marks on the bottom of the stem. The pips is stamped:
Charatan’s Make
London England
109 and the L stamp

I’ve learned that Charatan pipes stamped in this manner were known as having the “Rough” grade. From a somewhat controversial web article by Ivy Ryan, I’ve learned that:
“Sandblasted pipes stamped Charatan’s Make over London England and a number are one version of the famous “Rough” grade. These were apprentice pipes that didn’t come out well
enough to be graded but were still eminently smokable. To save the wood and give the
less-well-off a quality smoke, Charatan would first hand rusticate the pipe gently, then sandblast
it. (Due to Dunhill’s patent, they couldn’t simply blast the pipe, and the rustication made for a very
different blast.)”

The “L” in circle stamp denotes a pipe imported into USA by Lane Ltd between 1955 and 1988. If anyone has information to narrow down that range, please chime in.

Here is the pipe as it was delivered. The nomenclature on the stem was in decent shape but it had some heavy tooth waves on top and heavy indention’s underneath.

Charatan_109_Before

Charatan_109_Before (1)

Charatan_109_Before (2)

Charatan_109_Before (3)

Once again, I employed the Stew-Mac black superglue to repair the teeth marks on the bottom of stem. The first photo shows the application of the superglue and the second shows it sanded smooth with 800 grit sandpaper.

Charatan_109_Stem

Charatan_109_Stem (1)

I reamed the bowl and soaked it with alcohol and sea salt. There was some tar build up on the bowl top, but that was removed with a very mild oxy-clean solution and a cloth.

I removed the oxidation on the stem with 800 grit wet sandpaper, then progressed thru the 1500 and 2000 grade paper. Most of the waves came off the top of the stem and the marks underneath blended in nicely with the superglue. The button was in good shape. I stayed away from the CP stem logo. The stem was then buffed lightly with white diamond rouge.

I finished the bowl with some Halycon wax, worked into the bowl with an old toothbrush polished by hand

Here is the finished pipe.

Charatan_109_Gallery
Charatan_109_Finished (5)
Charatan_109_Finished (8)
Charatan_109_Finished (3)

Charatan_109_Finished (1)

Another Loose Stem Fix


Blog by Greg Wolford

As I undertook this project I had no idea that Steve was writing and posting an article on tightening a loose stem. But when I saw it I figured that since this was a little different fix, and the pipe was already blogged about here, I would go ahead with the article.

If you have read the story of Big-Ben then you know I had to restem it. It was the first time I’d done this and the first use of my new tenon turning tool, too. So, in my haste and excitement I made a goof, one that Ric Farrah was kind enough to comment on: I had not cleaned the shank out real well before fitting the stem, leading to a loose new stem.

I tried beeswax and “smoking it in” but neither of these worked on this particular problem; as Steve noted often an application of beeswax and use will tighten up an estate pipe stem. But I suppose since this was just a goof on my part and the stem had not been for properly these solutions weren’t going to work.

I was aware of the tools sold for stretching a tenon, the pluses and minuses that Steve mentioned. But I wasn’t really inclined to buy one at this point, especially since I had another idea on what might work: a drill bit! So, since the two easy fixes failed I went down to the shop to try out this new-to-me idea.

I removed the stem from the pipe and checked the size of the air-hole against my set of drill bits. I thought I had drilled it out to 5/32 so this is where I started. However, I soon realized that I had drilled it at 9/64 so I took both of these sizes and the stem to the heat gun set up.

I almost always use leather gloves when I use my heat gun; things can get real hot, real quick. And since I was using steel drill bits I definitely wanted the hand protection. So, I donned the gloves and turned the heat gun on low to start stretching!

Now, the first thing I need to say here is when doing this you are inserting the blunt end of the bit that normally gets chucked into the tenon. The sharp end is the turning end, in your hand for this procedure. This part is very important.

I began to heat the tenon slowly, checking every several seconds on the progress; I only wanted it warmed enough to be slightly softened, not so soft that it could easily be deformed or badly bent. Keeping the tenon moving, I would take the smaller bit and try to insert it in the air hole until it went in. At this point I worked very gently to get the bit inside the tenon the entire length of the tenon, removing the bit/tenon from the heat. I kept the bit turning slightly while it was inside the hole so it wouldn’t stick. After about a minute I gently removed the bit and allowed the tenon to cool a few minutes before checking the fit, which ended up being too loose still. So, I picked up the larger bit and began the whole process over, this time resulting in a perfect fit: good and snug with no “play” or slipping but not too tight either. Finally, the new stem was fit properly!

I left of overnight and loaded it up the next morning, checking the for again; it was still perfect, like it had been made for it (a little humor there)! The pipe smoked good before the adjustment but it now smokes very well with a good fit on the stem, part of which I’m sure is in my head, not fussing or worrying about the bowl falling off.

I found this fix very simple and expect to use it again in the future: it was done with tools/items I had on hand and only required a bit of patience and slow going to do right. Of course if I’d applied that idea to turning the tenon to start with I wouldn’t have had to refit the the stem. But then I’d not have had the opportunity to try out this fix if I had done it right to start with either: I suppose that is the silver lining in this cloud of errors!

20130822-211846.jpg

Tightening a Loose Stem


Blog by Steve Laug

Over the years I have read quite a few posts on various forums about tightening loose stems on pipes. I have read everything from “smoke ‘em ‘til they are tight again” to heat and pressure to expand them. Others have said to use beeswax to coat the tenon on the stem and as it smokes it will tighten. Yet others have suggested coating the tenon with various things such as clear nail polish or clear super glue. Over the years I have experimented with all of the various methods suggested and a few others and have written this article to talk about each of them and look at the positives and negatives of each. I will start with the least invasive methods and move to some of the repairs that can be done to expand the tenon permanently or build it up for a tight fit in the shank. The choice is ultimately yours as you address this issue in your own pipes. Personally I start with the first method – smoking them to see if they tighten and if it does not work then move on to the methods that build up the tenon. I rarely, if ever, use the tenon expander any longer. The “smoke ‘em til they are tight again” method is obvious so I begin below with Beeswax.

BEESWAX
The first method that I will address is one I commonly read on various pipe forums and publications. It is a simple one – the application of beeswax to the tenon of the pipe to tighten it up. Beeswax is readily available online or at most stores and is reasonable in cost so it is a very good first step in addressing a loose stem issue. Application is a simple process of rubbing the block/cake of wax or candle on the tenon to build up the diameter of the tenon. Once it is built up with wax the stem is reinserted into the pipe. After that load a bowl of tobacco and smoke it. The idea is that the wax will hold the stem tightly in place while you are smoking your pipe and that as you smoke the pipe, the shank and tenon will warm/heat up and things will expand and the fit will return to normal. It sounds good and it does work – some of the time!

beeswax1lbblock

The positives –
1. The beeswax is non-toxic and will not harm you or the pipe in the process.
2. It is easy to apply on the tenon and is also easy to remove.
3. It is a good short-term fix.

The negatives –
1. The method works some of the time but not all of the time. If it is the only tool in the kit there will be some significant disappointments.
2. It does not take into consideration that the problem may well be a matter of humidity in the place the pipe is stored. I have found that often a pipe shipped with the stem will arrive with a very tight stem. I have also found that one with the stem removed will be loose when it arrives. As the pipe adjusts to the humidity and is smoked the balance that was there when it was made returns.
3. The beeswax as heated during the smoking of the pipe melts and can gum up the inside of the mortise. I have cleaned out a lot of pipes that had this method applied repeatedly and had to remove much waxy build up in the shank/mortise.

HEAT AND PRESSURE ON THE TENON
Heat and pressure on the tenon was the second method that heard much ado about. On several of the online forums when I asked about tightening the tenon this is the method that was suggested immediately after the beeswax suggestion. The concept is simple. The tenon is heated on a flame or with a heat gun. When it is warm and soft the tenon is stood flat against a hard surface and pressure is applied downward to compress the tenon and thicken the tenon it for a tighter fit in the shank. The key is that the stem is held absolutely straight up and down and the pressure applied evenly so that the tenon does not tip one side or the other. If it tips it is virtually impossible to adjust back to straight. Once it is pressed down it is cooled by dipping the end in water to set the vulcanite.

The positives –
1. The method is very simple and the logic behind it is quite accurate. Heat the vulcanite tenon and it softens. Press against a hard surface and it compresses. When it is compressed it thickens and the fit is tighter.
2. There is nothing being added to the tenon to make the adjustment. No materials used that may have an unknown toxicity or danger. It is just heat.
3. It is a fix that when done can be forgotten and that will not need to be repeated.

The negatives –
1. The heating of the tenon and pressure can end up tilting bending the tenon to one side or the other. When that is done, even to a minute degree, the stem/shank union will no longer align and there will be a gap in the shank. It is almost impossible to see if the tenon has been tilted unless the tilt is drastic.
2. Too much heat can burn and weaken the vulcanite and it can become brittle and break. When that happens the stem is broken and the tenon needs to be replaced.
3. Too much pressure can cause the tenon to be too compressed and the fit is now too tight. The only repair is either to reheat and expand or to sand the tenon until it fits.

TENON EXPANDER AND HEAT
I wrote about the tenon expander almost a year ago now and posted it on the blog – https://rebornpipes.wordpress.com/2012/12/07/positives-and-negatives-of-the-pme-tenon-expander/
Below is a summary of the article that I posted:

After reading about it online, I picked up a tenon expander from the Pipe Makers Emporium several years ago. It can be ordered online at http://www.pipemakers.org/tools02.htmlThe website describes it as follows: Tenon Expander: (Three sizes-in-one: 1/25, 1/50, 1/60) “An absolute must for pipe repair! One tool that will do 99 percent of all loose tenons. Throw away that ice pick because this will do a much better job. Heat the Tenon with an alcohol lamp until it is soft. Insert the Expander to the next size. Place Tenon and Expander into cold water to set the Tenon to its new size. Remove the Expander and your Tenon will maintain its new size.” They sell for $29.00 each.

The concept of the tool is actually quite simple – heat the tenon with a heat gun/ hot water or heat the tenon expander tool with a flame or heat source. Once it is heated, push the expander into the tenon and twist it until the tenon expands. Cool the tenon under clean or cool water to set the expansion and then remove the tool. You will notice in the picture below that the tip is tapered and gets larger in diameter the farther you move up the tip toward the handle. By pushing the tool into the tenon you can expand it for a tighter fit in the shank. In my use of the tool I would heat and expand, then cool the tenon in water, remove the tool and try the stem on the pipe for a fit. If it needed more expansion I repeated the process until the fit was snug. The graduated slope on the tenon expander gives you a broad range of possibilities in accomplishing that task. After I had used it for a while I decided to evaluate the tool in terms of its positives and negatives. What about the tool did I like and what were its deficiencies?

ten_expan

The positives –
In thinking through the positives the obvious ones were those advertised on the PME website.
1. The ease of use is the first thing that stood out with the tenon expander. It is very simple to use even though it came with no instructions. It was not hard to figure out how to use it correctly.
2. The tapered end is also billed as a positive feature of at first glance as it works to open the tenon to varying degrees and you can repeat the fit until the stem is snug. I will explain in the negatives why I have come to believe that the tapered end is not as great a feature as it initially appears to be when you begin.
3. The grooves on the handle of the tool are cut to make it easy to hold on to as you work with it.

The negatives –
Over time and experience working with the tool I have found some of the features that I first thought were helpful have grown to irritate me and work as limitations of the tool.
1. The first thing I have learned is that the taper on the end of the expander, while being helpful, is also a negative feature. The expander does not expand the entire tenon but rather the end of the tenon. With use the tenon thus is no longer cylindrical but can flare at the end. The snug fit is thus only for the first 1/8 inch of the tenon. The rest of the tenon is not touching the walls of the mortise.
2. Heating the tenon to insert the expander makes the tenon very pliable and if you are not careful the tenon can be bent at an angle thus ruining the fit at the shank. I have found that if I heat the expander instead then the tenon does not soften as much and I avoid the potential of tilting the tenon.
3. A final negative for me is the handle of the expander. I use a pair of heat mitts to hold it as I heat it but if I were going to continue to use it regularly I would make a wooden handle and epoxy the expander into it. In my opinion it would make it more usable.

As I pushed the limitations of the tenon expander that I purchased I decided to look and see if I could find other tools that would address the negatives that I have spelled out above.

ICE PICK OR AWL AND HEAT
In that article I wrote “I have been experimenting with various sizes of ice picks and awls to use for tenon expansion as they have a longer shank and less taper. This allows me to expand the tenon the entire length of the tenon rather than just the tip. So far they have worked very well. I can easily heat the shaft of the awl or ice pick while holding the wooden handle. They slide into the tenon and are easily twisted slowly to expand the tenon. The final verdict is still out on them as I continue to look for picks and awls with a variety of diameter shafts.”

A year has gone by since then and I have used an awl with some success. I looked for one that had a sharp point and a quick taper. I wanted to improve upon the taper of the tenon expanding tool pictured above. To my mind an awl that kept the same diameter its entire length was what I was looking for. I found an old-timer in an antique shop and added it to my collection of tools that I use for refurbishing. It is picture below and you can see the long straight length of the blade on it. It works quite well. Again the method is a matter of heating the awl blade not the tenon. With the blade heated it is inserted into the tenon and twisted until the tenon opens. It is quickly cooled to set the enlarged tenon by cool water. Then the awl is removed.

Awl

The positives –
1. The handle on the awl makes the tool very easy to use when it is hot. It can be manipulated easily over the heat and in the tenon.
2. The straight blade makes it easier to open the tenon the entire length and not just on the end – it thus keeps the tenon equal diameter the entire length.
3. The blade diameter is perfect for most tenons, but there are various sizes of awls available that can be purchased.

The negatives –
The minuses with the awl/ice pick are less than those with the tenon expanding tool but in many regards there are similarities.
1. The awl needs to be turned into the stem and if left can become stuck in the airway. Care must be exercised to keep the tool moving and not let it stand in the shank too long.
2. Again heating the tenon and inserting the awl can cause the tenon to move and again ruin the fit against the shank. I have found that heating the blade works far better and minimizes this problem.

NAIL POLISH
Clear nail polish works very well on the outside of the tenon to add diameter. It comes with a brush applicator and can be painted on. It must thoroughly dry before putting the stem back in place or the nail polish makes a mess of the inside of the tenon. However once it is dry it is a solid repair. If too much polish has been applied it can be sanded with sandpaper to a correct fit very easily. I used this method on pipes that the beeswax did not provide a permanent fix. I have had it on pipes for years now and there is no foul after taste from the tenon, once dry. I also am very careful in applying it to avoid the end of the tenon or airway on the tenon. I just coat the outer diameter of the tenon. Because it sits against the inside of the mortise with a pressure fit I do not find any of the polish taste leaching into the smoke itself.

clear_nail_polish

The positives –
1. The clear nail polish is virtually invisible on the tenon and can be applied and adjusted as necessary with very little effort.
2. It is a more permanent fix than the beeswax on the tenon and it is also easy to remove should you choose to do so. If the tenon becomes too snug you can sand a little of the polish off and the fit is restored to a proper fit.
3. It is a fix that when done can be forgotten and will not need to be repeated.

The negatives –
1. The polish is toxic and should not be breathed or put in the mouth. Because of this extreme care should be exercised when applying it to be in a well-ventilated room and to also let it dry before reassembling the pipe. Once it is place and dry there is no smell or taste. I am careful to avoid the end of the tenon and airway in the application.
2. The stem can become too tight if the humidity varies greatly in the house or office where the pipe is used. If it becomes too tight it is not hard to loosen the fit with a small piece of sandpaper.

SUPER GLUE
Super glue or Cyanoacrylate glue can be used to build up the tenon in much the same way as clear nail polish. It dries harder than nail polish and is more permanent. Cyanoacrylate glue is used by medics on battle fields and trainers in sports to bind together wounds on the human body so it seems to me that the toxicity is a non issue. It dries very hard and is impermeable so I have found that it does not leach or bleed flavours into the smoke. I drip it on the tenon and turn the tenon as it drips. The glue encircles the tenon and dries very quickly. Once hardened it can be sanded or built up as case may be to provide a snug fit on the tenon. I have been using it on tenons for about a year and have found no ill effects from its use. Once dry it is odourless and tasteless. I find that it does not deteriorate over the year and pipes that I smoke often that I have used it on are like the day I put the glue on the tenon. The lack of breaking down speaks well of the glue.

ct2-16_superglue

The positives –
1. The glue is easy to apply to the tenon and flows easily around the diameter of the tenon. It is a clean fix to the stem.
2. It dries very quickly so that it can be adjusted with multiple layers or by sanding to make the fit snug. If during use the tenon becomes too snug, it is easily sanded down to accommodate change in fit.
3. It appears to be a good long term fix. I have been using it on some of my loose stems throughout the past year and a bit with no break down to the product and no need to reapply or adjust.
4. It is easily adjusted with sandpaper and then polishes to a clean shine.

The negatives –
1. Some will find the toxicity of the glue an apparent problem. I say apparent as it is used to repair cuts and surgeries of the human body so I think that is a non-issue
2. The long term effects of use on the human body have not been studied. This becomes less significant when you realize that the repairs tenon is not something that is touched by the mouth or tongue.
3. The glue dries very quickly and it is easy to overdue the repair. It dries very hard so it takes some work to remove the excess.
4. The glue can bond skin together so care must be exercised when applying it to the tenon to not get it on the hands. It is hard to remove from the skin. It is water proof and also is not removed by alcohol or acetone.

That is the list of the various methods that I have read of and tried in the work of tightening a loose stem. I always start with the least invasive method and work towards the last methods listed. I rarely use the tenon expander or the awl any longer due to the negatives of using both of them. I invite any of you who have used these methods or have other creative suggestions for tightening a stem to reply. Just post your replies in the comment box below. Thank you.

My Buffing Motor & Work Station Setup – Updated May 2025


Blog by Al Jones

Al_Pipes_@SMALL

See the June 2017 Updates at the bottom of this page
I get a lot of requests about my buffing station, so I thought an entry here on the blog would be handy to use as a point of reference. I do my pipe work in my garage which is well-lit. I have a small Coleman propane heater to warm up the space during the winter months.

For a buffing motor, I use an old Century brand motor that I found in my parent’s basement. I believe it was used on their old furnace motor or a back-up. It is a 1725 rpm, 1/4 hp motor. I wired an old appliance cord for power. It does not have a capacitor start, which would be nice. It does have two oil ports, which apparently aren’t used on modern motors.

IMG_20130819_214553_507

IMG_20130819_214532_867

I bought a 1/2″ arbor extension from Jestco Products. This bolts to the motor shaft and allowed for a buffing pad to be mounted. I also use Jestco for my buffing pads. I use 6″ wide pads. They make left or right thread arbors. A dual shaft motor would be a nice upgrade, in order to keep two pads mounted. A nut holds the pad in the arbor, I replaced it with a wing-nut to allow for easy hand changes. The pad only needs to be held snugly in place. I ground the wing-nut down a bit to make sure it wouldn’t inadvertently hit the pipe or stem.

Jestco is also a good source for bars of rouge. I get carnuba bars from my local Woodcraft store. The bars pictured below have been in use for three years and would seemingly last many more years.

I mount the buffer in my bench mounted vise. When not needed, I can easily pull it off and store it under my bench. Below is the link for Jestco Products.
http://www.jestcoproducts.com/index.php?act=viewProd&productId=40

IMG_20130819_214801_262

Buffing_Station

Jestco_Arbor_Extension

I keep my bars of rouge and pads in plastic holders above the bench. There are pads for Carnuba wax (loose cotton), Tripoli, White Diamond and Plastic Polish (sewn cotton buffs)

IMG_20130819_214710_043

IMG_20130819_214648_885

I have a small, plastic, three drawer cabinet under my work bench for my reamers, needle files, etc. I also keep my supply of micromesh paper there along with my retort.

IMG_20130819_214826_767

Other supplies are kept in a cabinet above the work bench, alcohol, stain, etc.

IMG_20130819_214840_516

Below is the entire work area. I share the work space for my car and motorcycle mechanical work but my pipe supplies don’t take up much space. Everything is easily stored off the work bench, when it is needed for big mechanical jobs.

IMG_20130819_214914_894

Updated – June 2017

I’ve made a number of changes to my pipe restoration station since writing this blog entry on 2013.  I’ve been doing enough pipe work that my shared car, pipe and general work bench was getting cramped.  I sold my motorcycles, but kept the MGB.  That freed up a generous area of the shop that I could dedicate to my pipe work station and a winter smoking area.

in 2016, During a restaurant remodel,  I happened across a small, stainless steel  work table  that was going to be discarded.  It had a 39″ height, which was perfect for pipe work (no need to stoop too low).   I found a pair of inexpensive drawers from a hardware company, which was perfect for small tool  storage, files, sandpaper, etc.   The table is positioned under the only window in the garage, which is nice for some additional light.

20170617_120046

I bolted my single arbor, 1725 rpm-1/4 hp motor to the work bench and installed some pockets to hold the pads and rouge/wax sticks.  A cabinet mounted above allowed for plenty of storage for the other items.  I added a two-bulb fluorescent light above the bench.

This setup served me well but I always wished for a dual-arbor motor to reduce the pad changes (my three most commonly used pads: Carnuba wax, White Diamond, Plastic Polish).  In June 2017, on Facebook of all places, I found a local man selling out an old workshop.  He had what appeared to be an old motor for sale.  I inquired about the specs, which turned out to be perfect:  1725 rpm and 1/2 horse-power.  The motor was an old Craftsman, and had two oil ports.  Modern  motors have eliminated the oil ports for supposedly “lifetime bearings”.  I prefer the oil port motors.  Here is the motor as received, with short arbors and an exterior mount power switch.

20170613_123452

Like my other motor, this one did not have a capacitor start, and a cheap, plastic switch mounted on the exterior.  I sourced a heavy-duty, double-insulated metal switch from Lowes, which is also on the other motor.

20170617_115830

Once again, I sourced extended  arbor mounts from Jestco Supply.  They are the only ones to make 6″ extensions that I have found.   This motor had 1/2″ and 5/8″ arbors, which Jestco sold in right and left hand options.  The webpage for Jestco is below, I highly recommend this vendor for all of your buffing supplies, service and quality is first rate.

Jestco Supply – Buffing Accessories

20170617_115825

My next decision was how to mount the motor.  I like having the pad off the table surface to give me plenty of working room.  The motor spins clock-wise, away from the operator and I usually have the pipe or stem around the 7 o’clock position.  With two arbors,  I decided  to remove the rubber feet,  install four bolts and then drill four matching holes in the table.  The buffer simply sets down in the four holes and I can rotate the buffer 180 degrees to  use the other pad.

20170617_115841

Drilling stainless isn’t easy.  I used a small, good bit for the pilot hole, with some WD40 on the bit and table surface to keep the bit from burning up.  You need to drill at a relatively slow speed.  I used a “step bit” to enlarge the holes, which was done quite fast (also with lubrication).

Below is my cabinet with extra supplies.

20170617_115922

Below is the finished station.  I mounted a paper-towel holder under the shelf.  I use a lot of paper towels during the stem standing process, to keep the water from damaging the stain of the briar.  I may upgrade the light to a four-tube fixture for the winter, when the garage is closed up and a bit darker.

20170617_115909

Update – May 2025

We moved from Maryland to Louisiana in August of 2024.  I brought my shop table down and basically set it up the same way down here.   I purchased some used cabinets and was lucky to find a garage that had a similar work area and a laundry tub sink.

I started fly-fishing down here (after a 25 year hiatus).  So the work table does dual duty for pipes and fly-tying.  I added a nice bright LED lamp.

The white box in the bottom right of the cabinet is my photo light-box.

A New Look for a Duncan Hill Aerosphere


Blog by Steve Laug

Over the years I have owned and sold several Duncan Hill Aerosphere pipes. The system on the pipes and the thinness of the bit always made the airway too tight for me and the draught sluggish at best. I have repaired several of them over the years as well and never found one that really worked well for me. Then in one of the lots I picked up on Ebay that needed new stems there was a Duncan Hill Aerosphere bowl without a stem. It had a wide open airway and was in decent shape. The bowl had a light cake and the rim was tarred but not damage. The bowl was still round and obviously the pipe had not been smoked very much. I figured it was an opportunity to restem it with a standard stem and see what I could get from it.

I tried two different stems on the pipe. The first was a flat blade saddle stem blank. I turned the tenon with a PIMO tenon turning tool and fit it to the pipe. I decided to put a nickel band on the shank for cosmetic purposes as I thought it would look good with the saddle stem. There were two problems with this fitting. The rustication pattern on the Duncan Hill made a smooth fit of the band virtually impossible and the gap around the shank did not work for me. The second issue was that the stem itself was just a few millimeters’ smaller in diameter than the shank. It was not noticeable except with the band it was accentuated. I removed the band and tried the stem without the band and it did not work well. I abandoned that option and went back to my can of stems to see what else I could find that might work in terms of both diameter and length.

IMG_0730

IMG_0731

IMG_0732

For the second stem I found an older “pre-used” stem that worked in terms of length and diameter. I cleaned up the tenon and shortened it slightly and the fit was quite good. I left the band in place and tried to rusticate the band to match the bowl rustication. I heated it and used a scribing tool to carve it up to get the bowl finish look. I stopped that rustication process and worked on the stem fit. For some reason the stem taper on top and bottom did not match. With the fitting on the Duncan Hill bowl the angles at the top did not match the bottom. Reversing the stem made the stem fit even worse. The diameter needed slight adjustments to repair the taper and fit it well against the band.

IMG_1690

IMG_1691

IMG_1692

I used a Dremel to take off material on the stem to adjust the taper to match on both the top and the bottom. I also used the Dremel to clean up the fit at the shank/band. I tried to mark the band with the Dremel in the process as well. I used a scribing tip and still did not get much more of finish than I had with the hand scribing tip. I did not like the look so I took the stem back to the worktable and sanded it to remove the scratches left behind by the sanding drum.

IMG_1693

IMG_1694

IMG_1695

I sanded the stem with 220 grit sandpaper, a medium grit sanding sponge and a fine grit sanding block to clean up the fit and also remove the scratches. The more I looked at it the less I liked the band. The area around the stem shank union looked terrible and the scribing merely looked like scratches. It was awful looking. I decided at this point to remove the band from the shank. I heated the band and slipped it off the shank. I cleaned up the light marks left by the band on the shank with micromesh sanding pads.

IMG_1696

IMG_1697

IMG_1698

With the band off the pipe the tenon was too long for the stem to seat properly. This was not visible to me with the band in place. It felt tight but without the band there was a gap at the junction. I measured the tenon and found that I needed to remove some of the length on the tenon and also needed to countersink the mortise slightly. The countersink on the mortise is a slight bevel inward. I used a knife to bevel the inner edge of the mortise. Once the mortise was prepared and the tenon shortened to measure the stem fit tightly against the shank. I used 220 grit sandpaper and a medium grit sanding sponge to remove a little more of the diameter of the stem to clean up the junction. The two bands on the stem appear to be briar but are actually Cumberland/brindle inserts. I sanded the top of the bowl/rim and the colour matched the twin bands on the stem.

IMG_1699

IMG_1700

I sanded the stem with micromesh sanding pads from 1500-12,000 grit to remove the scratches on the vulcanite and polish the stem. I wet sanded with 1500-2400 grit micromesh pads and dry sanded with the remaining grits. Between 3600 and 4000 grit pads I polished the stem with Maguiars Scratch X2.0. It polished the stem considerably. I then finished sanding with the micromesh pads. While I sanded the stem with the micromesh I also sanded the rim to polish it. With each successive change of grit the rim and the twin bands on the stem began to truly match. The combination looked like it was factory designed to be a combination. I wiped the stem down with Obsidian Oil and set it aside for the evening. In the morning I rubbed the stem down and then waxed it with carnauba.

IMG_1701

IMG_1702

IMG_1703

I gave the bowl a several coats of Halcyon II wax and buffed it with a shoe brush to raise the shine. I buffed the stem with carnauba several time to raise the shine as well. I then buffed the pipe with a soft flannel buffing pad. The finished pipe is pictured below. The look of the Duncan Hill with the banded stem that matches the rim is a great combination. The improved draught of the pipe is exactly what I was aiming for. The Duncan Hill Aerosphere pipe re-enters life with a new level of service to the pipeman who ends up with it in their collection.

IMG_1708

IMG_1709

IMG_1710

IMG_1711

City de Luxe 9438


Blog by Al Jones

I have a number of GBD 9438’s on my rack and it is a favorite shape. I’ve always admired the City de Luxe stem logo but didn’t yet own that brand, a GBD second line. I didnt’ find much about the City de Luxe line, other than it appears to have existed since 1921. I couldn’t resist this 9438 shape I found on Ebay. Below is a copy of an old Oppenheimer ad I found on the web.

City_de_Luxe_Ad_Oppenheimer

This one has a “twin bore” stem. I’ve never owned a twin-bore pipe and always considered it to be somewhat of a gimmick. I’ll have to see how it smokes to reserve judgement.

This is the pipe as it was delivered. The briar was in good shape with only a dulled finish and some tar build up on the rim. The stem was oxidized but also in very good shape.

City_DeLuxe_9438_Ebay

City_DeLuxe_9438_Ebay2

City_DeLuxe_9438_Ebay5

I reamed the bowl and soaked in with some alcohol and sea salt. While the bowl was soaking, I also soaked the stem in a mild solution of Oxy-Clean. I put a dab of grease on the Star stem logo. I use shot glasses to hold my alcohol and add it to the bowl/salt with a dog medicine syringe. Another shot glass makes a good container for soaking the stem.

City_DeLuxe_Process (7)

City_DeLuxe_Process (1)

I easily removed the bowl top tars with a wet cloth and elbow grease. The bowl was then buffed with Tripoli, White Diamond and then several coats of Carnauba wax.

The next step was to clean the stem. One of the twin-bore draft holes was plugged with tobacco build-up, but a cleaner and alcohol freed the blockage. Curiously, there is a white plastic plug at the button. I was hoping perhaps it led to a traditional draft hole, but is only about 1/4″ deep. I’m not sure why that was drilled or inserted. I suspect the City de Luxe stems are premade. Even cleared, the draw was somewhat tight. I opened up the tenon end with several drill bits and I hope that makes the smoking draw easier.

City_DeLuxe_Process (6)

The Oxy-clean soak loosened the oxidation, so I started with 800 grit wet sandpaper. I like to use the highest grade paper possible to start as I want to remove as little stem material as possible. I progressed to 1000, 1500 and 2000 grades wet paper than moved to the 8000 and 12000 grades of micromesh. The stem was then buffed with white diamond rouge and a final buff the Blue Magic auto plastic polish. Below is a shot of the stem after the 800 grade paper and the polished bowl.

City_DeLuxe_Stem_Soak

Below are pictures of the completed restoration a relatively easy task.

City_DeLuxe_9438_Finished (1)

City_DeLuxe_9438_Finished (2)

City_DeLuxe_9438_Finished (3)

City_DeLuxe_9438_Finished (5)

City_DeLuxe_9438_Finished (7)