Blog by Steve Laug
Over the years I have read quite a few posts on various forums about tightening loose stems on pipes. I have read everything from “smoke ‘em ‘til they are tight again” to heat and pressure to expand them. Others have said to use beeswax to coat the tenon on the stem and as it smokes it will tighten. Yet others have suggested coating the tenon with various things such as clear nail polish or clear super glue. Over the years I have experimented with all of the various methods suggested and a few others and have written this article to talk about each of them and look at the positives and negatives of each. I will start with the least invasive methods and move to some of the repairs that can be done to expand the tenon permanently or build it up for a tight fit in the shank. The choice is ultimately yours as you address this issue in your own pipes. Personally I start with the first method – smoking them to see if they tighten and if it does not work then move on to the methods that build up the tenon. I rarely, if ever, use the tenon expander any longer. The “smoke ‘em til they are tight again” method is obvious so I begin below with Beeswax.
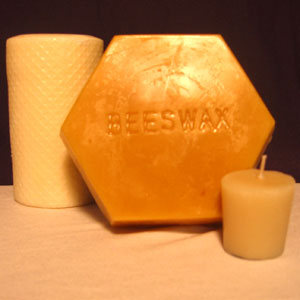
BEESWAX
The first method that I will address is one I commonly read on various pipe forums and publications. It is a simple one – the application of beeswax to the tenon of the pipe to tighten it up. Beeswax is readily available online or at most stores and is reasonable in cost so it is a very good first step in addressing a loose stem issue. Application is a simple process of rubbing the block/cake of wax or candle on the tenon to build up the diameter of the tenon. Once it is built up with wax the stem is reinserted into the pipe. After that load a bowl of tobacco and smoke it. The idea is that the wax will hold the stem tightly in place while you are smoking your pipe and that as you smoke the pipe, the shank and tenon will warm/heat up and things will expand and the fit will return to normal. It sounds good and it does work – some of the time!
The positives –
1. The beeswax is non-toxic and will not harm you or the pipe in the process.
2. It is easy to apply on the tenon and is also easy to remove.
3. It is a good short-term fix.
The negatives –
1. The method works some of the time but not all of the time. If it is the only tool in the kit there will be some significant disappointments.
2. It does not take into consideration that the problem may well be a matter of humidity in the place the pipe is stored. I have found that often a pipe shipped with the stem will arrive with a very tight stem. I have also found that one with the stem removed will be loose when it arrives. As the pipe adjusts to the humidity and is smoked the balance that was there when it was made returns.
3. The beeswax as heated during the smoking of the pipe melts and can gum up the inside of the mortise. I have cleaned out a lot of pipes that had this method applied repeatedly and had to remove much waxy build up in the shank/mortise.
HEAT AND PRESSURE ON THE TENON
Heat and pressure on the tenon was the second method that heard much ado about. On several of the online forums when I asked about tightening the tenon this is the method that was suggested immediately after the beeswax suggestion. The concept is simple. The tenon is heated on a flame or with a heat gun. When it is warm and soft the tenon is stood flat against a hard surface and pressure is applied downward to compress the tenon and thicken the tenon it for a tighter fit in the shank. The key is that the stem is held absolutely straight up and down and the pressure applied evenly so that the tenon does not tip one side or the other. If it tips it is virtually impossible to adjust back to straight. Once it is pressed down it is cooled by dipping the end in water to set the vulcanite.
The positives –
1. The method is very simple and the logic behind it is quite accurate. Heat the vulcanite tenon and it softens. Press against a hard surface and it compresses. When it is compressed it thickens and the fit is tighter.
2. There is nothing being added to the tenon to make the adjustment. No materials used that may have an unknown toxicity or danger. It is just heat.
3. It is a fix that when done can be forgotten and that will not need to be repeated.
The negatives –
1. The heating of the tenon and pressure can end up tilting bending the tenon to one side or the other. When that is done, even to a minute degree, the stem/shank union will no longer align and there will be a gap in the shank. It is almost impossible to see if the tenon has been tilted unless the tilt is drastic.
2. Too much heat can burn and weaken the vulcanite and it can become brittle and break. When that happens the stem is broken and the tenon needs to be replaced.
3. Too much pressure can cause the tenon to be too compressed and the fit is now too tight. The only repair is either to reheat and expand or to sand the tenon until it fits.
TENON EXPANDER AND HEAT
I wrote about the tenon expander almost a year ago now and posted it on the blog – https://rebornpipes.wordpress.com/2012/12/07/positives-and-negatives-of-the-pme-tenon-expander/
Below is a summary of the article that I posted:
After reading about it online, I picked up a tenon expander from the Pipe Makers Emporium several years ago. It can be ordered online at http://www.pipemakers.org/tools02.htmlThe website describes it as follows: Tenon Expander: (Three sizes-in-one: 1/25, 1/50, 1/60) “An absolute must for pipe repair! One tool that will do 99 percent of all loose tenons. Throw away that ice pick because this will do a much better job. Heat the Tenon with an alcohol lamp until it is soft. Insert the Expander to the next size. Place Tenon and Expander into cold water to set the Tenon to its new size. Remove the Expander and your Tenon will maintain its new size.” They sell for $29.00 each.
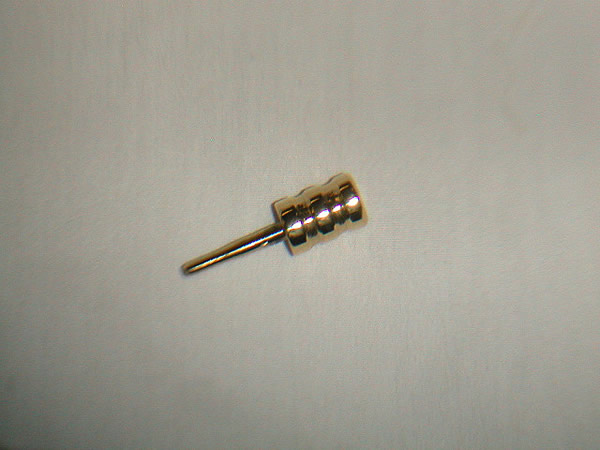
The concept of the tool is actually quite simple – heat the tenon with a heat gun/ hot water or heat the tenon expander tool with a flame or heat source. Once it is heated, push the expander into the tenon and twist it until the tenon expands. Cool the tenon under clean or cool water to set the expansion and then remove the tool. You will notice in the picture below that the tip is tapered and gets larger in diameter the farther you move up the tip toward the handle. By pushing the tool into the tenon you can expand it for a tighter fit in the shank. In my use of the tool I would heat and expand, then cool the tenon in water, remove the tool and try the stem on the pipe for a fit. If it needed more expansion I repeated the process until the fit was snug. The graduated slope on the tenon expander gives you a broad range of possibilities in accomplishing that task. After I had used it for a while I decided to evaluate the tool in terms of its positives and negatives. What about the tool did I like and what were its deficiencies?
The positives –
In thinking through the positives the obvious ones were those advertised on the PME website.
1. The ease of use is the first thing that stood out with the tenon expander. It is very simple to use even though it came with no instructions. It was not hard to figure out how to use it correctly.
2. The tapered end is also billed as a positive feature of at first glance as it works to open the tenon to varying degrees and you can repeat the fit until the stem is snug. I will explain in the negatives why I have come to believe that the tapered end is not as great a feature as it initially appears to be when you begin.
3. The grooves on the handle of the tool are cut to make it easy to hold on to as you work with it.
The negatives –
Over time and experience working with the tool I have found some of the features that I first thought were helpful have grown to irritate me and work as limitations of the tool.
1. The first thing I have learned is that the taper on the end of the expander, while being helpful, is also a negative feature. The expander does not expand the entire tenon but rather the end of the tenon. With use the tenon thus is no longer cylindrical but can flare at the end. The snug fit is thus only for the first 1/8 inch of the tenon. The rest of the tenon is not touching the walls of the mortise.
2. Heating the tenon to insert the expander makes the tenon very pliable and if you are not careful the tenon can be bent at an angle thus ruining the fit at the shank. I have found that if I heat the expander instead then the tenon does not soften as much and I avoid the potential of tilting the tenon.
3. A final negative for me is the handle of the expander. I use a pair of heat mitts to hold it as I heat it but if I were going to continue to use it regularly I would make a wooden handle and epoxy the expander into it. In my opinion it would make it more usable.
As I pushed the limitations of the tenon expander that I purchased I decided to look and see if I could find other tools that would address the negatives that I have spelled out above.
ICE PICK OR AWL AND HEAT
In that article I wrote “I have been experimenting with various sizes of ice picks and awls to use for tenon expansion as they have a longer shank and less taper. This allows me to expand the tenon the entire length of the tenon rather than just the tip. So far they have worked very well. I can easily heat the shaft of the awl or ice pick while holding the wooden handle. They slide into the tenon and are easily twisted slowly to expand the tenon. The final verdict is still out on them as I continue to look for picks and awls with a variety of diameter shafts.”
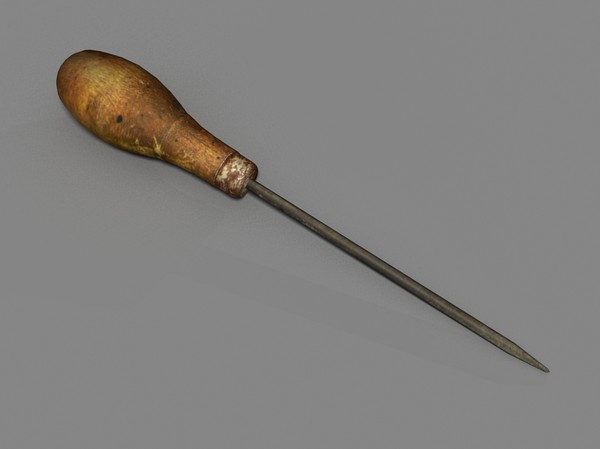
A year has gone by since then and I have used an awl with some success. I looked for one that had a sharp point and a quick taper. I wanted to improve upon the taper of the tenon expanding tool pictured above. To my mind an awl that kept the same diameter its entire length was what I was looking for. I found an old-timer in an antique shop and added it to my collection of tools that I use for refurbishing. It is picture below and you can see the long straight length of the blade on it. It works quite well. Again the method is a matter of heating the awl blade not the tenon. With the blade heated it is inserted into the tenon and twisted until the tenon opens. It is quickly cooled to set the enlarged tenon by cool water. Then the awl is removed.
The positives –
1. The handle on the awl makes the tool very easy to use when it is hot. It can be manipulated easily over the heat and in the tenon.
2. The straight blade makes it easier to open the tenon the entire length and not just on the end – it thus keeps the tenon equal diameter the entire length.
3. The blade diameter is perfect for most tenons, but there are various sizes of awls available that can be purchased.
The negatives –
The minuses with the awl/ice pick are less than those with the tenon expanding tool but in many regards there are similarities.
1. The awl needs to be turned into the stem and if left can become stuck in the airway. Care must be exercised to keep the tool moving and not let it stand in the shank too long.
2. Again heating the tenon and inserting the awl can cause the tenon to move and again ruin the fit against the shank. I have found that heating the blade works far better and minimizes this problem.
NAIL POLISH
Clear nail polish works very well on the outside of the tenon to add diameter. It comes with a brush applicator and can be painted on. It must thoroughly dry before putting the stem back in place or the nail polish makes a mess of the inside of the tenon. However once it is dry it is a solid repair. If too much polish has been applied it can be sanded with sandpaper to a correct fit very easily. I used this method on pipes that the beeswax did not provide a permanent fix. I have had it on pipes for years now and there is no foul after taste from the tenon, once dry. I also am very careful in applying it to avoid the end of the tenon or airway on the tenon. I just coat the outer diameter of the tenon. Because it sits against the inside of the mortise with a pressure fit I do not find any of the polish taste leaching into the smoke itself.

The positives –
1. The clear nail polish is virtually invisible on the tenon and can be applied and adjusted as necessary with very little effort.
2. It is a more permanent fix than the beeswax on the tenon and it is also easy to remove should you choose to do so. If the tenon becomes too snug you can sand a little of the polish off and the fit is restored to a proper fit.
3. It is a fix that when done can be forgotten and will not need to be repeated.
The negatives –
1. The polish is toxic and should not be breathed or put in the mouth. Because of this extreme care should be exercised when applying it to be in a well-ventilated room and to also let it dry before reassembling the pipe. Once it is place and dry there is no smell or taste. I am careful to avoid the end of the tenon and airway in the application.
2. The stem can become too tight if the humidity varies greatly in the house or office where the pipe is used. If it becomes too tight it is not hard to loosen the fit with a small piece of sandpaper.
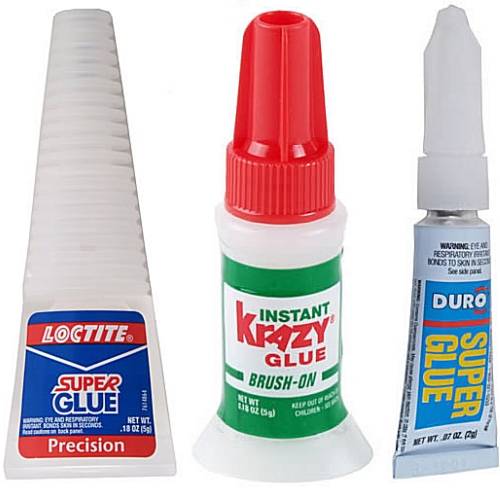
SUPER GLUE
Super glue or Cyanoacrylate glue can be used to build up the tenon in much the same way as clear nail polish. It dries harder than nail polish and is more permanent. Cyanoacrylate glue is used by medics on battle fields and trainers in sports to bind together wounds on the human body so it seems to me that the toxicity is a non issue. It dries very hard and is impermeable so I have found that it does not leach or bleed flavours into the smoke. I drip it on the tenon and turn the tenon as it drips. The glue encircles the tenon and dries very quickly. Once hardened it can be sanded or built up as case may be to provide a snug fit on the tenon. I have been using it on tenons for about a year and have found no ill effects from its use. Once dry it is odourless and tasteless. I find that it does not deteriorate over the year and pipes that I smoke often that I have used it on are like the day I put the glue on the tenon. The lack of breaking down speaks well of the glue.
The positives –
1. The glue is easy to apply to the tenon and flows easily around the diameter of the tenon. It is a clean fix to the stem.
2. It dries very quickly so that it can be adjusted with multiple layers or by sanding to make the fit snug. If during use the tenon becomes too snug, it is easily sanded down to accommodate change in fit.
3. It appears to be a good long term fix. I have been using it on some of my loose stems throughout the past year and a bit with no break down to the product and no need to reapply or adjust.
4. It is easily adjusted with sandpaper and then polishes to a clean shine.
The negatives –
1. Some will find the toxicity of the glue an apparent problem. I say apparent as it is used to repair cuts and surgeries of the human body so I think that is a non-issue
2. The long term effects of use on the human body have not been studied. This becomes less significant when you realize that the repairs tenon is not something that is touched by the mouth or tongue.
3. The glue dries very quickly and it is easy to overdue the repair. It dries very hard so it takes some work to remove the excess.
4. The glue can bond skin together so care must be exercised when applying it to the tenon to not get it on the hands. It is hard to remove from the skin. It is water proof and also is not removed by alcohol or acetone.
That is the list of the various methods that I have read of and tried in the work of tightening a loose stem. I always start with the least invasive method and work towards the last methods listed. I rarely use the tenon expander or the awl any longer due to the negatives of using both of them. I invite any of you who have used these methods or have other creative suggestions for tightening a stem to reply. Just post your replies in the comment box below. Thank you.
