The St. Patrick’s Day 2014 Pipes
Leave a reply

Blog by Greg Wolford
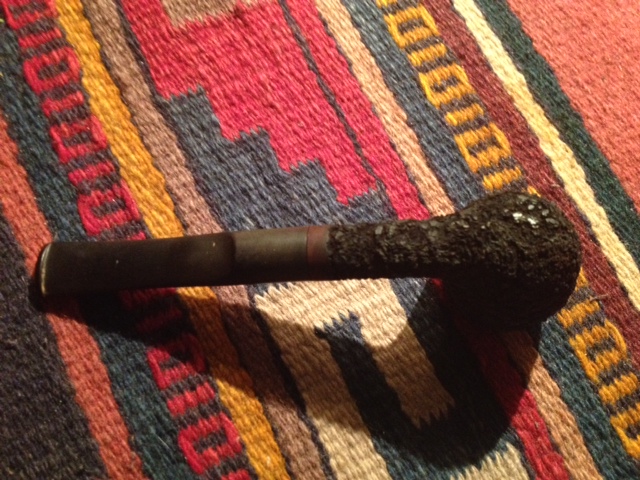
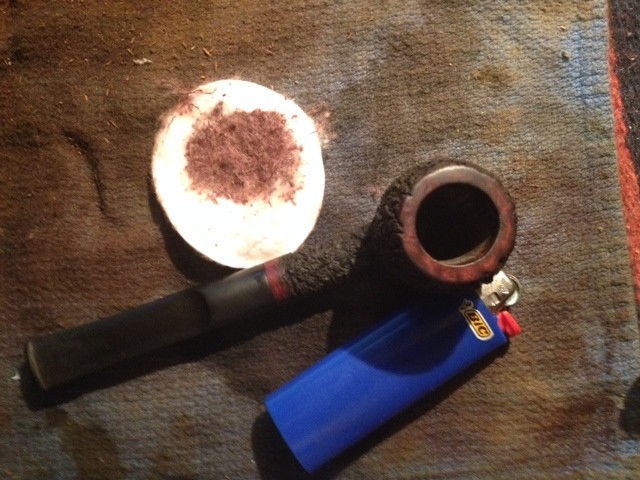
Recently I’d read a comment someplace about using wood filler to repair cracks and leaks in corn cob pipes. Being an avid fan and user of Missouri Meerschaum pipes, and needing a quick and fun project for me and my five year-old grandson to do, I decided to try it out on one of my cobs yesterday afternoon.
 Legends are one of my favorites: they are cheap, of decent size, and readily available locally. I use them for potentially “rough” times, like outside or on the pontoon, and also to test new blends and smoke the occasional aromatic. I had one that had seem better days (I didn’t get a before picture since I was sort of occupied with Connor, my grandson) that had some cracking in the plaster and some blackened “kernels” in the middle; this would be our project!
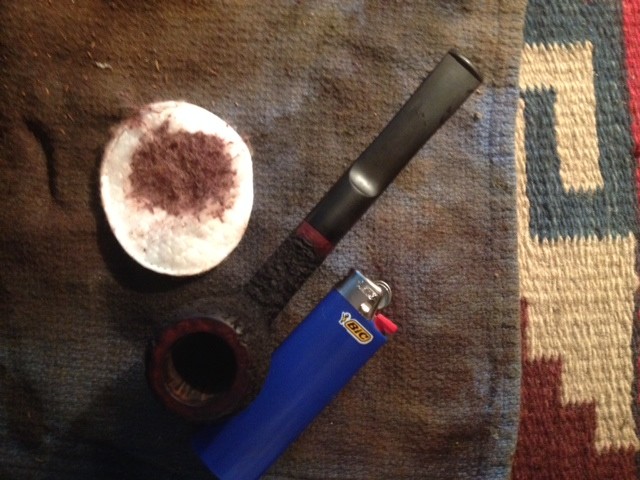
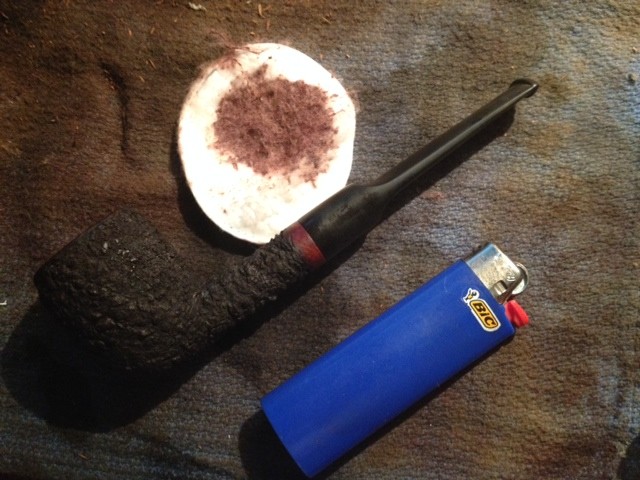
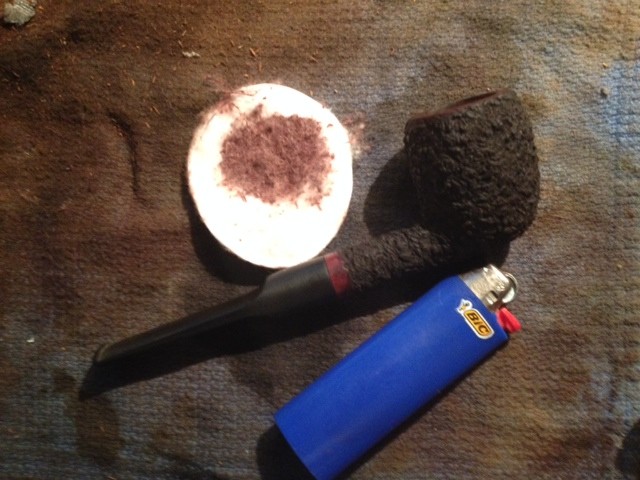
We used a minimal amount of tools for this project: wood filler, 220-grit sandpaper, and a light brown furniture repair marker.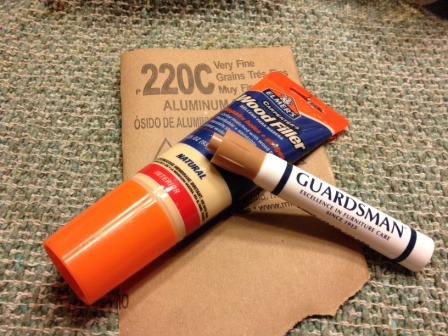 We applied a nice, thin coat of the wood filler all over the cob bowl and let it dry, about 10 minutes I’d guess. Then we took turns sanding the cob smooth with the sandpaper. I then topped the bowl a bit to remove most of the char and “gunk” that had built up. After it was nice and smooth we, again, took turns staining it with the furniture marker. It then needed a few minutes to dry.
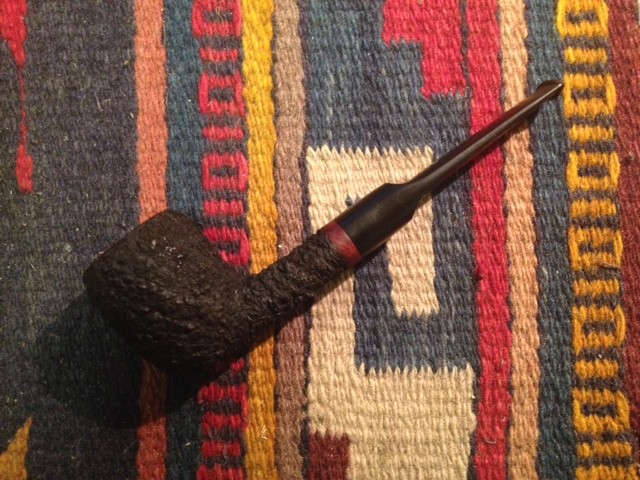
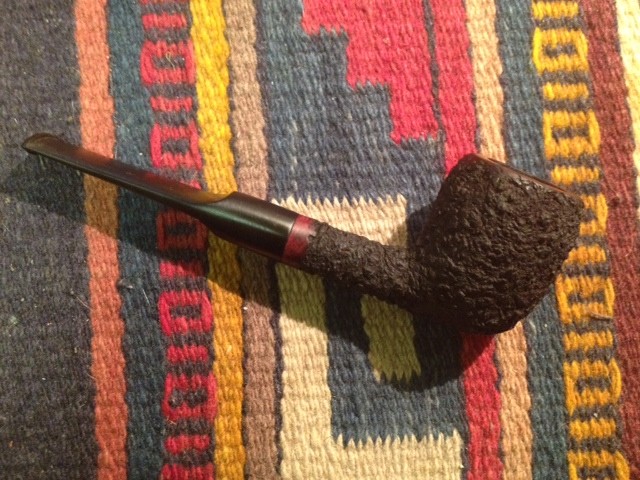
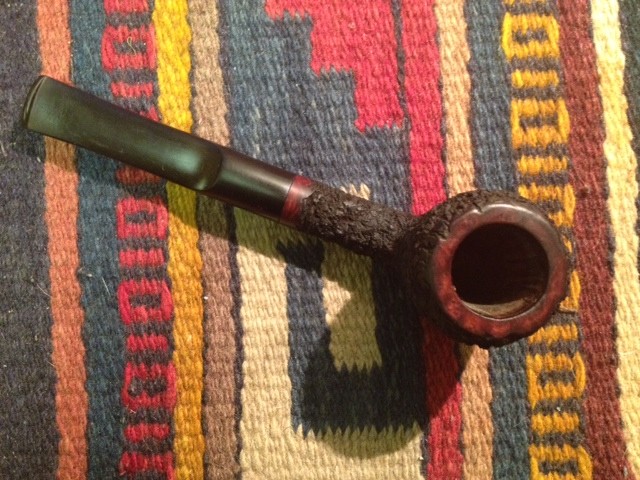
Connor had such a good time he convinced me to do a second, almost new, pipe that really didn’t need any thing done to it. But since the little guy was having such a good time and is on the mend from a broken arm and surgery to set it, how could I not do it? You are right: There was no way not to!
 The middle pipe is the one I set out to make repairs on, compared to a new in the package one and the almost new one. This project took us probably 20 minutes, maybe less, from start to finish and it was so simple, well, a five year-old can do it!
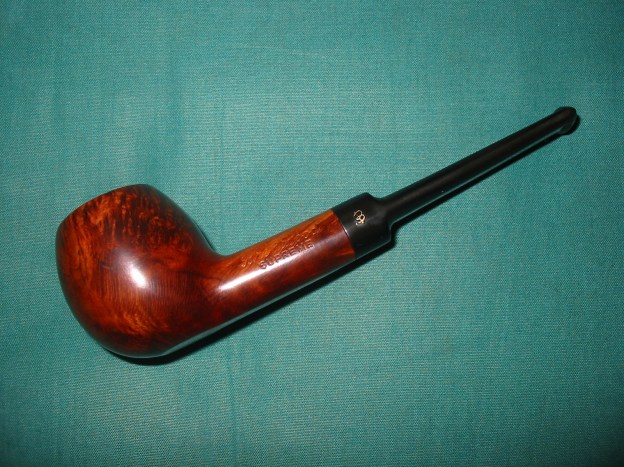
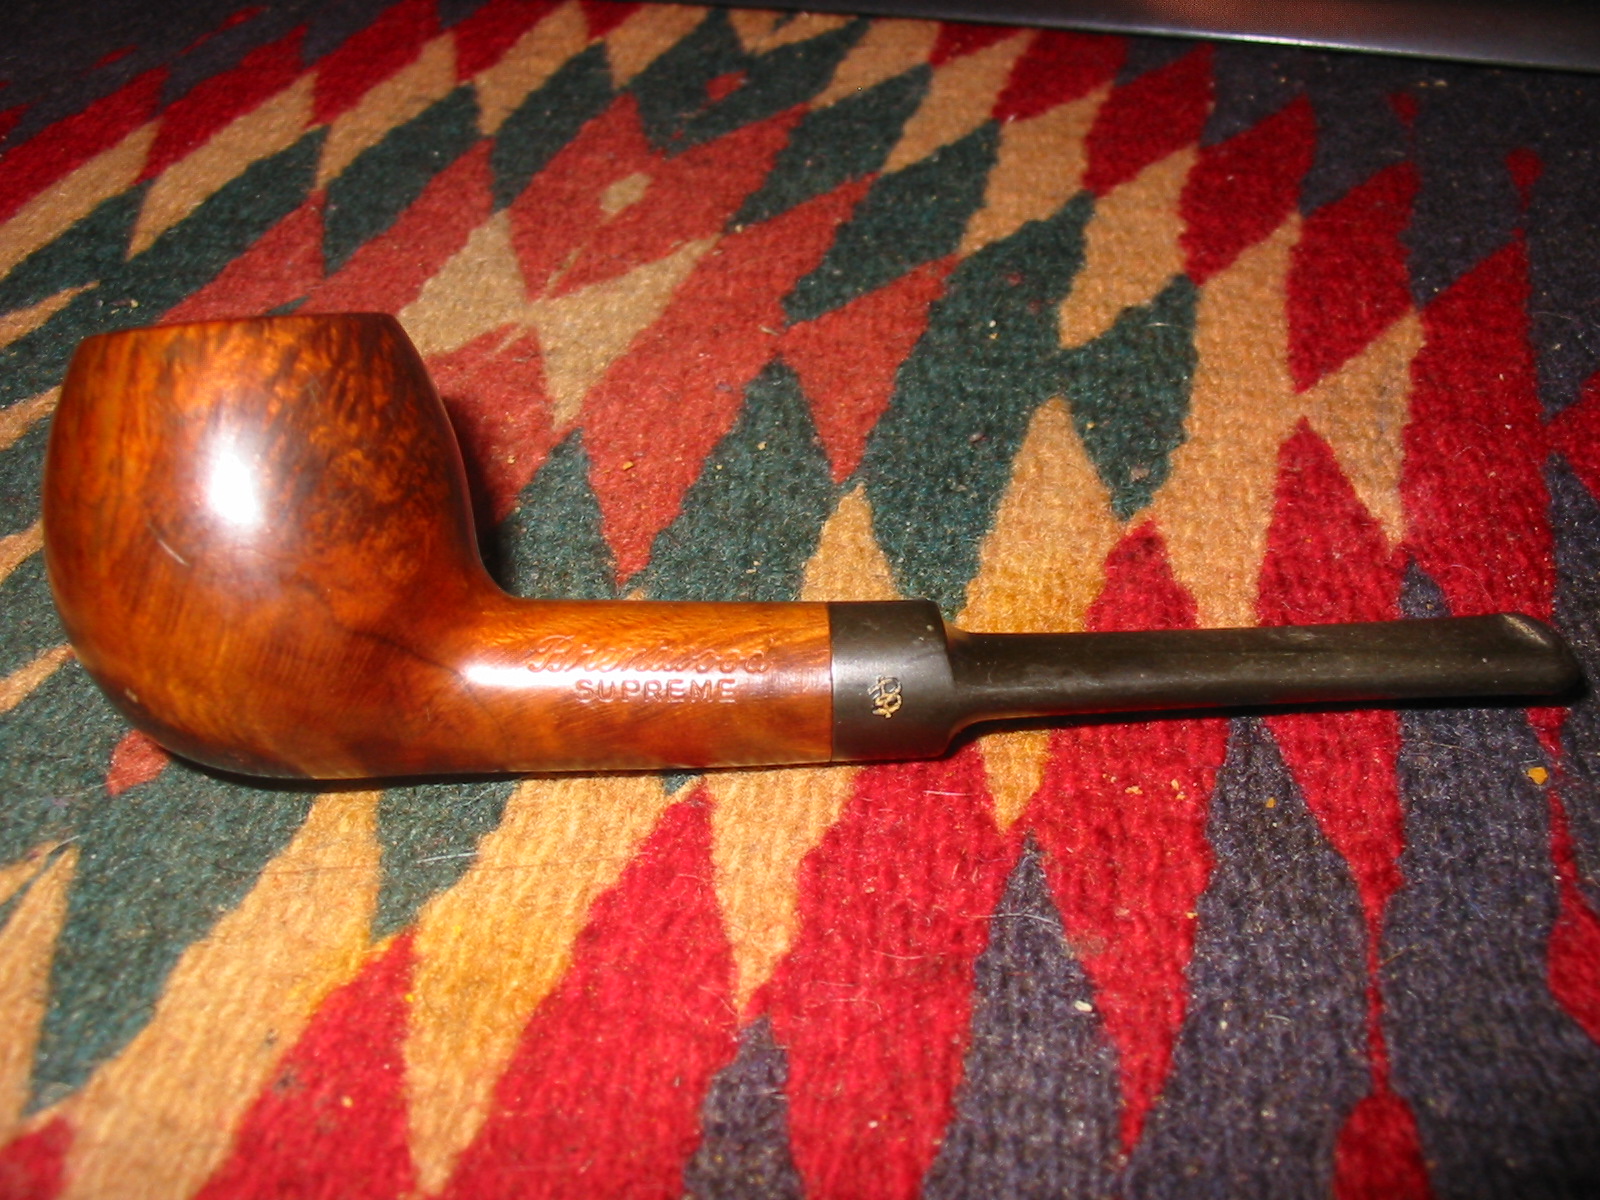
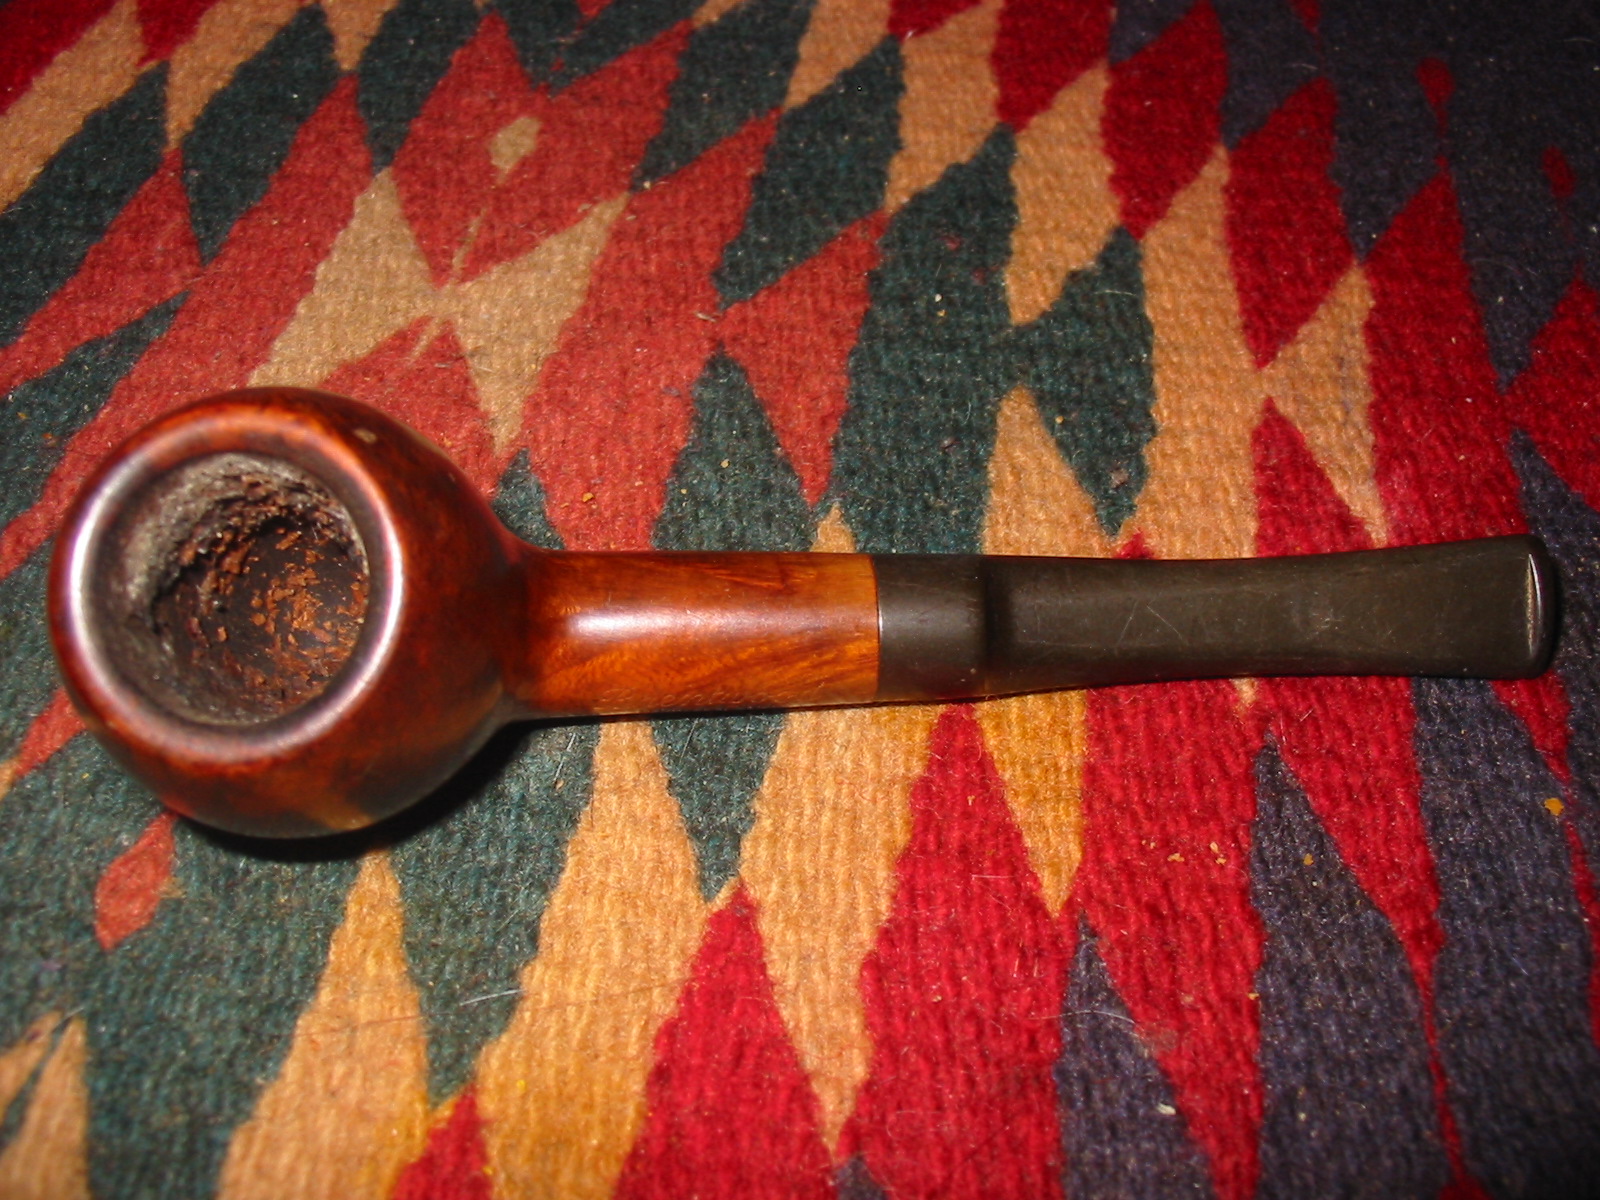
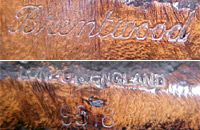
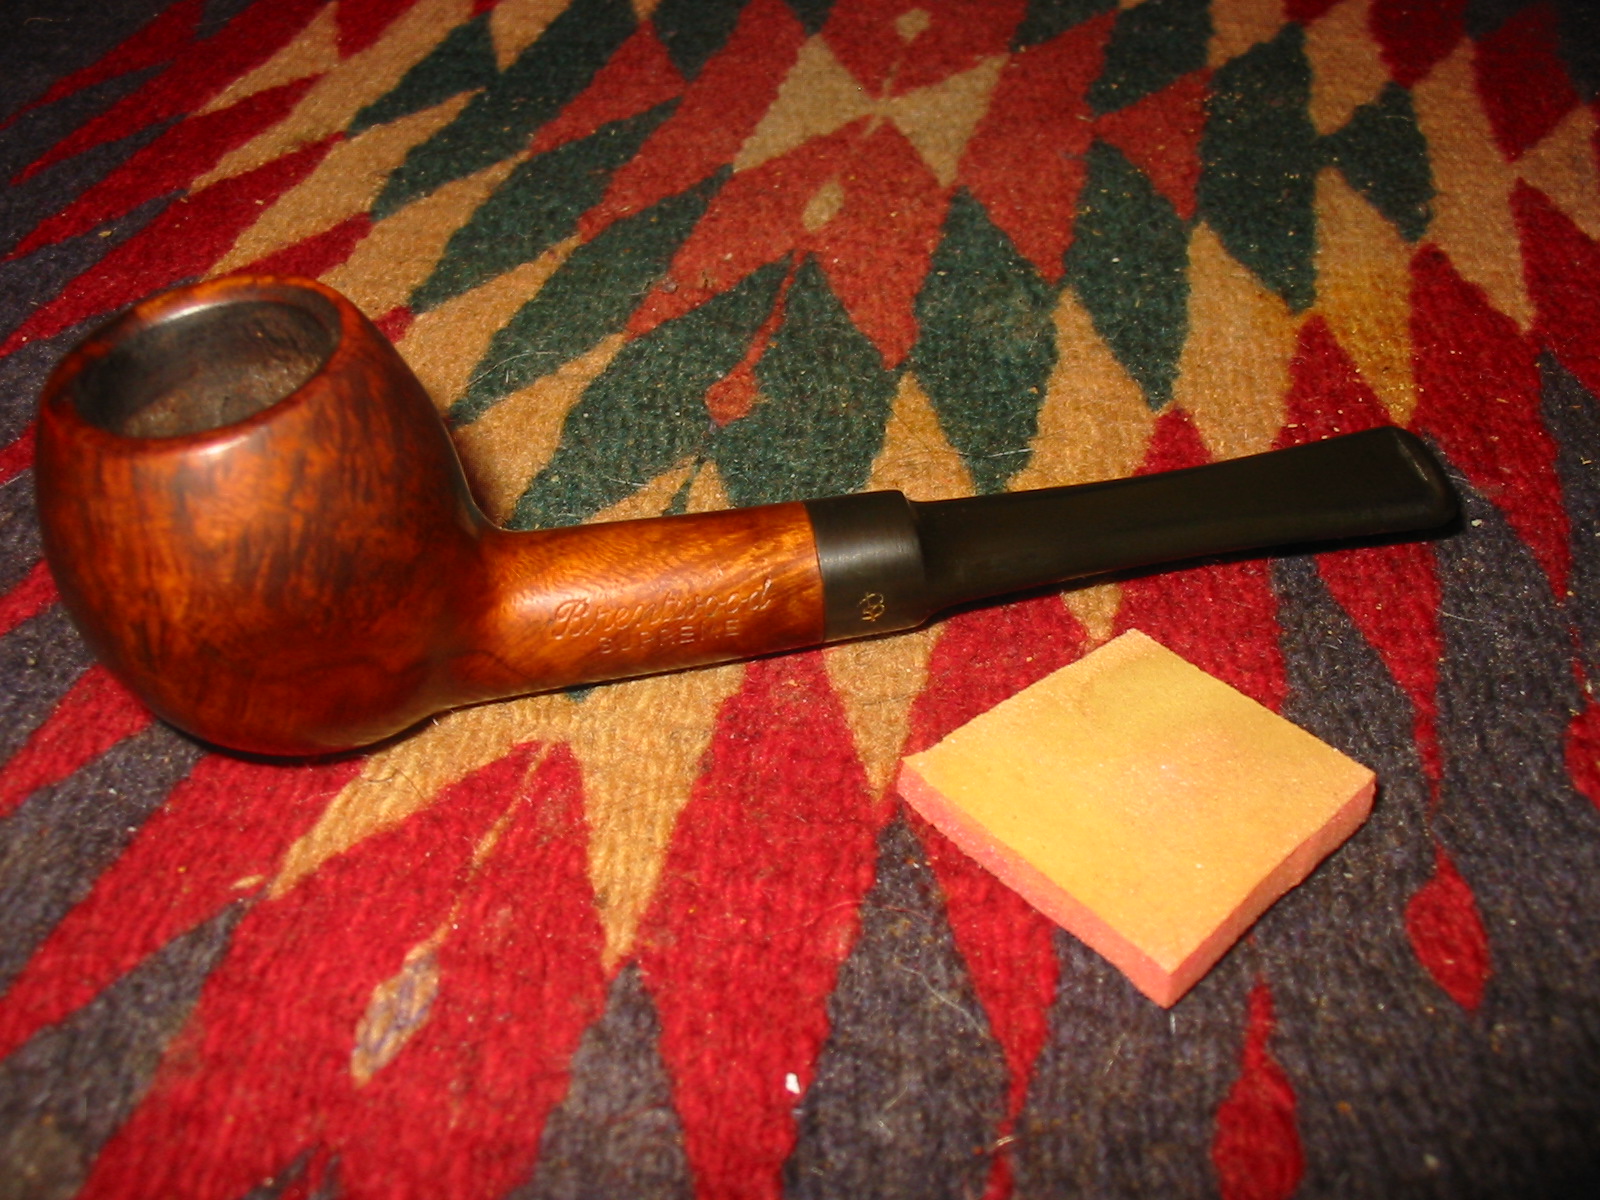
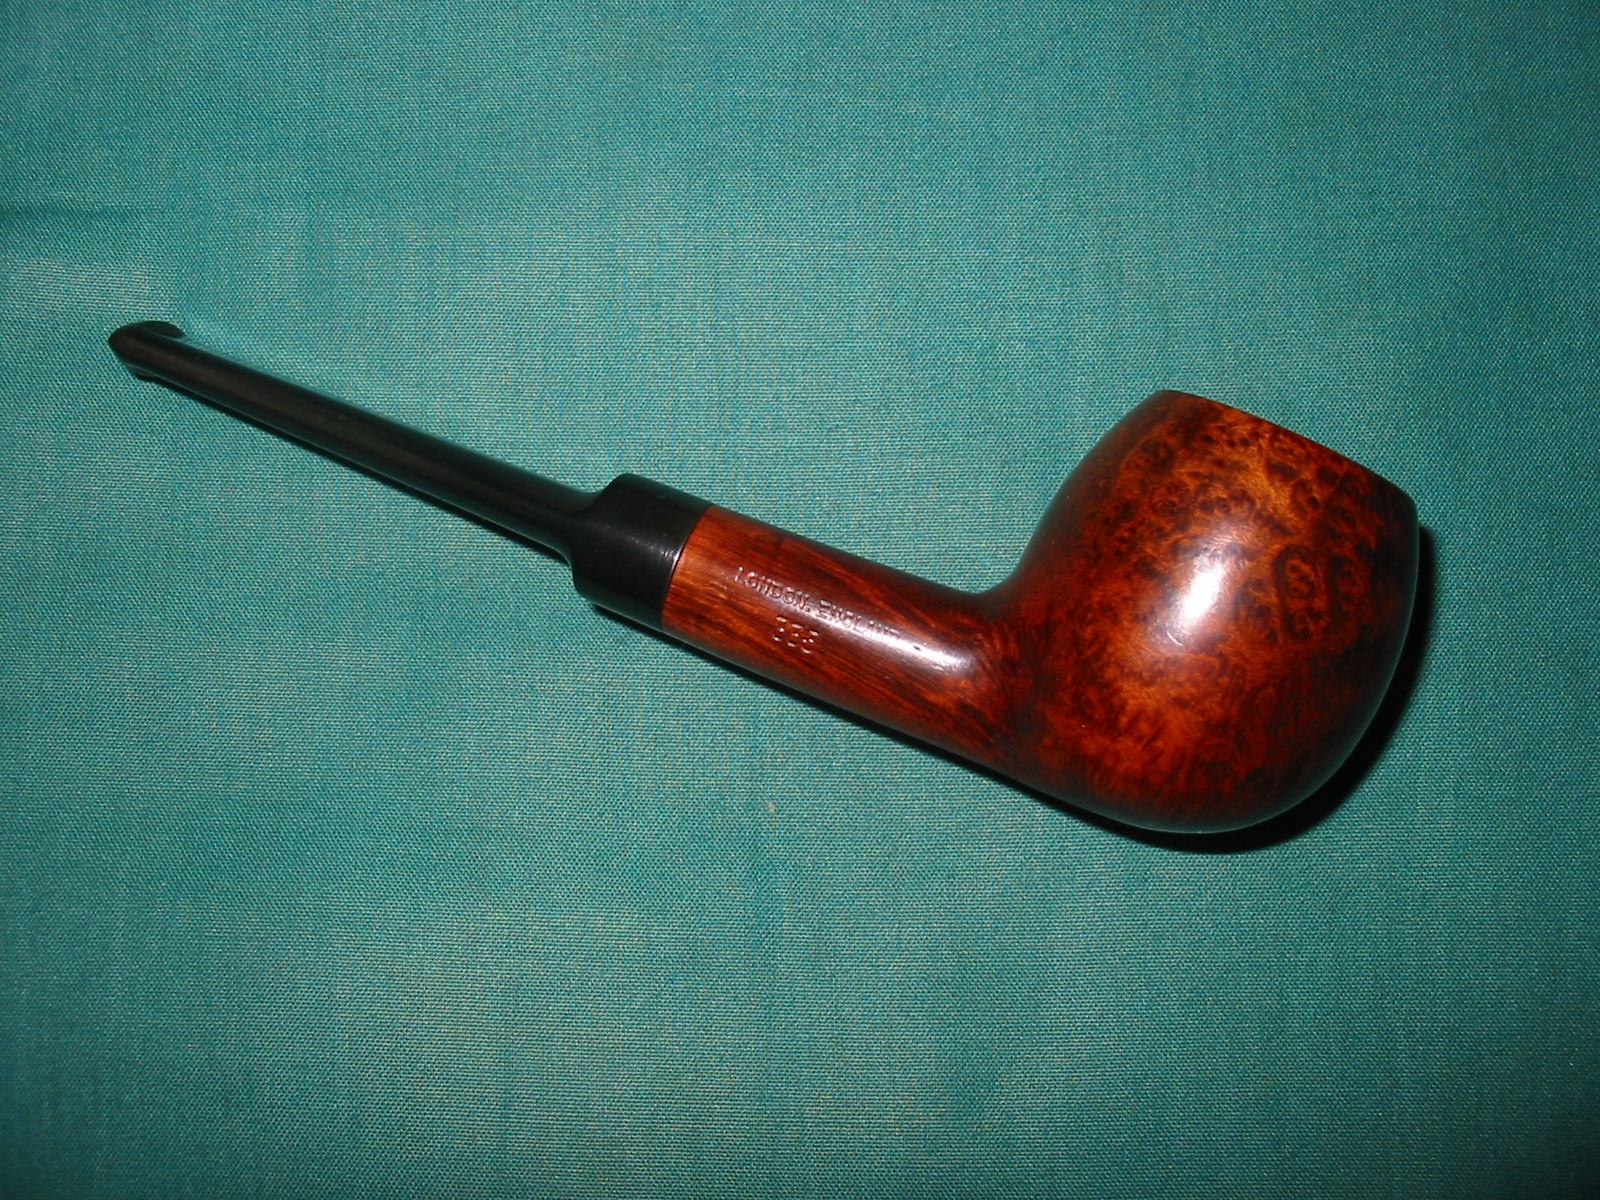
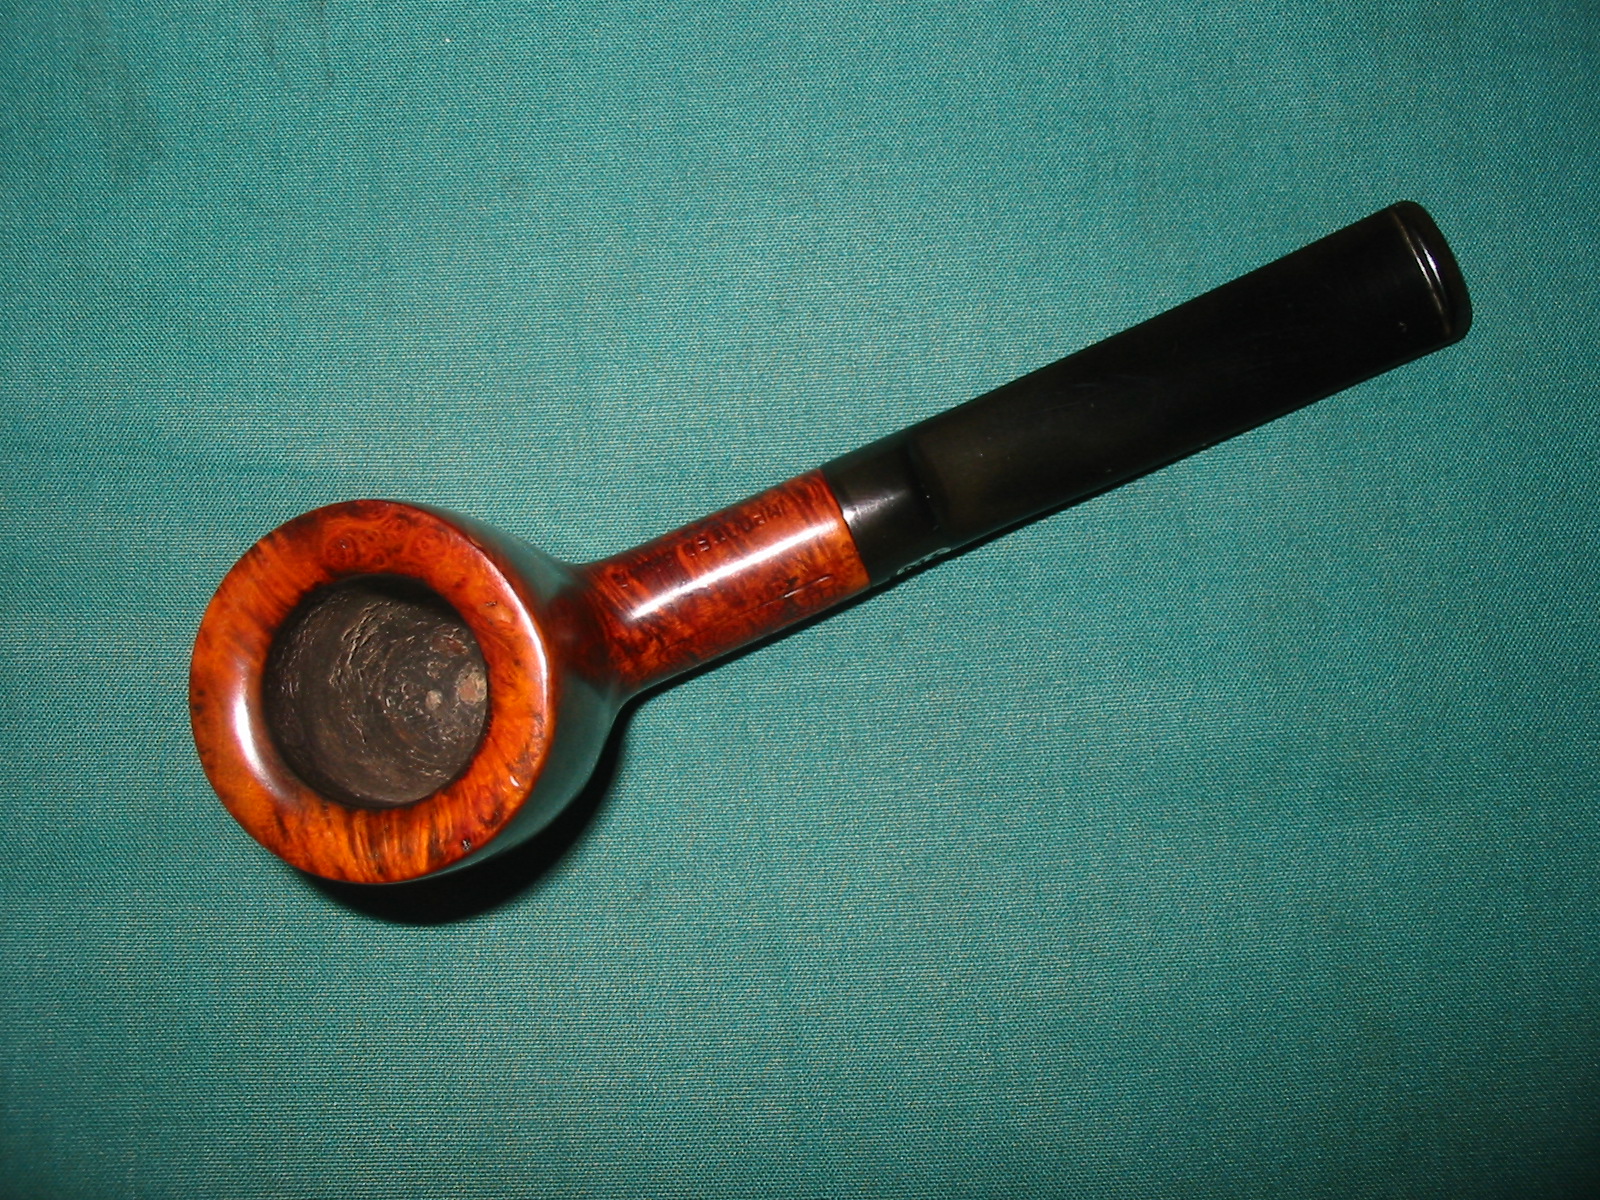
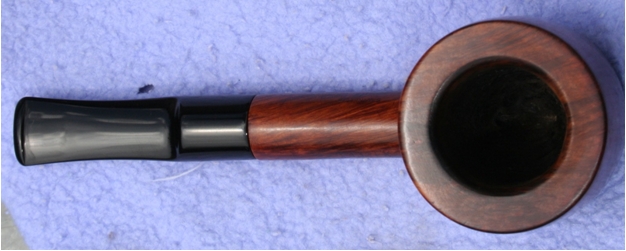
The last of the lot of six pipes I picked up in Washington was an apple shaped pipe. It was stamped Brentwood in script over SUPREME on the left side of the shank and London over England over 335 on the right side of the shank. The stem had a cursive letter ‘B’ on the left side. The finish was in good condition with a few small dings and dents in the briar. It had a thick coat of grime and grease on the briar. The rim was clean with no dents. It had a build up tars but was quite clean underneath. The stem was oxidized but there were no bite marks or dents. The stamping of the ‘B’ on the stem was in great condition and appears to have a gold colour stamped into the vulcanite. The overall look of the pipe looked familiar to me. I was not sure of the maker of the pipe but there was something about it that I remembered. Because of the sense that I had seen it before I decided to take it home, clean it up and see if I could dig up any information on the brand. I paid the $10 that the antique dealer had put on the pipe.
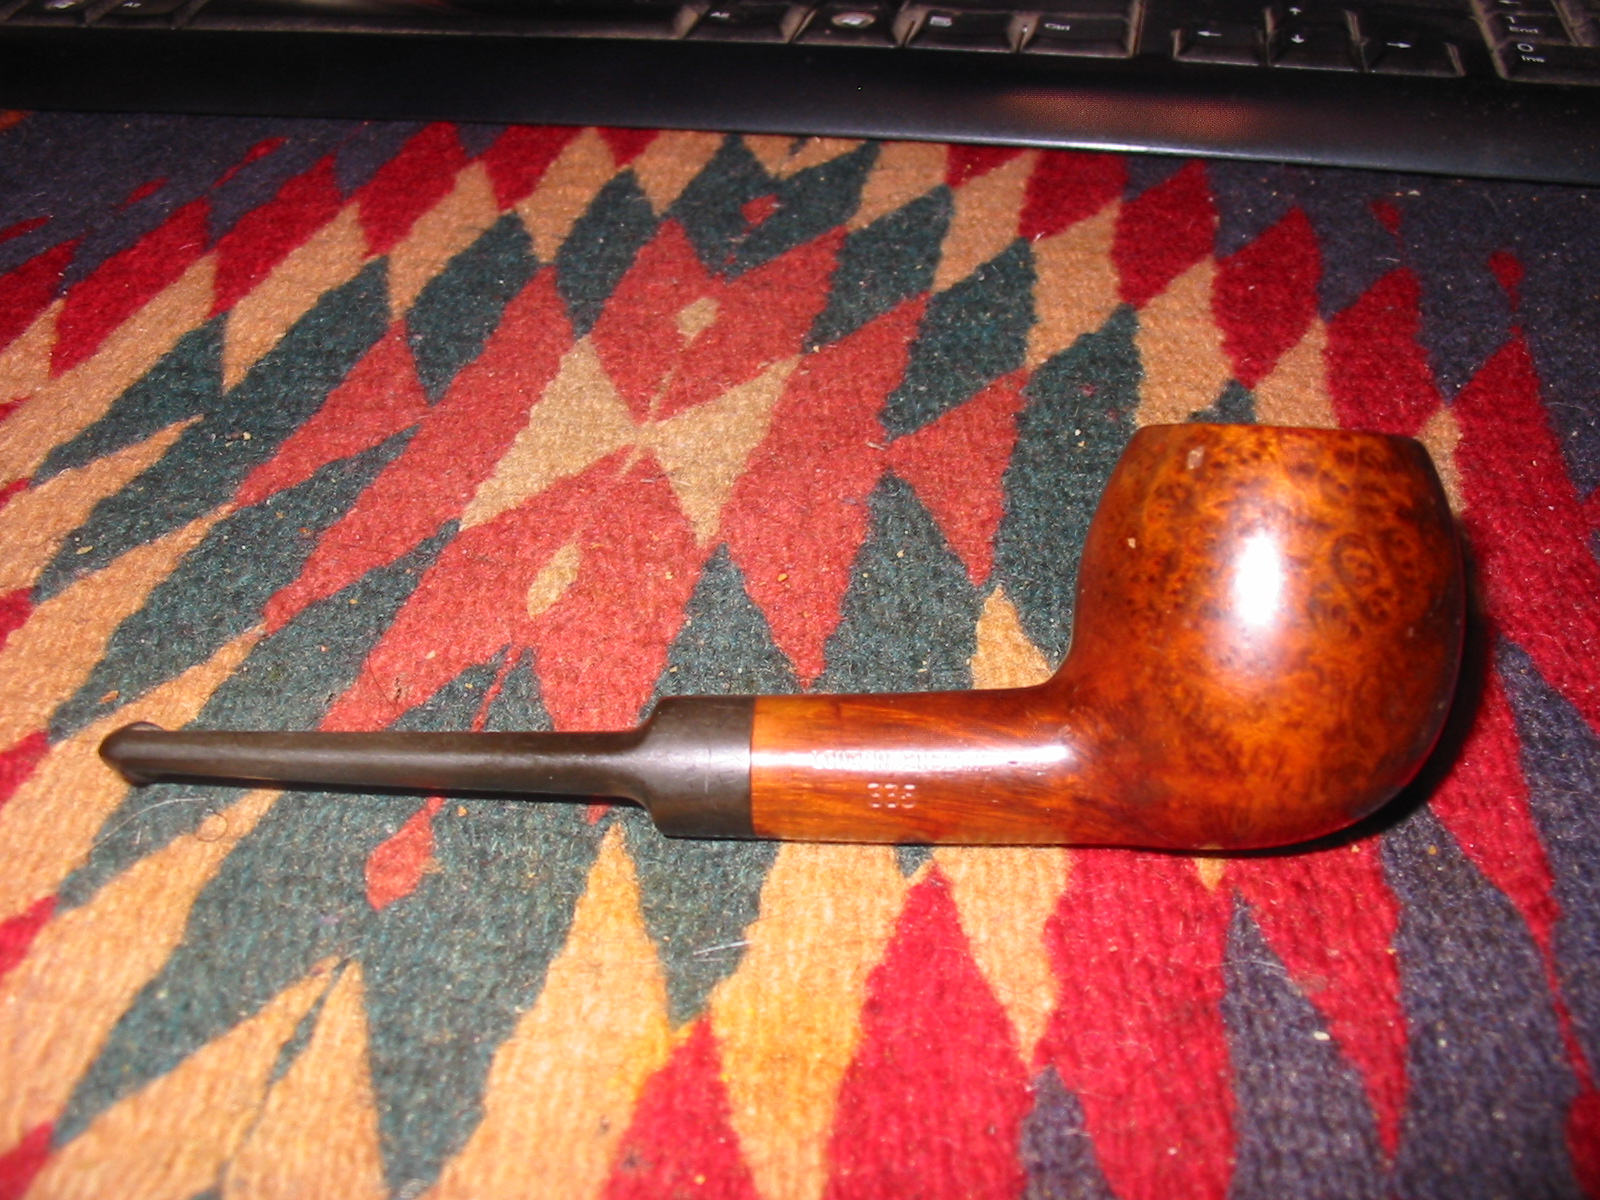
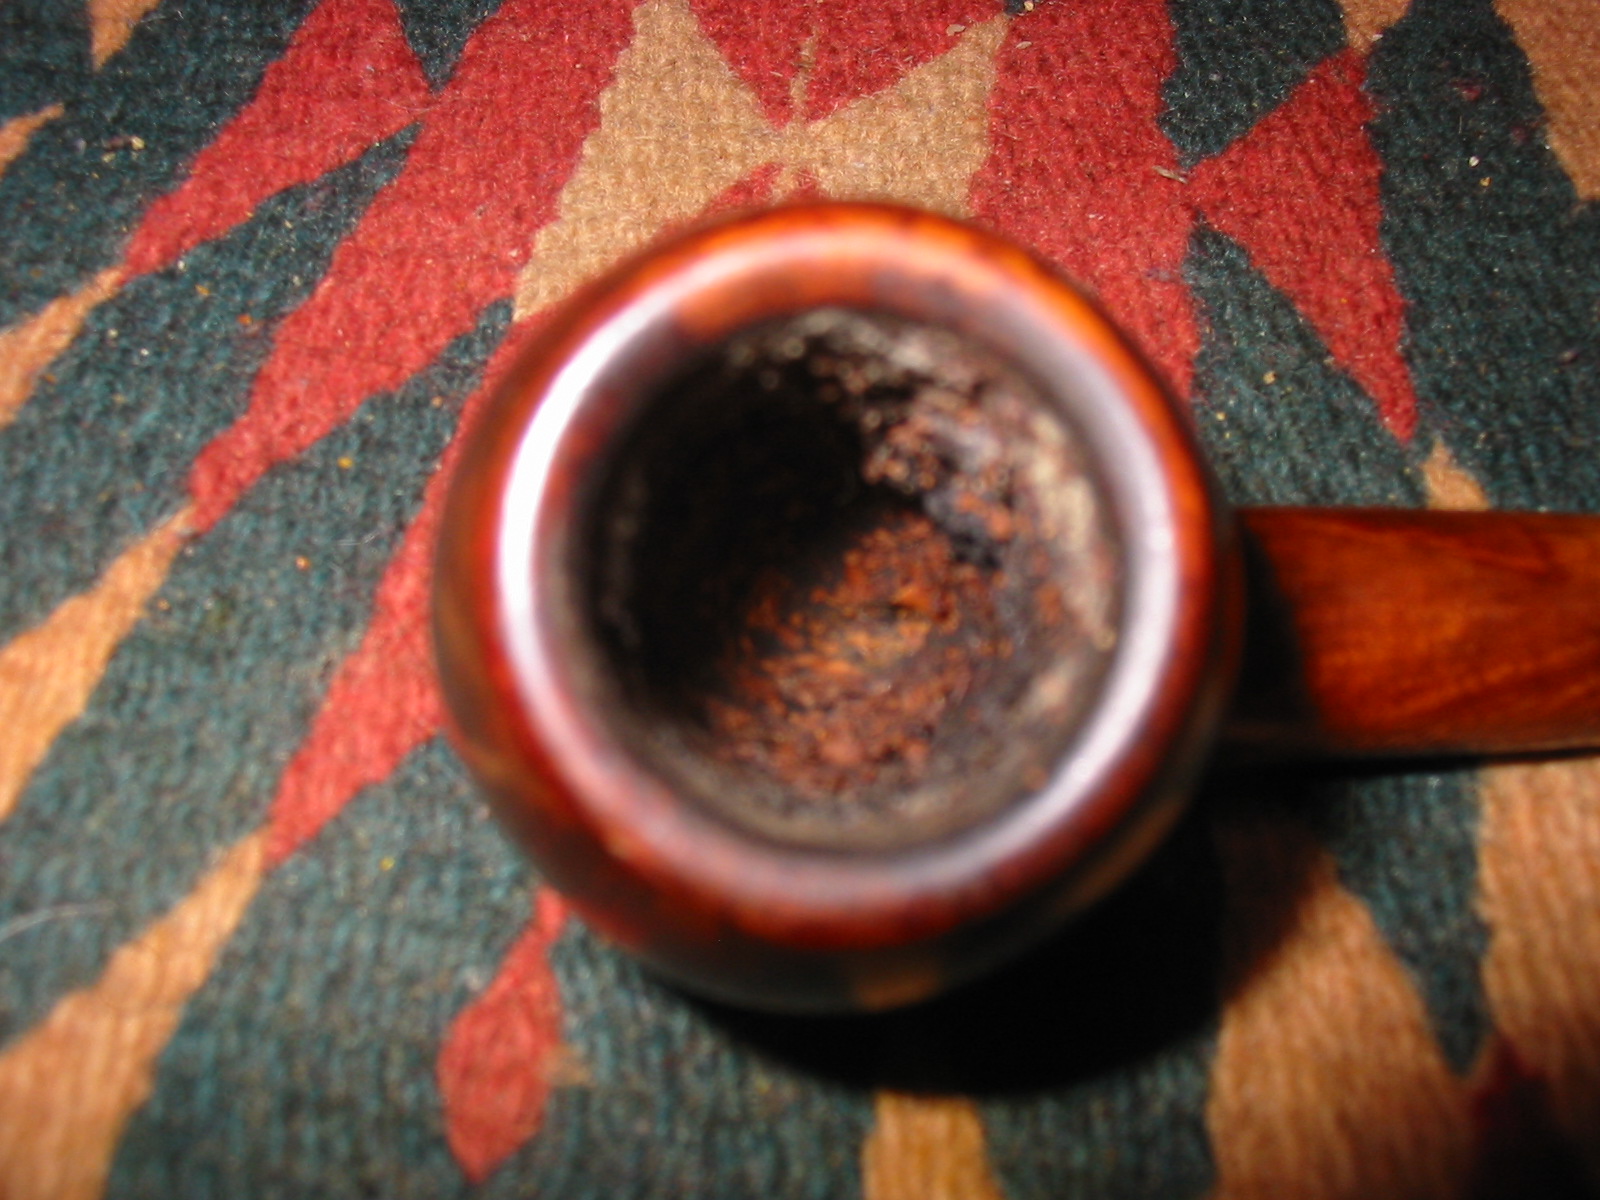
I examined the pipe and catalogued in my head what needed to be done to clean it up. I always do that to get some idea of what lies ahead for me. The bowl inside had an uneven cake on it. There were remnants of tobacco in the bowl. When I removed the stem the inside of the shank/mortise was clean and had some of the reddish brown stain inside from the bowl. There was no tar or build up in the shank. The inside of the stem had some tars and buildup that came out with the pipe cleaners and alcohol. I am not sure how that is possible that the shank was clean with the buildup and tobacco remnants in the bowl and the tars in the stem but that is the way it was. I may never know what the pipe went through.
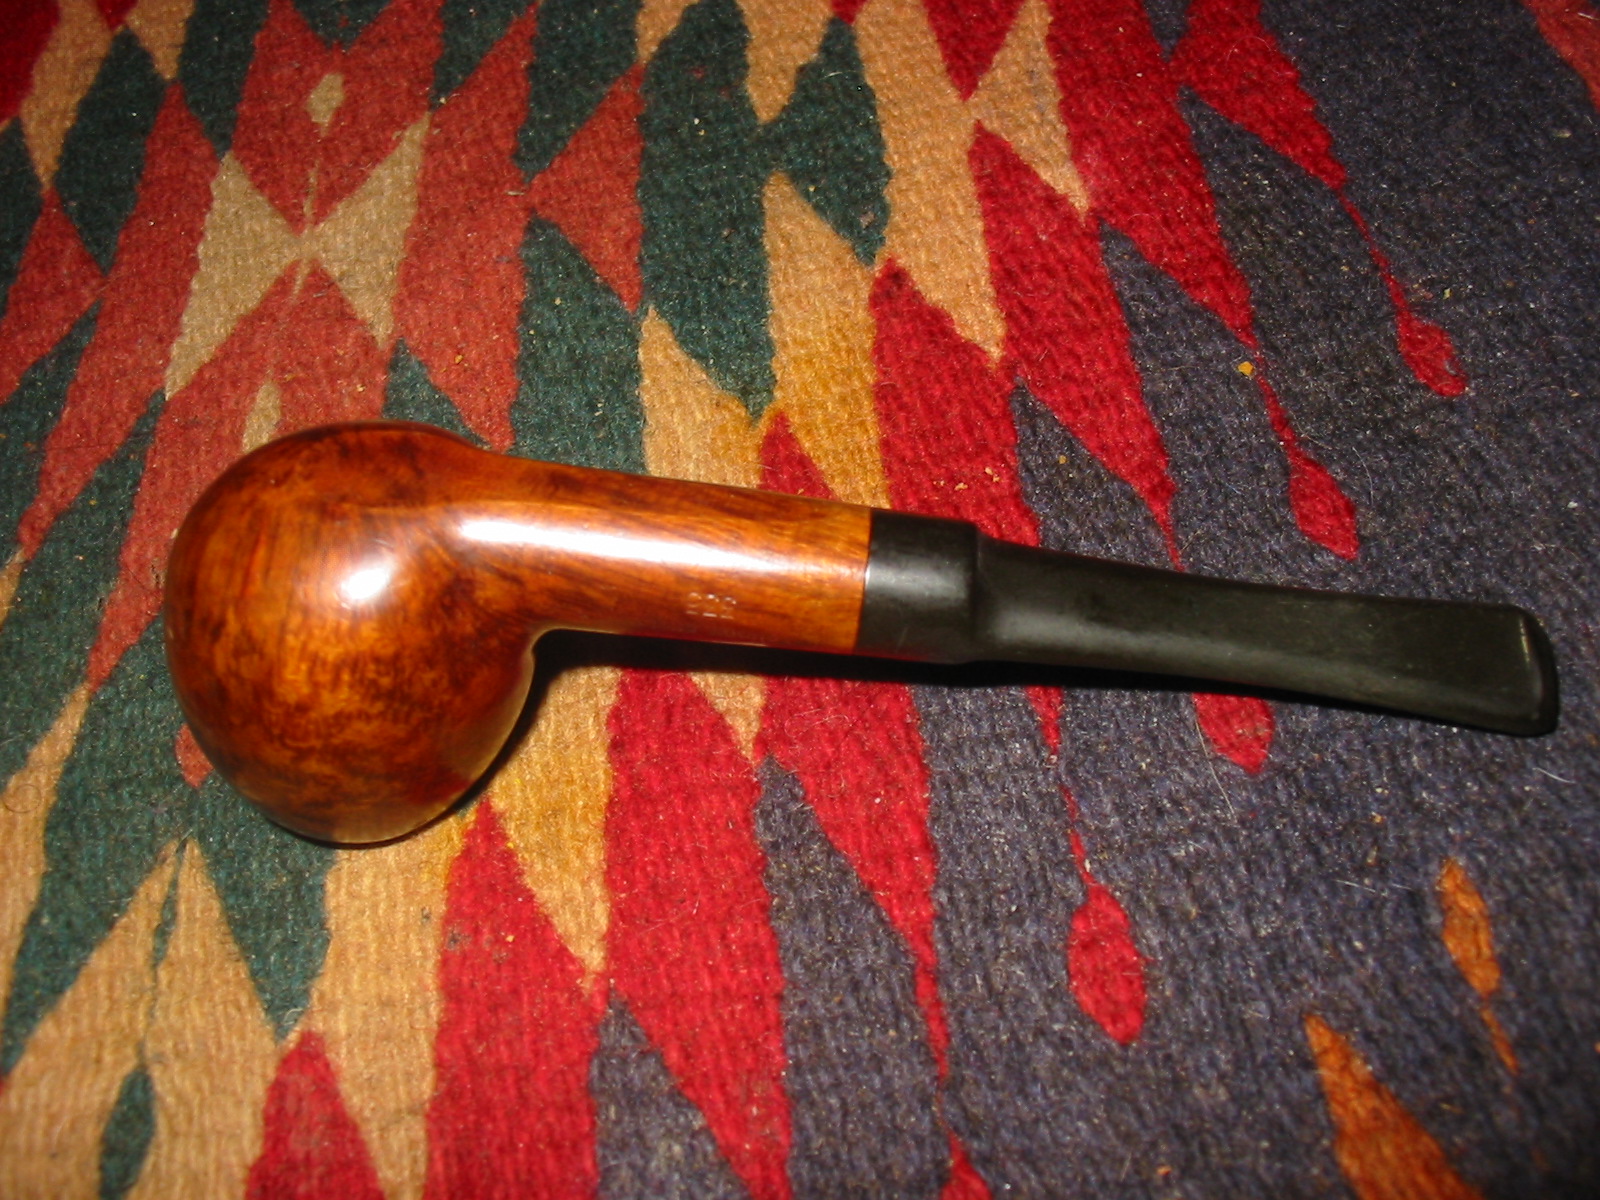
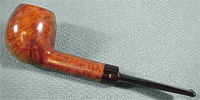
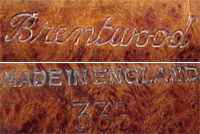
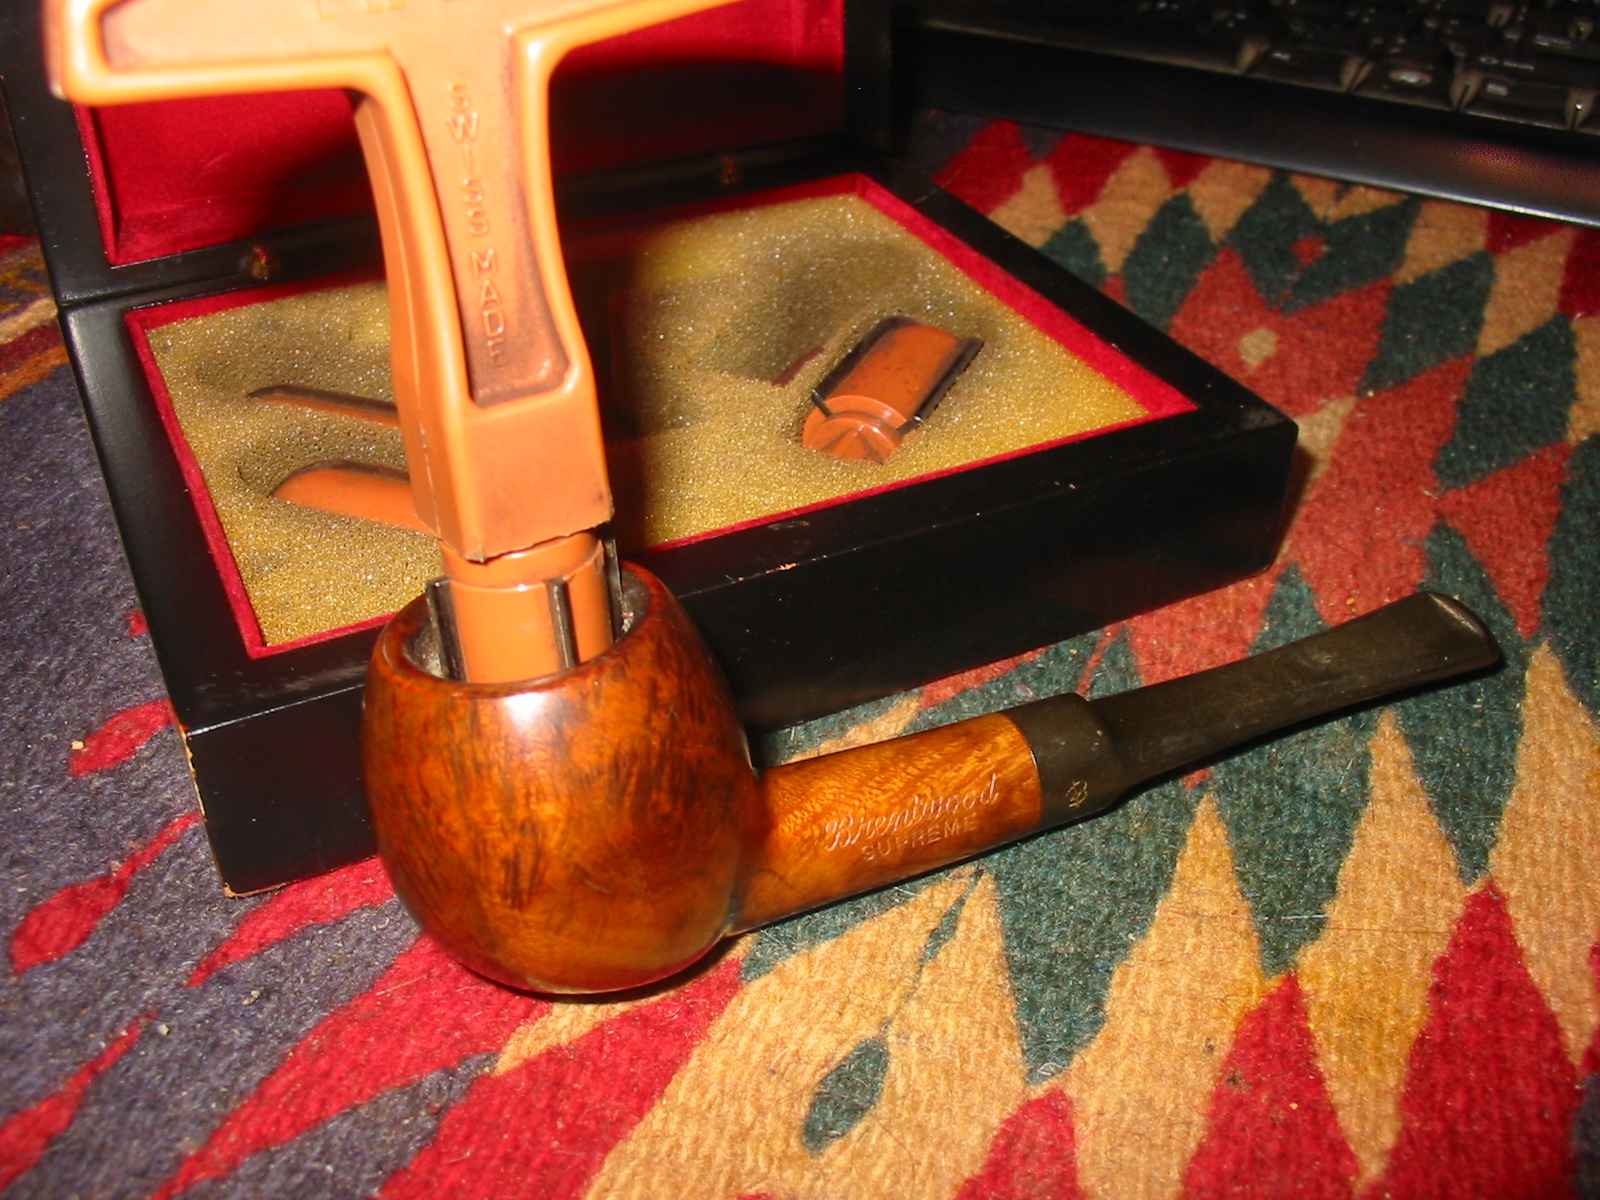
I compared the pipe to an older GBD apple that I have here at home. It had the same shape number stamp on it. Both were stamped 335. Both were apple shaped pipes. Both were stamped on the right side of the shank – LONDON, ENGLAND. The parallels made me go to the internet to see if I could find any information on the brand. I looked at Pipephil’s stamping and logo website (http://www.pipephil.eu/logos/en/logo-b7.html) and found the Brentwood stamping. The second pipe shown in the photo on the site had the same shape number as the one I had found. I have included the photo below as well as three other photos of the stamping on the briar and on the stem. The stamping shown in the second photo is the same on the left side of the pipe – the cursive Brentwood stamping. It is missing the Supreme stamping. The stamping on the other side of the shank – ‘MADE IN ENGLAND’ is different from mine but both the shape number and the position of that stamping is the same. The stamping on the pipe in the third photo shows the same stamping as the pipe I have – ‘LONDON, ENGLAND. The fourth photo shows the cursive ‘B’ on the side of the stem as the pipe I found.

Underneath the photo of the stamping on the Pipephil site read as follows: “Brentwood seems to be a GBD second for following reasons:
– 335 is a GBD shape number for an apple shape like the pipe above.
– 9518 (first pipe (not shown)) is a four digit shape number as used by GBD (ie: 9534, 9553, 9557, 9567…)”
The pipe I have that is a GBD with the same shape number and overall look, the same style saddle bit, the LONDON, ENGLAND stamping confirm the fact that the Brentwood pipe that I found is indeed a GDB second.
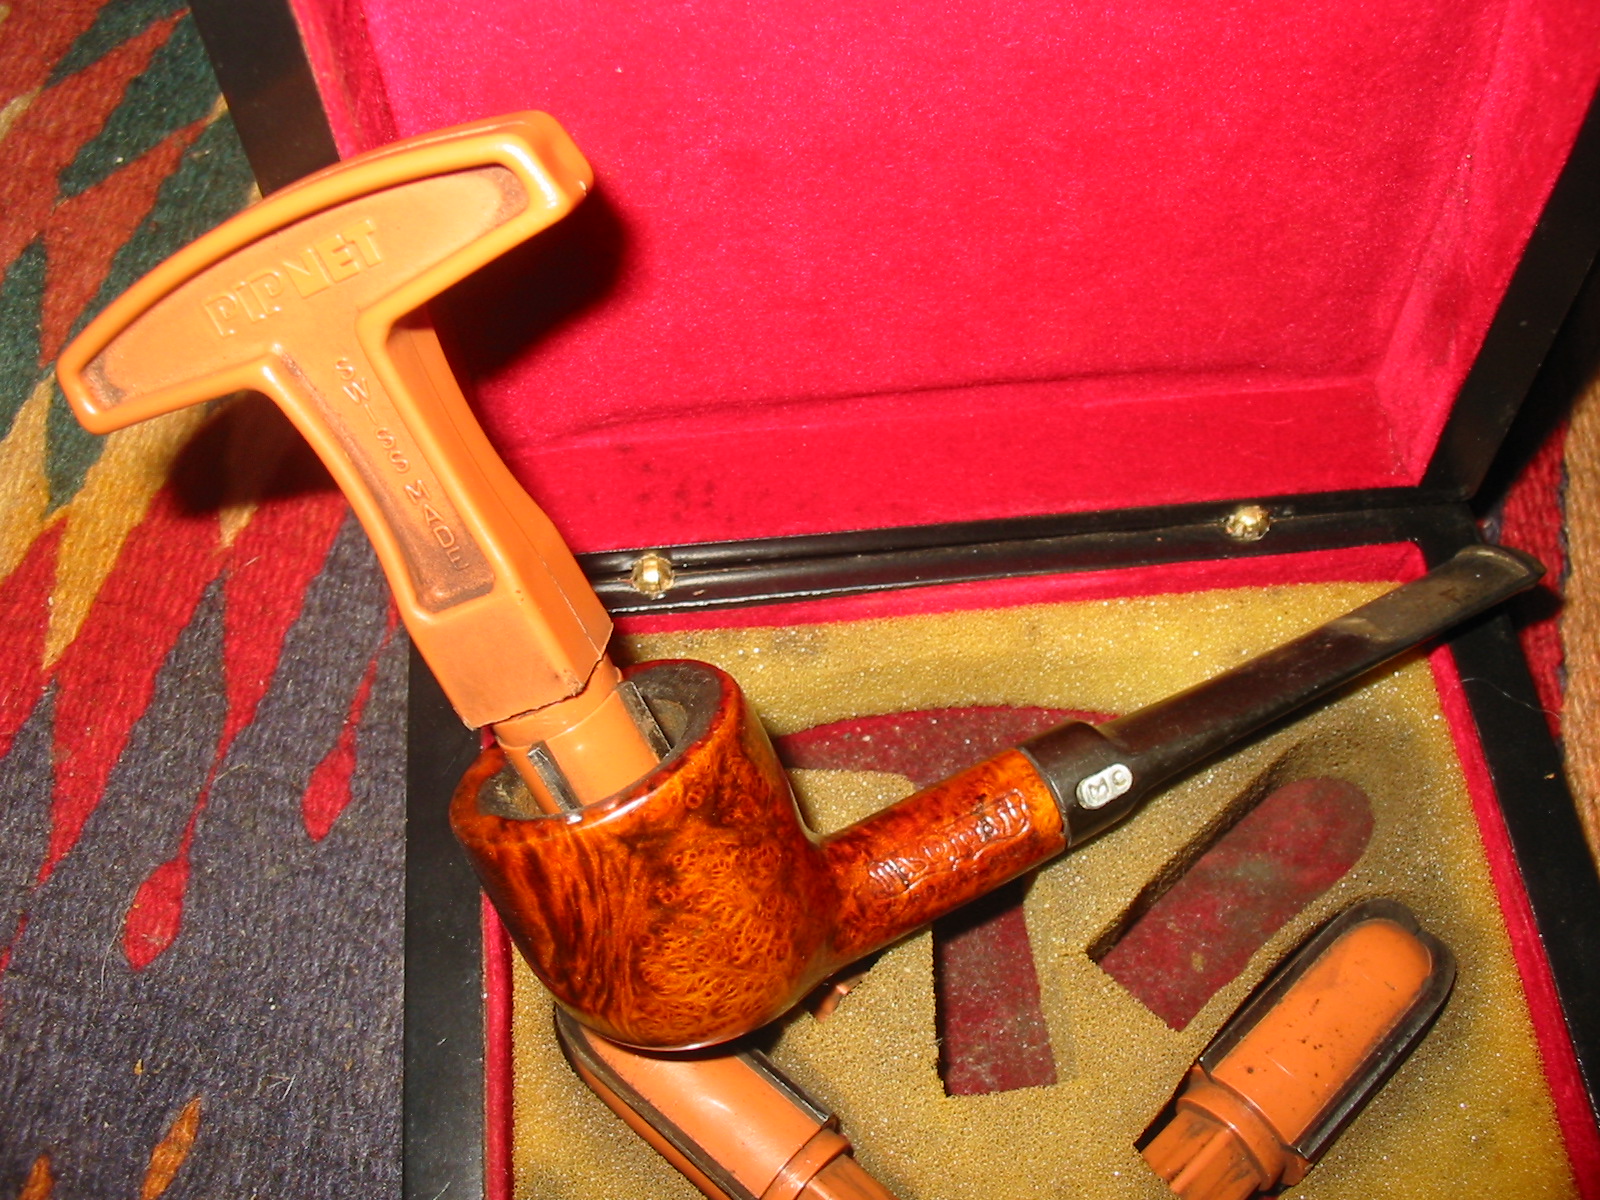
Armed with that information I went to work on the pipe to clean it up and refurbish it. The apple shape is one of my favourites so this was going to be a pipe that I would enjoy. I worked on the inside of the bowl and shank. The first photo below shows the condition of the bowl interior before reaming. The second photo shows the reaming process with a PipNet reamer. Once I reamed the bowl I scrubbed out the stain in the shank and the leftovers in the bowl with pipe cleaners, cotton swabs and isopropyl alcohol.
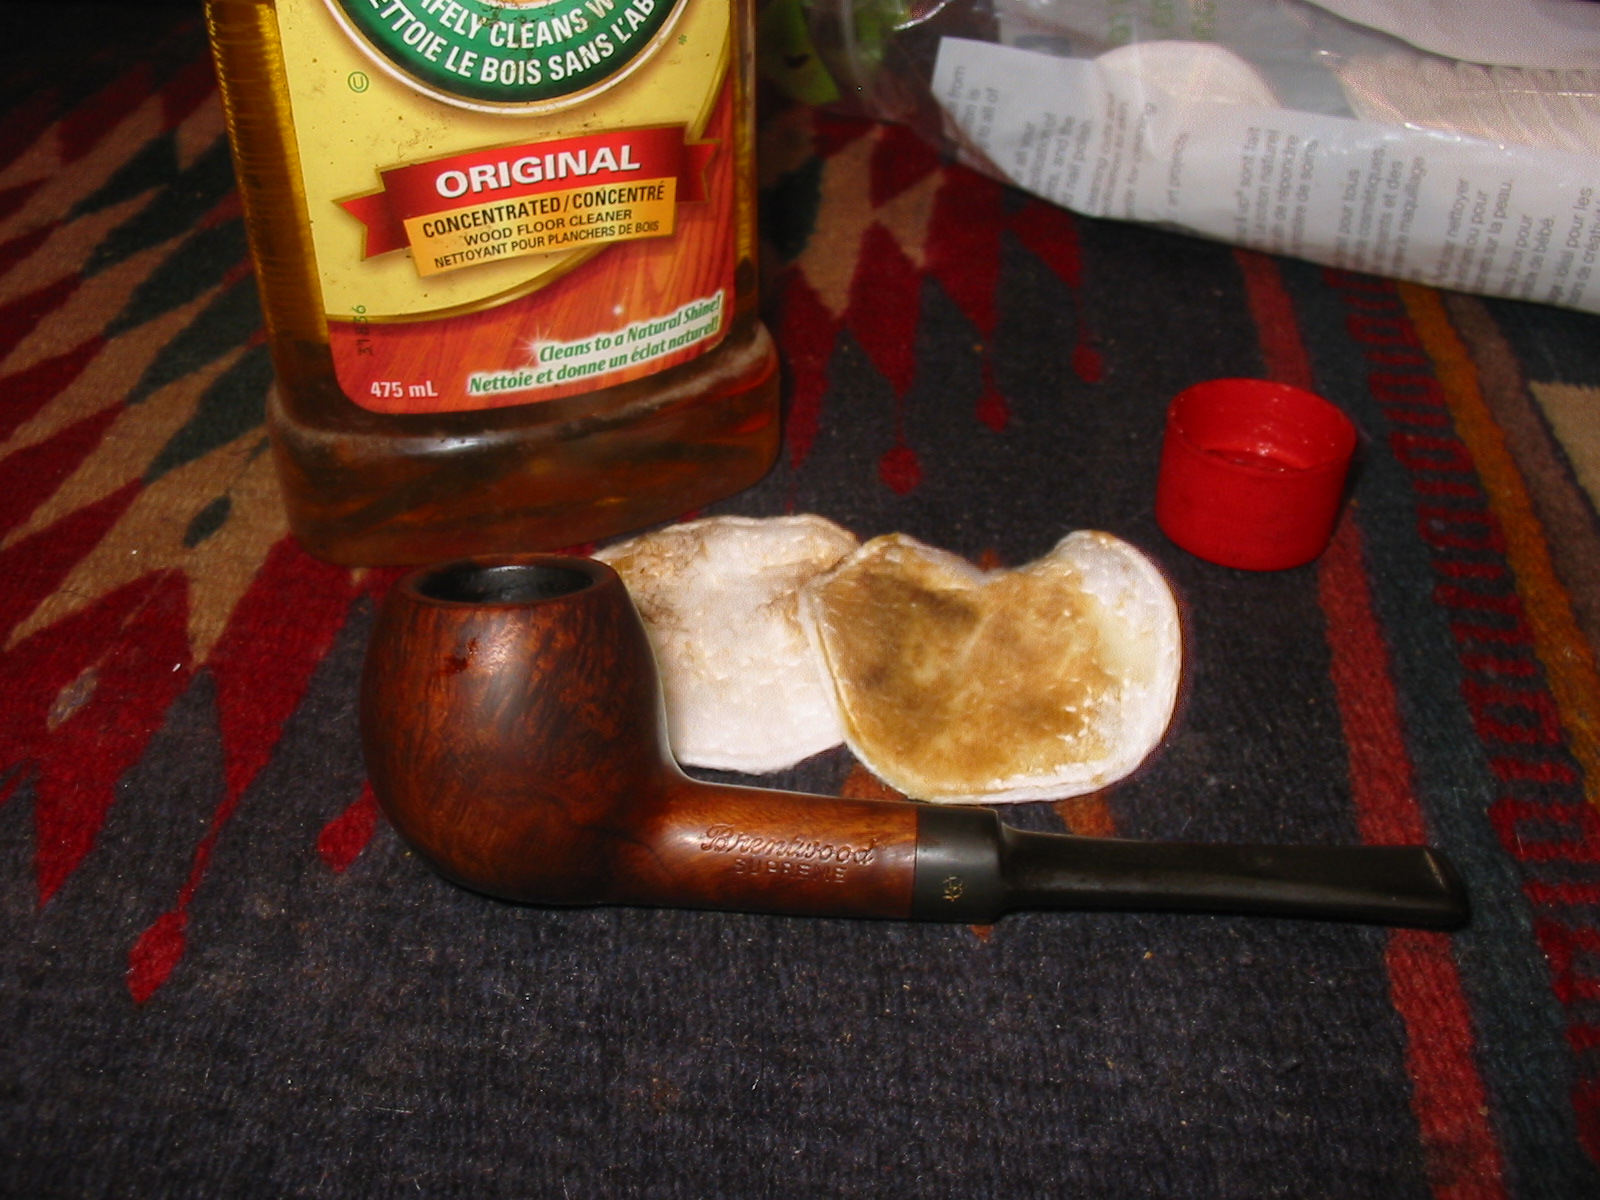
I scrubbed the exterior of the bowl and shank with Murphy’s Oil Soap on cotton pads. I wiped off the soap and residue and hand dried the bowl. The soap removed the grime and grease that was thick on the bowl. I always scrub with undiluted soap as I have found that it leaves the finish more intact than using the soap mixed with water.

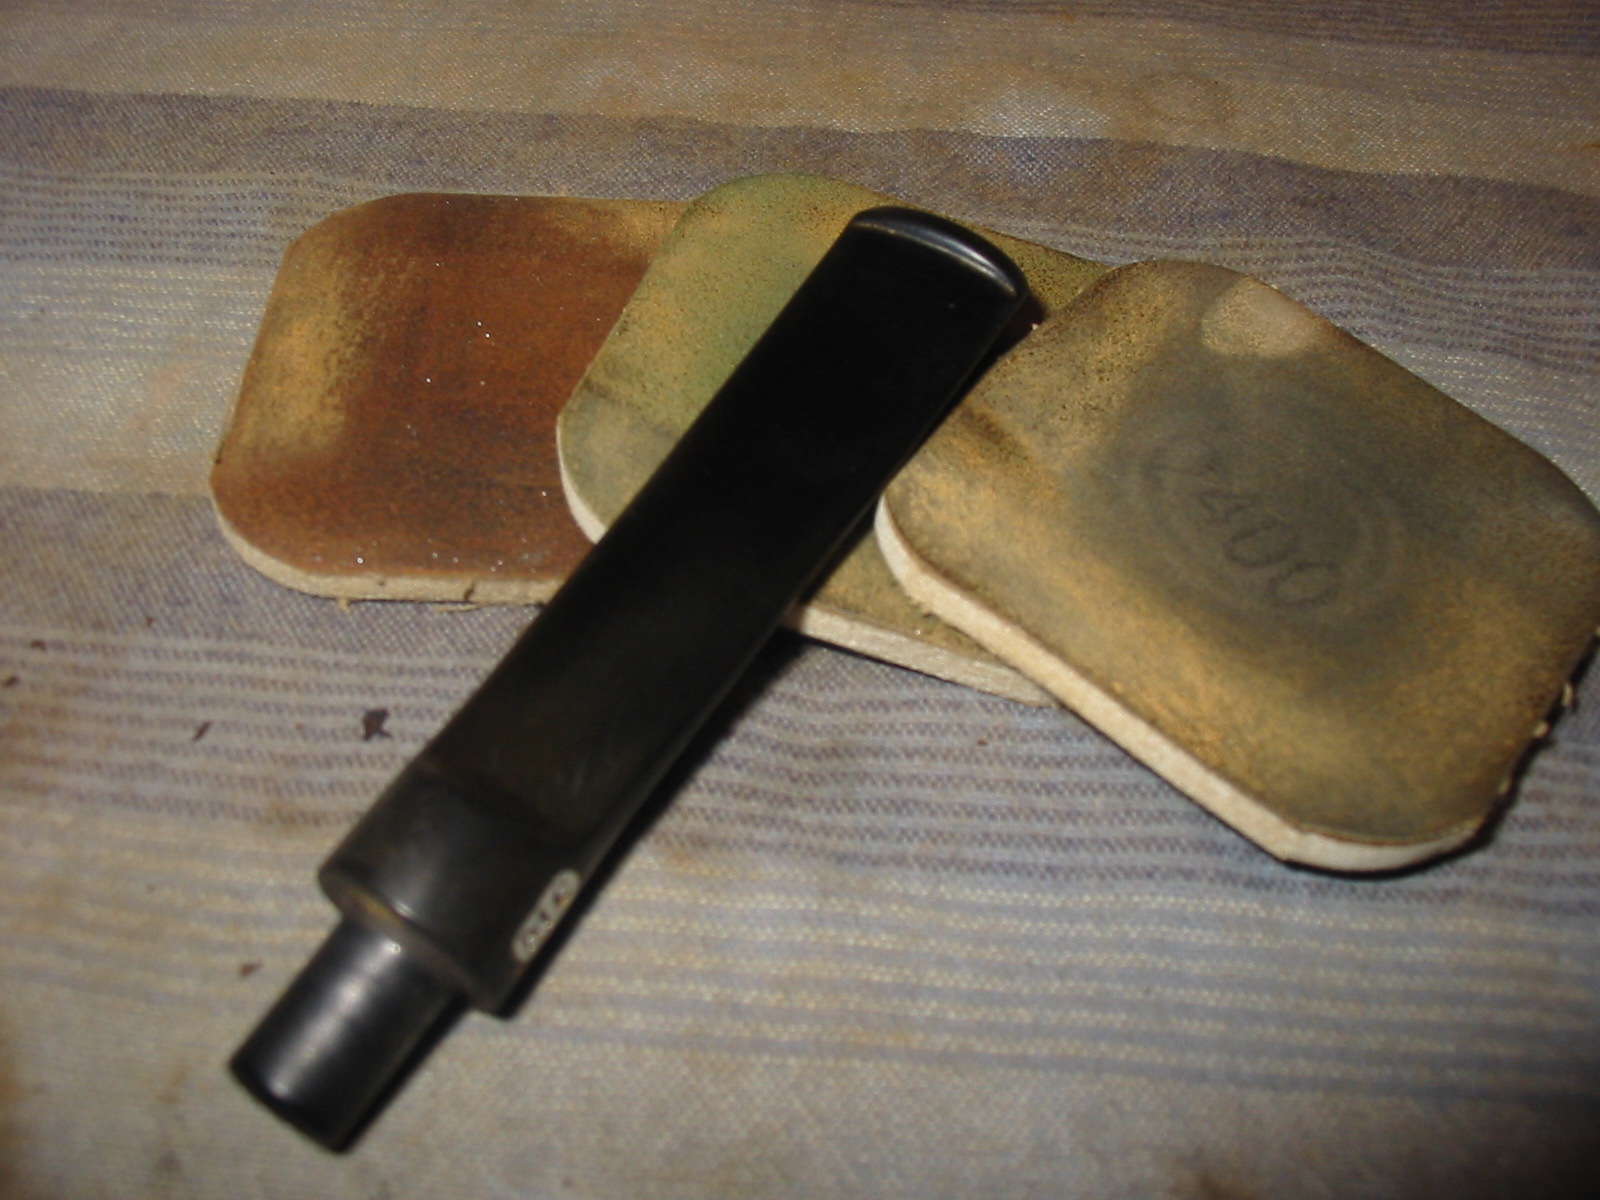
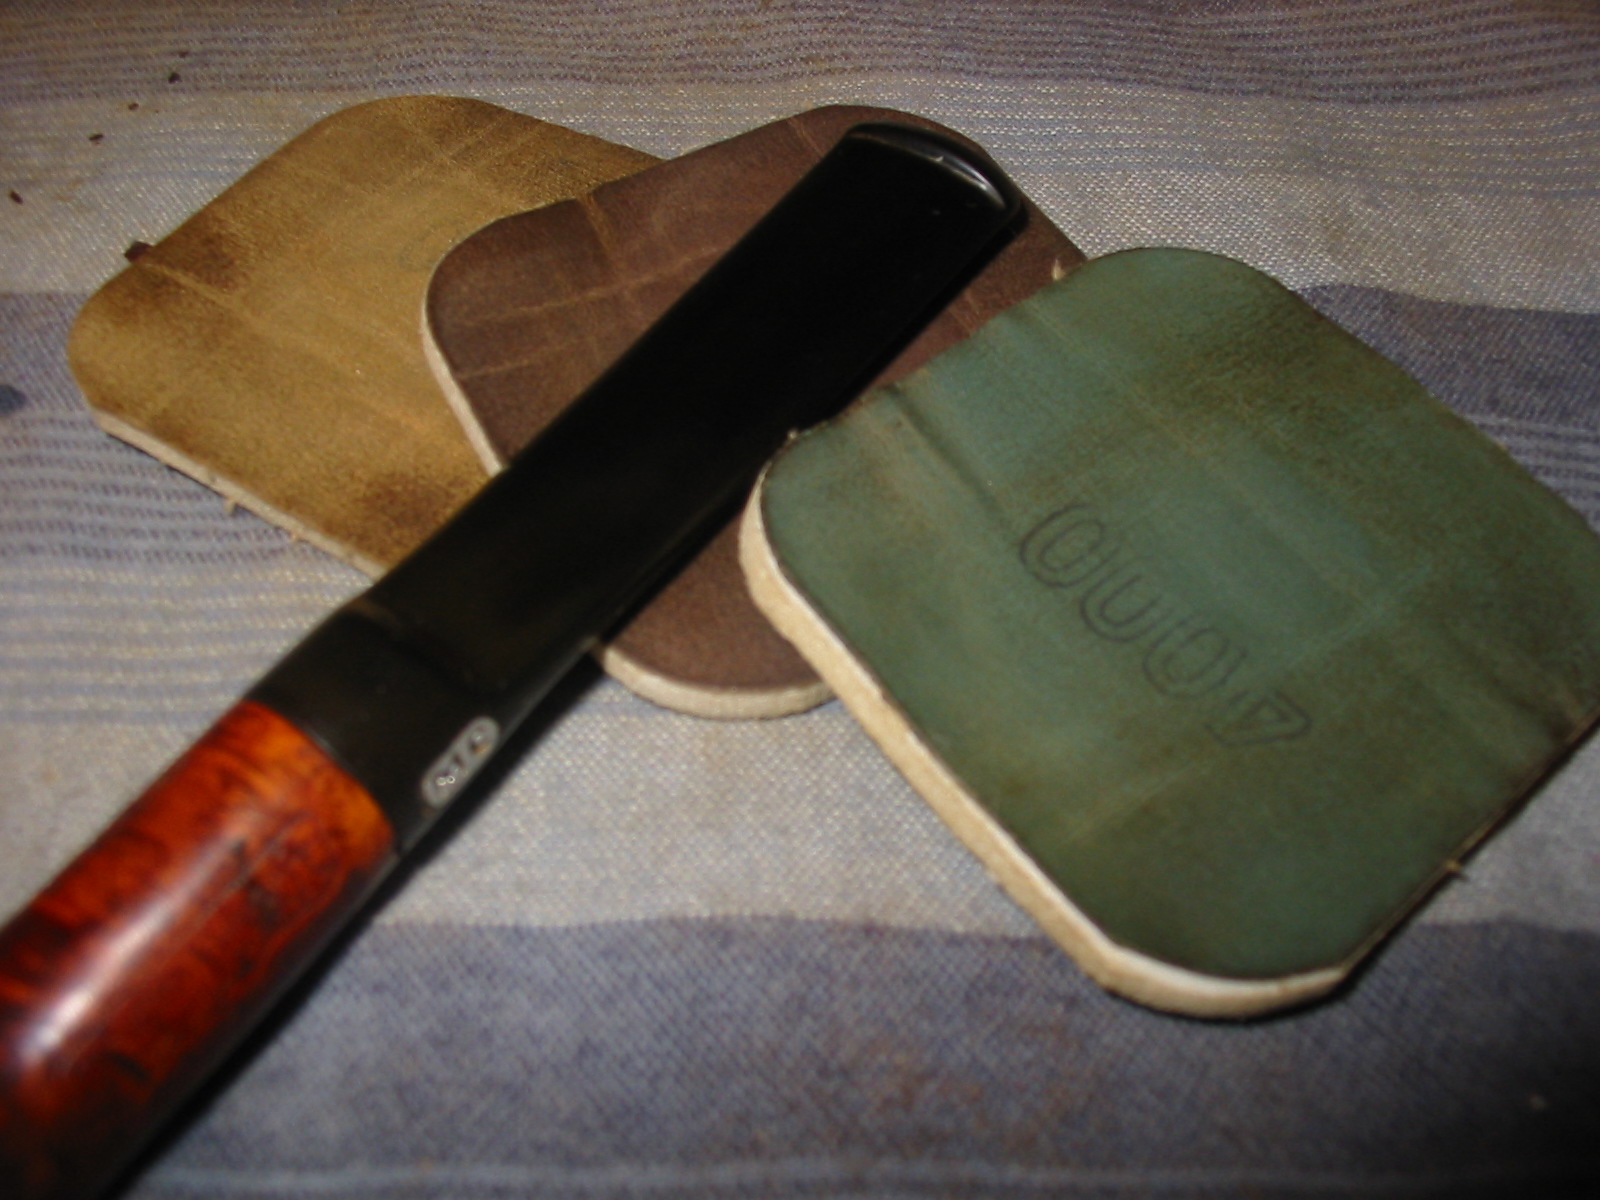
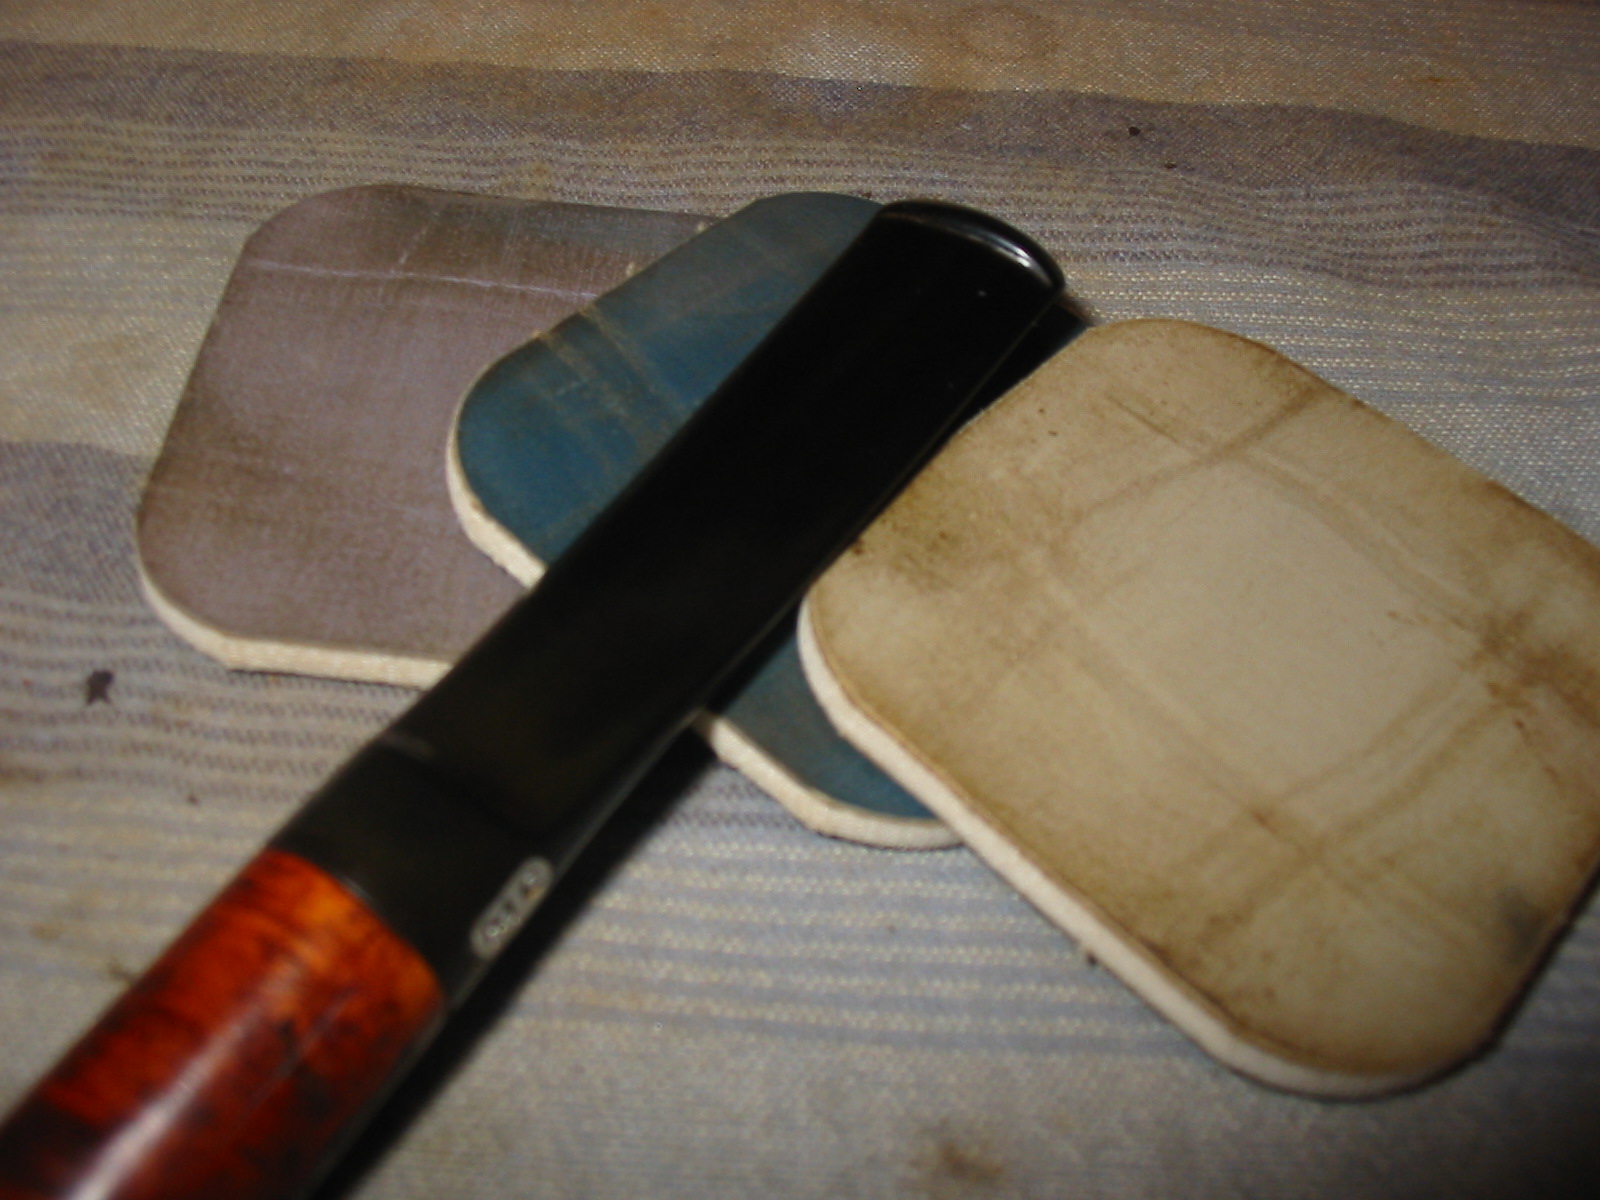
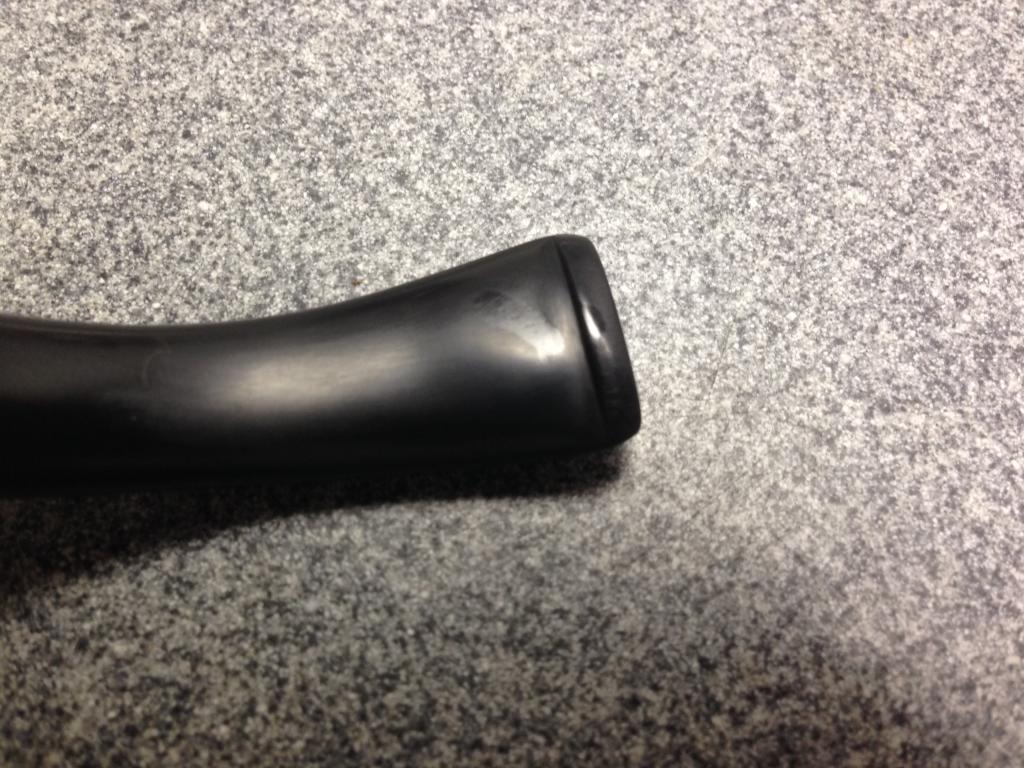
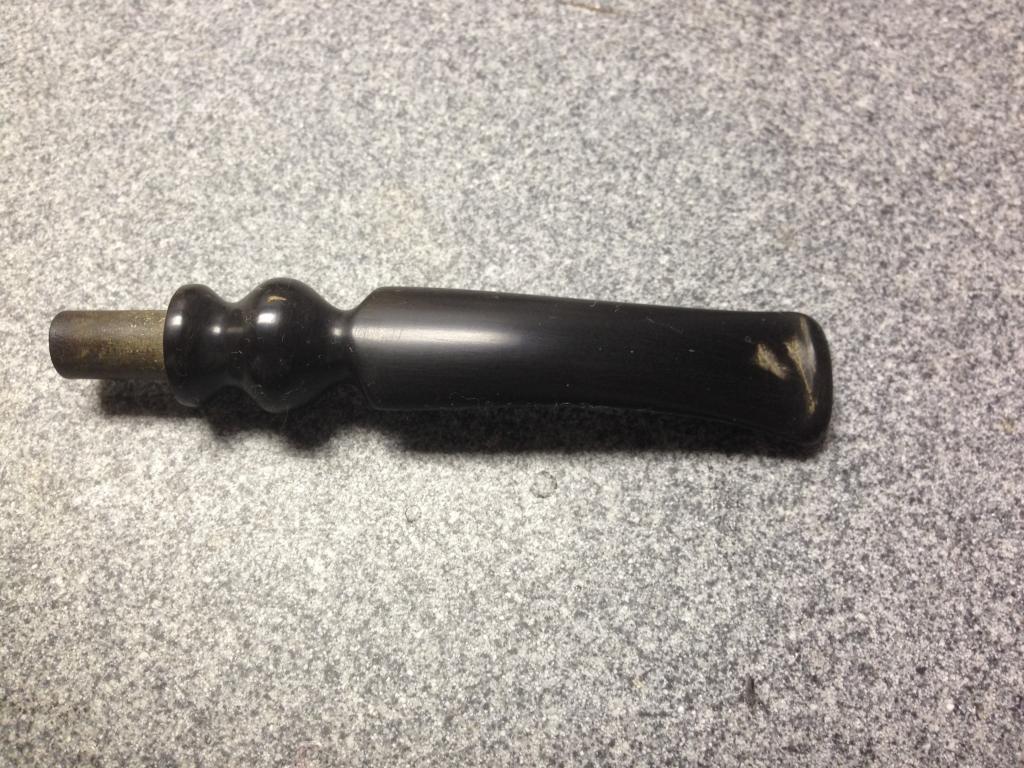
I sanded the stem with 220 grit sandpaper and medium and fine grit sanding sponges to remove some the buildup and slight oxidation on the stem. I then sanded the stem with micromesh sanding pads. I wet sanded with 1500-2400 grit pads and dry sanded with 3200-12000 grit pads. I rubbed the stem down with Obsidian Oil and when it had dried I buffed the stem with White Diamond.
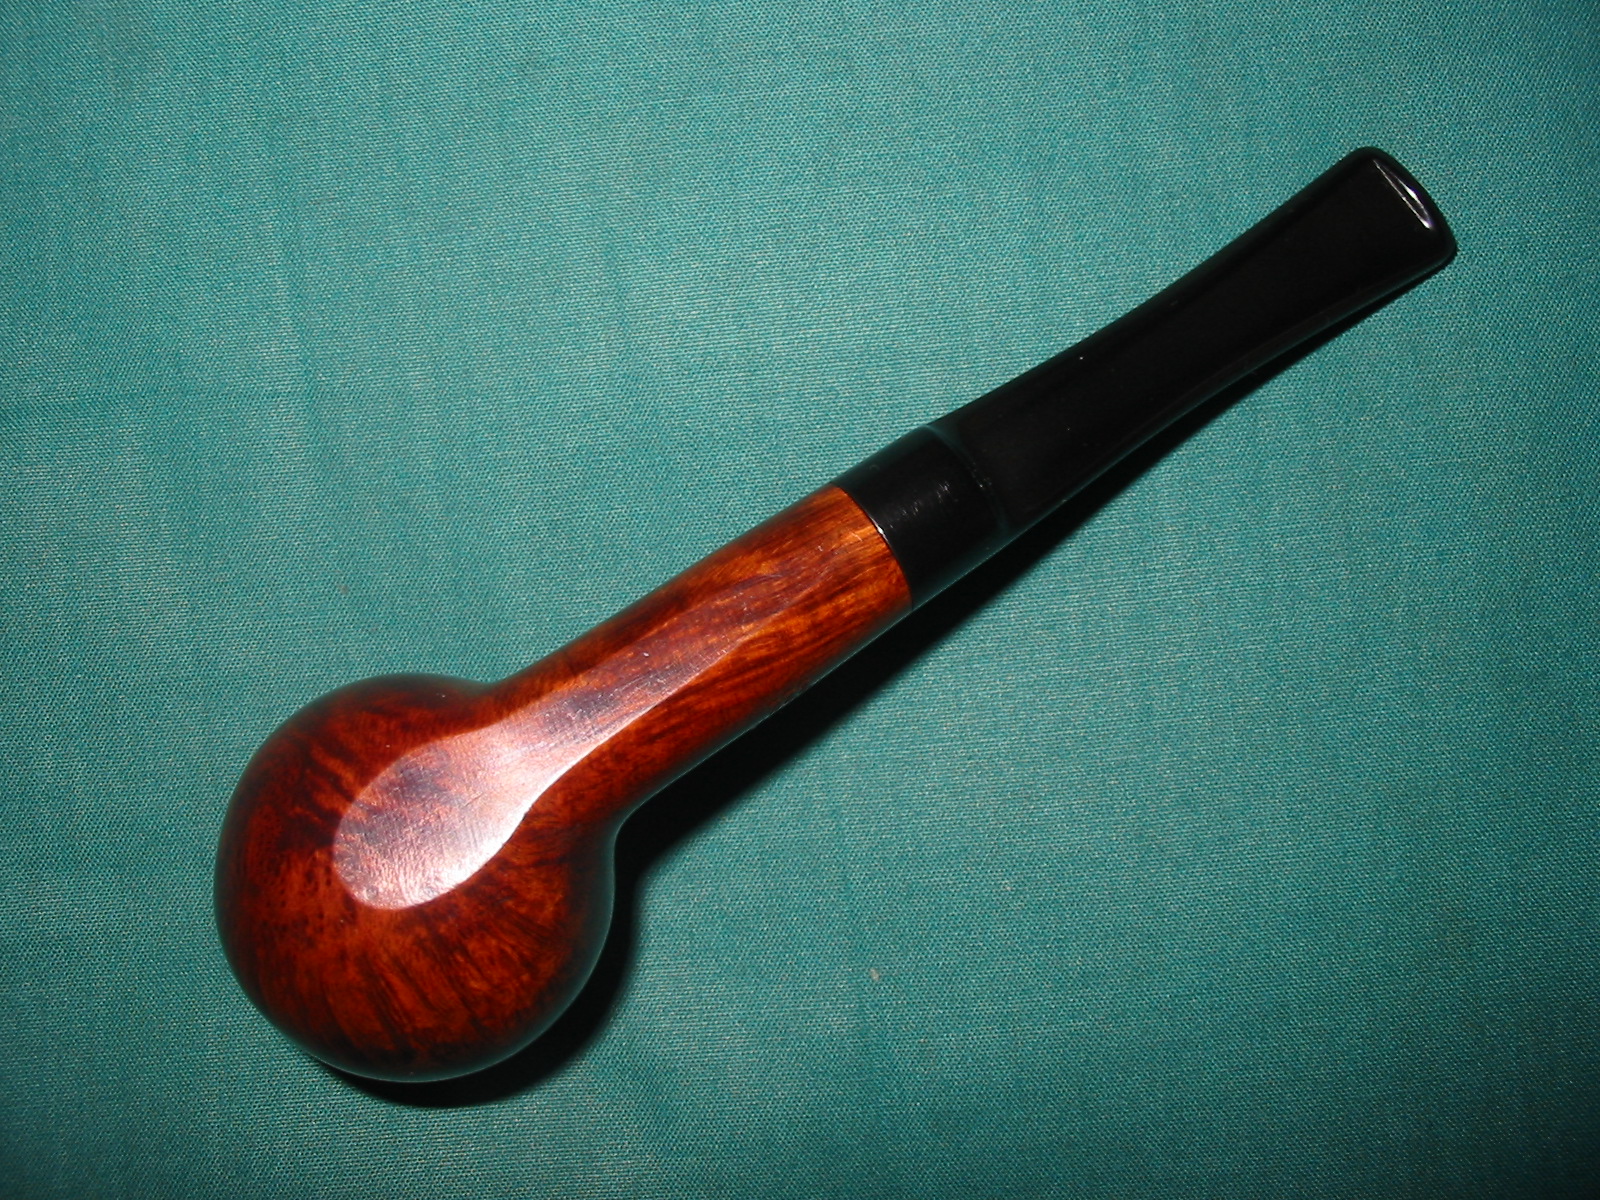
I buffed the stem and bowl with White Diamond and then gave it multiple coats of carnauba wax and buffed it with a soft flannel buffing pad. The finished pipe is shown below. The interesting grain is highlighted by the stain and the finish of the pipe. All that is left to do is to choose a tobacco to smoke in it for its inaugural smoke.


Blog by Steve Laug
One of the things I am always looking for online is information on the various lines of a brand of pipes. I have been working on one for Marshall Field Pipes and an amended one for other little known American lines. It is just something I do when I clean up pipes. I collect the data until I get a pretty comprehensive list. So when I found the little Mastercraft pot stamped Executive Choice it was a pretty natural thing for me to hunt down information regarding where it stood in the hierarchy of the brand. Not only do I find the information a fun part of the process for me I also find that understanding its place in the list of pipes made by a particular company gives me the desired background colour in the pipes I restore. It can give me much needed details regarding the stains and finishes used in a particular line. Here is the list Mastercraft pipes what I have called the Mastercraft Pipe Lines Hierarchy.
MASTERCRAFT PIPE LINES HIERARCHY (arranged from highest to lowest price)
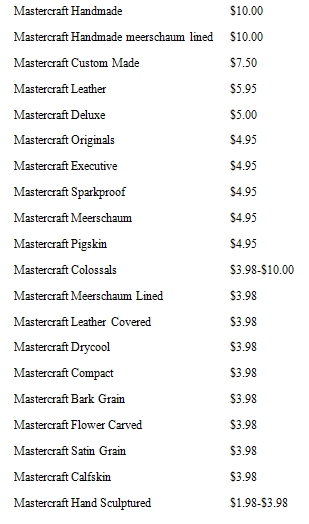
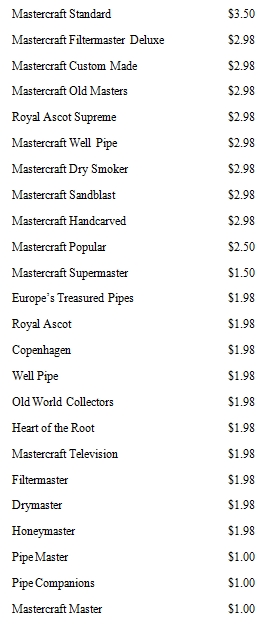
If you happen to have either examples of any of the pipes on the list or additions or corrections please post them here.
Blog by Steve Laug
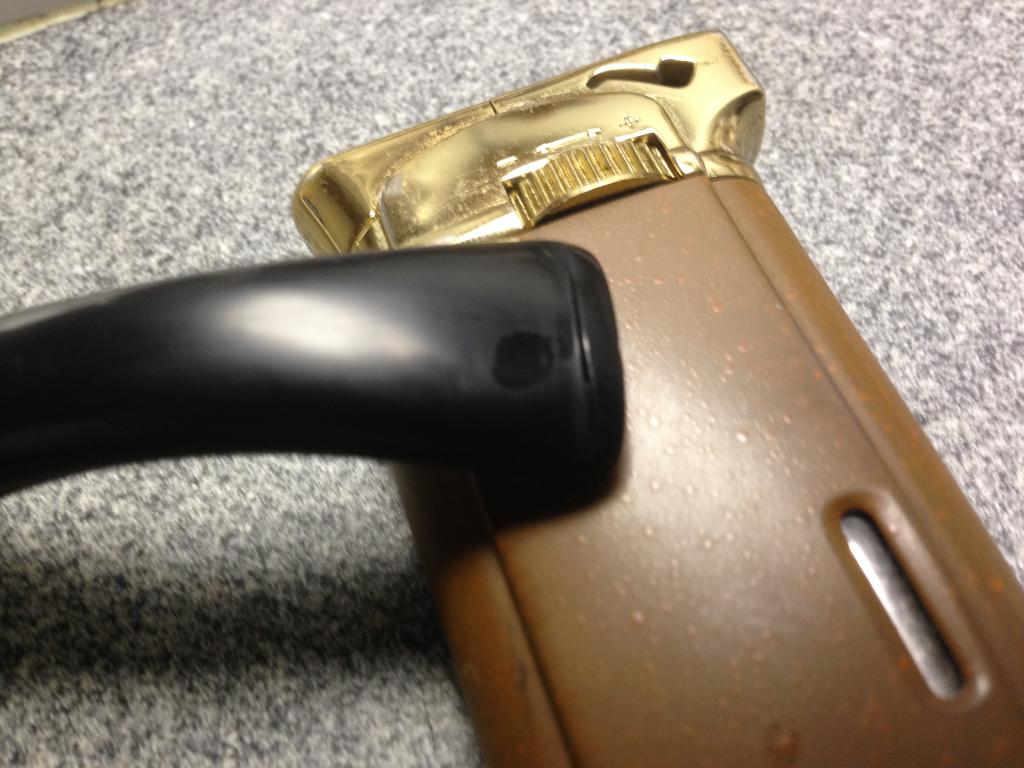
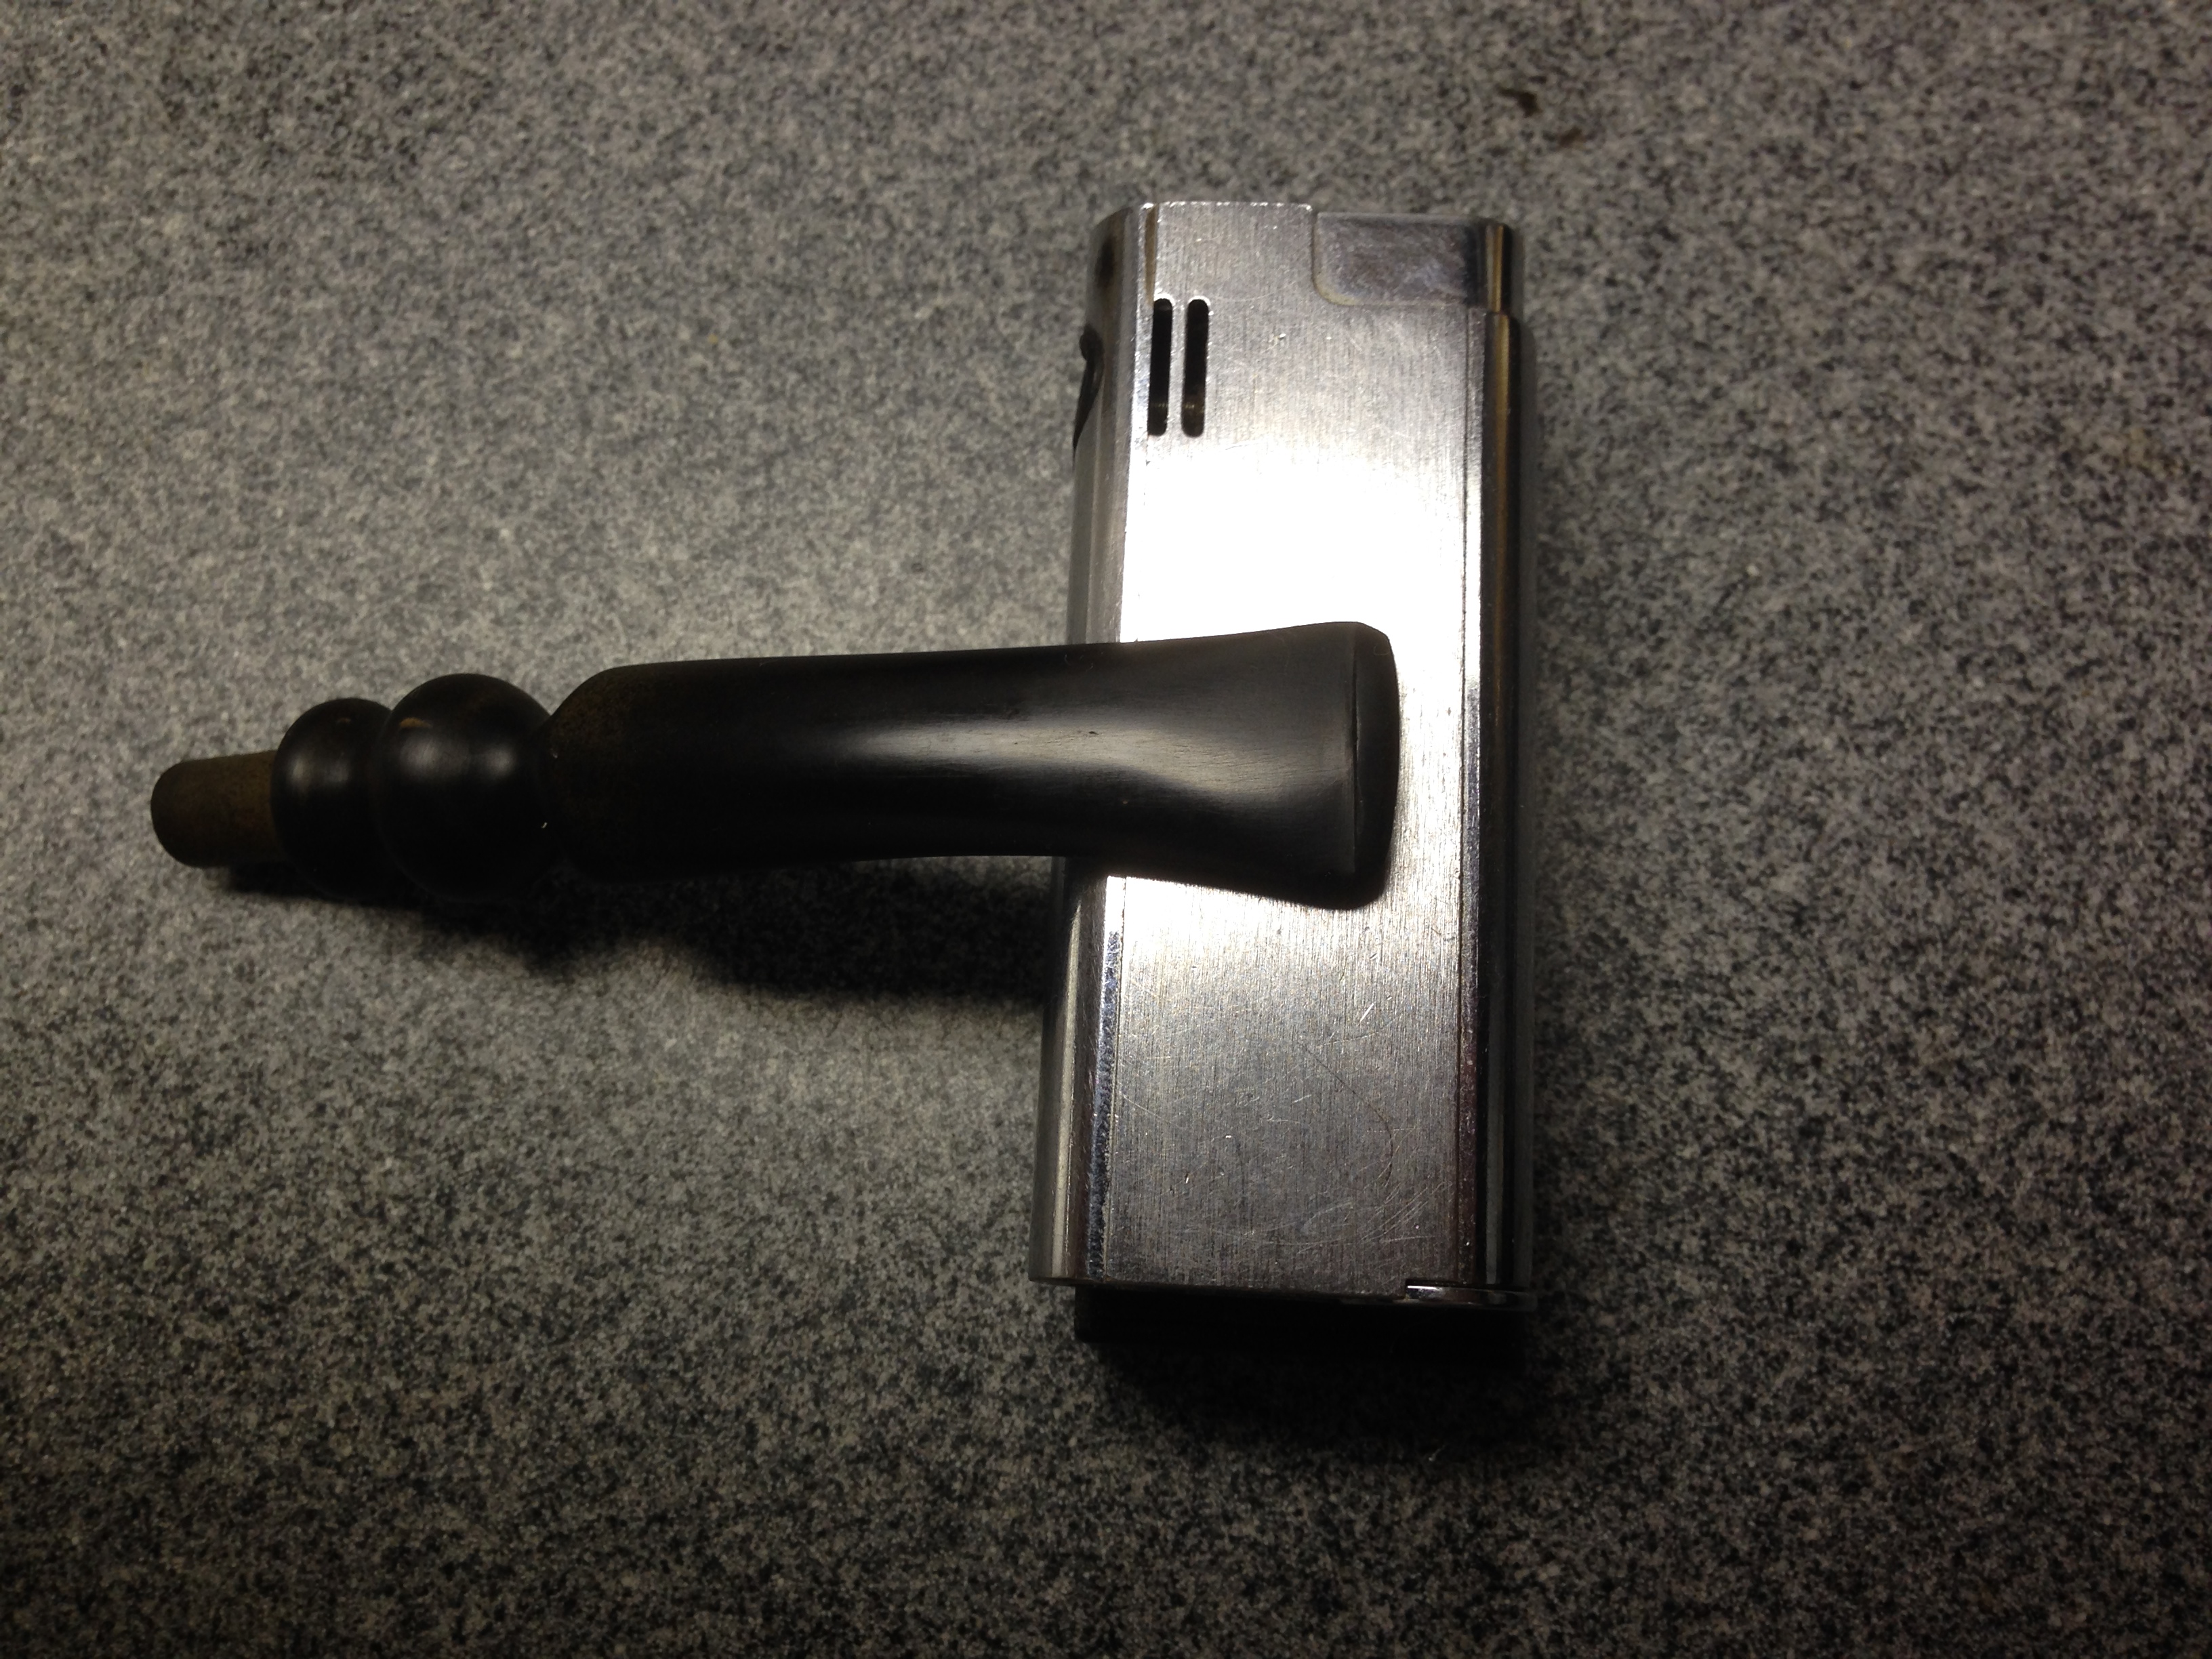
Another pipe I picked up along with the two pairs I have written about lately is a nice little Mastercraft Pot. I am generally not taken by the pot shaped bowl but this one has a nice bevel to the rim that shows off the grain on the rim. It has some nice grain on the sides, back and front. It is stamped on the left side of the shank Mastercraft in a shield. 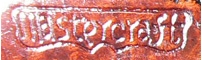 Underneath it is stamped Executive Choice. On the right side it is stamped Imported Briar over Italy. The stem bears the MC silver oval inserted in the side of the stem on the left side.
 The bowl was heavily caked and the beveled rim was covered with tars and buildup. The finish was in good shape. There were no deep scratches or dents. There were several fills but they were dark and did not stand out. The bowl was shiny but worn in some places. The stem was not too badly oxidized but it was dirty and seemed to have has a rubber bit guard on it at sometime in its life as it had left a line behind on the stem. There were no tooth marks or chatter on the stem.
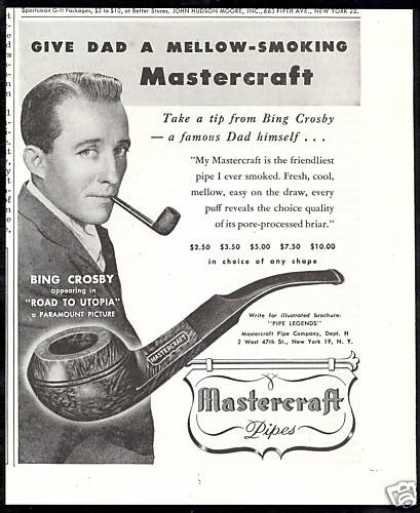
 I have cleaned up quite a few Mastercraft pipes over the years but did not really know anything about their history. I assumed that they were American made. I had heard somewhere that Bing Crosby owned stock in the company and smoked their pipes but I was not even sure of that. So I went to work digging into the background on the internet. The first thing I found was this old advertisement for the pipes with the old crooner himself.
 I continued through the Google list for Mastercraft and one of the next listing was in Pipedia. http://pipedia.org/wiki/Mastercraft
In the article the author wrote the following: “Bing Crosby smoked Mastercraft pipes and can be seen in their magazine ads from the fifties. That isn’t a lot of info so I went looking and found a thread with posting by “Ted” — the former Exec VP of Grabow/Mastercraft http://drgrabows.myfreeforum.org/viewtopic.php?t=155&start=0
It doesn’t appear it was ever a manufacturer and bought pipes from multiple factories — mostly French and English. It survived briefly the post war recovery and then was acquired by Grabow.
The following is quoted from the thread: First a confession. From 1974 till 1984 I had several positions with Mastercraft including Executive Vice President. I also worked for Grabow from 66 till 74 and from 84 till I retired in 91. In 91, with retirement, I was President and COO for the corporation that was called “Sparta Industries”. I have seen both sides of the “fence”, and even though I never left the “employ” of Grabow, my loyalties for 10 years were with M/C.
United States Tobacco(UST)(Skoal and Copenhagen) bought Grabow in 69′ from the Lavietes family. In 74′ they bought M/C from Bernard Hochstein and moved it into the EXACT facility Grabow occupied. I was named “operations manager” and we were in the basement of a 4 story building in Sparta, NC.
M/C was STRICTLY an importer of pipes and pipe related merchandise. In 74′ when M/C moved from NYC to NC the inventory of finished goods was stored in a facility in Winston Salem, NC. Lentz Moving and Storage. Stacked 10 feet high the inventory covered 180,000 square feet….FINISHED. In my time at Grabow I had never seen that much finished stock, and the shapes, manufacturers, finishes. Heaven for a pipe smoker…..Damn right. You would have had to slap me really hard to get the grin off my face.
I’ll just list a few Manufacturers/names of the inventory. England ….Parker/Hardcastle(Dunhill) …Orlick…France…Jeantet…Jima…Cherrywoods…Italy…GIGI pipe…Radica…Rossi…Federico Rovera…Emilio Rovera…Santambrogio.Brebbia..Meerschaums from Austria…. Strambach… Lighters from Japan…Pouches and accessories from Hong Kong…and the Israeli pipes from Mr. Hochstein’s sons. Trust me…this is only a small sample of the things M/C had, and bought into inventory.
Now the connection. Since M/C and Grabow shared a building, and I was an employee of Grabow we compared notes. Grabow copied a BUNCH of M/C items fully with my help and some skills I had developed.
First was Omega…A copy of a well pipe made by Federico Rovera (FERO.com)….Freehand by the Alpha/Shalom factory…Meerschaum Lined from M. Gasparini, and later GIGI PIPE. These were originally imported by M/C for Grabow and stamped Grabow, but also stamped ITALY. Later models…better finish were made in the USA. Bucko…copied from M. Gasparini… (Gasparini, to my knowledge is the only maker of leather covered pipes in the world). If you buy a leather covered pipe it was, most assuredly covered by M/G. And you thought the wood in the Grabow COLOR was bad…..oughta unwrap one of these scrappers. There is a lot more. Questions will be answered following the presentation.
Now the other way. Grabow to Mastercraft. M/C never really had a source of continuing supply. The foreign manufacturers would make a line for a while and then quit. Never do it again, no matter how well it sold, no matter the demands we put on em’. Grabow gave M/C a source of stability and a nice profit for both companies. A lot of these you will not have heard of, but maybe….Seville, for M/C all smooth, for Grabow all rustic Hillcrest…. Freehand, For M/C Andersen and (a few Mastersen), for Grabow, Freehand with a DRB tampon. New finishes… New shapes, New bits…..Mastercraft showed Grabow how to use LUCITE for stems… Royalton…Again, these are just examples.
Ted also said: Several years before UST bought Mastercraft, M/C had acquired Marxman Pipes. A wonderful kind man, Bob Marx was still working as a salesman in NYC, and I was fortunate to make a few sales calls with him. You all remember Charles Atlas? Bob Marx was about 76 and had just been awarded the (I think) Atlas Award for being the finest specimen of manhood over 70 years old in NYC, or maybe the state.
M/C had some inventory of Marxman stuff, but not a lot. I know very little about Marxman. Did they make, import, or both?
M/C was included in all the major Christmas catalogues…Sears… Spiegel… Penney… Ward… Aldens. This was from about 70′ till 80′. We usually would have a 2 pc. Massa (pressed) Meerschaum sets from Robert Strambach, A water pipe from Brebbia, a huge Well pipe (saw one on e-bay a few days ago), and various odds and ends to fill about 6 – 8 spaces.
Let me also say one more thing about the 180,000 sq. ft. That wasn’t all pipes. It included display cases for our sets, which were made in England, and took up lots of space. Regular boxes, bags, and display material were a part, and pouches and accessories took up quite a bit.
In about 78′ UST put together a “premium products” sales force. They sold, mostly to pipe shops, products that UST owned. Tobacco from a plant in Richmond, Don Tomas cigars from Honduras, House of Windsor cigars from Red Lion PA., and M/C pipes. I think the force was 11 or 12 men and this was the heyday for M/C. What we had what EVERYONE in the pipe business wanted.
After the sales force was disbanded, M/C struggled some. This is about the time that Grabow and M/C realized what an asset we were to each other. Sales stayed pretty good for a while because of the relationships Judy Weinberger (NYC sales office and VP Mastercraft) and I had developed with the pipe shop owners.
Most of the Mastercraft pipes I have seen/bought at the bid place have an Algerian Briar stamping which makes them an attractive buy in this era. They are very reasonable and everyone has been well made with a nice draw and fine centering.”
I continued to look through various links on the web and followed this link to Pipesmokers Forum. http://pipesmokersforum.com/community/threads/mastercraft-pipes.3773/
This post from the same Ted as above appeared there. In it he confirmed some of the same information as he did in the extended post on Pipedia. He wrote: “To most pipe smokers Mastercraft Pipes are small cheap pipes, signified by the oval aluminum “MC” on the shank. Absolutely nothing special.
But Mastercraft was much more. As an importer of finished pipes M/C worked with many of the world’s foremost pipe makers and had in inventory finished product from the likes of… England, Hardcastle and Orlik. France, Ropp, Jeantet, Jean LaCroix. Italy, Lorenzo, Gasparini, Federico Rovera, Emilio Rovera, GIGI Pipe, Brebbia, Santambrogio, Fratelli Rossi. Israel, Shalom and Alpha. Plus all the tools, pouches and lighters from Hong Kong and Japan. The list of suppliers is enormous, but these are the ones I can remember after 30 years, and very few of these great pipes were ever stamped Mastercraft (some from Rossi).
Please don’t discount the importance of Mastercraft in this wonderful hobby we enjoy. Mastercraft, like Grabow, made many of our fathers pipe smokers. We all carry on the tradition…Thanks…Ted”
I also found some older RTDA Almanac pages on Chris’ Pipe Pages site. http://pipepages.com/index.html The first of these shows the address of the Mastercraft Pipe Company in New York before the move and purchase that Ted mentions above. It is a listing of different brands sold by the pipe company. I clipped this image from the 1949 RTDA Almanac. It is an early catalogue listing since the brand was created in 1941.
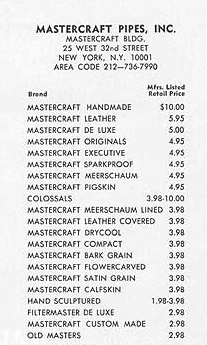
 The next two photos were clipped from the 1969 RTDA Almanac. I included these as they show a list of various MC pipe lines. Note the inclusion in this list of the Executive line. It is the fifth pipe in the list below and sold for $4.95. I am assuming that the Executive Choice could be a subset of this line. The one I have is Italian made and imported to the US. The time frame fits the pipe that I refurbished so it may well be a 1969 pipe. The Italian pipes were made for Mastercraft by such Italian pipe makers as: Lorenzo, Gasparini, Federico Rovera, Emilio Rovera, GIGI Pipe, Brebbia, Santambrogio, Fratelli Rossi.

Now that I had found out some of the history of the Mastercraft brand I was intrigued. I went to work on the pipe with a new interest. I find that often a bit of history of the brand fuels my clean up and restoration work. The photo below shows the cake and the tars buildup on the rim. The rim itself was beveled inward and appeared to be unharmed under the tars. The grain was quite nice on the bevel.
 I reamed the bowl with a PipNet reamer. For this bowl I used three of the reaming heads to take the cake back to bare briar so that I can build up a hard and even cake.
I scrubbed the tar on the rim with Murphy’s Oil Soap to soften and remove it. It took a lot of scrubbing to break through the tar and hard carbon buildup. I put the oil soap on cotton pads and worked them against the bevel of the rim. After much scrubbing the rim was finally clean. The photo below shows the finished rim. I scrubbed down the rest of the bowl to remove the grime on the surface.

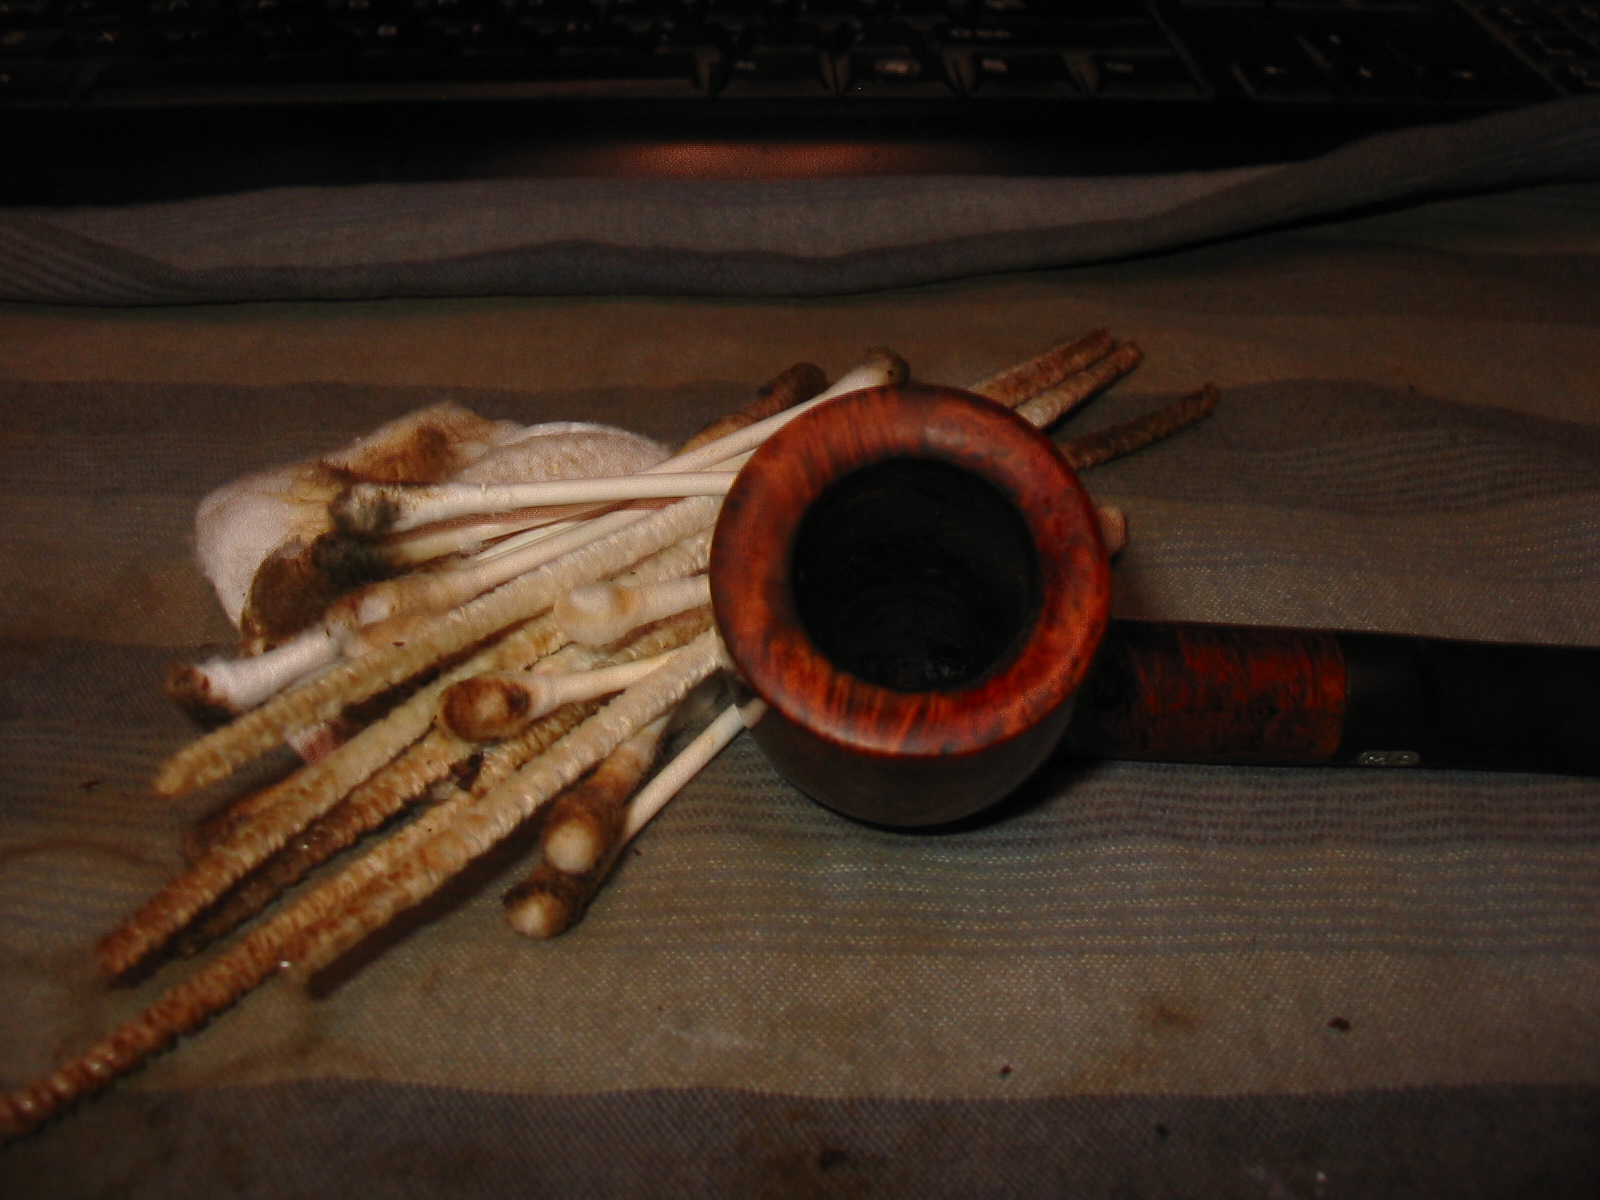
I cleaned out the shank and the bowl with pipe cleaners, cotton swabs and isopropyl alcohol. I scrubbed out the stem at the same time. Once the pipe was clean inside and out I found that the finish was covered with a thick varnish coat in a rather surprising way.
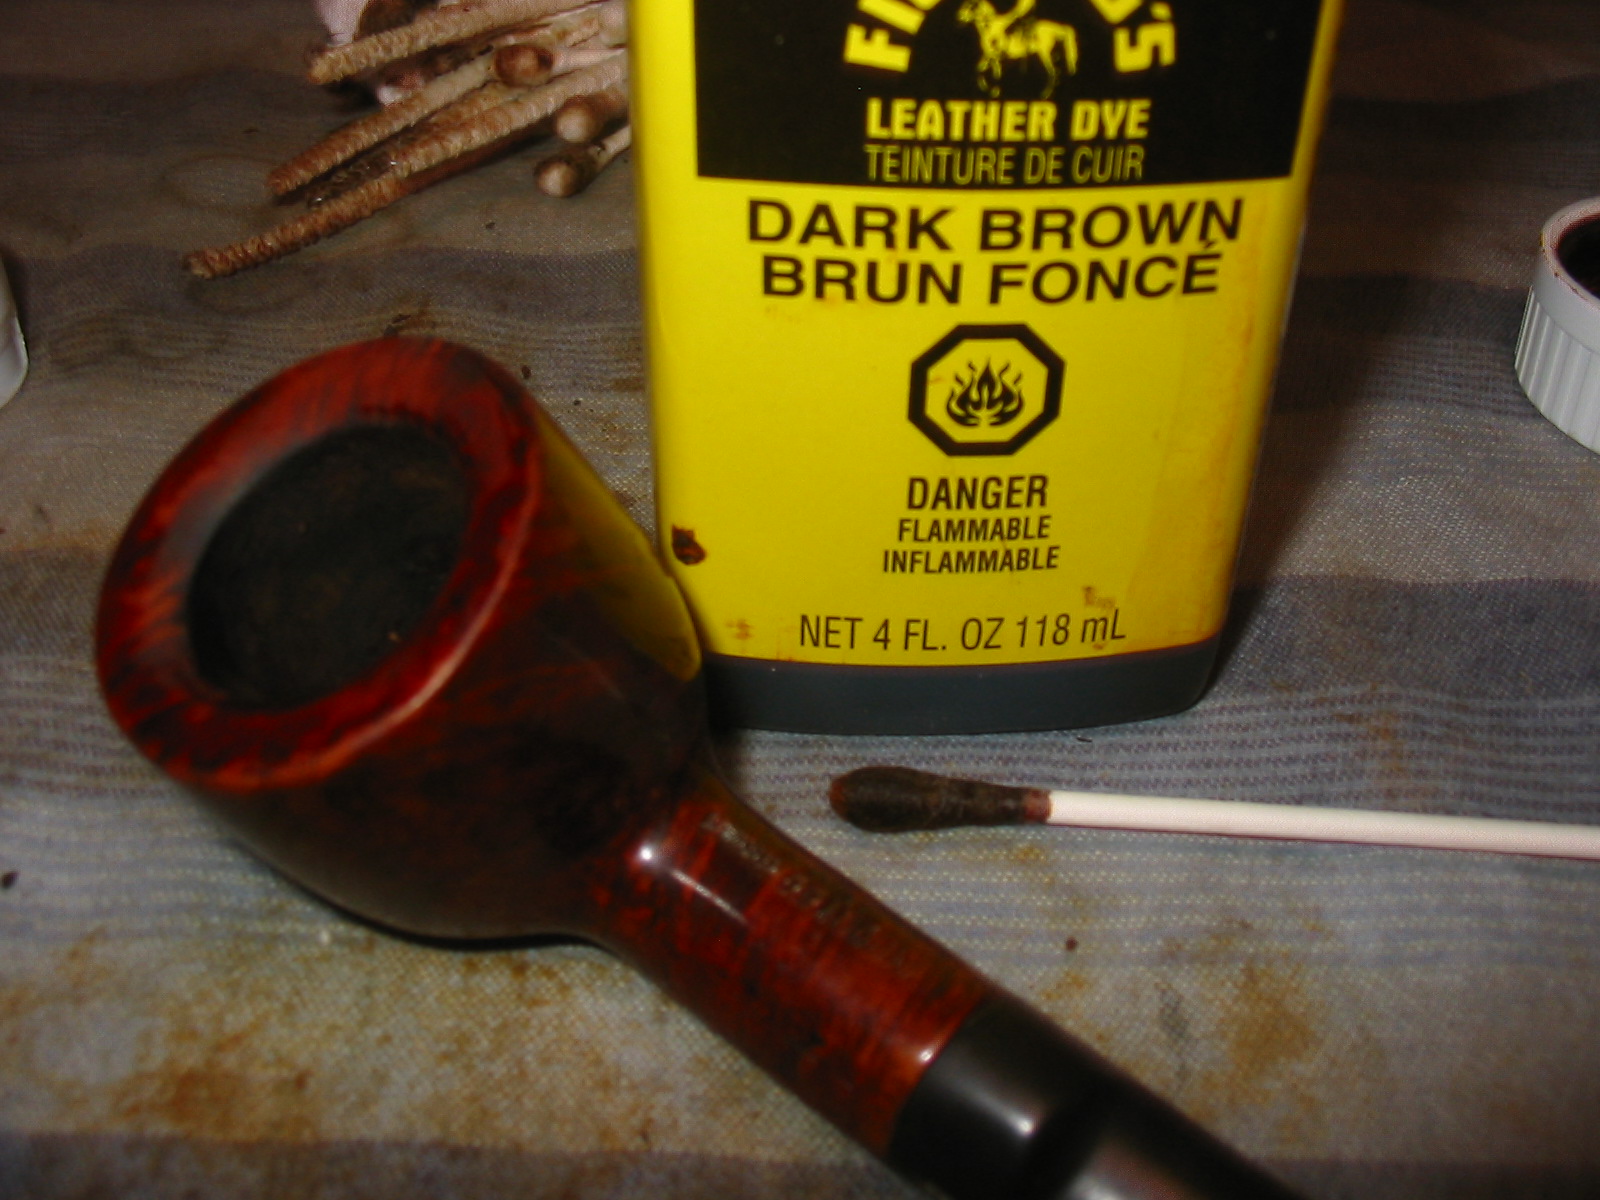
I decided to do a bit of touching up the rim edges and bevel with a dark brown aniline stain. It went on spotty and when I flamed and hand buffed it things did not feel or look right with the rim. I wasn’t sure what the issue was, the bowl had been quite shiny when I started but with the oil soap it had dulled slightly.
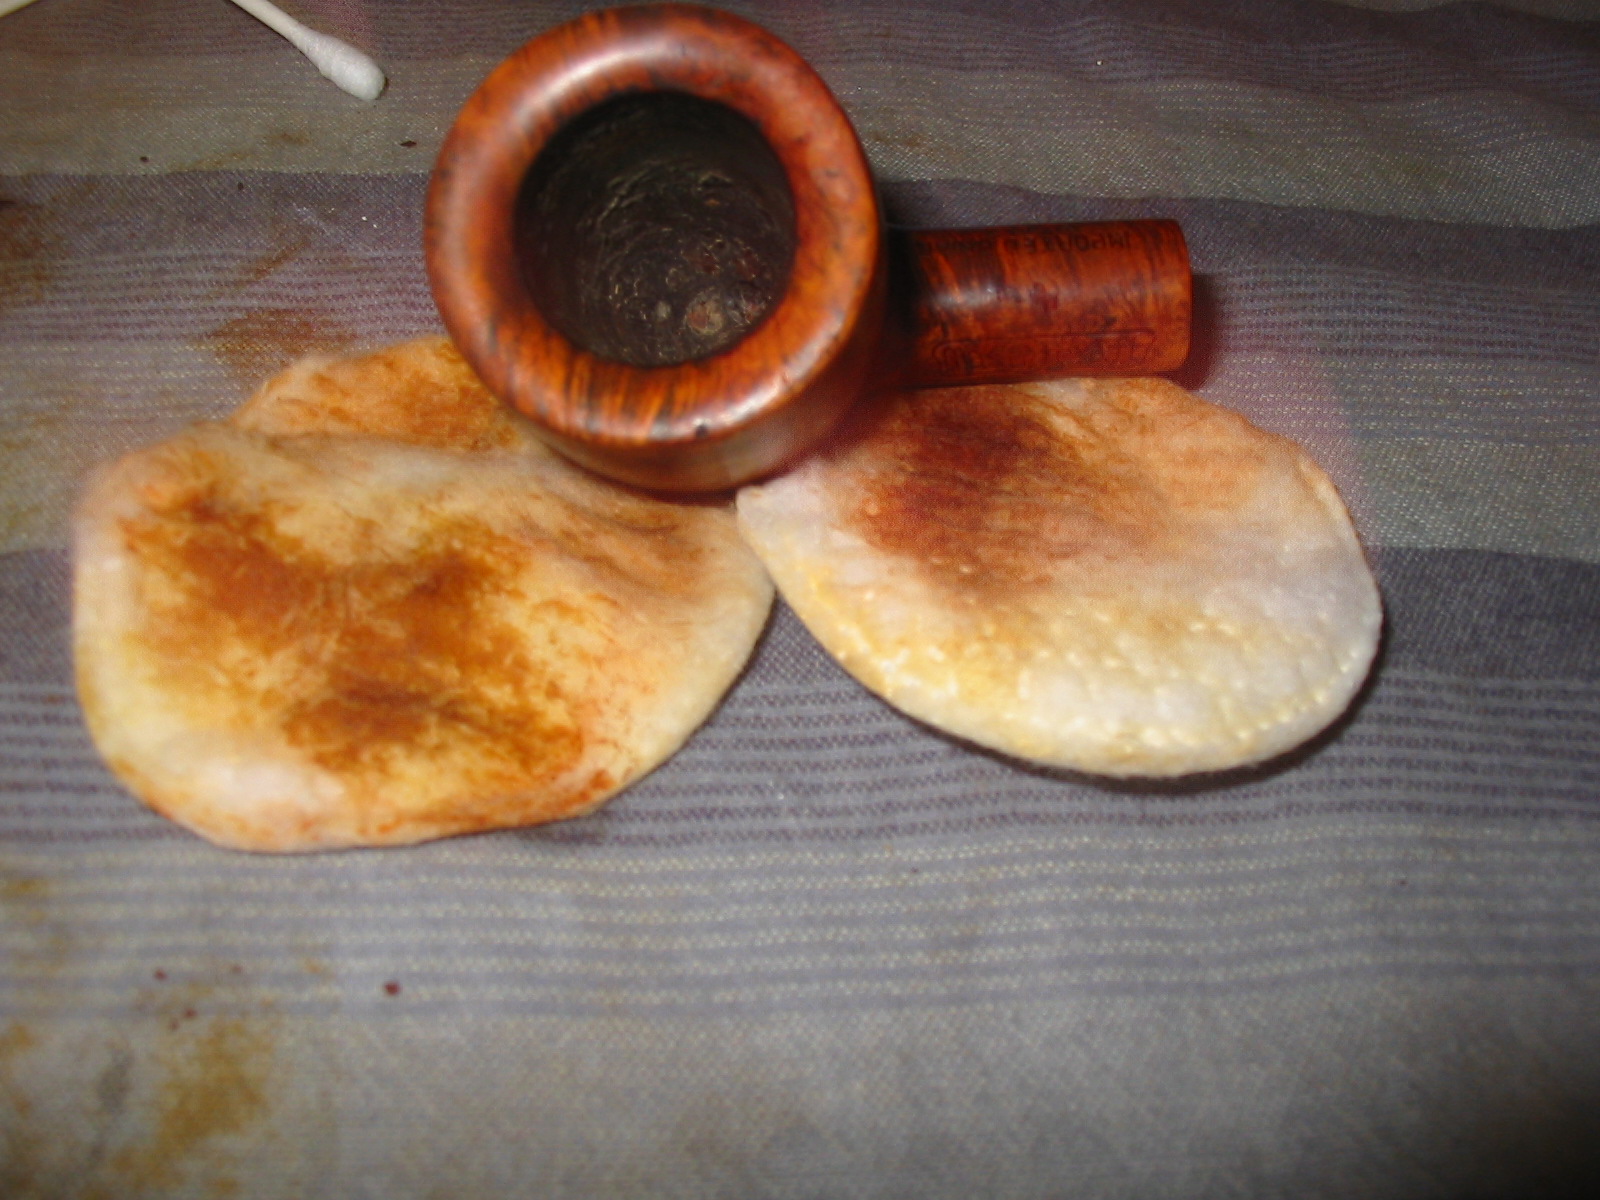
I found that the finish was covered with a thick varnish coat. I did not figure that out until I did a touch up stain on the rim and took it to the buffer to polish the rim. I gave the entire bowl a buff with red Tripoli. As I buffed it the finish began to bubble and peel. I have to tell you this was very frustrating and irritating at the same time. The photo below shows the bubbling of the finish on the back side of the bowl. It appears almost white in the photo.

I took the pipe back to the work table to remove the varnish coat. I wiped the bowl down with acetone on cotton pads to remove the finish. Thankfully it was a varnish and not a urethane based finish. It came off quite easily with a little scrubbing of the bowl, rim and shank. The next series of four photos show the bowl after the finish was removed. I decided I liked the colour of the bowl at this point so I did not restain it once it was clean. The rim and the bowl matched so it became unnecessary.


I sanded the stem with 220 grit sandpaper, medium and fine grit sanding sponges to remove the buildup on the stem. I then went on to sand it with micromesh sanding pads. I wet sanded it with the 1500-2400 grit pads and dry sanded with the 3200-12,000 grit pads.
I rubbed the stem down with Obsidian Oil and when it had dried I took it to the buffer and buffed the bowl and stem with White Diamond. I was careful in the buffing on the shank as I did not want to damage the stamping. When the bowl and stem shone I gave them multiple coats of carnauba wax. I gave it a final buff with a soft flannel buffing pad. The finished pipe is shown in the photos below. The first photo is a close of the beveled rim. I find that feature of this pipe to be one of its most beautiful features. The final series of four photos show various views of the finished pipe. It turned out to be a beautiful pipe with interesting grain and once the varnish was removed a more natural finish. The pipe is now ready to enter the next phase of its journey in time and be smoked by me until I pass it on to whoever comes next in its life.


Blog by Joyal Taylor
This is the third article by Joyal (known online as holymolar). Again it is with pleasure that I put this on the blog. Joyal had emailed me that he was working on this piece for the blog. I was looking forward to reading his thoughts on this. Others have mentioned the problem to me when they used the black super glue. Joyal has done some good experimenting and I am pretty certain he has gotten to the root of the problem. Thanks Joyal for taking time to write-up your experience and tips on this patching process. This is a what rebornpipes is all about – taking ideas and experimenting and improving them. Without further introduction have a read on what Joyal has learned.
The first few times that I patched stem holes and deep tooth marks with black superglue, I ended up with white margins like these: (very evident when a flashlight is shined on the patch at an angle).

At first, I thought that I must have contaminated it by sanding before the glue had totally set. But now, I’m convinced it was because I didn’t remove all of the oxidation beforehand. I’ve learned a few tricks with black superglue patching.
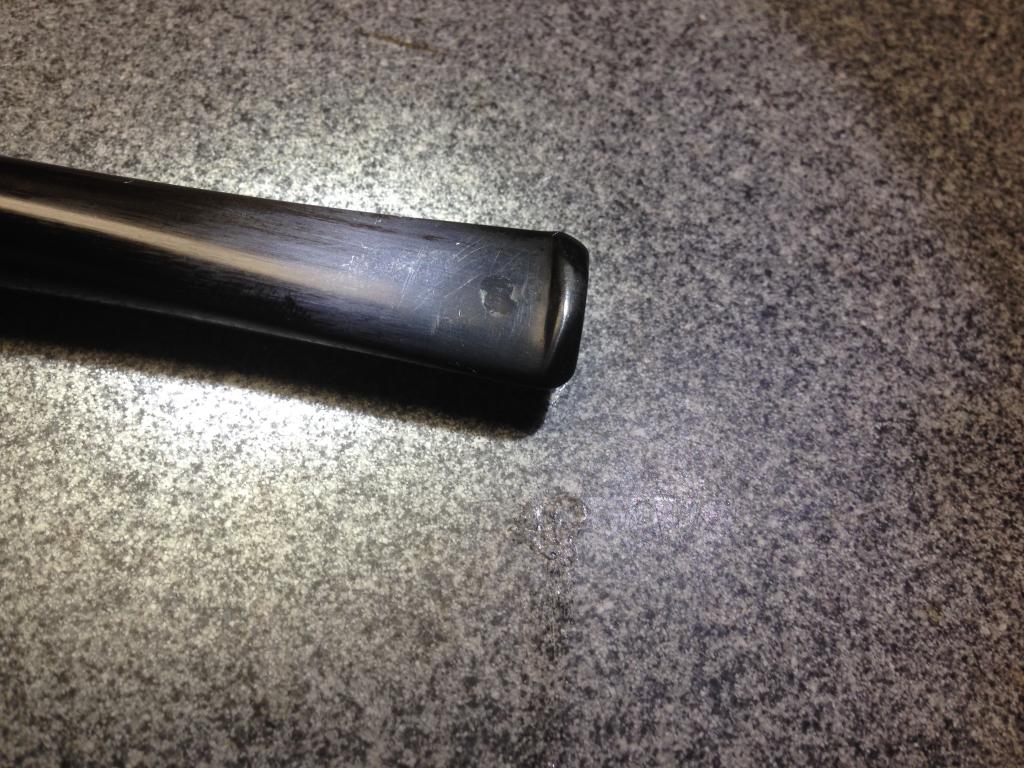
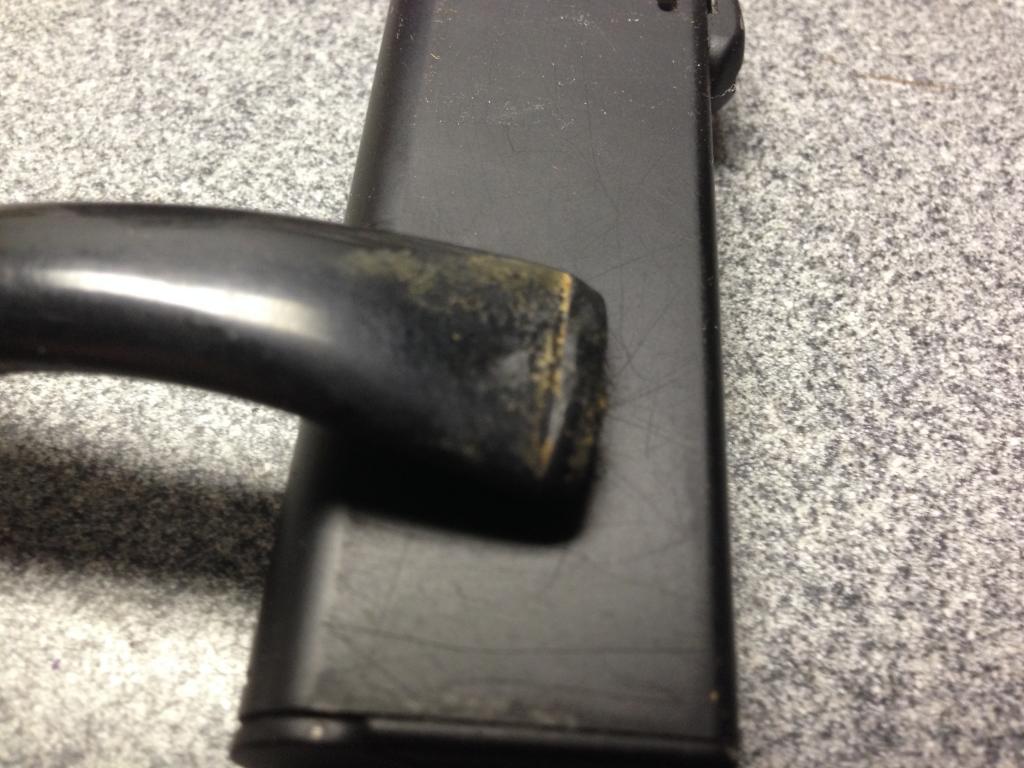
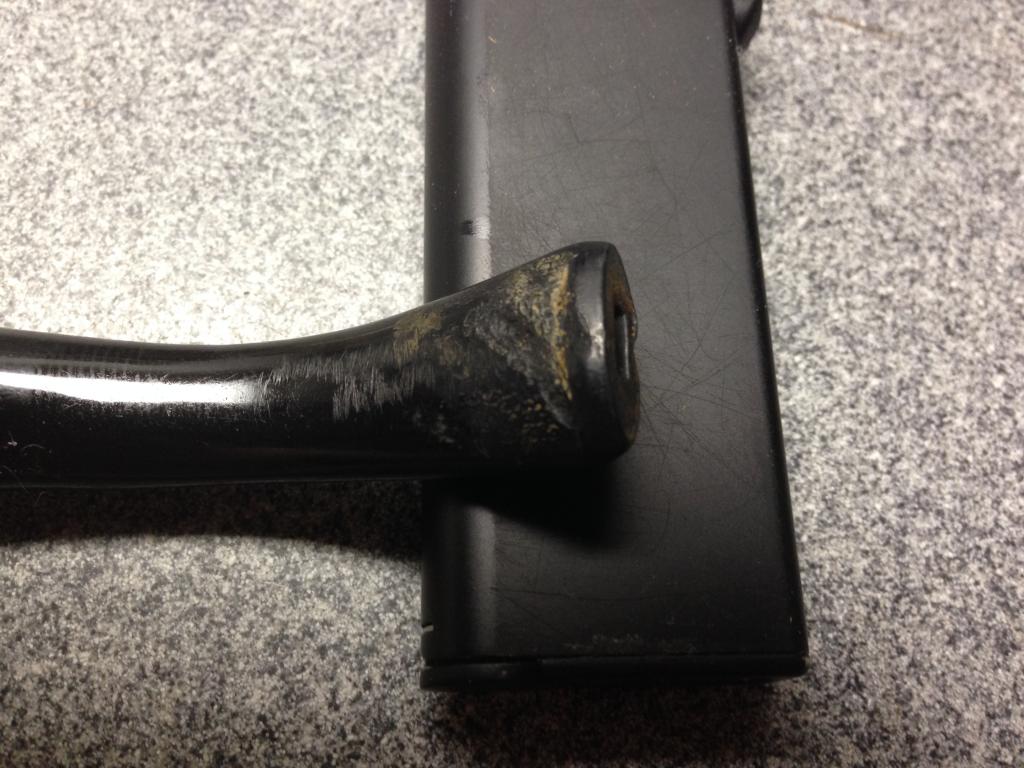
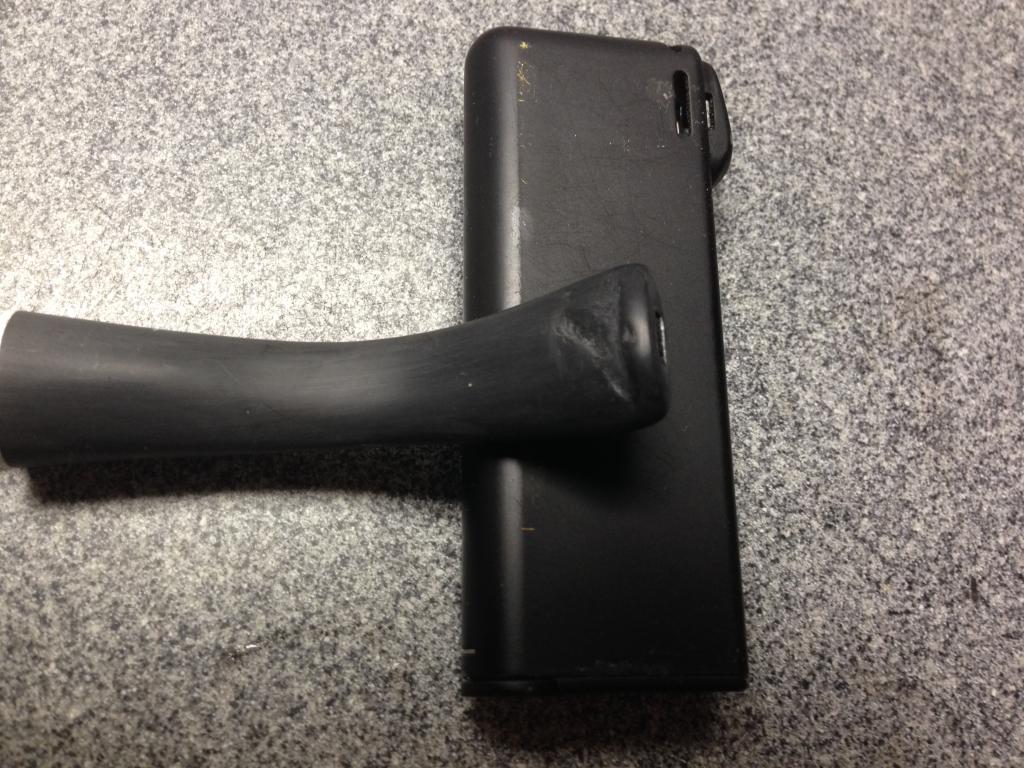
Here’s the before photos of a Dr Grabow stem that I recently patched. It’s not a high quality vulcanite but a relatively soft rubber.
Tip #1 – Absolutely ALL oxidation and oils must be removed before patching. There are many ways to remove oxidation but, for this, I prefer the most aggressive method that I know – A bleach bath for an hour or more. Then a 1 hour alcohol bath to remove the bleach smell and taste. The bleach causes surface pitting but, in my mind, that means it has removed the deepest oxidation. (Sometimes I’ll follow with a Oxyclean bath as well). After the bleach and alcohol, lots and lots of sanding is necessary to smooth down the pitting. I use 220-800 grit with water.
Tip #2 – Clean out the hole with a small round burr in a Dremel. Remove all oxidation and discolorations from inside the hole. “Feather” the edge which makes for better blending of the glue/stem junction and it also removes any microscopic particles of oxidation that may be hiding in the ragged edges.

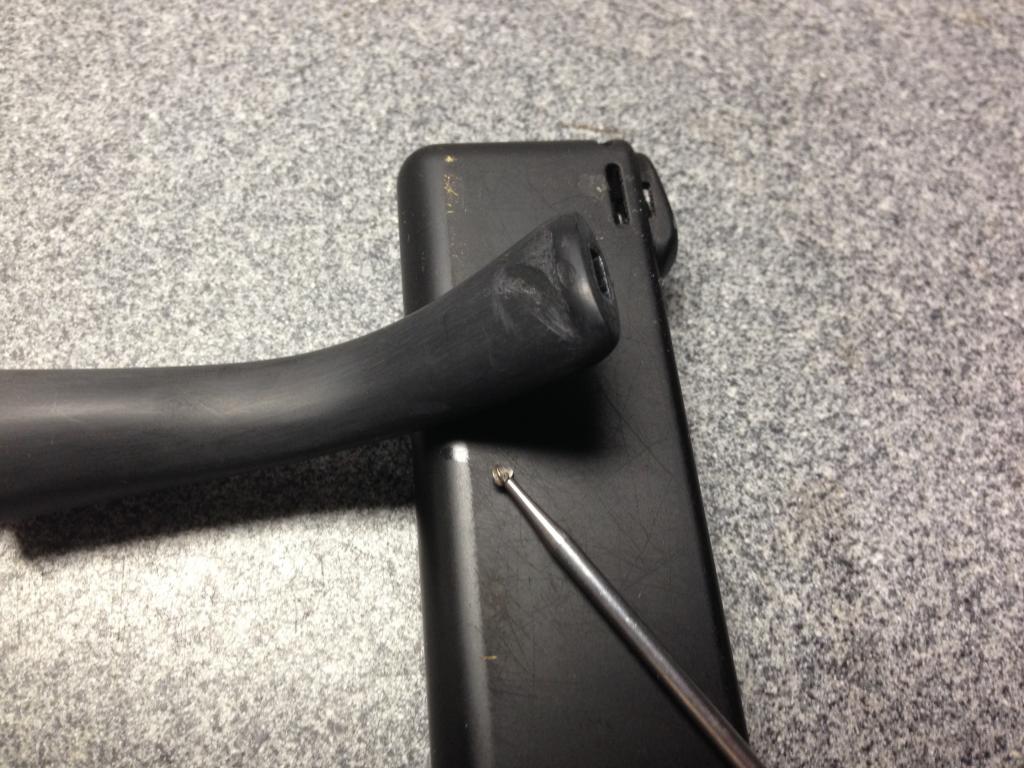
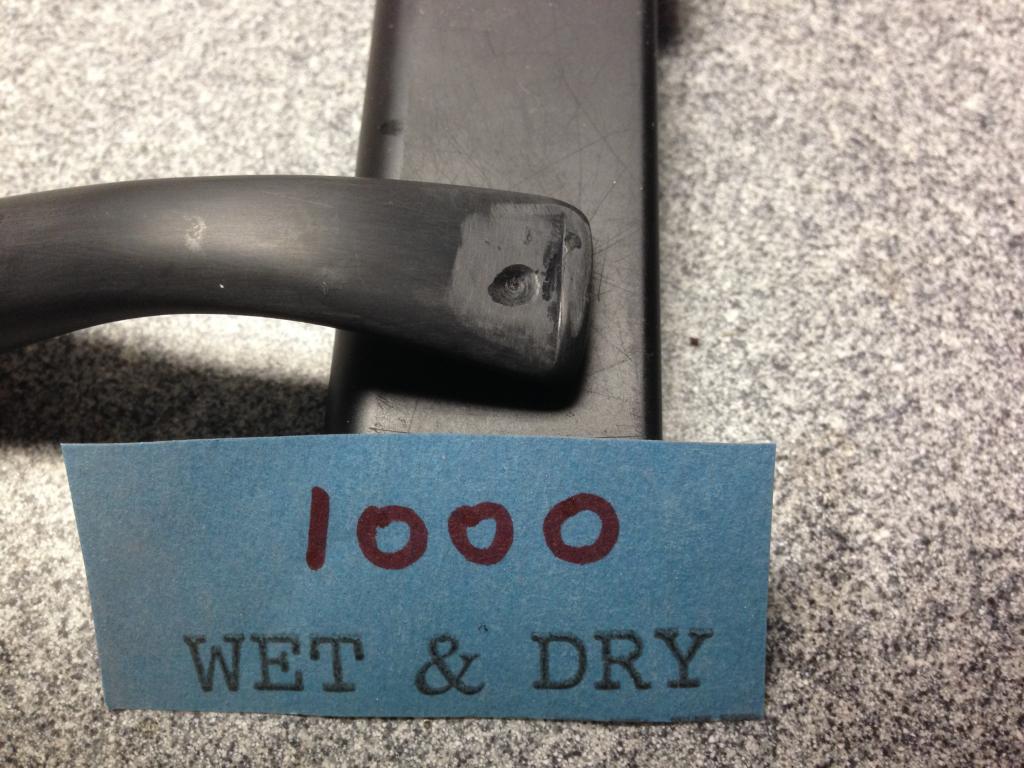
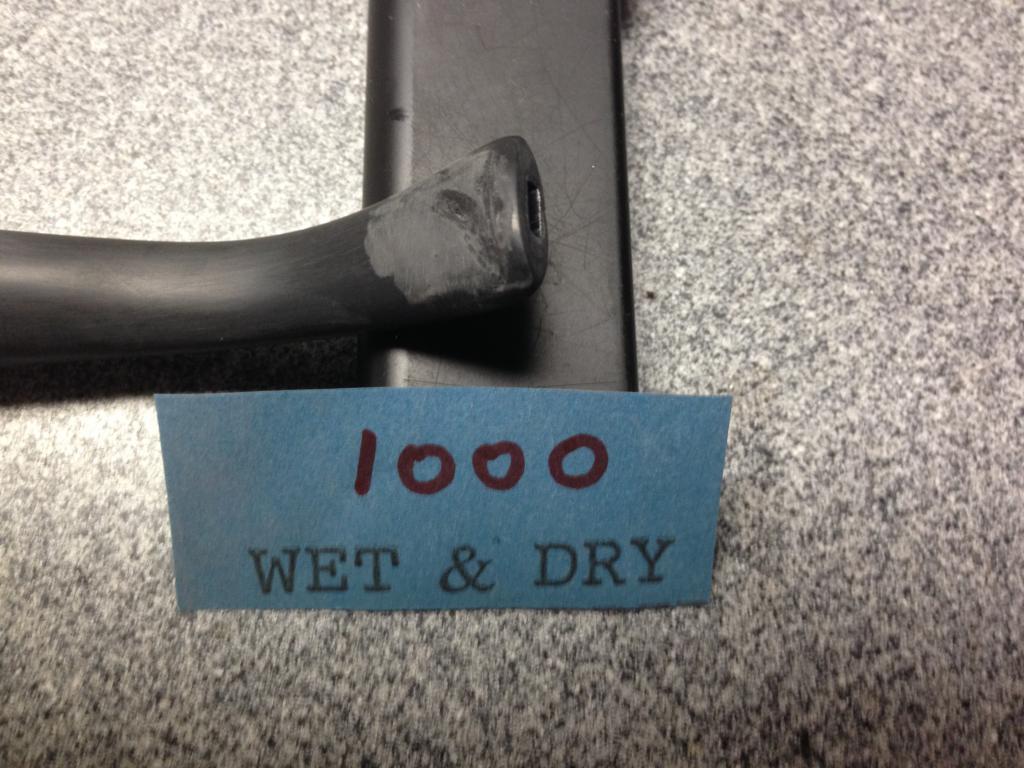
Tip #3 – Now use 1000 grit sandpaper on the edges to smooth it out some more. Remove any dust or oils with an alcohol wipe.
I sand down the overfill (220-2500 grit) until it’s even with the surface. (If necessary, I’ll freshen up the bit with needle files). Then micro mesh (4000 -12000), carnauba, and buff.
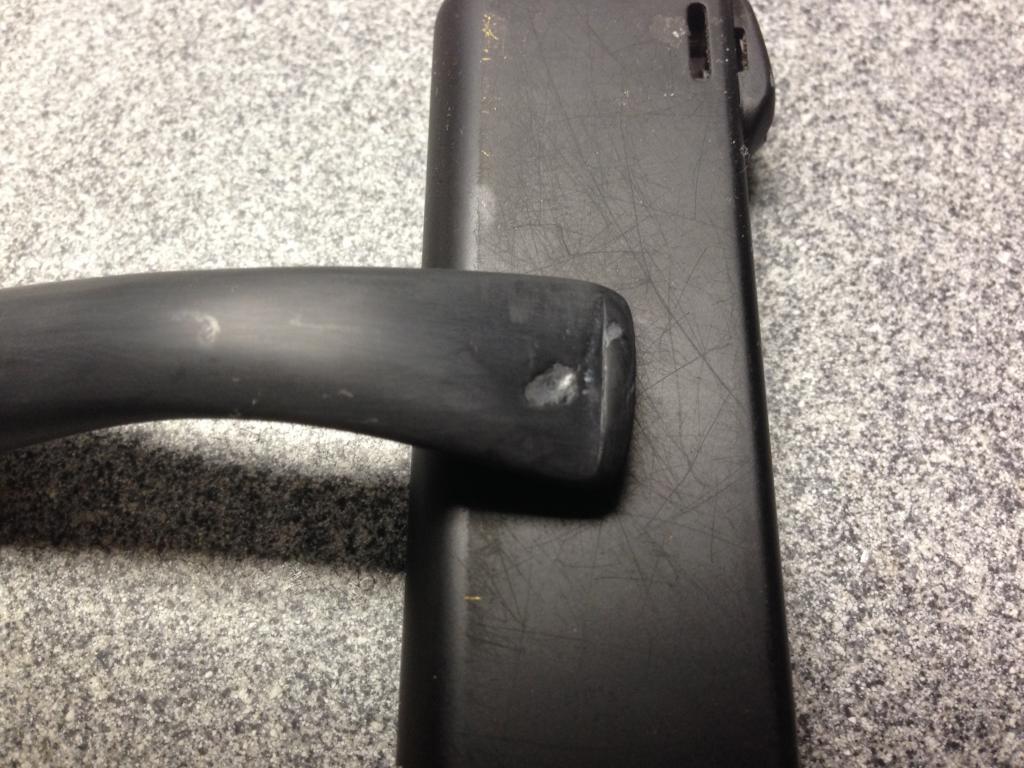
Here’s the after photos on that Dr Grabow stem before final polishing/waxing – .so it can be seen better without the glare of the camera flash on fully polished stems. No more “ring around the collar”.
Sometimes, on good quality vulcanite, I have difficulty seeing where the patches were.
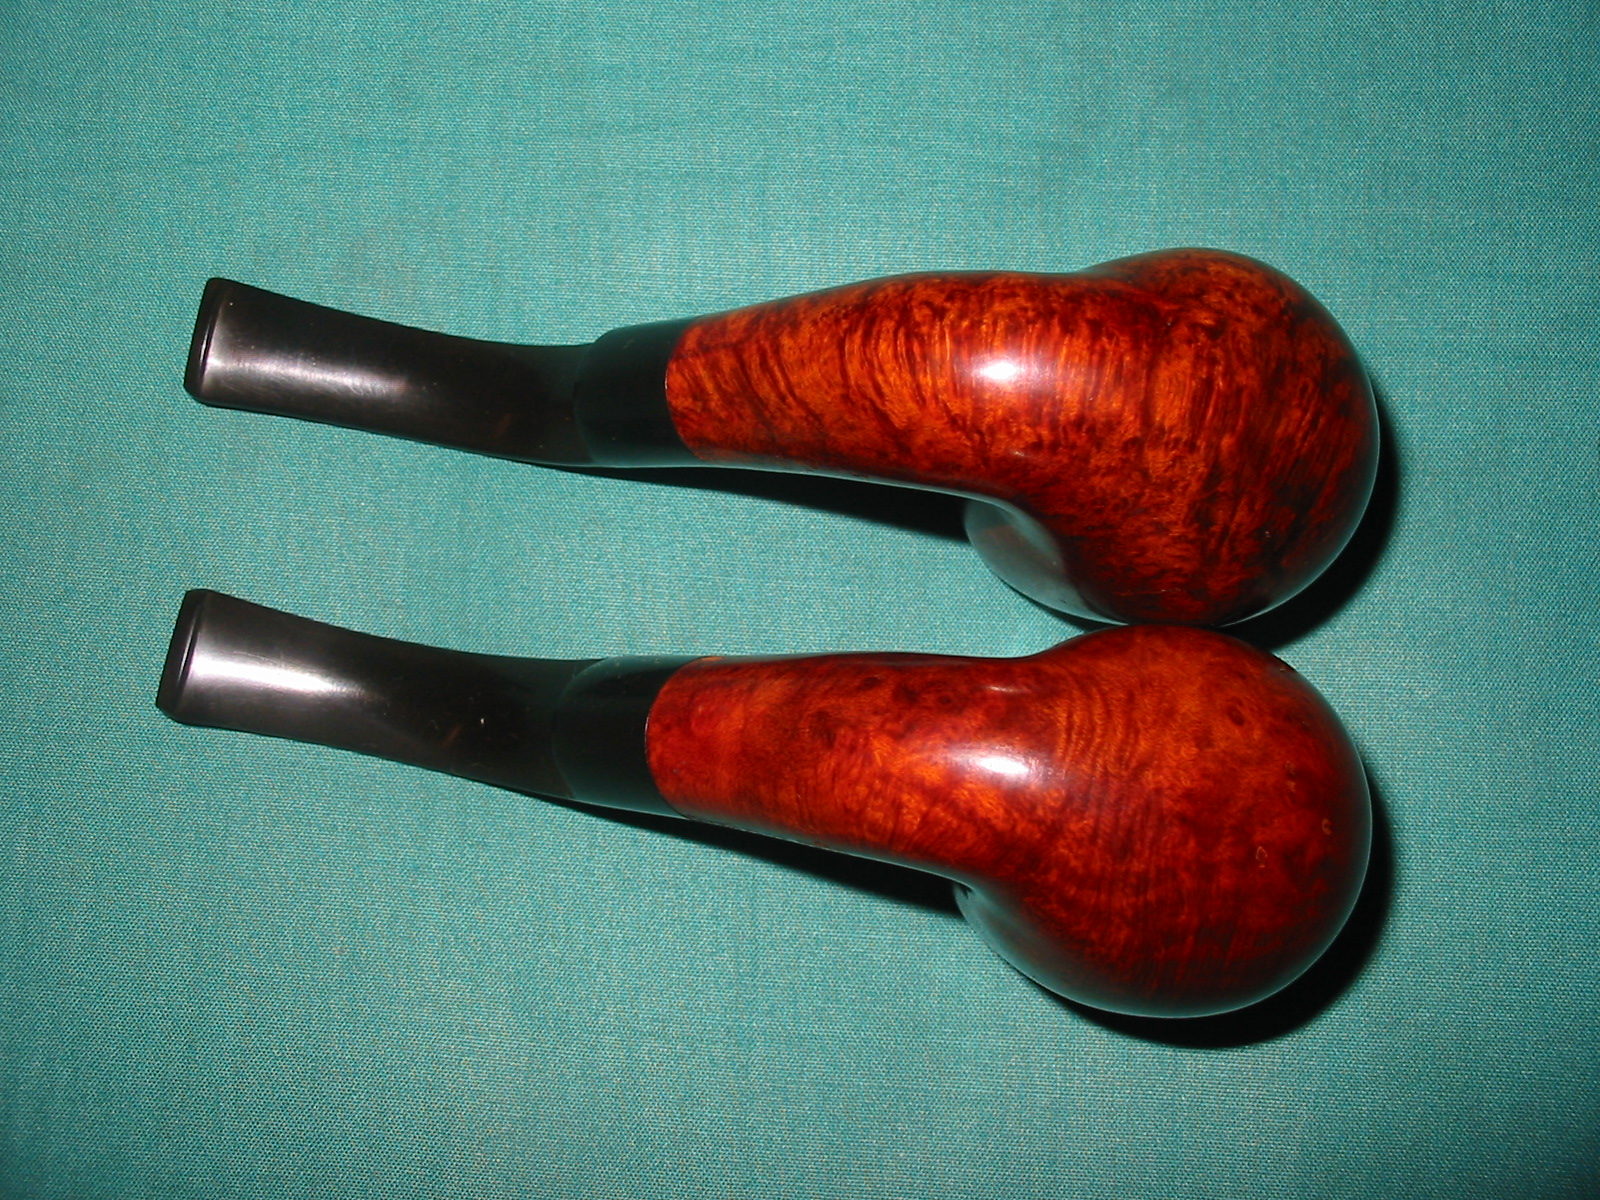
In a recent pipe hunt I picked up this second set of twin pipes. They came from the same collection as the pair of Royal Coachman bent billiards. These are stamped The Tinder Box over Meerschaum Lined on the left side of the shank and Imported Briar on the right side of the shank. I stated in the title that they are English-made and I came to that conclusion by the shape, size, staining and overall look of the pipe. Though I cannot definitively prove that, they are very similar to an older Orlik pipe of the same shape that I repaired and restored. The staining and finish were in very good shape. There were relatively few dents and dings in the bowl and shank though both were very grimy and greasy. The rims were clean other than the slight tar build up on the meer portion. The briar outer rim was in great shape with no nicks of dents. The stems were oxidized and had calcium build up all over the surface. There were also sticky places on the stem that looked like the residue from a sales label. Since they did not have a label when I bought them I am thinking this maybe the original labels on the pipe stems. Inside the bowl was slightly caked and had tobacco residue stuck to the walls. The inside of the shank and stem were very dirty with tarry buildup. The slot on both mouthpieces had narrowed with the tars.
 The meerschaum lining on the two was in great shape except for the bottom of the bowl. The lining on the bowl of the top pipe above and below shows the break through on the lining. It was worn all the way through to the briar. The size of the hole was about the size and shape of a pencil. The lining on the bottom pipe was not as worn but was significantly below the airway and showed damage. It was very thin if my measurements were correct. Both of these bowls would need to be addressed in a restoration.
 I cleaned out the inside of the bowl and the shank to prepare for patching the bottom of each bowl. I used cotton swabs, isopropyl alcohol and pipe cleaners to remove the tars and grime from the inside of both. I also used a fine sanding sponge to remove the tars from the top of the rim and the meer lining. All of this was done to prepare for the repairs I was planning for the inside of the bowl.
 I scrubbed the outside of the bowl and shank with Murphy’s Oil Soap on cotton pads to remove the grime and sticky substances on them both. I also rubbed down the stem with the oil soap.
 I mixed a small batch of Plaster of Paris in a plastic bowl that I use for mixing and cleaning pipes. I generally pour in the dry powder and then use an ear syringe to add water slowly to the mix to get the right consistency for a patch. I learned the hard way to do this. I used to pour in the powder and then pour in water. I had to keep adding back and forth to get the mix right and always ended up with excess material. This way I can actually mix it in very minute batches, and add water as needed to keep it workable.
 I inserted a pipe cleaner into the airway and into the bottom of the bowl to keep the airway from clogging with the mixture. I then pressed the mixture into the bottom of each bowl with the spoon end of a pipe nail and a dental pick. The trick is to push into the bottom and use the dental pick to push it into the holes. Once it is tightly packed by the pick I use the spoon to smooth it out on the walls of the bowl and the flat head to press the bottom of the bowl. In this case the bowl was somewhat conical so I used the spoon the entire time.
 I cleaned up the bowl and smoothed out the surface of the repair with my finger. I wet the end of it with water and then rubbed it against the walls and bottom. I do this to knock down the ridges left behind by the spoon. I cannot get it absolutely smooth but it is smooth enough that after a few smokes it matches the surface of the meer lining. In the photo below the top pipe shows that it took the largest amount of patching. It was the bowl that was worn through at the bottom. The crack at the airway is actually not a crack but a pipe cleaner end pushed into the bowl. The bottom bowl took far less of the mixture to patch. I set them aside to cure overnight. The last photo of the bowls shown below shows the bowls after the plaster had cured. They were hard and slightly rough to the touch. I wet my finger again and rubbed down the ridges on the sides and bottom of the bowl until the surface was smoother. I sanded the patch with 220 grit sandpaper and with a medium and fine grit sanding sponge. I wiped down the inside of the bowl with a wet cotton swab to remove the dust from the sanding.
 I sanded the stems with 220 grit sandpaper and then a medium and a fine grit sanding sponge. I buffed the stems with red Tripoli and then took them back to the work table. I sanded them both with my usual micromesh sanding pads. I wet sanded with 1500-2400 grit pads and then dry sanded with 3200-12,000 grit pads. I had to stop several times and go back to the sandpaper and sponges to get the deep oxidation. I repeated the sanding with the micromesh pads. I wiped the stems down with Obsidian Oil. When it had dried I buffed the stems and bowls with White Diamond and then gave the pipes a buff with carnauba wax. I finished by buffing with a soft flannel buffing pad to polish. The photos below show the finished pipe. I will let them cure for a few days longer before loading them and giving them a first smoke. I have found that as the plaster heats when smoking it becomes harder and even more cured. It makes a durable and lasting repair.
Blog by Flatticus
It is with pleasure that I introduce you to Flatticus. Flatticus is the designer and fabricator of the rustication tool that I wrote about a few posts back. We met via Smokers Forums and also through the blog. We exchanged quite a few messages and emails back and forth over the past months on refurbishing pipes and in building the rusticator. Flatticus has been reading the blog for quite a while now and I have asked him to feel free to write-up some of his work for us to read. Flatticus is a great communicator and does some excellent work in his refurbishing. Without further ado I will let Flatticus introduce himself and this pipe that he has restored.
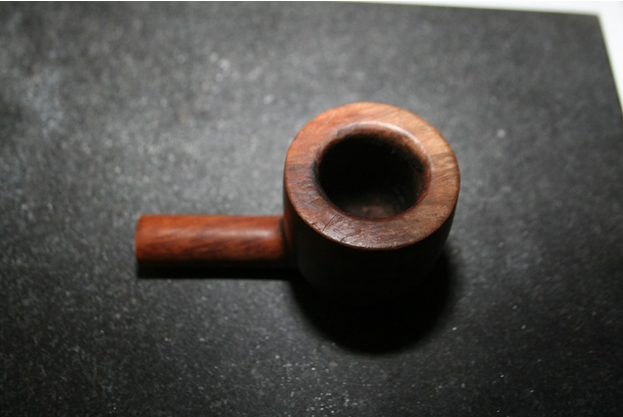
Hi all, Flatticus here, an amateur to this wonderful hobby. This blog has taught me everything I know about restoration (but far from everything Steve knows, yet) and I’m excited to have a chance to share some of my recent efforts, all with methods learned right here at Reborn Pipes. I recently came across a large lot of pipes with some hidden gems, including this enormous Savinelli De Luxe 132 EX Pot. Even through the grime, it was clear at the outset that this was a beautiful piece of briar. I was a bit hesitant from the outset, though, because I’ve never meddled with a pipe this nice. Still, there’s only one way to learn!
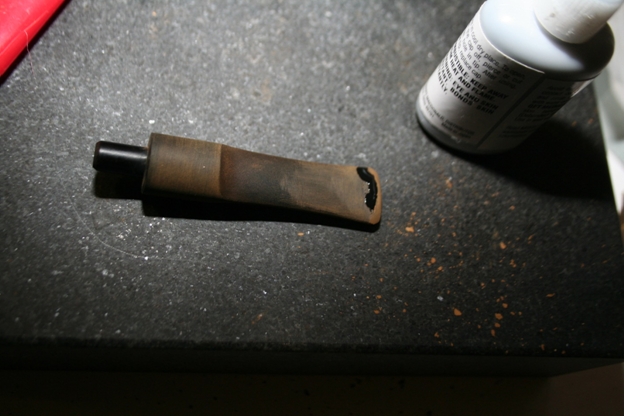
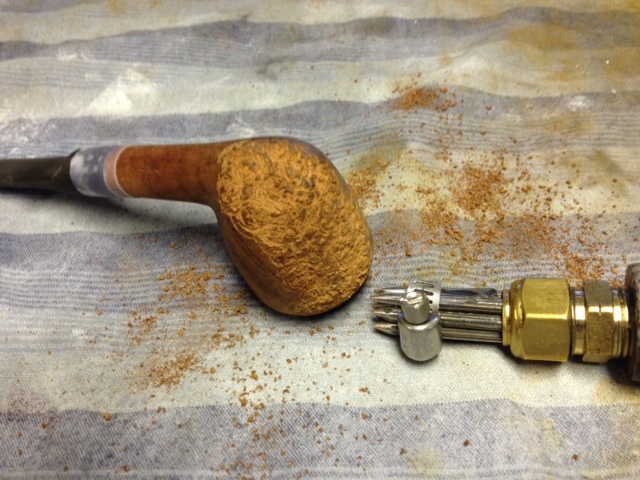
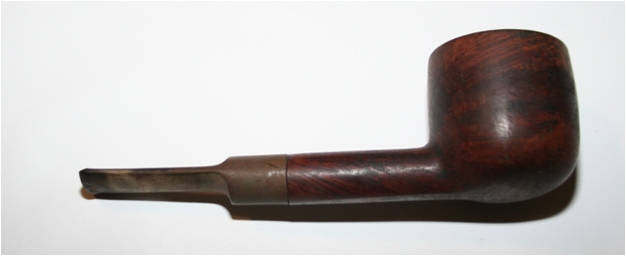 As you can see, the oxidation was extremely heavy, enough to hide the significant tooth damage to the button and bite zone. The pipe itself was grimy in the extreme, and while a touch of murphy’s oil soap took enough grime off to assure me this wasn’t heat damage, it wouldn’t touch the majority of the blackening on the pipe. First step, then, was to put the pipe in my alcohol bath, a technique I first read about in Steve’s post here. So I reamed the excess cake, and dropped it in the bath. The stem got a quick scrub with some pipe cleaners, and was already pretty clean, so into the Oxyclean it went for 2.5 hours.
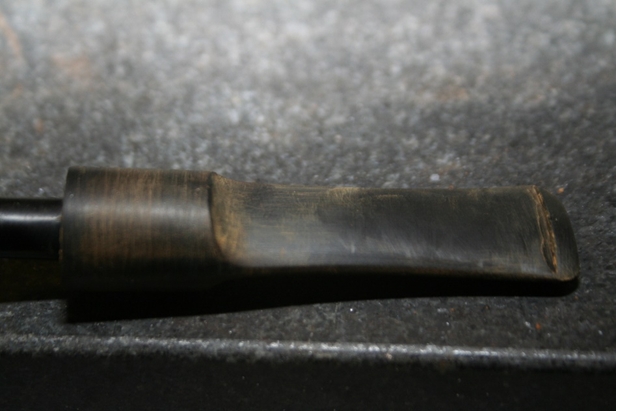
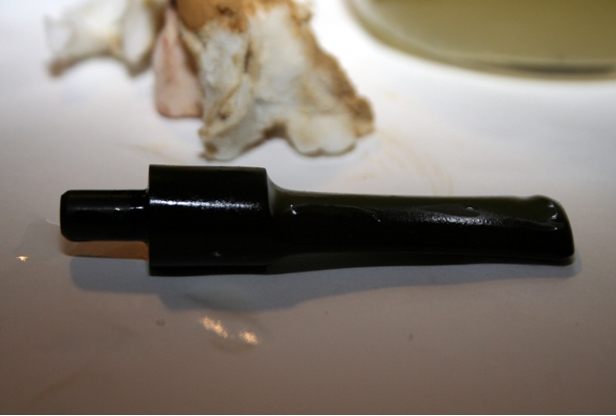 After the soak and a little scrubbing on with the Magic Eraser pads, actually bought as melamine foam on the cheap off eBay, but it’s the identical product, the stem looked great! At least unless you’ve read the recent post by Joyal Taylor here. Luckily, I had, so I knew to grab my trusty flashlight.
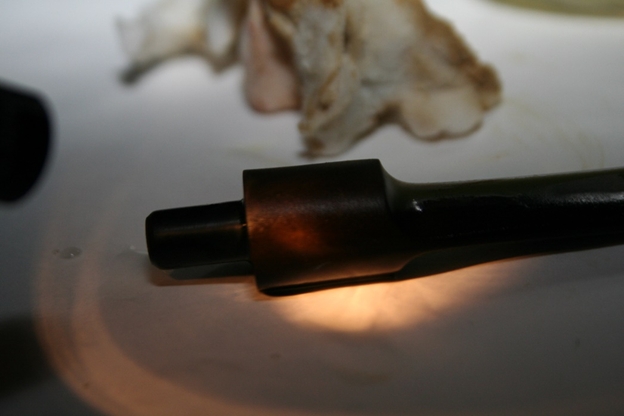 Oxidation was everywhere, and under an angled flashlight I could see it through the length of the stem. Ok, then I knew I had to sand. But first to address the bite marks. Step one was to try the heat gun, as I learned first here.
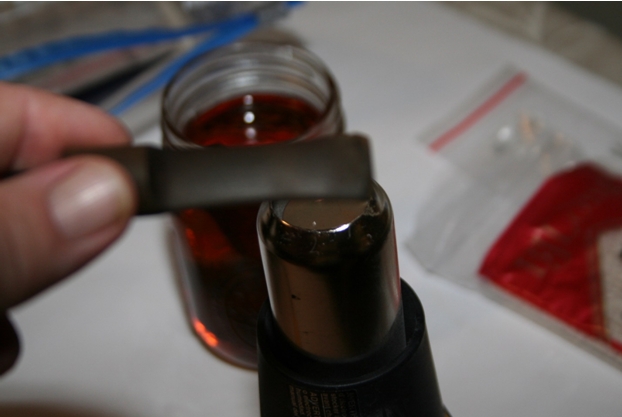 Unfortunately the marks were too deep to come out completely from the heat, so I filled them with black superglue, a technique I found an in-depth explanation of, among other places on the site, here. In the meantime I turned to the stummel itself while the glue was drying.
 The bowl top was scratched pretty badly, and had some definite darkening to contend with. I knew I’d have to top it like Steve showed me in many posts like this one. I grabbed my topping board, actually a granite surface plate I bought from woodcraft years ago for lapping wood plane soles, and now use almost exclusively for pipes.
 At 320 grit, my preferred poison for this procedure, the rim cleaned up quickly, but I soon enough decided that to eliminate all of the darkening I’d have to top the bowl lower than I liked. I came close, but left some of the color rather than lose the original shape. As you can see, the bowl was also a bit out of round (and still is, to a degree), which I went after with folder sandpaper to smooth out the curve without reshaping the bowl. The pipe had 2-3 fills, but I was confident they’d blend into the stain.
 After this was done I gave the bowl one coat, applied twice with flame, of a medium brown Fiebing’s Dye, diluted to about 75/25 with isopropyl alcohol and set it to dry while I turned back to the stem.
Unfortunately after a quick bit of sanding it was clear the stem needed more glue to be built back up, so I added some and tried to be patient while it dried.
 Once it had, I began sanding at 320 again, at this level with an eye towards shaping more than polishing. This is definitely a weak spot for me, so I’m glad for the practice, but I need more!
 After a lot of trial and error (mostly error) I finally had the stem shaped properly and sanded through 320, 600, 800, 1000 grit in sandpaper and the full range of micromesh pads from 1500 to 12000. It was looking nice and shiny, so I gave it a thick rubbing with obsidian oil and set it out to dry for about a half hour.
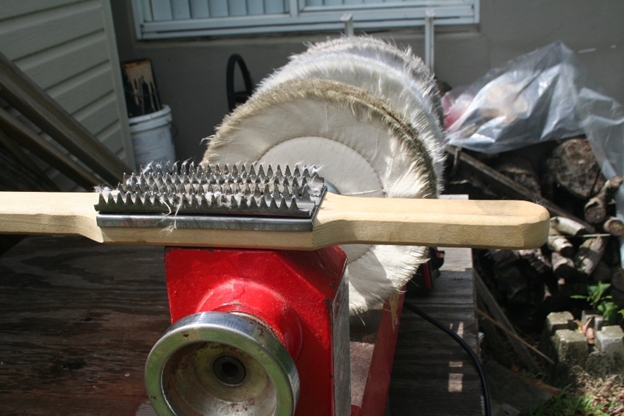
 At this point it was time to hit the buffing wheels. As you can see, I buff on the lathe, with a three wheel mandrel not made by Beall but suspiciously similar, and with tripoli, white diamond, and carnauba wax. One thing I’ll point out is that odd tool in the foreground, which is a wheel rake. You can get the job done with a hacksaw blade, but if you want clean buffing wheels, these are hard to beat.
 After the three-part buffing, I chucked a 4” flannel wheel into my cordless drill for a final polish by hand. For a rank amateur, I must say myself, this turned out to be a very beautiful pipe.
Some pictures of the finished product:
Looking back, I still have an awful lot to learn, that much is clear. For one thing, that rim fill didn’t blend quite as well as I was confident it would. All in all, though, I’m pleased as punch at having learned how to do any of this, and I have Steve and the great contributors to this site to thank for it.
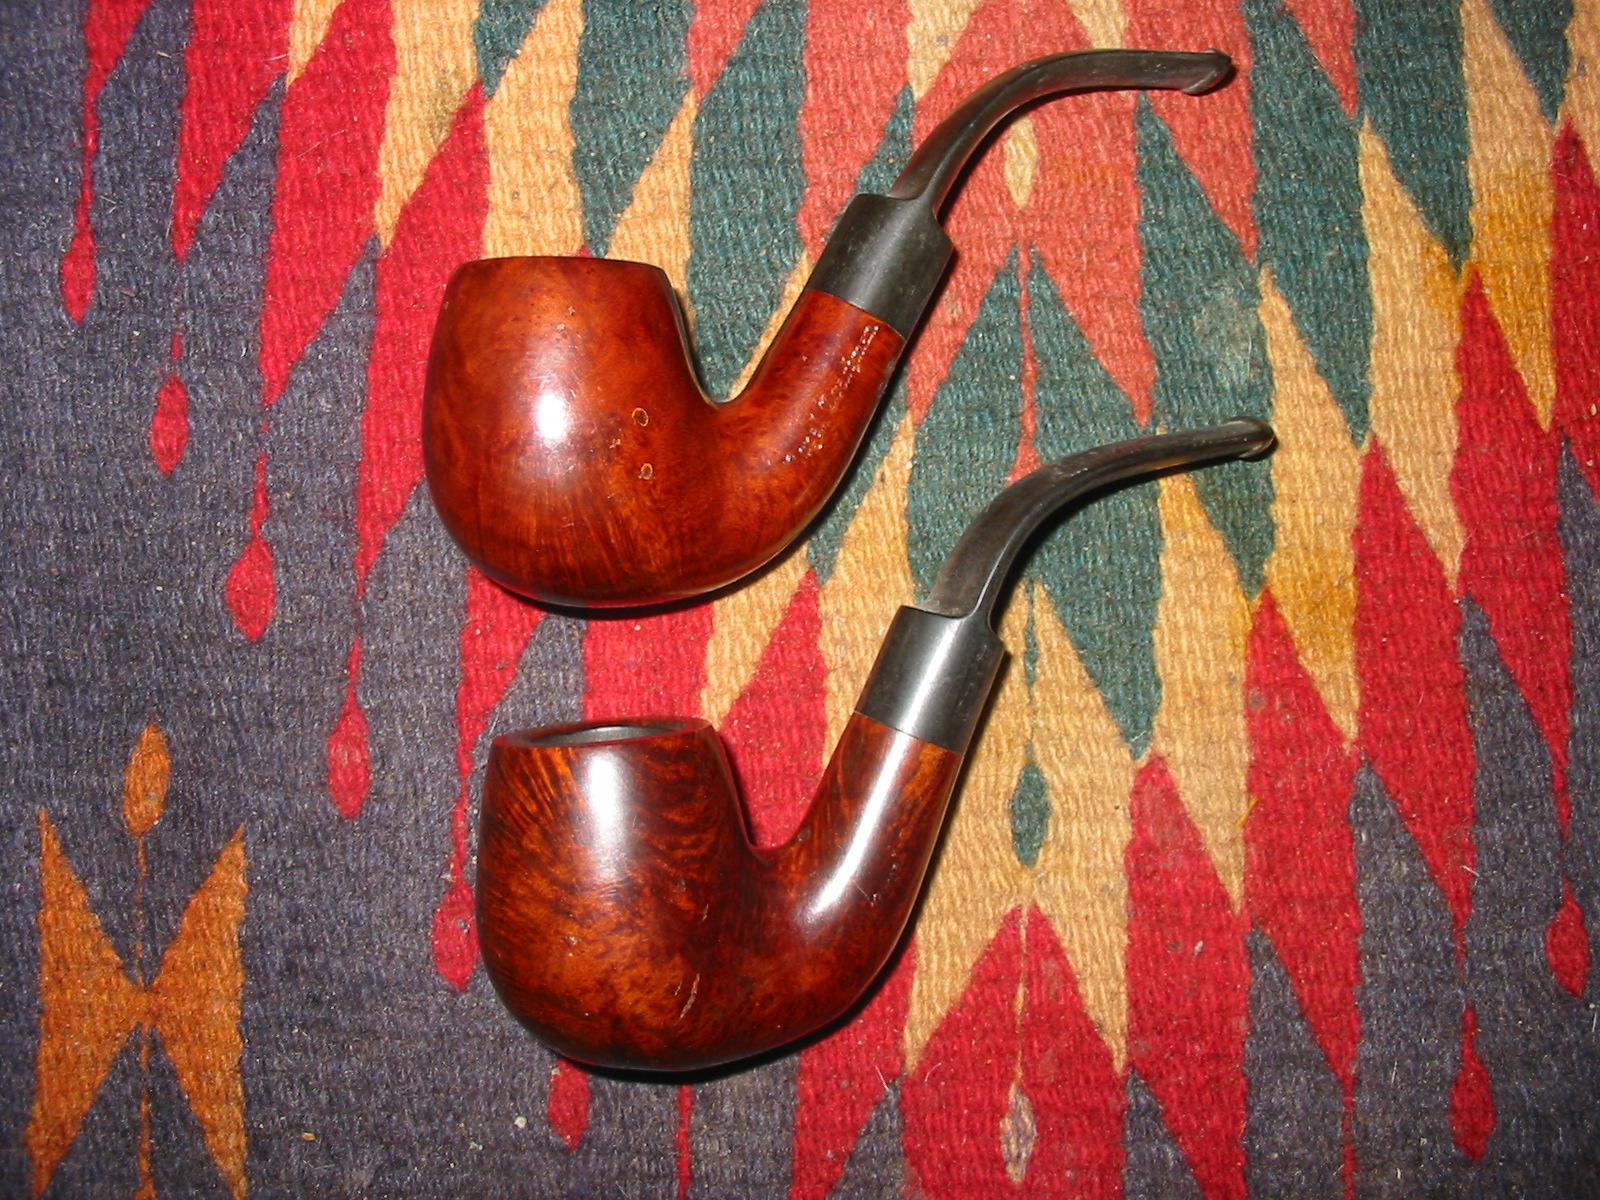
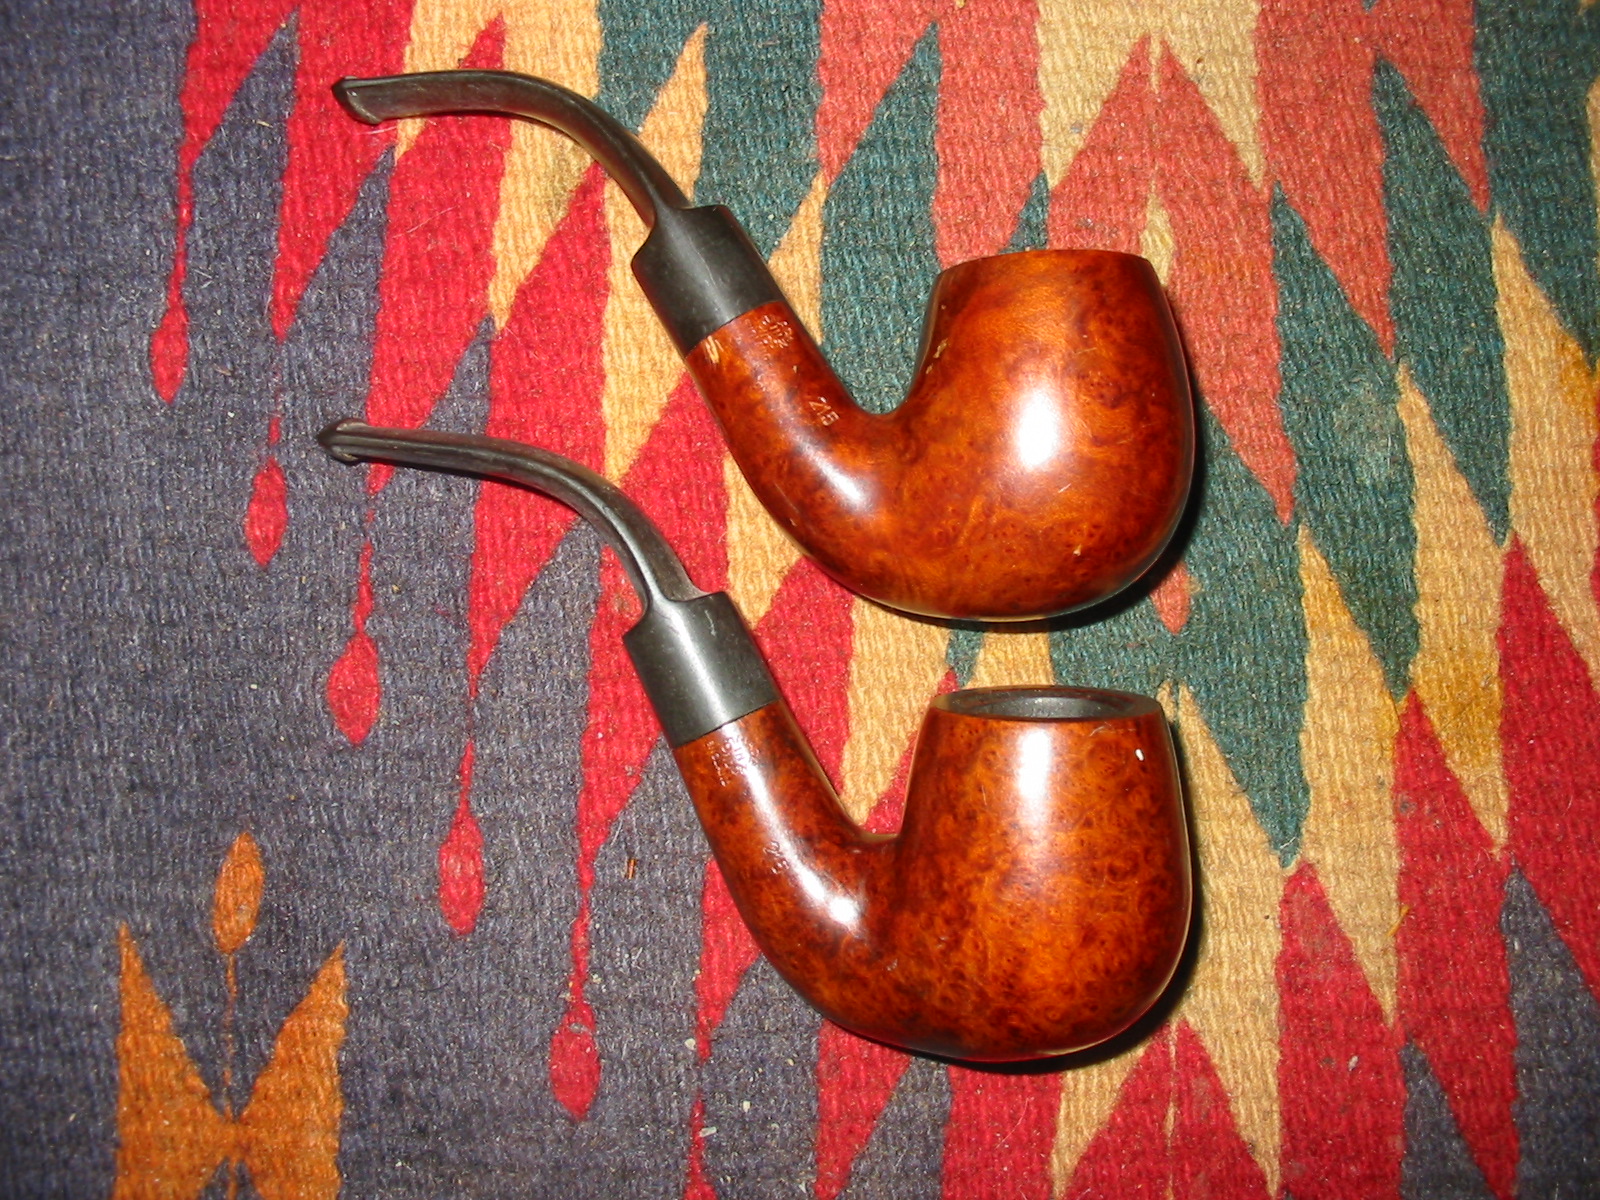
On a recent adventure I found a pair of bent billiards that had the Made in London England circle stamp on the right side of the shank and the Germanic script stamping, Royal Coachman on the left side of the shank. They were also stamped with a shape number 215. I did a bit of research to see if I could identify the maker. From the markings I was pretty confident that I was dealing with a Comoy’s seconds line but wanted to make certain I was right. The circle stamp on the right side of the shank was a giveaway to that identification. The shape number looked very familiar to me and the overall look said Comoys. So I looked in two the places that I always go to when beginning a hunt for info. The first is a website set up by Pipephil called Logos and Stampings. There I found that the Royal Coachman was indeed a Comoys brand. The site showed that the pipes were made by Chapuis-Comoys. The second site I looked at was Chris’ pipe pages http://pipepages.com/64com19s.htm . Chris has collected old catalogues and documents that give shape charts and many historical materials that cannot be found in other places. I have copied a page from the shape chart below and you can see that the 215 shape number matches not only the Comoys number but also the shape.
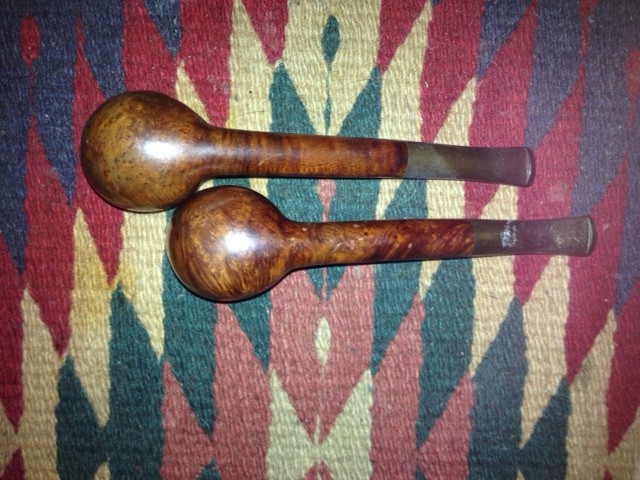
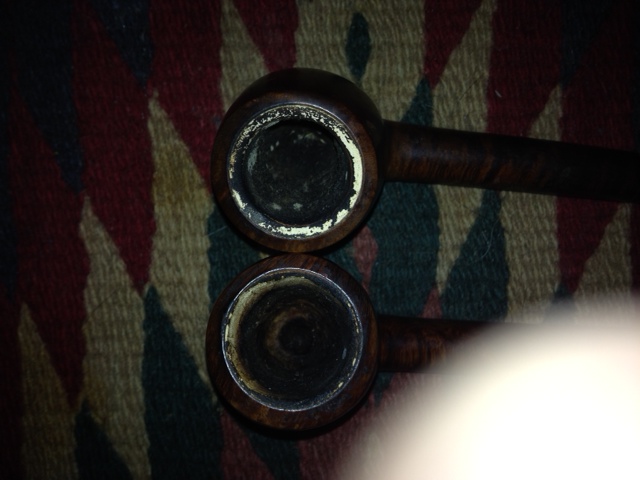
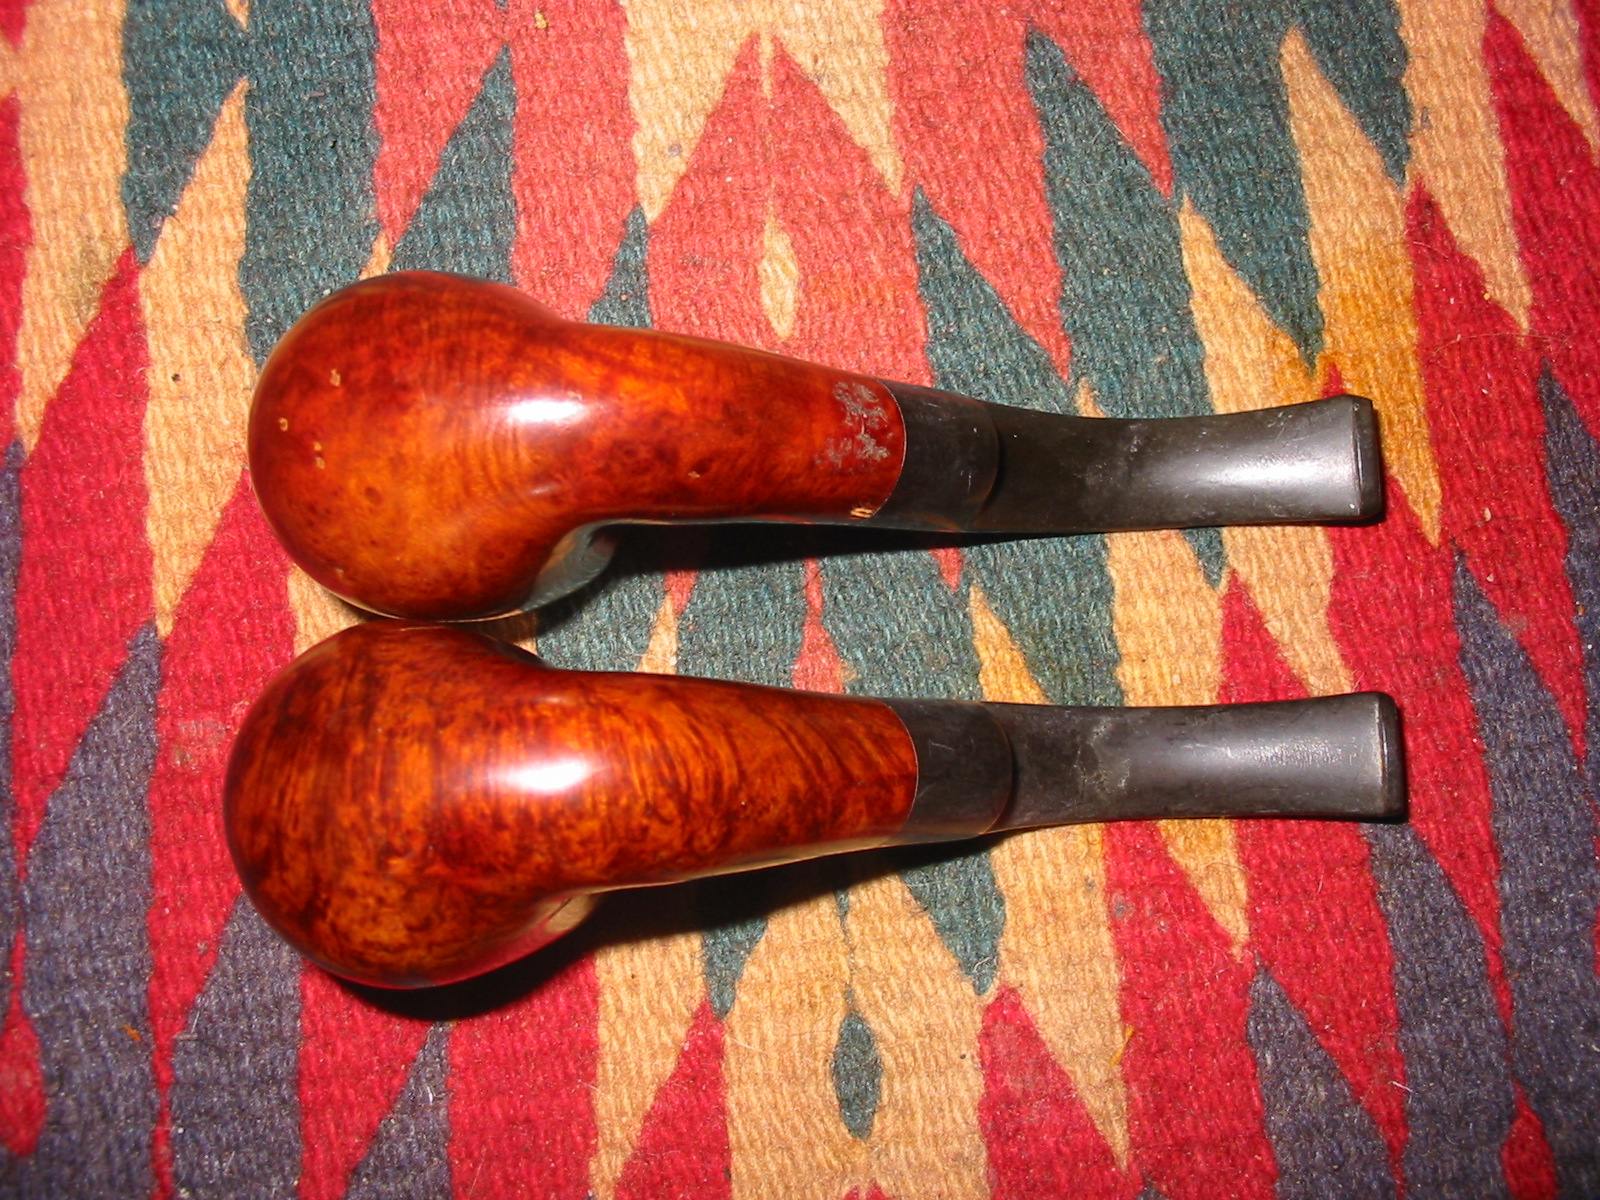
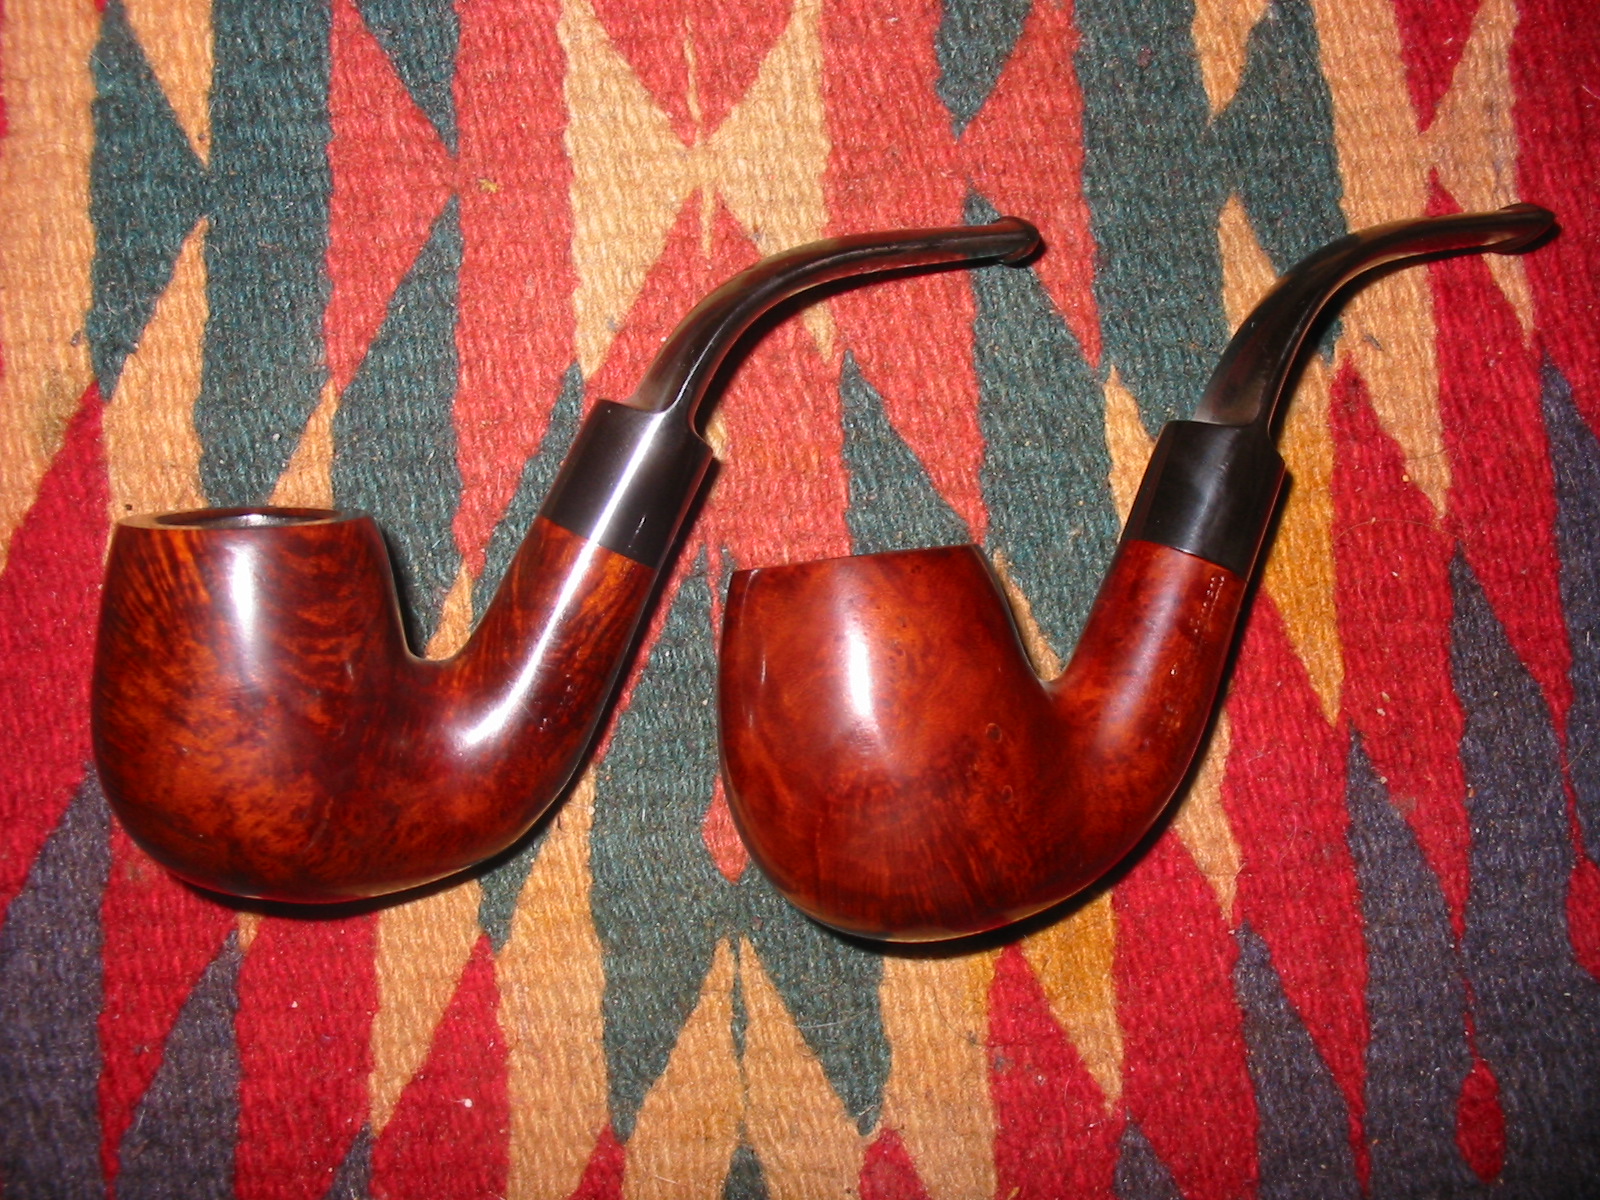
When I brought the pipes home from the antique shop they looked like the photos below. There were actually in pretty good shape for their age. The dealer said that he bought these along with 20 other pipes from a widow who was selling off her late husband’s estate. He had some interesting old pipes and I was able to pick through them and brought six of them home with me. These are the first pair of the bunch. The bowls were lightly smoked with a bare minimum of cake. The top pipe in the picture below was less smoked than the bottom one. Both pipes were grimy on the outside of the bowl and had some oxidation on the stems. There were no tooth marks on the top pipe and only a little tooth chatter on the underside of the bottom pipe. The top pipe has three small fills that are visible in the first photo below and a slight nick in the shank on the right side near the stem. The second pipe has a few fills as well with the largest of them visible low on the left side of the bowl in the photo below. The rims on both were clean and undamaged and showed no tar build up. On the right side of the bowl of both pipes there was a small spot of white paint.

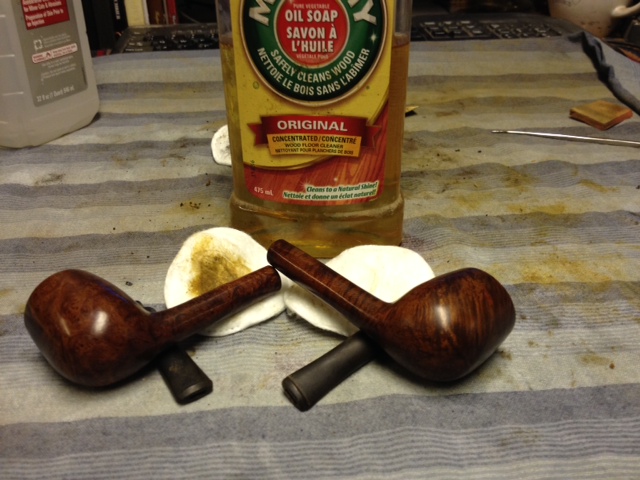
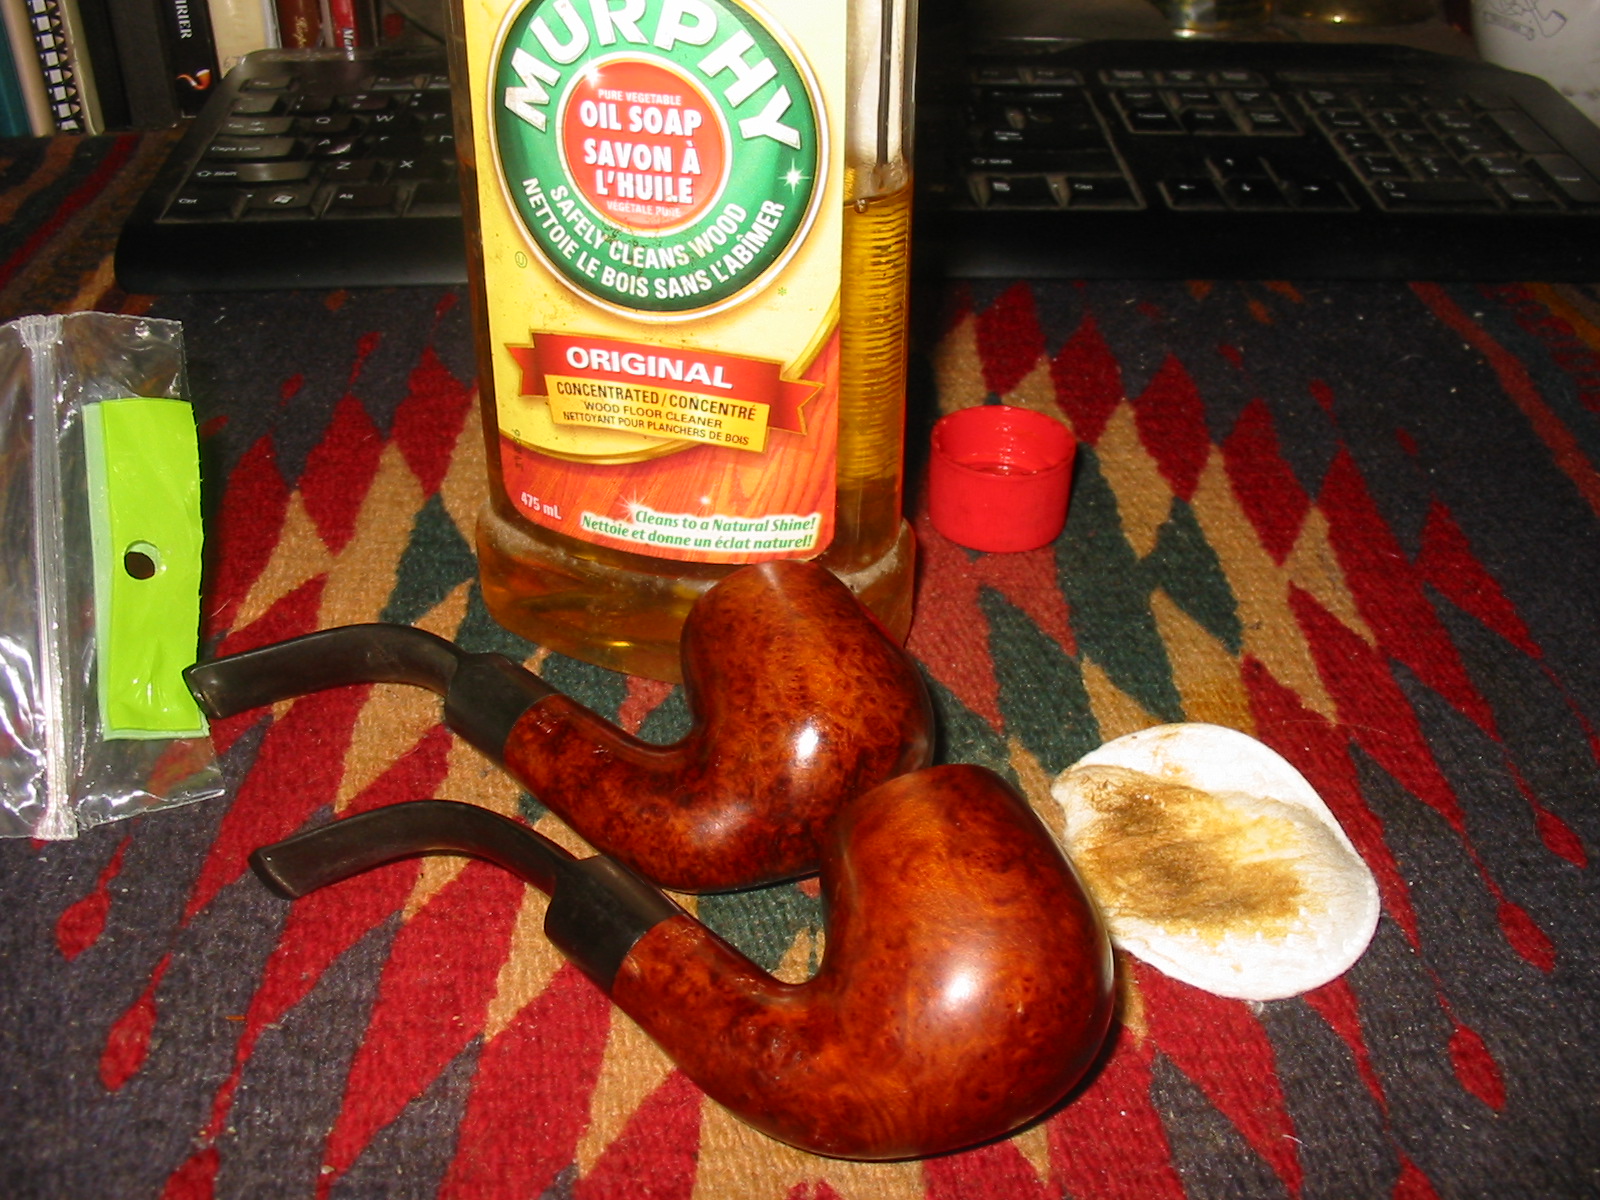
I reamed the bowls with a PipNet reamer to remove the slight cake build up and clean out the bowl. I wiped down the exterior of the bowl with Murphy’s Oil Soap to remove the grime and grease build up. It also took off the paint spots on the right side of the bowl. I use the soap undiluted as I find it does not remove the finish on the bowl as much as when it is diluted with water. I rubbed it on and scrubbed it with cotton pads and wiped it off with the same pads.

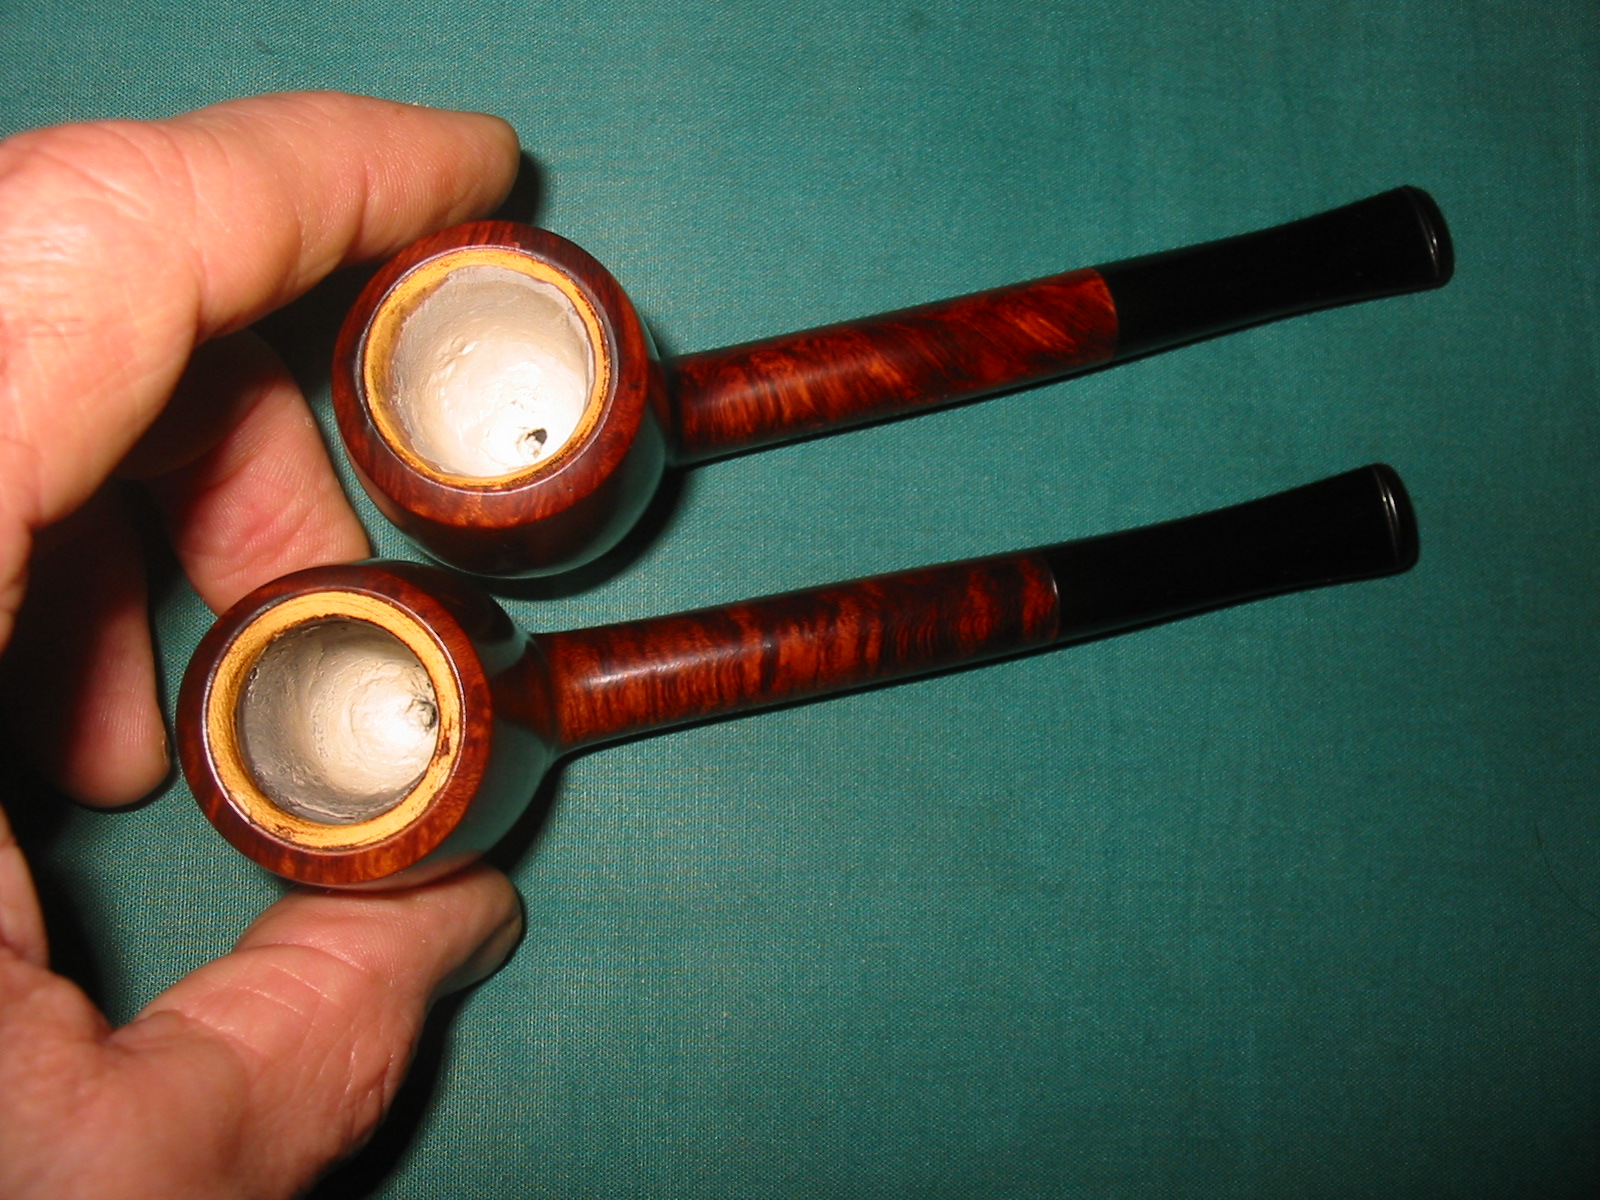
I cleaned out the inside of the shank on both pipe using cotton swabs and isopropyl alcohol. Both had a slight reservoir in the shank with the drilling being quite high in the shank to accommodate the bend in the shank to bowl junction. I cleaned out the airway with pipe cleaners and then the inside of the bowl with folded pipe cleaners and cotton swabs.
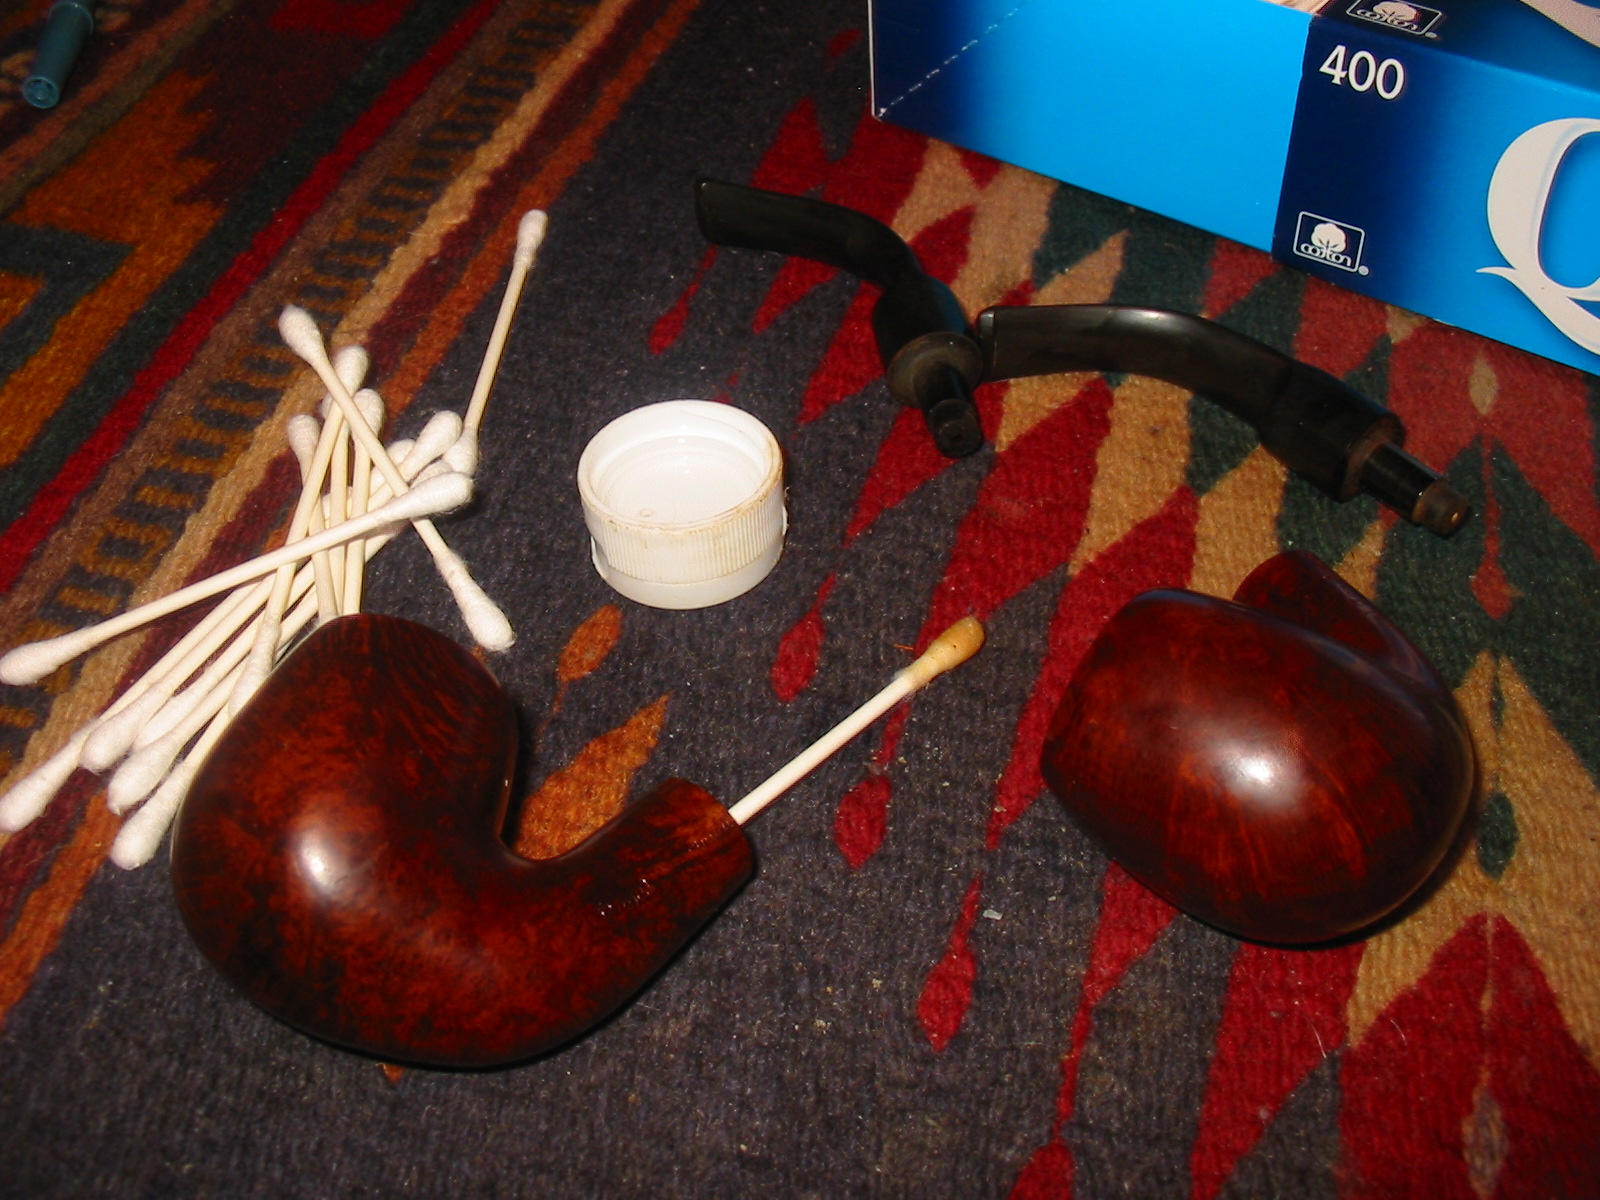
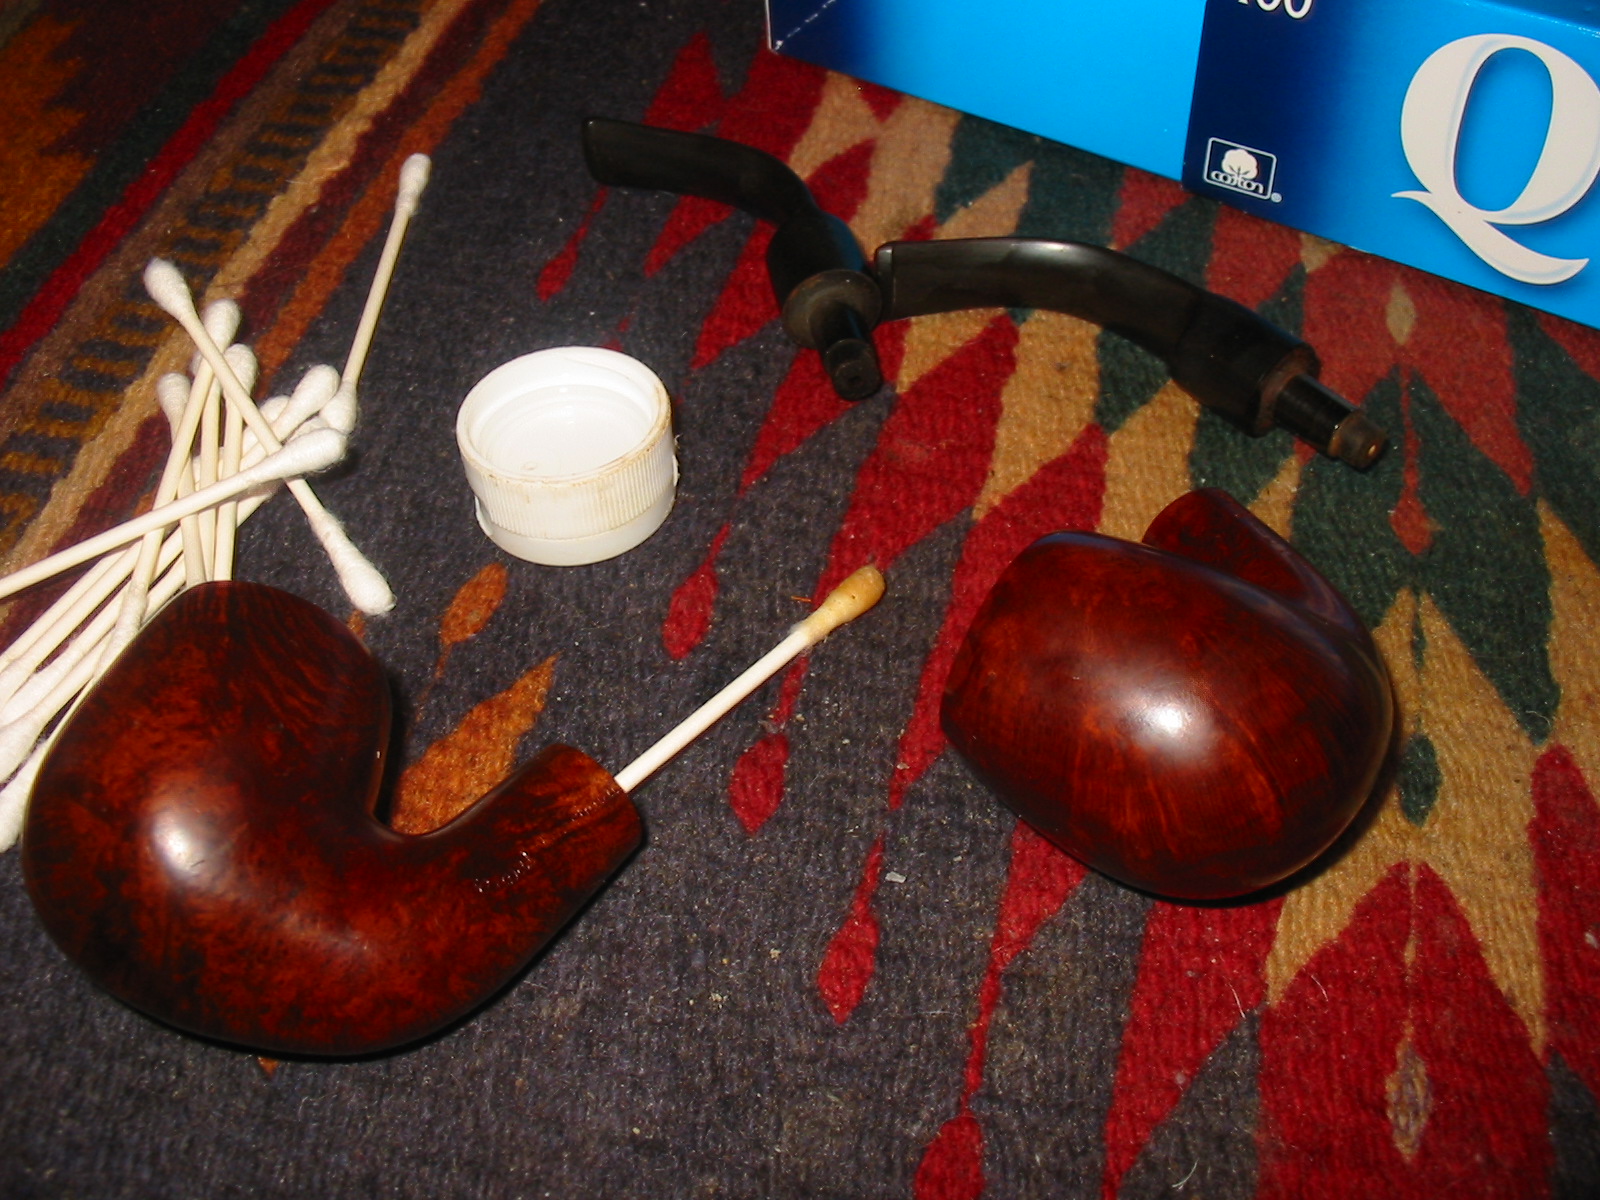
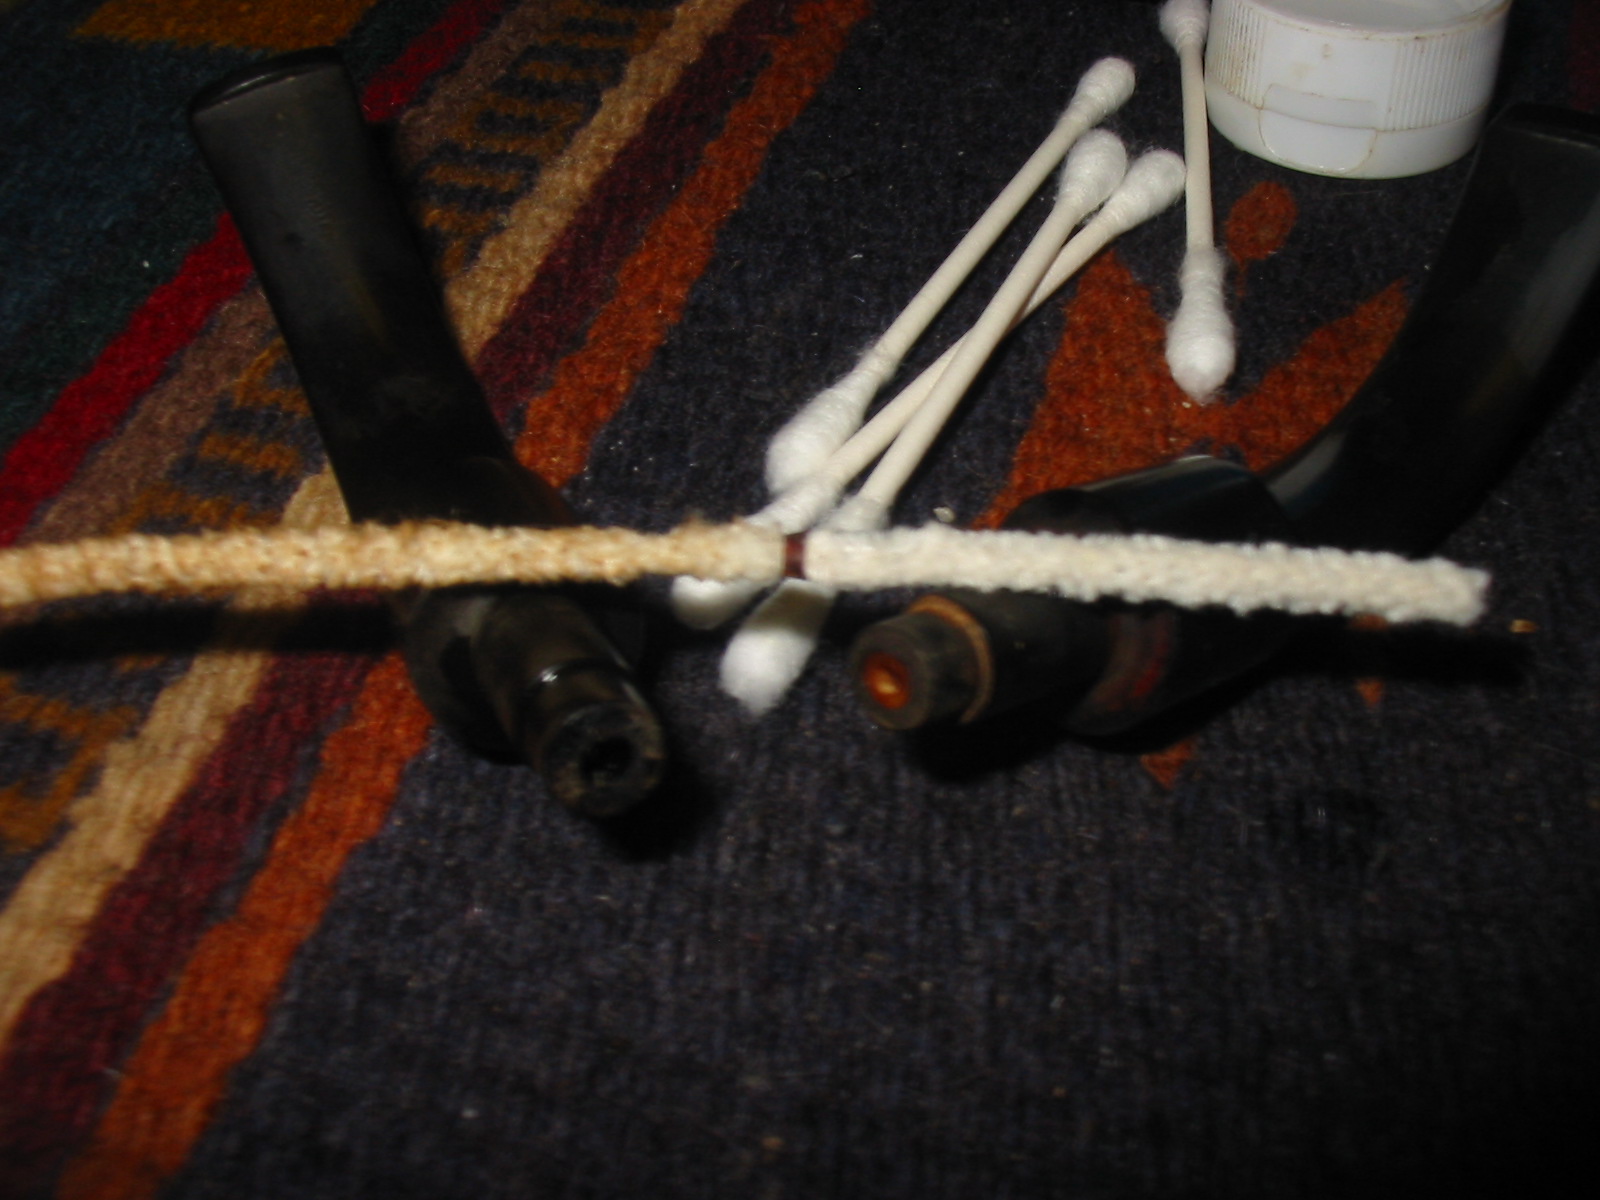
I wiped down the stems with isopropyl alcohol on a cotton pad and then cleaned out the inside with pipe cleaners. The opening/airway on the end of the tenon was very small so I had to work to push the pipe cleaner into place. I had not seen an airway this constricted in a long time. The draw on the pipe was very tight; it was like pulling air through a coffee stirrer. When I pulled the pipe cleaner out a small ring came out with it. It is visible in the photo of the pipe cleaner below. The stem on the left is the one that the ring came out of and the stem on the right still has the ring. It appears to be made of brass and is a thin ring that constricts the airway for about 1/16th of an inch. With the ring removed the draw was very open. I continued to clean out the stem and airway until it was spotless and the pipe cleaners came out clean. I cleaned the end of the tenon with cotton swabs and isopropyl alcohol.
I then used some Meguiar’s Scratch X2.0 on the stems to scrub the scratches and polish the stems. I applied it with a cotton pad and scrubbed and rubbed it off. The photos below show the stems after the polishing. There was some deep seated oxidation that came to the surface of the stems. There was more oxidation on the top of the stems than on the underside.
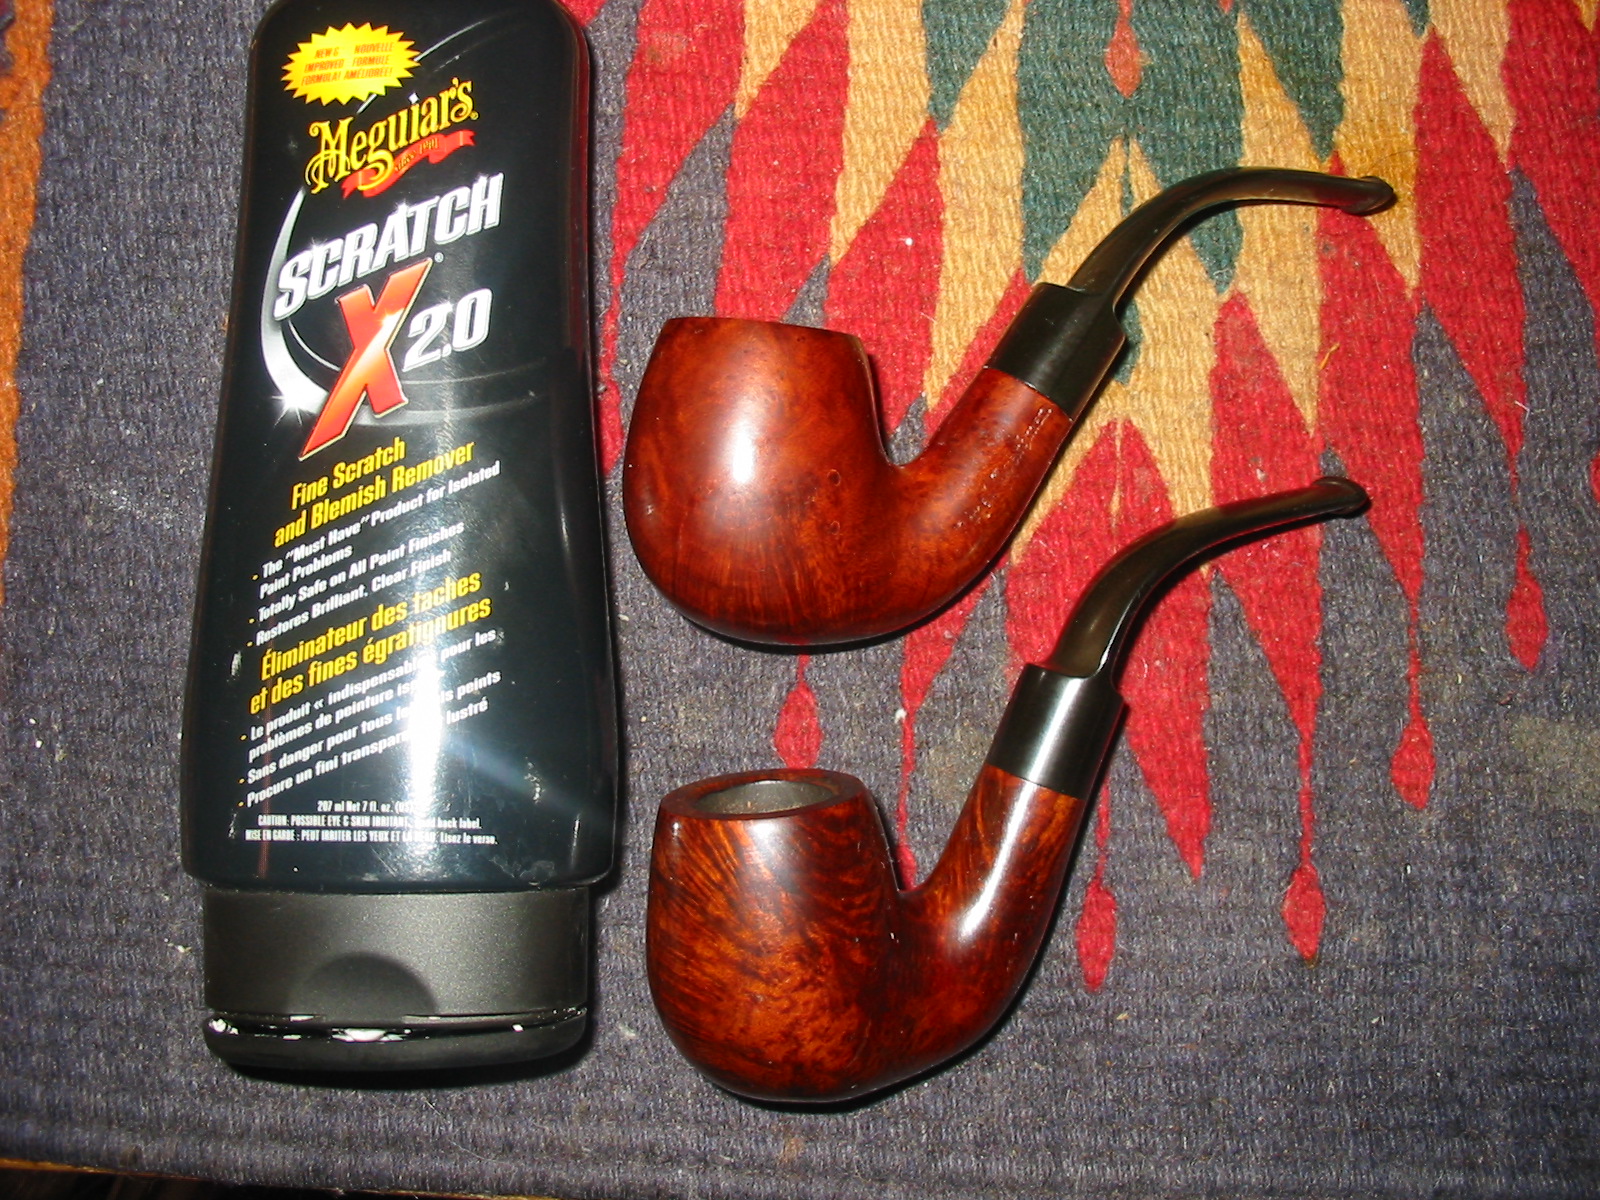
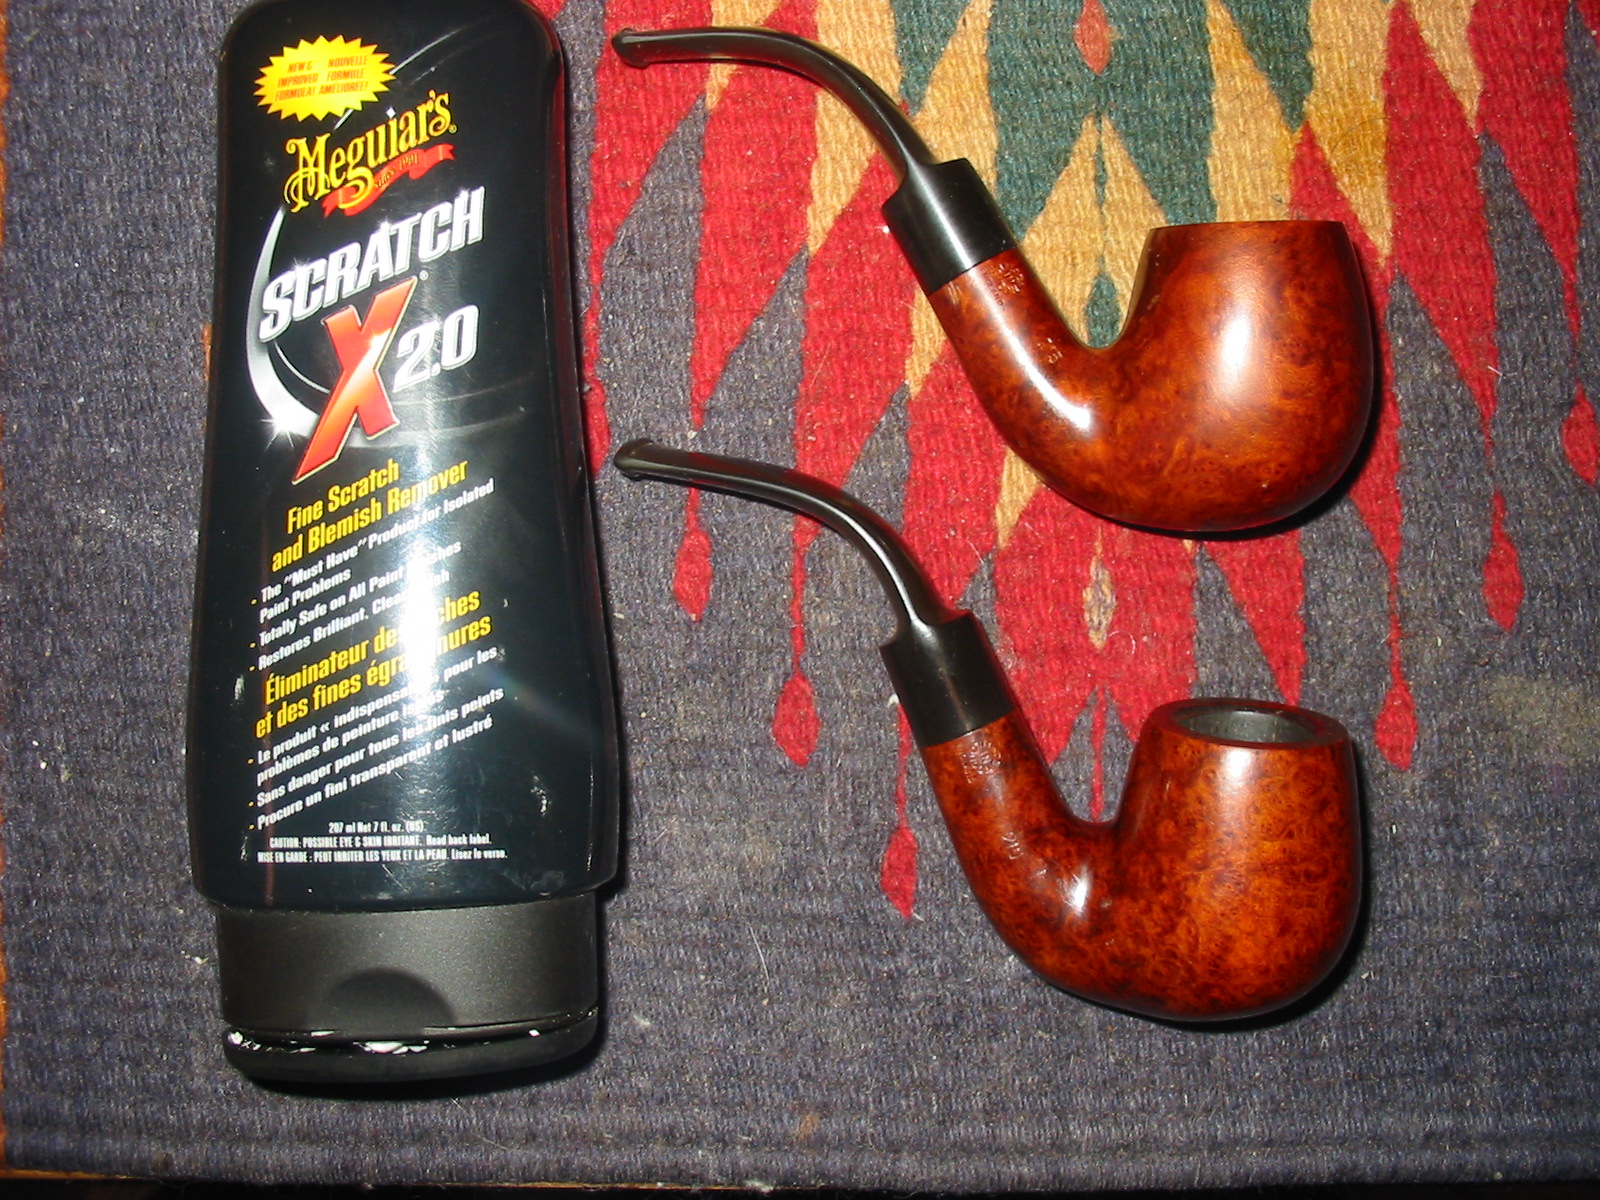
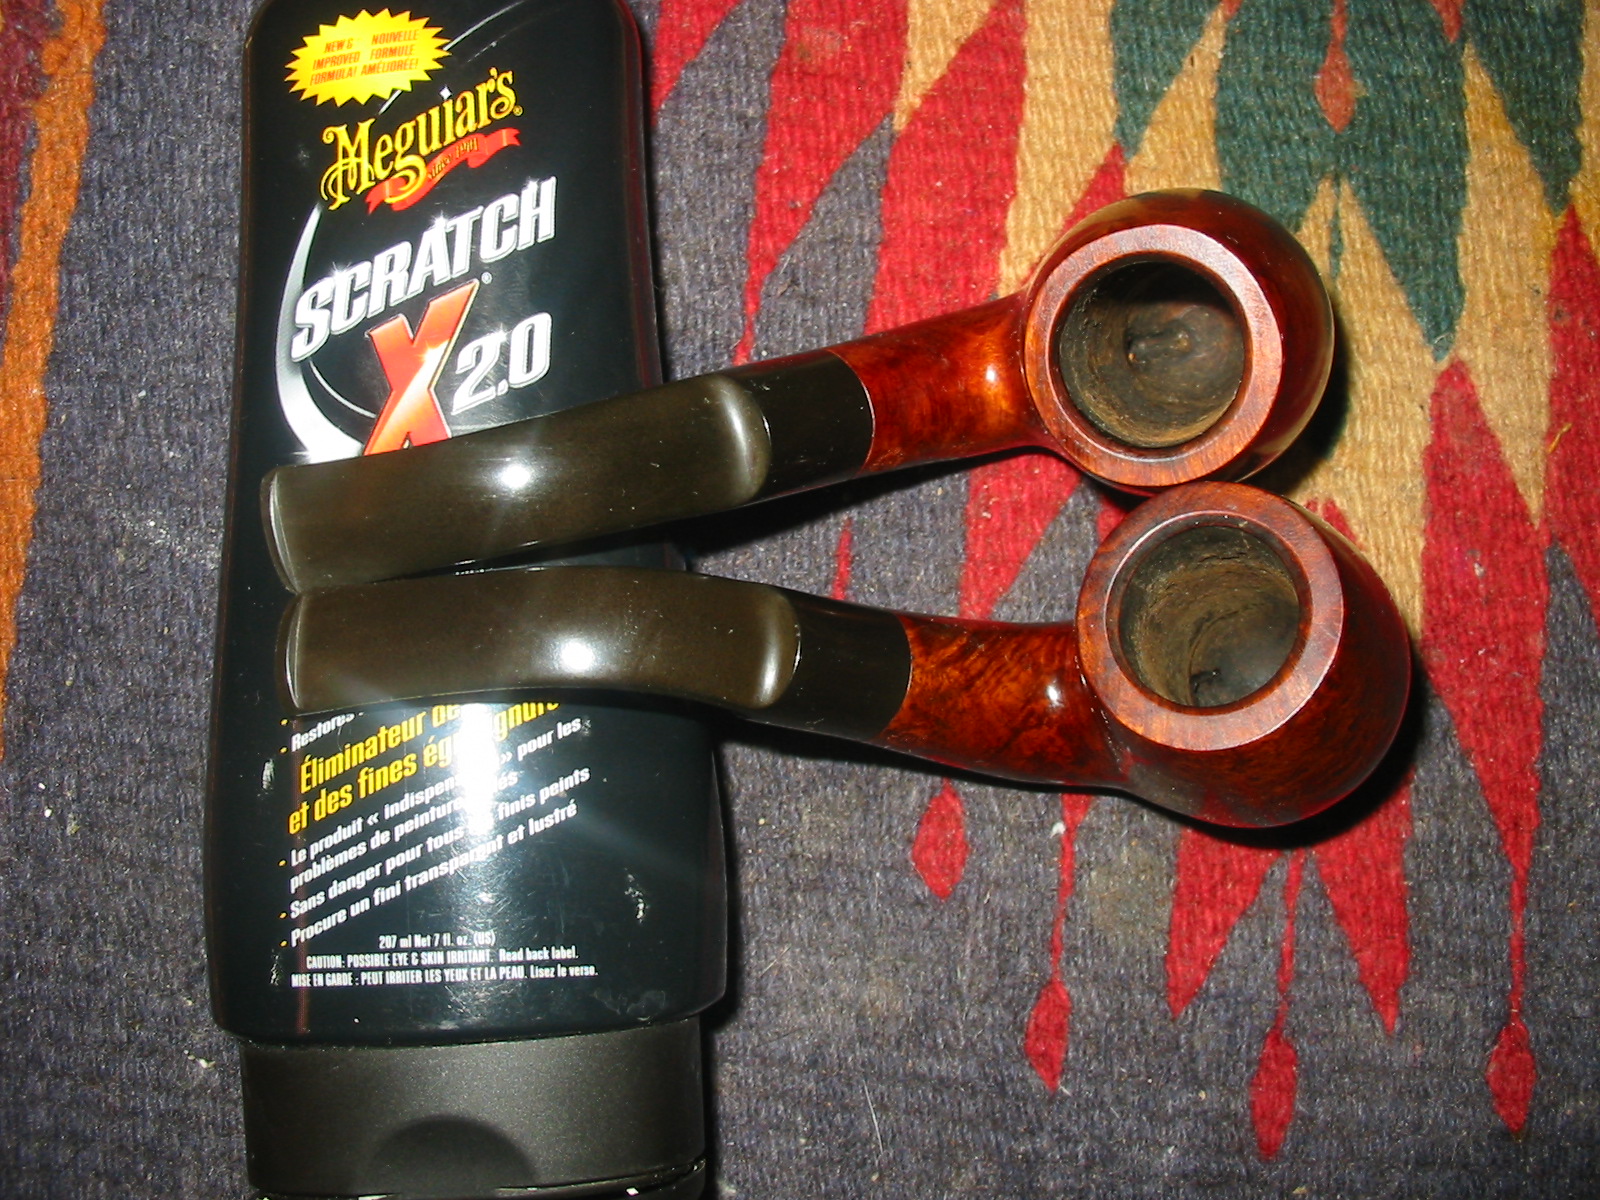

I buffed the stems with red Tripoli on my buffer to remove more of the oxidation. I followed that up with White Diamond polish on the buffer as well. I also buffed the bowl with White Diamond. The shine really came out.
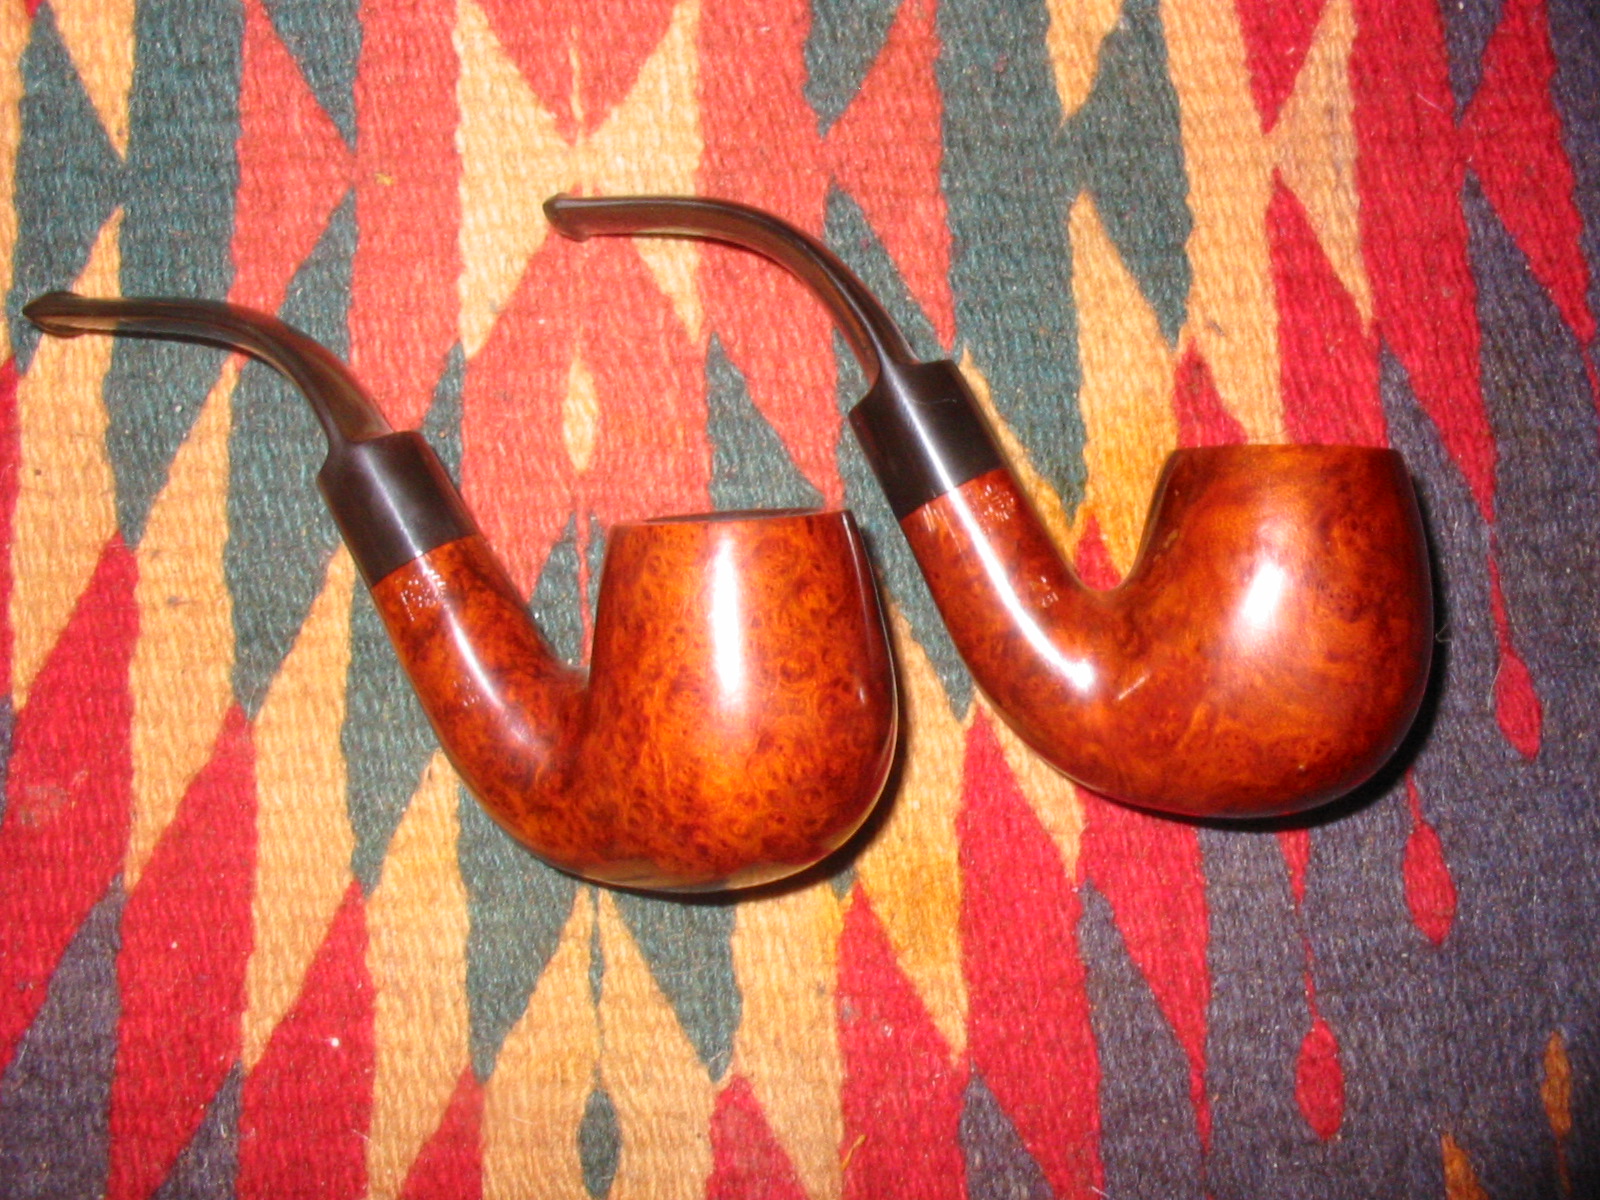
There was still oxidation that came up on the stems. I sanded it with a medium and a fine grit sanding sponge and then wet sanded with 400 and 600 grit sandpaper. This removed the remaining oxidation in the stem. I then wet sanded them with 1500-2400 grit pads. I dry sanded them with 3200-12,000 grit pads. I rubbed the stems down with Obsidian Oil and when it had dried I buffed them with White Diamond and then gave both the bowls and stems multiple coats of carnauba wax and buffed them with a soft flannel buff on the buffer. The finished pipes are shown below. They are ready to enter the next phase of their lives.


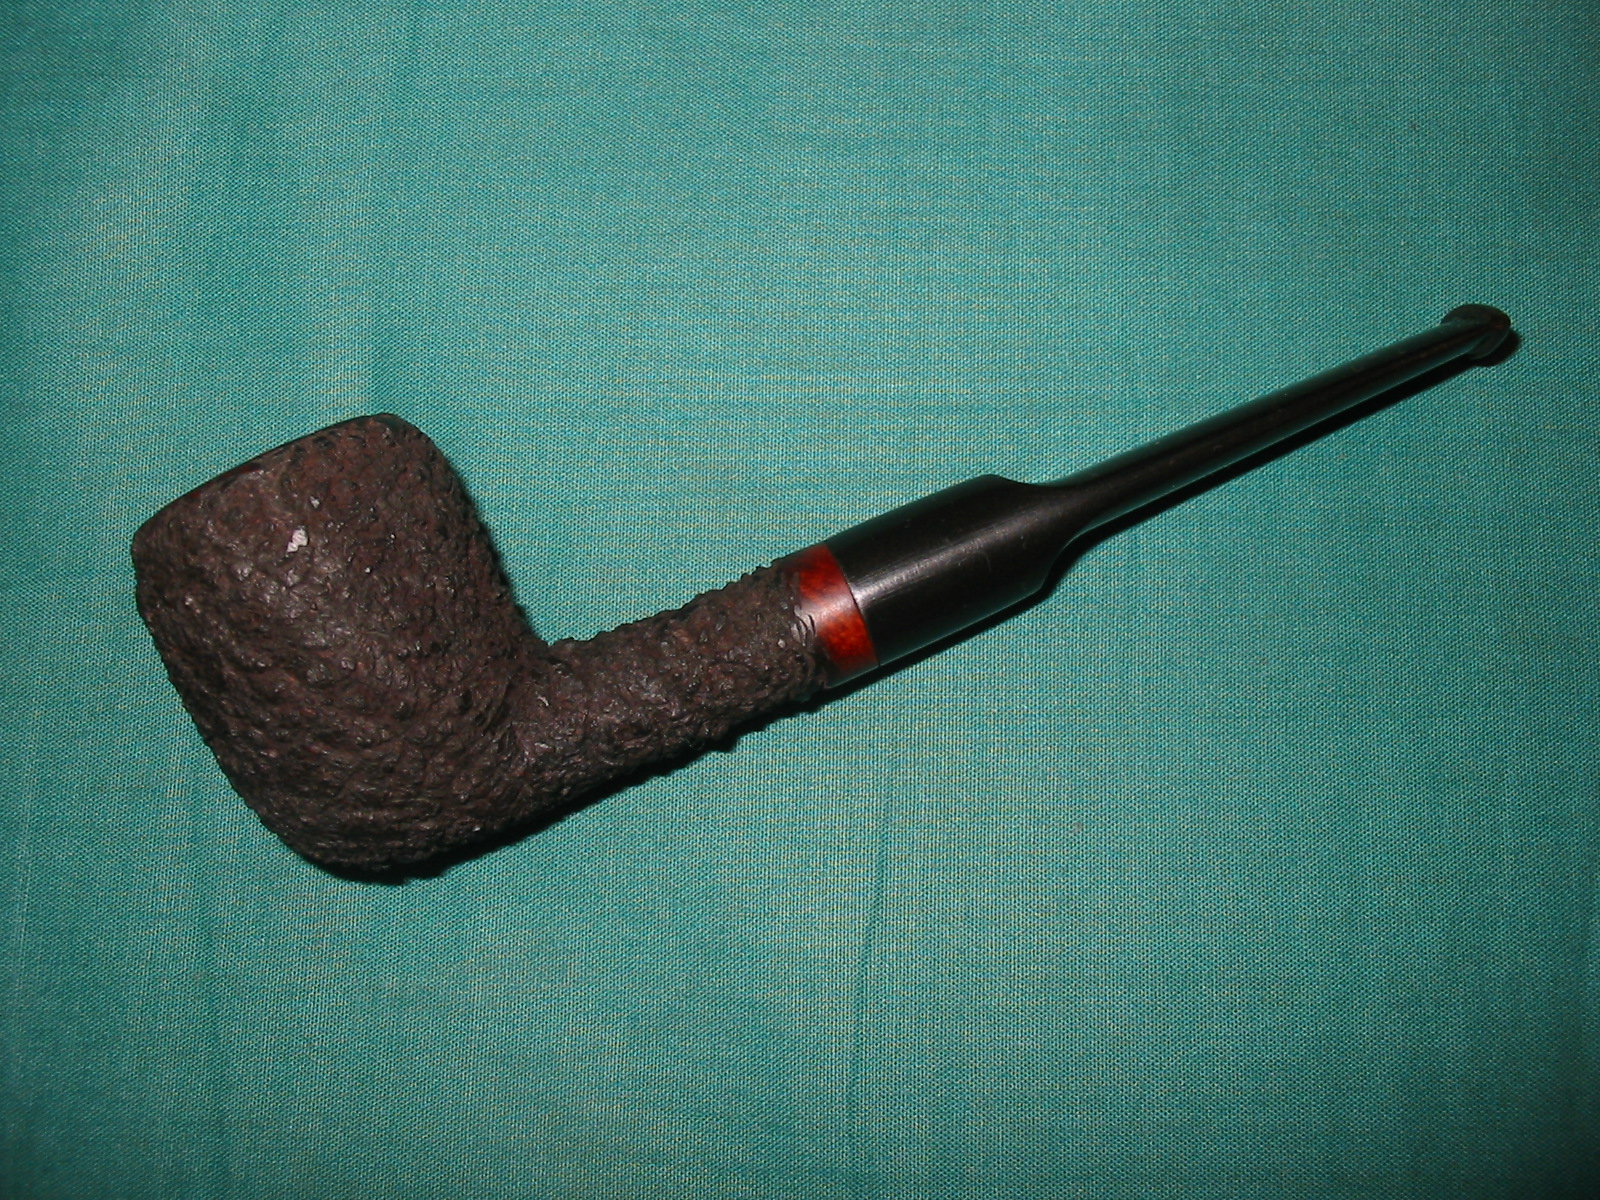
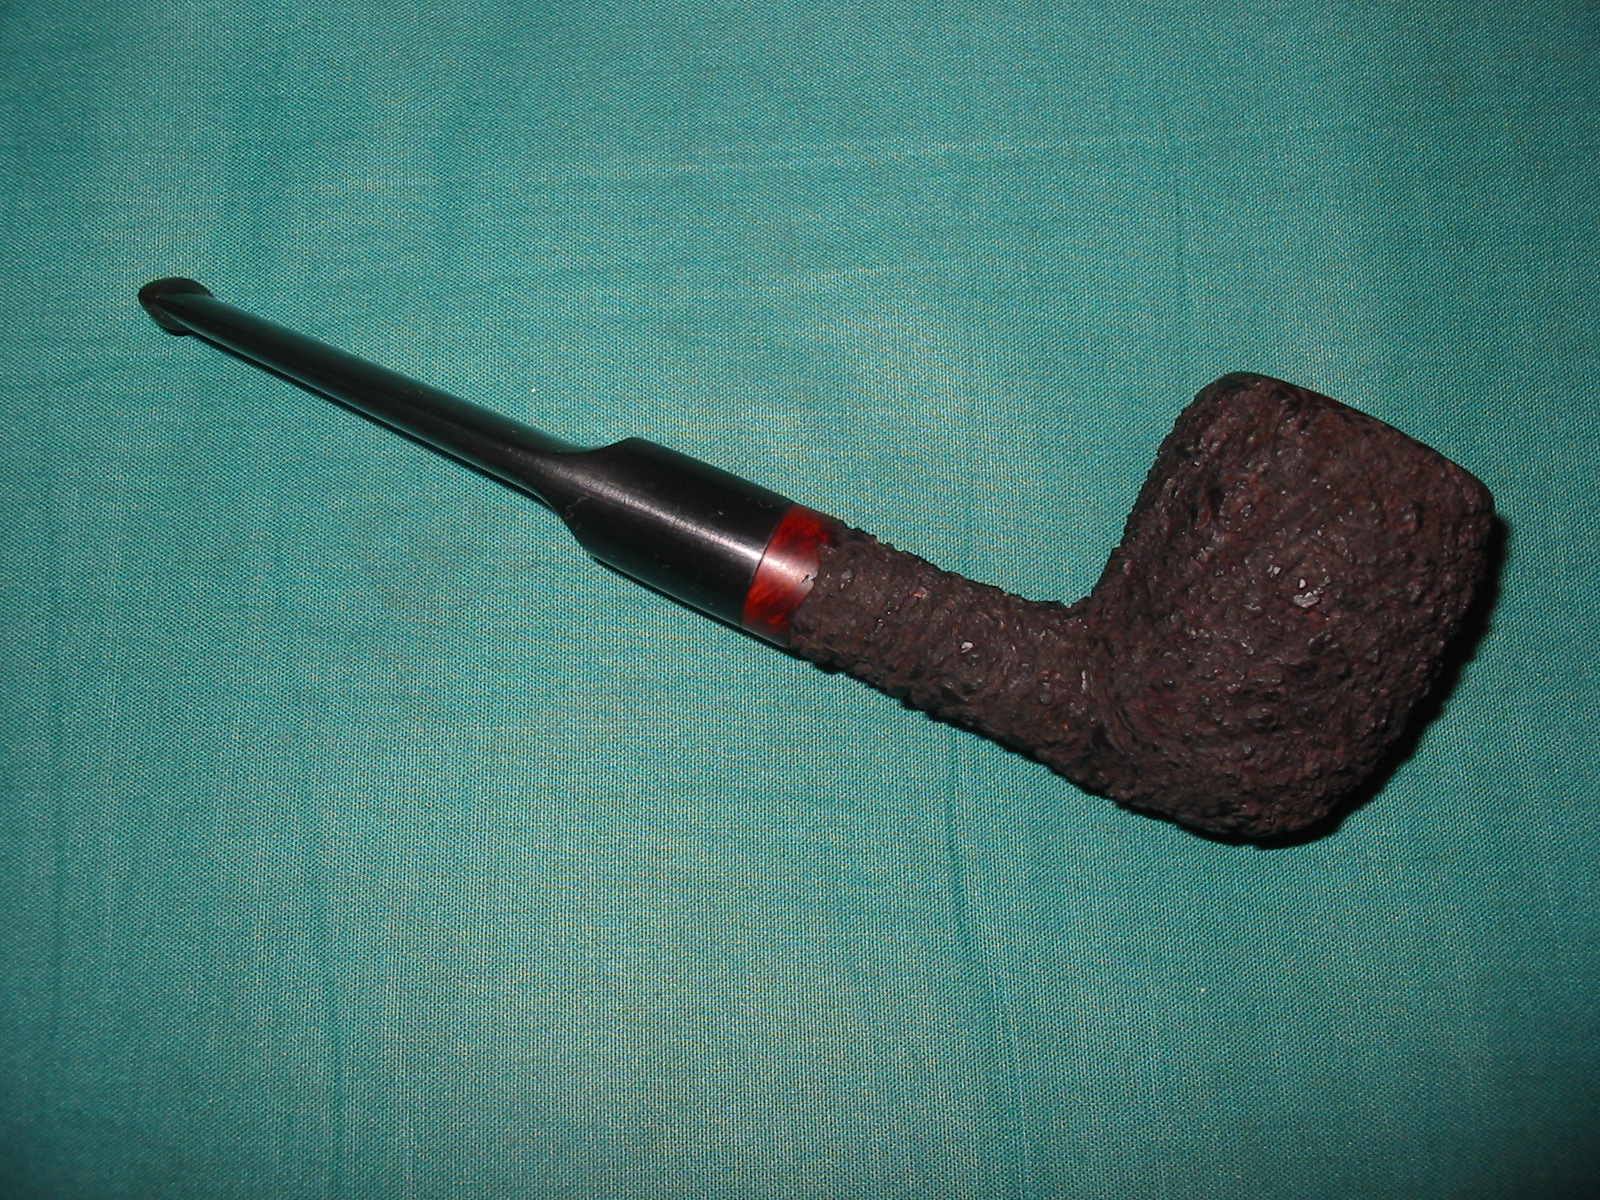
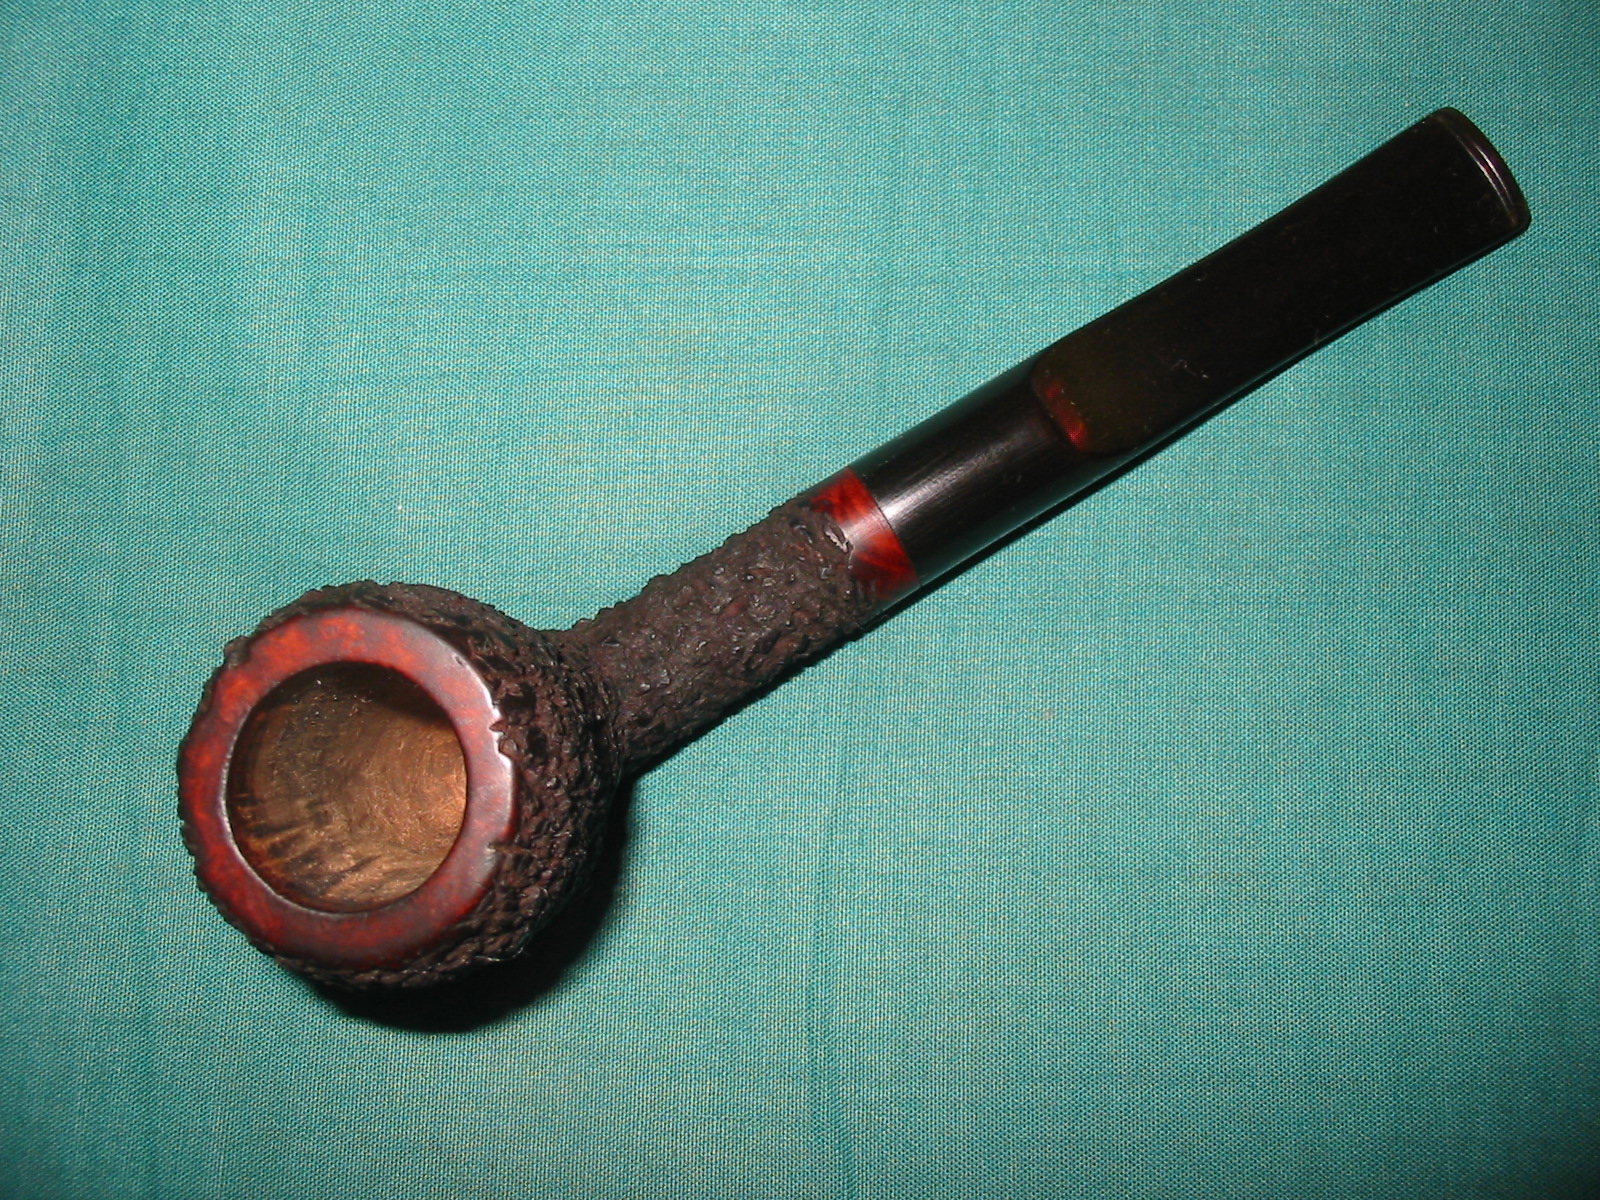
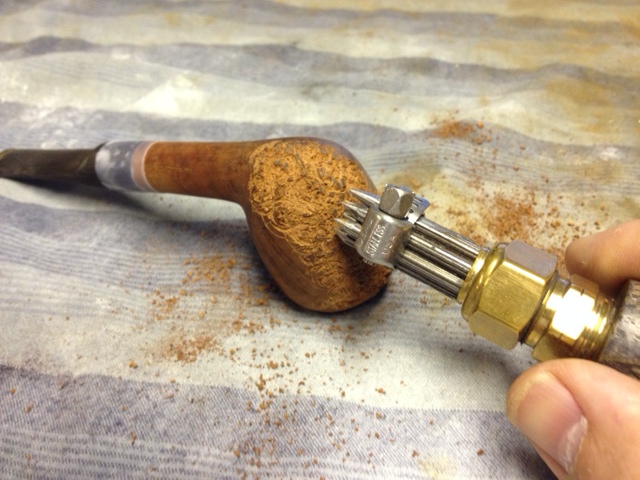
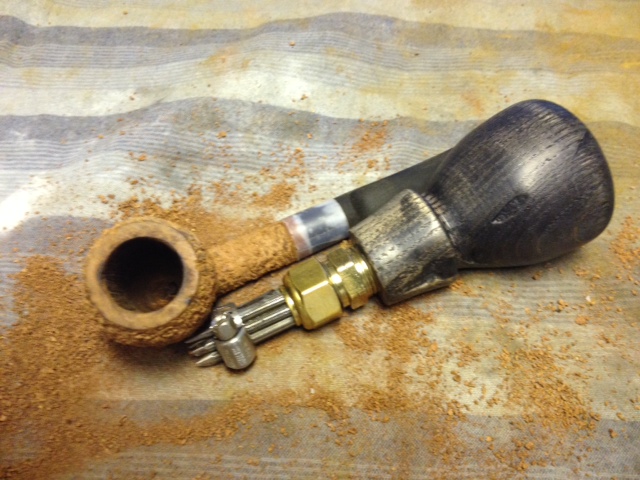
I wrote about restemming this pipe in the post on Replacing a tenon in a stem with a minimum of tools (https://rebornpipes.com/2014/06/15/replacing-a-tenon-in-a-stem-with-a-minimum-of-tools/). The thing I forgot to mention is that the bowl originally had a threaded metal stem and a metal insert in the shank. I was able to remove the insert from the shank with no trouble and craft a push stem for the shank as a replacement. The stem came out great and with some work came out looking like new. In figuring out how to finish the bowl I was faced with a few choices. The briar was not terrible, I have seen worse but there were fills in the bowl. I could have picked them out and refilled them as I have done on many occasions but somehow that just did not attract me with this bowl. I had been given a rustication tool by Chris and had not used it yet so that was very attractive to me for this bowl (https://rebornpipes.com/2014/06/07/a-handmade-rustication-tool-gifted-by-a-friend-and-reader-of-rebornpipes/). The stamping on the shank was virtually buffed away so it was not something that needed to be preserved. So the decision was made. I would get to try out the new tool and see what kind of rustication pattern it would make on the briar and how comfortable it was in the hand as I pressed and twisted it into the wood. I also wanted to see if I could use it in tight spots up against the bowl and shank and close to the stem/shank junction.

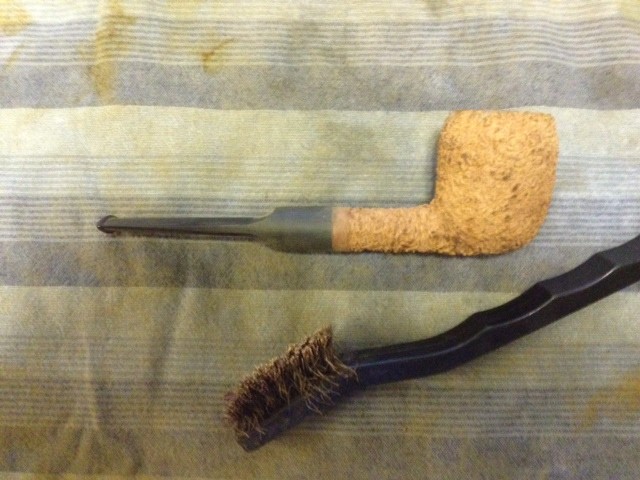
I started on the front of the bowl and pressed and turned the tool into the briar. It worked like a charm. The nails were sharp, the grouping tight and workable on the pattern, the handle was extremely comfortable and spread out the pressure across my palm. This was going to be a piece of cake. It would be no problem to finish rusticating this pipe with a lot less pain in my hands. I wrapped a strip of scotch tape around the shank to make a protective line to work toward on the shank. I wanted to leave a smooth band on the shank so this would remind me where to quit twisting the tool into the wood. The next series of eight photos show the process from start to completion. It probably took me the better part of an hour and a half to rusticate the bowl and shank. I worked it over several times during that time to get a rough finish. I wanted it to be very tactile and rough kind of like a sea rock finish so I pressed hard when I worked over the wood. I left the rim smooth as I wanted to stain it to match the band I was leaving around the shank. The two would provide some contrast to the rustic finish on the rest of the pipe.

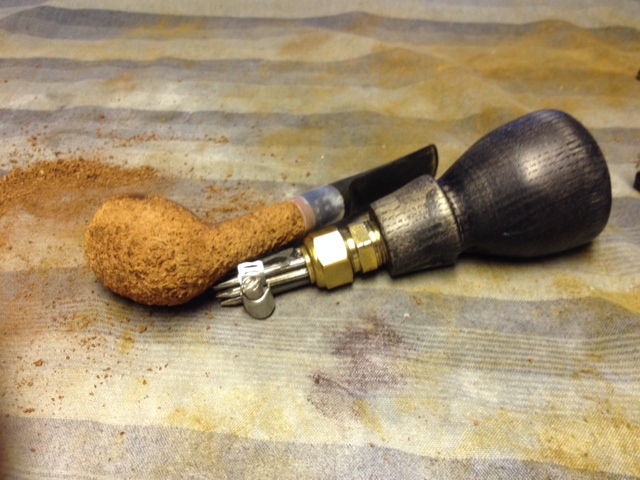

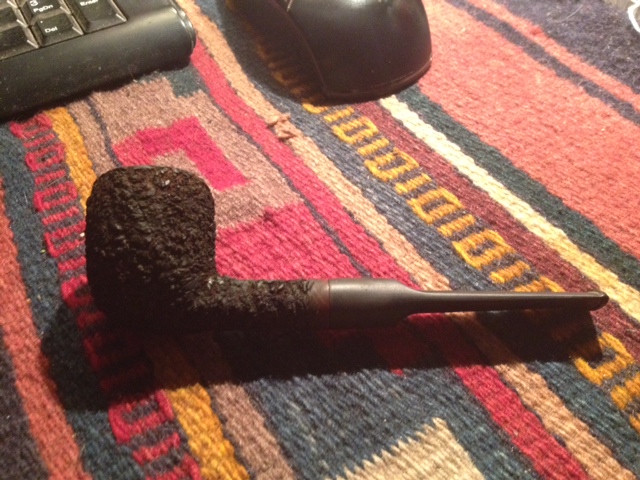
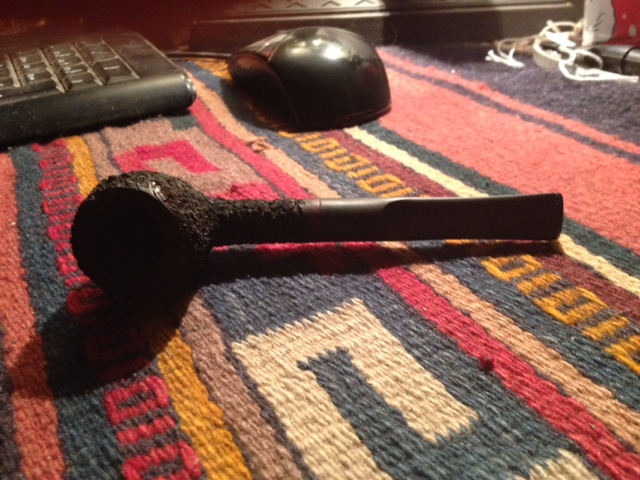
When I finished rusticating the briar unwrapped the scotch tape from the shank. The line was fairly straight and provided a nice contrast of finishes between the stem and the rustication. Then I used a brass tire brush to knock off any loose pieces of briar on the bowl. I find that using the tire brush evens out the finish and cleans up the briar once I have finished with the hard work.

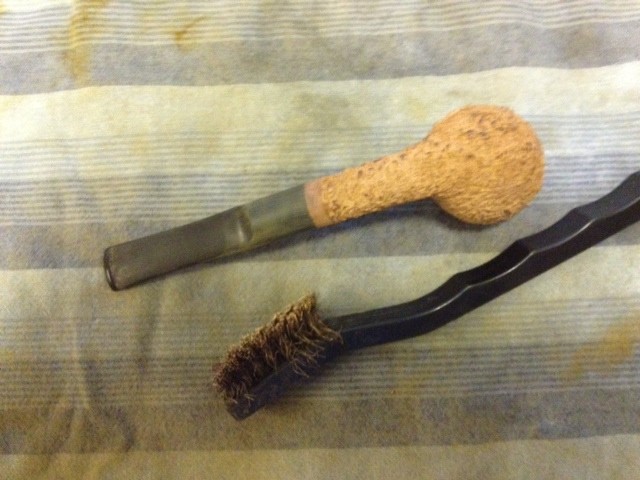
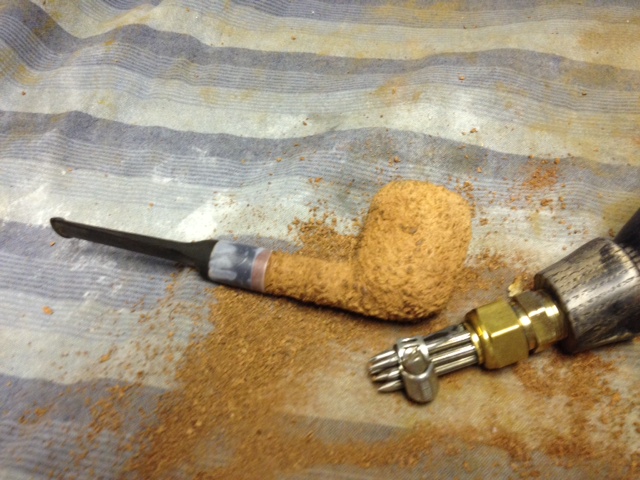
I sanded the band on the shank and the rim with a medium and a fine grit sanding sponge and a fine grit sanding sponge to prepare them for staining. I decided to use two different stains on the bowl to get some depth to the finish. I began with a dark brown aniline stain. I applied it with a wool dauber and let the stain permeate deep into the briar. I flamed it to set it. Reapplied the stain a second time and then flamed it again.
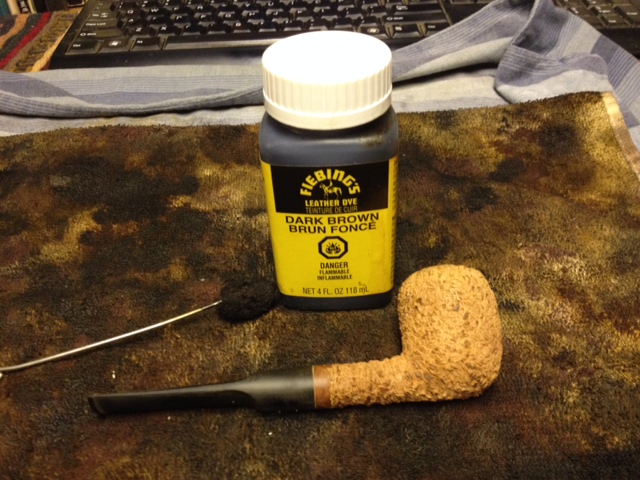

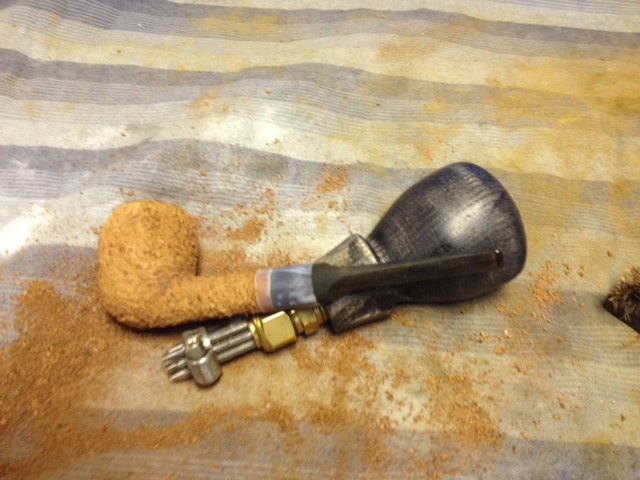
I wiped the bowl down with acetone and isopropyl alcohol on a cotton cloth to remove the stain from the highpoints on the bowl finish and on the band and the rim. I repeated the wash until I had the stain coat the colour I wanted. The dark brown sat deep in the grooves and the high spots were lighter in colour. I then stained the bowl with the second colour, a oxblood or cherry coloured aniline stain. I applied it with a cotton pad and daubed it onto the band, the rim and the high spots on the bowl. I flamed it, reapplied it and flamed it again. Once it was dry to the touch I hand buffed it with a soft cotton cloth.
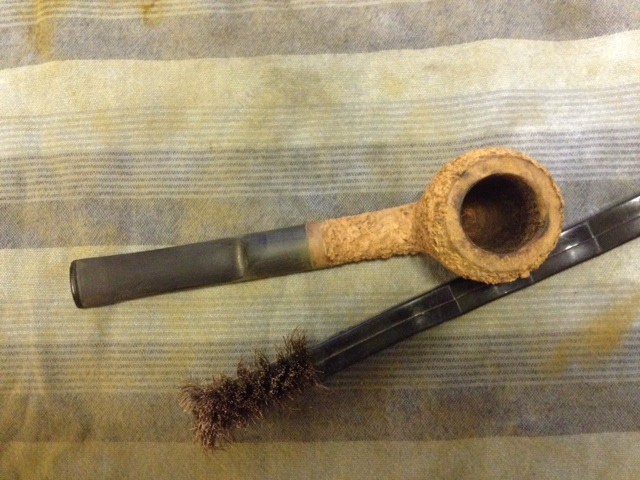
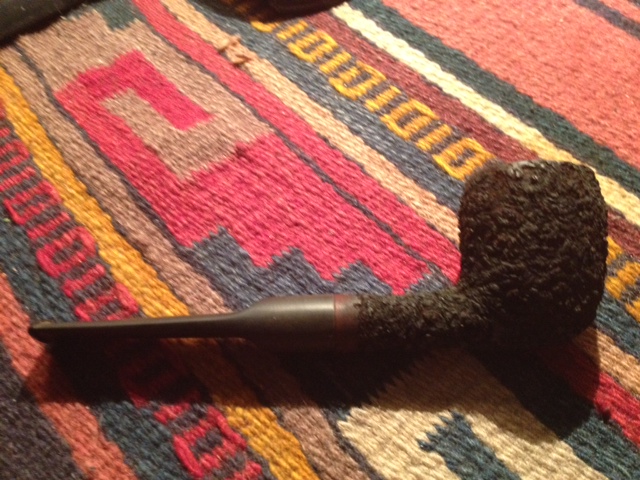
The cherry/oxblood stain worked well on the band and the rim. It made them stand out against the darker brown of the rustication. In the light the texture of the rustication has both a dark brown look in the crevices and a reddish tint on the high spots. The contrasts in the stain on the rustication came out well and the smooth band and the rim work well with the rest of the pipe. Interestingly, and this does not always happen for me, the stain came out exactly the way I was hoping it would when I started the process.
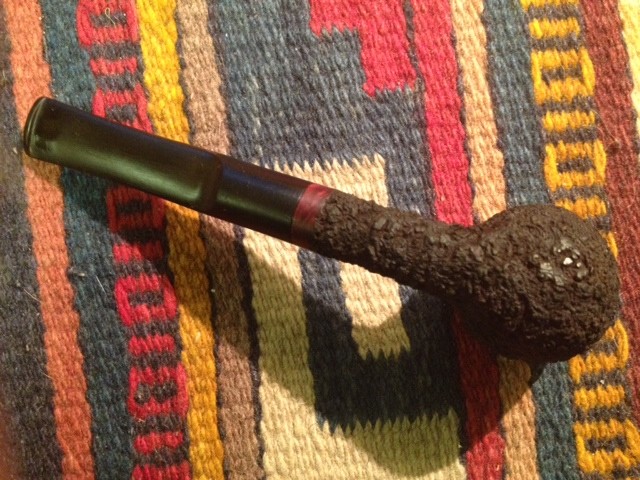
At this point all I had left to do was to work over the stem with the micromesh sanding pads and then give it a buff to polish it. I followed my normal process on the stem. I wet sanded it with 1500-2400 grit micromesh sanding pads and dry sanded with 3200-12,000 grit pads. I rubbed the stem down with Obsidian Oil and then took it to the buffer to give a light buff with White Diamond and a blue plastic polish. I finished by giving the rim, the band and the stem multiple coats of carnauba wax and a final buff with soft flannel buffing pad. The finished pipe is shown below. It has come a long way from the neglected bowl that sat in my refurbishing box for a long time with no stem. Now it is ready to fire up and enjoy.