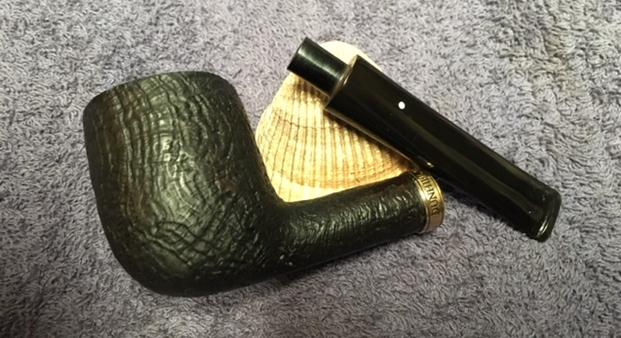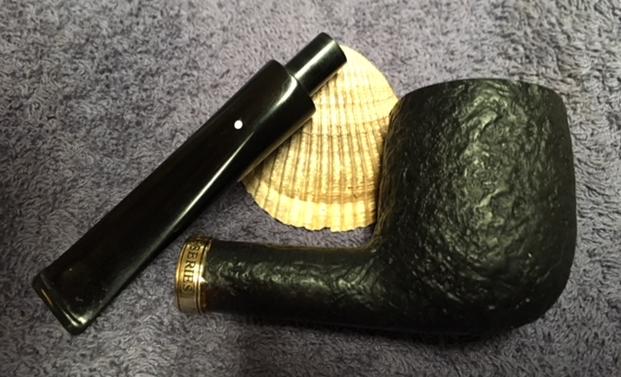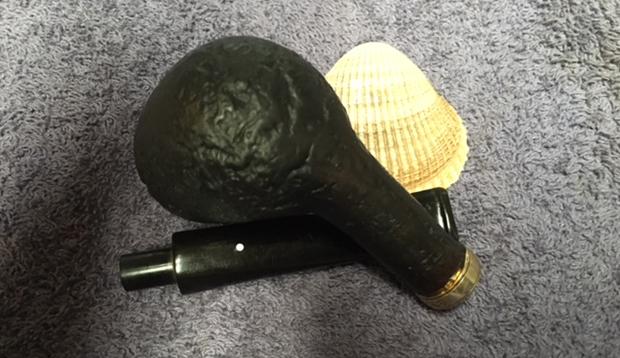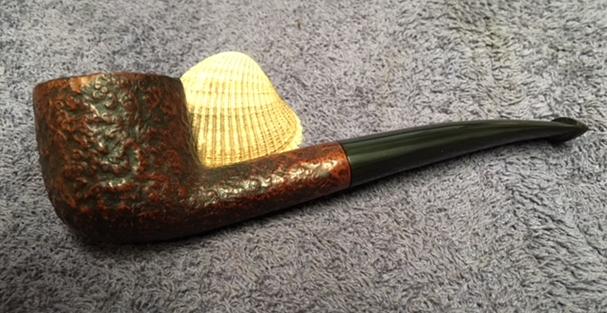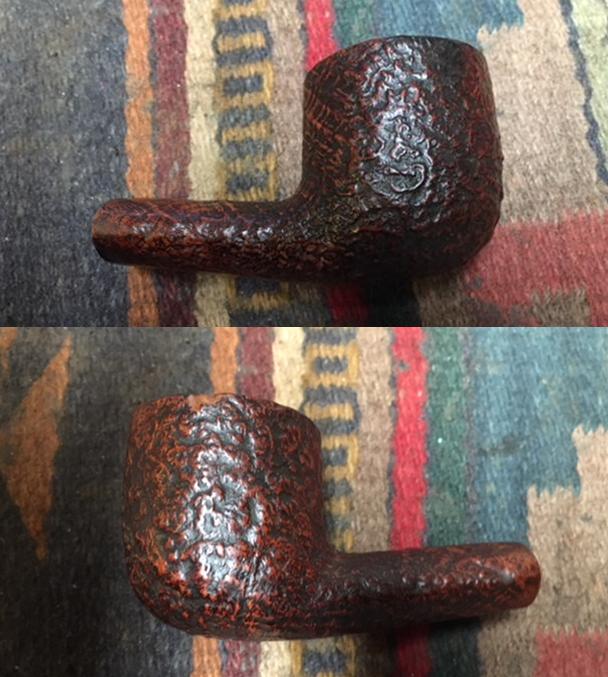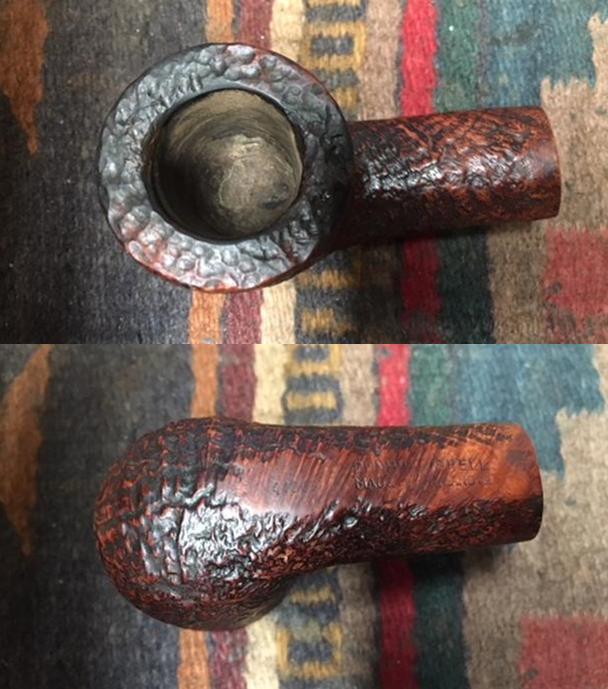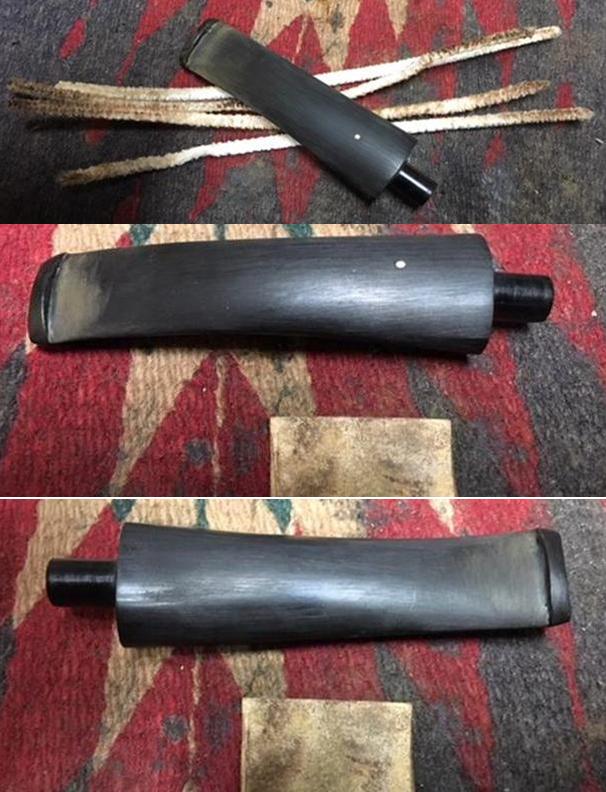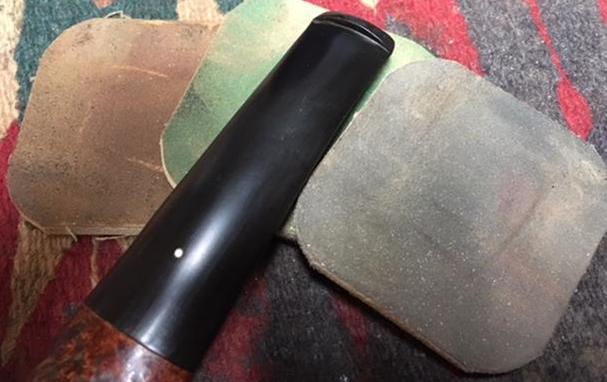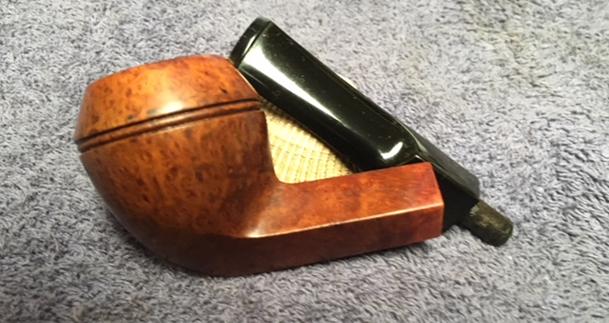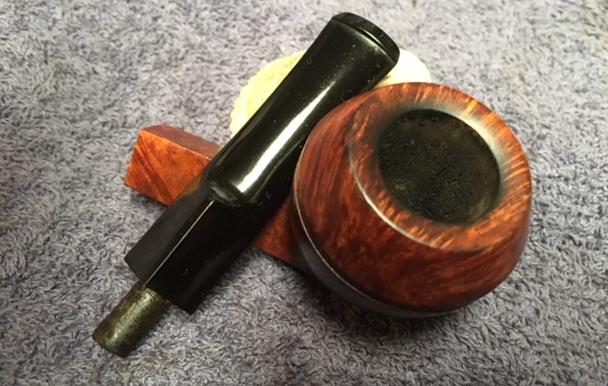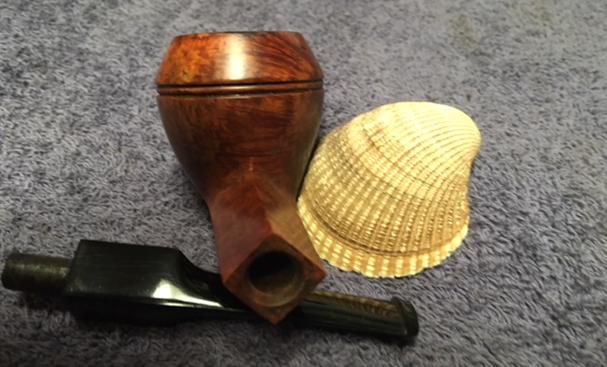
ANSWERS TO QUESTIONS – What do I look for when buying estate pipes?


Blog by Steve Laug

I remember when my brother got bit by the pipe hunting bug and just about picked up every pipe he saw because they looked good, or were unique, or just because… I remember doing the same thing when I first started going through antique malls or rummage shops. I just purchased what I found because they were there. Jeff and I sat down and talk through what I looked for and how to sort through all the brands of pipes that are in the sales. We spoke of brands and my process for sorting through the options. I don’t remember how long we took but he wrote down the brand names that I look for and asked questions about the details of knowing what was workable and what was not. This for me was the part of the process that was not logical it was merely a matter of preference. I have a lot of pipes to work on so I have become very selective over the years as the bins and boxes have filled up.

Since we had talked about this it dawned on me that it might be helpful to walk those of you who are interested through my process. It is here for you to use if you want to. If you don’t want to, just skip this blog and carry on. You will eventually develop your own hunting regimen and methodology. This one is mine and it has worked for me for many years now.

When I look at estate pipes, whether online, on eBay or in person at an estate sale, auction or in my visits to antique shops and malls, I have an internal checklist that I work through. I used to have to think about it and methodically work my way through the process but no longer. It is now a part of the warp and weave of my thinking when I am in the pipe hunting mode. I had to step back and think through it again as I write this blog because I just automatically do it now. Here is my list.

  1. Who made that pipe – my first question is one of the ways I eliminate pipes from my purchase. I have become more selective, as I mentioned above, so I quickly move through the pipes in a display. After a while you learn to recognize shapes, markings, finishings etc. so it is pretty quick. If the pipe is a drugstore pipe (think Medico, corn cob), then I skip over it. If is an older one – Kaywoodie, KBB or KB&B, Yell-bole I will often put it aside or add it to my mental list. Personally I pass up many Medicos, Carey Magic Inch pipes, Grabows and Willards. I skip most is not all of the Imported Briar no name pipes and all no name Italian pipes that have flooded the inexpensive baskets by pipe store cash registers.
  2. What is the general condition of the pipe – Again this review is almost automatic. Last weekend my brother was in an antique mall in Montana and we Facetimed for a bit and he showed me pipes. It seems I can see cracks, nicks, holes, breaks, wrong stem and misfit stems with broken tenons without taking a lot of time. I look at the rim top and check for lava, damage to the inner and outer rim, burn marks and charred areas. I quickly eye-ball the finish and see if there is a heavy varnish coat of varathane coat. I typically do not take a pipe apart at this point. I am merely eliminating the ones that I am not interested in working on. The ones I want are now added to my growing pile to be examined more thoroughly.
  3. Let’s take it apart (if I am able) – This is the time for a closer inspection of the pipes in hand. I scrutinize them at all levels in this step. I look at the stamping to see if it is readable and/or damaged. I look at the stem to check if it is original and the markings match the shank stamp. I remove the stem if I am able without breaking the pipe and check out the internals. He I am examining the inside of the mortise, holding it up to the light to see if the shank is clogged. I look for broken inner tubes or stinger apparatuses in the shank or the stem. I check the shank end to see if there are any signs of cracks that don’t show up on the exterior of the shank. I look for burn marks internally in the mortise as I have seen burn through areas even there. I check out the inside of the bowl as much as I can and the outside looking for burn marks or checking or charring. I am not too worried about fissures in the bowl I am more concerned with the condition of the wood around them. Those that make this final cut are the ones I purchase the rest are left behind. I do not hesitate to walk away from these pipes. Even the chosen few can be left behind if the price cannot be agreed upon between the seller and me.

Often folks will assume that I will not buy damaged pipes – broken shanks, cracked shanks, stems that are chewed up, etc. That is not necessarily so. I assess what work will need to be done and if it will reduce the value of the pipe or if I am not in the mood to work on that kind of issue (yes there are times that I just don’t want to look at another cracked shank). If the pipe is repairable and will look good when fixed then it remains in my purchase pile. Oh, there is also another exception I tend to also scavenge pipes for parts – stems, bands even briar for other repairs so some of the pipes I purchase may be for my bone pile. I gather my purchases, pay my bill and add them to my restoration bins.

I thought it might also be helpful to some of you to have an idea of the brands I look for on my hunts. I know that this highly subjective (at least to some degree) but I think it illustrates a point in terms of how my head works when I am hunting. The brands that make up this list are not exhaustive as there are many that may have escaped my memory as I write this but you will catch the pattern. I have organized them by region in the list below.

  1. Danish or Scandinavian – these include Stanwell, Kriswill, Jarl, Nordings (I have found many of each of these brands on my hunts).
  2. English and Irish – Dunhill, BBB, GBD, GW Sims, Barlings, Comoy’s, Charatan, Lowes, Petersons and all of the sub brands and seconds of each of these (check out the Pipephil.eu site to figure out these).
  3. French and Belgian – Hilsons, GBD early pipes, Comoy’s, Butz Choquin, Chacom and some of the earlier St. Claude made pipes (again check the Pipephil.eu site).
  4. Italian – I have found that other than Savinellis the estate market on these is limited. I have picked up some nice Castellos, Brebbias, Acortis, Radicis, and even an occasional le Nuvole pipe. I leave behind some of the other brands such as Lorenzo or Lorenzetti as well as the no name basket pipes that bear the Italy stamp.
  5. North American – Tracy Mincer, Custombilt, Custom-Bilt, CPF, National, Manhattan, Linkmanns, older Yello-Boles, KB&B pipes, KBB pipes, Kaywoodies, SM Frank, some Wally Frank pipes, Canadian made Brighams, Trypsis, Calich, and even the occasional artisan pipe from both countries – such as Tinskys, von Ercks, Wests, Buraks and the list can go on.
  6. Meerschaums – Generally I am not a big fan of facial meerschaums. I like classic shapes, lattice meers and sometimes well executed faces. I probably pass over more meerschaum pipes than I purchase. If I take one I want the carving to be really well done. I really dislike poorly carved faces with poorly executed features.

I am sure that each of you who are reading this could add more to the list but this is a bare bones list that I work with. It is meant to be a starting point. Add your own brands to the list as I am sure I will as more come to mind. I think that summarizes my thoughts on the original question. As with most things in our hobby there are questions behind the questions. There are multiple levels of answers but at the same time it really boils down to what you individually want to do. It comes down to your aesthetic and your willingness to take the time to work on an estate pipe. What I find ugly and worthless may well turn your crank and be on your wish list. No problem with that because that is what makes this hobby the amazing thing it is. Hopefully you have found this blog helpful as you make your own choices. Thanks for humouring this old pipeman in his ramblings. Cheers.


 

Farida’s Dad’s Pipes #2 – Restoring a 1990 LBS Classic Series Dunhill Shell Billiard


Blog by Steve Laug

The next collection of pipes that I am working on comes from the estate of an elderly gentleman here in Vancouver. I met with his daughter Farida last summer and we looked at his pipes and talked about them then. Over the Christmas holiday she brought them by for me to work on, restore and then sell for her. There are 10 pipes in all – 7 Dunhills (one of them, a Shell Bulldog, has a burned out bowl), 2 Charatans, and a Savinelli Autograph. His pipes are worn and dirty and for some folks they have a lot of damage and wear that reduce their value. To me each one tells a story. I only wish they could speak and talk about the travels they have had with Farida’s Dad.

Dad in the Antarctic in 54/55.

In the midst of restoring this Classic Series Dunhill and thinking about its travels, Farida sent me an email with a short write up on her Dad. She remembered that I had asked her for it so that I could have a sense of the stories of her Dad’s pipes. Here is what she wrote: My dad, John Barber, loved his pipes. He was a huge fan of Dunhill and his favourite smoke was St. Bruno. No one ever complained of the smell of St. Bruno, we all loved it. I see the bowls and they’re large because he had big hands. When he was finished with his couple of puffs, he would grasp the bowl in the palm of his hand, holding the warmth as the embers faded. The rough bowled pipes were for daytime and especially if he was fixing something. The smooth bowled pipes were for an evening with a glass of brandy and a good movie. In his 20s, he was an adventurer travelling the world on ships as their radio operator. He spent a year in the Antarctic, a year in the Arctic and stopped in most ports in all the other continents. He immigrated to Canada in the mid-fifties, working on the BC Ferries earning money to pay for his education. He graduated from UBC as an engineer and spent the rest of his working life as a consultant, mostly to the mining companies. Whatever he was doing though, his pipe was always close by. 

Thanks Farida that explains a lot about their condition. If your Dad was rarely without a pipe I can certainly tell which pipes were his favourites. As I looked over the pipes I noted that each of them had extensive rim damage and some had deeply burned gouges in the rim tops. The bowls seemed to have been reamed not too long ago because they did not show the amount of cake I would have expected. The stems were all covered with deep tooth marks and chatter and were oxidized and dirty. The internals of the mortise, the airway in the shank and stem were filled with tars and oils. I took pictures of the Dunhill pipes in the collection. These were some nice looking pipes when her Dad bought them and they would be nice looking one more when I finished.

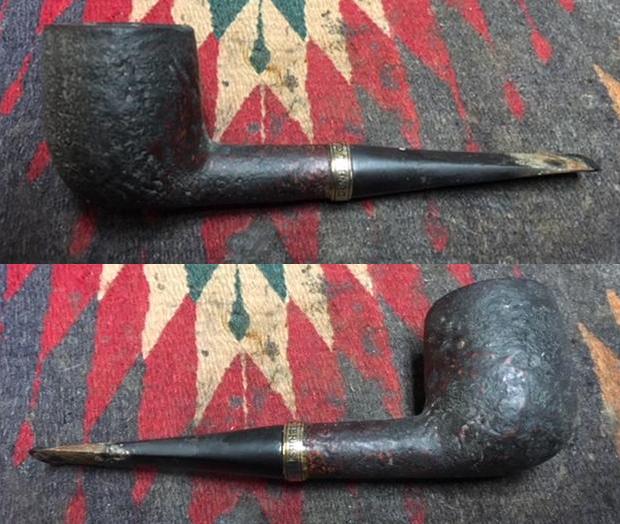
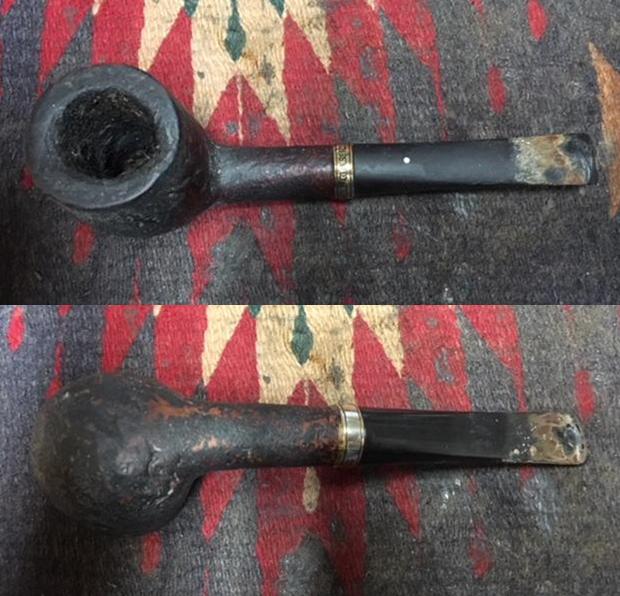
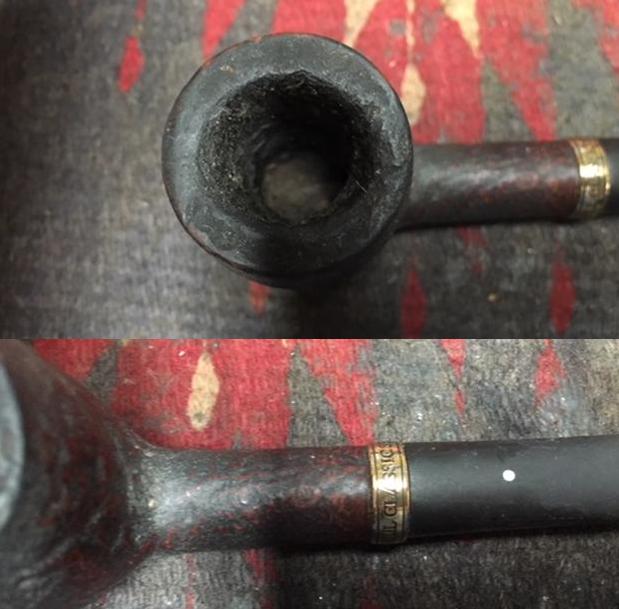
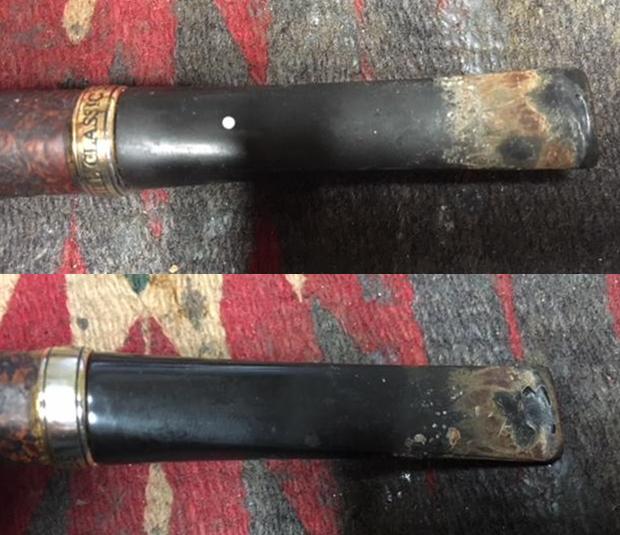
The second pipe that I am working on is a large Group 5 S Shell Billiard. I have circled in the above three photos in blue to identify it for you. It has a gold band that reads Dunhill Classic Series. It is good looking billiard. The Classic Series was produced by Dunhill in 199O as part of homage to their heritage and would make a great pipe for when you are out and about in the evening. When it was released it was a classic black Shell Briar in an equally classic shape, complete with a distinctive gold colored band. The pipe is stamped on the underside of the shank with the shape number LBS F/T. The first digit of the number is missing because of the sandblast, but it is a shape LBS and F/T for Fish Tail stem. Next to that it read Dunhill Shell over Made in England 30. There is a shape number after the Made in England stamping 997 (987?). Dating this pipe is a fairly easy proposition. You take the two digits following the D in England and add them to 1960. In this case it is 1960+30= 1980. (Pipephil’s site has a helpful dating tool for Dunhill pipes that I use regularly http://www.pipephil.eu/logos/en/dunhill/shell-briar1.html).

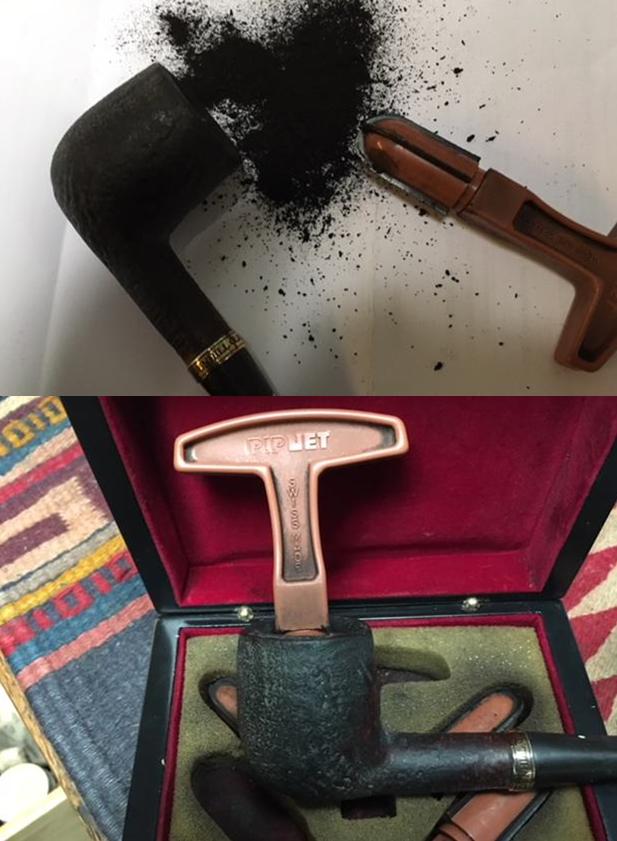
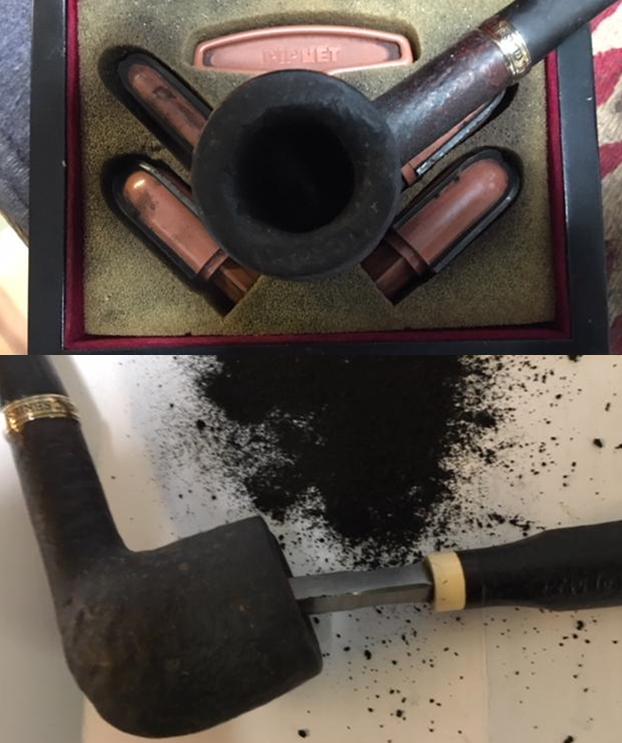
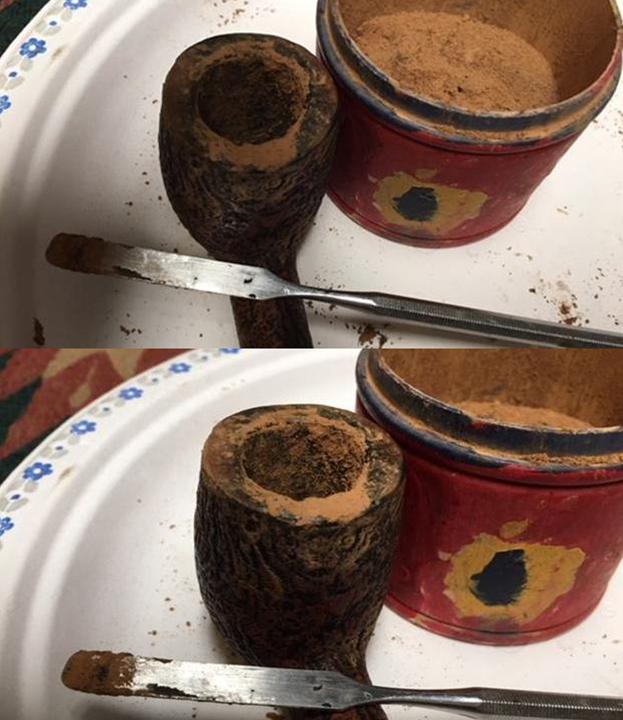
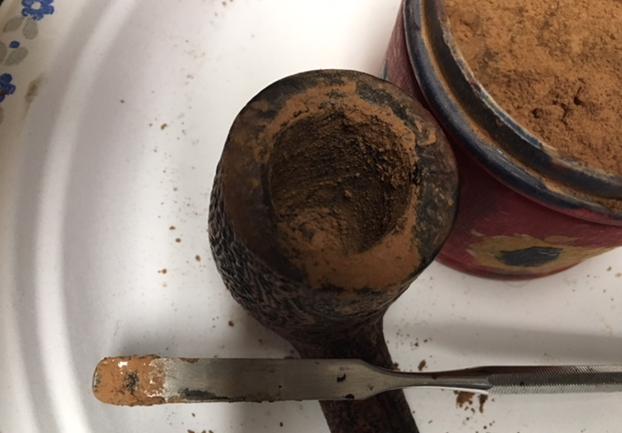
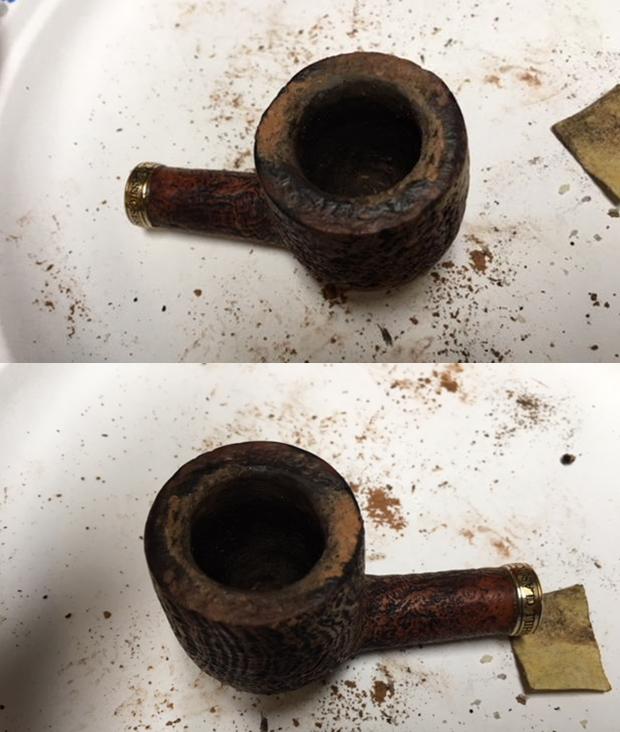
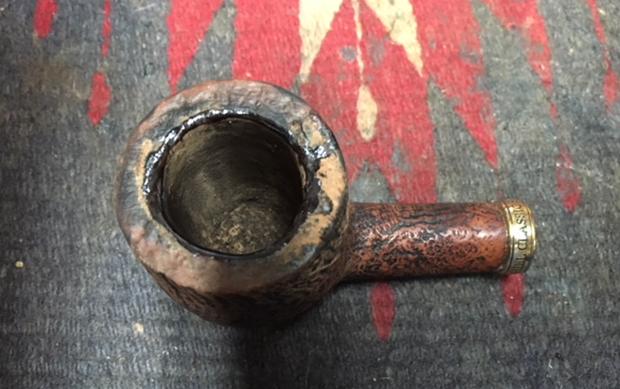
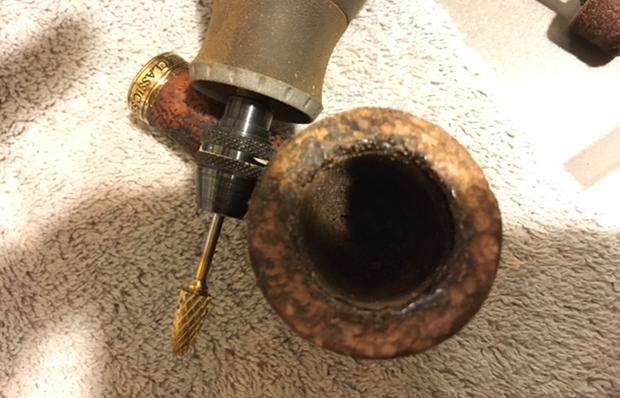
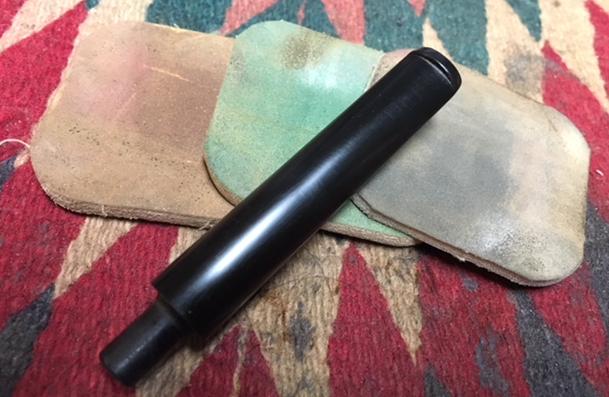
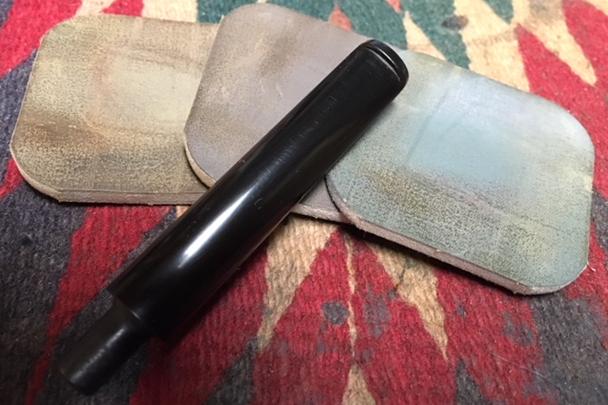
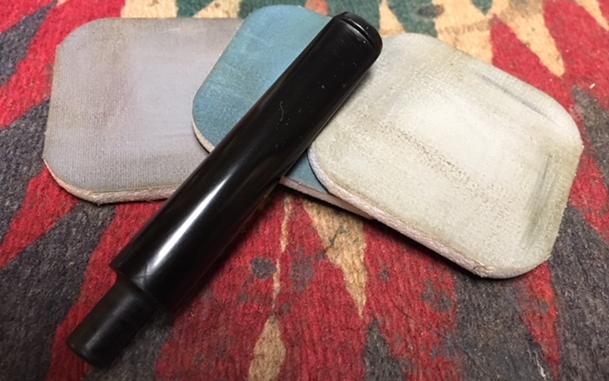
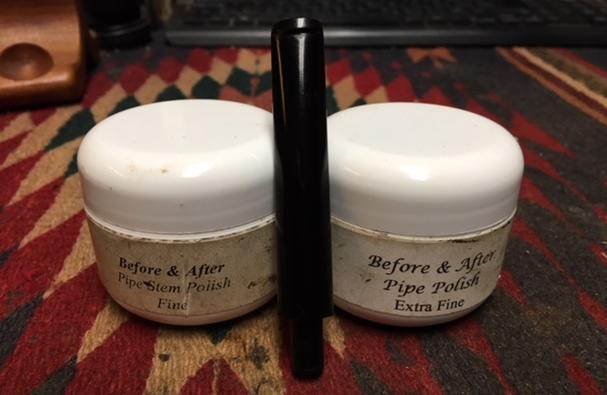
It was in pretty rough shape. The bowl was so dirty and caked with grime that it was very hard to tell what condition it was in. The finish was dull and caked with oils in all of the grooves and valleys of the sandblast. The top of the rim was rough and the inner edge was badly damaged. There were spots on the front of the rim top and at the rear that had deep burns into the briar just like the first pipe from this estate. The briar was burned to a point where I could pick it out with my fingernail. The shank was so dirty that the stem would not properly seat in the mortise. The stem was also a little rough – tooth marks on both sides near and in the button itself. The top side the button is quite thin and worn down. There is a deep tooth mark on the underside near the button and lots of chatter on both sides. It was oxidized and there was some calcification on the first inch of the stem. I took some photos of the pipe before I started to clean it up. I took close up photos of the rim top, the gold band and the stem. You can see from the photo the thick cake I the bowl overflowing lava onto the rim top. You can also see damage to the front, inner edge of the rim and the back left inner edge. There appears to be some serious gouges in those areas and also along the entire inner edge. The amount and extent of the damage will only be clear once the bowl is reamed and cleaned. The gold band on the shank says Dunhill Classic Series and it is in excellent condition. The stem has some deep bite marks on the top edge of the button and on the underside of the stem just ahead of the button. There is a lot of calcification and wear on the rest of the stem as well. I reamed the bowl with PipNet pipe reamer starting with the smallest cutting head and working my way up the third sized head. I took the cake back to bare briar. I used a Savinelli Fitsall Pipe Knife to finish up the reaming and also to clean up the damaged areas. They turned out to be burn damage so I scraped out the damaged briar until I got to a solid base. The bowl exterior was so encrusted in grime and oils that it was hard to see the sandblast finish. All of the grooves, nooks and crannies of the Shell finish were not visible due to the coating filling them in. I scrubbed the exterior of the pipe with a tooth brush and Murphy’s Oil Soap under warm running water to flush away the grime as the soap loosened it from the finish. I scrubbed until the finish was clean. The draw back in this case was that it removed the black Classic stain. The good news was that I could see some amazing grain in the sandblast. I knew that restaining it would not be an issue so it was good to see what was present. The damage to the rim top and inner edge is very visible in the third photo below. The heaviest damage is to the back edge of the rim top and it extends almost to the outer edge of the rim. I had several options to consider in repairing the damage. I could top the bowl and lose the rest of the nice blast on the rim top or I could repair and buildup the rim top with briar dust and super glue. To top it would require remove a lot of briar due to the depth of the damage on the back side. I decided to go with rebuilding the rim top and edges. I layered on clear super glue and briar dust with a dental spatula on both damaged areas until I had it built up even with the rest of the rim. I rebuilt the inner edge of the rim the same way keeping the super glue out of the bowl itself. You will notice in the three pictures that follow that I don’t worry too much about the dust in the bowl as I will sand it out once the repair is hardened. I scraped out the inside of the bowl with the edge of the spatula to knock off high spots along the inside edge. I sanded the bowl with a piece of 220 grit sandpaper to smooth out the inner edge and to sand down the walls of the bowl. I blew out the sanding dust through the shank. I also scraped the top of the rim with the edge of the spatula and knocked off high spots. The first three photos below show the repair rim top and edge. I put a dental burr in the Dremel and copied the sandblast pattern that was on the rest of the rim onto the repaired areas. I ran the Dremel at just below the 10 marker in terms of speed and carefully etched the surface of the briar. The fourth photo shows the rim top after I had used the Dremel on it. I used a brass bristle wire brush to clean up the surface of the rim and it was ready to stain. I put a cork in the bowl to hold on to and stained the entire pipe with a black aniline stain to bring it back to match the colour of the pipe in photos. I applied the stain with a dauber and flamed it. I repeated the process until the coverage was even all over the bowl. I set aside the bowl to let the stain dry overnight. In the morning I worked some Before & After Restoration Balm into the surface of the sandblast with my finger tips to deep clean the finish, enliven and protect the wood. I buffed the pipe with a horsehair shoe shine brush to get it into the grooves of the plateau. I let it sit for a few minutes and then buffed it with a cotton cloth. The pipe came alive and there was a rich shine to the briar. I took some photos of the bowl at this point to mark the progress in the restoration. With the bowl finished (except for buffing) I set it aside and worked on the stem. The stem was dirty and had some significant damage to the top side on the button and a large deep tooth mark on the underside. I cleaned up the damaged areas with alcohol and cotton pads. Once the areas were clean I built up the damaged areas on both sides of near the button with black super glue. I rebuilt the button on both sides as well. I set the stem aside to let the glue cure. Once the super glue patch had dried I sanded it with 220 grit sandpaper to smooth out the surface of the repairs. The topside of the button was far better than when I started. The tooth mark in the underside was filled in and smoothed out. More sanding and filling to do to cover the air bubbles but it was looking good.I decided to take a break from the sanding for a bit and cleaned out the stem and the shank. I cleaned out the airway and the slot in the stem and the mortise and airway in the shank with pipe cleaners, cotton swabs and alcohol. I worked them over until they were clean.I polished the stem with micromesh sanding pads – wet sanding with 1500-2400 grit pads and dry sanding with 3200-12000 grit pads. I wiped them down after each pad with Obsidian Oil after each pad. I polished it with Before & After Pipe Stem Polish – both fine and extra fine to take out some of the tiny scratches in the vulcanite. I finished by rubbing it down with a final coat of Obsidian Oil and set it aside to dry. With the stem polished I put it back on the pipe and lightly buffed the bowl with Blue Diamond being careful to not fill the grooves in the blast with the polishing compound. I used a regular touch on the stem to polish out any remaining scratches. I gave the bowl several coats of Conservator’s Wax and the stem several coats of carnauba wax and buffed the pipe with a clean buffing pad to raise the shine. I hand buffed it with a microfiber cloth to deepen the shine. The pipe polished up pretty nicely. The finished pipe is shown in the photos below. This is the second of six Dunhill pipes that I am restoring from Farida’s Dad’s collection. I am looking forward to hearing what Farida thinks once she sees the finished pipe on the blog. I will be posting it on the rebornpipes store as she wants to sell them for the estate. It should make a nice addition to a new pipeman’s rack that can carry on the trust from her father. The dimensions are; Length: 6 inches, Height: 2 inches, Outside diameter of the bowl: 1 ½ inches, Chamber diameter: 7/8 inches. Thanks for walking through the restoration with me it was a challenging and worthwhile pipe to work on. Cheers.

Restoring a 1983 Dunhill Shell 41009 Oval Shank Pot


Blog by Steve Laug

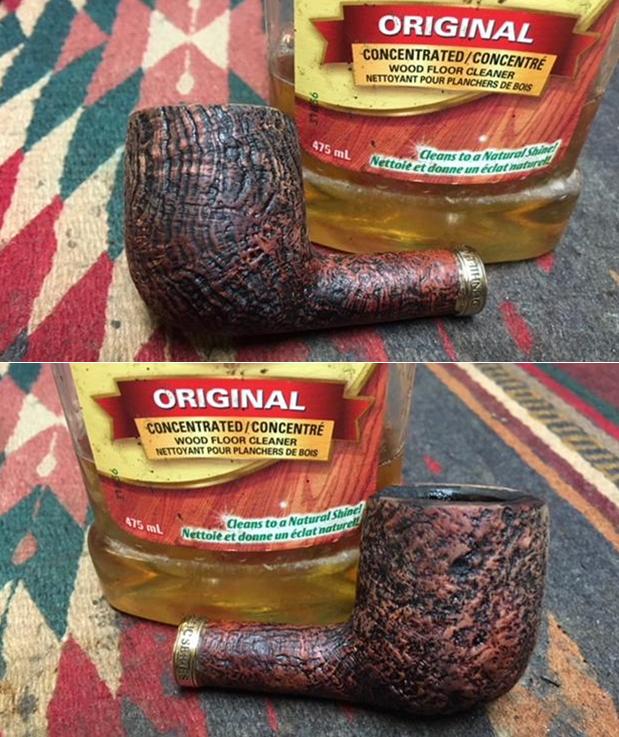
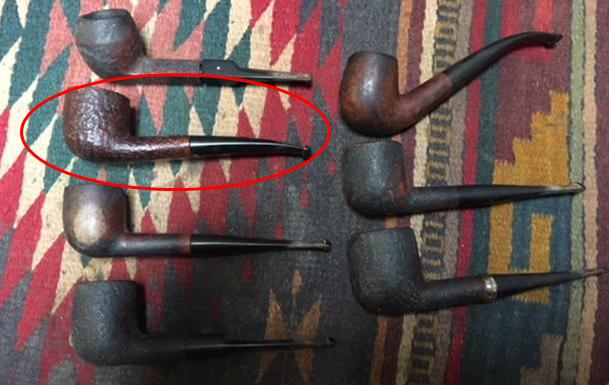
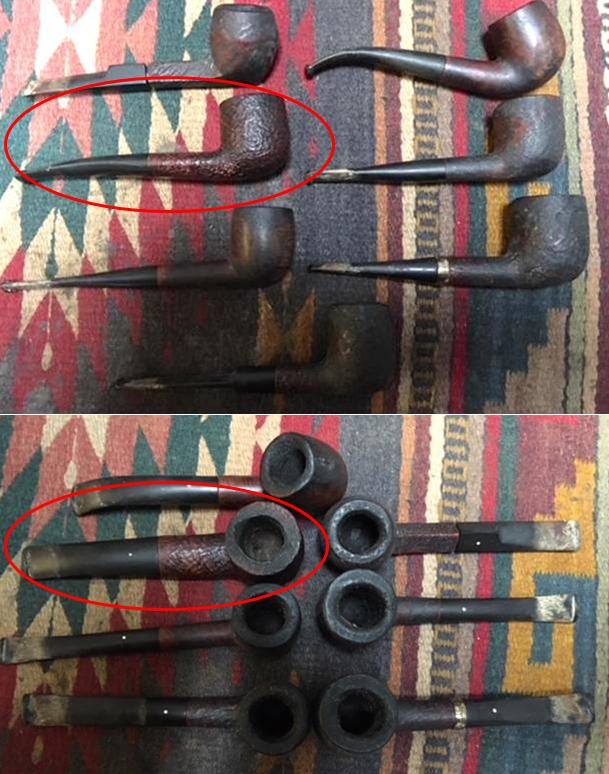
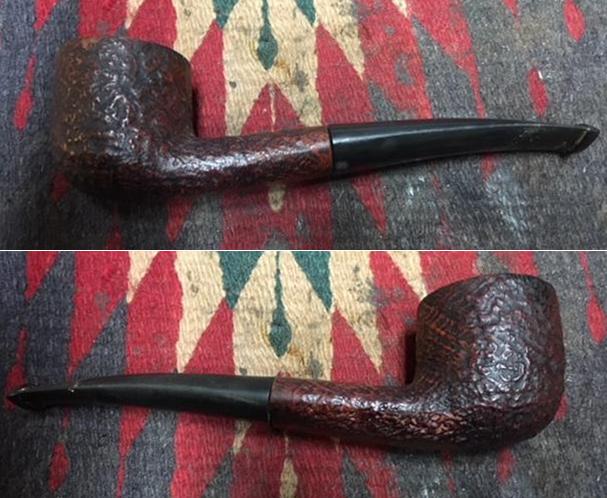
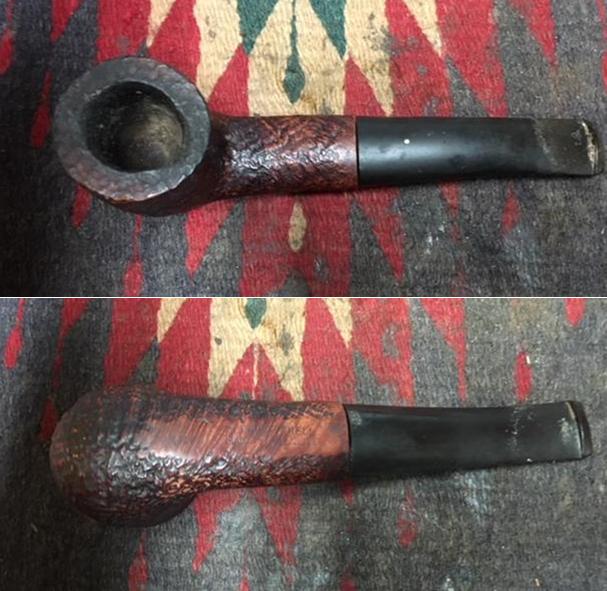
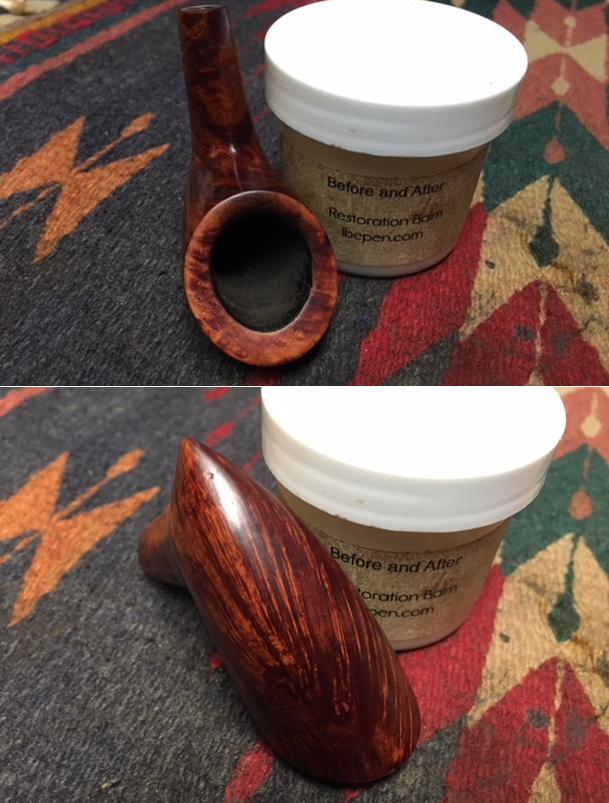
The next collection of pipes that I am working on comes from the estate of an elderly gentleman here in Vancouver. I met with his daughter Farida last summer and we looked at his pipes and talked about them then. Over the Christmas holiday she brought them by for me to work on, restore and then sell for her. There are 10 pipes in all – 7 Dunhills (one of them, a Shell Bulldog, has a burned out bowl), 2 Charatans, and a Savinelli Autograph.  He loved his pipes and she said that he was rarely seen without a pipe in his mouth. He traveled a lot and she remembers him having one of these pipes with him in the far north of Canada. His pipes are worn and dirty and for some they have a lot of damage and wear that reduce their value. To me each one tells a story. I only wish they could speak and talk about the travels they have had with Farida’s dad. Each of them has extensive rim damage and some have deeply burned gouges in the rim tops. The bowls were actually reamed not too long ago because they do not show the amount of cake I would have expected. The stems are all covered with deep tooth marks and chatter and are oxidized and dirty. The internals of the mortise, the airway in the shank and stem are filled with tars and oils. I took pictures of the Dunhill pipes in the collection. There are some nice looking pipes in the lot. The first pipe that I am working on is a Shell Oval Pot. I have circled in the above three photos in red to identify it for you. It is an interesting shape. The pipe is stamped on the underside of the shank with the shape number 41009 next to Dunhill Shell over Made in England 23. Dating this pipe is a fairly easy proposition. You take the two digits following the D in England and add them to 1960. In this case it is 1960+23= 1983. (Pipephil’s site has a helpful dating tool for Dunhill pipes that I use regularly http://www.pipephil.eu/logos/en/dunhill/shell-briar1.html). It was in pretty rough shape. The bowl itself looked good and the finish was in decent condition. The top of the rim was rough and the inner edge was badly damaged. There were spots on the front of the rim top and at the rear that had deep burns into the briar. The briar was burned to a point where I could pick it out with my fingernail. The shank was so dirty that the stem would not properly seat in the mortise. The stem was not too bad – tooth marks on the underside near the button and lots of chatter on both sides. It was lightly oxidized and there was some calcification on the first inch of the stem. I took some photos of the pipe before I started to clean it up. I took close up photos of the rim top, bowl and the stem to show the condition the pipe was in before I started my clean up. The first photo shows the damage on the top of the rim and particularly the inner edge of the bowl. You can see the damage on the front edge and the back edge of the bowl. There was some major burn damage on the inner edge of the bowl. The rim top also had some tars and lava on the surface that would need to be addressed before I could work on the burned areas. The surface of the bowl was dirty and grimy with dust and oils ground into the grooves of the sandblast. The photos show the light cake in the bowl and the dust and grime on the finish. The stem photos show the oxidation and the tooth chatter and tooth marks on the stem surface. You can also see that the stem does not seat in the shank well.I reamed the bowl with a PipNet pipe reamer to cut back the cake to bare briar. I finished cleaning up the remnants with a Savinelli Fitsall Pipe Knife. I used the knife to scrape away the soft briar from the burned areas of the rim top. I used a brass bristle wire brush to clean up the grooves in the good portion of the rim top. I also cleaned out the burned areas. I wiped out the burned areas with cotton swabs and alcohol to clean out the remaining dust and leave it clean. I built up both areas with briar dust and super glue. I used a dental spatula to apply the briar dust to the glue. I built it up in layers until it was level and the inner walls were round.I used a folded piece of 220 grit sandpaper to smooth out the inner edge of the bowl. I worked on it to round the edges. I used a Dremel and sanding drum to smooth out the hard spots of dried glue and dust. I used the brass bristle wire brush to clean out the grooves in the rustication on the rim top. With the rim top basically finished (other than rusticating it with a Dremel and burr) I worked on cleaning out the internals in the shank. I used a dental spatula to scrape out the hard tars and oils that had lined the walls in the mortise. I cleaned out the mortise and the airway in the shank with alcohol, pipe cleaners and cotton swabs until the shank was clean.I used a dental burr in my Dremel to rusticate the top of the rim. I wanted to match the repaired areas to the rest of the rim top. I slowly and carefully put divots in the surface to match the rest of the surface of the rim. I restained the rim with a dark brown aniline stain and a cotton swab to get the stain deep in the recesses of the repaired rim top.I rubbed Before & After Restoration Balm into the deep grooves and crevices of the sandblast on the rim and the rest of the bowl. I rubbed it until it was deep in the briar. It was amazing to see the grime and dirt on the cotton pad that I wiped it down with. The balm brought life and a rich glow to the briar. I rubbed the bowl down with Conservator’s Wax and buffed the pipe with a shoe brush. I took it to the buffer and buffed it with a clean buffing pad to raise the shine. I hand buffed it with a clean microfiber cloth to deepen the shine. The photos below show the repaired and restored bowl. It has come a long way from the damaged pipe I started with when I began. I laid the bowl aside and turned my attention to the stem. I cleaned the surface with alcohol and a cotton pad and cleaned out the airway with alcohol, cotton swabs and pipe cleaners. I scrubbed until the cleaners came out white. I sanded the stem with 220 grit sandpaper to smooth out the tooth chatter and remove the tooth marks. Fortunately they were not too deep so they came out with a little elbow grease.I polished the stem with micromesh sanding pads – wet sanding with 1500-2400 grit pads and dry sanding with 3200-12000 grit pads. I wiped them down after each pad with Obsidian Oil after each pad. I polished it with Before & After Pipe Stem Polish – both fine and extra fine to take out some of the tiny scratches in the vulcanite. I finished by rubbing it down with a final coat of Obsidian Oil and set it aside to dry. With the stem polished I put it back on the pipe and lightly buffed the bowl with Blue Diamond being careful to not fill the grooves in the blast with the polishing compound. I used a regular touch on the stem to polish out any remaining scratches. I gave the bowl several coats of Conservator’s Wax and the stem several coats of carnauba wax and buffed the pipe with a clean buffing pad to raise the shine. I hand buffed it with a microfiber cloth to deepen the shine. The pipe polished up pretty nicely. The finished pipe is shown in the photos below. This is the first of six Dunhill pipes that I am restoring from Farida’s dad’s collection. I am looking forward to hearing what Farida thinks once she sees the finished pipe on the blog. I will be posting it on the rebornpipes store as she wants to sell them for the estate. It should make a nice addition to a new pipeman’s rack that can carry on the trust from her father. The dimensions are; Length: 6 inches, Height: 1 ¾ inches, Outside diameter of the bowl: 1 ½ inches, Chamber diameter: 7/8 inches. Thanks for walking through the restoration with me it was a fun pipe to work on. Cheers.

Reworking and Restemming What Looked Like a Lost Cause


Blog by Ryan Thibodeau

I have been following Ryan’s work on FaceBook’s Tobacco Pipe Restorers Group and have been impressed with his work. When he posted the work on this old Canadian stummel with a lot of issues I wrote and asked if he would be willing to post it on rebornpipes. He said sure and sent me the following write up. I am happy to welcome Ryan to the pages of the blog. It is a pleasure to have you here. Without further ado I will let Ryan introduce himself to you all. — Steve

My name is Ryan Thibodeau, I live in the Hamilton Ontario region I stumbled upon this hobby by accident. When my Father learned of my new hobby, he gave me his 1959 Dunhill shell briar pipes. They hadn’t been smoked in 38 years and needed some TLC. I had them restored and they were the first two pipes in my rack.

From there I joined various Facebook Groups and happened upon Steve’s blog “Reborn Pipes”, I was inspired immediately. Since that time I’ve been collecting tired worn out pipes and testing my ability to return them to a condition that I would be proud of. It is a wonderful hobby, that doesn’t require a lot of space to do.

Every pipe has a story! Usually the smoker who owned it, and their story, is more interesting than the pipe itself.

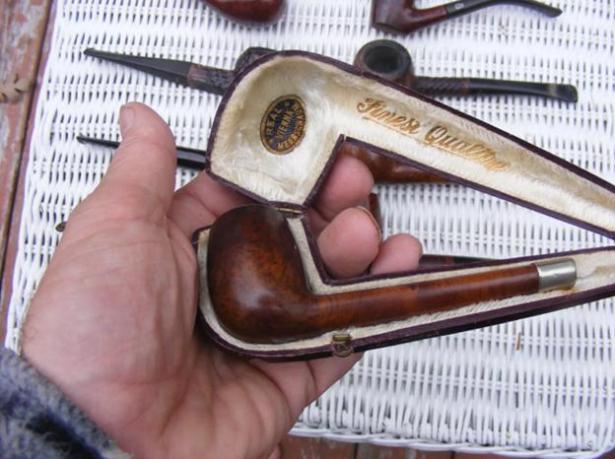
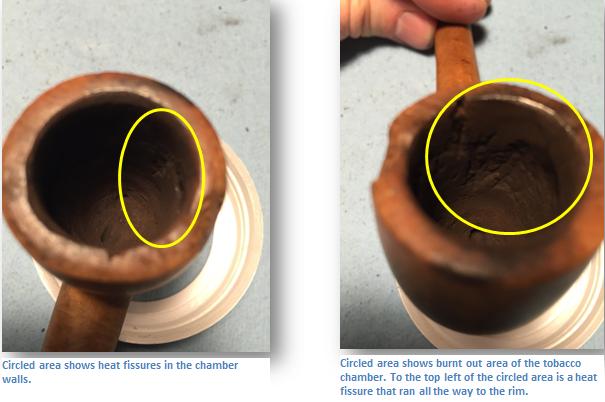
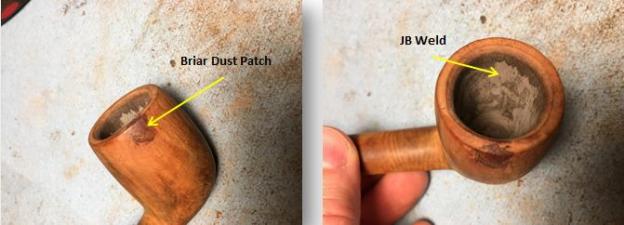
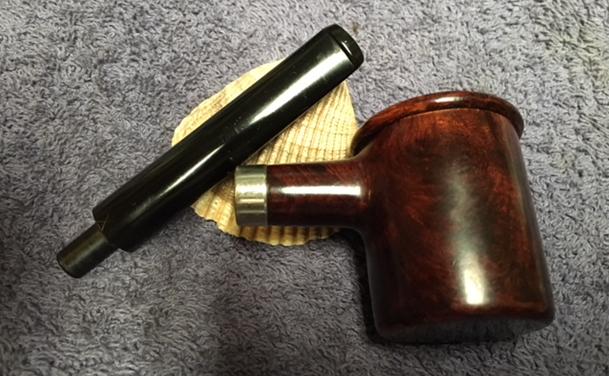
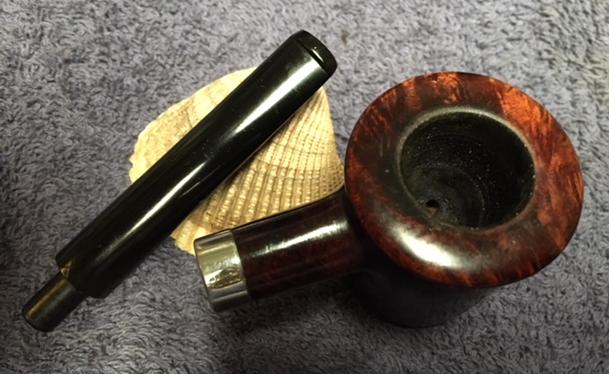
I purchased this pipe in a lot of 12. There were only one or two pipes in the lot that I really wanted and the price was right, so I wasn’t heartbroken if the rest came to rest in the bottom of my box of pipes. One of them came in a case that was meant for a meerschaum, and it looked decent when in the picture, but further investigation revealed a lot of issues that would need to be repaired. I started by removing the silver band, which came off without any effort and used Heirloom Stripper to remove all the dirt, grime, old finish and lift some of the stain. This allowed me to get a real good look at the damage to this pipe. Next I used my Castleford reamer to remove all the cake out of the bowl. There was very little cake lining the bowl, however; once I removed the cake I found that walls of the tobacco chamber were severely charred. I suspect this pipe was smoked very hot and the briar was charred to charcoal. I wanted to see how much of the chamber was damaged ( I prefer to ream my bowls right back to fresh briar. This way I can see if there are any heat fissures or major issues that would make a restoration go sour after the first smoke)

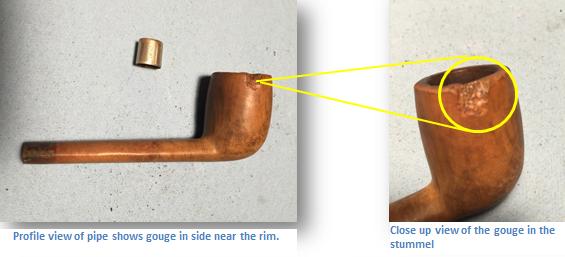
I removed the charred wood. The reamers will shave away the charred wood, once you feel the resistance of the blades rubbing the fresh briar you know you’ve removed the charring.I used a combination of Briar dust and CA Glue to create a patch for the gouge on the side of the bowl. Using a flat file, I filed the patch down to the profile of the pipe. Afterwards I topped the bowl to level out the rim and the patch. The bowl was also over reamed by its previous owner so I added a bevel to the inside of the bowl at the rim to blend everything in.

There was a lot of filing and sanding through this process to get it just right. Unfortunately I get hyper focused during this process and forgot to take step-by-step pictures.

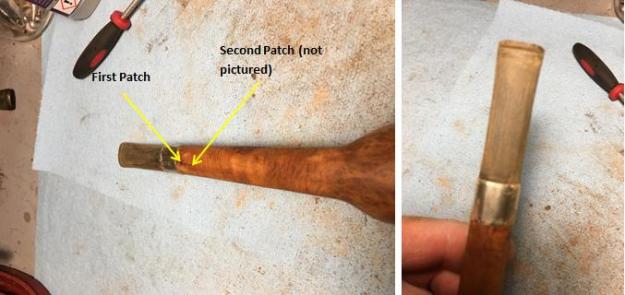
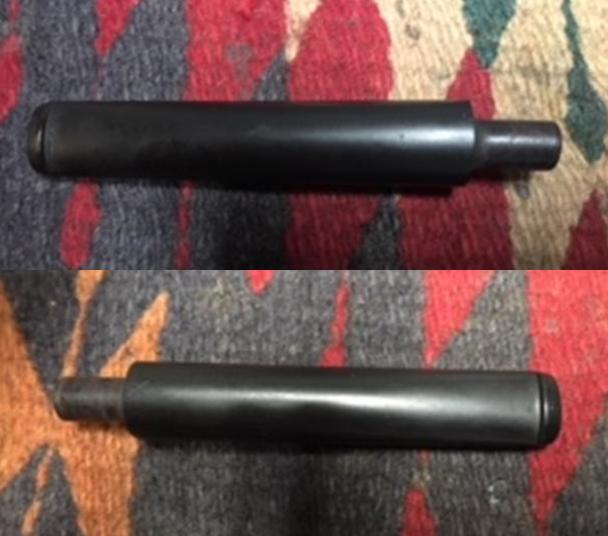
The grey patches you see inside the bowl is a product called JB Weld. I mixed up a batch and filled the problem areas in the chamber, afterwards I sanded it down to blend with the rest of the chamber. In my experience the product is completely inert once cured. It is handy for a reconstruction of this kind, but I’d recommend adding a bowl coating as an added barrier.This pipe came to me without a stem. Fortunately I had a stem that would be the perfect length, I just needed to shape the tenon to fit the pipe. For this I used the Pimo Tenon cutter from Vermont Freehand.

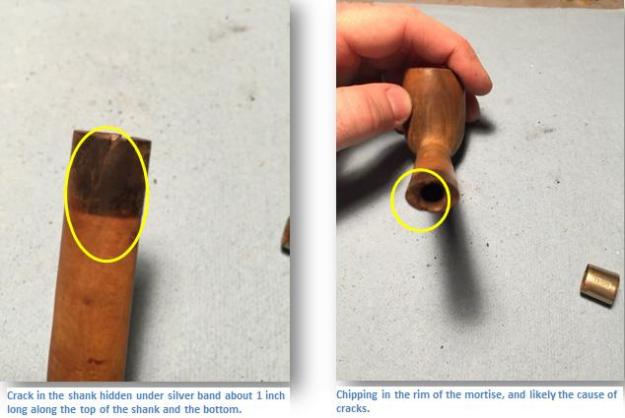
I also used the opportunity while I was at this end of the pipe to drill a hole ahead of the crack in the shank and filled used briar dust and CA Glue. As sometimes happens with restorations, I thought I stopped the crack from spreading, well I was wrong and it continued from the patch further up the shank about ¼ of an inch. So I drilled another hole and patched it again. This time I seemed to have everything under control.

The stem was quite simple to shape to the profile of the pipe and was a welcome change from the frustrations of the other repairs that didn’t go according to plan.

Once I had all the parts and repairs completed. I sanded the entire pipe and stem with 320 grit sandpaper up to 8000 grit (1500-8000 with micro mesh pads) Rustication

At this point I had to consider how I was going to finish this pipe. Originally this was a smooth finish Canadian Billiard, but those days were long behind this tired old pipe. I originally thought of using a really dark stain to hide all the imperfections, polish it and call it a day, then I thought I’d take a risk and create something new, and breath new life into this pipe. For all the effort I put into this pipe up to this point I figured I’d let my creativity flow.

I decided that I would rusticate this pipe and leave a smooth patch somewhere, where I hadn’t determined yet. Using a Dremel and a 107 Carving bit I started to rusticate the shank and worked my way to the heel, then up the stummel. Halfway up the stummel the pipe revealed its final design-leave the top of the bowl smooth! I wasn’t sure at first because it would mean I had to blend in that CA patch, but I now avoided trying to rusticate it.

I was very pleased with the result.

Staining & Finishing

I used Fiebings Dark Brown alcohol based dye over the entire pipe as a base, then wiped on Fiebings Oxblood till I achieved the colour I wanted. To seal the stain in the pipe I applied a thin layer of shellac which gave it a glossy look I didn’t like. I left it, and just stayed the course with this experiment to see how it turned out.

In the morning the Shellac had cured. I began the polishing process at this point. I don’t have a buffing wheel yet, so I use cotton wheel buffing bits that fit to my dremel.

I started with Tripoli and thoroughly went over the entire pipe and stem. The tripoli did a good job of taking down the shellac, and making it less pronounced. I followed that up with white diamond and then finally carnauba wax.  I used a fluffy felt bit to polish the whole pipe.

Bowl Coating

You will find a variety of recipes and opinions on bowl coatings. I use them when needed and I prefer the waterglass recipe that a pipe maker shared with me. It is a combination of Sodium Silicate, Activated Charcoal and White Pumice. Once cured it provides a refractory layer on the inside of the bowl, and it feels like 800 grit sandpaper which promotes new cake build up without putting a lot of heat stress on the worn out briar.

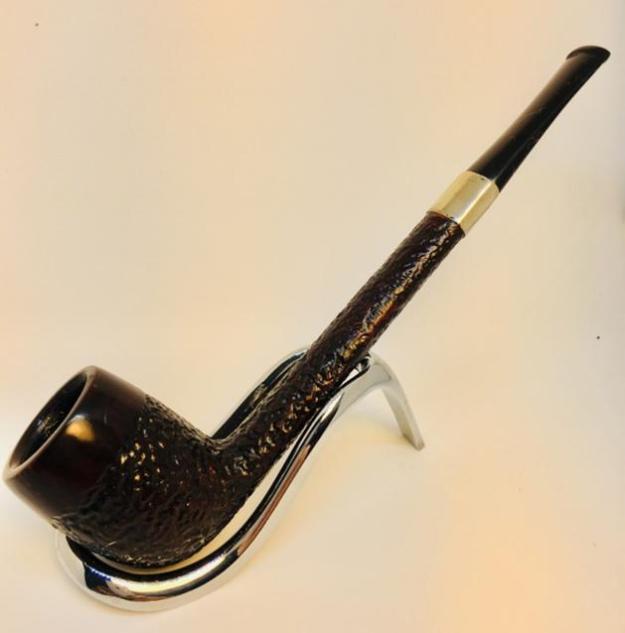
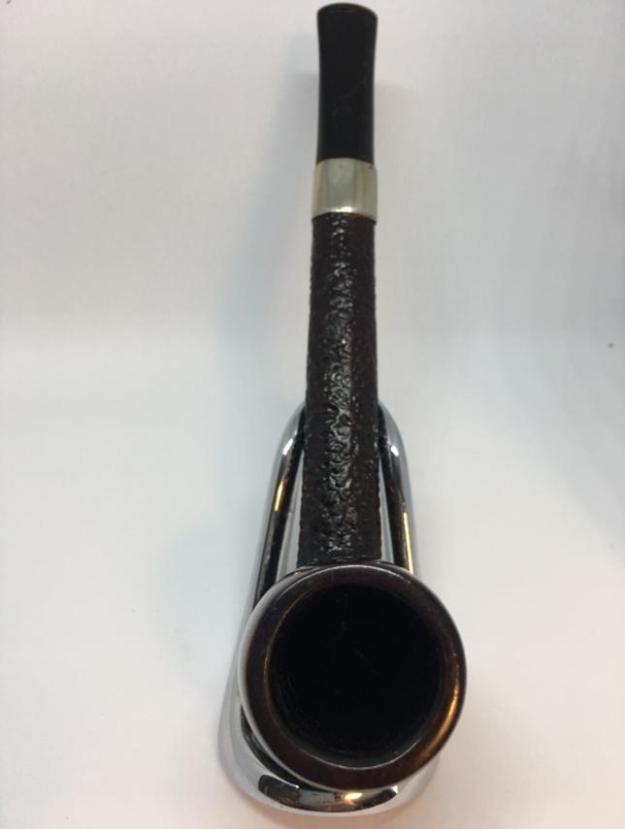
This pipe definitely tested the limits of my abilities  and I learned some new techniques that I had only seen others use. Here’s the finished pipe!


Craig’s Pipes #5 Restoring a William Demuth and Company (WDC) Campaign Calabash


Blog by Steve Laug

In my previous 4 blogs on Craig’s pipes I spoke of the five pipes that I am working on for him. In this blog I am taking on the fifth of his pipes – a WDC Campaign Calabash. It was another one with a cake in the bowl that was thick and hard. For the last time I am going to include what Craig wrote me about his pipes. I have included it in the previous four blogs but I think it adds context to the bunch.

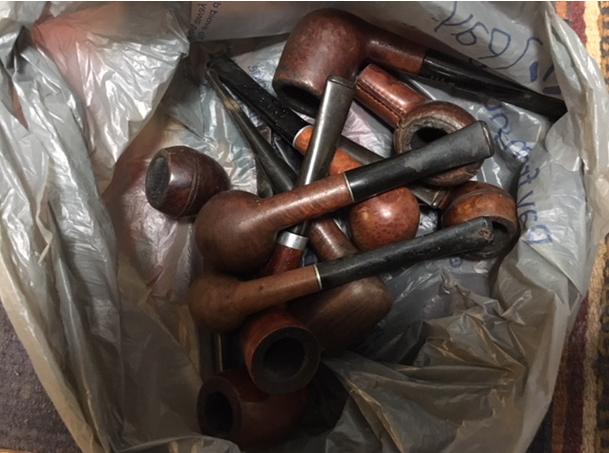
I was recently given a bag of pipes…literally, a BAG of 20 or so pipes that are 50+yrs in age and VERY used. I was wondering if you would have time to either Skype or FaceTime with me, and go through what I have in order to determine which are worth sending to you to have them refurbished. If you would be so kind, I’d really appreciate it.

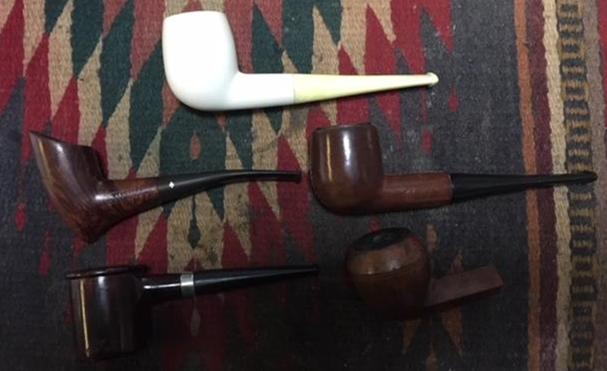
We met on FaceTime and he pulled out a grocery bag with no rhyme or reason to it. It was filled with a jumble of no name or low-end drug store pipes. This last pipe is one of the two pipes that stood out for me – the old WDC Campaign pipe and a Grabow Starfire. He had several others that he liked. But we excluded all but five of the pipes. The amount of work necessary to bring them back was not worth the price. These are the five that we chose to work on. I have included the links to the blog covering each pipe. I am finally addressing the last one.

– A No Name Meerschaum that looked interesting – https://rebornpipes.com/2018/01/31/is-it-a-meerschaum-looks-like-one-feels-like-one-but/

– A leather clad billiard marked R20 and bearing a shield – https://rebornpipes.com/2018/02/01/rejuvenating-a-leather-clad-billiard/

– A Wally Frank Bulldog marked Natural Unvarnished lacking a stem https://rebornpipes.com/2018/02/02/craigs-pipes-3-restemming-and-restoring-a-wally-frank-natural-bulldog

– A Dr. Grabow Starfire 39 that had great grain – https://rebornpipes.com/2018/02/03/craigs-pipes-4-restoring-a-dr-grabow-starfire-39/

– A WDC Campaign underslung pipe

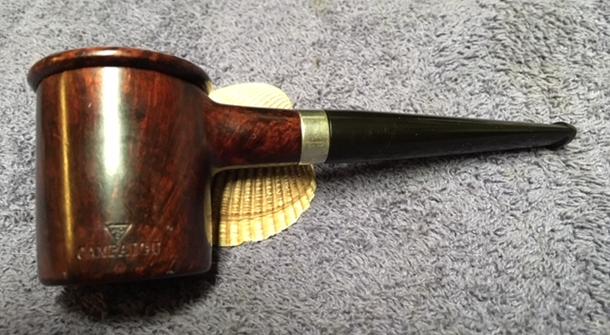
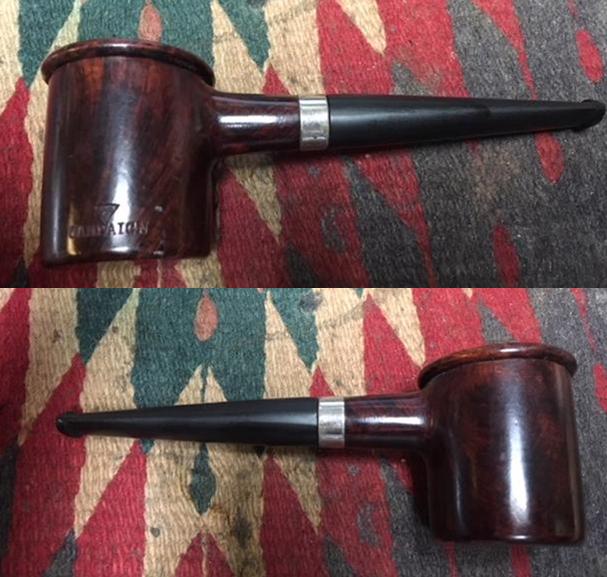
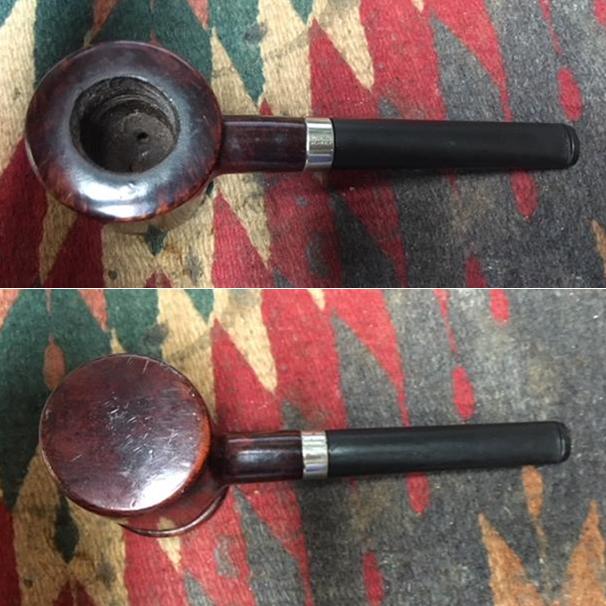
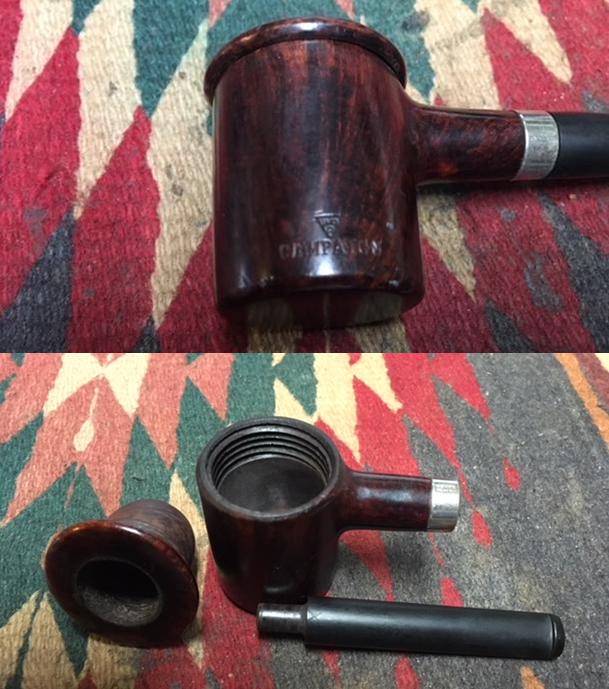
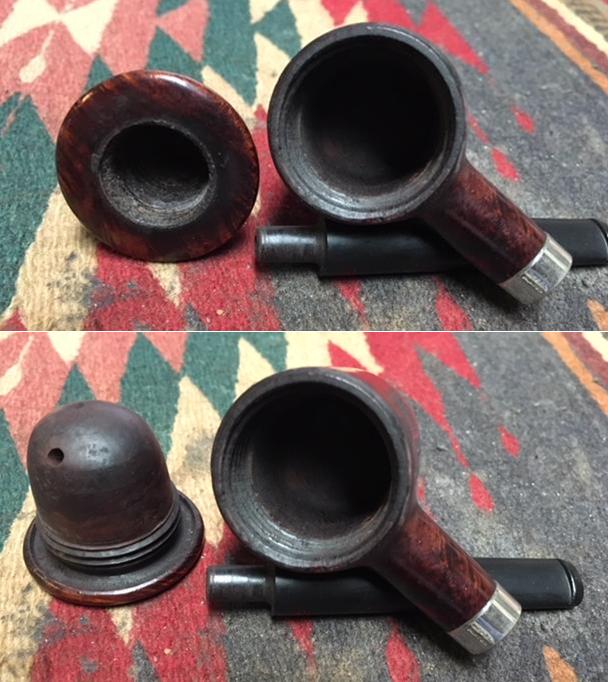
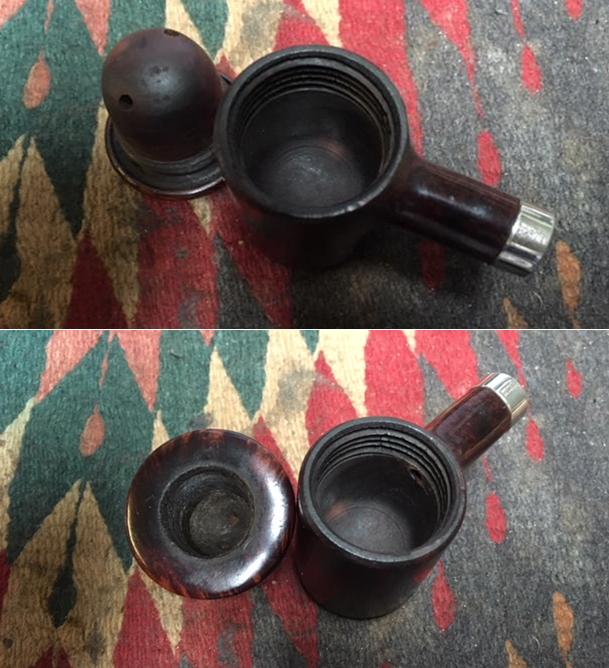
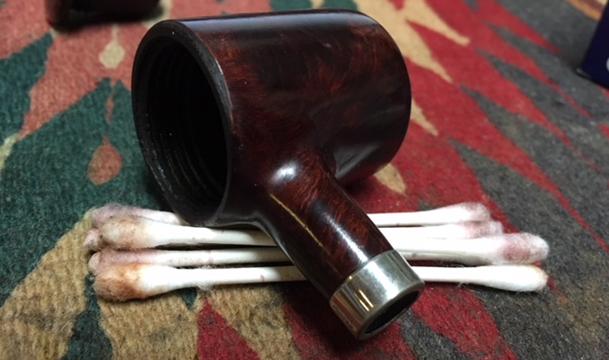
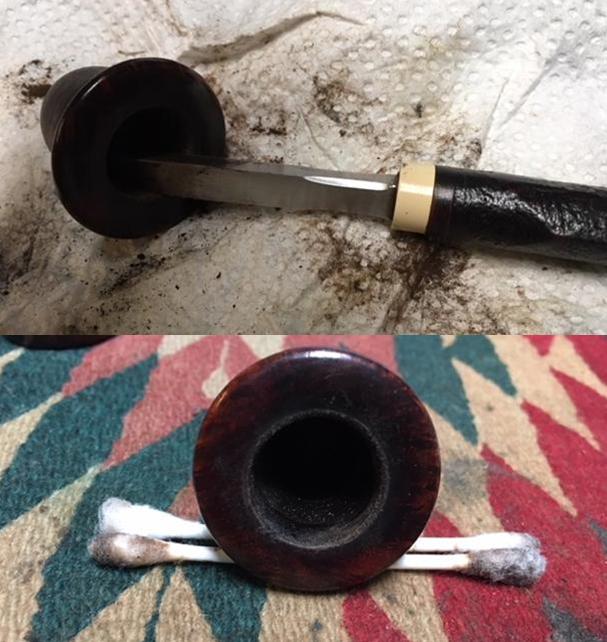
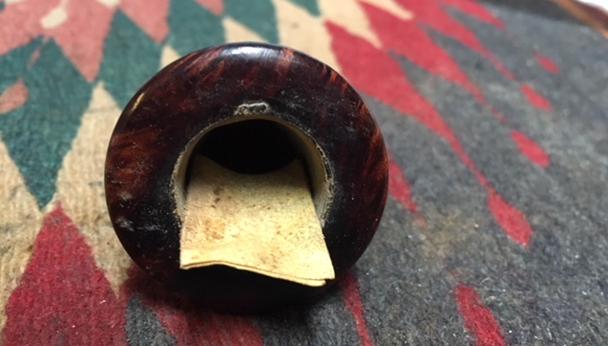
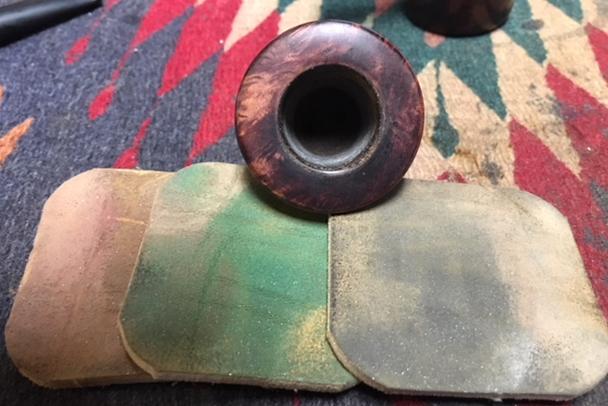
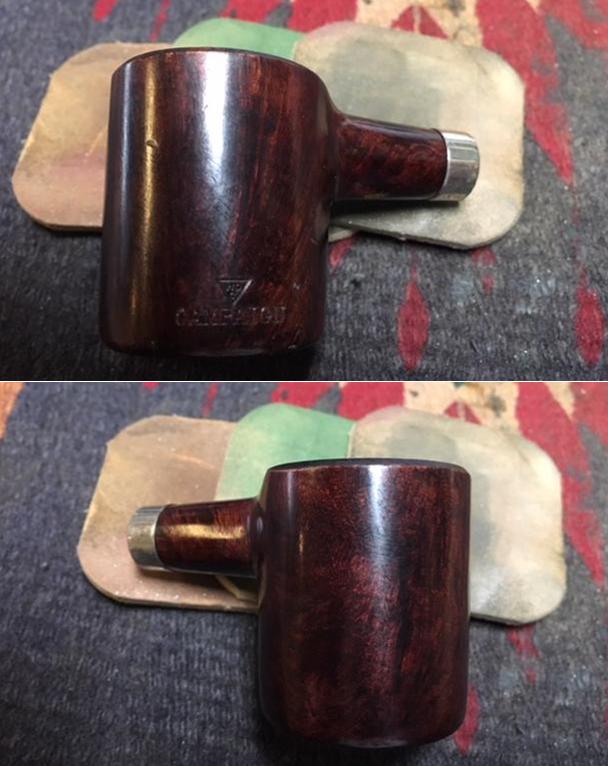
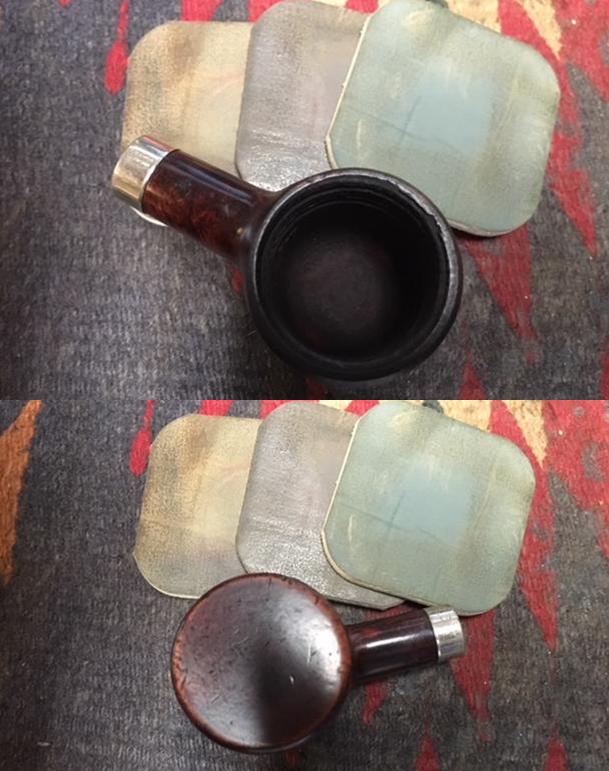
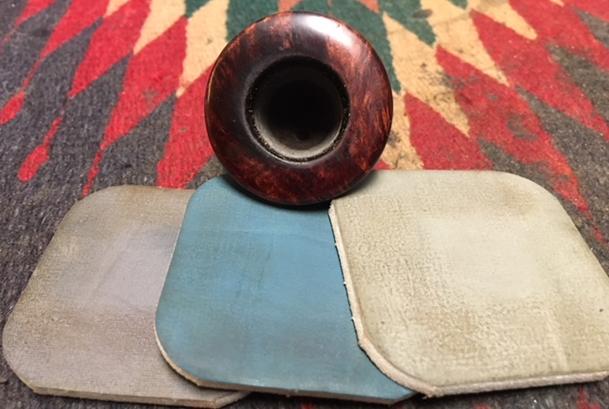
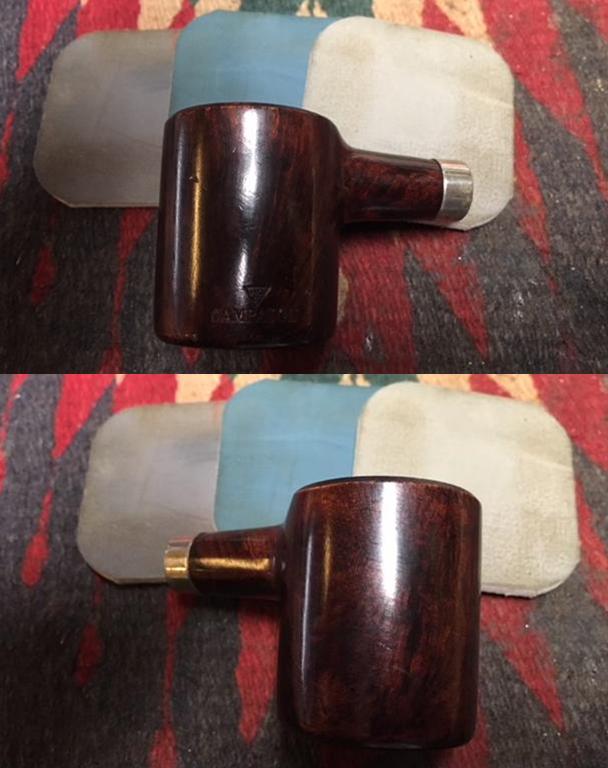
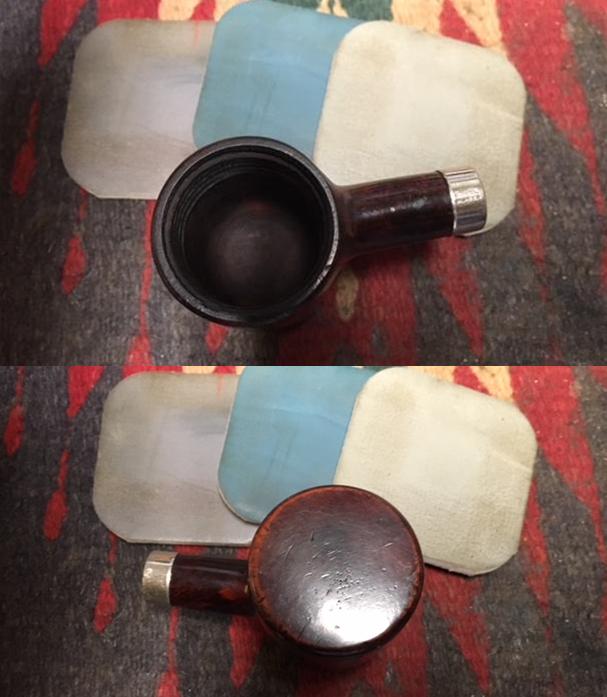
After our conversation, he packed up the pipes and threw the rest of the pipes in a separate bag for me to scavenge parts. The box did not take too long to get to Vancouver and when it did I opened the box and had a look. Here are pics of what I saw – there were two bags inside. One bag held the discards for the scrap pile and the other held the five pipes he wanted restored.  This is last of Craig’s five pipes. It is the second WDC Campaign that I have worked on. It is stamped on the lower left side of the outer bowl with the WDC triangle logo over the word CAMPAIGN. There was no other stamping on the pipe. The bowl was like a calabash bowl and screwed into the outer bowl. The entirety was made out of briar. The grain on the bowl and rim top is mixed grain with straight, flame, swirled and a bit of birdseye thrown in as well. The briar was very dirty and there were some sticky spots around the sides of the bowl. The rim top had some lava on the surface and there was an uneven cake in the bowl. There was a polished nickel band on the shank but there was no shank stamping. The band was stamped NICKEL PLATED. The stem was lightly oxidized and the fit against the end of the shank was snug. I took photos of the pipe before I started my cleanup work. I took close up photos of the bowl, rim top and all of the parts of the pipe. The first photo shows the stamping on the left side of the bowl. You can see the WDC triangle over the word Campaign. The surface of the outer bowl was dirty and grimy. The rim top had some tars and lava on the surface and a few nicks along the outer edge of the bowl. I unscrewed the cup from the outer bowl and took photos of the parts. It was actually surprisingly clean. The photos show the cake in the bowl and the dust and grime between the bowls. The stem had some minor tooth chatter and marks on both sides near the button and scratching on the surface. There were some small nicks on the top side of the stem. There was an X on the underside of the stem at the shank/stem junction. The surface of the stem was lightly oxidized and dirty.The previous Campaign pipe that I restored was posted on the blog earlier. I am attaching the link to that blog and some of the information that I found in researching the brand at that time. (https://rebornpipes.com/tag/wdc-campaign-calabash-pipe/). In my online research I found a brief interchange on a Google group. I include the link if you would like to read it in context and its entirety. It gives some helpful information regarding this particular pipe. https://groups.google.com/forum/#!topic/alt.smokers.pipes/kpkpd3zXoiwExcerpt from pipedia.org

To a request for information regarding the WDC Campaign pipe on the Google Group there was quite a long string of answers. I am quoting two of those in full…

Respondent 1: While I can’t say anything about this pipe specifically, I have a hazy memory of that shape listed in a book about pipes; (I may be totally misremembering this, but here goes) the shape being called the “Dawes”, named after Harding’s Vice President?  Anyone else remember this? Sounds like an interesting pipe, whatever it’s called…

Respondent 2: From Weber’s Guide to Pipes: “The Dawes Pipe (more correctly named the Lyons, after its inventor, Charles Herbert Lyons) happened to be the favorite pipe of General Charles G. Dawes, Vice-President of the USA from 1925 to 1929. General Dawes smoked the curious pipe incessantly and it became popularly known as the Dawes Underslung, because the shank joined the bowl near its rim.”

I looked on Pipedia, (https://pipedia.org/wiki/William_Demuth_Company) and I quote in part from the article on the William Demuth Company.

The Demuth Company is probably well known for the famous trademark, WDC in an inverted equilateral triangle. William commissioned the figurative meerschaum Presidential series, 29 precision-carved likenesses of John Adams, the second president of the United States (1797-1801) to Herbert Hoover, the 30th president (1929-1933), and “Columbus Landing in America,” a 32-inch-long centennial meerschaum masterpiece that took two years to complete and was exhibited at the World’s Columbian Exposition in Chicago in 1893.

The Presidential series was the result of Demuth’s friendship with President James A. Garfield, a connoisseur of meerschaum pipes. Demuth presented two pipes to Garfield at his inauguration in 1881, one in his likeness, the other in the likeness of the President’s wife. Later, Demuth arranged for another figurative matching the others to be added to the collection as each new president acceded to the White House, terminating with President Hoover.

From the above information I learned some significant details about the Campaign pipe. It was invented by Charles Herbert Lyons and was the favourite pipe of General Charles G. Dawes who was the Vice President of the USA under President Harding from 1925-1929. It fits nicely into that period when WDC was having Presidential Pipes commissioned ending in 1933. That places this old pipe in the time period between the late 1920s and early 1930s.

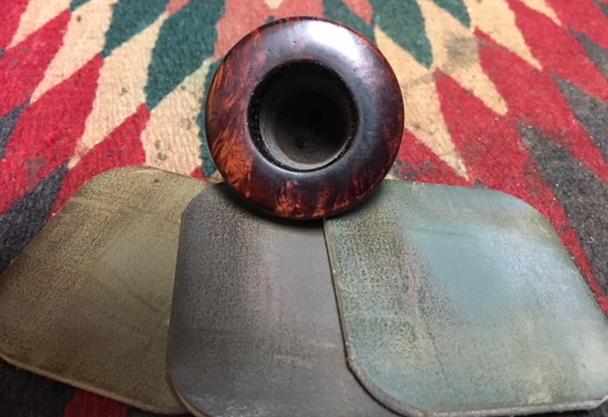
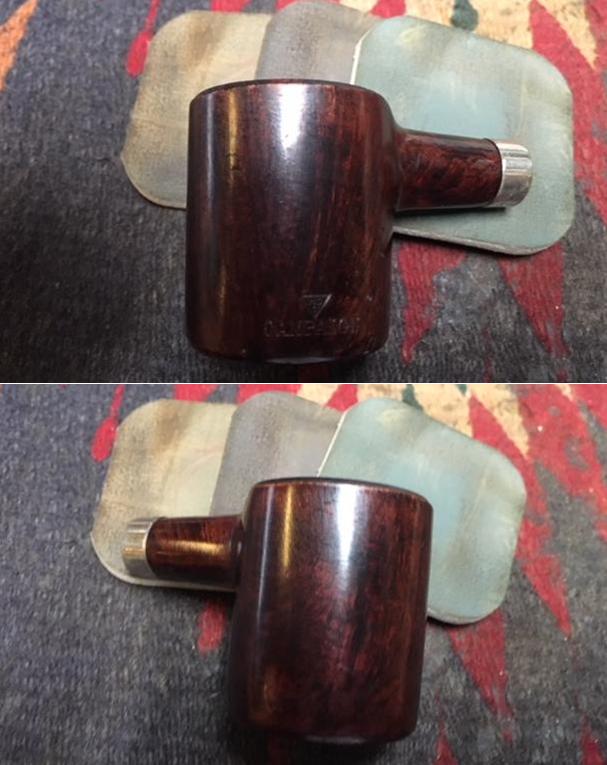
Reminded of the history of the brand and the provenance of this particular pipe it was time to begin working on the cleanup. I removed bowl cup and cleaned out the shank with pipe cleaners, cotton swabs and alcohol. I cleaned out the inside of the outer cup with cotton swabs and alcohol to remove the buildup of tars and oils in the threads and sides and bottom of the bowl.I reamed the inner bowl/cup with a Savinelli Fitsall Pipe Knife to scrape away the remaining cake that was in the bowl. I scraped it back to bare briar. I scrubbed out the outside and the inside of the bowl with cotton swabs and alcohol to remove the remaining oil and tars. I used a folded piece of 220 grit sandpaper to clean up the inner edge of the cup. I worked on the edge until it was clean. I polished the bowl and rim with micromesh sanding pads – wet sanding it with 1500-2400 grit pads and dry sanding with 3200-12000 grit pads. I wiped the bowl down after each pad with a damp cotton pad to clean off the sanding dust. The photos show the progress of the polishing. Once again I decided to do this before the deep cleaning with Before & After Restoration Balm. I worked some Before & After Restoration Balm into the surface of the briar on the bowl and the rim top with my finger tips to deep clean the finish, enliven and protect the wood. I let it sit for a few minutes and then buffed it with a cotton cloth. The grain in the wood came alive and there was a rich shine to the briar. I took some photos of the bowl at this point to mark the progress in the restoration. I sanded the band with 6000-12000 grit micromesh sanding pads. I polished the nickel band with a jeweler’s polishing cloth.I set the bowl aside in my rack and worked on the stem. I started by sanding it with 220 grit sandpaper to remove the light oxidation, tooth chatter and nicks in the surface.I cleaned the stem with alcohol and pipe cleaners to remove the debris and tars in the airway from the tenon to the slot in the button. I worked over the stem with micromesh sanding pads. I polished out the sanding scratches and marks from the reshaping work. I wet sanded it with 1500-2400 grit pads and dry sanded it with 3200-12000 grit pads and wiped it down with Obsidian Oil after each one. When I finished with the last micromesh pad I gave it a final coat of oil and let it dry. I polished the stem with Before & After Pipe Stem Polish – both the fine and the extra fine polishes. I wiped it down with a final coat of Obsidian Oil and set it aside to dry. With the stem polished I put it back on the pipe and buffed the entire pipe with Blue Diamond polish on the buffing wheel. I buffed it with the polishing compound until it was shiny. I gave the entire pipe several coats of carnauba wax and buffed it with a clean buffing pad to raise the shine. I hand buffed it with a microfibre cloth to deepen the shine. The stem and the bowl polished up pretty nicely. The finished pipe is shown in the photos below. This is the final pipe of Craig’s five. Now that I have finished the last of the pipes it is time to pack them up and get them out to him. I am looking forward to hearing what he will think once he has them in hand. Thanks for walking through these restorations with me. Once again I can’t help thinking that the pipeman who gave Craig these pipes would be happy that they are back in service and that Craig is carrying on the pipeman’s trust with them. Cheers.

Craig’s Pipes #4 – Restoring a Dr. Grabow Starfire 39


Blog by Steve Laug

In my previous 3 blogs on Craig’s pipes I spoke of the five pipes that I am working on for him. In this blog I am taking on the fourth of his pipes – one of my favourite Dr. Grabow shapes – Starfire 39. It was another one with a cake in the bowl that was thick and hard. Once more I am going to include what Craig wrote me about his pipes. I have included it in the previous three blogs but I think it adds context to the bunch.

I was recently given a bag of pipes…literally, a BAG of 20 or so pipes that are 50+yrs in age and VERY used. I was wondering if you would have time to either Skype or FaceTime with me, and go through what I have in order to determine which are worth sending to you to have them refurbished. If you would be so kind, I’d really appreciate it.

We met on FaceTime and he pulled out a grocery bag with no rhyme or reason to it. It was filled with a jumble of no name or low-end drug store pipes. The only pipes that stood out for me were an old WDC Campaign pipe and a Grabow Starfire. He had several others that he liked. But we excluded all but five of the pipes. The amount of work necessary to bring them back was not worth the price. These are the five that we chose to work on. As I finish them, I will include the link to the blog covering that pipe.

– A No Name Meerschaum that looked interesting – https://rebornpipes.com/2018/01/31/is-it-a-meerschaum-looks-like-one-feels-like-one-but/
– A leather clad billiard marked R20 and bearing a shield – https://rebornpipes.com/2018/02/01/rejuvenating-a-leather-clad-billiard/
– A Wally Frank Bulldog marked Natural Unvarnished lacking a stem https://rebornpipes.com/2018/02/02/craigs-pipes-3-restemming-and-restoring-a-wally-frank-natural-bulldog/
– A Dr. Grabow Starfire 39 that had great grain
– A WDC Campaign underslung pipe

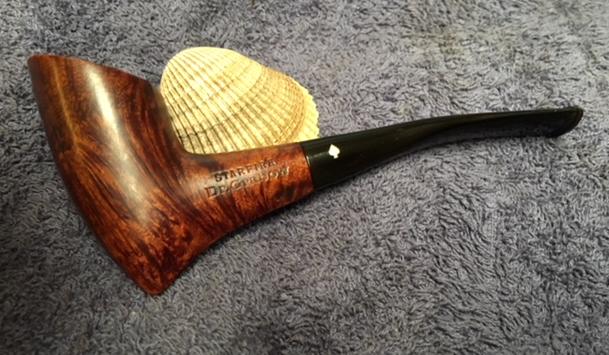
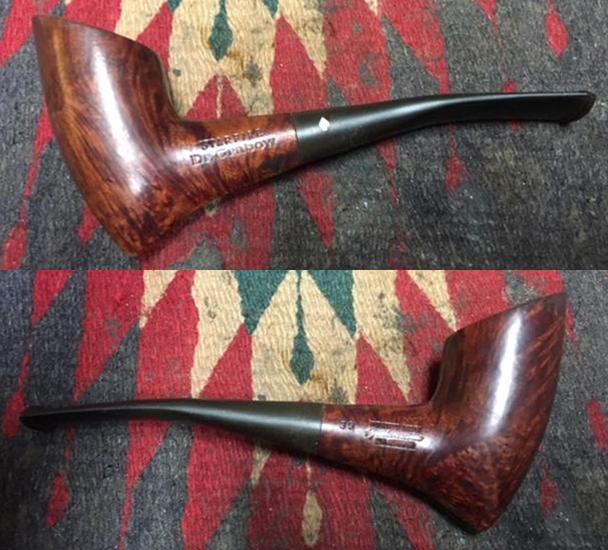
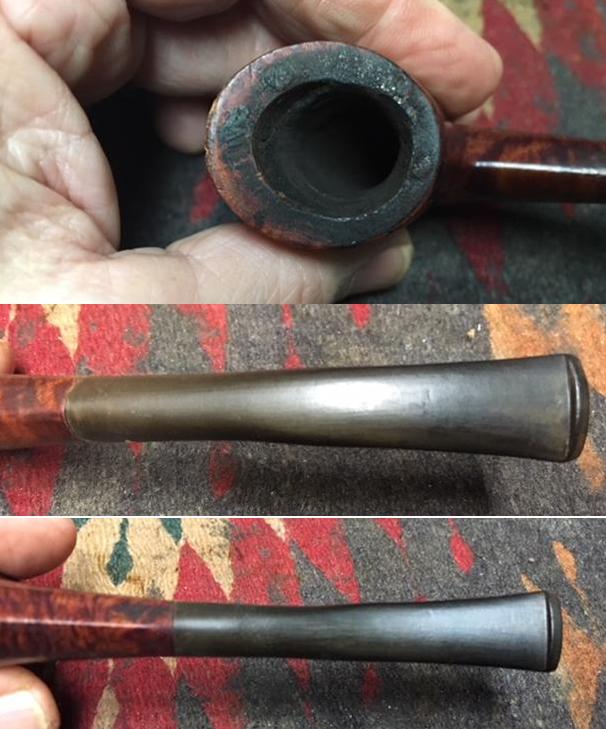
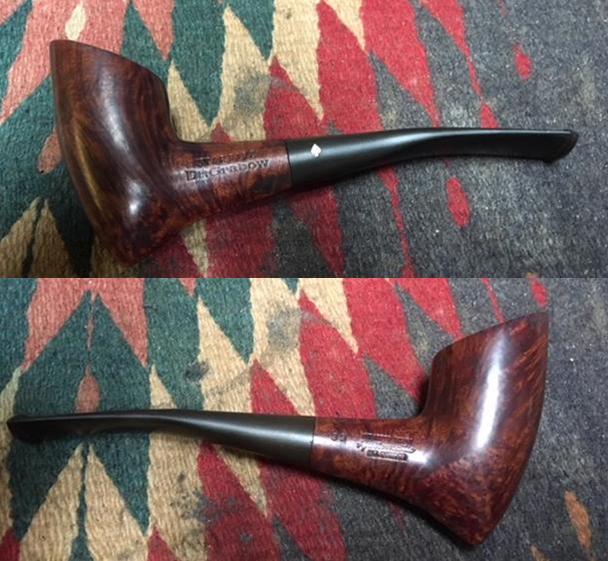
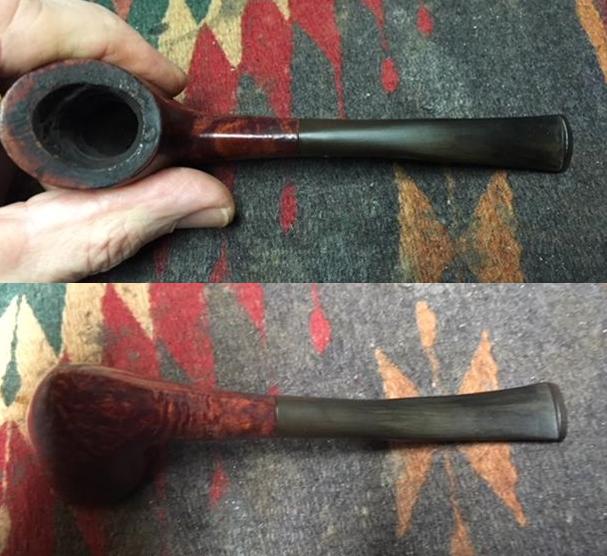
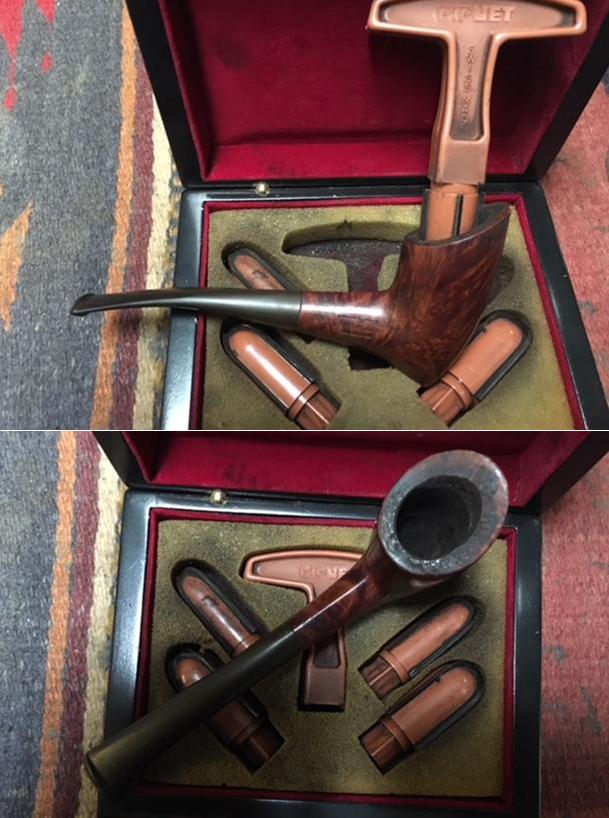
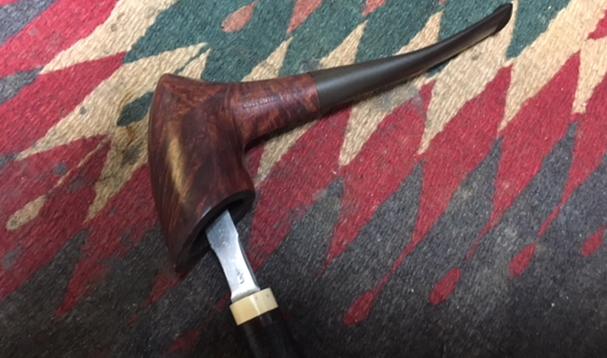
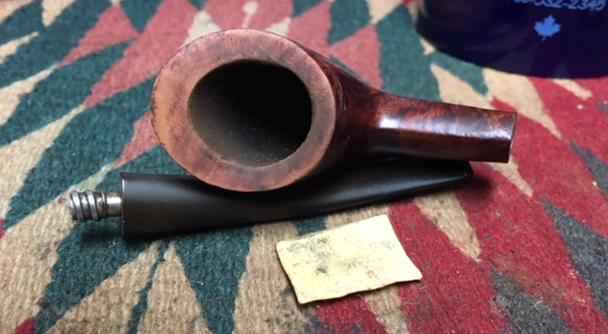
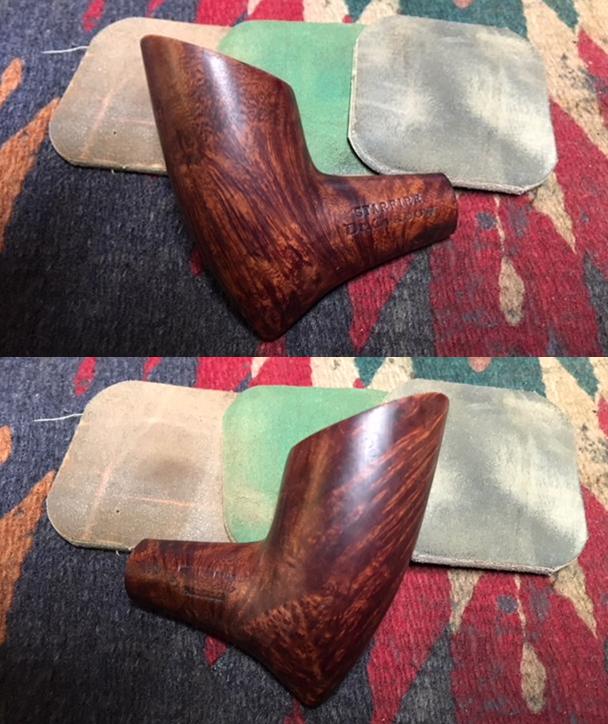
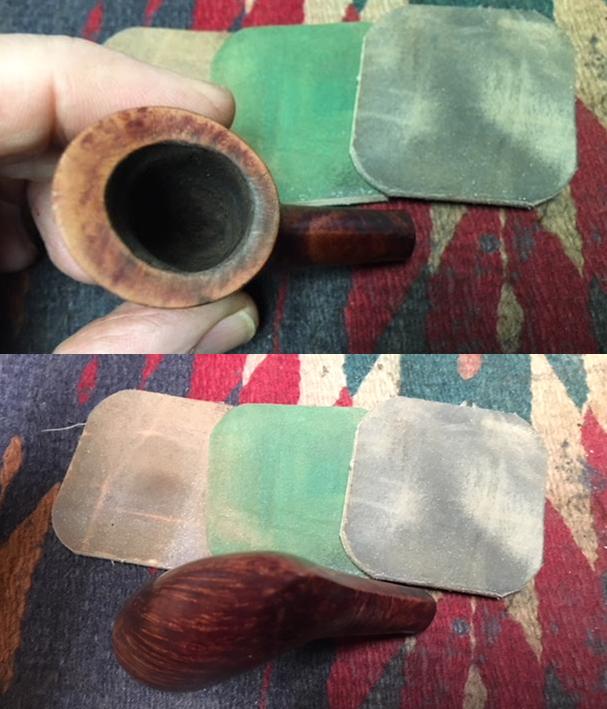
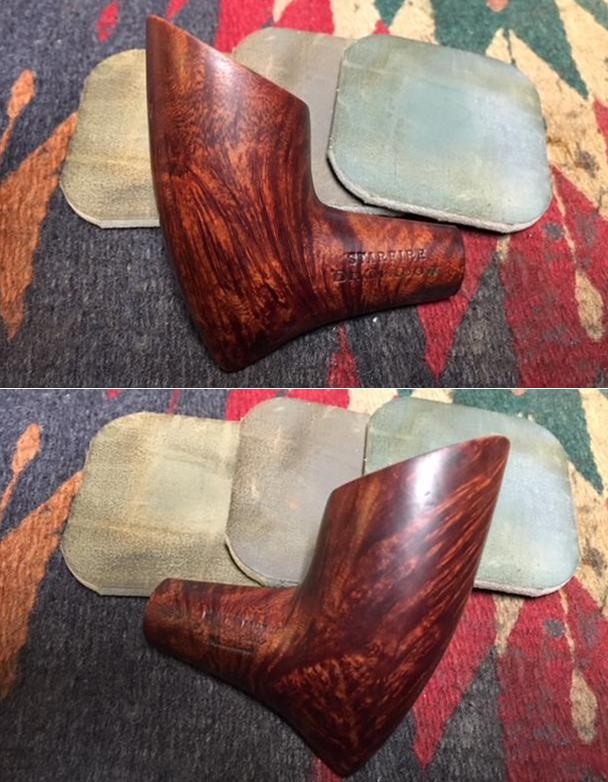
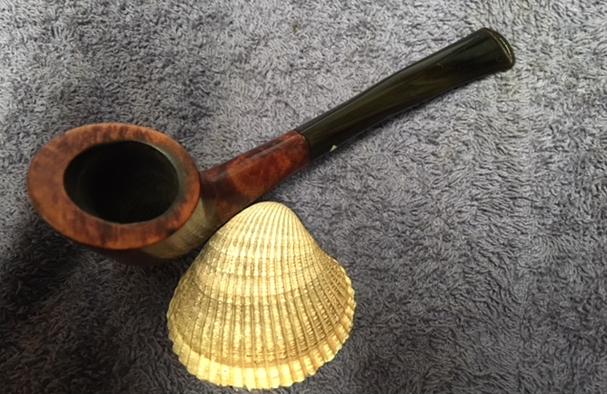
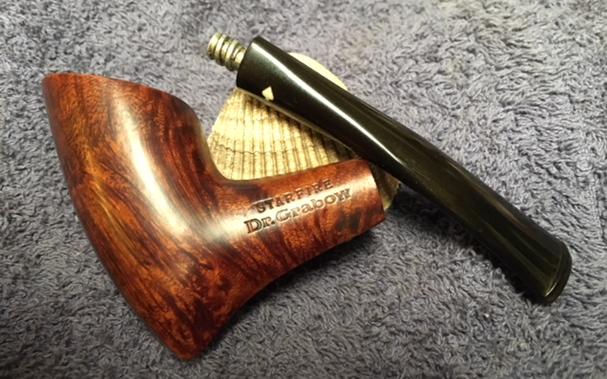
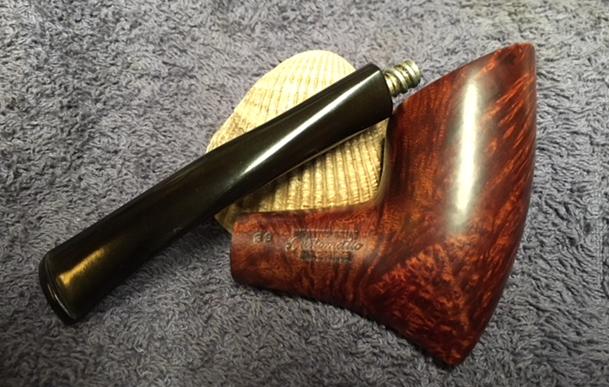
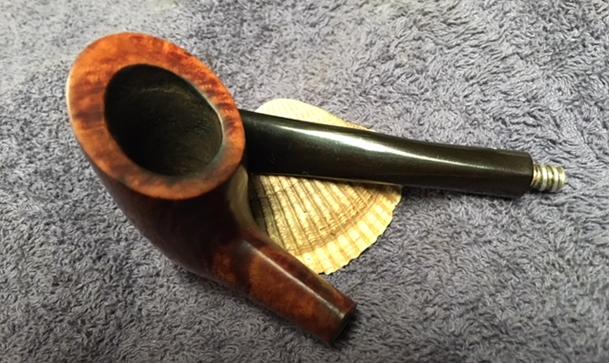
After our conversation, he packed up the pipes and threw the rest of the pipes in a separate bag for me to scavenge parts. The box did not take too long to get to Vancouver and when it did I opened the box and had a look. Here are pics of what I saw – there were two bags inside. One bag held the discards for the scrap pile and the other held the five pipes he wanted restored. The fourth pipe was the pickaxe shaped Dr. Grabow on the upper left of the above photo, just below the meerschaum. The briar was very dirty with lots of grime and residue that had hardened on the surface of the bowl around the front and right side of the bowl.  It was hard to tell what the rim top was like because of the lava overflow from the bowl up and over the scooped rim. The outer edges had some nicks at the front of the bowl. The inner edge looked pretty rough but I could not tell if it was just the lava or actually damage to the briar. There appeared to be some darkening on the rim but it may also be thin tars and oils. The bowl had a thick cake in it and remnants of tobacco. The shank is stamped on the left side Starfire over Dr. Grabow. On the right side it is stamped with the shape number 39 at the shank stem junction and next to that it reads Imported Briar over Adjustomatic over Pat.2461905. The patent is for the Adjustomatic apparatus in the stem. The stem was in pretty decent condition with some scratches on the top and underside at the button and a light oxidation. I took the following photos of the pipe before I started cleaning it up. I took close up photos of the bowl and rim top as well as the stem. The rim top had been beaten on a hard surface to knock out the dottle and there were some nicks along the outer edge of the bowl, particularly on the front edge. There was a lot of overflow on the rim, particularly heavy on the back side. The stem had some minor tooth chatter on both sides near the button and scratching on the surface. There were some small nicks on the top side of the stem. It was lightly oxidized and it was slightly overturned to the right. The Dr. Grabow metal “spear” stinger was missing. The pipe was very dirty.I looked up the brand and the line on Pipedia to see what I could find out about it. I have often wondered about how Grabow came up with the names like Regal, Eldorado, Starfire etc. The article solved that mystery for me so I have included that portion for easy reference. The link is:(https://pipedia.org/wiki/Dr._Grabow_Models_(Series,Line)_Names_Through_the_Years).

Before I get started in this section here is a great piece of trivia that I learned from a devoted and caring Dr. Grabow employee recently. You have probably wondered, as I have, just where these names originated or what inspired them. Maybe you have even guessed the connection, but I sure didn’t! When this employee mentioned this to me, he brought it up like a riddle: “THINK CARS!” Now, see if you came up with what I did:

Eldorado — Cadillac

Viscount — Dodge (Car built by Chrysler Corporation of Canada Ltd, for Canadian Markets only ca1959.)

Starfire — Oldsmobile (The original Oldsmobile Ninety-Eight Starfire, named after the Lockheed F9413 Starfire fighter jet, was first introduced as a show car in 1953 at GM’s Motorama along with the Buick Skylark and the Cadillac Eldorado.)

Regal — Buick

Savoy — Plymouth (by the way, my friend at Dr. Grabow didn’t say, but there was also a Plymouth BELVEDERE!)

Riviera — Buick, I think first produced for model year 1963, which would have made it known in 1962. The pipe name precedes that, but maybe I missed something.

Lark – Studebaker

All of these cars had roots or beginnings in the 1950s and early 1960s I believe, and perhaps I should do a little more research along those lines to get more accurate facts. If anyone finds better info, just let me know. I never thought of a “car” connection, but had looked at some sort of Royalty thing, what with the DUKEs, VISCOUNT, ROYALTON AND SAVOY, etc. I haven’t checked to see if they were also car names or not.

The article also included the following information on the date of the line. It stated that the STARFIRE (c1956) — First appears in a magazine ad for $3.50 as early as December 1956. “E” selection of briar was used on both the Starfire and Westbrook.

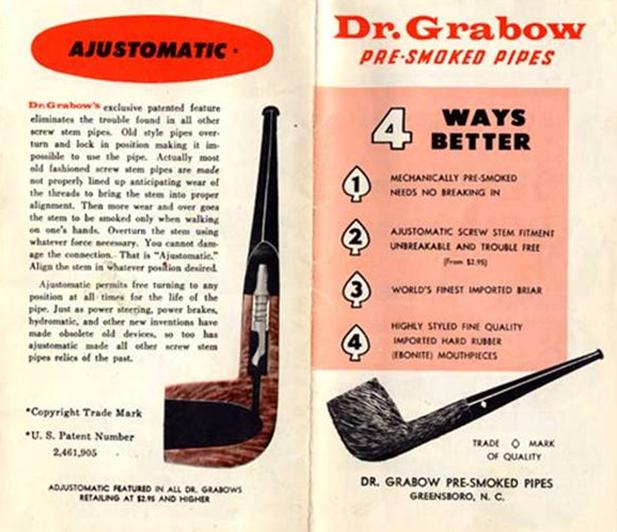
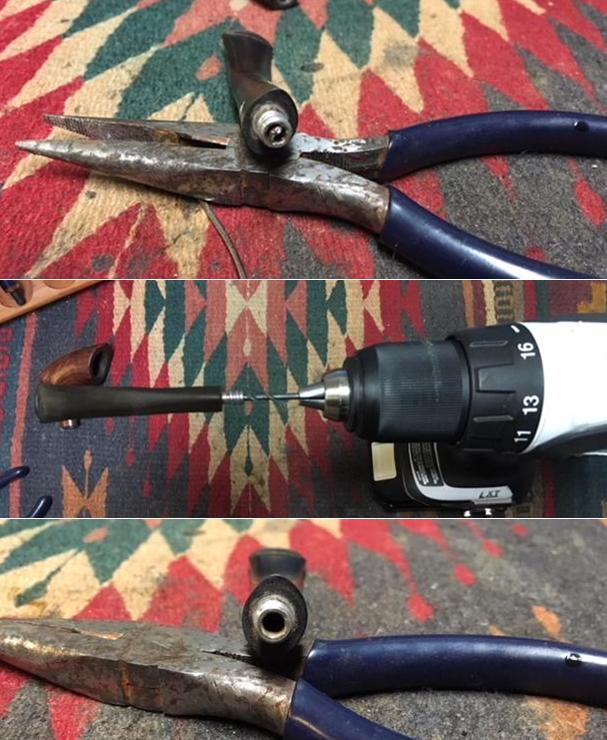
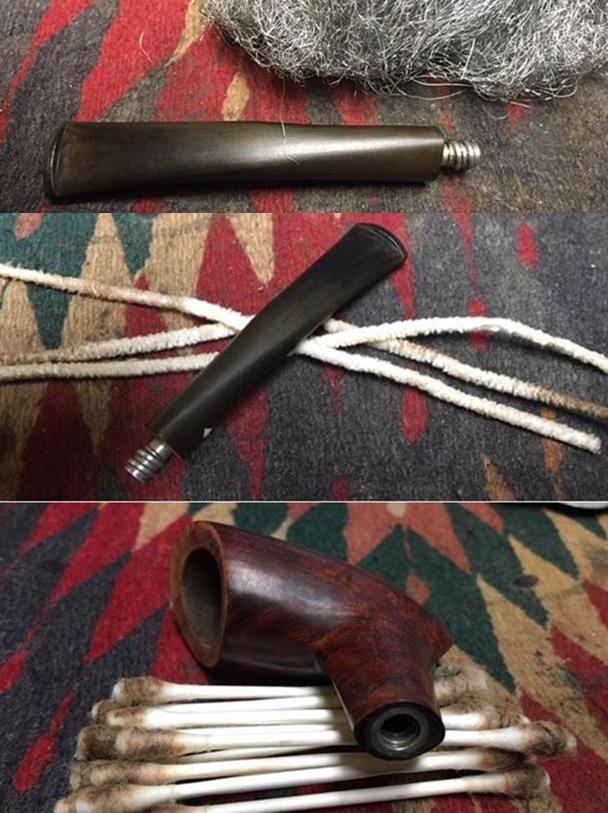
I also wanted to refresh my memory on the Patent information for the Adjustomatic stem and found a page from a catalogue in the same Pipedia article. I have included that page below. The description of the patented system and the cutaway picture are helpful in understanding how the system works.Armed with a refreshed memory I was eager to dive into the restoration of the Starfire. It really was a beautiful piece of briar and I could not wait to see the finished pipe. I started by removing the stem. I found that not only was the stinger apparatus missing but it had actually broken off in the tenon itself. I knew from past experience that the stinger were threaded and unscrewed from the tenon. In this case the upper part of the spade stinger had been twisted off leaving the stem clogged and useless. There was no airflow in the stem at all as the broken stinger cut off all air. I used a piece of wire to pry the edges of the broken stinger to the middle of the tenon, thinking I might be able to use some needle nose pliers to twist it out. But that did not work. It was time to resort to more intrusive measures. I set up my cordless drill and a small drill bit and drilled the tenon. I was careful to keep the bit in the centre of the tenon so as to not damage the threads should I want to put a new stinger in place. It was not too long before the broken stinger end came out on the drill bit. I blew air through the stem and was happy that it was clear and unimpeded.I used a piece of 000 steel wool to clean off the debris from the threads and body of the metal tenon. I cleaned the airway in the stem, shank and mortise with pipe cleaners, cotton swabs and alcohol. I scrubbed those areas out until the pipe cleaners and swabs came out clean.The stem was slightly overturned so I worked it back and forth until it lined up. That is the purpose of the Adjustomatic system. I took photos of the pipe with the stem in place and aligned. I reamed the bowl with a PipNet reamer starting with the smallest cutting head and working my way up to the second cutting head as it was the same diameter as the bowl. I reamed it back to bare briar. I cleaned up the remnants with a Savinelli Fitsall Pipe Knife. I carefully sanded the scooped rim top with 220 grit sandpaper to remove the thick lava coat and to minimize the damage on the front outer edge of the bowl.I polished the bowl and rim with micromesh sanding pads – wet sanding it with 1500-2400 grit pads and dry sanding with 3200-12000 grit pads. I wiped the bowl down after each pad with acetone to clean off the sanding dust. The photos show the progress of the polishing. I decided to do this before the deep cleaning with Before & After Restoration Balm this time. I decided to leave the rim unstained as the polishing had blended the colours with the bowl really well. Instead I worked some Before & After Restoration Balm into the surface of the briar with my finger tips to deep clean the finish, enliven and protect the wood. I worked the balm into the rim top to polish the cleaned up area. I let it sit for a few minutes and then buffed it with a cotton cloth. The grain in the wood came alive and there was a rich shine to the briar. I took some photos of the bowl at this point to mark the progress in the restoration. I set the bowl aside in my rack and worked on the stem. I started by sanding it with 220 grit sandpaper to remove the light oxidation, tooth chatter and nicks in the surface.I worked over the stem with micromesh sanding pads. I polished out the sanding scratches and marks from the reshaping work. I wet sanded it with 1500-2400 grit pads and dry sanded it with 3200-12000 grit pads and wiped it down with Obsidian Oil after each one. When I finished with the last micromesh pad I gave it a final coat of oil and let it dry.

With the stem polished I put it back on the pipe and buffed the entire pipe with Blue Diamond polish on the buffing wheel. I buffed it with the polishing compound until it was shiny. I gave the entire pipe several coats of carnauba wax and buffed it with a clean buffing pad to raise the shine. I hand buffed it with a microfibre cloth to deepen the shine. The stem and the bowl polished up pretty nicely. The finished pipe is shown in the photos below. This is the fourth of Craig’s five pipes. Once I finish the last of the pipes I will pack them up and get them out to him. I am looking forward to hearing what he will think once he has them in hand. Thanks for walking through these restorations with me. Once again I can’t help thinking that the pipeman who gave Craig these pipes would be happy that they are back in service and that Craig is carrying on the pipeman’s trust with them. Cheers.

Craig’s Pipes #3 – Restemming and Restoring a Wally Frank Natural Bulldog


Blog by Steve Laug

In my previous 2 blogs on Craig’s pipes I spoke of the five pipes that I am working on for him. In this blog I am taking on the third of his pipes – a Wally Frank Natural Unvarnished Bulldog that came to me sans stem. It was by far the most used pipe he sent me with a cake in the bowl that was thick and hard. I am going to include what Craig wrote me about his pipes. I have included it in the previous two blogs but I think it adds context to the bunch.

I was recently given a bag of pipes…literally, a BAG of 20 or so pipes that are 50+yrs in age and VERY used. I was wondering if you would have time to either Skype or FaceTime with me, and go through what I have in order to determine which are worth sending to you to have them refurbished. If you would be so kind, I’d really appreciate it.

We met on FaceTime and walked through each of the pipes in his bag. He pulled out a grocery bag with no rhyme or reason to it. It was filled with a jumble of no name or low-end drug store pipes. The only pipes that stood out for me were an old WDC Campaign pipe and a Grabow Starfire. We excluded all but five of the pipes. The amount of work necessary to bring them back was not worth the price. These are the five that we chose to work on. As I finish them, I will include the link to the blog covering that pipe.

– A No Name Meerschaum that looked interesting – https://rebornpipes.com/2018/01/31/is-it-a-meerschaum-looks-like-one-feels-like-one-but/
– A leather clad billiard marked R20 and bearing a shield – https://rebornpipes.com/2018/02/01/rejuvenating-a-leather-clad-billiard/
– A Wally Frank Bulldog marked Natural Unvarnished lacking a stem
– A Dr. Grabow Starfire 39 that had great grain
– A WDC Campaign underslung pipe

After our conversation, he packed up the pipes and threw the rest of the pipes in a separate bag for me to scavenge parts. The box did not take too long to get to Vancouver and when it did I opened the box and had a look. Here are pics of what I saw – there were two bags inside. One bag held the discards for the scrap pile and the other held the five pipes he wanted restored. The third pipe was the stemless Bulldog on the lower right of the photo above. The briar was very dirty with lots of grime and some residue that had hardened on the surface of the bowl. The rim top was in good condition but I would not be sure until I was able to remove the lava overflow from the bowl over the bevel. The outer edges were undamaged all around the bowl and I was hoping the same was true of the inner edge. There was some darkening on the rim as well. The bowl had a thick cake in it and remnants of tobacco. On the front of the bowl on the cap there was some hardened sticky substance. The shank is stamped on the left side Natural over Unvarnished. On the right side it is stamped Wally Frank Ltd. On the underside of the left side it reads Imported Briar. There was no stem so I was going to need to fit one to the shank. I took the following photos of the pipe before I started cleaning it up. I went through my can of stems and found one that would work with the pipe. It was a diamond saddle stem. The saddle portion was slightly larger than the shank of the pipe but I could work that to make it fit well. The tenon would need to be turned with the PIMO tenon turning tool make it a snug fit in the shank.I drilled out the airway in the stem with a drill bit the same size as the post in the centre of the tenon turning tool. Once it was open I adjusted the cutting head on the tool to take the tenon down incrementally to the right dimension. I readjusted it and repeated the process until the fit was right. I sanded down the tenon lightly with 220 grit sandpaper to fine tune the fit and put it in the shank of the pipe. I took photos of the pipe at this point to show what needed to be done to adjust the fit. It needed some work. The bowl was also very caked and that needed to be reamed. I took the stem off and reamed the bowl with a PipNet reamer. I started with the smallest cutting head and worked my way up to the one that was the same diameter as the bowl. I reamed it back to bare briar. I cleaned up the remnants with a Savinelli Fitsall Pipe Knife. With bowl reamed I turned to the rest of the internals. I used a dental spatula to scrape out the heavy tar buildup in the shank. There was a lot of mess there and it took a lot of scraping before I had it cleaned out. I cleaned the shank and mortise with pipe cleaners, cotton swabs and alcohol. I scrubbed out the shank and mortise until the pipe cleaners and swabs came out clean.I sanded off the lava and darkening on the rim top with 220 grit sandpaper. I was able to remove all of the buildup and damage on the rim.I sanded the saddle portion of the stem with a Dremel and sanding drum to reduce the sides to match the shank. I sand it on a slower speed and carefully work to keep it from hitting the shank of the pipe. I finish the fitting with 180 and 220 grit sandpaper to sand it to match the shank. I sand the shank at the same time to make the transition smooth. The next set of four photos show the fit of the stem at this point in the process. I worked some Before & After Restoration Balm into the surface of the briar with my finger tips to deep clean the finish, enliven and protect the wood. I worked the balm into the rim top and inner bevel of the rim to polish the cleaned up area. I let it sit for a few minutes and then buffed it with a cotton cloth. The grain in the wood came alive and there was a rich shine to the briar. I took some photos of the bowl at this point to mark the progress in the restoration. I polished the bowl and rim with micromesh sanding pads – wet sanding it with 1500-2400 grit pads and dry sanding with 3200-12000 grit pads. I wiped the bowl down after each pad with acetone to clean off the sanding dust. The photos show the progress of the polishing. I used a dark brown stain pen to blend the sanded shank end with the rest of the bowl. I polished it with micromesh sanding pads to blend it in and hand buffed it with a microfibre cloth. I worked over the stem with micromesh sanding pads. I polished out the sanding scratches and marks from the reshaping work. I wet sanded it with 1500-2400 grit pads and dry sanded it with 3200-12000 grit pads and wiped it down with Obsidian Oil after each one. I polished the stem with Before & After Pipe Stem Polish, using both Fine and Extra Fine polishes to polish out the remaining light scratches in the vulcanite. When I finished with the polish I gave it a final coat of oil and let it dry. With the stem replaced and polished I put it back on the pipe and buffed the entire pipe again with Blue Diamond polish on the buffing wheel. I polished it with the polishing compound until it was shiny. I gave the entire pipe several coats of carnauba wax and buffed it with a clean buffing pad to raise the shine. I hand buffed it with a microfibre cloth to deepen the shine. The new stem and the bowl polished up pretty nicely. The finished pipe is shown with the original stem in the photos below. This is the third of Craig’s five pipes. Once I finish the other two pipes I will pack them up and get them out to him. I am looking forward to what he will think once he has them in hand. Thanks for walking through these restorations with me. I am thinking that the pipeman who gave Craig these pipes would be happy that they are back in service and that Craig is carrying on the pipeman’s trust with them. Cheers.

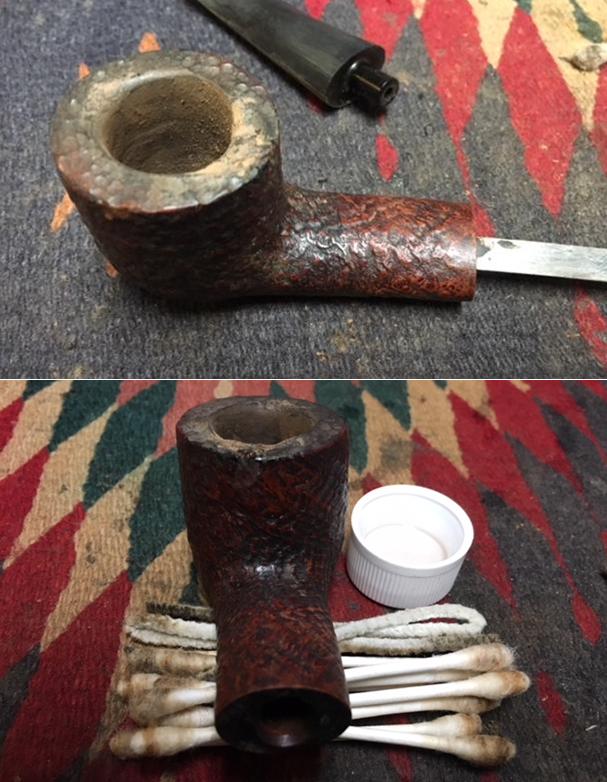
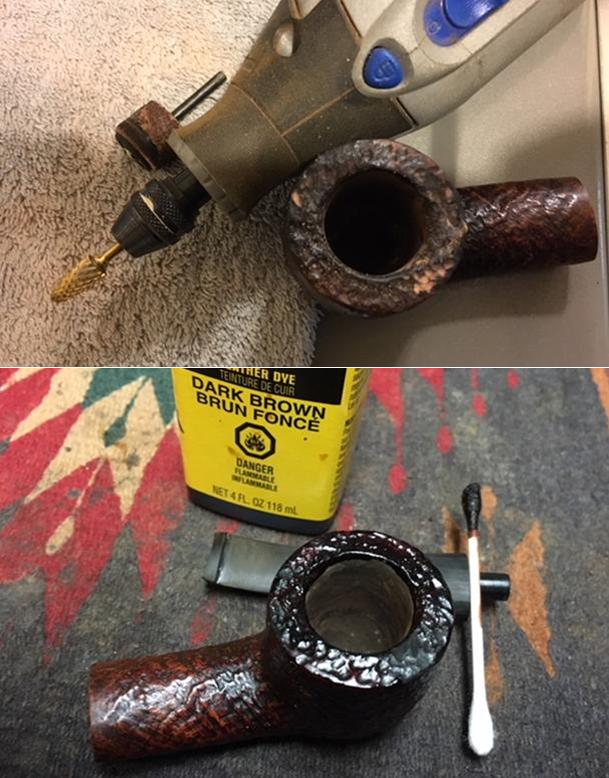
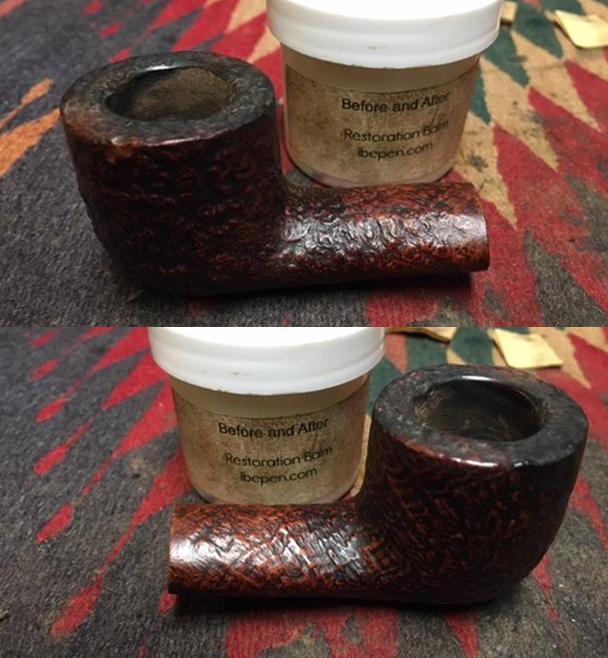
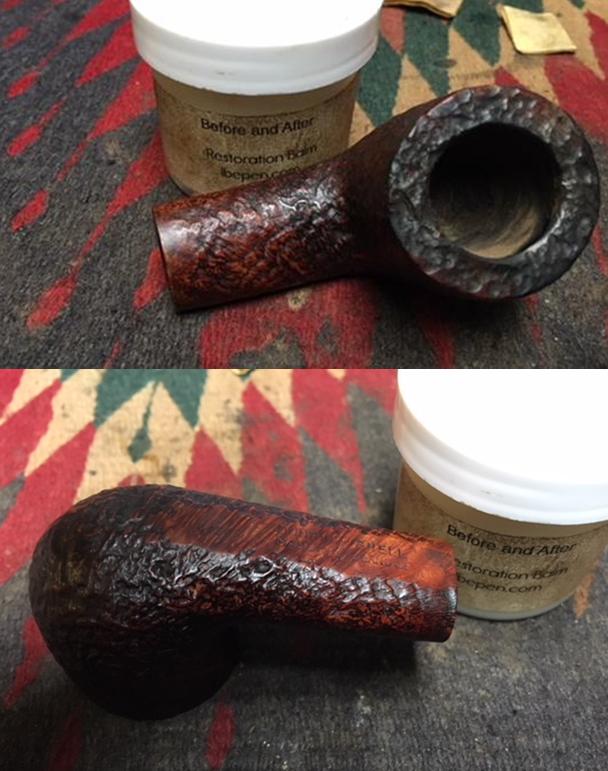
ANSWERS TO QUESTIONS – How do you decide whether to replace fills or rusticate a bowl?


Blog by Steve Laug

Another of the questions that I am frequently asked is “How do you decide whether to replace fills I the briar or to rusticate the bowl and shank?” As always seems to be the case there is another question behind that one that needs to be answered before even considering that decision. That question is fundamental to all the work we do as refurbishers/restorers. Simply stated it is: “How far do I go in the process of working on a pipe before it ceases to be its original maker/manufacturers pipe and becomes a product of my work?” If your changes essentially alter the original it has become yours. The choice boils down to a question of preservation or abandonment. I thought it was worth devoting an Answers to Questions Blog to addressing this question and all of the considerations that it raises. As always the ideas are my own and I am not expecting everyone to agree with my conclusions but I ask that at least you wrestle with the issues.

Once you have wrestled with the question of how far you go in your work and make a decision about how much is too much then you are ready to go the direction that decision presets for you. If you decide to preserve the pipe as much as possible to the original then rustication is off the table. It becomes simply a matter of repairing or replacing the fills in the briar. That decision is not difficult because the end result is that you want the fills to blend into the finish as much as possible. The last thing you want is spots all over the bowl where the fills stick out.

Hopefully, that will help you make the initial choice regarding the pipe in your hands. To fine tune the decision make process further, set some parameters for what you will or will not rusticate. For example for me the fine tuning has led me to make decisions on what I will and will not rusticate. I will rusticate any Imported Briar no name pipe without thinking twice. These generally have a lot of fills that stick out and I want to get rid of them. With these there is never any concern about preservation. I am really more concerned about beautifying what to me is an eye sore. I wipe it down with alcohol to clean it up and jump right into the rustication.

I have also decided that I will not personally rusticate or change any name brand pipes – Stanwell, Kriswill, BBB, KBB, Charatn, GBD, Kaywoodie to just name a few. With the Kaywoodie brand I specify even more focused on the early pipes they made. I never mess with higher end pipes like Dunhill or even new artisan pipes. With all of those I have chosen to take a minimalistic approach in terms of refurbishing and restoration. Even in my repairs I tend to be a minimalist with these brands as much as possible. I do not want the pipe to be anything less than what it was when it left the factory or the maker. I want it to shine in all of its beauty. Of course you will need to make your decisions regarding parameters and once you do you also have the power to make exceptions to them.

If I am going to preserve the pipe and leave the fills in place that decision also have some qualifiers. If the fills are large and ugly pink putty has been used to fill them in I almost always use a dental pick and remove them. I refill them with a mixture of briar dust and super glue. If they are chipped but otherwise solid I often repair them instead of replacing them. If they are soft they need to be replaced. If they are small and well hidden in the finish I tend to leave them. If they are out of my sight line when I smoke it then I also tend to leave them. If they stand out then to me they have to go. I replace them and blend them into the finish as much as possible. All of these qualifiers are arbitrary and personal at some level I guess but you can decide that yourselves. If you can live with the fills as they are then leave them. Most if not all of them are aesthetic and in no way affect the smoking function of the pipe. I have had the most filled and ugly pipes that are my best smokers and I have had almost flawless pipes that were awful smokers.

I think that summarizes my thoughts on the original question. As with most things in our hobby there are questions behind the questions. There are multiple levels of answers but at the same time it really boils down to what you individually want to do. It comes down to your aesthetic. Whether you choose to preserve a brand or to make it your own truly is your choice. I think for many of us once we have made it our own we should remove the original makers marks as it is no longer a pipe from their hands (at least externally as notice we have said nothing about changing the mechanics). Hopefully you have found this blog helpful as you make your own choices. Thanks for humouring this old pipeman in his ramblings. Cheers.

Some People Meditate. I Smoke a Pipe.


Well written and well thought out Charles. Your thoughts parallel what I have written and thought much about. Thank you.
Charles Lemon's avatar

I sometimes get asked why I smoke a pipe. It is, after all, the rarest method of tobacco consumption in Canada these days (only about half of one percent of tobacco users are pipe smokers). If it’s nicotine you’re after, there are more efficient, though arguably more diabolical, delivery methods than a cantankerous old briar. A pipe is also regarded by many as an anachronism, something belonging to the past that reminds one of leather-bound books, slightly damp tweed and Granddad telling stories by the fire.

Similar to a cigar, the smoke from a pipe is tasted rather than inhaled, so I don’t crave nicotine from my pipe, but I must admit to harbouring a bit of sentimentality when it comes to the hobby. My father smoked a pipe, and though he passed when I was still quite young, the olfactory memory kicks in when I catch a whiff of…

View original post 781 more words