Blog by Dal Stanton
 This story is about the restoration of perhaps, one of the oldest BBBs in the world today – but it’s much, much more. Every pipe man and woman has discovered this and within that even smaller subgroup of the pipe community, vintage pipe restorers, the experience is perhaps even more heightened. The love of pipes – their former stewards, provenances, shapes, grains, stems and especially their restorations, creates a unique bond and fellowship among those who have experienced the joy of seeing one’s hands bring about a pipe’s restoration. Whether a high-end Dunhill or a common ‘No-Namer’, to bring a crippled pipe back to life brings a sense of fulfillment and satisfaction to those whose skill, hands and purposeful patience have wrought.
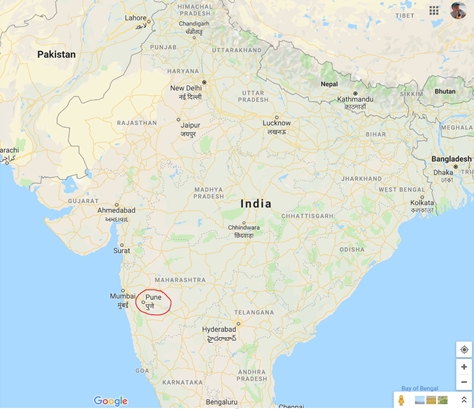
So much in our world today divides people of race, religion, politics, and station of life, but my amazement is kindled by how often these barriers are overcome within this community of pipe lovers and restorers. With the internet in full bloom, people in this world-wide community have come together in amazing ways. This happened when Steve Laug (aka: rebornpipes, Vancouver, Canada), Jeff Laug (Steve’s brother – pipe procurer and cleaner, Idaho, USA) and I, (aka: ThePipeSteward, Sofia, Bulgaria) converged in Pune, India, at the invitation of Paresh Deshpande (aka: rebornpipes contributor and the grandson who has become the steward of a treasure trove of pipes left to him by his grandfather).
I began this write-up with a full and thankful heart on the flight from Pune (Poo’-ne) to New Delhi on my return trip to Sofia. Steve and Jeff were able to stay a few extra days and so I said goodbye to them at the flat where our fellowship took shape several days earlier. I also said goodbye to Paresh’s daughters, Mudra (17) and Pavni (11), whose equally opposite personalities and dispositions were a wonderful composite reflection of their parents’ care and love. Mudra impressed us with her elegant sophistication and Pavni, well, she earned the nickname of ‘Bollywood’ – she entertained us and brought much laughter.
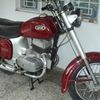
Paresh and Abha took me to the airport and I found myself surprisingly reflective and quiet as Paresh navigated the choked Pune streets heading to the airport – cars, scooters and Tuk Tuks (motorized rickshaw taxis) dodged here and there like swallows on wheels in a chaotic purposeful swarm. Only the day before I was helmeted on the back of Paresh’s classic 1980 ROYAL ENFIELD 535 CC motorcycle and videoed with my iPhone while Paresh became one with the swarm! Oh my…. As I sat in the back seat of the car on the way to the airport, Paresh asked me why I wasn’t smiling – that I was serious. It was true that navigating through the Pune Airport’s security was on my mind and wondering if they would remove my prized Savinelli pipe lighter, an unbelievable gift from my landlady, Rozie, in Sofia, left behind by her now departed husband. My concerns about the lighter fortunately, were proven to be unfounded, but I found myself reflecting on the past week under the watchful care and rich hospitality of Paresh and Abha. How do I describe it? How do I tell this story to capture not only the unbelievable pipe our special cohort restored together, but the bond that we discovered along the way?  I think I can safely speak for Steve and Jeff in saying that the hospitality we experienced from our Indian hosts was none like we had experienced before. For the most part, we started as acquaintances but through the week experienced a deeper bond that is more reminiscent of a family. Steve and I have known each other for some time because of our work with women and girls who have been trafficked and sexually exploited (Servants Anonymous Foundation and Daughters of Bulgaria), but through the internet was how our pipe lore fellowship was formed and based upon this, Paresh invited us to come to Pune coinciding with Steve’s trip to nearby Nepal in concert with his work. When I heard of this ‘Fellowship of the Pipe’ developing, I couldn’t bear to be left out, especially after hearing that Steve’s brother, Jeff, whom I had never met, was also coming. Steve had traveled to this part of the world several times. I had traveled to Cambodia previously, but never to India. Jeff, also, was experiencing his first trip to this area of the world. So, from Vancouver (via Nepal), from Sofia and from Idaho Falls, the ‘West’ converged in the ‘East’ in India, for the first convocation of this Pipe Fellowship.
This ‘Fellowship’ also included others that were unable to respond to Paresh’s invitations to come. Several months ago, Paresh formed a FaceBook Messenger group of pipe restorers that included the four of us but also Mark Domingues (aka: LoneStarBriarWorks Texas, USA) and Victor Naddeo (aka: Naddeo Pipes, Belo Horizonte, Brazil). This group, as you might guess, was the online ‘Pipe Man Cave’ where pipes, nomenclatures, techniques were discussed, and questions entertained – of course, Steve is recognized as the undisputed pipe sage and guru of this diverse and eclectic group of pipe men. The weeks before the convocation in Pune, this group was actively involved in shaping the convocation. It was in the FaceBook group that Paresh proposed what became the anchor activity of our time in Pune – the restoration of one of the oldest and most precious of Paresh’s trove of pipes he inherited from his grandfather, whose collection could possibly rival any personal collection in the world. Steve and Paresh told the story of Paresh’s grandfather in Steve’s earlier restorations of some of these pipes on rebornpipes (see: Paresh’s Grandfather’s Pipe #7 – Charatan’s Make De Luxe 140 Billiard). Paresh had so many of his grandfather’s pipes, that Steve (as he has done with many of us!) began to encourage (coerce 😊) Paresh to start dabbling in restoration. Paresh didn’t dabble long and has become an excellent restorer and contributor to rebornpipes. As Jeff does for Steve, Abha cleans many of the pipes that Paresh restores.
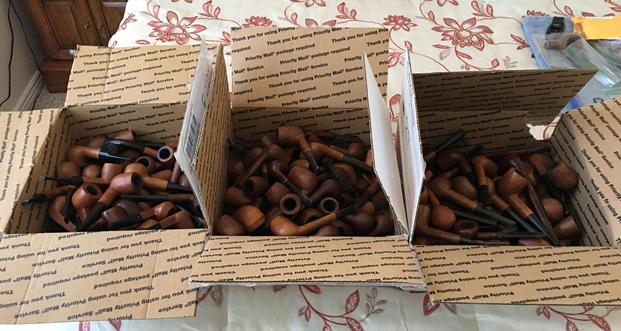
One of the highlights of our time in Pune was going through Paresh’s entire collection of pipes – from his grandfather as well as his own additions. During the hot(!) part of the Indian day, Paresh unwrapped each pipe to show and to pass around. To hold and examine these pipes was a treat. If this were not enough, we (Dal, Steve and Paresh – Jeff’s not a smoker just a collector and journeyman cleaner!) also smoked 3 very special pipes from Paresh’s grandfather that Paresh had restored – classic pipes with albatross bone shank extensions and horn stems. At the beginning of the convocation, we decided we would smoke these pipes together in celebration of the completion of our communal restoration project.  On the Fellowship Facebook group, Paresh proposed restoring one of his grandfather’s pipes together. His idea was that we would do the restoration as a group, but that we would each share that part of the restoration that focused on strengths of each: Jeff and Abha, (cleaning), Pavni (sanding the chamber), Steve (main restoration work), Dal (final buffing and polishing with the Dremel), and Paresh would be the project manager! Paresh also appointed me as the scribe – the one who would do the write-up and take pictures of the restoration because of my ability to spin a good tale! After the 1846 BBB was chosen to be our restoration project, this was the discussion on the Fellowship FB Group that revealed Paresh’s deeper hope of what would result from the group restoration:
 Paresh: Steve Sir, what say about working this pipe…
Mark: You can handle it Paresh! It’s no different than a Dr. Grabow!
Paresh: More than the value of the pipe, it’s worth its weight in gold working together with Steve Sir and Dal Sir on this oldest heirloom piece that I desire. And not to mention Jeff Sir and Abha doing the initial cleaning…lol
Steve: Sounds like an interesting proposal Paresh… I am game. But I also know that you can handle it
Paresh: Thank you Sir. I appreciate your confidence in my abilities. But just think, you shall be meeting up with Mudra and Pavni, my daughters. They would see all of us working together on this very very old pipe. We shall be handing over these memories to them. Kids will always associate this pipe as THE ONE which belonged to their Great Grandfather and was worked on by their father and his friends from across the oceans…. wow wouldn’t that be great.
Paresh: So that’s decided. 1846 made BBB project postponed to 03 May 19 and now back to square one! Which pipe should I work next? Fresh suggestions requested please.
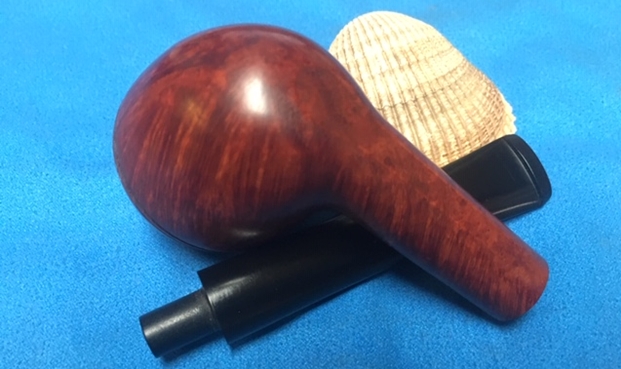
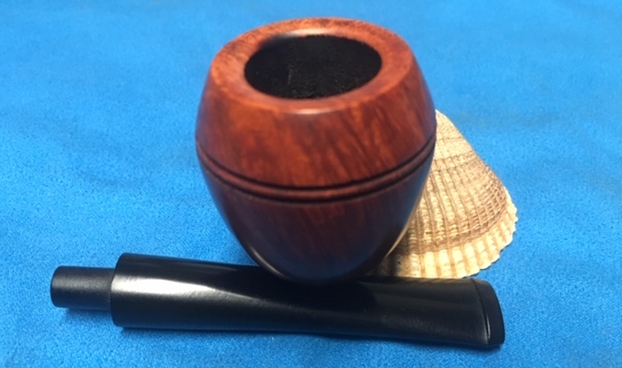
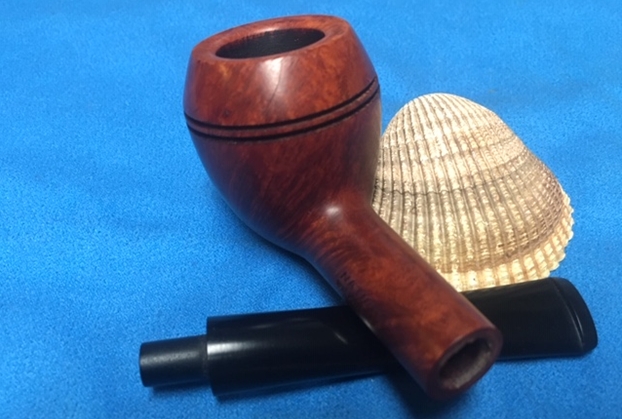
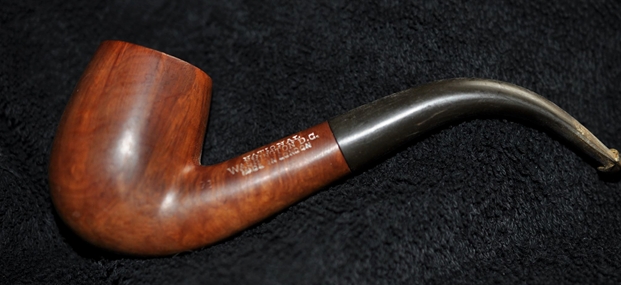
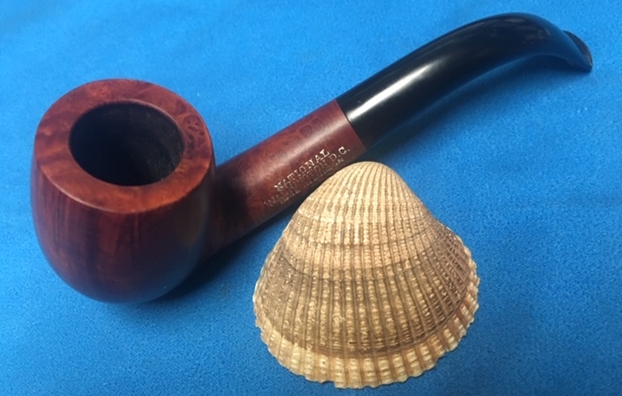
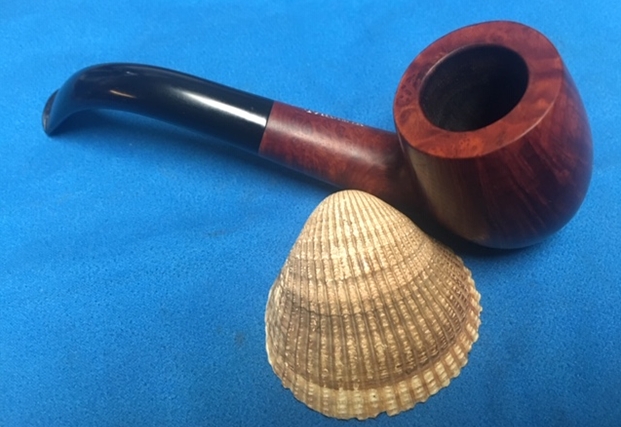
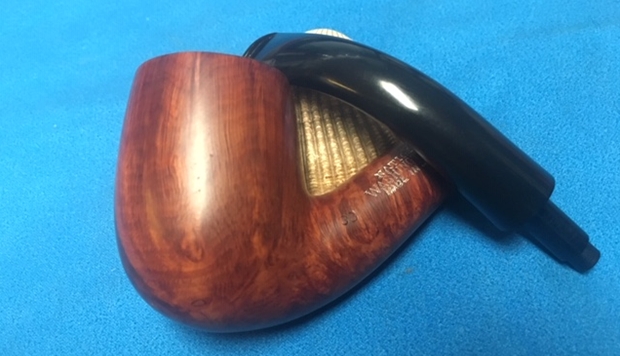
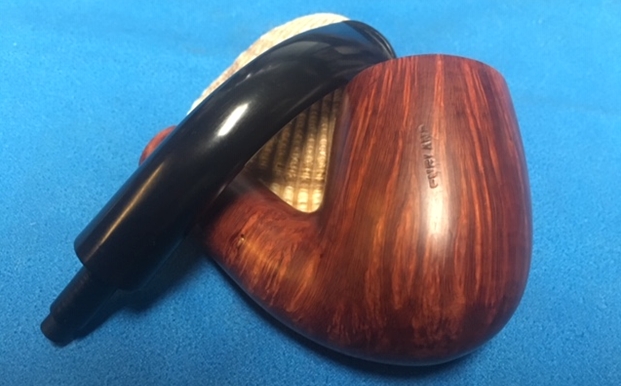
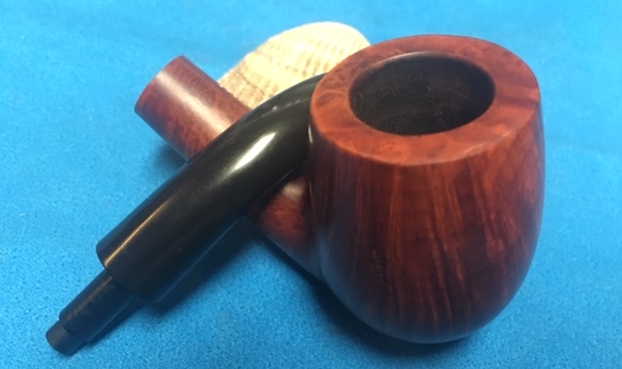
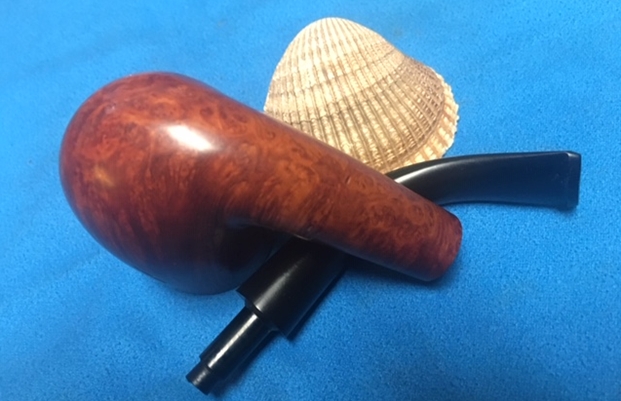
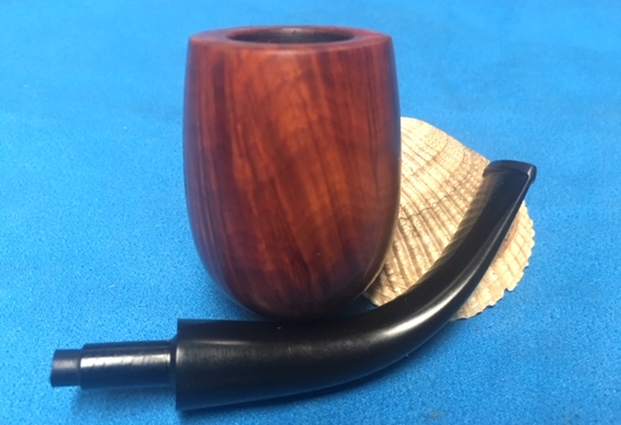
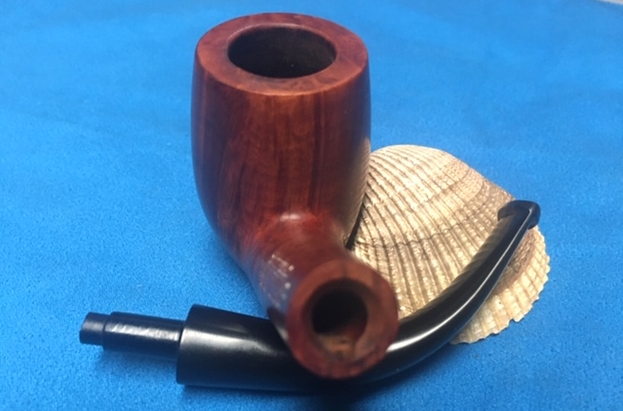
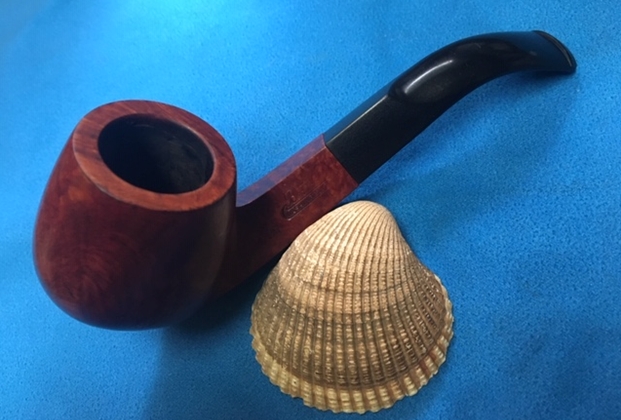
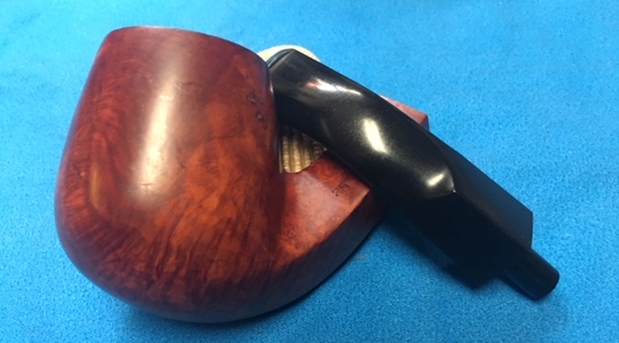
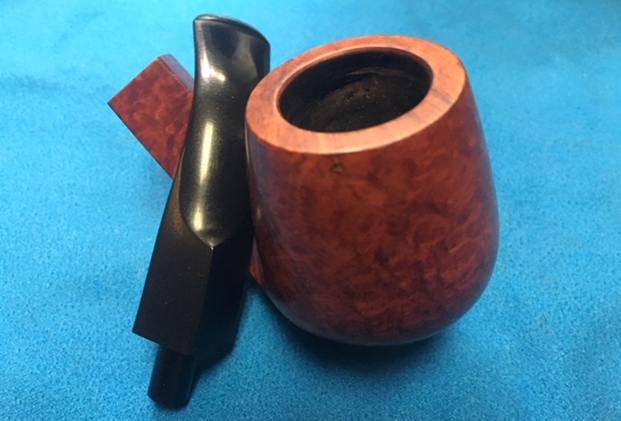
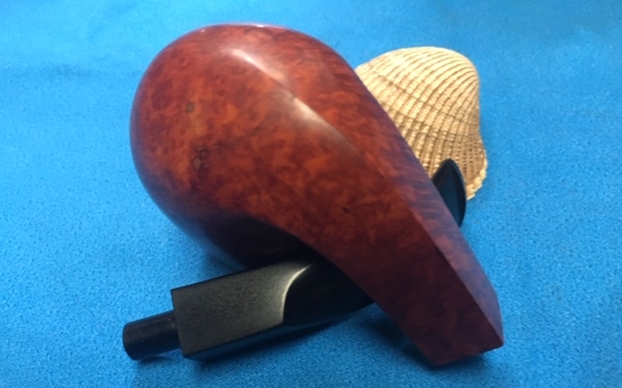
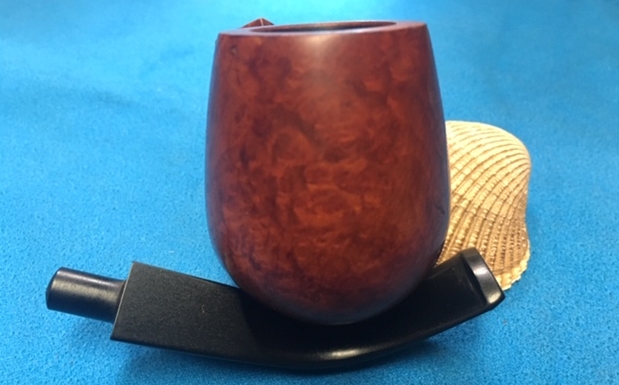
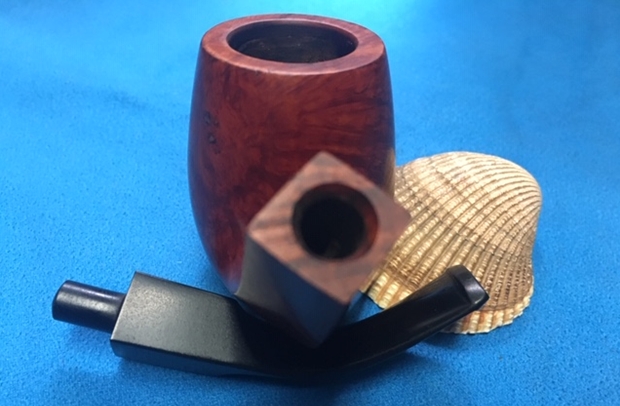
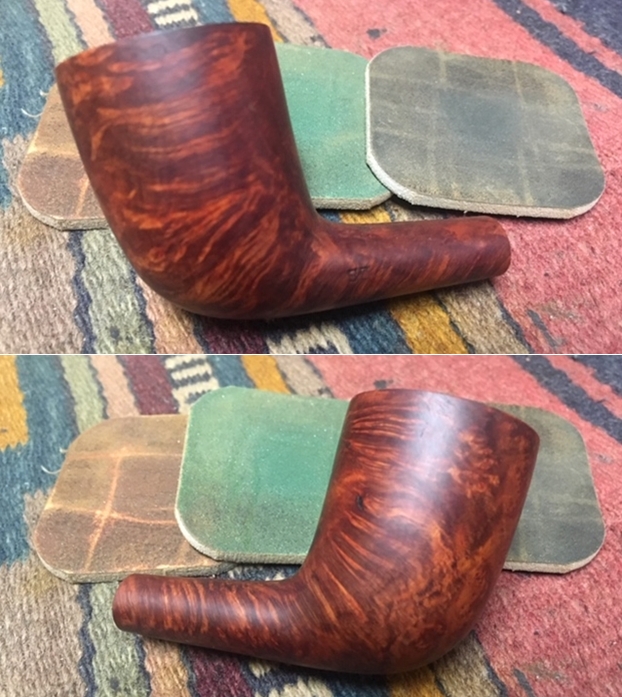
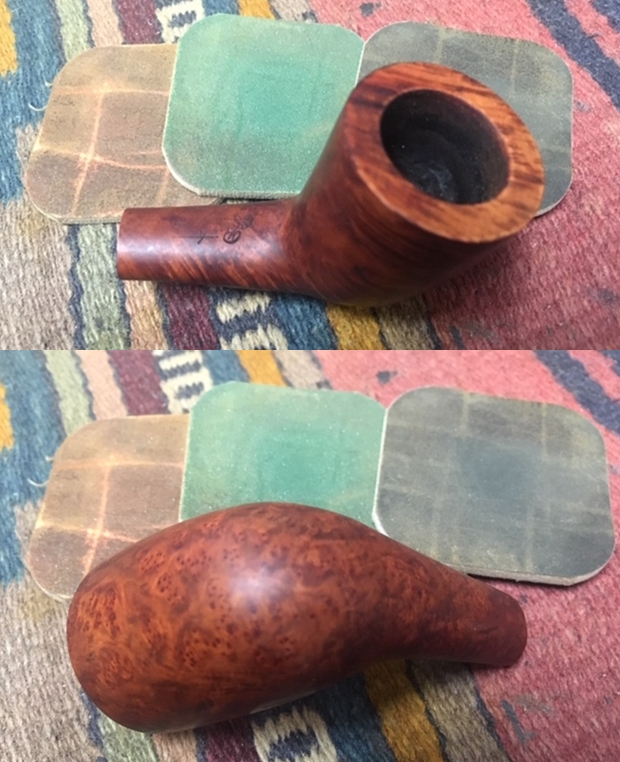
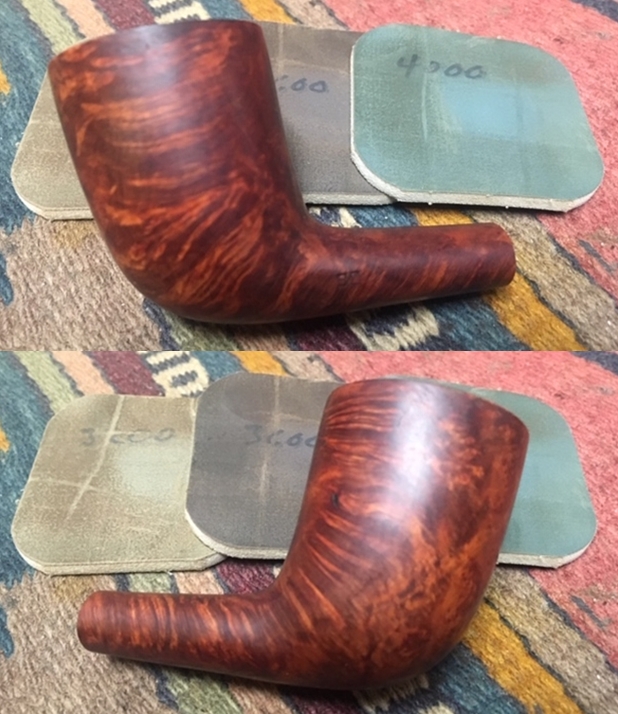
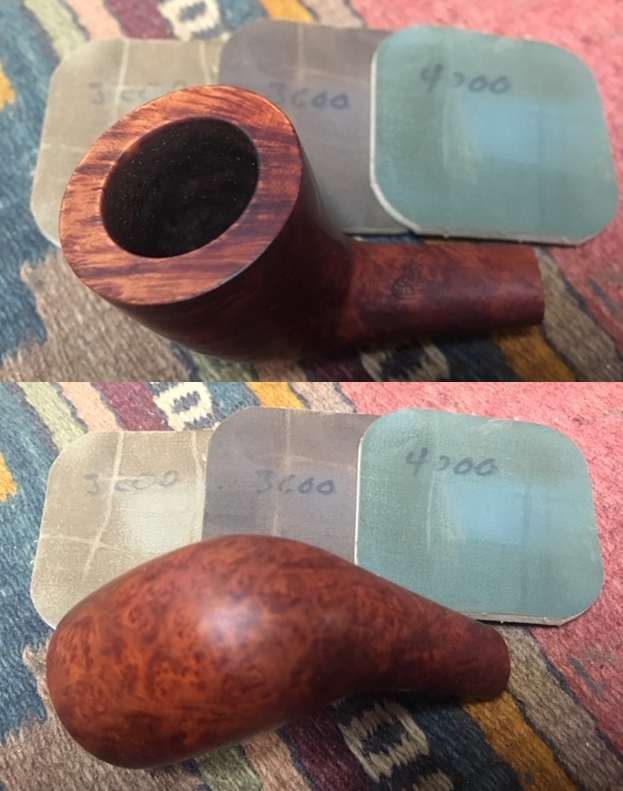
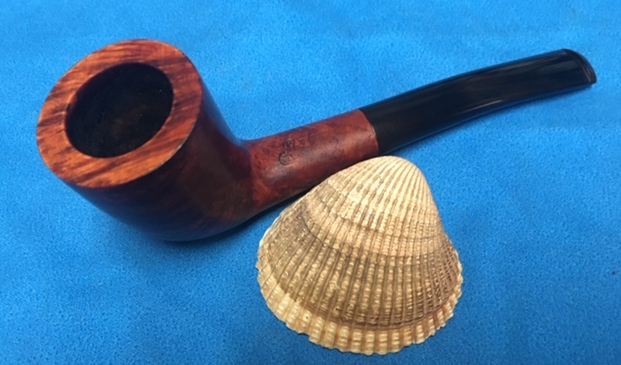
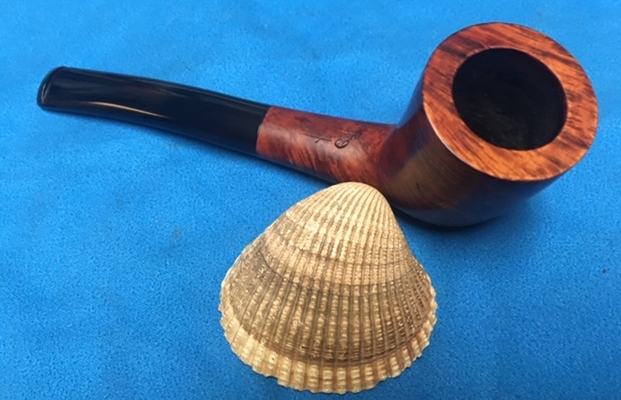
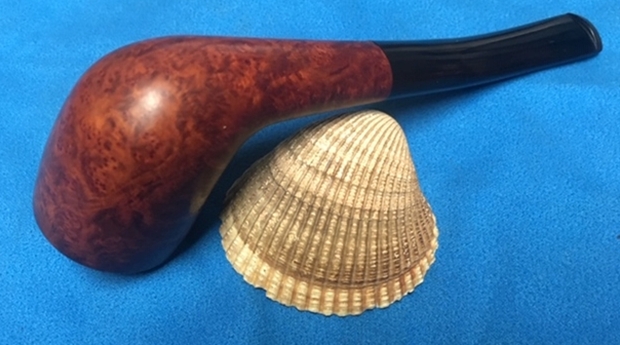
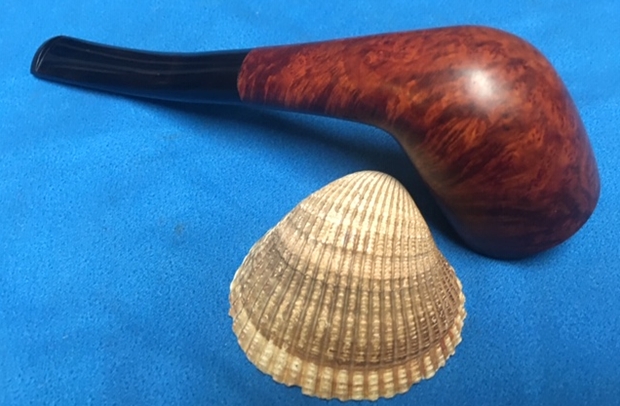
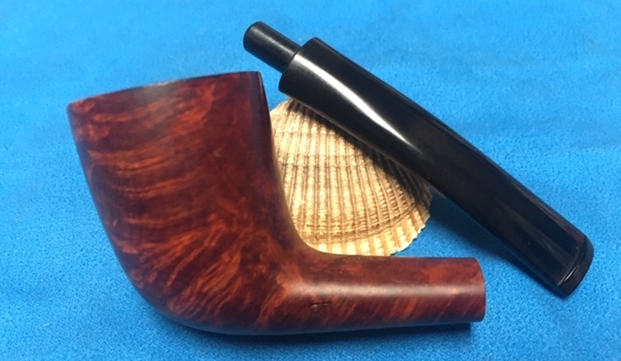
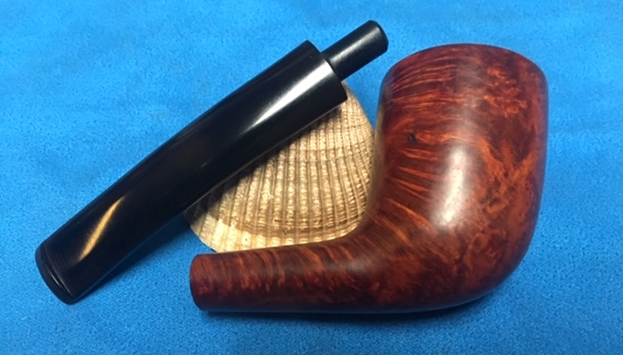
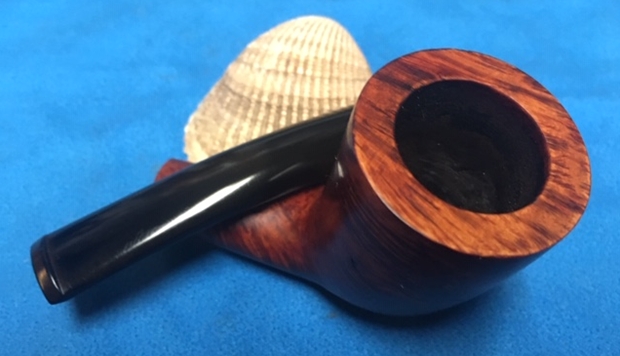
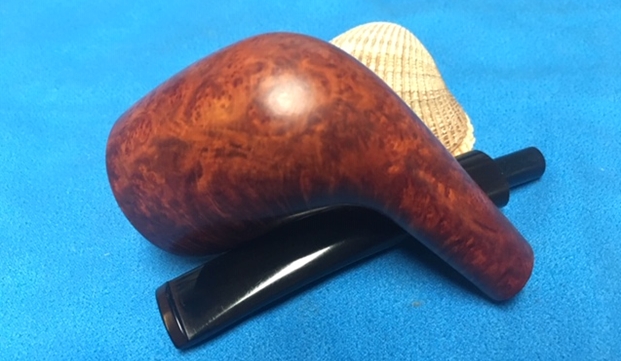
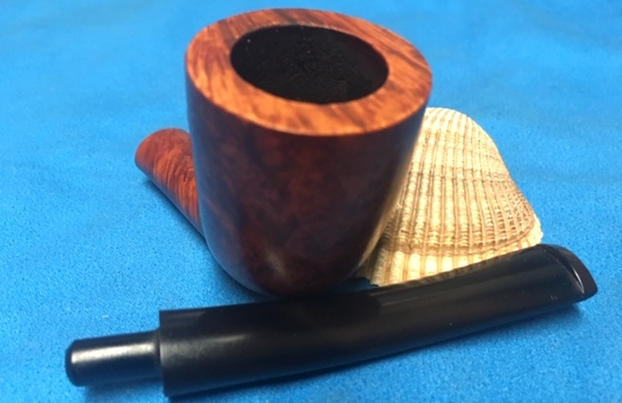
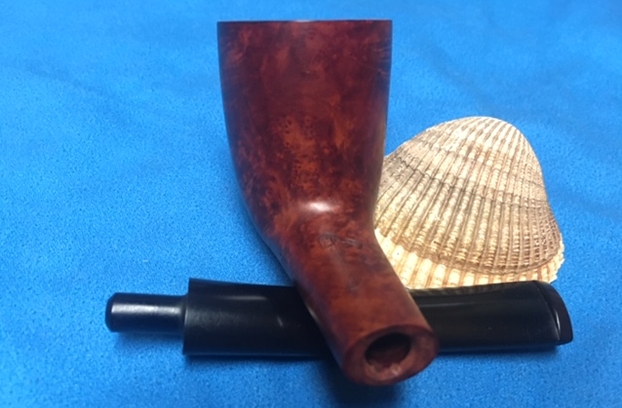
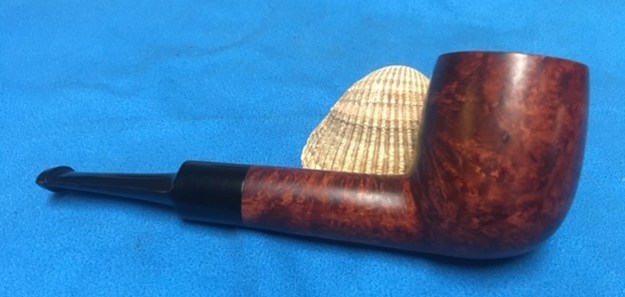
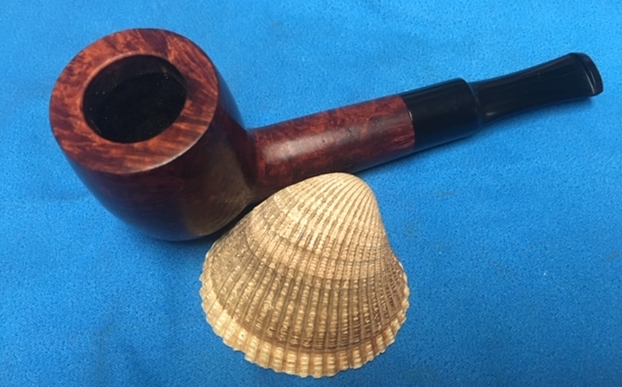
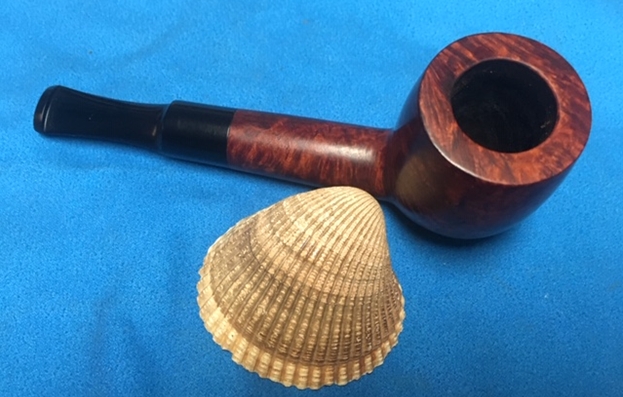
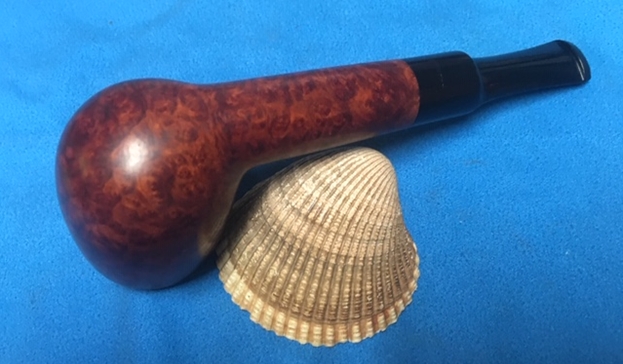
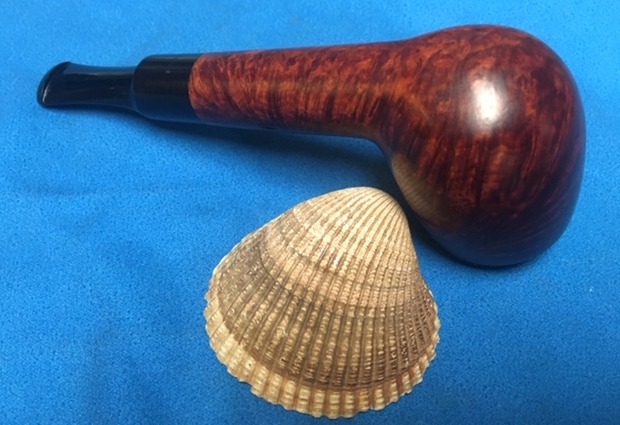
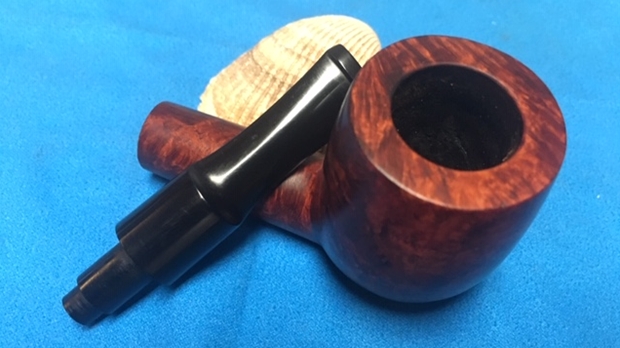
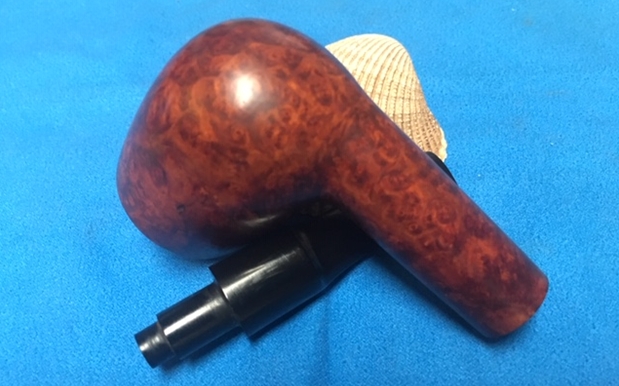
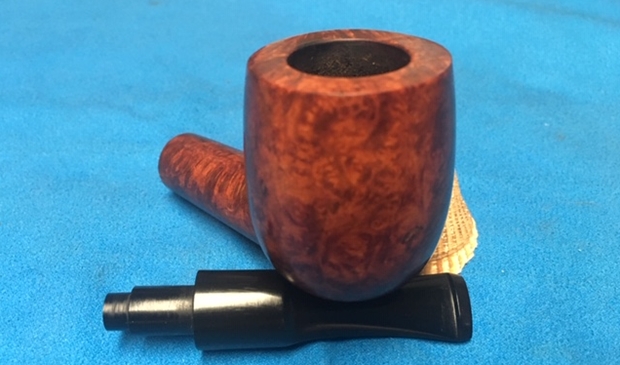
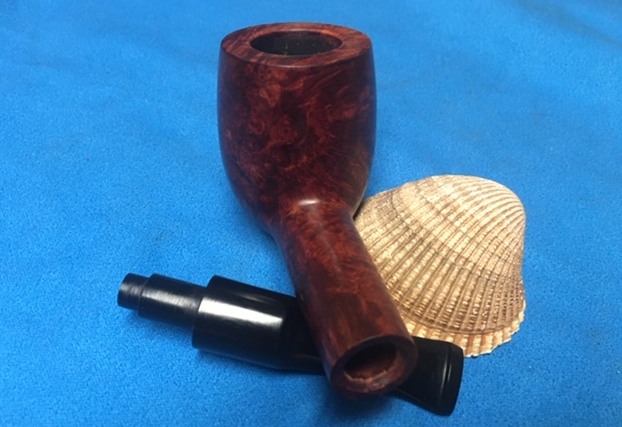
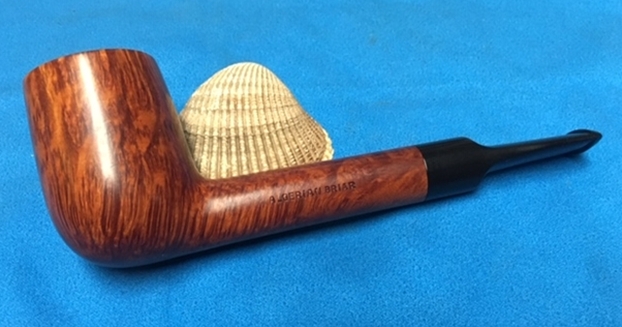
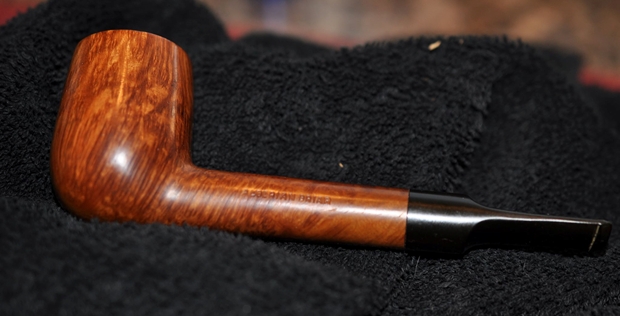
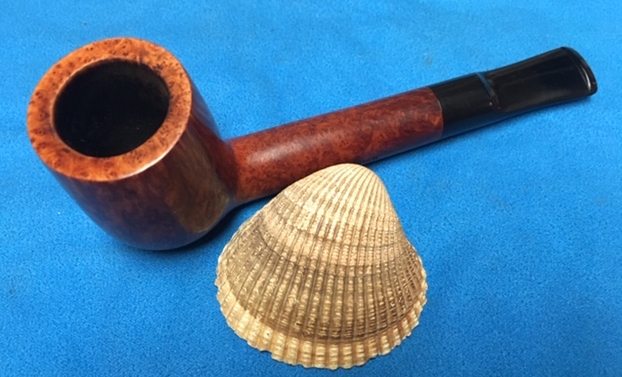
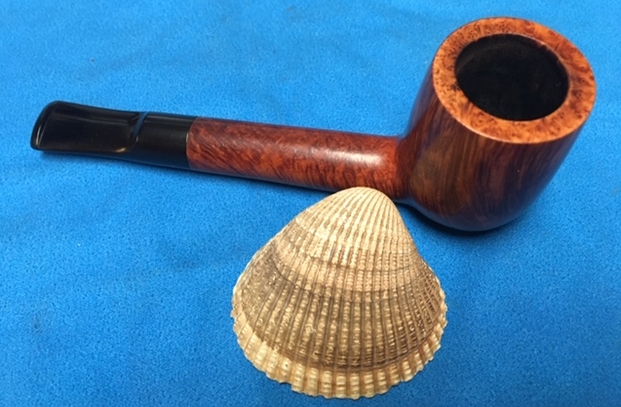
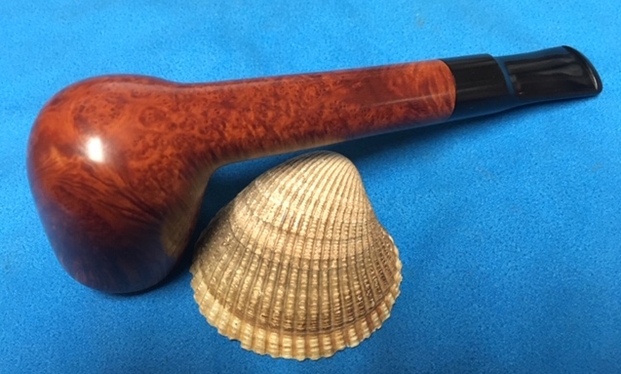
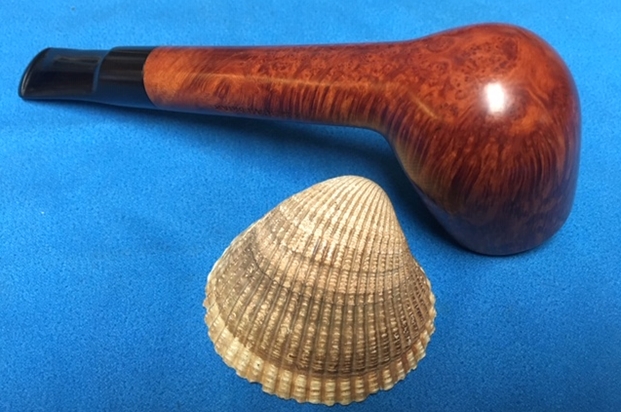
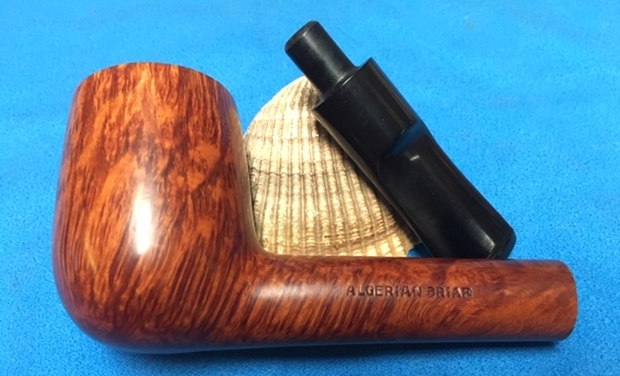
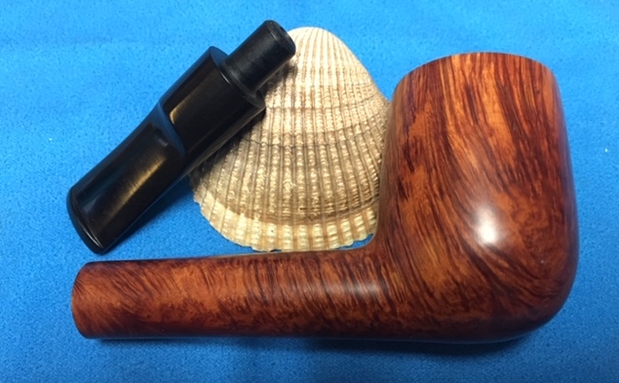
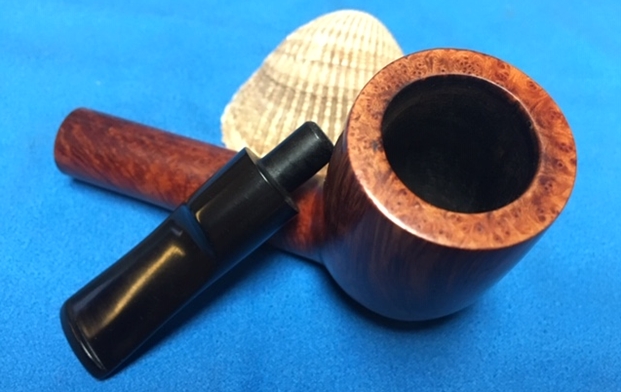
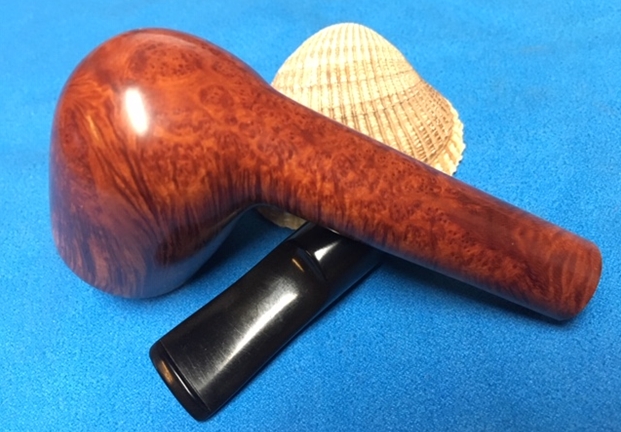
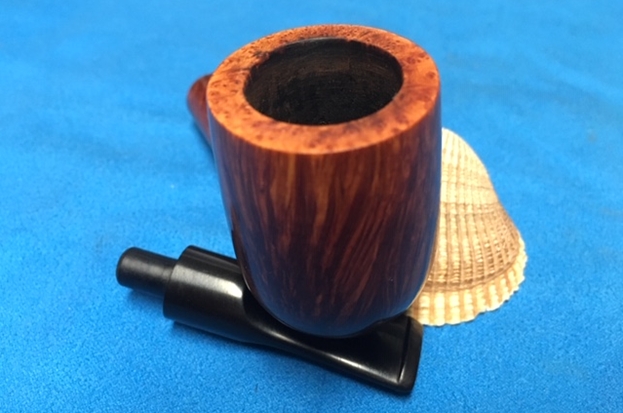
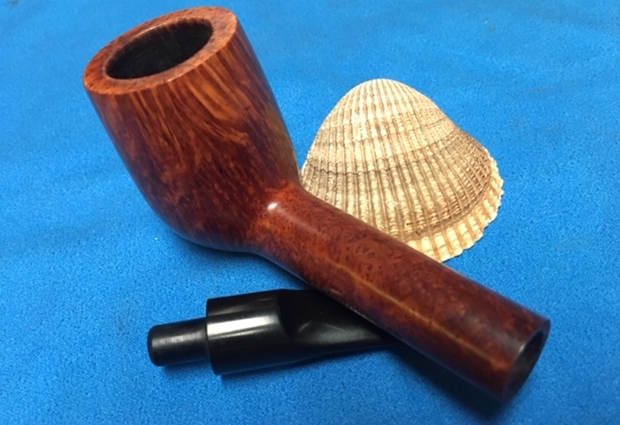
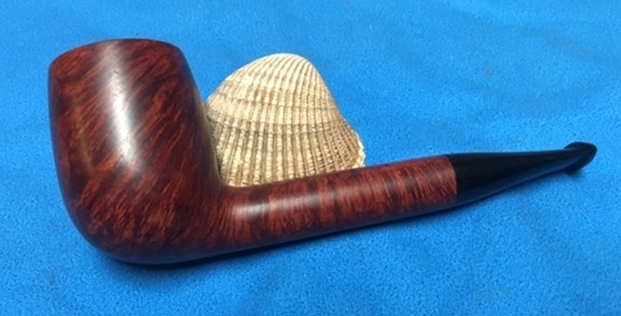
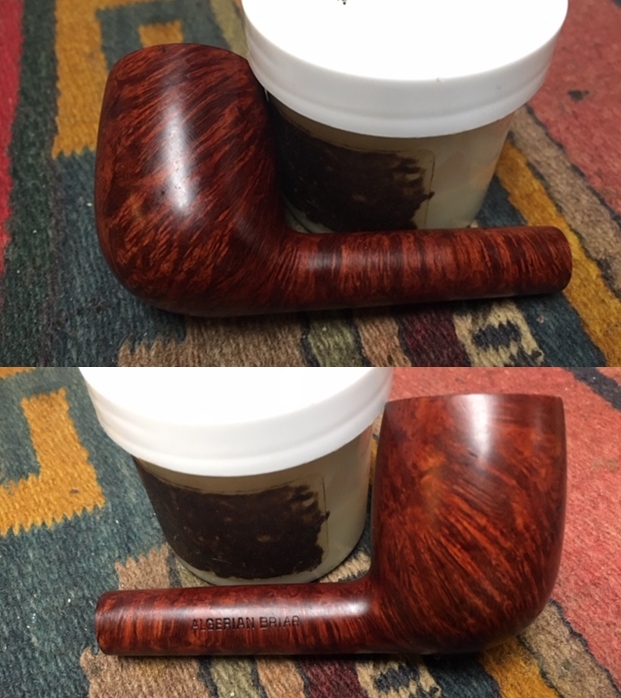
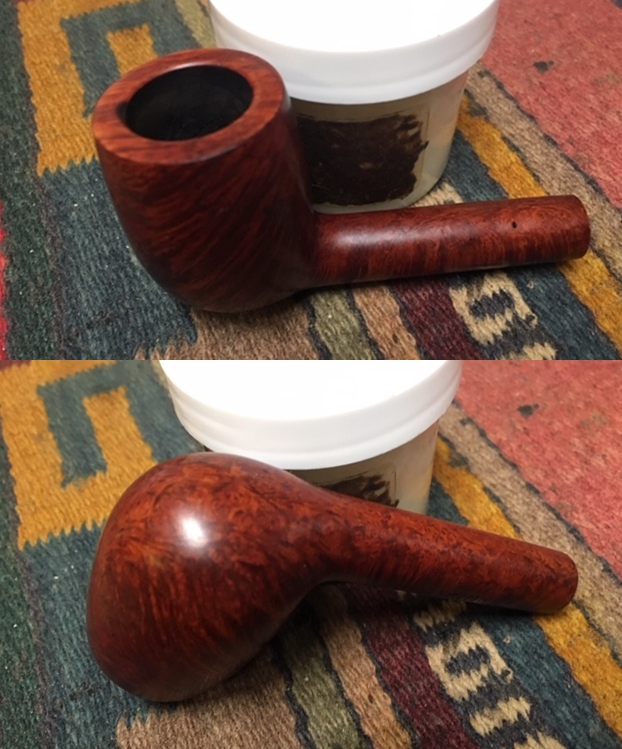
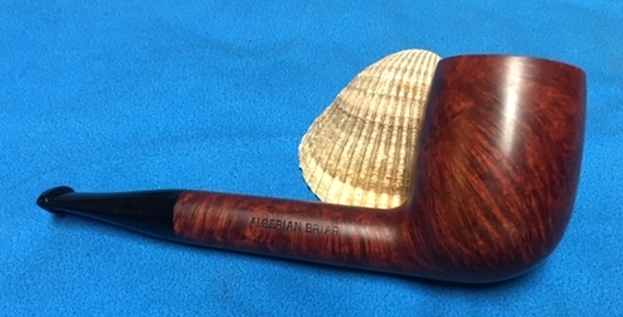
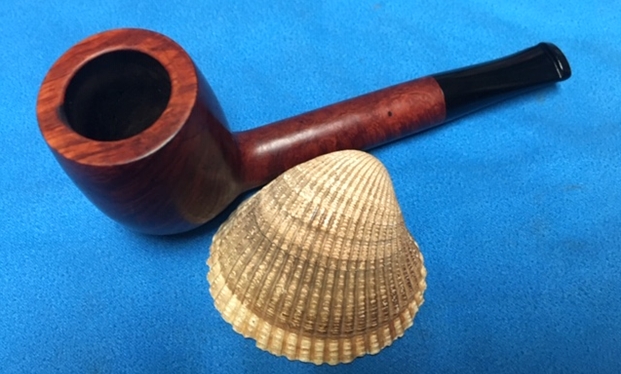
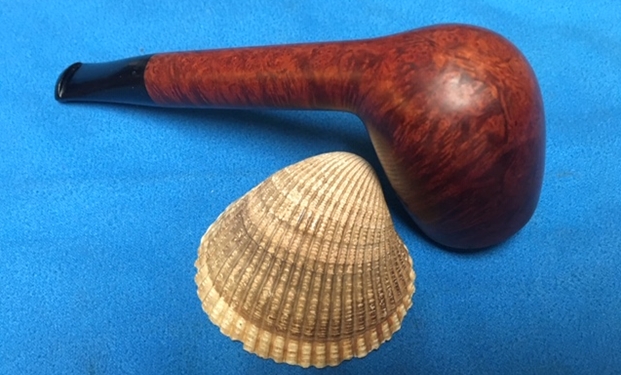
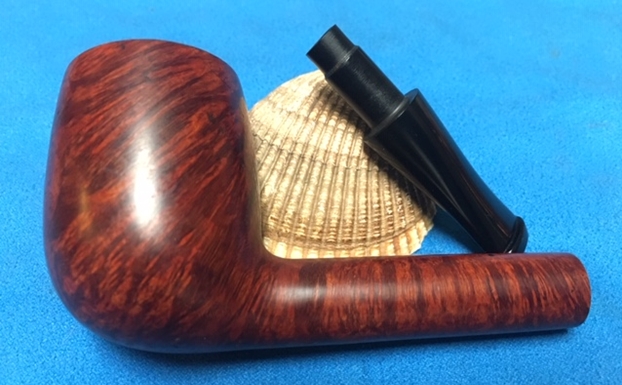
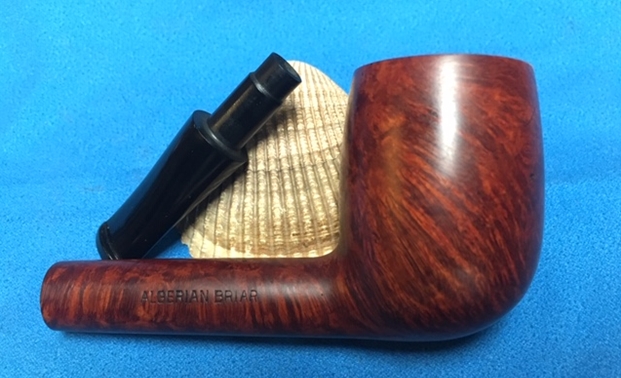
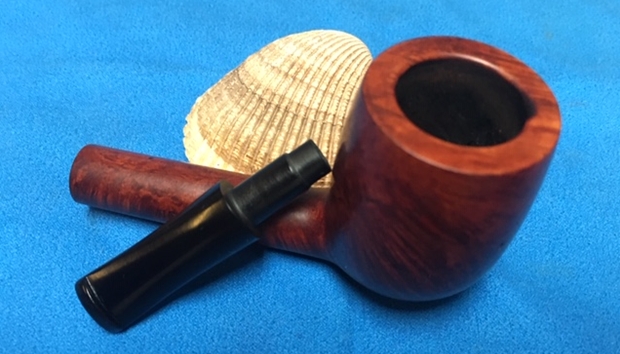
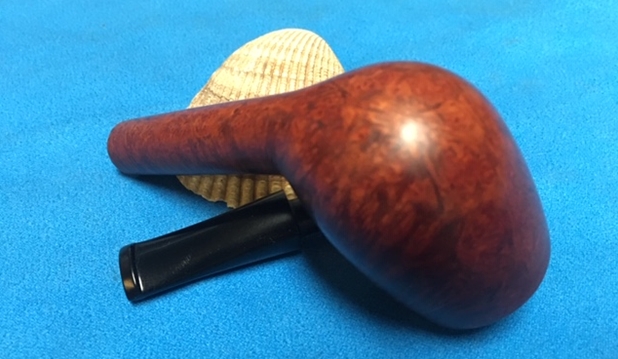
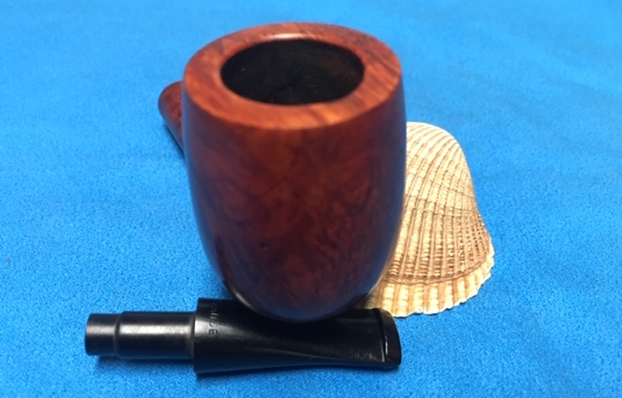
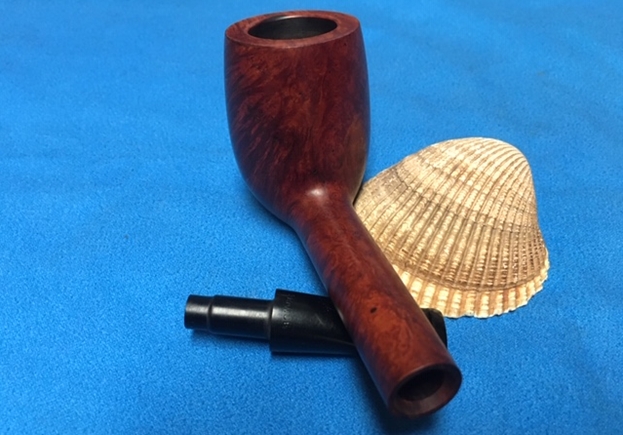
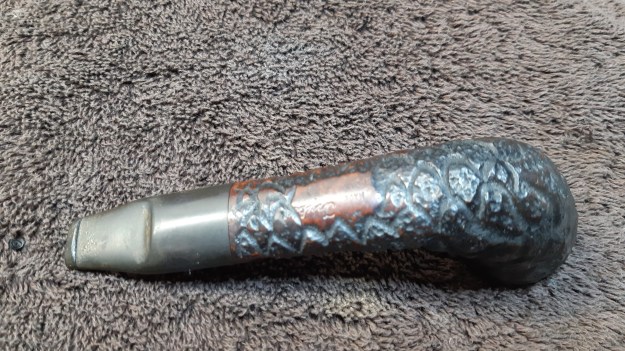
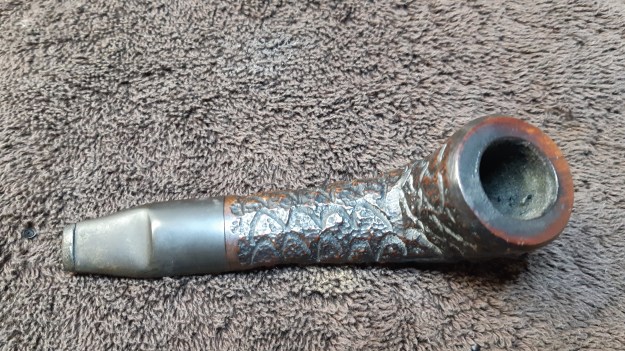
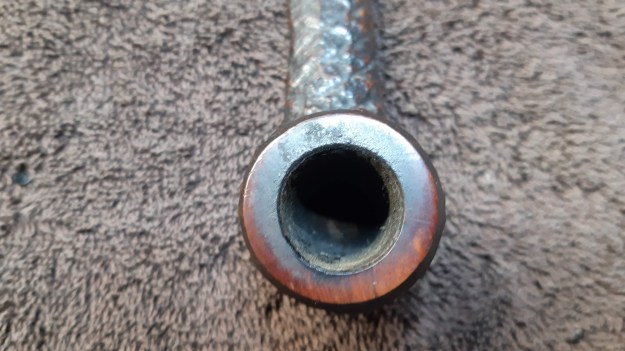
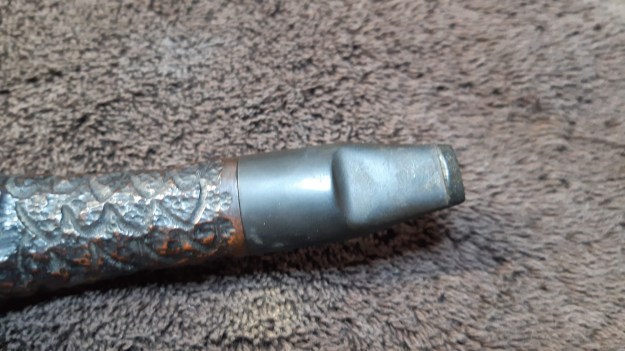
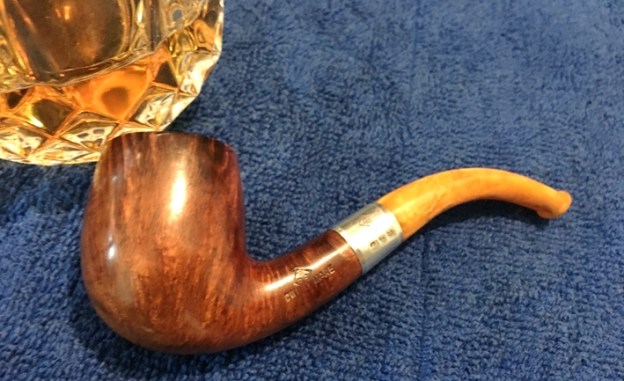
When I discovered I was to be the writer of this grand project before coming to Pune, Paresh sent pictures of the 1846 BBB. Here are the pictures of the BBB Bent Billiard with its classic amber stem.


 The nomenclature is stamped on the left flank of the shank with the classic stacked BBB ensconced in the diamond. The diamond is centered above ‘OWN MAKE’. The silver ferule repeats the BBB diamond stamp over hallmarks providing information on the provenance which will be unpacked below.
 With a pipe dated so early, it qualifies as one of the first pipes produced by BBB. I look to Pipedia’s article on BBB to set the stage for understanding the origins:
BBB
The initials once stood for Blumfeld’s Best Briars after Louis Blumfeld, who took over the management of the Adolph Frankau Company in 1856. After his death, the BBB gradually became known as Britain’s Best Briars. Soon to be the oldest English trademark in current use and the first pipe ever to have a registered trademark. “Britain’s Best Briars”, often called BBB, is one of the oldest brands still in production and has always been the most popular foreign brand in Denmark. Earlier pipes included a metal rondel with a diamond shape including BBB embedded in the stem top, and later post-Cadogan went to a stamped-on logo, similar to the GBD pipes.
Dating and History:
I have been doing some digging into BBB pipes for some we have for VPC auctions and I found an article online in French. Here is a Babelfish translation of a history of BBB from http://www.fumeursdepipe.net/artbbb.htm
Genesis and history of the company. Adolph Frankau & Co Ltd In 1847, Adolph Frankau arrived in London and quickly understood opportunities that the market of tobacco presented, in full expansion. He created the company “Adolph Frankau & Co” and became an importer of meerschaum pipes and supplies in connection with the tobacco. It takes under its wing young a 14 year old boy, Louis Blumfeld. The business thrives quickly until the death of Adolph Frankau in 1856. His widow prepares to sell the company.
The dating we’ve placed on the BBB is 1846. The formation of the Adolph Fankau & Co. Ltd is said to be 1847 in London from the article above. The seemingly contradictory information creates part of the mystery uncovered in the research – the origins of BBB and a pipe apparently dated before it began! Fortunately for me, the Pipe Man Facebook Group tackled the research for me. With only slight editing, here is the ‘research wing’ dialog in toto. I repeat the dialog because it captures the thrill of discovery of a treasure and the process leading to it:
Paresh: From my grandfather’s collection…. unable to decide my next project. Please suggest…… It’s nice to be spoilt for choice.

Jeff
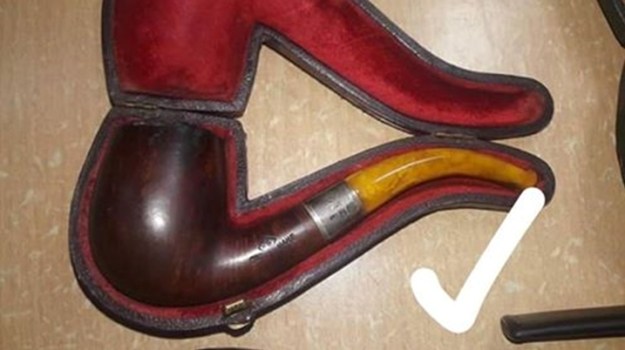

Steve: Here’s my vote… marked with the check .
Paresh: BBB it is then….. thank you.
Paresh: The BBC….. just for the record you all have chosen the dirtiest one for me to work on. Other three pipes….. Abha, my wife, had done the initial cleaning……Lol. It’s BBB and not BBC….. you have chosen wisely as in Indiana Jones and the Last crusade!!!!

Victor: Oh man! I love BBB’s, it’s my favorite brand ever!
Paresh: Where have you been my friend?
Victor: This pipe looks to me like Pamela Anderson ….[edited by scribe 😊]…. with a suitcase full of dollars and a bottle of champagne. I’ve been working hard this days my friend, and my head was a little bit away from the pipes
Paresh: And me….. [edited by scribe]…. it happens….
Victor: Hahahaha I’ve 12 BBB’s in my collection
Paresh: On this selection, there was a unanimous vote from all parts of the world…….and the bigwigs wonder how to bring the world together……………….. It’s this simple.
Victor: i just LOVE all of them.
Paresh: All vintage?
Victor: yeah!
Paresh: I need to check how many I have. Never bought one BBB, except for one commissioned from ThePipeSteward….. All my BBB are my grandfather’s.
MAR 15, 2019, 2:02 AM
Steve: Victor and I share a love of BBB pipes…one of my favourite brands
Paresh: I haven’t been able to identify my favourite brand!! My present rotation includes Farida’ s dad’s Dunhill, GBD International, BIJOU, Hilson Viva and two Somersets.
MAR 15, 2019, 5:53 PM
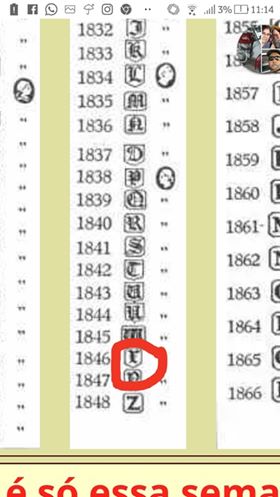
Paresh: Found this stamp on 1858 BBB Meer….. exact same stamp on my BBB but letter D. This makes it from 1852. Did they make Briar pipes then?
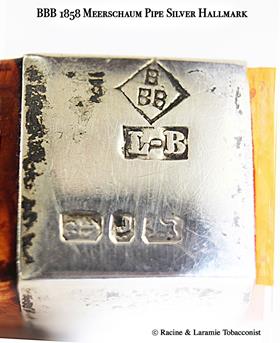
Need help in dating this pipe based on hallmarks….
 MAR 15, 2019, 7:08 PM
Victor: I need a close picture of the hallmarks and I could say precisely the year
Paresh: I shall try. But as I said earlier, the only difference between the meer stampings above and mine is letter capital D…
Victor: Oh, I thought you said the meer had the letter D – ok! But i must say the frame around the letter influences too
Paresh: Hallmark stampings are slightly worn out. Understood. I wish I had an iPhone…..
Steve: Anchor is Birmingham, lion is the mark for 925 silver,
Victor: Yes, exactly. And L&B the silversmith. If your pipe has the exactly same square frame around the D as this meerschaum, You have a 1852 pipe in your hands. And i must say this is probably the oldest briar pipe i ever seen.
Paresh: Does this help?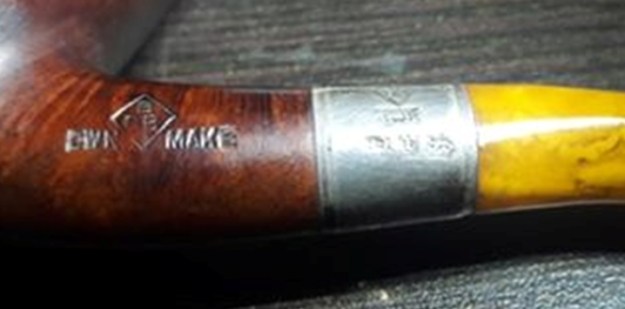
Victor
Could L-B stand for Louis Blumfield?
Victor:

This

Or this
Paresh: More like the upper one but more decorative but less than the second…..
Victor: Maybe like the third one? This is the oldest briar pipe i ever had Its 1873 Samuel McLardy
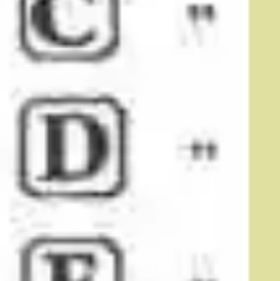
Paresh: Neither the third. Look for the J letter in 1858 and in same chart look for D. More or less same. 80% match….
Victor: I must admit I’m little envious about you BBB hahaha. What a lucky guy you are! Hahahaha
Paresh: Mclardy letter not clear…..
Victor: The first one is the D from the same chart of this J
Paresh: The different is “moustache” like shape at the junction……..on my pipe. Where the vertical line of D meets the horizontal line towards the right….
Victor: Looking close to your picture. I don’t think it’s a D
Paresh: Could you please enlarge the last pic that I sent you, Victor?
Victor:

I think it’s an “r”
Paresh: Wow…..that’s….. Let me check again.
Victor: And if is this one it’s a 1846 pipe
Paresh: You may be right Victor, it could be an ‘r’ What do you think? Enlarge the picture please.
Steve: I think it is an r as well
Paresh: Steve Sir, what does the letter appear to you?

Mark: Lower case R
Steve: Lower case r
Victor: Now I’m sure. It’s an 1846 pipe. Congratulation
Mark: So what year is that?
Victor: !!
Mark: No way!
Victor: Yes it is sir!
Mark: When did they start?!?
Victor: Actually its a lower case x – Hahahhaa
Mark: BBB?
Paresh: Okay. That settles it. So let me check again if it’s a repair band…… hearts thumping like nuts…
Victor: BBB it’s one of the oldest factories in England – Wait, Pipedia says it was founded in 1847 But they could be wrong. I’ve seen this kind of mistake before in pipedia
Steve: Remember silver hallmarks date the silver…
Mark: Amber stem?
Paresh: NO REPAIR BAND…… summary of all discussions?
Agreed, hallmarks date silver. But the other stampings on the silver, like BBB and L- B?
Mark: Louis Blumfield? Amber stem, it must be old!
Paresh: As asked before, could LB stand for Louis Blumfield?
Mark: Maybe that’s one of the first after Frankau’s death in 1846? Sorry, 1856
Paresh: So am I holding a BBB which dates back to 1846? Remember, Louis Blumfeld joined him much earlier than 1856 before his demise.
Victor: Man
Steve: Man…
Victor: This is probably one of the first Frankau era pipes ever made!
Paresh: Concrete summary requested please, before I hit the Bar!!!
Victor: Maybe the silver was made in the end of the ear of 1846, few months before the factory made the pipe.
Year* Concrete summary?
Steve: That was my thinking Victor
Victor: You’re a [edited by scribe 😊] lucky bastard! Vavavavava Hahahahaha*
Paresh: Yes!!! Drinks are on me gentlemen….
Victor: Congratulations. Probably the oldest BBB in the whole world.
Steve: Congrats
Paresh: Good that I sought your advice on selection of the pipe to work on. My what a thrilling experience this was. Thanks again gents. Dal Stanton has missed this frenzy…
Paresh: Victor, you started this……
Steve Sir, would you like to work this pipe with me when you reach? This will be an epic project together or you want me to proceed ahead? It will be a significant project.
Victor: W8, Steve is going to India? (You live in India, right?)
Paresh: Yes Sir. Even Dal Stanton will be with us.
Victor: I wanna go too! Hahahaha
Paresh: Really?
Victor: I’m just kidding, I can’t afford a trip like this
Paresh: Okay. U will not be spending a dime here.
Steve Sir, what say about working this pipe…?
Mark: You can handle it Paresh!
It’s no different than a Dr. Grabow!
Paresh: More than the value of the pipe, it’s worth its weight in gold working together with Steve Sir and Dal Sir on this oldest heirloom piece that I desire. And not to mention Jeff Sir and Abha doing the initial cleaning…lol
Steve: Sounds like an interesting proposal Paresh… I am game. But I also know that you can handle it
I did miss the frenzy of the discovery of the dating of this BBB treasure Paresh inherited from his grandfather, but I experienced the thrill of having a part in its restoration – and what a restoration it was! One of the fun parts and challenges was to use only the tools available to Paresh in India. Each restorer is used to his own tools and techniques. The restoration of the 1846 also became a time of sharing and seeing how each of us approached the different phases of the restoration.
The day we determined would be THE day for THE restoration arrived. We three are in the flat that Paresh had provided for us during our stay. On this day set for THE restoration, we were up early before Paresh arrived from his home. After our tea and coffee, we were ready to go and decided to start on the cleaning phase to get a jump on things. Here we go! Jeff and Steve set up camp to begin the cleaning phase laying out the tools of the trade – no Savinelli Fitsall Tool this time around!

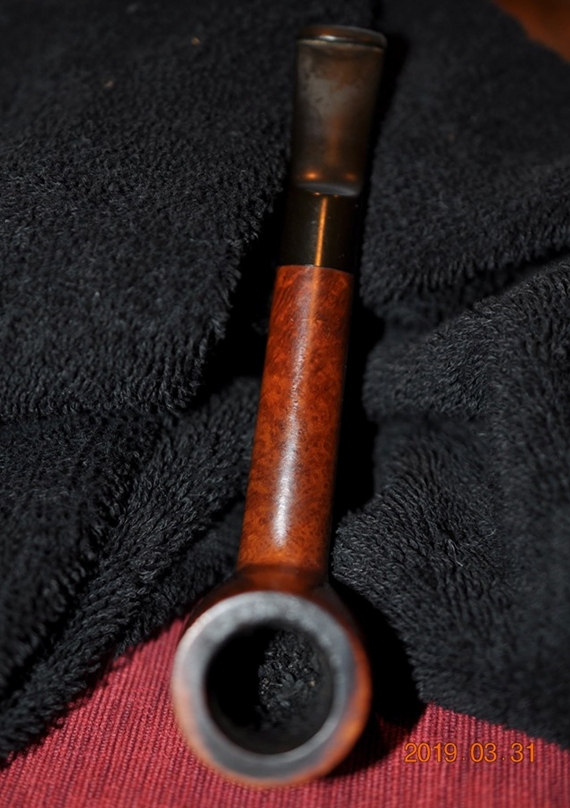
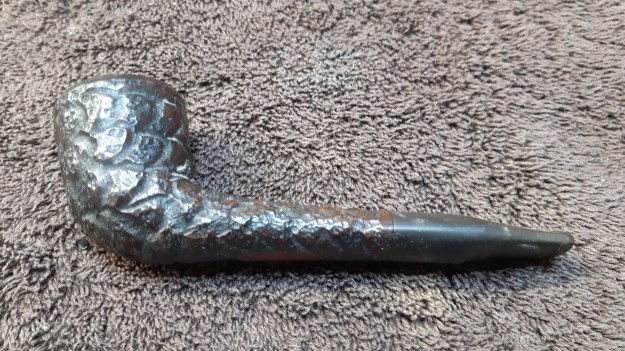
 The BBB had very thick cake and lava flow over the rim – very characteristic of Paresh’s grandfather’s other pipes where the practice seemed to be smoke, never clean and toss in the box when they were unsmokable and buy another!
 Steve started with reaming the chamber. Starting with the reaming blade heads he reams with the smallest blade and then works to the next larger.
 He uses two of the four blades available and then switches to the long pen knives available in Paresh’s arsenal and continues clearing the thick cake.

 After scraping the chamber walls with the pen knives, he follows by using ‘230’ grade paper (I can’t remember what the grading was in India – it could have been 220 to 240, mid-range) to clean the walls of the carbon further and wipes the chamber with paper towel.

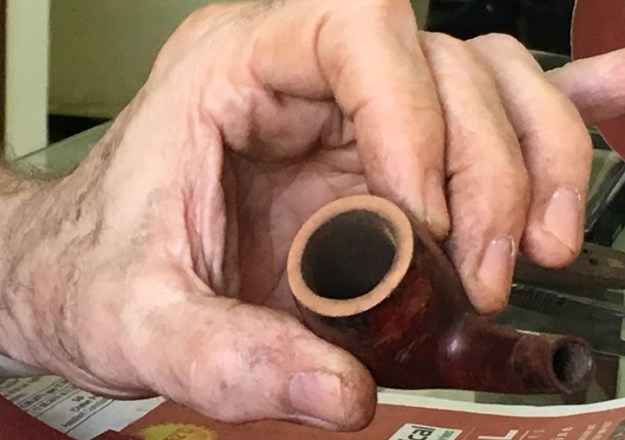
 After wiping, Steve evaluates the condition of the chamber and the 173-year-old chamber is in good shape from what we can see at this point.
 Switching now to the rim, Steve carefully employs the sanding paper over the rim to begin removing the thick lava flow.
 Continuing on the rim, next he uses a flat blade and pen knife and continues carefully scraping the rim.

 Using a spatula tool, he switches attention to the mortise and scrapes out the old oils and grime buildup.
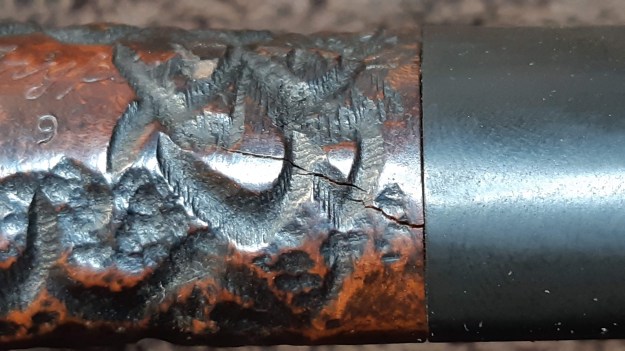
 With the lava excavated from the rim, Steve identifies what looks like a hairline crack running over the rim.
 The crack isn’t easy to see. It runs across the rim and over and down the stummel a bit.
 Steve continues smoothing the rim using 230 grade paper in order to get a better look at the rim’s condition.
 The crack is now more clearly seen.
 We paused when Paresh and Pavni arrived and I got more practice perfecting my selfie technique. Pavni enjoys helping her father in his restoration adventures. Her specialty in the restoration process, which has become a unique trademark in Paresh’s restorations, is sanding the chambers to a smooth perfection.
 As the project manager, Paresh receives an update on the progress on the 1846 BBB which includes the news about discovering of the crack after the rim cleaning.
 After conferring with the master restorer, the decision is made to take the 1846 to the topping board. In this case, a piece of 230 paper on the flat, glass table serves well as Paresh begins the topping process. The debate using the topping board is always weighing the loss of briar verses the needed corrections in the restoration process. The rim needs refreshing and redefinition, and the hope is that some topping will improve the situation with the crack.
 The first revolutions show the progress and revealing more distinctly the rim crack.
 After another few revolutions on the topping board, it is time for a conference and Steve again takes the stummel to the topping board.

 Paresh harvests the briar dust off the sanding paper, which appears to be a 150 grade from this view. Under Pavni’s watchful eye, Steve takes the stummel a few more rotations and we arrive at a satisfactory point.


 From the picture above, the inner rim edge is rough and uneven. There is also a dark scorched ring remaining around the inner perimeter. Paresh goes to work cleaning the inner rim edge with a roll of sanding paper. We’re hoping that the sanding will take care of the minor hairline crack.


 Across the table, Jeff takes a close look at the amber stem with the Henry Hughs Son LTD London magnifying glass. The night before we were all squinting looking at the nomenclatures of many pipes and this morning Paresh remembered to bring this classic lens! Looking at the 1846 BBB through this antique lens seemed only right!

 Jeff goes to work on cleaning the delicate bone tenon but waits on the airway of the amber stem. We don’t want to use alcohol on the amber which could potentially damage it causing it to shatter or craze – making spider web-like cracking. During the week, Paresh had a young man on call to respond to all our needs. We needed a natural acidic cleaner for the amber stem and lemon juice is a good choice for the job. Paresh made a call to the young man to bring us lemons.… Waiting for the lemons, Jeff gave Murphy’s a try on the bone tenon and airway with some results.

 On the other side of the table, Steve isn’t satisfied with the rim and adds a few more turns on the topping board and follows with a light sanding touch on the external rim edge to soften the rim edge and clean remaining nicks.
 The threads of the bone tenon have years of debris compacted and Jeff starts with a bristled brush to help clean and then passes the stem across the table and Paresh continues the delicate thread cleaning probing and scraping with the flat blade.

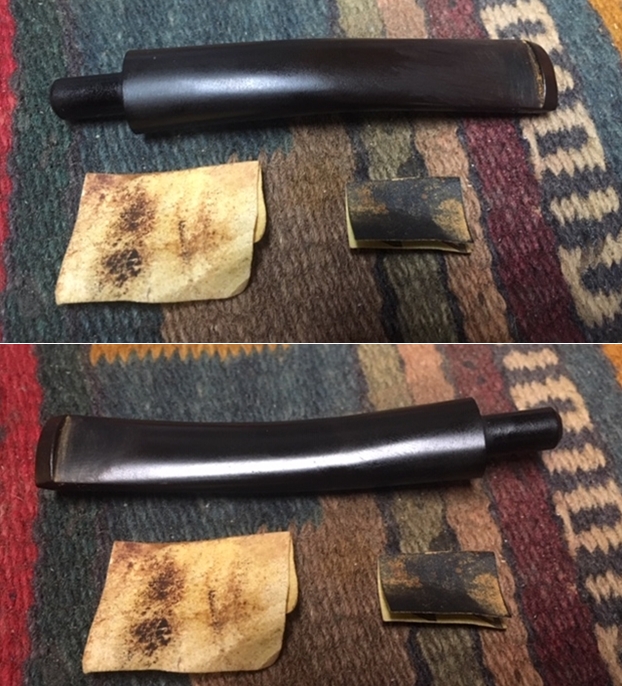
 With Paresh working on the tenon, Steve passes the stummel to Jeff who starts his cleaning regimen using Murphy’s Soap and a paper towel. The towel shows the first layer of grime coming off. He also gently scrapes the shank shaft with a blade where the band was mounted removing grime softened by the Murphy’s Soap.


 Paresh hands the stem off to Steve who continues working on the bone tenon threads using a stationary inverted wire brush. This does the job and the stem goes back to Jeff for his inspection.

 Jeff continues cleaning the BBB stummel with more Murphy’s Soap and gently scrapes the lava buildup on the stummel surface just over the rim.

 Next, Jeff furthers the cleaning by taking the stummel in the kitchen and giving the stummel a cleaning using warm water and liquid dish soap, which in India came in a paste form, and scrubbing with a bristled toothbrush. I was very interested in seeing Jeff’s cleaning process. He has developed an interesting system of which even Steve was not fully aware!
 With Jeff’s cleaning, he’s not concerned to allow water in the internals but washes the internals as well using a shank brush to clean – rinsing with warm water – external surface and internals.

 With the stummel clean, Steve takes the stummel to work on the primary restoration issues. Using a 1500 grade micromesh pad, Steve dry sands the upper part of the stummel around the rim and the rim surface to work on some rough areas and to clean the area of the crack identified earlier. The challenge is to preserve the 1800s patina while applying some abrasives to the surface. Steve employs the micromesh for this reason.


 While Steve is working on the stummel, our young helper man arrives with the lemons needed for Jeff to continue his internal cleaning of the amber stem!
 Steve’s fine sanding with the micromesh pad on the rim brings into focus two cracks, the original and a lesser one – in the picture below at the 4 o’clock and 6:30 o’clock positions.

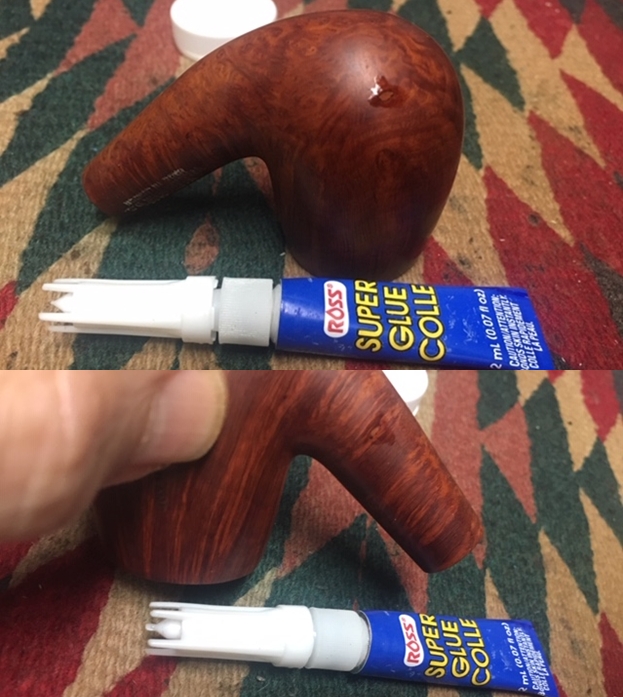
 To address these issues, Steve decides to drill a counter-creep hole with the Dremel on the original lone crack which creeps down the stummel and then apply CA glue shoring it up. To begin, to create a hole to guide the drilling, using the magnifying glass, Steve presses the corner of the flat blade into the briar where the crack terminates creating the guide hole for the Dremel drill bit.
 With the area cleaned, the crack is clearly seen now on the external side as well as internally looking in the chamber.
 After a very short discussion with Paresh, it’s decided that Steve will do the honors of drilling the counter-creep hole. Mounting a 1 or 2mm (not sure which now!) drill bit in the Dremel, with nerves of steel preparing to drill on the 1846 BBB, Steve does the job. This part of the restoration is critical – drilling the hole keeps the crack from advancing as the bowl heats and cools – expands and retracts. During the drilling, one does not want to drill too far punching through into the chamber!

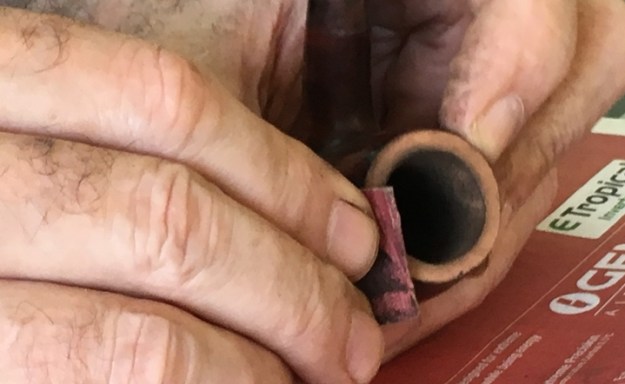
 Next, after Steve applies CA glue over the crack and count-creep hole, Paresh is ready to apply briar dust over the wet repair area to enhance the blending on the vintage briar surface.


 With the main crack glued and briar dust applied, the secondary crack receives a spot drop of the thin CA glue as well to create a strengthened reinforcement.
 After the CA glue cures, Steve strategically files and sands the repair areas removing the excess glue and bringing the patches flush with the briar surface.


 To again freshen the rim after the crack repairs, Steve lightly tops the stummel and the results look good.
 Following the topping, again using the 1500 micromesh pad, Steve sands both repair areas on the stummel surface as well as topping the stummel with the micromesh pad. This smooths and blends the repair area well with little impact on the ancient briar’s patina.

 Now armed with a natural cleanser, lemon juice, Jeff continues the cleaning of the amber stem’s airway.
 You get a better idea now why this write up seems a bit like watching a ping pong tourny! Paresh now continues the application of micromesh to the rim of the 1846.

 The results are great for Jeff’s stem cleaning utilizing the lemon juice. The pipe cleaner reveals the buildup in the airway.
 Steve continues to work on the rim and repair areas with micromesh pads 1800 and 2400.

 With a sense of having worked the areas enough with the micromesh pads, Steve applies Before & After Restoration Balm to the rim and the crack area where he had been applying the micromesh pads to see how the briar will snap to. The result is phenomenal as the following pictures show.


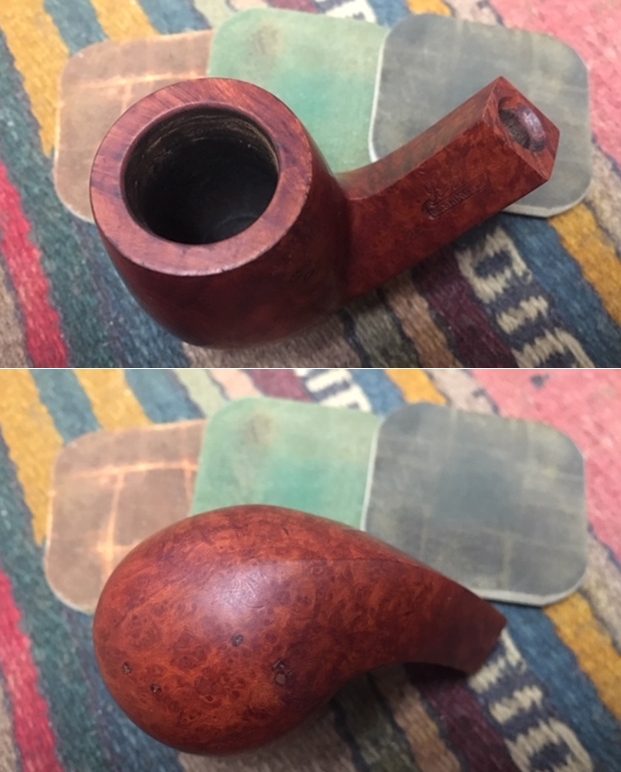
 This marks the completion of micromesh pads 1500 to 2400 on parts of the stummel and rim. The cracks are still visible but have blended well in the darkening briar hues.
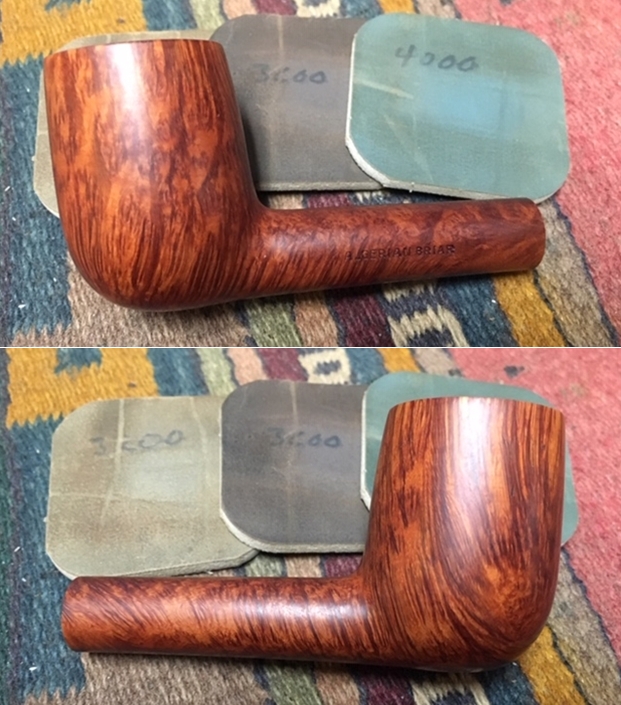
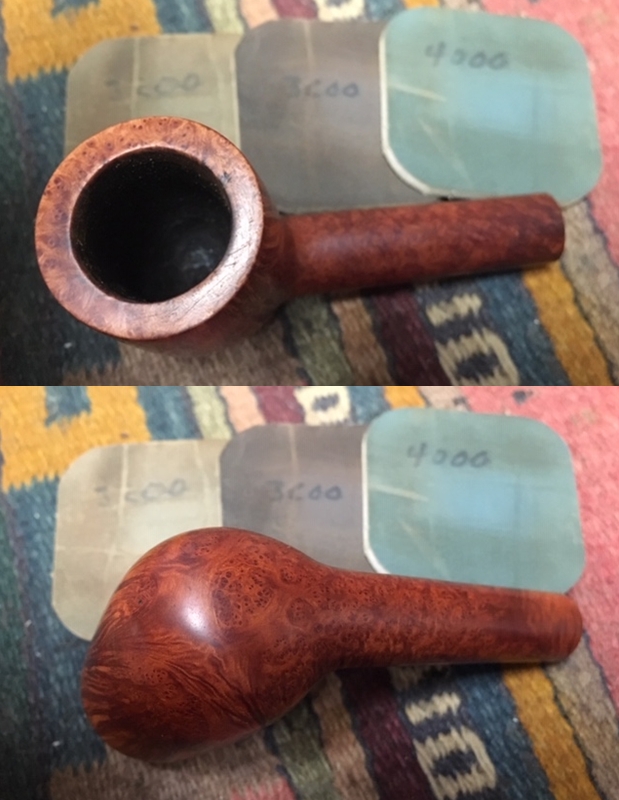
 Paresh follows by dry sanding with 3200 grade micromesh on the stummel.
 Jeff declares that the stem internals are now clean. After thinning a thick pipe cleaner with the pen knife, Paresh runs the pipe cleaner through the stem and bone tenon for one final pass.


 The amber stem bit has experienced chipping and this is next up for repair. Steve begins the repair by spot dropping clear CA glue to fill the divot. After applying, he puts the stem aside for the CA glue to cure.

 The BBB silver band is next. The band shows the normal coloring as the silver oxidizes over time.
  Paresh tackles this project by using a dry powdered silver cleaner that he has available in India. I had never seen anything like it before and watched with interest as Paresh pinched the powder and applied it to the band and rubbed the powder in the metal.

 The results were stellar as the pictures show.
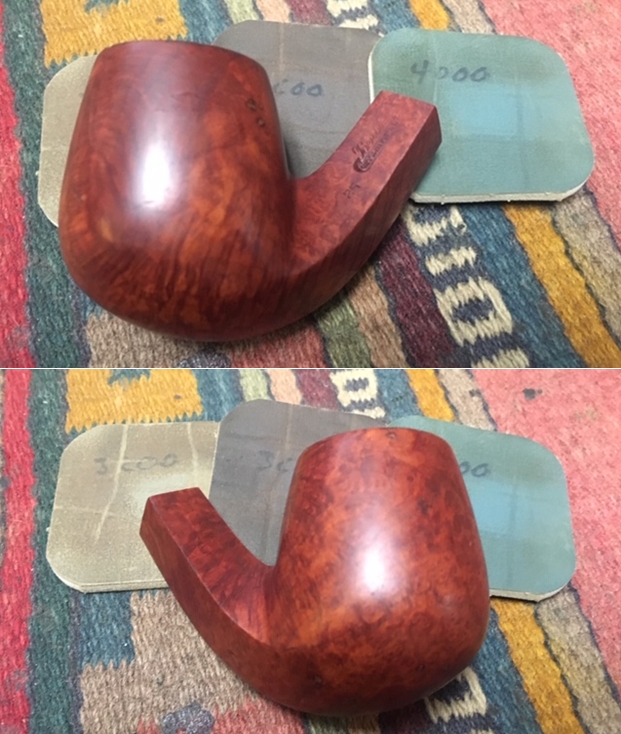
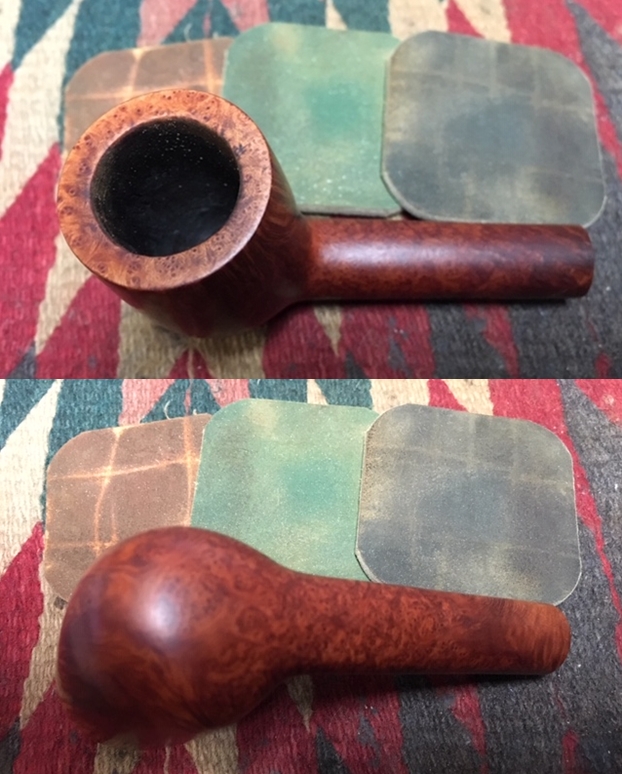
 While Paresh worked on cleaning the band, Steve pressed forward applying the next set of micromesh pads to the stummel and rim of the 1846 BBB. Using pads 3600 to 4000 he dry sanded.
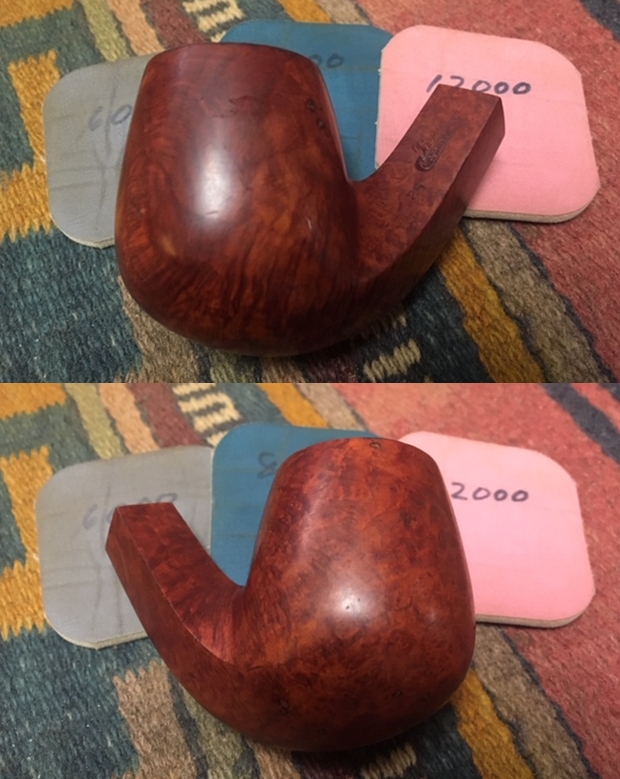
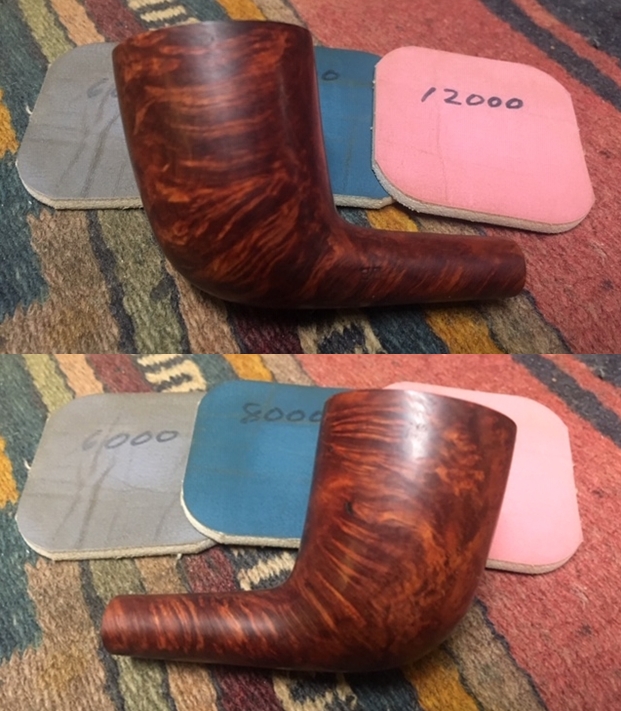
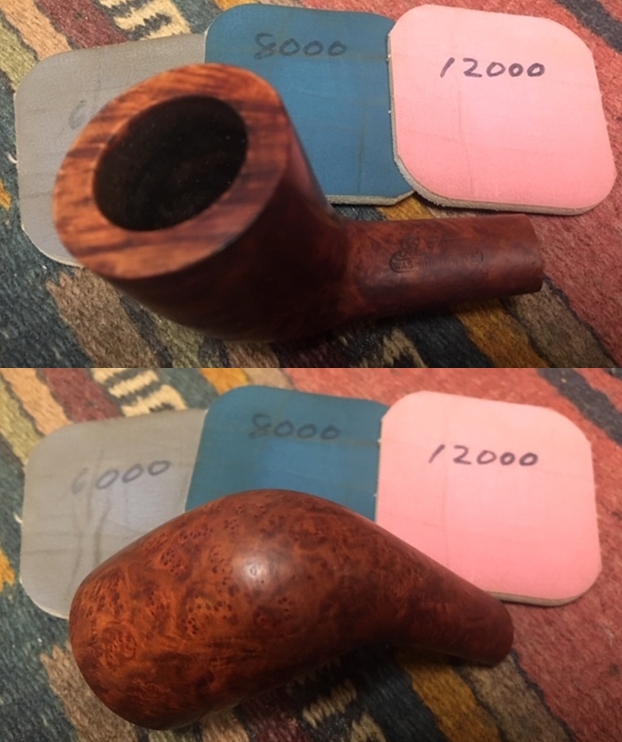
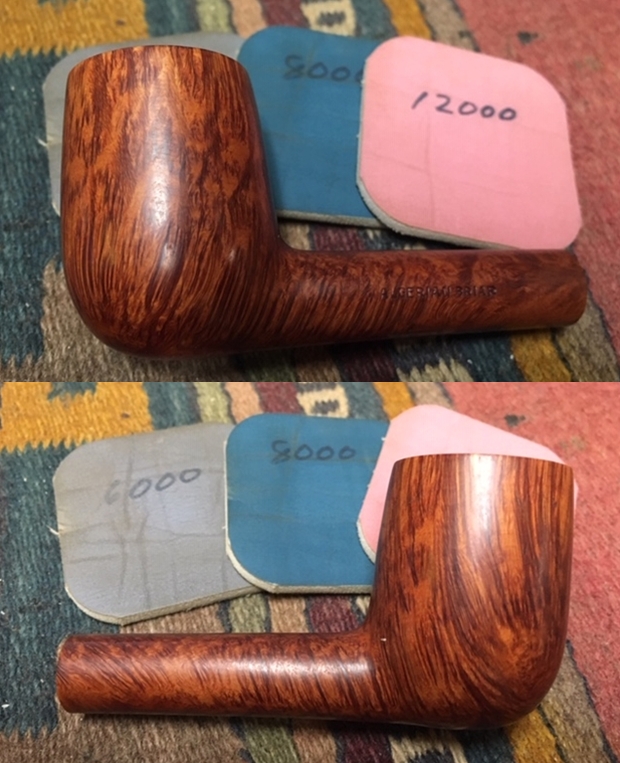
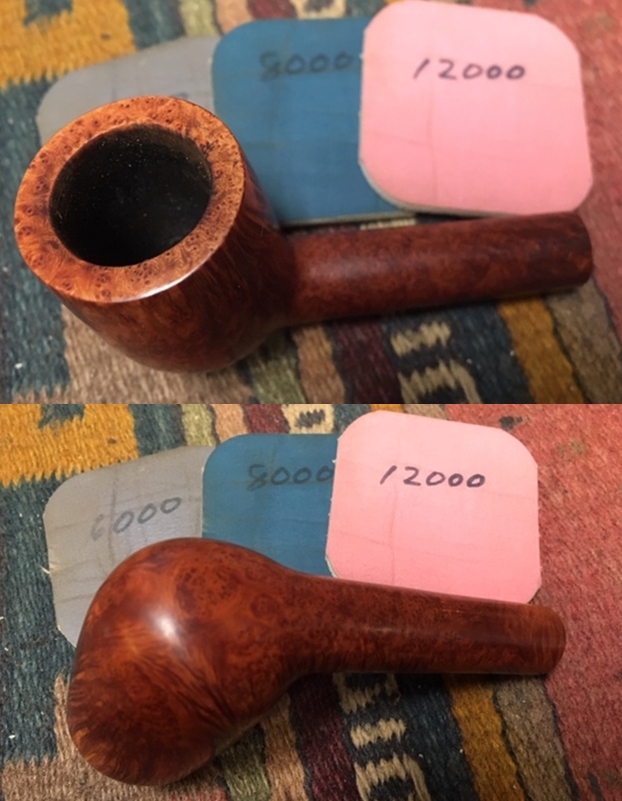
 The emergence of the beauty of this aged patina was amazing to watch as Steve teased it out by dry sanding with pads 6000 to 12000.
 With the micromesh phase completed, Steve attaches the newly shined BBB silver band with its identifying hallmarks, using a bit of CA glue. After applying a small line about midway up the shank underneath where the band will rest, Steve positions and slides the band over the shank until it tightened.


 All I could say was, ‘Wow!’. The vintage band adds that touch of class that the 1846 BBB already had in spades!
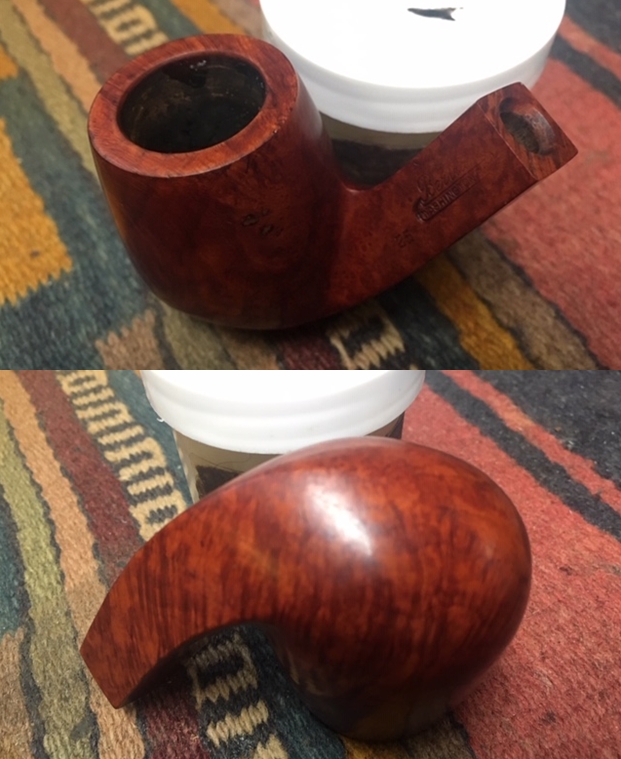
 Next, we’re all anticipating the results of applying Before & After Restoration Balm to the entire bowl. The Balm does a great job coaxing out the deeper hues of the briar. Often, the changes are subtle, but distinctive. This picture shows the stummel before application.
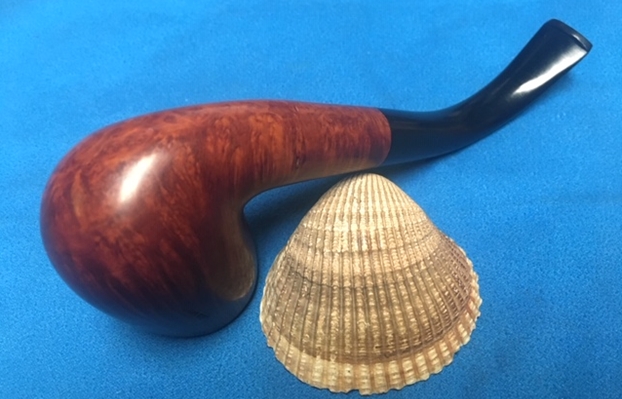
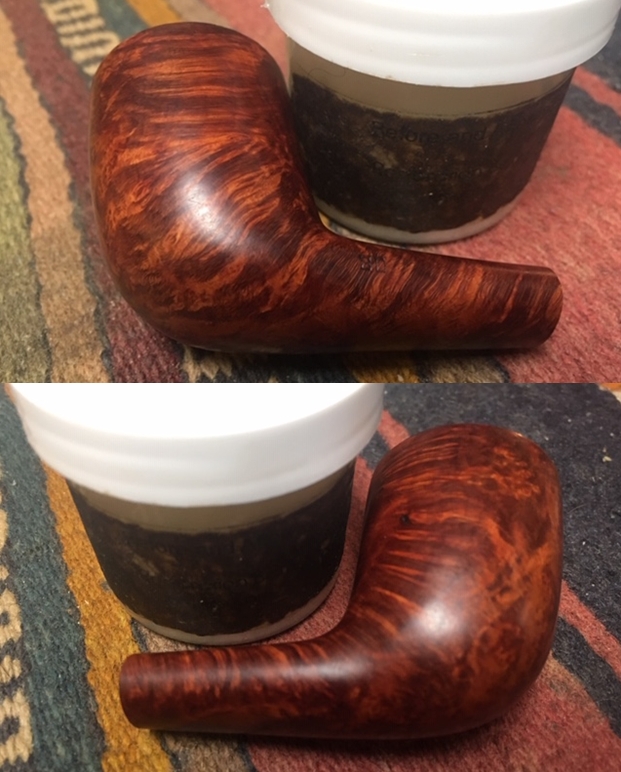
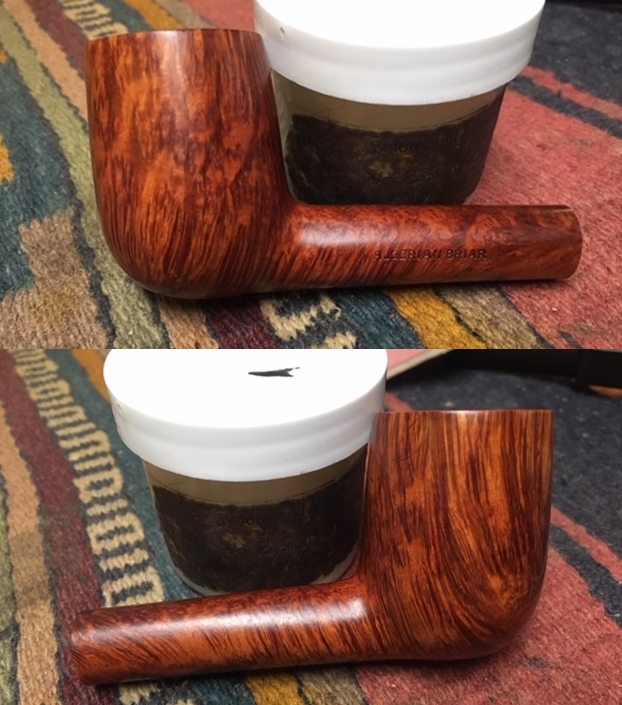
 Steve applies the Balm by putting some on his finger and thoroughly working it into the briar surface. I have often described the texture as thinner, or cream-like when first applied, then thickens into a wax-like texture as it is rubbed in. After allowing the Balm to set a while, Steve buffs it off with a cloth to reveal the great results! The vertical grain on this stummel is beautiful with a smattering of bird’s eye grain on the heal.
 It’s true, we may have done this a bit out of order, but Jeff and Paresh team tag working on cleaning the internals of the mortise. Cotton buds and pipe cleaners are used, after dipping in alcohol. Paresh excavates some gunk with a small scoop tool which was part of his arsenal.
 Meanwhile, after the first round of CA glue cures (it didn’t take long), Steve continues to work on the bit of the amber stem. He uses a file on the button and also files out a chip on the side of the stem, next to the button.


 He applies another round of CA glue to chipped area on the side as well as to the previous divot to continue building up the surface. The pictures show the progress.

 Jeff declares, ‘Clean!’ after a plethora of cotton buds and pipe cleaners bear witness to the tars and oil he removed from the stummel internals.
 The 1846 BBB was the main show of the day’s restorations, but several other projects were going on as well. Here, Steve and Paresh confer and Pavni works on doing what she does best – patiently sanding and smoothing another stummel – this one a Meerschaum!

 Steve completes filing the stem repairs and sands down the patches so that they are invisible.
 With the stummel cleaned, I finally get the nod from the project manager to put down my iPhone (actually, Paresh takes over the picture taking) and pull out the Dremel and to begin the fine polishing phase. I use White Diamond compound with a cotton cloth buffing wheel mounted with the speed set at about 40% of full power and apply the compound.
 While I disappear into the ‘zone’, Paresh takes a picture.
  While I’m in the zone, Paresh captures the progress Steve is making on the amber stem. The CA glue patches have been fully sanded out and are invisible. Steve did a great job smoothing, blending and filling the chipped area on the side of the stem. He had to apply several coats of CA to build out the surface so that it again blended naturally.
 Zone….
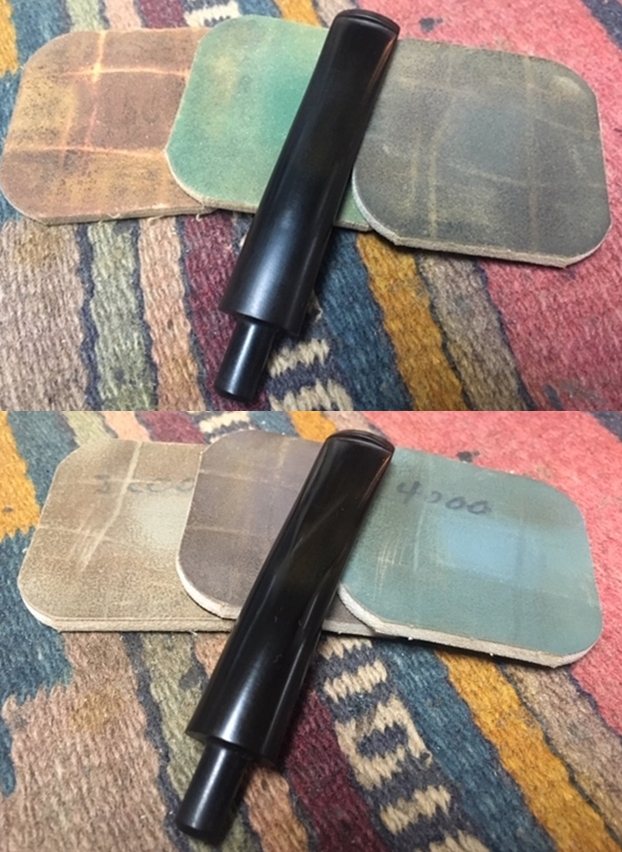
 The amber stem is then treated to the full regimen of micromesh pads, dry sanding from 1500 to 12000.
 Zone….


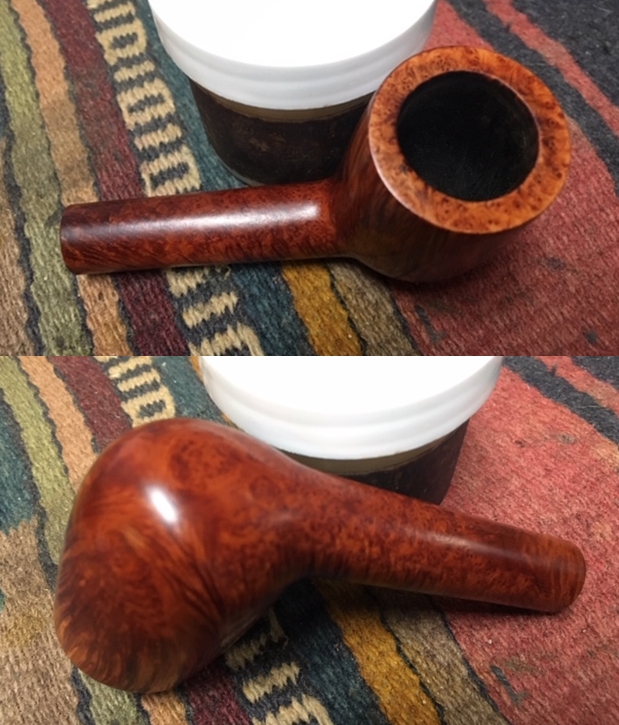
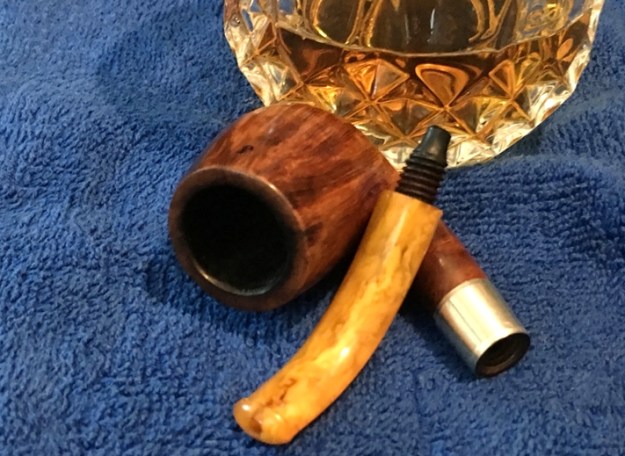
 After completing application of the compound, I mount another cotton cloth wheel maintaining the same speed and apply carnauba wax to the stummel. I’m please the way the grain is popping!
 Then, to add the finishing touches, I apply White Diamond compound to the amber stem – appreciating the work that Steve did. After the White Diamond, I decided not to apply carnauba to the stem – it was already glistening and the pure, raw amber was more than ample to present this classic pipe.
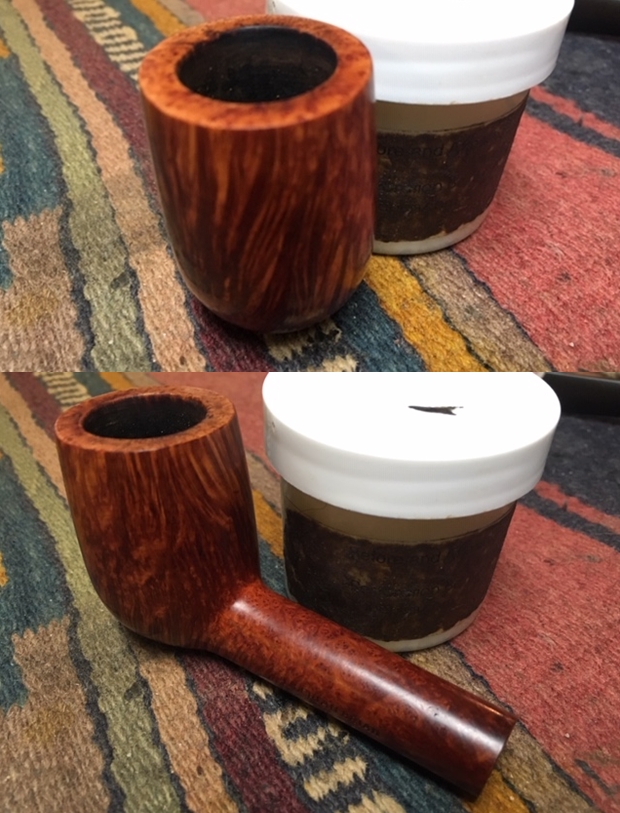
 After I completed applying the compound to the stem, I rejoined stem and stummel and passed the 1846 to Paresh who had the privilege of doing the final handbuffing to raise the shine and complete the restoration of the 1846 BBB. Woohoo!
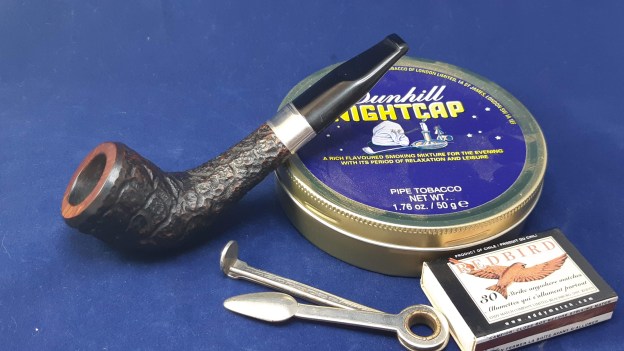
 As we had planned, in celebration of the completion of the restoration together we smoked 3 unbelievable vintage pipes with albatross shank extensions and horn stems – all from the 1800s. Oh my…. We each thoughtfully packed our bowls with our choice of blends and lit up and, well…. What a treat for Paresh to share the treasure trove of pipes left to him by his grandfather. Jeff did the honor of commemorating this event with pictures.
  To further commemorate this amazing experience, we took a portrait of everyone who had taken part in the restoration of the 1846 BBB – notice Abha will have the first use of this grand old BBB! Mudra did the honor of taking the picture.
 There are not enough words to describe all that we experienced together while in India with Paresh’s family. Steve, Jeff and I were treated literally like royalty! We were taken to many different places to see the sites and to enjoy different cuisines, even pizza! We all stored up memories which we’ll value all our days.
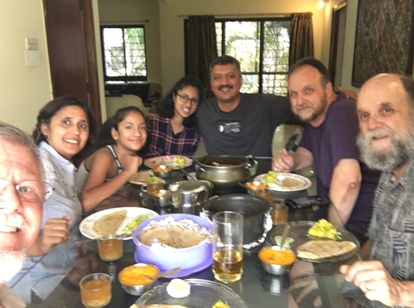
 Before heading to the airport, I took one more picture of Paresh and his family, Abha, Mudra and Pavni. We arrived in India as acquaintances and we parted as family.
  And now the story has been told. West met the East in India for the restoration of the star of this story, the beyond classic 1846 BBB Own Make – a treasure from a grandfather to his grandson. Thanks for joining us!


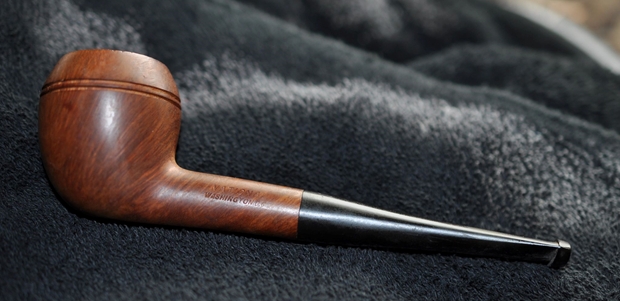
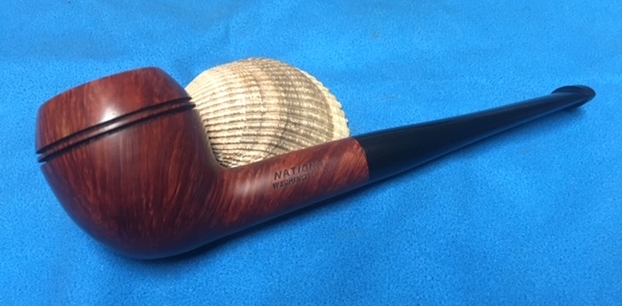
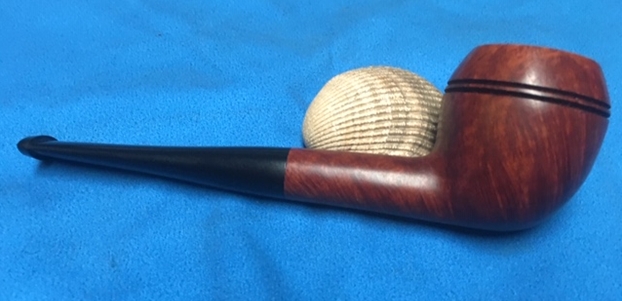
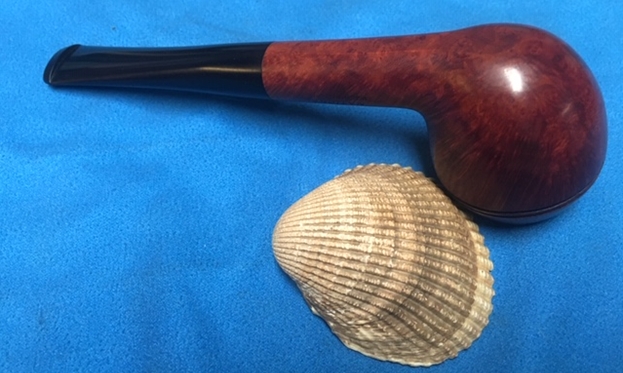
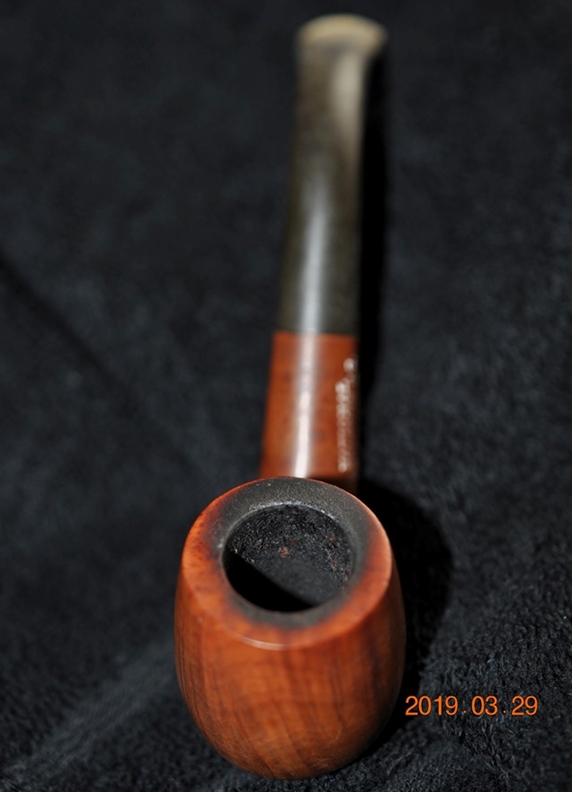
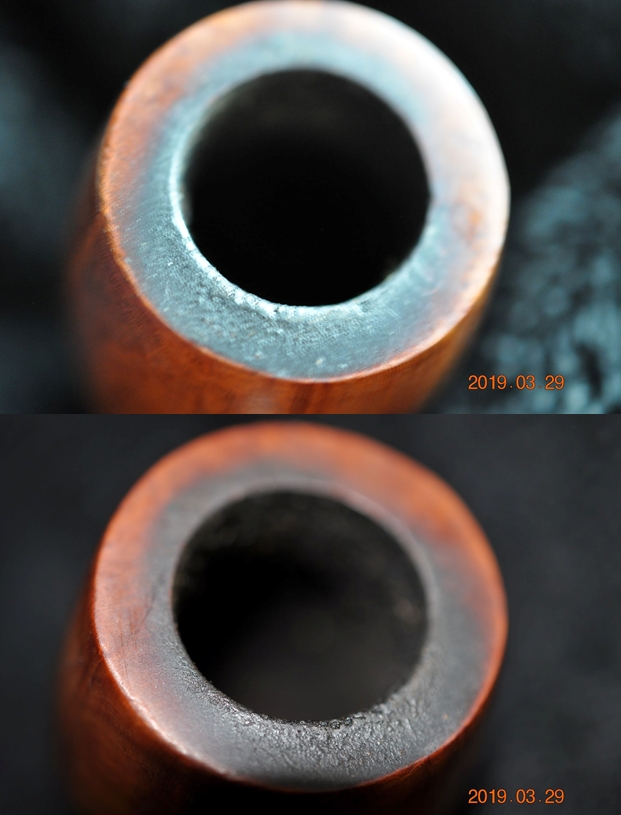
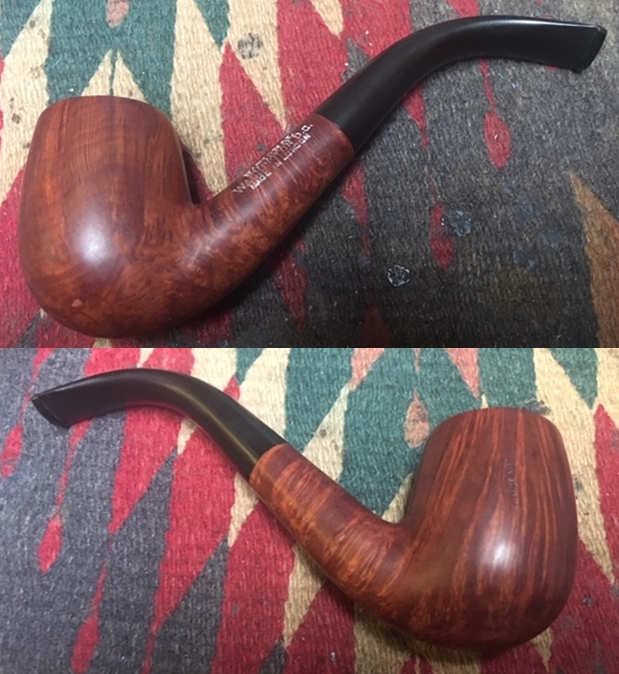
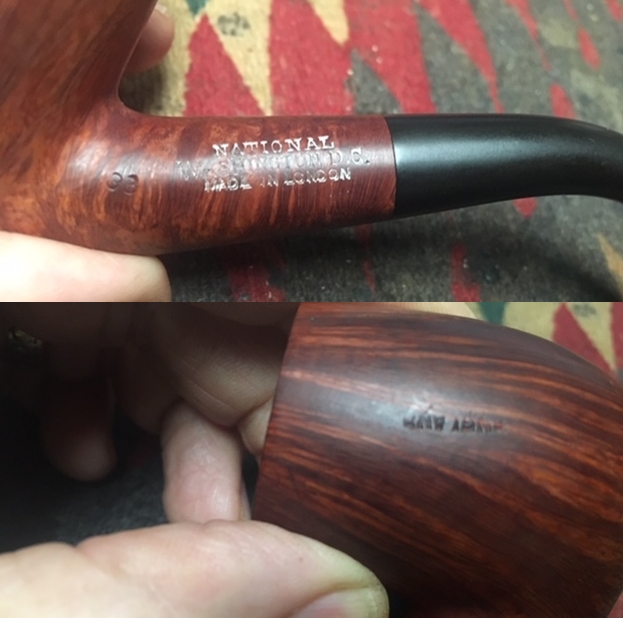
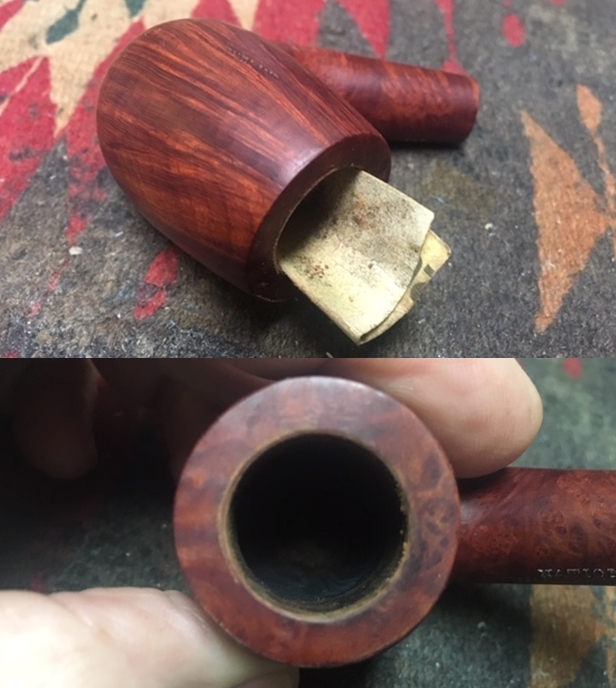
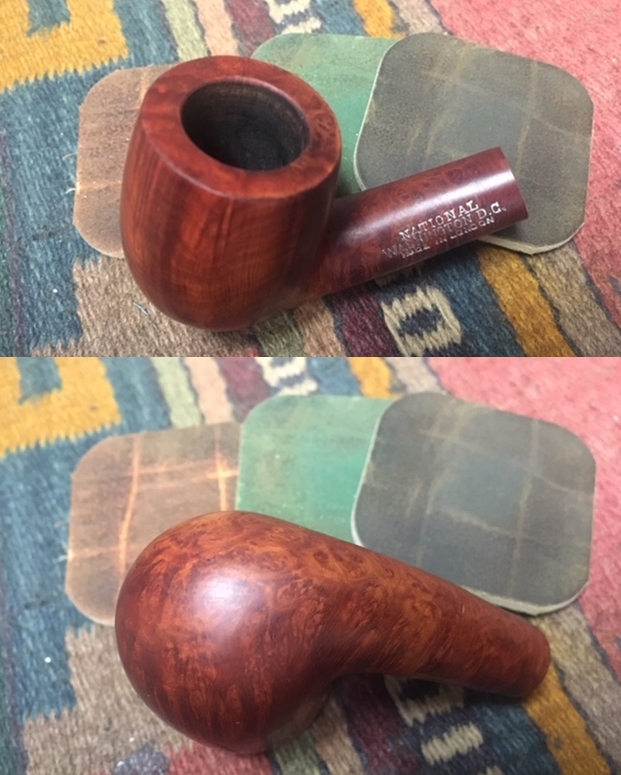
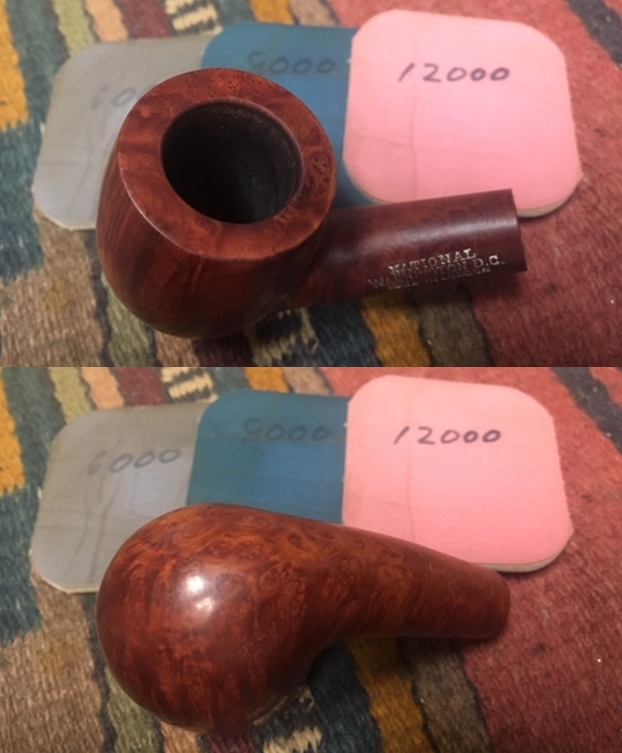
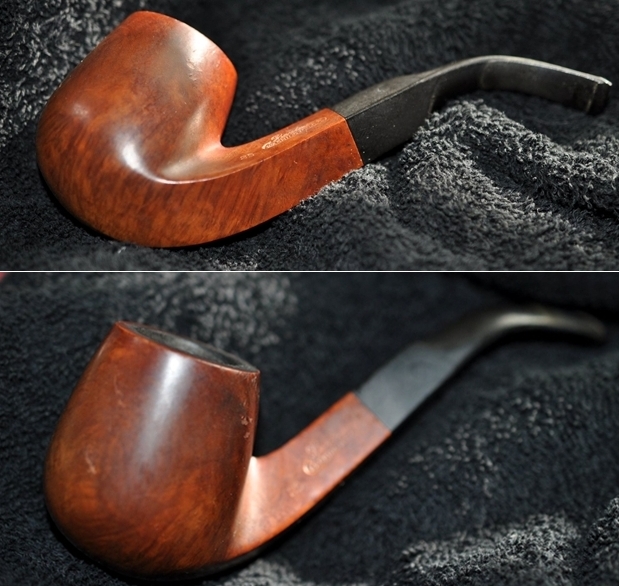
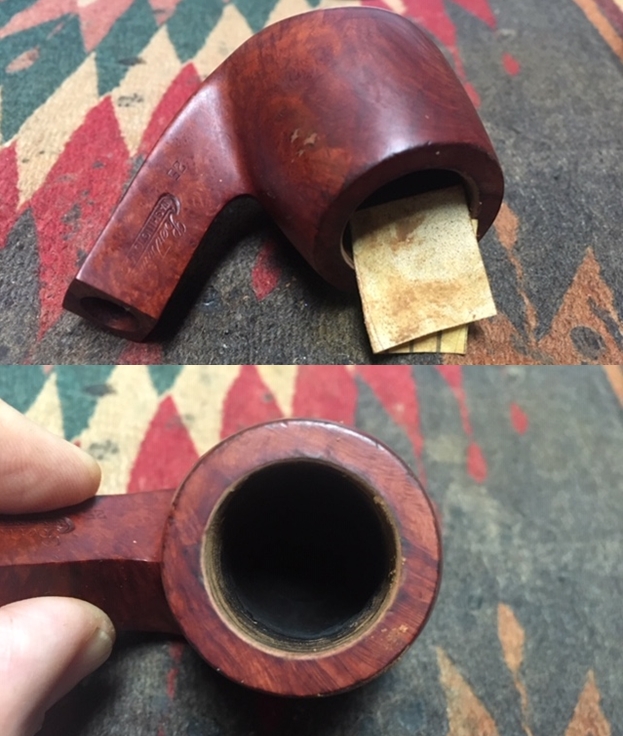
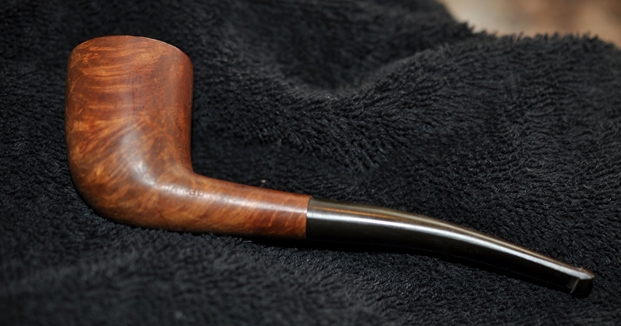
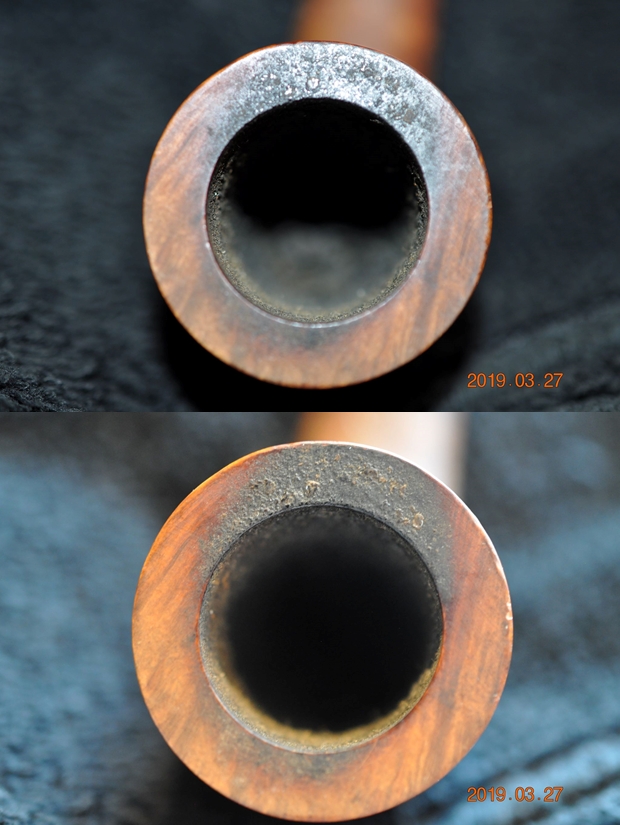
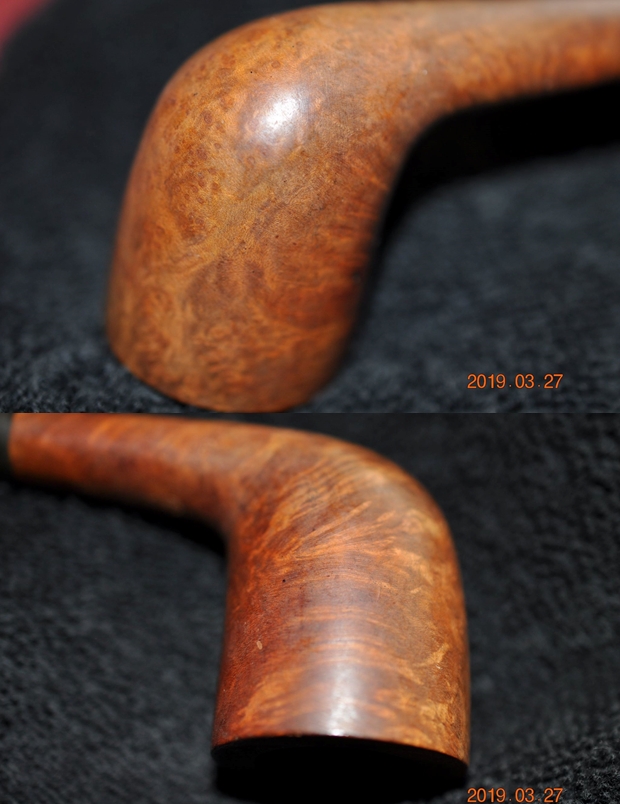
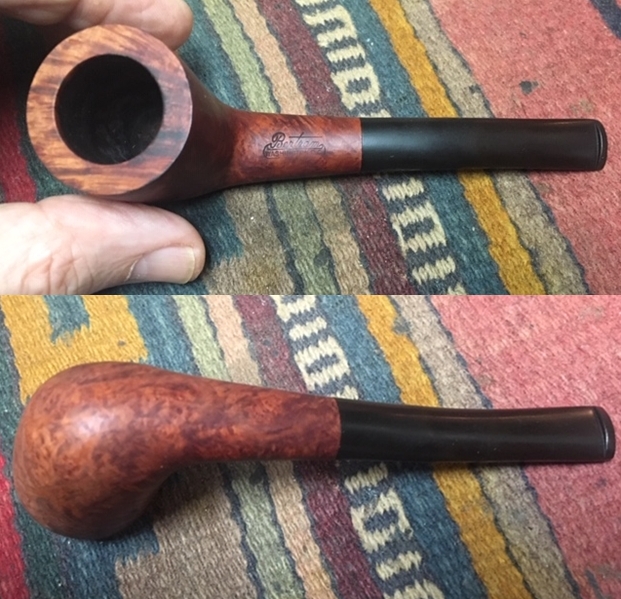
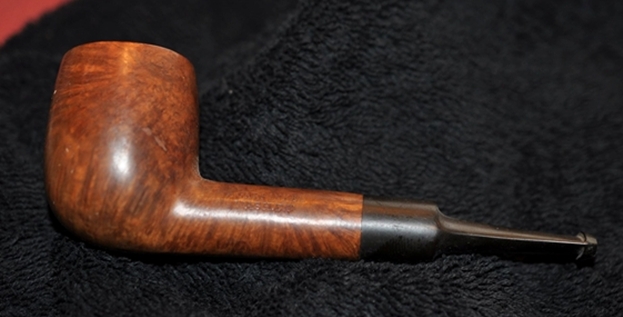
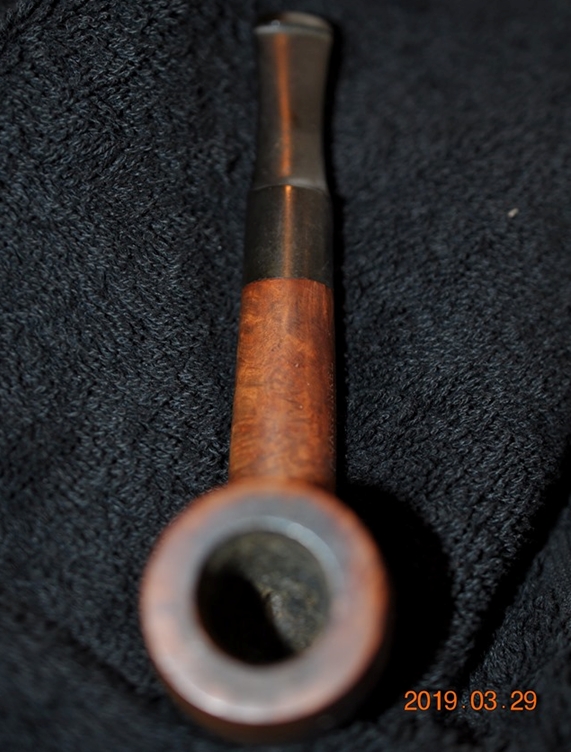
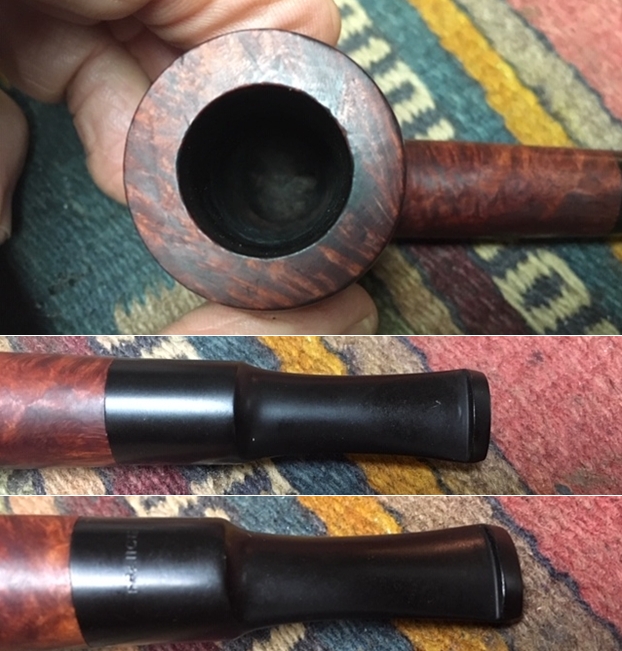
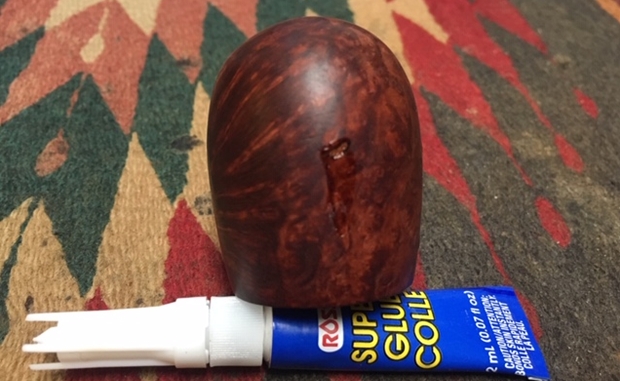
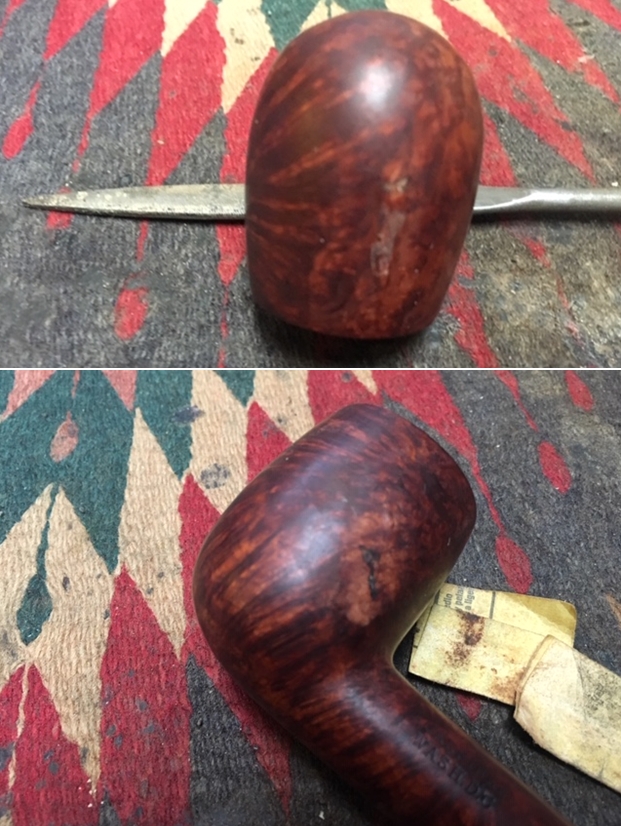
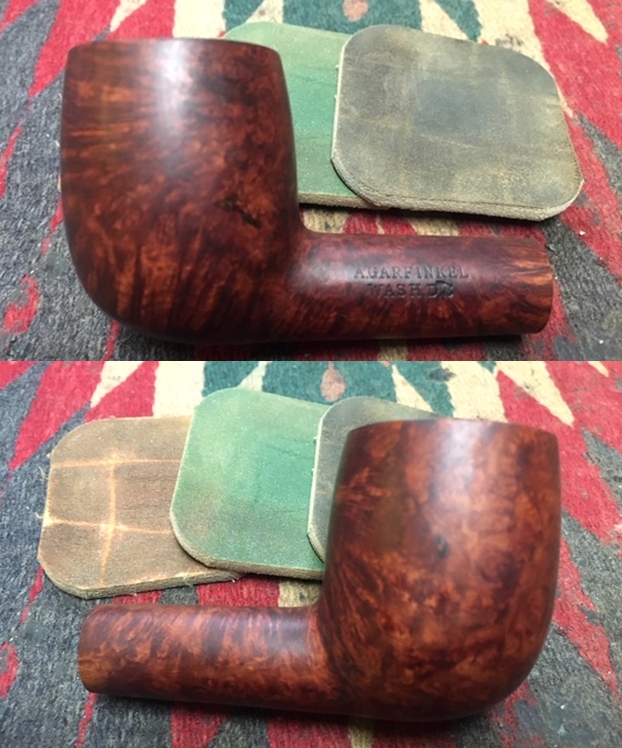
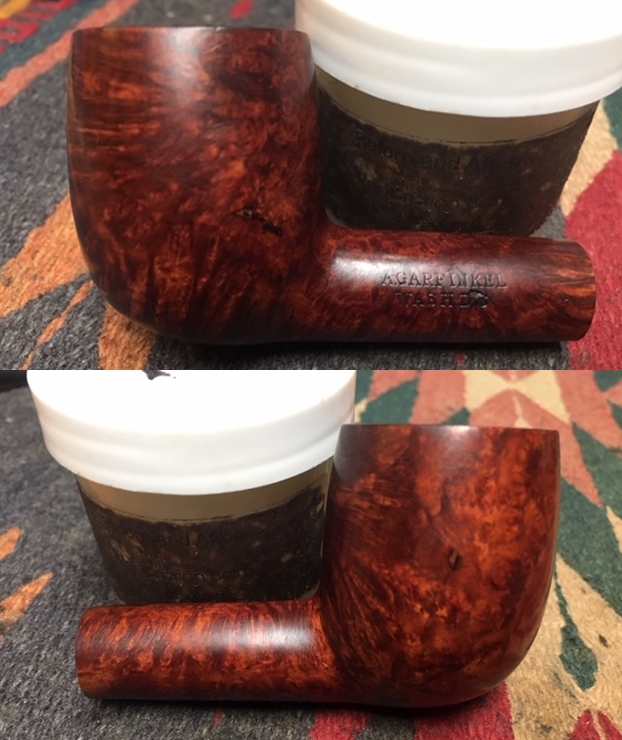
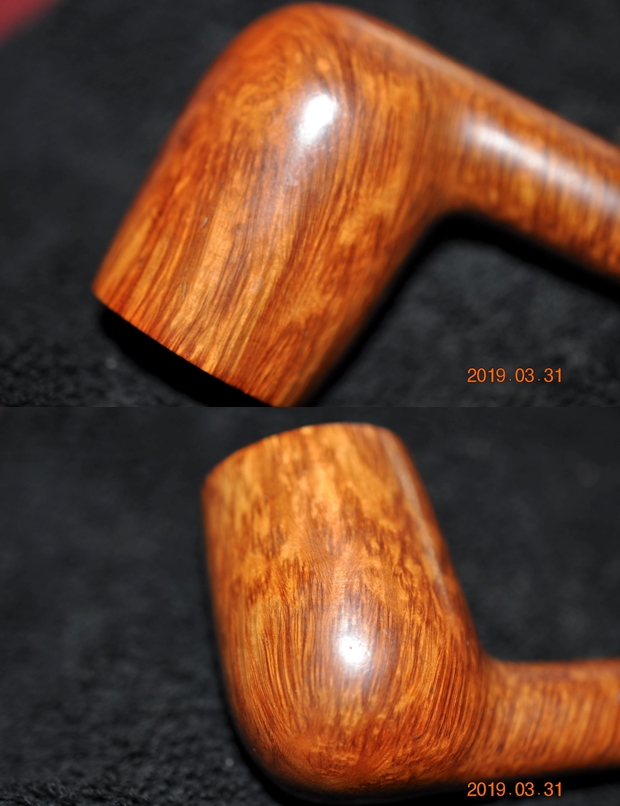
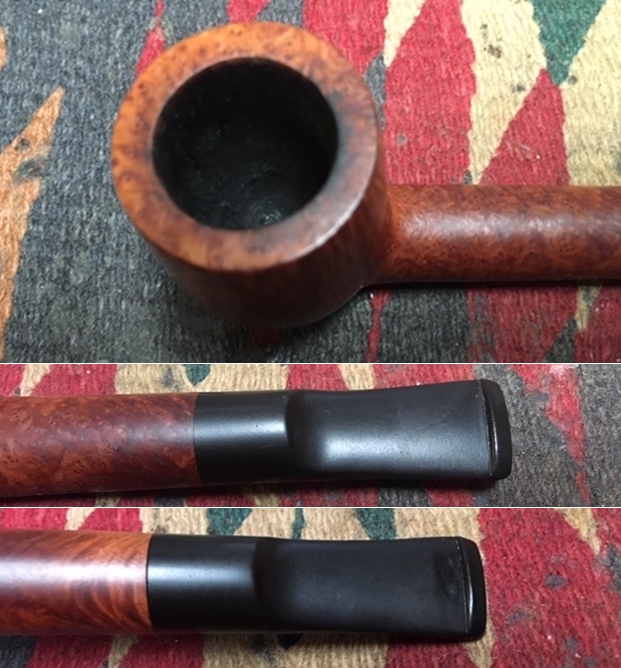
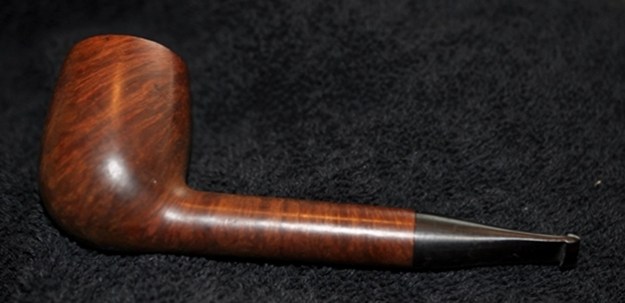
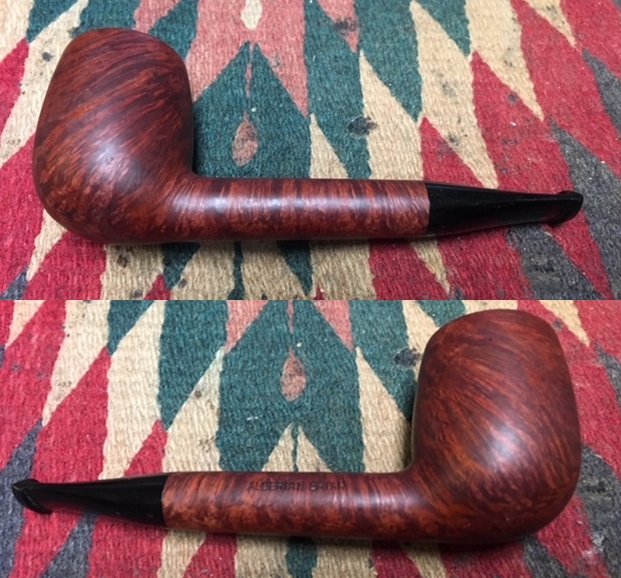
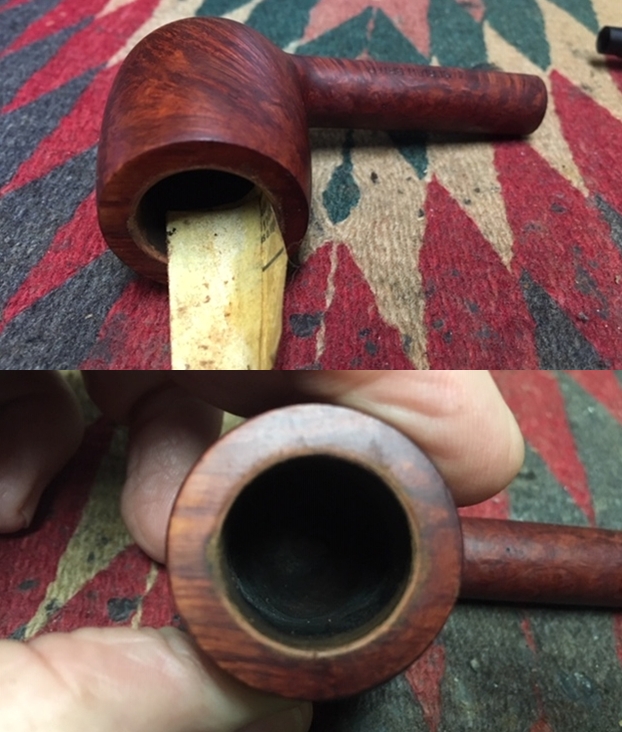
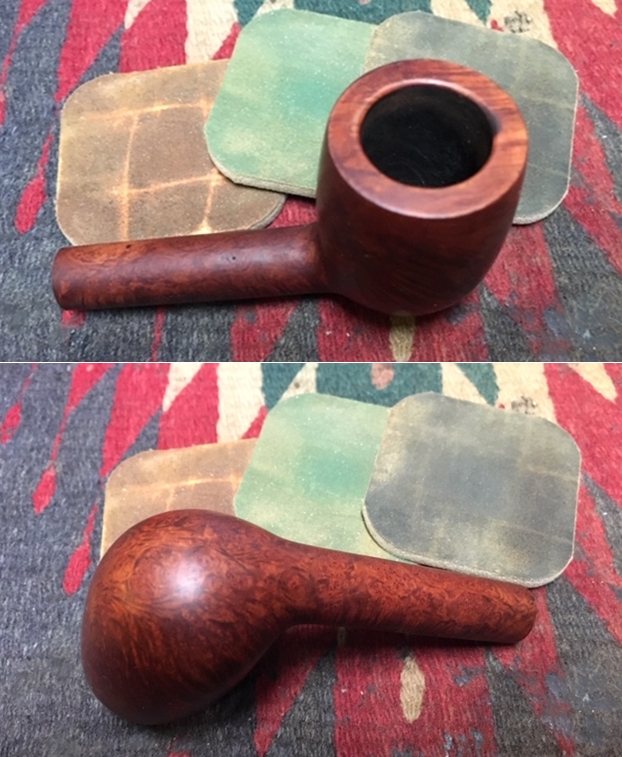
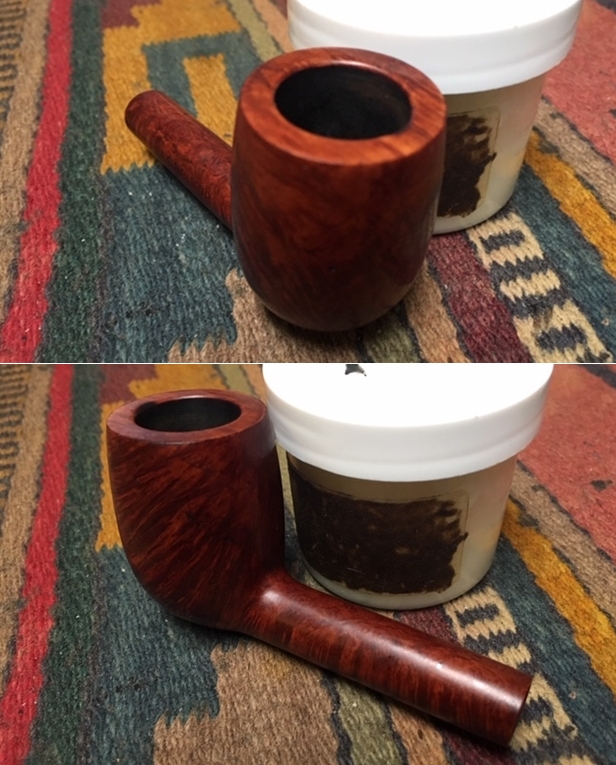
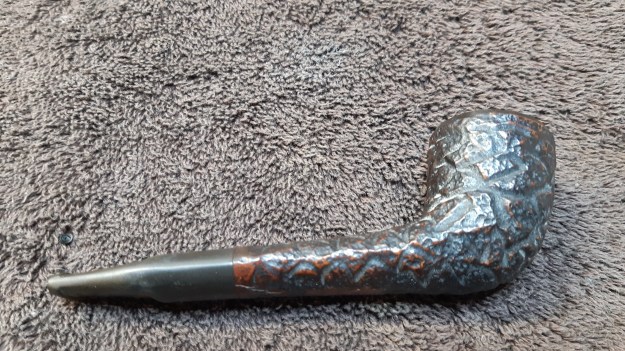
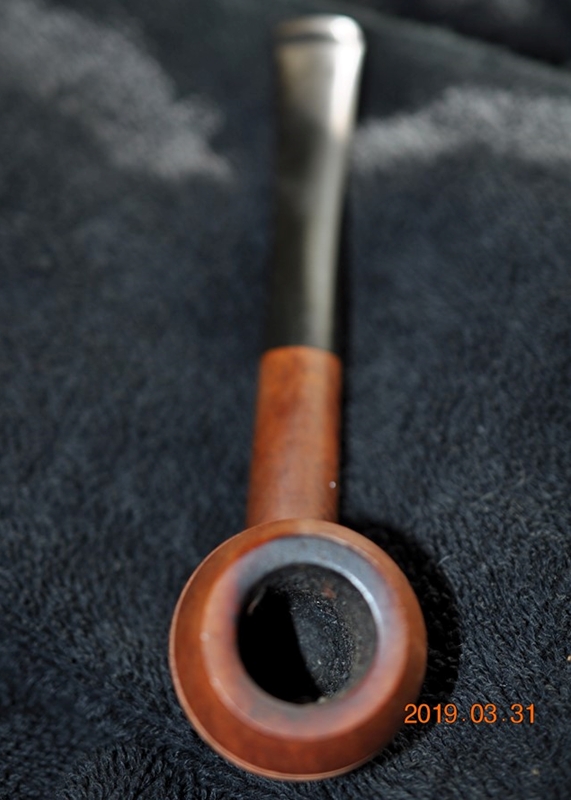 Jeff took close-up photos of the bowl and rim to capture the condition of the pipe when it arrived. The rim top had a thick coat of lava and the bowl had a thick cake. It was hard to see what the inner and outer edge looked like with the cake and lava.
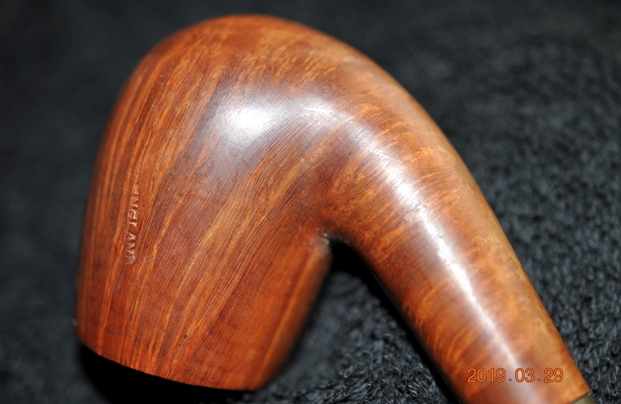
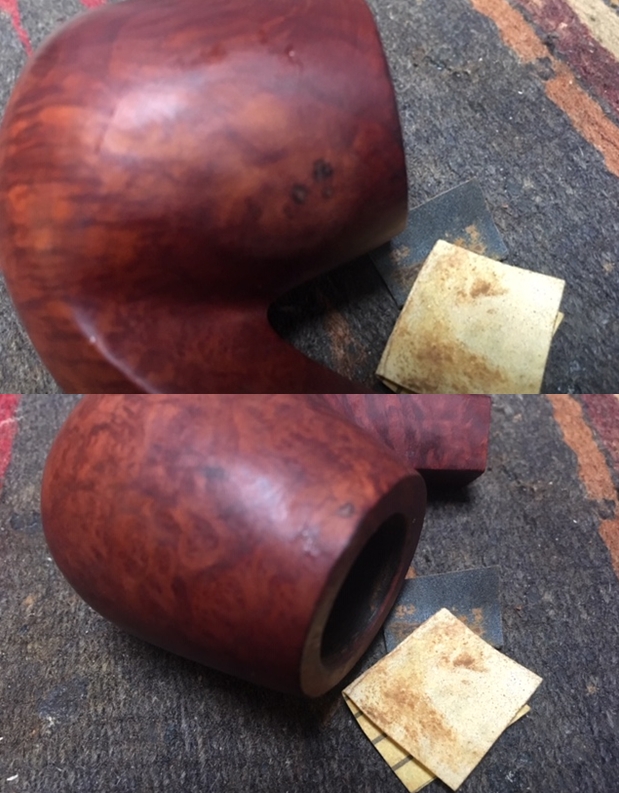
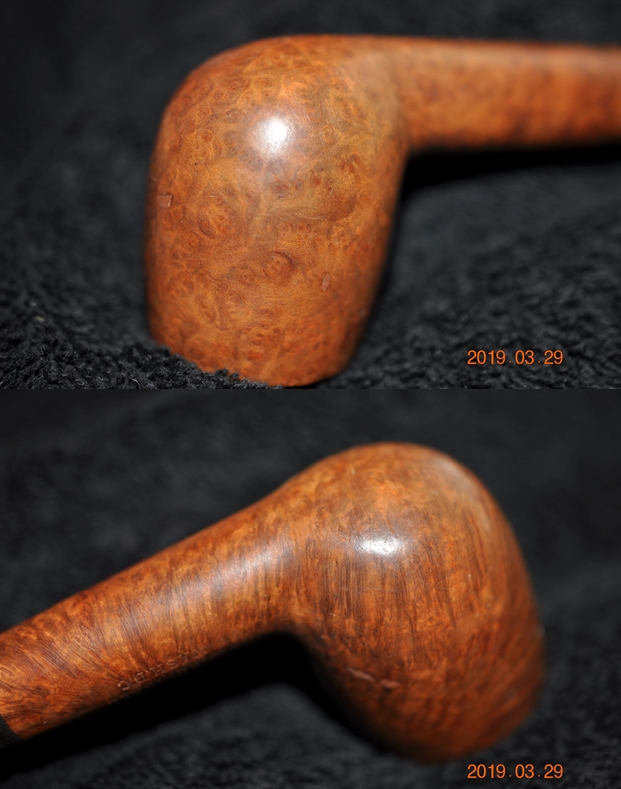
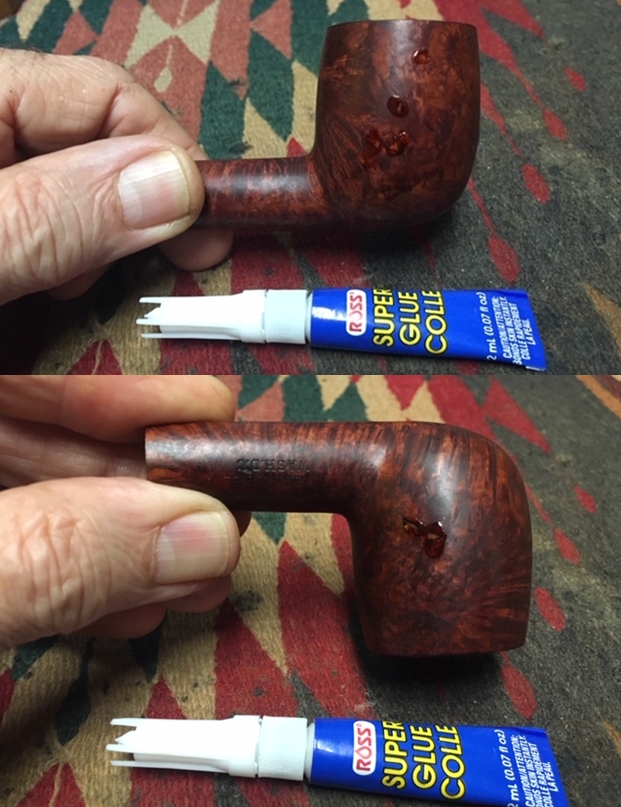
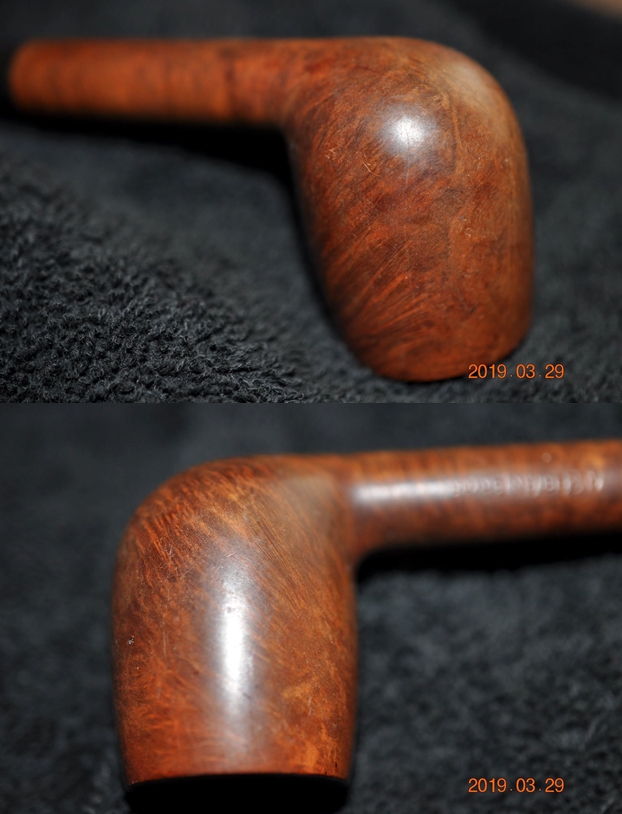
 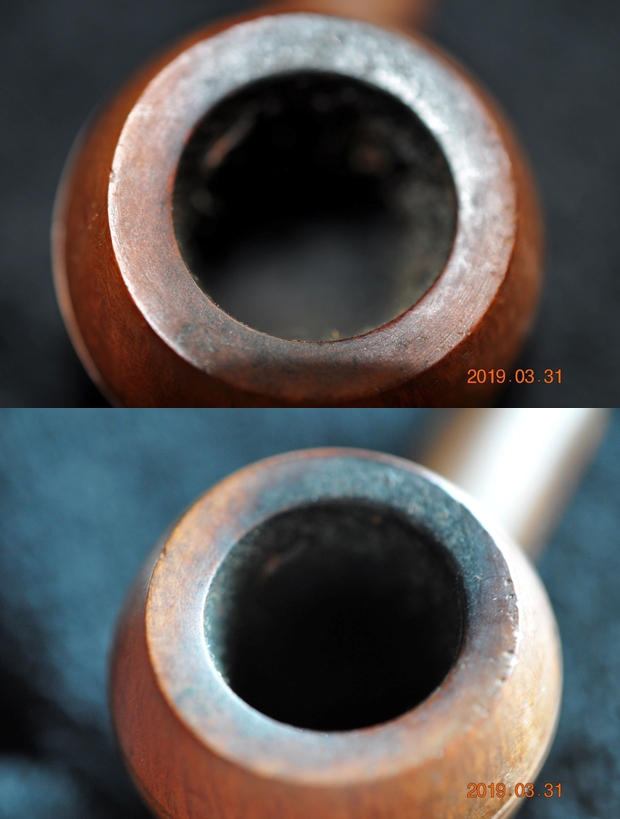 Jeff took a picture of the bowl side and the heel to show the marvelous grain on the bowl. It really is quite stunning and very dirty!
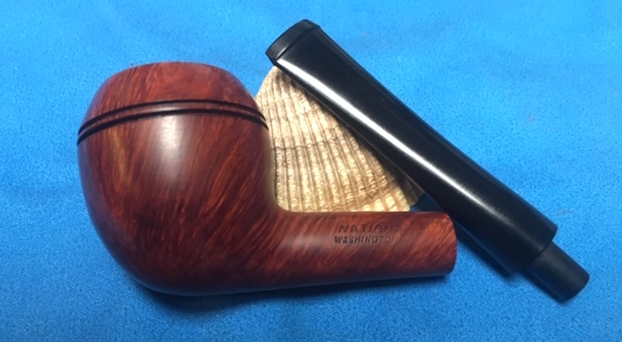
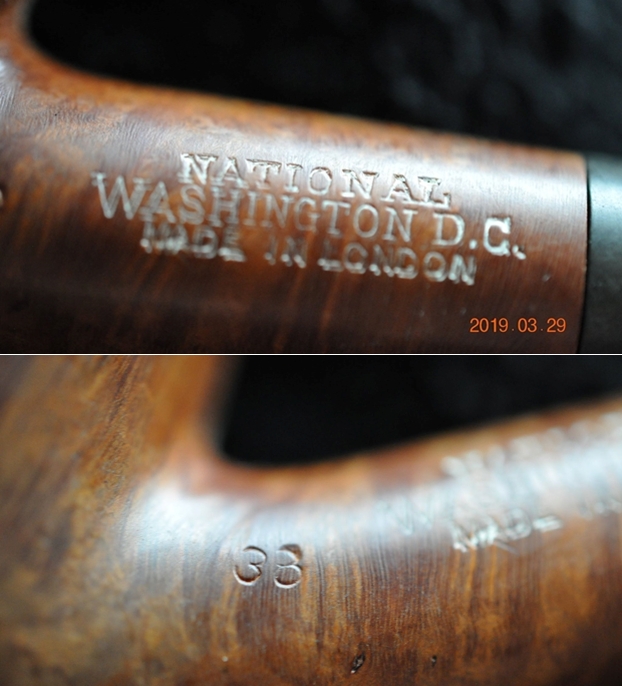
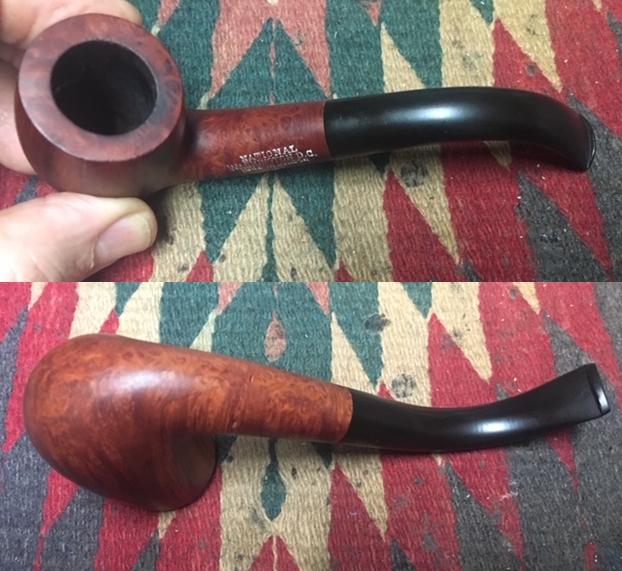
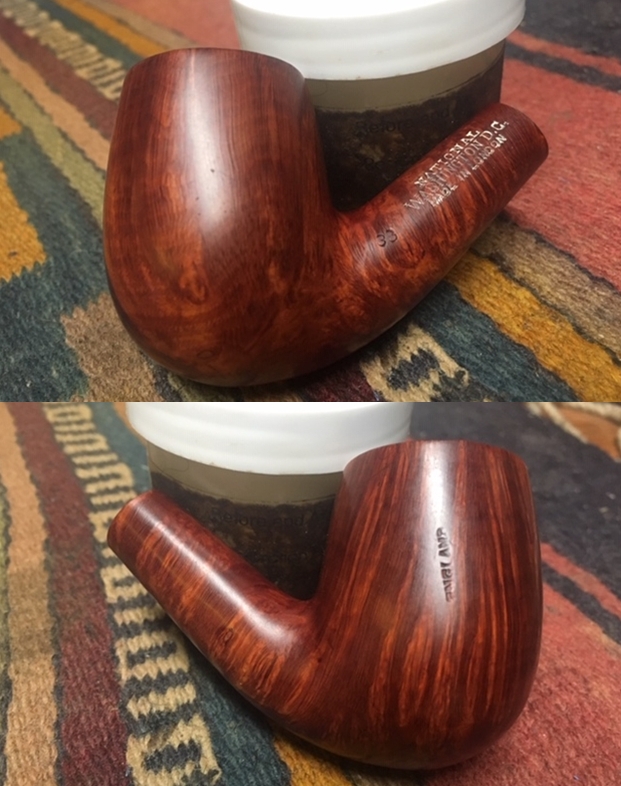
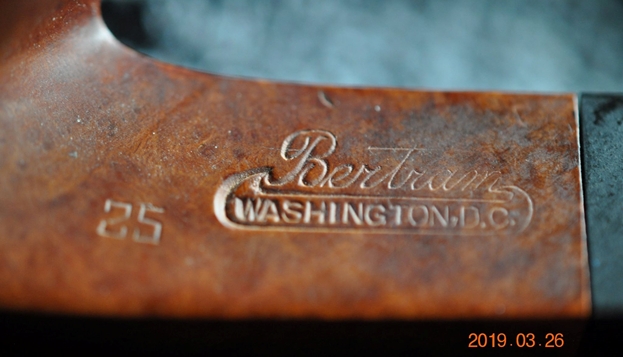
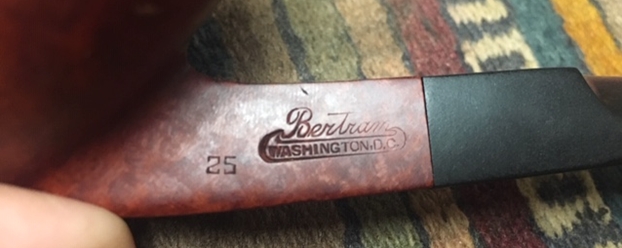
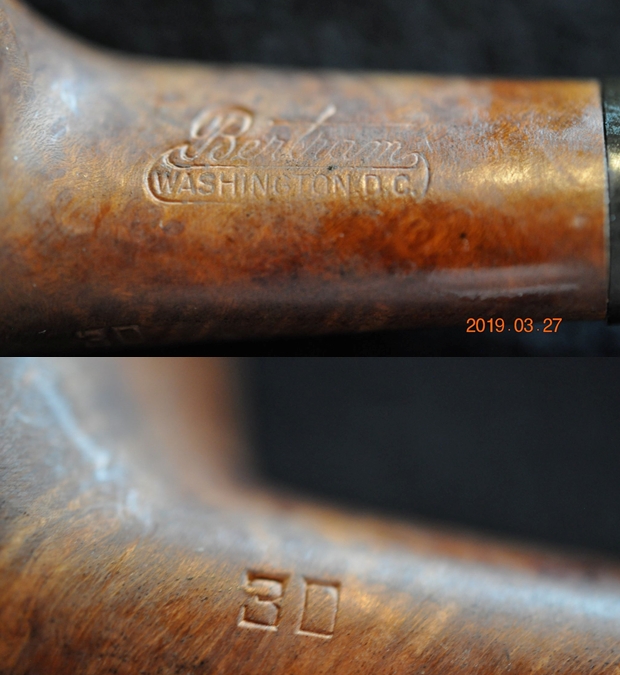
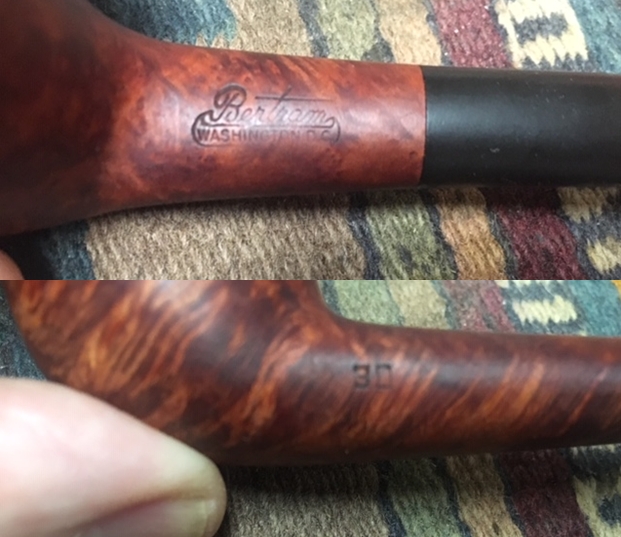
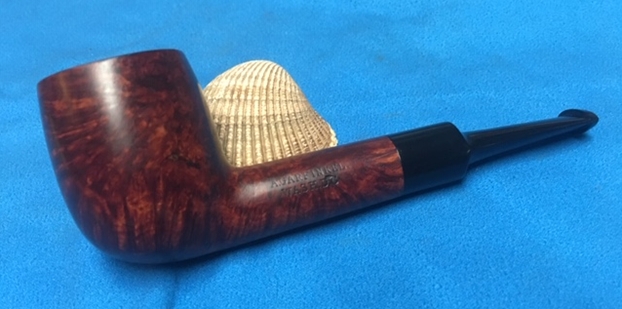
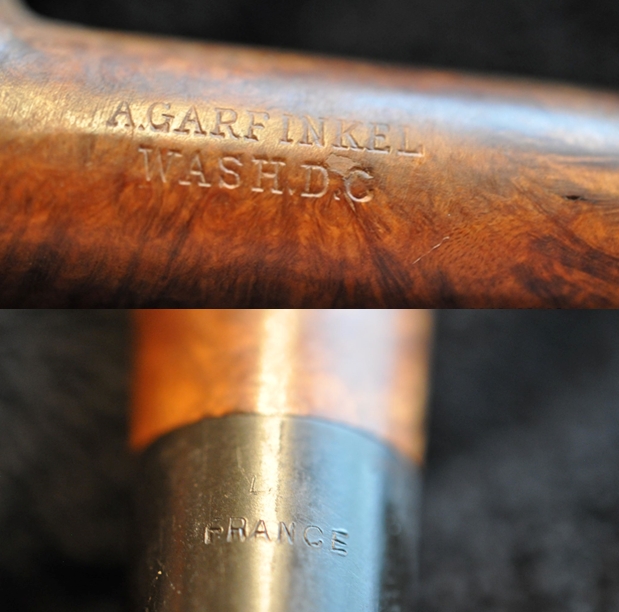
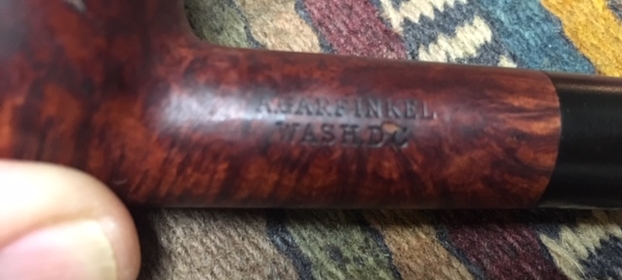
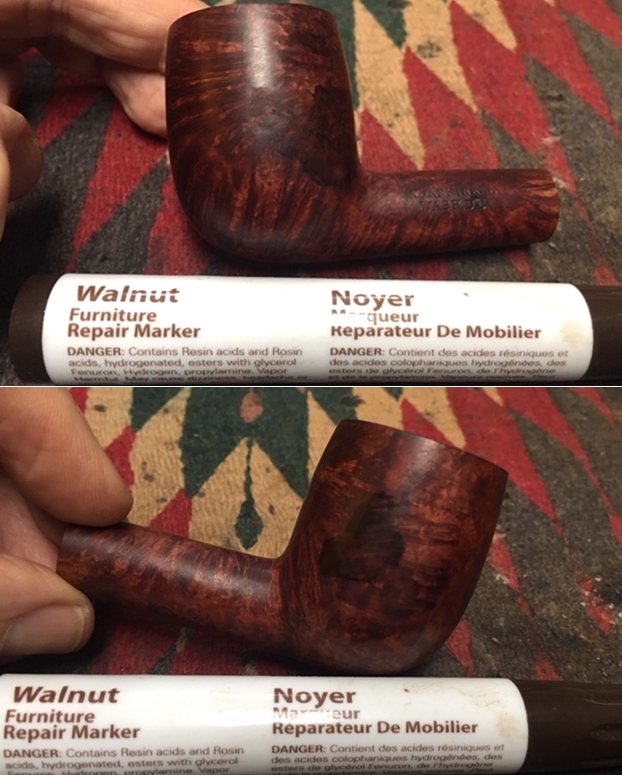
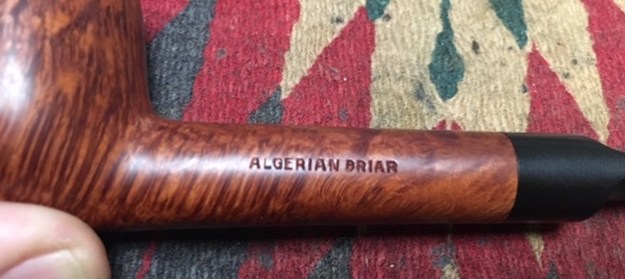
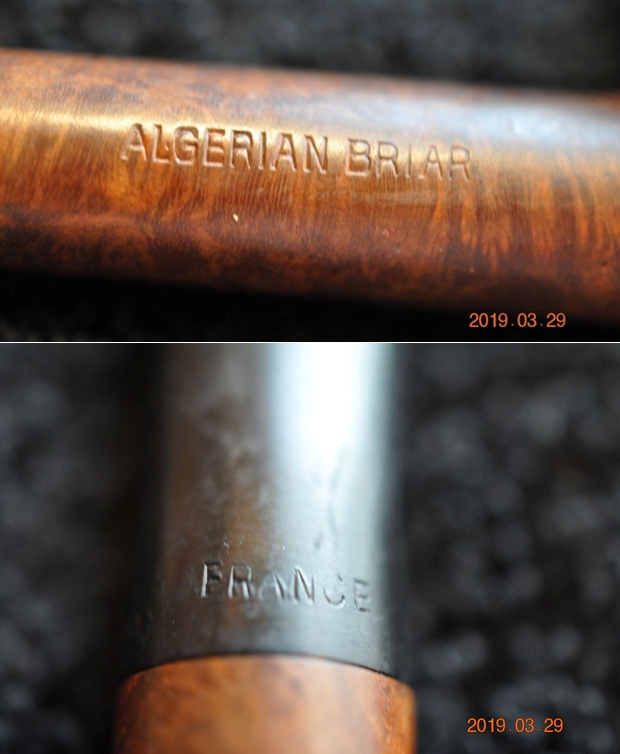
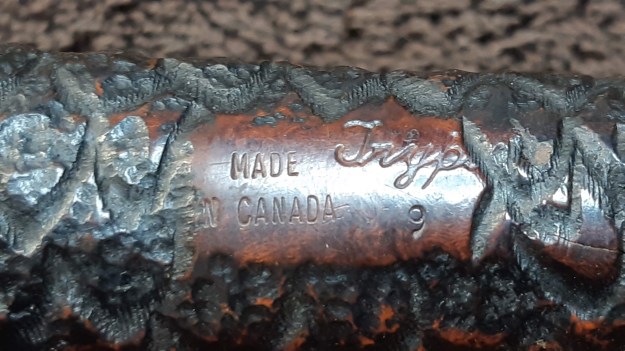
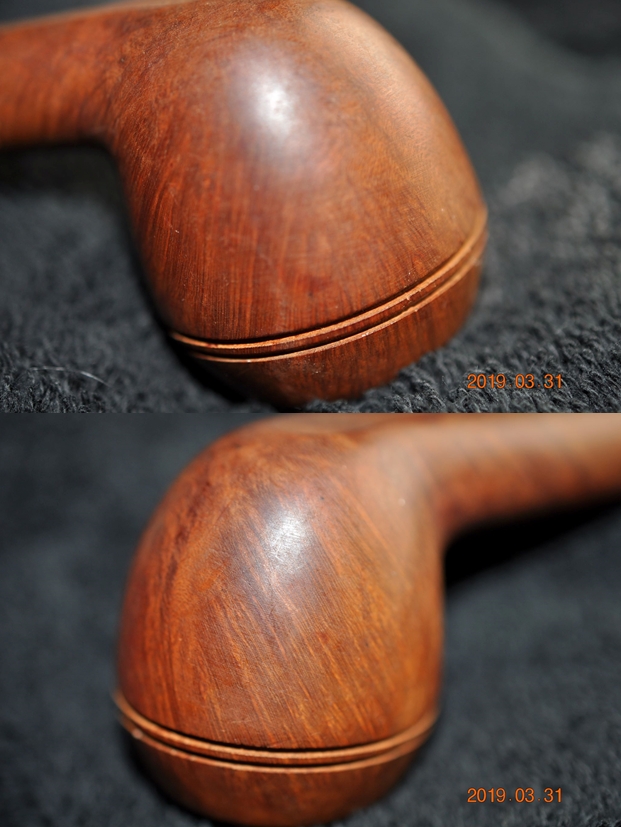 The next photo shows the stamping on the left side of the shank. The left side is stamped with National over Washington, D.C. The stamping on the shank is very readable.
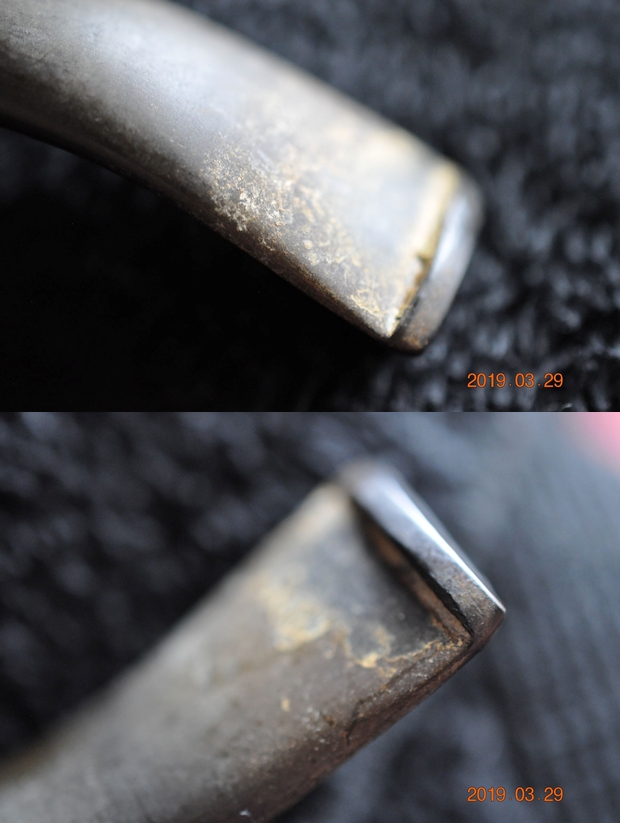
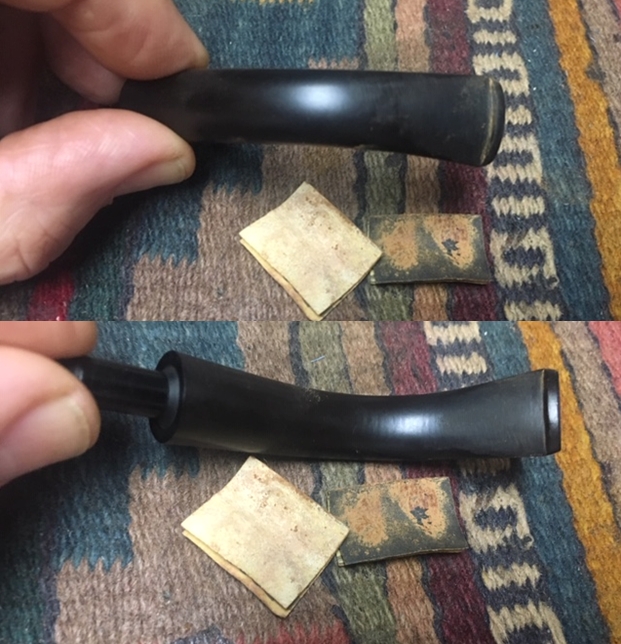
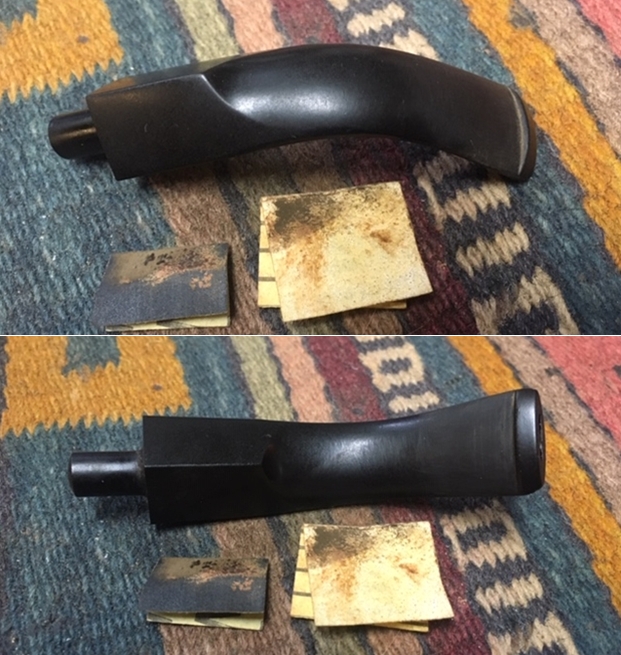
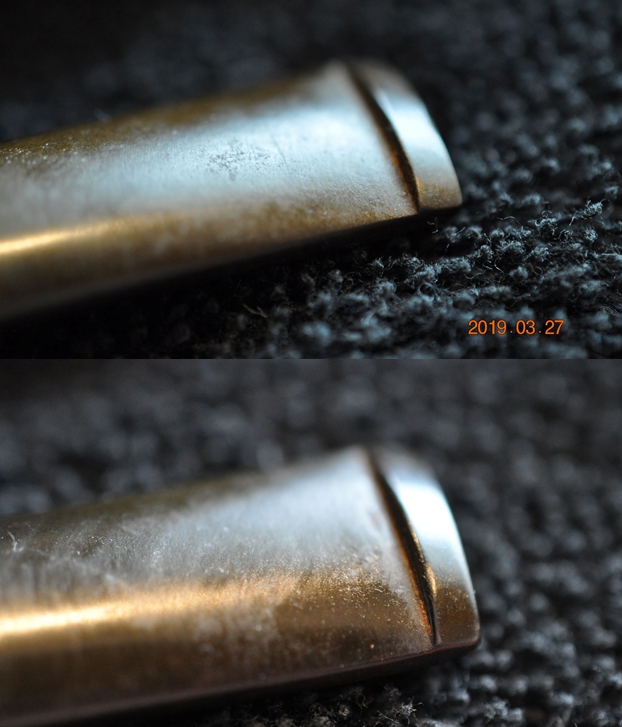
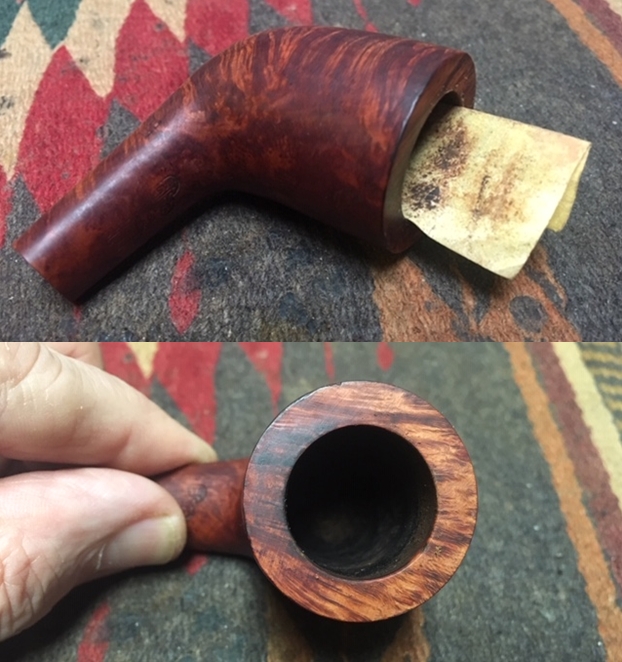
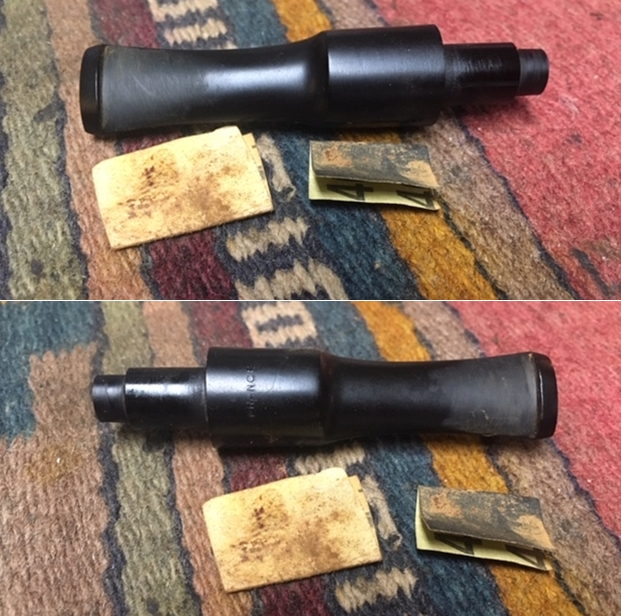
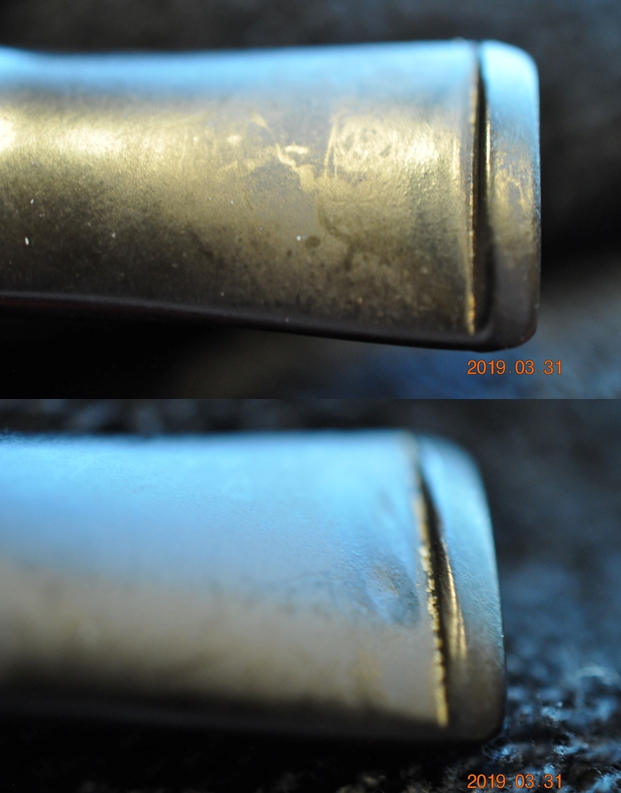
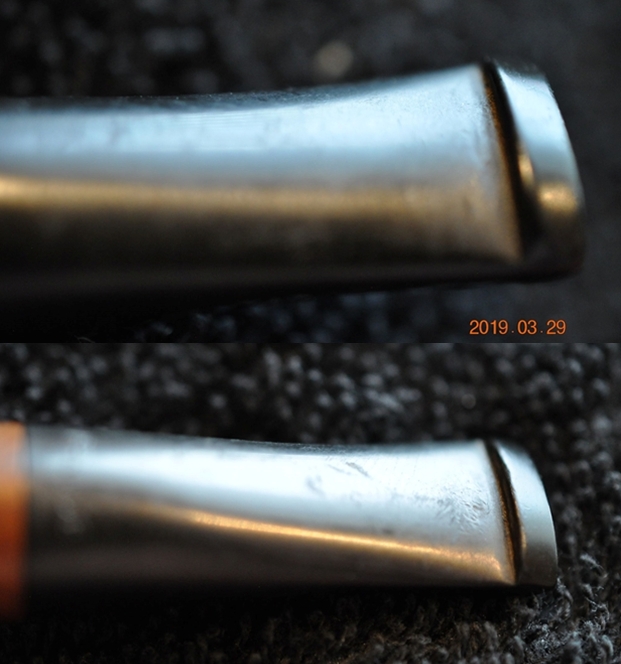
 The next two photos show the condition of the stem surfaces. The stem was oxidized and had some calcification on the surface as well as tooth marks and chatter on both sides near the button.
 I have already done the work on one of the National pipes in the Bertram lot so I turned to that to have another look at the history of the brand (https://rebornpipes.com/2019/05/21/doing-some-cosmetic-work-on-a-national-pipes-rhodesian/). I quote in full from that blog.
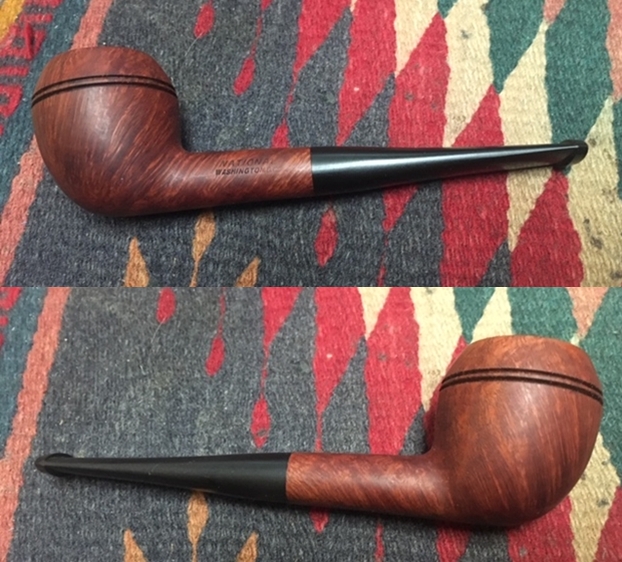
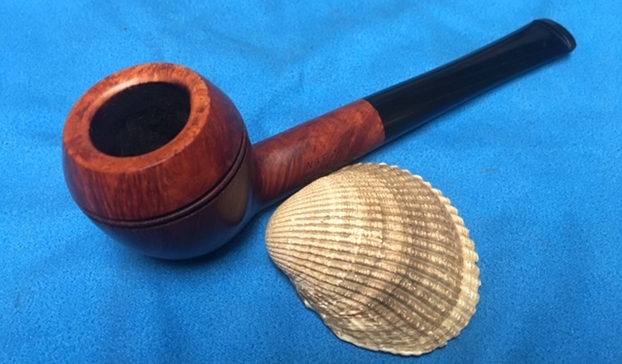
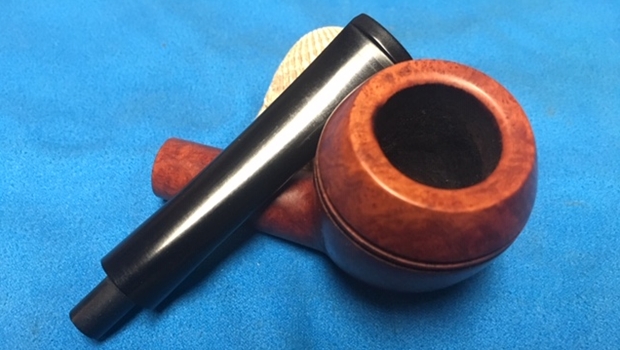
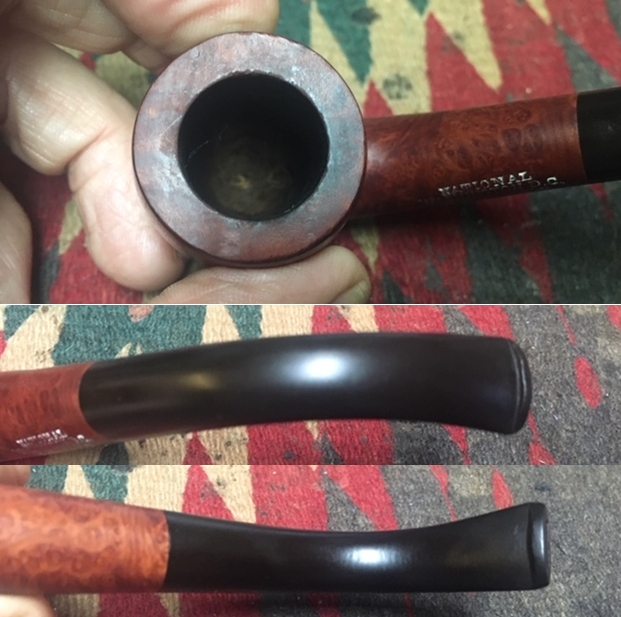
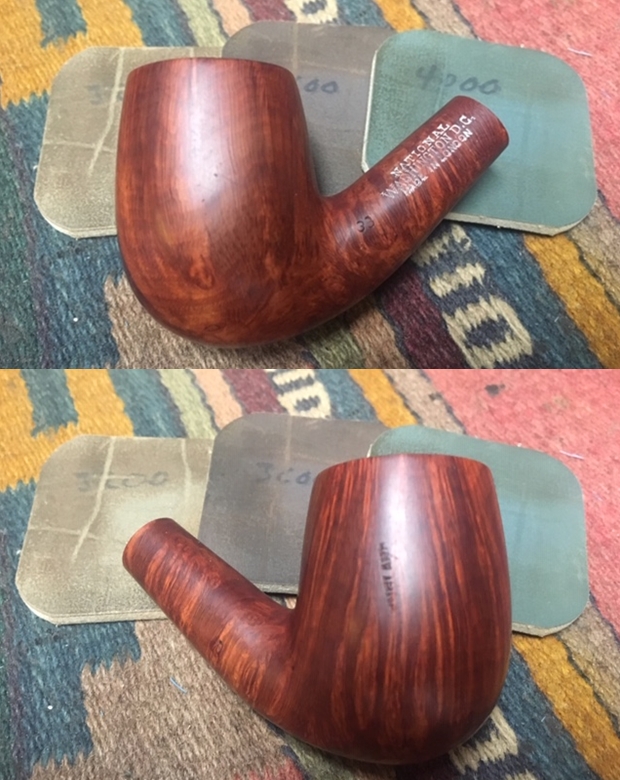
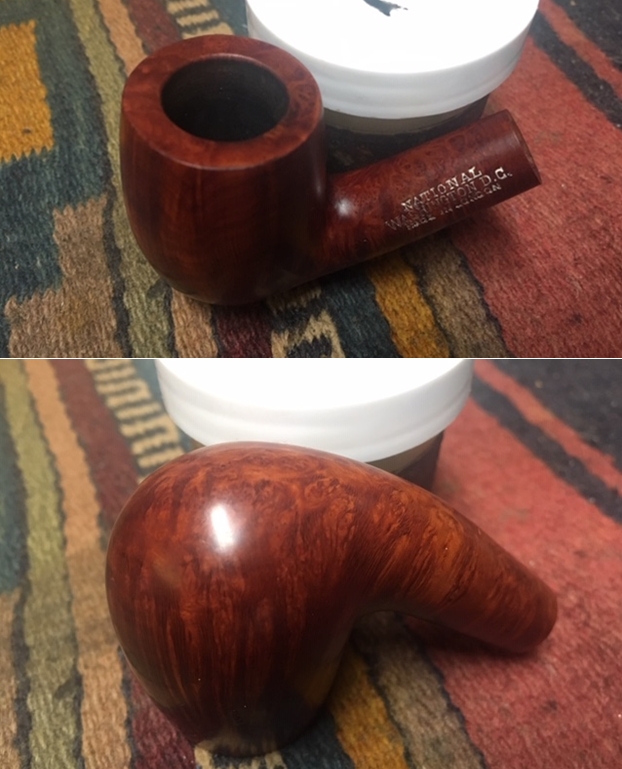
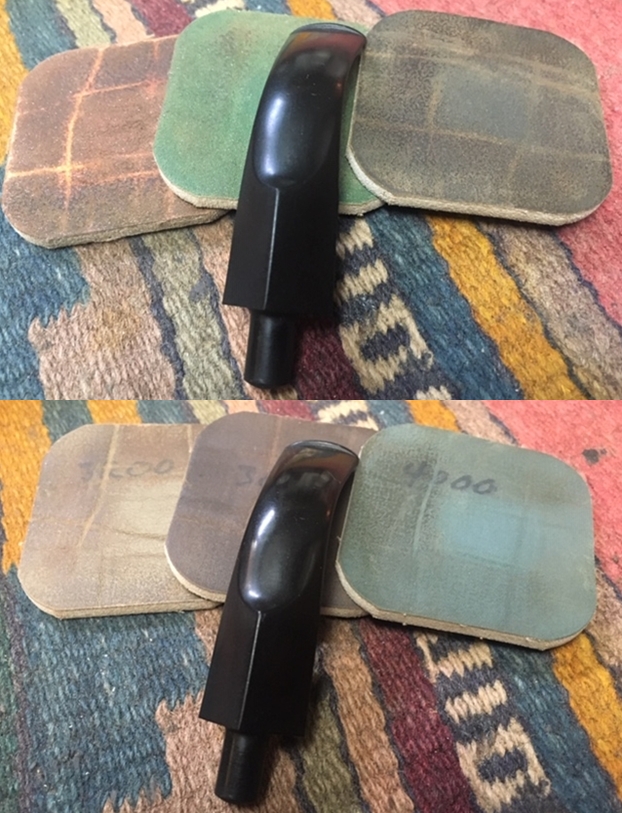
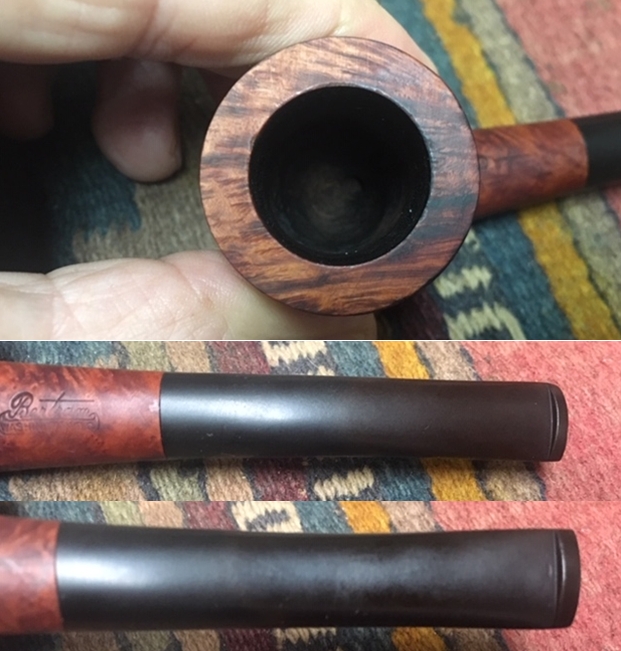
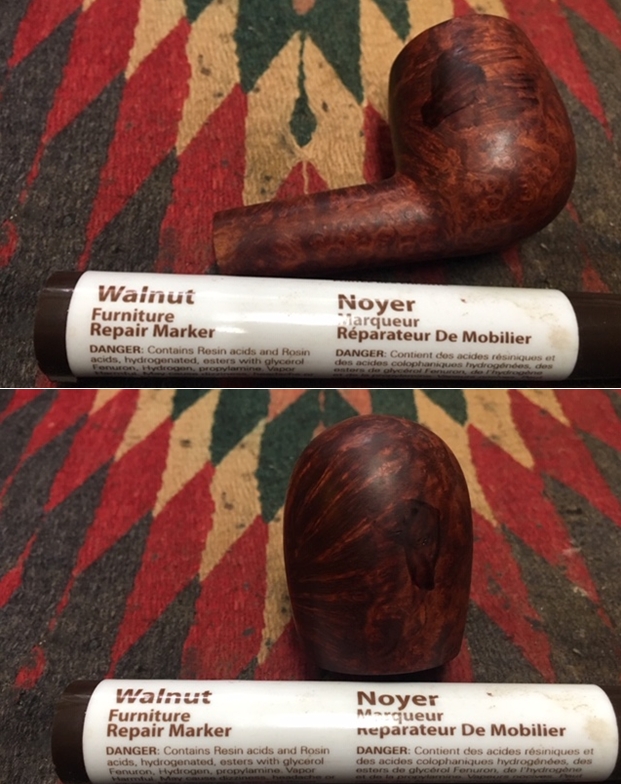
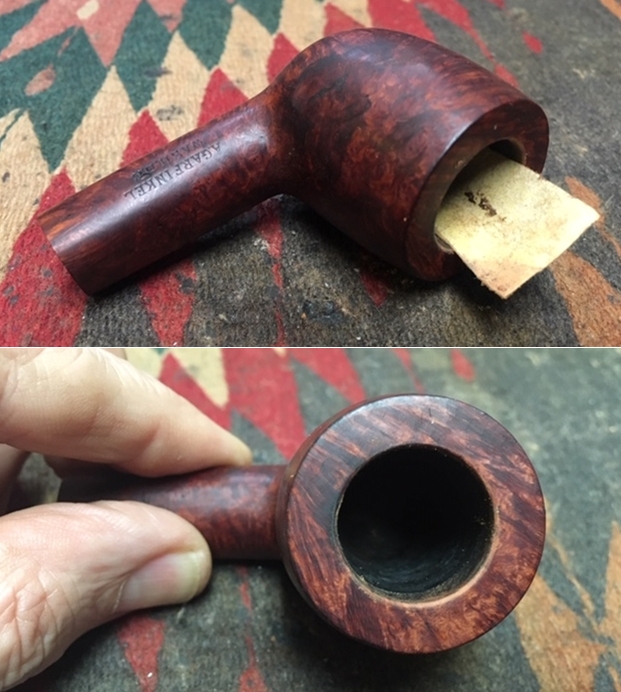
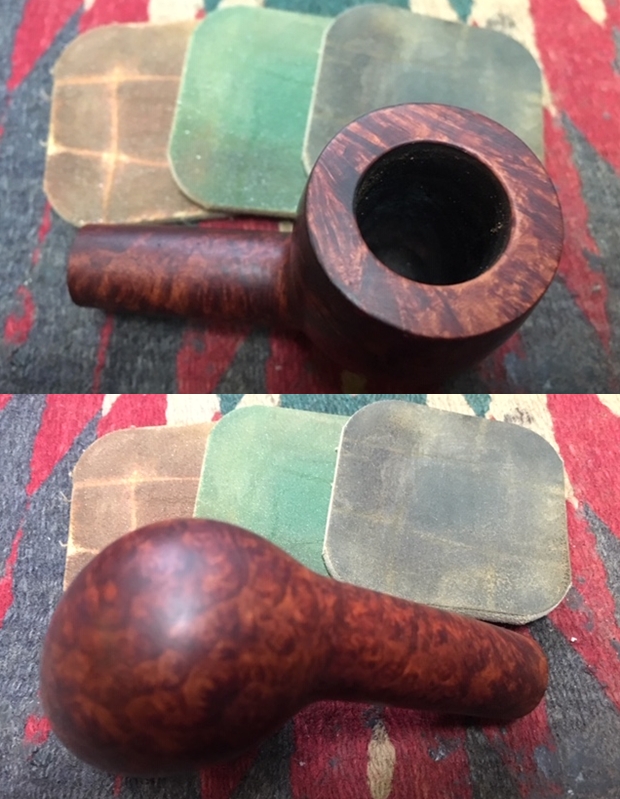
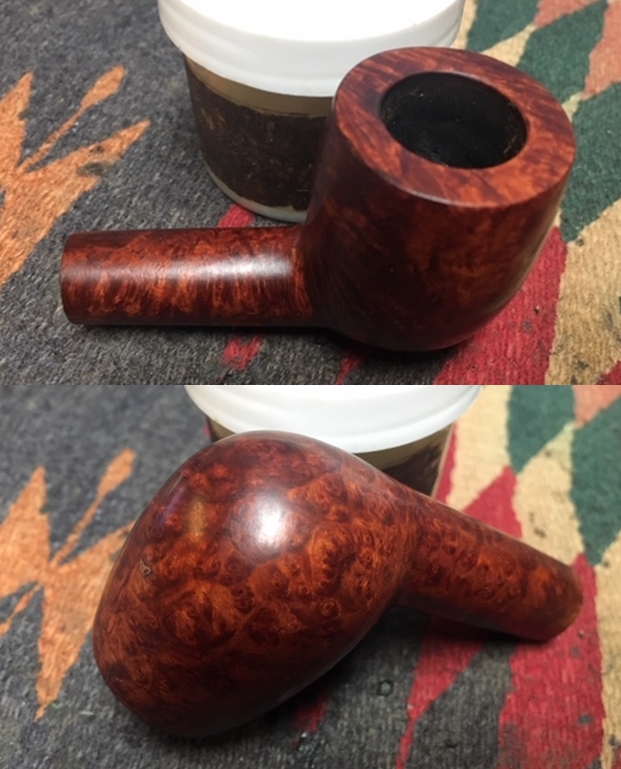
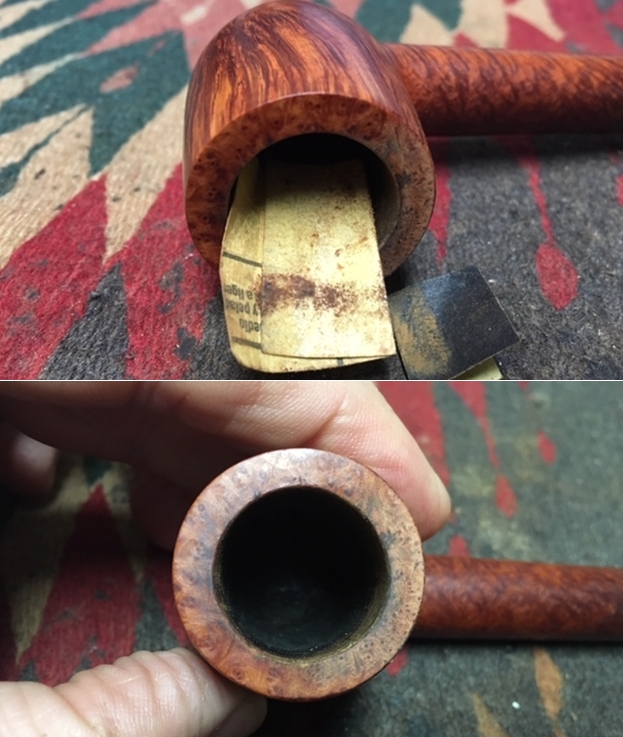
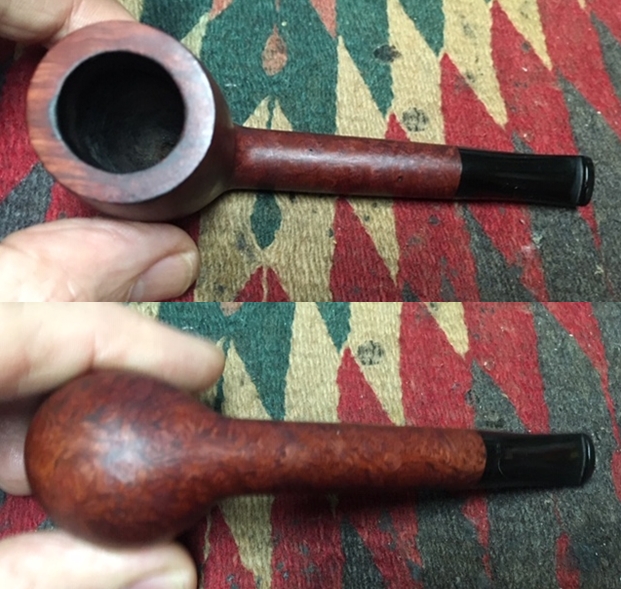
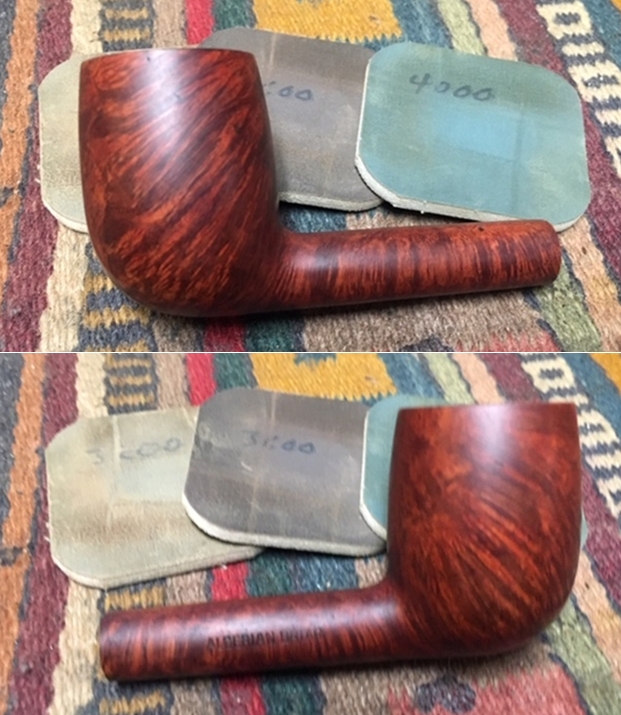
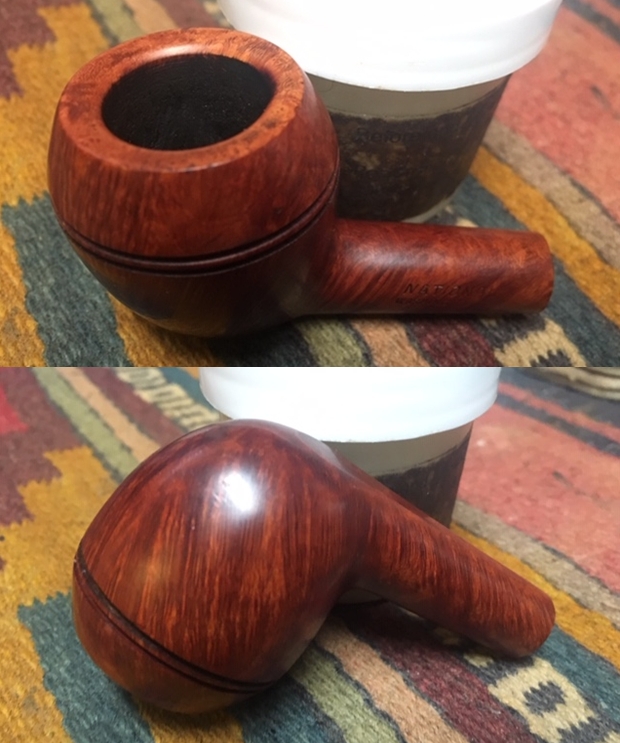
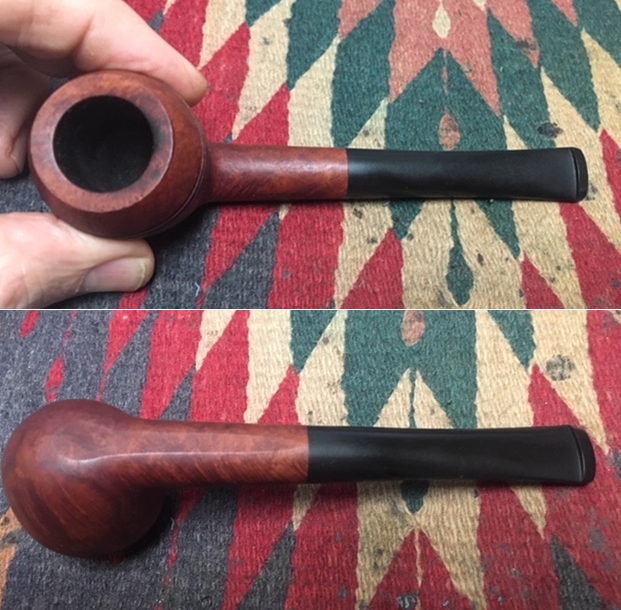 I took a close up photo of the rim top to show the condition of the bowl and rim after Jeff had cleaned up the grime and lava. You can see the damage on the inner edge of the rim at the back side and the darkening on the rim top. The stem photos show that the oxidation is gone. The surface of the vulcanite looked very good. There were some light tooth marks and chatter on the top and underside of the stem near the button.
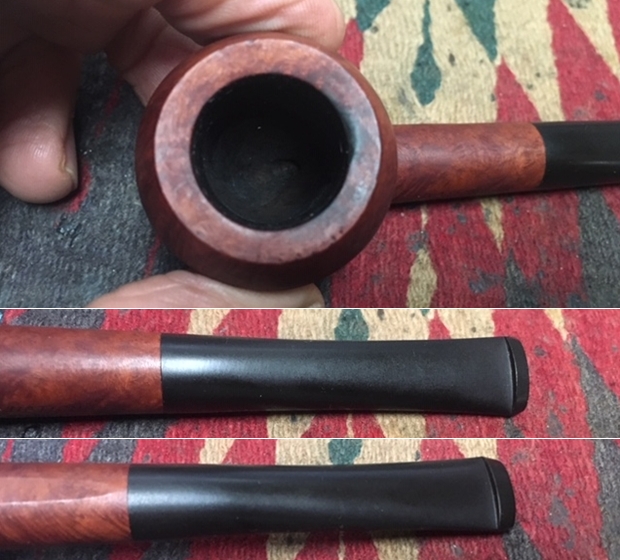 I also took a photo of the stamping on the left and right side of the shank showing how the stamping was laid out.
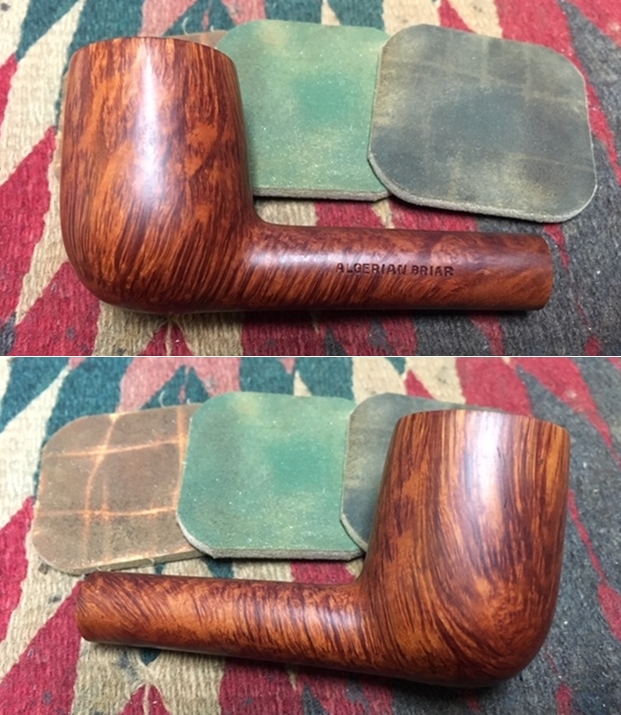
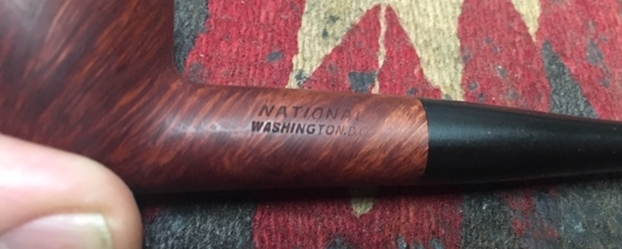 I worked on the inner edge of the rim and the darkening on the backside of the top with a folded piece of 220 grit sandpaper to smooth out the damage and remove the darkening. I polished it further with 400 grit wet dry sandpaper to smooth out the scratches in the briar.
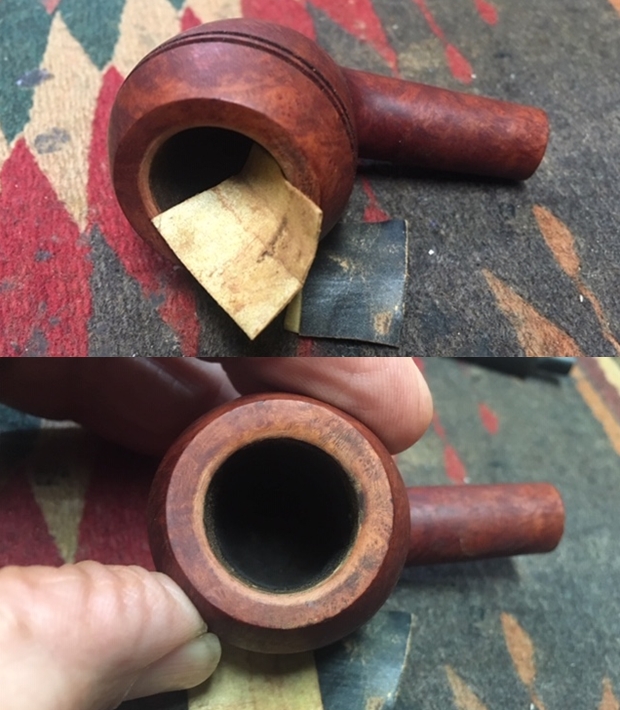 I polished the bowl and rim top with micromesh sanding pads – wet sanding it with 1500-12000 grit pads. I wiped the bowl down with a damp cloth after each pad to remove the sanding debris. After the final sanding pad I hand buffed it with a cotton cloth to raise a shine. (I forgot to take photos of the bowl and rim top after I polished it with 1500-2400 grit micromesh pads.)
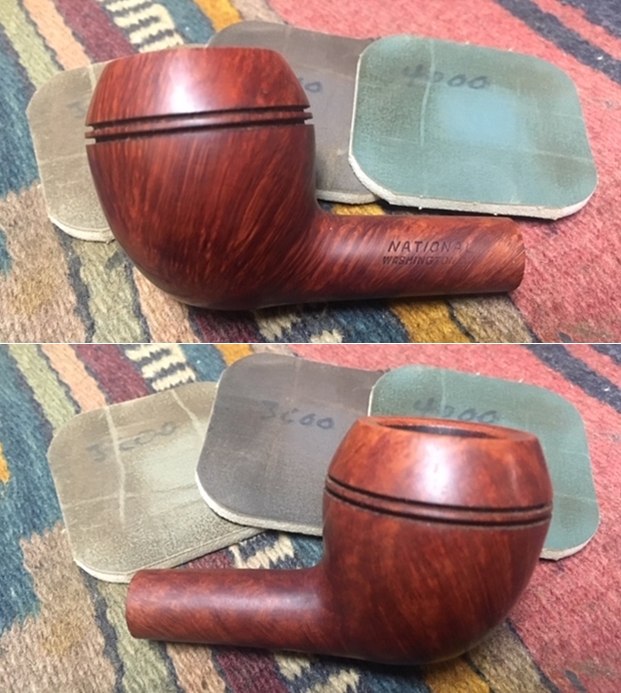
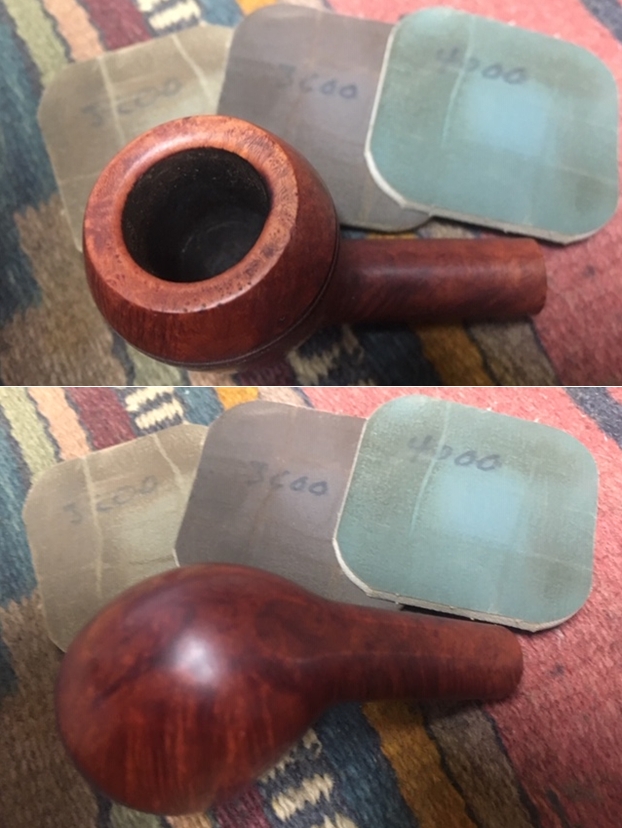
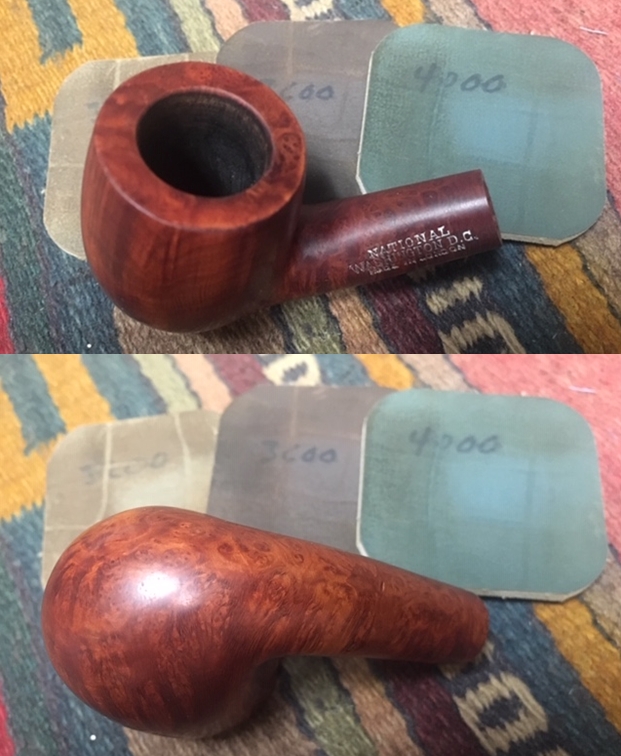
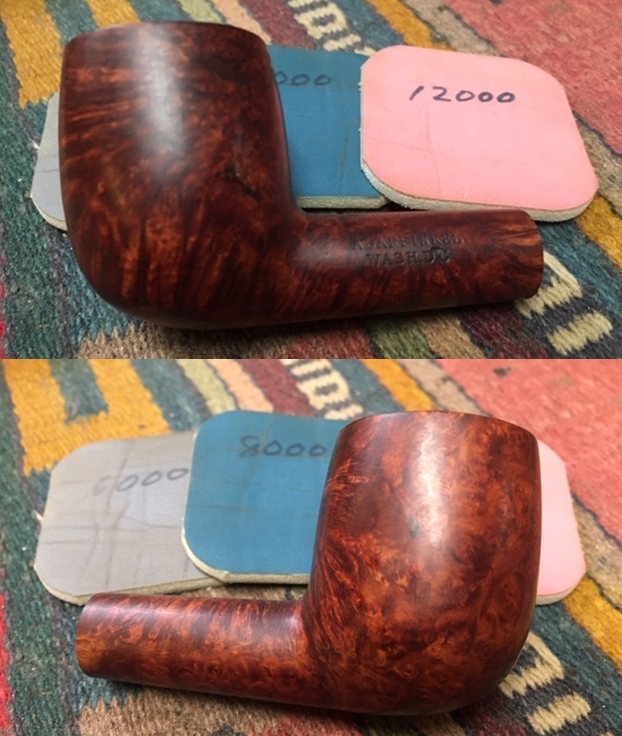
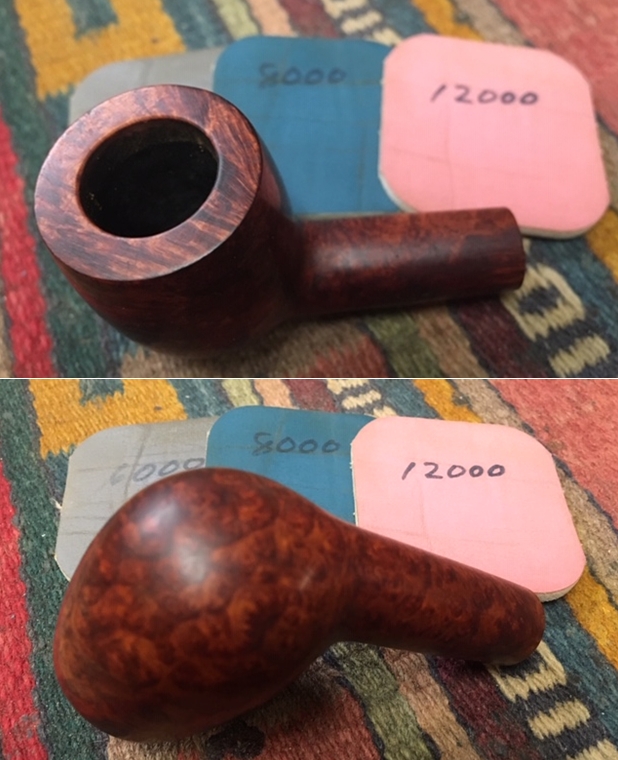
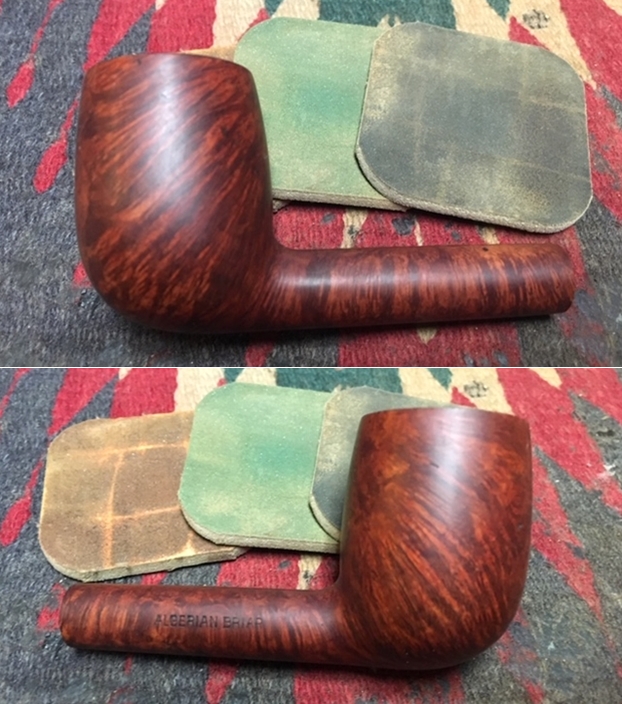
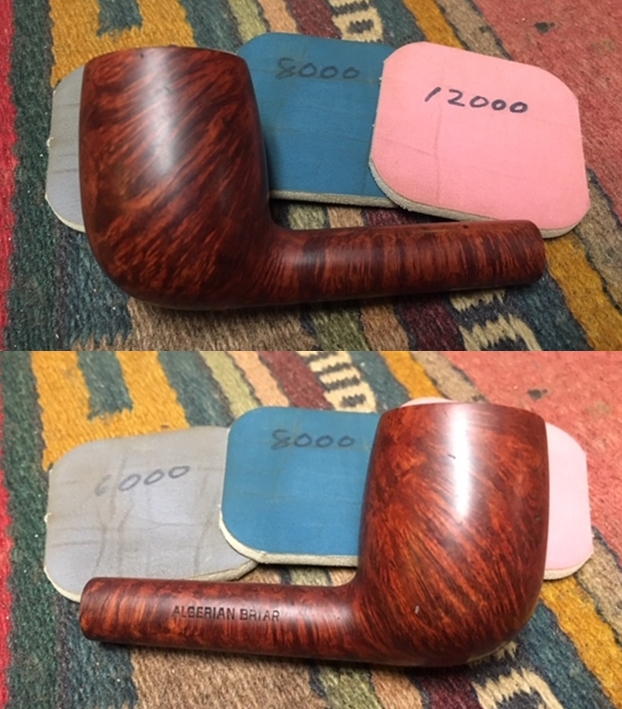
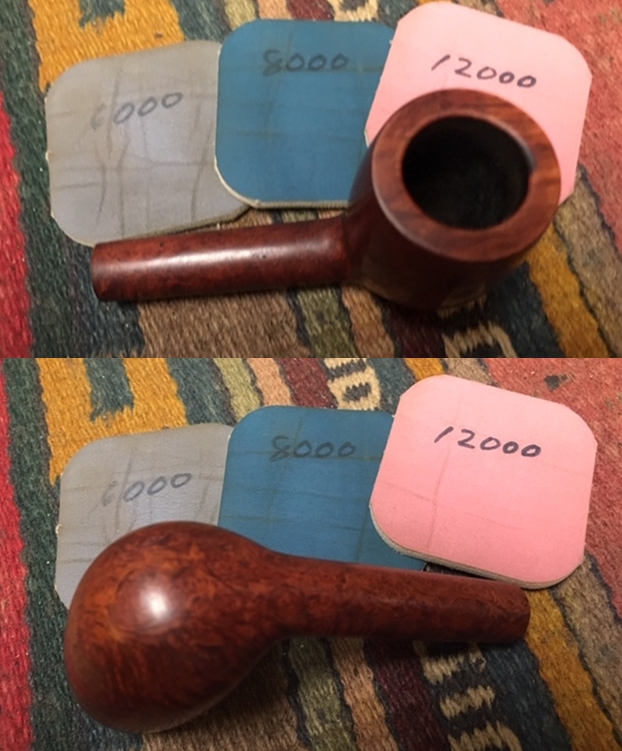
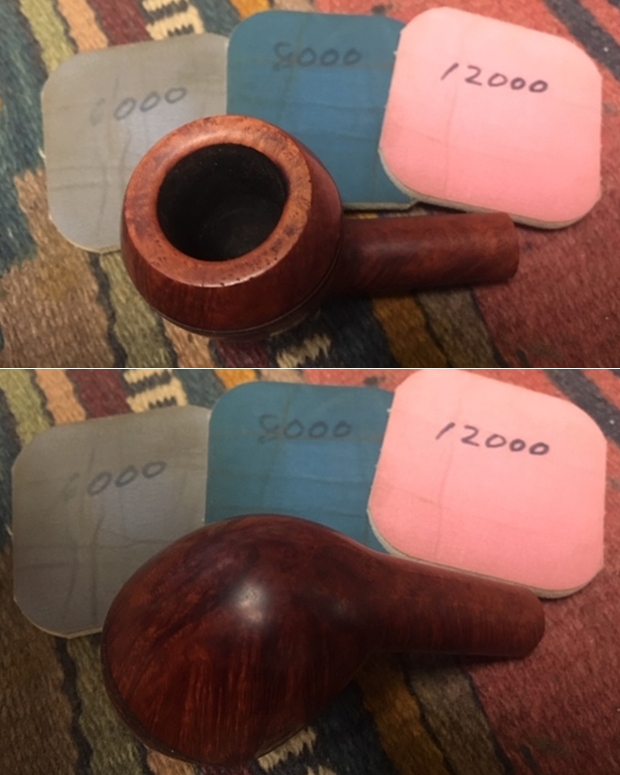 I worked some Before & After Restoration Balm into finish of the briar with my fingertips to clean, enliven and protect it. I let the balm sit for a little while and then buffed with a cotton cloth to raise the shine. The Restoration Balm really makes the grain stands out beautifully.
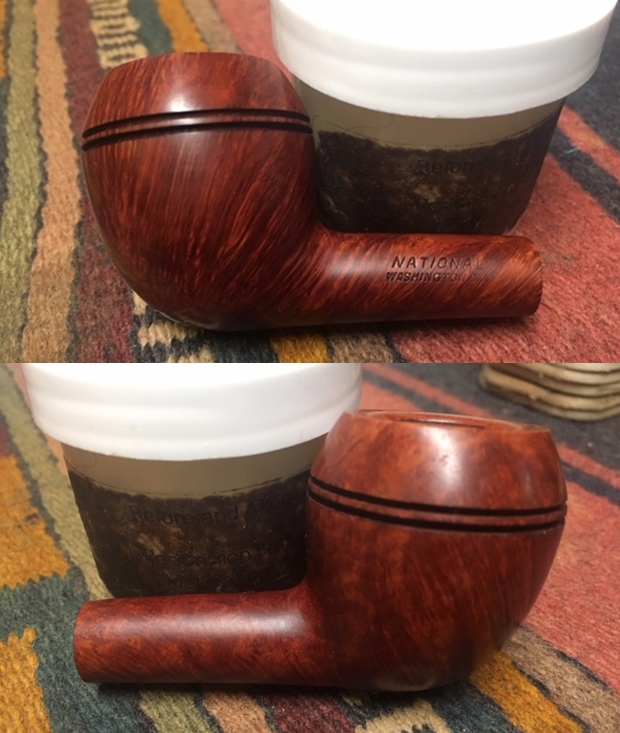
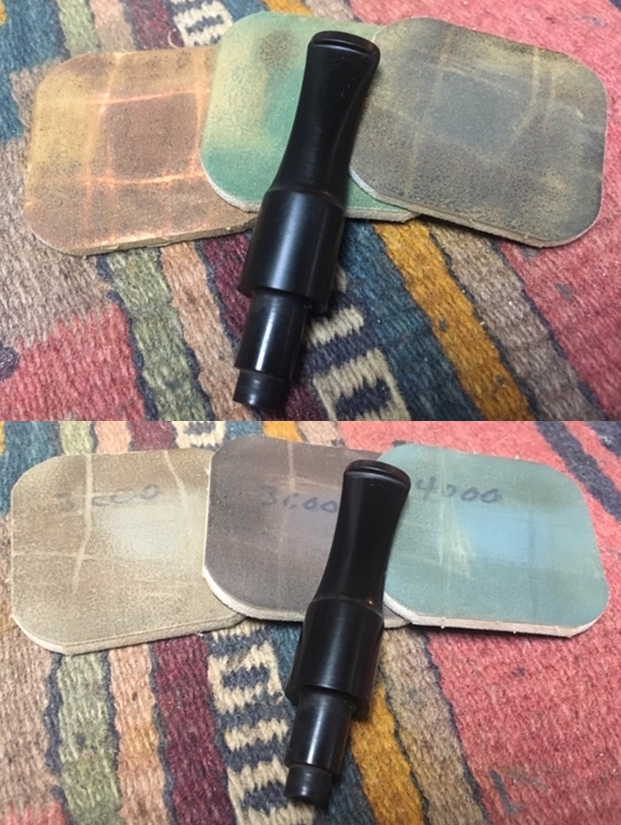
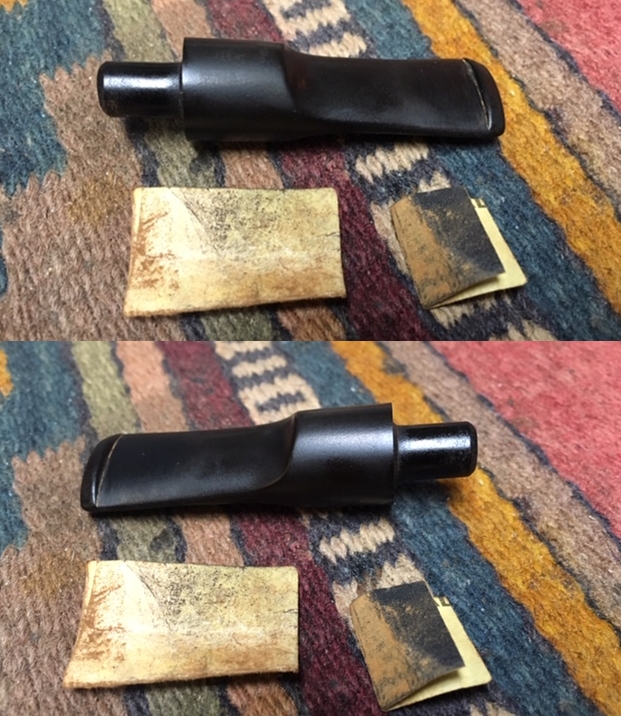
 I set the bowl aside and worked on the stem. I used a folded piece of 220 grit sandpaper to blend the tooth marks and chatter into the surface of the stem. Once the surface was smooth I sanded out the scratch marks and started the polishing of the stem with a folded piece of 400 grit sandpaper. I wiped the stem down with Obsidian Oil.
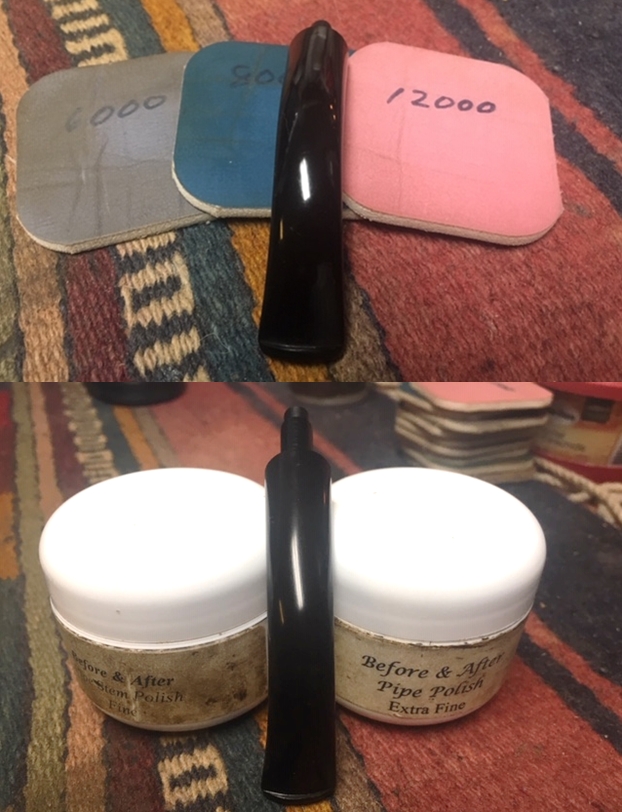
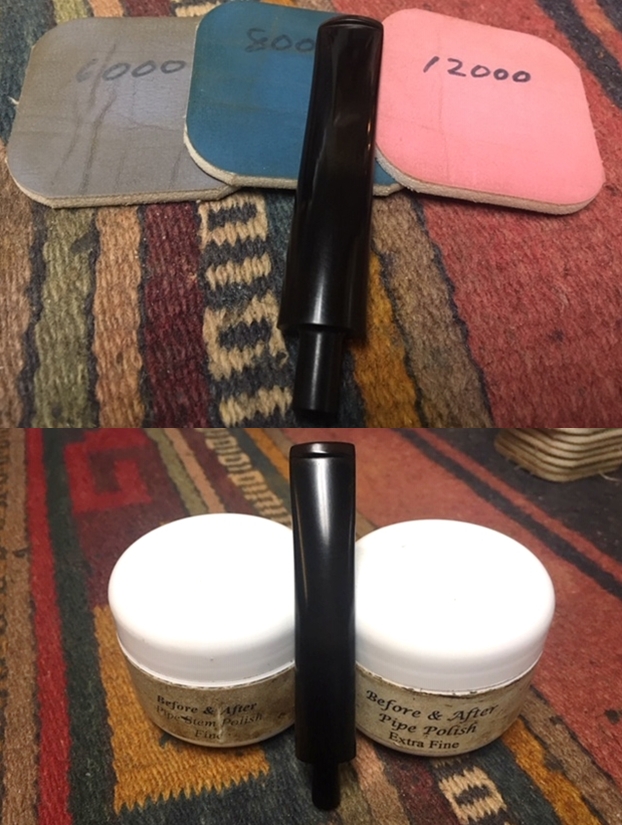
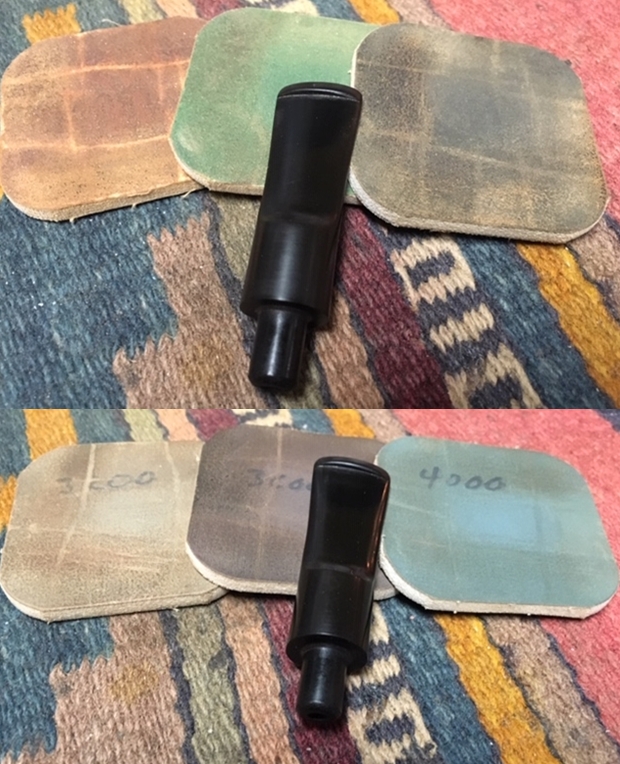
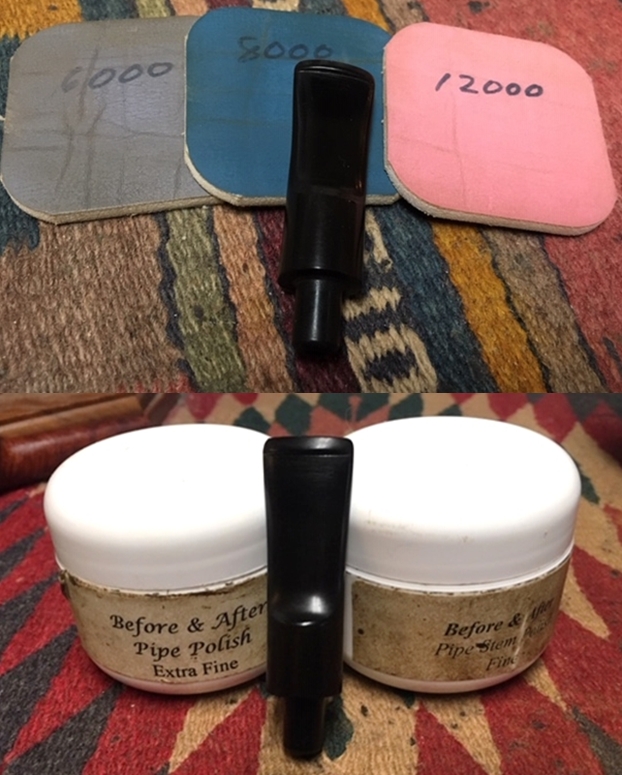
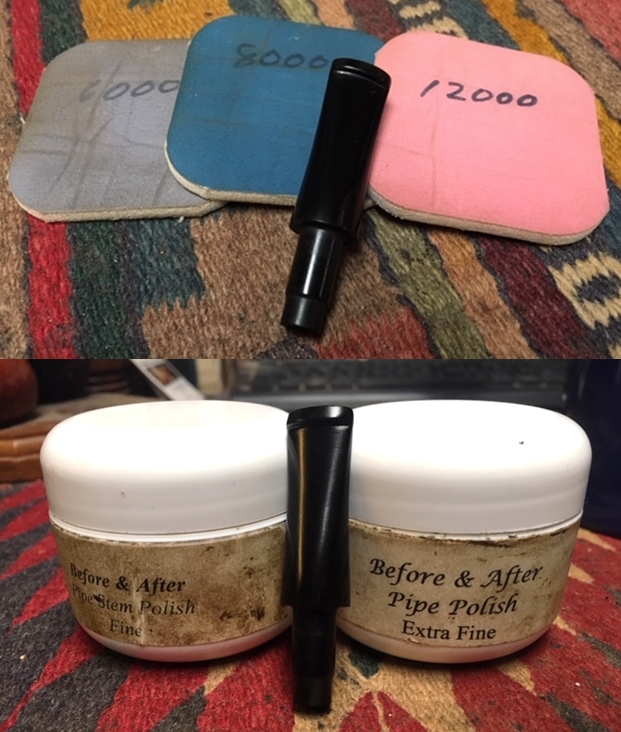
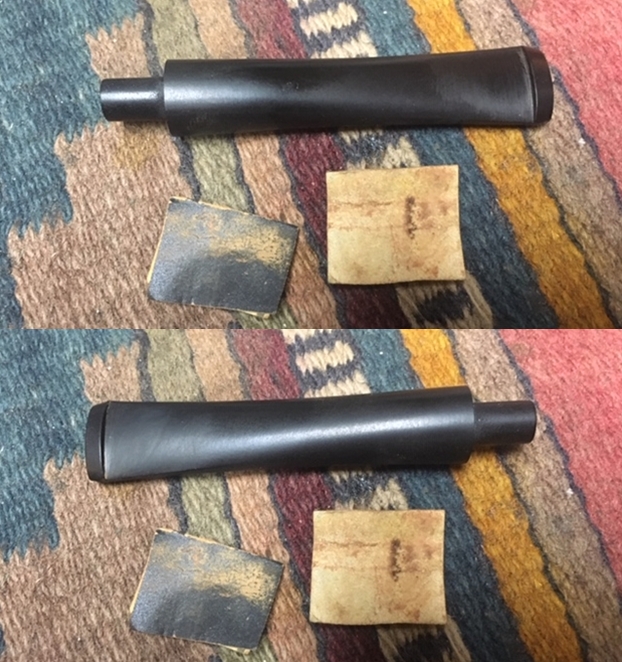 I polished the stem with micromesh sanding pads – wetsanding it with 1500-12000 grit pads. I wiped the stem down with Obsidian Oil after each pad. I polished it with Before & After Pipe Polish – both Fine and Extra Fine and gave it a final coat and set it aside to dry.
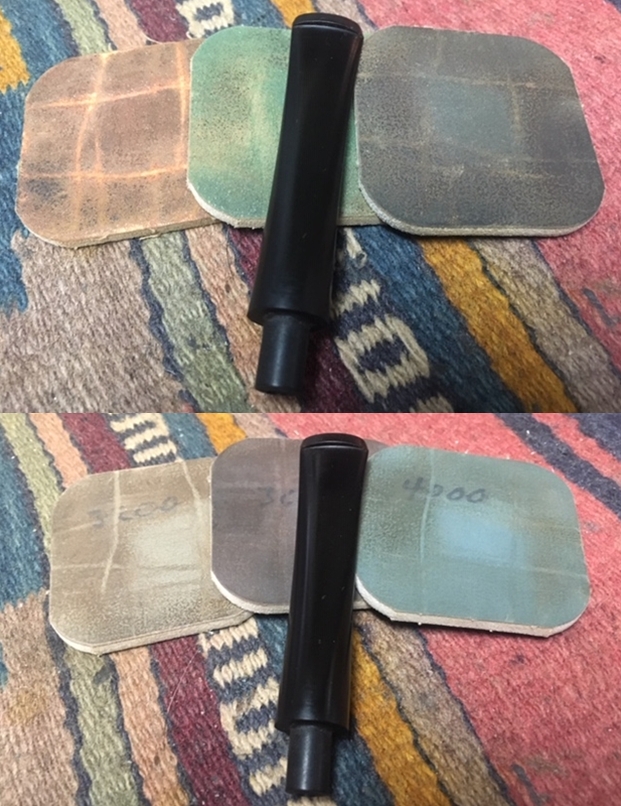
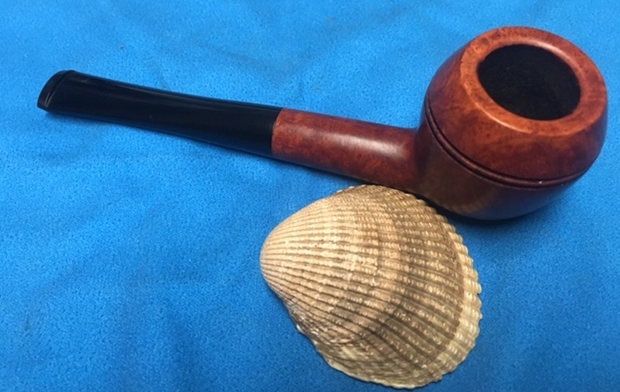
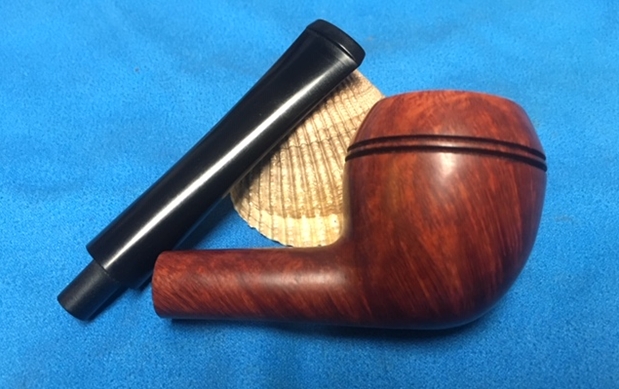
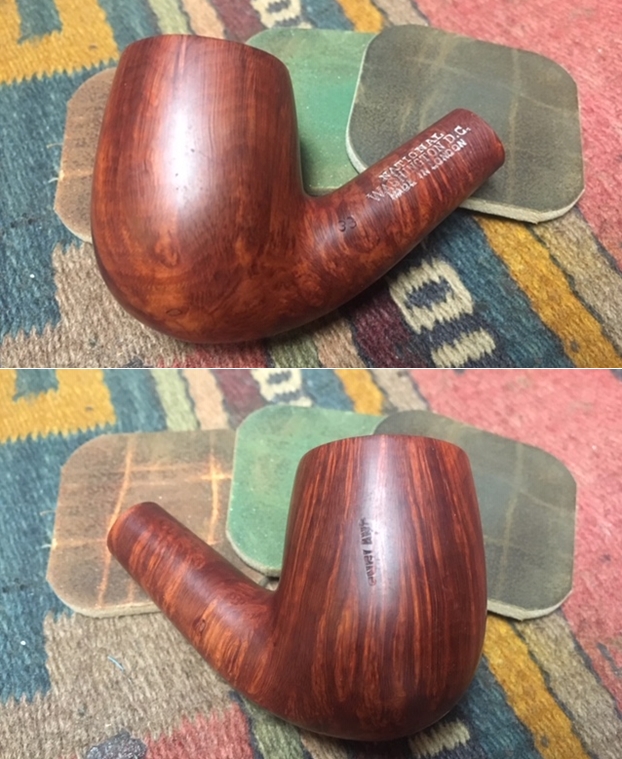
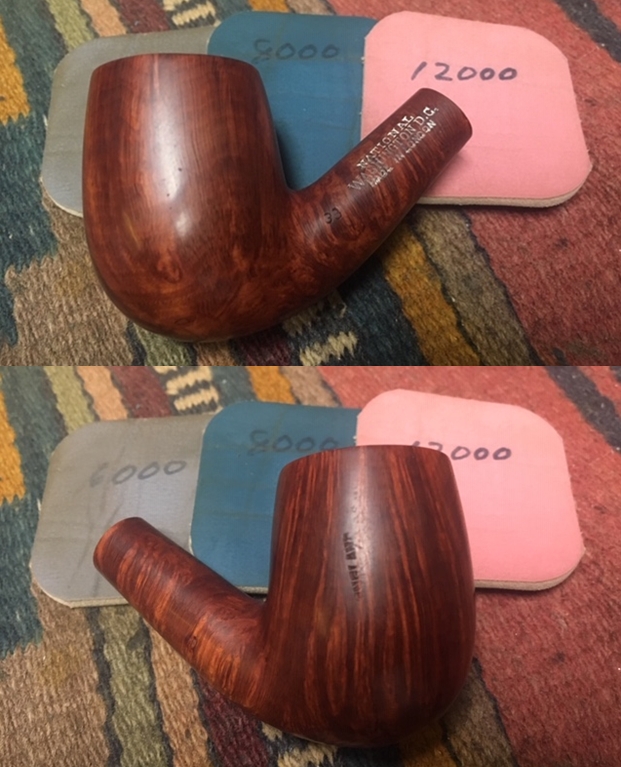
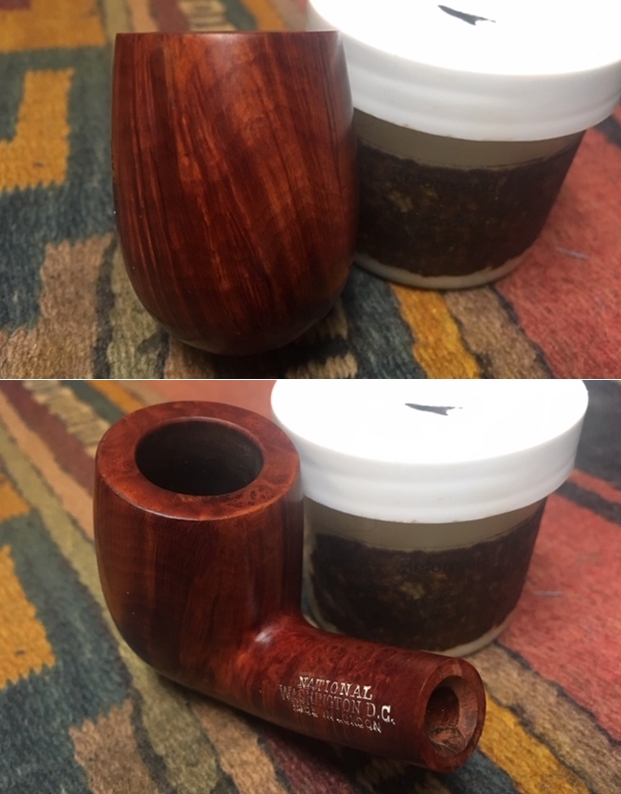
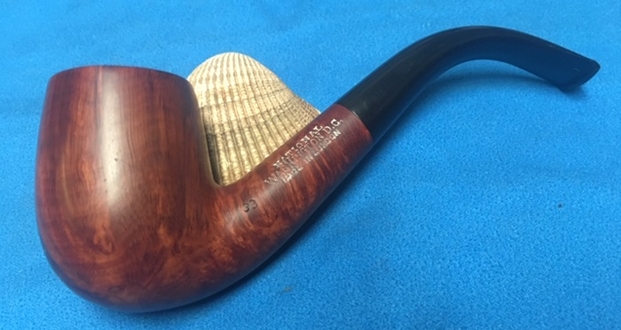
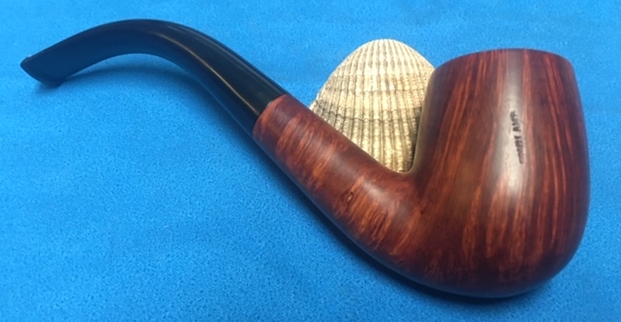
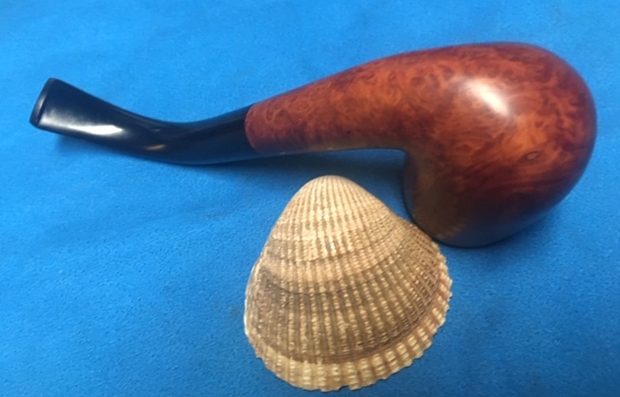
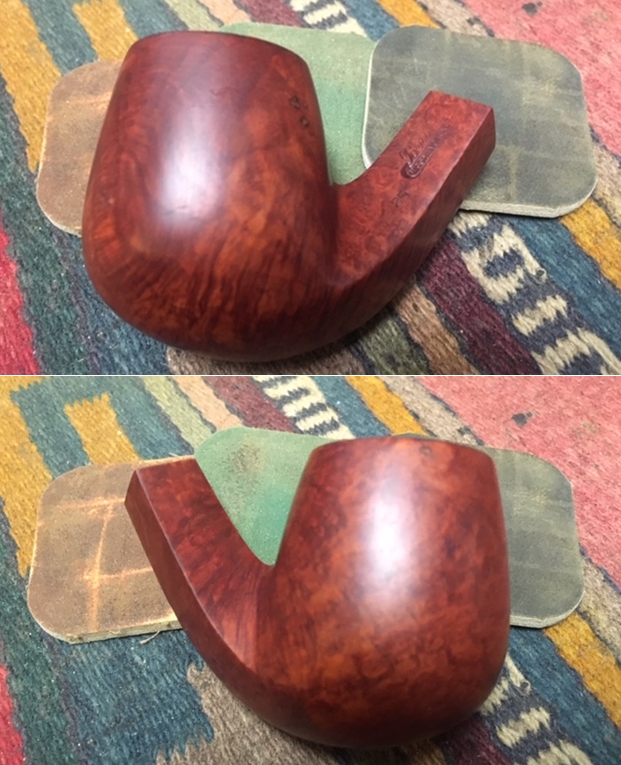
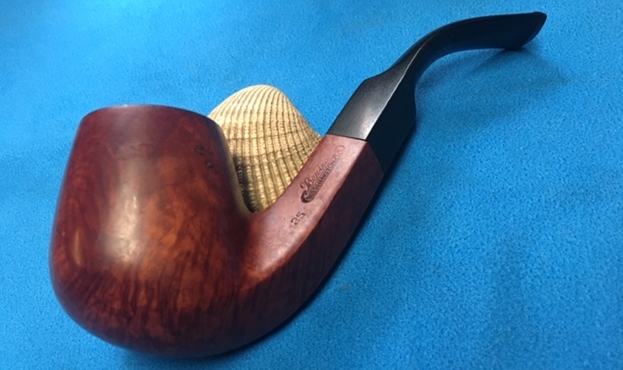
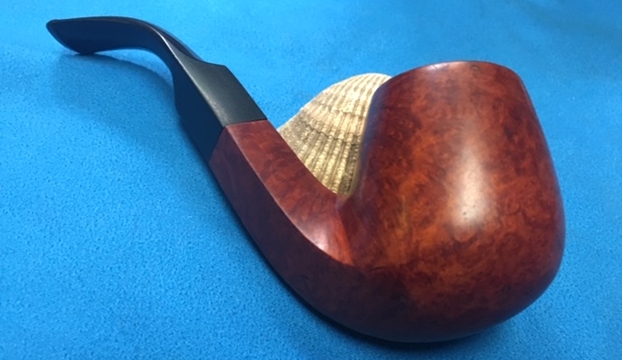
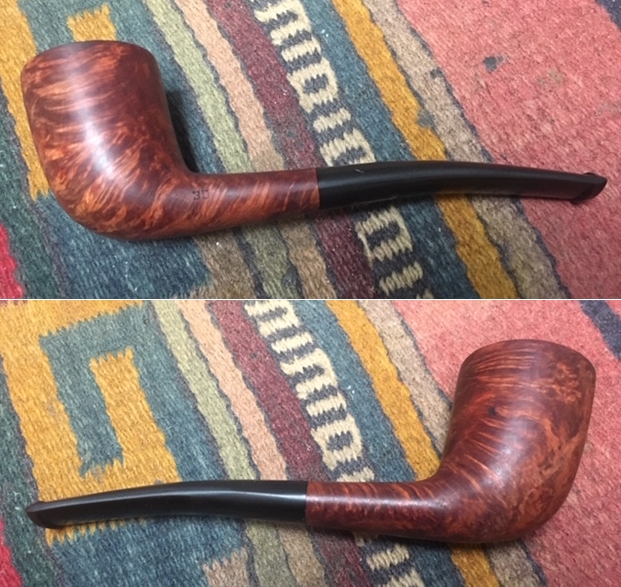
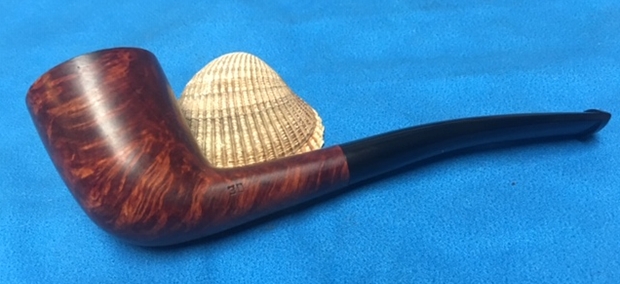
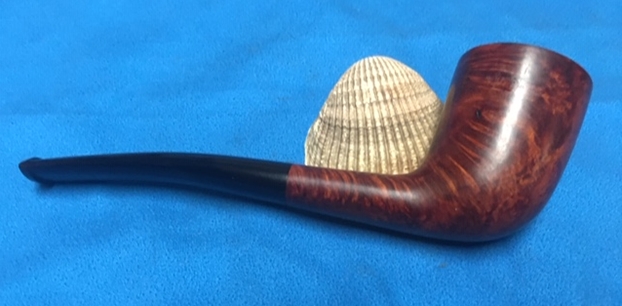
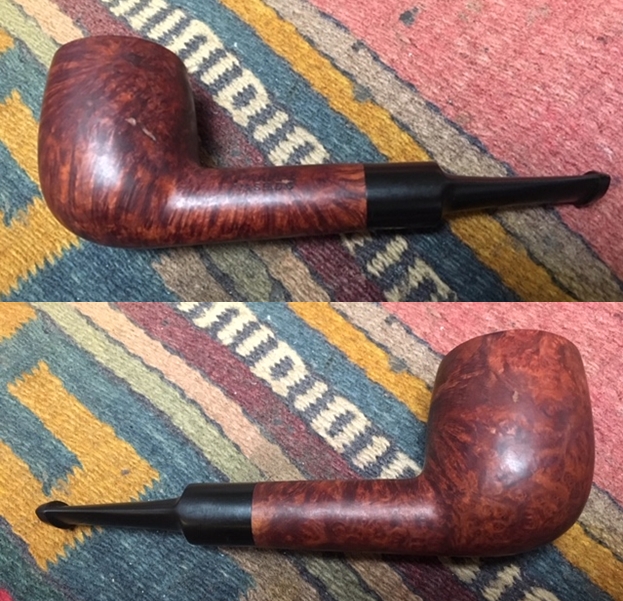
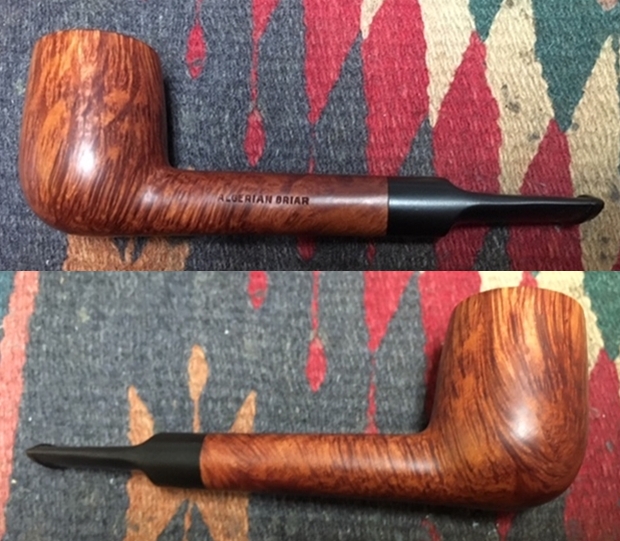
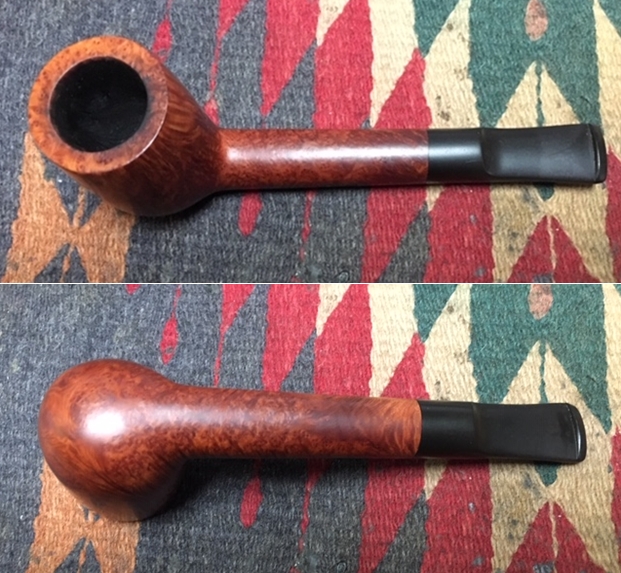
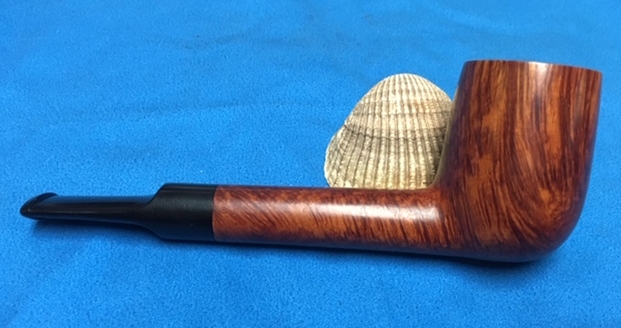
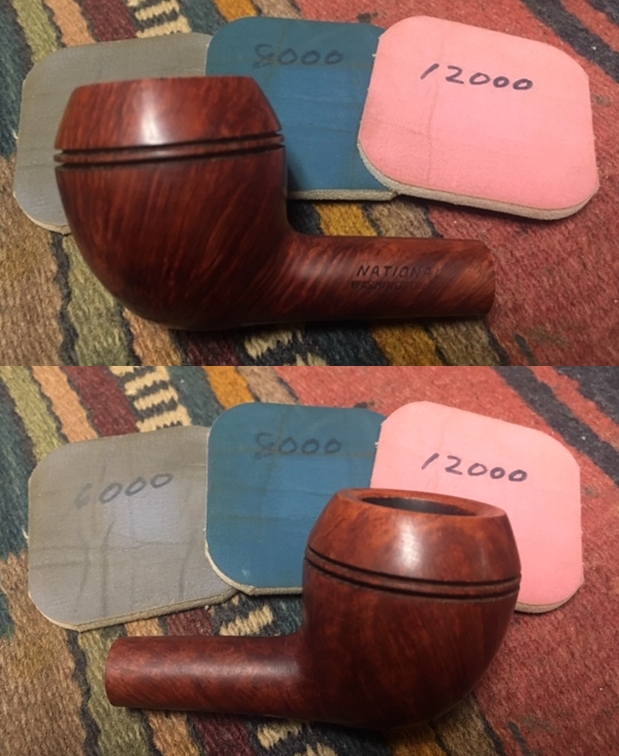
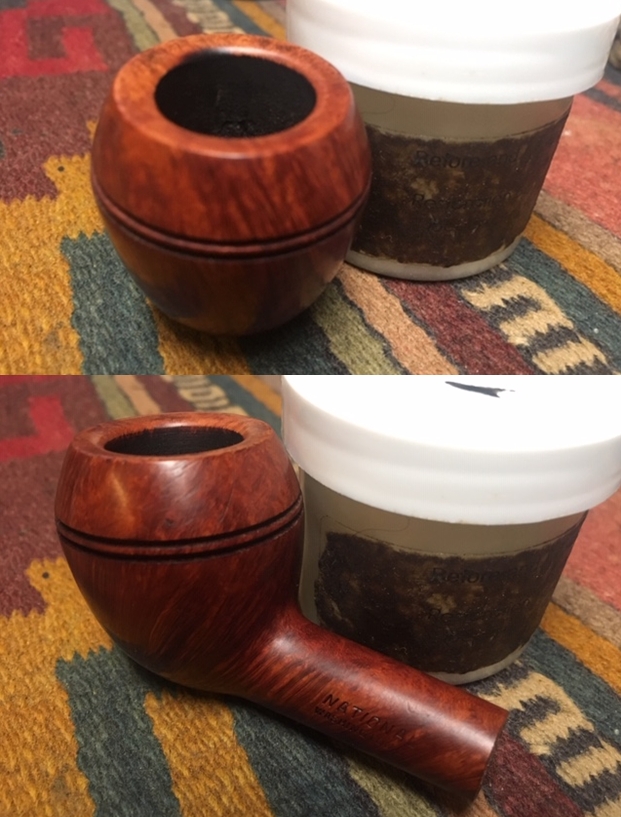
 This is the part of the restoration process that I really look forward to! When all the parts are finished and the pipe is clean then I put the stem and bowl back together and buff the pipe with Blue Diamond on the buffing wheel. I polish the briar and any minute scratches still in the vulcanite of the stem until there is a rich shine. This National Washington, D.C. pipe is a classic straight Rhodesian shape with a natural finish that highlights some amazing straight and flame grain on a proportionally well carved pipe. Buffing the pipe made the briar come alive and the grain popped with polishing. The black vulcanite stem had a rich glow. The finished pipe is a beautifully grained National Straight Rhodesian that feels really good in the hand and sits right in the mouth. Have a look at it with the photos below. The dimensions are Length: 5 ½ inches, Height: 1 3/4 inches, Outside diameter of the bowl: 1 1/4 inches, Chamber diameter: ¾ of an inch. Thanks for walking through the restoration with me as it was a pleasure to work on.