Author Archives: rebornpipes

Using steam to lift dents in briar


ImageIn the early days of our marriage, my wife and I bought a lot of used furniture. Today many would call them antiques but then they were just used furniture and were quite inexpensive. I bought a book on working with furniture called the Furniture Doctor by George Grotz in which he gave all kinds of helpful tips on restoring wood furniture. One of the tips that I used for years was a simple procedure for raising dents in wood. He explained a process of steaming the wood to lift the dents. I can’t remember his exact method any more as I have modified it and made it mine over the years so I don’t know where George leaves off and Steve takes off. It seems to me that it was a simple procedure of place a damp cloth on the dent and applying heat to the surface to make steam. I always used a steam iron from the laundry closet to do this. I would wet a cloth and place it on the dent and then apply the hot steam iron to it. There would be a resultant hiss and steam released. I would repeat the procedure until the dent was gone. Then I would refinish the piece with sand paper and stain it again to match.

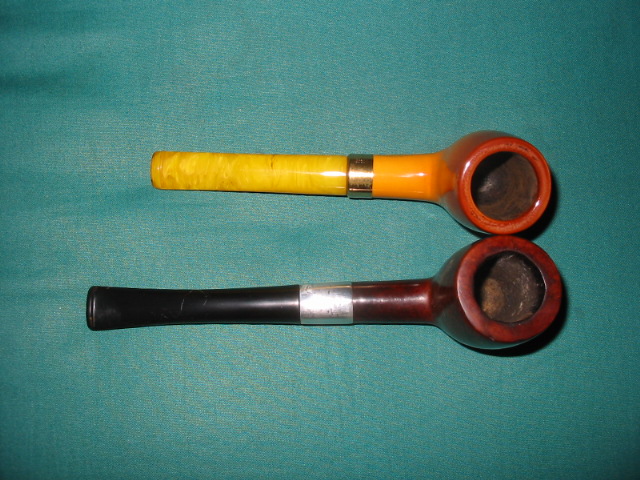
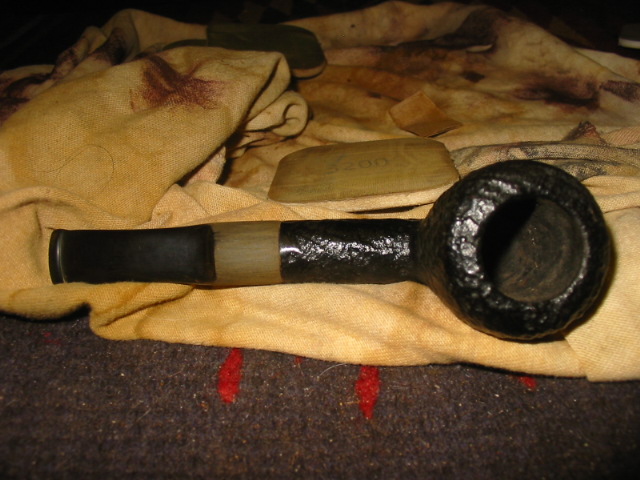
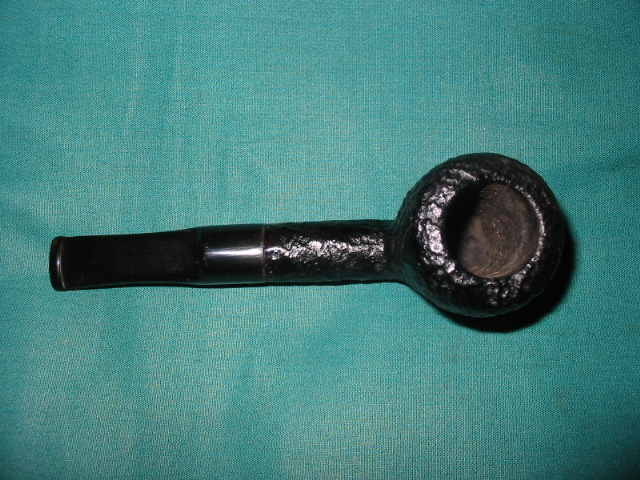
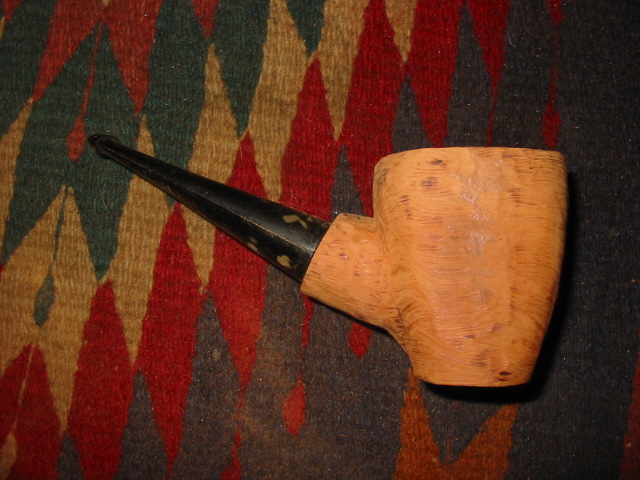
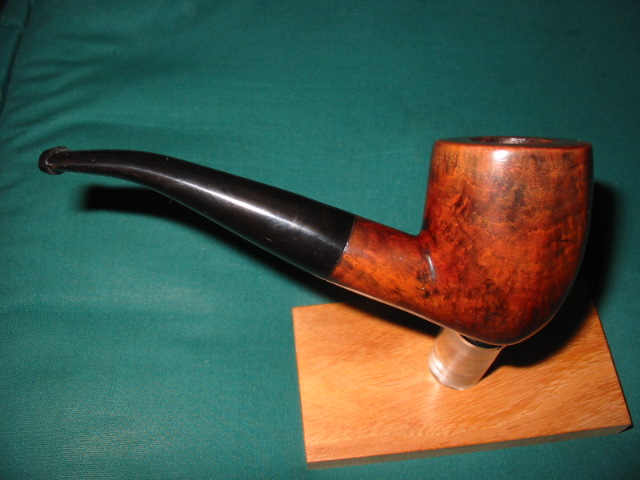
When I got into refurbishing pipes I decided to try the same thing. I had not read about it anywhere, though since I have seen others speak of it. I tried the cloth and steam iron but found it too cumbersome to use the big iron on a small dent on a smaller pipe. The iron just over shadowed the pipe. I tried using just the tip of the iron and it worked quite well but I wanted a bit more of a vantage point when I was doing the steaming. I wanted to see that I was actually placing the heat on the dent. So I tried a few methods from the tip of a soldering iron to a lighter to try to accomplish the same thing.

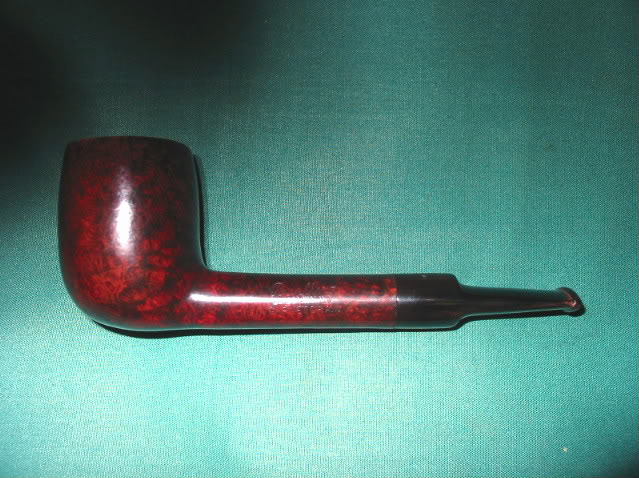
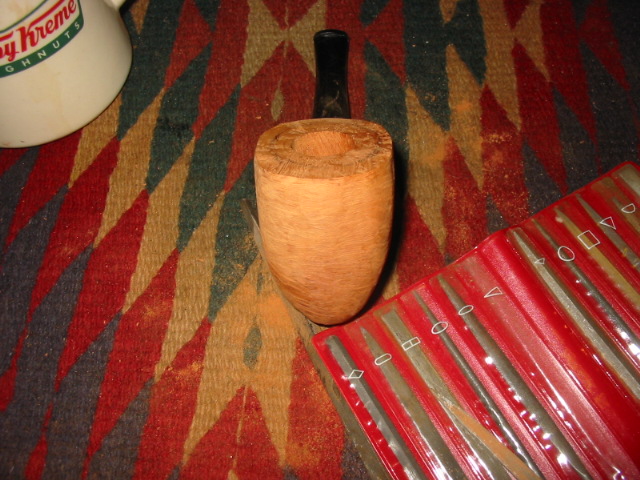
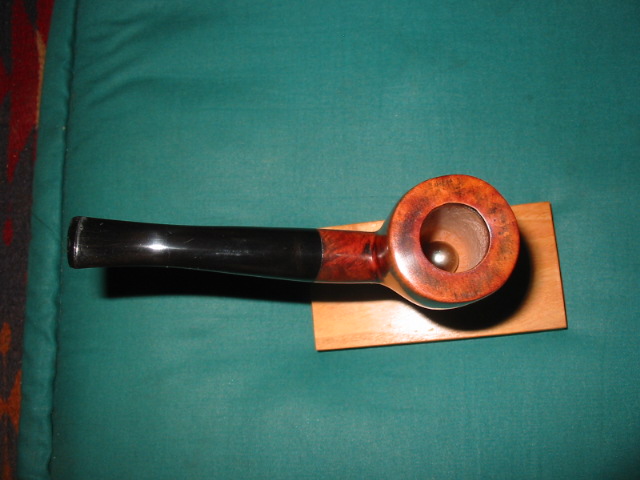
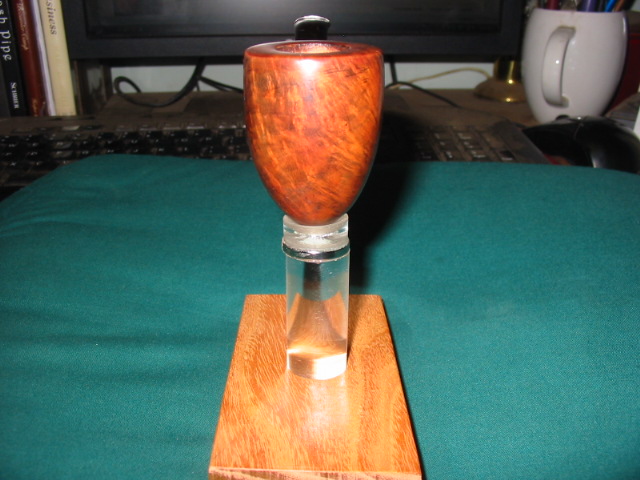
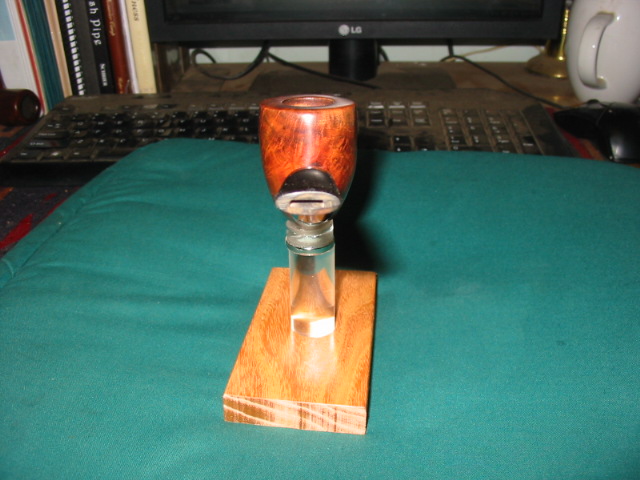
Then one day I was frying a couple of eggs on our gas stove and the lights came on. I laid aside the frying pan and ran down to my work bench for a pipe I was working on to put my idea to the test. I wet a dish cloth (shhh don’t tell my wife!) and then took one of the butter knives from the cutlery drawer. I heated the tip of the blade over the gas flame for a few seconds and then applied it to the wet cloth on the dent in the pipe. Viola! It worked exceptionally well. I repeated it several times on the dents on the rim and around the sides of the bowl and was amazed at how I could put just a bit of the wet cloth and the hot tip of the knife exactly on the spot. It really left little to work out once I was finished. The wet spot under the towel quickly dried and the finish was only left with a matte look to it. I took it to the buffer and within moments the matte area was polished and the pipe was as good as new.

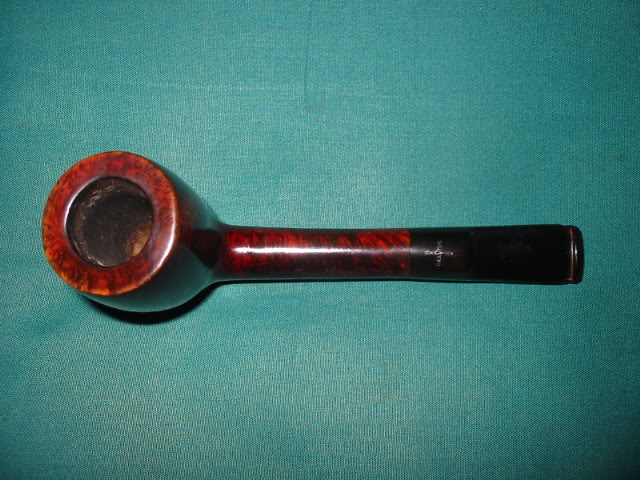
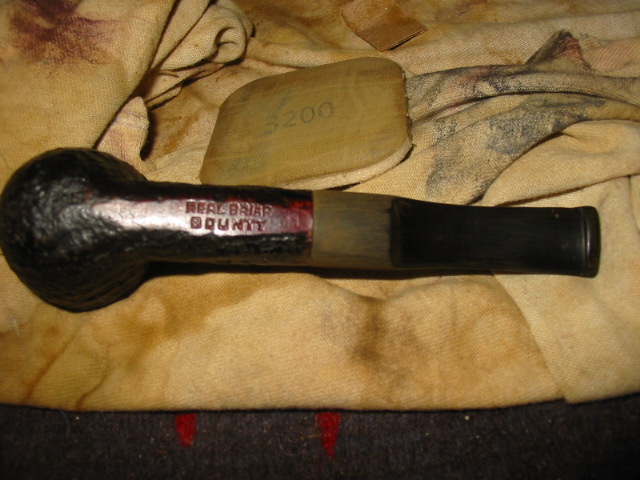
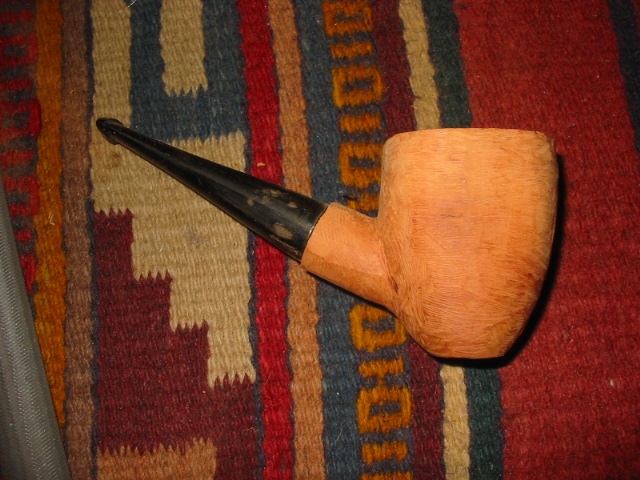
Over the years now I have used this method on lifting dents in the shank area of pipes, on the sides of bowls and on the rims with great success. I have refined it a bit from those early days of experimentation so now I use a small piece of cotton cloth and a “not so new” butter knife that I requisitioned from the kitchen cutlery drawer. I love the control you have over the field of repair. To be able to directly target the spot of the dent and not put the wet cloth on the entire side of the bowl is amazing. I keep using it and reworking it to find other ways to do the work but I come back again and again to the kitchen stove, fire up the gas burners and work on the dents. I have learned, by and large, to do this when the kitchen is not occupied by my wife or daughters as they go about their preparations for dinner – you see, you can teach the old dog new tricks!

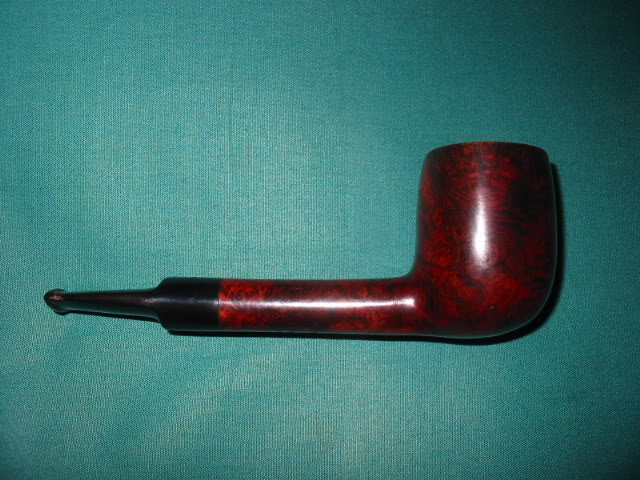
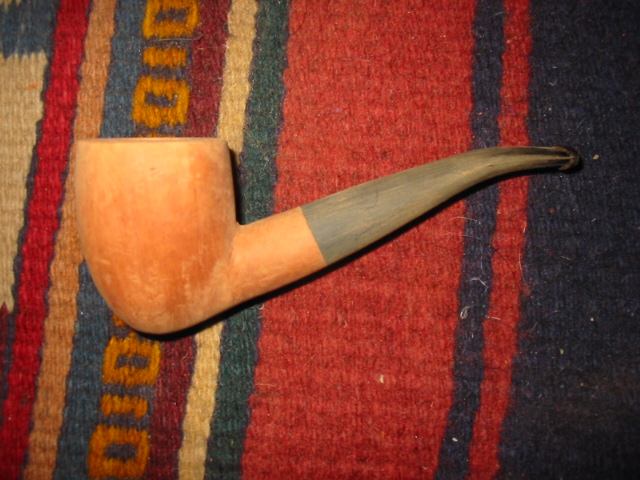
Give the trick a try, experiment with it and post here to let us know how it works for you.

Refurbished Mastercraft Bulldog


Another old timer, a Mastercraft Bulldog was in my box of bowls without stems. The squat shape of this little bulldog caught my eye.

The bowl pretty rough looking. The finish was gone and the top had been used as a hammer so it was badly dented and the roughening of the wood left a lot of splintering edges. It was also badly caked and still had a remnant of tobacco left in the bowl. Since it was missing its stem I have no idea when the bowl and tobacco got separated from the stem. I have a coffee can in which I keep a wide range of stems that I have picked up and another can of stem blanks that need to be shaped and fit to the new pipe. For this pipe I found an old stem in the can that was a perfect fit once I removed the old stinger type insert. The stem was badly oxidized virtually brown. There were no tooth marks on the stem and no dents that needed to be repaired.

I reamed and cleaned the bowl and shank until the pipe cleaners came white. I use 99% isopropyl alcohol for doing this as I find that it works well and evaporates quickly leaving no residual tastse. The top had been hammered so much that the bowl had to be topped so that it would be smooth again. The trick with this one was not to remove too much of the top and thus change the angles of the bulldog shape. So I removed enough to give me a smooth surface to work with but not enough to change the shape. Once it was topped and sanded I put it in the alcohol bath and left it while I worked on cleaning up the stem.

I had soaked the stem in a mixture of Oxyclean to soften the oxidation and prepare it for the sanding that would be necessary to clean it. Once I remove it from the soak I buffed it with Tripoli to remove the oxidation that had softened and then sanded it with 240 grit sandpaper. Once I had removed the brown surface I used 400 and 600 grit wet dry sandpaper to continue the smoothing and polishing process. I finished the stem with the micromesh pads from 1500 – 6000 grit. Then I set it aside to wait until I had finished bowl and polish the entirety on the buffer.

I took the bowl out of the alcohol bath and sanded it with the micromesh pads to remove the surface scratches and remaining marks in the bowl surface. I steamed out the dents with a damp cloth and a hot knife and then sanded them smooth again. I restained this bowl with a Medium Brown stain. I flamed it to set the stain, inserted the stem and then took it to the buffer and buffed it with White Diamond to polish it. The entirety was then given several coats of carnauba wax. This one found a new home with someone who loved the shape and it is providing a great smoke for them. ImageImageImage

Refurbished and Restemmed this interestingly shaped no name pipe


I refurbished this interestingly shaped no name pot/rhodesian/bulldog (?) or you name it shape. I was drawn to it and liked the look of it when I found it in my box of pipes and bowls that I have gathered for refurbishing. It is a box I have that at one point held over 300 pipes that needed work but is slowly shrinking even though I add to it each time I go scavenging. I am pretty much incorrigible about picking up estate pipes and hunting for them. I am getting more picky over the years as to what I want to work on but I pick up ones that will be a challenge to me or that I like the brand or the shape.

This one was truly a mess. I forgot to take pictures of what it looked like when I took it out of the box but I will describe it to you. In many ways it was no different than most of the others that I work on. The bowl was caked to the point of barely holding any tobacco any longer. It was a tarry mess on the rim and running down the sides of the bowl. There were dents and deep “wounds” in the briar of the rim. It also was without a stem. The silver band on the shank was badly beat up and to be honest the pipe was downright ugly. But in its ugliness I saw something that drew me to pick it up and see what I could do with it. So I took it to my work table and it became a project that took me two days.

I did what I call field dressing the pipe the first day. That includes reaming the bowl and cleaning out the grit and grime from the shank and bowl. I washed the bowl down with acetone to remove the overflow from the bowl and rim on the outside of the bowl. I also removed the dirt and grease marking on the bowl. Once it was clean I fit a stem for it. It has a diamond shank, and those have always been a challenge for me to make a proper fit. I find that on these old timers what appears to be a diamond with equal sides never truly is equal. Each side on this one had a different measurement. I used a blank that I had here and shaped it to fit. It is difficult to get each side correct and maintain the shape to fit the shank. I cut the tenon with my Pimo tenon turner and worked the shape for a long time to make it flow with the shank. It took a long time because I would get one side perfect only to lose a bit of the angle on the next side. I finally was able to get the angles right and fit the stem to the shank well. In the finished photos you can get a bit of an idea of the work involved in that.

I then removed the silver band and put the bowl in the alcohol bath while I tried to straighten and smooth out the silver band. I got a lot of the wrinkles and dents out of it but a few still remained even after my work.  I set it aside to reinstall on the shank once it was restained and turned my attention to sanding and polishing the stem. I used 400 and 600 grit wet dry sandpaper as usual to remove the scratches and marks left by the shaping. I then use my normal regimen of 1500-6000 grit micromesh to bring a shine to the stem. When I had it finished and ready for the buffer I put it aside and went back to the bowl.

I removed the bowl from the bath and sanded it with the usual variety of sand papers and micromesh pads. Then I restained it with a cherry stain that I use on some of the older pipes as I have found that it brings out the old colours from the briar and really looks good. I then sanded again with micromesh and put the stem on it before taking it to the buffer to polish it with White Diamond. Once that was finished I gave the bowl and stem several coats of carnauba wax.

There are no stamping or marking on it all. But the unusual shape continues to attract me in an odd way. It is 6 inches long, bowl height is 2 inches. The chamber diameter is 1 inch and the chamber depth is1 1/4 inches. The rim is chamfered and clean. Anyone have a name for the shape??
ImageImageImageImage

Refurb on the Weingott Billiard


I finished up refurbishing this large Weingott Billiard that was a part of the threesome I picked up on EBay. All three were huge pipes and were ones that I would definitely recycle to someone else once they were refurbished. The Weingott is a BIG piece of briar – the pipe has a length of 8 inches, height 2 1/2 inches, the bowl inside diameter is 7/8 inches, outside diameter 1 1/2 inches. I took a picture of it next to a Dunhill group 4 to show the size of this big fellow in a picture.

The overall condition of this pipe was poor. Obviously it was a much loved pipe as it had been smoked hard. I had to ream and clean it – the bowl was very caked and the shank and stem almost clogged with a goopy tar substance. The finish was blackened on both sides of the bowl and the rim was caked and dented. The dents and scratches were deep and the surface was rough from knocking the pipe out on something hard. The stem had a very deep oxidation and was greenish brown. There were not tooth marks on the stem – at least the pipe had that going for it.

I reamed the bowl and cleaned out the shank. That took some work to unclog the airway. I ended up using a piece of wire to break through the accumulated tars and residue. I then used a drill bit and turned it into the shank until the airway was clean and open. Then I used a shank brush and many pipe cleaners and isopropyl alcohol to clean out the remaining residue. I packed the bowl with cotton bolls and used an ear syringe to fill the bowl with alcohol so that I could leach out the tars and oils in the bowl. I put a cork in the shank and set the pipe aside overnight.

Image

The oxidation on the stem took a lot of work as it was deep. I quickly buffed the stem with Tripoli to remove the surface oxidation and see how deep it went. The first coat of greenish brown seemed to be untouched by the Tripoli. It was hard and it smelled bad! I then sanded it with emery clot (fine grit) to break the surface of the oxidation. From there I sanded with 240 grit for a long time until I finally got the stem to the point that it was just a brown haze in the stem. I then put the stem in a soak of Oxyclean overnight to let it soften and draw out the remaining oxidation.

In the morning I took the cotton bolls out of the bowl and dumped them in the rubbish bin. They were dark brown and in places almost black. I let the bowl dry out and had a coffee. Then I topped the bowl to remove the damage that was on it. Once it was smooth and clean I put it in the alcohol bath to soak in order to remove the finish and the grime on the surface. It sat for about an hour and ½ before I took it out of the bath and dried it off. I sanded it with micromesh pads 2400-6000 grit and then restained it with a cherry stain.

I removed the stem from the Oxyclean soak and dried it off. I buffed it again with Tripoli and then sanded it with 400 and 600 grit wet dry sandpaper. Then I polished it with micromesh pads 1500-6000 grit to bring the stem back to black. Once finished I put it back on the pipe and buffed the whole pipe with White Diamond and several coats of carnauba. The pipe is now finished and ready for the new owner!

ImageImageImage

Refurbished a Peterson’s Deluxe Zulu


In one of my EBay purchases was this little Peterson’s Deluxe Zulu shape #268. To me this pipe epitomizes the Zulu shape – in other words, when I think Zulu I think of a pipe that is shaped like this. When the pipe arrived the bowl was dirty and caked (two things that I almost forget to say as they are to be expected in estate pipes and I am surprised when I find one that is not). The finish was mottled with light and dark spots where the stain had worn off. It also had some flecks of paint on the surface that are not clearly visible in the photos below. The rim was very caked and covered with tars. Fortunately there was no charring that was visible as I looked it over. The stem also had paint flecks on it and was slightly oxidized. There were tooth marks on the top and bottom of the stem that would need to be repaired.ImageImage

I reamed and cleaned the bowl and the rim of the pipe. The shank took some work with isopropyl alcohol and many pipe cleaners and a shank brush before it was clean. I wiped down the surface of the bowl with acetone to clean off the remaining finish and the paint spots. I use cotton makeup removal pads that I picked up at the store. They work great and are easier to use than just cotton bolls. Once the finish was cleaned I dropped the bowl in the alcohol bath to soak while I turned my attention to the stem.

I buffed the stem to remove the oxidation and the paint spots. I was careful to avoid the area where the stem and shank meet so as not to round the sharp edges and ruin the great fit of the two. I heated the tooth marks that needed to be lifted with my heat gun and when they had come back as far as possible I sanded the stem with 240 grit sandpaper to remove what remained. I sharpened up the edge of the button with my needle files to give it a good crisp edge. I then sanded the whole stem with 400 and 600 grit wet dry sandpaper and water. I finished the sanding and polishing process with micromesh pads from 1500 to 6000 grit. Once that was finished I laid the stem aside with a coat of Obsidian Oil and turned back to the bowl.

I took the bowl out of the alcohol bath and restained it with a medium brown aniline stain. I flamed it, let it dry and then took it to the buffer and buffed it with White Diamond. This was done and the entirety buffed and polished with carnauba wax to give it several layers of wax. The cross grain, birdseye and straight grain on this beauty are well laid out. ImageImageImageImage

Some of the pipes I have carved over the years


I thought I would post some pictures of the pipes I have carved over the years. Some are better than others and many are no longer in my collection as I have given them to friends. I post them here on the blog to show some of the possibilities with finishes – smooth, rusticated and semi rusticated – and with various stains and also as naturals.

Pipe #1 (only in terms of pictures not in terms of creation). A quarter bent ball or apple with a chamfered rim. The stains include a black under stain and a medium brown over stain.ImageImage

Pipe #2 – A ¼ bent tadpole. This is a great smoker and very light weight. The stains are a contrast of reds and browns.

ImageImage

Pipe #3 – A saddle stem Dublin with a Medium Brown stain

Image

Pipe #4 – a ¼ bent Tomato. This one is rusticated to look like old leather. The undercoat is black stain then it is buffed and given a top coat of Medium Brown stain.Image

Pipe #5 – A semi rusticated apple. The bottom of this pipe is plateau briar and the rustication carries that theme upward to mid bowl. The rustication has a black understain and a medium Brown top coat. The smooth portion is medium brown. Image

Pipe #6 – A Canadian with a leaf pattern carved over a flaw in the briar. The stain is a Medium Brown.Image

Pipe #7 –a bent Dublin. On this one I used a medium brown stain. I had Stephen Downie help me with the shank extension and work on this one. Image

Pipe #8 – Volcano shape with plateau on the bottom. This one has a black understain to highlight the beautiful grain and then a medium Brown overstain. The stem is a modified saddle.ImageImage

Pipe #9 – ¼ bent egg. This one is stained with a black understain and then a tan overstain. The grain is very interesting on it.Image

Pipe #10 is a natural Dublin with no stain. Many coats of carnauba wax were applied. The band is a brass pressure fitting that I shaped to give it character. Image

Pipe #11 is a poker with a mix of rustication and smooth. It was stained with a medium brown stain. And waxed with carnauba. Image

Pipe #12 is a fanciful freehand that I did to highlight the amazing grain that flows along the pattern. This one is also natural in terms of finish – no stains were used. Just wax.Image

Reclaimed – an Old Baronite Ceramic and an Old Briar


Blog by Steve Laug

When I saw this pair of old pipes on EBay I was intrigued enough to put in a bid. I did not bid high as I was intrigued not captured by them. As I looked at them the upper pipe had some interesting possibilities in grain and the shape of the stem and angles looked old to me. The bottom pipe fooled me a bit – when I first looked I thought it might be a meerschaum with an amber stem. But after bidding and a bit more digging on the internet I found that it was a double walled ceramic pipe and the stem appeared to be Bakelite. I found out that I had bought these pipes when I got home from work that evening. They would arrive soon and I would have the pleasure of working on them.Image

When they arrived I took time to look them each over to get a feel for what needed to be done to bring them back to service. Looking over the briar pipe first I could see that it is old. The stem style and the orific button point to an older pipe. The silver band has no hallmarks or stamping so it is no help in identifying the pipe’s brand or age. The stamping on the shank is too faint to see even with a bright light and a jeweler’s loupe for magnification. The bowl was thickly caked and much of the tars of the tobacco were built up on the rim. It appeared that the rim was not damaged with char or denting. The finish, as can be seen in the photo below as very dirty and darkened with oils from the hands on the sides of the bowl. The stem had deep tooth marks and much chatter from teeth along top and bottom from the button up about a ½ inch.

The second pipe was a double walled ceramic pipe. It was stamped Baronite Made in Holland. The outer surface of the bowl was dirty and darkened with what appeared to be grease. The band on it appeared to be a golden colour under the dirt. The stem was in pretty good shape but the cork seal on the tenon was dry and thus loose in the shank. The inside of the bowl was caked and black. The shank was also black and dirty. I shined a light into the shank and could see the gap between the walls of the inner and outer bowl. This area was in need of a thorough washing.

On the briar pipe I cleaned and reamed the bowl. The shank was a mess and full of grime and grit. It took many pipe cleaners, a shank brush and isopropyl alcohol before it was clean and the pipe cleaners came out white. The deep tooth marks on the stem were lifted with my heat gun and then sanded smooth. I used 240 grit sandpaper, 400 and 600 grit wet dry sandpaper and then finished the work on the stem with micromesh pads from 1500-6000. While I worked on the stem I had put the bowl in the alcohol bath to soak and hopefully remove the darkened and soild finish. When I took it out of the bath and dried it, I sanded the bowl and restained it with a medium brown aniline stain. I put the stem back on it and then buffed it with White Diamond and polished it with carnauba wax

On the Baronite Ceramic pipe I did a bit of seeking advice and found out that I could flush out the bowl with hot water. I did this at my sink with the water running through the bowl and out the shank. I repeated it the other direction as well. Several times I filled the bowl and shank and shook it to help the water scour between the inner and outer bowl. After about five minutes of this the water came out clear and the pipe smelled clean again. I decided to do the same process with isopropyl alcohol as well and ran it through the pipe both directions for a final cleaning. I used repeated applications of Vaseline on the cork seal on the tenon to soften it and expand it again. Once that was done the stem fit snuggly to the shank. I cleaned the stem with isopropyl alcohol and pipe cleaners and a shank brush to get the dark areas out of the inside of the stem near the button. Once the stem was done I put it on the pipe and buffed the entirety with carnauba wax. The series of photos below show the finished look of the two pipes.ImageImageImage

Refurb – Barling Garnet Grain Lovat


One of the classic shapes that I refurbished lately was this little Barling Lovat. It is stamped Barling in script (Post Trans I believe) then London England in block text under that and a third line – Garnet Grain. The bottom of the shank is stamped with the four digit shape number – 4189. The classic lines of this little pipe, to me show what Barling could do with these shapes. The reddish stain on the Garnet Grain pipes is one of the attractive features of this line of Barlings.

This one came to me in a lot of pipes I picked up along the way and it had obviously been sitting for a long time. The bowl had cobwebs deep inside and a musty smell to it. There was a crumbling cake though it was not thick, just soft. I reamed the bowl and cleaned out the bowl and shank with the usual pile of pipe cleaners and a shank brush with lots of Isopropyl alcohol. The outside of the bowl was spattered with white paint all around and some especially ground in along the shank so I scrubbed it with an alcohol cloth and put it in the alcohol bath.

While the bowl was soaking I worked on the stem. It had tooth chatter and a few light tooth marks that needed to be lifted and sanded out. The stem was badly oxidized and also smelled musty like the bowl. I scrubbed the interior with a lot of pipe cleaners and alcohol until they came out clean. I then tacked the bite marks and chatter with 240 grit sandpaper to smooth them out and followed that with 400 and 600 grit wet dry sandpaper and water. I finished sanding the stem with my usual regimen of micromesh pads from 1500-6000 grit. Each progressively higher  grit polished the stem more. I then took it to the buffer and buffed it with Tripoli and White Diamond being careful around the area that it meets the shank. I would give it a more thorough buffing and polishing with carnauba wax once I put it back on the finished bowl.

After I finished the stem I took the bowl out of the bath and dried it off. I sanded it with micromesh 2400 to 6000 grit to polish and remove any scratching and then restained it with an oxblood aniline stain that matched the colour that it had before. Once dry I put the stem on it and took it to the buffer and gave it a light buff with White Diamond and then multiple coats of carnauba wax. It is a perfect sized little Lovat in my opinion and spots a classic shape and look. Here are some pictures of the pipe after cleaning. I forgot to take pictures before I started cleaning it. Sometimes I get into a space and just work at them before I suddenly stop and remember that I did not take photos before starting.ImageImageImage


Restemming a little nosewarmer


Last evening I finished restemming this little nosewarmer. It is stamped Bounty over Real Briar on the bottom of the shank. It has a nice sand blast finish and is stained black over a red undercoat. It length is 4 ½ inches, height is 1 ½ inches, outer diameter of the bowl is 1 ¼ inches and the chamber diameter is 5/8 inches.

The bowl was in great shape when I got it in a box of stummels needing restemming. When I restemmed the one that I carved I set aside the old stem and yesterday was looking at it and thought it would fit this bowl. I took the bowl out and the stem fit. The tenon was perfect but the diameter of the stem was too big. I used my Dremel and sanding drum to take it down close. The series of four photos below show it when I had finished the first work with the Dremel.ImageImageImageImage

The next series of four photos show the stem fit after sanding with 240 grit sandpaper to remove the remaining vulcanite and bring the stem to a proper fit. This took several trips back to the Dremel for more sanding with the drum and then back to the sandpaper to smooth out the scratches. The photos were taken just at the point I had moved on to sand with the micromesh pads. I started with 1500 and 1800 grits to really work on the scratches and shaping. I use these wet as I find that they work better wet. From there I moved through the micromesh pads from 2400 to 6000 grit with each one polishing the stem more deeply.ImageImageImageImage

The last series of photos show the finished pipe. The stem has a deep shine. I used some 8000 and 12000 grit micromesh for the first time on this one and I have to tell you the difference between the 6000 and the 8000 grit was noticeable in the finish. This morning I buffed the pipe with carnauba wax and it is ready for a smoke!

ImageImageImageresImage

Carved from a kit – a predrilled block and stem


I took this photo essay of a pipe I carved from a pipe kit I purchased from smokindawg (Steve) on Smokers Forums and Pipe Smokers Unleashed. It was a predrilled block of briar and a straight vulcanite stem fit with a Delrin tenon. I actually only had to shape and finish this one. Steve did the hard work in drilling and prestemming it for me. Here is a photo journal of the progress in making the pipe. I used a hand held Dremel with the larger sanding drum to bring the pipe out of the block. At the junction of the bowl and shank I used a wood rasp and a long file to get the angle cut the way I wanted it to be.

Photos 1-3 the block when it arrived (I sketched a potential shape with pencil on both side of the block to give me an idea of where I was going to go)ImageImageImage

Photos 4-5 show the initial sanding to remove material.ImageImage

Photos 6-9 Making more briar dustImageImageImageImage

Photos 10-13 – Making more dust – Shape emergingImageImageImageImage

Photos 14-17 Making more dust – shape is coming. I bent the stem with heat to get an idea of the curve of the stem. Also removed some of the vulcanite on the stem.ImageImageImageImage

Photos 18-23 – The shaping is done. The pipe has been sanded with 240 grit sand paper and then buffed with Tripoli and White Diamond. I then sanded it with 400 and 600 grit wet dry sandpaper.ImageImageImageImageImageImage

Photos 24-27 – Black Stain. After some more sanding I stained the entire bowl with black aniline stain as an undercoat.

ImageImageImageImage

Photos 28-31 – Excess black stain removed. With the buffer and Tripoli I removed the excess of the black undercoat of stain. My goal was to leave it in the grain patterns to highlight them.

ImageImageImageImage

Photos 32-36 – More buffing and sanding. ImageImageImageImageImage

Photos 37-40 – Top stain of Oxblood Aniline for contrast. ImageImageImageImage

Photo 41 – An adjustment to the bend. I reheated the stem and curved the bend a bit more to match the curve of the underside of the bowl.

Image