Author Archives: rebornpipes

Investigating a Melting Stem While Refreshing a Willard Imported Briar


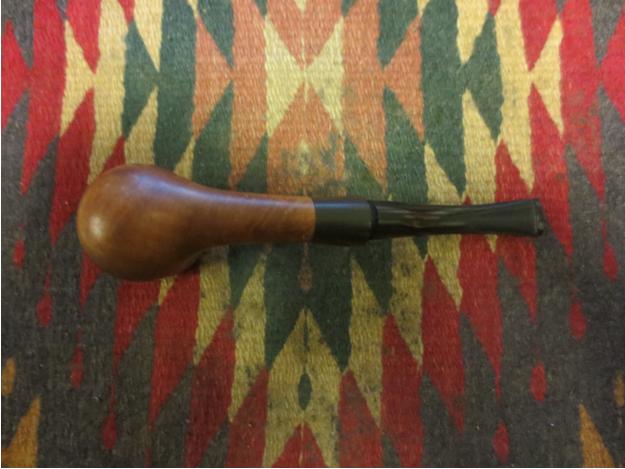
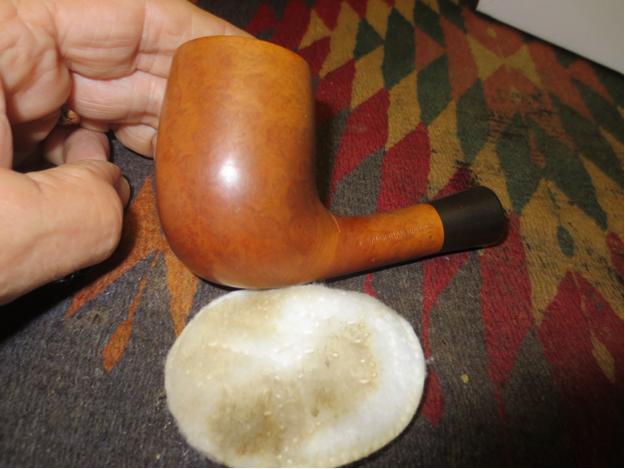
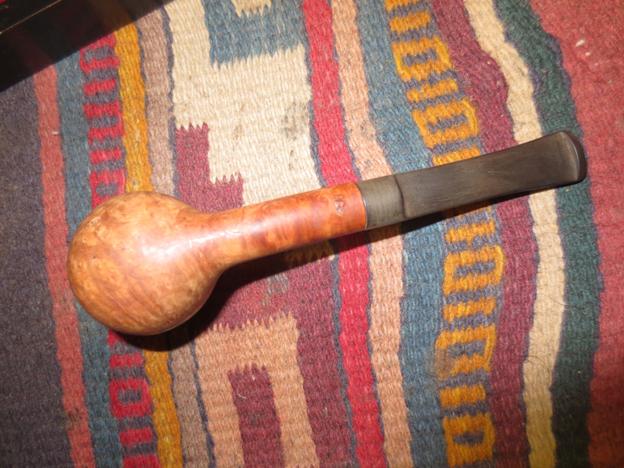
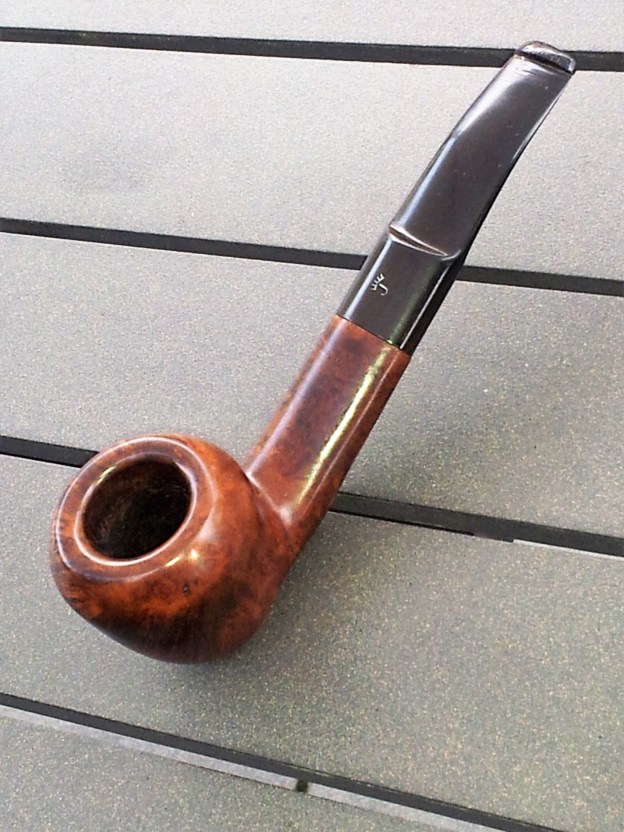
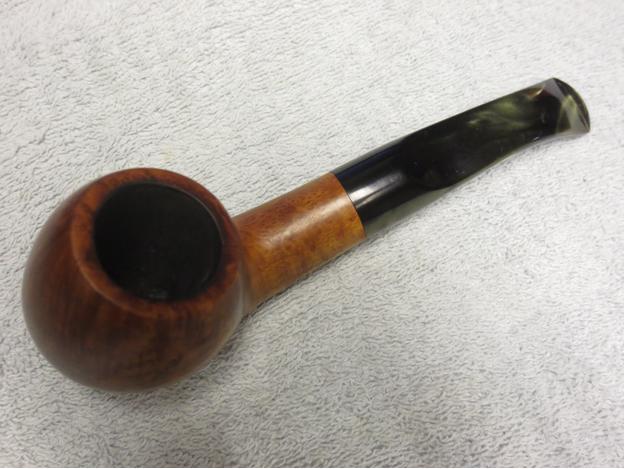
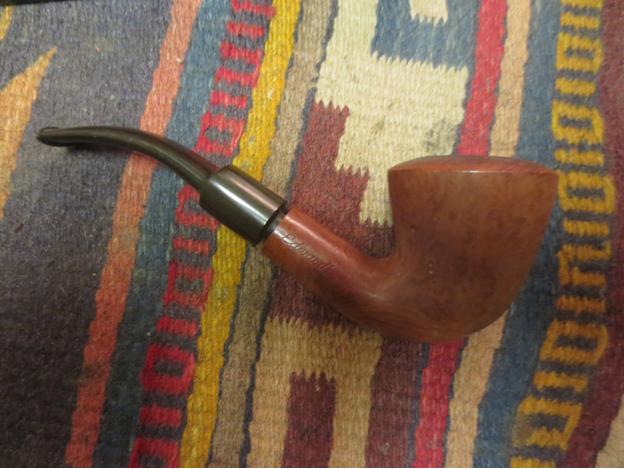
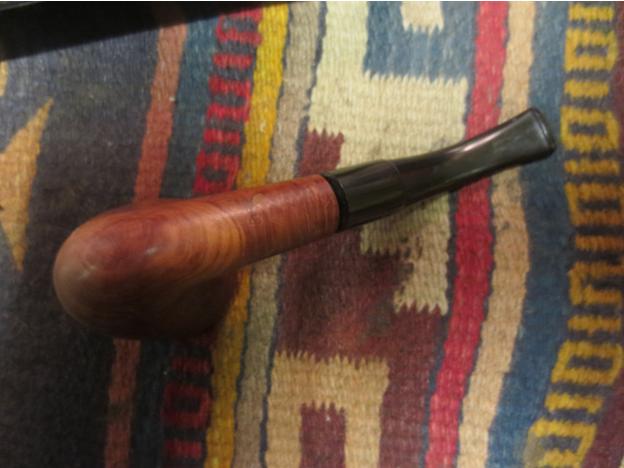
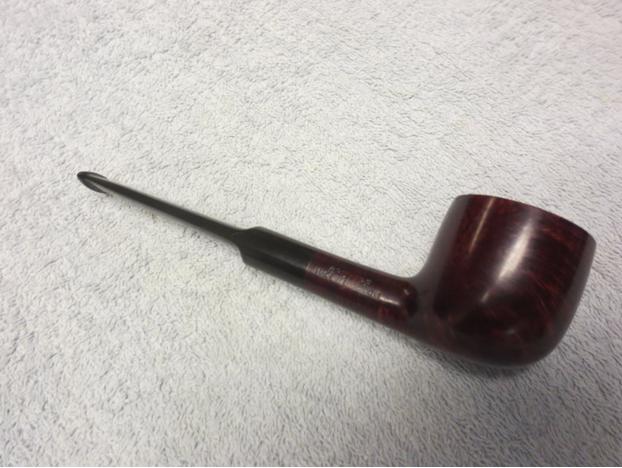
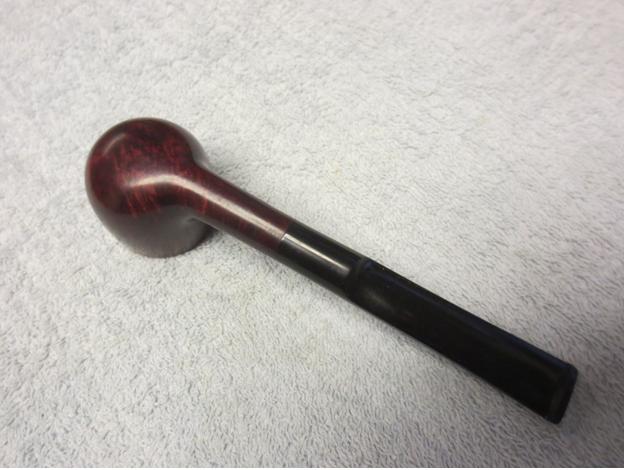
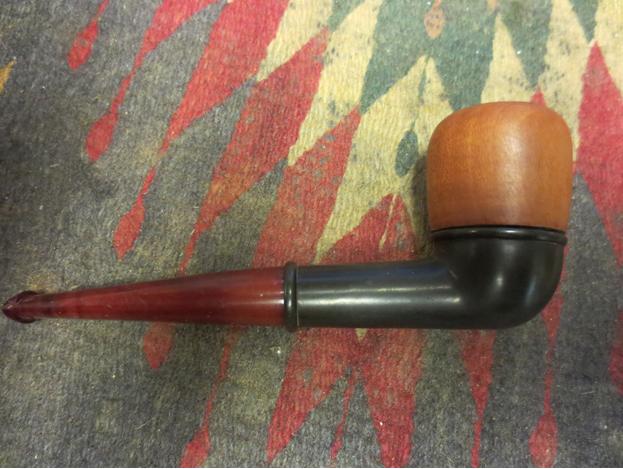
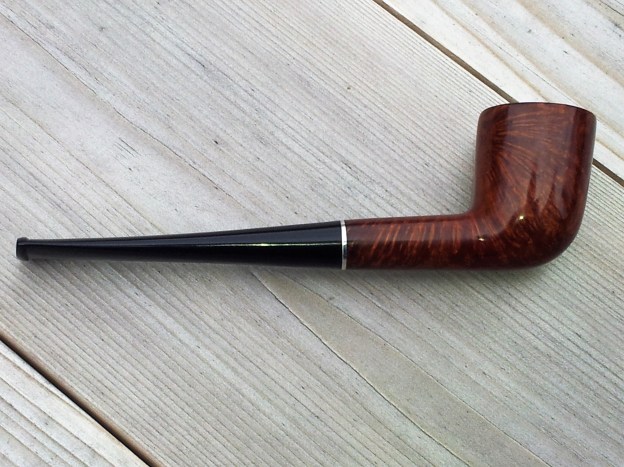
That turned out really well. I wanted to pass on the results of your experiment and the heads up with regard to alcohol! Great work Charles.

Charles Lemon's avatar

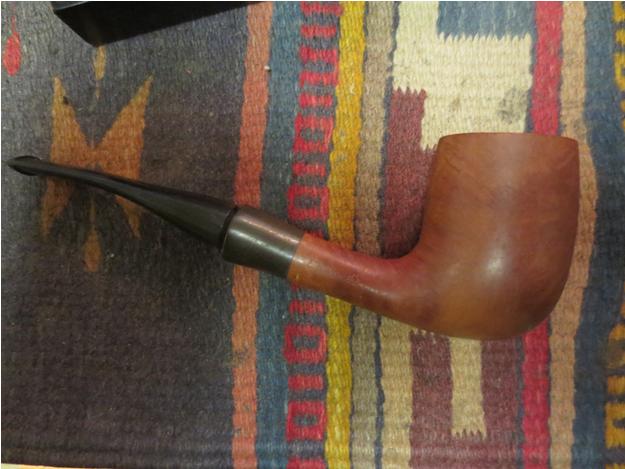
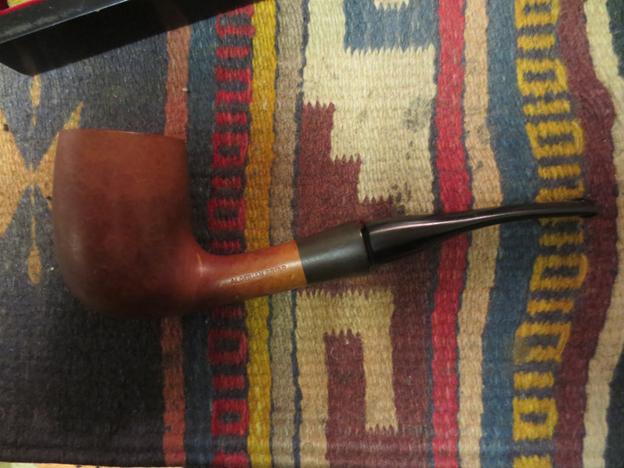
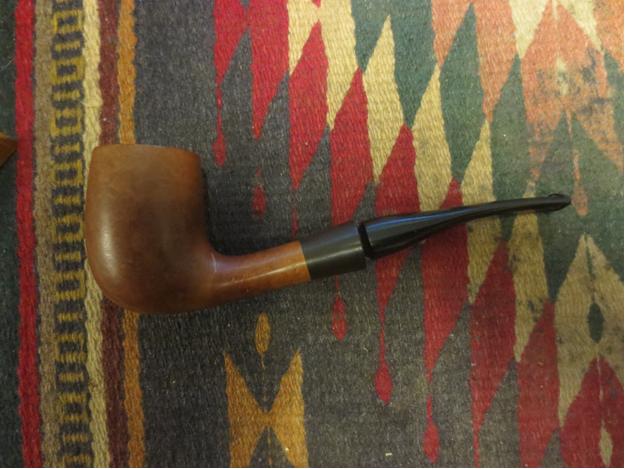
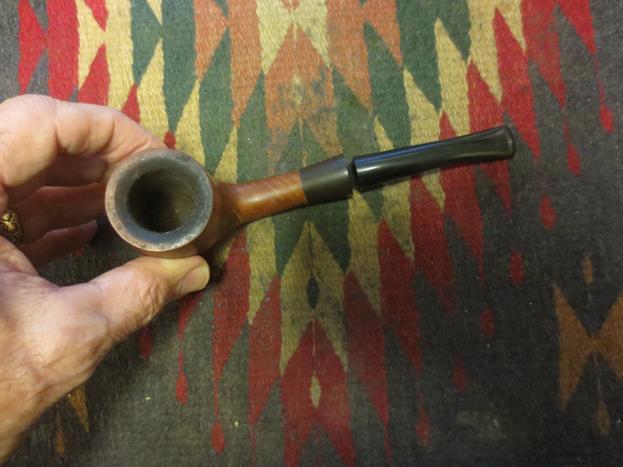
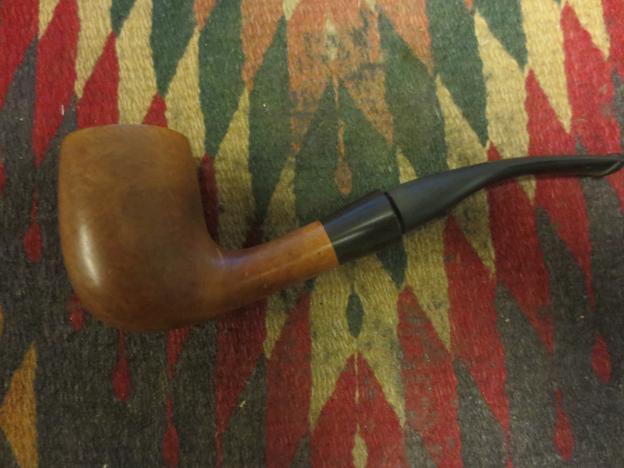
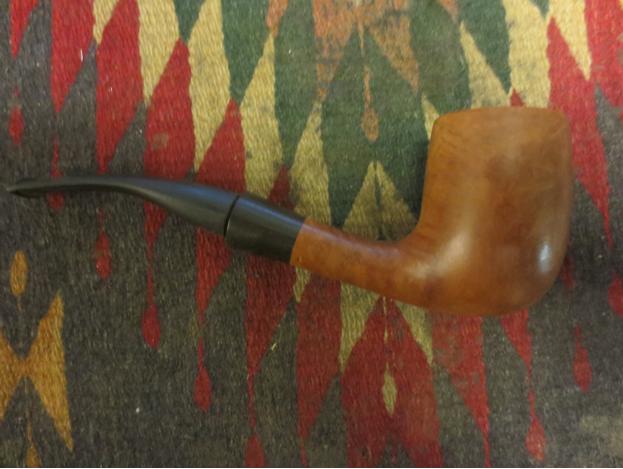
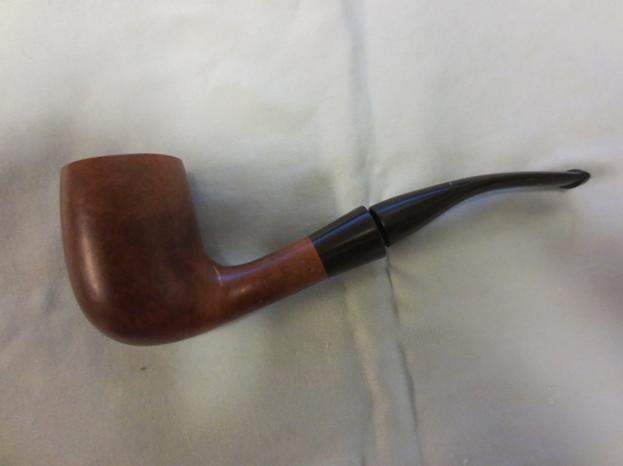
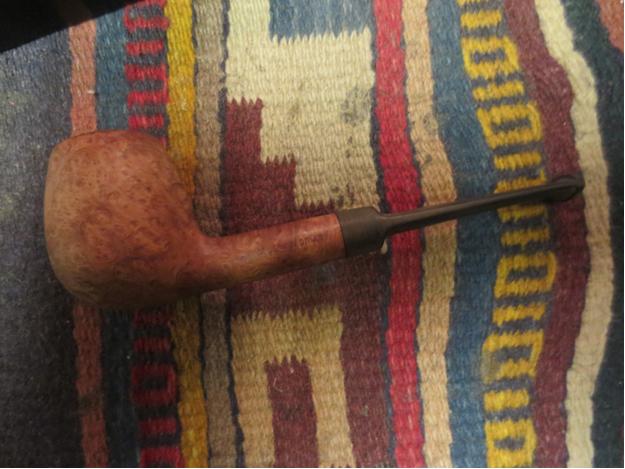
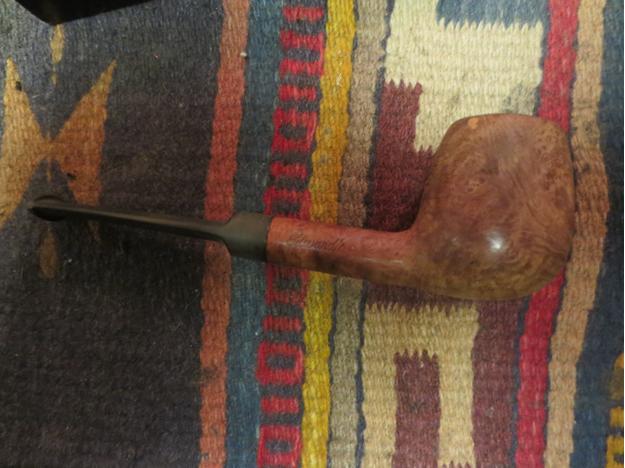
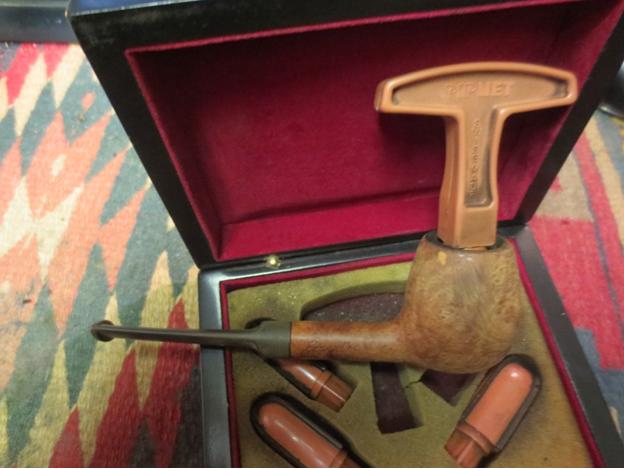
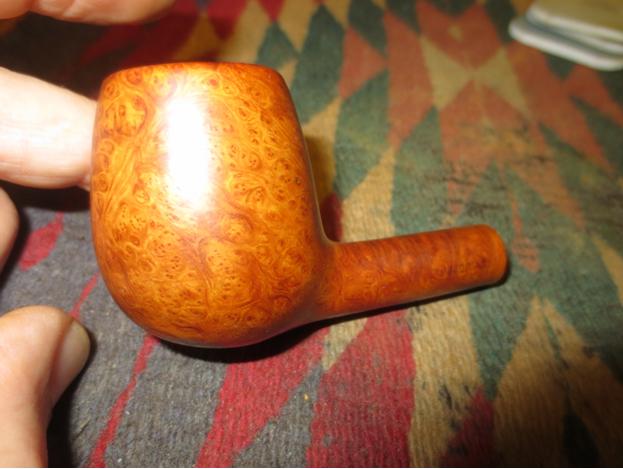
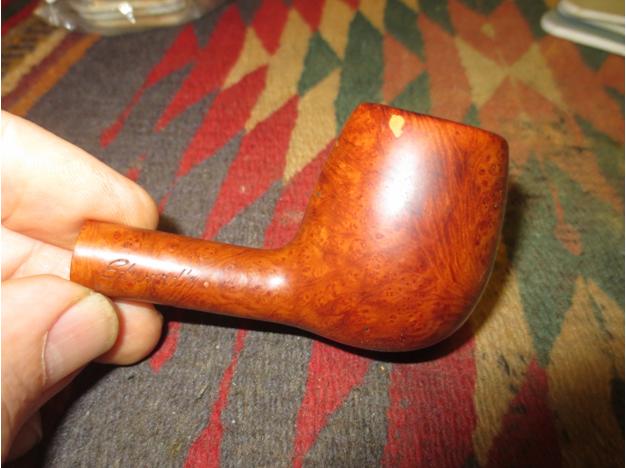
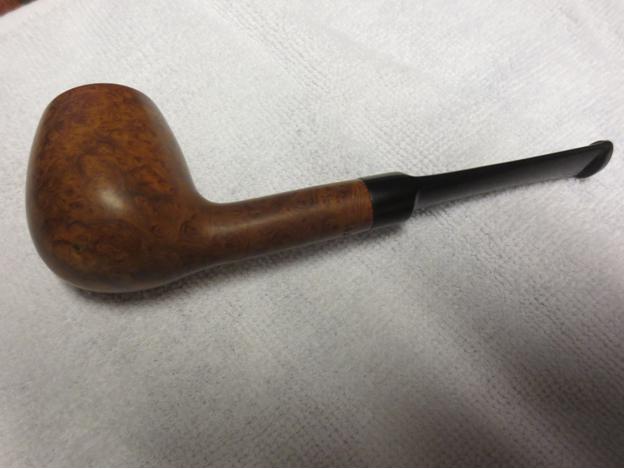
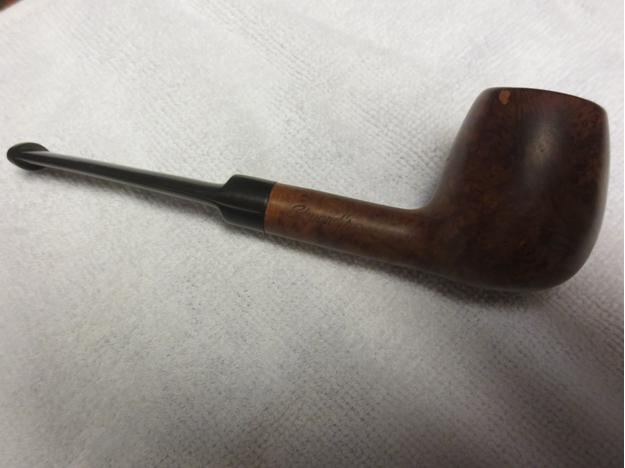
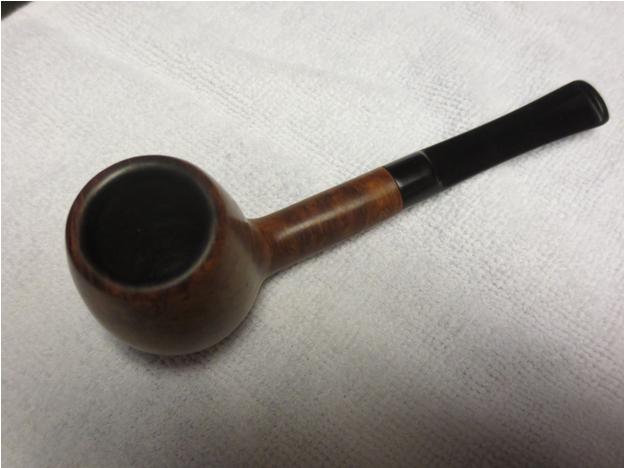
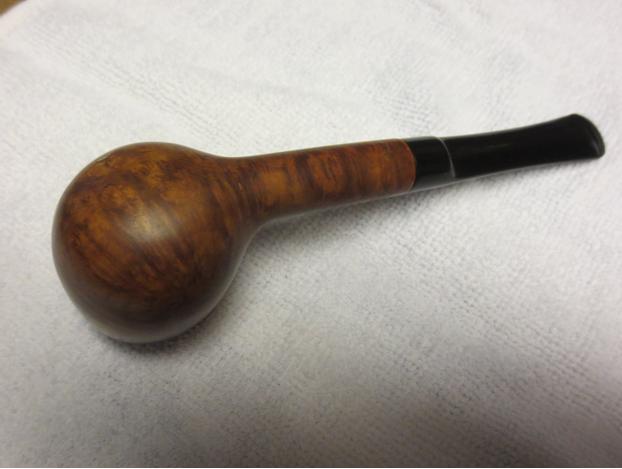
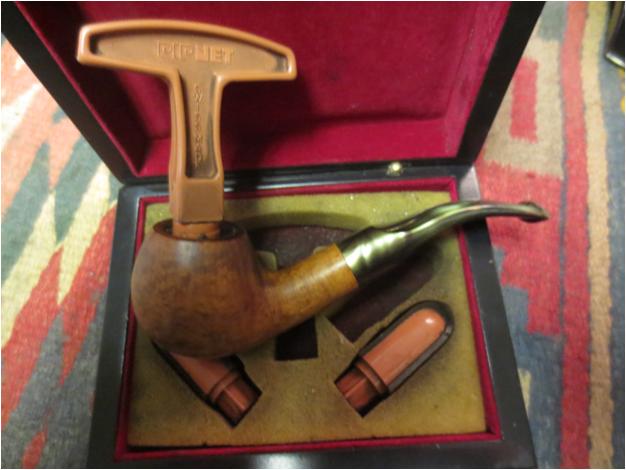
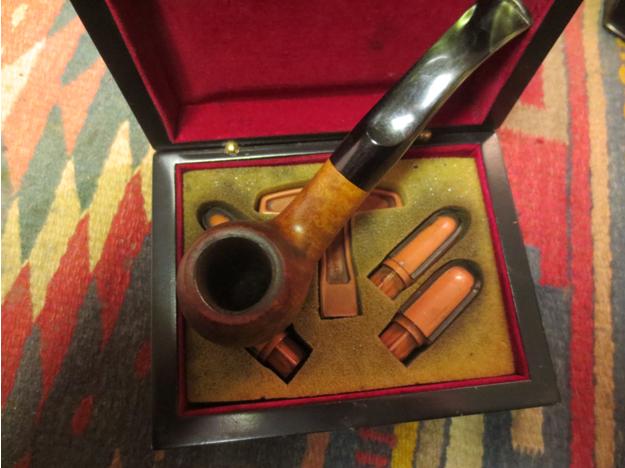
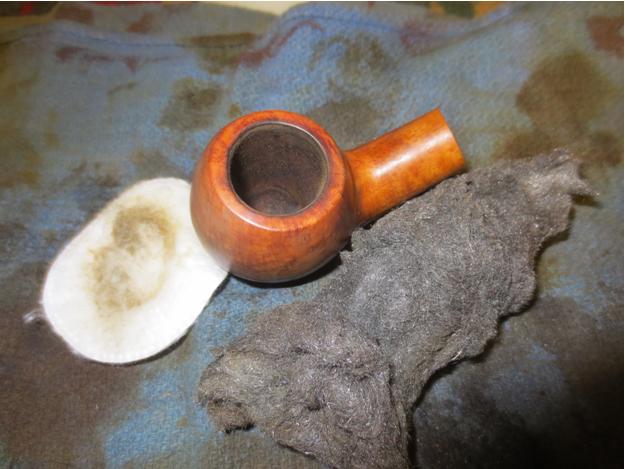
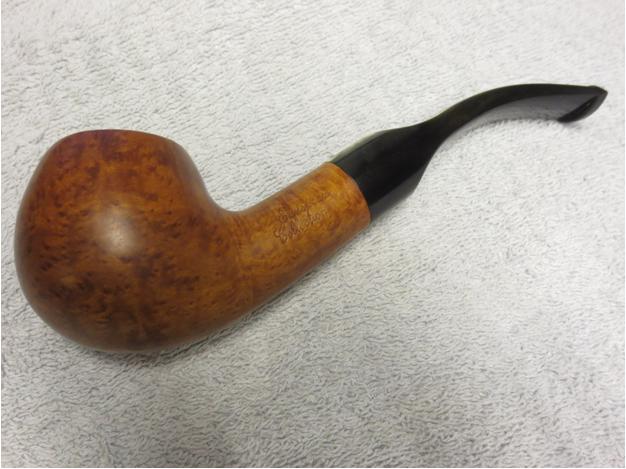
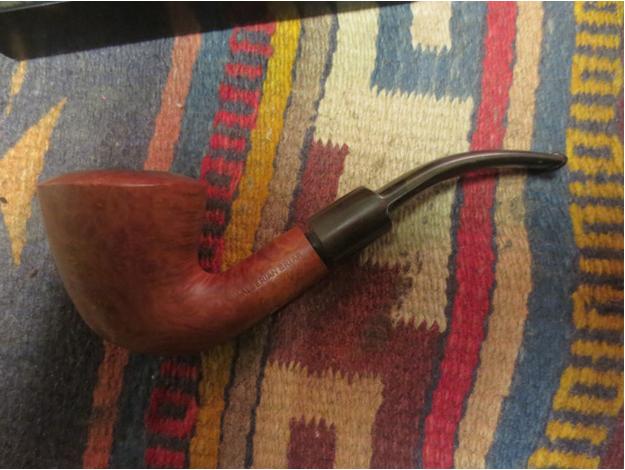
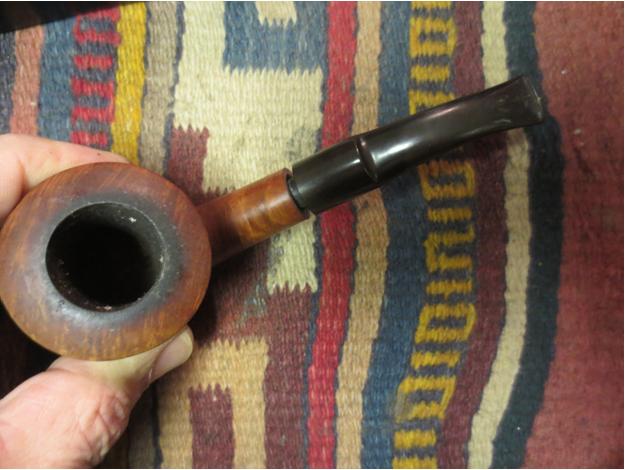
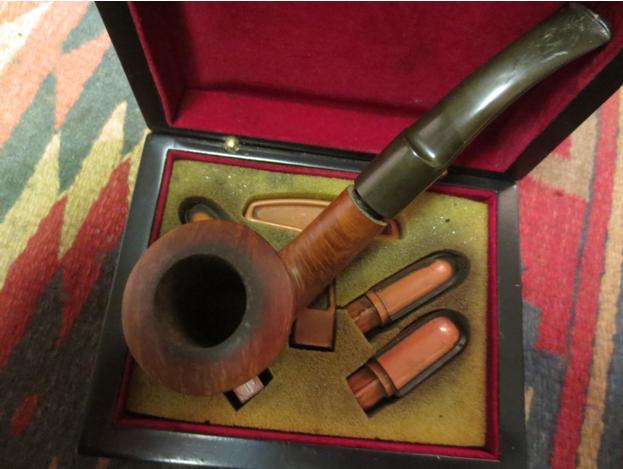
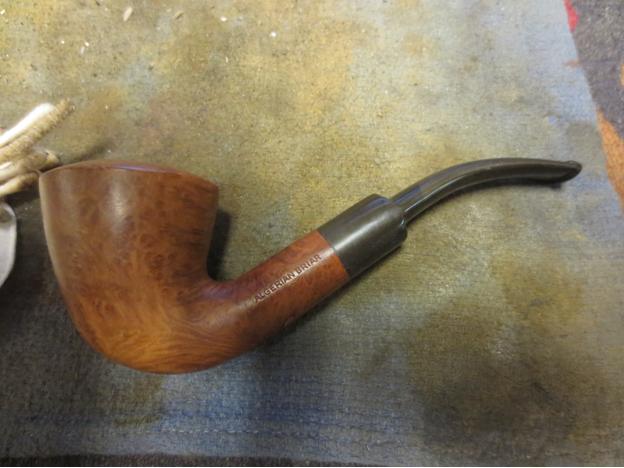
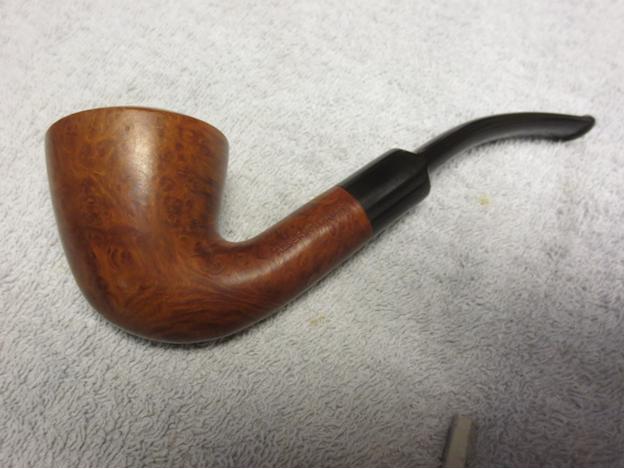
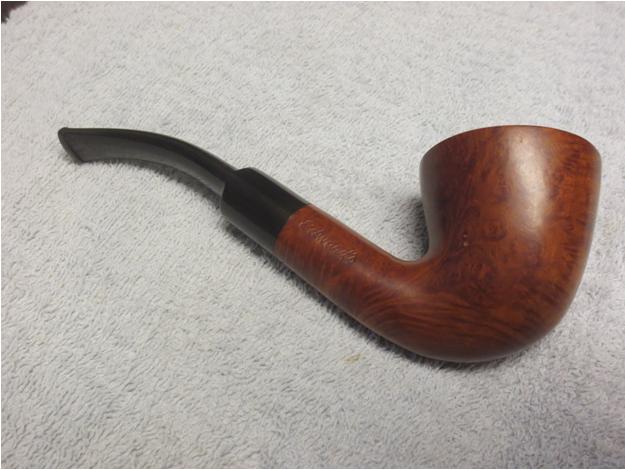
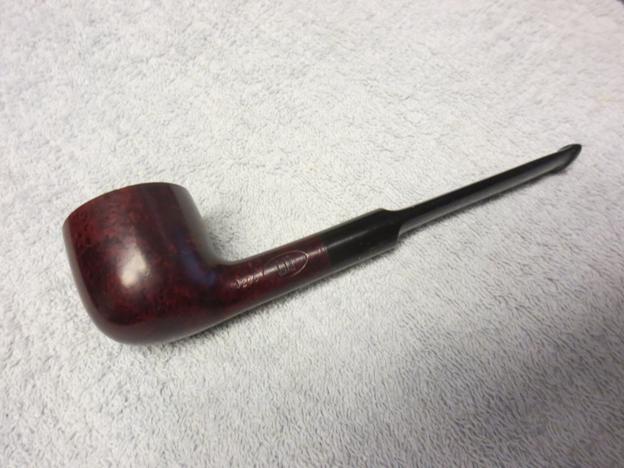
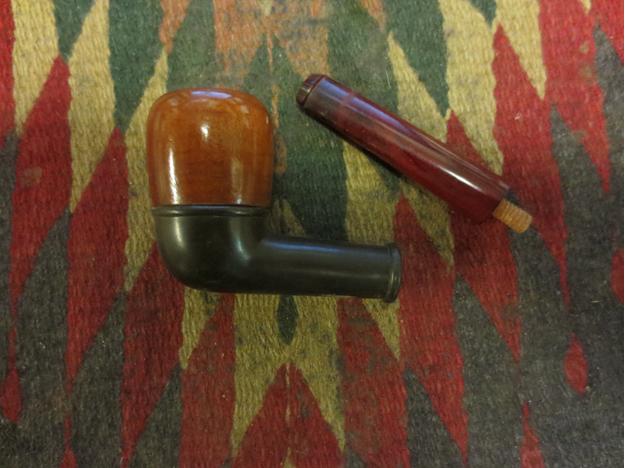
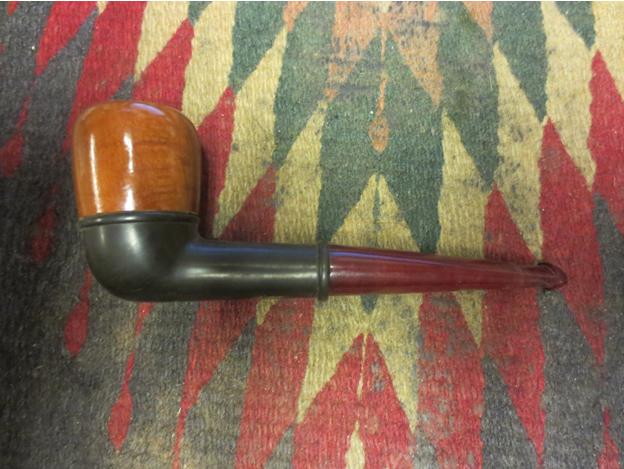
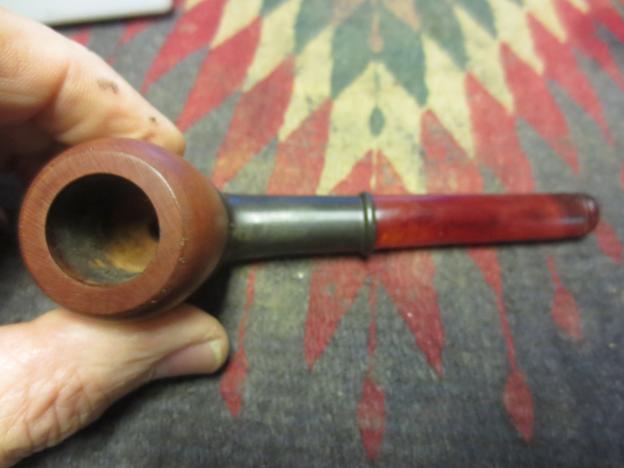
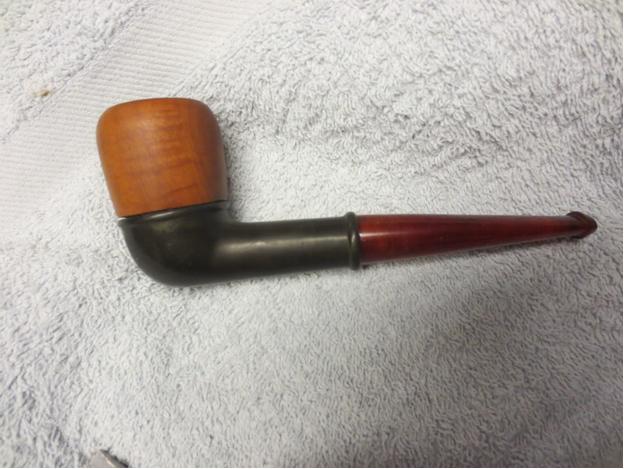
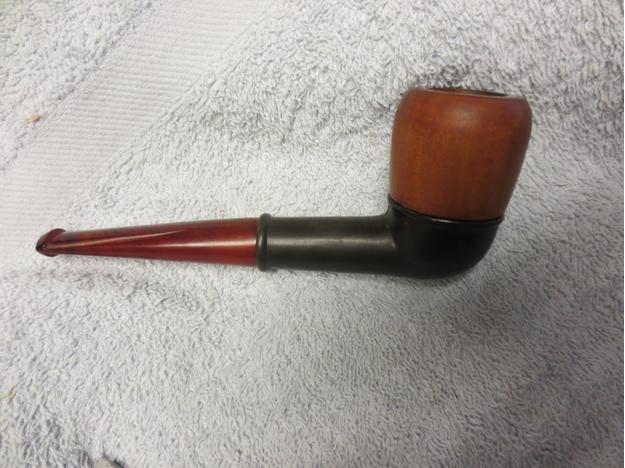
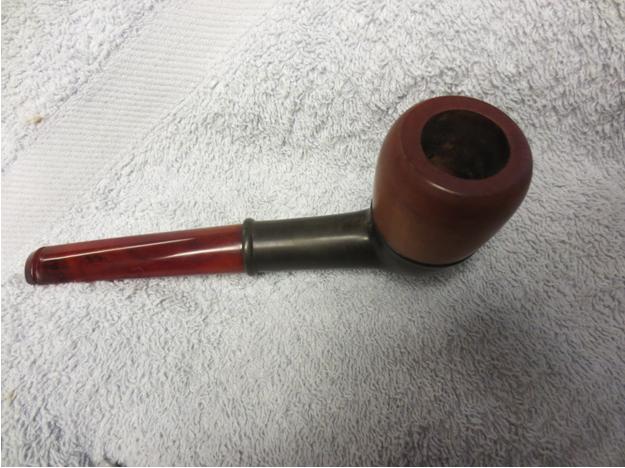
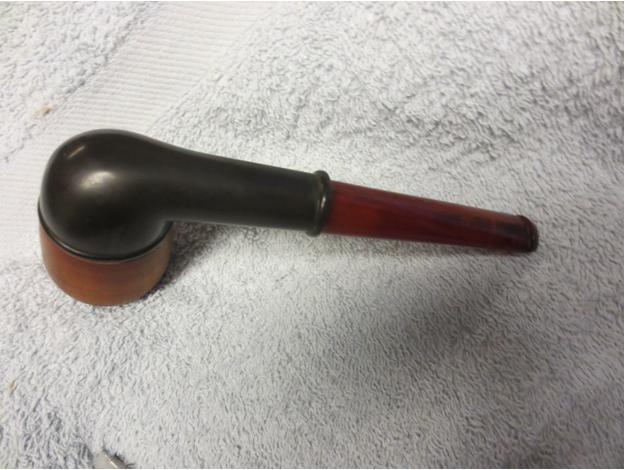
This smaller pipe came to me in pretty rough cosmetic condition. Marked “Willard” over “Imported Briar”. Pipedia tells us this:

“The Willard pipes were made by Sparta Industries in Sparta, N.C from 1963 to 1975 (about 60,000 pipes per week). Some were distributed by the Post and Base Exchanges that serviced the military during the Vietnam War. Others were produced for R. J. Reynolds Tobacco.”

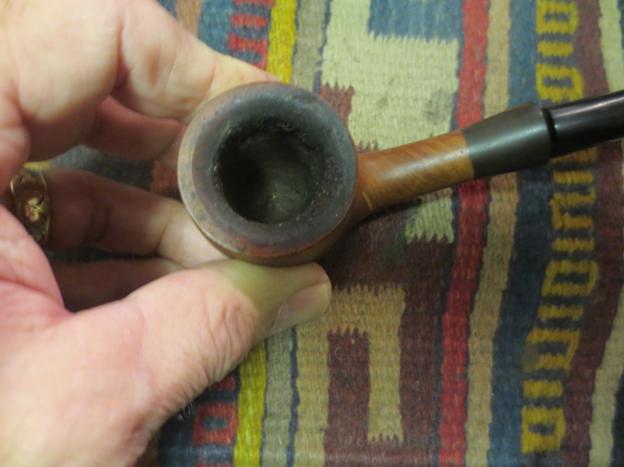
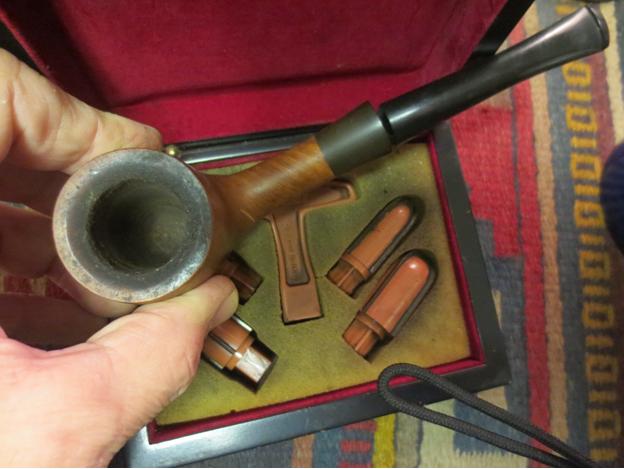
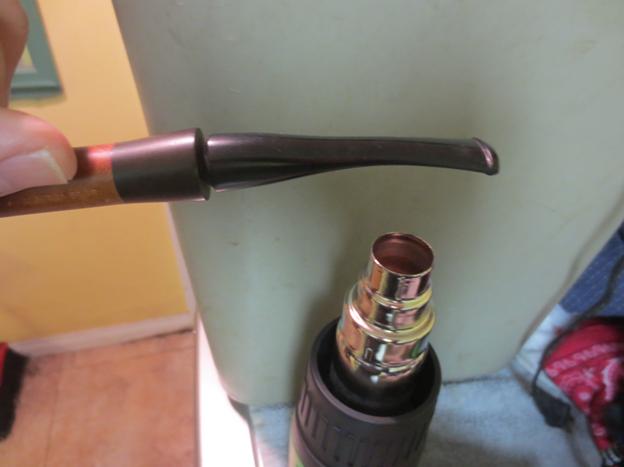
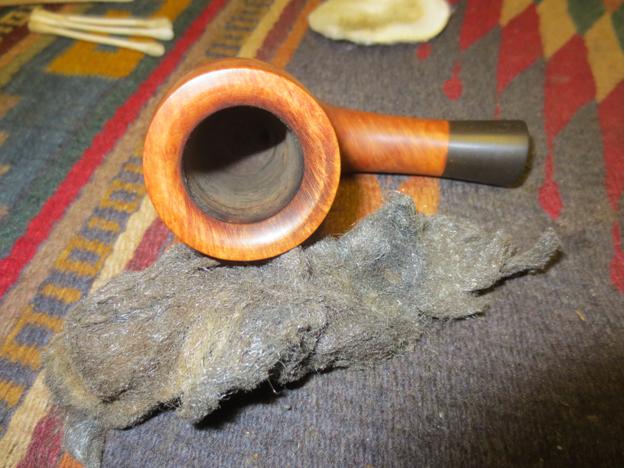
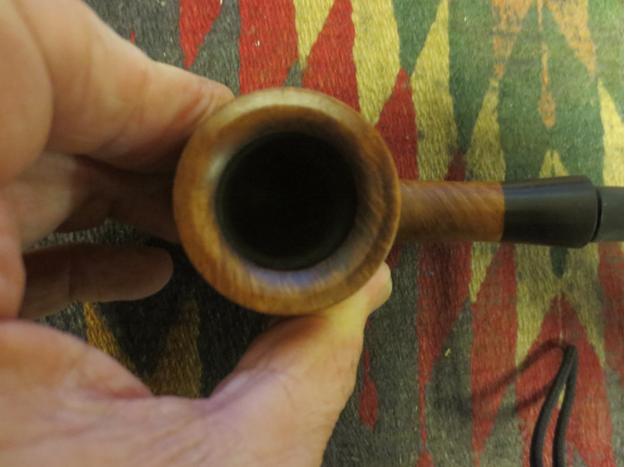
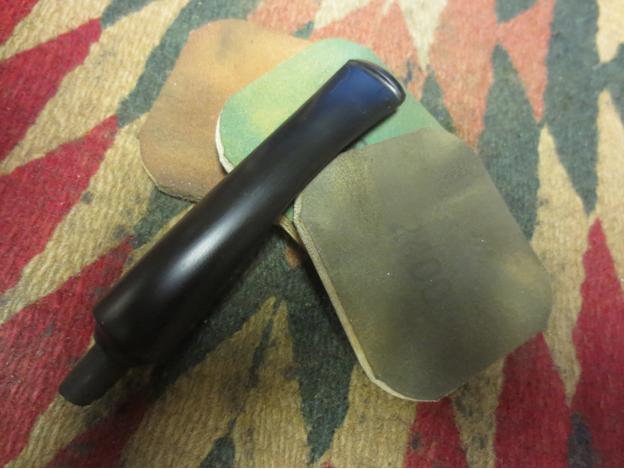
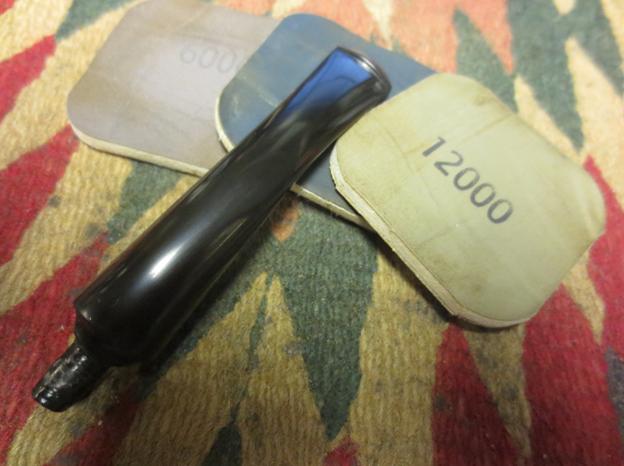
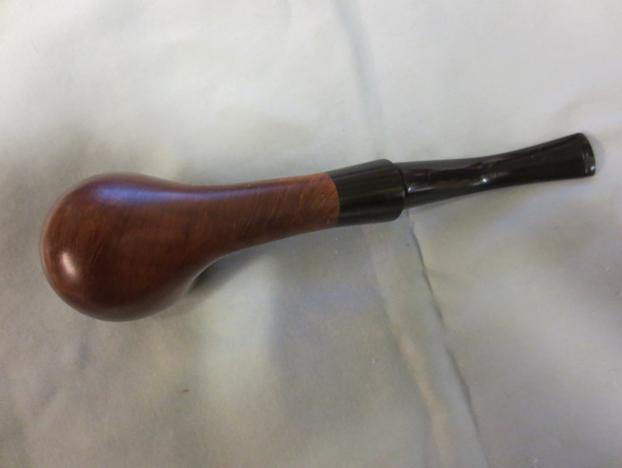
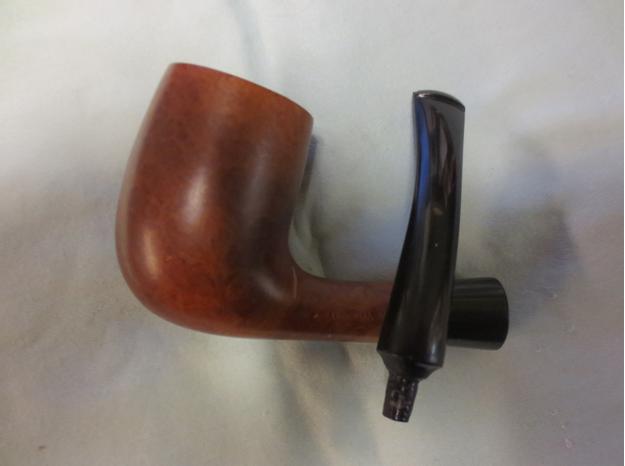
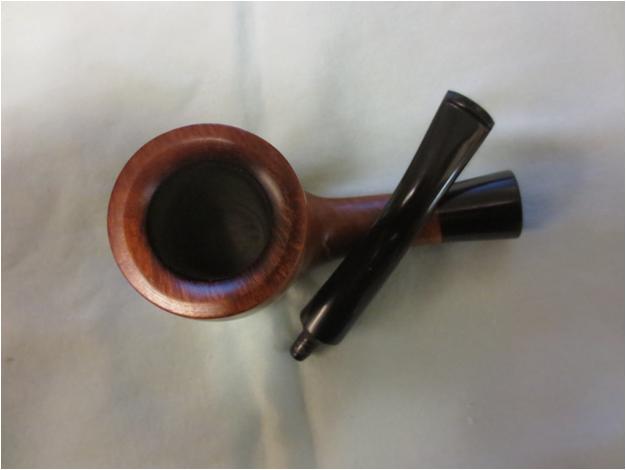
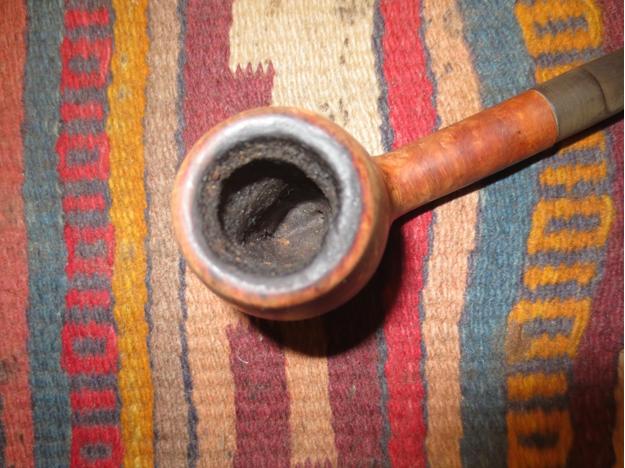
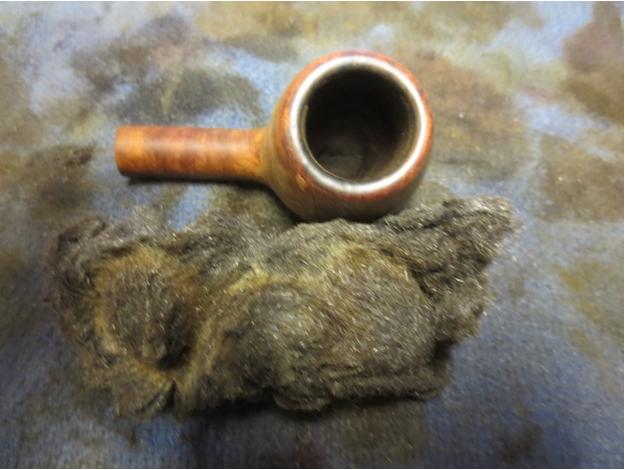
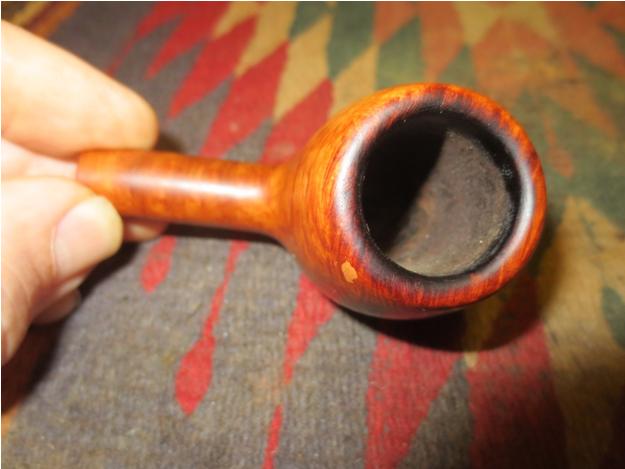
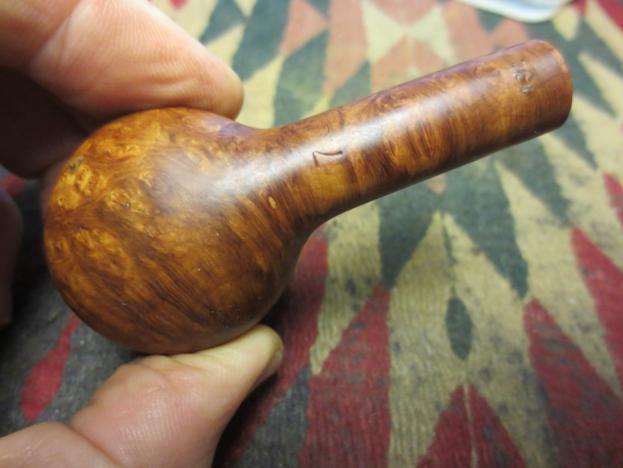
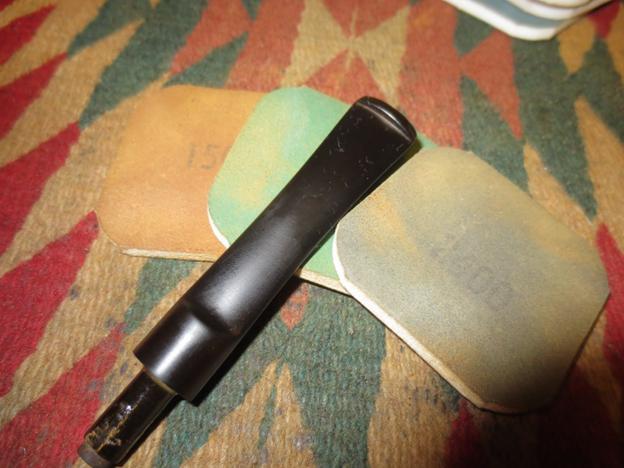
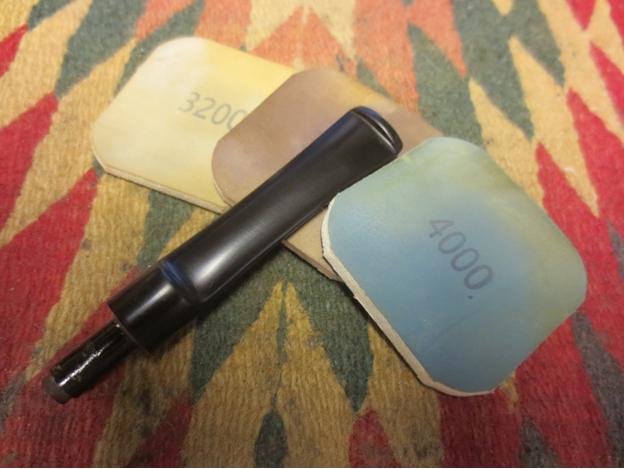
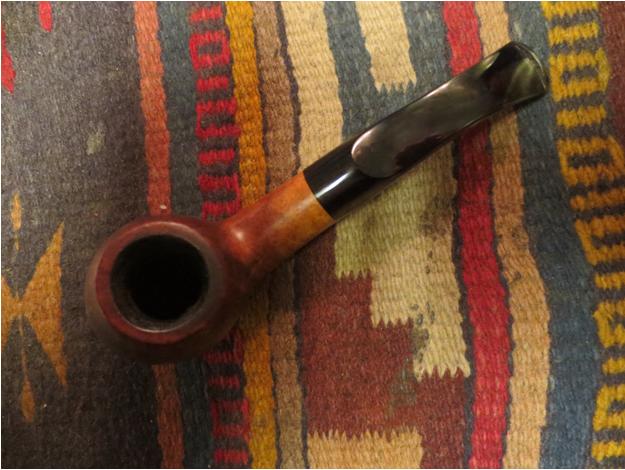
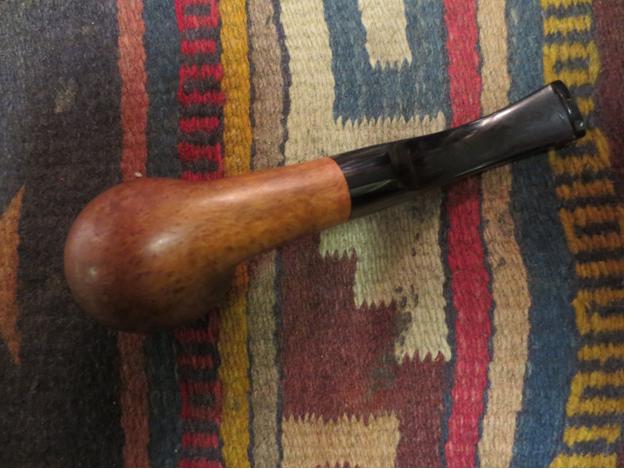
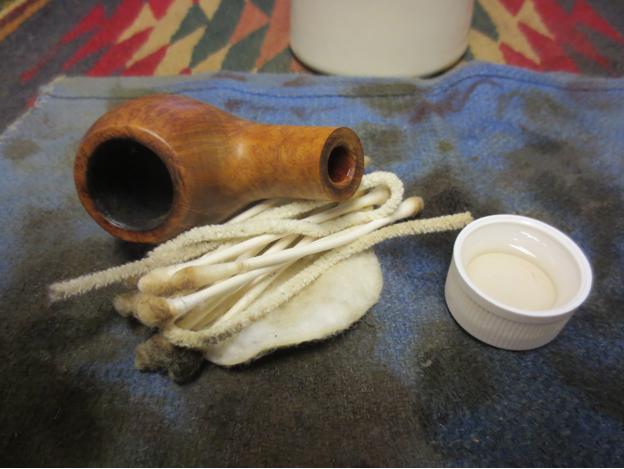
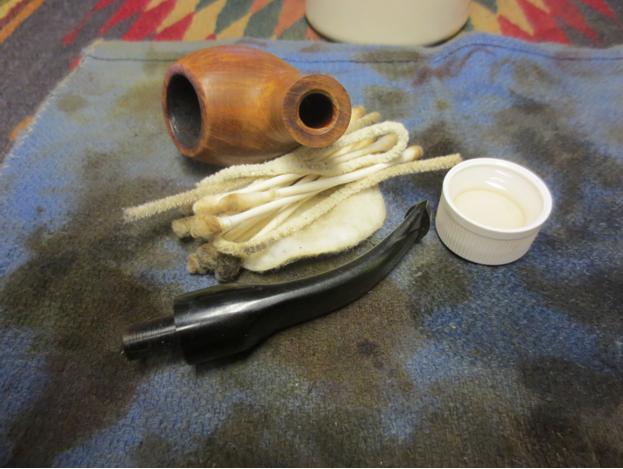
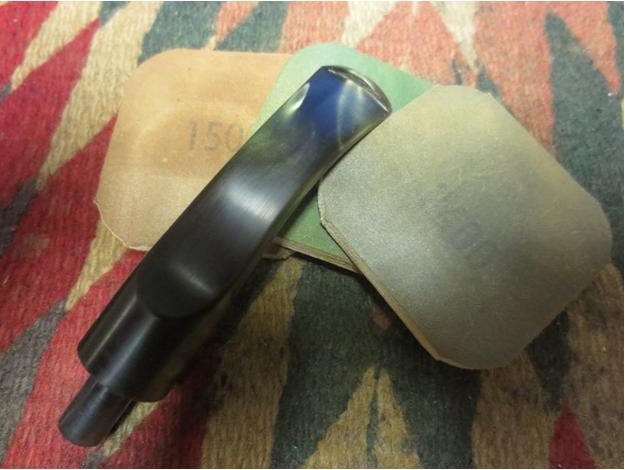
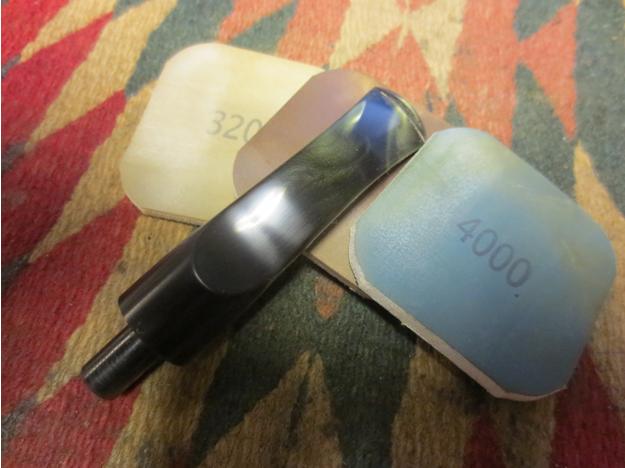
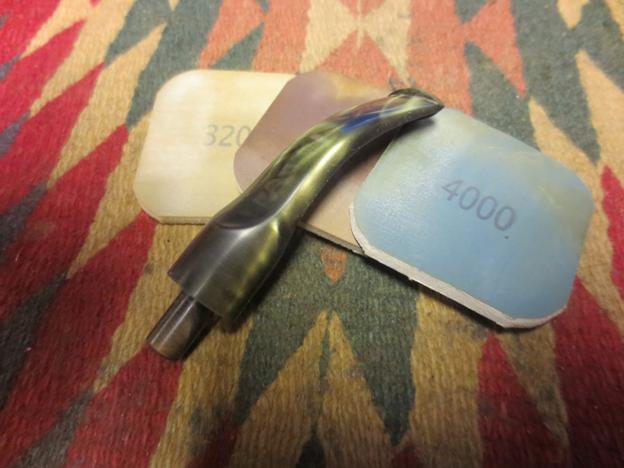
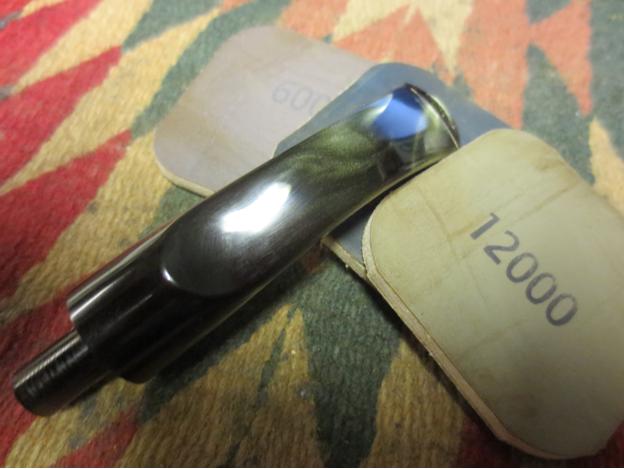
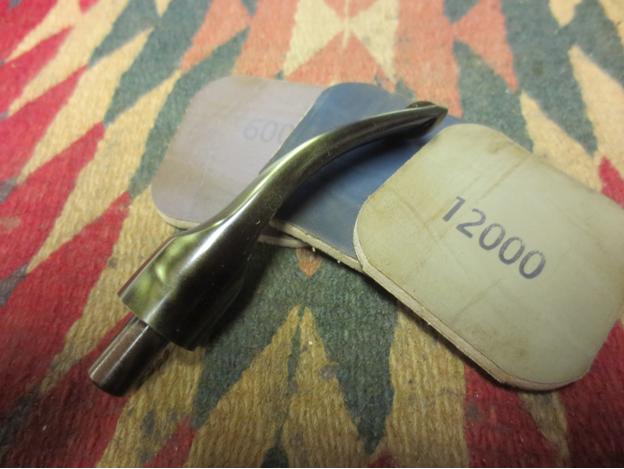
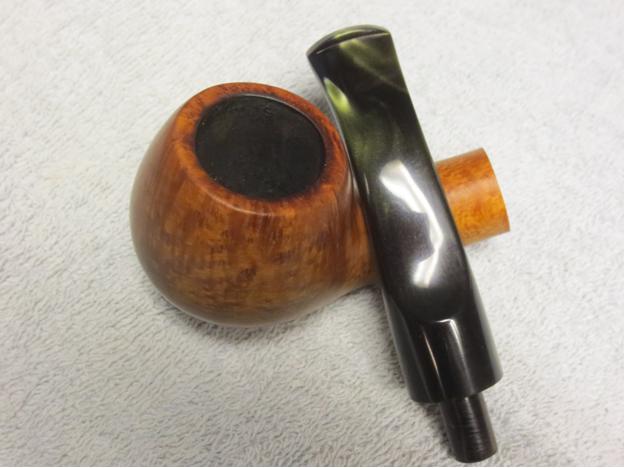
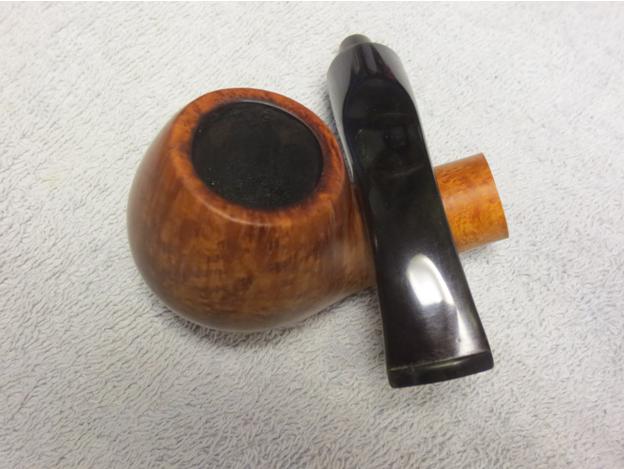
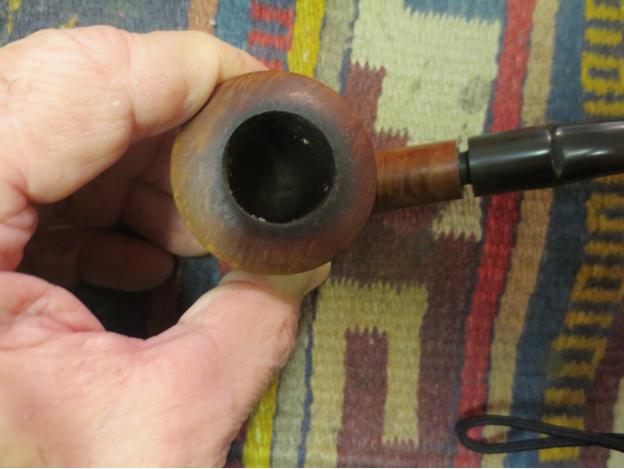
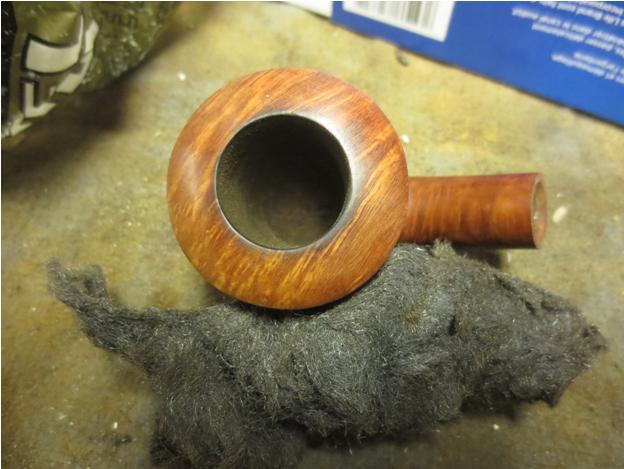
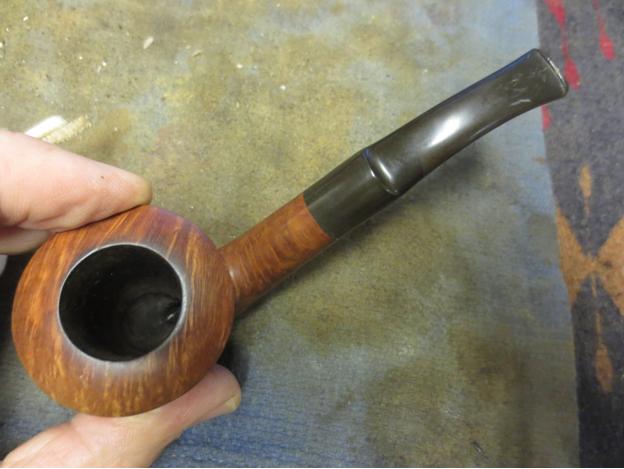
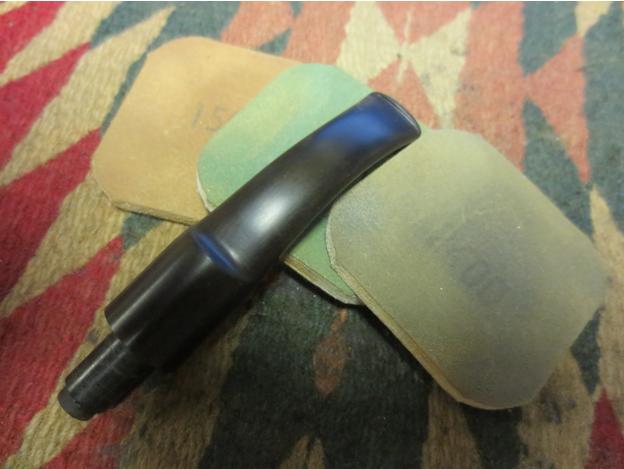
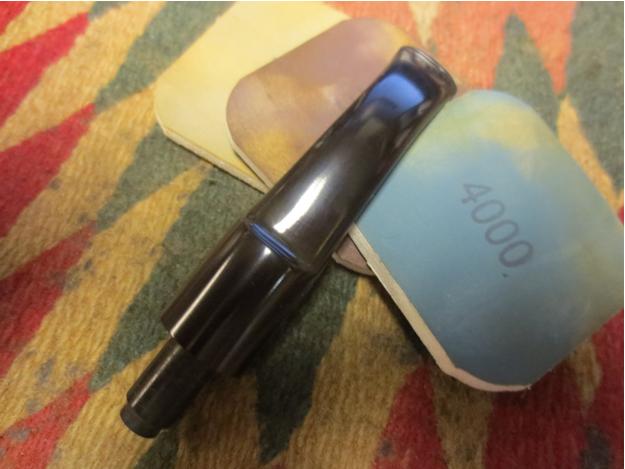
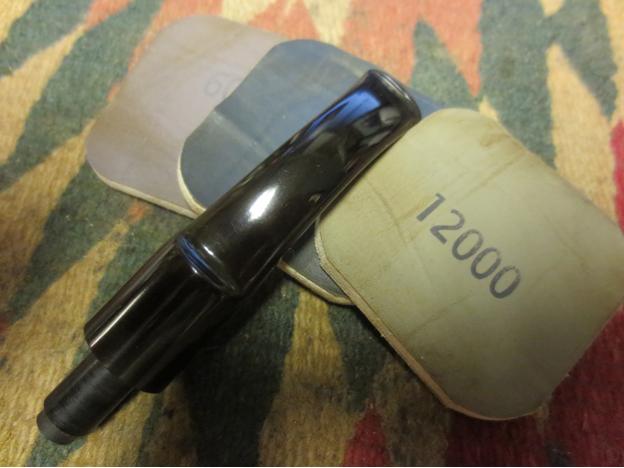
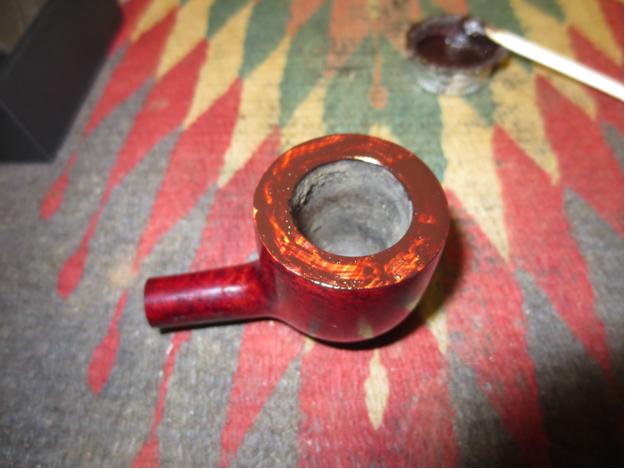
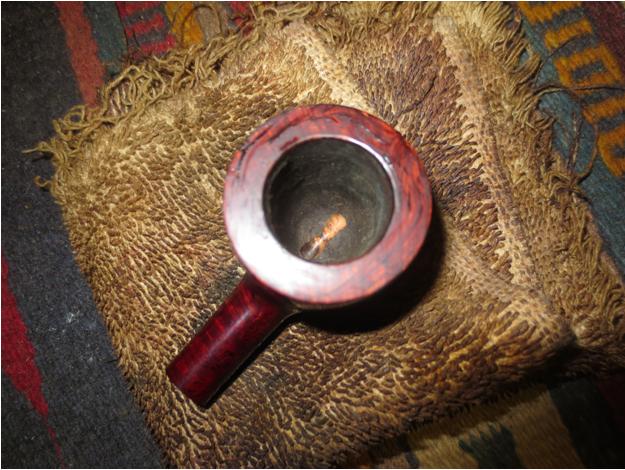
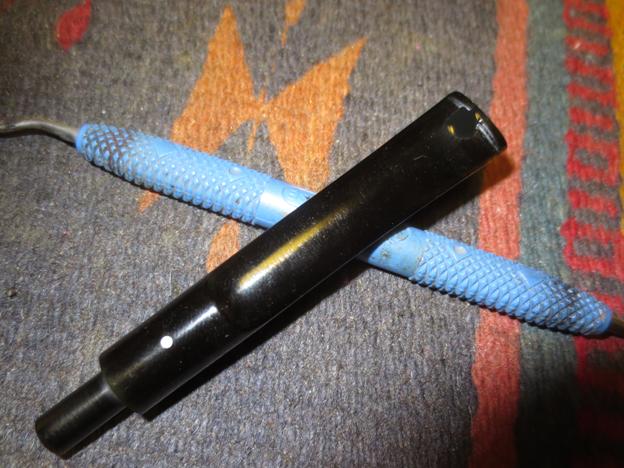
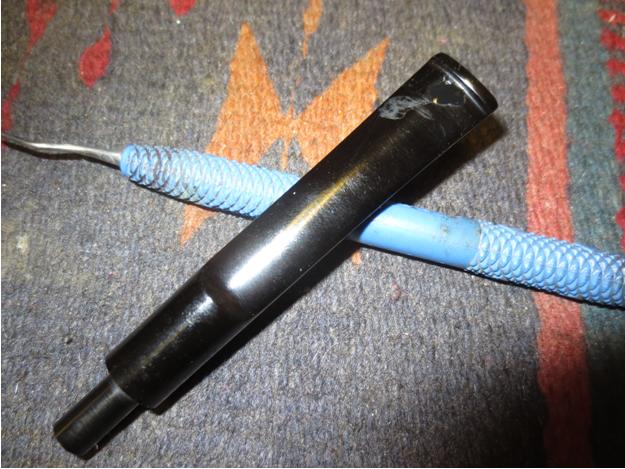
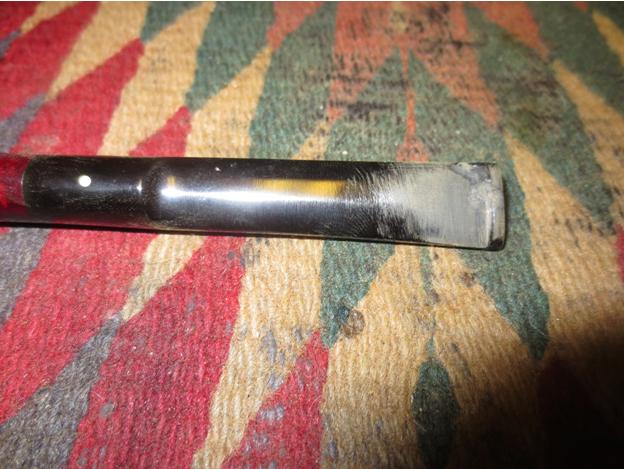
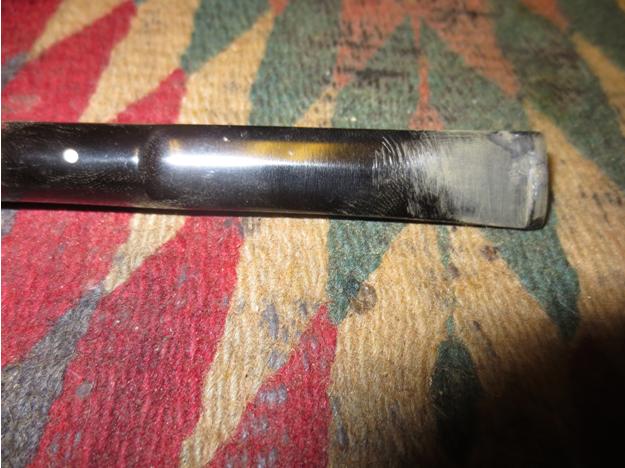
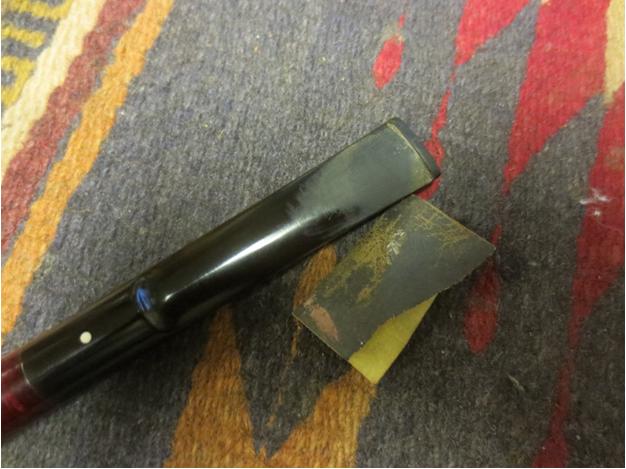
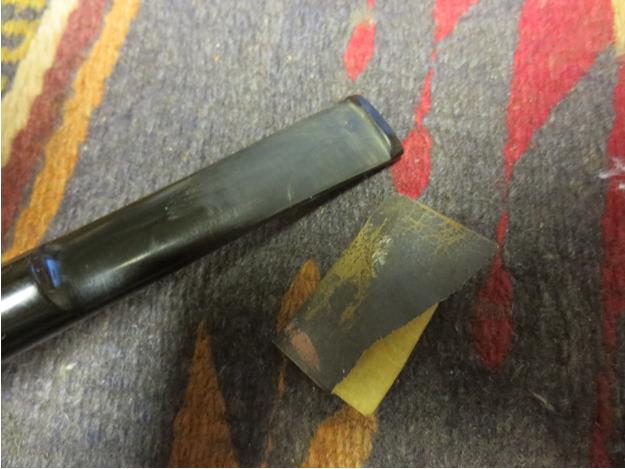
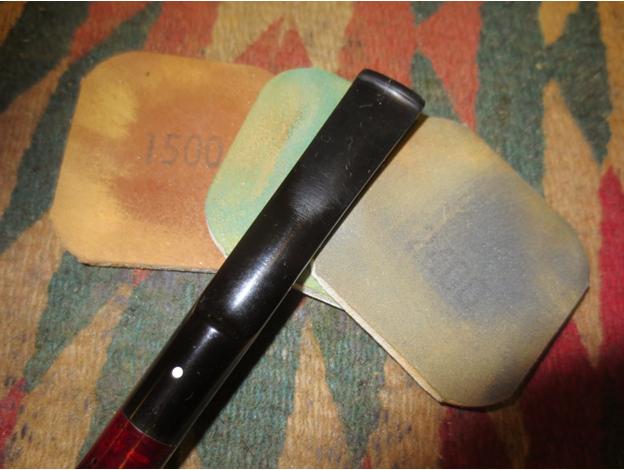
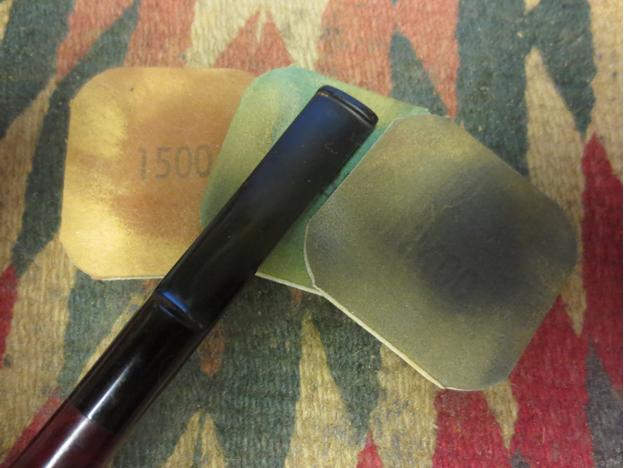
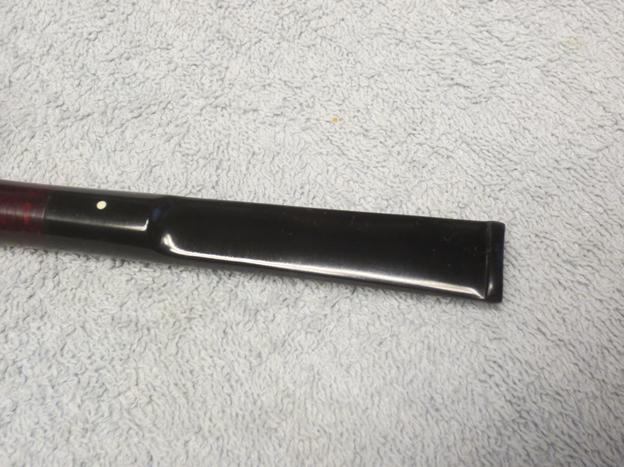
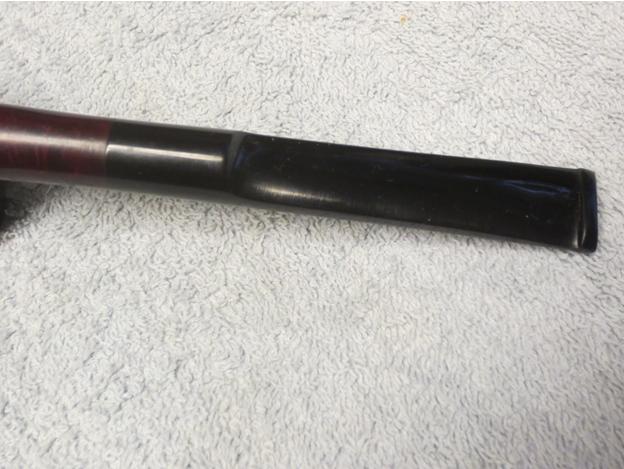
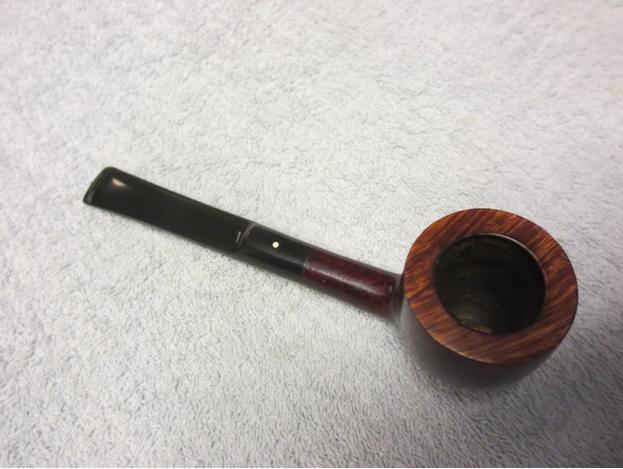
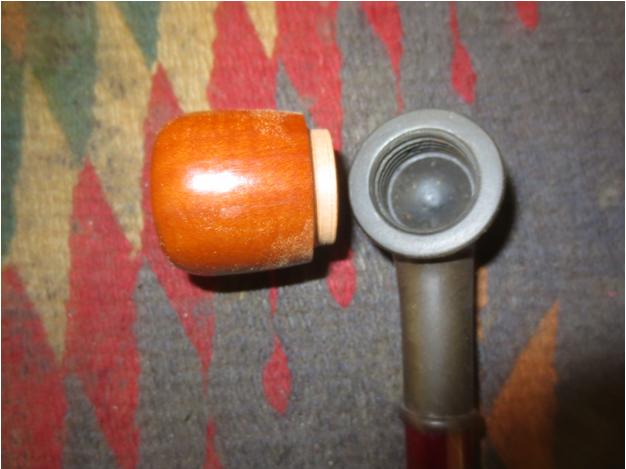
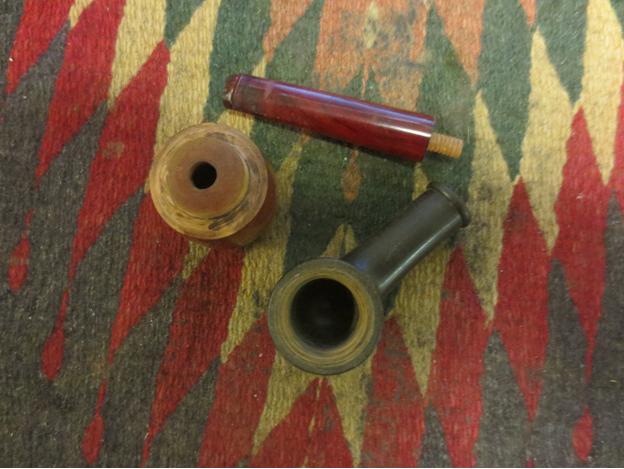
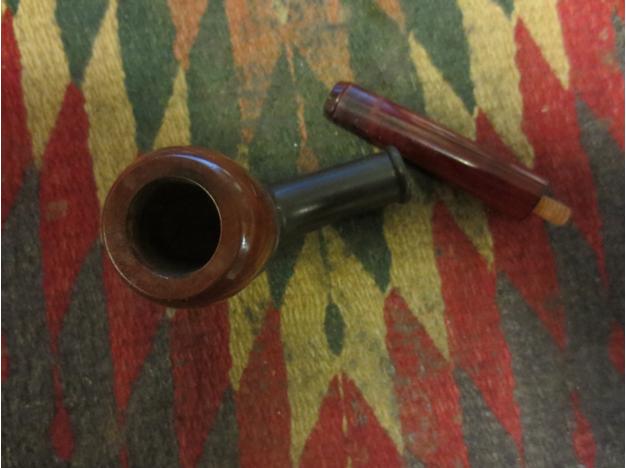
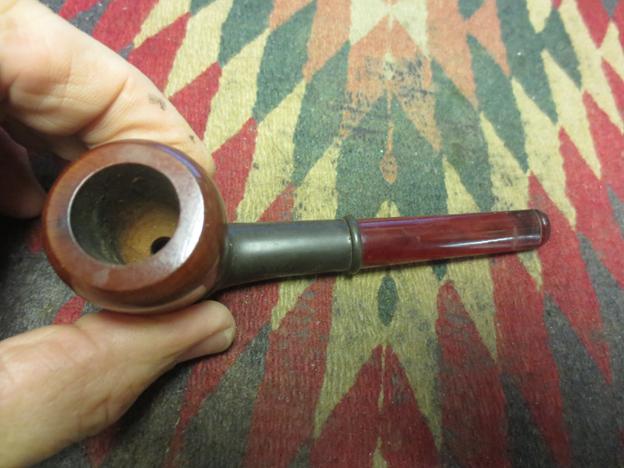
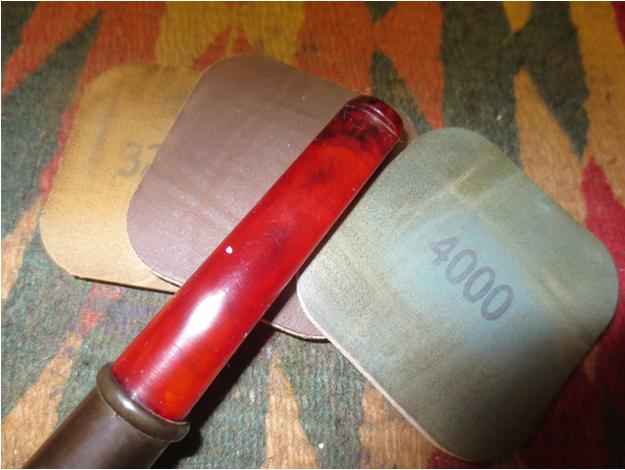
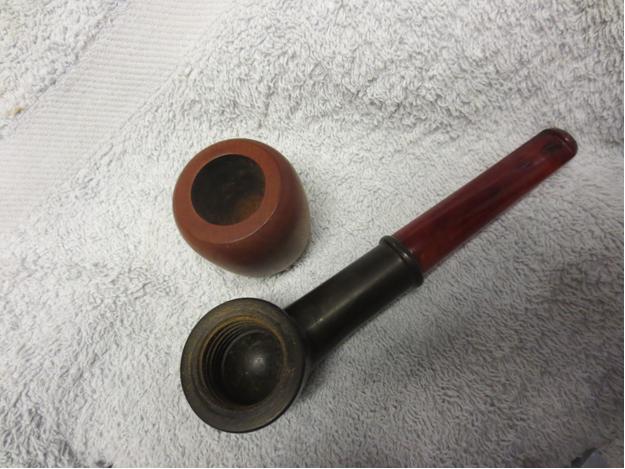
The pipe was covered in blobs of sticky gunk and general grime, the lacquer finish was chipped and peeling, and the rim was covered in a hard, flaky layer of “lava flow” – tars and other crud produced through heavy use. The stem had considerable tooth chatter in the “bite” area, both above and below, though otherwise it seemed in good shape, with little to no oxidation. The stinger was intact and, somewhat remarkably, the stem was not overturned, lining up perfectly with the shank. The lack…

View original post 889 more words

Restoring and Restemming a Large Edward’s Bent Billiard with a Vulcanite Ferrule


Blog by Steve Laug

Label Logo_medium The last of the foursome of Edward’s pipes that I cleaned up for the fund raiser on Smoker’s Forums is a large Billiard with a vulcanite ferrule. It came to me without a stem so I would need to go through my stem can and see if I had any stem that would work with this bowl. The pipe is stamped Edward’s in script on the right side of the shank. On the left side it is stamped Algerian Briar in block letters. On the underside of the stem there is a large + sign and the shape number 42 near the ferrule. The bowl was in rough shape. The finish was dirty and there are some large and small fills along the shank from the bowl shank union to the ferrule. The ferrule was oxidized. The internals of the bowl and shank were dirty. The bowl was caked with the same heavy soft cake as the other Edward’s pipes. The tars had flowed over the beveled inner rim of the pipe and hardened into a dark hard cake. The briar itself was quite beautiful under the grime so a good cleaning would reveal some excellent grain as it had in the other three pipes.

I found a stem in my stem can that fit the shank well and looked pretty decent. It would need to be bent slightly and the roughness of the stem would need to be sanded down to make the fit right but I took photos of the pipe with this stem to get an idea of how it would look. At this point the pipe has not been cleaned up or reamed.Free1

Free2

Free3

Free4 I took one close-up photo of the bowl to show the state of the rim and the cake in the bowl. It would take some work to clean off the lava and bring the finish back to pristine.Free5 I reamed the bowl with the PipNet reamer and took it back to bare wood to remove the crumbling, soft cake in the bowl.Free6

Free7 Once I had the bowl reamed I took a photo of the stem and then took it to the heat gun to soften and rebend it to fit the bend of the pipe. There was a slight wave in the top of the stem that needed to be straightened as a part of the new bend.Free8

Free9 I heated it until the vulcanite was pliable and then straightened it before rebending it to match the curve of the bowl and when held in the mouth was horizontal with the top of the bowl.Free10

Free11

Free12

Free13 I liked the look of the stem with the new bend so I set it aside and went to work on the bowl. I used 0000 steel wool on the rim to remove the lava overflow and repolish the rim. I am finding that this works really well as Troy shared in various blog posts he has done here and on his own site. There is always something new to learn and add to the refurbishing skill set.Free14 With the rim cleaned up I wiped down the bowl with acetone on a cotton pad to remove the grime in the finish and refresh the briar.Free15

Free16

Free17

Free18 I cleaned out the bowl, shank and the airway in the stem with pipe cleaners, cotton swabs and alcohol. It was pretty clean which is amazing when you consider the condition of the rim and the cake.Free19

Free20 I sanded the stem with 220 grit sandpaper to clean up the shape and smooth out the angles and make the sides proportionally the same when the stem was in the mortise. I finished by sanding it with a medium and fine grit sanding sponge to smooth out the scratch marks left behind by the sandpaper.Free21

Free22 I lightly sanded the bowl and the rim with micromesh sanding pads – wet sanding with 1500-2400 and dry sanding with 3200-4000. I also sanded the vulcanite ferrule at the same time to remove the oxidation.Free23 I sanded the stem with the micromesh sanding pads as well – wet sanding with 1500-2400 grit pads and then rubbing it down with Obsidian Oil. I also used the oil on the ferrule. I dry sanded with 3200-4000 grit pads and rubbed it down again with the oil.Free24

Free25 I buffed the stem with Tripoli and White Diamond before sanding it with the final grits of micromesh pads. I finished with 6000-12000 grit pads and then gave the stem and ferrule a final rub down with the Obsidian Oil. I let it soak in and dry before taking it to the buffer.Free26 I gave the bowl a light coat of olive oil to bring life back into the briar and then gave it a buff with Blue Diamond on the buffing wheel. I gave the bowl and stem multiple coats of carnauba wax and then buffed it with a clean flannel buff. I finished by hand buffing it with a microfibre cloth to bring depth to the shine. The finished pipe is shown below. The first photo is of the pipe with the Edward’s large apple to give a sense of the size of the pipe. It is a large piece of briar.Free27

Free28

Free29

Free30

Free31

Free32

Free33

Cleaning up an Edward’s Brandy Shaped pipe


Blog by Steve Laug

Label Logo_mediumThe third Edward’s pipe that came to me in the box of pipes to clean up and sell for the support of Smokers Forums is stamped Algerian Briar in block print on the left side of the shank and on the right side Edward’s in script. There is a large 7 toward the bowl end of the underside of the shank. Near the shank it is stamped 13L which according to Edwards shape charts generally has a 7 as the first number. I think this is the same age as the previous pipes I have been working on and it only has the two digits and the letter L. That numbering is called a large apple. On the original pipes it appears that the pipe originally had a taper stem. That would explain why this stem is slightly loose and does not perfectly match the diameter of the shank.

It is about the same size as the Dublin and the apple that I just finished restoring. It has similar grain. The back and front of the bowl are cross grain and the sides are birdseye grain. The top and the bottom of the bowl and the shank are cross grain as well. The finish on the bowl was in rough shape. The briar was dry and lifeless looking. The surface of the pipe was dirty and grimy. The rim was covered with an overflow of lava like the other pipes in the lot. The bowl had a thick cake that had the same sticky and crumbling consistency as it had in the other bowls. The stem was oxidized and had some tooth chatter on the top and the bottom of the stem. The internals of the stem and the shank were very dirty and covered in a thick tar. There were quite a few fills in the bowl. There was a large on the back right side near the top of the bowl. There were several smaller fills on the front of the bowl and on the underside at the bowl shank junction. There were also some small sandpits that were not filled. Like all of the Edward’s pipes that I have worked on this one was natural briar. Once it was cleaned up it would have a rich natural look that would darken over time and use.Brandy1 Brandy2 Brandy3I took a close-up photo of the bowl to show the build up on the rim and also the odd configuration of the cake.Brandy4 Brandy5I reamed the bowl with a PipNet pipe reamer and started with the smallest cutting head and worked my way up to the head that was the same diameter as the bowl. I reamed it back to bare wood and cleaned out the debris that was left with a pen knife.Brandy6 Brandy7I scrubbed the rim with 0000 steel wool to remove the lava overflow that had hardened on the rim. I have used the steel wool on the last two pipes and I am impressed with how easy it makes this process. Of course it helps that the bowl is a natural finish so I am not damaging any of the original finish on the bowl with the steel wool.Brandy8I cleaned the internals with pipe cleaners, cotton swabs and alcohol until the inside was clean and sweet smelling. I swabbed out the bowl with a cotton swab and alcohol to clean up any of the dust left behind by the steel wool.Brandy9I scrubbed the exterior of the bowl with acetone on cotton pads to remove the ground in grime in the finish. I scrubbed it until the finish was clean and lifeless looking.Brandy10 Brandy11 Brandy12I gave the bowl a light coat of olive oil and rubbed it in to bring some of the original colour back to the briar and give it a little life. The photos below show the bowl after this treatment. It has some awesome grain – along with a few sandpits and fills.Brandy13 Brandy14 Brandy15 Brandy16With the bowl finished it was time to work on the stem. I am pretty certain that this is a replacement stem as the fit is not quite right and according to the charts it was supposed to be a taper stem. However, I decided to go with the stem that came with it in the box I received and clean it up and make it fit as best as possible. I sanded the stem with a medium and a fine grit sanding sponge and then went on to sand with micromesh sanding pads. I wet sanded with 1500-2400 grit pads and then rubbed the stem down with Obsidian Oil. I went on to dry sand it with 3200-4000 grit pads and gave it another coat of oil.Brandy17 Brandy18I buffed the stem with Tripoli and then White Diamond before sanding it with the final three grits of micromesh – 6000-12000 grit.Brandy19I buffed the pipe with Blue Diamond Plastic polish on the wheel and then gave bowl and stem multiple coats of carnauba wax. I buffed it with a clean flannel buff and then took it back to the table and hand buffed it with a microfibre cloth. The finished pipe is shown below. I kind of like the saddle stem as it gives the pipe a bit of an English flair.Brandy20 Brandy21 Brandy22 Brandy23 Brandy24 Brandy25

Rehabilitating a Worn Jarl 852 Sitter


Nice work on this one – lots of valuable tips.

Charles Lemon's avatar

This Jarl Sitter pipe (pictured third from the top in the left-most column in the pic below) is stamped “Oil Hardened” on the top shank and “Jarl” over “Made in Denmark” on the bottom shank. Across the shank at the mortise end is stamped “852”, and the stem sports a nicely defined “crowned J” Jarl logo.

Estate Pipe Lot

The pipe was DIRTY when it came out of the box. Greasy and grimy from head to toe, the pipe was caked up to the point of blocking off the airway, and sported a number of dents and dings on the rim underneath a nice lava flow of tars. The stem was heavily oxidized, especially at the button, which was also covered with a heavy whitish salt/calcium buildup.

Apart from its generally neglected state, this old Jarl showed two major signs of previous trauma – the shank had cracked off the bowl and been…

View original post 723 more words

Cleaning up an Edward’s European Collection Apple


Blog by Steve Laug

The second Edward’s pipe from the box I received to clean up and sell to support Smokers was a beautiful smaller sized apple with an acrylic/Lucite stem. It is stamped Edwards in script on the right side of the shank and European Collection on the left side. There is no shape number on this pipe. The finish was dirty, the rim had less lava overflow than others that came with this collection but it was present. The bowl had a thick crumbly cake. All of these pipes tended to have stickiness to the cake that makes me think that the pipes were used for aromatics. The shank was dirty with tars and oils. The stem is black acrylic with dark green swirls throughout that are accentuated in the light. It is a bit thick which leads me to believe that the pipe came from the 70’s or 80’s era. It is a saddle stem with an integral tenon turned from the Lucite. It was dull from the oils and disuse. It would be interesting to see the colours once it was shined up.Paddy1

Paddy2

Paddy3

Paddy4 I took a close-up photo of the bowl to show the cake and the state of the rim. Fortunately the rim had no damage on the outer or inner edge.Paddy5 I reamed the bowl with the PipNet pipe reamer and took the cake back to bare wood. Whatever the previous tobacco was the cake was soft and crumbly.Paddy6

Paddy7 I dampened the rim and scrubbed it with 0000 steel wool to remove the lava that was on the top edges. It worked really well and the rim was clean in no time at all. I wiped down the bowl with alcohol on a cotton pad to remove the grime and oil that was in the finish. It took off all of the grim and left me with some beautiful mixed grain around the bowl.Paddy8

Paddy9 I scrubbed out the interior of the bowl and the shank with pipe cleaners, cotton swabs and alcohol to remove the tar and oil. I did the same with the stem and the chamfered tenon end.Paddy10

Paddy11 With the interior clean I turned my attention to the acrylic/Lucite stem. It had some light tooth chatter on the top and underside but was in pretty decent shape. The finish was dull and no longer smooth to the touch. I worked on it with micromesh sanding pads – wet sanding with 1500-2400 grit pads and dry sanding with 3200-12000 grit pads. I buffed it with Tripoli and White Diamond after I finished with the 4000 grit pad and then finished with the last three pads. As I polished it with the pads you could begin to see the colours come through the stem. It is a beautiful piece of Lucite.Paddy12

Paddy13

Paddy14

Paddy15

Paddy16

Paddy17 I buffed the bowl and the stem with Blue Diamond Plastic polish on the wheel and was amazed at the shine. I then gave the bowl and stem several coats of carnauba wax to protect it and give it a shine. I buffed it with a clean flannel buff and then hand buffed it with a mircrofibre cloth to raise depth to the shine. The finished pipe is shown in the photos below. I have to tell you that so far I really like the two Edward’s pipes that I have cleaned up out of this lot. They seem to be ringing all of my bells. It will be hard to part with either of them 😉Paddy18

Paddy19

Paddy20

Paddy21

Paddy22

Paddy23

Paddy24

Cleaning up a Lovely Edward’s Algerian Briar Bent Dublin that came across my table


Blog by Steve Laug
Label Logo_mediumI received this pipe in the mail with a box of 11 others and it is the first one that caught my eye. The shape was well executed. The bowl had a round crowned rim. The bend of the shank and the curve of the stem looked elegant. The bowl had a thick, sticky and crumbly cake that needed to be removed. The rim was covered with a thick coat of lava that had overflowed the bowl. The finish was a typical Edward’s natural briar – I think that they must have used a light tan/brown stain at one point that highlighted the grain but did not mask it. The grain was mixed with cross grain on the front right and back left. There was birdseye on the sides of the bowl and swirling circles of grain on the underside and up the shank. There were two small fills on the right side of the bowl near the shank bowl junction – almost two dots one above the other. There was also a larger fill on the underside of the shank. The pipe is stamped Algerian Briar in block text on the left side of the shank and Edward’s in script on the right side. On the underside mid shank it is stamped with a large 5. On the end of the shank next to the stem it is stamped with a 31. The large 5 is the bowl size and 31 is the shape number, though current production shows the shape as a 731. The stem was lightly oxidized and would not push all the way into the mortise. The fit was very tight. The inside of the shank had a thick coat of tar and oil on the walls of the mortise.Ed1

Ed2

Ed3

Ed4 One of the packing peanuts was jammed into the bowl so I used the dental pick to remove. It left some crumbling pieces in the sticky aromatic cake in the bowl. In the first photo below you can see the tars on the rim of the bowl and the generally dull finish of the bowl.Ed5 I reamed the bowl with a PipNet reamer and took the cake back to bare briar. I wanted the new owner to be able to build a cake of their own choosing.Ed6

Ed7 I scrubbed the rim with 0000 steel wool to remove the lava on the top of the rim. I had seen Troy use that several times in his refurbs so I thought I would give it a go with this bowl. It worked extremely well. I wet the rim with a bit of water and then scrubbed it until the rim was clean.Ed8 I scrubbed out the interior of the bowl and the shank with pipe cleaners, cotton swabs and alcohol. Ed9

Ed10 I scrubbed down the exterior of the bowl with the steel wool and also wiped it down with alcohol on a cotton pad. I removed the wax and grime from the finish. Once the shank was dry the stem fit snuggly in the mortise. The stem had some light tooth chatter at the button that would clean up quite easily. With the stem fitting well I took the next four photos to show what it was about the pipe that caught my eye.Ed11

Ed12

Ed13

ED14 The stem did not need a lot of work to clean off the oxidation. I wet sanded the stem with 1500-2400 grit micromesh sanding pads. I rubbed it down with Obsidian Oil after the third pad and then continued to dry sand the stem with 3200-4000 grit pads. I rubbed it down again with another coat of oil and let it dry.Ed15

Ed16 I finished sanding it with 6000-12000 grit pads and then gave it a final coat of oil. I set it aside to dry. I buffed the stem with Tripoli and with White Diamond to remove the remnants of oxidation.Ed17 I buffed the stem and bowl with Blue Diamond Polish on the buffing wheel and then gave the pipe several coats of carnauba wax and buffed it with a soft flannel buffing pad. I took it back to the work table and hand buffed it with a microfibre cloth. The finished pipe is shown below.Ed18

Ed19

Ed20

Ed21

Ed22

Ed23

Bringing New Life to a Scarred Butz-Choquin Supermate Major


Nice job on rusticating and blending in the repaired shank. Did you ever figure out why the fills you were doing would not stick? That is curious.

Charles Lemon's avatar

This pipe immediately caught my attention when I first unpacked the auction lot. Pictured in the top left corner of the pipe lot pic below, this Butz-Choquin Supermate Major struck me by its elegant simplicity. No fuss, nothing fancy, just good grain, clean lines and a classic Lumberman shape characterized by its long, pinched-oval shank and saddle bit.

Estate Pipe Lot

Unlike many of its brethren in this lot, the Supermate was relatively clean with only a bit of grease & grime on the exterior, minor cake build-up in the bowl and a few small nicks on the rim. The stem had only minor oxidation but had other issues: the BC logo I assume used to be in the circle on top of the stem was long gone, and the button was worn down nearly flat and showed the remains of old tooth dents.

The flattened button and the poor condition of the…

View original post 1,014 more words

Repairing a stem on a beautiful little Dunhill Bruyere 3206 Pot


Blog by Steve Laug

On the work table at the moment is a beautiful little Dunhill Bruyere pot. It had some serious gnaw marks on the stem. There were tooth dents that were deep on the top and the bottom sides of the stem. Fortunately they did not penetrate the airway. The pipe is in great shape. The finish was in excellent shape. The rim was clean but had been lightened quite a bit. It had hardly been smoked so I am wondering if somewhere along the way it had been used as a prop and the individual had just bitten down hard!

I removed the stem from the bowl and gave the rim a quick clean and then a coat of an opaque aniline based oxblood stain that matches the Bruyere finish. I flamed it and set it aside to dry while I turned my attention to the damaged stem (unfortunately I was in grand rush to work on the stem and the pipe and forgot to take photos of the pipe when I received it. Instead you will have to trust the descriptions and look through the repairs).Dun1

Dun2 I used a dental pick to clean out the debris in the deep dents and the crack along the edge of the button. I used the heat gun to raise the dents as much as possible but sadly they were of the nature that the heat did not do much to raise them. I then wiped down the dents and crack with alcohol to remove any debris in the area to be repaired. I filled in the dents on both sides of the stem with black super glue. You can see in the next two photos the bubble of super glue next to the edge of the button. I decided to let it cure rather than use an accelerator so I set it aside to do so.Dun3

Dun4 Once the repair had cured (several hours later) I sanded the patches with 220 grit sand paper to blend them into the surface of the stem. I sanded the repair to the button as well to blend it in without changing the profile of the end of the stem.Dun5

Dun6 I sanded it with a medium and a fine grit sanding sponge to minimize the scratches left behind by the sandpaper and to further blend in the repair. I used a needle file to sharpen the edge of the button and then sanded it with 400 grit wet dry sandpaper and a little bit of water. You can see from the next two photos that the patches are blending into the stem nicely.Dun8

Dun9 I moved on to wet sanding the stem with 1500-2400 grit micromesh sanding pads. The scratches are disappearing and the patches are blending in to the point that if you did not know where they are you would not see them. I rubbed the stem down with Obsidian Oil before going further with the micromesh pads.Dun10

Dun11 I wet sanded the repairs with 3200-4000 grit micromesh pads to further blend in the repaired areas. I spent extra time working on the repair to the small crack on the top of the button. I wanted that spot to blend in well and be smooth to the touch.Dun12

Dun13 The repair to the top of the button and along the top side of the button needed a little more work to get them to be less visible and more blended. The repair on the underside was really looking good. I cleaned up the repair on the button and then used some clear super glue applied with the tip of a dental pick. Once it cured I sanded it with 220 grit sandpaper and then the same set of wet dry sandpaper and micromesh pads that I commented on above. Finally the repair blended well.Dun14

Dun15 I buffed it with Blue Diamond and gave it several coats of carnauba wax. I buffed it with a clean flannel buff and then hand buffed it with a microfibre cloth.Dun16

Dun17 The finished pipe is shown below. The darkening of the stain on the rim and the repaired stem are finished and the pipe is almost ready to send back to the owner.Dun18

Dun19

Dun20

Dun21

Fitting a Bowl to an Old Bakelite Base and Stem


Blog by Steve Laug

When I was in Idaho recently I ended up finding a lot of pipes and parts that I knew would come in handy in the months ahead. One of the parts I found was a no name Bakelite stem and base that was threaded for a bowl. There was no bowl to be found for it. The base is dark grey Bakelite and the stem is red Bakelite (maybe Redmanol). The threaded tenon was also Bakelite which surprised me. It was threaded to fit into the stem and into the shank which made adjusting the fit really simple. A turn of the tenon into the shank or into the stem is all it took to align the stem with the shank. I have always liked the looks of these old timers so whenever I find one I buy it. I figured somewhere along the way I would find a bowl for it. If not I could at least make a pressure fit bowl for it. I have a long weekend ahead of me with some time off so I decided to fiddle with it. I also had a plastic Falcon style stem that I decided would be scrap except for the bowl. The bowl is not briar but rather Maplewood I believe. It is hard and barely smoked so it would be a good candidate for a pressure fit bowl for the Bakelite pipe.Bakelite1 The bowl from the plastic Falcon style donor pipe had a threaded bowl bottom that was larger than the base of the Bakelite pipe. It would take some reworking to make it work. The bowl also had a thick varnish coat that was shiny and plastic looking like the base. That finish would have to go before it fit the look of the pipe I was working on.Bakelite2

Bakelite3 I reduced the diameter of the bowl bottom and removed the threads with a Dremel and sanding drum. I held the Dremel against the base and let it go around the base of the bowl with even pressure so that I could keep the base round. It took quite a few turns of the drum before I was able to get close to a fit. I finished by sanding the base of the bowl with a wood rasp to make sure that it sat flat against the Bakelite base and would also press into the threaded base.Bakelite4

Bakelite5 I pressed the bowl into place in the base and took the next two photos below. I then threaded the stem on the base and took a few more photos to give me a good idea of what the pipe would look like once I finished with the fit.Bakelite6

Bakelite7

Bakelite8

Bakelite9

Bakelite10 I removed the bowl from the base and wiped it down with acetone on a cotton pad to remove the finish. I wanted a natural finish on the bowl so I removed the varnish coat and took of the plastic looking shine.Bakelite11

Bakelite12 I wet sanded the Bakelite stem with micromesh pads – wet sanding with 1500-2400 grit pads and dry sanding with 3200-4000 grit pads and finished sanding it with 6000-12000 grit pads. I rubbed it down with Obsidian Oil after sanding with each set of three pads. I also rubbed down the base with Obsidian Oil.Bakelite13

Bakelite14

Bakelite15 I rubbed down the bowl with a light coat of Olive oil and let it dry into the wood. I gave the stem and the bowl a light had buff with a microfibre cloth and then took the following photos.Bakelite16

Bakelite17

Bakelite18

Bakelite19 I buffed the pipe and bowl with Blue Diamond on the wheel and then give it multiple coats of carnauba wax. I buffed it with a clean flannel buff to give it a matte finish shine. I then hand buffed it with the microfibre cloth to give depth to the wood. The finished pipe is shown below. It is ready for its inaugural smoke.Bakelite20

Bakelite21

Bakelite22

Bakelite23

Bakelite24

Showcasing A Linkman Deluxe 9732 Canadian


This old timer came out great. The new mouthpiece with the inset propeller looks original. This is a winner all the way around. Great partnership on this one Troy.

Troy W's avatarBaccy Pipes

About a year ago i was talking to Tim Pollock about pipes and mentioned i would like to start getting hold of some old KBB Yello Bole and Linkman Canadian’s. He told me that he had a old Linkman Canadian that did not have a stem but that he would happily  give me if i wanted it. He mentioned it used to have a propeller stem but the stem was so damaged the previous owner had threw it away and stated it was non repairable.

I told him that i would take it and see if i could find a stem for it . So he sent me this old Linkman Deluxe 9732 medium Canadian. Other than missing a stem, a slightly banged rim and being dirty the pipe was very nice. The stamping’s were in pretty nice shape as well.

I asked around on the Dr. Grabow Collector’s forum…

View original post 467 more words