by Kenneth Lieblich
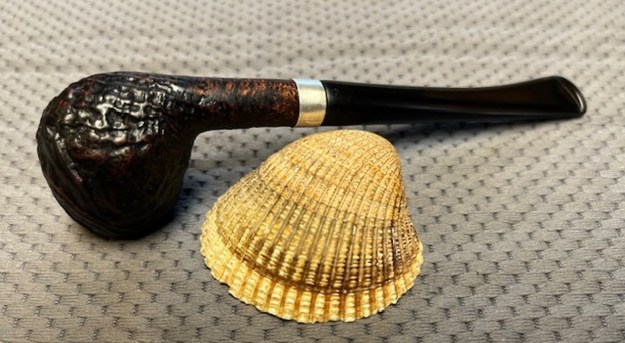
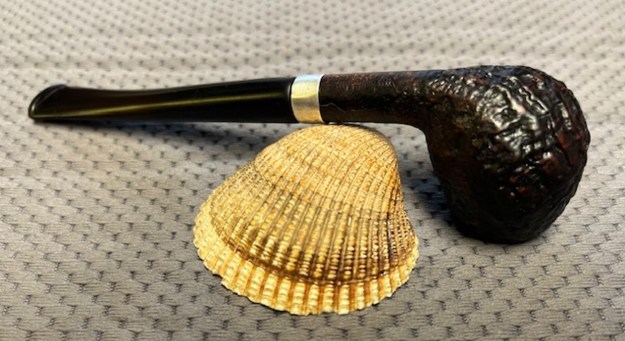
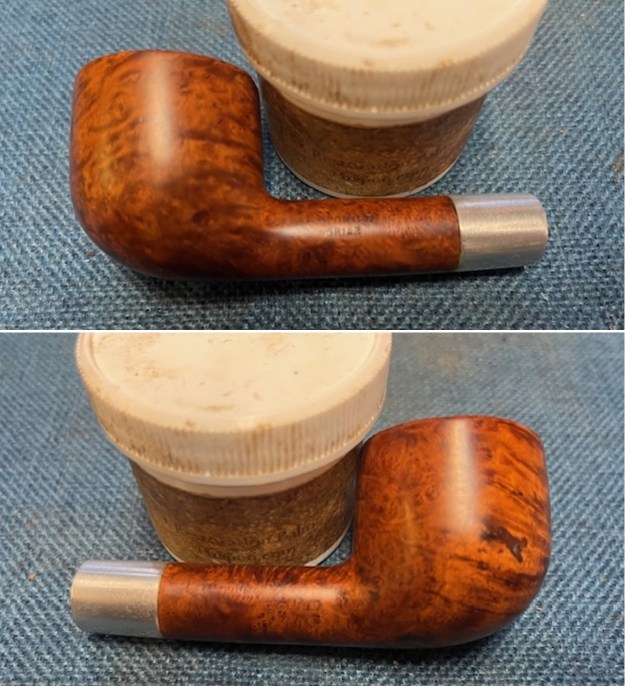
A gentleman contacted Steve a while back about restoring his late grandfather’s pipe. Steve was going to be away for more than a month, so he referred the fellow to me for the repairs. I was happy to help – especially when a family heirloom is involved! The pipe is an unusual one, called a Nørding Nordcoat. It’s a freehand style and was quite obviously the old man’s favourite pipe – it had been smoked and smoked and smoked. It was one of the dirtiest pipes I’ve ever worked on. All the great things I’ve learned over the years from Steve and Jeff about cleaning pipes came to the fore in this restoration!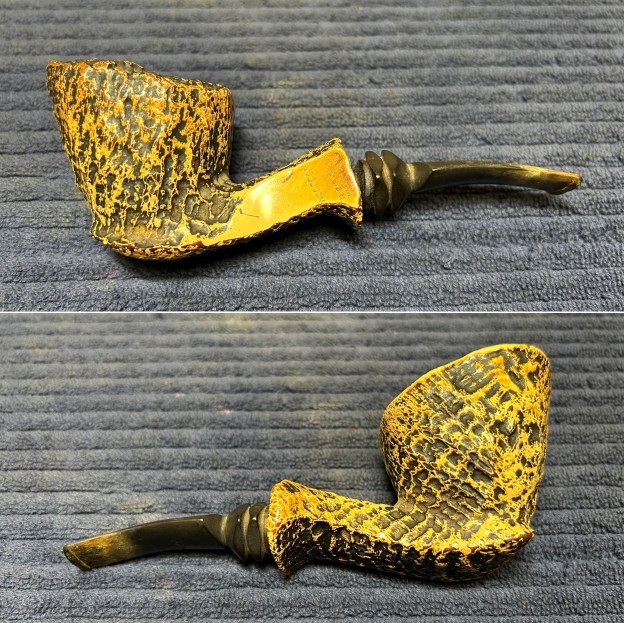
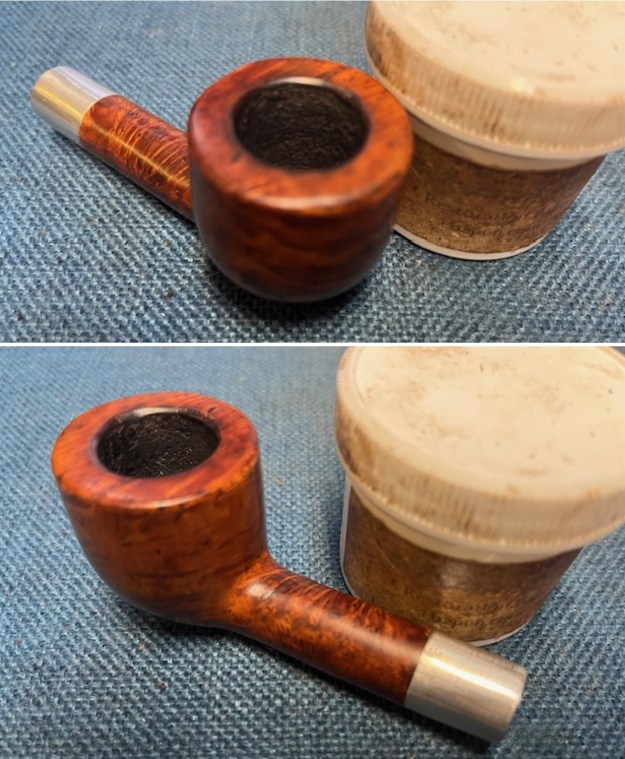
 The markings on the pipe were clear enough to understand. The only marks were found on the underside of the shank and read Nordcoat [over] Nørding [over] Made in Denmark.
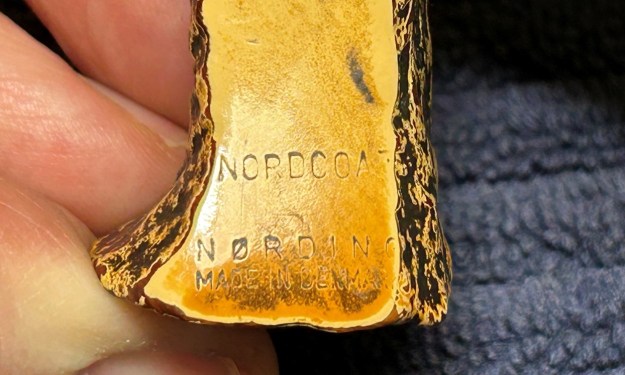 Although I was quite familiar with Erik Nørding (Pipedia article here), I wasn’t familiar with the Nordcoat line. I saw that Steve had restored one two or three years ago. Here’s a link to that restoration. I read Steve’s blog post and took note of the fact that the markings were different: Nord-Coat (with a hyphen on Steve’s) and Nordcoat (without a hyphen on mine). I couldn’t find any information on the difference between the two spellings. In general, there is very little confirmed information on the Nørding Nordcoat. In his blog, Steve quoted the following passage from user pipeshark on the forums of pipesmagazine.com:
… apparently this is something that is supposed create a life lasting coating that will color similar to meerschaum but not lose it’s color for any reason. Supposedly all Nordcoat pipes should have the big man’s signature on them, and the hubbub is that if they don’t, they may be seconds. According to another post, there was a page on the Nording site some years ago that “guaranteed these pipes to color like meerschaum and provide a great cool smoke”. I read on post that claimed to have one of these pipes from 30 years ago, so they must have been around for some time… I didn’t see anything about the pipes being lower quality briar as such… I must say that I have not substantiated this with any official sites or sources, this is just what I have seen on multiple threads of blog/forum postings, some claiming to have checked it out…
I researched further and found some additional information on Nordcoat. On a different pipesmagazine.com forum, user lukasstrifeson wrote this:
I think there’s some debate over whether Nord-Coat is actually a meerschaum-based product or it simply a paint that mimics meerschaum behavior. I’ll have to do some digging to confirm what “I think I know” (it’s been a while since I’ve thought about Nord-Coat!) but I think I remember researching the product in the 2000s and it was very difficult to weed through all the commercial advertising to actually understand what it is. As far as I remember it’s a patented “secret” coating that Nording advertised as “[owning] a briar that ages like a meerschaum!” The Nord-Coat line were briars that weren’t fit for smooth or sandblasted pipes but because of the patented coating Nording was able to salvage these and sell them at a higher price as somewhat of a budget-friendly competitor to true block meerschaums.
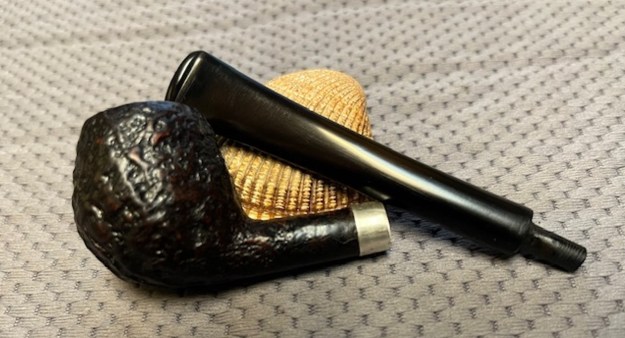
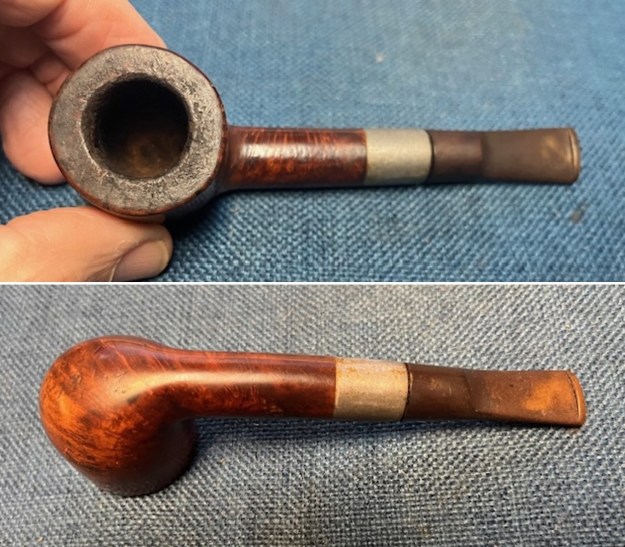
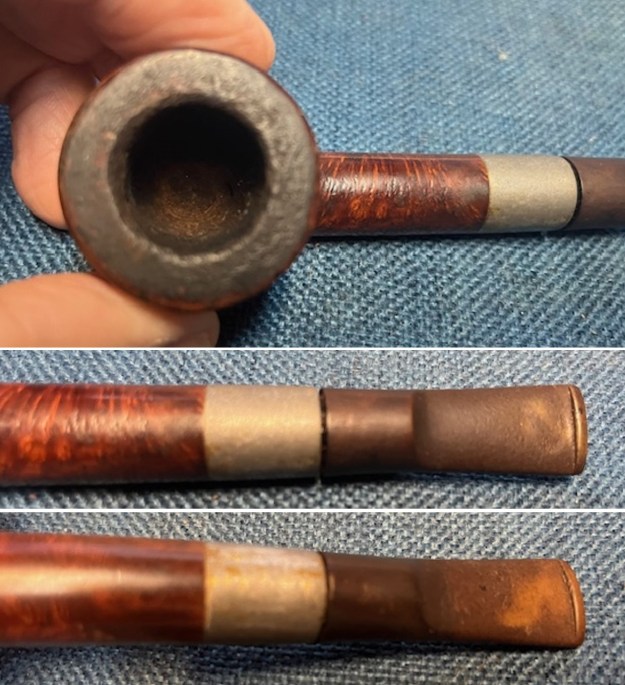
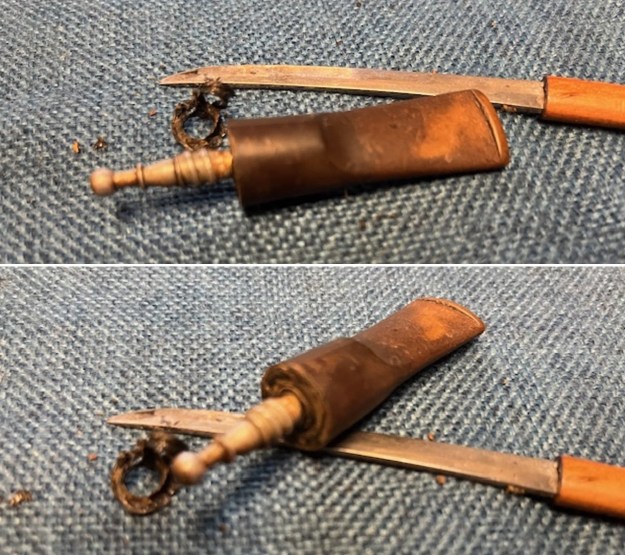
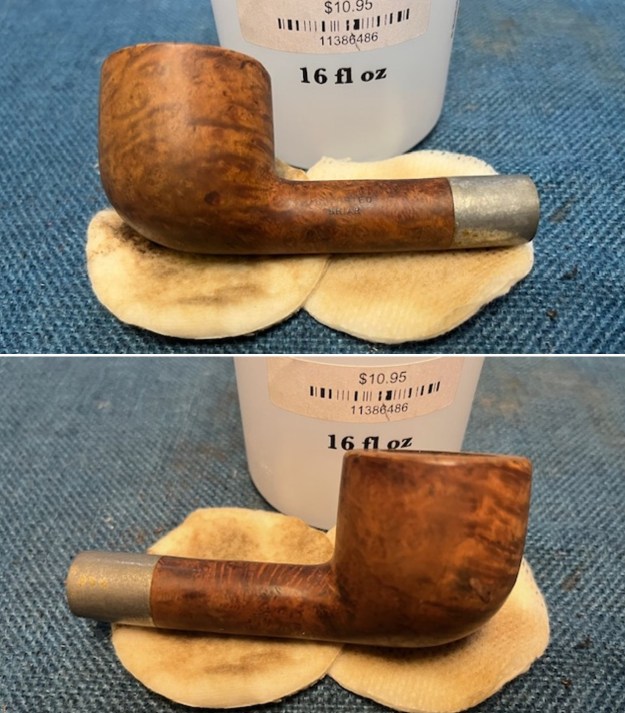
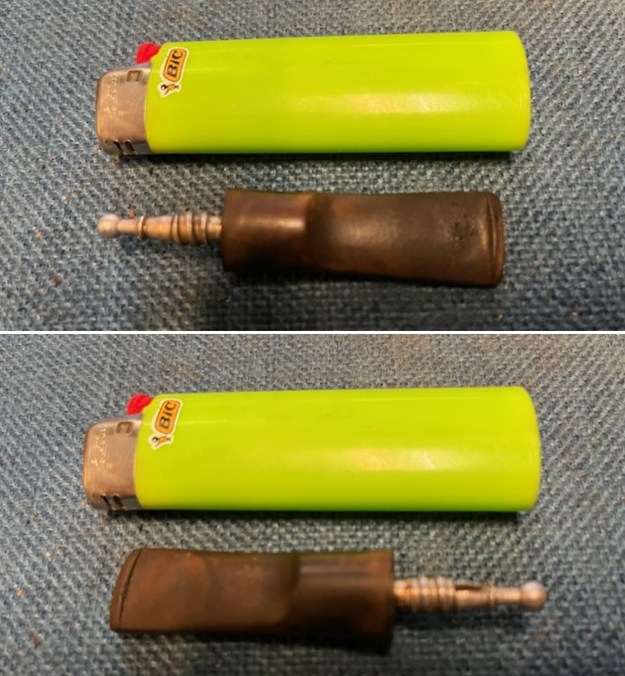
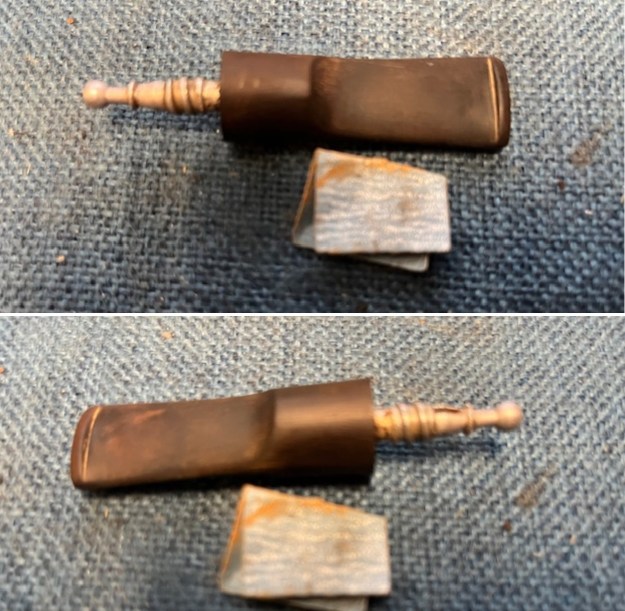
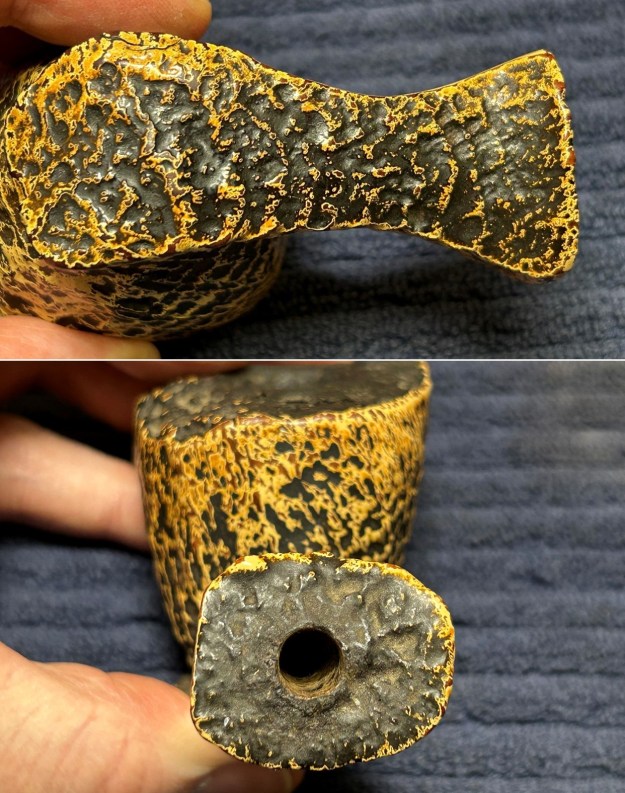
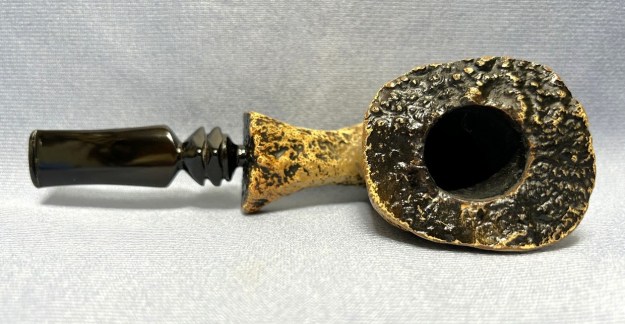
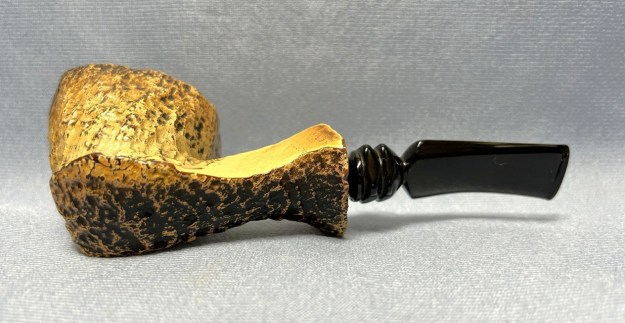
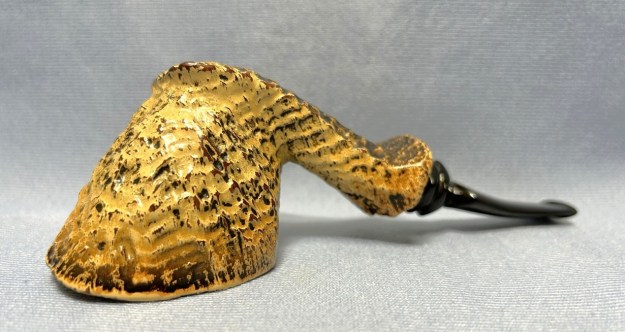
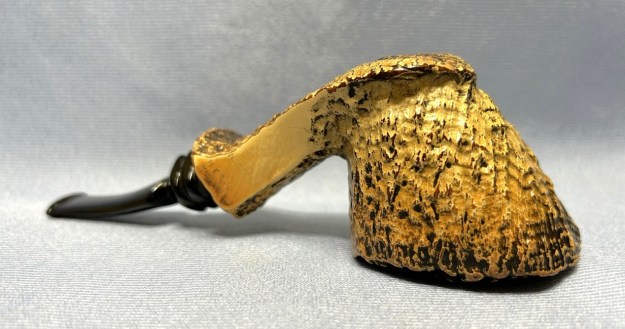
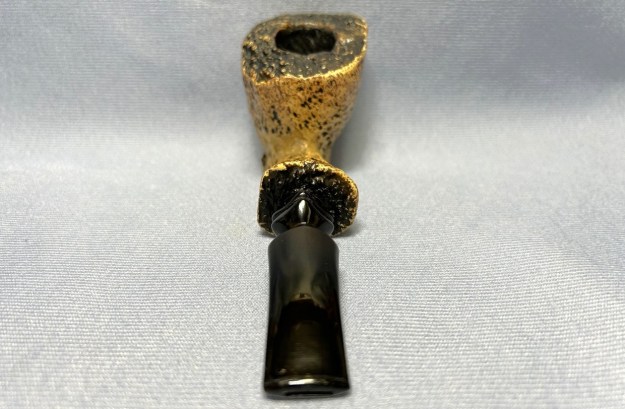
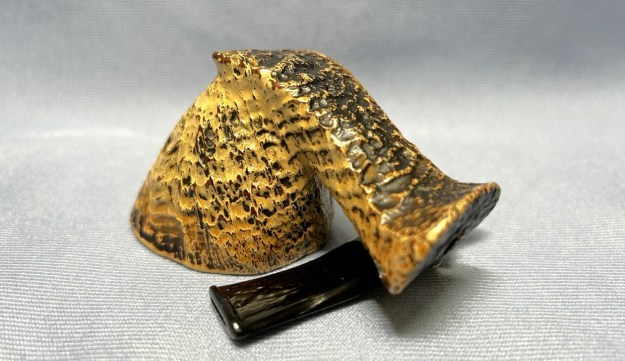
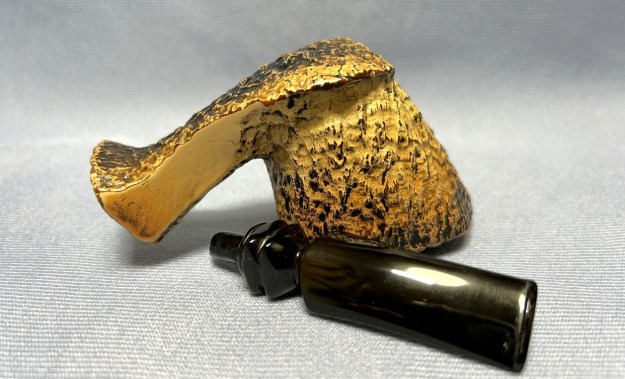
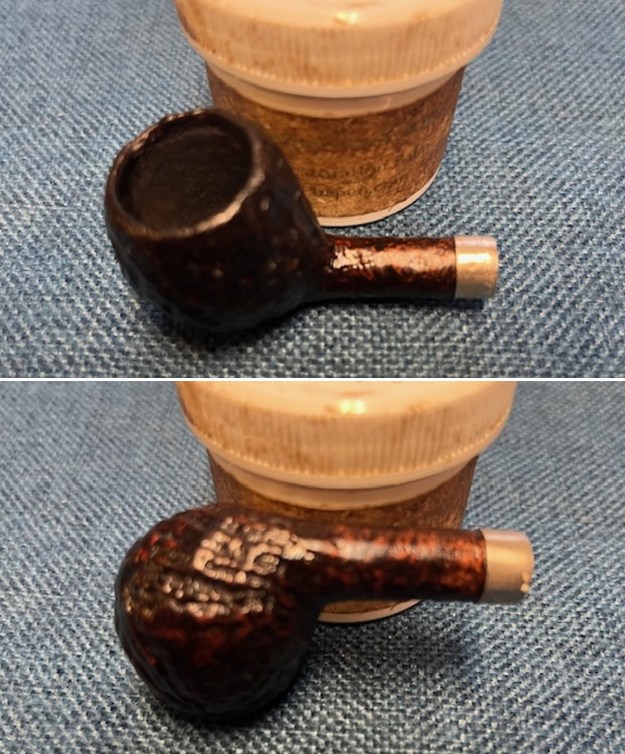
So, not a lot to go on. This pipe has the feel of a 1970s pipe, but that’s just a guess on my part. Let’s examine the pipe and see what we’ve got. On first glance, the stummel seems in good condition – just filthy beyond words. There is lava all over the plateau rim and plateau shank end. The bowl is choked with cake and the mortise is lined in ooze. The stem is just as nasty! There is considerable oxidation and calcification, as the photos only too clearly show. Grandfather’s molars evidently made short work of bashing the vulcanite into submission. The tenon is chipped and no longer fits properly into the mortise – the fit is too loose. 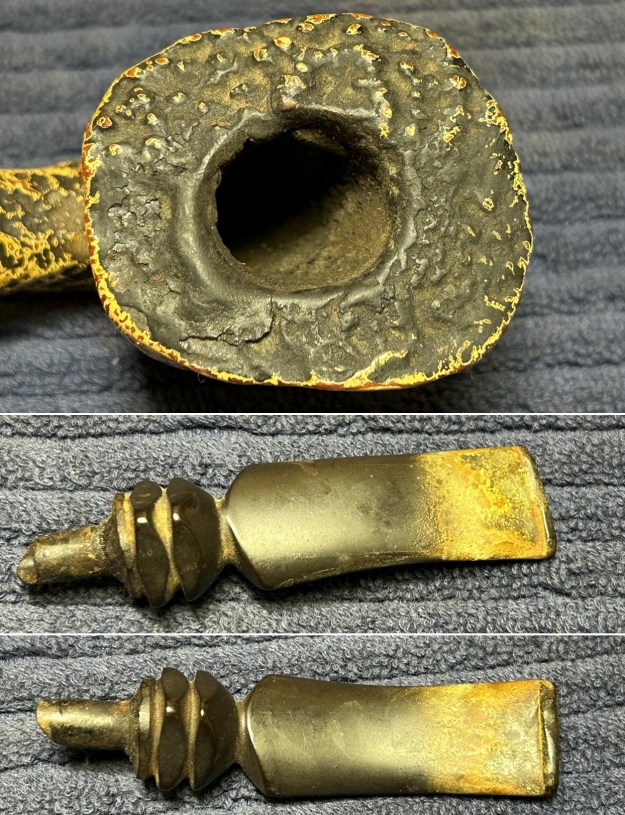

 My customer asked about replacing the stem altogether. After some consideration, he and I agreed that we wanted to keep the original if at all possible. A replacement stem would not have been part of his grandfather’s story – so we stayed with the original, with its faults and history.
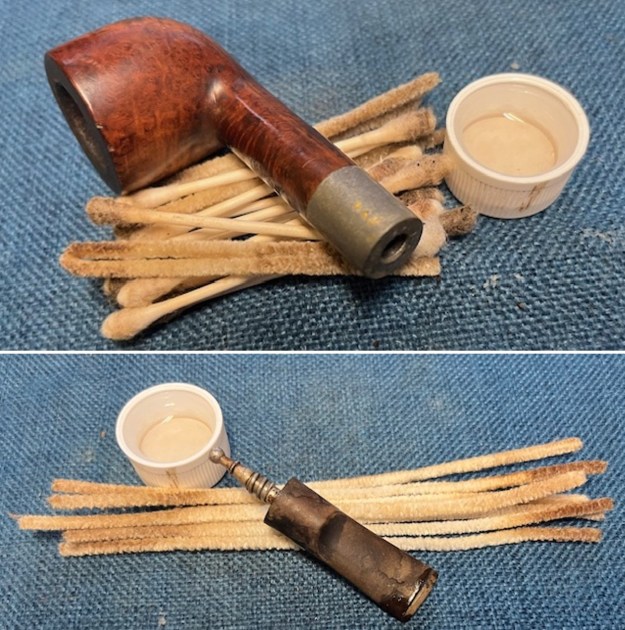
Let’s get working. As mentioned, the stem’s calcification was quite substantial. I used an old butter knife and gently scraped some of the thicker accretion off. Doing this now helps later in removing the oxidation.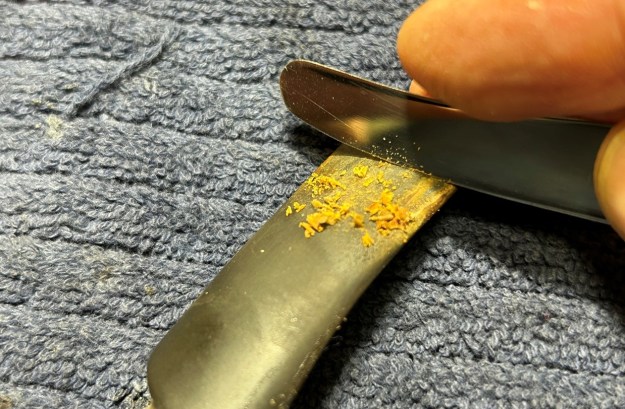 Next, I used oil soap on a few cotton rounds and wiped the stem down to provide an initial cleaning of filth before moving on to the next steps. The primary cleaning comes next. I cleaned the inside of the stem with both pipe cleaners and cotton swabs dipped in 99% lemon-infused isopropyl alcohol. I scrubbed thoroughly to make sure the interior was clean. I used a lot of pipe cleaners and cotton swabs. It was remarkably dirty.
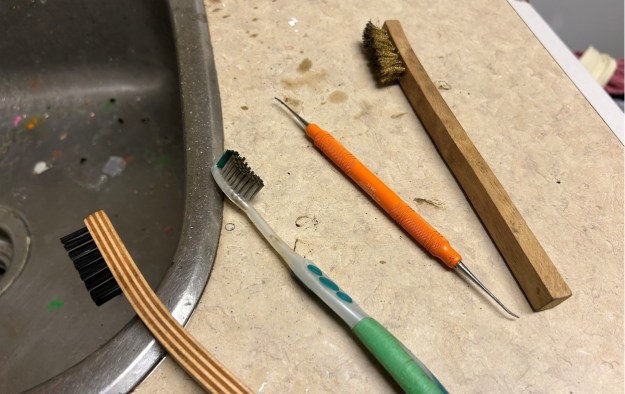
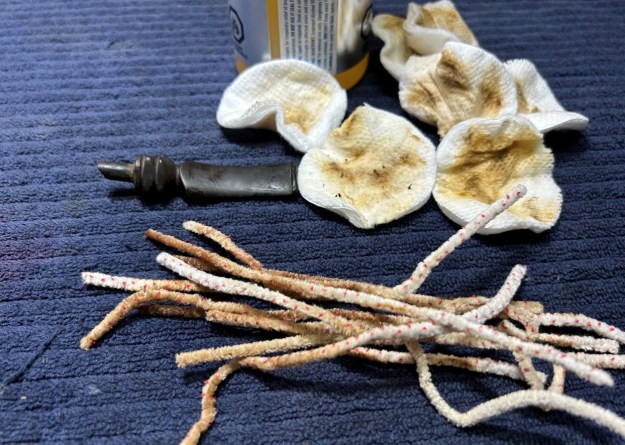 The goal of the next step is the removal (or minimization) of oxidation. Going to my sink, I used cream cleanser, cotton rounds, and a toothbrush, and scoured the stem to remove as much surface oxidation as possible. As the photos show, the result is a hideous brownish mess – but better off the stem than on it.
 Once the stem was reasonably clean, I soaked it overnight in some Briarville Stem Oxidation Remover. This solution works to draw oxidation in the stem to the surface. This is a major aid and an important step in ensuring a clean stem. The following day, I drew the stem out from its bath and scrubbed the lingering fluid with a toothbrush. Due to the severity of the oxidation, I then repeated the scrubbing with the cream cleanser for maximum effect.
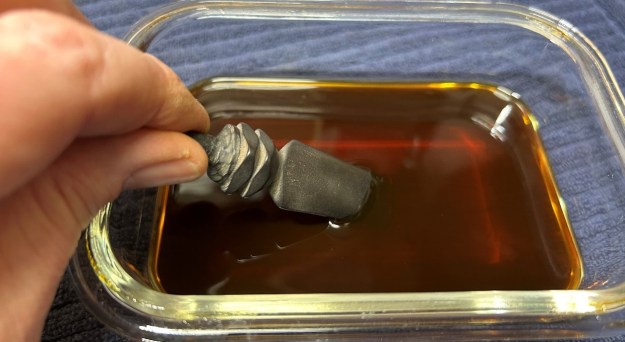 After this, I used a disposable lighter and ‘painted’ the stem with its flame. The gentle heat of the flame can cause the dents in the vulcanite of the stem to expand back into shape. This exercise was, sadly, a bit futile, as there was just so much damage.
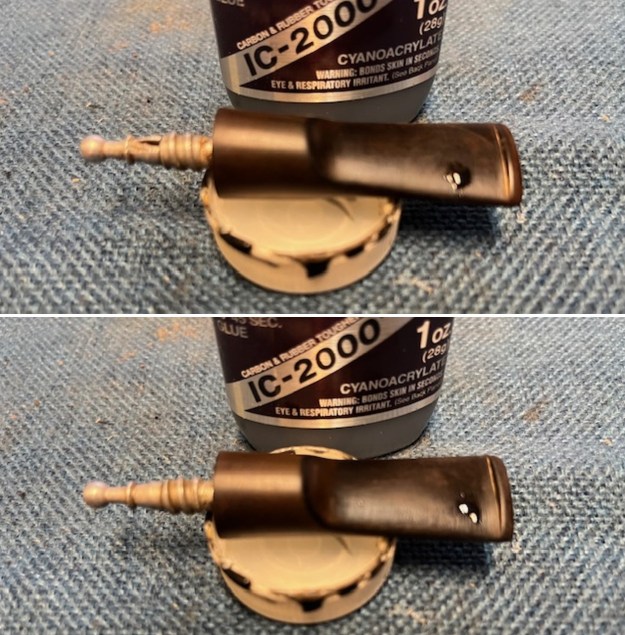
 Now that the stem is clean and dry, I set about fixing the marks and dents in the vulcanite. This is done by filling those divots with black cyanoacrylate adhesive, impregnated with carbon and rubber. At the same time, I built up the thickness of the tenon with this adhesive, so that it would fit correctly again in the mortise. However, I deliberately left the chipped area as it was. I left the adhesive to cure and moved on.
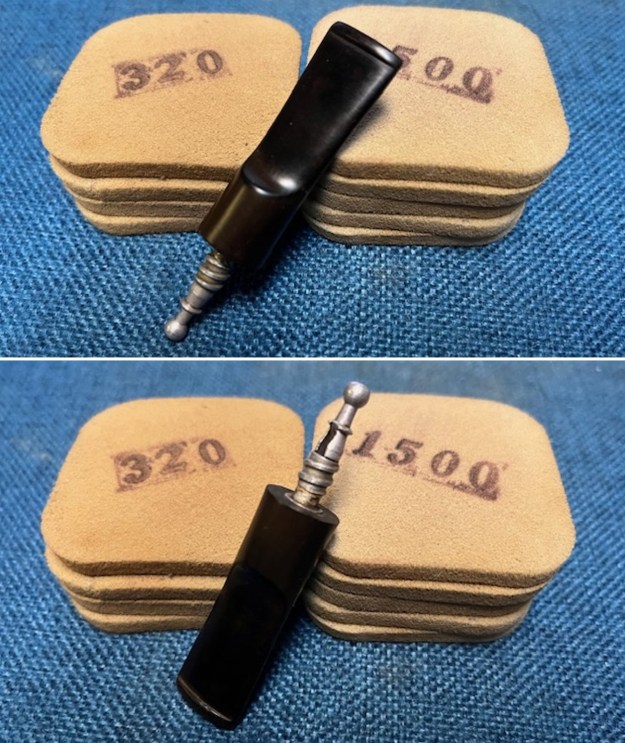
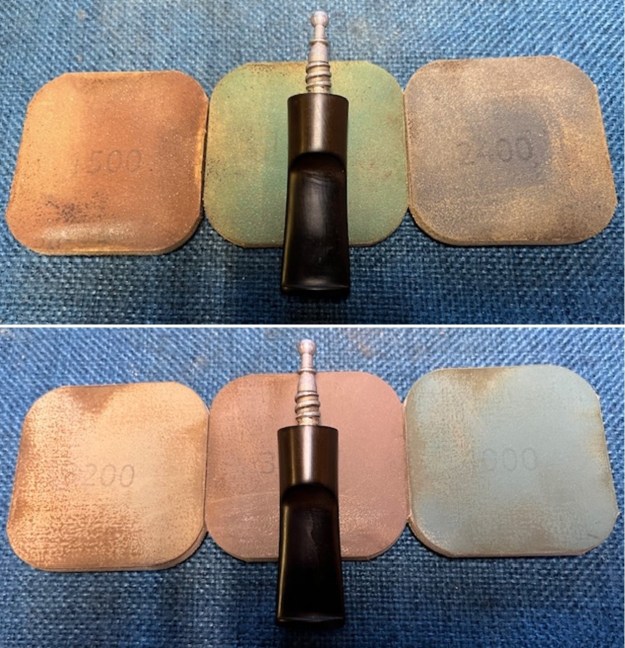
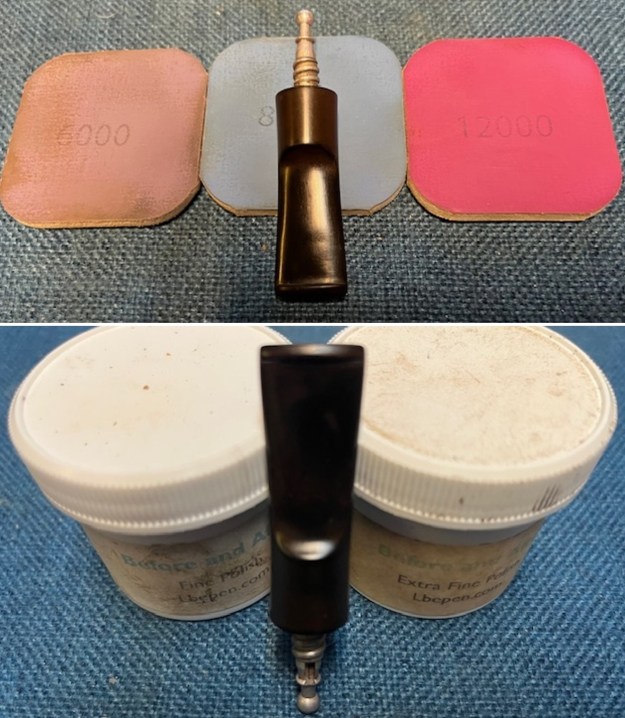
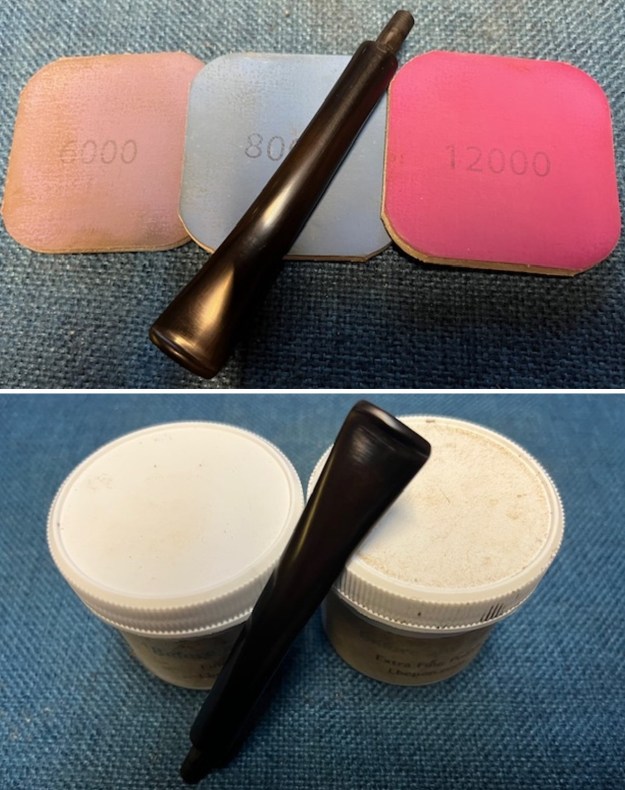
 The penultimate step for the stem is sanding. First, with my set of needle files, I reduce the bulk of the cyanoacrylate repairs. I want to remove the excess adhesive as near to the surface as possible, without cutting into the vulcanite. Following that, I use all nine of the micromesh sanding pads (1,500 through 12,000 grit) to sand out flaws, even out the vulcanite, and provide gentle polishing of the finished surface. I also apply pipe-stem oil while using the last five micromesh pads. There was a wonderful, deep black shine to the stem when I was done.
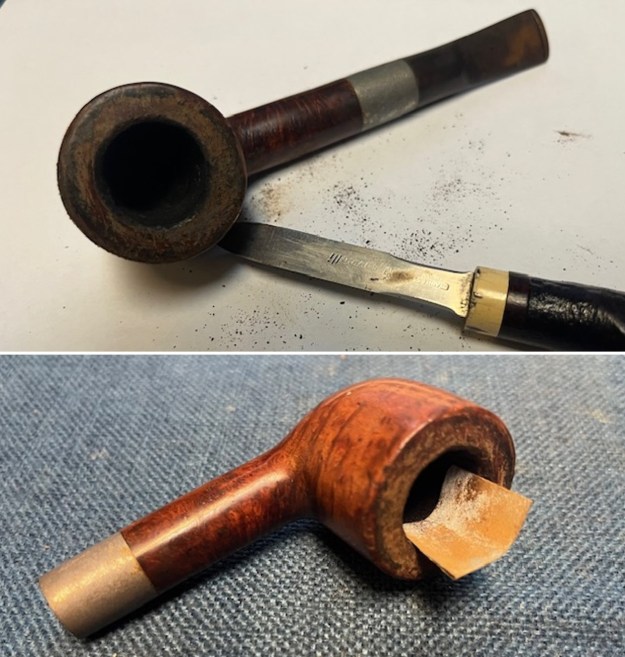
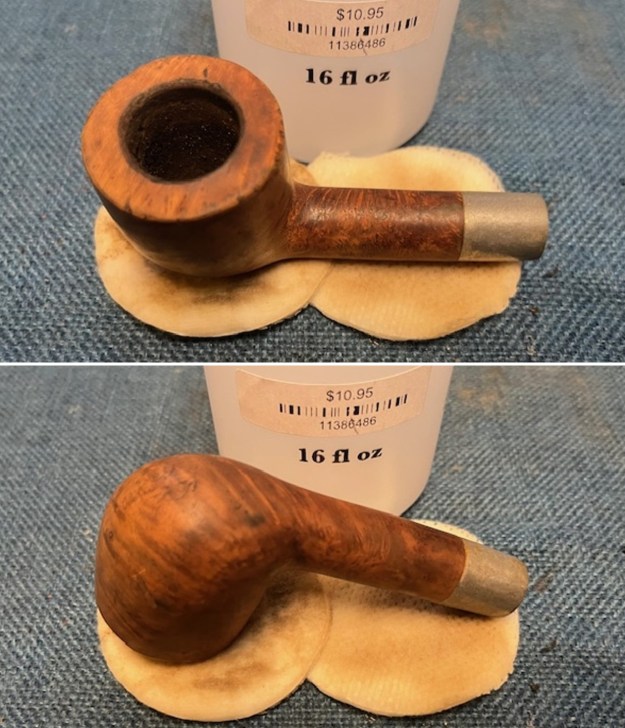
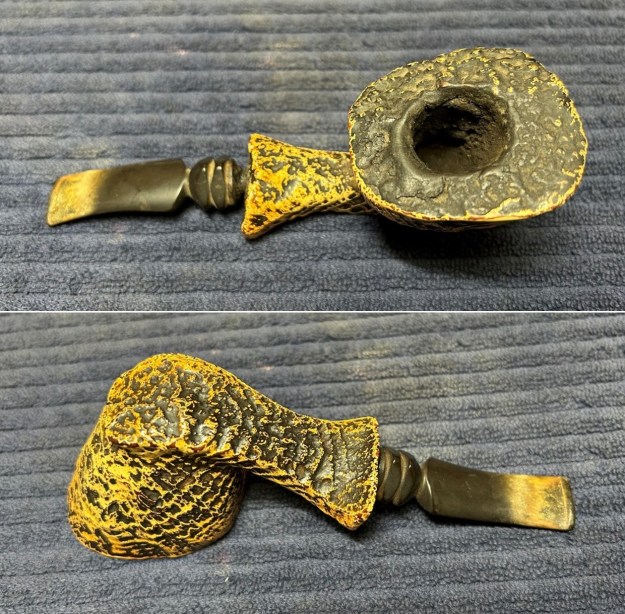
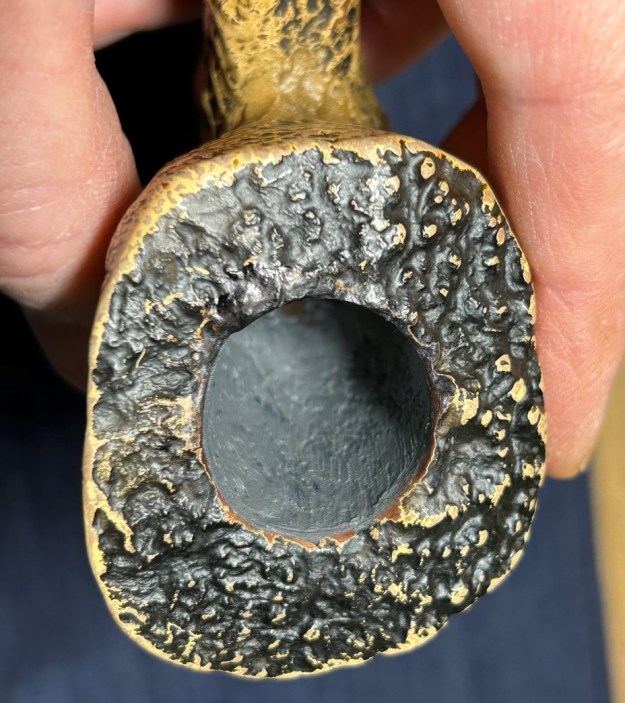
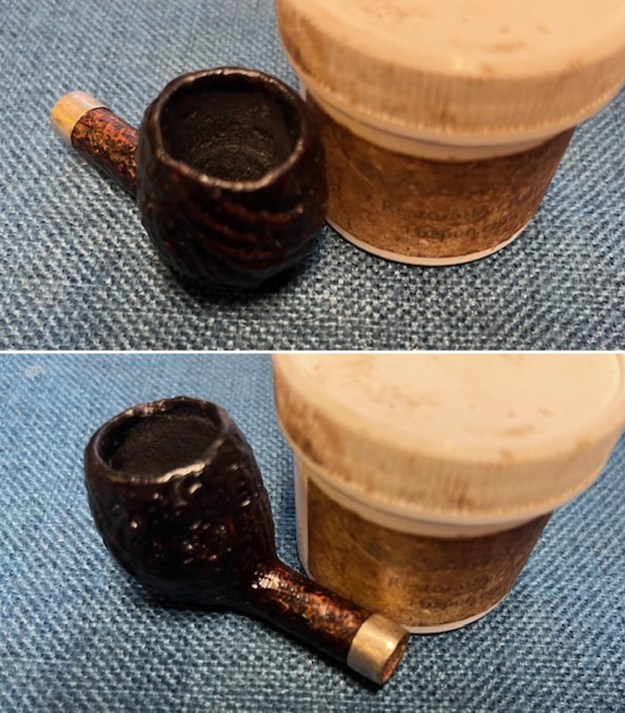
 Now that the stem is (nearly) complete, I can move on to the stummel. The first step for me is to ream out the bowl – that is to say, remove all the cake inside the bowl. This accomplishes a couple of things. First (and most obviously), it cleans the bowl and provides a refurbished chamber for future smoking. Second, when the old cake is removed, I can inspect the interior walls of the bowl and determine if there is damage or not. I used a reamer, a pipe knife, and a piece of sandpaper taped to a wooden dowel. Collectively, these ensure that all the debris is removed. However, there was considerable damage to the interior walls. The heavy, hot, and persistent smoking this pipe had undergone resulted in heat fissures all over the inside. More on that later.
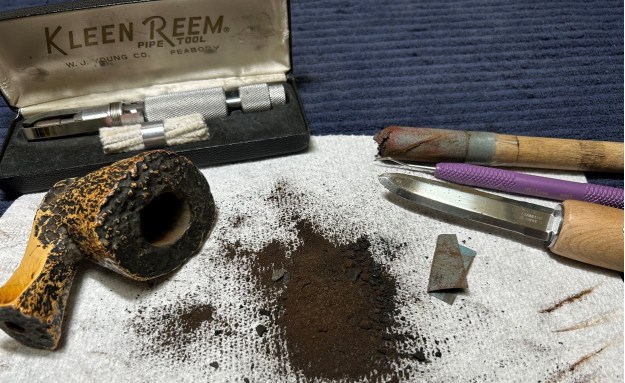 My next step was to remove the lava on the rim. For this, I took a piece of machine steel and tried to remove the debris. However, the plateau rim inhibited the piece of steel from working properly. I did get some chunks out – but not enough. I also used a dental tool, which was more successful, but there was still more. So, I pivoted and pulled out brushes: tooth, nylon, and brass. I scrubbed and scrubbed until I was satisfied that everything was clean. This wasn’t so obvious because the filth is black and the rim top is black too!
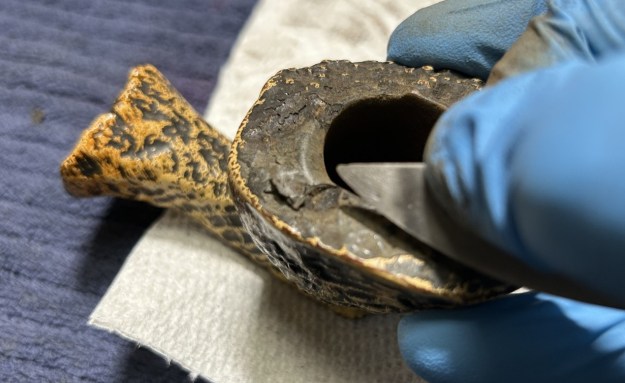
 Naturally, the inside of the stummel needs to be cleaned thoroughly. Similar to the stem, I then cleaned the stummel with both pipe cleaners and cotton swabs dipped in 99% lemon-infused isopropyl alcohol. This pipe was extraordinarily dirty – it took quite a while and an enormous amount of cotton to get clean. This photo doesn’t even show all of the cotton used.
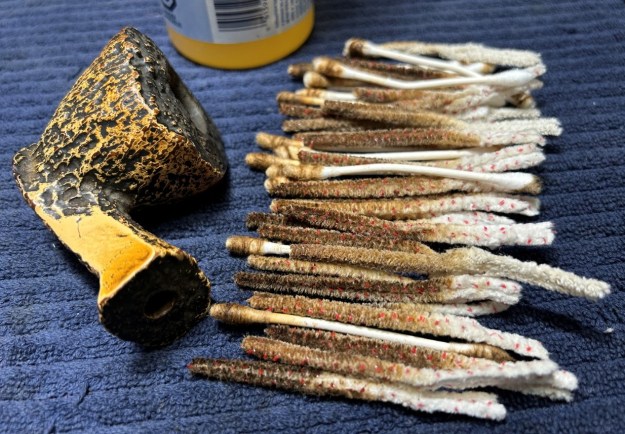 I then decided to ‘de-ghost’ the pipe – that is to say, exorcize the remaining filth from the briar. I filled the bowl and the shank with cotton balls, then saturated them with 99% isopropyl alcohol. I let the stummel sit overnight. This caused any remaining oils, tars and smells to leach out into the cotton.
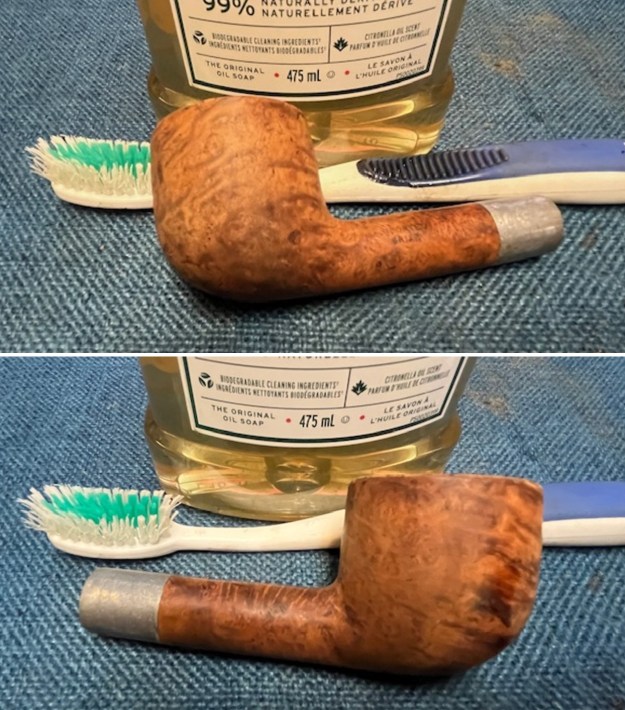
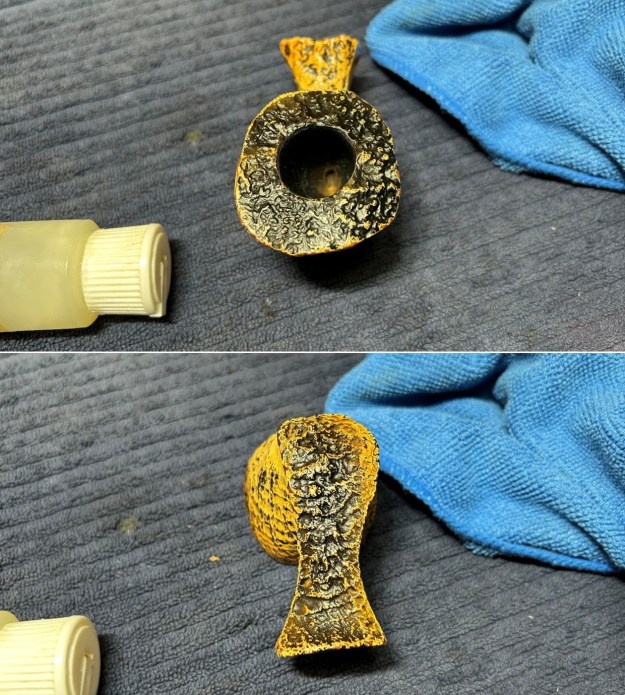
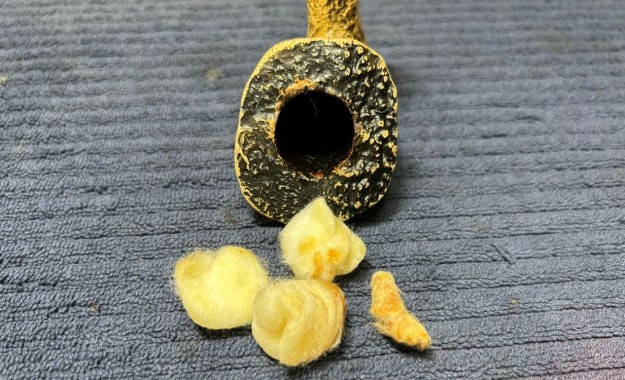 To tidy up the Nordcoat on the briar, I also wiped down the outside with some oil soap on cotton rounds (and a toothbrush). This does a good job of cleaning any latent dirt on the surface. The last step of the cleaning process is to scour the inside of the stummel with some soap and tube brushes. This is the culmination of a lot of hard work in getting the pipe clean.
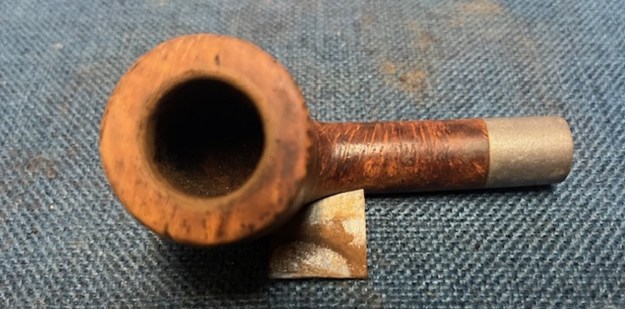
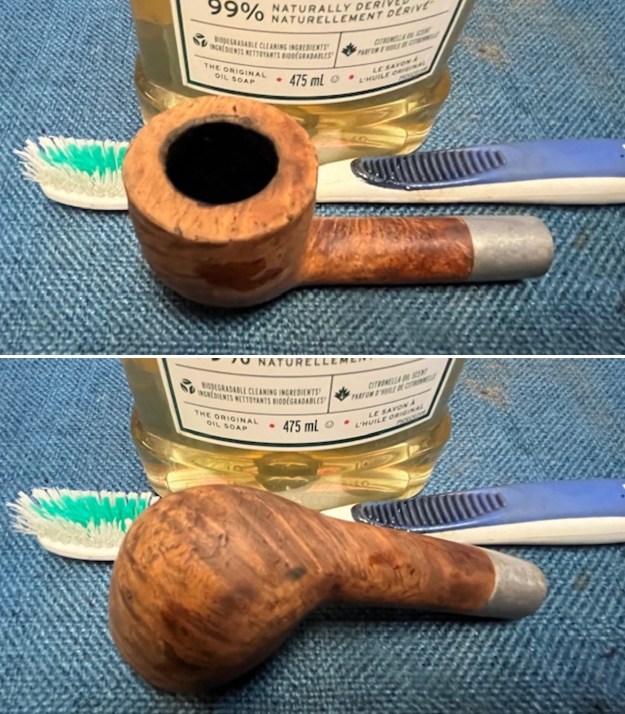
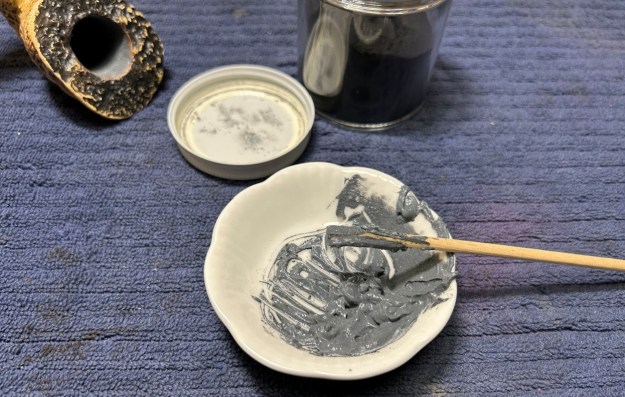
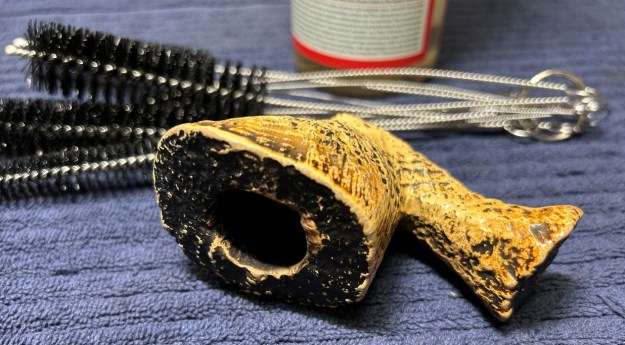 Back to the inside of the bowl. As I mentioned, there were many fissures and cracks in the briar. To repair damage like this, I use an epoxy adhesive that is extremely hard, resistant to high temperatures, and completely inert when cured. It works superbly. I coated the affected area with a thin layer of epoxy and let it cure for a full 24 hours. The next day, I roughened up the epoxy’s surface for the next step. I thinly spread the inside of the bowl with a mixture of my wife’s homemade yogurt and activated charcoal. Once hardened, this provided a good, faintly rough surface for a new cake to build.
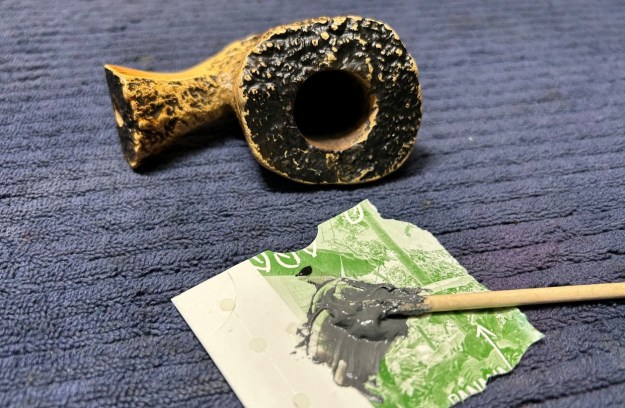
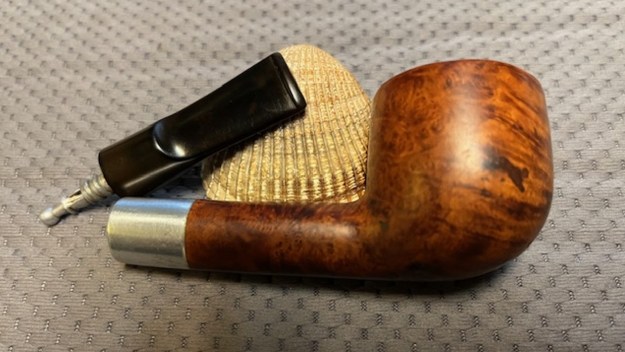
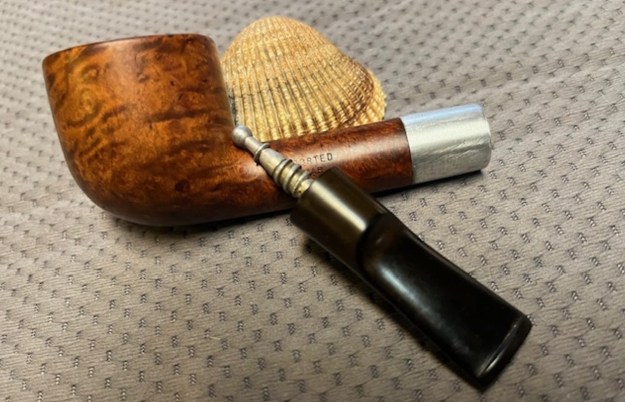
 I rubbed some Before & After Restoration Balm into the Nordcoat and let it sit for 20 minutes or so. I then buffed it with a microfibre cloth.
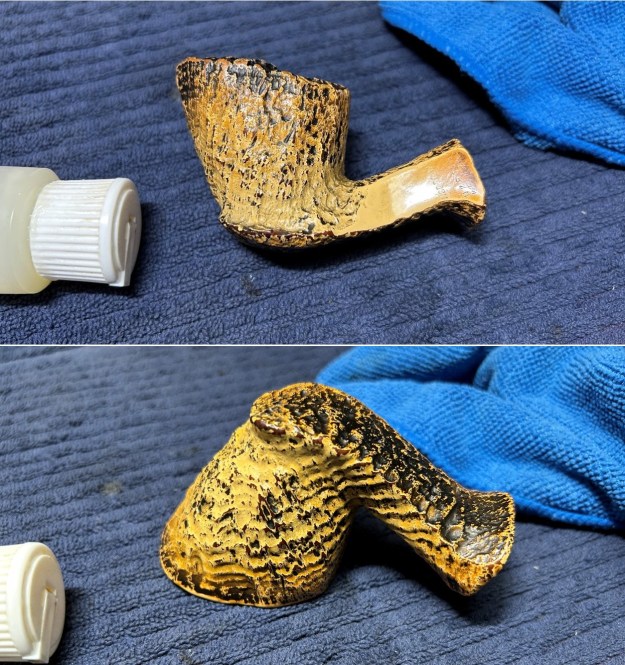
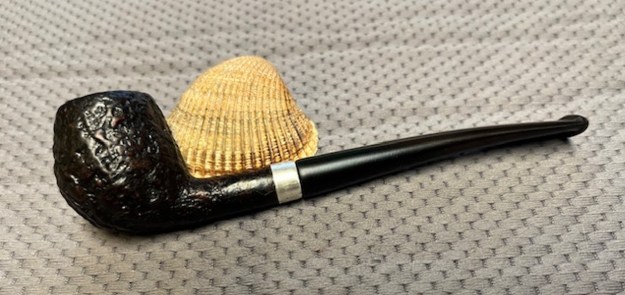
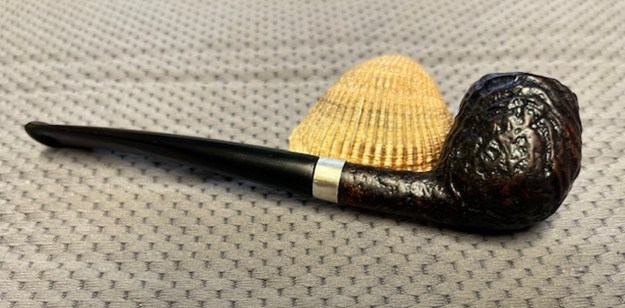
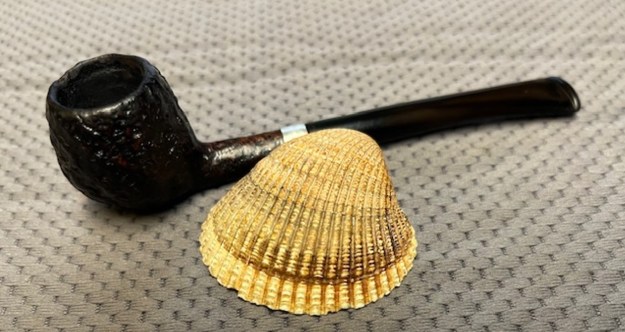
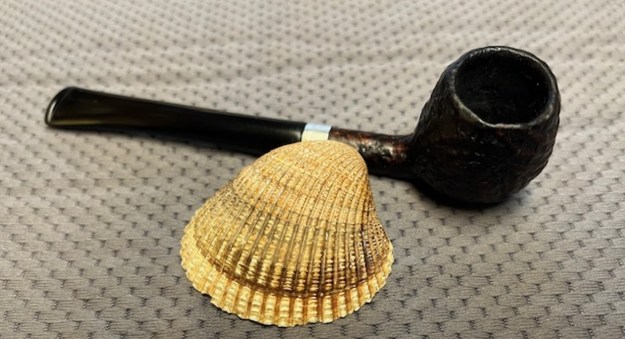
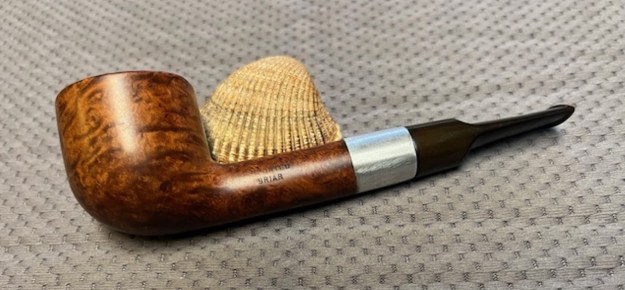
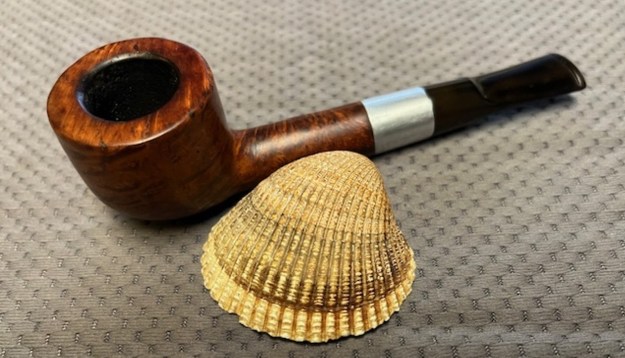
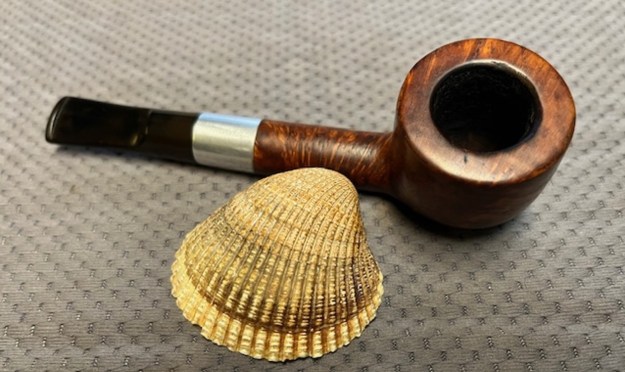
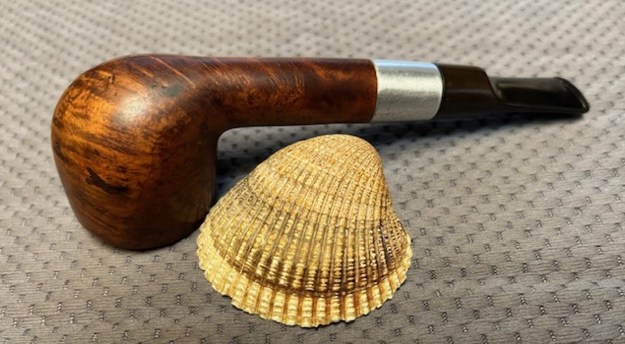
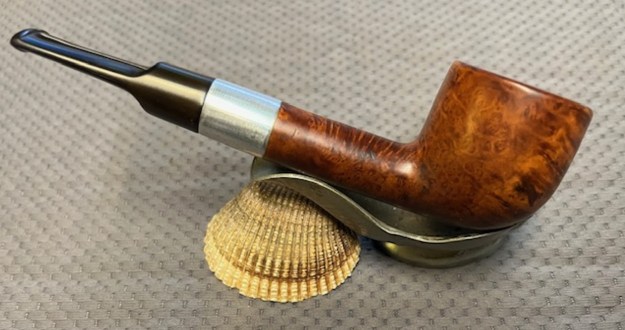
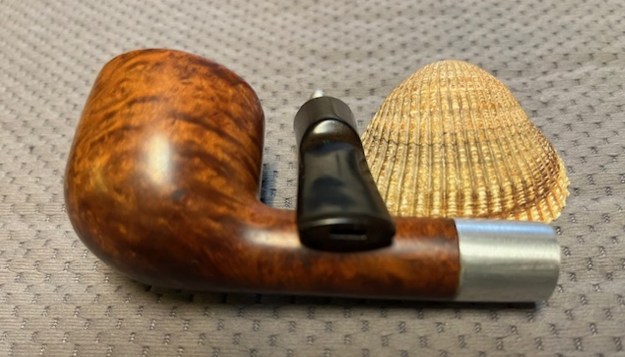
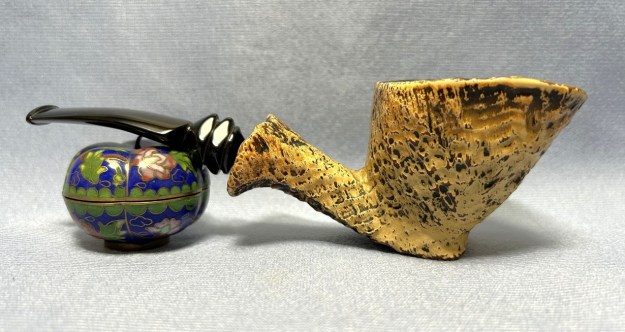
 For the final step, I took the pipe to my bench buffer and carefully polished it with three coats of conservator’s wax. This procedure makes the pipe look its best – the stummel sings and the stem glows.
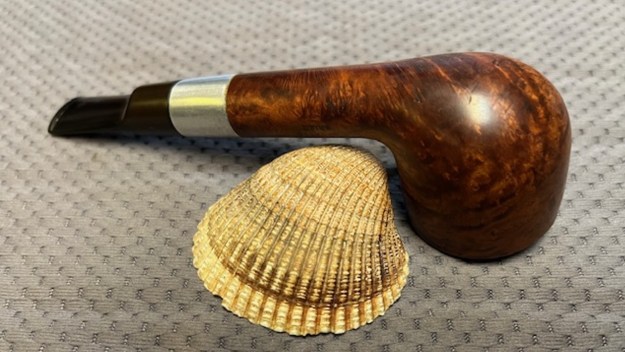
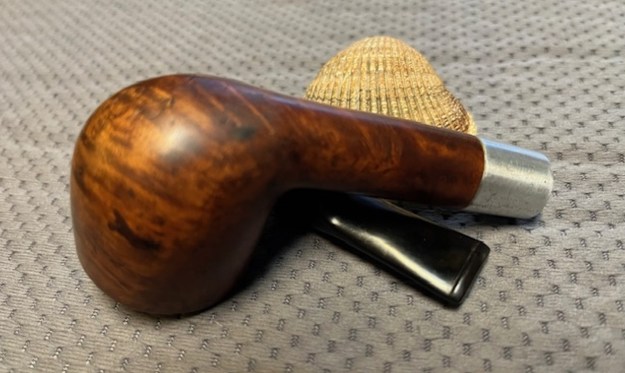
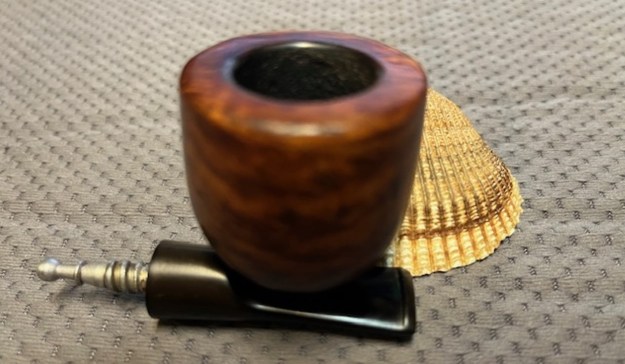
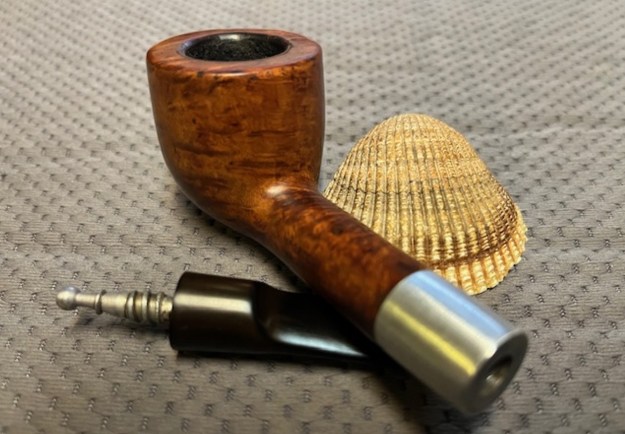
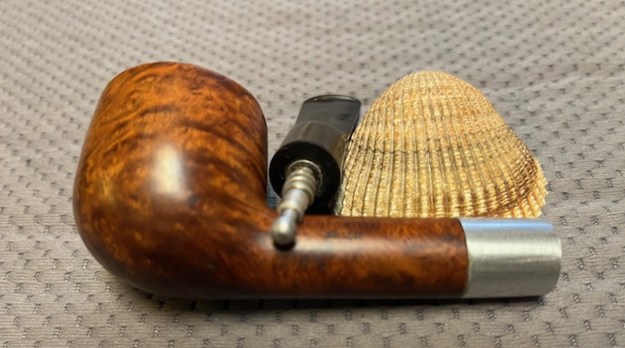
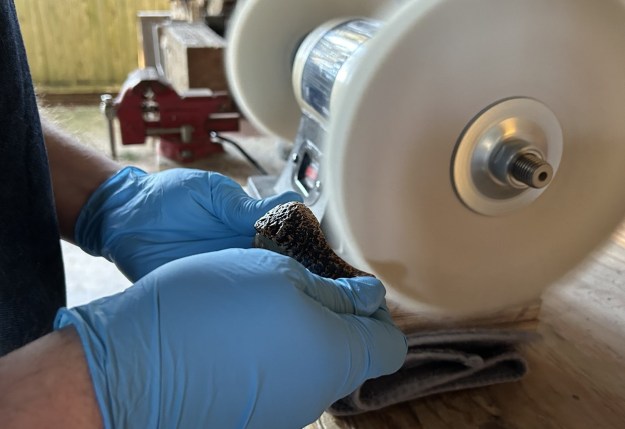 This Nørding Nordcoat freehand was a huge challenge, but I am really pleased with the results – and I anticipate that my customer will be too. I hope you enjoyed reading the story of this pipe’s restoration as much as I enjoyed restoring it. If you are interested in more of my work, please follow me here on Steve’s website or email me directly at kenneth@knightsofthepipe.com. Thank you very much for reading and, as always, I welcome and encourage your comments.
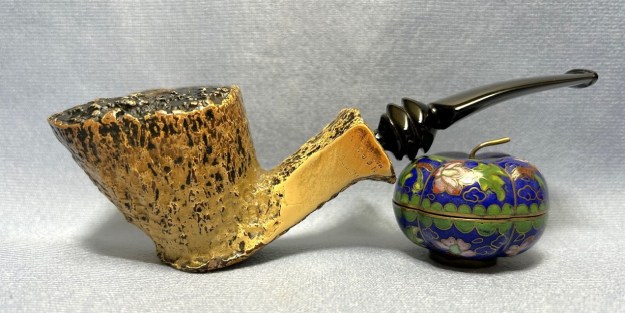


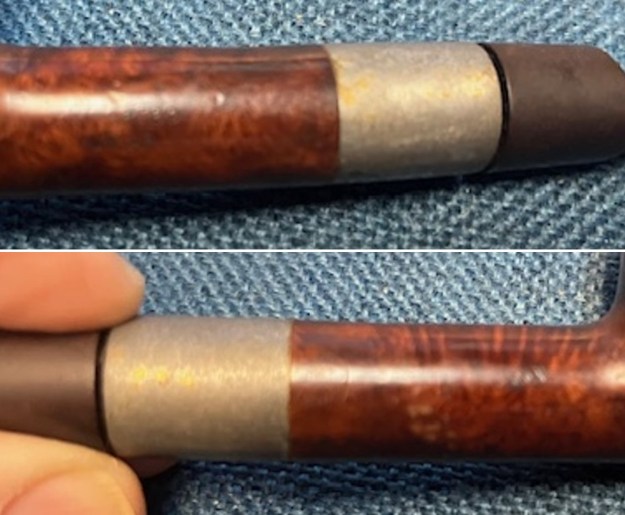
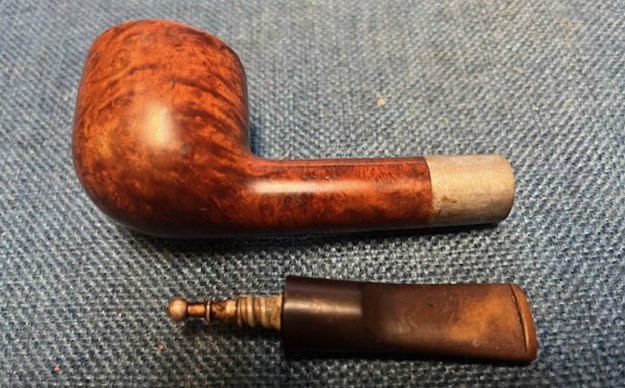
 I took a photo of the underside of the shank to show the stamping. It is quite clear and readable as noted above. I also tried to capture the Sterling Silver stamp o the band.
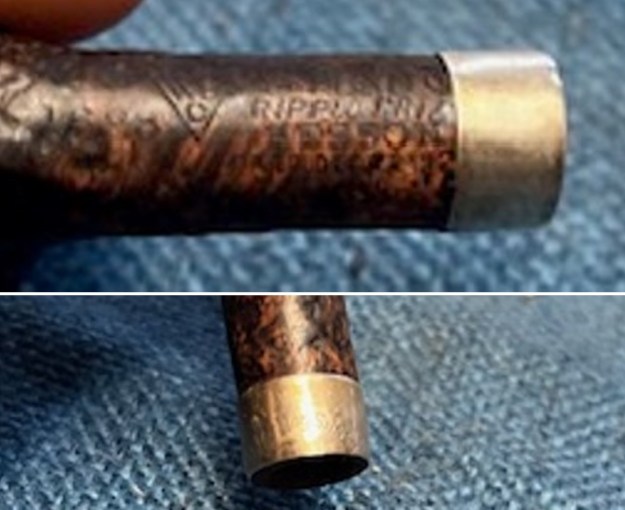 I went through my stems and found one that was close to the right diameter to the shank and had a small diameter tenon. It would need some adjusting but it would fit very well. I took photos of it showing the look with the bowl.
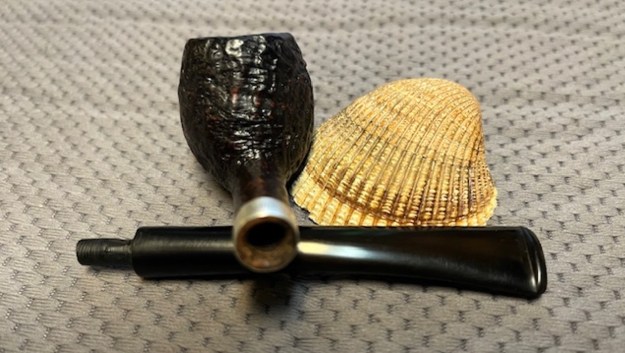
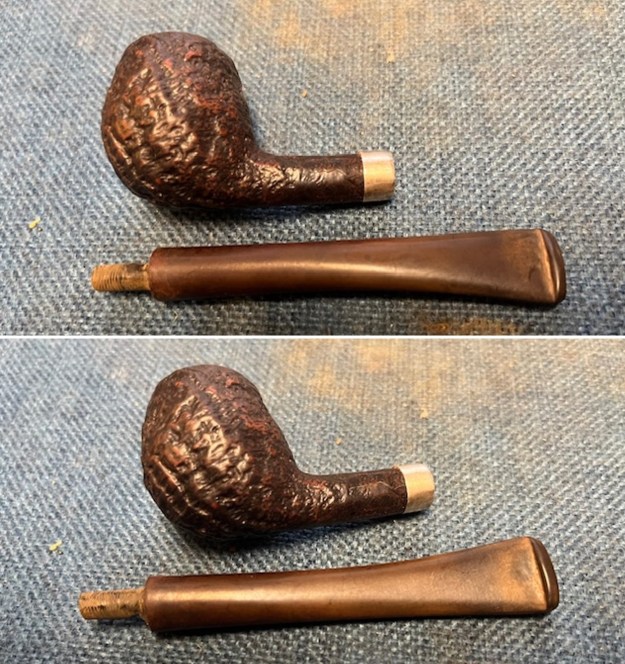 I started work on this pipe by polishing the bowl. The bowl was very clean and had little wear on it. The cracked shank had been banded and repaired somewhere in its journey. The silver band was very clean with some small scratches in the surface. It was in great condition so I started by staining the rim top faded and marks spots with a Walnut stain pen to blend them in and clean up the damage. It looked very good.
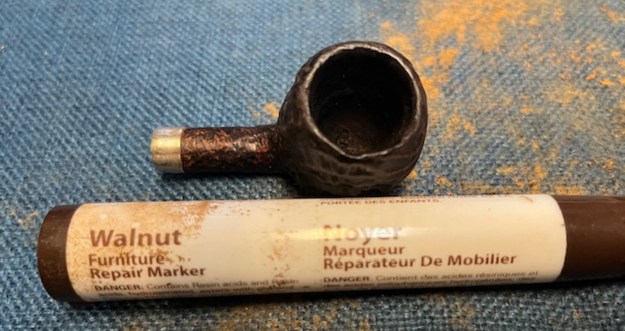 After the touch up stain cured, I rubbed the bowl down with Before & After Restoration Balm. It is a paste/balm that works to deep clean the finish, enliven and protect the briar. I worked it into the briar with my finger tips to make sure that it covered every square inch of the pipe. I set it aside for 10 minutes to let it do its work. I buffed it with a cotton cloth. The briar really began to have a deep shine. The photos I took of the bowl at this point mark the progress in the restoration.
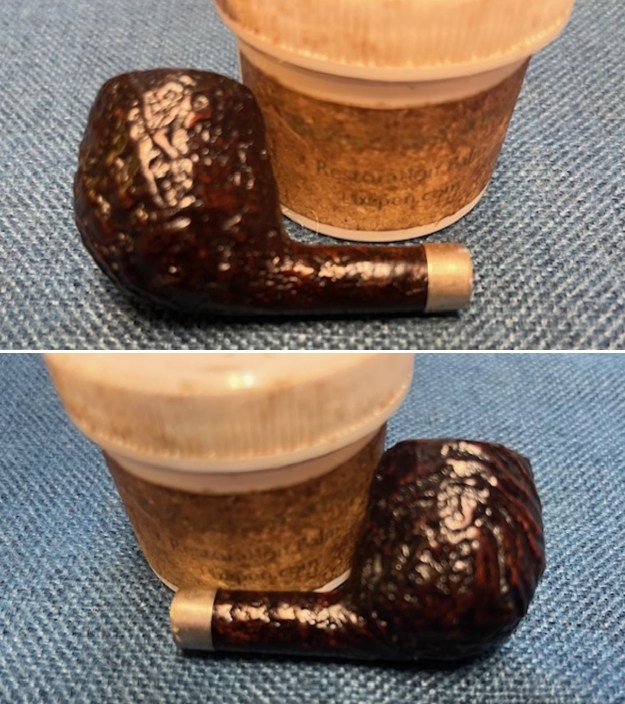
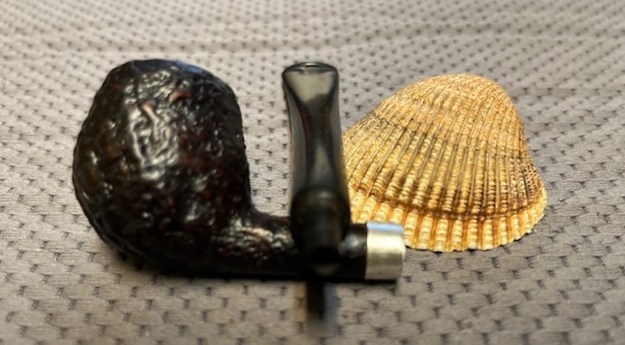
 I set the bowl aside and turned my attention to the stem I had chosen for the pipe. I cleaned up the tenon and shortened it slightly to fit the shank of the pipe. I sanded the diameter with a folded piece of 220 grit sandpaper to fully match the shank diameter. I sanded out the tooth marks and chatter on both sides of the stem.
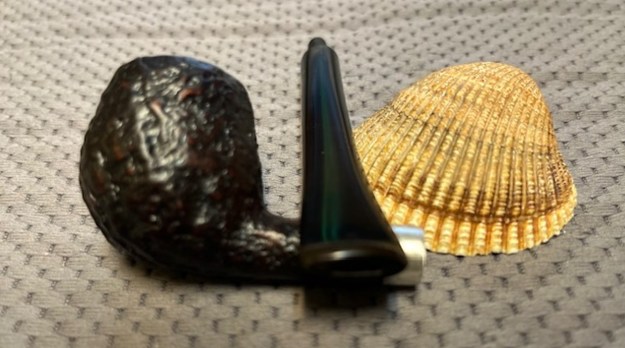
 I put the stem on the shank and took photos of the fit of the stem to the bowl and the new look of this deeply sandblast pipe. I am liking the looks of the new stem.
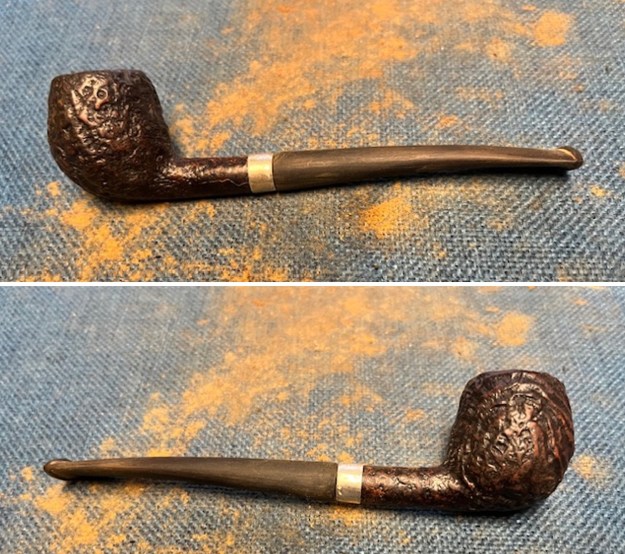
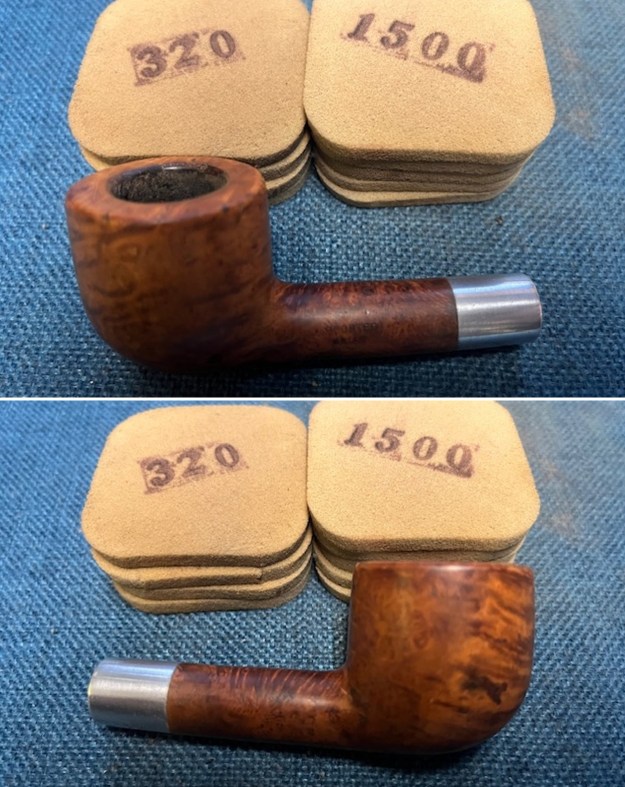
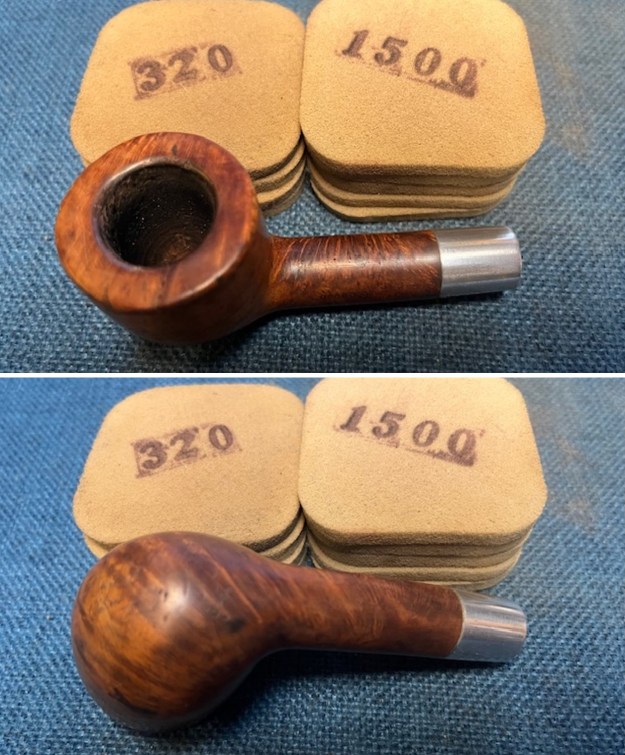
 I removed the stem from the shank and sanded it further with 320-3500 grit sanding pads. I wiped the stem down after each pad with an Obsidian Oil impregnated cloth. By the time I finished with the 3500 grit pad the stem really looked good. I also sanded out the rough spot on the underside of the silver band to smooth it out.
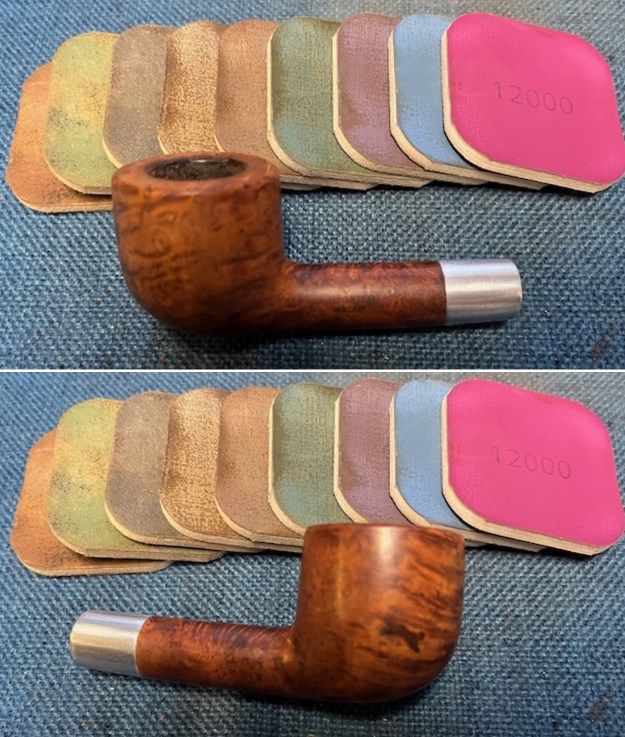
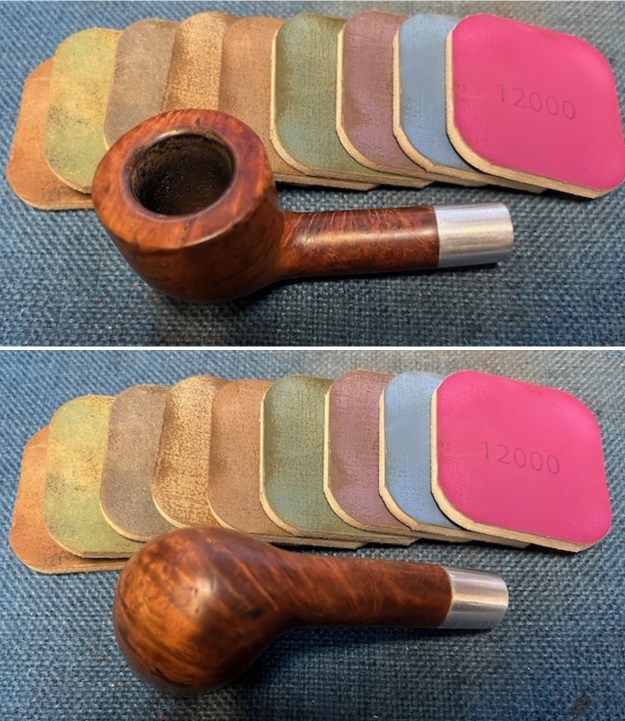
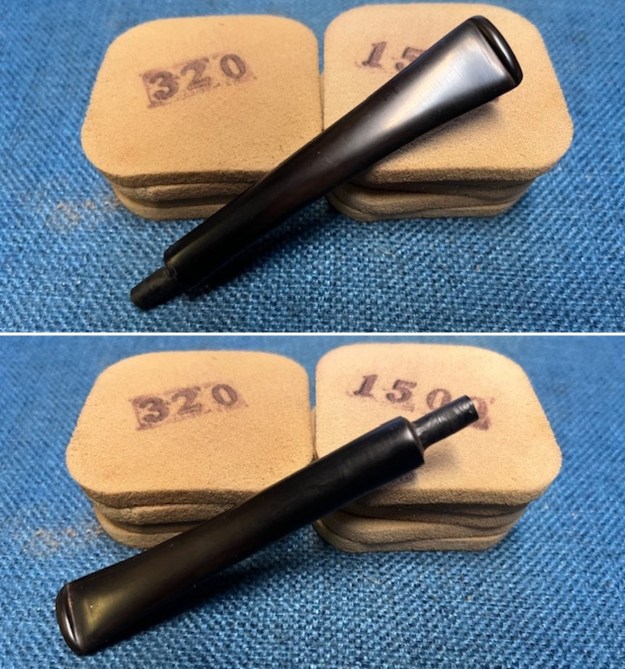 I polished the stem with 1500-12000 grit micromesh sanding pads – dry sanding with each pad. I wiped the stem down after each pad with an Obsidian Oil cloth. I polished it further with Before & After Pipe Stem Polish and wiped it down a final time with the oil cloth.
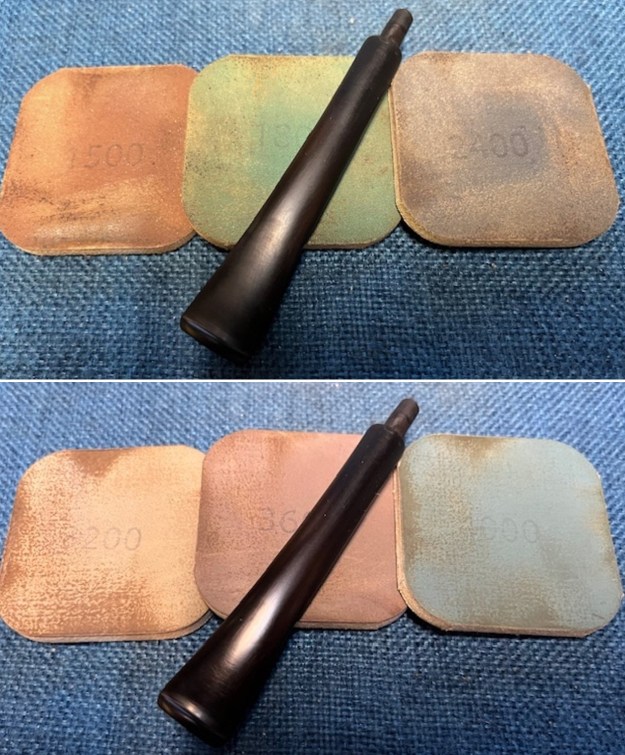
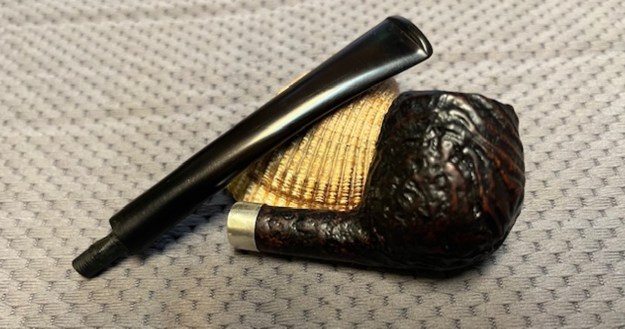
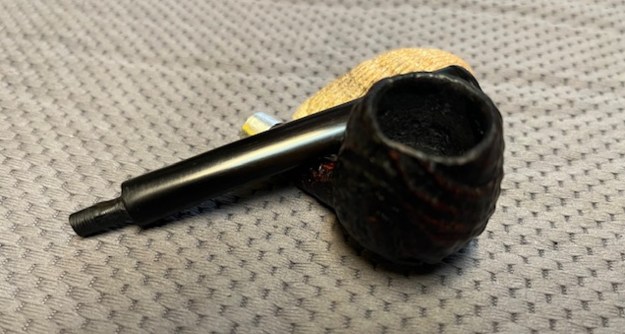
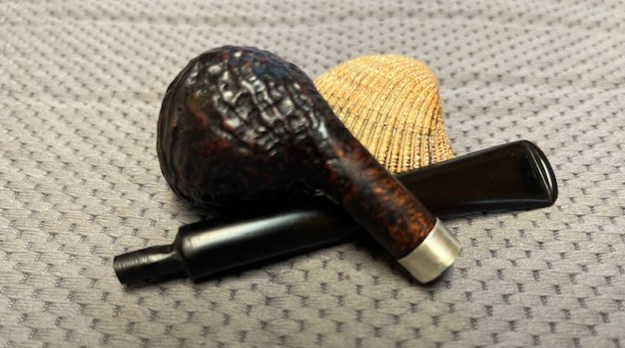
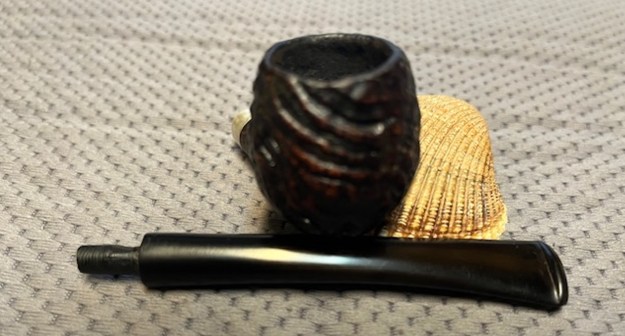
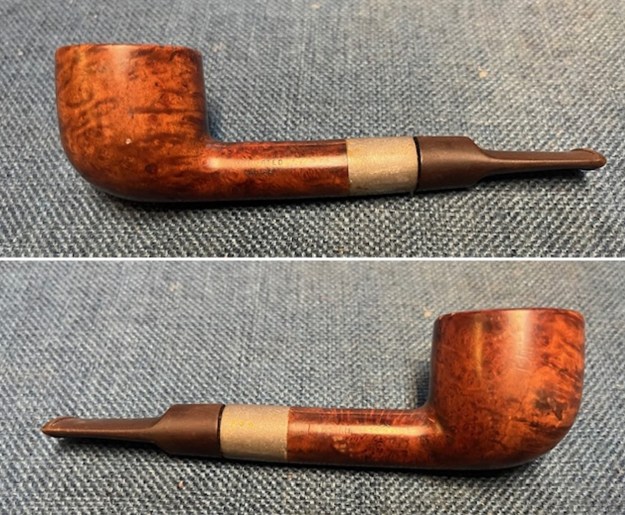
 The finished WDC Milano Ripple Briar Hession Apple looks great with its new stem. The taper stem brings out the contrast of the silver band and dark nooks and crannies of the sandblast. I buffed the pipe with a light coat of White Diamond on the buffing wheel and then gave the bowl multiple coats of Conservator’s Wax and the stem multiple coats of Carnauba Wax. I buffed the pipe with a clean buffing wheel and it is a real beauty. The dimensions of this WCD Milano Ripple Briar Apple are length: 5 ½ inches, height: 1 ½ inches, outside bowl diameter: 1 inch, chamber diameter: ¾ of an inch. The weight of the pipe is .67 ounces/19 grams. This is a beauty that will be going on the American Pipemakers Section of the rebornpipes store shortly. If you are interested in adding it to your collection let me know. Thanks for giving the blog a read.