Blog by Steve Laug
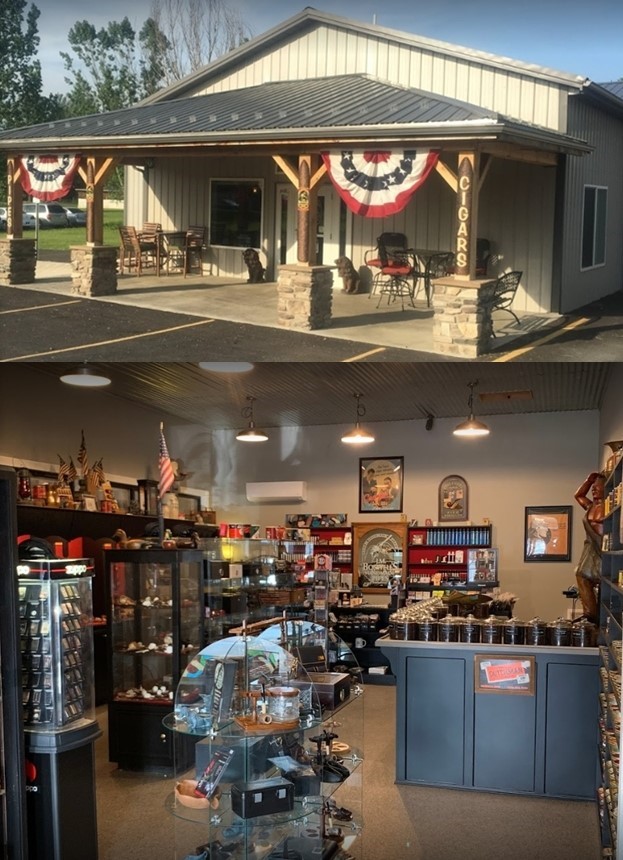
The next pipe on the table is large smooth finished Bent Poker. We purchased it from an Antique Store in Missoula, Montana, USA on 07/25/2023.The pipe is stamped on the left side of the shank and reads Collector in script [over] Digby [over] London Made. On the right side of the shank it was stamped London England [over] 9539. The rim top is shaped like an eye or football. There was grime ground into the bowl sides. The pipe had been smoked and there was a thick cake in the bowl with a thick lava overflow on the rim top. The is a D logo stamped on the top of the saddle stem. The stem is oxidized and calcified. It had light tooth marks on both the top and underside of the stem just ahead of the button. Jeff took photos of the pipe before he started his clean up work. I have included them below.
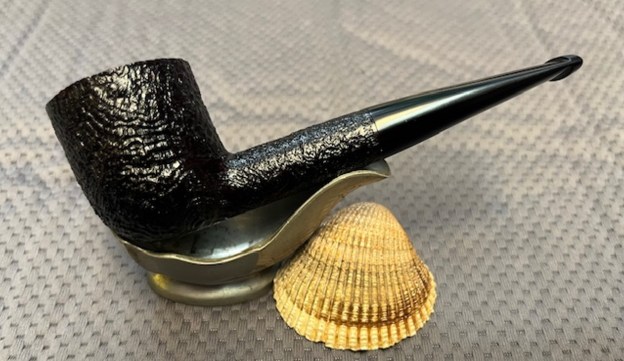
 Jeff took photos of the rim top, bowl and the surfaces of the stem to give a sense of the condition of the pipe. The walls of the bowl had a thick cake which overflowed over the rim edges and onto the rim top making a mess. The stem is oxidized, calcified and dirty. There are light tooth marks on both sides ahead of the button.

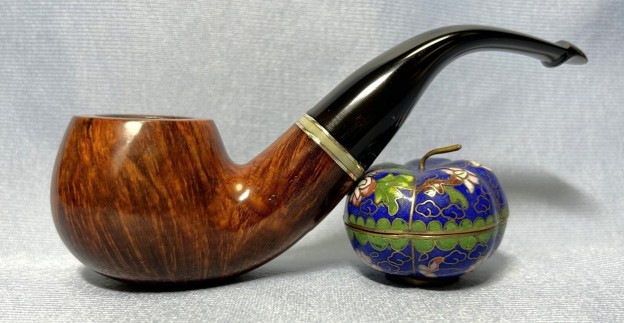
 He took photos of the sides and heel of the bowl to give a clear picture of the way the shape follows the grain. The grain is quite beautiful. There are some fills and flaws in the right side of the bowl.
 He took photos of the stamping on the sides the shank. It is clear and readable and read as noted above. The D logo on the top of the stem is faint but it is readable.
 I knew that Digby was a second made by GBD but I wanted to do some digging to confirm that I turned first to Pipephil’s site (http://www.pipephil.eu/logos/en/logo-d6.html) to see what I could find. The screen capture below links Digby to GBD quite clearly.
 From there I turned to Pipedia and looked up Digby pipes (https://pipedia.org/wiki/Digby). I quote below what I found there as it confirms the link.
Digby pipes were made by GBD as a second line for pipes with too many flaws to carry the primary brand. They appeared, in the 1976 catalog, in either a smooth walnut finish or a dark sandblast. Digby pipes were openly sold as being made “By the Makers of the Famous GBD”. For more information see GBD.
I followed the link in the Digby article on Pipedia to the GBD article that is noted in the quote above (https://pipedia.org/wiki/GBD_Model_Information). I read through the article and found the listing I was looking for below. I quote:
In addition to the pipe line and shape information stamped on the pipe GBD also had codes for plus sized pipes. These codes in ascending order of size were…
- Conquest
- Collector
- Colossus
Now it was my turn to work on the pipe. Jeff had done an amazing cleanup of the pipe. He reamed the light cake with a PipNet reamer and cleaned up that with a Savinelli Fitsall Pipe Knife. He scrubbed the internals of the bowl and stem with alcohol, cotton swabs and pipe cleaners. He scrubbed the externals with undiluted Murphy’s Oil Soap and rinsed the bowl off with running water. He soaked the stem in Briarville’s Pipe stem Deoxidizer and once it had soaked rinsed it off with warm water to remove the residual solution. He dried it off and rubbed it down to remove any oxidation that was still on the stem. The pipe looked very good when I received it.
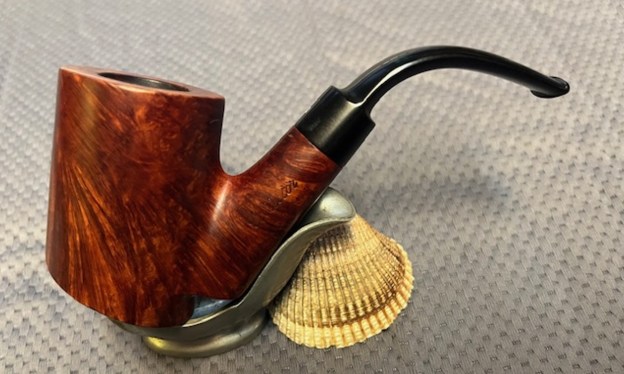
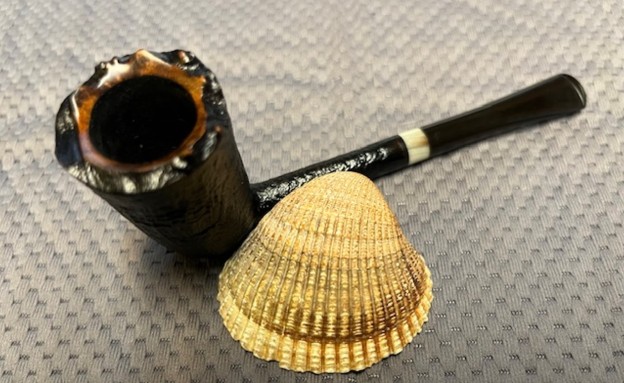
 I took photos of the bowl and the rim top as well as both sides of the stem to show the condition of the pipe before I started my work. The rim top was very clean and the edges looked good. The clean up had removed some of the stain on the top the outer edges of the bowl. It really looked remarkably good.
 I took a photo of the stamping on the shank. The photo of the stamping is clear and readable. I also removed the stem and took a photo of the parts of the pipe. It is a unique piece of pipe history.
 I started my work on the pipe by addressing the damage to the rim top and inner edge of the bowl. I used a folded piece of 220 sandpaper to smooth out the roughness of the rim edge. I then used a wooden sphere and 220 grit sandpaper to smooth out the top and give the edge an even bevel.

 I touched up the rim top with a Cherry stain pen. It matched the colour of the rest of the bowl. I set it aside to dry.
 I sanded the rim top and edges with 320-3500 grit sanding pads. I wiped it down after each sanding pad. The rim top began to really look good and take on a shine. The sanding marks were well blended in by the final pad.
 I polished the briar with micromesh sanding pads. I dry sanded it with 1500-12000 grit sanding pads and wiped the bowl down after each pad with a damp cloth. By the final pads the briar really had a shine.


 I rubbed the briar down with Before & After Restoration Balm. I worked it into the surface of the briar with my fingertips. The product works to clean, enliven and preserve the briar. I let it sit for 10 minutes then I buffed it with a cotton cloth to deepen the shine. The briar really comes alive with the balm.

 I set aside the bowl and turned my attention to the stem. I sanded out the tooth damage with 320-3500 grit sanding pads. I wiped the stem down after each pad with a damp cloth. I was able to remove the damage and the stem looked better.
 I touched up the D logo on the left side of the stem with white acrylic nail polish. Once it dried I used a 1500 grit micromesh sanding pad to remove the excess acrylic paint. The white acrylic that remained filled in the letter on the stem.
 I polished the vulcanite stem with micromesh sanding pads – 1500-12000 grit pads. I wiped it down with Obsidian Oil after each sanding pad. I used Before & After Pipe Polish – both Fine and Extra Fine to further polish the stem.
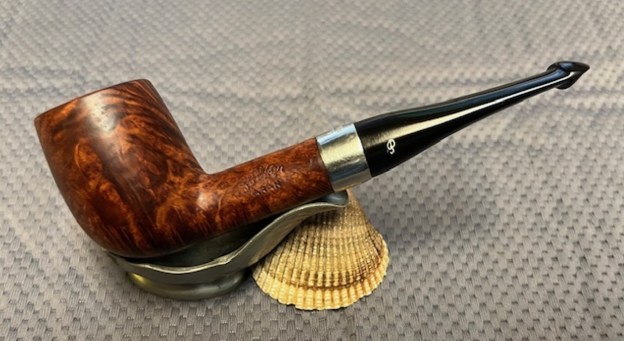
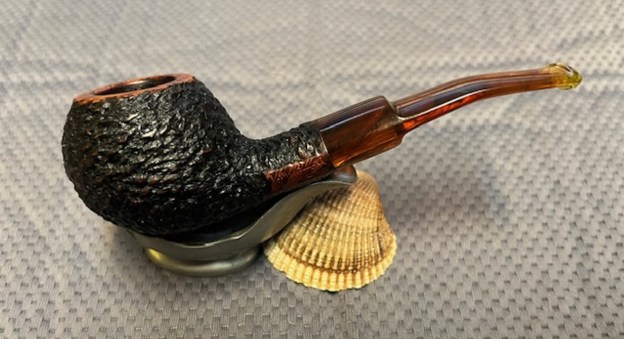
 This Collector Digby London Made 9539 Bent Poker has a beautiful, reddish brown finish that highlights some beautiful grain. The polished vulcanite stem adds to the mix. I put the stem back on the bowl and buffed the pipe with Blue Diamond on the buffing wheel being careful to not buff the stamping. I gave the bowl and the stem multiple coats of carnauba wax on the buffing wheel and followed that by buffing it with a clean buffing pad. I hand buffed the pipe with a microfiber cloth to deepen the shine. The finished Collector Digby 9539 Bent Poker is quite stunning and feels great in my hand. Give the finished pipe a look in the photos below. The dimensions of the pipe are Length: 5 inches, Height: 2 ½ inches, Outside diameter of the bowl: 1 ¼ inches x 1 ½ inches, Chamber diameter: ¾ of an inch. The weight of the pipe is 2.15 ounces/61 grams. Thanks for walking through the restoration with me as I worked over another beautiful pipe. I am going to putting the pipe on the rebornpipes store in the British Pipe Makers Section. If you are interested in adding it to your collection let me know. Thanks for your time.


