Daily Archives: January 20, 2024

The Ghost of Tobaccos Past


by Kenneth Lieblich

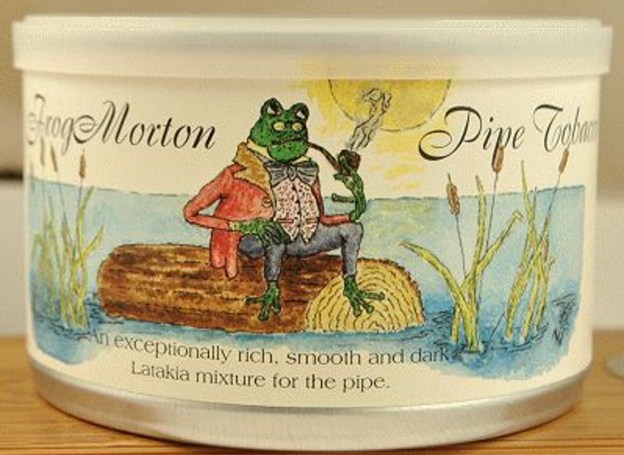
About fifteen months ago, I wrote a blog post here on my first attempt at blending tobacco. From some online forum, I had learned of a “recipe” to recreate McClelland’s Frog Morton tobacco, and this mix was (appropriately) called the Ghost of Frog Morton. This consisted of a 50-50 mixture of Peter Stokkebye English Luxury PS 17 and Lane Limited HGL. I was mildly concerned about the volume of Lane Limited HGL, as I’m not a strong aromatic fan, but figured it was worth a shot. At the time, I committed to jarring the stuff for a year (to let flavours blend) before trying it out. More than a year on, I’ve had some requests for an update on how it turned out and this is that update.

Let’s have a closer look at the two tobaccos that make us Ghost of Frog Morton. First, Peter Stokkebye English Luxury PS 17 is made with Georgian Virginias, black cavendish, Mexican burleys and Cyprian Latakia. This is a milder English blend than I tend to smoke (which is ok) and it has a certain sweetness to it. I’m not sure if this is a topping or not, but it is noticeable. Second, Lane Limited HGL is an American blend (not usually my style) made with toasted black cavendish, Latakia, white burley and golden Virginia. It is quite sweet. Despite the four components of each tobacco being the same, they are quite different as mixtures.I want to acknowledge that many sympathetic correspondents were correct in saying that this mixture bears little resemblance to the original Frog Morton. This has no bearing on whether the tobacco is enjoyable or not, but it’s worth noting that someone must have very odd tastebuds to think that Frog Morton and Ghost of Frog Morton were alike!

Upon opening a jar of the stuff a year on, I decided to try the tobacco in a corn cob for two reasons. First, I felt this would provide a neutral medium through which to try GoFM. Second, the blend smelled too “aromatic” for me and I didn’t want to ghost (pun intended) a briar with it, in case it wasn’t to my taste.Ghost of Frog Morton is a decent blend for those wanting a hybrid between English and aromatic tobaccos. I don’t claim any great expertise in either tasting or blending, but this is a bit too aromatic for me. I’m glad I tried it, but it is not really my thing. I like the idea of having a slightly hybrid tobacco on occasion, but I would lean towards something even less aromatic than this. If I tried this again, I would alter the Stokkebye/Lane ratio from 1:1 to 3:1 or even 4:1. For those who enjoy hybrids, I would recommend trying this blend. The base tobaccos are quite inexpensive and it is easy to produce.

In the comments to my original post, Jack Gillespie suggested Sutliff’s Eastfarthing as a similar hybrid that suits him. I tried that too, and it was better than GoFM but still a bit too vanilla/aromatic for me. I guess I’m an inveterate English and Virginia man! I hope you enjoyed reading this brief review of Ghost of Frog Morton. If you are interested in my work, please follow me here on Steve’s website or email me directly at kenneth@knightsofthepipe.com. Thank you very much for reading and, as always, I welcome and encourage your comments.

This Rare and Beautiful “Malaga” Raskassa Cutty cleaned up extremely well


Blog by Steve Laug

For the next little while I am working on some Malaga Pipes. I have several in queue to work on so I tend to pick them by what catches my eye. The next pipe on the table is an interesting Malaga Raskassa Large Cutty. Jeff saw it on eBay and purchased it on 10/05/2023 from a seller in Pomona, Missouri, USA. The grain on this pipe is very stunning. It was obviously someone’s favourite smoker. The pipe is stamped on the left side of the shank and reads RASKASSA. The smooth bowl and shank were dirty and worn. There were tars and oils ground into the surface of the briar. The bowl had a very thick cake that flowed over the top of the smooth rim in a spotty lava coat. The cake in the bowl was thick right up to the top of the rim. It was hard to fully assess the condition of the inner edge. The rim top and inner edge of the bowl appeared to have some damage but more would become clear in the cleaning process. The outer edge had chips and dents from knocking the pipe against a hard surface. The taper stem appeared to be either vulcanite or hard rubber. There were tooth marks on the top and the underside ahead of the button. Jeff took photos of the pipes before he started his clean up work.Jeff took photos of the rim and bowl to show the heavy cake and lava spots on the rim top and edges. The bevelled inner edge of the rim showed some darkening and had some cake on it. The grain on the rim top is quite stunning. It was a dirty pipe but still a beauty. The hard rubber stem had tooth marks and chatter on the top and underside of the stem ahead of the button. The photos of the sides and heel of the bowl show some stunning and unique grain all around the pipe. The oil curing/finish makes the grain really stand out on the bowl and shank. Jeff took a photo of the stamping on the left side it read Raskassa as noted above. It was clear and readable.For those of you who are unfamiliar with the brand, I am also including the link to a blog that I wrote that gives some of the history of the Malaga brand and the Malaga Pipe Shop in Royal Oak, Michigan in the USA. Here is the link – https://rebornpipes.com/2013/02/09/george-khoubesser-and-malaga-pipes/. That blog also includes links to a catalogue and the history of the pipemaker George Khoubesser. If you are interested to learn more then I invite you to follow the link to get a feel for the brand and the pipemaker.

I am also am including a link to some printed material on the Malaga brand that came to me from the daughter of George Koch (we purchased George’s pipes from his daughter) to help identify the particular stamping on the pipe. The link takes you to the entire collection of materials that were sent to me. I have included a screen capture of one particular page that helps identify the RAS KASSA stamping on the pipe (https://rebornpipes.com/2019/02/27/malaga-pipes-catalogue-of-pipes-and-tobaccos/). I have enclosed the section on the brand in a red box in the picture above. To summarize, it basically says that the stamping is applied to pipes with special rare grain patterns in the briar. These appear to be straight grain, birdseye, swirled grains etc. that are tight patterns. They are rare – 1 or 2 in every hundred pipes. This pipe is one of those. You can read the description in the detailed explanation below.

Jeff had cleaned up the pipe using his usual procedure. He reamed the pipe with a PipNet pipe reamer and removed the rest of it with a Savinelli Fitsall Pipe Knife. He scrubbed the bowl with undiluted Murphy’s Oil Soap with a tooth brush. He rinsed it under running warm water to remove the soap and grime. He cleaned out the inside of the shank and the airway with alcohol, cotton swabs and pipe cleaners. The shank had an inset to take in the tenon and the end of the stem so I would need to fit a stem to sit in the shank. I took photos of the pipe once I received it. I took a photo of the rim top and the stem to show their condition. Jeff was able to clean up the cake and the lava overflow that was shown in the rim and bowl photos above. The rim top was clean but there were chips and nicks around the inner edge of the bowl and nicks on the outer edge. There was also some darkening on the flat surface of the rim. It is visible in the first photo below. The stem looked better, though there were tooth marks and chatter on both sides near the button and on the button surface itself.I took a photo of the stamping on the left side of the shank to show that it was readable and undamaged by the cleanup work. I removed the stem from the shank and took a photo of the parts to give a sense of what the pipe looks like.It was time to start my work on the pipe. I started with the rim top and edges of the bowl. I sanded the inner and the outer edge of the bowl. I used a topping board and 220 grit sandpaper to clean up the rim top and darkening. Once I was finished with the light topping the grain on the rim top looked very good. I polished the smooth panels on the bowl sides and the smooth rim top with micromesh sanding pads. I dry sanded it with 1500-2400 grit sanding pads and wiped the bowl down with a damp cloth after each sanding pad. I touched up the clean rim top with a Maple Stain Pen. After the staining I continued sanding the rim top and bowl with 3200-12000 grit micromesh pads. I wiped it down after each pad. It really began to be beautiful. I rubbed the bowl and shank down with Before & After Restoration Balm to deep clean the finish on the bowl and shank. The product works to clean, enliven and protect the briar. I worked it in with my fingers to get it into the briar. I let it sit for 10 minutes then I wiped it off and buffed it with a soft cloth. The briar really began to have a rich shine. I took some photos of the bowl at this point to mark the progress in the restoration. It is a beautiful bowl. I set the bowl aside and turned my attention to the stem. I filled in the tooth marks on both sides with black CA glue. I set it aside to cure. Once the repairs hardened I used a small needle file to flatten out the repairs. I smoothed them out with 220 grit sandpaper to blend them into the rest of the surrounding vulcanite. I set the finished bowl aside and we back to the stem. I started the polishing of the stem with 2 x 2 inch sanding pads – dry sanding with 320-3500 grit pads and wiping it down after each pad.I polished the stem with micromesh sanding pads – dry sanding with 1500-12000 grit pads. I wiped the stem down after each sanding pad with Obsidian Oil. I did a final hand polish of the stem with Before & After Pipe Stem Polish – both Fine and Extra Fine. I gave it a coat of Obsidian Pipe Stem Oil. It works to protect the stem from oxidizing. I set it aside to dry.I put the stem back on the “Malaga” Beautifully Grained Raskassa Large Cutty and took it to the buffer. I buffed the bowl and stem with Blue Diamond to polish the briar and the vulcanite. Blue Diamond does a great job on the smaller scratches that remain in both. I gave the bowl and the stem several coats of carnauba wax and buffed the pipe with a clean buffing pad to raise the shine. I hand buffed it with a microfiber cloth to deepen the shine. I am amazed at how well it turned out. The finished pipe is shown in the photos below. This is a beautiful “Malaga” Large Raskassa Cutty and the hard rubber taper stem and smooth finish combine to give the pipe a great look. I honestly have no idea why it is labeled a second as there are no fills or flaws in the briar. The dimensions of the pipe are Length: 7 inches, Height: 2 ¼ inches, Outside diameter of the bowl: 1 ½ inches, Chamber diameter: 7/8 of an inch. The weight of the pipe is 1.98 ounces/56 grams. This is another pipe that I will be putting on the rebornpipes online store in the American Pipe Makers and Pipemaking Companies Section shortly, if you are interested in adding it to your collection. Thanks for walking through the restoration with me on this beauty!

As always, I encourage your questions and comments as you read the blog. Thanks to each of you who are reading this blog. Remember we are not pipe owners; we are pipe men and women who hold our pipes in trust until they pass on into the trust of those who follow us.

This Amazing Magnum “Malaga” Rusticated Billiard cleaned up extremely well


Blog by Steve Laug

The next pipe on the table is an interesting Rusticated Malaga Magnum Billiard. Jeff saw it on eBay and purchased it on 12/22/2023 from a seller in Greensboro, North Carolina, USA. It was a large and dirty pipe with grit and grime in the grooves of the rustication. It was obviously someone’s favourite smoker. The pipe is stamped on a smooth panel on the left side of the shank and reads “Malaga”. The rusticated bowl surface had a smooth rim edge and rim top and down about 1/8 inch down the outside of the bowl. There were smooth panels on all sides of the bowl and on the left and right side of the shank. There were tars and oils ground into the surface of the briar. The bowl had a very thick cake that flowed over the top of the smooth rim in a spotty lava coat. The cake in the bowl was thick right up to the top of the rim. It was hard to fully assess the condition of the inner edge. There was a fill on the front of the rim top from the inner edge half way into the rim top. There were also burn marks on the left side of the top edge band on the rim and onto the edge of the smooth panel on the left side. There was a crack in the shank on the right side toward the bottom of the shank. The taper stem appeared to be either vulcanite or hard rubber. There were tooth marks on the top and the underside ahead of the button. Jeff took photos of the pipes before he started his clean up work. Jeff took photos of the rim and bowl to show the heavy cake and lava spots on the rim top. The inner edge of the rim had some cake on it. There was also a flaw in the briar on the rim top at the front of the bowl extending from the inner edge to the middle of the rim top. It was a dirty pipe but still a beauty. The hard rubber stem had tooth marks and chatter on the top and underside of the stem ahead of the button. The photos of the sides and heel of the bowl show a unique rusticated finish with smooth panels on the pipe and makes the grain really stand out on the bowl and shank. This bowl shows real promise. Jeff took a photo of the stamping on the left side of the shank centred on the smooth panel. It read “Malaga” as noted above. It was clear and readable.He took a photo of the crack on right side lower on the shank. It is about an inch long and extended from the shank end inward to the rustication.I am including the link to a blog that I wrote that gives some of the history of the Malaga brand and the Malaga Pipe Shop in Royal Oak, Michigan in the USA. I have written an earlier blog to give a little history of the Malaga Brand and the pipemaker, George Khoubesser. Here is the link (https://rebornpipes.com/2013/02/09/george-khoubesser-and-malaga-pipes/). That blog also includes links to a catalogue and the history of the pipemaker George Khoubesser. Follow the link to get a feel for the brand and the pipemaker.

Jeff had cleaned up the pipe using his usual procedure. He reamed the pipe with a PipNet pipe reamer and removed the rest of it with a Savinelli Fitsall Pipe Knife. He scrubbed the bowl with undiluted Murphy’s Oil Soap with a tooth brush. He rinsed it under running warm water to remove the soap and grime. He cleaned out the inside of the shank and the airway with alcohol, cotton swabs and pipe cleaners. The shank had an inset to take in the tenon and the end of the stem so I would need to fit a stem to sit in the shank. I took photos of the pipe once I received it. I took a photo of the rim top and the stem to show their condition. Jeff was able to clean up the cake and the lava overflow that was shown in the rim and bowl photos above. The rim top looked very good but there was fill visible on the front of the bowl from the inner edge toward the middle of the rim top. It is visible in the first photo below. The stem looked better, though there were tooth marks and chatter on both sides near the button. I took a photo of the stamping on the left side of the shank to show that it was readable and undamaged by the cleanup work. I removed the stem from the shank and took a photo of the parts to give a sense of what the pipe looks like.I decided to start working on the pipe by dealing with the crack in the shank. I ran a thin bead of CA glue on the crack and pressed it together. I went through my bands and found a silver band that fit well on the shank. I heated the band with the flame of a lighter and pressed it onto the shank against the padded surface of my desk top. I took photos of the newly banded shank from a variety of angles to give a sense of what the pipe looked like with the bling. The crack in the shank was no longer visible. The band brought the crack back together and it was tight. The only issue once I repair a crack with a band is that the original tenon no longer fits in the shank. I sanded the tenon with a folded piece of 220 grit sandpaper until it fit snug in the shank. I put the stem in place and took photos of the stem in place. The pipe is looking good.I set the stem aside and worked on the bowl top. I repaired the fill and flaw with clear CA glue and briar dust. I worked it into flaw with a dental spatula. Once it had cured I sanded the inner edge to clean up the repair with 220 grit sandpaper. I used a topping board and 220 grit sandpaper to flatten the repair and blend it into the surrounding briar. Once it was flat I used a 600 grit sanding pad to smooth out the surface. I stained the rim top with a Maple stain pen to match the surrounding bowl and shank. I polished the smooth panels on the bowl sides and the smooth rim top with micromesh sanding pads. I dry sanded it with 1500-12000 grit sanding pads and wiped the bowl down with a damp cloth after each sanding pad. I rubbed the bowl and shank down with Before & After Restoration Balm to deep clean the finish on the bowl and shank. The product works to clean, enliven and protect the briar. I worked it in with my fingers to get it into the briar. I used a horsehair shoe brush to work it into the rustication. I let it sit for 10 minutes then I wiped it off and buffed it with a soft cloth. The briar really began to have a rich shine. I took some photos of the bowl at this point to mark the progress in the restoration. It is a beautiful bowl. I set the bowl aside and turned my attention to the stem. I filled in the tooth marks on both sides with black CA glue. I set it aside to cure. Once the repairs hardened I smoothed out the repairs with 220 grit sandpaper to blend them into the rest of the surrounding vulcanite. I set the finished bowl aside and we back to the stem. I started the polishing of the stem with 2 x 2 inch sanding pads – dry sanding with 320-3500 grit pads and wiping it down after each pad.I polished the stem with micromesh sanding pads – dry sanding with 1500-12000 grit pads. I wiped the stem down after each sanding pad with Obsidian Oil. I did a final hand polish of the stem with Before & After Pipe Stem Polish – both Fine and Extra Fine. I gave it a coat of Obsidian Pipe Stem Oil. It works to protect the stem from oxidizing. I set it aside to dry. I put the stem back on the “Malaga” Magnum Rusticated Billiard and took it to the buffer. I buffed the bowl and stem with Blue Diamond to polish the briar and the vulcanite. Blue Diamond does a great job on the smaller scratches that remain in both. I gave the bowl multiple coats of Conservator’s Wax and the stem several coats of carnauba wax and buffed the pipe with a clean buffing pad to raise the shine. I hand buffed it with a microfiber cloth to deepen the shine. I am amazed at how well it turned out. The finished pipe is shown in the photos below. This is a beautiful “Malaga” Magnum Billiard and the hard rubber taper stem and smooth finish combine to give the pipe a great look. I honestly have no idea why it is labeled a second as there are no fills or flaws in the briar. The dimensions of the pipe are Length: 8 inches, Height: 2 ¼ inches, Outside diameter of the bowl: 1 ½ inches, Chamber diameter: 1 inch. The weight of the pipe is 2.93 ounces/83 grams. This is another pipe that I will be putting on the rebornpipes online store in the American Pipe Makers and Pipemaking Companies Section shortly, if you are interested in adding it to your collection. Thanks for walking through the restoration with me on this beauty!

As always, I encourage your questions and comments as you read the blog. Thanks to each of you who are reading this blog. Remember we are not pipe owners; we are pipe men and women who hold our pipes in trust until they pass on into the trust of those who follow us.