Monthly Archives: December 2023

A Quick Clean up of an UNSMOKED NOS Stanwell Danish Design Trio Rhodesian


Blog by Steve Laug

Getting a box of pipes from Jeff is like opening a box of Christmas Presents… though they won’t often be mine for the keeping. The buzz that I get when the box arrives and I am not sure what pipes he is sending always is a highlight for me. Not long ago he sent a box of a group of Stanwell pipes that we purchased from our contact in Denmark. This pipe was in that group of pipes purchased 01/26/2023. When I took this box out of the larger box I got a double dose of excitement. If you want to feel like I felt holding it stay with me and follow the photos in order. It is a black Stanwell box in great condition. I always turn the box over in my hand and read the end panels for any hints. In this case it had a tag on the right end (photo) that read Trio Brown/Pol Model 191. The hint was a good one… I now knew I was going to find a smooth Bulldog shaped pipe in the box when I removed the lid.What I did not know was the condition of the pipe – smoked or unsmoked and the banding that was on a Trio. I seemed to remember it was a combo of metal and acrylic and the stem would also be acrylic. So, I lifted the lid and saw a black Stanwell stamped pipe sock in the box. You can certainly skip ahead to the third photo if you are impatient to see the pipe. 😊
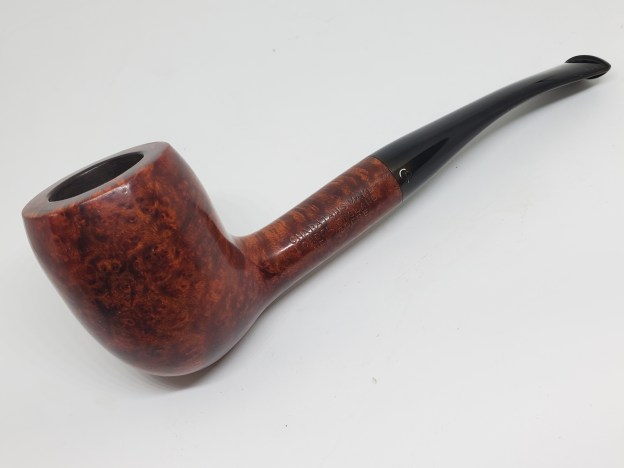
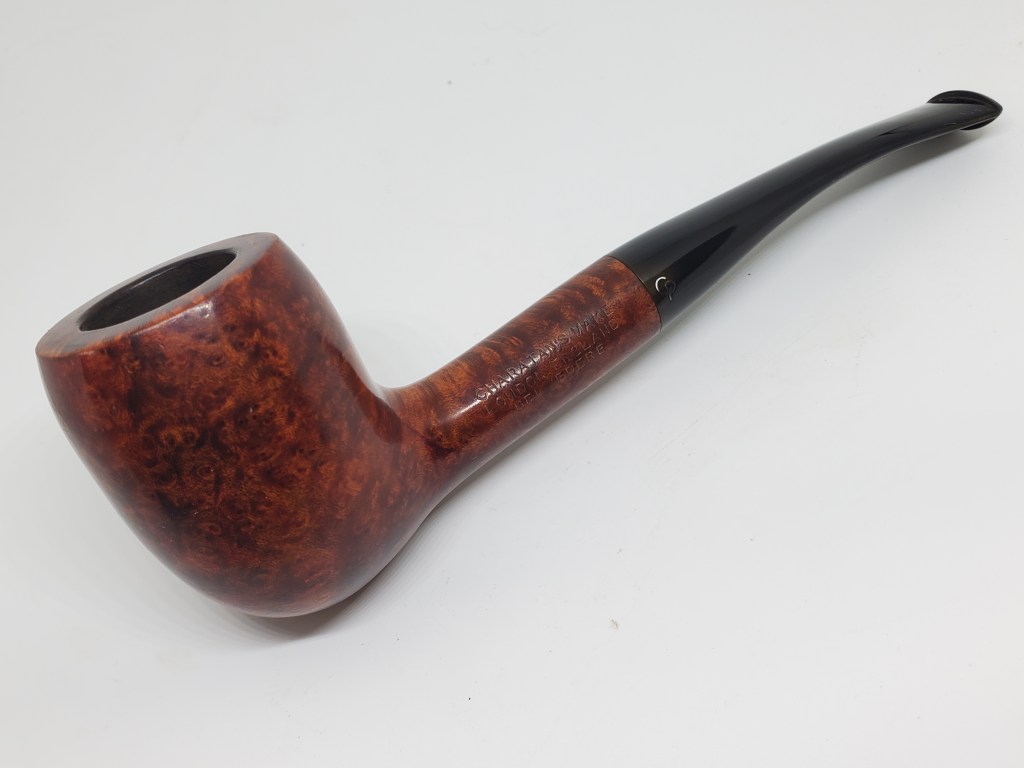
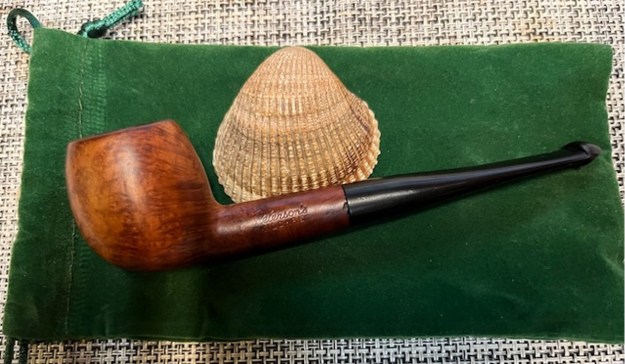
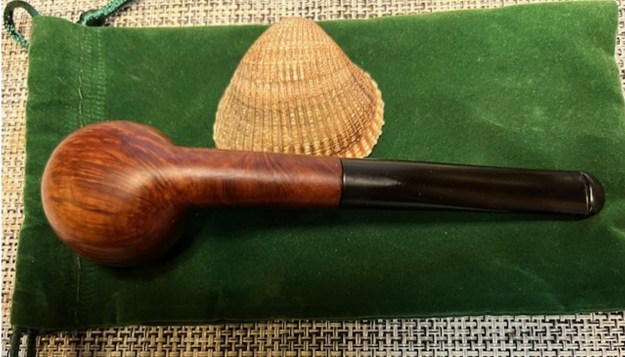
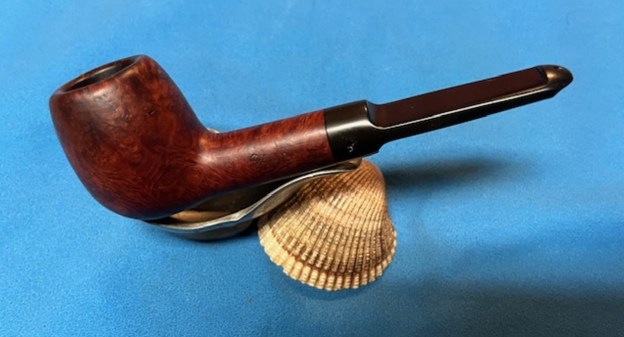
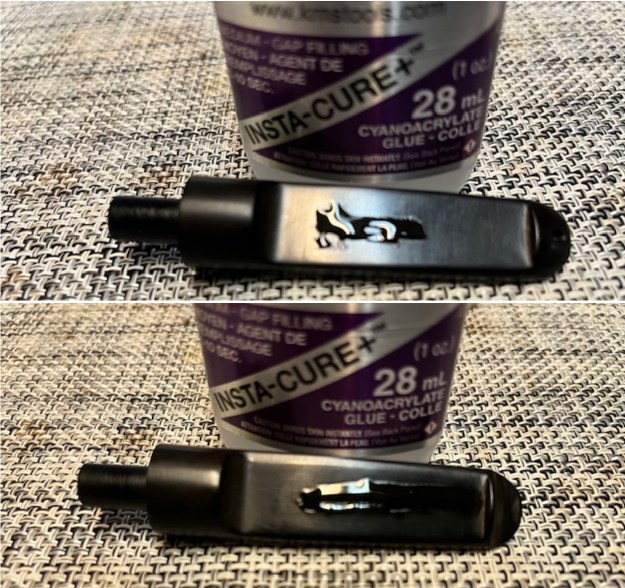
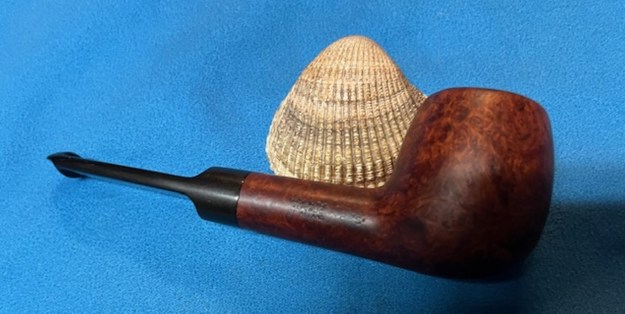
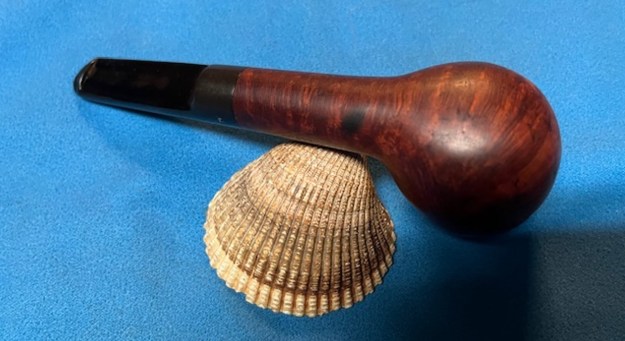
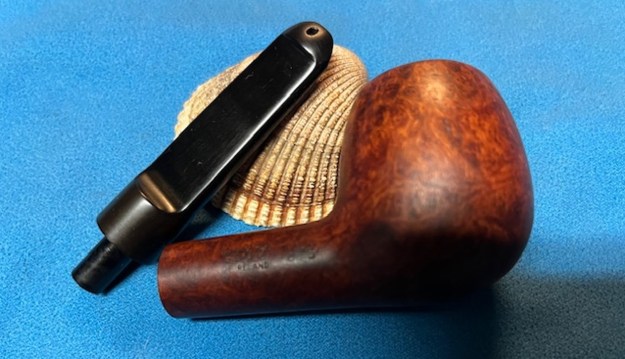
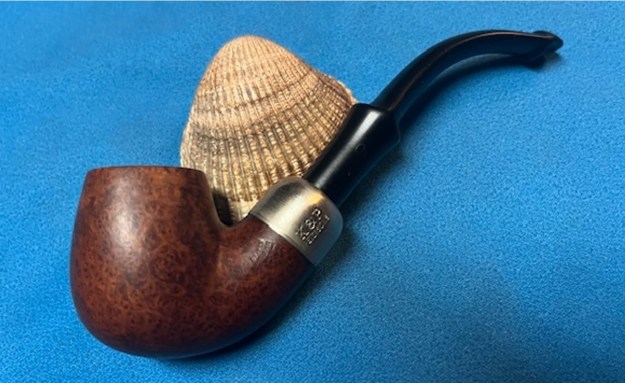
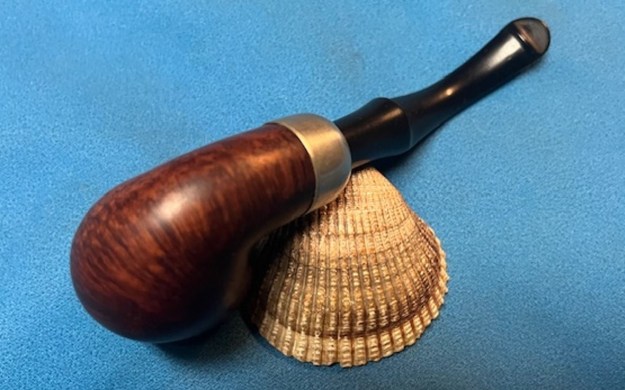
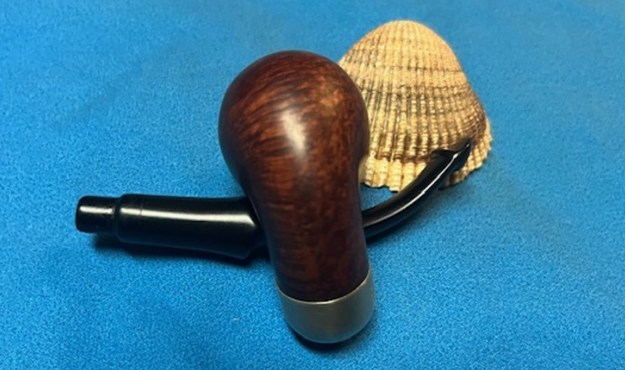
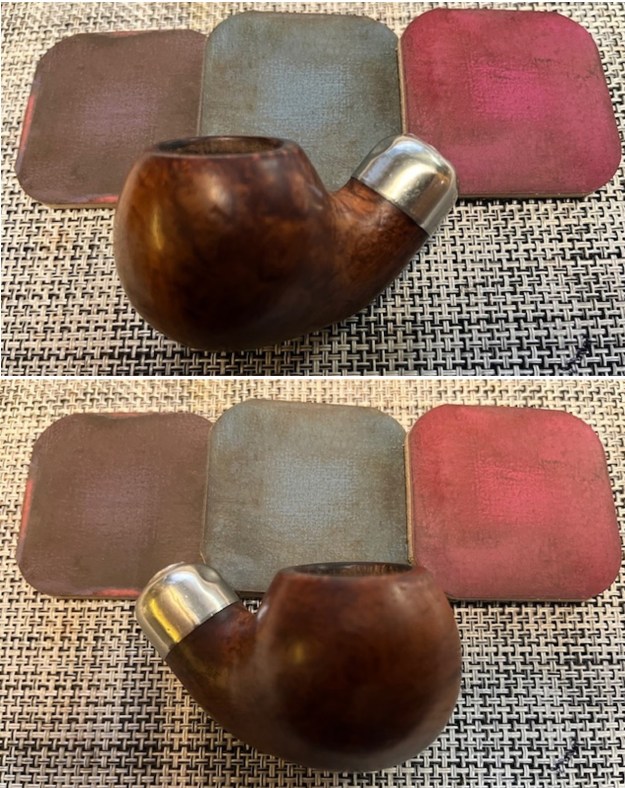
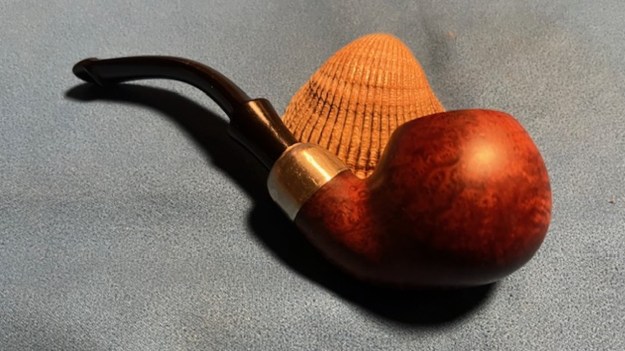
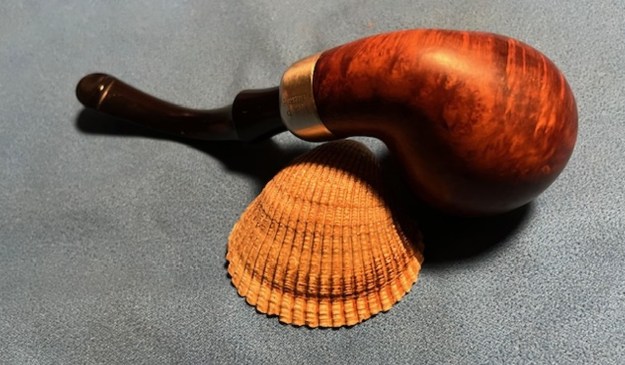
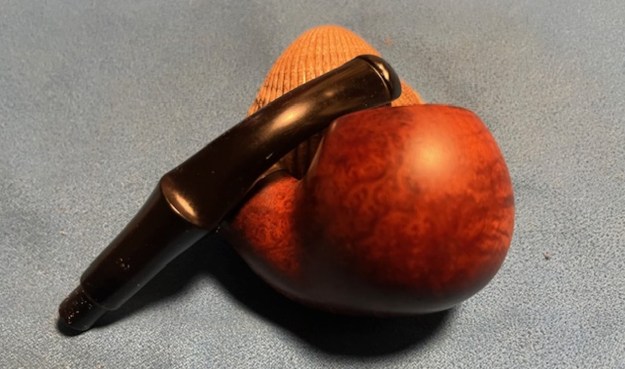
So, the moment arrived. I opened the pipe sock and lifted out a beautiful Stanwell Bulldog in the shape 191 which is a favourite of mine. The rich walnut finish was beautiful and the triple (TRIO?) bands looked great. There was an orange/amber acrylic spacer sandwiched between two silver wafers attached to the shank. On the side of the acrylic saddle stem is that classic Silver Crowned S logo inlaid in the acrylic. It really is a great looking pipe.
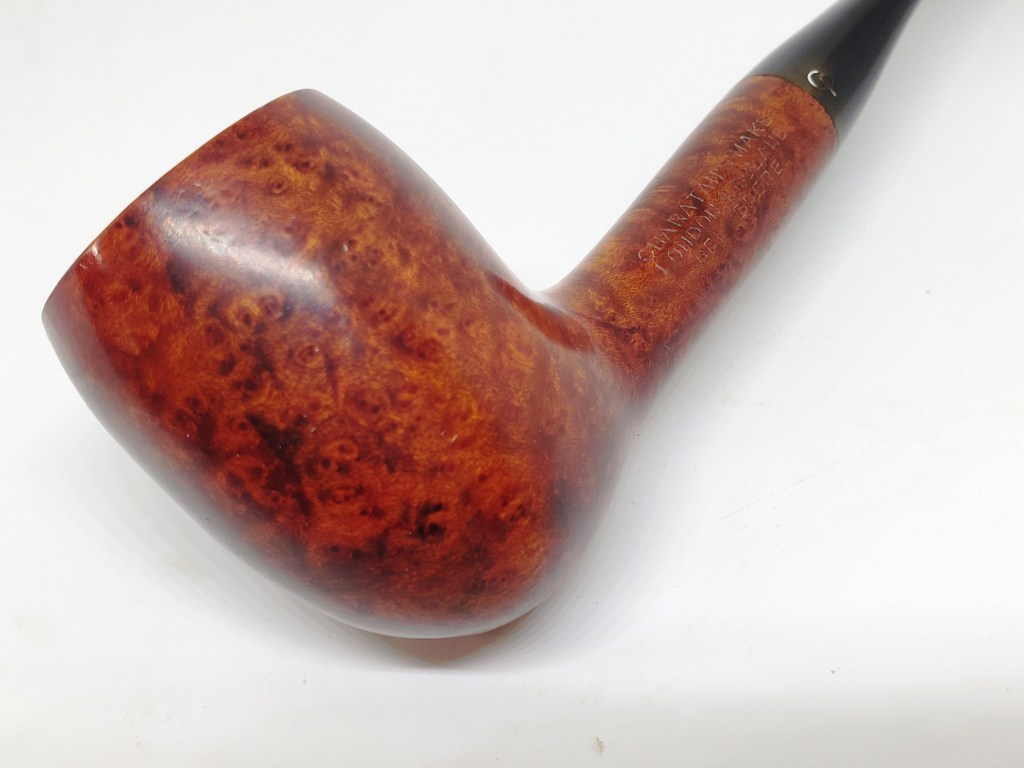
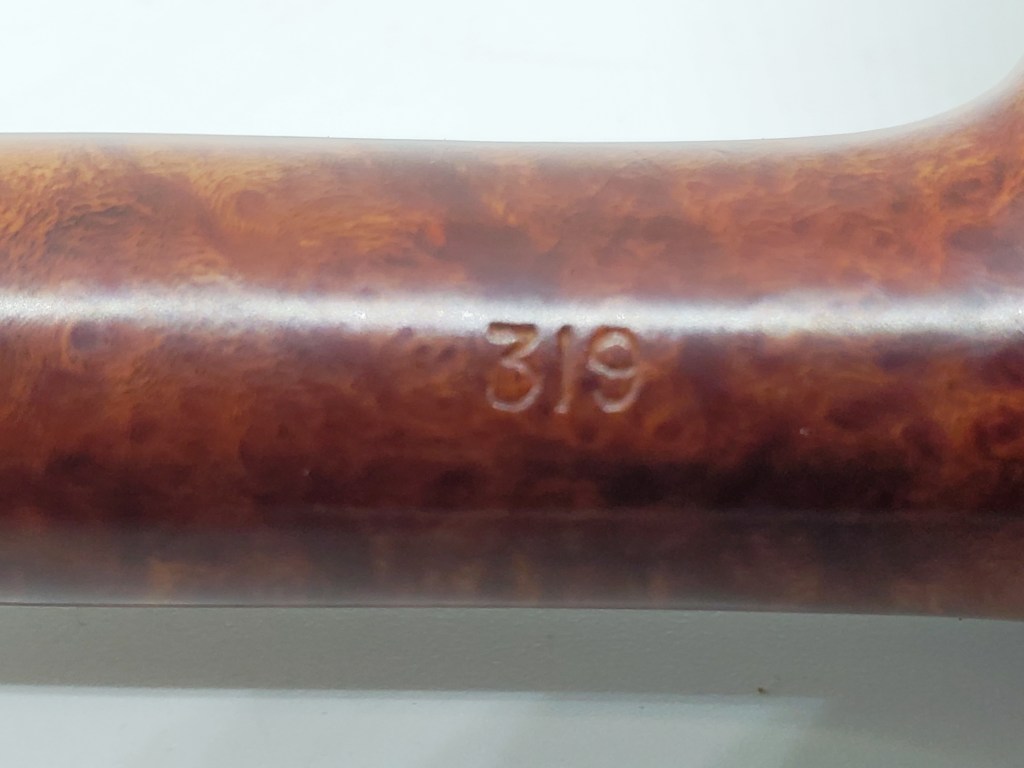
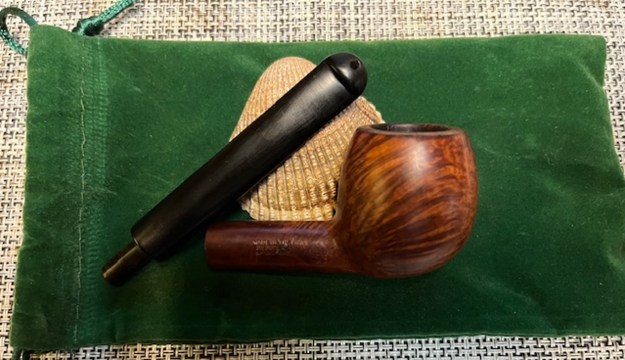
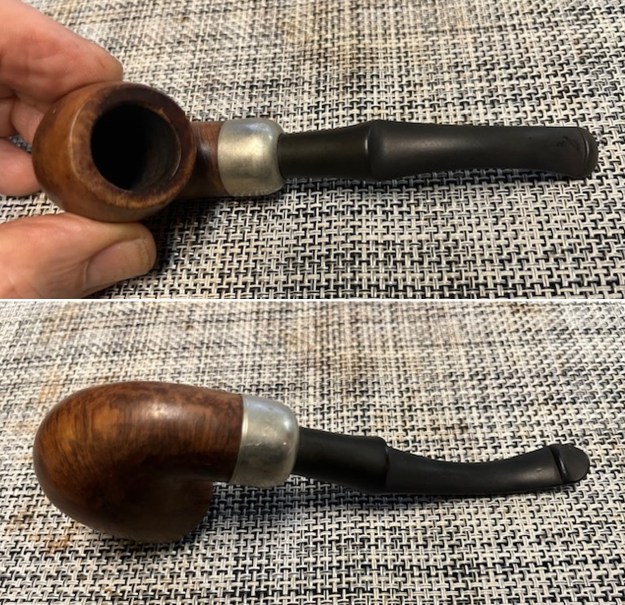
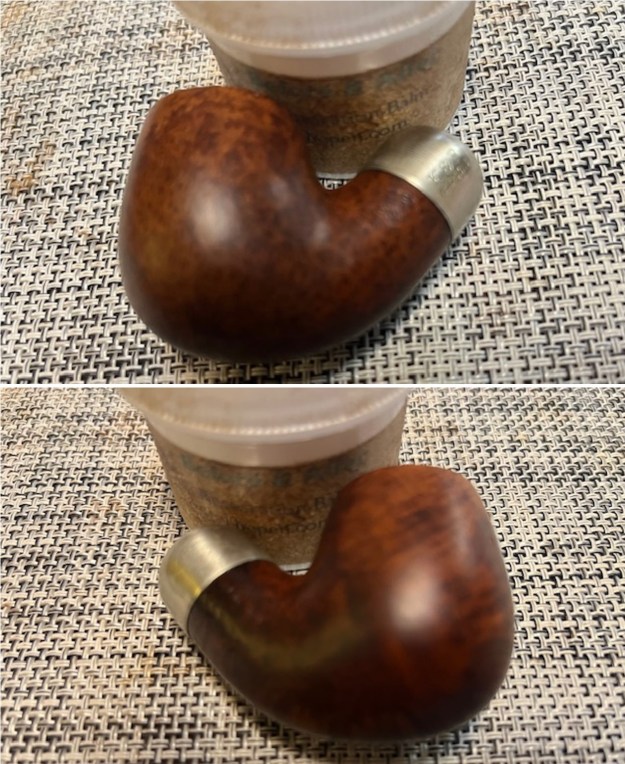
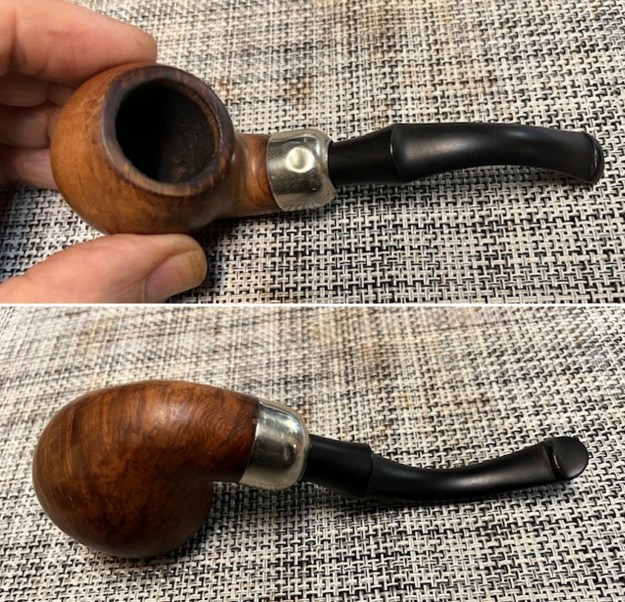
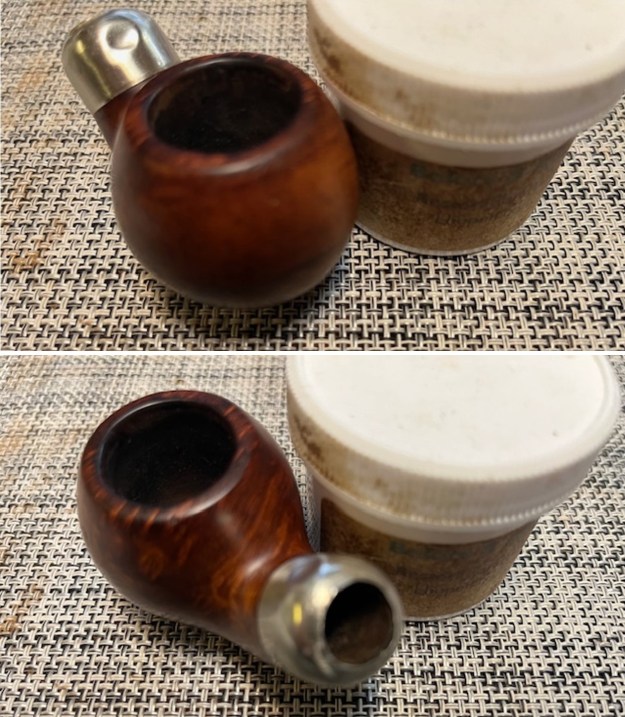
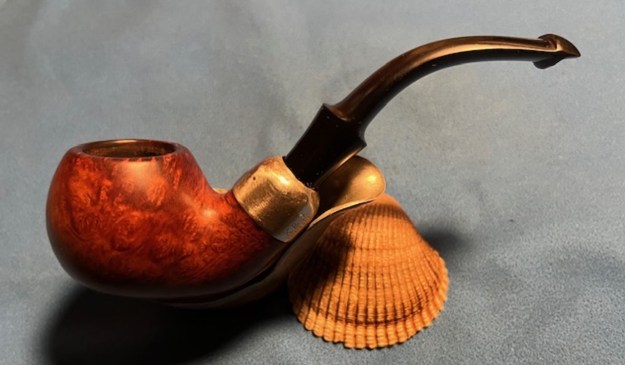
Now it was time to examine the pipe more thoroughly. I picked it up and turned it over in my hands to examine the condition of the bowl and the finish and the stem. Amazingly this pipe was UNSMOKED. The had a light carbon bowl coating that was undamaged. The finish was in okay condition though it had been coated with shellac and in places the shellac had wrinkled. That is a pretty easy fix but it was there. The stamping on the pipe was very clear and readable. On the left underside of the diamond shank it reads Stanwell [over] Danish Design [over] Trio. On the right underside of the shank, next to the Trio shank extension the shape number 191 is stamped alongside the extension/shank joint. The stem was clean and shiny acrylic with no tooth marks or shop display damage. It looked very good. The pipe even smelled great… There you go all the senses come into play – touch, eyes, smell… oops forgot taste but then there is nothing to taste! I took photos of the pipe as I saw it at this stage of my examination. 
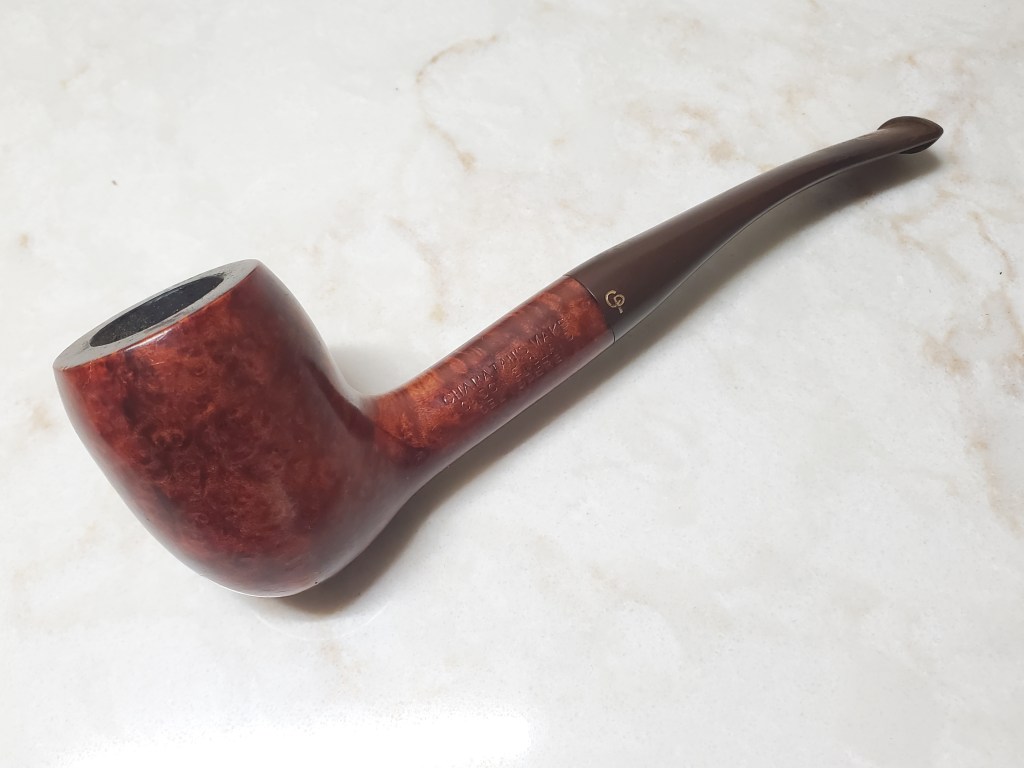
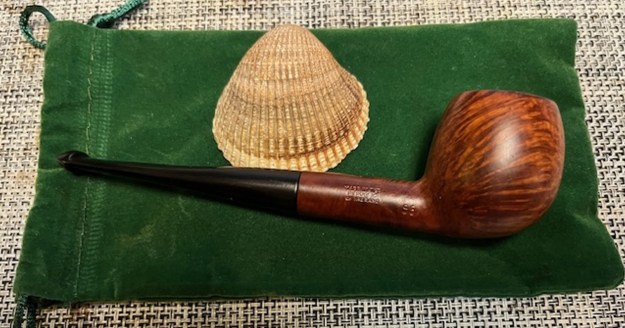
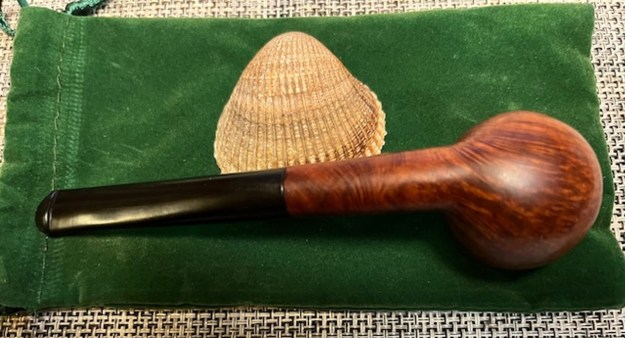
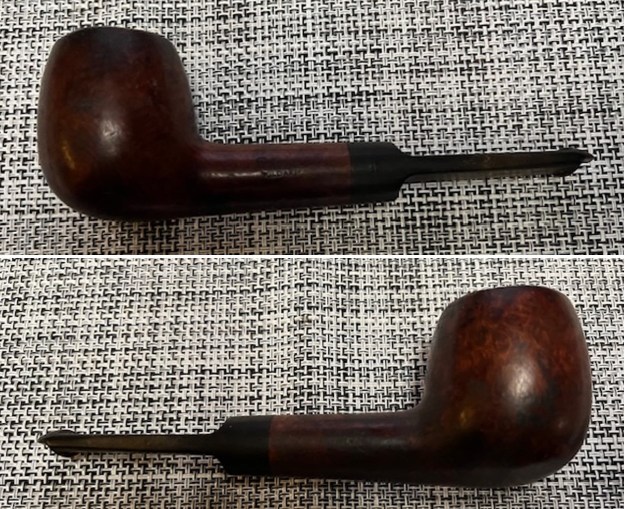
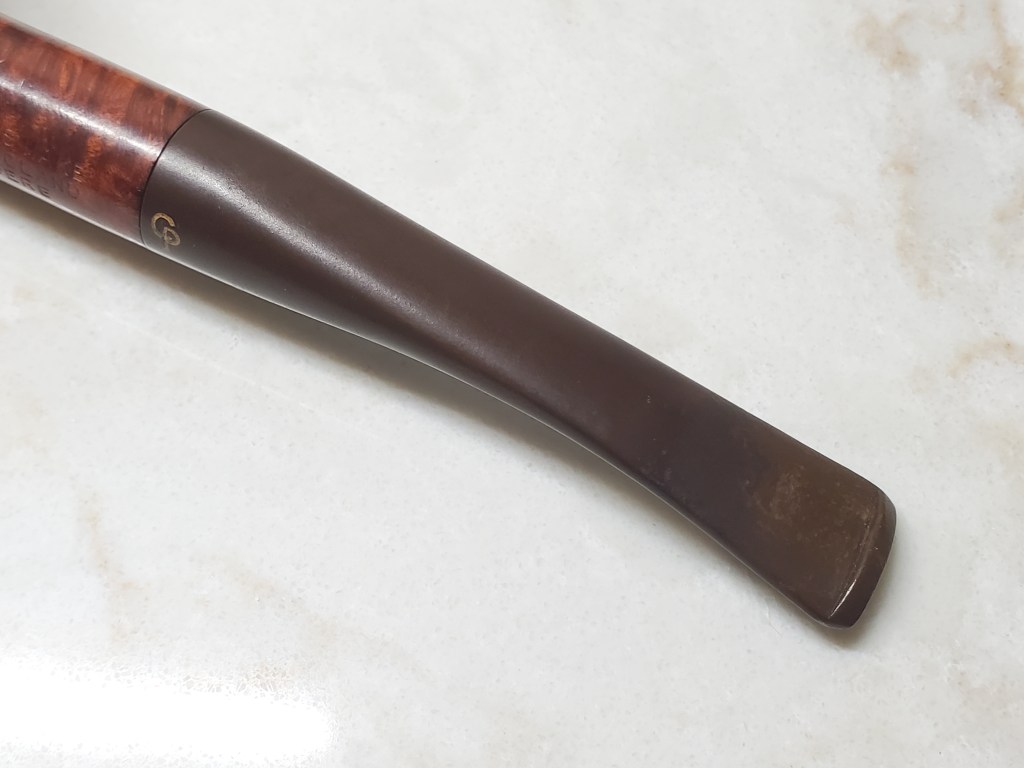
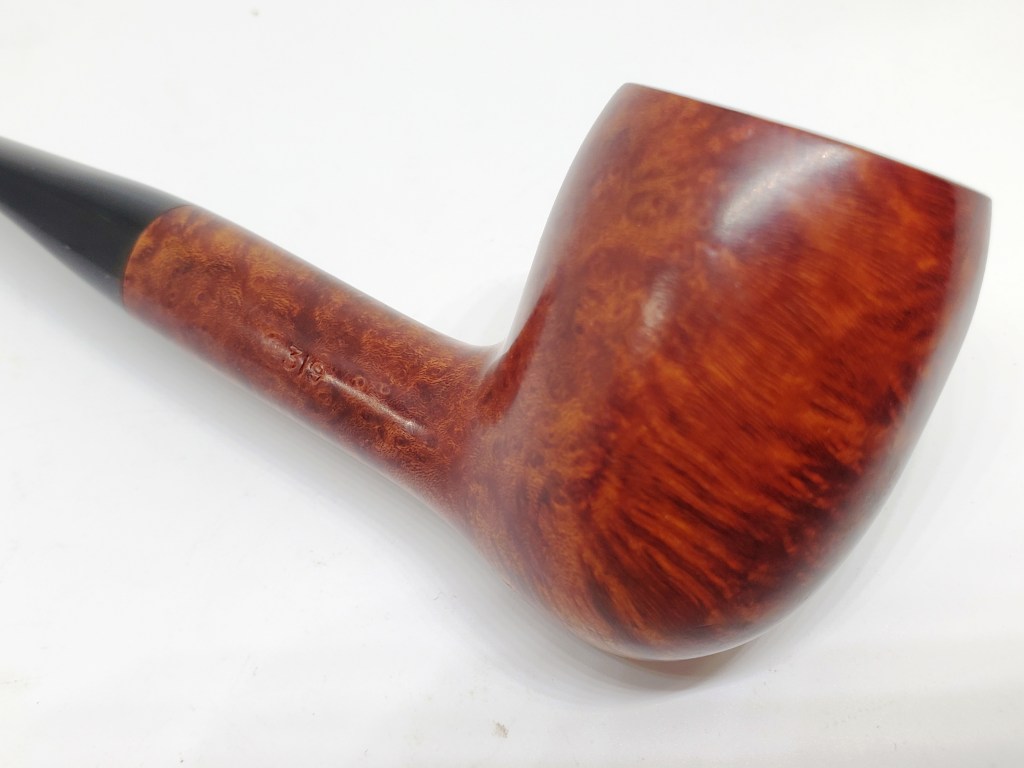
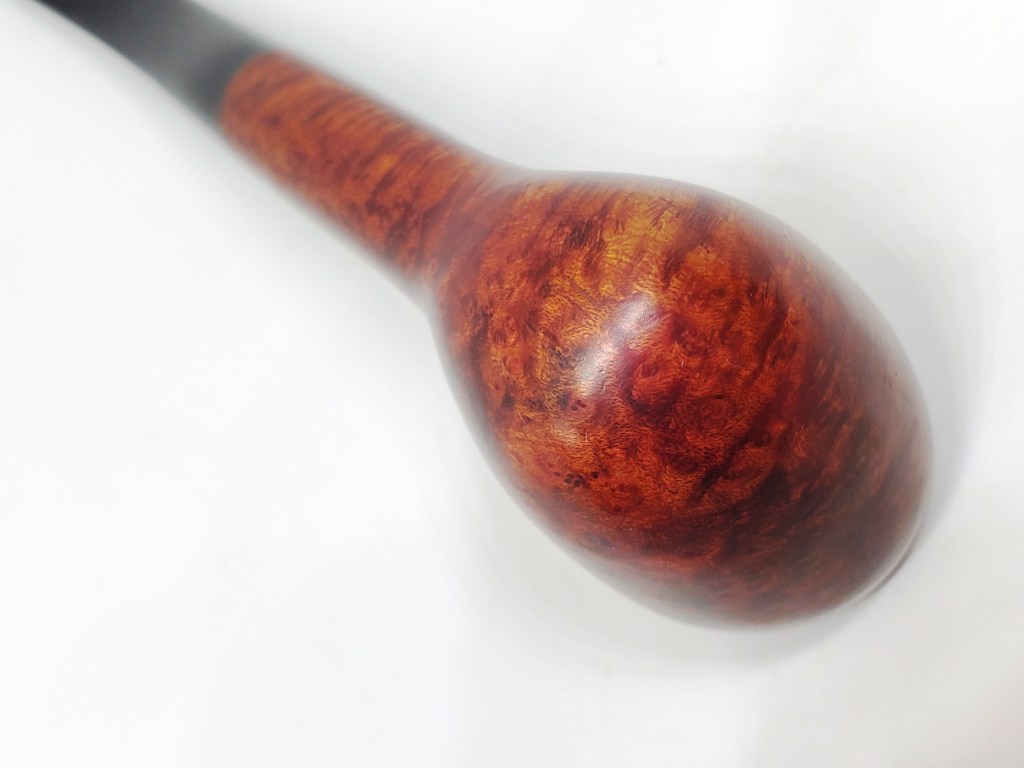
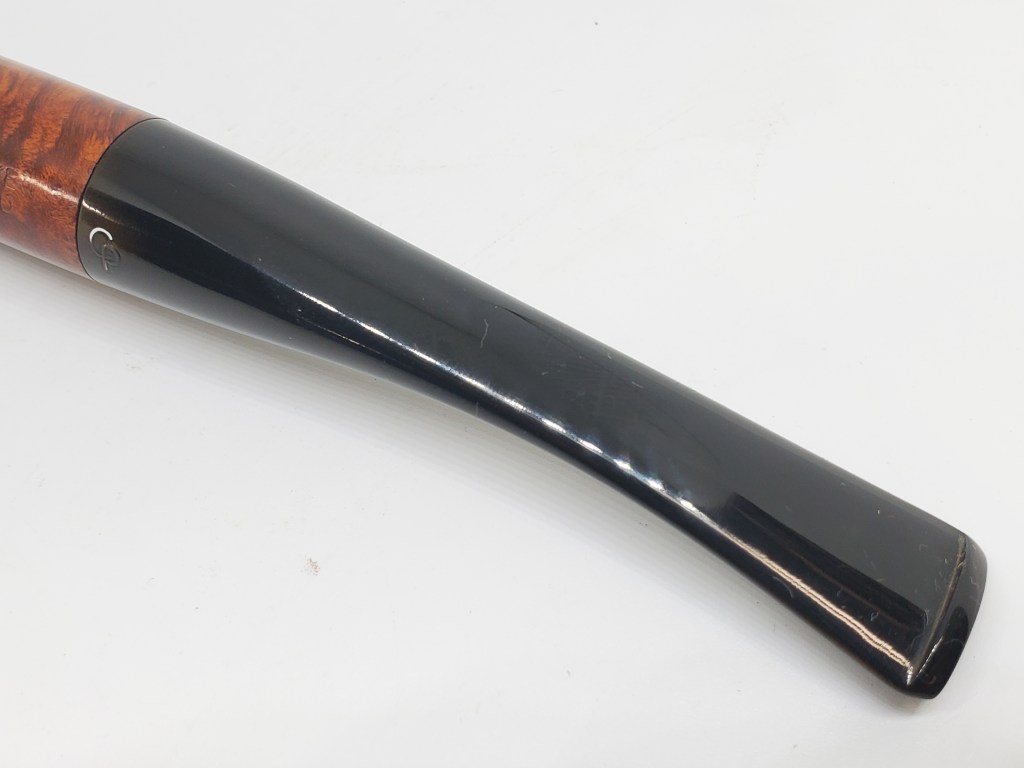
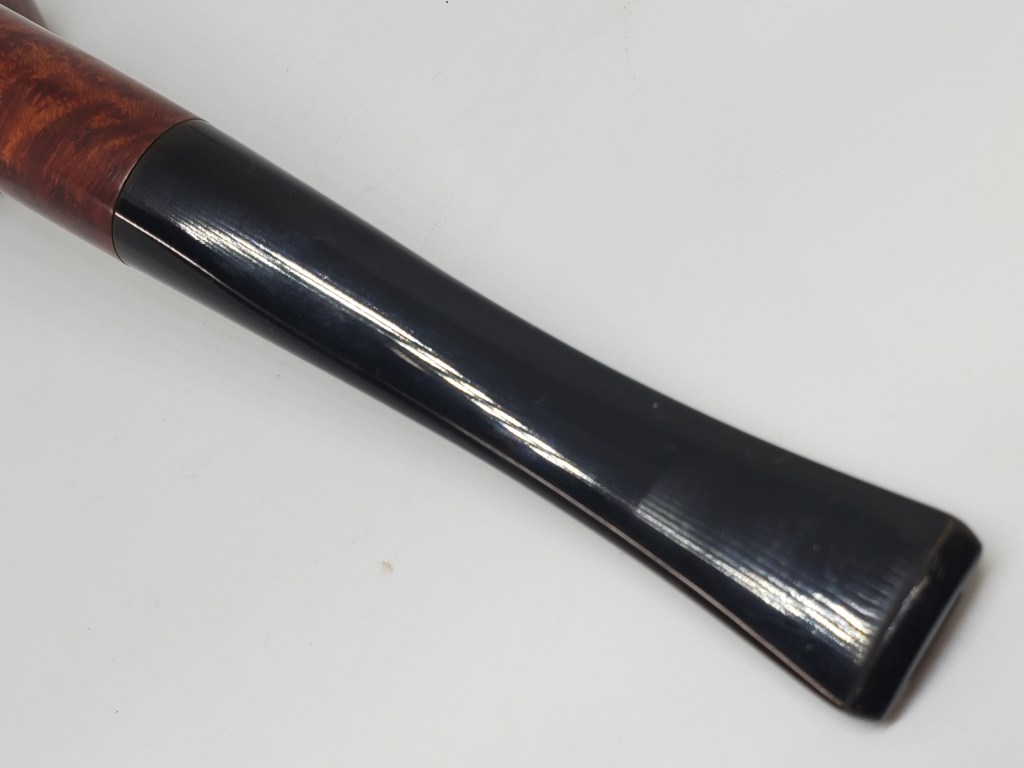
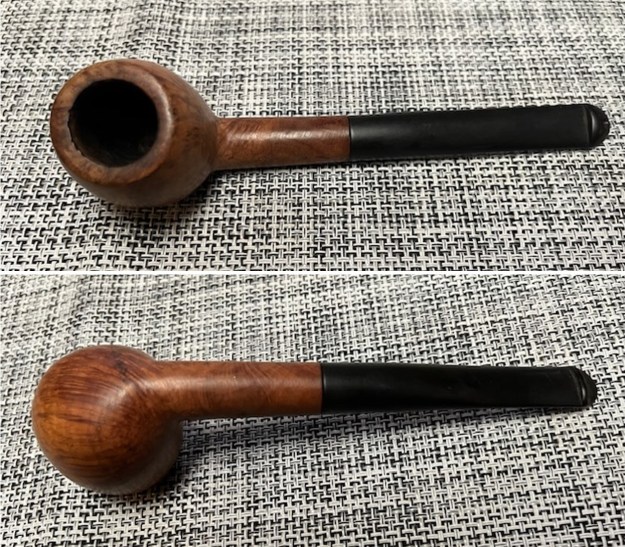
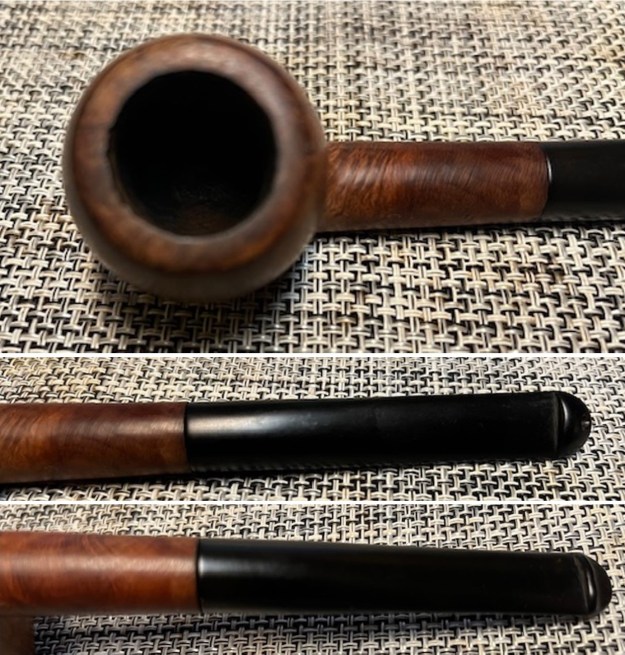
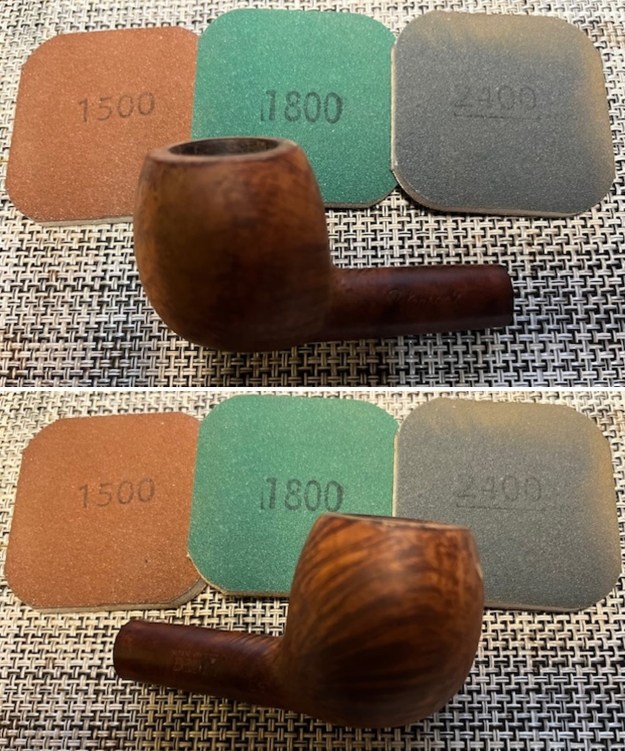
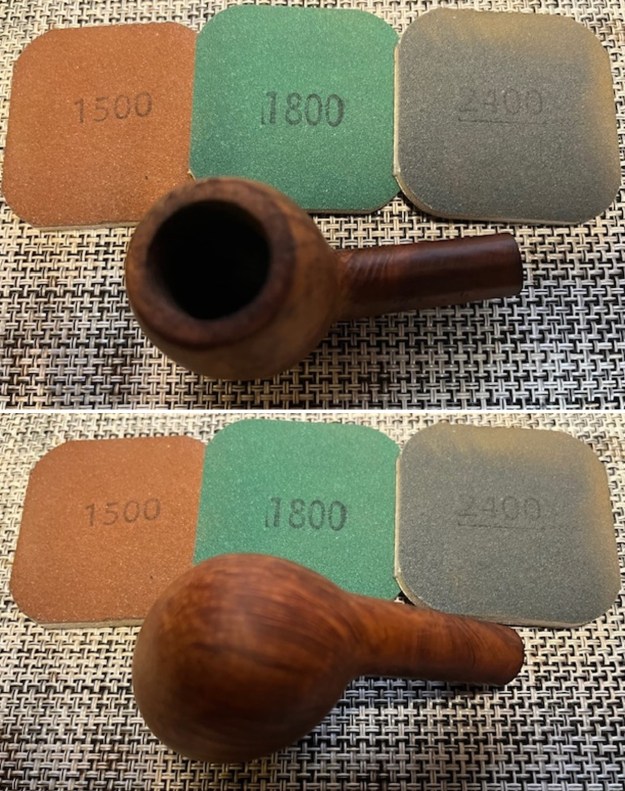
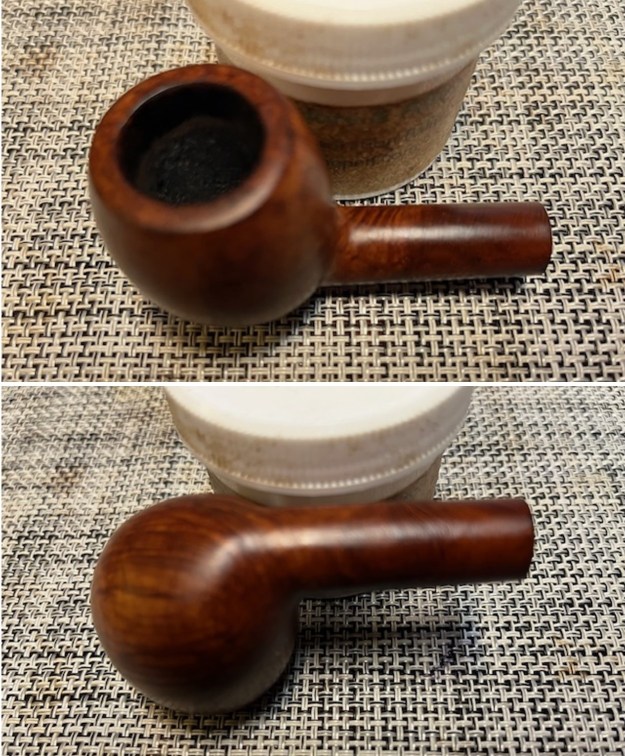
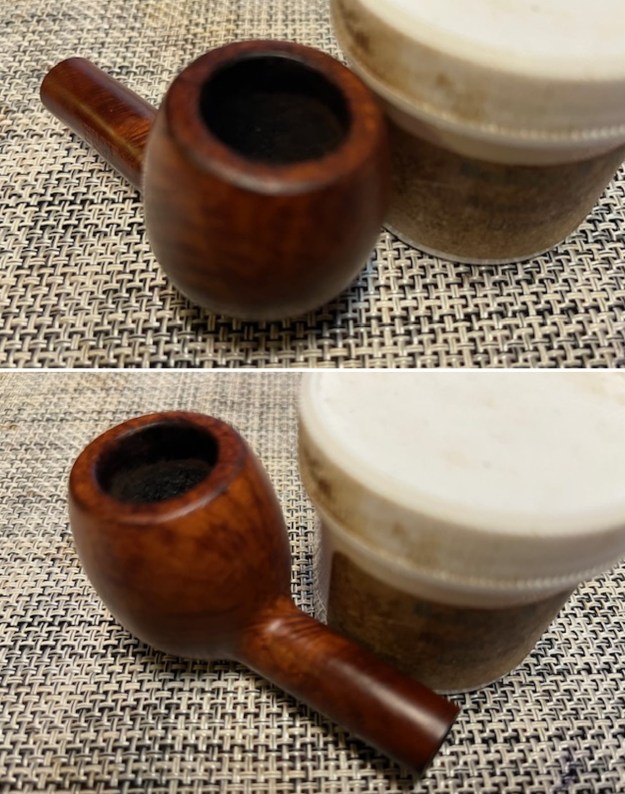
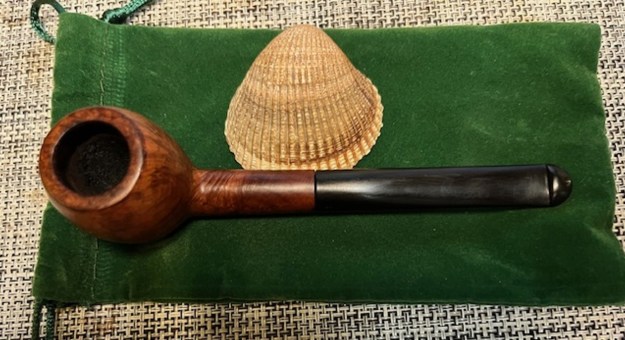
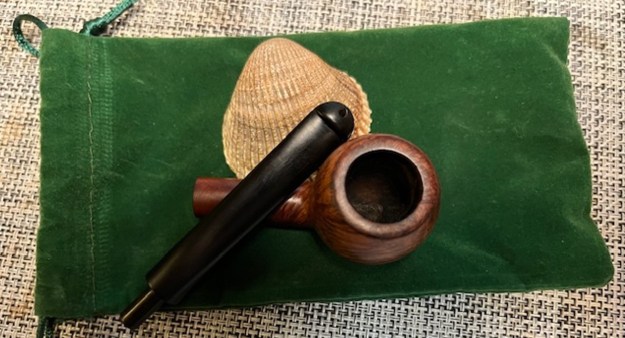
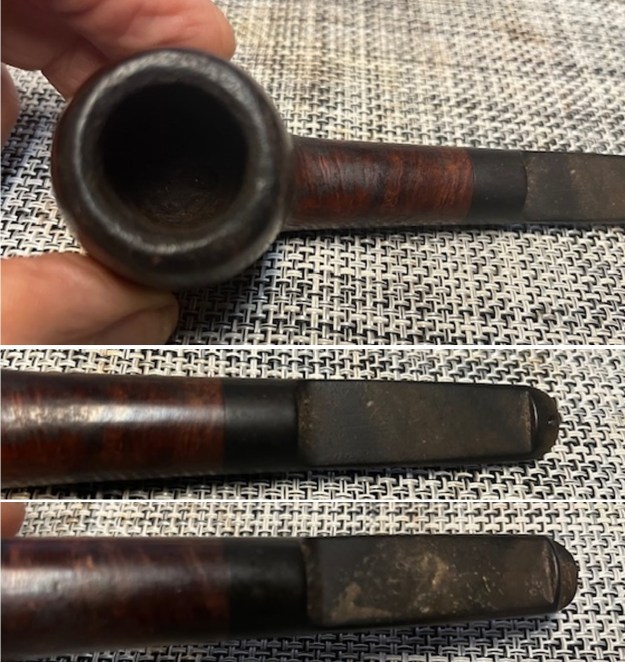
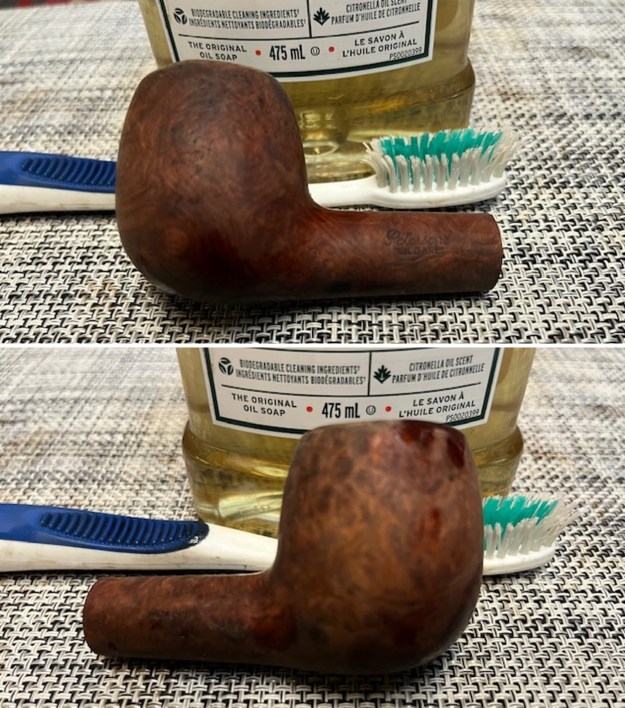
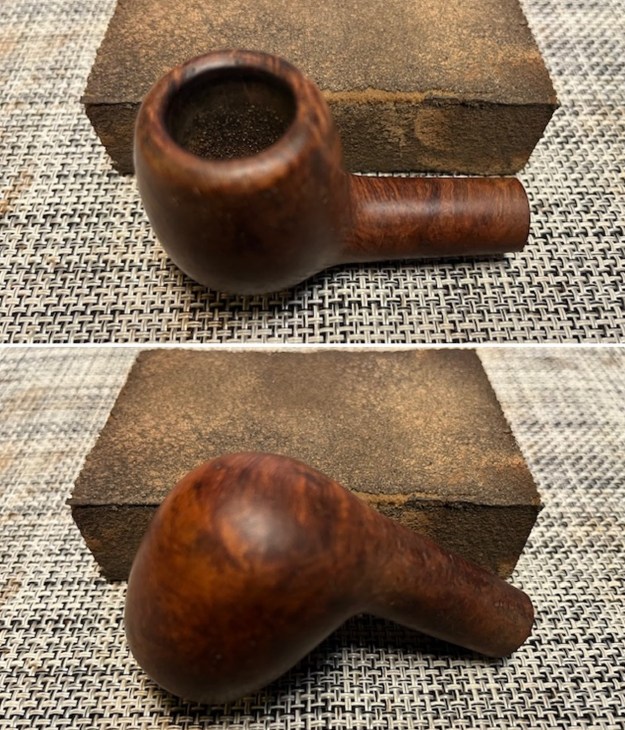
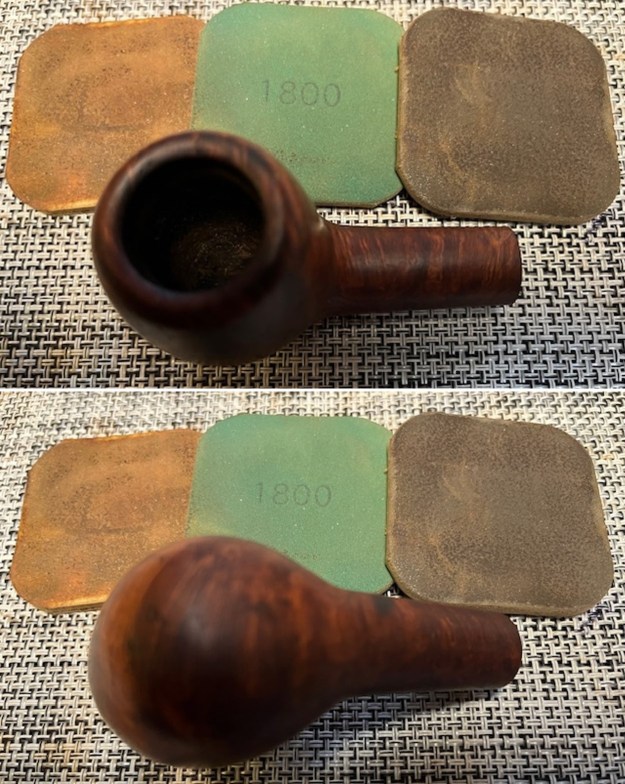
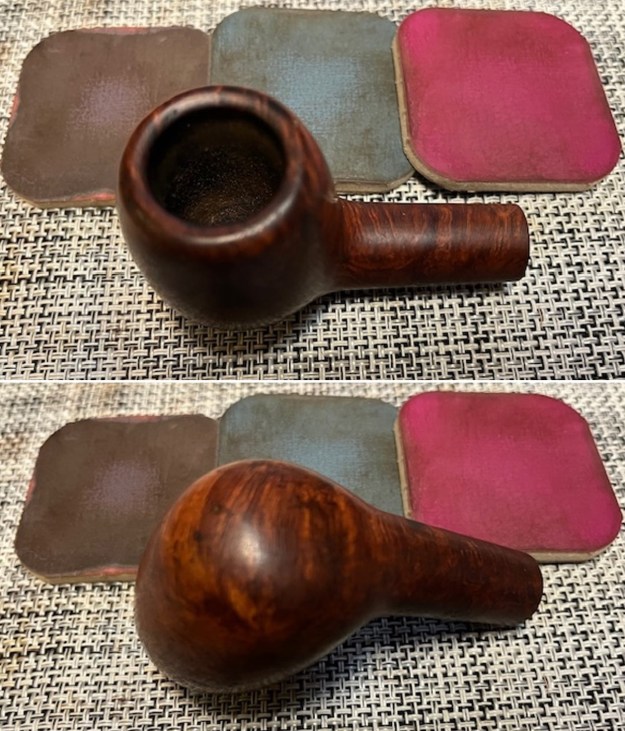
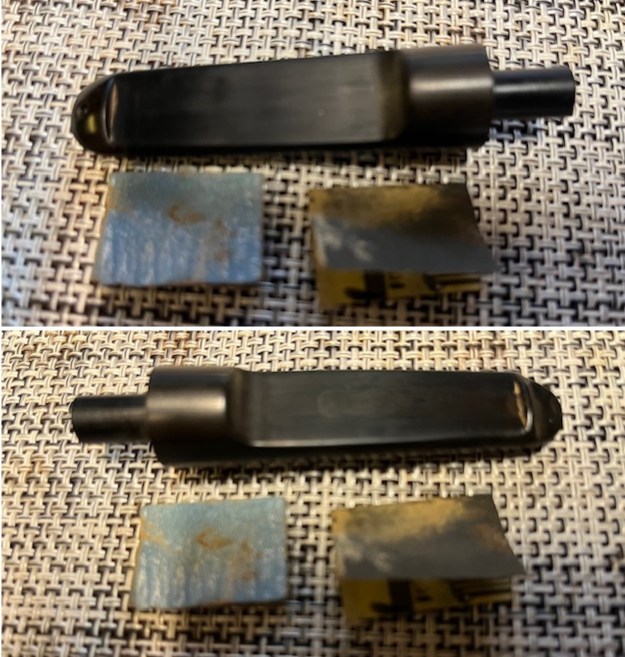
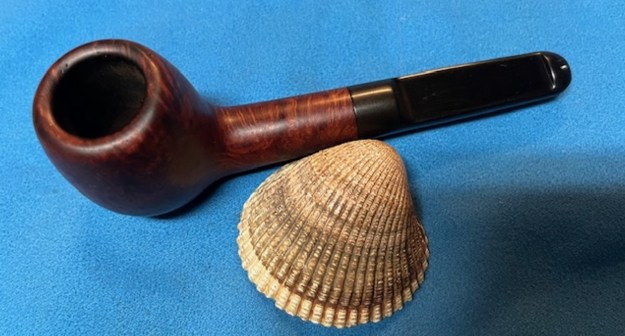
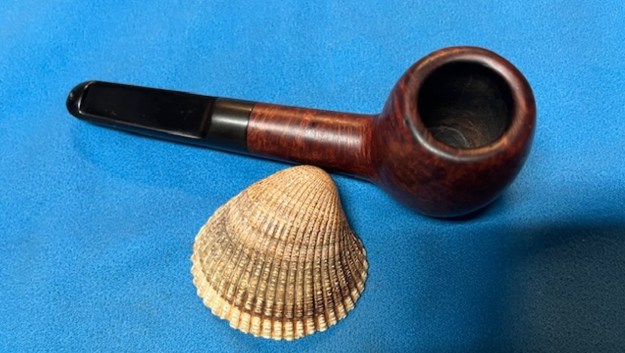
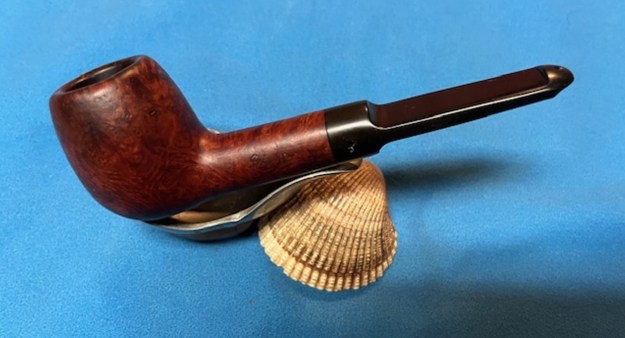
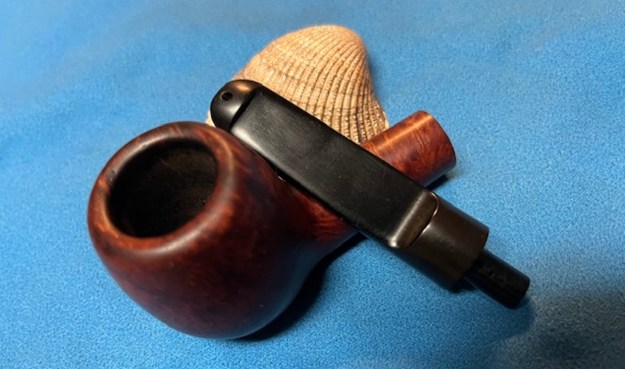
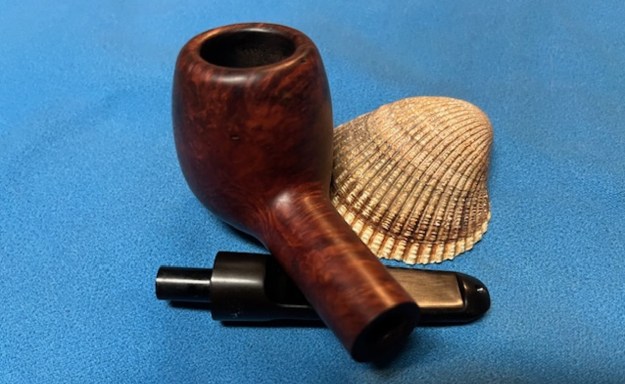
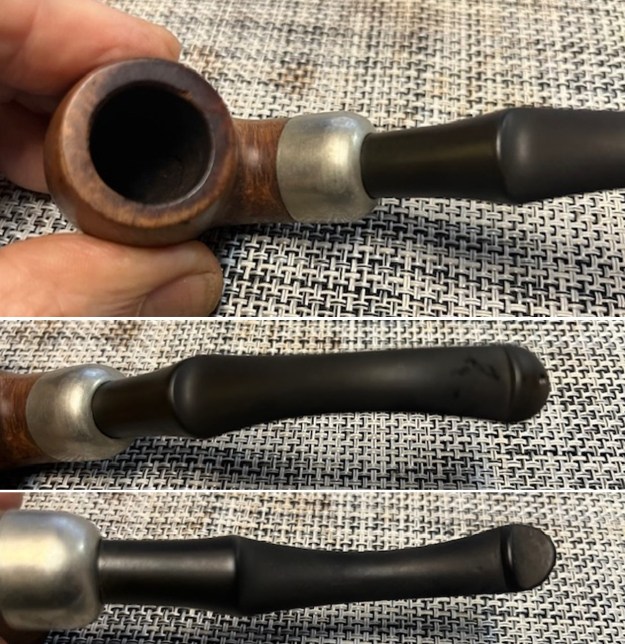
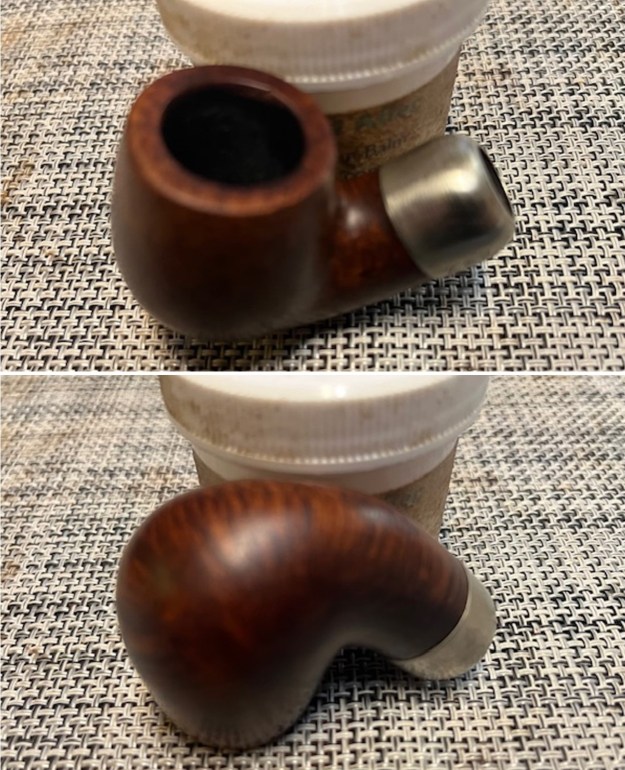
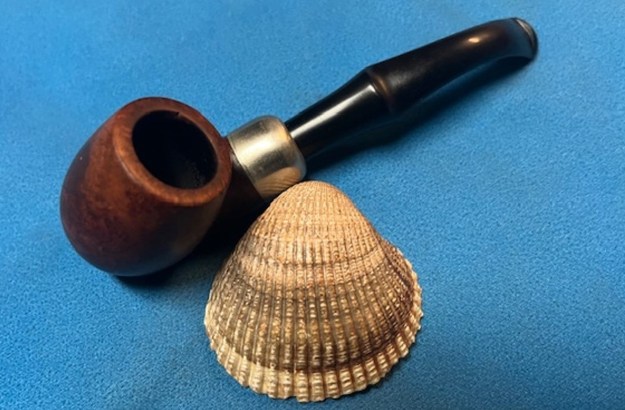
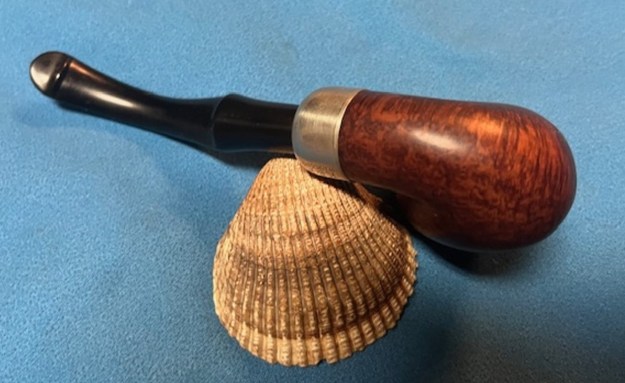
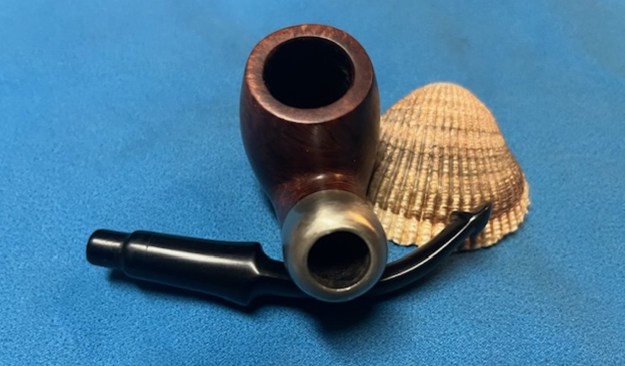
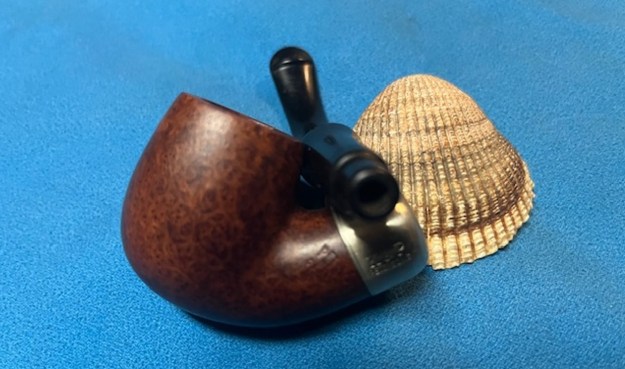
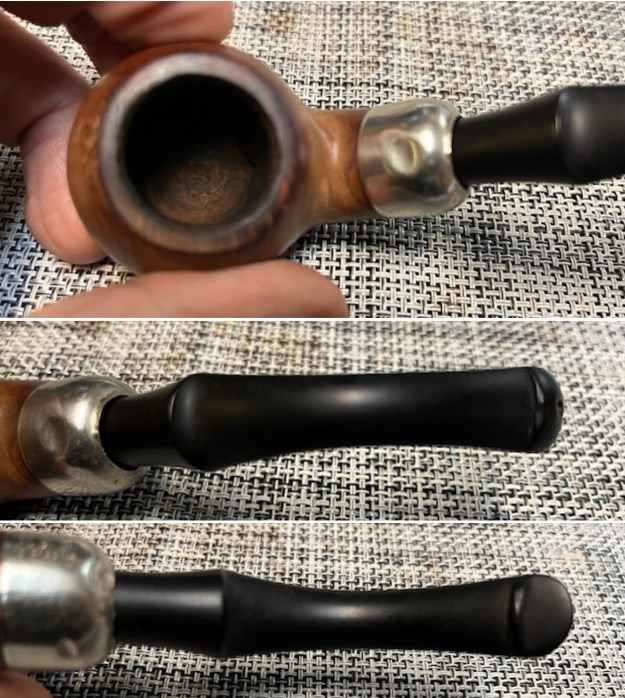
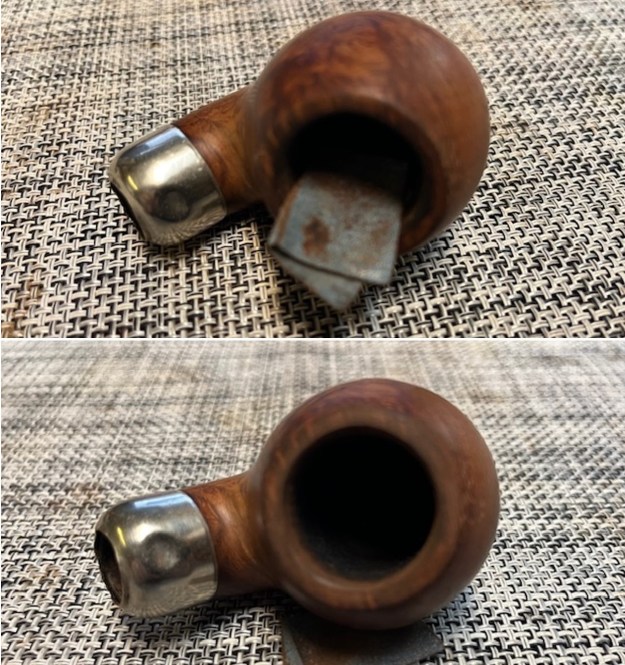
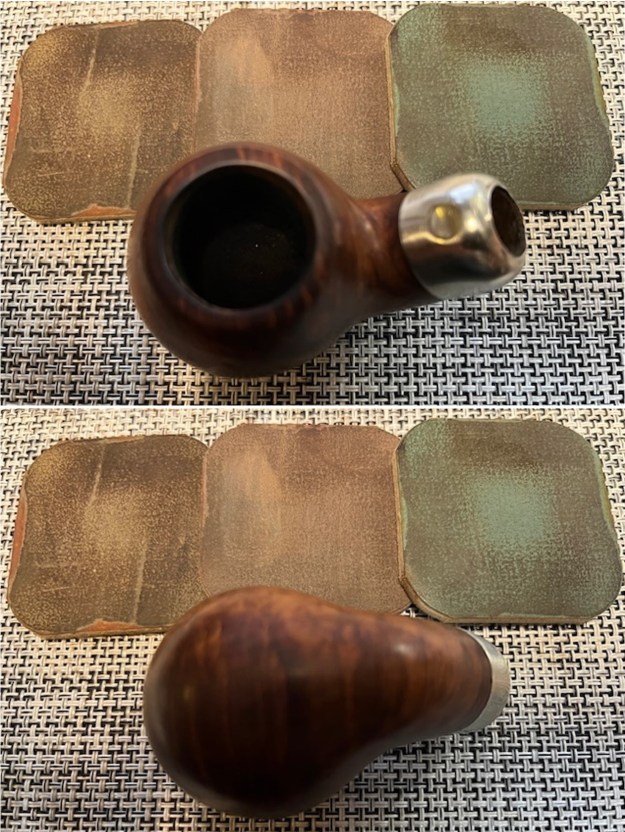
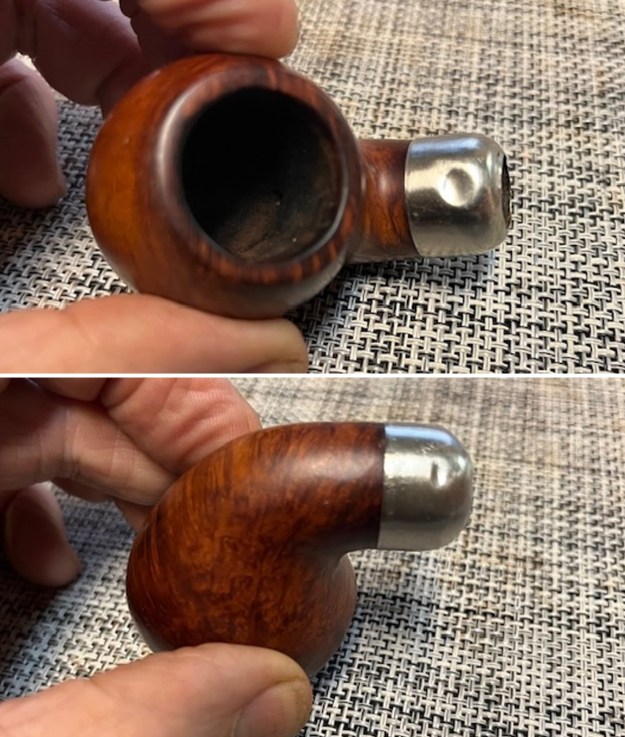
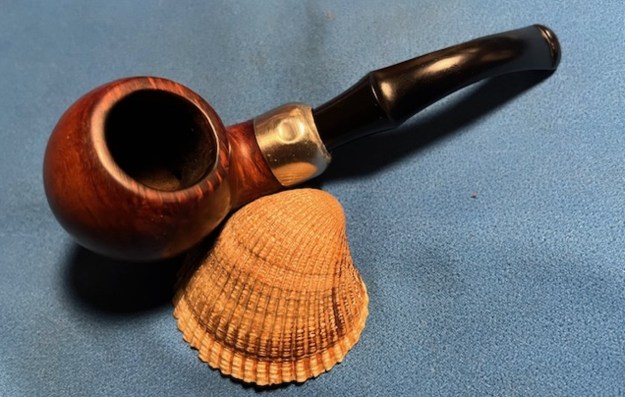
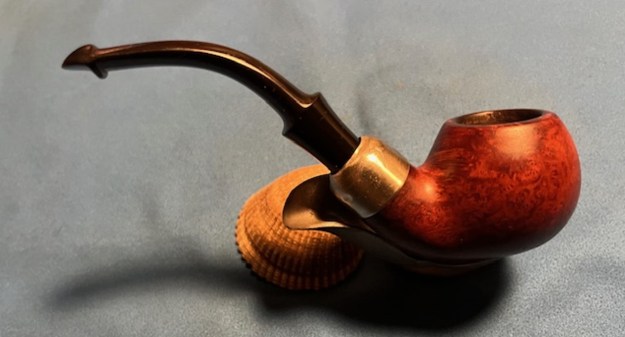
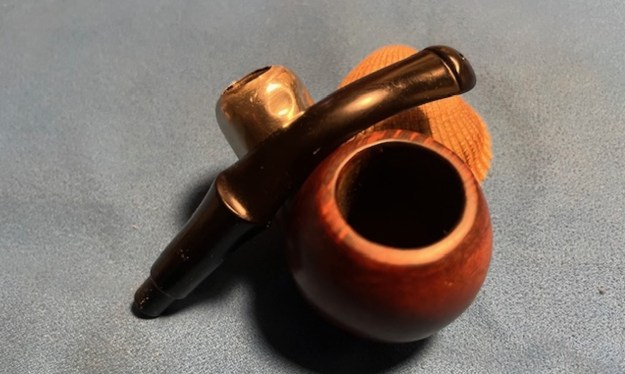
Now I examined it more closely. I will show you what I see and describe it as I go. The rim top looked very good and was clean with a slight bevel inward on the inner edge. The finish was in good condition with no wrinkles in the shellac coat on the top or down the sides of the rim cap. You can see the dark carbon coat on the bowl walls and it was smooth to the touch. Turning to look at the stem I found that it was very clean, just a little dust next to the edge of the button. There were not any tooth marks or nicks in the acrylic. It was also clean on the inside of the airway in the mortise and stem and the slot was clean in the button.
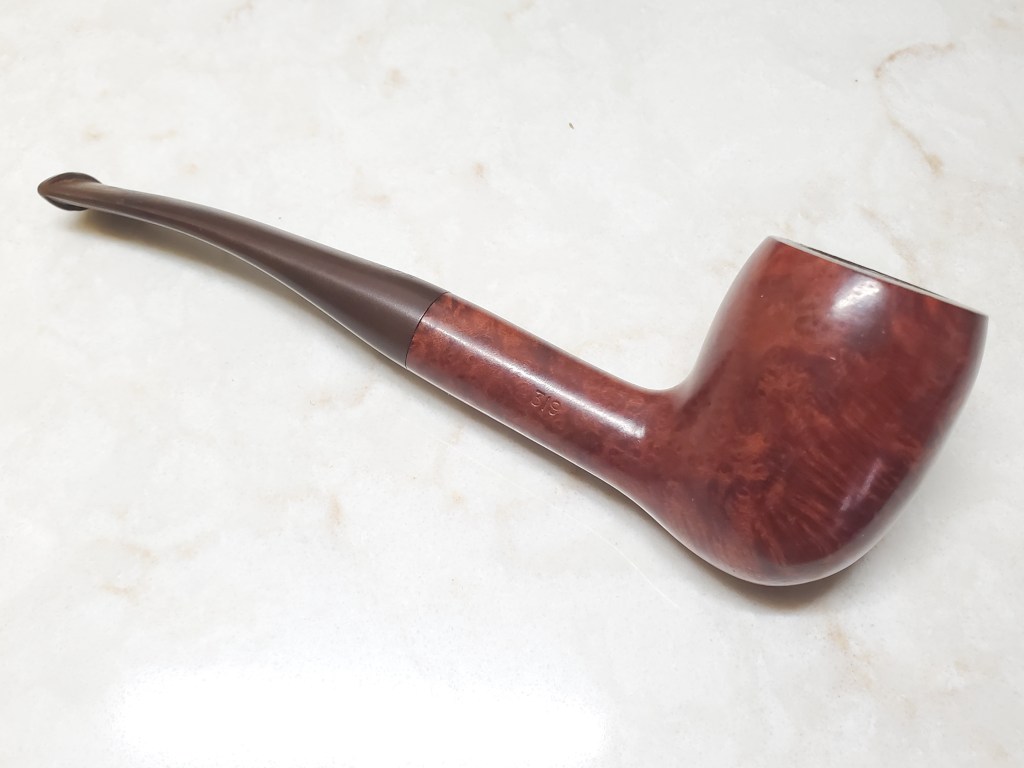
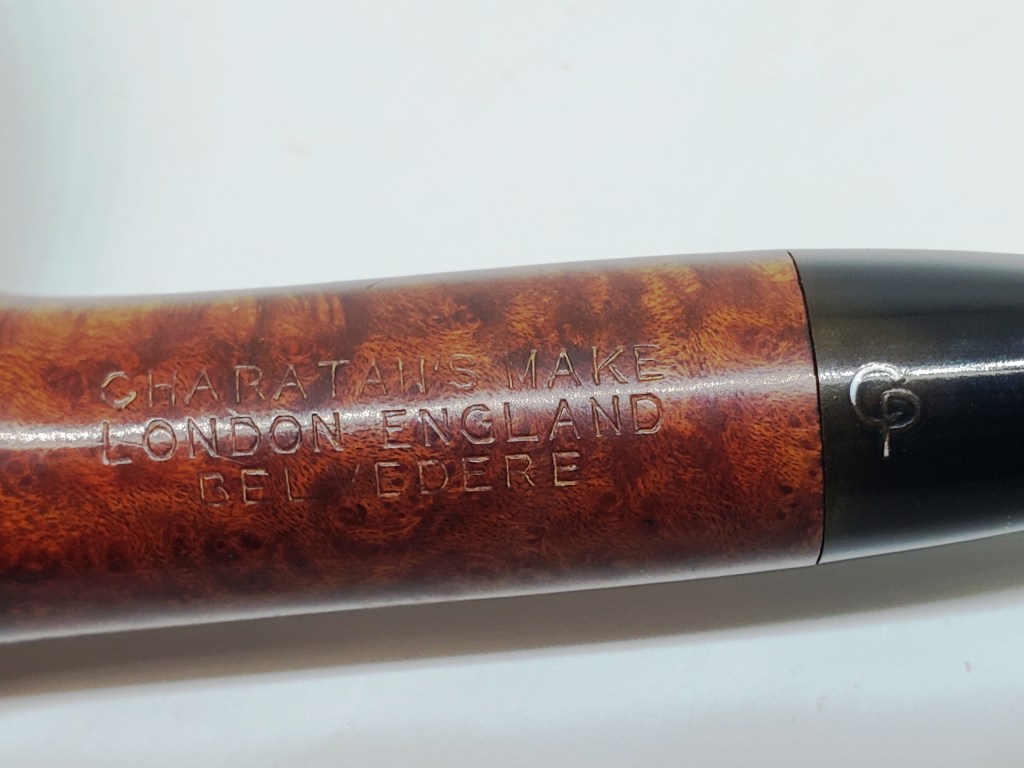
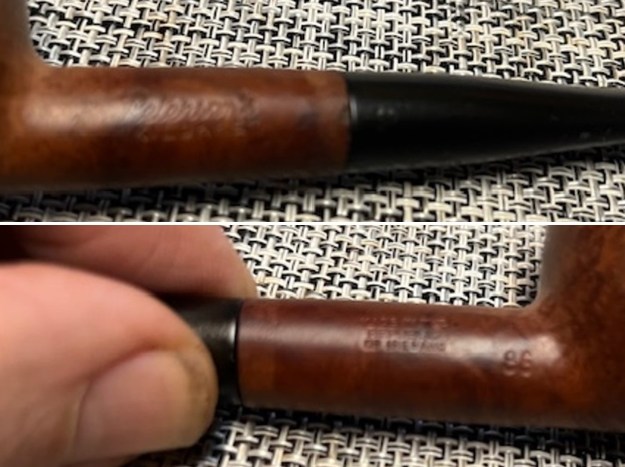
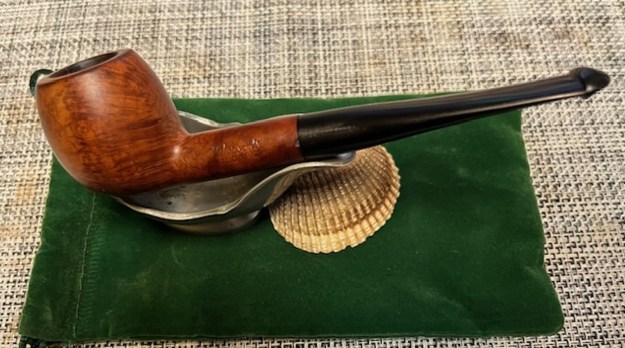
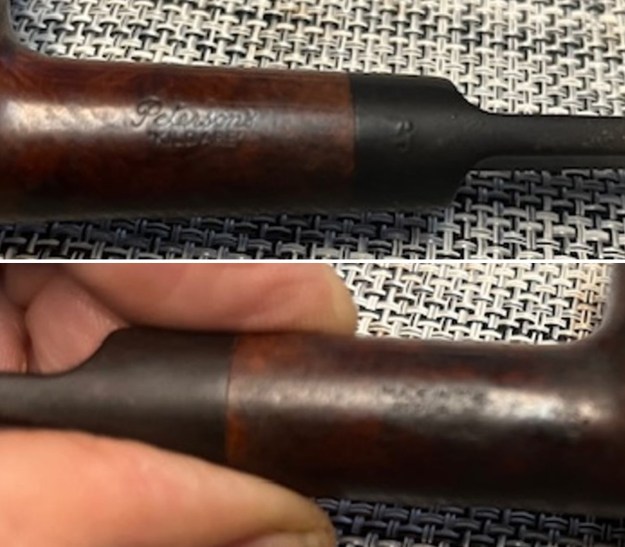
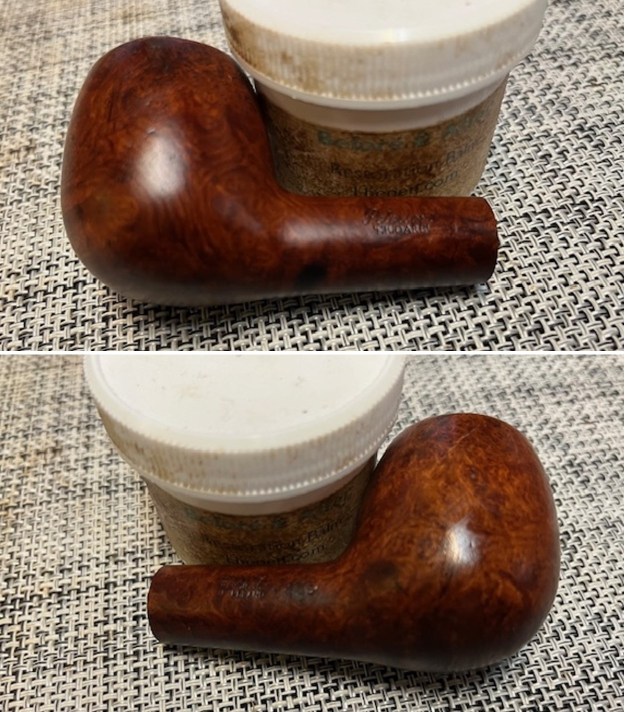
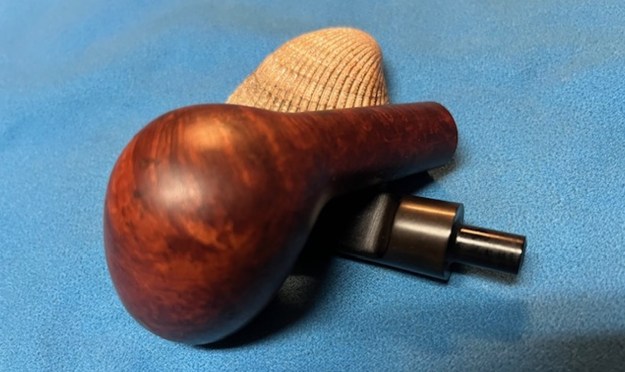
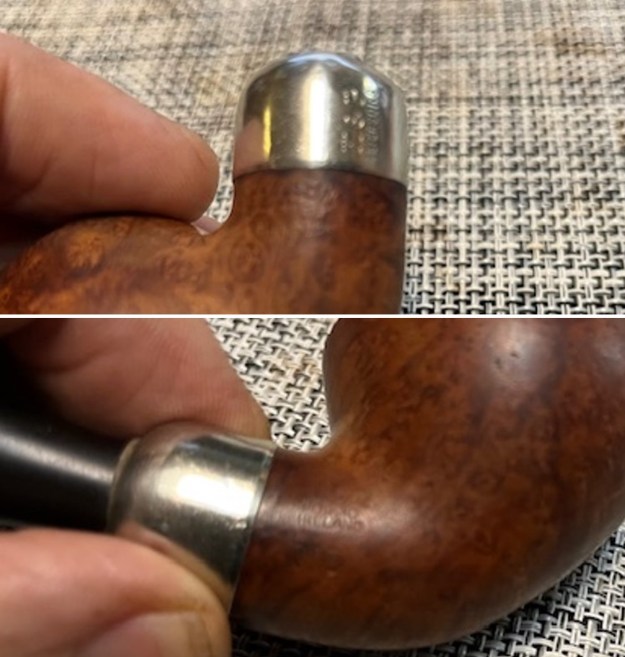
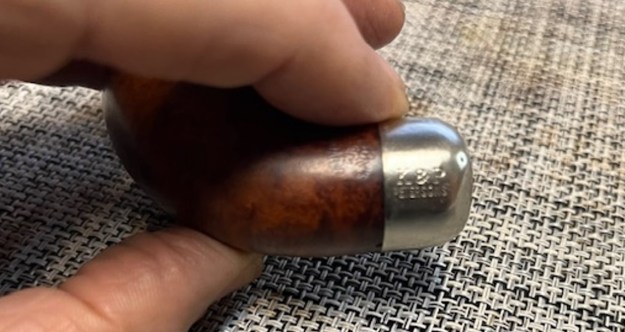
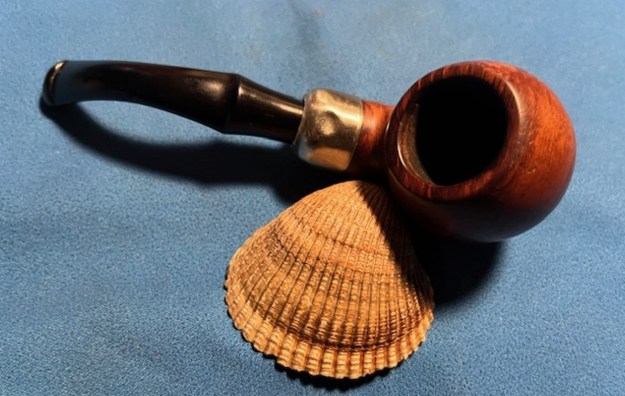
I examined the sides of the shank and the stamping is clear and readable. It is deep and clean stamping. The finish on the underside of the shank is where the wrinkles are in the shellac coat are visible. The triple bands are also undamaged and very smooth. The transitions between the briar and the shank extension is smooth as well as that between that and the acrylic stem.
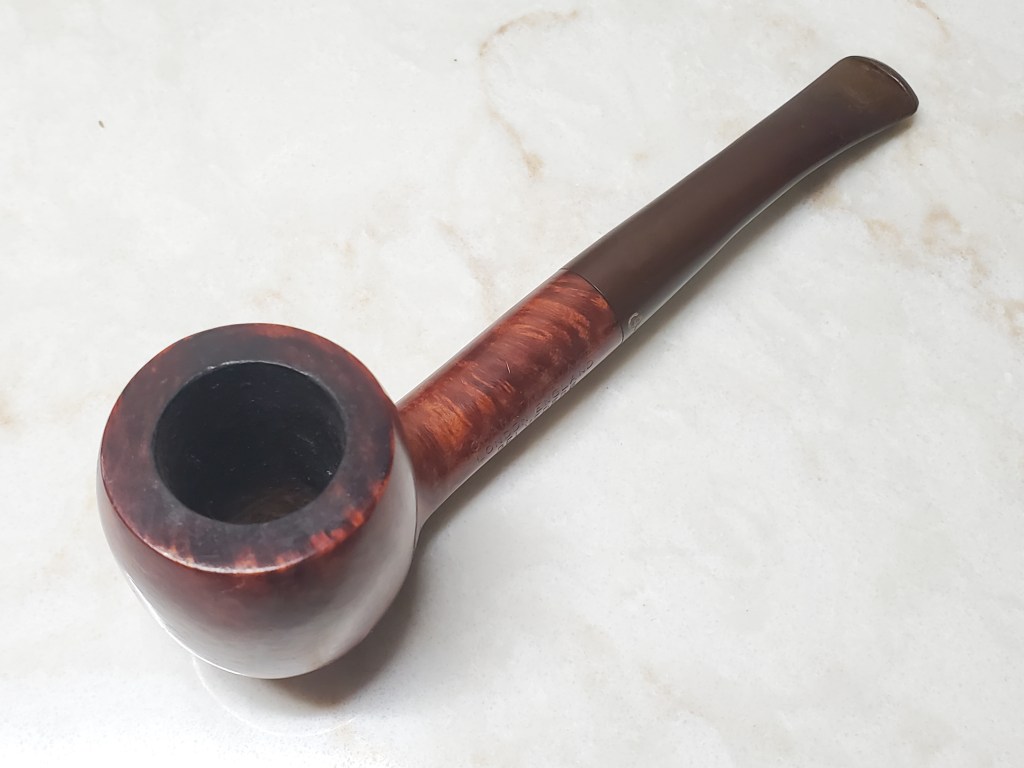
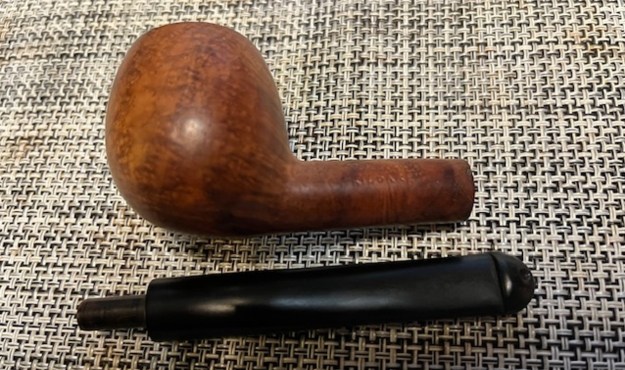
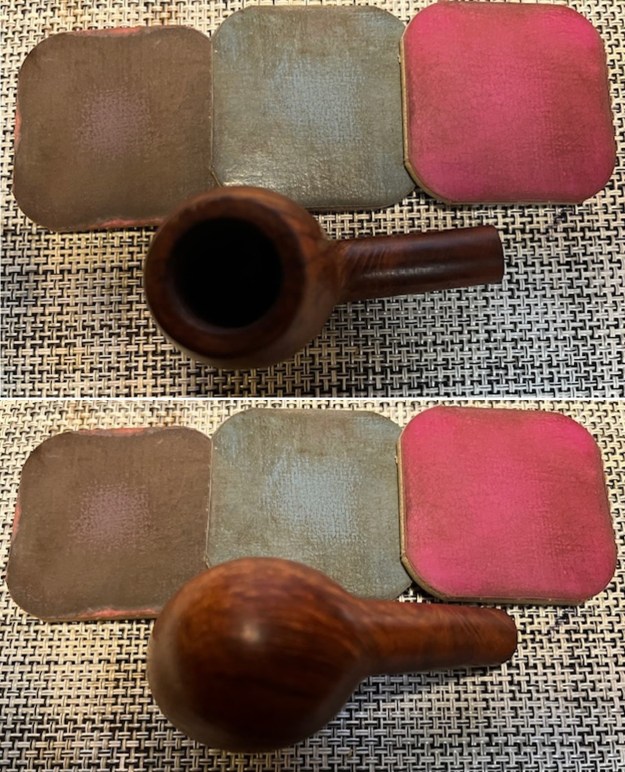
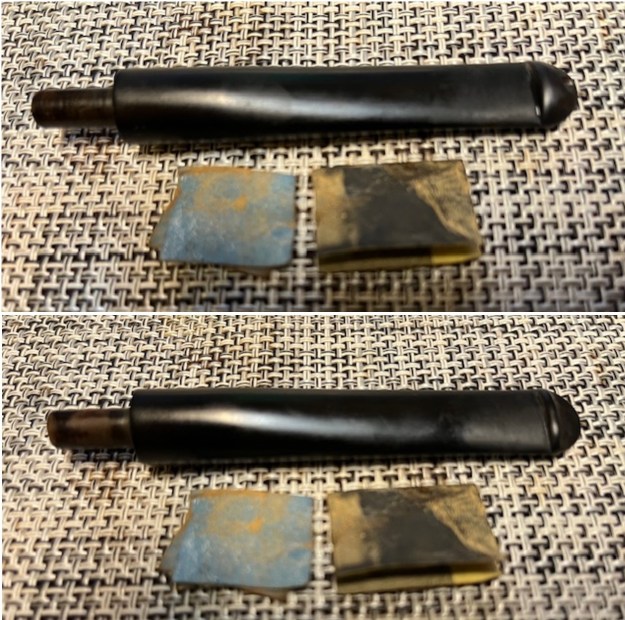
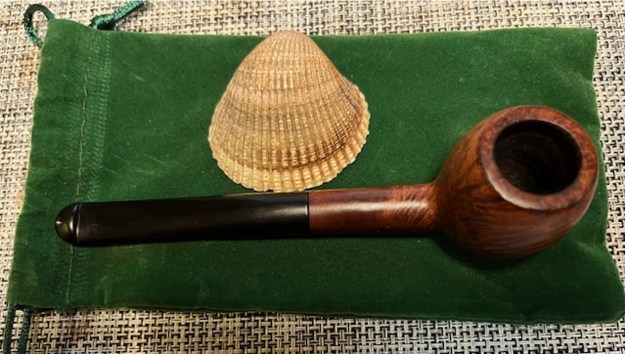
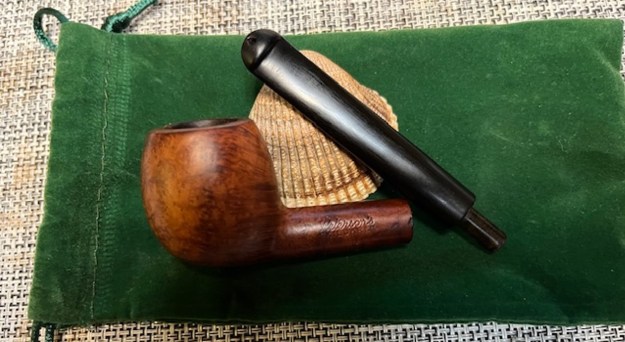
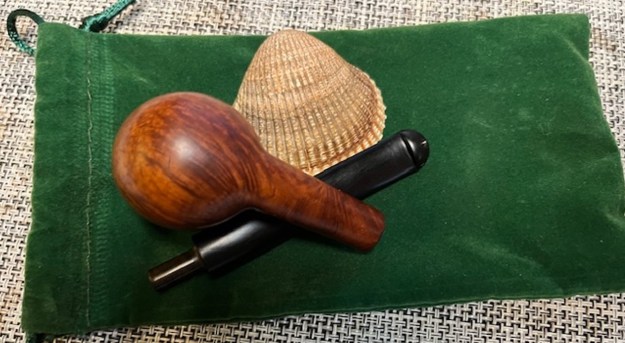
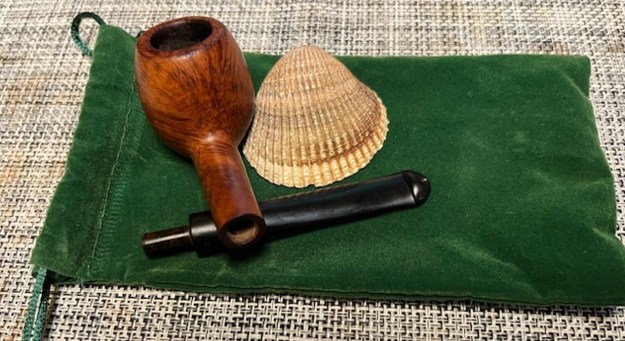
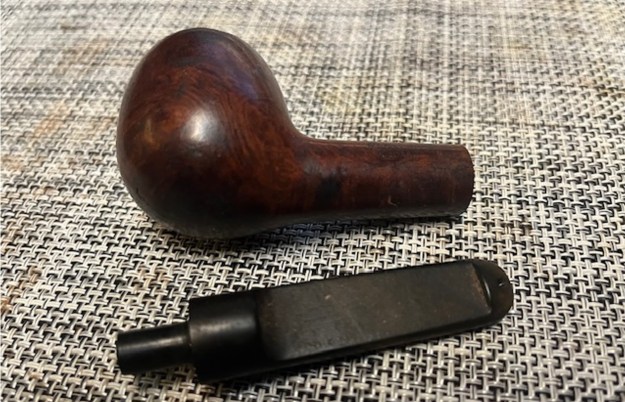
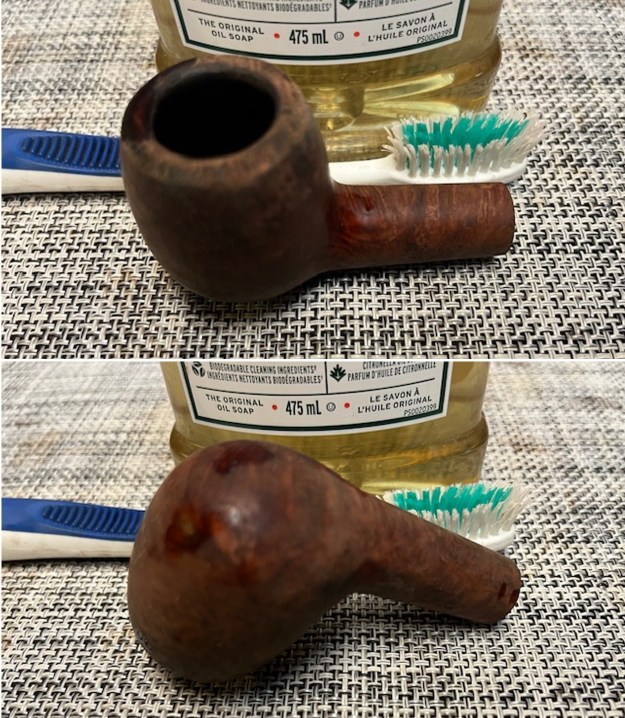
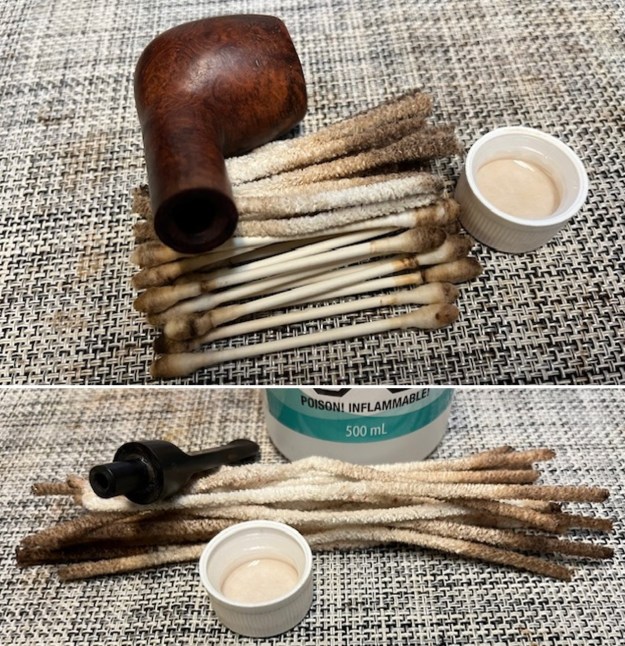
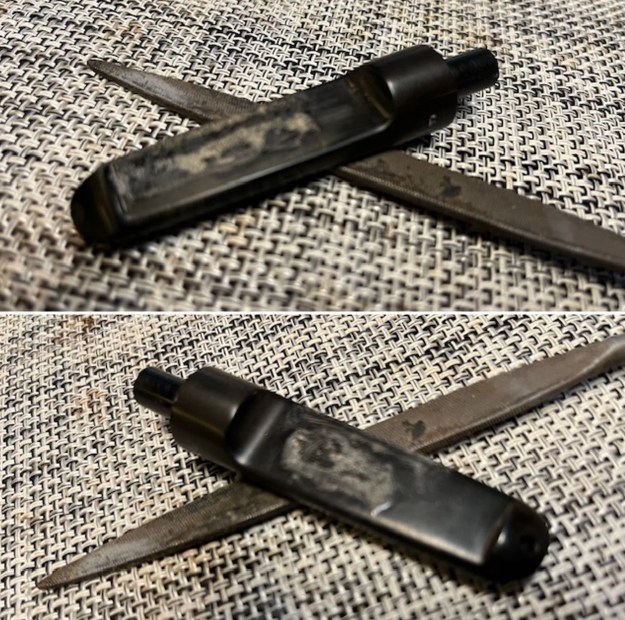
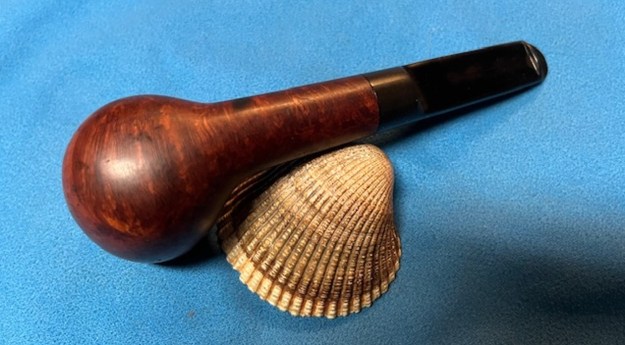
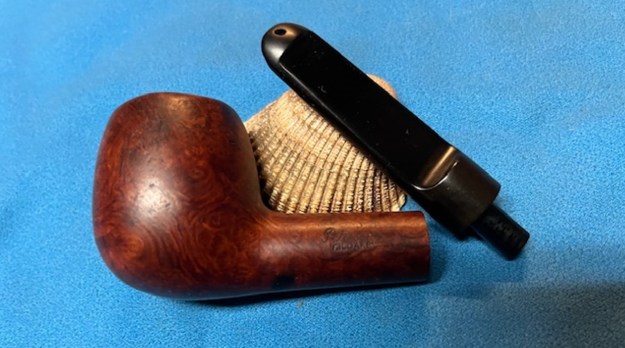
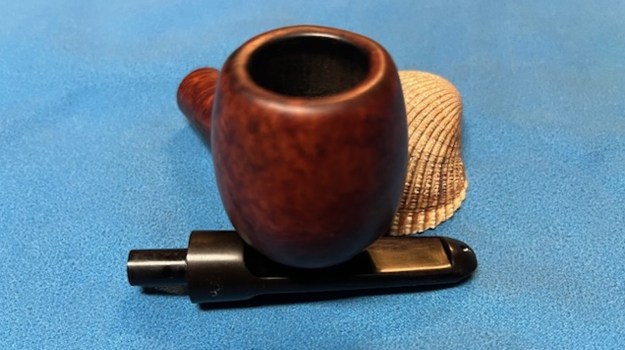
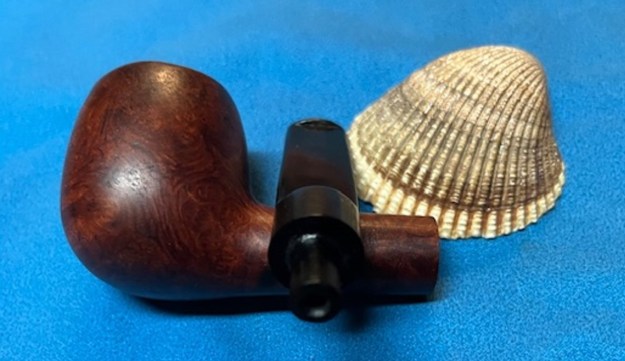
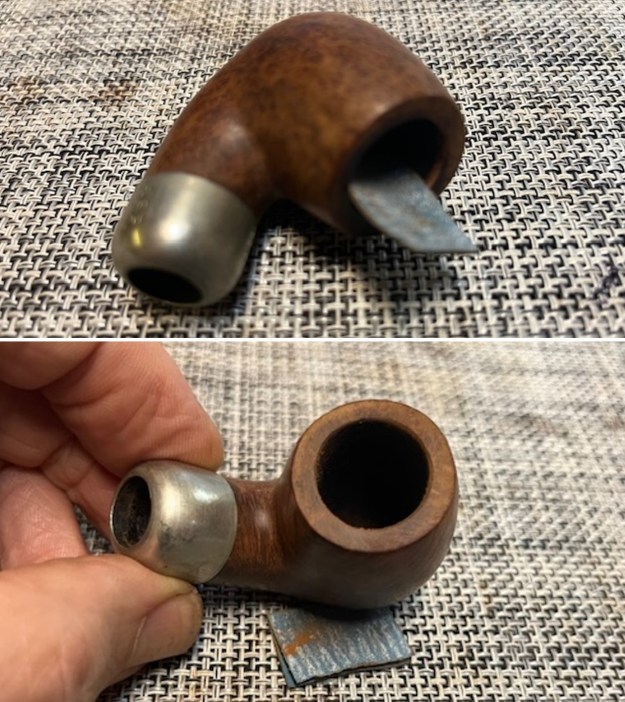
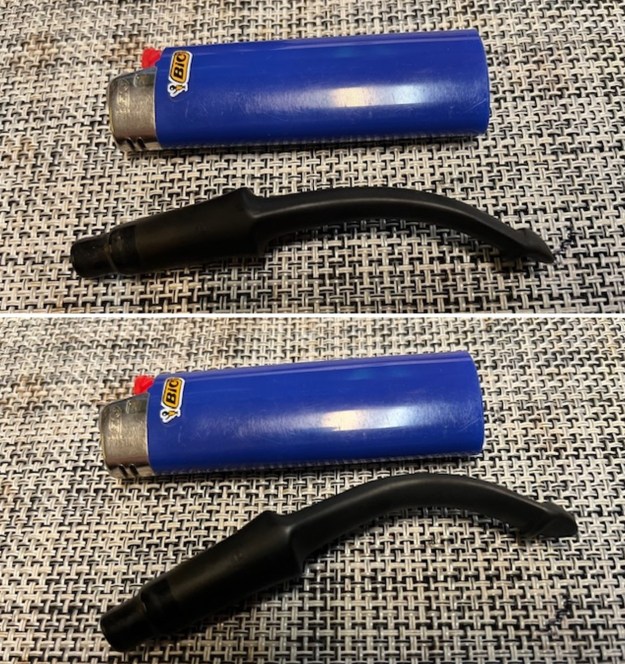
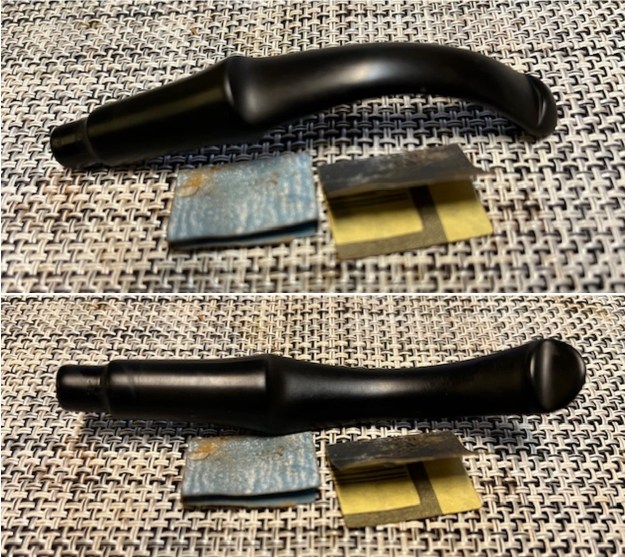
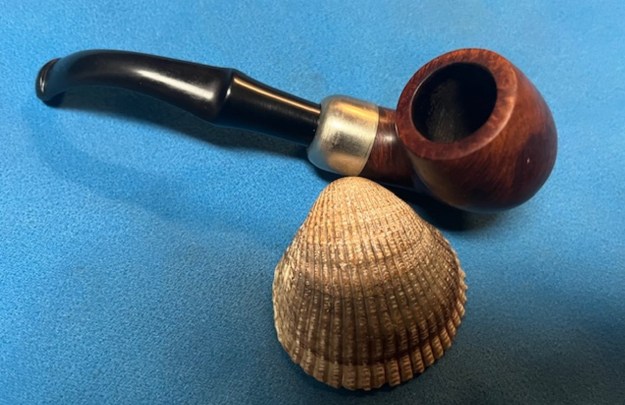
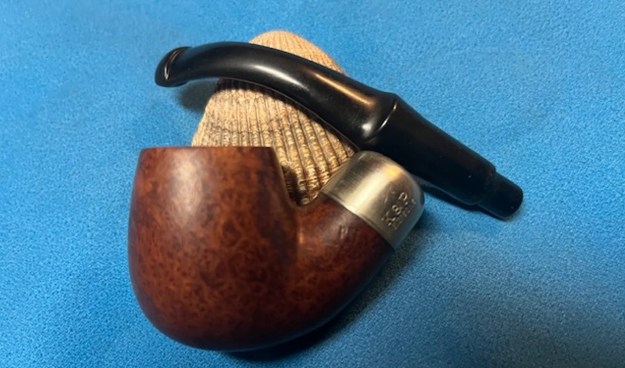
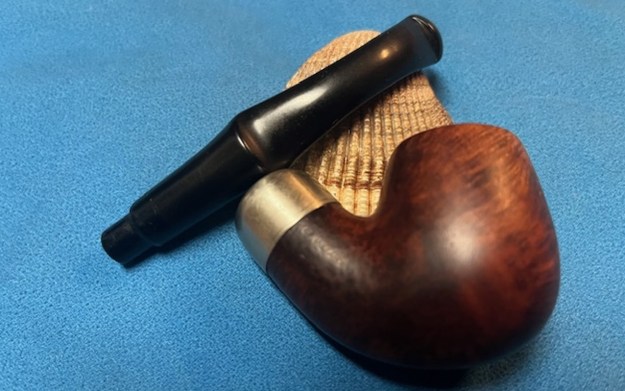
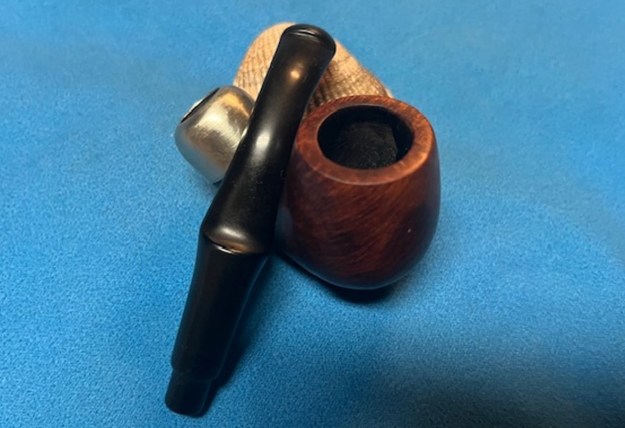
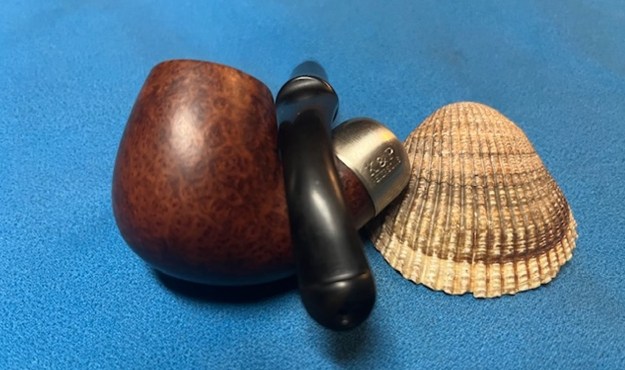
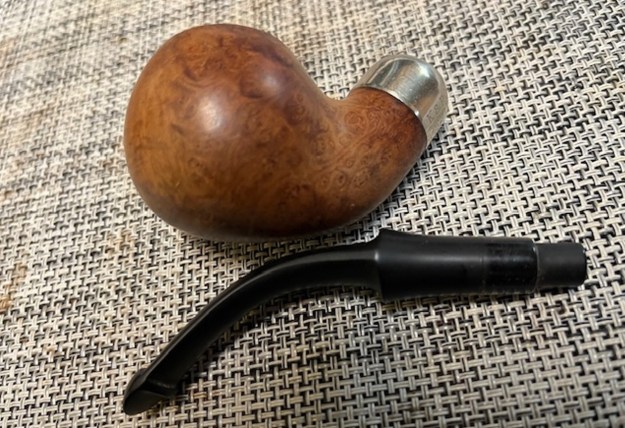
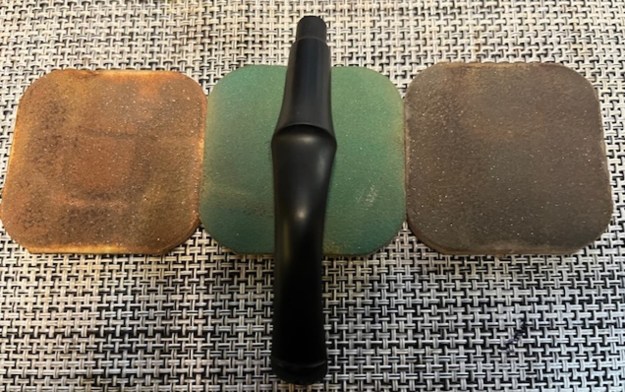
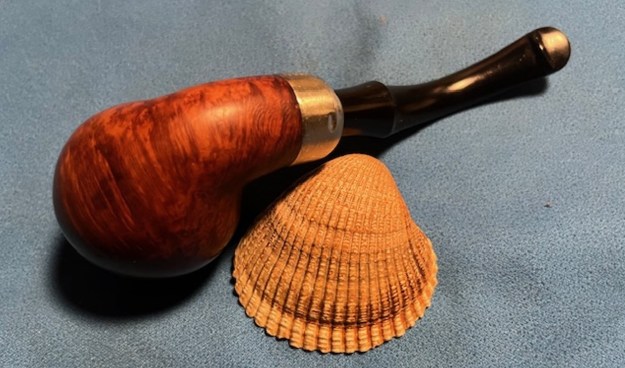
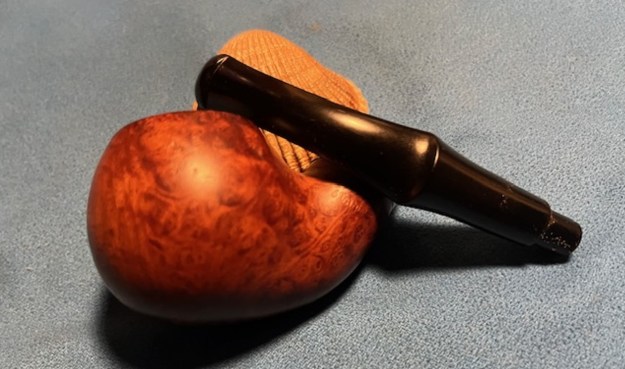
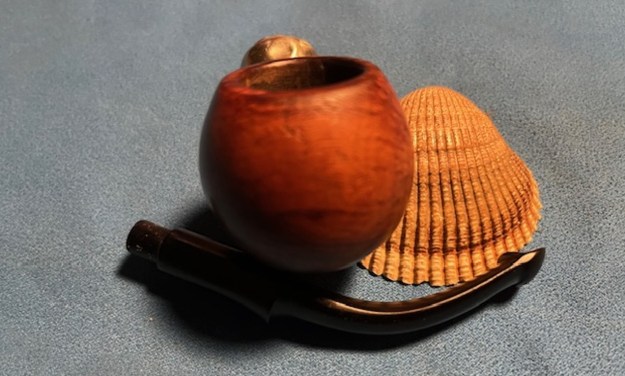
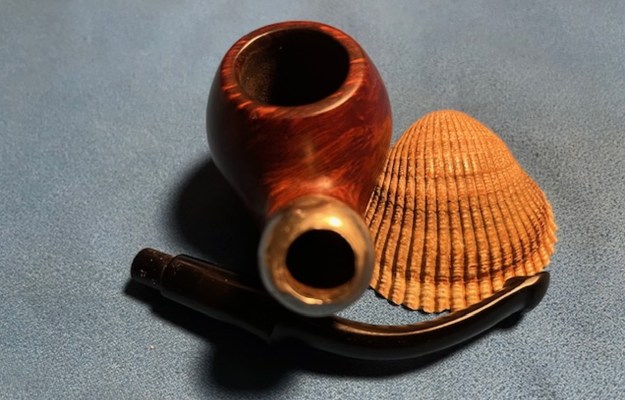
I took the stem off the shank and took a photo of the parts. It is a beautiful pipe for sure. It is hard to see but the wrinkles in the finish are more on the shank than anywhere else.I did some reading to see if I could find out anything about the Danish Design Trio Line of Stanwell pipes. The pipe I have does not say Made in Denmark and from what I can find it seems that the line is a newer one and could have been made in Italy. However, it does not say that either so I am wondering if it is a transitional line that came out during the move from Denmark to Italy. I can’t find anything listed on the line itself so that is what I am left with.

I did find several listed on the web for sale so they are available. I found the line offered online on cigarsunlimited.co.uk site (https://www.cigarsunlimited.co.uk/product-category/pipes-pipes/pipes/stanwell-pipes/stanwell-trio-serie-pipes/). The description was helpful so I have included that below.

Dark brown polished bowl with a superior grain and a combination of metal and acrylic rings on the shank. The rings create a perfect match to the pitch-black acrylic mouthpiece displaying the Stanwell Silver S. The Trio Series is an example of a pipe that will suit any occasion.

I also did some looking through the catalogues on Pipedia and the information there and did not find the line listed. I did have a look at the article on Shape Numbers and Designers there (https://pipedia.org/wiki/Stanwell_Shape_Numbers_and_Designers). From there I found that the shape 191 is a small Rhodesian that was designed originally by Tom Eltang.

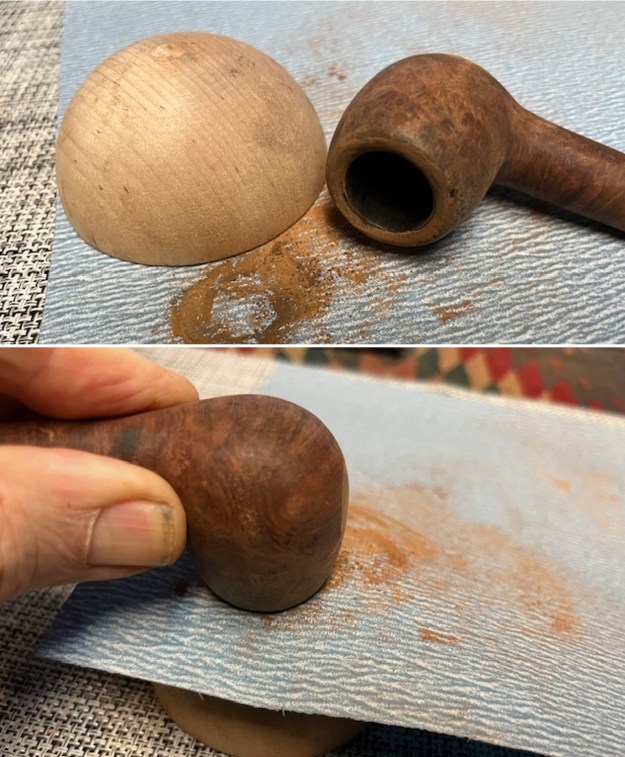
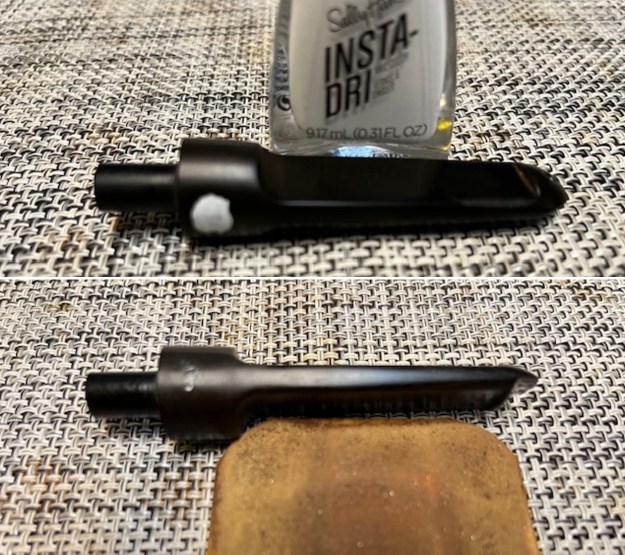
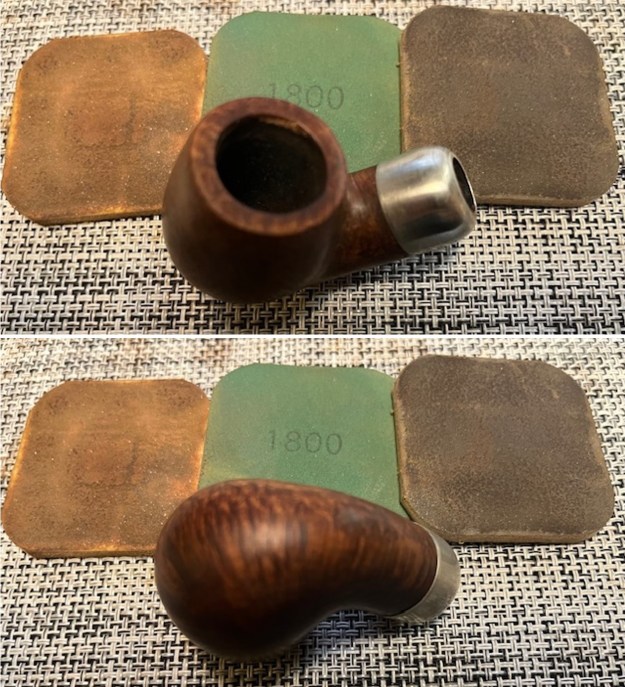
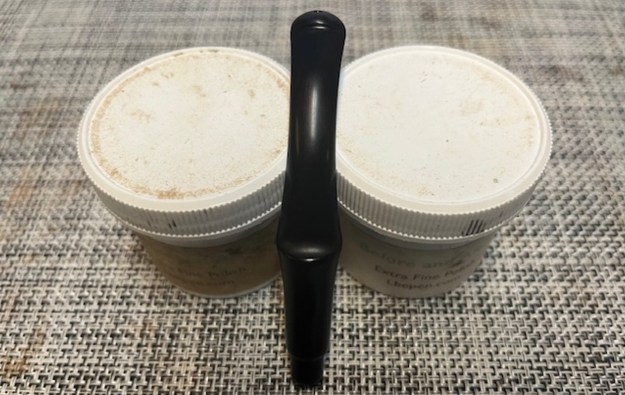
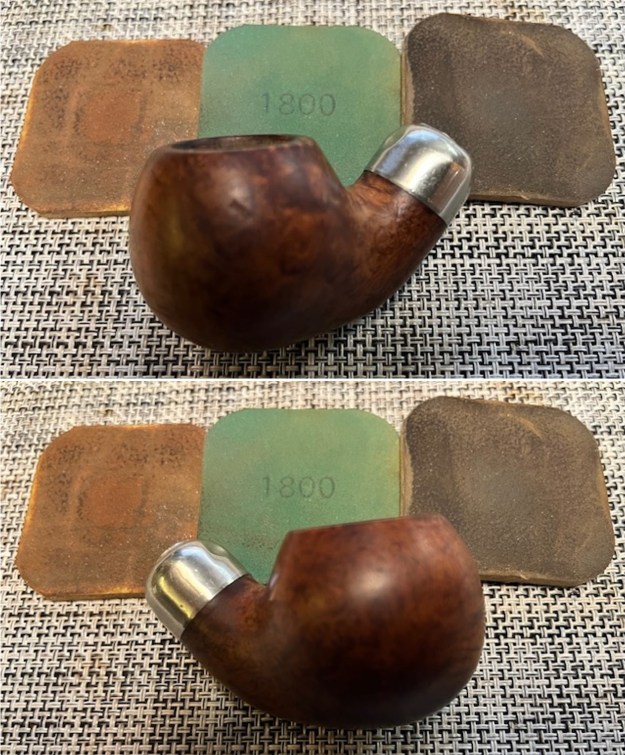
Now I knew a little bit about the pipe in my hands. Now where to begin this cleanup? I decided to begin by removing the wrinkled shellac coat. I wiped the bowl down with a cotton pad and some fingernail polish remover (acetone) to remove that top coat. It was so wrinkled on the shank I decided to remove it all. 
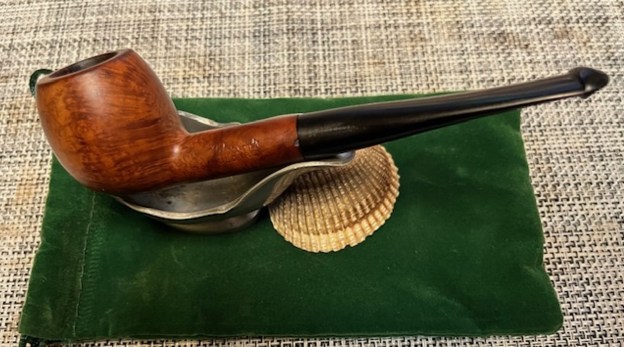
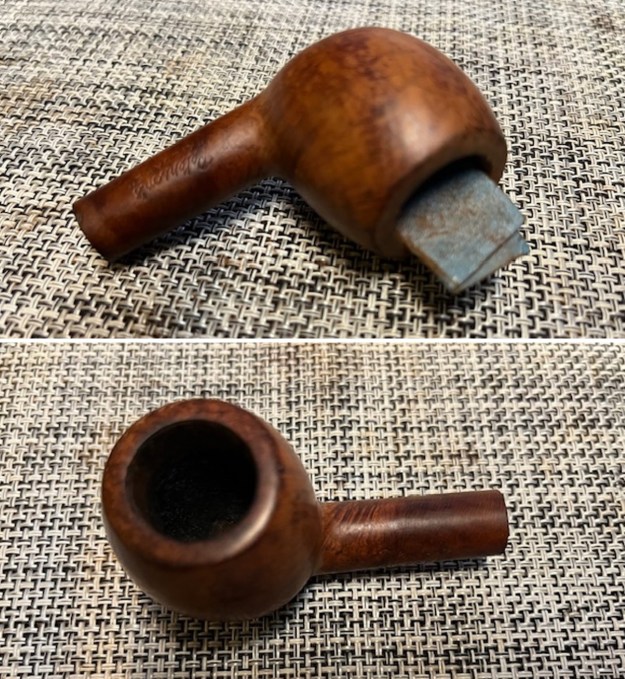
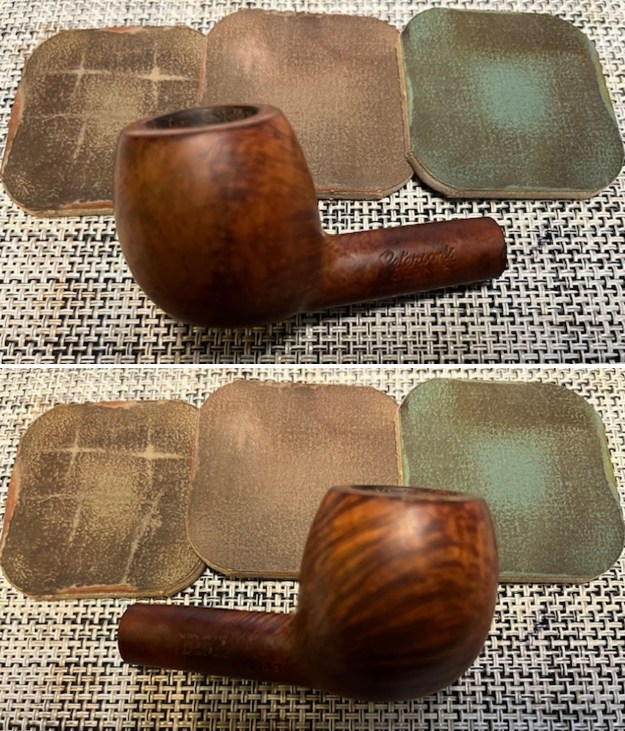
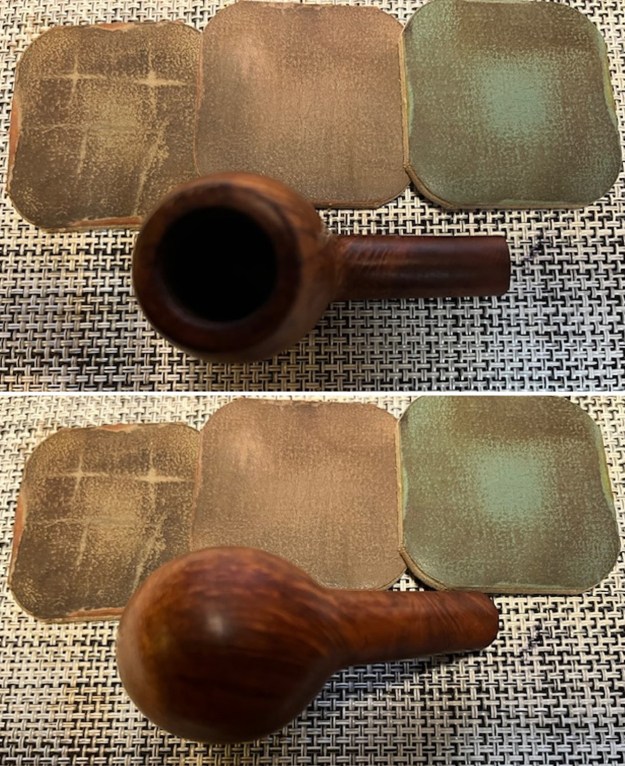
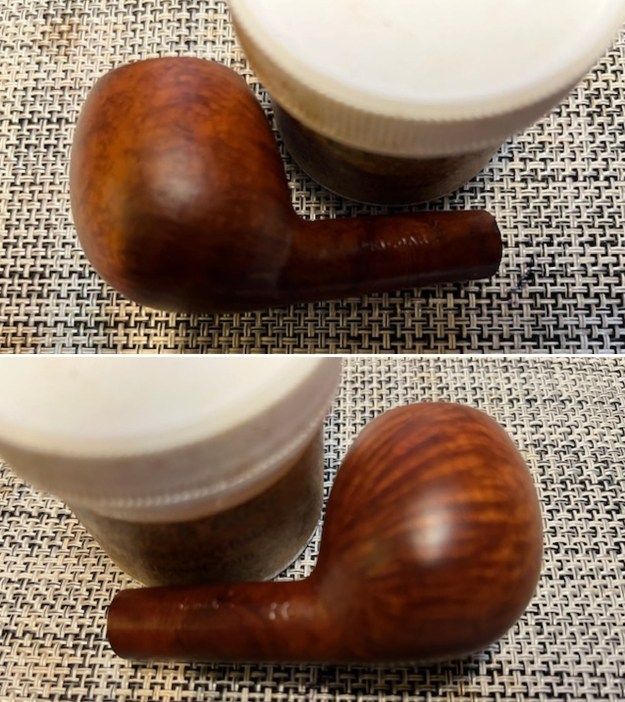
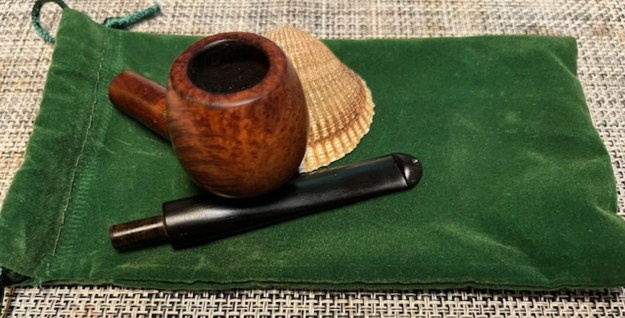
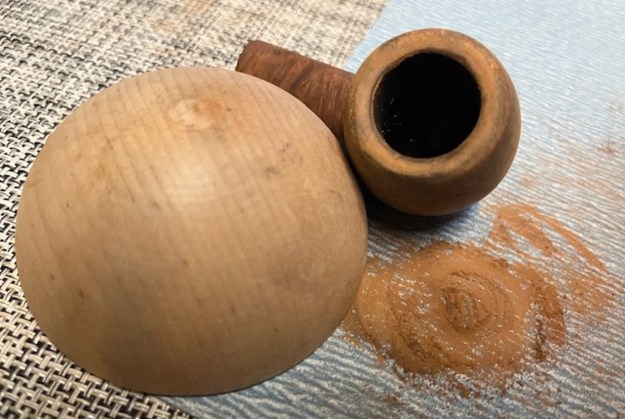
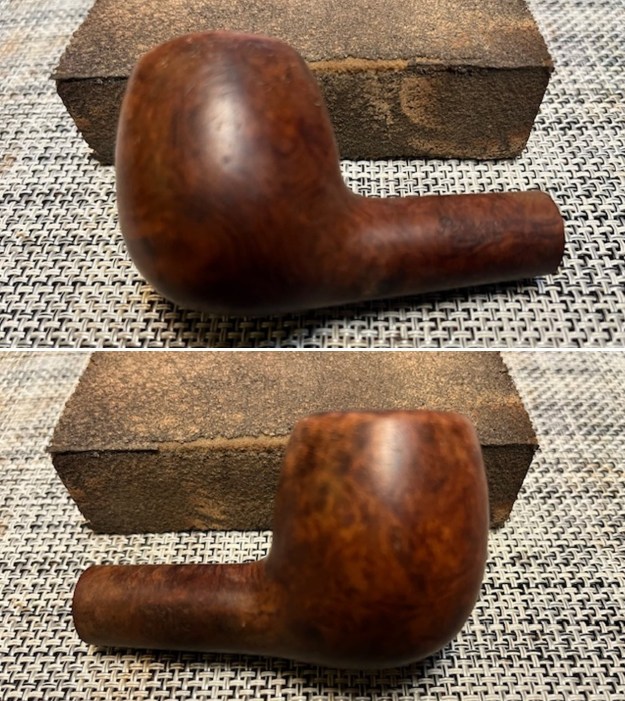
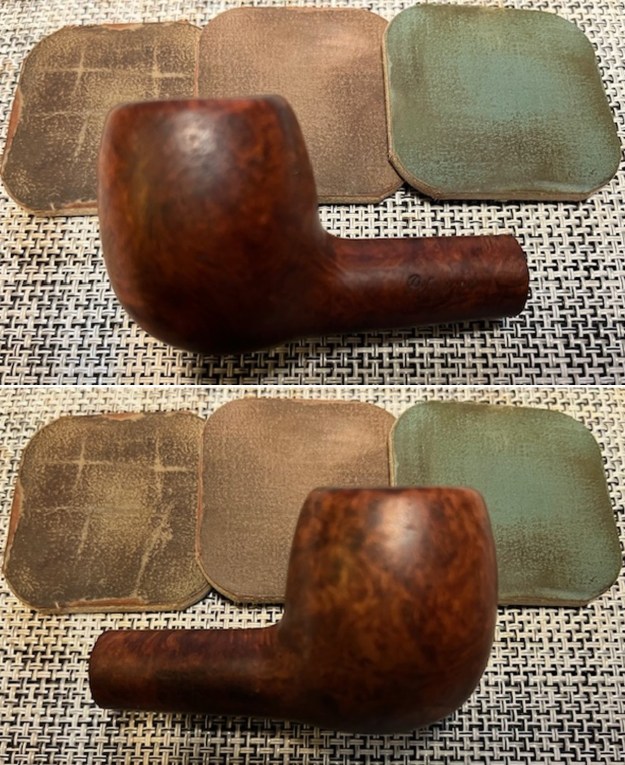
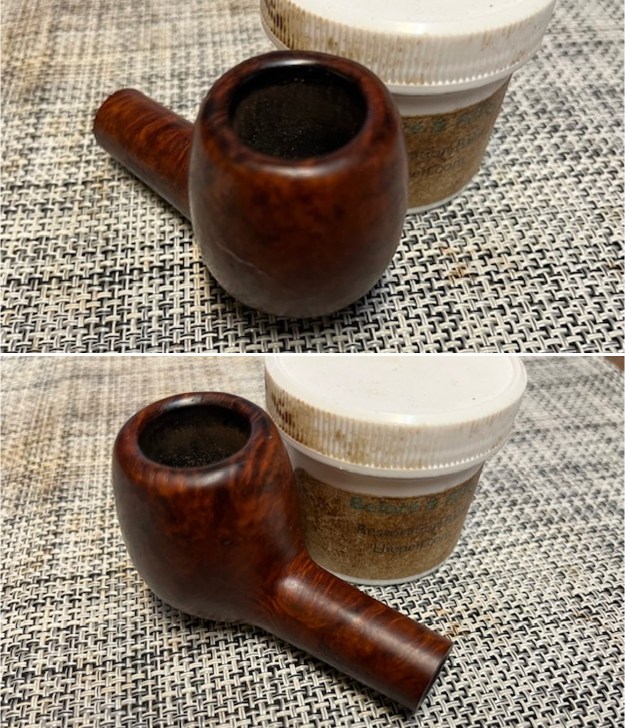
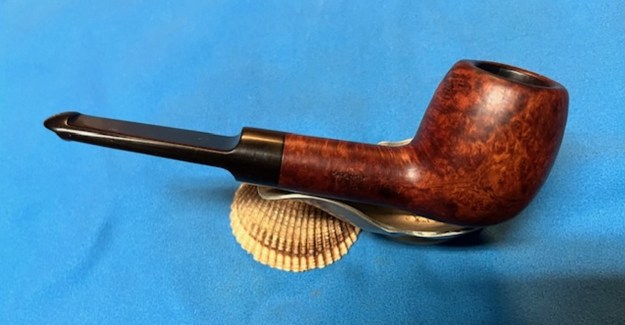
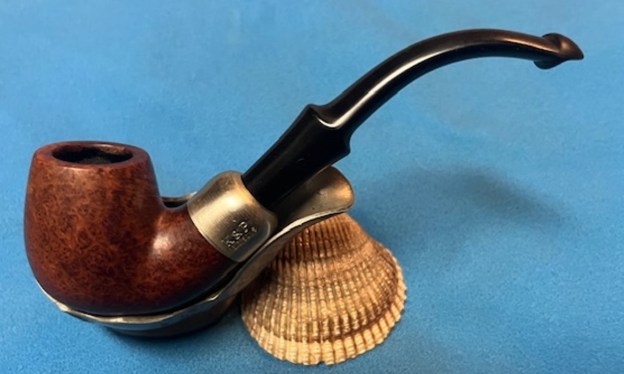
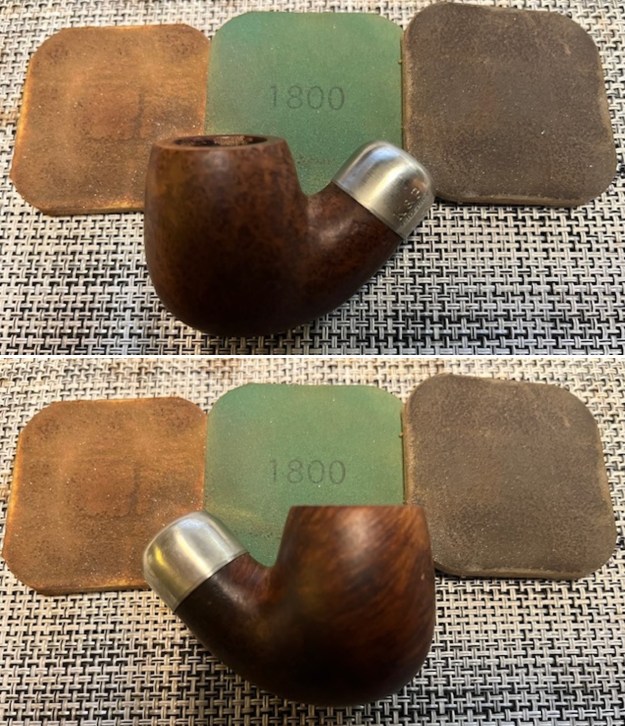
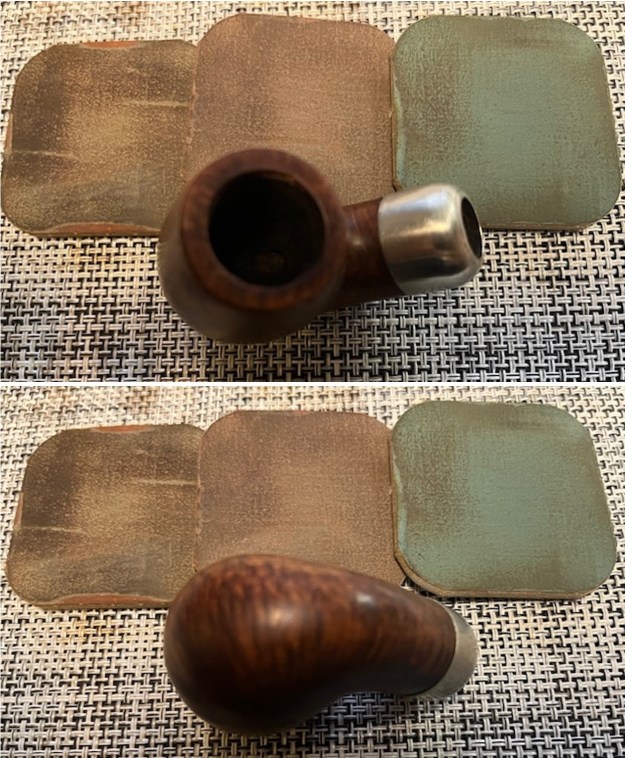
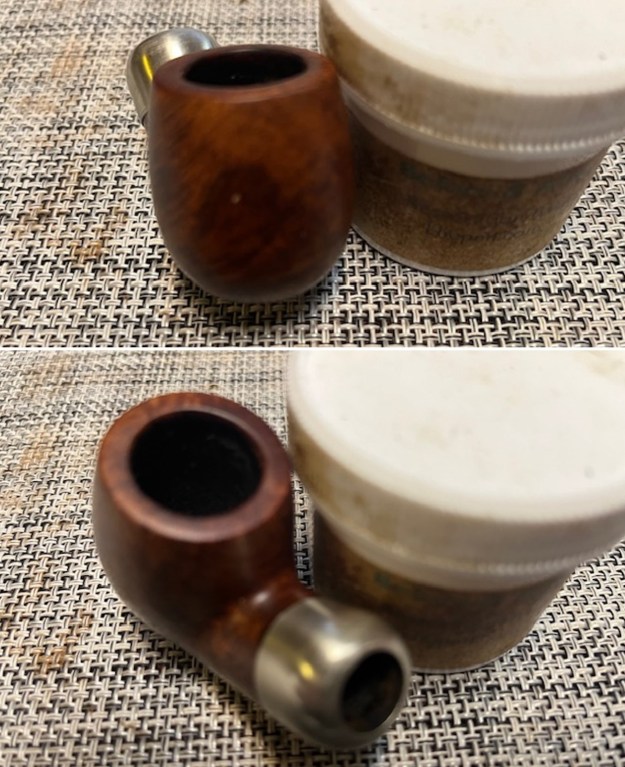
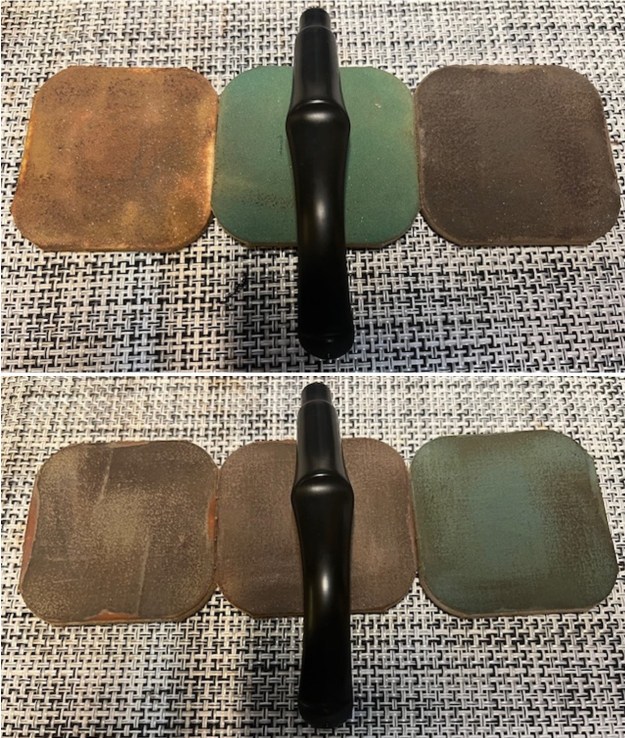
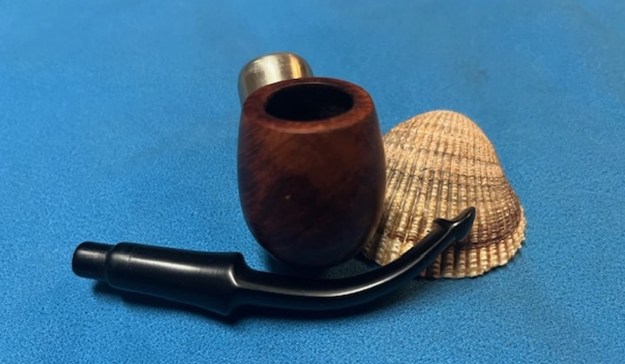
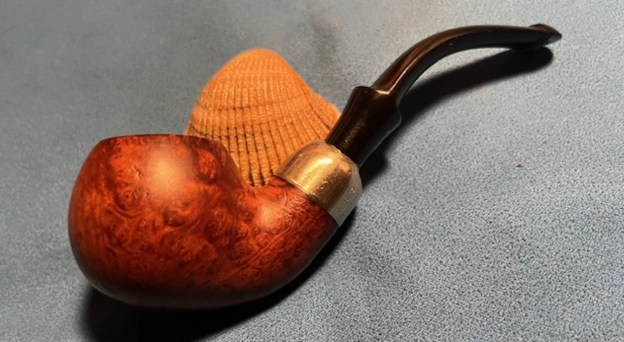
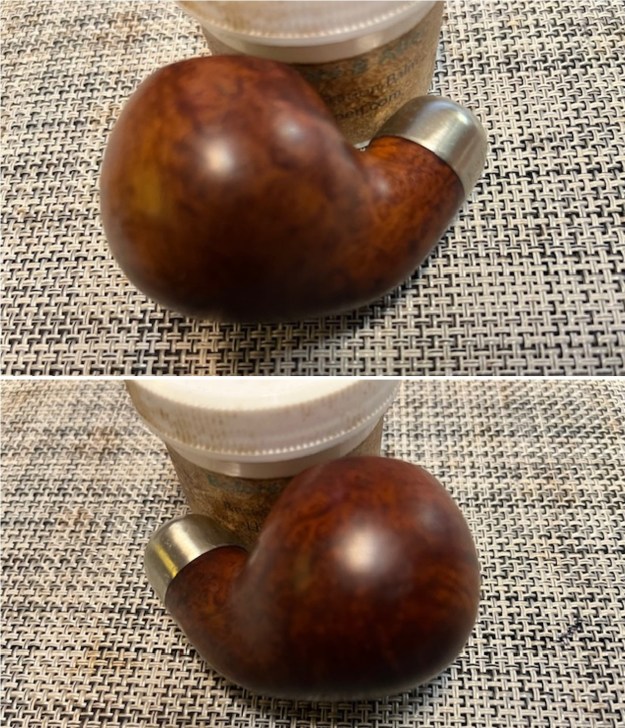
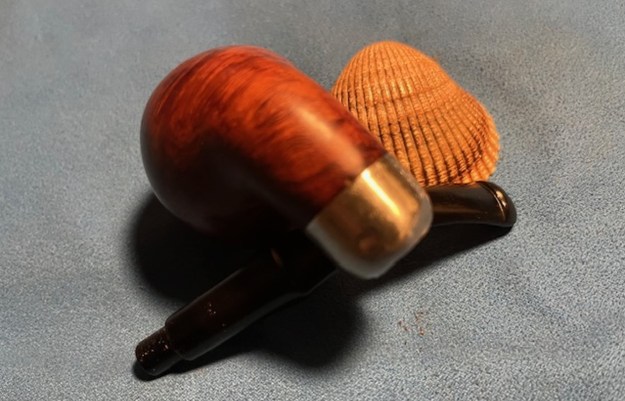
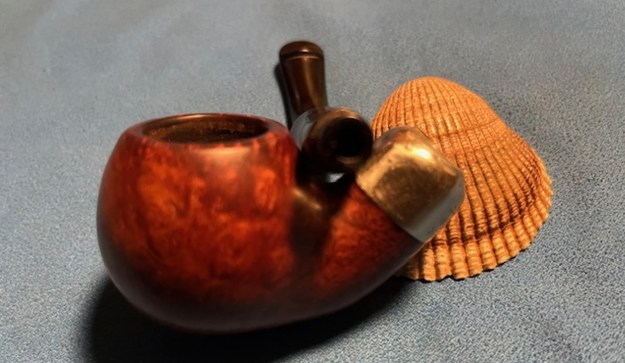
With the topcoat gone I rubbed the bowl down with some Before & After Restoration Balm. I worked it into the briar with my fingertips and into the grooves with a shoe brush. I let it sit for 10 minutes then I buffed it off with a soft cloth. I liked the finish sans shellac much better. What do you think? 
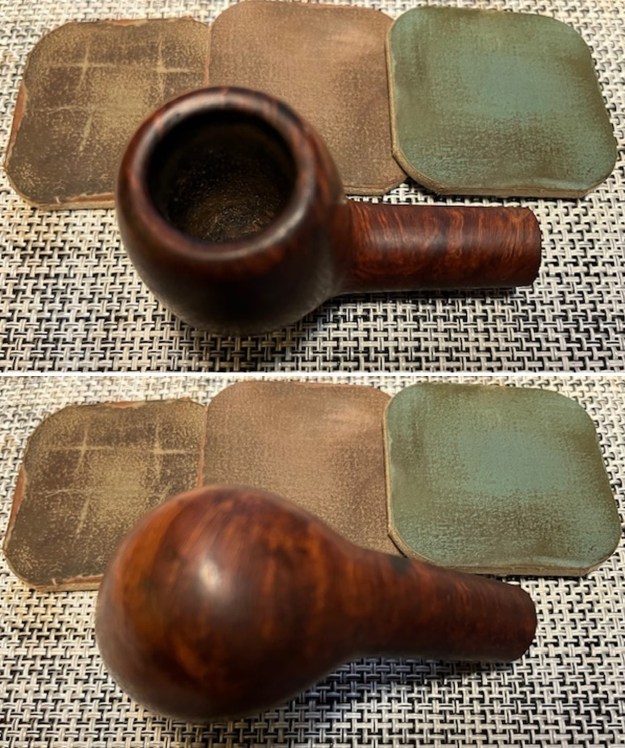
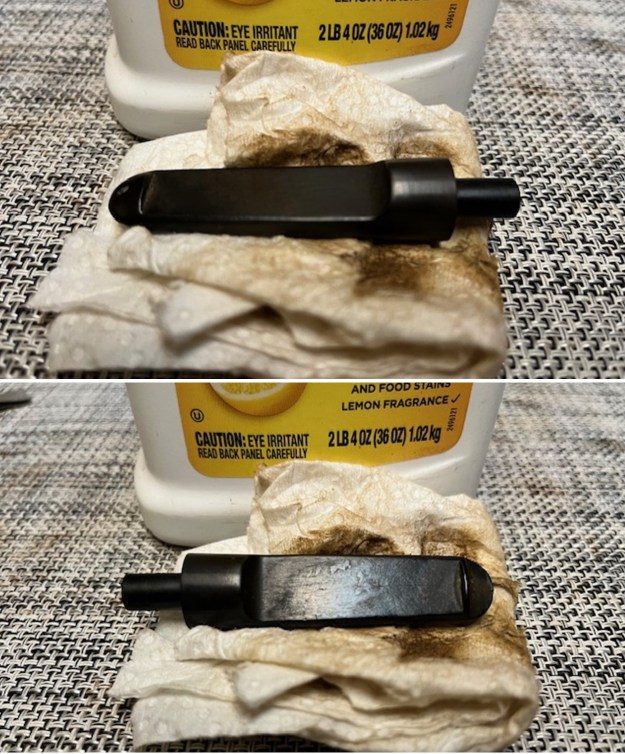
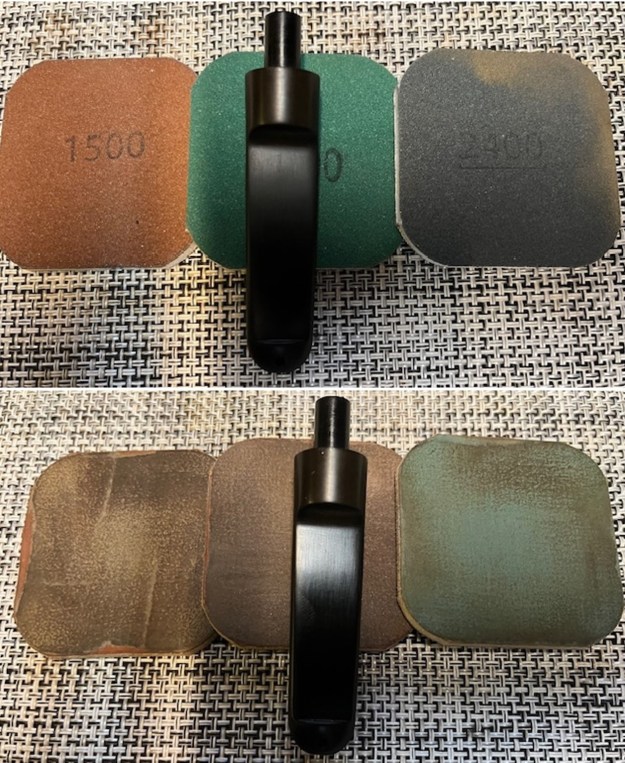
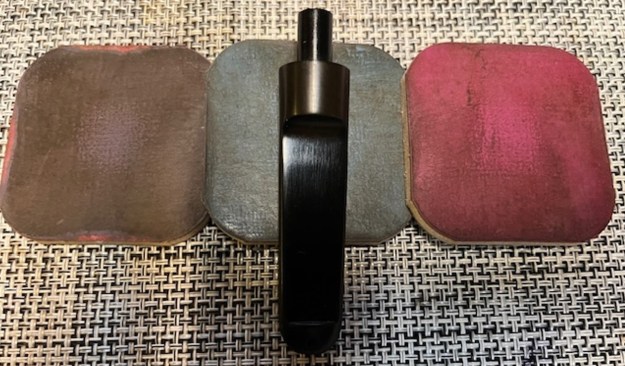
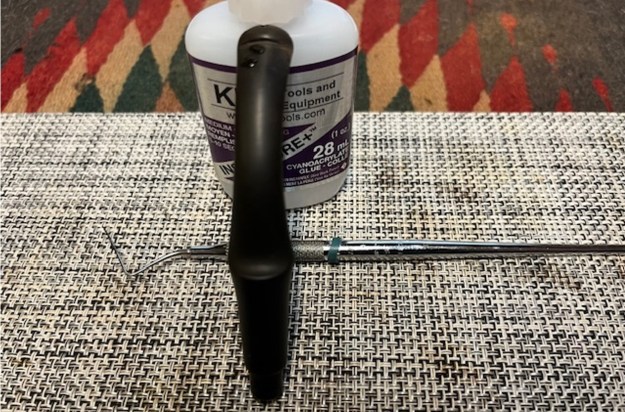
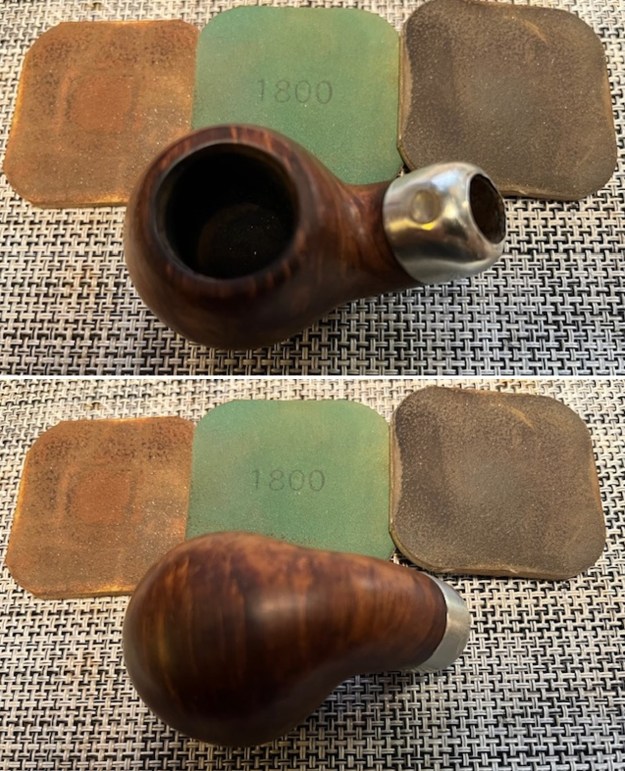
I hand buffed the bowl another time and set it aside. Now it was time to do a little detail work on the stem. It was very clean and there were no marks on the surface on either side. I ran a pipe cleaner through it to remove the dust and worked over the sharp edge of the button with my Obsidian Oil cloth to remove the dust that had collected in that spot on both sides. It looks great.
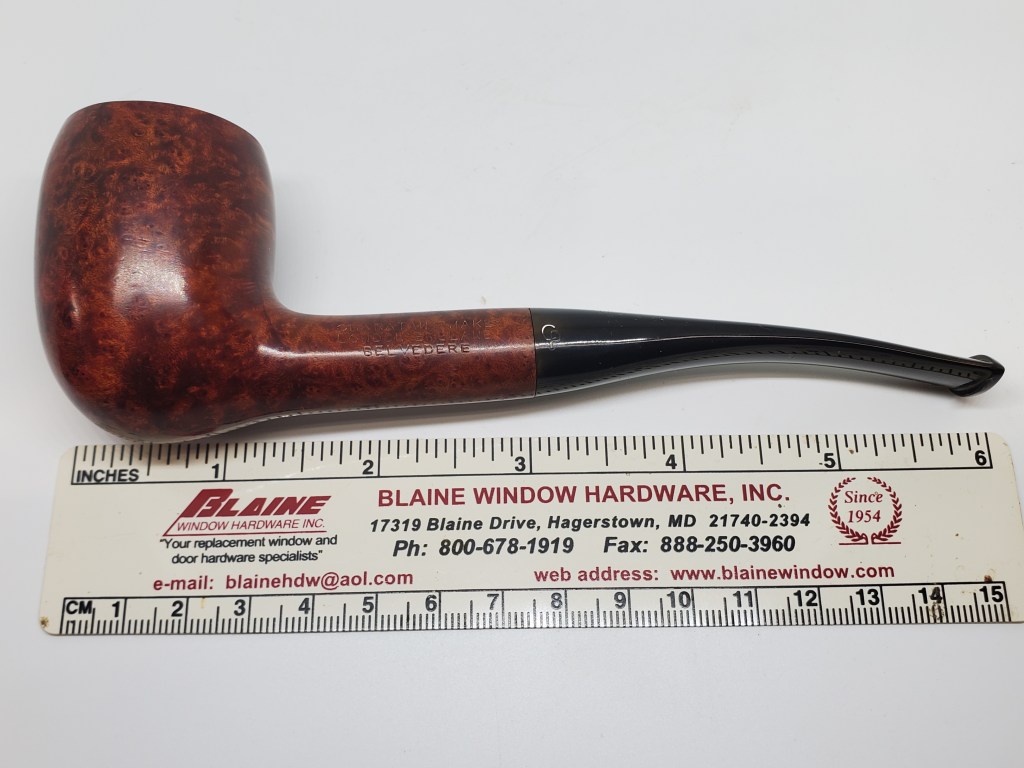
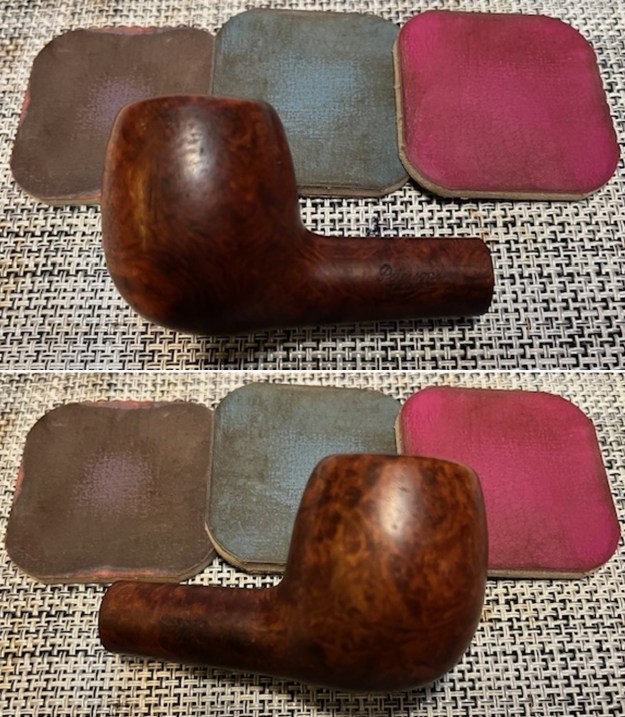
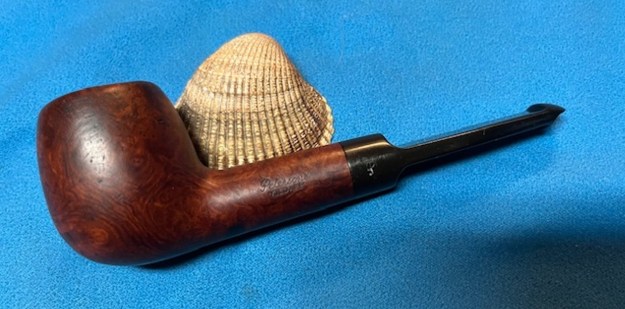
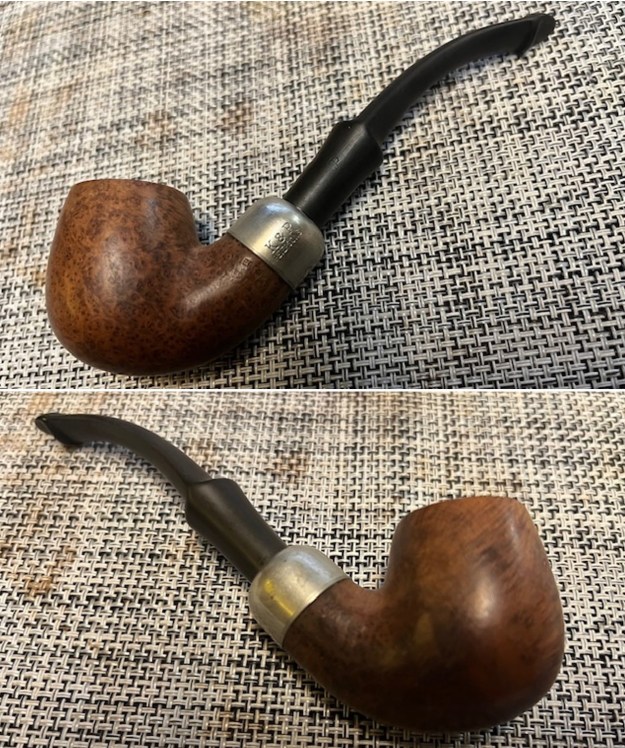
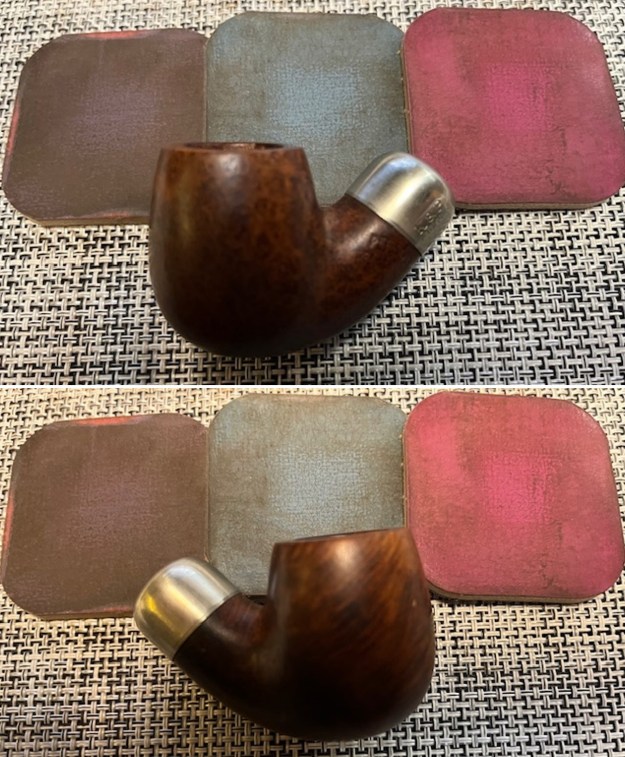
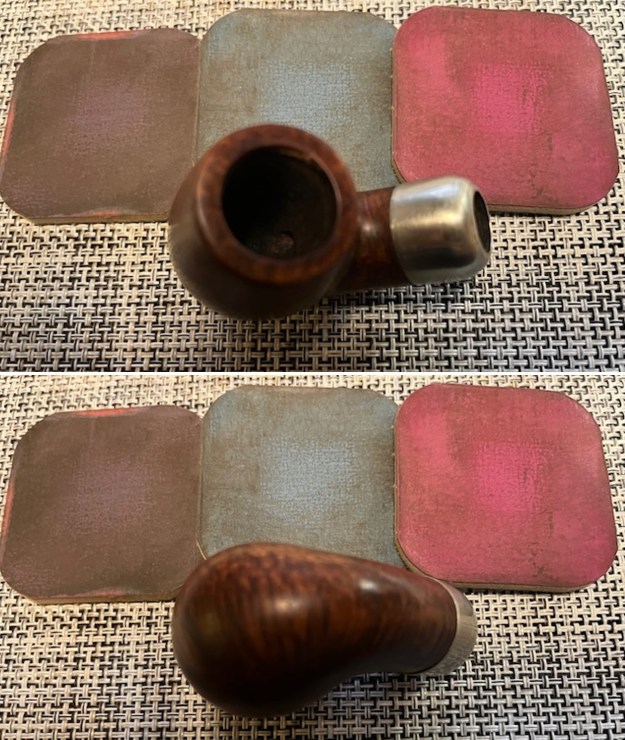
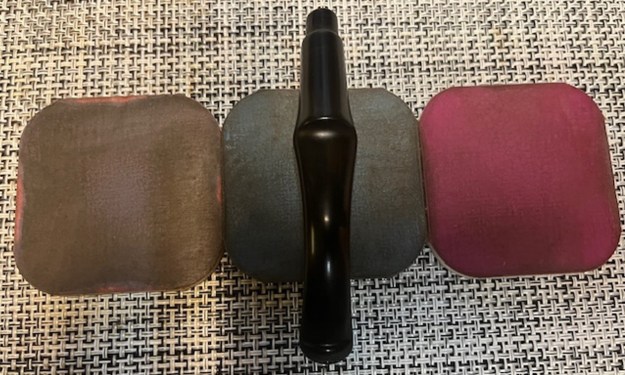
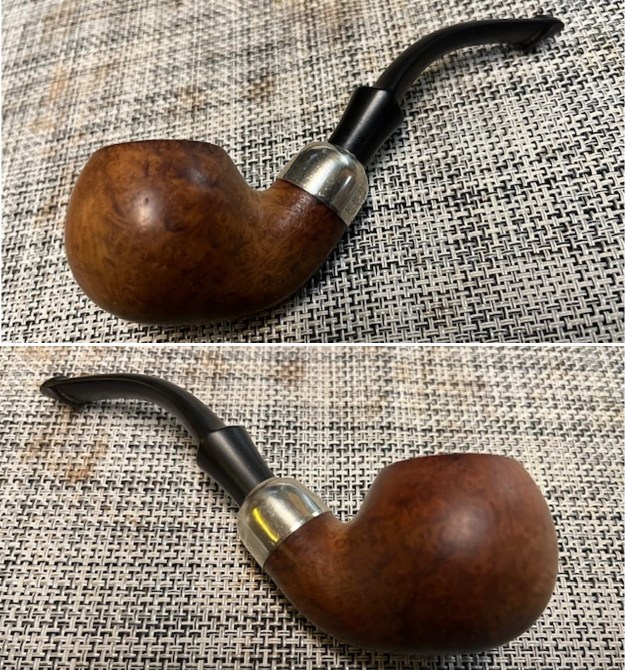
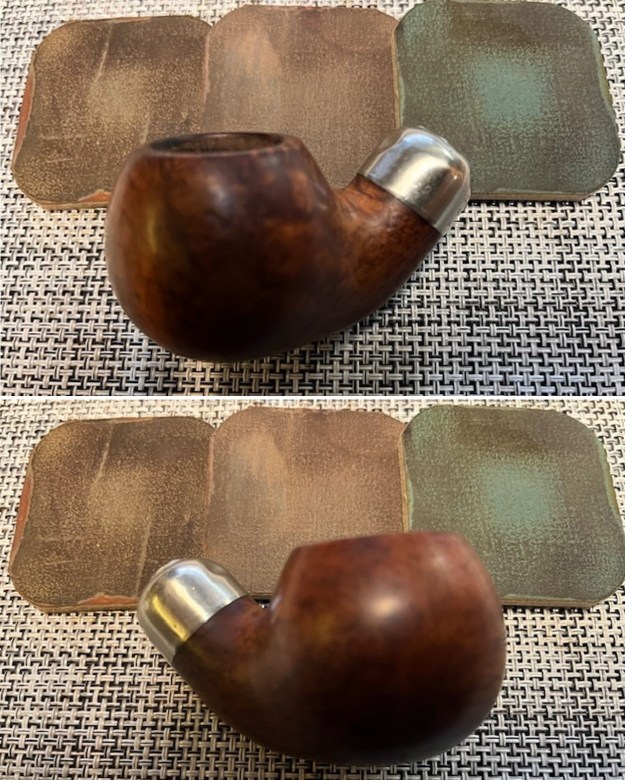
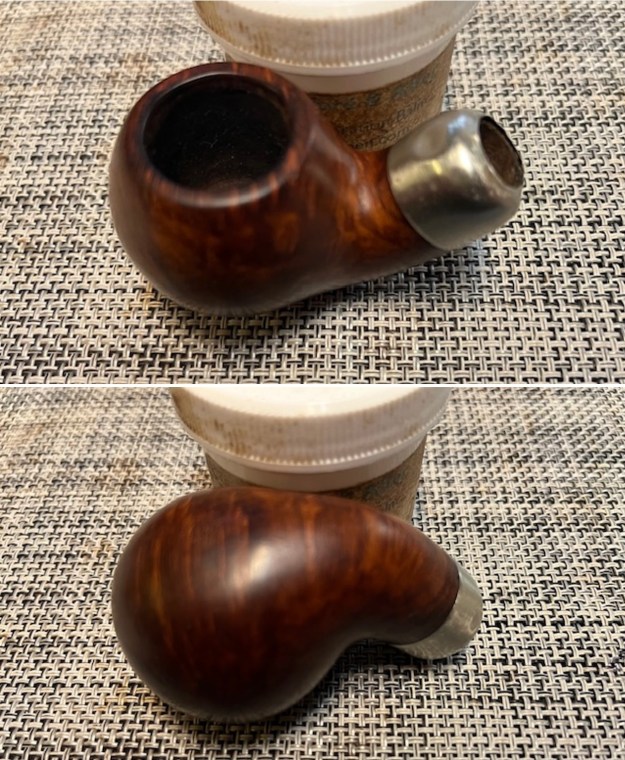
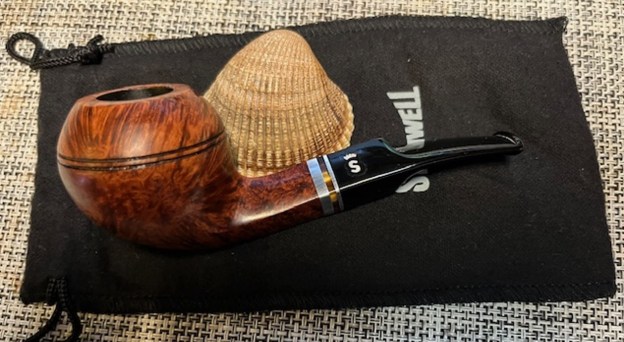
I am excited to put the finishing touches on this Tom Eltang Danish Design Stanwell Trio 191 Bulldog. I put the pipe back together and buffed it with Blue Diamond on the buffing wheel. I gave the bowl and the stem multiple coats of carnauba wax. I buffed the pipe with a clean buffing pad to raise the shine and hand buffed it with microfiber cloth to deepen the shine. It is fun to see what the polished bowl looks like with the polished black, fancy turned vulcanite stem was beautiful. This Stanwell Danish Design Trio 191 is nice looking and the pipe feels great in my hand. It is also an UNSMOKED and NOS (New Old Stock) pipe that you can break in as you choose. It is light and well balanced. Have a look at it with the photos below. The dimensions are Length: 5 inches, Height: 1 ¾ inches, Outside diameter of the bowl: 1 ¼ inches, Chamber diameter: ¾ of an inch. The weight of the pipe is 1.80 ounces/51 grams. It is a beautiful pipe and one that I will be putting in the Danish Pipemaker Section on the rebornpipes store. Thanks for walking through the cleanup with me as I worked over this pipe.

As always, I encourage your questions and comments as you read the blog. Thanks to each of you who are reading this blog. Remember we are not pipe owners; we are pipe men and women who hold our pipes in trust until they pass on into the trust of those who follow us.

A new old stock (NOS) Weber “Windpruf” Restoration


Written and photographed by John M. Young Here we have another pipe from the curiosities rack.  This is a pipe that I received years ago and didn’t …

A new old stock (NOS) Weber “Windpruf” Restoration

I have the same pipe and love it, nice job John

Making an Invisible Shank Repair on a 1960s Sixten Ivarsson


Charles, you make this look so easy. Well done great repair on a beautiful old pipe. You definitely improved it. Thanks for posting this.

Sixten Ivarsson was one of the Danish pipe makers at the forefront of the Danish Fancy craze that hit North America in the 1960s and 1970s and though…

Making an Invisible Shank Repair on a 1960s Sixten Ivarsson

Charatan Belvedere Acorn Restoration.


By Al Jones

This is another pipe that belongs to a fellow PipesMagazine.com forum member, that I was asked to restore.

With help from Pipepedia, I date this Charatan to the Reubens era (1910-1960) because of the “CP” stem stamp and it lacks:

  • Double-Comfort stem
  • “L” Lane stamp
  • No “Made by Hand” (which was used starting in 1958)
  • No X or DC on the nomenclature

According to Pipedia, the Belvedere is one of the four ” Apprentice” grades for Charatan. From their webpage:

Charatan’s make “Apprenticeship” standard shape grades

  • Special
  • Relief Grain (tan)
  • Relief Grain (dark)
  • Belvedere
  • Perfection
Courtesy Pipedia

The pipe was in great shape, some bowl top build up and an oxidized stem. The CP stem logo was faded, and very light, I knew that was going to be challenging. The briar had some dents and dings. The nomenclature was excellent. The pipe arrived in this condition:

To remove the briar dents and dings, I steamed most out with a wet towel and an electric iron on high to generate some steam. I used some 320 grit paper in the bowl to remove the very light cake. The bowl was soaked with sea salt and alcohol. Following the soak, I cleaned the bowl top with 8000 grade micromesh, followed by 2000 grade wet paper. The bowl was then buffed with White Diamond and several coats of carnuba wax.

The stem stamp presented a challenge. I removed the initial layer of oxidation, except around the logo. This looked unacceptable to me and the pipes owner.

I suggested that I could try to repaint the stem stamp with white acrylic polish, and hope it protected the logo enough to save it. I used 600,800, 1500 and 2000 grade paper to remove the oxidation, working carefully around the stem stamp. I used some wet Magic Eraser around the logo and was successfully able to salvage the logo and remove the majority of the oxidation. The stem was then buffed with White Diamond rouge and Meguiars Plastic polish.

Below is the finished pipe:

Restoring a Peterson’s Republic Era Kildare 86 Taper Stem Apple


Blog by Steve Laug

The next pipe on the table came to us from somewhere neither Jeff or I remember. I can tell you though that it has been sitting here for a long time. That happens a lot when I am working through a country in my boxes. This the last of the current Peterson Pipes that I have to work on at the moment (no worries as there are more coming). It is a beautifully grained Peterson’s “Kildare” 86 Apple. The shape follows the grain around the bowl which is a combination of cross grain and birdseye. The finish was clean and the pipe had been reamed in the past so I am pretty sure it has been through Jeff’s clean up. The pipe is stamped on the left side of the shank and reads Peterson’s [over] “Kildare”. On the right side of the shank Made in the Republic of Ireland (three lines) followed by the shape number 86. The stamping is clear and readable on both sides. The stem was quite clean though there were light tooth marks and chatter on the stem near the button on both sides. There was the no Peterson’s “P” on the taper stem. I took photos of the pipe before I started my work on it. I took photos of the rim top and stem to show the general condition of the pipe. The bowl has been cleaned but the rim top and the inner edge have some darkening. The finish on the bowl is quite clean. The photos of the stem show the oxidation, calcification and light tooth marks and chatter on both sides near the button. The P-Lip button and edges look good.I took photos of the sides of the shank to show the stamping. The stamping is faint but readable in the photos below and is as noted above. I also removed the stem from the shank and took a photo of the parts of the pipe to give a clear picture of what I see here. I am including the information from Pipedia’s article on Peterson pipes. It is a great read in terms of the history of the brand (https://pipedia.org/wiki/Peterson). I have included a bit of the pertinent history here.

1950 – 1989 The Republic Era – From 1950 to the present time, the stamp for this era is “Made in the Republic of Ireland” in a block format generally in three lines but two lines have been used with or without Republic being abbreviated.

During the 1950’s and 60’s the Kapp & Peterson Company was still in the ownership of the Kapp family. However, 1964 saw the retiral of the company Managing Director Frederick Henry (Harry) Kapp.

I turned to “The Peterson Pipe” by Mark Irwin and Gary Malmberg to get some background on the Peterson’s System Line. On page 314 it had the following information.

Kildare (1965-) First issue of line with matte-finish in Classic Range shapes, P-Lip and fishtail mouthpiece. Second issue C.1979 as Kildare Patch, with rusticated patches on pipe surface. Third issue 2010, matte-brown, P-Lip or fishtail mouthpiece, no band. Fourth issue 2011-, burgundy sandblast finish, nickel army mount, fishtail mouthpiece, exclusive to smokingpipes.com.

Judging from the description above I believe that I am working on a First Issue of the line in the time period of 1965-1979. It is a late Republic Era Classic Shaped pipe with a matte-finish and a P-Lip stem. Now it was time to work on the pipe.

With that information at hand I turned to work on the pipe itself. I used a folded piece of 220 grit sandpaper to smooth out the inner edge and the rim top. It looked much better.I polished it with micromesh sanding pads – dry sanding with 1500-12000 grit sanding pads. I wiped it down with a damp cloth to remove the dust on the surface. I did not need to restain the rim top and edge because with polishing the match is very good. I rubbed the bowl down with Before & After Restoration Balm. I worked it into the surface of the bowl sides and shank with my fingertips. The product works to clean, enliven and protect the briar. I let the balm sit for a little while and then buffed with a cotton cloth to raise the shine. I set the bowl aside and turned my attention to the stem. I sanded it smooth with 220 grit sandpaper. I started polishing it with 600 grit wet dry sandpaper.I polished the stem with micromesh sanding pads – wet sanding with 1500-12000 grit pads. I wiped the stem down after each sanding pad with Obsidian Oil. I polished it with Before & After Pipe Stem Polish – both Fine and Extra Fine. I gave it a coat of Obsidian Pipe Stem Oil. It works to protect the stem from oxidizing. I set it aside to dry. Once again at this point in the restoration process I am excited to be on the homestretch. I look forward to the final look when the Republic Era Peterson’s “Kildare” 86 Apple with a saddle stem is put back together, polished and waxed. I put the bowl and stem back together. I lightly polished the bowl and stem with Blue Diamond to polish out the scratches in the briar and the vulcanite. I gave the bowl and the stem multiple coats of carnauba wax. I buffed the pipe with a clean buffing pad to raise the shine. I hand buffed it with a microfiber cloth to deepen the shine. The pipe polished up pretty nicely. The grain really pops with the wax and polish. The shiny black vulcanite stem is a beautiful contrast to the browns of the bowl and thick shank. This Republic Era Peterson’s “Kildare” 86 Apple was another fun pipe to work on. It is a nice piece of briar that cleaned up really well. The pipe feels great in the hand will be better when warmed up while smoking. The finished pipe is shown in the photos below. The dimensions of the pipe are Length: 5 ½ inches, Height: 1 ½ inches, Outside diameter of the bowl: 1 inch, Chamber diameter: ¾ of an inch. The weight of the pipe is 1.09 ounces/31 grams. I will be putting it on the rebornpipes store in the Irish Pipemakers Section if you would like to add it to your rack and carry on the previous pipeman’s legacy. This is an interesting estate to bring back to life.

As always, I encourage your questions and comments as you read the blog. Thanks to each of you who are reading this blog. Remember we are not pipe owners; we are pipe men and women who hold our pipes in trust until they pass on into the trust of those who follow us.

Restoring a Republic Era Petersons “Kildare” 87S Apple with a Saddle Stem


Blog by Steve Laug

The next pipe I have chosen is smooth finished Peterson’s “Kildare” Apple shaped pipe that had a very dirty/grimy finish but had some good-looking grain around the bowl sides and shank. Both Jeff and I have no memory of where we picked up this pipe. Was it a trade or a pipe hunt find? Could easily have been either one. This Lightweight Apple was stamped on the left side of the shank and read Peterson’s [over] “Kildare”. It was stamped on the right side and read Made in the Republic of Ireland (three lines) followed by the number 87S (faint but present) near the shank/bowl junction. I believe the “S” is for the saddle stem designation. The pipe was filthy when I brought it to the table. There was grime ground into the briar sides and rim. There was a minimal cake in the bowl but there was still a coat of lava on the rim top but the edges of the bowl. The inner edge of the bowl was thickly coated in lava and it was hard to know how the rim top and edges looked underneath. The stem was dirty with oxidation and calcification on it. There were light tooth marks and chatter on the top and underside on and near the button. There was a light “P” stamp logo on left side of the saddle stem. I took photos of the pipe before my cleanup work. They tell the story and give a glimpse of the promise that we see in this pipe. I took photos of the rim top and stem to show the general condition of the pipe. The bowl has been but the rim top has a lava coat flowing down the outside of the bowl and the inner edge. The finish on the bowl is rough around the outer edge but I will know more once it is cleaned up. The photos of the stem show the oxidation, calcification and light tooth marks and chatter on both sides near the button. The P-Lip button and edges look good.I took photos of the sides of the shank to show the stamping. The stamping is faint but readable in the photos below and is as noted above. There is a “P” logo stamp on the left side of the saddle stem. It is faint but I am hoping that I can bring it back with white acrylic. I also removed the stem from the shank and took a photo of the parts of the pipe to give a clear picture of what I see here. I am including the information from Pipedia’s article on Peterson pipes. It is a great read in terms of the history of the brand (https://pipedia.org/wiki/Peterson). I have included a bit of the pertinent history here.

1950 – 1989 The Republic Era – From 1950 to the present time, the stamp for this era is “Made in the Republic of Ireland” in a block format generally in three lines but two lines have been used with or without Republic being abbreviated.

During the 1950’s and 60’s the Kapp & Peterson Company was still in the ownership of the Kapp family. However, 1964 saw the retiral of the company Managing Director Frederick Henry (Harry) Kapp.

I turned to “The Peterson Pipe” by Mark Irwin and Gary Malmberg to get some background on the Peterson’s System Line. On page 314 it had the following information.

Kildare (1965-) First issue of line with matte-finish in Classic Range shapes, P-Lip and fishtail mouthpiece. Second issue C.1979 as Kildare Patch, with rusticated patches on pipe surface. Third issue 2010, matte-brown, P-Lip or fishtail mouthpiece, no band. Fourth issue 2011-, burgundy sandblast finish, nickel army mount, fishtail mouthpiece, exclusive to smokingpipes.com.

Judging from the description above I believe that I am working on a First Issue of the line in the time period of 1965-1979. It is a late Republic Era Classic Shaped pipe with a matte-finish and a P-Lip stem. Now it was time to work on the pipe.

With that information at hand I turned to work on the pipe itself. Jeff had thoroughly cleaned up the pipe. He reamed the pipe with a PipNet Pipe Reamer and cleaned up the remnants with a Savinelli Fitsall Pipe Knife. I scrubbed the bowl with undiluted Murphy’s Oil Soap and a tooth brush. I rinsed it under running warm water to remove the soap and grime. The bowl was much cleaner though there were many small nicks and divots in the surface of the briar – but it was clean! I used a half wooden ball and a piece of 220 grit sandpaper to bevel and clean up the rim top. I also used a folded piece of 220 grit sandpaper to smooth out the outer edge as well and give a slight curved or crown rim top look. I filled in the many nicks and divots in the bowl surface with clear CA glue. Once it cured I smoothed them out with a medium and a fine sanding sponge. Once finished it looked much better. I cleaned out the inside of the shank and the airway in the stem with alcohol, cotton swabs and pipe cleaners. Many pipe cleaners later the airways were clear and the smell much better.I polished it with micromesh sanding pads – dry sanding with 1500-12000 grit sanding pads. I wiped it down with a damp cloth to remove the dust on the surface. I did not need to restain the rim top and edge because with polishing the match is very good. I rubbed the bowl down with Before & After Restoration Balm. I worked it into the surface of the bowl sides and shank with my fingertips. The product works to clean, enliven and protect the briar. I let the balm sit for a little while and then buffed with a cotton cloth to raise the shine. I set the bowl aside and turned my attention to the stem. I scrubbed the exterior of the stem with Soft Scrub to remove as much of the oxidation and calcification as possible. It certainly is improved!In the photos above you can see roughening on the top of the stem surface. I cleaned up the surface and there was some pitting in the surface on both sides. I filled in the pitted surface with clear CA glue. Once it cured I flattened it out with a small file and sanded it smooth with 220 grit sandpaper. I started polishing it with 600 grit wet dry sandpaper. I touched up the “P” stamp on the left side of the saddle with some white acrylic fingernail polish. Once it cured I used a worn 1500 grit micromesh pad to polish off the excess material. The stamp is faint in the vulcanite so it is quite hard to see clearly.I polished the stem with micromesh sanding pads – wet sanding with 1500-12000 grit pads. I wiped the stem down after each sanding pad with Obsidian Oil. I polished it with Before & After Pipe Stem Polish – both Fine and Extra Fine. I gave it a coat of Obsidian Pipe Stem Oil. It works to protect the stem from oxidizing. I set it aside to dry. NOTE: When I was buffing the pipe I notice a scratch on the left side the shank above the stamping that looked like a crack in the shank… I was a bit frustrated so I stopped buffing and checked it out and was relieved to see under bright light that it was a scratch and not a crack. I also removed the stem and checked the mortise end and there was no crack! I tried steaming the scratch out and was able to improve it but it is still present. There is also a small on the underside of the stem… irritating but part of the pipe’s story.

I am excited to be on the homestretch. I look forward to the final look when the Republic Era Peterson’s “Kildare” 87S Apple with a saddle stem is put back together, polished and waxed. I put the bowl and stem back together. I lightly polished the bowl and stem with Blue Diamond to polish out the scratches in the briar and the vulcanite. I gave the bowl and the stem multiple coats of carnauba wax. I buffed the pipe with a clean buffing pad to raise the shine. I hand buffed it with a microfiber cloth to deepen the shine. The pipe polished up pretty nicely. The grain really pops with the wax and polish. The shiny black vulcanite stem is a beautiful contrast to the browns of the bowl and thick shank. This Republic Era Peterson’s “Kildare” 87S Apple was another challenging pipe to work on. It is a nice piece of briar that cleaned up really well. The pipe feels great in the hand will be better when warmed up while smoking. The finished pipe is shown in the photos below. The dimensions of the pipe are Length: 5 ½ inches, Height: 1 ¾ inches, Outside diameter of the bowl: 1 inch, Chamber diameter: ¾ of an inch. The weight of the pipe is 1.13 ounces/32 grams. I will be putting it on the rebornpipes store in the Irish Pipemakers Section if you would like to add it to your rack and carry on the previous pipeman’s legacy. This is an interesting estate to bring back to life.

As always, I encourage your questions and comments as you read the blog. Thanks to each of you who are reading this blog. Remember we are not pipe owners; we are pipe men and women who hold our pipes in trust until they pass on into the trust of those who follow us.

A Daughter’s Christmas Gift – Renewing an X-Series/Continental Dr. Grabow Starfire Wire Carved Zulu


Thanks for the blog Dal. Pipe looks great.

I love the Season of Christmas when most of the world celebrates the fact that Christ was born.  When I consider the shape of the world, and our …

A Daughter’s Christmas Gift – Renewing an X-Series/Continental Dr. Grabow Starfire Wire Carved Zulu

A new old stock (NOS) Wally Frank


Thanks John for a well written piece on a unique pipe.

Briar Wind-capped Horn Restoration Written and photographed by John M. Young Wally Frank is a most enigmatic (AKA: crazy cool) figure in the history …

A new old stock (NOS) Wally Frank

Restoring a Worn and Tired Republic Era Peterson’s System Standard 317


Blog by Steve Laug

Jeff and I both have no idea where we picked up this pipe. We have no real memory of it but it is obvious that Jeff had cleaned it up sometime in its journey. It was stamped on the left side of the shank and read Peterson’s [over] System [over] Standard. On the right side it is stamped and reads Made in the Republic of Ireland (three lines) with the shape number 317 underneath. The pipe was a tired old workhorse with a worn finish. The bowl was also clean and there was no cake or damage on the bowl walls. The rim top was clean but there was some darkening on the top and on the inner and outer edge of the bowl. The nickel ferrule was tired and dull. It was stamped K&P [over] Peterson and there were no dents in the nickel ferrule. The stem was very clean with a light oxidation and light tooth marks and chatter on the top and underside. There was a faint “P” logo on the stem side. It had also straightened out over time and would need to be bent to fit the flow of the pipe. I took these photos before I started my clean up work to give an idea of the condition of the pipe. I took photos of the rim top and bowl as well as the stem to give a sense of the condition of both. The rim top had some scratching on the top and damage to the inner edge and rim top. The stem cleaned up well and the tooth marks on the top and underside ahead of the button are light and should clean up easily.I took photos of the stamping on the sides of the shank and on the ferrule and stem. It is readable but faint in places. I took the stem out of the shank and took a photo of the overall look of the pipe. I remembered that Paresh had restored a Peterson’s System Standard (his was a 314) earlier this year and as usual had done good work on the research. I turned to his blog and read through his work on the pipe (https://rebornpipes.com/2021/07/24/helping-a-fellow-piper-with-his-dream-pipea-petersons-system-pipe/). I quote below from the section on his blog regarding the dating of the pipe.

While dating a Peterson’s pipe, I always fall back to my under mentioned favorite site; http://thepetersonpipeproject.blogspot.com/2007/07/dating-peterons-pipes.html  I quote from the above site.

Stamping of Bowl: During the years of Kapp and Peterson’s business operations, the country of Ireland has undergone several name changes and K&P’s stamping on their pipes reflects these changes. Knowing these changes, a Peterson pipe can be roughly dated and placed in “eras.”

  • The Republic Era is from 1949 until the present. The Republic of Ireland was formed on 17 April 1949. From 1949 to present the stamp for this era is “Made in the Republic of Ireland” in a block format generally in three lines but two lines have been used with or without Republic being abbreviated.

With that information at hand I turned to work on the pipe itself. I decided to start my work on the pipe by addressing the damage on the inside edge of the bowl and the rim top. I used a folded piece of 220 grit sandpaper to give the inner edge a slight bevel to remove the darkening and clean up the rim top. I wiped the top and edges down with a damp cloth and the rim top and edges looked much better. I polished the briar with micromesh sanding pads – dry sanding with 1500-12000 grit pads. I wiped the bowl down after each pad with a damp cloth. I did not need to restain the rim top and edge because with polishing the match is very good. I rubbed the bowl down with Before & After Restoration Balm. I worked it into the surface of the bowl sides and shank with my fingertips. The product works to clean, enliven and protect the briar. I let the balm sit for a little while and then buffed with a cotton cloth to raise the shine. I set the bowl aside and turned to work on the stem. I decided to start by rebending the stem. I heated it with the flame of a lighter to soften the vulcanite and when it was soft I bent it to the correct angle. It looked much better.I repaired the tooth marks on the top of the stem with clear CA glue. There were two deeper marks that I could not lift. This took care of those on the top side. There were none on the underside. Once it cured I sanded the repairs smooth with 220 grit sandpaper and cleaned up the light marks on the underside at the same time. I started polishing the stem with 600 grit wet dry sandpaper. I polished the stem with micromesh sanding pads – 1500-12000 grit pads. I wiped it down with Obsidian Oil after each sanding pad. I continued polishing the stem using Before & After Pipe Polish – both Fine and Extra Fine to further it. I wiped it down with Obsidian Oil and set it aside to dry. This Republic Era Peterson’s System Standard 317 Bent Billiard with a vulcanite stem is a great looking pipe now that it has been restored. The beautiful grain that shines through the polished finish is stunning. The dents in the rotated nickel ferrule really are a part of the story of the pipe and one that was unchangeable. It carries on to the next pipeman or woman who takes on the trust. As the pipe is smoked the patina should darken and look even better. I put the stem back on the bowl and carefully buffed the pipe with Blue Diamond on the buffing wheel. I gave the bowl and the stem multiple coats of carnauba wax on the buffing wheel and followed that by buffing the entire pipe with a clean buffing pad. I hand buffed the pipe with a microfiber cloth to deepen the shine. The finished Peterson’s System Standard 317 Bent Billiard fits nicely in the hand and feels great. Give the finished pipe a look in the photos below. The dimensions of the pipe are Length: 5 inches, Height: 1 ½ inches, Outside diameter of the bowl: 1 inch, Chamber diameter: ¾ of an inch. The weight of the pipe is 33 grams/1.16 ounces. I will soon be adding it to the rebornpipe store in the Irish Pipe Makers Section. If you are interested in this pipe send me a message or an email. Thanks for reading this blog and my reflections on the pipe while I worked on it. There are many more to come!

Restoring a Worn and Tired Republic Era Peterson’s System Standard 303


Blog by Steve Laug

Jeff and I both have no idea where we picked up this pipe. We have no real memory of it but it is obvious that Jeff had cleaned it up sometime in its journey. It was stamped on the left side of the shank and read Peterson’s [over] System [over] Standard. On the right side it is stamped and reads Made in the Republic of Ireland (three lines) with the shape number 303 underneath. The pipe was a tired old workhorse with a worn finish. The bowl was also clean and there was no cake or damage on the bowl walls. The rim top was clean but there was some darkening on the top and on the inner and outer edge of the bowl. The nickel ferrule was tired and had dents on the top and bottom. It was stamped K&P [over] Peterson and the stamp had been turned. Somewhere along the way it was glued on the shank end. It was not movable. The stem was very clean with a light oxidation and light tooth marks and chatter on the top and underside. I took these photos before I started my clean up work to give an idea of the condition of the pipe.  I took photos of the rim top and bowl as well as the stem to give a sense of the condition of both. The rim top had some scratching on the top and damage to the inner edge and rim top. The stem cleaned up well and the tooth marks on the top and underside ahead of the button are light and should clean up easily.I took photos of the stamping on the sides of the shank and on the ferrule and stem. It is readable but faint in places. I took the stem out of the shank and took a photo of the overall look of the pipe. I remembered that Paresh had restored a Peterson’s System Standard (his was a 314) earlier this year and as usual had done good work on the research. I turned to his blog and read through his work on the pipe (https://rebornpipes.com/2021/07/24/helping-a-fellow-piper-with-his-dream-pipea-petersons-system-pipe/). I quote below from the section on his blog regarding the dating of the pipe.

While dating a Peterson’s pipe, I always fall back to my under mentioned favorite site; http://thepetersonpipeproject.blogspot.com/2007/07/dating-peterons-pipes.html  I quote from the above site.

Stamping of Bowl: During the years of Kapp and Peterson’s business operations, the country of Ireland has undergone several name changes and K&P’s stamping on their pipes reflects these changes. Knowing these changes, a Peterson pipe can be roughly dated and placed in “eras.”

  • The Republic Era is from 1949 until the present. The Republic of Ireland was formed on 17 April 1949. From 1949 to present the stamp for this era is “Made in the Republic of Ireland” in a block format generally in three lines but two lines have been used with or without Republic being abbreviated.

With that information at hand I turned to work on the pipe itself. I tried to remove the nickel ferrule. I heated it, put it in the refrigerator, painted the joint of the briar and the ferrule with acetone and none of them worked. The ferrule had been obviously epoxied in place and there was nothing I could do to remove it. The dents in the ferrule would remain with the pipe as a part of its journey. There were also sharp edges on the ferrule end that I would need to smooth out to keep from damaging the vulcanite. It was turned to the left leaving the stamping on the ferrule on the left underside.

I decided to start my work on the pipe by addressing the damage on the inside edge of the bowl and the rim top. I used a folded piece of 220 grit sandpaper to give the inner edge a slight bevel to remove the darkening and clean up the rim top. I wiped the top and edges down with a damp cloth and the rim top and edges looked much better. I polished the briar with micromesh sanding pads – dry sanding with 1500-12000 grit pads. I wiped the bowl down after each pad with a damp cloth. I did not need to restain the rim top and edge because with polishing the match is very good. I rubbed the bowl down with Before & After Restoration Balm. I worked it into the surface of the bowl sides and shank with my fingertips. The product works to clean, enliven and protect the briar. I let the balm sit for a little while and then buffed with a cotton cloth to raise the shine. I used a folded piece of 220 grit sandpaper to smooth out the sharp edge of the ferrule. I polished the ferrule end with micromesh sanding pads. I buffed it with a jewellers cloth to protect and to raise the shine in the nickel. You can see the dents and the rotated ferrule in the photos below but it is still quite nice. I set the bowl aside and turned to work on the stem. I polished the stem with micromesh sanding pads – 1500-12000 grit pads. I wiped it down with Obsidian Oil after each sanding pad. I continued polishing the stem using Before & After Pipe Polish – both Fine and Extra Fine to further it. I wiped it down with Obsidian Oil and set it aside to dry.This Republic Era Peterson’s System Standard 303 Bent Apple with a vulcanite stem is a great looking pipe now that it has been restored. The beautiful grain that shines through the polished finish is stunning. The dents in the rotated nickel ferrule really are a part of the story of the pipe and one that was unchangeable. It carries on to the next pipeman or woman who takes on the trust. As the pipe is smoked the patina should darken and look even better. I put the stem back on the bowl and carefully buffed the pipe with Blue Diamond on the buffing wheel. I gave the bowl and the stem multiple coats of carnauba wax on the buffing wheel and followed that by buffing the entire pipe with a clean buffing pad. I hand buffed the pipe with a microfiber cloth to deepen the shine. The finished Peterson’s System Standard 303 Apple fits nicely in the hand and feels great. Give the finished pipe a look in the photos below. The dimensions of the pipe are Length: 5 ½ inches, Height: 1 ½ inches, Outside diameter of the bowl: 1 ¼ inches, Chamber diameter: ¾ of an inch. The weight of the pipe is 44 grams/1.55 ounces. I will soon be adding it to the rebornpipe store in the Irish Pipe Makers Section. If you are interested in this pipe send me a message or an email. Thanks for reading this blog and my reflections on the pipe while I worked on it. There are many more to come!