Blog by Steve Laug
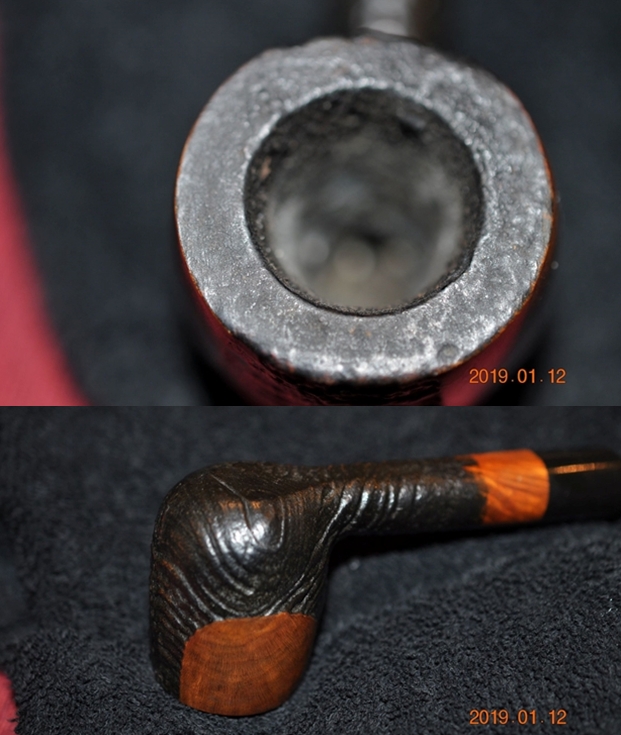
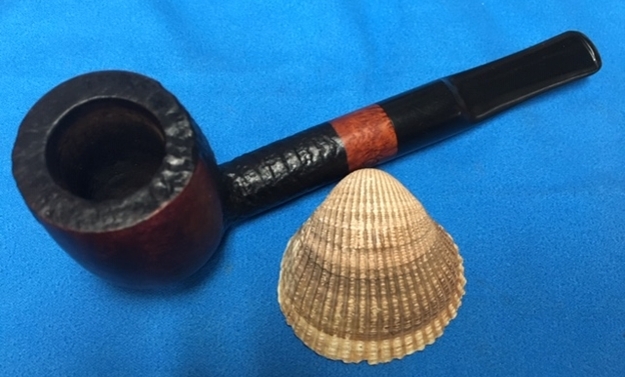
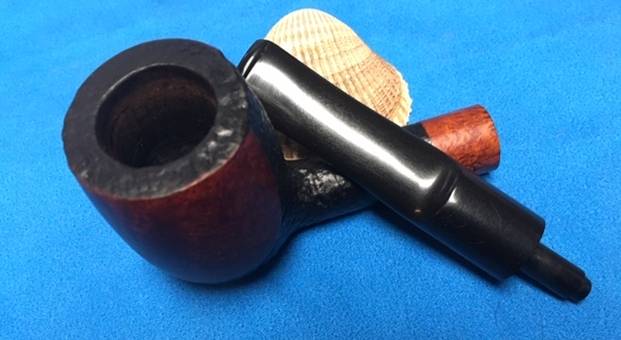
The next pipe in the queue is a beautiful hand made Butz Choquin Calabash with both a rusticated and smooth finish. The cap and a patch on the left side of the bowl are rusticated while the rest is smooth. There is a horn shank extension that sets off the bowl from the black vulcanite stem. It came to my brother and me in the lot that included a pipe cabinet and 21 pipes. The finish is a rich brown with black undertones and the rustication shows black in the grooves and valley while the high spots are brown. The left side of the shank is stamped Butz Choquin ovwe Maitre Pipier and the right side is stamped Fait Main over St Claude France. It is a unique piece like many of those in this lot. It is on set out in front of the cabinet’s first shelf, the first pipe from the left in the photo below. I have circled it in red to make it easier to identify. The finish on the pipe is dirty but looks good under the grime. I look forward to seeing it cleaned. There is a thick cake in the bowl and a lava overflow onto the rustication on the rim top. Both the inner and outer edges of the rim appear to be in good condition but because of the cake and tars it is hard to know what the inner edge looks like. Jeff took photos of the pipe before cleaning it. The photos give a pretty clear picture of the shape of the pipe and its general condition when we received it.
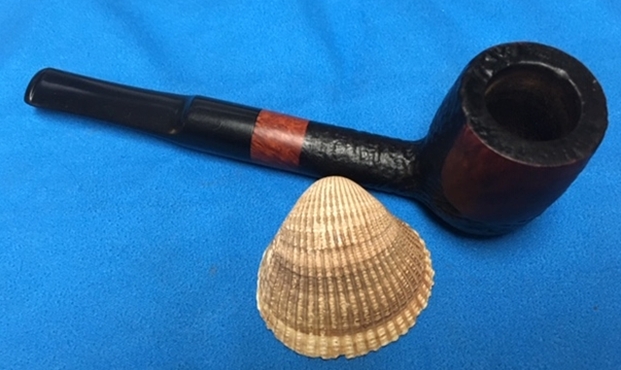
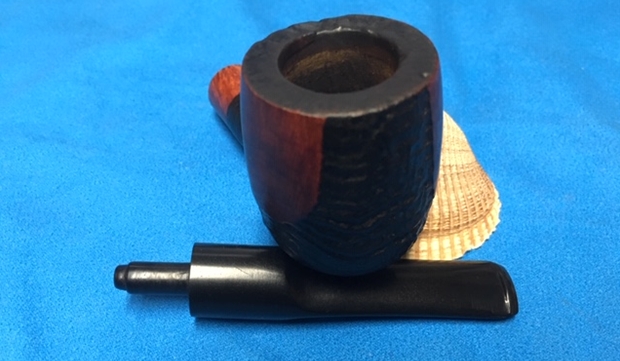
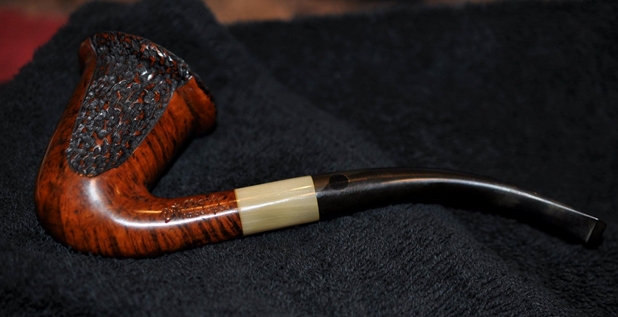 Jeff took some photos of the bowl/rim top and the sides and bottom of the bowl to give and idea of the condition and the shape. The rustication pattern on the rim top is filled in with lava on the back and left side with dust and grime the rest of the way around the bowl. The cake is very thick. The rest of the photos show the condition of the rest of the bowl. It is a beautifully finished pipe with contrast stains of blacks and medium brown. They work well with the horn shank extension and the pattern of the rustication on the rim and left side of the bowl.
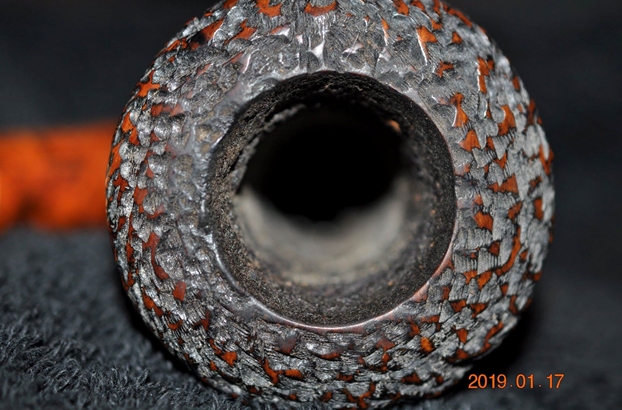

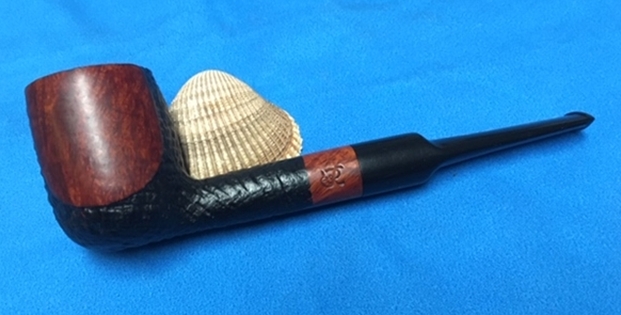
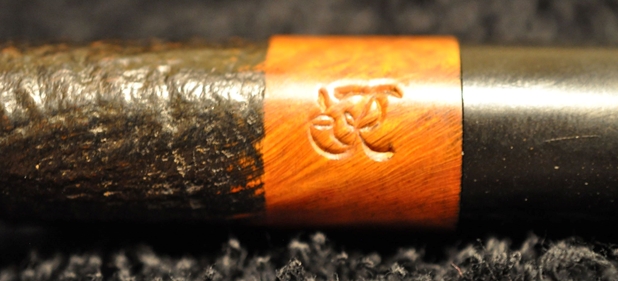
 He also took photos of the stamping on the left side of the shank. The left side was clear and readable. It read Butz Choquin over Maitre Pipier. On the right side of the shank it was stamped Fait Main over St. Claude France, though Jeff did not include that photo. There was a clear circle on the left side of the stem that generally held a BC inside the epoxy but this one is empty.
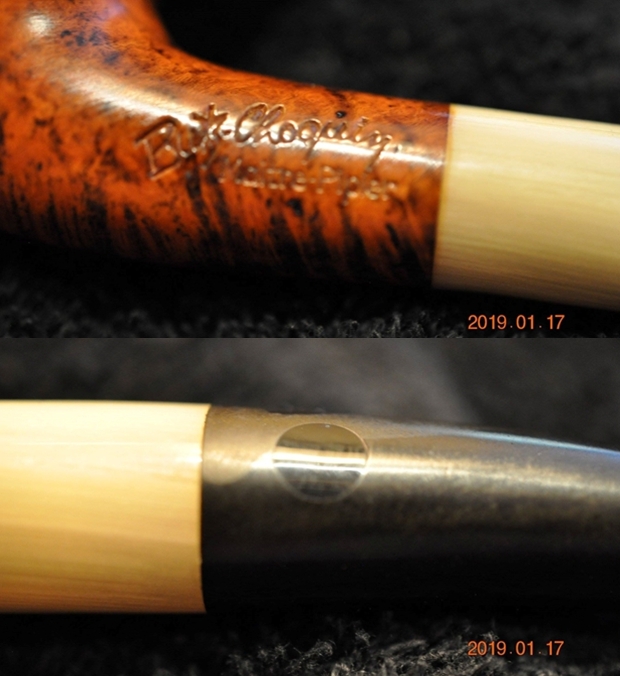 The stem had some deep scratching in the surface ahead of the button and some small tooth marks next to the button. There was also wear on the sharp edge of the button.
 Butz Choquin was a brand that I was familiar with having worked on quite a few of them over the years. I decided to check on a few sites to refresh the memory of the brand. I turned first to Pipephil and as usual the site gives a great summary. (http://www.pipephil.eu/logos/en/logo-butzchoquin.html). I quote:
The origin of the brand reaches back to 1858 when Jean-Baptiste Choquin in collaboration with his son-in-law Gustave Butz created their first pipe in Metz (France). Since 1951 Butz-Choquin Site officiel Butz Choquin, pipes de Saint-Claude jura. BC pipe de bruyere luxe is a brand of the Berrod-Regad group (Saint-Claude, France).
I also found the line of Fait Main Maitre Pipier pipes listed. The pipe I am working on is stamped the same way as the one in the screen capture below. The shape is different but the rest is the same. The capture has a small paragraph on the line that reads as follows: Pipes of the “Maitre Pipier” séries were crafted by Paul Lanier until he retired and after him by Alain Albuisson. I turned then to Pipedia to see what I could find out there (https://pipedia.org/wiki/Butz-Choquin). I quote the article in its entirety as it gives a clear history.
The pipe, from Metz to Saint-Claude. Jean-Baptiste Choquin of Metz started out as a tobacconist. This enterprise was prosperous; he had several employees. Among those, there was a certain Gustave Butz who was its first workman and who became his son-in-law by marrying Choquin’s daughter Marie in 1858.
In 1858 Jean-Baptiste Choquin created, in collaboration with Gustave Butz, the Choquin pipe. This bent pipe with a flat-bottomed bowl was finished with an albatross-bone mouthpiece, fixed with silver rings.
In 1858, still in Metz, Gustave Butz built an establishment for the manufacture of the Choquin pipe which took the name of . In 1951, the Berrod-Regad company bought the trademark, continuing manufacture until 2002. Departing from Metz, the workshop was relocated to Saint-Claude, then also called “the world capital of the briar pipe,” under the Berrod-Regad group. The Berrod-Regad group would go on to completely rebuild the network of representatives until finally entering the export market in 1960 and has since won several prizes, as well as the Gold Cup of French good taste.
In a few years, the brand’s collection increased from ten to seventy series. 135 years after it was founded, the pipe is still well-known not only in France but throughout the world. In 2002, the Berrod family, wishing to preserve manufacture of pipes in Saint-Claude, handed over the company to Fabien Guichon, a native of the area, who will continue to develop the brand during the 21st century.
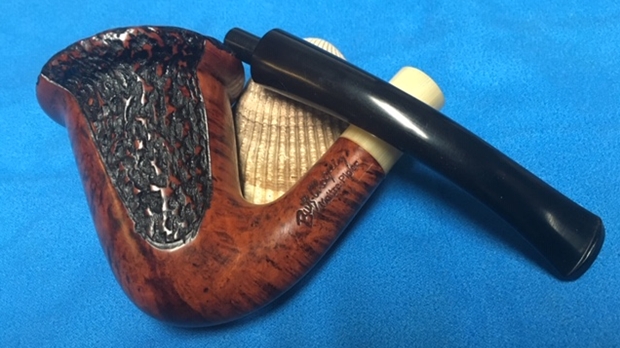
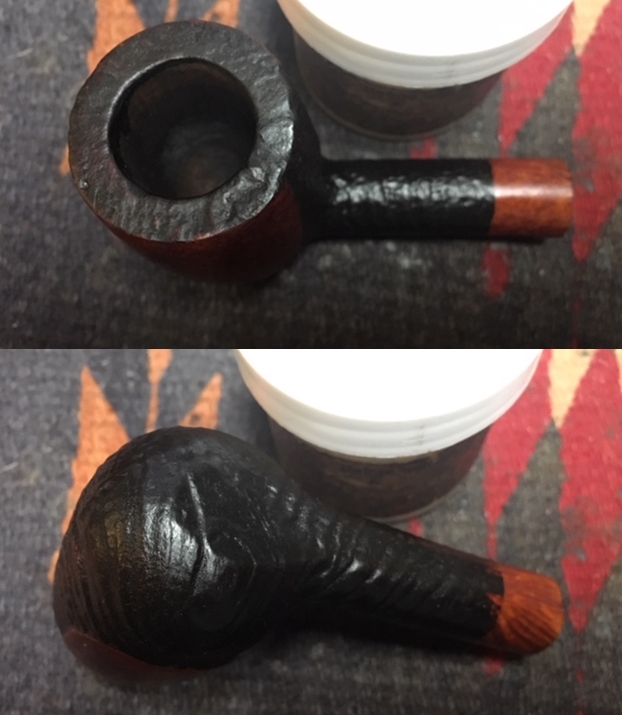
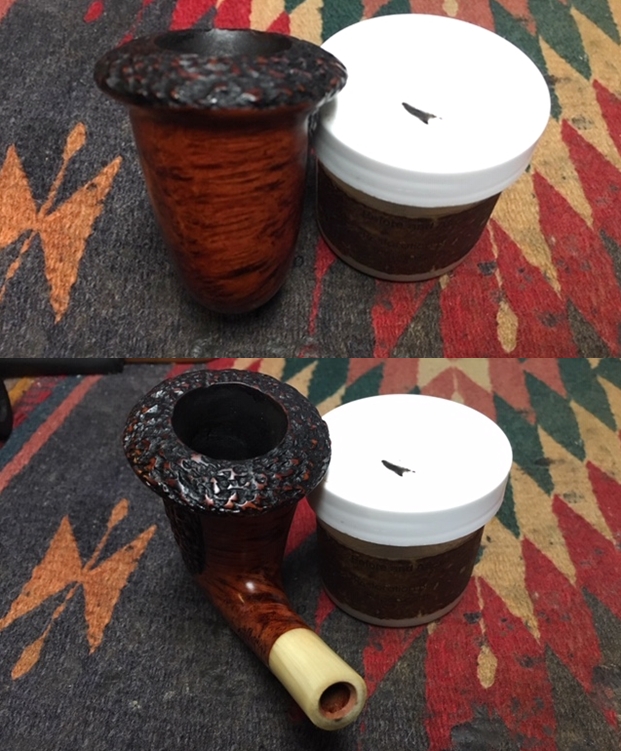
Jeff reamed the bowl with a PipNet pipe reamer and followed up with a Savinelli Fitsall pipe knife to remove the cake. He scrubbed out the mortise and the airway in the shank and the stem with alcohol, cotton swabs and pipe cleaners. He scrubbed the exterior of the bowl, rim, shank and stem with a tooth brush and Murphy’s Oil Soap to remove the oils and tars on the rim and the grime on the finish of the bowl of the pipe. He rinsed it off under running water. He dried it off with a soft cloth. He was able to remove all of the lava build up on the rim top of the pipe. The rim top looked really good with no damage to the edges of the bowl or the top. I took photos of the pipe to show its condition before I started my work. 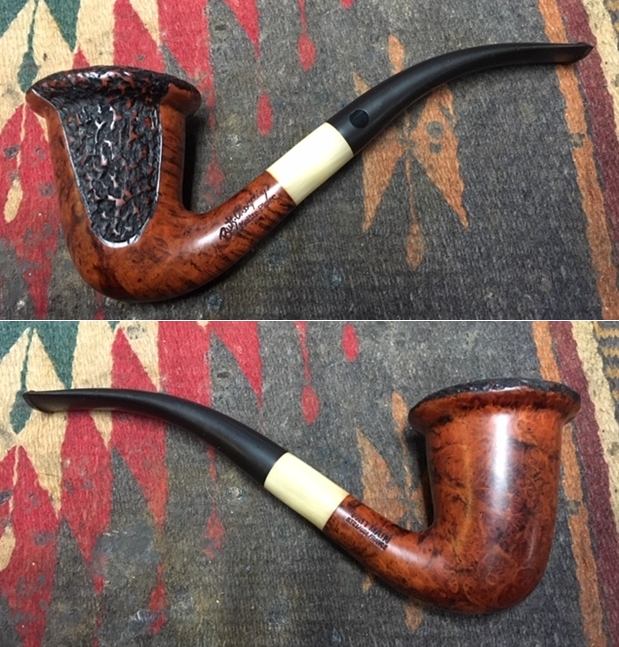
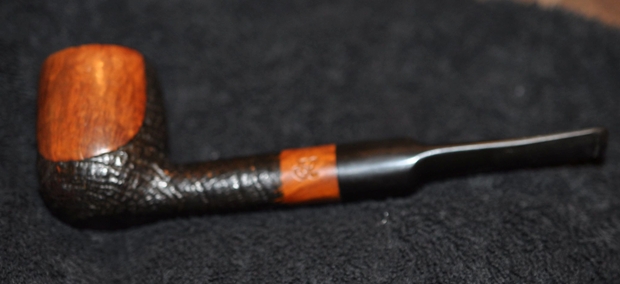
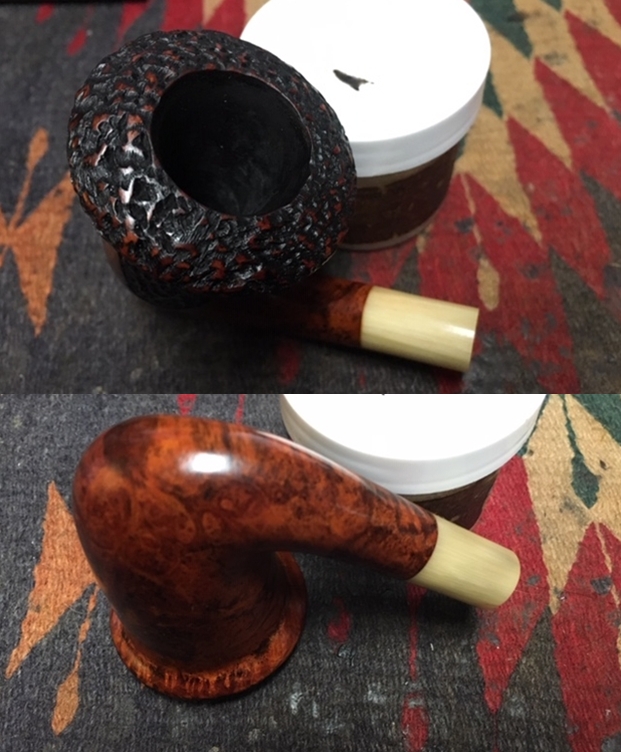
 I took a close up photo of the rim top to show how clean the top came out after Jeff worked it over. The outer edge and inner edges are clean and undamaged. The stem photos show some light tooth marks and chatter on the surface on both sides.
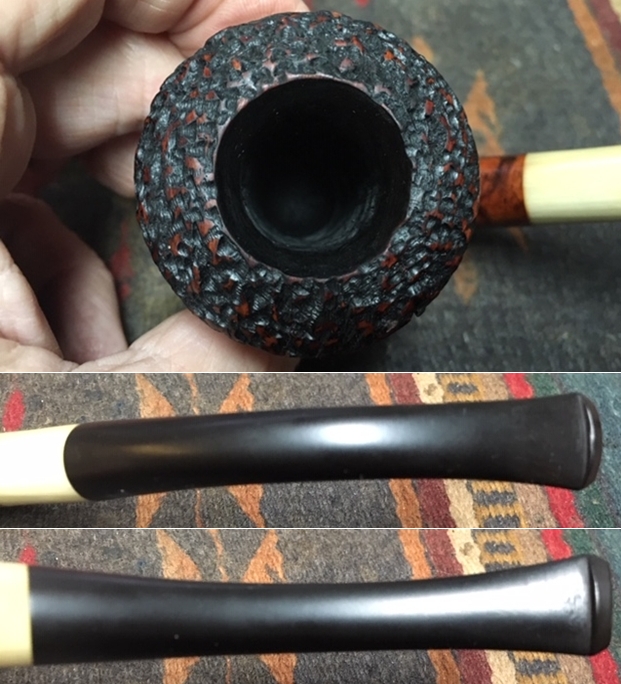 I took photos of the stamping to document what it looked like at this point in our cleanup process. You can also see some of the fills in the bowl and shank.
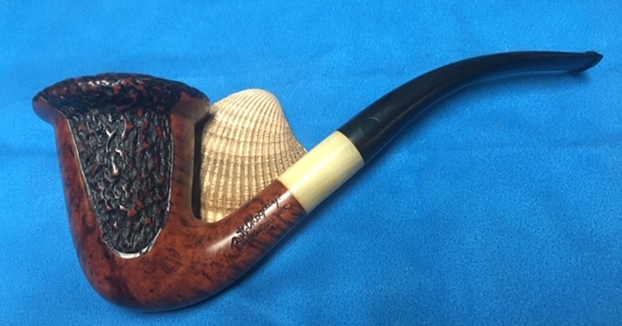
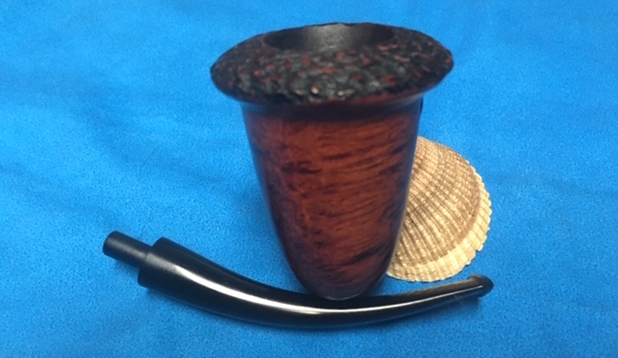
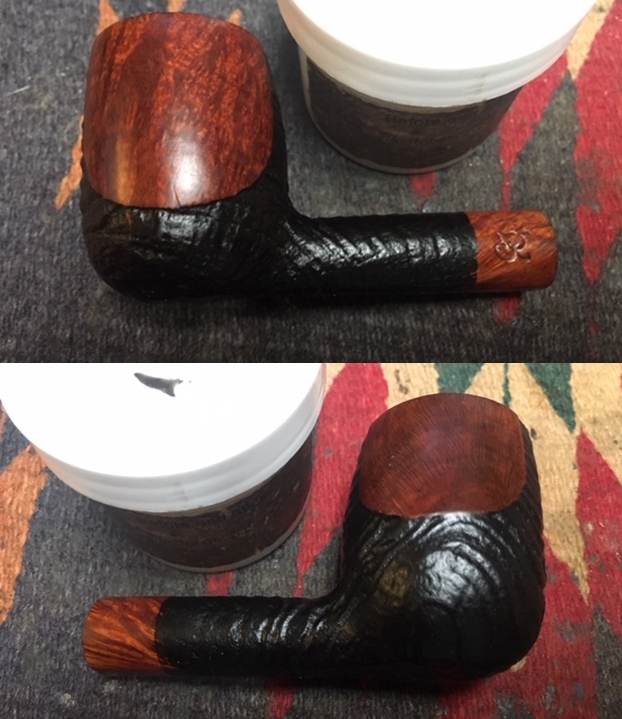
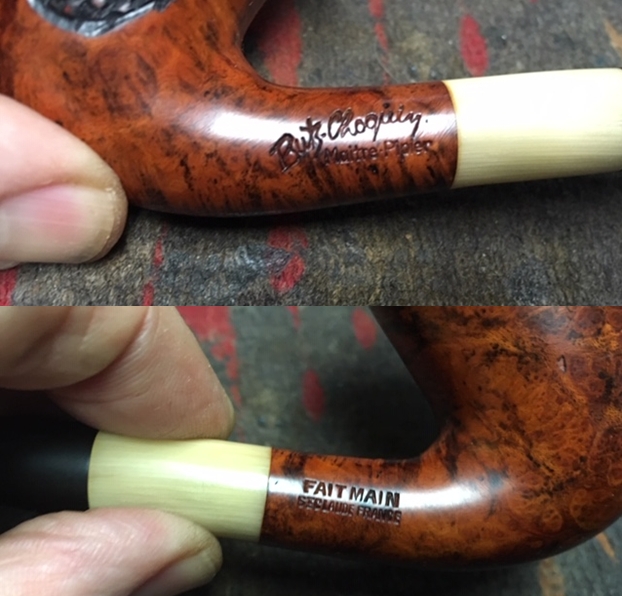 With the rim top and bowl looking so good after Jeff’s cleanup work this pipe did not need any work on the briar. I worked some Before & After Restoration Balm into the surface of the smooth and rusticated briar with my fingertips to clean, enliven and protect it. I let the balm sit for a little while and then buffed with a cotton cloth to raise the shine. The following photos show the bowl at this point in the restoration process. The rusticated patch on the left side of the bowl and the rim top look really good. The smooth finish has a great contrasting stain and looks very good. I am very happy with the results.
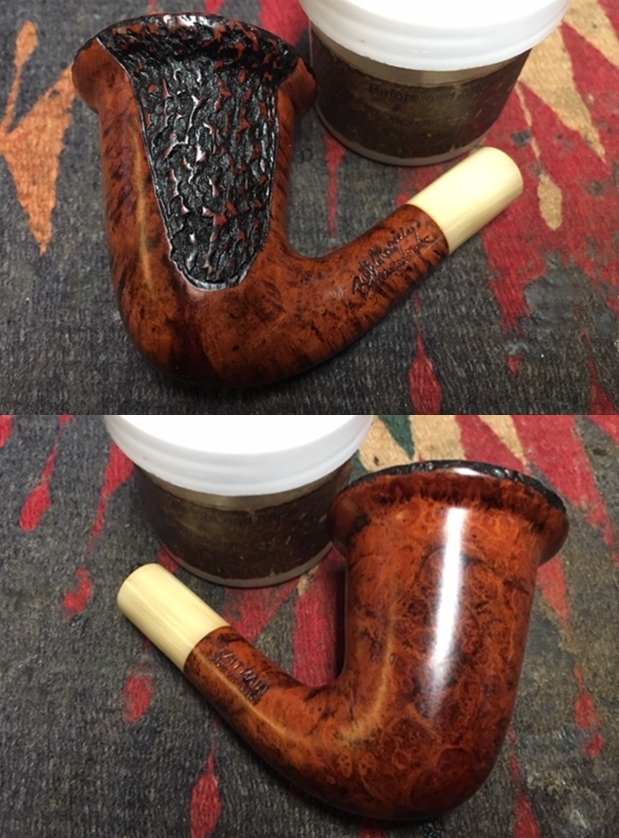
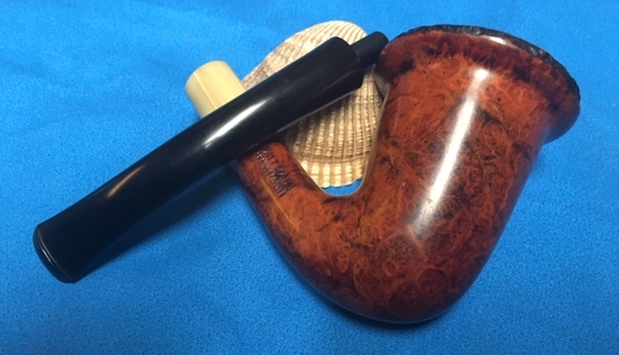
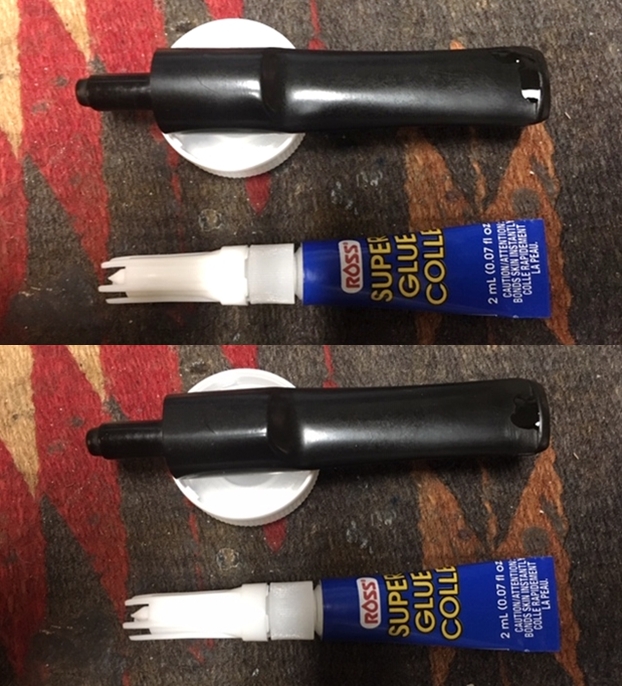
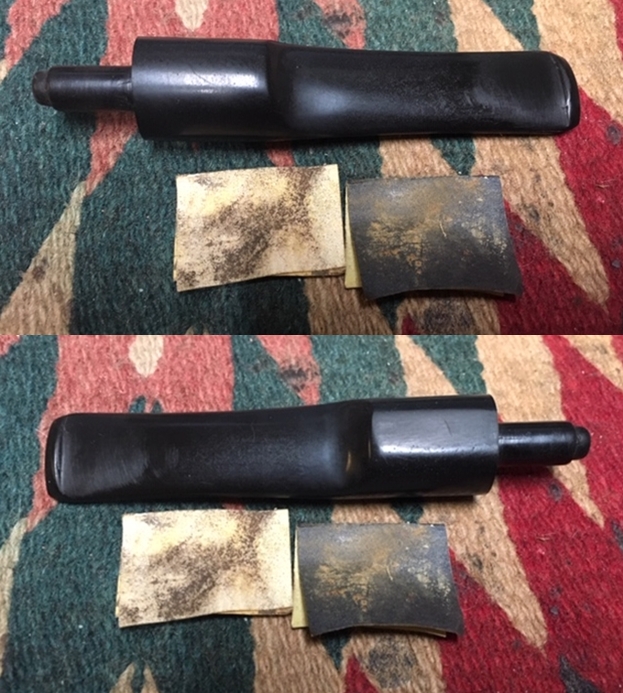
 With the bowl finished I set it aside and turned my attention to the stem. I sanded the tooth chatter and marks on the stem with 220 grit and 400 grit sandpaper to blend them into the surface. I took a photo of the left side of the stem to show the missing BC inside the clear insert.
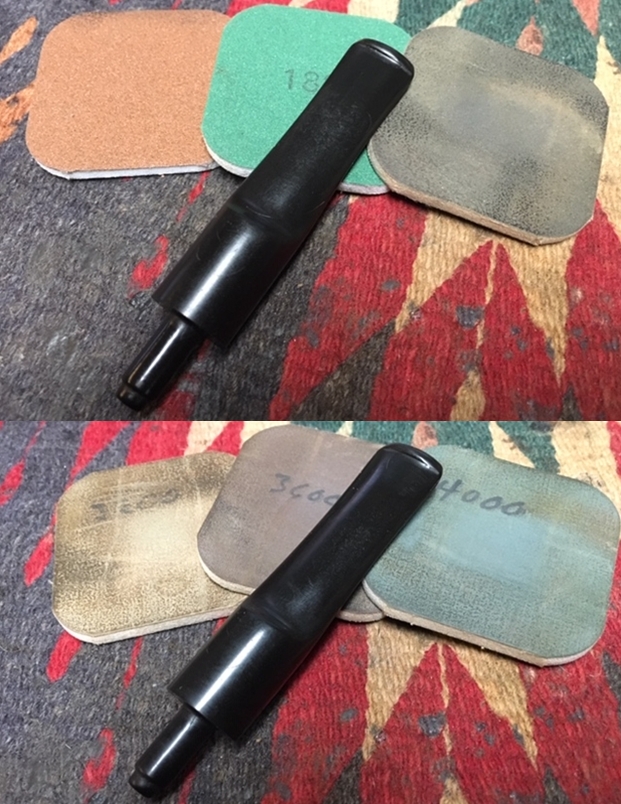
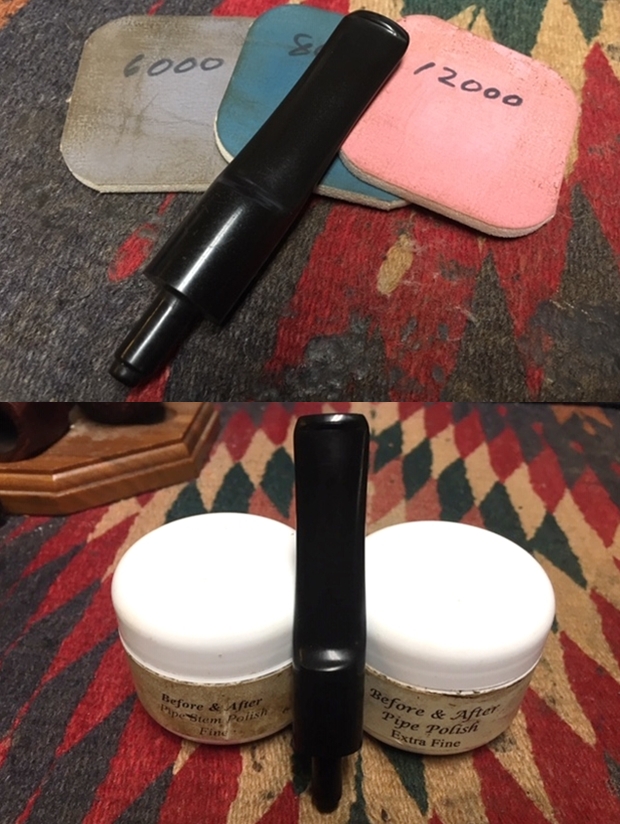
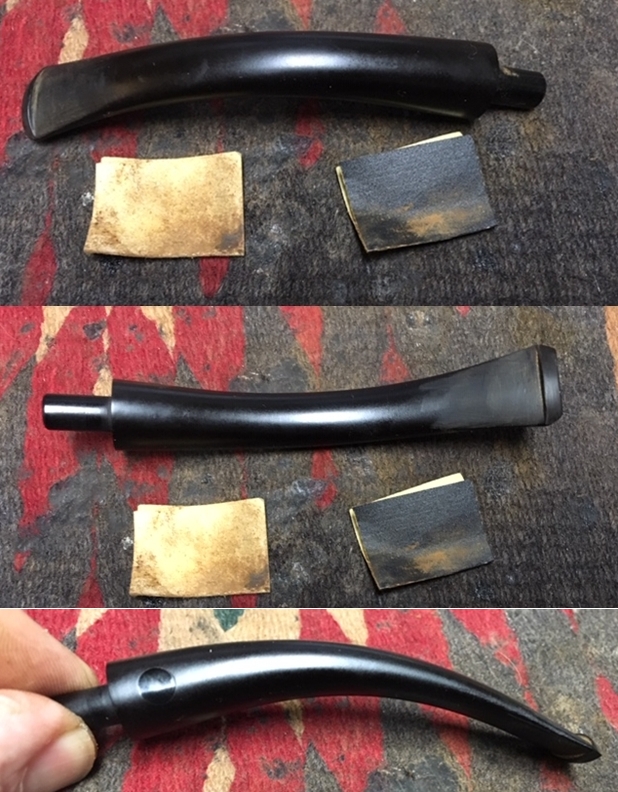 I polished the stem with micromesh sanding pads – wet sanding it with 1500-2400 grit pads and dry sanding it with 3200-12000 grit pads. I wiped the stem down with Obsidian Oil after each pad. I further polished it with Before & After Pipe Polish – both Fine and Extra Fine. I gave it a final coat of Obsidian Oil and set it aside to dry.
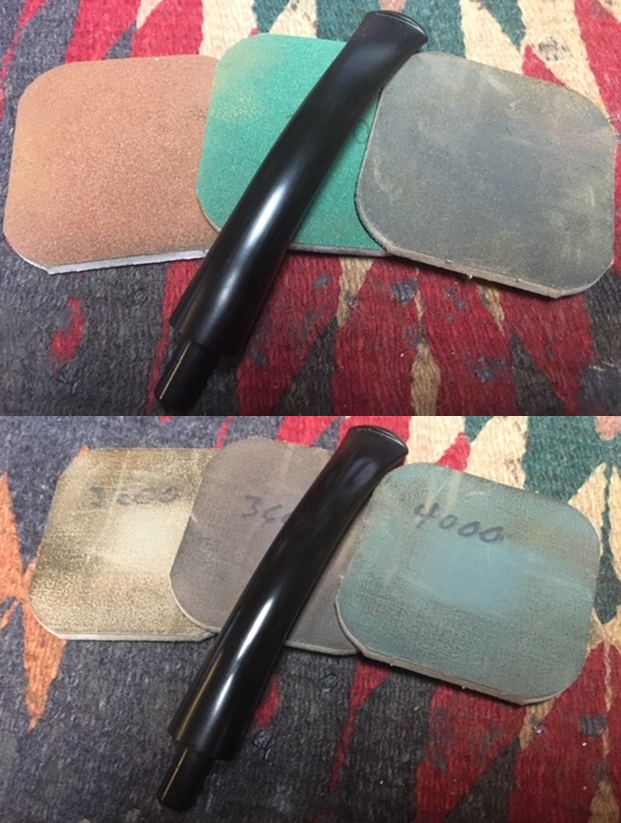
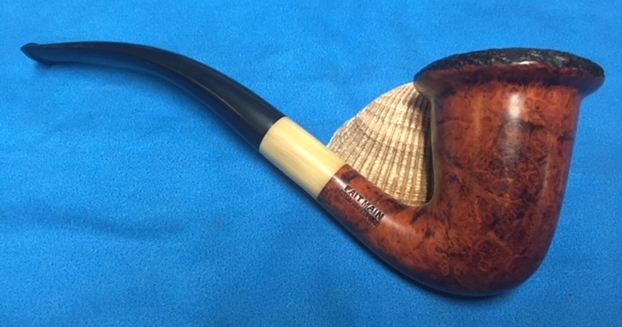
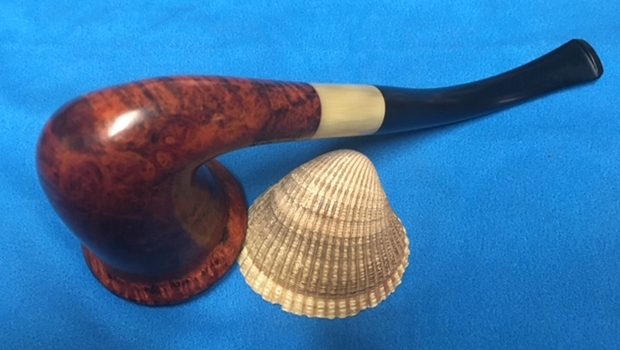
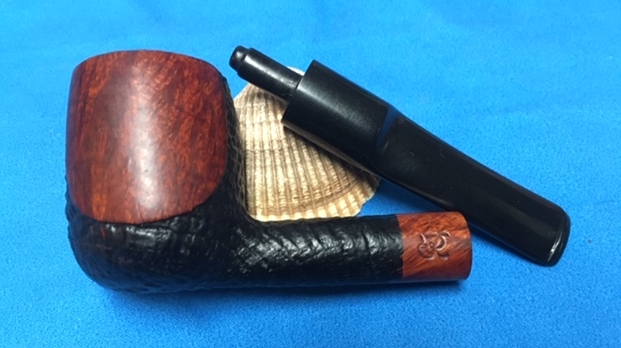
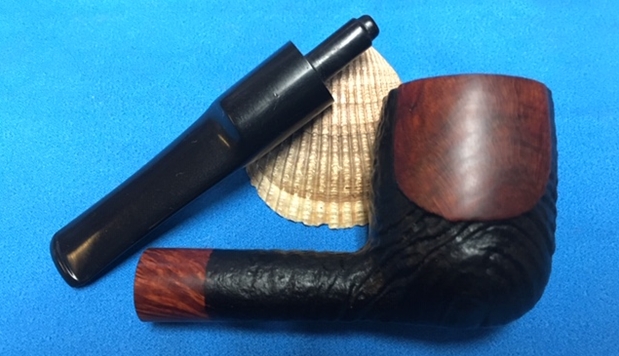
 This beautiful calabash with the rusticated cap and the patch on the left of the bowl was truly stunning. I polished stem and the bowl with Blue Diamond polish on the buffing wheel. I gave the smooth parts of the bowl and the stem multiple coats of carnauba wax. I hand waxed the rusticated patch and cap with Conservator’s wax. I buffed the pipe with a clean buffing pad to raise the shine. I hand buffed it with a microfiber cloth to deepen the shine. The pipe polished up pretty nicely. The contrasting black and brown stain made the grain come alive with the buffing. It looked very good with the horn shank extension and the polished black vulcanite stem. The finished pipe is a beauty and feels great in the hand. Have a look at it with the photos below. The dimensions are Length: 7 inches, Height: 2 5/8 inches, Outside diameter of the bowl: 2 inches, Chamber diameter: 1 inch. I will be putting this beautiful briar calabash on the rebornpipes online store soon. It may well the kind of unique pipe you have been looking for so have a look. Thanks for walking through this restoration with me.