Blog by Dal Stanton
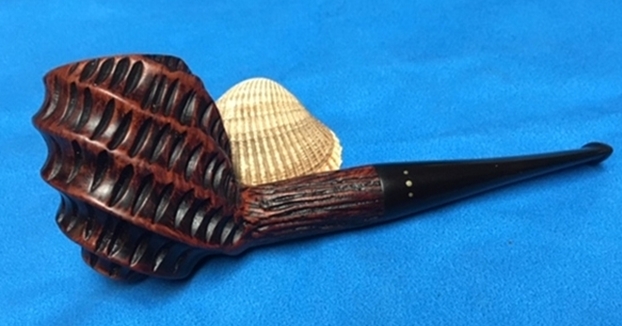
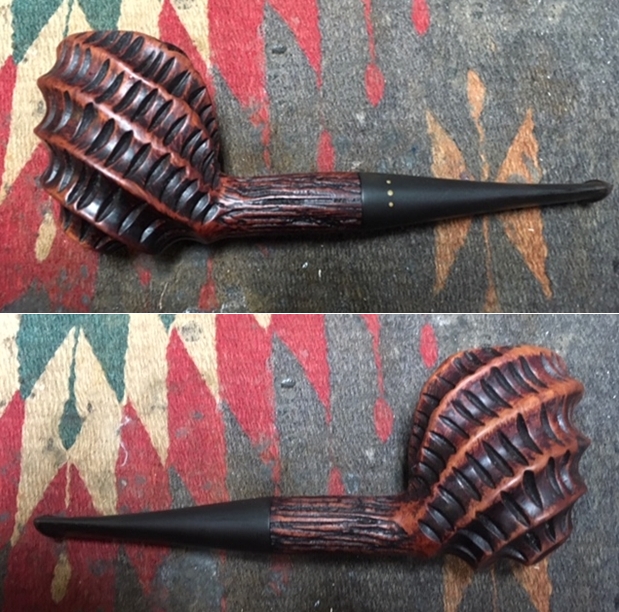
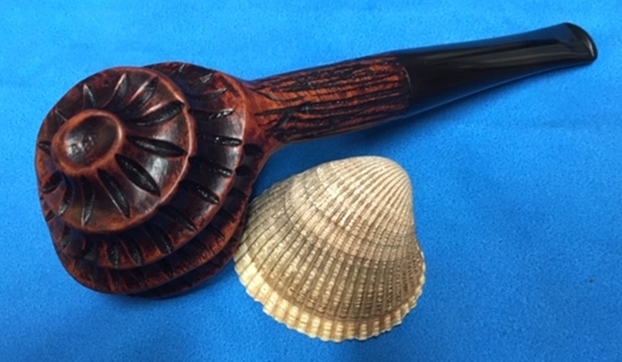
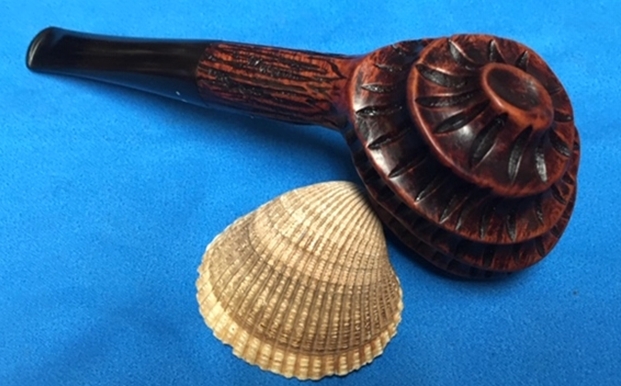
This is the second of 3 pipes that Todd commissioned. I saw this GBD New Era long shank Pot or possibly a wide bowled Lovat, on the eBay block and liked it immediately. It has seen some serious wear and tear, but he is obviously well loved, and the grain…. Oh my, the vertical grain on the bowl of the Pot shape it distinctive and when cleaned up…. Dream! Well, my bid was enough when the bell rang, and it didn’t remain in my collection, and Todd saw the potential in the For “Pipe Dreamers” Only! collection and now this GBD New Era is on my worktable. These pictures take a closer look at the GBD New Era:


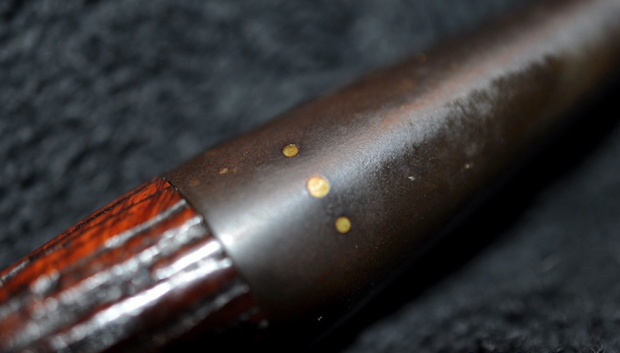
 The nomenclature on both sides of the shank are thin but legible. On the left flank of the shank is ‘GBD’ encircled in the oval [over] ‘NEW ERA’. The right side of the shank is stamped ‘LONDON ENGLAND’ [over] 9493, the shape number. The stem bears the classic brass GBD rondel.
I like this A Brief History of GBD from Pipedia to remind me of the origins.
The company was founded in Paris France in the 19th century by Ganeval, Boundier and Donninger who were no longer associated with the company by the turn of the century. By the time they left the GBD name was well established and thus retained. In 1903 an additional factory was built in England and ran by Oppenheimer. The Paris factory moved to Saint-Claude in 1952. Since 1981 the majority of GBD pipes come from the English factory. At about that same time GBD merged with Comoys, since then all production for both GBD and Comoy comes from a single factory.
The dating of this New Era can be determined with certainty to be before the 1980s. The brass rondel on the stem and straight line “LONDON, ENGLAND” stamping of the nomenclature identify it as being made prior to the merger with Comoy’s in 1982 (or 1981). 
 The GBD line, New Era, can be found in catalogs going back to the 1950s. The example I found on Pipedia’s article on GBD are pages from Circa 1950s Oppenheimer Pipes Catalog, courtesy Václav Blahovec, which I’ve included.
The add to the right is from Pipedia’s discussion on GBD Model Information is credited to the 1961 GBD Flyer, courtesy Chris Keene’s Pipe Pages, unfortunately now a defunct website. So, the spread of possible dating for the GBD New Era Pot on my table could span from the 50 through the 70s.
The quality of the New Era line is toward the upper third of GBD lines, from what I read in the Pipedia article. This last quote from Pipedia’s reprint of Pieces From My GBD Collection, by G.L. Pease (re-published here by permission), sums up well GBD pipes and what I believe is true of the GBD New ERA before me:
Since then, many GBDs have come, many have gone. I’ve tried to select exquisite examples for my collection – pipes that are exemplary in every regard. Not all old GBDs smoke wonderfully, but when they do, they sing. The French made ones, for some reason, seem particularly suited to Virginias. GBDs are not exactly hip. They’re not trendy. They’re not the high-grade pipes du jour. But, they are solid, classic pipes with a long history, and they can be subtly and sublimely beautiful. They can also often be had without sacrificing too much coin.
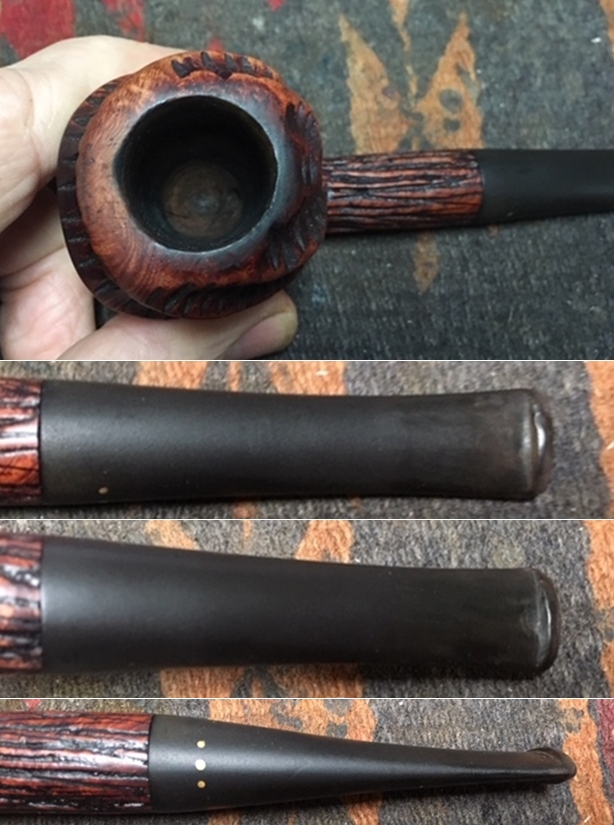
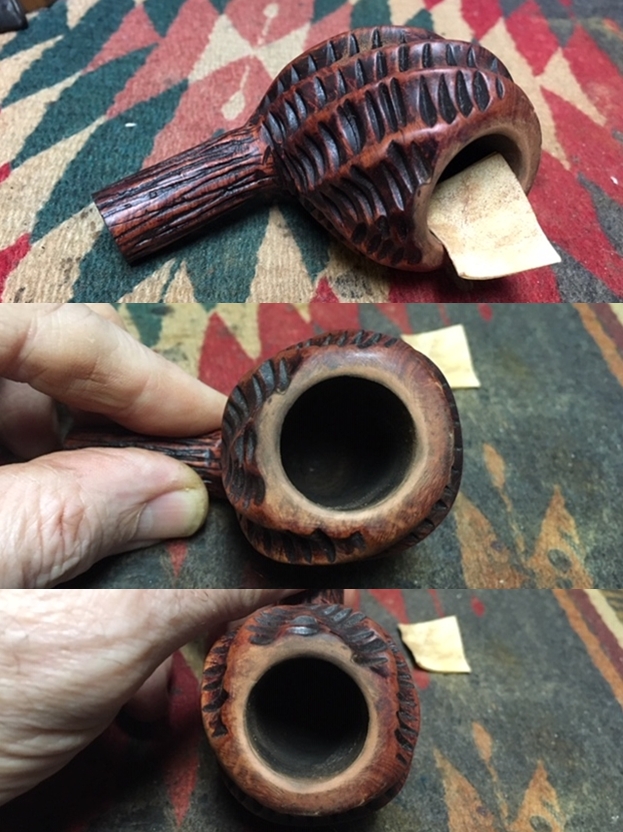
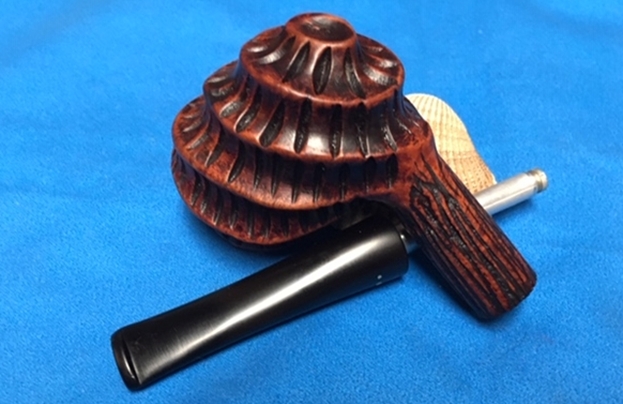
As I look at the GBD New Era Pot on my worktable, what stands out immediately are the dark blotches on the briar surface, especially on the long shank. If these were on the bowl or the heel, I would be concerned about heating damage. But on the shank, the issue is on the briar surface and hopefully cleaning will address it.  The chamber has moderate cake build up and the rim shows some lava flow and scorching on the forward part of the rim, yet there is darkening around the entire inner circumference.
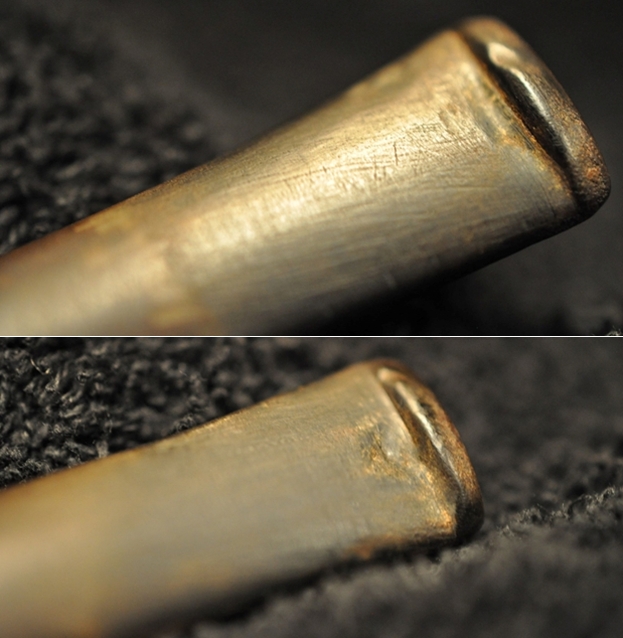
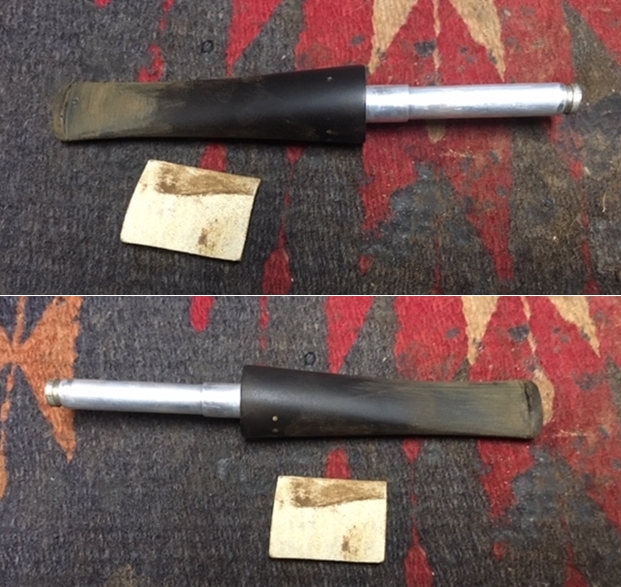
 Oh my, the short saddle stem is oxidized and mauled! Looking at the bit (upper and lower below) the forensics are not difficult to decipher. One can discern the eye or canine tooth imprinted followed by the first premolar – especially on the upper side. The lower side is not as distinct, yet the practice is revealed. The former steward’s ‘hands free’ approach was to insert the entire flat part of the stem on the right side in his (or her?) mouth and clamp down using the stem as a palate to hold the pipe in place. Hmmmm, deep breath. Moving on.
 With a good understanding of the pipe on my worktable, I begin the restoration by cleaning the internal airway of the stem with several pipe cleaners wetted with isopropyl 95% and then I add the GBD’s mangled short saddle stem to a bath of Before & After Deoxidizer along with other pipes in the queue.
  After the stem soaks for several hours, I fish the GBD stem out of the Deoxidizer and after draining the Deoxidizer, I wipe the stem with cotton pads wetted with alcohol. A good amount of oxidation is removed, and the stem looks good after cleaning it.
 To begin the revitalization of the vulcanite, I then hydrate the stem by applying paraffin oil (a mineral oil) to the stem – it absorbs it well. I put the stem aside for the time.
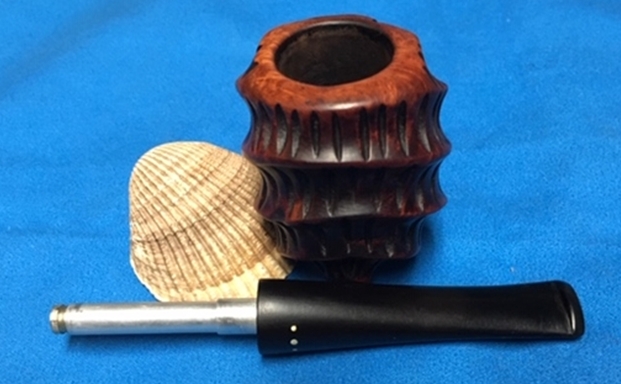
 To begin the cleaning regimen of the GBD Pot stummel, I ream the chamber using the Pipnet Reaming Kit. The dimensions of the chamber live up to a grand Pot image – the chamber is 1 inch wide and 1 3/8 inches deep, plenty of room for a bit of tobacco! After putting down paper towel to minimize cleanup, the width of the chamber causes me to skip the smallest blade head and I use the remaining 3 larger blade heads. I then transition to scraping the walls further with the Savinelli Fitsall tool and finish the reaming by sanding the chamber with 240 grit paper wrapped around a sharpie pen to give leverage. After wiping the chamber with a cotton pad and alcohol, I inspect the chamber, and everything looks great – no signs of heat damage. Now a fresh start for the chamber.

 Now, turning to cleaning the external briar, I hope that the cleaning will address the large dark blotches on the surface. I use undiluted Murphy’s Oil Soap and a cotton pad to do the job – and what a job it does! As I scrub with the cotton pad the grunge starts breaking up and eventually the black spots on the shank are removed! I love Murphy’s Soap! I work further on the inwardly sloped rim also using a brass wire brush. This helps, but the rim still has some scorching darkness left. The pictures show the great progress.

 Remaining on the cleaning regimen, I now address the internals of the stummel using cotton buds, pipe cleaners wetted with isopropyl 95%. I also use shank brushes which are perfect for the longer shank of this GBD. To quicken the process, I also scrape the mortise with a dental spatula. In time, cotton buds started emerging much cleaner. Later, I plan to also clean the internal further with a kosher salt and alcohol soak.
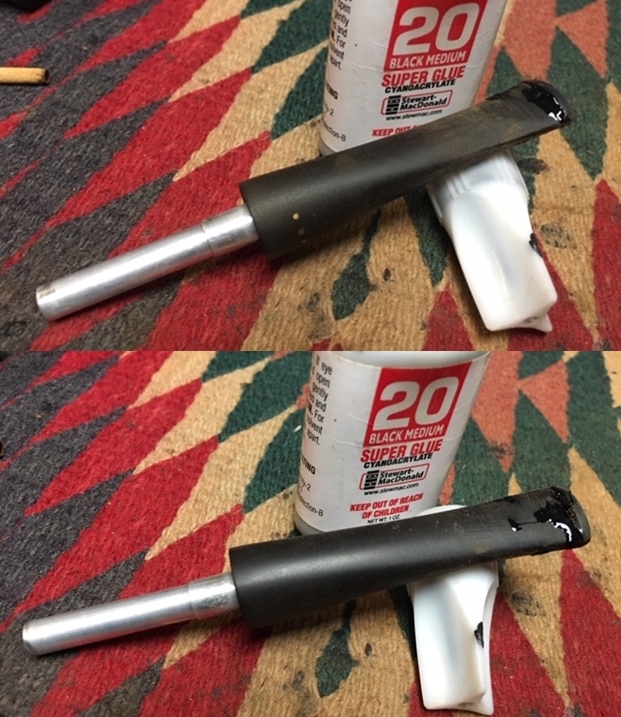
 With some fear and trembling, I study again the mauled saddle stem. The Before & After Deoxidizer did a good job removing the oxidation. My first assault on the stem damage will be to expand the stem’s surface to regain the multitude of compressions on the upper and lower bit. I take pictures to mark the starting point for comparison. Then, using a Bic lighter I paint the vulcanite surface. As it heats, it expands and hopefully reducing the severity of the compressions. After one round of heating upper and lower bit several times, I take a picture for comparison.
Upper, before and after: Lower, before and after:
 Next, using 240 grit sanding paper, I sand the upper and lower bit to get a better understanding of the contours of the remaining damage after using the heating method. As you can see in the pictures I take after sanding some, the compression areas are revealed more clearly. I have found from experience is that using charcoal/CA glue as a patch on the vulcanite stem, the patch material needs to have enough depth in the compression to get a good hold. I have found that patching a compression that is too shallow will not hold, but sometimes these compressions are too deep to sand! For instance, I debate whether it is better to sand the two lesser upper compressions on the lower bit (second picture) and risk sanding and taking too much of the stem? And going partially and changing your mind with the view to applying patch material, and then it’s too shallow! I decide to apply patch material at this point and then sand and see how it comes out.
 I first wipe the stem with alcohol to clean the area. To form the patch material, I mix CA glue with activated charcoal. I start with the upper stem side. I put a small pile of charcoal on an index card and put a blob of thick CA glue next to it. Then, using a toothpick I pull charcoal into the CA glue mixing it as more is added. When it thickens to that of molasses, I use the toothpick to trowel the mixture to the compressions needing filling. I use an accelerator to speed the curing time. I do the same for the lower bit compressions.
 To now begin removing the excess patch material to the upper bit, I use a flat needle file. The pictures show the progression.
 After bringing the patch mound down to the surface, I then switch to sanding with 240 grit paper to remove the excess patch material totally. In the second picture you still see the patches, but the patch is now flush with the stem surface.
 Remaining on the upper bit, I refresh the button using the flat needle file and follow with 240 grit paper erasing the file marks and fine tuning the button restoration. The upper bit repair looks great.
 Now, starting on the lower bit, I do the same using the flat needle file to bring the patch mounds down close to the briar surface.
 Then, taking over with the 240 paper I sand away the excess patch material totally bring the patch flush with the vulcanite surface. The second picture looks closer showing pitting in the patch. This happens when air bubbles are trapped in the patch material and when they are sanded, they are exposed as pits. I’ll address this later.
 Moving again to freshen the button lip I use the flat needle file and transition to 240 grade paper to erase the filing scratches and to smooth the stem. I like the progress!
 To address the air pockets in the lower patch I first wipe the areas with a cotton pad and alcohol to clean it. I then paint a fine layer of thin CA glue over the patch area with the CA glue filling the pockets. After the glue cures, I then sand it with 240 paper. The patch is patched, and I move on!
 Now addressing the entire stem, I wet sand using 600 grade paper followed by applying 0000 steel wool.
 To complete this phase of the stem restoration, I use Magic Eraser on the stem to cleanse it further and then I apply paraffin oil (a mineral oil) with a cotton pad to rejuvenate the vulcanite. From where we started with this stem, its been through a lot! I put the stem aside.
 This work day is ending and the last thing I do is to continue the cleaning of the stummel giving it a kosher salt and alcohol soak through the night. I first fashion a ‘mortise wick’ by pulling and twisting a cotton ball. I then stuff it into the mortise and airway with the aid of a stiff straight wire. I then fill the bowl with kosher salt. I use kosher salt because it doesn’t leave an aftertaste and the whole process, with the salt and alcohol, freshens the briar and it is much more pleasant for the new steward! After putting the stummel in an egg crate for stability, I then fill the bowl with isopropyl 95% until it surfaces over the salt. After a few minutes the alcohol recedes, and I follow by topping off the alcohol once more. I then turn out the lights.
 The next morning, the kosher/alcohol soak had done the job. Both salt and wick were discolored from the process of drawing out the residual tars and oils from the mortise and airway. After tossing the expended salt I wipe the chamber with a paper towel, push shank brushes through the mortise and blow through the mortise. To make sure all was cleaned, I utilized a few more cotton buds and a pipe cleaner wetted with isopropyl 95% to finish the cleaning. Moving on.
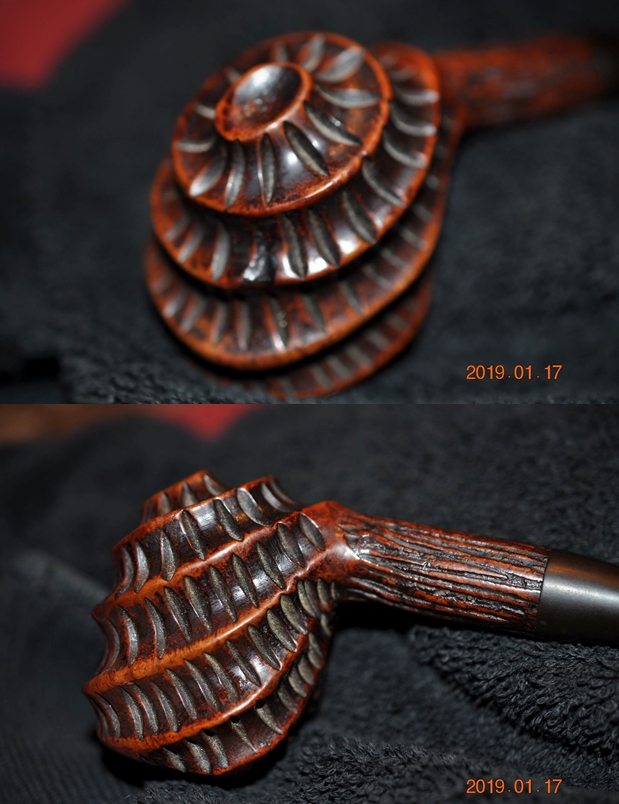
 With the cleaning completed, I study the bowl and the grade of this block of briar is pushing up the New Era reputation stamped on its shank. Who ever the pipe crafter was in the GBD factory in London was, cut the block beautifully. The main orientation of the distinct straight grain is astonishingly vertical around most of the bowl. Predictably, the heel and the rim show the striking results of the horizontal cuts that formed them – bird’s eye grain, the end or cross-section views of the vertical straight grain. This presentation of bird’s eye carries through the shank as well. After the cleaning of the surface, the heel already displays beautifully its patch of bird’s eye grain. The rim’s damaged state at this point, masks the bird’s eye that I see faintly. The challenge of the rim, but what also makes it attractive, is the tapered cant toward the chamber, so topping is out of the question. The taper is also gently rounded. The other thing I see is the thin finish. The cleaning around the rim created a discoloration so that the upper bowl is lighter – and there’s a water line circling. The pictures show the things I’m describing.

 The first thing I do is to wipe the stummel with isopropyl 95% to clean the older finish off so that I’m starting with a clean slate – as much as possible! The alcohol did a great job, just what I wanted. Interestingly, what I thought were water lines running around the circumference of the bowl were not caused by cleaning. I discover that it is also part of the grain structure – fascinating. With curiosity, I looked back at pictures from the eBay seller and yes, the line pattern was there! The pictures below look at it again after the cleaning with alcohol.
 Next, I start addressing the rim damage and sanding. My goal overall, is to remove the damage and tease out the bird’s eye on the rim so that it is more distinct. The picture below shows that the bird’s eye is hidden for the most part. To start conservatively, I use a coarse sanding sponge that will hug the contours of the rim and gently sand. Let’s see what this does. The first picture below shows the cleaning of the rim in general and you can still see a scorch mark on the forward rim (at 9 o’clock in the pictures). The second picture is focusing more into this area and you can better see that the lower area is still darkened from burning.
 I’m not satisfied with the results. Becoming less conservative out of need, I use 240 grit paper and sand the rim – approaching it more like a bevel with the paper rolled and I press the paper with my thumb, conforming to the contours of the rim. I leverage the fact that the rim is already canted and I simply go with it. I do the hard work with the 240 sanding the entire rim and focusing on the lower circumference more to remove the charged, discolored briar.
  I follow the 240 with the same approach but with 600 grit paper. Now I’m seeing what I want to see! The briar is cleaner and more responsive. We’re on the right track.
 After examining the briar surface of the entire bowl again, I see no fills needing attention, but I detect very small scratches and pitting through normal wear and tear of the years on this GBD. To address this, I use a medium grade sanding sponge and work on the small imperfections on the briar surface. After this, I utilize a light grade sanding sponge on the entire surface. I’m very careful to avoid the thin nomenclature stamping on the shank flanks. I like working with sanding sponges and the results look good.
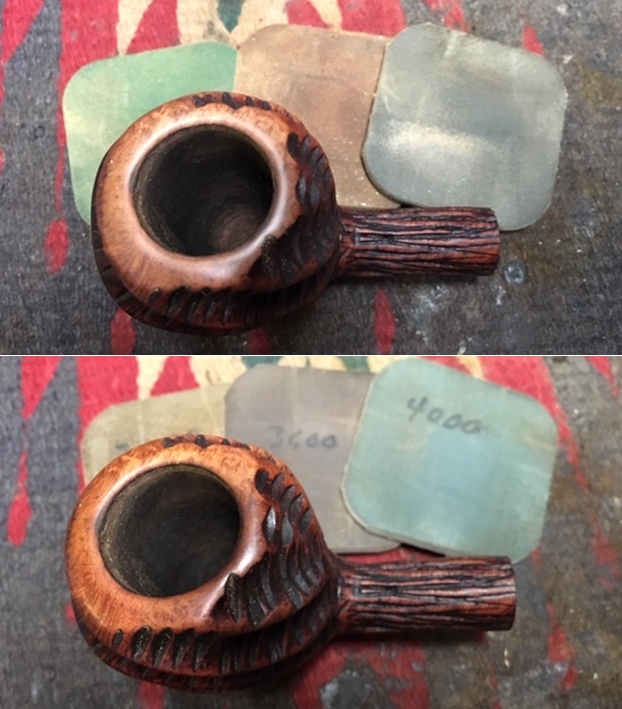
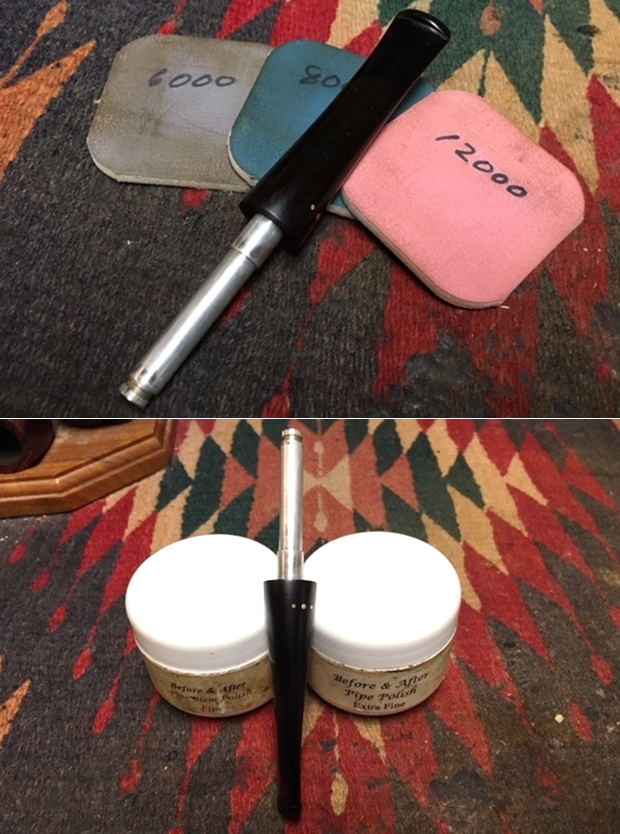
 The micromesh regimen is next. First, I wet sand with pads 1500 to 2400, then dry sand with pads 3200 to 4000 and 6000 to 12000. Throughout, I’m uber cautious to avoid the thin nomenclature stampings on the shank flanks until the last couple of pads, which I run lightly over the stampings to clean it. I love the pop of the grain after the micromesh regimen. This GBD New Era is a very nice pipe.
 I put the stummel aside for the time and turn now to the waiting, short GBD saddle stem. I run through the normal micromesh regiment wet sanding with pads 1500 to 2400 and dry sanding with pads 3200 to 4000 and 6000 to 12000, applying Obsidian Oil after each set of 3, when it strikes me that this stem had looked like it was mauled by a dog…and now. If one works hard enough putting the glare at the right angle, like I did in the pictures below, you can see the residual scaring on the vulcanite stem where the patches were applied, yet these for restored pipes are marks revealing that they’ve had rough spots, but this one will wear his scars proudly.
 While working on the stem, my mind considers the next steps of the restoration process. The question is which direction to go with the finishing of the GBD New Era Pot stummel – or bowl – it truly can pack a lot of one’s favorite blend! Leave the natural briar as it is now or apply a dye. The guiding principle when restoring vintage pipes with distinctive nomenclature and age is to try as much as one can match the original color motif. So, I looked for examples of New Era pipes.
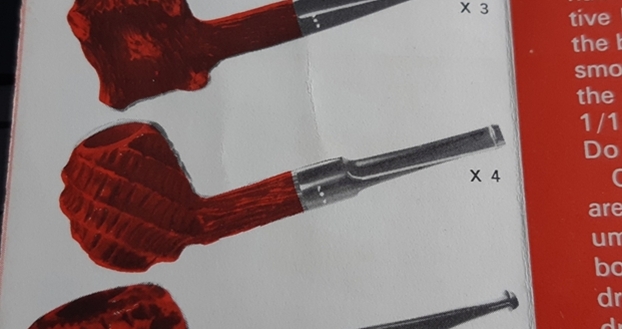
While doing research on GBD New Era, I read the very interesting and helpful article reposted in Pipedia: Pieces From My GBD Collection, by G.L. Pease (re-published here by permission). It’s a good read, I enjoyed it. What was most helpful was the listing by GBD groups or lines of pipes that were part of G.L. Pease’s collection. I eagerly looked and found his offerings for New Era. Not only did he have New Era, but 4 beautiful long, round shank Pot shapes, shape number 9493 like the GBD that Todd has commissioned. I cropped the picture below to focus on the patina of the 4 Pots and on mainly the smooth briars. To me, all the pipes leverage toward a reddish hue even though in different shades. The lower smooth Pot is redder, leaning toward Oxblood or burgundy. The Pot on the top, is reddish but leaning more toward the browns.  After studying these New Era pipes, I remembered reading about the red leanings of the New Era line from Pipedia’s GBD Model Information. I clipped this description about New Era:
 This confirmed what I had observed. The question remains, how to mix dyes and hit the right hue, or as close as one can manage? As I’ve done before many times with Steve Laug (Rebornpipes) and Charles Lemon (DadsPipes) I reached out to Charles because I recently read one of his blogs, Stem Repairs and a General Freshening for a “Made by Millville” Full Bent, where he discussed his approach to staining. It was helpful information, well worth reading. My question to Charles was how he might approach the reddish hues and mixing dyes. His answer was straightforward and helpful – trial and error! Yep, I know how to do the latter part of that well. He did say that he had had success mixing Fiebing’s Saddle Tan and Browns to achieve that general direction, and to mix and test to see how it looks. So, armed with Charles’ input, I went to work mixing the dyes.
  I ended up with what Charles calls a ‘wash’ – being more diluted (with alcohol with aniline dyes and water with water-based) it can be applied more times as needed to acquire an increasingly darker result. This approach would necessitate that I improvise my usual approach to staining. After mixing Saddle Tan and Light Brown, I diluted it with alcohol to lighten the wash. I assemble my desktop dying components, and I am ready.
  I first wipe the bowl down with alcohol to clean the surface. Following this, I heat the stummel with a hot air gun to expand the briar resulting in it more effectively absorbing the dyes.
  After heated, I apply the dye mixture to a portion of the stummel surface with a pipe cleaner that I had folded in half. After applying the dye to a portion, I fired that portion by placing it quickly over the lit candle. The flame immediately combusts the alcohol in dye and sets the dye pigment. I do this several times to cover thoroughly the stummel surface. After repeating the washing and firing process many times, the bowl has the right look, sufficiently dark that I think will hopefully point in the right direction! It’s time to turn out the lights letting the newly dyed stummel to rest and to set the dye.
 The new dye set through the night and has settled in. Allowing this ‘rest’ time helps guard against new dye coming off on the hands during the first uses of the pipe when the bowl heats.
  To unwrap the fired dye shell around the stummel I mount a felt cloth buffing wheel in the Dremel, setting the speed to the slowest to avoid scorching the wood. Felt cloth is more abrasive than cotton. Added to this, I apply Tripoli compound to ‘plow through’ the thick dye residue. While applying the more abrasive compound, I purge the wheel often on the edge of the chopping block which is my work station. Not pictured is that I follow the application of Tripoli with the felt buffing wheel with a cotton cloth buffing wheel and go around the stummel one more time applying Tripoli compound at an increased Dremel speed of about 40%. This is to fine tune and make sure no dye clumps are left behind.

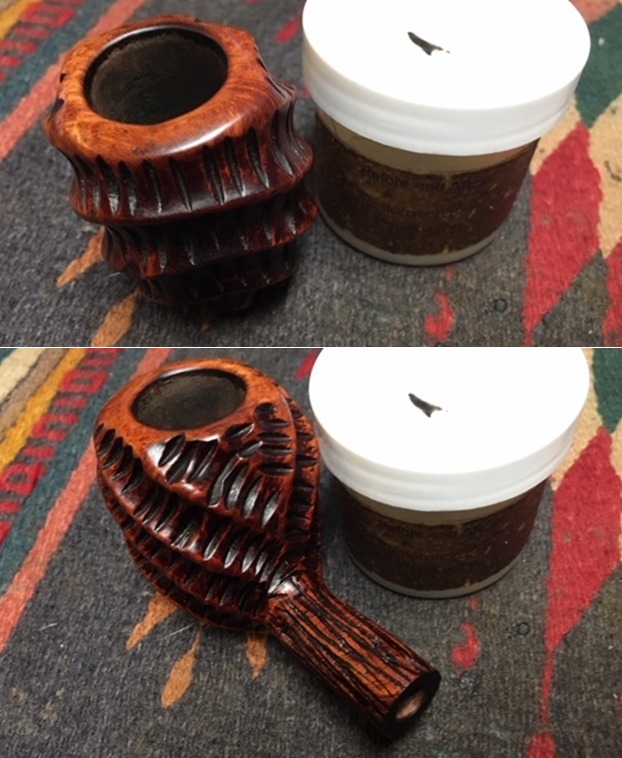
 Next, after rejoining the stem and stummel, I apply Blue Diamond compound using a cotton cloth buffing wheel at a 40% speed. I apply compound to the entire pipe. When finished I buff the pipe with a felt cloth to remove the residue compound dust.
 The final step is applying carnauba wax by mounting another cotton cloth wheel onto the Dremel, maintaining the same 40% speed and I apply the wax. Following this, I use a microfiber cloth and give the pipe a final hand buffing.
This GBD New Era Pot has come a long way. The stem was mauled and now it looks great. The patches can be seen in the glare but from where we started…. The grain on this New Era is striking. I love studying the vertical grain that is distinct and certainly a feast for the eyes. There is no disappointment with the bird’s eye grain that was teased out so well by the compounds on the rim. The bird’s eye is small, tight and subtle. The heel view is equally a cornucopia of bird’s eye. I think what makes this GBD shape so classically appealing is the (‘Lovat’) long shank stretching the look of the large Pot bowl, which has plenty of space for a slow enjoyable time of fellowship with one’s favorite blend. Todd resides in the Big Apple as he practices law and this second pipe in the list of three he commissioned will fit well. He has the first opportunity to acquire this GBD New Era Pot from The Pipe Steward Store. As with all my pipes, this pipe benefits the work we do here in Bulgaria with the Daughters of Bulgaria – women and girls who have been trafficked and sexually exploited. Thanks for joining me!