Blog by Dal Stanton
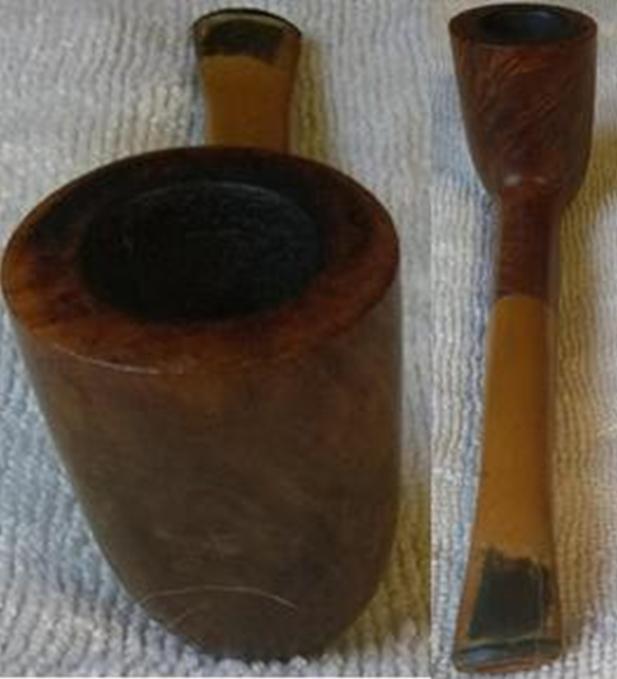
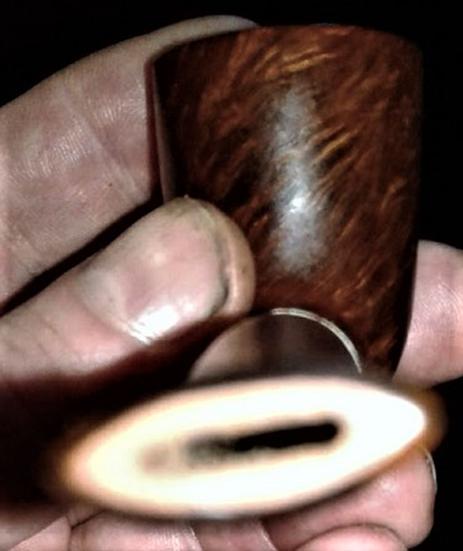
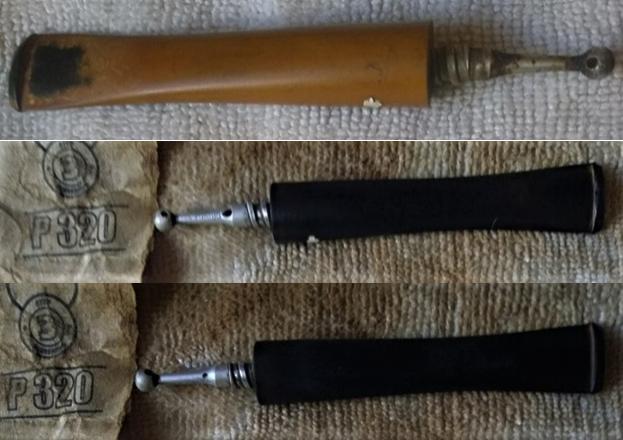
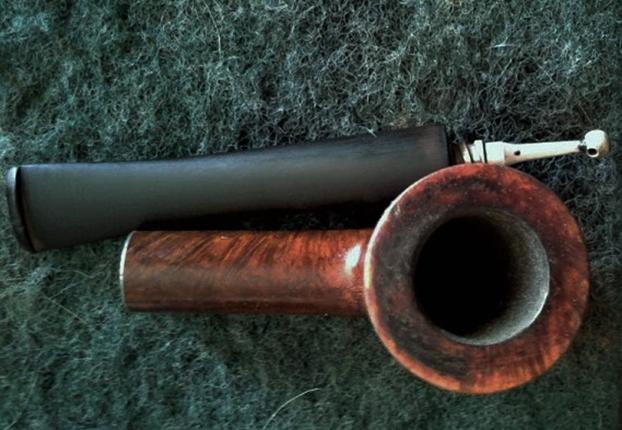
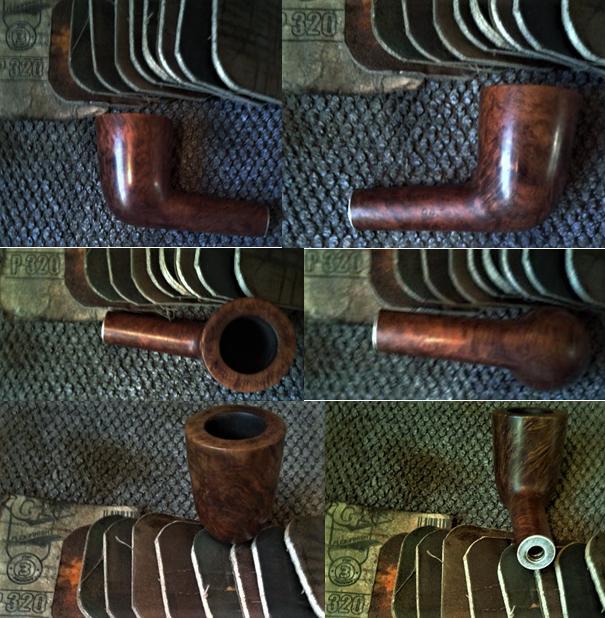
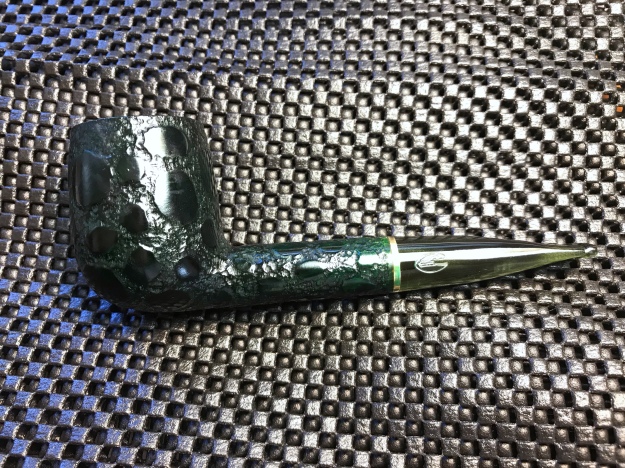
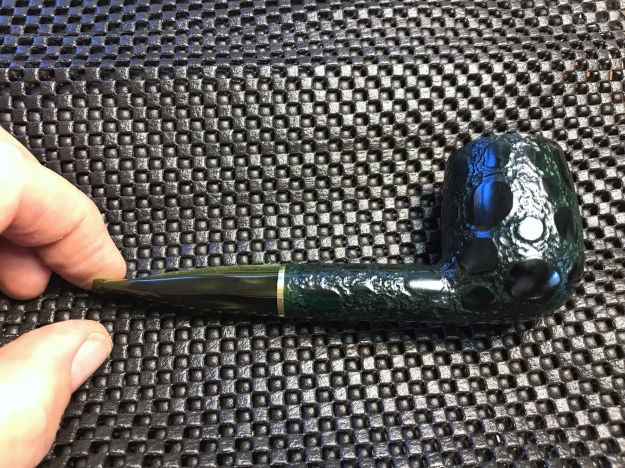
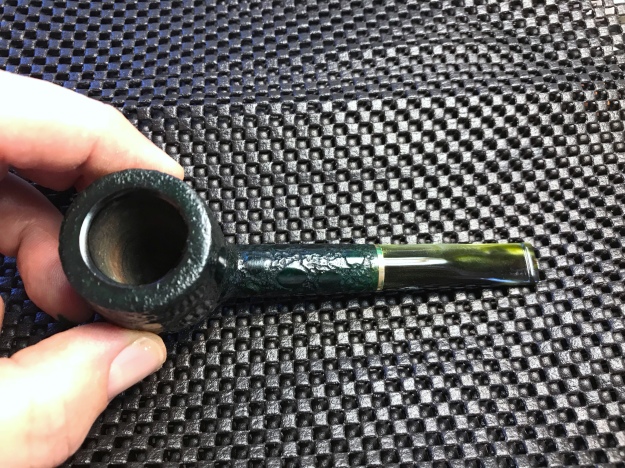
Let’s be honest. When I saw this Poor Richard’s on the eBay auction block I thought the name was a joke by the seller. He WAS huge (L: 6 3/4”, H: 2 1/8”, Rim W: 1 1/2″, Chamber W: 7/8”, Chamber D: 1 7/8”, Weight: 74gr), no doubt, but his condition could qualify him for the title: King of the Basket Pipe Realm. His condition was indeed poor and adding to the ‘joke’ was that he was displayed on satiny royal purple material. But the clincher was coming. Adding insult to injury, the seller’s byline description under Poor Richard’s picture was: Poor Richard’s Classic Bulldog Large Estate Pipe Beautiful !!! Nice !!! Bulldog? I felt sorry for him. I placed a bid and when the auction ended, it was no surprise that mine was the only bid seeking a new life for Poor Richard’s. My wife’s response when she first saw Poor Richard’s was that Poor Richard’s dog got a hold of him! Here are the pictures I saw.
 After bringing Poor Richard’s back to Bulgaria, I put him on my website in the For ‘Pipe Dreamers’ Only! section where my friend and fellow Pipe Dreamer from India, Paresh, saw him. Poor Richard’s became the fourth pipe Paresh commissioned – all of them on the larger side and each one of them advancing our work here in Bulgaria benefiting the Daughters of Bulgaria, helping women and girls who have been trafficked and sexually exploited.
Taking more pictures on my worktable on the 10th floor of a formerly Communist ‘Block’ apartment building, the nomenclature on the left shank is ‘PoorRichard’s’ in what I call an ‘Old World’ script. There are no other markings on the shank. The stem is stamped with an interlocking ‘PR’. The bottom of the stem is stamped with the COM, Italy. When I began doing the research on this Poor Richard’s, I recalled that rebornpipes’ contributor, Al Jones (aka: Upshallfan), had recently posted a restoration of a Poor Richards 9438 Cordovan Rhodesian shape. Reading Al’s write-up was helpful because it clued me into the ‘mystery’ surrounding the origins of the Poor Richard’s name. I noticed that our pipes shared the ‘Old World’ script nomenclature as well as the interlocking ‘PR’ stem stamp. The obvious difference was the COMs – his, London, England and mine, Italy and his included a shape number, and mine, without.
 As I’ve done in the past with much benefit, I wrote to Al asking about the differences between our Poor Richard’s and what to make of the differing COMs? His response was helpful:
Dal
Unfortunately, there is nothing but speculation about these Poor Richard pipes. The one shop here, with that name, can’t even conclusively determine if they had shop pipes.
I suspect it was a shop pipe, made by various makers for this shop. But a shop in Montana having shop pipes doesn’t exactly make sense either. Usually shops with their own pipes were larger, and in metro areas, not out in the wilderness of Montana.
Poor Richard pipes are not listed in “Who Made That PIpe”, so my guess is still a shop pipe. Perhaps that Montana shop was bigger than I presumed.
I suspect Italian companies, like GBD made shop pipes as well. Perhaps that one was made by Savinelli or other? Without a shape number, it’s impossible to determine.
Have fun restoring it!
Al
Al referenced the pipe shop in Montana that in a subsequent email he referenced that Steve had also worked on a Poor Richard’s attributed to the ‘Poor Richard’s’ pipe and tobacco shop in Bozeman, Montana. However, Al said that Steve’s Poor Richard’s pipe had a totally different nomenclature with Montana stamped on the pipe. I found this write up on Rebornpipes and what a write up! It was one of Steve’s and Charles Lemon’s classic collaborations including a pinning tutorial. When these two masters get together, its fun to see the wonders happen! (See this post which is worth the read: A Humpty Dumpty Cross Canada Project – Could this Poor Richards Select Square Shank Billiard 9489 ever be whole again?) Steve’s research on the Montana shop is good and saved me time and steps. Since Steve’s write up in 2016, the website had changed and a description of Poor Richard’s history beginning in 1962 can be found here: History. The following pictures show the shop early on and what it is today. Even with the mystery and the discrepancies with the nomenclatures, in researching different pipe shop pipes in the past (L. J. Peretti, Pipe Pub), I found that it’s common to have pipes manufactured in various places. Another indicator that the Poor Richard’s nomenclature refers to a shop is simply because it is possessive – Richard’s, pointing to something else. Whether there’s another Poor Richard’s shop other than the one in Bozeman, I don’t know. This question has been lost to history.
The condition of the giant Poor Richard’s before me now is poor. I take more pictures to take a closer look. The chamber has moderate cake build up that needs to be removed to inspect the condition of the chamber. The lava flow on the rim is thick. The stummel surface reminds one of a moonscape with all the craters in need of attention! Along with the pits and holes there are dents and scrapes. The oxidation on the stem is joined by bites and compressions on the lower and upper bit. 

 With a better understanding of the Poor Richard’s name, I begin the salvage of the giant Billiard by running pipe cleaners dipped in isopropyl 95% through the stem and then adding it to a soak of Before & After Deoxidizer along with several other commissioned pipes in the queue. The Poor Richard’s stummel and stem are first on the left. After letting it soak overnight, I fish out the Poor Richard’s stem and let the fluid drain off. I then push a pipe cleaner through it to help remove the Deoxidizer. I then wipe the stem with cotton pads wetted with isopropyl 95% to remove the raised oxidation from the vulcanite stem. After wiping off with the alcohol, I then wipe again using a cotton pad and light paraffin oil (mineral oil) to clean and condition the stem further. Finally, I run another pipe cleaner through the stem dipped in isopropyl 95%. The pictures show the process.
 Taking the stummel, I use the Pipnet Reaming Kit to clean the chamber. After putting paper towel down on the table for easier clean up, I start reaming using the third largest blade head since the chamber is so large. I also use the fourth and largest blade to ream. Following the reaming, I use the Savinelli Fitsall Pipe Tool to scrape the chamber walls removing additional carbon cake – especially down in the floor of the chamber with the difficult angles. Then, after wrapping 240 grit paper around a Sharpie Pen, I sand the chamber walls removing additional carbon and smoothing the chamber surface. I clean the chamber next using a cotton pad wetted with isopropyl 95%. While inspecting the chamber, I do see some hairline heat cracks that are very small, but not serious enough to warrant repair.

 Next, using undiluted Murphy’s Oil Soap I work on the external briar surface using a cotton pad. I also use a brass wire brush on the rim to remove the lava and follow by carefully scraping the rim surface with a flat knife edge. After scrubbing, I rinse the stummel in the sink with cool tap water.
 Turning to the internals, I use pipe cleaners and cotton buds dipped in isopropyl 95% to clean the mortise and airway. I also use a small dental spatula tool to scrape tars and oils off the mortise walls. The cleaning wasn’t too bad. Later, I’ll continue cleaning the internals with a kosher salt and alcohol soak.
 With the internals cleaned, I now look at the stummel surface. I have several fills to dig out and to fill. My main tool in doing this is a sharp dental probe. The goal is to only have a solid base in the holes – either old filler material or briar. It takes quite a bit of time, but I move from fill to fill doing the needed excavation work.
 With the holes excavated, I prepare a batch of briar dust and CA glue patch to apply to the problem areas. I scoop briar dust in a small mound on an index card and put a glob of thick CA glue next to the briar dust. Using a dental spatula, I mix briar dust into the CA glue until I reach a thicker consistency, like molasses. I then trowel the patch mixture into each of the holes leaving excess to be sanded down after cured. The pictures show the process.

 With the Briar Dust patches curing, I turn to the stem. After the soak in the Before & After Deoxidizer, much of the oxidation was removed. But looking more closely, there remains oxidation but it’s much subdued. I decide to place the stem in another soak – this time with OxiClean. I put a pipe cleaner through the stem and put it in the OxiClean to let it soak overnight.
 With the day ending, I continue the cleaning and refreshing of the stummel internals. To do this I employ a kosher salt and alcohol soak. First, I form a wick by stretching and twisting a cotton ball and with a stiff piece of wire, I stuff it down the mortise and airway. It will serve to draw out tars and oils. Then I fill the bowl with kosher salt and place the stummel in an egg crate to keep it stable. With a large eyedropper, I fill the bowl with isopropyl 95% until it surfaces over the salt. After a few minutes, I top off the alcohol as it is absorbed and turn out the lights.
 The next morning, there isn’t too much discoloration of the salt which means I didn’t put in enough alcohol or that the internals are clean. The wick is darker. I toss the expended salt into the waste, wipe the bowl with paper towel and blow through the mortise to remove remaining salt crystal. I then use a shank brush on both the bowl and the mortise – blowing again. Finally, to make sure all is clean and ready to go, I wet a cotton bud and pipe cleaner with isopropyl 95% and run them through the mortise and airway. They come out clean and it’s time to move on.
 I put the stem in an OxiClean soak through the night and it’s time to fish it out. I take a picture of the additional oxidation that has been raised and I take the stem to the sink and wet sand the stem with 600 grade paper to remove the oxidation. It looks cleaner now after sanding.
 Looking more closely now at the bit area, there are good sized compressions. The button also has some bite marks. The first step is to use the heating method to see if it will expand the vulcanite reducing the severity of the compressions. I use a Bic lighter and paint the upper- and lower-bit areas. The areas were lessoned, but not erased by heating the vulcanite. I then use 240 grade paper and sand the upper- and lower-bit areas as well as redefine the button with a flat needle file. I take pictures of each step. First, the upper bit progress:
 After heating:
 After 240 sanding and filing:
 Progression of the lower bit area:
 After heating:
 After 240 sanding and filing:
  I’ve sanded out as much as will sand and now I will patch the areas that did not sand out. I first wipe the stem with alcohol to clean the area. I then apply black CA glue to the areas. And I wait, and wait, and wait…. Well, I just discovered that Black CA glue can go flat and lose its ability to bond. Reading the directions, is says to refrigerate to prolong shelf life. Well, the shelf life must have been reached. I wipe the old CA glue off and thankfully, I had purchased another bottle of Hyper Bond Black Rubber Reinforced CA glue. I discover that the bottle mouth is larger than the squirt spouts that I have so I end up troweling a small bit of the glue on the end of a pointed dental spatula and apply it to the spot. It works! To advance the curing time I spray the upper and lower patches with an accelerator which does the trick. The first picture, upper that didn’t cure and the new glue on the lower. New bottle of glue is heading for the fridge!
 Next, taking a flat needle file I start filing the black CA patches staying on top of the glue mounds. I then follow by using 240 grade sanding paper to bring the excess CA glue to flush with the vulcanite surface. First, pictures showing the upper bit:
 The next step with the stem is to wet sand it with 600 grade paper then I follow by buffing the stem with 0000 steel wool to prepare the vulcanite surface for the micromesh pad phase of sanding. The patches on the bit blended very nicely.
 I put the stem aside because I’m anxious to get started on the Poor Richard’s stummel. I decide to start from the top and work down. I will establish fresh lines for the rim and remove the surface scratches by topping the stummel. I first use 240 grade paper on the chopping board and invert the stummel and rotate the stummel over the paper. After the 240 paper, I use 600 grade paper for another few rotations. It looks good.
 To dress this Poor Richard’s up a bit, I create an internal bevel. To me, an internal bevel softens the rim lines and is a classy touch. I cut the bevel initially using a rolled piece of coarse 120 grade paper then follow with 240 and 600. I simply pinch the rolls of sand paper under my thumb and rotate around the internal circumference of the rim. I like it.
 Now, time to work on filing and sanding all the briar dust putty patches all over the stummel surface. I use the flat needle file to work the mounds down to near the briar surface then I finish off with 240 grit paper, bringing the patch flush with the surface. The pictures show the process. Lots of filing and sanding!


 With the patches all repaired, I use sanding sponges to sand the entire stummel to remove additional nicks and scratches and to blend the patch areas. I start with a coarse sponge, follow with a medium then light sponges. I like the way sponge sanding cleans up a rough bowl.
 Moving on to the micromesh stage, I wet sand the stummel with pads 1500 to 2400 then dry sand with pads 3200 to 4000 and 6000 to 12000. I love the way the micromesh process teases out the briar grain. This Poor Richard’s is looking good!

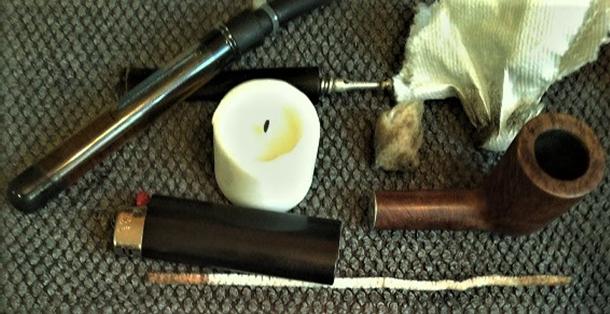
 To mask the plethora of fills scattered on this Italian Poor Richard’s stummel, I will give him a dark stain. I use Fiebing’s Dark Brown Leather Dye to do the job. With it being an aniline based dye, later I can wipe the bowl with alcohol to blend and lighten as I choose. I assemble the components used in applying dye on my worktable. I mount a cork in the mortise to act as a handle and I pour the dye into a shot glass. I use a folded pipe cleaner to apply the dye and a lit candle to flame the aniline dye. I begin by wiping the stummel with alcohol to clean the surface. I then warm the stummel using a hot air grain. This expands the briar grain aiding in it being more receptive to the dye. Using the pipe cleaner, I then apply dye liberally to the entire stummel making sure to cover the rim well. I then ‘flame’ the stummel with the lit candle and the alcohol immediately combusts leaving the pigment sealed in the grain. After letting the stummel ‘rest’ a few minutes, I repeat the process of applying dye and flaming. I then put the stummel aside to rest for several hours helping to assure that the dye is set and will not rub off later on hands when the pipe is put back into service. The pictures show the process.


 With the flamed stummel resting, I turn again to the stem. Using micromesh pads 1500 to 2400, I wet sand the stummel. Following this, I dry sand using pads 3200 to 4000 and 6000 to 1200. After each set of three micromesh pads, I apply a coat of Obsidian Oil to the stem to revitalize the vulcanite. The stem is looking good.
 The stained stummel has rested for about 24 hours and it’s time to unwrap the flame crust. After mounting a 1 inch felt buffing wheel on the Dremel, I set the speed to the lowest RPM and apply the more abrasive compound, Tripoli, to remove the crust revealing the newly stained briar surface. As I have refined my technique using the Dremel during the compound phases, I’ve learned that using a felt buffing wheel and Tripoli allows me to have more control over the degree of opaqueness allowed through the stain, especially when using darker stains like with this Poor Richard’s. When I begin removing the crust with the felt wheel and the coarser Tripoli compound, the initial pass of the buffing process removes the top crusty layer, but thick, ‘blotched’ stain remains. These blotches, or darker patches of stain hide the grain underneath. After this first pass, my practice is to purge the wheel quickly on the side of the chopping board that is on my lap, providing the work platform for all the buffing. After I purge the wheel of the thick stain residue from the flaming, I load more Tripoli to the felt wheel and then begin additional passes over the same area – frequently purging and reloading the felt wheel with Tripoli. Through this process I can determine how the grain is presented. More Tripoli buffing, the lighter hues are raised in the grain, giving more definition. When I’m working an area where a patch is located, I tend to allow it to remain darker to enhance the masking. After staining, I would say that this phase applying the Tripoli is the most critical for the finished look of the grain. Why? The coarse Tripoli combined with the coarser felt wheel does the heavy lifting by increasing the opaqueness of the stain when desired which sets the stage for the finished look. The following less coarse compounds, such as Blue Diamond, and using the cotton wheel, provides more buffing of what is there rather than remove it. The pictures below give a hint of what I’m describing. For those who use a Dremel, I hope this is helpful.
 To blend the stained finish, I lightly wipe the stummel with a cotton pad wetted with alcohol. I don’t need to lighten the stummel, only blend.
 After wiping down the stummel with the cotton pad, the Tripoli with felt wheel had lightened more than I wanted in order to provide a darker shading to blend and to mask the fills. I decide to stain the stummel again, but the second time around, I use a cotton cloth buffing wheel and Tripoli instead of the more aggressive felt wheel. Saving on pictures repeating the same process, here is the stummel after the second staining and flaming. Again, I wait several hours allowing the stain to rest.
 Following the Tripoli compound, I mount another cotton cloth buffing wheel in the Dremel, increase the speed to about 40% full power, and apply Blue Diamond compound to both the stem and stummel which I reunite. After completing the application of Blue Diamond, I wipe/buff the pipe with a felt cloth to remove the residual compound dust in preparation for the wax application.
 Before applying wax, I refresh the Poor Richard’s stem stamping, the interlocking ‘PR’ and the country of manufacturing stamp, ‘Italy’. Using white acrylic paint, I use a pointed cotton tip to apply paint to the stamps. While still wet I lightly wipe the excess paint off leaving the stamps filled. It works well, and the Poor Richard’s is shaping up well!


 To finish the buffing stage, I mount another cotton cloth wheel to the Dremel, leaving the speed at 40%, and I apply carnauba wax to stem and stummel. I follow by giving the pipe a rigorous hand buffing with a microfiber cloth.
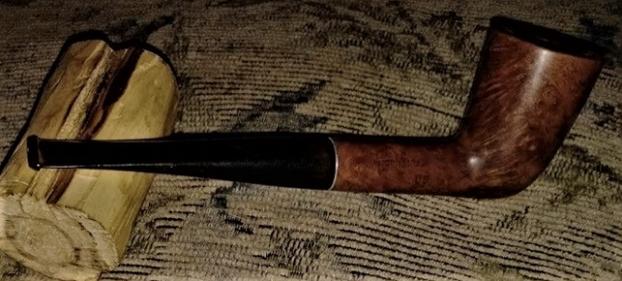
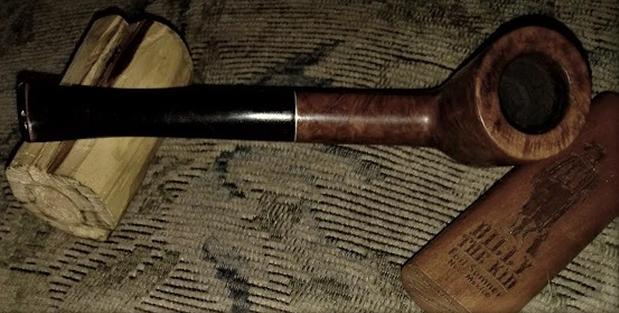
I’m pleased with the transformation of the Poor Richard’s. The dark brown dye helped to mask the repairs done to the stummel and it looks great. This straight Billiard is a classic shape and as large as this Poor Richard’s is, I believe it will serve its new steward well. Paresh commissioned him from the For ‘Pipe Dreamers’ Only! section on The Pipe Steward site. He will have first opportunity to acquire the Poor Richard’s from the The Pipe Steward Store which benefits the Daughters of Bulgaria – helping women and girls who have been trafficked and sexually exploited. Thanks for joining me!


