Blog by Dal Stanton
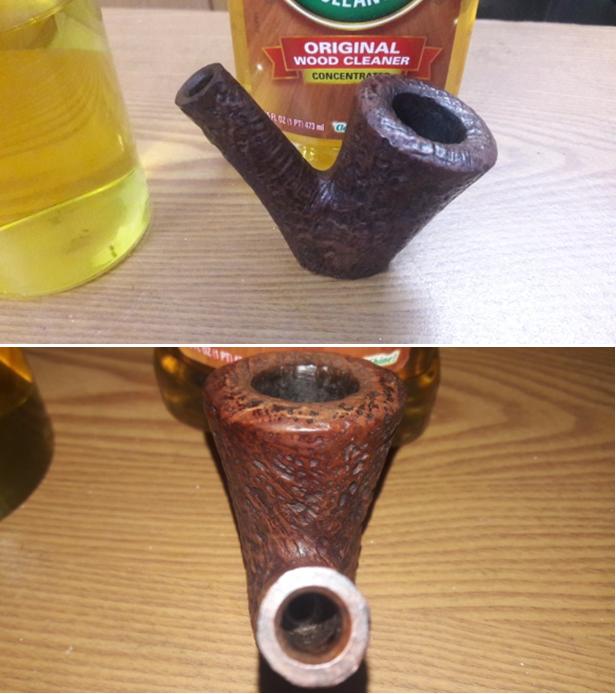
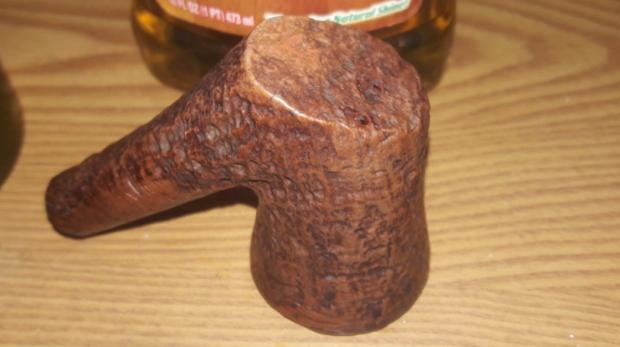
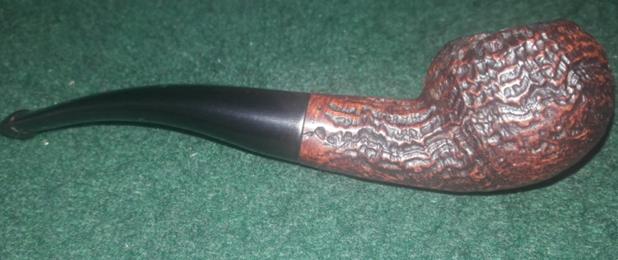
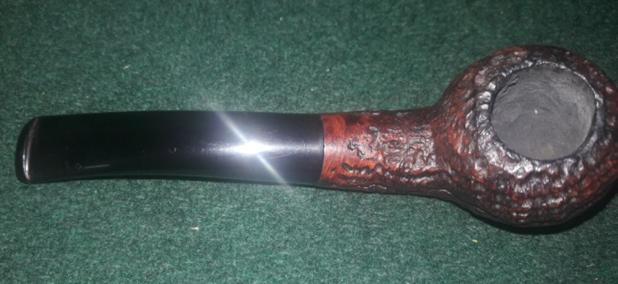
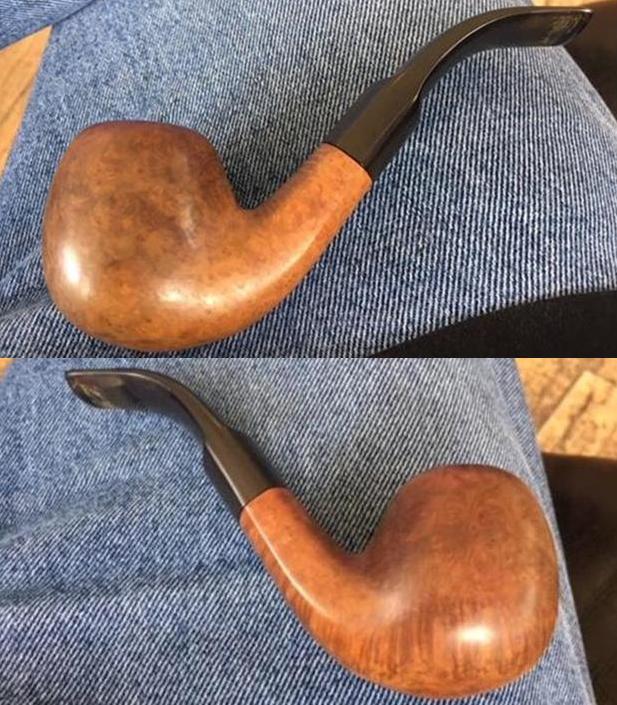
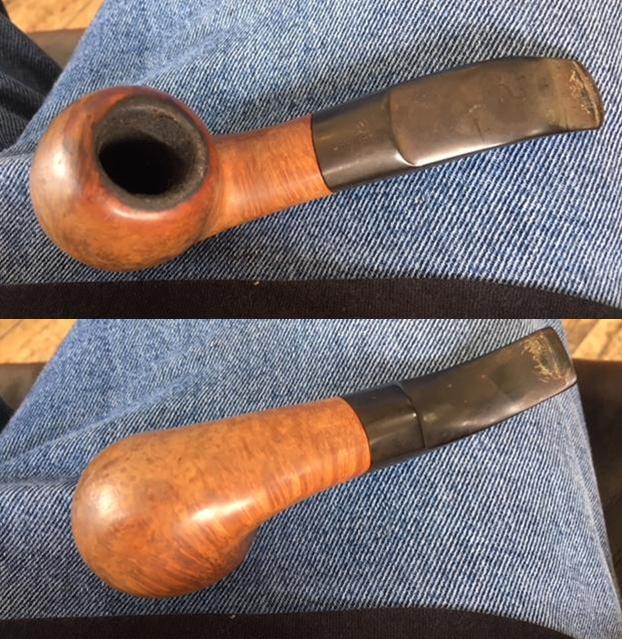
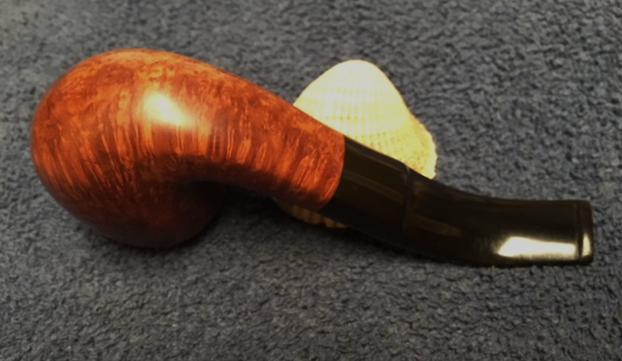
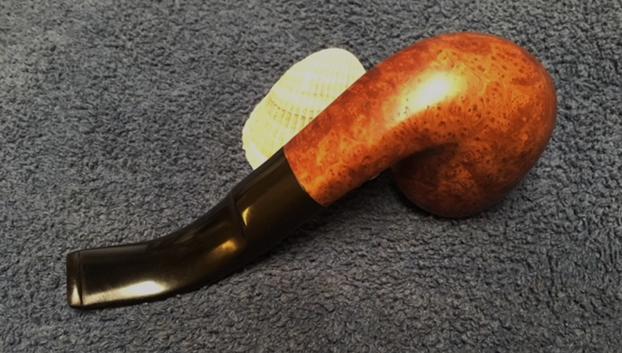
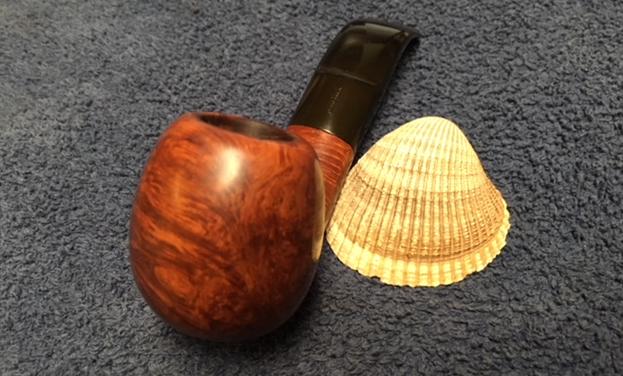
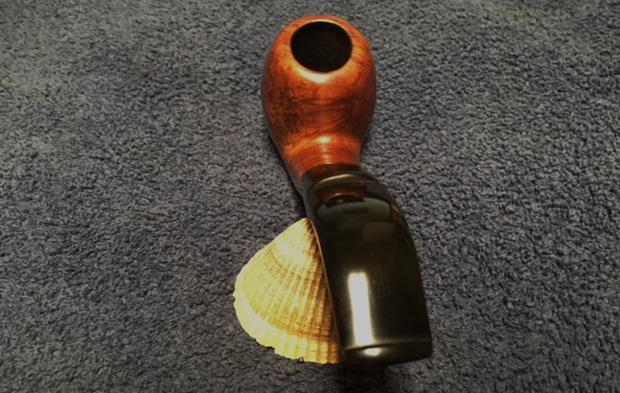
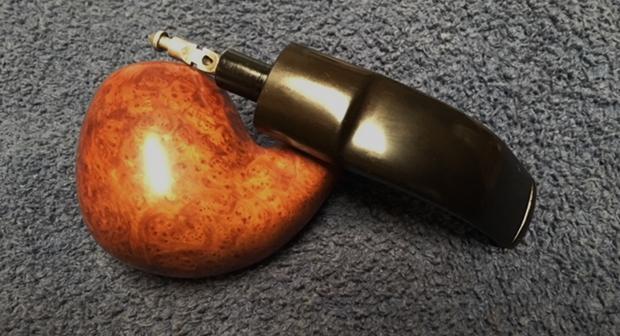
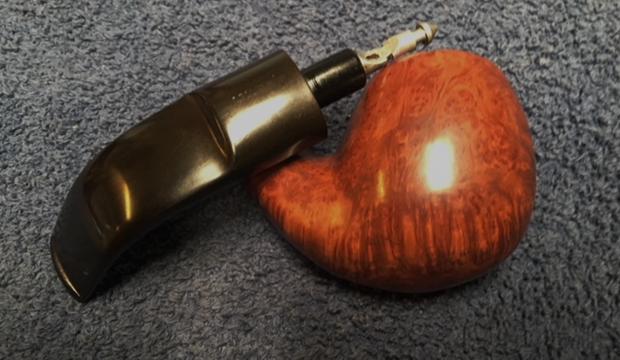
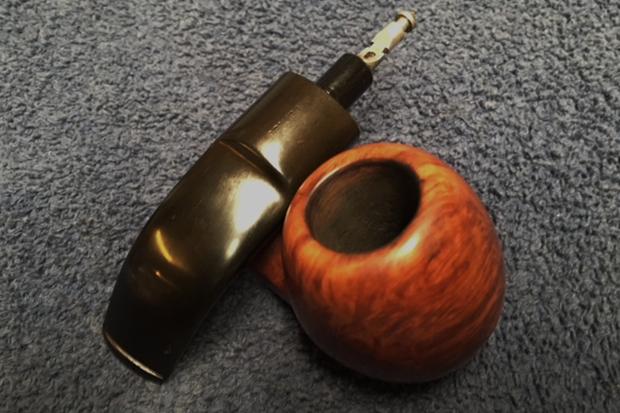
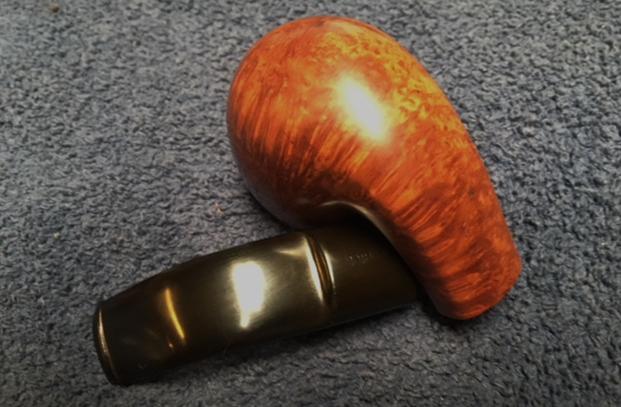
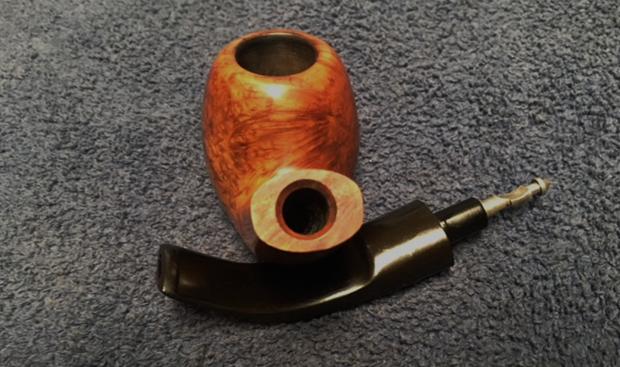
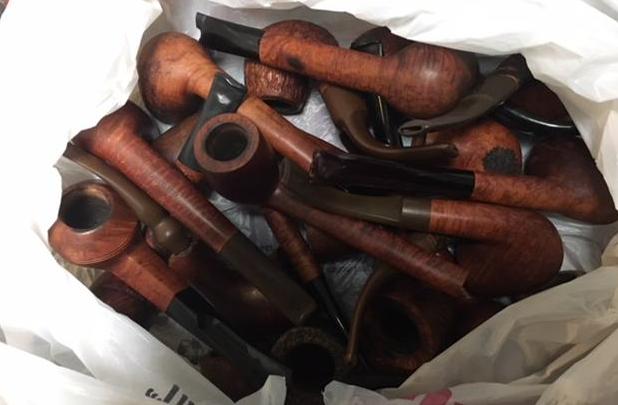
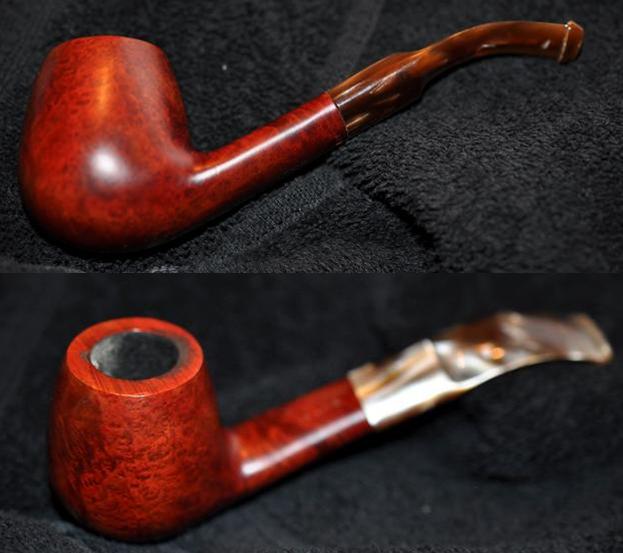
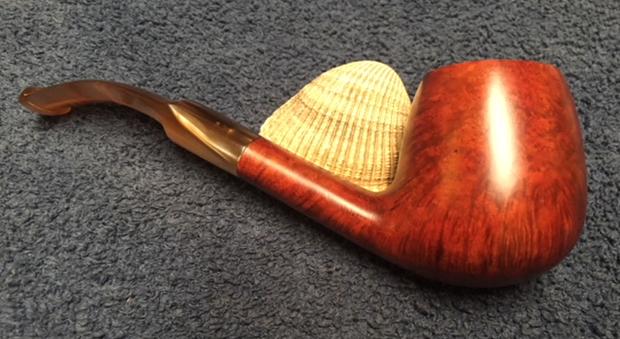
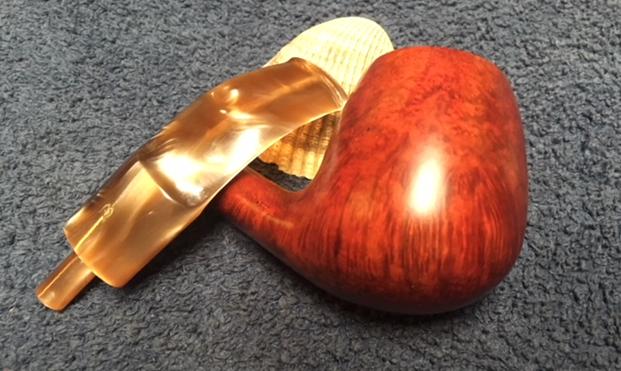
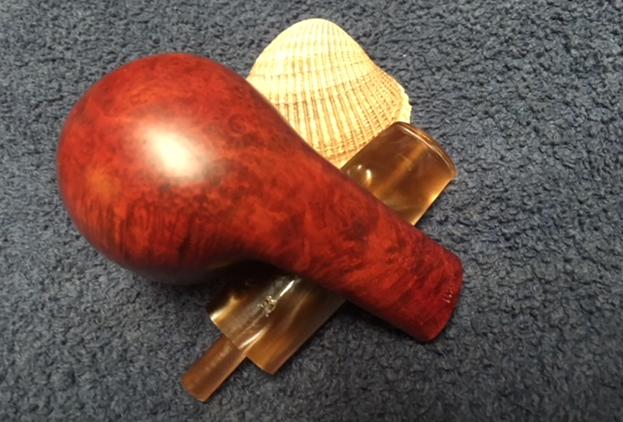
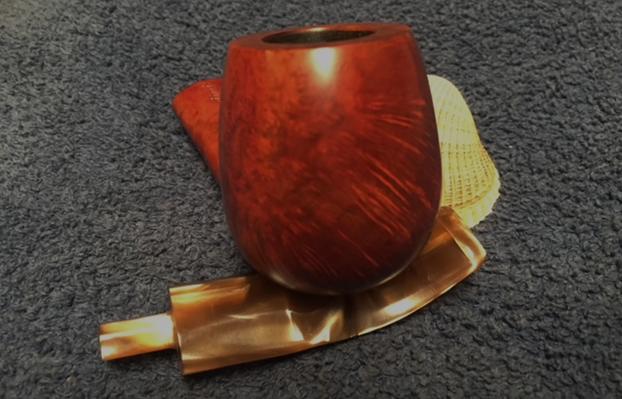
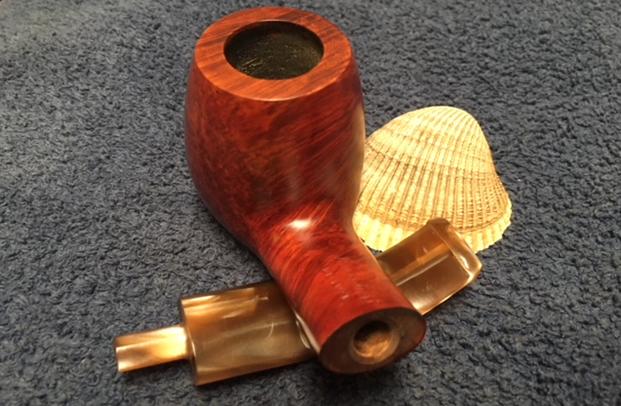
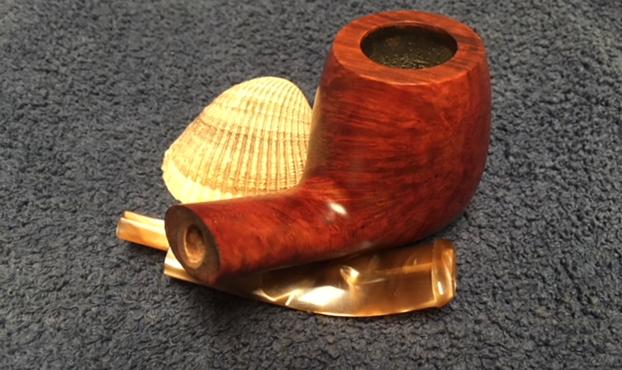
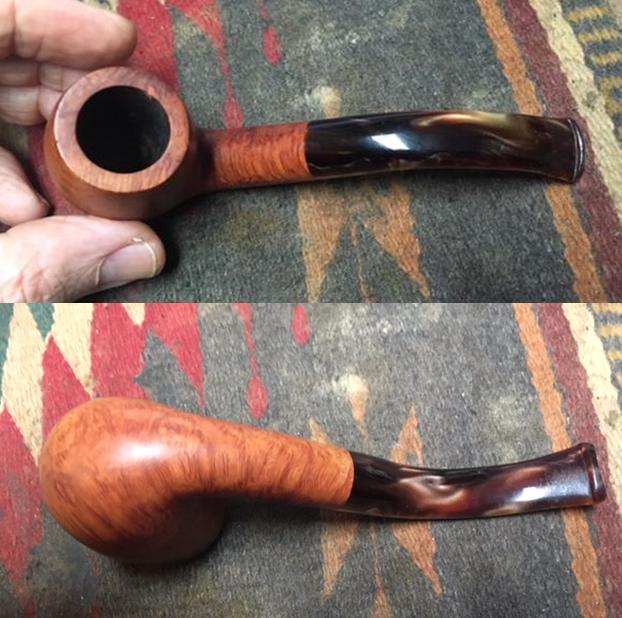
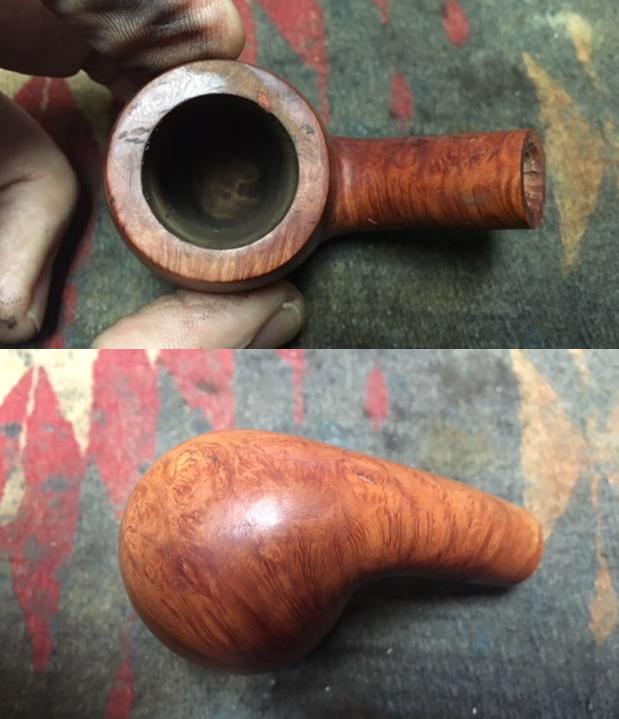
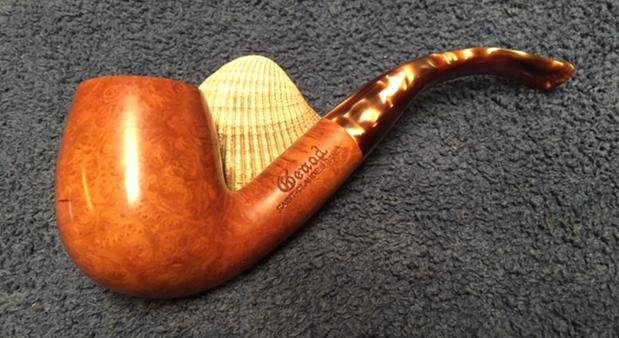
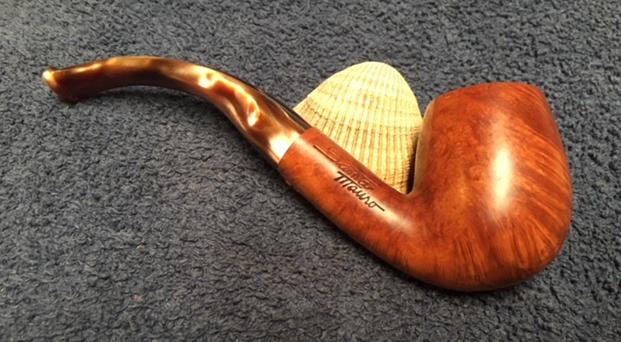
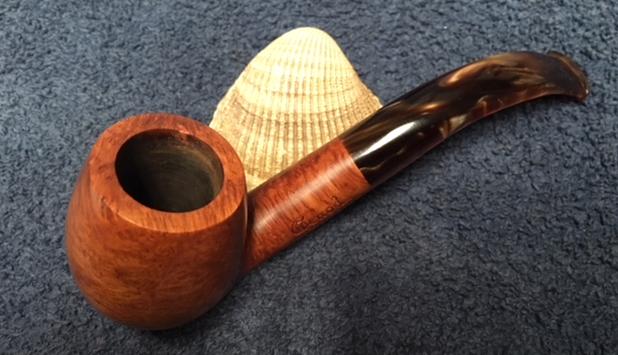
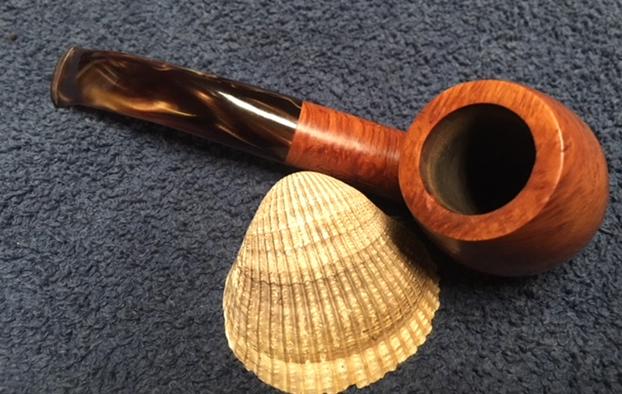
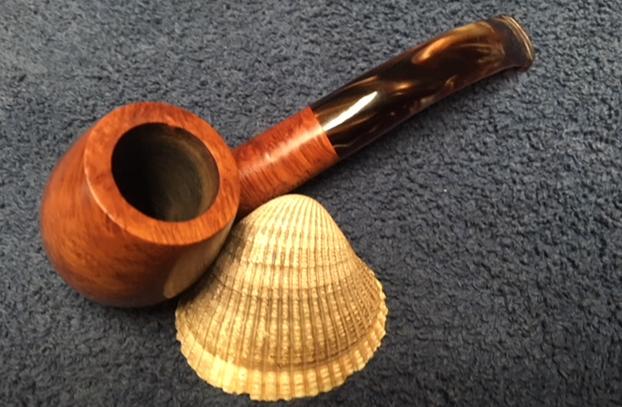
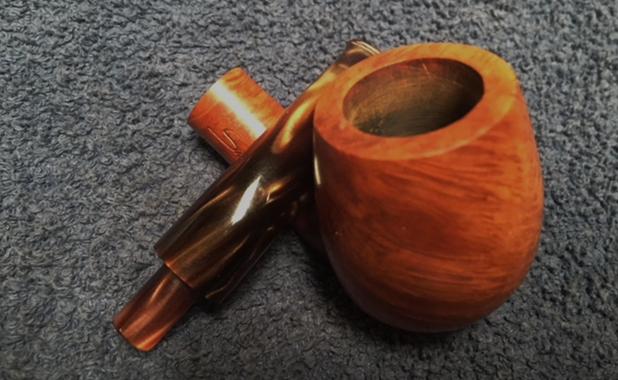
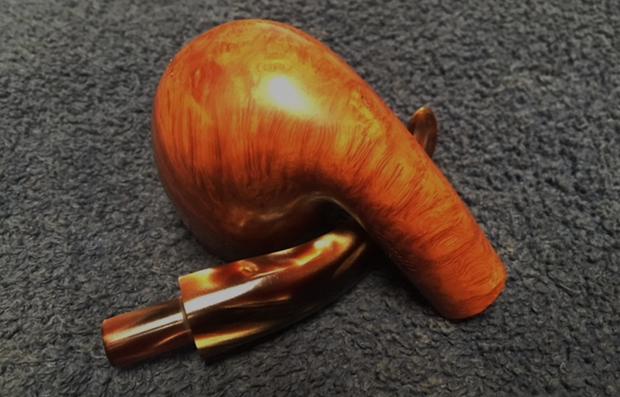
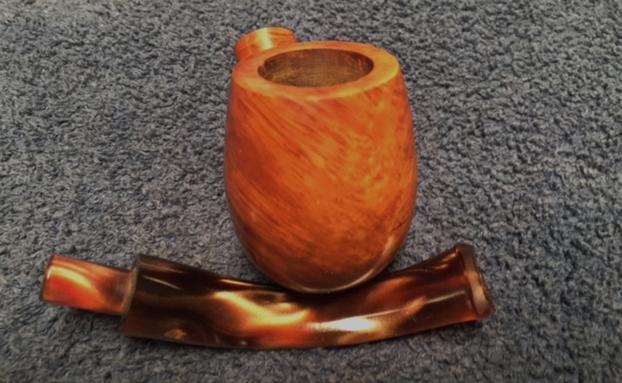
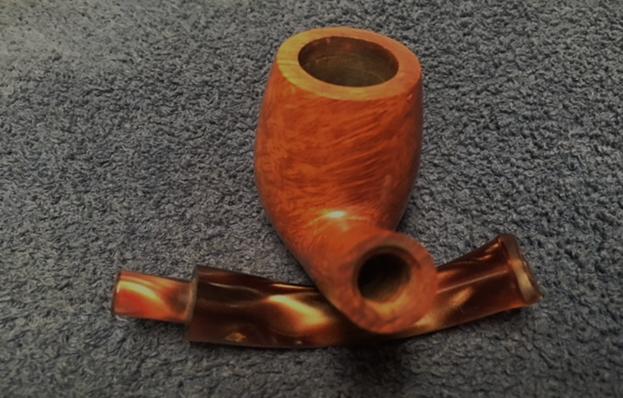
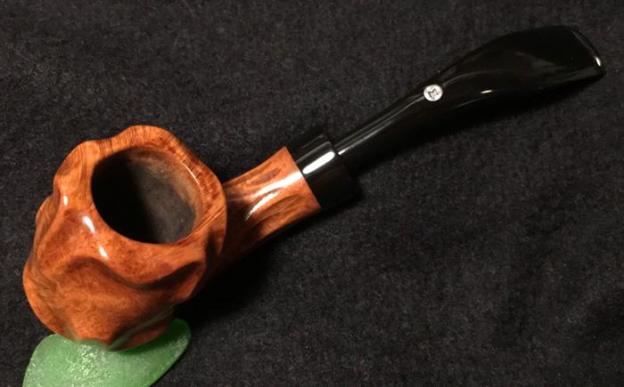
Idian lives in Indonesia and sent me an email after trolling through The Pipe Steward electronic “Help me!” basket which I call, “For ‘Pipe Dreamers’ Only!” He inquired about commissioning two pipes, a Peterson and the Italian, Gasparini M.G.M. Rock Briar 1912. He settled on the Gasparini and assured me that he was a patient man as I put his commissioned pipe in the queue behind quite a few other commissioned pipes. I found this pipe along with 65 others in a Lot of 66 which has provided several pipes for my work table which have benefited our work with the Daughters of Bulgaria, helping women and girls who have been trafficked and sexually exploited. This M.G.M. Rock Briar stood out to Idian and it also stood out to me not only because it’s a unique Freehand shape but also because the shank is chocked full of nomenclature information that I’ve looked forward to researching. Here are the pictures that Idian saw.

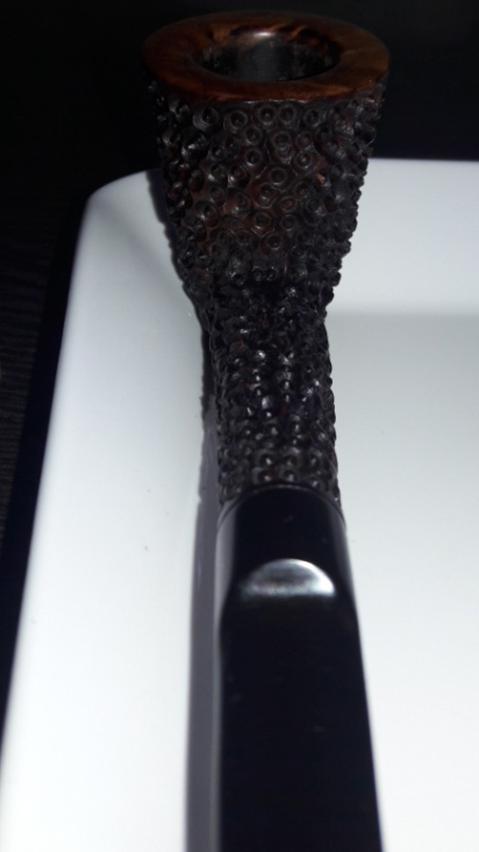
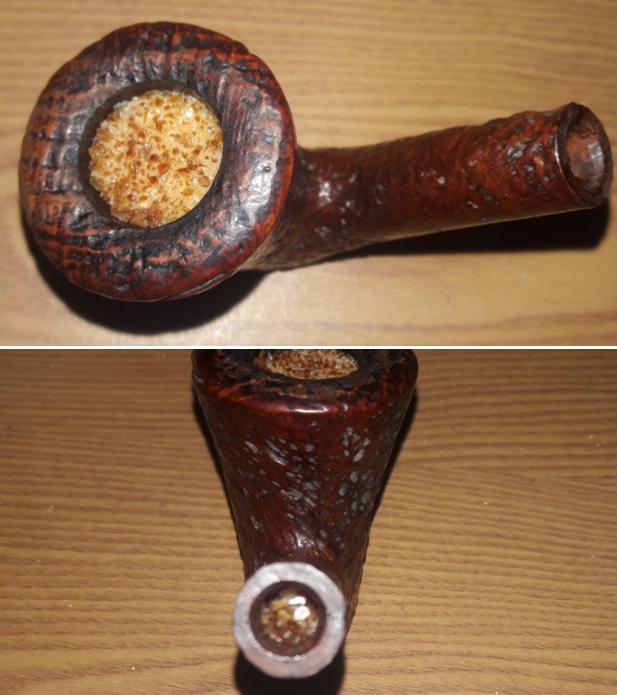
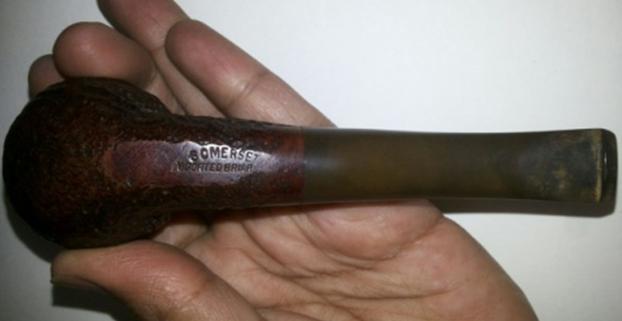
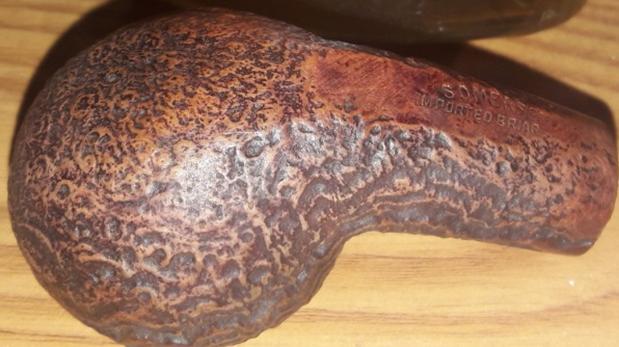
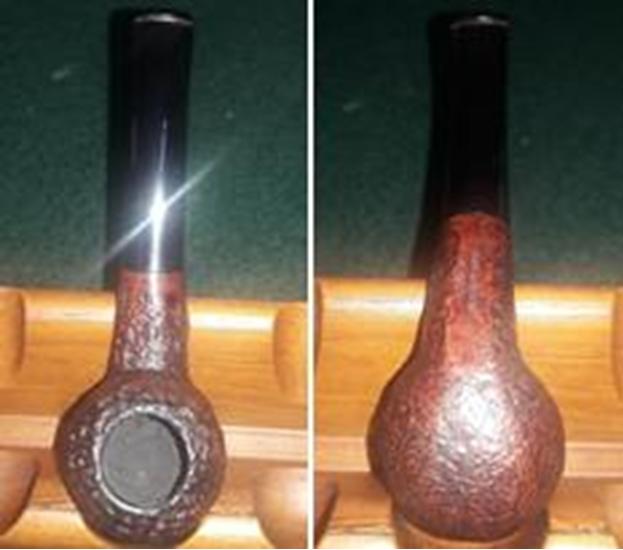
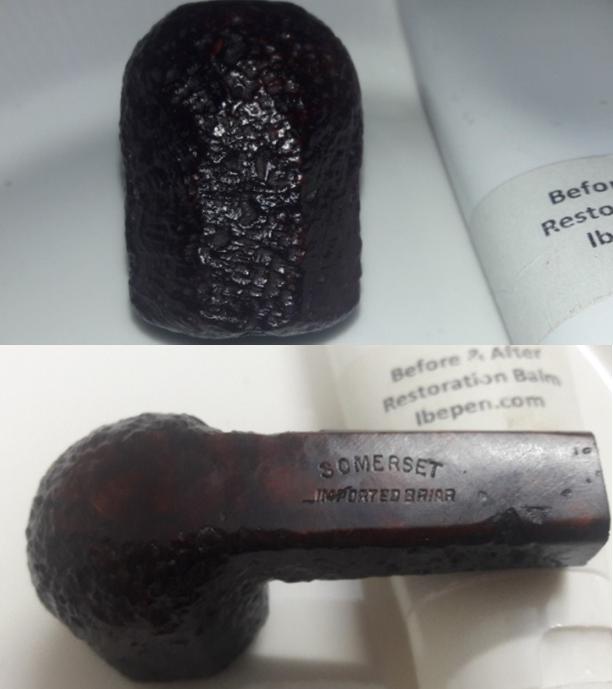
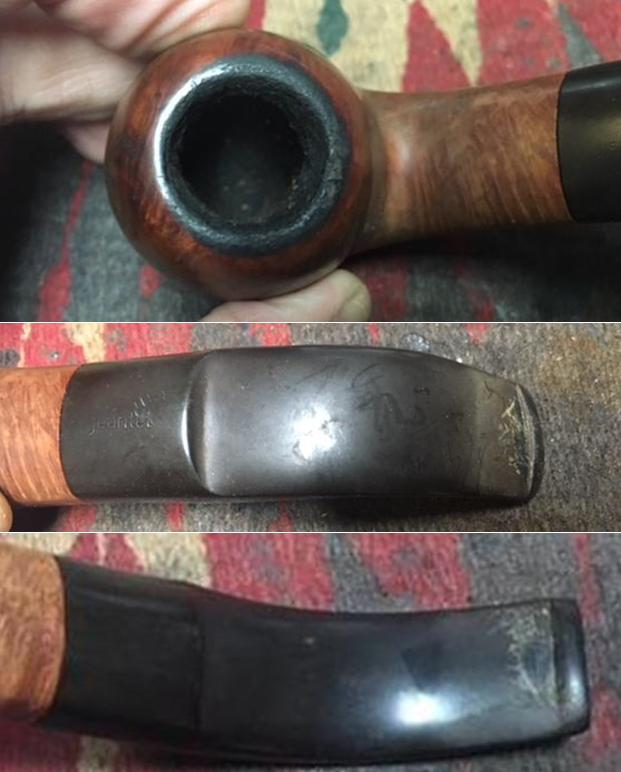
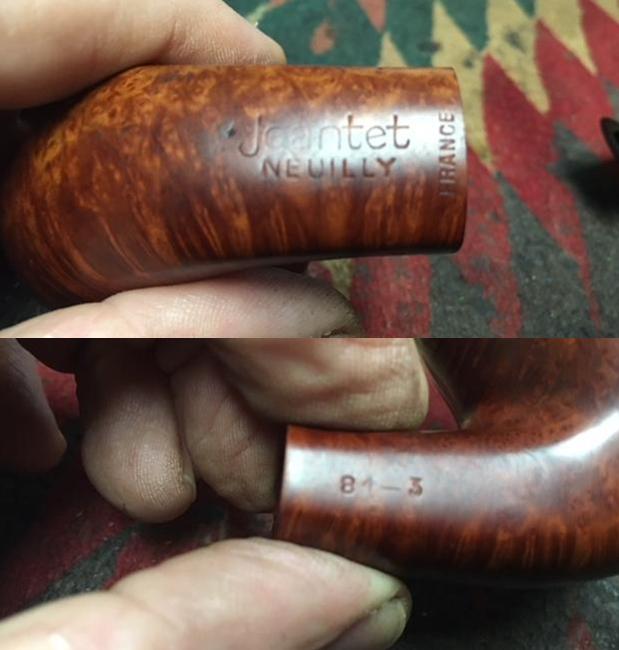
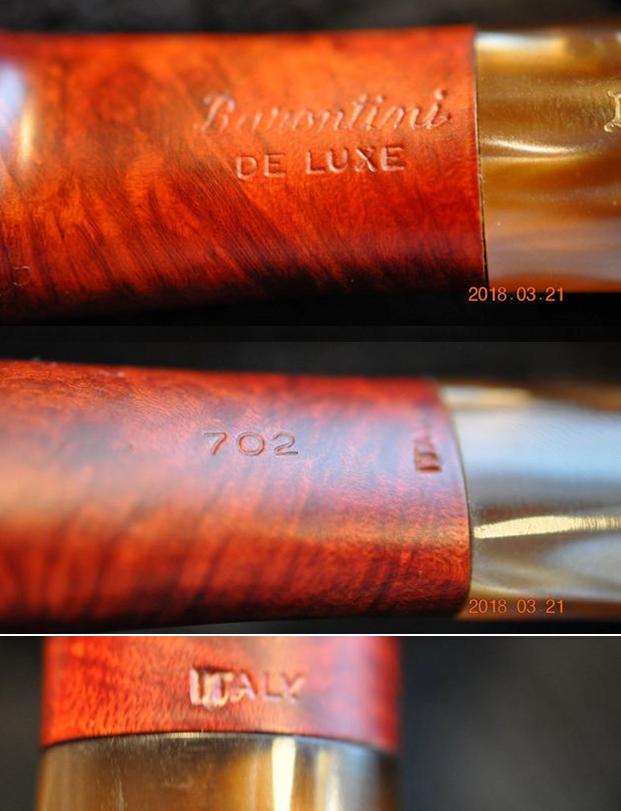
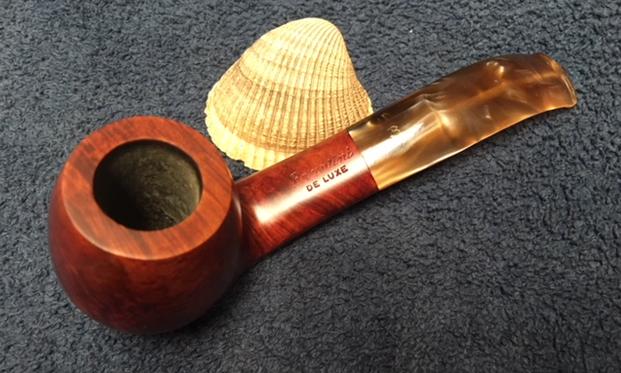
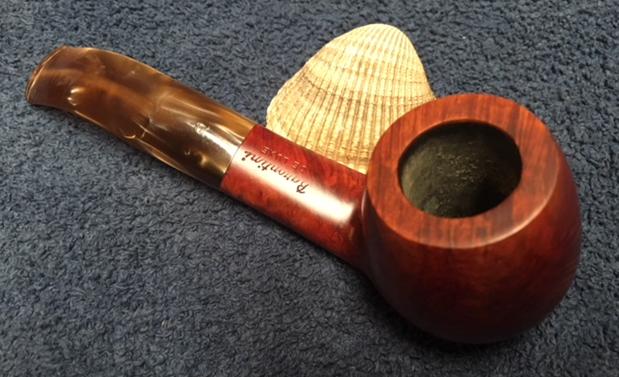
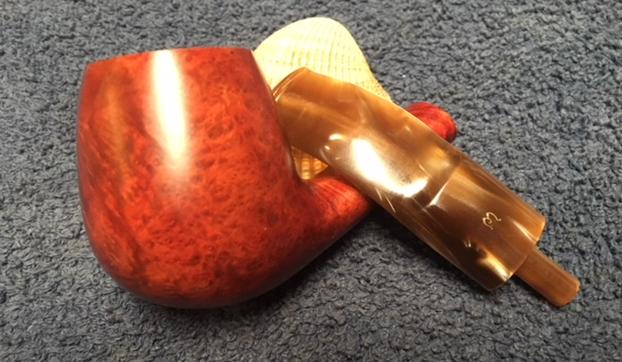
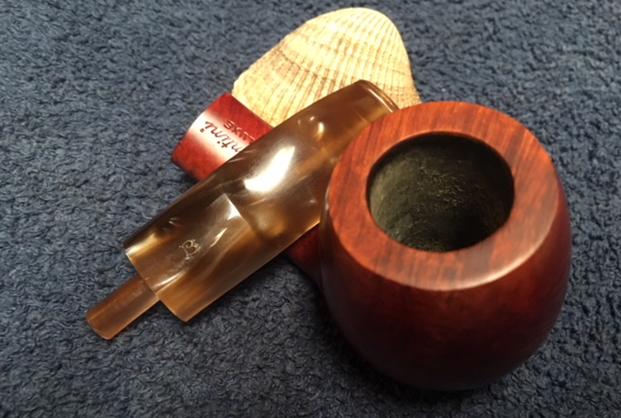
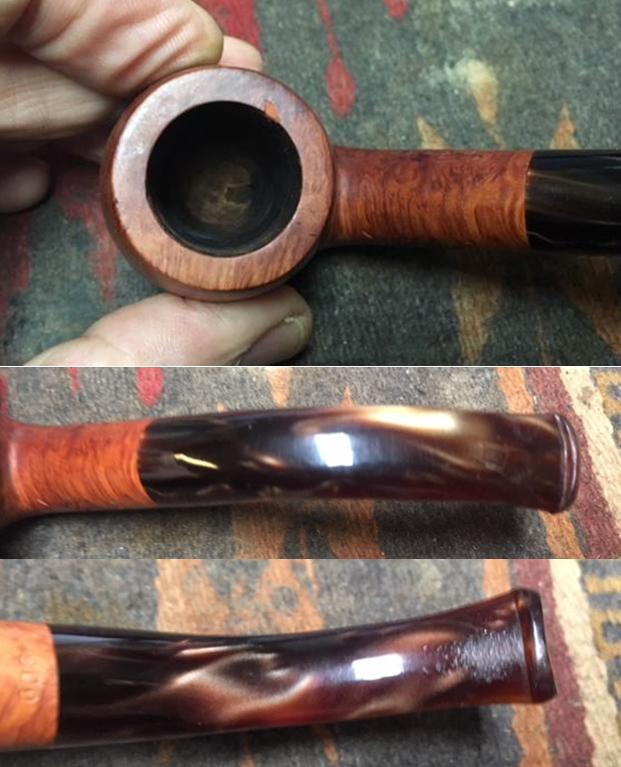
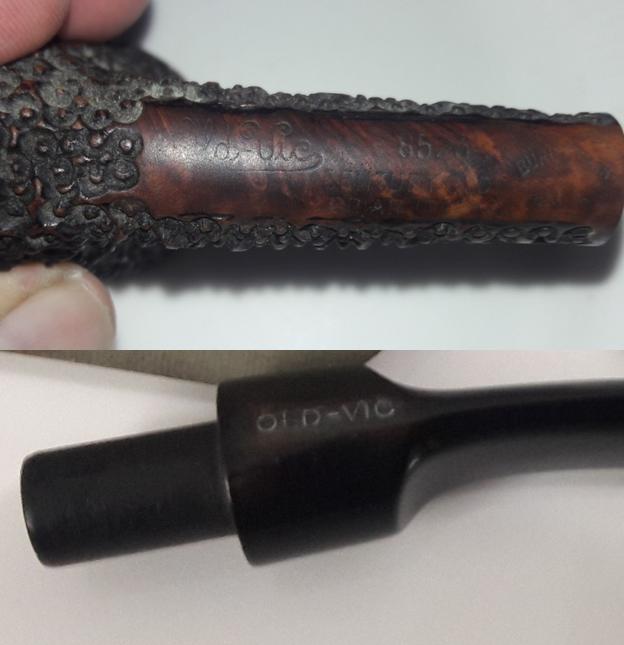
 The heel of the shank is stamped with ITALY [over] BRIAR 1912 [over] M.G.M. [over] Rock in cursive script. Below this is a stamp – a pipe partially ensconced in a circle with M.G.M. repeated under the circle. To the right of this, hugging the briar’s edge transitioning to the vulcanite ferrule is the number 25, which I’m assuming is a shape number. The pictures above show the rondel with the pressed M for Mario, the patriarch of the Gasparini family.
 Much of Pipedia’s article about the Gasparini name came from the current Gasparini website, http://www.mgasparini.it/en/. When reading the information, one gets the impression of the enterprise having deep family roots which continue today. From the Pipedia article:
In 1938 Mario Gasparini, with his wife Ida, took his first steps into the world of the pipe. Today his daughter, Marisa Gasparini, sits at his desk; since 1977 Marisa and her husband, and now her daughter, carry on the tradition of her family. At the beginning of 1950’s, the building, that still today hosts the production department, was enlarged. In 1971 the offices and the warehouse were moved from Milan (where they were situated for marketing purposes) to Luvinate.
During those years the skilled workers and our direct partners have always followed the history of the Gasparini factory, becoming very fond of it and devoting themselves, with care and love, to the making of each pipe, with the personal fantasy and skills of the artist. We would like to take this opportunity to thank those artisans who, with their creativity, gave, and continue to give, life to the Gasparini Pipe factory.
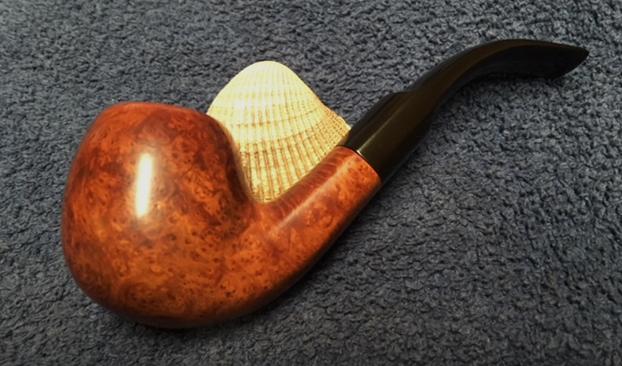
The article also describes the Gasparini series, M.G.M. coming on-line in 1965 as a classical line with the initials standing for the founder’s name – Mario Gasparini Milano. Pressing the research, the Pipephil.eu site offered more information. Of interest in the Pipephil information was the reference connecting the M.G.M. “Collectionist” series (marked by the circle/pipe stamp) with a comparison to ‘wax-drip pipes’. I looked at that link and got a clue of what might be the considered shape of the M.G.M. Rock on my work desk: stummels fashioned to look like the ends of used candles. Here is a clipping of three ‘high-end’ examples of this interesting shape:
 With these examples before me, I take another look at the M.G.M. Rock Collector on the table and it I believe that its possible it was fashioned in the ‘wax-drip’ manner with the ripples of melted wax shaped on the rim flowing down.
 Pipedia’s article included an older Gasparini brochure (courtesy of Doug Valitchka) – unfortunately no dating was given for the brochure, showing three pipes in the ‘Collector’ series. The middle example is obviously the same shape style and stem as the pipe on my work table but with a squatter bowl – very much reminiscent of a ‘wax drip’ shape. My guess is that the brochure is from the 60’s because it’s black and white and I would imagine that the stated pricing at that time would not be for a corner drug store pipe! Unfortunately, this was the only page shown – I would love to have read the description for the ‘b.’ pipe!
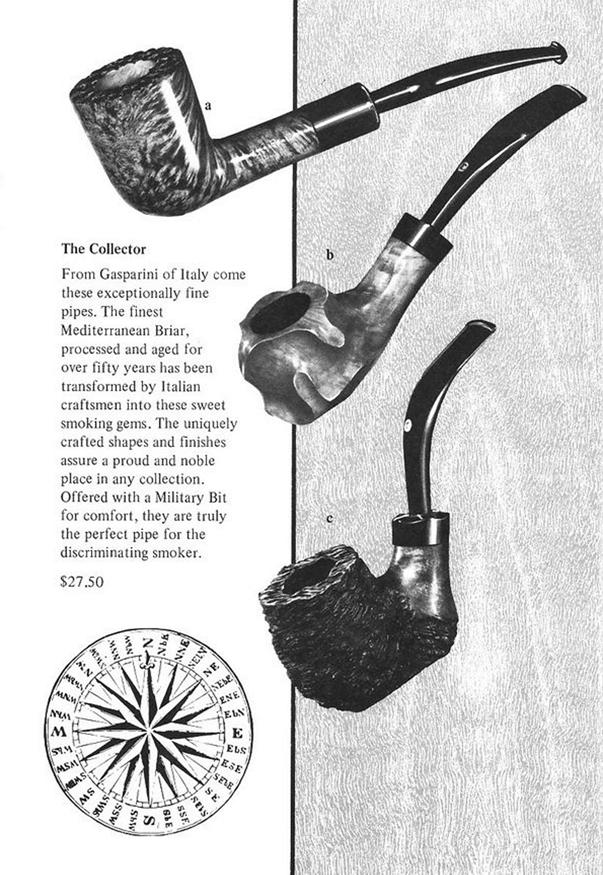 One more question dogged me in my research of the M.G.M. Rock – ‘Briar 1912’. Briar 1912 was stamped on several examples I saw of Gasparini pipes on Pipedia and Pipephil.eu. What did it refer to? As I’ve done before with much success, I decide to go to the front door of the Gasparini house and knock and introduce myself. On the ‘Contact’ page of the Gasparini website I find contact information and send an email with the 1912 question as well as a few other questions to confirm the shape number and dating. We’ll see if they respond! The description in the brochure gives a clue that I didn’t recognize until later – it states that the briar had been aged over 50 years! If one does the math, if 1912 is when the aging process began – plus 50 years, lands us in the year 1962 – the decade the M.G.M. series was introduced and perhaps the ‘Collector’ series as well. It was only after discovering an August 2013 thread in Pipes Magazine Forum (LINK) concerning Gasparini pipes that I tied the 1912 with the aging of the briar – I know, I’m slow! This clip from Doc Watson speaks very positively of the Gasparini named pipes:
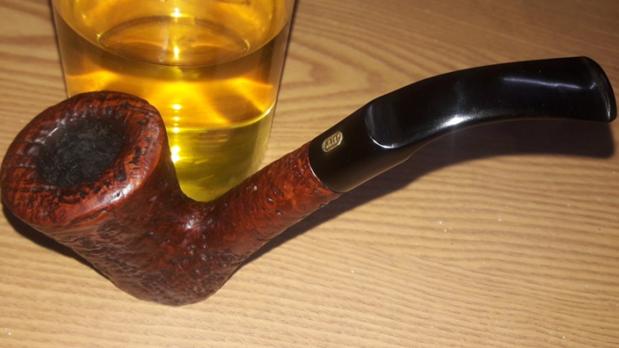
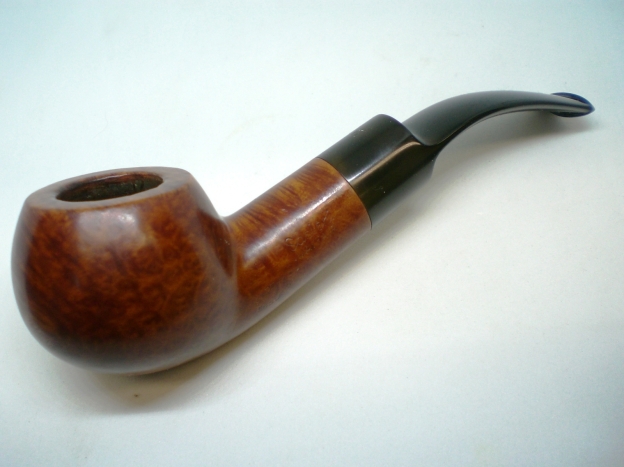
I have a few Gasparini pipes. They are real sleepers IMO and are seldom talked about by collectors but believe me there are some magnificent Gasparini pipes out there. Here’s a photo of one that came from the late Jack Ehrmantrout (owner of Pipe Collectors International PCI) collection. It was one of his favorites that he never smoked. Some are stamped 1912 briar, which is indeed some old root. As most pipe companies/makers they make different lines, some higher grades than others but IMO if you find one you like, go for it. (Note from me: IMO = in my opinion) I love ‘Sherlocking’ the provenance of pipes not only to learn about the names of historic lines, but to more fully appreciate the value of what I’m handling and seeking to restore. The picture above, along with several examples in the Pipedia article courtesy of Doug Valitchka, give me a good idea of the natural briar hue Gasparini used and I will shoot for this with the M.G.M. Rock on my table.
We ll, my cup runs over! I received a reply from M. Gasparini Pipes in Luvinate, Italy, but not from a desk employee. Marissa Gasparini (picture from previously cited Pipedia article) responded to my questions, the daughter of Mario Gasparini, the founder of the Gasparini Pipe house in 1948. She assumed control of the Gasparini Pipe interests in 1977 and I assume she continues in that role today. I was honored that she wrote to me. Here is her letter, switching to my native tongue and responding to my questions:
Dear Dal,
1) the 1912 is the year in which was born the briar that we used for making that serie of pipes so particular.
2) The circle with pipe in it was used only for some special fancy serie like the Rock.
3) We begin to produce thise serie in the 1960 and finish in the 1965, and now we have left only few pieces, and you are lucky to have one.
4) The number 25 is the number of the shape and the pipe was waxed.
We hope that our informations are o.k. for you and we thank you and remain at your complete disposal,
with best regards,
Marisa Gasparini
Wow! I love restoring pipes! With Marisa’s letter as confirmation, the briar root aging process used for this M.G.M. Rock began in 1912, 106 years ago. The Collector stamp was only used for special, fancy lines, which applies to this Rock. This M.G.M. Rock was produced between 1960 and 1965 – which gives it an age ranging from 58 to 53 years. The shape number perhaps points to the wax candle shape that I was guessing might be the case or the shape may simply be a freehand Rock. She also said that I was ‘lucky’ to have one of these special collector series in my possession – I would call it blessed. I responded to her gracious letter and ventured another question – to ask about the significance of the third letter, ‘M’ in M.G.M. moniker? The first two letters are clear – the initials of her father. The third letter, ‘M’ stands for Milano. I asked her the significance of ‘Milano’?
A few hours later her reply arrived. The M.G.M. – Milano was where the Gasparini family lived and produced their pipes 45 years ago – a special place in their memories.
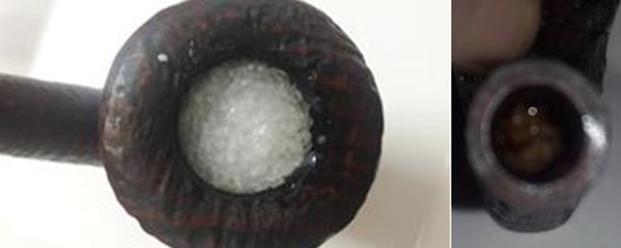
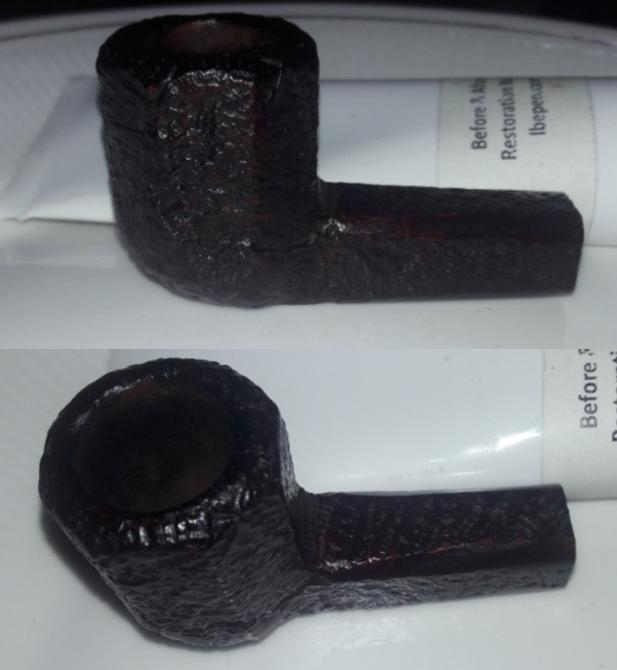
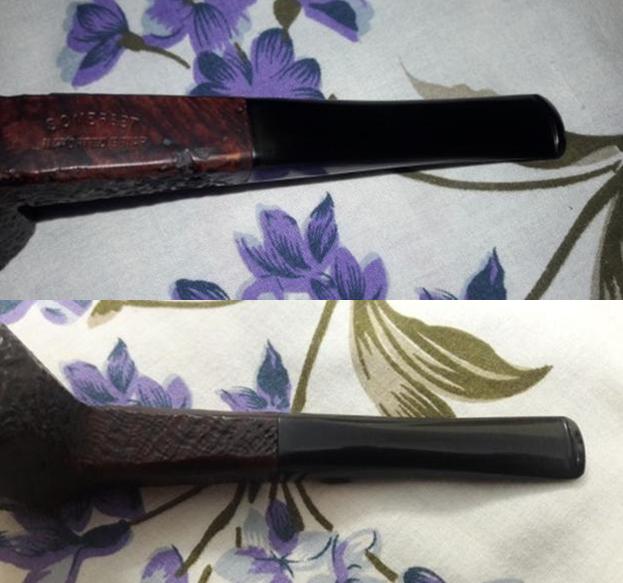
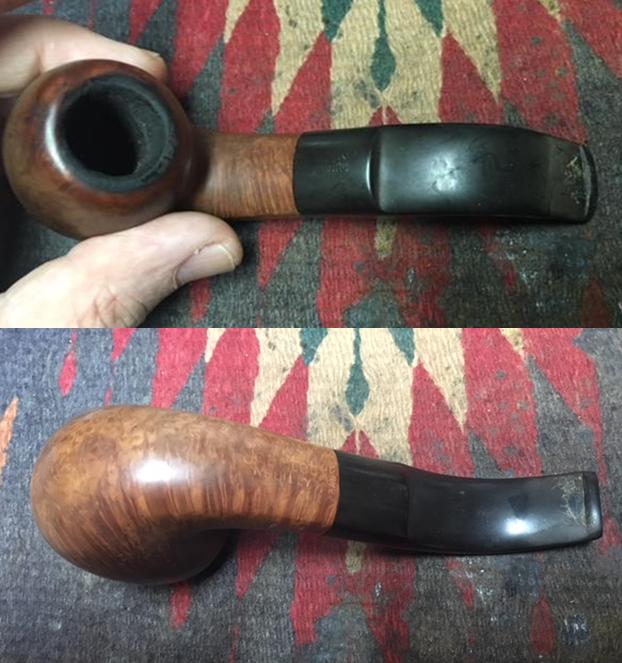
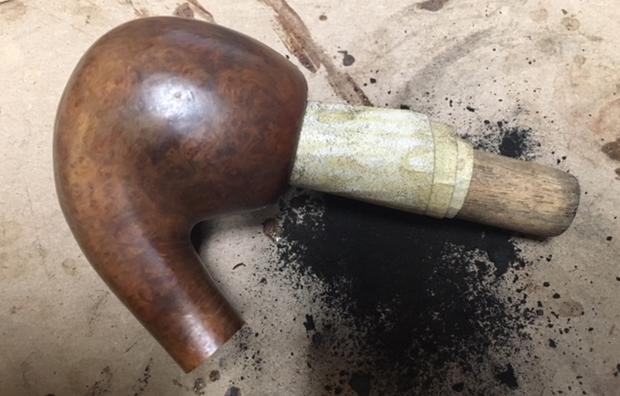
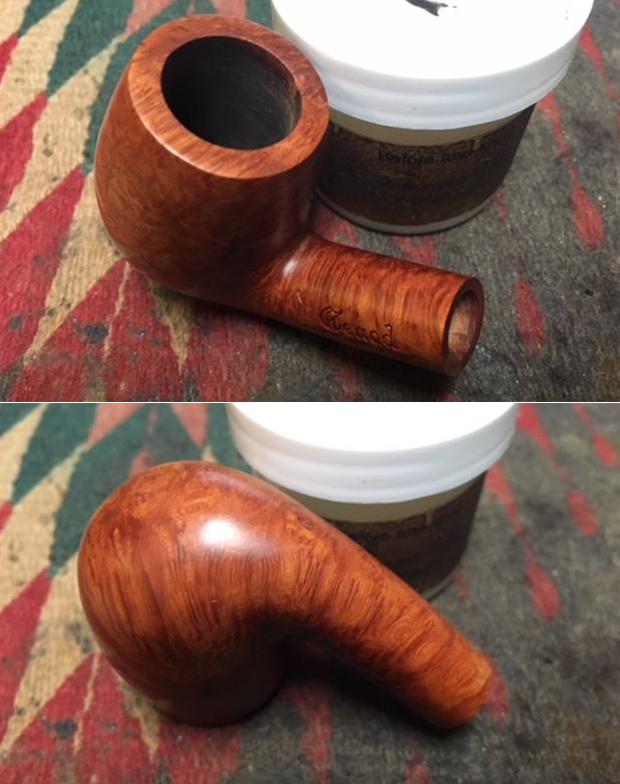
This is a nice-looking pipe and I’m happy to call this a “Refresh” on the title of the blog. With a very quick cursory look at the chamber, stummel and stem I see no challenging issues. There is a light cake in the chamber, the rim has minor discoloration from grime and oils, and the stummel surface appears to be in good shape. The surface of the stummel has darkened and has become tired and needs some cleaning and spiffing up a bit. The Military stem shows no perceptible oxidation and only minor scratches – no tooth chatter. Maybe an easy restoration!
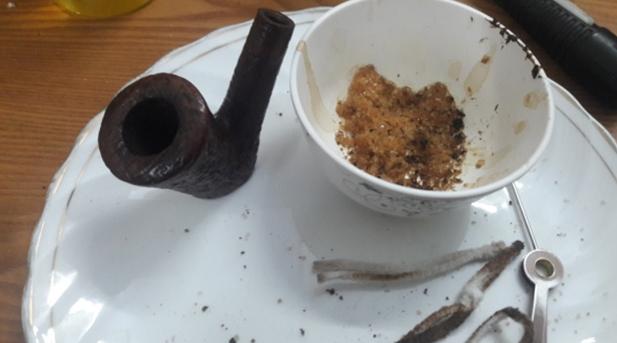
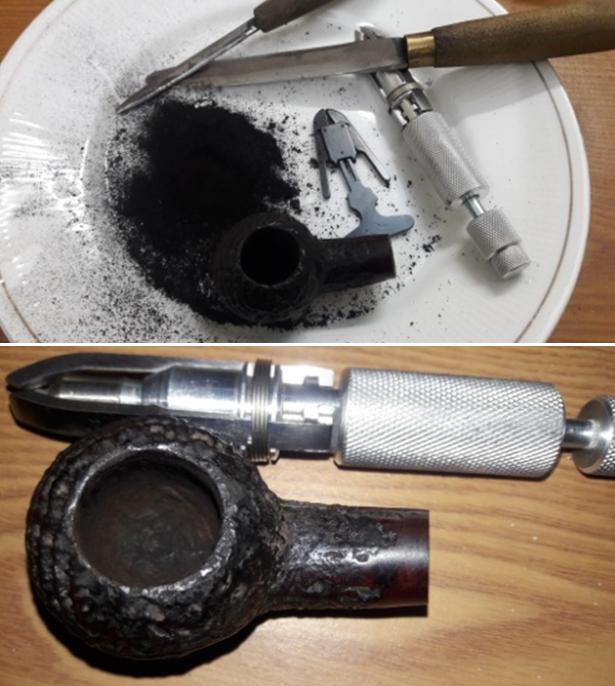
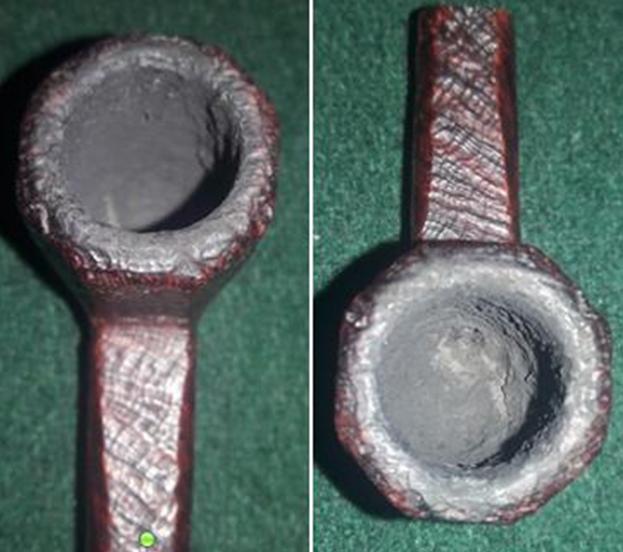
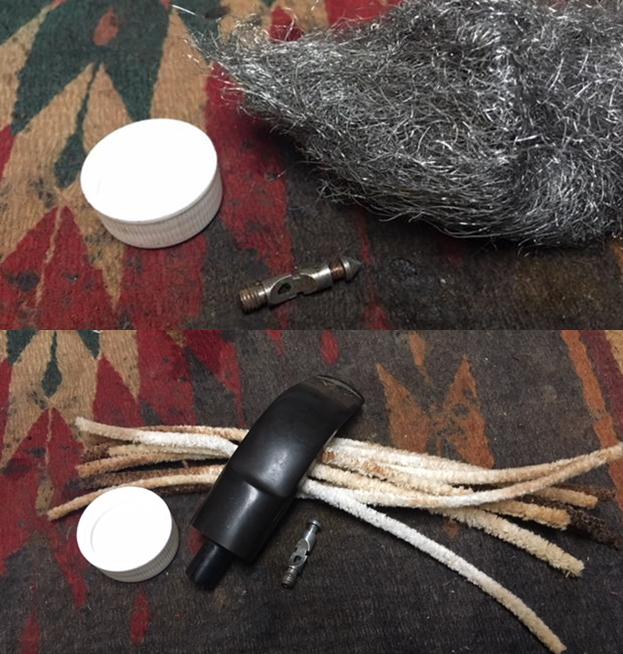
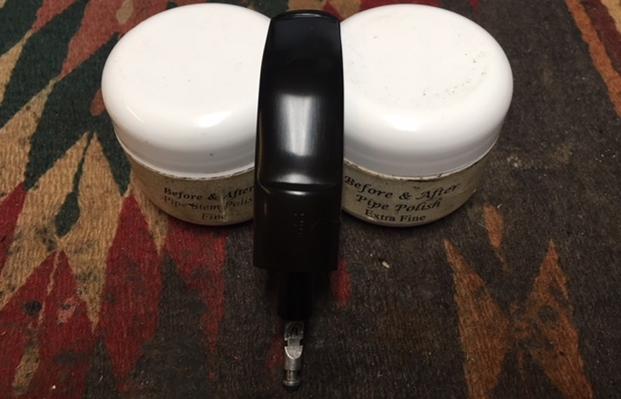
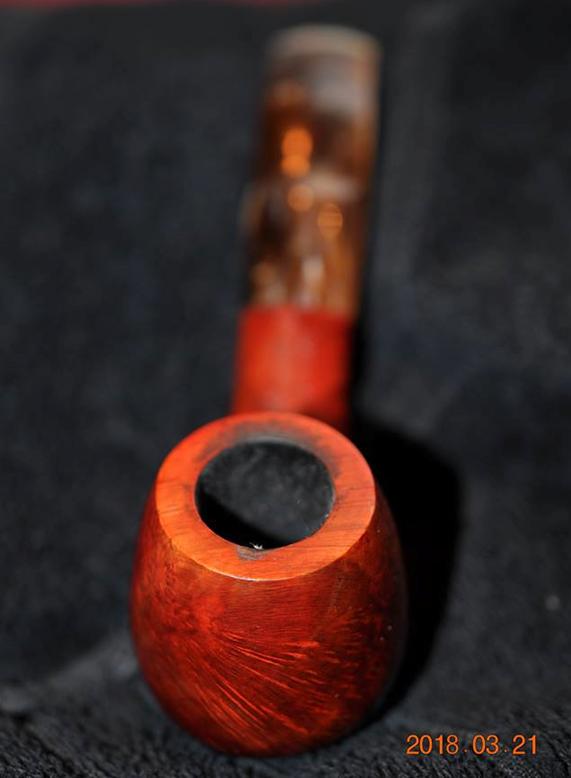
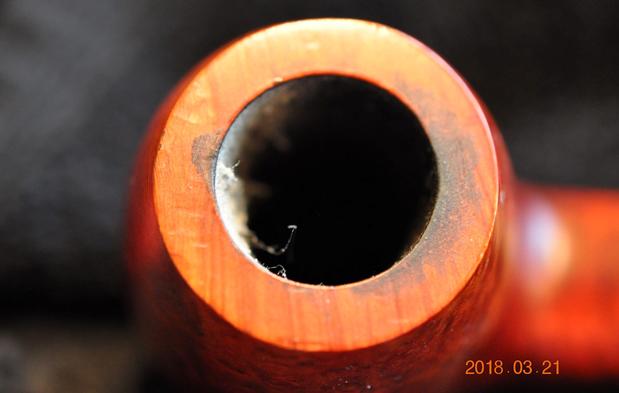
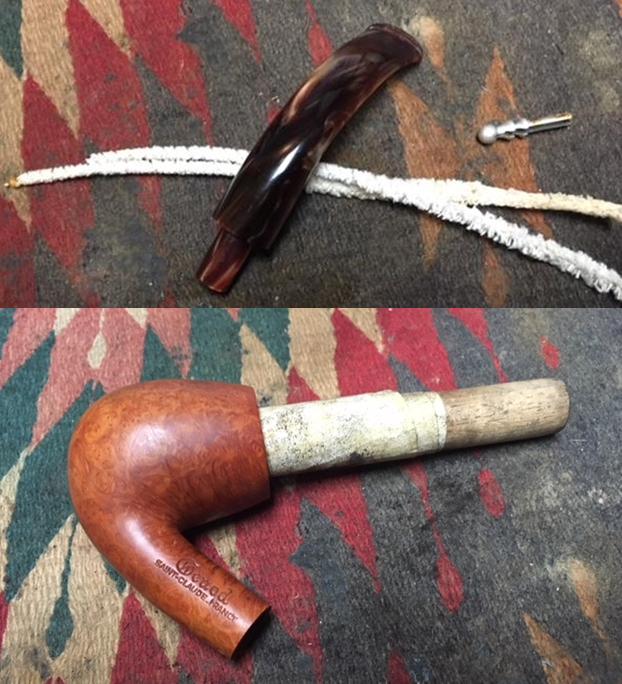
I begin the restoration by placing the stem in a soak of Before & After Deoxidizer along with other stems of pipes in queue for restoration. Even though I see no oxidation, I’ll give it a soak to make sure. Before putting the stem in the soak, I run a pipe cleaner dipped in isopropyl 95% through the airway to clean it first. After soaking for several hours, I fish the stem out, drain it and wipe it down with a cotton pad wetted with mineral oil (light paraffin oil here in Bulgaria). As I thought, very little oxidation was raised during the soak. Looking now to the M.G.M. Rock stummel, I begin by reaming the chamber to remove the moderate collection of carbon cake to provide a fresh start for the 106 year aged briar. After putting down paper towel for easier clean-up, from smaller to larger, I use 3 of the 4 blade heads available to me in the Pipnet Reaming Kit. After this, I employ the Savinelli Fitsall Pipe Tool to fine tune the reaming by reaching the more difficult angles at the floor of the chamber and by scraping the walls. Finally, I wrap a piece of 240 grit paper around a Sharpie Pen and sand the chamber walls. I then wipe the chamber with a cotton pad wetted with isopropyl 95% to clean the carbon dust left behind. An inspection reveals a healthy chamber with no cracks or heat fissures. The pictures show the process.
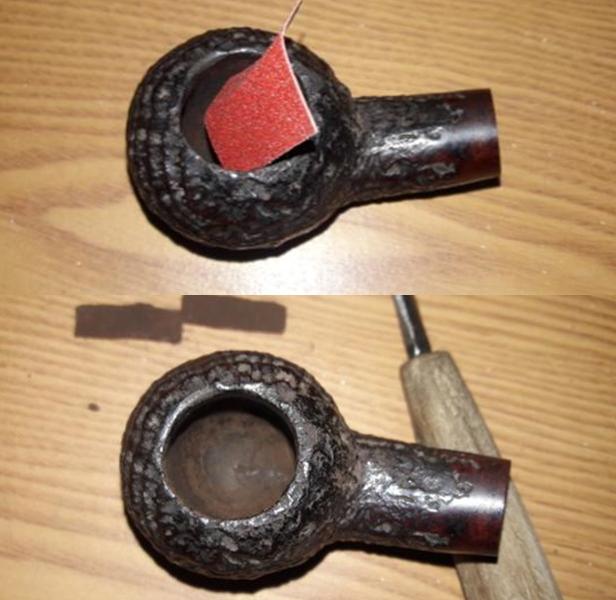


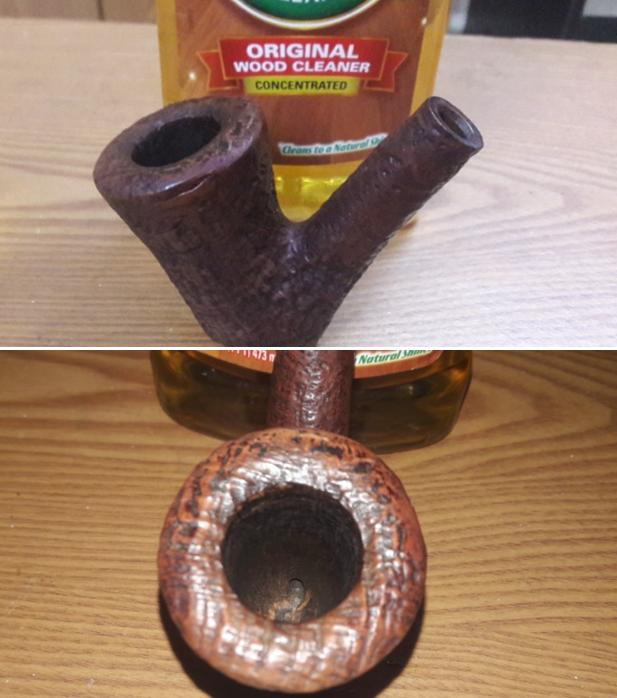
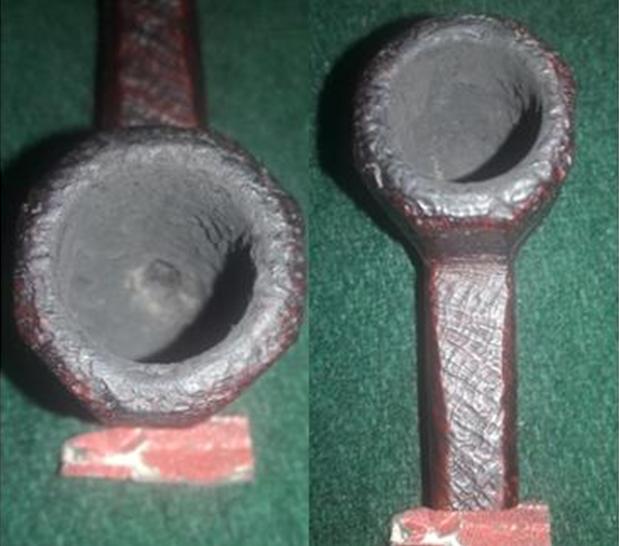
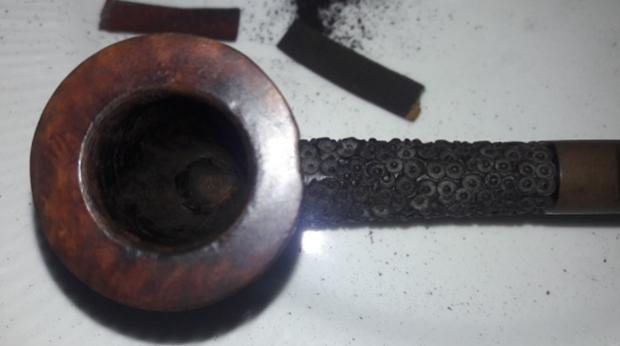
 Now, turning to the external surface cleaning, I use undiluted Murphy’s Oil Soap with cotton pads and a bristled tooth brush to reach into the rolls of the briar shaping. I also use a brass wire brush on the small plateau to loosen the scorching around parts of the internal lip. Following this, I gently scrape the scorching with a Winchester pocket knife edge to remove more of the damaged briar. The cleaning and brushing made good progress.

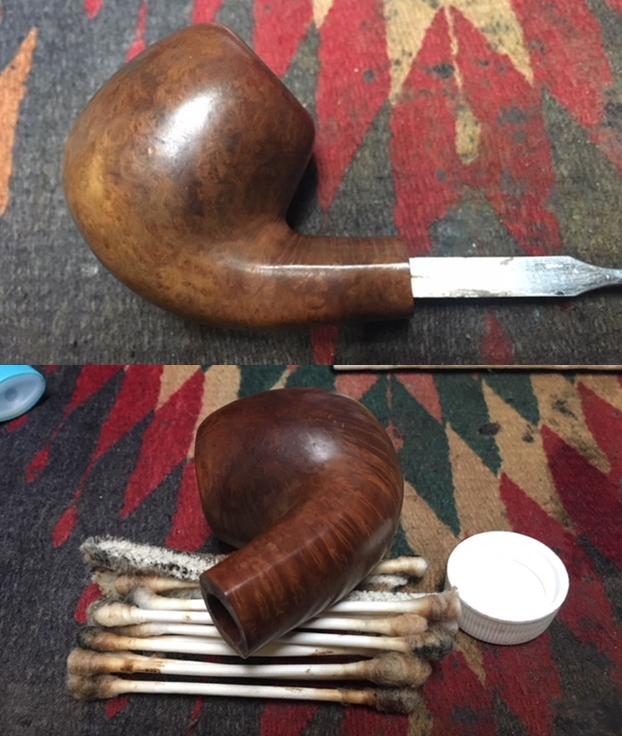
 Preferring to work on a cleaned pipe, I now switch to the internals of the stummel by cleaning the mortise and airway with pipe cleaners and cotton buds dipped in isopropyl 95%. I also utilize different sized dental spatulas and scoops to excavate tars and oils by scraping the mortise walls and digging around the draft hole drilling deeper in the mortise. I have learned over time that it shortens the clean up by excavating what you can and following with the cotton buds. Last time I was in the US, I went to the US 1 Flea Market in Stuart, Florida, looking for pipes, of course. I found a shop in the Flea Market that had absolutely everything and found an assortment pack of about 8 different dental tool accessories – sharp, flat and scooped. These tools are very helpful in different phases of the pipe restoration process. A good investment! After excavating and swabbing, the internals are clean. I move on!
 Back to the Military stem – it is in good shape with respect to the oxidation, but it has scratches and roughness around the bit that one expects to find through normal use. The button also has compression marks to address.
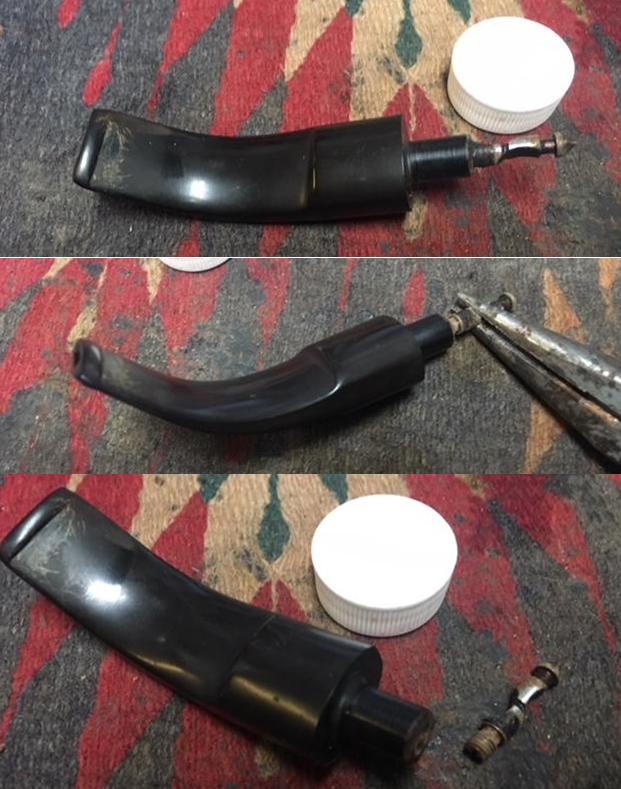
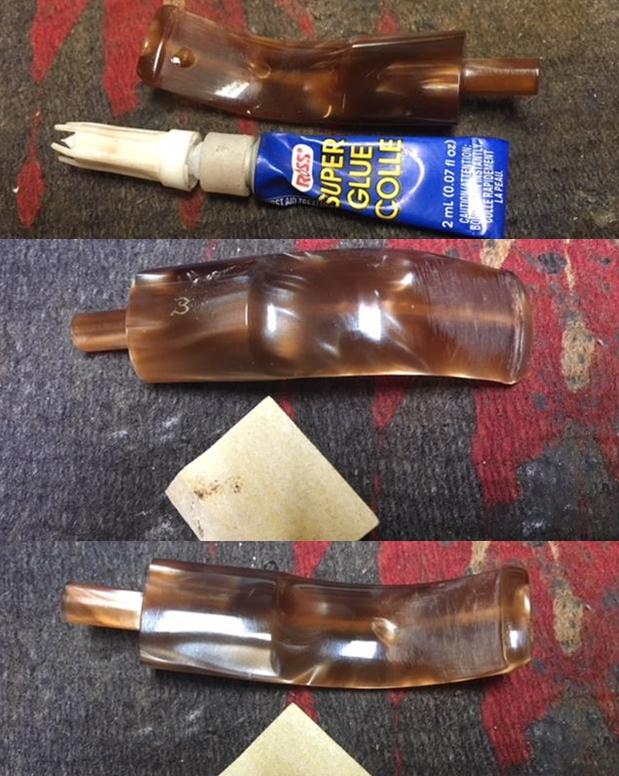
 I first wet sand using 600 grade paper to find out if a mid-range grit is invasive enough to address the issues I see. It does well, but it uncovers small tooth dents that I didn’t see before as well as the button being a bit compressed.
  I backtrack and use a flat needle file to give the button refreshed definition. I then use 240 grit paper only in the bit area to remove the tooth dent and work on the button.
 To erase the 240 grit scratches, I again sand using 600 grit paper followed by sand/buffing the entire stem with 0000 grade steel wool. I think the Military stem is looking pretty good.
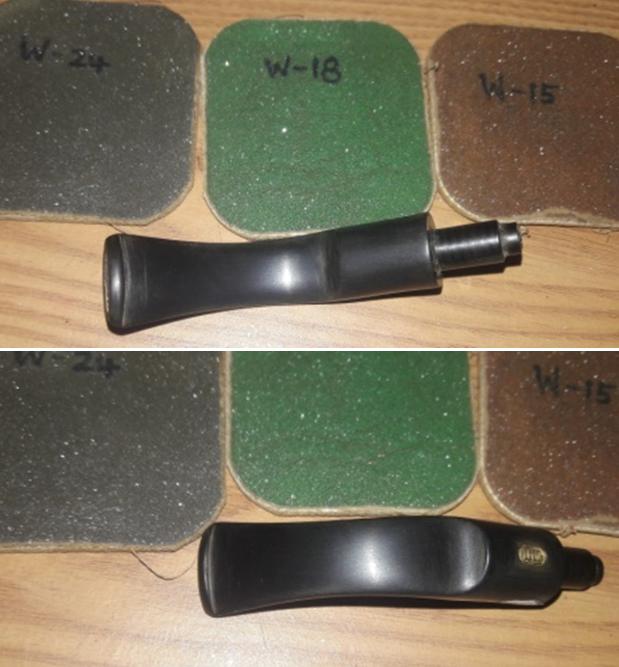
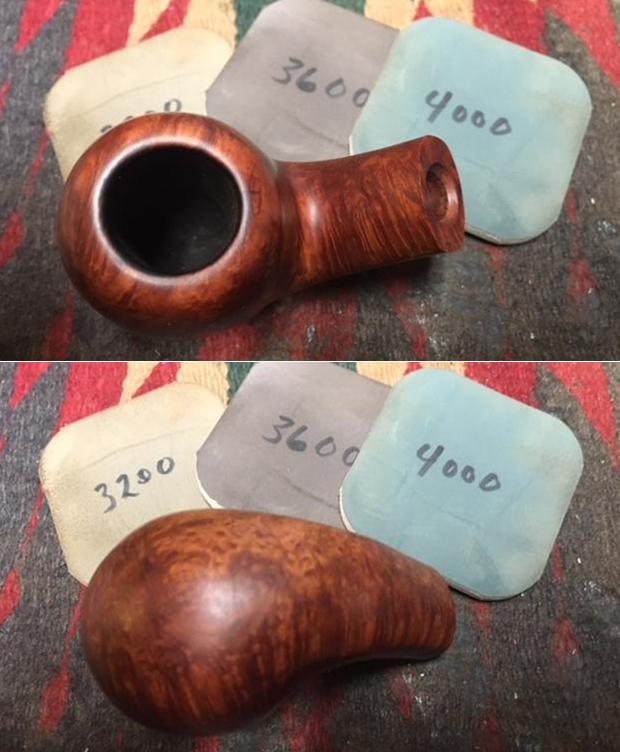
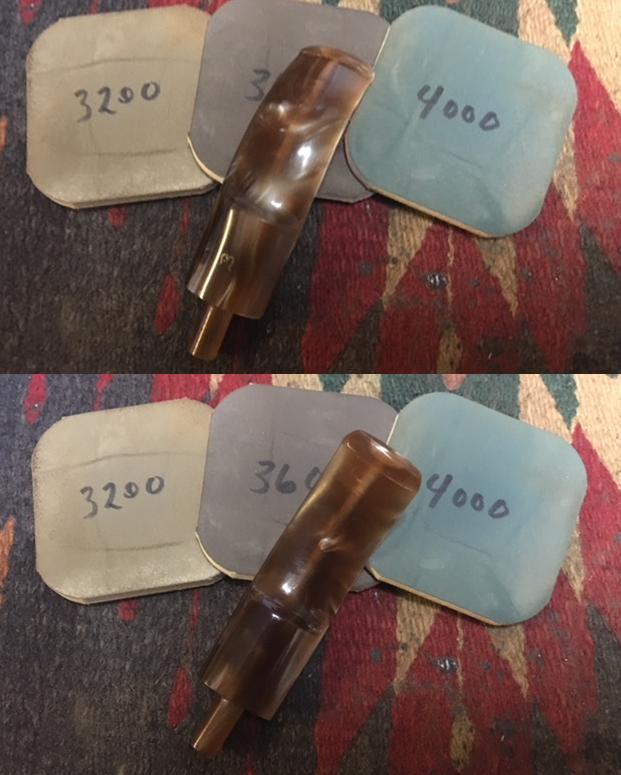
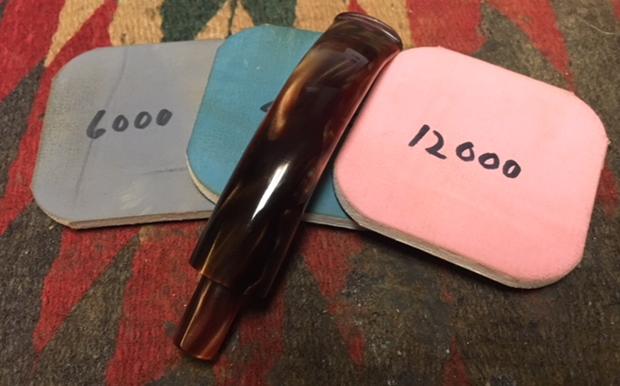
 Pressing forward with the stem sanding, I wet sand using micromesh pads 1500 to 2400 followed by dry sanding with pad 3200 to 4000 then pads 6000 to 12000. After each set of 3 pads, I apply a rich coat of Obsidian Oil which rejuvenates the vulcanite. The stem’s looking great – I love the pop!

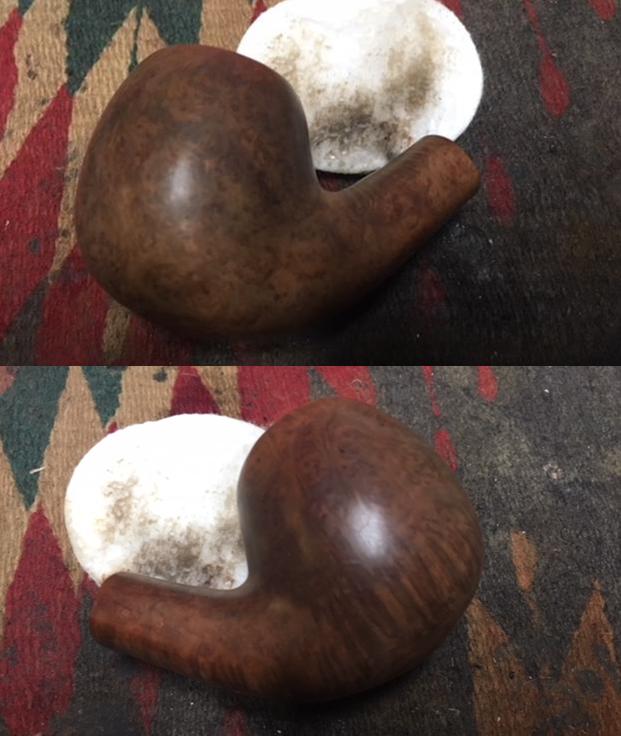
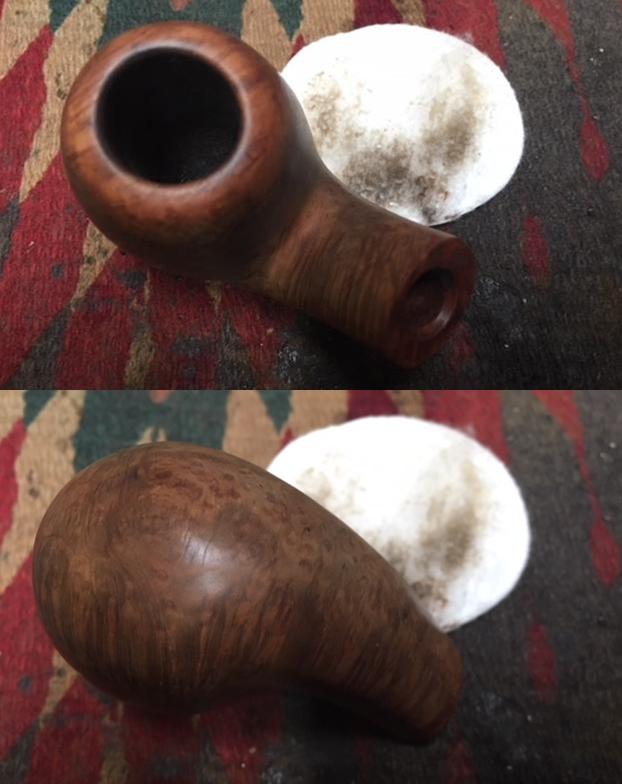
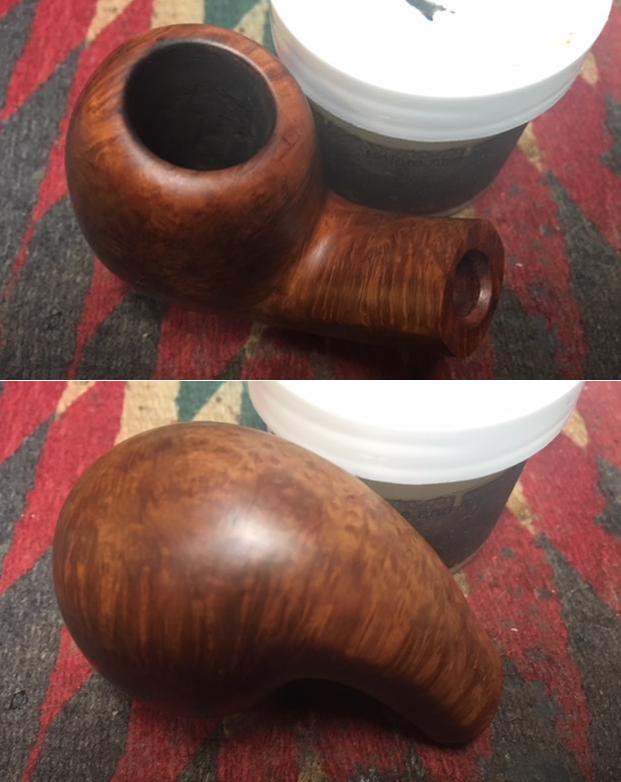
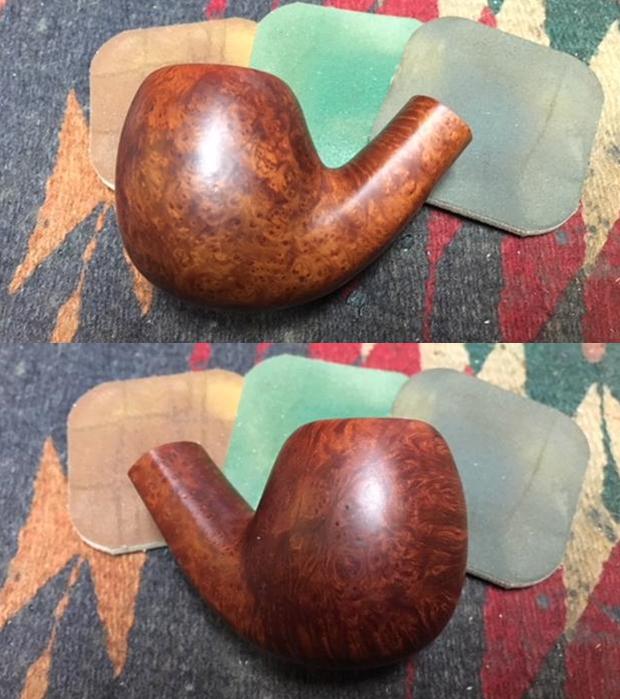
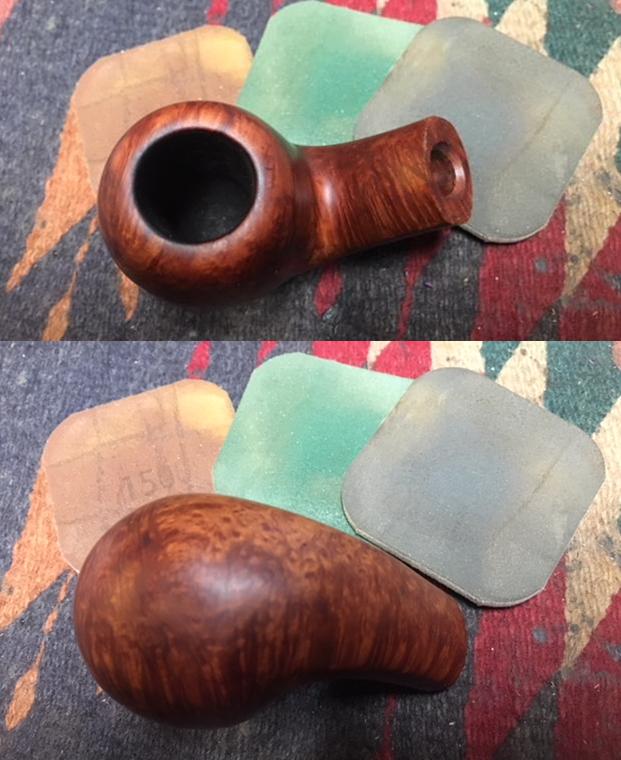
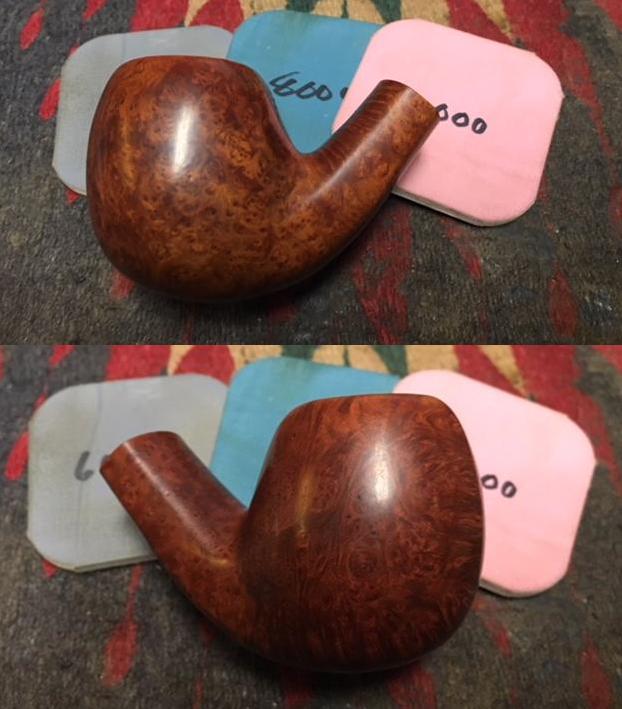
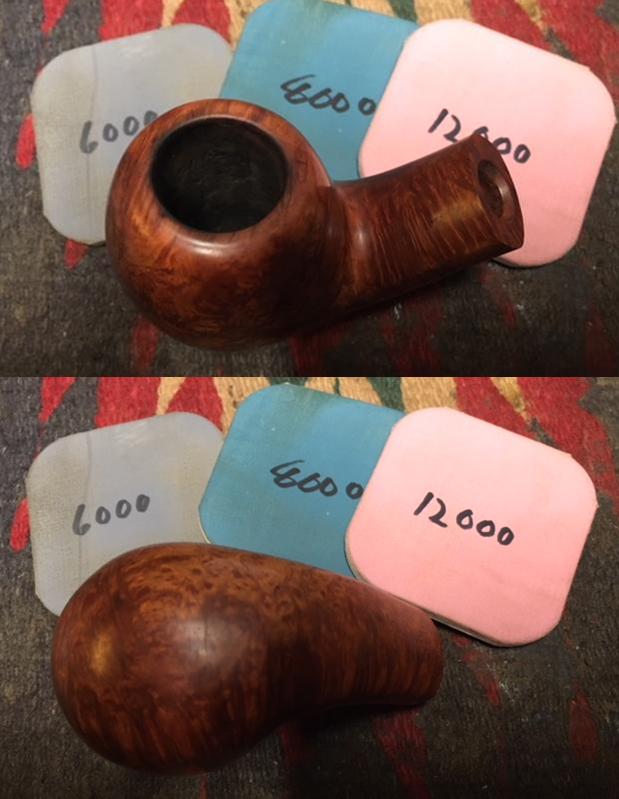
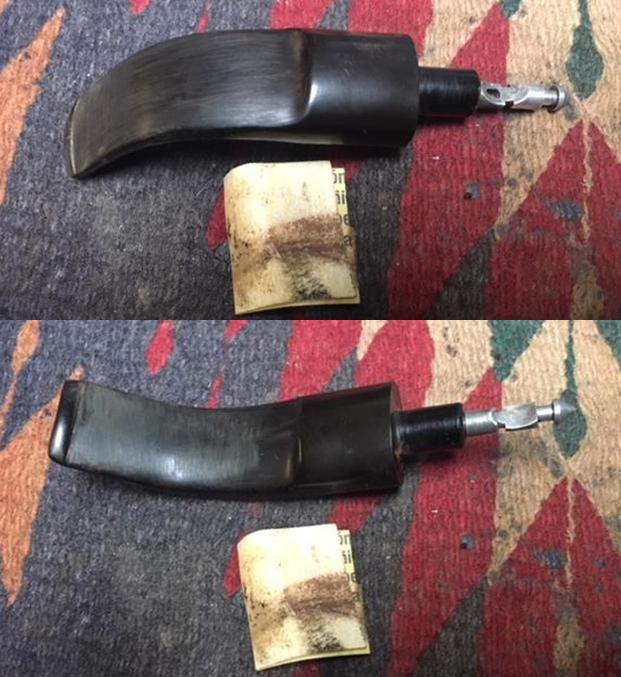
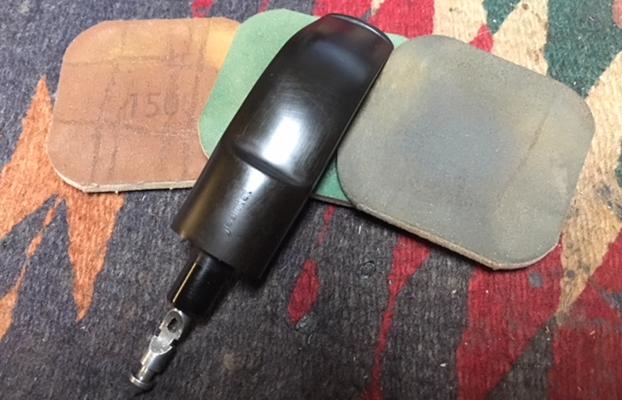
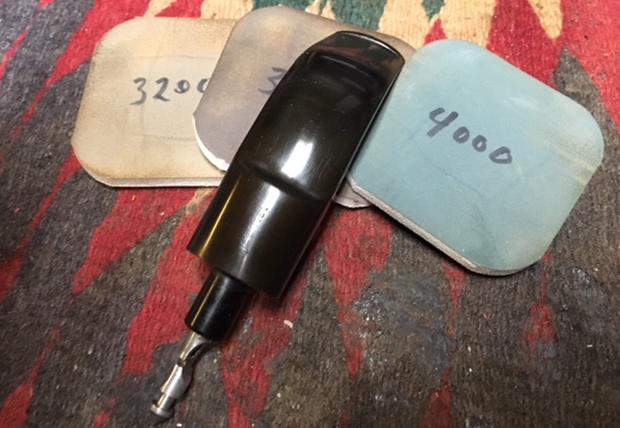
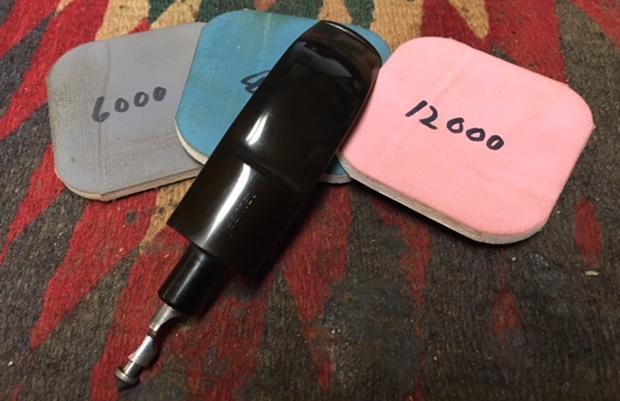
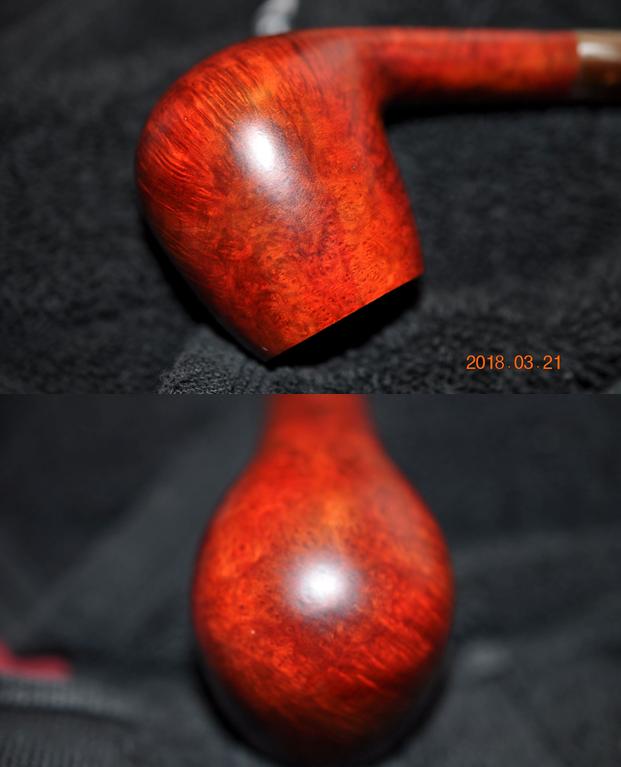
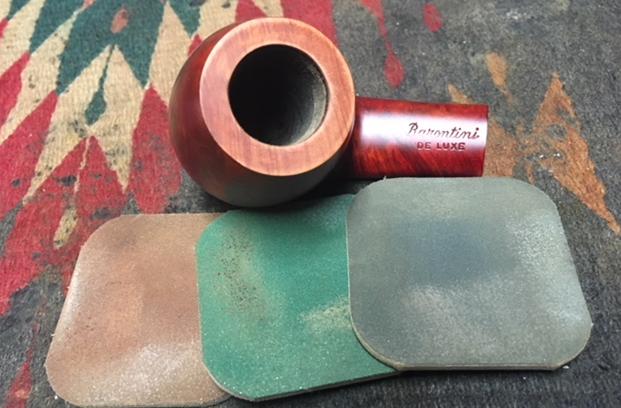
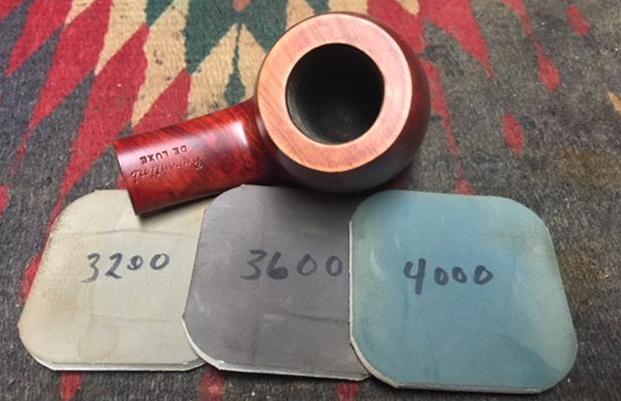
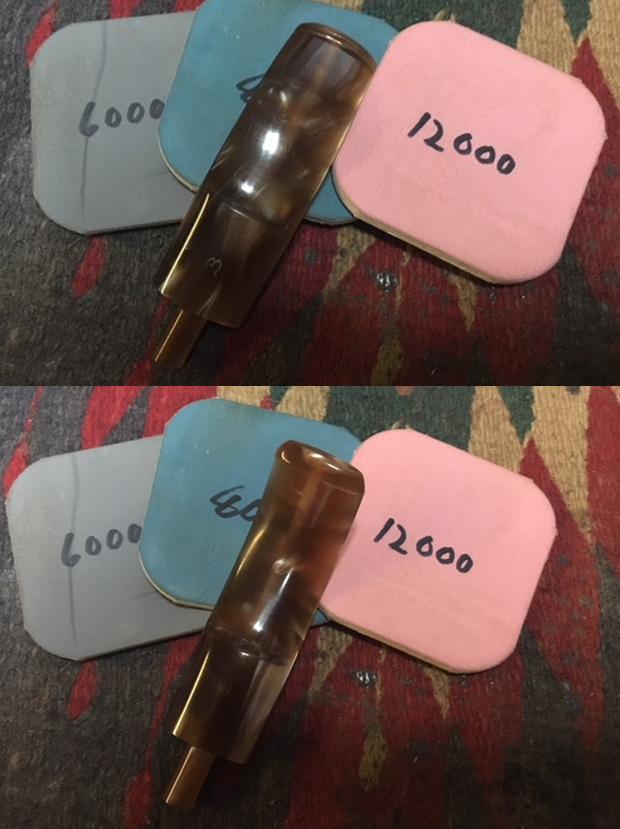
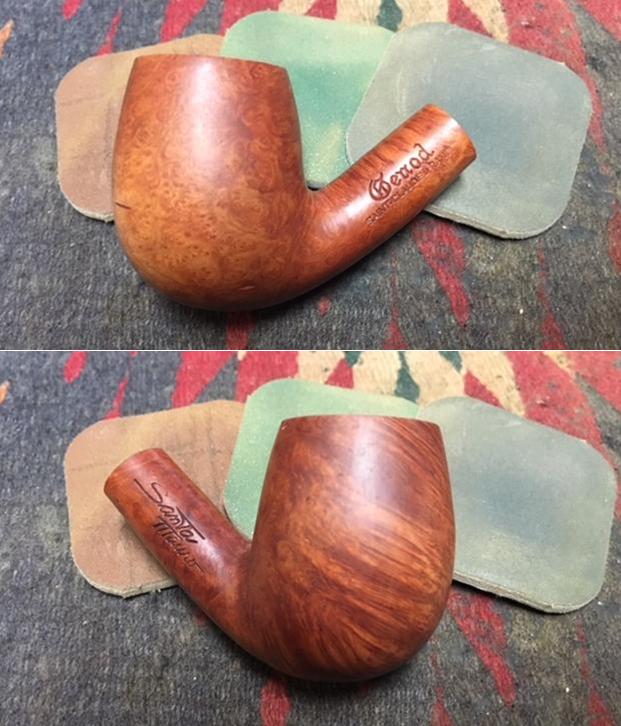
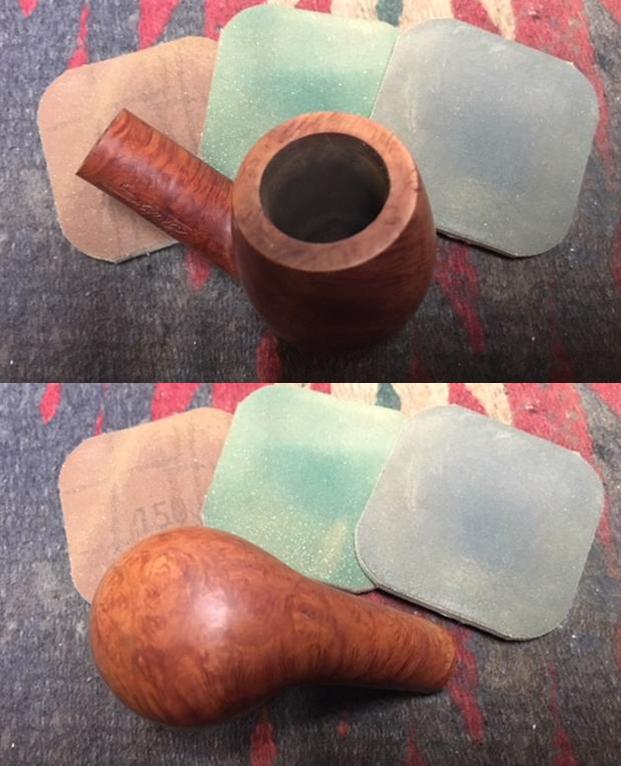
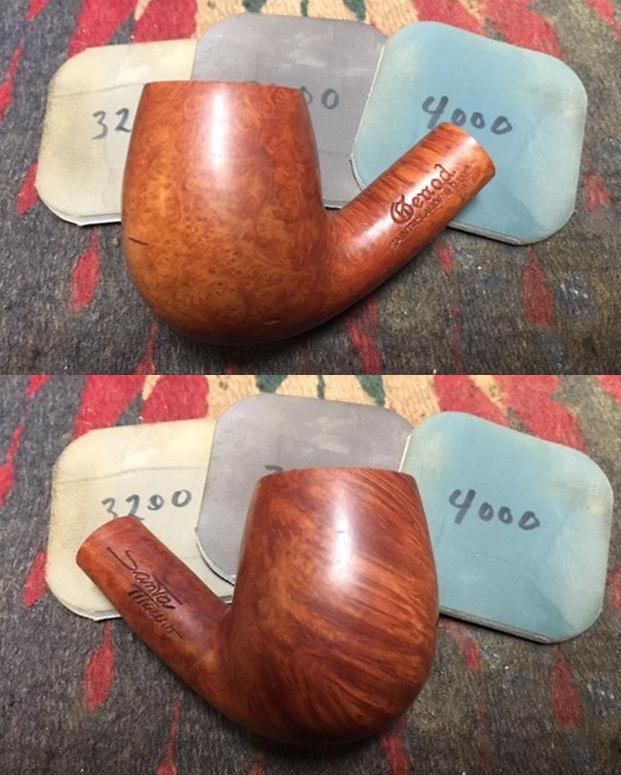
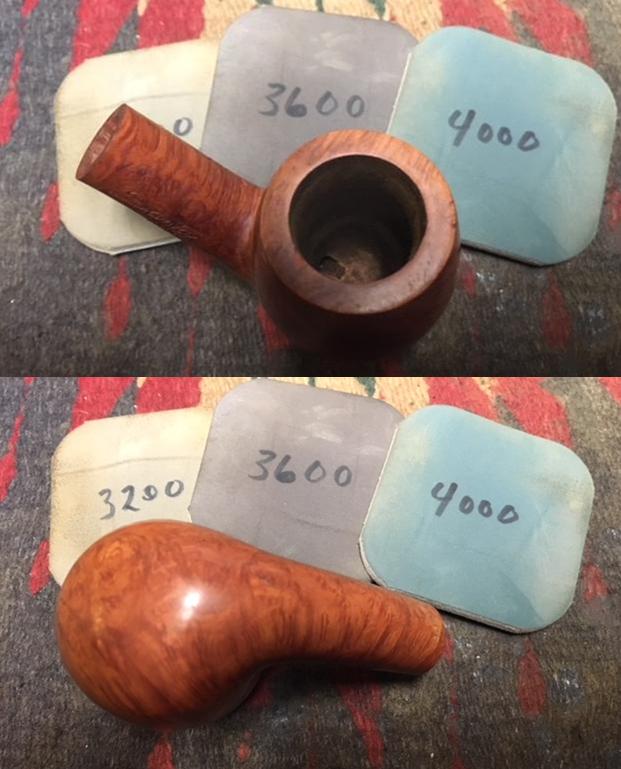
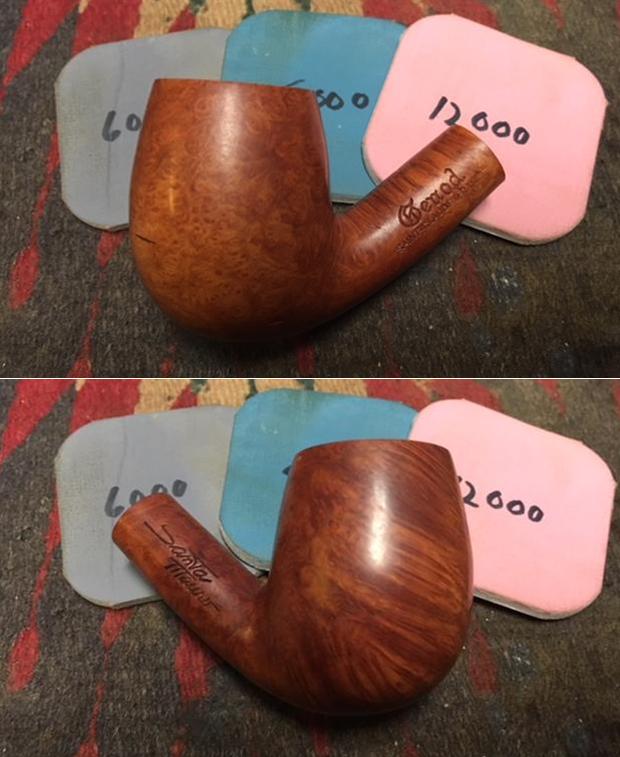
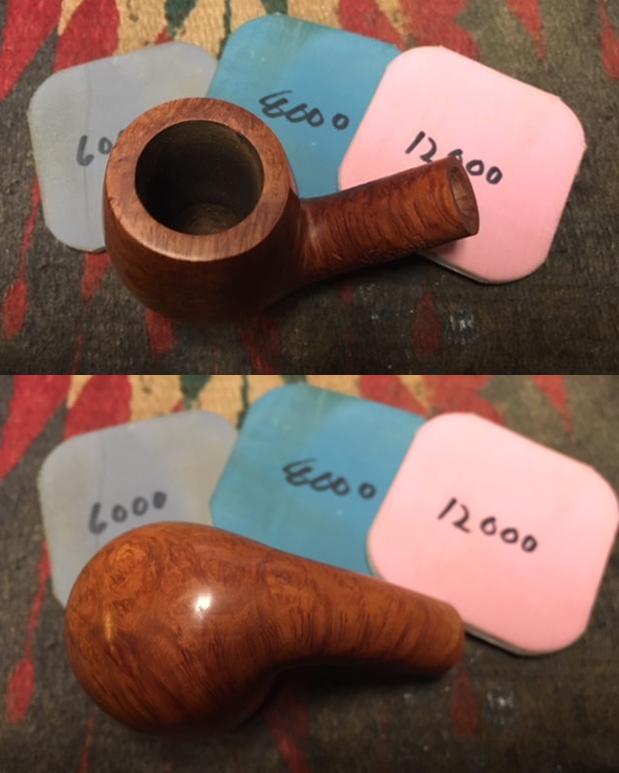
 I’ve been thinking as I’ve been working how I should approach the sanding/finishing of the ‘Wax Drip’ Rock shape? As the tired finish is now, the pipe to me is one dimensional. The darkened finish is uniformly non-expressive. I look at it and I see the beautiful, unique shape, but I don’t see the beauty of 106-year-old briar grain standing on center stage of this presentation. The great thing about micromesh pads is that they are flexible and hug the surface which I believe will aid me in adding some depth and contrast of shades in the briar’s presentation. While sanding with the micromesh pads, there will be natural and unavoidable changes in the pressure and impact of the pads because of the contouring of the Wax Drip Rock shaped briar. High points will naturally be lighter and lower points will be darker, providing (at least theoretically at this point!) contrast and shading through the briar landscape. Ok, that’s the theory and the plan. Time to march! Using pads 1500 to 2400, I wet sand the stummel and vulcanite ferrule. Following this, I dry sand using pads 3200 to 4000 then 6000 to 12000. The pictures show the progress and I like what I see – theory becoming reality.

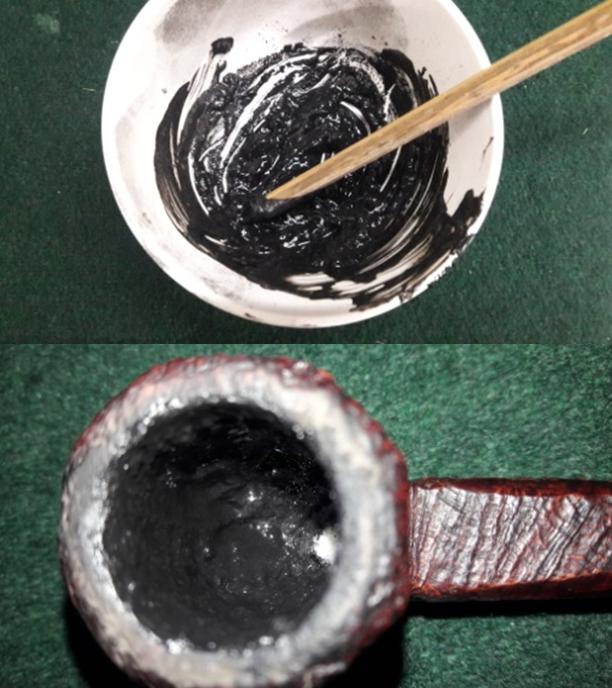
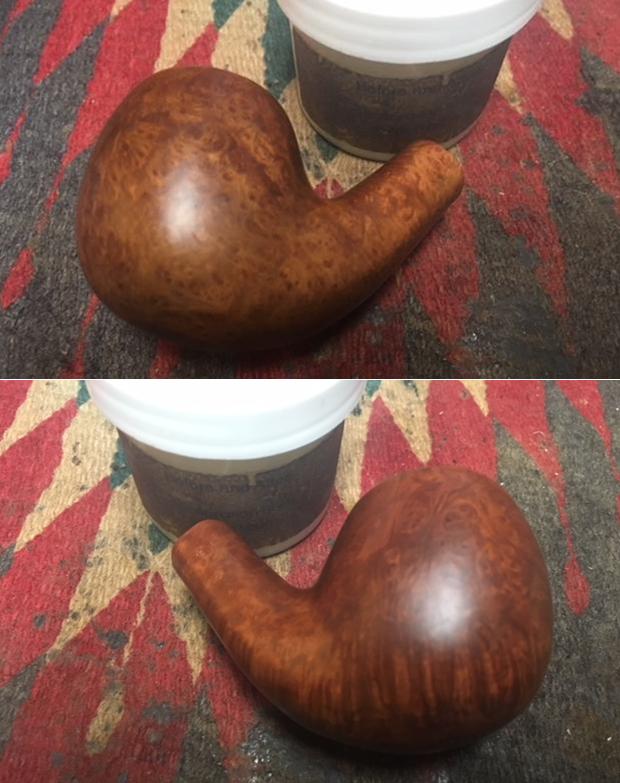
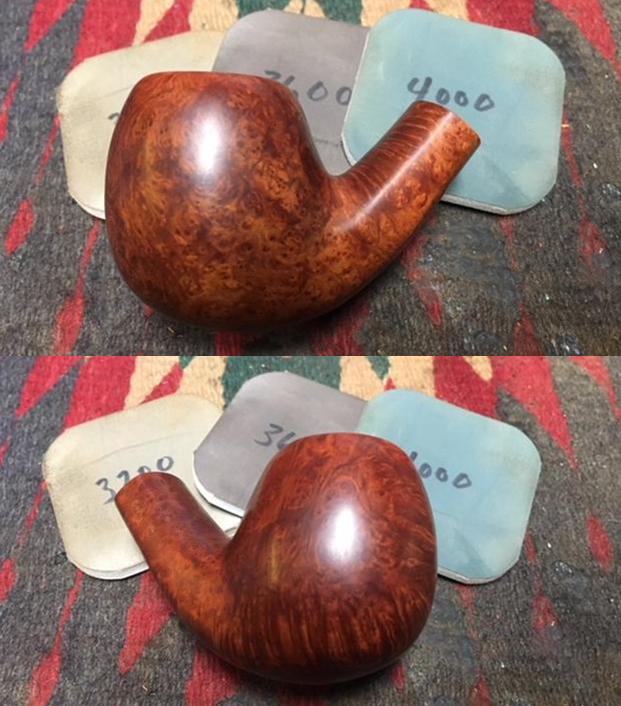
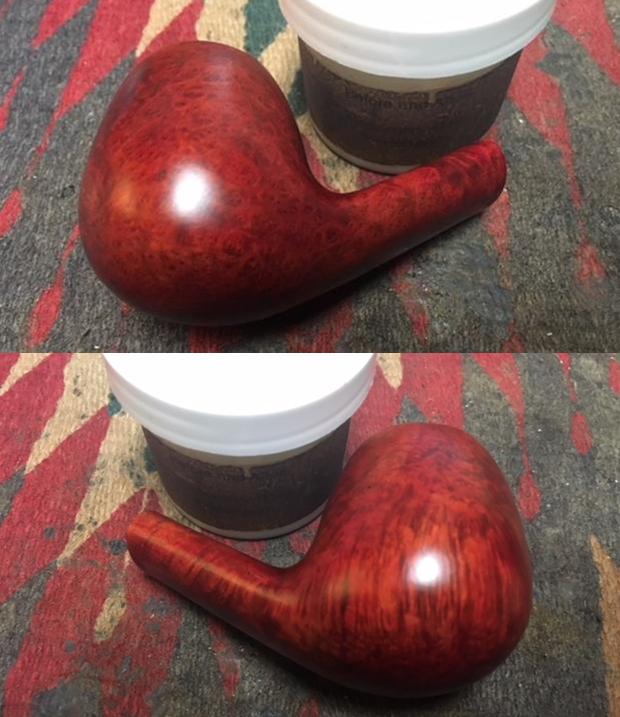
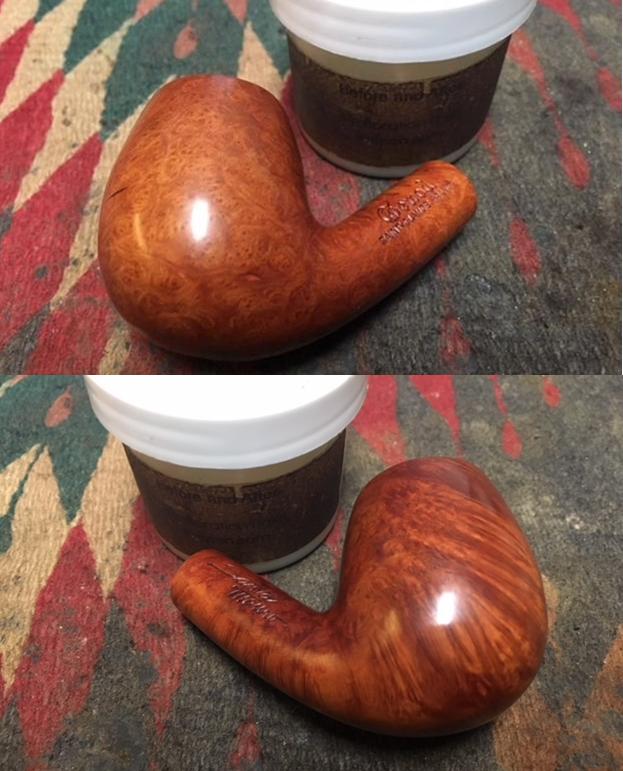
 Next, I mount the Dremel with a cotton cloth buffing wheel set at 40% full power and I apply Tripoli compound to the briar surface. I’m able to reach more directly into the carved areas of the briar with this more abrasive compound. After the Tripoli compound, I change to another cotton cloth buffing wheel, maintain the same speed and apply Blue Diamond compound to both stummel and military stem. To remove compound dust from the pipe, I buff the pipe with a felt cloth. Before applying carnauba wax to the stummel, I apply Before & After Restoration Balm. I like using the Restoration Balm because it deepens and enriches the natural briar hues. After squeezing some Balm on my finger, I apply it to the briar with my fingers working the Balm into the surface – making sure I work it into the carved areas. As I work the Balm into the briar, it begins with a light oil consistency but thickens during the application to a wax-like ointment – the picture below shows this stage. After letting the Balm settle for about 10 minutes, I wipe/buff off the Balm with a clean cloth.
  The final stage is to apply carnauba wax to the stem and stummel. I mount another cotton cloth wheel to the Dremel, maintain the same 40% of full power, and apply a few coats of carnauba wax. When I complete the waxing cycles, I give the pipe a rigorous hand buffing with a microfiber cloth to raise the shine even more.
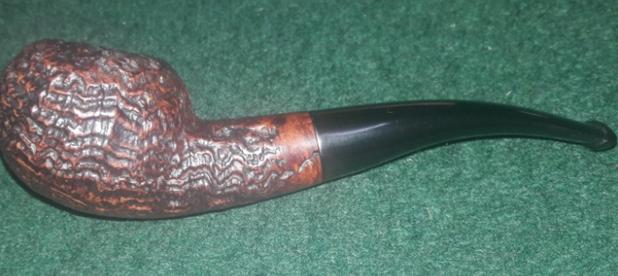
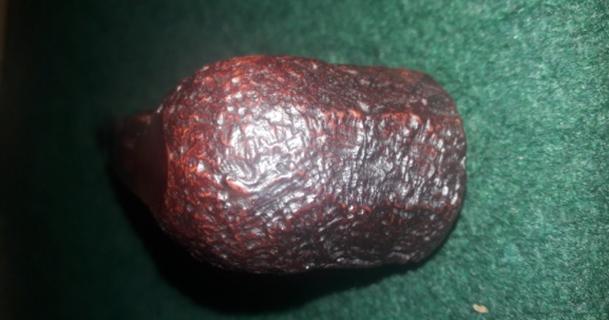
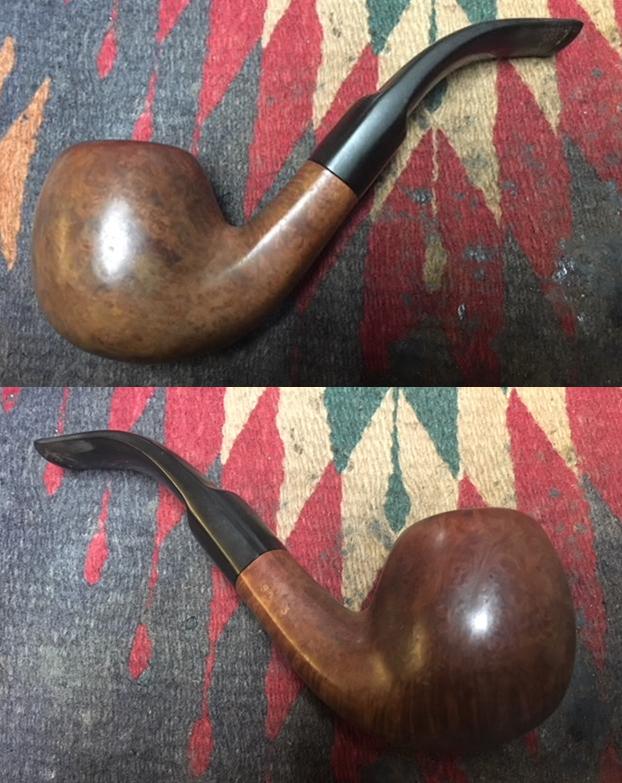
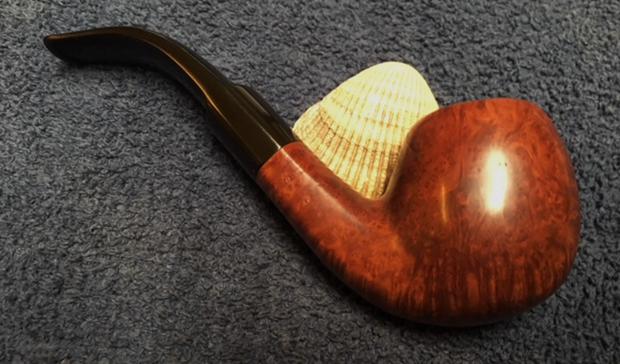
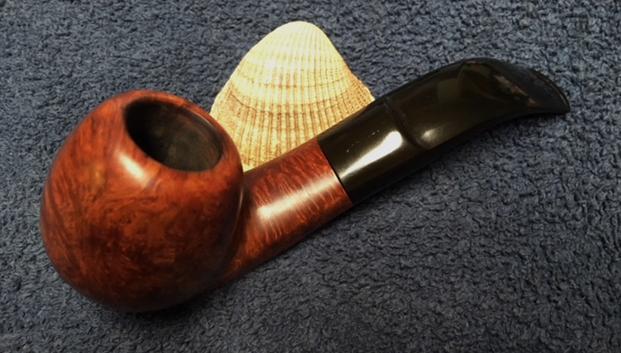
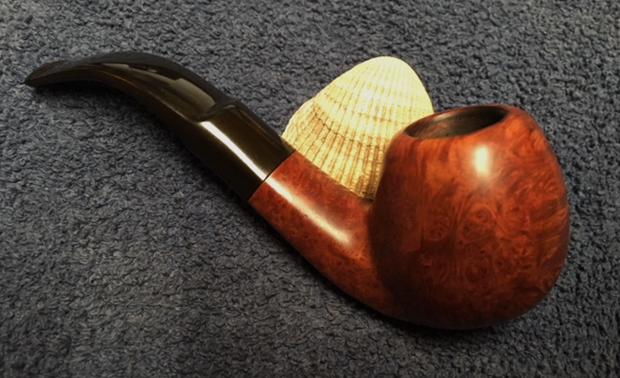
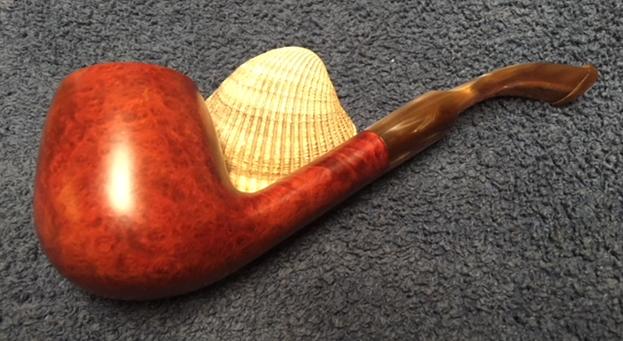
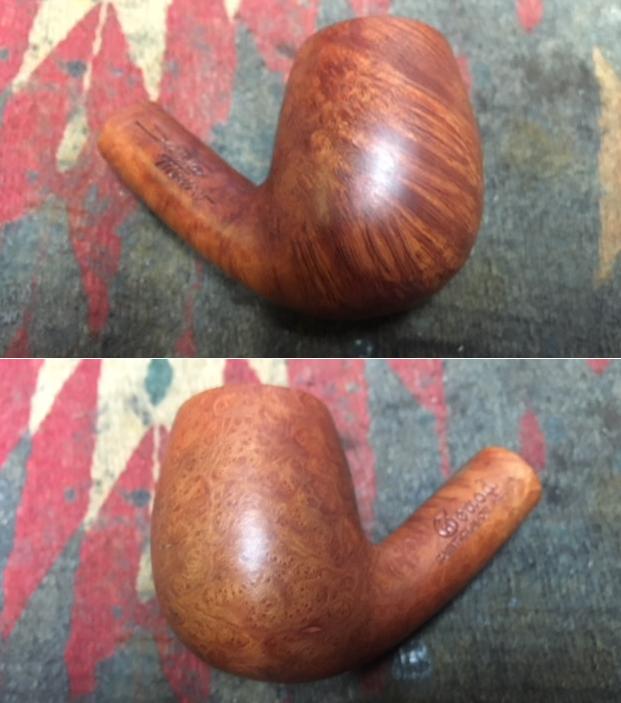
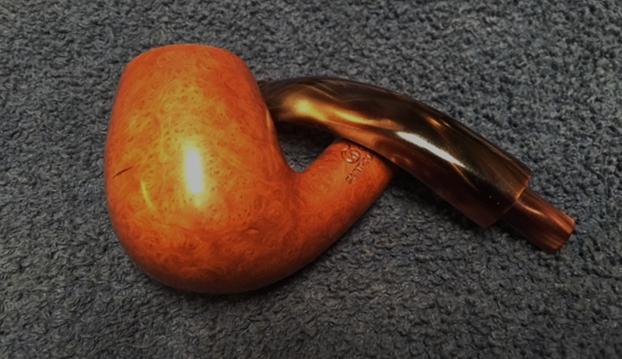
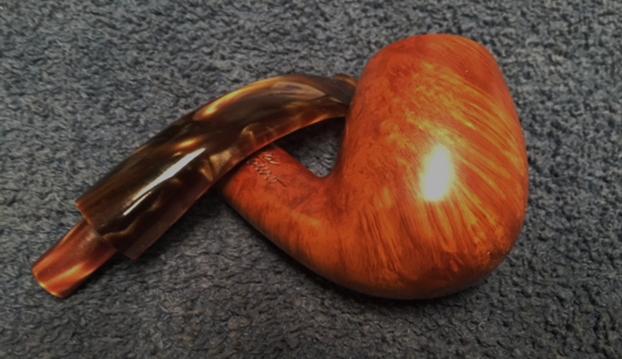
Restoring this Gasparini M.G.M. Rock exceeded my expectations in important ways. The pipe was beautiful before I started. Now, it’s a show stopper as the 106-year aged briar has retaken center stage and the Freehand shape with the dips, curves and swirls are a stellar supporting cast. I can easily see the Wax Drip shape, but it could also be petals on a flower. The Military style stem looks classy but unassuming as it joins the vulcanite ferrule with a contrasting ring of briar between ferrule and stem. Another exceeded expectation was to understand better the Gasparini name and the value of family. My appreciation brimmed for Marisa Gasparini as she took the time to answer my questions – this was an honor. This simple act revealed her pride in the Mario Gasparini heritage and her willingness to answer questions shows her concern for each pipe bearing the Gasparini name.
Idian commissioned this pipe with the understanding that the final valuing of the pipe would be after I researched and restored the pipe and published the write-up. Then, as is the understanding for all the pipes that are commissioned, the commissioner of the pipe has the first opportunity to acquire the pipe in The Pipe Steward Store with the value determined. If the price is not agreeable, he may pass, and I leave the pipe in the store for another steward to eventually add to his collection. However, for this restoration, for this Gasparini M.G.M. Rock, the value for me is ‘priceless’. I’ve invited him to join my collection and start pulling his own weight in the rotation – my first Gasparini, we’re happy. I’m thankful to Idian for his understanding after letting him know – he was a bit disappointed but happy that the M.G.M. Rock was restored and continued in good hands. Thanks for joining me!


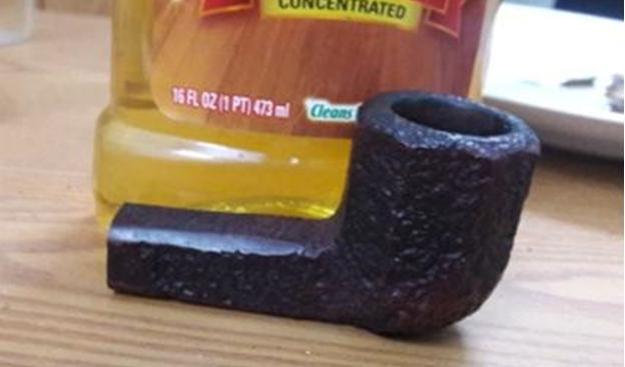
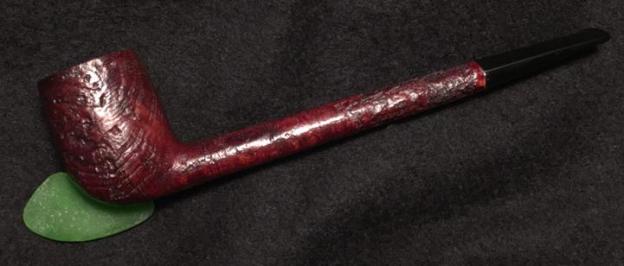
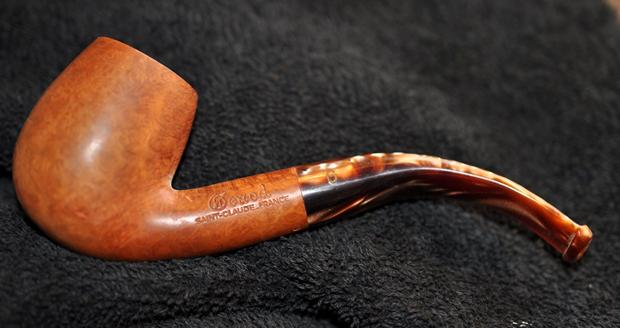
 Not much is known about this brand other than that these were made by LORENZO and hence the Italian connection. I have to concede that Italian pipes are very desirable looking with perfect proportions and beautifully crafted. I had even made an attempt to know more about this line of Lorenzo pipes by emailing Lorenzo’s American distributors, but have no response from them since last 15 days. Mr. Dal Stanton, if you are reading this piece, please enlighten me with your MANTRA for making these guys respond!!!!!!!!!!!
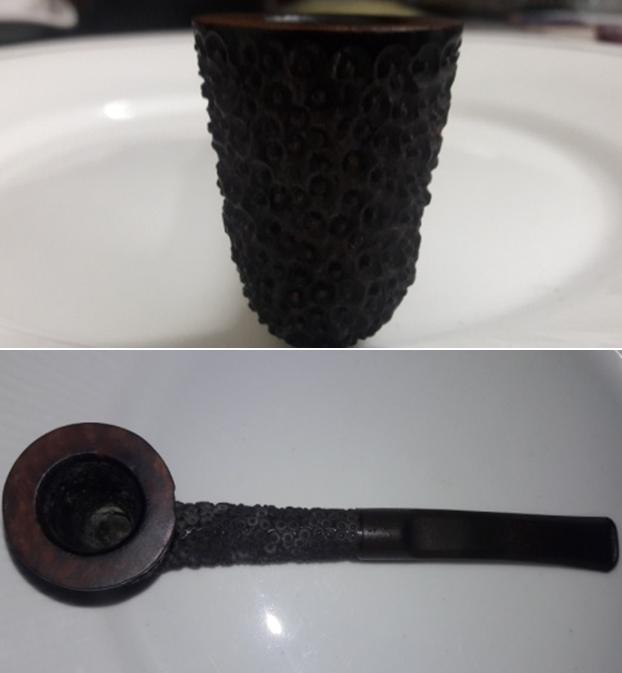
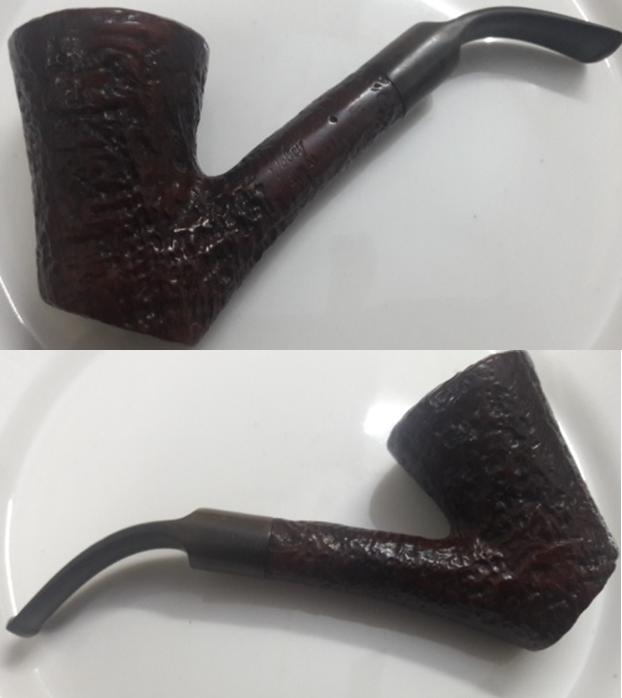
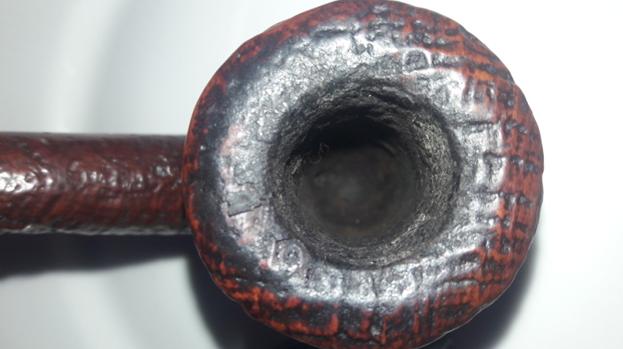
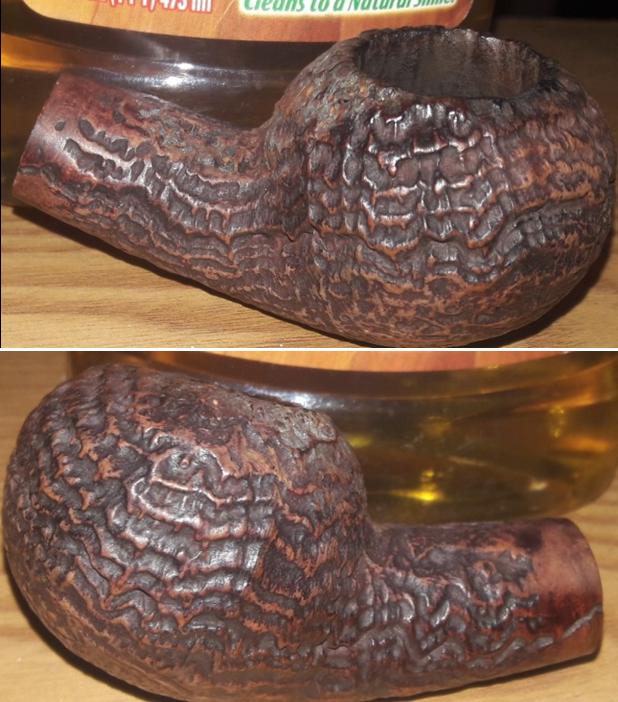
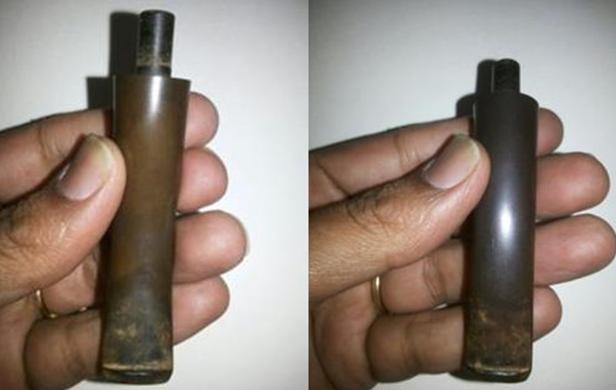
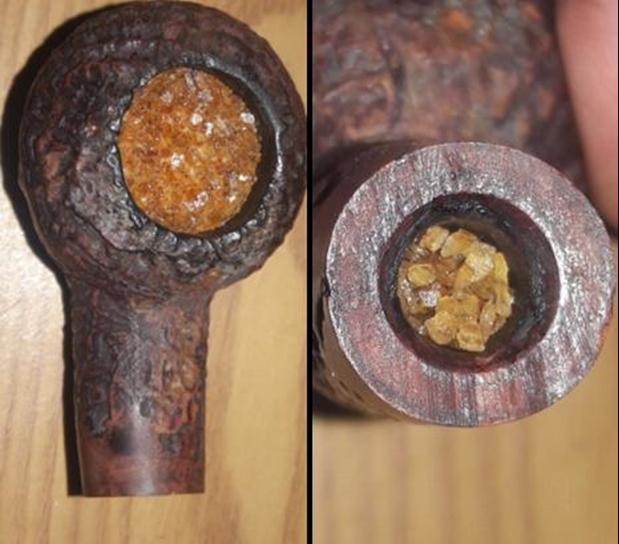
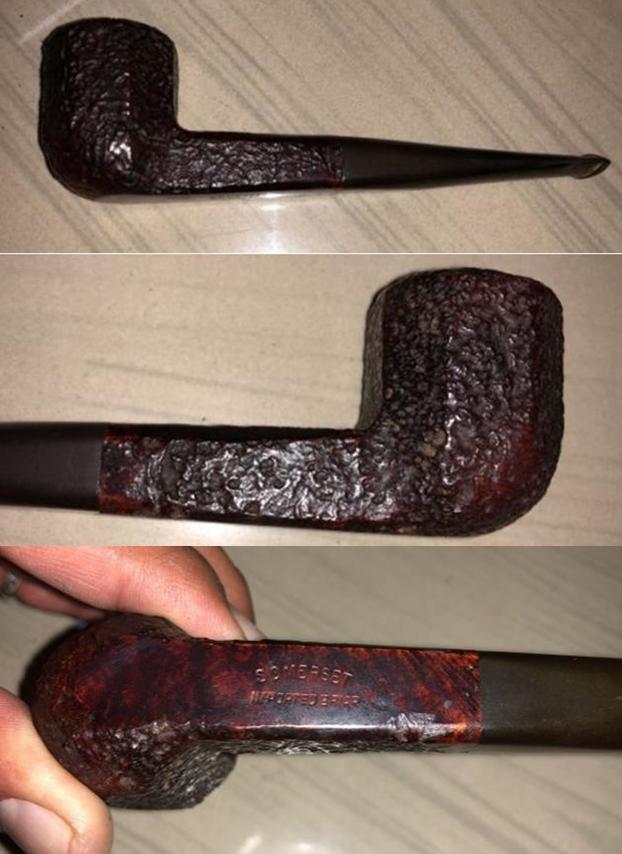
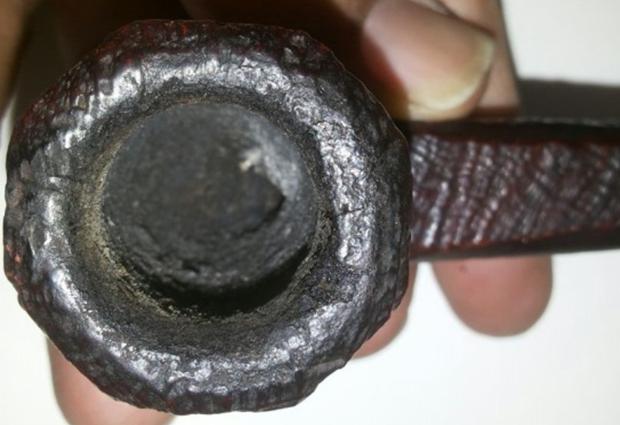
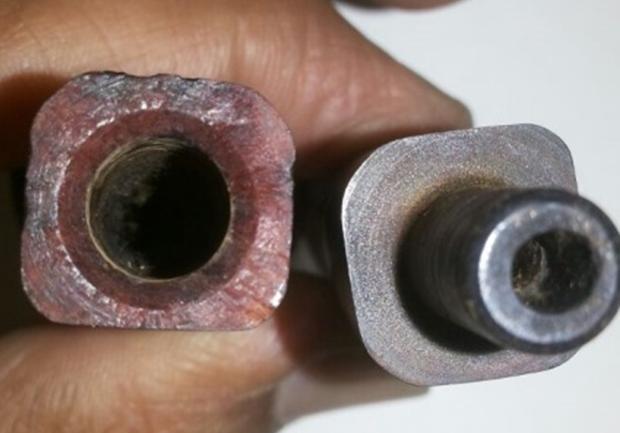
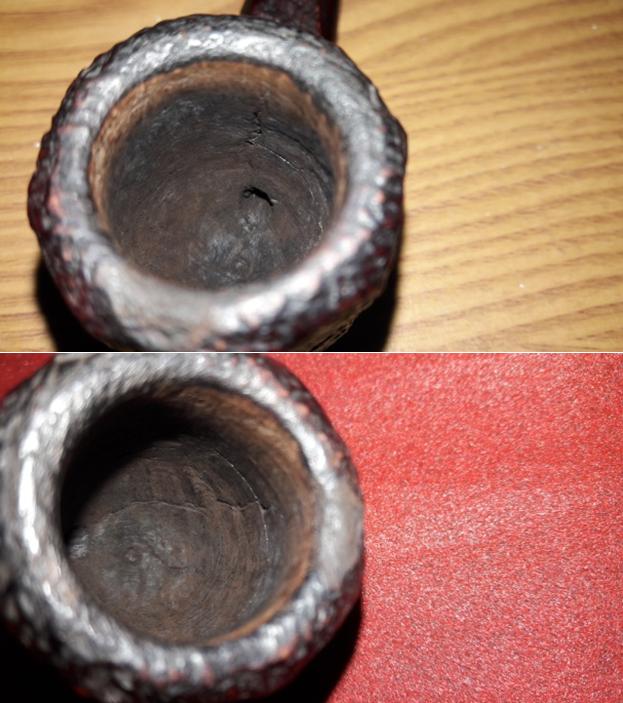
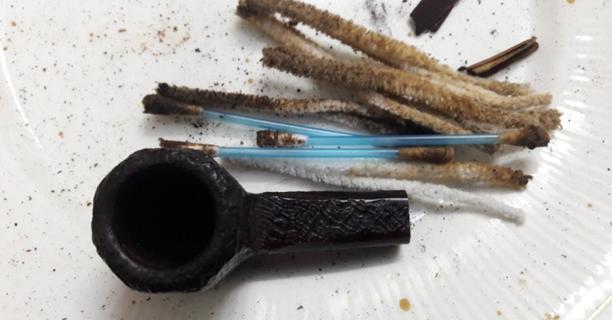
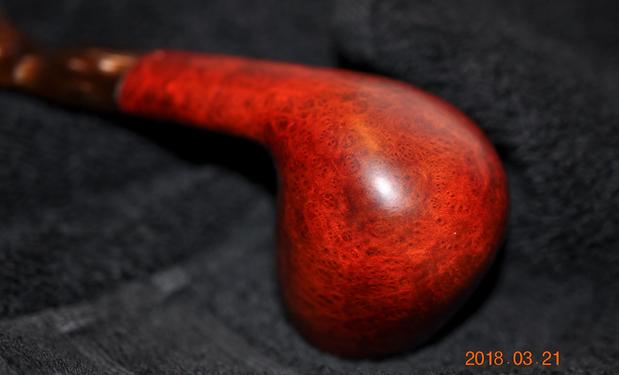
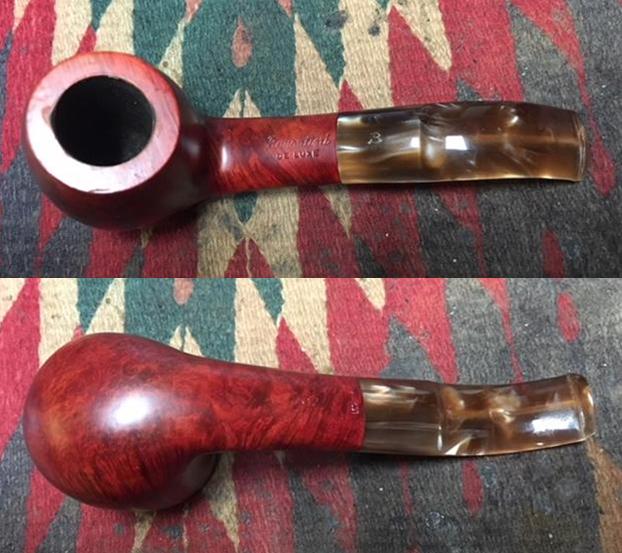
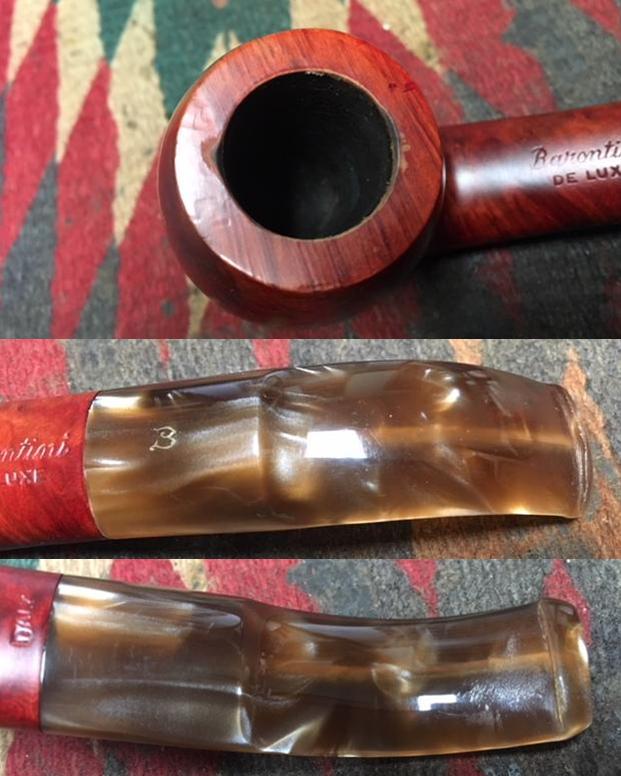
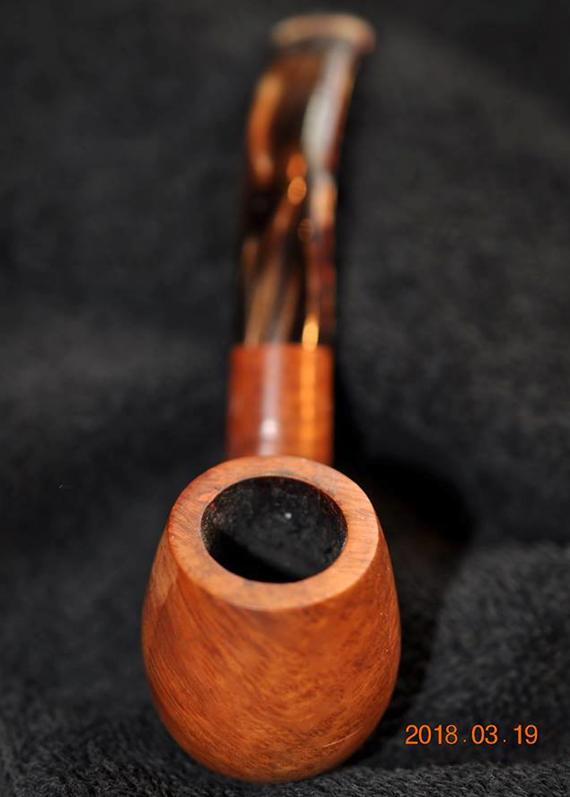
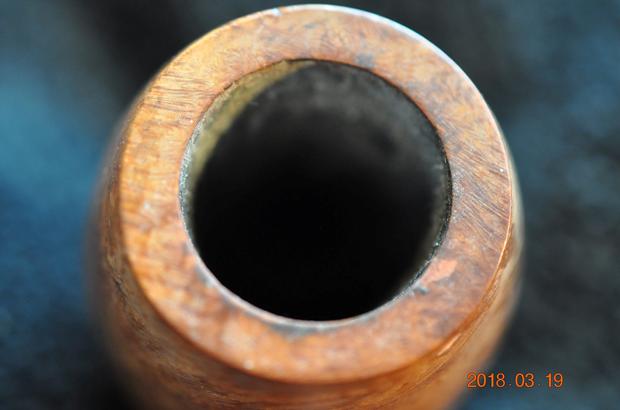
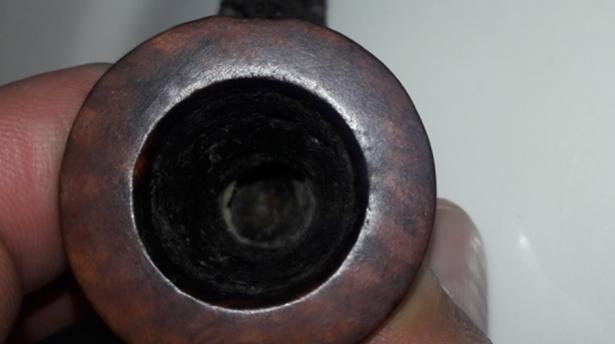
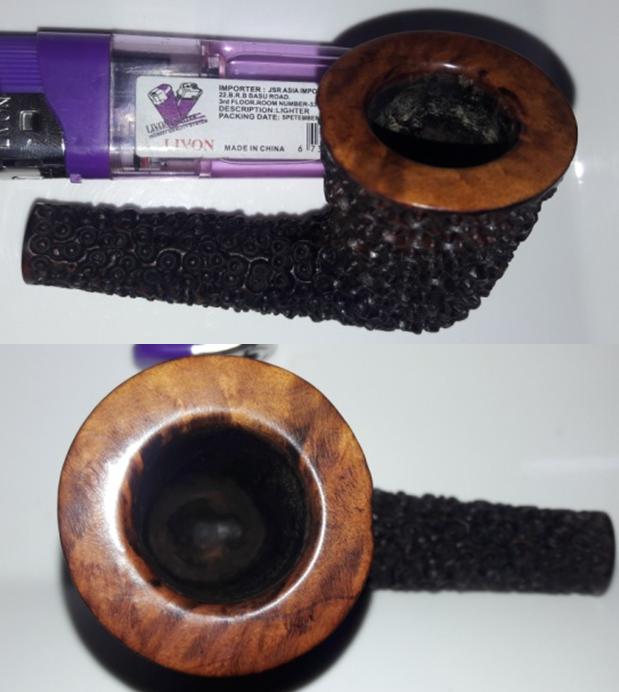
 The bowl is narrow and tapers down towards the draught hole. The chamber is so filled with cake that I am unable to reach the bottom of the bowl with my little finger. The build-up of the cake is more heavy in the bottom half of the bowl. The mortise is full of oils and gunk and air flow is restricted. The rim top is smooth and the grains are accentuated with a lighter stain, which can be seen through the overflowing lava. The inner and outer edge of the rim is in pristine condition with no dings or dents.
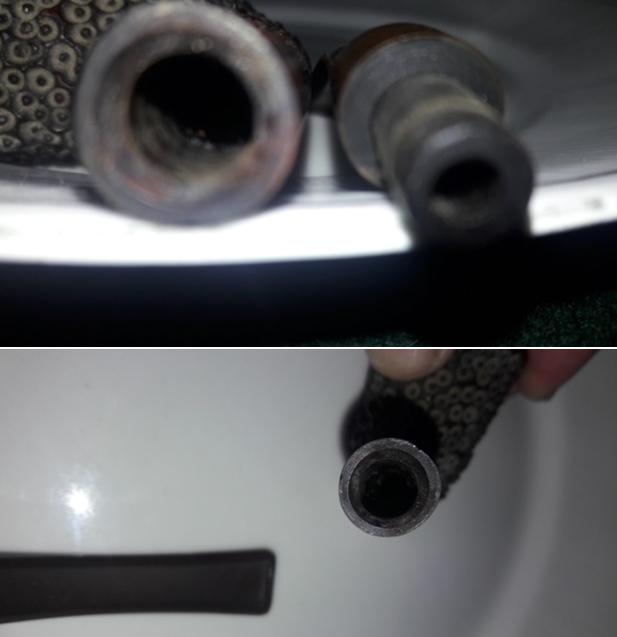
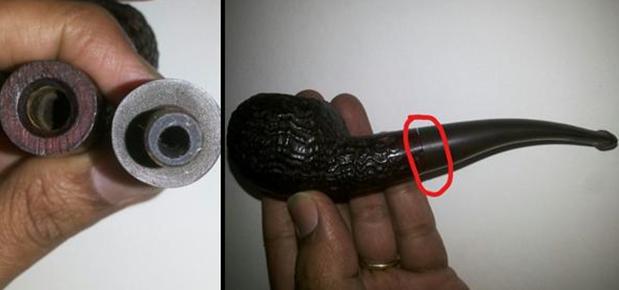
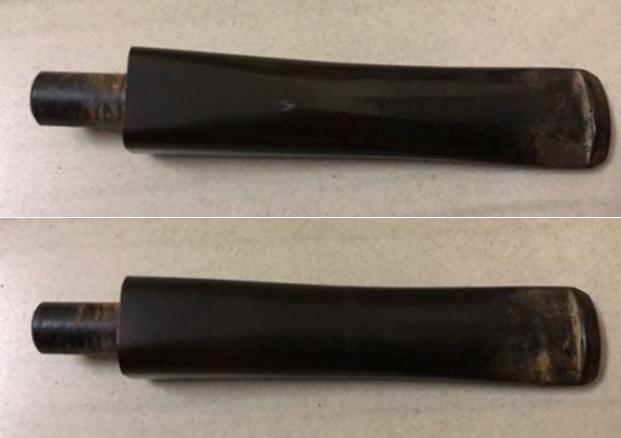
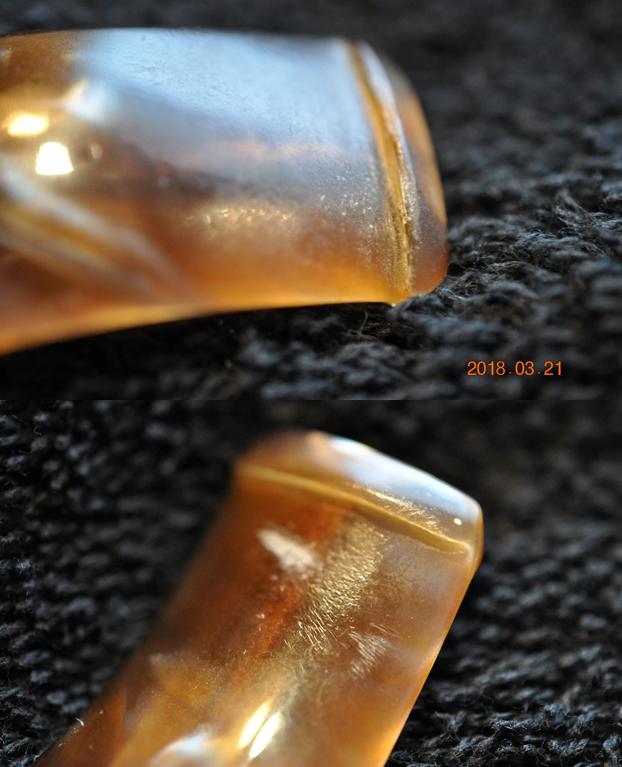
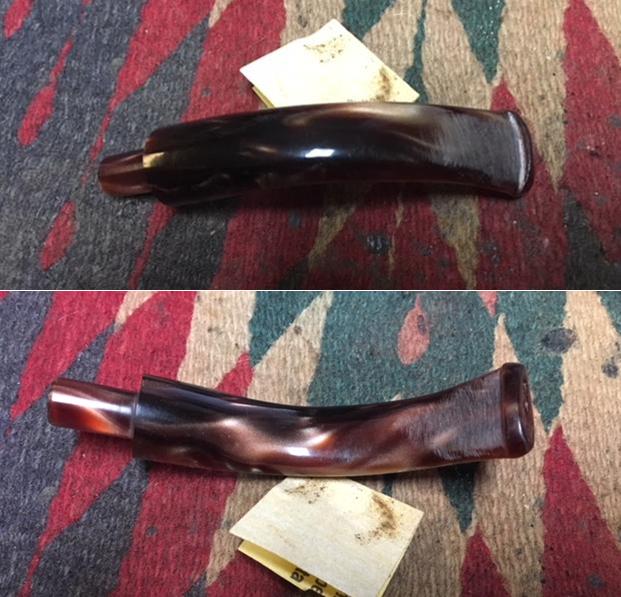
 The vulcanite stem is so heavily oxidized that it appears brown in color!!!! Some light tooth chatter is seen on both surfaces of the stem towards the lip. This issue should not be a major headache to address. The lip edge on both side is crisp and without any damage. The quality of vulcanite is good.
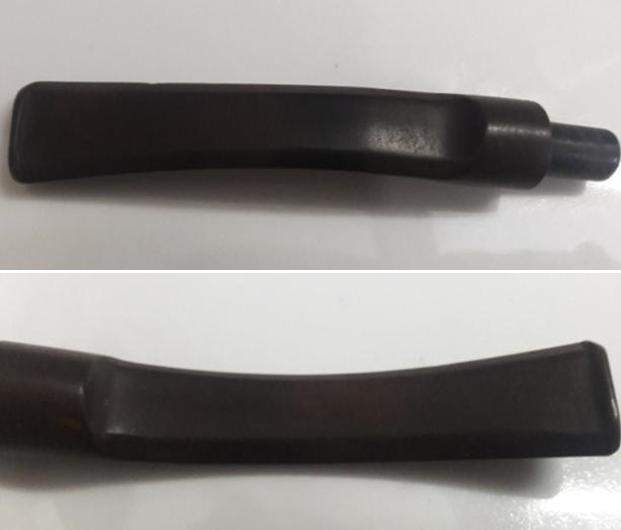
 THE PROCESS
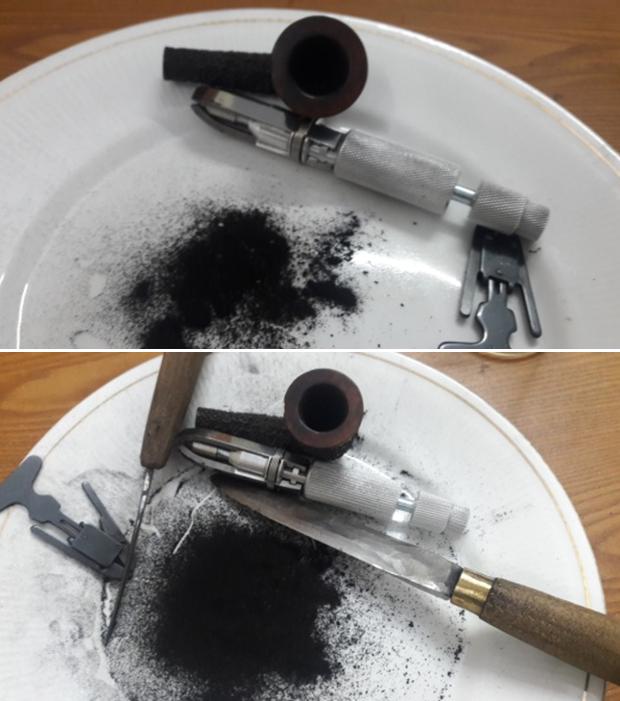
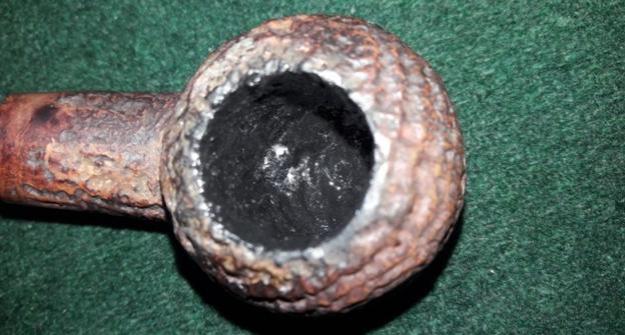
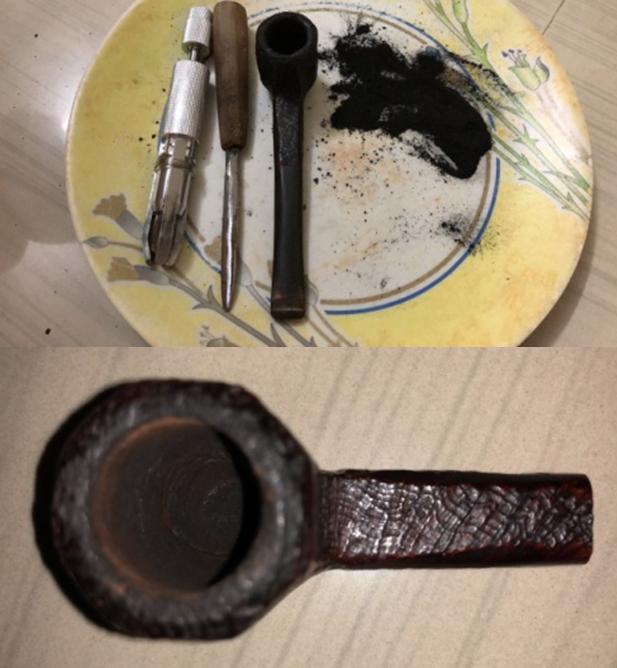
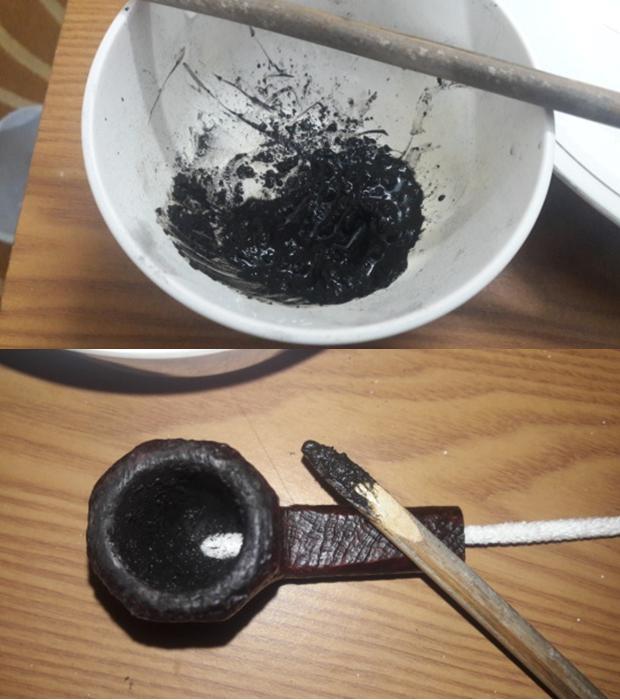
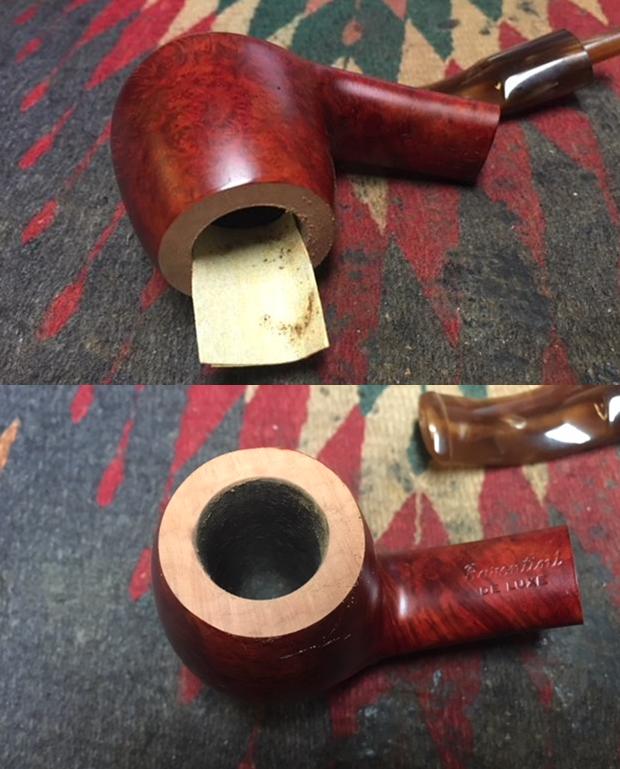
 I wiped the rim top with a cotton pad dipped in isopropyl alcohol. This helped me to get rid of all the overflow of lava as well as the dirt and dust that had accumulated on the rim surface. This was followed by cleaning the mortise with cue tips, pipe cleaners and shank brush dipped in isopropyl alcohol. This further eliminated all the traces of old smells from previous usage.
 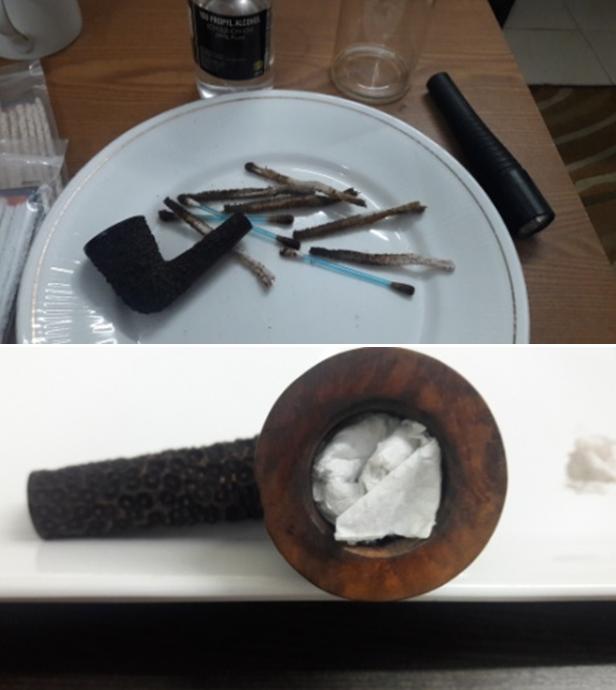 Now, it was the turn of the stummel to get cleaned up. Using a hard bristled tooth brush dipped in undiluted Murphy’s oil soap, I very deliberately scrubbed through all the hexagonal patterns, cleaning them thoroughly. I cleaned the rim too. The stummel and rim top was dried using paper napkins and soft cotton cloth. I set the stummel aside to dry out naturally.
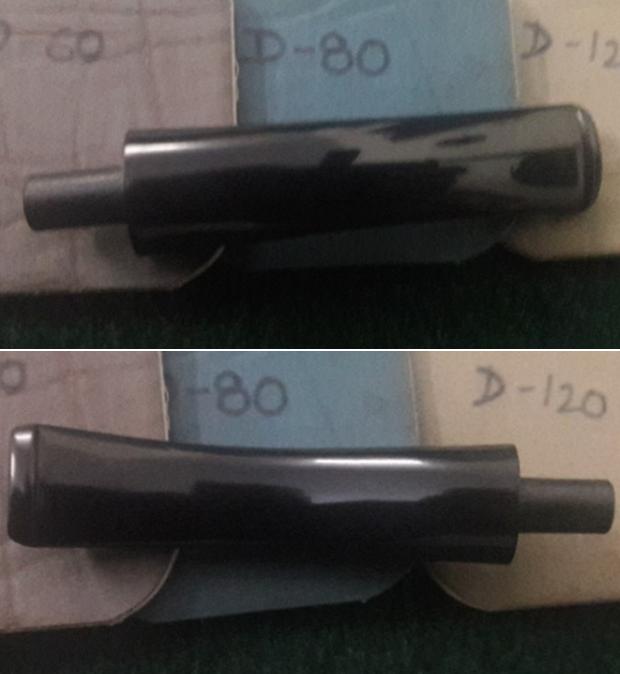
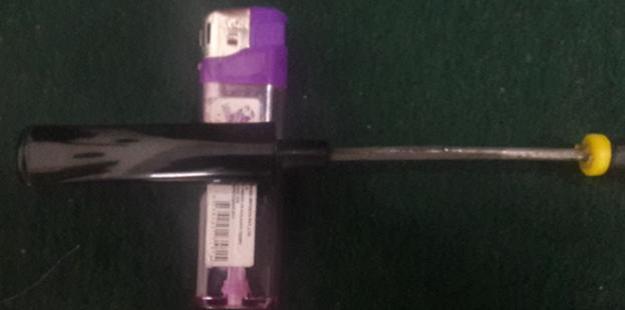
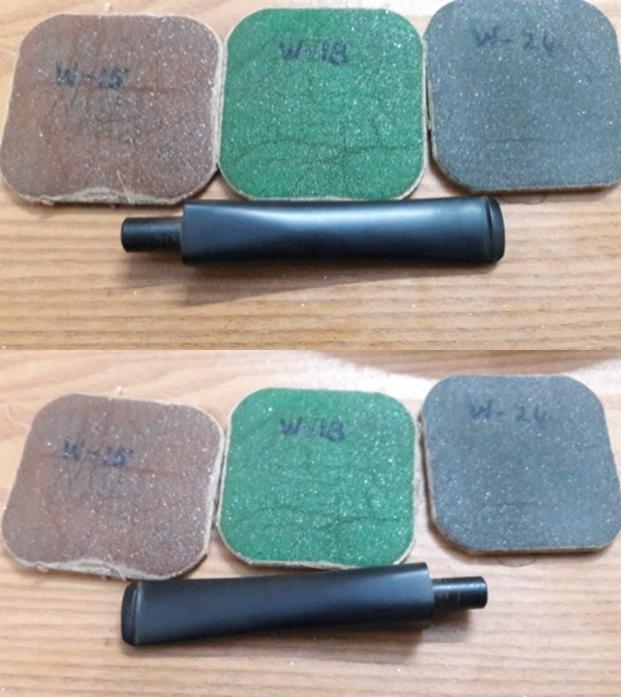
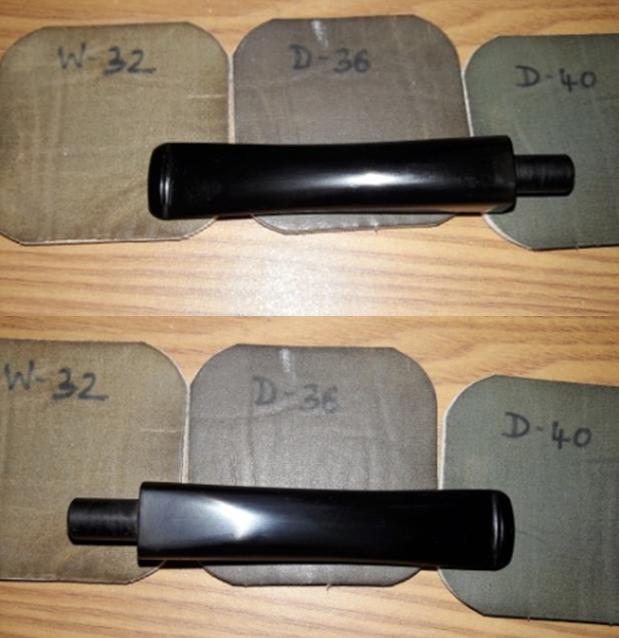
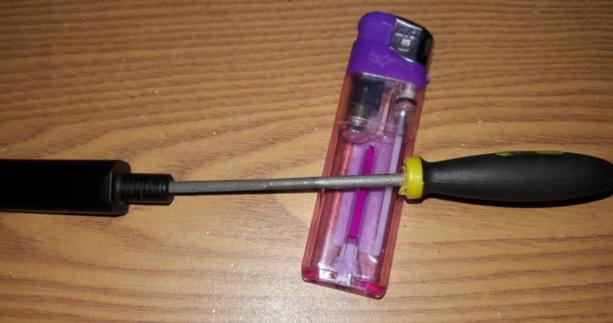
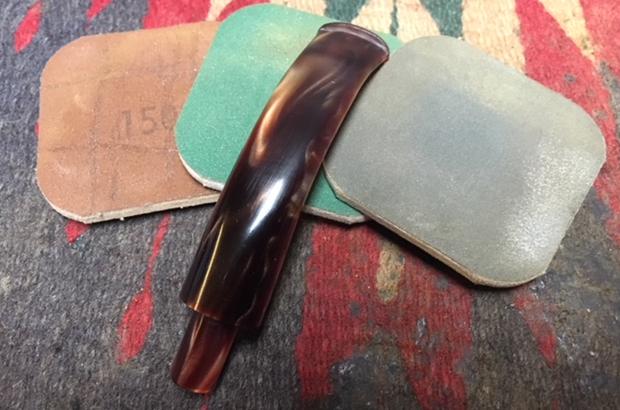
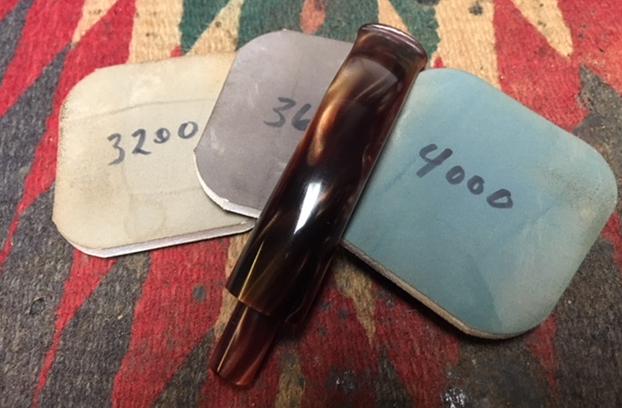
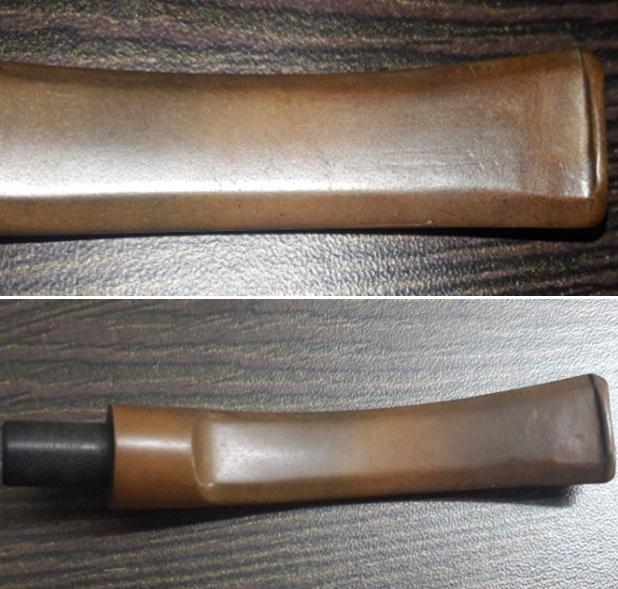
 While the stummel was drying, I worked the stem. In order to address the minor tooth chatters, I flame the surfaces of the stem with a Bic lighter. This brings most of the tooth chatter to the surface. For a better blending, I further sanded the entire stem with 220 followed by 400 and 800 grit sand paper. This helps to reduce the sanding marks left behind by the more abrasive 220 grit paper. To bring a deep shine to the vulcanite stem, I went through the complete set of micromesh pads, wet sanding with 1500 to 2400 grit pads and dry sanding with 3200 to 12000 grit pads. I wiped the stem with alcohol after each pad and rubbed it down with Extra Virgin Olive oil. The internals of the stem was cleaned out using alcohol and pipe cleaners. The finished stem is shown below.


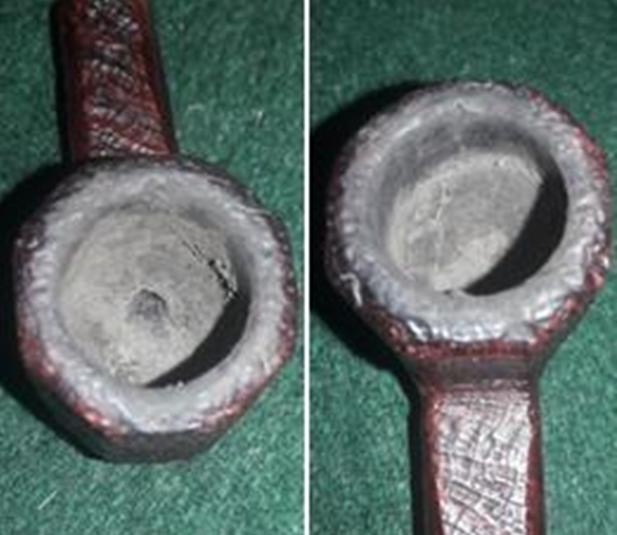
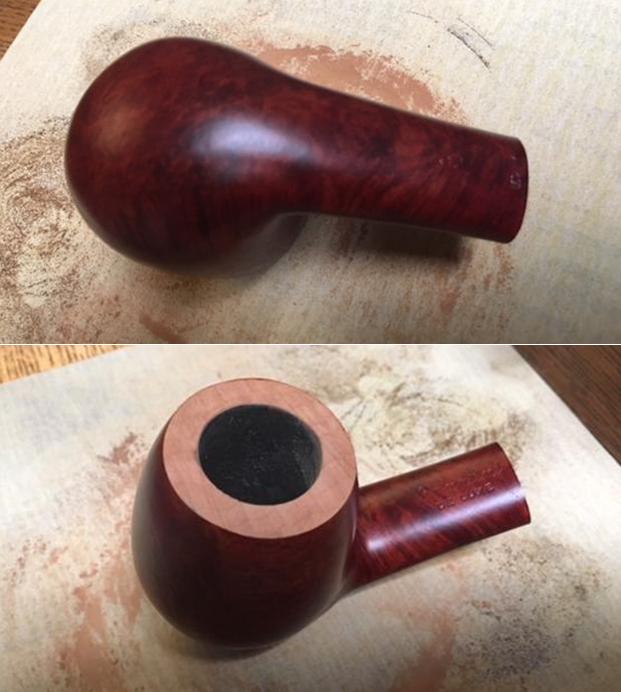
 I wanted to highlight the grains on the rim top as well as enhance the contrast with the rest of the pipe. To achieve this aim, I sand down the rim top using micromesh pads, wet sanding with 1500 to 2400 grit pads and dry sanding with 3200 to 12000 grit pads. The rim top now has a deep shine with grains popping out and now with a magnificent contrast with rest of the stummel.
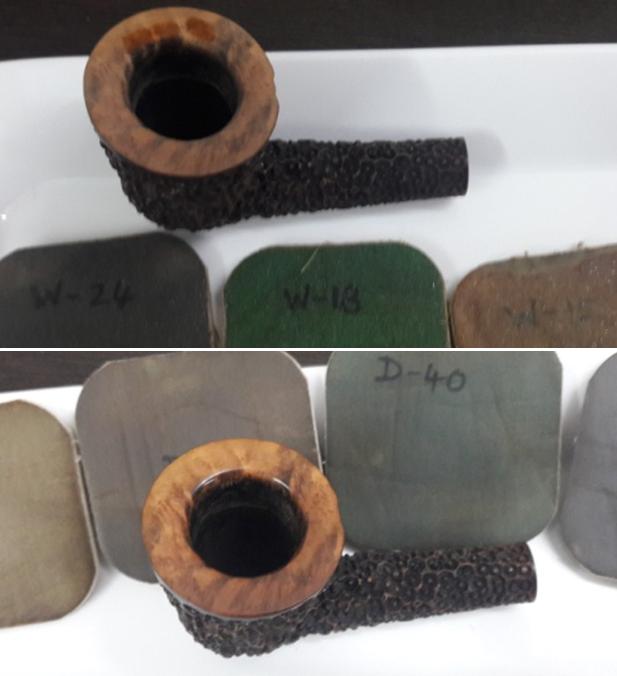
 Once I was satisfied with the stem and rim top restoration, I started work on the stummel which has dried by now. I rub a small quantity of “Before and After Restoration Balm” in to briar and let it rest for a few minutes. The balm almost immediately works its magic and the briar now has a nice vibrant appearance. I further buff it with a horse hair shoe brush.
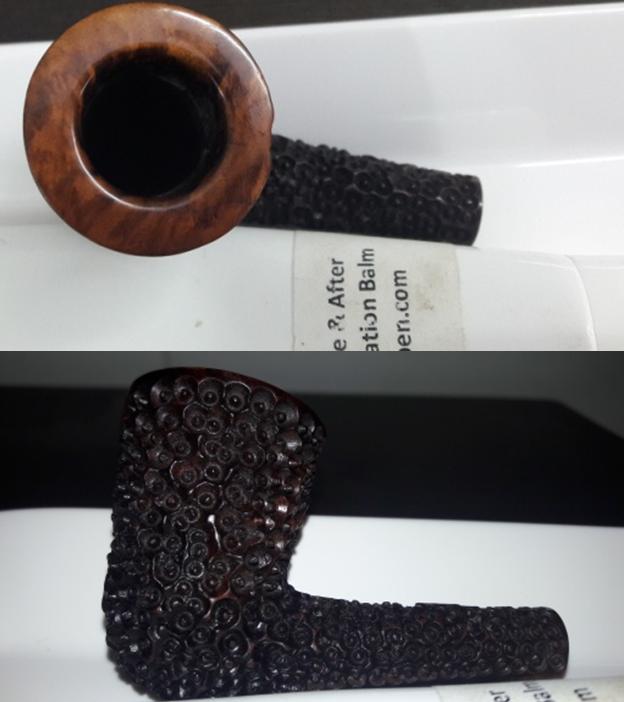

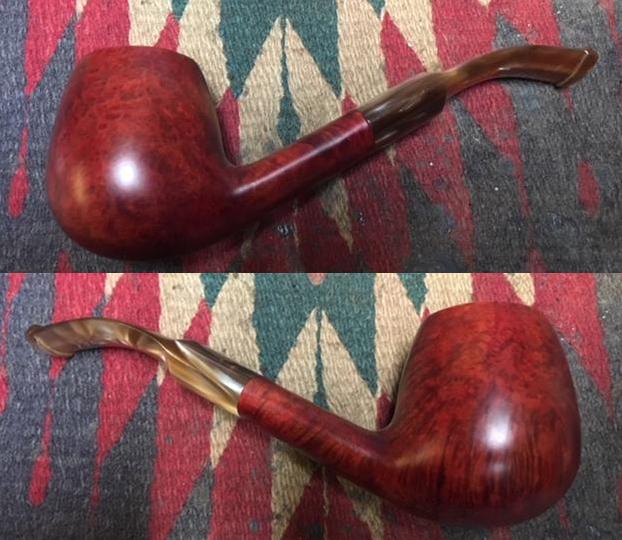
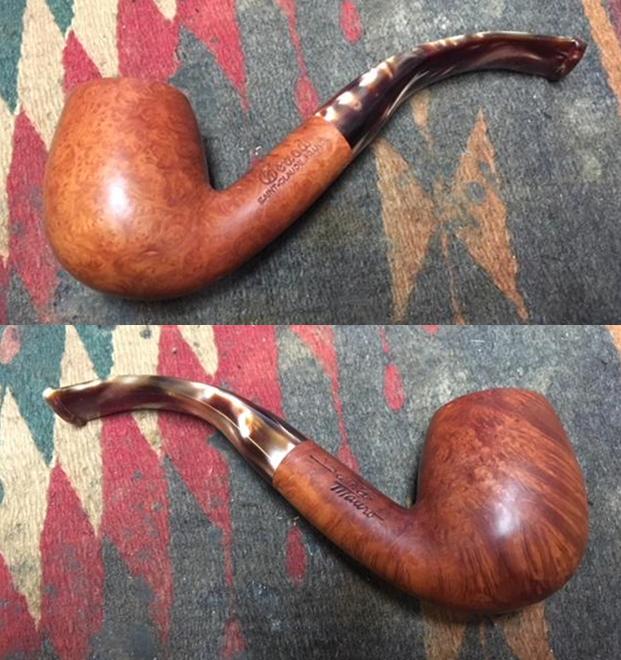
 To finish, using a cotton cloth and brute muscle power, I gave it a final polish. I re-attach the stem with the stummel. The completed pipe looks lovely, fresh and vibrant; the photographs speak for themselves. Thank you for having the patience to reach this far while reading the write up.