
Blog by Steve Laug
This older MLC bent billiard is a turn of the 20th century pipe. According to Pipedia, (https://pipedia.org/wiki/M._Linkman_%26_Co) the initials stand for M. Linkman Company which was thought to mean Mary Linkman Company. They were a Chicago based company that produced both briars and meerschaums. The company was named for the mother of the same Linkman who branded pipes under that same name and then eventually became the Dr. Grabow pipe manufacturer with which we are familiar. Pipephil’s site gave a little more information at this link (http://www.pipephil.eu/logos/en/logo-l4.html). M. Linkman and Co. was established by Louis B. Linkman and August Fisher in 1898. The company closed down in the 1950s and the Dr Grabow branch was sold to Henry Leonard and Thomas Inc. There was also a note that early Linkman’s pipes were stamped MLC in an oval.
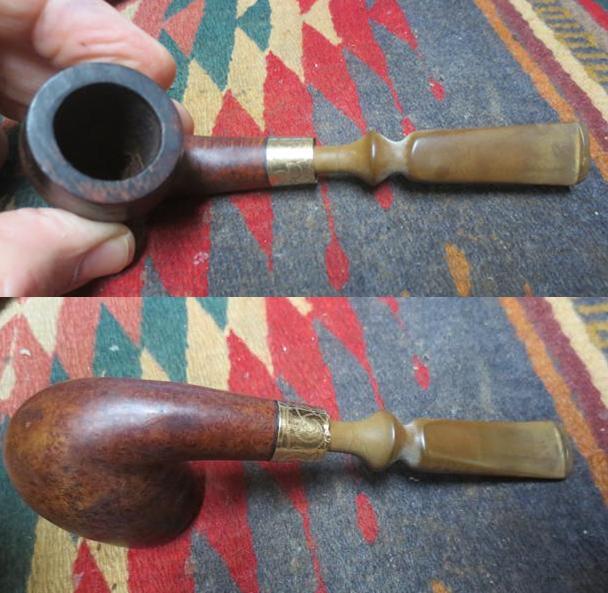
If you have followed this blog for a while you have come to know that I love really old pipes and this one fits into that category of pipes. It is stamped MLC in an oval over Redmanol over French Briar on the left side of the shank. There are no other stampings on the pipe. The band is brass and is etched with a pattern of vines and flower around the entire band. The band was a mess on the shank end. It was bent and dented and no longer round. It was loose on the shank and would need to be straightened out before it was reglued. It is a small bent billiard and definitely sporting the wrong stem. It should have had a Redmanol stem to go with the stamping on the shank of the bowl.
I have written a bit more about the MLC brand on several early blogs (https://rebornpipes.com/2016/11/12/an-interesting-the-nuvo-mlc-italian-briar-hidden-in-a-wdc-case/ https://rebornpipes.com/2017/08/17/restoring-a-sad-old-mlc-bent-billiard/).
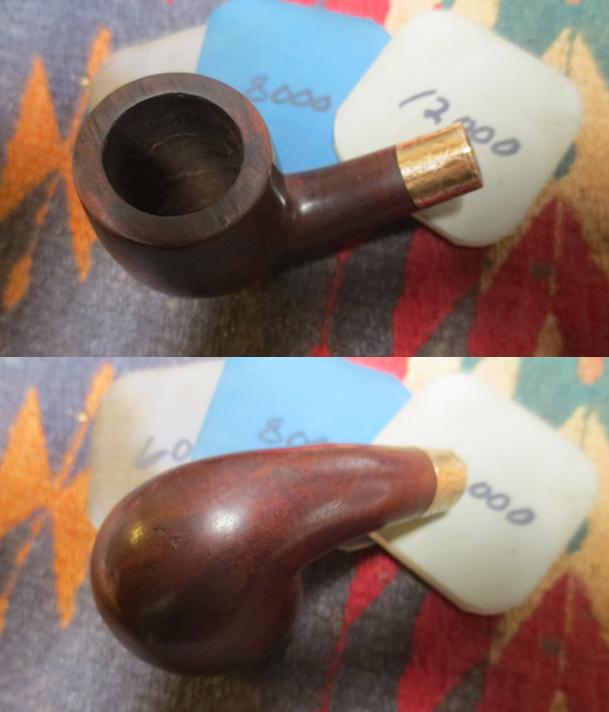
Jeff took the photos that follow before started the cleanup. You can see from the photos the condition of the pipe. The bowl exterior was absolutely filthy. It is the first time I have seen the lava that usually is on the rim flow over the top and down the sides of the bowl. The lava on the outside edge of the bowl and the thick cake in the bowl made it hard to know what the condition of the rim edges. The incorrect stem and the condition of the pipe told me that it was someone’s favourite smoker and when the old stem broke or wore out a convenient replacement was stuck in the shank and it continued to be smoked.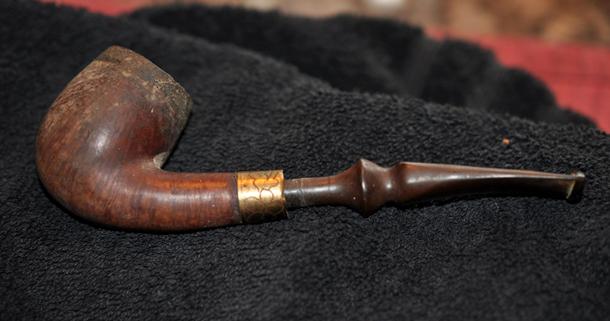
 The next photos of the bowl, rim and the flow of lava down the outside of the bowl shows how filthy this pipe was before Jeff started his clean up. The bowl is scratched and nicked but even that damage is hard to assess given the condition of the pipe.
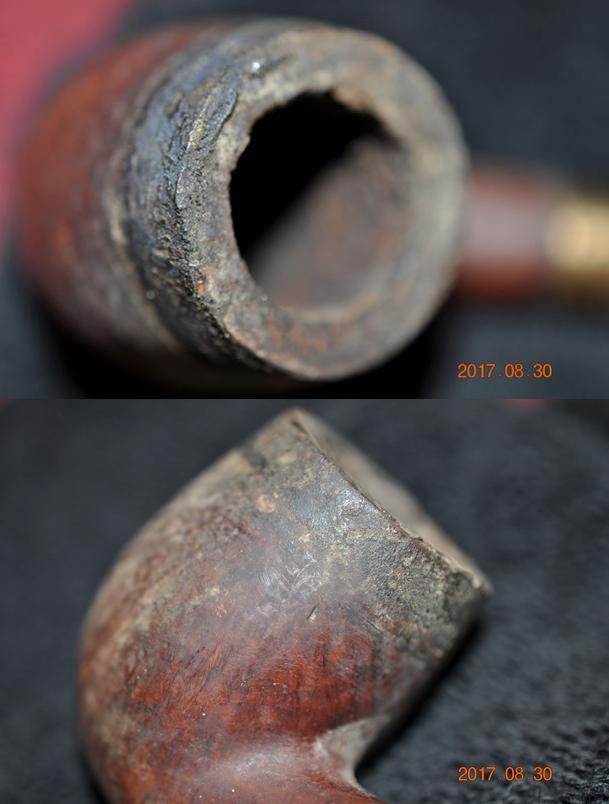
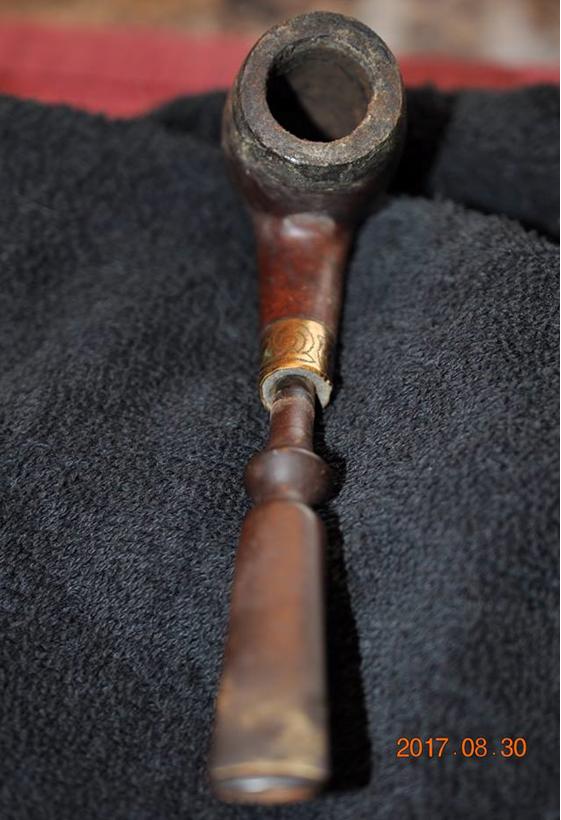
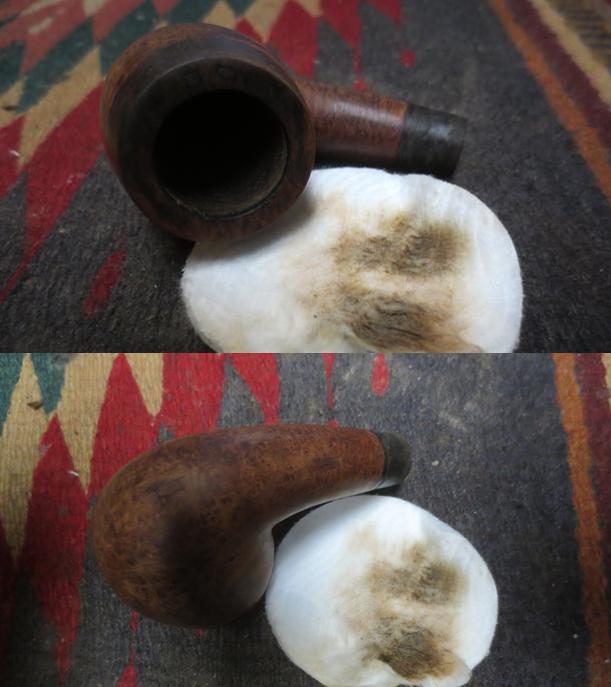
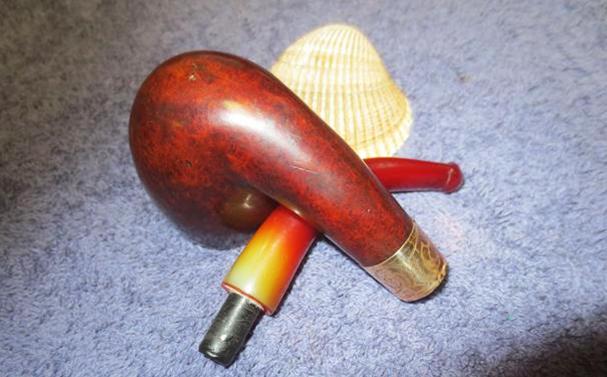
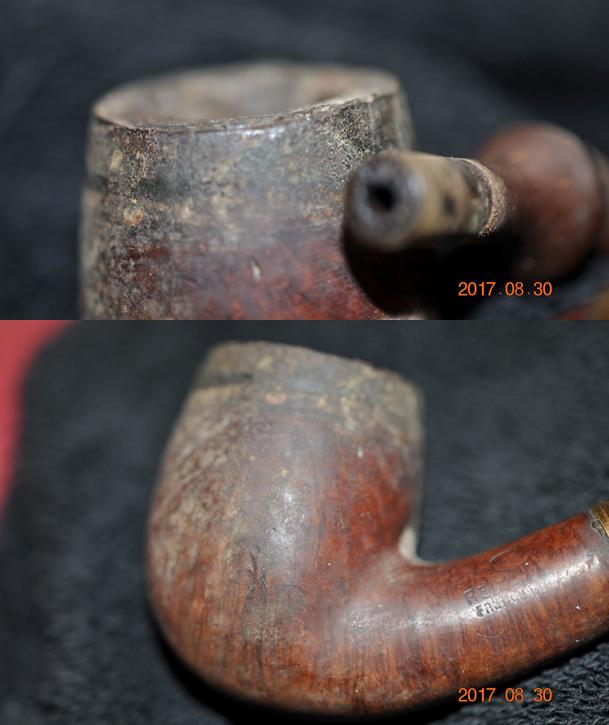 If you look closely you can see the MLC oval on the next photo of the shank. Below that it reads Redmanol over French Briar. You can see the tars that have built up on the shank and pushed the band toward the end of the shank. It really was a dirty pipe. The photo of the bottom of the bowl and shank show more of the worn condition of the briar.
 The next three photos show the condition of the end of the band. It was in rough shape. As the band was pushed off the shank end because of the tars the end that extended beyond the briar of the shank was bent and damaged.
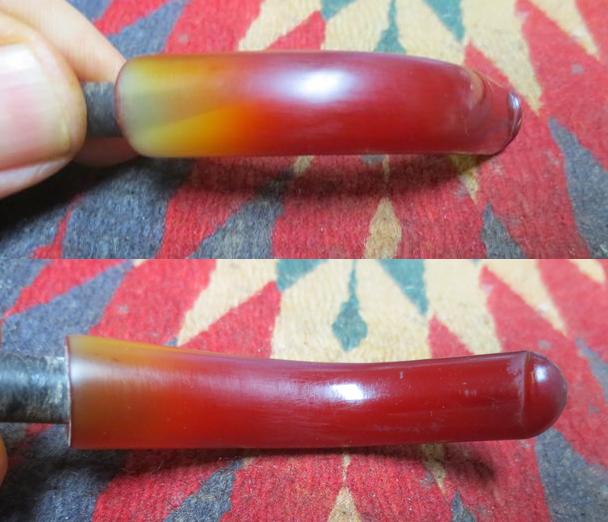
 The last photo Jeff took showed the condition of the stem. I was not particularly concerned with the stem as I was planning on replacing it with a fitted stem. If I used it in the future I would clean it up.
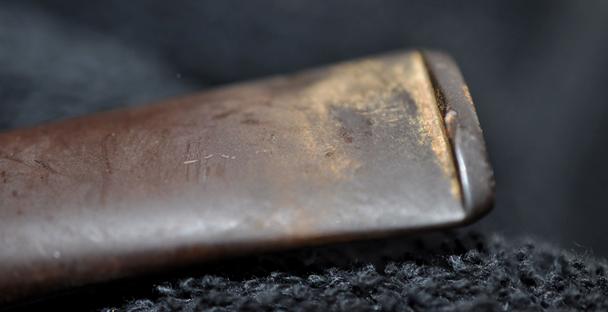 I reread the blogs on the MLC pipes that I had restored previously to refresh the information. Now I was ready to see what I could do with this old pipe. It is really nice working on clean pipes. I have done enough repairs recently that have required me to ream and clean them that I have a greater appreciation for how nice it is to have this done for me. Thanks Jeff for your work and the way it makes my part a bit easier. He worked his usual magic in cleaning up this messy pipe. I really wondered what would lie beneath all of the grime and tars. Jeff reamed it with a PipNet reamer and cleaned up the remnants with a Savinelli Fitsall pipe knife. He scrubbed out the mortise and the airway in the shank and the stem with alcohol, cotton swabs and pipe cleaners. He spent quite a bit of time scrubbing the exterior of the bowl, rim cap and shank with a tooth brush and Murphy’s Oil Soap to remove the build up. He rinsed it under running water. It took a lot of scrubbing to get it free of the tars but it worked well. He dried it off with a soft cloth. Once the grime was removed it was clear that the finish underneath was in rough shape. The briar was quite nice with a mix of straight and birdseye grain around the bowl and shank. I took photos of the pipe to show its condition before I started my work on it.
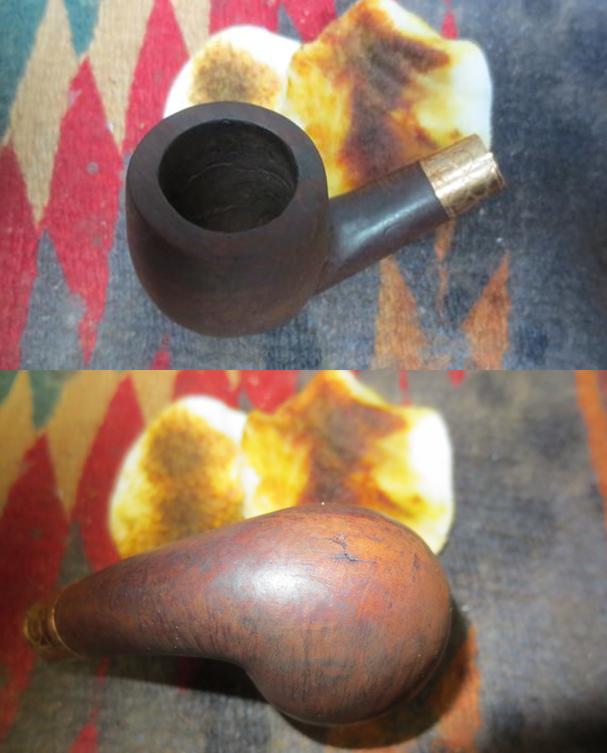
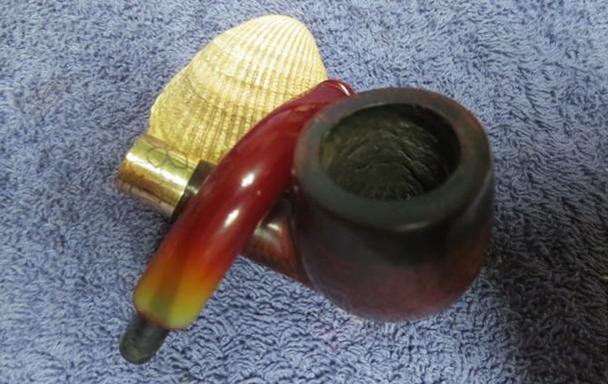
 Jeff had done a miracle in removing the thick cake, cleaning the lava on the rim and sides of the bowl. The inner edge was in pretty decent shape as was the outer one. I was happy to see the condition. There was however a darkening on the rim top and all around the bowl coming down the sides about ¼ inch. At first I thought that it might have been left behind by a rim cap of some sort but there were no small nail holes in the briar on the sides of the bowl. I think that actually it is what is left behind by the greasy hands of the pipe man and the lava that had flowed down the bowl sides.
 He was also able to remove much of the grime around the band on the shank and leave the stamping undamaged.
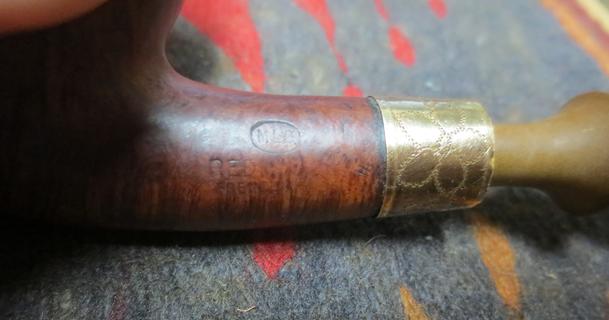 I removed the stem and carefully slid the band off the shank. I wanted to clean up the end of the shank with alcohol and sandpaper. I also want to smooth out the back edges of the band and see if I could make it smooth and useable once again. I heated the end of an awl/ice pick and pressed it against the damaged areas of the band. The brass was quite thin so it was really quite workable. I was able to remove all of the damaged areas but one that was a compressed area on the bottom side. It would be hidden on the underside of the shank once it was glued back in place.
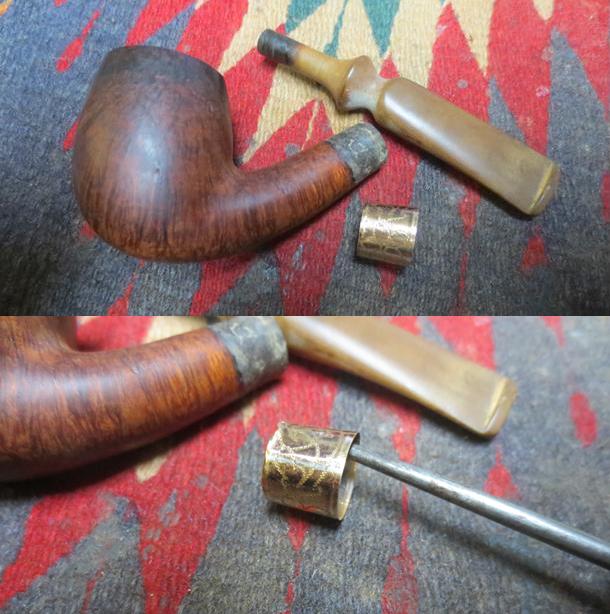 I scrubbed the shank end and the dark area with acetone to remove more of the grime that was on the surface of the briar. I was able to reduce quite a bit of the buildup around the top of the bowl and the rim top with this method.
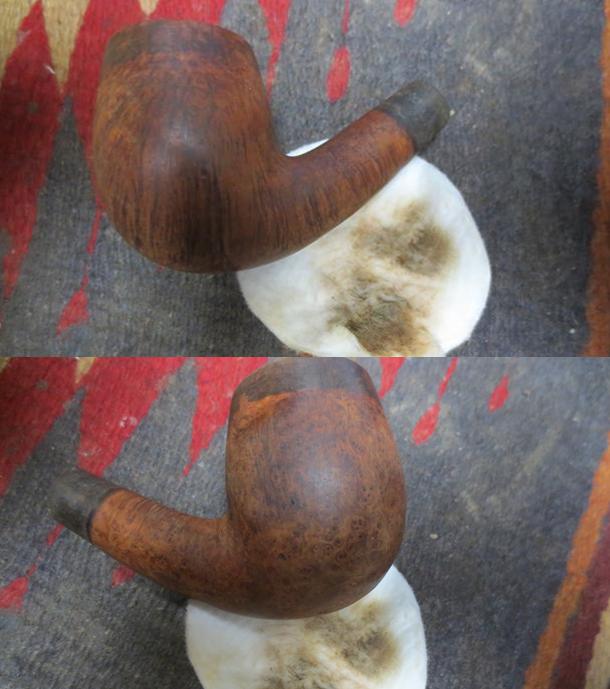
 I sanded the end of the shank to smooth it out. I used a dental spatula to spread the all-purpose glue around the shank. I pressed the band back on the shank with the small damaged spot on the underside.
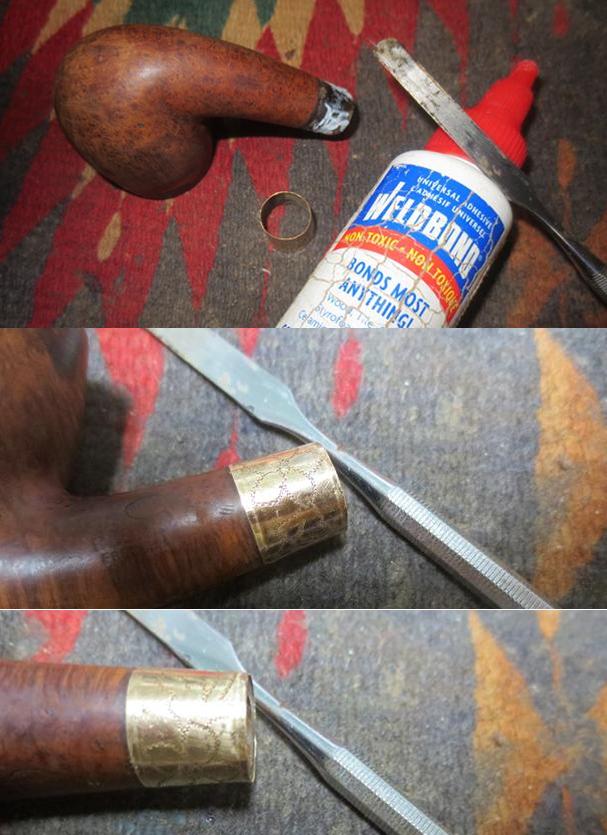 I took a photo of the end of the shank to show that the band fit tight on the shank and was even with the shank end. You can see the damaged area on the underside of the shank on the right side of the photo.
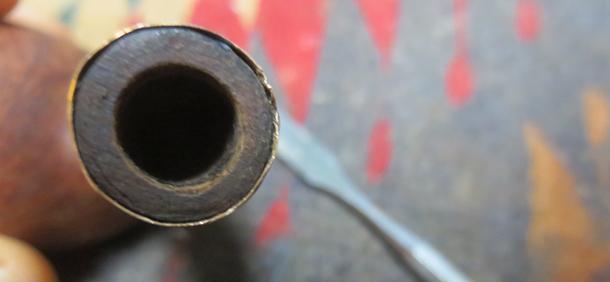 I looked through my can of stems because I remembered having a bent Redmanol stem that I had picked up somewhere along the way. Sure enough it was there. It was slightly larger in diameter than the shank of the pipe so it would need to be sanded to fit nicely on the shank. It also had a push stem on it that would need to be removed and replaced with a normal tenon. Both of those were relatively easy jobs. I was anxious to get moving on the stem so of course I forgot to take photos of the stem with the meerschaum push tenon. It was loose so I unscrewed it from the stem. I had a small threaded Delrin tenon with the threads that were close to the same and threaded it into the airway on the stem. It worked well so I unscrewed it and glued it in place in the stem. The photos below show the new tenon on the stem.
 The tenon fit well in the mortise. The fit against end of the shank was nice. I sanded it to remove the excess material and reduce the diameter of the stem to match the shank using 220 grit sandpaper. In the photos below it is getting close to a nice fit.
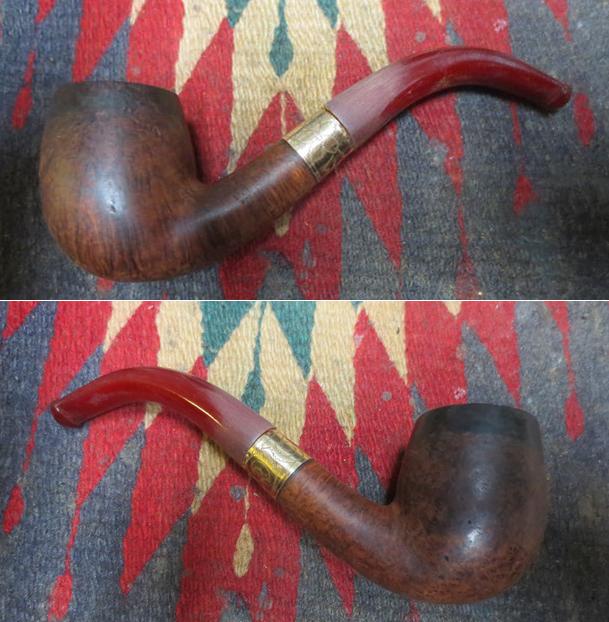
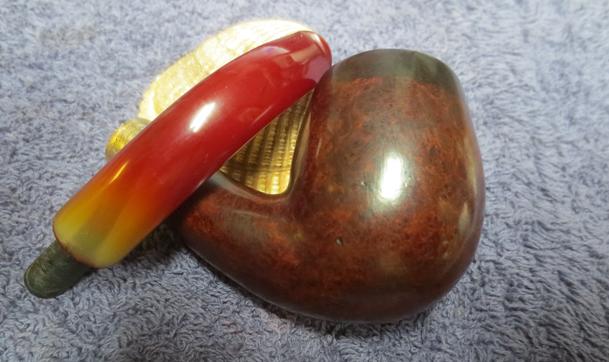
 What you can’t see in the photos is that the nice, rich, red colour of the Redmanol lightened with sanding to shades of blood orange. I could not start over so I decided to keep sanding until the fit was correct. At first I did not like the effect on the Redmanol and I was disappointed by the colour shift. Looking at the stem from the drilled airway before I put the tenon in place and the flat end of the stem it appeared that the red was solid all the way through the material so when the oranges and yellows started to show up I was a bit frustrated. Now as I look at it I have to say it is growing on me. It reminds of the Popsicles that we used to by when I was a kid.
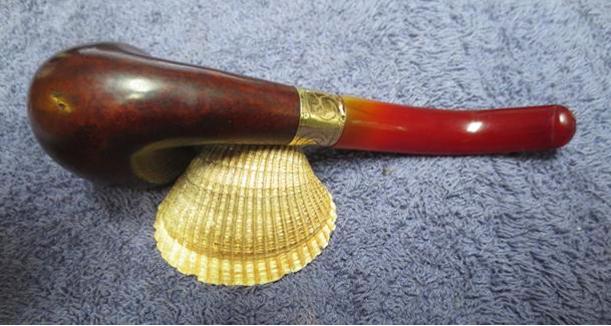
 I stopped sanding the bowl and put the stem on the shank to get a couple of photos so I could look at it on the screen and get the effect. It is almost like flame… kind of a nice variation. It is interesting to see the fine red line between the band and the stem – the flat end still is an even red. I don’t quite understand it but I am resolved to live with it. I am going to stain the bowl so that should also add to the variations of colour on this old pipe.
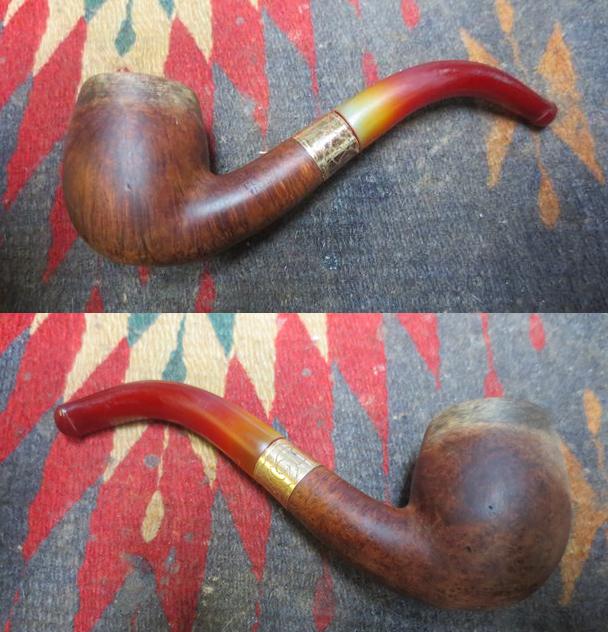 I decided to try to bleach out the darkening on the rim top and first ¼ inch of the bowl all the way around. I wiped it down with bleach on a cotton pad and left it on the dark area to do its work. It worked better on the left side than the right.
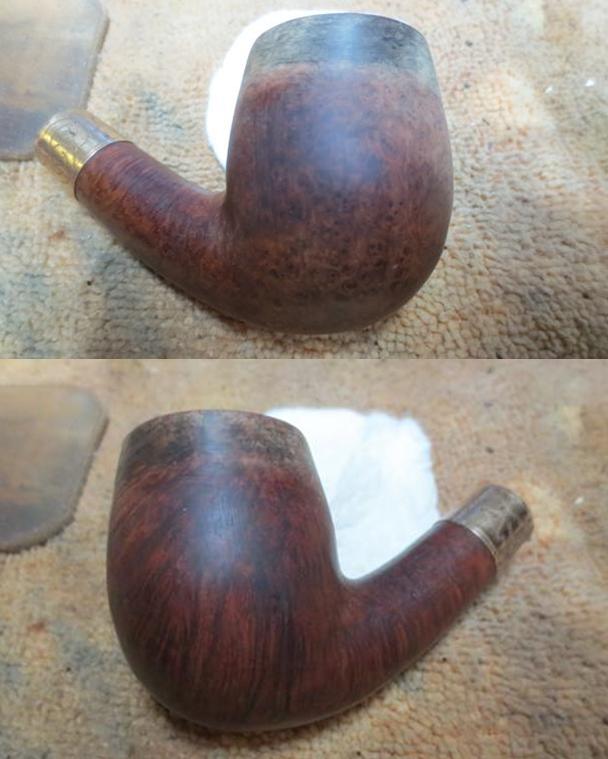 I stained the bowl with a dark brown aniline stain to try to blend in the dark rim stains. I applied the stain, flamed it and repeated the process. Once it dried I wiped the bowl down with alcohol on cotton pads to make it more transparent and let the grain shine through. In the process some of the nicks in the briar showed up more clearly. I decided not to fill them in but to leave them as war wounds on this old timer. They tell a story that I wish the pipe could tell us.
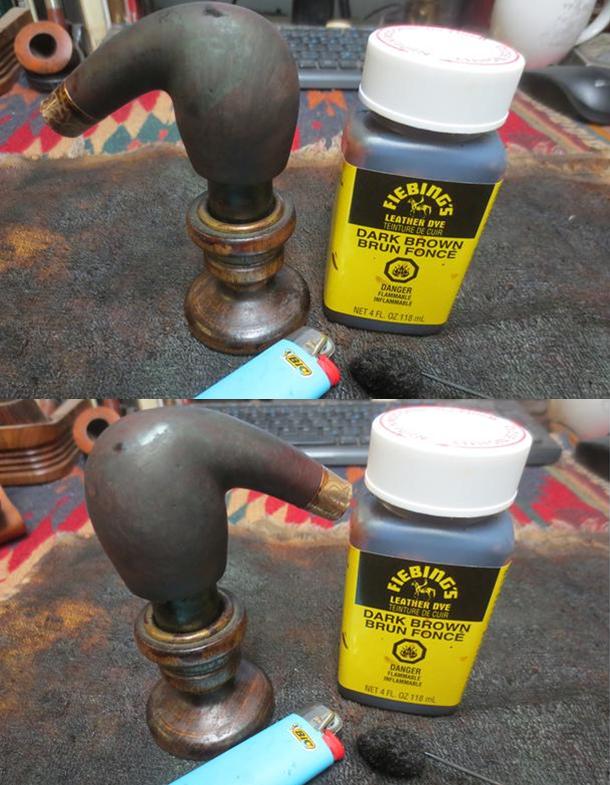

 I polished the briar with micromesh sanding pads. I started polishing with 3200-4000 grit pads and wiped the bowl down after each pad with a damp cloth. I continued to polish with 6000-12000 grit pads and wiped it down after each pad. I hand buffed it with a soft cloth. The dark ring around the top of the bowl is still visible but less than before. The rim looks good.
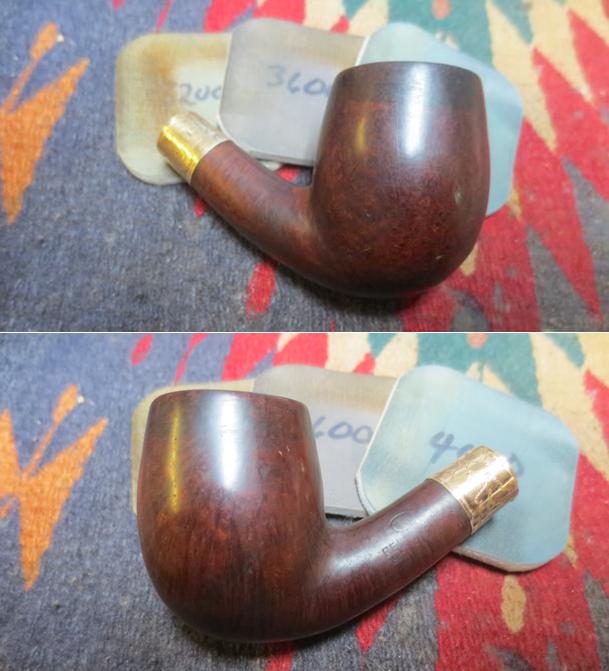

 To further blend the darkened top portion of the bowl with the rest of the pipe I gave the bowl a contrast coat of Danish Oil Cherry Stain. I applied it by hand and rubbed it off and repeated the process to get a good smooth coat.
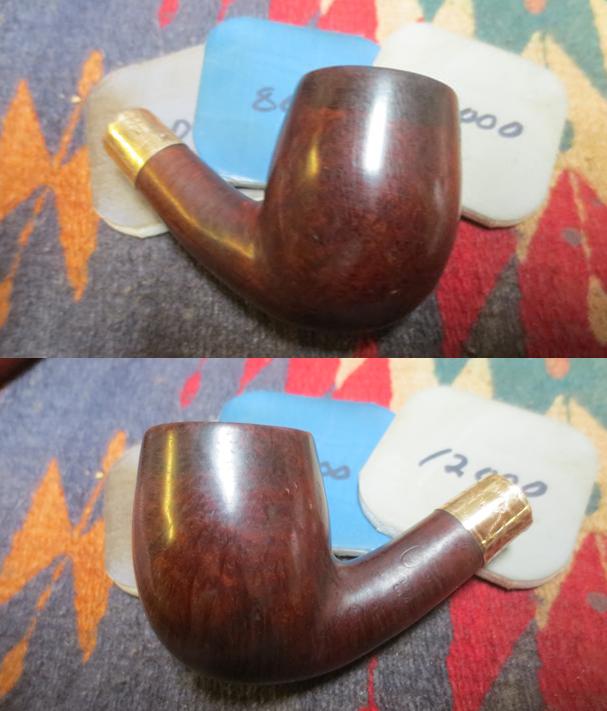
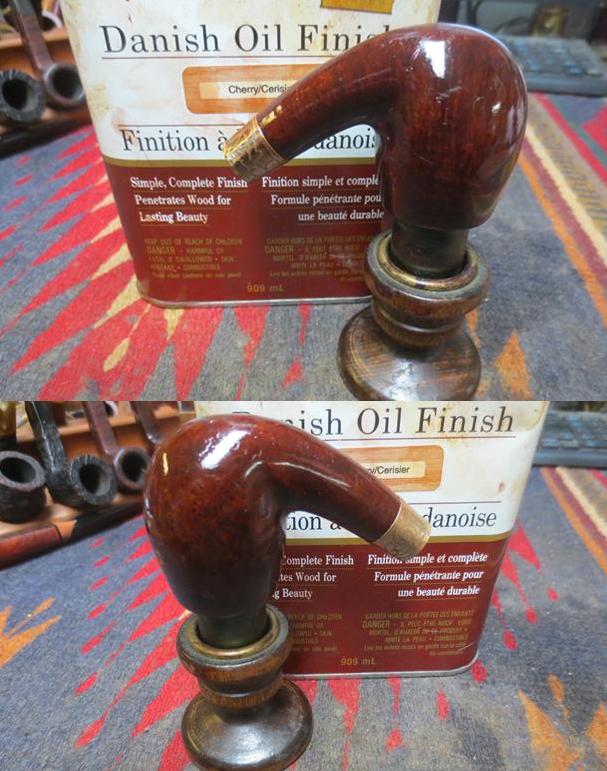 I wiped the stain coat off and hand buffed the pipe lightly. The photos below show what the pipe is looking like at this point in the process. The right side still shows darker than the left at top edge of the bowl.
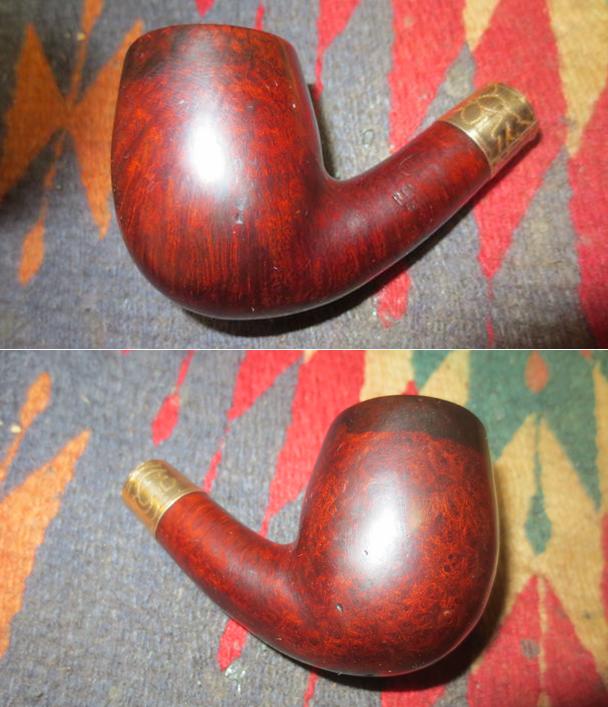
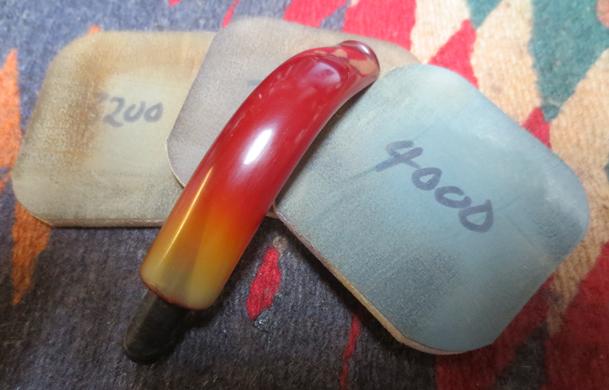
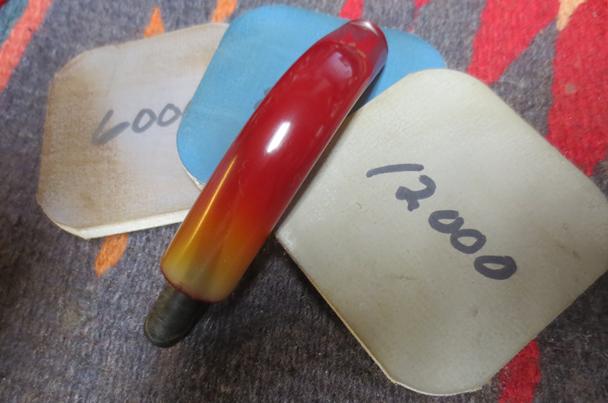
 I polished the stem with micromesh sanding pads – wet sanding it with 1500-2400 grit pads and dry sanding with 3200-12000 grit pads. I wiped the stem down with Obsidian Oil after each pad. After the final 12000 grit pad I gave it a final coat of oil and set it aside to dry.
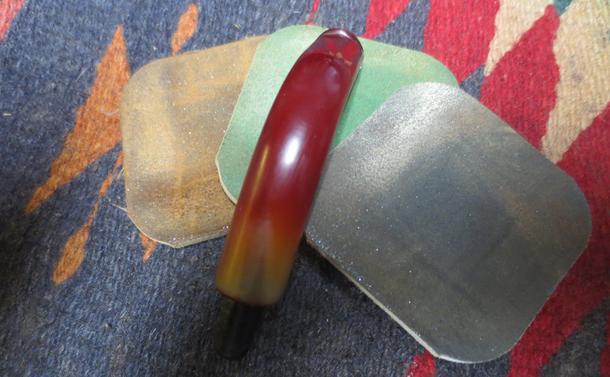
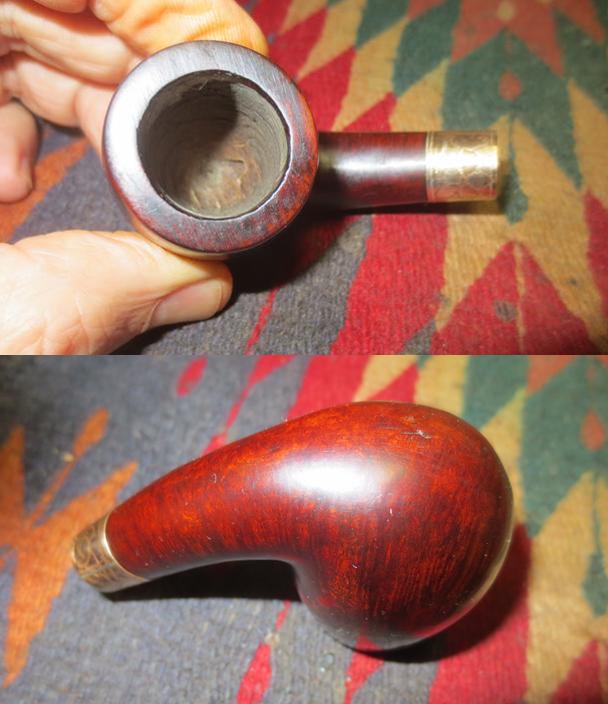
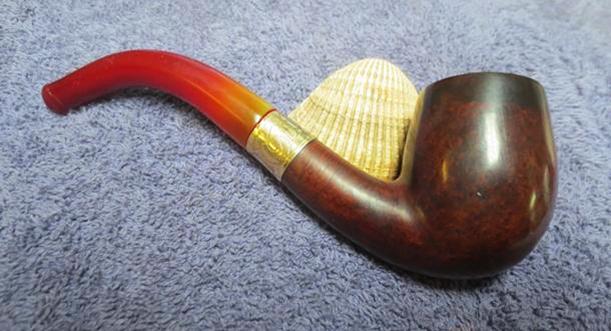
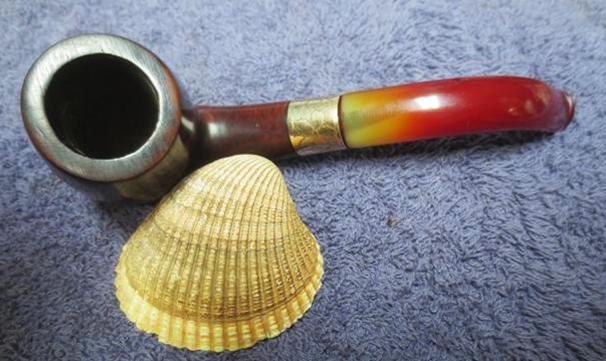
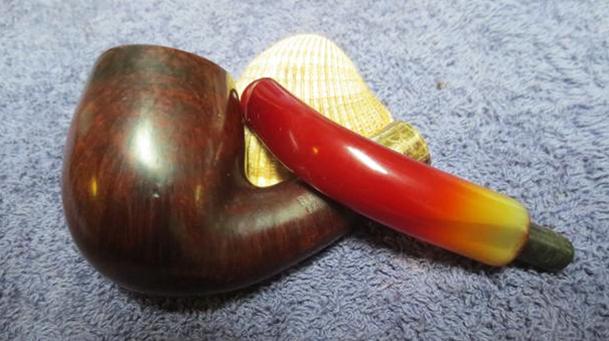
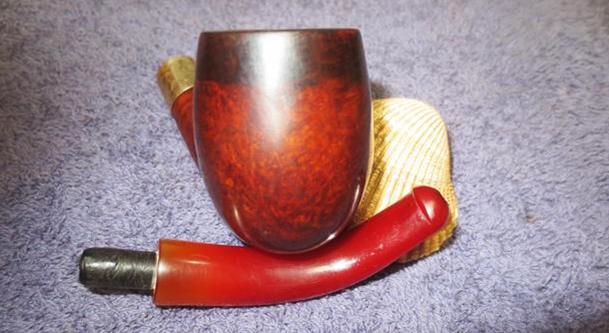
 I put the stem back on the bowl and buffed it with Blue Diamond on the buffing wheel to polish the briar. I gave the pipe multiple coats of carnauba wax and buffed it with a clean buffing pad to raise a shine. I hand buffed it with a microfiber cloth to deepen the shine. The newly variegated Redmanol stem did not too bad with the old pipe. It shines like polished horn and the flow of the colours worked with the colours on the bowl. The way the colours shifted on the parts worked well together to present a beautiful pipe. The dark rim edge almost looks like the way meerschaum pipes were flumed with a dark edge. The pipe looks fresh and new. Later I will need to give it a bowl coating to protect the bowl inside as there are spidering cracks all around the briar. The finished pipe is shown in the photos below. Thanks for looking.
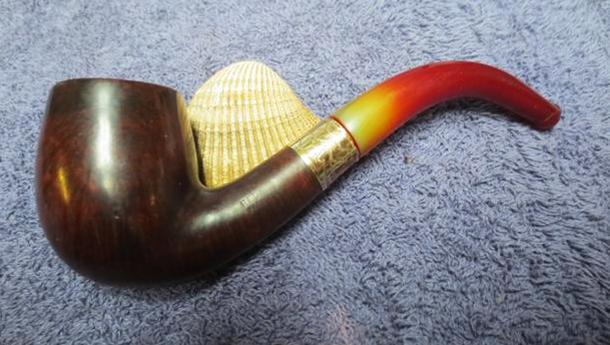


That stem ended up looking pretty cool, kinda like a sunrise! Not what you wanted in the beginning but a cool effect and outcome! Nice work Steve!
LikeLiked by 1 person
Thanks Ryan, it does make an interesting contrast of colours. Ah well even those that don’t work are still usable.
LikeLike