Monthly Archives: July 2016

Have you ever heard of a Benedetto Luna Billiard?


Blog by Steve Laug

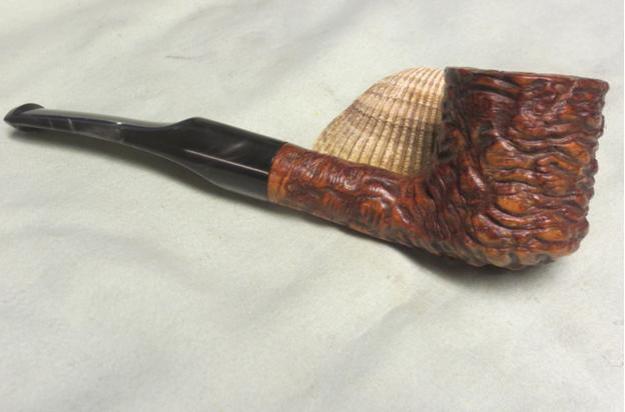
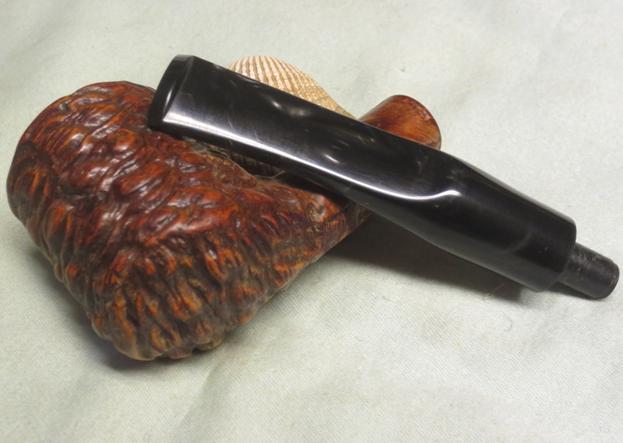
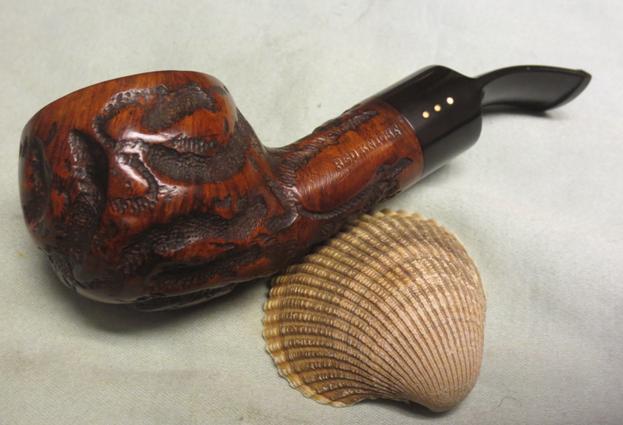
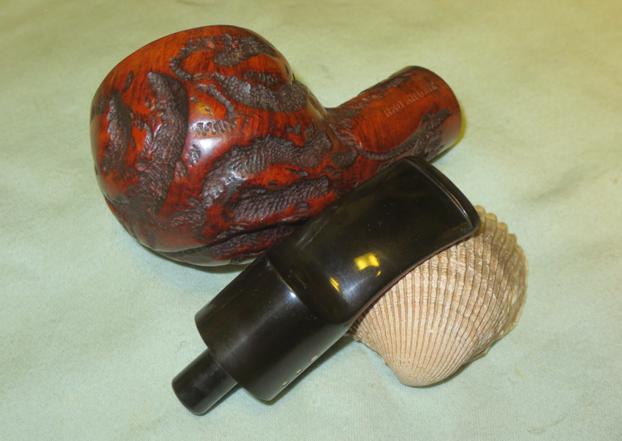
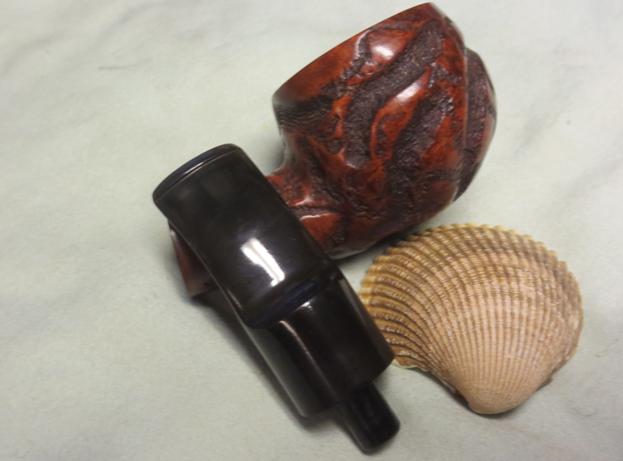
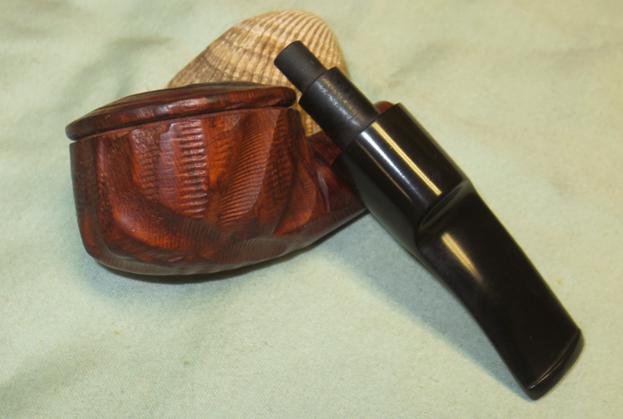
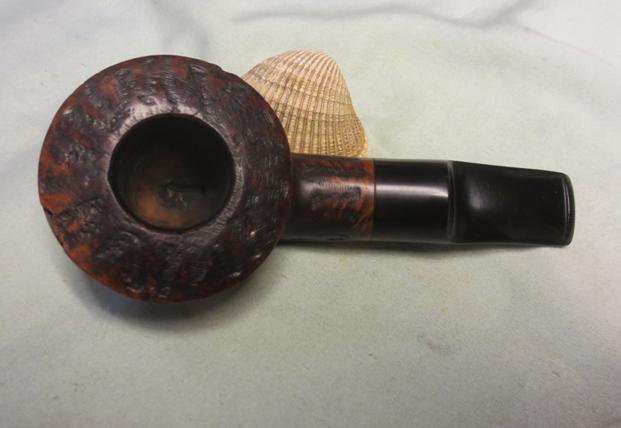
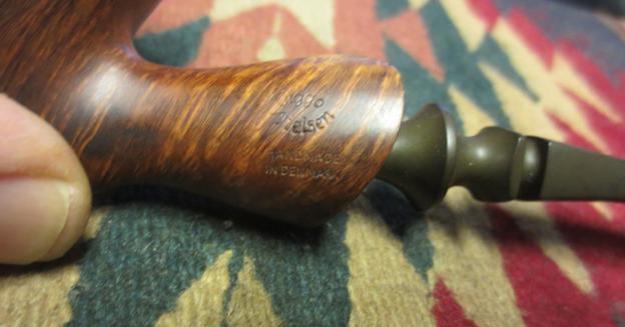
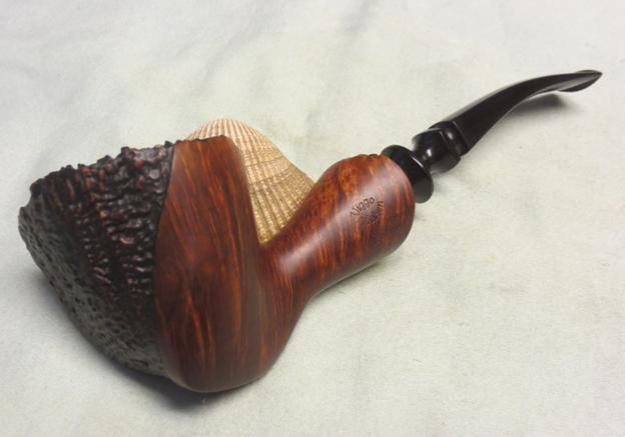
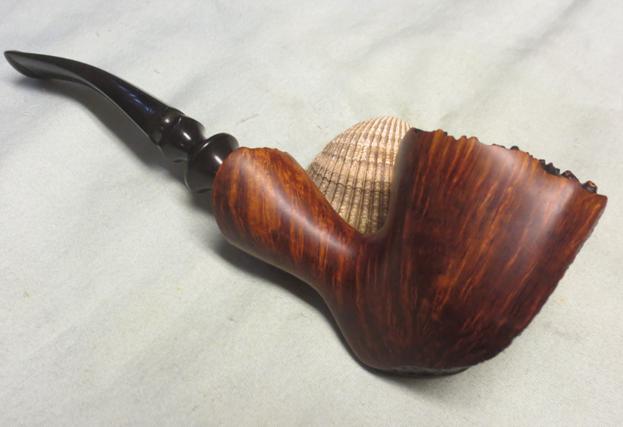
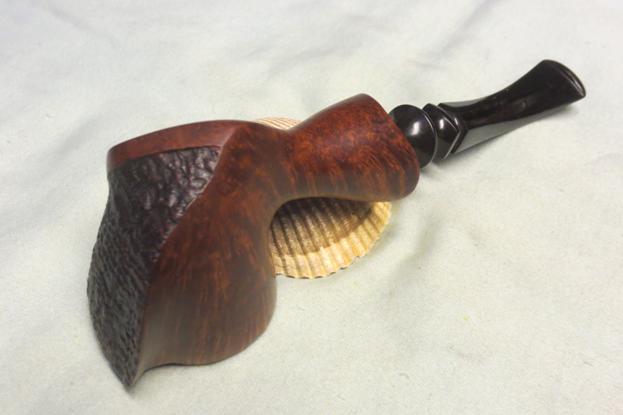
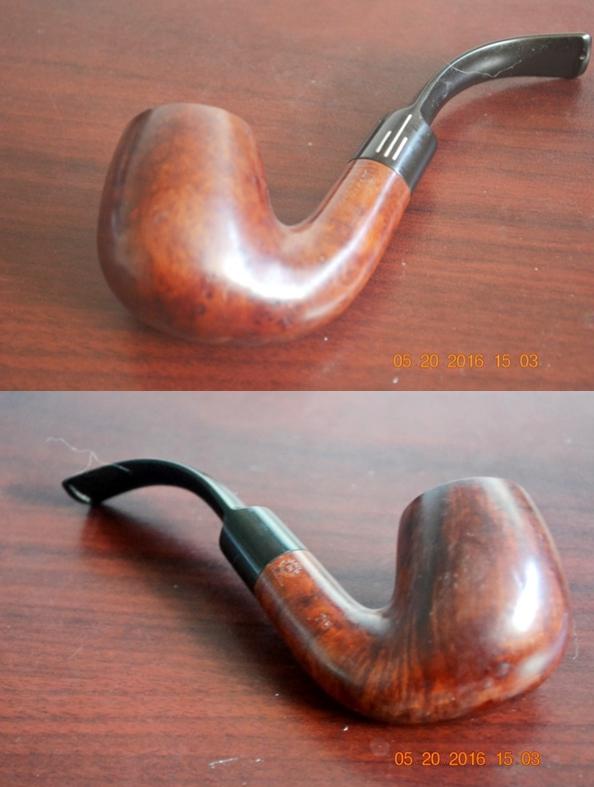
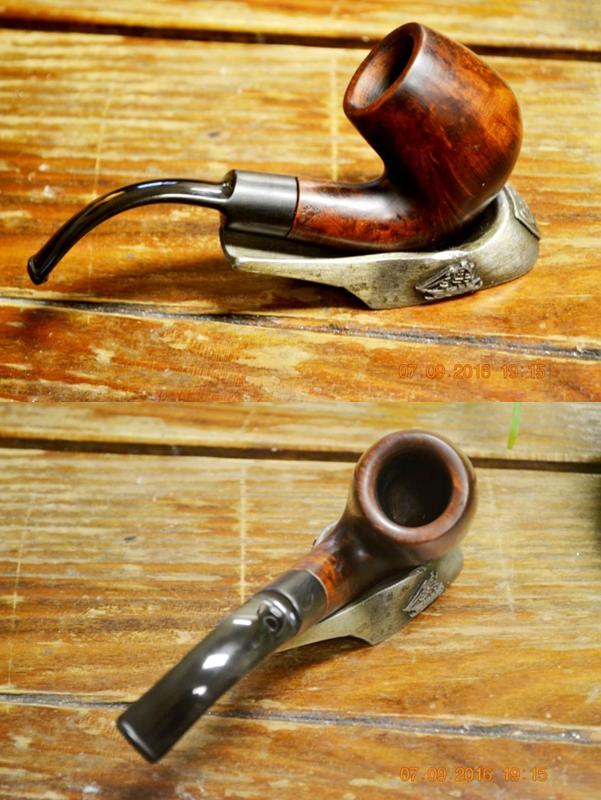
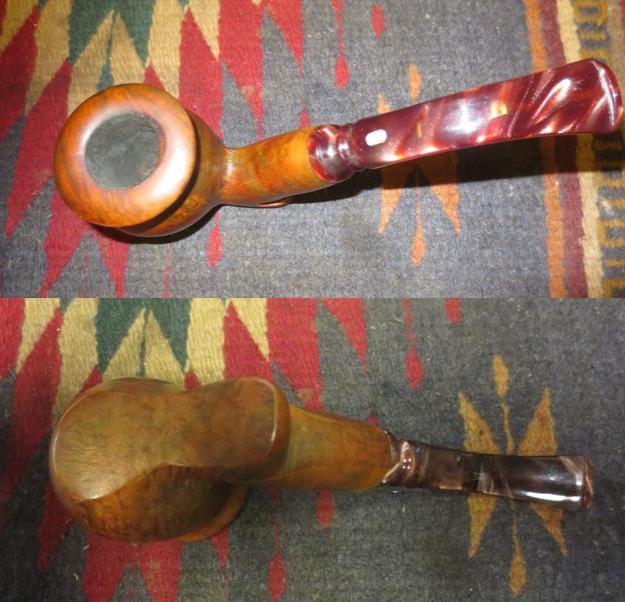
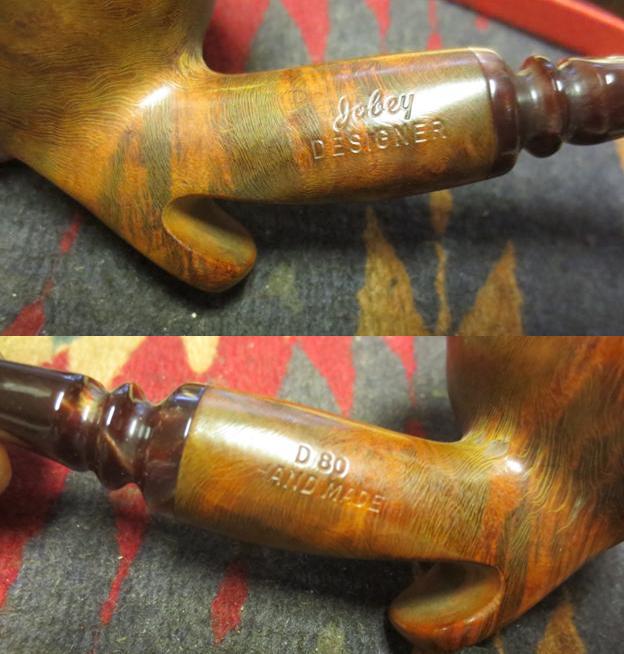
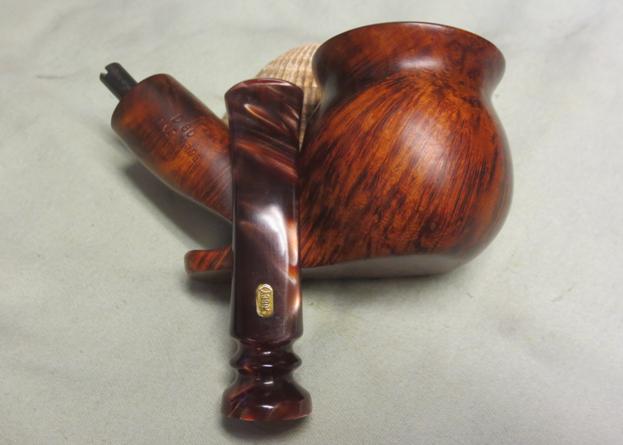
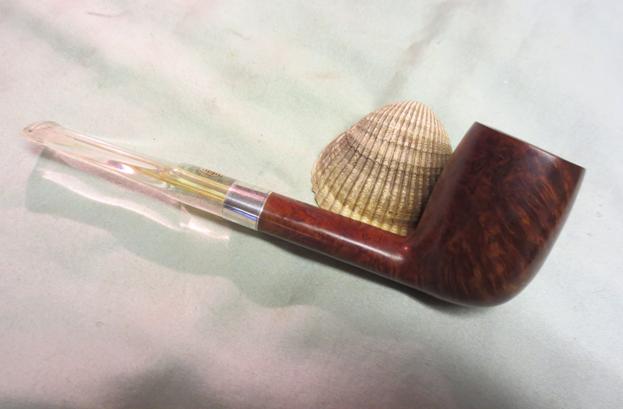
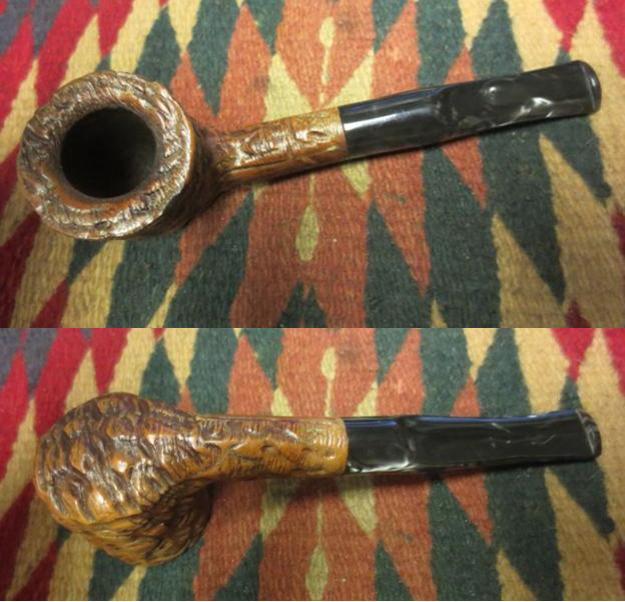
The next pipe on my work table is a rusticated billiard with a fascinating rustication. The pipe is stamped on the left side of the shank, Benedetto Luna from Italy. It has a gnarly rustication and a marbled silver and black Lucite stem.Ben1The bowl seemed to have a coat of urethane that was wearing away. The rim had some darkening and the crevices were dirty. The bowl had a light cake. The stem was in great shape other than being dirty and having minimal tooth chatter. I figured it would be a relatively easy clean up.Ben2 Ben3
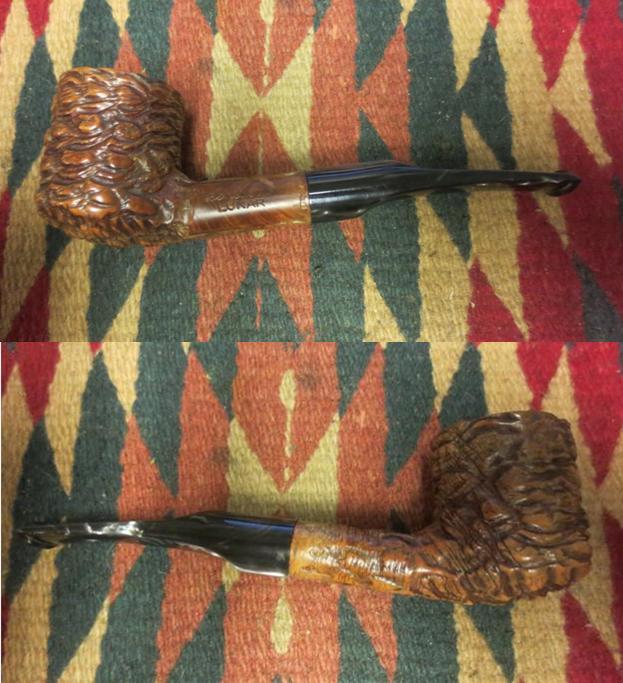
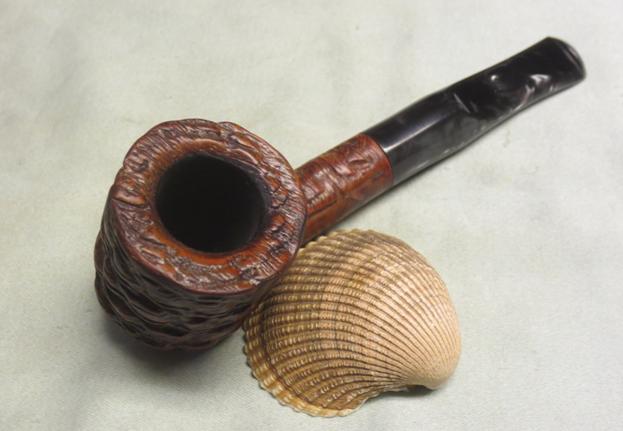
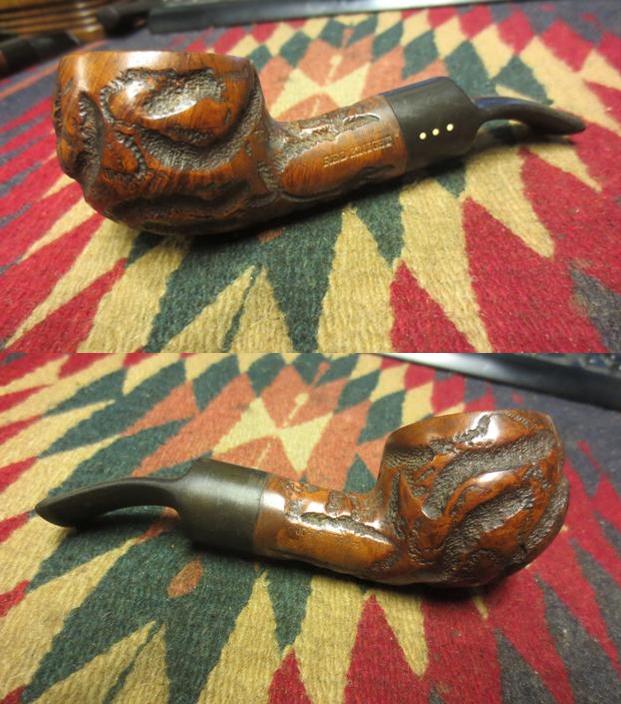
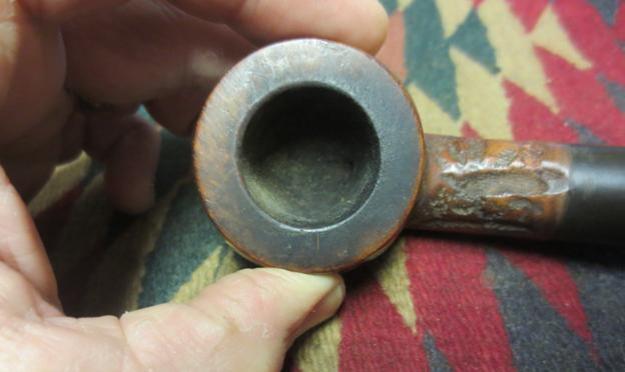
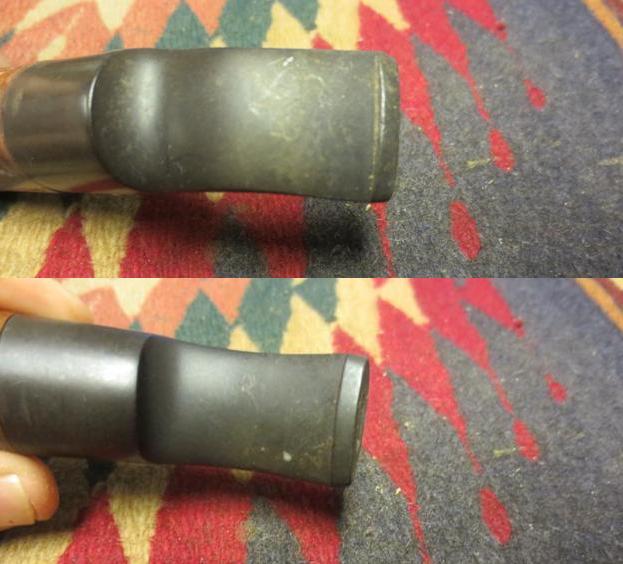
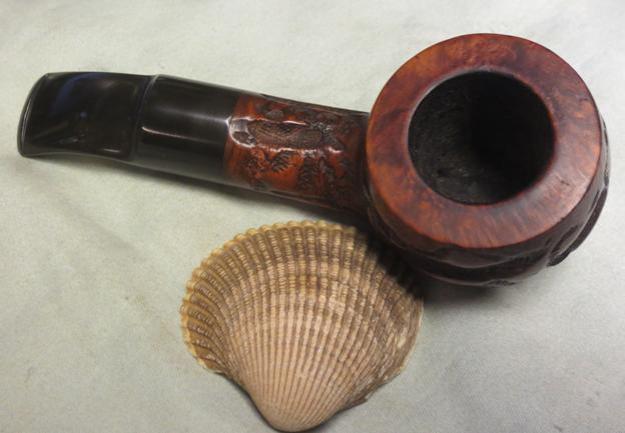
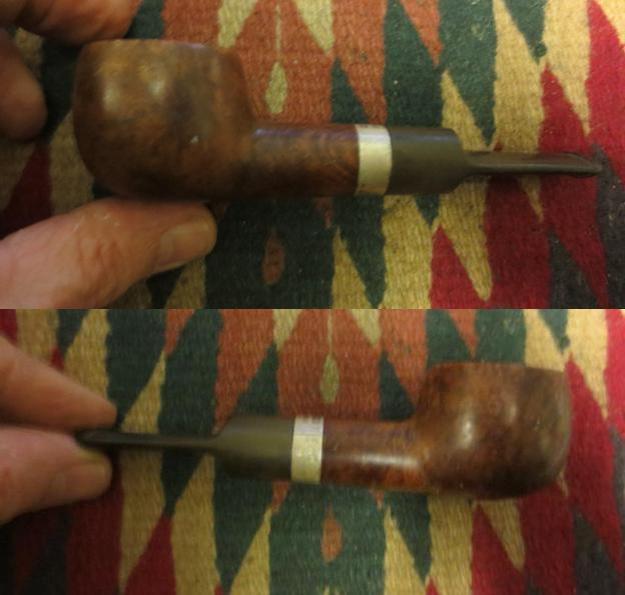
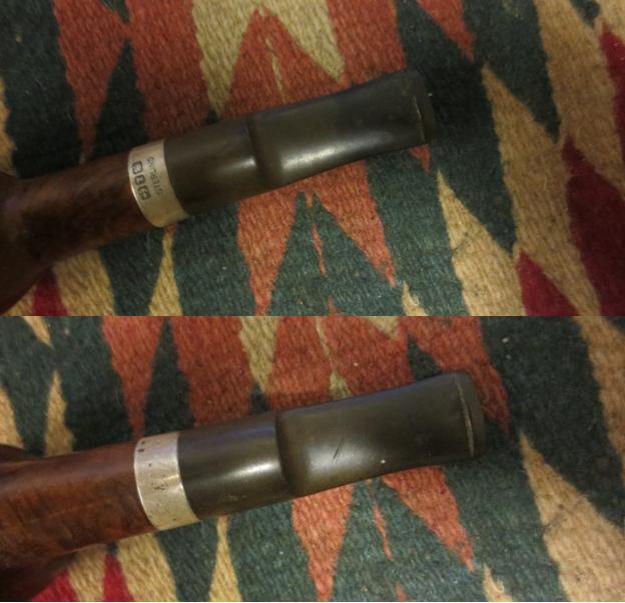
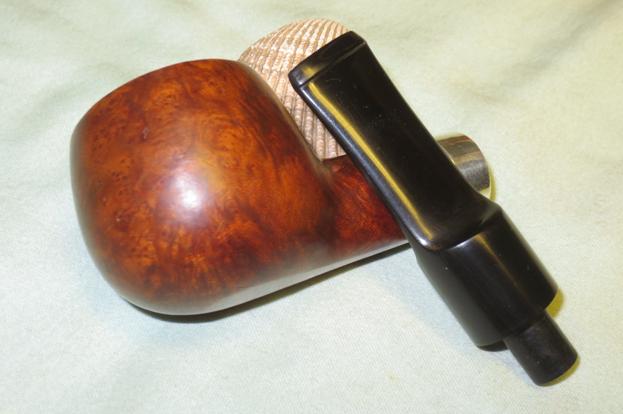
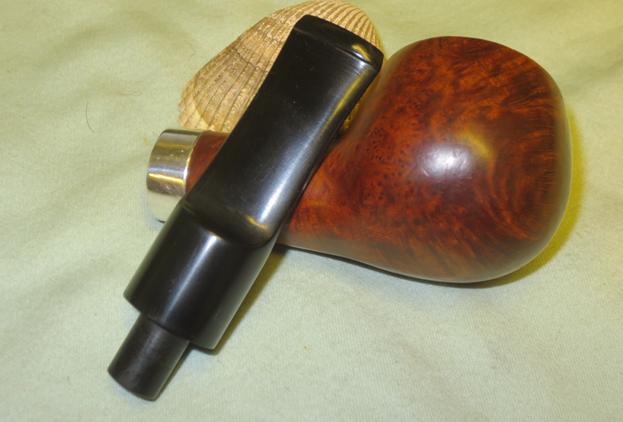
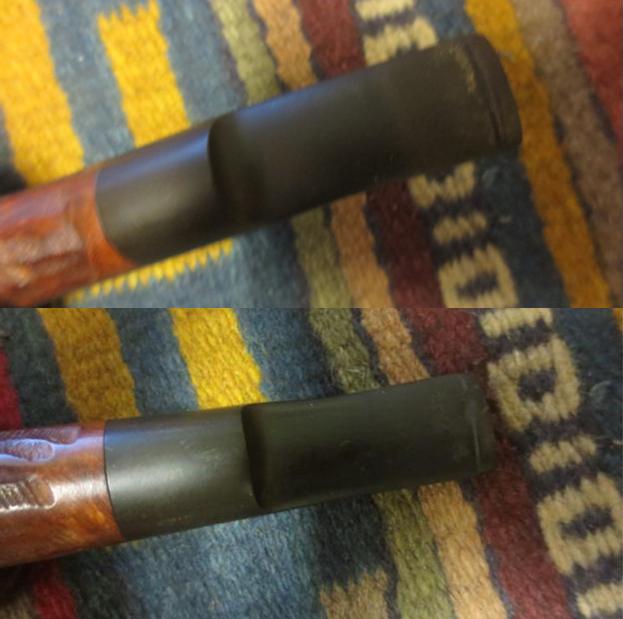
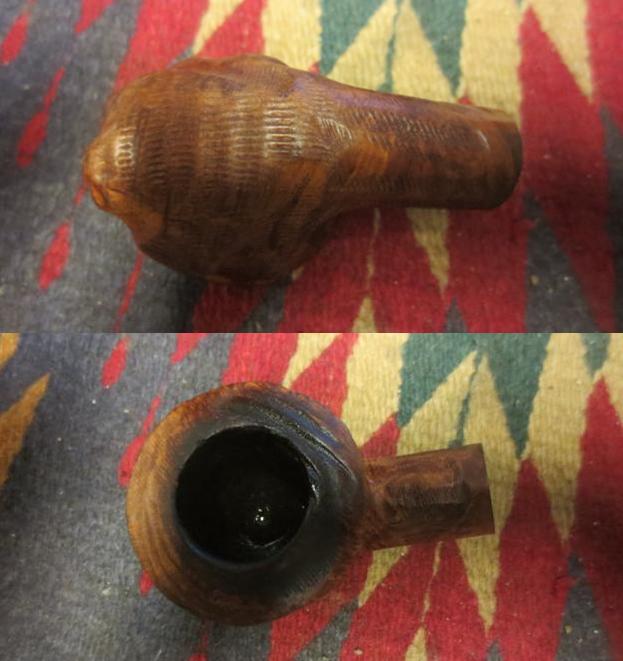
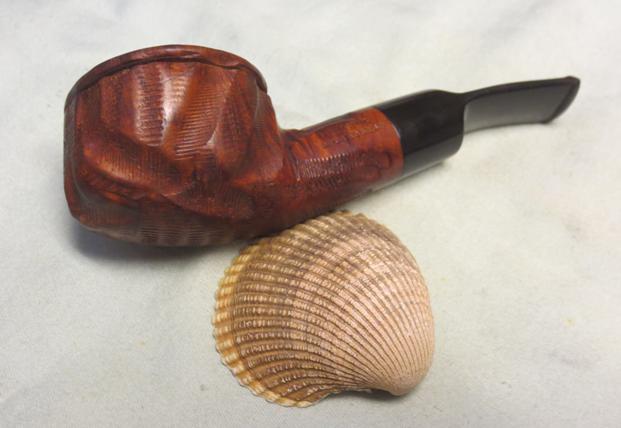
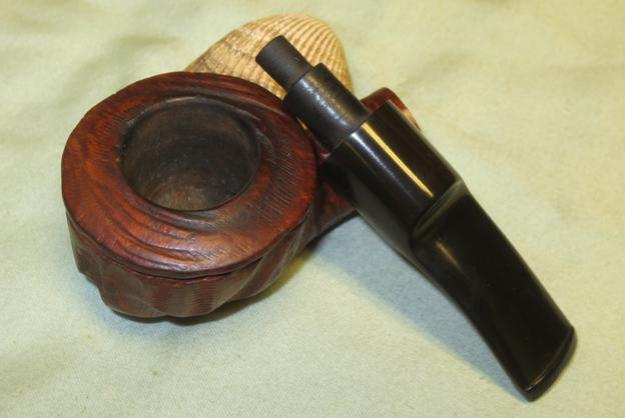
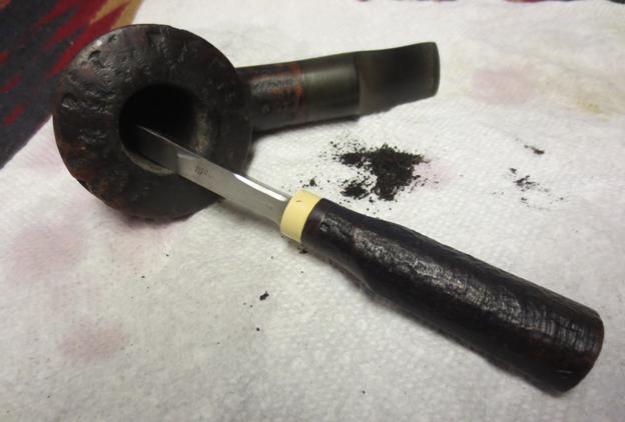
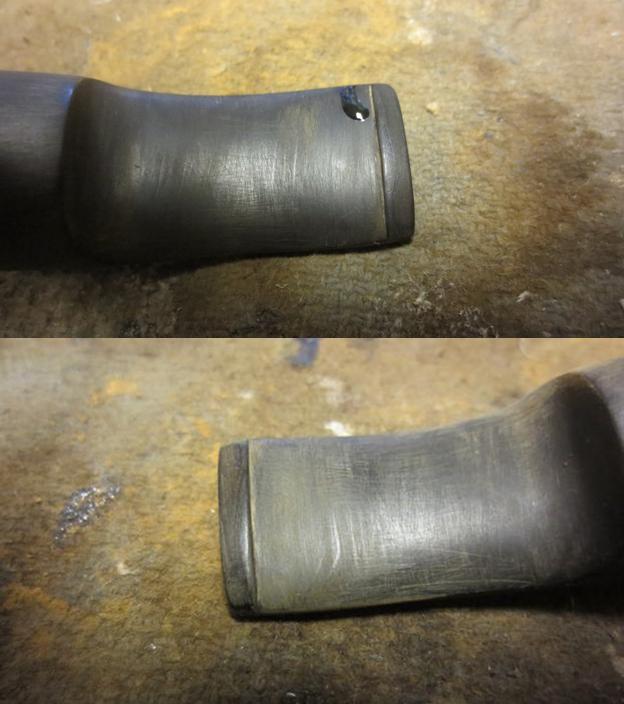
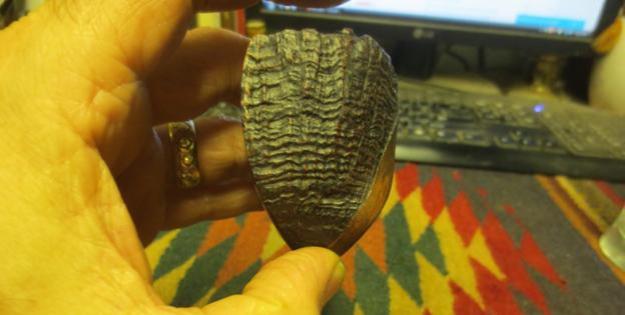
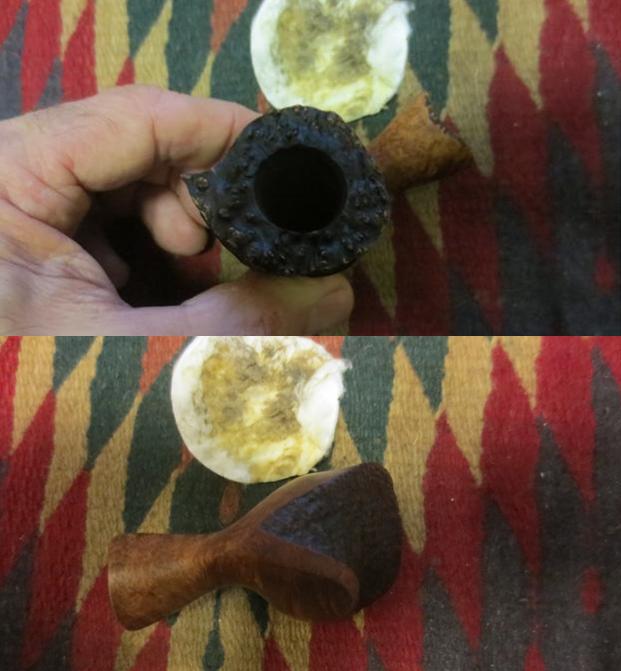
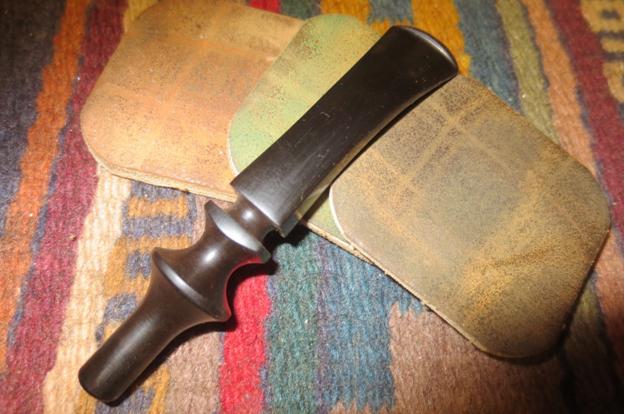
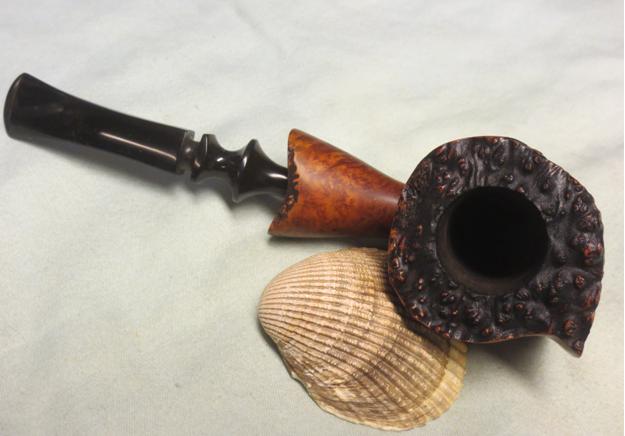
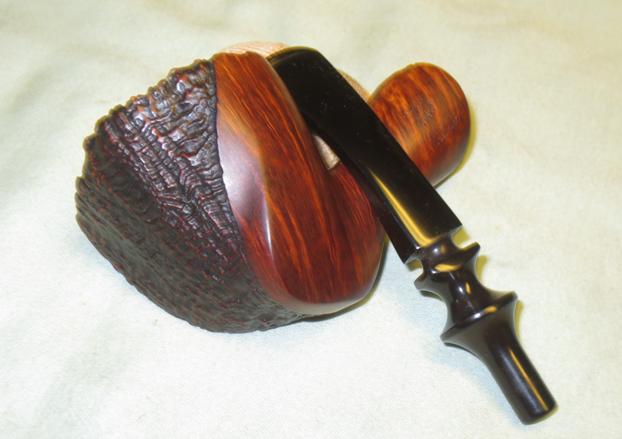
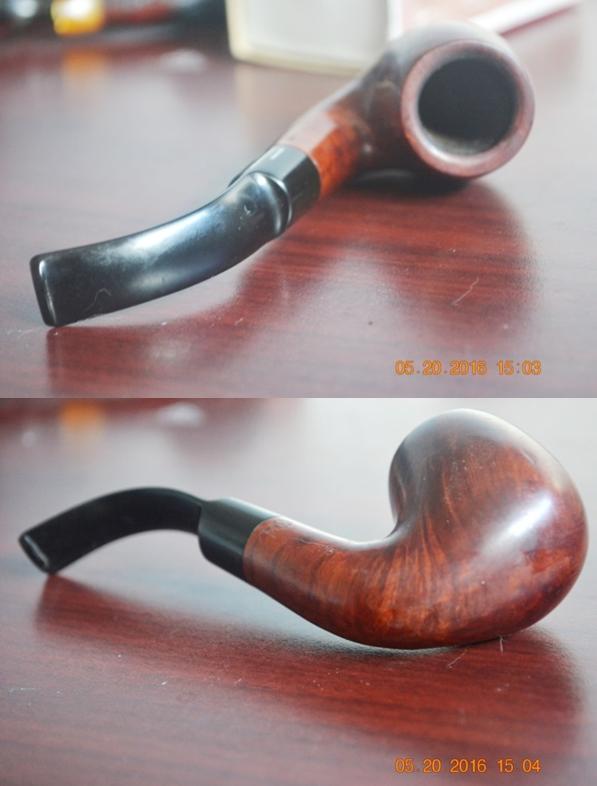
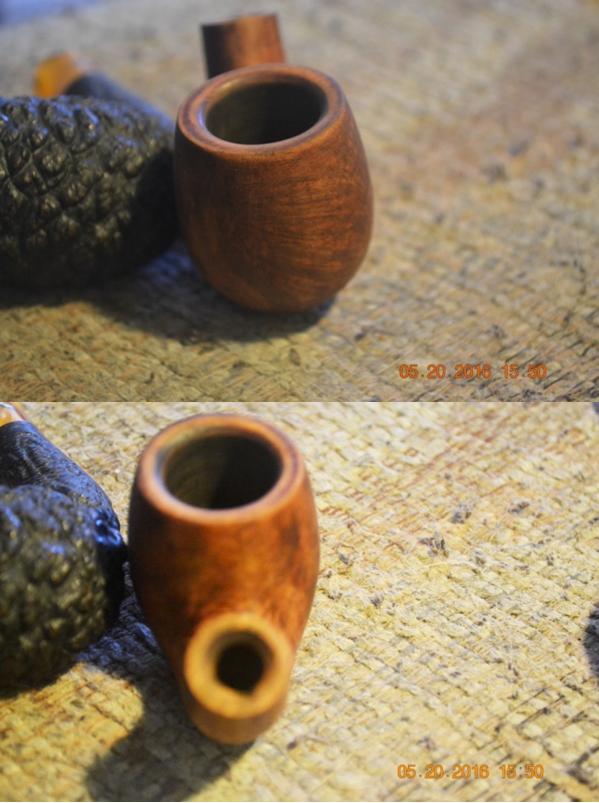
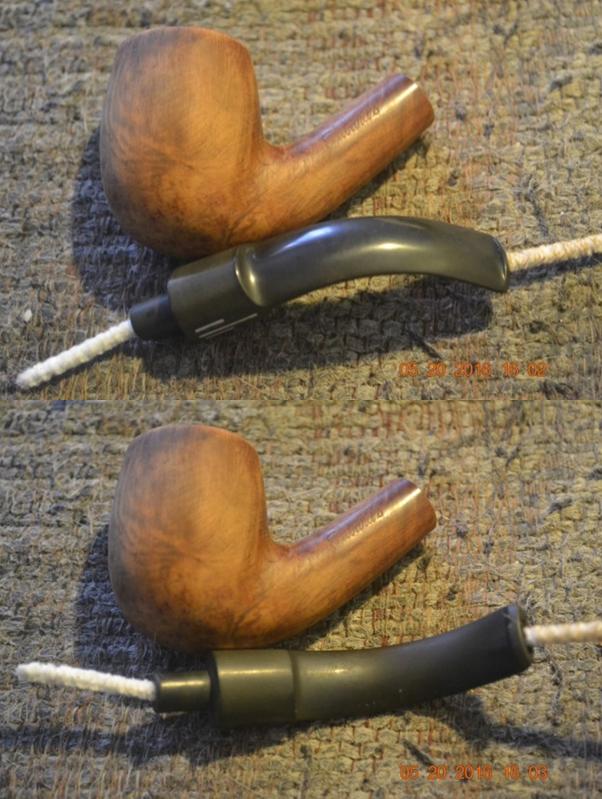
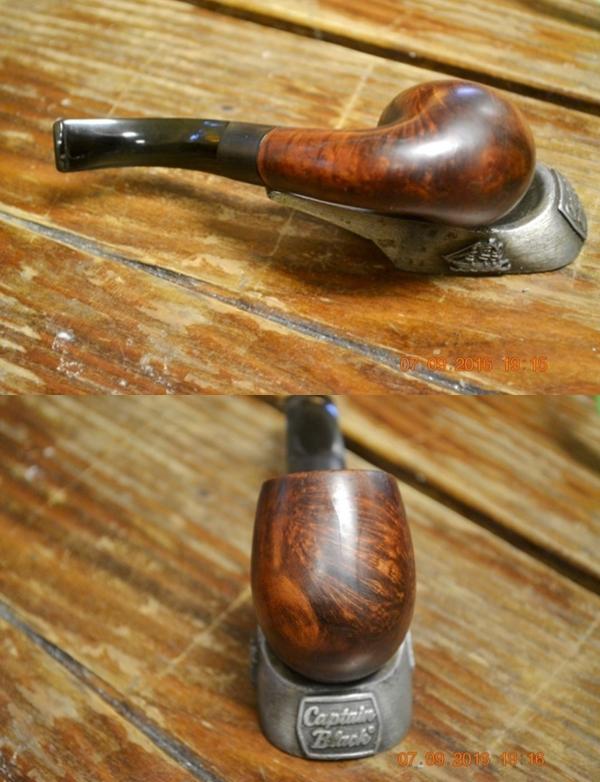
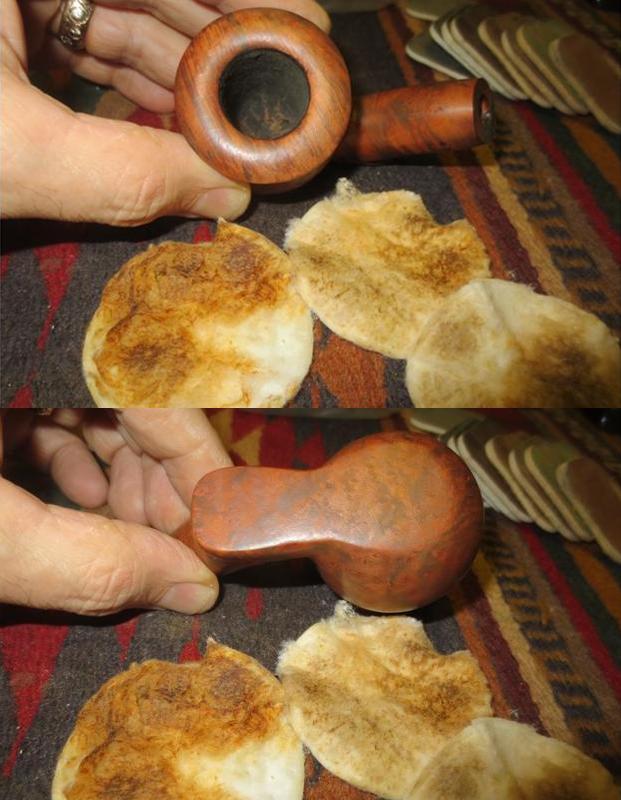
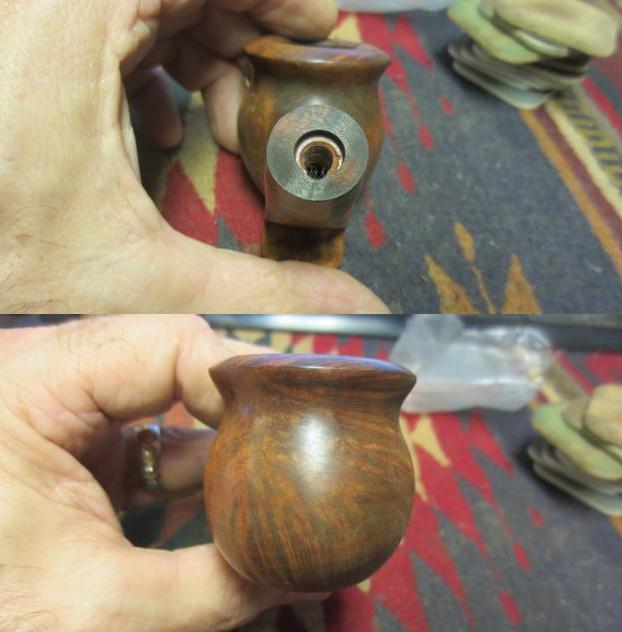
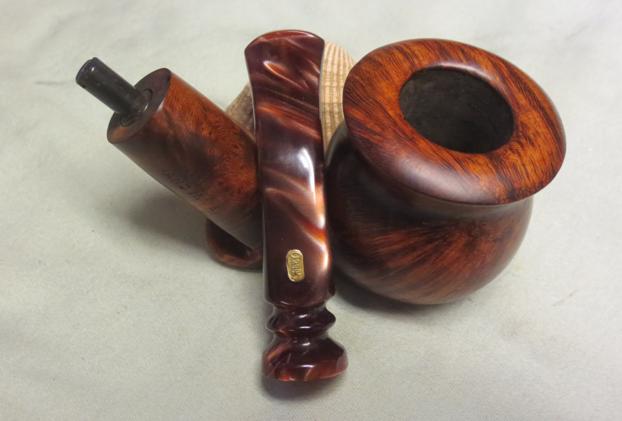
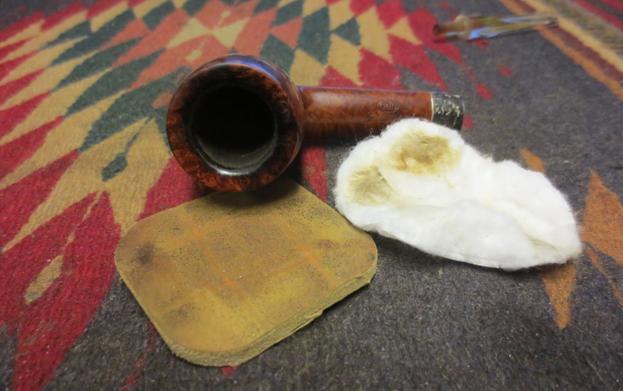
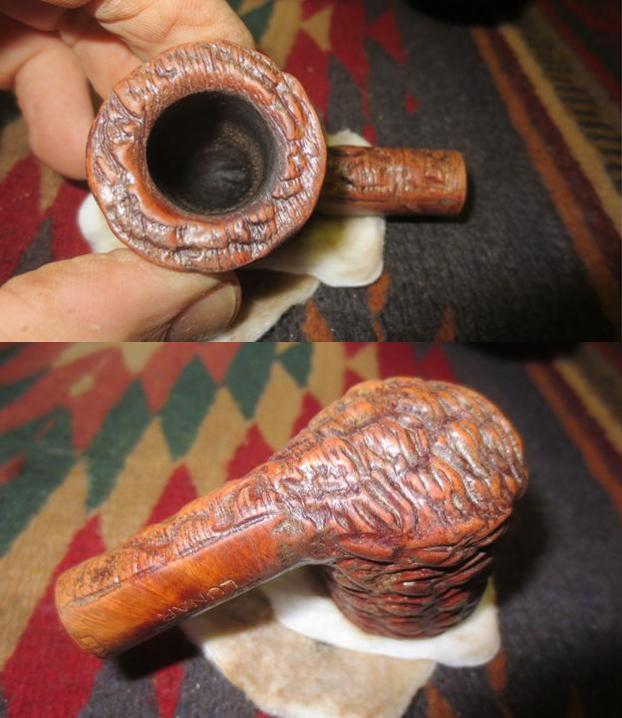
I took a close-up photo of the rim to show its condition. You can see the light cake in the bowl and the dust in the crevices of the rustication on the rim. The inner and out edges are undamaged and still round. The stem photos show the condition of the top and underside – light chatter but otherwise excellent condition.Ben4 Ben5
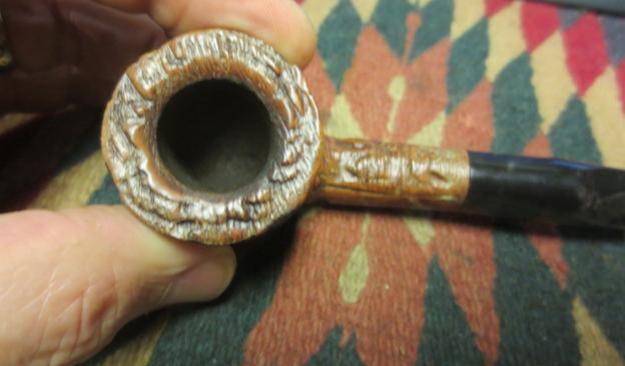
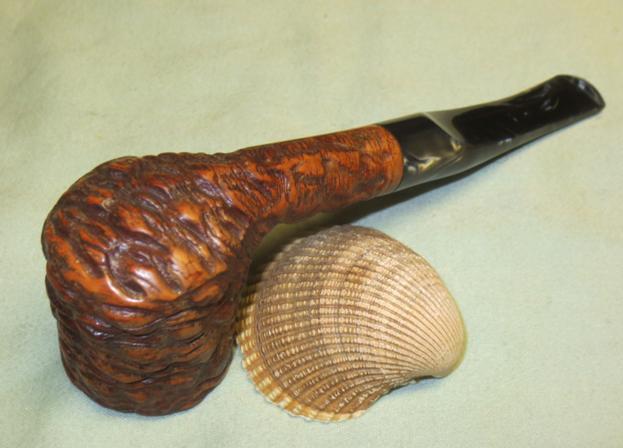
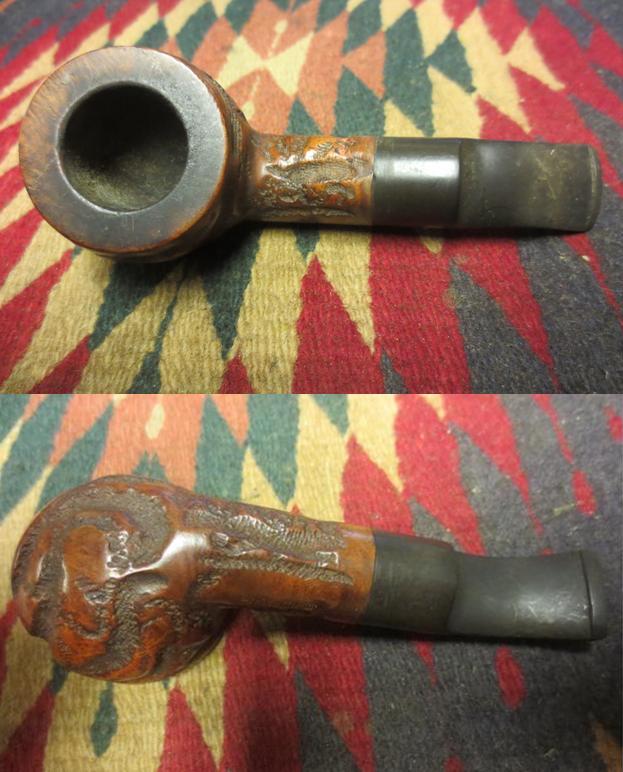
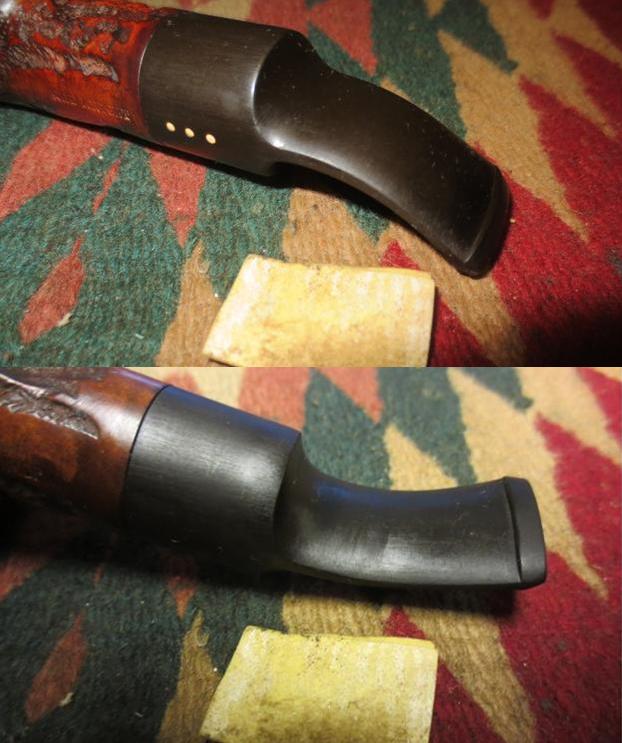
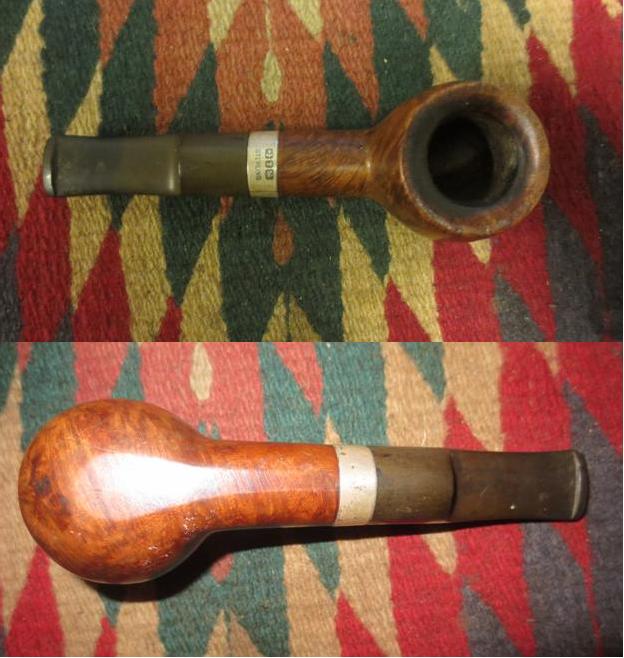
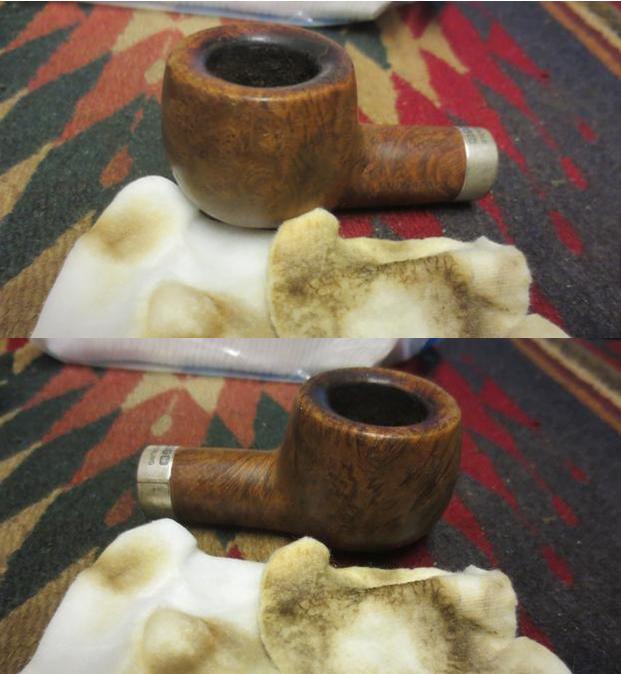
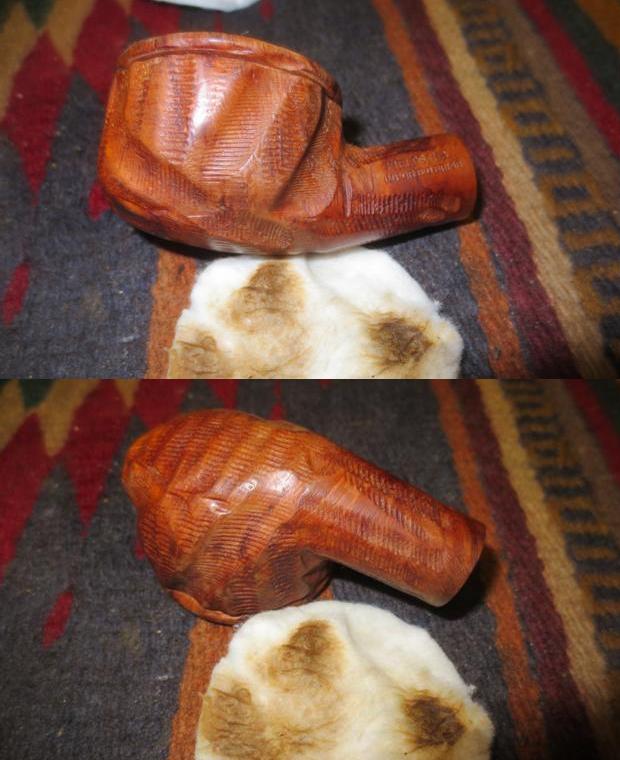
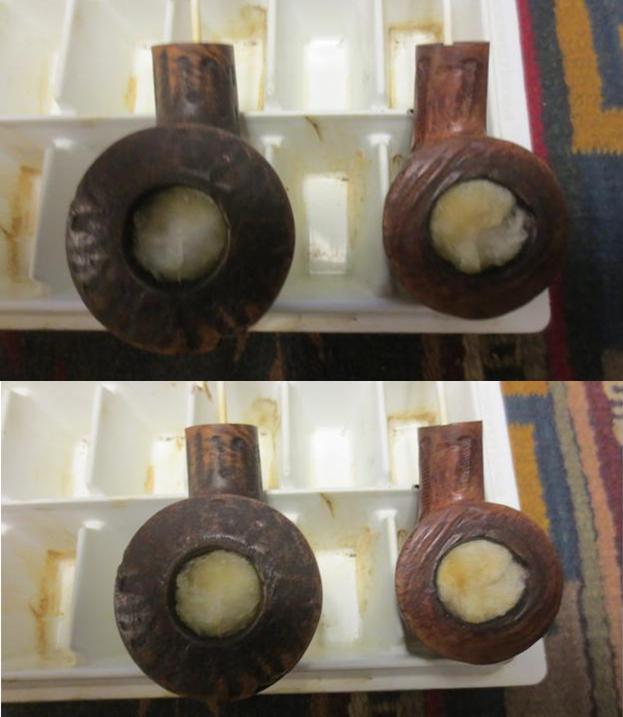
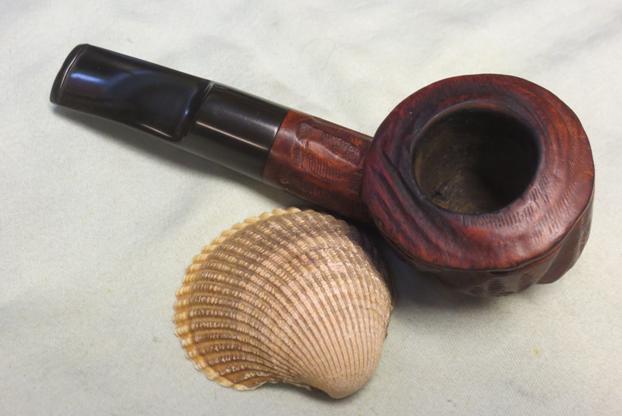
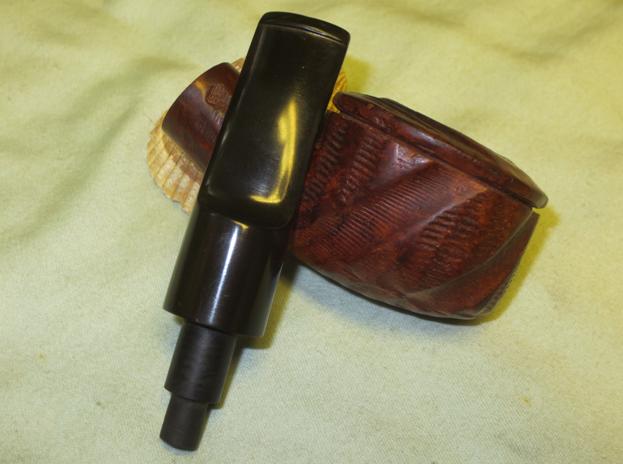
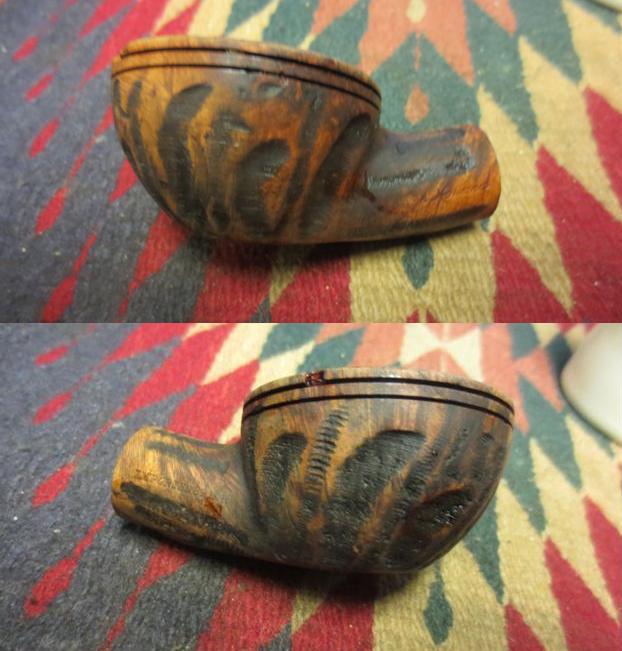
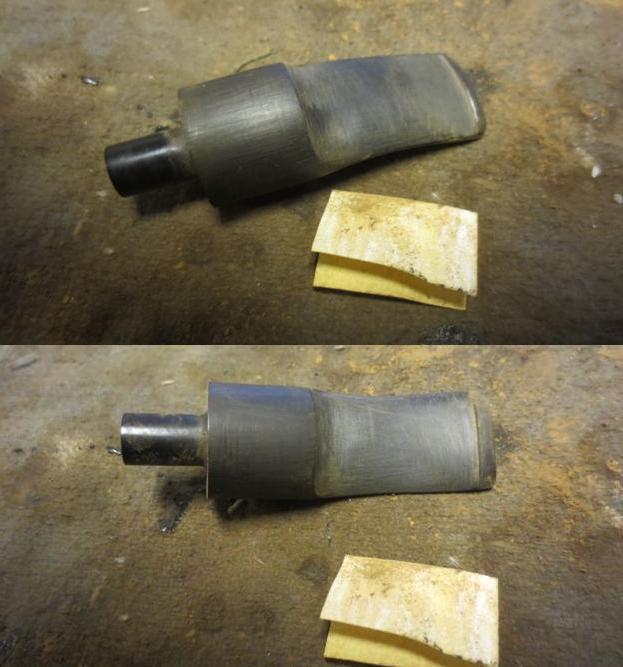
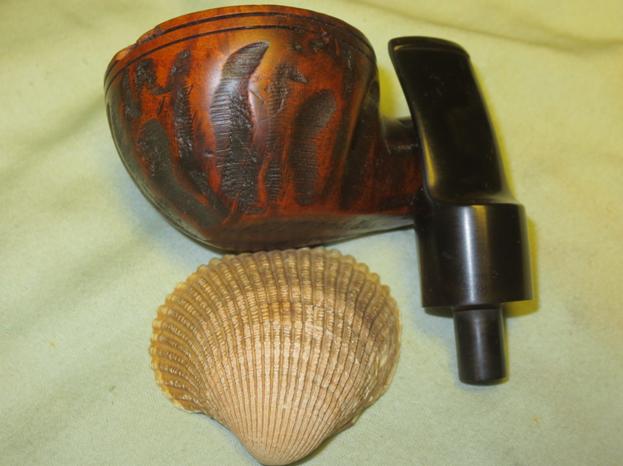
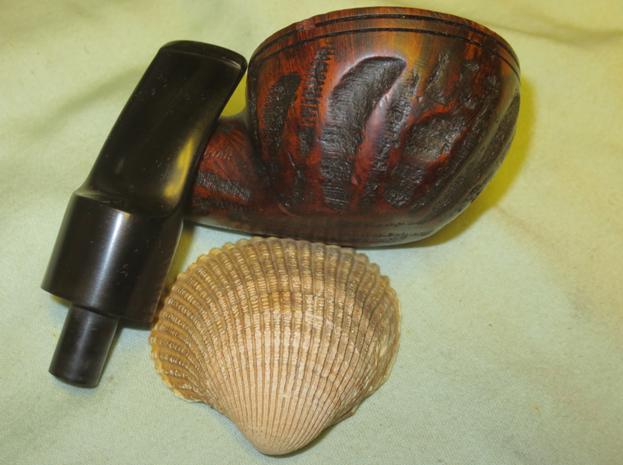
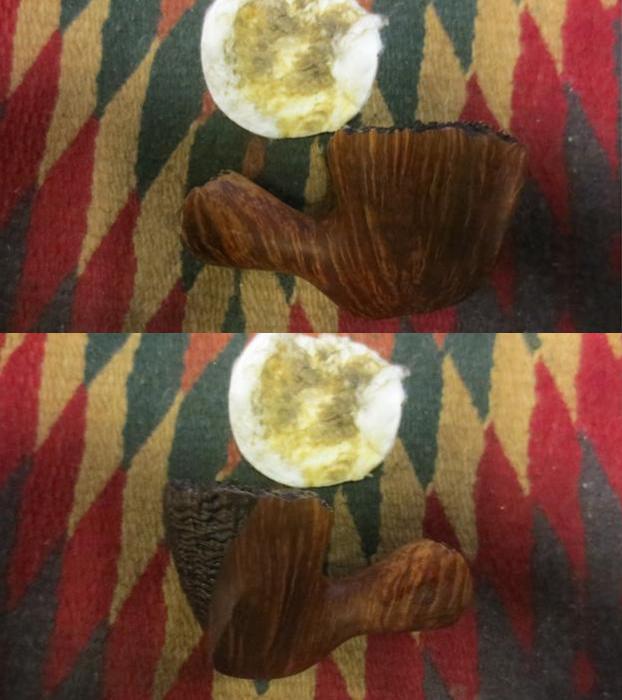
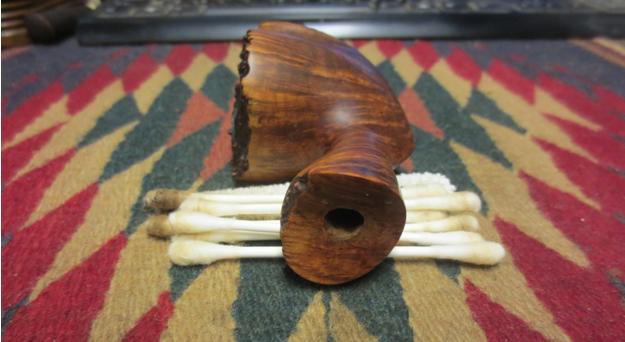
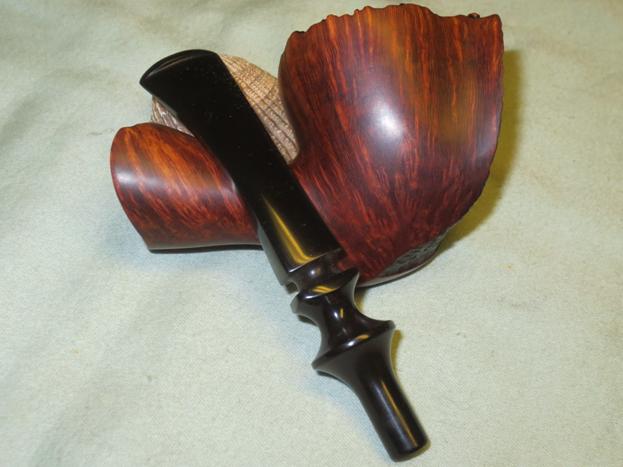
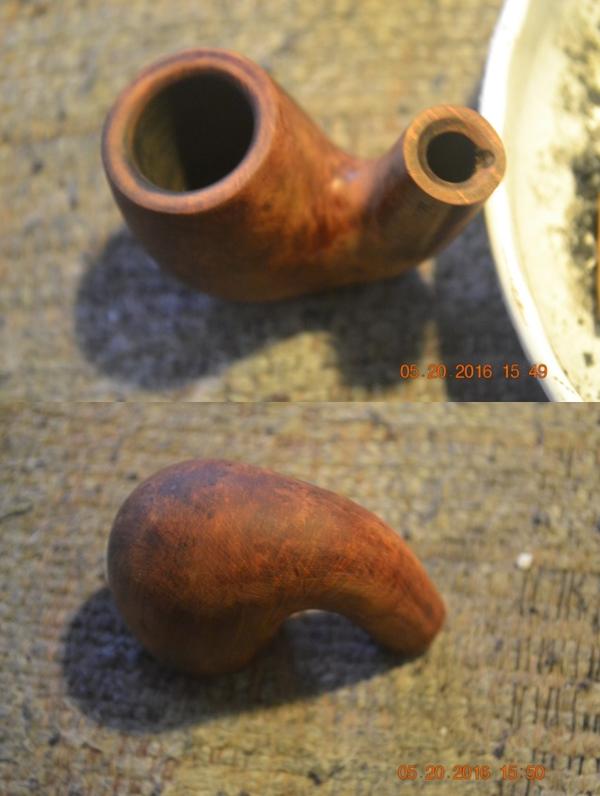
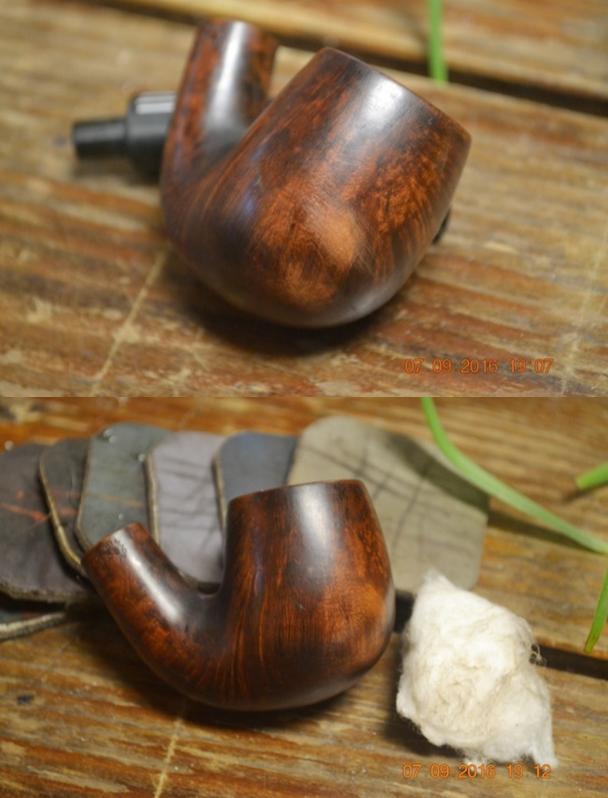
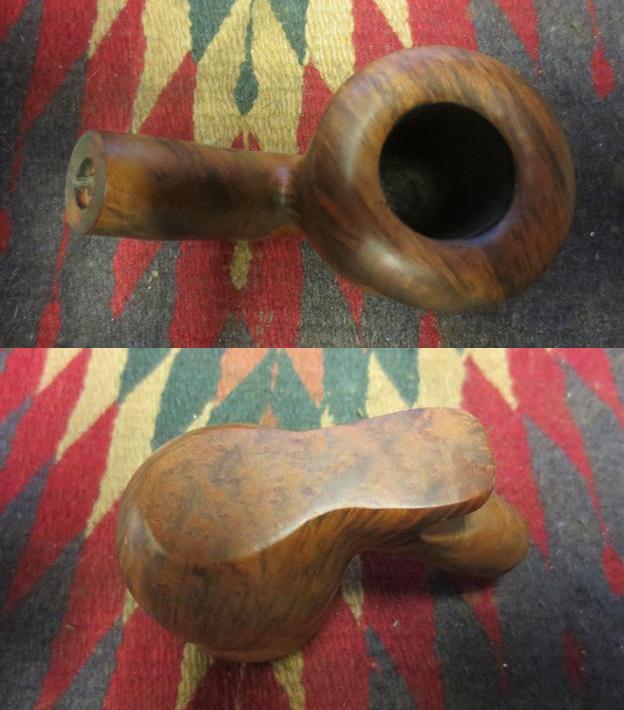
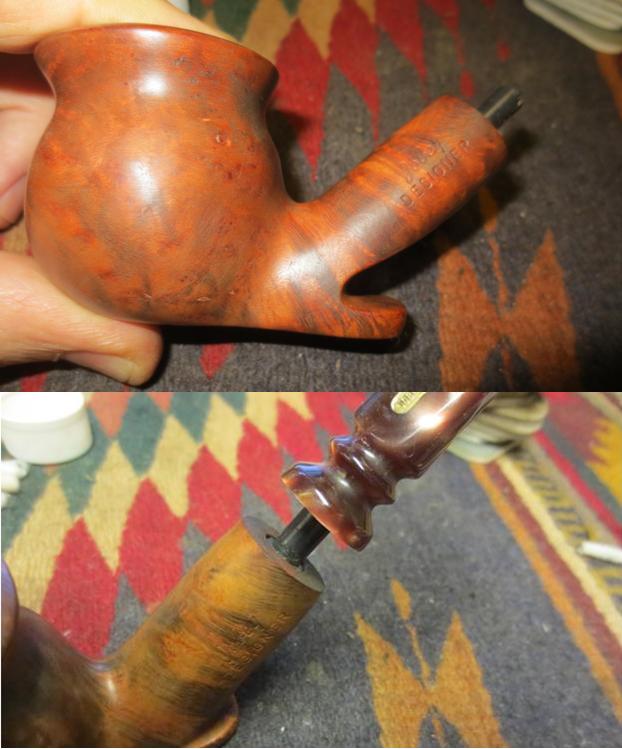
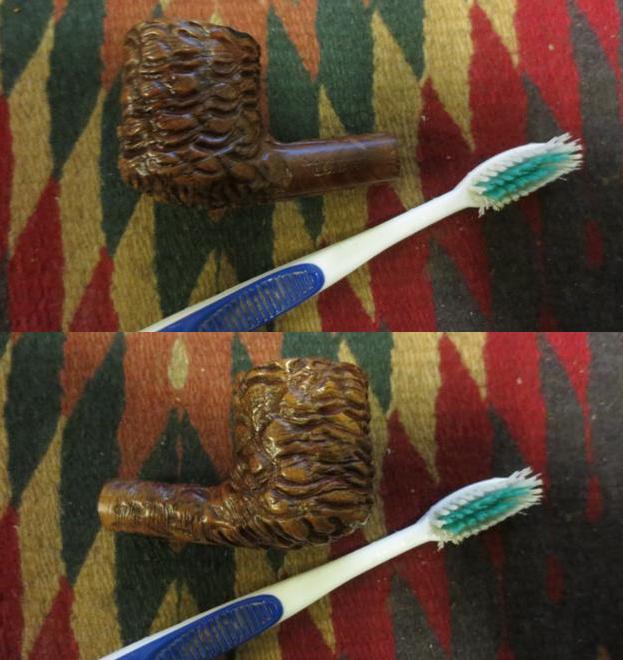
I scrubbed the bowl with a tooth brush and Murphy’s Oil Soap to remove the dust and grime from the rustication. I scrubbed and rinsed the bowl under running water. I dried it off and took a series of photos to show the clean bowl.Ben6 Ben7 Ben8
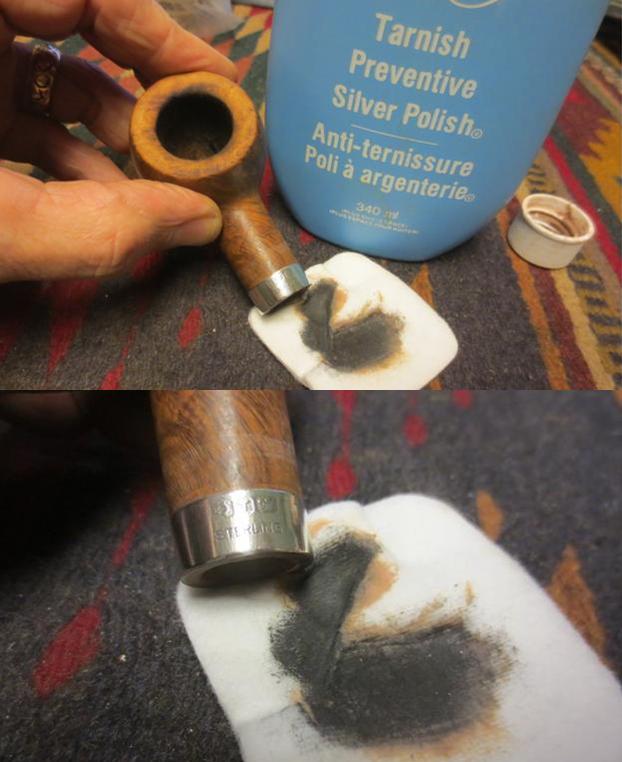
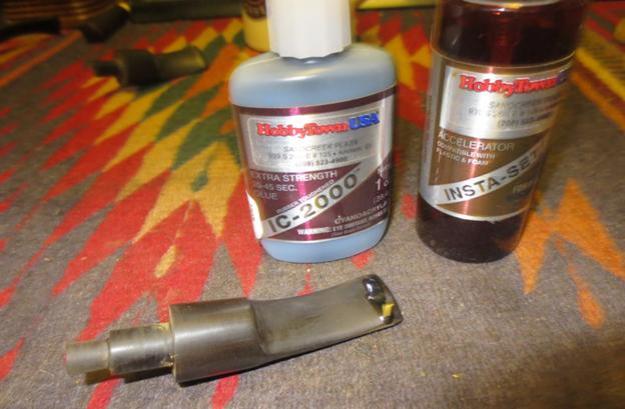
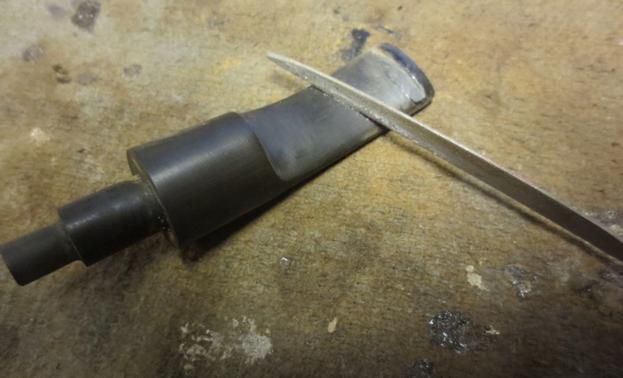
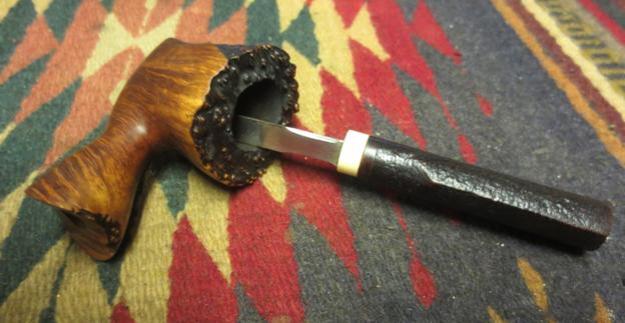
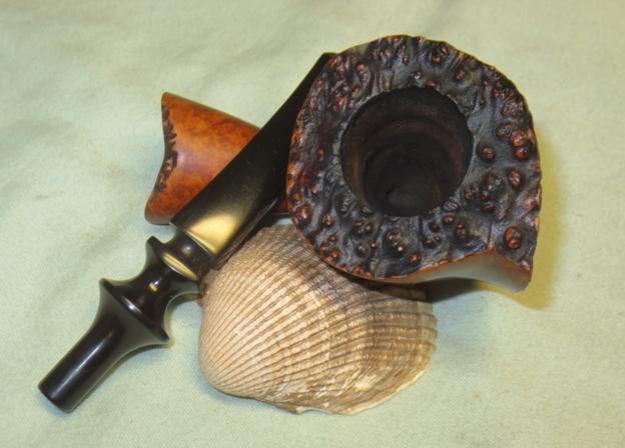
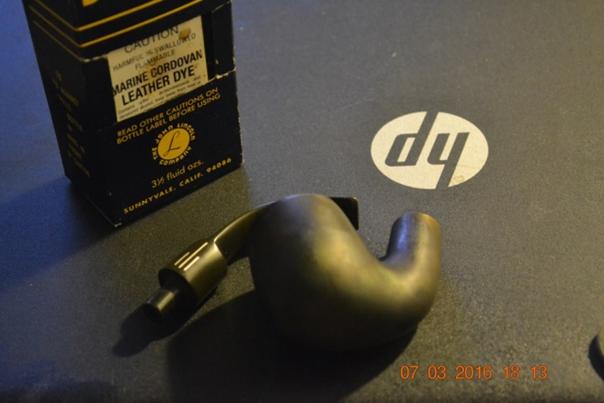
I decided to try to remove the urethane finish with acetone. It was an exercise in futility but I thought I would try.Ben9I sanded the high spots on the bowl and shank with a medium and fine grit sanding block to break up the urethane on those spots. It worked significantly better than using the acetone by itself. I washed down the bowl with acetone once I finished sanding.Ben10 Ben11
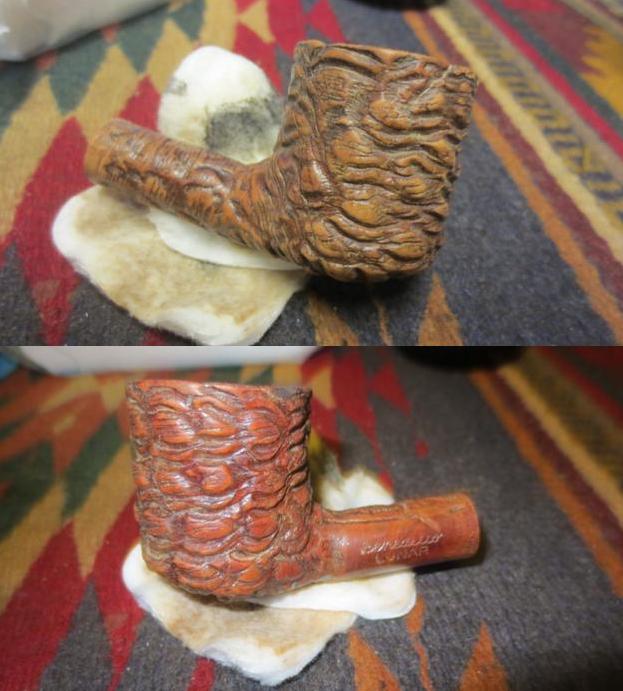
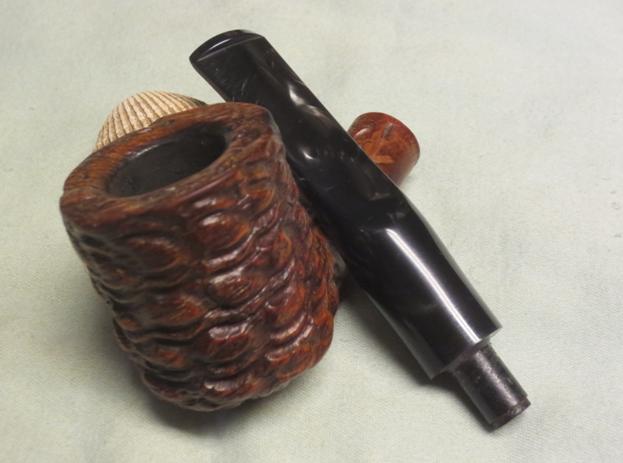
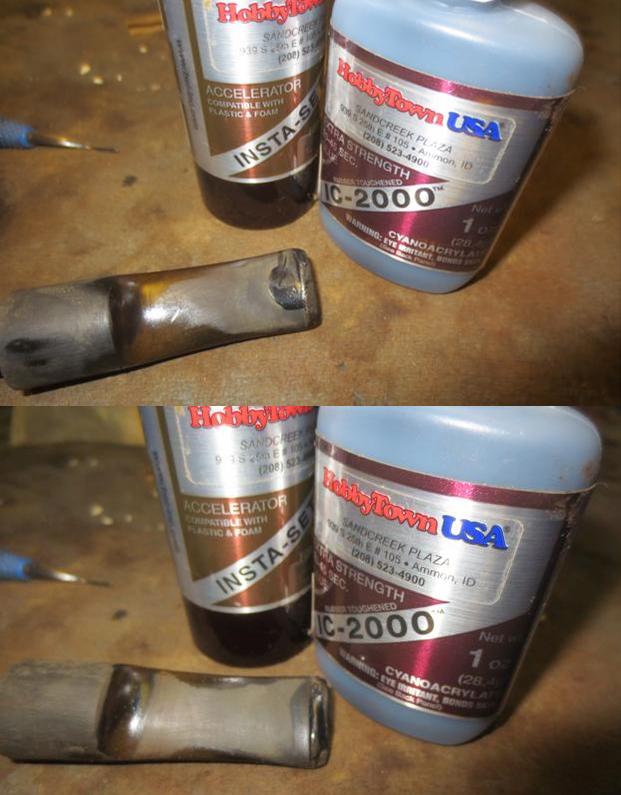
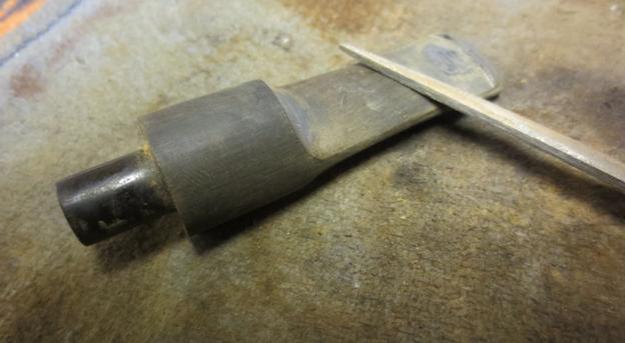
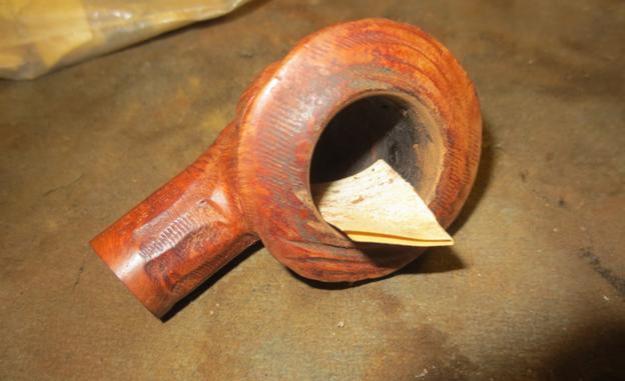
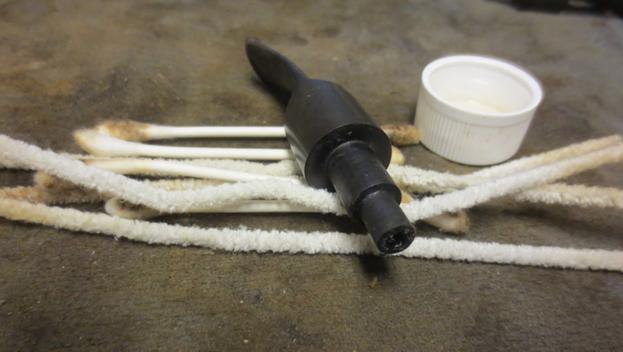
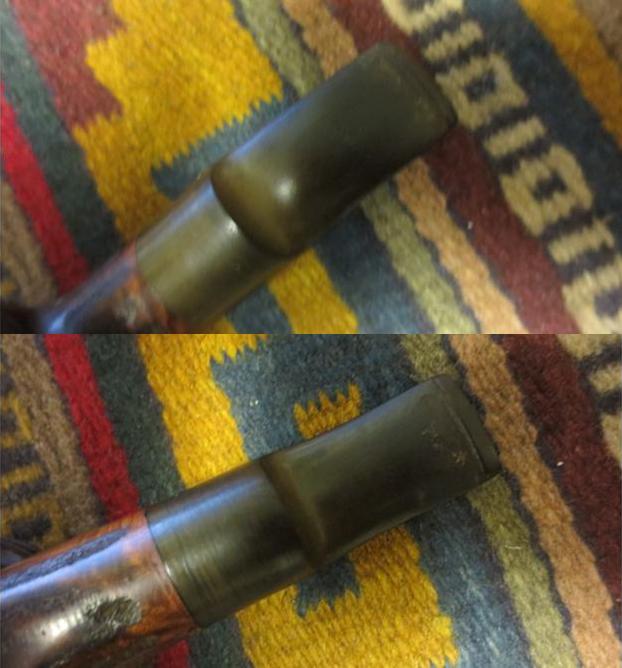
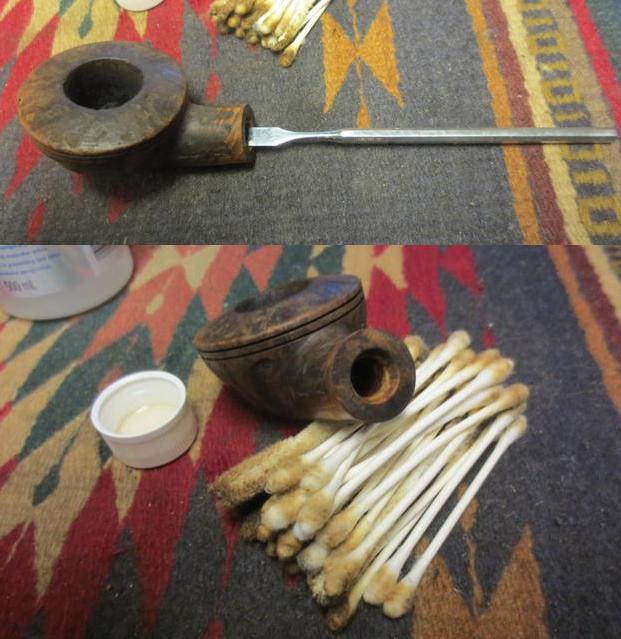
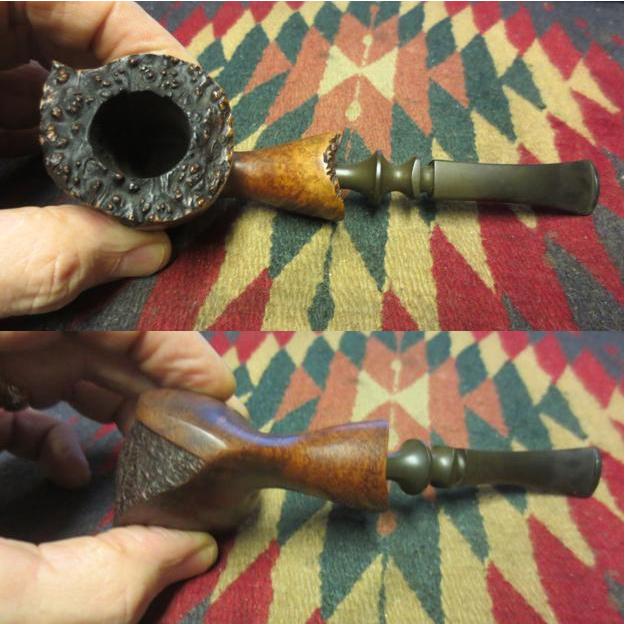
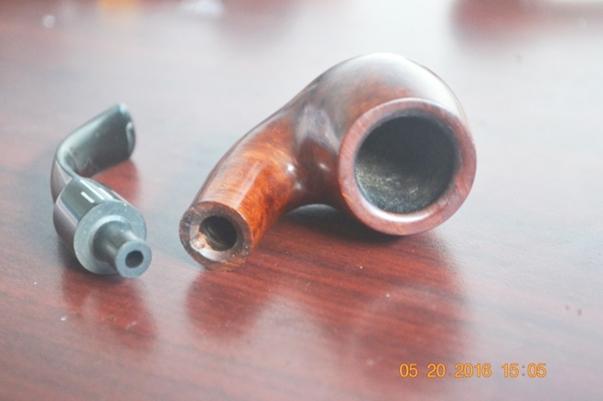
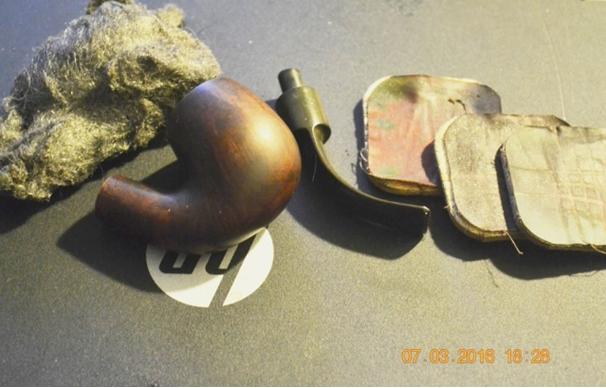
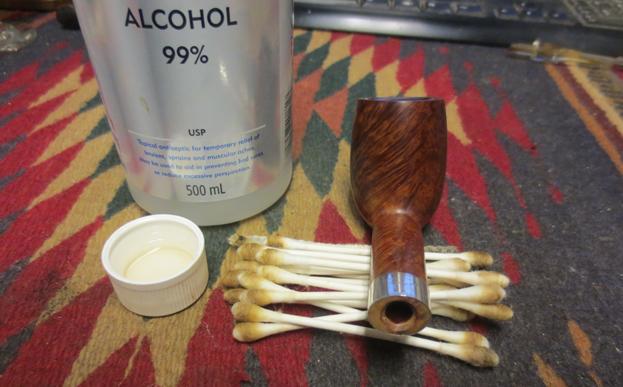
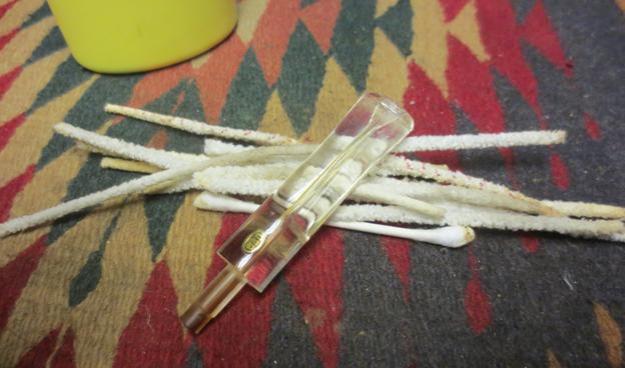
I cleaned the mortise and airway in the bowl and the stem with alcohol, cotton swabs and alcohol. It was not particularly dirty in comparison to many of the pipe I have cleaned up.Ben12
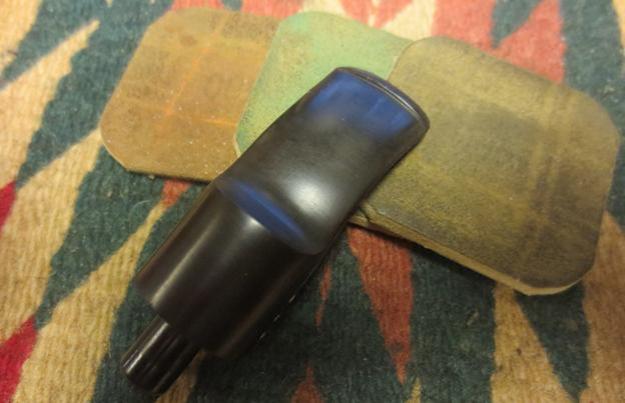
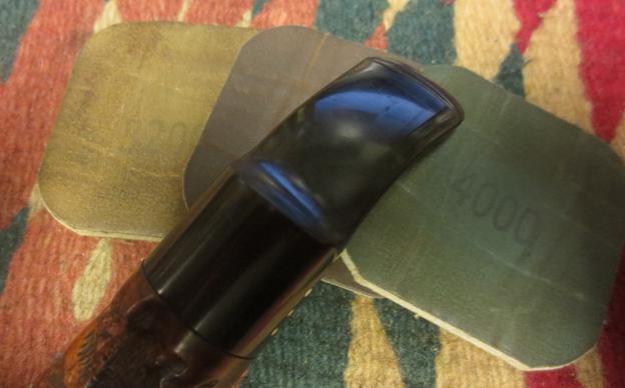
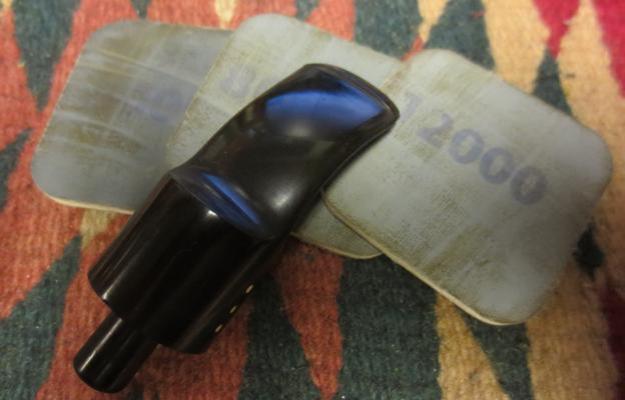
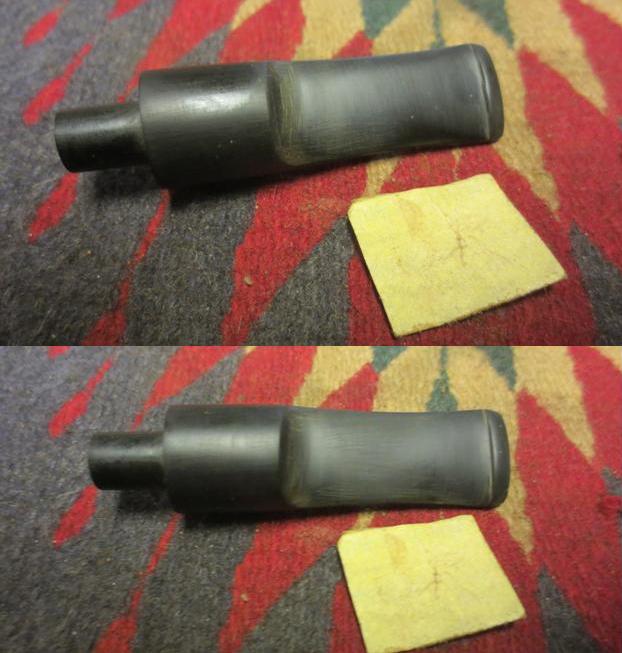
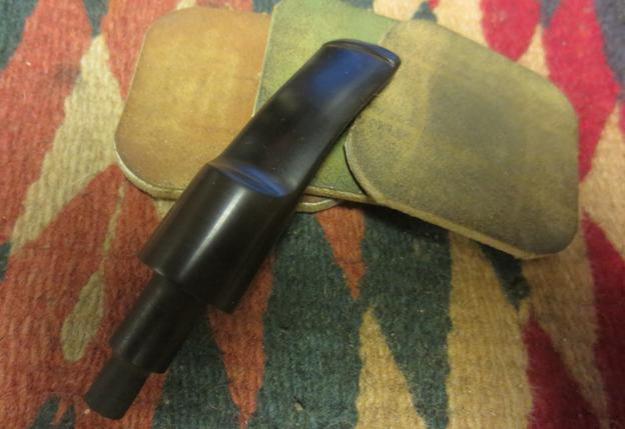
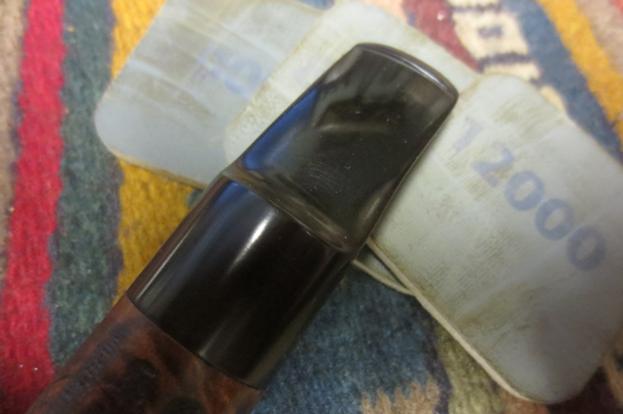
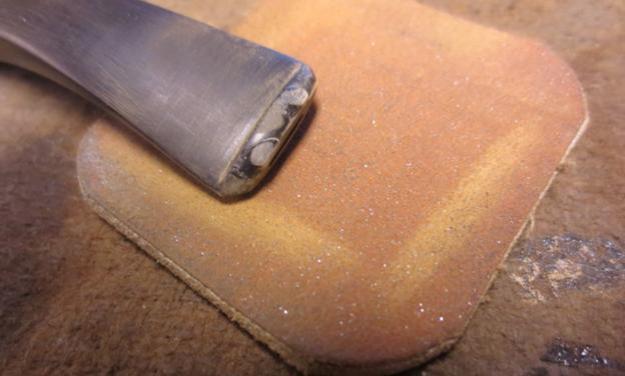
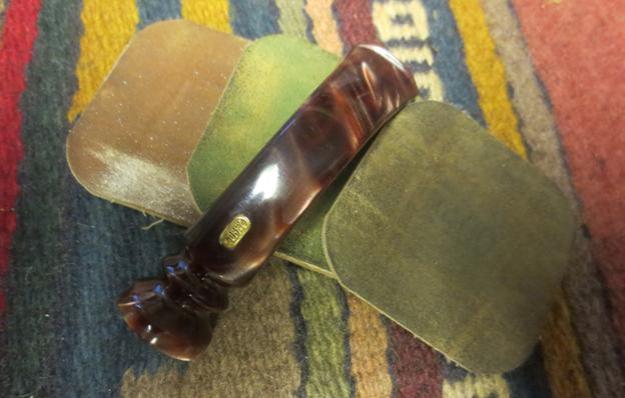
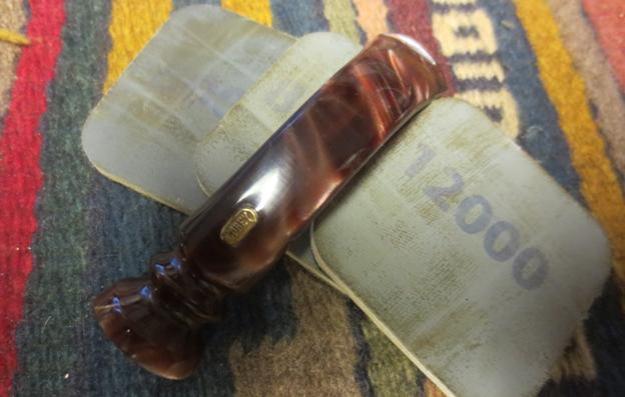
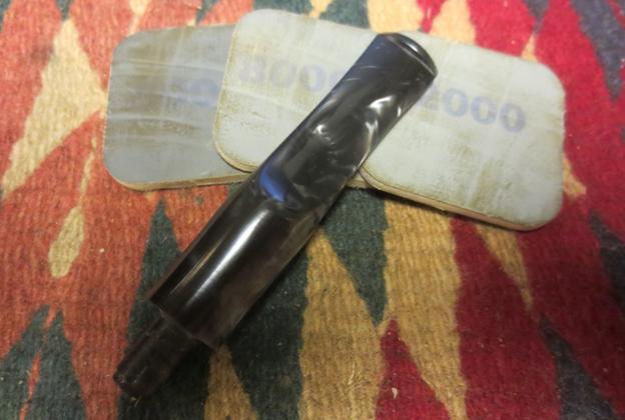
I sanded the tooth chatter with 220 grit sandpaper to remove it from the top and bottom sides of the stem. I wet sanded with 1500-2400 grit micromesh pads and dry sanded with 3200-12000 grit pads. I wiped the stem down with a damp cotton pad between grits to keep the stem clean of dust.Ben13 Ben14 Ben15
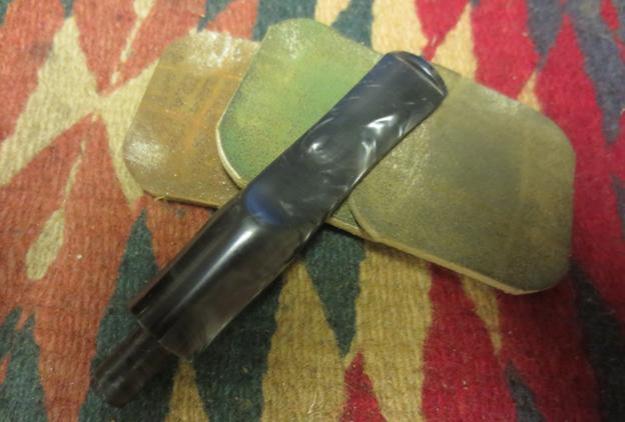
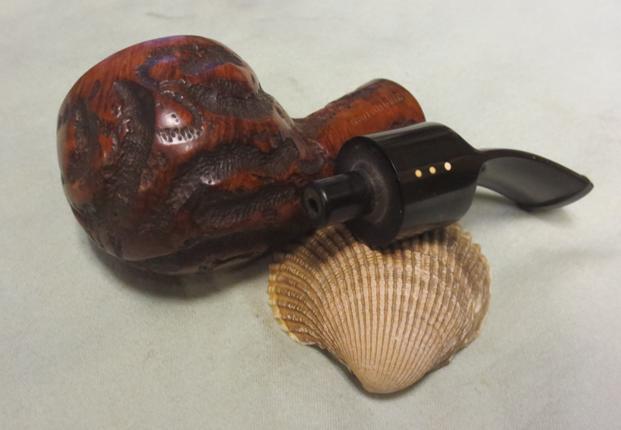
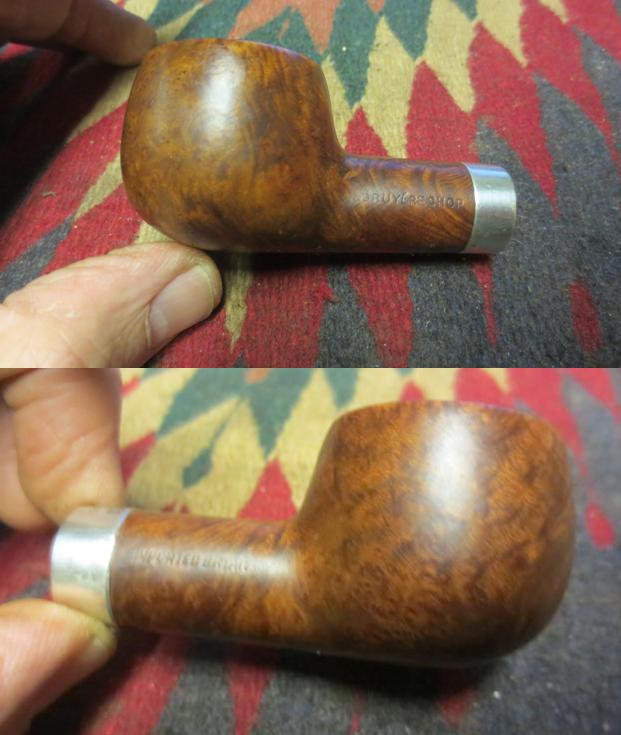
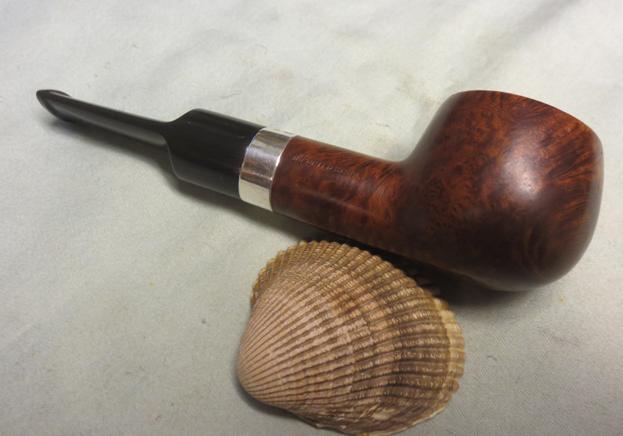
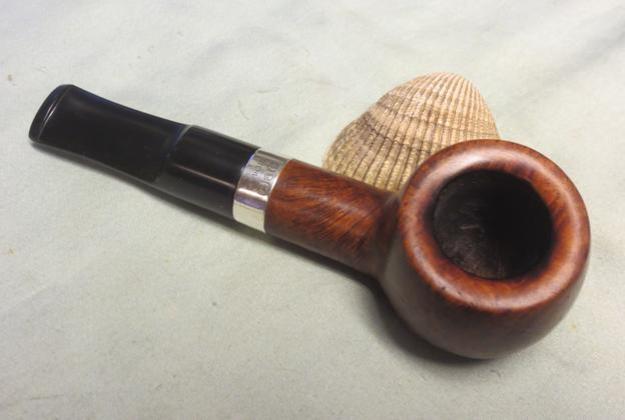
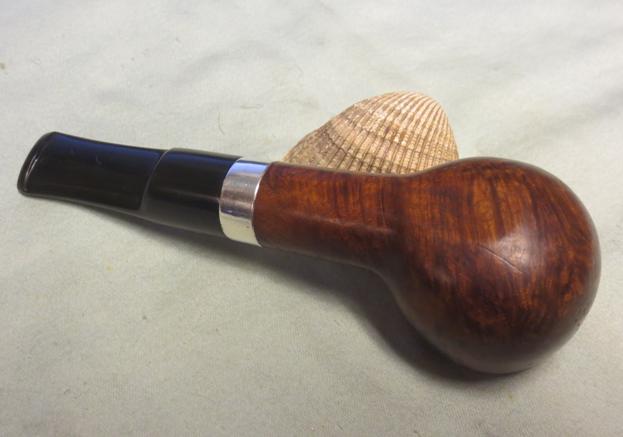
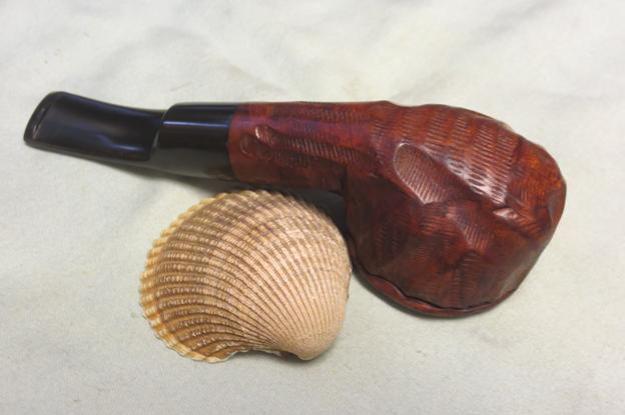
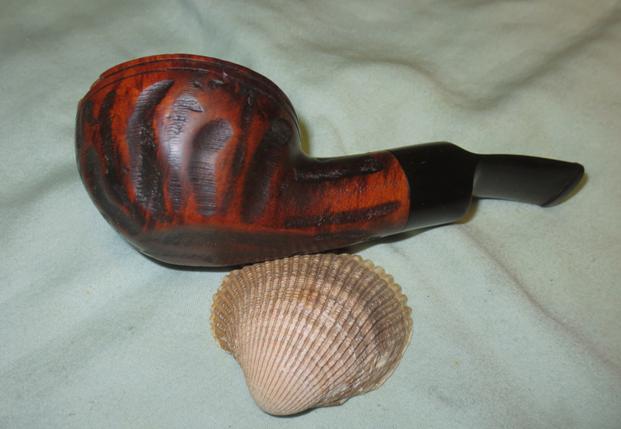
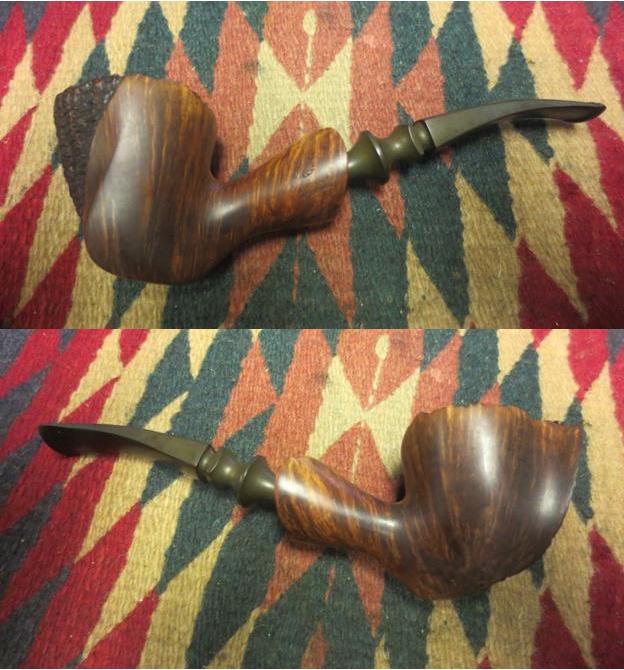
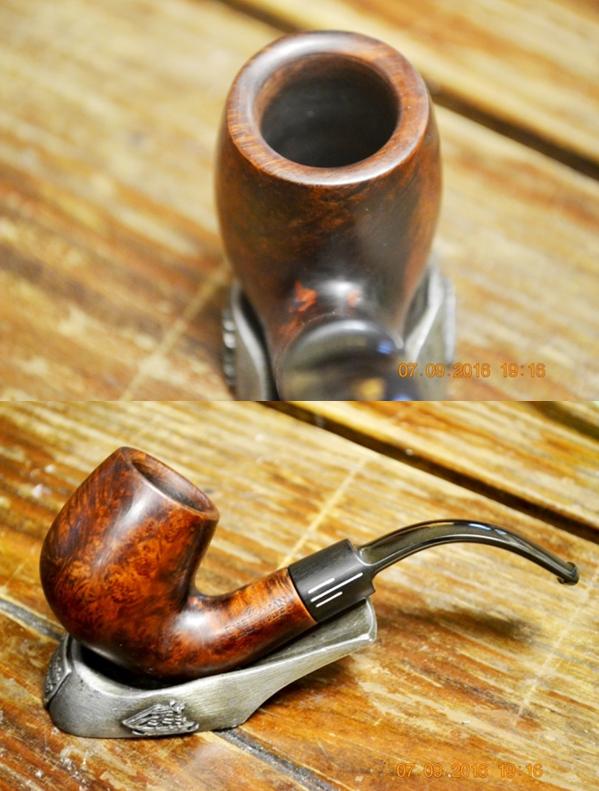
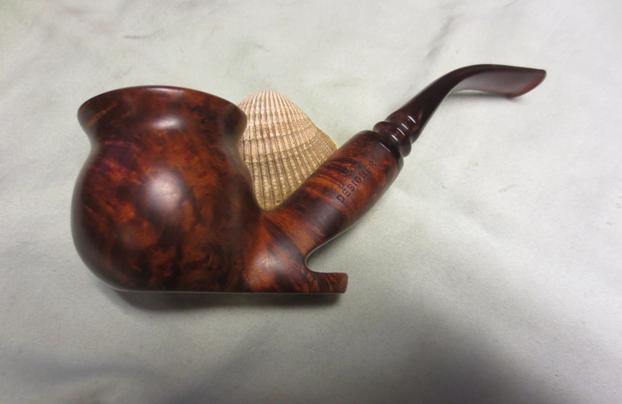
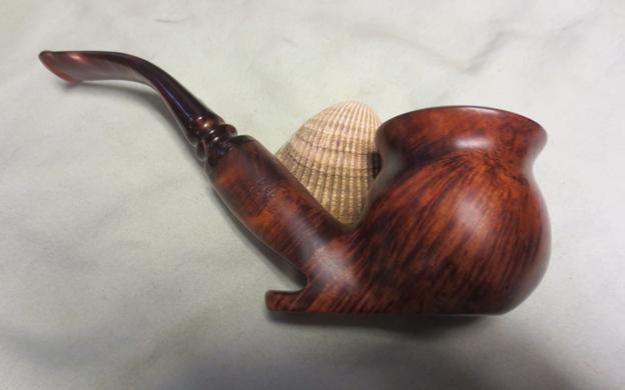
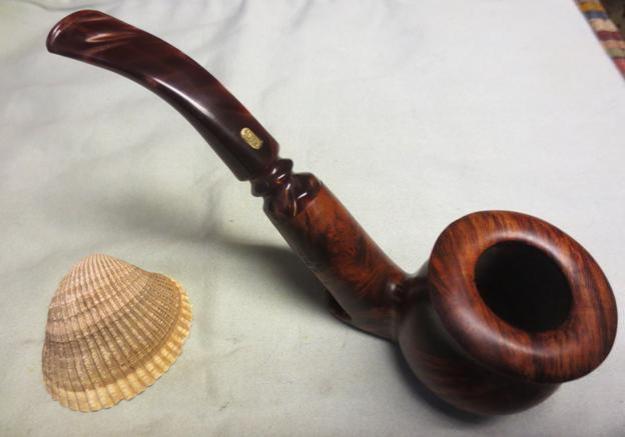
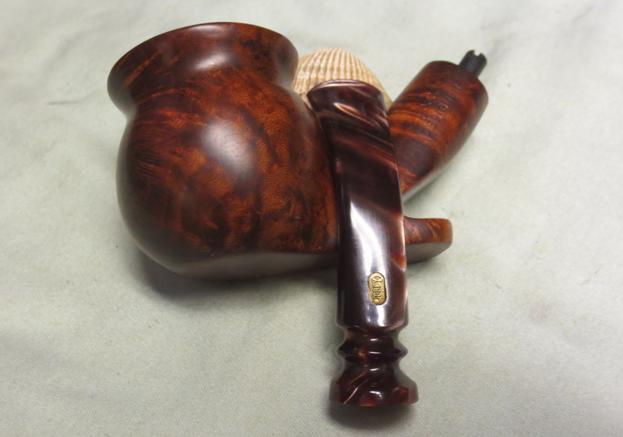
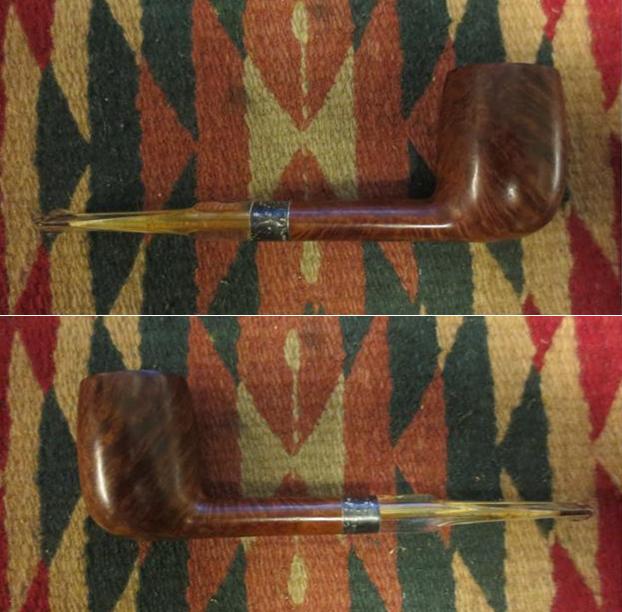
I gave the bowl several coats of Conservator’s Wax and hand buffed it with a shoe brush. I gave the stem several coats of carnauba and then buffed the entire pipe with a clean buffing pad. I hand buffed it with a microfibre cloth to deepen the shine. The finished pipe is shown in the photos below. If any of you would like to add this one to your rack let me know. It will be an inexpensive addition to you collection and should smoke extremely well. Just send me an email or a message on Facebook. Thanks for looking.Ben16 Ben17 Ben18 Ben19 Ben20 Ben21 Ben22

Breathing New Life into a John Surrey Ltd. Red Knight


Blog by Steve Laug

It seems like I am currently on a bit of a roll with the rusticated Tracy Mincer like pipes that I have been working on. This one came to me in my brother’s box and it is stamped Red Knight on the left side of the shank and John Surrey Ltd. over Imported Briar on the right side of the shank. red1The straight line of three dots on the left side of the saddle is also characteristic of John Surrey Ltd. pipes. I did some digging on the Pipephil Logos site http://www.pipephil.eu/logos/en/logo-j3.html and read that John Surrey, Ltd., was located at 509 Fifth Avenue New York NYC, NY and made pipes in the late 40s and early 50s. I also looked on Chris’ Pipe Pages and found a catalogue of their line. Here is the link: http://pipepages.com/jsurpage.htm jsur16red2When the pipe arrived it was in decent shape. The rusticated grooves were dirty with grime and dust but there was some nice grain on the smooth portions of the bowl. The rim was very dirty and thick with tars and oils. The inner edge and the outer edge were very clean. The inside of the bowl had a thin cake and the airway and mortise were very dirty. The stem was in good shape with not tooth marks but some chatter on the top and the bottom sides. It was oxidized. The dots on the side of the stem are a light yellow in colour. red3I took a close up photo of the rim top so that I would have a record of what it looked like when I received it. The thin cake on the bowl walls would be easy to clean off. I also took some close up photos of the condition of the stem top and bottom.red4 red5I began the clean up by cleaning the rim top. I scrubbed the rim with saliva on cotton pads to remove the buildup. I also used a 1500 grit micromesh sanding pad to remove what was left behind by the scrubbing and then repeated the scrubbing. It did not take too long to remove the grime on the rim.red6I scrubbed the exterior of the bowl with alcohol and cotton pads to remove the grime in the grooves.red7I scrubbed out the mortise and airway in the bowl and the stem with alcohol, cotton swabs and pipe cleaners.red8I sanded the surface of the stem with 220 grit sandpaper to remove the oxidation and the tooth chatter.red9I wet sanded the stem with 1500-2400 grit micromesh sanding pads and rubbed the stem down with Obsidian Oil. I dry sanded it with 3200-4000 grit pads and gave it another coat of oil. I finished by sanding it with 6000-12000 grit pads and gave it a final coat of Obsidian Oil and set the stem aside to dry.red10 red11 red12I buffed the bowl lightly with Blue Diamond polish on the wheel and buffed the stem normally at the same time. I gave the bowl several coats of Conservator’s Wax and the stem several coats of carnauba wax. I hand buffed the bowl with a shoe brush and then buffed the stem and bowl lightly with a clean buffing pad. I hand buffed it with a microfibre cloth to give it deeper shine. The finished pipe is shown in the photos below. The look and shape of the pipe are quite attractive and the feel of the pipe in the hand and the mouth is excellent. Thanks for looking.red13 red14 red15 red16 red17 red18 red19 red20

Restoring a Chubby Shank Bruyere Shop Apple


Blog by Steve Laug

This one came to me in the box of pipes from my brother, Jeff. It is stamped Bruyere Shop on the left side of the shank and Imported Briar on the right side. It has a sterling silver band that is stamped STERLING and bears three hallmarks – an Anchor, a Lion and a T. The band thus reads Birmingham (the Anchor), .925 Sterling Silver (the Lion) and the letter T which dates the pipe to 1943. The band appears original as there are no cracks that it is banding or repairing. There is no damage to the pipe under the band. The silver band was oxidized and tarnished. It is pressure fit on the shank. The bowl was in decent shape when I got it – dirty and worn. There were paint specks on the briar. The beveled/rounded rim had darkening and heavy coating of tars and oils. The bowl had a cake that cover the sides and bottom. The thick shank was extremely dirty and oily. The stem had tooth marks on the top side and the underside next to the button. It was oxidized and very dirty as well.b1 b2I took a close-up photo of the rim to show the buildup and the cake in the bowl. The second one shows the stamping on the band that I spelled out above.b3The next two photos show the condition of the stem and show the oxidation and the tooth marks next to the button.B4I scrubbed the bowl and rim with acetone on cotton pads to remove the old wax and grime on the finish. I worked on the rim to remove the buildup that had collected there.B5 B6I used the Savinelli Pipe Knife to cut back the cake to bare briar.B7I sanded the inner edge and top of the rim to clean off the tarry buildup and also smooth out the dents and nicks in the rim.B8I scraped out the shank with a dental spatula and scrubbed the shank with pipe cleaners, cotton swabs and alcohol until it was clean.B9I polished the silver band with silver polish to remove the tarnish and oxidation. The bright shine of the sterling silver came through the polish and I could see that it was going to be a beauty once the tarnish was gone.B10I used a light brown stain pen to restain the rim and polished it.B11I buffed the bowl lightly with Blue Diamond to polish the briar. I buffed it until the bowl and rim matched each other.B12 B13I sanded the stem with 220 grit sandpaper to remove the tooth marks on the top side of the stem. I repaired the one on the underside with black super glue. I built up the top of the button on both sides of the stem with black super glue. I sprayed it with an accelerator to dry it quickly.B14I used a needle file to rehape the sharp edge of the button and smooth out the surface of the stem.B15I cleaned out the airway with pipe cleaners and alcohol to remove all of the oils and tars in the stem.B16I sanded the stem with 220 grit sandpaper to remove all of the oxidation. B17I wet sanded the stem with 1500-2400 grit micromesh sanding pads. I gave the stem a coat of Obsidian Oil and dry sanded it with 3200-4000 grit pads. I gave it another coat of oil and sanded it with 6000-12000 grit pads. I gave it a final coat of oil and set it aside to dry.B18 B19 B20I buffed the stem and bowl with Blue Diamond on the buffing wheel to polish it. I gave the bowl and stem multiple coats of carnauba wax and buffed it with a clean buffing pad to raise the shine. I hand buffed it with a microfibre cloth to deepen the shine. The finished pipe is shown in the photos below. If anyone knows anything about the Bruyere Shop please let me know in the response below. Thanks for looking.B21 B22 B23 B24 B25 B26 B27

ADDENDUM

I was doing some reading on the web and found a reference to a pipe shop in Buffalo, N.Y. called the Bruyere Pipe Shop in a May 1953 Popular Mechanics Magazine. I wonder if there is a tie…


Restoring a Fieldstub Bullmoose for a Friend


Blog by Steve Laug

This is the second pipe that my friend dropped by for a restoration and cleaning. The first was the Tom Howard that I wrote about recently https://rebornpipes.com/2016/07/09/restoring-a-tom-howard-rhodesian-scoop/. This one is a Fieldstub imported briar. The most I can find out about it is that is American made in the 30-40s by and unknown factory. It shares a lot of features with pipes made by Tracy Mincer and the Custom-Bilt line but I can find no link. This one was dirty and tired looking. The rim had a lot of darkening and the bowl had a cake. The grooves on the rim were dirty and darkened. The stem was oxidized and had tooth marks at the button on both the top and underside of the stem. The pipe is stamped FIELDSTUB over Imported Briar on the left side of the shank.F1 F2I took a few close-up photos of the rim and the stem. The first shows the buildup on the rim top and the cake in the bowl. The second and third show the stem with the tooth marks right next to the button edge.F3 F4I scrubbed the bowl with a tooth brush and Murphy’s Oil Soap, used a brass bristle brush on the rim top and rinsed it under running water. I dried it off and took these photos.F5 F6I scrubbed the top of the rim to remove the darkening using acetone and cotton pads. I was able to remove most of the darkening. I wiped down the rest of the bowl with acetone as well to remove the wax and any debris that remained.F7 f8I cleaned up the inner edge of the bowl with a folded piece of 220 grit sandpaper to smooth out the nicks and dings on the edge.F9I sanded the stem with 220 grit sandpaper to remove the oxidation and cleaned the airway with pipe cleaners, cotton swabs and alcohol.F10I used alcohol and wiped off the damaged areas next to the underside of the button where the worst of the tooth marks remained after sanding. I filled in the tooth marks with black super glue and sprayed it with an accelerator to speed the drying time. F11I cleaned up the edge of the button and smoothed out the repair with a needle file. I wanted a clean, sharp edge on the button.F12I sanded the patch with 220 grit sandpaper to blend it into the surface of the stem and remove the file marks.F13I stuffed a cotton ball into the bowl and filled it with alcohol to pull the tars and oils out of the bowl and shank. I let it sit for several hours while I worked on the stem.F14I took the cotton ball out of the bowl and cleaned out the shank and bowl with pipe cleaners and cotton swabs to clean up the last of the alcohol. I let the bowl dry and turned to the stem. I wet sanded the stem with 1500-2400 grit micromesh sanding pads and rubbed it down with Obsidian Oil. I dry sanded with 3200-4000 grit pads and gave it another coat of oil. I finished sanding it with 6000-12000 grit pads, gave it a final rubdown of Obsidian Oil and set it aside to dry.F15 F16 F17I buffed the pipe with Blue Diamond on the buffing wheel and gave the stem several coats of carnauba wax. I hand waxed the bowl with Conservator’s Wax and buffed the pipe with a clean buffing pad to raise the shine. I hand buffed the pipe with a microfibre cloth. This one joins the Tom Howard as they wait for Theo to stop by and pick them both up. They are cleaned, polished and smelling great! If you read this blog, they are both ready for you Theo. Thanks for looking.F18 F19 F20 F21 F22 F23 F24

Restoring a Tom Howard Rhodesian Scoop


Blog by Steve Laug

This pipe is stamped Tom Howard on the left side of the shank and Imported Briar on the right side. A friend of mine emailed me and asked if I would clean it up for him and bring it back to life. He said the stem tasted awful. He said he had tried to clean it up a bit but was not happy with the results. He dropped it by the house before he left on a short trip. Here is what it looked like when it arrived.H1 H2There was a pretty thick cake in the bowl and the rim had overflow on the top. The grooves and worm trails were pretty much filled in with grime. The stem was badly oxidized and there were some deep scratches in the surface. There was tooth chatter on the top and bottom of the stem near the button.H3H4I reamed the bowl in stages. I began with a Savinelli Pipe Knife to take back the inner edge of the bowl.H5I used a brass bristle wire brush to clean off the top of the rim and get rid of the buildup.H6I scrubbed the bowl with a tooth brush and Murphy’s Oil Soap to remove the buildup of tars and oils that darkened the bowl and shank. It did not take too much to get the briar clean. I rinsed the bowl with running water and dried it off with a towel. The cleaned exterior is shown in the photos below.H7 H8I did the second stage of reaming the bowl with a PipNet Reamer and took the cake back to bare briar. I cleaned up that reaming with the Pipe Knife again.H9I used the dental spatula to scrape out the mortise and then scrubbed it with pipe cleaners, cotton swabs and alcohol until it was clean.H10I decided to scrub the surface some more with a cotton pad and acetone. I was able to remove more of the finish on the bowl and lighten it even more.H11 H12I used a folded piece of 220 grit sandpaper to clean up the inner edge of the rim and smooth out some of the damage that was there.H13I cleaned out the inside of the stem with pipe cleaners and alcohol.H14I sanded the stem with 220 grit sandpaper to remove the oxidation that was on the surface of the saddle, the groove where the saddle joined the bowl and the area around the button.H15Before continuing on the stem I stuffed a cotton ball in the bowl of the pipe and also the bowl of a second one I was working on and filled it with alcohol. The alcohol pulled the tars and residue from the bowl and shank into cotton ball.H16I let it sit in the bowl for several hours while I worked on the stem. You can see the oils and tars that are being drawn into the cotton ball in the next photo.H17The underside of the stem near the button had one deep tooth mark in the surface that I was unable to sand out. I cleaned it up and then filled it with some black super glue. Once the glue had dried I sanded the patch back to blend it into the surface of the stem.H18I wet sanded the stem with 1500-2400 grit micromesh sanding pads. I sanded and polished the stem. I rubbed it down with Obsidian Oil. I dry sanded it with 3200-4000 grit pads and gave it another coat of oil. I finished sanding it with 6000-12000 grit pads and gave it a final coat of Obsidian Oil. I set it aside to dry.H19 H20 H21I stained the bowl with some medium walnut Danish Oil and then buffed it with Blue Diamond on the wheel. I gave the bowl several coats of Conservator’s Wax and the stem several coats of carnauba wax. I buffed the pipe with a clean buffing pad and then hand buffed it with a microfibre cloth. The pipe is clean, the smell and bad taste are gone and to me the pipe looks better than when I started the process. The bowl smelled clean. The pipe is ready to go back to its owner once I get the second pipe finished. Thanks for looking. Theo if you see this – your first pipe is ready for you when you return.H22 H23 H24 H25 H26 H27 H28

A Clean and Restore of a Viggo Nielsen Handmade Freehand


Blog by Steve Laug

My brother Jeff is developing quite an eye for beautiful pipes. He came across this freehand on eBay and sent me the photos. He bid on it and soon received it in the mail. It is a stunning piece that Viggo made in such a way that the shape absolutely maximizes the grain. It is stamped with Viggo’s normal stamp Viggo Nielsen in a circle over Handmade in Denmark on the left side of the shank.V1Its finish is a combination of smooth and what looks like sandblast but I am not sure it is not just a well done rustication made to look that way. The colours of the stains are a rich medium brown on the smooth portions that accentuate the grain. The colour on the rustication shows both a medium and dark brown stain that is repeated on the plateau on the rim of the pipe and small bit of plateau that peeks out on the top edge of the shank. The stem is a custom cut square piece of vulcanite that is carved with a square ring and a round one just before the tapered tenon.V2 V3 V4The finish was dirty with thick wax and grime from years of use. The bowl had a light cake. The rim edges were in perfect condition and the plateau top look new under the grime. The rustication/blast on the front of the bowl also looked to be in great shape. There were no dings or nicks in the finish. The stem was oxidized and had tooth marks on the top and bottom sides near the button.

V5I turned to Pipedia to learn about Viggo Nielsen. I had memory about him being somehow connected to Kai Nielsen but I was not sure of the relationship of the two. In Pipedia I learned that Viggo, now deceased, was born in 1927. I believe that during World War II he worked for Stanwell making pipes out of birch due to a shortage of briar. In 1948 he opened the Bari pipe factory and in 1951 began to make briar pipes. He carved both classic and freehand pipes.

In 1978 Bari was sold to a company in Germany and he and his two sons, Jorgen and Kai started making Faaborg pipes. Now I knew the connection between the two names that I remembered. https://pipedia.org/wiki/Nielsen,_Viggo

I scrubbed the surface of the bowl with Murphy’s Oil Soap on cotton pads to remove the old wax and accumulated grime. Once the pipe was cleaned I rinsed it under running water and dried it off. The grain just stood out and showed how well Viggo laid out the shape to the grain.V6 V7 I cleaned out the internals of the mortise and airways in the shank and the stem with pipe cleaners, cotton swabs and alcohol until the pipe was clean.V8I reamed the light cake back to bare briar with a Savinelli Pipe Knife – a tool that I am using more and more often since I purchased it. It works exceptionally well to pare back light cake and clean up remnants in a bowl after I have used my other reamers.V9The oxidation on the stem was stubborn so I soaked it in an Oxyclean solution for a day and a half to soften the oxidation. After I removed it from the solution I scrubbed it dry with a coarse towel to remove as much of the softened oxidation as possible. I sanded the stem with 220 grit sandpaper to remove the tooth marks on both the top and bottom sides at the button. There were tooth deep tooth marks on the top edge of the button that needed attention. I cleaned off the stem surface and then used clear super glue to repair the two deep tooth marks. I sanded them back to the surface with 220 grit sandpaper and later with the micromesh sanding pads.V10I wet sanded the stem with 1500-2400 grit micromesh sanding pads. I rubbed the stem down with Obsidian Oil. In the photo below you can still see the battle I am having with the oxidation on the turned stem. It was a bear to get it off.V11I repeated sanding with 220 grit sandpaper and repeated the wet sanding with the 1500-2400 grit pads. I was beginning to conquer the issue. I dry sanded the stem with 3200-4000 grit pads and gave it another coat of oil. I finished sanding with 6000-12000 grit pads to bring out the shine and gave it a final coat of Obsidian Oil. I set the stem aside to dry.V12 V13I buffed the pipe with Blue Diamond and worked on the tight areas on the stem – the grooves in the stem. I buffed the bowl with Blue Diamond – lightly on the rusticated/blast and plateau portions and more heavily on the smooth portions. I gave the bowl and stem multiple coats of carnauba wax and buffed the pipe with a clean buffing pad. I hand buffed it with a microfibre cloth to finish polishing the finish. I have found that this last step adds some depth to the shine. I am pleased with the finished look of the pipe. Thanks for looking.V14 V15 V16 V17 V18 V19 V20

An Everyman London Pipe Un-dinged


Guest Blog by Robert M. Boughton

Member, International Society of Codgers
Member, North American Society of Pipe Collectors
http://www.naspc.org
http://about.me/boughtonrobert
Photos © the Author except as noted

“The average man, who does not know what to do with his life, wants another one which will last forever.” — Anatole France (1844-1924), French novelist

INTRODUCTION
According to several sources, including Gregory Please, the circular “Made in London England” stamp on Comoy’s lines, of which this Everyman London Pipe full bent billiard is a second, was discontinued in the early 1950s.  Therefore it seems probable that the Everyman I put in my sub-group of unrestored pipes to be fast-tracked is from the same period.  This was my second Everyman London Pipe restoration, as well as one Guildhall, which leads me to suspect and there is a collective unity of pipe enjoyers out there, however nebulous, who seek out these inexpensive but fine seconds.  I make this supposition considering the speed at which all three of the Comoy’s seconds on which I’ve worked sold: within days of completion, one of each line on my old website and the other in a local transaction.  Comoy’s began, with the manufacture of clay pipes, in St. Claude, France in 1825; the company’s first briar pipe was made in 1848, and Comoy’s of London was established in 1879.  Then there are Chapuis-Comoy, founded in 1925, and the Chacom connection, starting in 1934.  But don’t let me confuse things.

By admitting this was not a difficult job, I should note that I nevertheless decided upon an Everclear strip of the old stain to uncover the many pocks and scratches that were all over the outer surface rather than sanding the entirety of the stummel.  Otherwise – although there were a couple of adjustments that needed to be made after I took the first set of “final” photos, the task was relaxing and diversionary in between some more involved projects I’m still finishing up.  The bit was in good shape and needed minimal sanding, the rim was as clean as I’ve ever seen one, and the chamber had little char.  Still, it was one dinged up pipe.C1 C2 C3 C4
RESTORATION
I soaked the wood in the alcohol and the bit in an OxyClean bath.  The bit came out first, but that’s not the order I’m recounting the process here.  After I removed the stummel and wiped it most of the way dry with small soft white cotton cloth pieces, I gave it a gentle sanding with 320-grit paper.  All of the dings went away, and I thought I got all of the scratches as well.  But I will return to that thought later.

C6C7 The bit came out of the bath much cleaner and ready for wet micro mesh pads from 1500-12000. I did the same with the wood, only using dry pads.C8 I sanded the chamber with 220- and 320-grit papers and retorted the pipe. Already at the re-staining point, I chose Lincoln Marine Cordovan leather treatment, which I flamed.C9 To remove the outer layer of dark, charred stain, I used 1800, 2400 and 3200 micro mesh followed by a soft touch of superfine “0000” steel wool.C10 Now, for the first “final” shot I took showing two problems: the bit where it attaches to the shank needed more sanding and micro mesh work, and through the camera’s unblinking eye there were two glaring scratches remaining on the right side of the pipe.C11 And so I broke out a little piece of 320-grit sandpaper and went at the isolated scratches on the wood, micro meshing that area again with the full range of grits. I finished it by wiping with a cotton ball. To my surprise, I didn’t even need to rebuff the wood with the white Tripoli, White Diamond and carnauba I used in the first place.C12 I used 320-grit paper again on the rounded shank end of the saddle bit and the full line of micro mesh pads on that small section. I re-buffed the re-worked part of the bit.C13C14C15C16
CONCLUSION
The nomenclature was crisper than it seemed before the project, unlike a certain GBD Prestige brandy I was forced to keep – and often enjoy  — lest I forget.  Steve demonstrated the correct way to approach a Prestige of a different shape in one of his recent blogs, referenced below.

SOURCES
http://www.glpease.com/Pipes/Comoy.html
https://pipedia.org/wiki/A_History_Of_Comoy%27s_and_A_Guide_Toward_Dating_the_Pipes
http://www.glpease.com/Pipes/Comoy.html
https://rebornpipes.com/2016/07/06/a-stellar-find-a-gbd-prestige-1451-oval-shank-billiard/

A Collection of Methods for Cleaning Clear Perspex Stems


Blog by Steve Laug

GBD4

When I posted a blog on work I had done on the GBD Prestige Billiard recently Dave wrote and asked that I share tips that I may have on cleaning clear Perspex stems. These stems are distinct from clear Lucite or acrylic stems which are treated exactly like other acrylic stems. Perspex stems are typically found on GBD Prehistoric and Prestige as well as periodically on other GBD pipes. Over the years I have struggled with removing the tobacco stains in the airways of these stems. There seems to always be a brown line that fills the airway and looks lousy when viewing an otherwise clean and restored pipe. I have tried many methods that others have recommended with varying degrees of success and sometime no success. I have combined methods and had better success but always I have been seeking a better way of cleaning this part of the Perspex stem. If you have one of these pipes you know the struggle I am talking about. It generally is an issue of the airway and the funnel slot in the button. I thought I would share with you the variety of methods that I have tried, modified and then end with the one I am currently using and a potential new method on the docket.

I think there is a common reason for the issue with these stems. I have worked on a lot of them over the last 20 years so I see some similarities in the stems that are the worst to clean up. I have had some that were relatively easy to clean and others that I never been able to remove all of the stain. In looking them over I believe that the difficult stems share a common issue – the drilled airways in the stem are rough and porous. You can see it when you look at the stem as they are more opaque than the rest of the clear stem material. When the drill bit passed through to create the airway it left a rougher surface in some of them than others. What I have found is that the rougher the surface the more likely it is that the stains will be more difficult or even impossible to remove with the standard methods that I will enumerate below.

When I started cleaning these stems I used the usually my universal airway cleaning method – a pipe cleaner and alcohol pushed through the stem. I immediately regretted doing so because of what happened. I was able to remove some of the stain but the Perspex tended to craze into lots of tiny little spidering cracks. None of them caused the stem to break or fall apart but they all went throughout the material. Later I read on the forums that you are never to use alcohol on Perspex! I bear witness to the damage alcohol does to Perspex. I know others here use it sparingly on the stems with no issues. However, due to my previous experience I will not use it at all no matter how sparingly. Needless to say that left me with a dilemma. How was I going to remove the stain in the stems? I wrote to various restorers and refurbishers to see if they had any tricks up their sleeves that they would be willing to share and I tried them all.

One friend wrote me back and explained his method. He uses lemon juice to clean the inside of the stem. His rationale was that the juice is acidic enough that it should work to loosen the stains in the airway. He said he had experienced good success using it. So I thought why not give it a try. I scrubbed the airway repeatedly and inserted a pipe cleaner in the airway and let the lemon juice work on the stem overnight. When I removed the pipe cleaner and scrubbed the internals of the airway with water I could see that the colour of the stain was lighter and believed that I had removed a portion of the stain. I repeated the process half a dozen times with the lemon juice expecting further stain removal. It did lighten the stain but no matter how many times I scrubbed and soaked the airway with the lemon juice I could never completely remove the stain from the stem.

Another friend wrote about using Bar Keepers Friend scouring powder. He applied it to a wet pipe cleaner and it worked well for him. So with nothing to lose and potential a method that would give better results than the lemon juice I decided to give it a try. I wet a pipe cleaner and dipped it in the powder to coat the pipe cleaner. I pushed it through the airway repeatedly and then coated it again with more powder and repeated the process. With this method I was able to remove more of the stain than with the lemon juice but I could not remove all of it. I had the brilliant idea of combining the two methods to see if together they would do better. I soaked the airway with lemon juice and then scoured it with the powder. The results were the same as I got with either one alone a stain – still remained. As far as I was concerned I had not found a method that gave me the results I wanted.

I read about another method on one of the forums and decided to try it. I dipped a pipe cleaner in a Soft Scrub Cleanser and worked over the inside of the stem repeatedly, recharging the pipe cleaner regularly. I scrubbed it and rinsed it with running water. After I rinsed it I found that it had done a much better job than either of the previous methods I had tried. I repeated the process and found that the stem was about 80% better than when I started. Things went better but still a stain remained in the airway.

I decided to approach the issue from a different starting place. I wanted to test my hypothesis regarding the relation of the roughness of the material in the airway to the presence of stain there. The stem I chose to these this on had a rough airway that was visible in the opacity of its colour through the stem. I used a variety of needle files to smooth out the internals of the funneled slot in the button and a round micro needle file to sand out the inside of the airway in the stem. My intention was to smooth out the rough surface. It took a bit of patience to enter the stem from both ends to reach the length of the stem and smooth out the airway. As I worked on the airway That process removed 90% of the stain in the stem and then I followed it up with the soft scrub cleanser to finish the last 10%. My goal was to make the inside airway as smooth as possible to minimize the surfaces that held the stain. I think I had finally found the method.

There is one other addition to the methodology that I intend to experiment with. If it works well it may be a way to polish the inside of the stem. I read that you can chuck the pipe cleaner in a cordless drill, dip it soft scrub and spin it in the airway. I want to see if I can achieve the same results with less hand work. I would also like to try to spin a bristle pipe cleaner through the stem and see if that works as well. I have gotten emails and had conversations with folks who swear by this method for cleaning out these stems so I want to try it out and see for myself. I will keep you posted on this addition to the process.
Cleaning the externals of the Perspex stems is relatively easy in comparison to what I have just explained. I sand out tooth marks or repair those that need it with clear super glue and sand the surface smooth. I polish the stem by wet sanding with 1500-2400 grit micromesh sanding pads and dry sanding with 3200-12000 grit pads. I lightly buff the stem with Blue Diamond polish on the buffing wheel. I give the finished stem several coats of carnauba wax and buff with a clean buffing pad and hand buff with a microfibre cloth to give it a deep shine.

If any of you have tried other methods of cleaning these stems and had success post your additional tricks in the comments below. Thanks for reading.

A Beautifully Grained Jobey Designer Cauldron Lay Under Thick Varnish


Blog by Steve Laug

When I was visiting in Idaho my brother Jeff pulled out this Jobey box and handed it to me to look at. I had no idea what to expect once I opened the box. I have cleaned up a lot of Jobey pipes over the years and have really liked the rusticated Jobey Stromboli pipes with their colourful stems and deep rough surfaces. I have seen others that were pretty but nothing spectacular. I turned the box over in my hands to see if there were any hints on the outside what was hidden under the lid but there was nothing – just the classic red box with the Jobey Pipe logo on the lid.Jo1I opened the box to have a look and was surprised. What was inside was actually a really nice looking pipe at first glance. It was stamped on the left side of the shank Jobey over DESIGNER and on the right side of the shank D80 over HANDMADE. The stem was Lucite with a variety of brown tones that ran at an angle across the stem. The finish looked funny to me in that for a handmade pipe it was rough textured. I expected it to be silky smooth but it was rough to the touch and there were brush marks all over the surface. It looked to me like someone had brushed on a thick coat of varnish to give the pipe a perma-shine. The box also had the red pipe sleeve and a Jobey Polishing Cloth in the lid.Jo2Inside the polishing cloth package there was also a cloth for treating the stem. Both were Jobey specialty products. The Jobey sock is slightly worn.Jo3I took the leaflet out of the top of the box to have a look and it was a fun read. It reads: “The Jobey Pipe Guarantee, Limited Warranty. Should any Jobey pipe burn out within 90 days of normal usage, a new bowl will be furnished by us without charge. Shanks and mouthpieces are not guaranteed, but may be repaired for a moderate charge. This warranty gives you specific legal rights and you may also have other rights which may vary from state to state. Return the burned out bowl with a request for bowl replacement to: – Hollco International Repair Department, 37 Warren St., New York, NY 10007.”

The other side reads: “This Pipe has the “Jobey Link” U.S. Pat.No. 3537462. The unique “Jobey Link” is the first big breakthrough in high quality pipe mounting. There is no metal. Easy to repair – just ask your dealer for an economical replacement “Jobey Link” it keeps your pipe permanently mounted without loosening up. The “Jobey Link” is precision threaded into the briar, but is still adjustable within the stem so that it always lines up straight. If the “Jobey Link” becomes difficult to unscrew use a coin in the convenient unscrewing slot (X). The “Jobey Link” comes in 4 sizes, small, medium short, medium long and large.”Jo4I took some photos of the pipe to show how the varnish coat had muddied the finish and hid the grain as well as hopefully captured some of the brush strokes. Under the varnish on the rim on the back inner edge of the bowl there was also some tar that had been painted over.Jo5 Jo6I took some close-up photos of the rim and the stamping on the shank. In those photos you can clearly see the tar on the rim, the clear stamping on the shank and the brush strokes of the varnish on the pipe.Jo7 Jo8I was hopeful that the shiny coat on the bowl was not urethane but merely varnish. The muddiness of the finish and the way it felt in the hand made me hopeful. I scrubbed the bowl with acetone on cotton pads and was amazed at how easily it came off. I was really happy that I was not dealing with a plastic coat. I scrubbed it repeatedly until the grain clearly showed.Jo9 Jo10The bowl was still rough under the varnish so I wet sanded it with 1500-2400 grit micromesh sanding pads.Jo11 Jo12 Jo13I scrubbed the internals of the mortise and airway in the shank to clean out any build up in the threads and airway. I used cotton swabs and alcohol and found that it was really quite clean. I remove the Jobey Link from the end of the stem and cleaned out the airway in the link and the stem with cotton swabs, pipe cleaners and alcohol.Jo14I threaded the Jobey Link into the end of the shank and set it then pushed the stem in place on the other end of the link.Jo15I reamed the bowl back to bare briar with the Savinelli Pipe Knife.Jo16I wet sanded the Lucite stem with 1500-2400 grit micromesh sanding pads and wiped it down with a cotton pad. I sanded 3200-4000 and wiped it down again. I finished sanding it with 6000-12000 grit pads to finish polishing it.Jo17 Jo18 Jo19I gave the bowl a light coat of olive oil and then buffed it and the stem with Blue Diamond. I gave the bowl and stem multiple coats of carnauba wax and buffed it with a clean buffing pad. I hand buffed it with a microfibre cloth to deepen the shine. The finished pipe is shown in the photos below. Personally I have never seen a Jobey quite like this one. The carver who did the work captured the lay of the grain extremely well with it flowing up the shank. The new oil and wax finish really went well with the brown striated Lucite stem. Thanks for looking.Jo20 Jo21 Jo22 Jo23 Jo24 Jo25 Jo26 Jo27

A Stellar Find – A GBD Prestige 1451 Oval Shank Billiard


Blog by Steve Laug

I was looking through the box of pipes I brought home from my brother’s when I visited recently and came across a beautiful example of a GBD Prestige pipe. It is stamped GBD in the oval and Prestige below that on the top of the shank. It sports an oxidized silver band stamped Sterling in an arch across the top. It has some stunning grain and is an oval shank. On the bottom side of the shank it is stamped 1451 which according to the GBD shape charts is an oval shank Canadian. This one however does not look like a Canadian to me. It is a nice looking billiard. The stem is clear Perspex and was in decent shape. It has the brass GBD roundel on top of the stem.gbd1 GBD2I took some close-up photos of the pipe. The first shows the stamping on top of the shank. It is very legible and sharp. The second shows the build up on the rim and the cake in the bowl. The inner and outer edges of the rim are sharp and show no damage.gbd3The Perspex stem is actually surprisingly clean. Often the airway and slot on these older stems is stained a deep brown from the tobacco smoke and it is a bear to get out. This one however had minimal staining and most of that is in the slot on the end of the button and on the tenon itself. There was also some light tooth chatter on the top and bottom of the stem at the button.GBD4I was hoping that the build up on the rim could be scrubbed off so that is where I started. I used cotton pads and saliva and was able to remove most of the tars and lava. I used 1500-2400 grit micromesh sanding pads to clean it up further. Other than some slight darkening of the beveled rim it came out clean.GBD5I polished the silver band with some silver polish and a jeweler’s polishing cloth and was able to remove all of the tarnish without scratching or damaging the band.GBD6I reamed the bowl with a PipNet reamer. It was slightly bigger than the second cutting head so I used the Savinelli Pipe Knife to remove the remainder of the cake. I finished by sanding the inside of the bowl with 220 grit sandpaper.GBD7I scrubbed out the airway and mortise in the shank with alcohol, cotton swabs and pipe cleaners until all of the tars and oils were gone. Fortunately this pipe was well cared for and it did not take too many cleaners before they came out clean.GBD8The stem was another story. Never use alcohol on Perspex stems as it causes them to craze and crack. I scrubbed out the airway and slot with pipe cleaners dipped in Soft Scrub cleanser until the airway was once again clear. The slot took a little more work. When the pipe was made the slot work was rough and sloppy so the dark stains filled in grooves and scratches internally that no amount of scrubbing would remove. I used a round, oval and a flat oval needle file to clean up the roughness of the slot and remove the stains from those spots. I rinsed the inside of the stem with cool water to remove the scrubbing compound. The stem came out reasonably well in my opinion. There were a few brown stains that I was not able to remove but they are minimal. They will show up in the final photos of the pipe.GBD9I wet sanded the tooth chatter on the top and bottom sides of the stem at the button using 1500-2400 micromesh sanding pads. I sanded with those until the tooth chatter was gone. I was fortunate that none of the tooth marks were very deep. I dry sanded with 3200-12000 grit pads and finished by wiping the stem down with a damp cotton pad to remove the dust.GBD10 GBD11 GBD12I buffed the bowl and stem with Blue Diamond on the wheel and was amazed at how the grain popped and the stem began to shine. I gave the bowl and stem multiple coats of carnauba wax and buffed them with a clean buffing pad. I finished by hand buffing the pipe with a microfibre cloth. The finished pipe is shown in the photos below. While there are some small brown stains in the button area it is clean. I think you will agree that it is a stunning example of a GBD Prestige. The grain and the stem work really well together and the factory installed silver band sets off the pipe with a touch of class. Thanks for looking.GBD13 GBD14 GBD15 GBD16 GBD17 GBD18 GBD19 GBD20