Blog by Steve Laug
Inside the first boxed set of Picadilly Brand Genuine French Rustique Briar pipes that my brother picked up was a straight billiard that did not bear the markings that were on the bent billiard or on the other complete set of Picadilly pipes. This one had a familiar finish to me but I could not put my finger on it and identify it. It was stamped on the underside of the shank with the following: 7118 over Berkeley Club over London Made. The bowl end of the smooth bottom of the shank it was stamped England in an arch. The finish on the bowl sides was very clean. The rim was a bit beaten. The front edge of bowl had been knocked out on a hard surface repeatedly and left a rash. The entire top of the rim was also beaten up and pitted. It was the only part of the bowl that was in rough shape. The stem had some tooth chatter and some light tooth marks on the top and bottom sides near the button. There was some oxidation and a faded stamp with what looked like a B partially circled by a C.
 I took a close up photo of the bowl and rim to show the cake on the bowl and the damage to the rim surface. I also took a close up photo of the stamping on the underside of the shank.
 I went online to Pipephil’s site Logos and Stampings (http://www.pipephil.eu/logos/en/logo-b4.html) and found the brand and the reminder that had niggled at the back of mind. The Berkeley Club with this stamping was made by Sasieni. The photo below came from that website and shows the same finish and the same stamping on both the shank and the stem.
 With that in mind I took the pipe apart to have a look at it. I was expecting the pipe to have an inner tube in the tenon. I looked in the bowl and the point extended into the bowl showing a glint of metal. However when I took the pipe apart there was no inner tube. I shined a light down the mortise and airway in the shank and sure enough the tube had broken off in the airway leaving the mortise unobstructed. I looked at the stem and saw the same – broken off slightly inside the tenon leaving it also unobstructed.
I decided to work on the rim top damage by topping the bowl with 220 grit sandpaper on a topping board. It took some work to remove the damaged portion of the rim. The second photo shows the initial sanding and the third photo shows the finished topping. You can also see the chips in the cake at 12 o’clock in the third photo. I used the Savinelli Pipe Knife to clean out the cake in the bowl and work on the inside edge of the rim. I was able to remove all of the cake and smooth out the rim edge while keeping it in round in the process.
 With that completed I decided to drill out the broken inner tube in the shank of the pipe. I used a drill bit almost the same size as the airway in the inner tube. I increased the size of the bit until it was the same size as the airway and drilled out the broken tube. I never use a power drill when I am doing this – rather I use a cordless drill sans battery (I don’t want to inadvertently hit the trigger and regret it). I turned the shank onto the drill bit until it grabbed onto the tube and I was able to pull it out on the end of the bit. While I was pulling I also used the end of the Savinelli Pipe Knife to push on the end of the inner tube in the bowl. It takes patience but the result leaves behind no damage to the airway or the bowl.
 I scrubbed the rustication on the bowl with a tooth brush and Murphy’s Oil Soap until it was clean. I rinsed it under running water to remove the soap and the debris. I dried it off with a soft cotton towel.
 I took some photos of the cleaned and dried pipe to get an idea of what I needed to do with the finish on the bowl and shank. The pipe looks really good other than the top of the rim that I will need to restain and polish.
 I cleaned out the mortise in the shank and the airway in the shank and the stem. The airway was quite clean thanks to the broken inner tube. The mortise had some tars and oils that took a few cotton swabs, pipe cleaners and alcohol to remove. The stem was dirty on the inside and took considerably more pipe cleaners than the shank. I used pipe cleaners and alcohol to clean out the stem airway.
 To match the stain on the bowl sides I used a black Sharpie Marker and a dark brown stain pen to restain the rim top and the outer edges of the bowl.
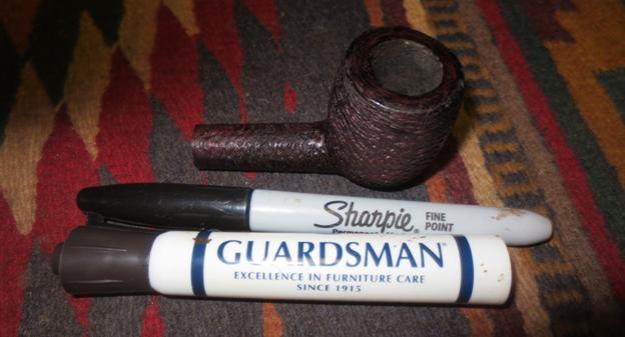 I cleaned up the inner edge of the bowl with a piece of sandpaper wrapped around my finger to smooth out the rough edges of the inner rim. It took a few passes to smooth out the edge but when it was done it looked much better.
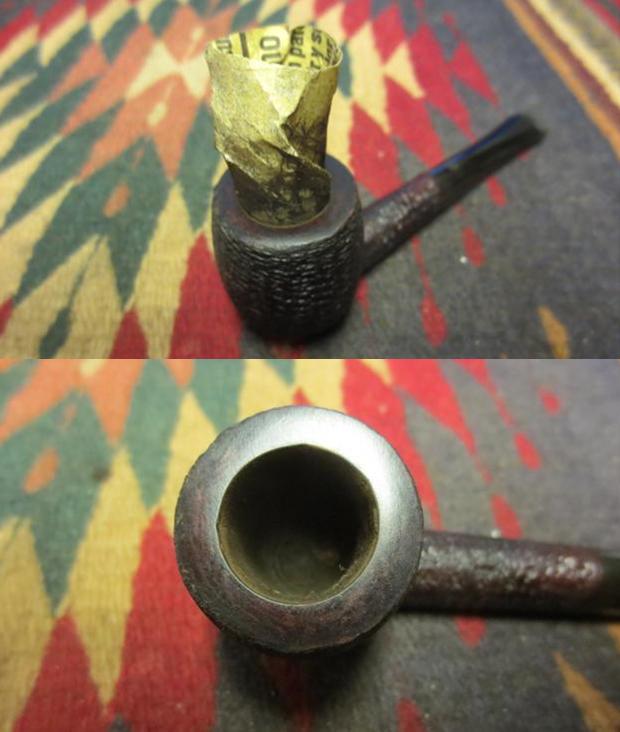 I gave the bowl a coat of Conservator’s Wax and buffed the bowl with a shoe brush to bring up the shine.
 I used the same method that I spelled out above – a stationary drill and drill bits to remove the broken tube in the tenon. I drilled until the bit caught a hold of the tube and then pulled the tube out of the tenon.
 I used some European Gold Rub ‘n Buff to fill in the logo on the stem. I applied it with a cotton swab and then rubbed off the excess. The finished logo is shown in the photo below.
 I wet sanded the stem with 1500-2400 grit micromesh sanding pads. I rubbed it down with Obsidian Oil. I dry sanded it with 3200-4000 grit pads and gave it another coat of oil. I finished sanding with 6000-12000 grit pads. I gave it a final coat of Obsidian Oil and set it aside to dry.

 I buffed the stem with Blue Diamond polish on the buffing wheel and then gave it multiple coats of carnauba wax. I buffed the bowl and the stem with a clean buffing pad to raise the shine and polish the wax. I buffed it again by hand with a microfibre cloth. The finished pipe is shown in the photos below. It came out looking really good. This one will eventually be listed for sale on the store. You can send me an email or a message any time if you would like to add it to your collection. Thanks for looking.


