Monthly Archives: June 2016

Rejuvenating an Alko Long Oval Shank Billiard – My second find from Sofia


Blog by Steve Laug

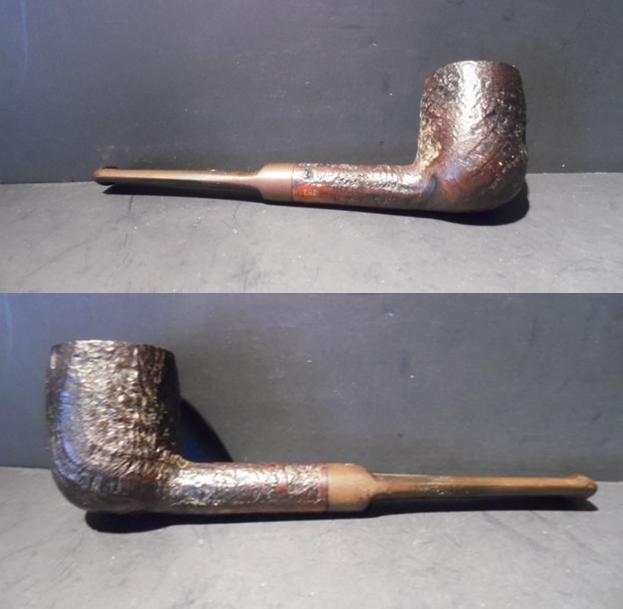
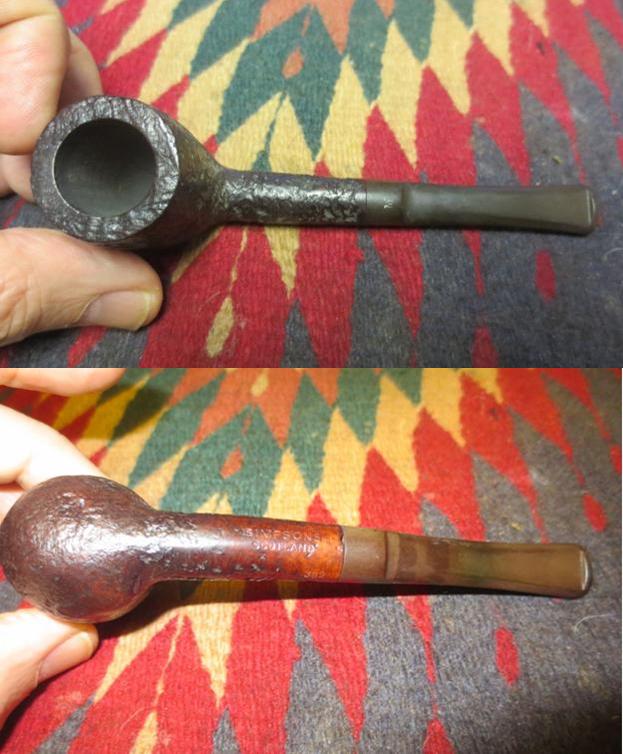
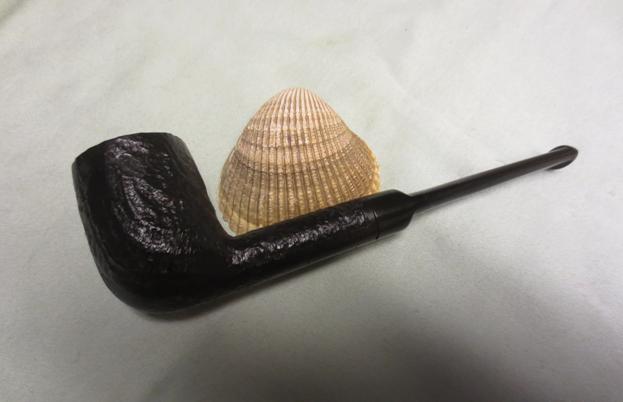
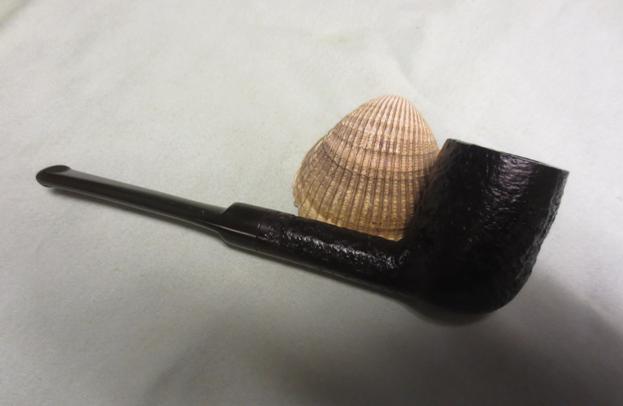
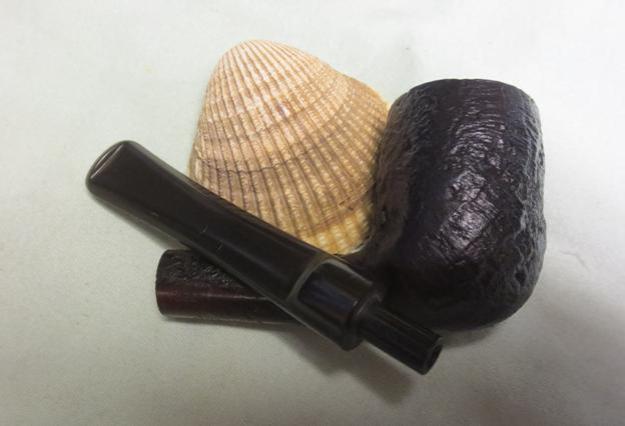
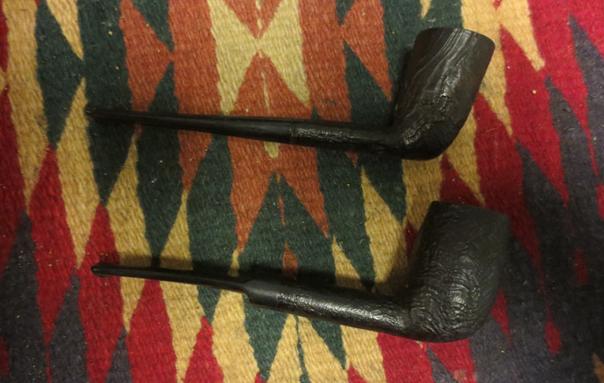
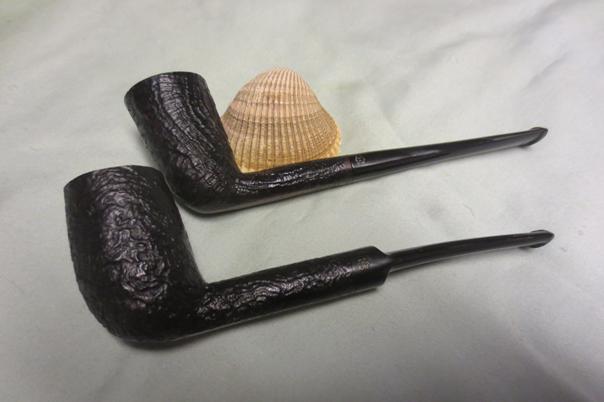
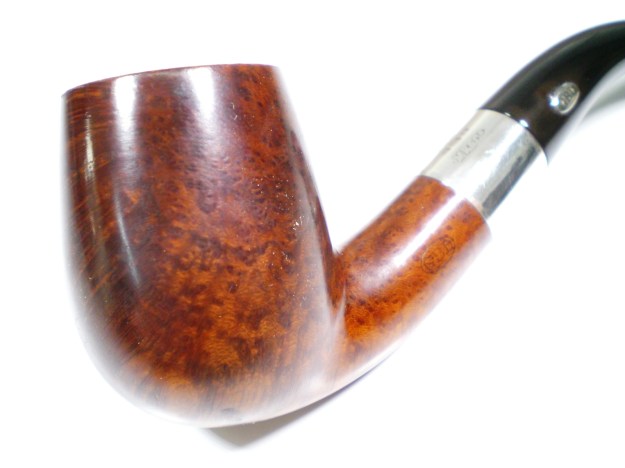
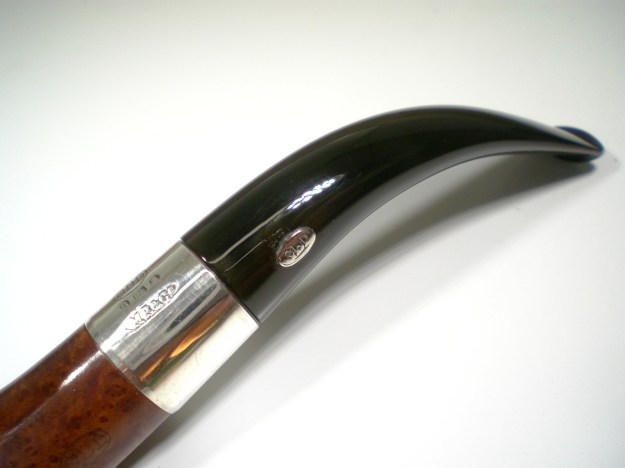
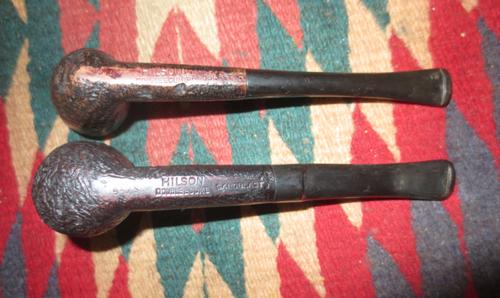
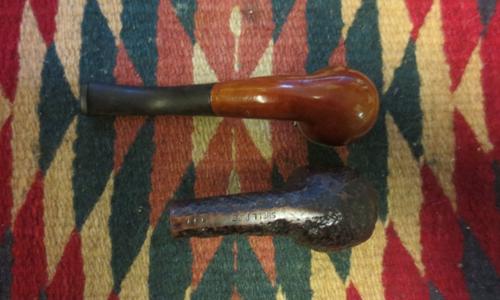
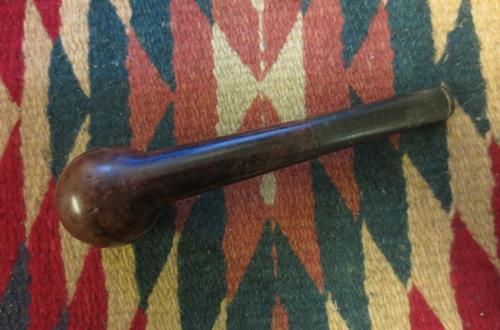
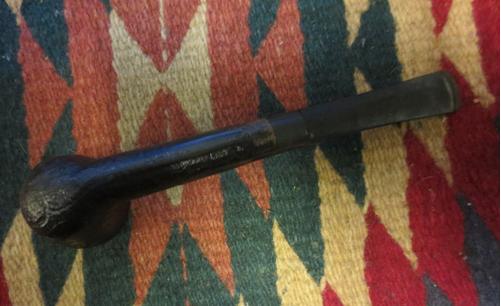
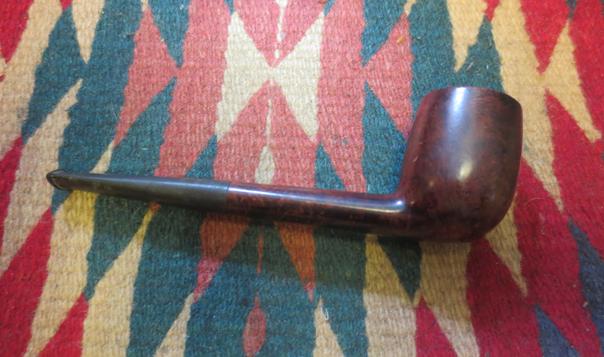
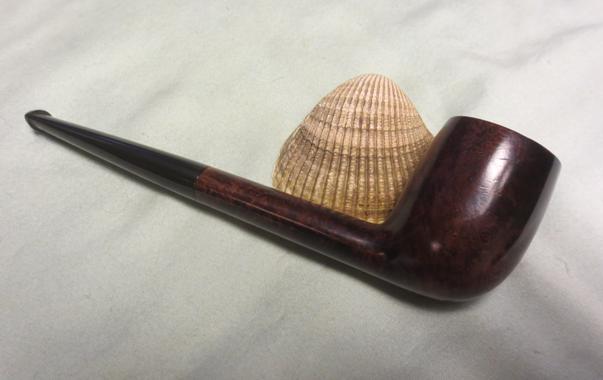
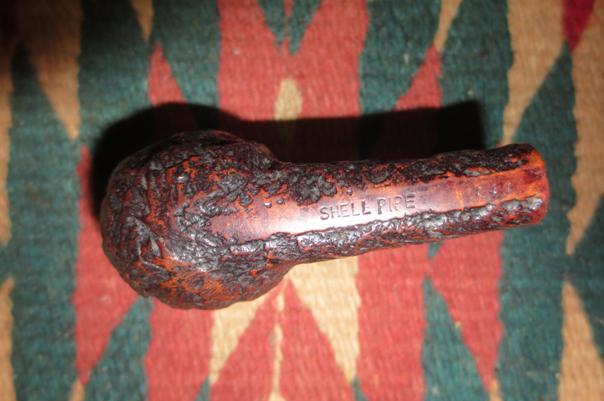
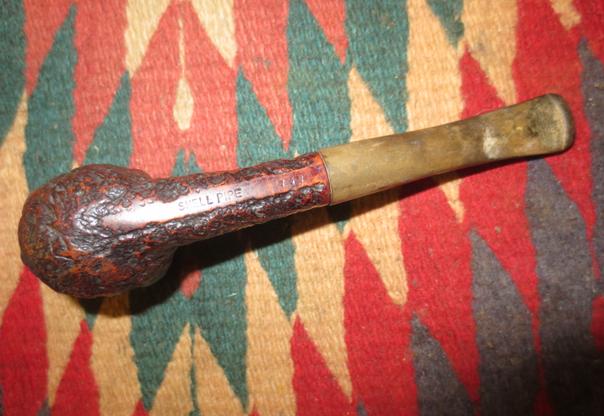
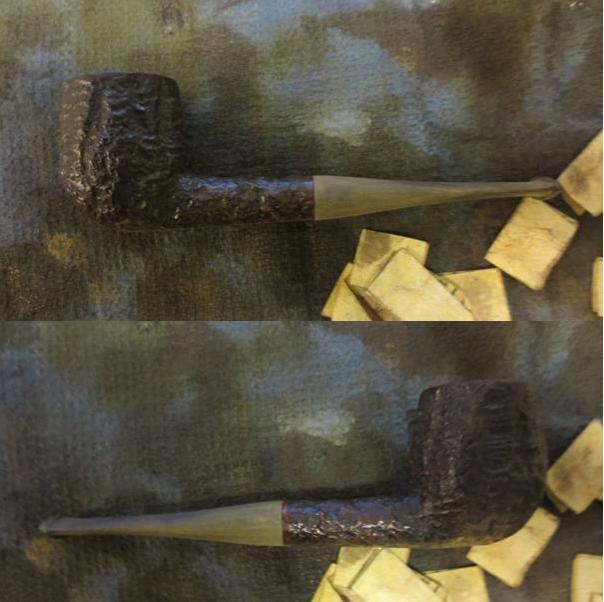
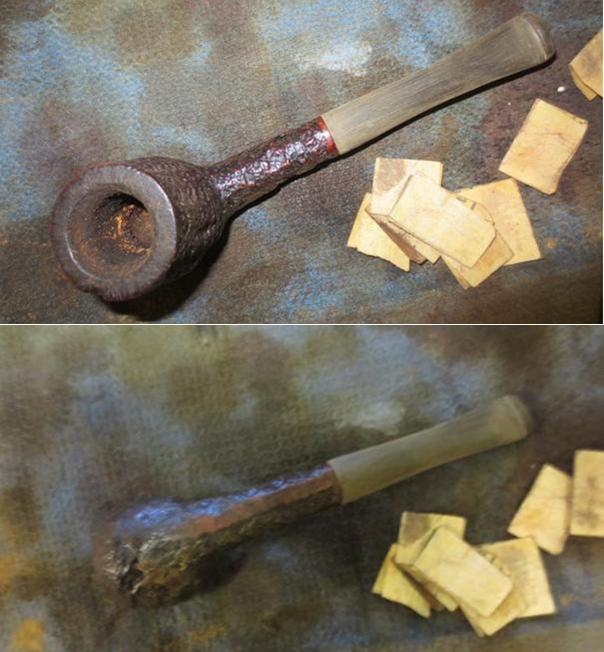
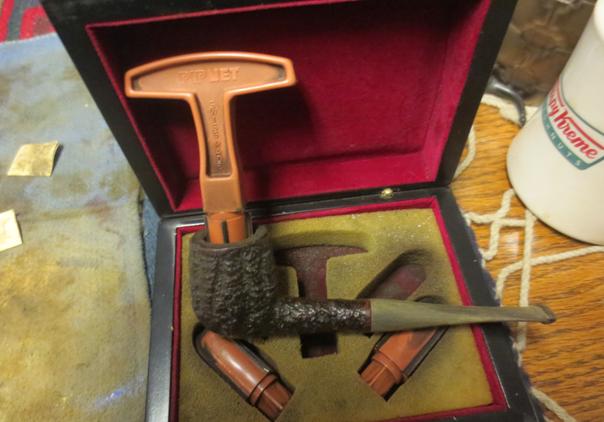
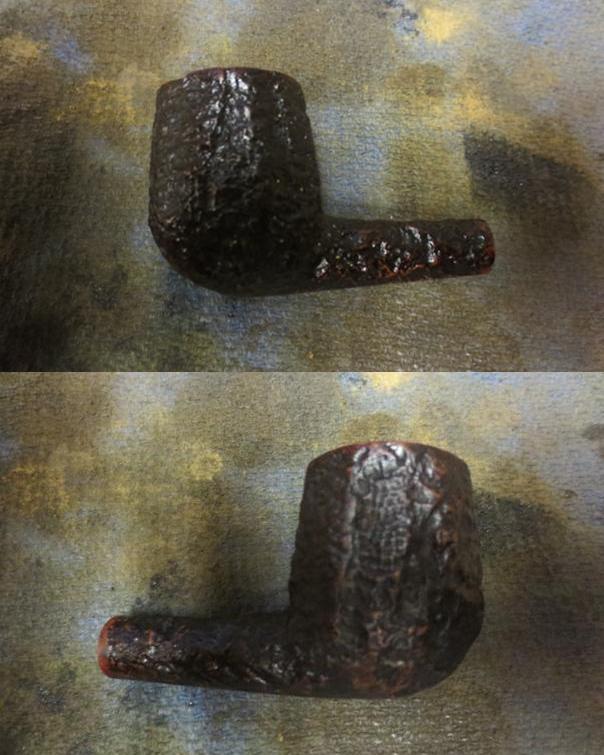
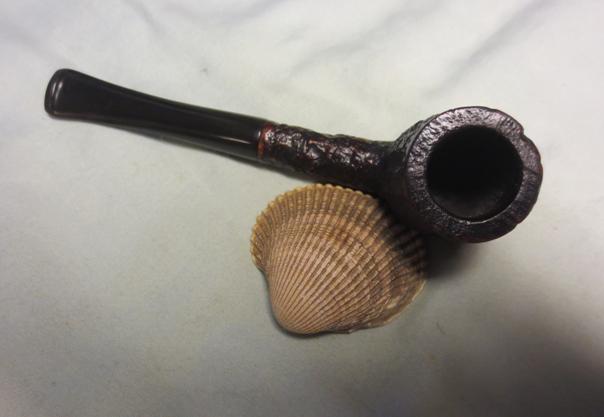
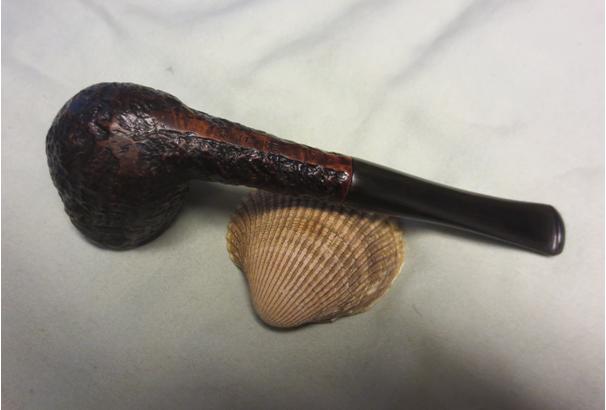
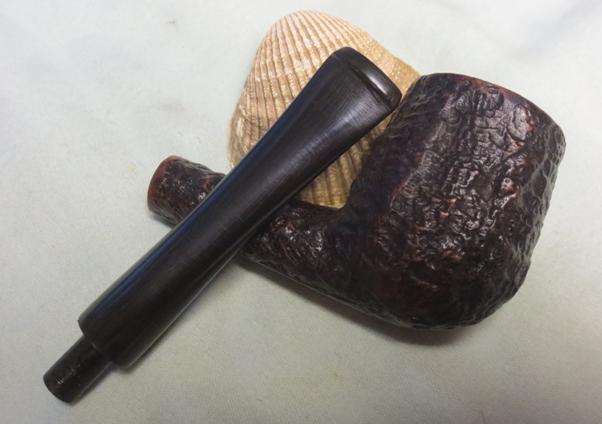
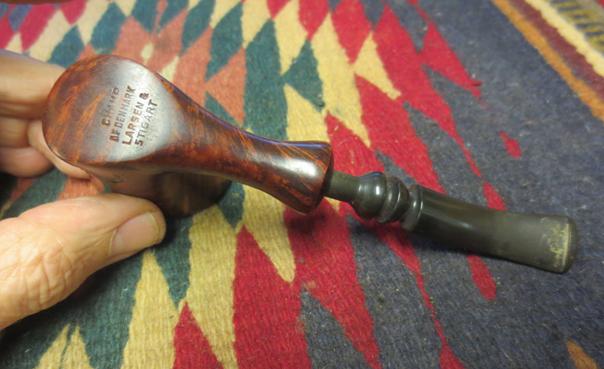
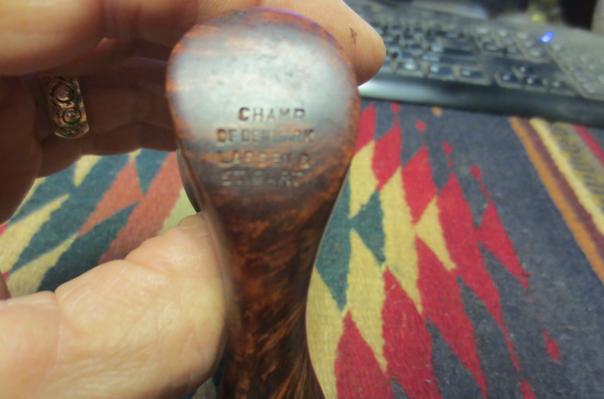
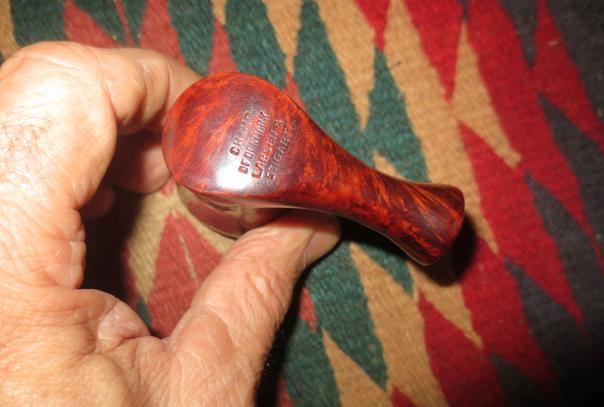
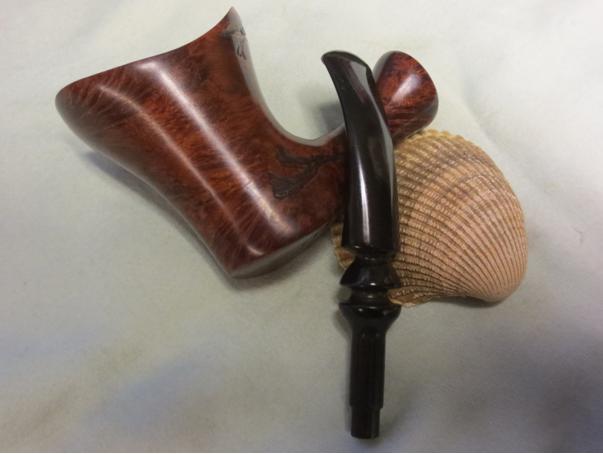
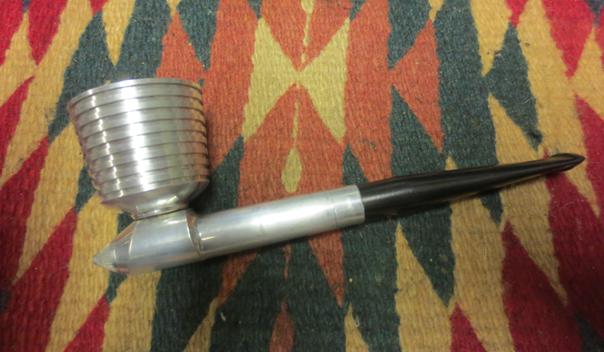
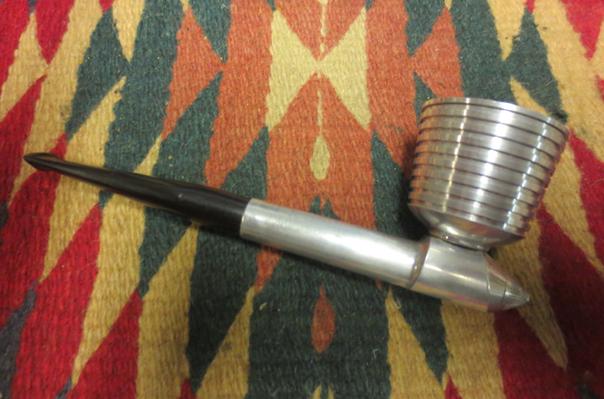
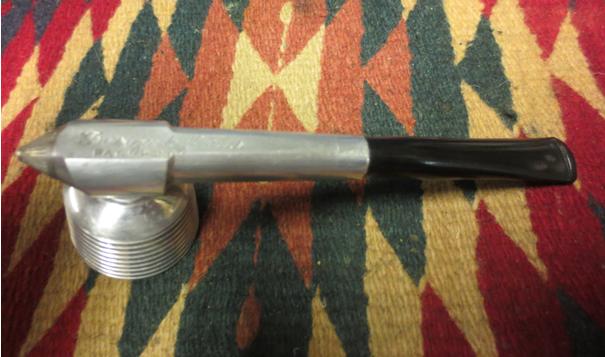
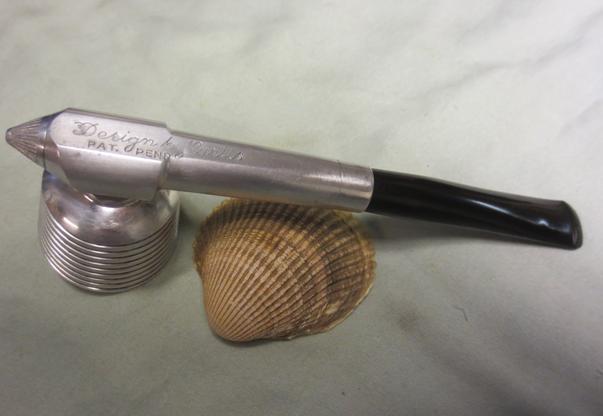
This was the third pipe I found on my recent trip to Sofia, Bulgaria in the open market near the Cathedral. The shape, the grain and the finish caught my eye when I saw it on the seller’s table and I knew that I wanted it. I paid the price and it was mine to bring home. It is simply stamped ALKO on the top right side of the oval shank and Old Briar on the top left side of the oval shank. There are no other stampings on the pipe or stem. The narrow stem and button shape hint to an older pipe but I could find no information on the brand in my searches on the internet. The finish of the bowl was dirty and had some scars and dings. Sadly they were not dents but rather cut marks. No amount of steaming would raise them. The finish was nice enough that I chose to clean them up rather than fill them in. The rim had an overflow of tars on it and had some damage to the inner edge. There was a thin cake in the bowl. The stem had a bit of tooth chatter on the top and the bottom sides near the button and was lightly oxidized. The vulcanite of the stem was high quality and hard. The light oxidation literally was on the surface.Alko1 Alko2 Alko3 Alko4
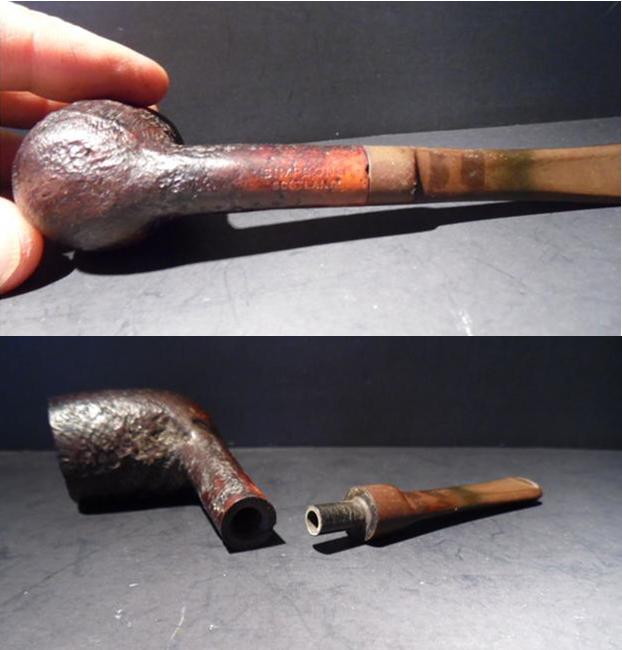
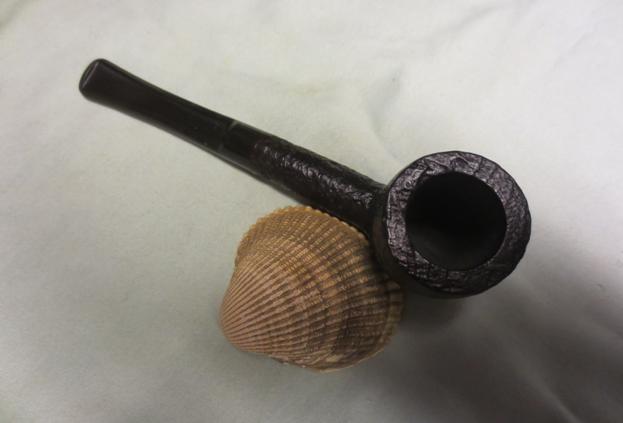
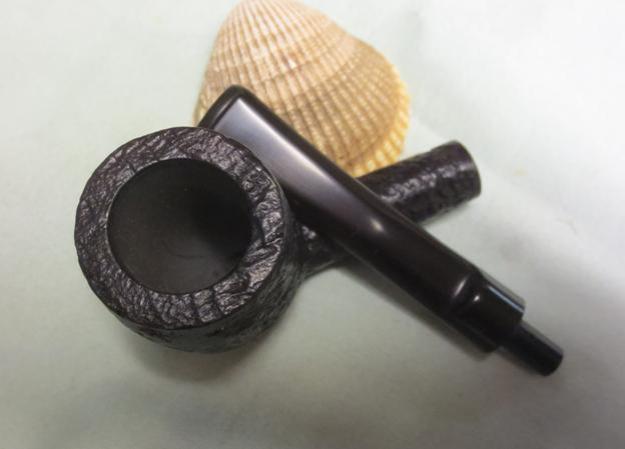
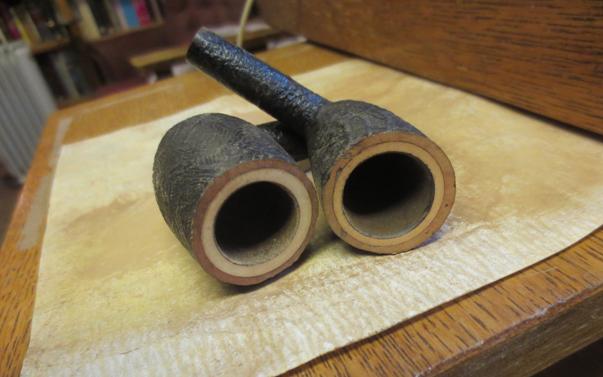
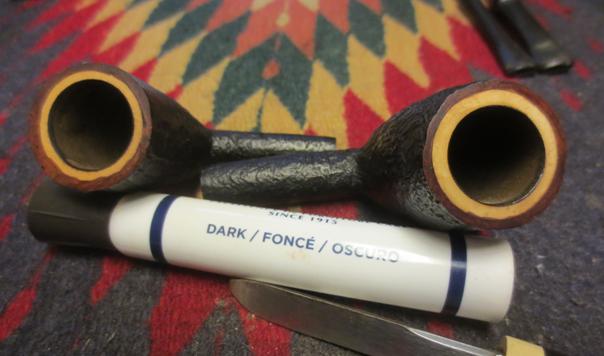
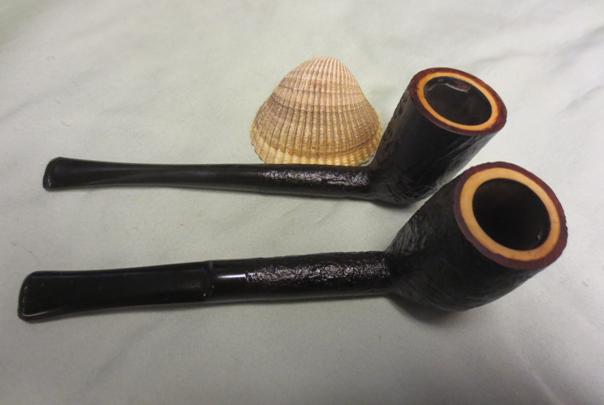
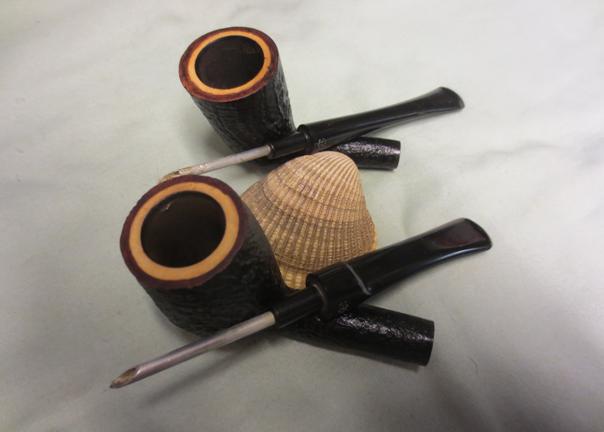
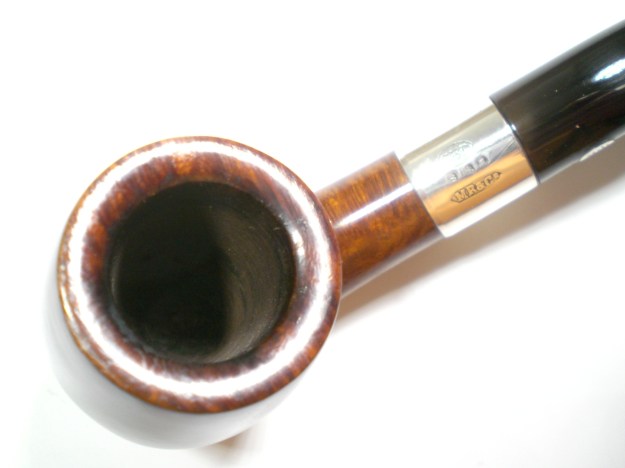
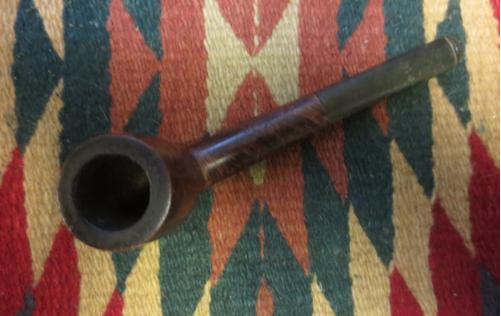
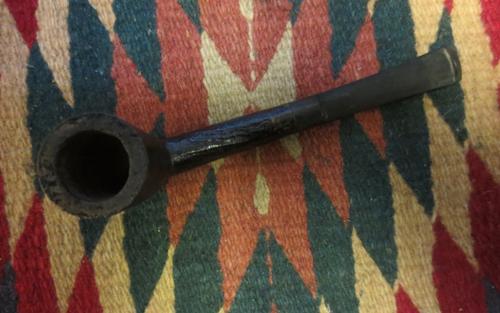
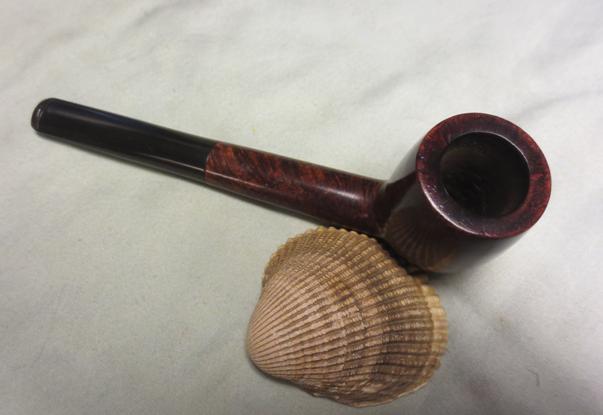
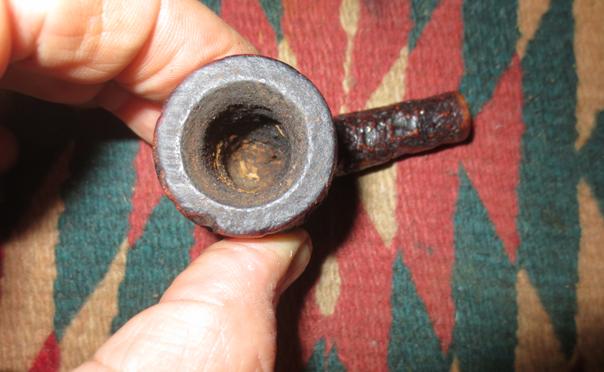
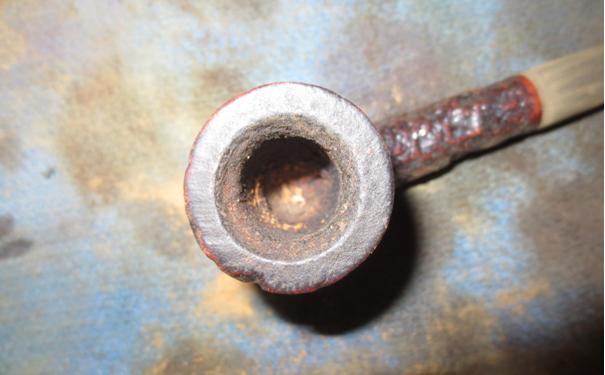
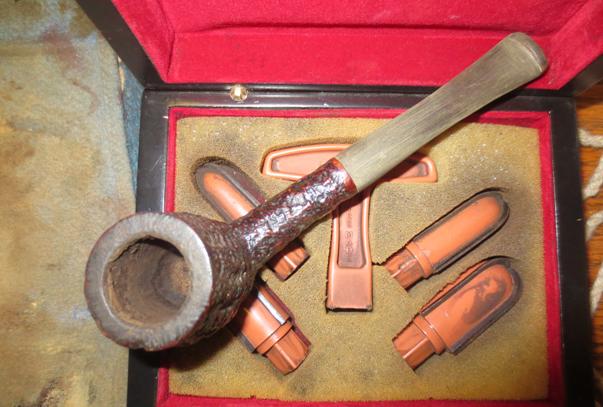
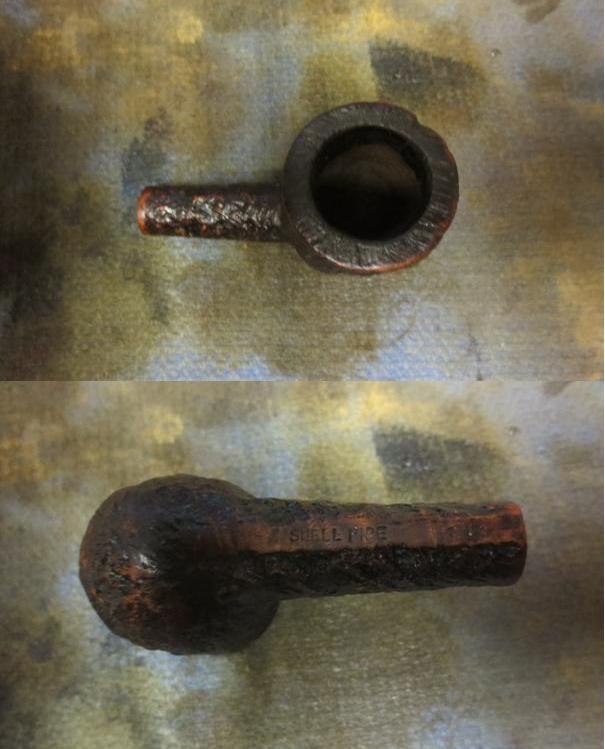
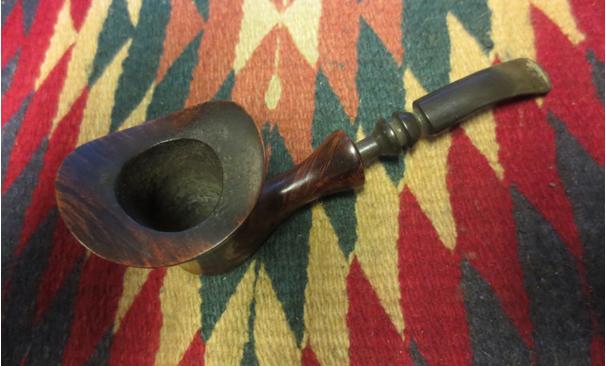
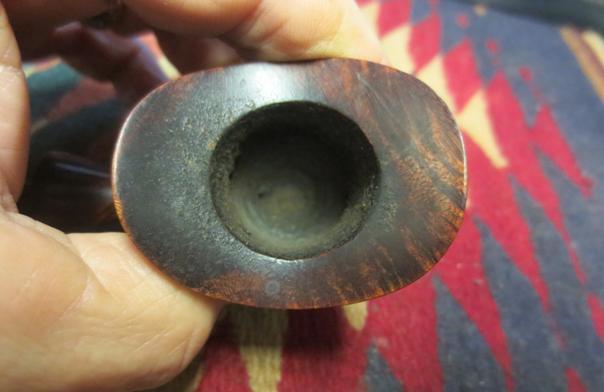
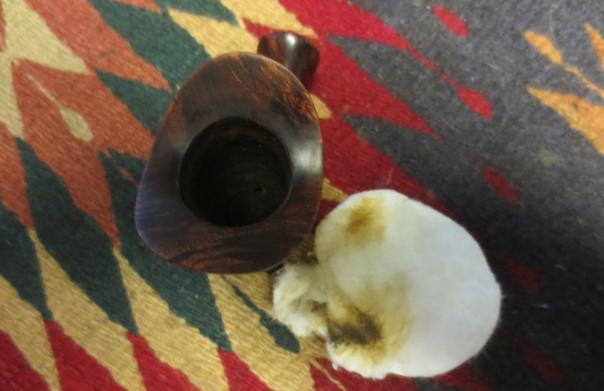
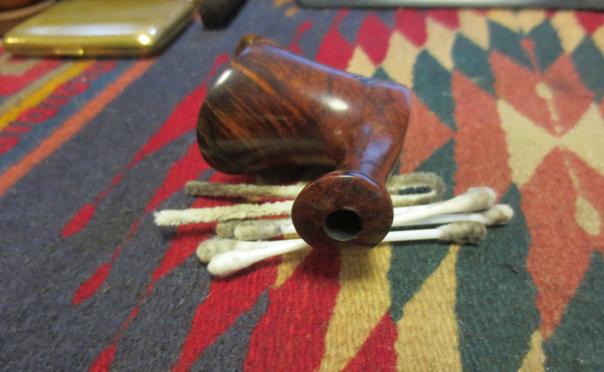
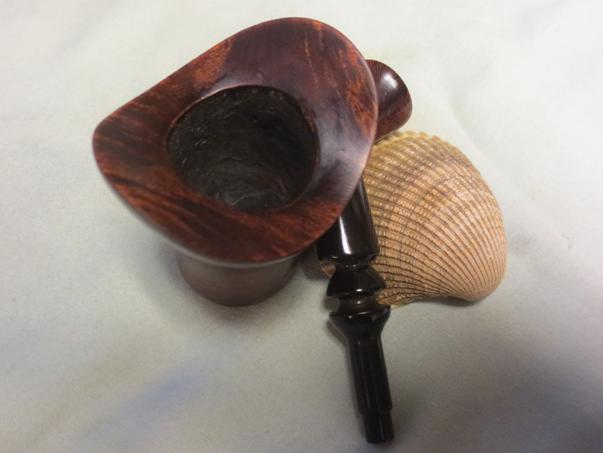
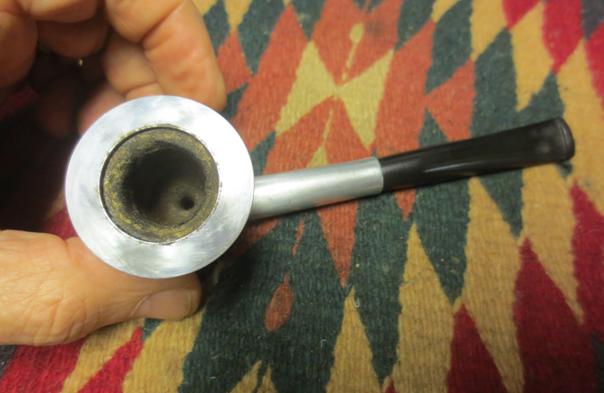
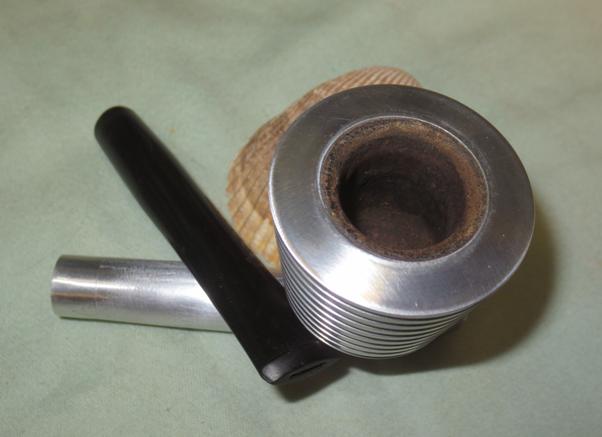
I took a close-up photo of the rim to show the damage to the inner edge and the build up and the marks on the surface. It would clean up nicely but some of the damage would take some finesse to blend into the rim.Alko5
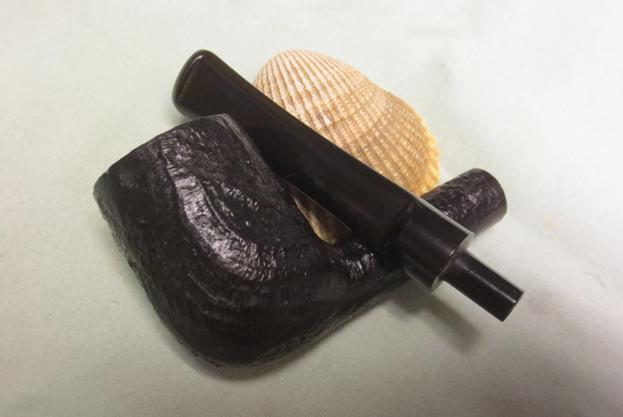
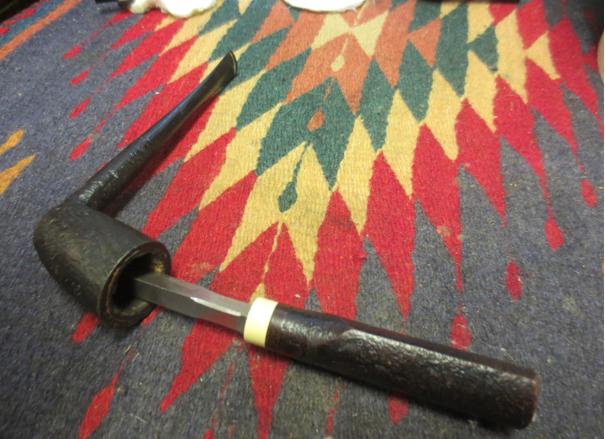
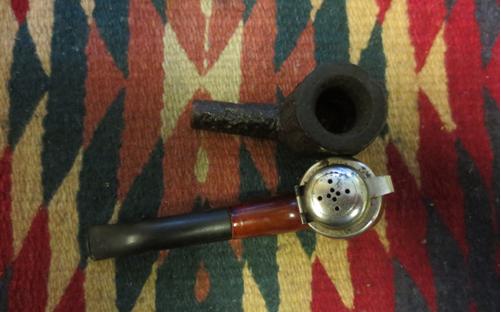
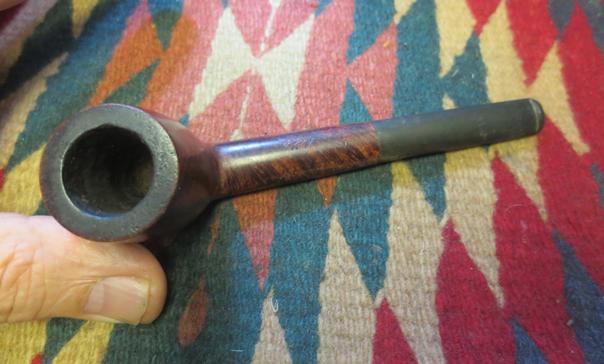
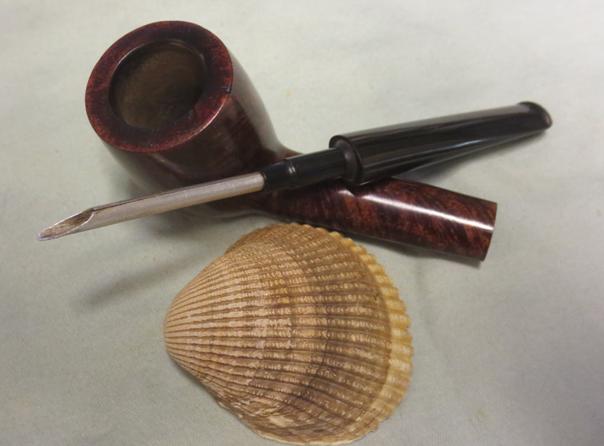
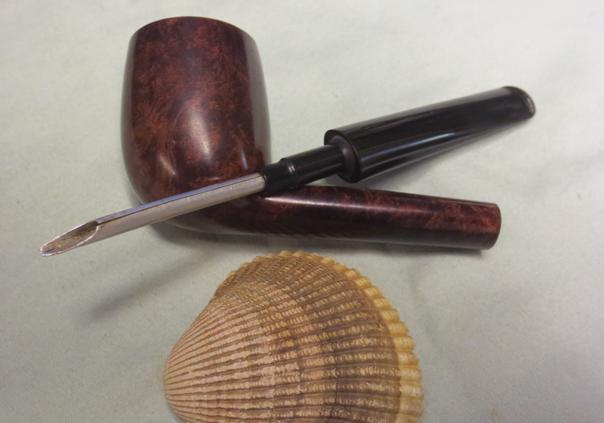
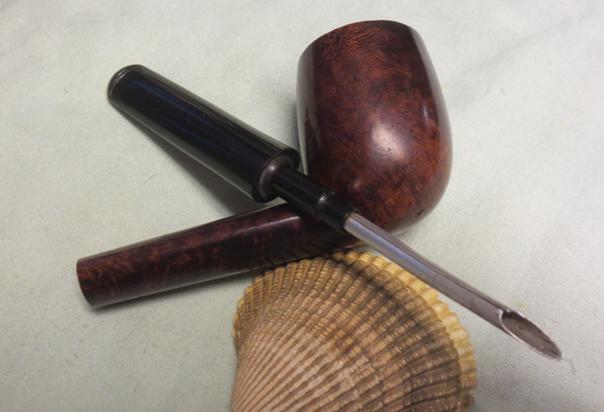
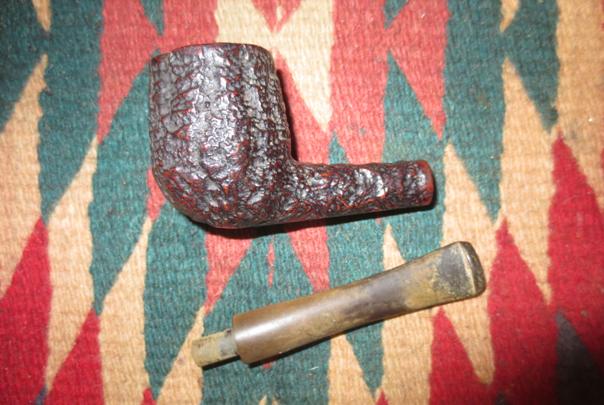
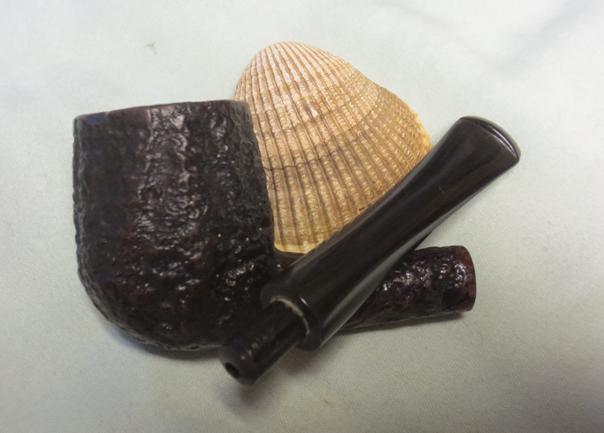
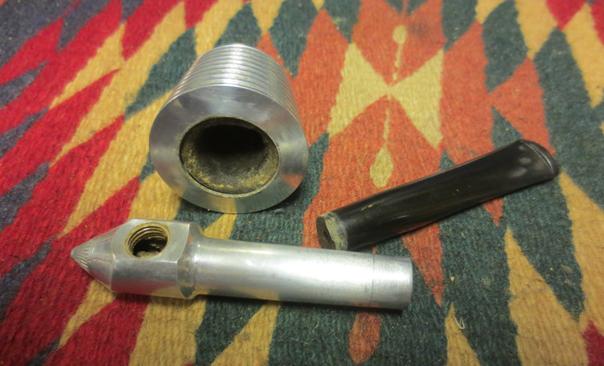
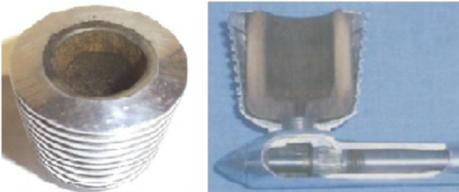
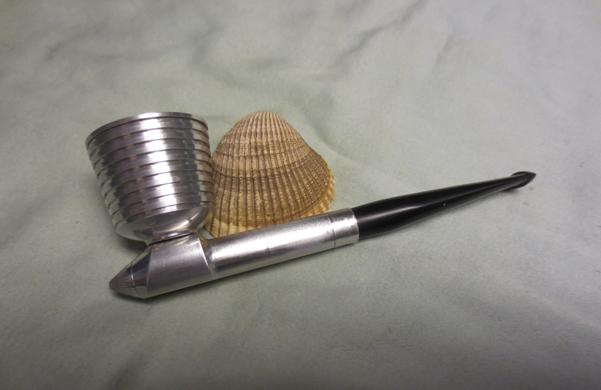
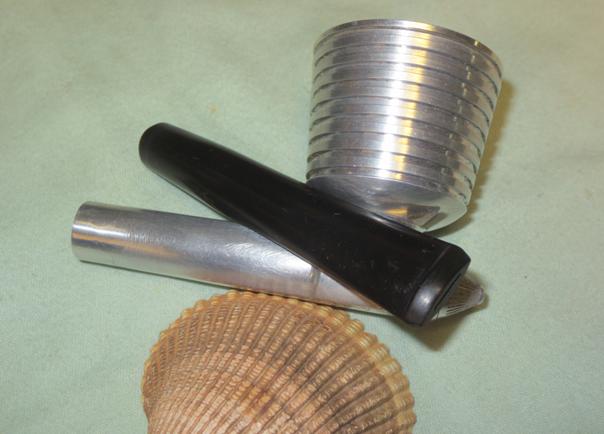
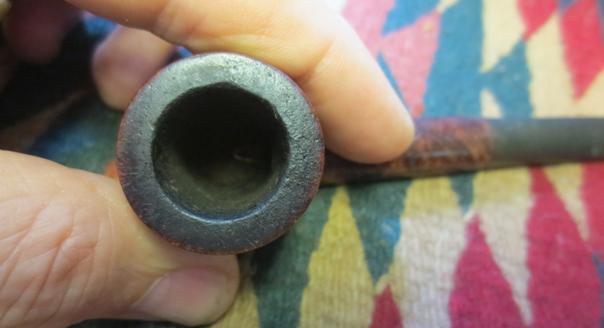
The stem was interesting in that it had a tube that ran from the button all the way into the bottom of the bowl. It was not removable so it had to be clean in place. It did function well and the shank was actually cleaner than I had anticipated.Alko6
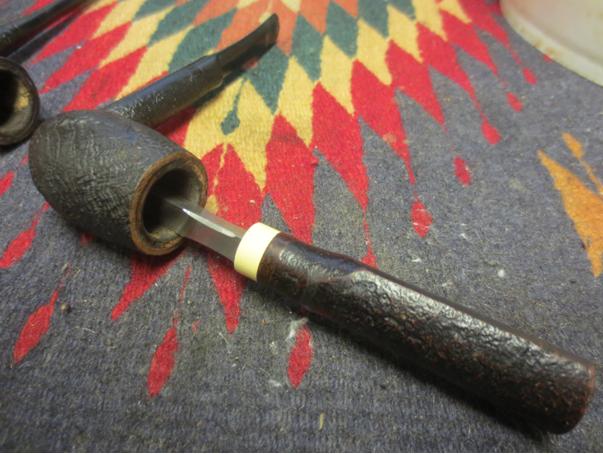
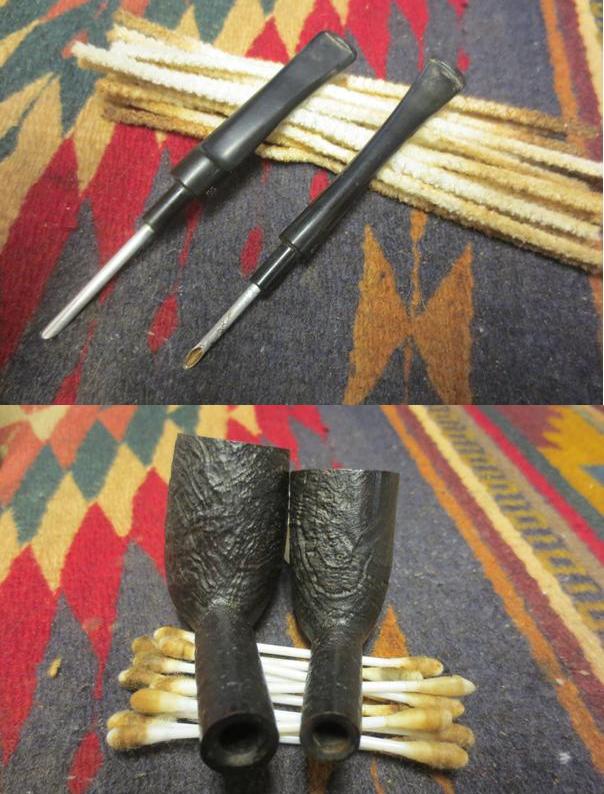
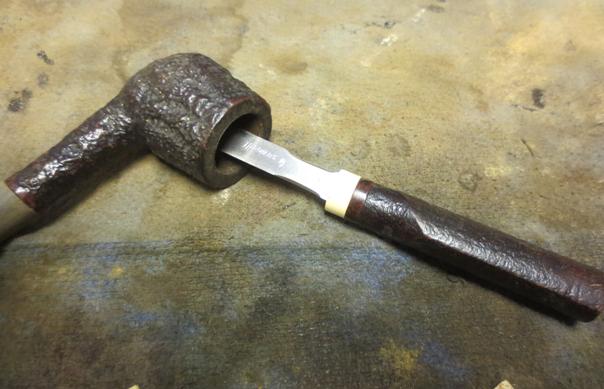
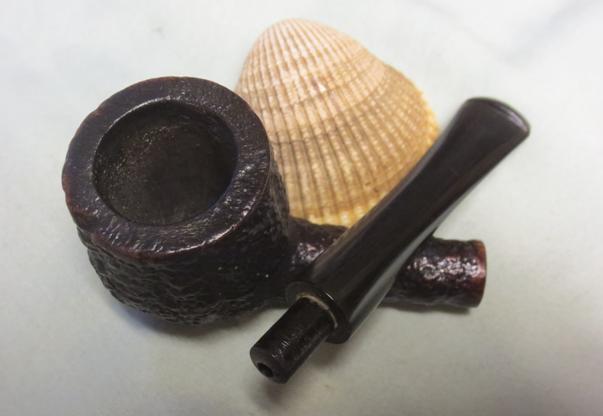
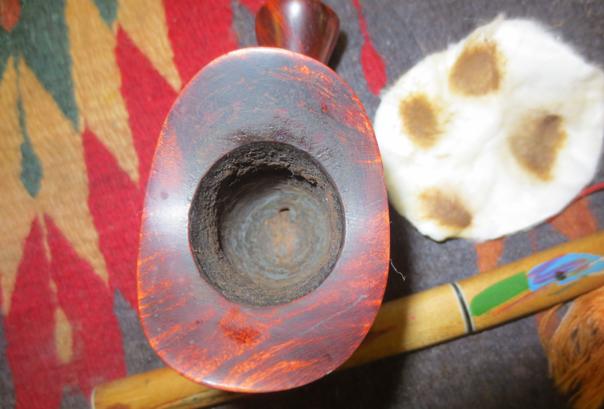
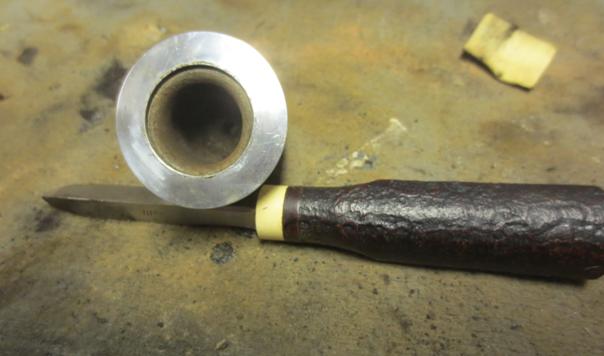
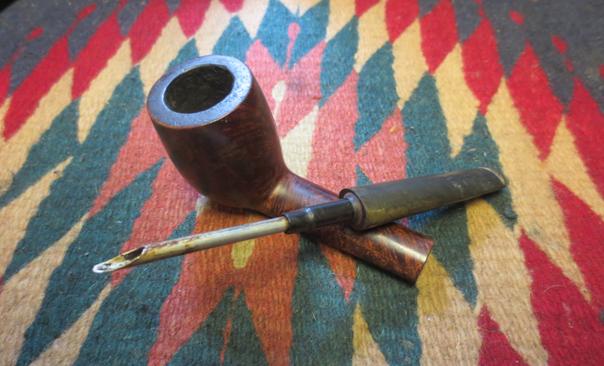
I reamed the bowl with the Savinelli Pipe Knife and took the cake back to bare briar. I also used the knife to clean up the inner edge of the rim. I sanded the bowl with a rolled piece of 220 grit sandpaper to smooth out the inner edge and the bowl interior.Alko7
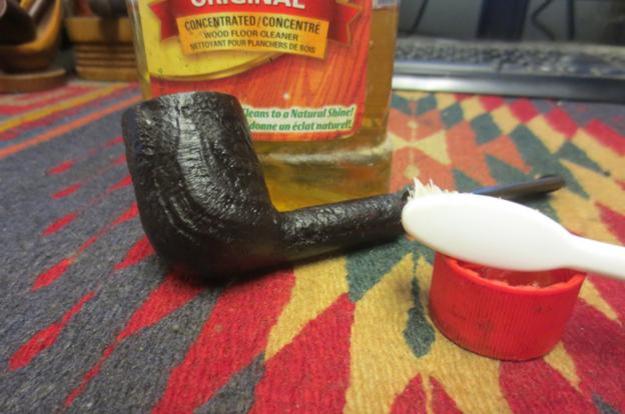
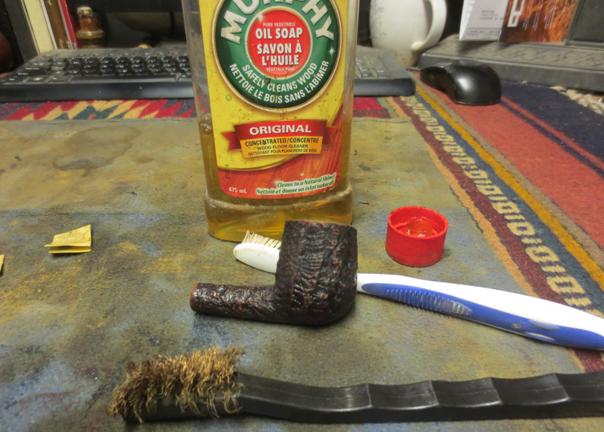
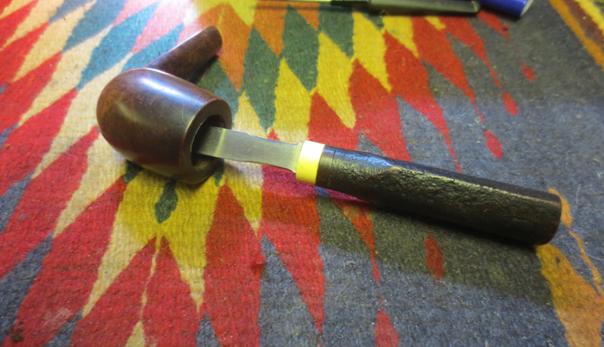
I scraped the rim surface with a pen knife and then scrubbed it with saliva and cotton pads until I removed all of the tars and oil that had accumulated there.Alko8
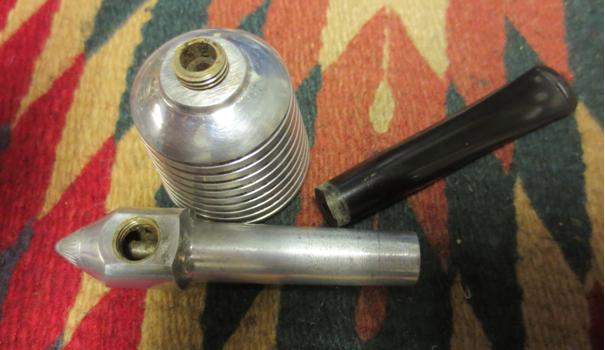
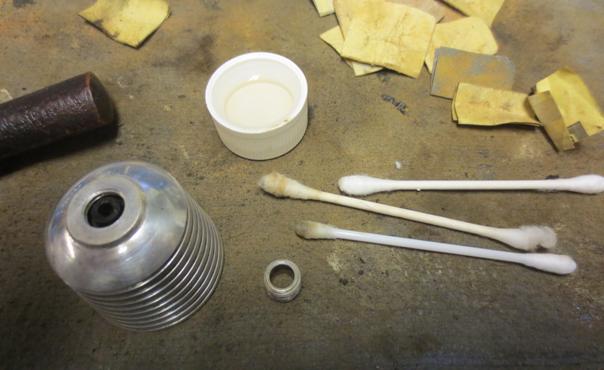
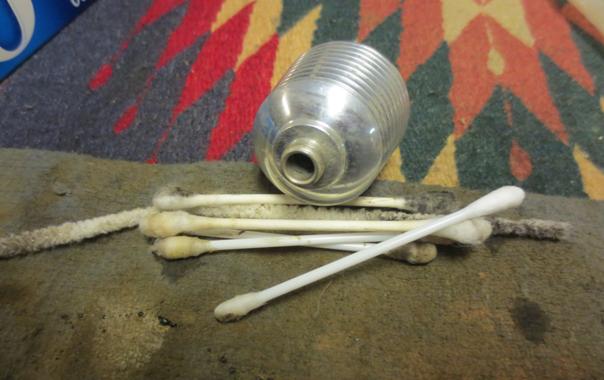
I scrubbed the inside of the mortise and airway with cotton swabs and alcohol and found that I removed more stain from the inside than tars. The inner tube had actually worked very well in keeping the bowl and shank clean.Alko9
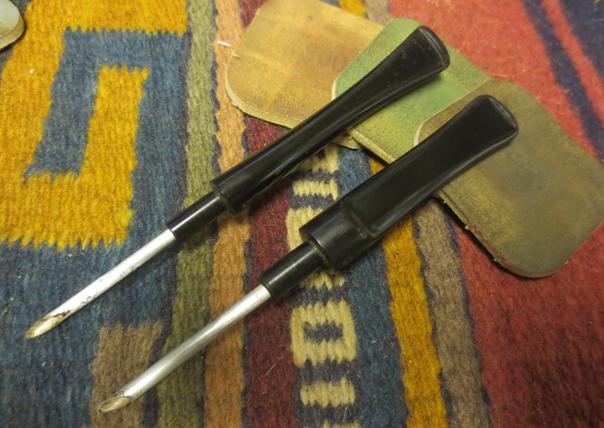
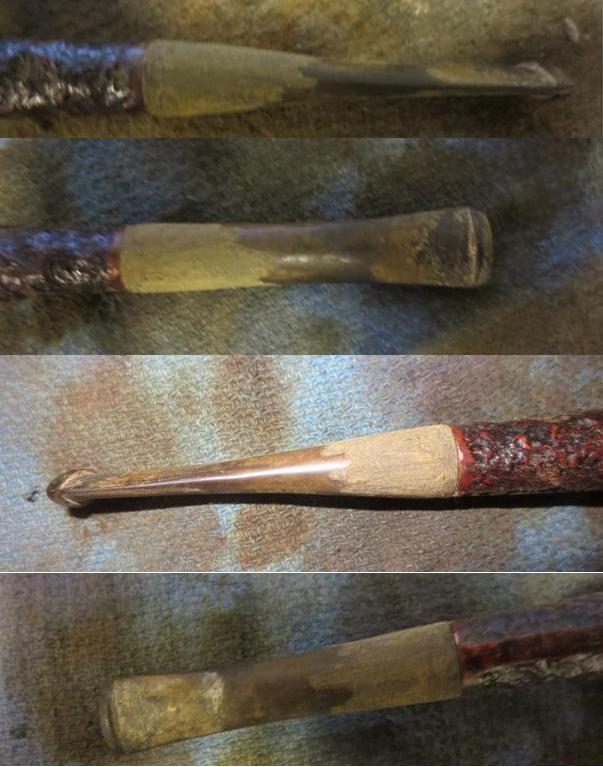
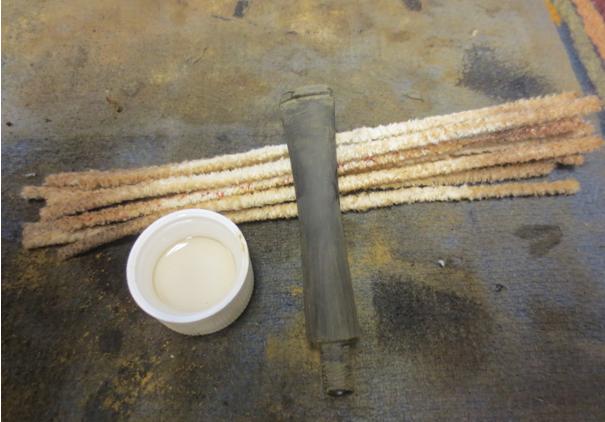
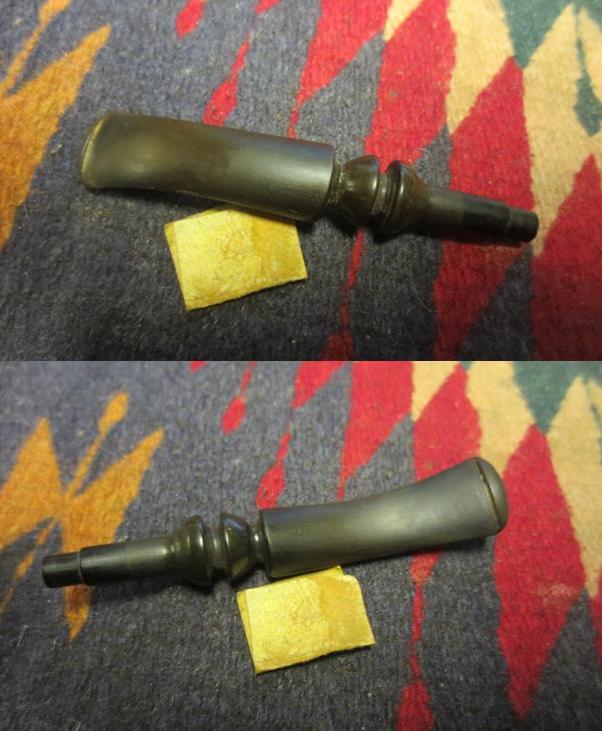
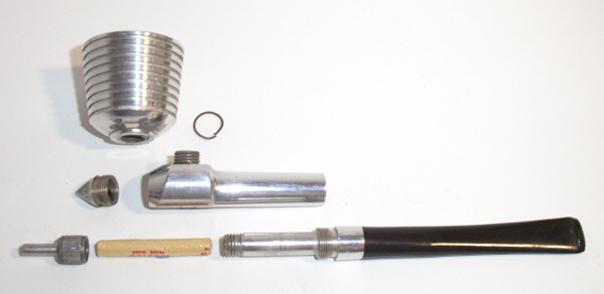
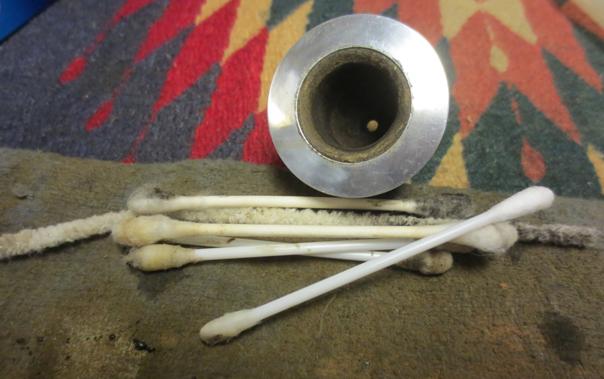
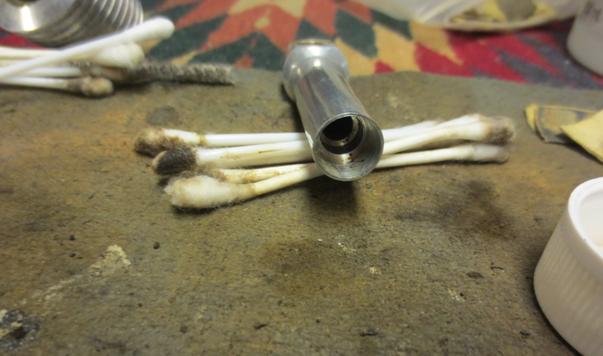
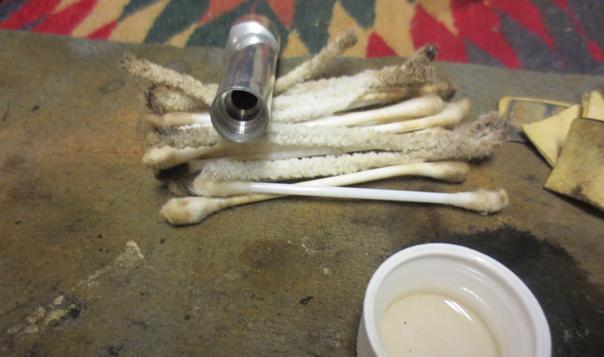
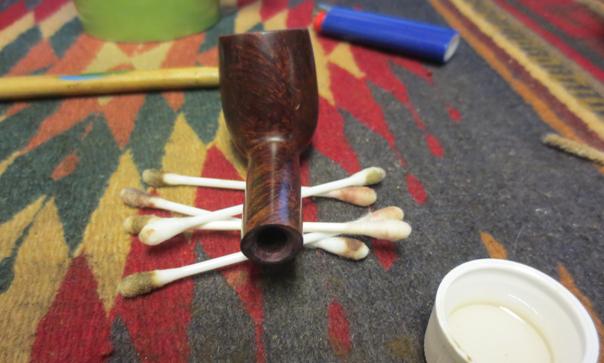
The stem was another story. The tars had accumulated quite thickly inside the inner tube and collected at the end of the tube just before the slot in the button. It took many pipe cleaners and much alcohol to get rid of the accumulated debris in the tube and slot.Alko10
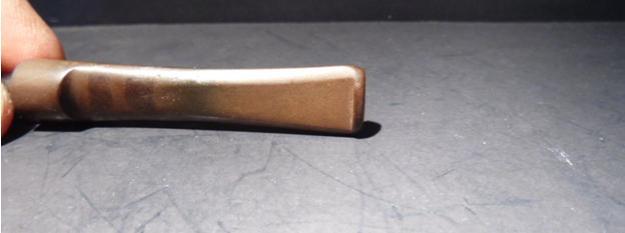
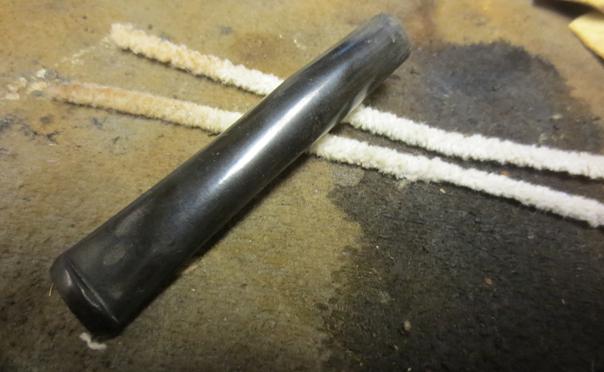
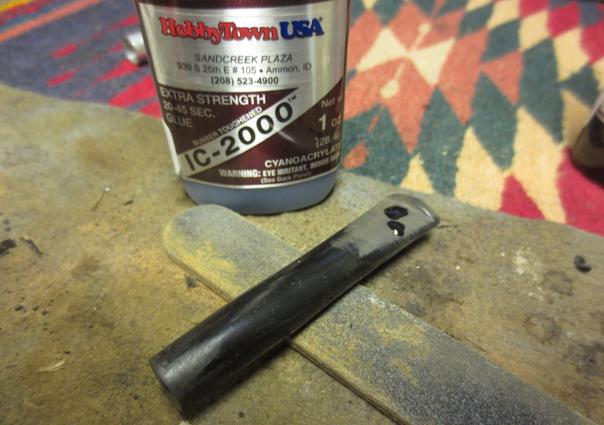
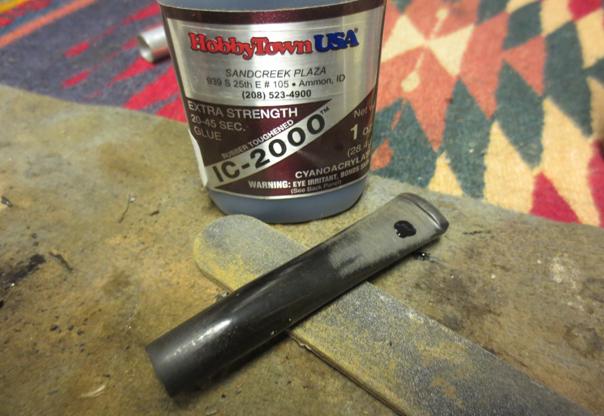
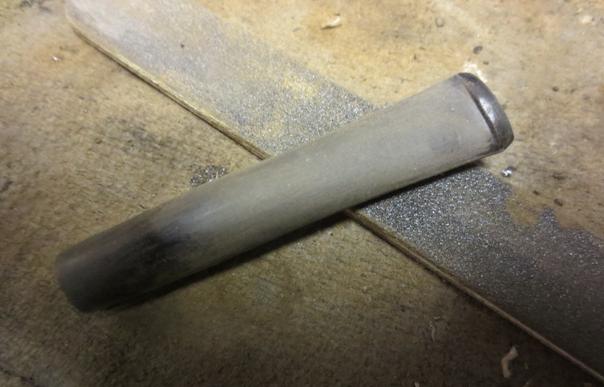
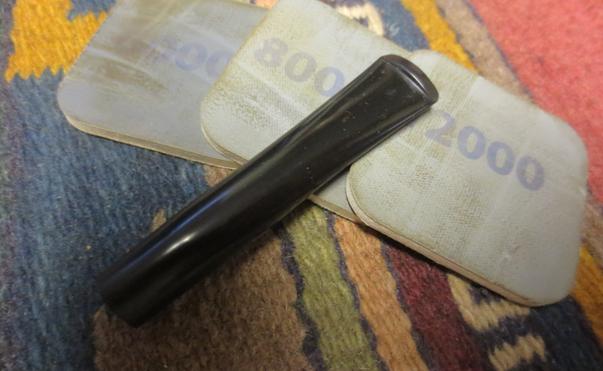
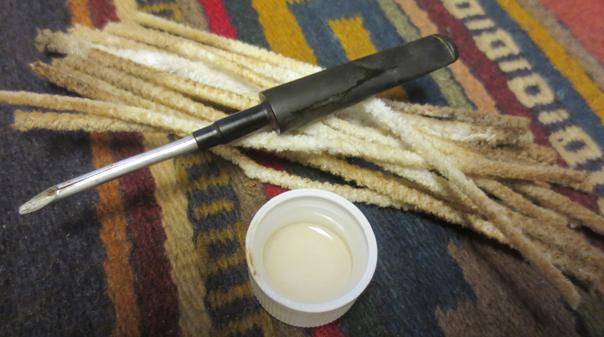
I sanded the tube with 0000 steel wool and then the stem with 220 grit sandpaper to remove the tooth chatter and the surface oxidation.Alko11
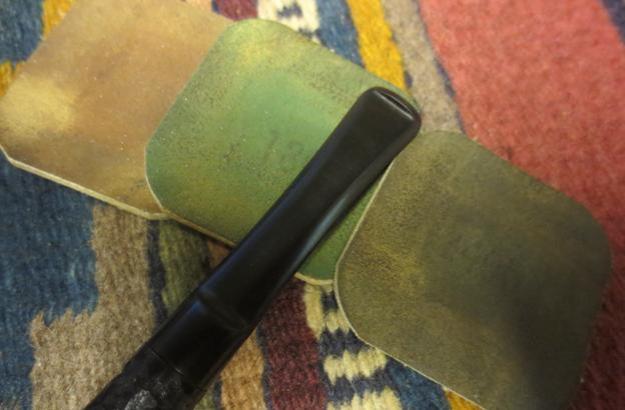
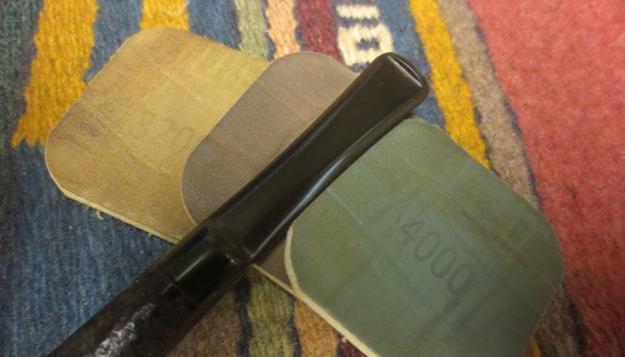
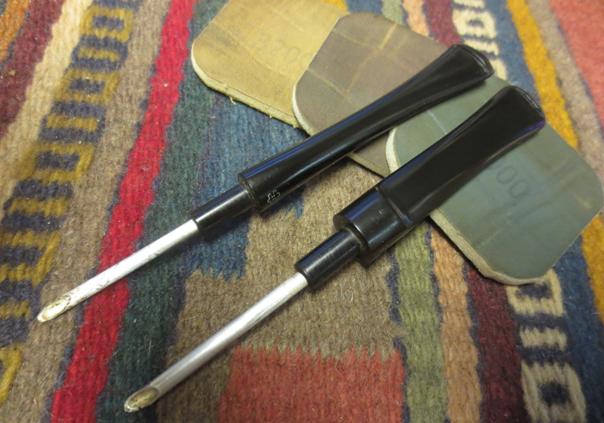
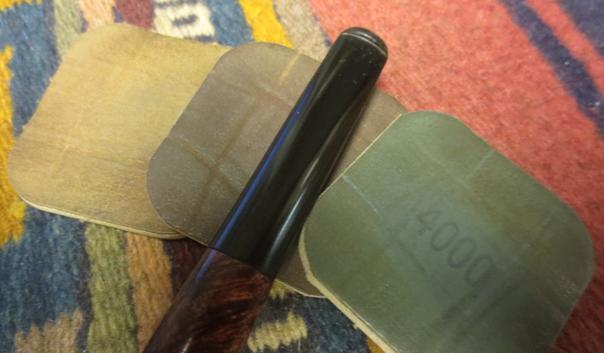
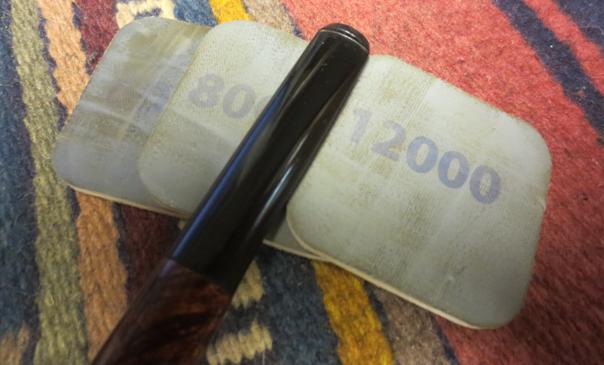
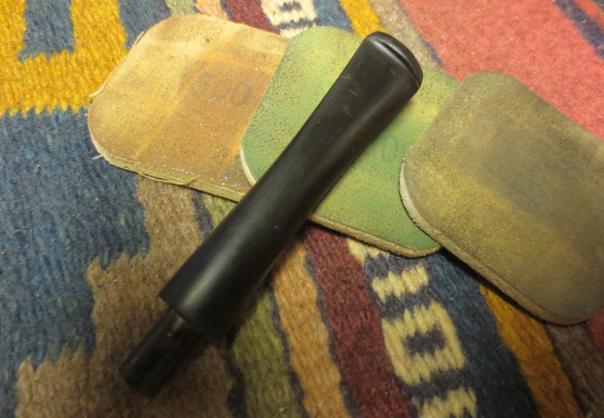
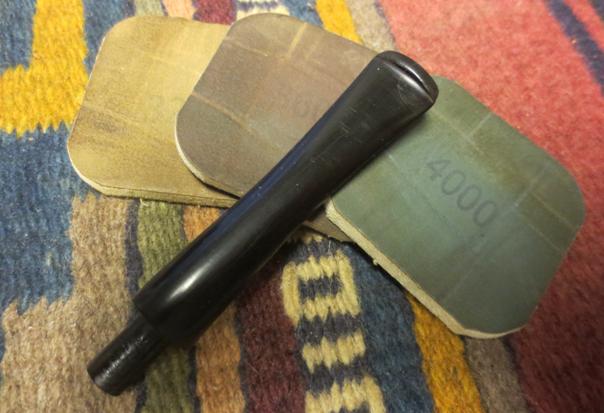
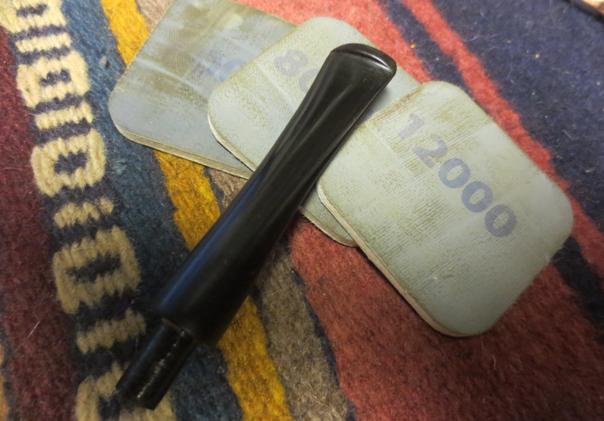
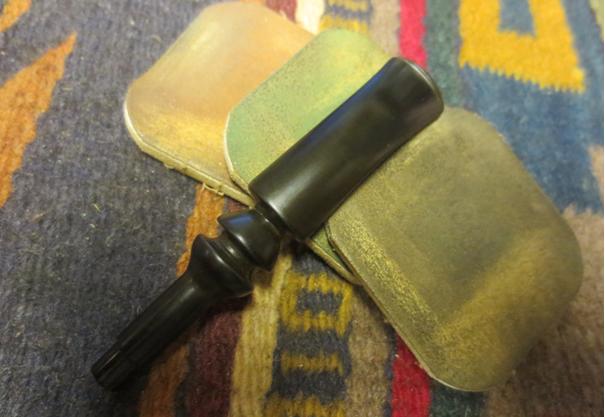
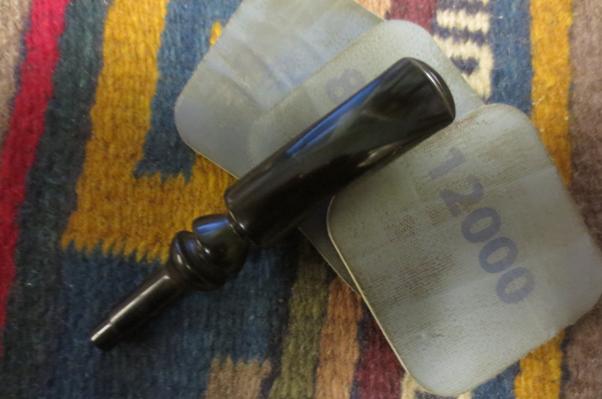
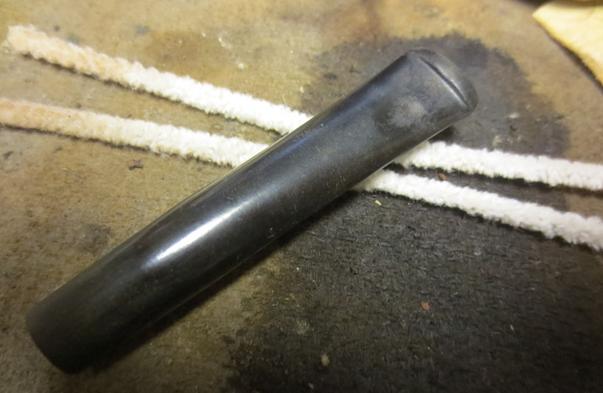
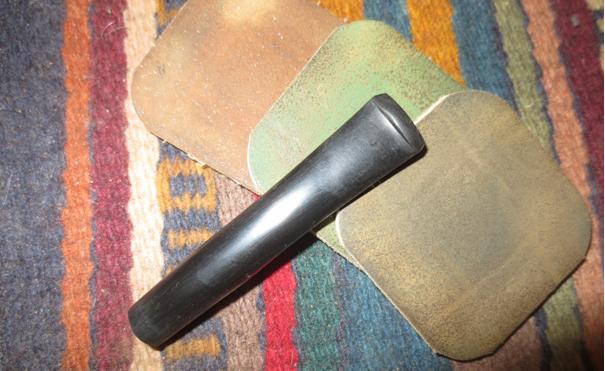
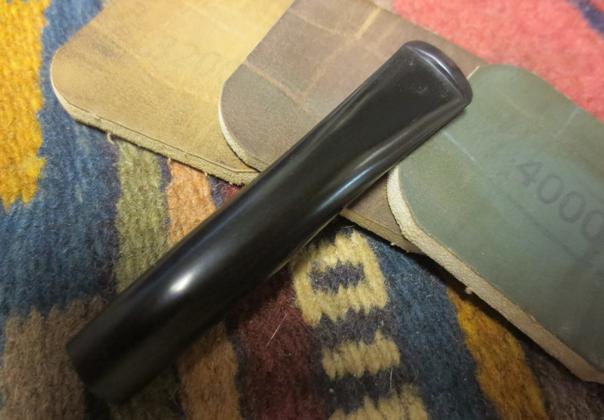
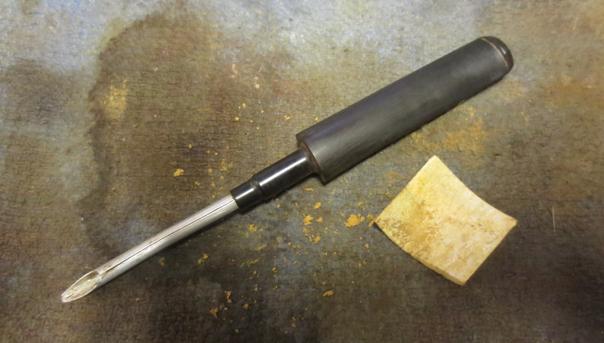
I wet sanded the stem with 1500-2400 grit micromesh sanding pads and gave the stem a coat of Obsidian Oil. I dry sanded it with 320-4000 grit pads and gave it another coat of oil. I finished sanding it with 6000-12000 grit pads and gave it a final coat of Obsidian Oil and set it aside to dry.Alko12 Alko13 Alko14
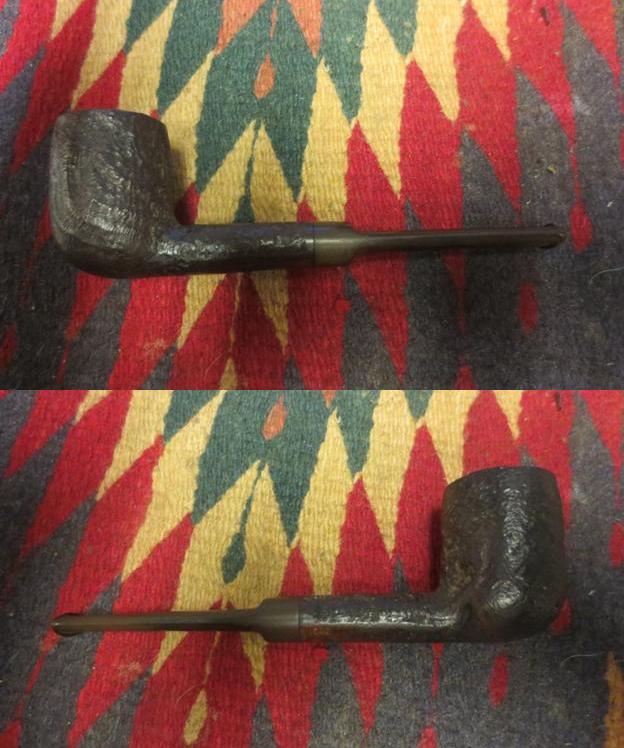
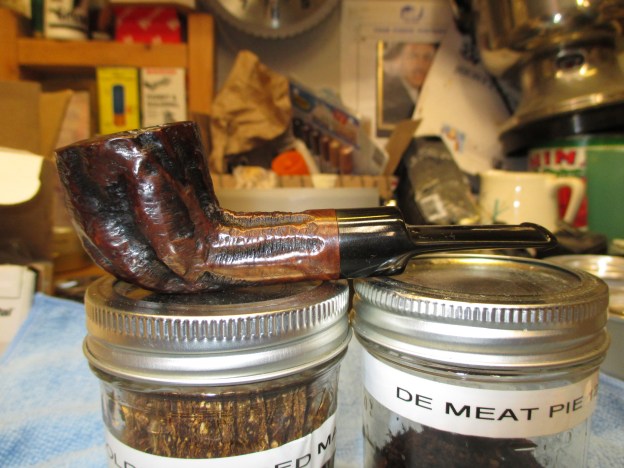
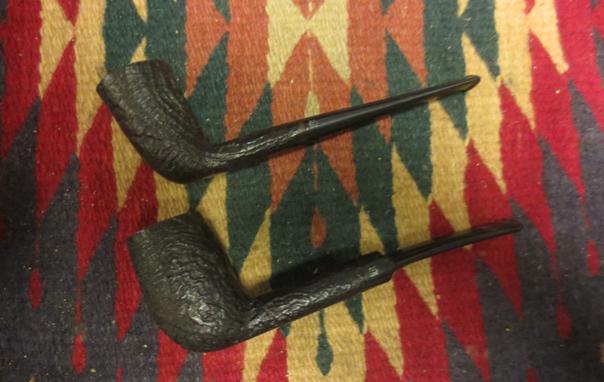
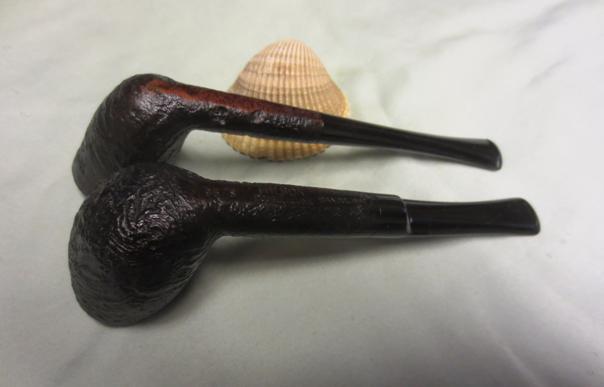
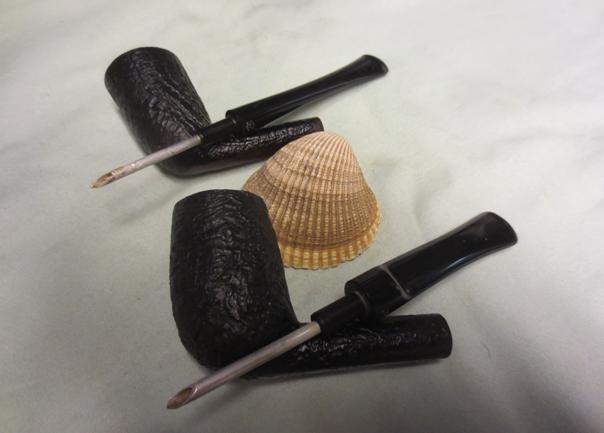
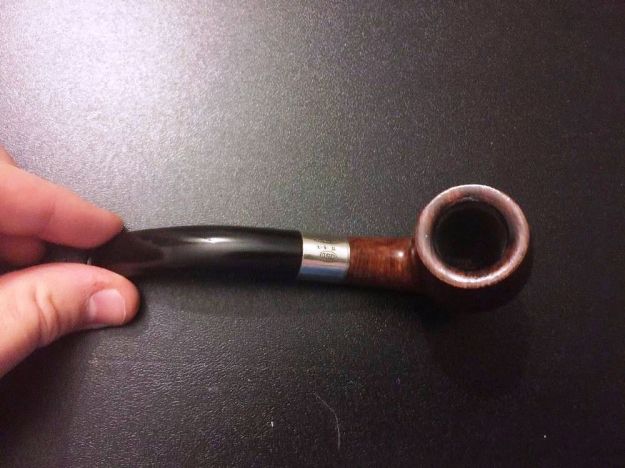
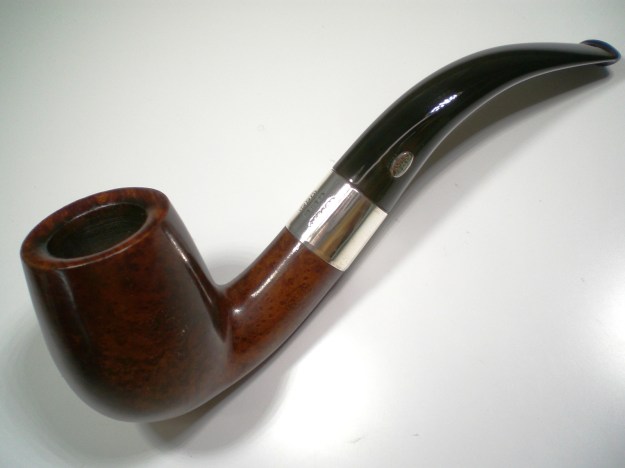
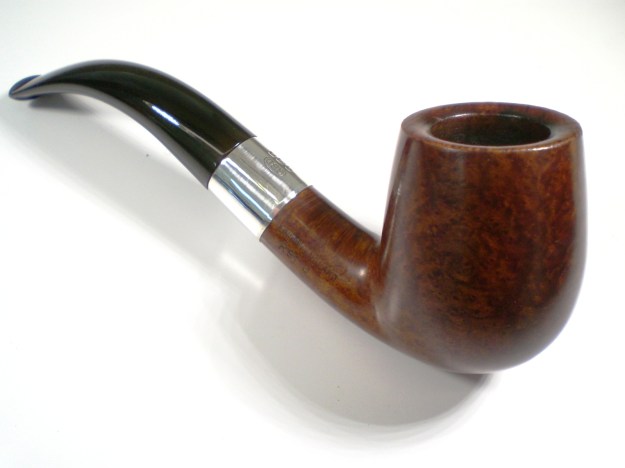
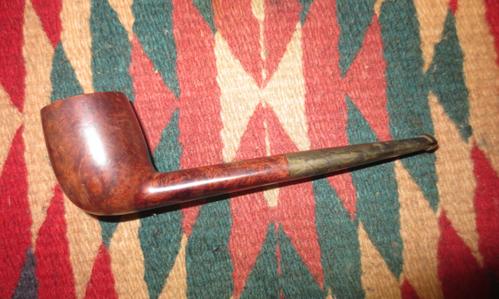
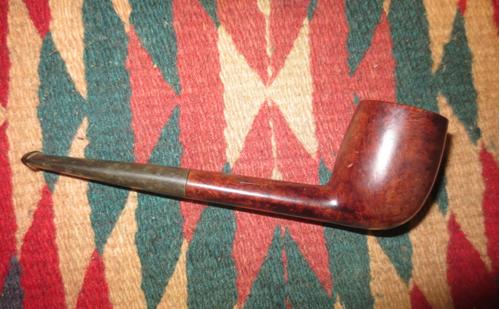
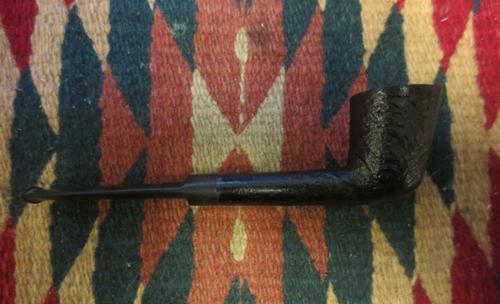
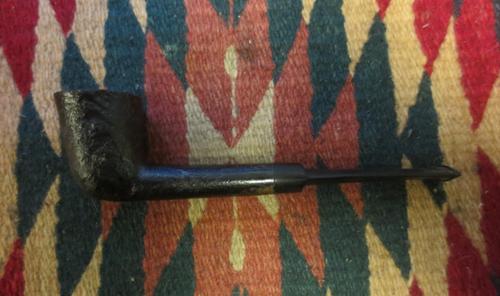
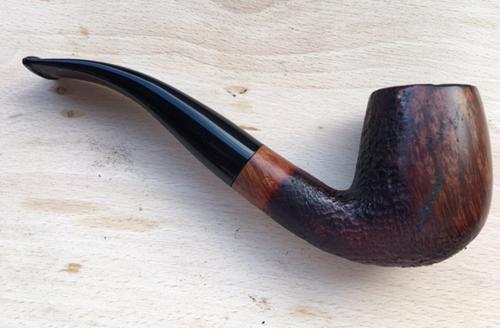
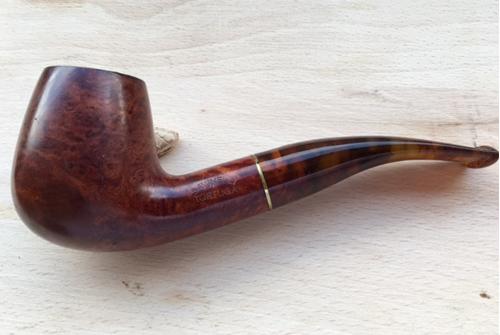
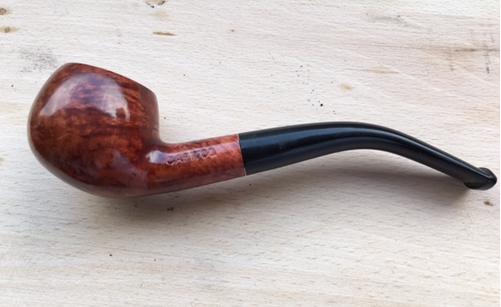
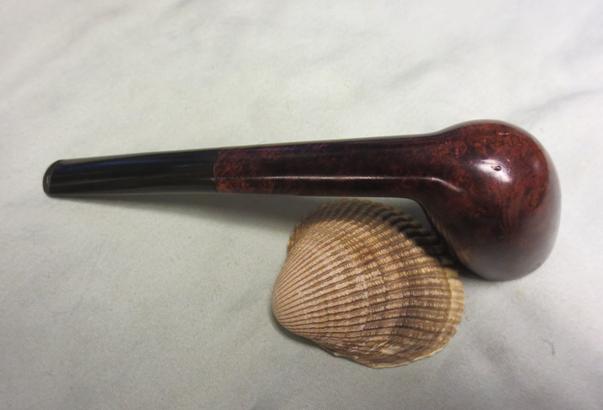
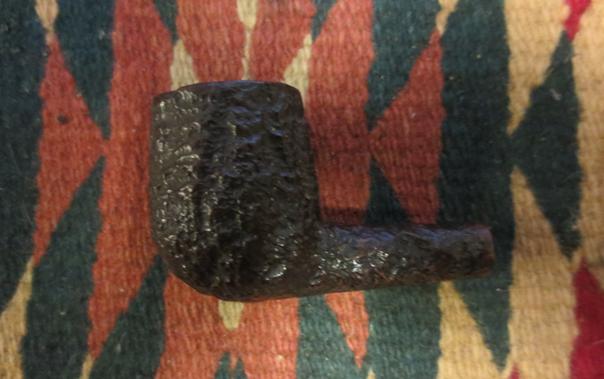
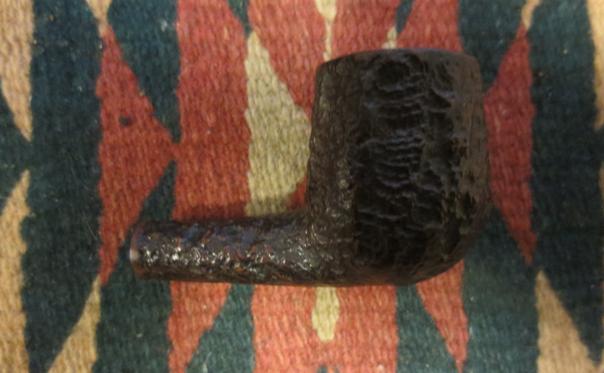
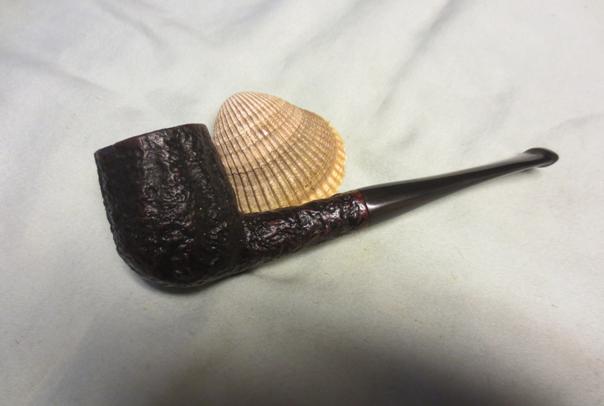
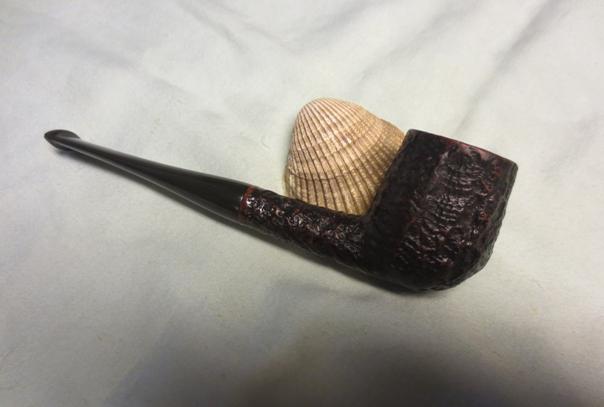
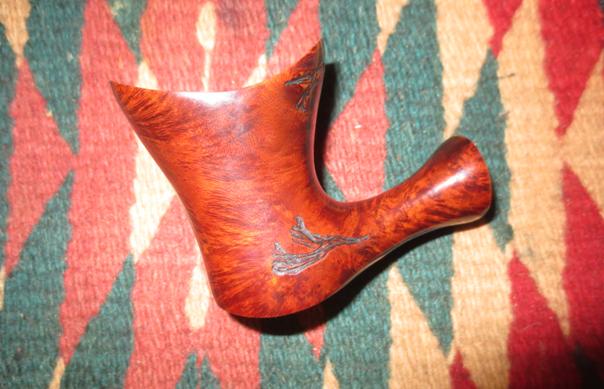
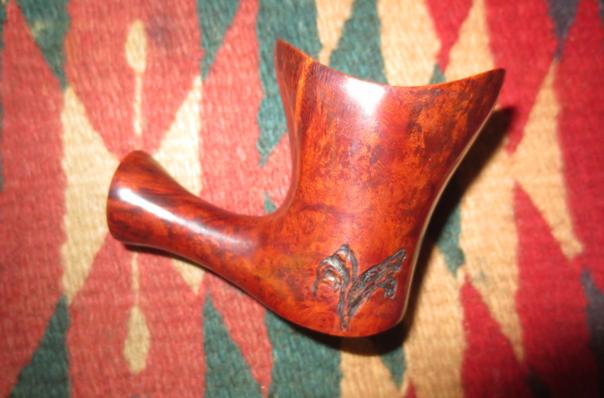
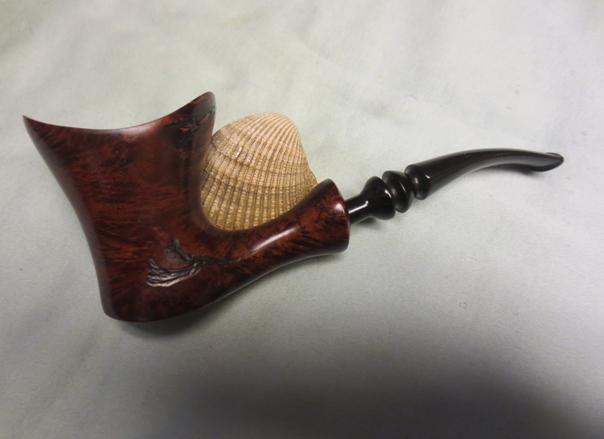
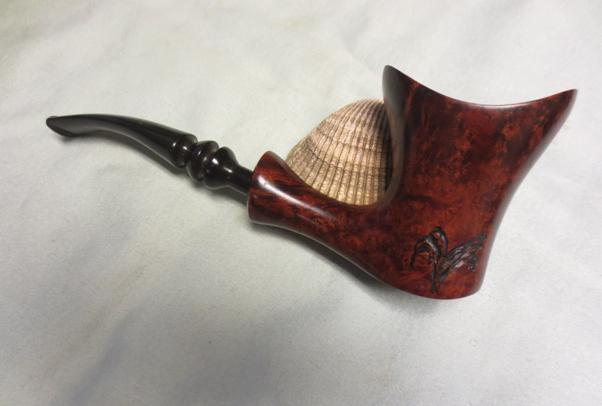
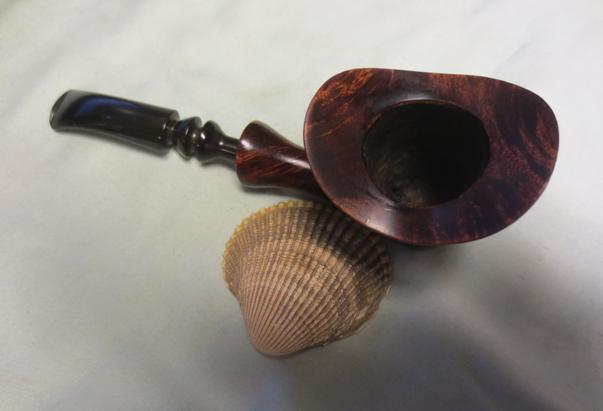
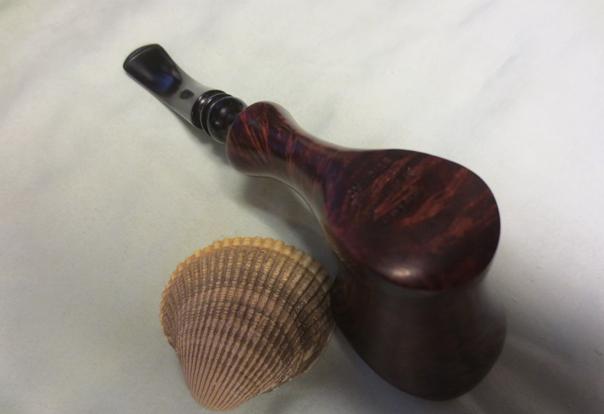
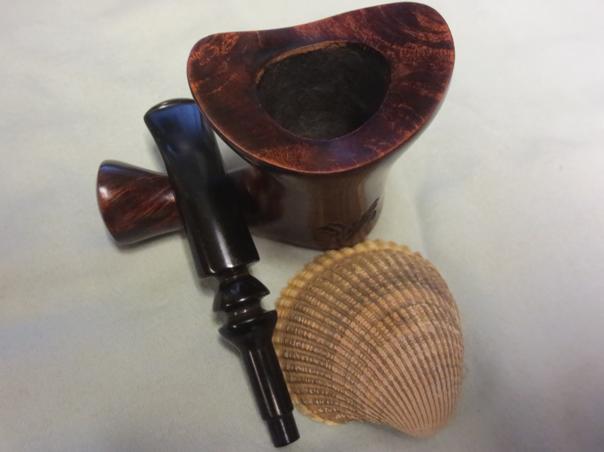
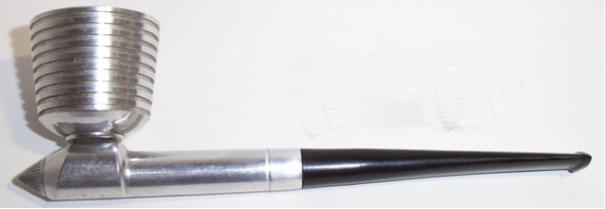
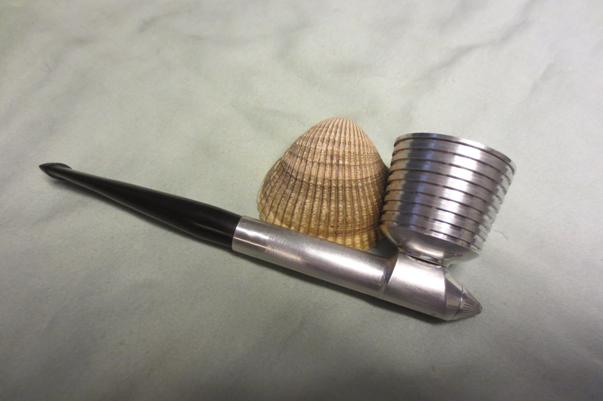
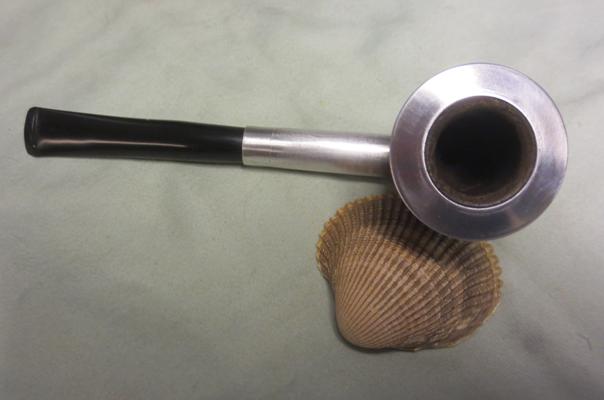
I sanded the entire bowl with 6000-12000 grit micromesh sanding pads and then buffed the bowl and stem with Blue Diamond. I gave the bowl and stem multiple coats of carnauba wax and buffed it with a clean buffing pad. I finished the buffing by hand with a microfibre cloth. The finished pipe is shown in the photos below. Can anyone help me with the ALKO brand? I am wondering if it is not an Eastern European brand. Thanks for looking.
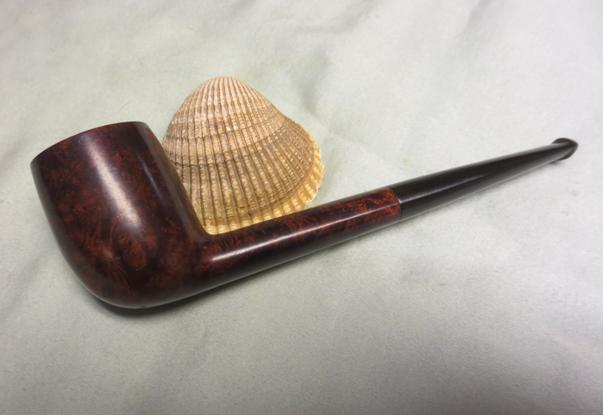
Alko15 Alko16 Alko17 Alko18 Alko19 Alko20 Alko21

Cleaning up my first Sofia find – A Shell Pipe 141


Blog by Steve Laug

After I had settled into my hotel in Sofia, Bulgaria on a recent trip Dal took me to one of his pipe hunting haunts – an outside antique market in the shadow of Sofia’s largest church building – Nevski Cathedral. We visited the same vendor where he had purchased the Dr. Plumb Oom Paul pipe that he restored and restemmed. He had a lot of pipes on his table for sale. I worked through them and purchased one – a bent billiard with a windcap. Then I went through a bag of bowls and stems that he had and chose the bowl shown in the photo below. The bowl was stamped Shell Pipe 141. The combination sandblast and rustication give the pipe a great look. The finish looked to be pretty decent under the grime that filled the nooks and crannies of the blast. The rim was filled in with tars and oils to the point that the rustication on the surface was invisible. There was a pretty thick uneven cake throughout the bowl. The shank was dirty and almost clogged with tars. There was no stem on the pipe but there was no crack in the shank and I was pretty certain that I had a stem that would fit it once I got home to Vancouver.Shell1 Shell2 Shell3 Shell4I went through my can of stems and found a stem that would fit with a bit of adjustment. I sanded the tenon in order to get a proper fit in the mortise of the bowl. The stem was slightly larger in diameter than the shank end and would need to be reduced to fit. The star on the stem would disappear once the stem was properly fit in the shank.Shell5 Shell6 Shell7 Shell8 Shell9I used the Dremel and sanding drum to reduce the diameter of the stem to match the shank. I sanded it with the stem in the pipe to make sure that I could match the stem and shank. I sanded it as close as possible with the Dremel and then worked on it by hand to get the lines of the fit correct.Shell10I sanded the stem with 220 grit sandpaper to remove the scratches left behind by the Dremel sanding drum and to fine tune the fit against the shank.Shell11 Shell12With the stem fit completed I turned to the bowl. I took a close-up photo of the bowl to show the build up on the rim and the state of the cake in the bowl.Shell13I reamed the bowl back to bare briar with a PipNet pipe reamer and finished cleaning it up with a Savinelli Pipe Knife.Shell14 Shell15 Shell16I scrubbed the sandblast/rusticated finish with Murphy’s Oil Soap and a tooth brush and worked on the rim with a wire brush.Shell17I rinsed the bowl with warm water under the tap (being careful to keep it out of the inside of the bowl). The cleaned briar is shown in the next series of photos.Shell18 Shell19I cleaned out the airway in the stem, mortise and airway in the bowl with pipe cleaners, cotton swabs and alcohol.Shell20 Shell21With the bowl cleanup finished and the internals on the stem down it was time to work on the finish of the stem. I wet sanded it with 1500-2400 micromesh sanding pads and gave it a coat of Obsidian Oil. I dry sanded it with 3200-4000 grit micromesh pads and gave it another coat of oil. I finished sanding it with 6000-12000 grit pads and gave it a final coat of Oil. I let it sit until the oil was dry.Shell22 Shell23 Shell24I buffed the bowl and stem with Blue Diamond on the wheel. I used a light touch on the bowl and a heavier touch on the stem as I did not want to get the polishing compound in the grooves and crevices of the blast. I gave the stem multiple coats of carnauba wax and buffed it with a clean buffing pad. I gave the bowl several coats of Conservator’s Wax and buffed it with a shoe brush. I hand buffed the finished pipe with a microfibre cloth. The finished pipe is shown below. I am pleased with the outcome. The bowl from Sofia, Bulgaria and the new stem from Canada work well together. Thanks for looking.Shell25 Shell26 Shell27 Shell28 Shell29 Shell30 Shell31

Finally a Simple Clean up – A Champ Freehand


Blog by Steve Laug

This beautifully grained freehand is stamped on the heel of the bowl CHAMP of Denmark over Larsen & Stigart. The pipe was in pretty good shape with the finish intact and just dirty. The grain on the bowl is quite nice and there are some unique swirled carvings in the briar on the right and left side of the bowl near the bottom. There is also one swirl at the top edge of the back of the bowl. These in no way detract from the beauty of the briar but actually follow the flow of the grain and add a unique touch to the bowl. The rim of the bowl was dirty with an overflow of lava on the top surface. The inner and out edges of the rim were in great shape and showed no damage. The bowl itself had a thin cake that was uneven throughout the bowl. The stem was oxidized and had some tooth chatter on the top and bottom sides near the button. There were no deep tooth marks just a light chatter.Free2 Free3 Free4I took a close-up photo of the stamping on the bottom of the bowl and of the cake in the bowl and the tar on the bowl rim.Free5 Free6In the back of my mind I had a vague memory of the CHAMP brand. I could not dig out the details but I knew that it was not a carver but rather some kind of distributor. I turned to Pipedia and to Pipephil’s site to do a bit of research on the brand. I found the information that was niggling at my memory. Champ of Denmark pipes were made for and distributed by Larsen & Stigart, a famous tobacconist in Copenhagen that is now closed. The warehouse had a workshop where several pipe carvers stayed. Two of the more famous of those carvers were Karl Erik Ottendahl and Soren Eric Andersen. They supplied some fancy Danish Pipes to Dunhill in London. I have included the two links to the material I found below. https://pipedia.org/wiki/Champ_of_Denmark ; http://www.pipephil.eu/logos/en/logo-c4.html

I started the clean up on the Champ by working on the rim of the pipe. I scrubbed the rim with saliva on cotton pads to remove the tars. I scraped it with a pen knife that I used for this kind of work and rescrubbed it. The oils and tars came off with little work. There was still work to do but the majority of the buildup was gone. I reamed the bowl with a Savinelli Pipe Knife to remove the crumbling cake.Free7 Free8 Free9I scrubbed the rim harder with saliva and cotton pads and then wet sanded it with 1500-2400 grit sanding pads and was able to finish removing the last of the oils and tars.Free10I buffed the bowl with carnauba wax and then with a clean flannel buffing pad. The buffed and shined bowl is shown in the photos below.Free11 Free12 Free13 Free14I scrubbed out the interior of the shank and the airway in the stem with alcohol, pipe cleaners and cotton swabs. It did not take too much work to clean out the insides of the pipe.Free15I sanded the stem with 220 grit sandpaper to remove the oxidation and tooth chatter. I wet sanded the stem with 1500-2400 grit micromesh sanding pads. I rubbed it down with Obsidian Oil. I dry sanded it with 3200-4000 grit pads and gave it another coat of oil. I finished sanding it with 6000-12000 grit pads and gave it a final coat of Obsidian Oil. I let the oil dry.Free16 Free17 Free18 Free19I buffed the bowl and stem with Blue Diamond on the wheel and then gave both multiple coats of carnauba wax. I buffed it with a clean buffing pad to raise the shine on the pipe. I hand buffed it with a microfibre cloth to deepen the shine. The finished pipe is shown in the photos below. It is a beautiful pipe and I am glad that I finally had one that was easy to clean up. This one will be up on the rebornpipes store shortly. If you are interested let me know. Thanks for looking.Free20 Free21 Free22 Free23 Free24 Free25 Free26 Free27

Common Pipe Problems: Gagging the Gurgle


Charles writes in his inimitable way about an issue that plagues a lot of pipe smokers. Well done Charles. I laughed a lot as I enjoyed this piece.

Charles Lemon's avatar

Gurgles can be good. The burbling of a mountain brook is a pleasant, peaceful sound. Listening to the water splashing over rocks while lounging in the spreading shade of a willow on a sunny summer day can be positively therapeutic. Gurgles can be fun. Witness the sheer joy of children as they frolic in the playful spray of a splash park. Gurgles can even be art as people more clever than I channel water into high-arcing fountain displays in public squares around the world.

pipe-gurgle

But gurgles can be considerably less pleasure-inducing when they come from your pipe during a much-anticipated moment of rest at the end of a busy day. So why do pipes gurgle and how can we fix it? It all boils down to two simple factors: condensation and construction.

Let’s deal with condensation first. Condensation is water, and there is water in all tobacco. In fact…

View original post 835 more words

Breathing New Life into a Design by Curtis Metal Pipe


Blog by Steve Laug

This smoking metal pipe is really Art Deco looking. It has a metal finned bowl with a pressure fit top cap holding in a briar bowl. There is a threaded connector between the bowl and the metal shank base. The connector threads into both the bowl and the shank. The shank has a pointed end cap that is frozen in place. The bowl was caked and worn. The stem had bite marks on both the top and the bottom sides near the button. The stem is a military mount that sits in a stepped down interior of the metal shank. There is a tube at the end of the airway in the shank that seems to have holes in it as the air flows through when blown into the end. The exterior of the pipe is oxidized and dull. The bottom of the shank is stamped Design by Curtis over Pat. Pend. It is a brand about which I know nothing.Curtis1 Curtis2 Curtis3 Curtis4I took some close-up photos of the bowl and the stamping on the shank to give a better idea of what the pipe looked like when I started.Curtis5 Curtis6I took the pipe apart to have a look at the pieces individually and see what I could learn from the way it fit together. I was unable to take the end cap off the shank and I was not willing to damage the cone shaped piece to work it free.Curtis7 Curtis8 Curtis9I wanted to learn more about the pipe so I did a bit of digging on the Smoking Metal Pipes Site and found this information and pictures (http://www.smokingmetal.co.uk/pipe.php?page=52 ). The site showed a picture of another version of the pipe. It may be newer than the one that I had in hand. It was marked as a Curtis Custom-Built Pipe Model 100. It was manufactured by Curtis Industries of 1120 East 222nd Street, Cleveland, Ohio. They were first seen around 1946. The pipe that was pictured was different in several ways. The stem was different in that it had a filter insert and a threaded tenon. My version did not have a filter system and also did not have the stinger end cap that held the filter in place. The pictures that follow come from that site. I have cropped and rearranged them to better suit the order of my blog. The brochure also comes from that site.Curtis9a Curtis9bFrom the Smoking Metal Site it appears that the patent was applied for 25 December 1945. It had the patent number #D143257 and the inventor is named as Howard Abrams from University Heights, Ohio. The site also showed a cut away photo of the bowl and cup.Curtis10It also includes a copy of the brochure that was included with the pipe. The cover of the brochure reads The Curtis Custom-Built Pipe and three descriptors – Streamlined, Precision Built, Guaranteed. The back reads The Curtis Pipe carries a six month guarantee. The rest reads No. 52927 over Curtis Industries 1120 East 222nd St. Cleveland, Ohio over Model 100 Patent Pending.Curtis11Inside it reads A few simple ways to care for your Curtis Pipe. I typed out the contents below the picture.Curtis121. Break your pipe in slowly. For the first few smokes fill the pipe loosely and only half way then smoke the new Curtis Pipe slowly and all the way down. Don’t puff hard or fast or you may burn your tongue and may burn out the bowl as well.

2. Don’t collect too much cake, a cracked, burnt and useless bowl will result.

3. Never knock your pipe on hard surfaces since you may split the shank or break the bit. Don’t bite on the bit too hard.

4. Keep your pipe clean. Use your cleaner every few smokes and occasionally use a good fluid to cleanse it.

5. By removing the knurled cap on the pipe stem, a standard pipe filter can be used.

The Curtis Pipe, new in design is produced with a high degree of precision, designed for a cool, clean smoke. Enjoy the full smoking benefits of the pipe by following above suggestions.

Armed with this information I took the pipe apart and began to clean and restore it. I reamed the bowl with the Savinelli Pipe Knife to remove the cake and clean up the briar rim of the bowl insert.Curtis13 Curtis14I unscrewed the bowl and the threaded connector from the bottom of the bowl. I cleaned out the connector and the airway in the bowl with alcohol, pipe cleaners and cotton swabs.Curtis15 Curtis16I scrubbed the rim and the interior of the bowl with cotton swabs and alcohol to clean out the remaining debris in the bowl and on the rim.Curtis17I scrubbed out the mortise and airway with alcohol, pipe cleaners and cotton swabs to remove the tars and residue.Curtis18 Curtis19I heated the end cap and still could not remove it so I cleaned out the inside of the airway from the top of the shank with pipe cleaners, cotton swabs and alcohol. It was a bit of a pain to work around the tube in the shank below but I was able to remove the grime and build up in that place.Curtis20I set the shank aside and worked on the stem. I cleaned it out with alcohol. There were two deep tooth marks on top and the underside of the stem. Curtis21 Curtis22I wiped the stem surface down and filled in the dents with black super glue. I sprayed the glue with the accelerator and then sanded the repairs down with 220 grit sandpaper and a medium grit sanding stick until they matched the surface of the stem.Curtis23 Curtis24 Curtis25I wet sanded the stem with 1500-2400 grit micromesh sanding pads and rubbed it down with Obsidian Oil. I dry sanded with 3200-4000 grit pads and gave it another coat of oil. I finished sanding it with 6000-12000 grit pads and gave it a final coat of oil. I let the oil dry.Curtis26 Curtis27 Curtis28I dry sanded the aluminum barrel shank and the rim of the bowl with 4000-12000 grit micromesh pads. I buffed the stem with Blue Diamond and then buffed it with a clean flannel buffing pad. The finished pipe is shown in the photos below. It is a beautiful example of the Curtis pipe and the finished pipe is a great addition to my metal collection. Thanks for looking.Curtis29 Curtis30 Curtis31 Curtis32 Curtis33 Curtis34 Curtis35 Curtis36

ADDENDUM

I received and email from one of the blog’s readers, Doug with some photos of the break down of the bowl system. It looks like the rim top is indeed pressure fit. Thanks for providing these photos Doug. They certainly add to our understanding of the way the bowl was designed. thumbnail_20160709_144214-1_resized[1] thumbnail_20160709_144222-1_resized[1] thumbnail_20160709_144234-1_resized[1] thumbnail_20160709_144253-1_resized[1] thumbnail_20160709_144305-1_resized[1]


A Simple Cleanup – NOS Simpsons Scotland Billiard 382


Blog by Steve Laug

A pipe my brother picked up quite awhile ago on Ebay was a nice vintage Simpsons 382. The seller said that they thought it had been lightly smoked. From the photos that were included in the sale I can see why they thought the pipe was smoked. It looked rough. The finish was dirty with dirt in grooves of the sandblast. There are parts of the blast that are deep and those had dust and grime in them. The rim appeared to be flawless and clean the inner and outer edges are undamaged. The dimensions of this petite pipe were given and it appeared to be proportional and attractive. The bowl is 1 5/8″ tall and measures about 1 1/8″ across the top. The chamber is ¾”. The length is 5 ½”. The saddle stem has some oxidation and scratches from sitting around and never being used. It has a faintly stamped and peeling M on top of the stem but I have no idea what that refers to. The pipe is marked as follows “Simpsons Scotland 382 “. The seller said that from their research that the 382 is a Comoy’s shape number. The photos below are the ones included in the advert on Ebay.Simpson1 Simpson2 Simpson3 Simpson4When the pipe arrived it was actually in much better condition than the photos portrayed it. The finish was dirty but it was also a dark brown with light undertones coming through. The stem was oxidized but there were no tooth marks or chatter. The pipe looked like it had been sitting a very long time in a cupboard or on a shelf and the dust had settled into the crevices and the sunlight had done its work on vulcanite but it indeed was unsmoked. In my opinion it is New Old Stock or NOS. The bowl has a carbon bowl coating but the airway is absolutely clean. There is no debris or tar in it. All those things combined make think that it has never been smoked. I took a few photos of the pipe when I brought it to the work table. I was due for one that was an easy clean up and this looked like it might be the one.Simpson5 Simpson6I took a close-up photo of the rim and bowl to give you a look at what I see. The carbon coating in the bowl is untouched by fire. The rim is flawless.Simpson7I also took a close-up of the stamping on the underside of the shank. It read SIMPSONS over SCOTLAND and below Scotland and to the right (almost on the side of the shank) was the number stamp 382.Simpson8With the interior pretty clean I decided to run a couple of pipe cleaners through the mortise, airway and into the bowl and the airway in the stem. The only thing that came out was the carcass of a small bug that fell out of the stem ahead of the pipe cleaner.Simpson9 Simpson10I scrubbed the exterior of the pipe with Murphy’s Oil Soap and a tooth brush to remove the dust and grime in the crevices and grooves of the bowl. I rinsed it off with warm water and dried off the bowl with a soft cloth. I hand buffed the bowl with a shoe brush and you can see the state of the cleaned bowl – it has a deep shine.Simpson11I sanded the stem with 220-600 grit sandpaper to break up the oxidation. In the process of cleaning it the M decal came off and the stem was unmarked. I decided not to worry about it as it was not clear what it meant anyway. I wet sanded it with 1500-2400 grit micromesh sanding pads and then buffed it with red Tripoli. I rubbed it down with Obsidian Oil and then dry sanded it with 3200-4000 grit micromesh pads. I gave it another coat of oil. I finished sanding it with 6000-12000 grit pads and gave it a final coat of oil. I let it dry.Simpson12 Simpson13 Simpson14I buffed the stem with Blue Diamond on the buffing wheel and gave it several coats of carnauba wax. I gave the bowl several coats of Conservator’s Wax and hand buffed it with a shoe brush. I buffed the bowl and stem with a clean flannel buffing pad and then with a microfibre cloth to raise the shine. The finished pipe is shown in the photos below. It is a beauty. Thanks for looking.Simpson15 Simpson16 Simpson17 Simpson18 Simpson19 Simpson20 Simpson21

Custombilt Refresh


Al does a great job on this Custombilt. I appreciate his attention to detail and his great write up of this restoration. I wanted to pass it on to all of the readers of rebornpipes. Thanks Al for a great job.

pipedreamersite's avatarPipeDreamer

blog by Al Loria

I came across this pipe a few months ago in a lot buy with another pipe which the seller thought was unmarked because of prior wear and polishing. But, with a loop and bright light I could see it was Mincer era Custom-Bilt. Score one for me!

This is one of the odder Custombilts I’ve come across. The nomenclature is different than any other I’ve seen. It is the old script logo, but does not have the dash between Custom and Bilt, and only the C in Custombilt is capitalized. There is a square stamped on one side of the stummel, which I have seen before, and imported briar on the bottom. It is a short, saddle-bit billiard with a slightly canted bowl.

The overall condition was good. No major dings, little tar on the rim, the chamber was in very good shape and solid. There…

View original post 680 more words

Restoring my Paris Finds – A Pair of Hilson Double Ecume Sandblast Pipes


Blog by Steve Laug

As I wrote earlier in another blog, I found these two pipes on an evening walk to dinner in the Latin Quarter of Paris (https://rebornpipes.com/2016/06/10/some-good-pipe-finds-on-a-recent-work-trip-to-europe/). The pair of Hilson pipes was stamped in block letters Hilson over Double Ecume with the word Sandblast following. The delicate canted Dublin was stamped with the shape number 5 just before the stem shank union, while the stack with the saddle stem was stamped with the shape number 95/S on the bottom of the bowl. The finish on both pipes was dirty and worn but not ruined. The bowls were meerlined and the top of the Dublin had a heavy build up of tars and cake that overflowed the bowl. The stack/billiard was less dirty but the cake overflowed onto the rim as well. The meer lining was darkened. The bowl in the Dublin had a thick cake that extended to the bottom of the bowl and reduced the size of the already petite bowl. The bowl on the stack was less thick but it nonetheless reduced the diameter of the bowl as well. The stems on both pipes had some tooth chatter and light oxidation but would easily clean up. Both stems bore a stylized capital H on the left side. As I looked at them I was glad I had picked them up for small sum of 10 Euros or slightly over 14 dollars Canadian. Hilson1 Hilson2 Hilson3 Hilson4

I remember when I purchased them I took them back to the hotel in Paris and used a wooden coffee stirrer to scrape away some of the cake and debris in the bowls to check the meerlinings. I was hoping that they were intact all the way to the bottom of the bowl. I breathed a sigh of relief when I found that they were uncracked as far as I could see.

I was curious as to the stamping on the pipes. I have cleaned and restored quite a few Hilson pipes over the years – many of them meerschaum lined – and I do not recall seeing the Double Ecume stamping before. First I wanted to know what the name Ecume meant so I looked it up in a French/English dictionary and found that it meant Foam. Thus the pipe name was Hilson Double Foam. I liked the French far better! It sounded more elegant. I used Google and found out that the pipes were made when Hilson was still a Belgian Company. This dates them as pre 1980 as the company was then purchased by Gubbels in Holland. I checked on Pipedia and found an advertisement for Hilson Elan pipes. The sandblast looks like the one on my Ecume pipes. The interesting thing that came from this Wally Frank Catalogue advertisement was the description of the tube in the shank. It is described as Hilson’s special tubular dry smoking condenser. You can see a line drawing of that in the photo below marked as FIG. A (circled in red in the photo below).Hilson5From that link I checked out Chris Keene’s Pipe pages site for more information and found the following catalogue page. http://pipepages.com/2wf14.htm. Even thought the advertising page is for Hilson Fantasia Pipes it confirmed several facts for me that I had not previously known. First was that the meerschaum lined bowl was cut from block meerschaum and not a pressed meerschaum. That is probably why it had survived intact through the years. Second, that all Hilson Belgian pipes had the condenser tube in the shank. I also found a page from an Iwan Ries Catalogue from 1962 that showed meerschaum lined briar pipes. Sadly I could not view the page as the link was not functional.Hilson6I carefully reamed out the cake in both pipes with the Savinelli Pipe Knife to take it back to the meerschaum lining. I did not want to gouge or chip the meerlining so I proceeded with caution. I sanded the interior of the bowl with a piece of 229 grit sandpaper around the cutting head of the PipeNet pipe reaming tool to take out all of the cake in the bowls.Hilson7 Hilson8Once I cleaned the bowls I decided to top the two pipes to remove the build up on the rim surfaces. Since both pipes appeared to have smooth rims topping them would not damage the original look of the pipe and would allow me to smooth out the top of the meerschaum bowl insert. I topped both bowls on 220 grit sandpaper on the topping board.Hilson9When I finished topping them the meerschaum was clean the surface of the rim was smooth.Hilson10I sanded the rims with 1500-2400 grit micromesh sanding pads to remove the scratches left behind by topping the bowls. The polished rims looked really smooth and ready to be stained. I stained the rim of the briar outer bowl with a dark brown stain pen and a Sharpie black permanent marking pen to get the dark brown colour of the bowl.Hilson11I scrubbed out the inside of the stem and the shank of the pipes with alcohol, pipe cleaners and cotton swabs. There was a lot of grime in both pipes. The condenser tubes on both were coated with tars and oils that I removed with 0000 steel wool. I had to reshape the open end of the tube in the Dublin stem as someone had tried to remove it with pliers. It was crushed and there were some marks from the jaws of the pliers. I reshaped it with an ice pick inserted and heated the tube with a lighter. I was able to bring it back to round. I was also able with the heating to remove both tube inserts and clean the stems before putting them back in place. I scrubbed the briar with a tooth brush and Murphy’s Oil Soap and rinsed them with tap water. I dried them off and both bowls were clean.Hilson12I sanded the tooth marks and chatter on the stems with 220 and 380 grit sandpaper and a medium grit sanding stick. I was able to remove all of the marks.Hilson13 Hilson14I wet sanded the stems with 1500-2400 grit micromesh sanding pads and rubbed them down with Obsidian Oil. I dry sanded the stems with 3200-4000 grit pads and gave them another coat of oil. I finished sanding them with 6000-12000 grit pads and gave them a final coat of Obsidian Oil and let them dry.Hilson15 Hilson16 Hilson17I buffed the stems with Blue Diamond on the wheel and gave them both multiple coats of carnauba wax. I hand waxed the bowls with Conservator’s Wax and a shoe brush. I hand buffed both the bowls and stems with a microfibre cloth to add depth to the shine. The finished pair of Hilsons is shown in the photos below. They are a beautiful set of pipes and serve as a reminder of my recent Paris trip. Thanks for looking.Hilson18 Hilson19 Hilson20 Hilson21 Hilson22 Hilson23

1937 GBD Bent Billiard


By Al Jones

I’m always on the lookout for unique GBD brand pipes and silver hallmarked pipes of that brand are not often seen. This one was offered on Ebay and I was able to strike a deal with the seller. The sellers pictures were promising and the pipe appeared to be in very good condition. In communication with the seller, I learned that the pipe was found at a large flea market in Brimfield, Massachusetts. He found it sitting in a large pipe of pipes.

The sterling band had the “B” hallmark stamp which denotes 1937. So, this pipe was made the same year as Amelia Earhart died and the Hindenberg exploded. It’s former owner perhaps smoked it while listening to the radio announce the advent and end of World War II. I’m always intrigued by what a pipe may have encountered and I wish this one could tell me of its journey.

When I opened the box, I could see that the pipe was indeed in great condition. It had a little oxidation on the stem and some cake in the bowl. The stem fitment, button and briar were all better than it appeared from the photos.

GBD_R9118_ebay
GBD_R9118_ebay2

GBD_R9118_ebay3

I’ve restored a number of old pipes, but I have to admit that I was nervous working on this one. The bowl only had a very light cake, so I just wrapped a piece of 320 grit paper around the suitable insert for my Castleford reamer. The bowl was then soaked with alcohol and sea salt. Following the soak, I cleaned the shank with some bristle brushes dipped in alcohol. The shank was very dirty and it took a while until the brushes were clean. I buffed the briar lightly with White Diamond and several coats of Carnuba wax. The brand logo section on the briar was worn, but legible, so I was careful not to touch that area. I hand waxed the nomenclature areas with Halycon wax.

I removed the light oxidation around the button with 800 grit paper, followed by 1500 and 2000 grades. I then used 8000 and 1200 grade micromesh paper. The stem was mounted to the pipe and buffed lightly with White Diamond and Meguiars Plastic polish. The vulcanite was raised around the GBD rondell. It may have been re-glued to the stem at some point. The brass rondell was worn, so I decided to let well enough alone. The rondell is smaller in size than those on any of my other GBD’s.  I used a silver polishing cloth on the sterling band. The hallmark stamps are in good shape I did not want to diminish them.

Below is the finished pipe, one that I was very pleased to add to my GBD collection.

GBD_R9118 (1)GBD_R9118 (4)GBD_R9118 (2)GBD_R9118 (5)GBD_R9118 (8)GBD_R9118 (3)

GBD_R9118 (9)

?

GBD_R9118 (10)

?

GBD_R9118 (11)

?

GBD_R9118 (12)

?


Some Good Pipe Finds on a Recent Work Trip to Europe


Blog by Steve Laug

I just can’t get around fitting in a pipe hunt on my trips. There is something intoxicating about hunting for old estate pipes in whatever city I am traveling to or visiting. When I am traveling in Europe for work it is a bit harder to have time to go pipe hunting but on the most recent trip to Paris, Berlin, Sofia and Athens I had a little time. In Paris the hunt was almost an accident. My colleague from work and I were walking in the Latin Quarter to meet some friends for a dinner at a Belgian Mussel’s Restaurant and I came across a fellow selling items on a table-cloth in a doorway. It was like the sidewalk sales that spring up here in Vancouver where a person put a table-cloth down and puts items for sale on it. I looked in an archway as we walked by and I happened to see a pipe on the cloth. I picked it up and it was a Hilson Double Ecume Sandblast Dublin 5. The stain was dark and the blast was deep and craggy. The stem was in great shape with the Hilson H stamp on it. It had minimal bite marks. As I looked at it I noticed that it was a meerlined bowl. I asked the seller what he wanted for it. He said he had another as well and pulled out a second Hilson Double Ecume Sandblast with a meerlined bowl. This one was a stack with a saddle stem stamped 95/S. It also had a nice sandblast. The stem was in better shape than the Dublin and also bore the Hilson H on the left side of the saddle.He said he would sell me both of the pipes for 10 Euros. I handed him the Euros and the deal was done.

The pair of pipes is shown in the next four photos below. They are in pretty nice shape and should clean up easily enough.find1 Find2 Find3 Find4I was pretty excited to have found this pair of pipe when I really was not hunting for them and figured I had my finds for the trip. I wrapped them and put them in my bag for safe keeping while I continued on my trip. I did not expect to have more time to go pipe hunting. But I would be proved wrong.

I left Paris for Berlin and had quite a few days of meetings with no time for pipe hunting. We left Berlin and flew to Sofia, Bulgaria. We were met by a colleague and her husband at the airport. After a quick trip to our hotel they took us for a walk about in the city centre. The two women went looking for gifts that my colleague wanted to bring home with her and the husband and I went pipe hunting. He is a newbie pipe restorer (I just posted his first blog on rebornpipes today – Dal Stanton). He took me to one of his haunts – an outside antique market in the shadow of Sofia’s largest church building – Nevski Cathedral. We visited the same vendor where he had purchased the Dr. Plumb Oom Paul he wrote about restoring (https://rebornpipes.com/2016/06/10/a-newbie-restore-of-a-dr-plumb-9456-oom-paul/). He asked the vendor to show us his pipes and after looking through them I picked out three.

The top pipe in the photo is stamped Primus over 2. It appears to be made of an alternative wood rather than briar and has a silver rim cover and windcap. It is missing a band that must have disappeared previously and the stem is an obvious replacement that is poorly fit to the shank. The second pipe I purchased from him was a bowl sans stem that is stamped Shell Pipe 141. The combination sandblast and rustication give the pipe a great look. I paid about 15 Lev or $11 Canadian for these two. We left behind a lot of pipes with cracked shanks and a bag of pipe bowls and assorted stems. Who knows maybe Dal will pick some of them up at a later date?Find5 Find6 Find7 Find8 We went on to another seller and I found a nice looking oval shank billiard that was stamped Alko Old Briar on top of the shank. It had an inner tube from the tenon extending into the bottom of the bowl. The briar had some nice grain and the finish, thought dirty was in decent shape. The stem was lightly oxidized with some tooth chatter but otherwise it was in decent shape. It looks like an older pipe by the shape of the stem and the button. This one cost me about 5 Lev or just over $3 Canadian. Find9 Find10 Find11 Find12 Find13We wandered around the market and visited as we walked along. We went to another seller that Dal had bought things from in the past and I picked up a nice little straight sandblast saddle stem Dublin. The bowl had a nice blast that was lighter than the one on the pair of Hilson pipes from Paris but it was pleasing nonetheless. The finish was worn but redeemable and it was stamped on the underside of the shank HEIBE in an arch with the number 430 next to the shank/stem junction. The stem was lightly oxidized and had no tooth chatter on the surface. This one also cost me about 5 Lev or just over $3 Canadian.Find14 Find15 Find16 Find17From the market we walked to a shop Dal called the hole in the wall – a place he had found some nice pipes in the past. We went through many of the pipes that vendor was selling and left them behind. Dal spoke to the vendor about some pipes that he had seen when he had been there previously and the man took out a pipe bag and opened it for us.Find18Inside there were some beautiful pipes. We looked them over carefully– there was a bent sandblast Stanwell Vario, a Savinelli Tortuga, a Butz Choquin Rocamar and a bent Capitol Apple. All of these were in a pipe bag with a tamper and filters in the pouch. The seller was asking somewhere around 140 Lev or $102 Canadian for the four pipes and the bag. I bypassed them by Dal went back and picked them up the day I flew to Athens. I think he got a great deal on four beautiful pipes.Find19 Find20 Find21 Find22When I got to Athens I did not have time to go pipe hunting. I did see some promising antique shops that will have to be checked out the next time I am there. It was a great trip with great meetings and people and it ended with me bringing home these six pipes. I am happy to have found them and had a great time in the process of hunting.  Until I get to go back and do some more looking, I will have many fond memories of the trip and the hunts that will come to mind as I clean and restore these pipes.