Monthly Archives: March 2016

GBD Militaire Bulldog


By Al Jones

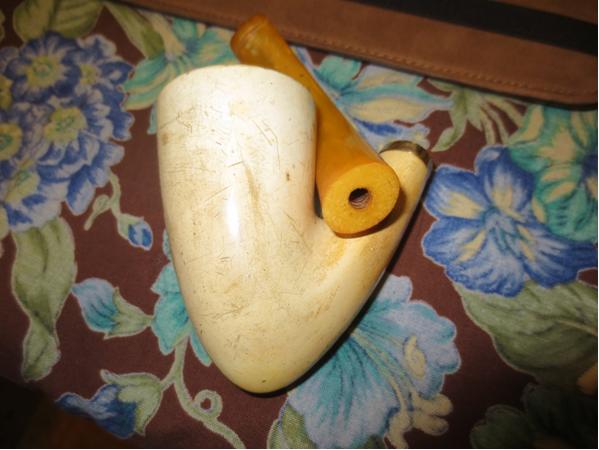
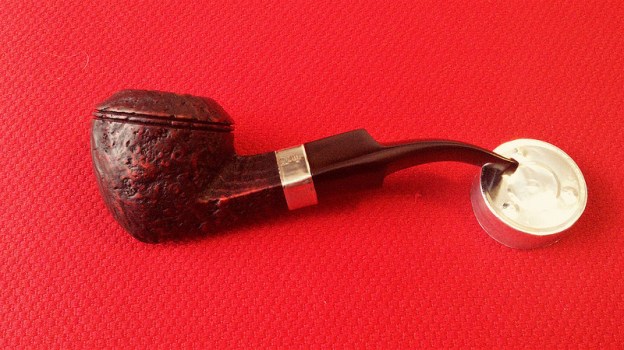
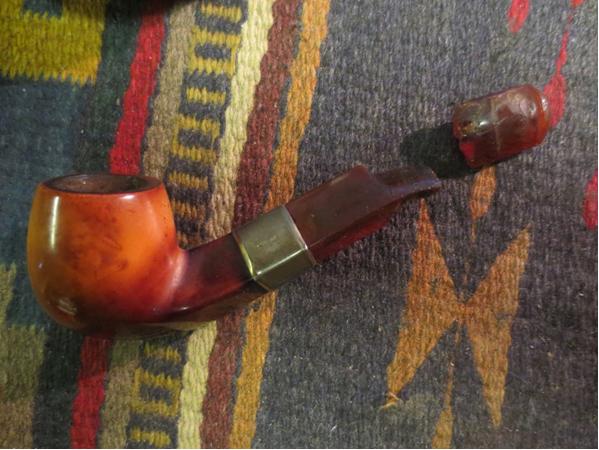
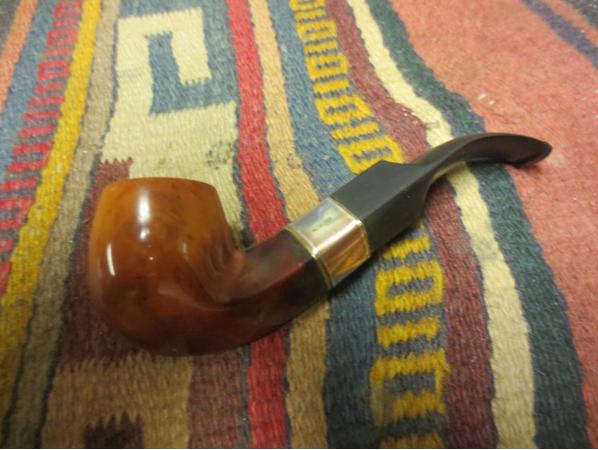
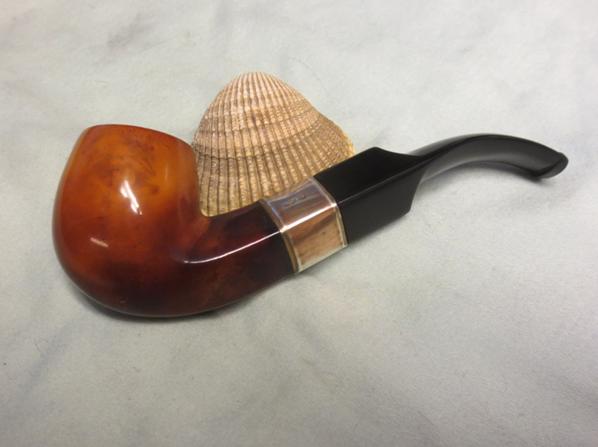
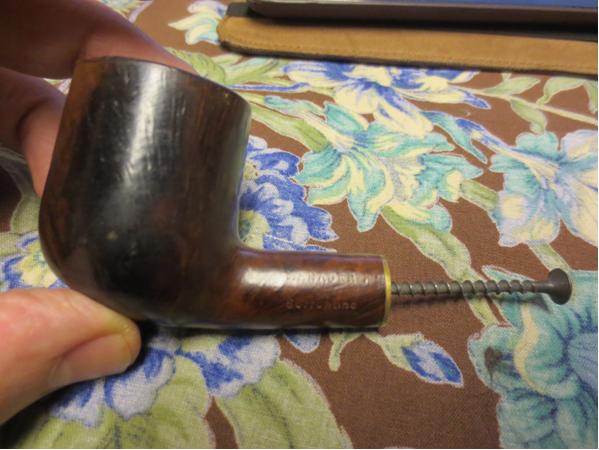
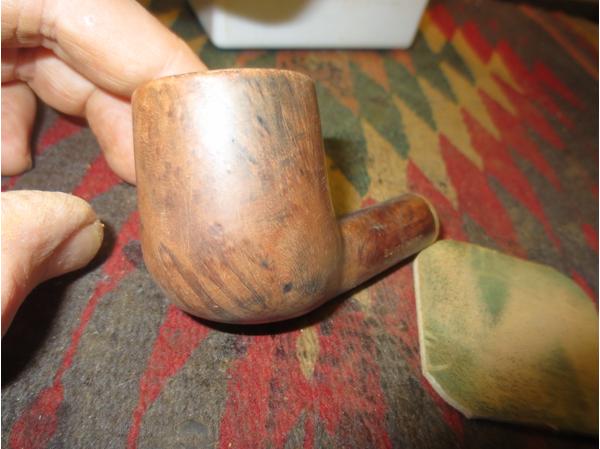
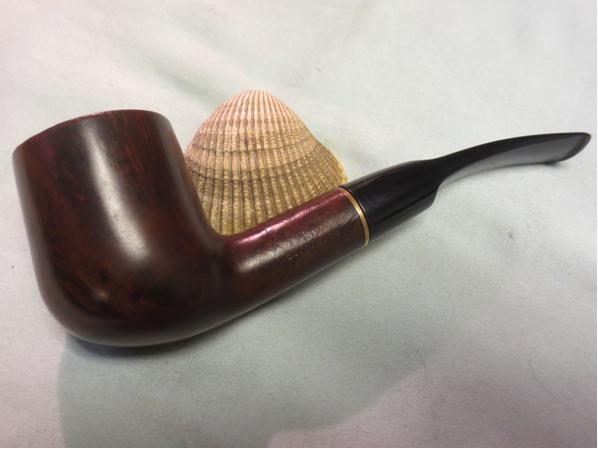
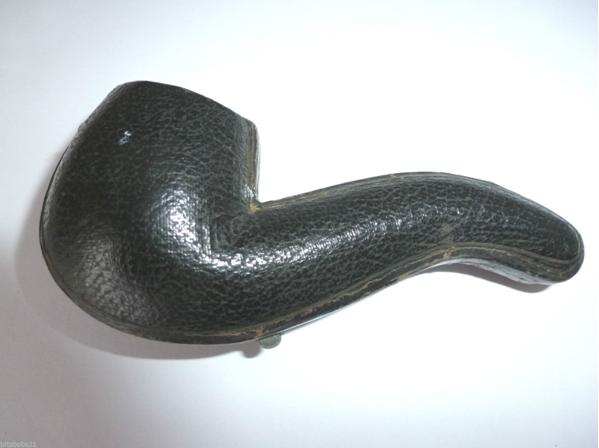
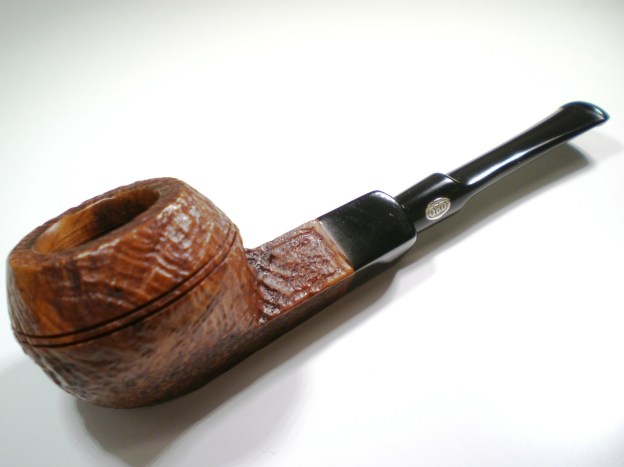
This unqiue GBD was posted unrestored,last year on the “GBD Collectors Thread on PipesMagazine and caught my attention. I was recently delighted to find it for sale on Ebay and fully restored. I won the auction and after receiving it, I realized that I knew little about the Militaire finish. This pipe is sandblasted and in the 9240 Squat Straight Bulldog shape.

GBD Collectors Thread – PipesMagazine.com

Google didn’t yield any additional information on the Militaire finish but the few pipes I discovered were all sandblasted (typically “Prehistoric” grades). By GBD standards, the blast is very good.

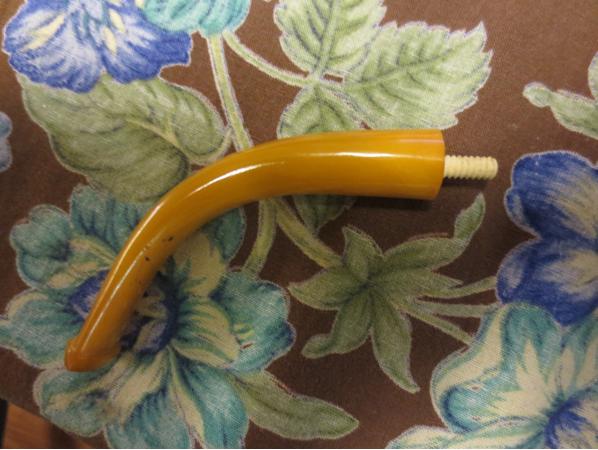
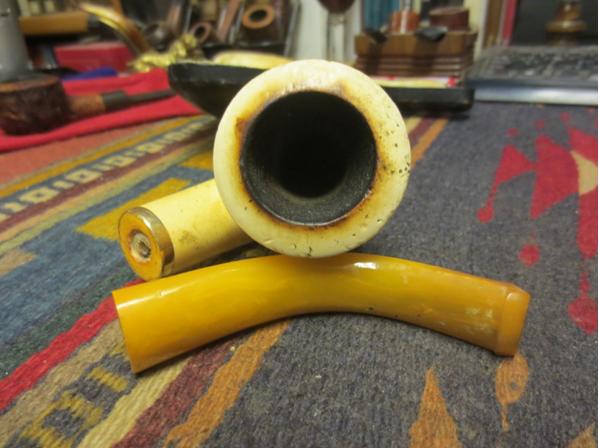
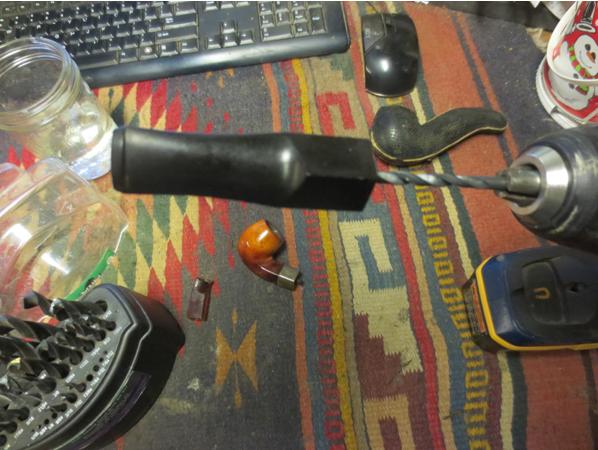
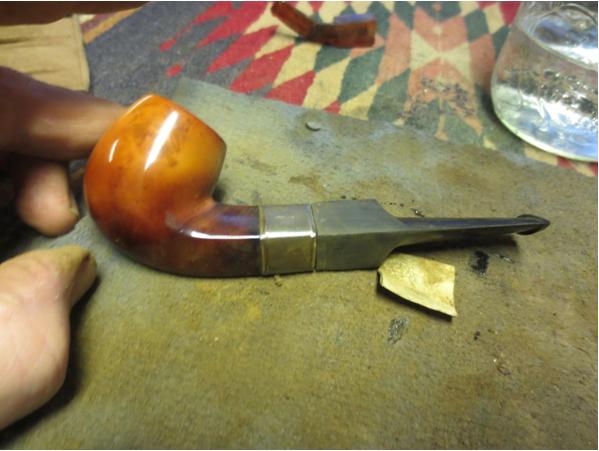
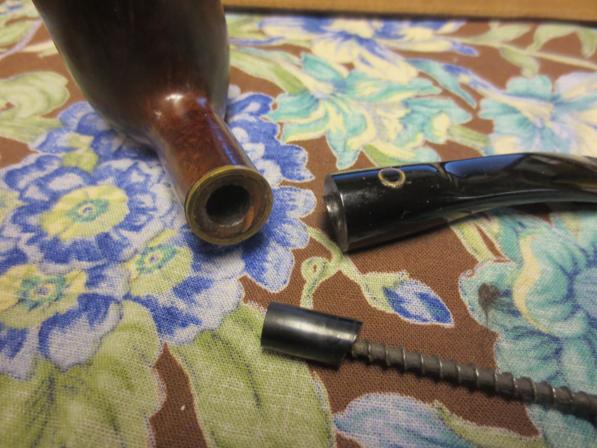
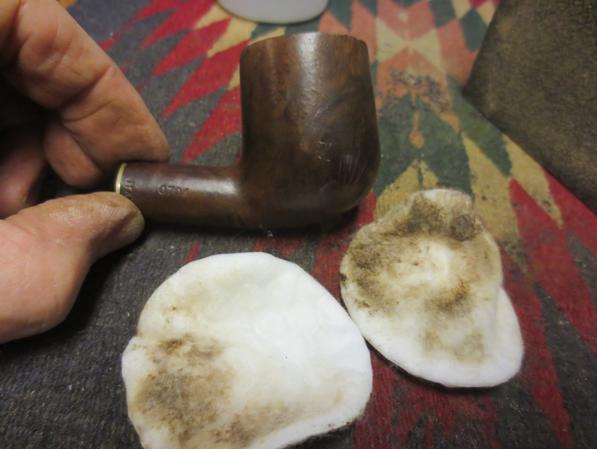
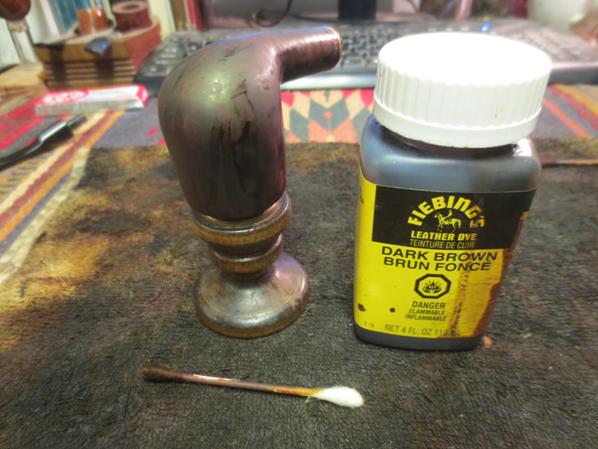
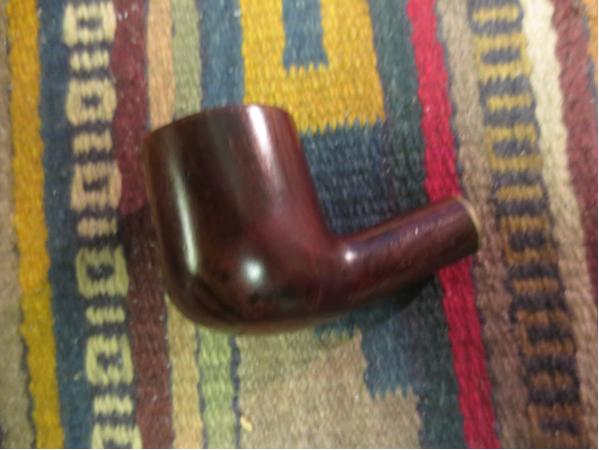
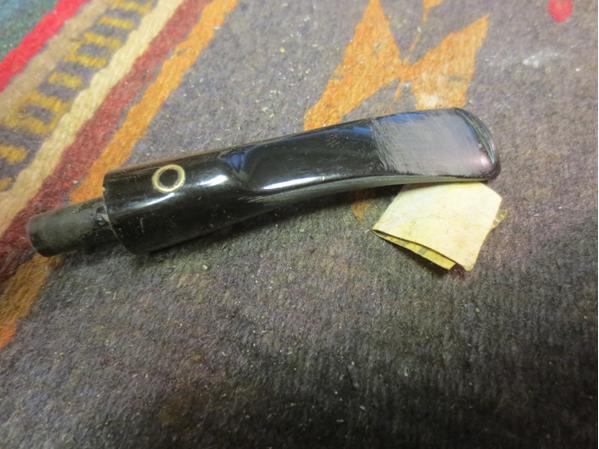
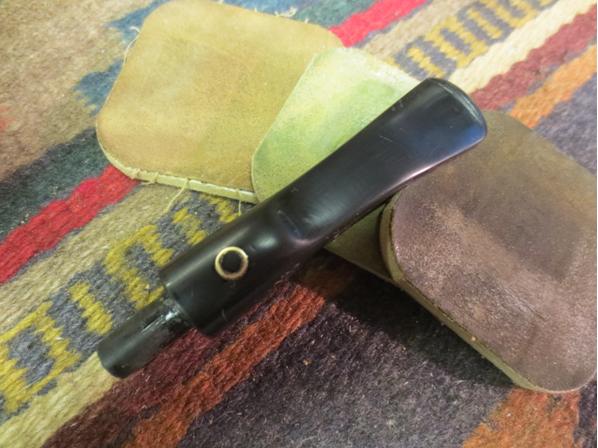
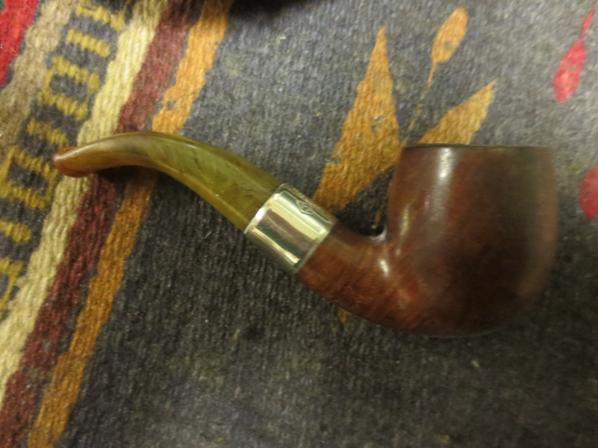
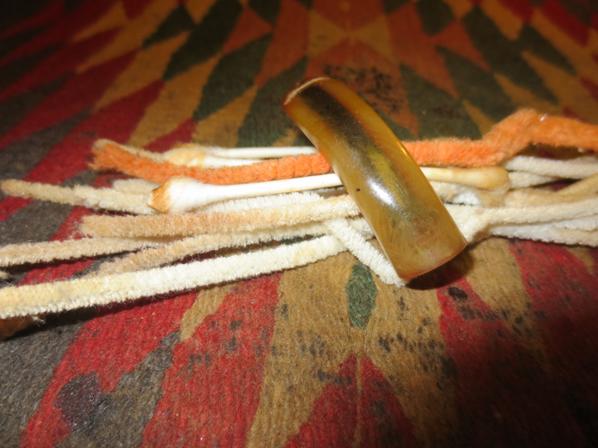
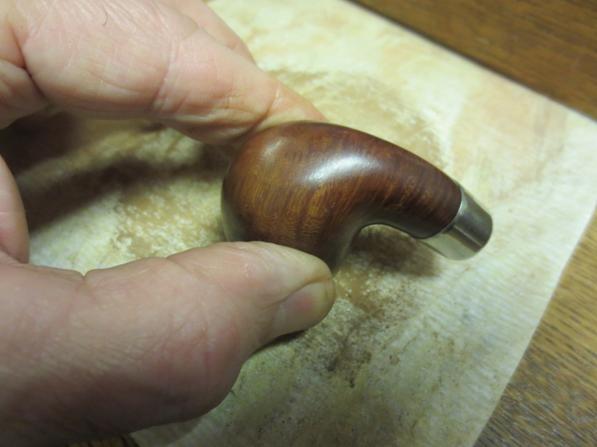
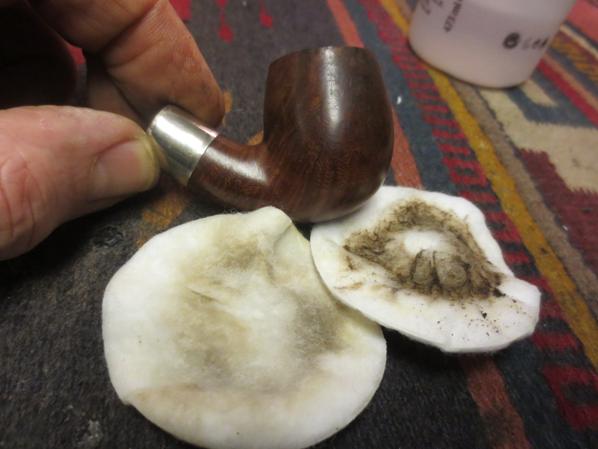
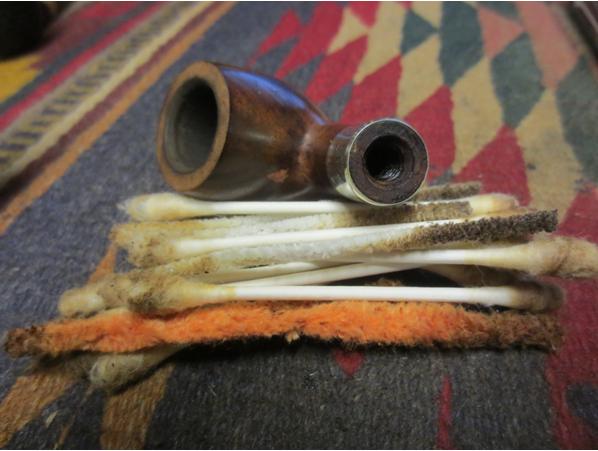
The seller (303_pipe_restoration) did a great job on the pipe and it came ready to smoke. I’m typically not happy with most stem restoration work, but this one was excellent. I used some high grade micromesh on the stem and then polished it with Meguiars Plastic Polish as I feel it helps retard oxidation. The bowl was very clean and there was no ghosting.

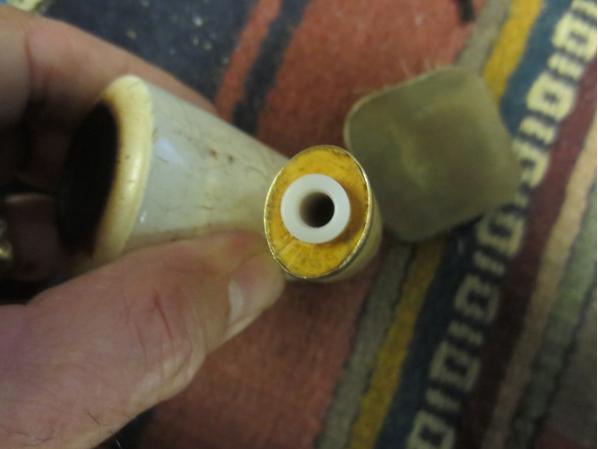
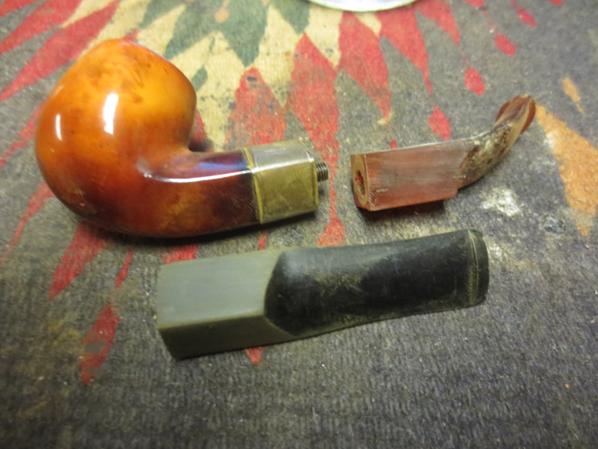
The pipe is stamped “London, England” and has the brass stem rondell, which indicates it was made prior to 1981. The pipe weighs an amazing 30 grams and is easily the lightest of any GBD in my collection.

GBD_9240_Militaire_Gallery

GBD_9240_Militaire (5)

GBD_9240_Militaire (3)

GBD_9240_Militaire (4)

GBD_9240_Militaire (6)

GBD_9240_Militaire (2)

?

?

GBD_9240_Militaire_Gallery

Replacing a Threaded Mortise/Tenon system with a Push Mortise/Tenon System in a Meerschaum Pipe


Blog by Steve Laug

When I received this meerschaum pipe the sender said that it needed to have the tenon replaced. It looked like it would be a simple repair so I left it until last. I restemmed the other little meerschaum that I posted earlier and put a new tenon on an Italian pipe for him and figured that this would be an easy fix. I unscrewed the stem from the broken tenon – it was split and half of it was missing. The stem came off with no problem. I had a perfect replacement tenon available to me so I screwed it into the stem and then looked at the broken tenon in the shank. Still the problem seemed quite simple. I used my wood screw and threaded it into the airway and tried to pull the tenon – either unscrewing it or at least wiggling it free. It did not move at all. I looked at it with a lens and saw that there were remnants of epoxy around the portion of the tenon that showed. Now I was in trouble. What had originally been an easy fix now was complicated.Meer1Meer2Meer3 Meer4Before I drilled out the tenon I took a few photos of the bowl to show the condition of the meer. It was worn and scratched but had some beauty that shown through the grime and the scratches. The rim was dirty and pitted but the edges were sharp. The bowl interior was lightly caked and the pipe smelled of strong aromatics.Meer5 Meer6 Meer7 Meer8I drilled out the tenon in the shank of the pipe starting with a bit slightly larger than the airway. No problem with that first step. I increased the size of the bit and drilled it again. It was my hope to have the glued tenon break free with the drilling. I increased the size of the bit yet again, this time to almost the same size as the threaded tenon. No luck. The tenon was absolutely stuck to the insert in the shank. I increased the bit size once more and this time the tenon broke. I tried to pick out the remaining pieces but they were solidly glued in place. I looked at the insert with a lens and could see that the glue and tenon had damaged the internal threads on the insert. This was turning into a real pain. I would have to drill out the entire insert and replace it. Once I had the tenon free I figured this would be easy as well. Again I was wrong. The insert was also glued in place. I increased the size of the bit several times until I had removed the insert itself. This old pipe was turning into a head ache.

I finally was able to remove the insert. I examined the inside of the shank. The original drilling of this pipe was fascinating. It was obviously drilled in several stages stepping down the mortise to the airway. I wrote to the owner and asked if it would be okay to replace the threaded tenon and mortise set up with a push tenon. I figured why complicate things. He confirmed that he was okay with that replacement. I started work on the stem and shank for that set up. I drilled the airway on the stem slightly bigger to take the push tenon. I cleaned out the inside of the stem to remove the debris and the tars. I checked the fit of the tenon in the stem and it was a good fit. I would need to countersink the airway to accommodate the rim on the tenon.Meer9 Meer10 Meer11I cleaned out the shank and airway on the bowl as well. I fit the insert in the shank. The fit was good but I would also need to countersink it to make a flat surface for the stem to sit against.Meer12I used a slightly larger drill bit to create the countersink on the shank and pushed the insert in place. The fit was perfect. Due to the damage on the shank from all of the glue I would need to use glue to hold the insert in place but I wanted to clean up the fit before I set the glue in place. In the photo below the new system can be seen. The mortise insert is in place and the push tenon is on the stem.Meer13I cleaned out the shank one more time and then mixed a two part epoxy for the insert. I applied the mixture to the insert and pressed it into place. I aligned the airway and the stem so that things would be straight once it dried and set the bowl aside so the epoxy could cure.Meer14I used a drill bit to countersink the rim on the tenon into the stem. I threaded it in place to make sure the fit was correct.

I sanded the bowl with micromesh sanding pads to smooth out the roughness and bring back some of the shine of polished meer. I wet sanded it with 1500-2400 grit pads and was able to bring back a lot of the life in the meerschaum. I dry sanded with 3200-4000 grit pads to polish it further. The photos below show the pipe after I had sanded it. When I am working on an older meerschaum I do not like to remove all of nicks and scratches as they add character to an old pipe. They are like battle scars and each of them has a story to tell. I clean up the surface damage and highlight the patina but leave the pipe clean but looking its age.Meer15 Meer16 Meer17I let the epoxy set over night and then this morning pushed the stem into the new mortise. The fit was a little tight and I could see some light between the stem and the shank end. I needed to finesse the fit of the stem and shank.Meer18 Meer19 Meer20 Meer21I carefully sanded the end of the mortise with the Dremel to make sure the insert was flush against the meerschaum end of the shank. I also worked on the countersink of the tenon in the stem with a sharp knife to give it a wider and sharper bevel to accommodate the rim around the middle of the tenon. I polished the newly sanded and cut areas with micromesh sanding pads to smooth out the fresh work. I polished the stem and the bowl lightly with some soft white Beeswax and then buffed the pipe by hand with a microfibre cloth to raise the shine. The finished pipe is shown in the photos below. Soon I will pack up the threesome of pipes and send them back to the pipe man who sent them to me. They are all functional now and to me actually look and work better than they did before. Thanks for looking.Meer22 Meer23 Meer24 Meer25 Meer26 Meer27 Meer28 Meer29

Banding a Cracked Shank on a Truly Filthy Alpha Enterprise Chubby Bulldog


This is a great refurb. The process Charles used in cleaning and restoring it are great examples of how to move through a clean up.

Charles Lemon's avatar

I spotted this Alpha pipe on eBay and managed to submit the winning bid at a price reflective of the pipe’s condition. It’s always nice when that works out. I think most other bidders were put off by the euphemistically described “hairline” crack running about 3/8” up the shank from the mortise, but as I had recently stocked up on repair bands, I figured I likely had one that might get the job done.

In due time the pipe arrived and I got my first good look at it (the pics online were, typically, not the best). To say that the pipe needed a cleaning would have been a gross understatement. It was filthy, inside and out. The ridges in the sandblast finish were visibly plugged up with dirt and grime, the rim was covered in lava that dripped back down the rear of the tobacco chamber, the chamber itself…

View original post 1,174 more words

Restemming an Old Diamond Shank Meerschaum Bent Billiard


Blog by Steve Laug

The second pipe sent to me for work was a nice older style diamond shank meerschaum. The bowl was clean with some grime on the outside and some lava on the rim top. The bowl was quite clean. The stem was Bakelite and was missing a lot of the parts to connect the two broken pieces. The tenon connecting the stem to the bowl was stuck in the shank but I was able to unscrew the broken stem from the tenon. The silver band was marked Sterling and was badly tarnished. I would clearly need to restem this pipe as the original stem was unusable.Bake1 Bake2 Bake3 Bake4I went through my can of stems and found a likely candidate for the new stem. I did not have any Bakelite stems so I would have to use vulcanite and shape and drill it to fit. I had one stem that was slightly longer than the broken stem but the shape was right. The sides of the saddle were larger than the original as well so I would need to shape it to fit.Bake5I used the Dremel to remove the tenon from the new stem and flatten the end. I used the topping board to smooth out the end of the stem. Once I had it faced I used a drill bit to drill out the airway. I started with one slightly larger than the airway and hand turned the stem onto the bit. I changed the bit to one that was the same size as the tenon and repeated the process. Bake6I was able to twist the stem onto the tenon and it cut threads into the vulcanite. I thought I was set at this point as the stem fit pretty well. I would need to sand the sides and the points of the diamond to get a fit that matched the shank and band but it looked like it was going to work out well. Bake7 Bake8 Bake9 Bake10I used the Dremel and sanding drum to remove the excess material on each side of the diamond, trying to get as close as possible without damaging the silver band. I would need to finish it by hand but I wanted to minimize the work that needed to be done by hand. I sanded it with 220 grit sandpaper to smooth out the marks left behind by the Dremel and to further reduce the sides of the diamond.Bake11I put a drop of super glue on the Bakelite stem to get an idea of the angle of the bend in the stem. I figured I would use it along with the case as a template for the new stem. While it dried I sanded the surface of the new stem with 220 grit sandpaper and used the topping board to reduce the length of the stem. You can see that the vulcanite is cleaning up very nicely and the scratches are gone.Bake12 Bake13I used a ragged piece of sanding sponge to sand the lava on the top of the rim. I was able to remove all of it without harming the patina on the rim or bowl.Bake14I polished the silver band with a jeweler’s cloth to remove the tarnish.Bake15 Bake16I was able to remove the bone tenon from the shank of the pipe and clean out the inside of the shank before putting in a replacement tenon that I got from Tim at JH Lowe. The fit was perfect in both the shank and the stem. The new tenon was not brittle like the old one so it would last and give better durability to the pipe.Bake17I set up my heat gun and heated the stem until it was pliable. Using the old broken stem as a template I bent the new stem to match. I sanded the stem with a 1500 grit micromesh sanding pad to remove more of the scratching and then put it on the pipe to check the fit. I really like the look of the new stem. The black vulcanite goes well with the patina of the old meerschaum.Bake18 Bake19 Bake20 Bake21I wet sanded the stem with 1500-2400 grit micromesh sanding pads and then gave it a coat of Obsidian Oil. I am sure by now you know my drill by heart but just in case – I sanded it with 3200-4000 grit pads, another coat of oil and final sand with 6000-12000 grit pads. I gave it a final coat of Obsidian Oil and let it dry.Bake22 Bake23 Bake24I buffed the stem with Blue Diamond on the wheel and then gave it multiple coats of carnauba wax. I buffed the stem with a clean buff and then put it back on the bowl. I finished buffing the pipe with a microfibre cloth. The finished pipe is shown in the photos below. I like the way the black shiny vulcanite stem sets off the colours of the bowl. I hope the pipeman who sent it to me for a new stem will be pleased with the result. Thanks for looking.Bake25 Bake26 Bake27 Bake28 Bake29 Bake30 Bake31

Uncharted Linkman Ringmaster Tri-Shank#2656


What a beautiful piece of pipe history. Well restored Troy. I like the fill blending you did. Thought it would be good to reblog because of several of your innovations. Great work.

Troy W's avatarBaccy Pipes

I picked up this old Linkman  green spade Ringmaster from Al , a online friend and fellow member of Dr. Grabow Collectors Forum.

I saw the pipe in his Etsy store , not having a Ringmaster in my collection and or a Linkman tri-shank model i thought i would be a good next project. I contacted him at  a deal was struck.

Check out Al’s store sometime he has a ever changing inventory of old  good project pipes at good prices.I have gotten a few pipes from him .

https://www.etsy.com/shop/Als12paws?section_id=10630414&page=2

The pipe as it arrived to me .

The Ringmaster is a small to medium size at 5 1/2 inches long and 1 5/8 inches tall bowl.

100_9058 (640x480).jpg100_9047 (640x480).jpg100_9056 (640x480).jpg

Seems AK owned the pipe . If you are looking AK , i got your pipe.

100_9052 (640x480).jpg

While waiting on the pipe to arrive i did a little research. I could not find the shape 56…

View original post 753 more words

Replacing a Tenon and Doing a Restoration on a Sorrentino Manager 0704


Blog by Steve Laug

I received this one from a fellow who wanted the tenon replaced but being the way I am I could not just replace the tenon and leave the pipe looking tired and worn so I wrote and offered to clean it up for him. It took more work than I had originally thought it would but the added effort made for a beautiful looking pipe. It is stamped on the left side of the shank MANAGER over SORRENTINO. On the right side it says 0704 which is the shape number and Italy. The briar was really in need of some work. The left side was stained with a dark patch that ran from the top to the bottom of the bowl. The finish was also rough to the touch over that section. On the bottom, front and right side of the bowl there was a lot of dents and dings like the pipe had been dropped. The rim had a coat of lava and the bowl had a very uneven cake with more on the left side of the bowl than the right. The finish was basically shot. The stem came with lots of tooth chatter and a broken tenon. The tenon snapped right at the shank and was stuck in the shank. The brass band on the shank was loose. The pipe was tired and needed some TLC. Here is what it looked like when I started.Briar1 Briar2 Briar3In the photos above I had already turned the wood screw into the broken tenon. I use that to pull a broken tenon and it never disappoints in effectiveness. Note the state of the bowl in the photos.Briar4I used a Dremel and sanding drum to flatten out the remnant of the broken tenon on the stem. Once it was flat it was time to drill the stem to take the new tenon. I started with a bit slightly larger than the airway to center the drilling and turned the stem onto the bit by hand. I find that though it is harder to do it by hand, turning it by hand and not drilling it gives me more control of the stem. I worked my way up to a ¼ inch bit and then cleaned it out with a needle file. I had a Delrin tenon I purchased from Tim at JH Lowe and I roughed up the surface of the portion that would go into the stem and gave it a coat of two part slow drying epoxy to hold it in place.Briar5 Briar6 Briar7I lined up the stem in the shank and then set it aside to let the epoxy cure over night. While it dried I worked on the bowl. I stripped off the remaining finish with acetone and cotton pads. I sanded the dark stain mark on the left side of the bowl with 220 grit sandpaper to remove the damaged briar and smooth things out. I scrubbed that side with acetone to finish.Briar8 Briar9I reamed the bowl with a PipNet reamer to even out the cake that had been there. I decided to strip it back to bare wood. I wanted to check out the inside of the bowl walls. The interior was sound and there was no damage on the bowl walls. Briar10 Briar11I sanded the bowl with 1500-2400 grit micromesh sanding pads to clean up the scratches left behind on the briar by the sand paper and by the wear and tear of age. The stripped and sanded bowl was looking pretty good.Briar12 Briar13 Briar14I sanded the inner bevel of the rim to clean it up and prepare the bowl for staining. I wiped it down a final time with isopropyl alcohol. I stained the bowl with a dark brown aniline stain. I flamed it and restained it with a second coat of the stain. I flamed it again.Briar15 Briar16Before setting the bowl aside to dry I wiped it down with alcohol on a cotton pad to smooth out the stain and lighten it slightly. I wanted the grain to show through.Briar17I buffed the bowl with Blue Diamond on the buffing wheel and gave it several coats of carnauba wax to seal and preserve the finish. I buffed it with a clean buffing pad to raise the shine. (Forgive the poor focus on the first photo below. It is blurry but still gives you an idea of how the dark area had been reduced.)Briar18 Briar19 Briar20 Briar21With the bowl finished I set it aside and worked on the stem. I sanded the tooth marks and chatter on the stem with 220 grit sandpaper until they were smoothed out. I was able to easily remove most of the tooth damage to the stem. There was one small tooth dent on the top of the stem that I left as it is minimal and I did not want to thin the stem.Briar22 Briar23I wet sanded the stem with 1500-2400 grit micromesh sanding pads. I dry sanded it with 3200-4000 grit pads. I finished with 6000-12000 grit pads. I buffed the stem with Blue Diamond on the wheel.Briar24 Briar25 Briar26 Briar27I put the pipe together and lightly buffed it with some more carnauba wax to finish it. I hand buffed it with a microfibre cloth for the final buffing. The photos below show the finished pipe. Hopefully when it is returned to the pipeman who owns it he will be pleased with the finished pipe. Thanks for looking.Briar28 Briar29 Briar30 Briar31 Briar32 Briar33 Briar34

An LHS Purex Patented Lovat that showed promise


Blog by Steve Laug

My brother showed me a link on eBay that showed this older LHS Lovat. It was stamped LHS in a diamond. Next to that was stamped PUREX over the patent number, PAT.No1587048. Under that was stamped REAL BRIAR. The shape number 12 was stamped on the underside of the shank. LHs2The pipe looked decent. There was some damage to the rim but the bowl was nice other than the usual dirtiness and dents. The shank also looked good. There did not appear to be any fills in the bowl or shank. There was very little cake in the bowl and it appeared that it had been recently reamed. The finish was in okay shape though there were paint flecks on the sides of the bowl near the rim. lhs3 LHS4 LHS5The seller included a close up photo of the rim to show the extent of damage. It looked to me that the outer rim was the roughest. It was rounded and the defined sharp edge was gone. The front edge had more damage than the back. The inner edge showed damage and would take some work to round it out. The top of the rim was pretty beat up from what I could see in the photos.LHS6The stem was in rough shape with lots of tooth chatter and wear. It was oxidized and also had a thick coat of some substance that appeared to be flaking or peeling. The dots on the stem were probably white and red though the photos showed the white dot as almost yellow. I was pretty sure that the coat on the coat on the stem accounted for that.LHS7 LHS8I weighed the work it would take to bring it back to life and we put in the only bid on the pipe. It did not take too long for the seller to send it to my brother and for him to send it to me. Even with the double postage it is cheaper to send it to him in the US and then to me in Canada than to ship it directly to Canada. When the pipe arrived in Canada I was able to see that the seller’s photos had shown the condition of the pipe very well. The only thing not shown was that the stem was quite plugged from the slot to the metal threaded tenon. I was not able to push a pipe cleaner through it. The other thing was that the patented stinger apparatus was missing. I have included a picture of the missing apparatus from the patent information.LHS1I went through my collection of tenons and I did not have one like the one shown in the drawing above. I took the next photos to show the state of the pipe from my perspective before I started on the refurb.LHS9 LHS10 LHS11 LHS12I found that the stem was slightly underclocked and needed to be rotated. The first photo below shows the turn of the tenon when it arrived. I heated the tenon with a Bic lighter to soften the glue in the stem. Once it was softened I was able to turn the stem straight. The second photo shows the corrected stem.LHS13 LHS14I took a close up photo of the rim and the bowl interior. There was still some cake in the bowl that needed to be scraped off.LHS15I reamed the bowl with the PipNet reamer and took out the remaining cake.LHS16 LHS17I cleaned out the shank with pipe cleaners, cotton swabs and alcohol. This was one dirty shank and mortise. I would need to use the retort to clean it out. I cleaned out the airway in the stem. It was clogged so I used a dental pick to open the slot area and then I was able to push a thin pipe cleaner through the airway. It took quite a few pipe cleaners to open the airway. I scrubbed the metal tenon with a brass bristle brush and then with alcohol and cotton pads. It was stained but all of the debris was cleaned.LHS18 LHS19I set up my retort, filling the test tube with isopropyl alcohol and then putting the stopper in place in the tube. I put a cotton ball in the bowl and the slid the rubber end of the retort over the stem. I lit a candle and heated the alcohol to boil through the bowl and shank. I boiled two test tubes of alcohol through the airway in the stem and shank before the alcohol came out clean. Once it was finished I ran pipe cleaners and cotton swabs through the mortise and airway to clean out the remaining alcohol and debris. Once I was finished the pipe smelled clean.LHS20 LHS21It was time to address the rim top. I topped it on the topping board using 220 grit sandpaper to remove the damage to the surface and sharpen the inner and outer edges of the rim. Fortunately I did not need to remove much of the surface to clean up the rim surface and edges.LHS22 LHS23I scrubbed the finish with acetone on cotton pads to remove the sticky surface of the finish and the dirt and grime of the years.LHS24 LHS25I sanded the stem with 220 grit sandpaper. I removed the “varnish” coat or whatever the substance was as well as the oxidation and tooth marks.LHS26 LHS27Once I had the surface clean of oxidation and tooth marks I wet sanded it with 1500-2400 grit micromesh sanding pads. I gave the stem a rub down of Obsidian Oil. I dry sanded it with 3200-4000 grit pads and gave it another coat of oil. I finished by sanding it with 6000-12000 grit pads and then gave it a final coat of oil.LHS28 LHS29 LHS30I sanded the rim with 1500-3200 grit micromesh sanding pads to smooth out the scratches left behind when I topped the bowl. I used a light brown stain pen to match the rim to the rest of the finish. I gave the pipe a light wipe down with olive oil and then buffed it with Blue Diamond plastic polish on the wheel. I gave it multiple coats of carnauba wax and buffed it with a clean buffing pad. I took it back to the table and gave it a final hand buff with a microfiber cloth. The finished pipe is shown in the photos below. I have no idea how old the pipe is but the patent number at least gives me a post 1926 date as a starting point. I don’t know how long LH Stern included the Pat.No. stamping on the shank but my thinking is that the pipe is from the mid to late 30s. Thanks or looking.LHS31 LHS32 LHS33 LHS34 LHS35 LHS36 LHS37 LHS38 LHS39

Early production Yello-Bole Imperial #3151


Some helpful thoughts on dating older Yello-Bole pipes. Like Troy I love the old timers in this brand. Well done.

Troy W's avatarBaccy Pipes

Well first off i accidentally  deleted my before and refurbish pics off my camera before i could save them. So its just the after shots.I have actually had this pipe a while and just got around to working on it. In fact i cant recall where i got this pipe now , so I’m gonna guess Ebay.

This is a early production Imperial four digit (3151) Yello -Bole . Since i have no pictures of me working on the pipe ill break down how i date this pipe.

3151  ( In case you dont know Yello Bole uses same shape charts as Kaywoodie )

31- KB&B Yello-Bole Imperial, push tenon, black vulcanite stem (1932-1940’s) or if it was a Kaywoodie  –  Drinkless Kaywoodie Relief w/black vulcanite push-in stem (late 1920’s)

51-  Medium billiard, short stem                                …

View original post 480 more words

No name basket pipe#2


Troy gave some real life to this one with his understain of Black Sharpie Ink… great job.

Troy W's avatarBaccy Pipes

My earlier no name basket pipe post was pretty popular ( one of my most viewed ) . I though i would share another  unmarked pipe i picked up and re-did back in May 2014. I originally posted the refurbish on Dr. Grabow Collectors Forum. I still own and smoke the pipe today.

I got the pipe from a co-worker who was selling her fathers old pipes. She brought a box of pipes for me to look at one day at work. I did not see anything that really grabbed my eye but one  unmarked Lumberman. Most were full bents and such that i just don’t care for . I agreed  to purchase it and a nice twelve pipe inline rack that you can hang on the wall. I think i agreed to give her twenty dollars for the rack and pipe. I sent some pictures of the other pipes to a friend of…

View original post 792 more words

A Restoration Project – A Small Bent Billiard from a Past Era


Blog by Steve Laug

When I saw this pipe on Ebay I decided I wanted to have it in the collection. The seller said the stem was amber and it may be though I am thinking it is more of an Amberoid. The bowl had a fill on the back left side at the shank bowl junction. The band on the shank was rotated to the right and a little loose. The finish was worn and dirty. The rim was covered in tars and lava and the bowl was caked and half filled with the last unfinished bowl of tobacco. There was no information from the seller as to stampings or markings on the bowl or shank. It appeared to be a no name pipe. The seller thought the stem was horn or amber but it did not look like that to me. The stem looked to be in decent shape though it had tooth marks on the top and the underside near the button. The stem was very dull in appearance and the airway was black. The case was in decent shape with a lot of ash and detritus from the years. All in all the pipe was tired but it looked to be easily restorable. The photos below came from the seller.amber1 amber2 amberr3The next two photos show the stem damage. It does not appear to be extensive more chatter than any deep bite marks. The way the marks look on the stem it looks to me that the stem is amberoid or Bakelite not amber or horn.amber4 amber5The pipe is diminutive – a small one all the way around. It is well proportioned but is 4 inches long with a bowl height of 1 ½ inches. The inside diameter of the bowl is 5/8 inches.amber6The seller also included several close up photos – one of a large fill on the back left side of the bowl. It appeared to be tight and smooth but I would know more once I cleaned up the bowl. The other photo was of the metal band. It was stamped with faux hallmarks and an EP in a diamond that signified that the band was electroplated.amber7 amber8The case was in decent shape for a pipe this age.amber9When the pipe arrived I unpacked it and took it out of the case and took a few photos of my own to confirm my assessment from the seller’s photos. The pipe was solid and clean. The finish was worn and tired – dirty but would clean up nicely. The lava on the rim and the damage to the rim edges would need some work. The stem was not amber or horn but amberoid or Bakelite. It had some interesting swirls and would clean up nicely. The material on the inside of the case had a lot of ash and was dirty but intact.amber10 amber11 amber12 amber13 amber14I removed the stem from the shank and was surprised that I was able to unscrew the bone tenon from the stem. It was a little sticky but with a bit of wiggling it came free.amber15With the stem out I worked on the inside of the stem. The airway was almost black with tars and oils. I wanted to clean out the stem as much as possible and bring it back to a clean airway that blended with the stem material. I used alcohol, pipe cleaners and cotton swabs. The photo below shows the first stage of the cleaning. Following the scrubbing I also used Barkeepers Companion with pipe cleaners dipped in it and using that to scrub out the airways. I was able to clean out the majority of the stains.amber16 amber17I reamed the bowl with a PipNet reamer and took the cake back to bare briar. amber18 amber19To clean up the rim I topped it with 220 grit sandpaper. I was able to take off all of the lava and cleaned up the edges of the rim. I sanded the inside edge of the rim with a folded piece of sandpaper. I cleaned up the rough edges and the inside of the bowl.amber20 amber21 amber22I scrubbed the exterior of the bowl with acetone on cotton pads. It removed the finish and the grime from the bowl.amber23 amber24 amber25I removed the loose band and cleaned the outside of the shank. I reglued the band with Wellbond white all purpose glue.amber26I cleaned out the inside of the mortise and airway with cotton swabs, pipe cleaners and alcohol.amber27I used a black Sharpie to hide the fill on the back of the bowl and then stained the pipe with Dark Brown aniline stain. I flamed it and restained and reflamed it.amber28 amber29 amber30 amber31I sanded the tooth chatter with 220 grit sandpaper to remove it. I wet sanded the stem with 1500-2400 grit micromesh sanding pads to begin the process of polishing the stem. I rubbed it down with Obsidian Oil and then dry sanded it with 3200-4000 grit pads. I gave it another coat of oil and then sanded it with 6000-12000 grit pads. I gave it a final coat of oil and let it dry.amber32 amber33 amber34I lightly buffed the stem and bowl with Blue Diamond and then gave the pipe several coats of carnauba wax. I buffed it with a clean flannel buffing pad and then with a microfibre cloth. I brushed out the inside of the case with the shoe brush to remove the dust and ash. The finished pipe is shown in the photos below.amber35 amber36 amber37 amber38 amber39 amber40 amber41 amber42 amber43This is a great old pipe and one that will hold a spot in my collection. I will keep it in trust, using it and caring for it until I pass it into the hands of the next pipe man. Thanks for looking.