Blog by Steve Laug
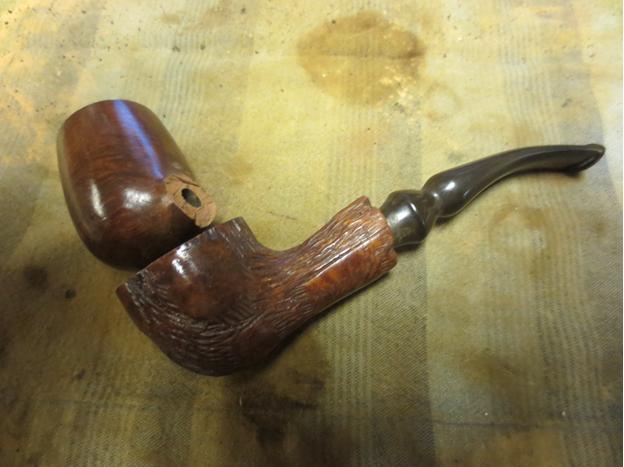
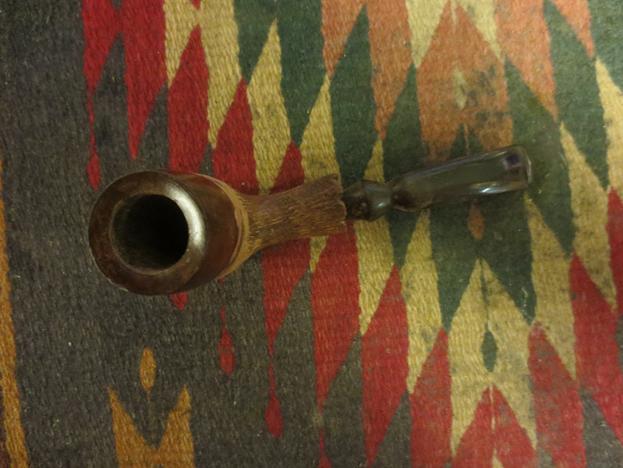
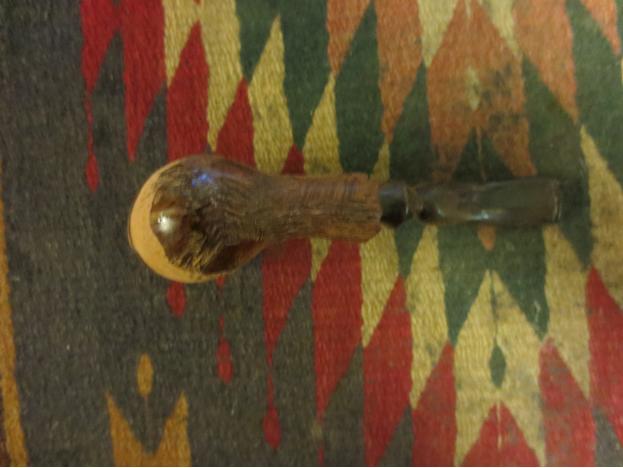
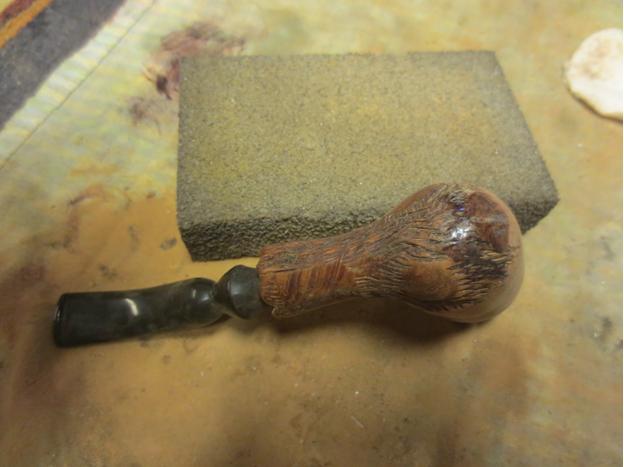
I have wanted to do some more experimenting and learning new ways of doing things for a while now. That is why I love refurbishing, there is always something new to learn. I was sent some pipes as a gift to either scrap out or clean up. In this lot was an Israeli Anderson freehand pipe. The bowl had been cut off and what was left was not much different from a Falcon base. There was no way it would hold any tobacco that would even make it worth smoking and it was in pretty rough shape. The stem was great the base was solid but the finish was done. I also had a pipe that I had cut the shank off of and repurpose on another project so the bowl was left. It had a lot of large fills on the side that were full of pink putty. I thought maybe with a little imagination I could join the two parts together and get a workable pipe. Let’s see what I can do with the parts.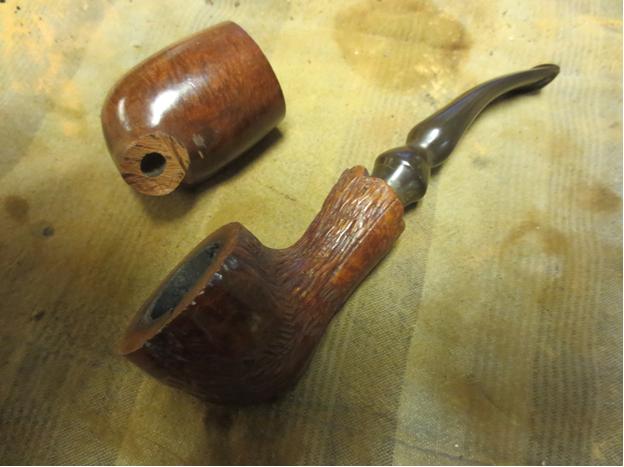
 I don’t have a table saw or a band saw so any kind of cutting briar needs to be done by hand. In this case I used a hacksaw to cut the bottom of the bowl off so that I could splice the bowl and the base together. I figured it would work and I might get a half way decent pipe out of the blend.
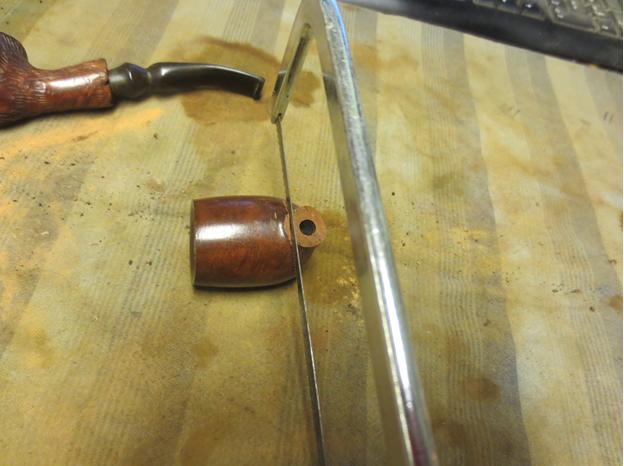
 I used a small drill bit to place six small holes around the base and the bowl. I stabilized the small cracks with wood glue and briar dust. I planned on putting a bowl coating on the interior so I was not too concerned with the walls of the base. I had some small stainless steel pins that I had found that would work well to join the two parts together.
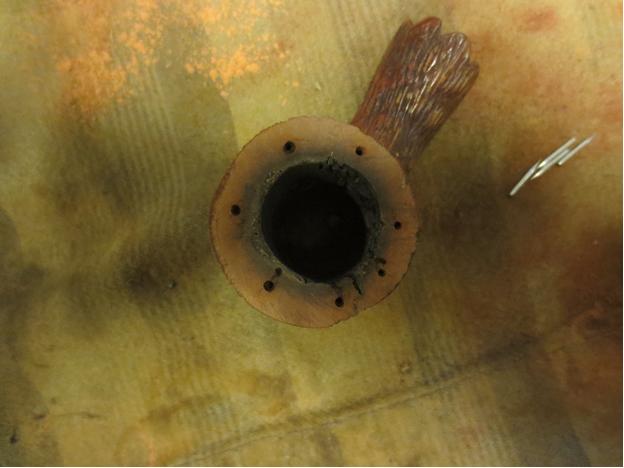 I inserted the pins in the holes in the base and glued them in place. When the glue had set I put glue on the top of the base and the bottom of the bowl portion and set it on the pins as well.
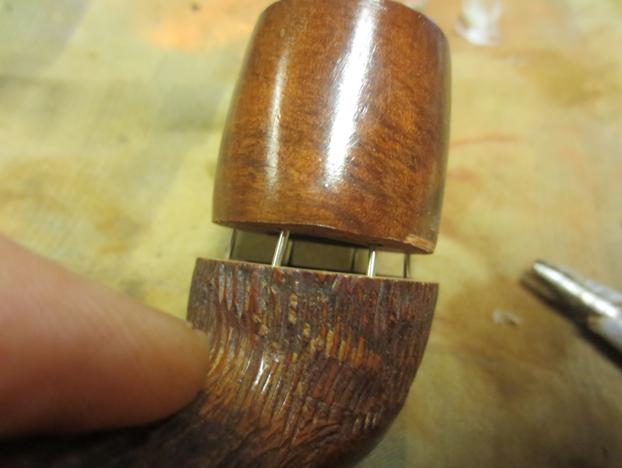
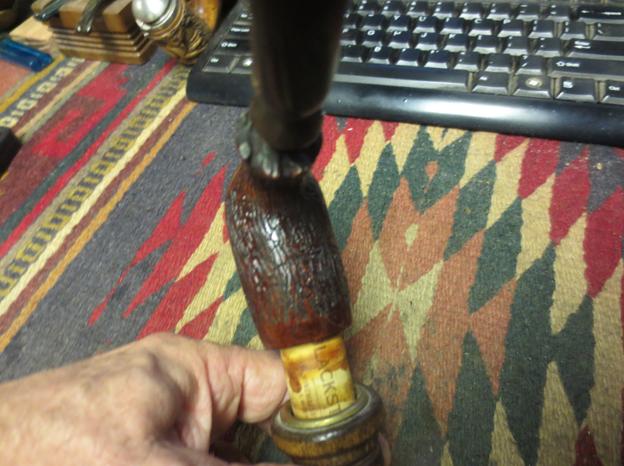
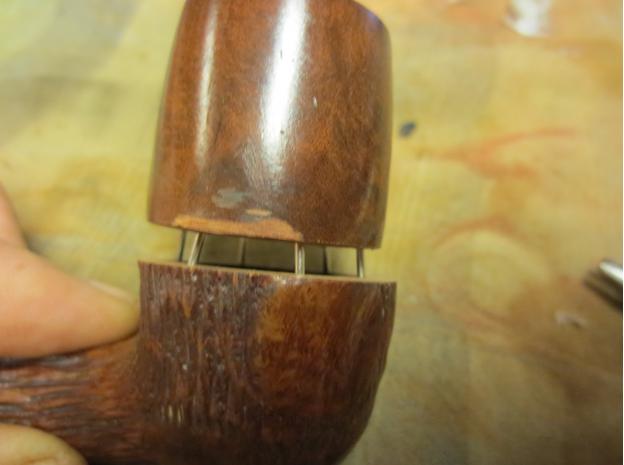 I pressed the bowl onto the pins in the base until the two surfaces connected. I clamped it in place until the glue dried. Once it was dry I put a ring of super glue around the joint on the two and pressed briar dust into the remaining crevices in the joint.
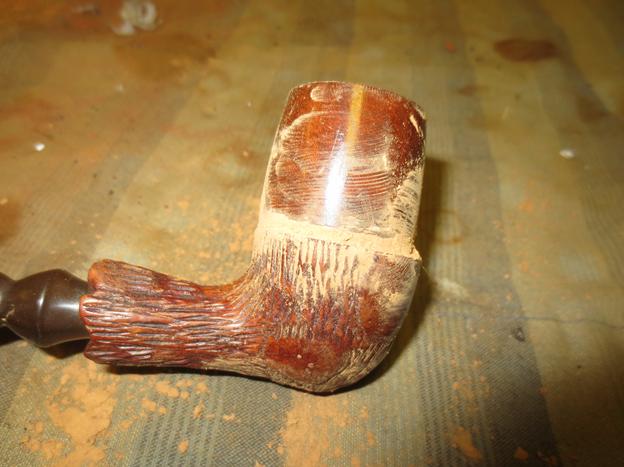

 I used a Dremel and sanding drum to remove the excess briar on the front of the base and bring it into alignment with the bowl. I did the same on the sides and back of the bowl.
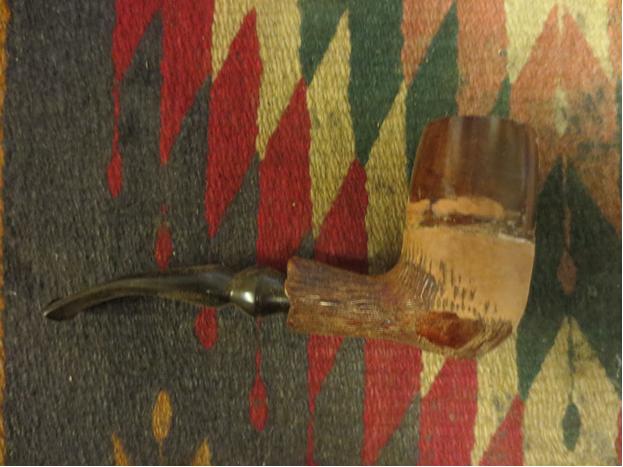
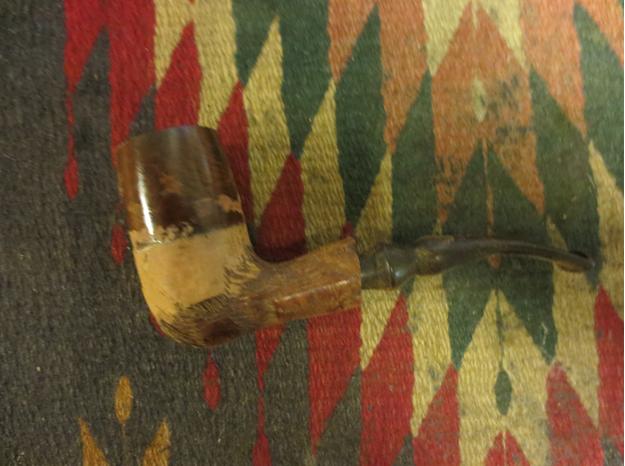
 I sanded the bowl and base union with a medium grit emery paper and then with 180 grit sandpaper to smooth out the surface of the two parts and to work on making the junction smooth between the two. I followed that by sanding it with 220 grit sandpaper to further smooth out the walls of the new pipe. The photos below show the new “Stack” that had been fashioned from the two parts – one plus one did in this case render a third.
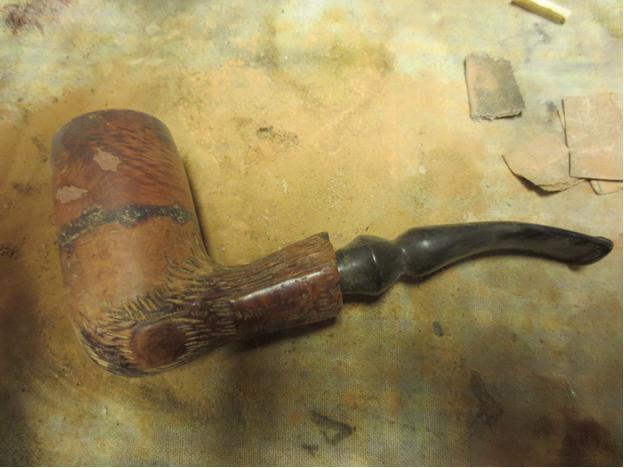

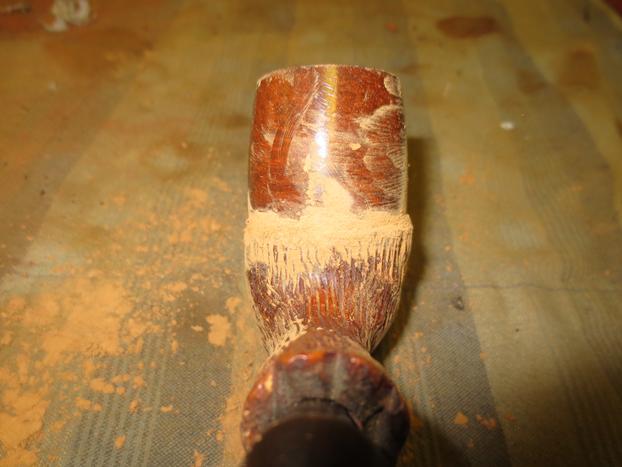
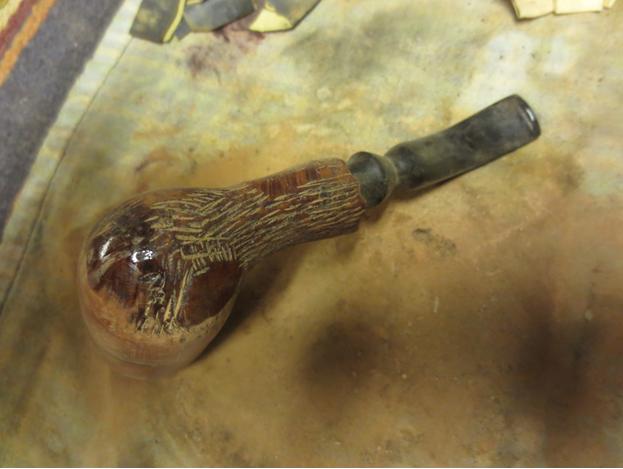 I sanded the exterior of the bowl and base with a coarse grit sanding block and then with a medium grit block. The photos below show the state of the bowl after much sanding with the blocks. The surface of the bowl and base junction is smooth to touch. The large fills on the side of the bowl and the dark ring of the glue and briar dust patch around the middle were going to take some work to make them “disappear”.
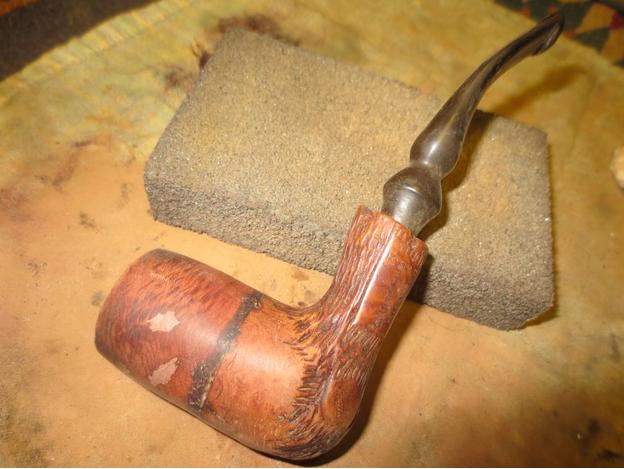
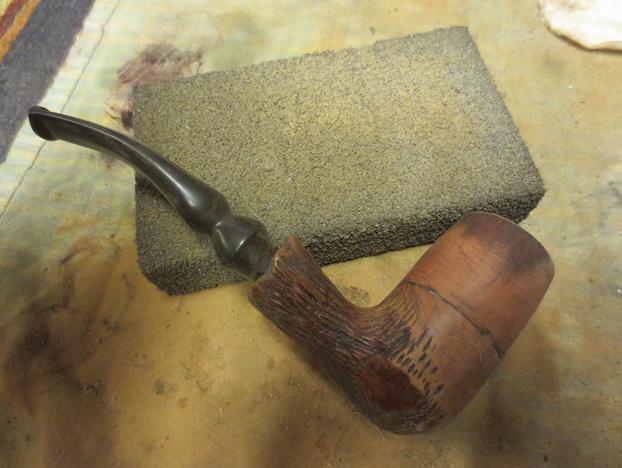
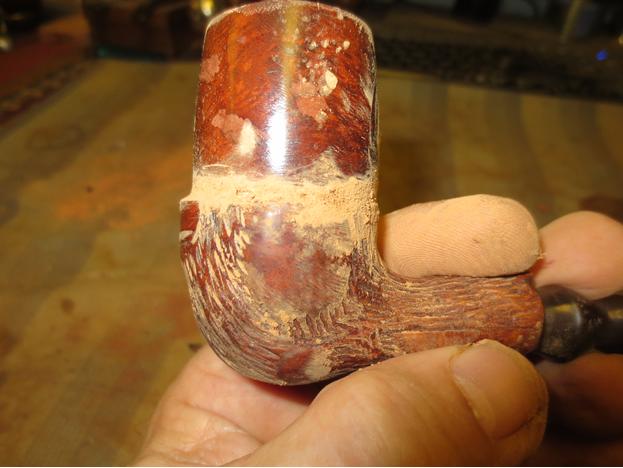
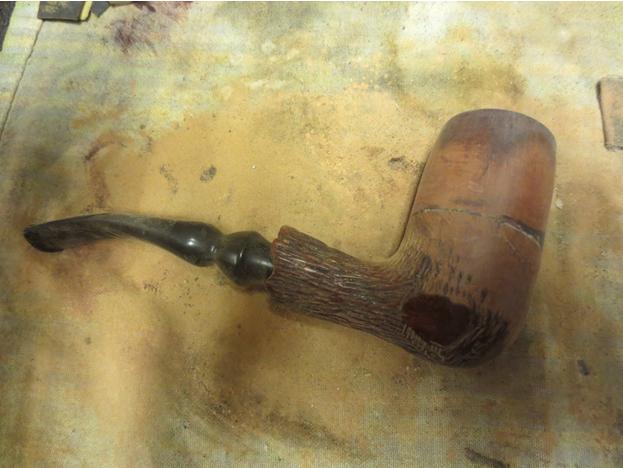
 I sanded the bowl with a fine grit sanding sponge to further smooth things out while I decide on how to proceed next with the finish on the bowl.
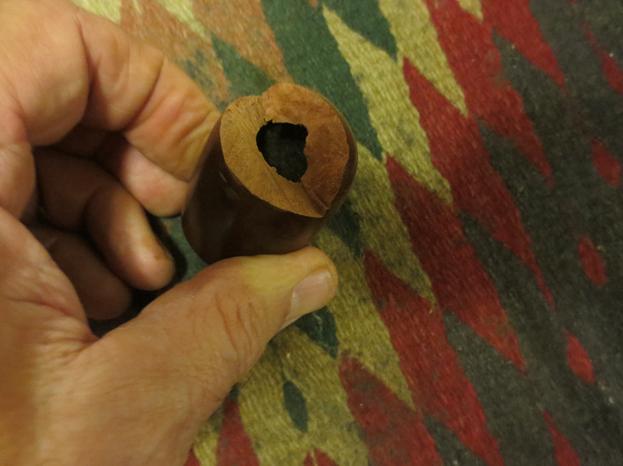
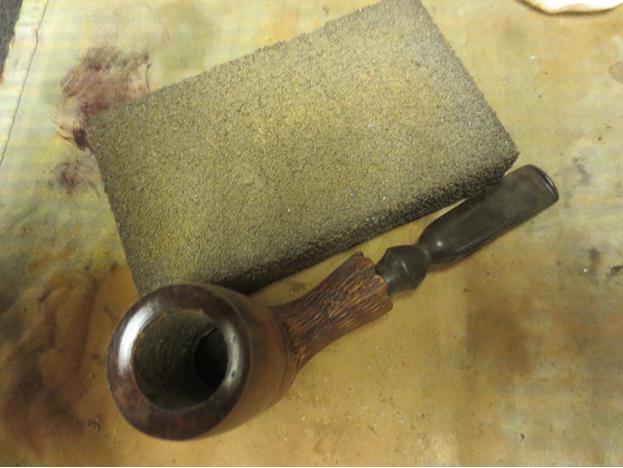
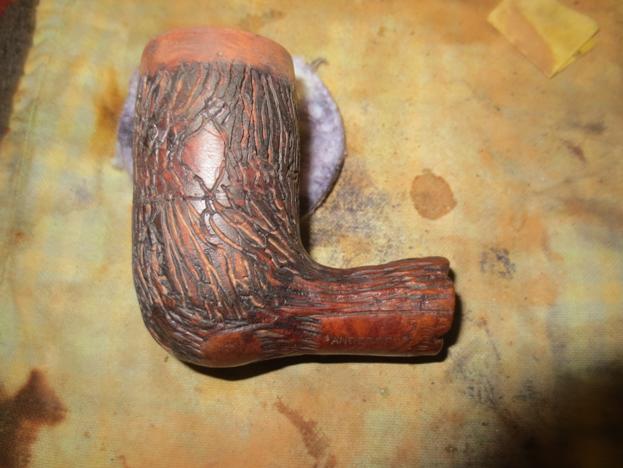
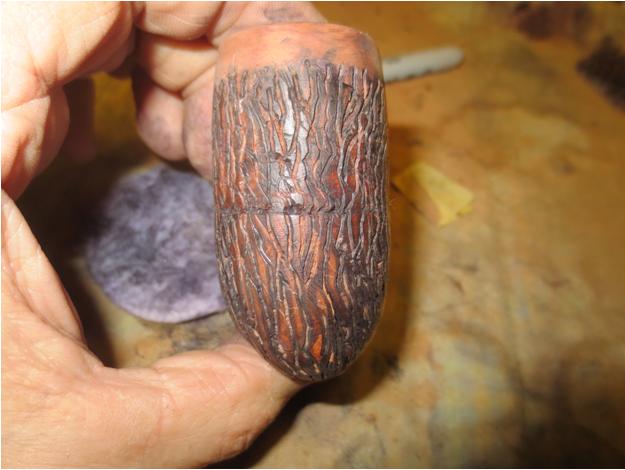
 The internal junction of the bowl and base needed some work as well. The bowl I had used was slightly conical on the base so the internal walls came in at an angle. The base walls were straight. I needed to sand the joint from the inside to smooth out the junction. I used the Dremel and the sanding drum to smooth out the junction. I proceeded slowly and carefully and was able to smooth out the walls. The photo below shows the inside of the bowl after the first work over with the Dremel and sanding drum. More needs to be done but you can see the progress.
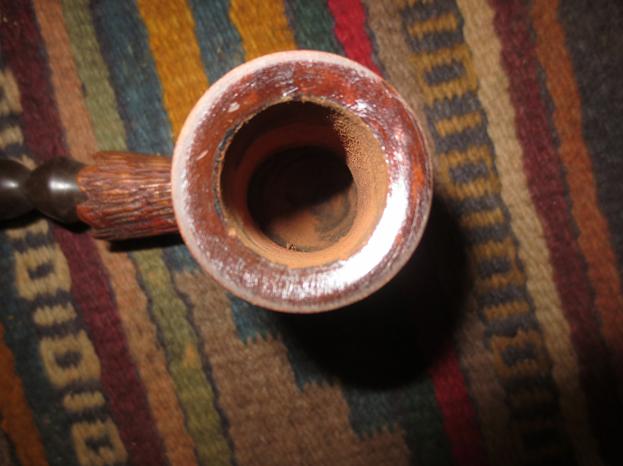 When I got back from the office I decided to rusticate the new bowl with the same tree bark rustication pattern that the Anderson Freehand had. I used a pointed dental burr with striations through the shape of the cone. I held it like a pencil and worked on the surface of the briar. I followed the pattern on the lower portion of the pipe and worked to match it and continue it to the top of the rim.
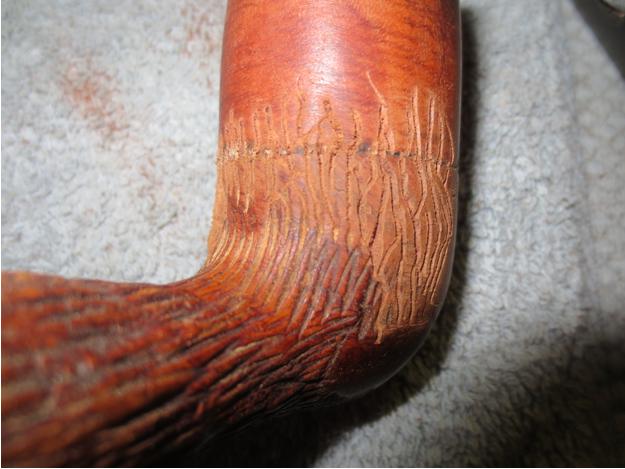
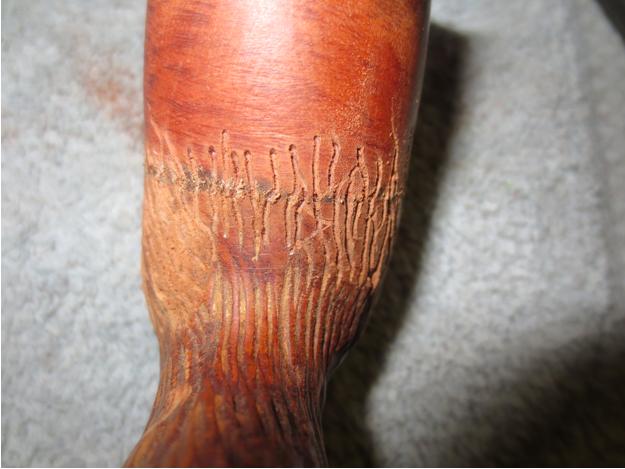
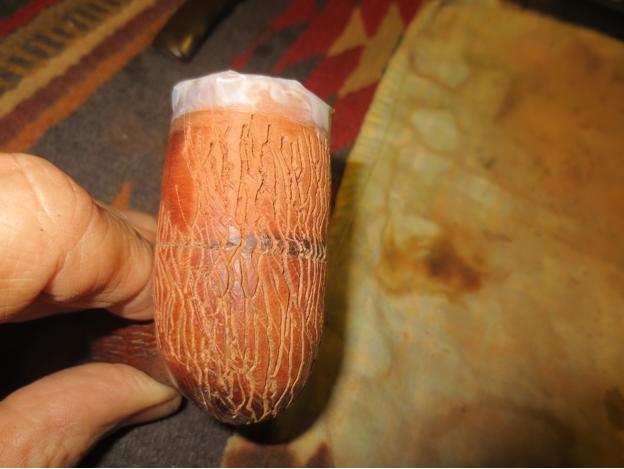
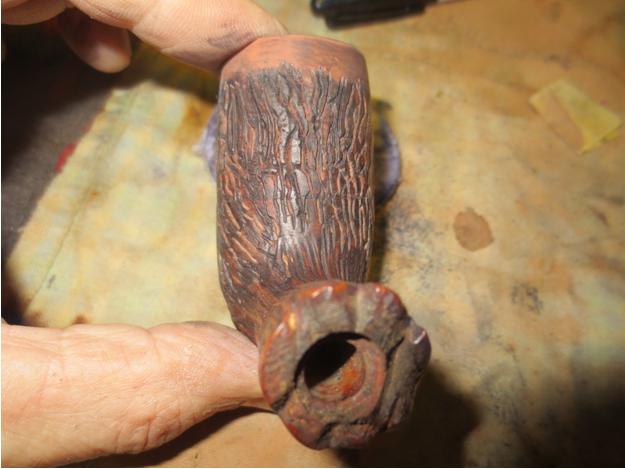
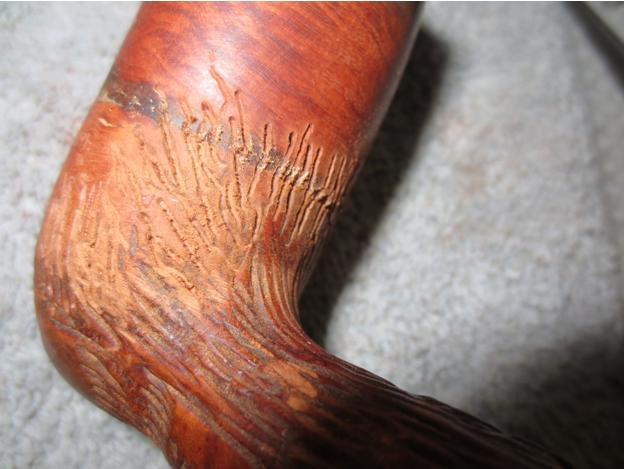 As I got closer to the top of the bowl I wrapped the edge with several layers of cellophane tape and folded it over the rim as well. I continued to use the burr until I had carried the pattern all the way to the edge of the tape. The original bowl also had some smooth spots in the midst of the rustication. These looked like the ends of cut off branches. I put several of them on the sides of the new bowl as well to match the lower portion.
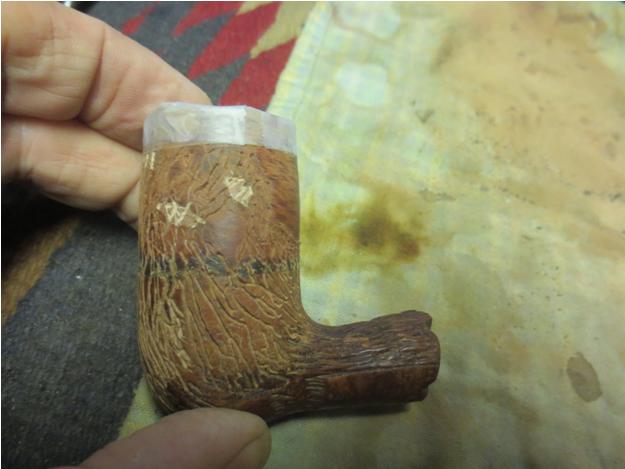
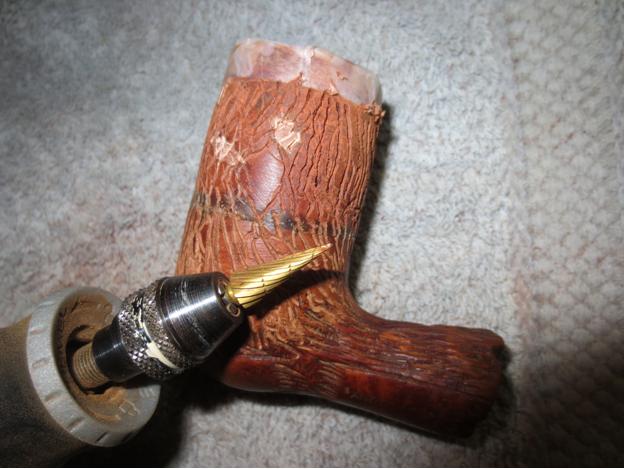
 The next two photos show the conical burr that I used for the rustication pattern.
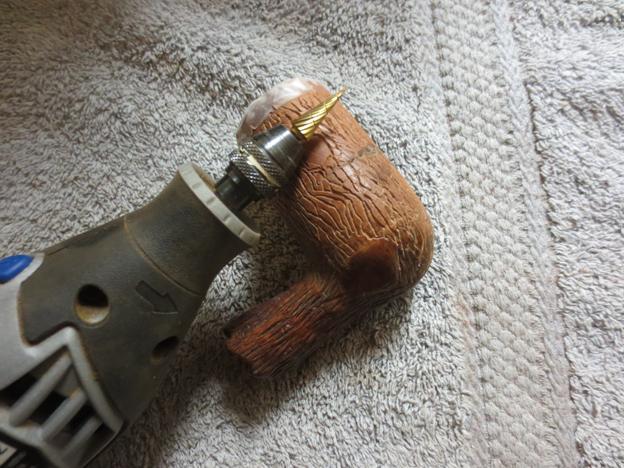
 To highlight the barklike nature of the rustication I used a black Sharpie permanent marker to colour in the trails in the briar.
 I wiped the bowl down with alcohol on a cotton pad to even out the black and to set it in the bottoms of the lines.
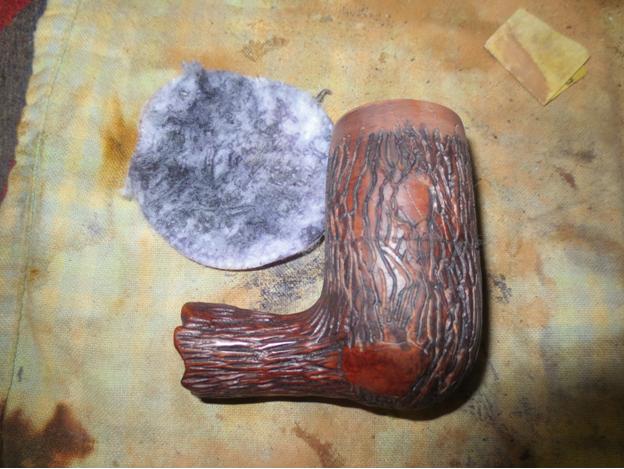
 I stained over the black marker with a dark brown thinned 50% with alcohol. I applied the stain and then flamed it. I repeated the process until the coverage was even.
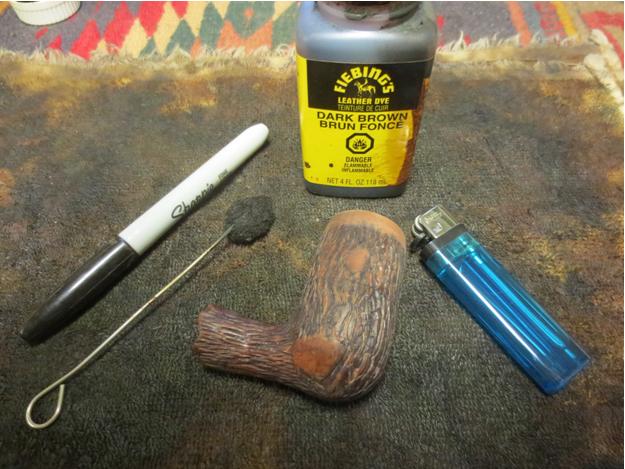

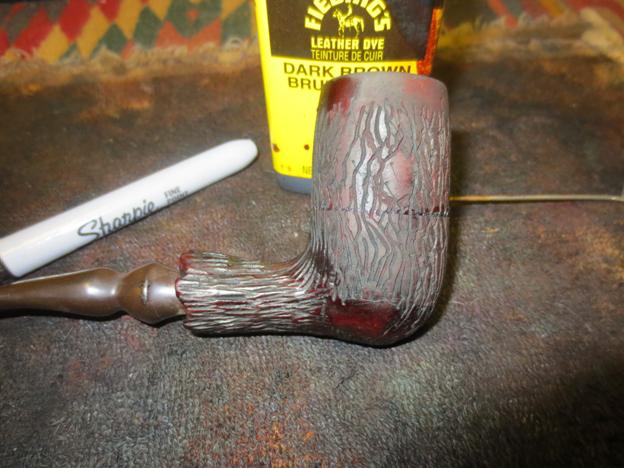 I then gave the bowl a coat of oxblood stain thinned 50/50 with alcohol and set it on the cork stand to dry.
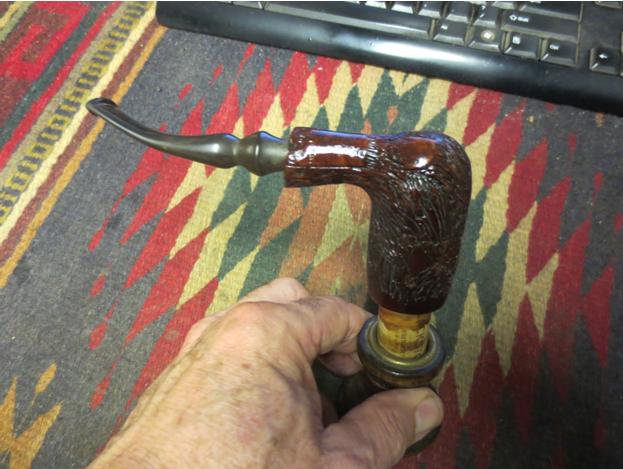
 To protect the newly sanded bowl and the joint between the bowl and the base until a cake had a chance to form I mixed a batch of organic bowl coating that I have used for years. It sounds like it would smell and make things a mess but it does not. I use sour cream and activated charcoal powder. I put a dollop of sour cream in a bowl and empty the contents of three or more charcoal capsules into the sour cream. I mix it until it is a grey pasted. At this point there is very little smell to the mixture.
 I painted the inside of the bowl walls and bottom with a folded pipe cleaner. I want to give the bowl a coating on all sides. I insert a pipe cleaner in the airway so I do not get the mixture in the airway. I put on the coating in several layers letting the one underneath get a little set. I paid special attention to the area around the junction of the two parts.
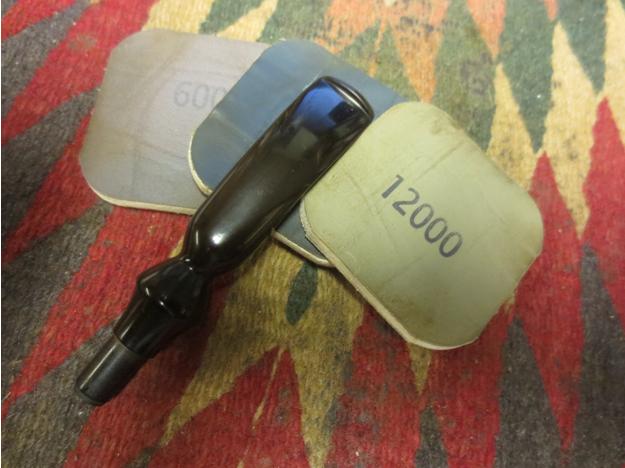
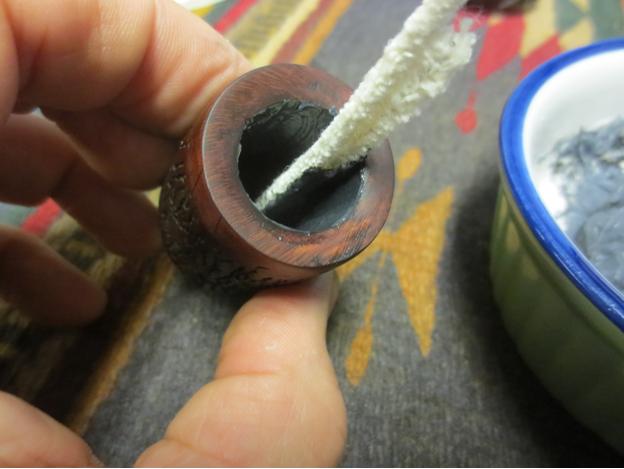 I set the bowl aside to dry. When it dries the coating will be a charcoal black colour and provide a base for the formation of the cake. While it dried I worked on the stem. I sanded it with a medium and a fine grit sanding sponge and then moved on to sanding with micromesh pads. I wet sanded with 1500-2400 grit pads and rubbed the stem down with Obsidian Oil. I dry sanded with 3200-4000 grit pads, rubbed it down with oil again and then dry sanded with 6000-12000 grit pads. I gave it a final coat of Obsidian Oil and when it dried I buffed the stem with Blue Diamond.
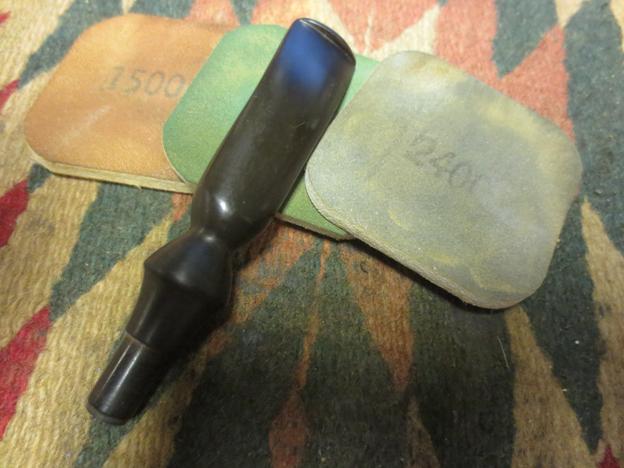

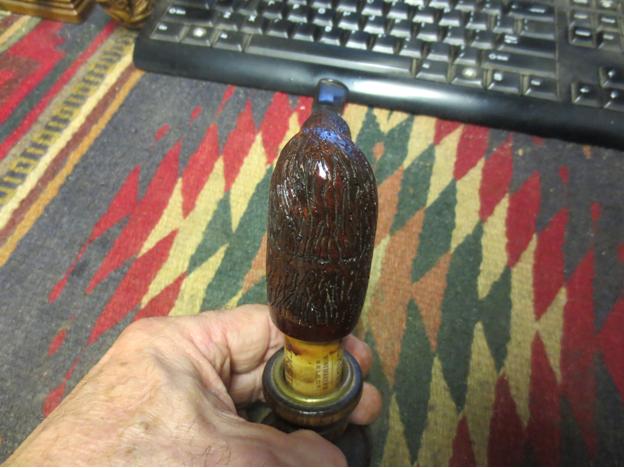
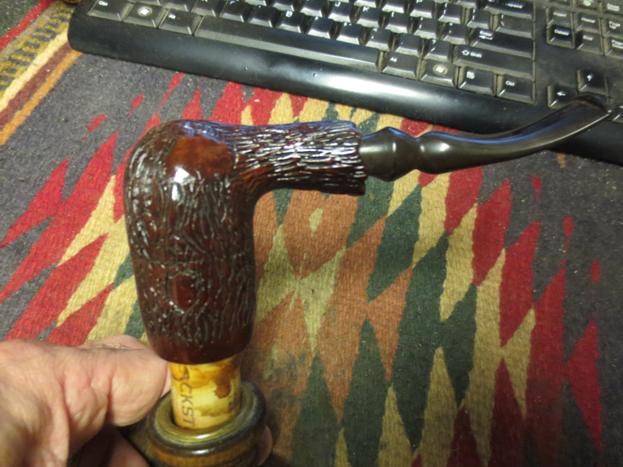
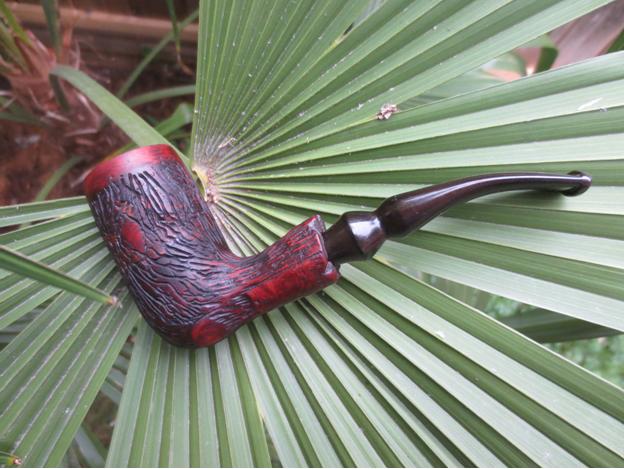
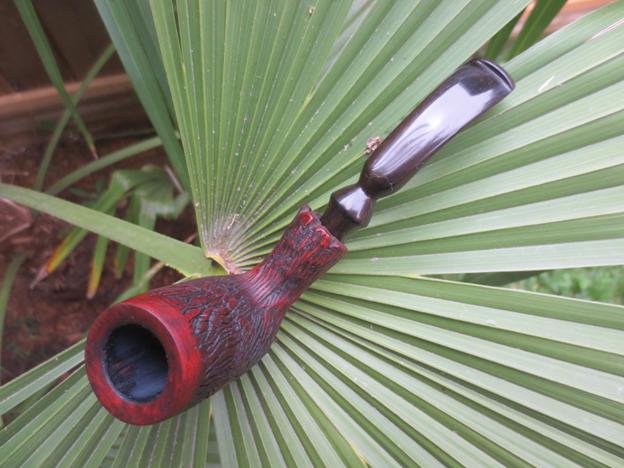
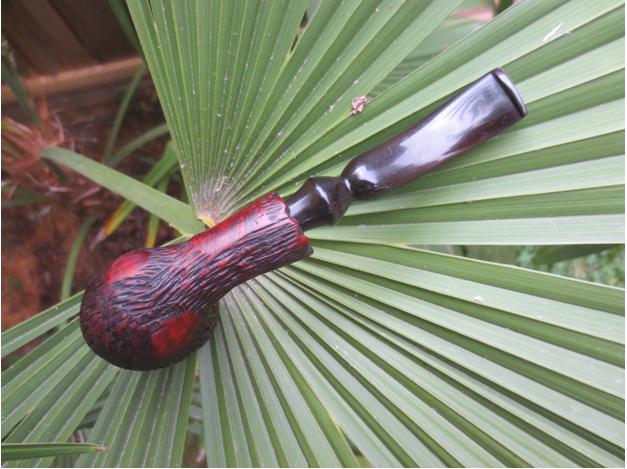
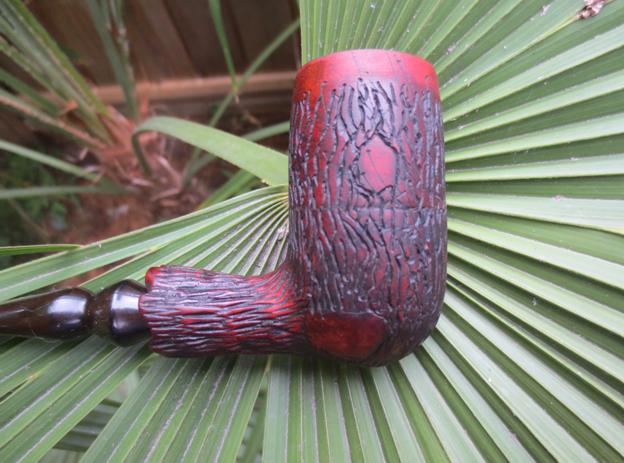
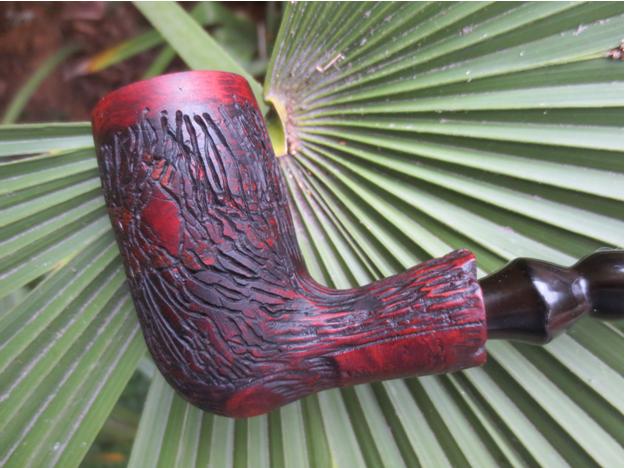
 I lightly buffed the stem and the bowl with carnauba – spending more time on the stem than on the bowl. I then took it back to the work table and hand buffed it with a microfiber cloth to raise the shine. I did not want too much of a shine as I think the matte finish looks good on the tree bark rustication. The finished pipe is shown below. Once the bowl coating has dried for several days it will be ready to smoke. I am still mulling over what I will pack it with for the inaugural smoke. Thanks for looking.
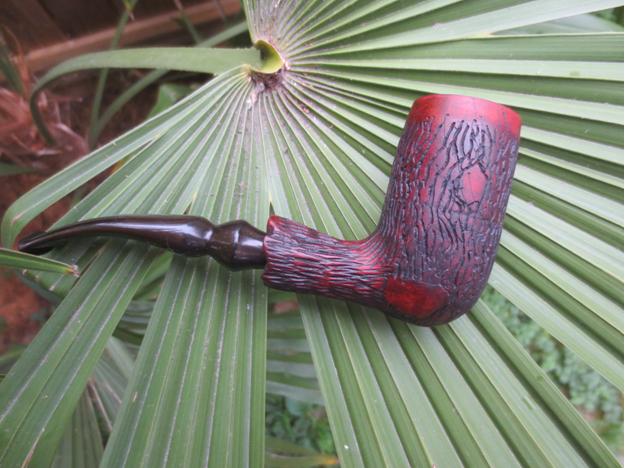


Pingback: 112. Franken Petes | peterson pipe notes
Yet another innovative solution to a seemingly impossible job. Just great. Thanks.
LikeLike
That gives a new definition to the term rebuilding a pipe. Furrowed brows of curiosity adorned my face as I scrolled through the build. Amazing work! Well done sir.
LikeLike
Beautiful work brother Steve!!!
LikeLike
I am in awe Steve, incredible work.
LikeLike
How many Dave G’s do we have round here…
LikeLike
Positively ingenious!
LikeLike